

Dann Tier
-
Posts
8,048 -
Joined
-
Last visited
Content Type
Profiles
Forums
Events
Gallery
Posts posted by Dann Tier
-
-
Well done!...i need this kit too!!
-
Love it!!....very cool!!
-
3 minutes ago, Rich Chernosky said:
Awesome to see this one back on the bench. Boy...you sure do have a way with styrene. Those bamboo skewers do make some great modeling tools.,....<G>
Thanks, Rich!, I do love using the skewers, lol.
-
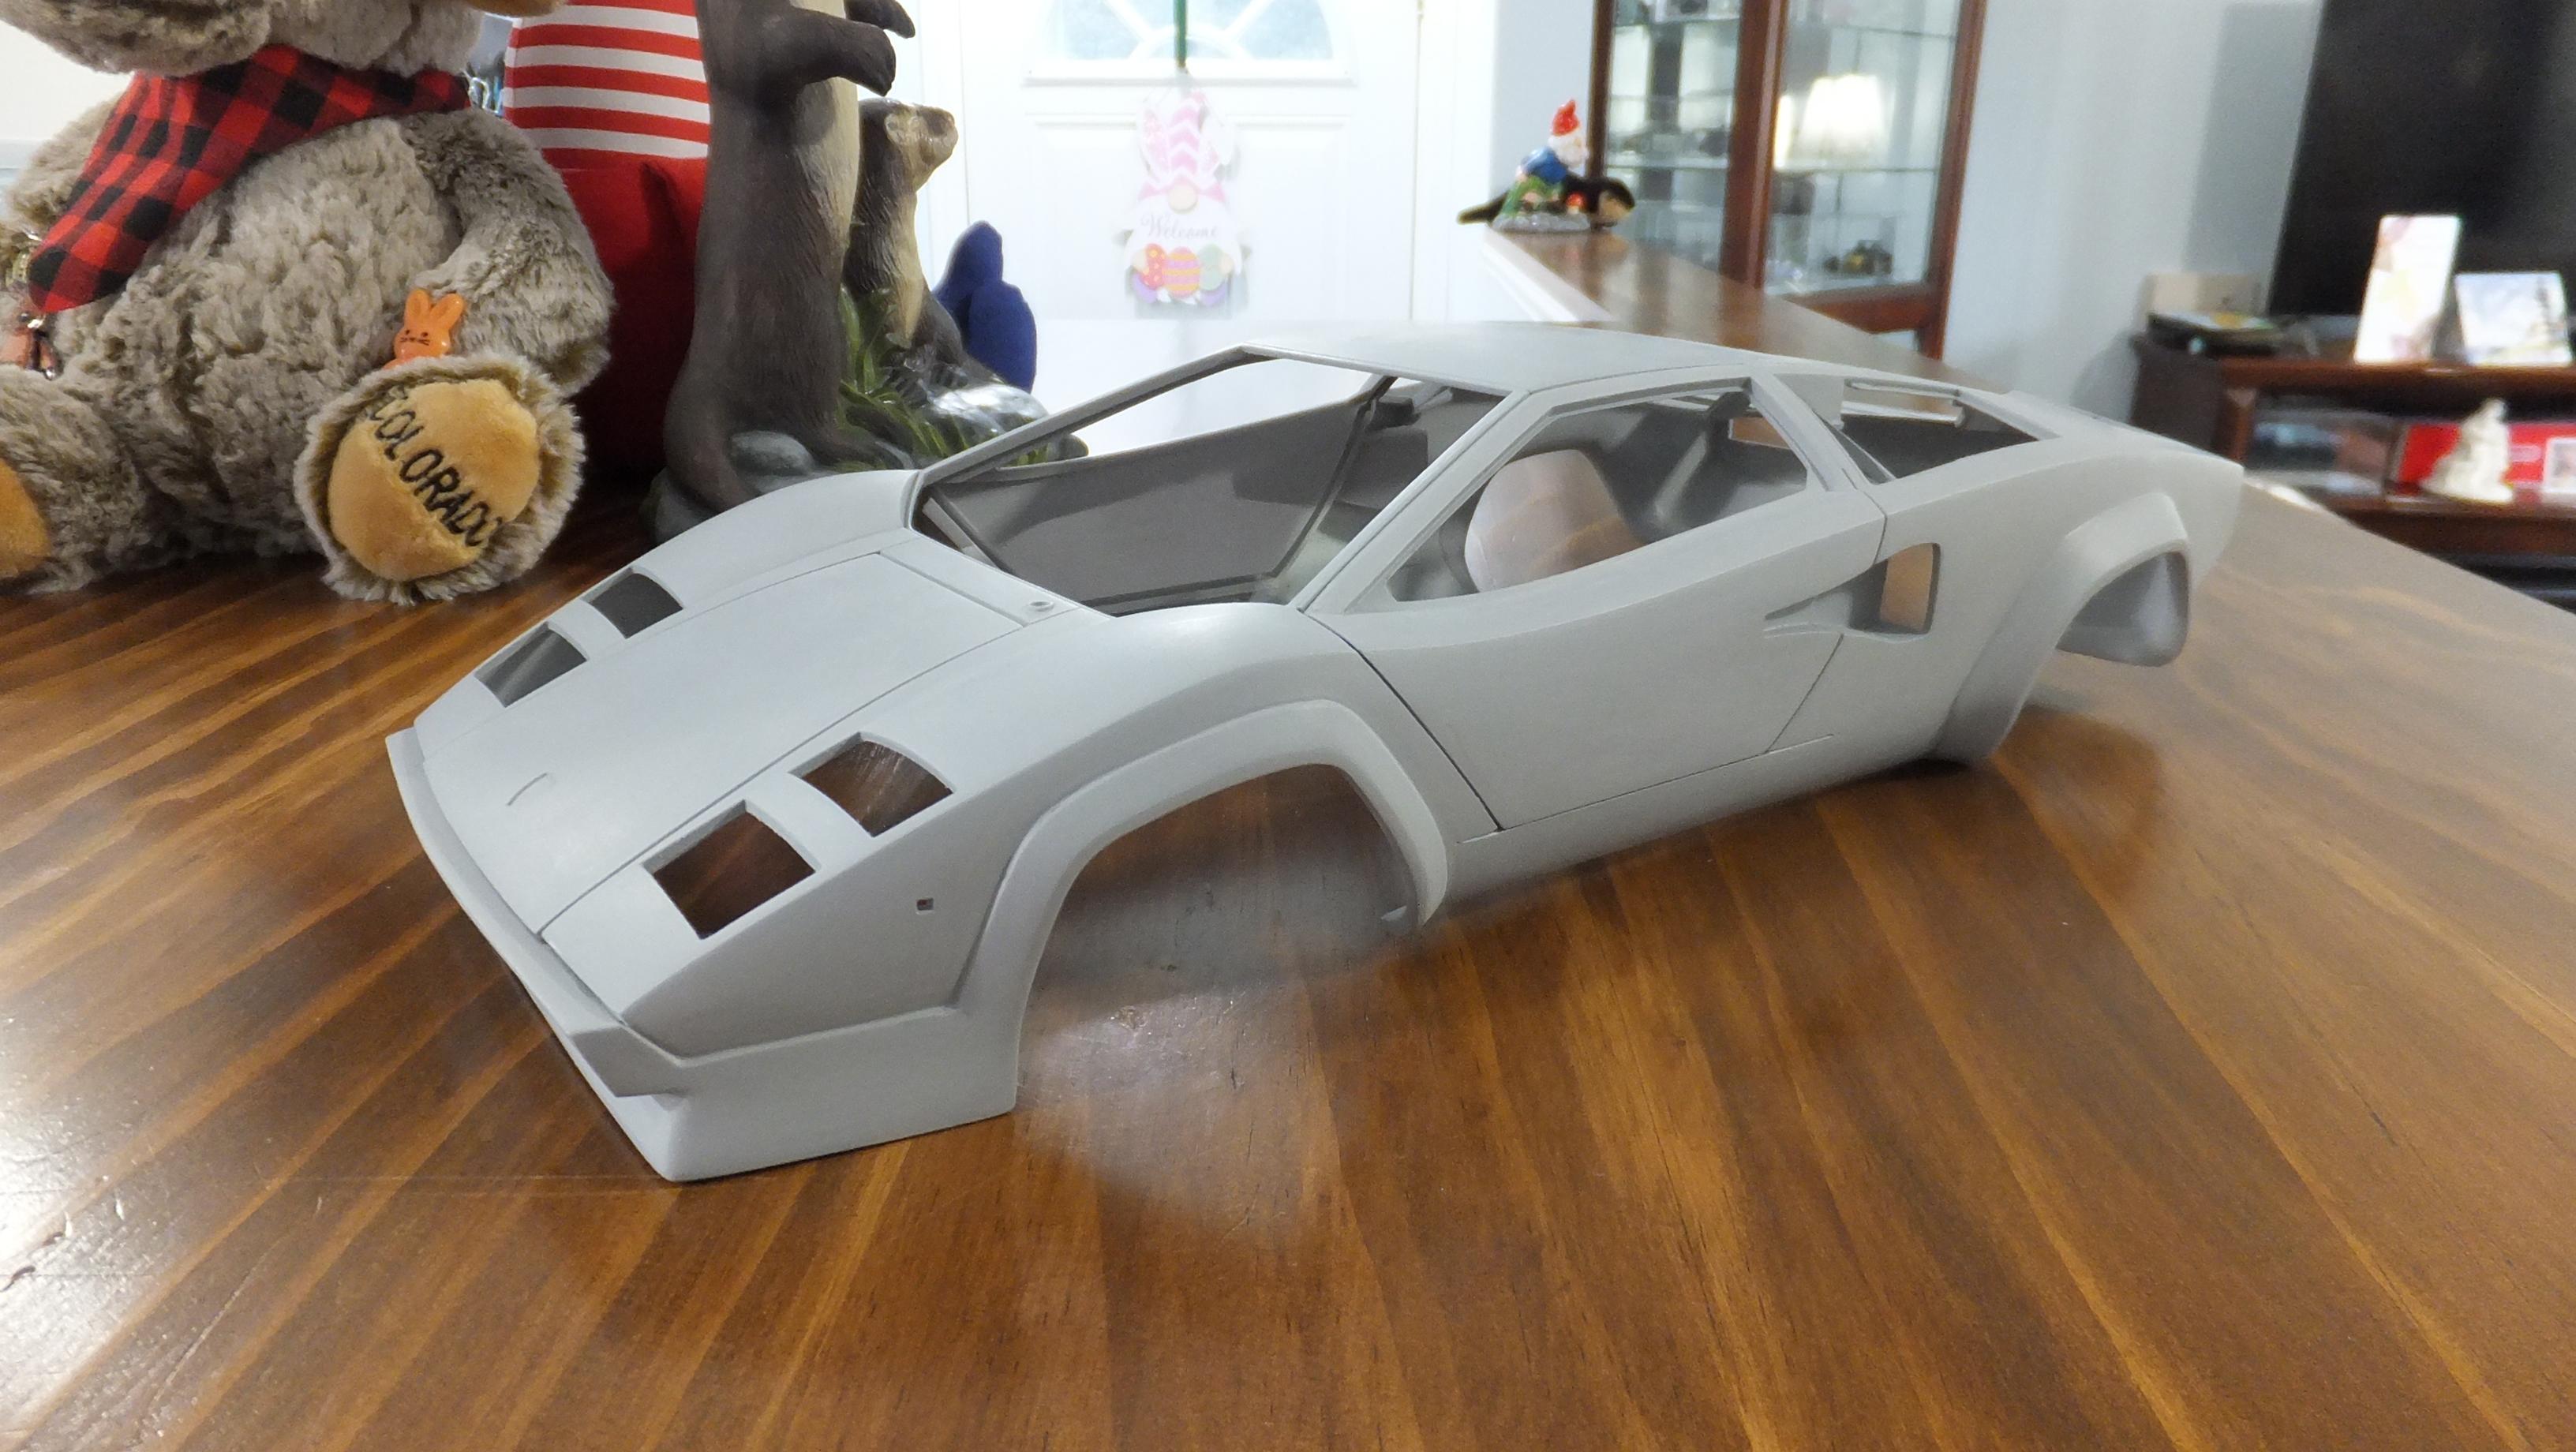
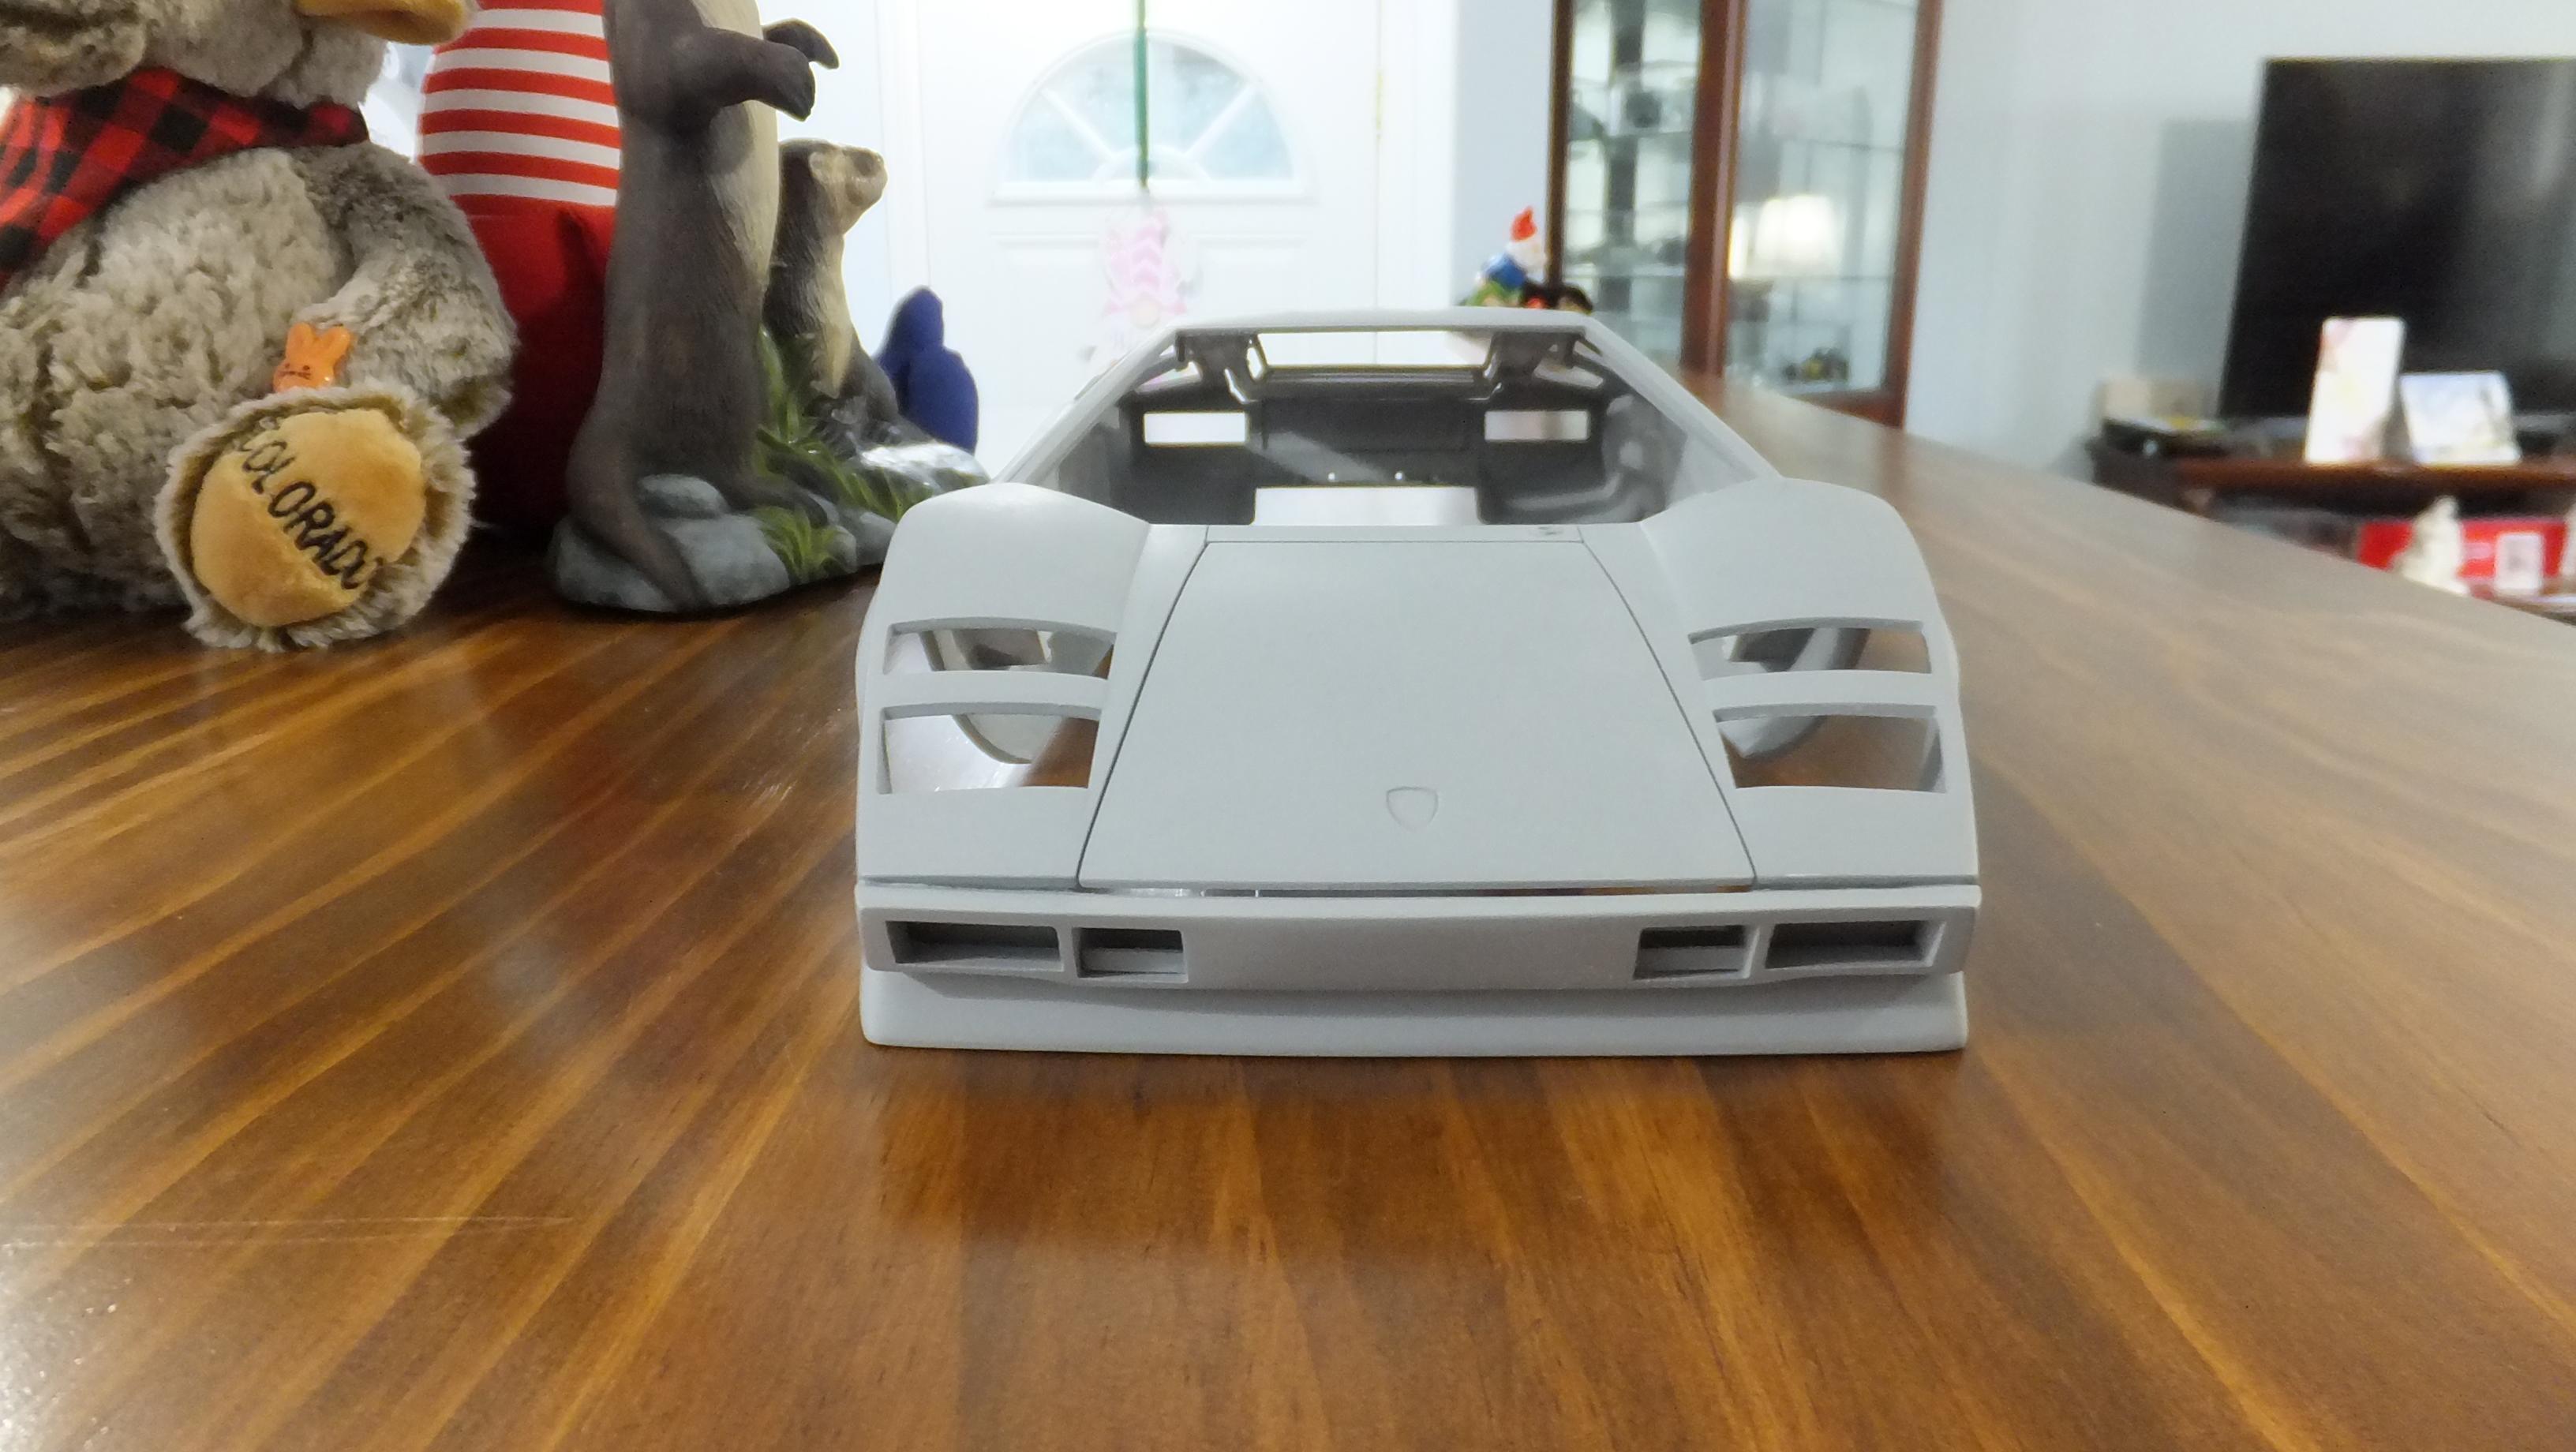
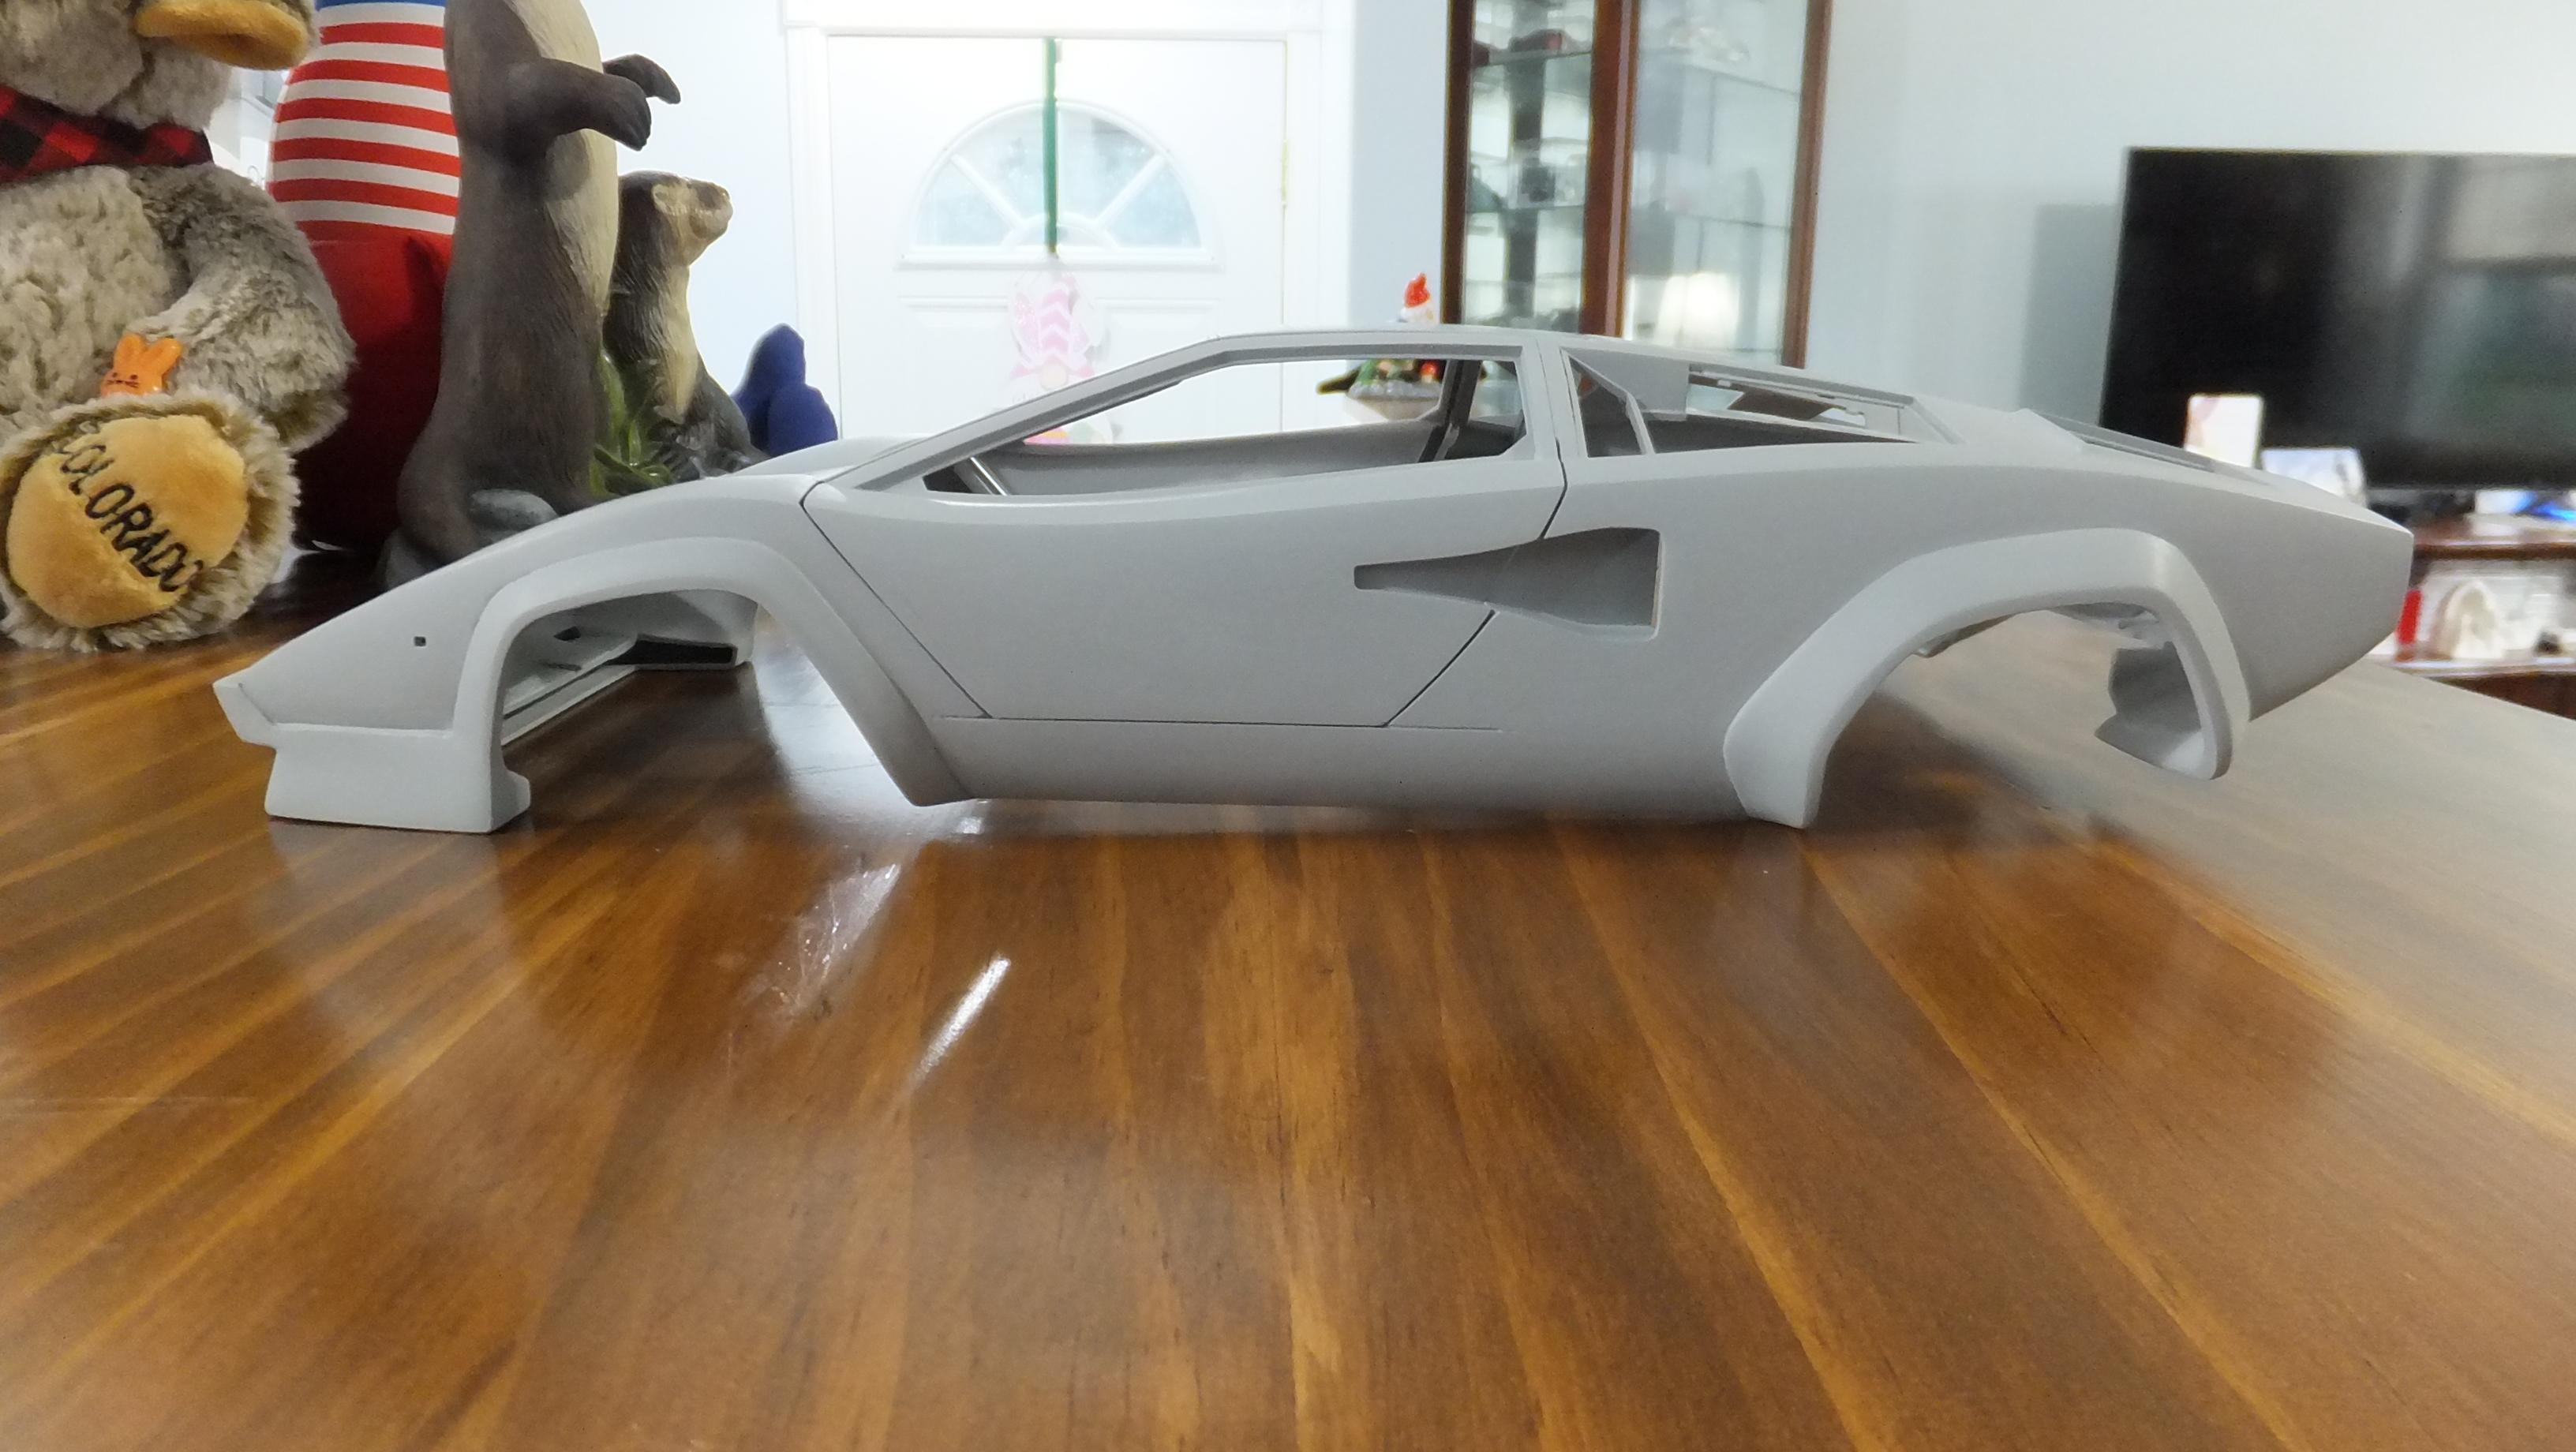
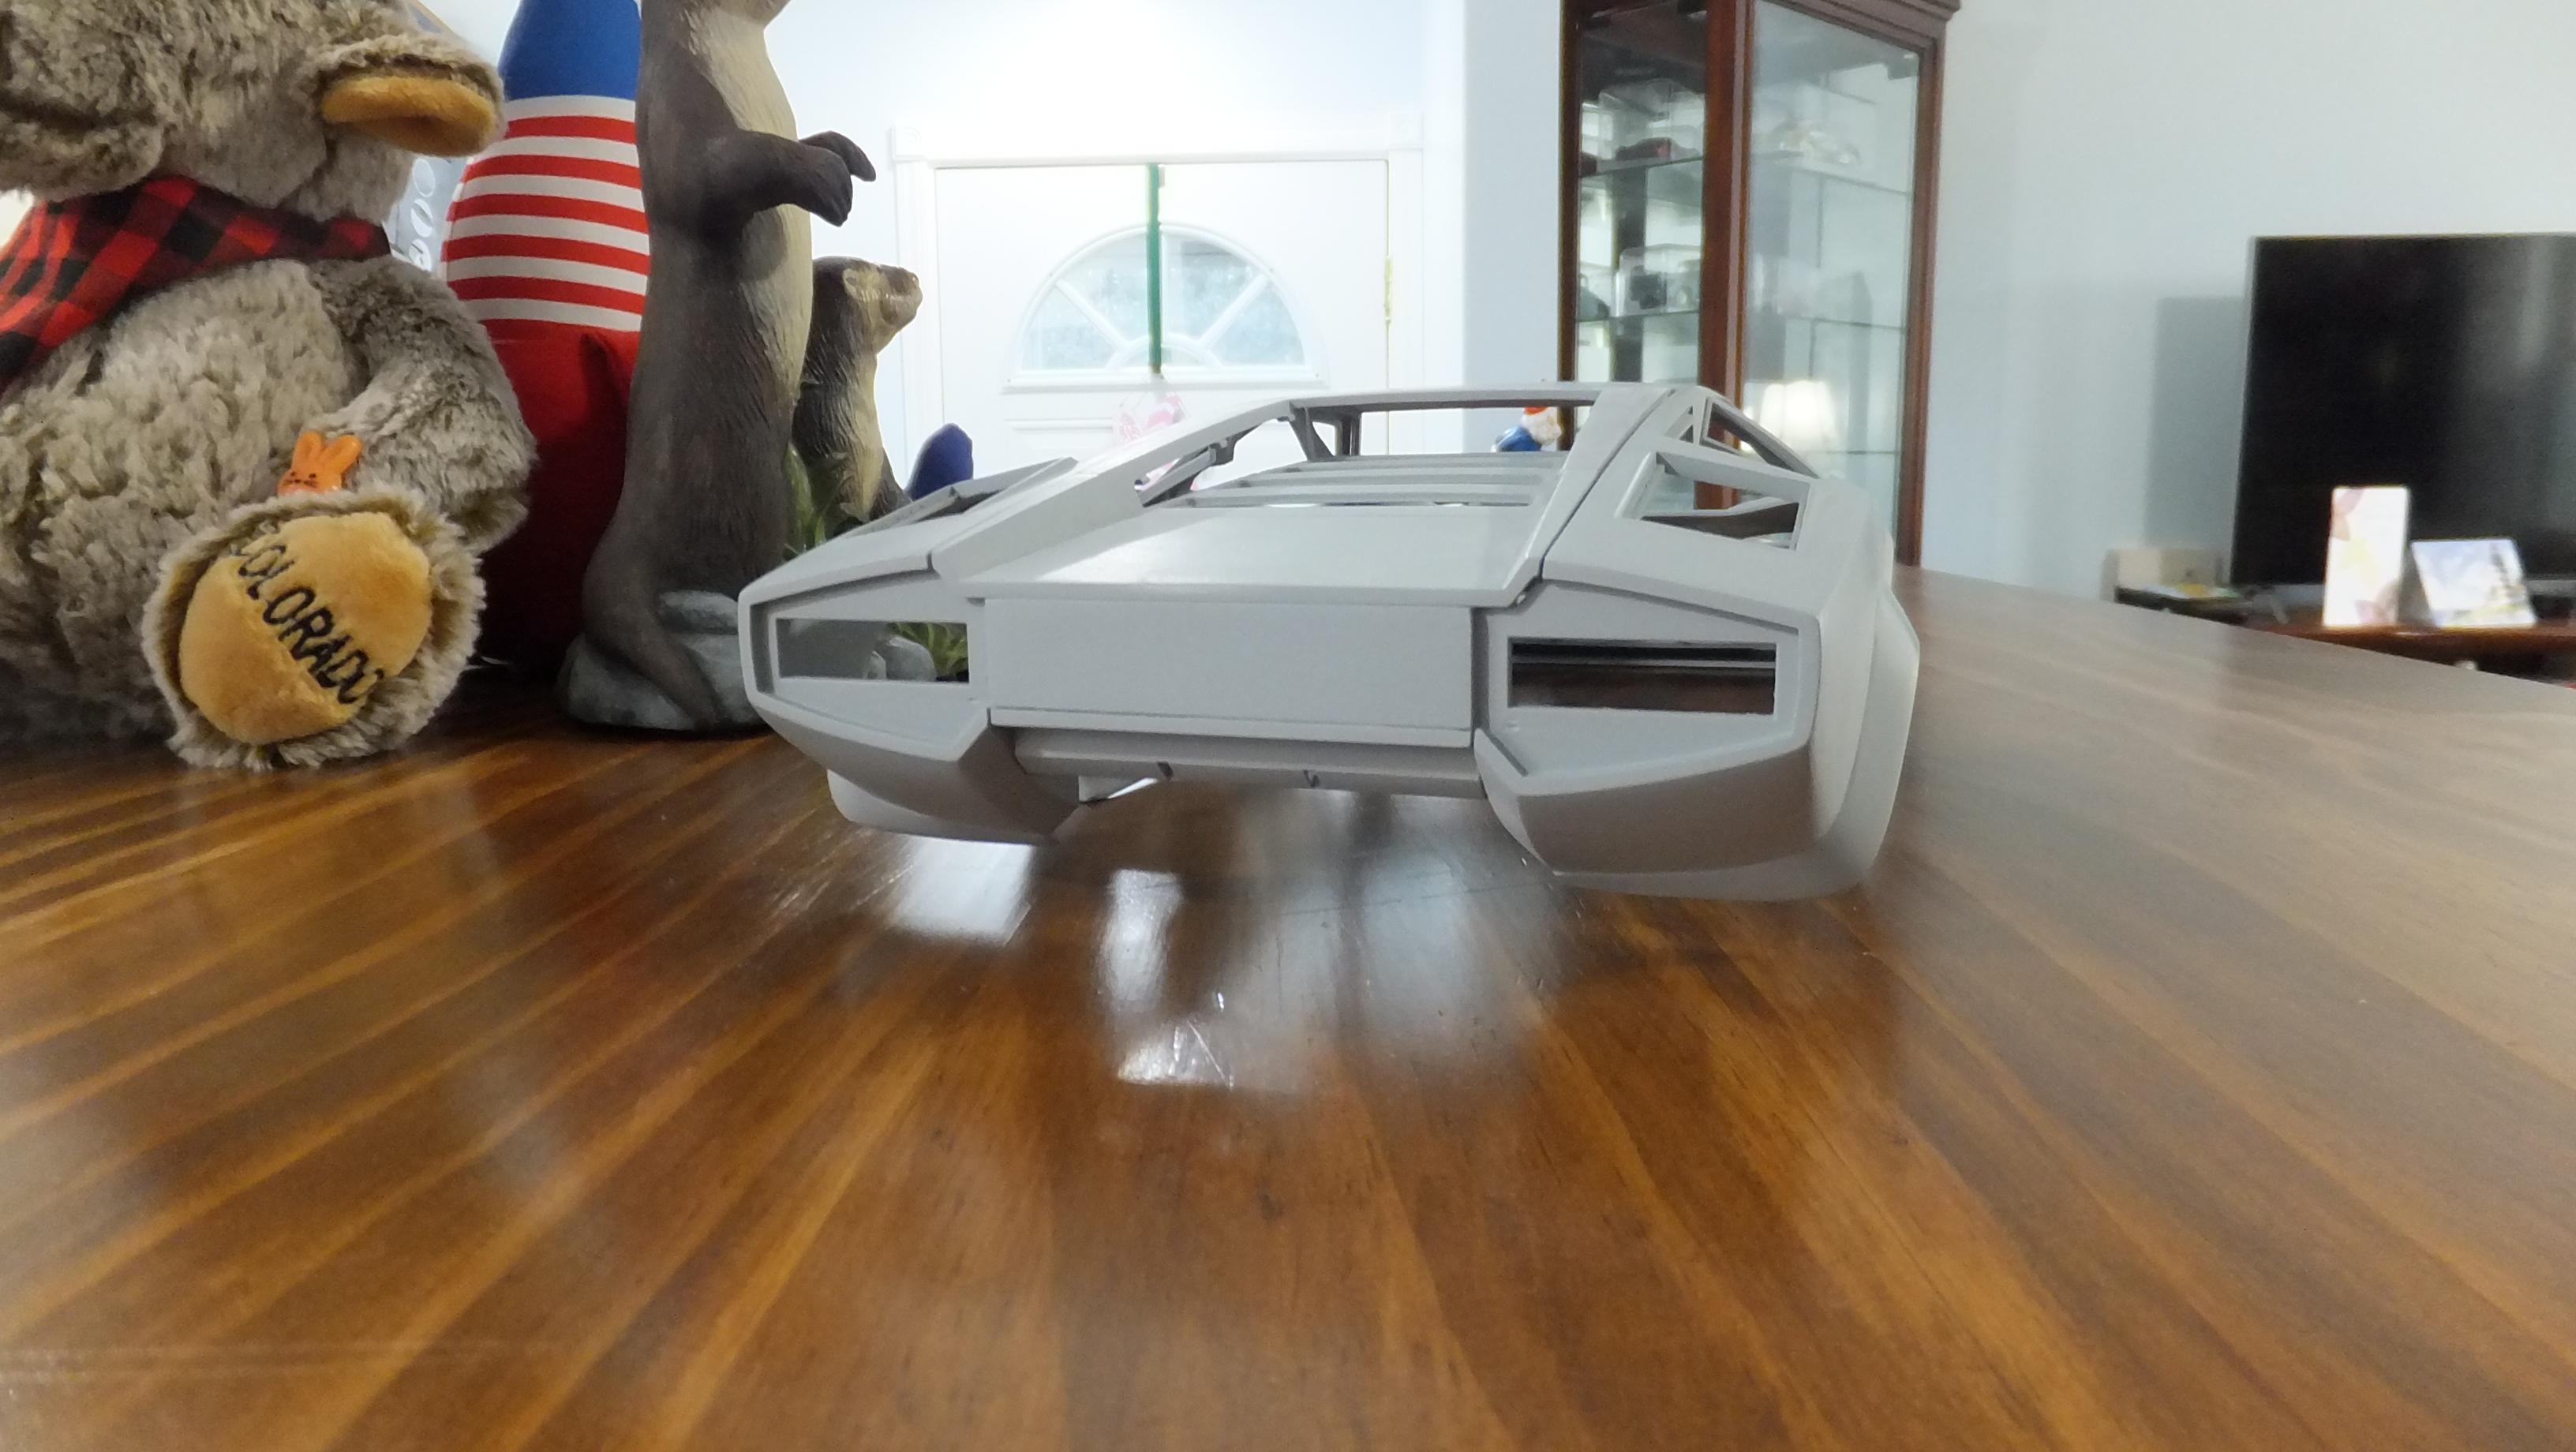
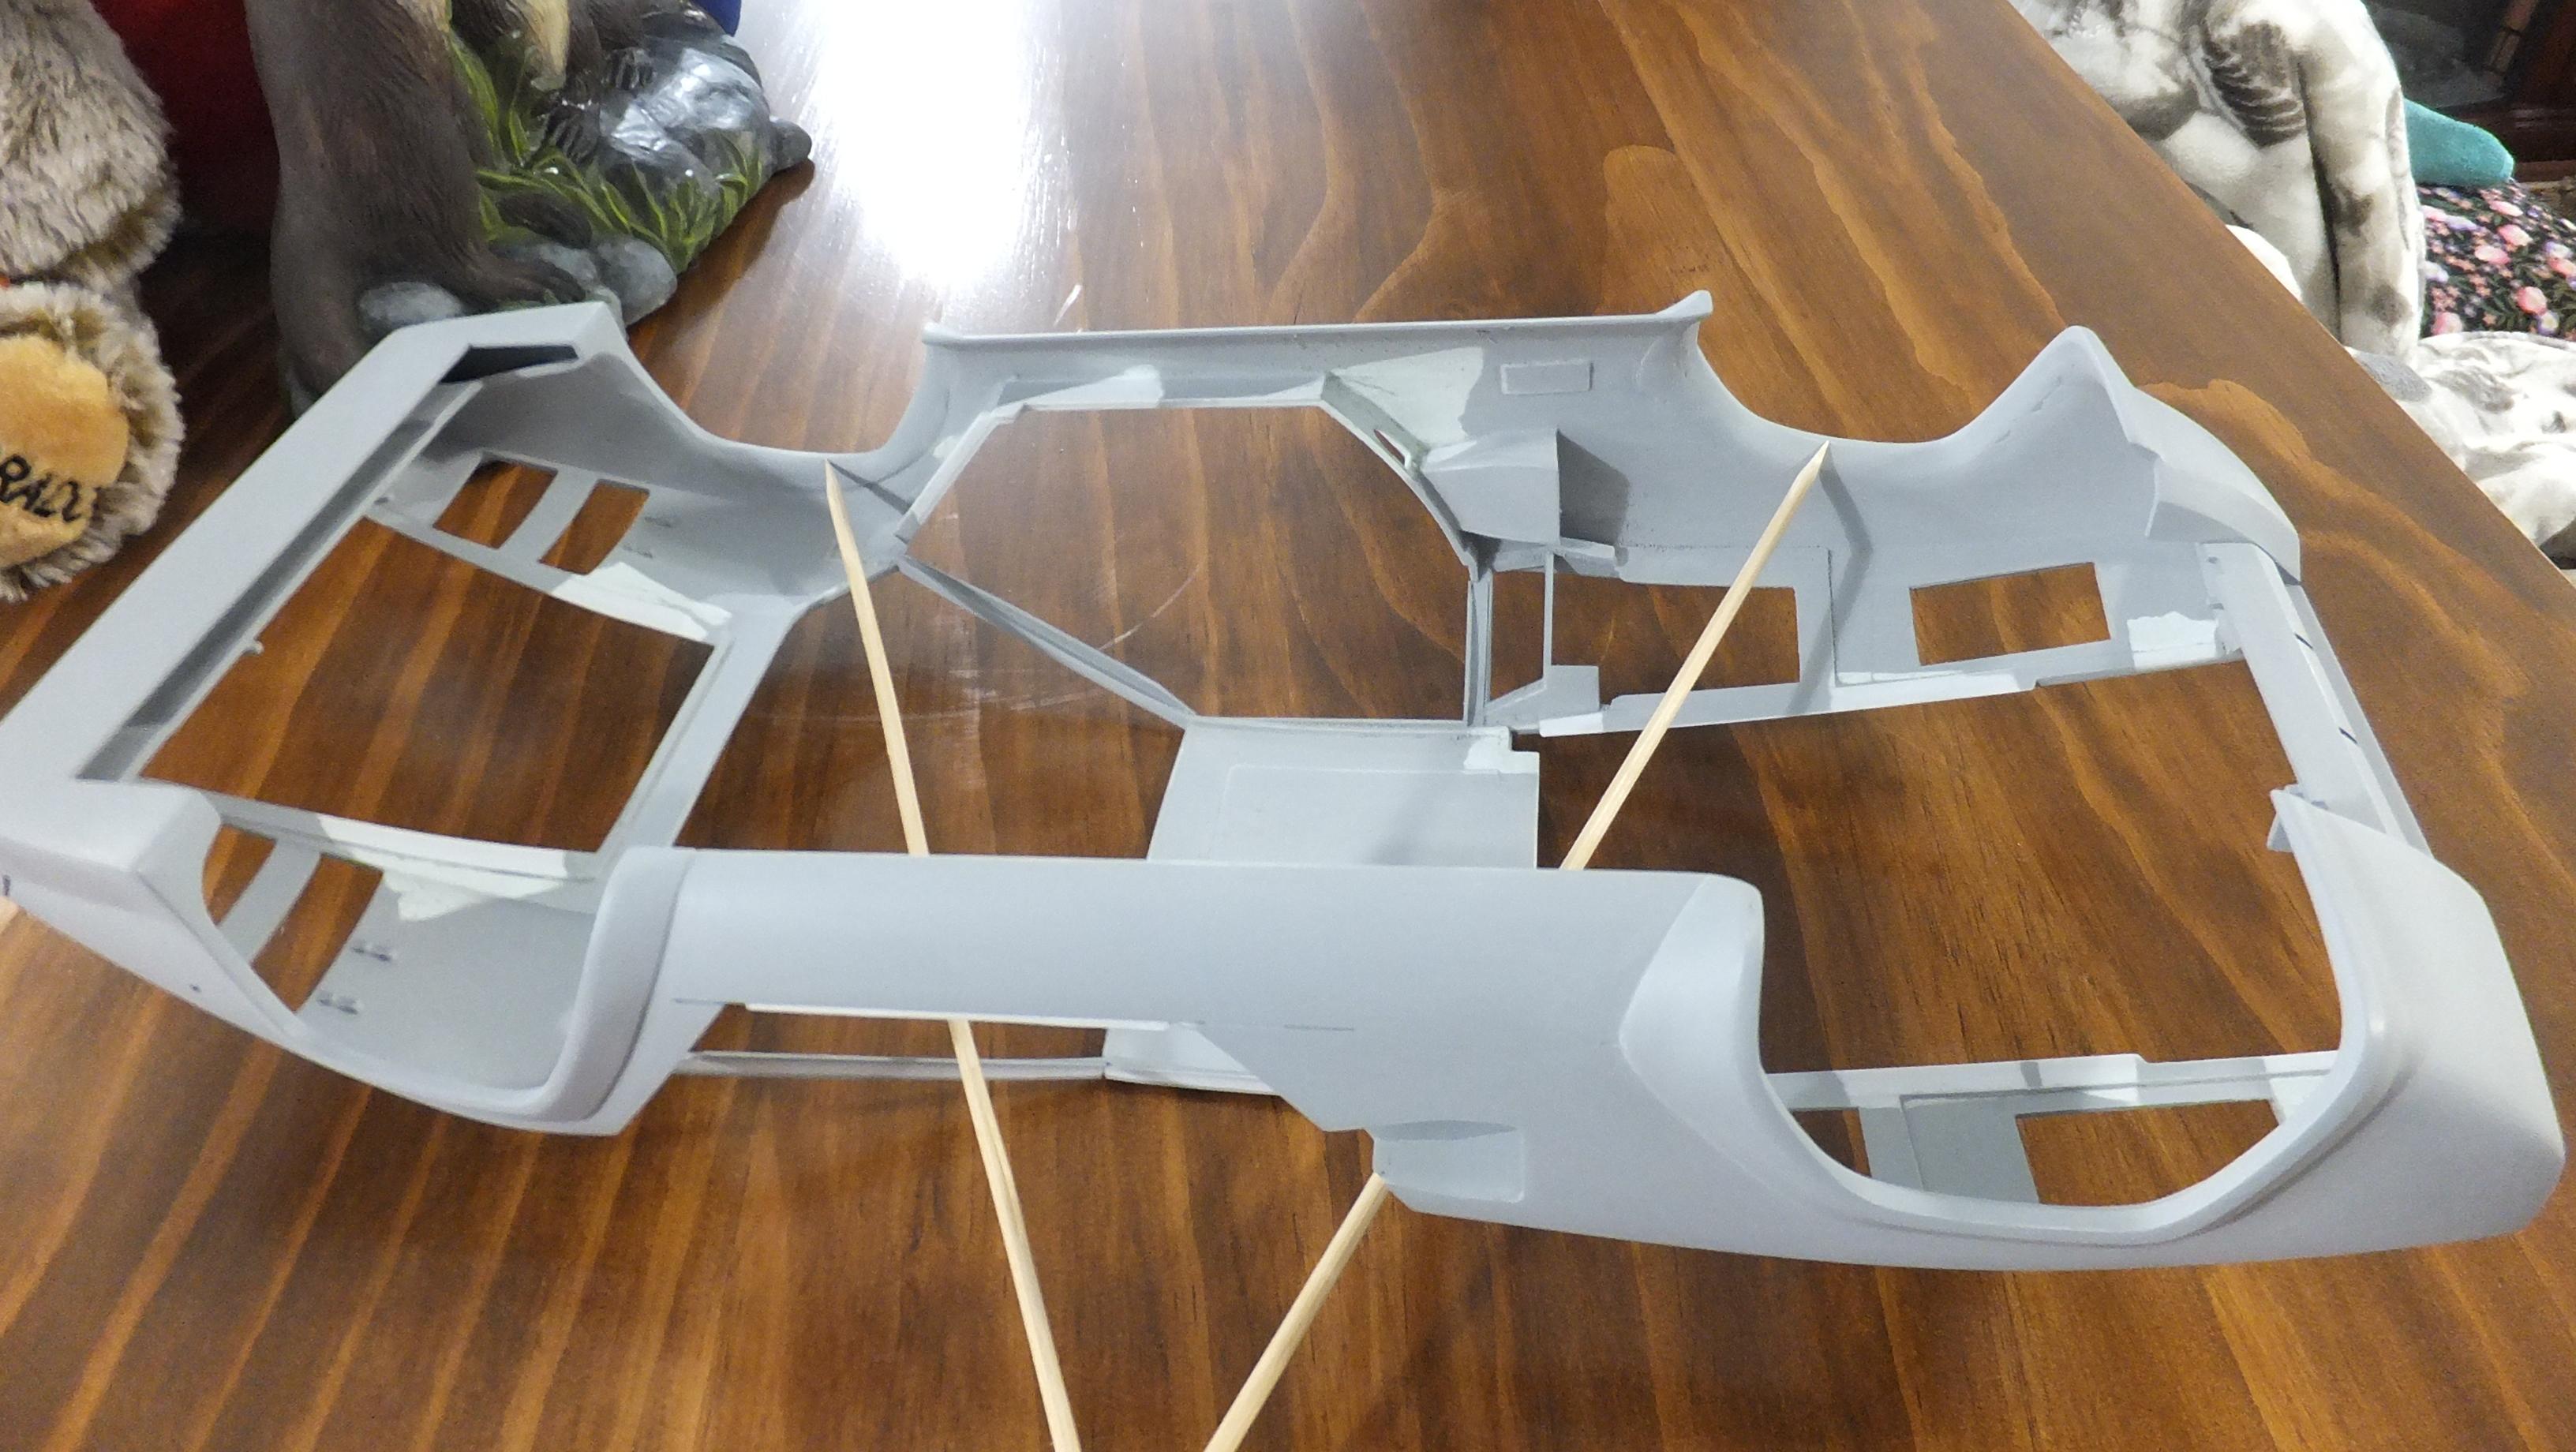
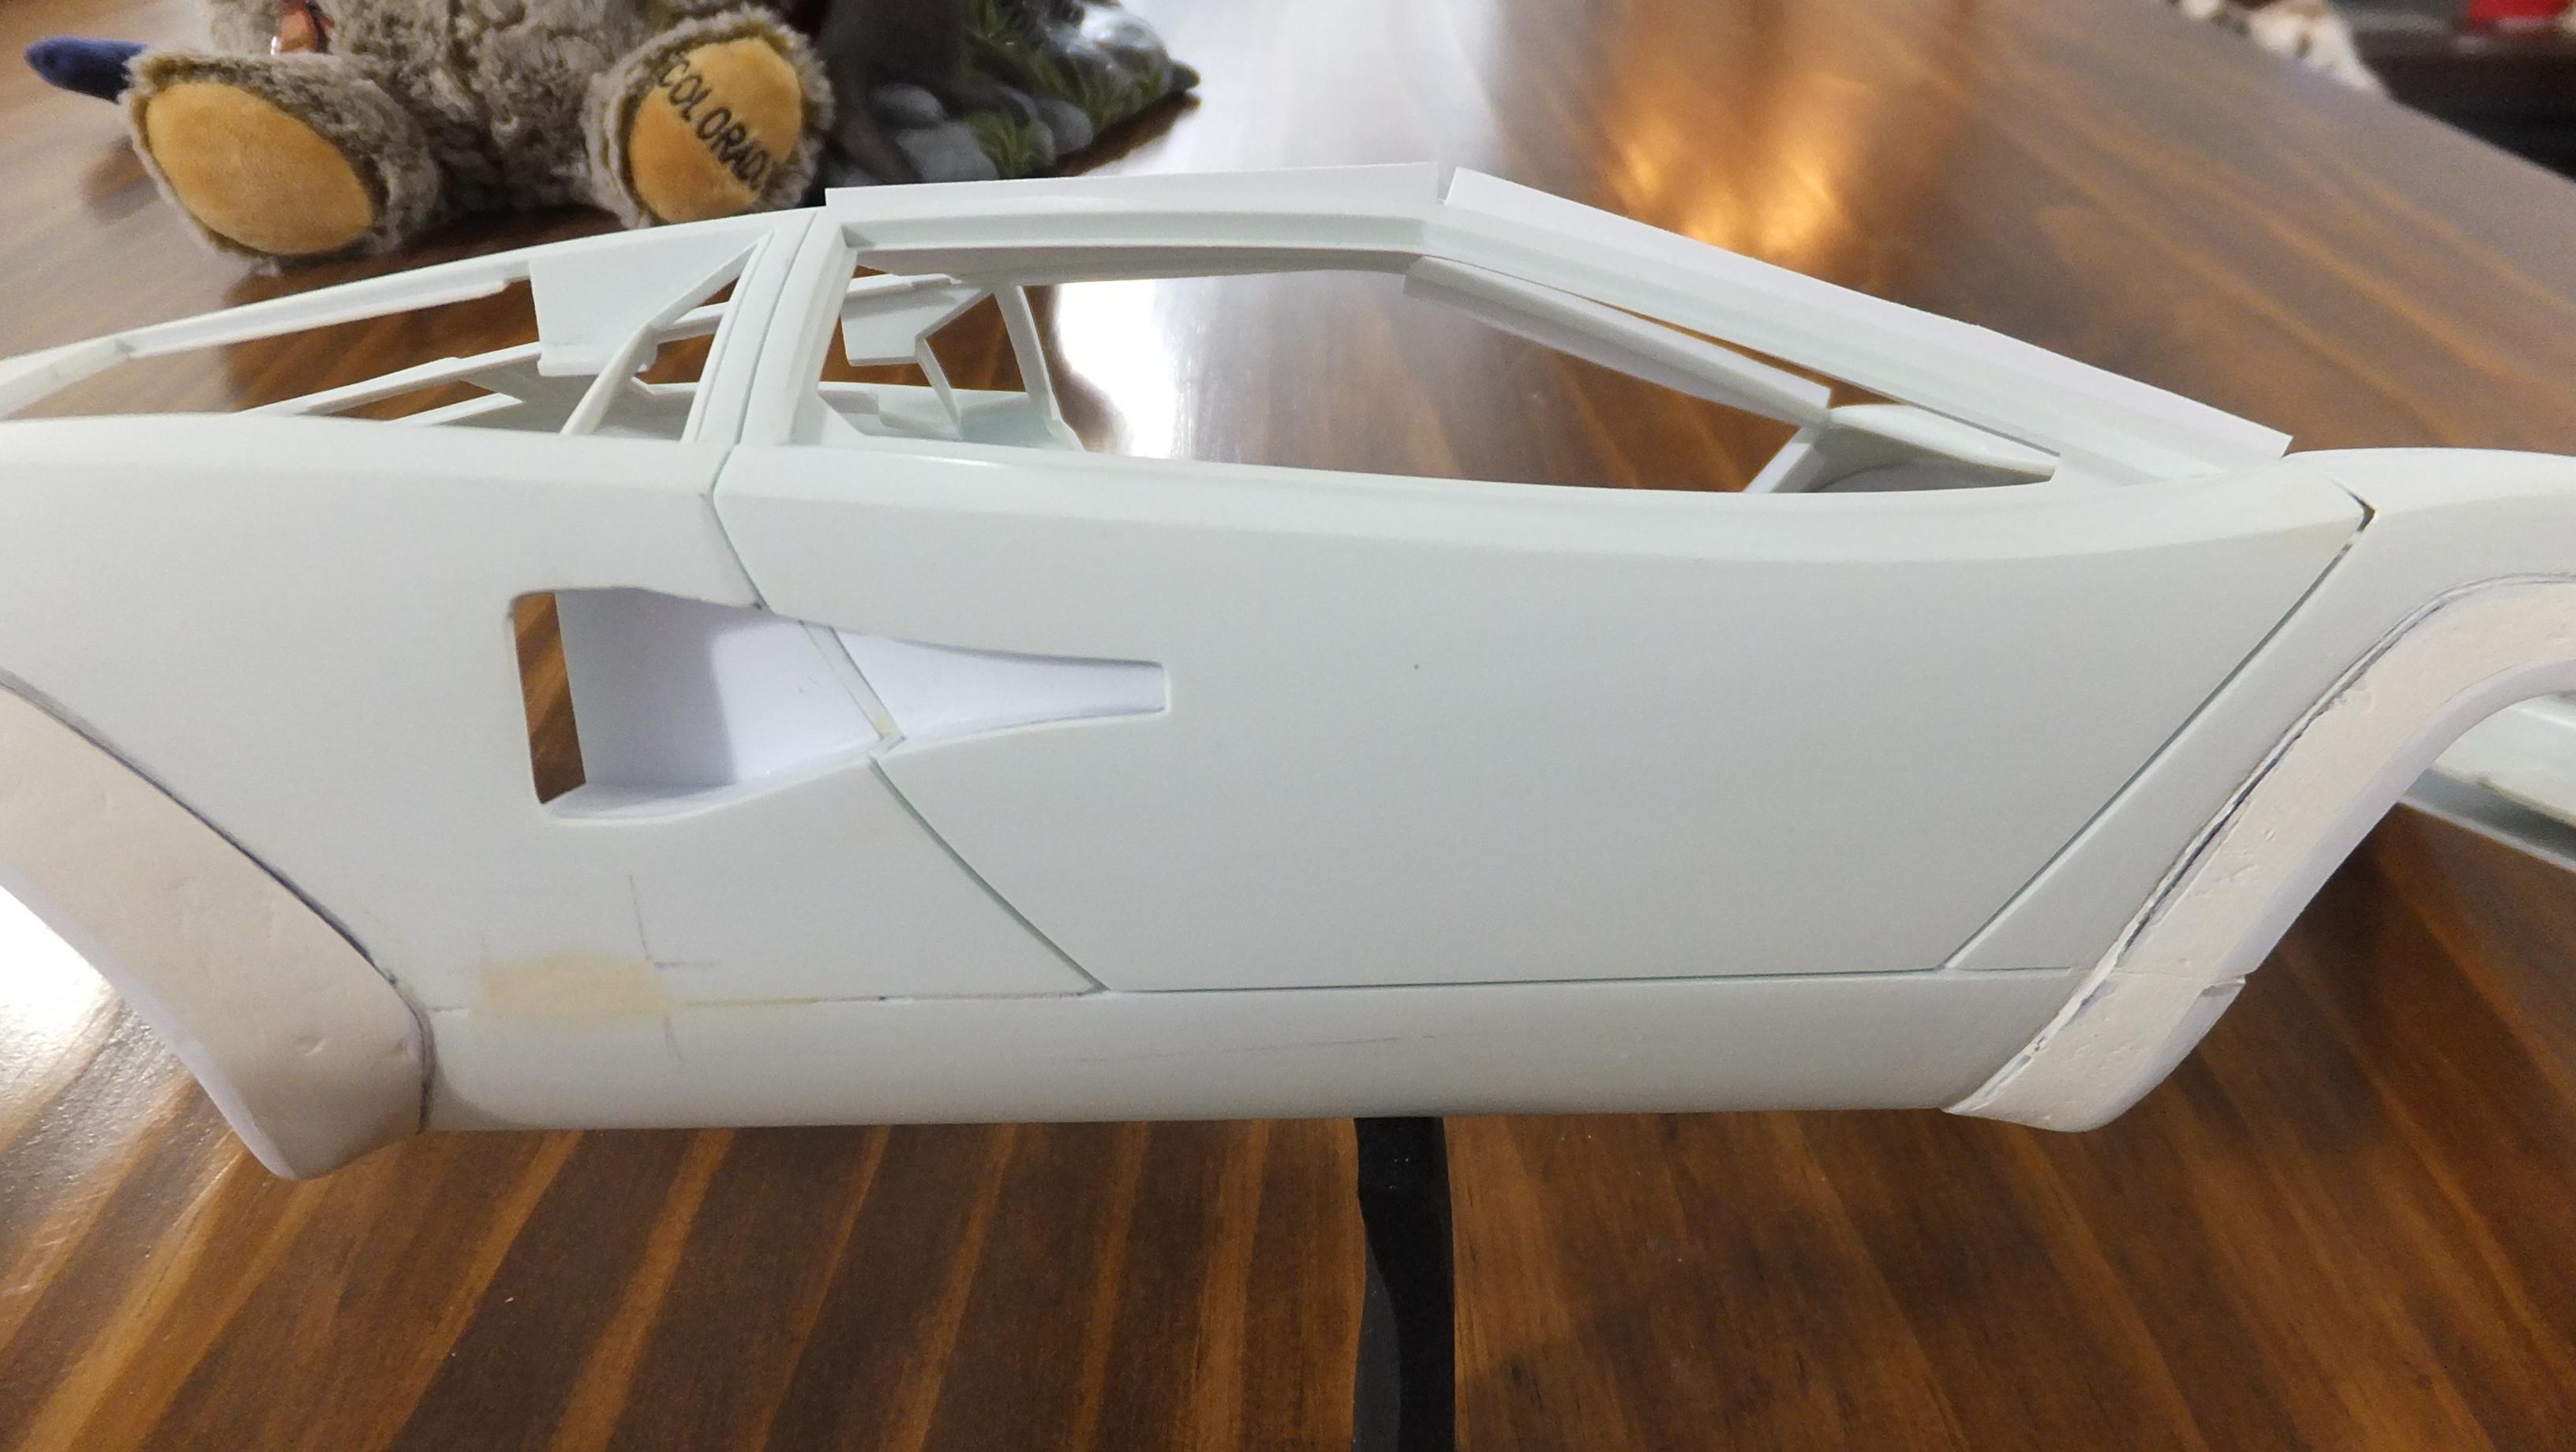
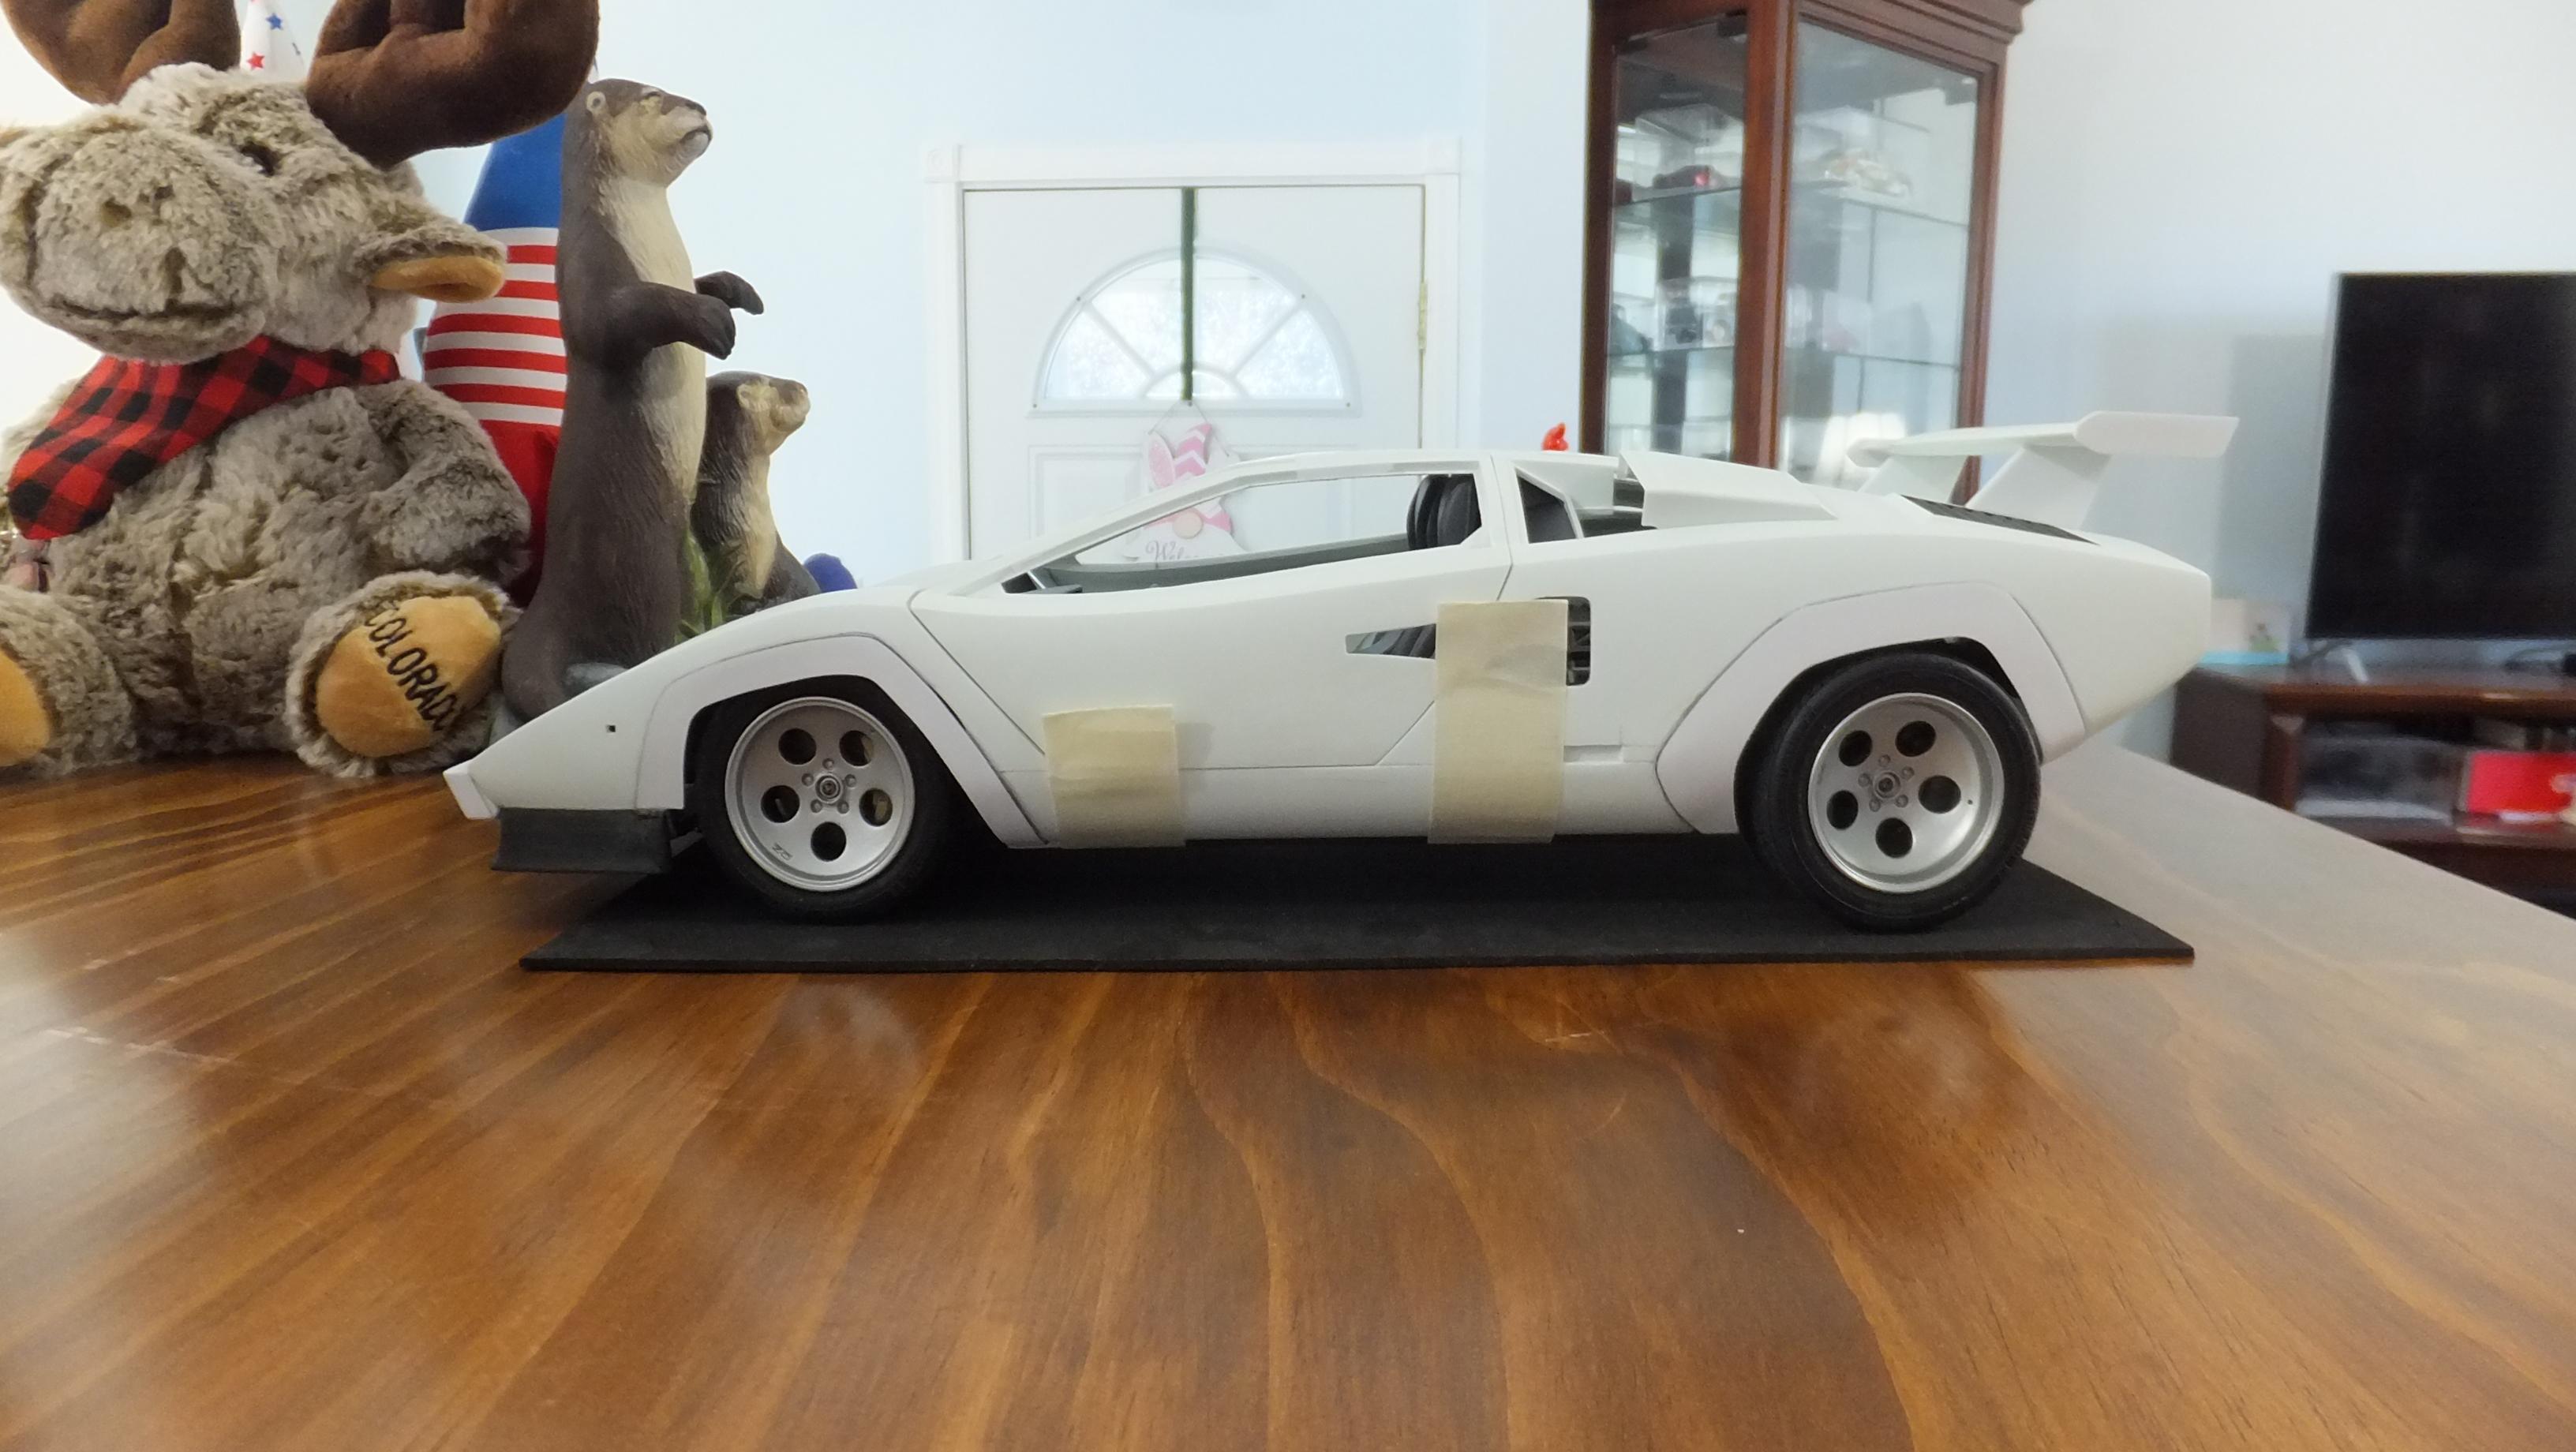
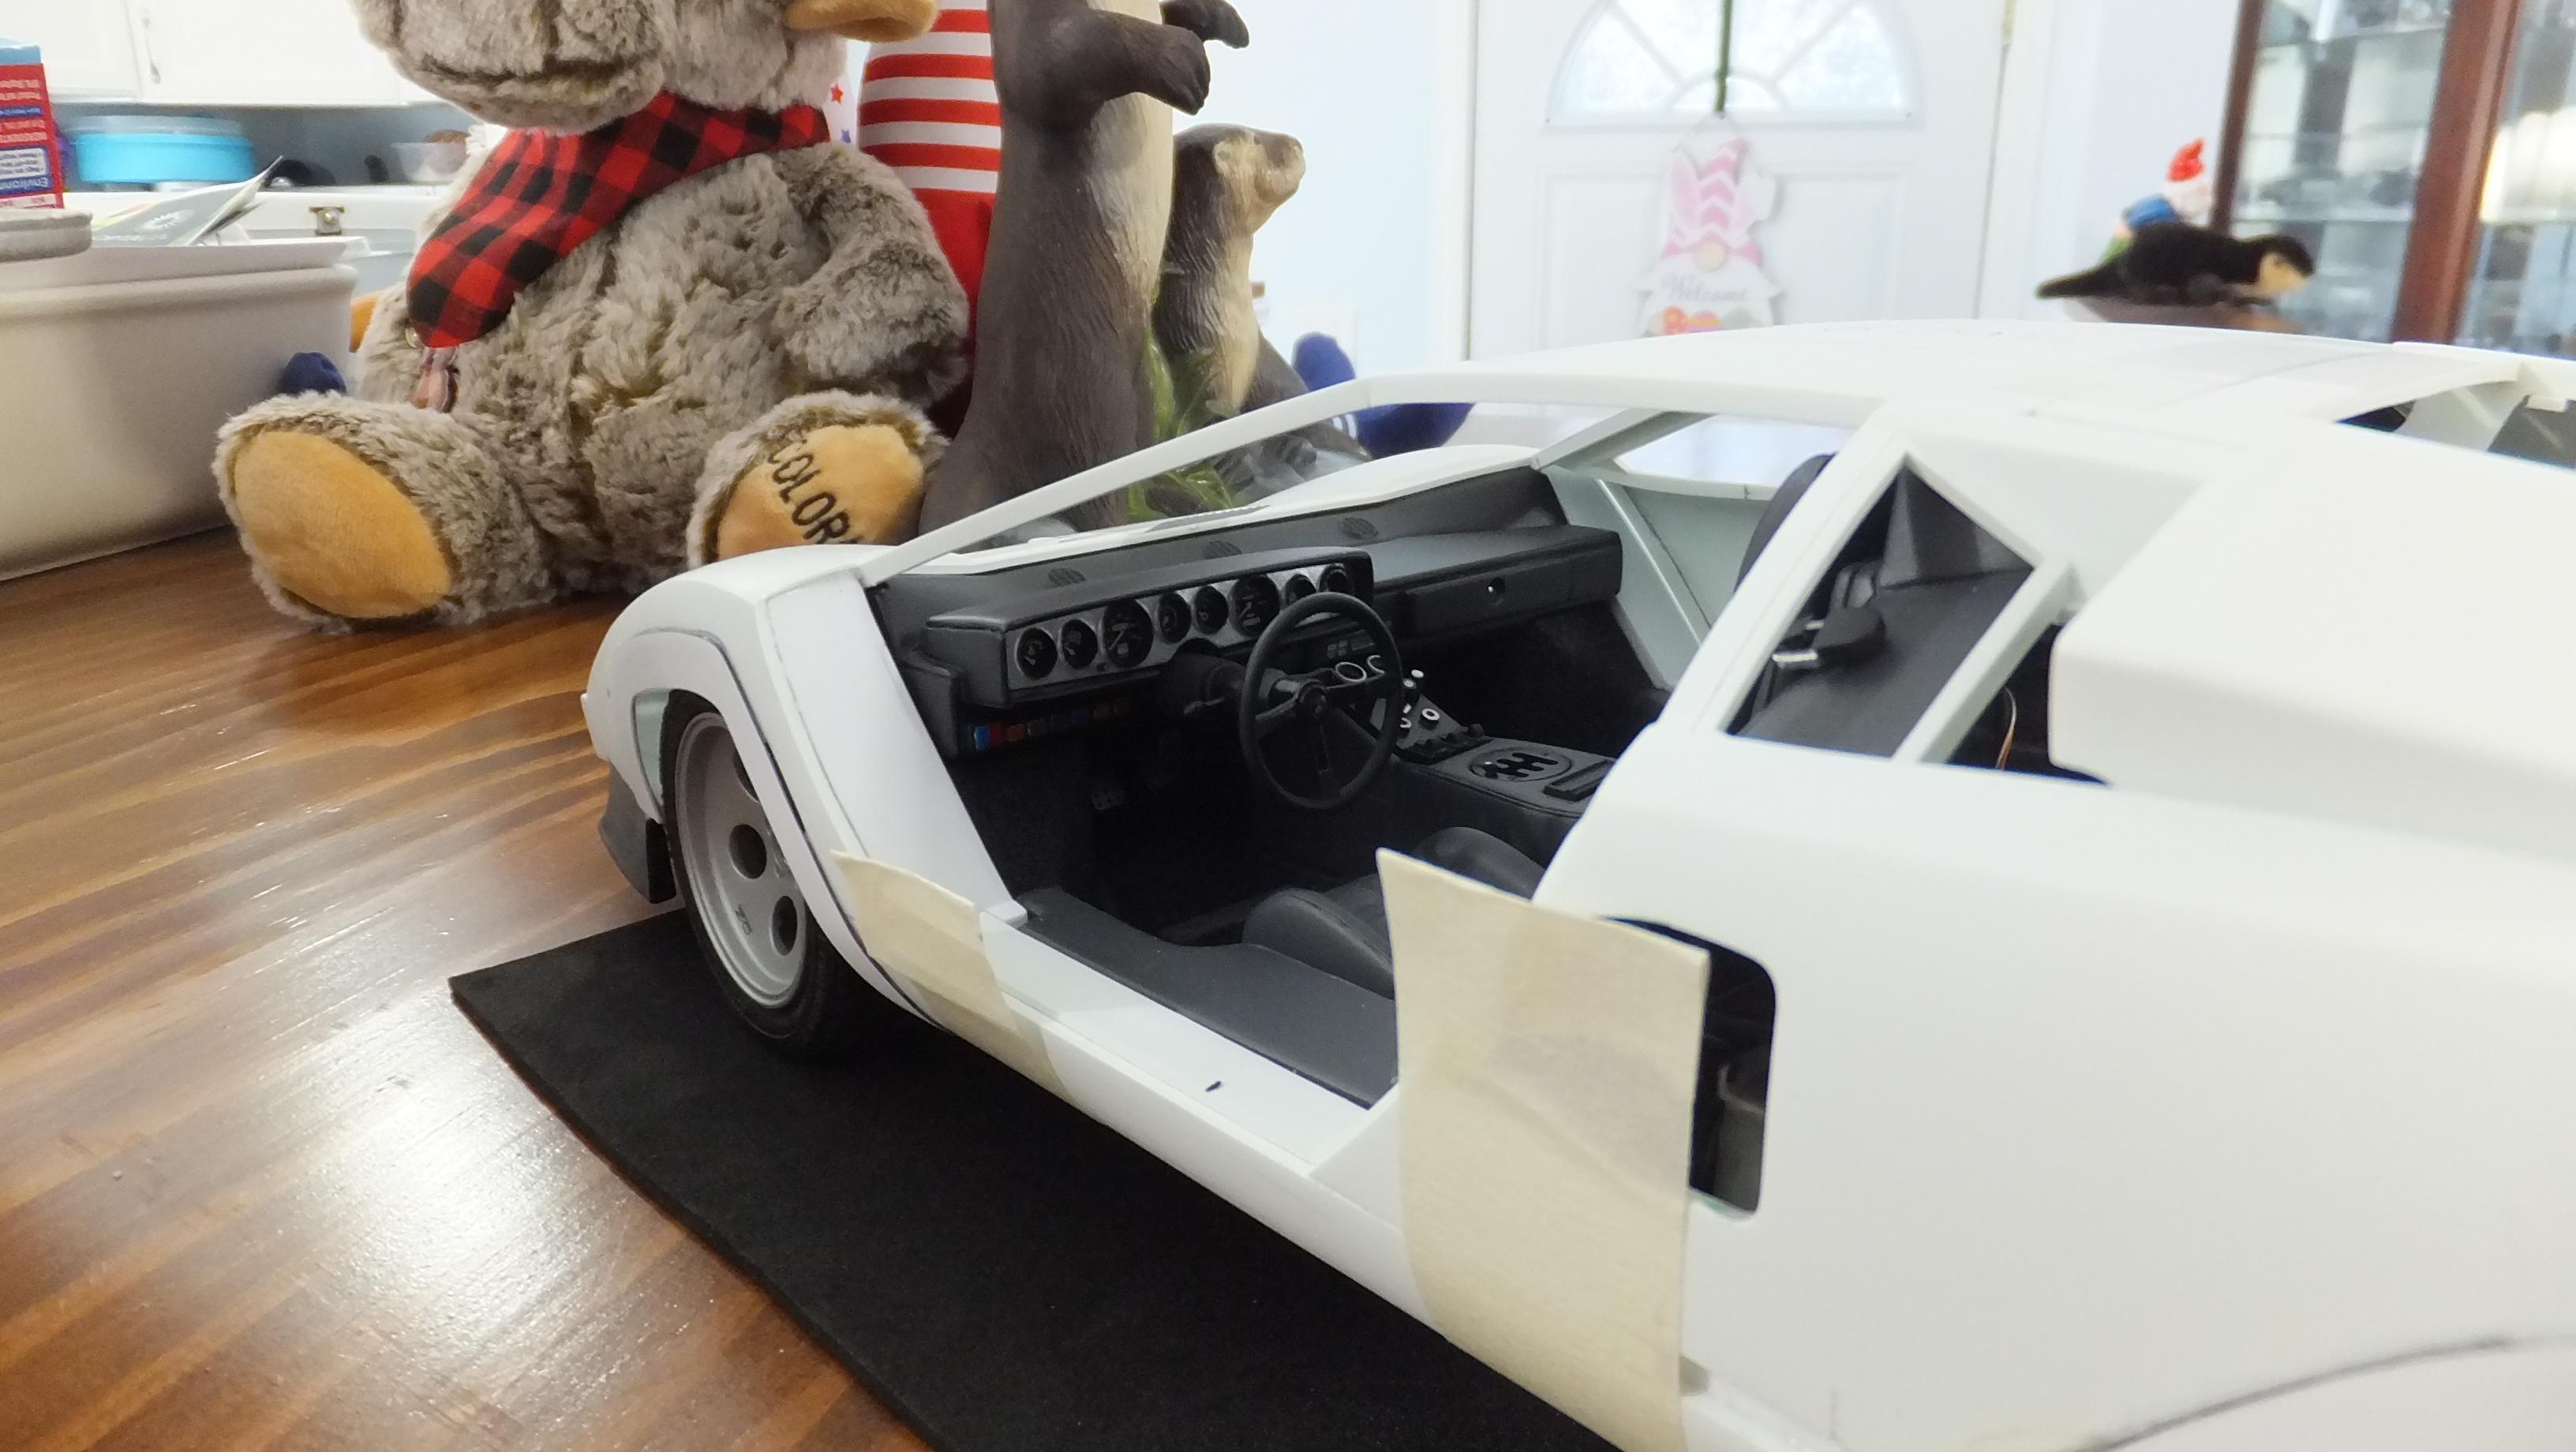
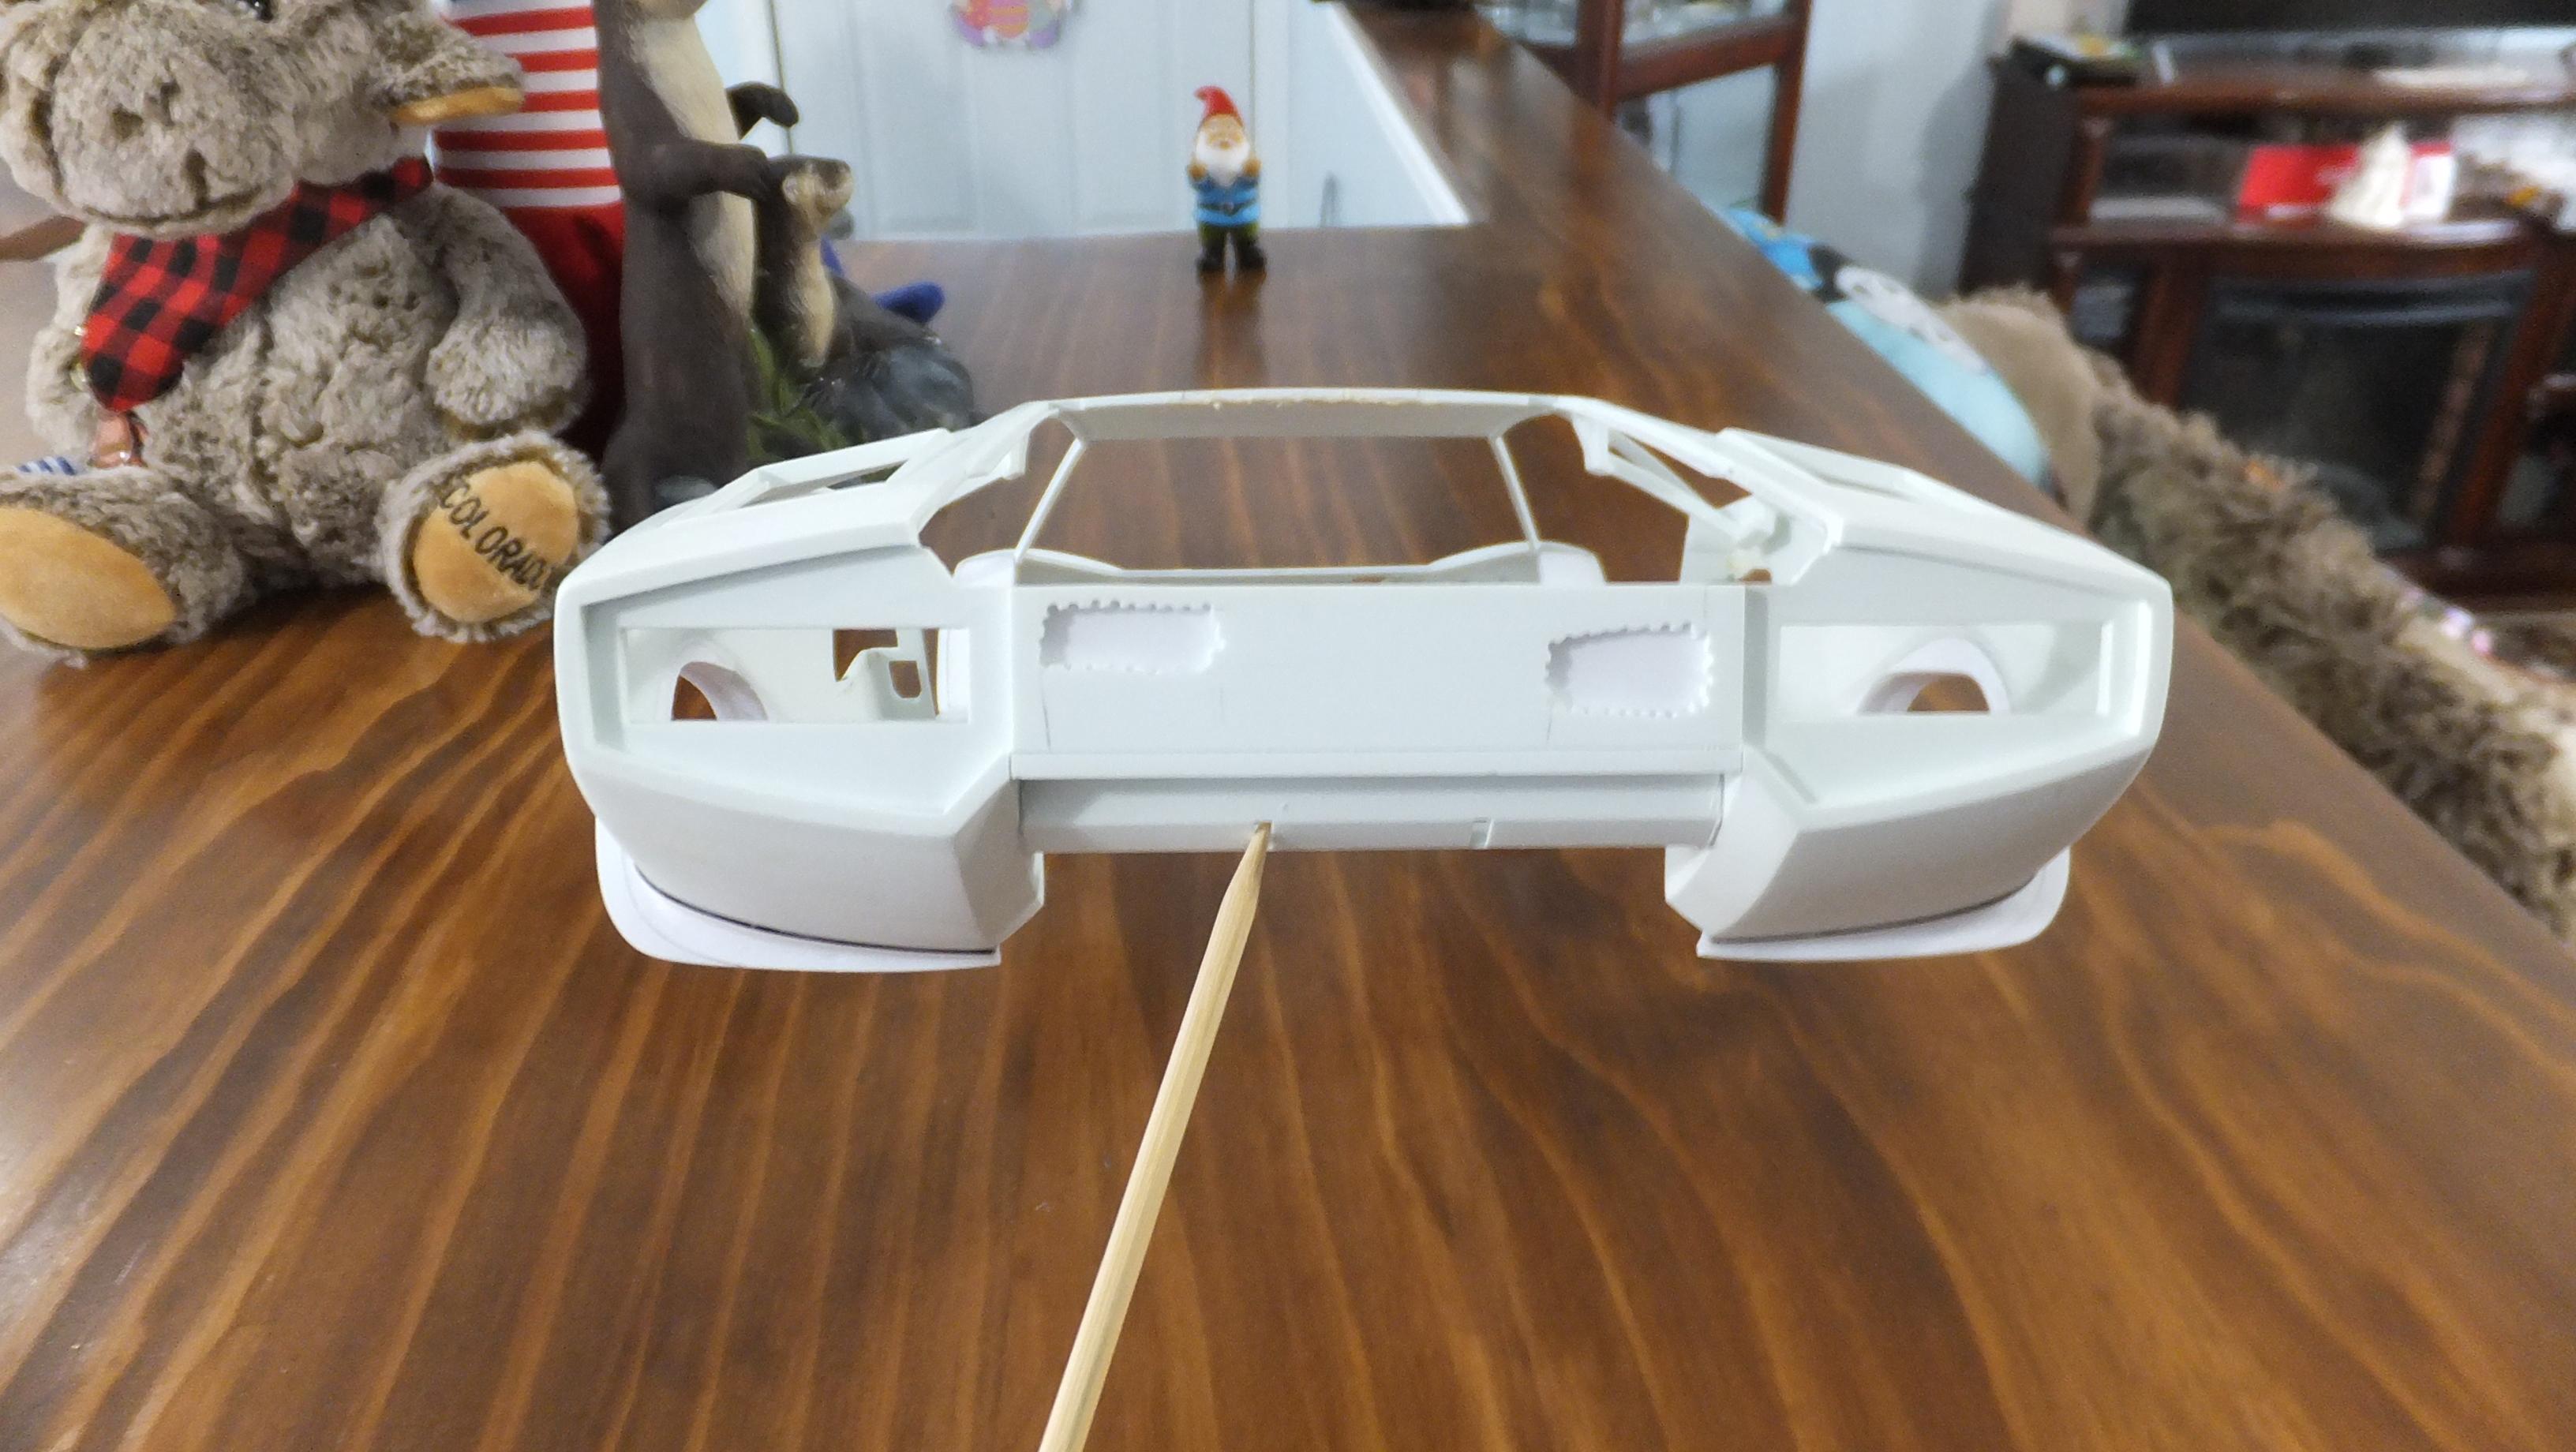
Hey, everyone! While i'm still working on how to make real factory hinges, i decided to finish off all the fenders, and fitments. Heres the body all primered up, and ready for finishing touches.
-Photo 1; Everything is properly gapped, and flush.
-Photo 2; I'm still not sure what i want to do to the chin spoiler of this fictional one of a kind Countach.
-Photo 3; The fenders turned out great, and soon i will rescribe the rocker seams, fender seams, and add the strip of sheet metal hanging down from the bottom of the rockers.
-Photo 4; No traces of where i cut out any of the molded in scripts.
_photo 5; All the fender flares were rolled up out of the way, and just need a bit of glazing putty.

-
 2
2
-
-
On 4/3/2023 at 9:52 PM, iamsuperdan said:
As usual with your stuff, it's pretty awesome. Great to see it back on the bench!
Sorry to hear about why though.
Thanks, Dan!...very much appreciated! I'm just about to post another update...
-
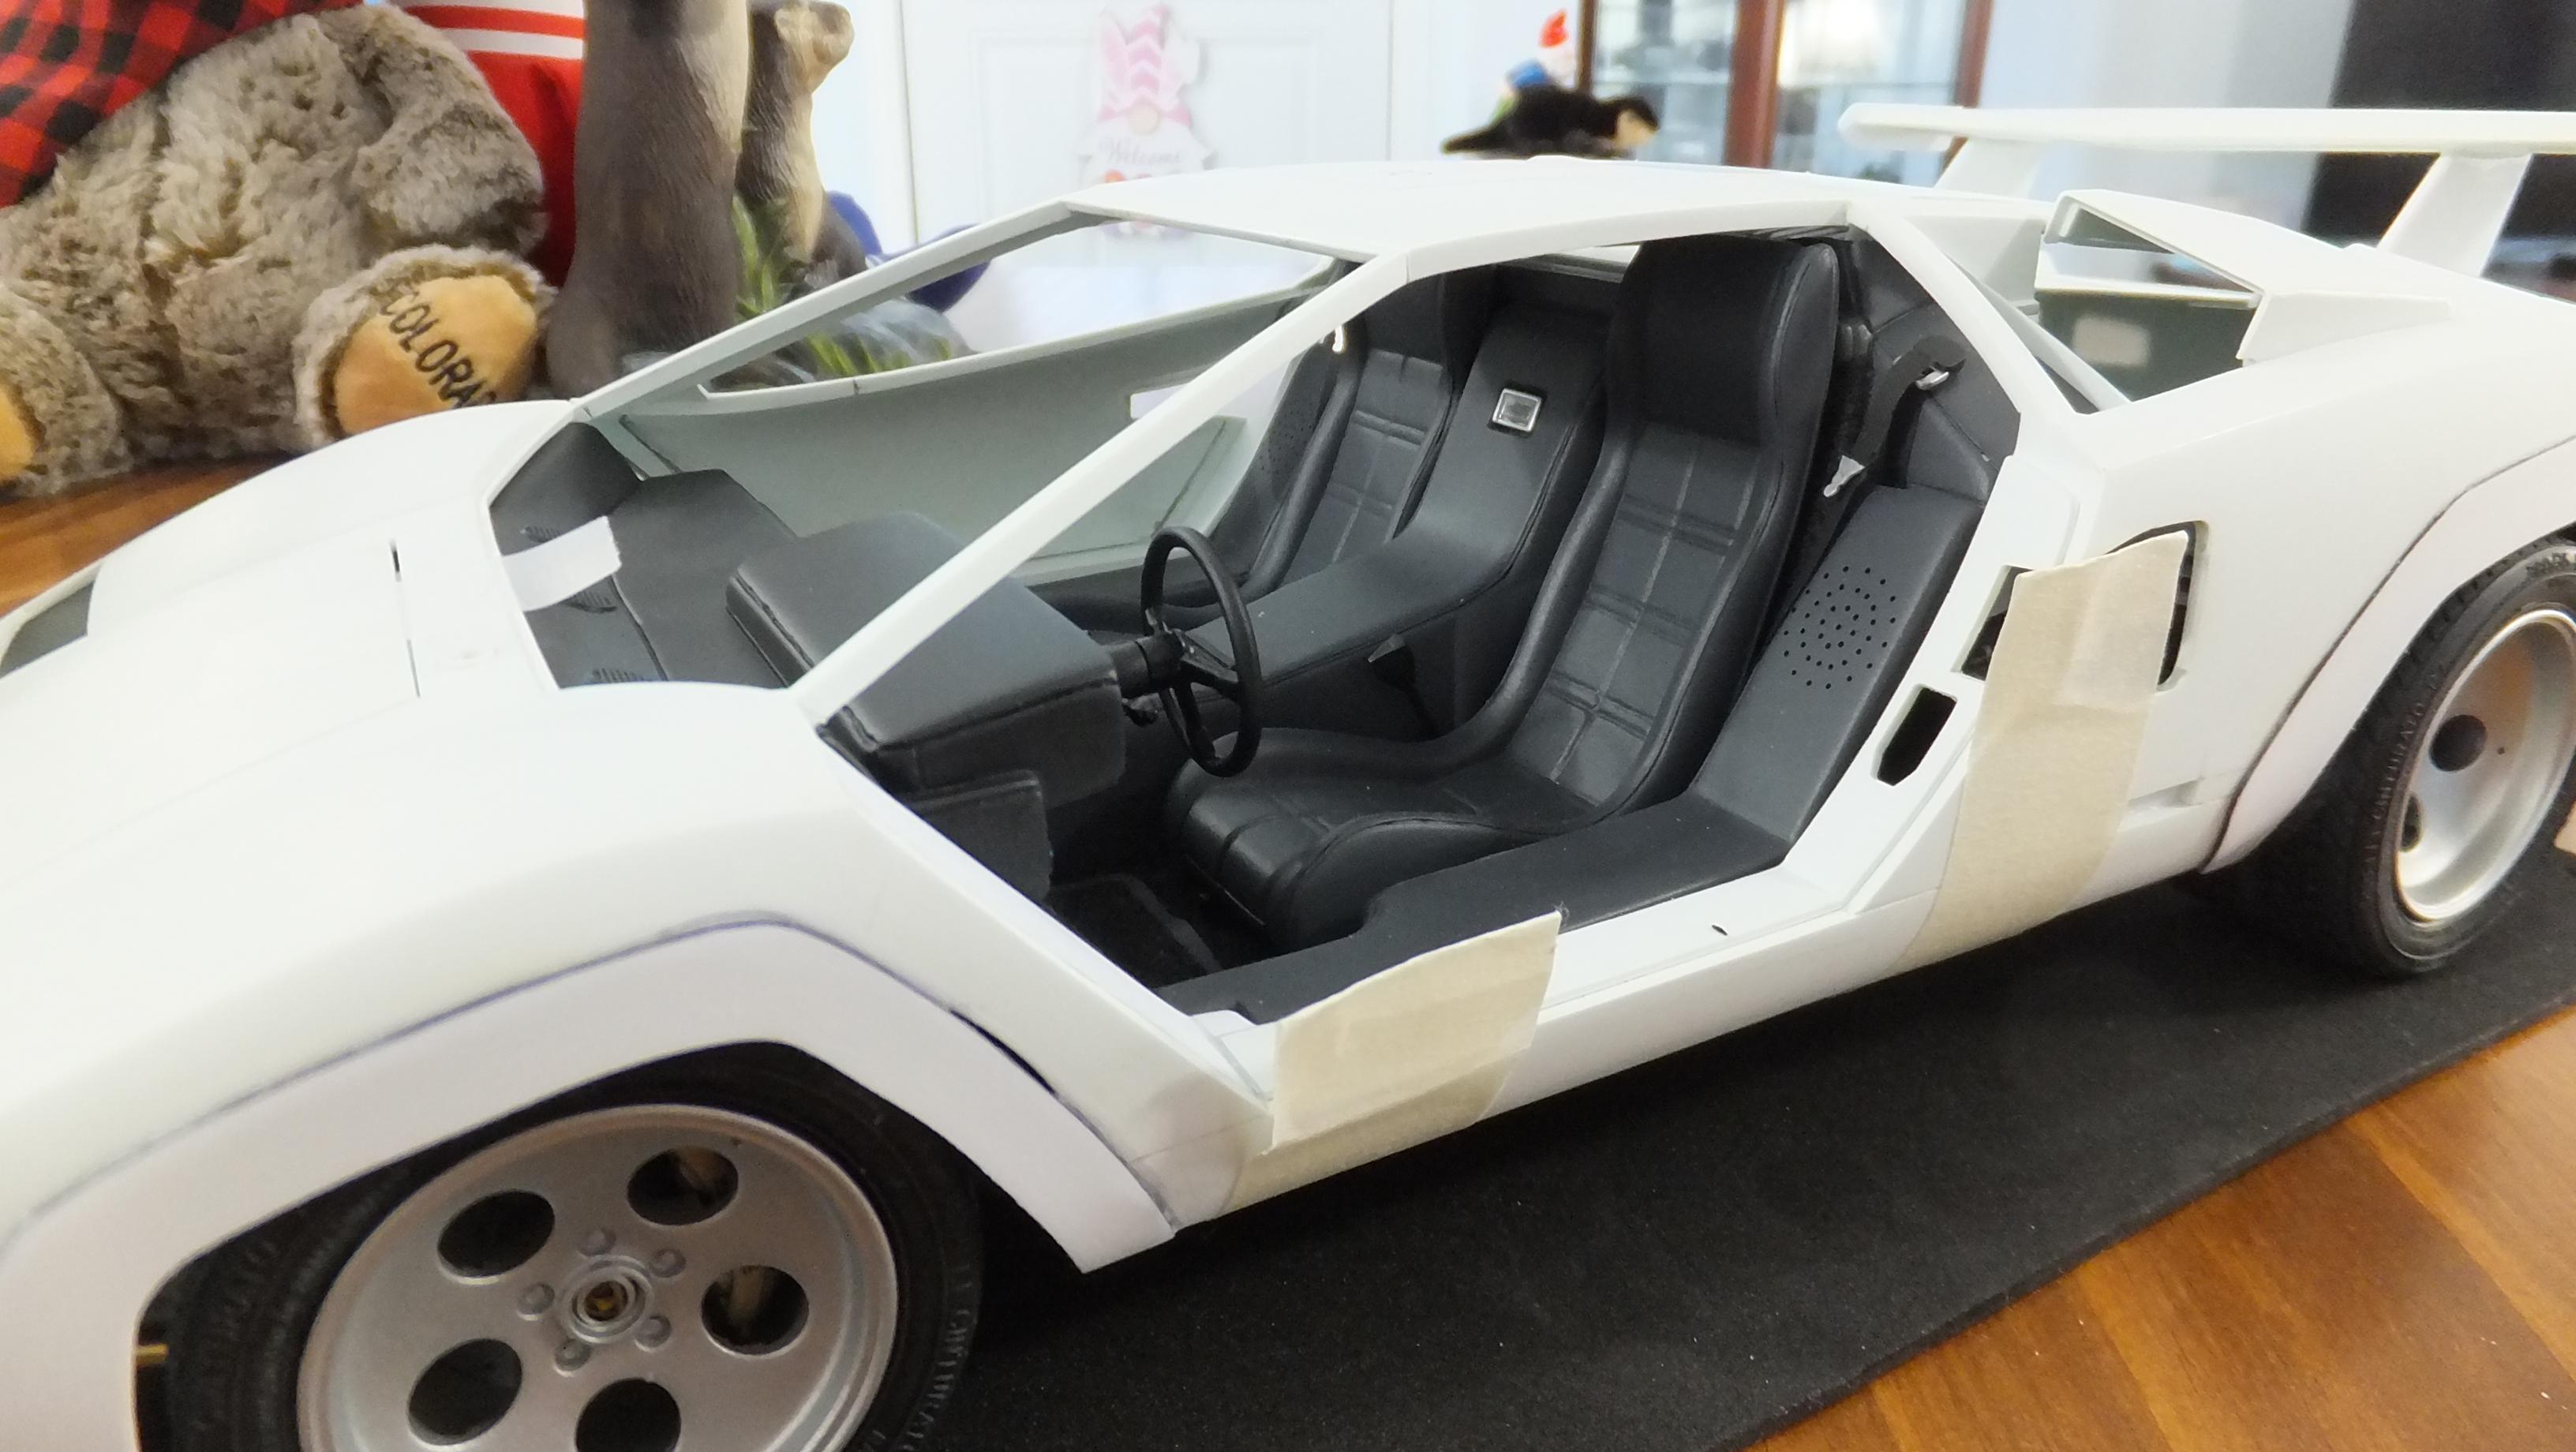
Even with all the issues you ran into, you have managed to build a Beautiful white/black Countach!!...i am so glad you stuck with it!! I'm especially jealous about the white paint job...i've failed 16 white/black Countach paintjobs over the years... its my favorite color combo for this car, but its also my nemesis. I WILL have one some day, just dont know when.
Just a little bit of trivia here; Most people think the best color for the Countach was red, or black, and believed that the Periscope' was the best version -Ferruccio himself had a Countach that wasnt a Periscope', and it was white/black...he said that they were the perfect, only colors for a Countach.
-
24 minutes ago, ea0863 said:
Ah, yes. An homage to Ken Imhoff - the man who built a stunning charcoal grey Countach from scratch in his basement over a 17 year period... and then had to figure out a way to get it out!
")
Pretty close to that color, ya.
-
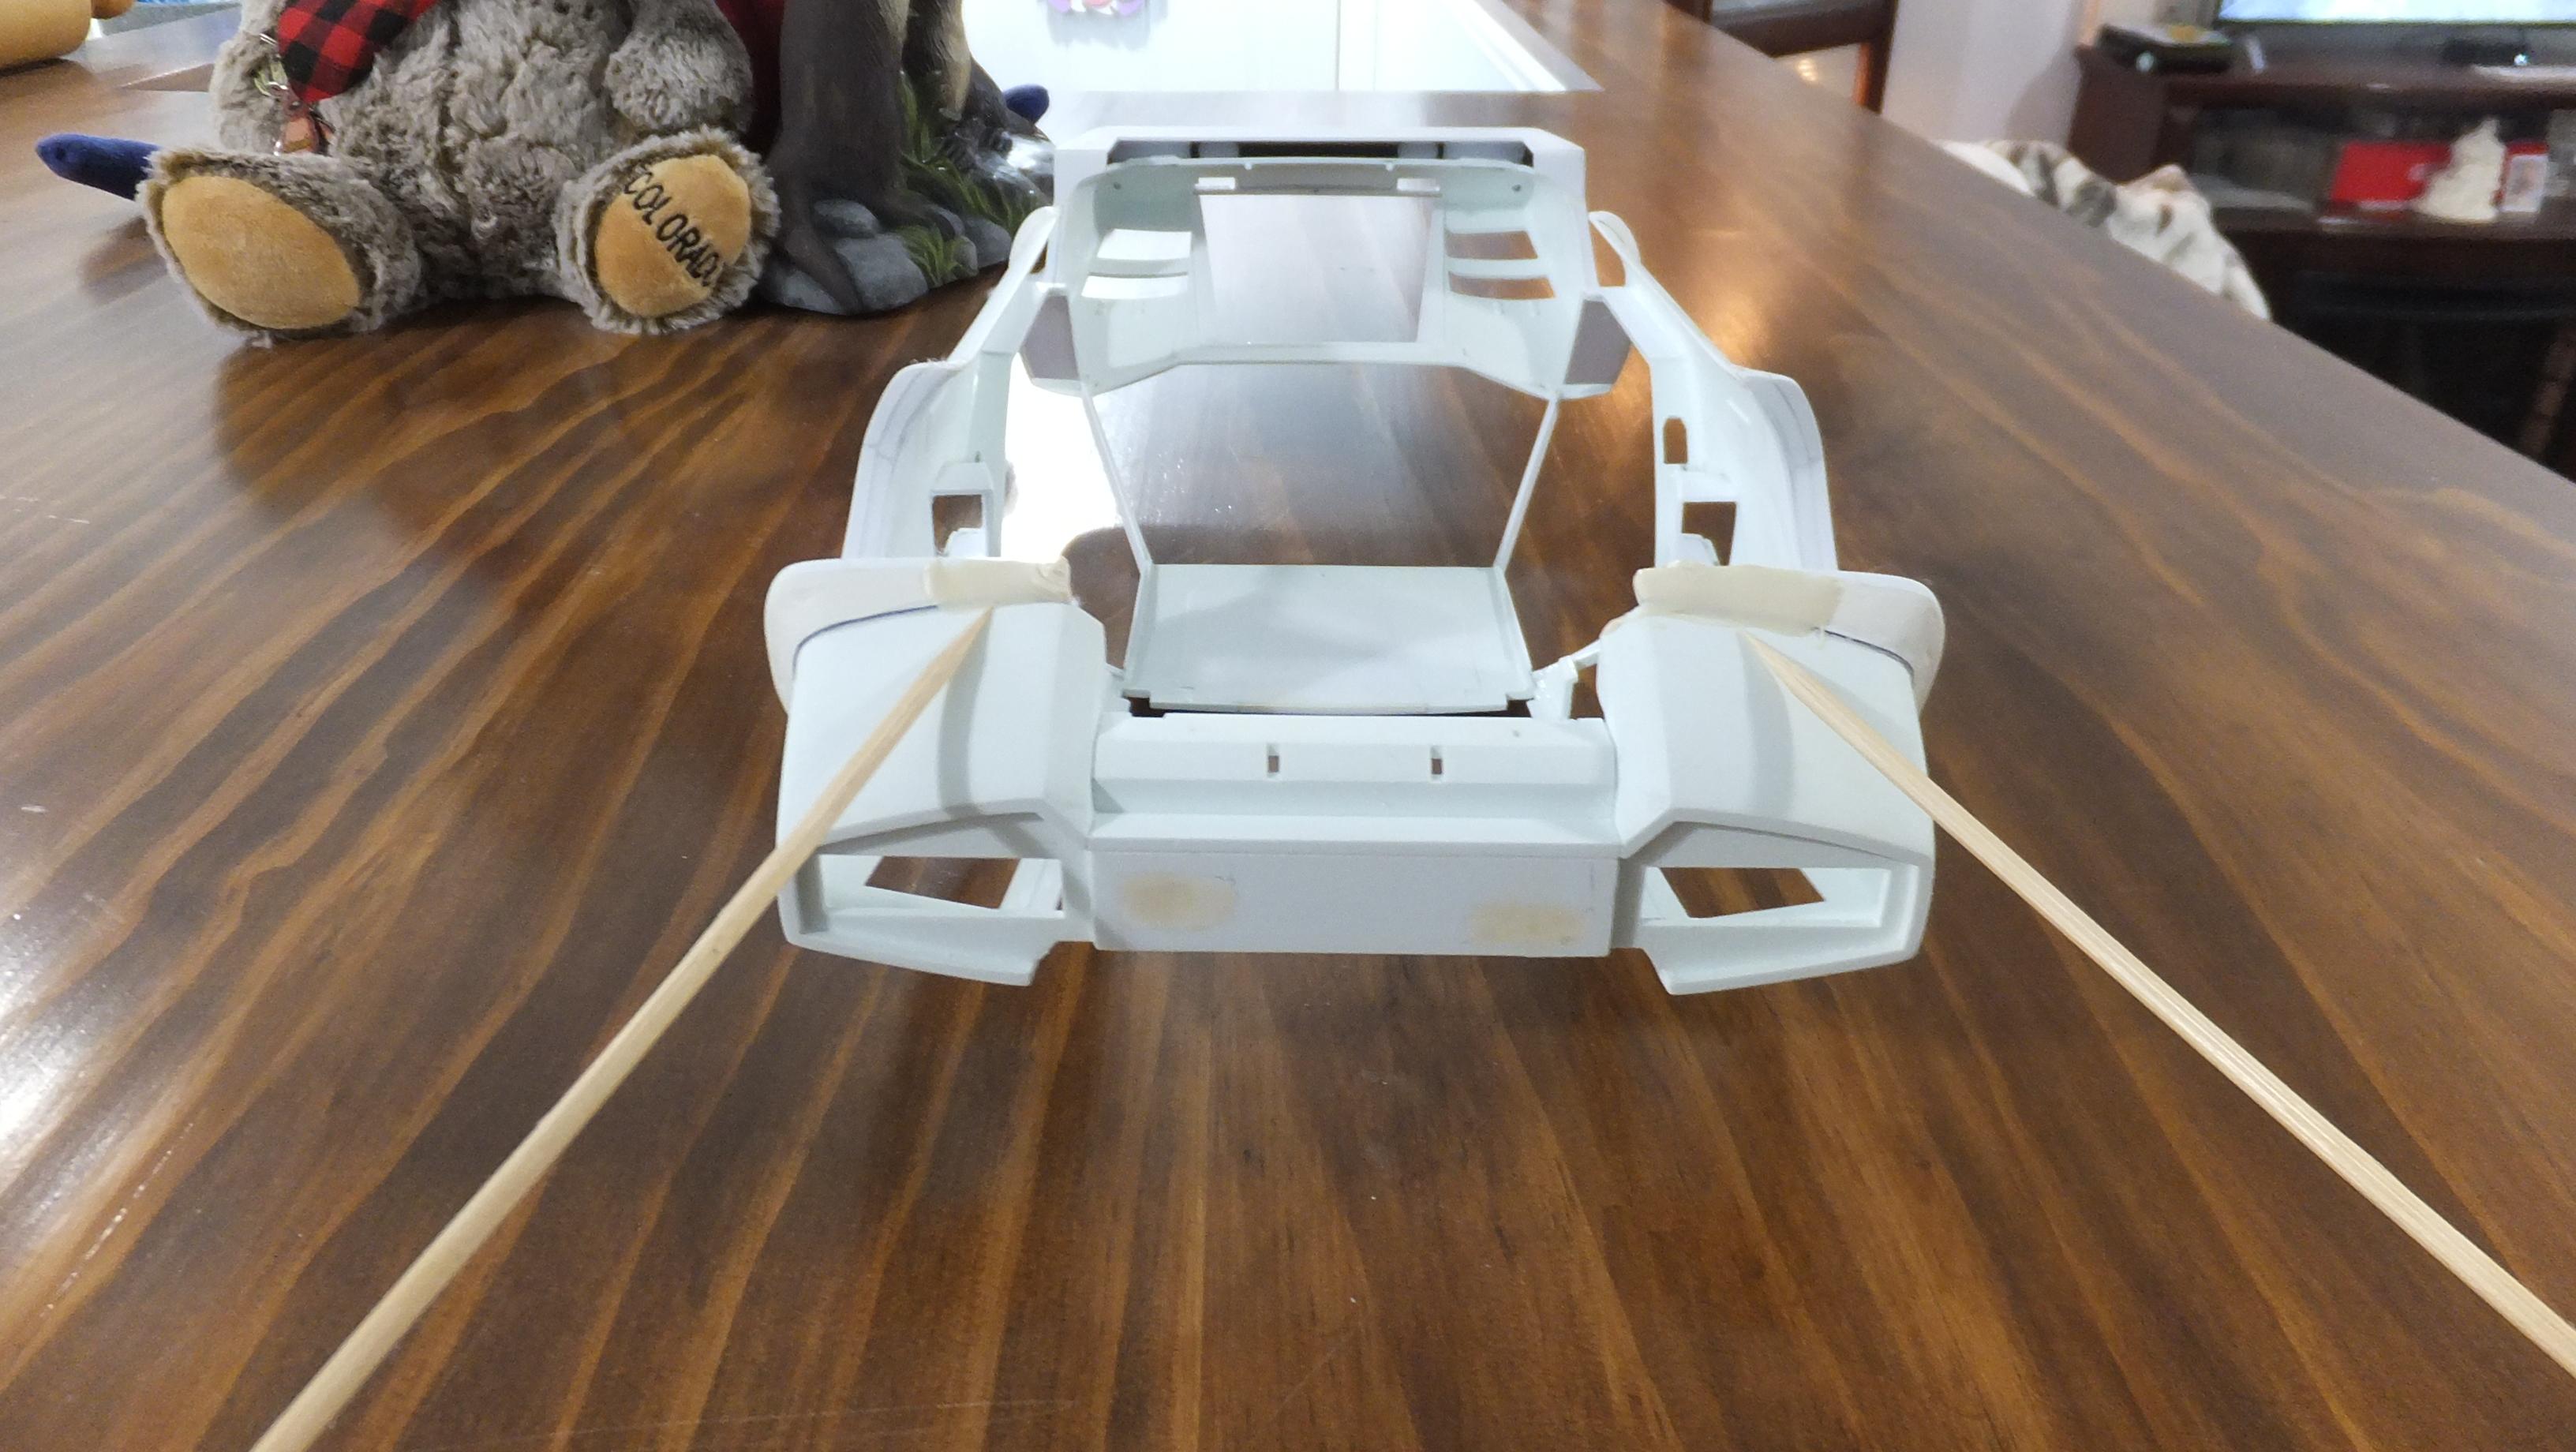
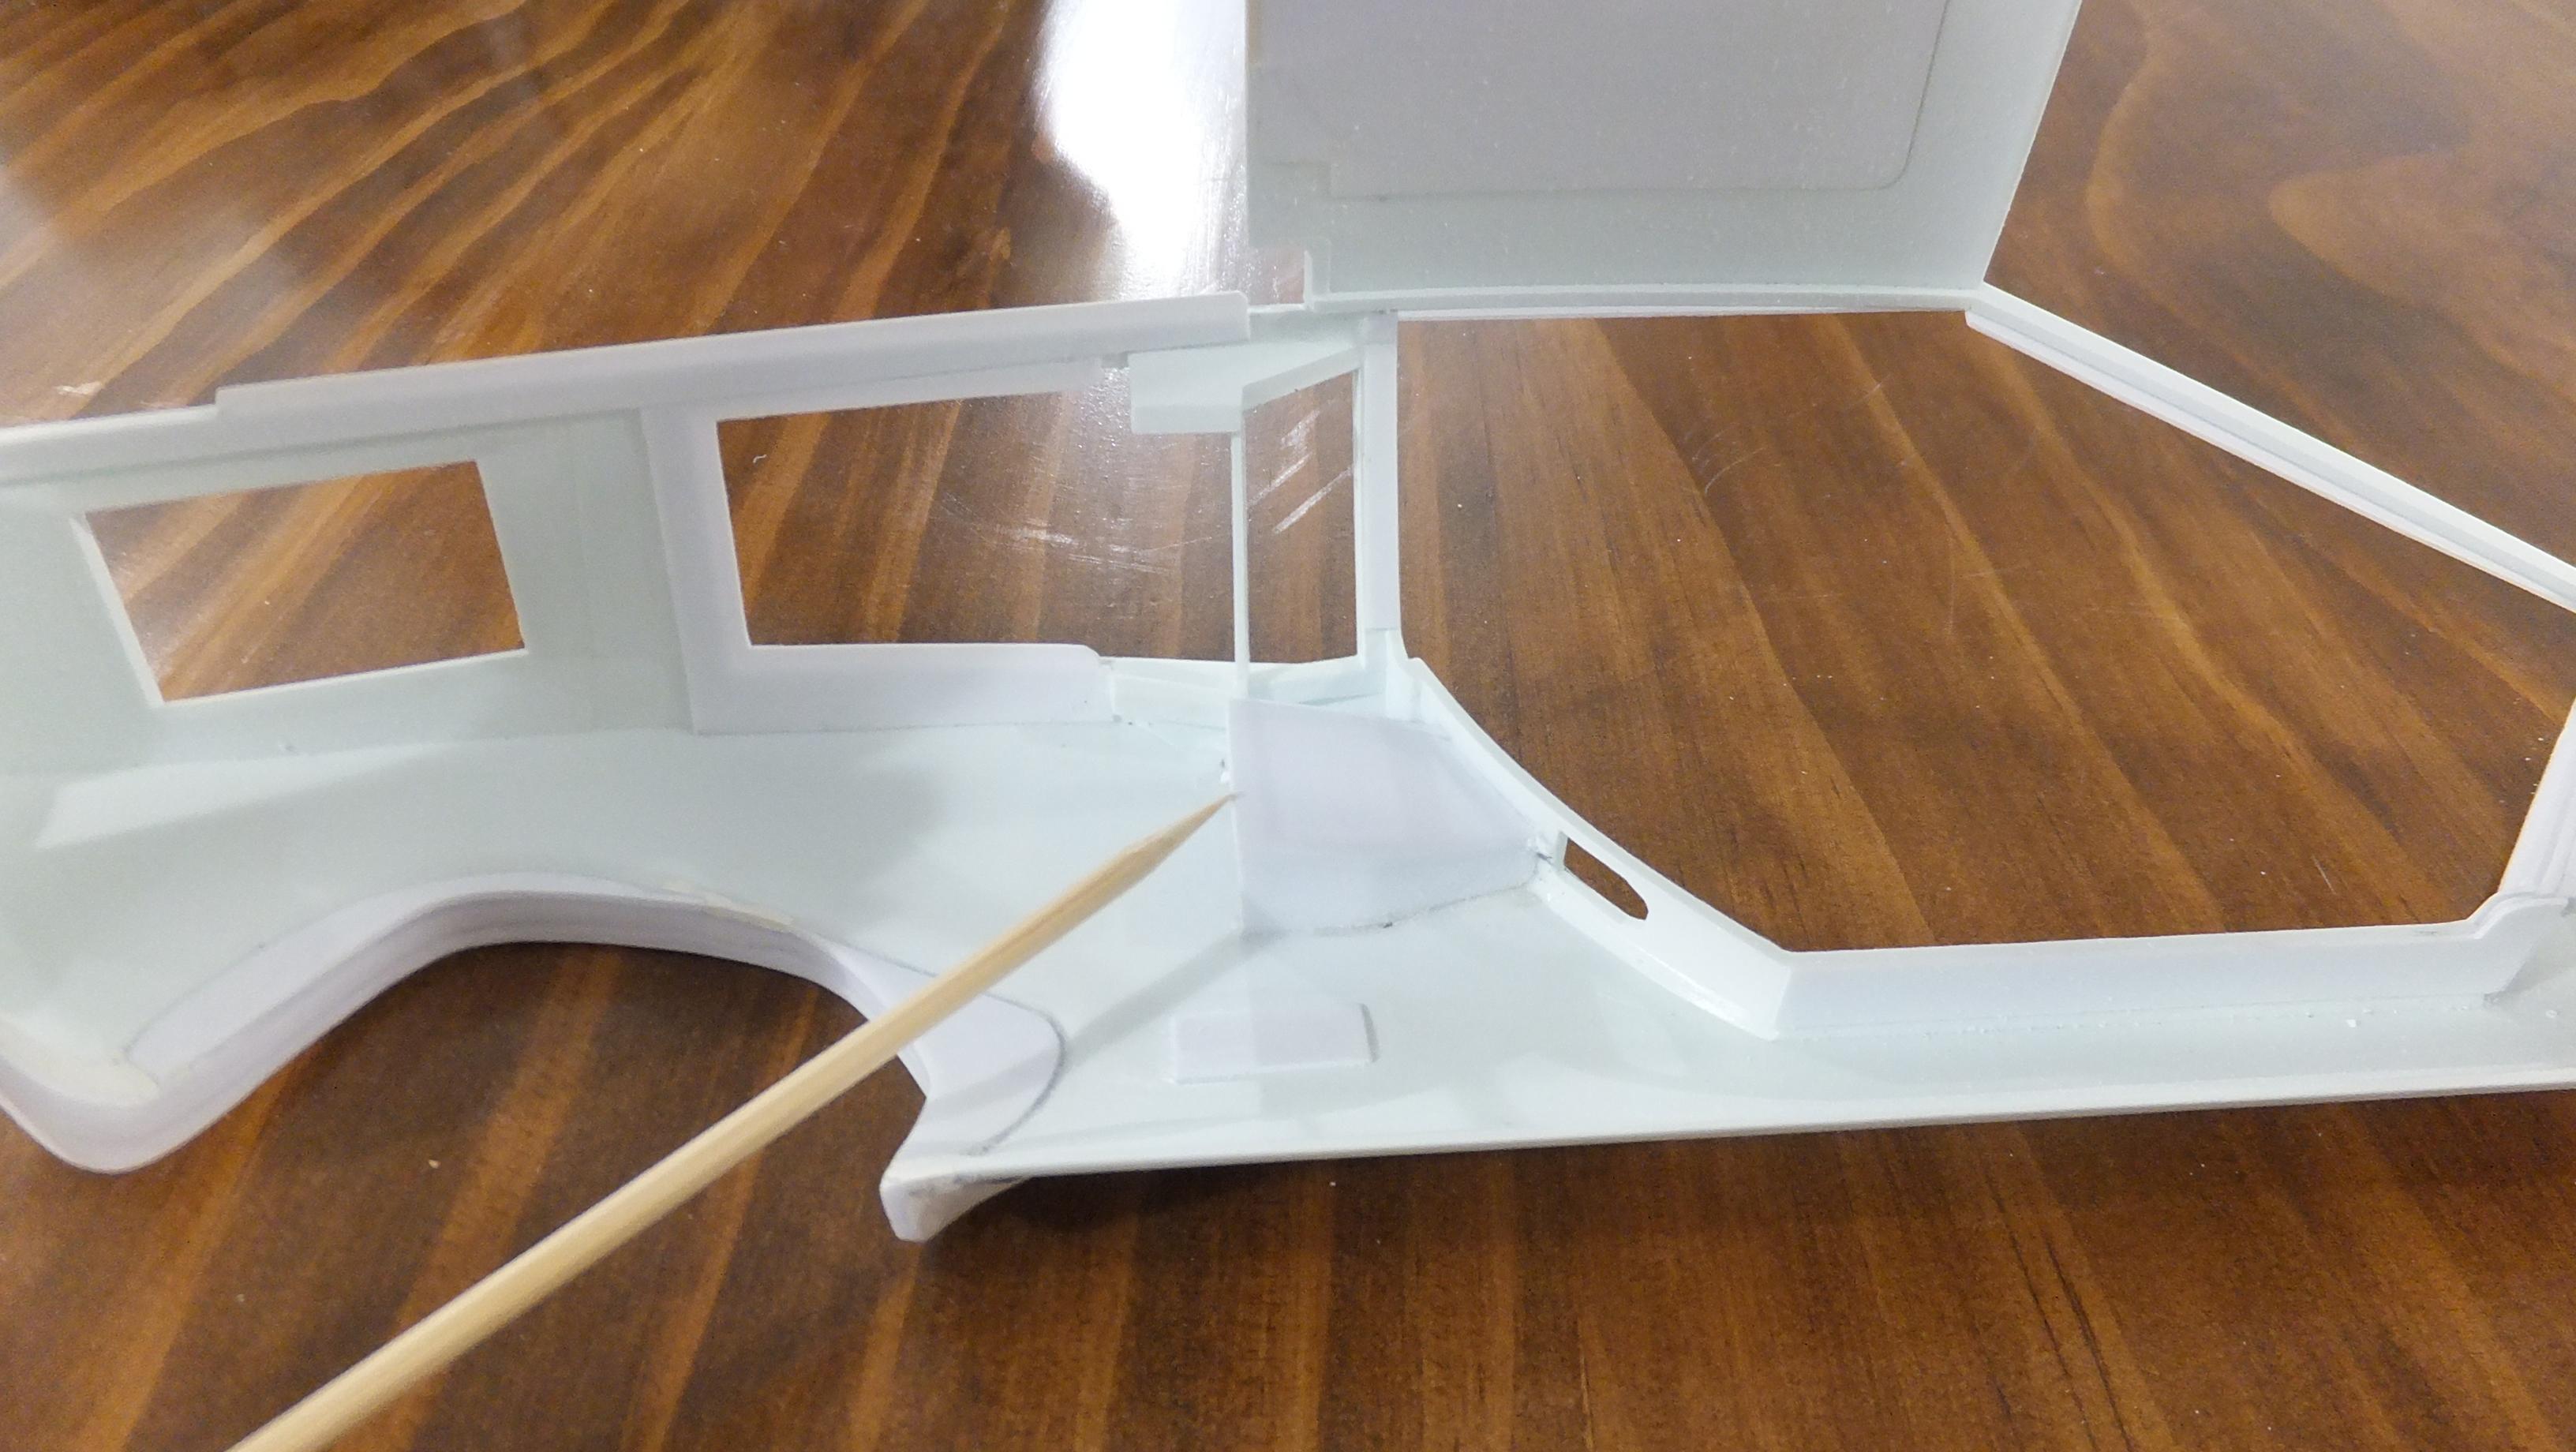
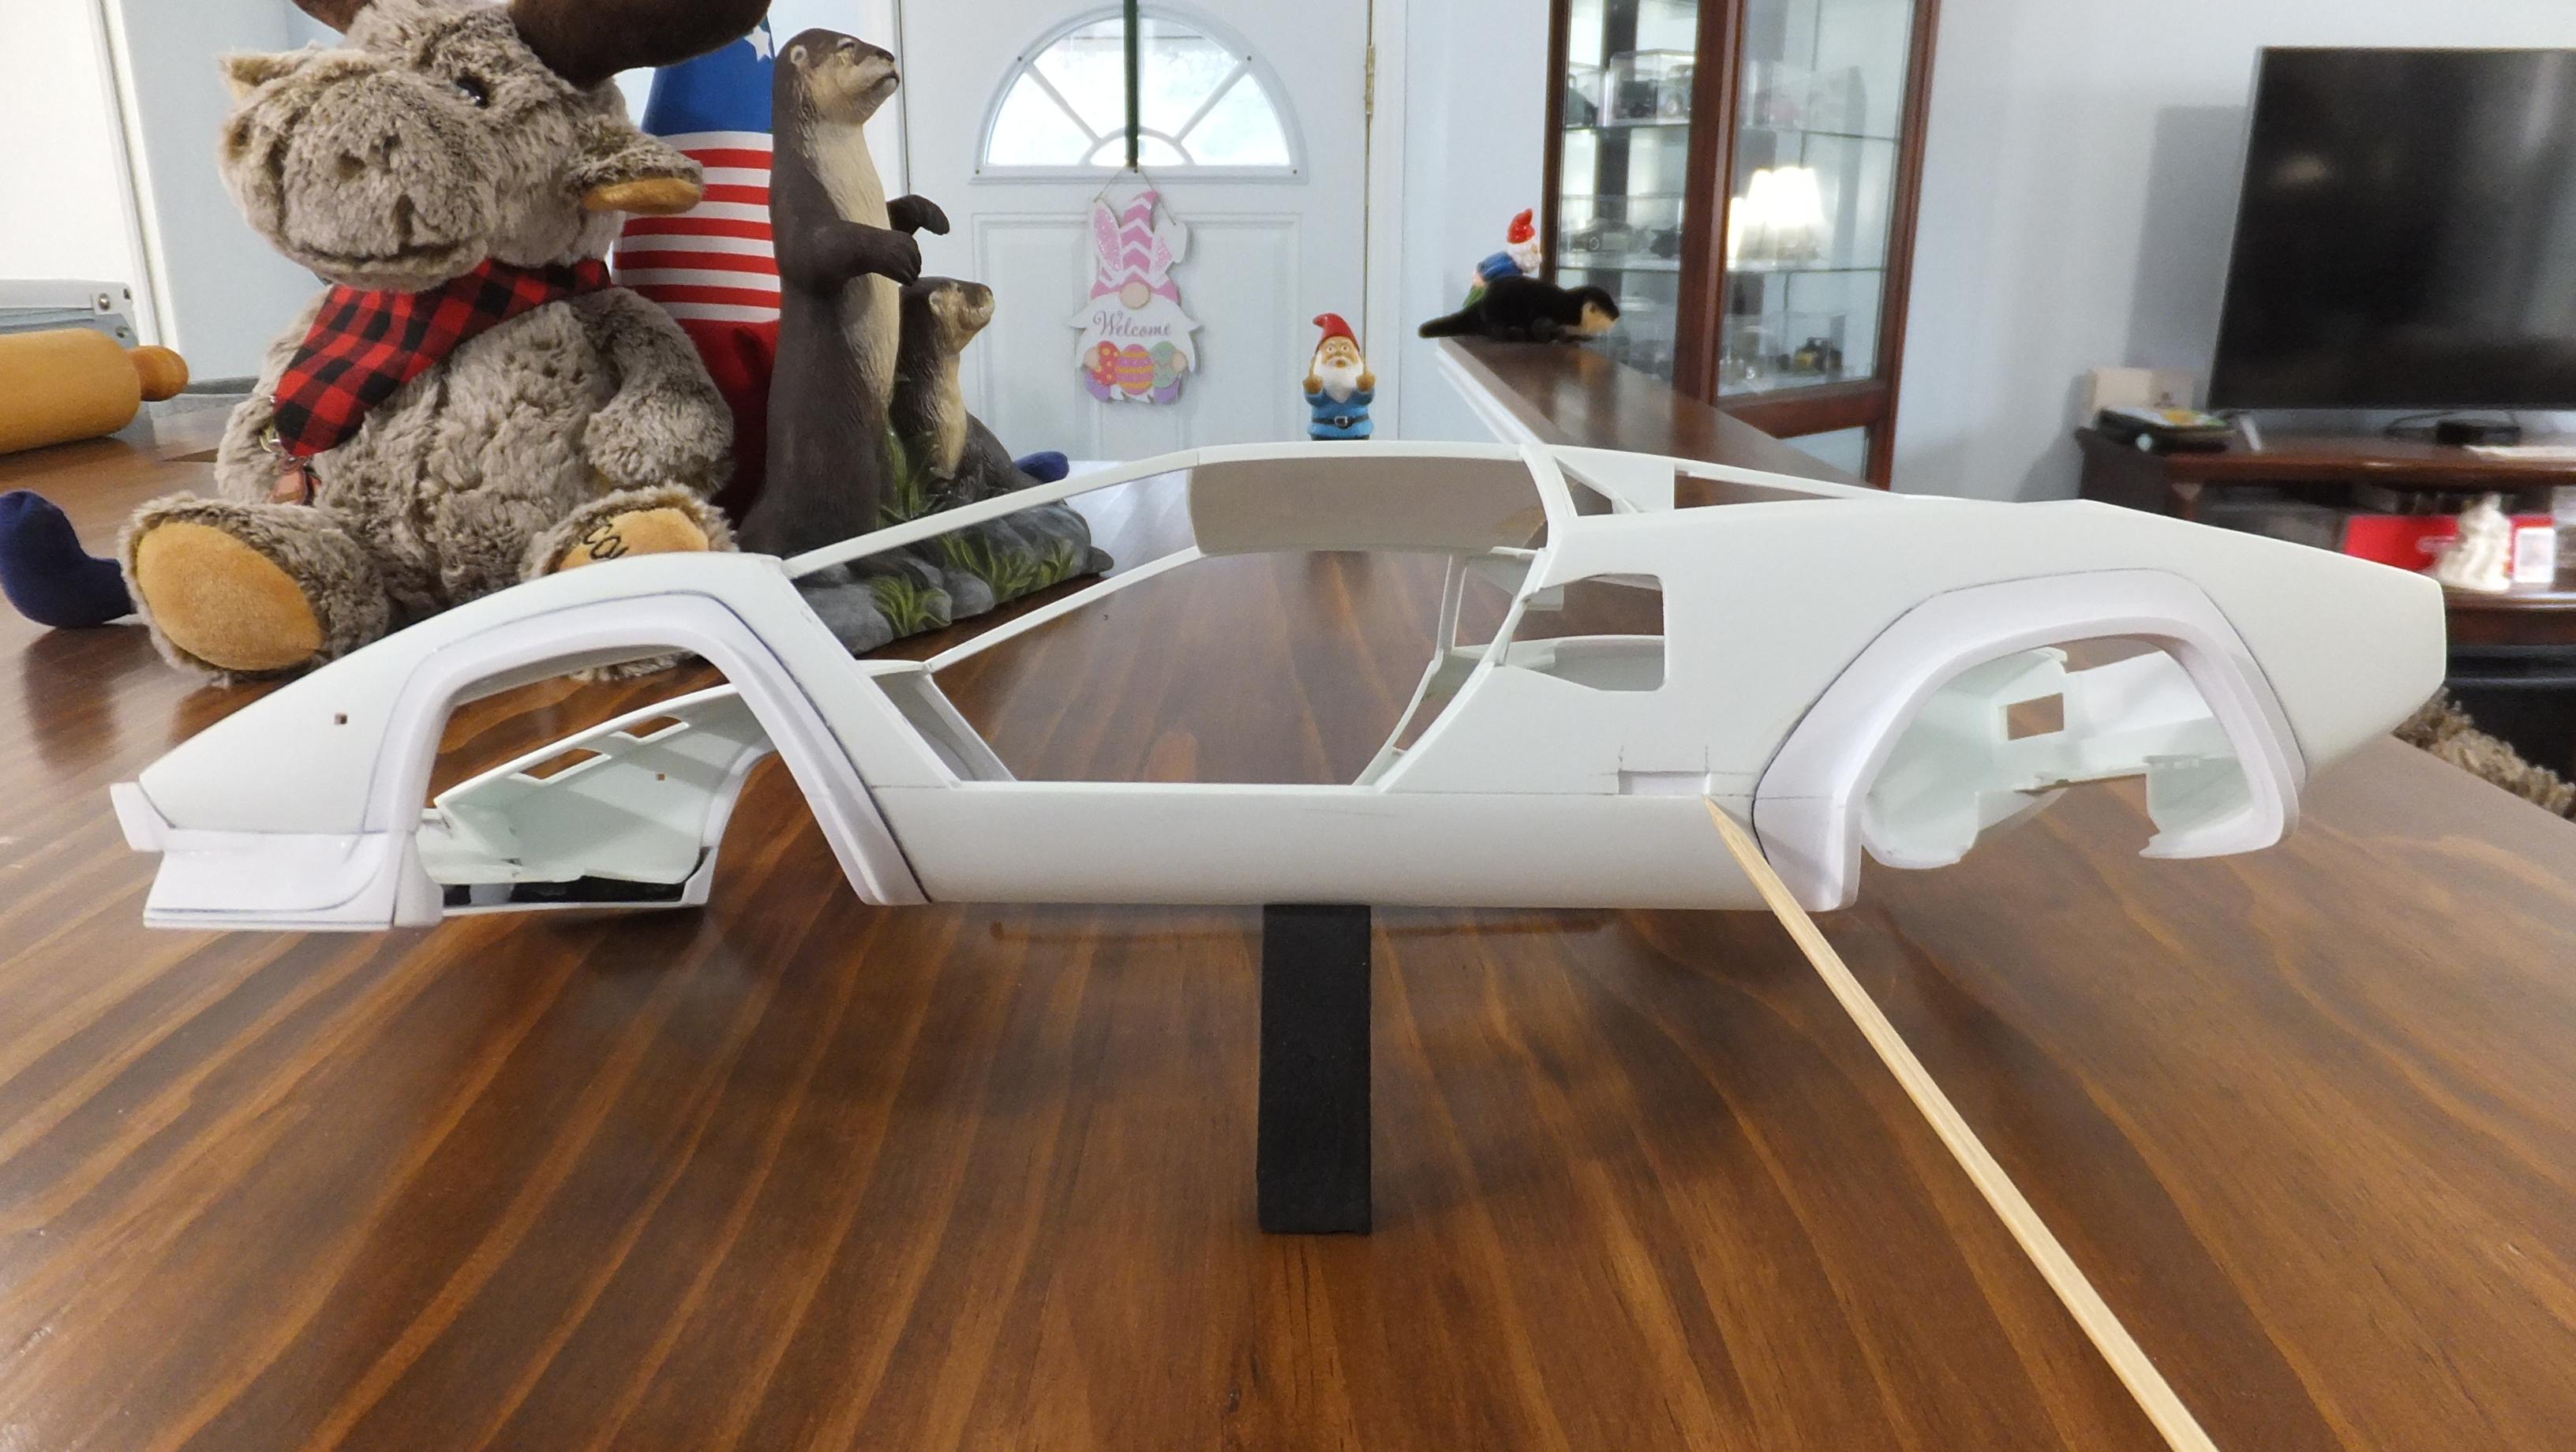
Hey, everyone!, after having to scrape off old Milliput that wasnt curing, i managed to replace it, and had almost enough to get it done right. It still needs some glazing putty since i had to make it go further. After all that, its moving along nicely once again.
-Photo 1; Fenders are roughed on with putty. Badging holes also filled in.
-Photo 2; I ran out of Milliput here, but Tamiya putty finished it off.
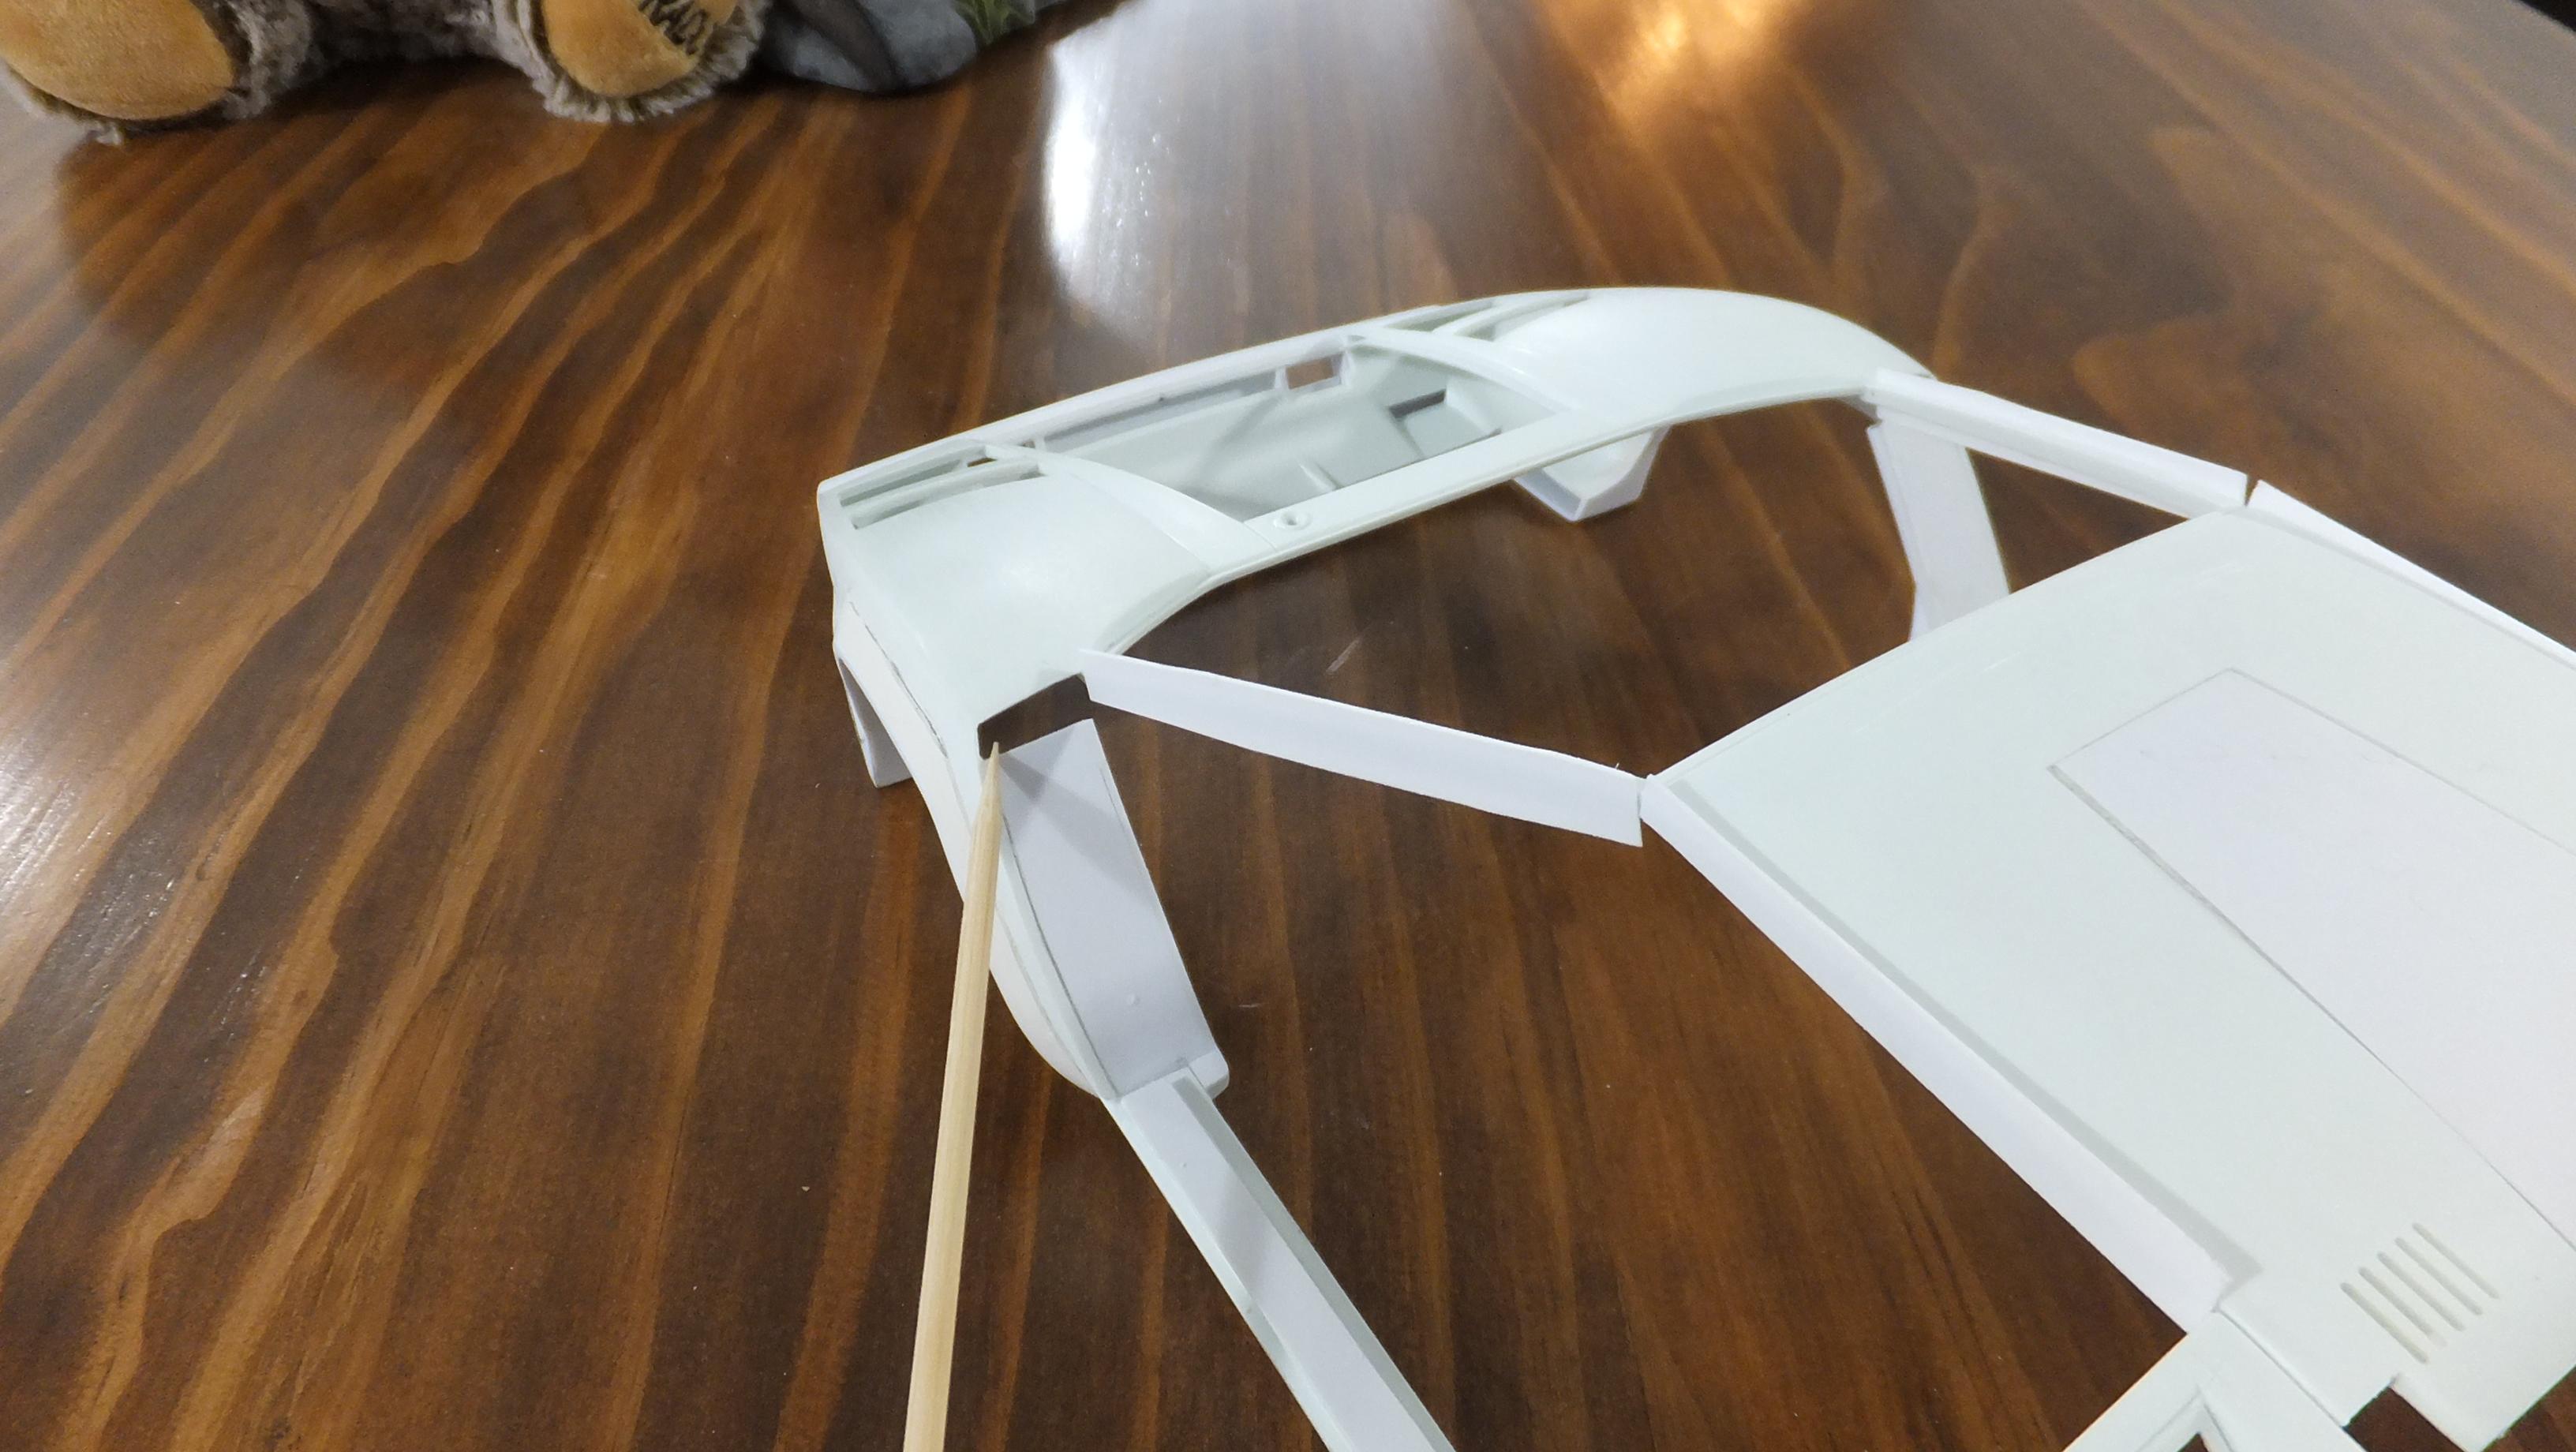
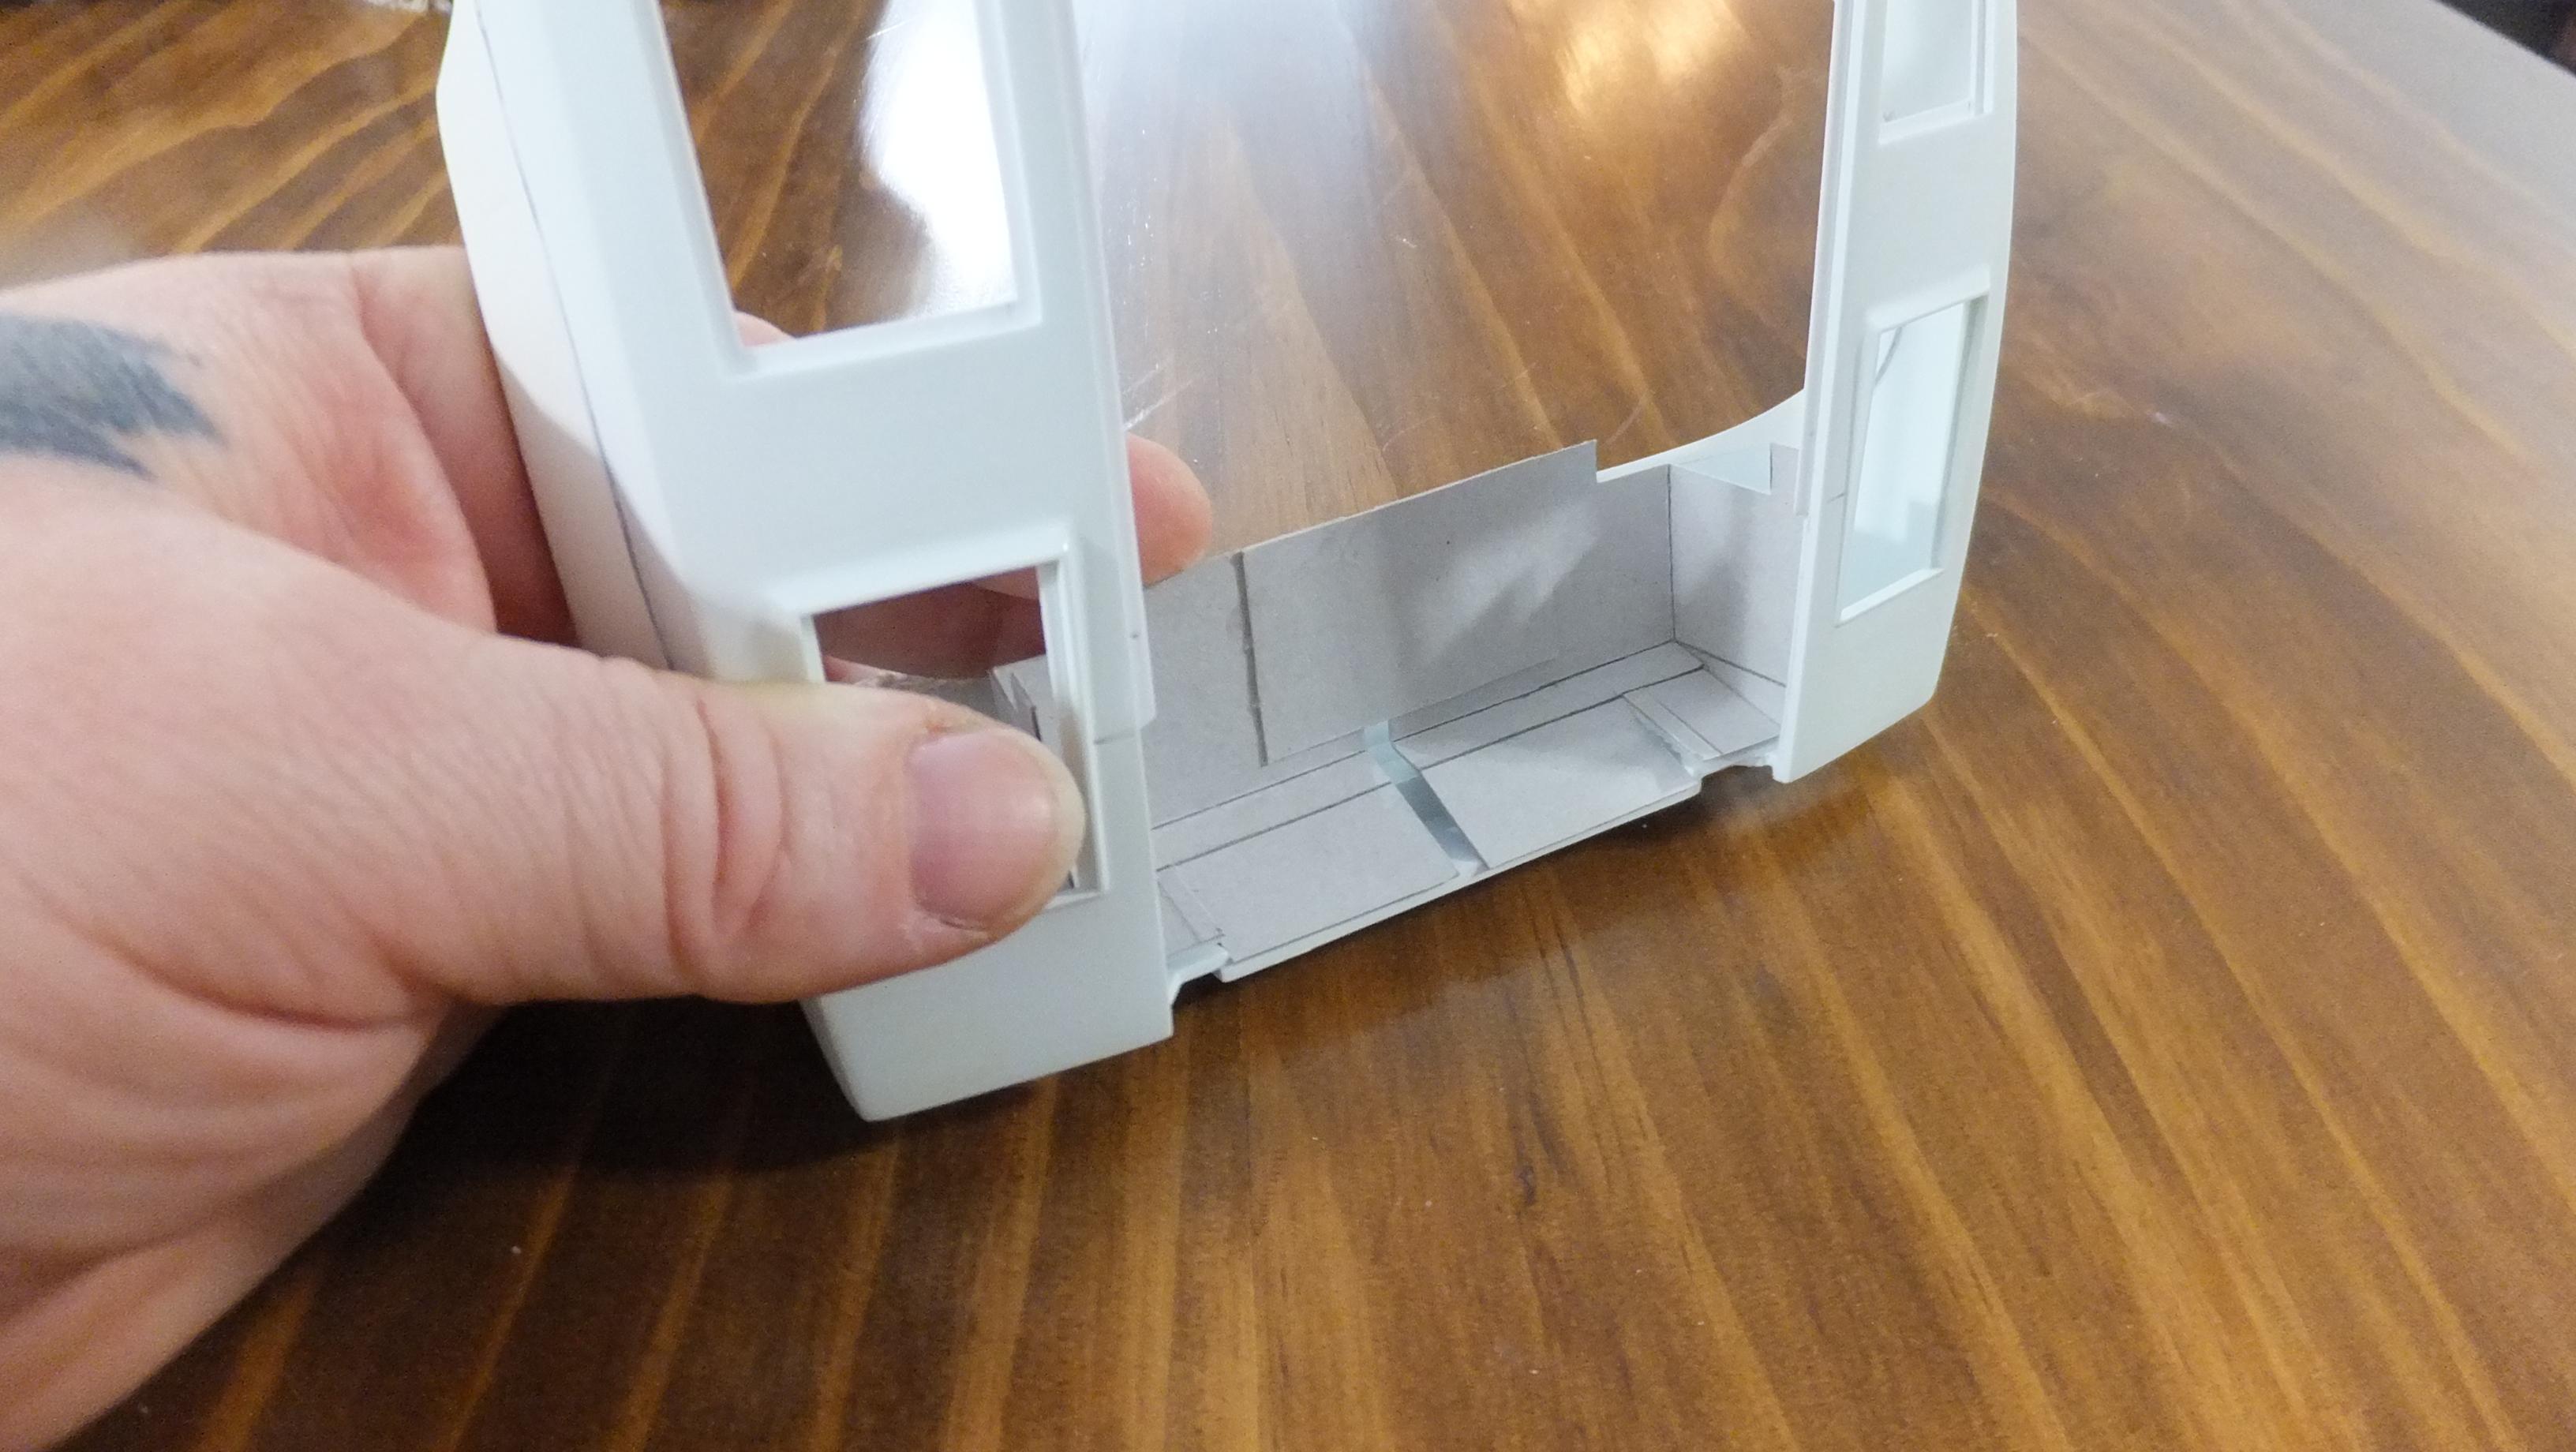
-Photo 3; I temporarily glued styrene strips to the roof, A pillar, and door sill so that i get the proper fitment gapping while i work on the hinges, and keeping proper alignment.
-Photo 4; I cut slots out for the door edges to tuck into.
-Photo 5; I was just modifying the kit provided NACA ducts, but i felt like i overworked them to death, and decided to make brand new ones.
-Photo 6; The original bits were notched to cover this area of the door sill, but i found it better/more realistic to blend it in butted-up.
-Photo 7; Great door fitment with enough gapping for paint thickness.
-Photo 8; Yep, i decided to make my own new door edges. I'm pointing at the area that will have the latch pins added to next.
-Photo 9; The new NACA ducts really do look much better.
-Photo 10&11; The stencil for my boot.
-Photo 12; In order to make test fitting, and final assembly waaay easier, i'm gonna remove the rear bits of the wheel wells, and remake them as part of the boot assembly.
-
2
-
-
On 3/30/2023 at 8:42 PM, ea0863 said:
Makes me wish I were a 1:12 scale person just so I could enjoy your Countach all the more! BTW, have you picked a body color yet? Not trying to suggest anything, but I still have my Alpine Countach poster from 1980!...
I'm glad you like it that much, Emre! I've often thought like that, lol. Thats so cool that you still have that poster...mine will be a darker metallic gray -like a charcoal.
-
On 3/30/2023 at 8:26 PM, peteski said:
Wow, it's been a wile since you worked on this baby!
I'm curious why didn't you just foil-cast the emblems/logos instead of yanking them out, leaving holes the body?
EDIT: I went back and read some earlier posts, so I know your reasons.
When I built mine, I masked the "bertone" logos before painting the body. Then after the body color was applied, I removed the masking and painted the bare plastic logos. That way there was no paint buildup on the lettering. I seem to recall that I then dry-brushed the scripts on the rear panel. Nowadays I would scan the rear panel then trace the scripts in Corel Draw and print black decals to cover the raised lettering.
Nice!...waaay more high-tech than me, lol
-
On 3/30/2023 at 10:53 AM, 89AKurt said:
Heck of an incentive to geterdone. I'm surprised this has the emblems molded on, there are twice as many taillight parts as needed (granted same mold, different color clear plastic).
You are right, Kurt!
-
1
-
-
On 3/30/2023 at 9:19 AM, dino246gt said:
Man I'm diggin' your build of this fantastic car!
I stalled with the doors, did decide to remove the door cards, but still struggled with hinges, put it back in the old box.
Can't wait to see how you make hinges, I'll try to copy!
LOVE the Countach, mine though is the LP400.
Cheers! Or should I say CIAO!
Thanks again, Dennis!, i'm pretty sure i need to do the hinges next.
-
That sounds like a great way to fix the issue!...stick to it, bud! -its getting close, and looking great doing it!!
-
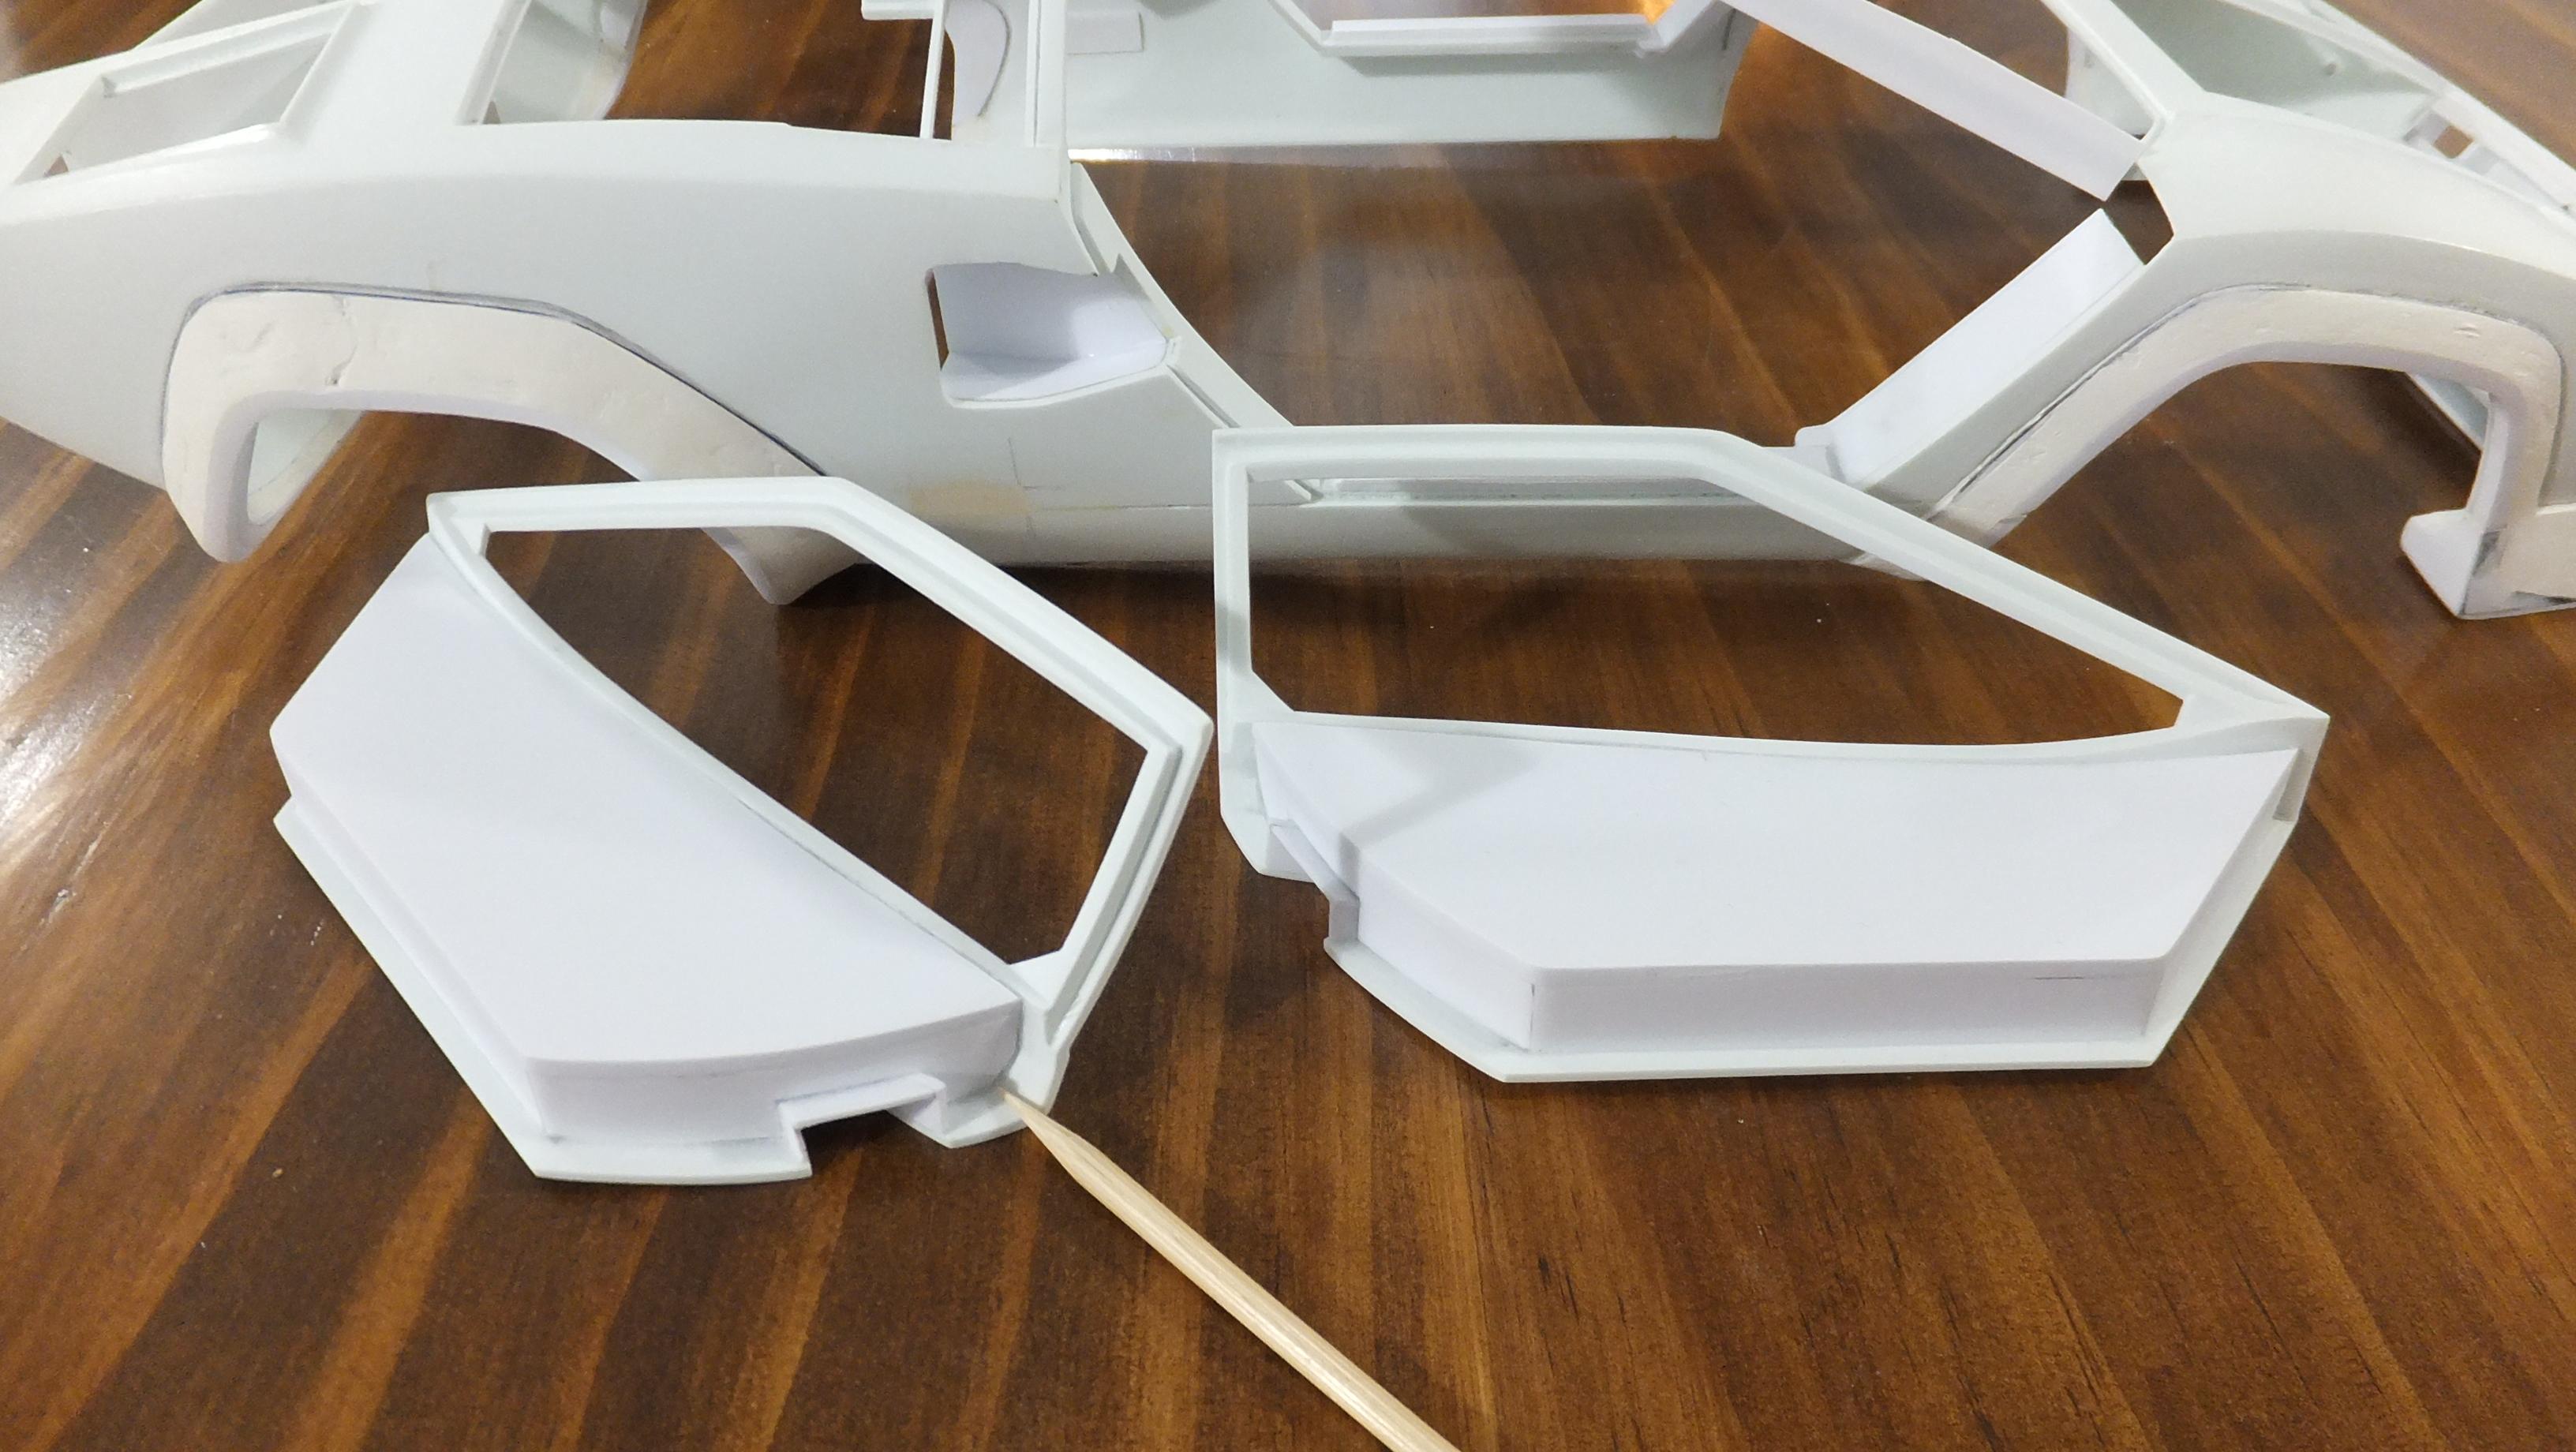
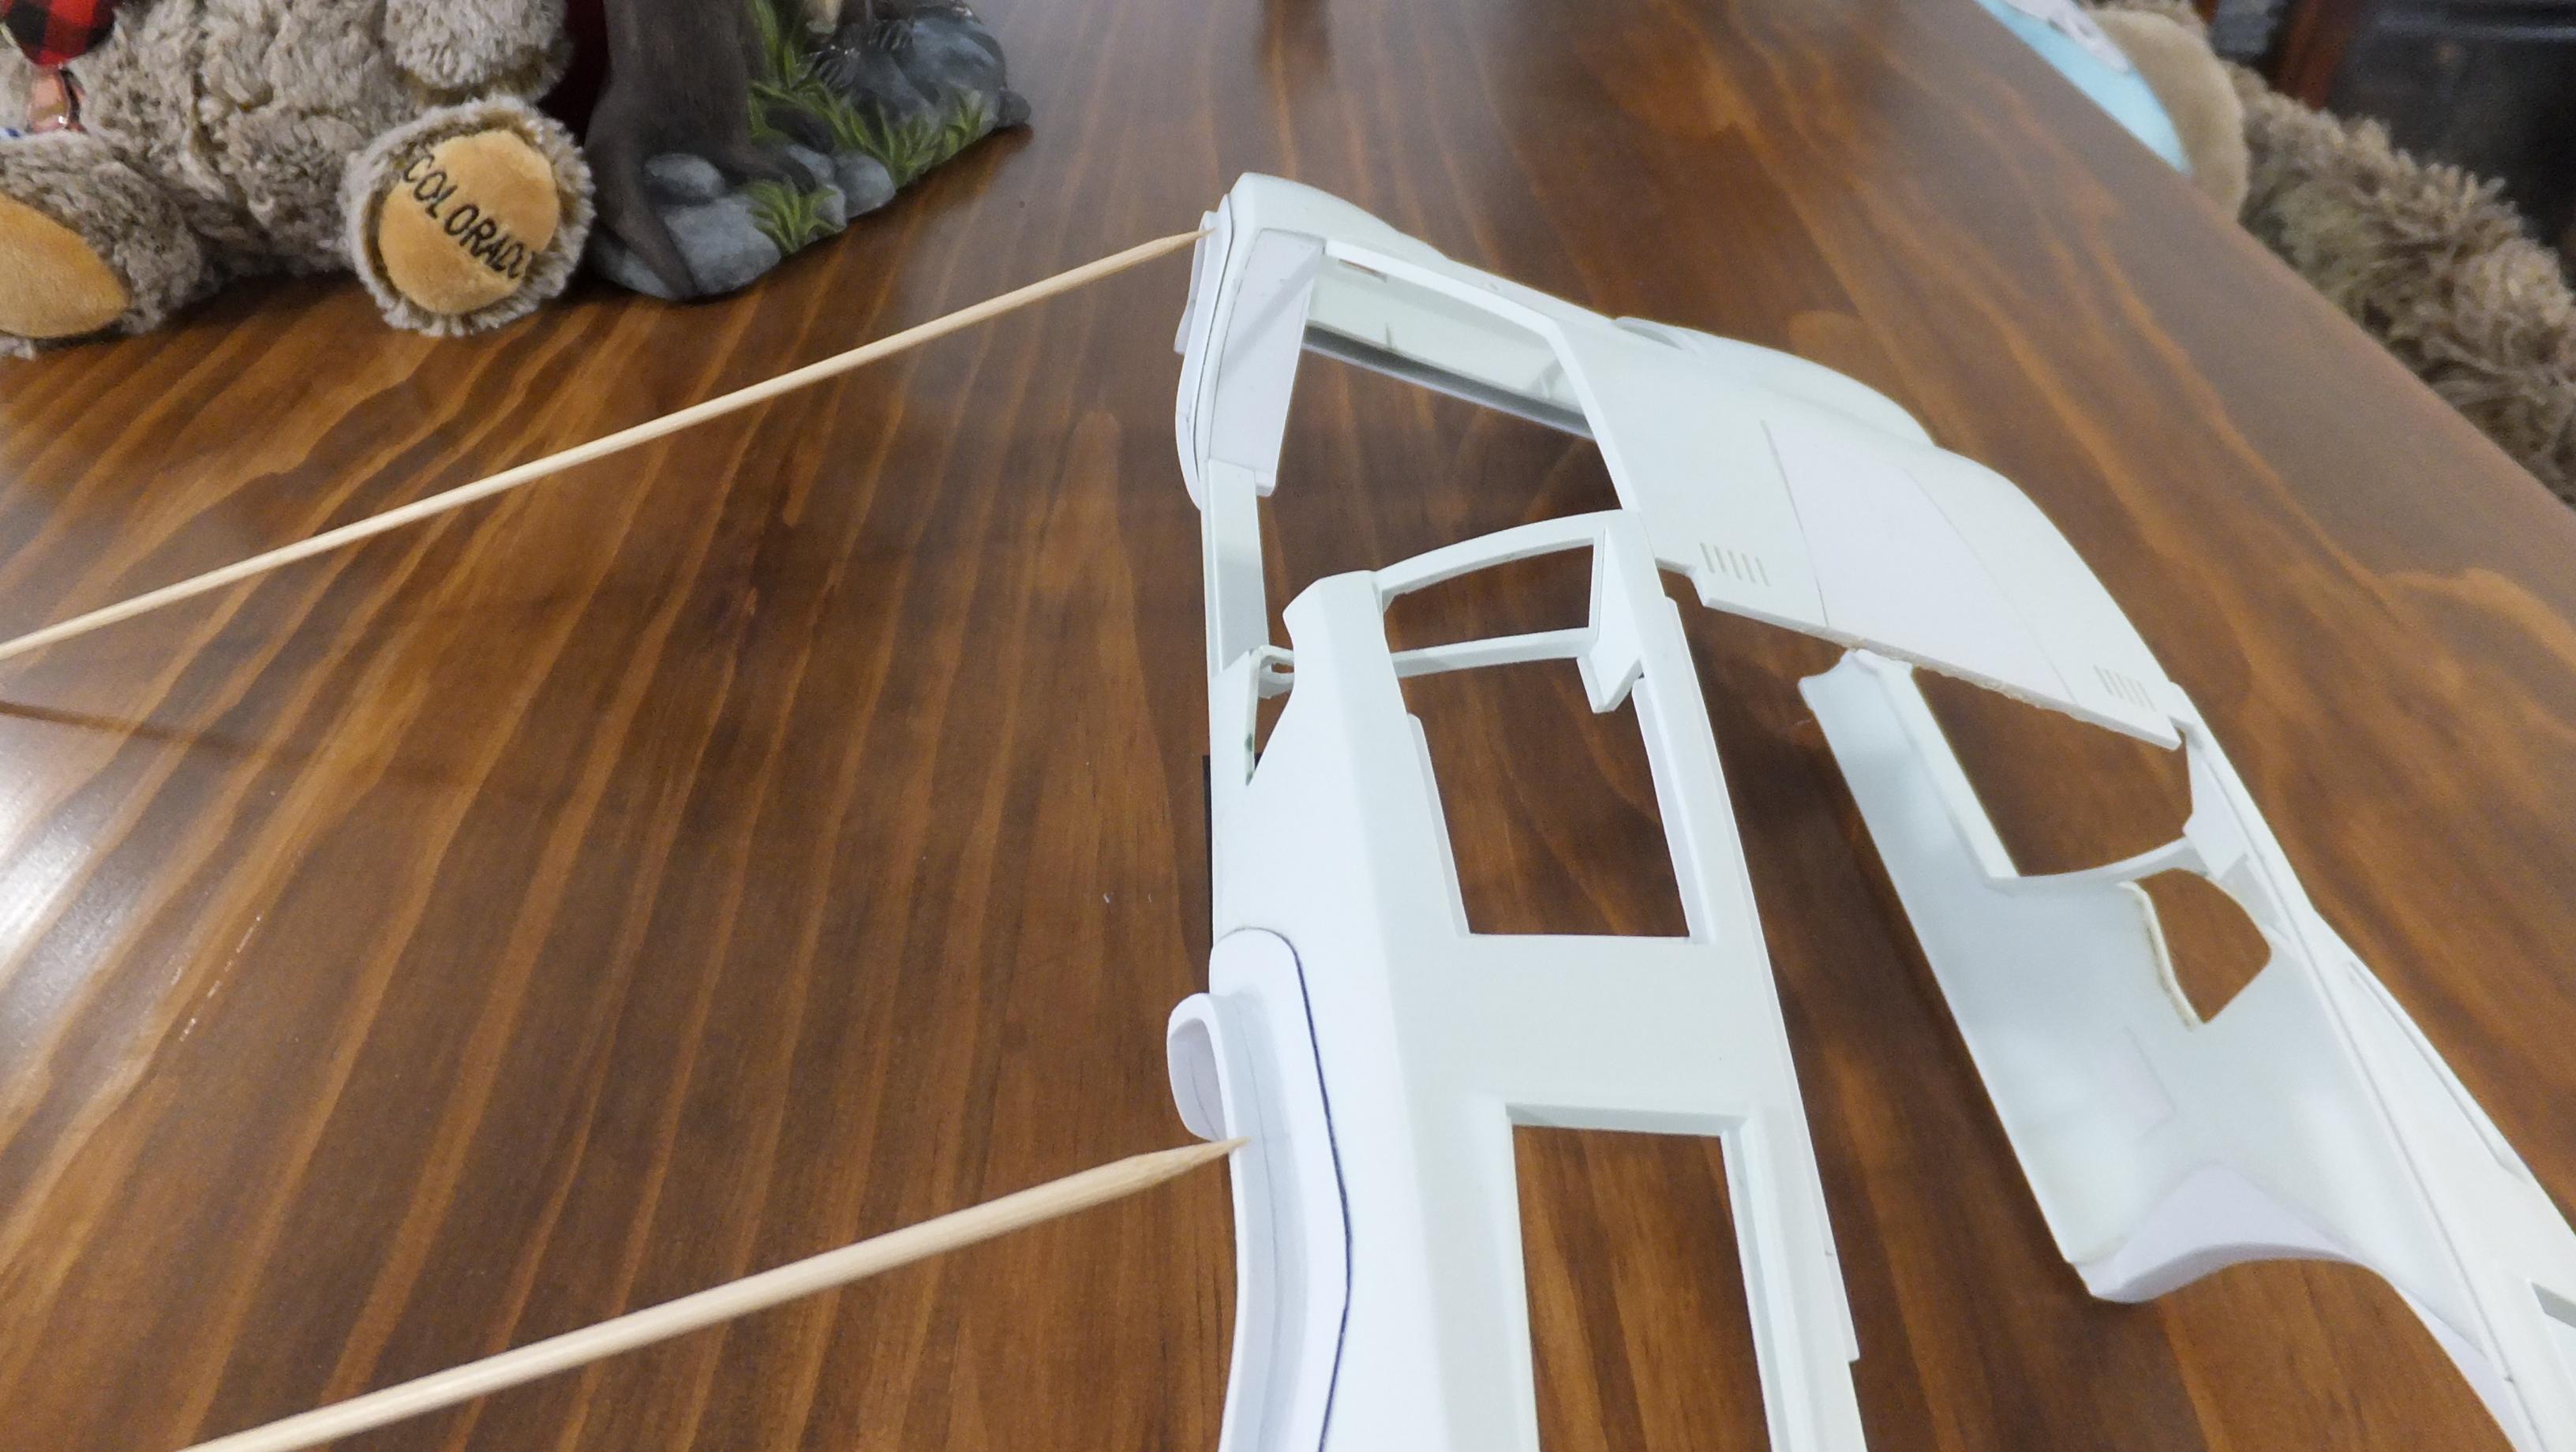
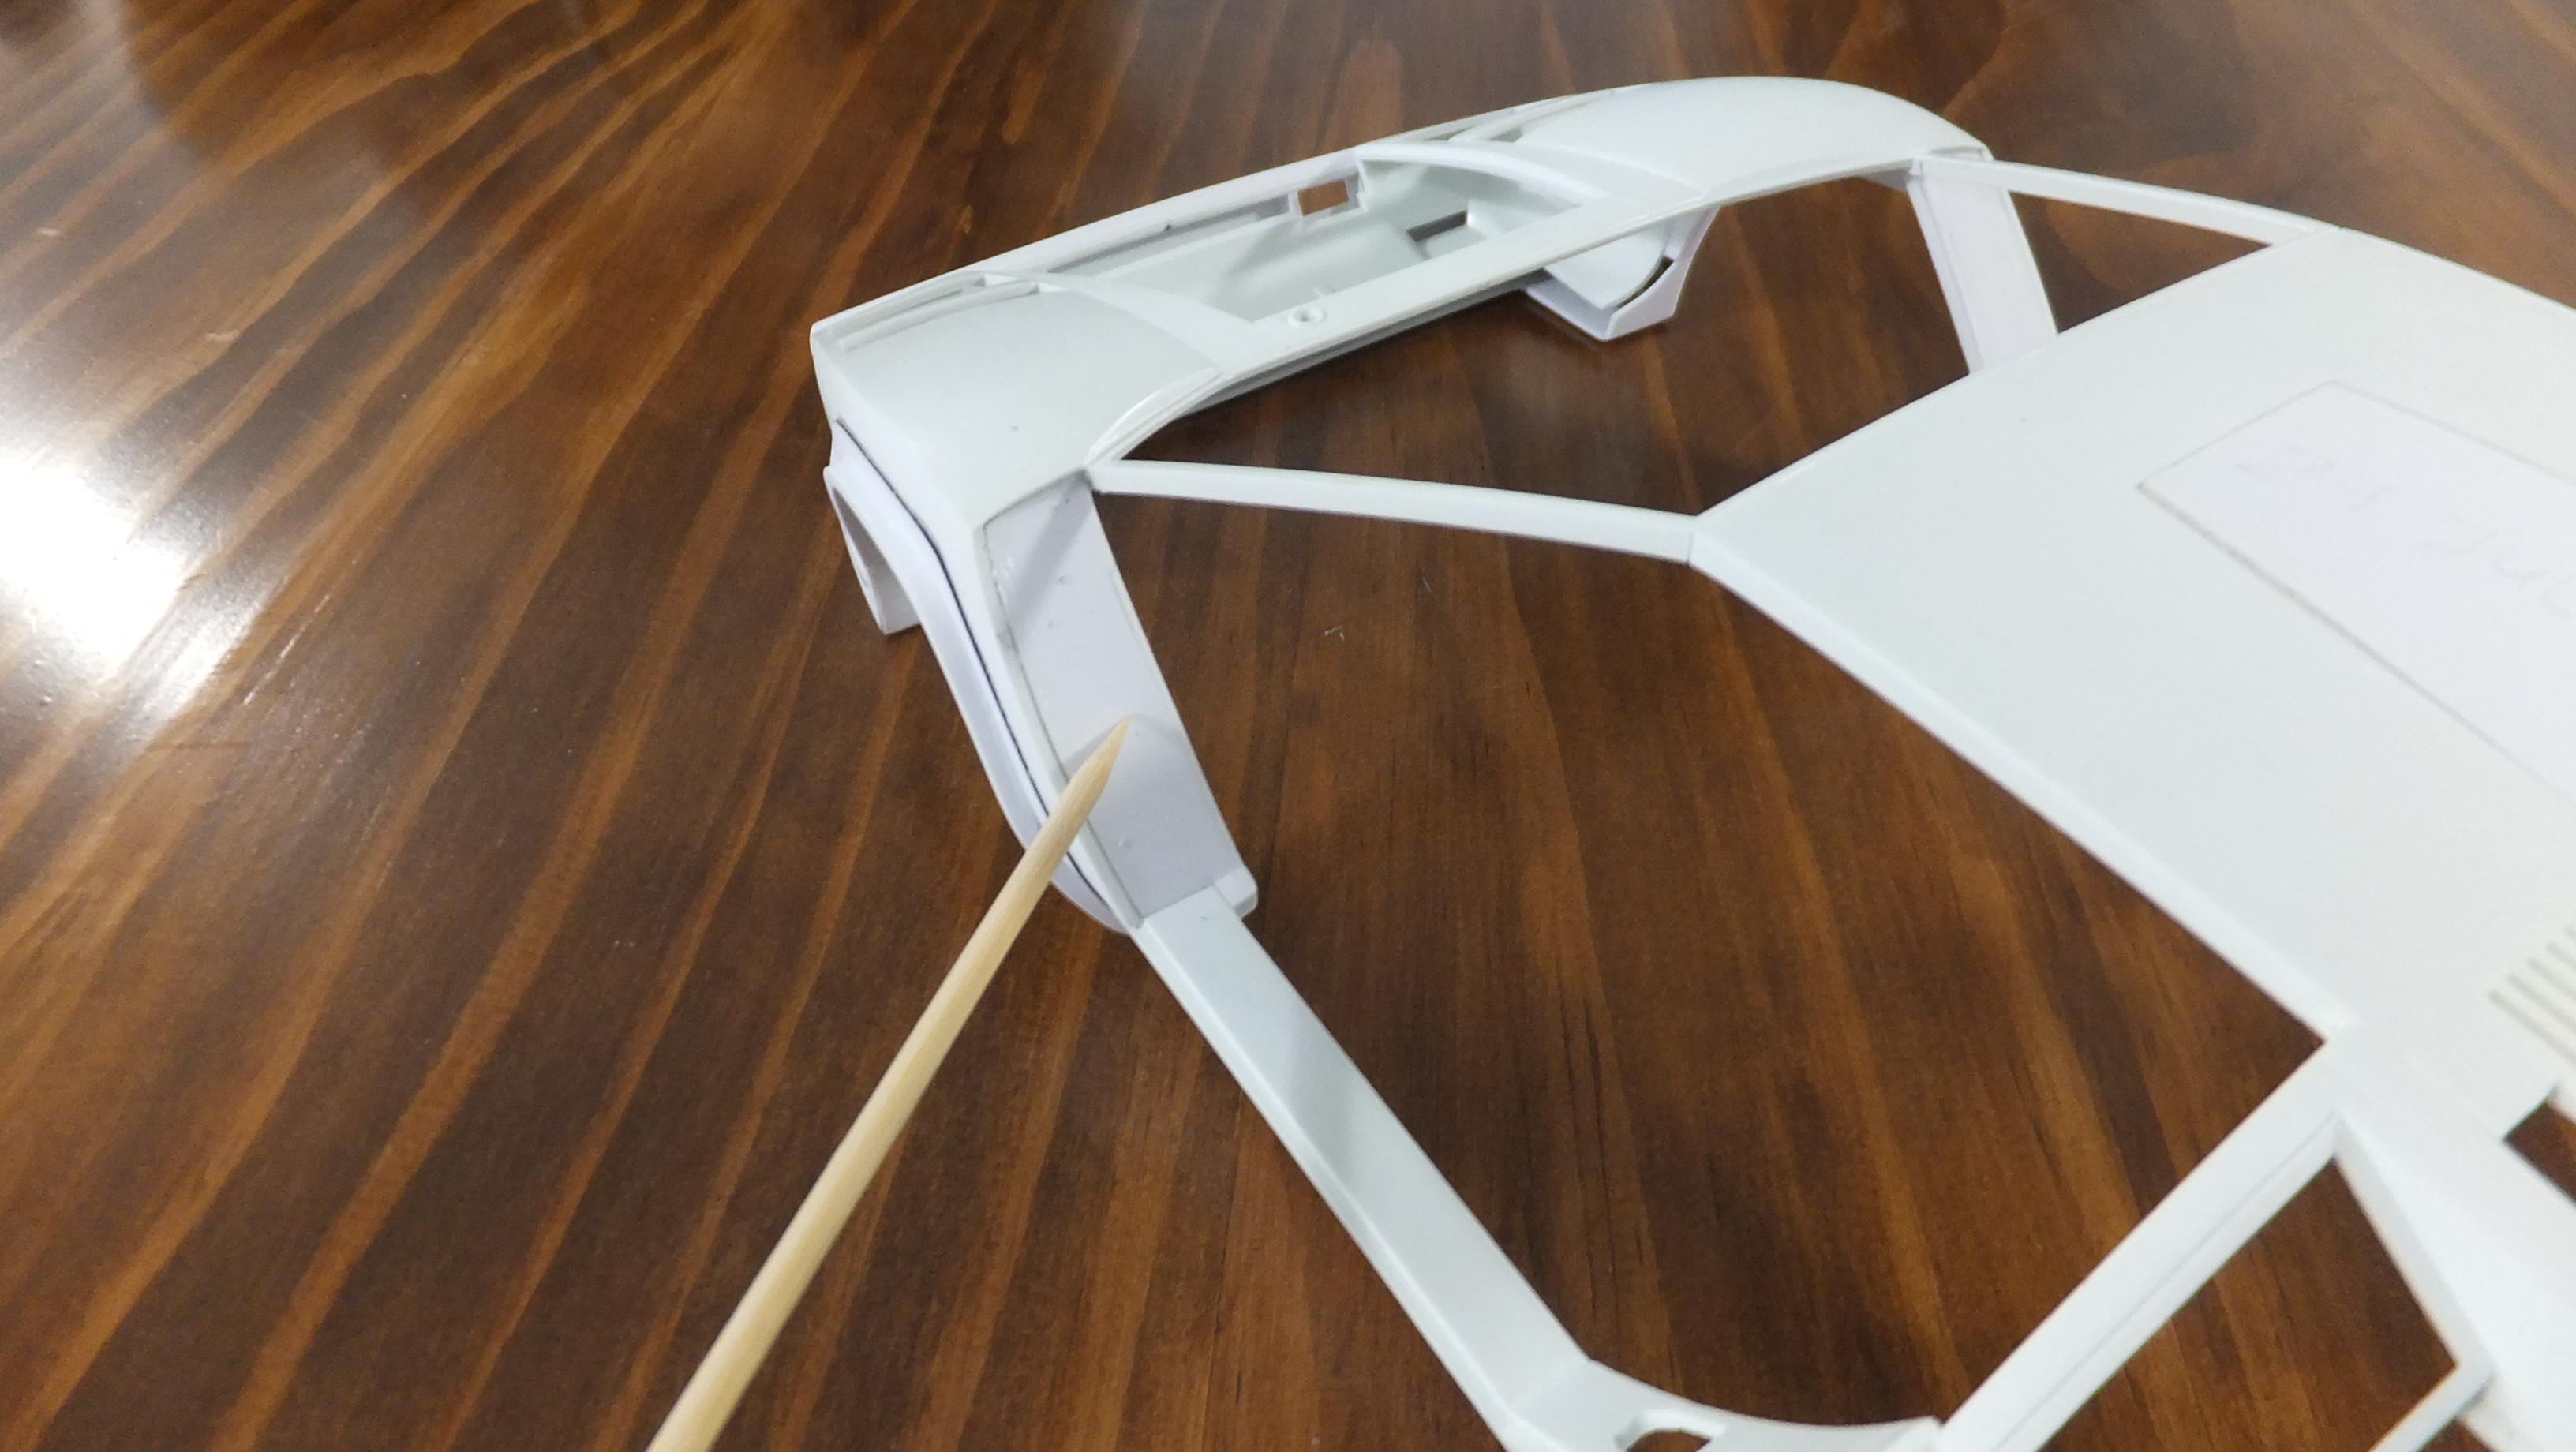
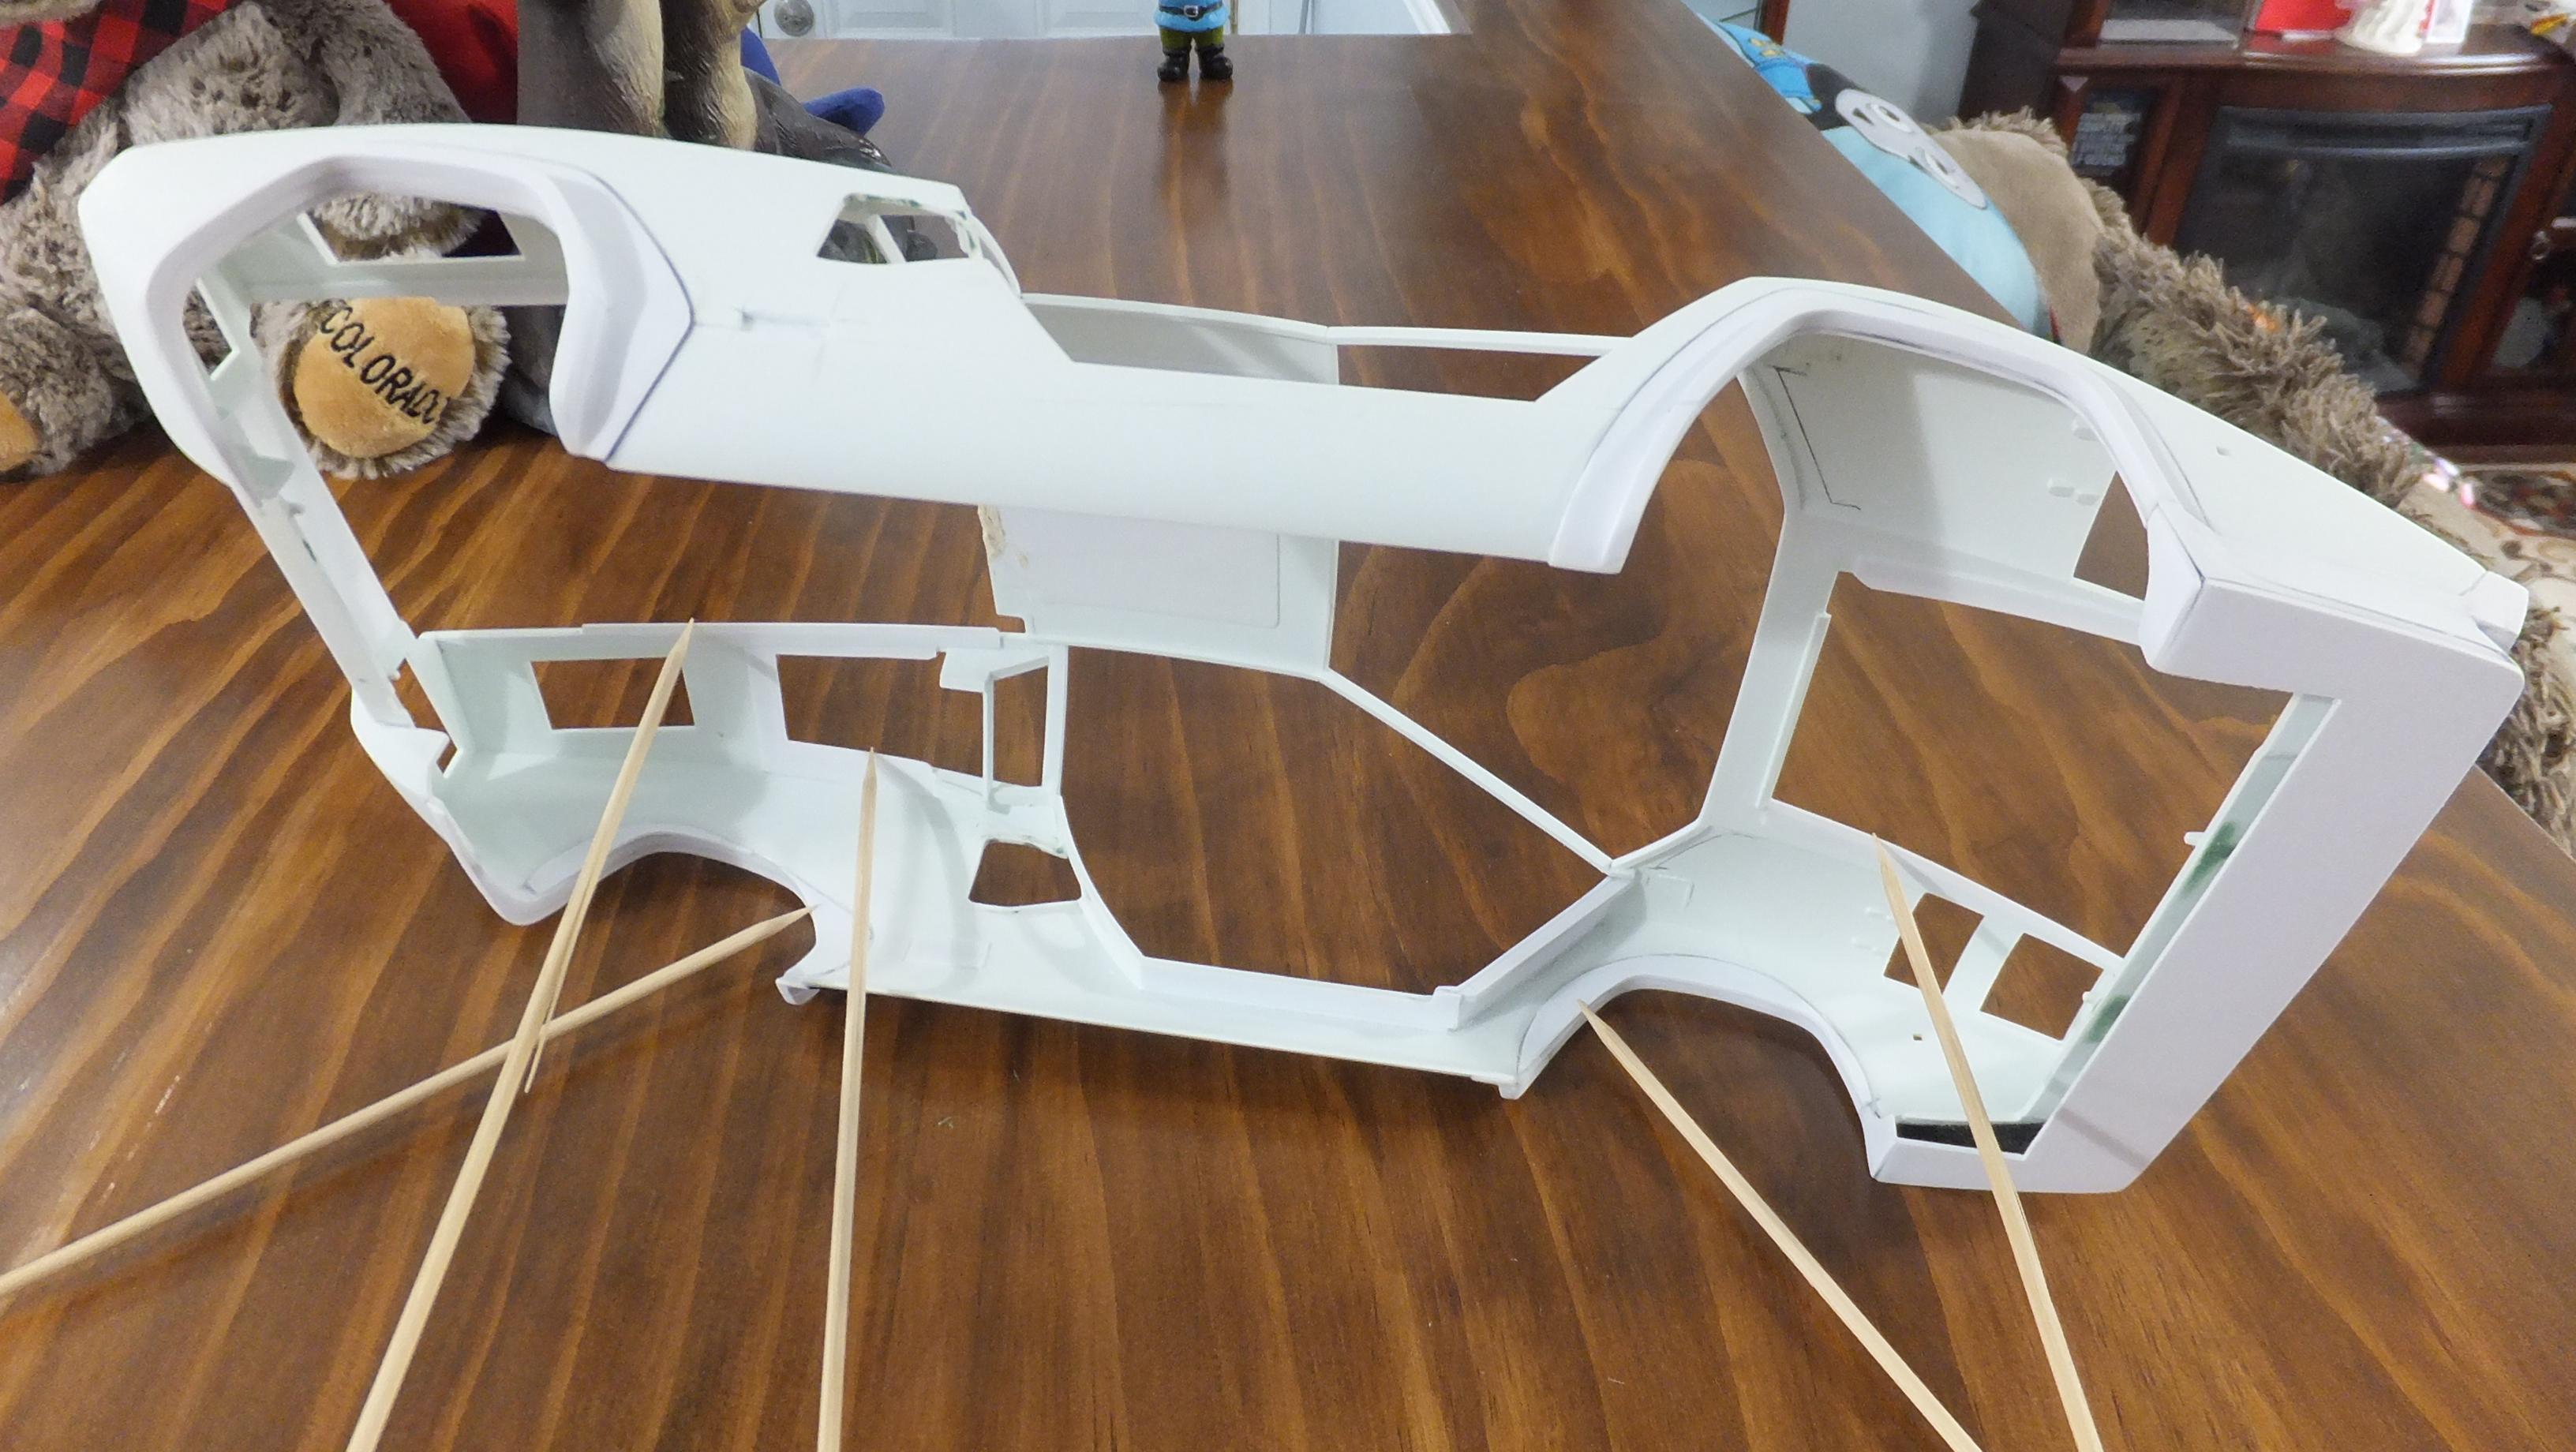
Just heard that the friend that gave me this kit had his cancer go to stage four, so i'm gonna also be kicking this one into full gear so that i can show it to him in person.
-Photo 1; The first step to new fender flares was to attach sheet styrene to the openings with the new shape.
-Photo 2; I cut an opening in the door sill below the NACA duct that will house the two release levers for the rear hood, and boot.
-Photo 3; I tried to use the front door sill that came with the kit, but its gonna be a whole lot easier to make my own...especially since i will be making actual factory door hinges.
-Photo 4; I cut out the Bertone badges from both sides, and i will reattach them with better detail.
-Photo 5; Stage two for the fenders was to bend square styrene stock around the wheel openings to create the edges. The narrower front got one level, but the wider rear fenders got two levers.
-Photo 6; The new front door sills.
-Photo 7; I also cut out the scripts from the rear to reattach later as well...notice the shape of the fender flares from the rear.
-Photo 8; It was also easier to cover over the kit chin spoiler...i will rework easier now.
-Photo 9; All sorts of sheet styrene was used to fill in the old wheel openings, and lips for the bonnet, hood, and boot to rest on.
-Photo 10; Ejection marks all filled in.
-
3
-
-
On 3/16/2023 at 8:28 AM, David G. said:
The work you've done on the chassis looks rock-solid Dann.
It looks like it's going to have a killer stance!
David G.
Thanks, David!, it needed it with all the power boost.
-
On 3/15/2023 at 10:00 AM, dino246gt said:
Man that's some fantastic modeling! I love it, I have the kit, now I can see how it should be built, someday! Thanks for showing us all the mods, I love this stuff!
Thanks, Dennis!, glad you are enjoying it!
-
On 3/15/2023 at 12:01 AM, SpikeSchumacher said:
This is a truly outstanding build Dan! Looking forward to the final stretch 😉
Thanks, Mathias!, i will be back to it soon again.
-
1 hour ago, Funkychiken said:
Looking forward to it, this one is close to the finishing line!
Thanks, Atin!...yes it is!
-
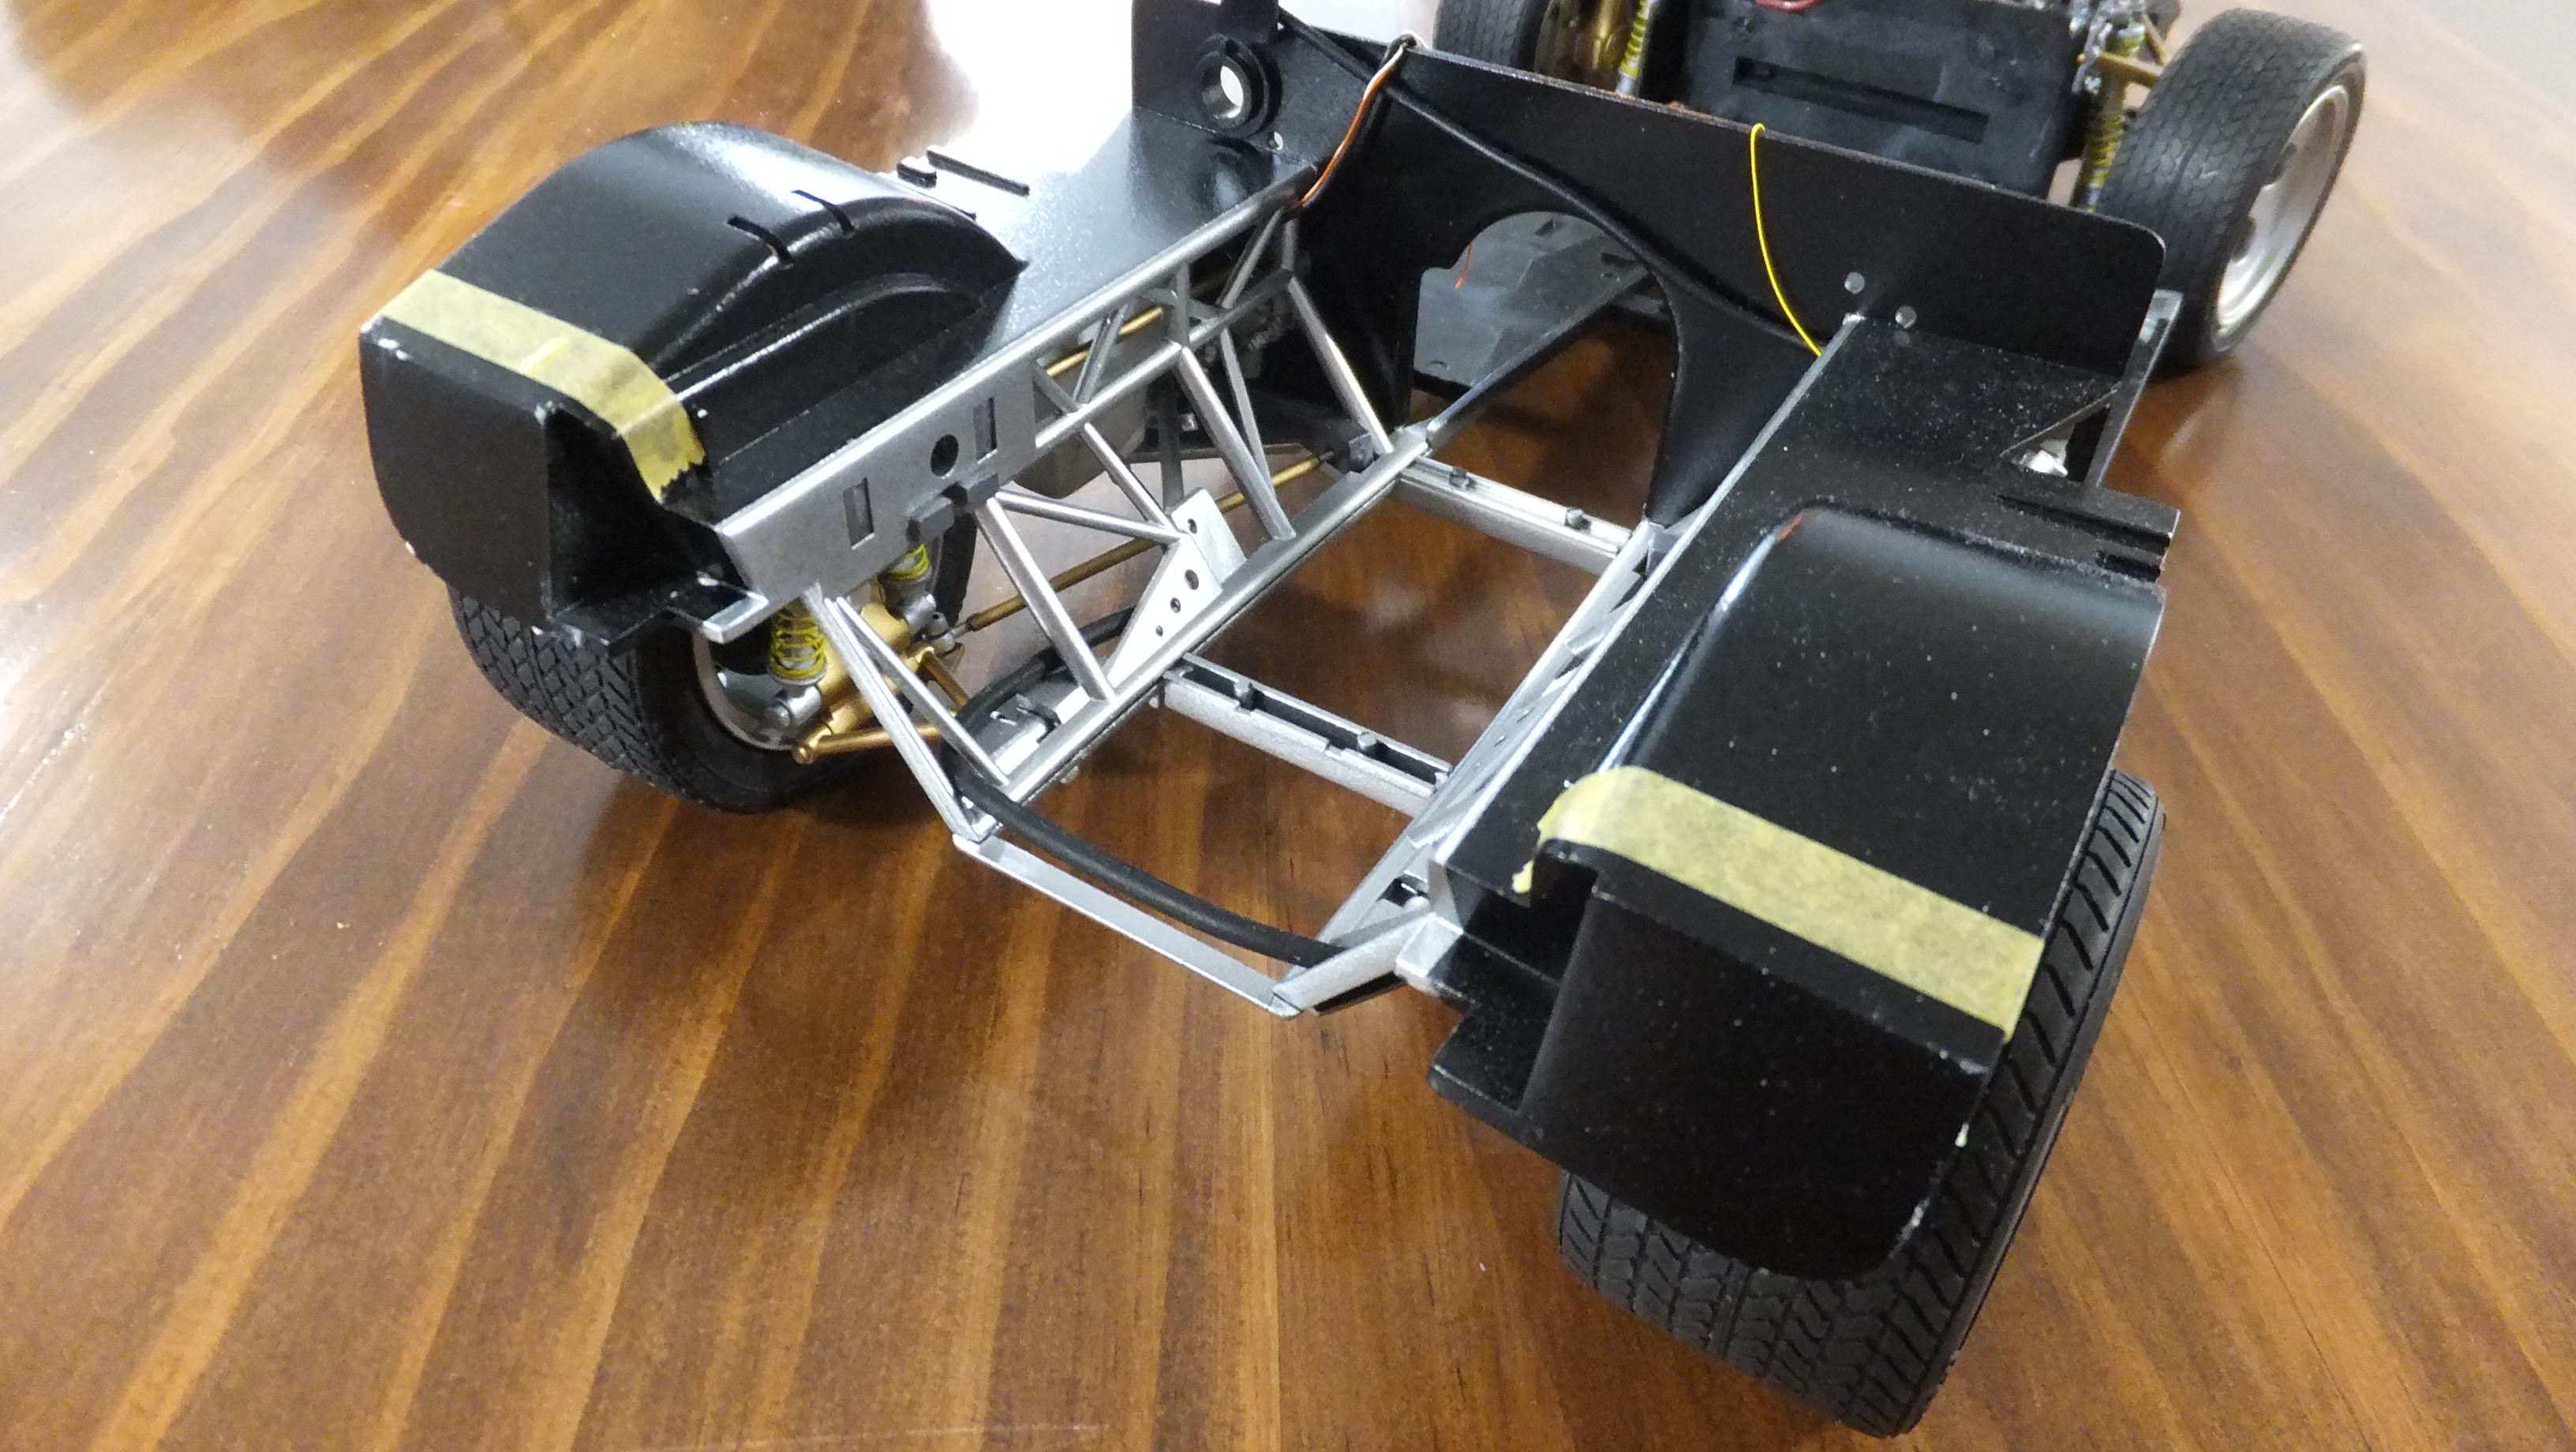
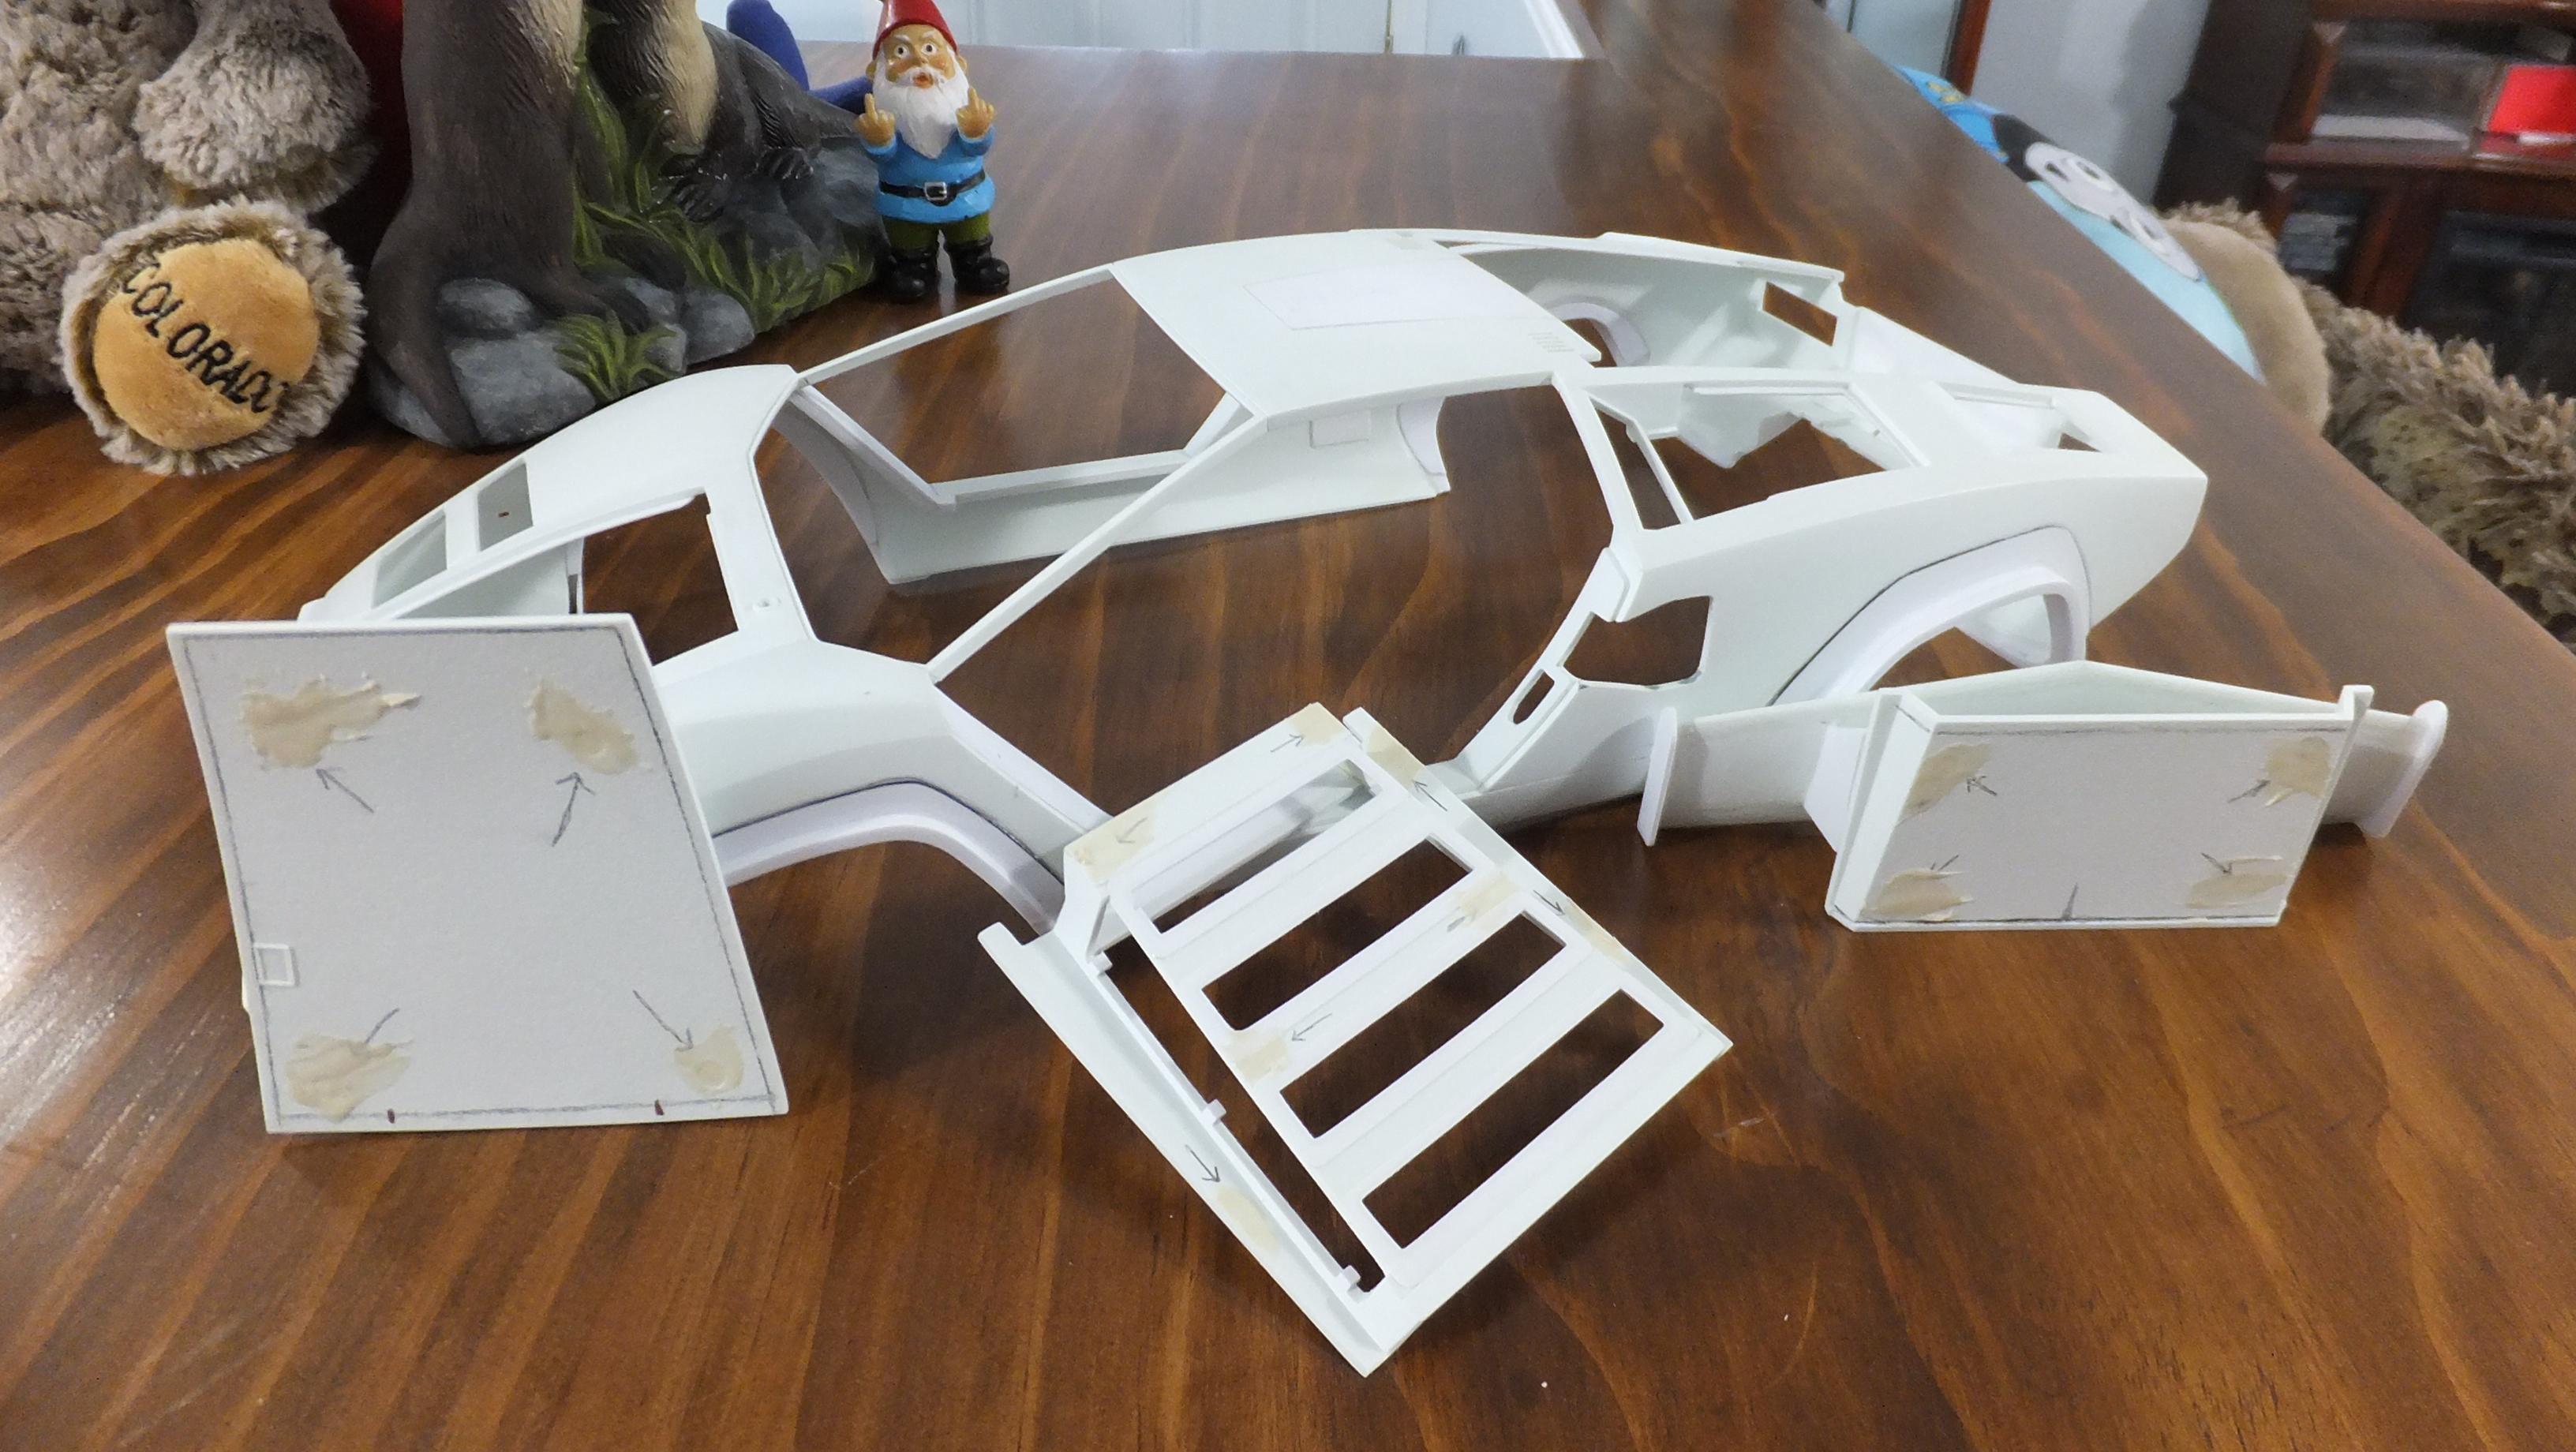
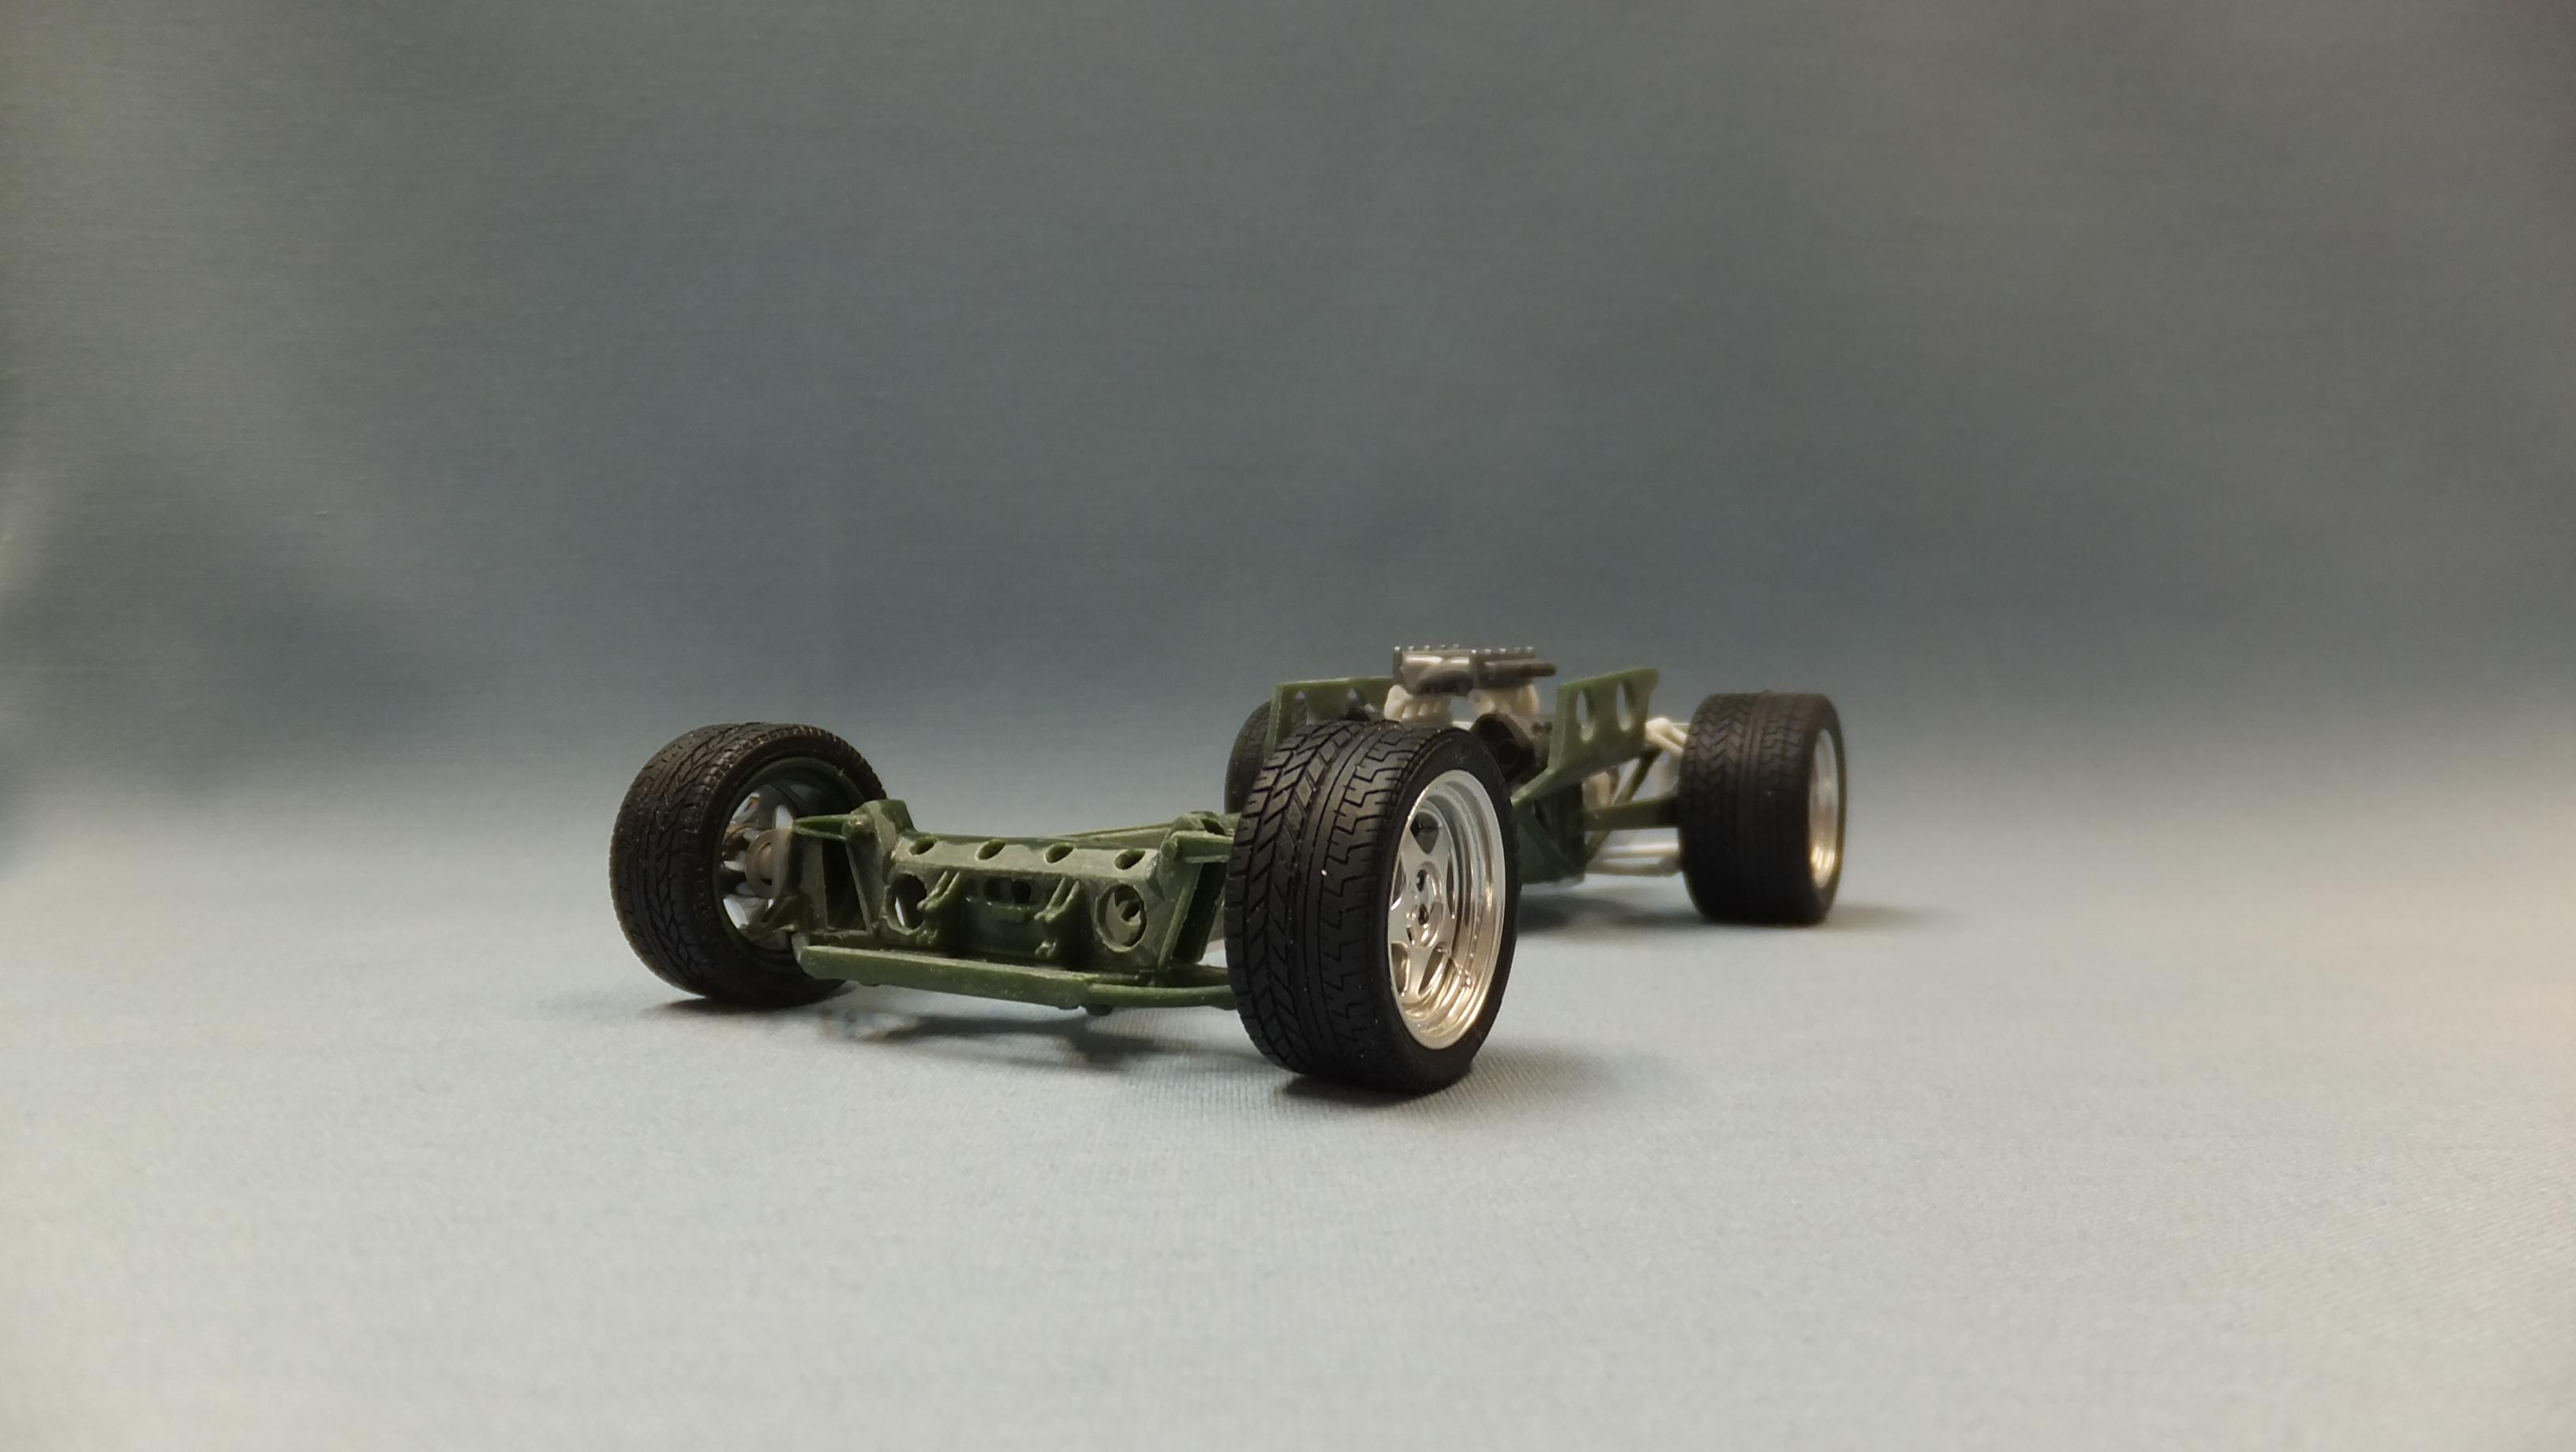
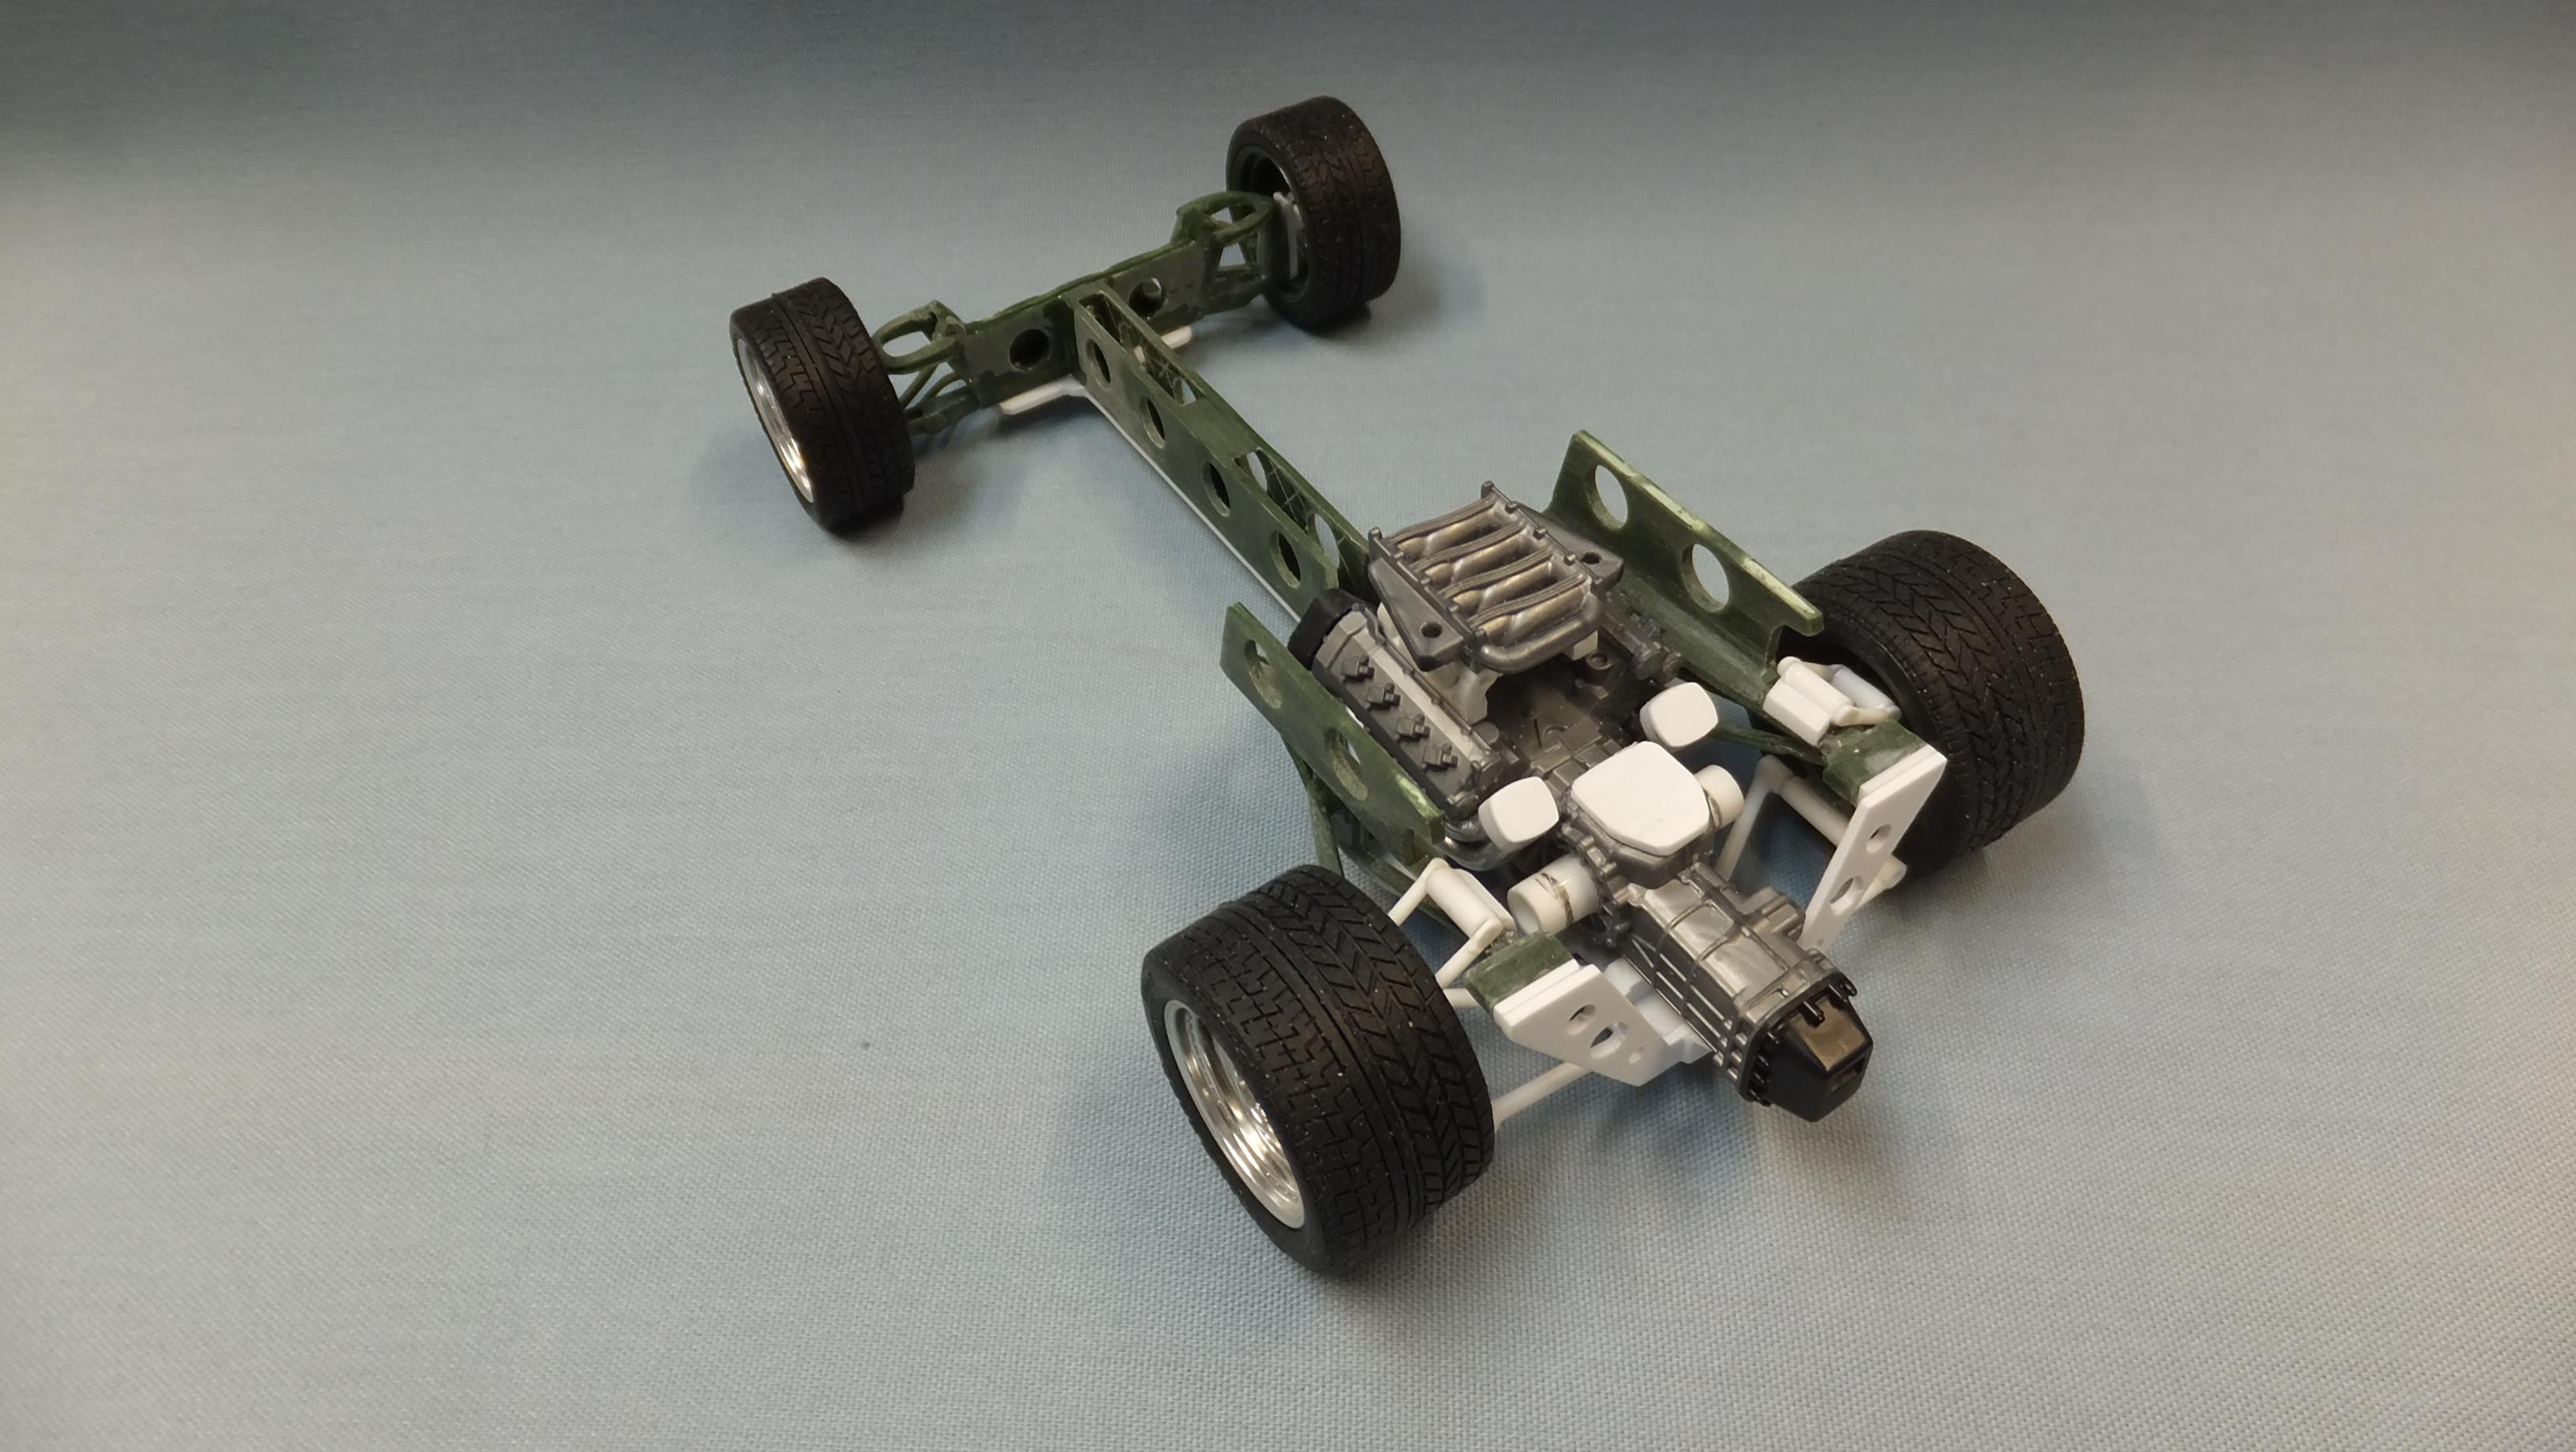
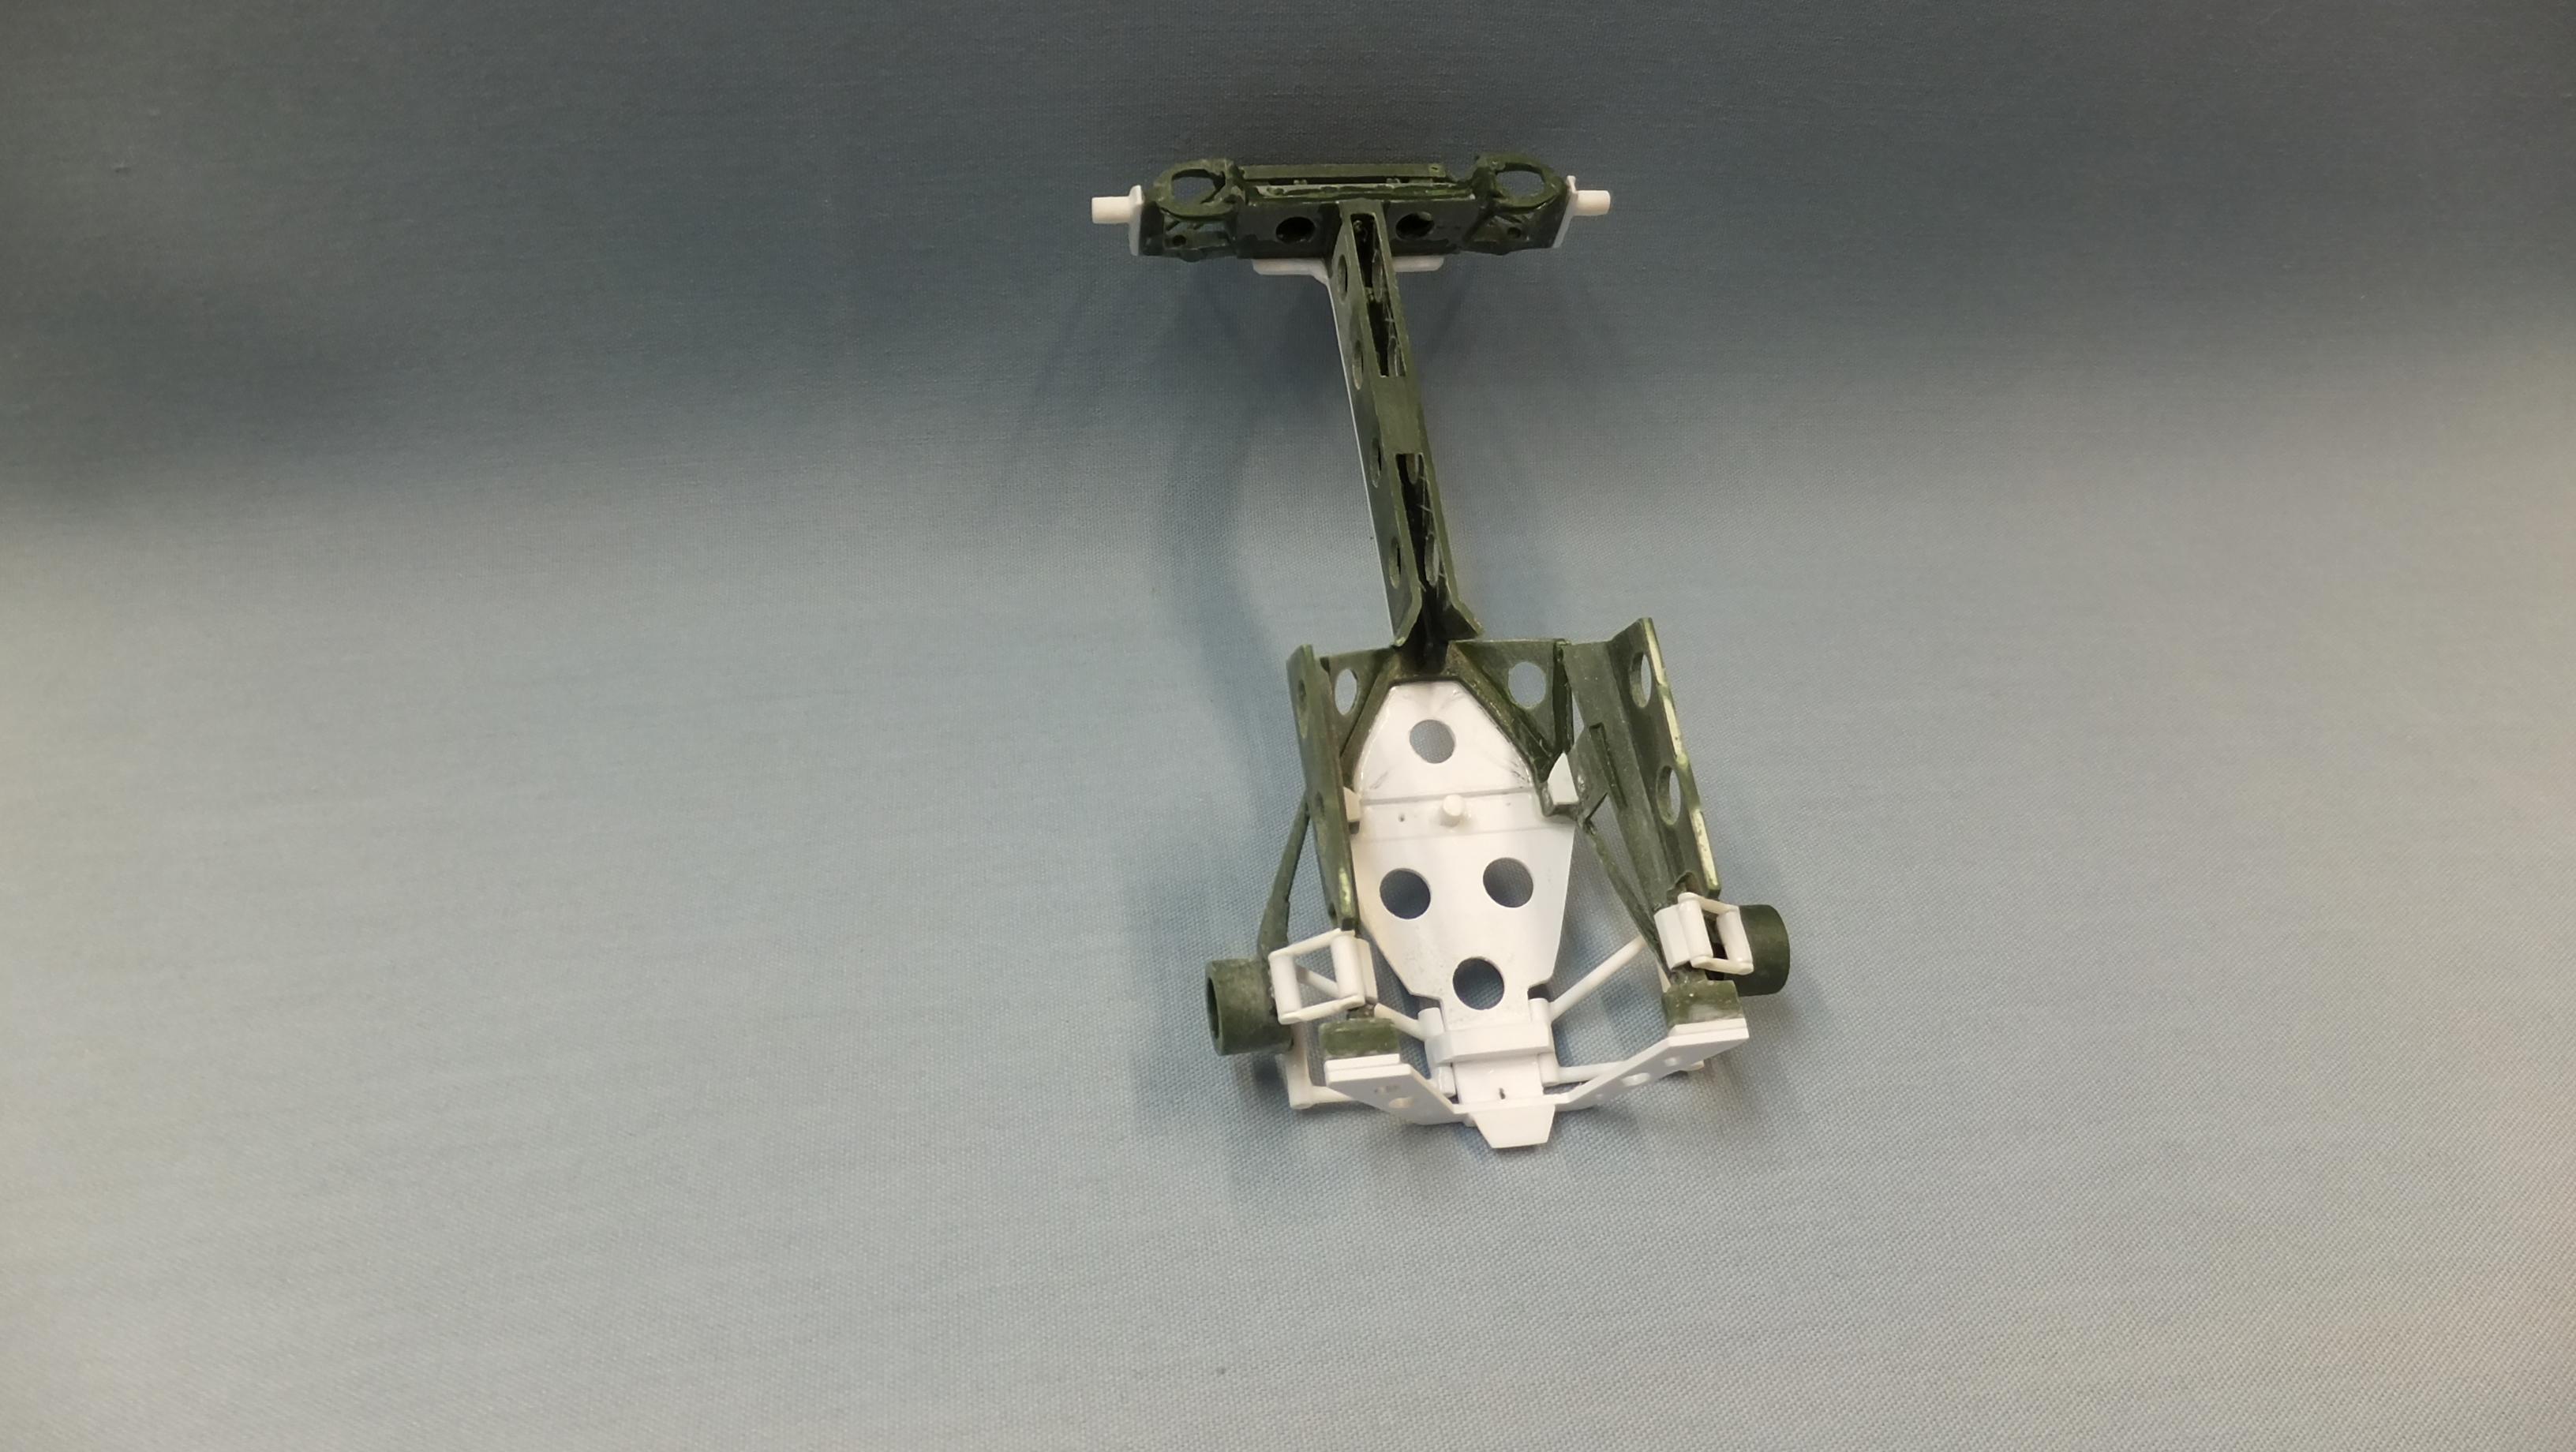
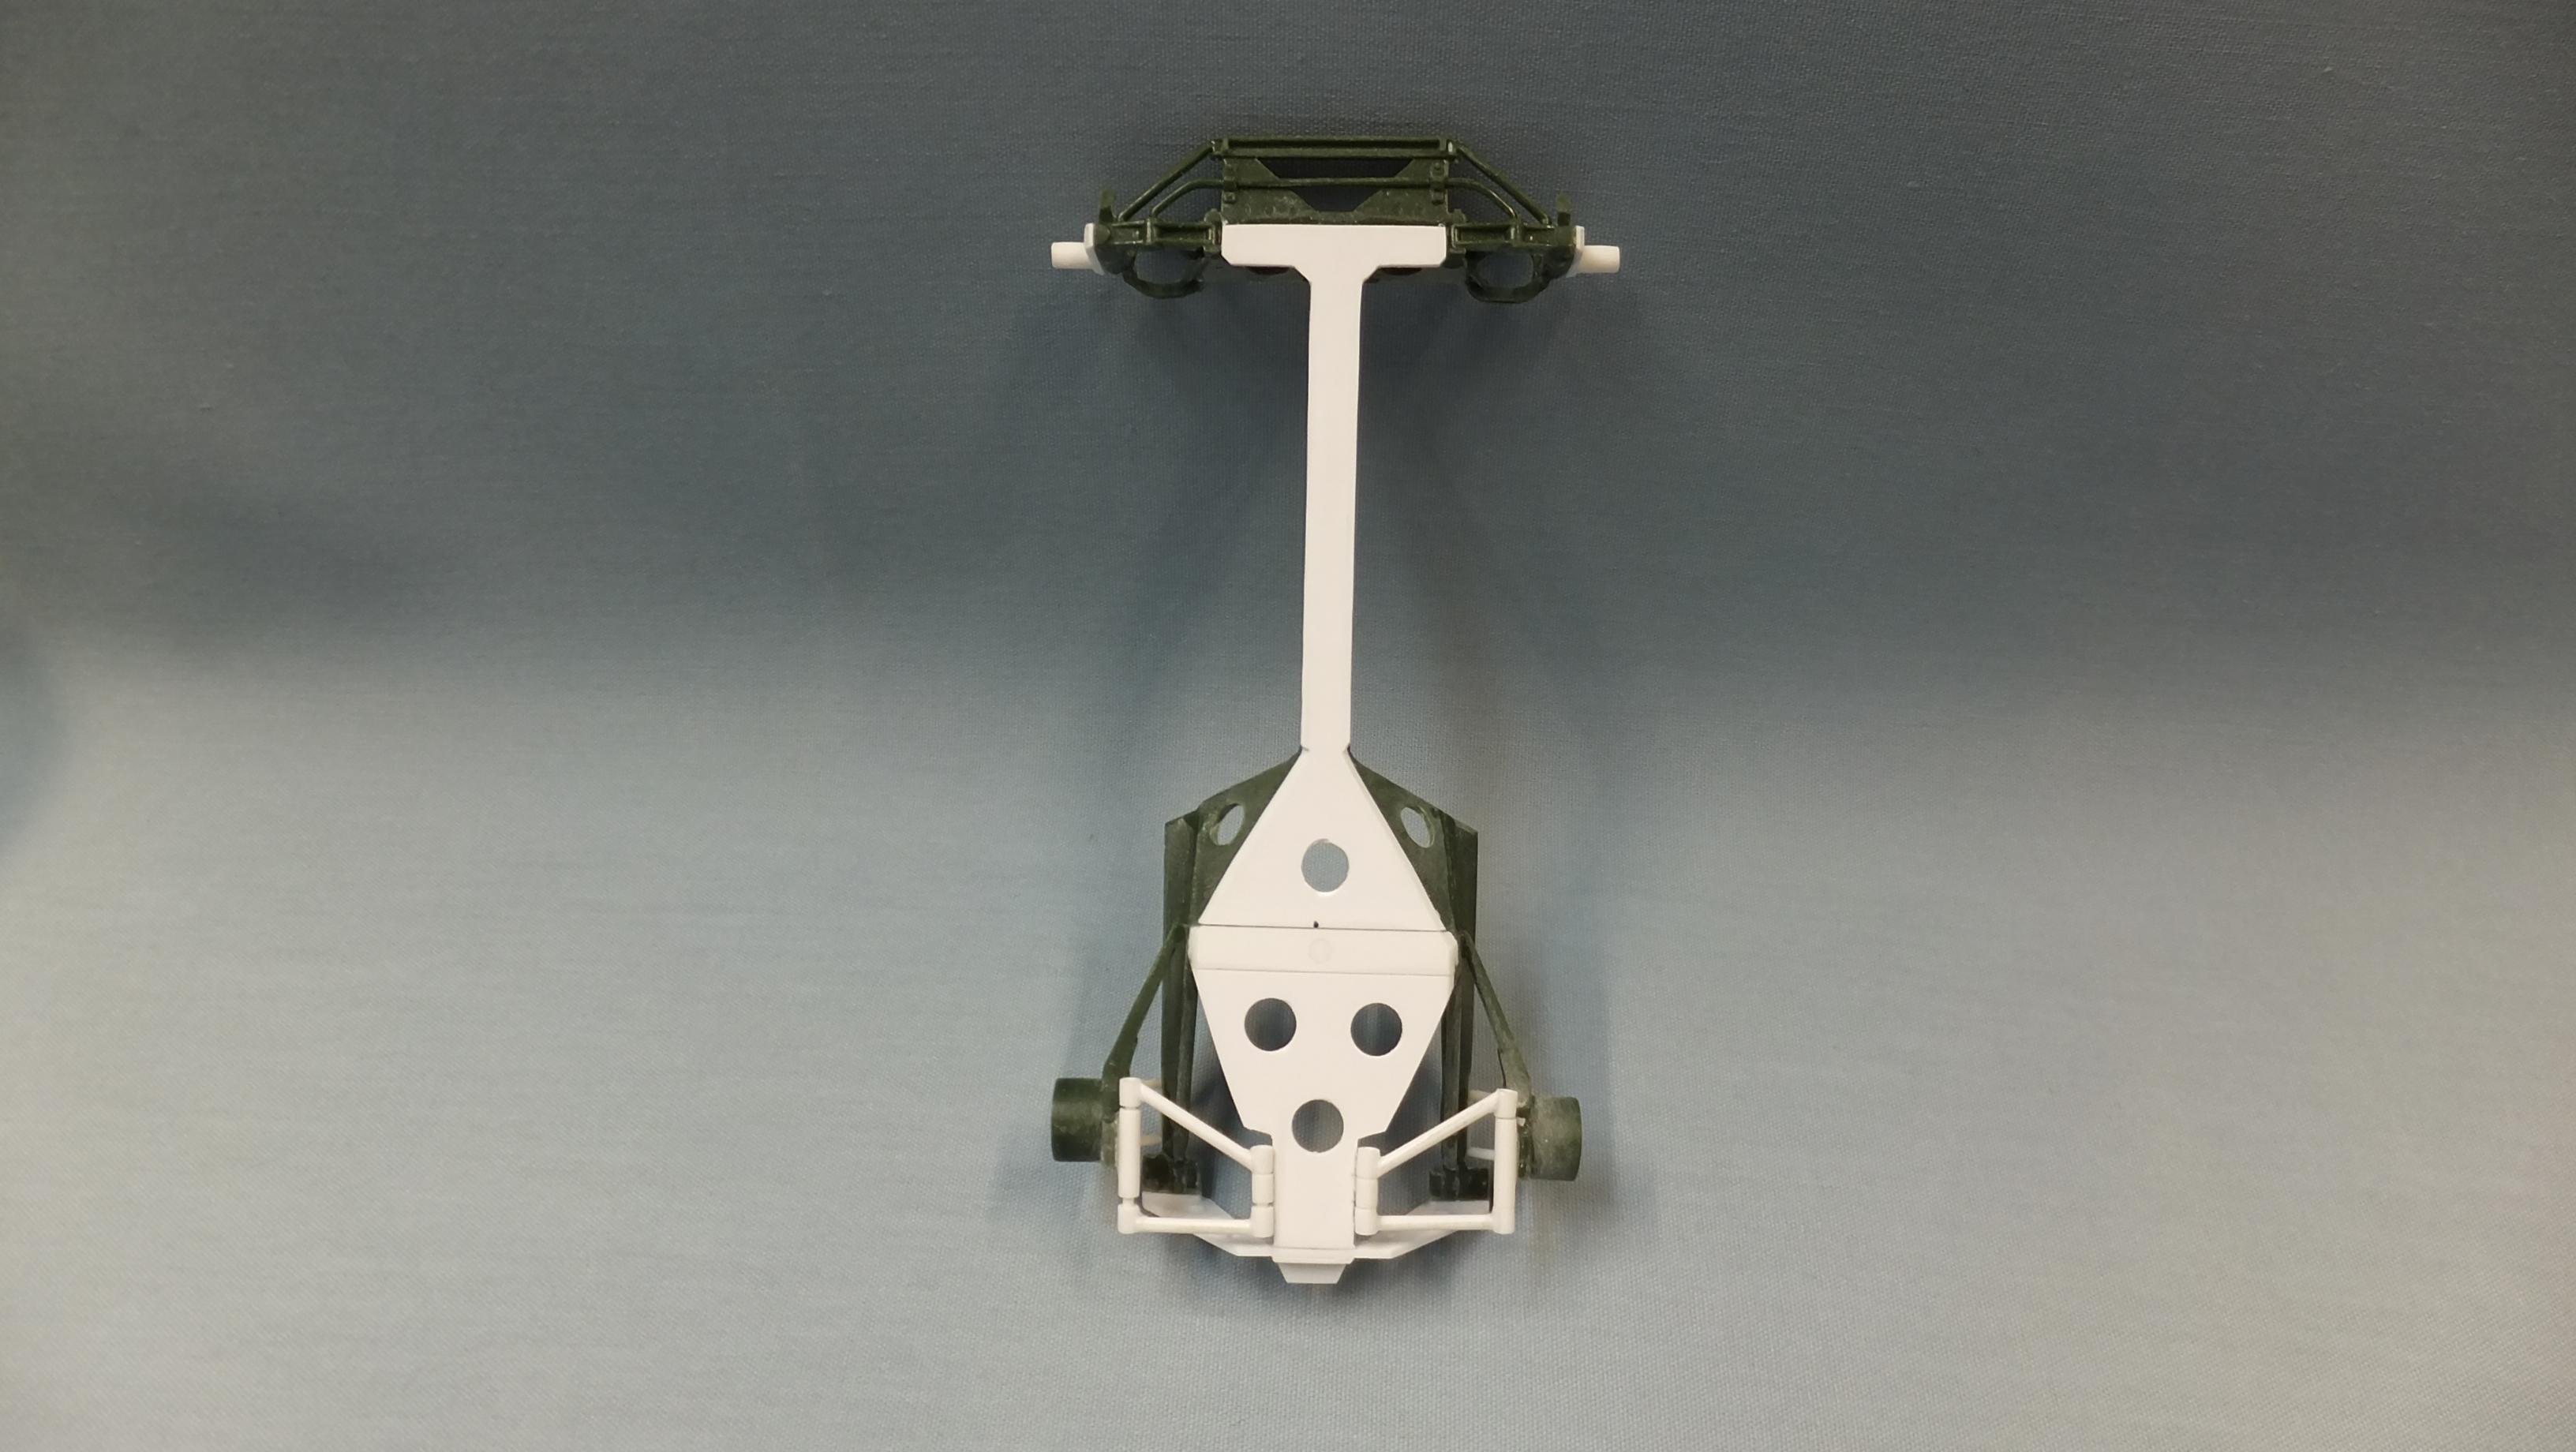
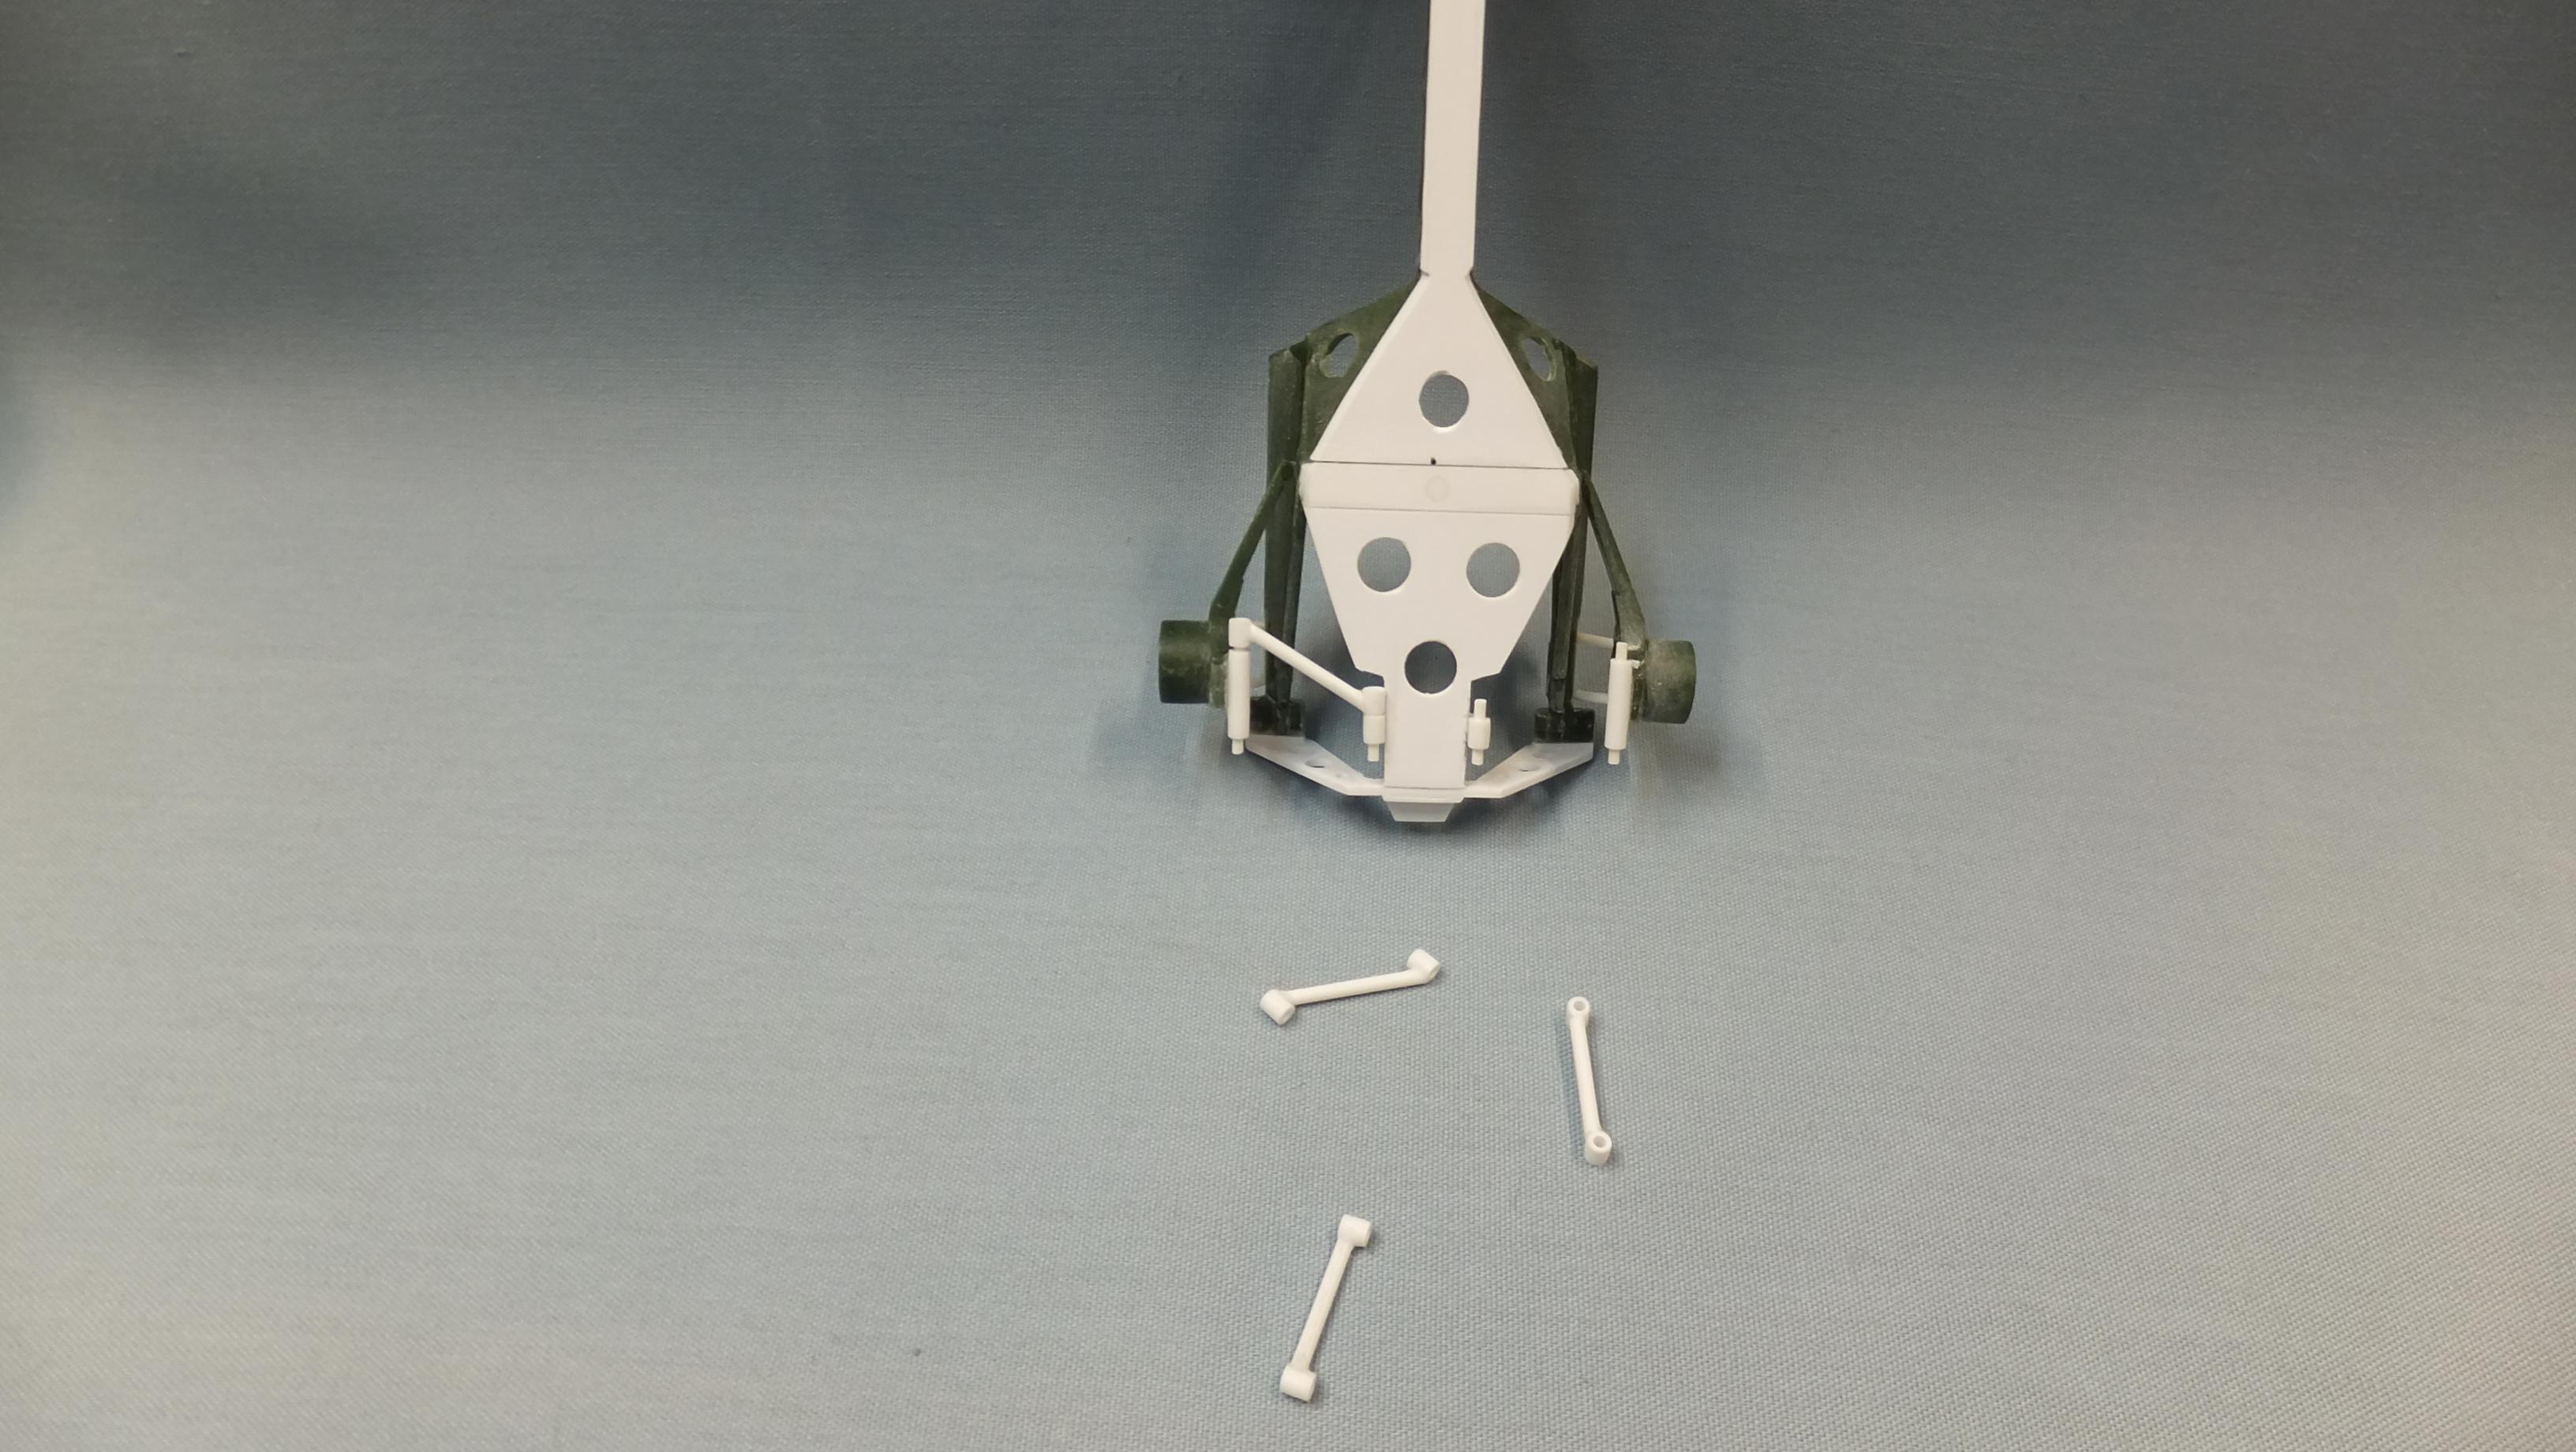
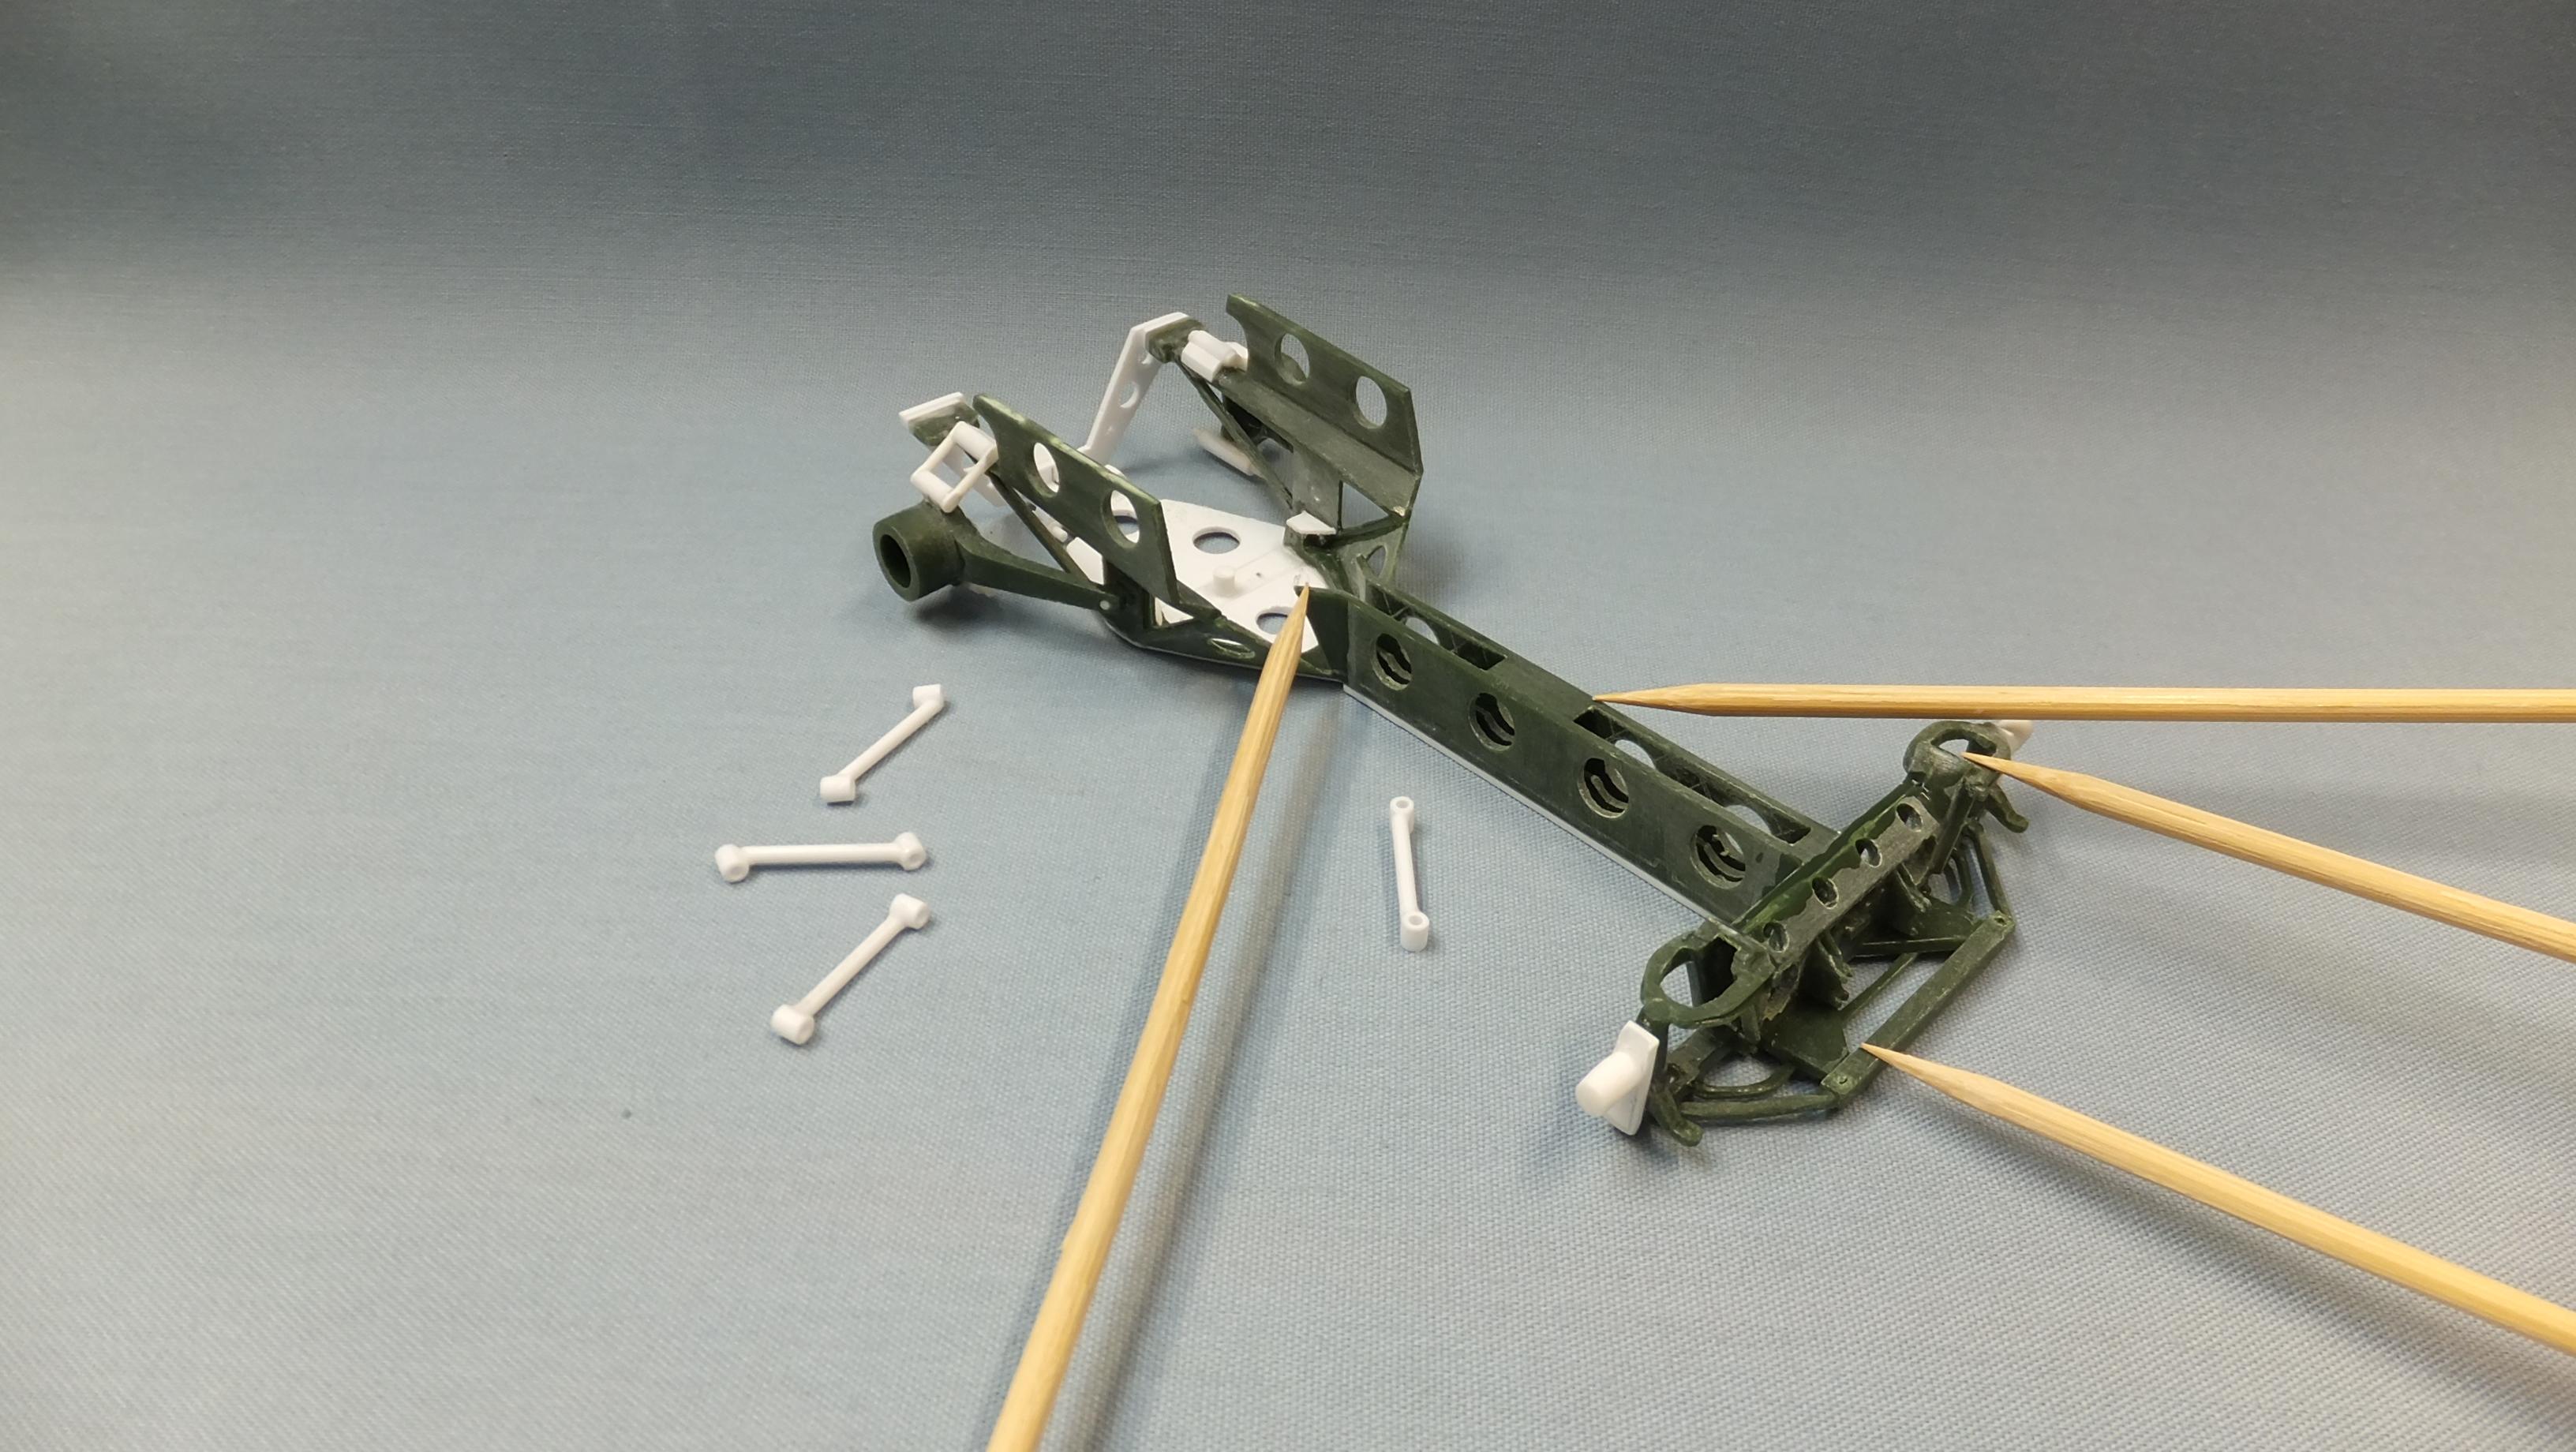
Its not Sunday, but better late than never, right? Theres been alot of hacking, fitting, and redoing. Over all, i decided to lighten up the car a bit more, hence all the holes. I normally dont bother with details that wont be seen, but i thought it would be cool to be able to still lift the body off the frame -only because its a very unique assembly.
-Photos 1-3; Heres how it sits lowered, and leveled. Most bits arent glued yet...there are a few more tweaks to do.
Photo 4; everything has been beefed up to handle the power increase.
-Photo 5&6; Just more views.
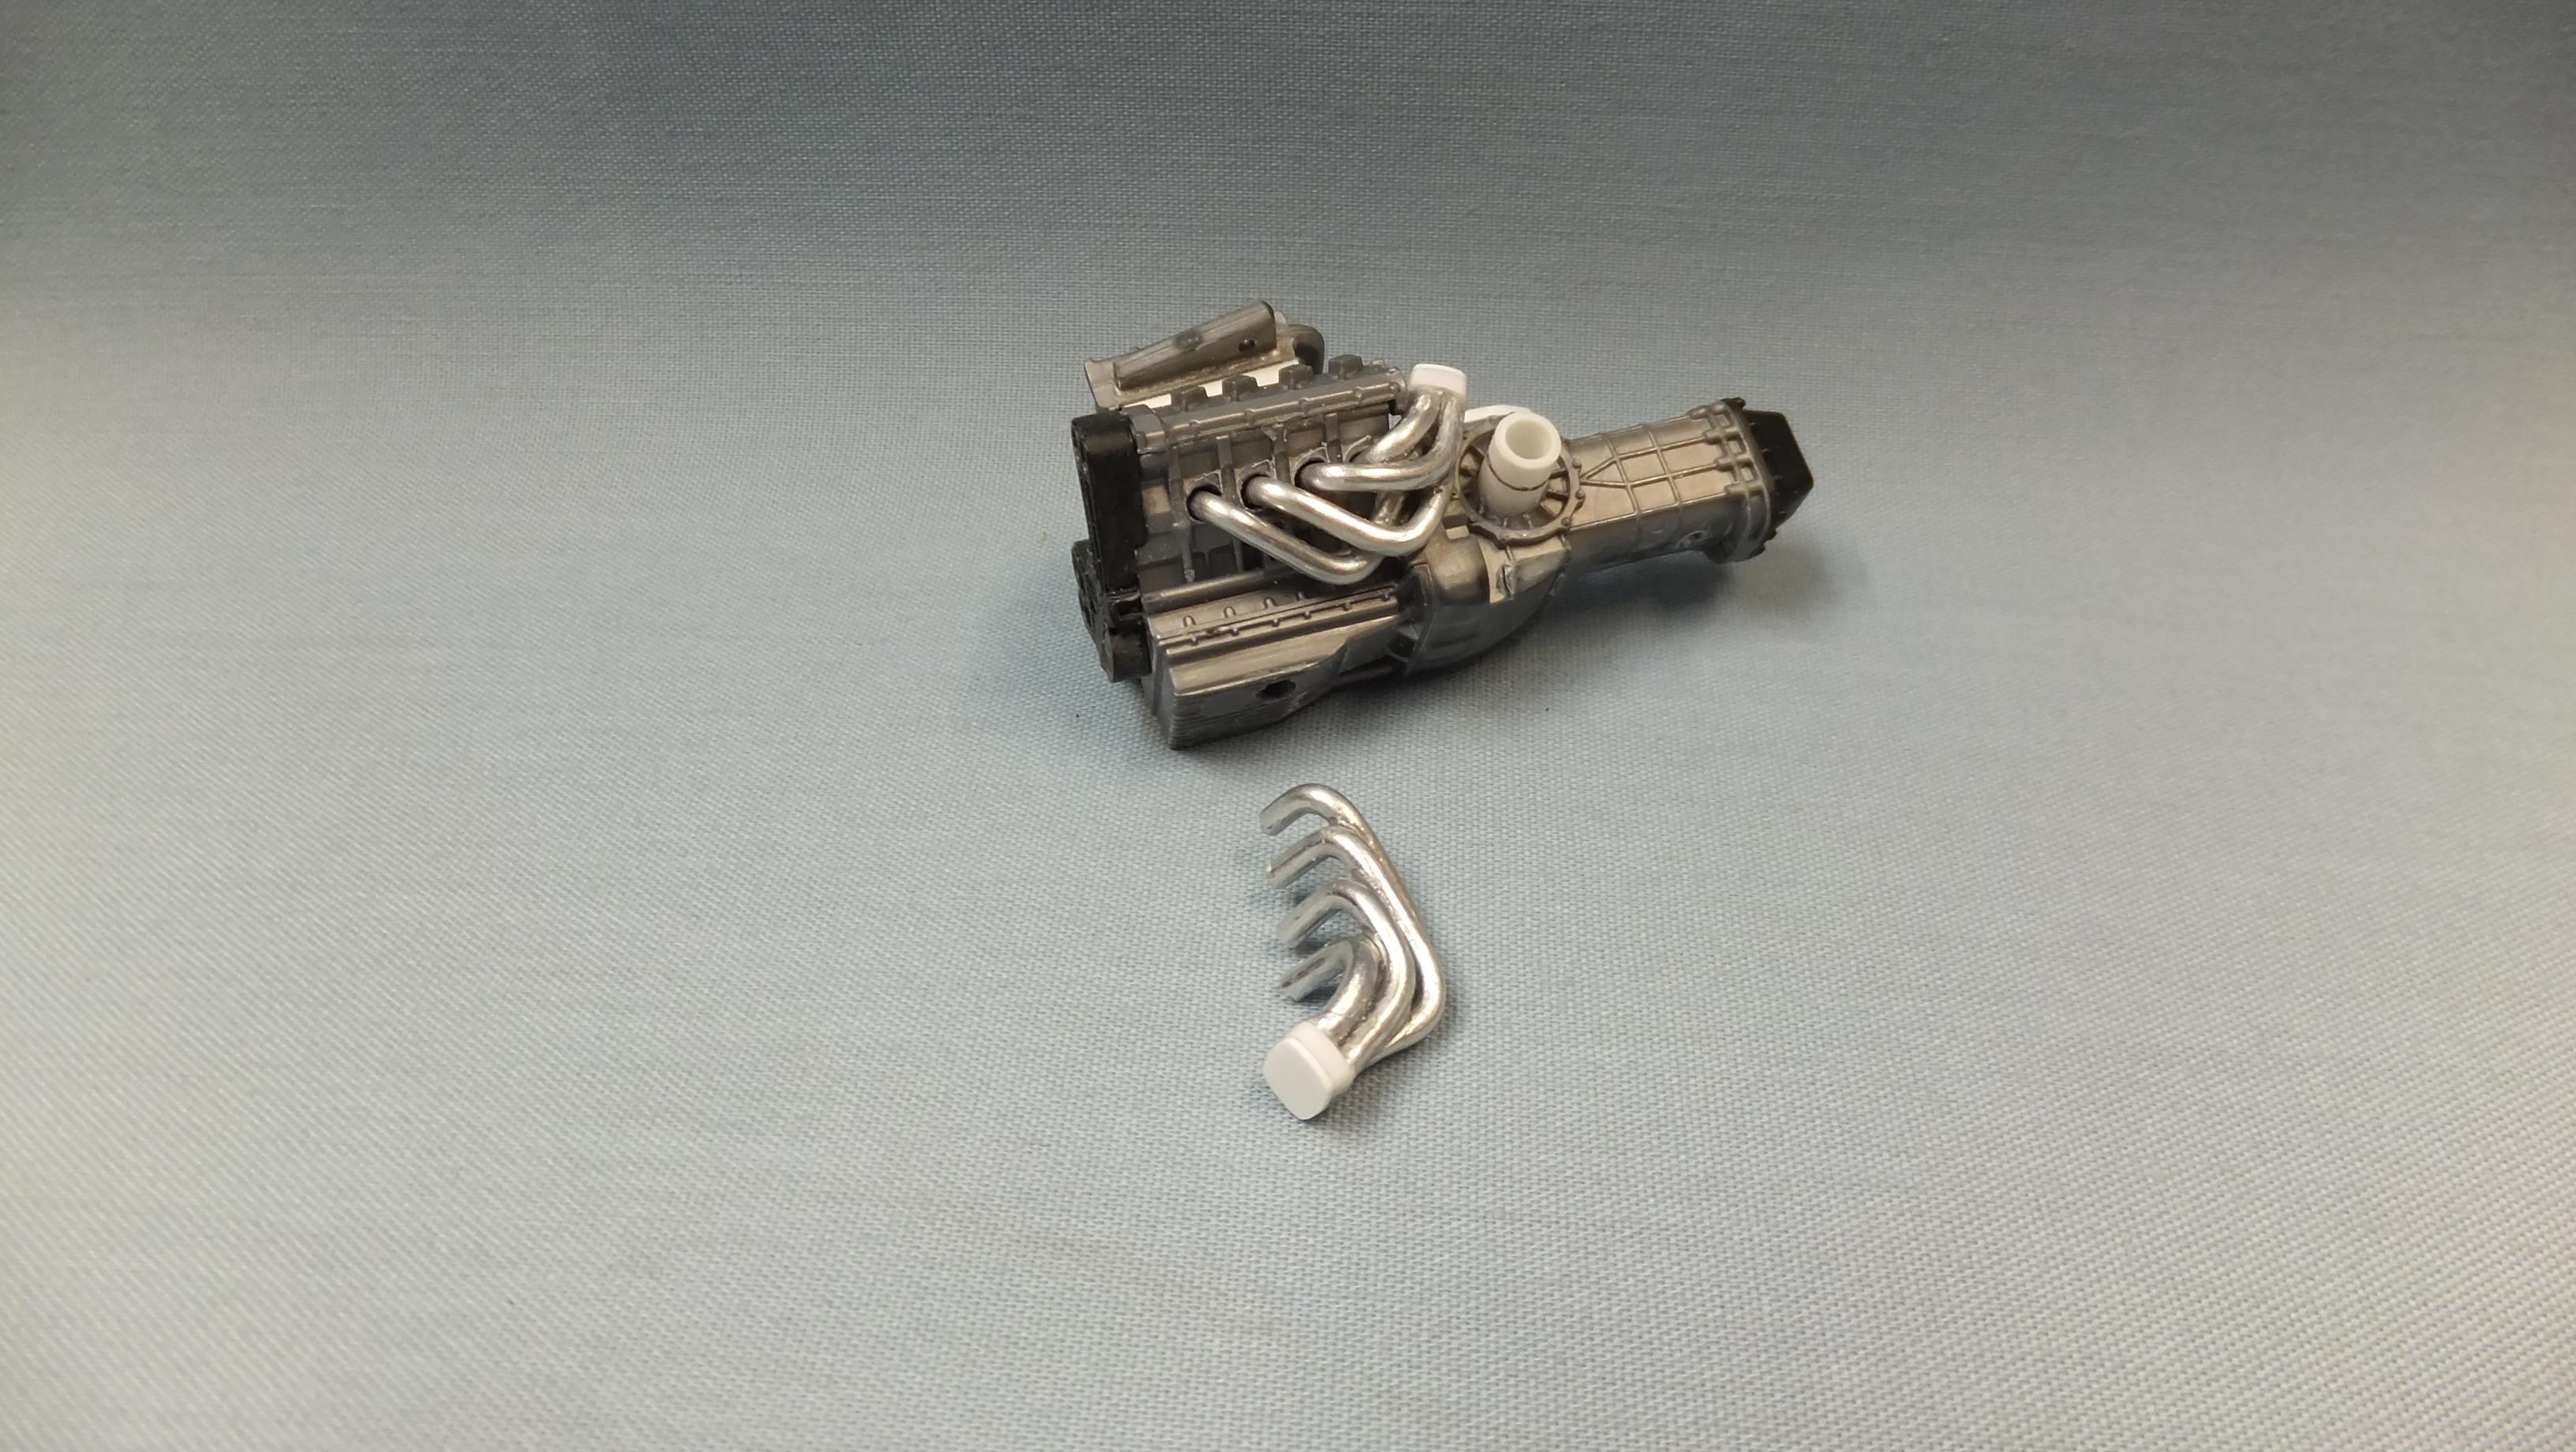
-Photo 7; Lowering the suspension wasnt all that was needed to get a proper ride height. I had to shave the top off the long frame section, and remove the firewall to get the rear end to match the front. I didnt have to, but i removed the front upper shock mounts to be able to add upgraded coil overs. The front cooler framework kept braking off during sanding, so i left it off til the end. The walls up the sides of the engine were shaved a bit as well.
-Photo 8; Made some headers, but no matter how much i snugged them up out of the way, i couldnt find a way to keep the brakes up against the tranny...its a bummer, so they have to be relocated to the wheels -sorry Lotus fans.
-
4
-
-
On 3/11/2023 at 12:46 PM, Kenmojr said:
Nice build. I always loved these Lotuses. Kind of reminded me of a Ford Pantera.
Thanks, Ken!, cant say they've ever reminded me of Pantera's though, lol.
-
On 3/11/2023 at 10:18 AM, cobraman said:
I enjoy looking in on ALL your builds.
Thanks, Ray...i'm glad you do!
-
On 3/11/2023 at 6:30 AM, David G. said:
Awesome! Welcome back, I can't wait to see what you've got for us.
David G.
Thanks, David, its great to get back to it!
-
Very cool!
-
Well done!


Lotus Esprit S1 (Airfix 1/24)
in Model Cars
Posted
These are both Fantastic builds!...i need a boomerang as well!