The Fisherman
-
Posts
46 -
Joined
-
Last visited
Content Type
Profiles
Forums
Events
Gallery
Everything posted by The Fisherman
-
Twisted Fish - 3/13, main pieces put together.
The Fisherman replied to The Fisherman's topic in WIP: Model Cars
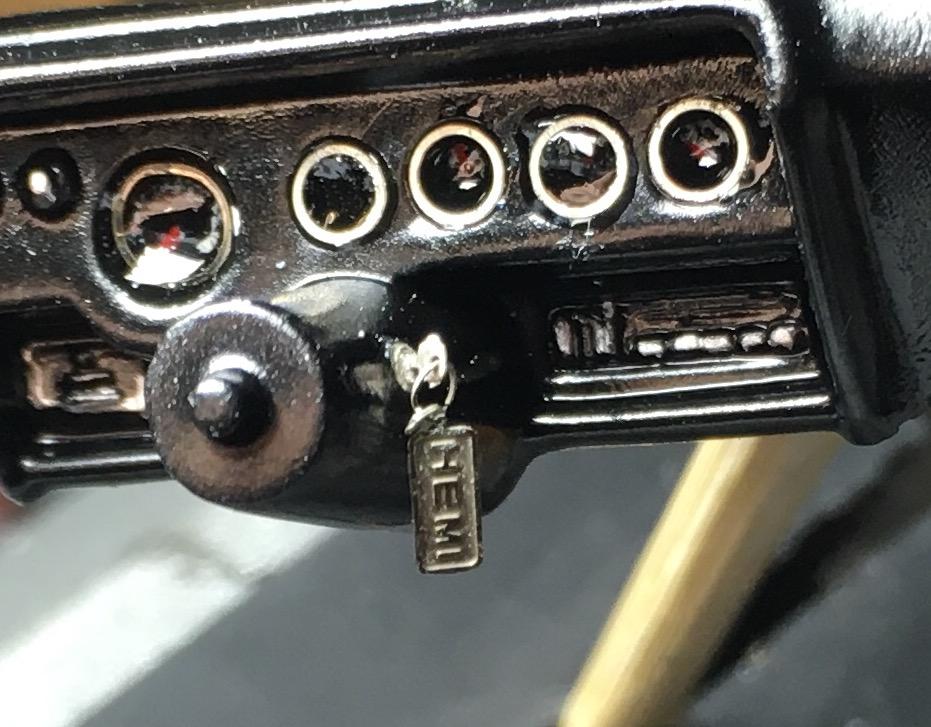
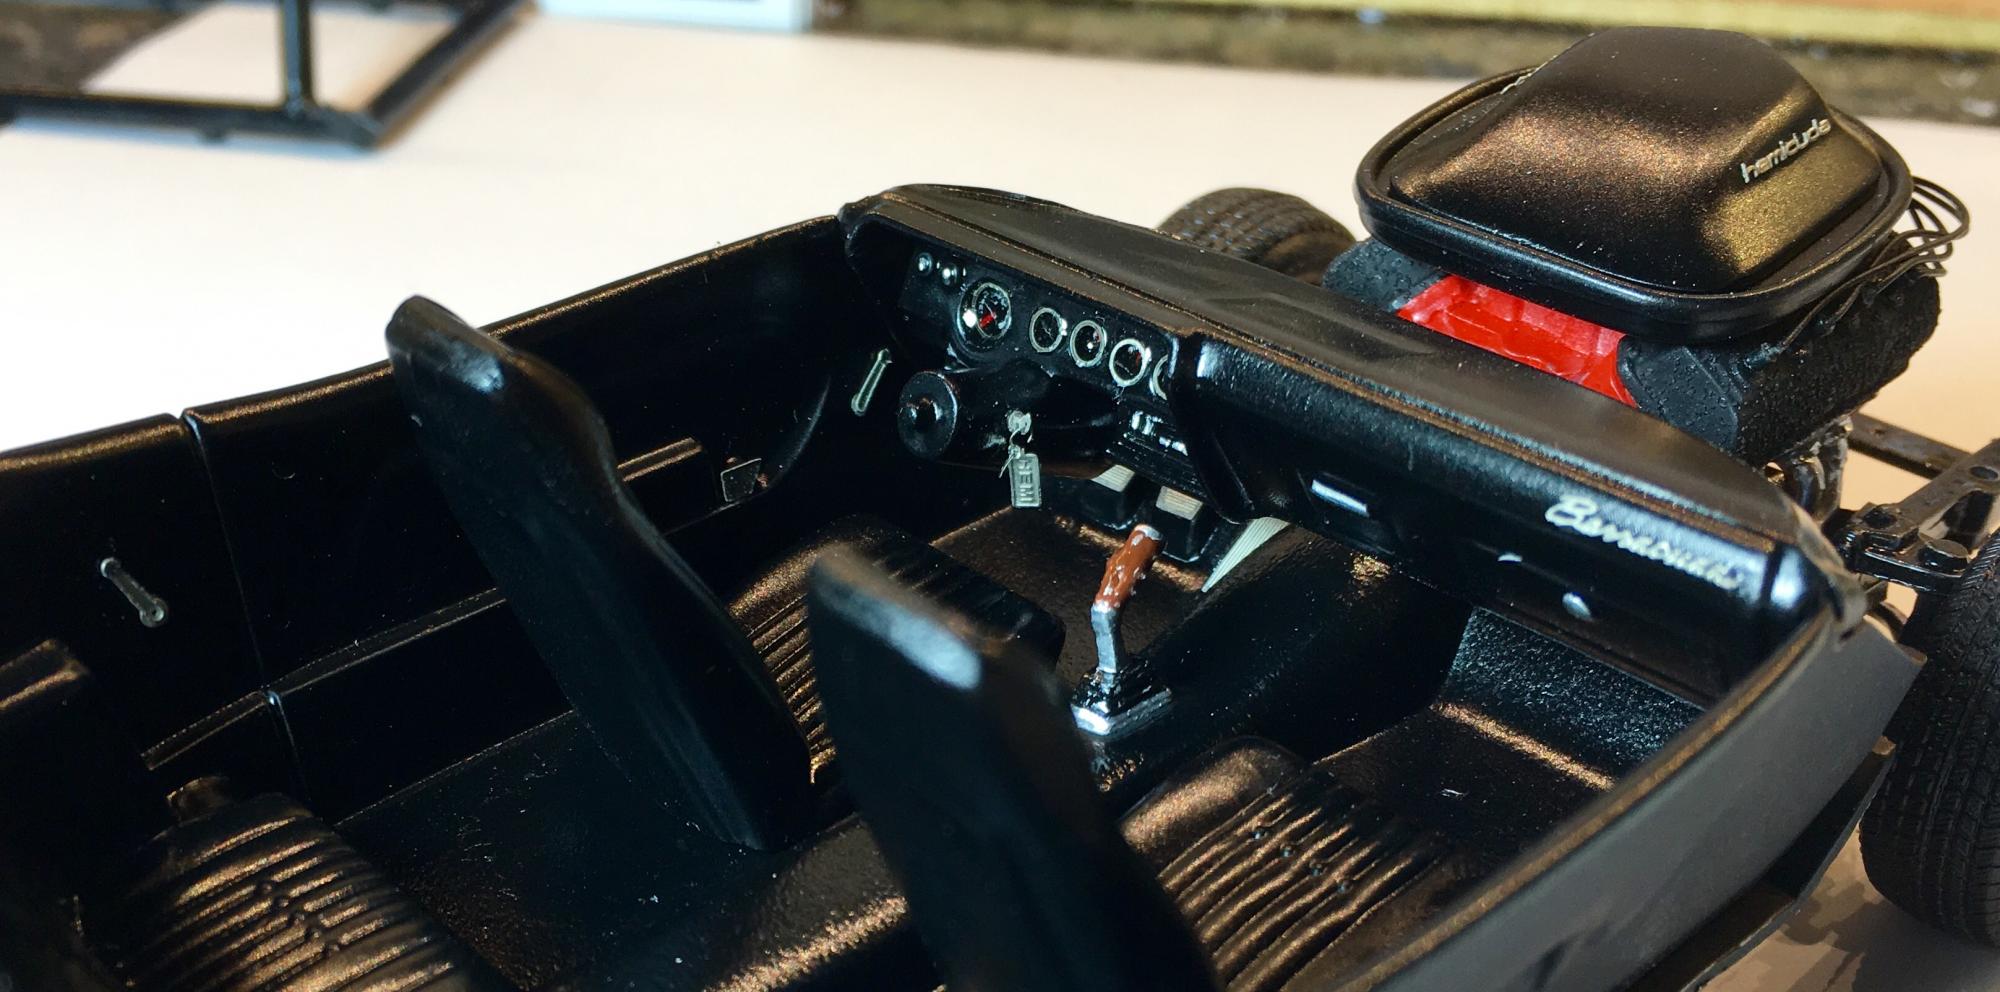
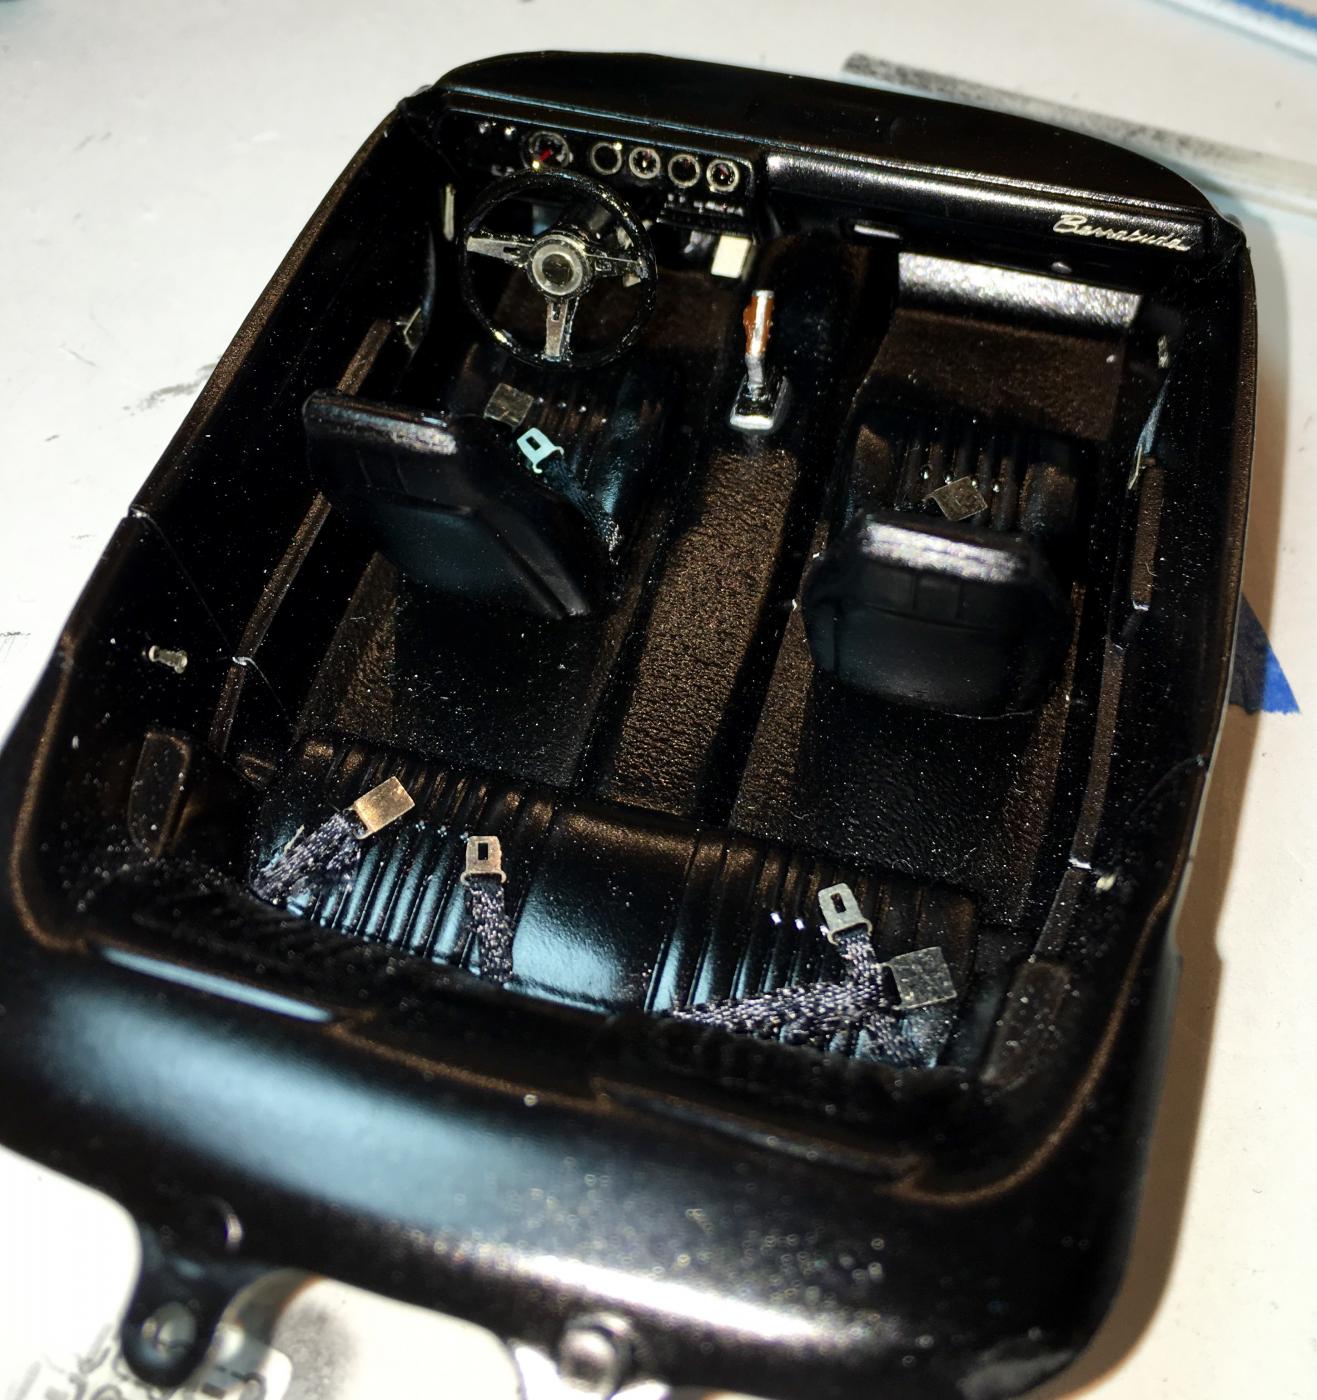
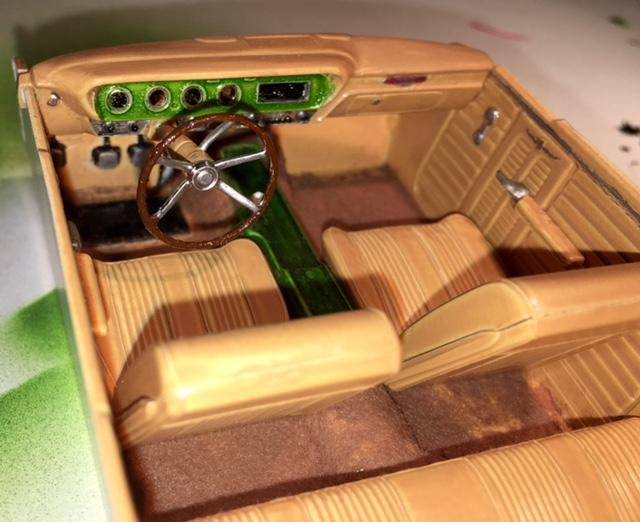
Moved to the interior bucket. Went with a satin black that will be shared with the billboard graphics on the exterior. Two part epoxy drops for gauge glass, PE keys and other interior hardware, and seat belts.
-
Twisted Fish - 3/13, main pieces put together.
The Fisherman replied to The Fisherman's topic in WIP: Model Cars
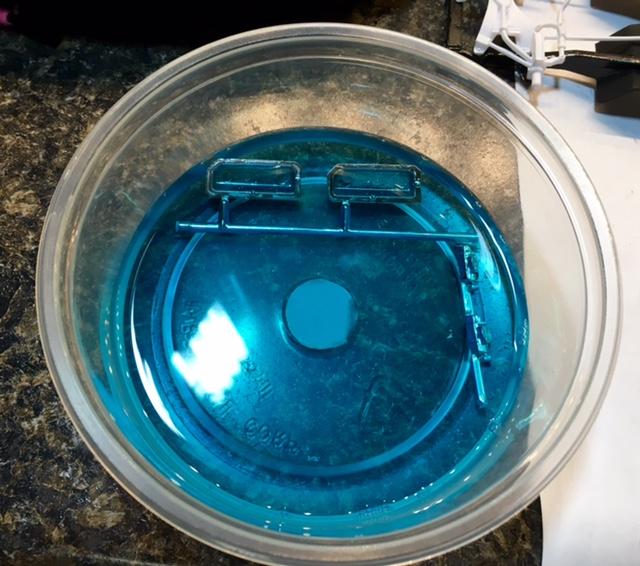
Heavy scratch (400 grain sandpaper) after the chrome removal, etching primer coat, flat black heavy coat, sifted baking soda over the still wet flat black coat, then an immediate 2nd heavy coat of flat black. -
Twisted Fish - 3/13, main pieces put together.
The Fisherman replied to The Fisherman's topic in WIP: Model Cars
Thanks for the compliments! Ryan - not certain if it will make a difference or not, but I'm not planning on making the hat permanent. If I have to, I'll prop the hood open and set the scoop assembly on the fender side to display. Appreciate the heads up!! -
Twisted Fish - 3/13, main pieces put together.
The Fisherman replied to The Fisherman's topic in WIP: Model Cars
Yes, '71 Hemi Cuda by Revell. Purple and silver example on the box. -
Twisted Fish - 3/13, main pieces put together.
The Fisherman replied to The Fisherman's topic in WIP: Model Cars
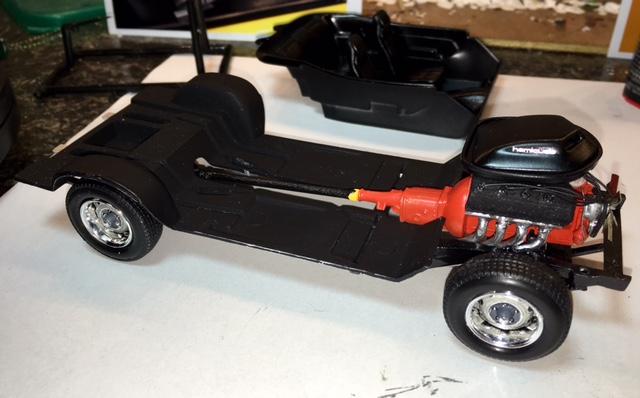
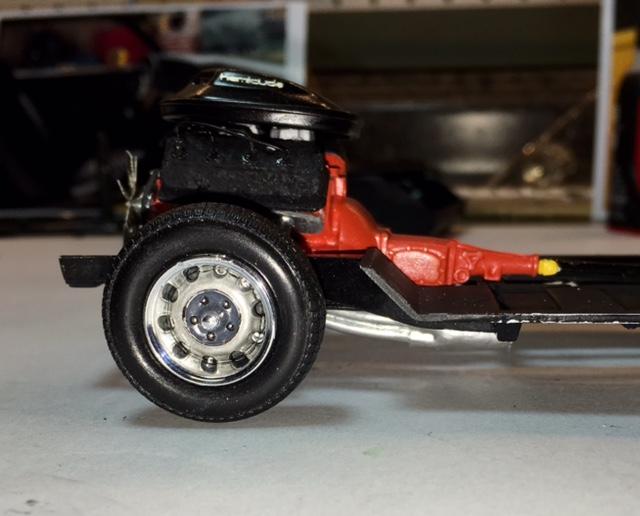
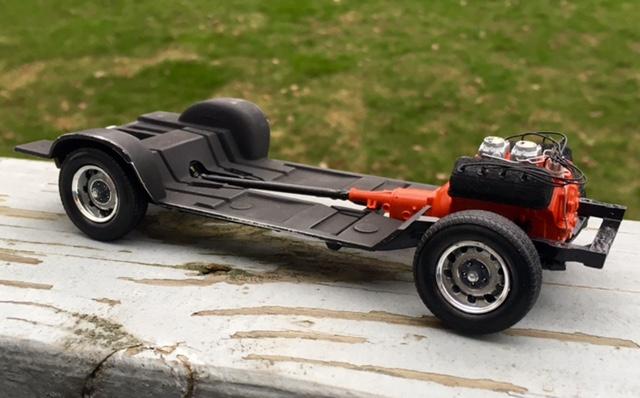
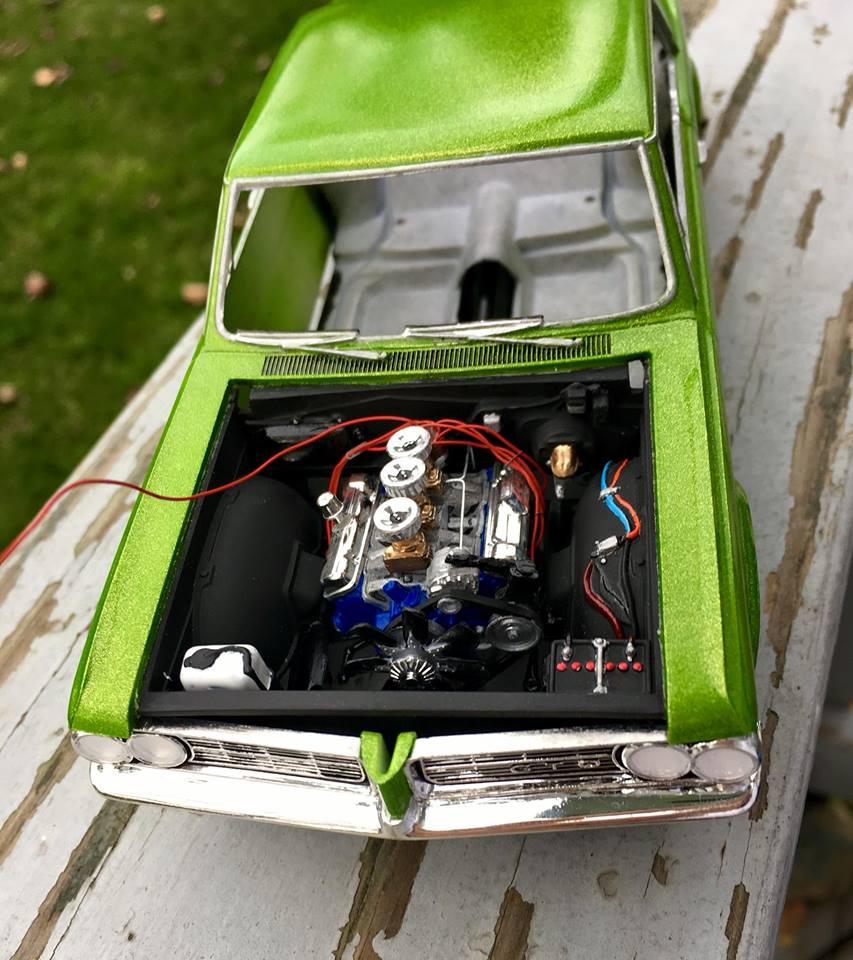
Another fitment check. Set the powertrain back in the chassis again to make certain it was going to work: My personal favorite view:
-
Twisted Fish - 3/13, main pieces put together.
The Fisherman replied to The Fisherman's topic in WIP: Model Cars
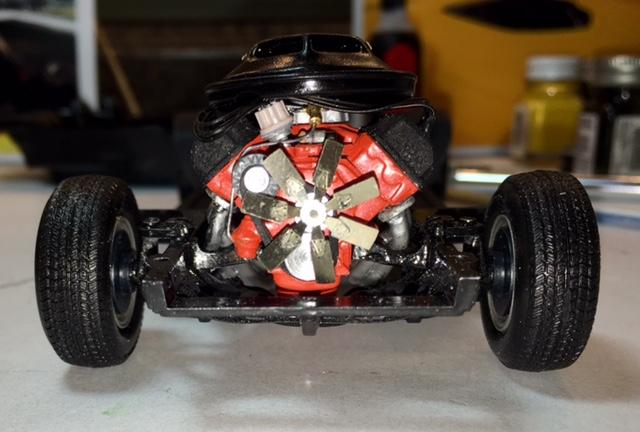
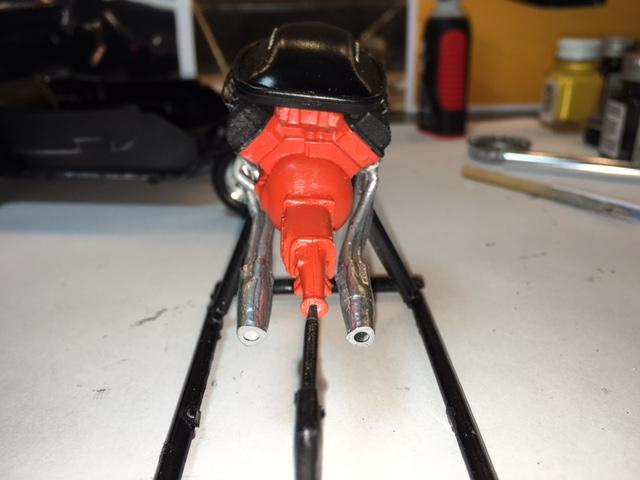
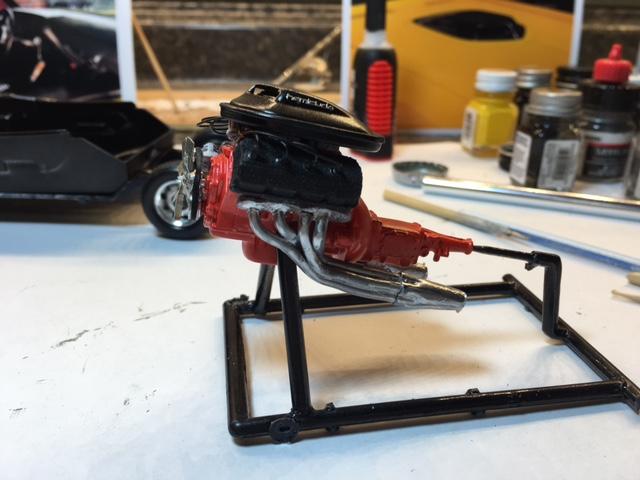
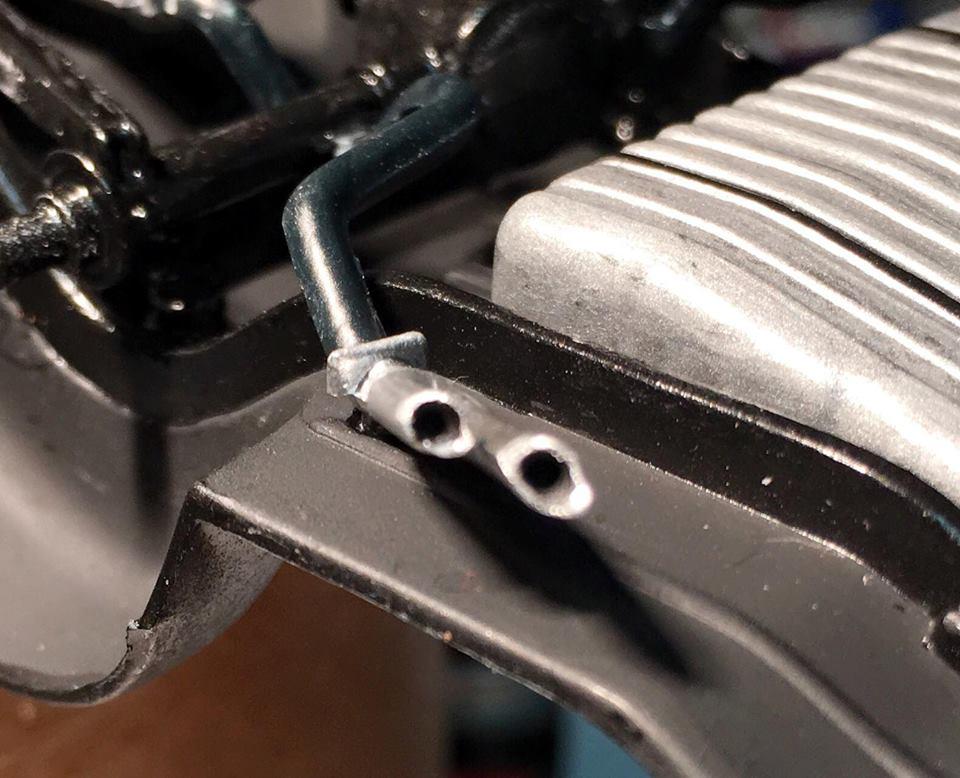
The box Hemi leaves a bit to the imagination on the front end. The water pump and timing belt cover are, well, skinny to nonexistant. I'm guessing in 1971 an oil filter was also an aftermarket option. I'm certain one will find it's way on, but not right now. Opted to use aftermarket pulleys and belt rather than the preformed piece that is supplied. The crank and camshaft pulleys required some clearance trimming to work with each other. PE fan was used to keep things "cool. Fuel deliver lines and transfer block have also been completed: The headers are DONE. I absolutely refuse to futz with them any longer. Ended up moving down to a scaled 2½" tube and still had to notch the front end for clearance reasons. I tried using the techniques found within this wonderful site to make the collectors but ended up with more scrap than pieces I liked the looks of. Ended up tapering three(3) different size aluminum tubes inside each other, filling the "steps" they each created, and massaging them to a smooth, tapered finish: Final detail was a set of flanges to mate with the exhaust on the chassis:
-
Twisted Fish - 3/13, main pieces put together.
The Fisherman replied to The Fisherman's topic in WIP: Model Cars
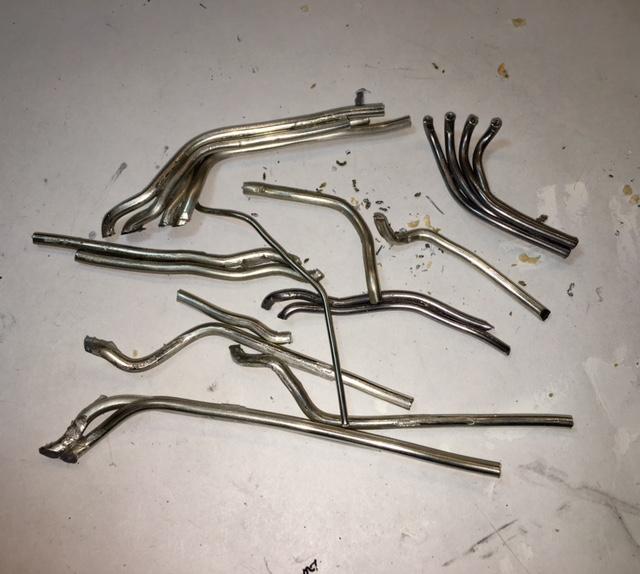
A quick mock up to see how things are shaping up. Take note, the headers are.....................missing: Turns out, the header itself is quite easy to make. Fitment is a whole different story. This is the pile: But, things do come together given enough time and determination. Now to figure out the collectors:
-
Twisted Fish - 3/13, main pieces put together.
The Fisherman replied to The Fisherman's topic in WIP: Model Cars
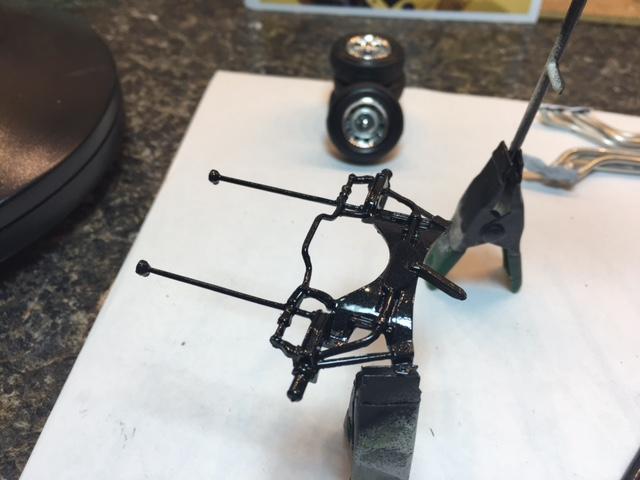
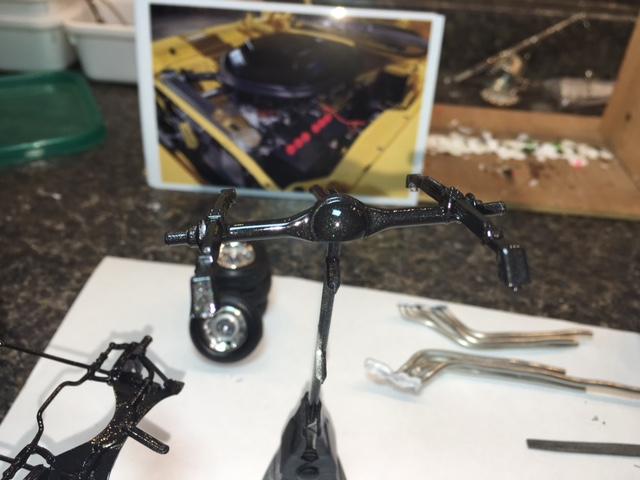
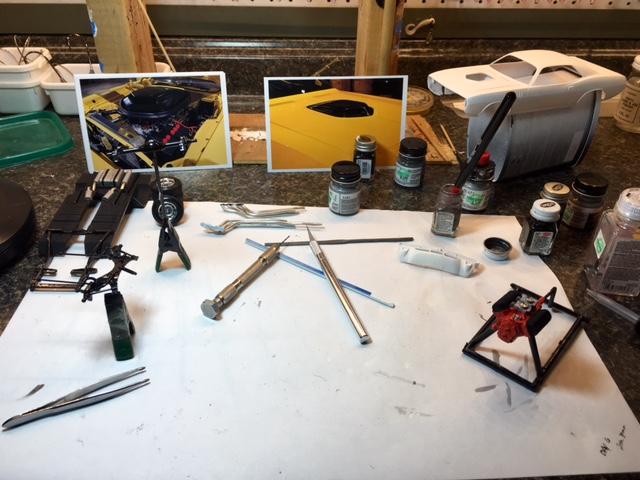
Front and rear suspension painted with a metallic black. Still haven't decided what I'm doing about the chassis as a whole yet: Hemi construction continues. Distributor is in and wired for clearance under the air hat, carbs have been modified to reflect correct orientation, and the the fuel line from pump is started: My work space, stolen from one of my jig making benches:
-
Twisted Fish - 3/13, main pieces put together.
The Fisherman replied to The Fisherman's topic in WIP: Model Cars
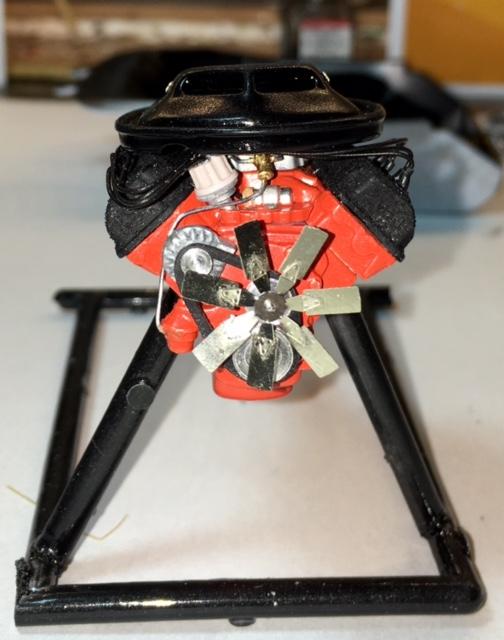
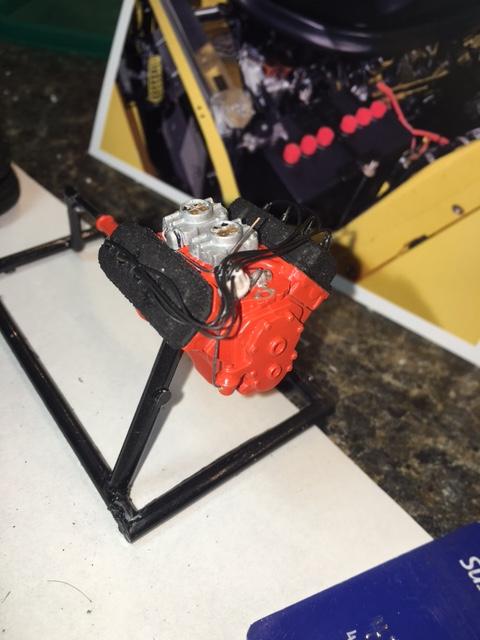
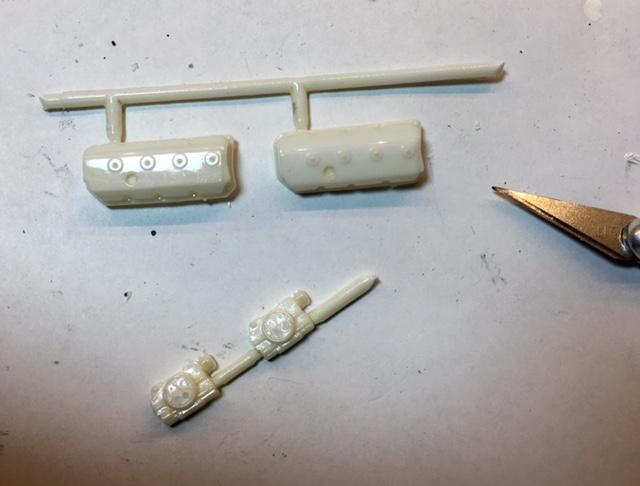
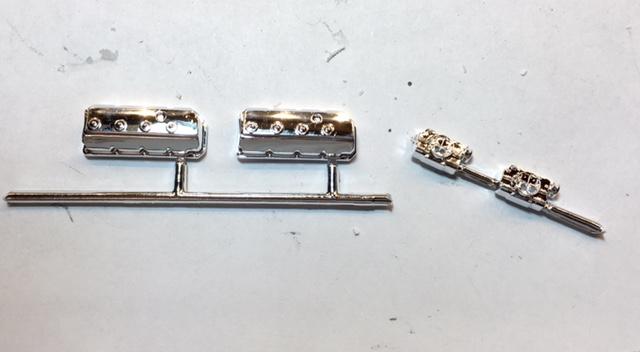
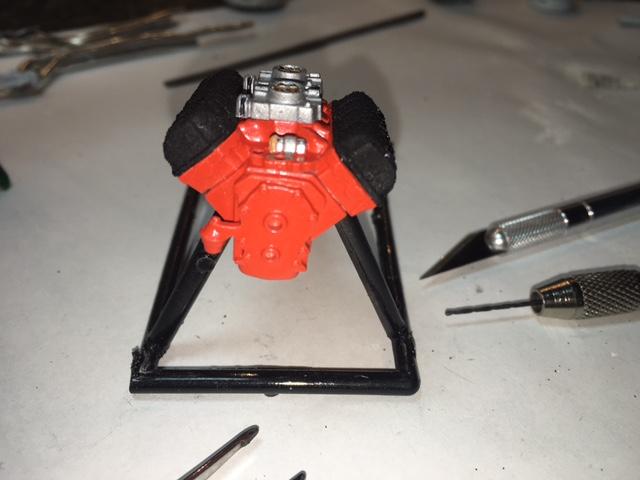
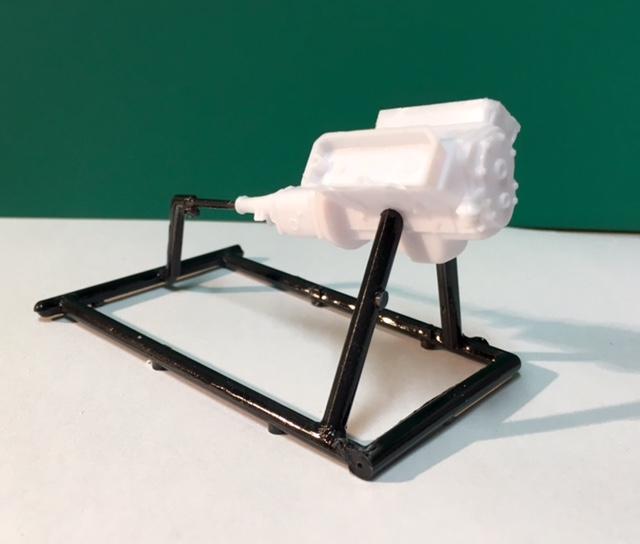
Still on the motor. The chrome carbs and valve covers just didn't seem right to me: So they had to go: Now they are at a point they can be made into something more believable: This is how bad things get started. The motor and transmission are done in correct Hemi orange, carbs are as detailed as I can do within my abilities at this time, valve covers are textured and painted, and a few of the small details are getting done:
-
Twisted Fish - 3/13, main pieces put together.
The Fisherman replied to The Fisherman's topic in WIP: Model Cars
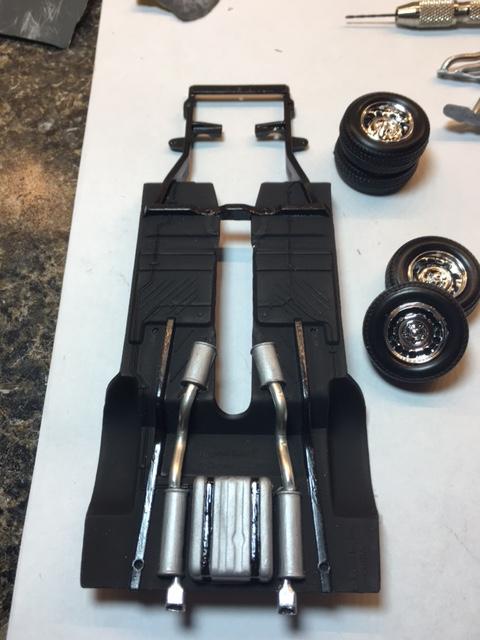
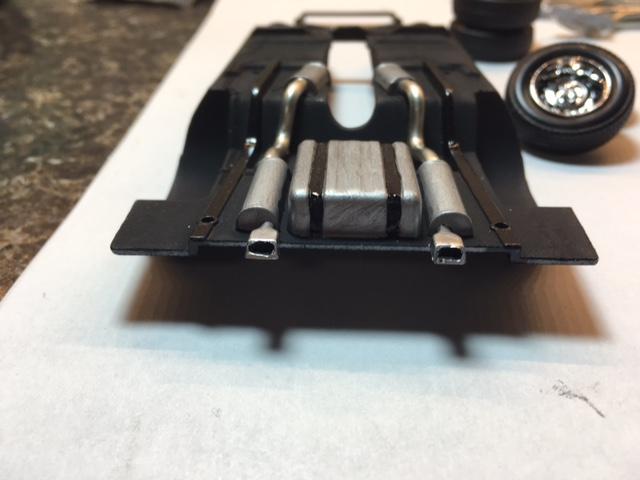
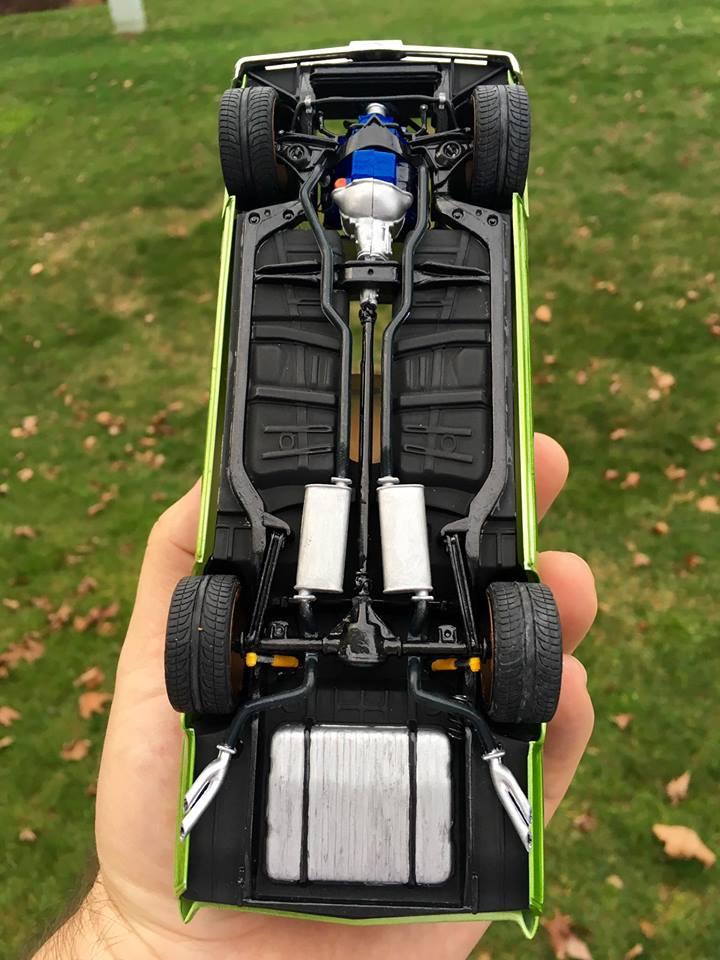
Front fender body work is completed. Primer coat only shows me that the side marker outline needs enhanced just a bit to return to to where it should be: Chassis has been painted. This is where I realized I made a wrong turn. I wanted to finish this with a factory look of steel with body color overspray, but I automatically went into show car mindset and went with a flat finish and gloss frame rails. I haven't talked myself out of pulling the chassis out of the next box and completely redoing it and save this one for build #2. Note the headers in this layout........they have turned into a real....................how do you say.............pain: Pleased with how the exhaust piping came out between the mufflers and resonators. Wheels have been started as well: Need to spend some time cleaning up the open tailpipe tips. They're open, but the lines aren't clean enough for me to sleep at night yet:
-
Twisted Fish - 3/13, main pieces put together.
The Fisherman replied to The Fisherman's topic in WIP: Model Cars
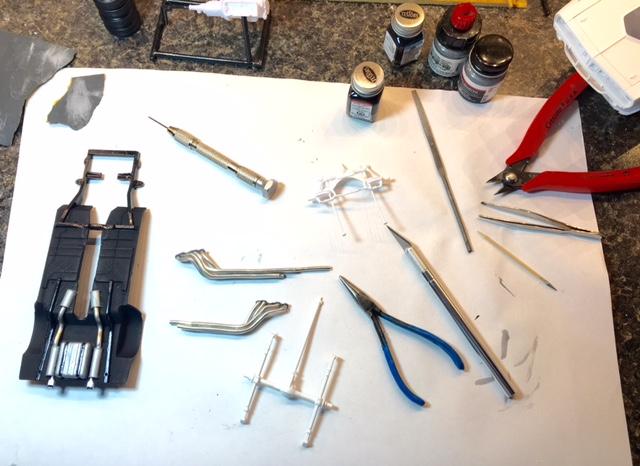
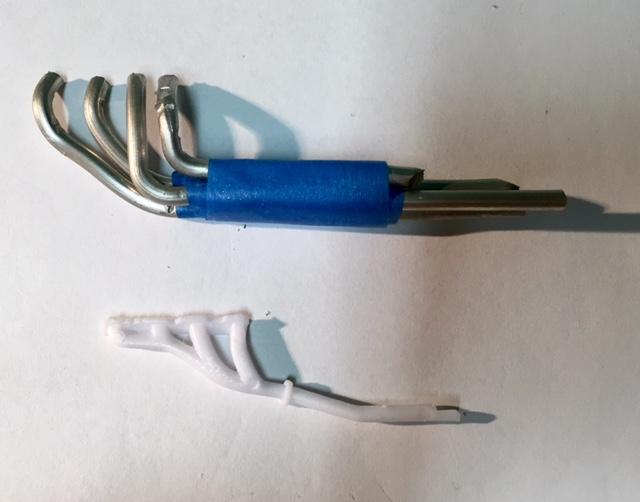
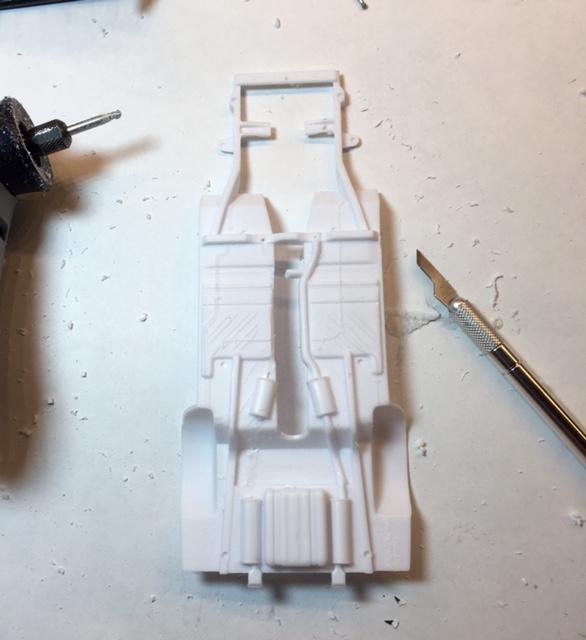
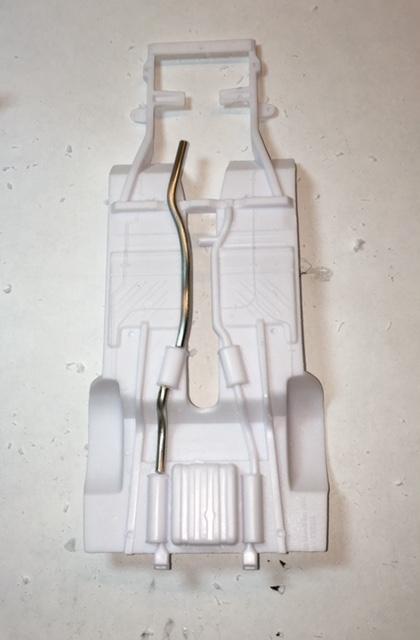
While waiting for primer coats to dry, I turned my attention to the engine: Which very quickly lead me to the anorexic headers that are supplied. They had to go; started bending up a replacement set: Following through on the exhaust side of things took me to the tubing that was molding in with the chassis. Went back and forth if I just wanted to paint it and call it done, or if I wanted to create more work for myself. Figured the build is what the fun is all about, so the tools were picked up again and the removal process began: Planned replacement:
-
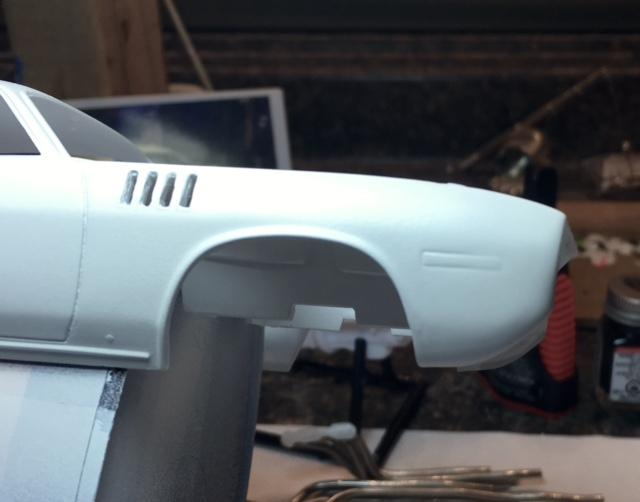
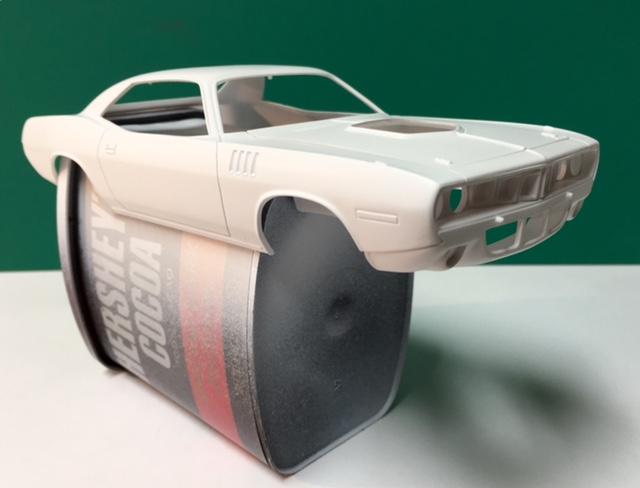
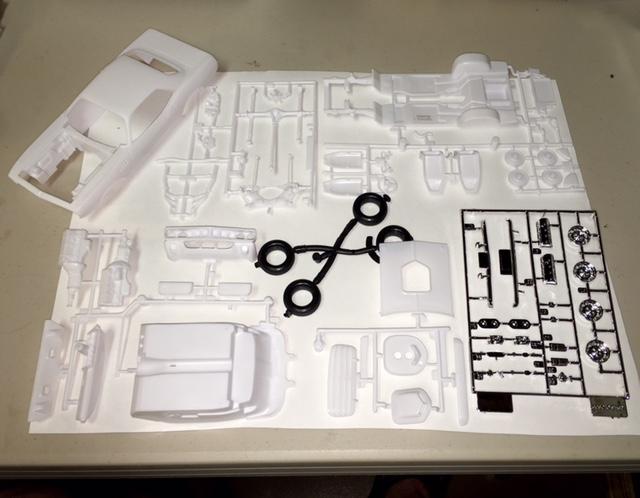
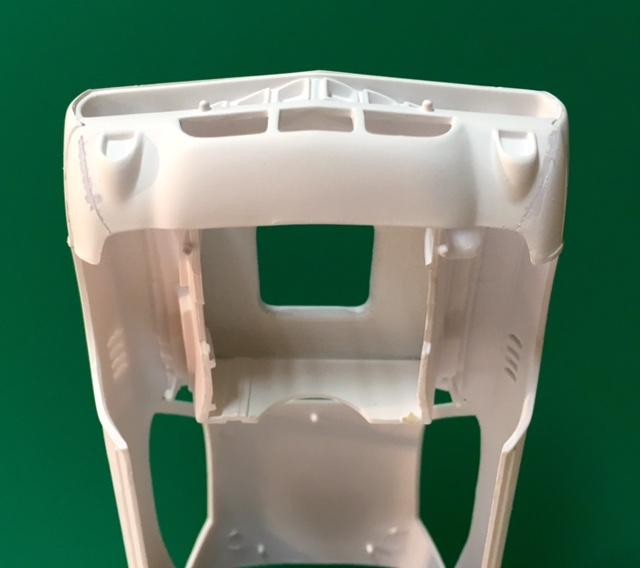
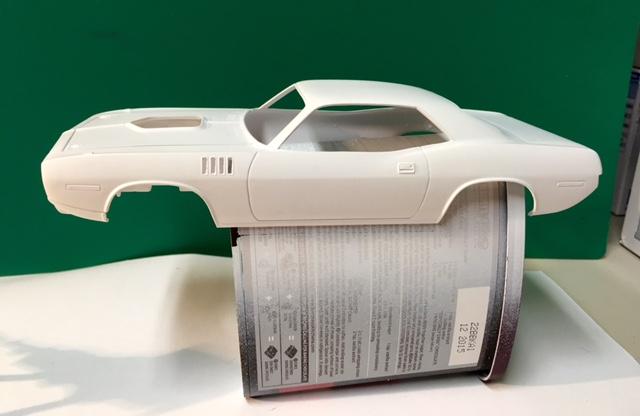
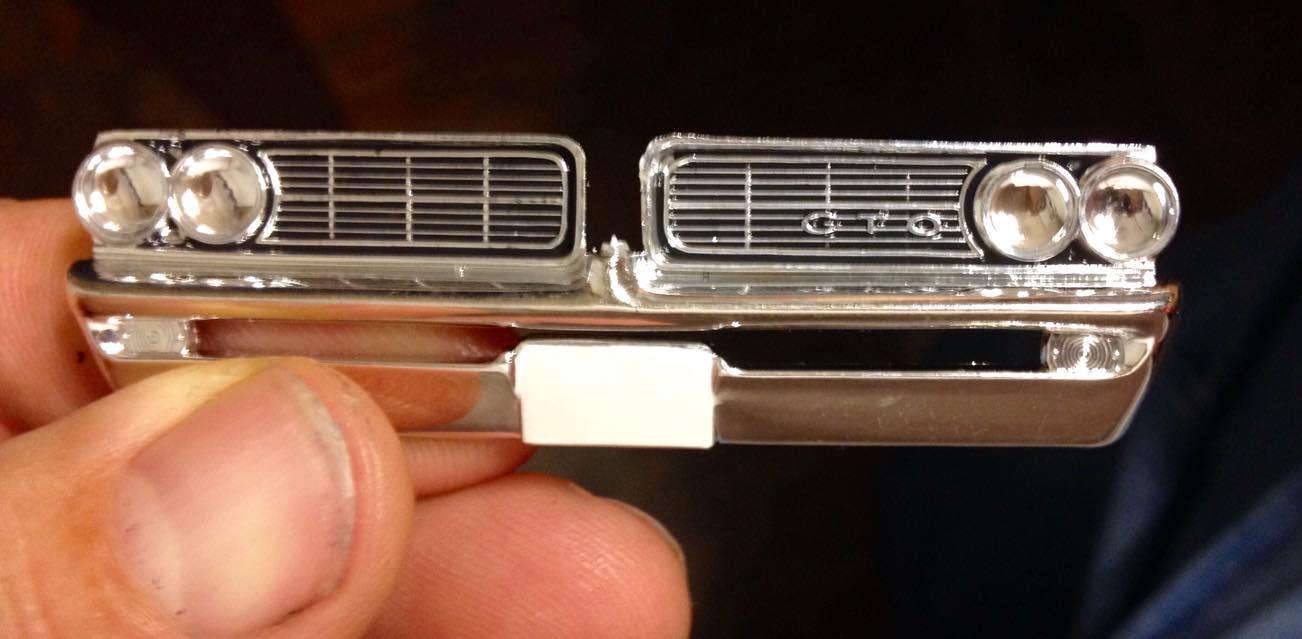
Started this project a few weeks ago. Plans are to do a series of three(3) builds all based off the same vehicle: 1st a (semi) factory original, 2nd a rundown/abused version, and 3rd a resurrection. I'm calling this an OOB build as there's no major changes being done. Any and all comments, pointers, suggestions, sarcasms, etc. are openly encouraged. Starting point from the box: Sanded down the body mold lines and flash and shot the body/grill/hood with primer. Scribed the panel lines: Very early in the build my visions started getting cloudy. I want to keep things original, yet present some "extra step" aspects to the finished piece. Saying this, I just had to open those gills up: Also the OCD in me couldn't stomach the front fender lines that are not supposed to be there. Laid out where the correct panels should be and started cutting (does this change the OOB status?):
-
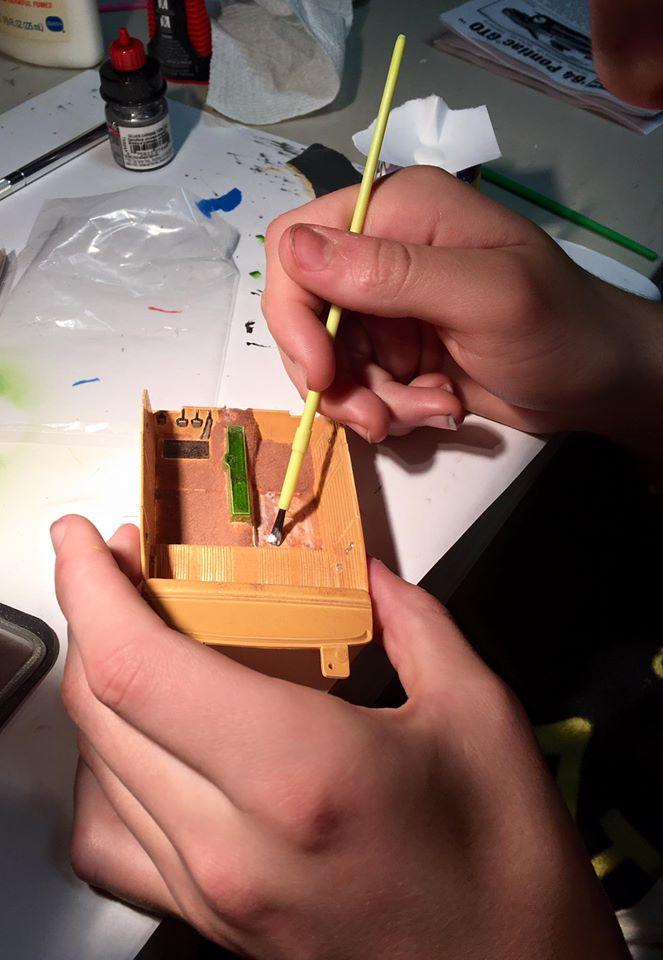
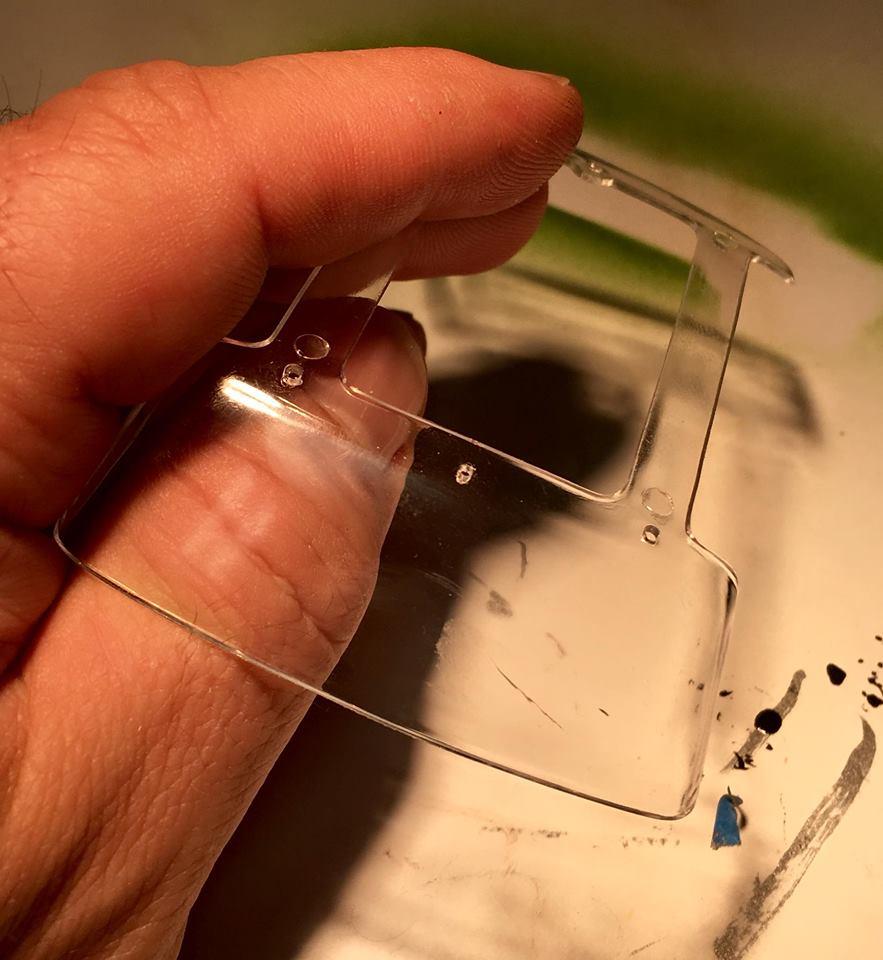
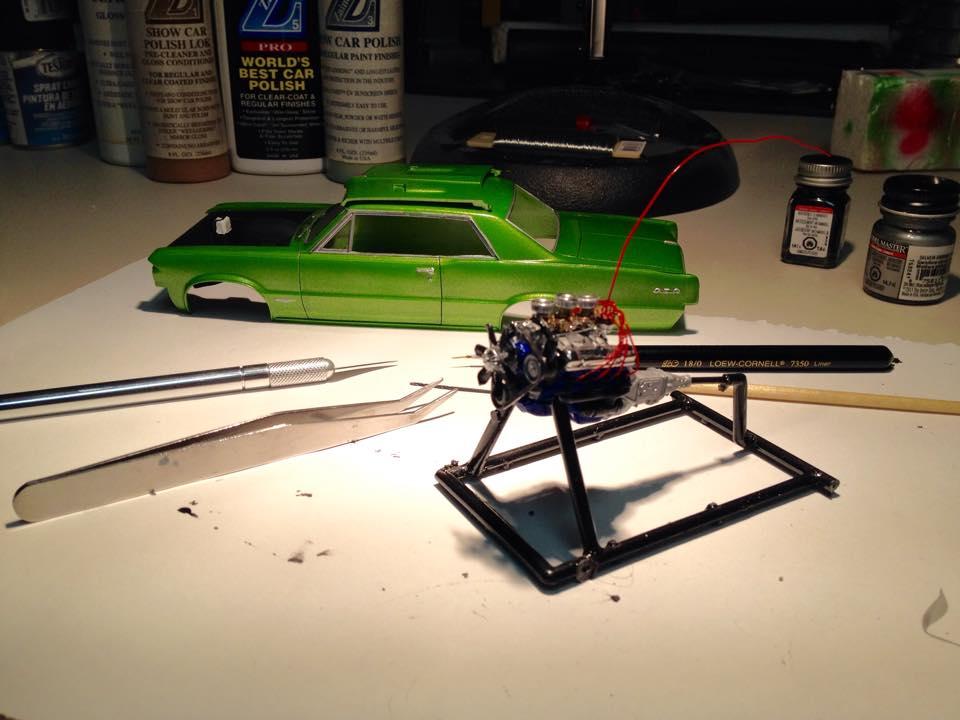
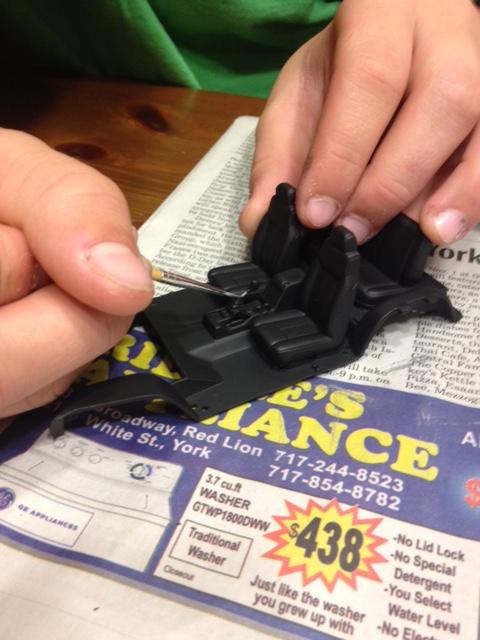
Thanks for all the kind words! He had some time to continue on, so the engine compartment got detailed, engine mounted on the chassis, and test fittted with the body: Then his attention turned to the interior bucket. He opted to match a few parts of the interior with the body color, add carpet, and "update" the dash with digital gauges: Either he was rushing, or this part of the build process showed his lack of experience. The dash went very badly for him; he dealt with a lot of painting mishaps, that lead to repairing finished areas, that lead to.............well, you know what happens when you try to touch up an airbrushed surface with a paint brush. He had bleed through (under) his tape jobs on the door panels and just couldn't stay consistent with the flocking for the carpet. Do believe he now knows you cannot apply glue with a brush over already flocked areas. The final straw may have been my fault. His frustration level was peaked, but he really wanted to finalize this build. I should have told him to just walk away from it until the next day. He was prepping to glue the rearview mirror into the glass package and install it when he a droplet of glue got away from him and landed on the viewed part of the front glass. Before I could get out my warning of not wiping it, he swiped his finger over it. To add insult to injury he picked it up a little later in the evening and started trying to "rub" the now dried smear off the plastic. He brought his attempt to my attention after the plastic had cracked. Call is now in to Revell to purchase a replacement piece. Time to start on the '67.
-
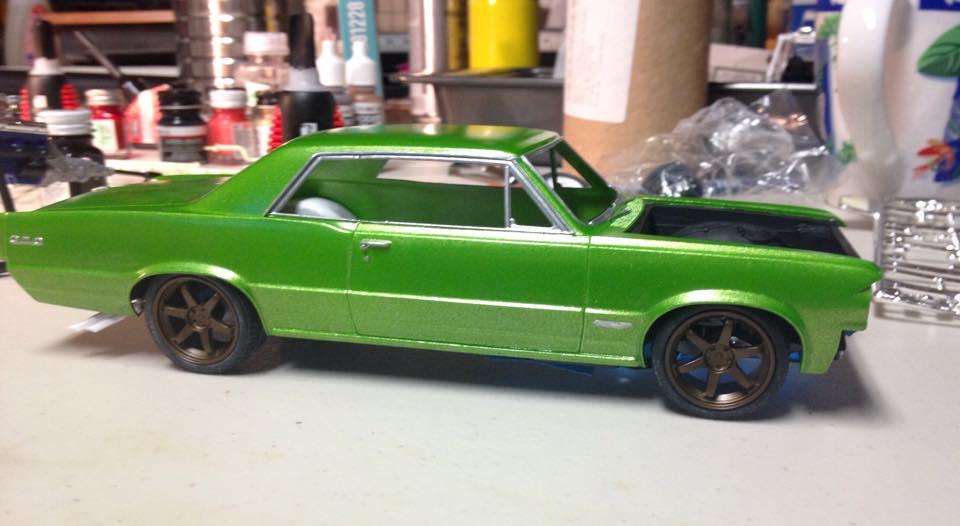
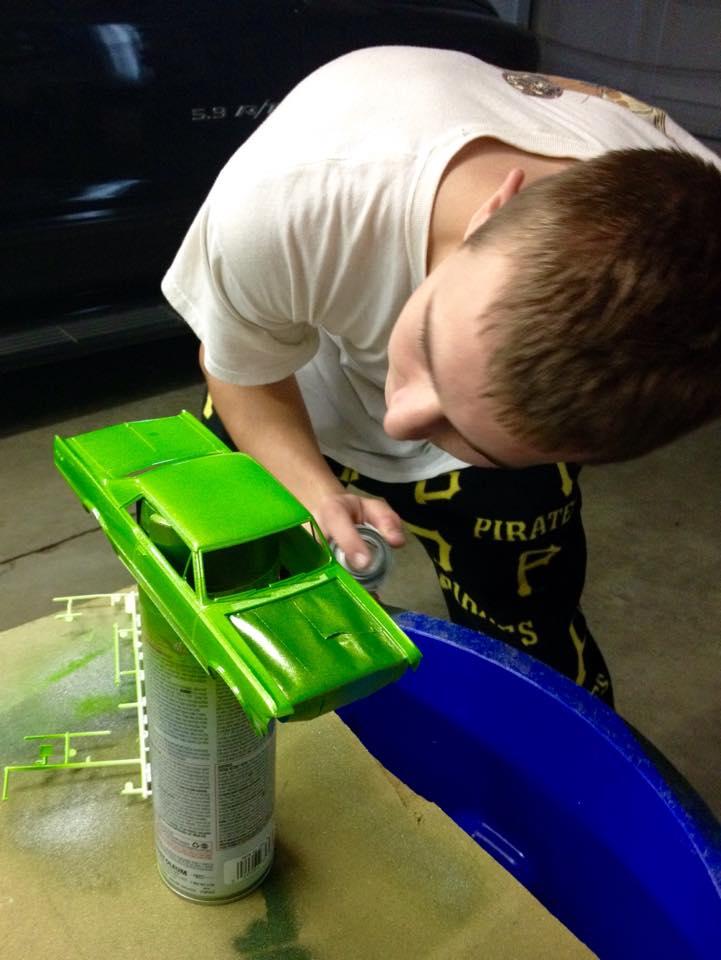
Testor's small rattle can - Lime Ice. I believe he put five coats on an unprepped (no primer or sanding), white base to get the shade he was happy with. The first two(2) coats he did very, very lightly (tack coats), then did three(3) heavy, wet coats. I actually have a question about the use of this: it is a lacquer (one step), he did all the trim by hand with Testor's epoxy paint, and black washed the cowl vents and panel trim with Testor's acrylic paint. Is there a clear that can be used over all three(3) types of paint as a top coat without destroying one(1) of them? He spent A LOT of time making certain the door handles, Pontiac emblems, etc were perfect (including red washing the GTO emblems on the fenders)..............I'd hate to see that start lifting.
-
Forget to add - please share any advice and/or comments. I'd prefer to have him learn from sources beside what I can offer him from my limited experience..........
-
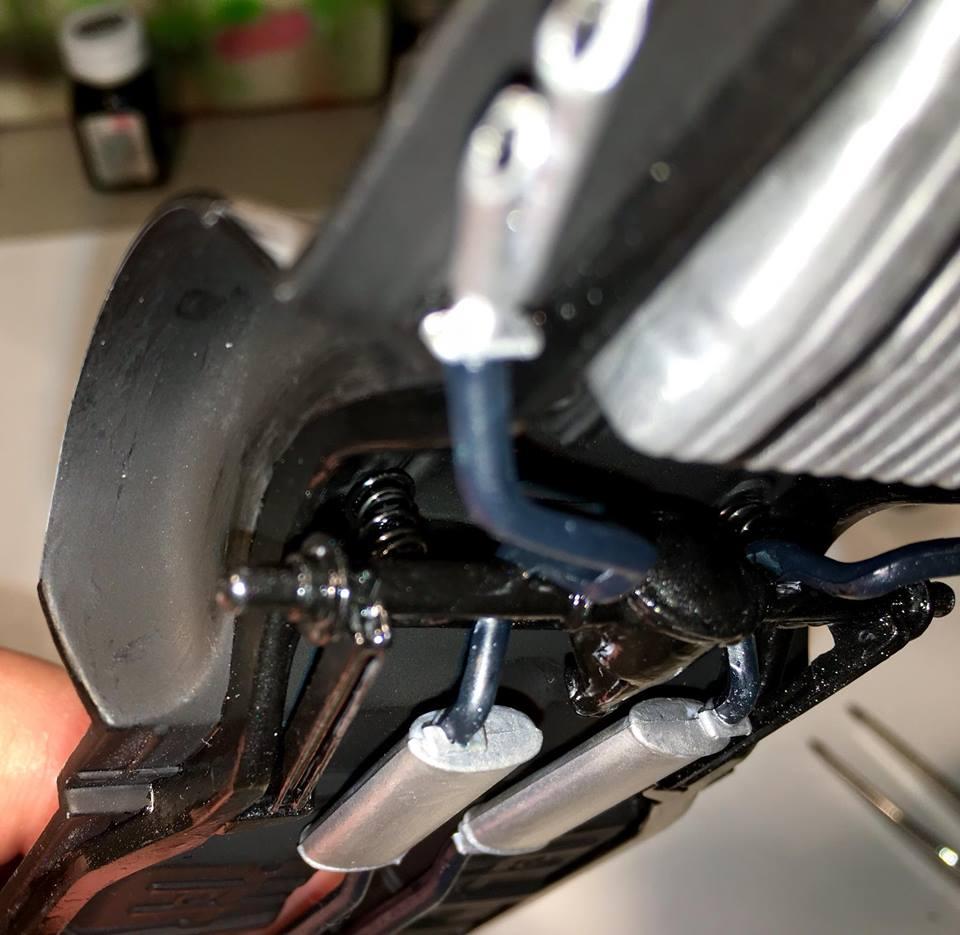
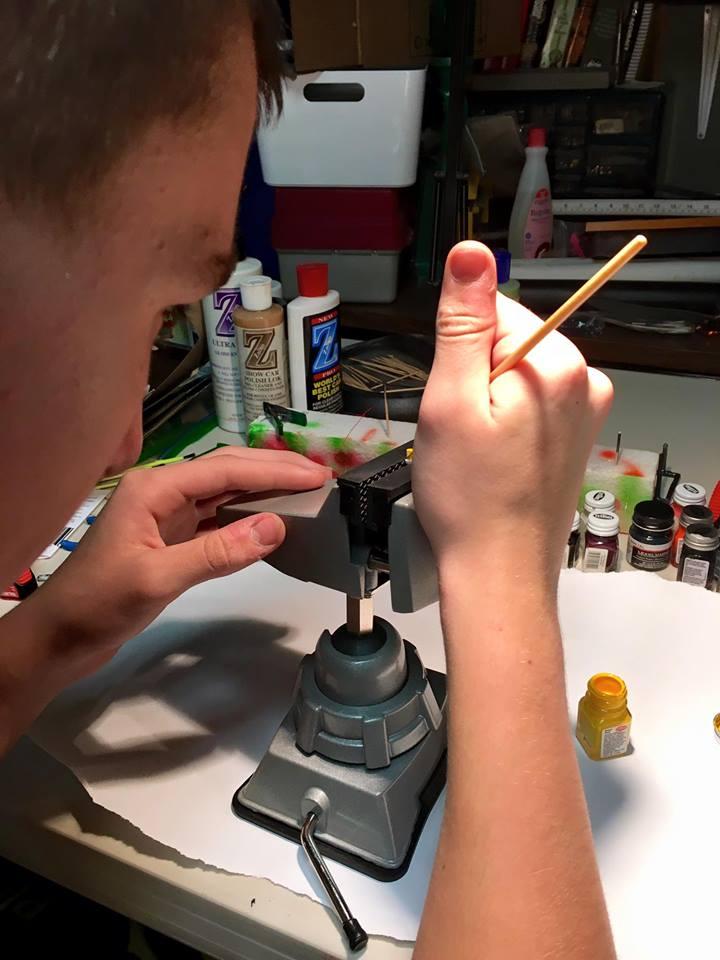
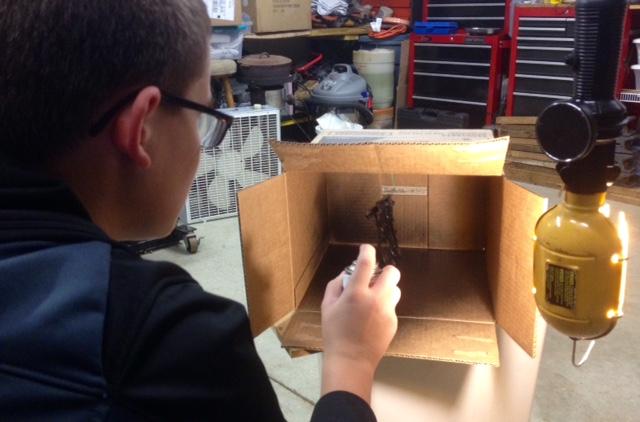
As the build carries on, he concentrated on the chassis. The smaller parts, such as the shocks in this instance, had to go into the vise to help keep the hands steady. He did pull off opening the exhaust tips and darkening them for effect (sorry for the blurry pic, camera focused on everything but what I wanted): He wasn't thrilled at all with the box offered rear suspension springs, so he made his own with craft wire and a file handle: After a few days worth of work, he finished the dark side of the build: I do believe I'm going to get him to black wash all my pieces from here out as well. His comment at the time, "this is easy". His mock up of the stance he wanted (obviously the pictures are out of order). Aftermarket wheels and tires with PE drilled and vented brake rotors were used. He LOVED (sarcastically said) putting the 3-piece rotors together.
-
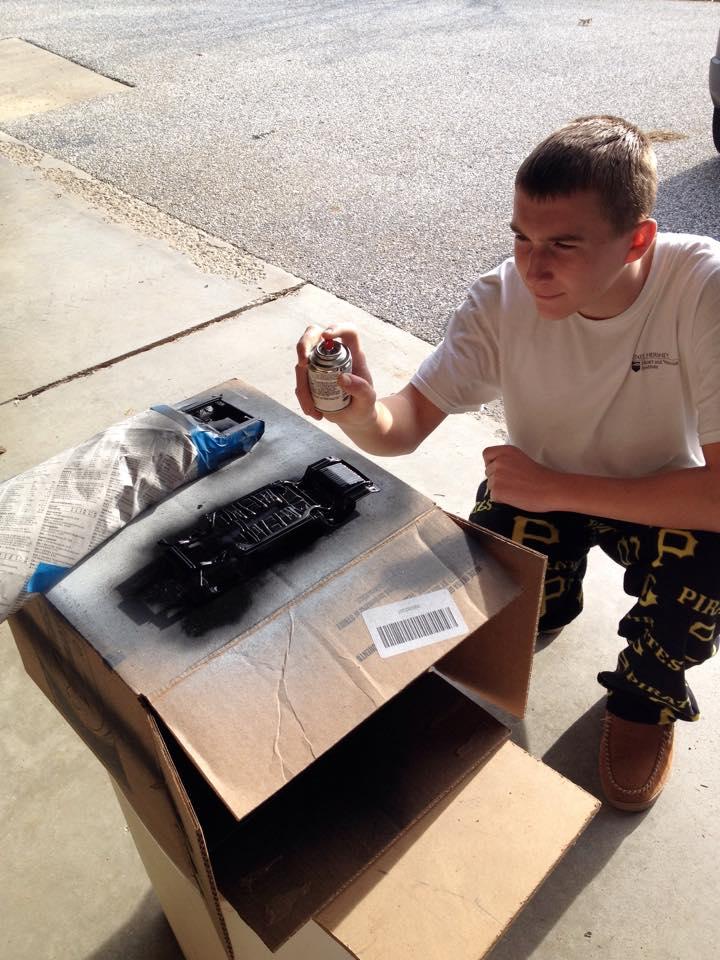
And so it begins..............My older son decided to try his hand at model building. He's a few years older than my one that did The Burnt Marshmallow, so he is a bit more tuned into details. He had a Revell 2-n-1 1964 GTO kit that we bought years ago simply for the motor to put in a Pinewood Derby car he built, so he opened it back up and started to put together what was left. The color picked out and shot: He has the chassis and engine compartment started: Started detailing things as soon as the engine/trans package went together. All mold lines removed for smooth surfaces (or so he says): Engine/trans finished and on the stand. A few details he worked on was using PE wire looms on the plug wires, fabricating an alternator bracket, adding a fuel line for the carbs, and using paint to distinguish the molded in oil filter and starter: He has also spent time on the body trim, emblems, and hood up to this point as well (everything is done in paint). I'll have to get a picture of the hood as well; he has decided to take this build down the Pro-Touring route (aka: make it "cool"), and opened up the hood scoops to make them functional, eliminating the chrome inserts. He's got big plans for this build, as he's been talking opened exhaust, lowered suspension. etc. Wish I had this much ambition for my 1st build............
-
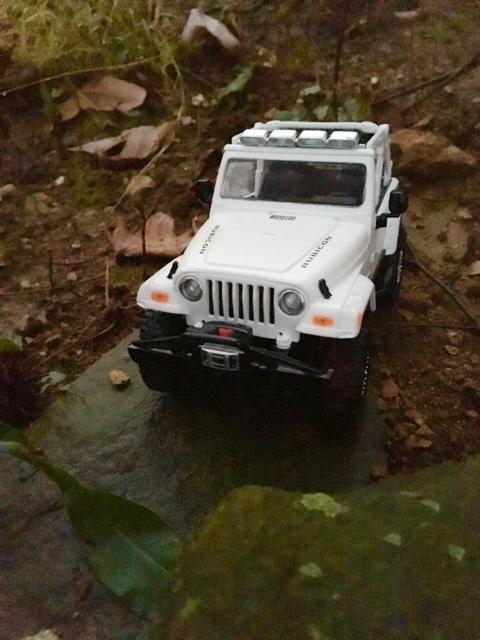
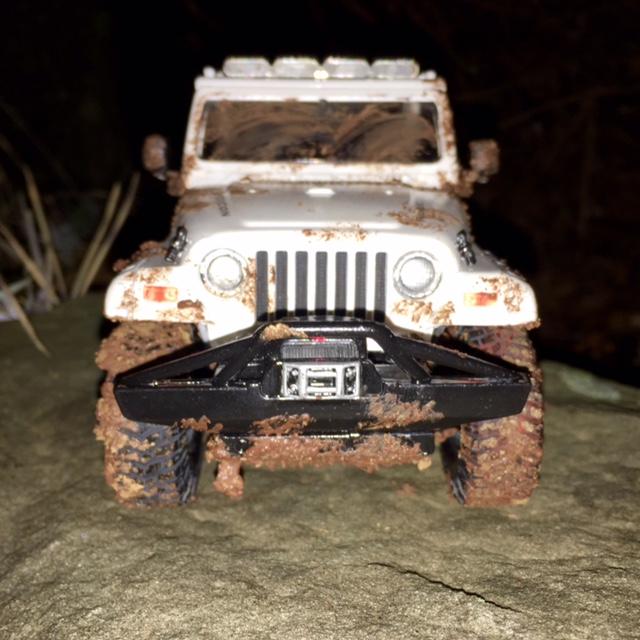
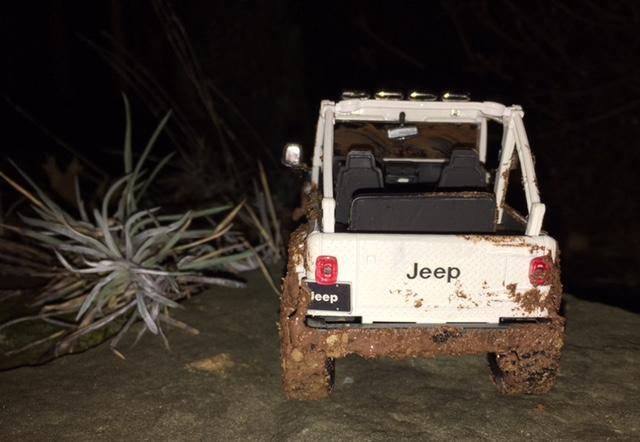
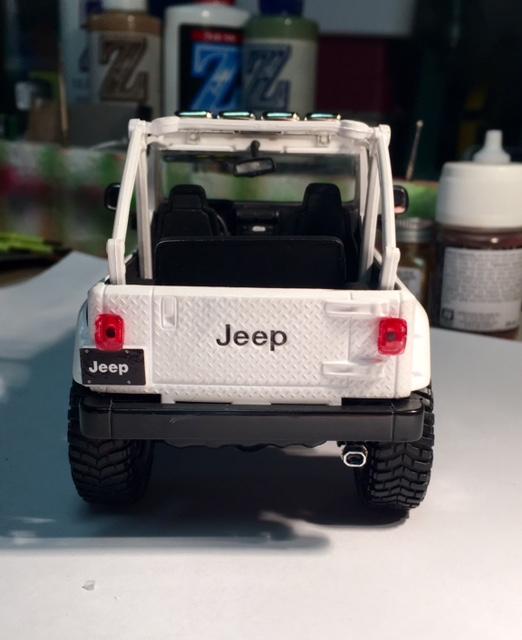
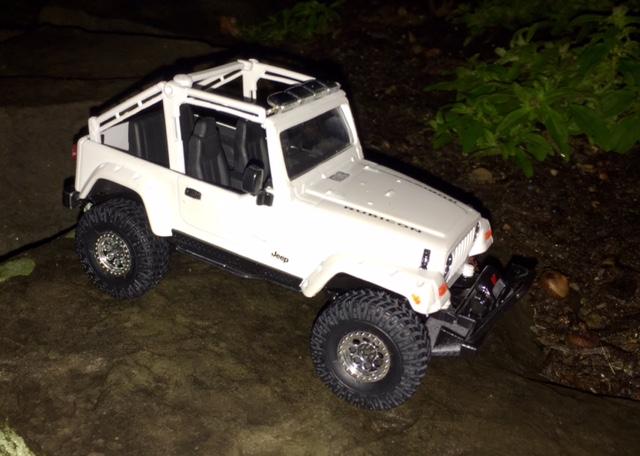
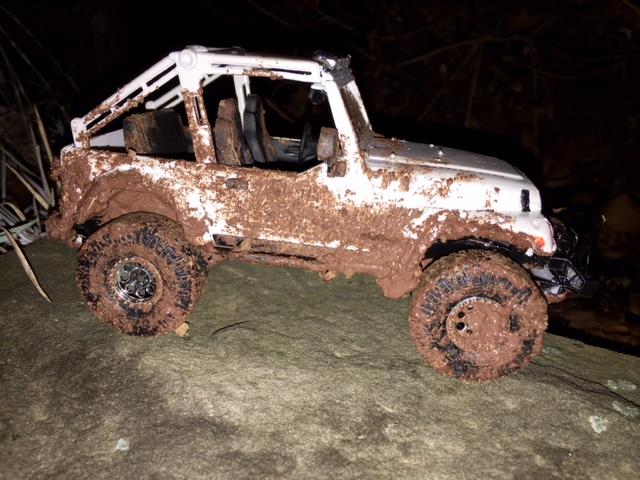
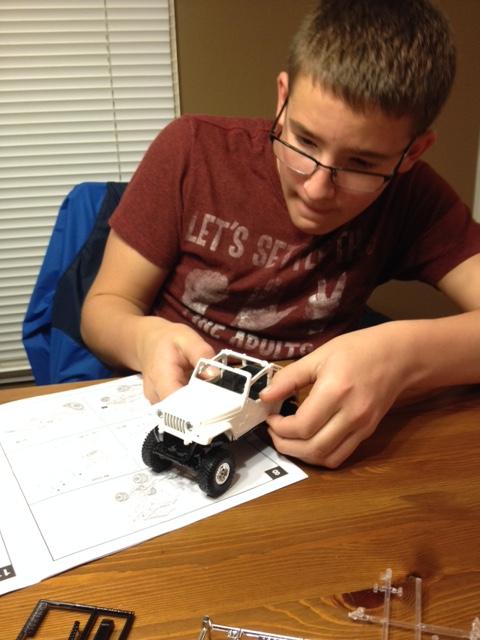
My 13 year old's almost finished Revell Jeep Rubicon: His finished product (what he had planned from the on-set):
-
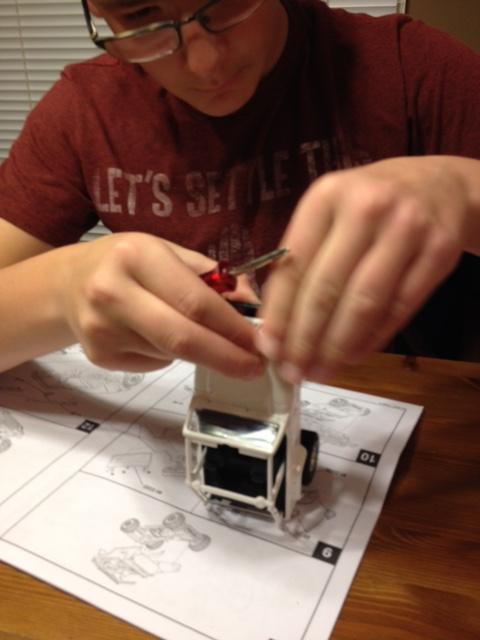
He appreciates the kudos.............and I appreciate the tips! Sledsel - I had to chuckle when I saw what he came up with to fill the unused holes in this thing. Guess he only ever saw me work with 1:1 tools and didn't switch the gears to go smaller for a fractional sized repair. When asked if he was going to do another build after this one is finished, he said, "Well, I have all those cars in the pictures around my room. I think it would be pretty cool to make a model to match each one of them to put underneath." He has old 18x24(s) of Z/28's, Shelby Mustangs, GTOs, etc. (It's a shame........he comes from a Mopar home.)
-
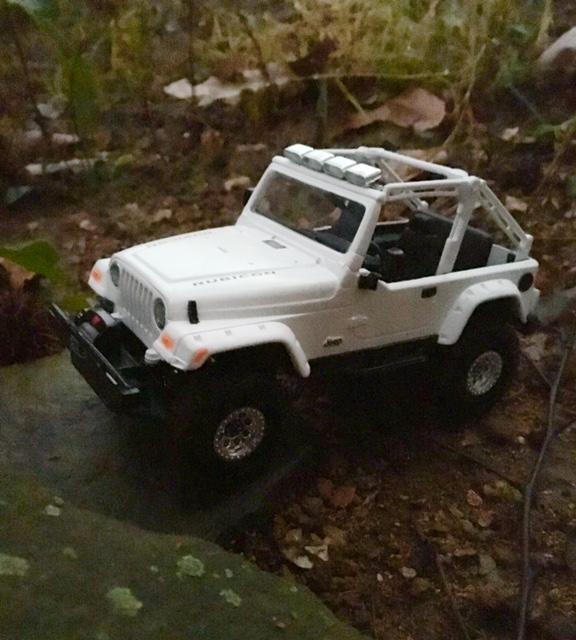
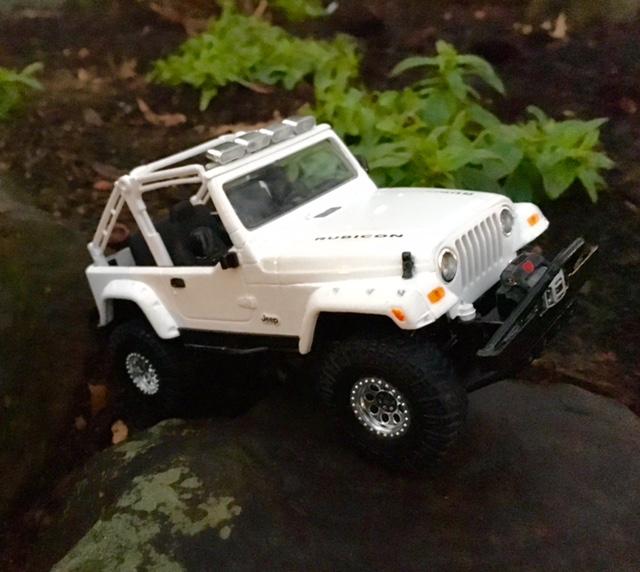
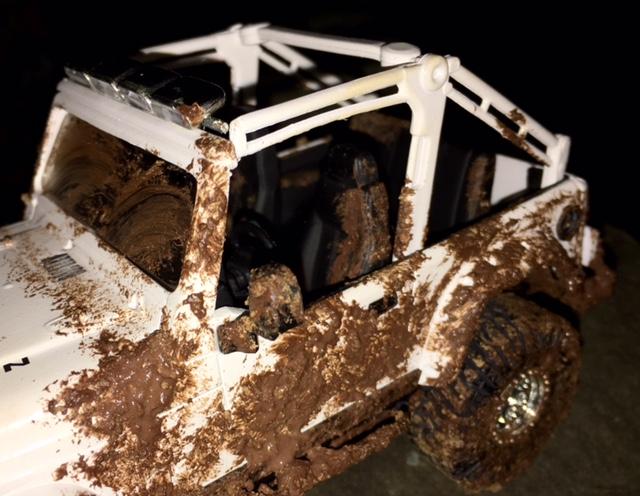
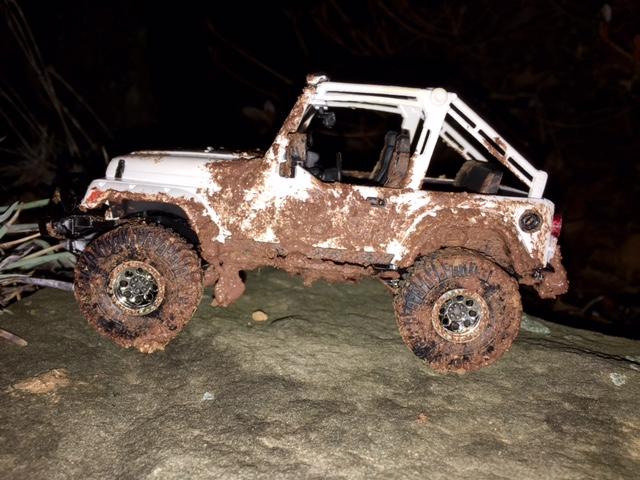
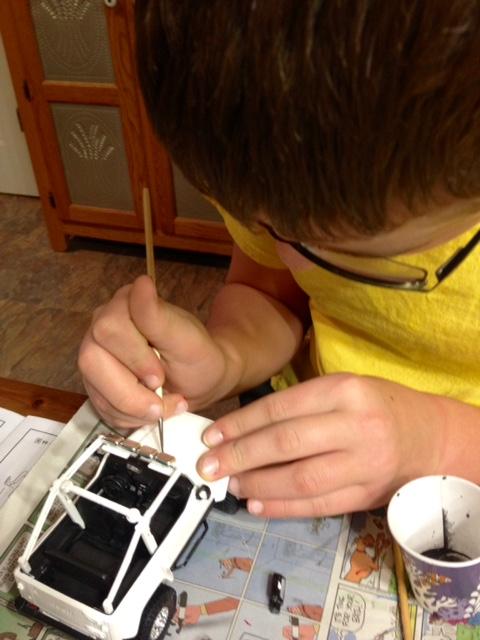
Two years ago, my now 13 year old, received a Revell Jeep Wrangler model as a Christmas gift. A few weeks ago something motivated him to open the box and start working on it. This is his 1st ever build, but I'm not certain he hasn't been night-lighting somewhere.......... He build himself a make-shift paint booth to keep the rattle can over-spray to a minimum, and started working on the frame. Unfortunately, I didn't realize I would be sharing the process with a forum, so the photos are a tad skimpy between procedures. After the frame was finalized into a rolling chassis, he turned his attention onto the interior bucket. (Note: this is a curbside model, with solid axles and screw mounting points. He spent some time working the suspension springs to get all four wheels to sit on the ground.) After he was satisfied with that, he started working on the body parts. When he started this, he had a vision of what he wanted the finished Jeep to look like, so kept things plain and simple. A little body work and spot detailing (black washing the cowl vents) was all that really went into the body other then the Testors rattle can white. He fought with the body/chassis mating; actually ended up removing the mounting posts for the rear bumper to keep things visually parallel. This is where he is currently. A few more small details and he's ready to get it muddy.
-
Going to be brief: Father of two(2) teenagers that have recently uncovered the joy and sense of pride in making models; specifically car/truck versions. My 13 year old is in the final stages of a Revell Jeep Wrangler build, and my 16 year old has a solid start on a Revell 1964 GTO build. I'll be around the forums for help, tips, pointers,...................and more help. The time I've been spending looking through all the threads so far have done nothing but motivate and inspire helping the boys put their own touches on their builds. Thanks in advance for everything, especially dealing with the trials and tribulations of what could be a lesson in futility.