The Fisherman
-
Posts
46 -
Joined
-
Last visited
Content Type
Profiles
Forums
Events
Gallery
Everything posted by The Fisherman
-
They weathered better then a 1:1 would have! Nice builds.
-
Done. Only stop left is to set in on the table at my local MCC for opinions. The outside pics:

-
He's down to the last few turns now. Glass and interior is in. Chassis and body have been mated. Next step is getting the brakes installed. Once the GTO is sitting on all fours, he'll finish off the engine bay and get it outside for a few glamour pics.
-
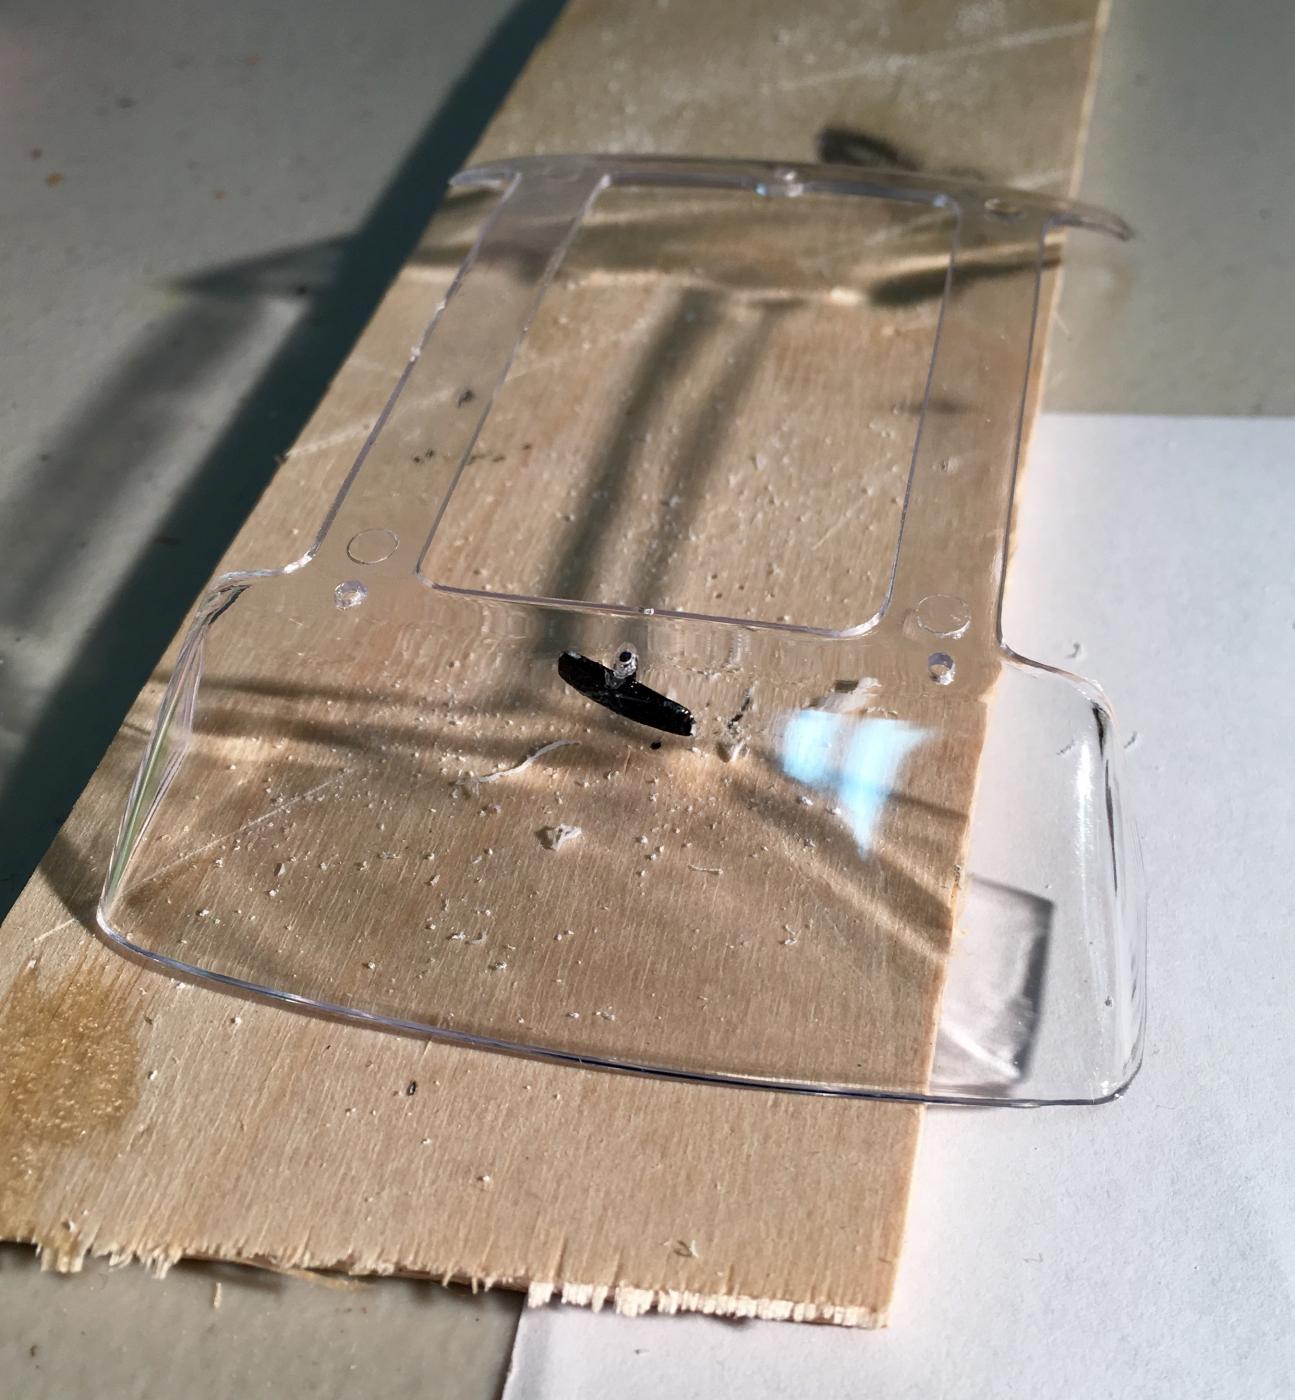
He's back on this build finally. After failing to get a hold of anything he/we could make work as a windshield, I ended up getting him a complete kit. He happily set aside the nightmare '67 he's been working with(against) to get the '64 under glass. Finishing up some hood detailing:
-
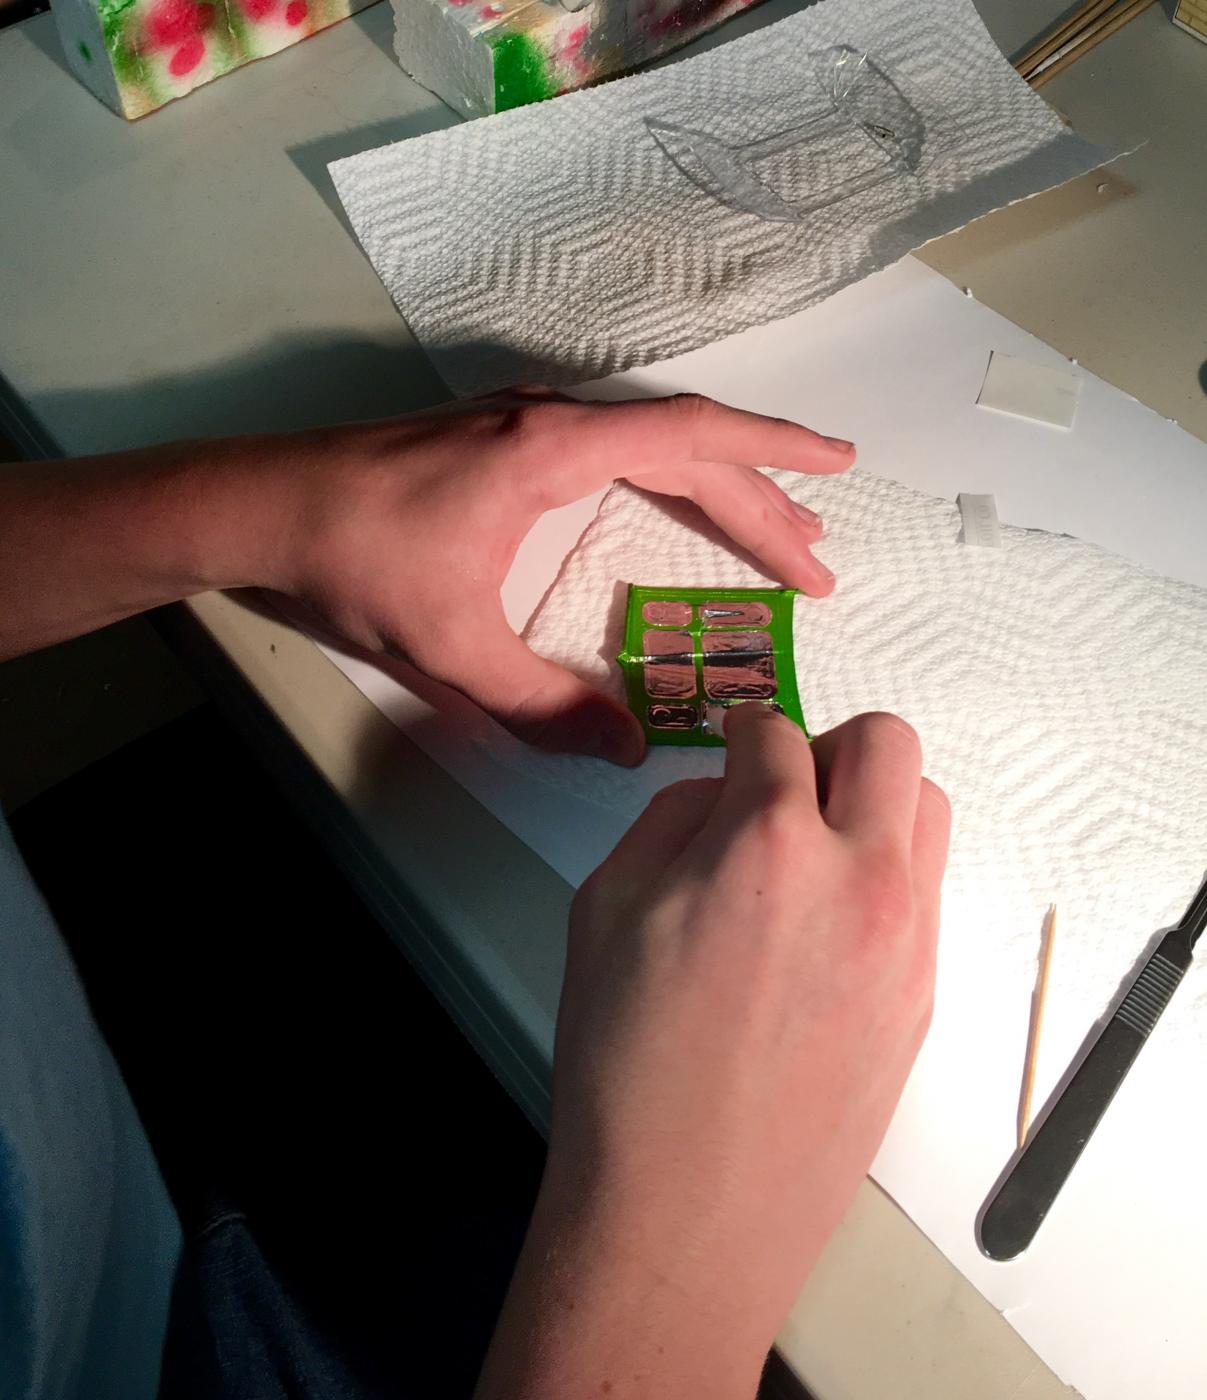
The rear inlay and opening trim rings are. The rings are a bear to work with as they are all the same size, while the actual opens are progressively, slightly different sizes. Thanks to all for the kind words. Whole lotta learning on this one: BMF, scaling details, scratch building, PE usage, etc.
-
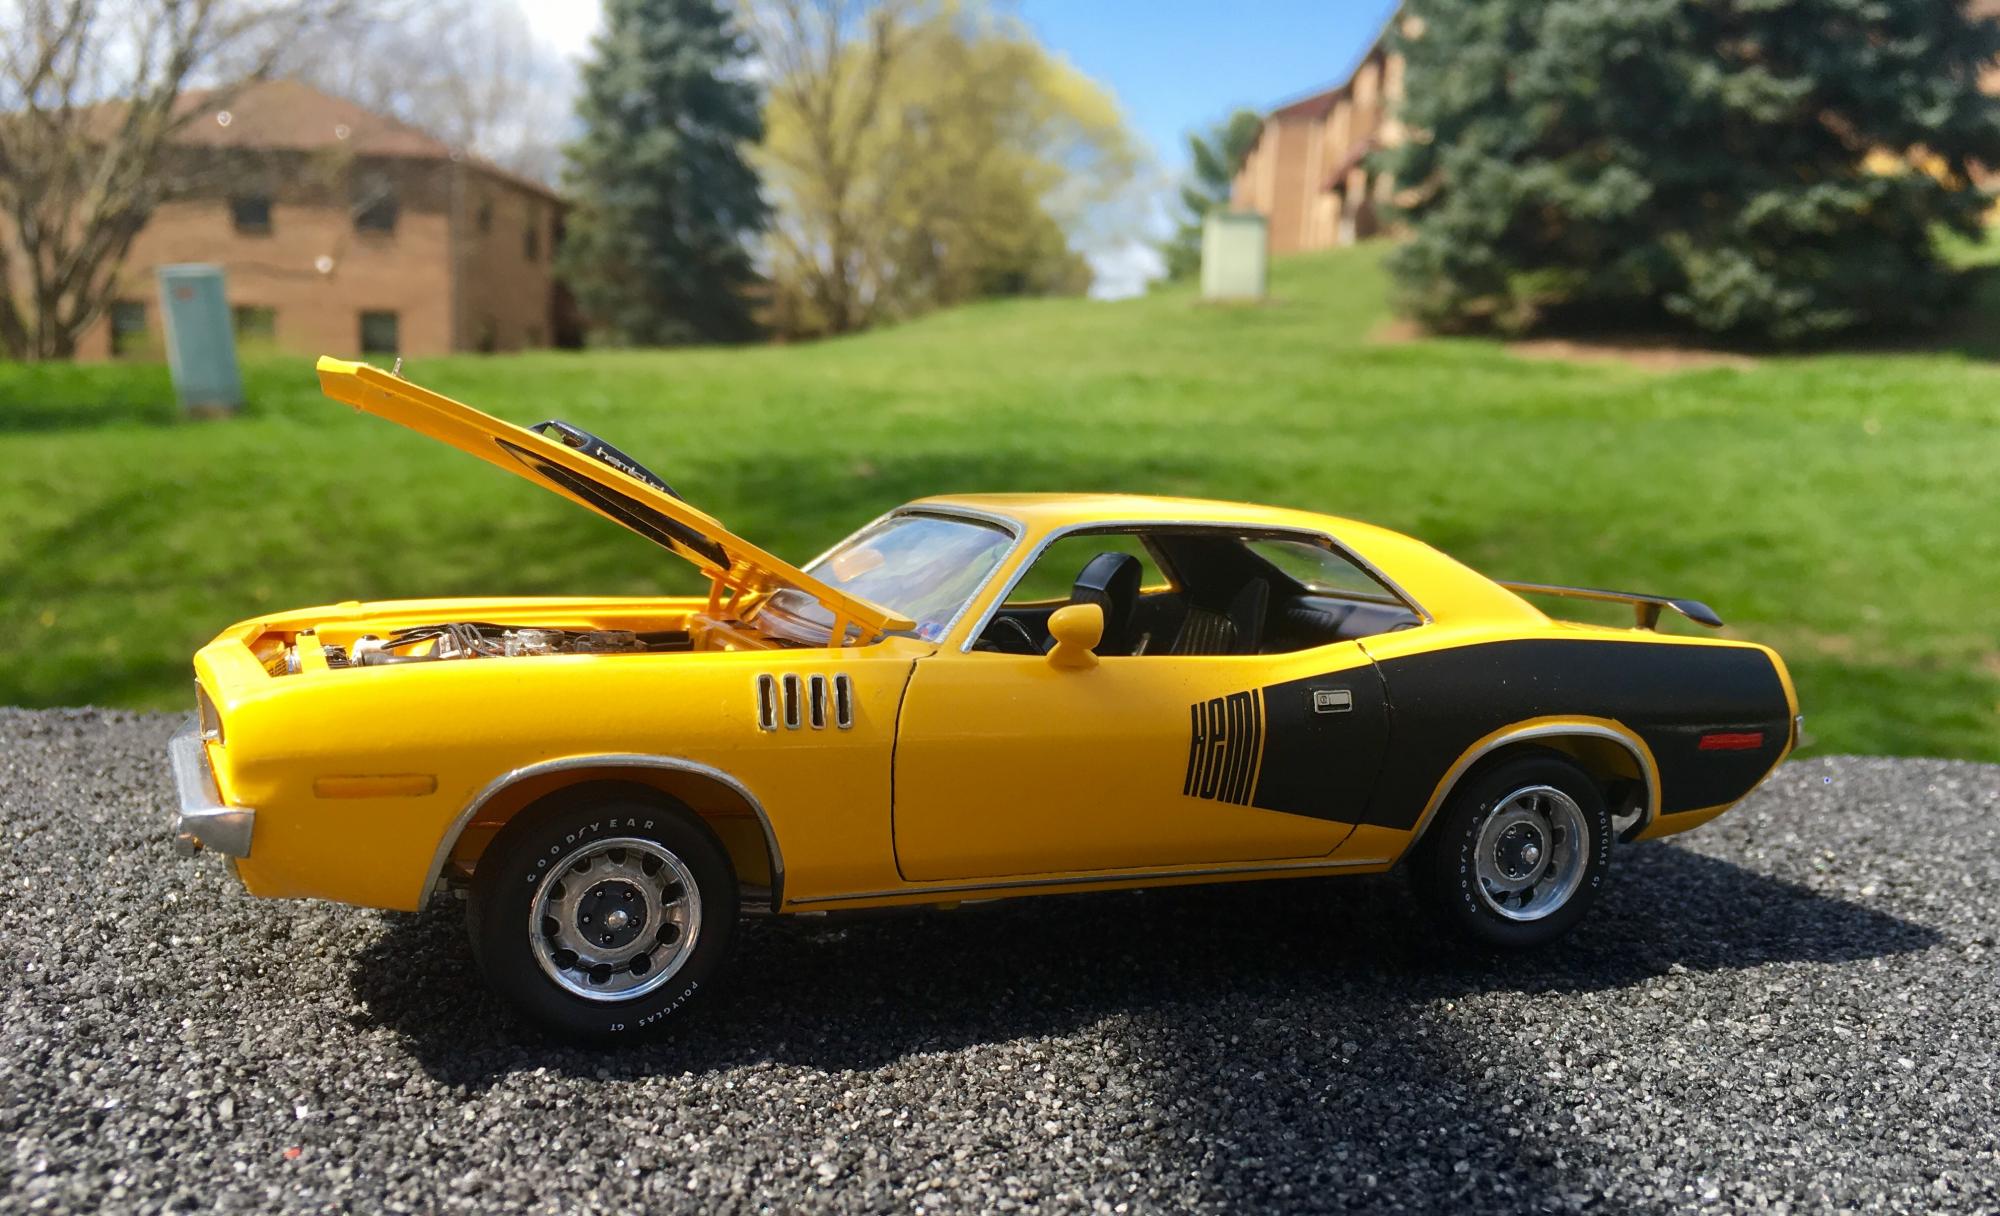
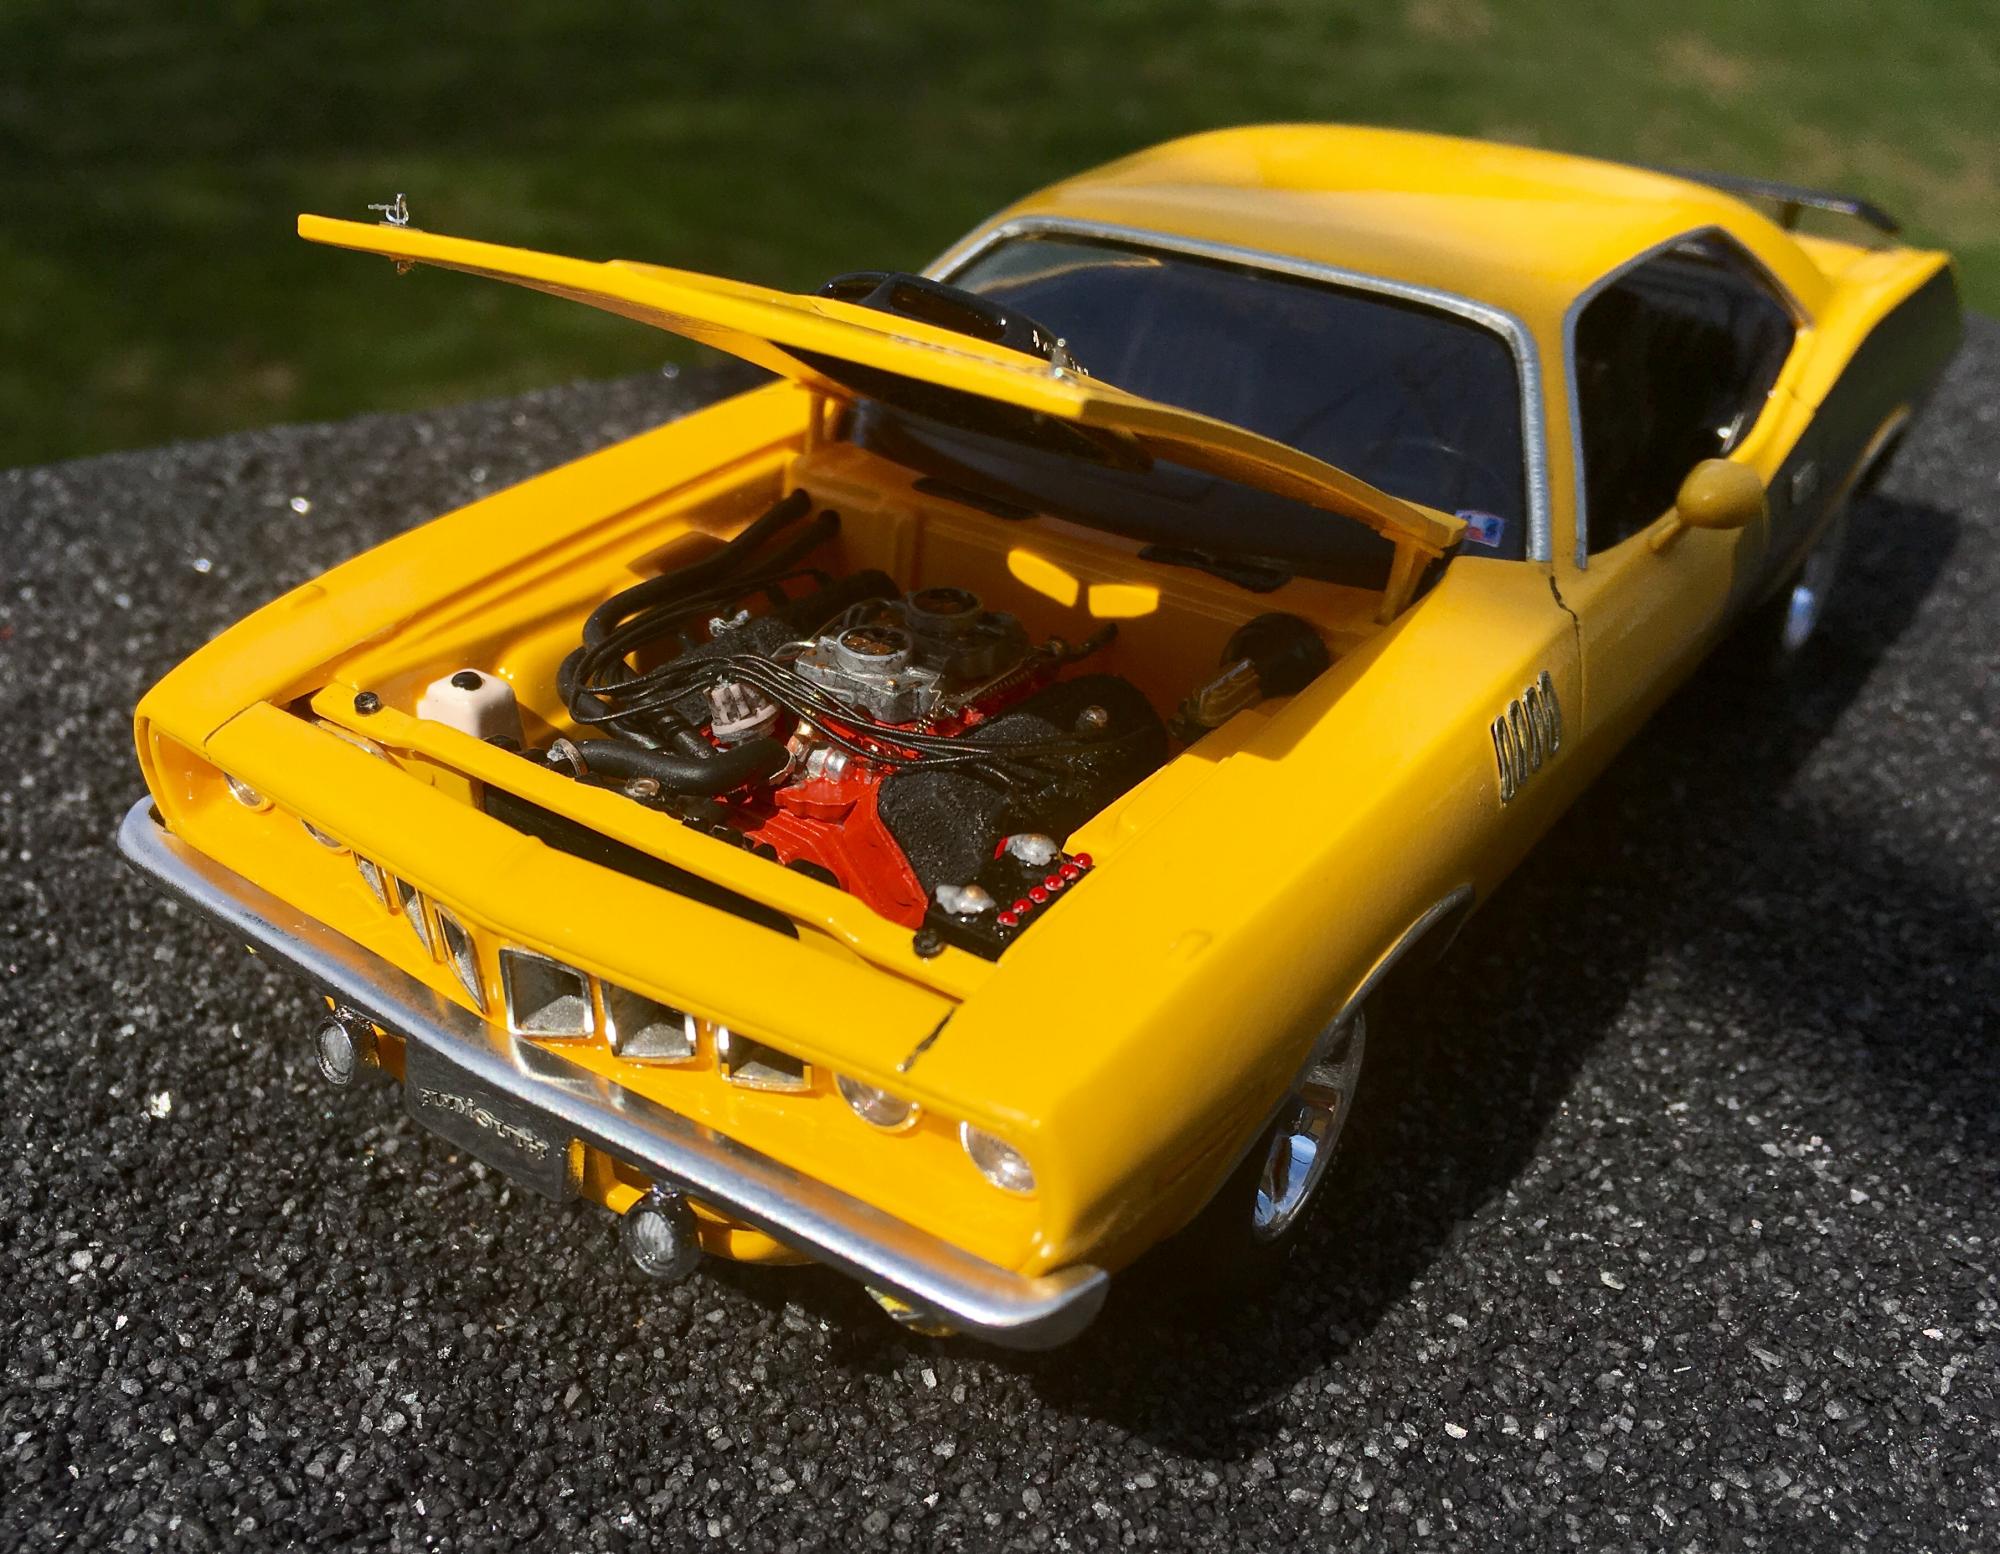
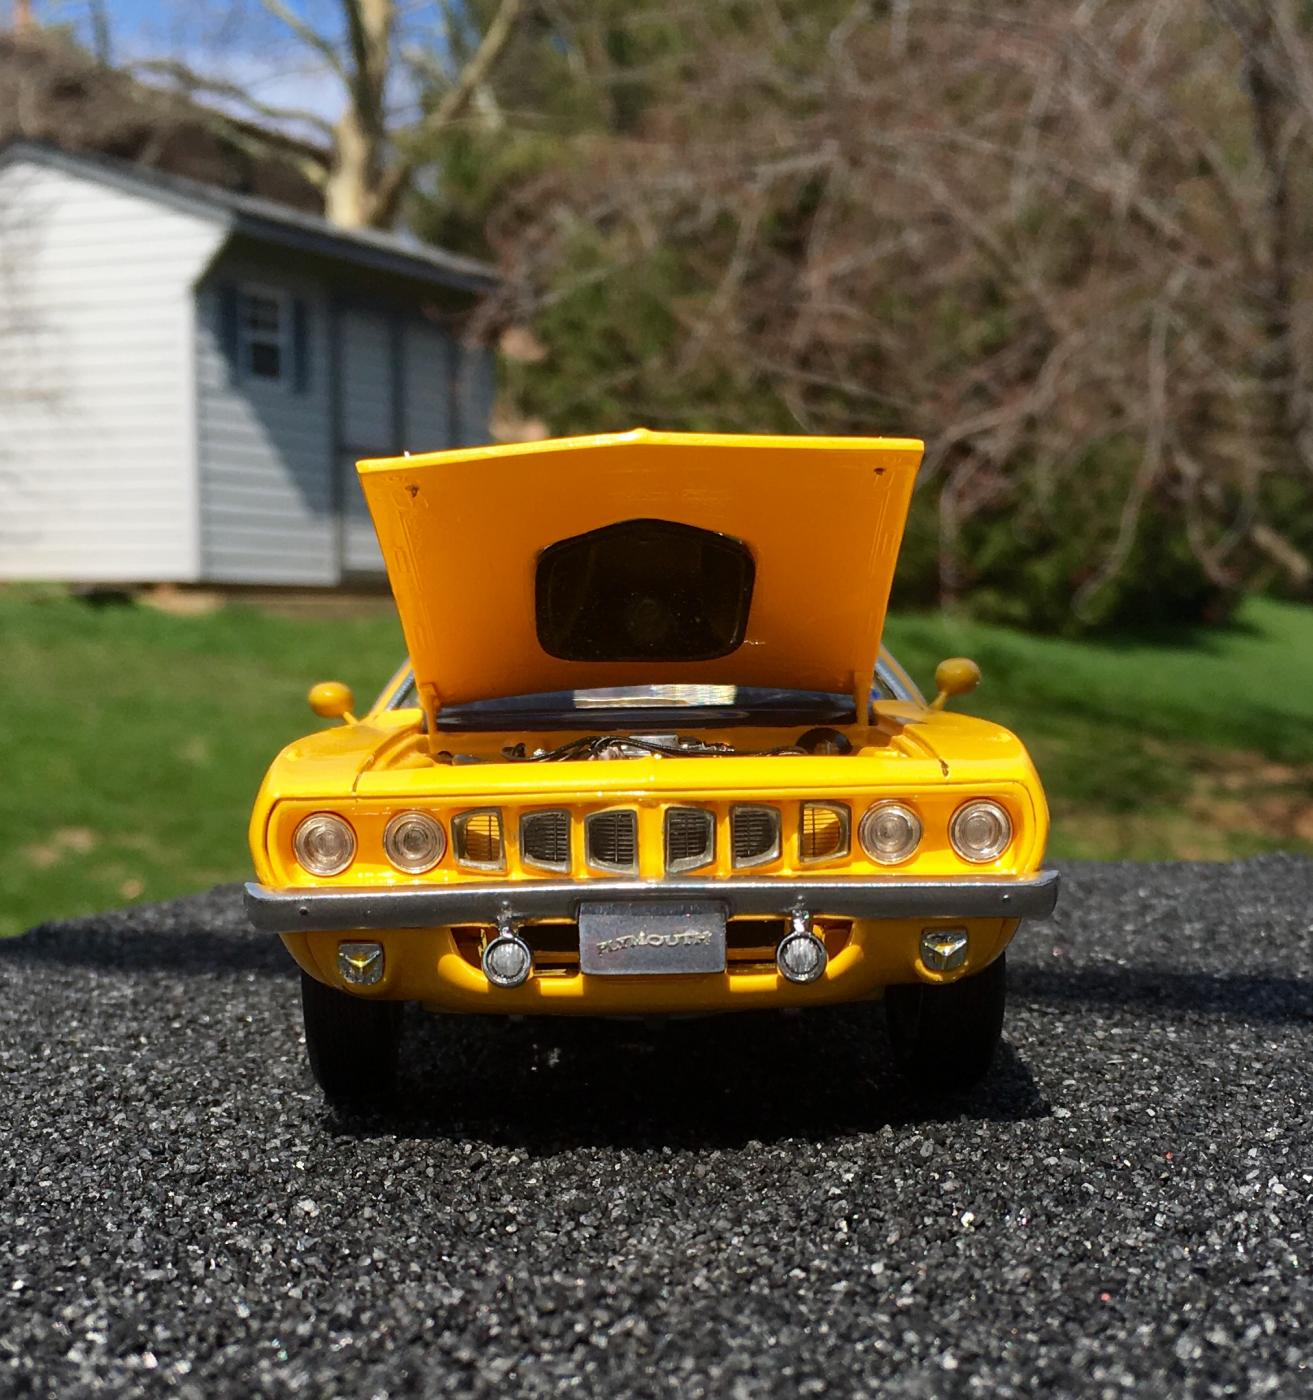
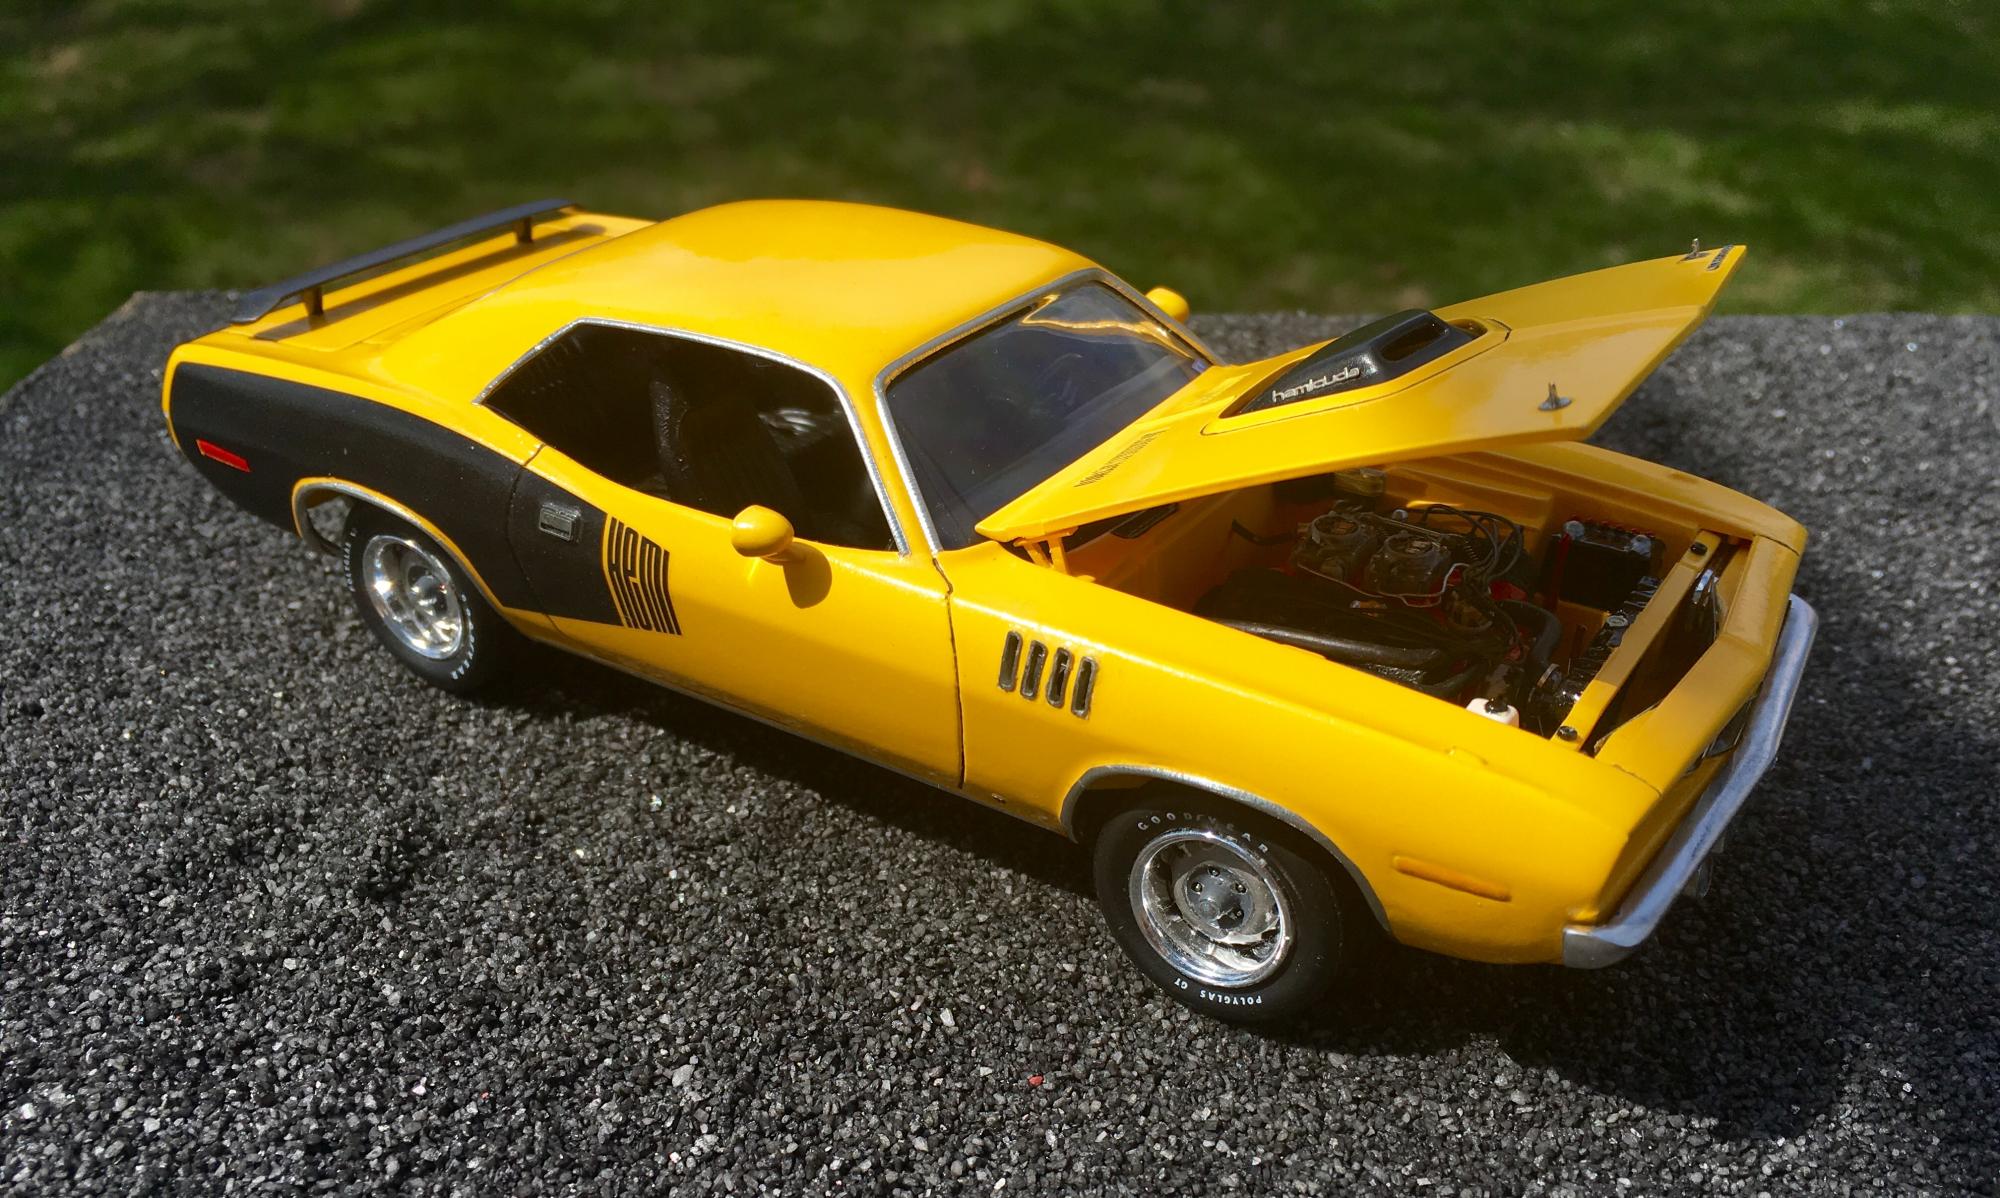
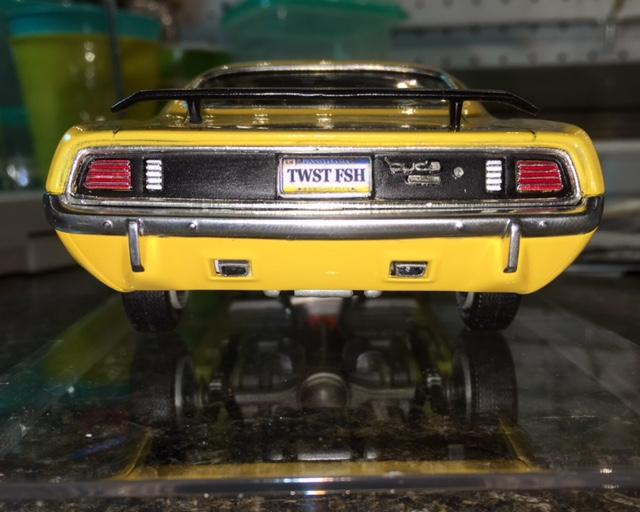
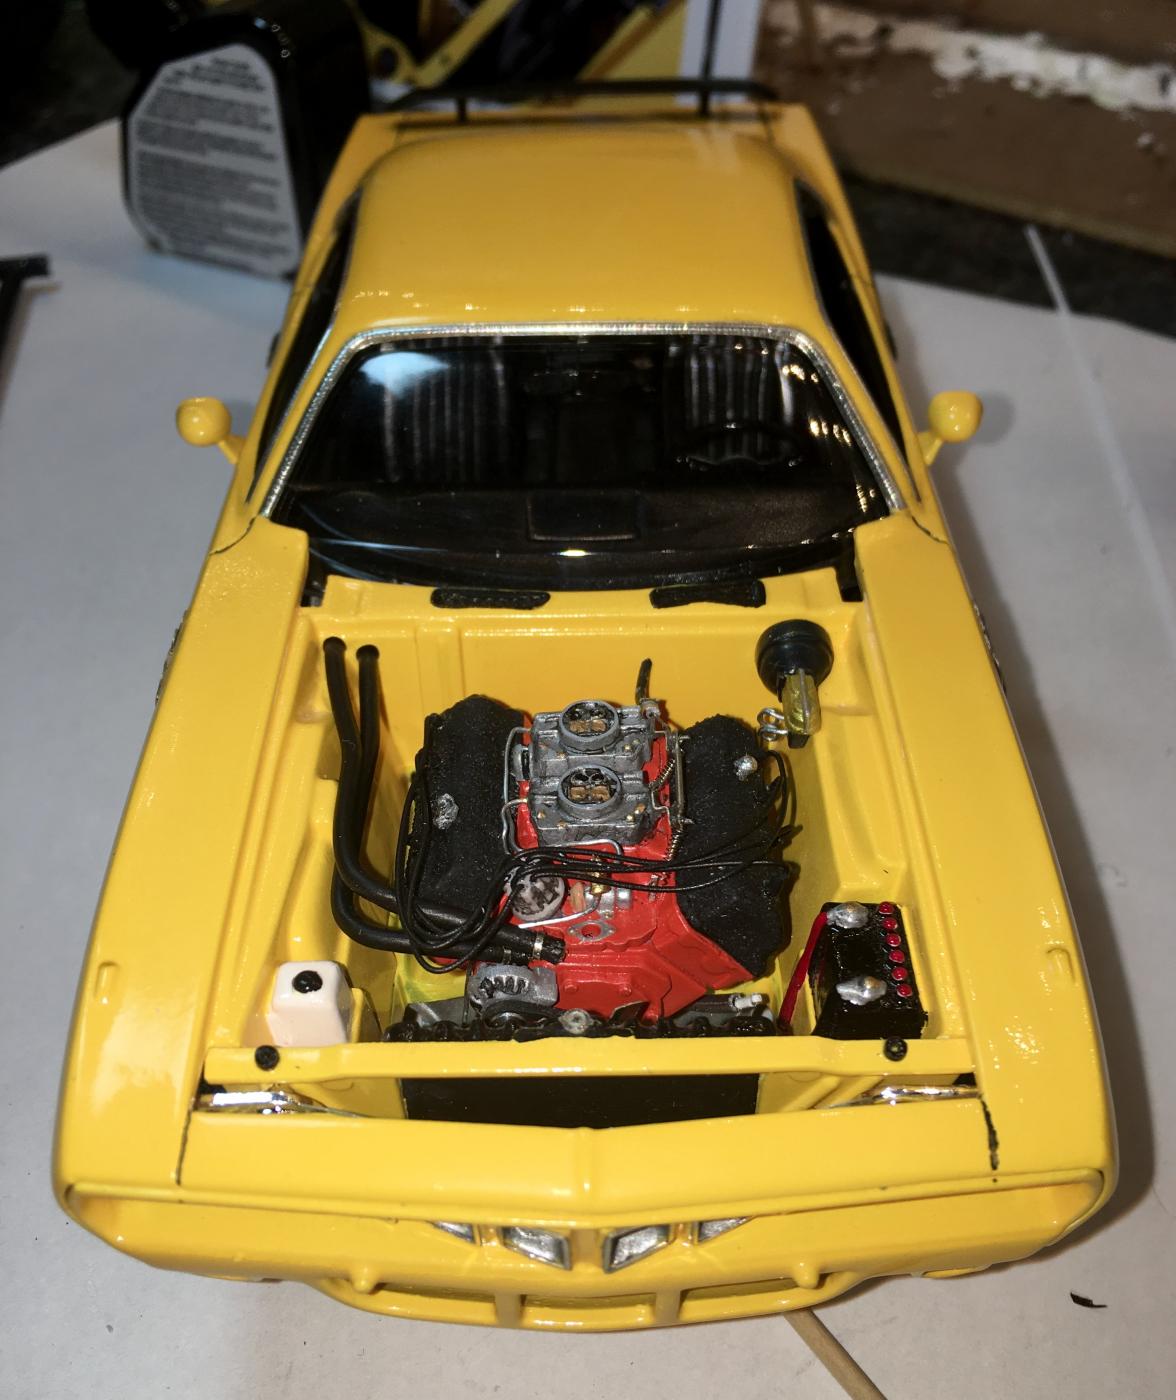
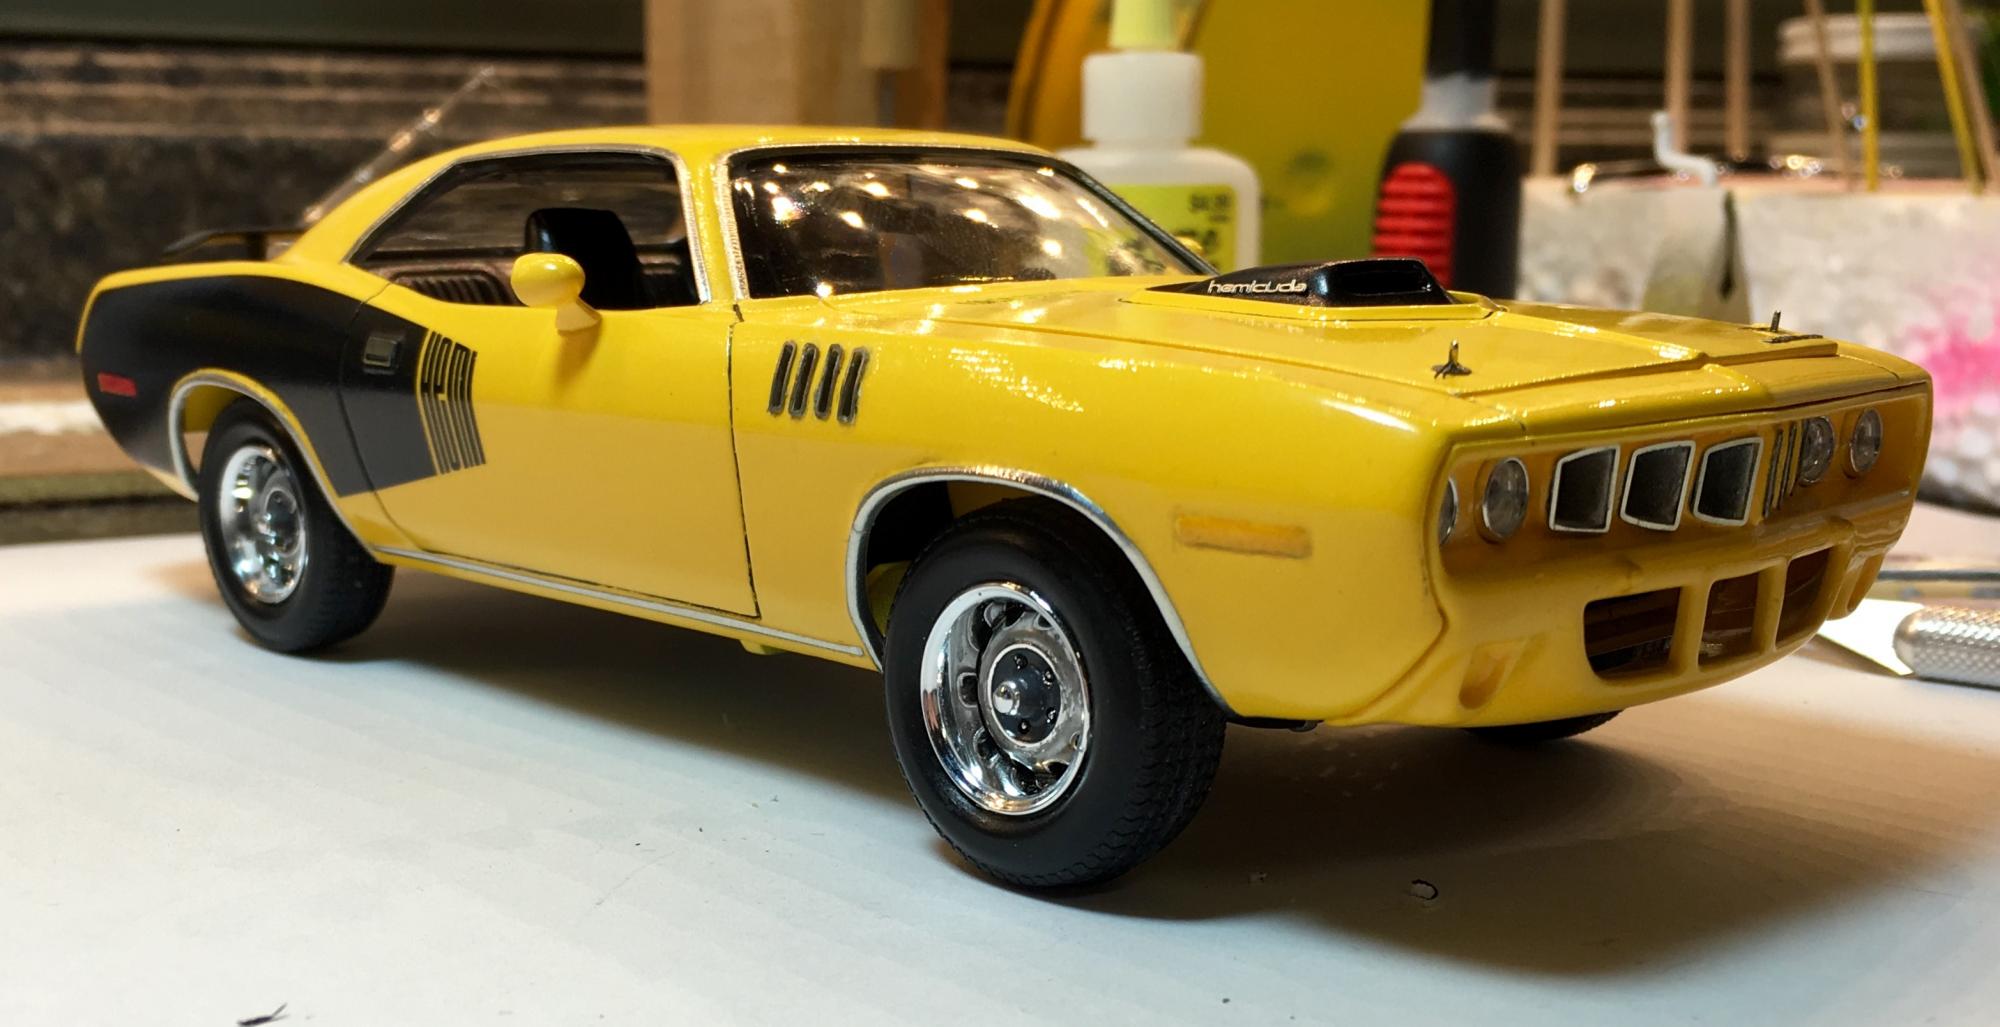
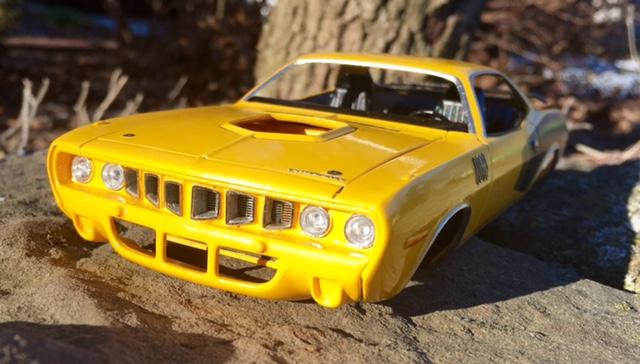
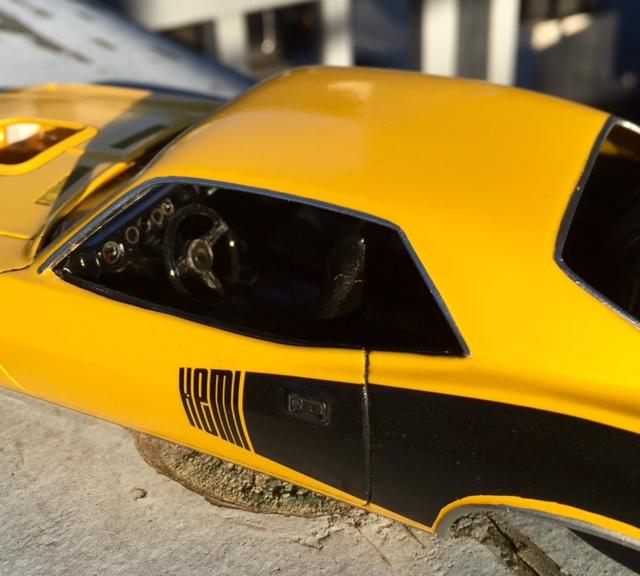
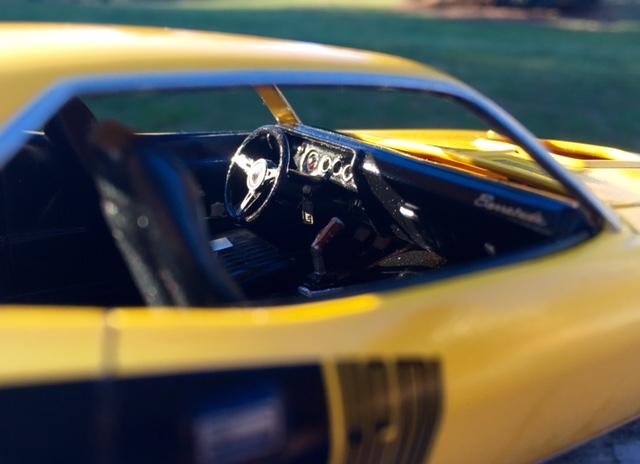
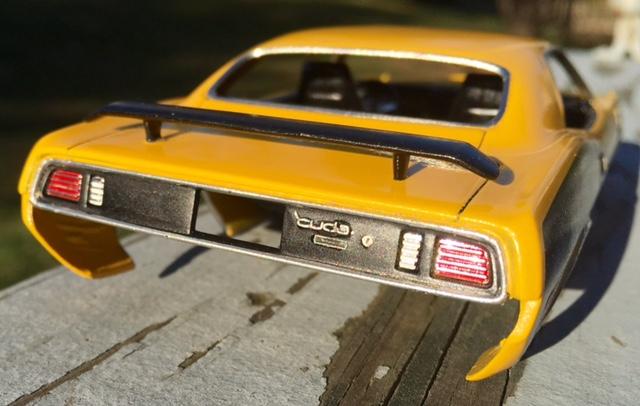
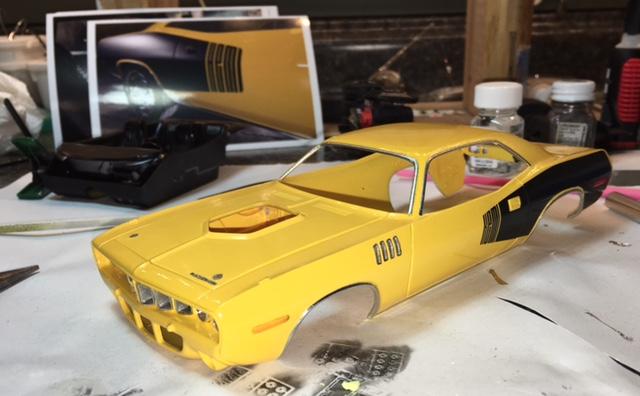
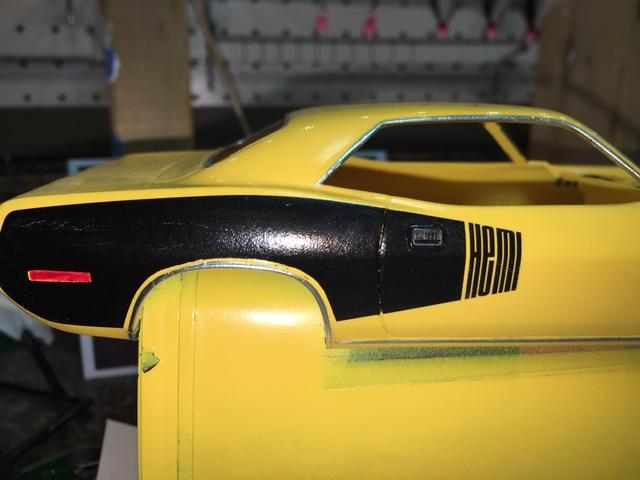
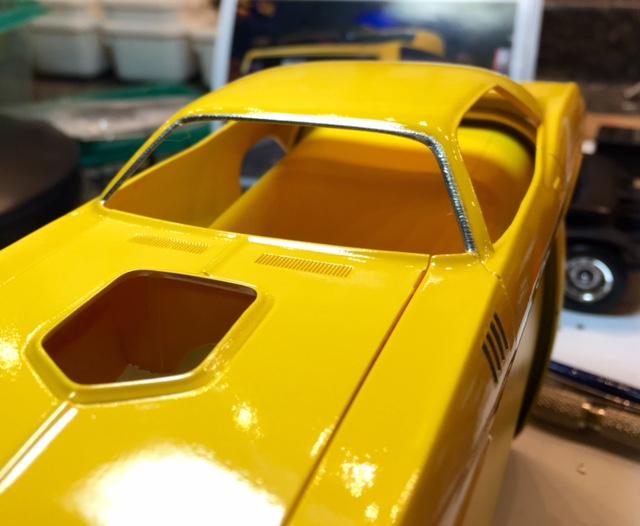
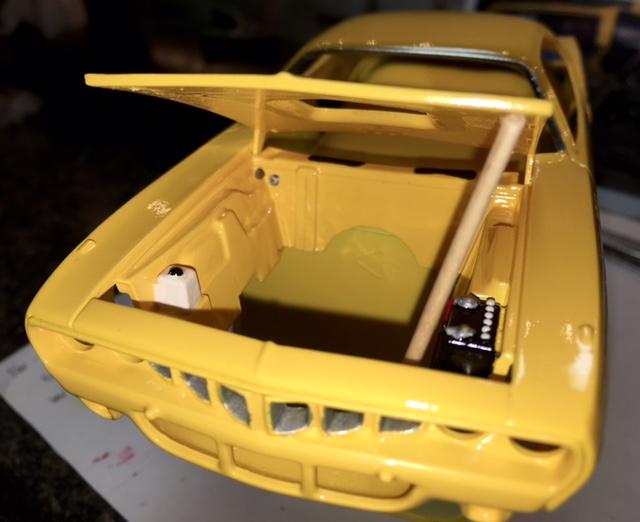
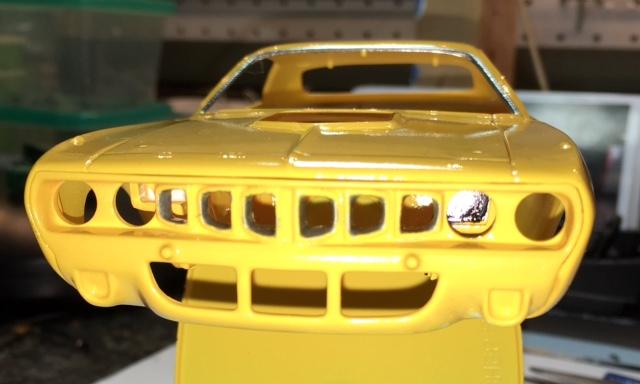
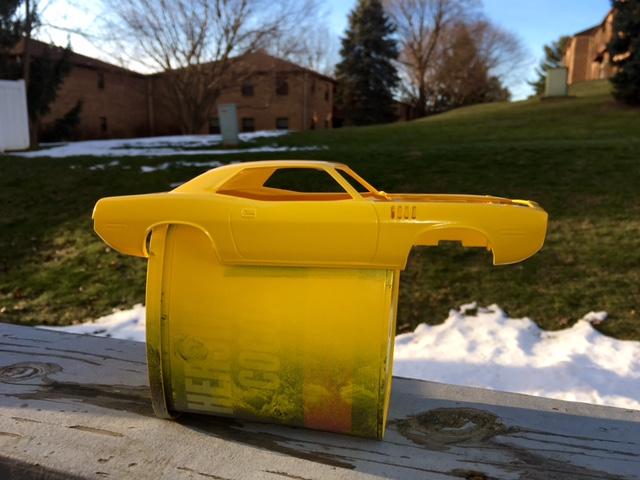
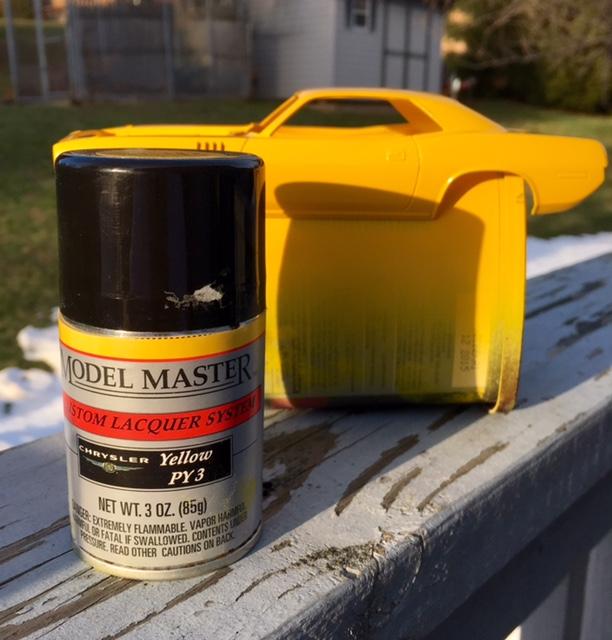
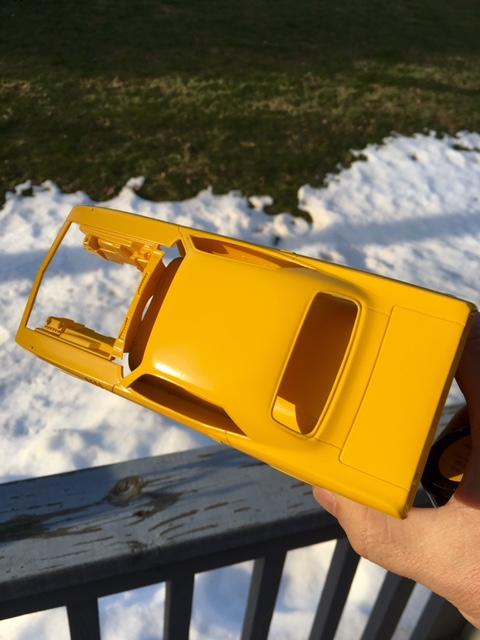
Need a sunny day to get a few outside pictures, but here are a few indoor pics of my Revell '71 Hemi 'Cuda. Paint: Model Master enamels, acrylics, rattle can lacquer (for the body), and Alclad chrome. Zaino polish to finish '70's era shine. PE pieces used throughout.
-
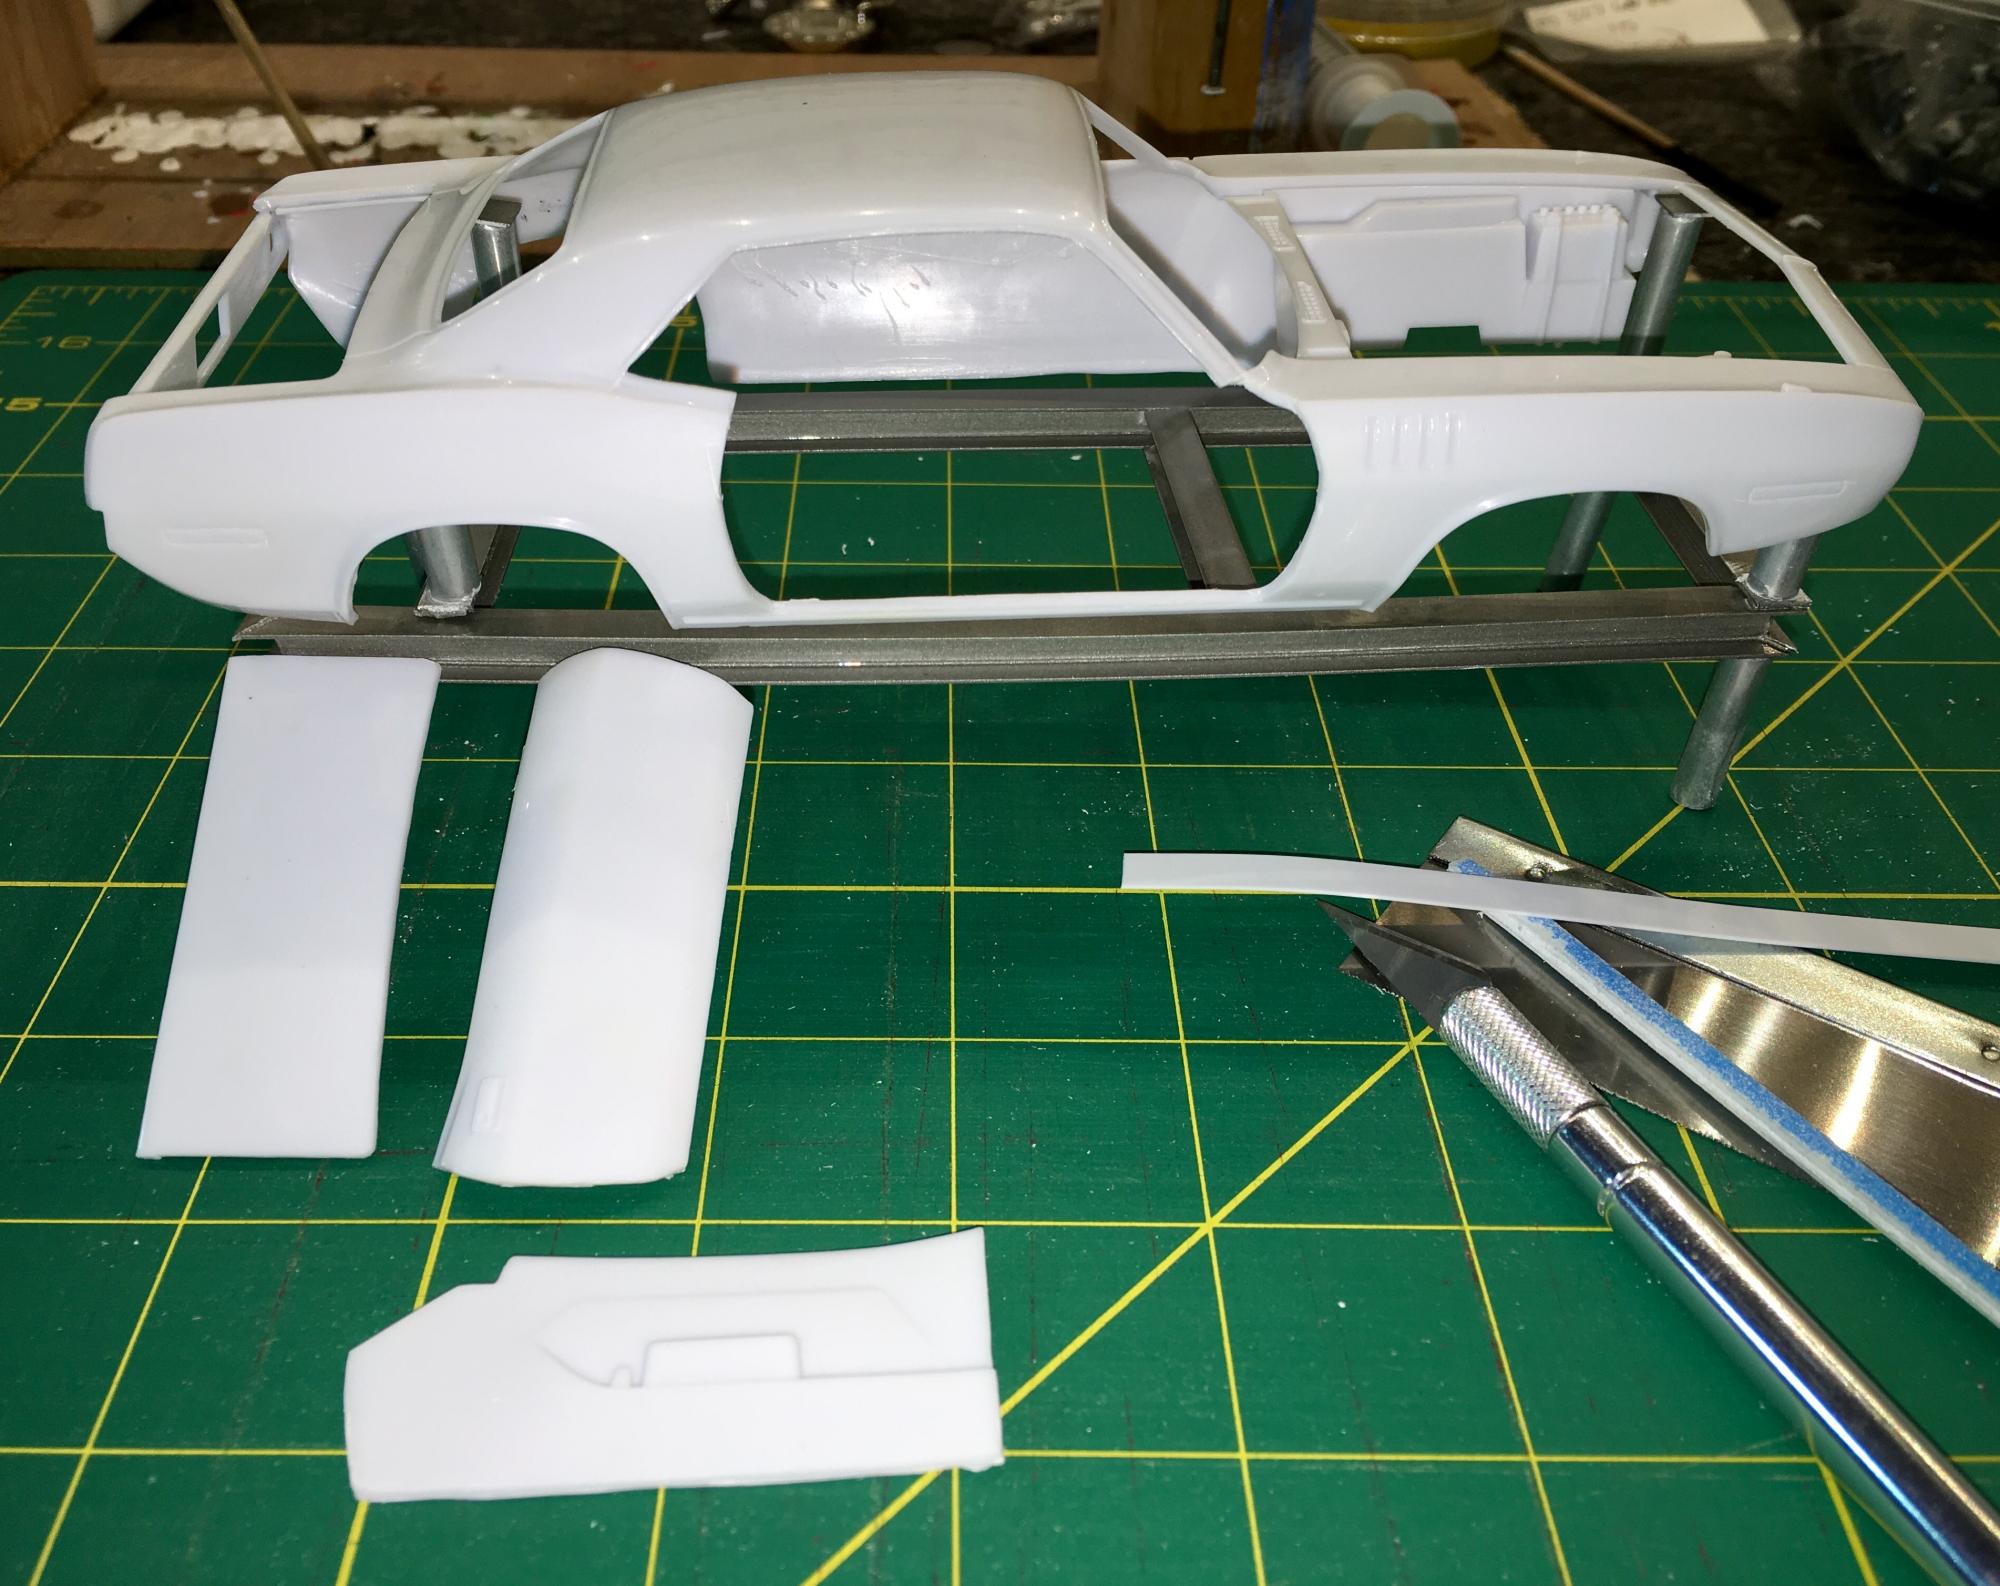
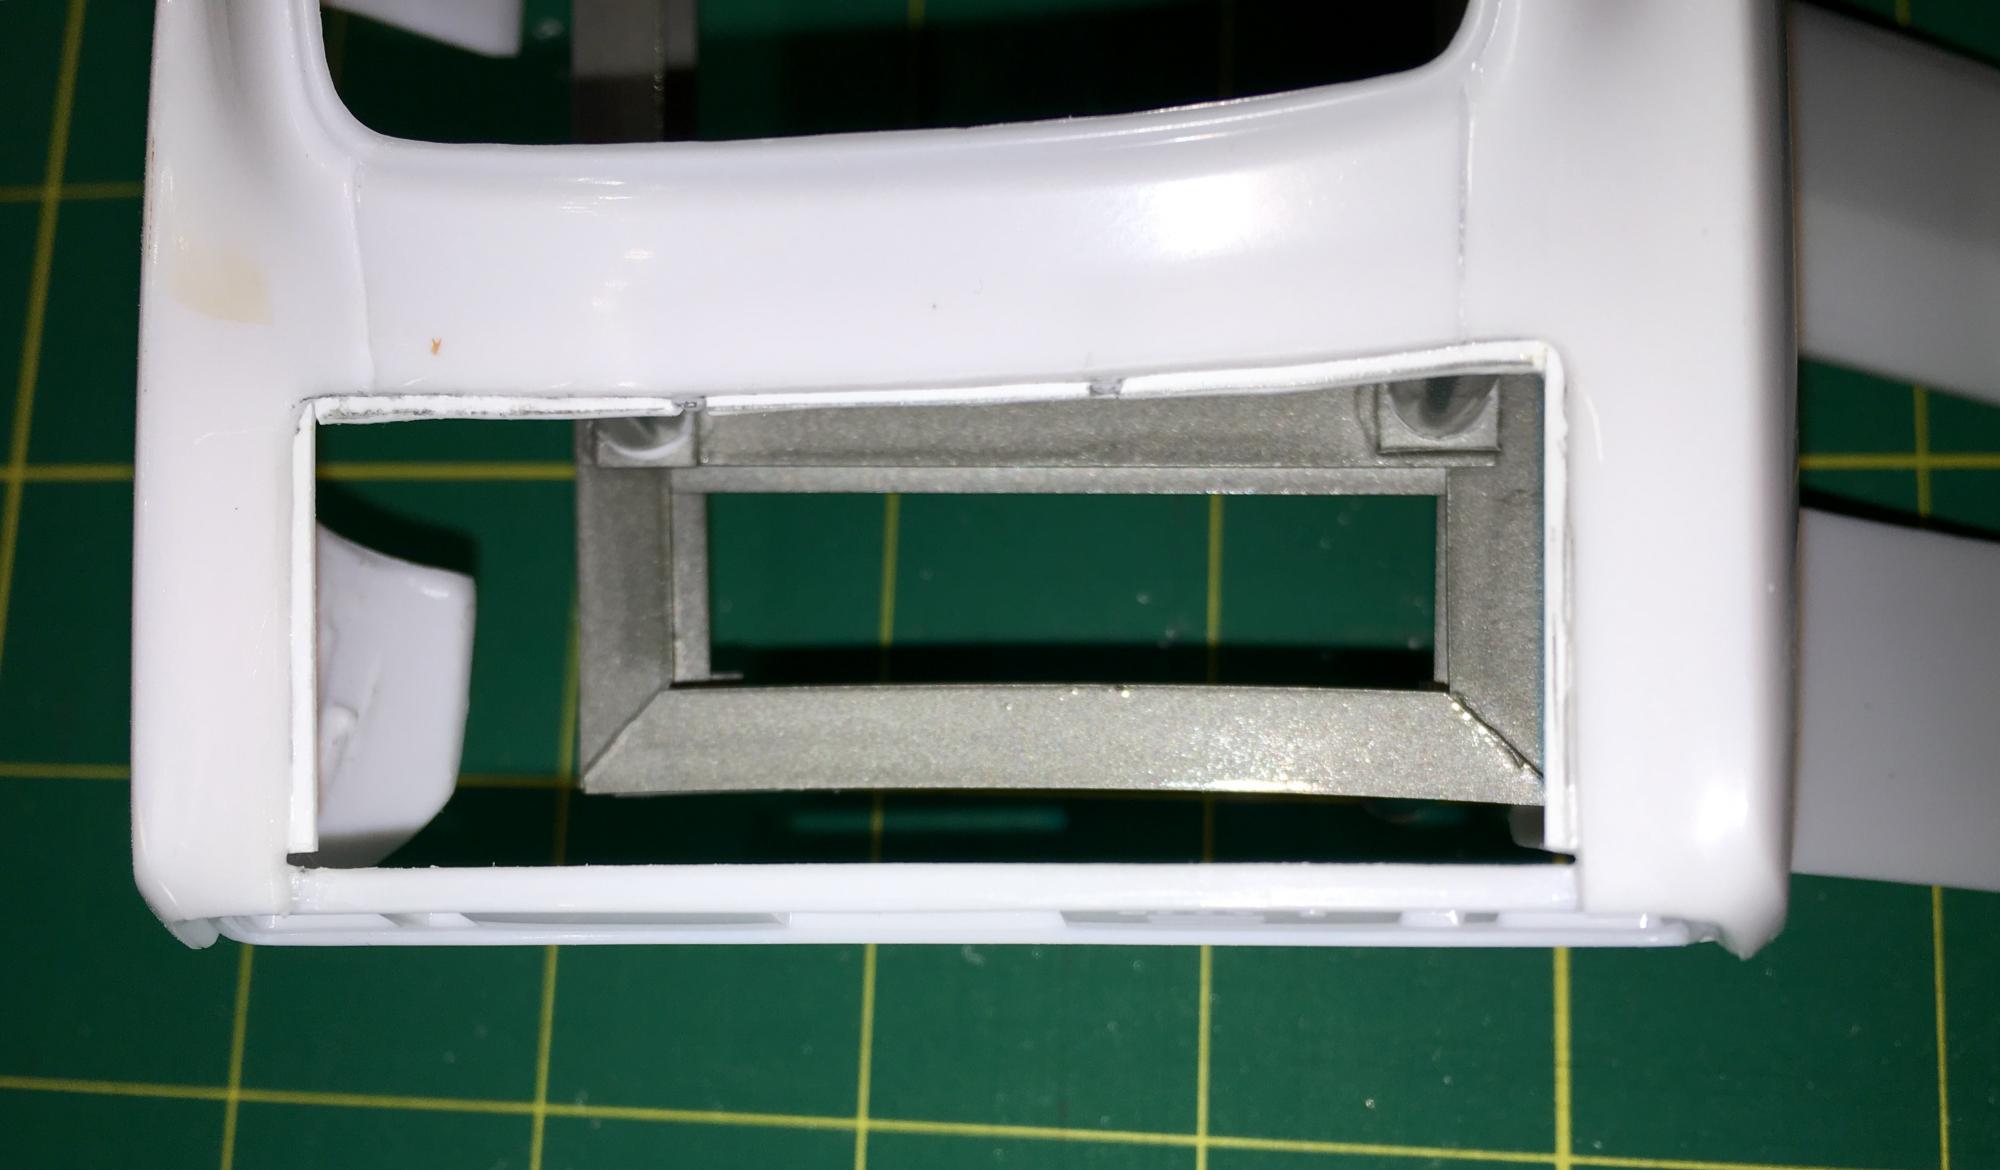
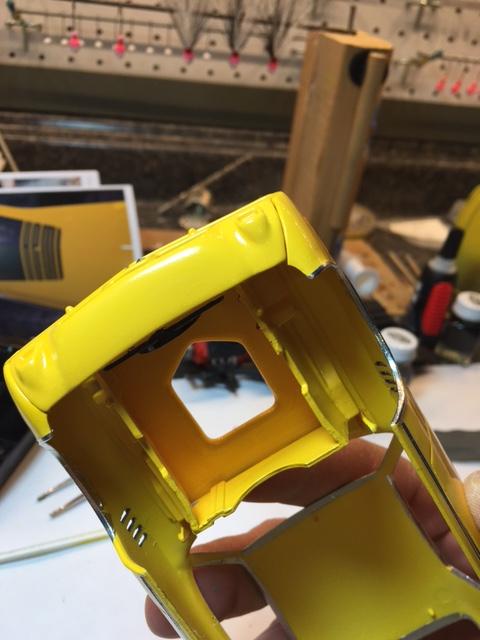
4/4/16 - I'm well outside my comfort level now. I have no idea what I'm doing, but Continue to press forward. Removed one(1) door and cut the interior bucket apart to match. I have to figure out where the filler pieces will be installed; not certain if they get built onto the body, then the interior is installed to fit, or if the fillers get built onto the interior bucket, then fitted into the body like a typical step(?) Installed the rain gutters in the trunk. I will need to work around this mistake, as I neglected to budget for the height of the half-round I was going to use as the trunk gasket. Right now, the trunk lid fits perfect on the gutters, but will sit too high with the .040 strip laid in. (May just opt to display the car trunk open.......
-
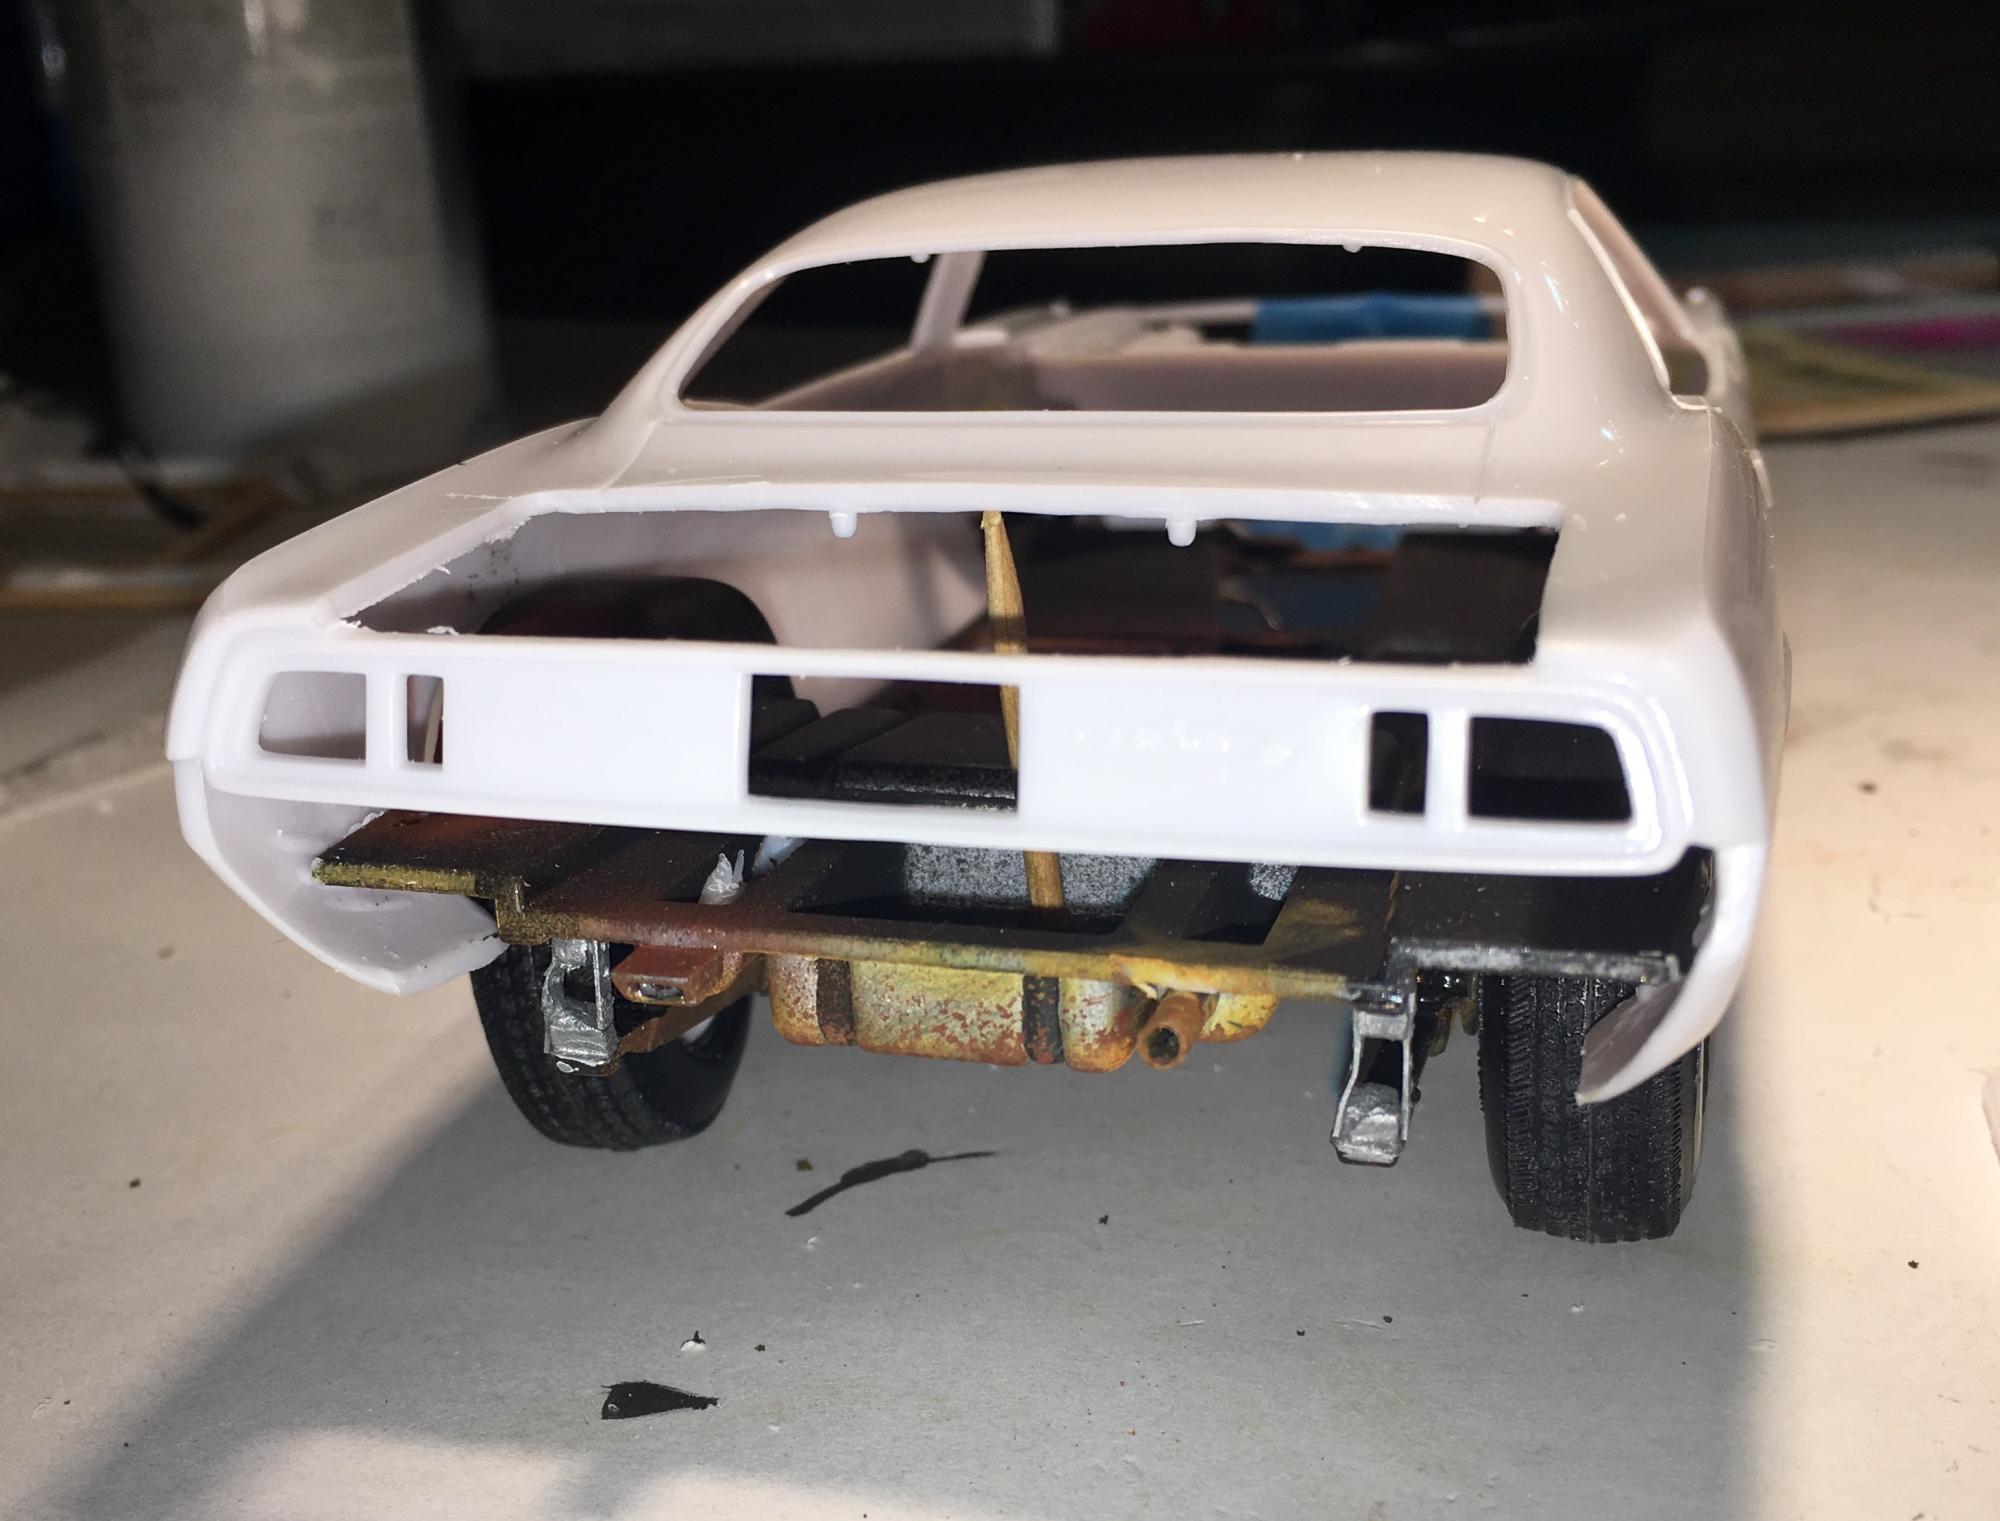
Thanks! Here is a better view of the chassis that I started to "rot": Not certain if I'll do it on the chassis or one of the quarter panels, but I want to incorporate a "license plate patch panel" somewhere.
-
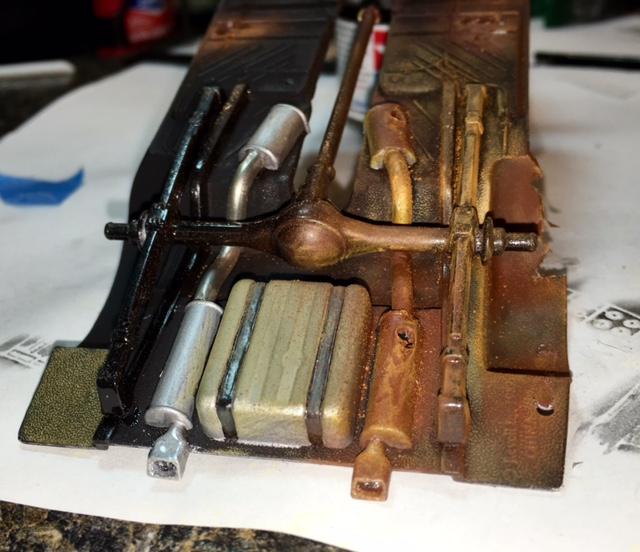
While waiting for paint to dry on a few pieces for Twisted Fish, I started on version II. This is planned to be the same car, 30 (hard) years later. It will show what happens when someone too young to have such a muscle car: accident damage, rust from lack of care, a motor that has been tinkered with and neglected, factory options replaced with whatever was available (affordable) at the time; all while still being driveable. This will be my first attempt at rusting/weathering and opening doors/trunk. Please feel free to let me know where I go wrong and/or share any thoughts about the process(es). Mocked up stance with the broken, shackle rear end lift: Shackles that are broken (on purpose), yet still keeping things together. Rear view also shows a lost exhaust tip and rust on what is left. The shackles and front leaf spring connections will get rusted in time.
-
Twisted Fish - 3/13, main pieces put together.
The Fisherman replied to The Fisherman's topic in WIP: Model Cars
Almost there. Need to finish installing the hood hinges and front directional signals. Planning on showcasing the car with the hood extended above the roof line with aluminum rods at all four(4) corners.
-
Alclad chrome - 1st test hit
The Fisherman replied to The Fisherman's topic in Model Building Questions and Answers
The only reason those were left on the "spruce" was because they aren't going to be used for anything other than trial/error. I typically will drill holes as well, but use toothpicks to hold the pieces that are getting painted. Pieces that can't be drilled either get a piece of tacky clay or Elmer's (white) glue applied with a toothpick or skewer. I don't know..................this stuff can be pretty hard to cut through sometimes. -
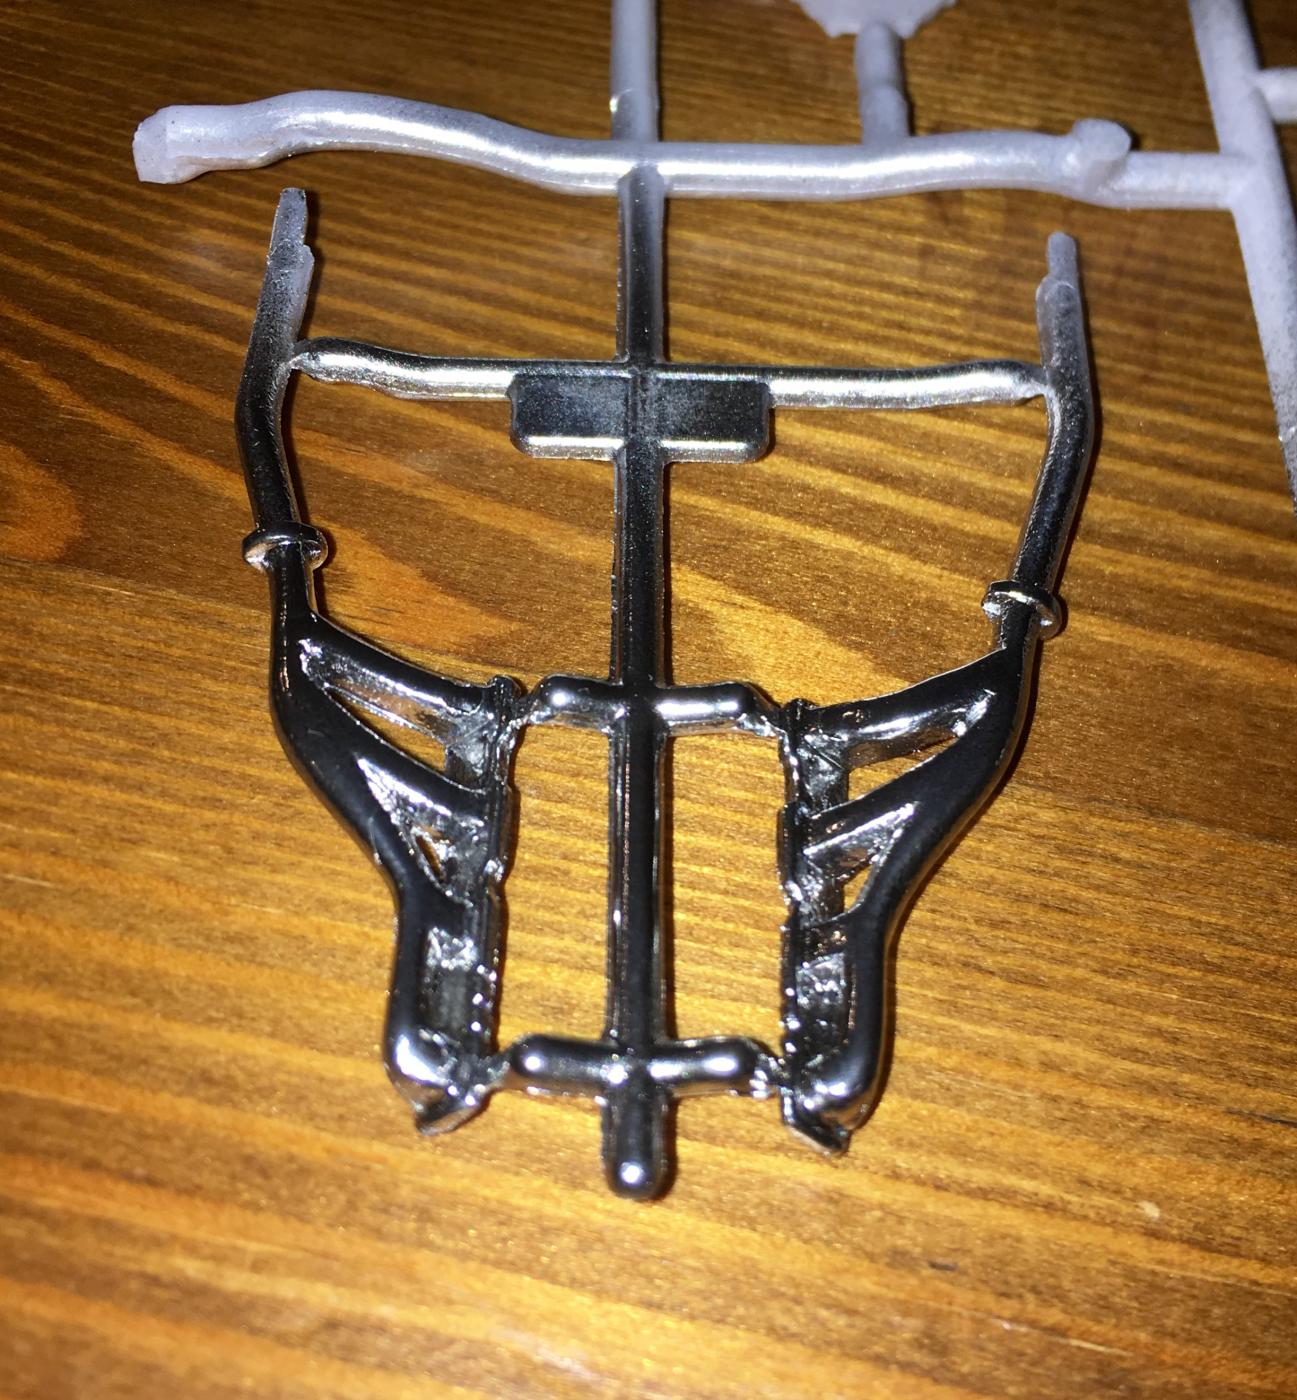
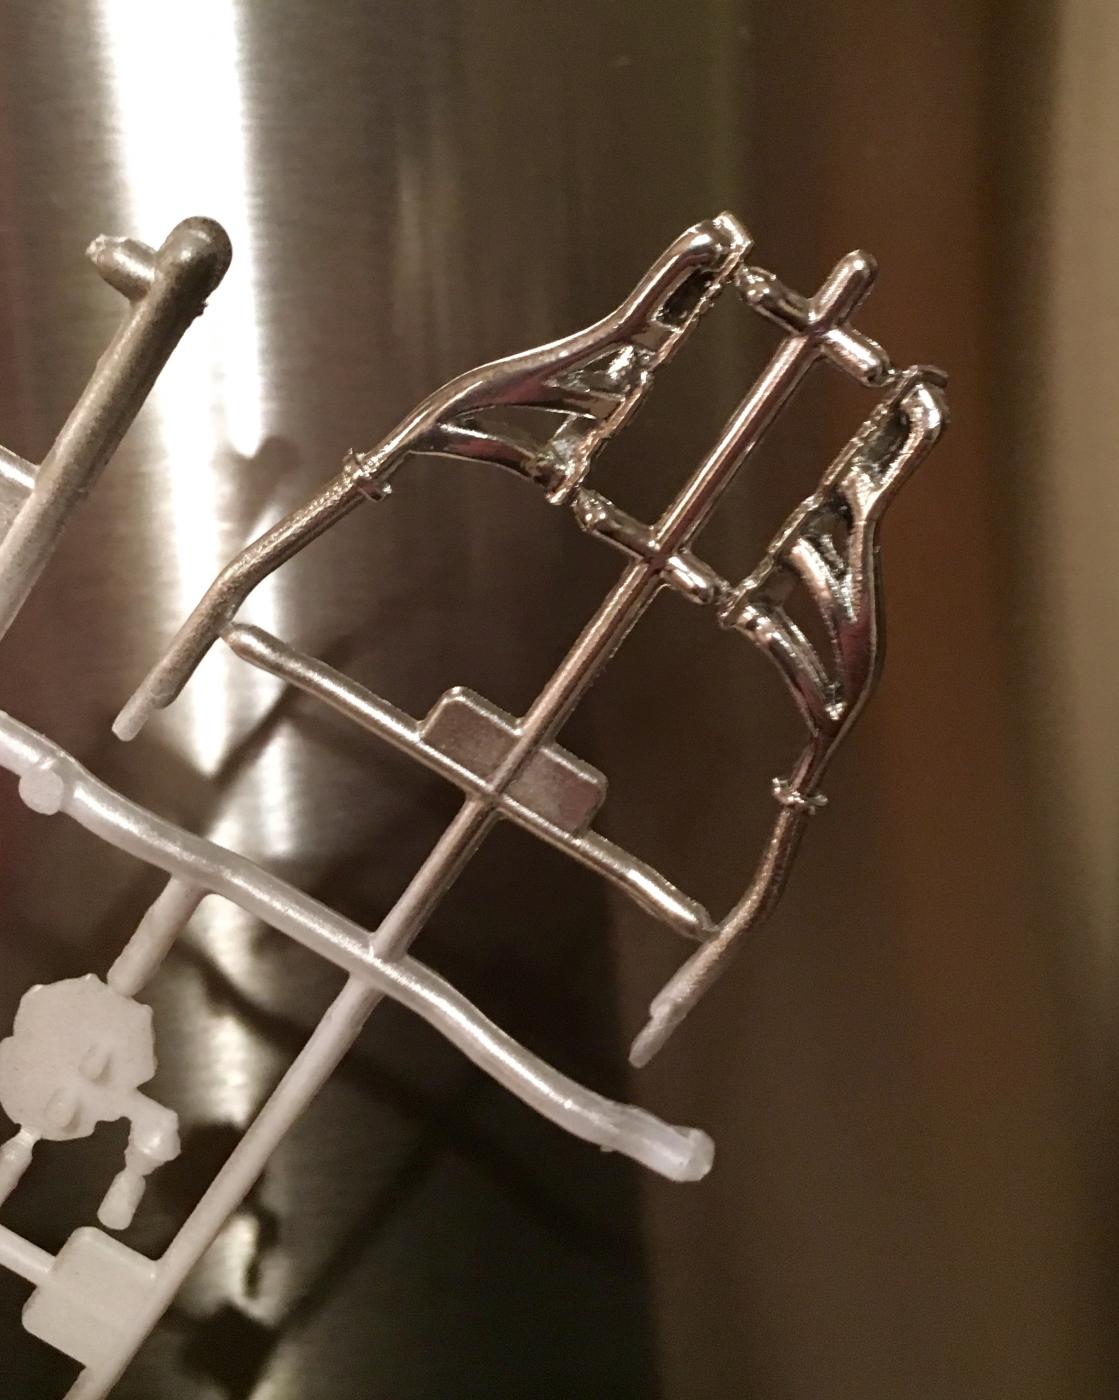
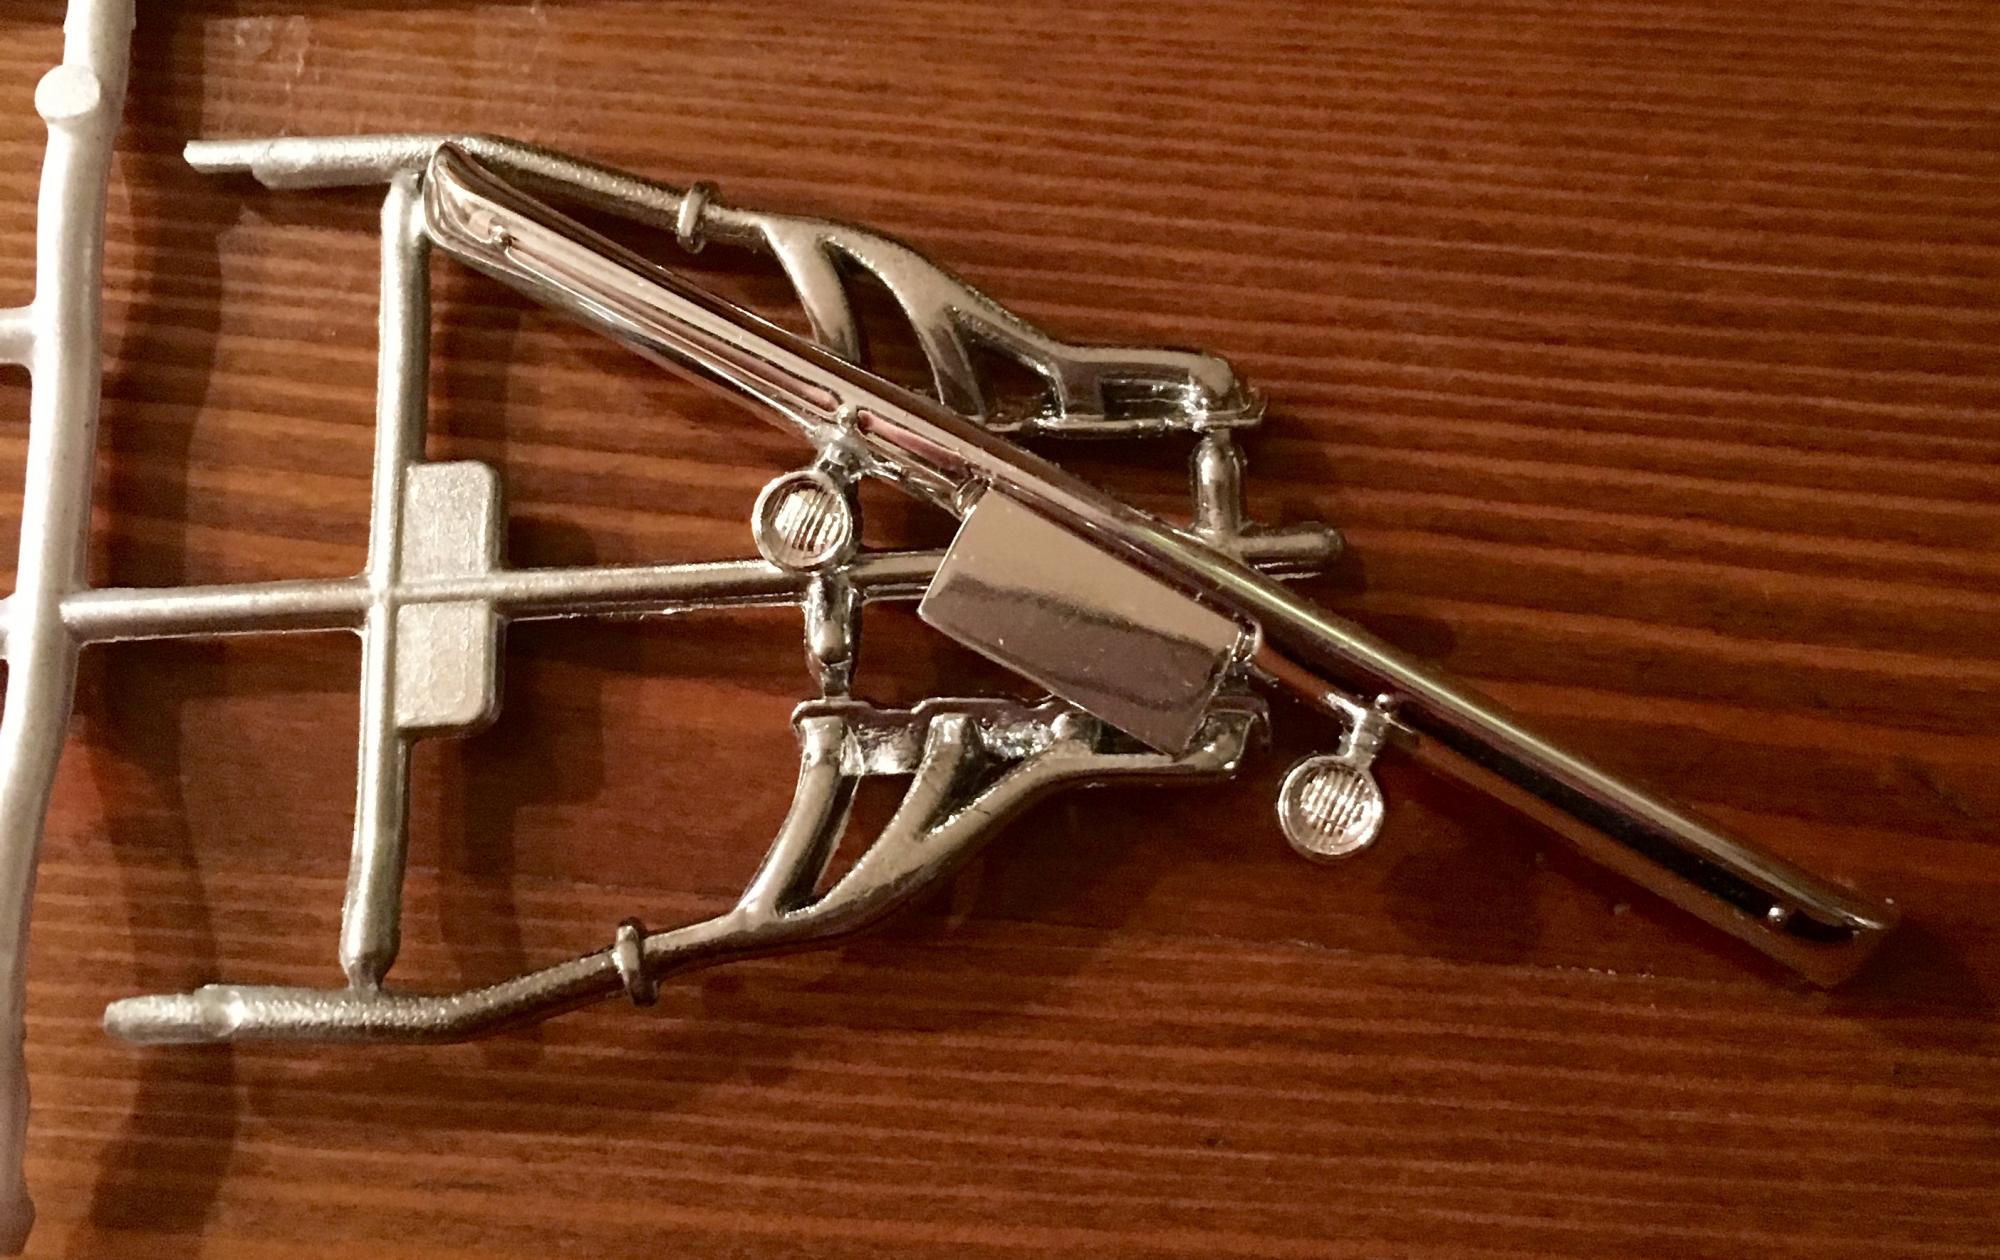
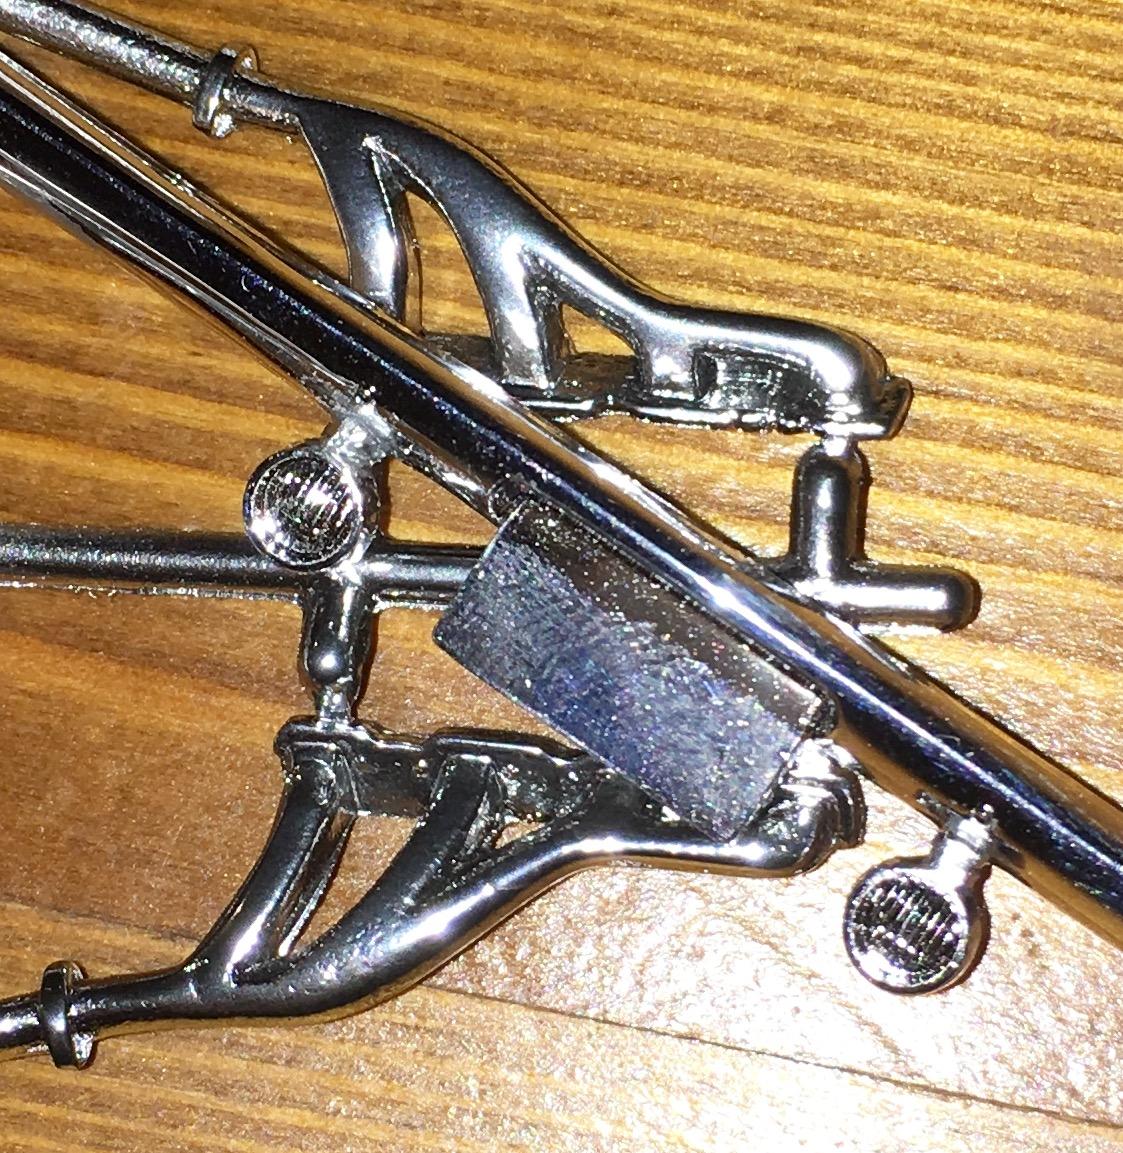
I believe I know what I'm looking for, but I was prepped for failure after talking to the HS owner, so is this the correct finish? Or should I be going after more reflection and glare qualities? Kit pieces were sanded as finely as I could. Shot with Alclad black base, left to cure for 24hrs. Then Alclad chrome sprayed with multiple fine passes with the airbrush held at a 45 degree angle to the pieces as each pass was made. Made certain to make no spot shots, and no heavy passes........which I had to think about as the color started to come out. Tried to get captures with different light intensities and comparisons with one of the pieces that will receive the paint to correct spruce damage. Is this right, or is there room for improvement?
-
Twisted Fish - 3/13, main pieces put together.
The Fisherman replied to The Fisherman's topic in WIP: Model Cars
Down to front and rear bumpers, both of which need to be done with a chrome Alclad treatment, and radiator hoses. Ran into a slight problem with hood clearance due to my own lack of experience. Had to ditch the air hat base and mount the scoop in the hood, which for me is OK as I had plans to keep it removable anyway due to the detailing it covered on the engine. Also had to modify the wheels to fit a set of AMT Goodyear F60-15 tires. (Saving that view for the finished set of pics.)
-
I'm stuck. Picked up at set of AMT Goodyear tires to finish off Twisted Fish and ran into a problem I haven't been able to find an answer about. The AMT tires (F60-15 and L70-15) are both narrower than the Revell wheels and backer. I've shaved thickness from both pieces and dished the backer as much as I can to set the wheel into it and the pieces are still too wide to fit either tire. Is there a trick to using these tires, or do I simply make a new backer to fit? I have no problem doing that, I just feel as if I'm missing something with the usage of these popular tires.
-
Twisted Fish - 3/13, main pieces put together.
The Fisherman replied to The Fisherman's topic in WIP: Model Cars
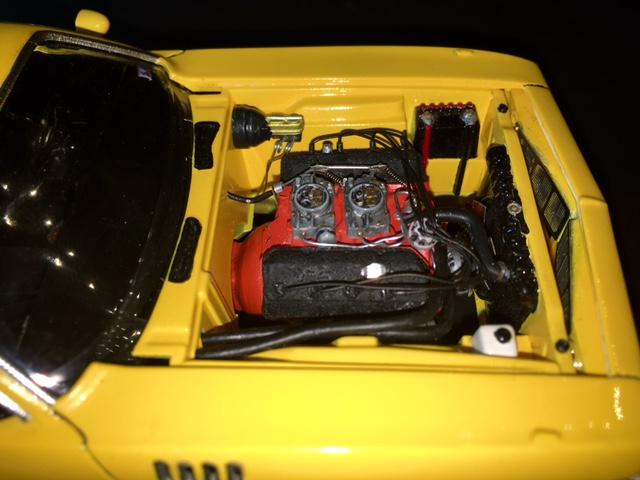
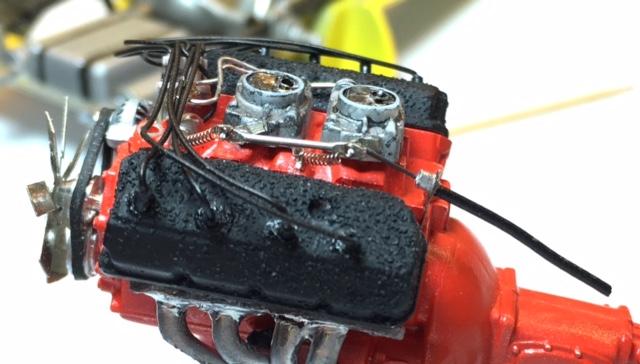
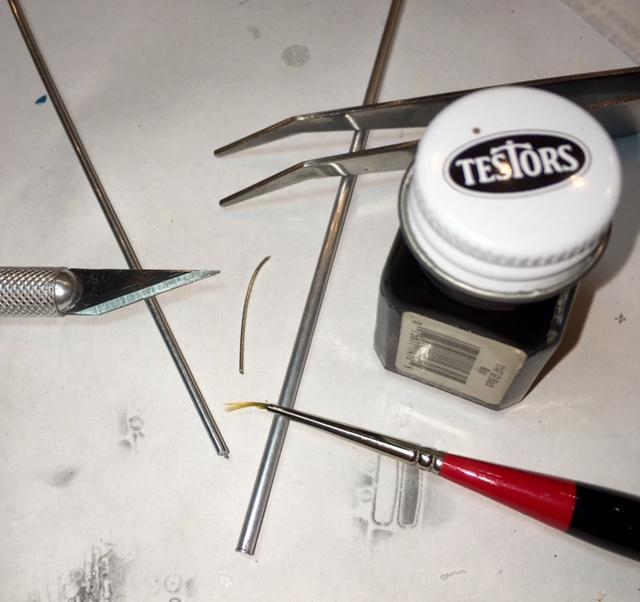
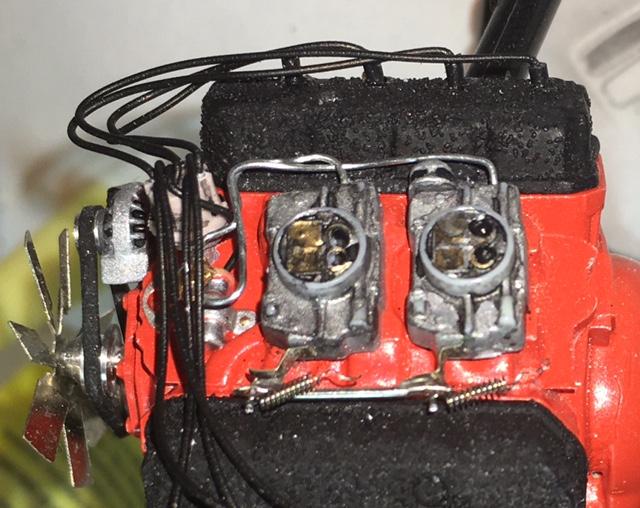
Is that a good thing or more on the lines of burnt toast? (joking) I was influenced last evening. Watching my 14 year old scratch build an alternator simply because "the one that came with it doesn't match my pictures" (in reference to the '69 Z/28 he is working on), I looked at my engine and just wasn't content with where I was stopping at. The throttle return spring mounts were fabricated and the springs mounted in their correct orientation. I was going to stop there.................but it just seemed incomplete through my eyes. So, a little brass fret, small cut of aluminum tubing, a short piece of piano wire, and leftover electrical wire covering found themselves combined to become a throttle cable and tensioner. Still need to fabricate a breather element and oil fill cap.....................then it'll need vacuum lines............when does it truly end? Guess it'll end when I want it to.
-
Twisted Fish - 3/13, main pieces put together.
The Fisherman replied to The Fisherman's topic in WIP: Model Cars
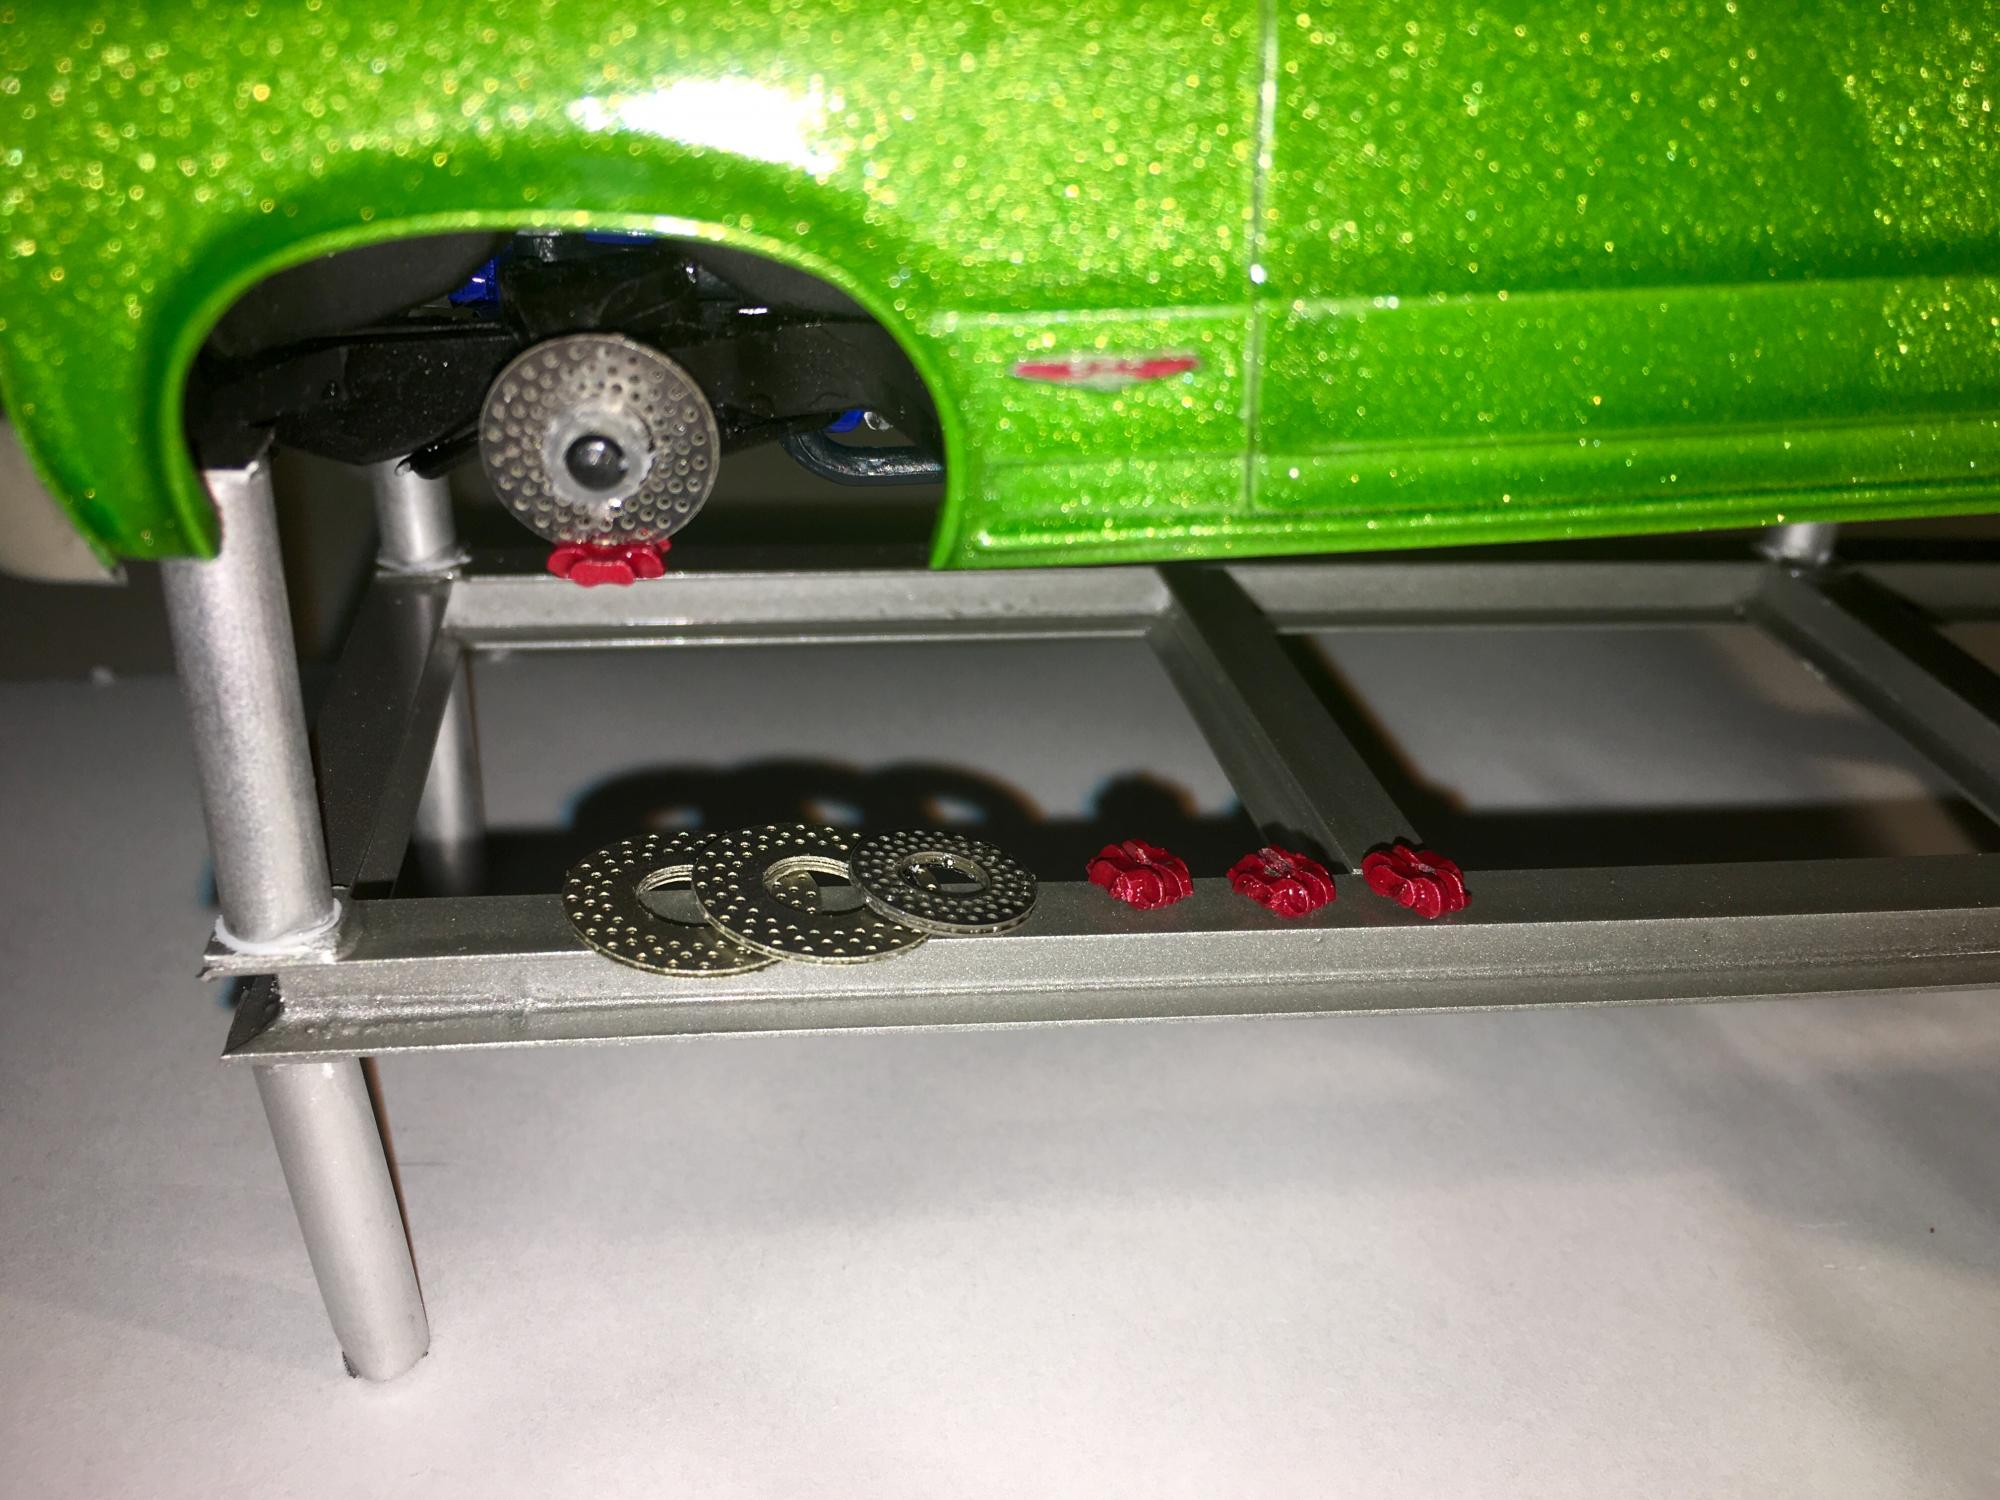
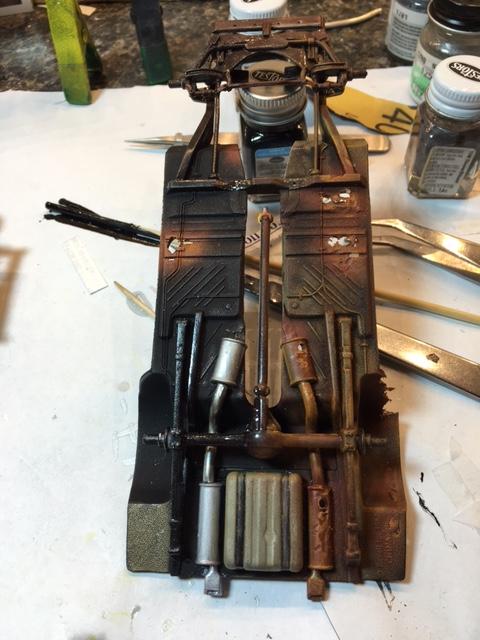
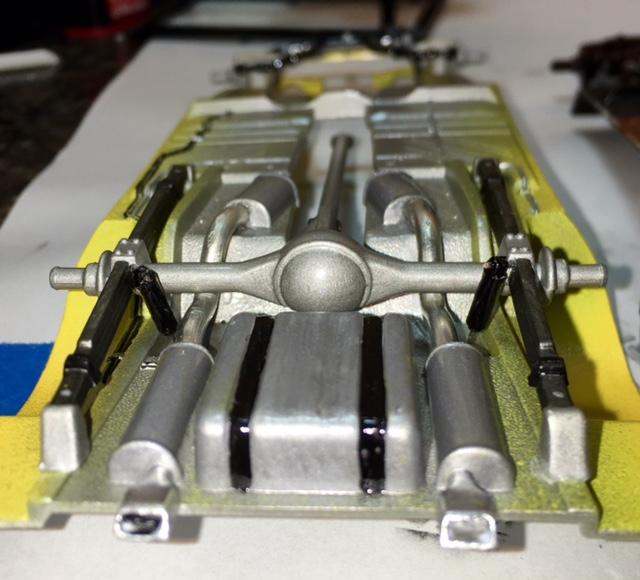
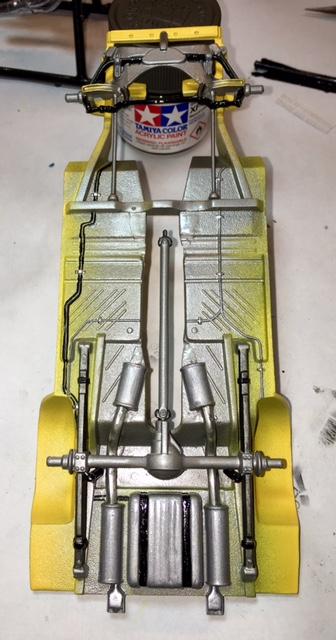
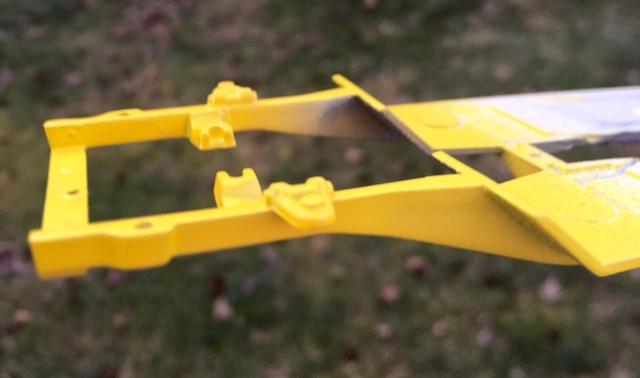
Made a little more progress with the chassis this weekend. The aspect of missing rear shocks from this kit bugged me on the first chassis I did, so I collected a few materials: And made up a pair of shocks. Painted them gloss black with a flat black insert to simulate a dust cover over the stem, then drilled a few few holes to mount them. Also managed to fabricate the throttle linkage and return springs for the carbs. The springs are simply set in place so I don't lose them. They will eventually be facing the other direction and connected to manifold mounts. In between these steps, while waiting for paint or glue to set-up, I started transforming the first chassis in preparation for Version II of this build:
-
Bare Metal Foil Problems
The Fisherman replied to 69NovaYenko's topic in Model Building Questions and Answers
What kind of paint? Almost sounds as if the paint is reacting to the glue on the BFM. -
Foiling over large curves
The Fisherman replied to Roadrunner's topic in Model Building Questions and Answers
Keep in mind - this is the 1st time I've used BFM (or any foil for that matter). When I did the wheel well trim on Twisted Fish, I did them in three(3) pieces. One along the top and two along each side. I'd burnish and trim the top piece, then one side, then the other. There was overlap on the pieces, but it burnished completely out making the wheel wells appear to have been done with a single piece. Very little waste; not enough trimmed to use anywhere else. -
Twisted Fish - 3/13, main pieces put together.
The Fisherman replied to The Fisherman's topic in WIP: Model Cars
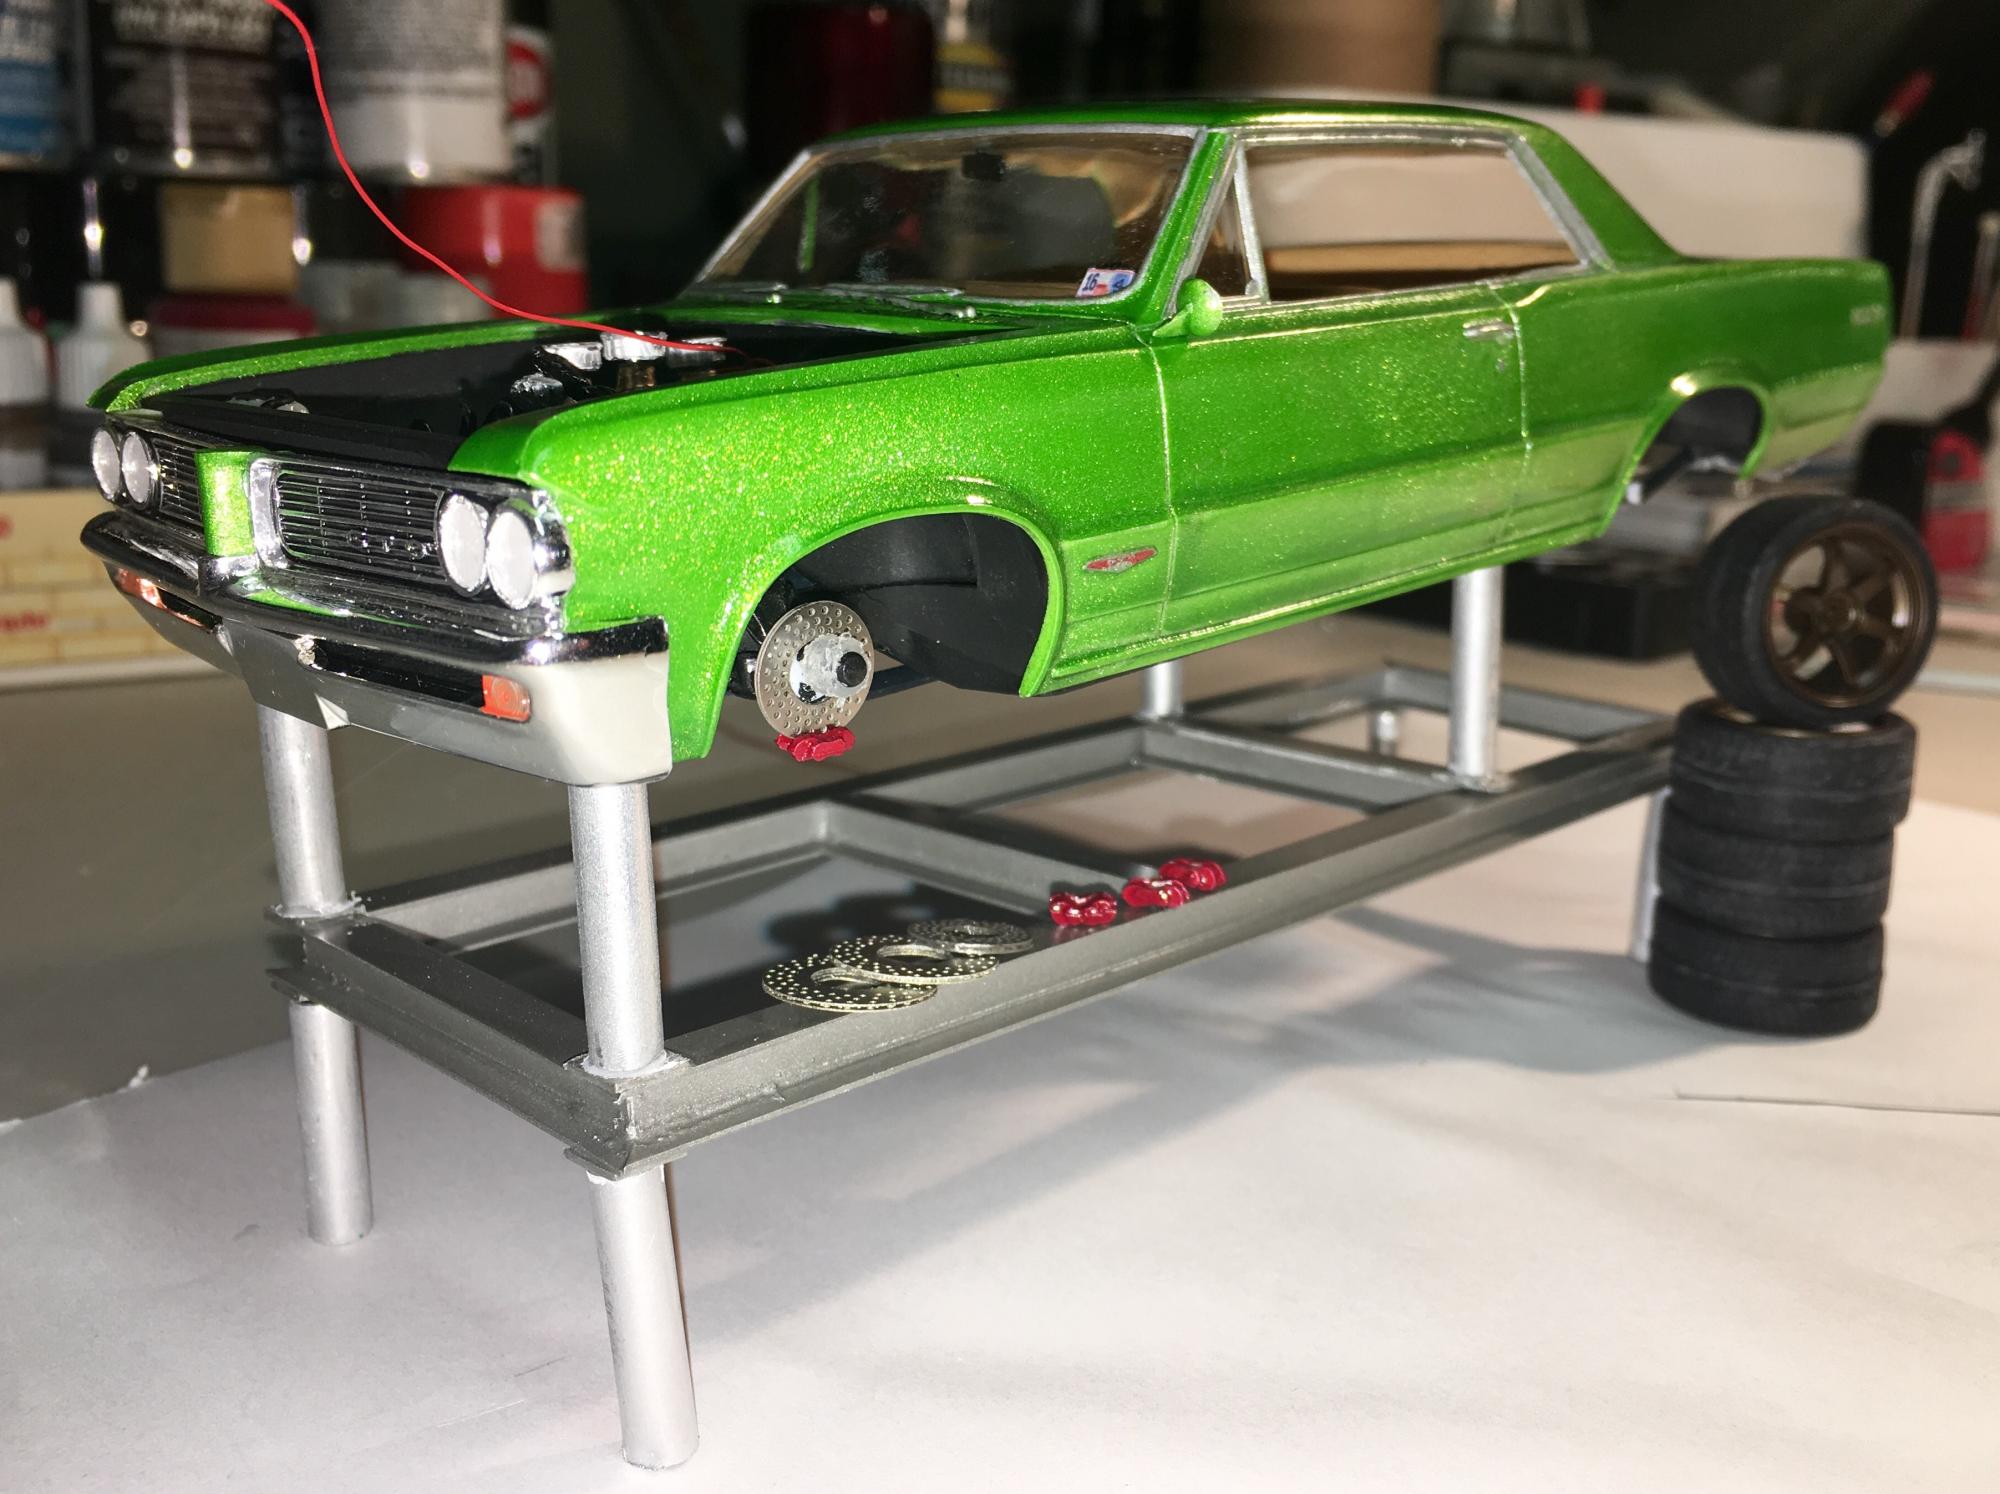
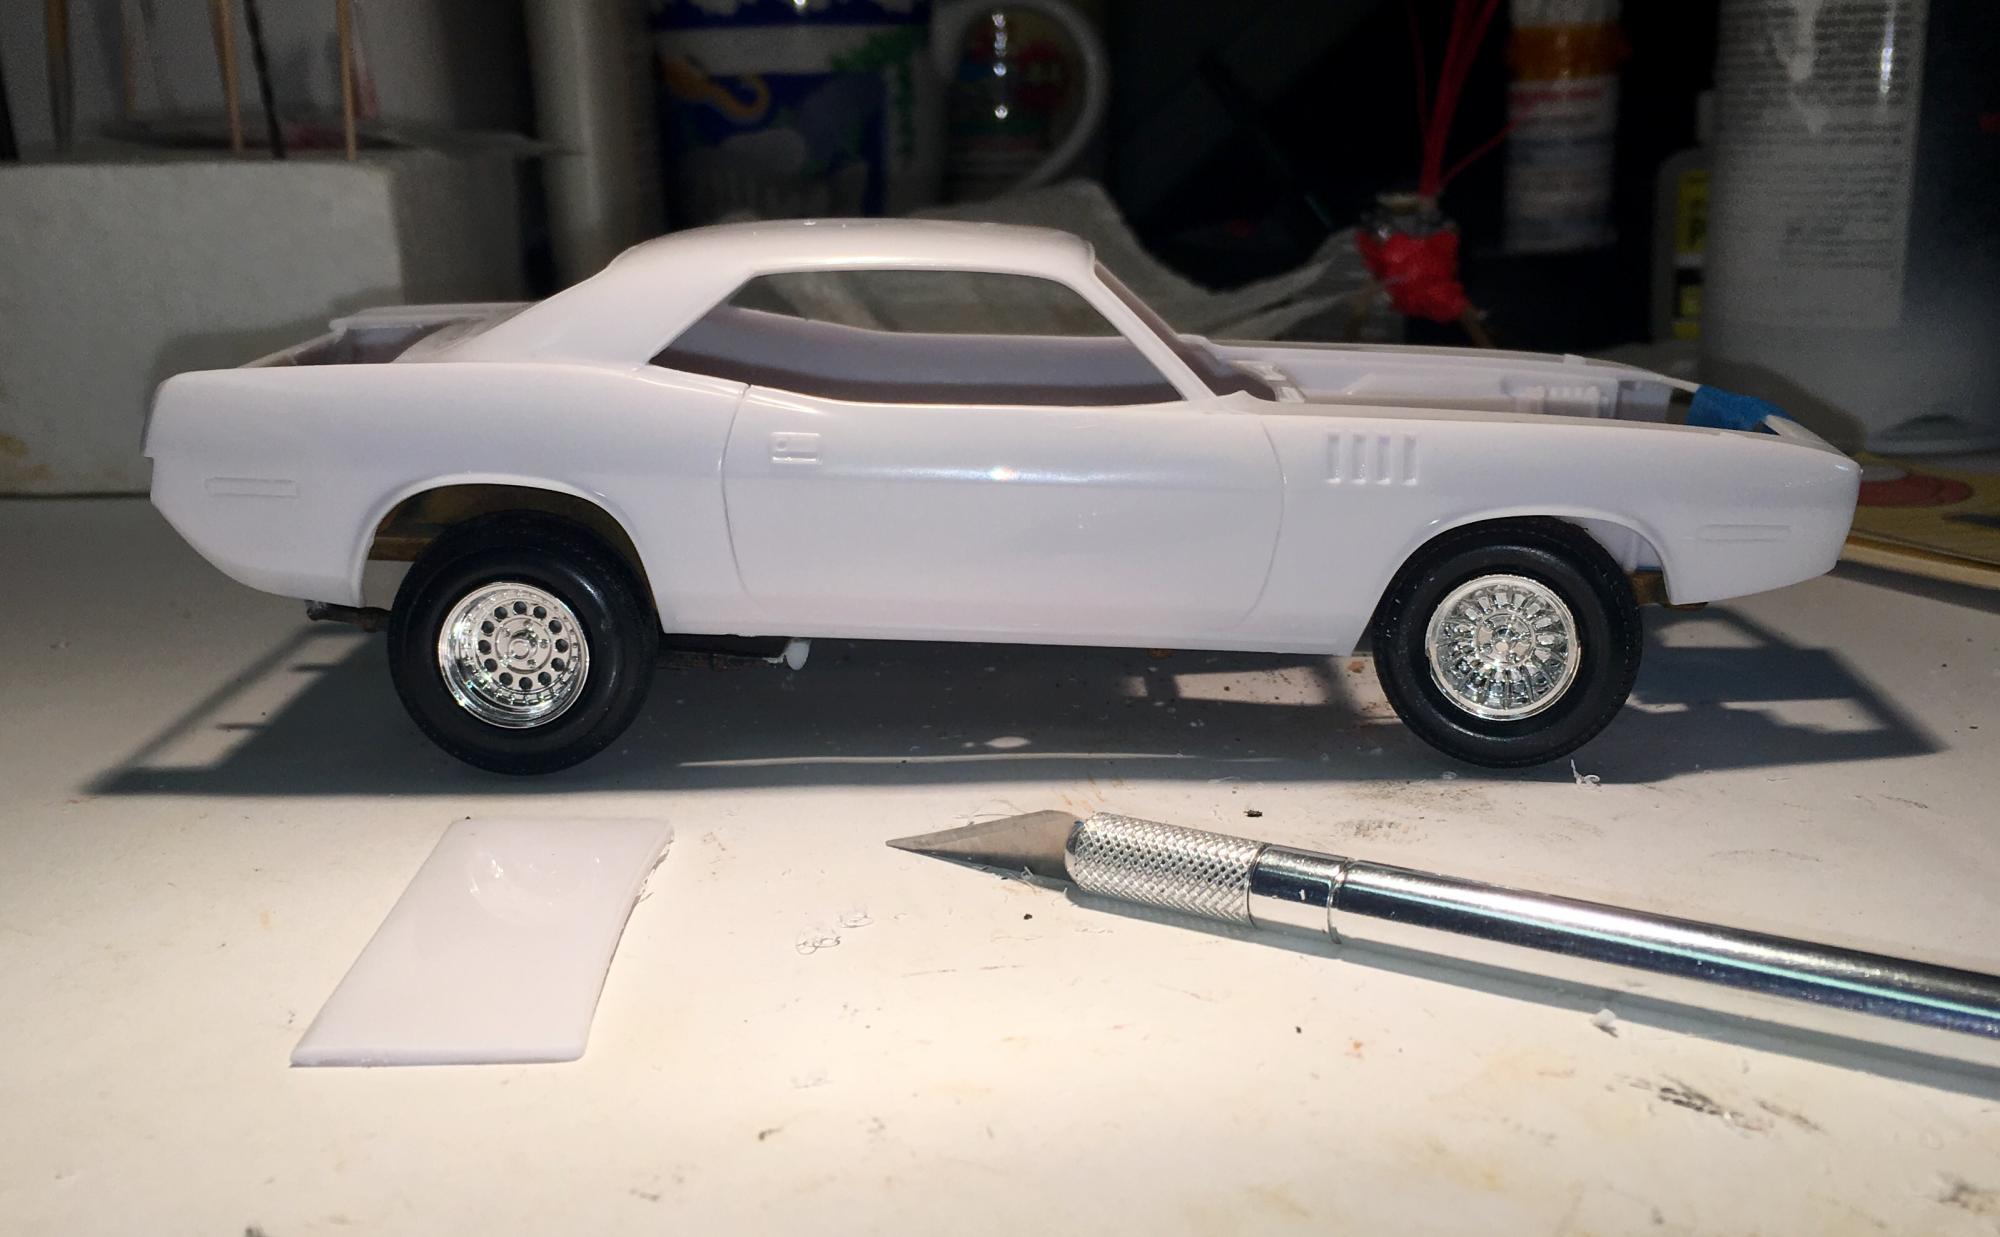
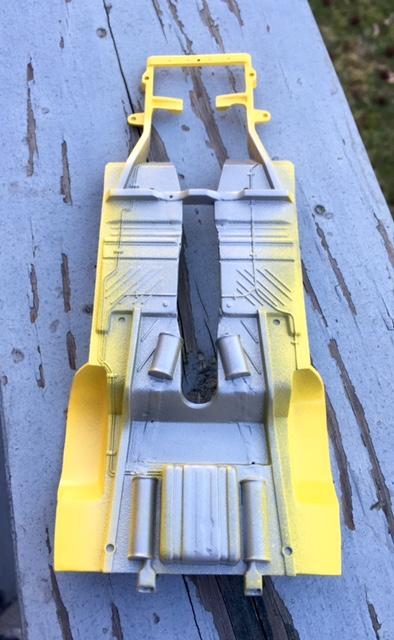
Wanted to see how things looked outside so far since the weather was nice. I'm calling the body done at this point. Bumpers will show up later as well as the front turn signals: Interior I'm also setting aside as complete: The chassis is another story completely. I pondered redoing it a few weeks back; and have been influenced by the fantastic builds I've been watching on the board. I'll use the 1st chassis in version II of this car, but for now, I've stripped another chassis and painted it a bit closer to an original. Really not 100% certain if what I'm doing is "correct" or not, but I'm hoping everything will come together properly once the body is mated with the chassis.
-
Have you run into any fitment issues with the bumpers? My oldest started this a few weeks back and it has all but stopped him in his tracks with issues. Front bumper/headlight piece was off by over 1/8" to fitting properly, and the rear bumper didn't even seem to be from the right kit. So far he's had to build the bottom of the rear quarter panel up 3/16" just to get the bumper to sit level (it wanted to lay under the rear quarters), and he's shaved quite a bit of material off both sides so the bumper didn't stick out past the body lines. The rear taillights were also found to be problematic as they were too thick to mount in the slots on the rear valance; which led to more body trimming........
-
Twisted Fish - 3/13, main pieces put together.
The Fisherman replied to The Fisherman's topic in WIP: Model Cars
A few more steps forward. Was able to repair my "grab and destroy" dust removal mistake: : Body detailing continues, albeit slowly. Managed to remove just a smidgen too much of the billboard over one of the fender flares, so now I don't know if I want to just cut my losses or gamble to hide it and possibly make it stick out more then what it already does. I do like the effect the polished door handles have (an unexpected surprise); they blend in to the satin black of the billboard at certain angles, or reflect a high shine at others. This is the reason I removed the grill inserts a few weeks ago. I liked the idea of real metal to showcase the front end a little more (see through to radiator and radiator support area). Still needed to paint the frame interiors though:
-
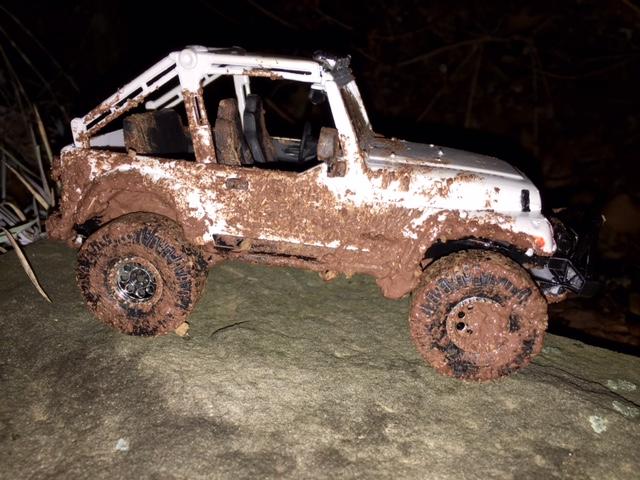
Finally something I can help with! This is a random mix of white glue, real dirt, paint pigment powder(s), and gloss enamel paint. The pigments were simply to get the shade we wanted, and the enamel was used to keep things wet looking. To this day, people won't touch it because they think they'll get mud on them.
-
Twisted Fish - 3/13, main pieces put together.
The Fisherman replied to The Fisherman's topic in WIP: Model Cars
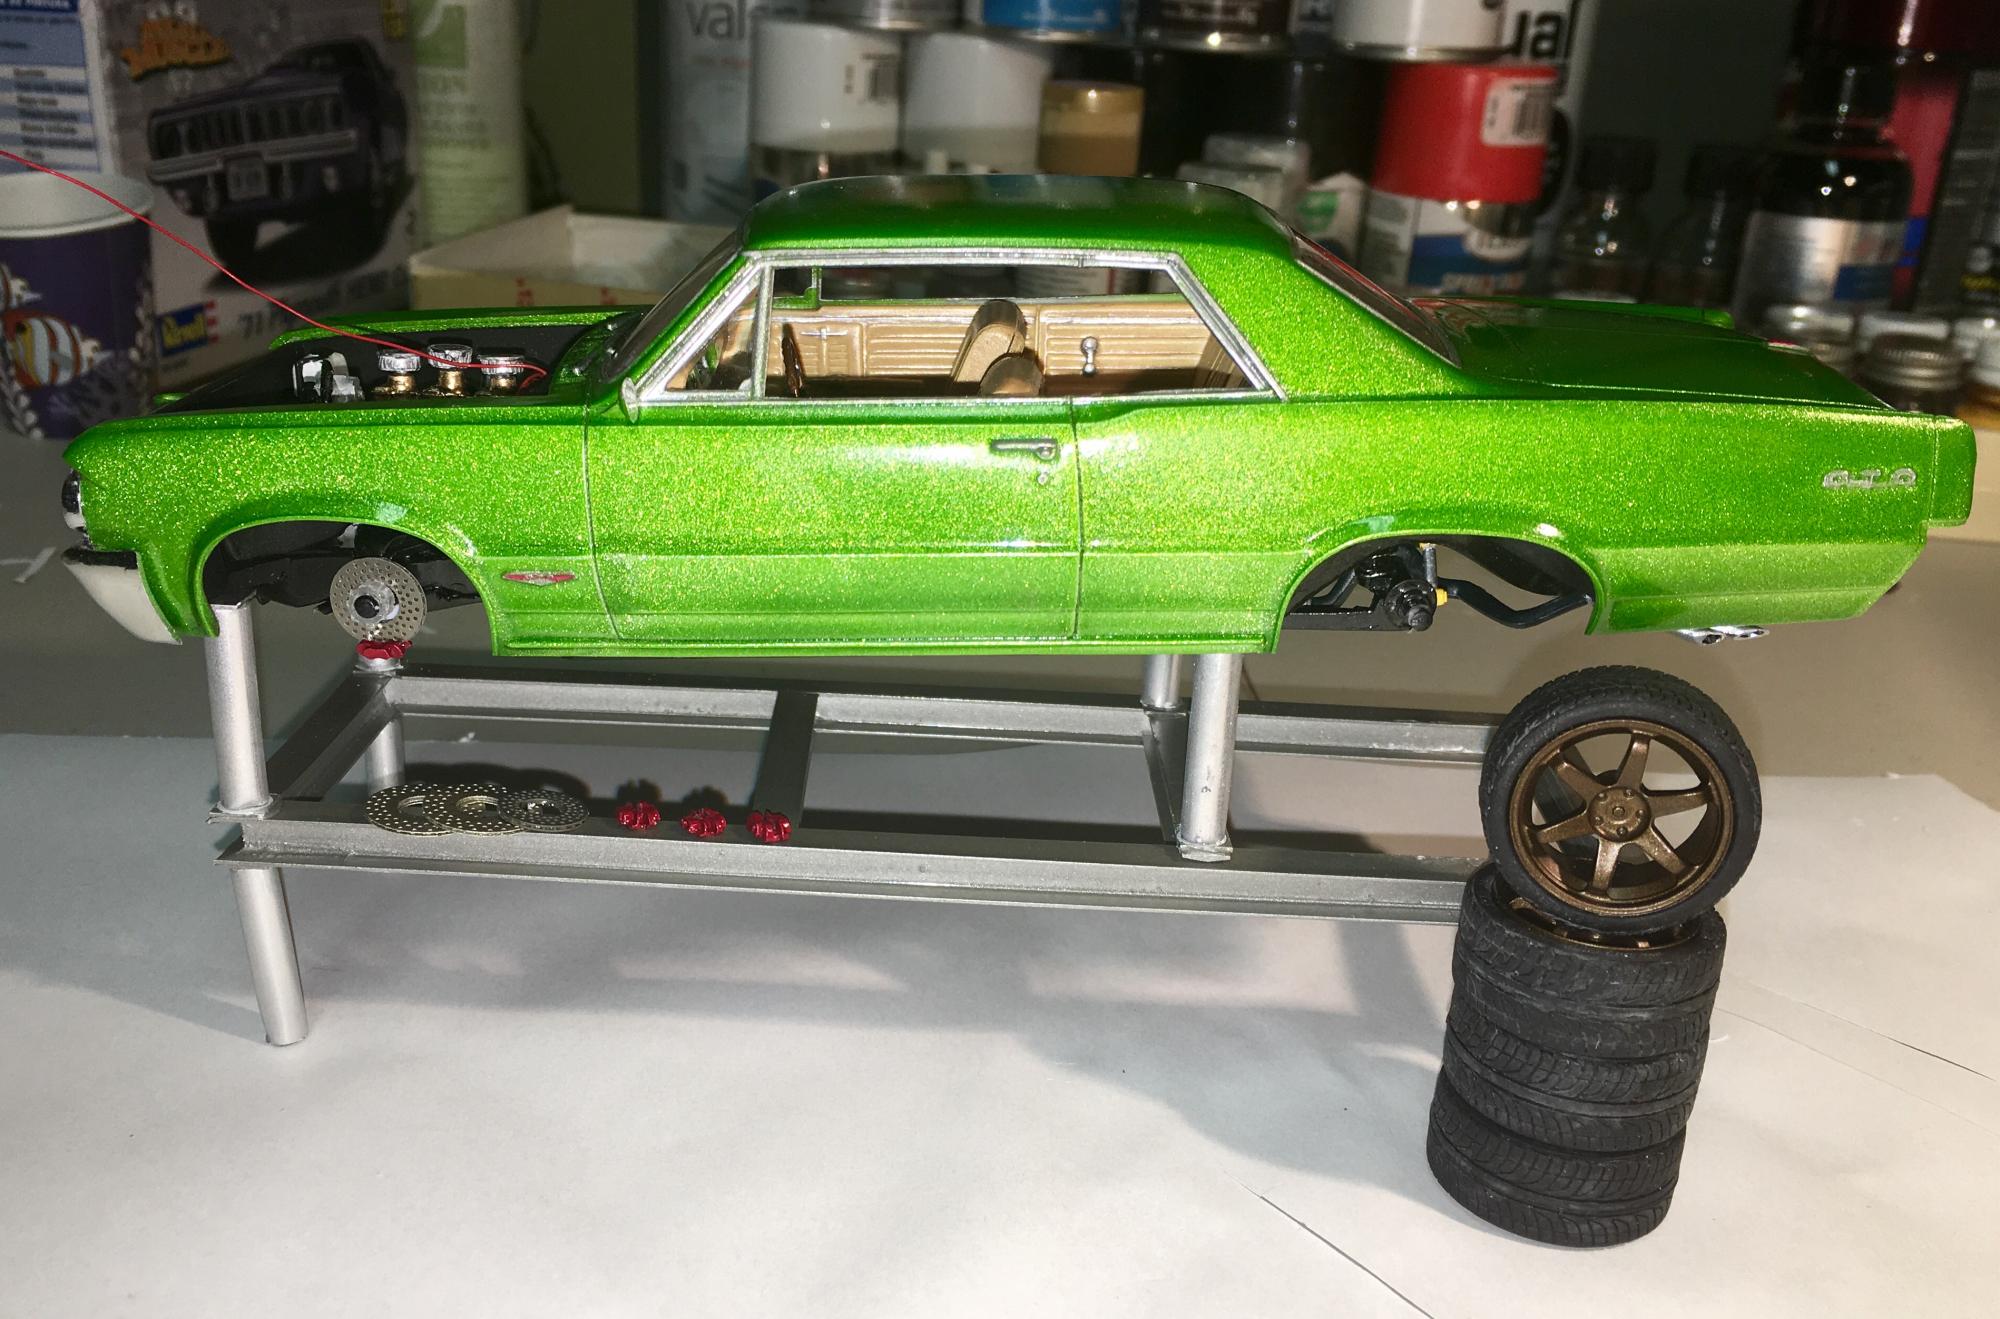
Slowly moving forward. Four coats of clear are now on; things have laid out surprising smooth which I hope will lend itself well to minimal polishing. Really not planning on doing a mile deep shine on this. Most of the smaller, molded in details (scripts, hood pins, emblems, etc) have been removed to make room for PE replacements. Glad to see the primer/paint/clear coats tightened up the panel lines as well; just enough to be consistent while not creating rubbing spots. Started on my 1st use of BMF. Not 100% crazy about the fact I can't burnish out the small ripples that I made while taking it off the backing paper. From what I've researched, this is a common problem (?) Did have a few other self-induced problems to deal with: Totally forgot I wanted to remove the molded in heater hoses before the body was painted. So, just before the clear went on, they were removed, new locations opened up for the "real" hoses, and the battery and windshield wiper container were detailed. Which brought me to this minor setback: Dust............... One. Simple. Small. Speck. I knew better.............but I thought I could just "pick it out before the clear started setting". Someday I'll start listening to that voice between my ears.
-
Twisted Fish - 3/13, main pieces put together.
The Fisherman replied to The Fisherman's topic in WIP: Model Cars
Thanks John - the valve covers (after having the chrome stripped) were scratched with a course grit (400 grain) sandpaper, then shot with an etching primer coat. Once that was dry it was covered with a flat black (heavy coat - not tack coated), then sifted baking soda over the still wet flat black coat, and then an immediate 2nd heavy coat of flat black. Scratched the finish off the areas the plug wires would go and painted a gloss black circle to simulate the hole cover/plug boot. I was torn about the headers; either using them for this version or the next one........ figured there's other issues that I've either done incorrectly or flat out missed so I'm proceeding as if this a "day 2" showing. Thanks for the motivation too!! It's a Mopar thing...............along with Statutory Grape (In Violet or Plum Crazy), Chartreuse green (Lime Light or Sublime), and a host of other "unique" colors. -
Twisted Fish - 3/13, main pieces put together.
The Fisherman replied to The Fisherman's topic in WIP: Model Cars
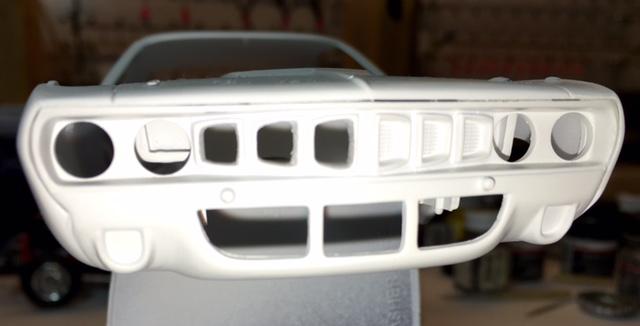
Turned my attention to the body now. Removed a few sections of the grill to make way for a touch more realism: We had a slight temperature rise, so after every thing was sanded down good I laid on a few coats of color: Some light wet sanding and a few final coats to call it done at this point in time: