
.jpg.238624ae01ad47a74b8b8979bad672f6.jpg)
J Witt
-
Posts
20 -
Joined
-
Last visited
Content Type
Profiles
Forums
Events
Gallery
Everything posted by J Witt
-
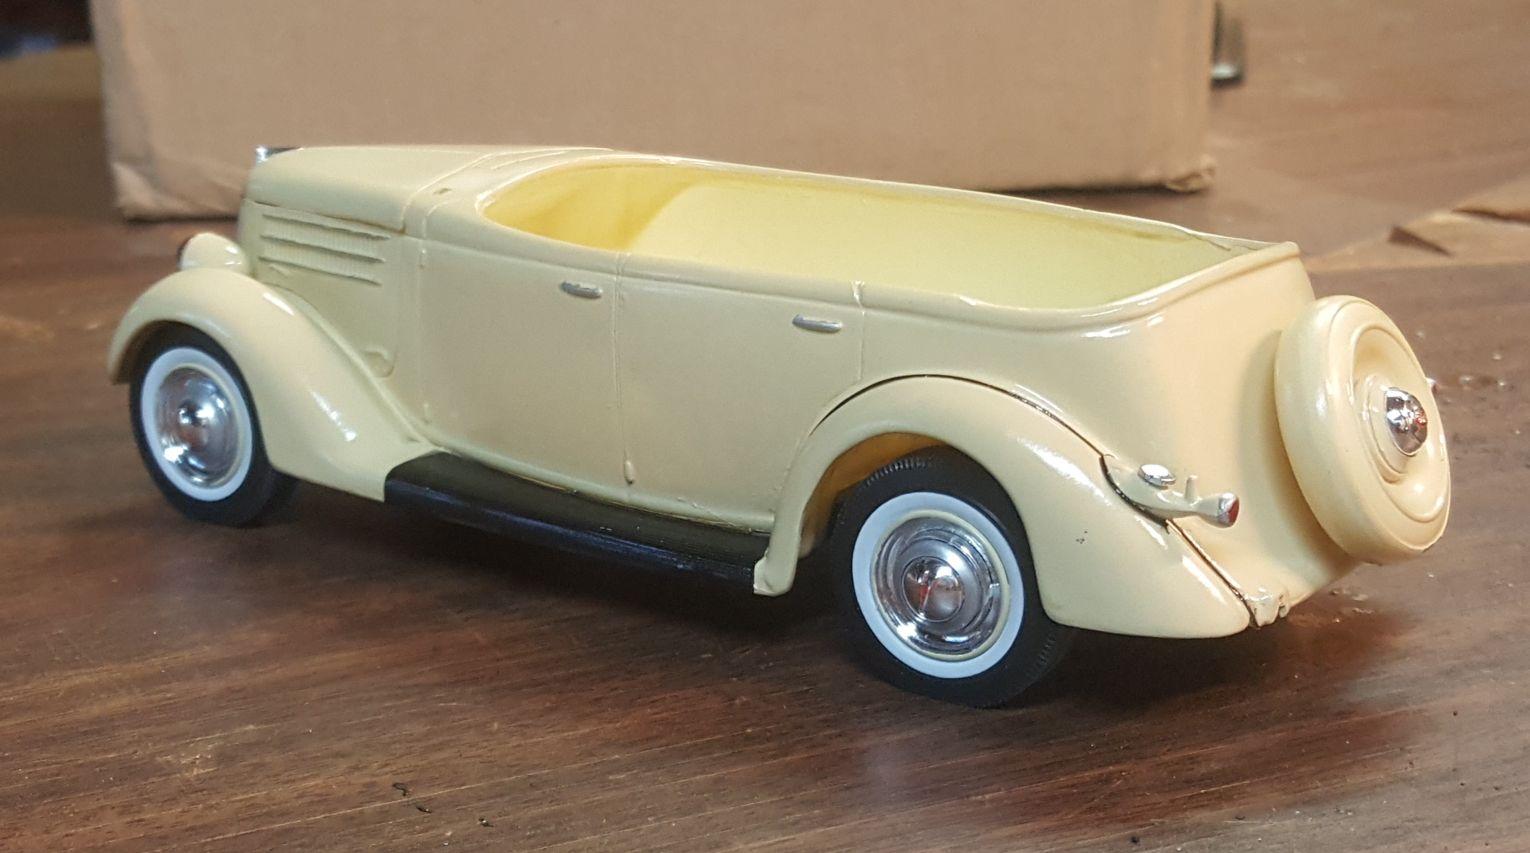
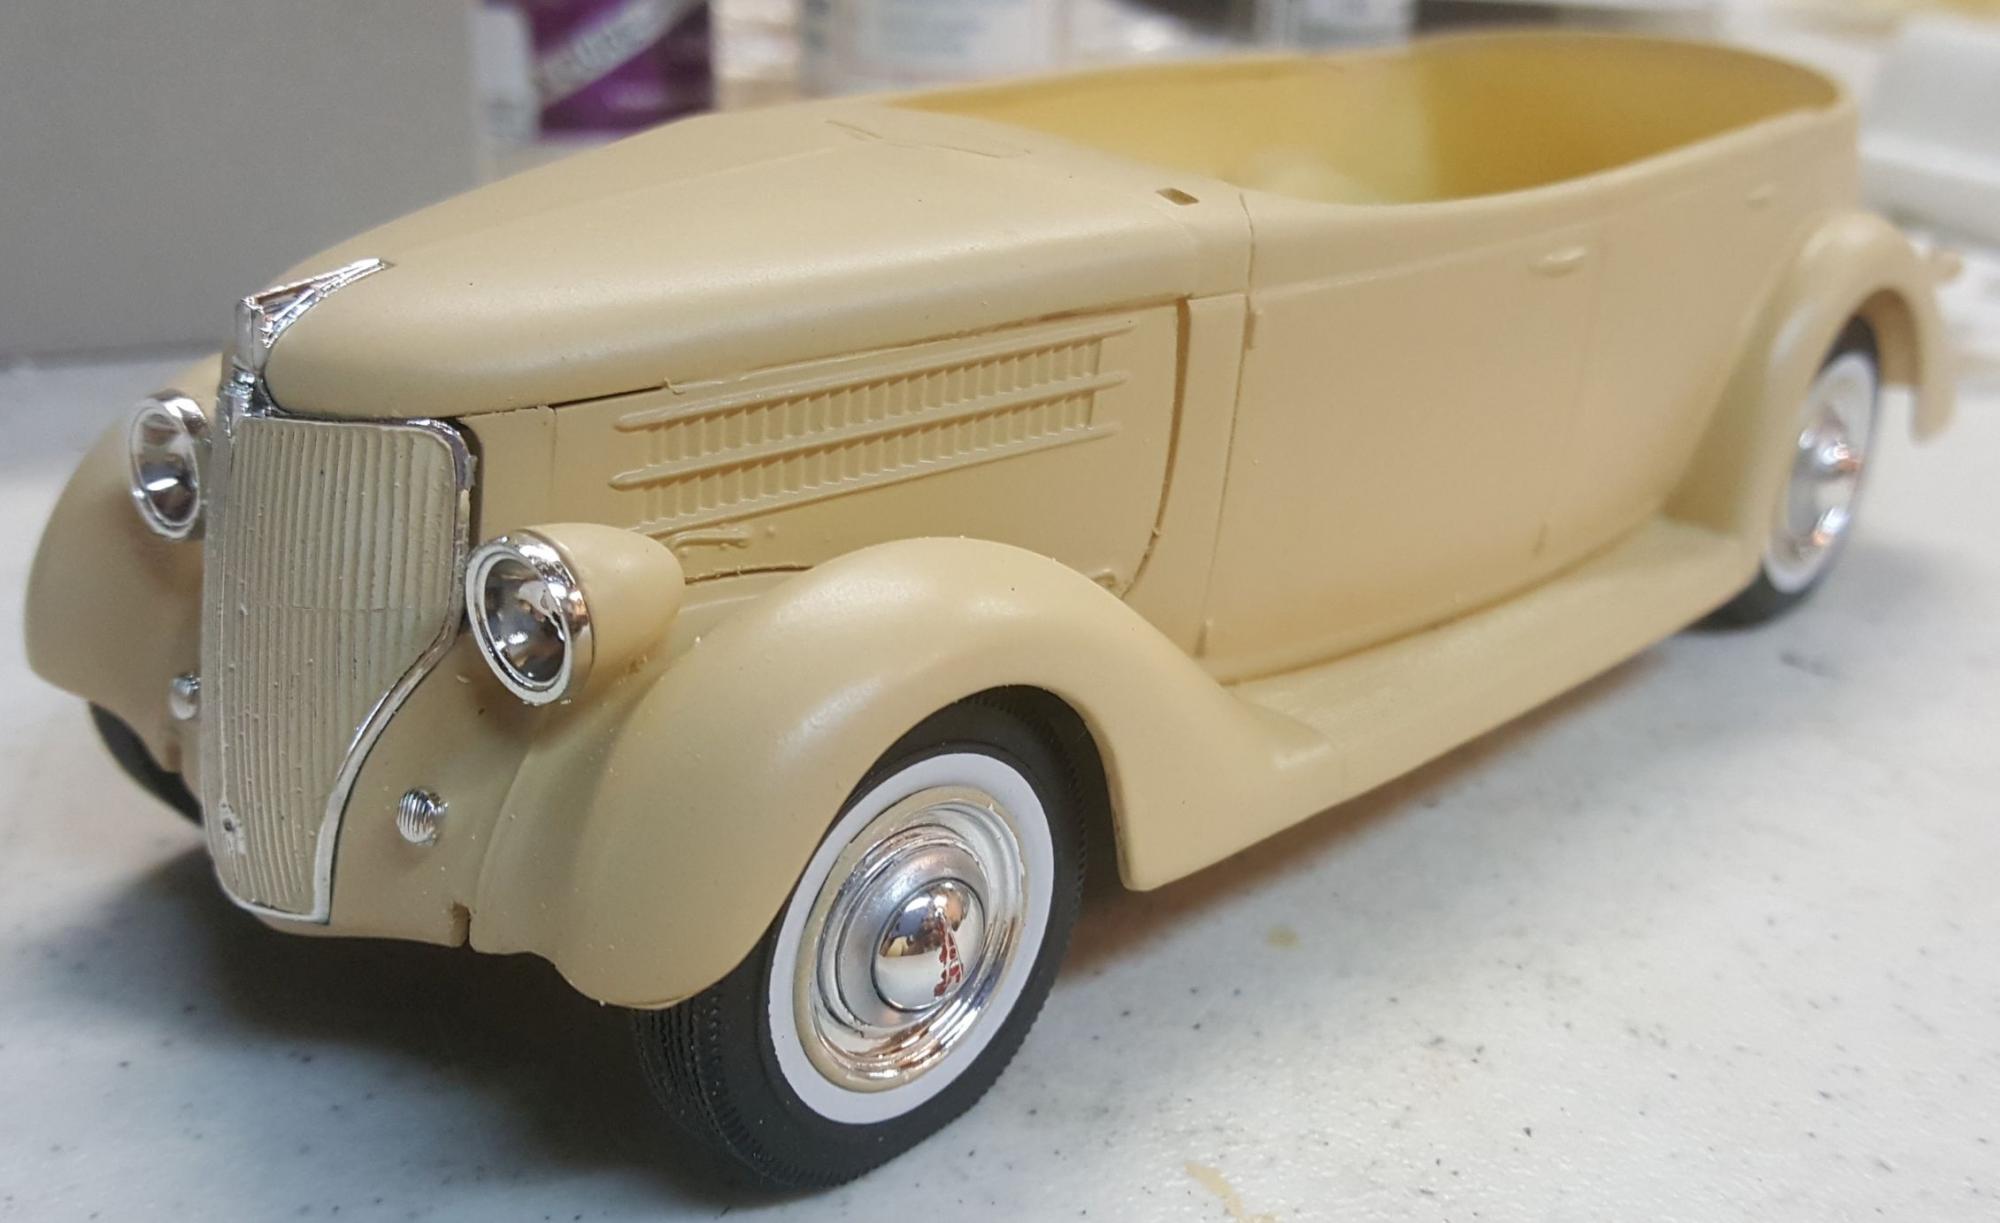
I've been occupied with other stuff and didn't get a chance to do any model work for awhile. The 1:1 car has been getting an engine rebuild and will be back in my shop in a few days to get the nose put back on. I'll be out of time to model build again for however long that takes. I also play in a community orchestra and we are getting in the final rehearsals for a couple of performances. It's been a busy summer and that's likely true for many of us. In the meantime an few things are done. The interior was finished and the top, so those pieces are installed, making the project close to finished. There are still a number of details to be built that aren't kit parts, like the outside mirrors, snaps on the top and the side curtain sockets on the top edges of the body. Sorry these pix aren't too good.

-
Some more bits glued on and interior work. have the panel in, though it looks less interesting in the model than the real car. It's a rather plain panel anyway. In the real car all the instruments work, which is somewhat rare as they have a delicate construction. Next up is the rear floor mat and then the seats. After that, the top, which will require some scratch building -- wouldn't be fun without some of that. Actually those chromed trim strips on the edge of the running boards are some small half round styrene strips with Bare Metal chrome, so I guess that counts. Current state pictures:
-
For sure, go for it. It will be a looker. John
-
Sprayed the running boards and then the gloss clear on the body, and also leather color on the interior panels. The interior work is going to slow things down some, especially the top since the exposed ends of the top bows and some of the interior metal bits will have to be fabbed out of brass and styrene. But I'm reasonable happy with it right now.
-
Thanks for the compliments, folks. Here is a little more progress. After listening to the good suggestions, I ended up making the welting out .012 monofiliament fishing line. There is a nice little V-notch formed where the fender meets the body side and that was uses to locate the monofilament. The line was painted with gloss black Model Master enamel and allowed to dry. I drilled a .013 holes in the running board where it meets the fender, then threaded the monofilament through and glued it on the bottom side with CA. The line then was stretched over the fender top in the V-groove and glued with a small drop of CA at the trailing edge of the fender. Another bit of the monofilament was bent in a vee shape and CA glued to the bases of the tail lights to form the edges of the black rubber gaskets on the real car. These gaskets were glued on with CA also, one half of the tail light at a time. Regards, John
-
Here's a little more progress, wheels on the frame and paint on the shell. Not too happy with the fit of the hood side panels, maybe a redo. Wheels came out with a reasonable facsimile of the spider wheel covers. Actually looks better in person because your eyes tends to gloss over the wiggly bits. The paint is a Humbrol mix that I originally did for chip touch up on the real car. It is a satin gloss, but will eventually get a high gloss clear coat.
-
Here's a question for the crew. This car has black fender welting between all the fenders and body, plus black rubber pads under the tail lights and at the joints of some of the front sheet metal. Does anyone have a good way to model this? I've been thinking along the lines of black thread, or soft wire. The real welting is just over 1/4 inch in diameter, so reduced to 1/25 that is .010 inch wire -- pretty small. A technique I've used before for really small details like badges is to use a small amount of clear enamel or lacquer to hold the item in place and was thinking that might work for this too.
-
Made a little modest progress, fitting up the nose parts, hood and the tail lights. The tail lights come from the donor kit and the right needed to have the rumble seat step trimmed off. So far everything is fitting up well. I'm getting close to painting the shell, so I dug my airbrush and compressor out from under the bench and set about getting all the fittings hooked back up. I'm planning to use some Humbrol enamel that I mixed up as color match to 1:1 car, so that part at least should be accurate.
-
I have a soft spot for TR4s as well. I drove this car at Sebring in 1968. We did well until about 8PM (race over at 10PM) and the car had somehow gotten too lean a mixture and holed a piston, putting an end to the effort. The team was 2nd in class with this car in a previous year. It had a Laycock overdrive and would go about 135 on the long straights. Nice work on the model. Glad to know there is a kit out there.
-
Got a little more done, just cleaning up and assembling the chassis. I'm trying to decide how much under body detail to scratch build for this model. The real frame has a series of holes in the vertical walls of the frame and a lot of the under body parts are routed through them, like the tailpipe and muffler which are cast on. There are so many discrepancies that the only real way to do it would be to scratch build the whole chassis and I'm not leaning toward the time investment that will require. Almost none will be visible without picking the model up and turning it over. I thought initially I'd at least add the brake rods and some of the front steering detail. My thought now is to paint it black and see how it will look. I think I will spend that time on the interior detail and give the undercarriage a pass.
-
Thanks for the kind words and comments. The wheels do make the model present well. I guess I ought to come up with some wipers and mirrors for it one of these days and do a little restoration. The underside detail is basic stuff, no engine under the hood. I also built the Gunze Cobra Daytona around the same time, but it has disappeared somewhere along the way. Those wire wheels were built (as I recall) of three layers of pe spokes stacked together with plastic disks that gave them the right spacing. It was a little touchy since the spokes had to be "flexed" to get right separation. I think this model was the first one I tried the rub on chrome on. It has stayed put remarkably well for the age and travels.
-
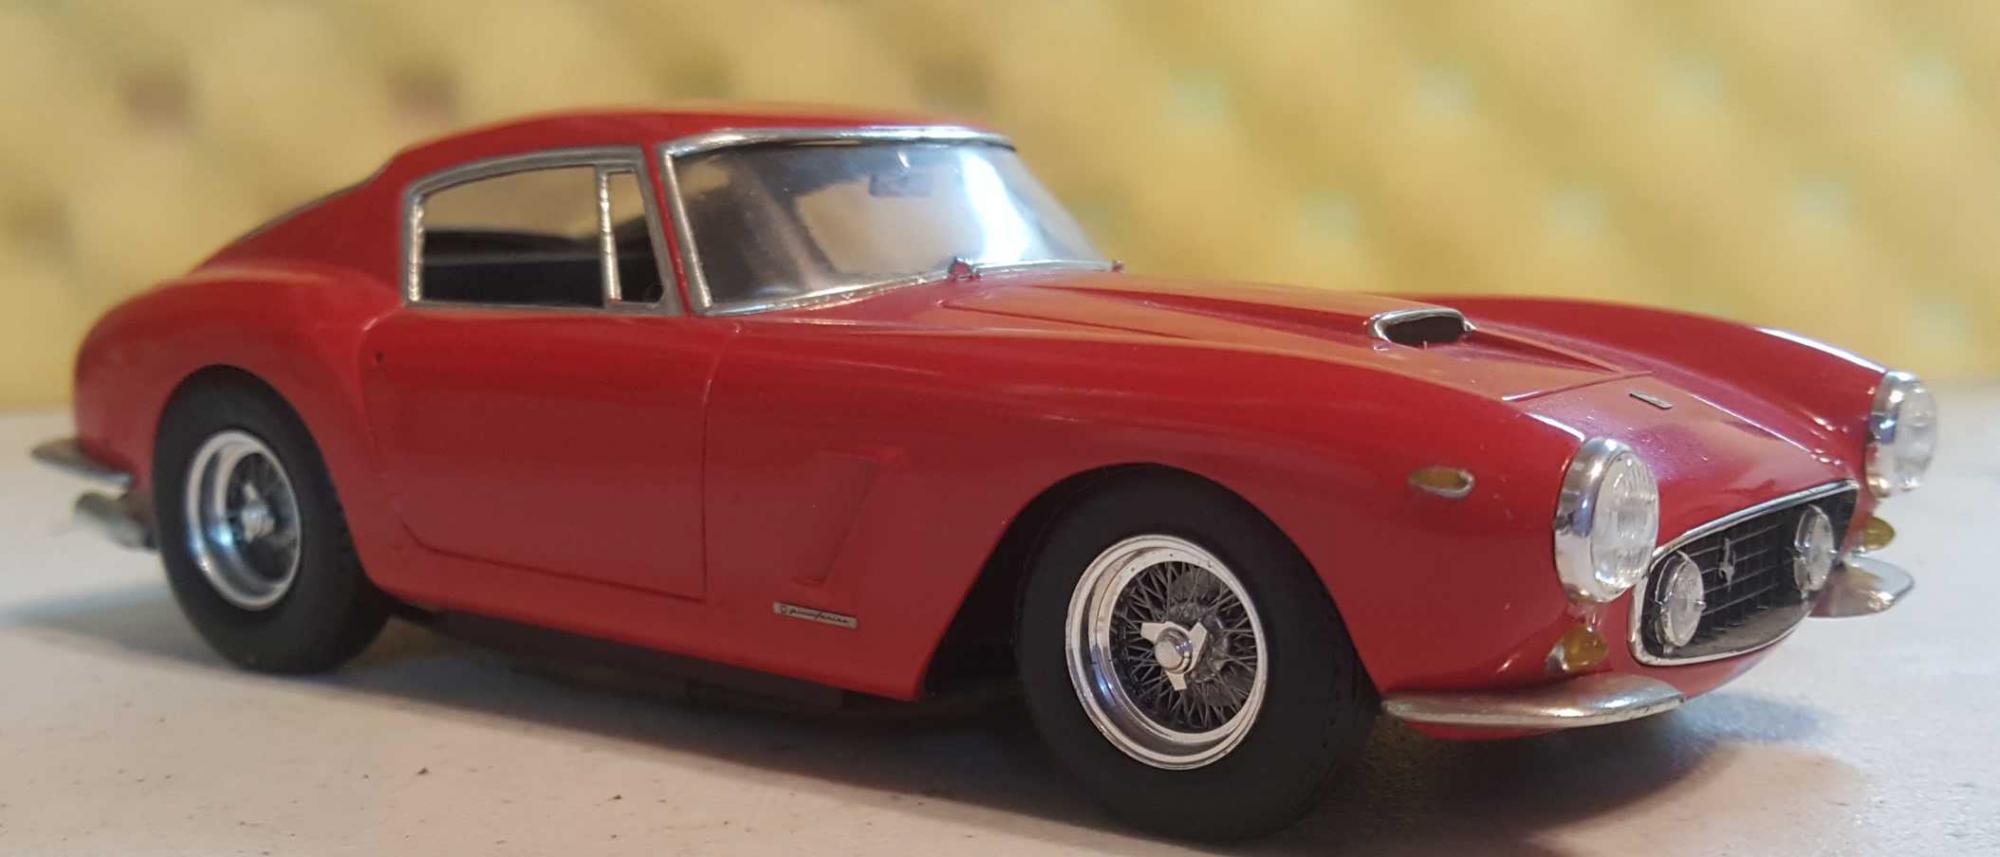
This is a Gunzi Sangyo kit built about 20-25 years ago. It has held up well considering it has been packed and moved six times in that span. This was an expensive (for the time) kit with lots of photo etched parts, notably the wheels, which make a good representation of the Borrani wires the 1:1 car came with. Back in my day you could buy one used for about $7000 (1964), now I guess they are $1M plus. I saw four of these run at Sebring in 1960s. In those days they could be driven to the track, run 12 hours and then driven home. Not so anymore.
-
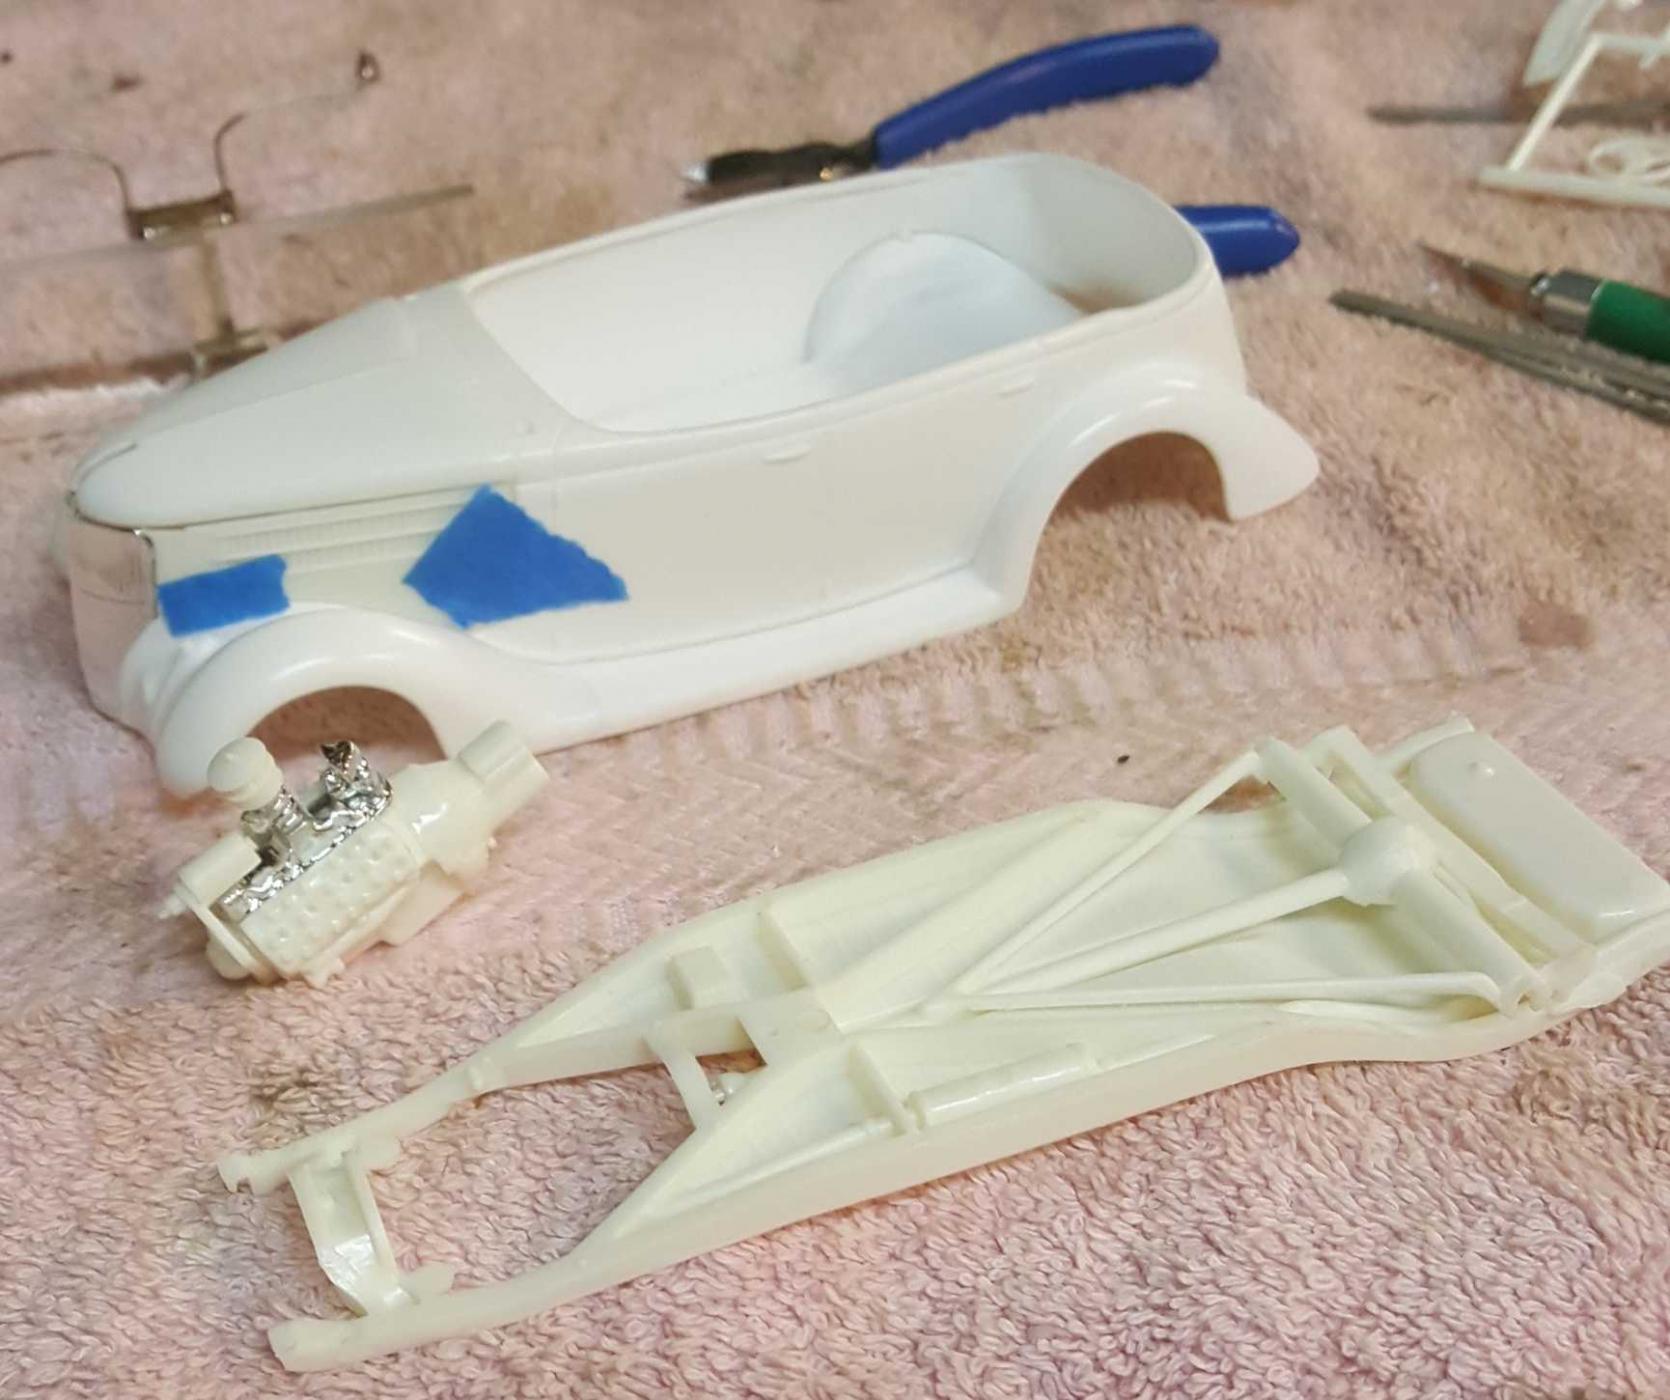
So the AMT kit arrived and I shook all of the parts out of the box to have a look. On the resin side, the body was assembled to the fenders. This fit was OK, but off a little at the tail end, which was corrected with a few rubber bands. After the glue was set, i taped on the hood and nose parts from the AMT kit and this all was an excellent fit. In fact almost too good. The real car has a gap at the bottom edge of the hood sides. This gap is about 3/8 inch wide. The plastic parts are a flush fit, so will have to sanded a little to have the correct look. This is going to be an OK build I think, having the basic parts fit as they should goes a long way to making the project fun.
-
The two kits together will be about $65. You can see the Motor City site here: http://motorcityresincasters.com/ I bought the AMT coupe from HobbyLinc. That Buick will be an interesting project. Properly done, a restoration can make the car a family heirloom for another 80 years. Be sure and document everything about it.
-
.jpg.238624ae01ad47a74b8b8979bad672f6.thumb.jpg.5e856912afb8655e6ad83691622582b9.jpg)
1963 Corvette Grand Sport (update 8/16/16)
J Witt replied to RancheroSteve's topic in WIP: Model Cars
Wow, those models bring back some memories. Got to see the Gran Sports at Sebring prior to '64 Nassau race. Superformance is building full scale replica cars now, if you have the bucks. http://www.superformance.com/corvette.aspx By the way Delmo passed away earlier this year. A legendary figure in the Texas racing scene. -
Thanks for the kind words. So far, all I have done, pending getting the AMT donor kit, is to clean up and test fit parts. The interior panels fit well and the mating edges are chosen to match the full scale dividing lines between metal and upholstery, so that will make the interior work easier. This phaeton has an interesting history, having been owned for a large part of its life by Dee Howard, of Howard aviation fame. It spent about 40 years in his car collection, indoors in San Antonio TX. The car was "restored" by him and his shop crew in about 1978. It is mostly straight up box stock, but has some interesting changes, like a full stainless steel exhaust system and aircraft style fuel lines. Howard's shop was a large aviation business doing aircraft maintenance, custom interiors and aircraft modifications to WWII planes into business aircraft. http://www.deehoward.org/ It's in very nice condition, but is currently being readied for an engine overhaul by Josh Mills Co. http://millscustoms.com/ , here in Marietta GA. Most of the other rework required has been small items, like old rubber parts that have deteriorated. Hopefully the model and the full scale car will hit the road about the same time, 4-6 weeks from now.
-
Adventures in soldering:The GT40 project New pics 2/13/17
J Witt replied to Randy D's topic in WIP: Model Cars
Very nice work. What kind of soldering tools are you using? I was fortunate enough to see the GT40s and Daytona coupes running at Sebring in the 60's. Pretty indescribable racing in that time period, which was also the heyday of the Ferrari front engine sports racers and the GTO/SWB Berlinetta cars and many others. -
I have a full scale 1936 Phaeton and I was delighted to find the Motor City Resin Casters kit for this car. I just received the resin kit, but haven't gotten the AMT donor kit in the mail yet. That part should be here in a couple of days, since HobbyLinc is only about 25 miles from me. Here's a photo of the full size Phaeton. It is an early '36, so has some features that are different than the later cars, mostly in small details of the dash and engine. Many of those details will be irrelevant to a model. If anyone needs reference info on early V8 cars, let me know and I may be able to get pictures for you. I belong to the local EV8 club and they have a wide age range of cars in stock trim. The MCRC kit is very nice quality, no pinholes to speak of and excellent parts fit. I've just started cleaning up the castings and have yet to glue anything together. I'm waiting to get the AMT parts to start in on the trimming and trial fit process before gluing anything. It's going to be nice to have the reference vehicle sitting in the garage. Regards to all, John
-
I've been modeling planes, trains, cars and boats since I was about 6 years old. Always have to have some kind of project on the burner. I have a full scale 1936 Ford Phaeton and stumbled over a resin kit for this car that uses an AMT '36 Ford coupe as a donor car. Thought I'd find a good forum to pirate suggestions and tips.Hope you guys will help me out.


.jpg.d29f61da3462ee84fc8a3bb9ccc965c1.jpg)


.jpg.551db8b476d927fb394e4903ecd15347.jpg)


.jpg.bfd5bb3e74ffa98cd79c1c03a02425e2.jpg)