sdbos777
-
Posts
48 -
Joined
-
Last visited
Content Type
Profiles
Forums
Events
Gallery
Everything posted by sdbos777
-
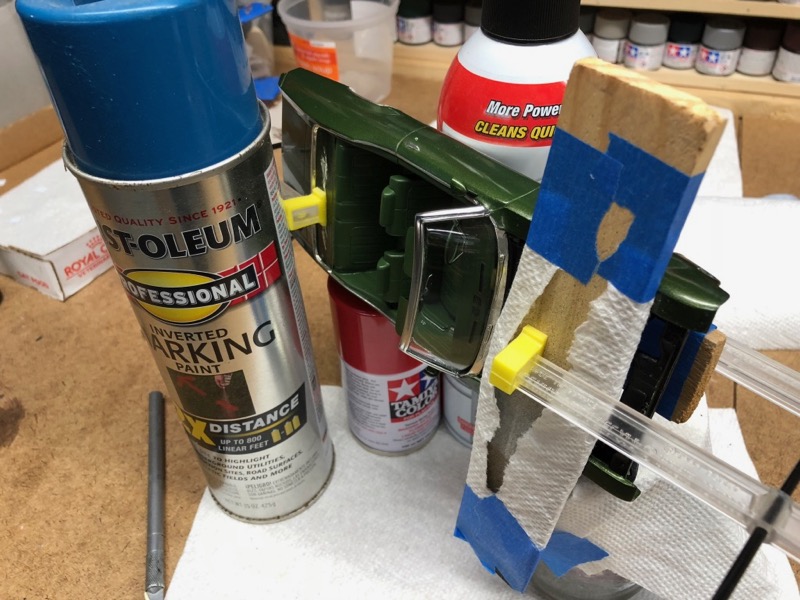
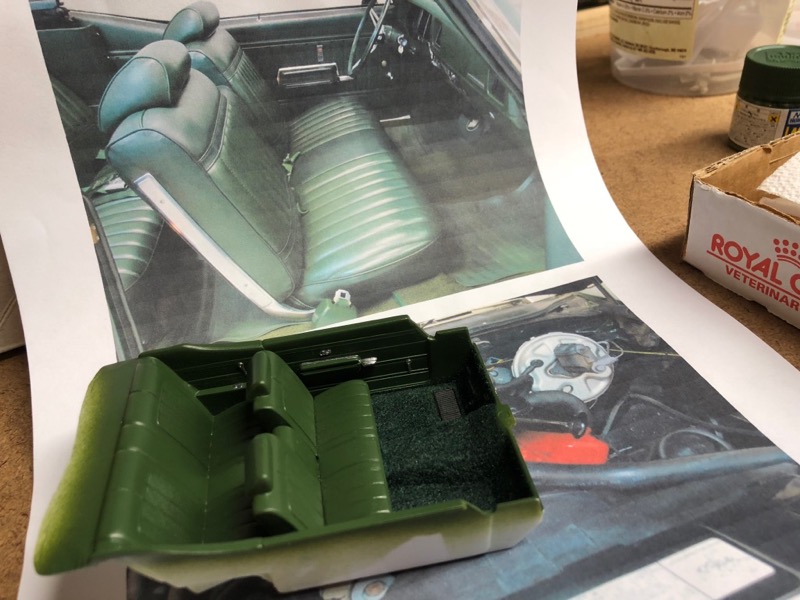
@ewetwo The interior is not two-tone. It is Mr Color 129 Dark Green thinned and shot through a 3mm airbrush. The carpet is Ken's Kustom Fuzzy-Fur 122 green, mixed heavily with black to darken it.
-
Converted Monogram's '70 Buick GS hardtop to a '71 GS convertible (see on the workbench)

-
Under glass (I'll probably post pics in that forum too)
-
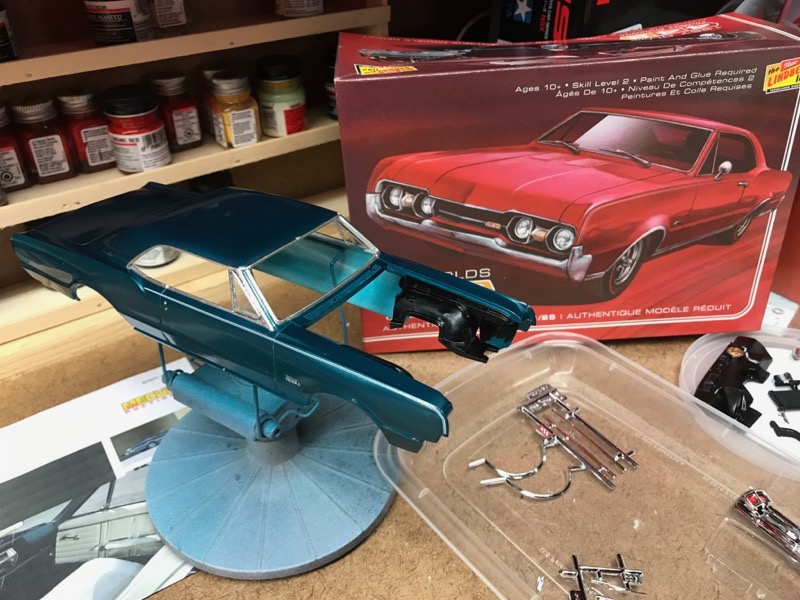
Final Assembly
-
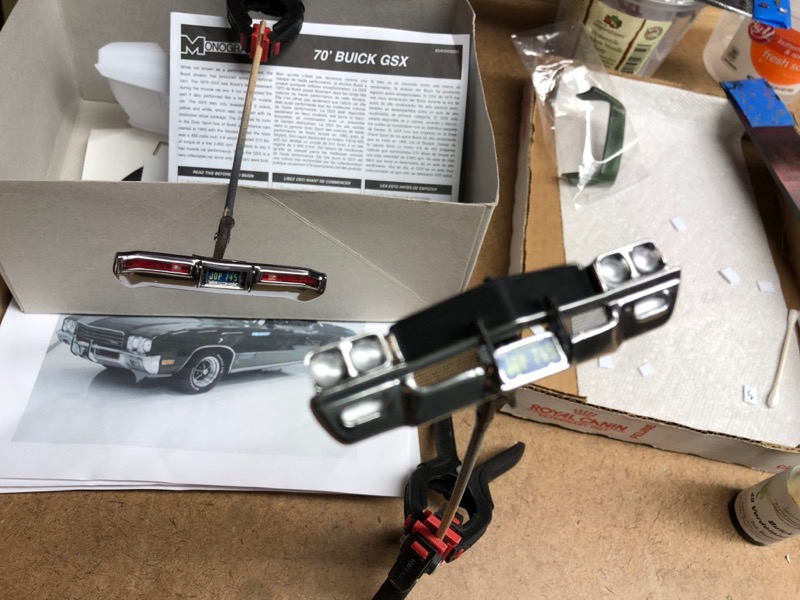
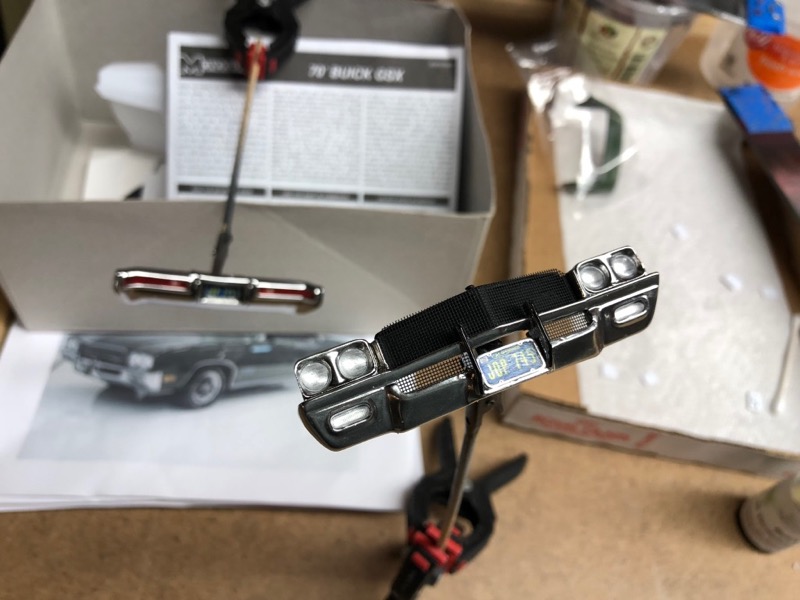
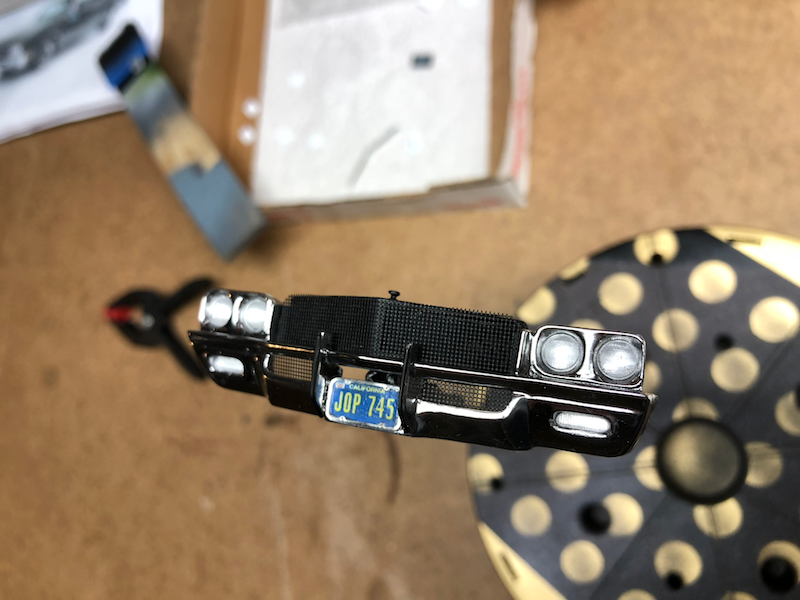
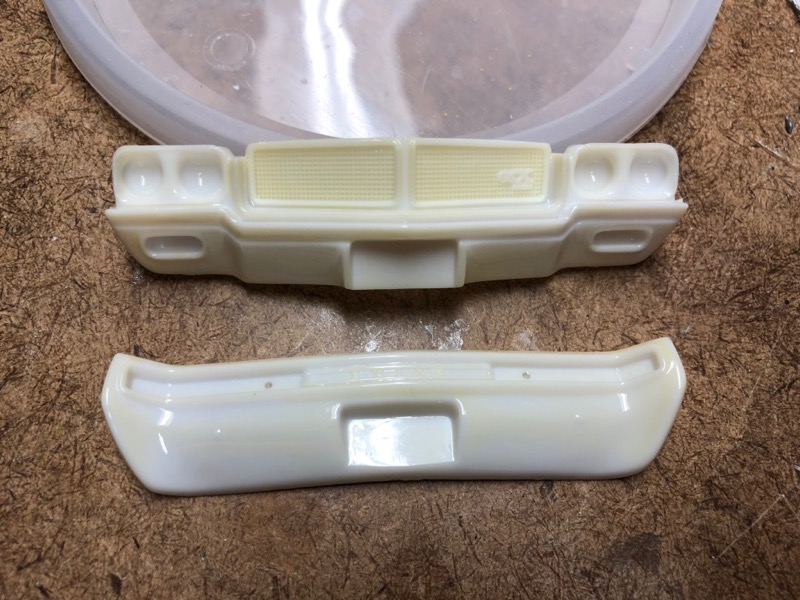
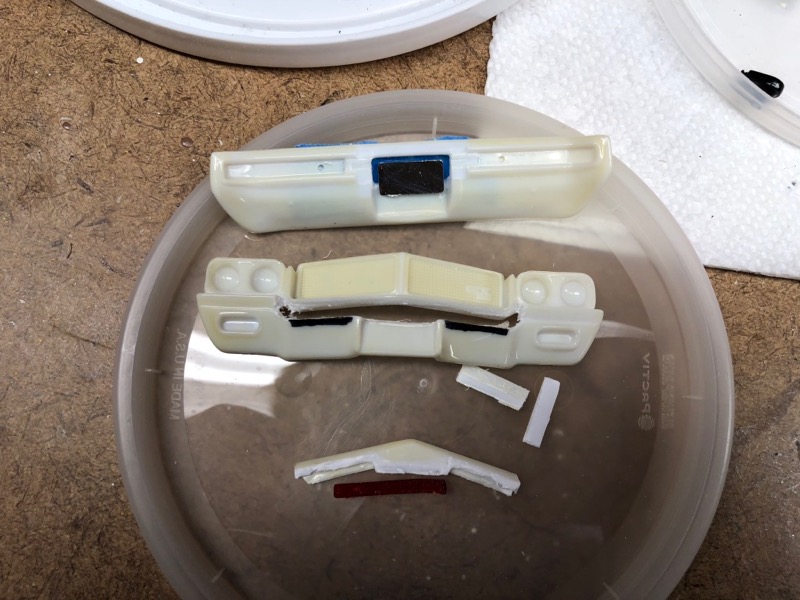
Bumpers ready to be installed.
-
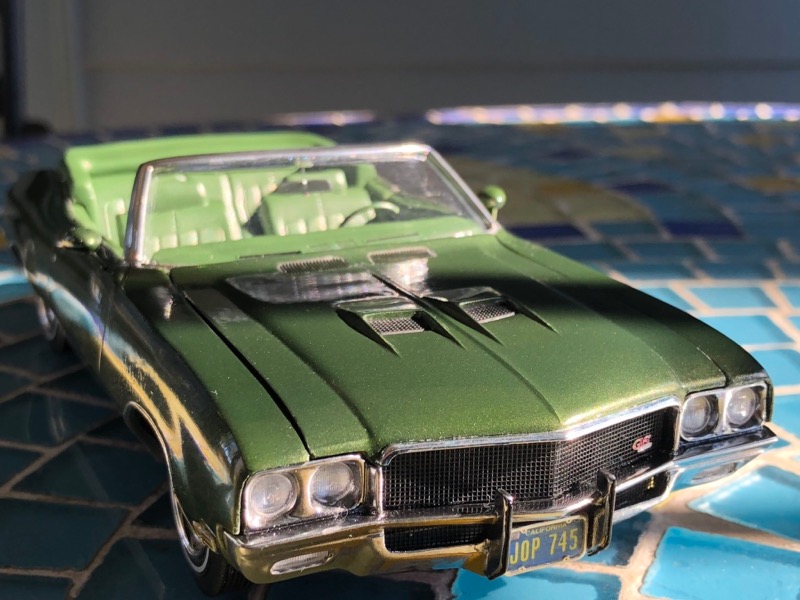
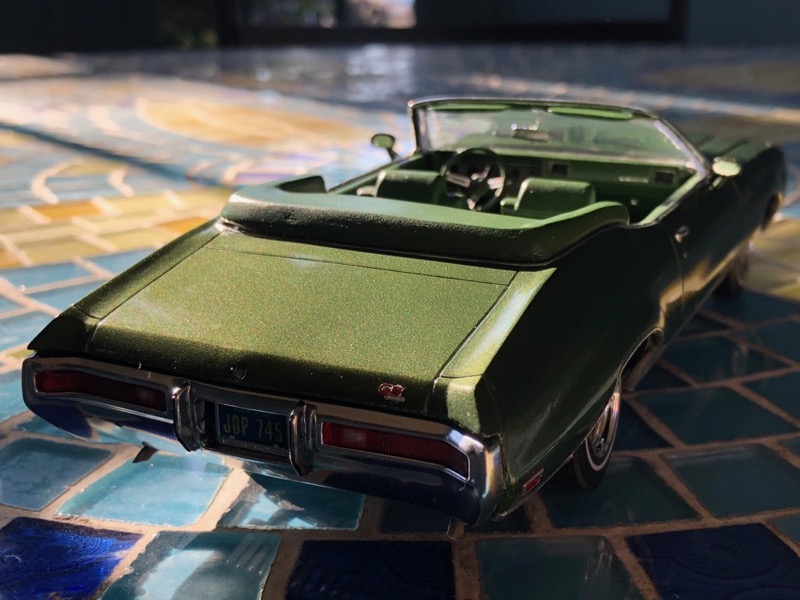
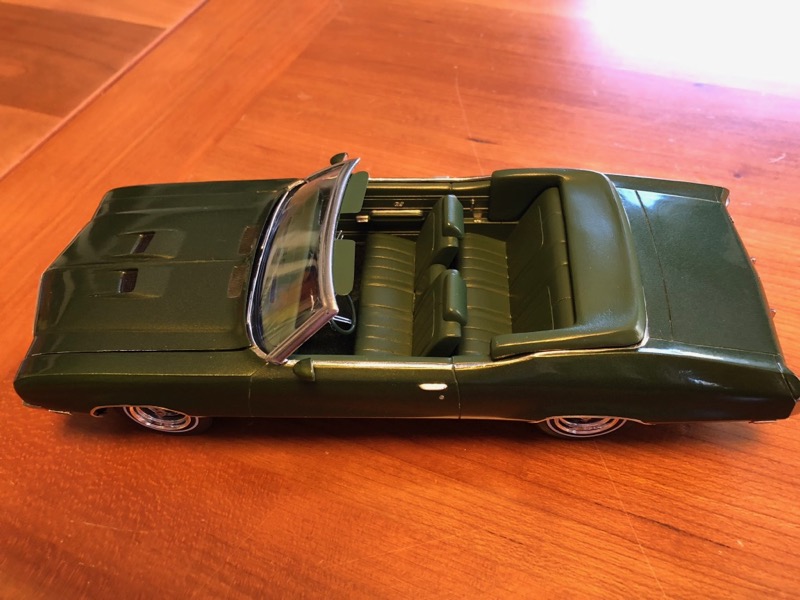
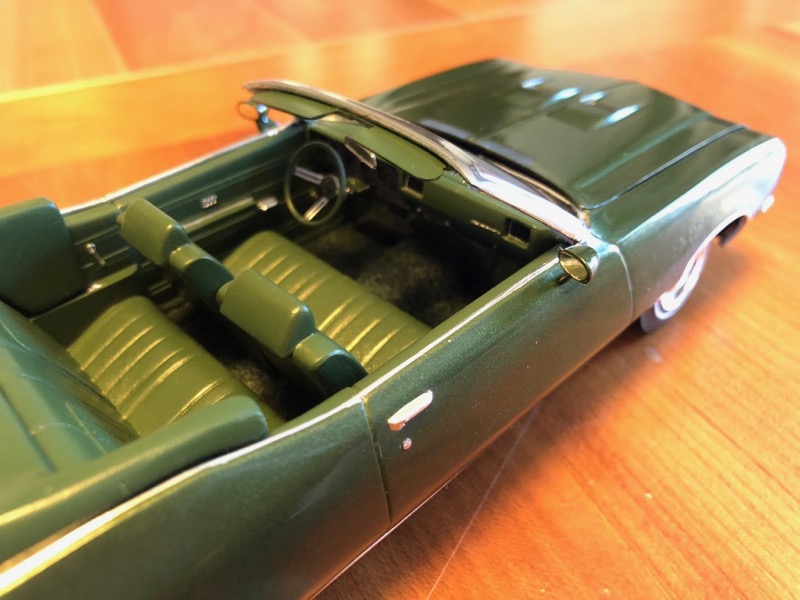
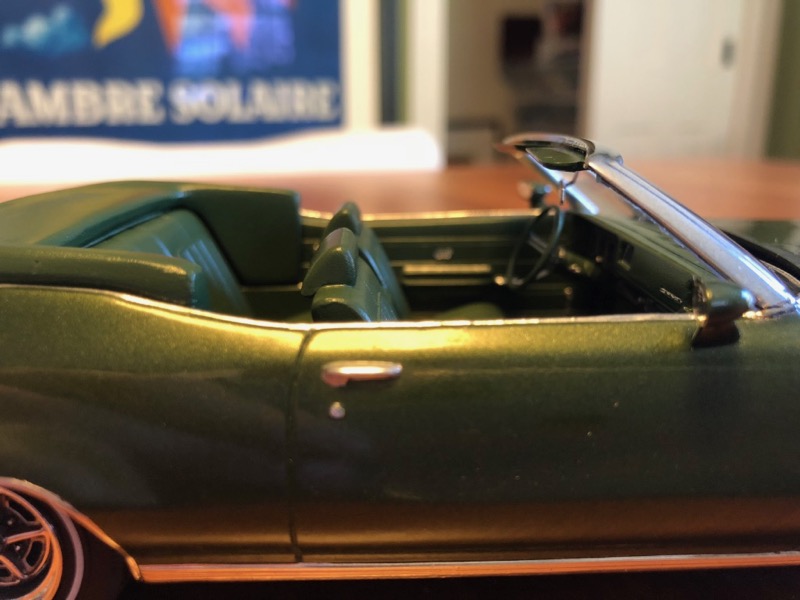
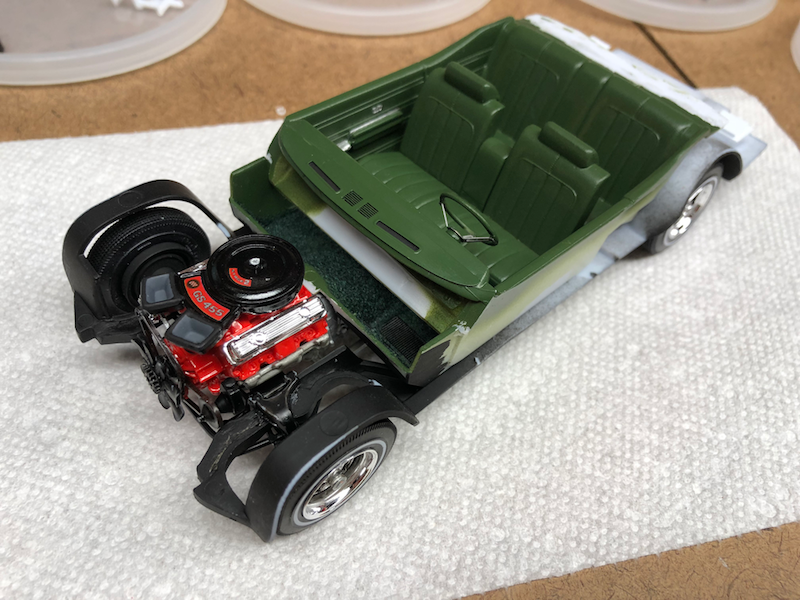
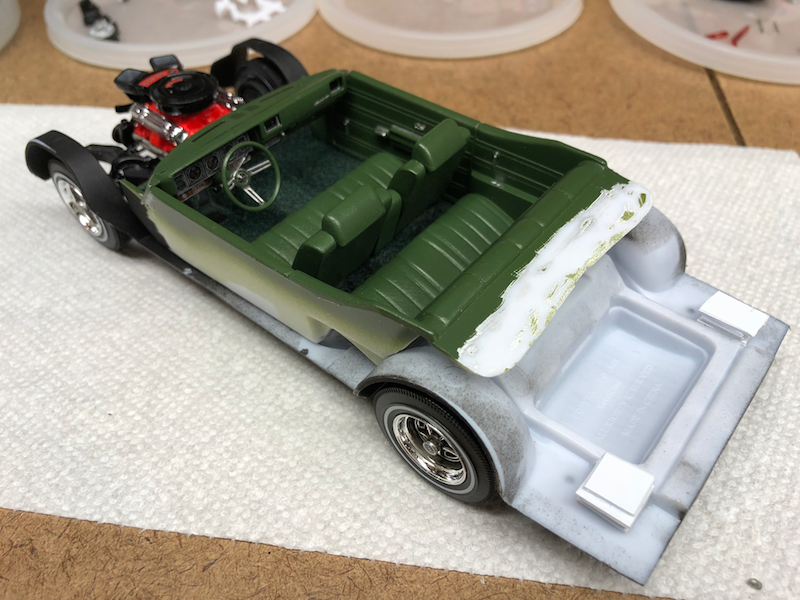
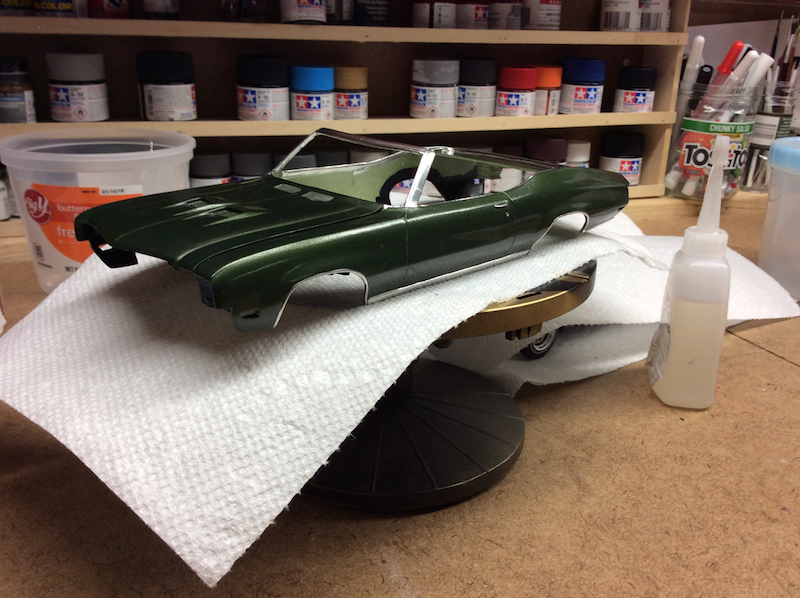
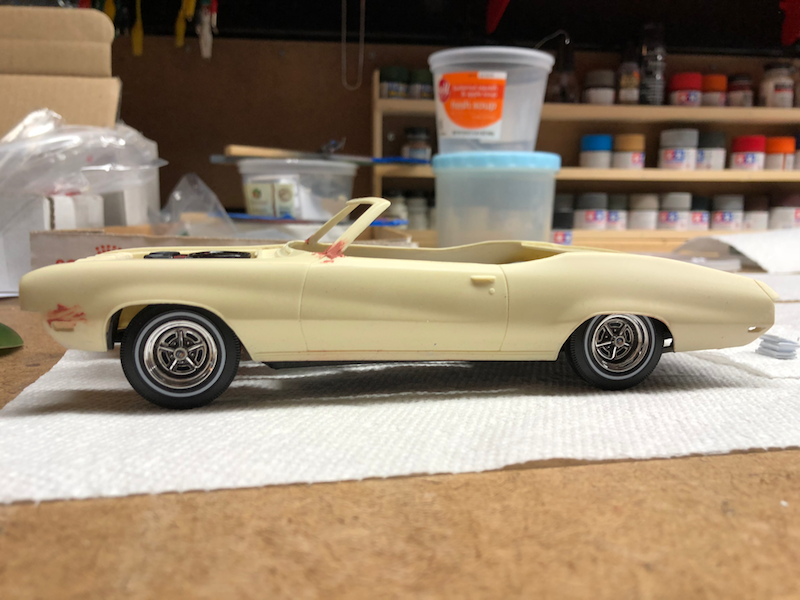
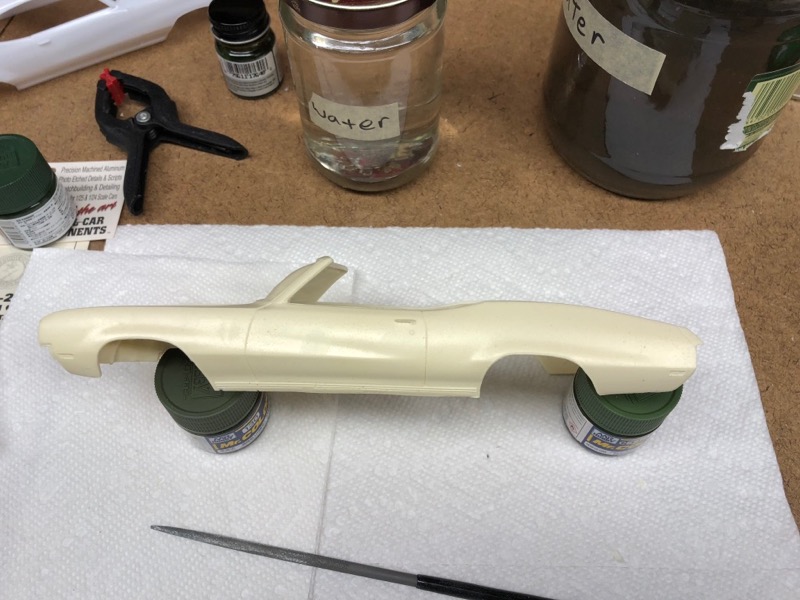
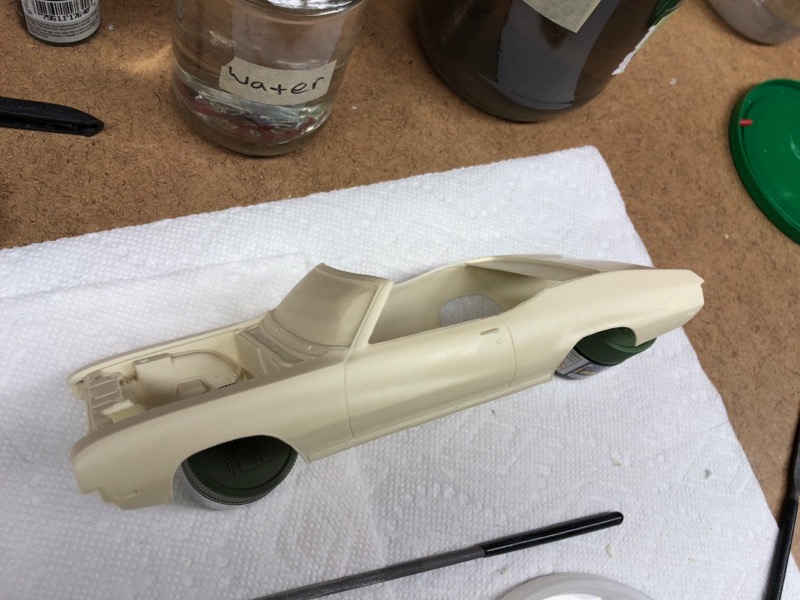
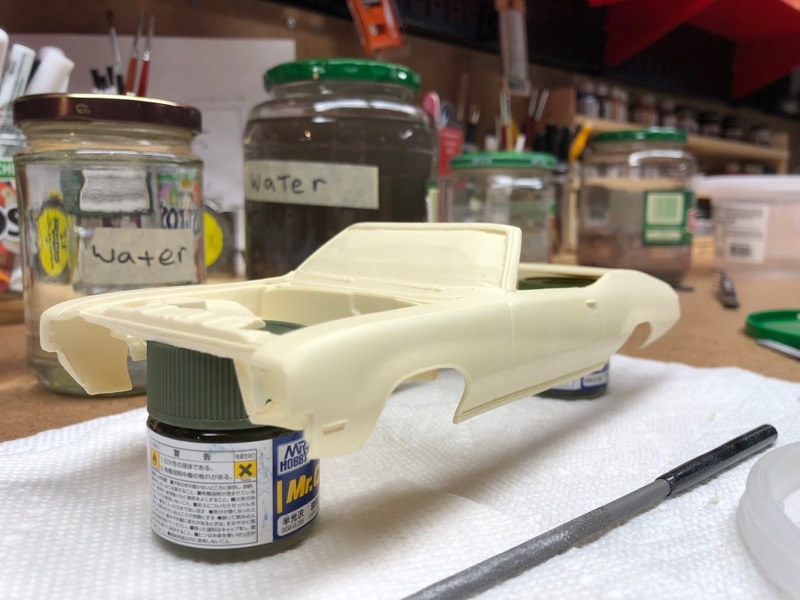
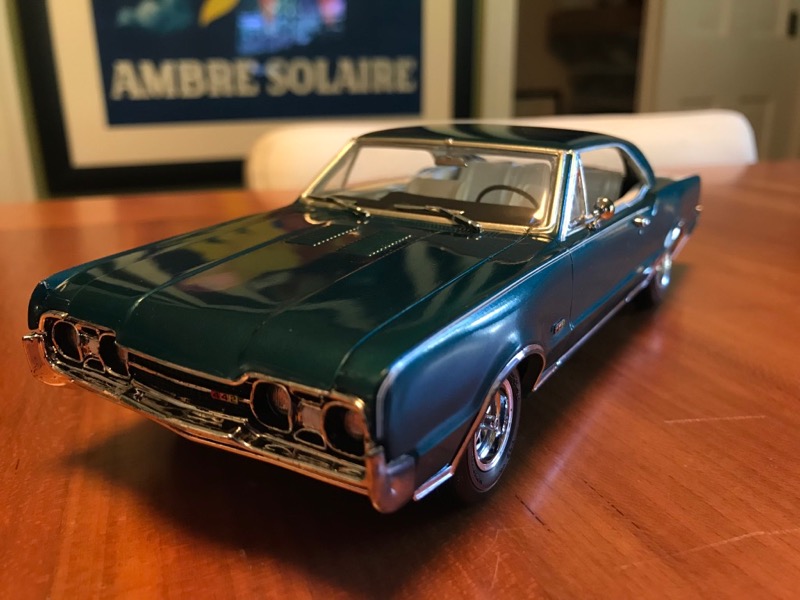
Here is the completed interior and chassis, and the body with paint and foil all done. It is Buick Verdemist Green from Scale Finishes. Tamiya white primer, then the Verdemist color, then Alclad clear coat, pretty heavy. Then rubbed out with 6 sheets 3200-12000, 3M rubbing compound, micro-gloss liquid abrasive and, finally, The Treatment model wax. In the photo the windhield frame is foiled, but the frame is delicate and it flexes and caused little ridges in the foil. I took it off and am doing it in alclad chrome. The resin body did not sit completely right on the frame - too low in the back. I added stacks of flat stock styrene onto the chassis and under the trunk (you can see the passenger side stack in the picture of the painted body). When I put them together, the stacks will meet up, and I will slip in some final pieces of flat stock between the upper and lower 'piles' to align it properly.
-
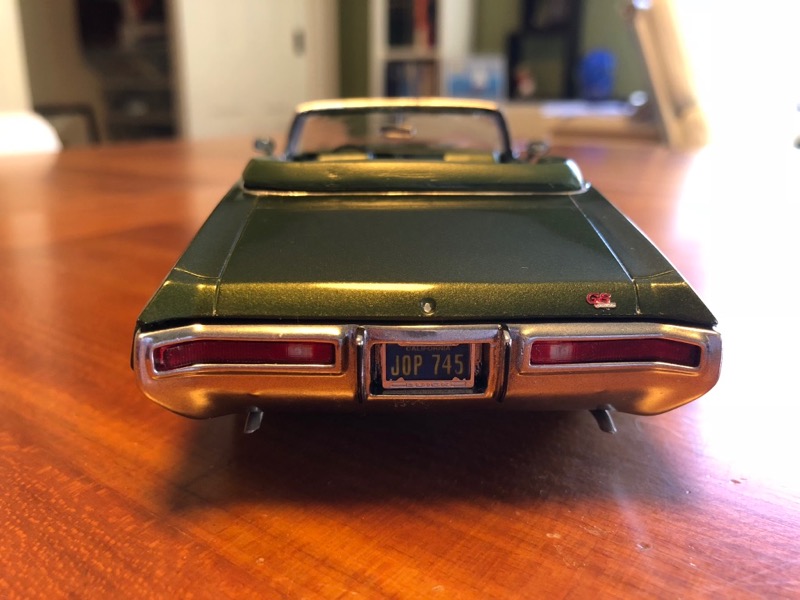
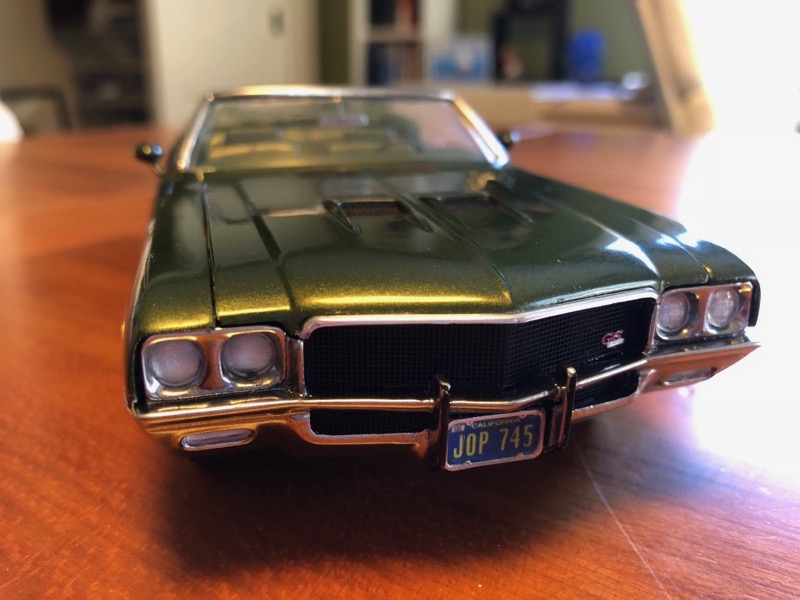
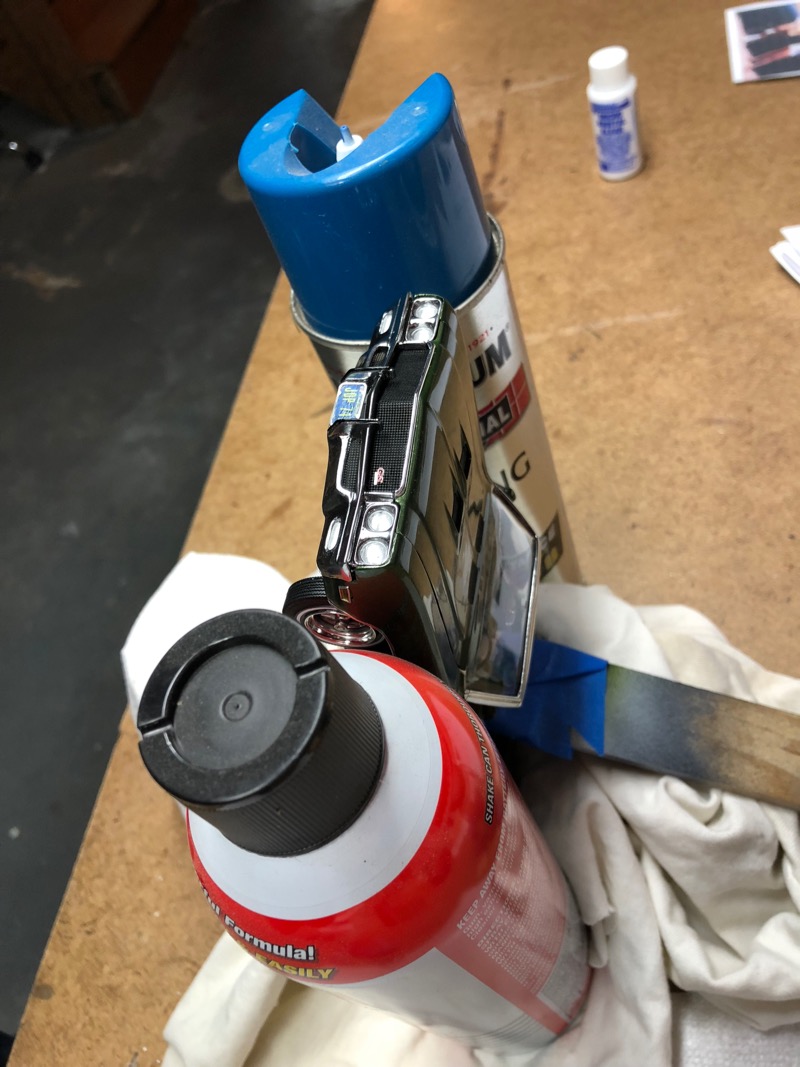
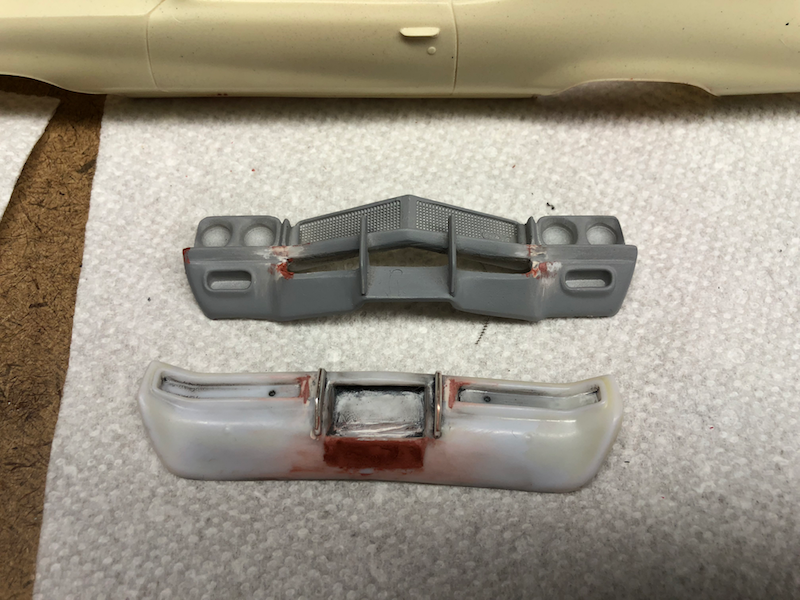
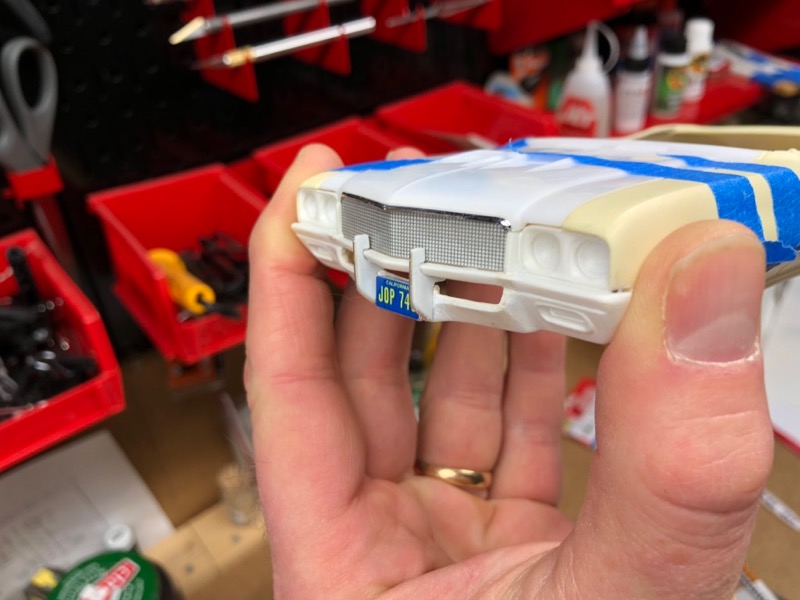
Afte much puttying and finagling, the front bumper is looking like a '71. The finished product will have the red "GS" logo on the grill. It likely won't have the fine silver trim work - I've tried jewelers wire, guitar string, hard spring steel rods fractions of a millimeter wide - none seem like I'll be able to get them into the proper shape, be smooth enough to look good, and be affixable to the model without the risk of ugly glue on the grill. So a black grill, which looks fine, is what it'll likely be.
-
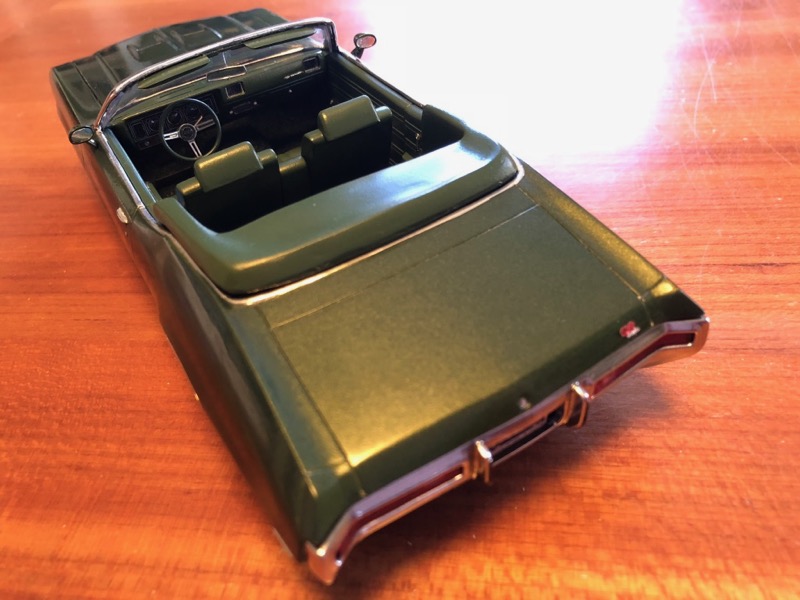
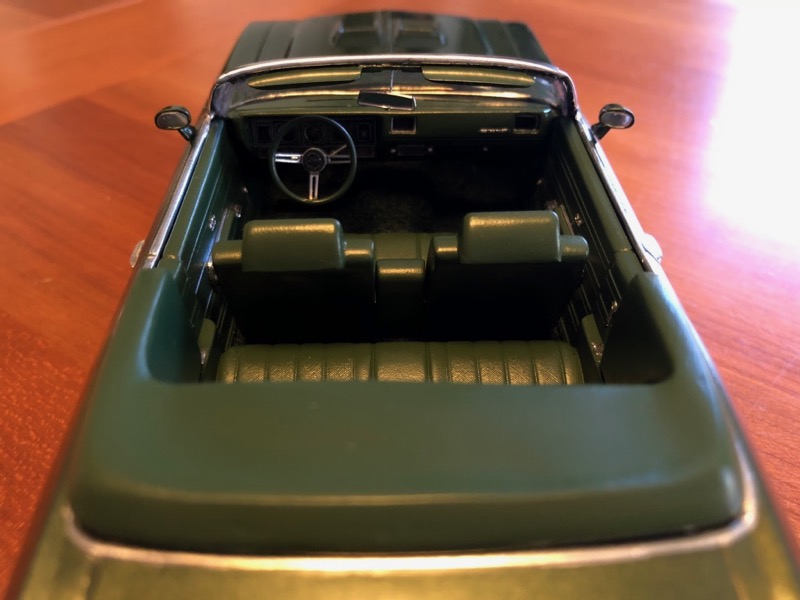
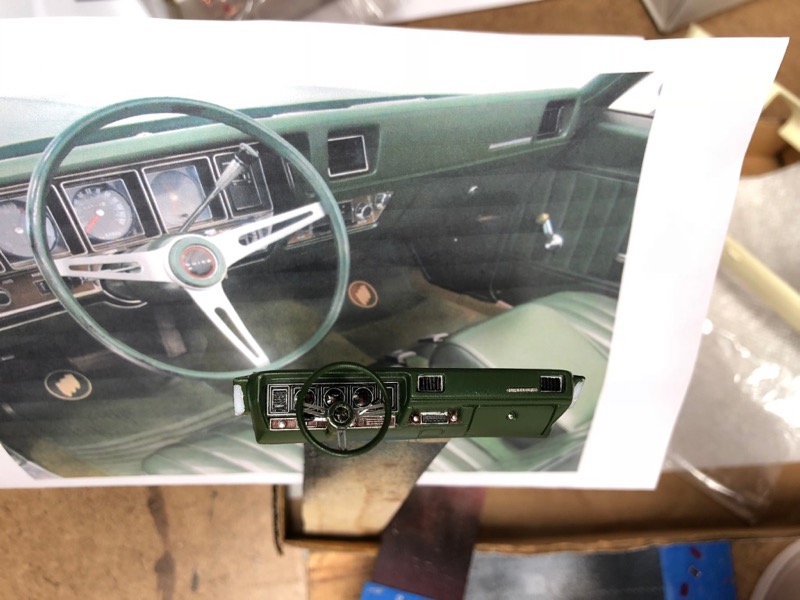
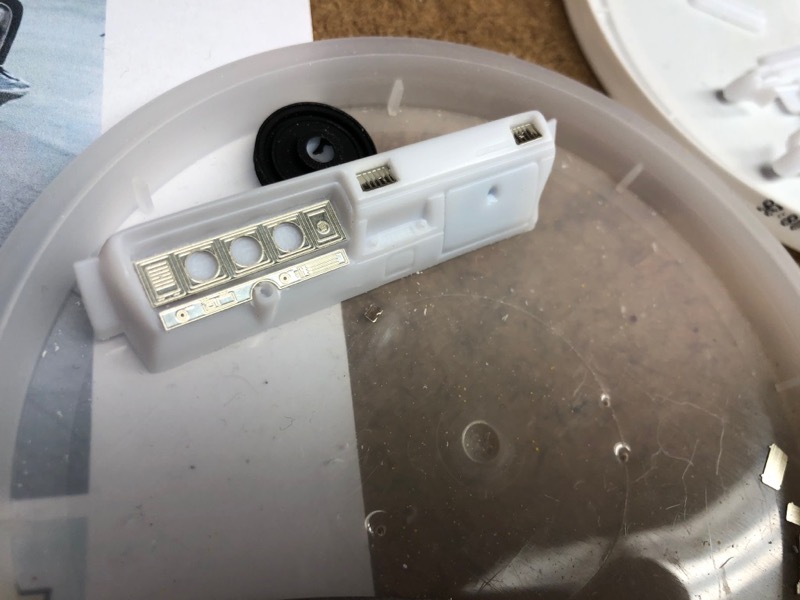
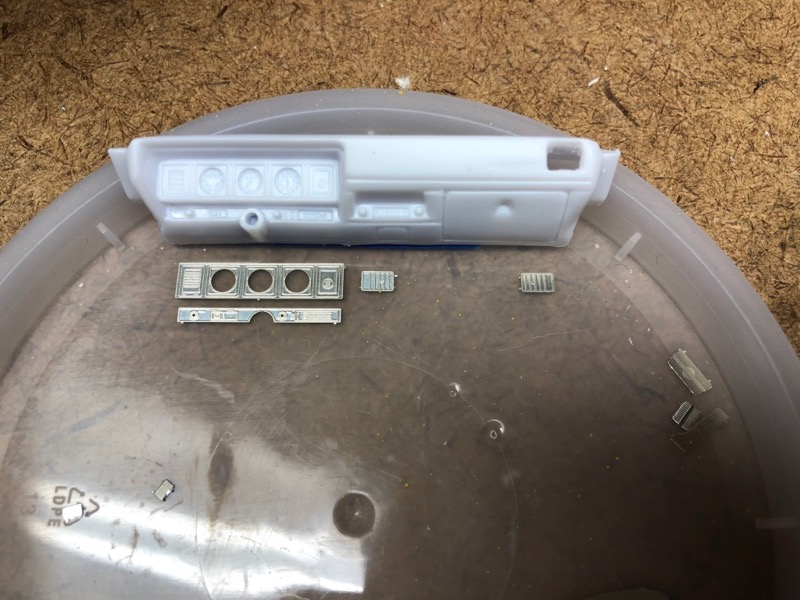
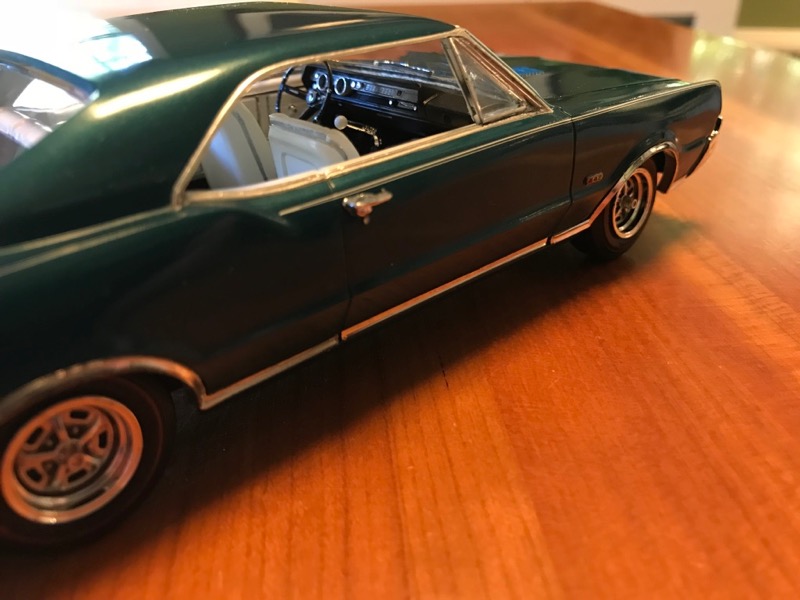
Dashboard Done. As the original kit had a console, I had to add the shifter stalk.
-
More pics of current progress. Last remaining fabrication issue is how to add some horizontal lines to the grille. I'm thinking artisan wire, very small scale.
-
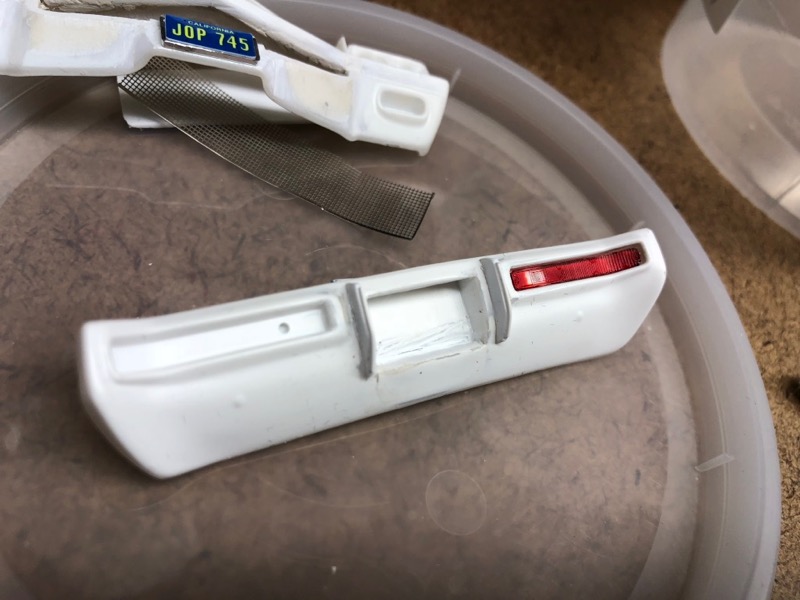
Progress today. Back bumper - glued in styrene rod to shape the new spaces. Putty will fill it all in later. Front seat - I bought a second kit, cut out the back seat and cut it down to be a bench front seat. I cut the headrests off the bucket seats that were in the kit. I will fabricate sides and back, putty, etc. I may cut the seabacks down a bit, as they look high. Dashboard - the 70 didn't have a center vent, but the 71 does. I'll cut a hole for it and use the photo-etch vent cover.
-
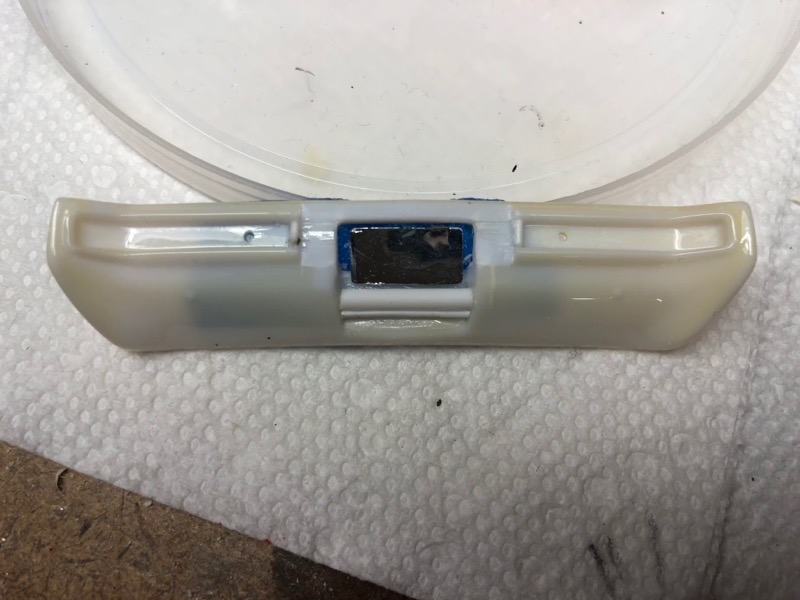
I had time to begin transforming the bumpers from '70 to '71.
-
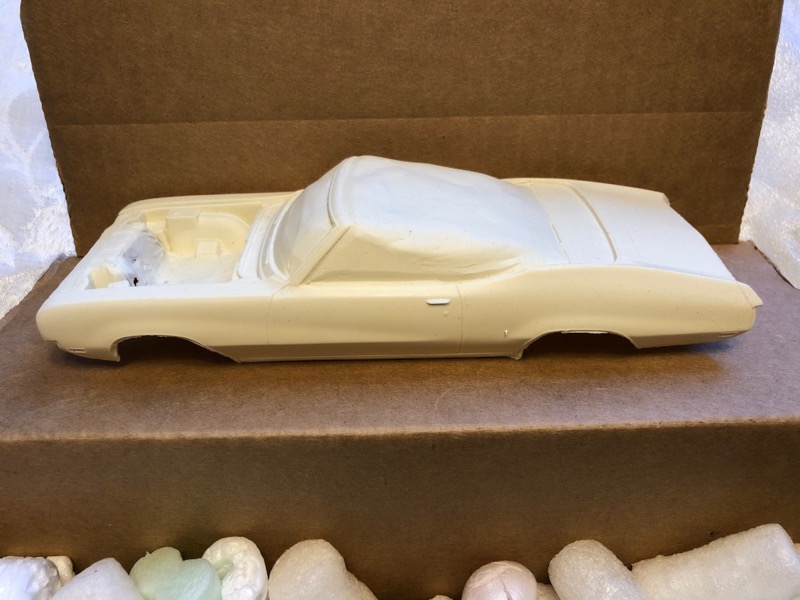
The body I received looks pretty good. The pics below show it as received, and after some initial cleanup. Beil
-
Bump. Anyone know a good photo-etch mesh that I could use for the grill?
-
Can anyone recommend a type of photo etch mesh that I could use to make a new grille? I've been doing a lot of googling and have some options, like this, but I've never made a grille from scratch before, so I thought I'd check with the experts. (I.e. you guys.)
-
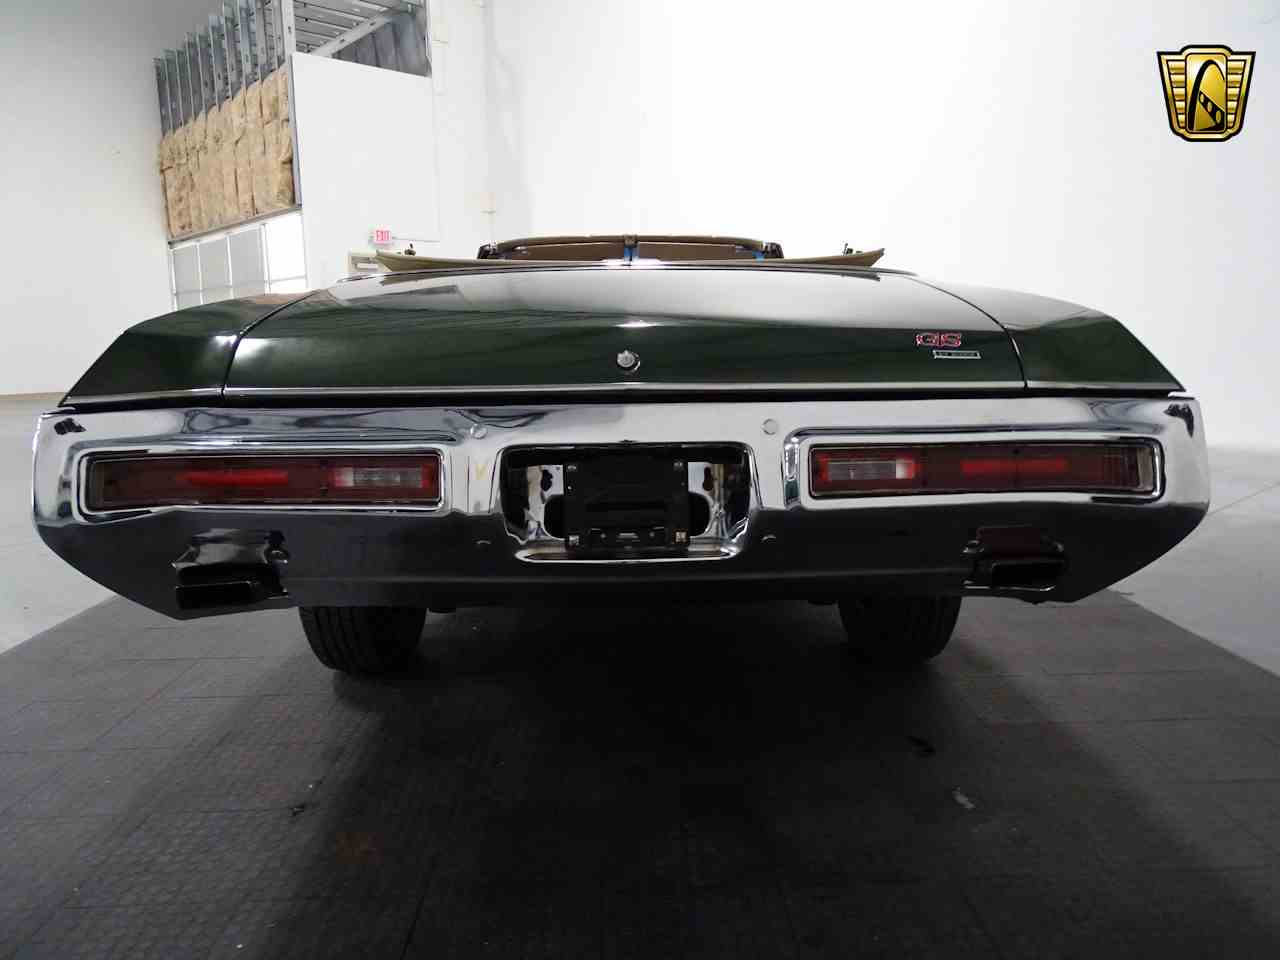
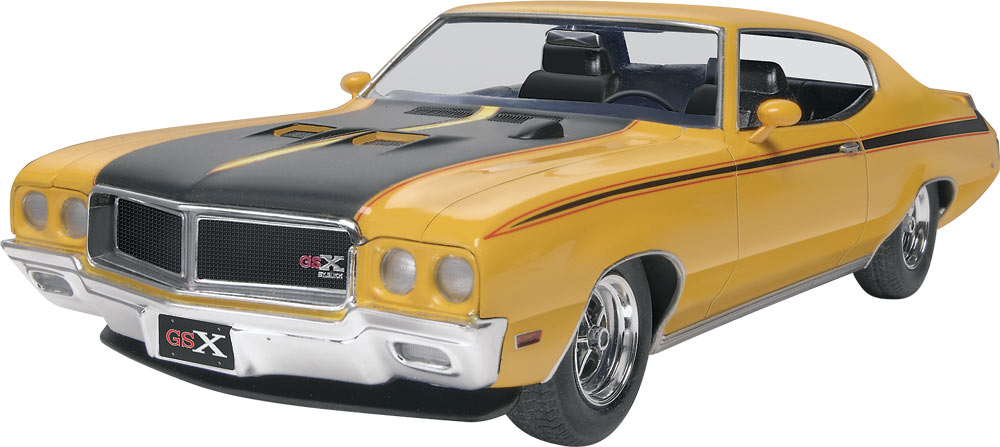
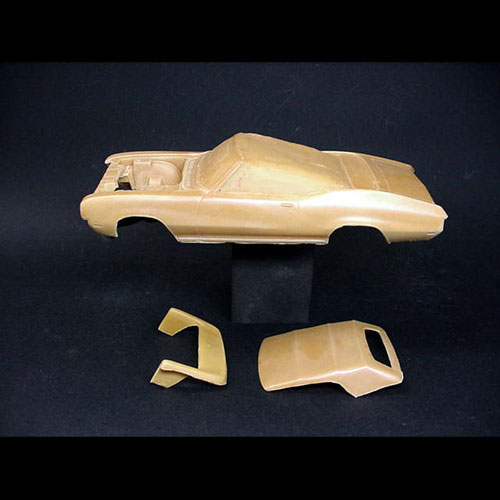
I have Monogram's '70 Buick GSX kit, and I'd like to build a '71 GS convertible. I ordered a resin convertible body from Mill City Replicas. The only other real differences between the years are the bumpers and the grill. --> Does anyone know if there is a '71 version of the bumpers and grill out there that I can use? Someone making them in resin or something? If not, I'll have to fabricate them. Below are pictures of the front and rear of the 1971 GS, which is slightly different from '70, the Monogram 1970 kit, and the resin convertible body I ordered.
-
El Caballo - I highly recommend this kit. It is nicely detailed, well molded, and well designed. There are positive contacts for nearly all parts, and everything fits together as it should. Well, mostly - the front-end bumper/grill assembly does not fit well and took much finagling, and I still did not get it quite right. But everything else all went together perfectly and easily. This kit was a joy to build.
-
I ordered a Molotow acrylic pen, and it worked great.
-
Well, after some more googling I found threads about how enamel and oil-based paints won't dry on rubber, or really on any glossy surface. No idea why that didn't come up during my initial "which pen do i need" search. Anyway, I've ordered a could of red pens that are acrylic based, from JetPens: https://www.jetpens.com/Sakura-Pen-Touch-Paint-Marker-Medium-Point-2.0-mm-Red/pd/14161 https://www.jetpens.com/Molotow-ONE4ALL-Acrylic-Paint-Marker-127HS-1.5-mm-Traffic-Red-013/pd/16014 Together they were $16. Hopefully they'll do. Now I'm going to scrub the useless red gelly ink off my tires.
-
Maybe, but the reason that I got a Gelly pen for the redline tires is that others in the forums were recommending Gelly pens for whitewalls and such.
-
I got a red Gelly pen and a circle template to make the plain tires in the AMT 1967 Oldsmobile 442 kit into redline tires. The red lines came out great, but - THEY AREN'T DRYING. Even after a week the red lines are wet. I've tried sitting them in front of a space heater, blowing warm dry air over them for hours, but they're still wet. Has anyone else had this problem? How did you deal with it? does Gelly EVER dry?!
-
Scale Finishes - Blotchy Paint
sdbos777 replied to sdbos777's topic in Model Building Questions and Answers
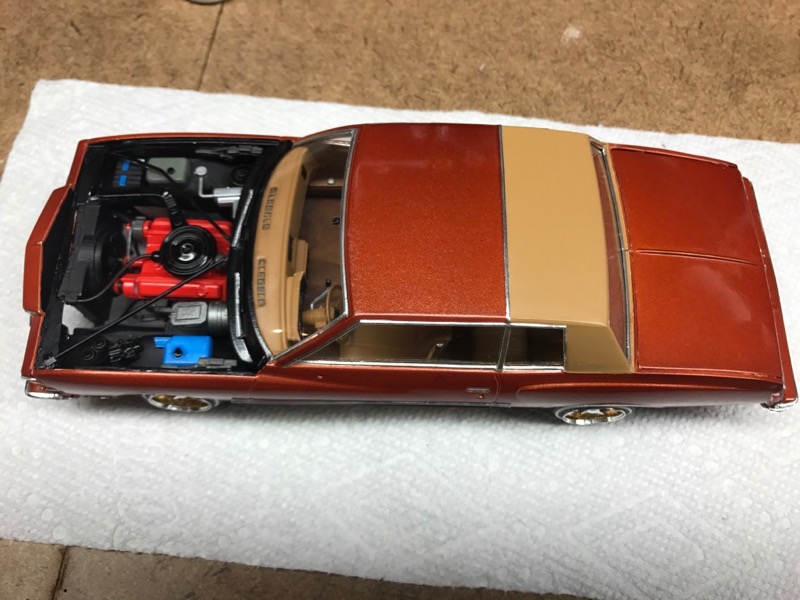
In the end the Monte Carlo came out ok. After stripping it all back, I redid the finish. The layers are: Tamiya primer, Zissner-Bin, color coats (scale model finishes Dark Camel), Alclad clear coats, micro gloss polishing compound, "the treatment" model wax. The primer/color/clear were pretty heavy coats, with sanding in between to even it out. The Zissner especially needed flattening - it was beyond orange peel, it was "lumpy". In the end the finish came out very nice. It is very brittle, though. The slightest contact tends to chip the paint. Does anyone know if Scale Model Finishes is usually this delicate? I'm dissuaded from using them again. Below are pics from done/nearly done.
-
Scale Finishes - Blotchy Paint
sdbos777 replied to sdbos777's topic in Model Building Questions and Answers
StevenGuthmiller - you said you put foil on before the last "color"coat? Do you put a rectangle of foil, then color over it, then rub off the color on the script? Then clear? What is your technique for the script foiling? -
Scale Finishes - Blotchy Paint
sdbos777 replied to sdbos777's topic in Model Building Questions and Answers
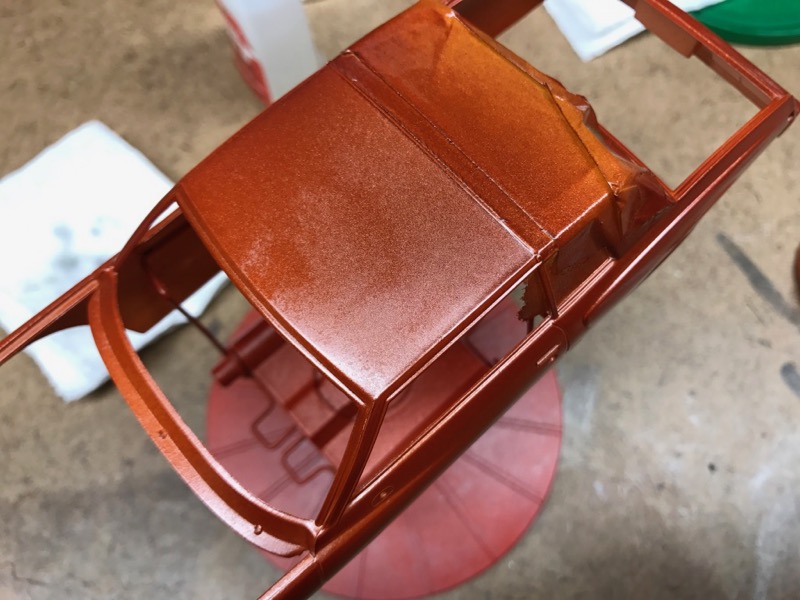
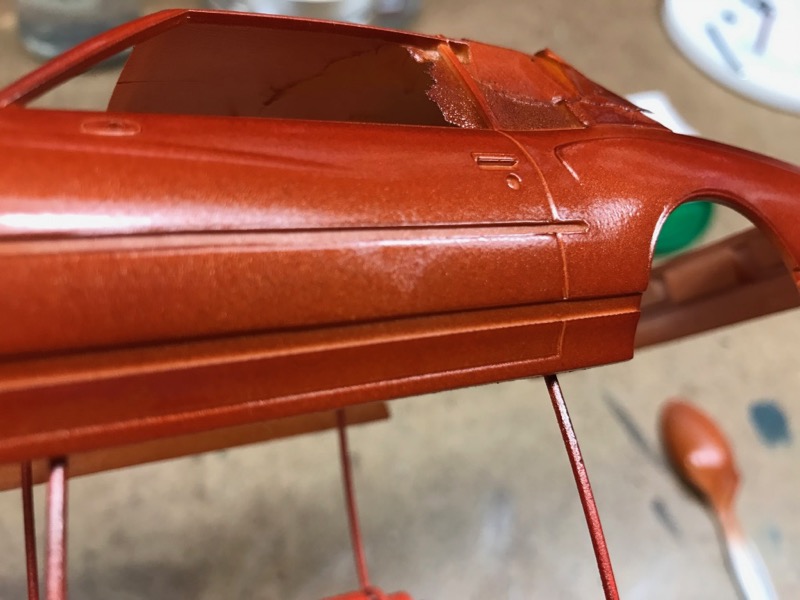
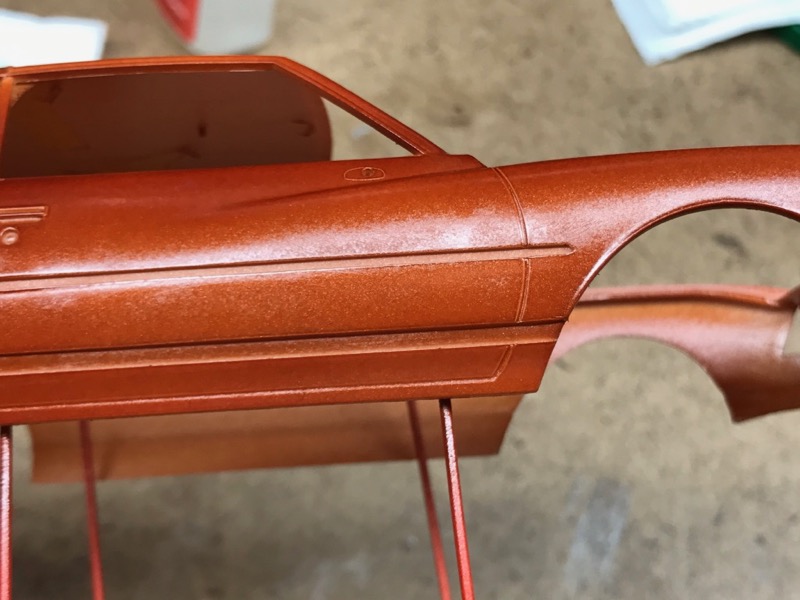
Thanks everyone. The consensus is that it is crazing, and that lines up with what I'm seeing here. Further info: Primer - the car body was primer'd with Tamiya white primer. The hood and trunk had more primer, as they had been filled/sanded and the body had not. I think they had enough primer to prevent the crazing problem. I do not usually primer the test spoons, so the paint usually goes right onto the plastic. Test spoons - The problems actually show up on only A FEW brands, not all. The shot below shows three spoons with the problem - those brands are Rustoleum Satin Black, Scale Finishes Dark Camel, and Quick Color black (this one actually bubbled after I sprayed it). The top two are Model Master "wood" color enamel jar paint, thinned with MM enamel thinner for the airbrush; and Model Master spray can Hemi Orange. All of these spoons were sprayed recently, but the top two don't have any problems. My bucket of spoons, all from the same box of styrene spoons (I researched spoons and got styrene, the same thing models are made of), and I never had this problem until I started branching out from Testors/Tamiya paints. Humidity - my basement is pretty much a constant 63% humidity. Not low, but not too high. I use 65% as the threshold above which spraying starts to become risky. So, it seems that some brands of paint are hotter than the others, and have more of a crazing problem. What I plan to do is: strip the car body, re primer with enough to seal the plastic well, reshoot with Scale Finishes Dark Camel. --> Does anyone know of a better way to "seal" the plastic, other than multiple coats of Tamiya primer?
-
Scale Finishes - Blotchy Paint
sdbos777 replied to sdbos777's topic in Model Building Questions and Answers
Thanks 935K3. Humidity is unlikely I think, though. I paint in my basement and humidity is fairly constant there. And the spoons exhibit the same pattern, many days apart. I've done a fair amount of woodworking and understand blushing in lacquer finishes. This isn't blushing. -
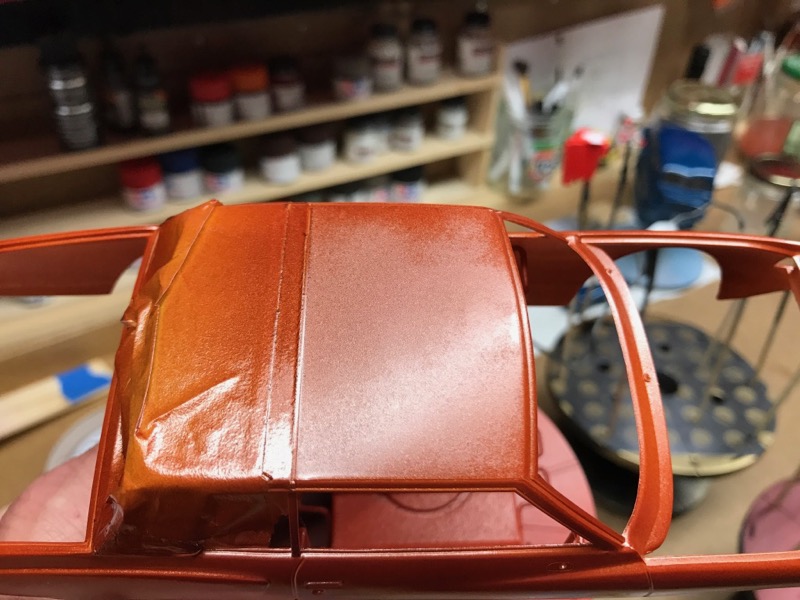
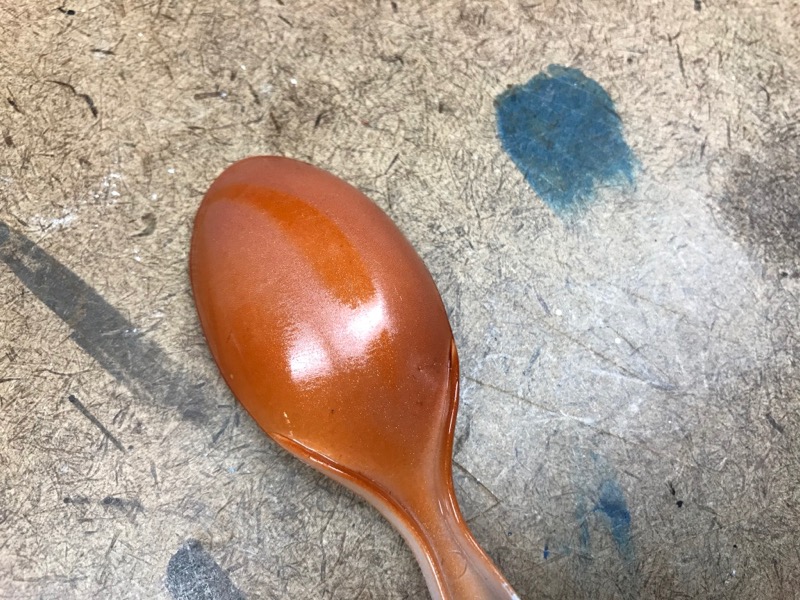
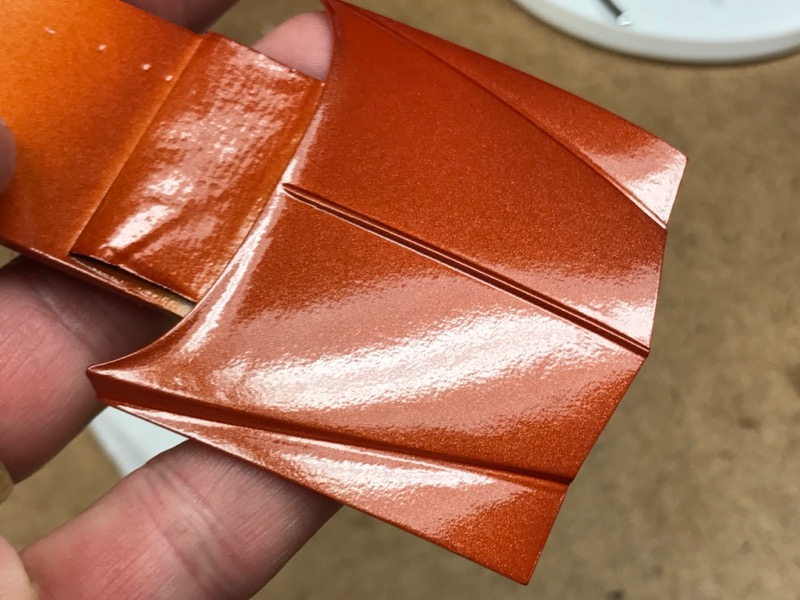
So I'm having another interesting problem with Scale Finishes paint. I am not sure it is specific to that brand. Here is the story. First, spoons. I very often test paint on plastic spoons. I bought a box of 1000 styrene spoons and have bene using them for years. Lately, the spoons show a glossy/not glossy pattern on them - see the photo below. This is with MANY different brands of paint, so I assume it is something to do with contamination in the plastic of the spoon. I tested the Dark Camel color from Scale Finishes on a spoon, and it exhibited the problem. After I applied the paint to the car, I noticed the same problem. See the photos - there are non-glossy patches on the body. This is after several light/medium coats of the paint, and it looked fantastic wet. As it dried, it got blotchy. Notice the picture of the hood, though - it looks great. Yeah it's orange-peely but this is before any gloscoat or sanding/polishing. --> What is going on with this blotchy paint!? Does anyone have any insight? Hoping that gloss coat would make it look right, I took my test soon and put on TWO medium/heavy coats of alclad clear kote, then a very heavy coat. When wet it looked like glass, but after it dried - blotchy. So it seems that no amount of clear coat is going to fix this. It is possible that the hood has more primer on it than the body. I had to fill dimples and depressions, and to cover the putty and sanding it took more primer. Is that the key? A lot more primer? Any help you all can give would be great. Thanks.