

Oldmopars
-
Posts
2,057 -
Joined
-
Last visited
Posts posted by Oldmopars
-
-
Something like this:

-
 1
1
-
-
Expand
Couple small part ideas for rigs and such..
What about the steps for on the corner of a trailer?
Or the "Brown" trailer manufacturer script for the BJ and Bear rigs being built?

Those steps would be easy if I knew what they are called so I can find some better pictures and dimensions. The Brown script is another story. Super easy to draw, a royal pain in the neck to try to print something that small. The printer will do it, but with the supports required it would be a challenge to keep them in one piece to get them glued on. I will try it though. I think I may need to use a more durable resin for this.
Any idea on the size of the Brown logo? If those rivets are 1in apart then 5in would be a guess? If you know, please tell me, or I will guess at about 5-6in and play with that.
-
Expand
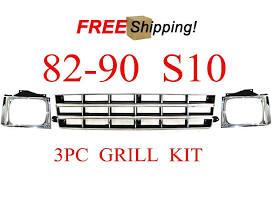
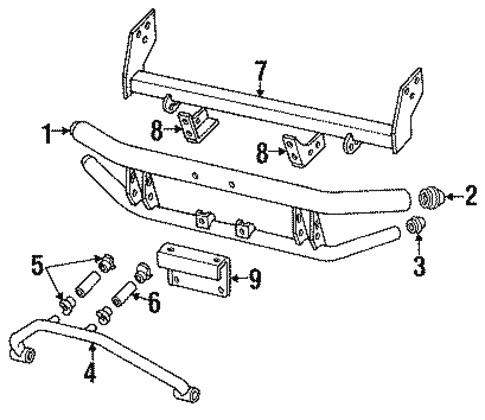
I have a number of requests that I’d like please. I’d like the roll bar, bed mounted spare tire, front & rear bumpers, wheels, and the ‘82 to ‘90 grille and a Blazer rear bumper for the Monogram S10 kit. I’d want the wheels to work with the standard 4x4 tires that Revell uses in there Chevy GMC and full size Ford kits.
I have a Grill/Bumper ready for first print. I may have to print it and send it off to you to see if it fits. I know the valance may need some tweaks, but for the moment it is close. Right now it is straight up and down, but I know it has some contour to it, I just don't have a picture showing it.
-
If you need different tire/wheels. Look at this post for wheels I just made and will offer for 3d print.
-
OK, The Casale V Drive is available Here: https://cults3d.com/en/3d-model/various/casale-v-drive
Yes, it is free. Just go download it. However, you will need to scale it in your slicer as it is drawn full size. This way you chose what scale you want it in.
There are several printing options out there for you, however if it is a real issue for you to get it printed, PM me and we can get something worked out.
-
Expand
How about a couple types of Casale V-Drives? I could use some for some weird projects lol
Well, you asked for it. This is one version I was able to find a print for. It is a lot easier to work from prints then to work from pictures. At least from prints I can get the proportions and scale correct. Do I see a "Stubby Bob" in the future?
-
This is great, thanks for sharing. I have found the best resources for weathering tutorials (YouTube) is from the guys that built Armor, Tanks, planes, military and Dioramas. Scale Creation World, Night Shift, Scale-a-Ton, and many more. I learned a huge amount from them and I have been fairly successful in recreating weathering with their help. While these are my creations, all of the weathering that I used I learned from these very helpful YouTubers.
-
2
-
-
Expand
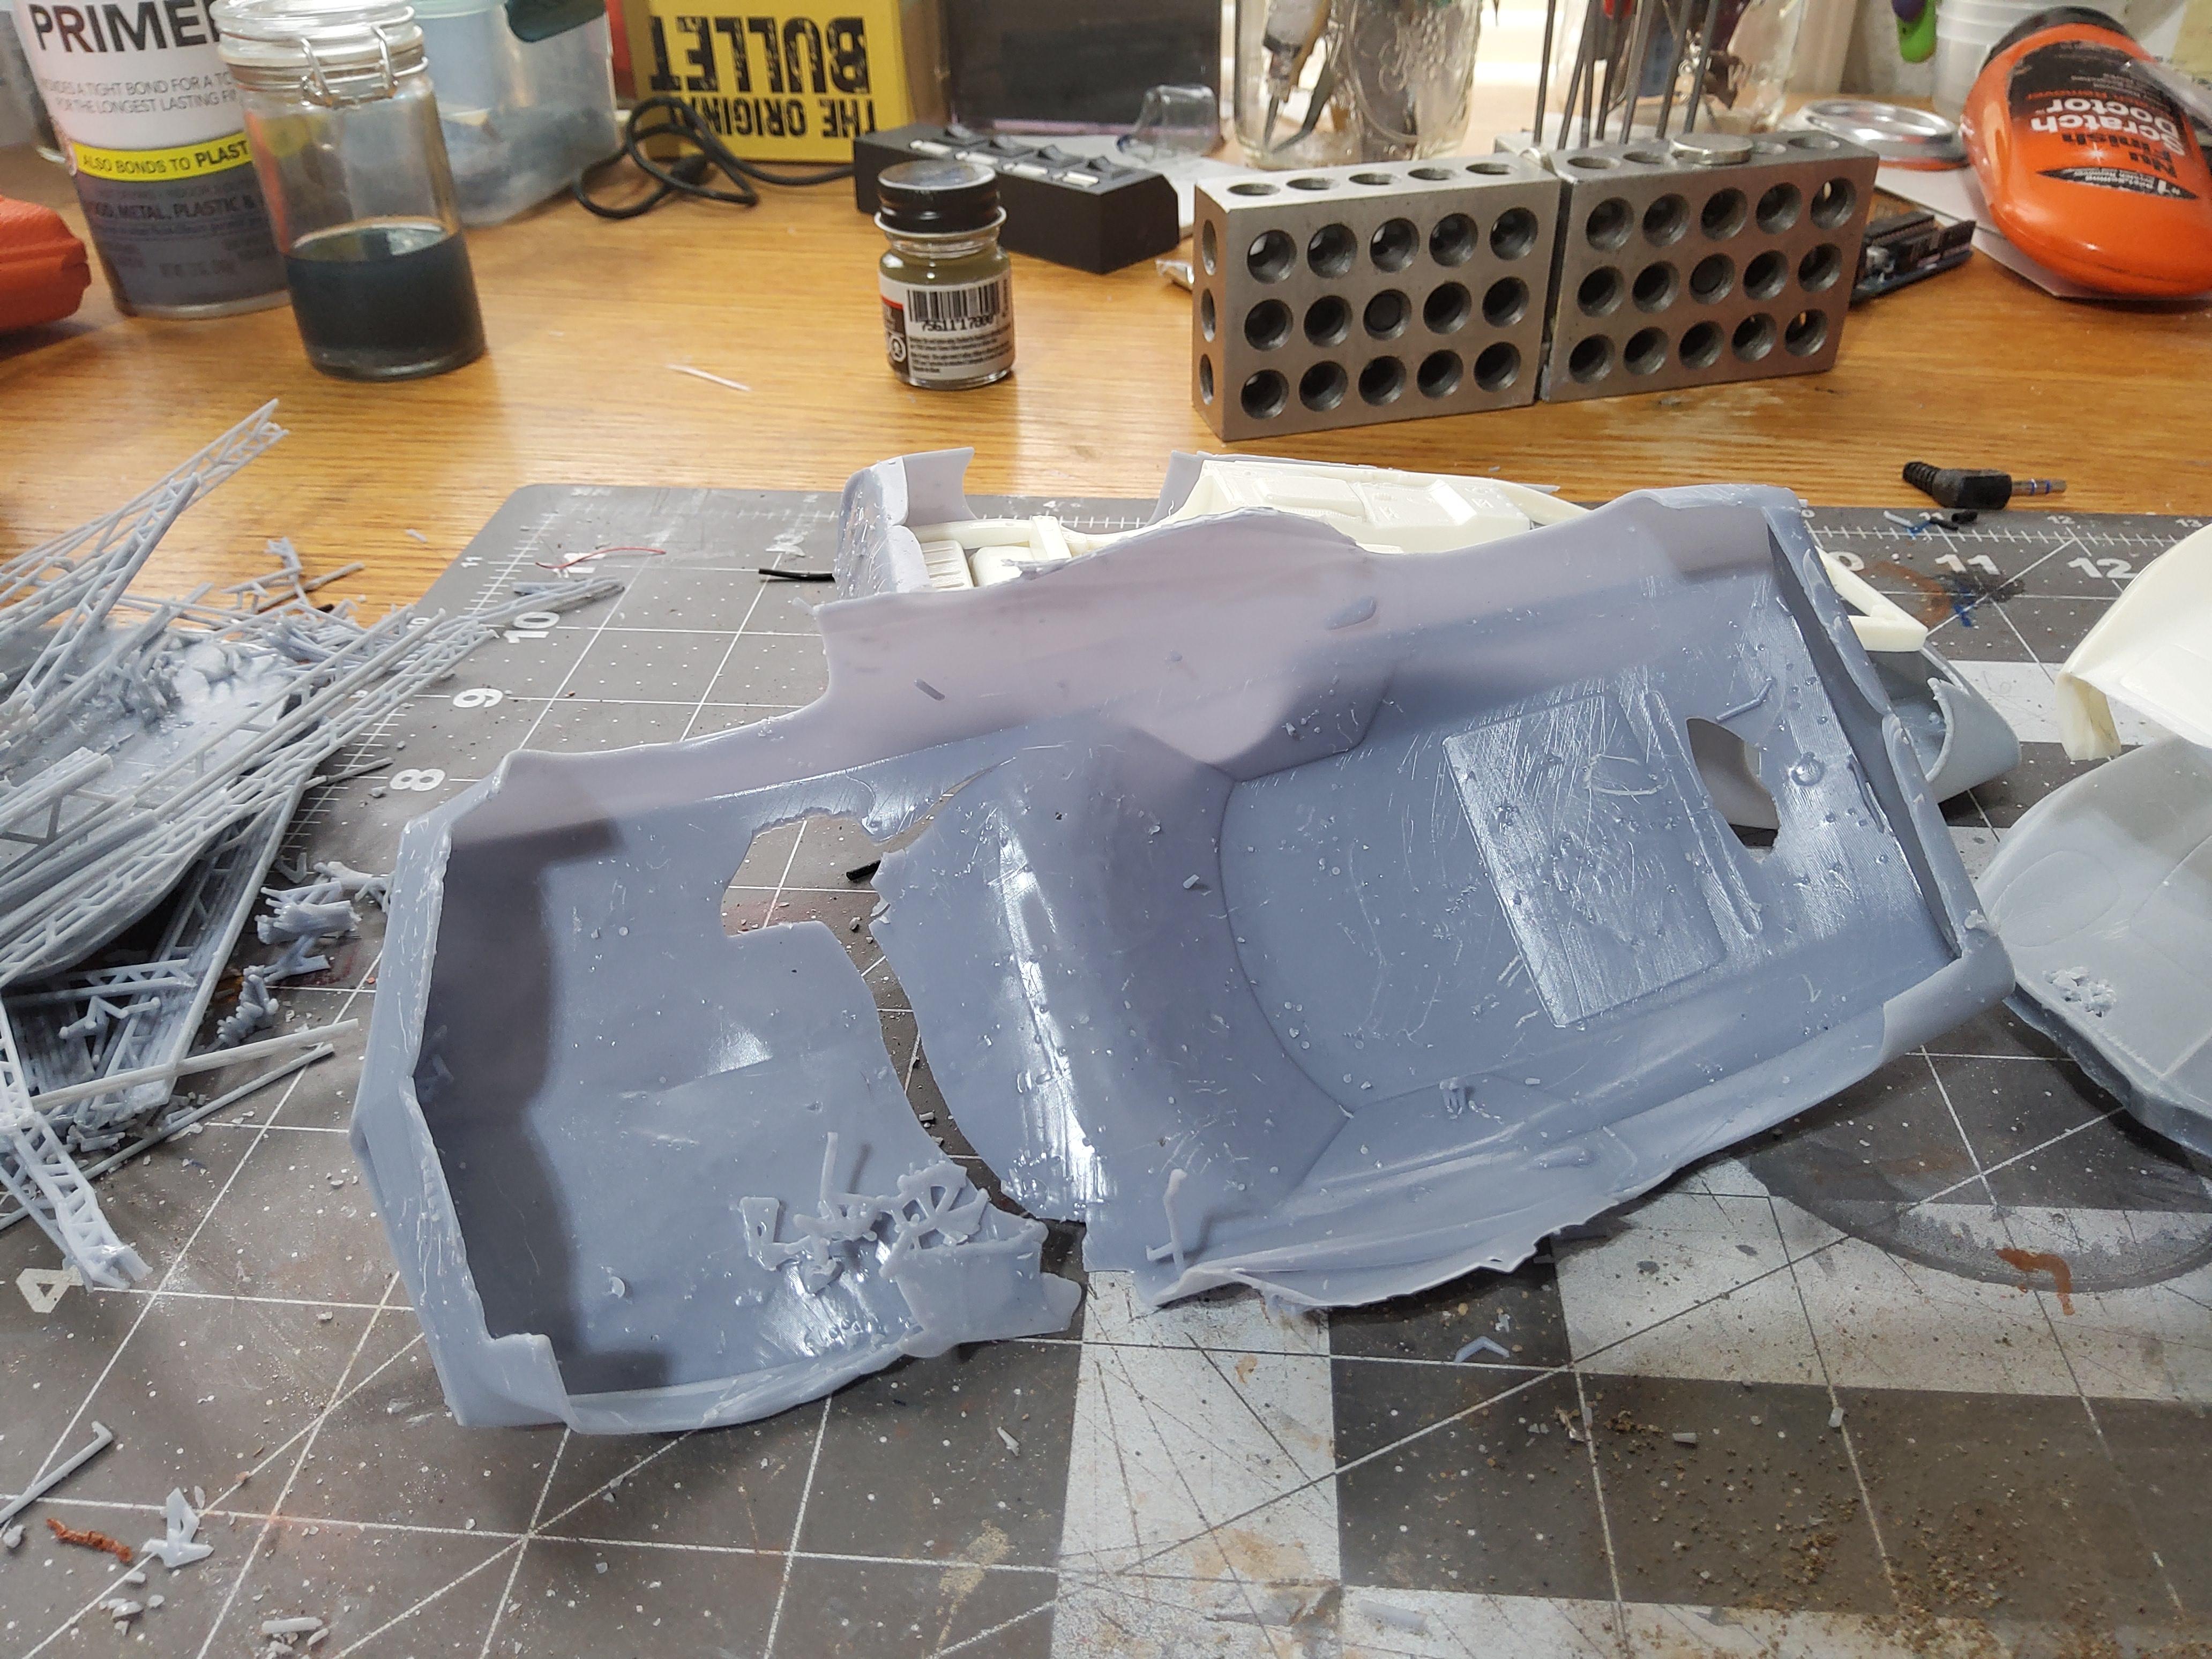
I don't know guys. Most of your problems come from the lack of experience. People say Robert Burns body's are thick. I have stated and I will restate now. He has a reason and that is that a thicker body will be, the less inclined for failure. These print ready files you purchase on line are, for the most part, too thin. Hence the rips in one of Oldmopar's build. I have never had a failure when printing car bodies, or anything for that matter, on my Phrozen Shuffle 2018 that I converted to 4k two years ago. But then, the printer is a step up from what you are using. As to thickness, I make my car bodies at 1.6 to 1.7 mm thickness. I checked the thickness on a couple of printable bodies and the max thickness was 1.4 mm. Also leave the bodies in the build plate for post curing. If you insist in using the too thin bodies, leave the supports on after post curing. The resin continues to cure afterwards. Thus, the warping. I totally avoid making anything real thin. It will eventually warp over time. When you encounter a body such as the one Oldsmopars is having trouble with remember that 3d printing is an additive process. Lowering the angle will increase the quality of the build. a 15 to 20 degree printed with the front down should do wonders. There should be no reason not to be able to print Oldmopars body correctly.
What's missing is experience.
The big issue I had is with print thickness, it was way too thin. However that is how I got it and while my skills in Fusion are good, my skill with Blender is none. I need to learn Blender so I can fix issues like this.
I also printed it at a lower angle, 15 degrees, however that is the body that failed. The 2 I did steeper were successful, but the details were lost.
In the future I will only print thicker bodies.
Also, please don't insult my printer, I did a ton of research and it is the highest rated 4K printer in its size class. I looked at all brands, I am very happy with the one I have.
-
Expand
Hi Zenon!
Wow, great find, bravo!
I had an 85, manual, and it was a blast. The intercooler came only in 87 from the factory. You can increase your boost by piercing needle holes in the wastegate sensor hose. Start with one or two, and progress as you fancy. You WILL feel the improvement, believe me! Just don't hit it full blown for too long...
CT
Now that is funny. I used to use fish tank air valves. That way I could "Dial-in" the amount of boost I wanted. It was a controlled way to bleed off the signal going to the waste gate.
-
I hear you, and you are right, some of the old AMT kits are pure junk. Some say we should just be thankful for the kits. I agree to a point also. I am glad to have some of these old kits even if they are bad. But I have given up complaining about them and now I have a 3D printer and taught myself to create what I need to fix the faults in the kits. Some are just so bad it is not worth it, so I just don't buy them.
There are always reviews of every kit out there. HPI Guys workshop is one of my favorites, but there are any options. I am very into trucks and there are so few options there, that I just have to accept what is and fix what I can.
If a kit is really bad, I don't build it. This is a hobby and should be fun, if a kit is no fun, it goes into the parts box to donate to other projects.
So, as I see it we have a few choices. Build it as is and try to have fun. Don't buy it in the first place. Or, take it as a challenge and fix it however you can.
-
1
-
-
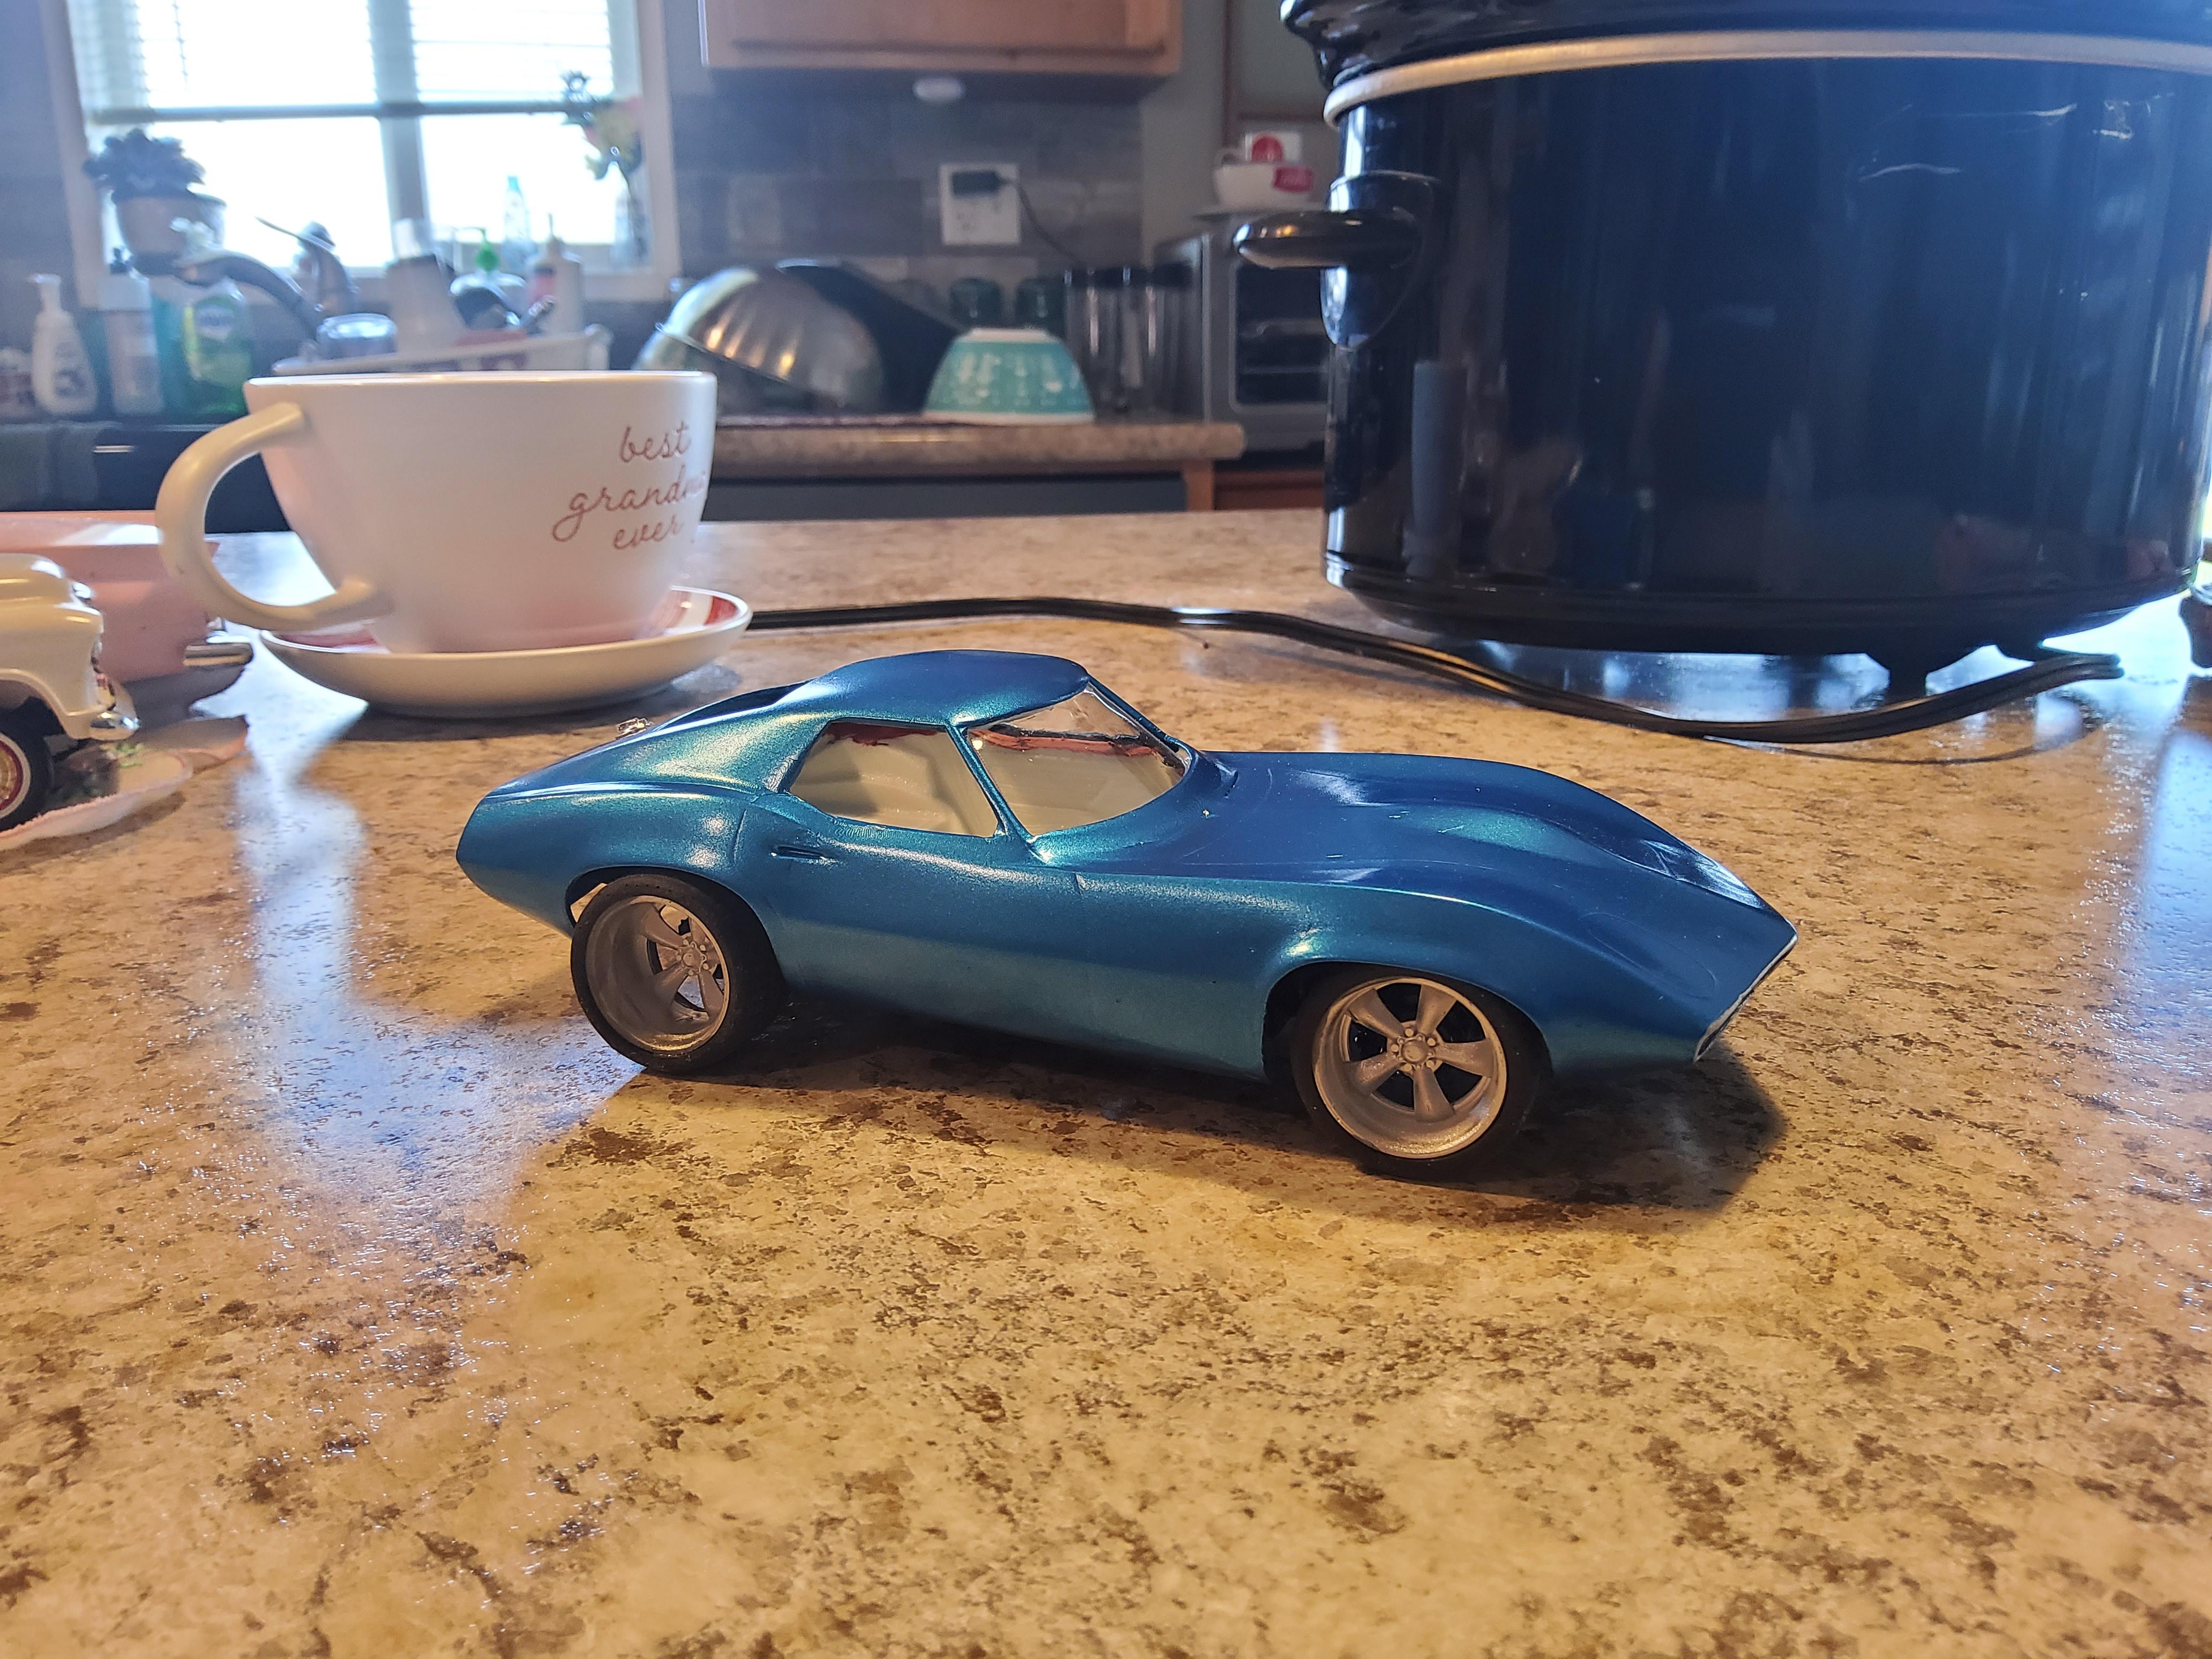
Moving forward on this I was able to get some color on it. I also added a set of resin wheels and tires.
Making the windsheild for this was a bit tricky, but I took my spare body and put some clear sheet over the windshield (not cut out) and put it in the toaster oven. I waited untill the sheet sagged down and took the form of the windshield area. While not perfect, it is a way too complex shape to do any other way.
I am making some tail light panels for it right now and I still have a way to go on the interior, but for a quick curbside build, it is movnig forward.
Oh, yes, it wll be curbside. The body is so thin that I have had to stop trying to fix stuff, it just cracks and breaks causing me to repair it. So, cutting out the hood is not happennig. Even scribbing the body lines deeper put too much pressure on the body. It is just to thin.
-
1
-
-
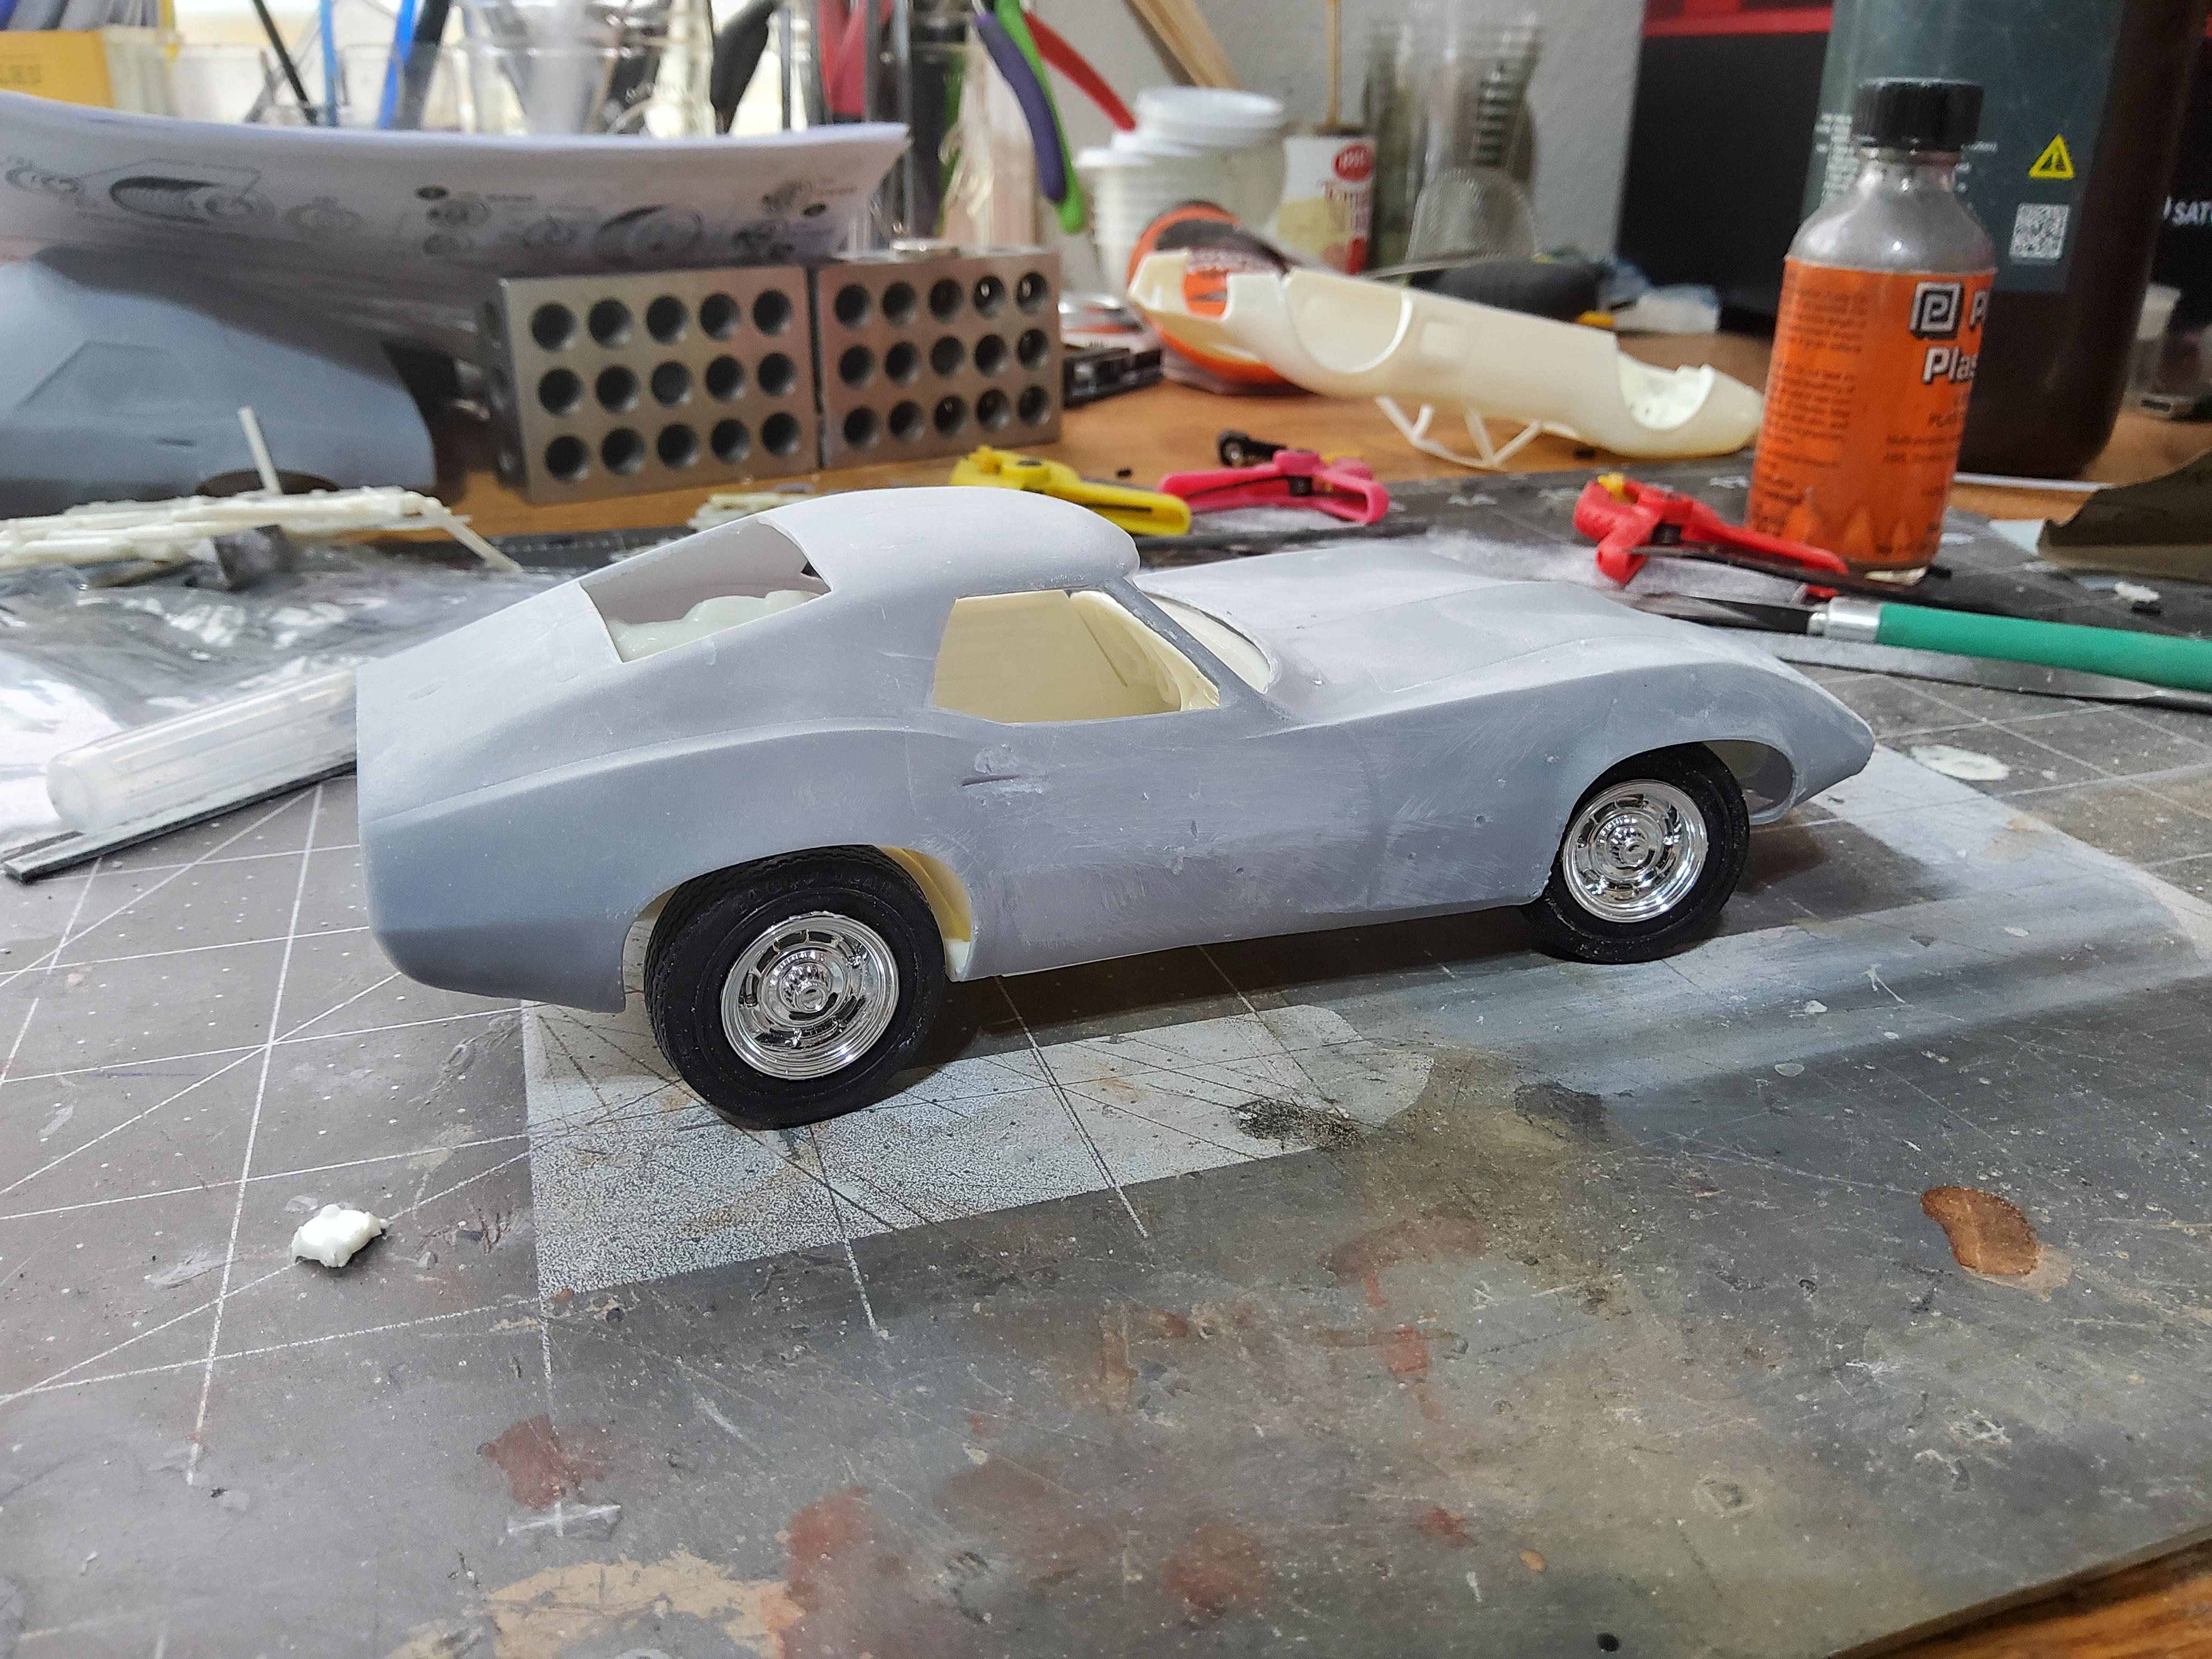
I have been wanting to print a body and try a full build. A member here gave me this file to print and so I thought I would try it.
Due to the file lackin some details and the issues had printing it, I am doing a custom. So, it is not fully faithful to the orginal.
I am using the chassis and interior from the 1974 Corvette Roadster as it s the closest thing I had that woud fit and it has the crrect wheelbase and the interior shape is close.
I know the original was on a Camero chassis, I did not have one of those.
-
1
-
-
Please enlighten us (Or at least me) on what the reason for a "Ball Race" 5th wheels is? It looks cool, but it is not something I have ever seen here in the USA. What is its purpose?
BTW, great build, it is coming along very nicely.
-
In my job I have access to very large amounts of Garnet. It comes in bags of 55lbs each and can be sized in 80 grit, 120 grit and even 220 grit. I have used this many times on my models. It works well, and will never dissolve or change forms. It is tiny little rocks, and will always stay tiny little rocks.
Oh, and for me, it is free.
This can be had in other "stones" in the form of sandblasting sand. Tons of grit sizes and colors.
-
Expand
Where were you when I built The Green Barge? ? I converted to a bench seat, and detailed the door panels. I could suggest a bunch of parts that need to be done for the '67-'72 series. If you need detail pictures of the real thing, I have a '68. Look forward to watching this topic. ?
I am always open to suggestions. What are you thinking?
-
I know that thhere has been a lot of taalk on here lately about 3D printng and it being the future of our hobby. I completely agree, but wanted to throw a smal dose of reality int the discussion.
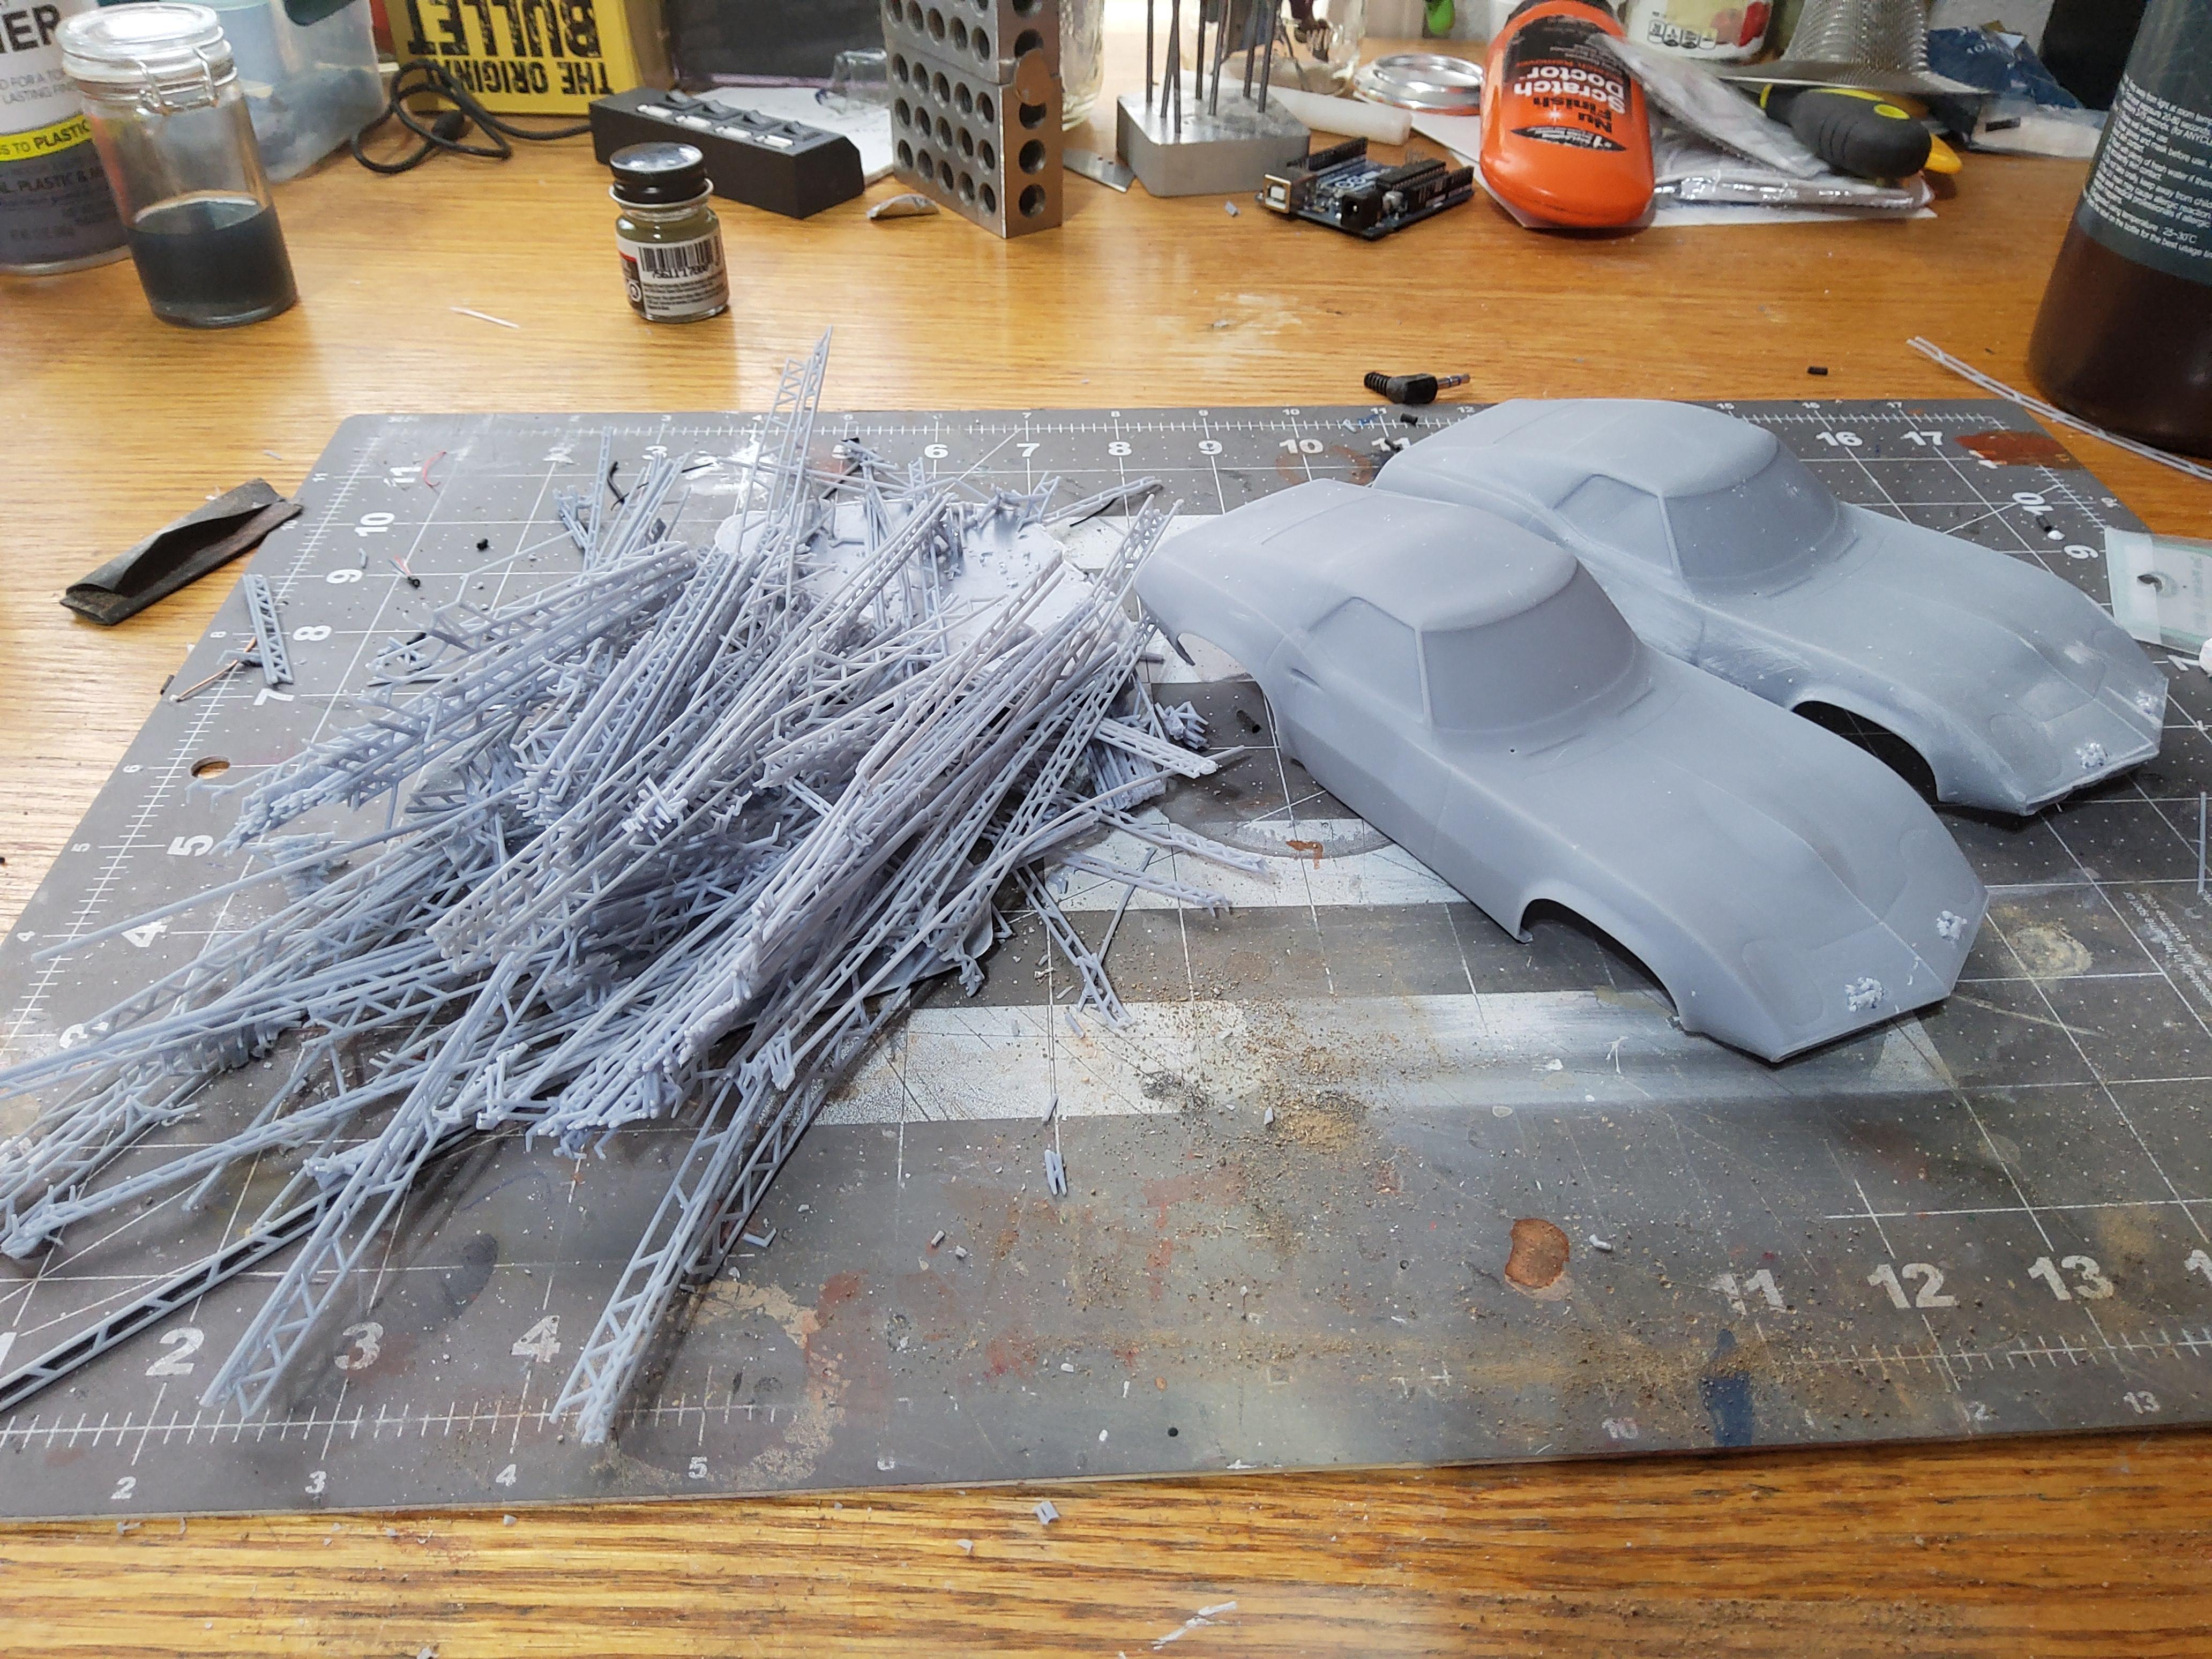
I have a new Elegoo Saturn S. Ths is a large printer for a hobby type machine. There are bigger, but for a hobby printer, it is on the large end. That said I can print 2 full size car bodies at one time. Most are luck to get one body all the way into the print area, and many have to cut the body and print in 2 parts.
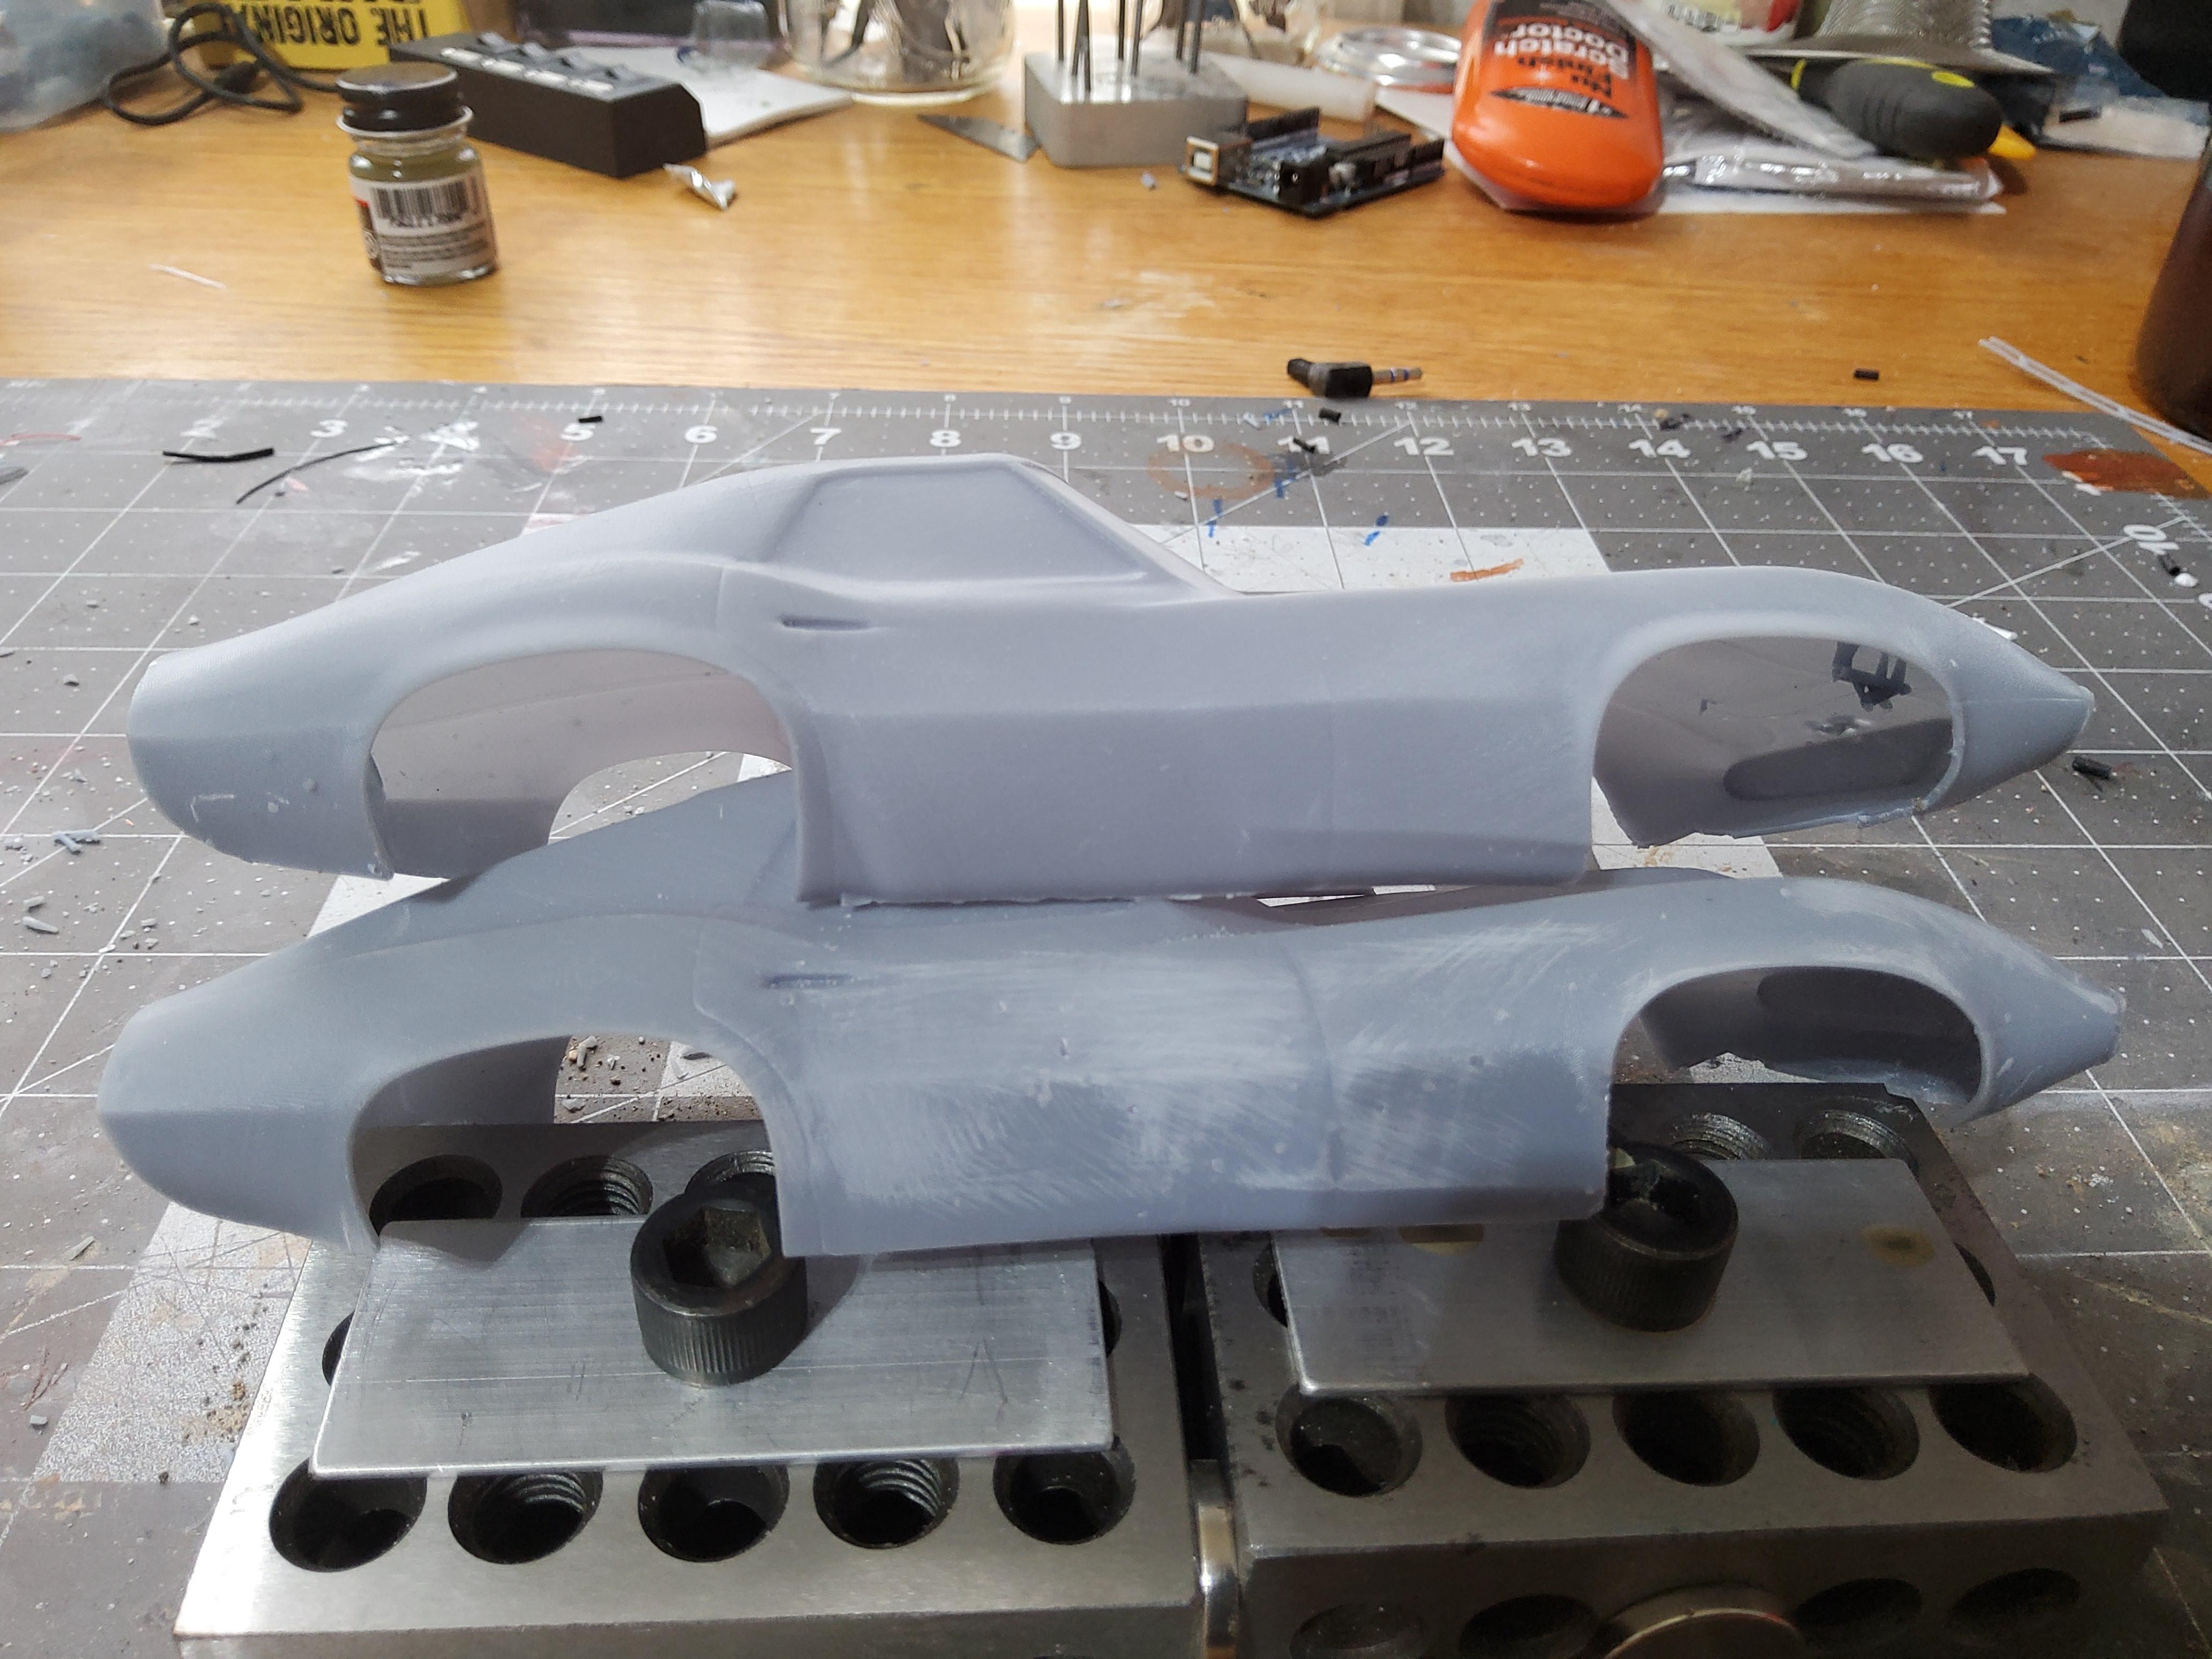
I recently received a file from a member here. The file is not really the issue, 3D printing is. When you print anything you need to decide where you want the details, and where you don't. Anything facing the build plate will lack details, anything facing away will be sharp.
So, I printed 2 bodies, 1 with the nose to the build plate, 1 with the tail to the build plate. As you can see from the pictures, one the nose is crisp, the other the tail is crisp. But neither are good on both ends. I did a prior print with the body flater tot he build plate, but as you can see, it just completely failed. Also notince that where it broke, I am getting severe warpage. These new bodies will need to sit out for about a week beforeI do anythingwitht hem to see if they warp beyond use.
If you ever wonder why most 3D printers are offering engines and parts, not full bodies, this is why. It is extremely difficult to get the resin to create thin car bodies that print right and retain their shape after printing.
Also, note the large pile of waste resin supports. This was required to print the bodies. More resin is used in the supports that the bodes that were printed.
Now, when you get great quality parts from a good 3D printing vendor, you can see that it is not an easy task.
-
2
-
-
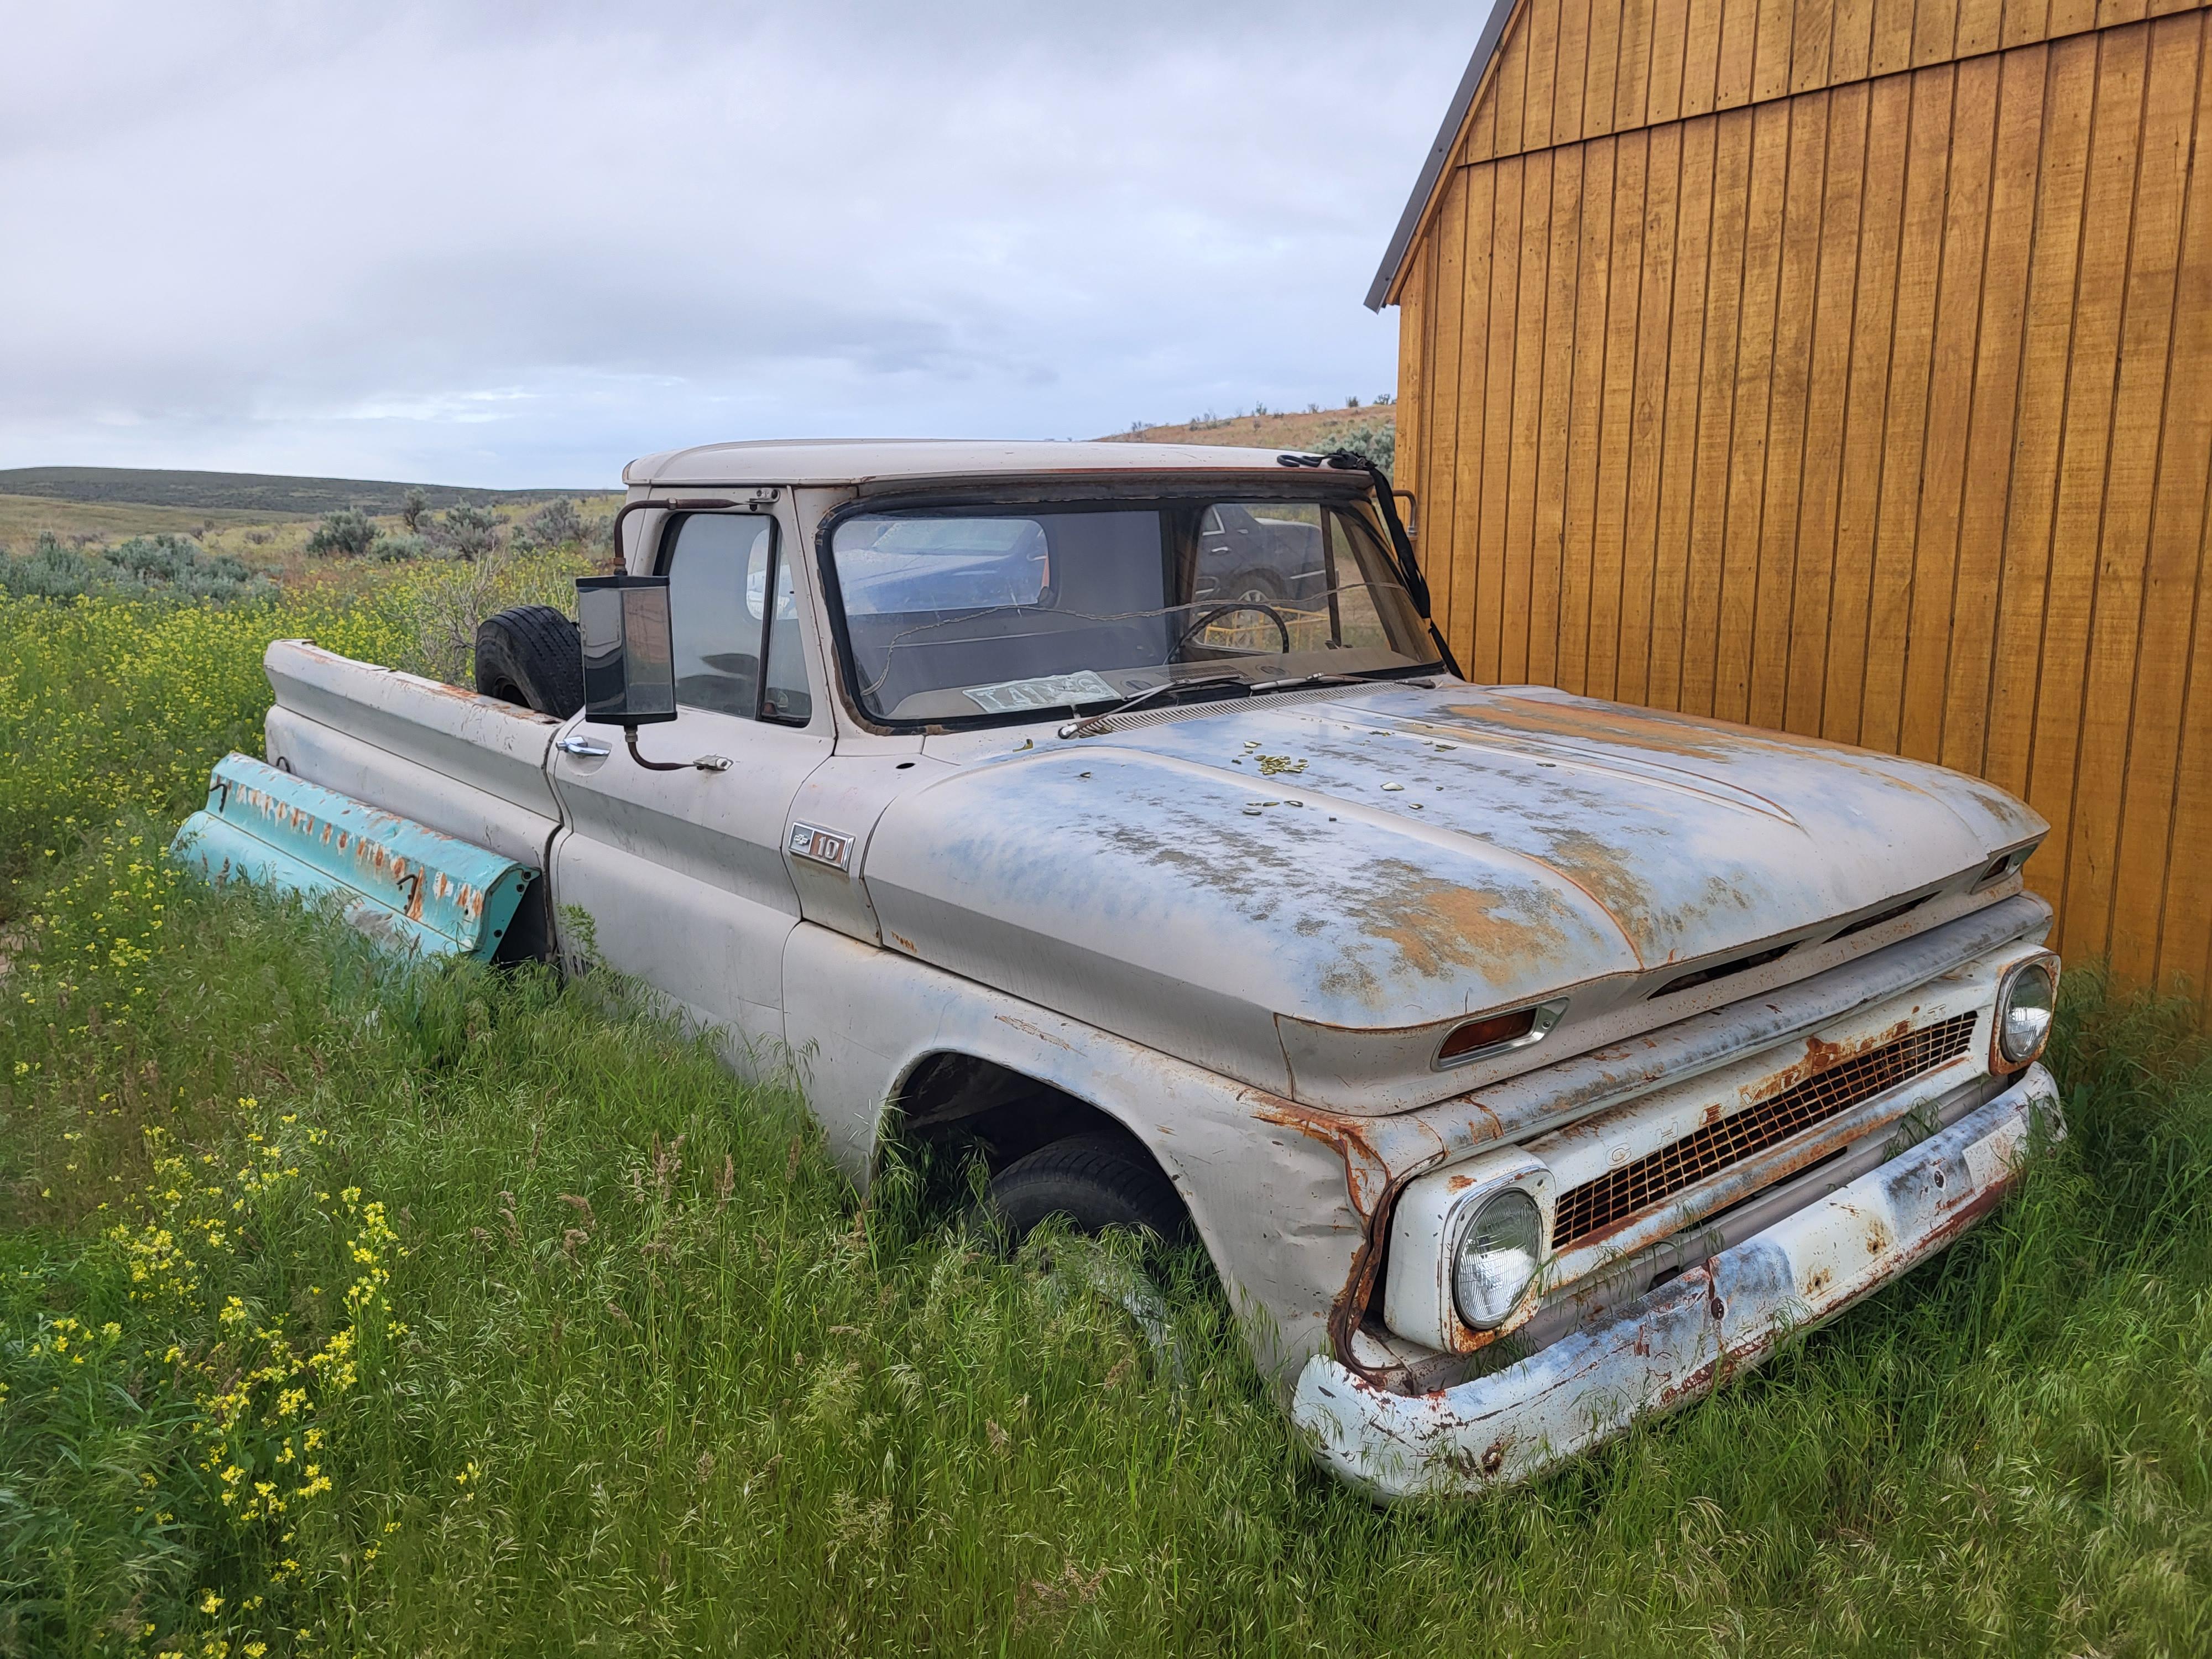
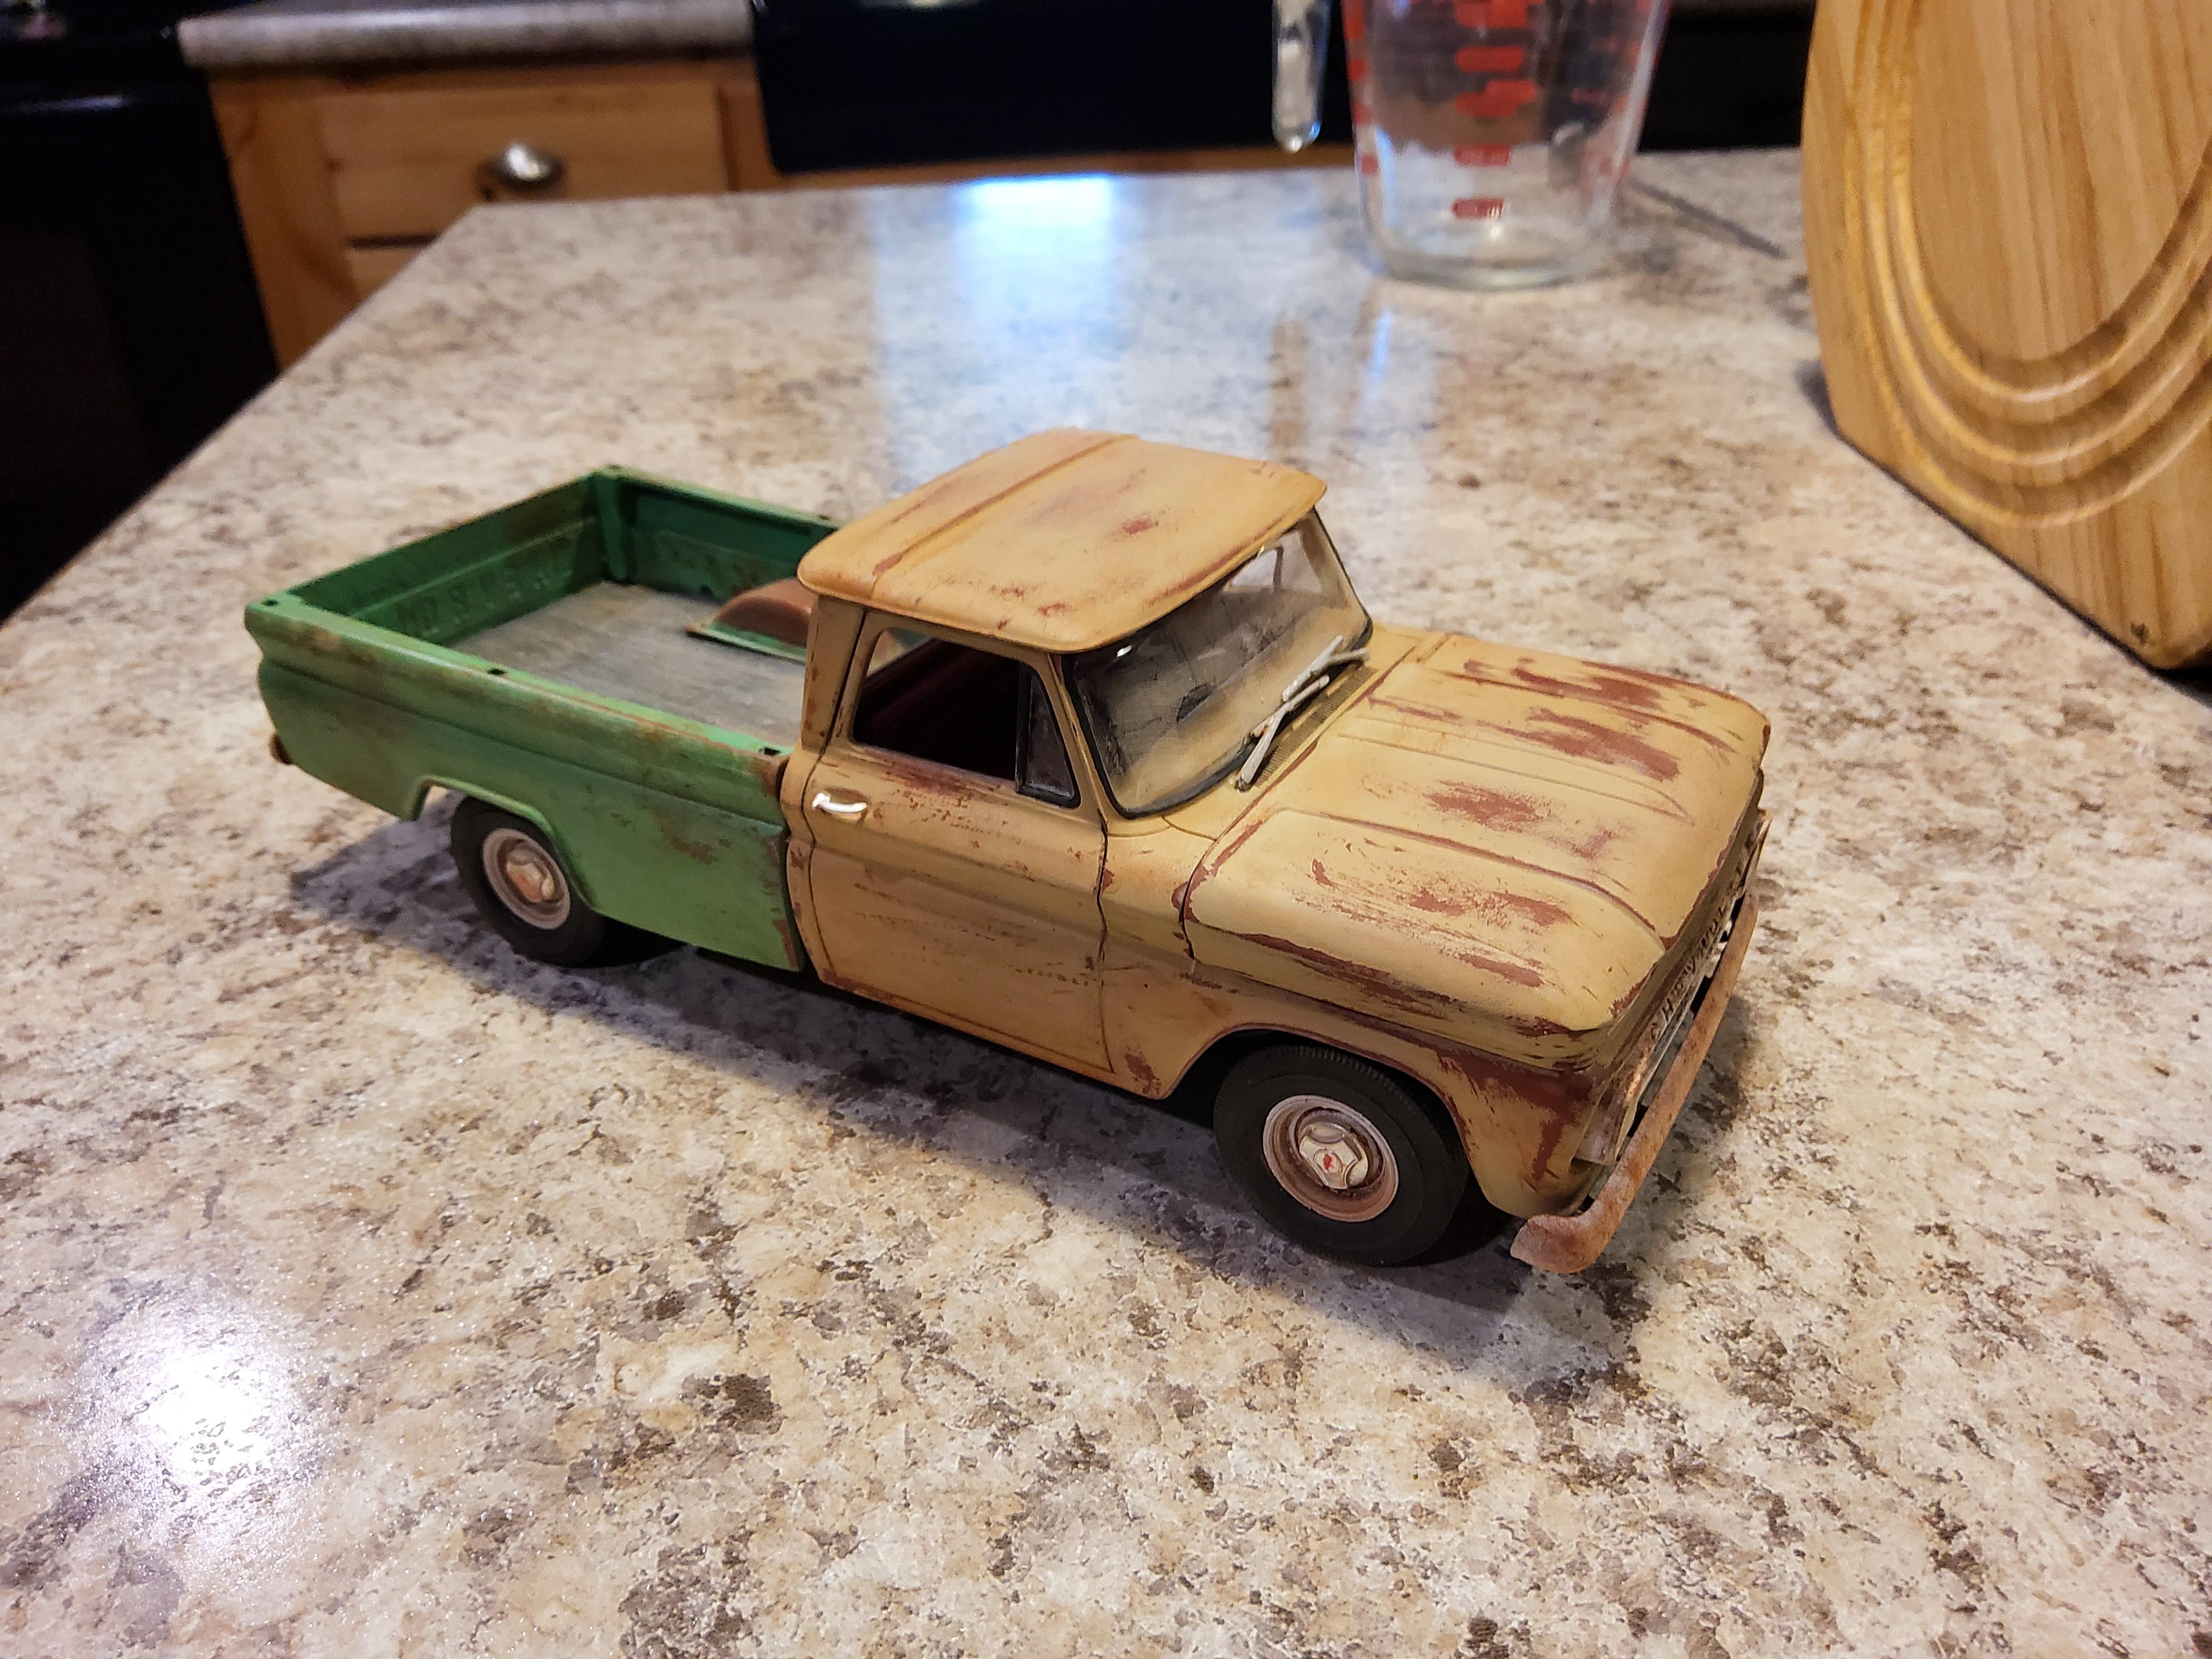
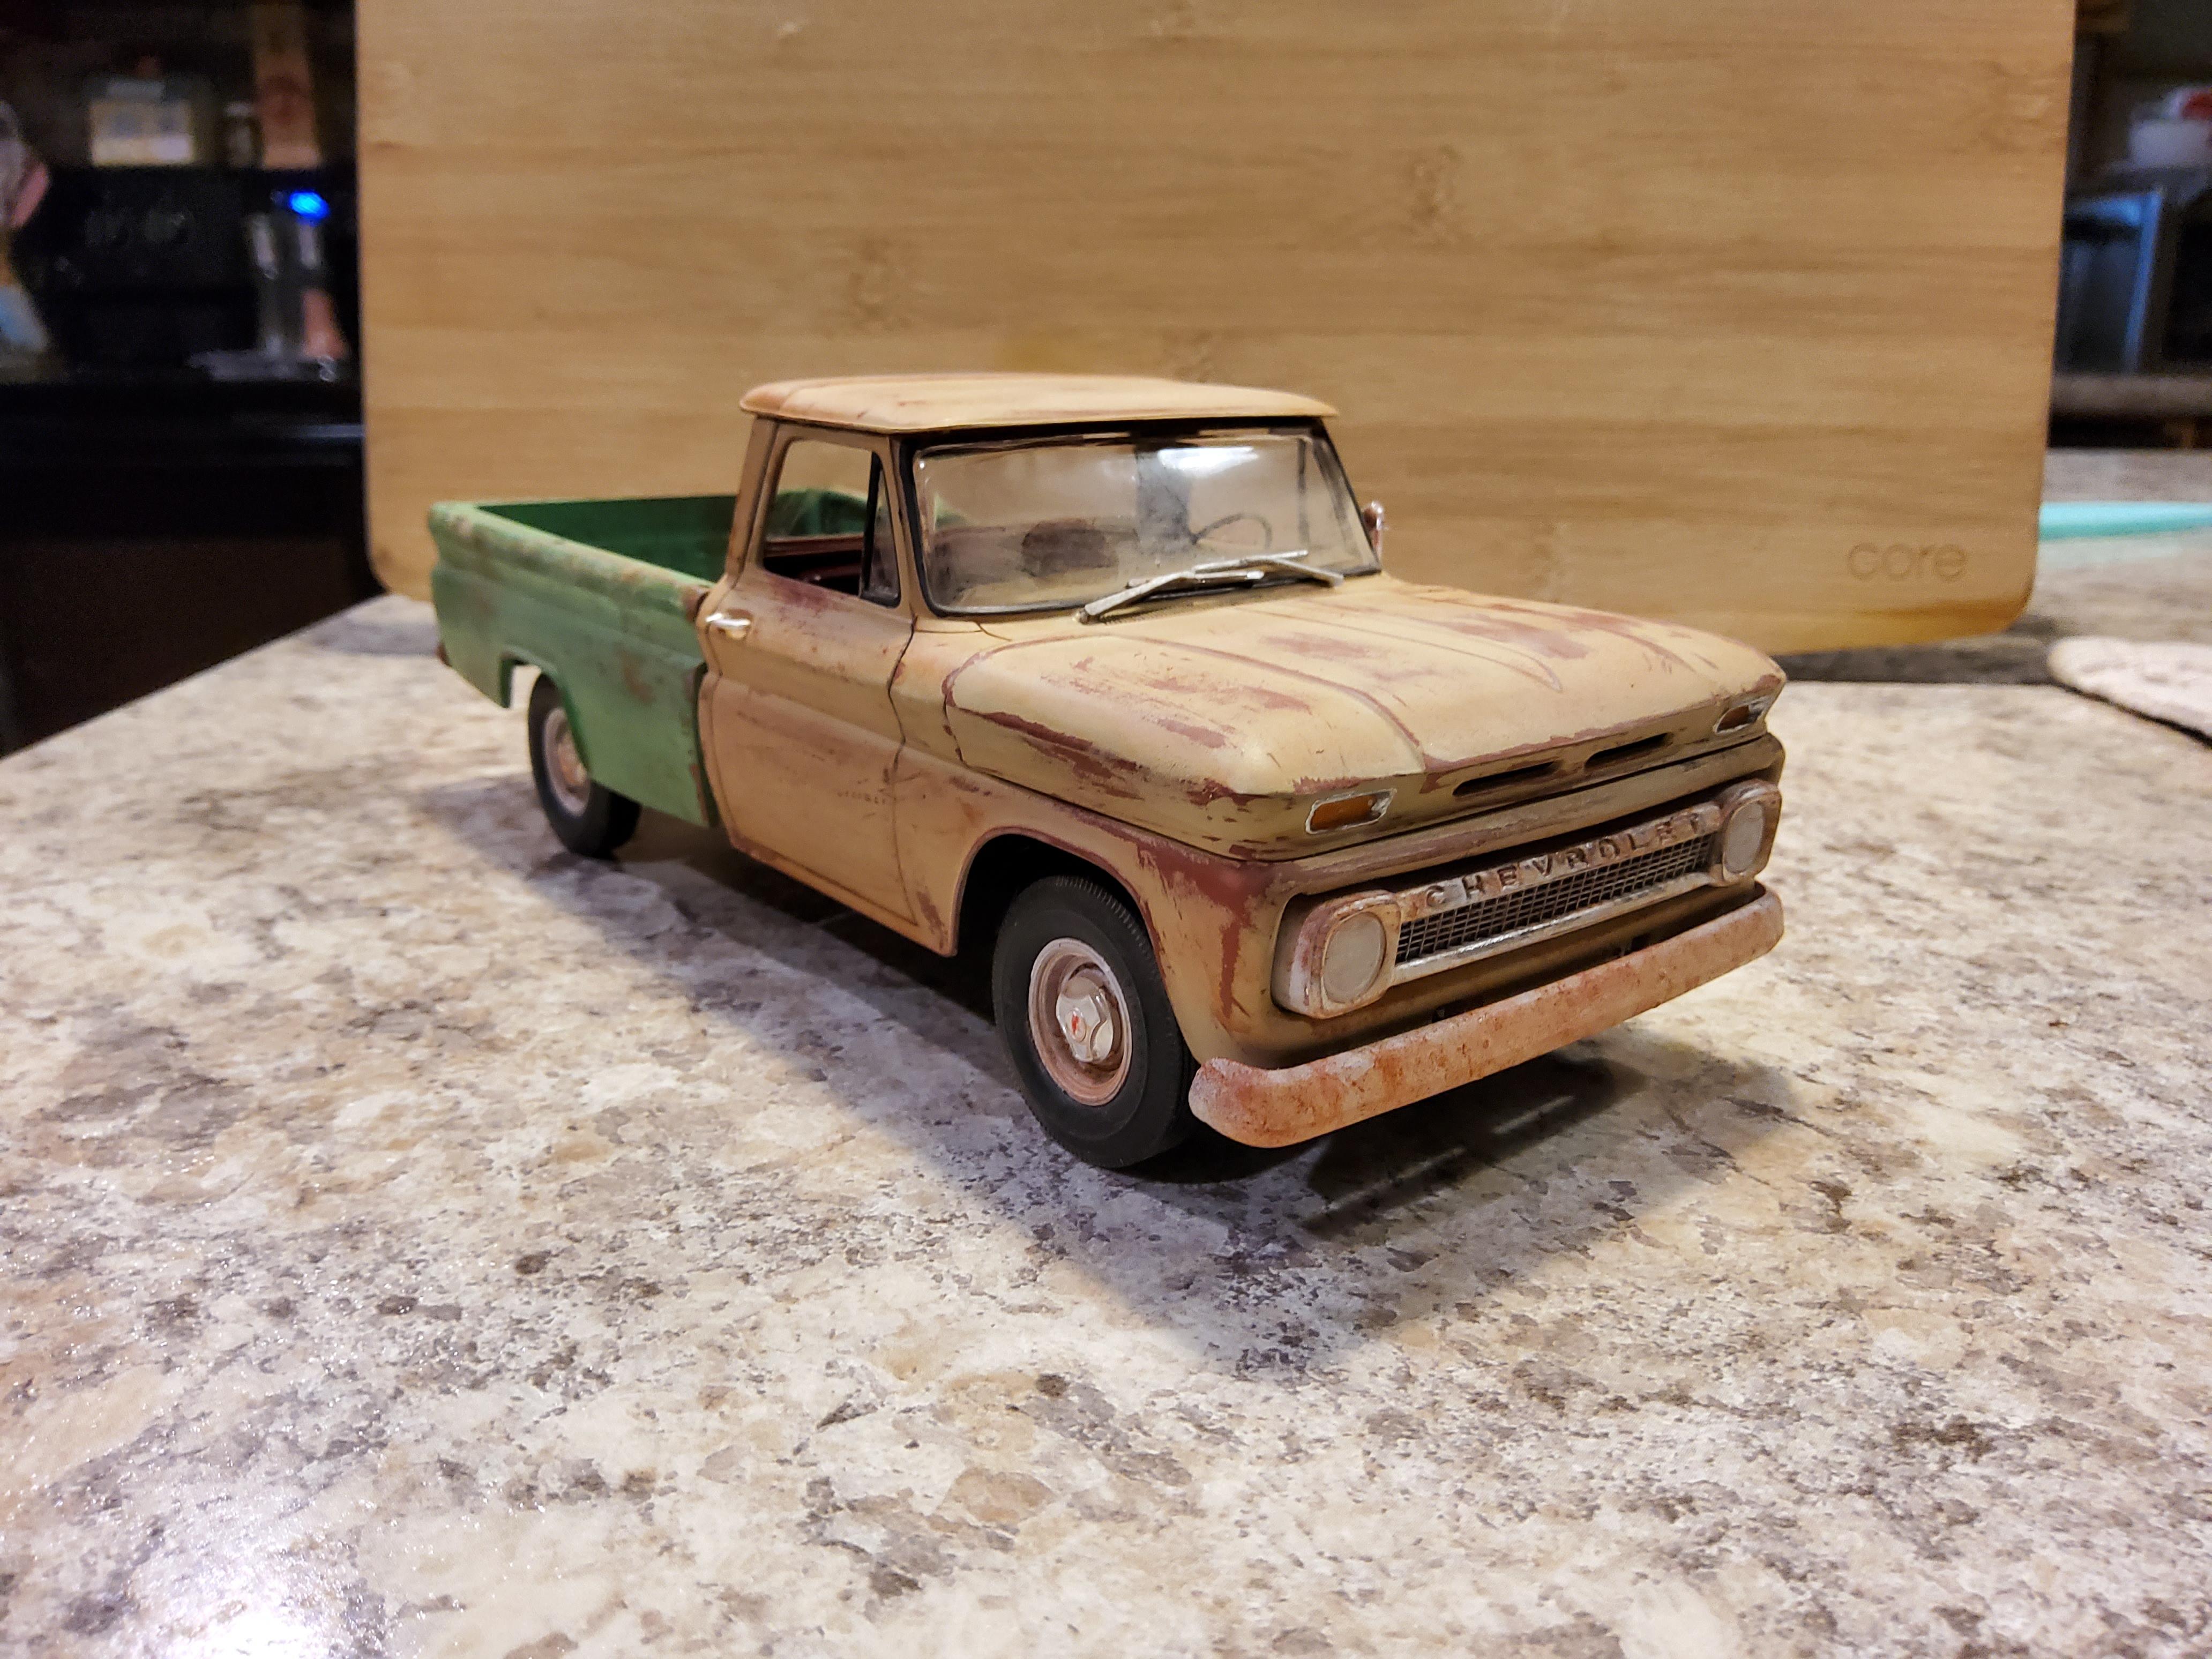
The real thing. I hope to have it like the model by end of summer.
-
2
-
-
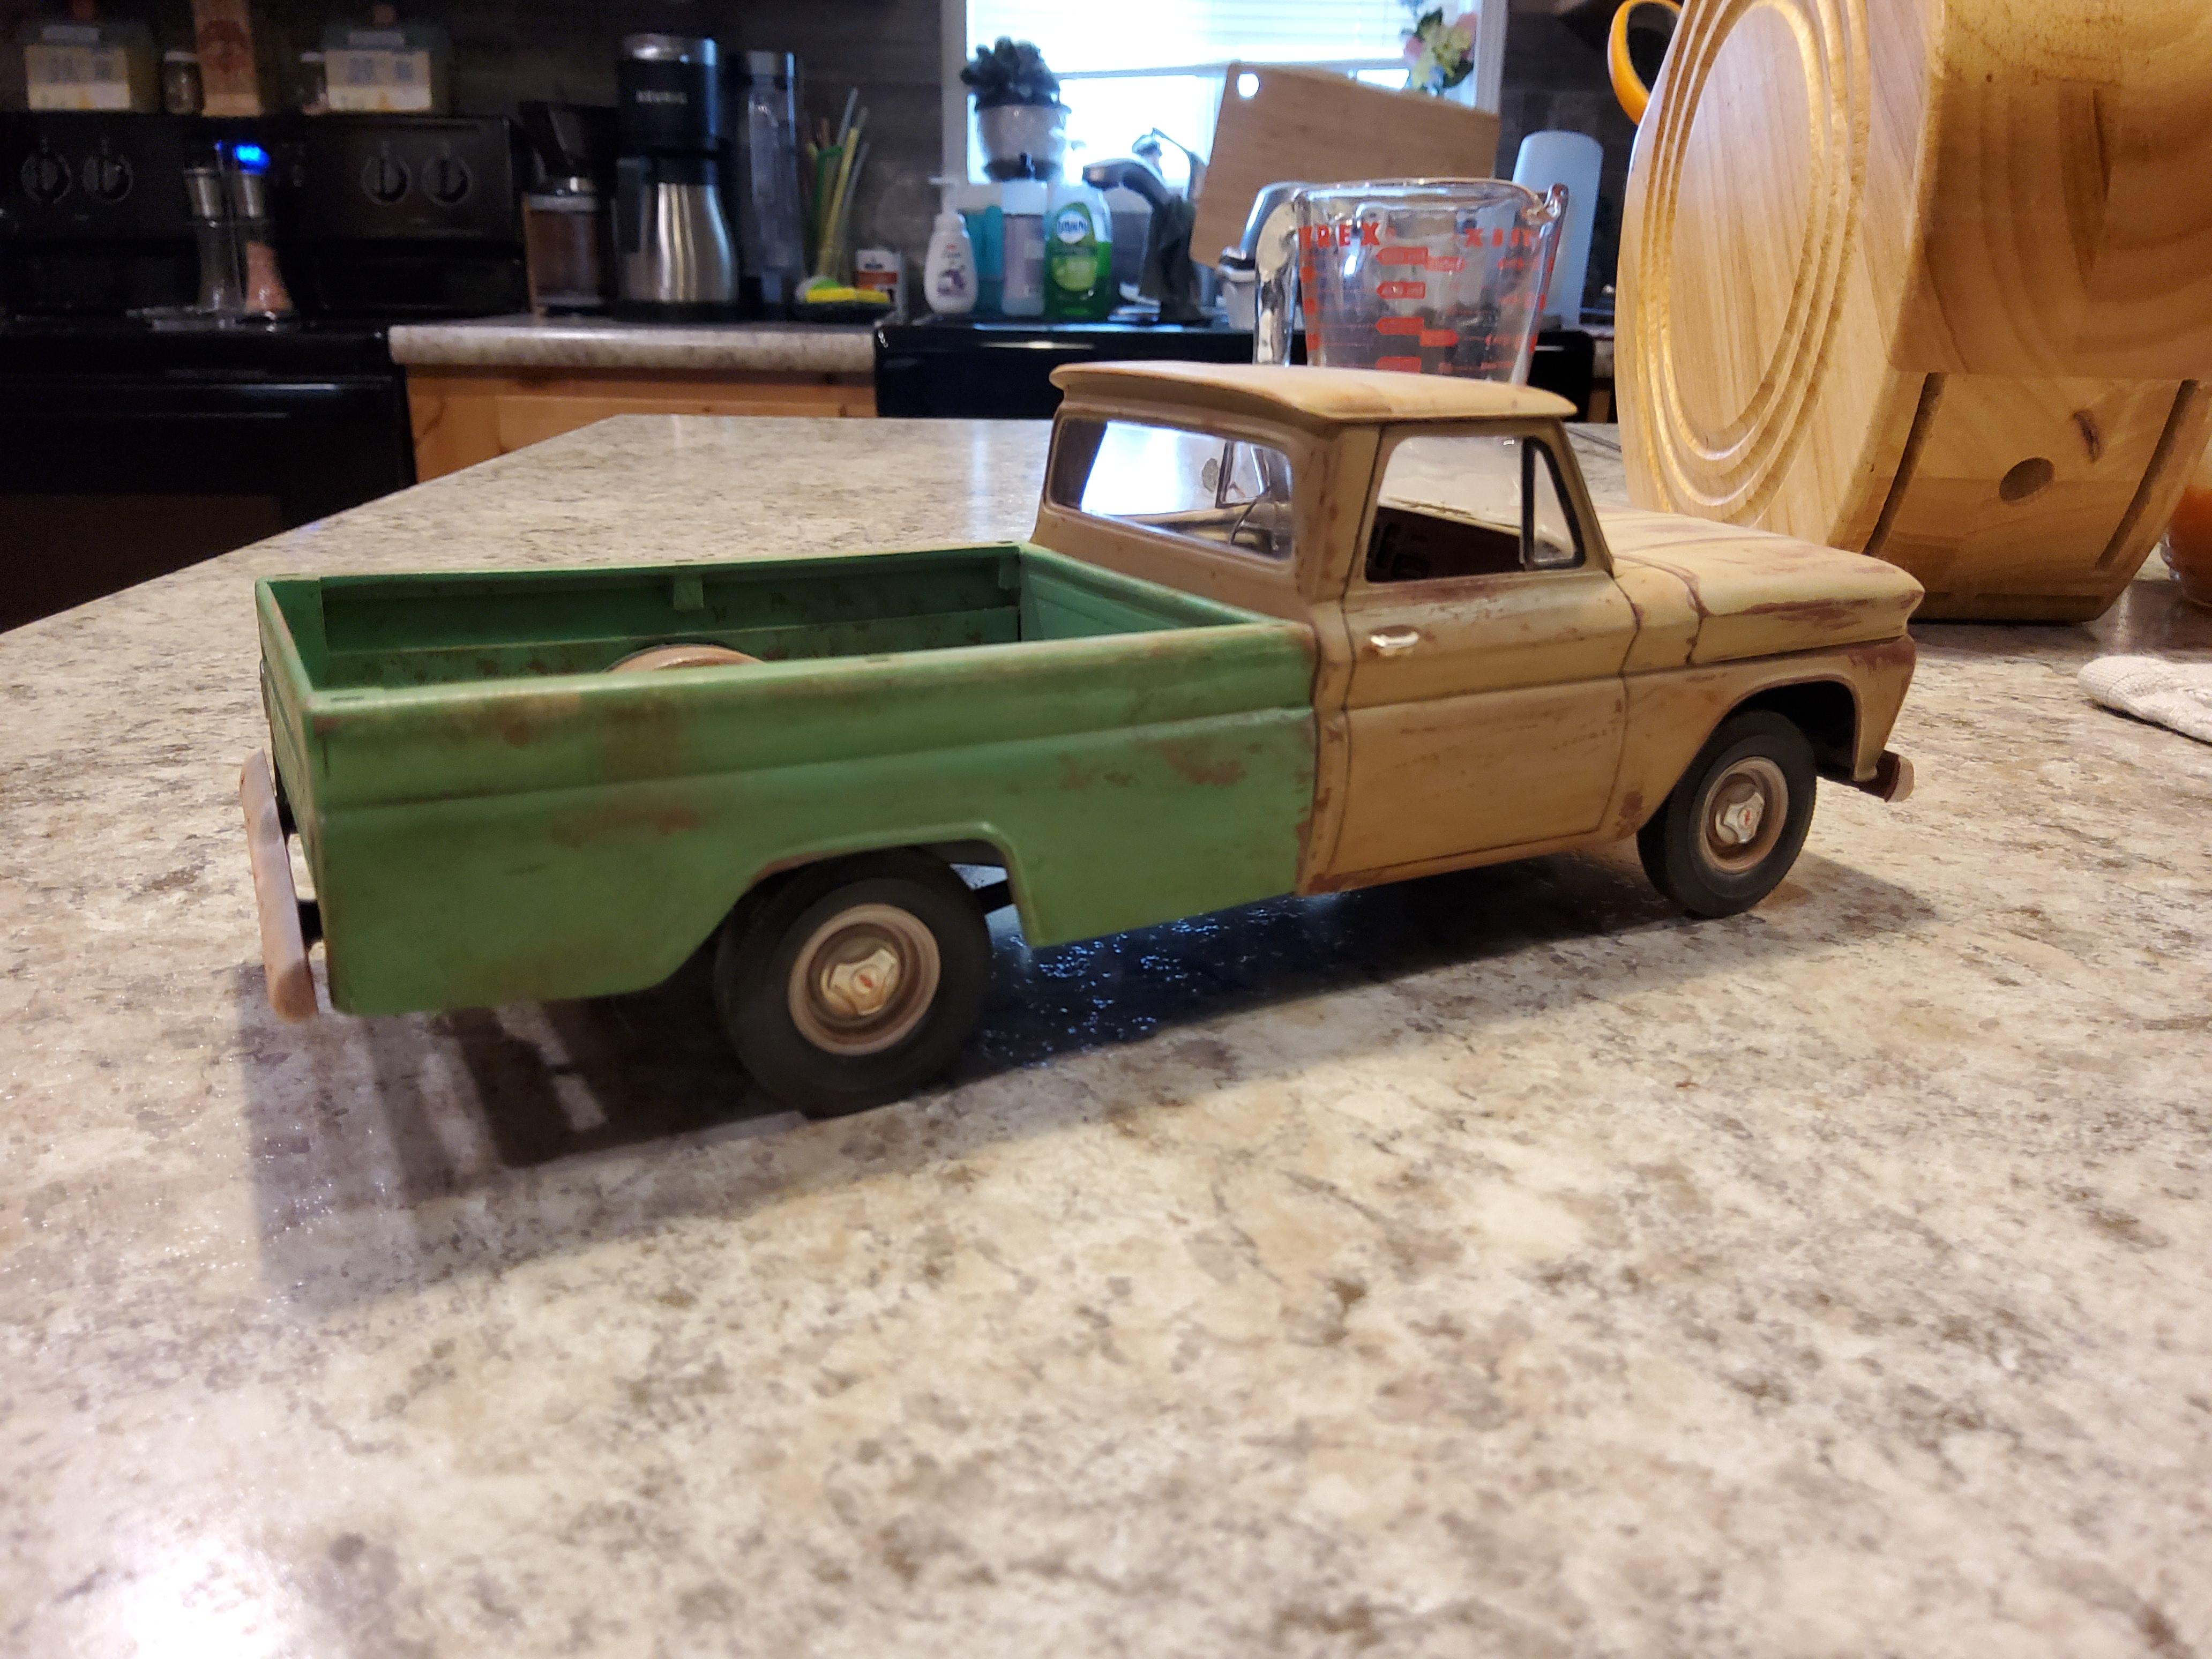
A few years ago I bought a 1:1 1965 Chevy C10. It had been sittin behind a barn for 22 years. It is now my project. When I was growing up my Grandfather had a 1966 Chevy and I loved that truck. I wanted it, but it went to my uncle. Fast forward to a few months ago and my uncle was really sick. When we visited I found the bed to my Grandfathers truck and asked my uncle for it. I now have my truck with my Grandfathers bed.
This is a replica of that full sized truck. My truck is a long bed, so I drew and printed an 8 foot bd and frame extension. The engine, while not techncally correct, looks good and is out of the 1960 Chevy C10. Tires are parts box, I think from the 1960 Impala.
My truck is weathered just like the model.
-
1
-
-
Expand
Just came across this thread and your work looks amazing. Just a couple of suggestions, how about an accurate engine for the AMT International Scout kit. I have a couple of pics I pulled off of the internet for reference.
I'd have to pull out my Scout shop manual to see if it has the dimensions for it. Also, I've been trying to find hubcaps that would match the stock ones off of my real world Scout so I could model it. Here's a pic of my real hubcaps for reference.
Thanks for any help for us IH fans.
Jeff
The engine would be a bigger task, however the hubcaps would be super easy. All I would need is the dimension of the tire that comes in the kit.
-
Well, I have an update on the frames. I have been able to print 3. They are a good fit for the AMT 72 Chevy, but need work on the Revell.
However the biggest issue is one that I am fighting on several projects. They warp. BADLY. When you print an engine, they are solid and have lots of structure to minimize warpage. However the longer and flatter a part is, the more it wants to warp. I currently have one frame sitting under 2 123 blocks to bend it back the other direction. At least this one bend front to back, the last one was printed the other way and it bent side to side. The truck would crab.
The interior is much less of an issue and I have one that is almost perfect. It is a box shape and so it has not warped.
If I ever figure out how to stop the resin from warping on large projects, I will be able to make these.
-
1
-
-
Expand
I meant where did you get those, I have a set of zoomies I made as well
I just drew them up myself and printed them
-
-
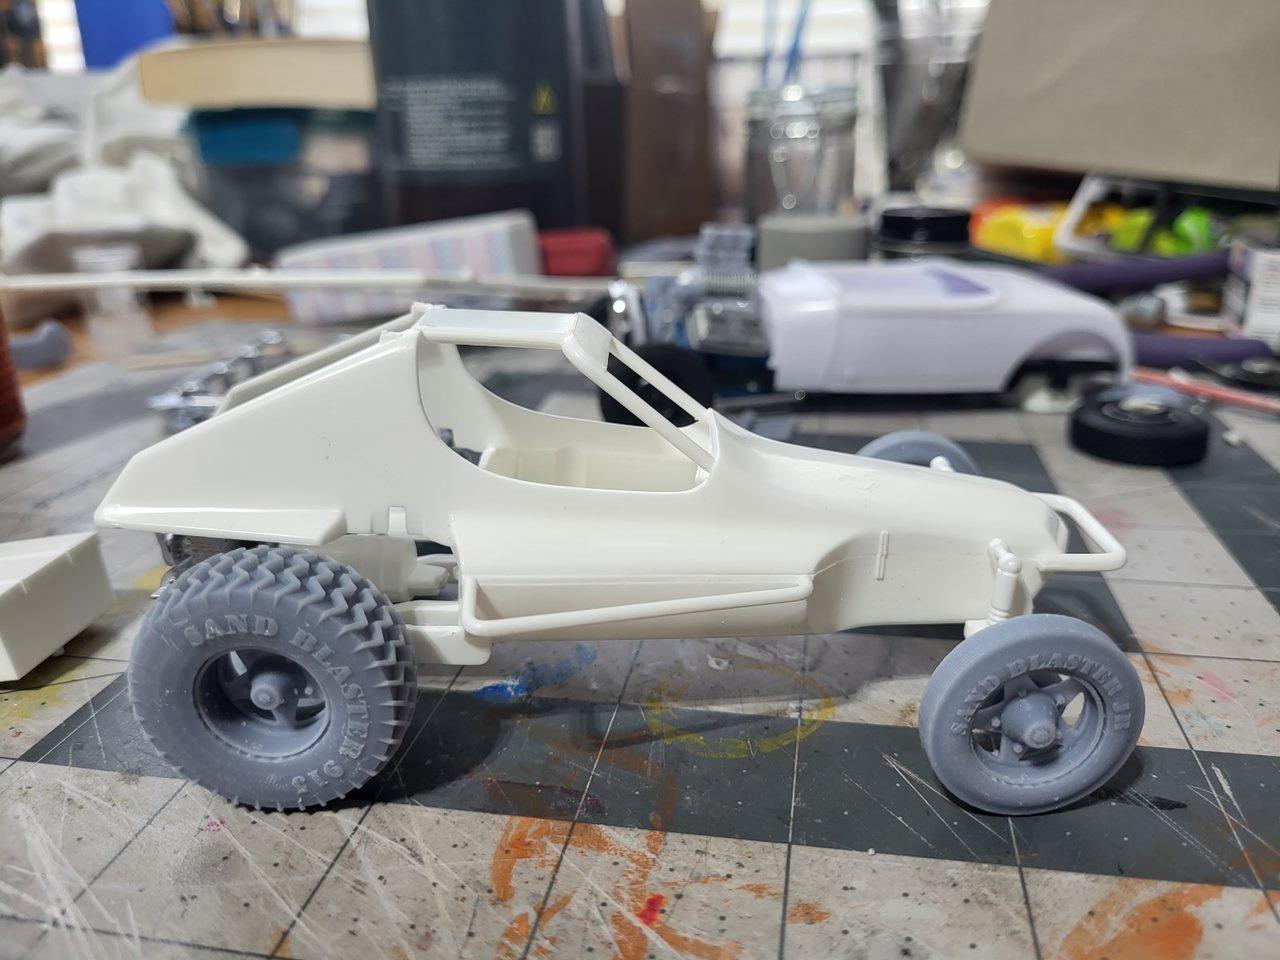
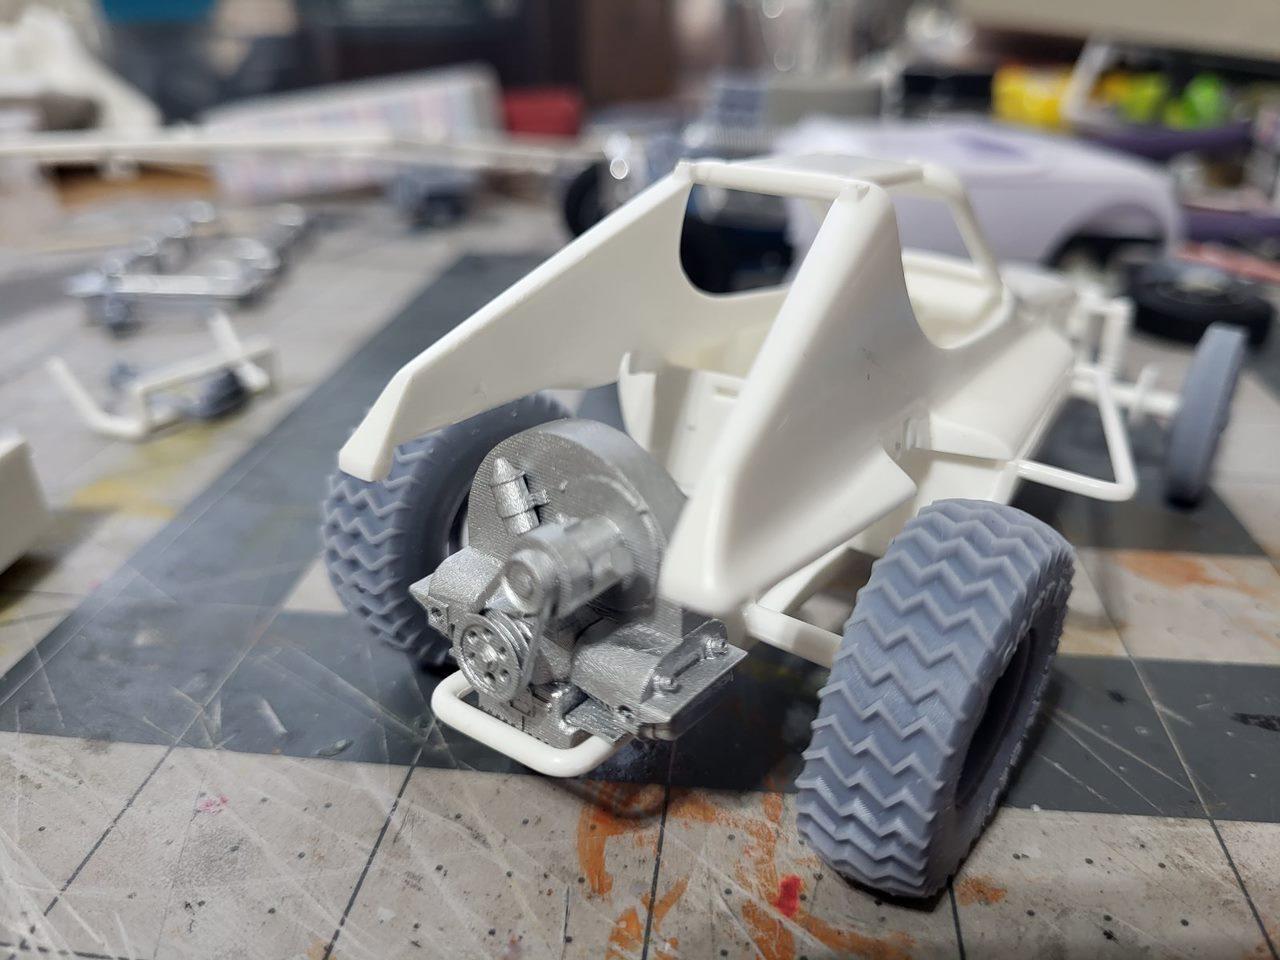
Let me start by saying that giving a man with ADD a 3D printer and Fusion 360 is a recipie for distraction. I now look at a kit and say "I need to make that better". This is the case with this Revell Bronco and Dune buggy kit.
The DUne buggy comes with something they want you to think is an engine. It is a lumpy block of styrene with a transmission attached. It is improperly sized, shaped and even what few details are the, are wrong, or in the wrong spot.
I was also not happy with the wheels/tires. They just look wrong to me and don't seem to represent the wheels/tire of the time. So, I remade those too.
For the rear I still need to add the rakes and push the rear out a little bit, but I am getting there.
I think I will use solder to bend up an exhaust system.
-
4
-
-
Expand
You're definitely printing that differently than I am, but I am mass printing them which makes me have to make a few compromises. What headers are those?
They are a Zoomie style header, basically 45 degrees out the side. The regular headers do not fit with the frame. I may try swapping side to side to get them to fit the outside of the frame. However, I think I like the Zoomie style.


Looking for projects, what do you need 3D files for, or printed?
in Truck Aftermarket / Resin / 3D Printed
Posted
OK, steps. I may have to get some dimensions from a real step to get the scale spot on, but they are proportionally correct.