black2002ls
-
Posts
30 -
Joined
-
Last visited
Content Type
Profiles
Forums
Events
Gallery
Everything posted by black2002ls
-
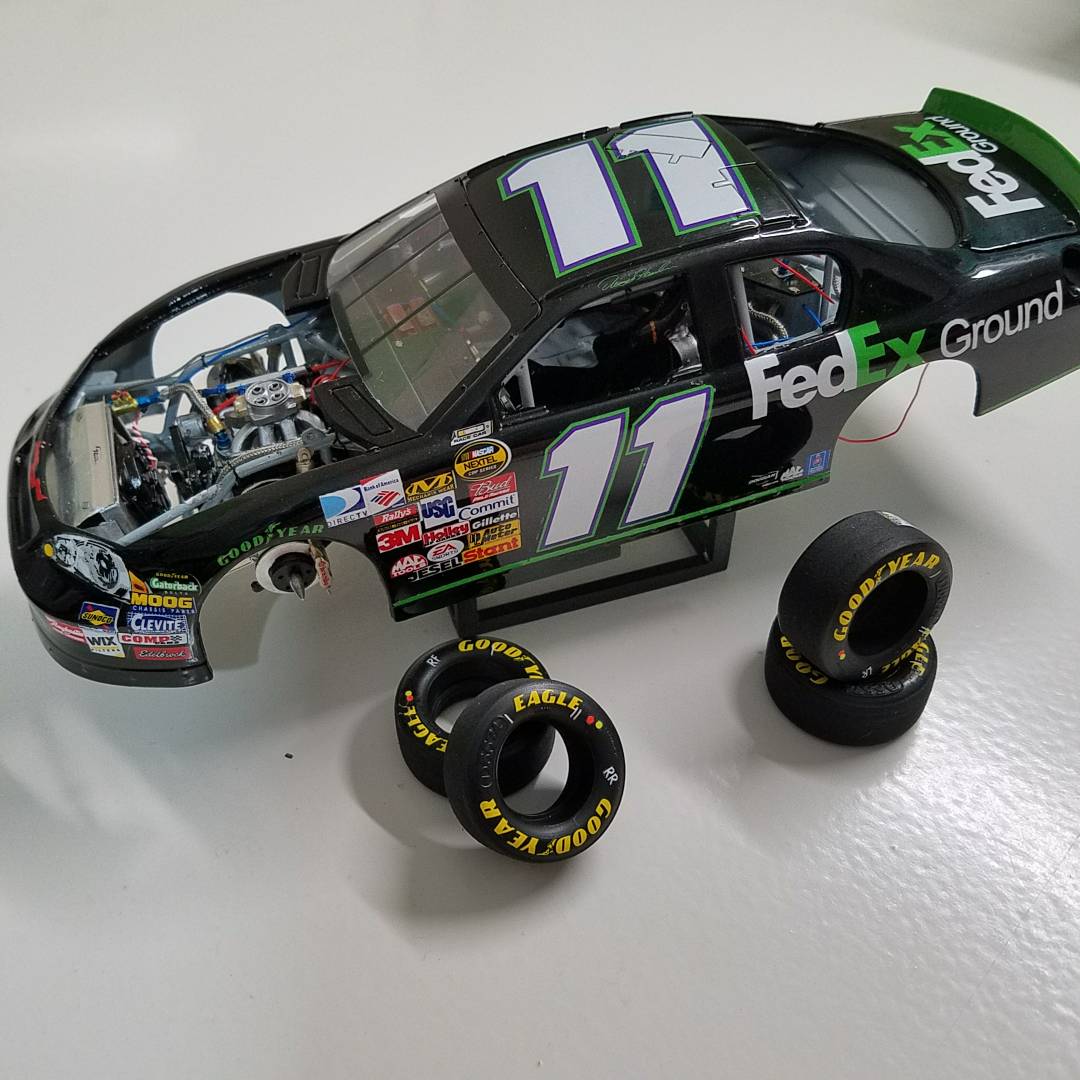
2006 FedEx Monte Carlo
black2002ls replied to black2002ls's topic in WIP: Stock Cars (NASCAR, Super Stock, Late Model, etc.)
Well, it wasn't quite what I hoped for, or what I set out to achieve, however, it was a solid showing for my first build after a 10 year break from the hobby. I plan to take it to scalefest in June and see how I do there! Thank you for following along! If you haven't, be sure to go and like my facebook page, facebook.com/lonestarmodelworks , I plan to share my build for next year via video updates!
-
2006 FedEx Monte Carlo
black2002ls replied to black2002ls's topic in WIP: Stock Cars (NASCAR, Super Stock, Late Model, etc.)
Me too! This is the first thing I have completed since 06 or 07. -
First Gen Bronco
black2002ls replied to black2002ls's topic in WIP: Model Trucks: Pickups, Vans, SUVs, Light Commercial
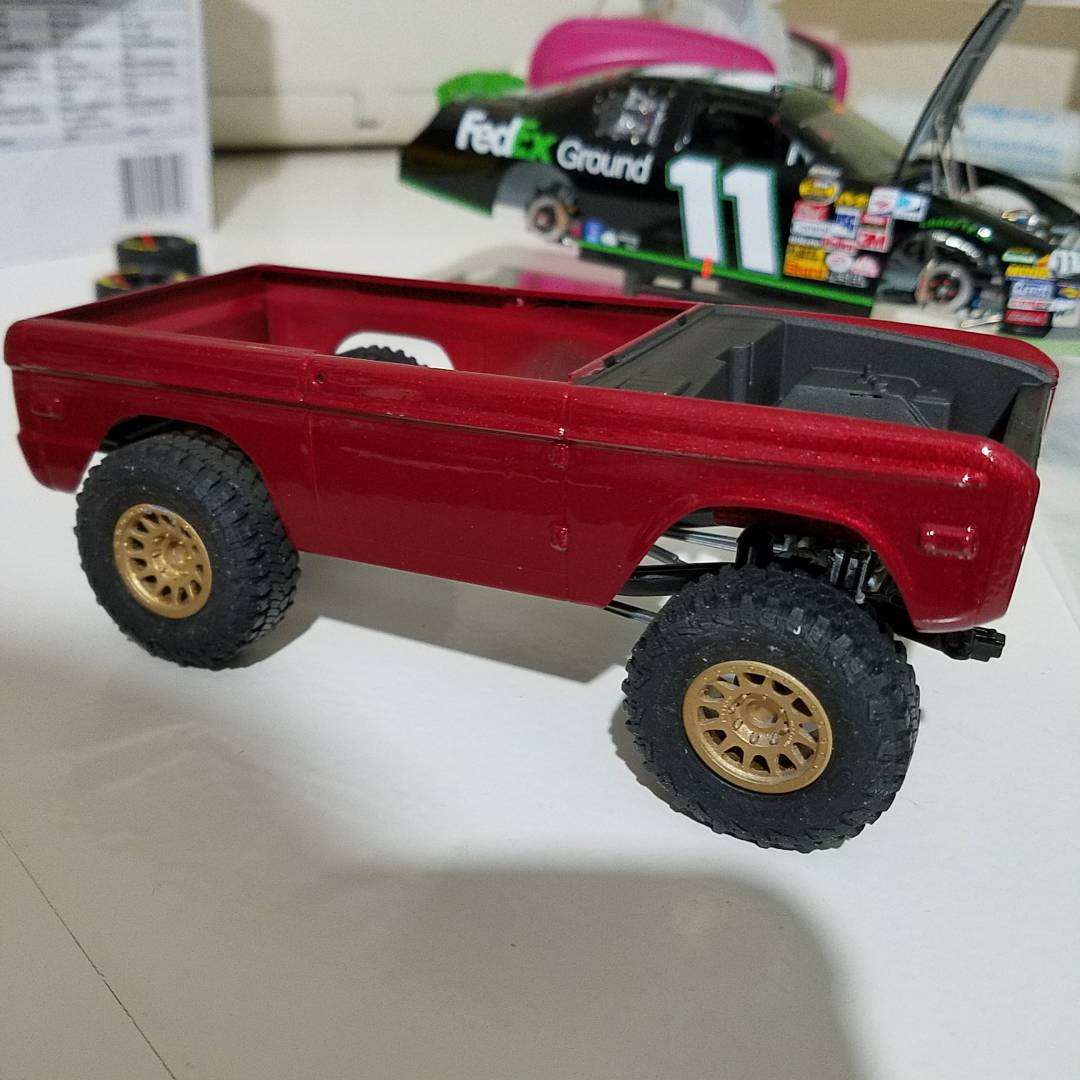
This thing is quite literally, being thrown together. Although, I do love the color combo! Trying to "complete" it for the Showdown tomorrow. The body was painted and cleared 2 days ago and polished today. The clear is 100% way too thick and I lost some detail, so, it will get tacked on with super glue and taken apart after the show and cleaned up and done properly. The wheels could use another coat of alclad pale gold and I think the bead locks need to be black. Lots of other little details that need re-done. This is the Theme or common kit for the show tomorrow, so I wanted to make sure I had one to display/enter.
-
2006 FedEx Monte Carlo
black2002ls replied to black2002ls's topic in WIP: Stock Cars (NASCAR, Super Stock, Late Model, etc.)
I remember some of your builds from back in the day! My SN was "white97ex" -
2006 FedEx Monte Carlo
black2002ls replied to black2002ls's topic in WIP: Stock Cars (NASCAR, Super Stock, Late Model, etc.)
No worries. I'll have plenty of pictures! If you have facebook, I have a page for my model builds, I may do a live stream on Sat, who knows. facebook.com/lonestarmodelworks Baseball, we bought our son his first ball and glove and Tee last weekend. He is 1 1/2, I CANNOT wait for baseball! I hope he plays well and they bring home the championship! -
This is the common kit for the Showdown on Saturday, needless to say, I'm behind the 8-ball! The plan was to re-build a lot of the suspension detail with aluminum tube and rod ends to dress it up, however, due to time constraints, I've had to settle for painting with contrasting colors to develop some dimension. Fireball modelworks wheels and tires, as well as fender flares once the new set arrives on Friday! This is the 3rd round of paint. The original plan was wild strawberry metallic, I had some custom mix from several years back that was still good. The first round of paint had some trash in it, then the clear went wrong, so I stripped it. The second round, I had a bad mix ratio of paint to reducer and it wasn't going to cure in time to clear it. So, I picked up a can of Duplicolor Toreador Red. When using Duplicolor base colors, I can generally go from primer to clear in 1-2 hours. I use Advantage 545 urethane clear. This clear is marketed towards auto body repair shops to help increase production. You can generally go from clear to polishing in 24-48 hours, which is essential for this project! The chassis is just about complete, just some touch up details to take care of. I had planned on painting the bead locks on the wheels black, however, that may not happen due to the amount of time I have to complete this. Power will come from a Coyote 5.0 from the '14 Mustang GT kit. I had to narrow the inner fenders just a tad to accommodate the width of the valve covers. Body: Ford Toreador Red Engine bay and under hood: Model Master buffing metallics Exhaust Wheels: Fireball model works painted in alclad pale gold
-
2006 FedEx Monte Carlo
black2002ls replied to black2002ls's topic in WIP: Stock Cars (NASCAR, Super Stock, Late Model, etc.)
I actually live in Greenville. I opened my account from my work computer, I work in Forney. I will be at the MCMA Showdown on Saturday. I will have this and a few other builds with me. Will you be there? -
Miller Genuine Draft
black2002ls replied to Old Coyote's topic in WIP: Stock Cars (NASCAR, Super Stock, Late Model, etc.)
Looks good! -
2006 FedEx Monte Carlo
black2002ls replied to black2002ls's topic in WIP: Stock Cars (NASCAR, Super Stock, Late Model, etc.)
Well, this will be the last progress update. The next pictures I post will be completed. Still a lot of little finishing details to do and touch ups to do, but all of the main sub assemblies are primarily complete. Items remaining: Install hood, make hood struts, and connect hood tethers TV camera and radio antenna Carb linkage and throttle cable/rod Window braces Steering wheel and radio wire Lug studs Front brake ducts Finish hood pins Miscellaneous nut/bolt detail and decals I'm sure I've missed a thing or two on that list, either way, a few hours work and it is ready to go.
-
Looking good!
-
2006 FedEx Monte Carlo
black2002ls replied to black2002ls's topic in WIP: Stock Cars (NASCAR, Super Stock, Late Model, etc.)
Finally getting down to the finishing details! I can mark wheels and tires off of the list! I finally bit the bullet and decided to use machined aluminum nuts for the lug nuts. I found some great pieces at a more than reasonable price. The tire tread was sanded down using the "drill method", Mounting the tire on a bolt and putting it in the drill and sanding the tread on 220 grit sand paper. This saves a ton of time. I wiped down the sidewalls with lacquer thinner to remove the kit markings and prep them for decals. Once the decals were on and dry, I hit the entire tire with Model Master dull coat lacquer to take the shine out of them. I added a few markings with a grease pencil, then mounted them on the wheels. The wheels were shot with Krylon Gloss black, which I had to top with Model Master ultra gloss lacquer due to a paint issue. More wet works decals for the weld logo and the alignment tape. The lug nuts are .031 machined aluminum nuts, I left them bare aluminum for some contrast and then painted the top edge with Fluorescent orange.
-
2006 FedEx Monte Carlo
black2002ls replied to black2002ls's topic in WIP: Stock Cars (NASCAR, Super Stock, Late Model, etc.)
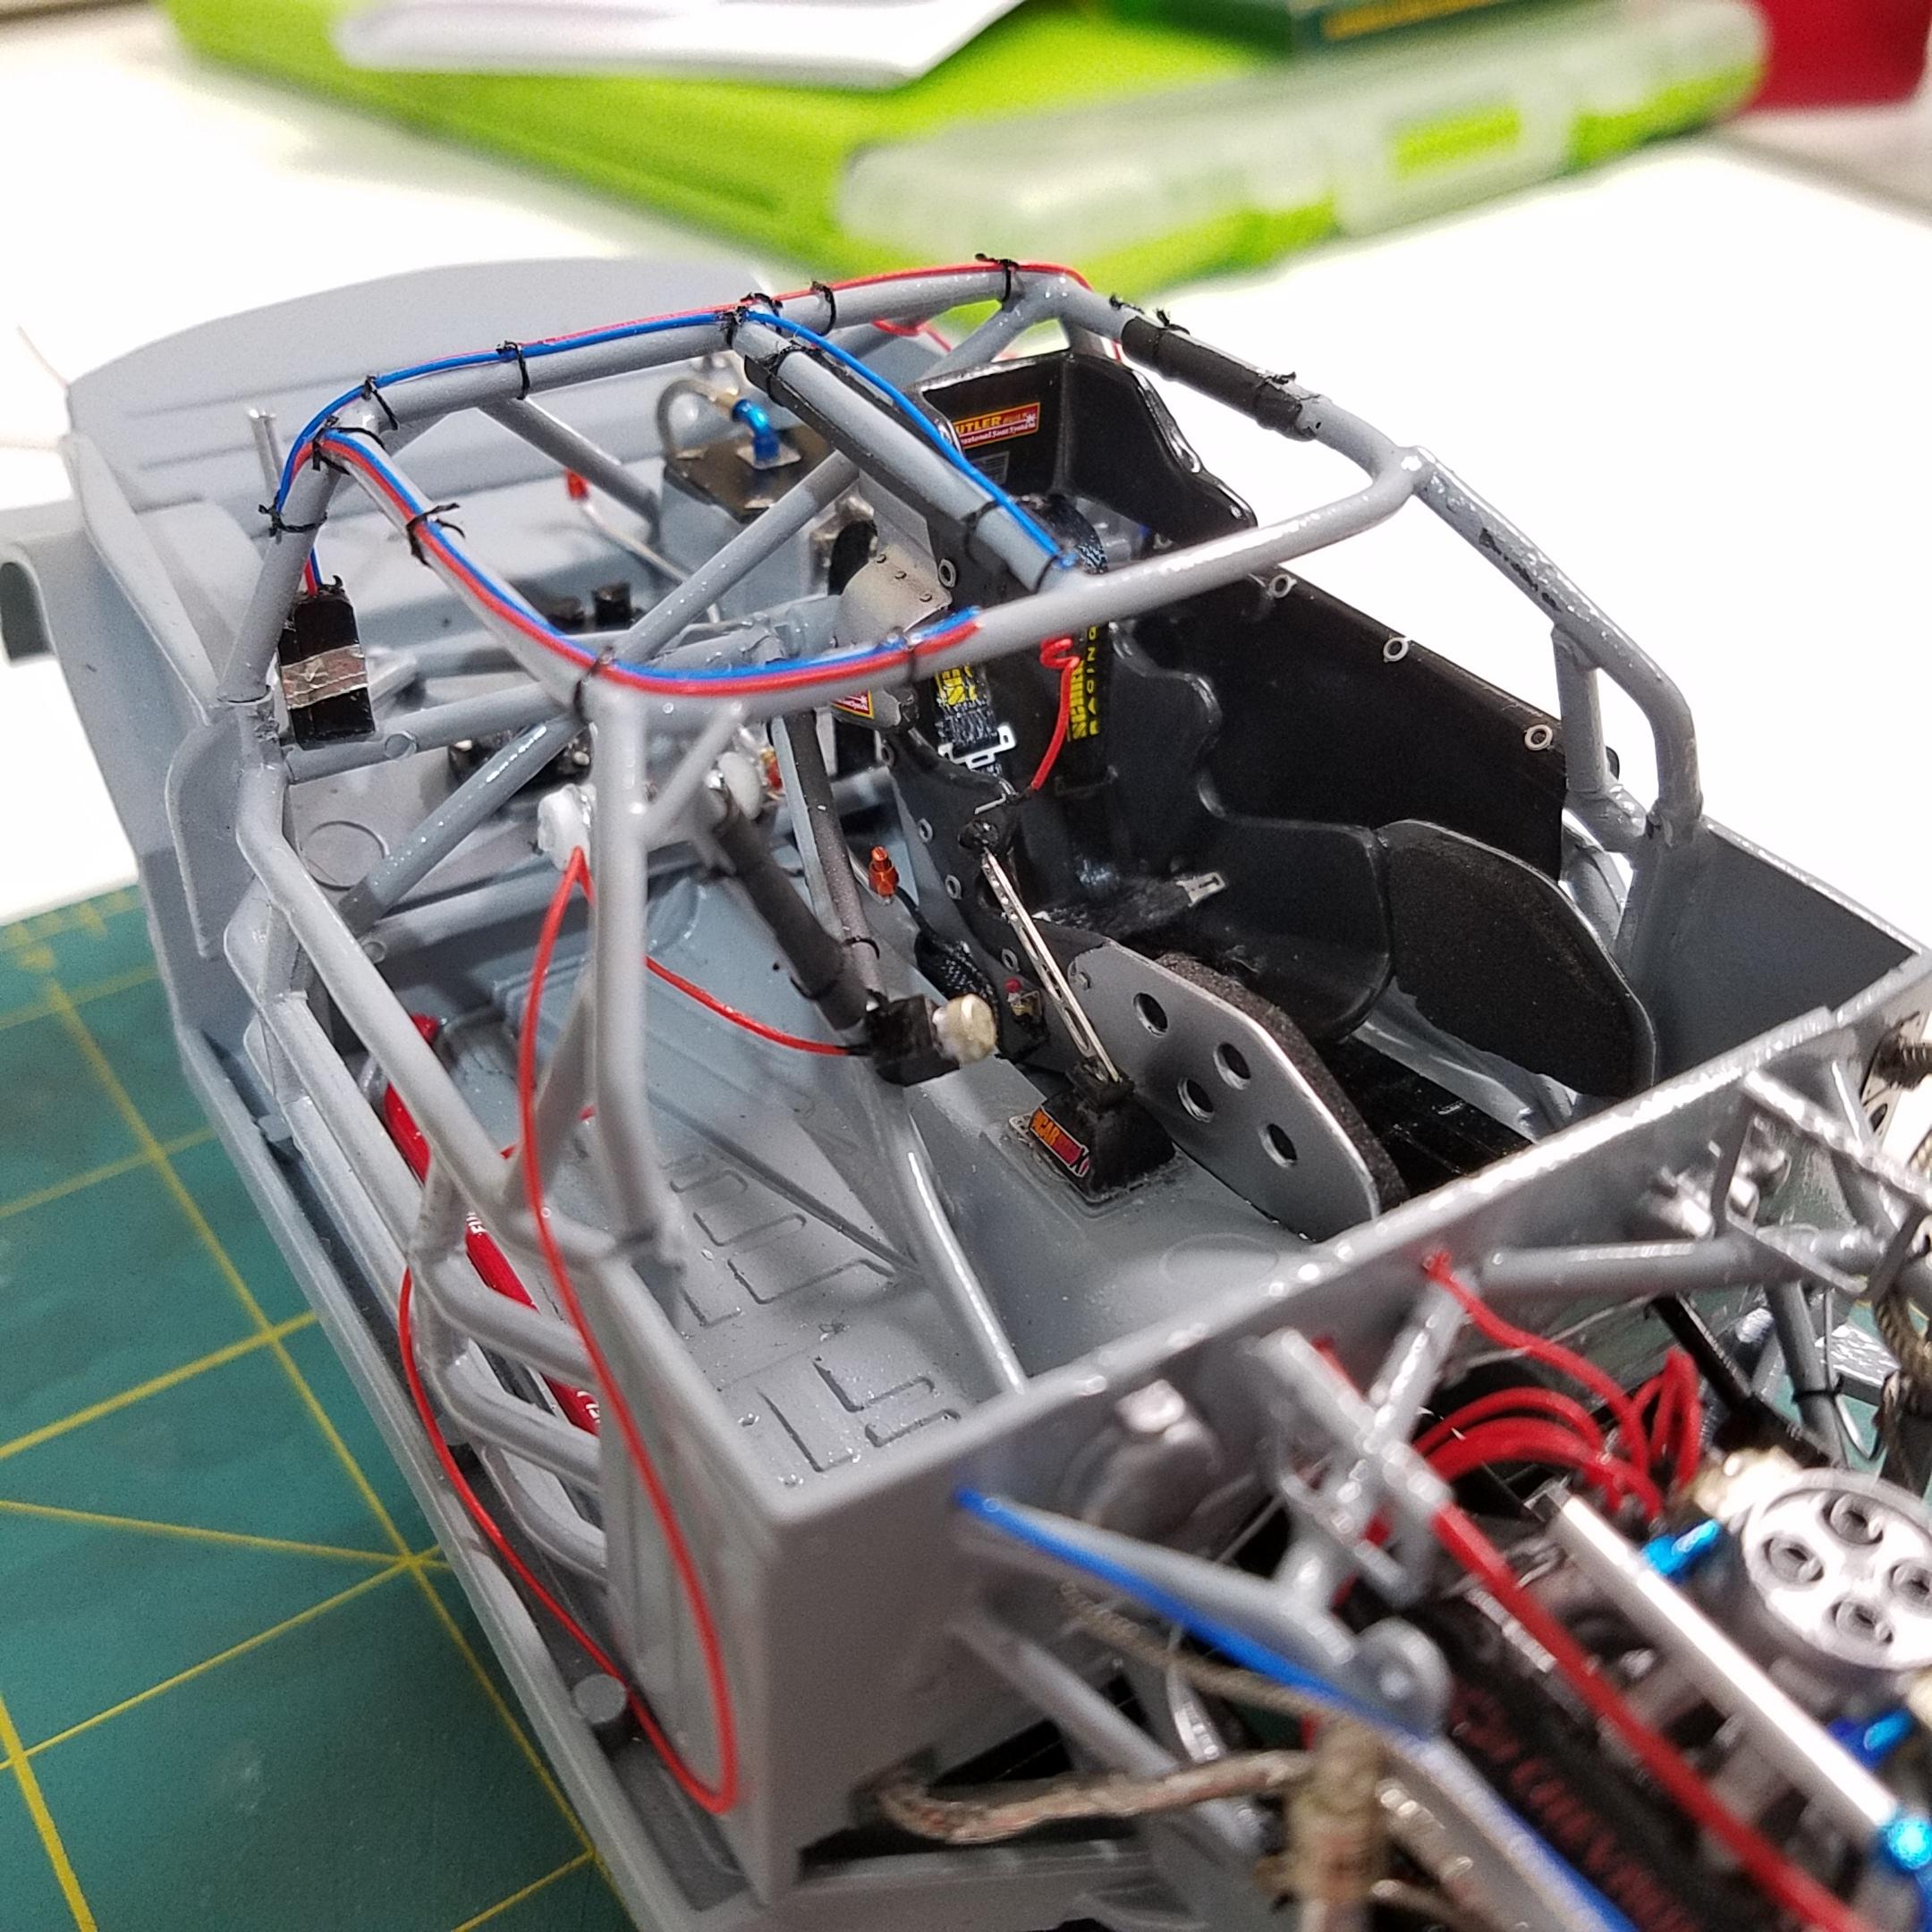
Thanks. I'm down to the finishing details! Dash is in for good, just waiting on a couple of ignition coils that should be here today to finish up the electronics tray. The only items left to build are the supports for the rear window braces, the center exhaust section, and the air ducts and boxes for the front brakes, everything else is just a matter of final details! I'm hoping this thing can be placed in the FINISHED column by Sunday! -
2006 FedEx Monte Carlo
black2002ls replied to black2002ls's topic in WIP: Stock Cars (NASCAR, Super Stock, Late Model, etc.)
Yeah, I prefer that deep gloss across the whole thing. I've only had one issue with clear over decals. I have a Joe Amato Top Fuel dragster that I started about the same time I started this that also went into storage. It was the Superman livery, I checked it about the time I picked this one back up, trying to decide which one I was going to finish for the competition and the decals appeared to have melted underneath the clear. -
2006 FedEx Monte Carlo
black2002ls replied to black2002ls's topic in WIP: Stock Cars (NASCAR, Super Stock, Late Model, etc.)
I got quite a bit done over the weekend. The rear suspension is installed an complete. There may be some bolt head detail here or there that I need but I am calling it complete and will take care of that on my final detail. The air cleaner housing got coated in SMS 1/20th scale CF decal and cleared. As of this picture, it needs another coat or two of clear and then a little polishing. Once that is done, I'll ad a washer and nut and some tape. The short track grills are installed on the front, along with some tape. The tape may not be correct, however, it adds some dimension to the front end. I also added some bolt heads for the spoiler.
-
2006 FedEx Monte Carlo
black2002ls replied to black2002ls's topic in WIP: Stock Cars (NASCAR, Super Stock, Late Model, etc.)
I had a couple of hours, uninterrupted last night, to work on this thing. I got some crush panels installed on the bottom, rear end is mounted, and the front steering has been re-worked. I was never happy with the junk I had scabbed in for the steering in the beginning. I finally figured out how I wanted to do it. The angles are a little funky, but it would be functional. Everything has been detailed with Pro Tech PE bolt heads/nut detail
-
Compressor recommendations
black2002ls replied to Modlbldr's topic in General Automotive Talk (Trucks and Cars)
Solid advice. I believe my compressor is a power jet. I gave it to my older brother to use when I was out of the hobby and didn't have a place to work. It is time to buy a new one. I am currently using my 3 gallon Kobalt compressor with an external regulator/filter/moisture trap. It works just fine, however, it would be nice to have something I could run in the house with a spray booth -
2006 FedEx Monte Carlo
black2002ls replied to black2002ls's topic in WIP: Stock Cars (NASCAR, Super Stock, Late Model, etc.)
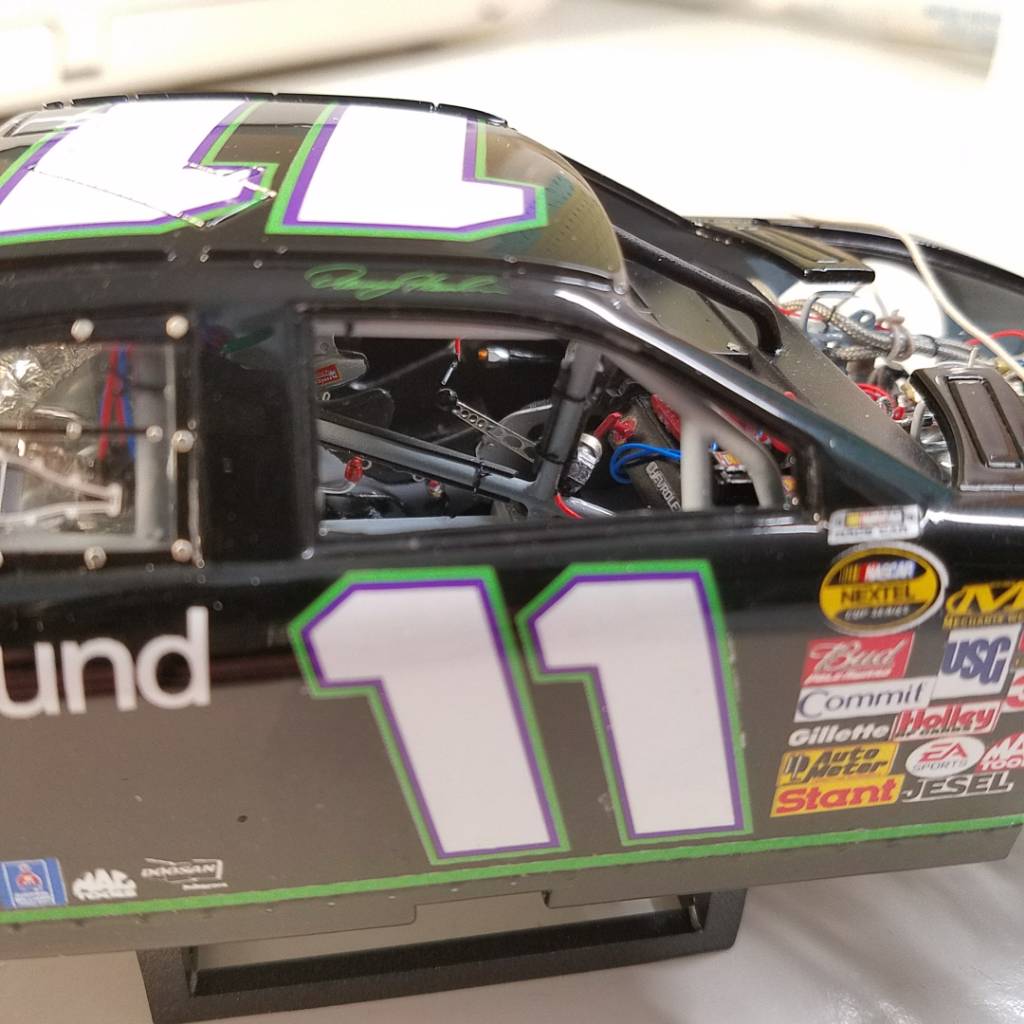
Well, it is starting to look like something! Body is cleared, still a little polishing left to go. I had a couple of issues with the decals and my clear. This is the first problem I've had, nothing major though. I think I may have cleared too soon. The edge of the driver door decal lifted just a bit, and I got some "dry spots" in the clear. Interestingly though, this only happened over the white number decals. I know there is a line in the sand with clearing over the decals. I prefer burying them in clear for the long term protection! Tires are detailed, just waiting on wheels and a couple of grease pencil markings I also started on the air ducts in the interior of the car. They don't perfectly meet the windows. I will add a piece of aluminum tube to move them closer to the windows and mimic the "connector" that would attach to the window. This kit started as a pro-finish kit, so the windows are all pre-painted and have no openings. So, I will use NACA duct decals and some PE washers for the exterior of the hose connections.
-
Sanding nightmare
black2002ls replied to Modeldude428's topic in Model Building Questions and Answers
If you still have some scars from sanding with the 120 grit, pick up some Bondo glazing putty. You can find it at Wal Mart in the automotive section. Spread a layer over the affected area, let it harden, and then hit it with 800 grit paper. Once you feel like you have it smooth, hit it with some 1000 grit and prime. Keep in mind, you can prime just the area that you worked on. This will help prevent losing any panel lines or cowl detail. -
Anyone in Texas?
black2002ls replied to black2002ls's topic in General Automotive Talk (Trucks and Cars)
I'm not real sure how it is now! This will be my first trip back in 10 years. -
2006 FedEx Monte Carlo
black2002ls replied to black2002ls's topic in WIP: Stock Cars (NASCAR, Super Stock, Late Model, etc.)
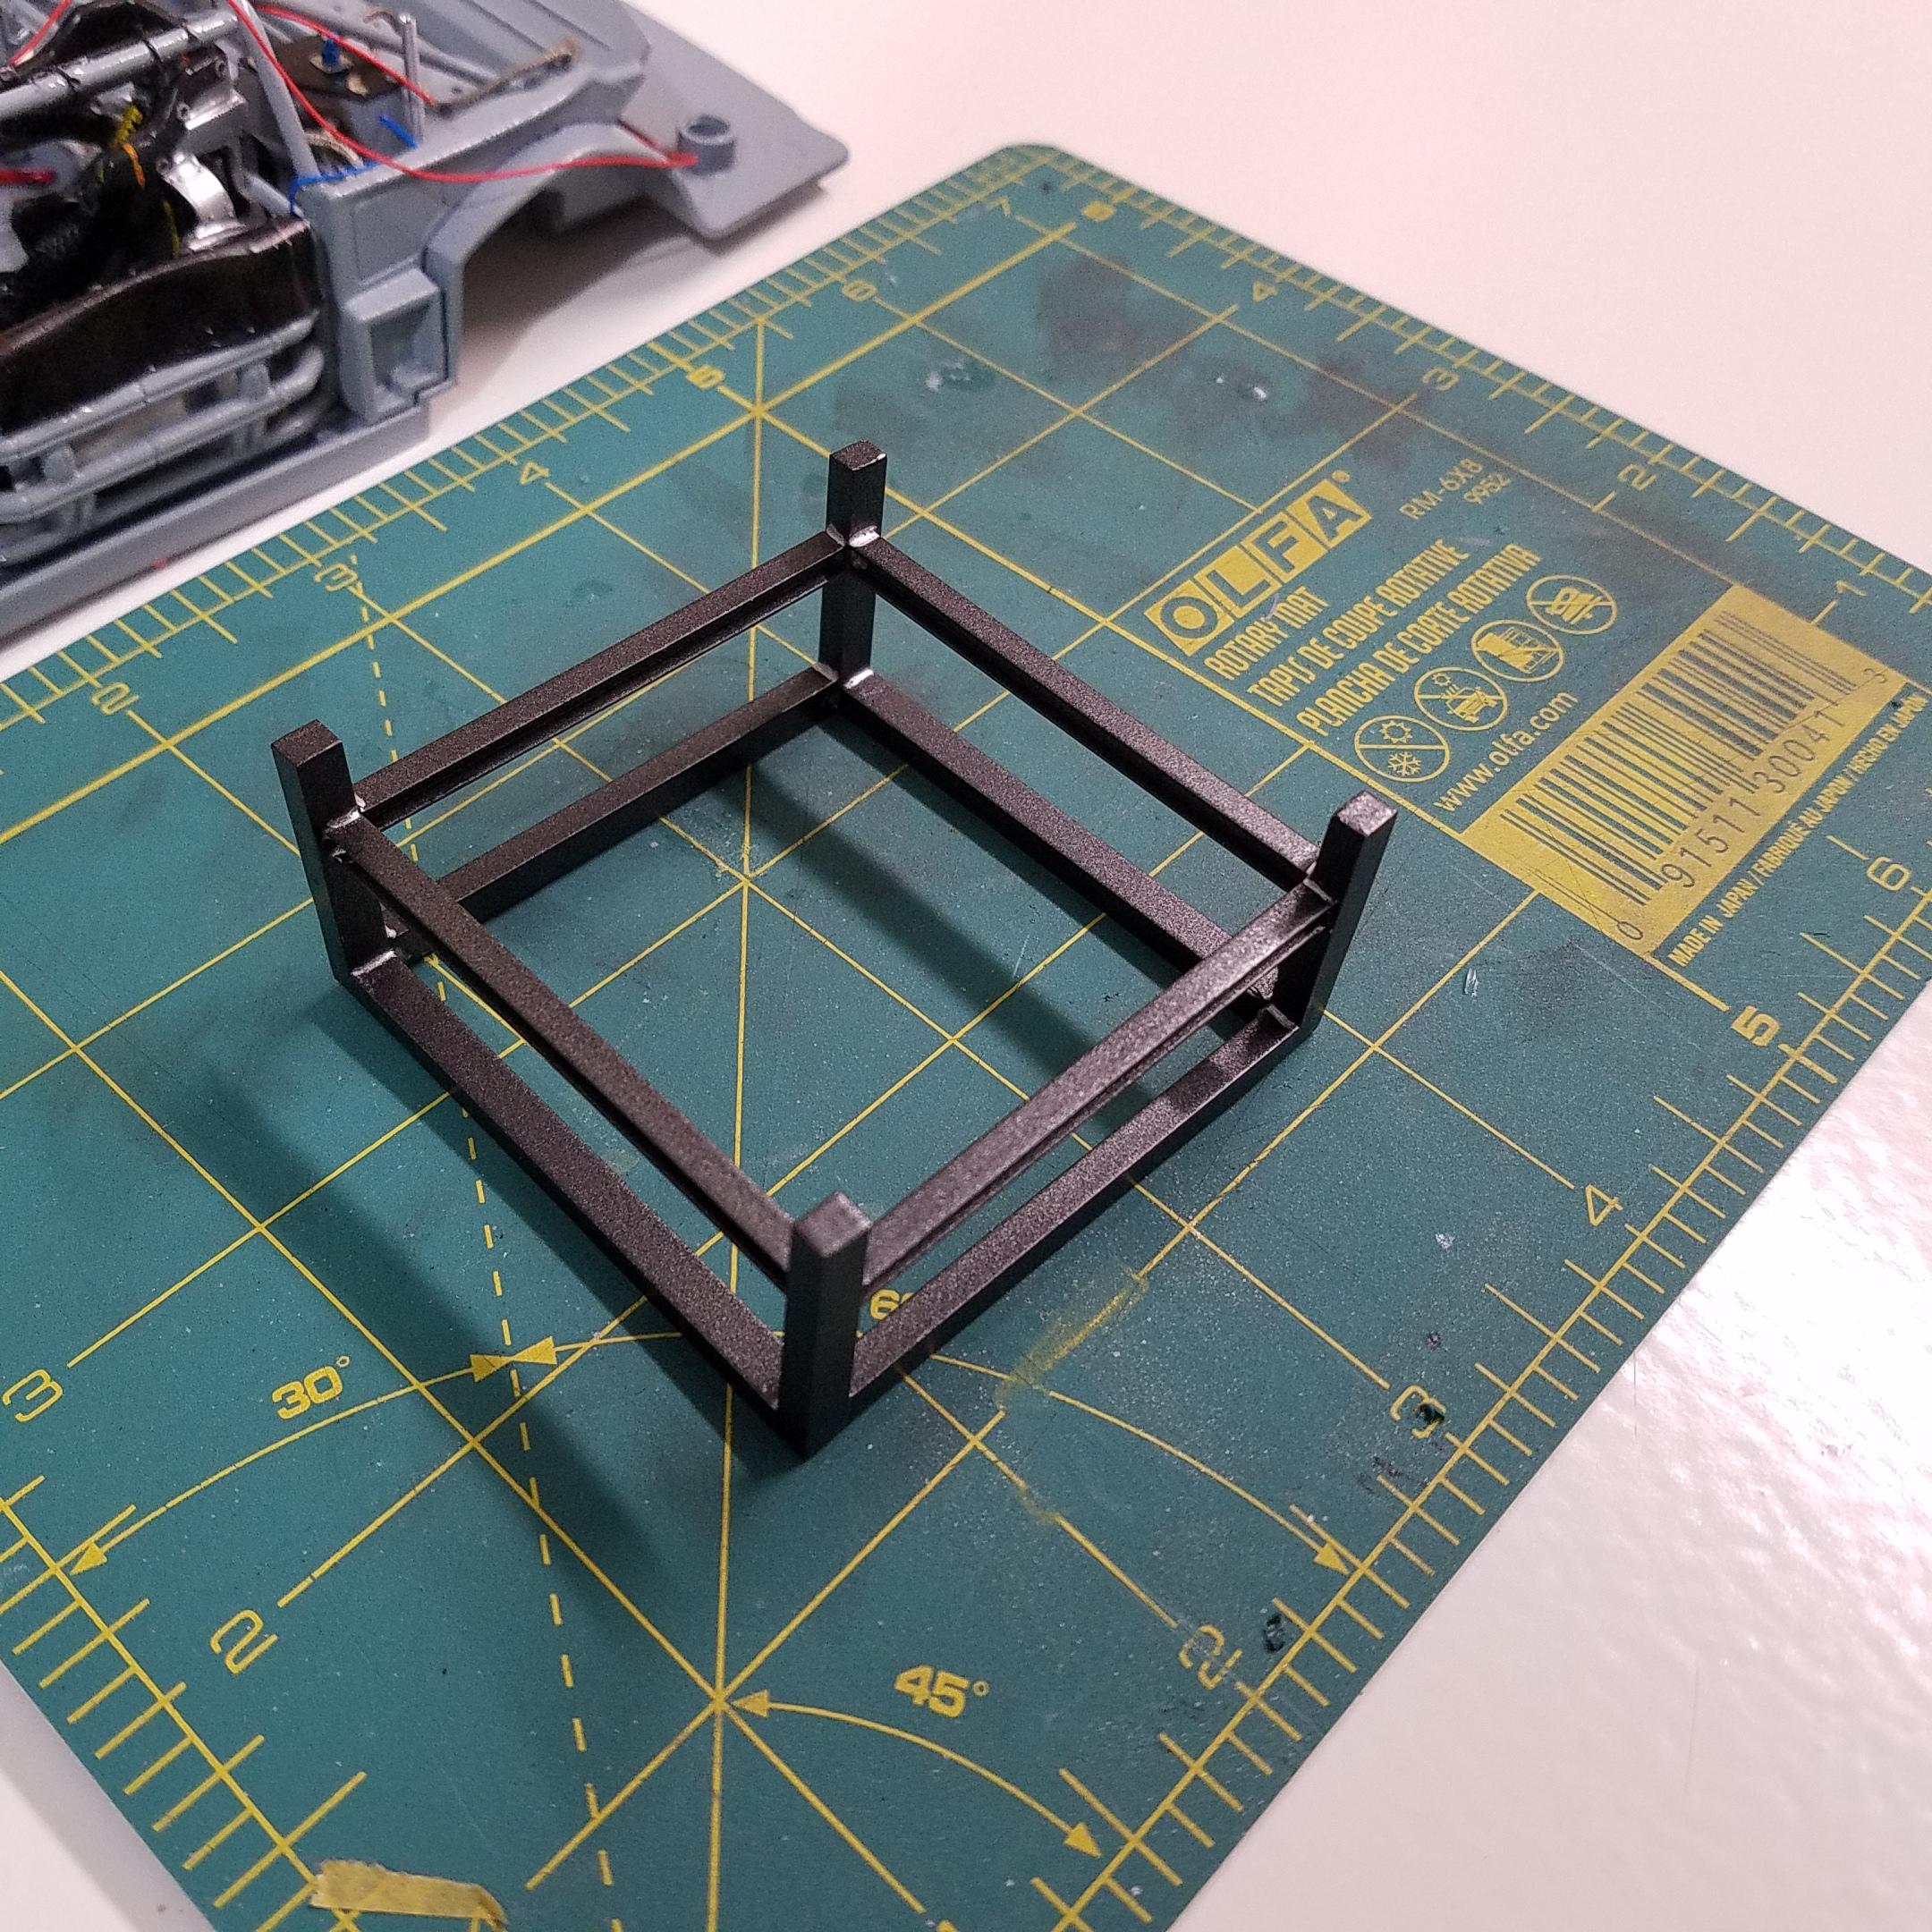
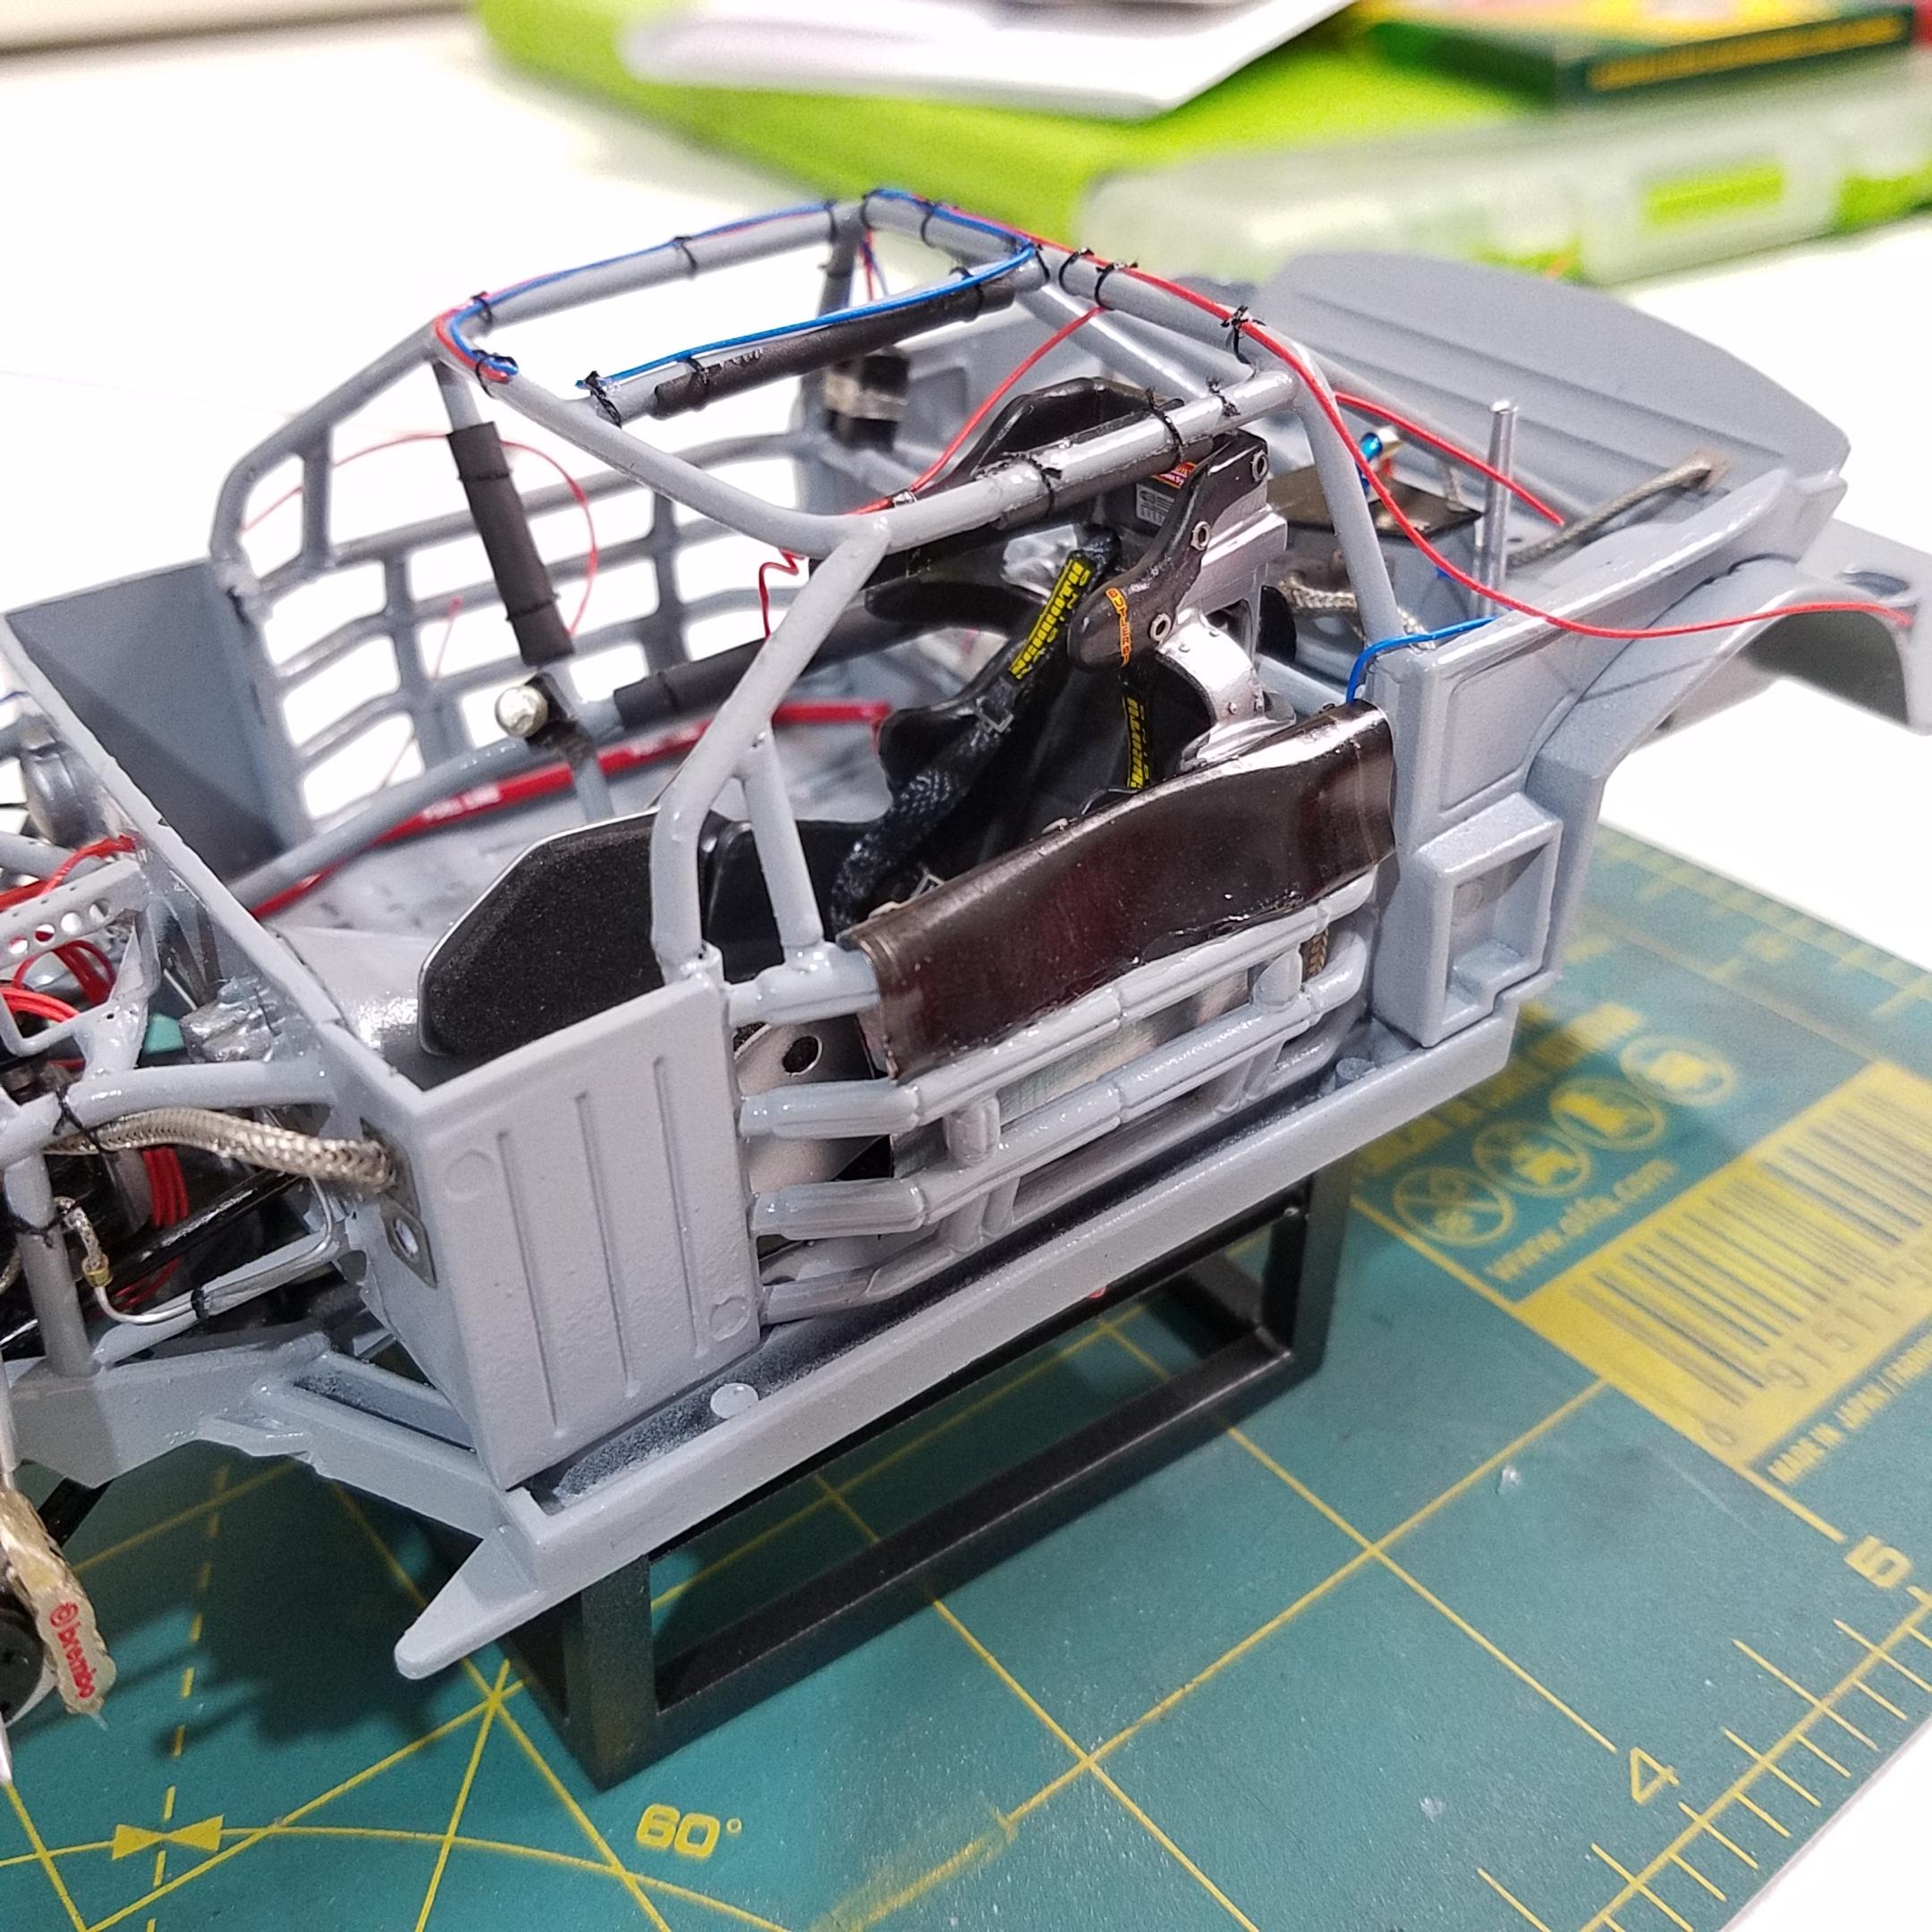
I made a lot of progress this weekend. Seat is done, detailed, amd installed. Fire suppression system is in, and I made a display stand.
-
2006 FedEx Monte Carlo
black2002ls replied to black2002ls's topic in WIP: Stock Cars (NASCAR, Super Stock, Late Model, etc.)
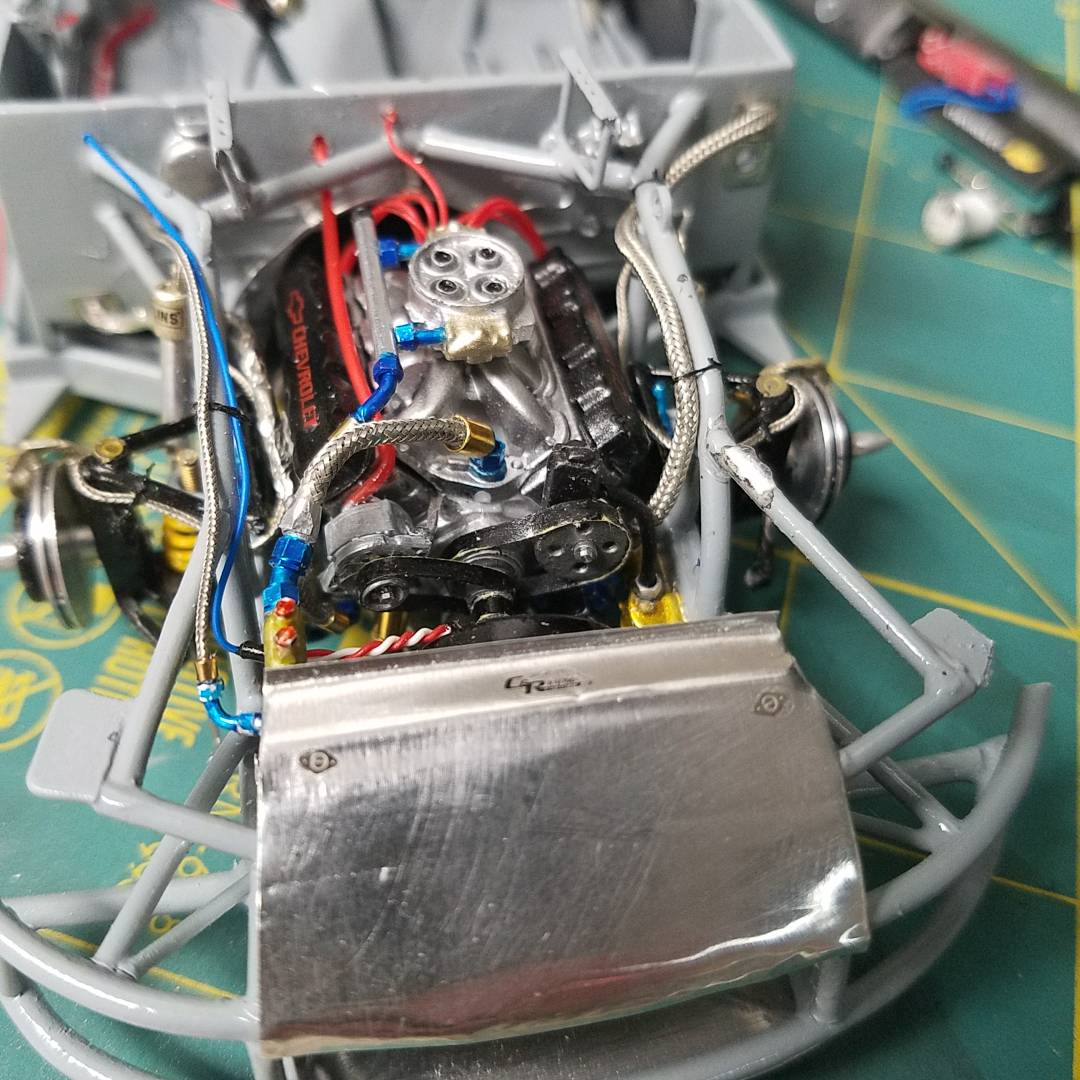
Thanks Jim. Still a lot of little things to take care of. Looking at that pic of the engine sitting in its home, I realized there is a lot of touch up painting to do as well! -
Is anyone in Texas? I'm planning to attend the MCMA showdown March 3rd and I haven't been since '07. I'm wondering what to expect, I've found a couple of fotki's with pictures of builds but nothing extensive, or showing class/show winners. I'm curious what I will be up against and what to expect! I won 3rd place in the pavement competition the year that I went with this box stock #3 build:
-
2006 FedEx Monte Carlo
black2002ls replied to black2002ls's topic in WIP: Stock Cars (NASCAR, Super Stock, Late Model, etc.)
There you have it! That is where I am at. Still a long way to go to get this thing finished up for the show on March 3, right at 3 full weeks! I'm hoping to get the body cleared today or tomorrow to seal the decals and give it plenty of time to harden before I polish it out and add all of the final details to it. I shoot advantage 545 clear which is marketed to body shops as a fast curing clear to help speed up production times. -
2006 FedEx Monte Carlo
black2002ls replied to black2002ls's topic in WIP: Stock Cars (NASCAR, Super Stock, Late Model, etc.)
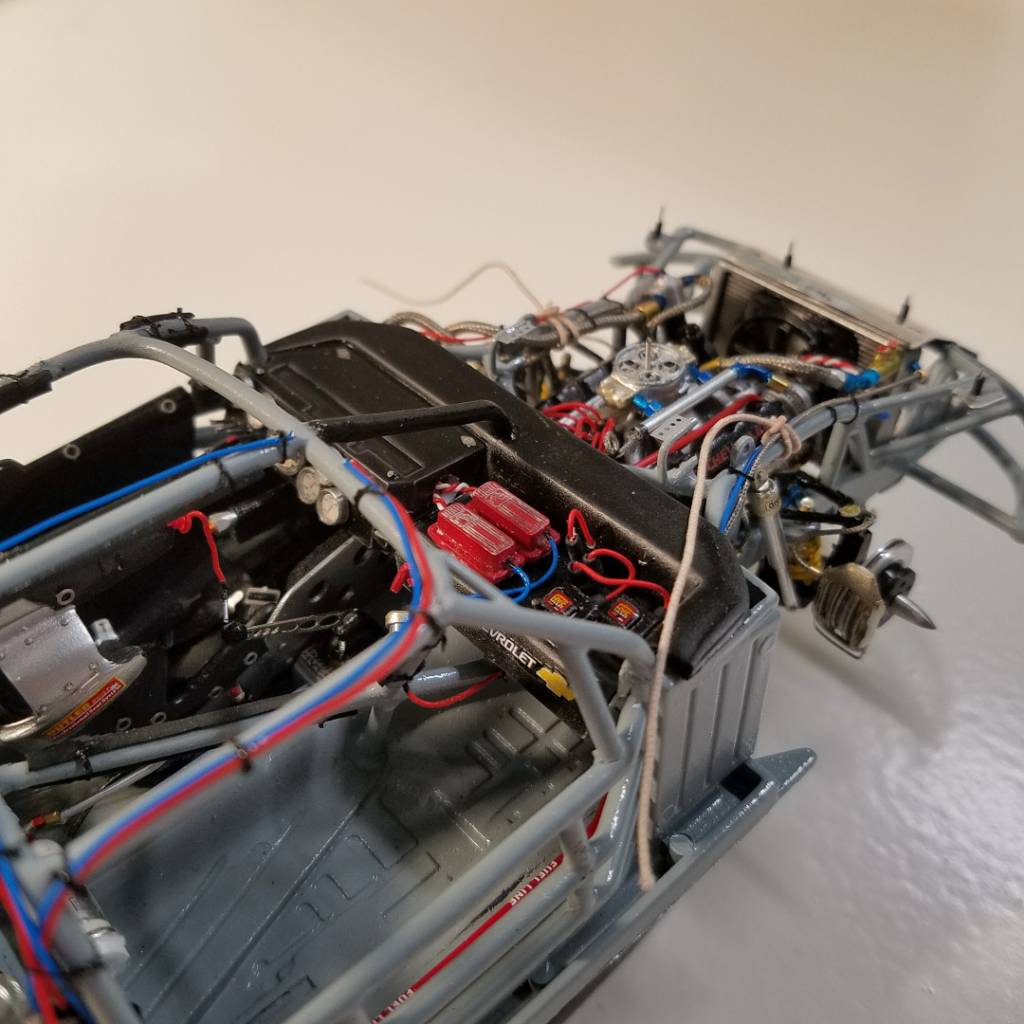
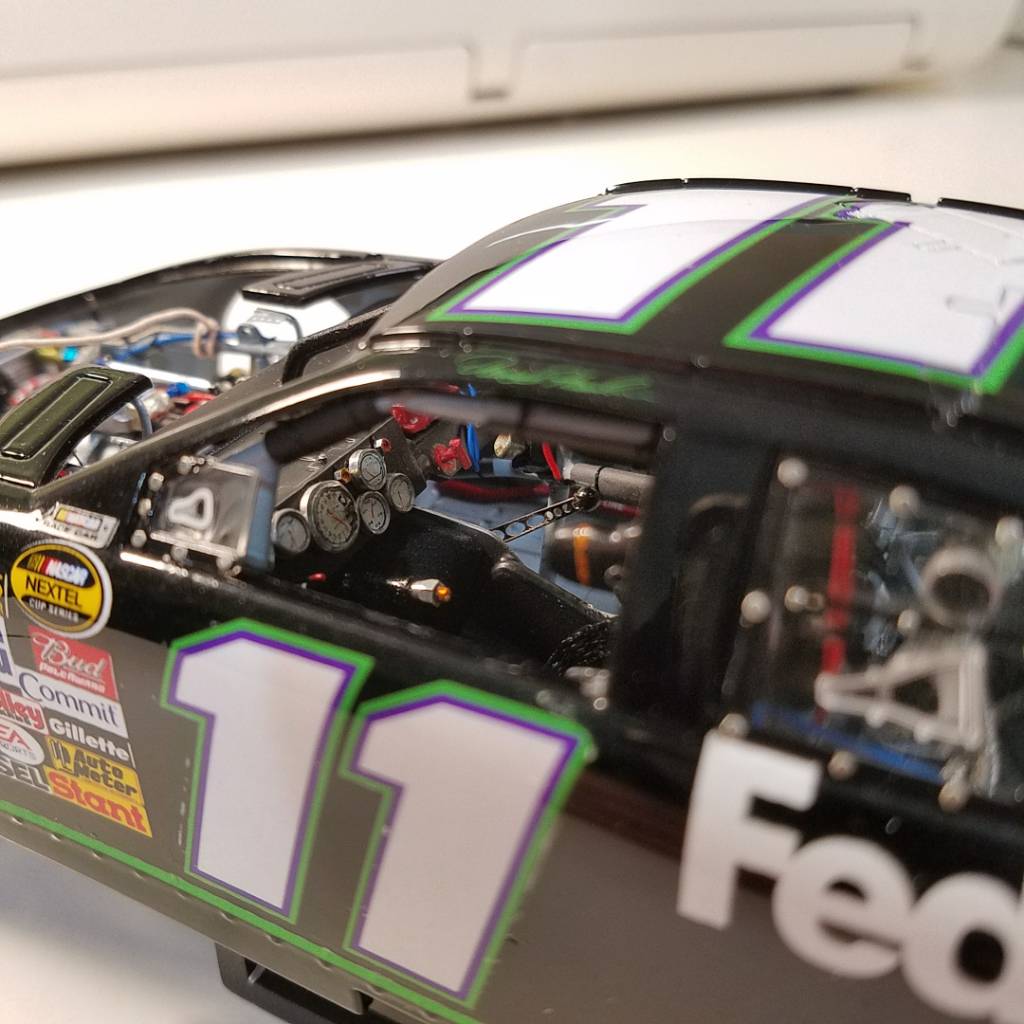
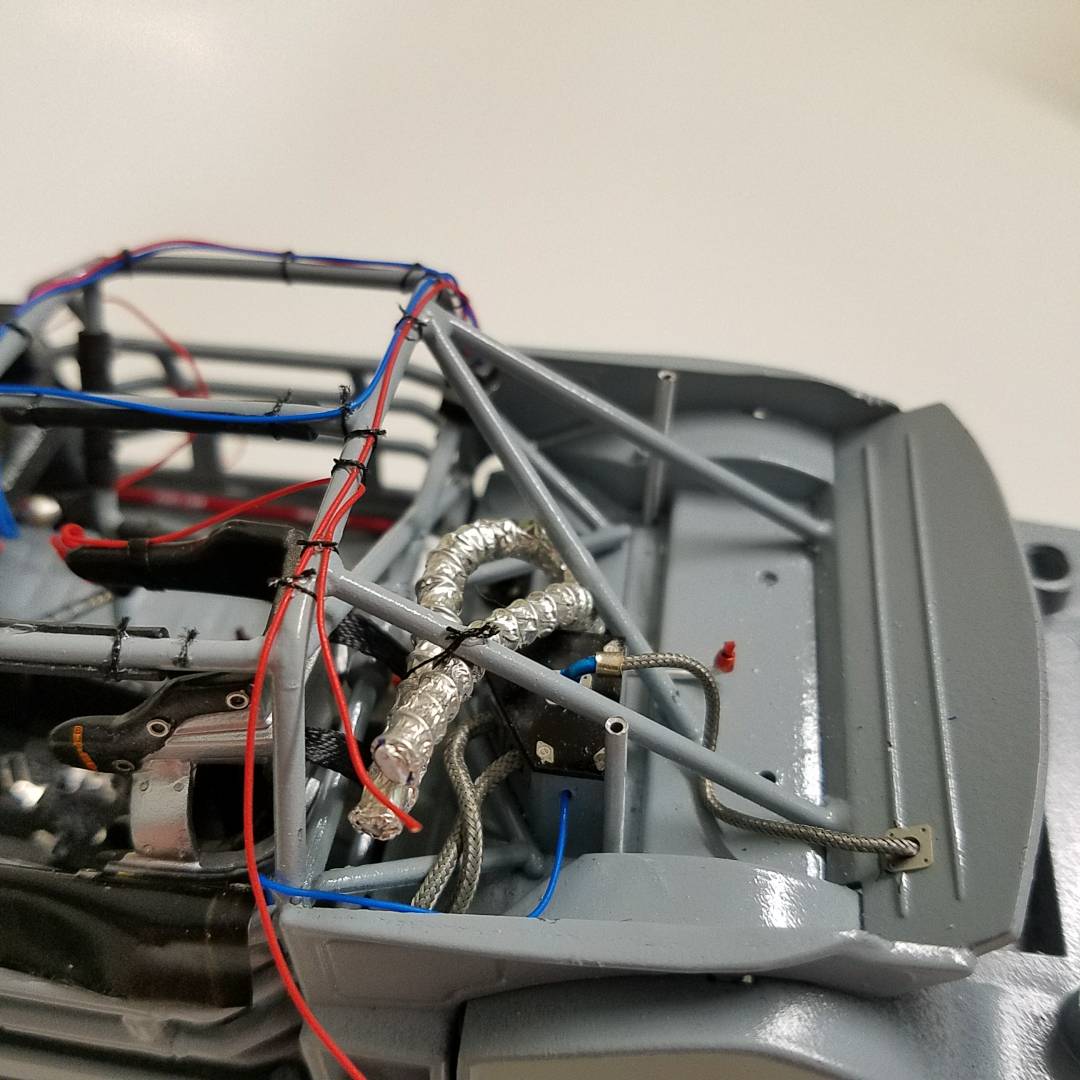
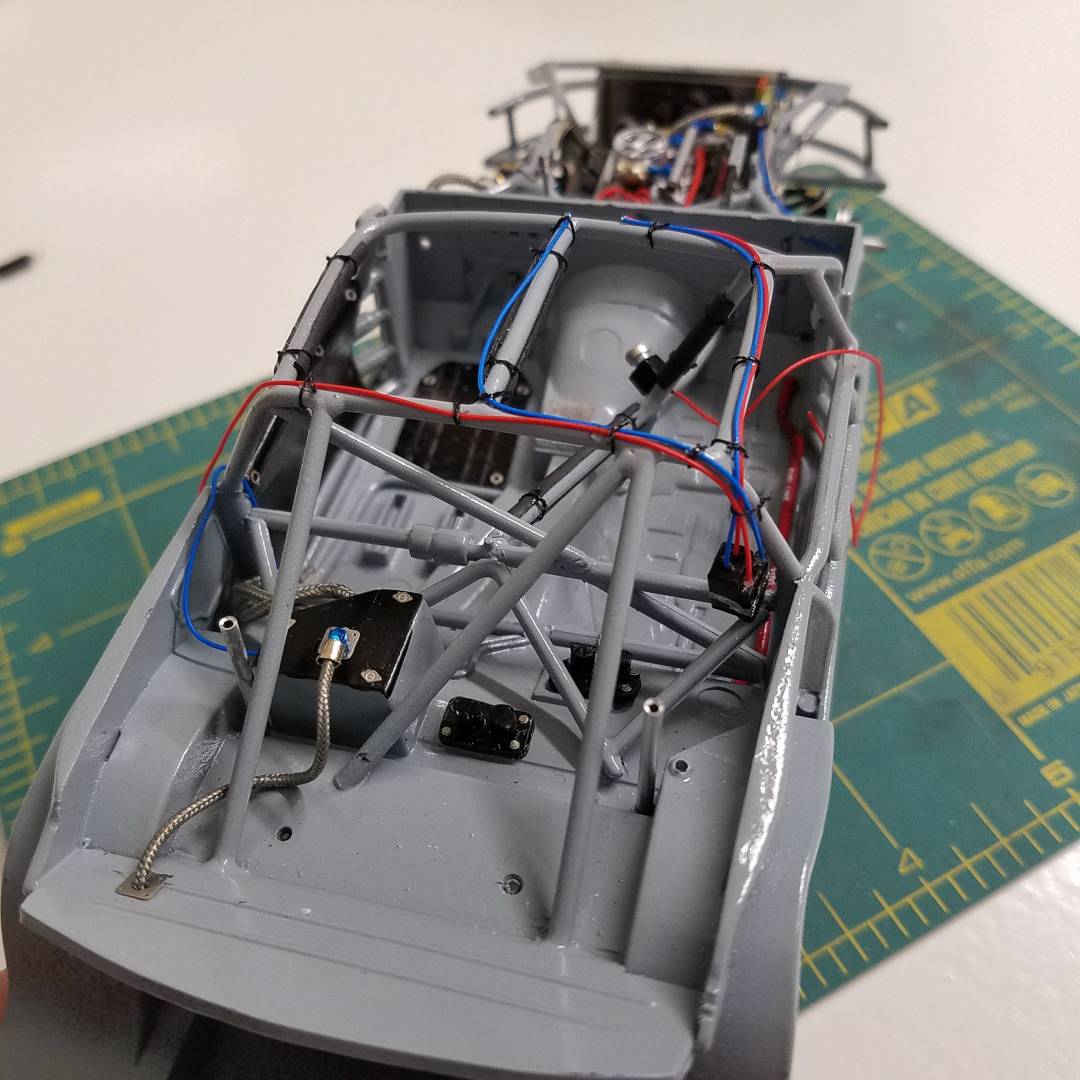
And finally, this is how it sits right now. BMF was added to the under side for heat shield. You can also see the spring cups, fuel and brake lines, and the upper shock mount for the rear shocks. Lots of detail going on inside. Oil tank is pretty much done from the top side. New cover made, supply and return lines are in, line for the breather tank that would be in the trunk is plumbed and dzus fasteners on top. The two black plates to the right of the oil tank are for the air duct lines to "pass through" to the under side. Roll bar padding is heat shrink tube with "zip ties" (sewing thread set with a little CA). Radio and camera transmitter boxes are in and wired, floor mat and driver door mat are installed along with the pipe for the fuel supply line. On the 1:1 car the package tray is black. Since I didn't catch this earlier, my only option now would be to brush it with flat black. I am undecided on that at this point. Finally, the engine bay in all of its glory. This area is ALMOST complete. I need to finish up the remote oil filter, get it mounted and lines run, carb linkage, and other small details. You can also see the upper radiator tin here. C&R racing decal added along with dzus fasteners for access.
-
2006 FedEx Monte Carlo
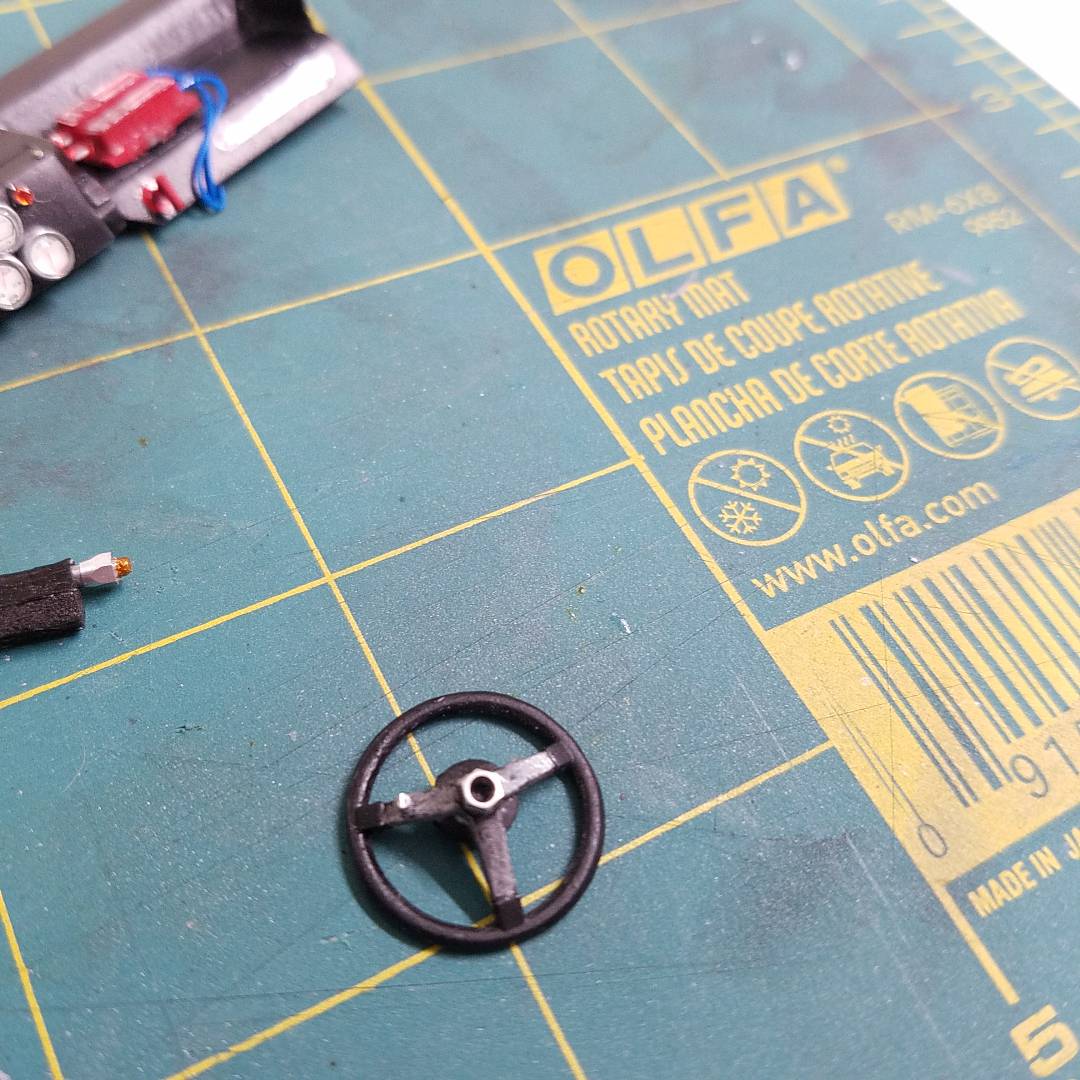
black2002ls replied to black2002ls's topic in WIP: Stock Cars (NASCAR, Super Stock, Late Model, etc.)
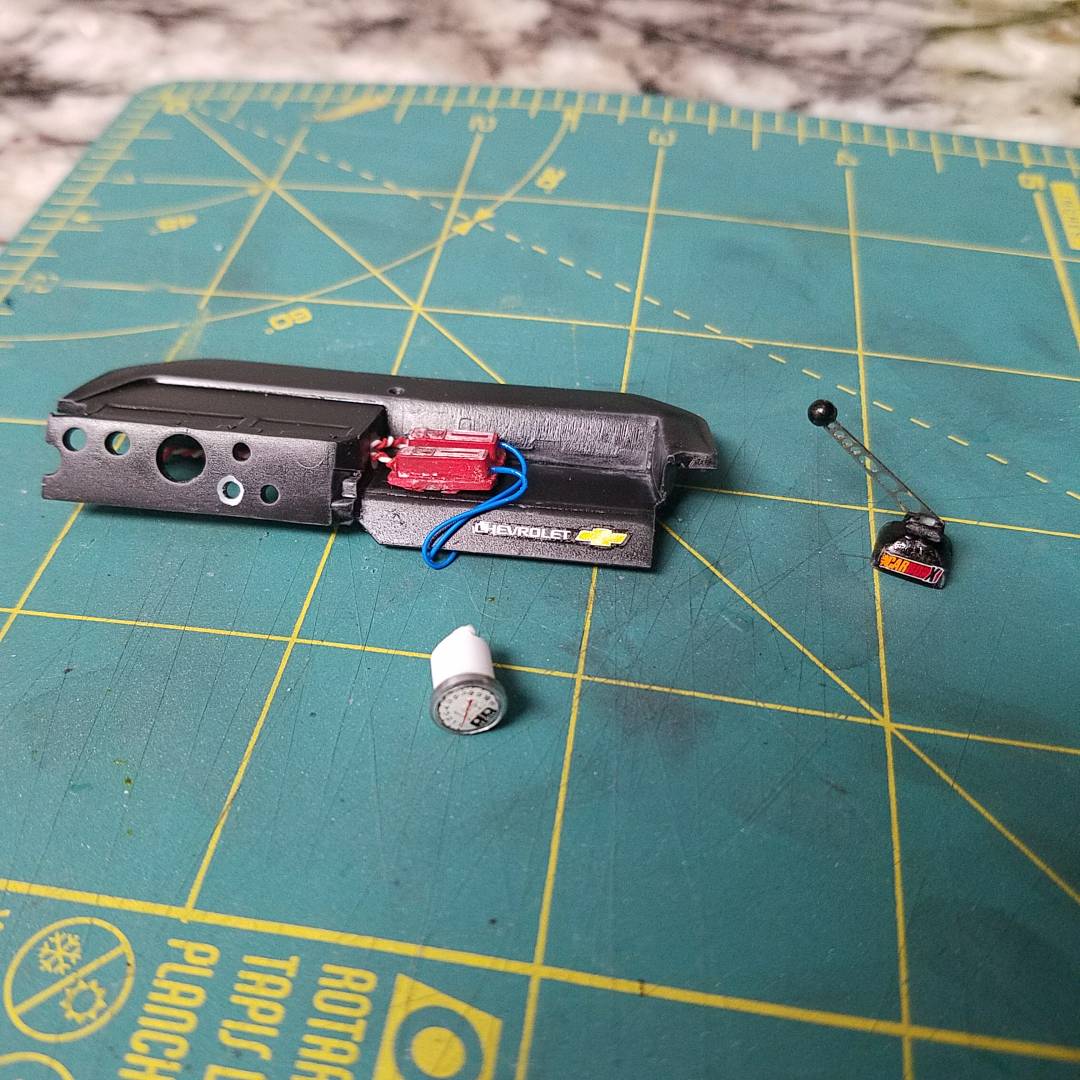
Steering wheel and column are pretty much done. The wheel is a piece from an older kit. I added a .065 AN fitting from Pro Tech to the back side for the quick disconnect and a piece of styrene rod into one of the wheel spokes for a radio button. All it needs is some wire. The steering column is a piece of polished aluminum tube with a AN compression fitting on the end from RB motion. Finally it was topped off with a piece of detail wire for the male end of the quick disconnect. The end was painted with a base of Tamiya titanium gold and clear orange. I finally made it around to interior details, trying to put off finishing up the rear suspension so that I don't mes it up handling the chassis. I modified the dash a little bit. The ignition tray was removed and replaced with sheet stock so that I could add my own electronics. All it needs at the moment are ignition coils. Dzus fasteners and PE bolt heads were added to the area above the gauges for access panels. The gauge bezels were sanded off so that I could make my own. The gauge bezels are all from aluminum tubing. I polished it with some 1500 grit paper followed with polishing compound to give them a little shine. Slixx gauge faces were inserted from the back and then topped with testors window maker/clear glue. Looking back, I wish I had waited and purchased a better quality clear glue. The Testors stuff is yellowing just a bit. The shifter is the kit piece with a new center section. The center section is a piece from a Dirt Modeler sprint car set. Warning lights are .025 Pro Tech AN fittings filled with testors clear glue and painted with Tamiya clear orange and clear red. The battery disconnect is a couple of pieces of styrene stock glued together. The red circle is a window decal for jack bolt locations.