wardsmodelbuilder
-
Posts
110 -
Joined
-
Last visited
Content Type
Profiles
Forums
Events
Gallery
Everything posted by wardsmodelbuilder
-
 Here is my latest client project, the Trumpeter 1:12 Ford GT40 Mk2. Its being built as a curbside model however all the box stock pieces will be done as per the instructions. The doors and rear body work are now in position and I've worked out the differences between the joins. I've done this only with a rough file at the moment so a fair bit more work is needed before priming. The lower chassis section is a little further on in progress. There was a bit of filing needed on the top edge due to a ridge between that and the lower edge of the top body section when placed together. I got the smoothed out and have now primed it ready for color. I've got the main engine block together and it's had its first coat. Moving forward the plan is now to get the lower chassis section finished in color, decals and clear so it can be left to fully dry before sanding and polishing. During this down time I will prepare the main body section, front nose section, complete engine, and the parts ready to go on the chassis. Chris Ward www.wardsmodelbuilder.com wardsmodelbuilder@outlook.com
 -
Studio27 1/20 Williams FW24
wardsmodelbuilder replied to wardsmodelbuilder's topic in WIP: Model Cars
I've been so busy lately with doing client builds that I almost forgot about this little Williams I started ages ago. So today I decide to make a start of getting it finished. Started applying the decals prior to its final clear coat, hopefully I will be able to get it finished shortly. Chris www.wardsmodelbuilder.com wardsmodelbuilder@outlook.com -
no it wasn't made specifically, I gave the customer an option of several that I tend to use for my builds and he choose this one. I think it suits the era and look of the model very well.
-
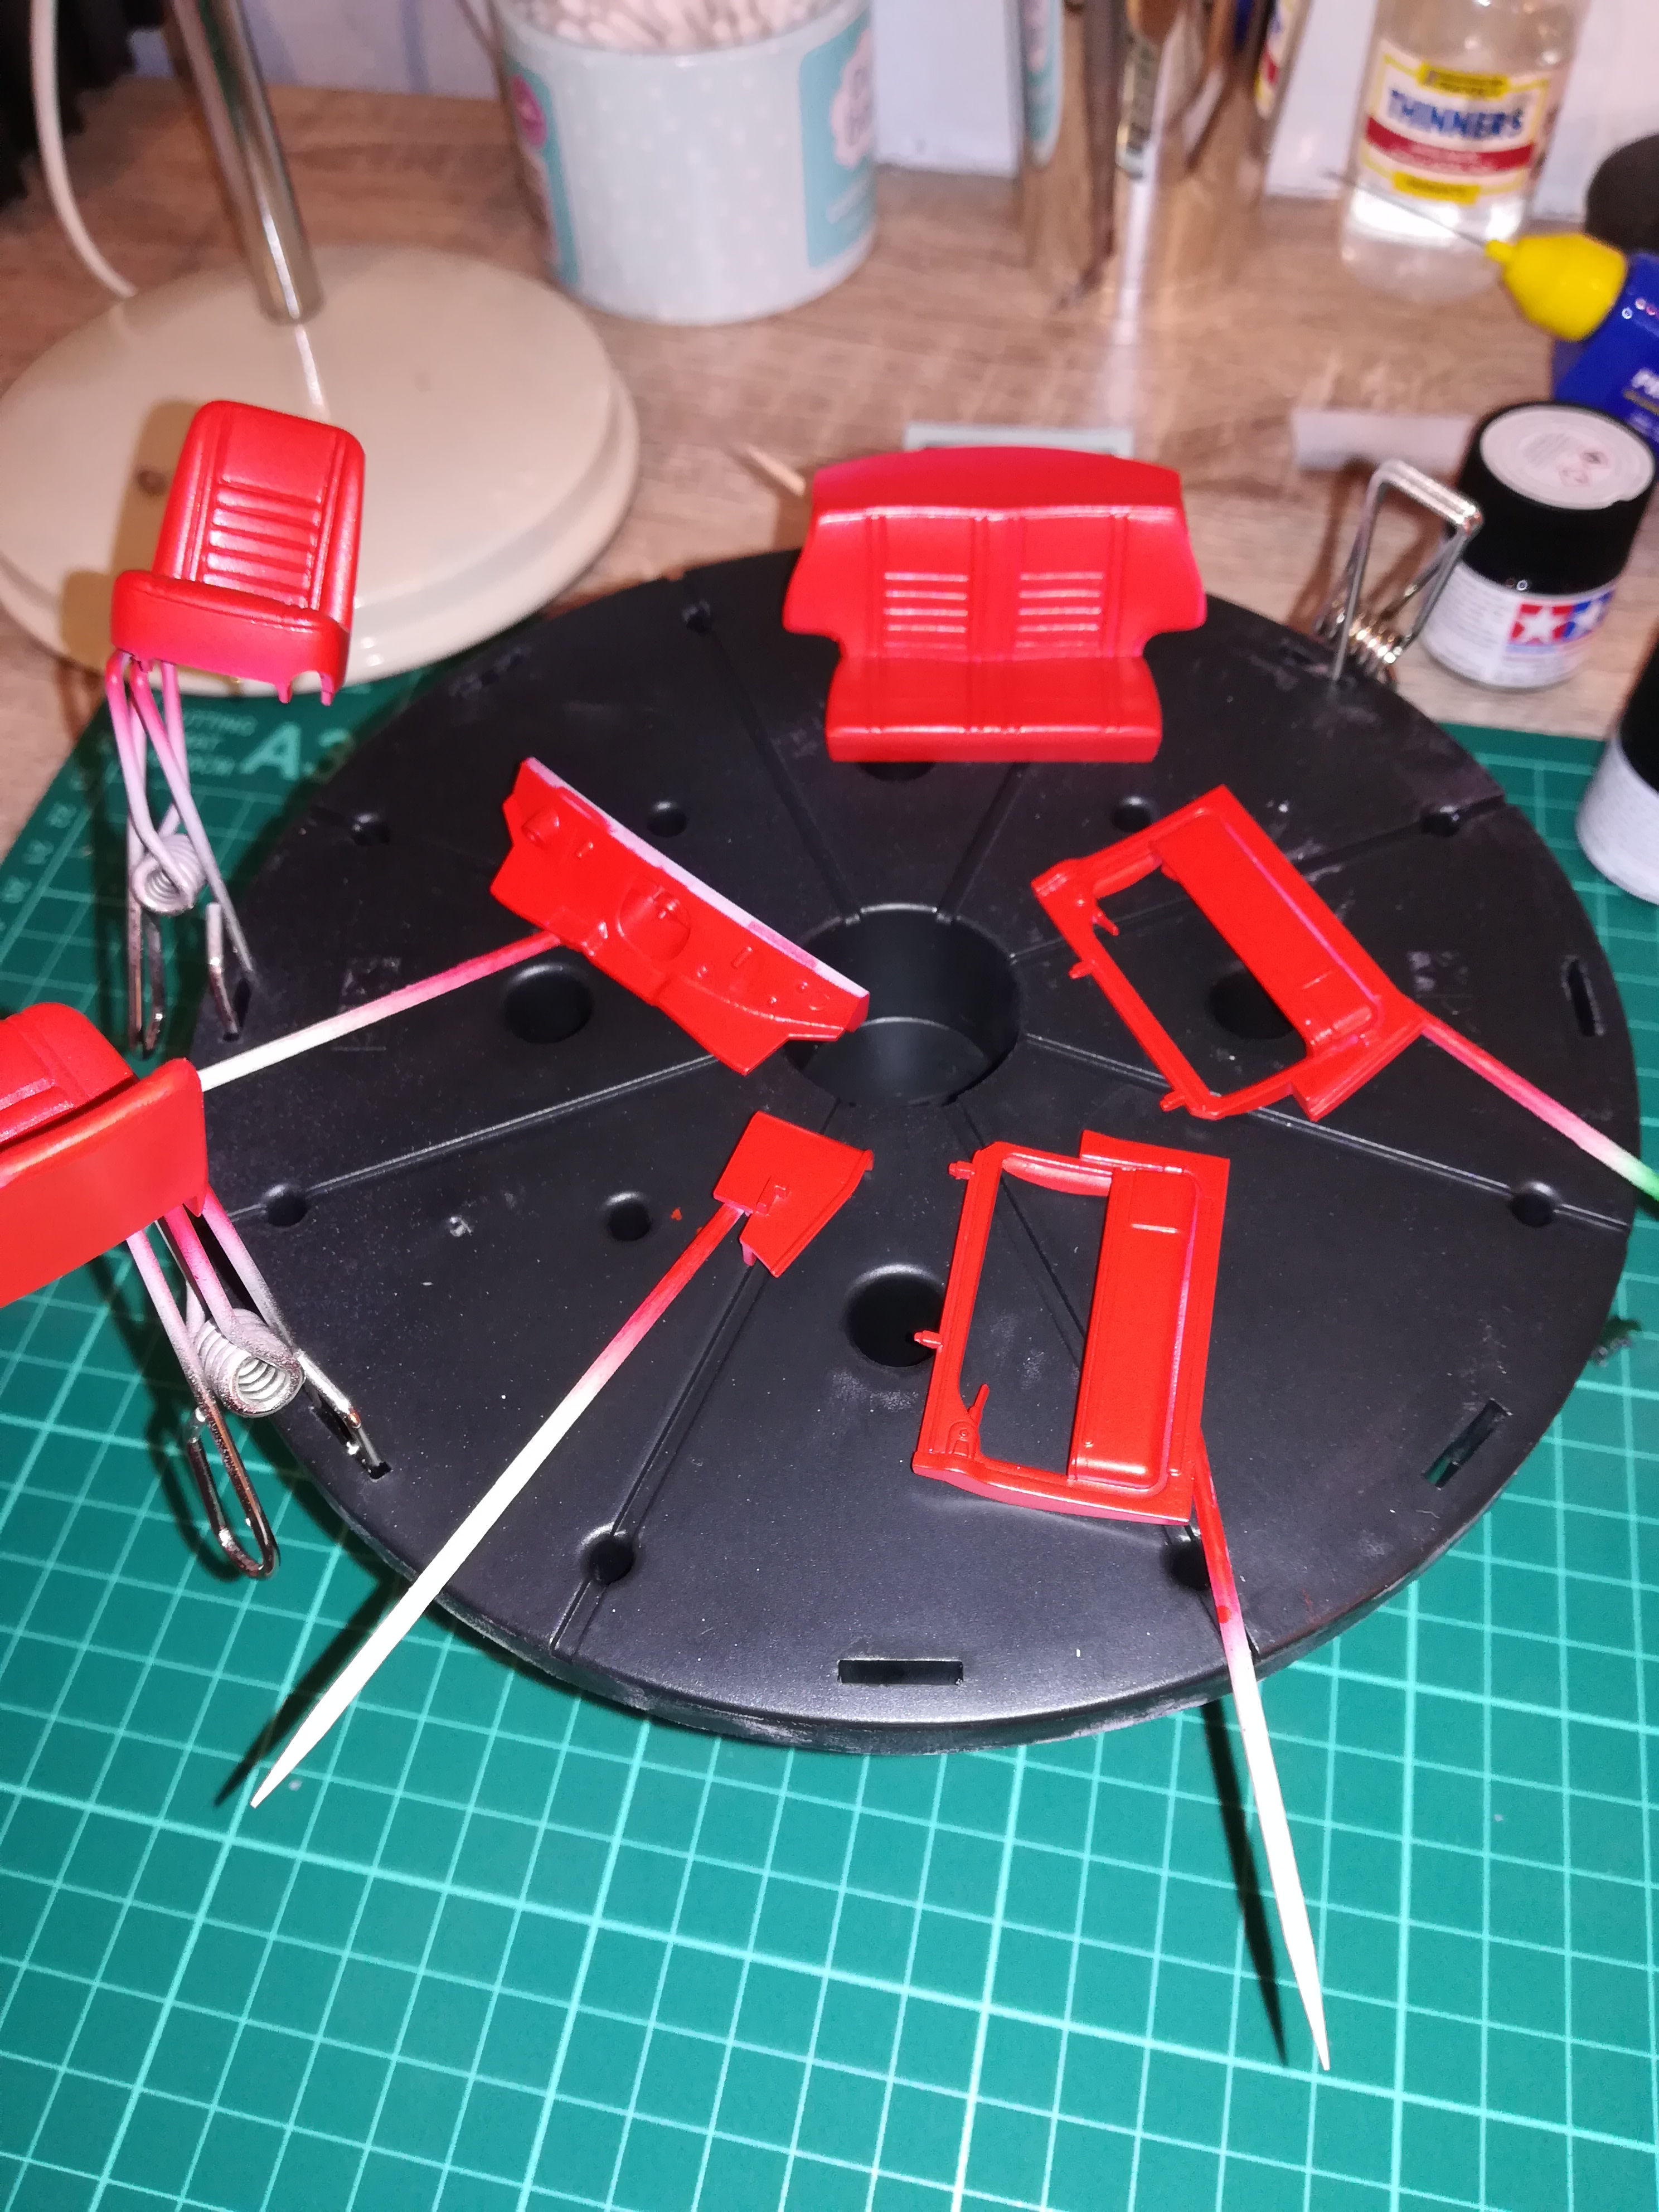
Here are some photos of my latest commission build, its not a racing model so I hope I am not offending anyone on here, I just thought it might be well received. Its a 1962 Morris Mini in Fiesta yellow, with old english white wheels and grille, copied from my clients original car. The kit was not of the same spec so quite a lot of modifications were required, some of which were. Changing the kit double carb and airbox layout to a single Front grille and bumper changes Oval speedo was changed to a round one Pull cord door opening system added Seats were remoulded with putty and wire Wicker baskets were made for under the rear seats and rear side panels, which were included with the car when originally bought in 1962 Hope you all enjoy looking at this old classic British car, it was fun building it!!! Chris http://www.wardsmodelbuilder.com wardsmodelbuilder@outlook.com
-
Here are some photos of my latest client build, a Tamiya Ferrari Enzo with some carbon fiber detailing and acu-stion detail parts. Chris www.wardsmodelbuilder.com wardsmodelbuilder@outlook.com
-
Here is the last but one update on the Italeri 1/35 Schnellboot. Once the wheelhouse was complete the rest of the details down the deck have come along very quickly. All the parts connected to the back of the wheel house have been added. The only thing left are the PH windows on top of the control deck which I keep putting off!!!! Just started with the torpedo racks and the torpedos themselves are next on the list. Then it's just the rear gun, and railings which I am looking forward to doing using the rope included in the kit. I also plan to do a little bit more weathering to the sides of the hull and the final 2/3rds of the deck. Oh and the crew then needs to be painted and set in place. I am hoping the last update will be later next week when the model will be finished, Thanks Chris www.wardsmodelbuilder.com wardsmodelbuilder@outlook.com
-
Here is the next update on the 1/35 Schnellboot, The cabin area is now finished along with some weathering around the cabin area. Finished the details at the front of the cabin and now starting to work backwards with the railings, antenna etc. Still need to add the windows on the top of the viewing area. Nothing has giving me too many problems other than the brass PH parts which just don't want to bend how they are supposed to. The centre deck piece has just been placed, so now I can start working off of that for the final pieces behind the cabin and along the length of the deck. Also the back section of the torpedo tubes have been done since the last update. All in all I feel it's coming together well, and hopefully progress will pick up a little now and I will be able to complete on time for the client!!! Any comments welcome, Chris www.wardsmodelbuilder.com wardsmodelbuilder@outlook.com
-
Here is the next update on the 1/35 Schnellboot. Since the hull was finish in the last update all the external pieces have now been added, Rudders, drive shafts and propellers. These all went together pretty easily. Also the torpedo tubes have been added along with the hatches which were very tricky to install in a way that they actually stay closed, was having a lot of trouble with them springing open slightly. After many adjustments and way too much time, I got them right. Two of the deck pieces have been placed, no problems here and attached with the screws that come with the kit. I have now started with the cabin section of the boat and I've also started a little bit of weathering, as I didn't want to leave it to do all at the very end, That's all for now, Chris www.wardsmodelbuilder.com wardsmodelbuilder@outlook.com
-
Here are a few photos of my Mclaren MP4/6 commission. Chris www.wardsmodelbuilder.com wardsmodelbuilder@outlook.com
-
Here is an update on the 1/35 scale Italeri Schnellboot. The hull is now complete, first attempt using the Italeri insignia red out of the bottle was not successful, to me the red was far too bright. So I decided to repaint using the same italeri paint but adding some black and few drops of brown. I think this is a much better match. The hull was then coated in a matt varnish. The forward deck is almost complete so now the hull is finished I should see some quicker progress on it all going together. Rudder, torpedo tubes, main deck, drive shafts and propellers are all ready to go. I will post some more photos when these are altogether. As far as the kit goes i'm very happy to be working with it, it's a nice change to be working on something in a much bigger scale. The parts are well moulded and other than the odd mould lines everything is fitting together very well. Chris www.wardsmodelbuilder.com wardsmodelbuilder@outlook.com
-
Here is the first update on the Schellboot, very early stages but the hull has gone together well. A little bit of work was needed sanding the joints and working out the seems lines, but now its had its coat of primer i'm very happy with it. One of the hoops over the torpedo hatch was broken in the box, a little superglue has fixed it and I don't see it being a problem later on. Next stage will be to paint the hull and fit the propellers and drive shafts, etc Overall its looking like a very nice kit to work with, instructions are very clear and the parts fit together well, also the plastic is very easy to sand, very soft, which I find a big help. Hopefully in the next update the hull will be complete and the deck will be fitted. Chris Ward www.wardsmodelbuilder.com wardsmodelbuilder@outlook.com
-
Hello Everyone, this is my blogg for my next project, something a little different and a nice change from car models. I think this is going to be a very fun and interesting build. First impressions of the kit are very good, very nicely detailed parts, a number of PE parts and other pieces such as rope and a plastic sheet for the windows. The ship is just under a meter in length. We are also doing the additional set of figures which will be added to the model for that little extra realism. I will keep you updated on how the build goes!!!! Chris www.wardsmodelbuilder.com wardsmodelbuilder@outlook.com

-
Studio27 1/20 Williams FW24
wardsmodelbuilder replied to wardsmodelbuilder's topic in WIP: Model Cars
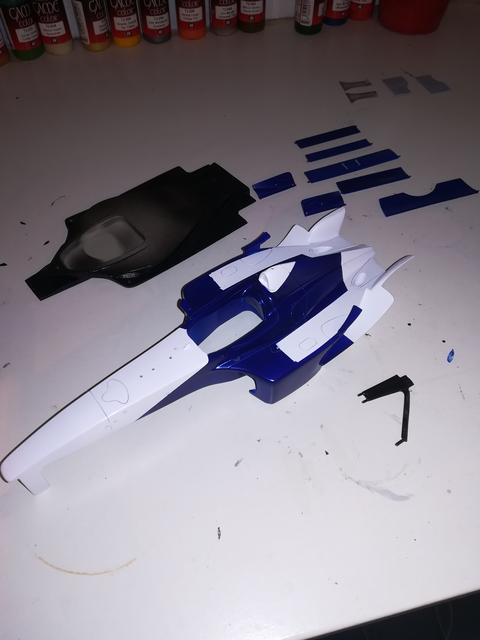
Here is the first update on the Studio 27 model I'm working on. Got the body masked off and the blue part of the two tone colour scheme done. Now it just needs a bit of work sanding down before the clear coat is applied. I've also painted the front wing pieces in the blue so that will be ready to clear at the same time. Now I just need to finished the very time consuming job of carbon decaling all the suspension pieces, I've done one so far!!!! Next update I should be able to show all the parts finished and ready for final assembly. Chris www.wardsmodelbuilder.com wardsmodelbuilder@outlook.com
-
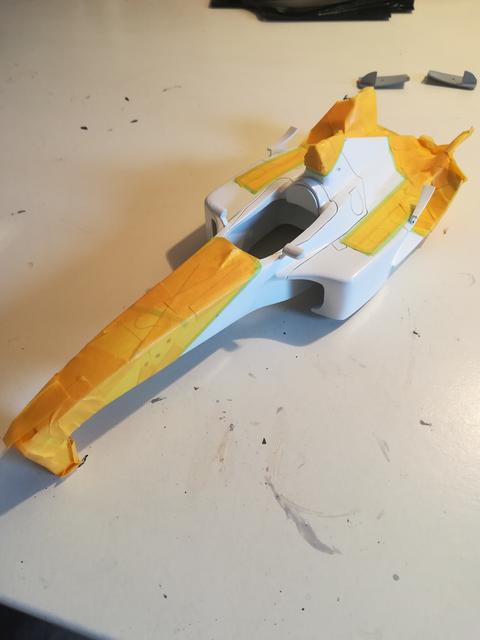
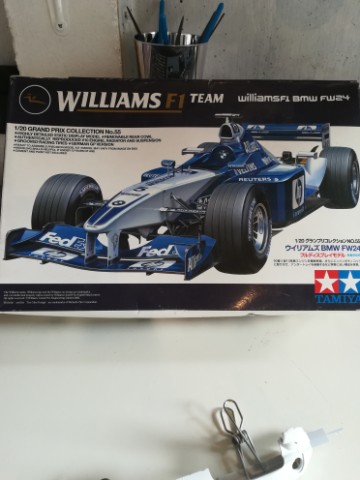
Hello Everyone, here is my new project thread on a Studio 27 Williams FW24 resin kit. Ive already made a start on the body, adding the metal pieces, drilled all the holes for the suspension (which will be done in carbon) primed and painted the first coat of white. Although these kits go together pretty quickly this is a personal build so updates might not be very often as client builds take priority but i'll keep you updated as often as I can. Chris www.wardsmodelbuilder.com wardsmodelbuilder@outlook.com
-
Tamiya 1/20 Williams FW27 w/Acu-Station detail set
wardsmodelbuilder replied to wardsmodelbuilder's topic in WIP: Model Cars
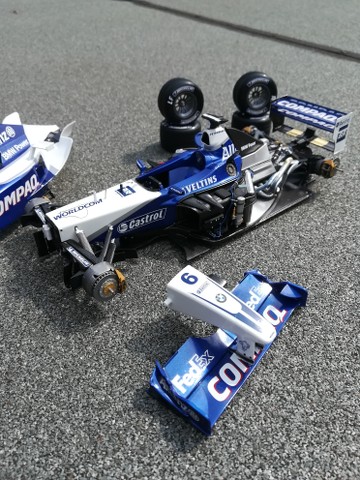
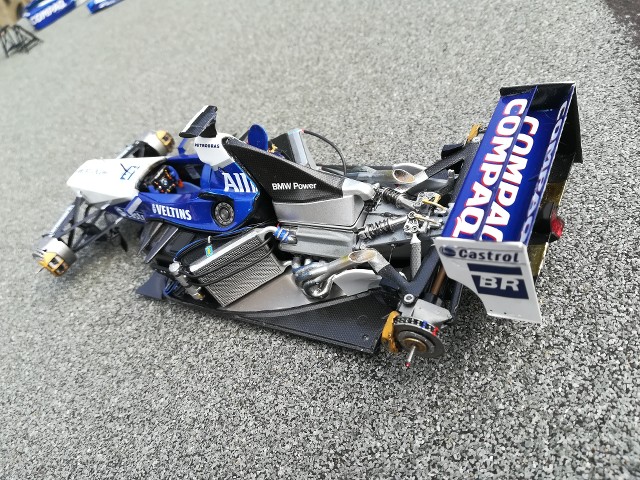
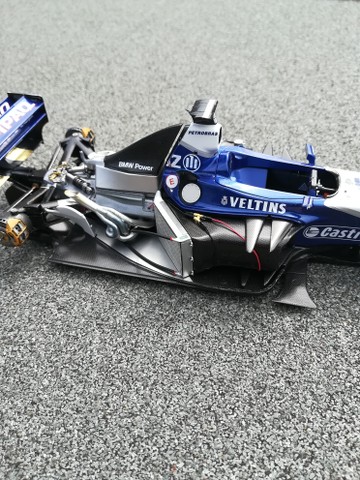
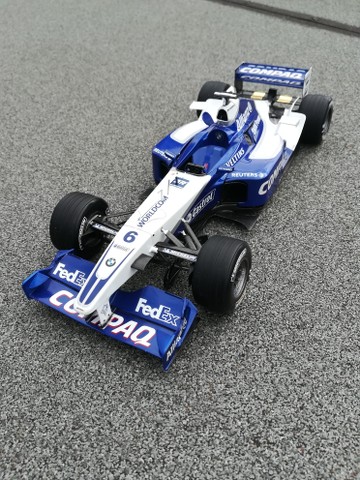
Hi everyone, well here is the final set of photos on the Williams FW24, all in all I'm pretty happy with the model even with all the fitting problems that I have had. Turned out well in the end. Chris www.wardsmodelbuilder.com wardsmodelbuilder@outlook.com
-
Tamiya 1/20 Williams FW27 w/Acu-Station detail set
wardsmodelbuilder replied to wardsmodelbuilder's topic in WIP: Model Cars
Another update on the Williams, Clear coating all done so I started to put the body together and added the side pods and front suspension. I have also started with some wiring detailing. Getting close to where I can put the engine together to the chassis and then into the floor. Hopefully my next update will be of the finished model. Chris www.wardsmodelbuilder.com wardsmodelbuilder@outlook.com
-
Tamiya 1/20 Williams FW27 w/Acu-Station detail set
wardsmodelbuilder replied to wardsmodelbuilder's topic in WIP: Model Cars
Thats awesome, I wouldnt build it either!!! -
Tamiya 1/20 Williams FW27 w/Acu-Station detail set
wardsmodelbuilder replied to wardsmodelbuilder's topic in WIP: Model Cars
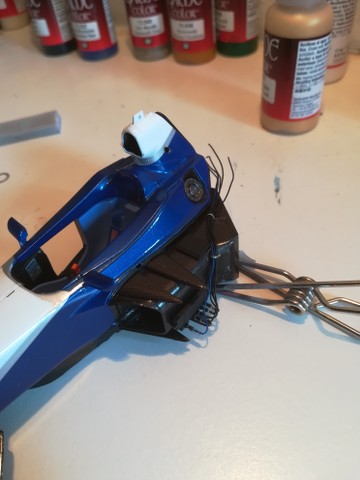
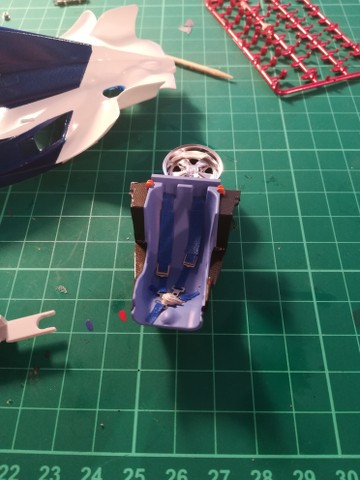
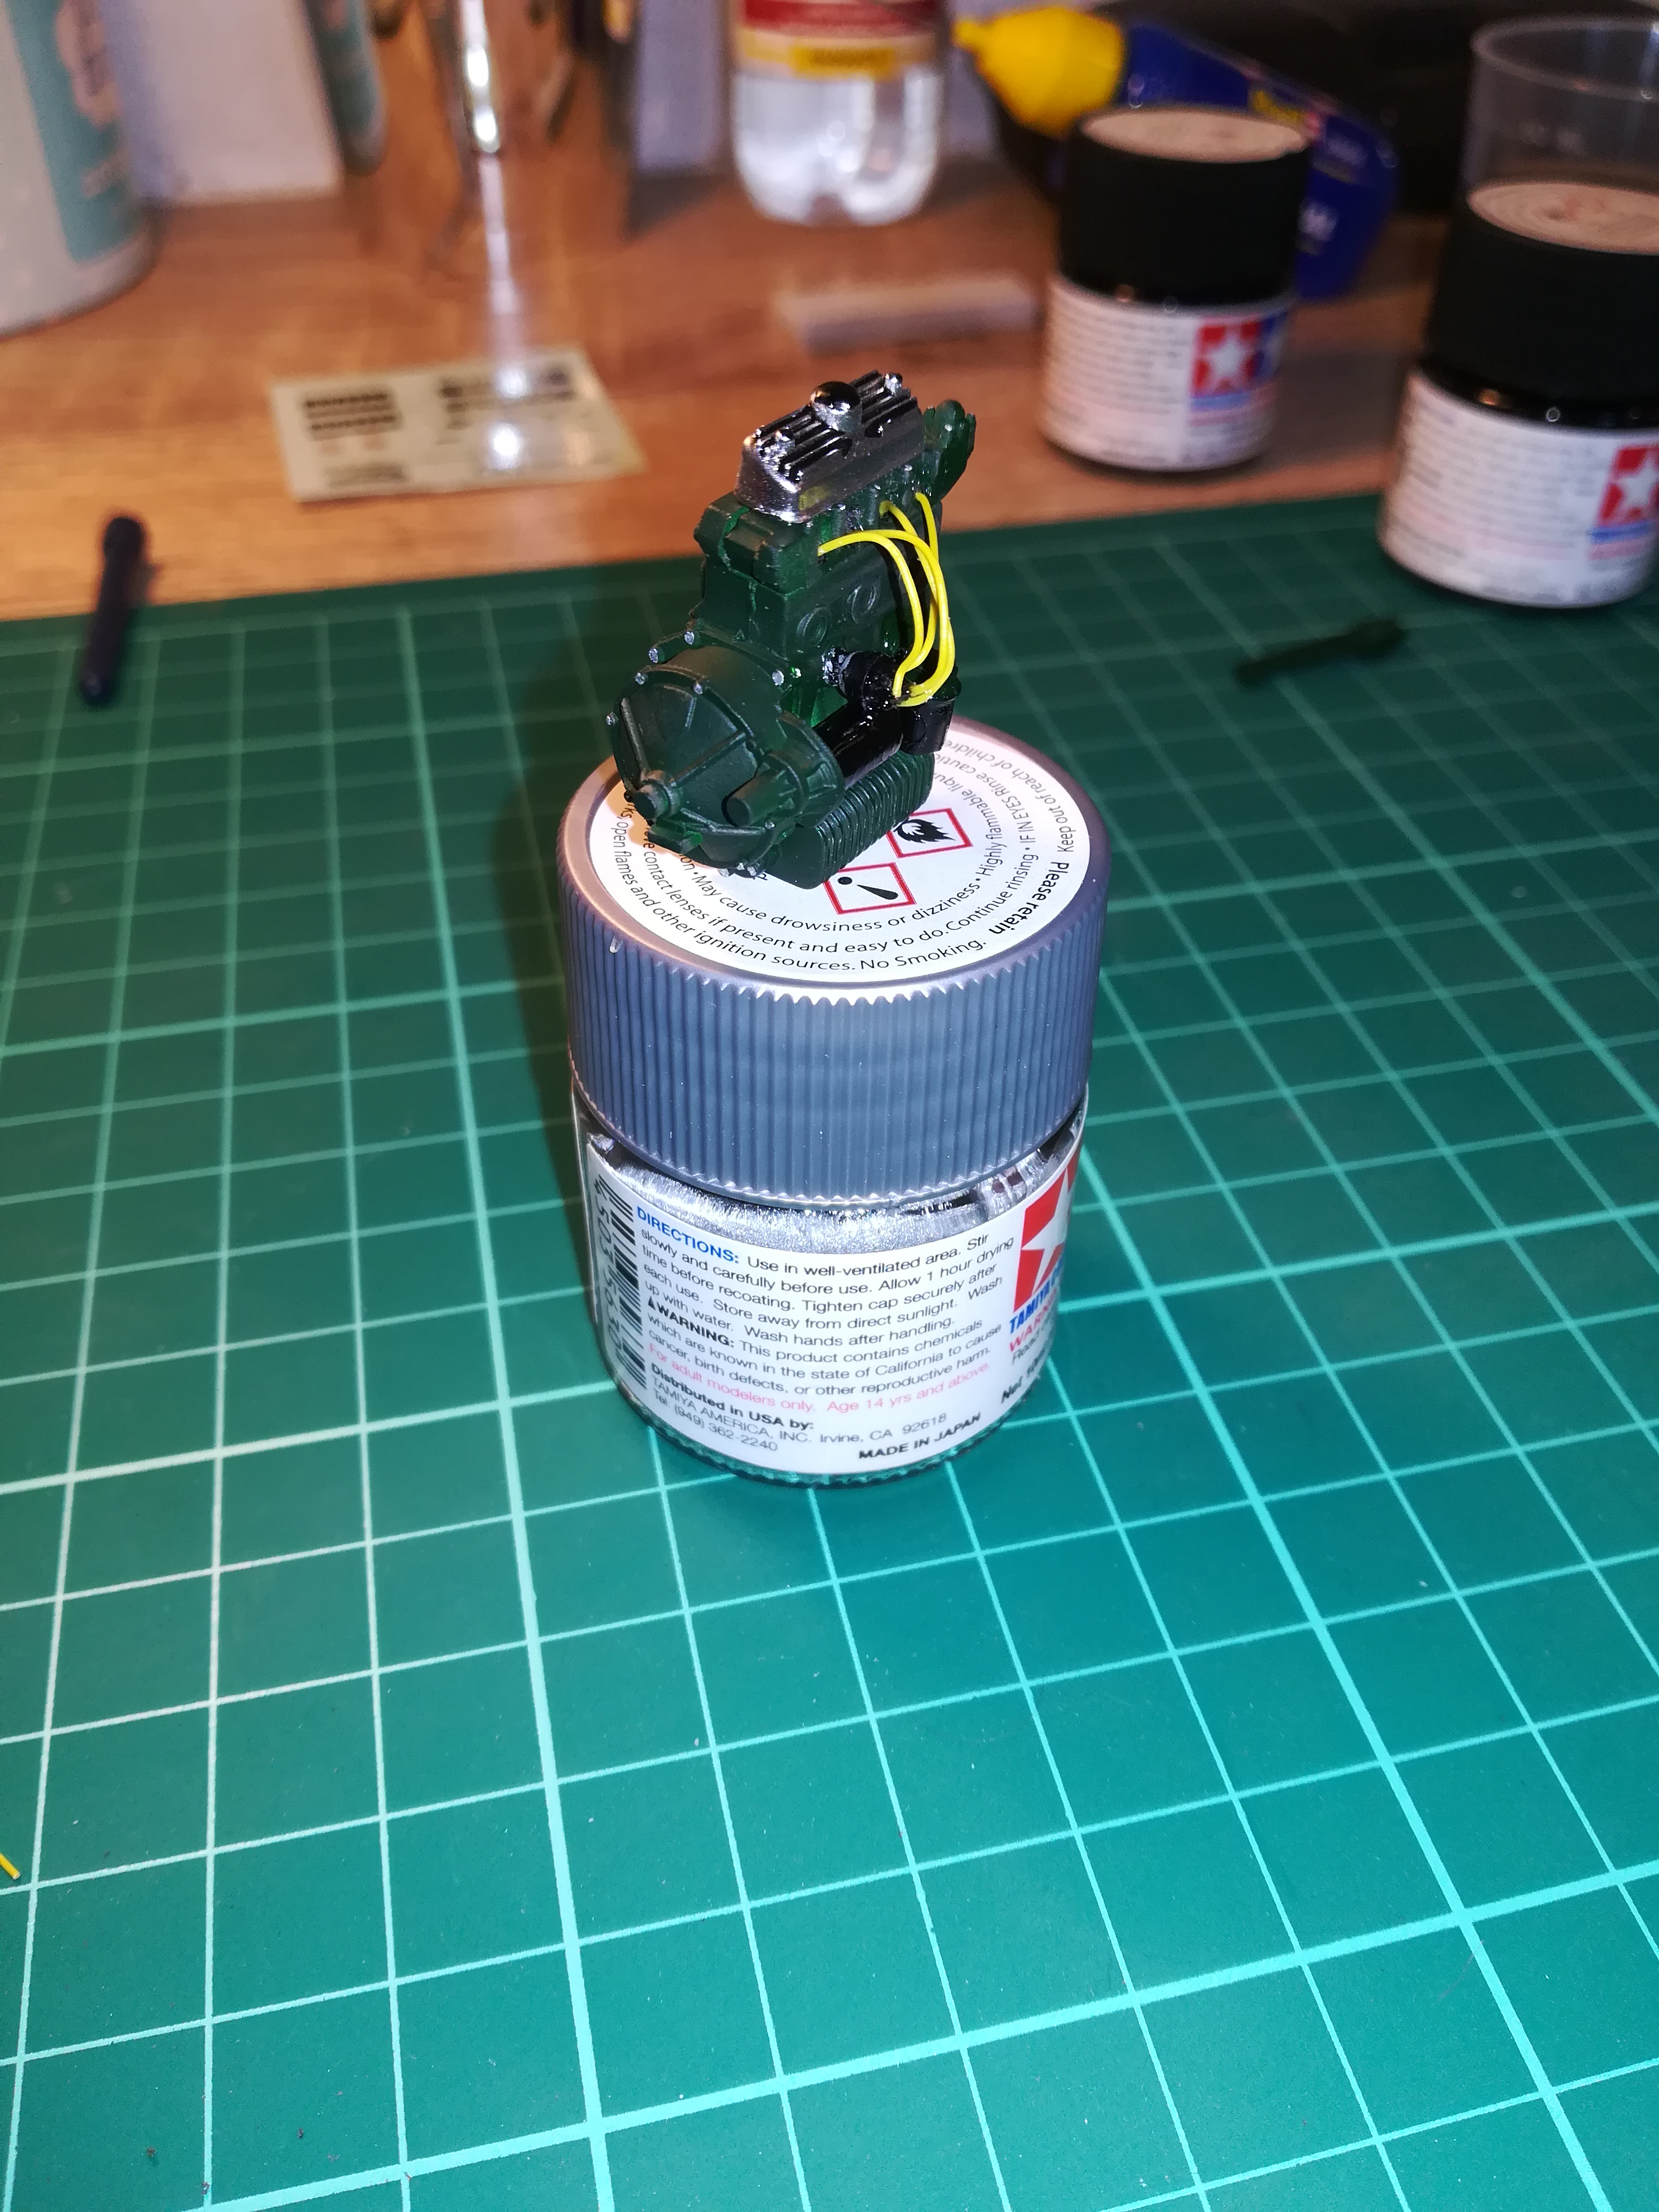
Here is an update on the Williams, going along pretty well now. Engine is complete and I have painted the body just need to add the clear coat. The Acu-cation detail set is very good in the detail it adds over the standard parts however there has been several fitting issues with the parts. The new shocks dont allow the bodywork to fit correctly so some cutting out needed to be done. The brake discs are very nice however the centre hole they give you isn't big enough for the axle to fit through, why they didn't make it a little large I have no idea, the metal they have used is so tough too, very difficult drilling all the six pieces per wheel, but got there in the end. If your considering using this detail kit just be prepared for a lot of messing around. So the next update should include the bodywork together after clear coating and hopefully the front suspension all mounted. Then it's just a case of all the little bits!!!
-
Tamiya 1/20 Williams FW27 w/Acu-Station detail set
wardsmodelbuilder replied to wardsmodelbuilder's topic in WIP: Model Cars
FW24 not FW27...lol -
Started a new project this week, it's a Williams FW27. I'm using a Acu-Station high detail set which replaces many of the kit parts, getting them to fit correctly is were the fun begins. I'm adding as much carbon decal as I can from Studio 27, carbon decal A size medium. I have the body pieces primed and the white coat done, need to mask off now and add the blue areas, i'm using Zero Paints. Chris www.wardsmodelbuilder.com wardsmodelbuilder@outlook.com
-
Building a Tamiya 1/24 Austin Mini Cooper
wardsmodelbuilder replied to wardsmodelbuilder's topic in WIP: Model Cars
Here are a few photos of the finished Mini, Not my best work but I'm ok with it. Just a little BMF around the windows let it down a little. But i'm happy with everything else, decided to do a little weathering on the interior to make it look a little tatty. Well now that's finished it's time to move on to the next project. Chris www.wardsmodelbuilder.com wardsmodelbuilder@outlook.com
-
Building a Tamiya 1/24 Austin Mini Cooper
wardsmodelbuilder replied to wardsmodelbuilder's topic in WIP: Model Cars
Here is another update on the little mini i'm putting together. Interior almost finished, need to finish up steering wheel and handbrake. Rear seats in and carpet flocking done. Body is finished and I've made a start on the bare metal foil work around the windows although I'm not too happy with the results. My BMF was a little old and very brittle (as I don't use it very often on my builds) think I'll purchase a new batch and redo. Other than that no major problems and everything is fitting together nicely. Hopefully should have it finished in the next few days. Chris www.wardsmodelbuilder.com wardsmodelbuilder@outlook.com
-
Building a Tamiya 1/24 Austin Mini Cooper
wardsmodelbuilder replied to wardsmodelbuilder's topic in WIP: Model Cars
Mini update, body painted and clear coated, will give it a few days before I start rubbing down and polishing. Engine going together well with a little detailing. Started on some interior painting too. All in all a nice kit to work with. I was worried over nothing with the grill, Im using alclad chrome and even with a prime and gloss black coat still visible grille lines. There is a fair bit of chrome on this motor!!!!!
-
Building a Tamiya 1/24 Austin Mini Cooper
wardsmodelbuilder replied to wardsmodelbuilder's topic in WIP: Model Cars
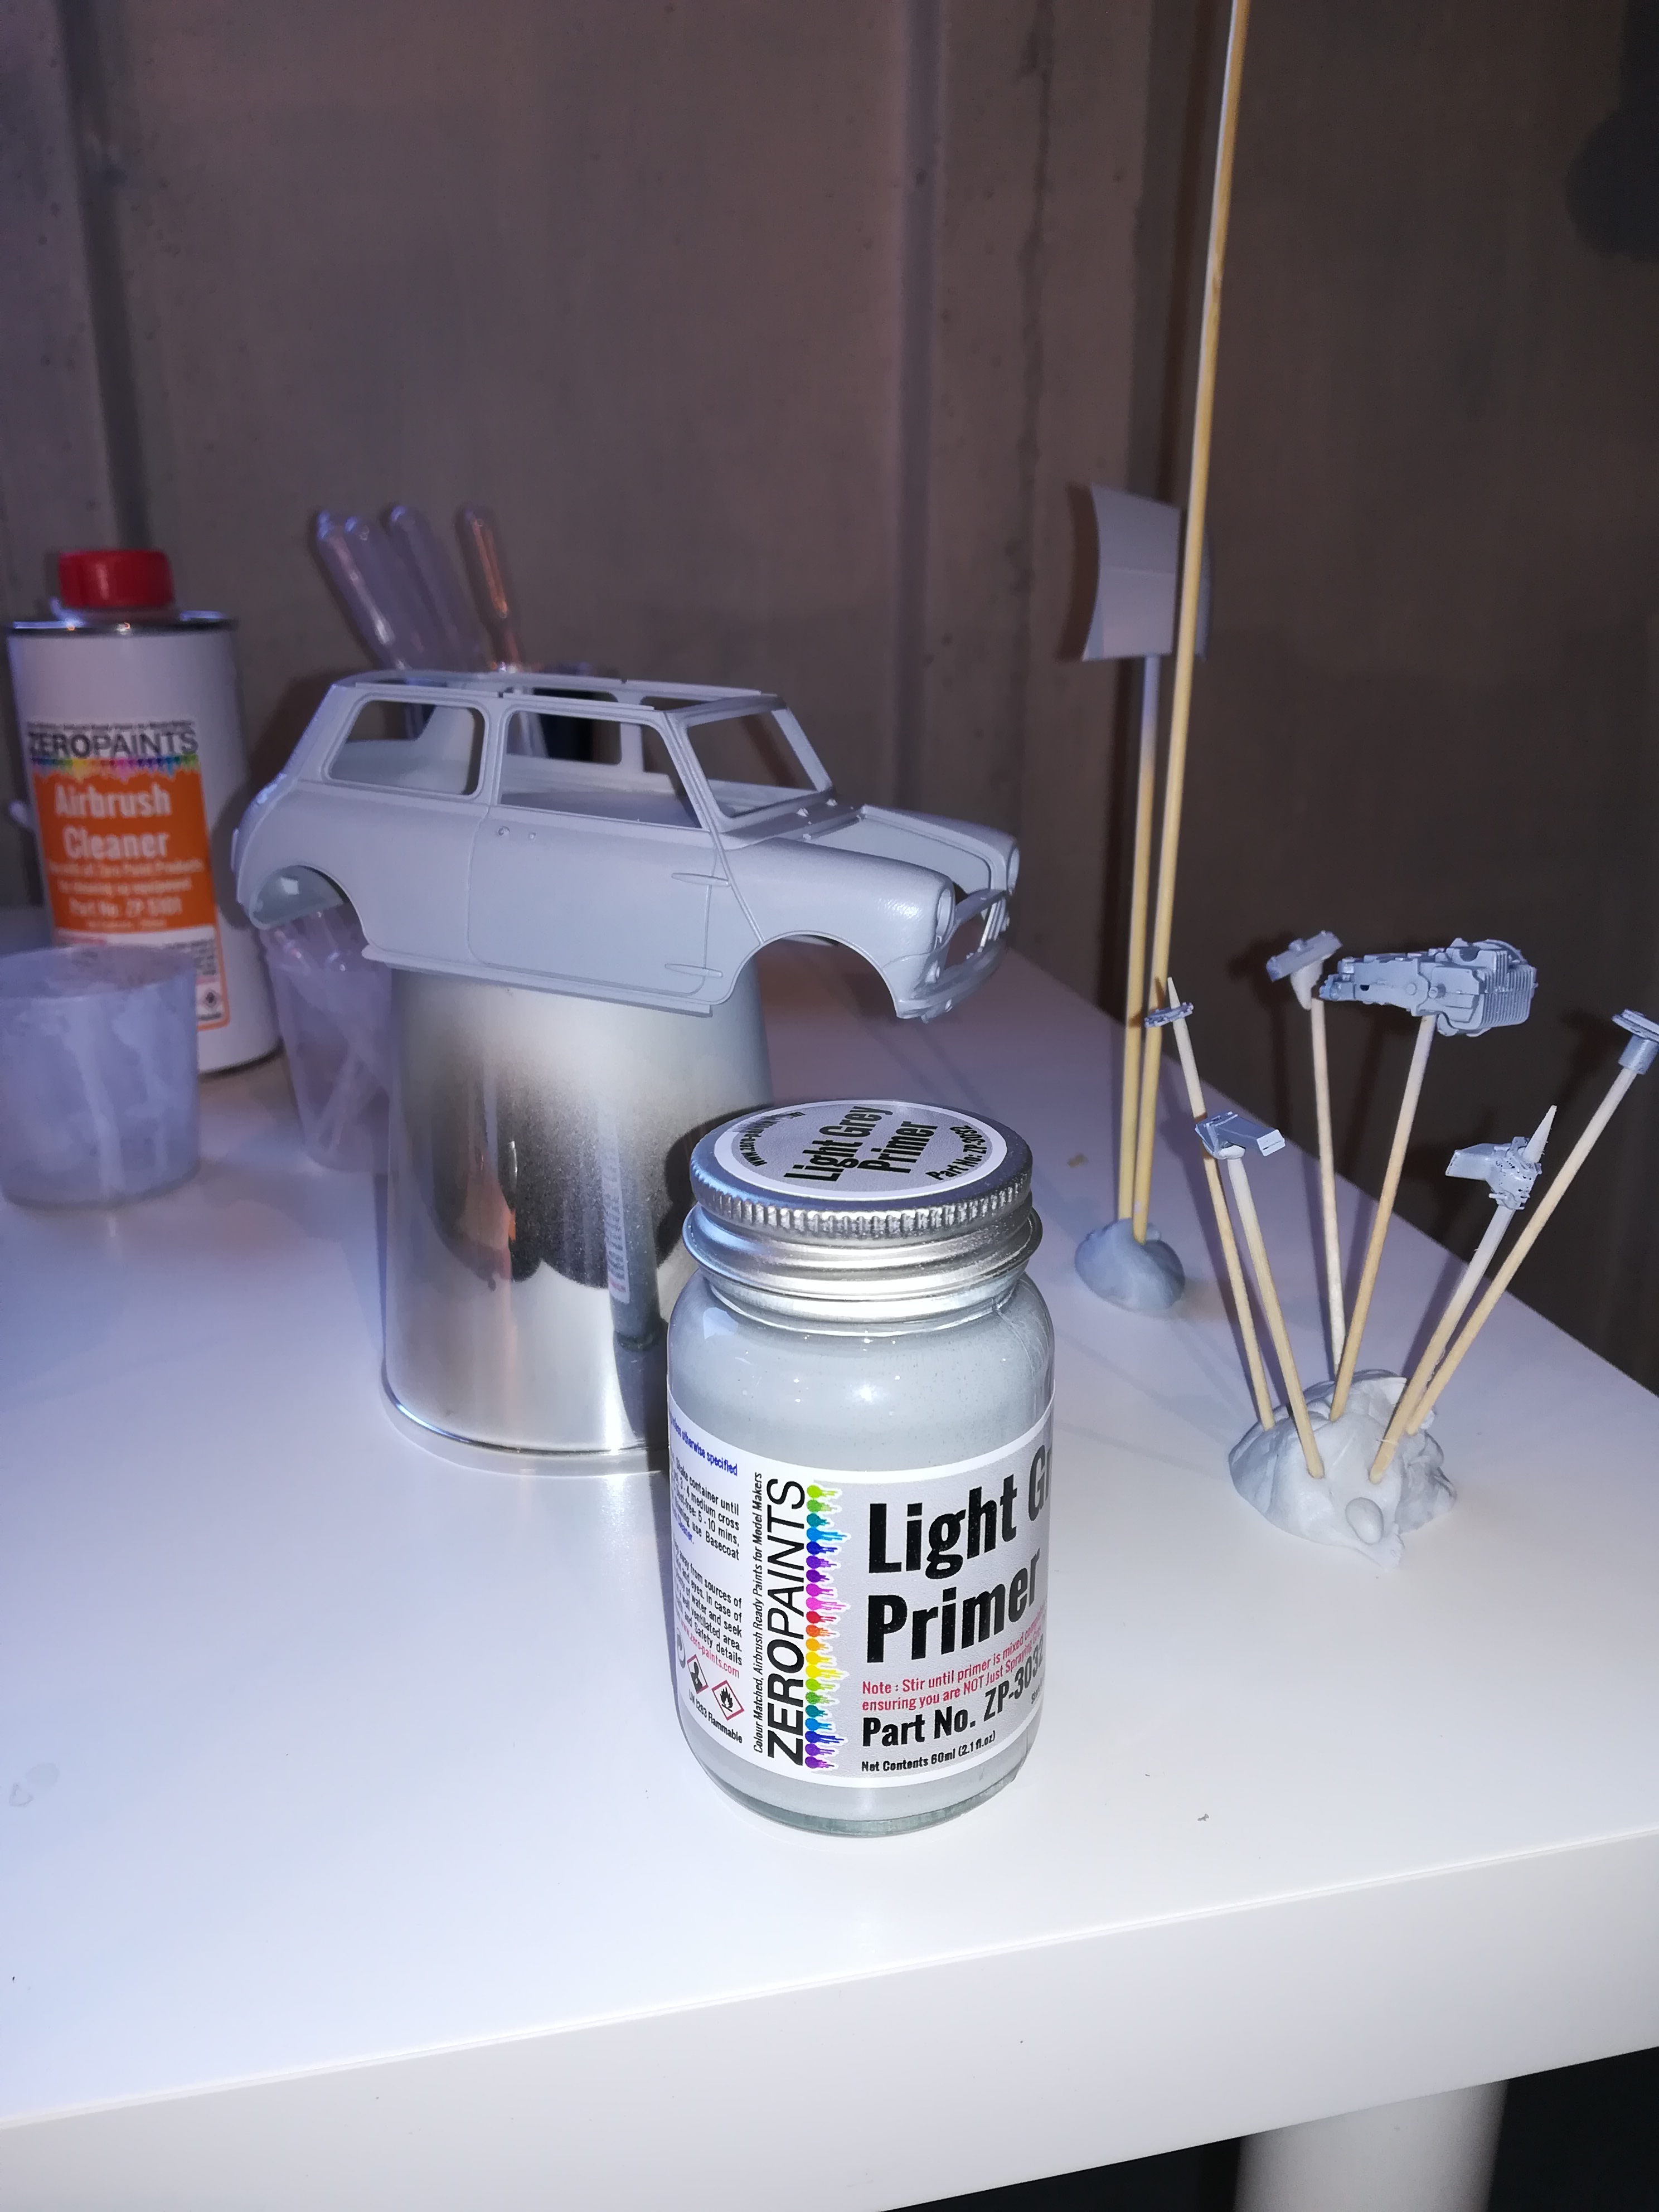
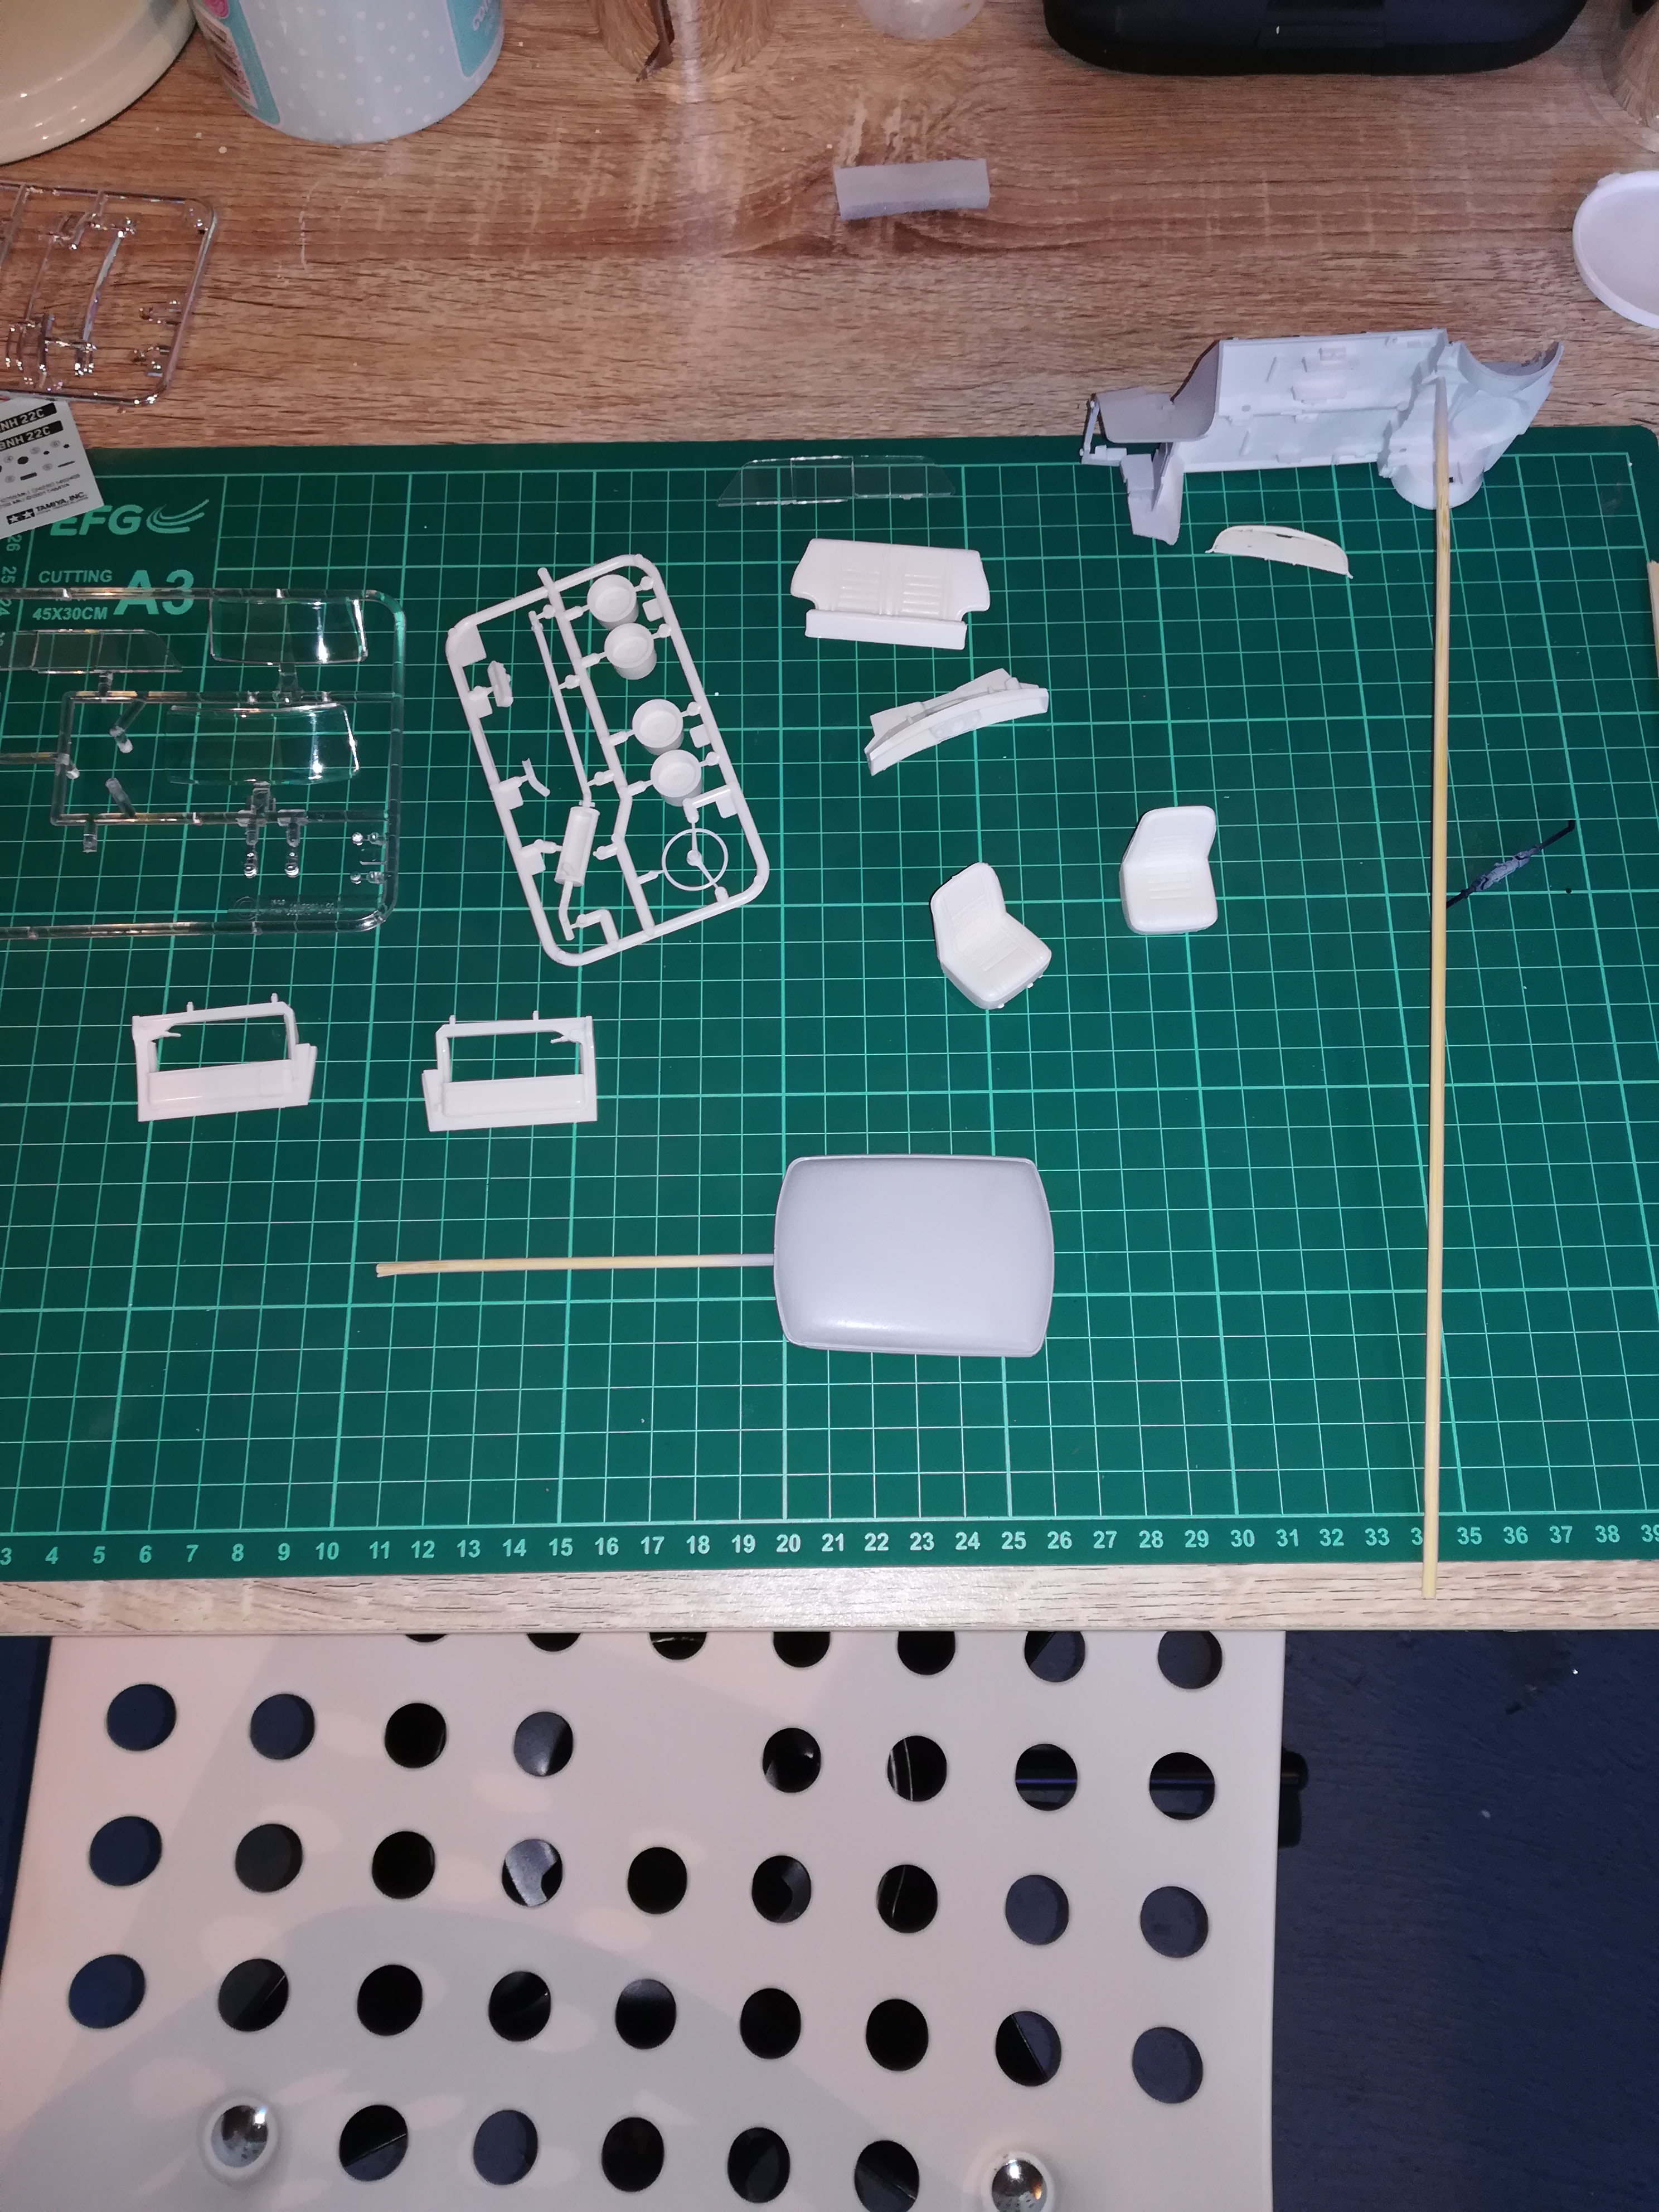
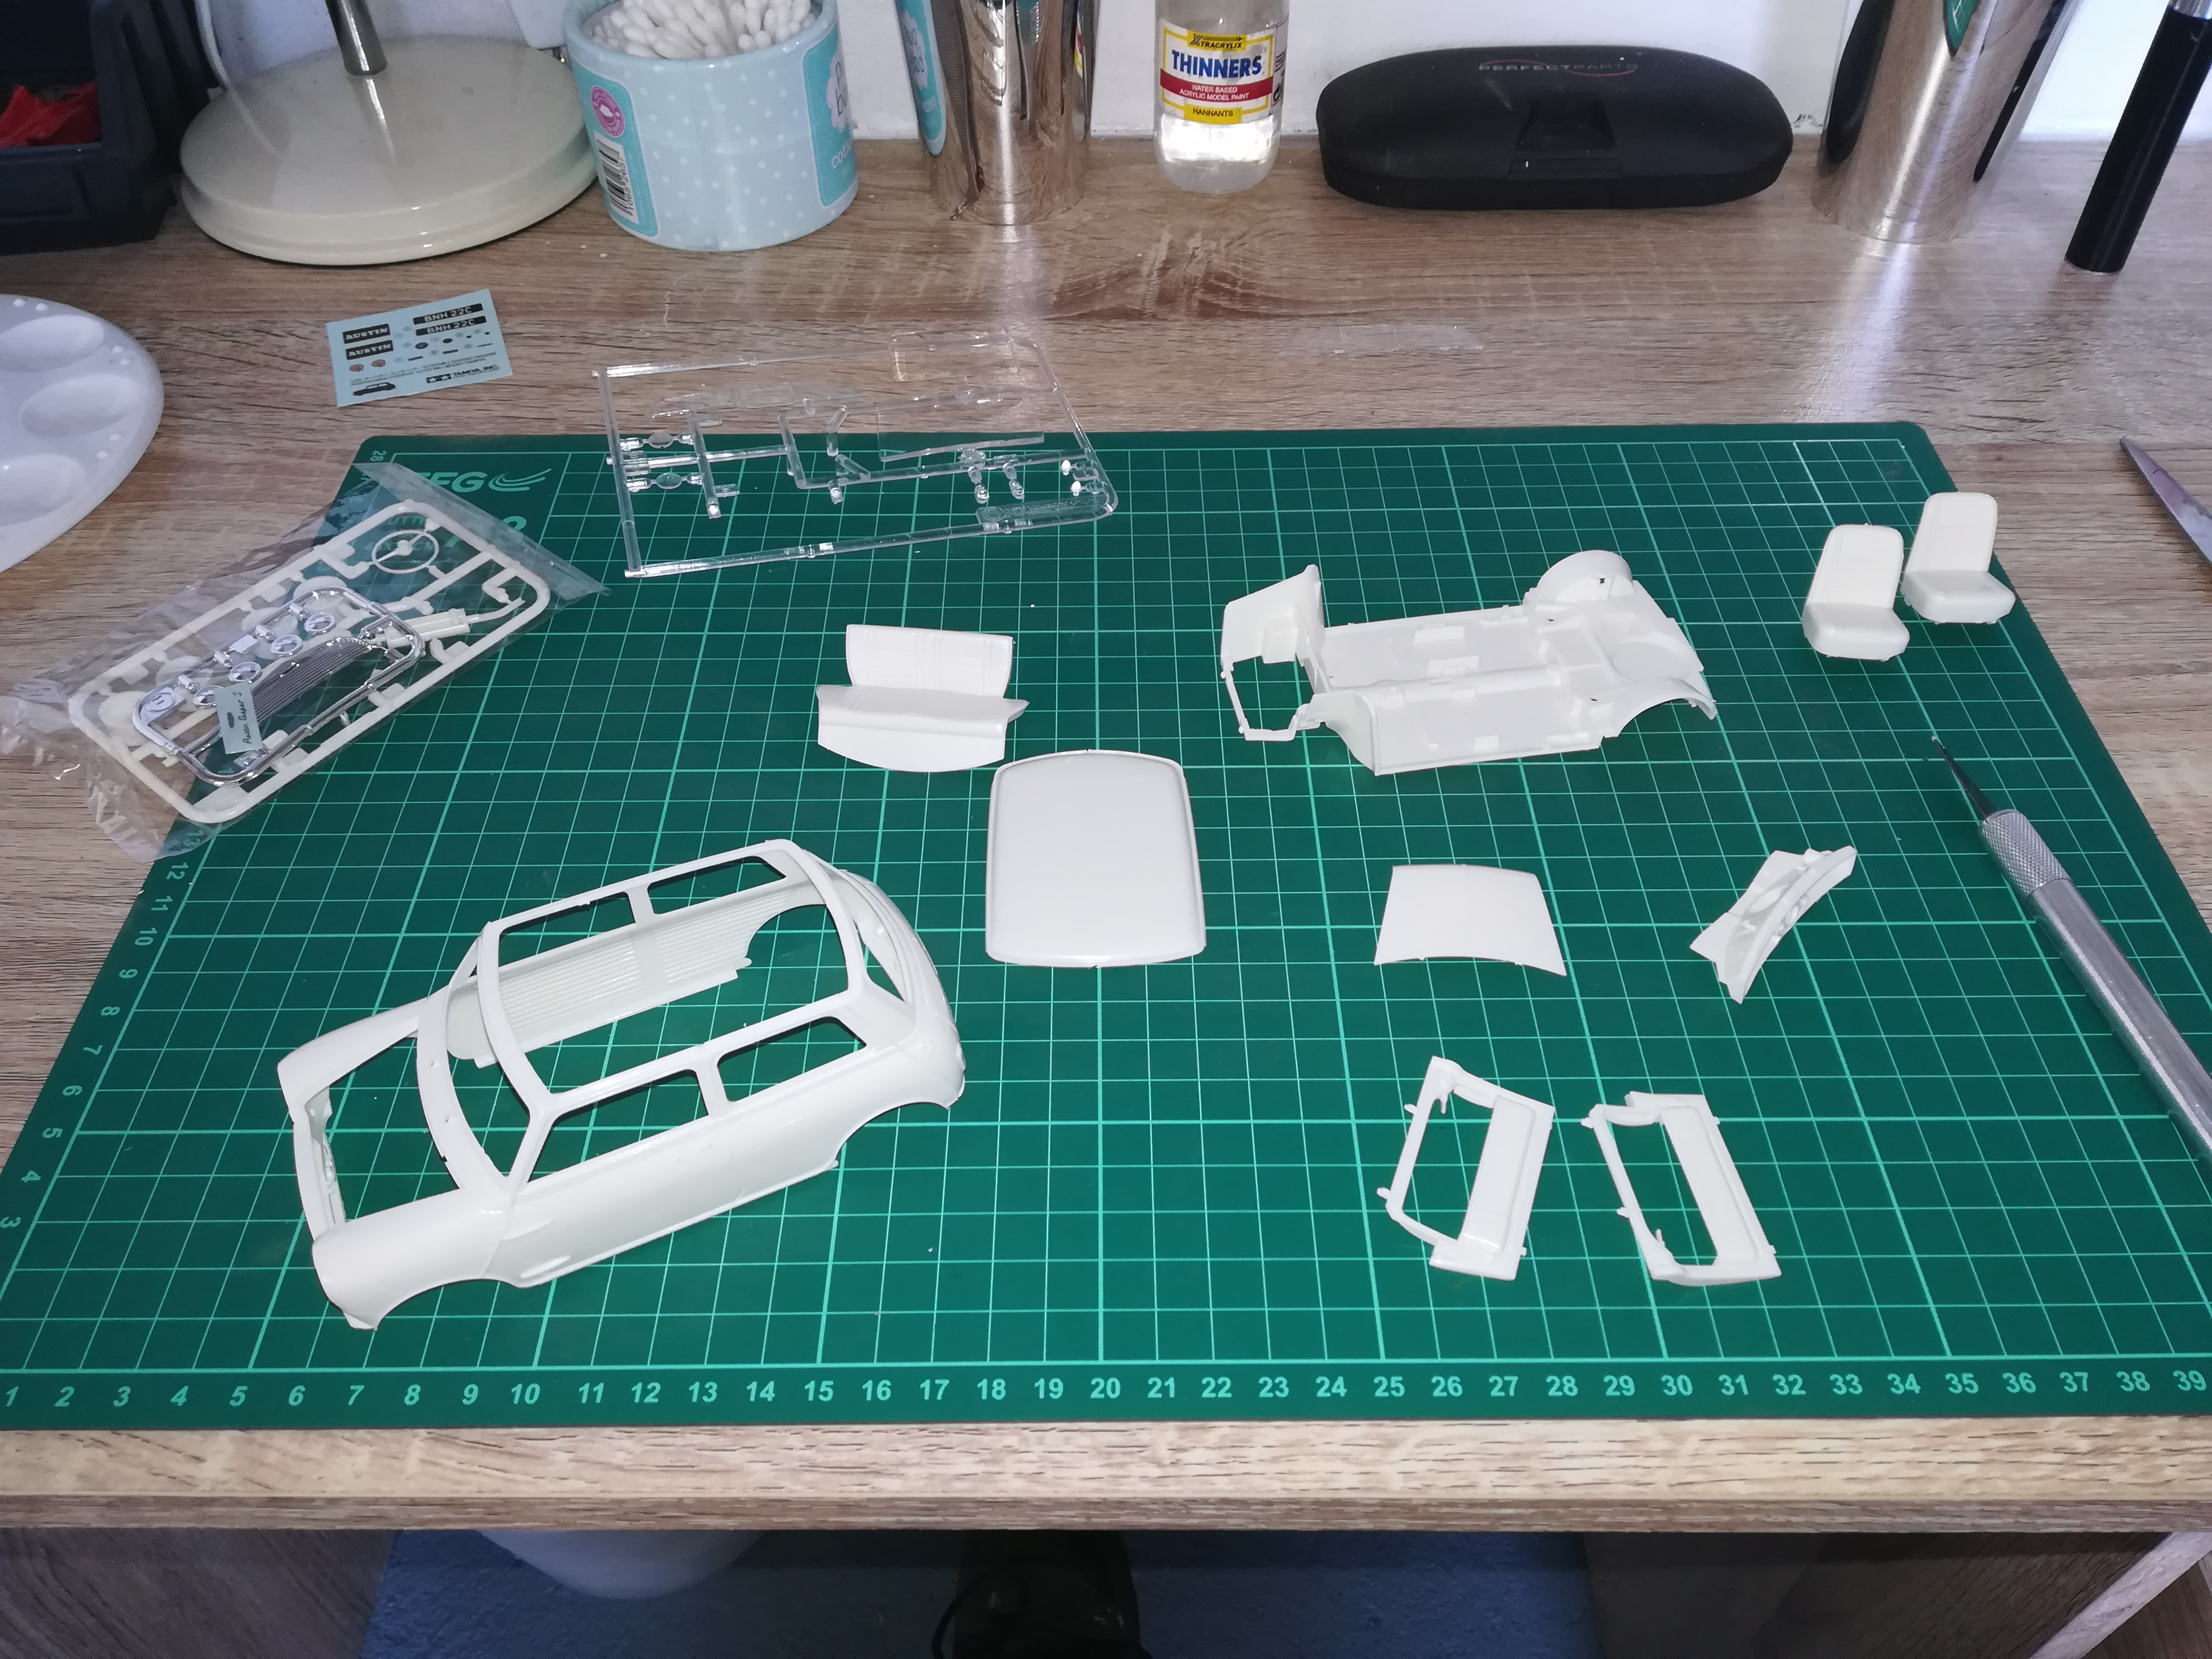
Yeah seems like I good kit, dont think Ive ever built this one before. A little sentimental feeling towards it too as this was my first car. Although mine was black and this is going to be red!! Got the body prepared and primed this evening, engine block put together and primed. Think the engine is going to be green which I believe was standard on minis from this time. Stripped the chrome plate off the grill, as I want to paint all the chrome myself for a better finish, bit concerned about the grill as the fins are very narrow so might clog when painted, luckily the kit came with two incase it goes wrong!!! Chris www.wardsmodelbuilder.com wardsmodelbuilder@outlook.com
-
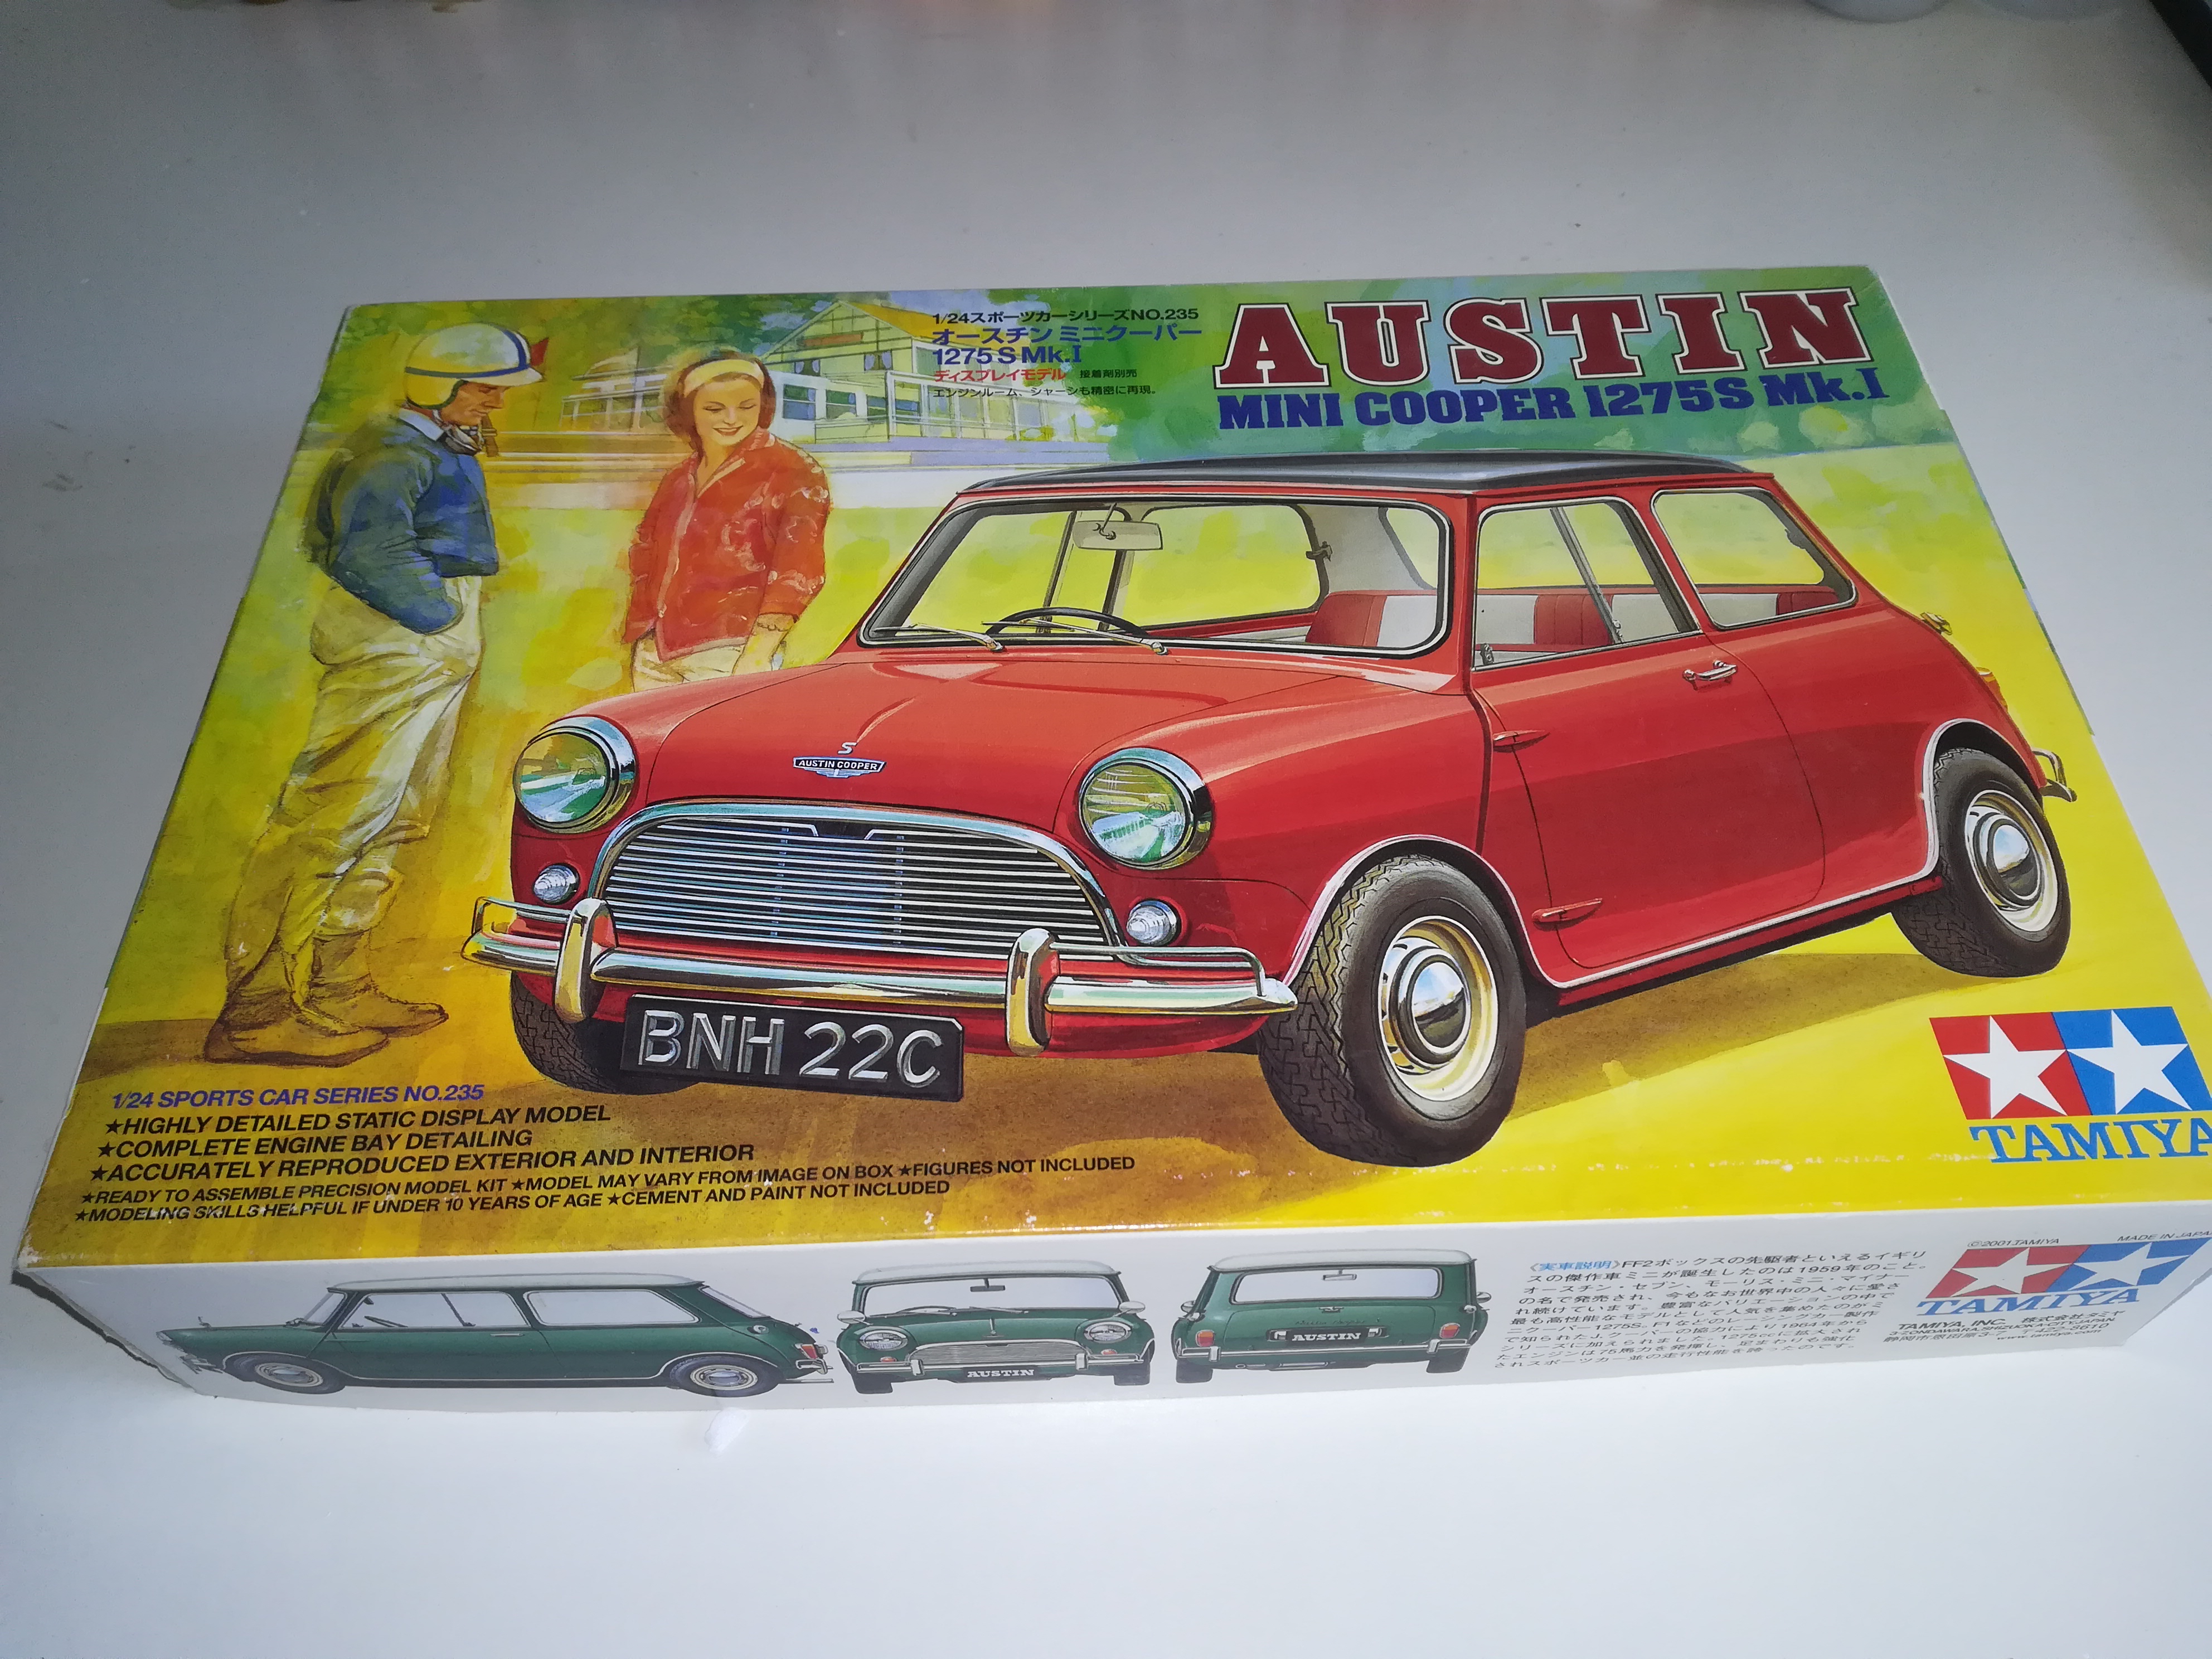
Starting a new build today, 1/24 Tamiya Austin Mini Cooper, should be a simple build, using Zero paints, bare metal foil for the chrome work and maybe a little detail work on the engine. Chris www.wardsmodelbuilder.com wardsmodelbuilder@outlook.com