Bill Anderson
-
Posts
154 -
Joined
-
Last visited
Bill Anderson's Achievements
MCM Friend (4/6)
-
 The one I'm looking at is a '66 Revell "Muscle" series, and its a grey car on box top. Sorry, I can't get the model number.
 -
Yep, I should have been clearer....... "Best" is obviously subjective of course. What I want is a realistic, higher skill level kit, and the one I have my eye on now is Revell 14551 (Yellow sedan box cover). It seems to have the most parts, which I tend to equate with more detailed. Obviously I would prefer a hardtop (buddy had one back in the day) but if nothing else, the sedan will work.
-
I'm looking to add a 57 Chev to my collection. I see Revell has a really detailed one, but it is a sedan. Is there a hardtop out there that is worthy? Thank you all, Bill Anderson
-
Well, I want a GTO kit to add to my roster and am looking for the most detailed 64 or 65 or 66 kit out there. Revell seems to be a good choice, but which one??? Thank you all! Bill Anderson
-
WOW !!! Those are some really outstanding models! FYI, I ordered the Tamiya white primer yesterday, so it is on its way.
-
THANK YOU ALL !!! Seems pretty unanimous, so white primer it will be. No matter what my problem, you folks always come through. Thank You!
-
I've got a second 1967 Corvette to build, this one representing what my Wife drove "back when". It was yellow with a black stripe (and 4 speed). So I have the Revell kit (#2491), which is molded in white plastic. Since IMO painting with yellow can be a bit difficult, I wish to ask the question. Should I paint the yellow directly on the white body shell, or should I apply grey primer first and then the yellow? Oh, the paints are all Tamiya rattle can. Thank you!
-
Wow, you guys are good! Thank you all for the response and info. As I haven't opened the "blue glue", I will return it on my next trip to Hobby Lobby. Please, have a good day! Bill Anderson
-
I have been using the Testors squeeze bottle cement with the red label (281216) for years. Recently I picked up a replacement but got the blue label instead. It appears that the only written difference (on the container) is the "blue" is non-toxic. But it seems to me that something else must be different - i.e. drying time, adhesiveness, etc. So does anyone out there know of other differences, or have a distinct preference? Thank you all once again! Bill Anderson
-
Fine job for sure!!!
-
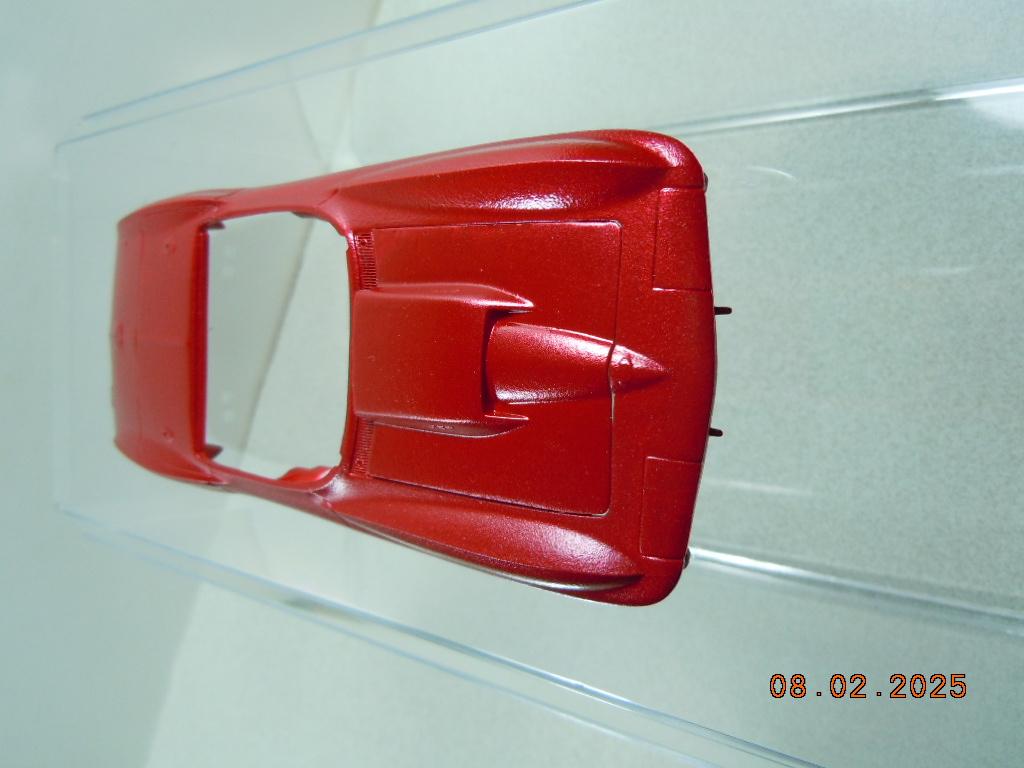
Hi, Well, I'm at the very end stages of building the Revell/Mongram '67 Corvette 427 Roadster (85-2968). I'm very pleased at how the motor/chassis, interior turned out, and am especially happy with the body paint job. The next step is the installation of the windshield/window "glass". Now I've done a lot of car models over the years, with some pretty decent results, but this one part is a bit "scary" to me - for want of a better word. There is no groove or pins or other features to attach the windshield to the body. I would normally scratch off some paint/chrome and use AC or a liquid cement and that has always worked in the past. But I find myself procrastinating on this one, and frankly don't want to screw up the paint - either by scratching too much off or getting adhesive in the wrong places. So who better to ask for advice than you guys...... what have you done and what do you recommend? Thank you!!!
-
Hi, I've been using Model Masters "chrome silver" and at times the Molotow Liquid Chrome pens. I consider both to be almost "okay", but really not good enough. Soooo, what do you use?
-
Painting Advice Needed !!!
Bill Anderson replied to Bill Anderson's topic in Model Building Questions and Answers
Well, it ain't show quality but it works for me!
-
Painting Advice Needed !!!
Bill Anderson replied to Bill Anderson's topic in Model Building Questions and Answers
Well, so far so good...... spent significant time sanding the faulty paint, and got it to the point it was primer ready. Did a light coat, and didn't see any obvious imperfections. So that was followed by 3 light coats of a dark red from Tamiya (name/number in not by me now), and this morning I did a light coat of Tamiya Mica Red, and later I'll do a second light coat. Have to say, the result is pretty good - not contest quality but definitely acceptable. Gotta say, some lessons were learned and/or re-emphasized during this whole process. Thanks all!!! -
Painting Advice Needed !!!
Bill Anderson replied to Bill Anderson's topic in Model Building Questions and Answers
Thank you both for the sensible advice! Like I wrote, this experience was a first for me, and I've been building models since the mid 1950s. I'm not placing blame (that belongs to me), but my nemesis was those two cans of Testors paint. Pretty sad, for I've never had a problem with them before.