
charlie libby
-
Posts
328 -
Joined
-
Last visited
Content Type
Profiles
Forums
Events
Gallery
Posts posted by charlie libby
-
-
i am trying to keep my concentration on this. i have a 1/12 1969 camaro thats next and it keeps creeping into my mind. trying to figure out how to make a set of minilite wheels in aluminum or brass and paint them.. hmmmm?

-
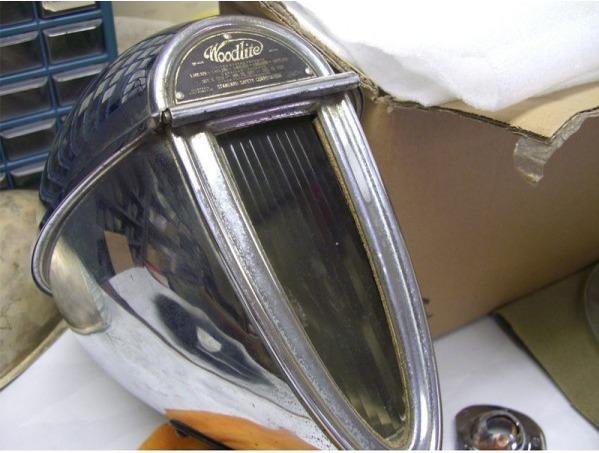
hi jim thanks for the comment. not many people know about the woodlites.
-
 1
1
-
-
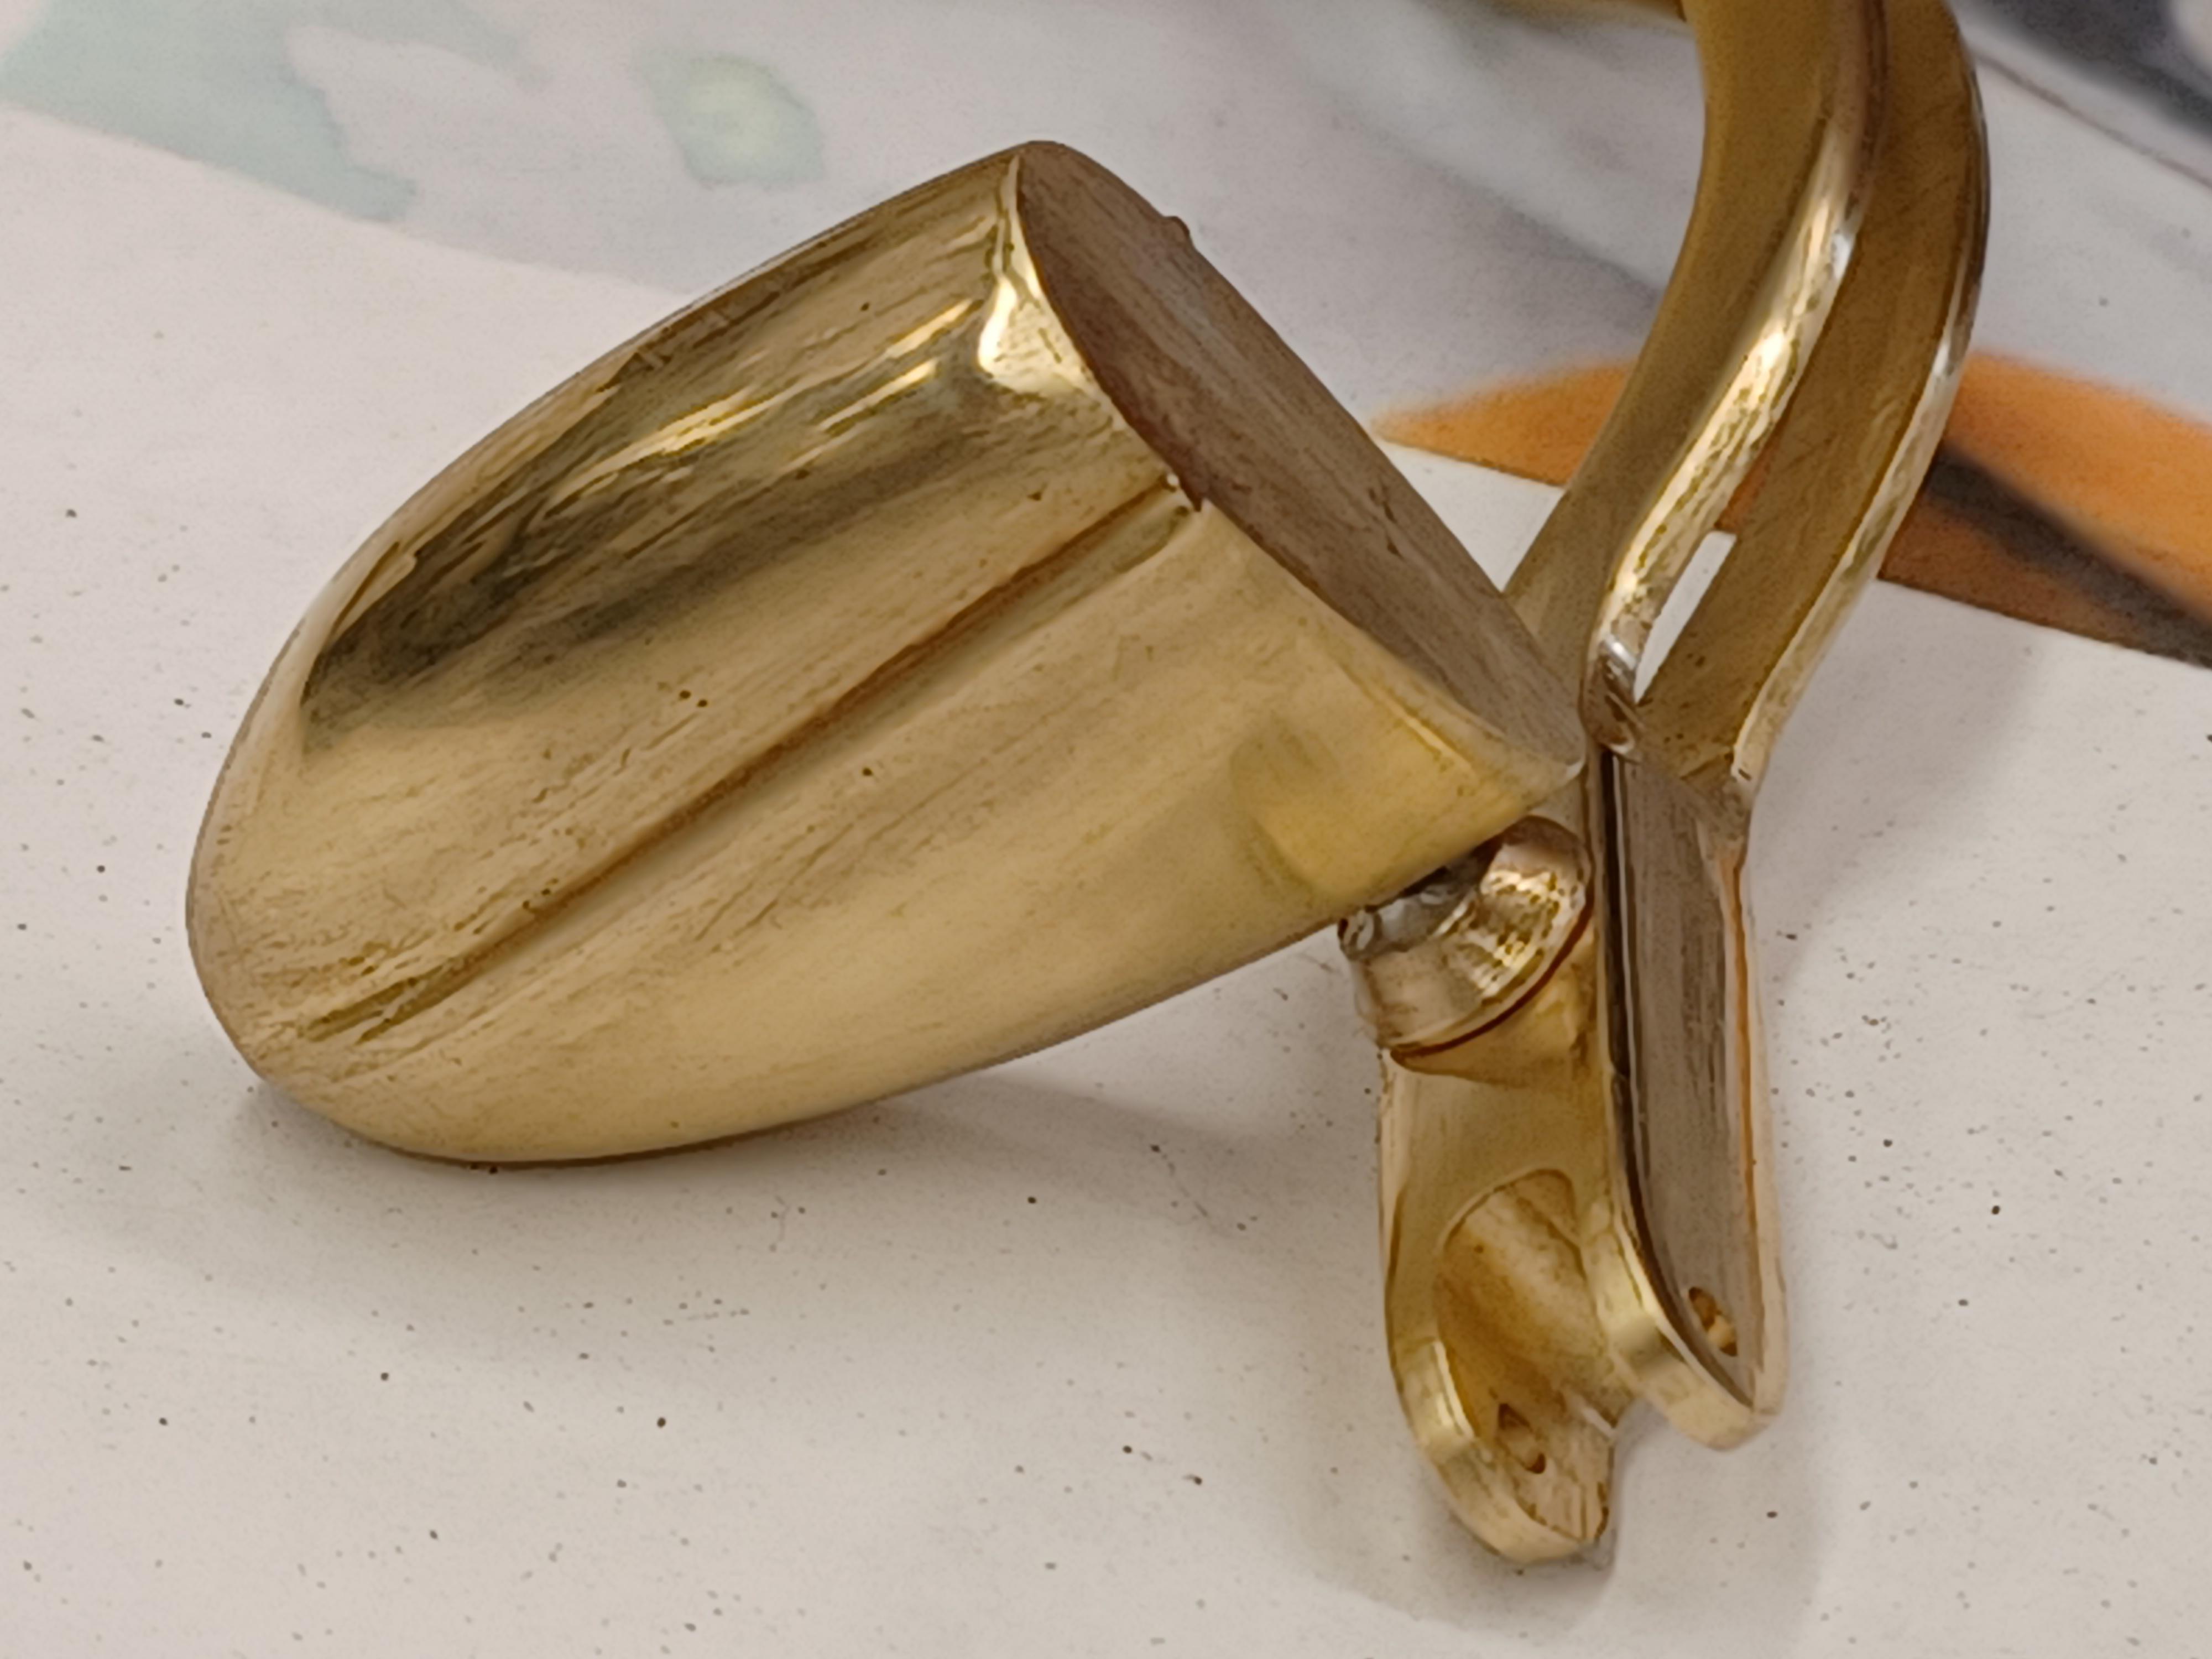
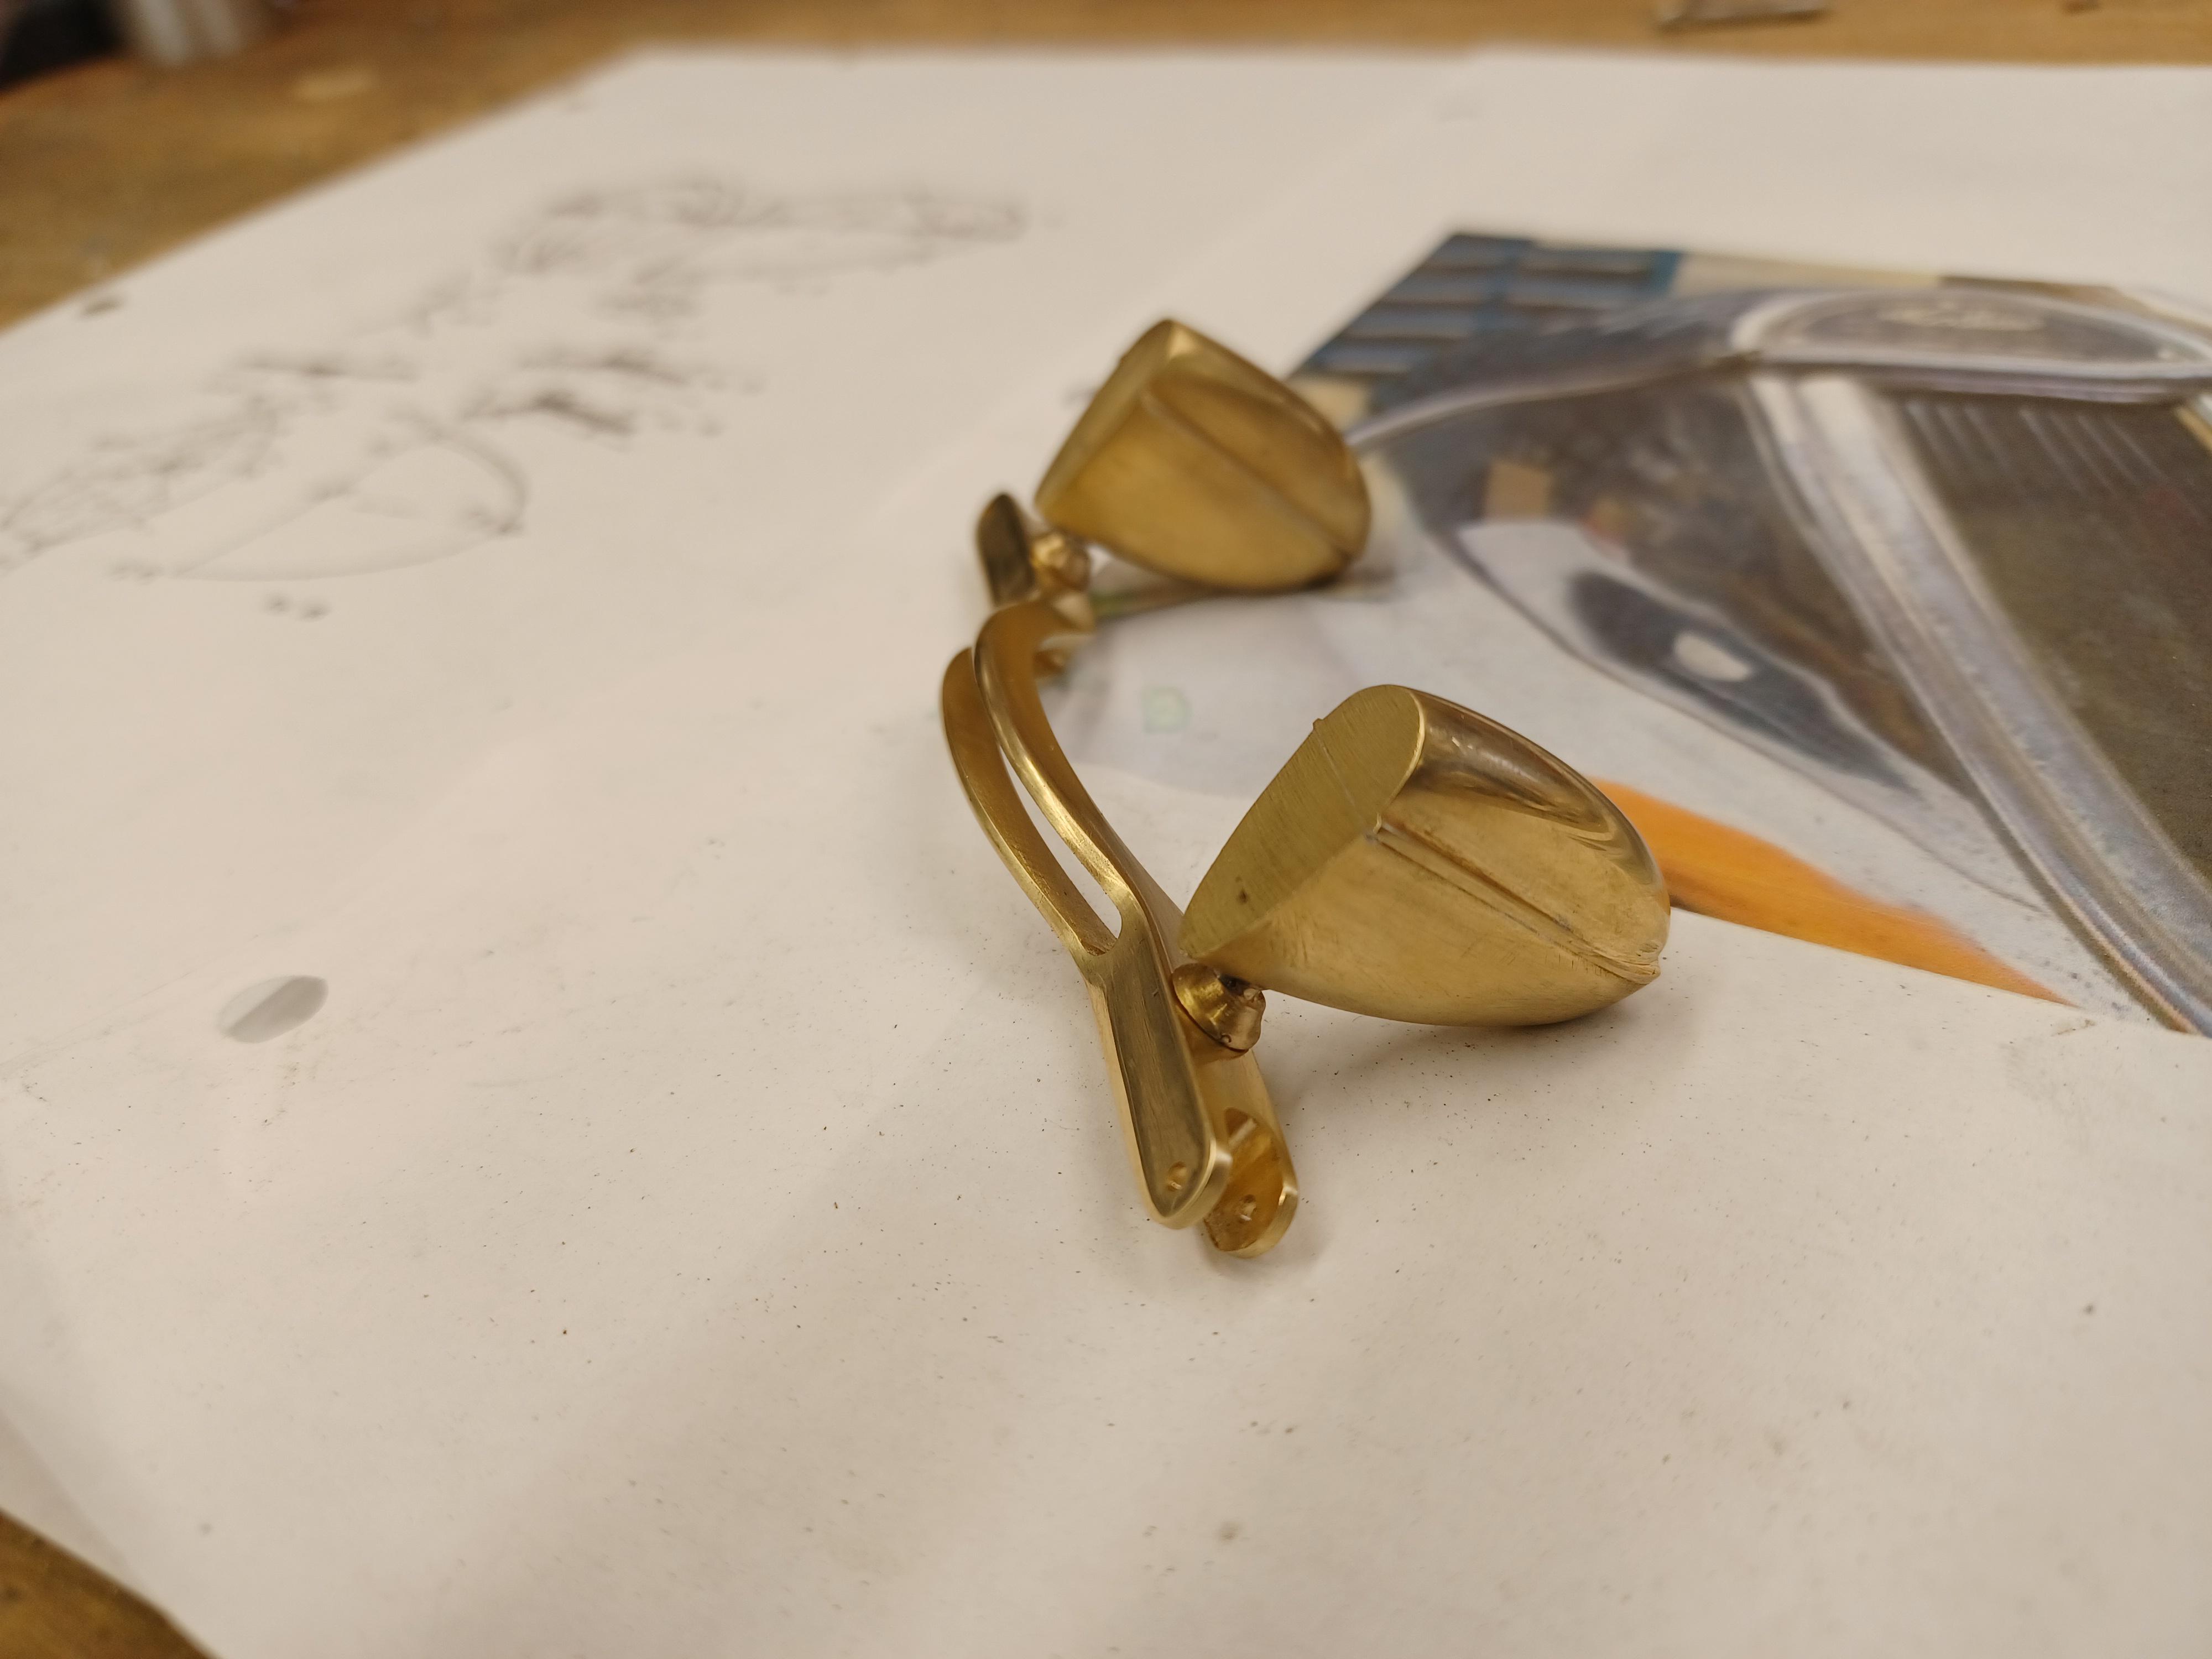
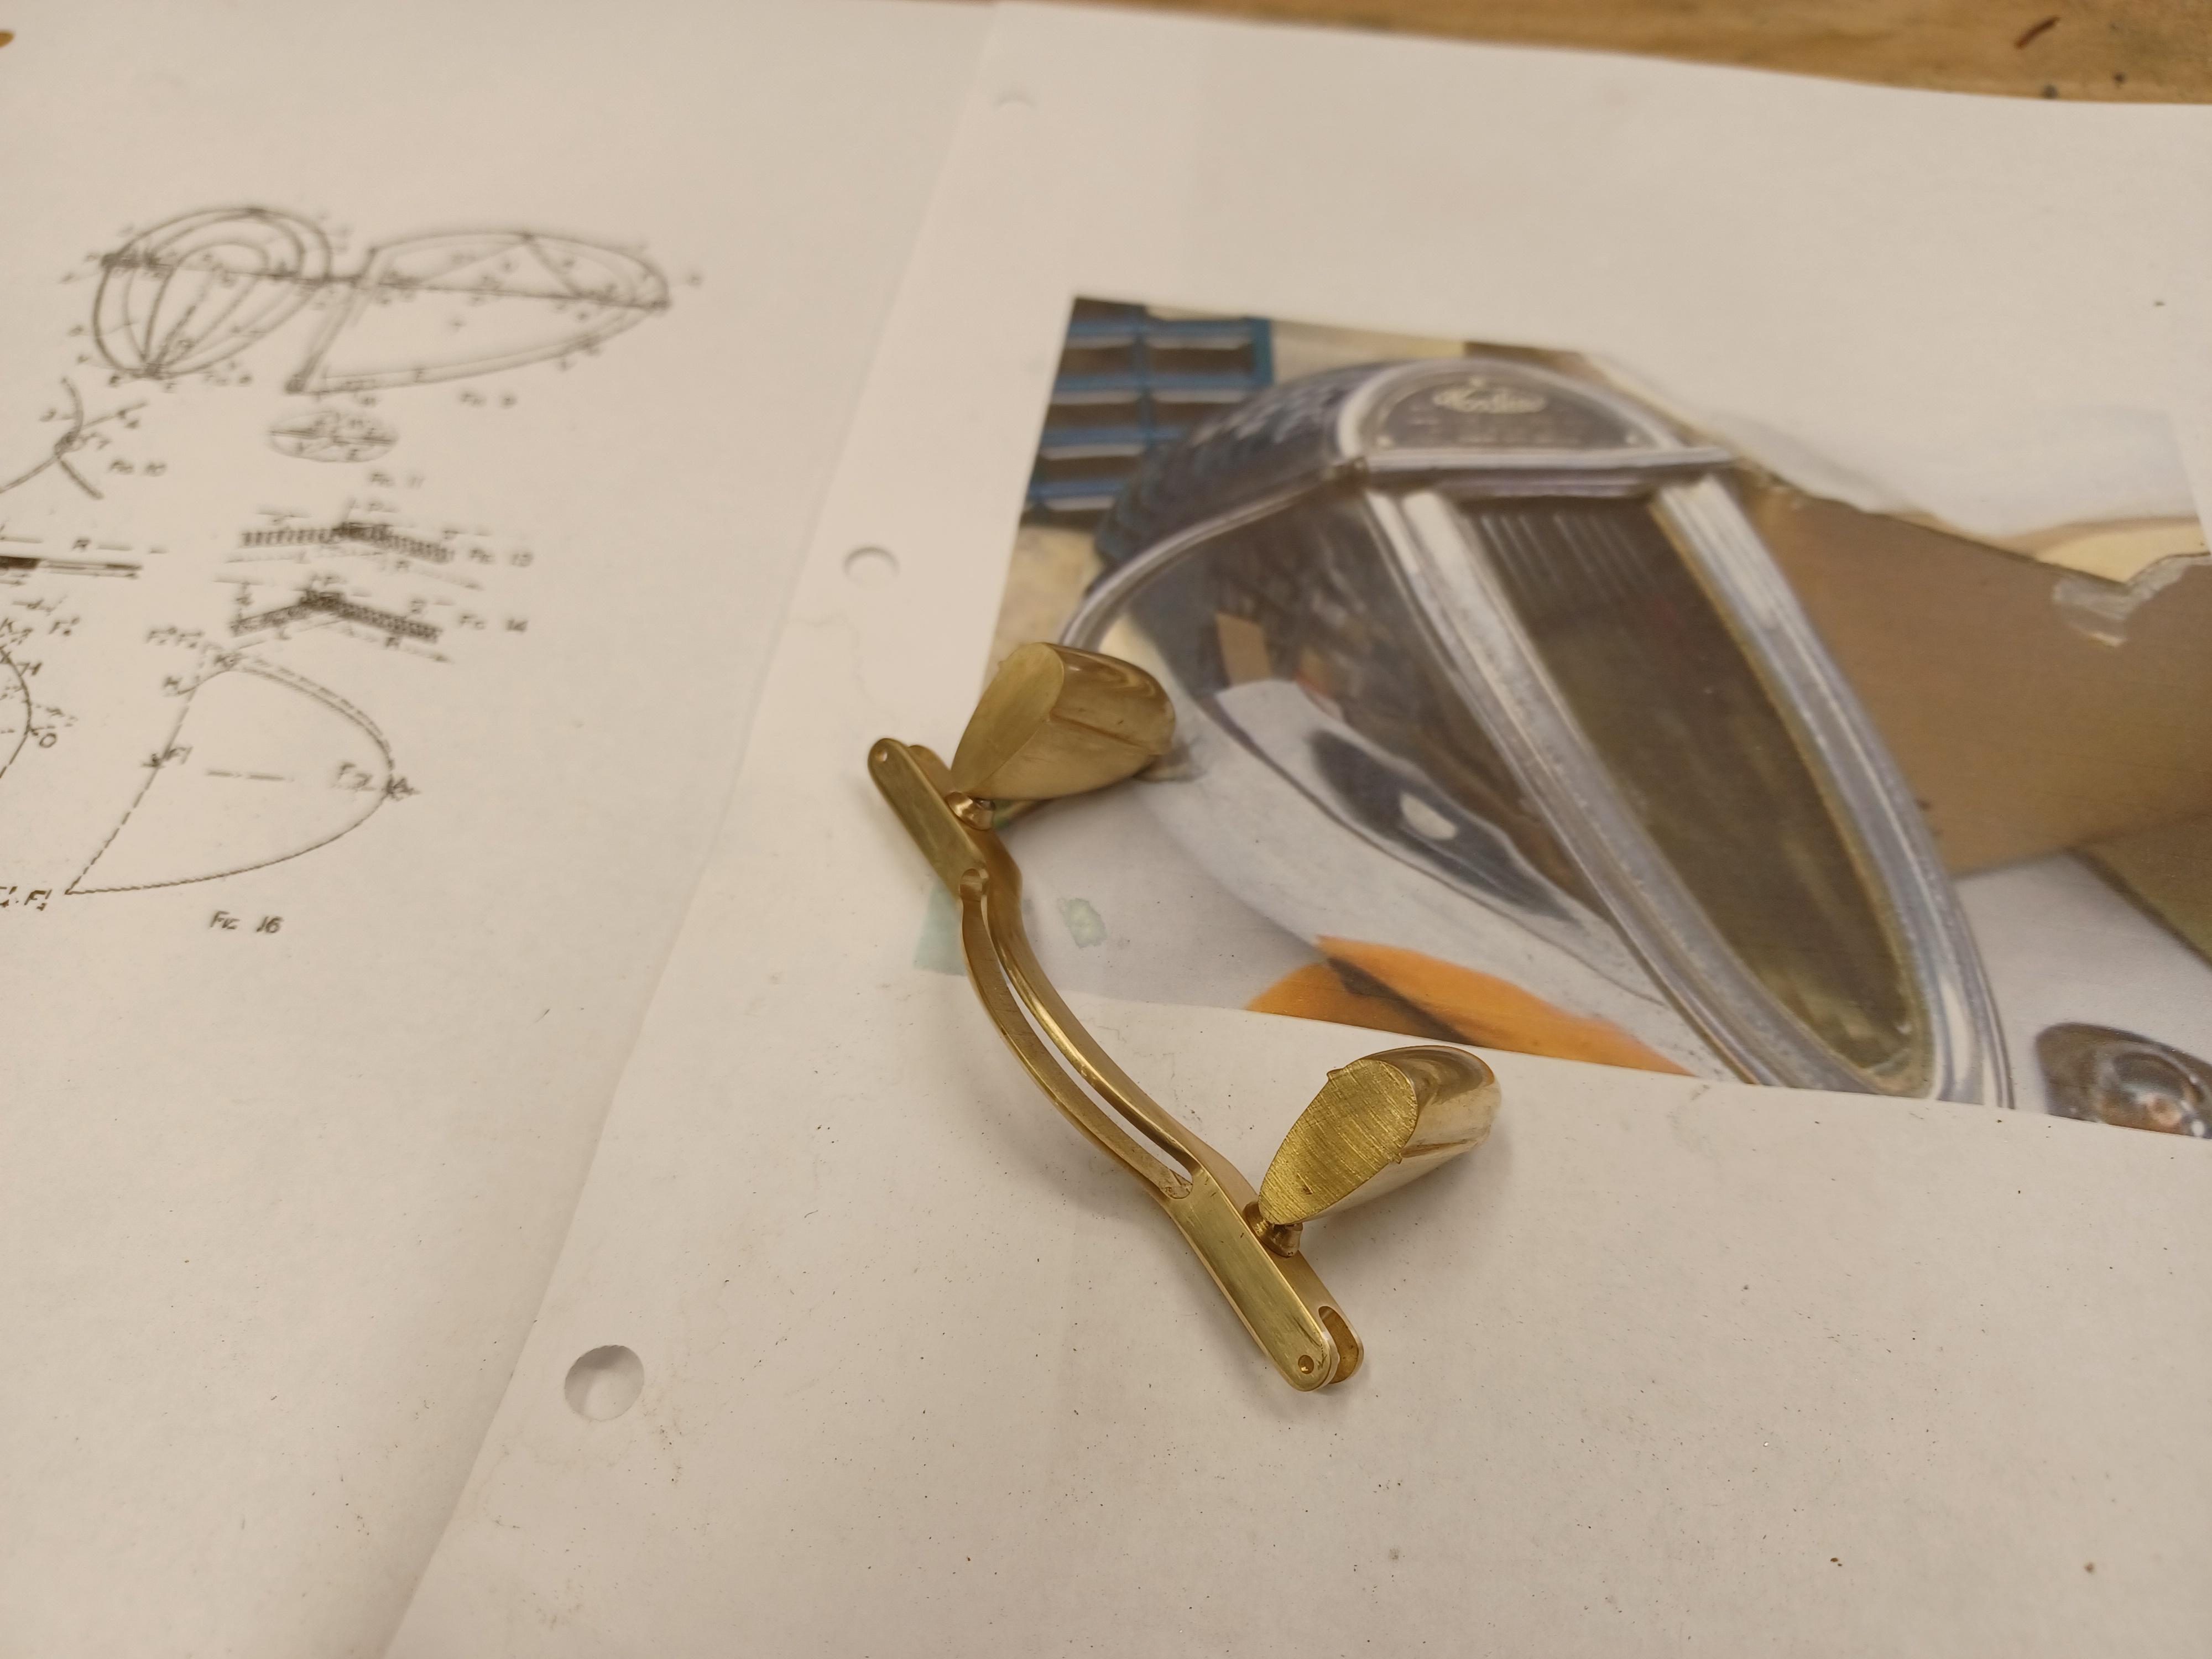
got a little further along on the headlites.plating and polish and started the trim for the lenses. i think i will make a similar bumper type mount for the tail lites. starting to think alot about paint colors.
-
you give us such great ideas on how to make these things. i think you should have classes. i will sign up for the first one. the mirror is so nice. i hooked a part up backwards in my plating solution and ruined it. made a new jar full today. happy new year
-
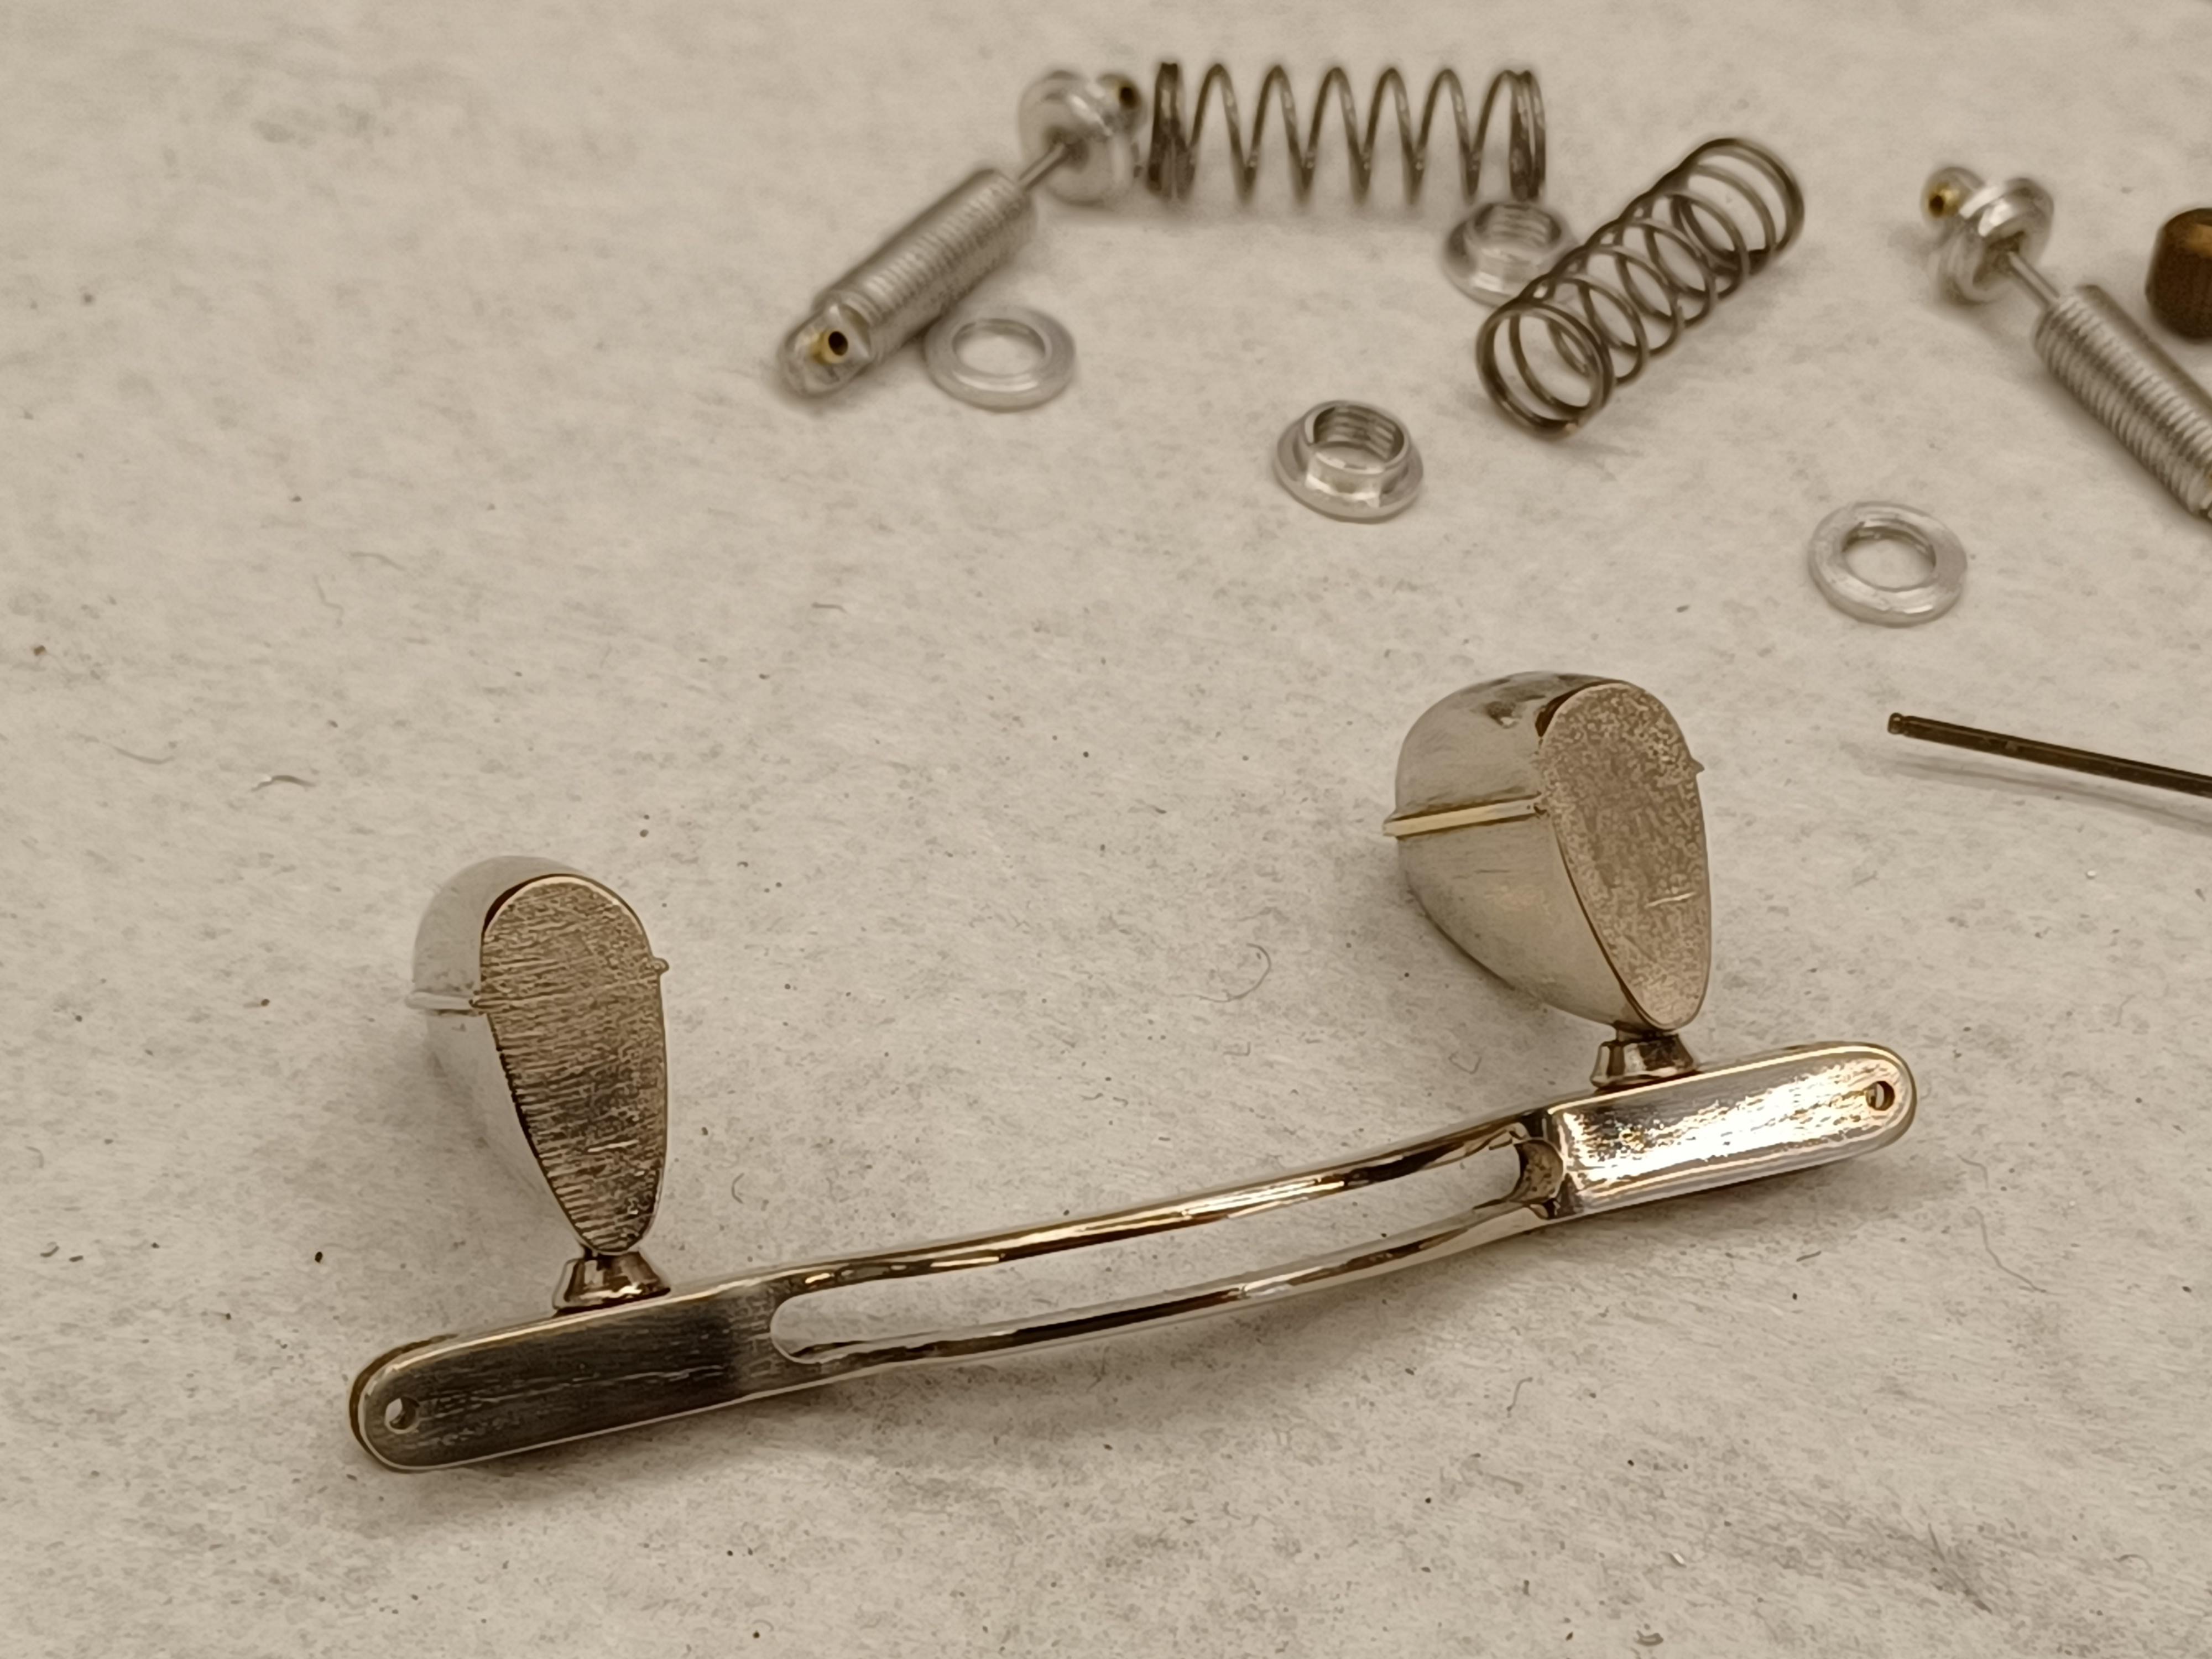
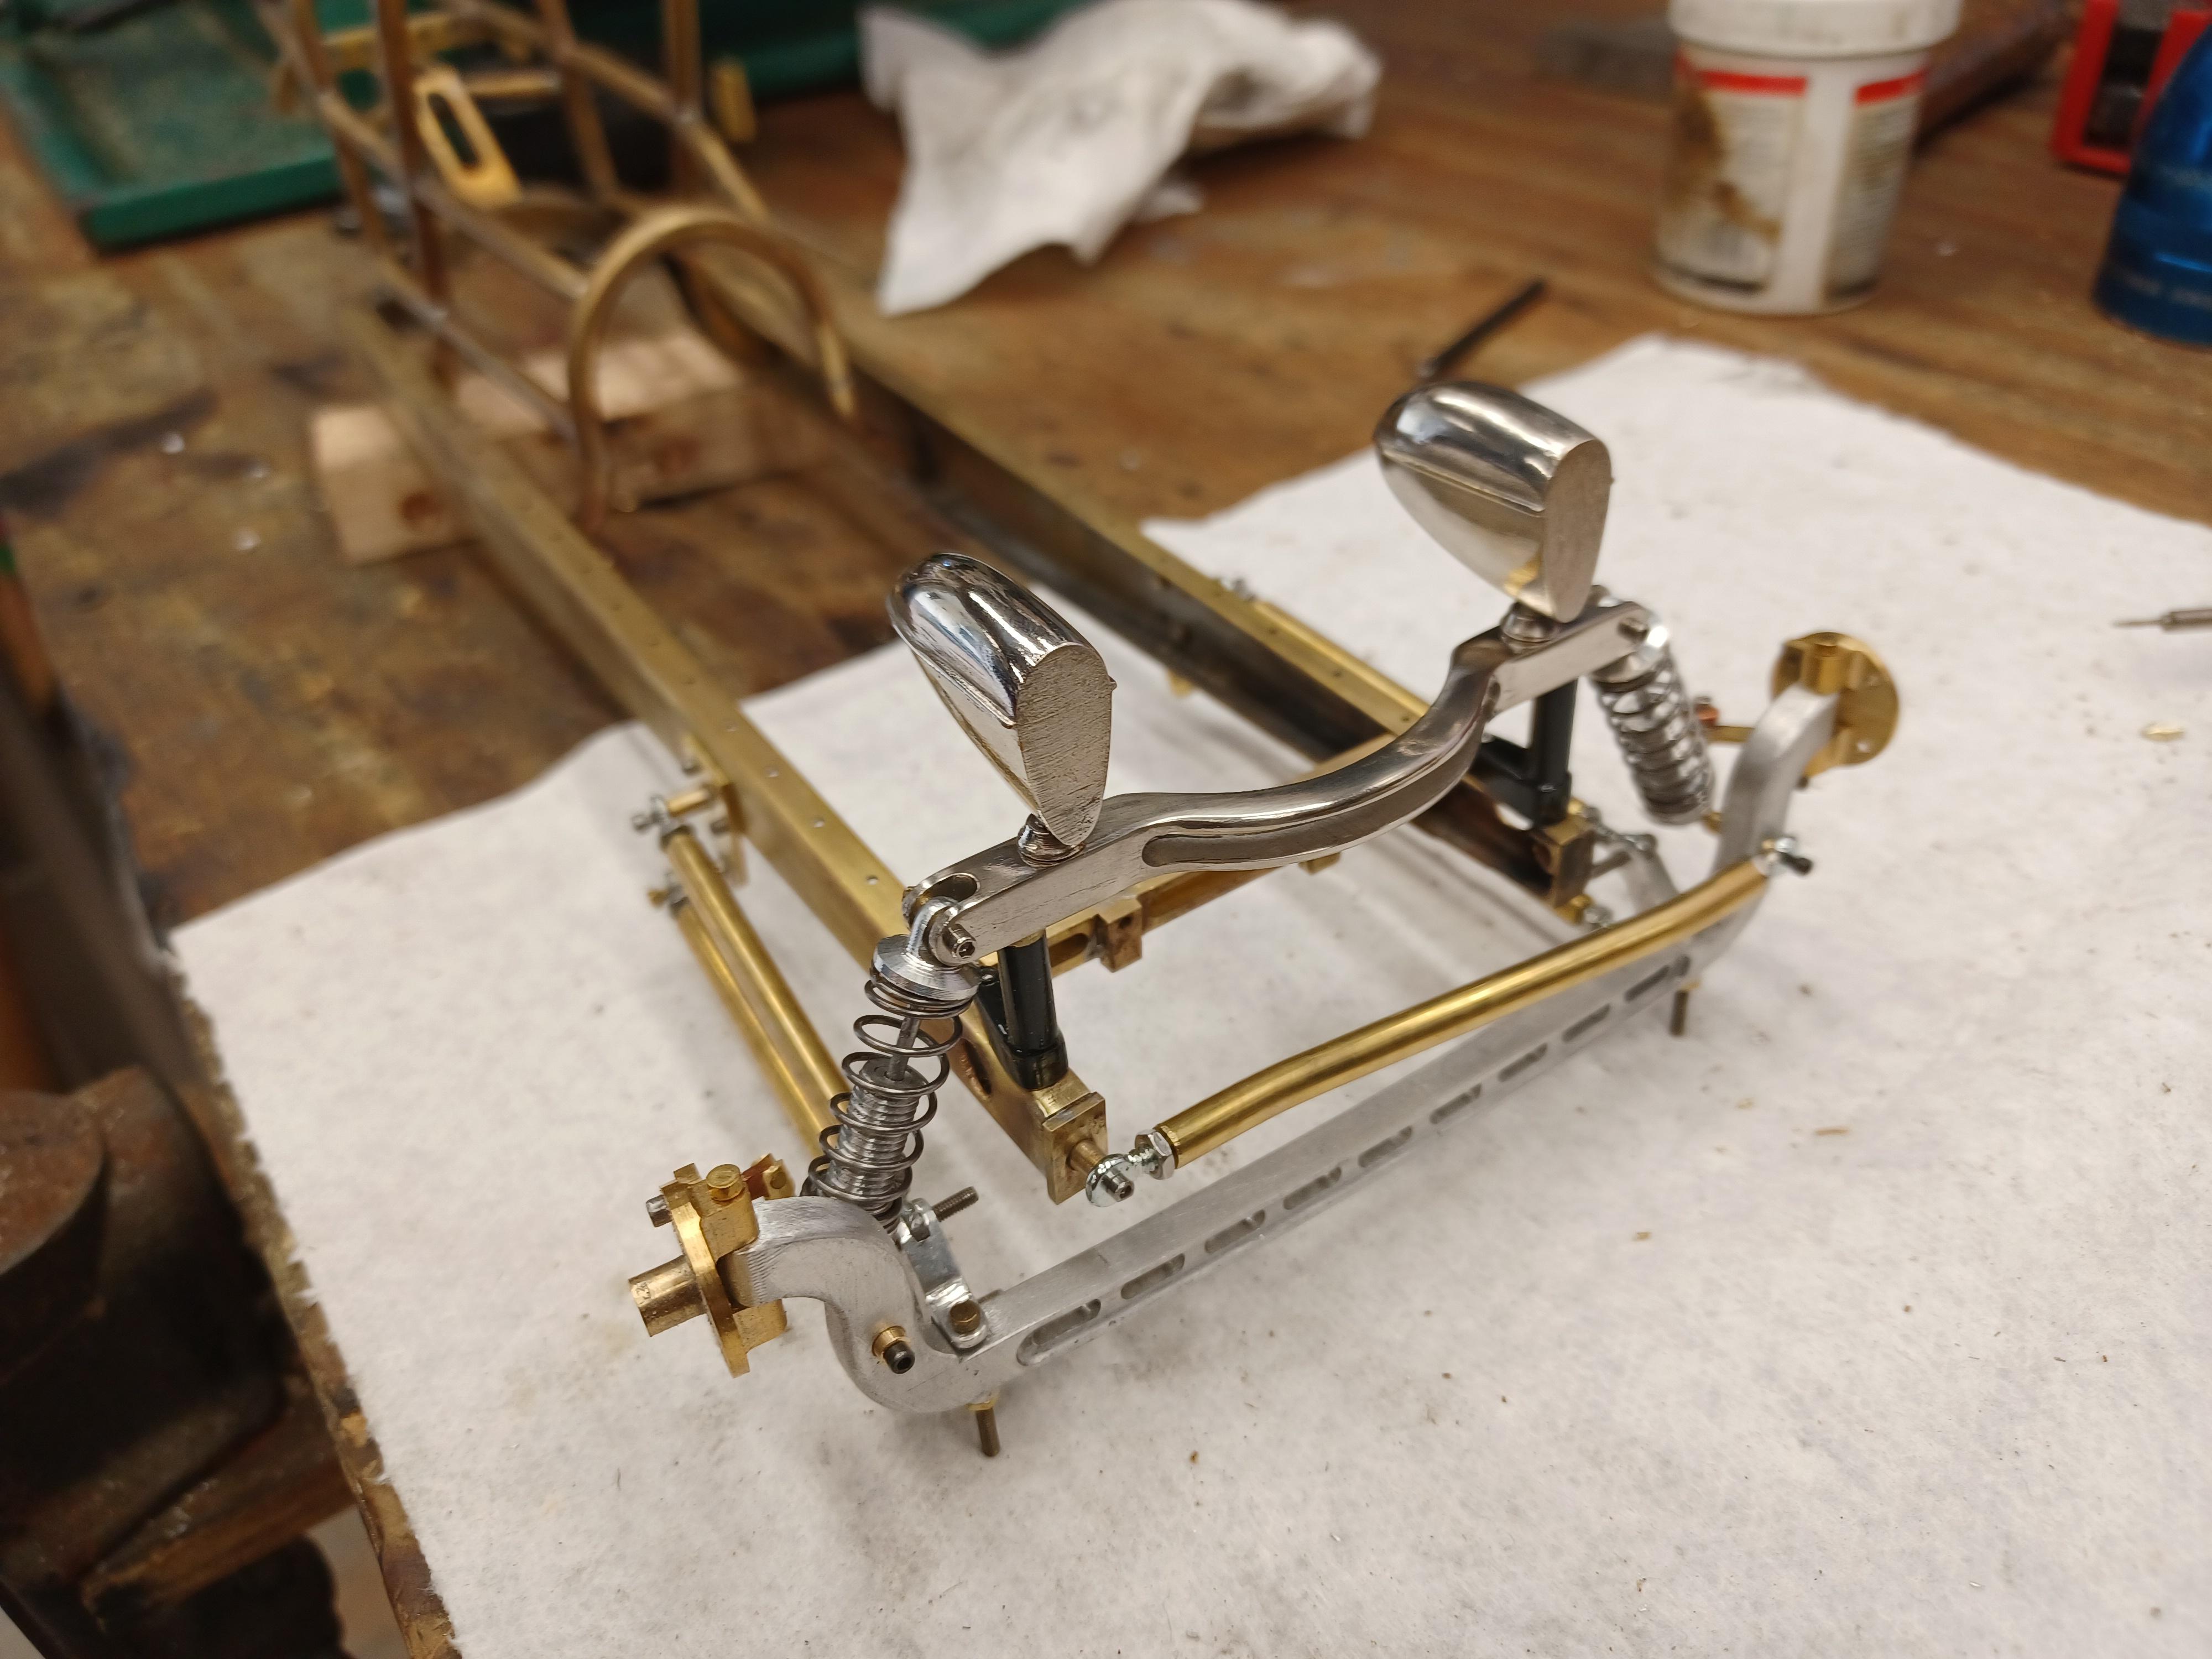
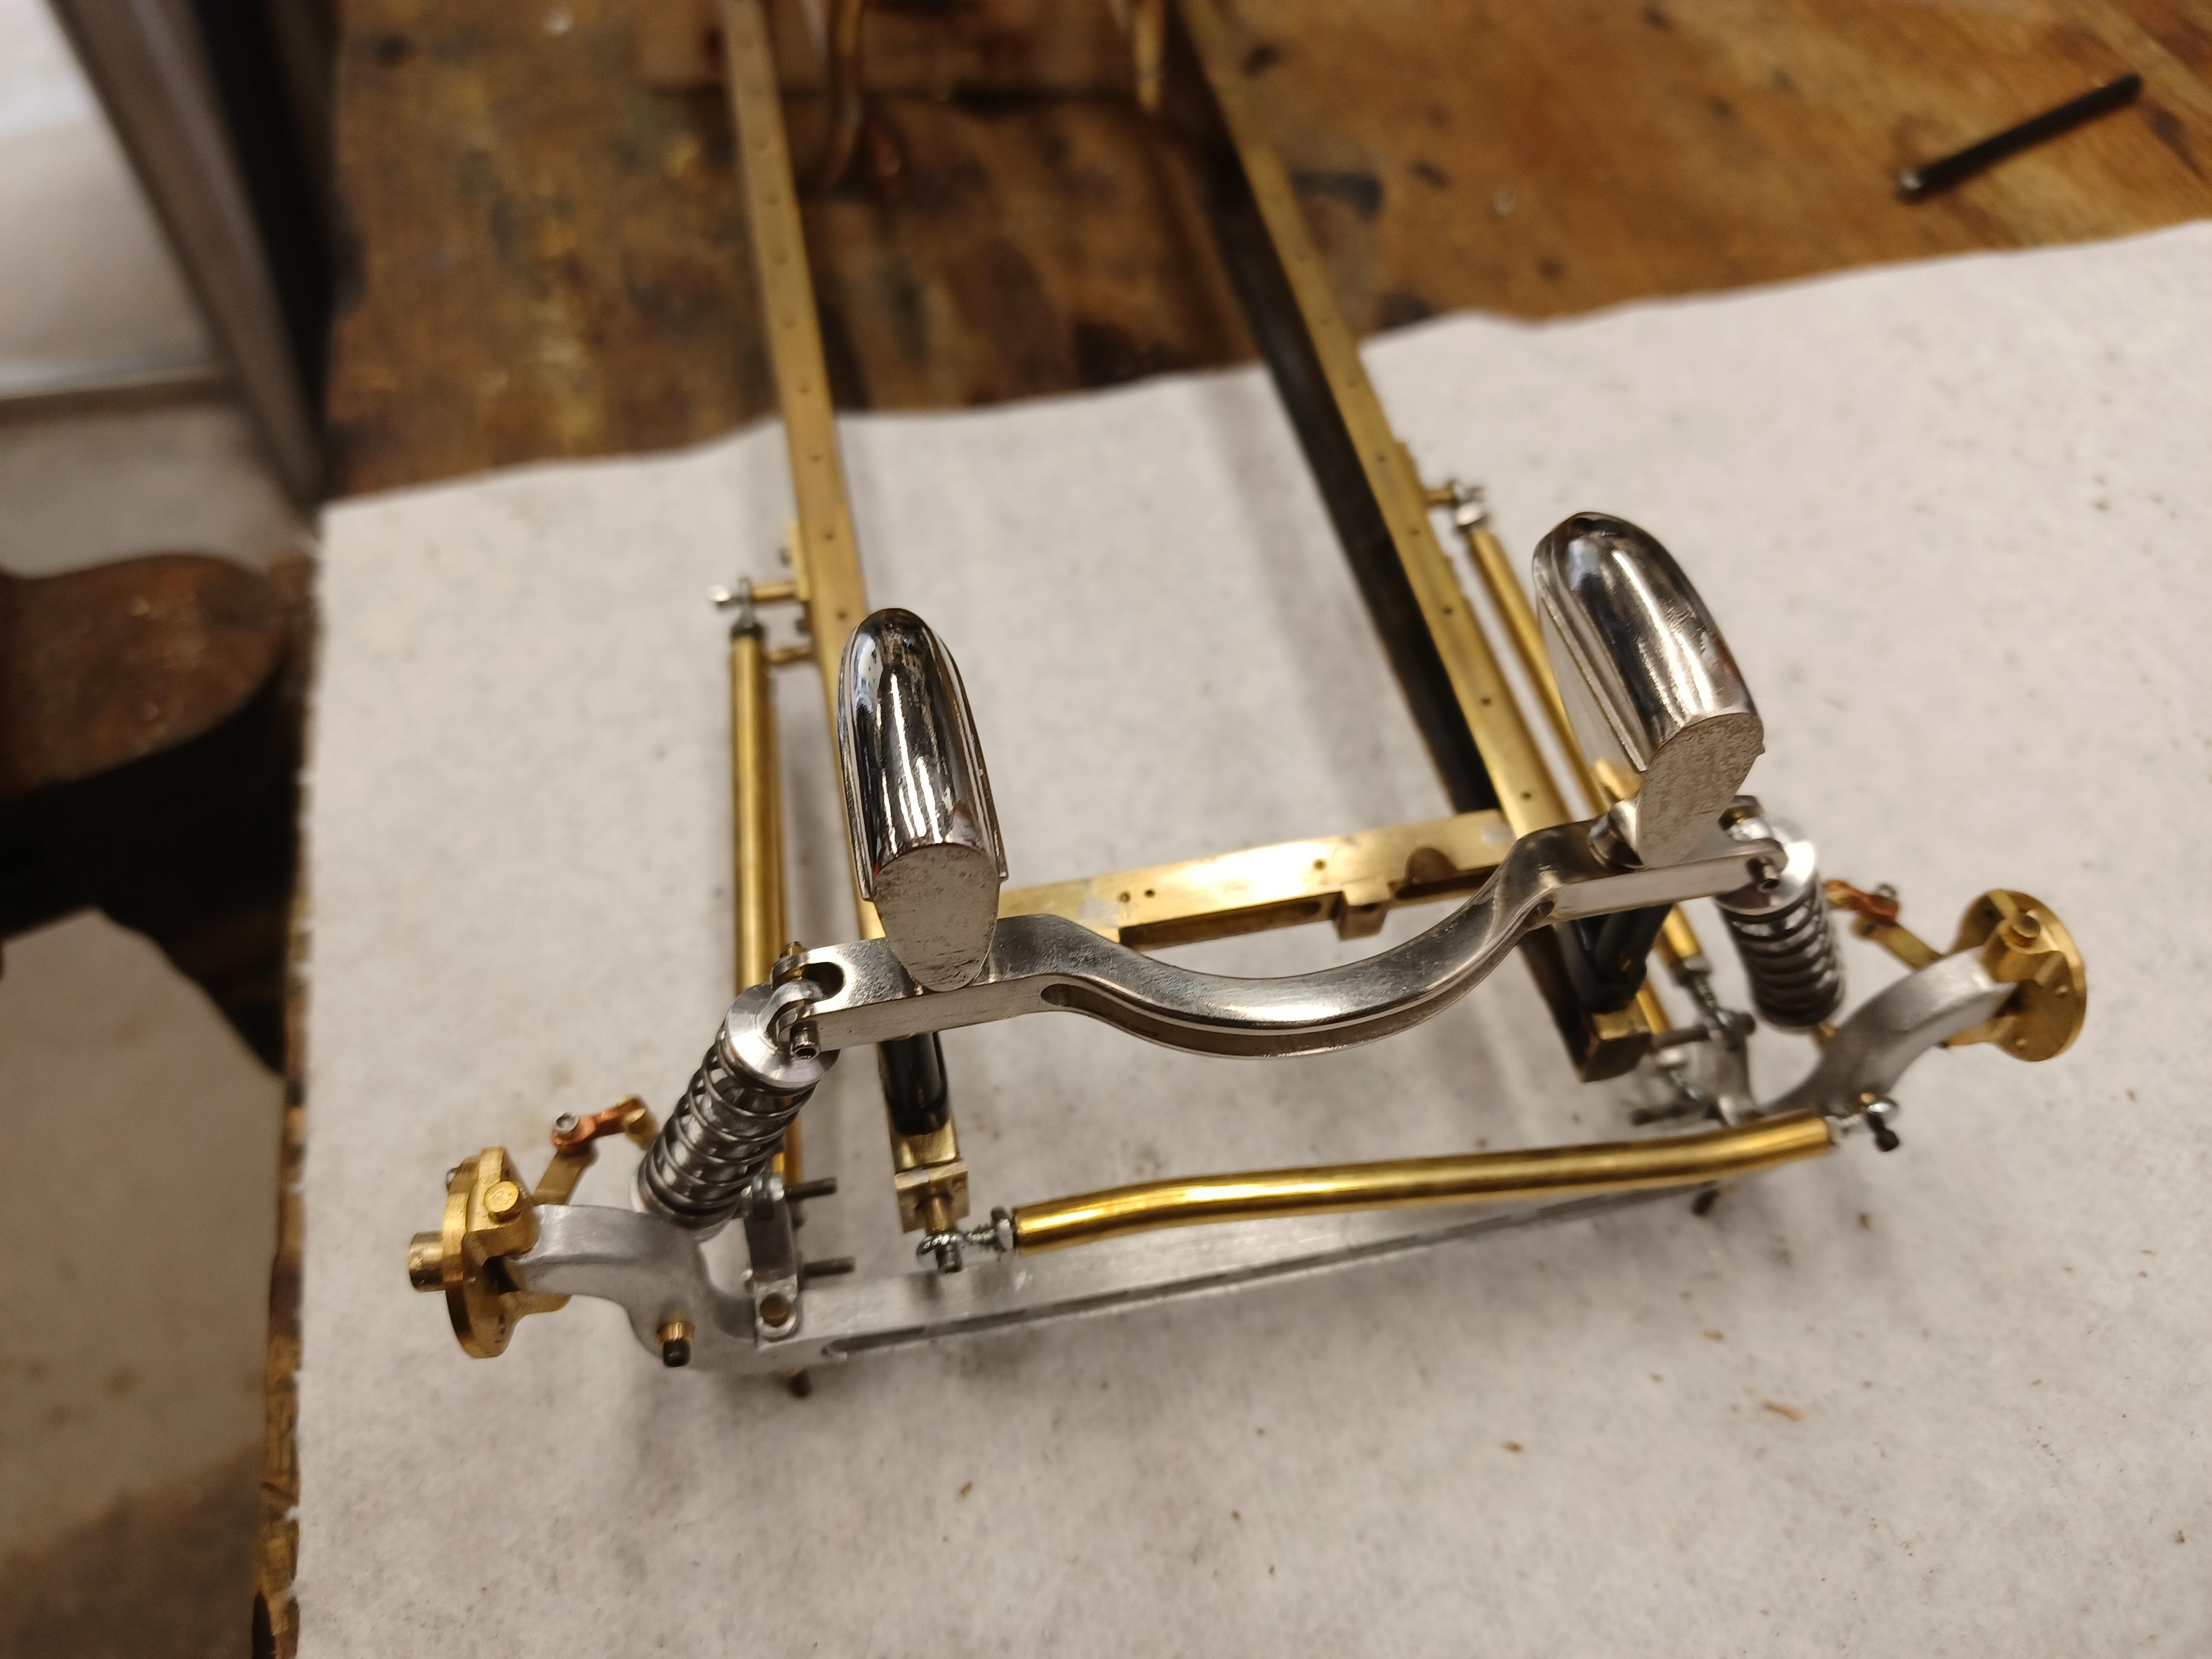
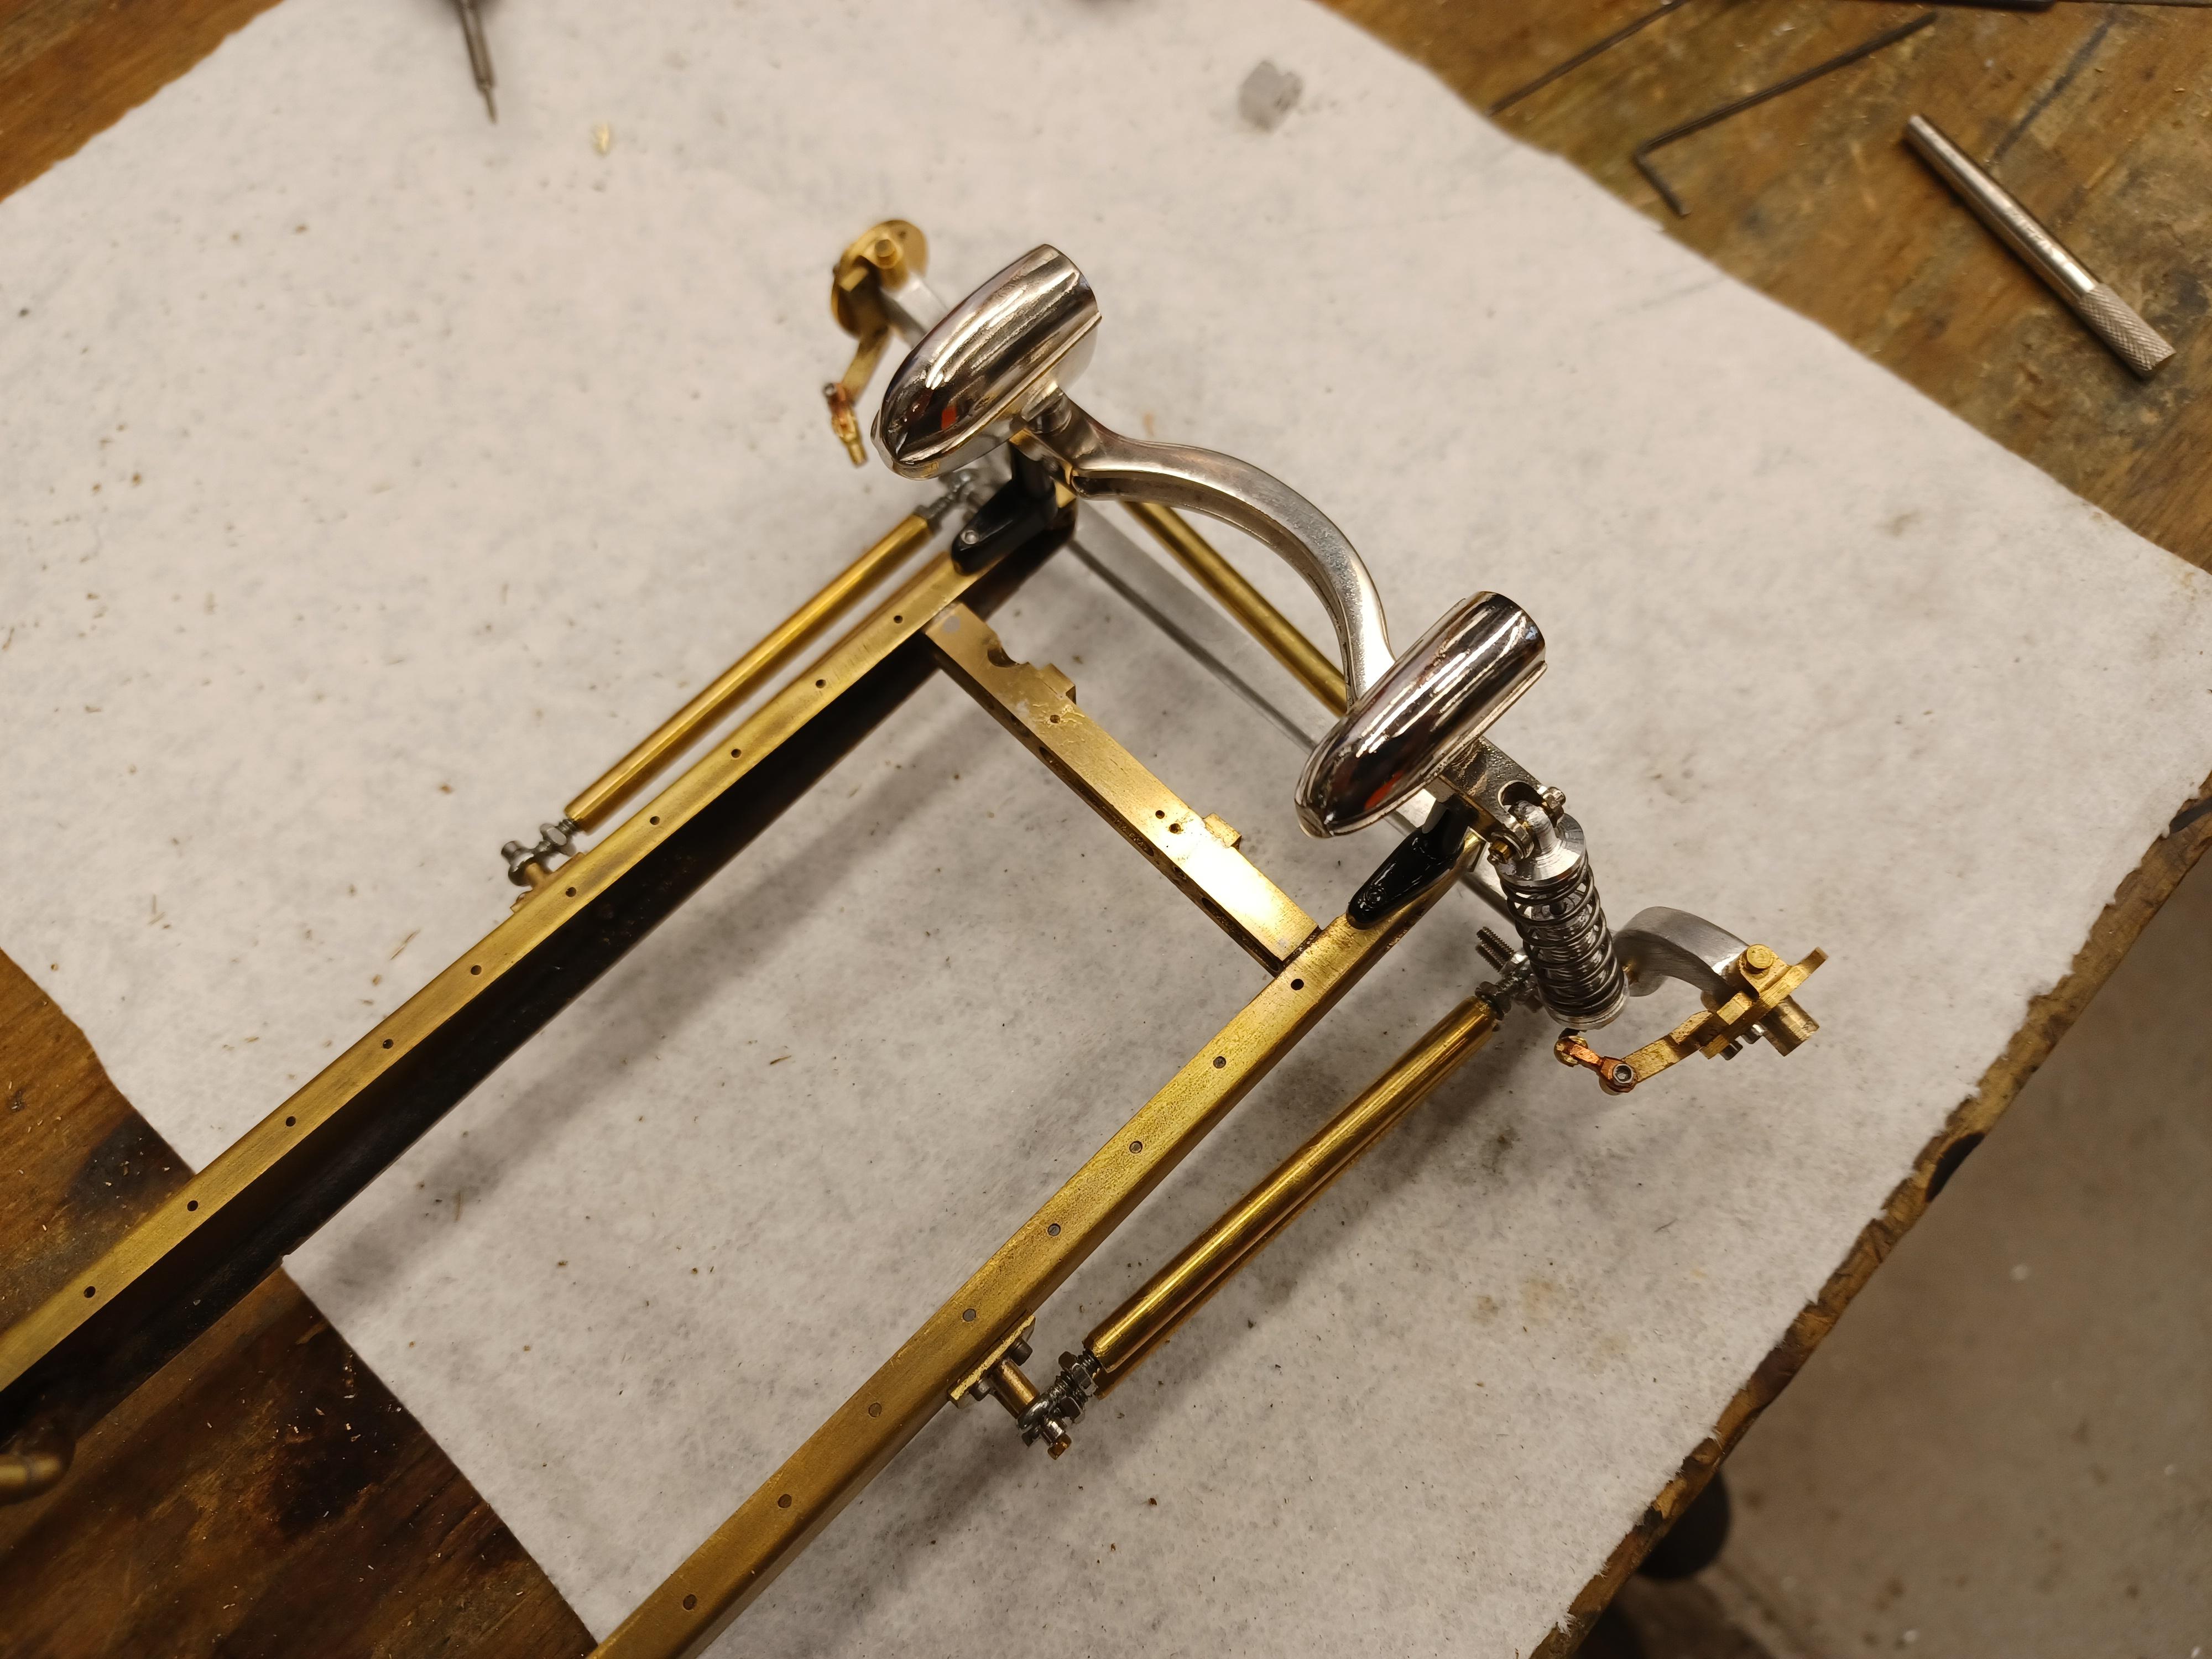
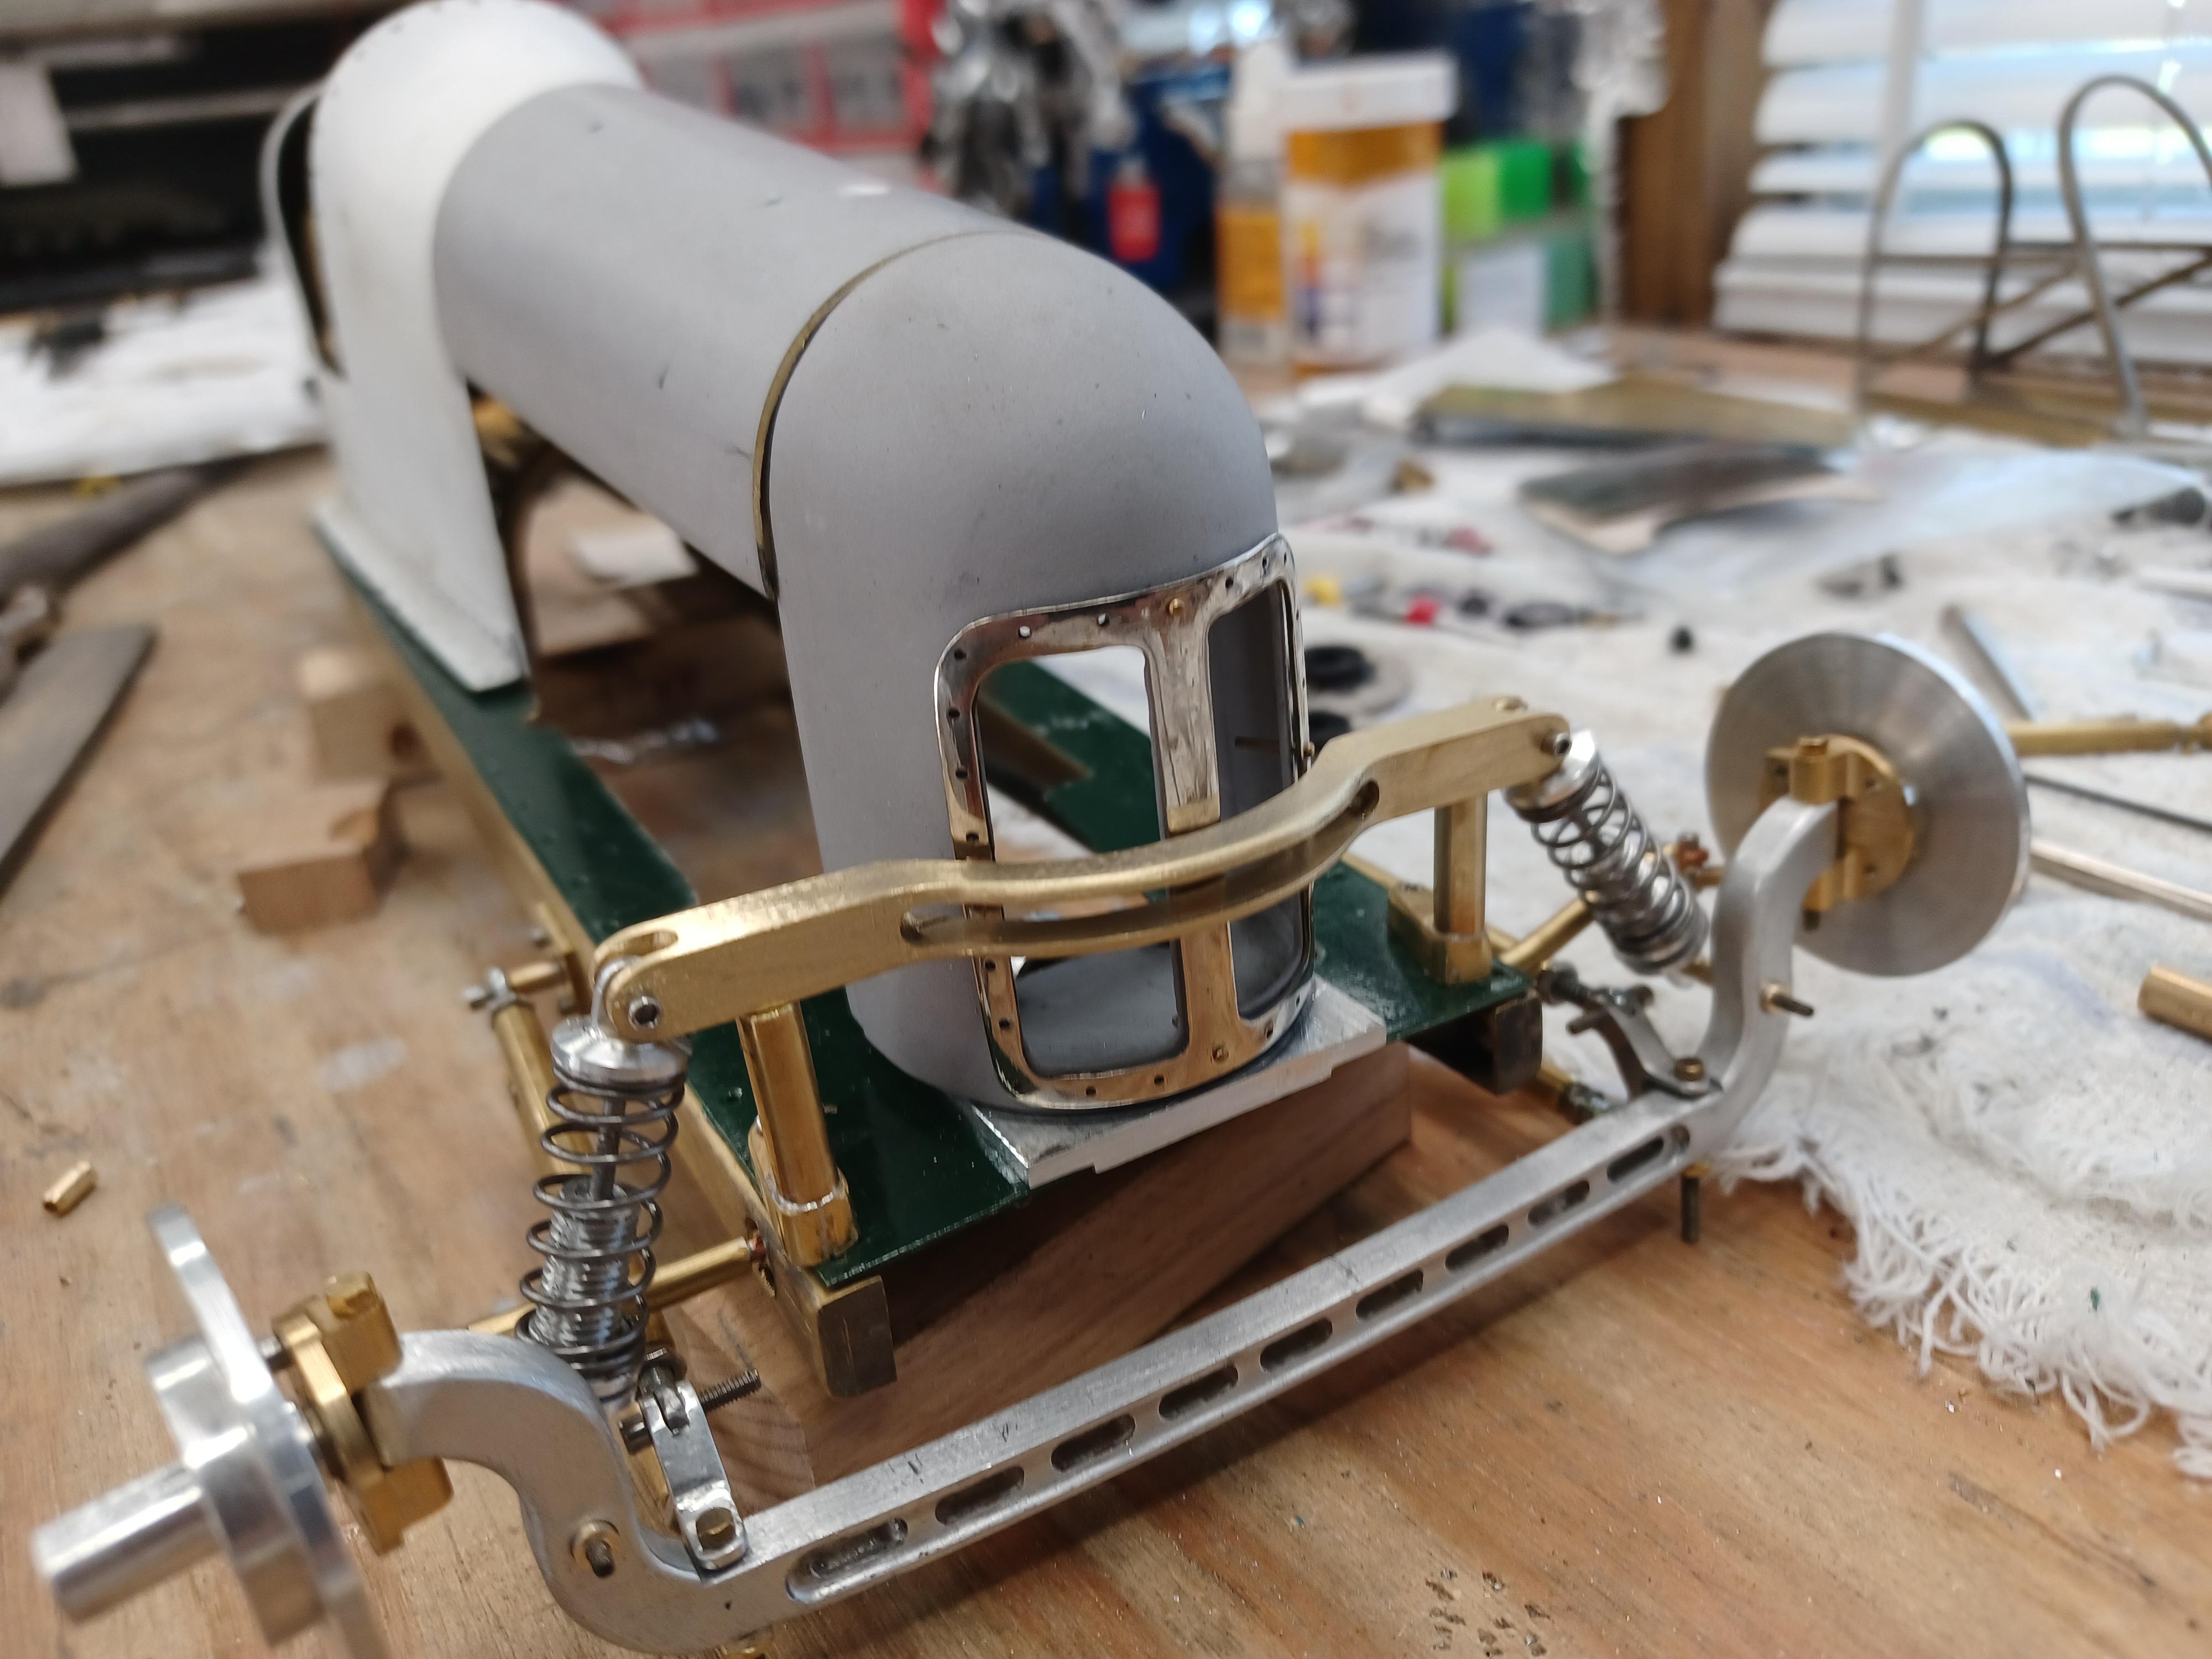
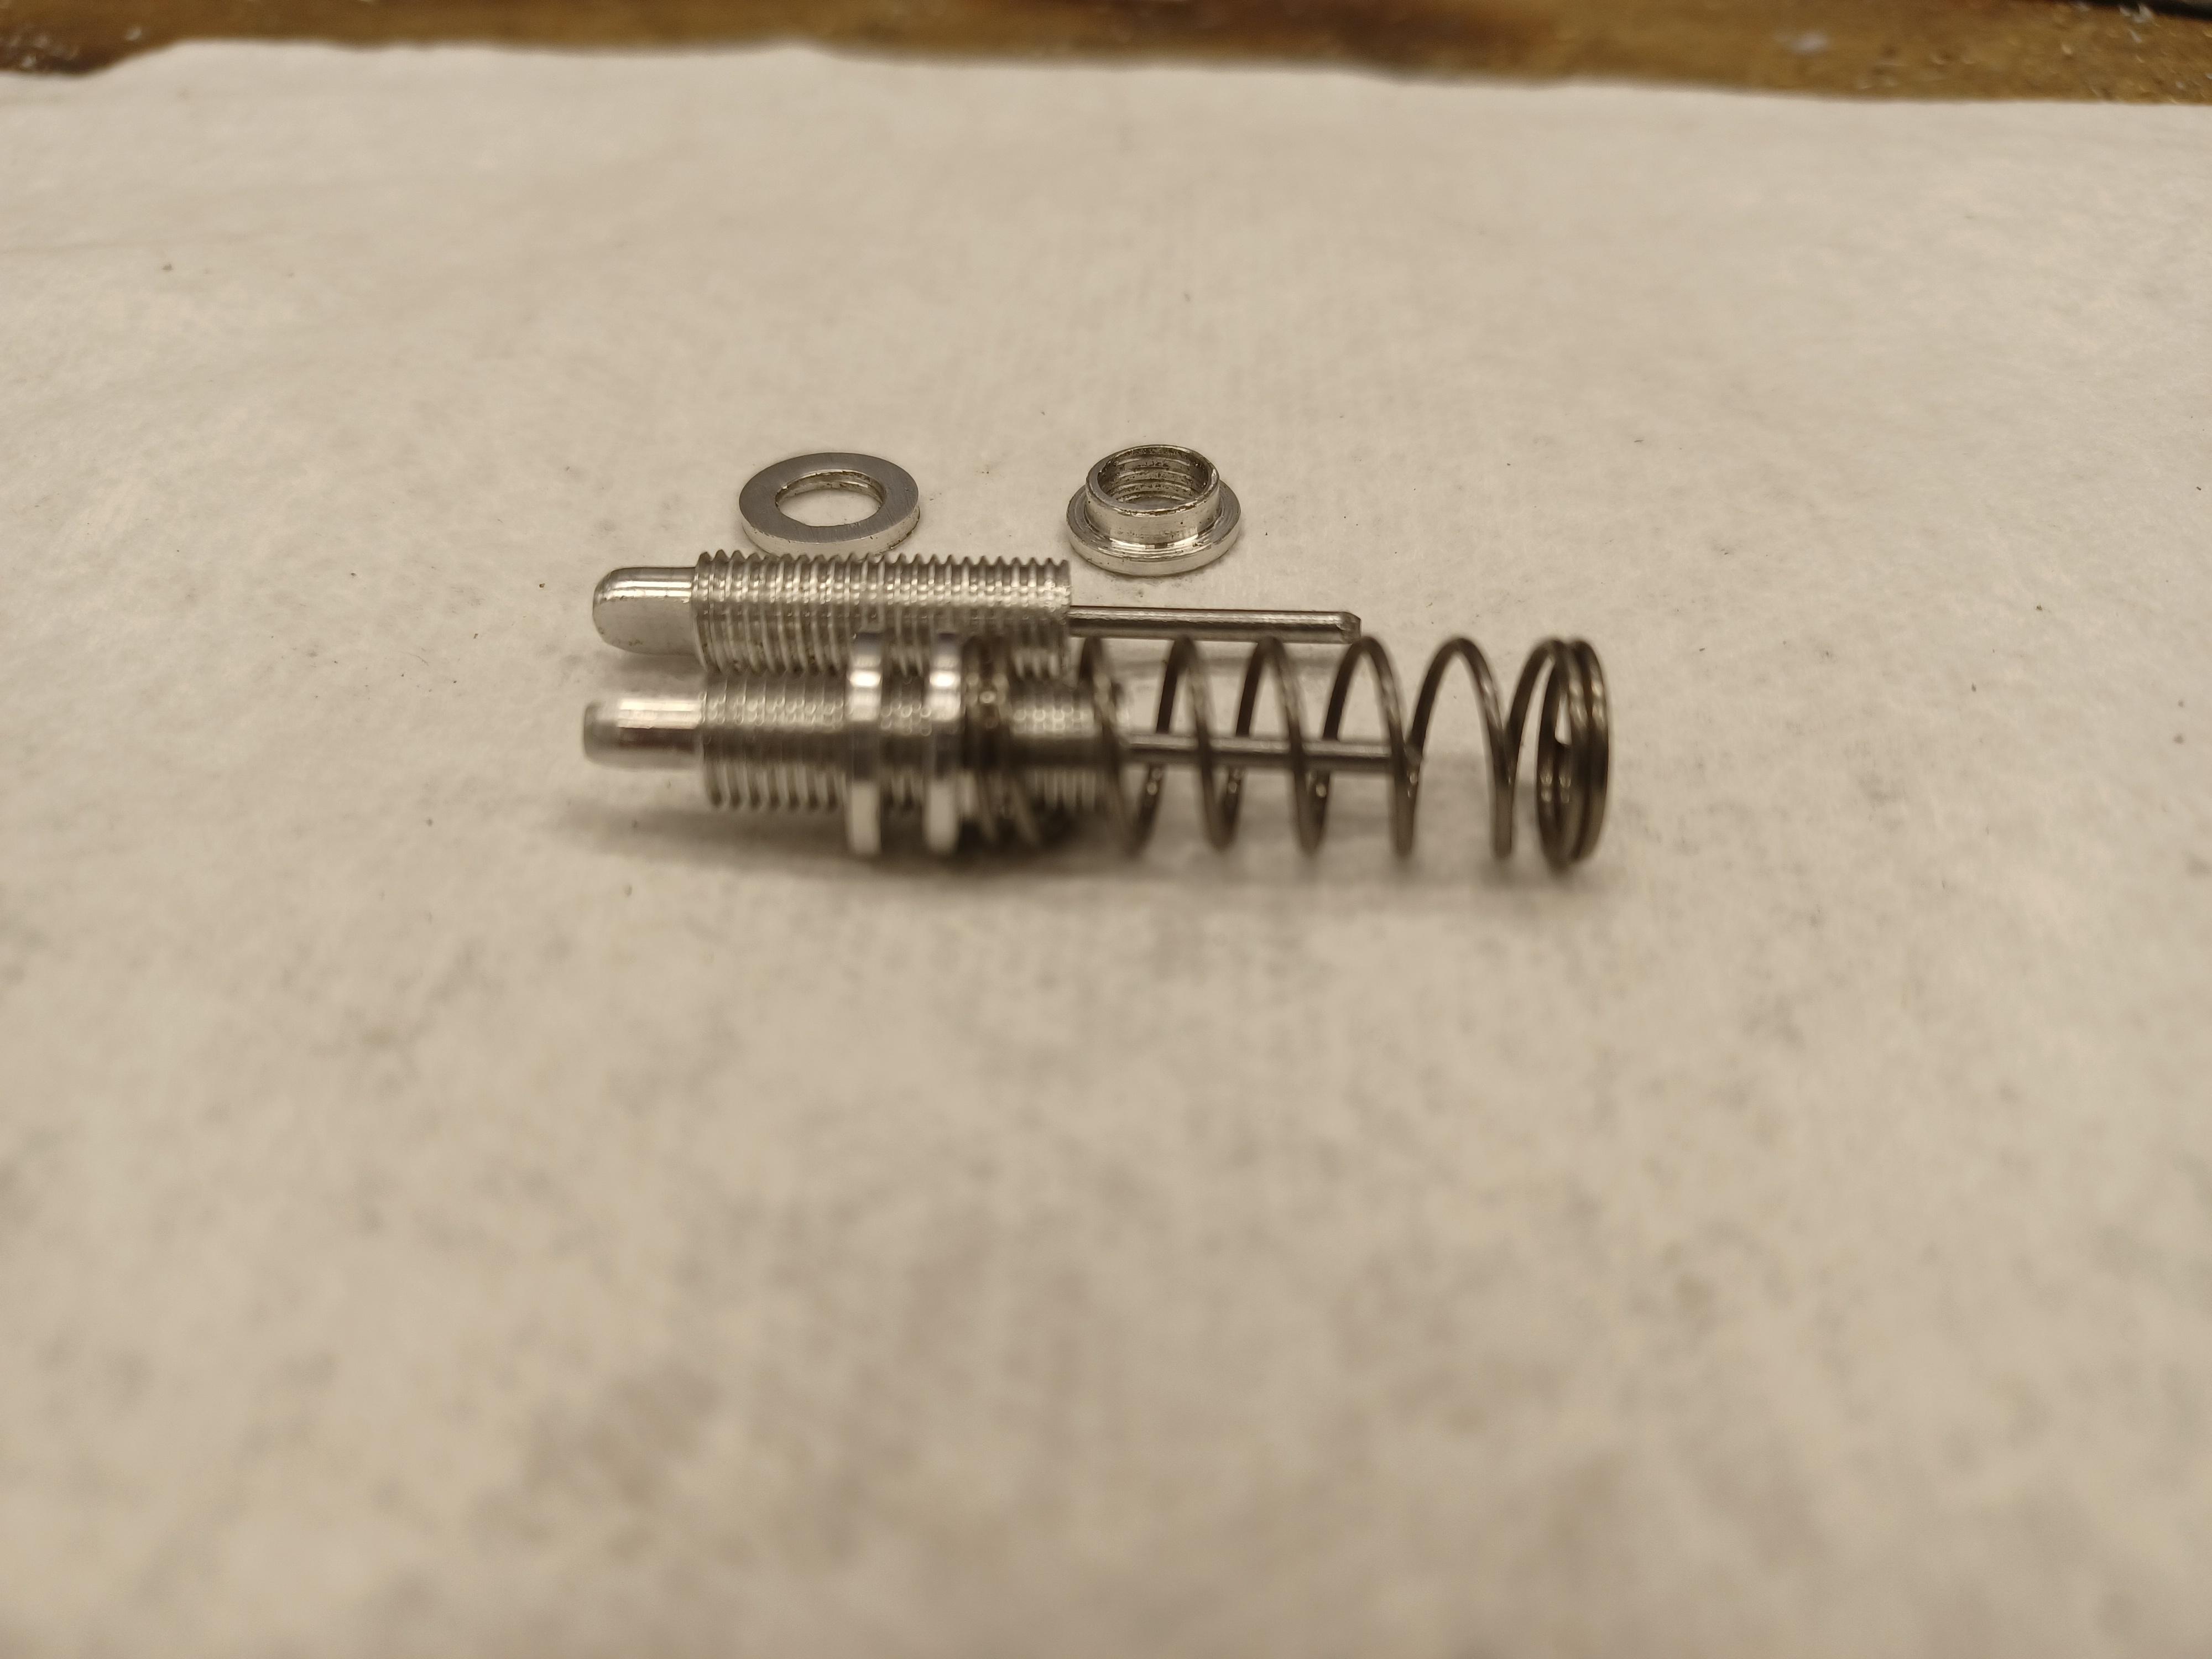
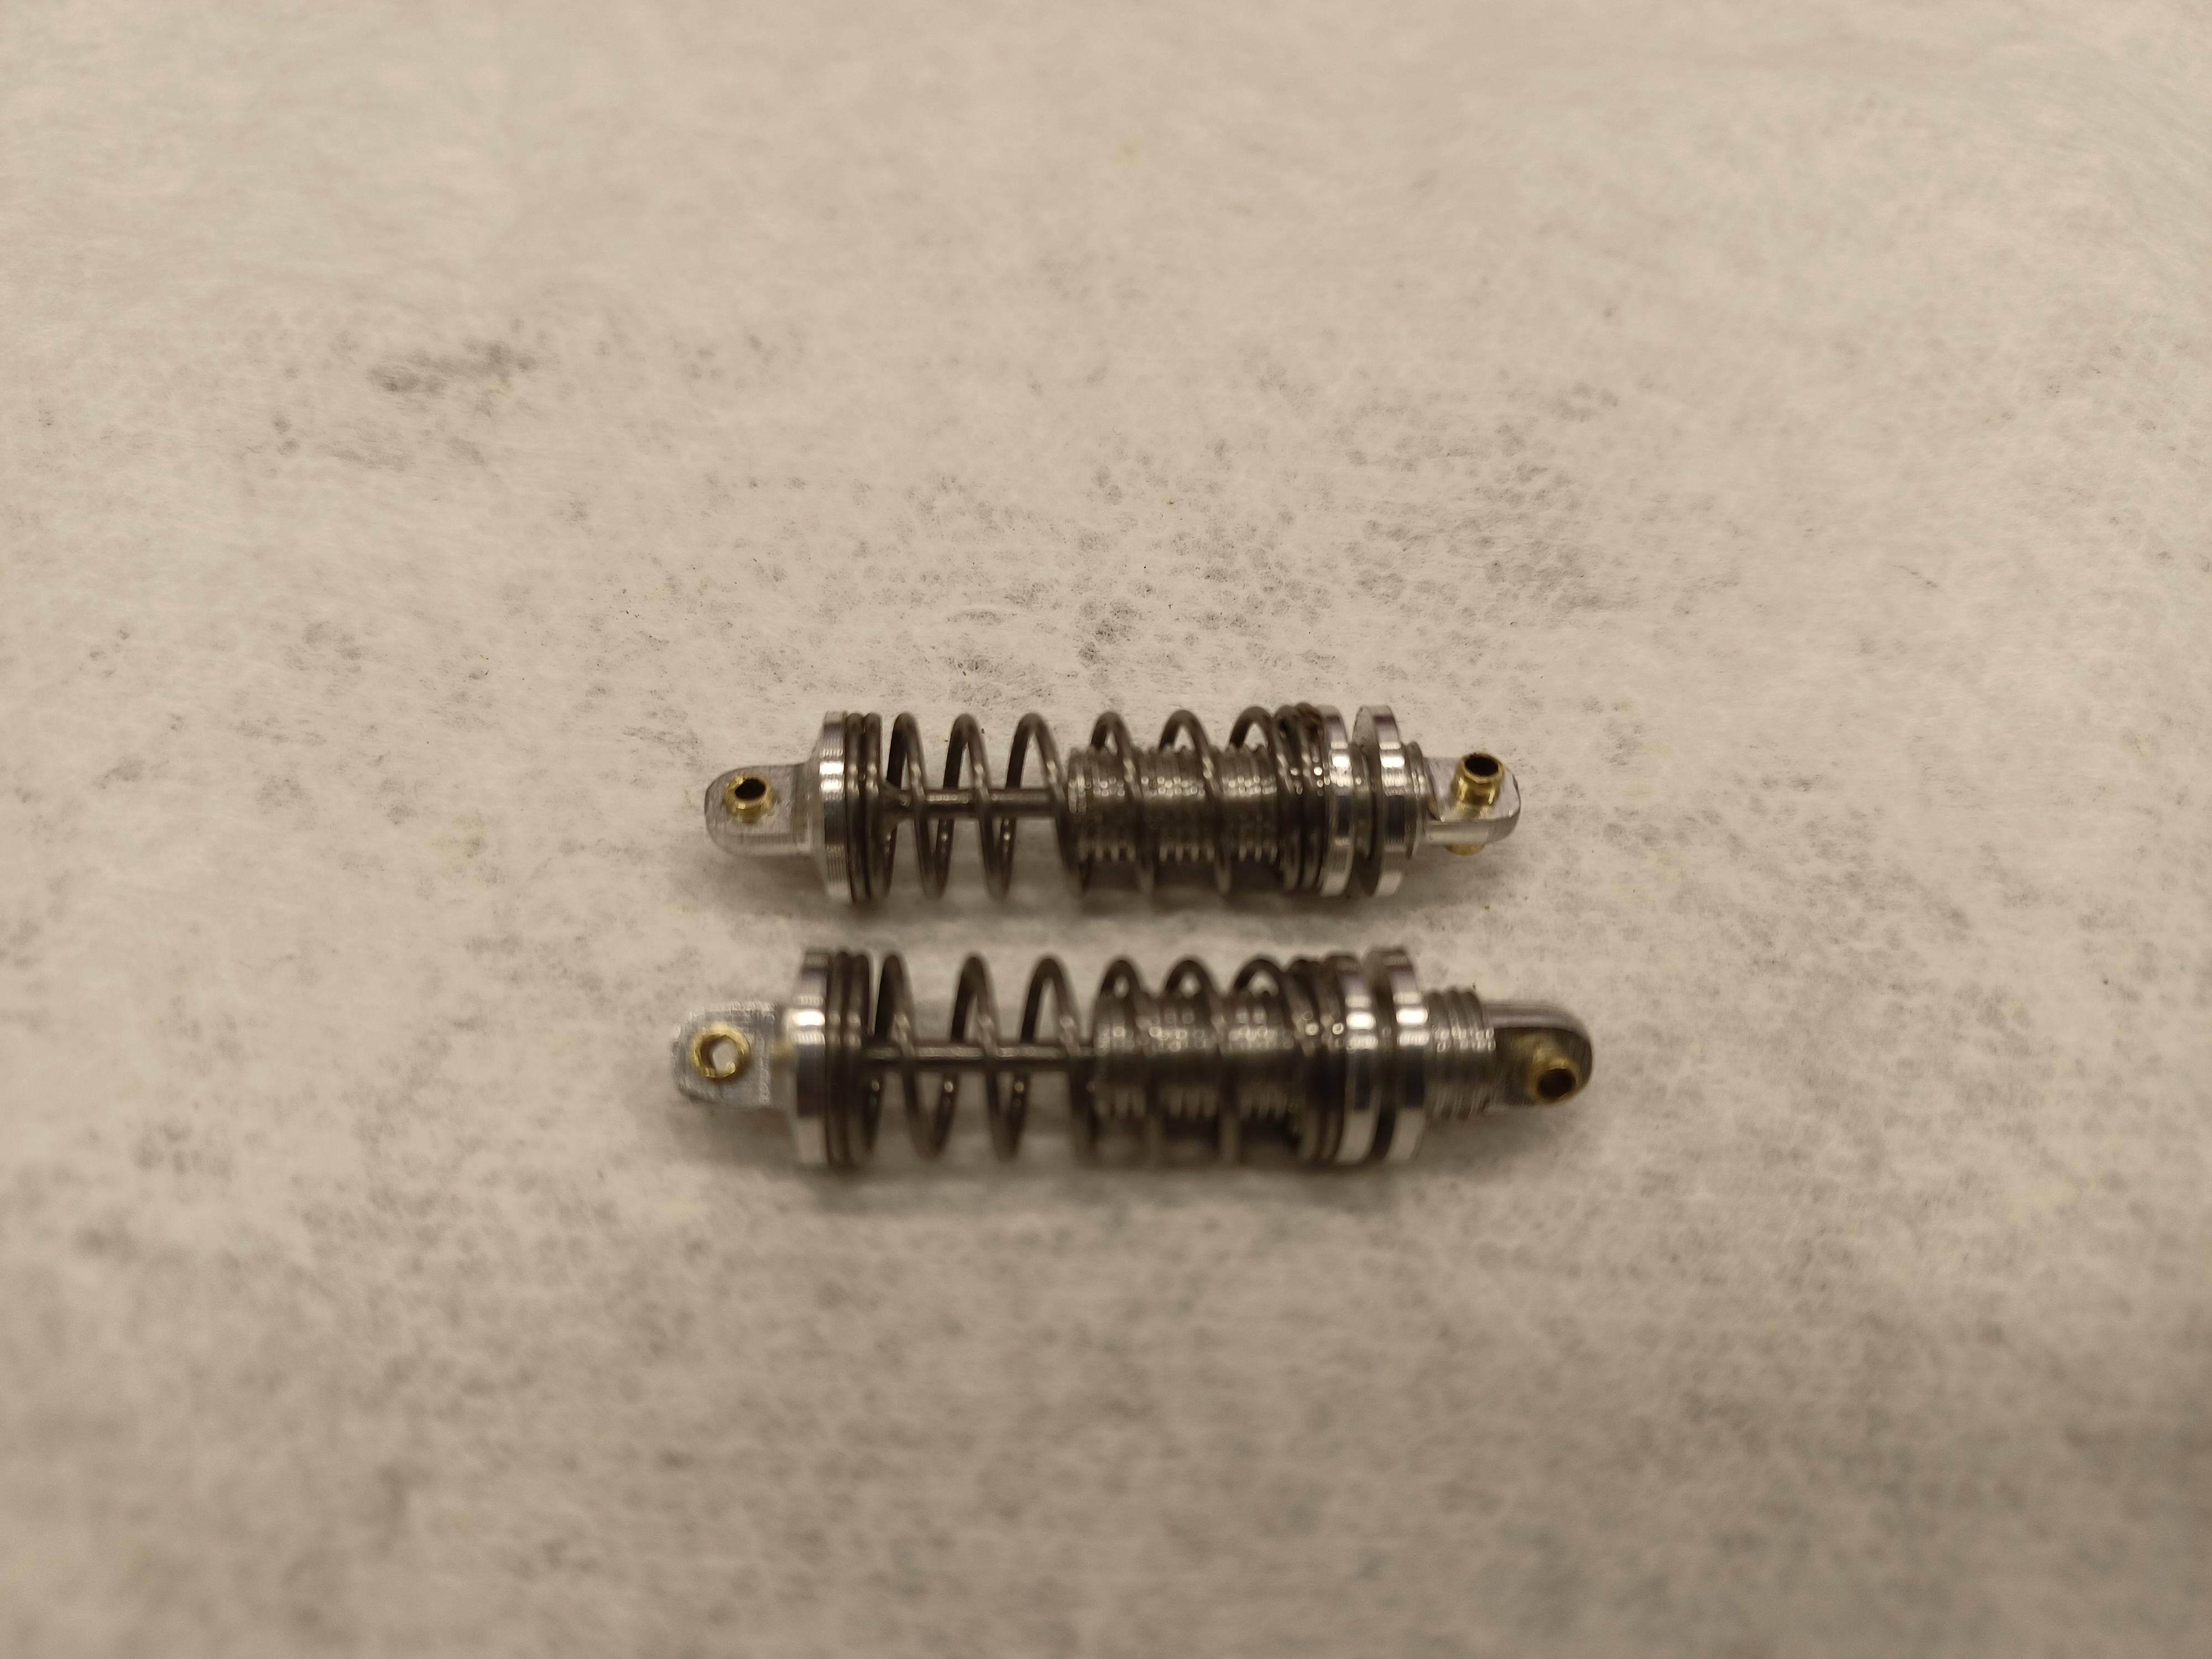
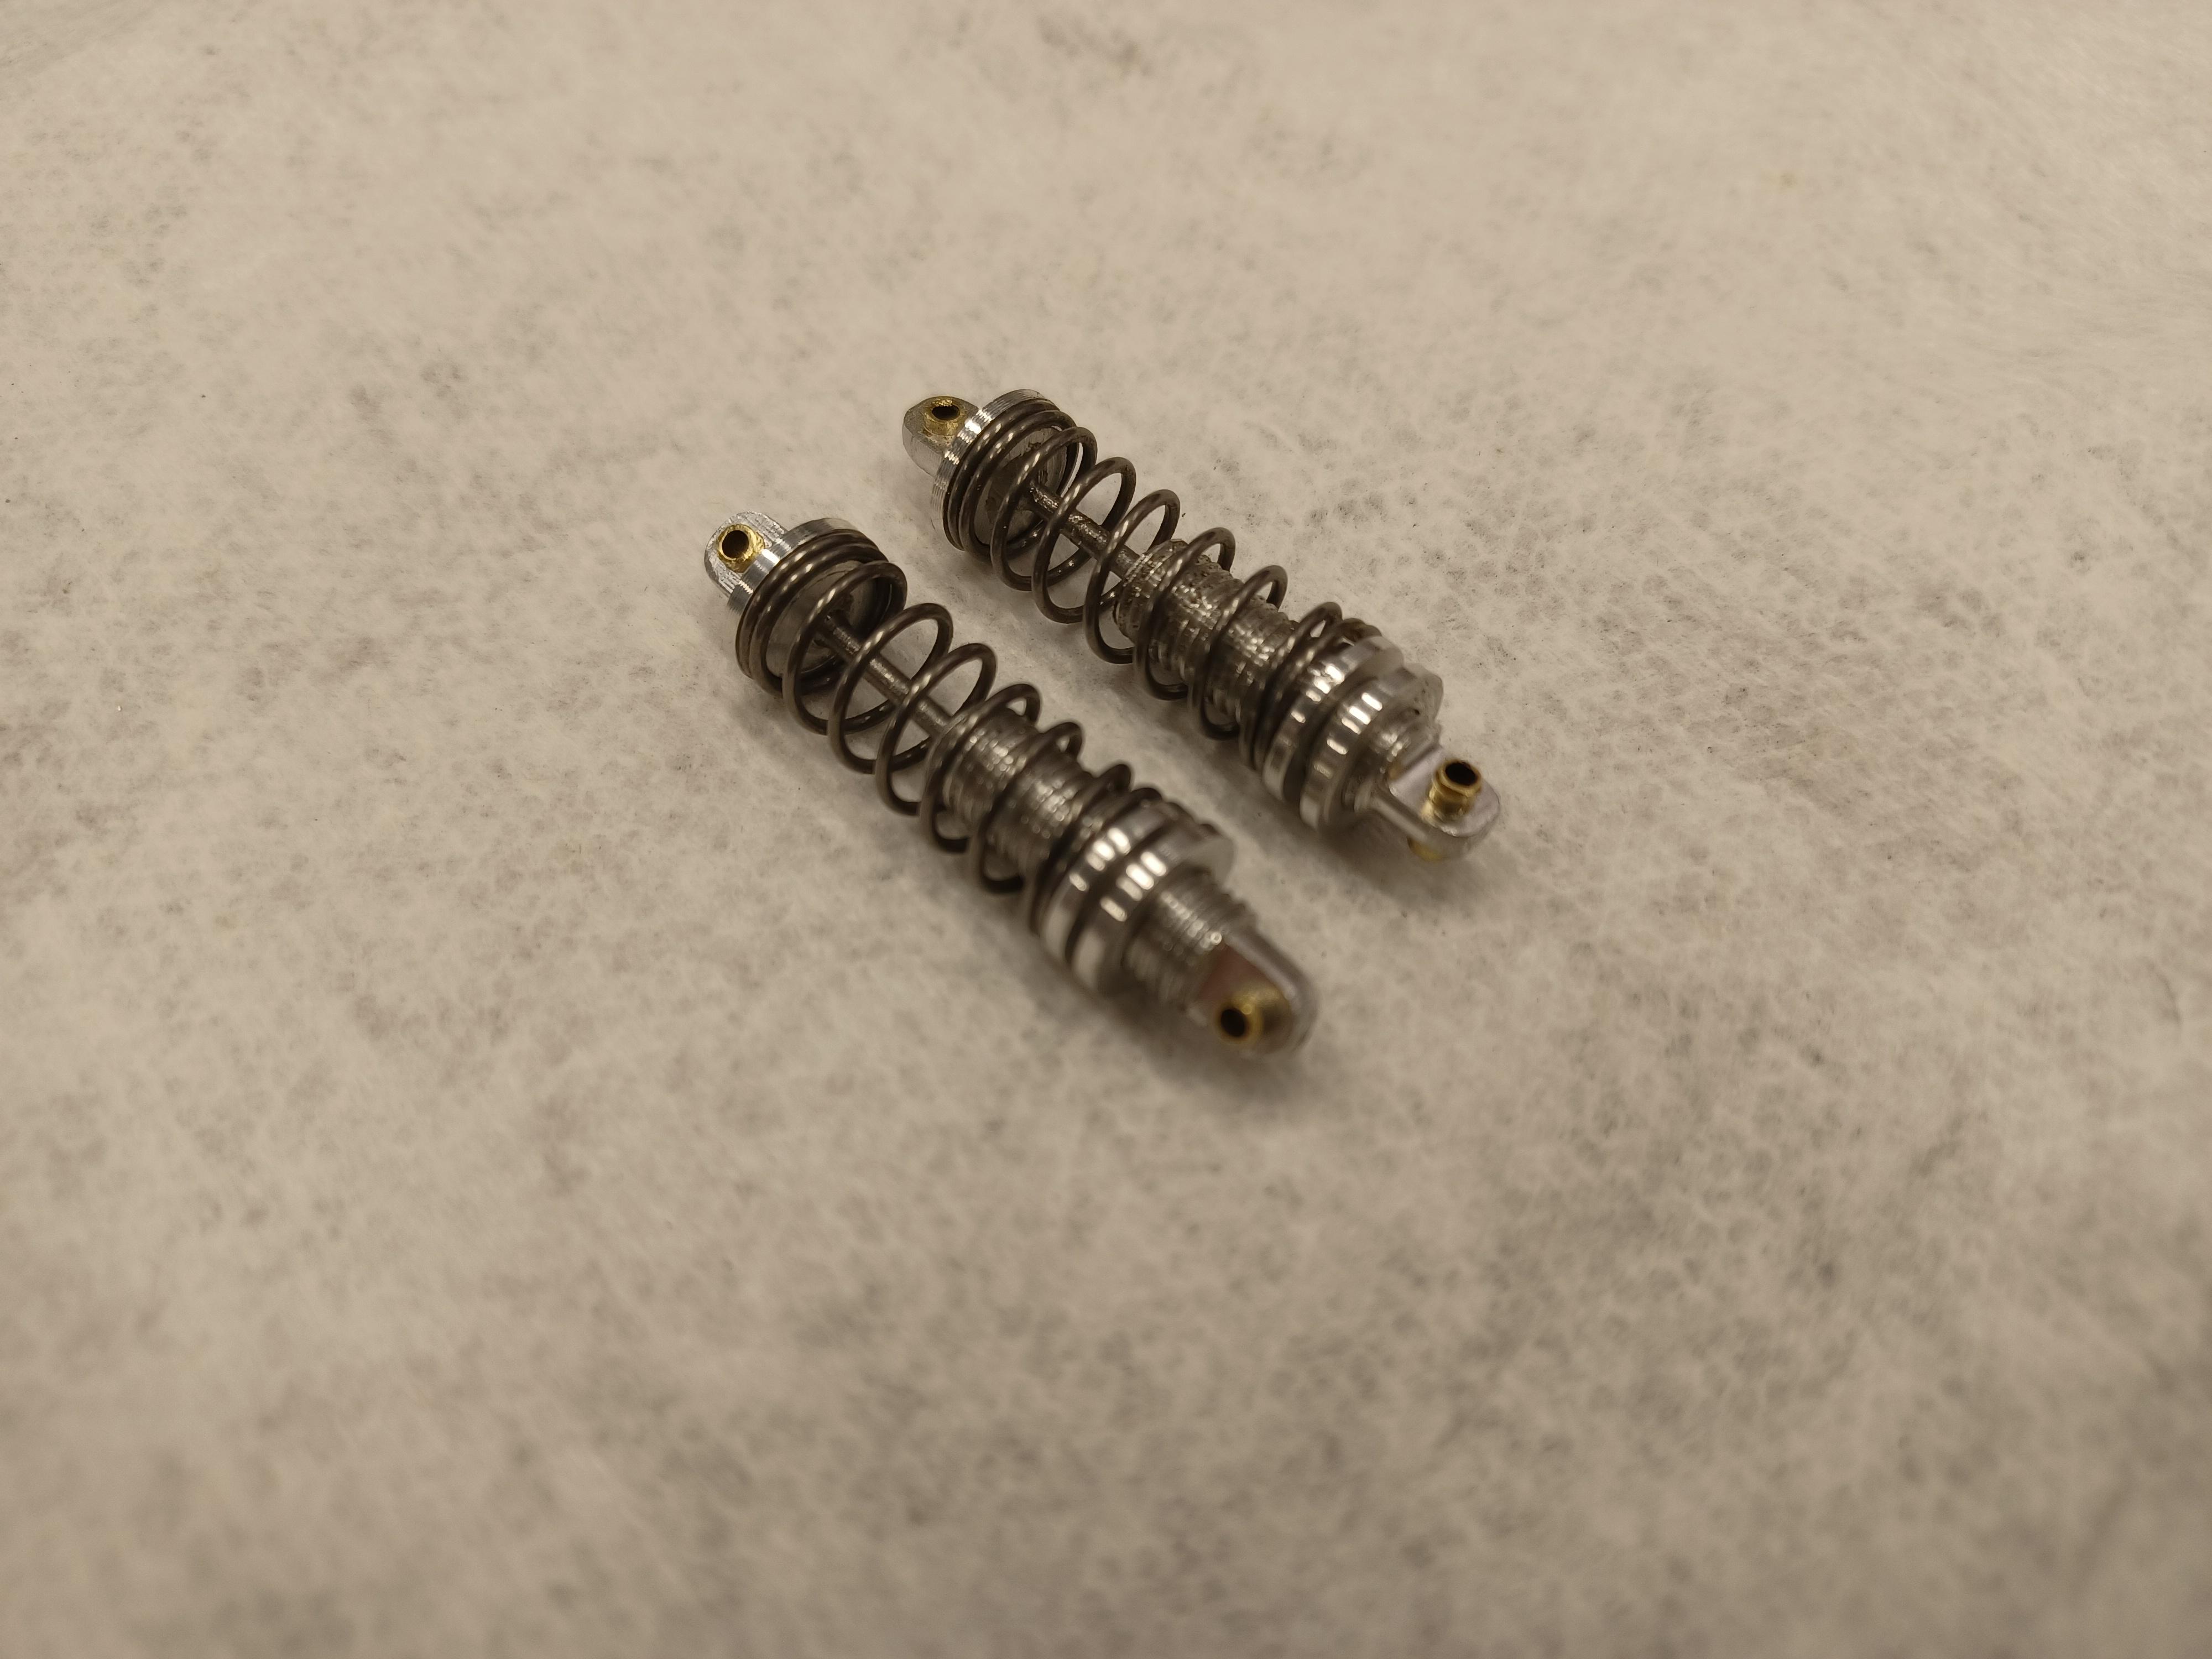
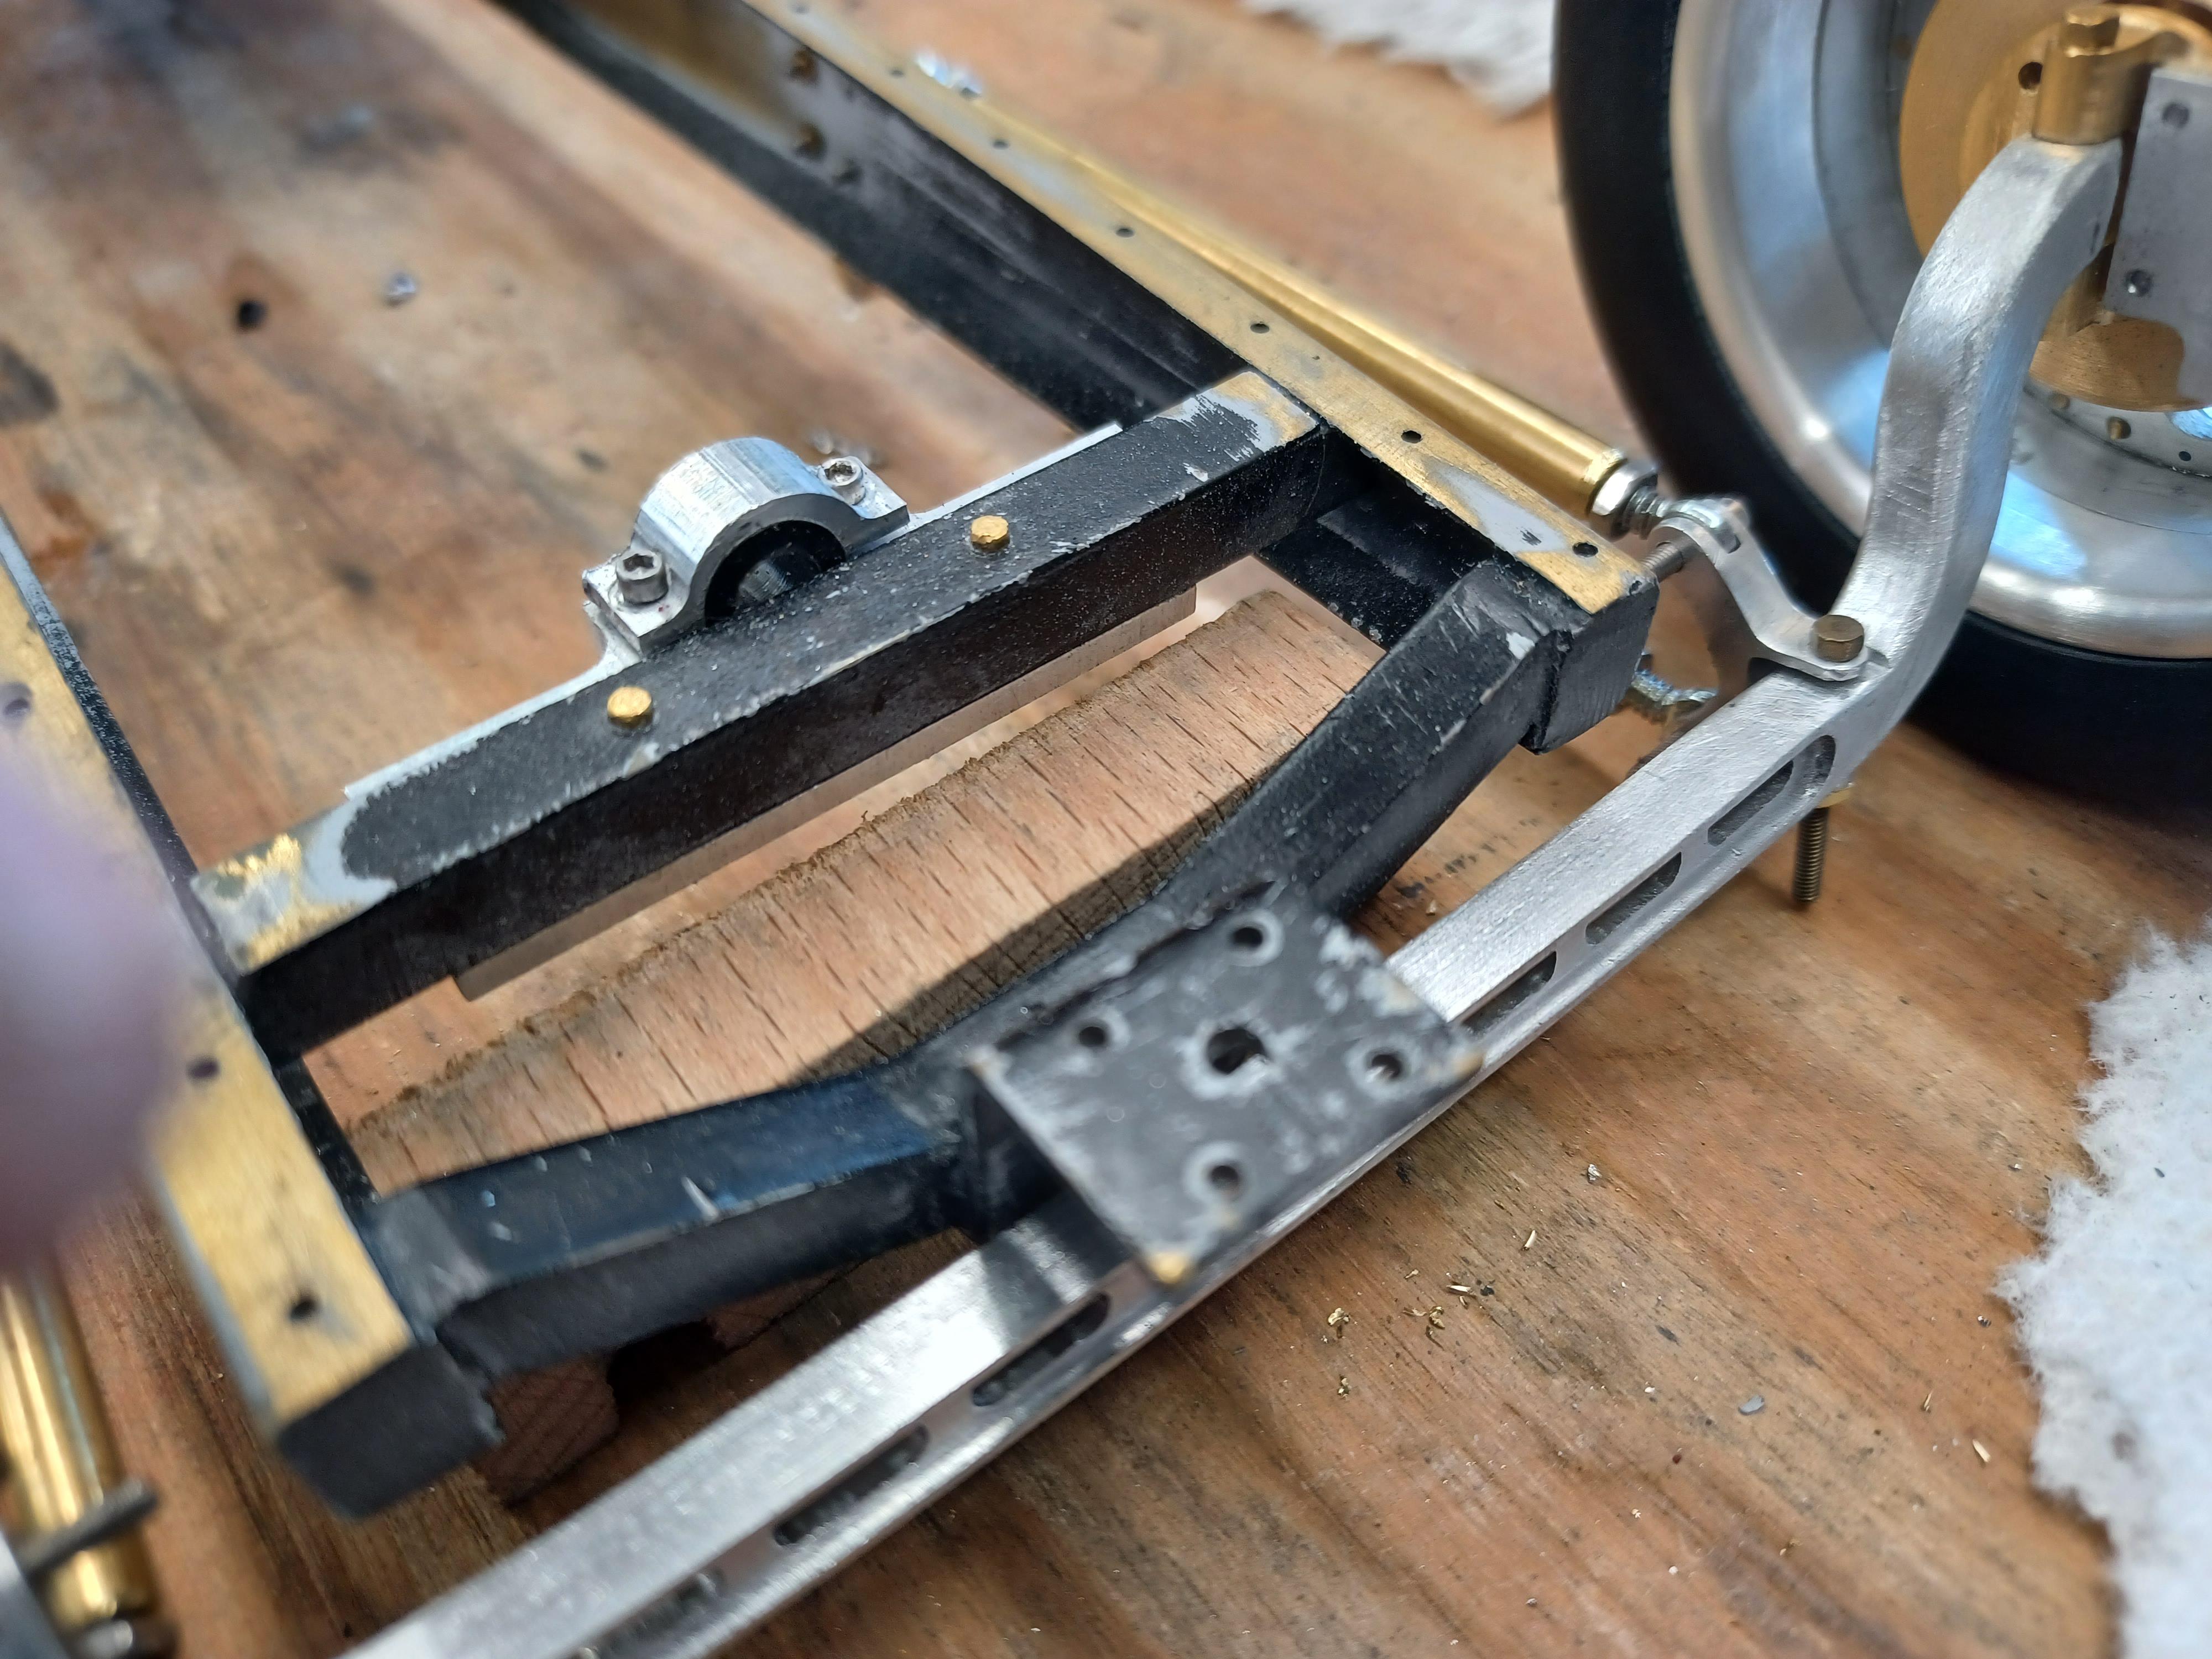
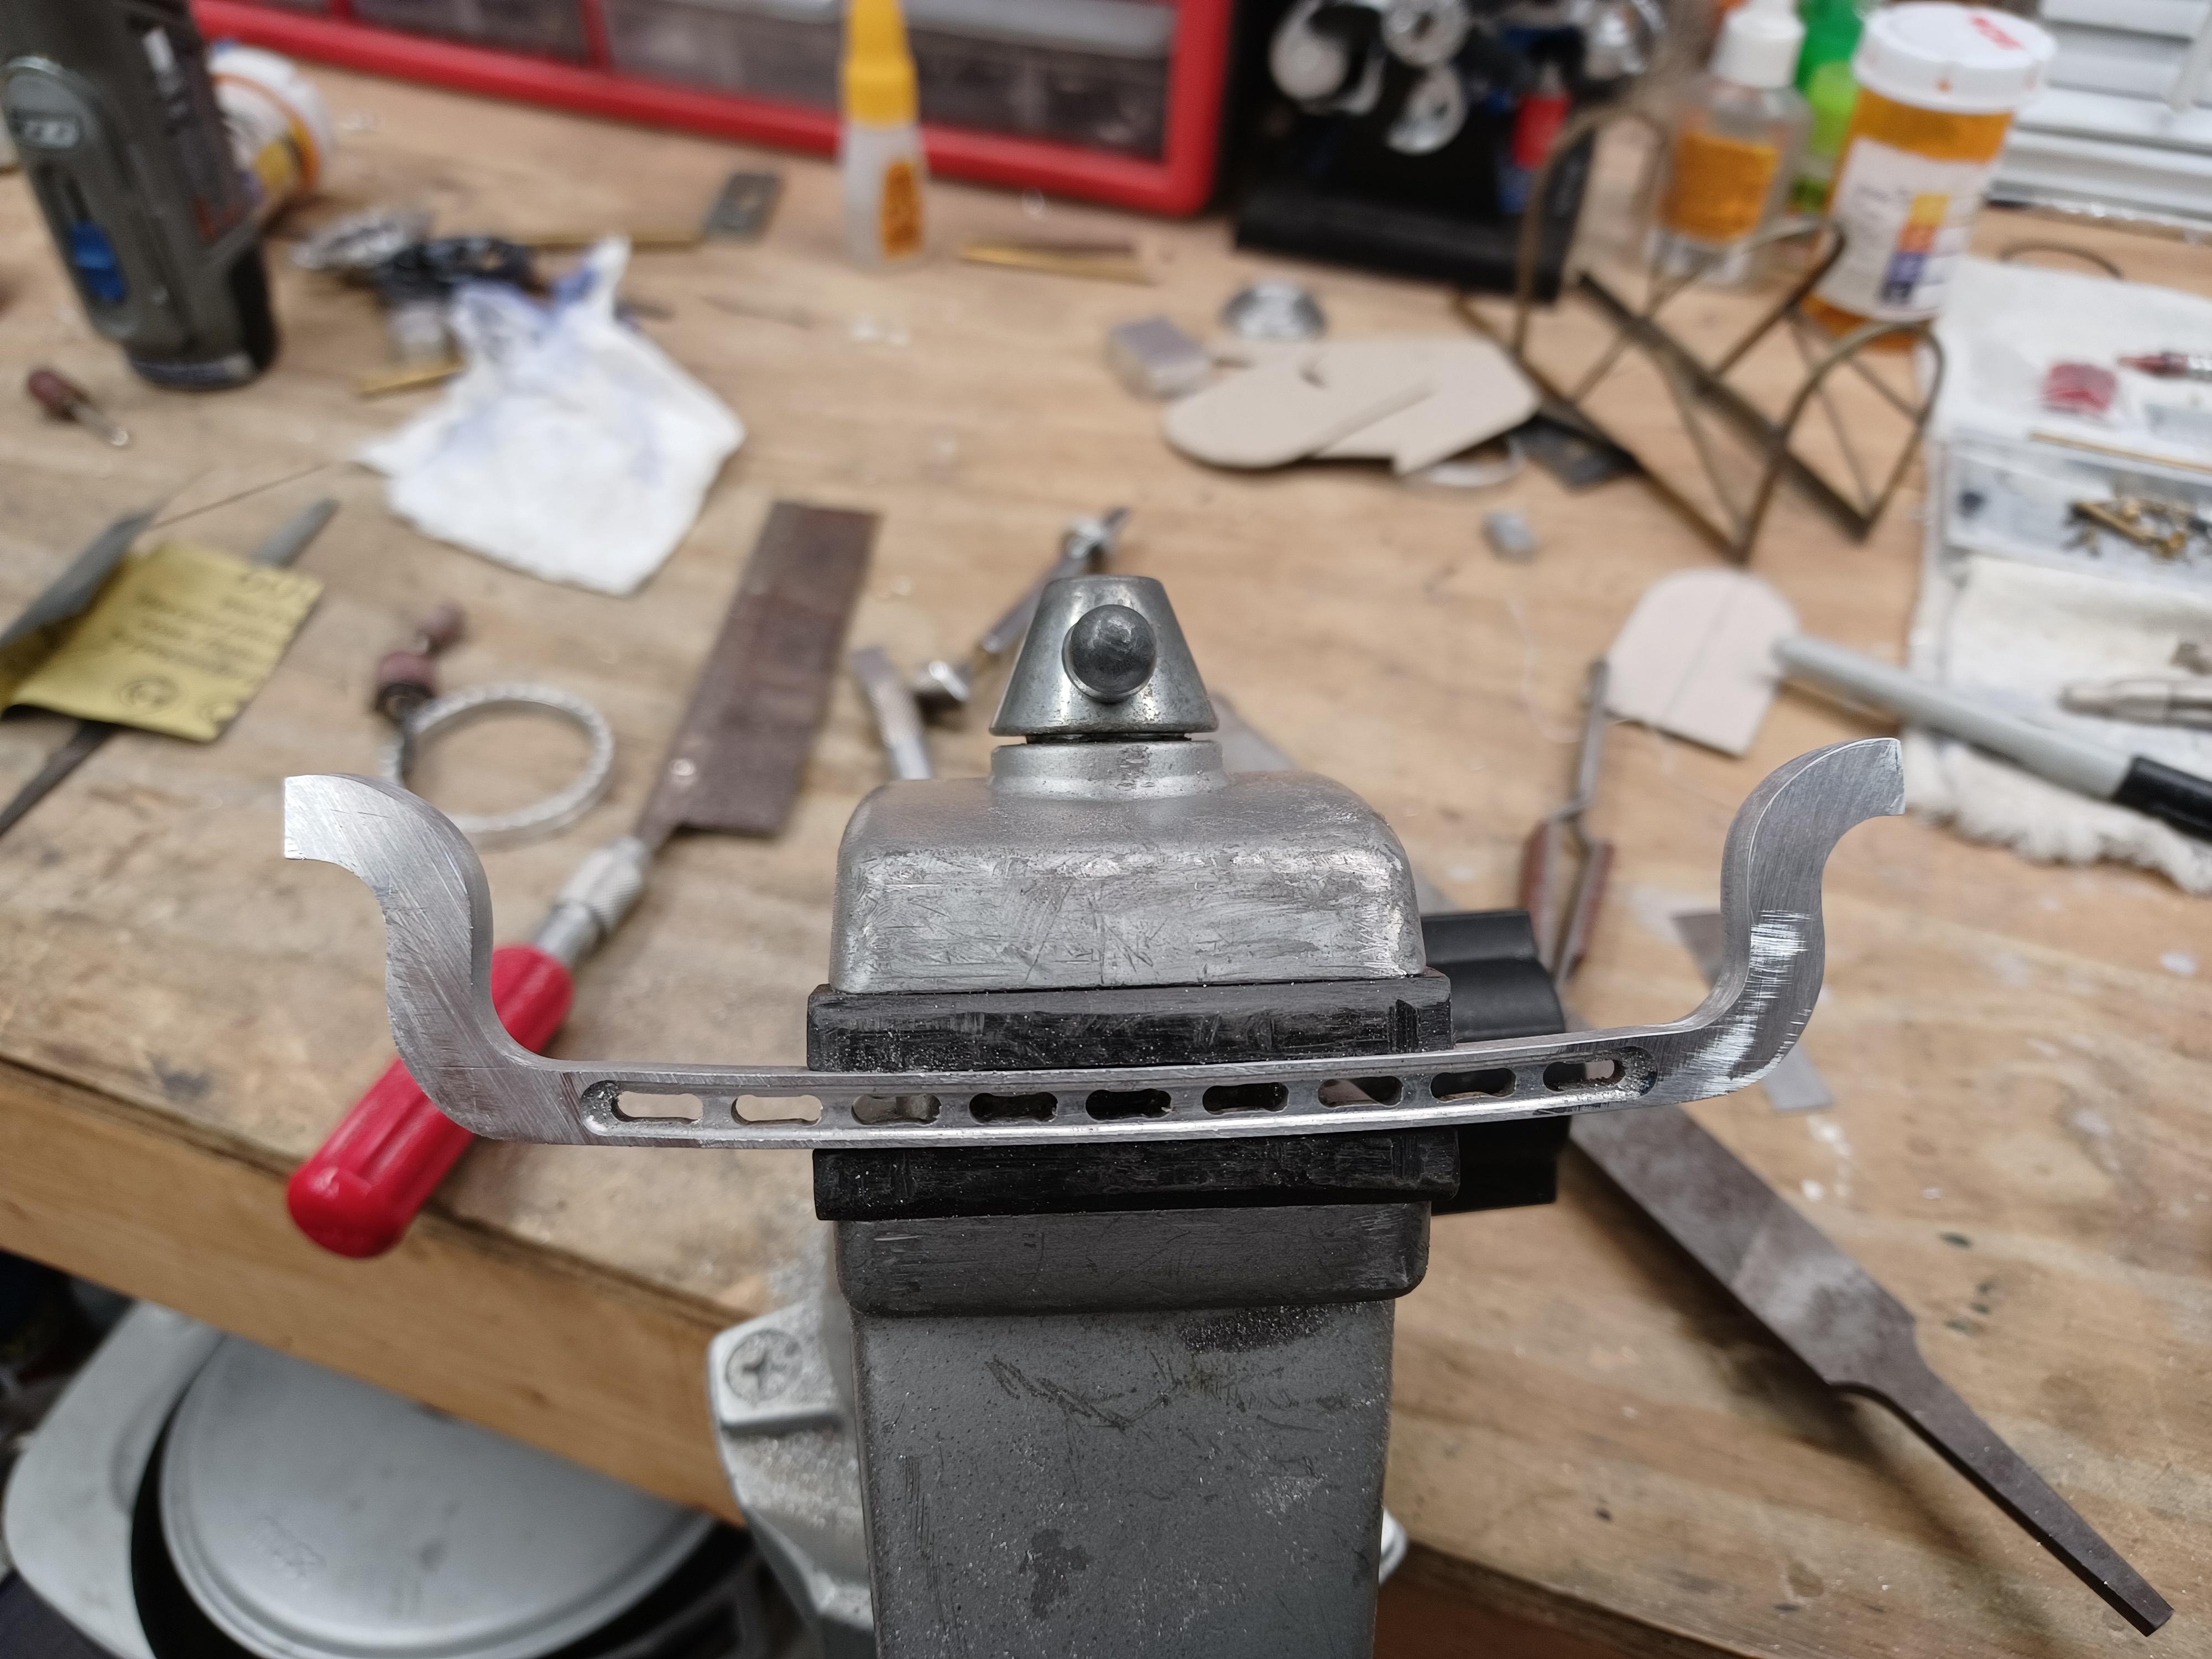
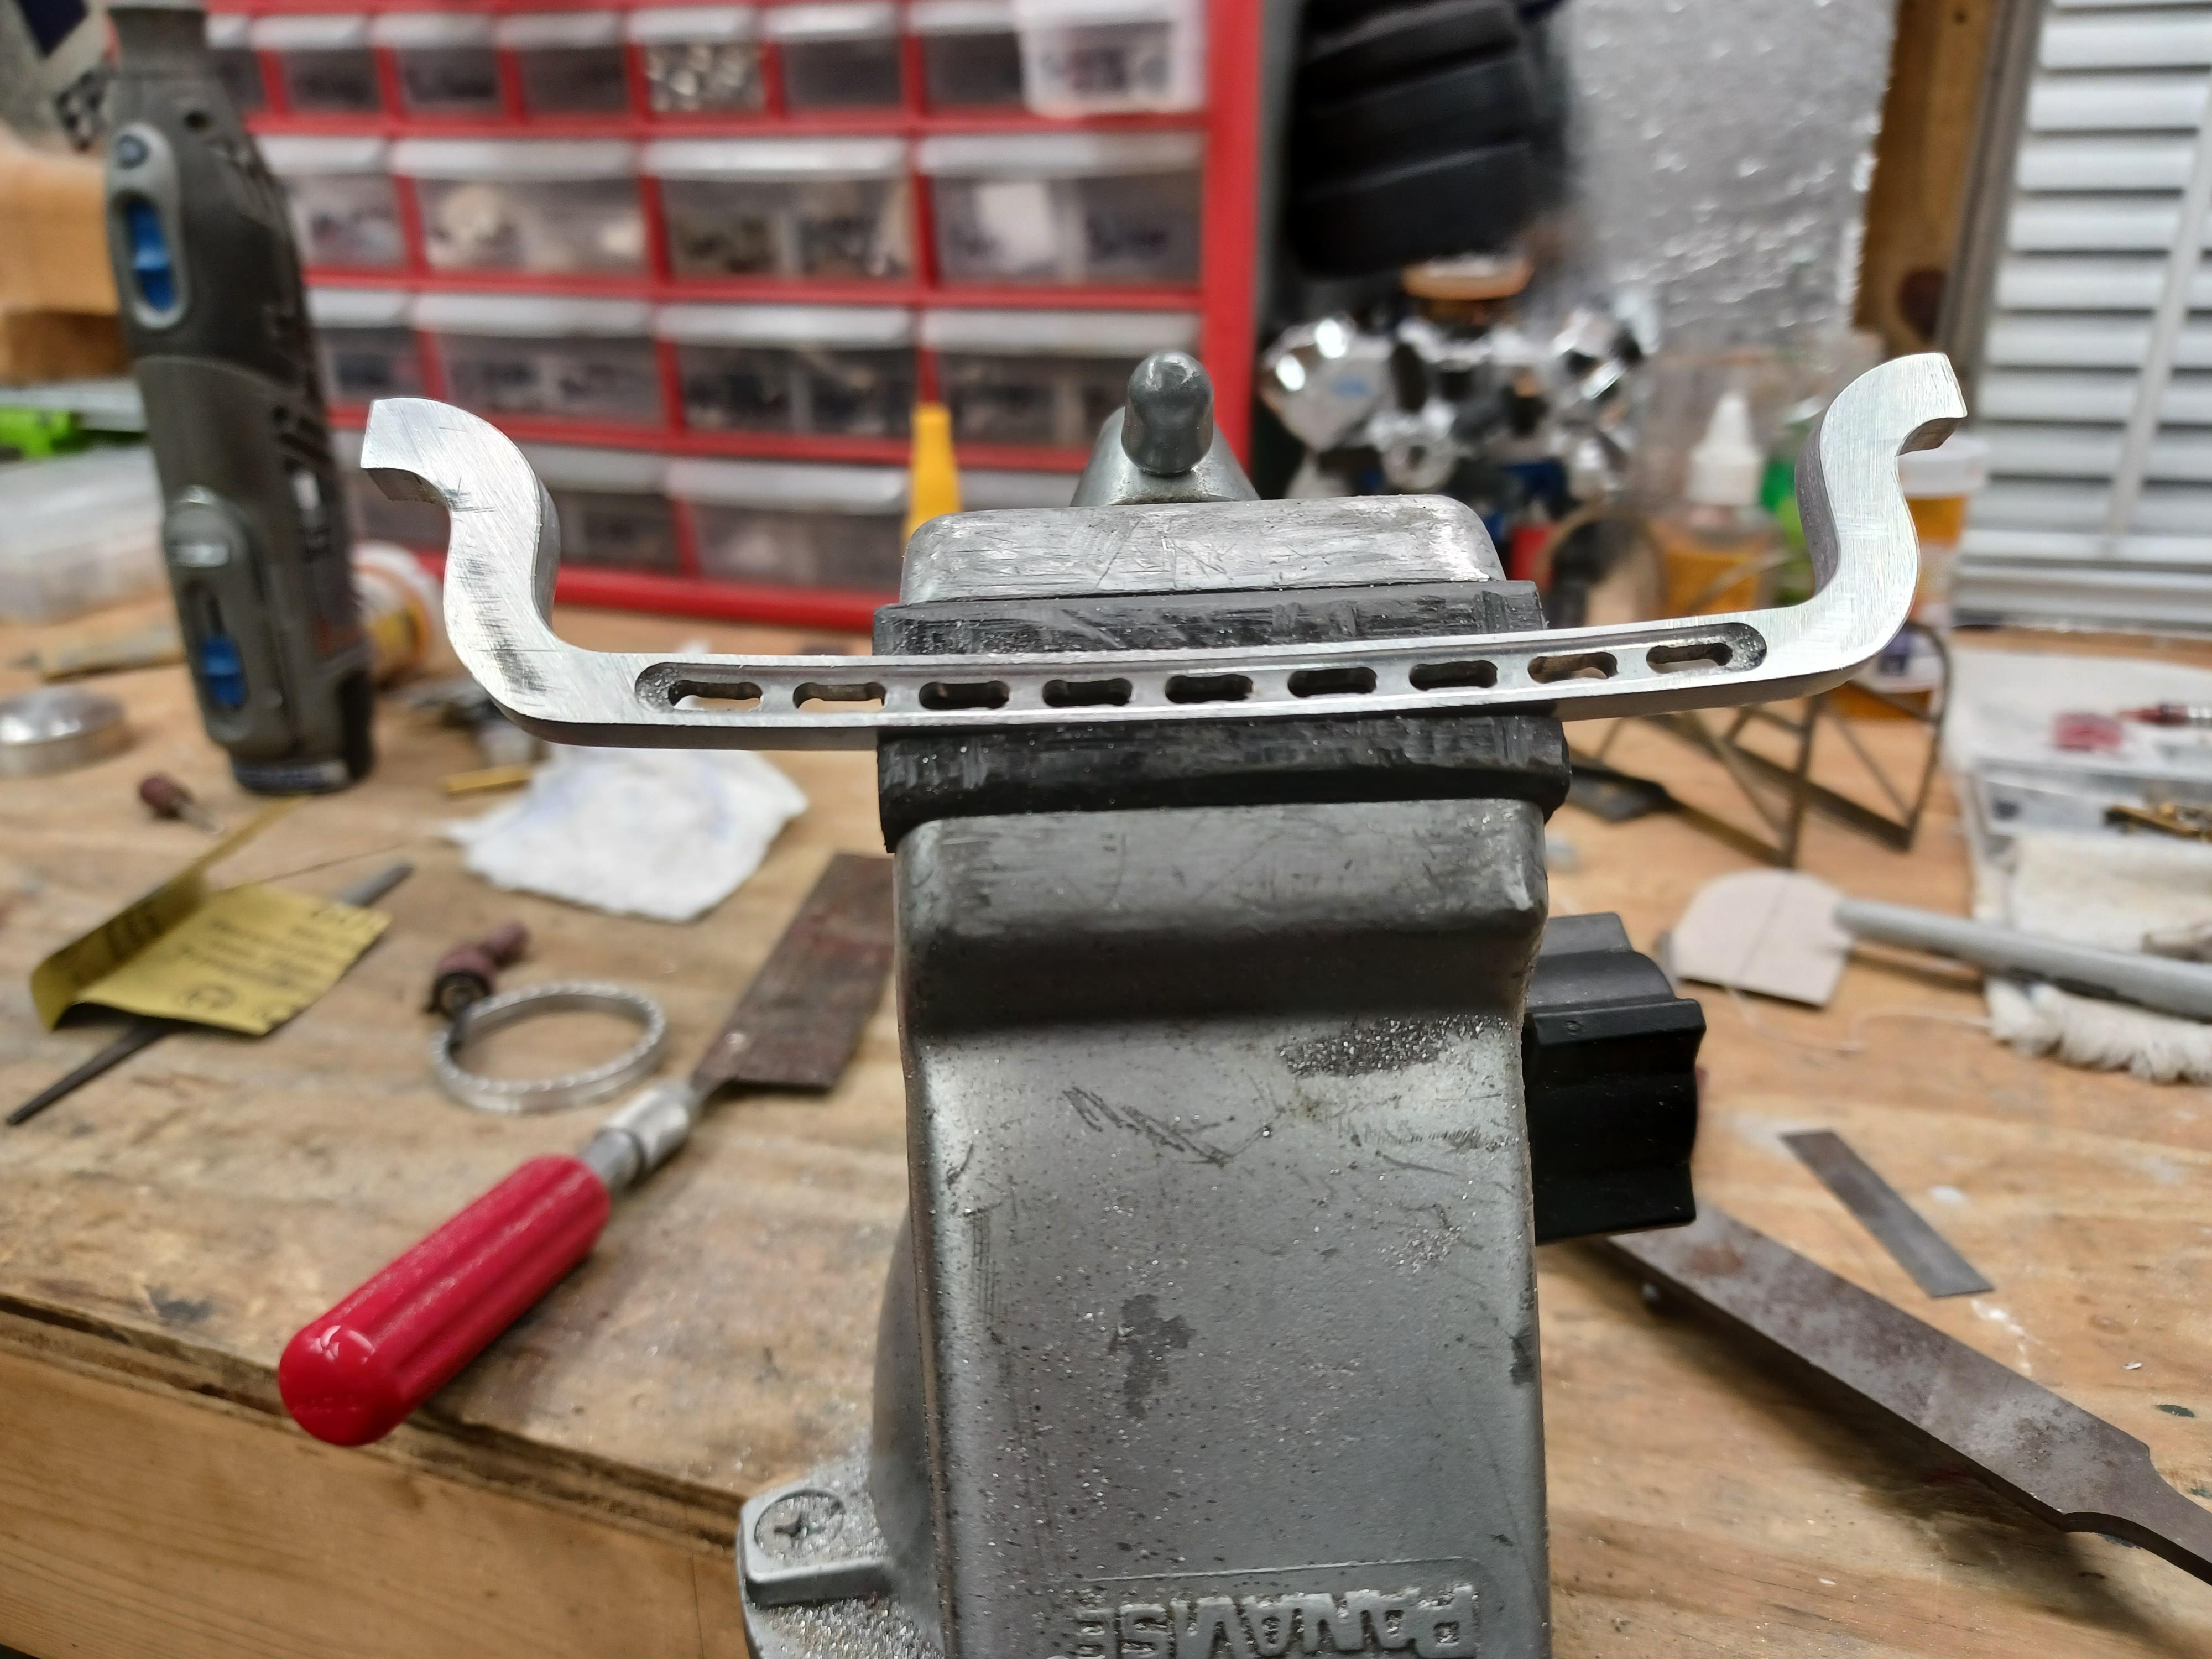
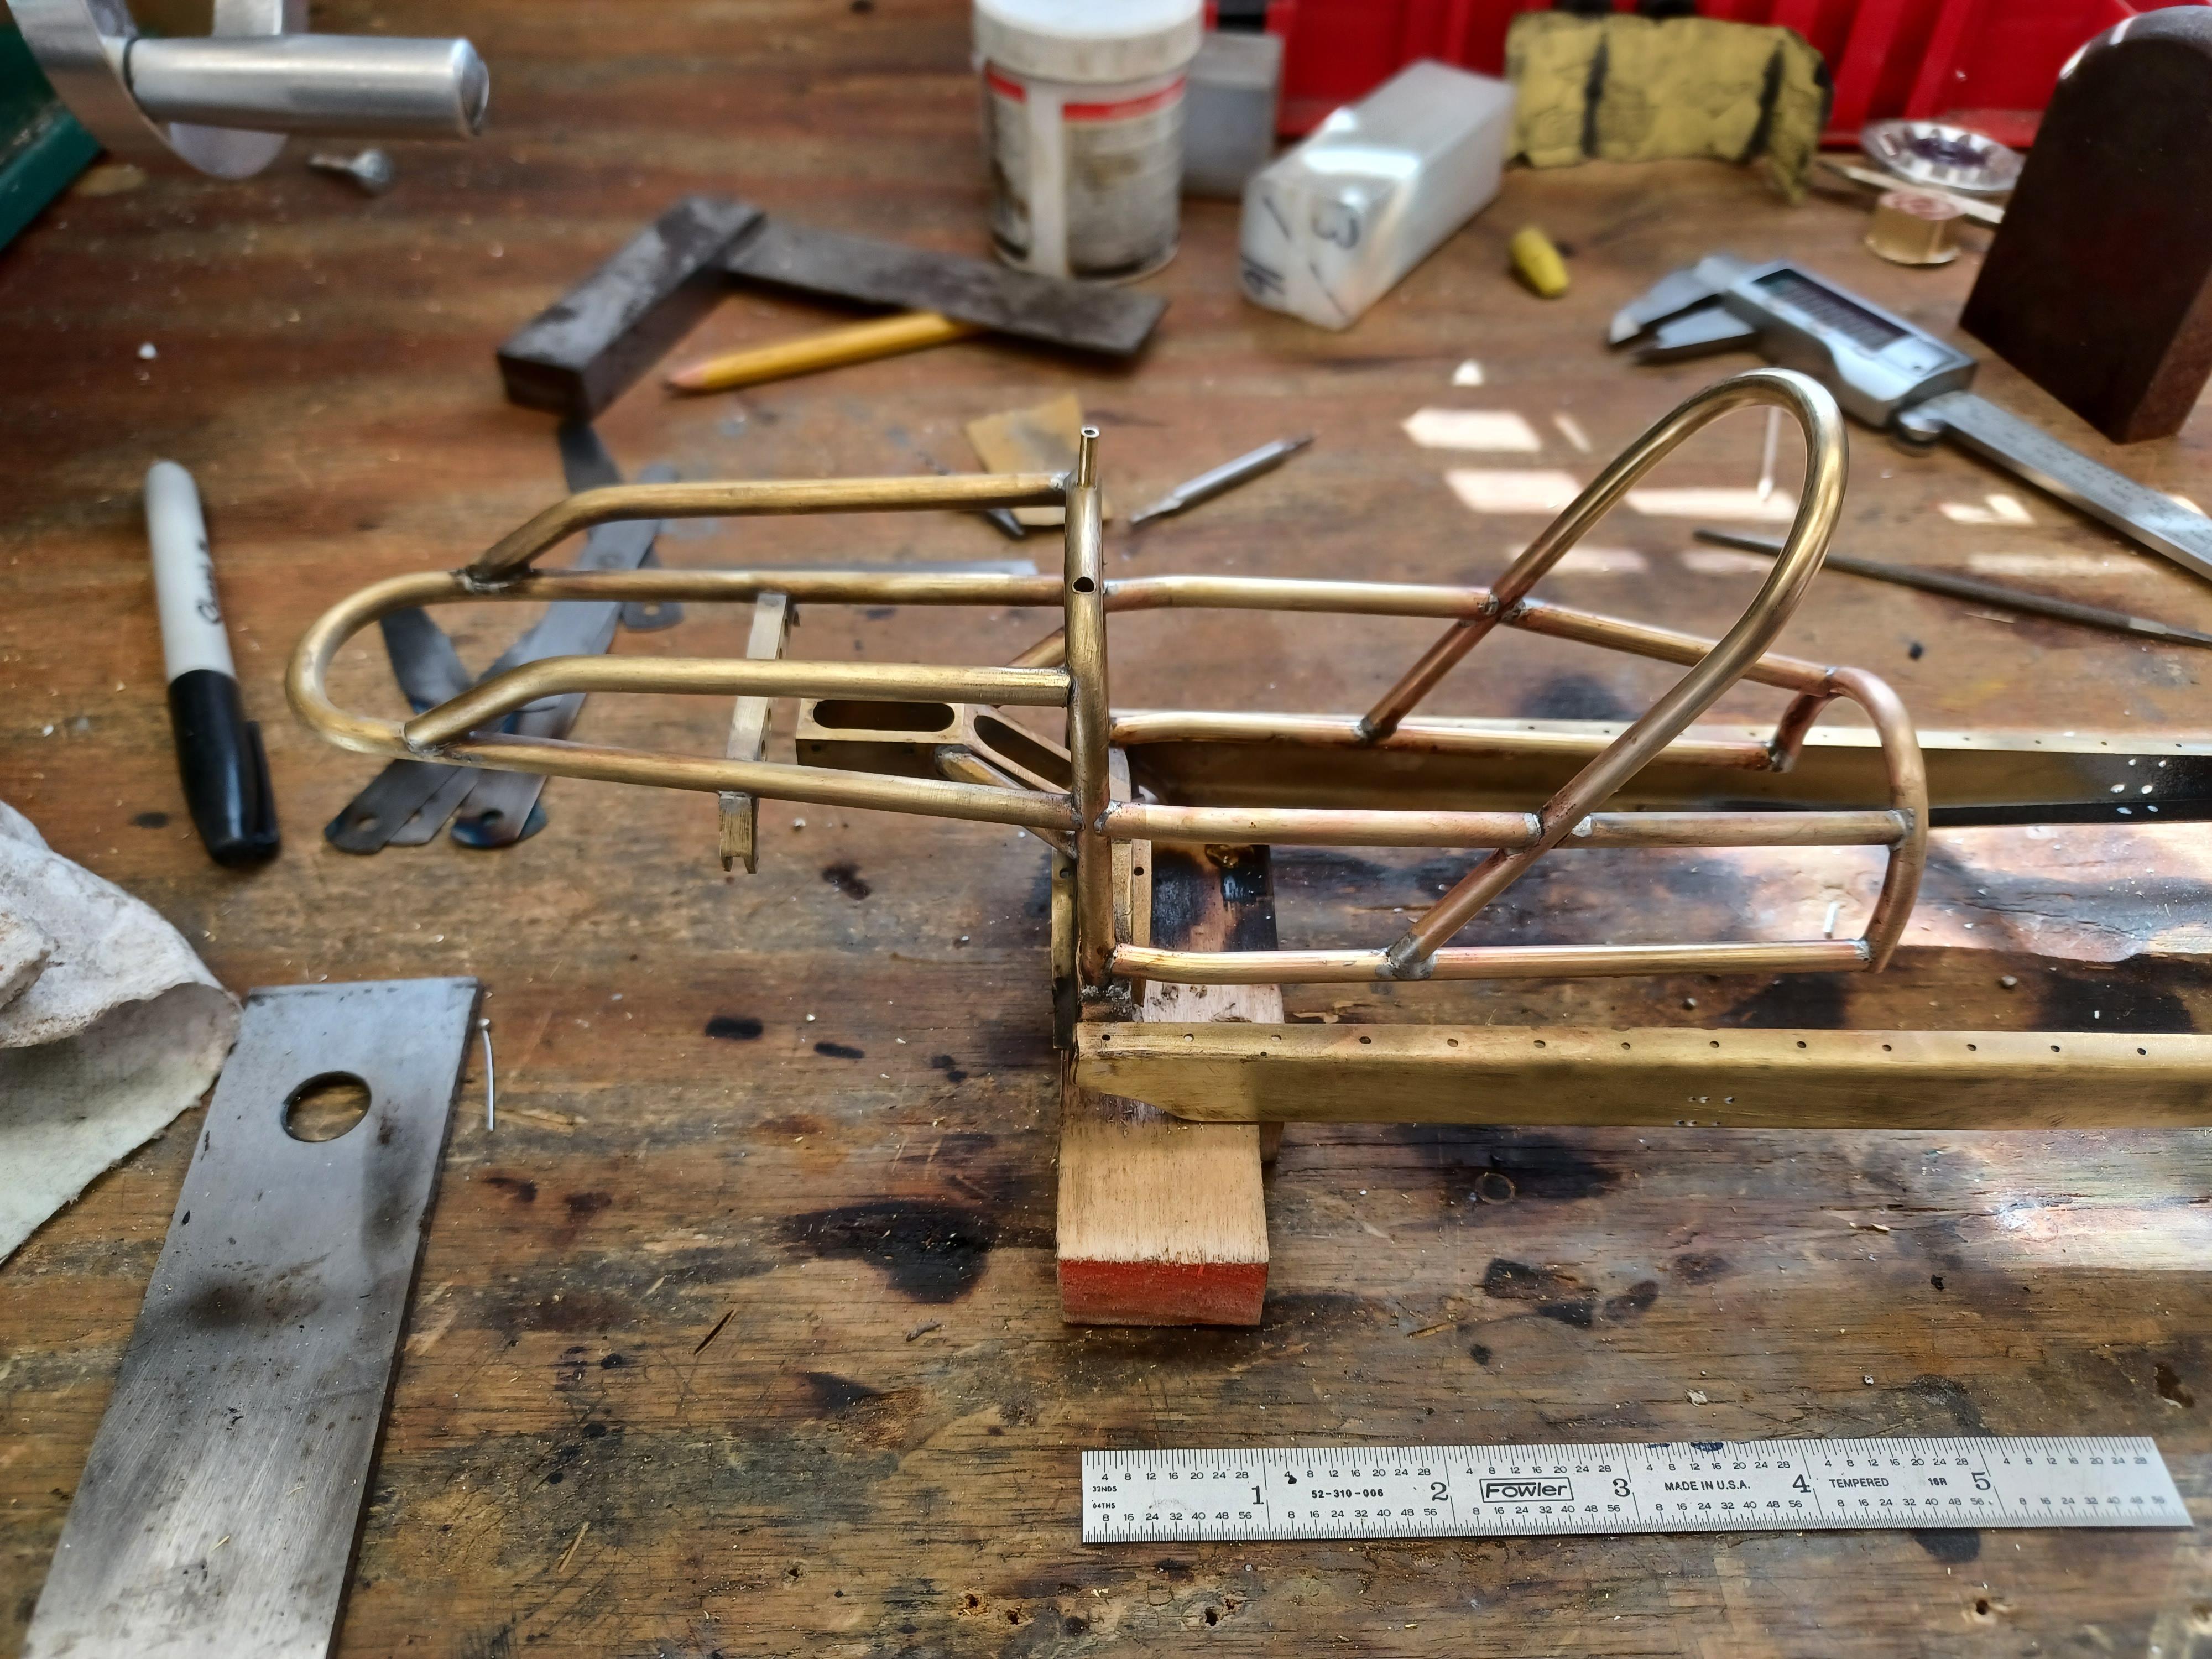
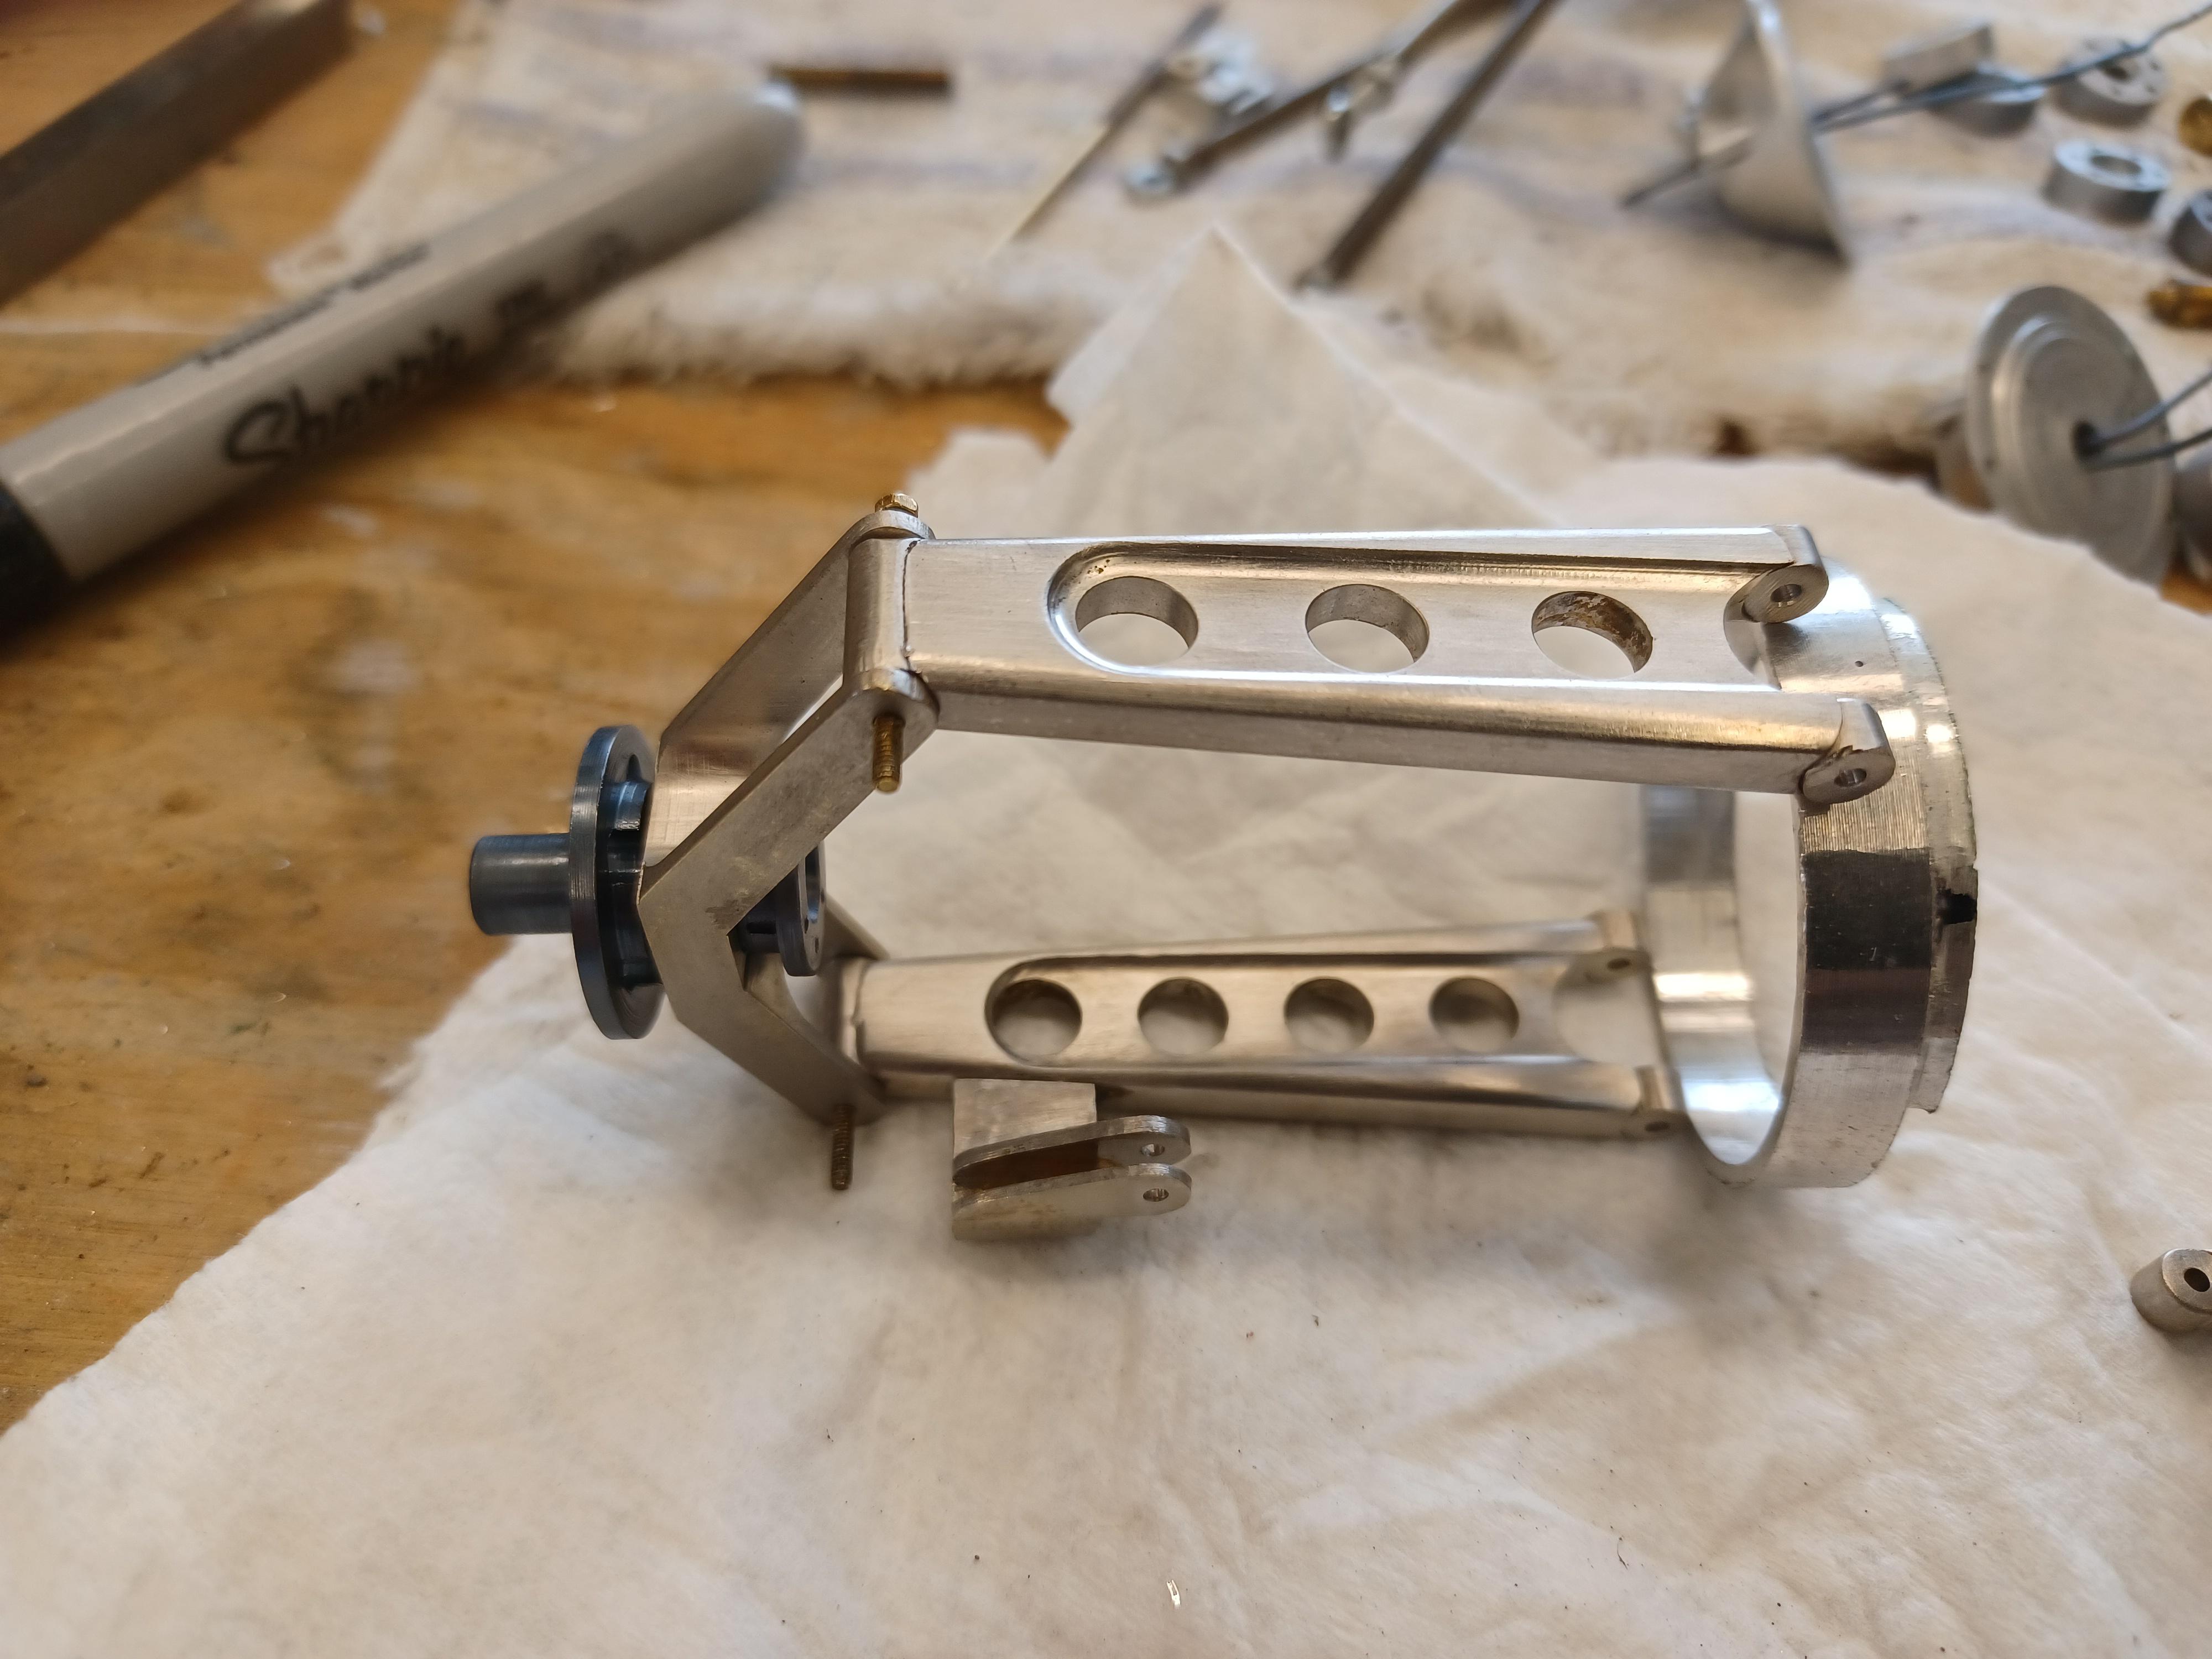
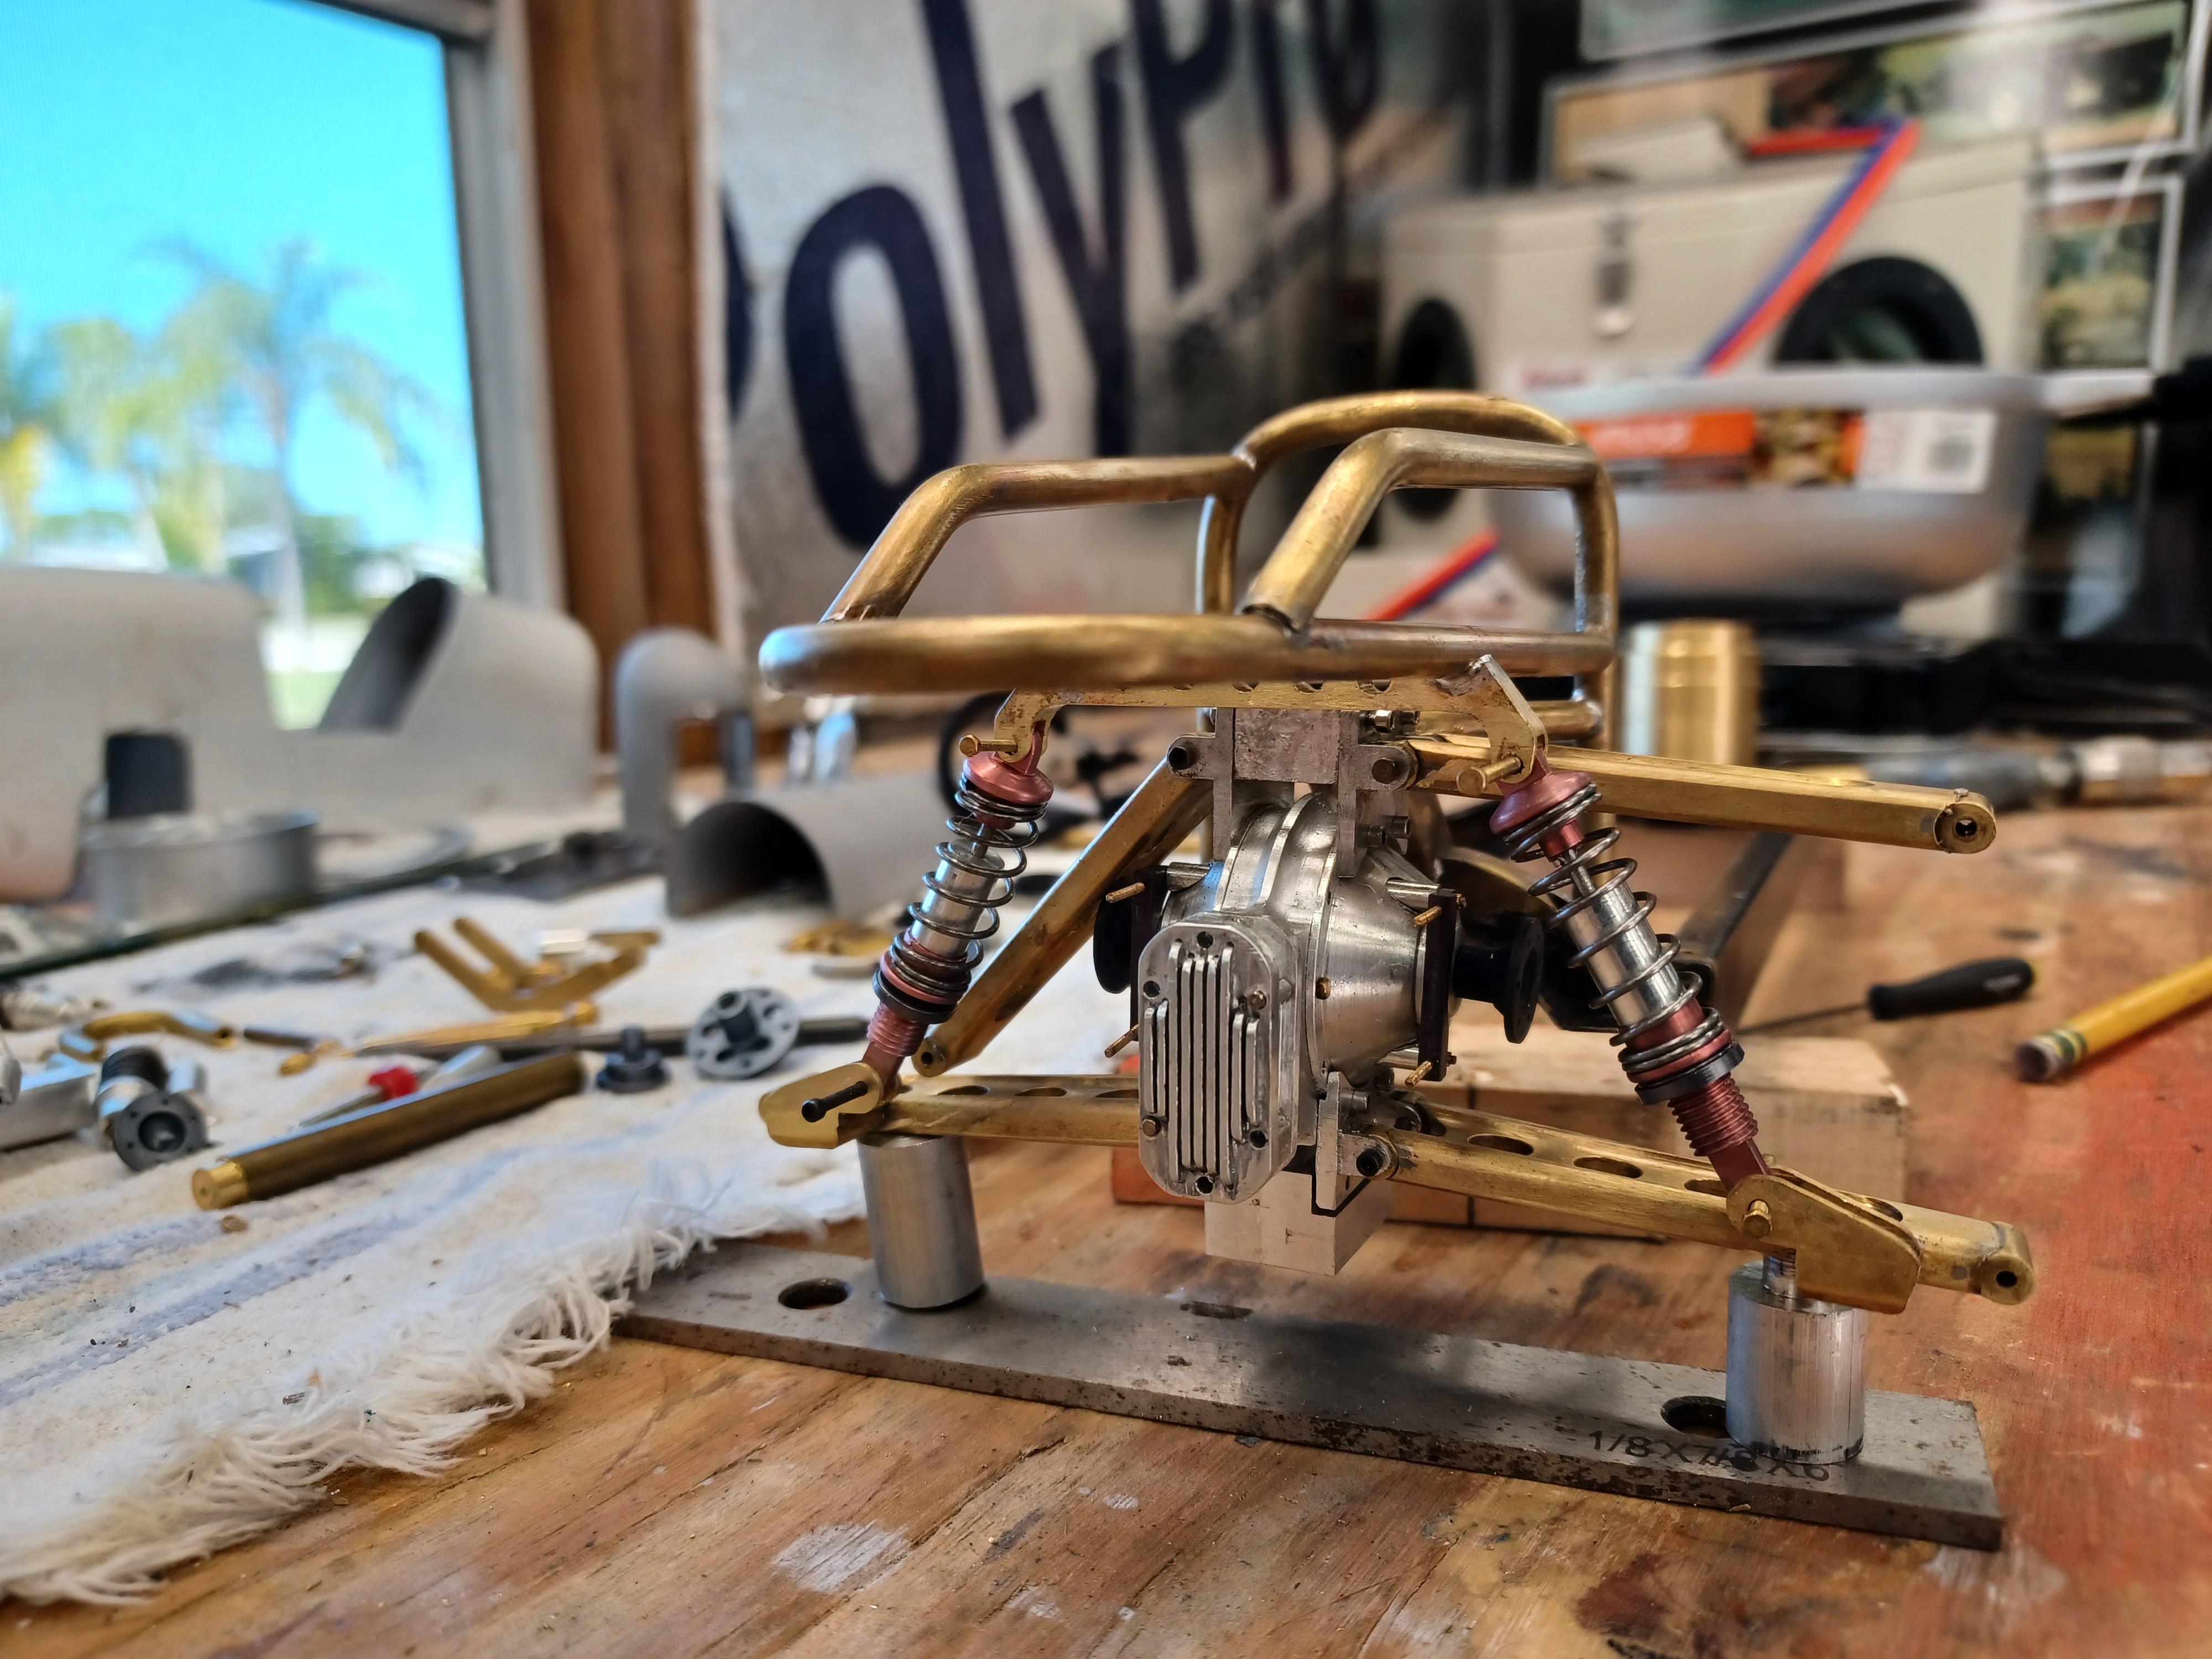
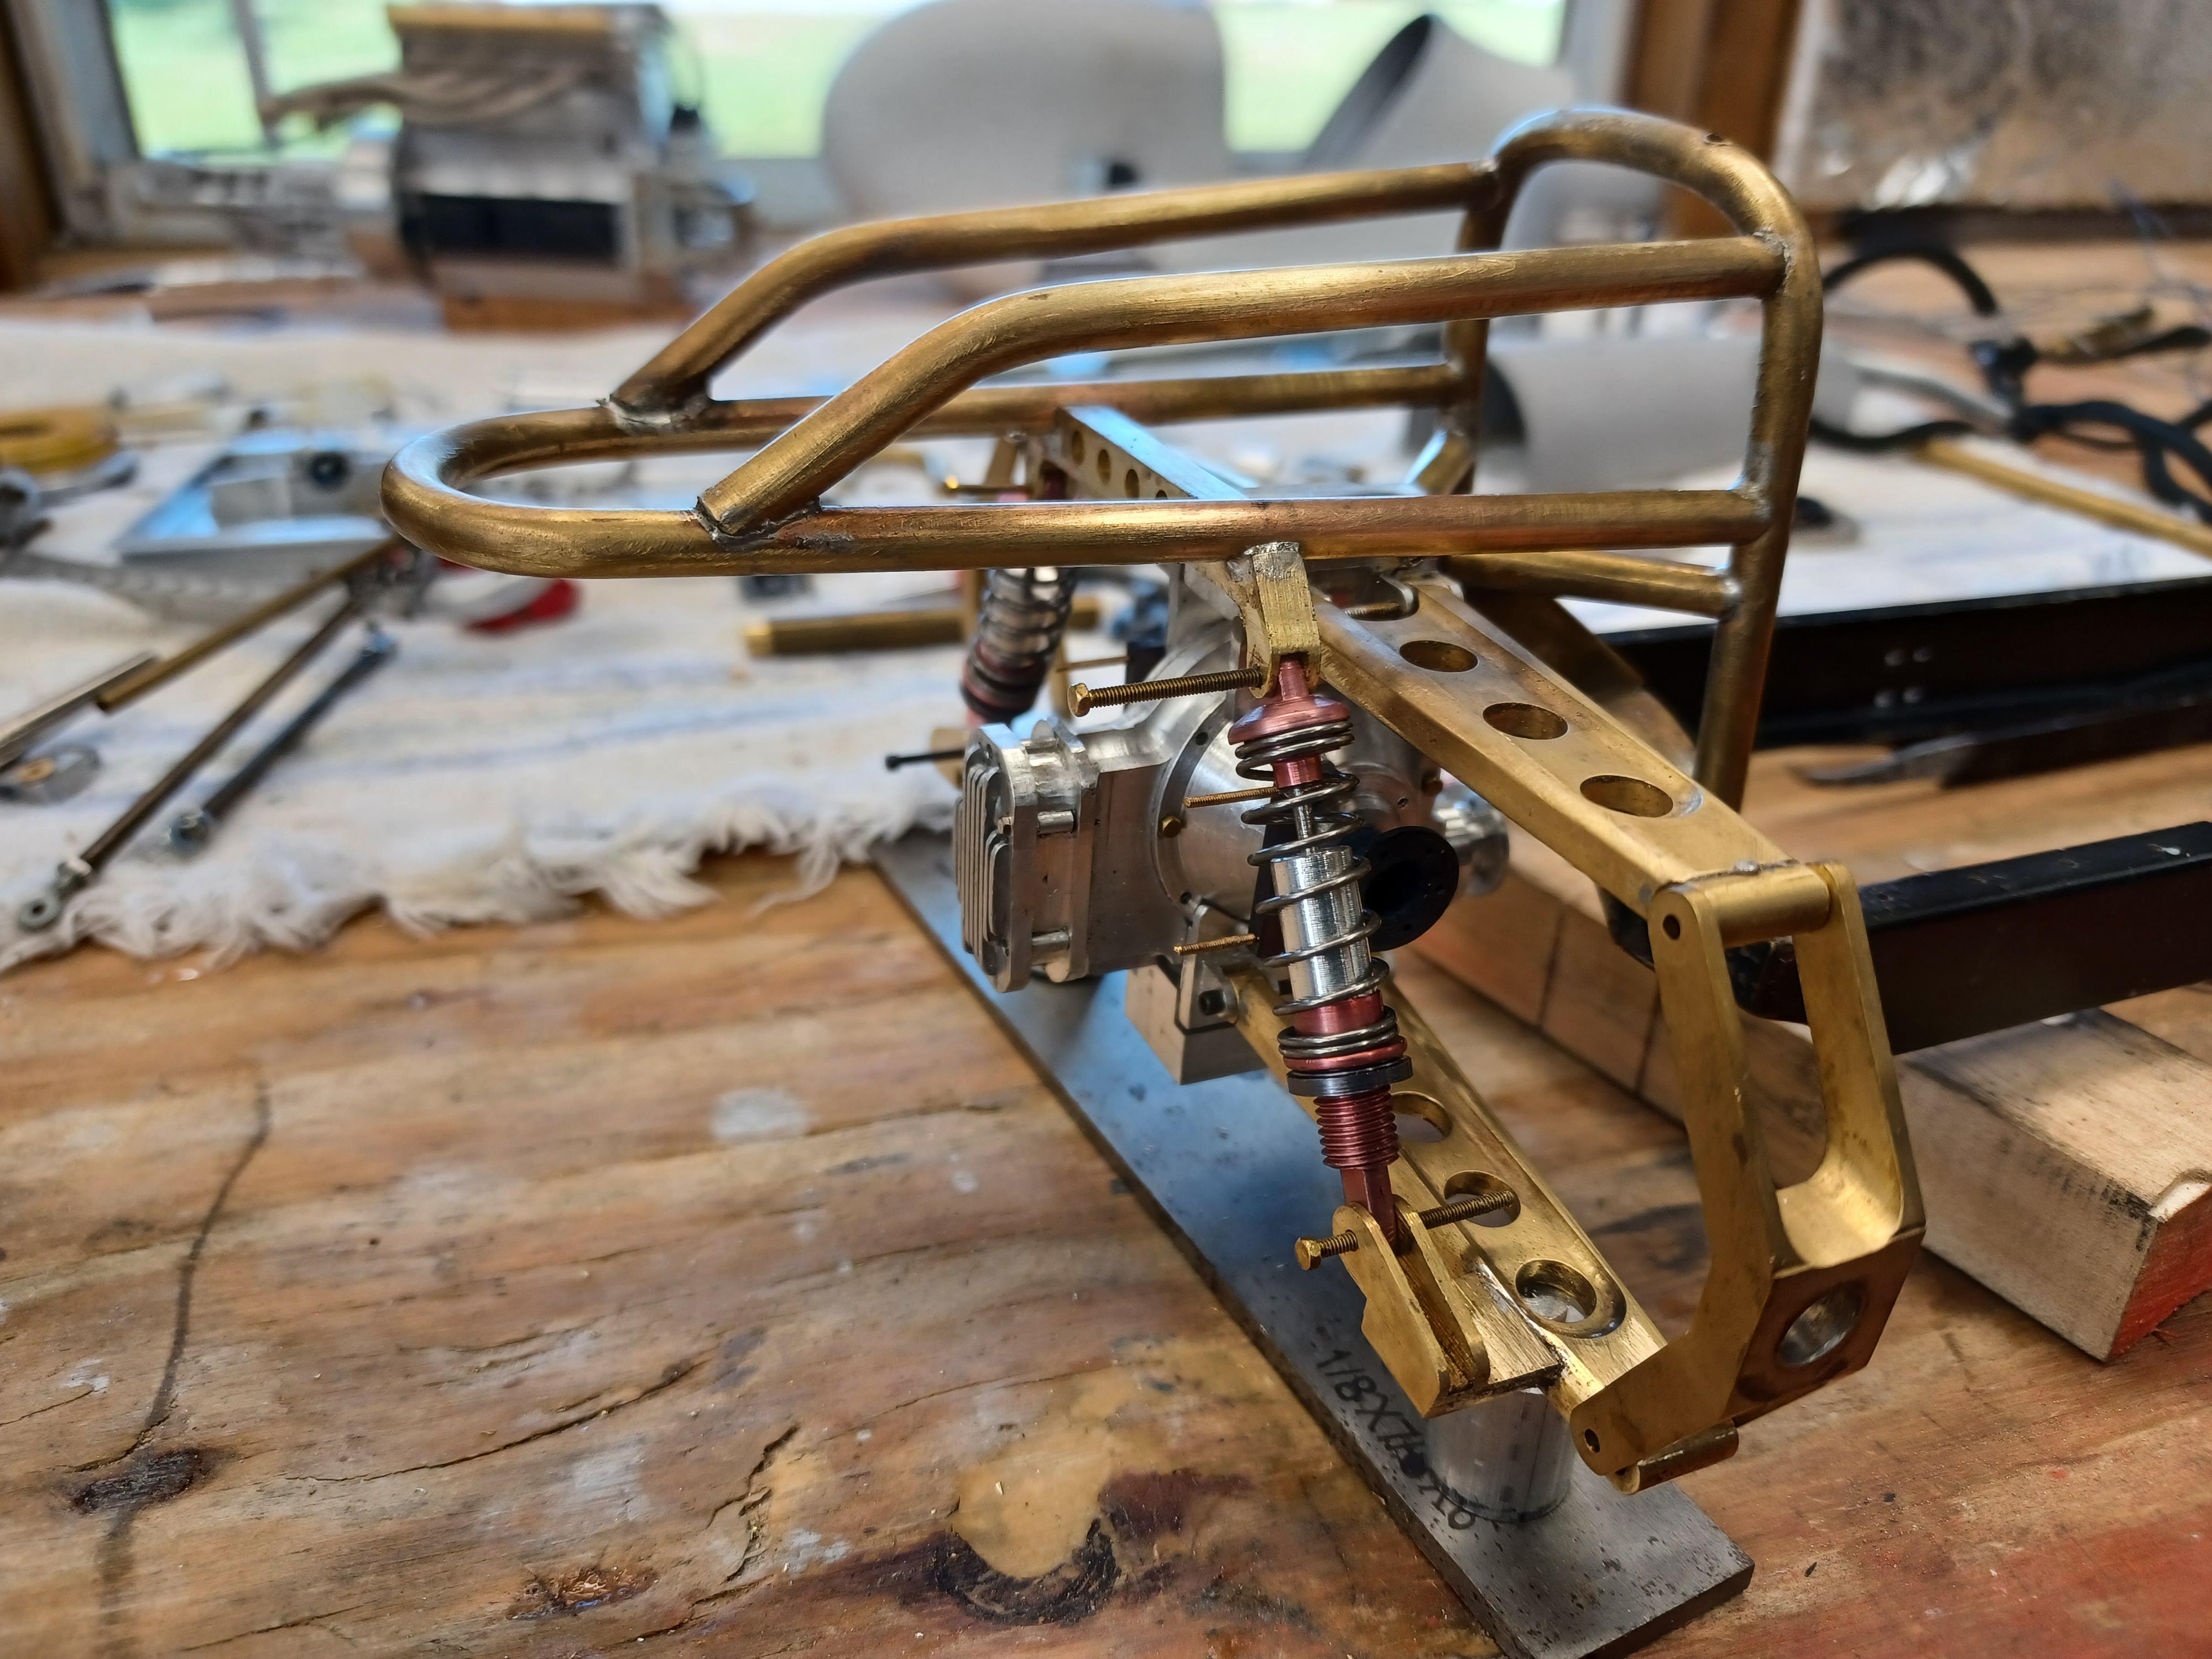
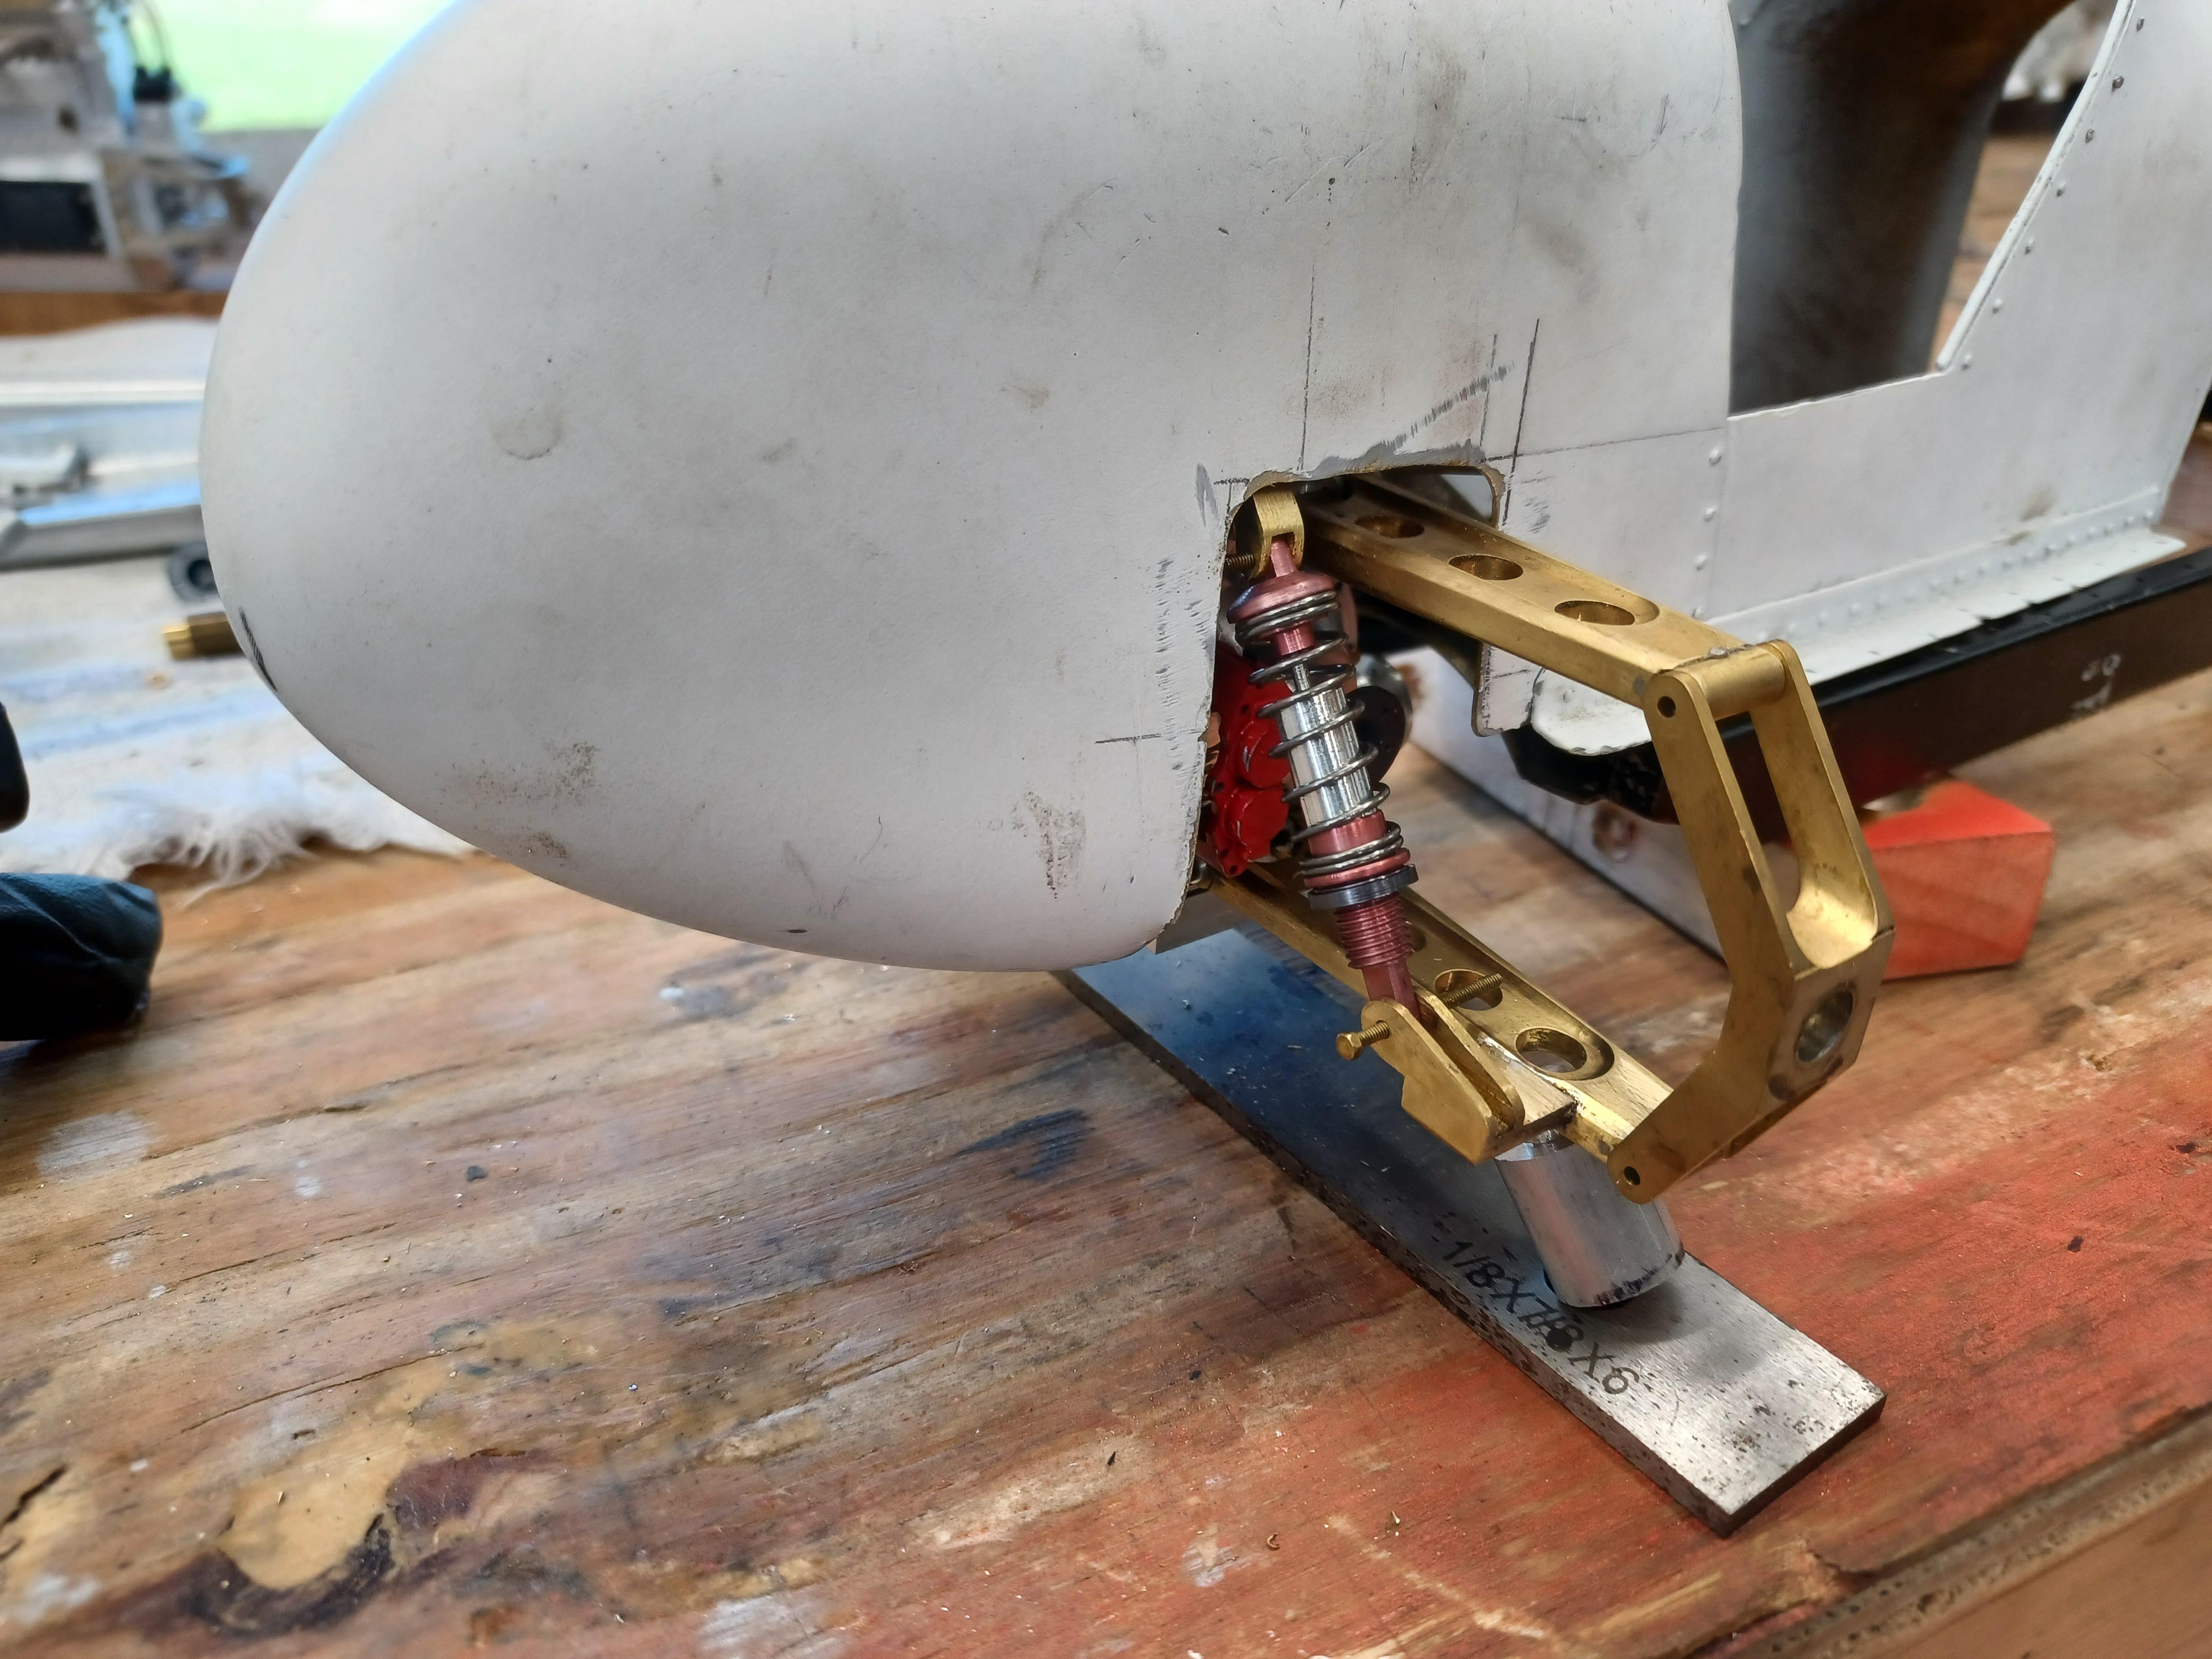
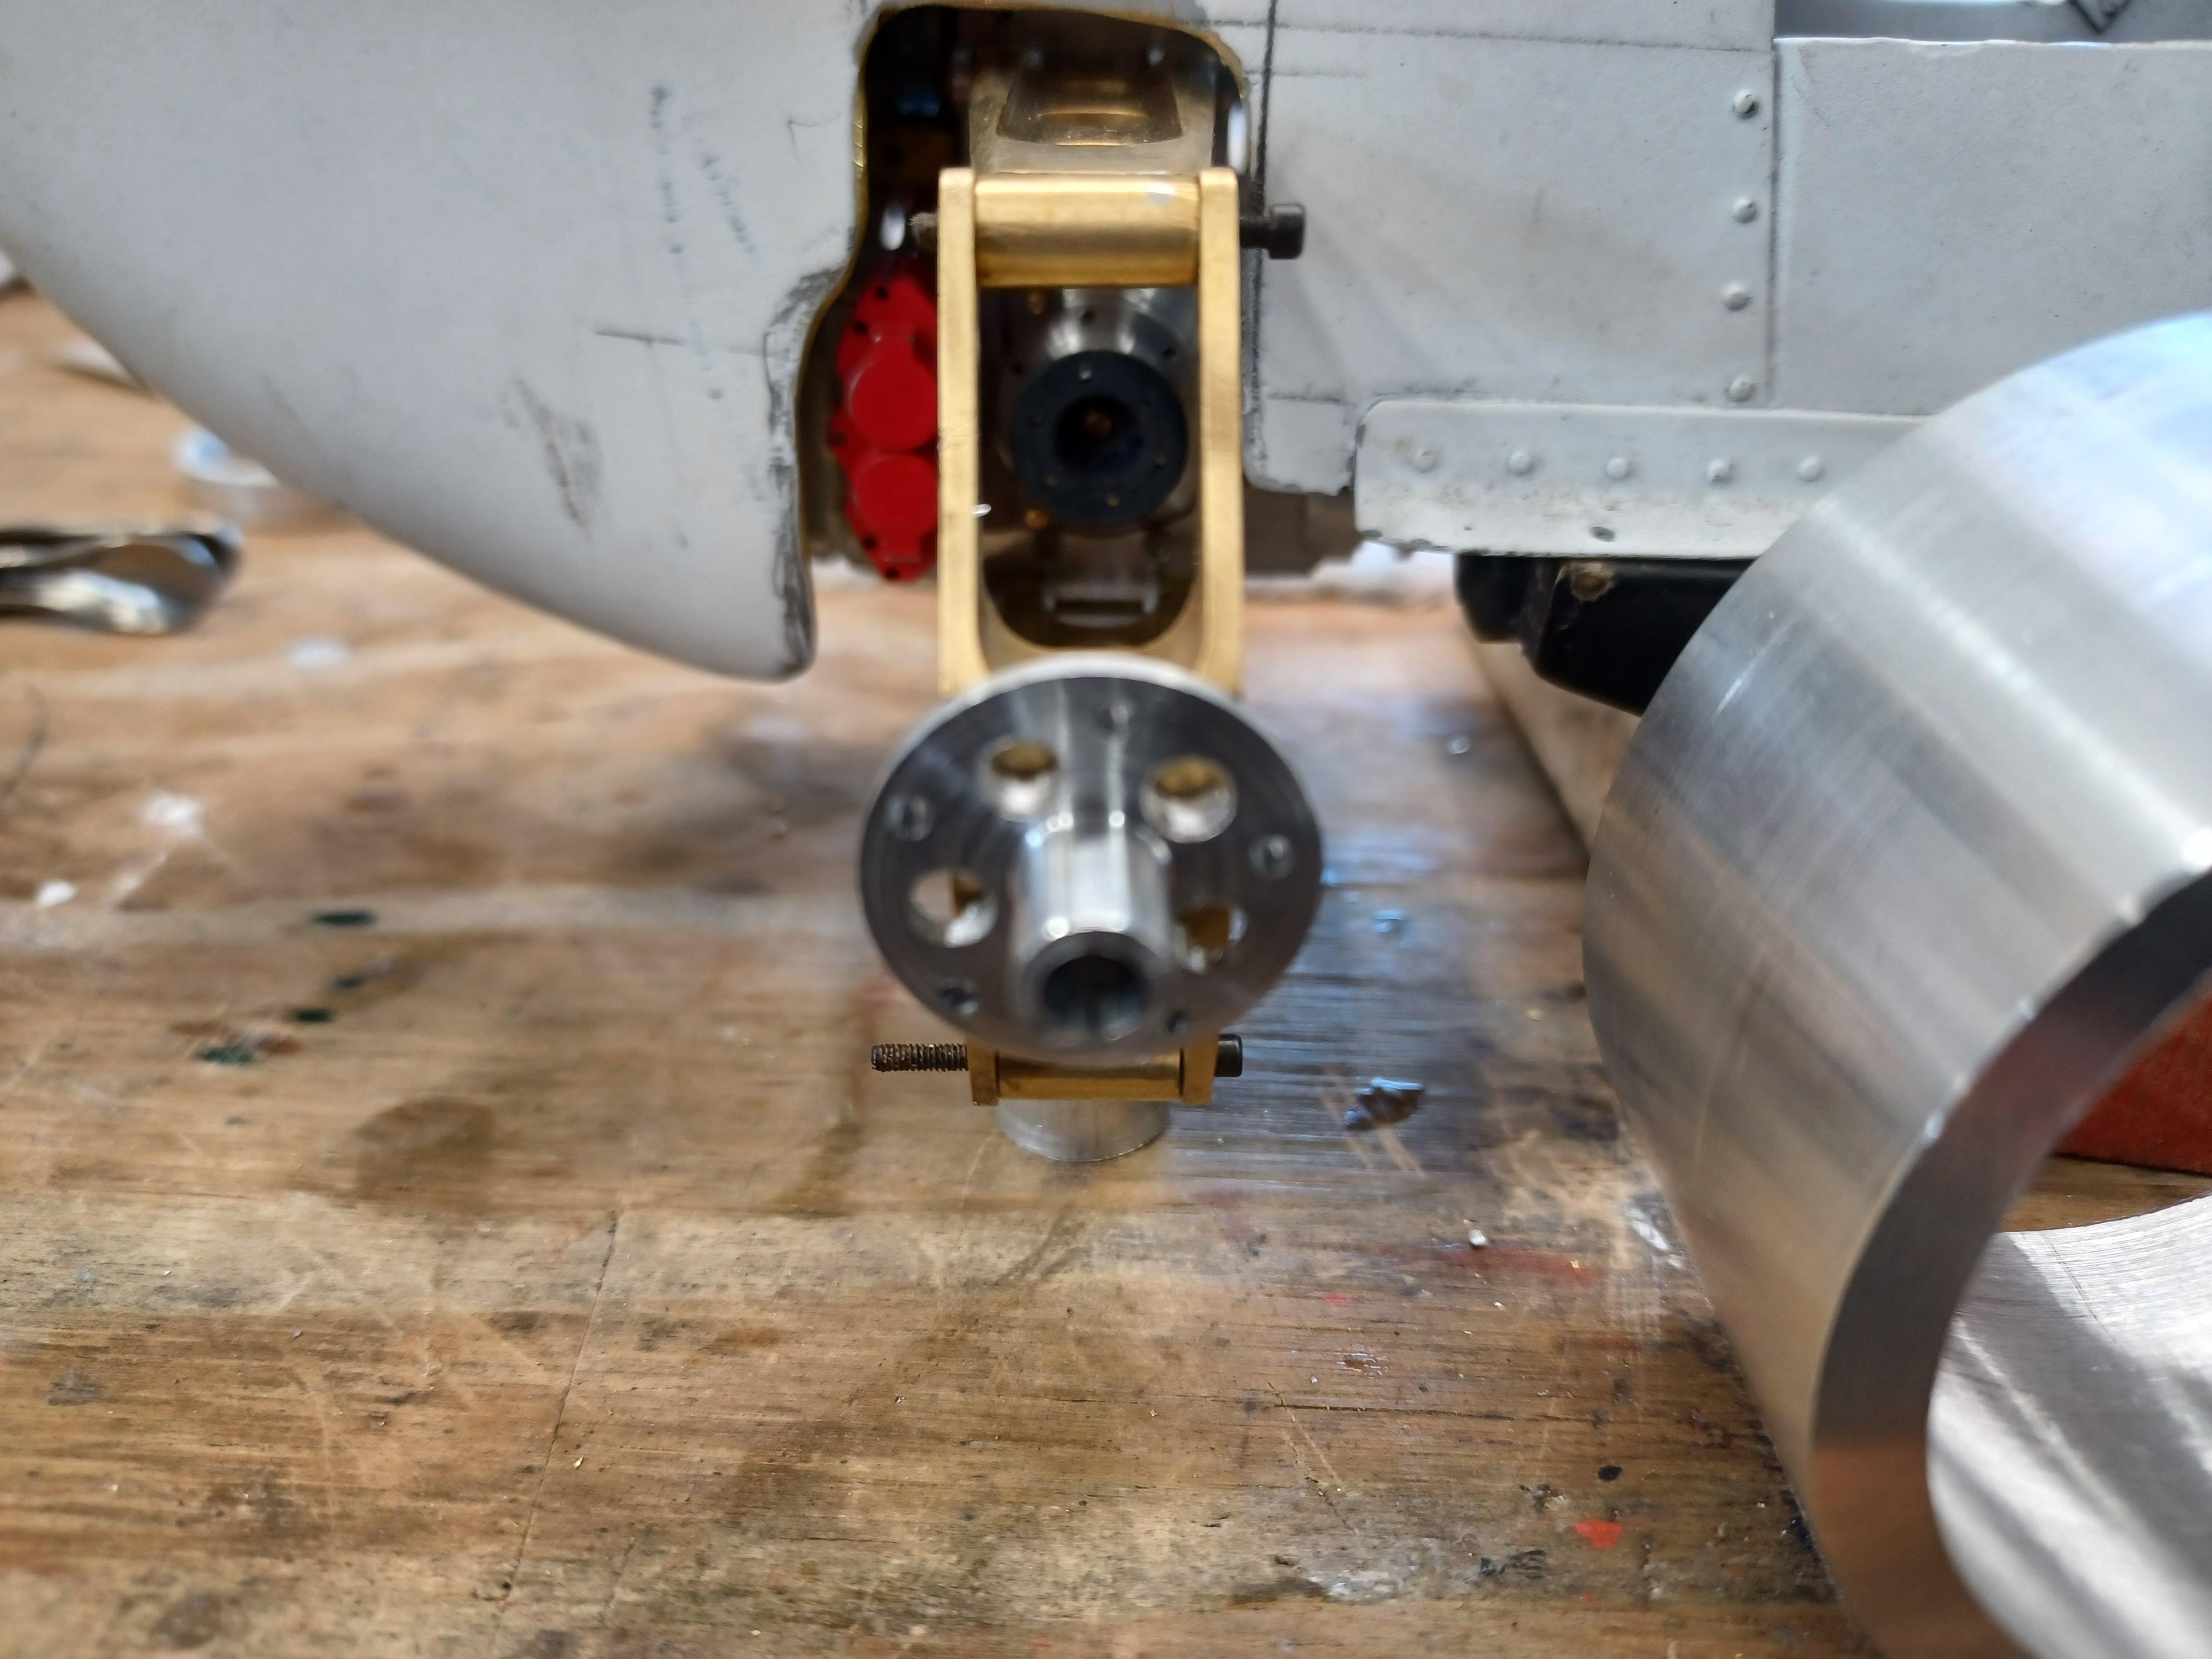
hi noel, he has not had time to finish the car. he owns 2 autobody shops and has been very busy. got some new shocks made for the front and threaded them to make them adjustable. i don't know if any of you has heard of a 1930's aftermarket headlite called woolite headlites. i have allways thought they were very cool and unique so i decide to carve them for this car. the front covers that hold the lenses i have not figured out how to make them yet . the originals have no lite in the top 1/3 but i am going to put the directional in there. i machined a front shock mount and headlite bar.could also be a bumper. am going to nickel plate an polish the bar and the lites. have a happy and prosperous new year.
-
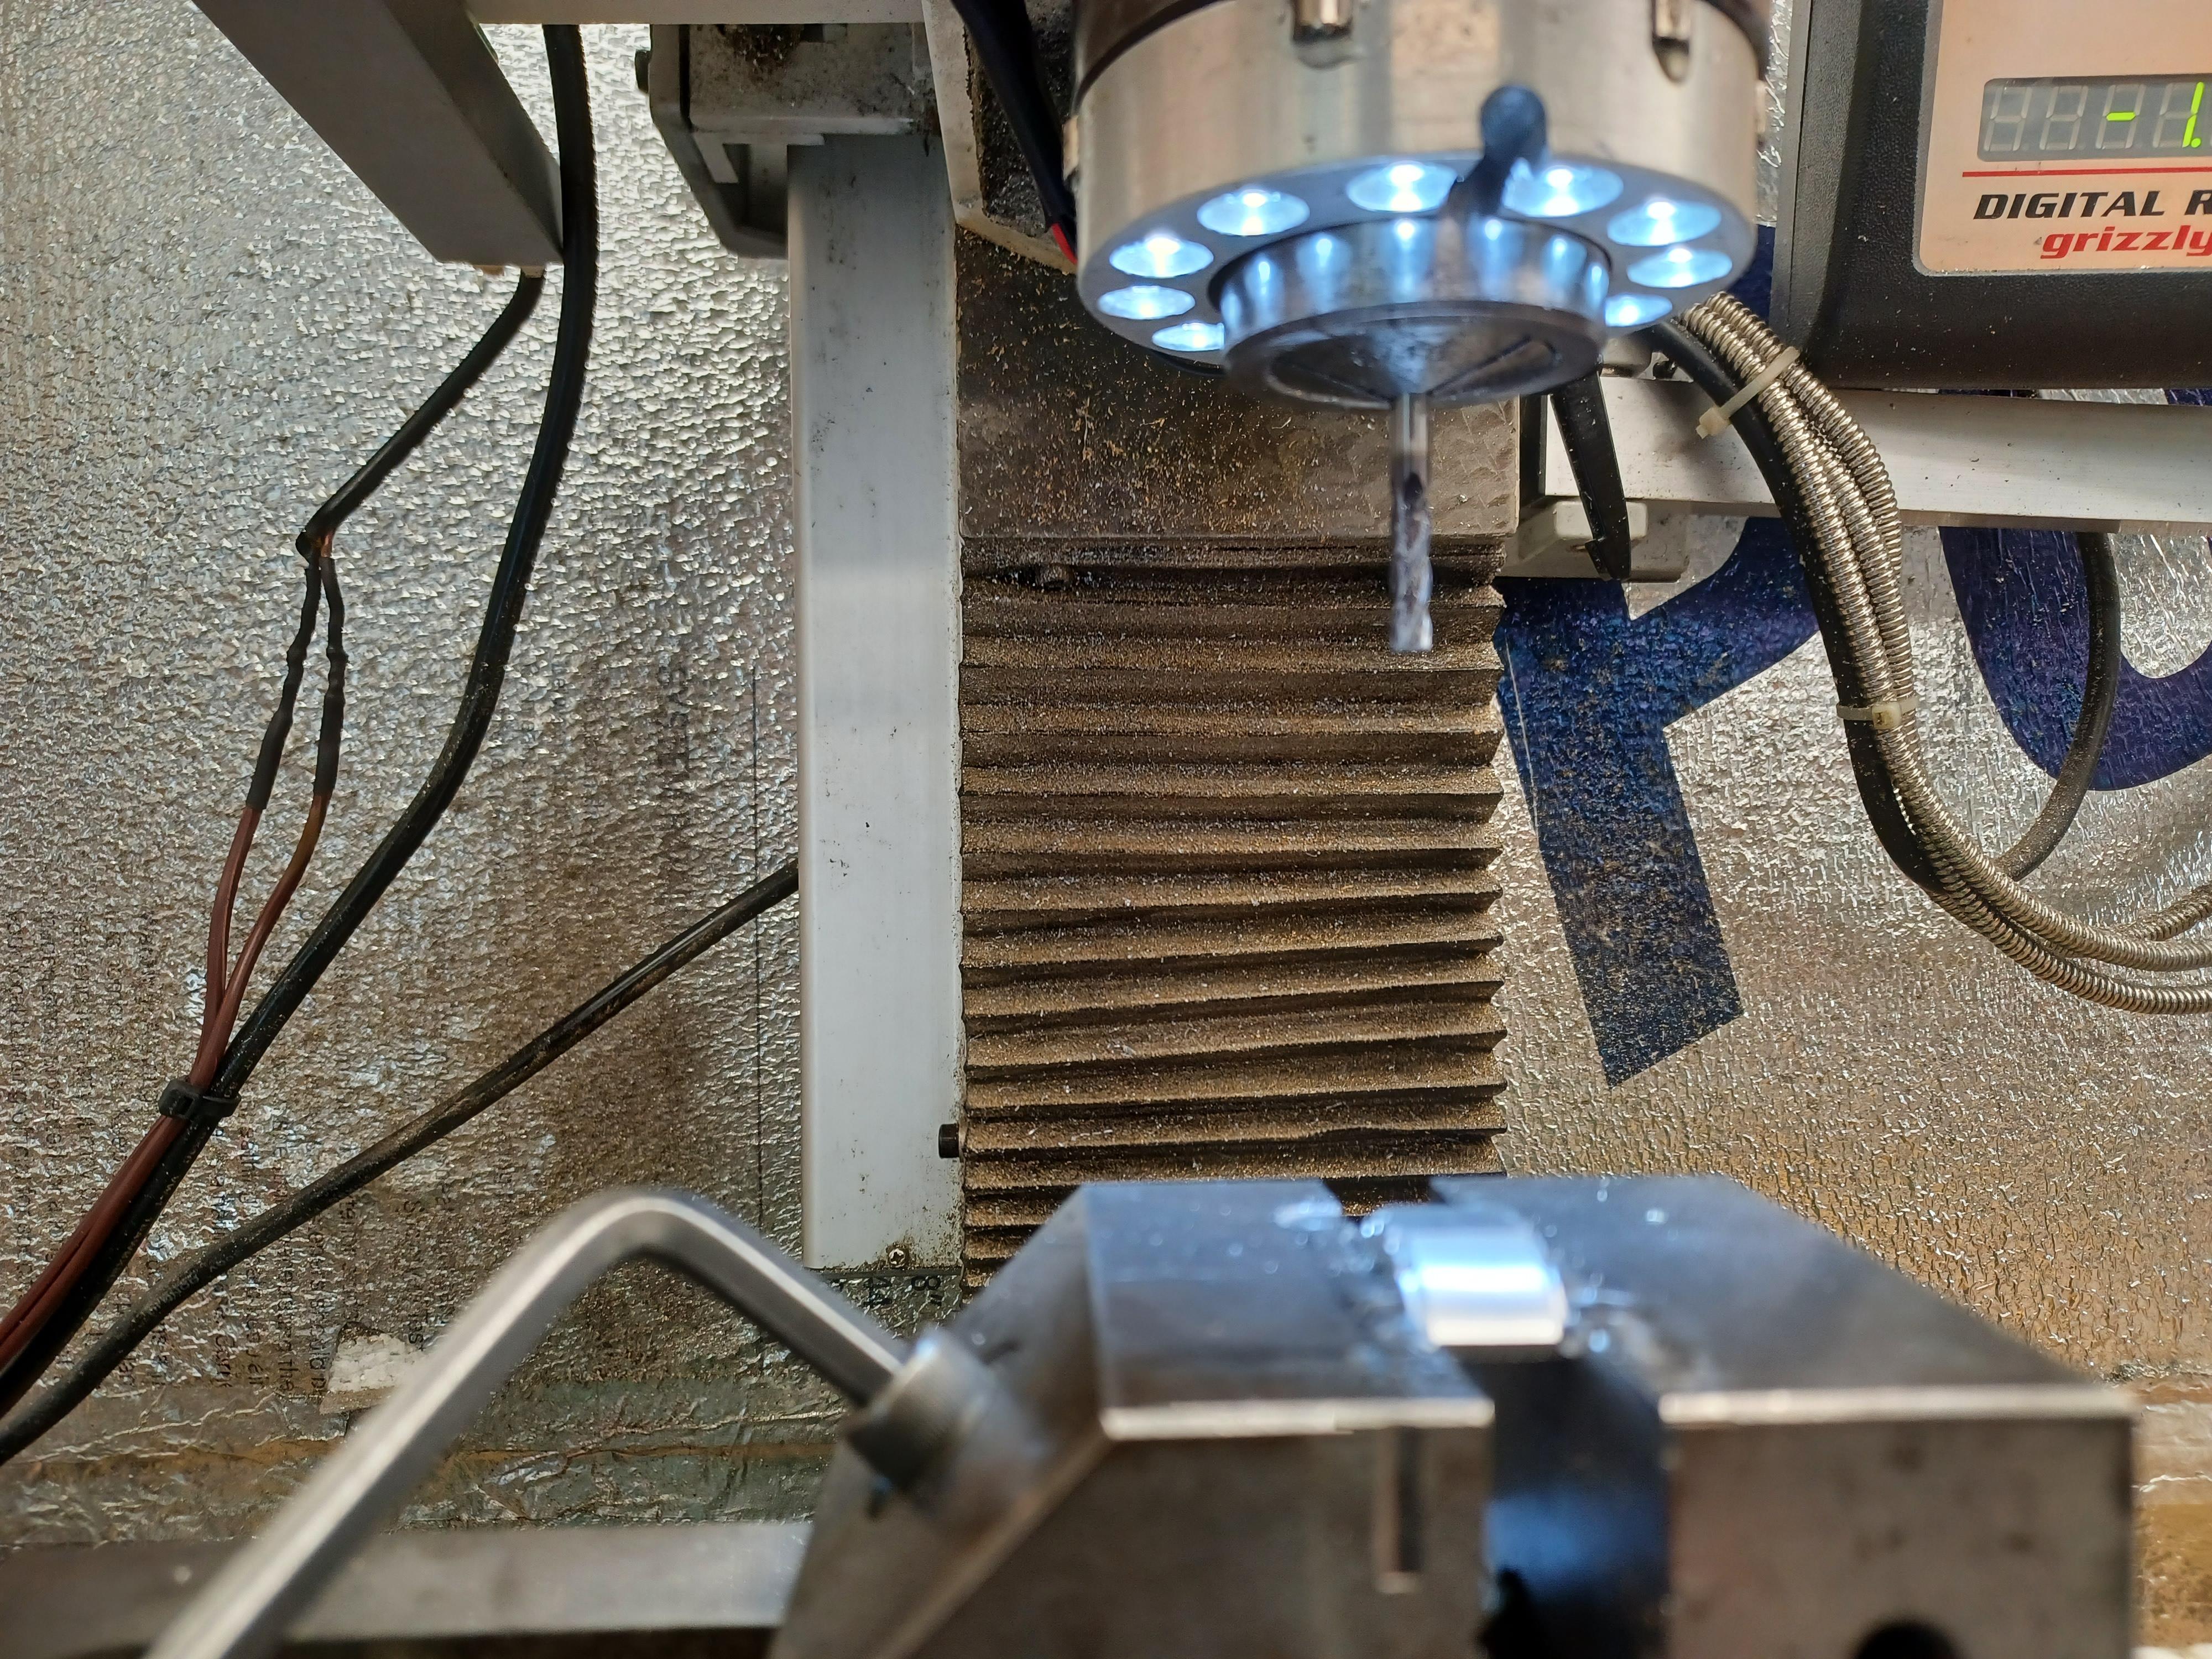
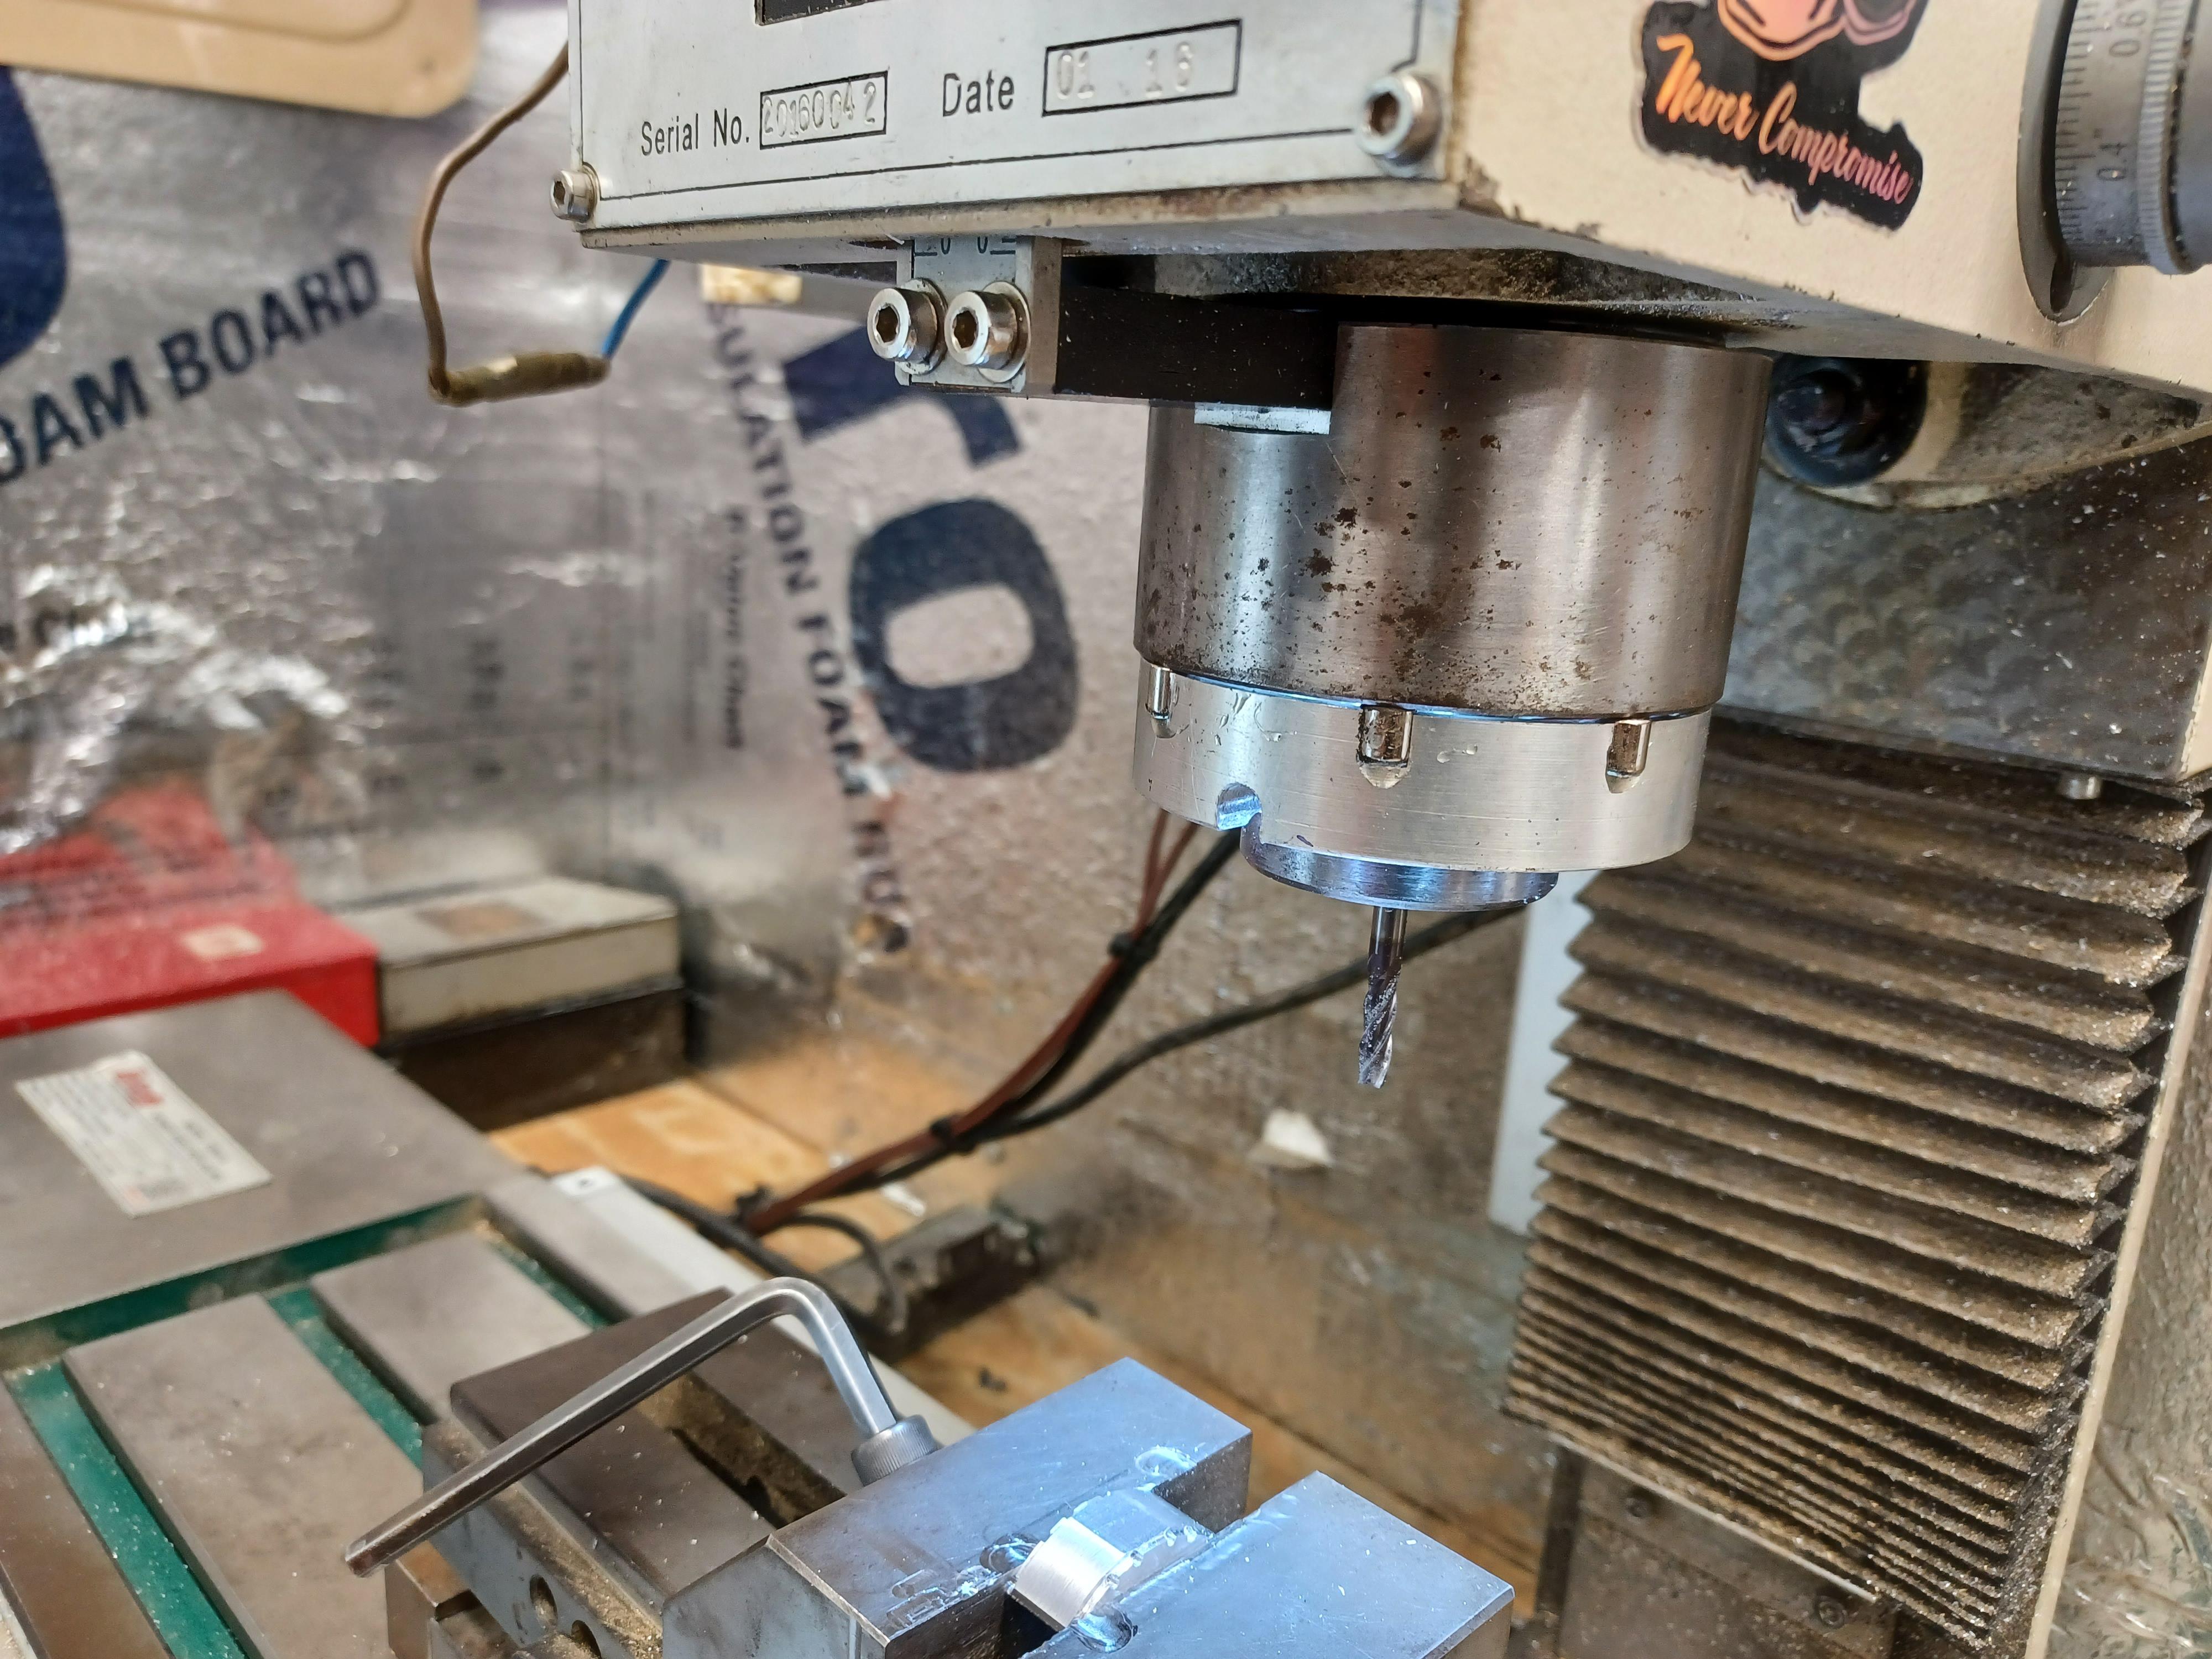
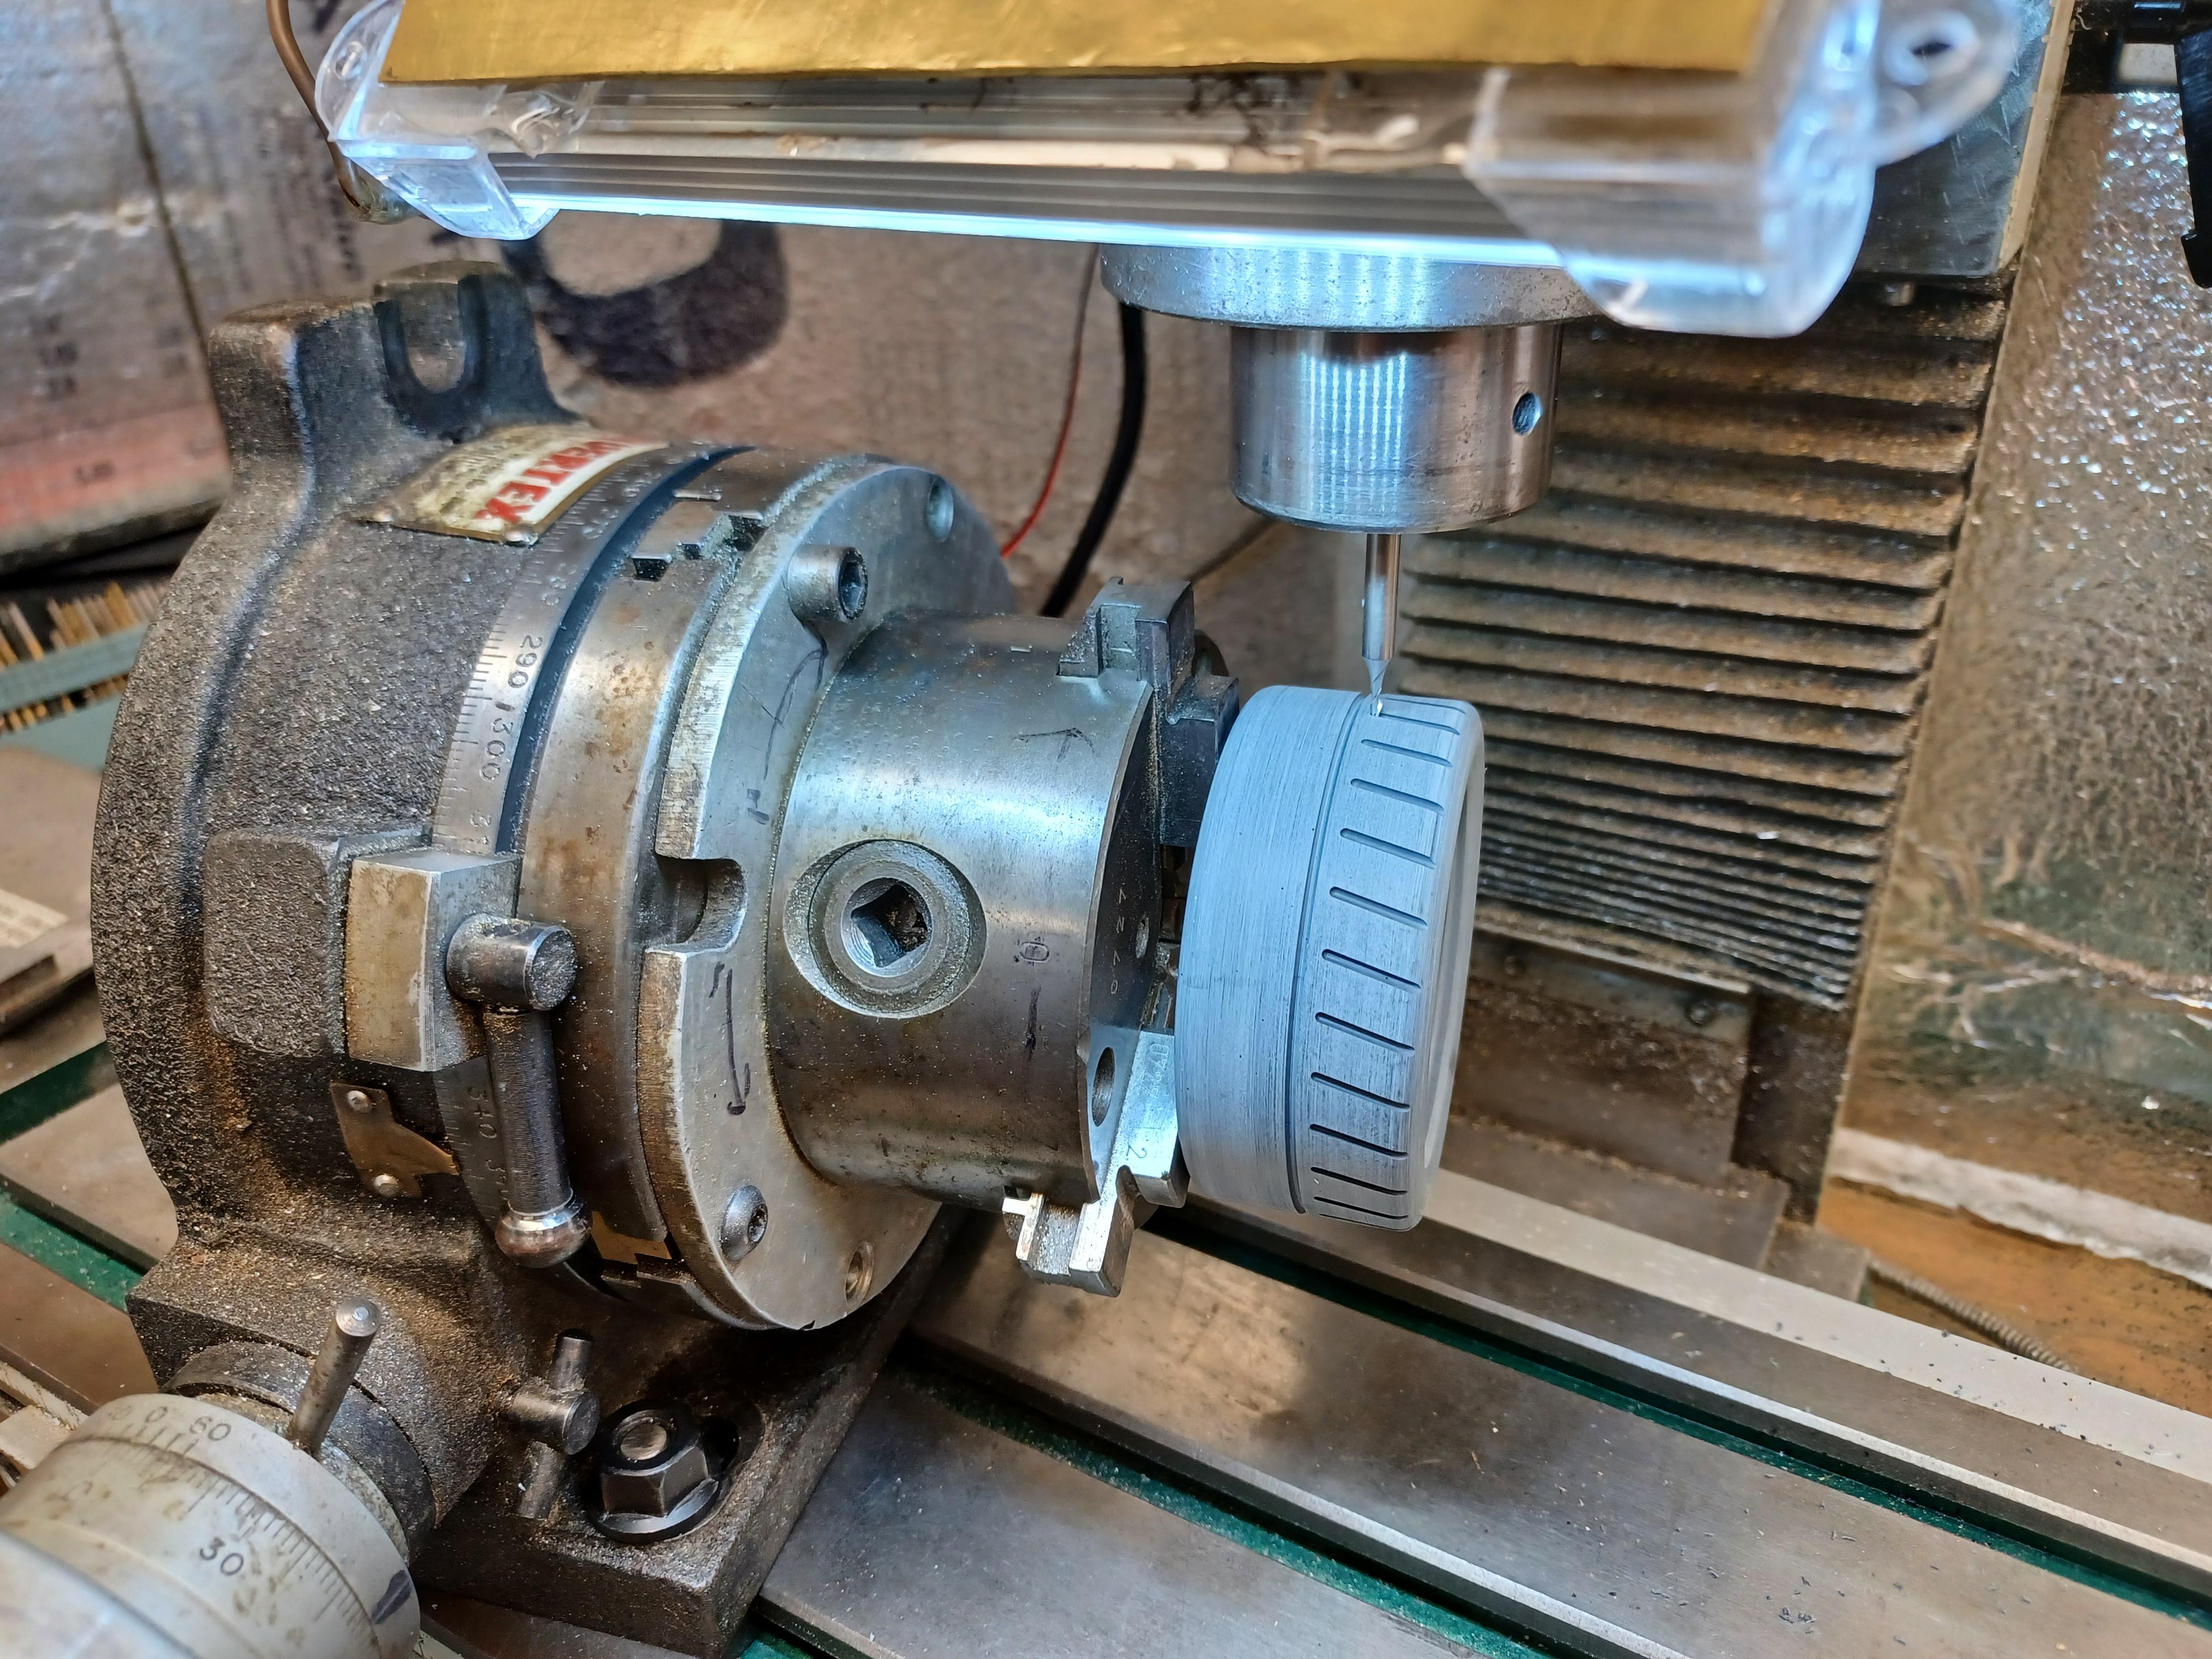
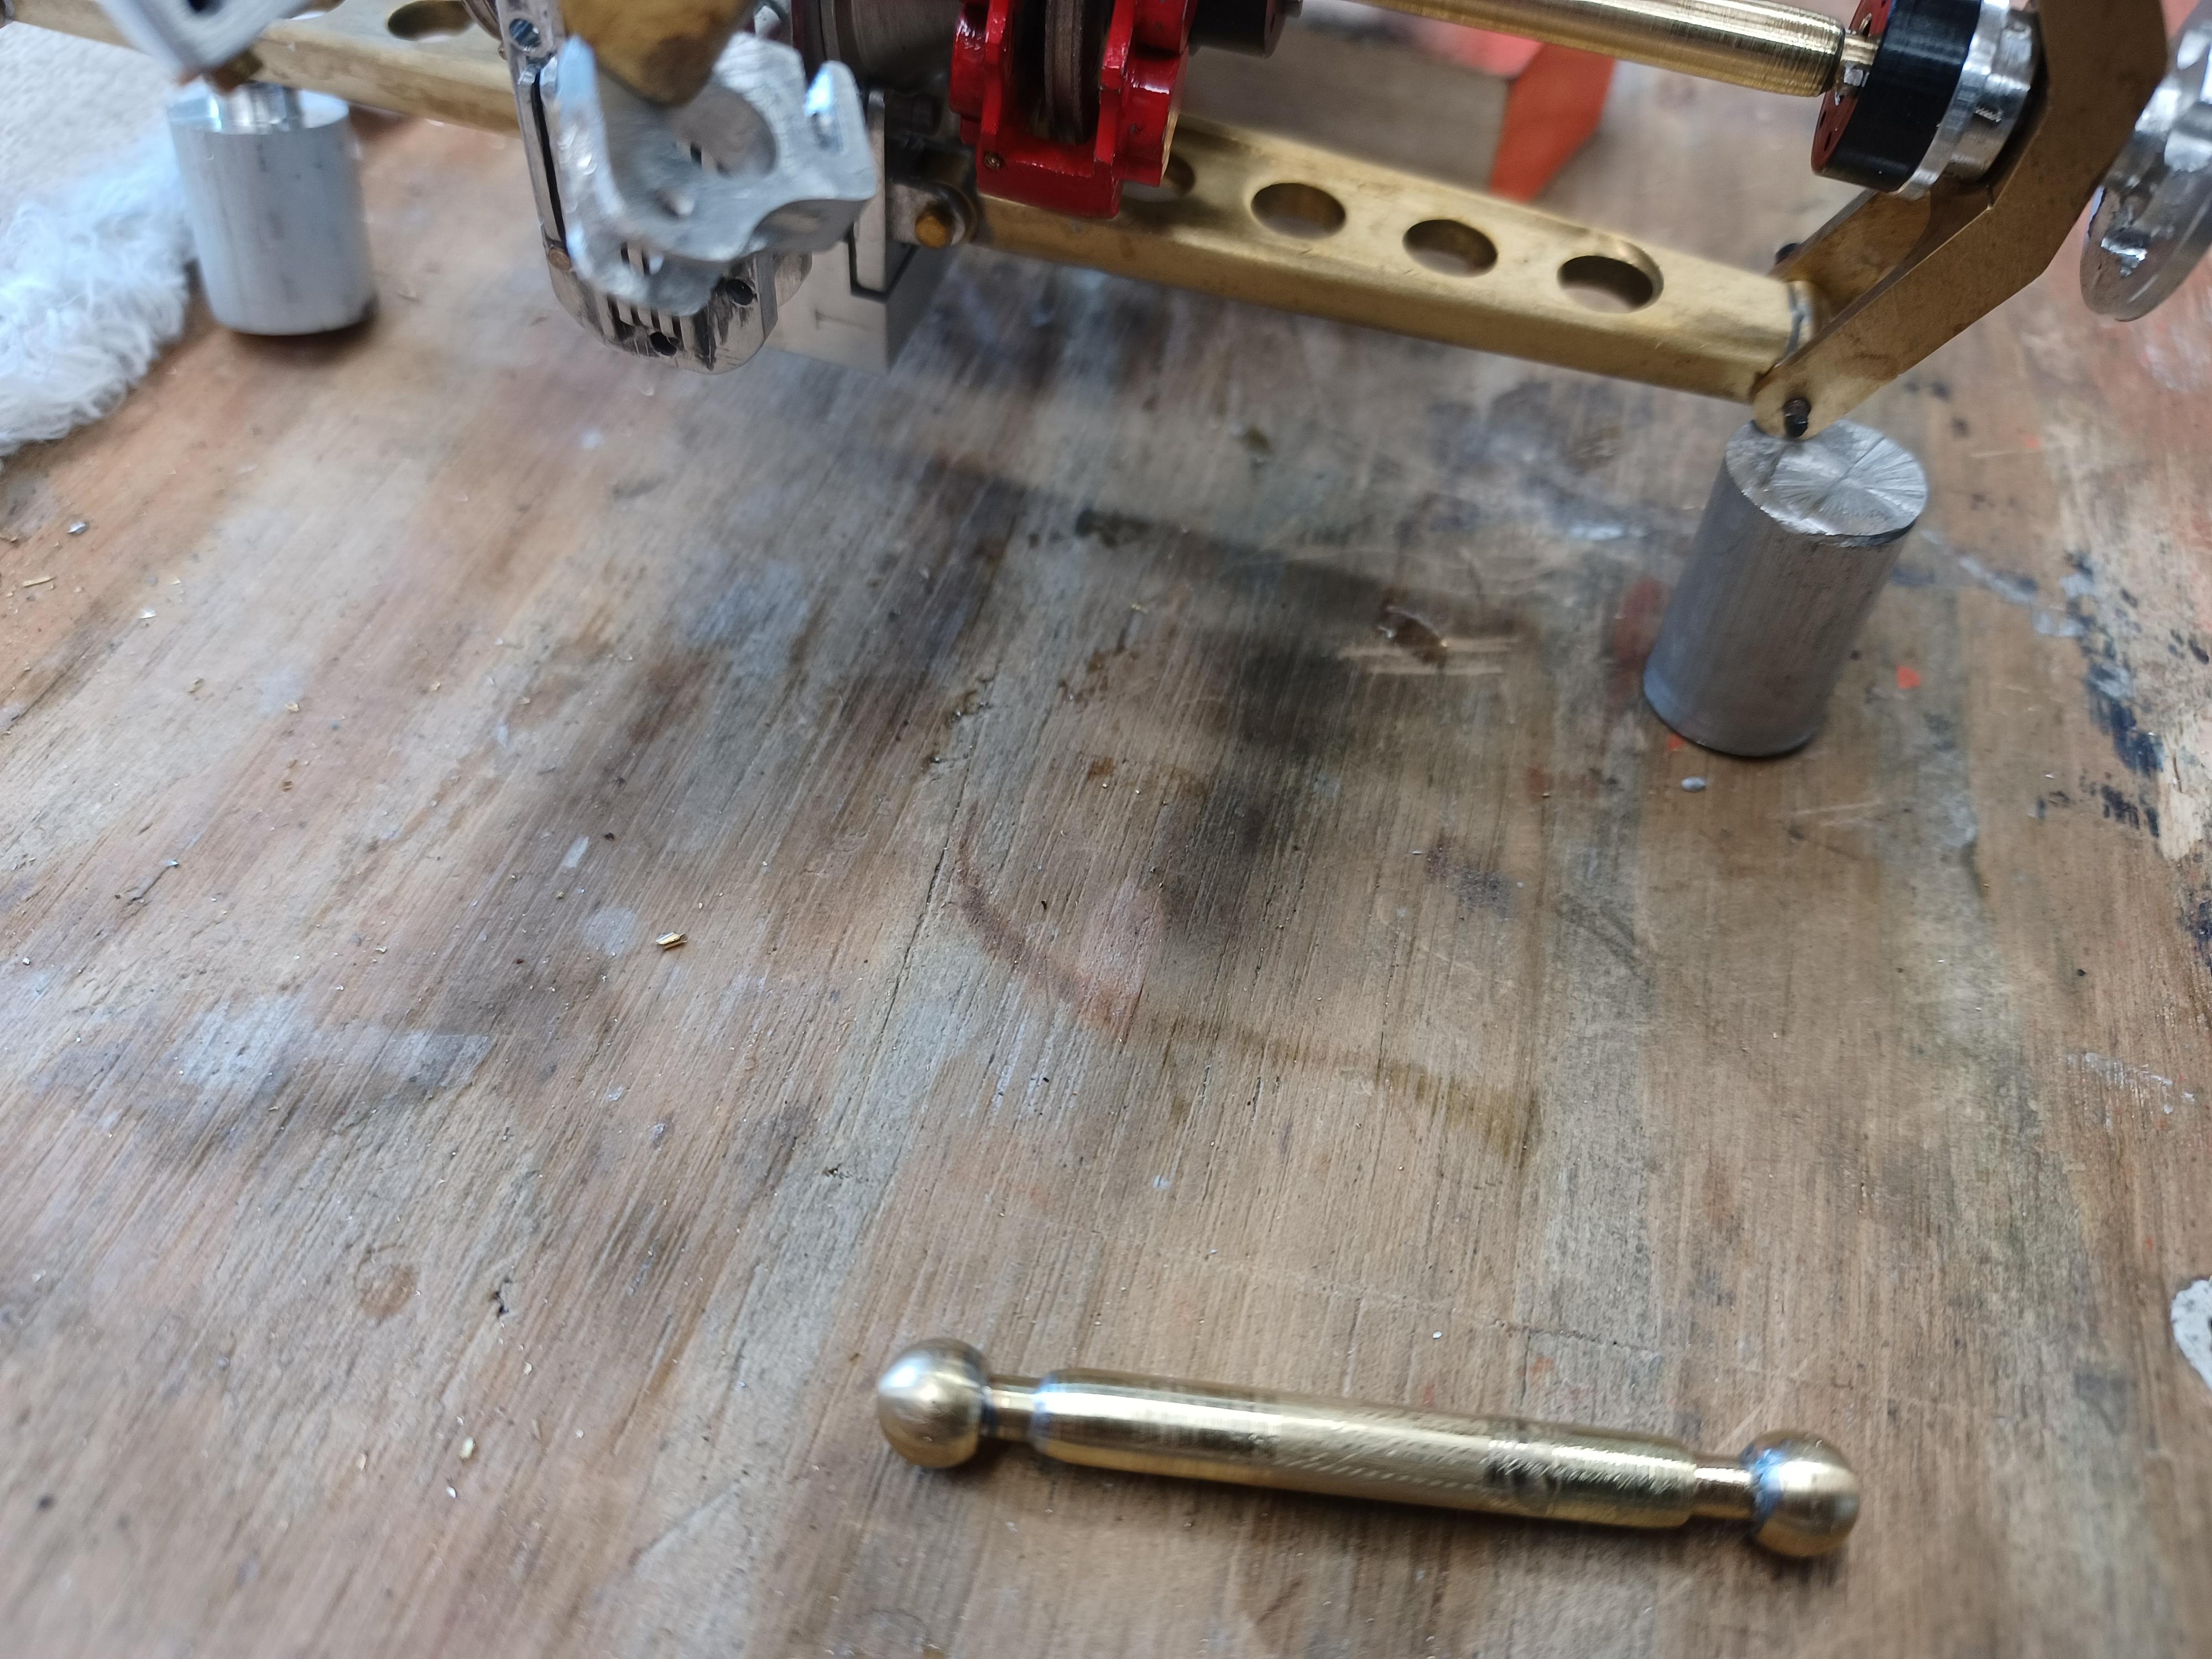
i made a lite for my mill 4 or5 years ago and it stoped working. i could not figure out why. put it in my tool box and forgot about it. i took it out the outhr day and decided to work on it. i ended up removing all the leds and installing new ones and its working fine . glad to have it back. if i were to make another one,i would drill the holes for the leds at a about 5 degrees to the middle but it works fine. it attaches with magnets. i did not like the size of the front brakes so i made new that are much larger.hope u all had a great christmas and have a happy newyear.
-
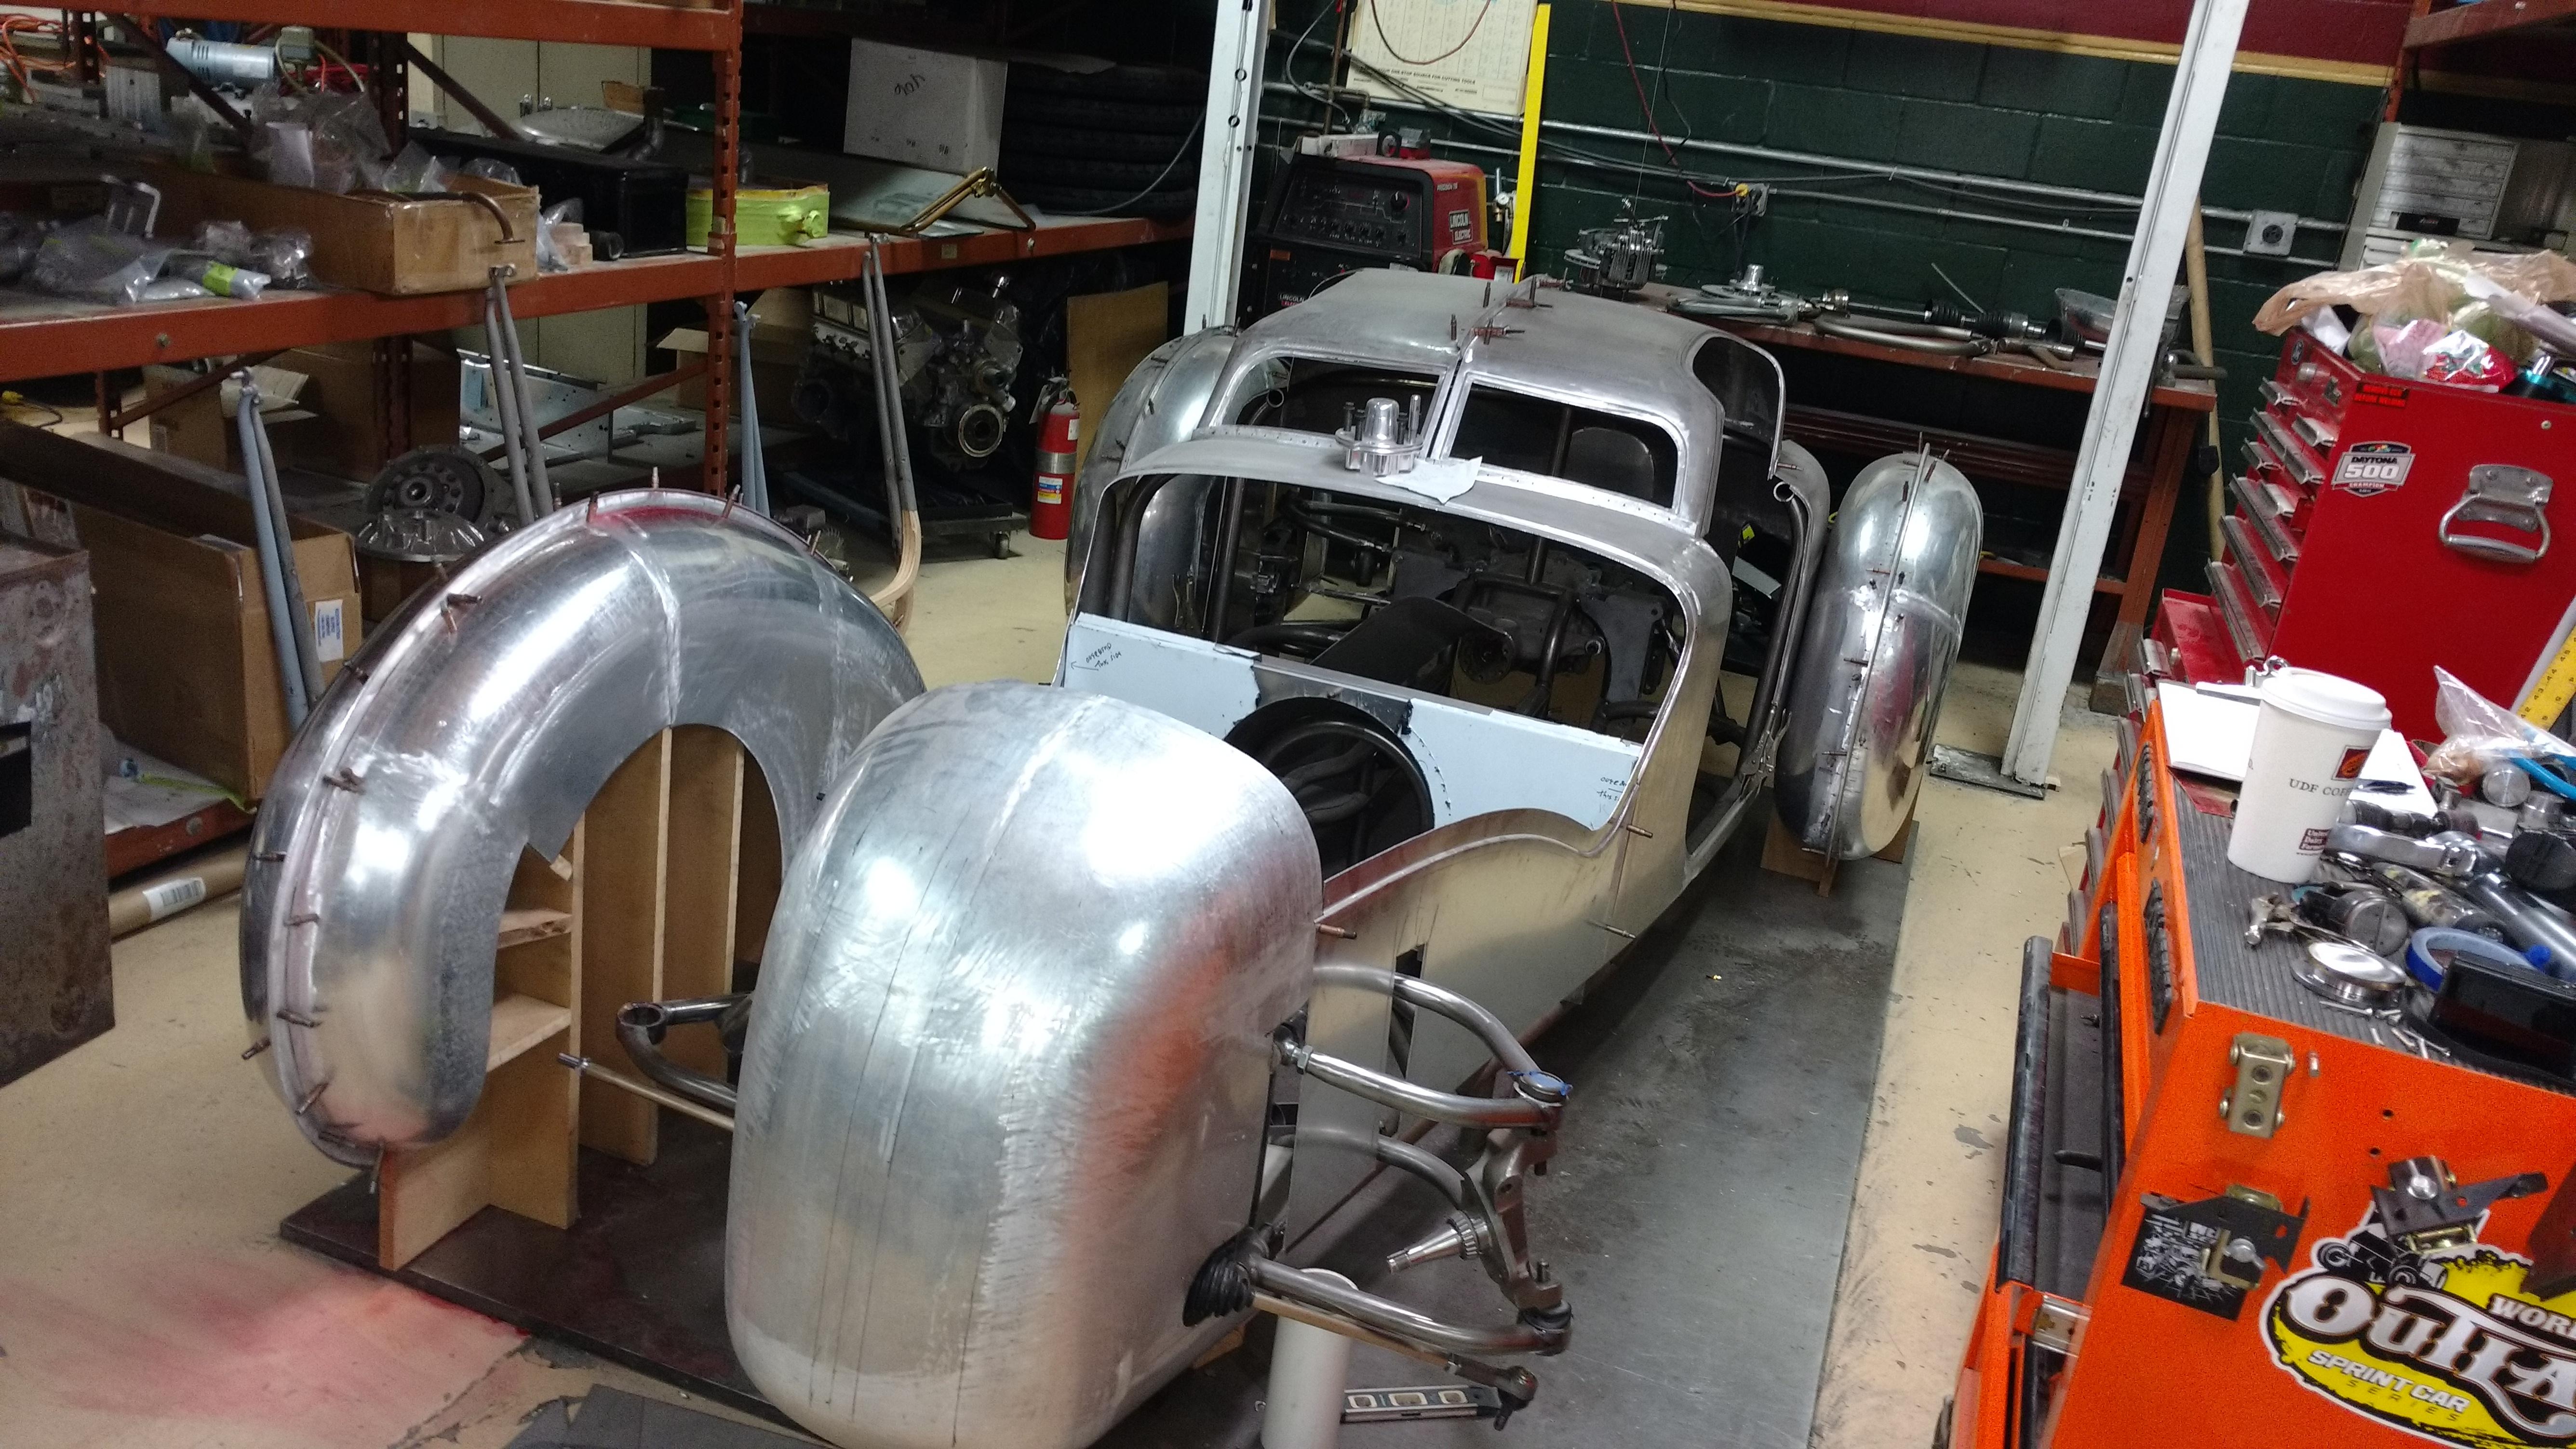
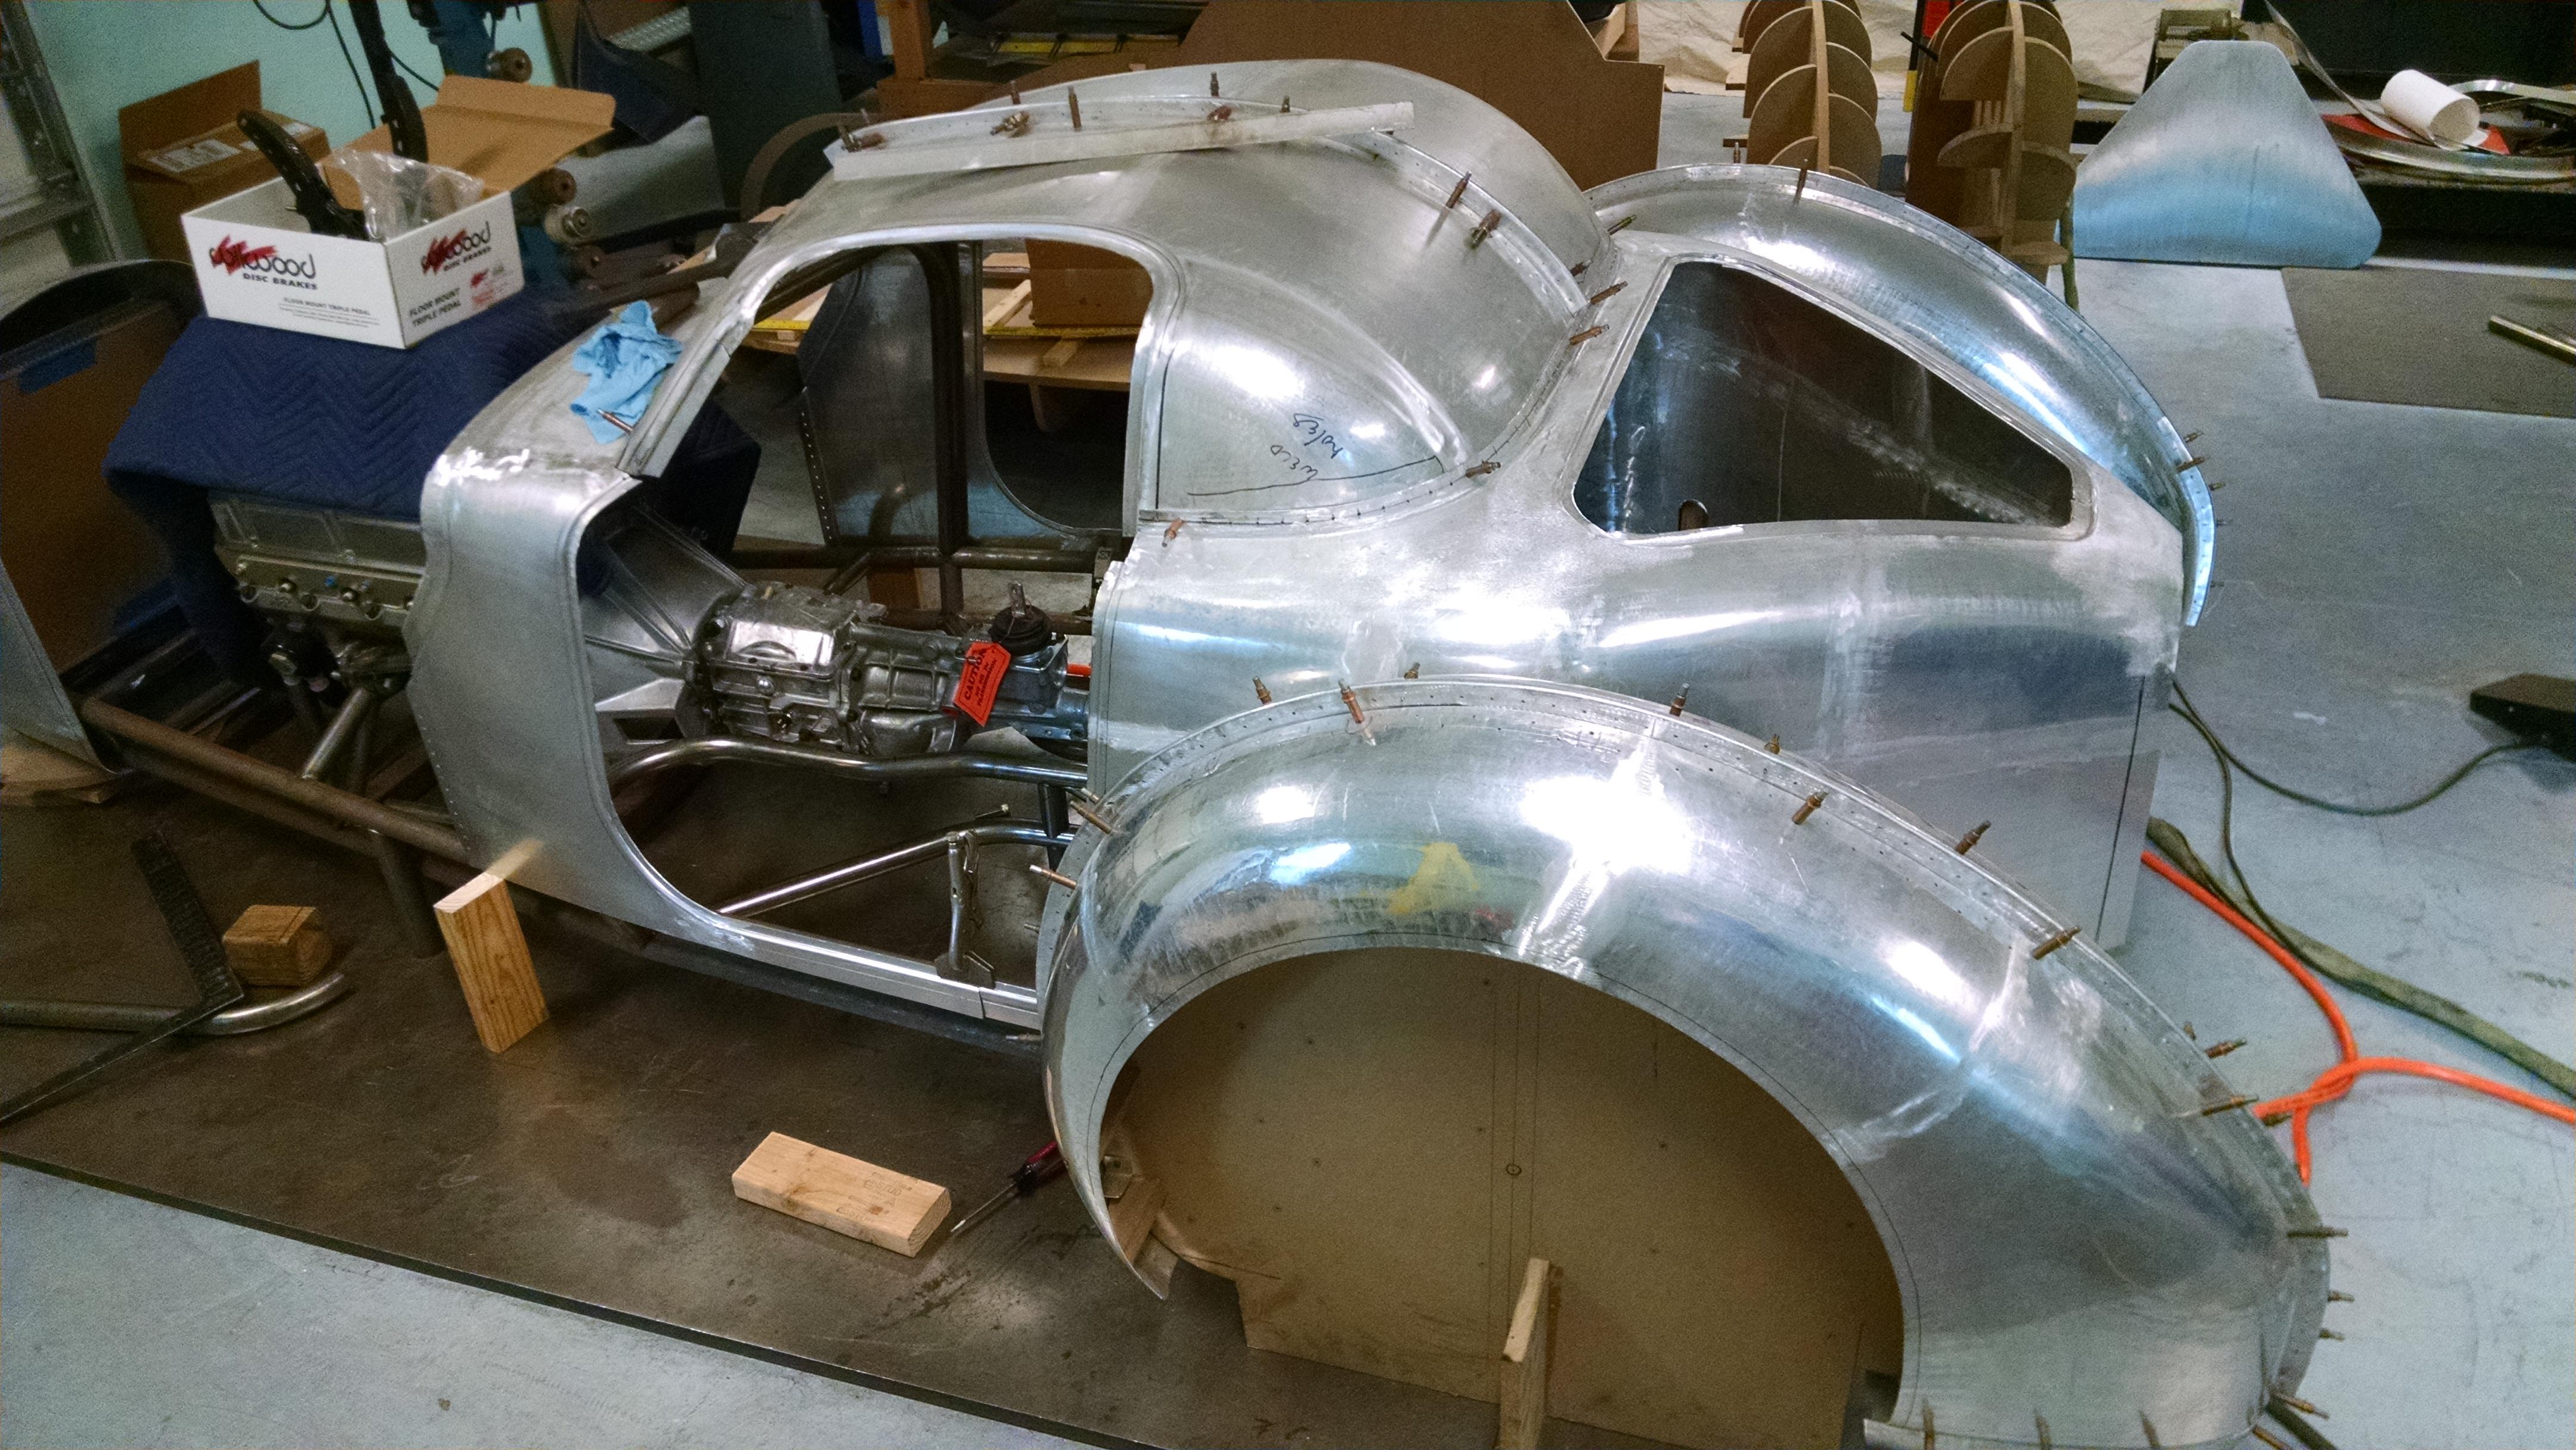
hi noel, here is a few pictures i think you might like being a bugatti fan. this was a project of mine . never got finished because i sold it.
-
hi andrew ,yes , ijust used the bowls as a cheap way to make a round piece thicker than i needed from black 2 part polyurethane , it worked as planed but its not very black after machining. i felt that i could machine the tires better than i could machine molds for the 2 different size tires. have a great holiday. hi noel,nice to hear from you. i have purchased 2 sf. of black 1.5 oz leather and i think it will work fine. i appreciate the suggestions. the thin ladies gloves never occured to me. happy holidays
-
hi tim hope your back is getting better. hope you get it cleared up for the holidays.charlie
-
every time i check your progress it makes me smile , your work is just so nice.the doorhandle and the grille emblem are outstanding. have a great holiday.charlie
-
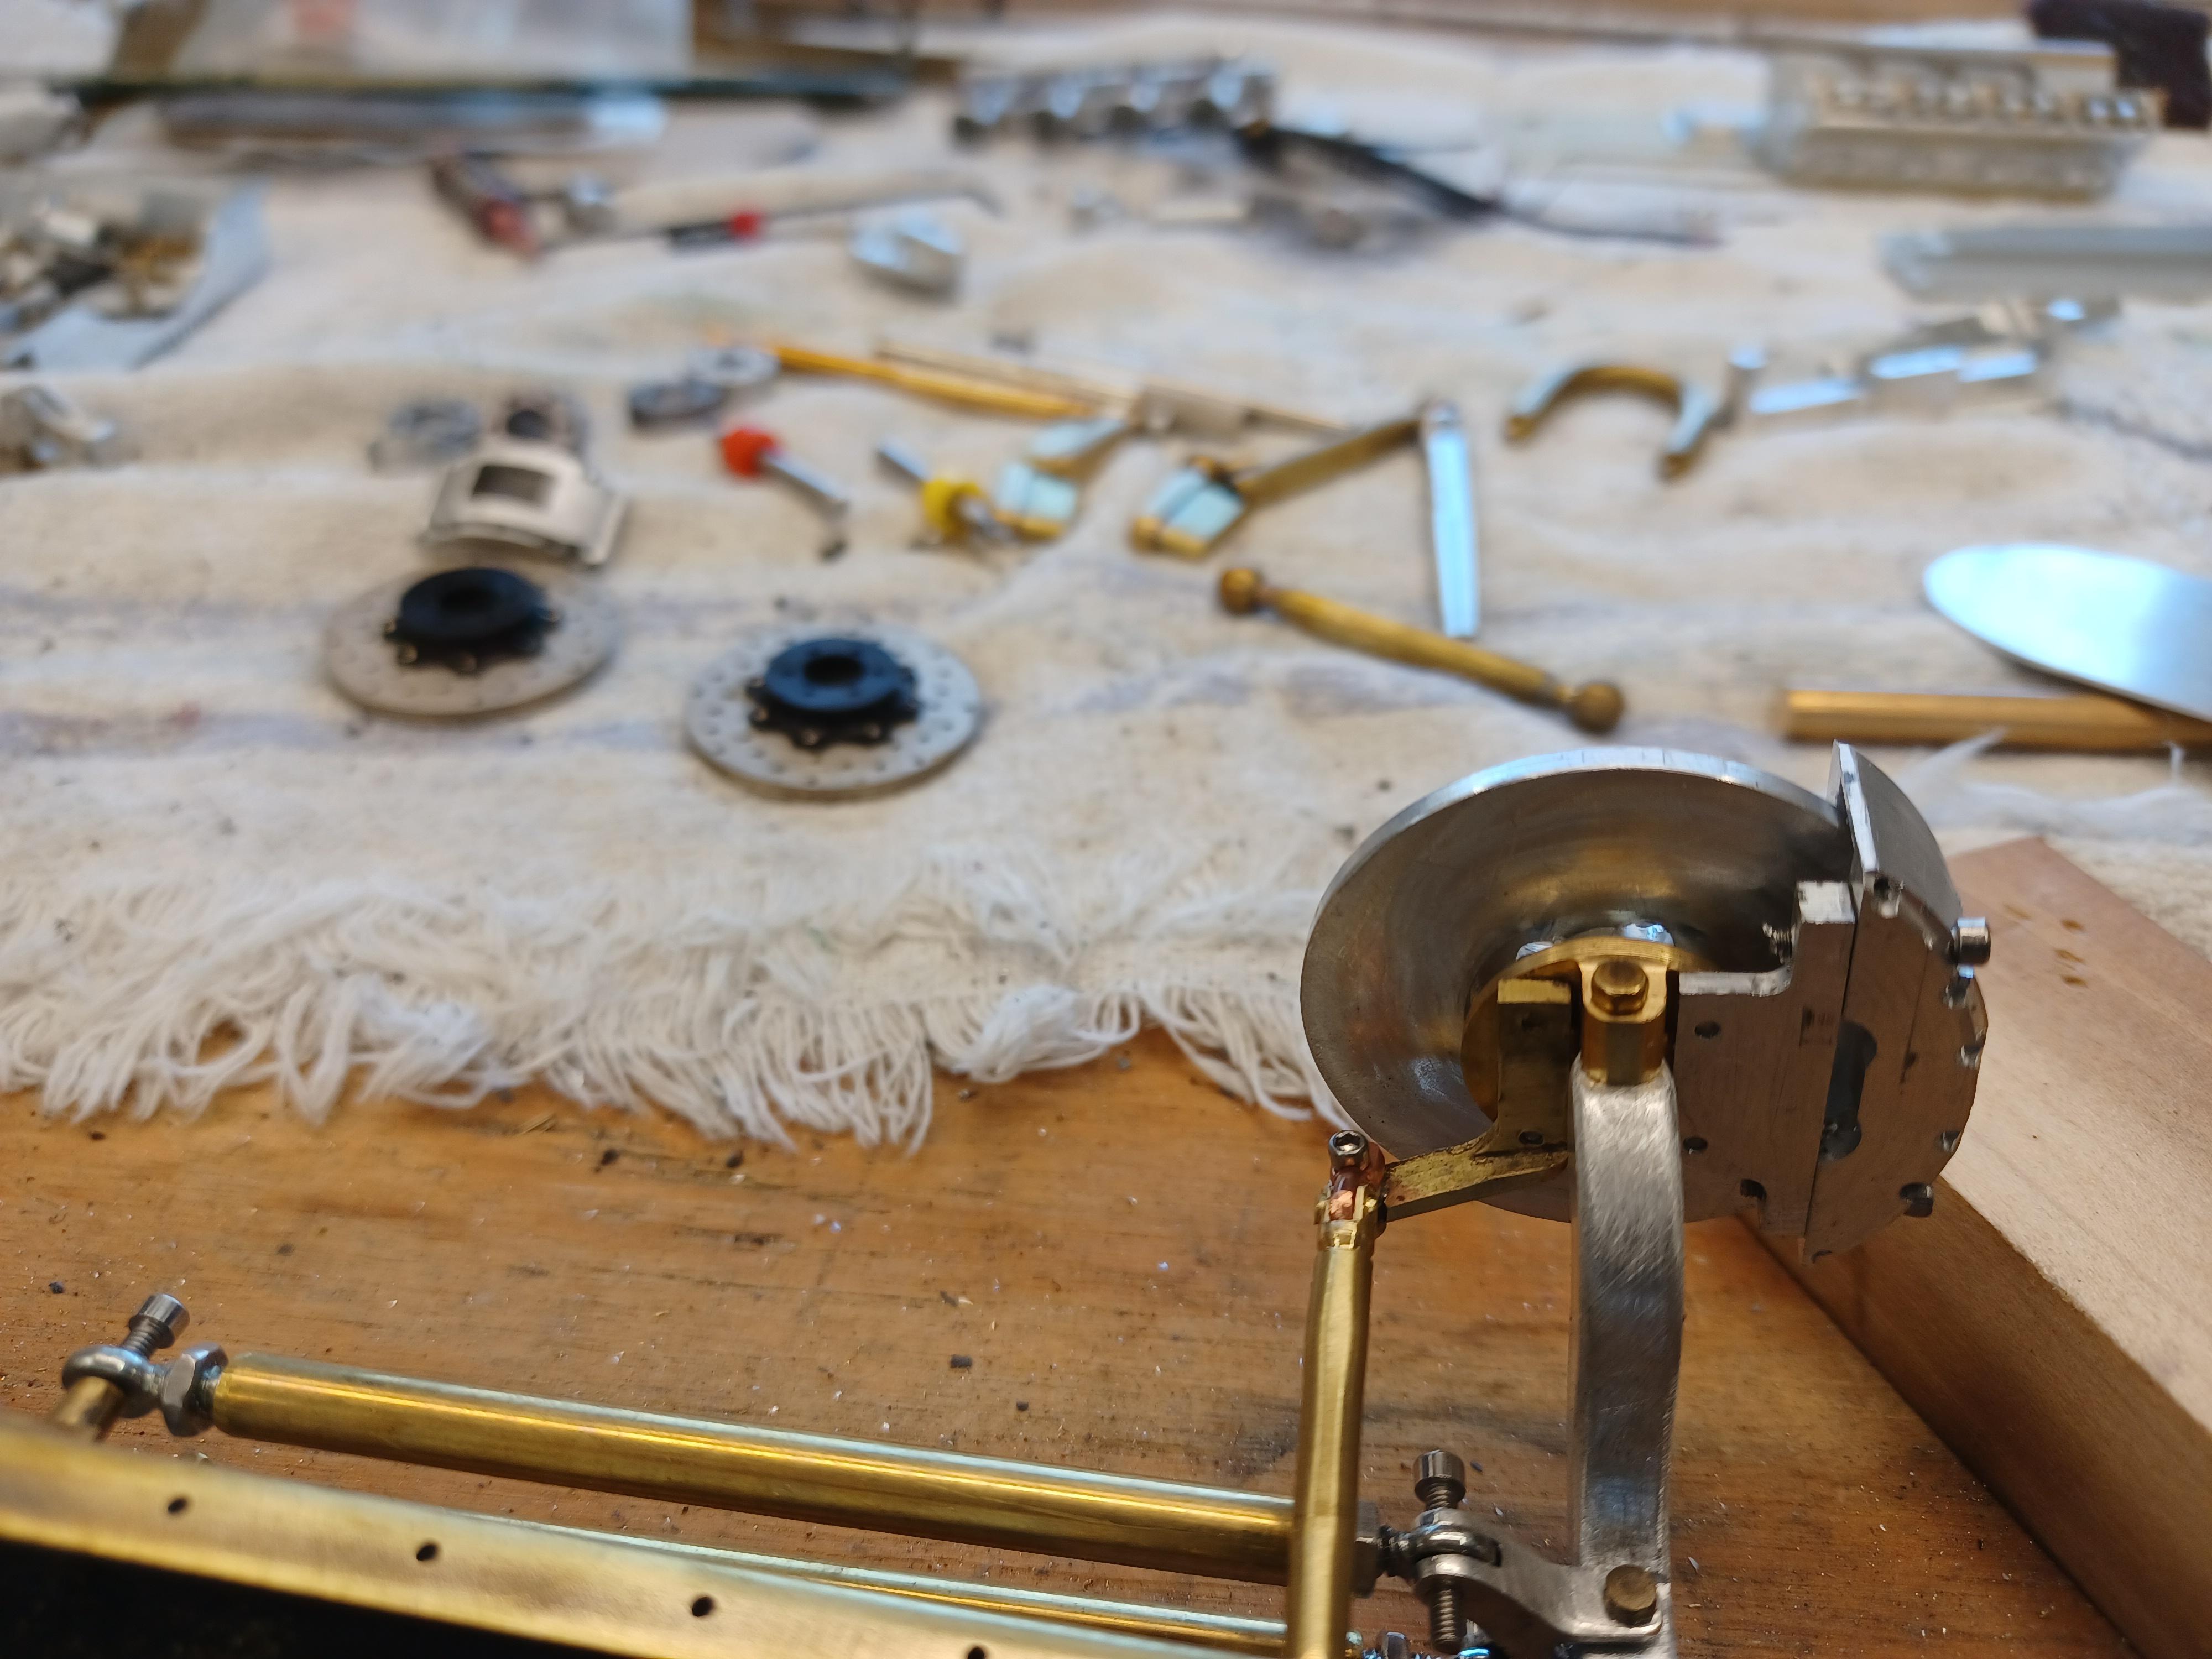
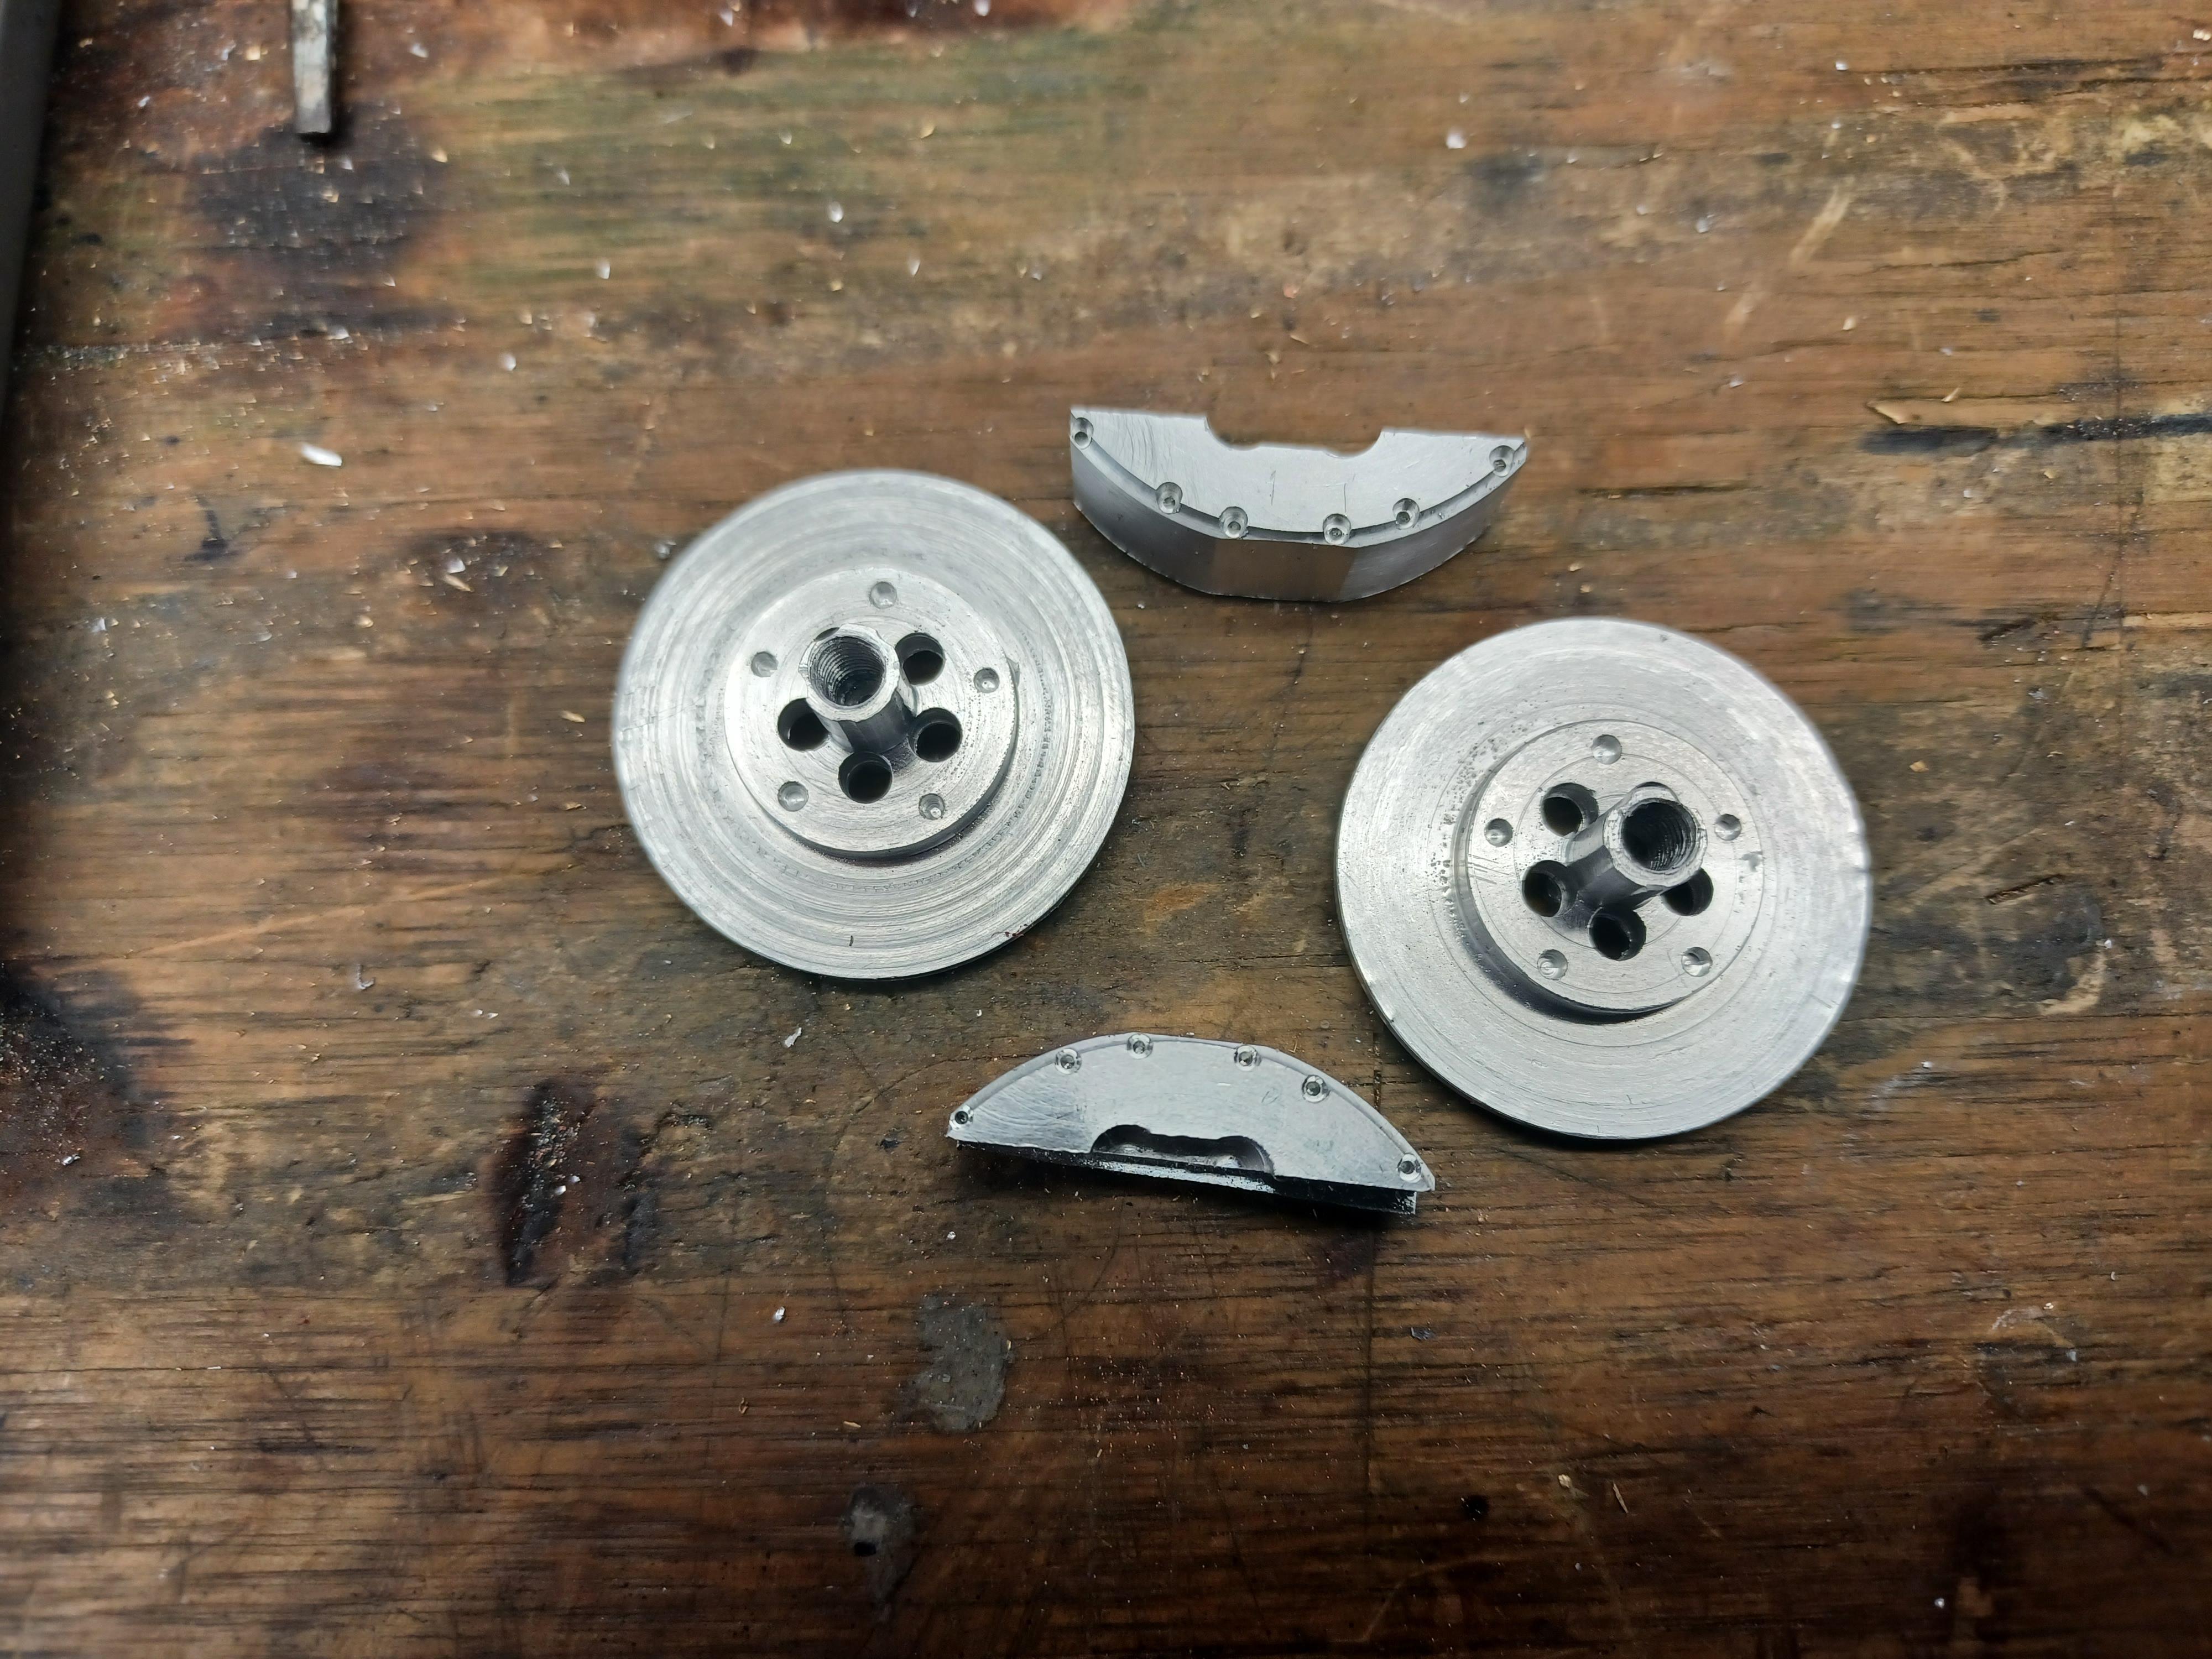
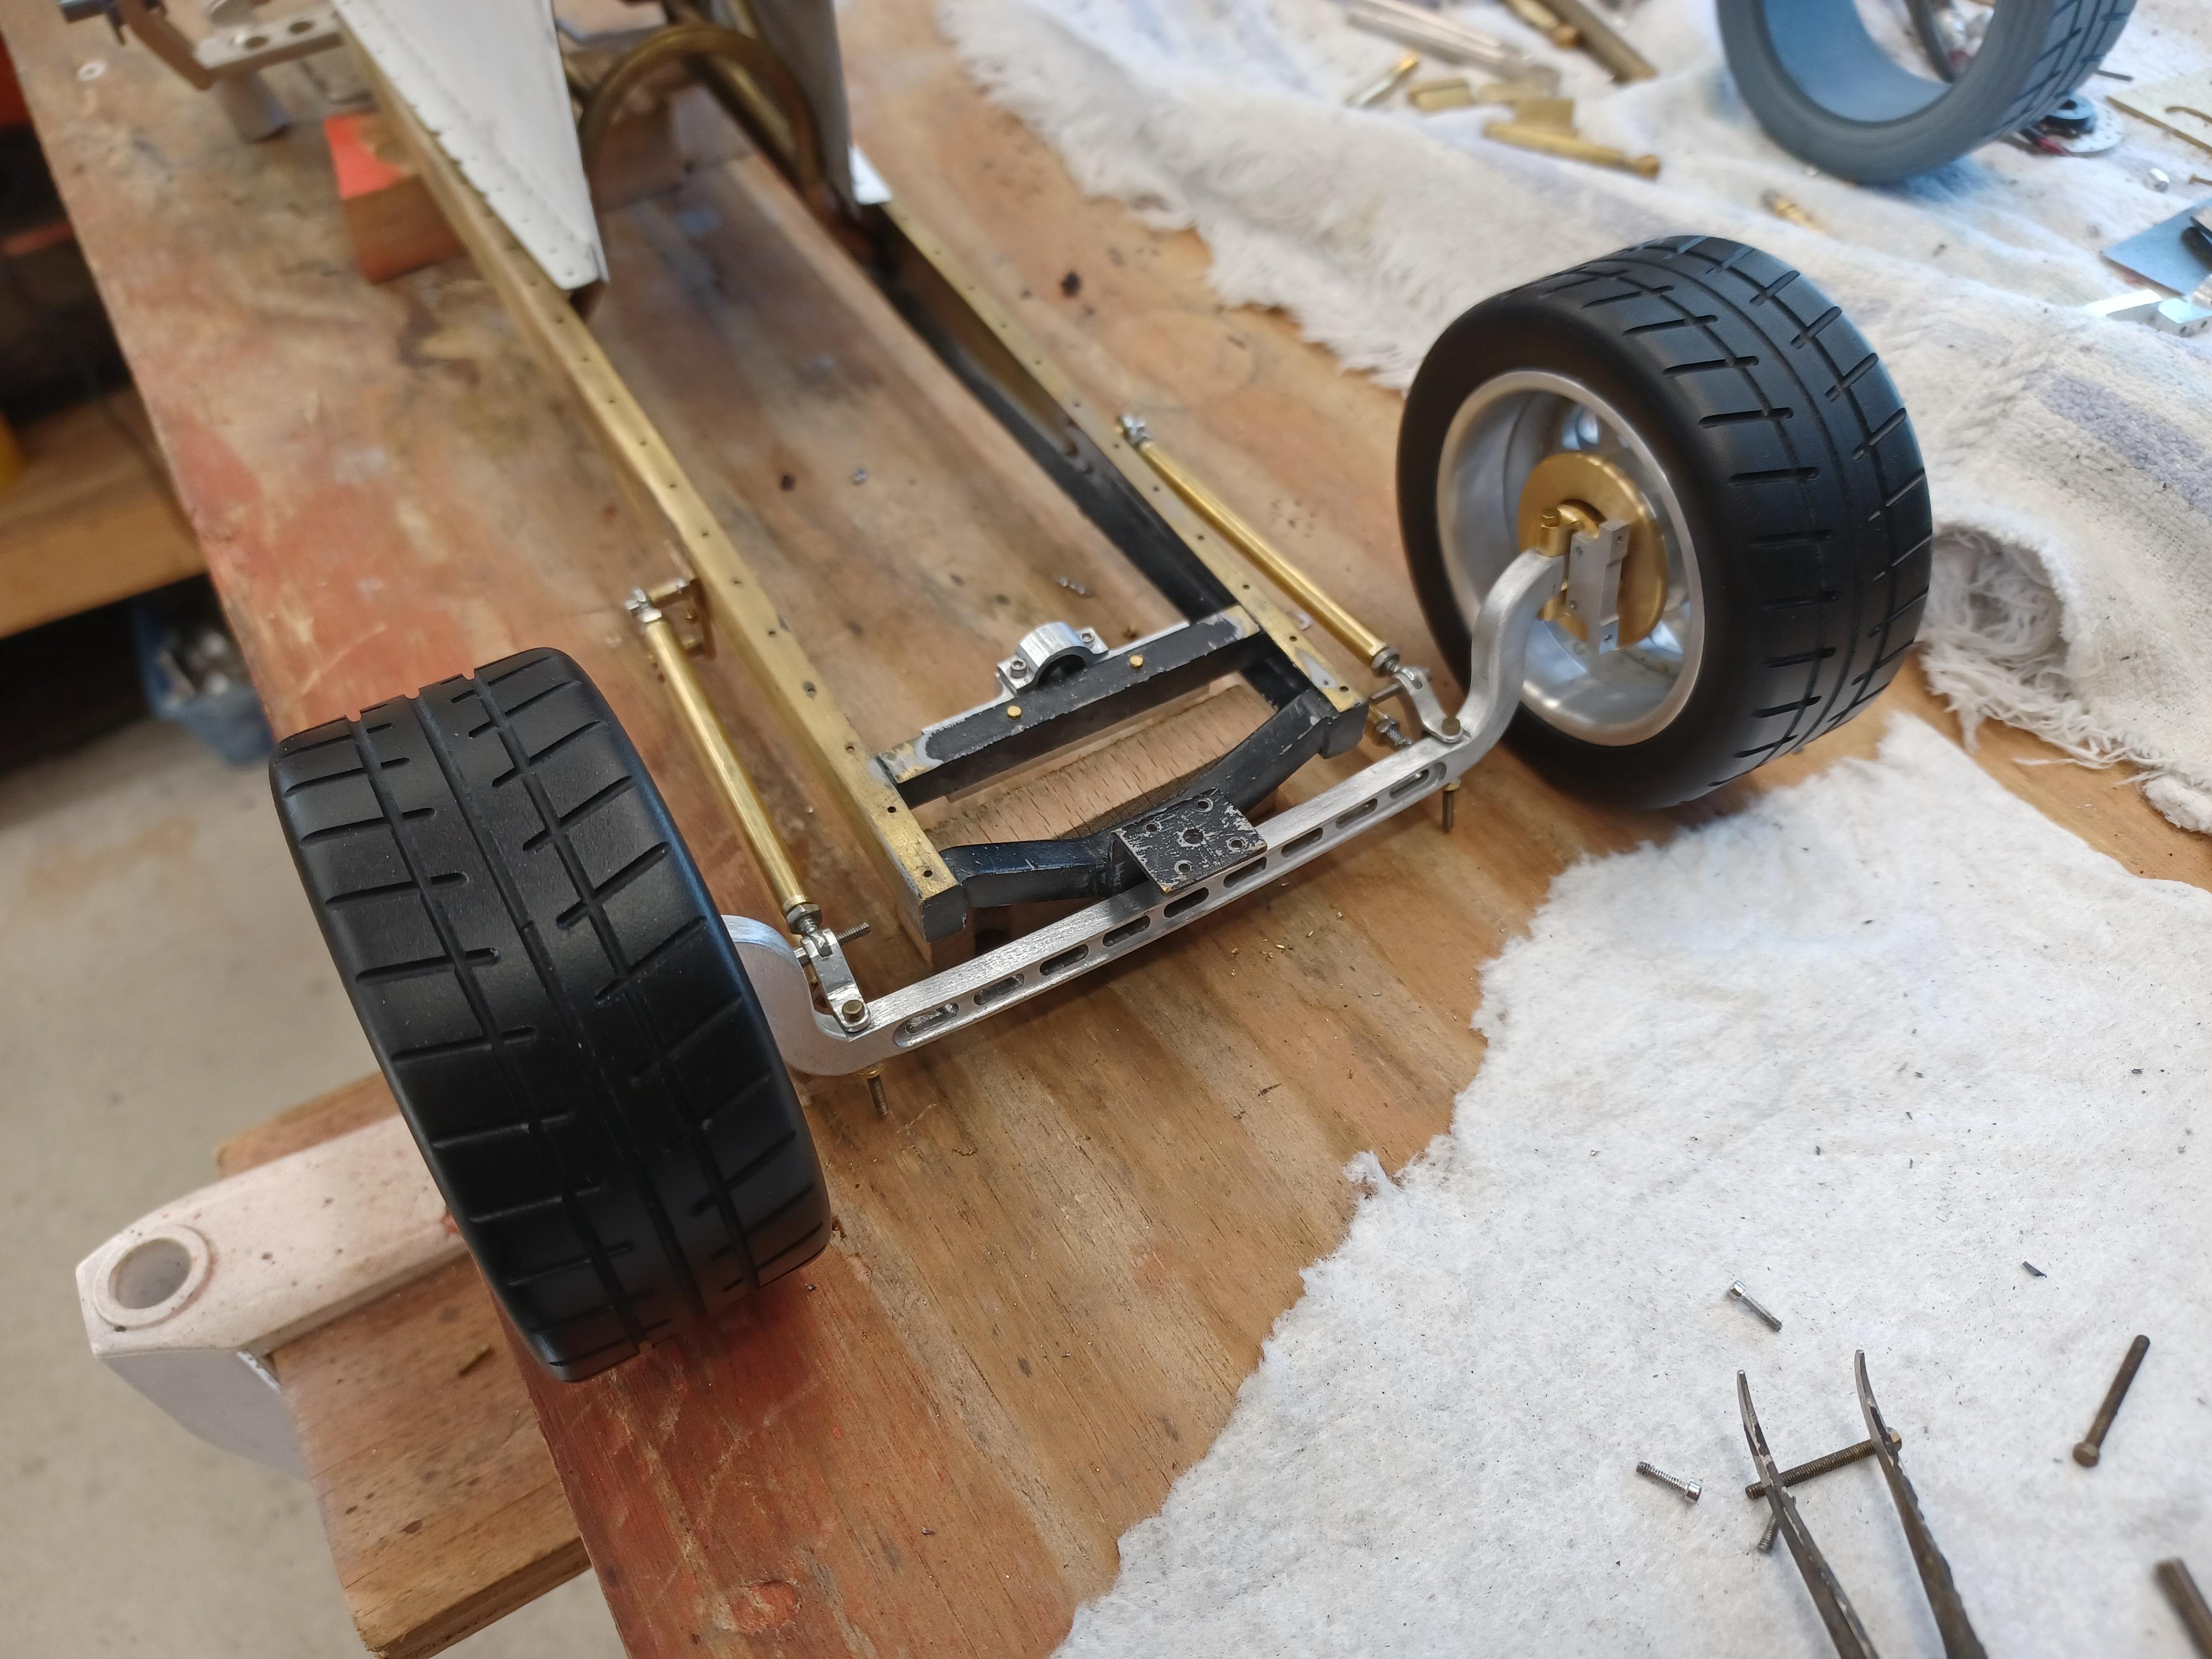
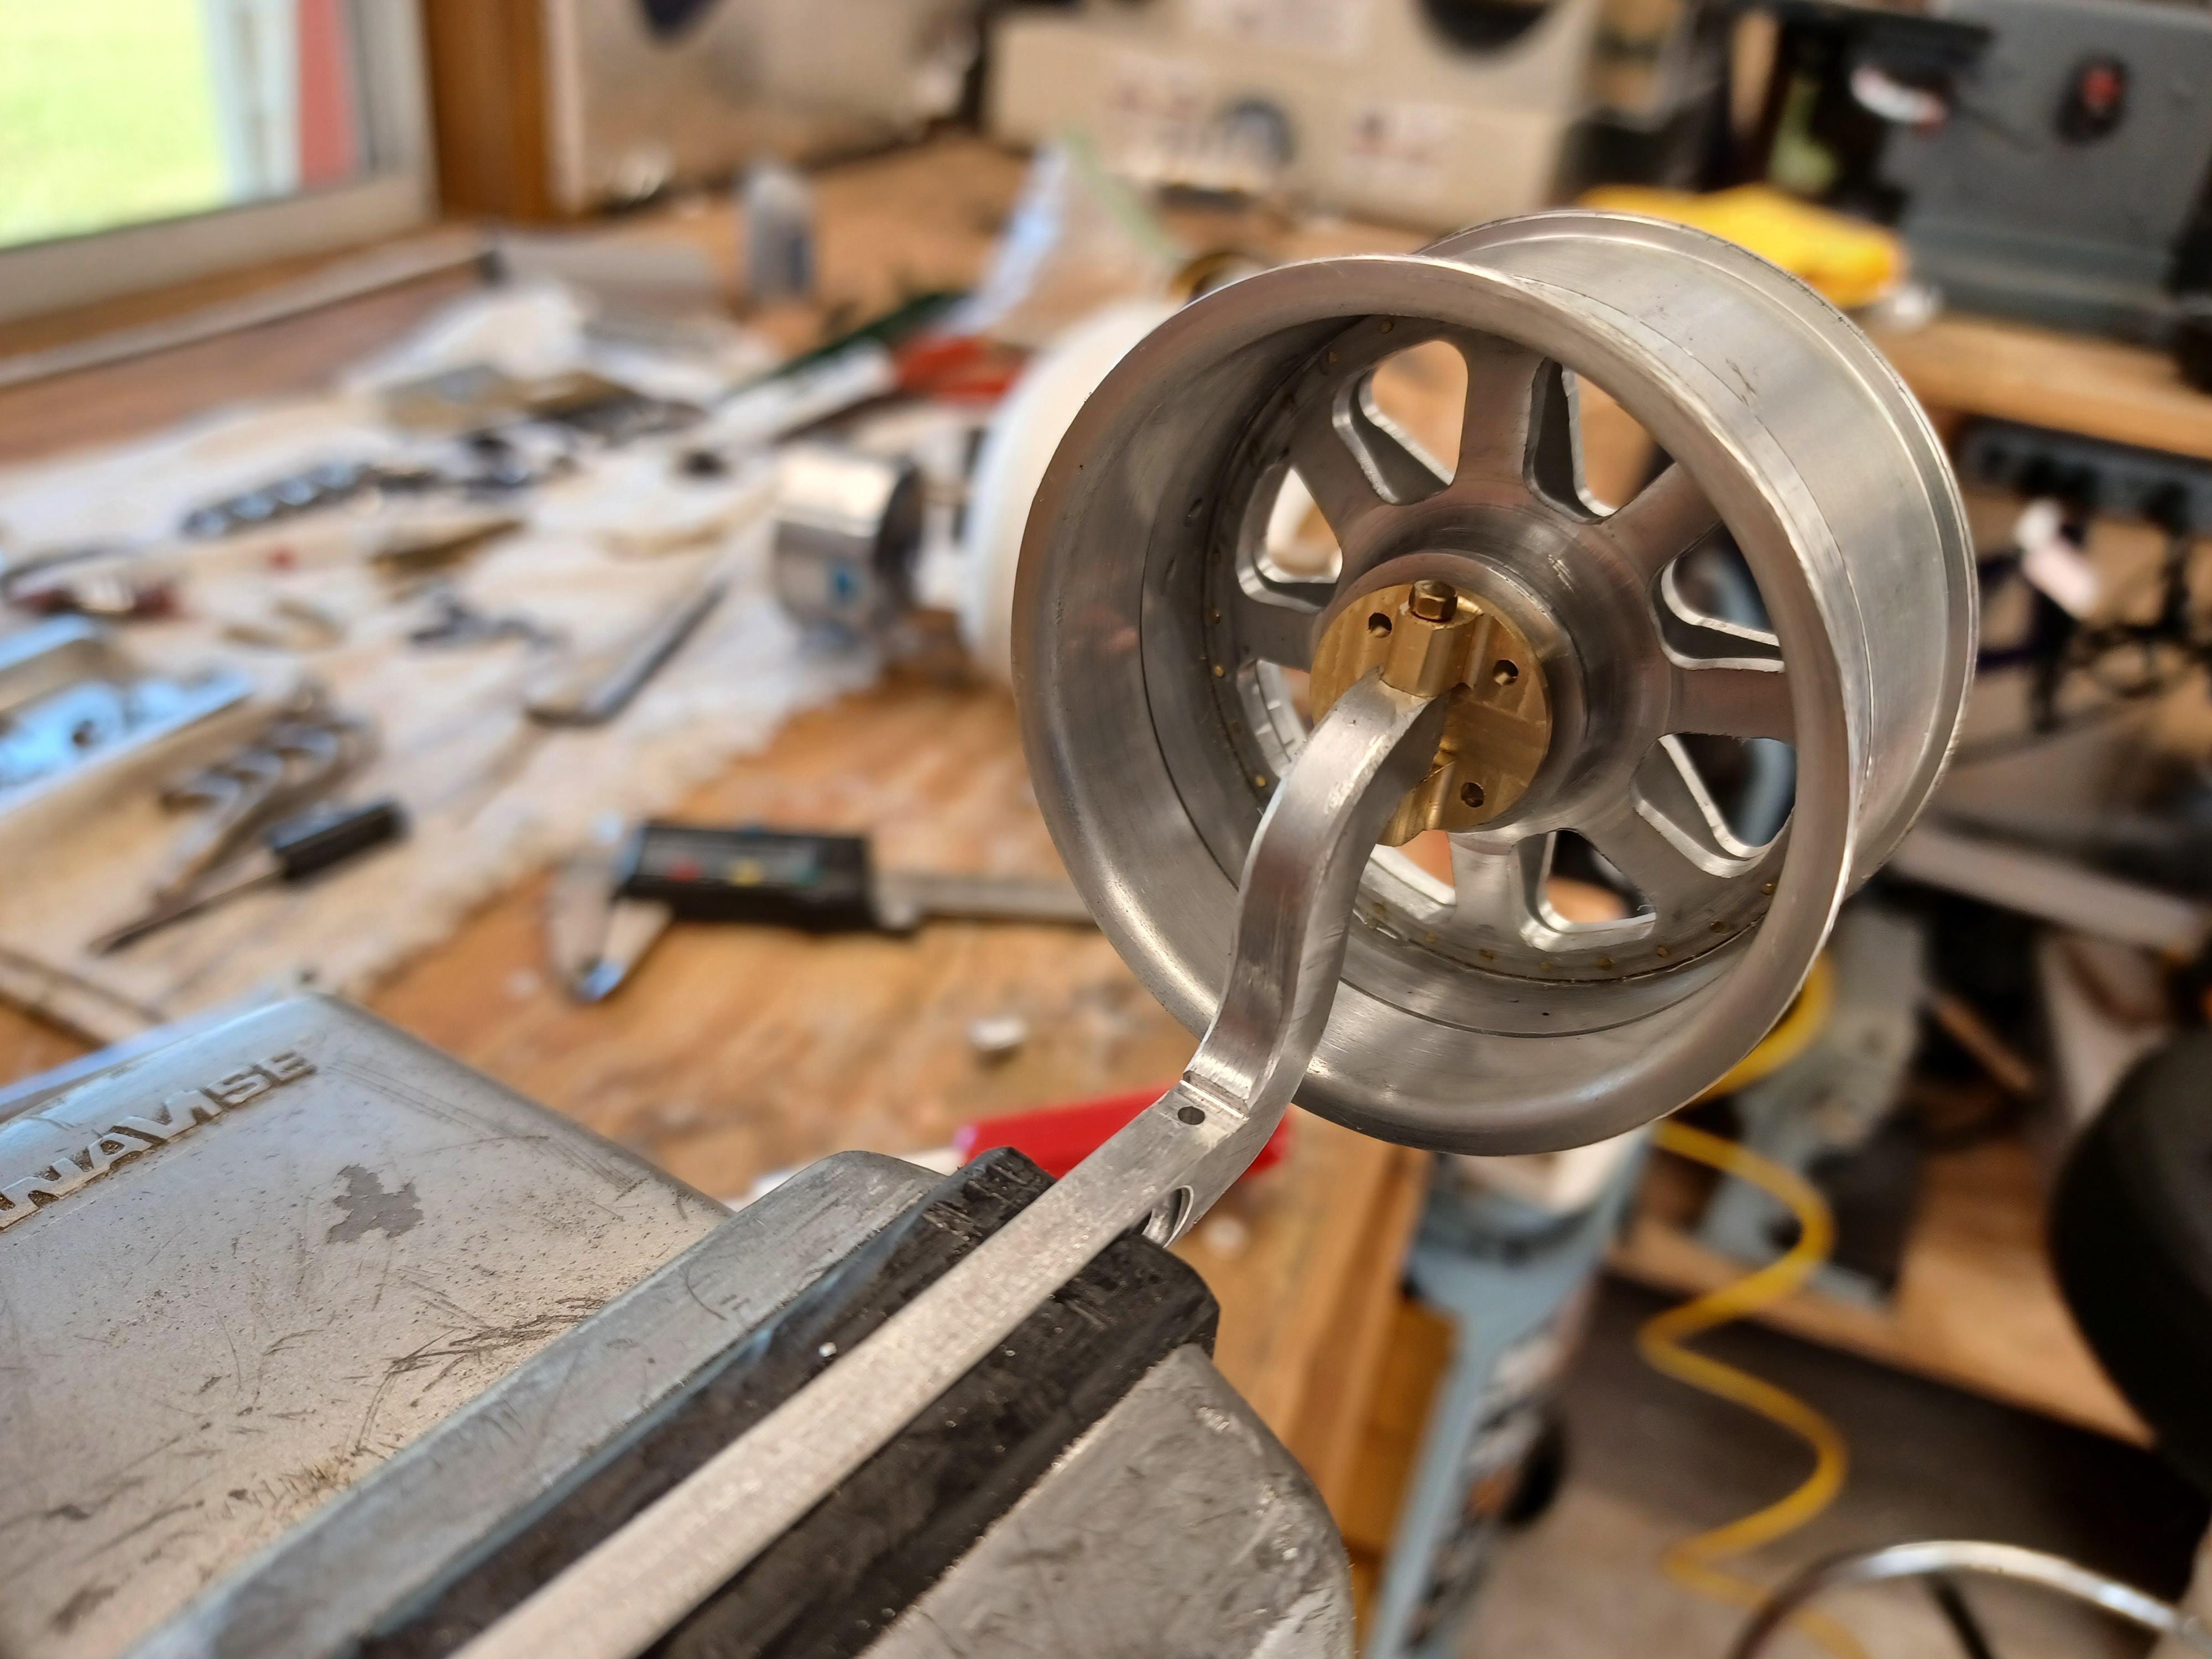
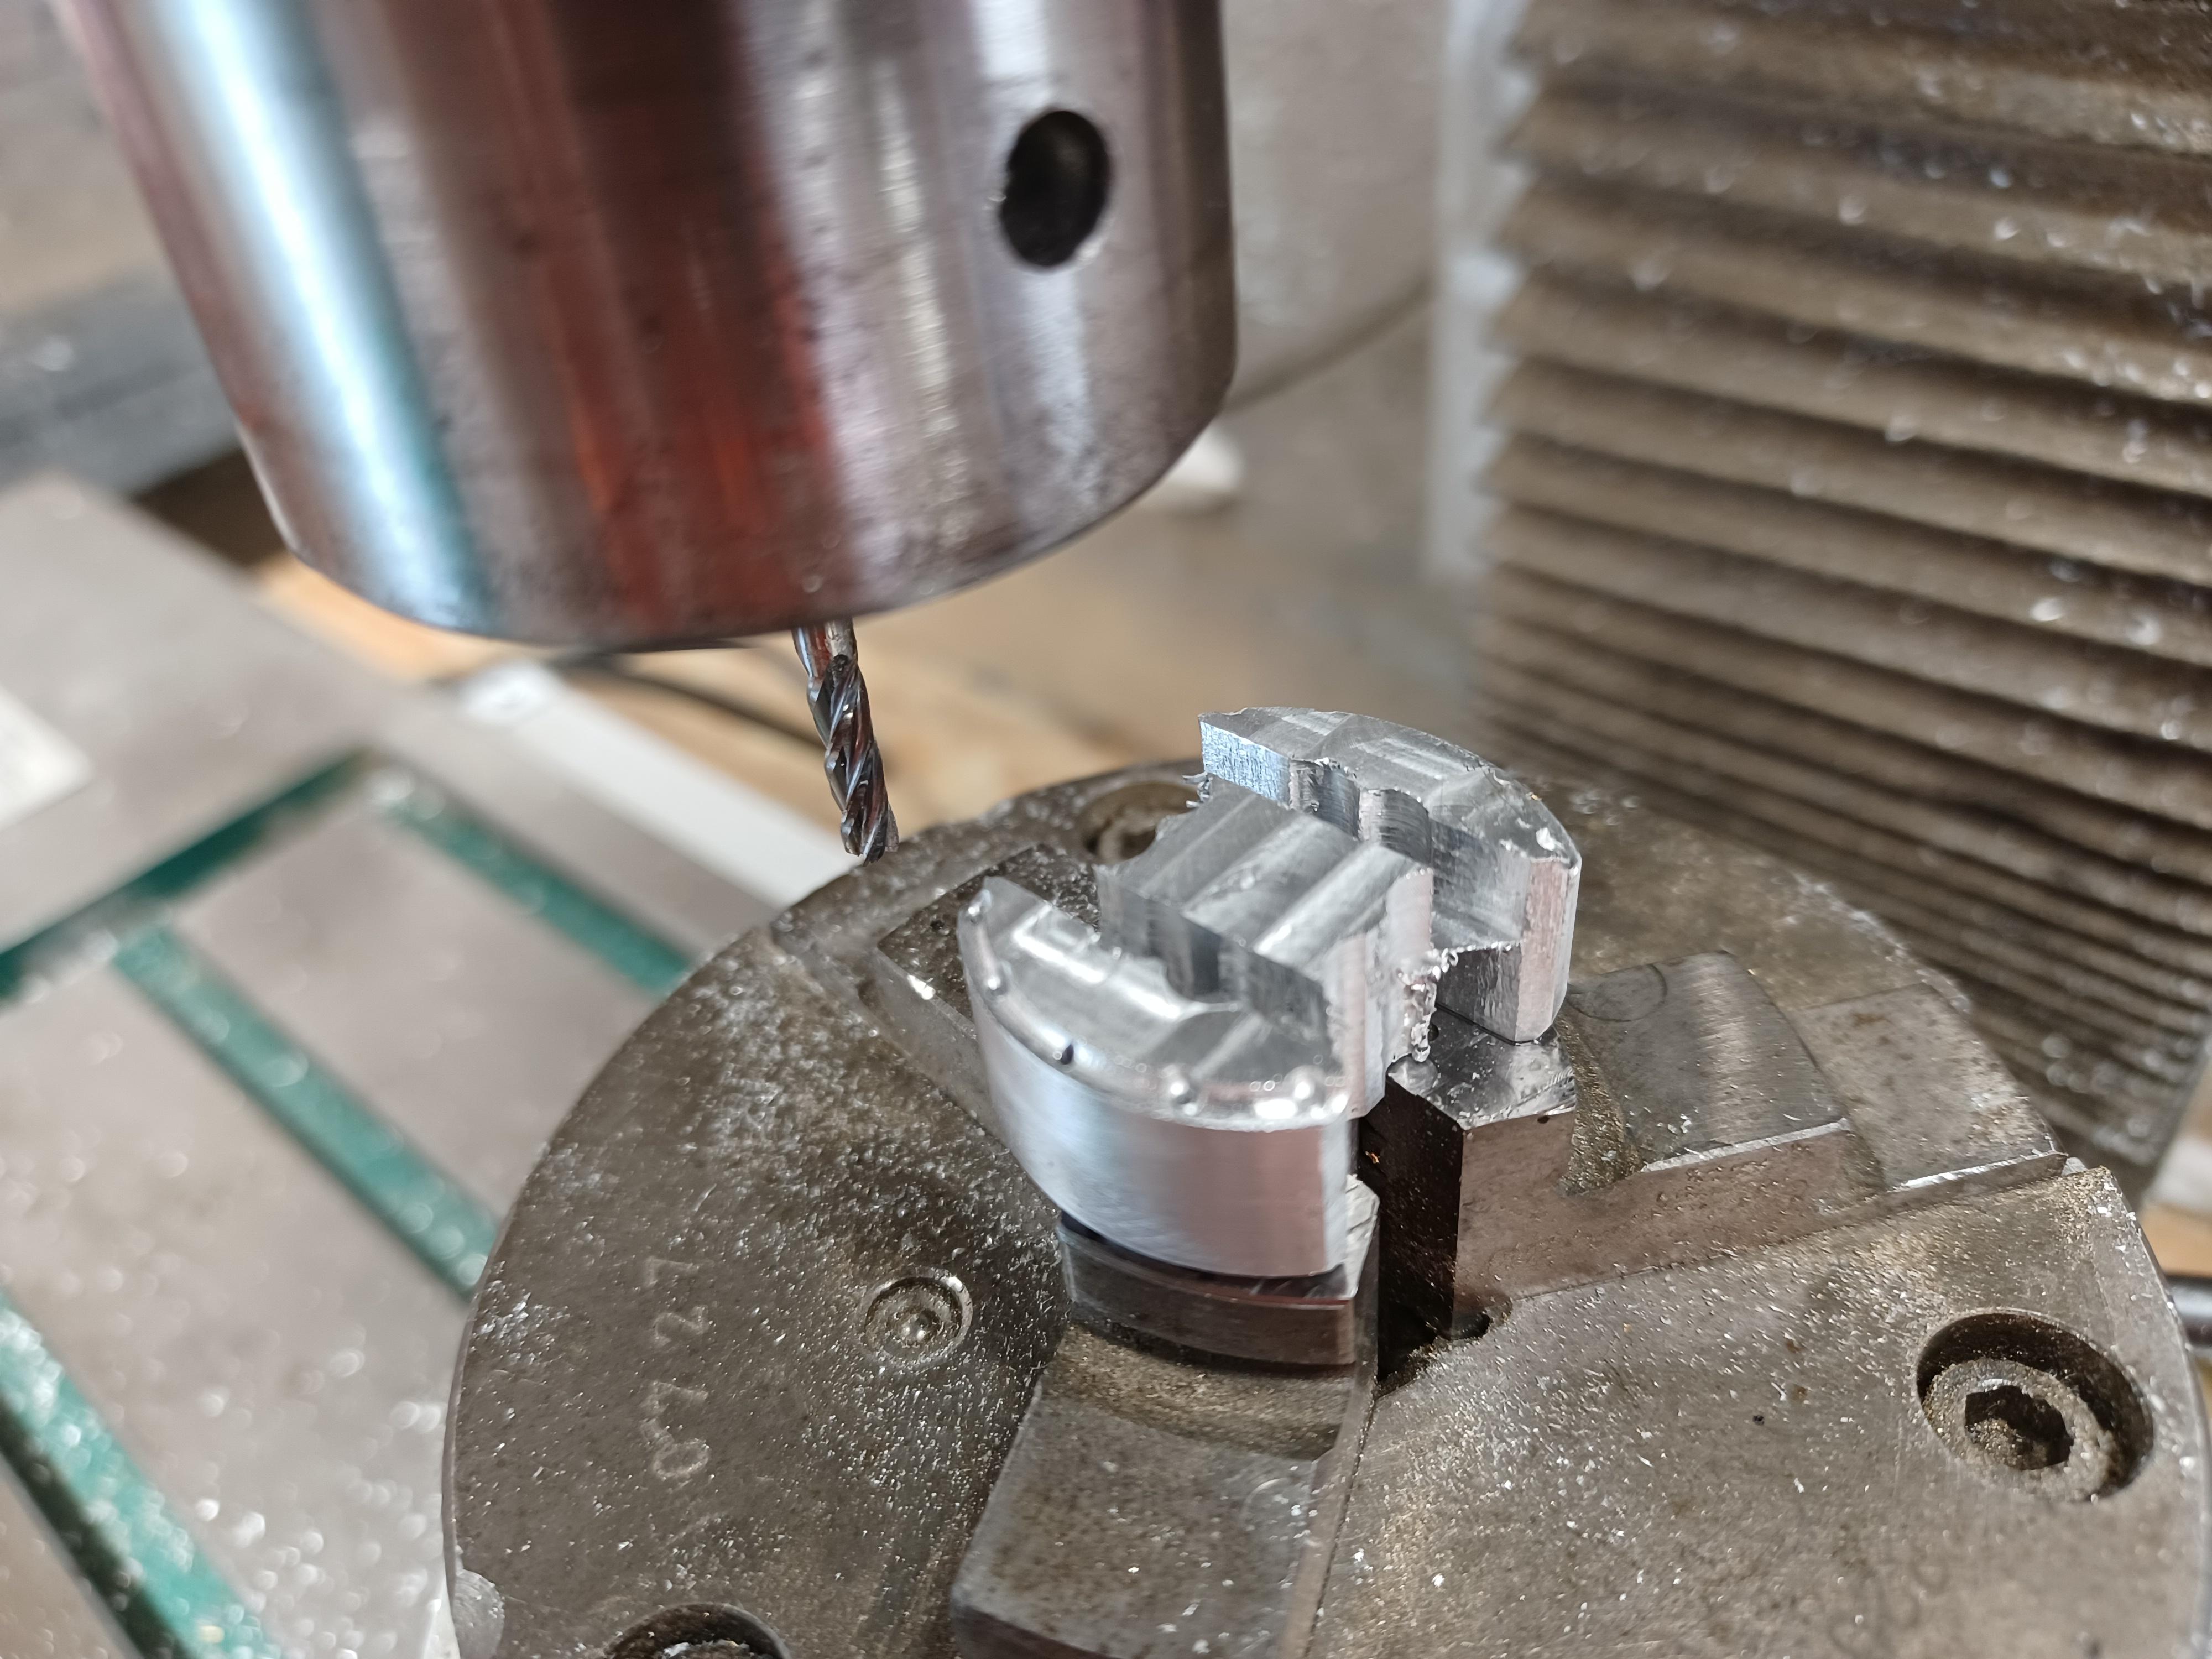
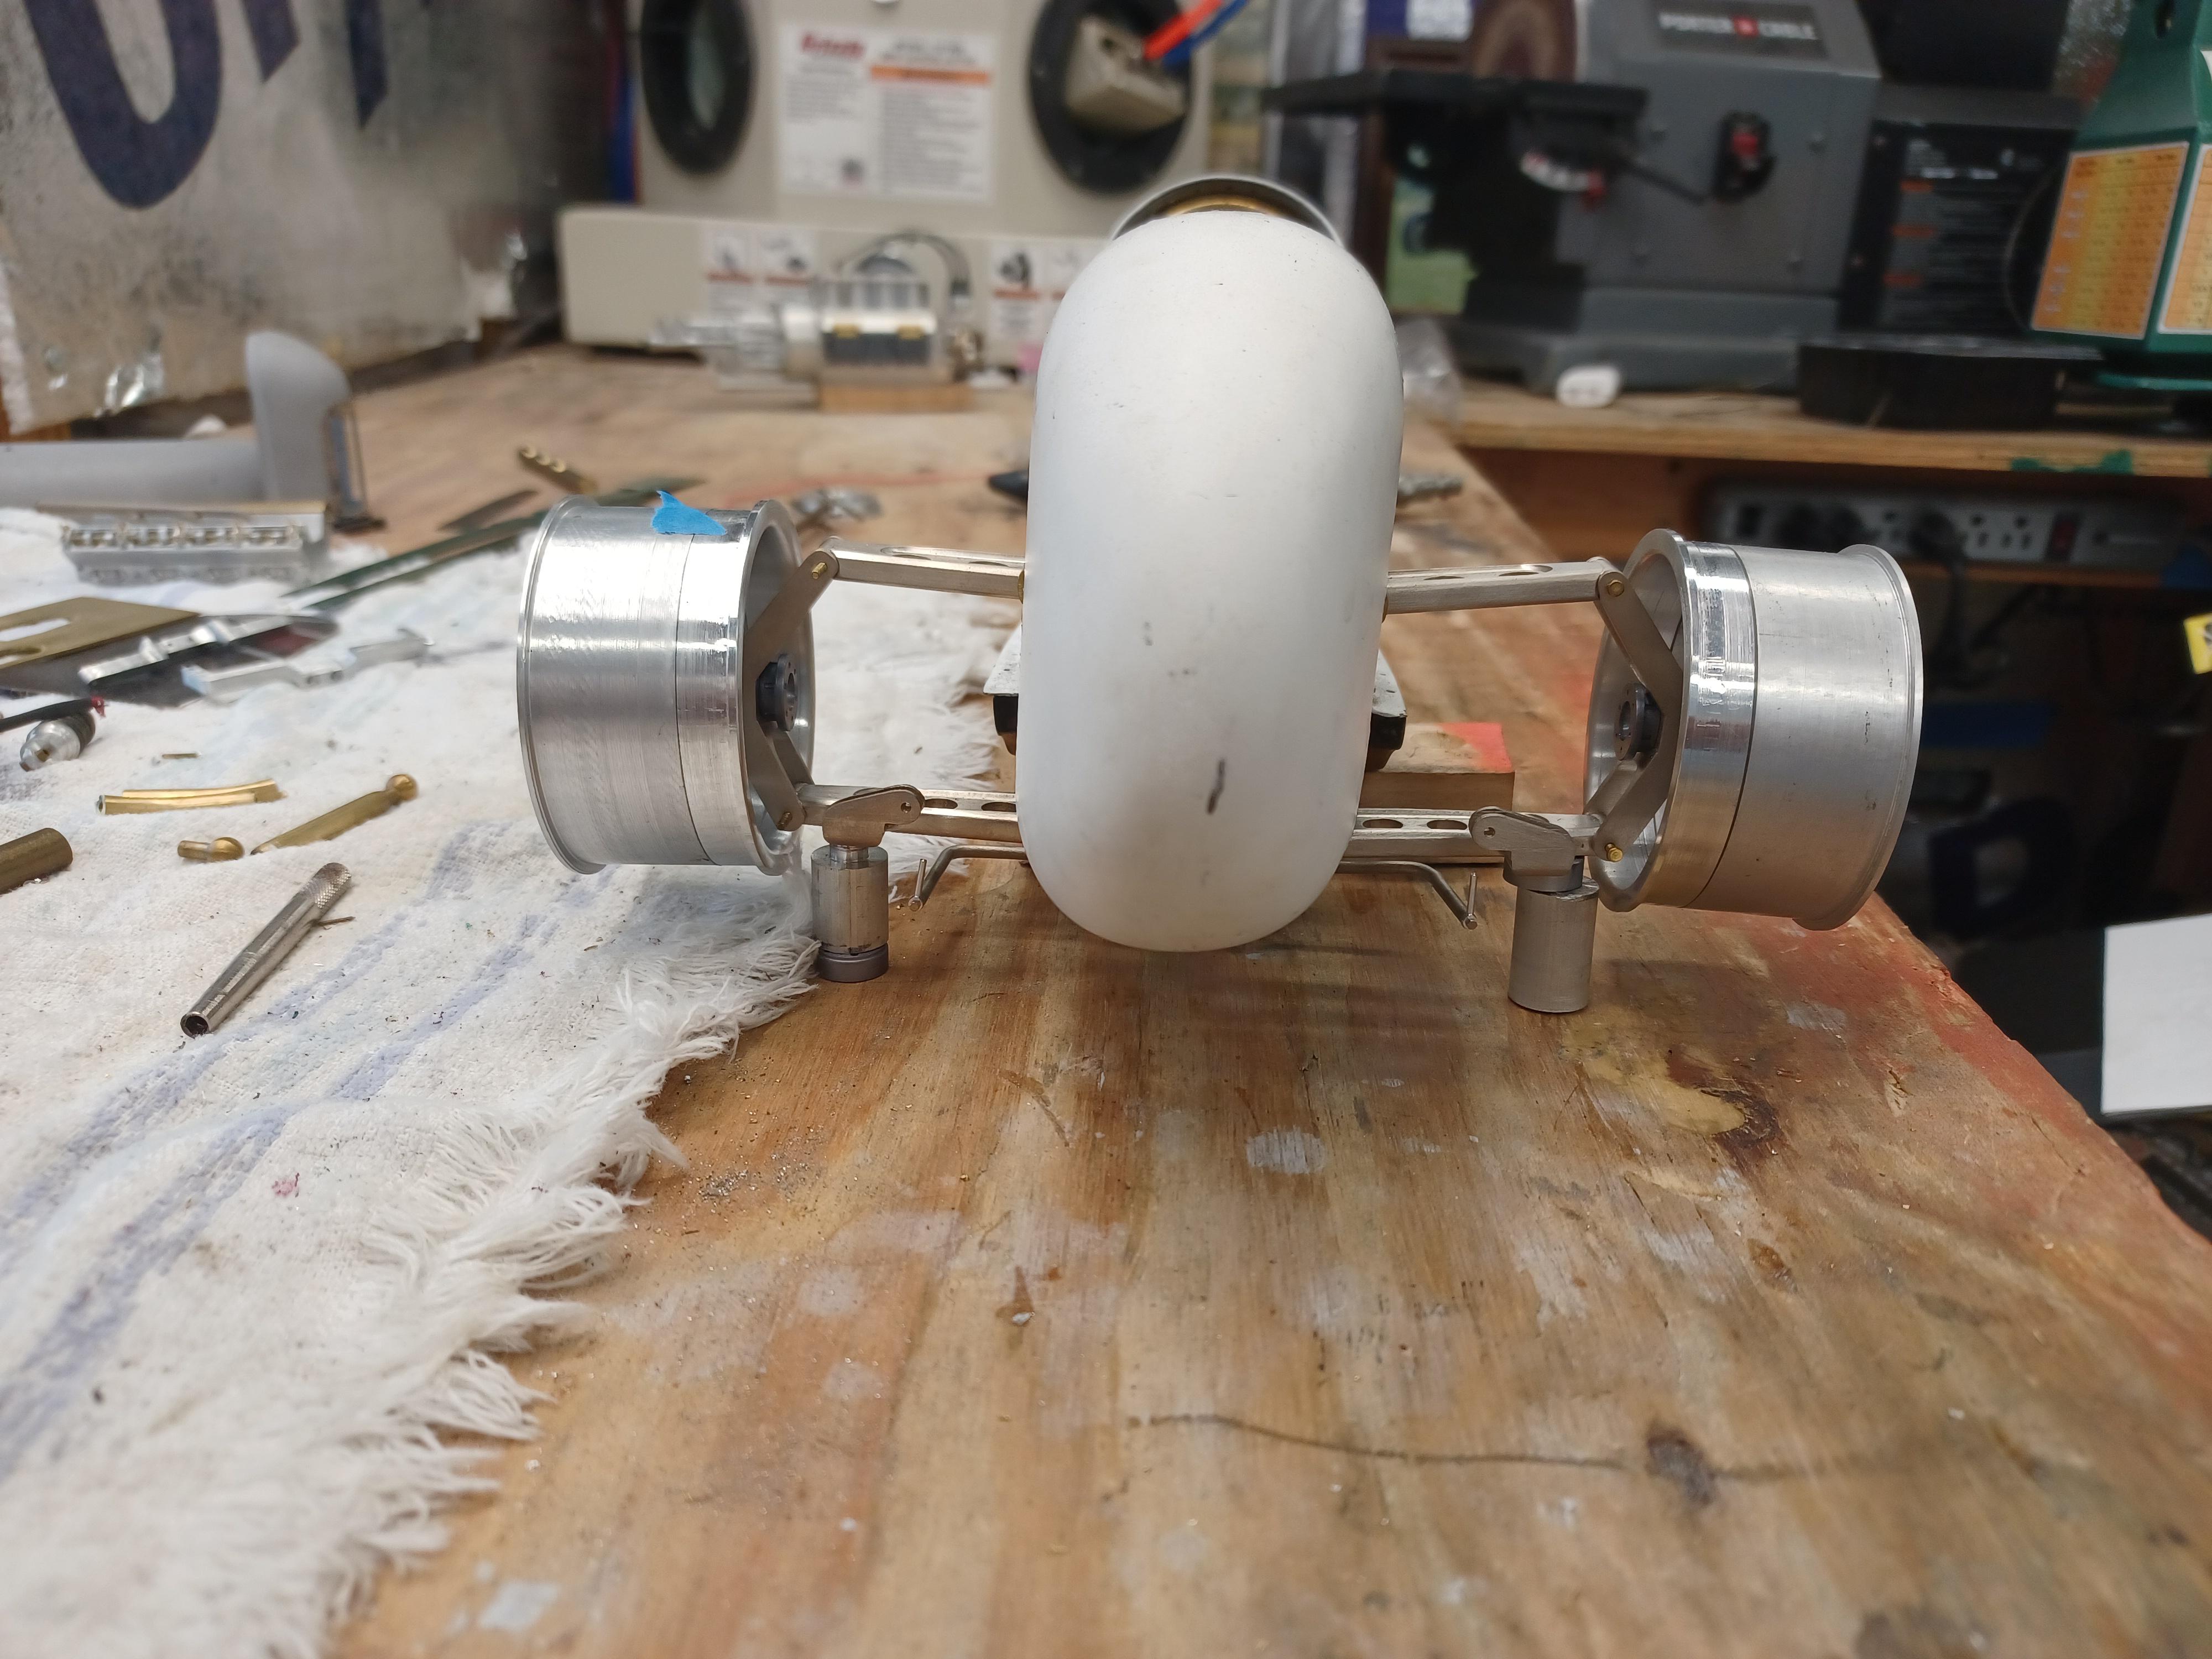
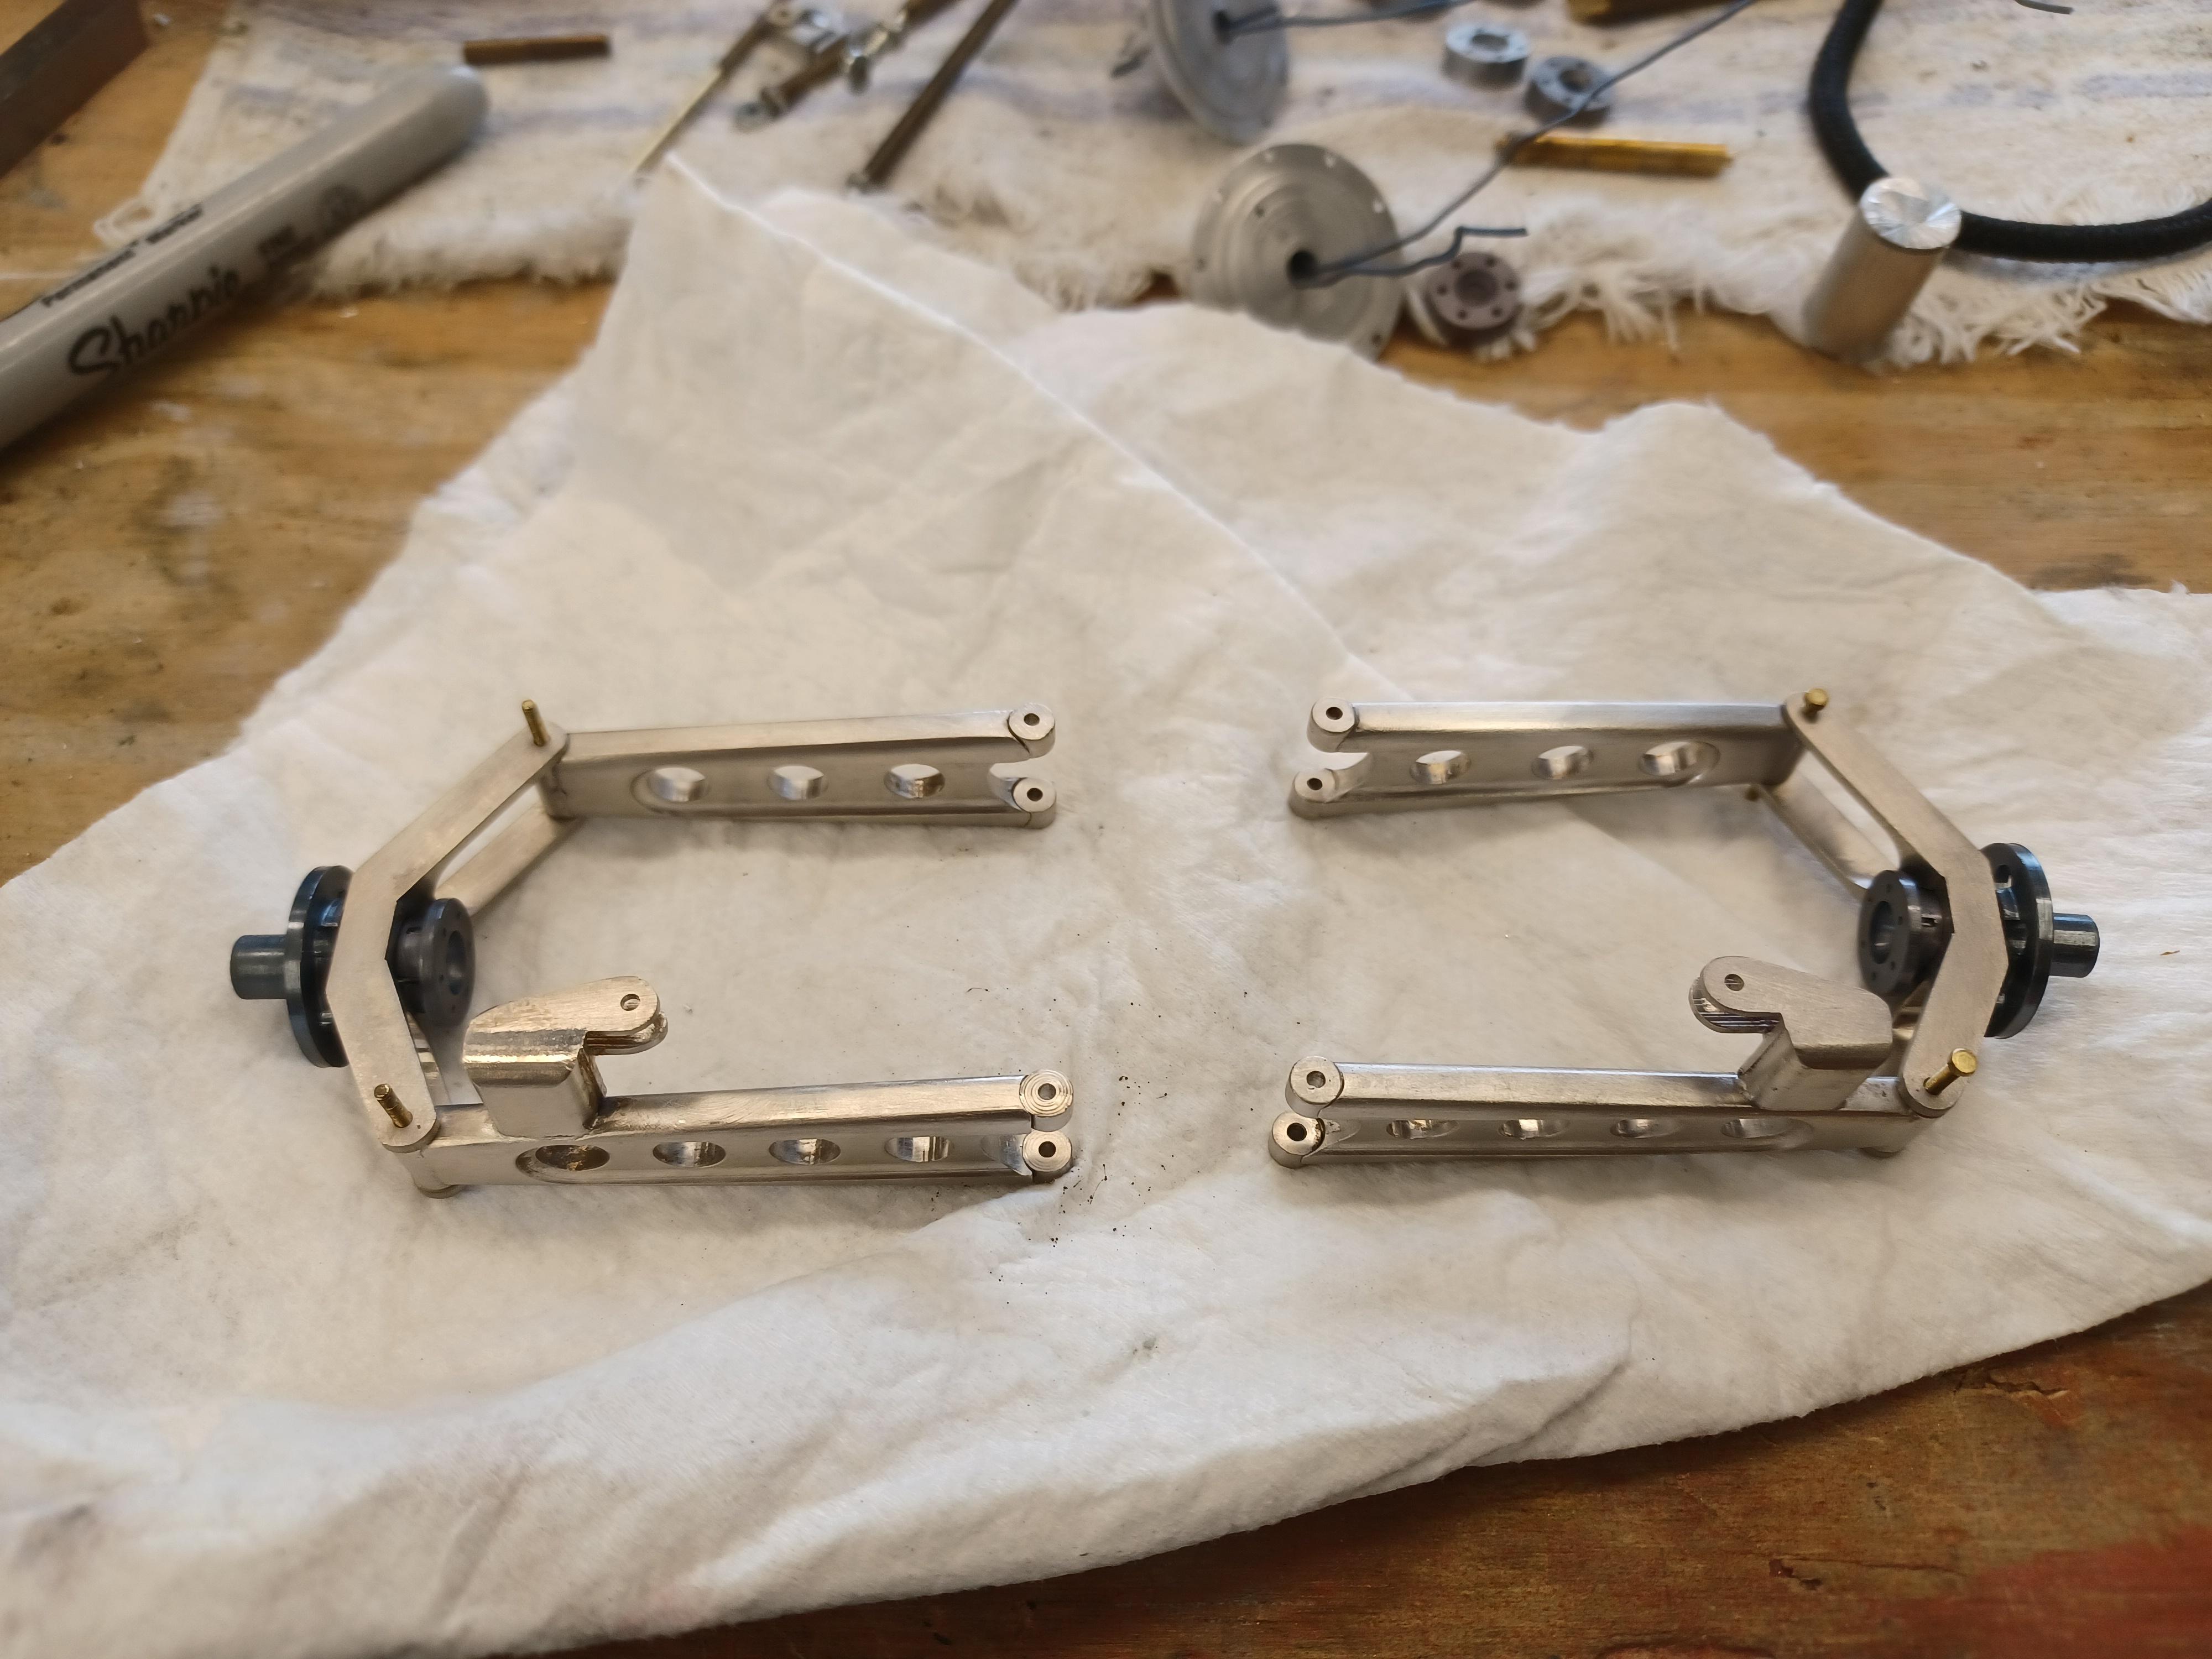
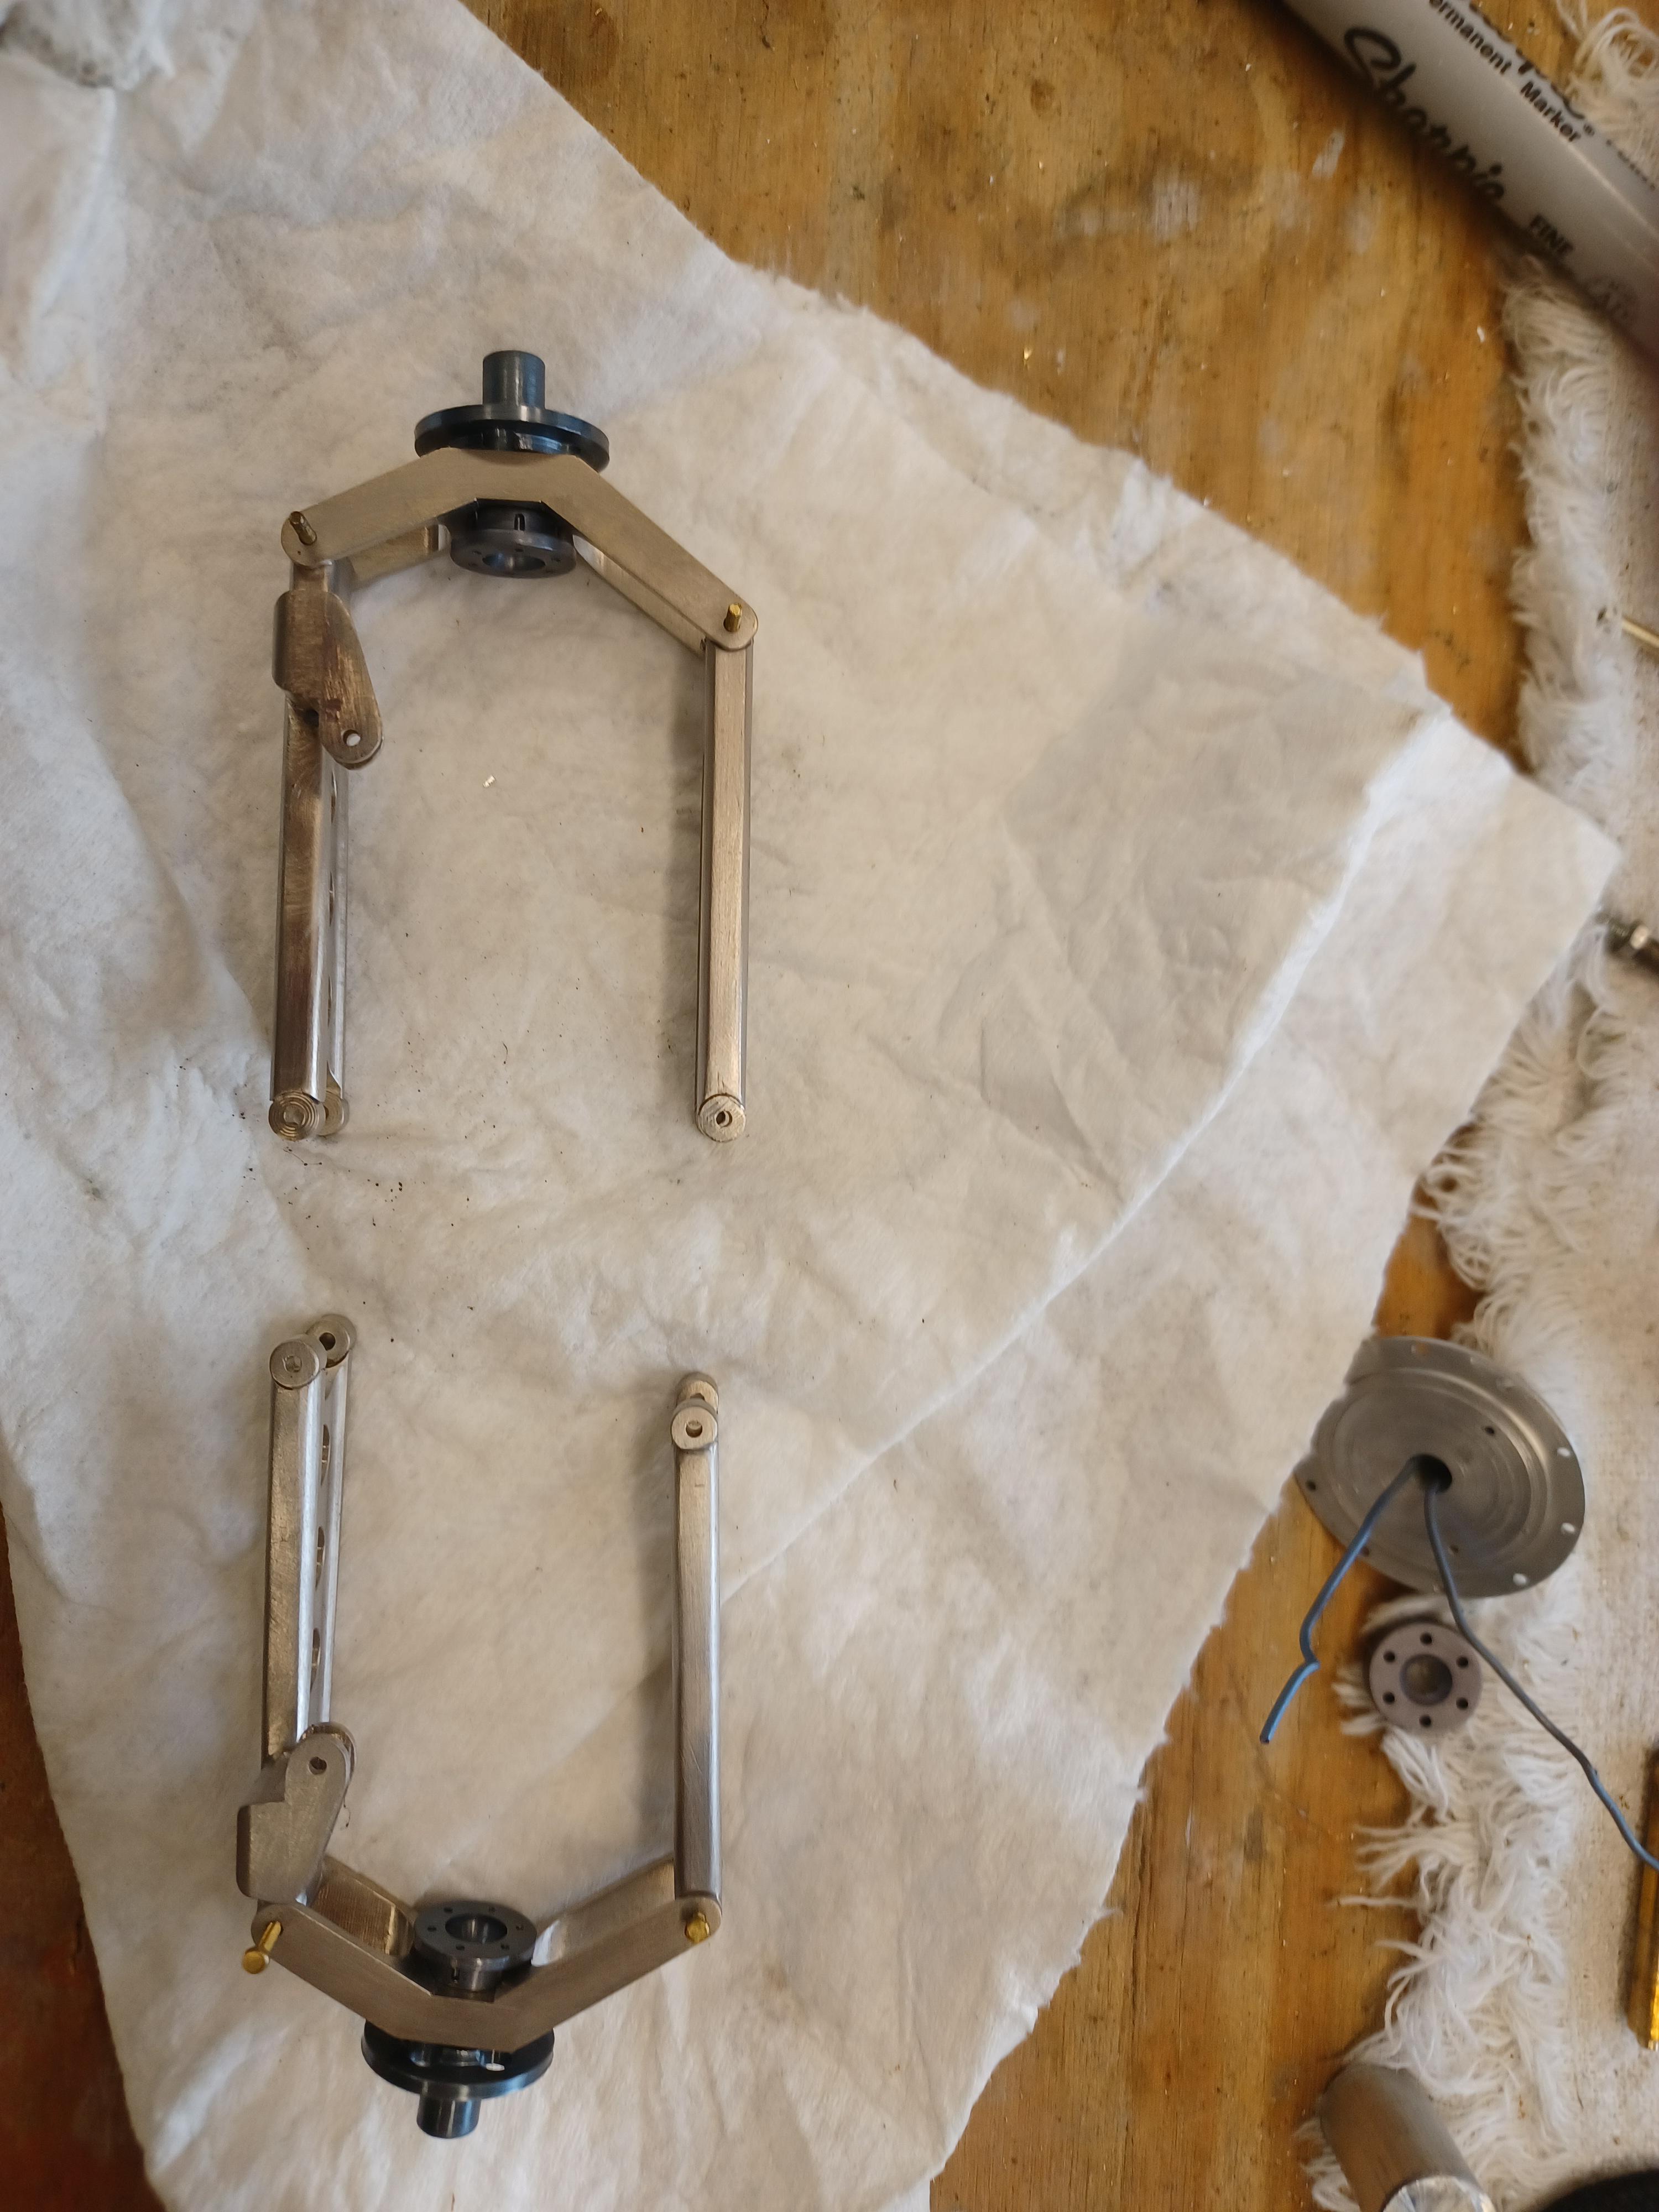
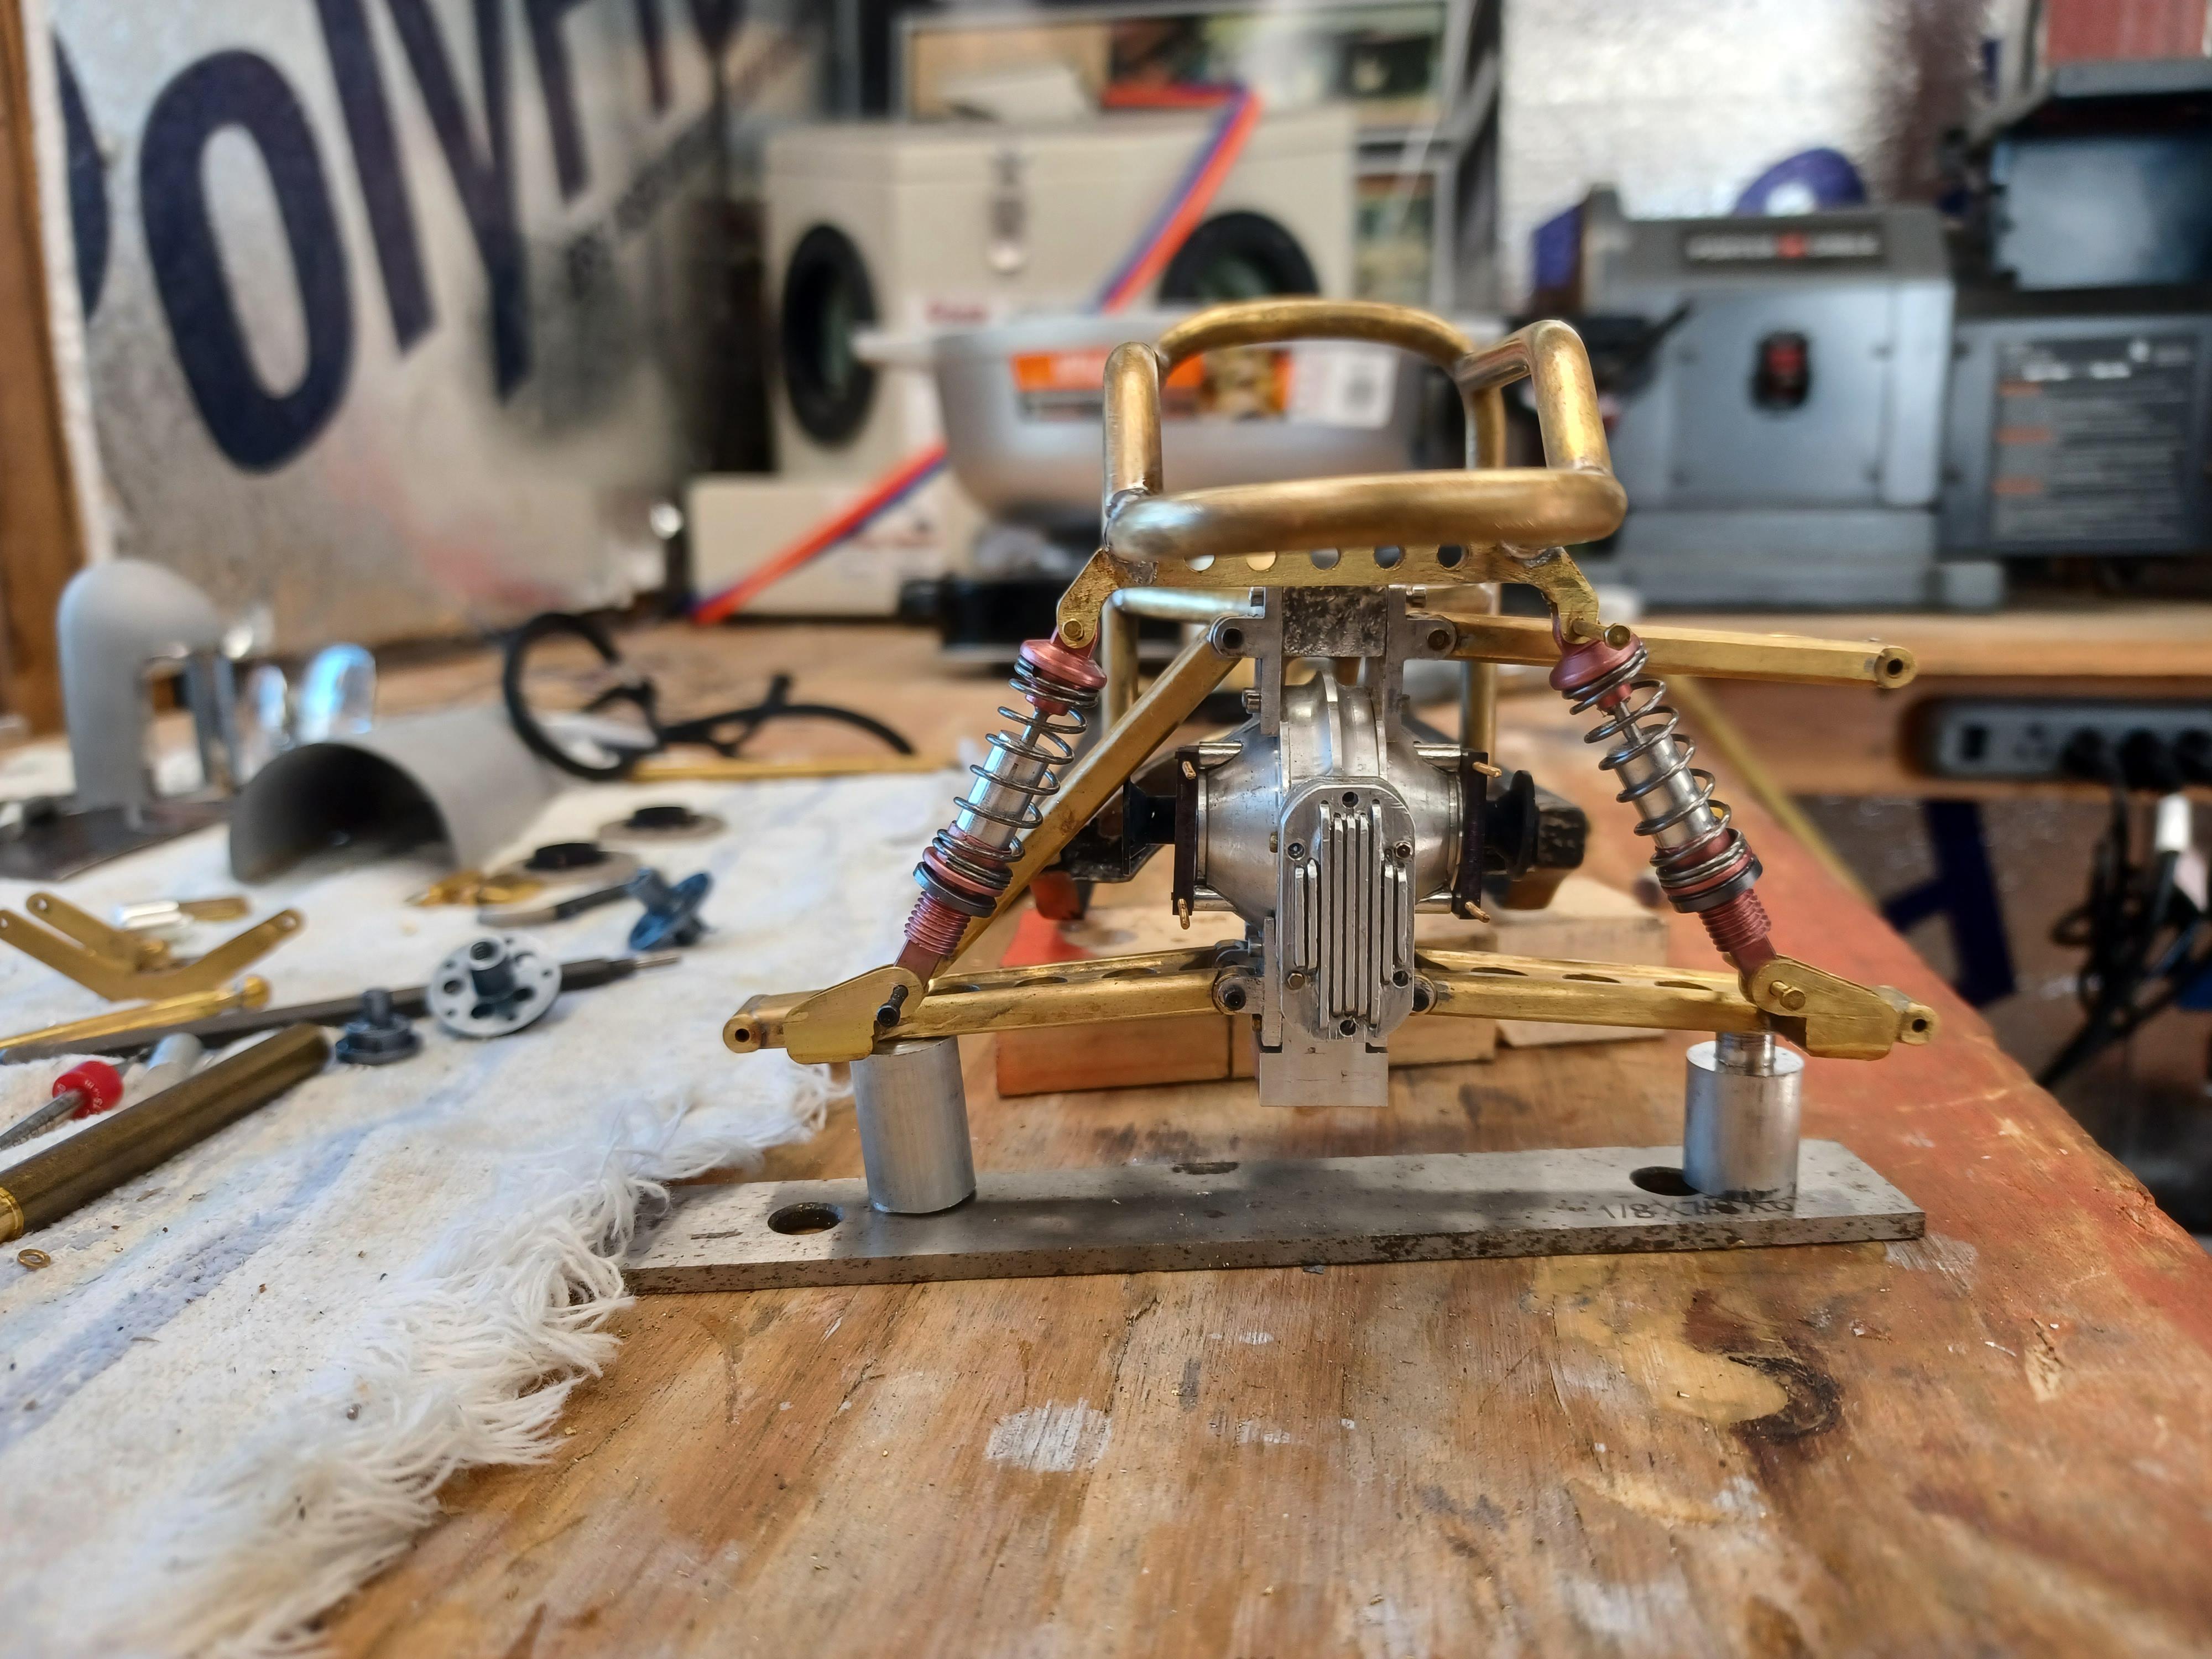
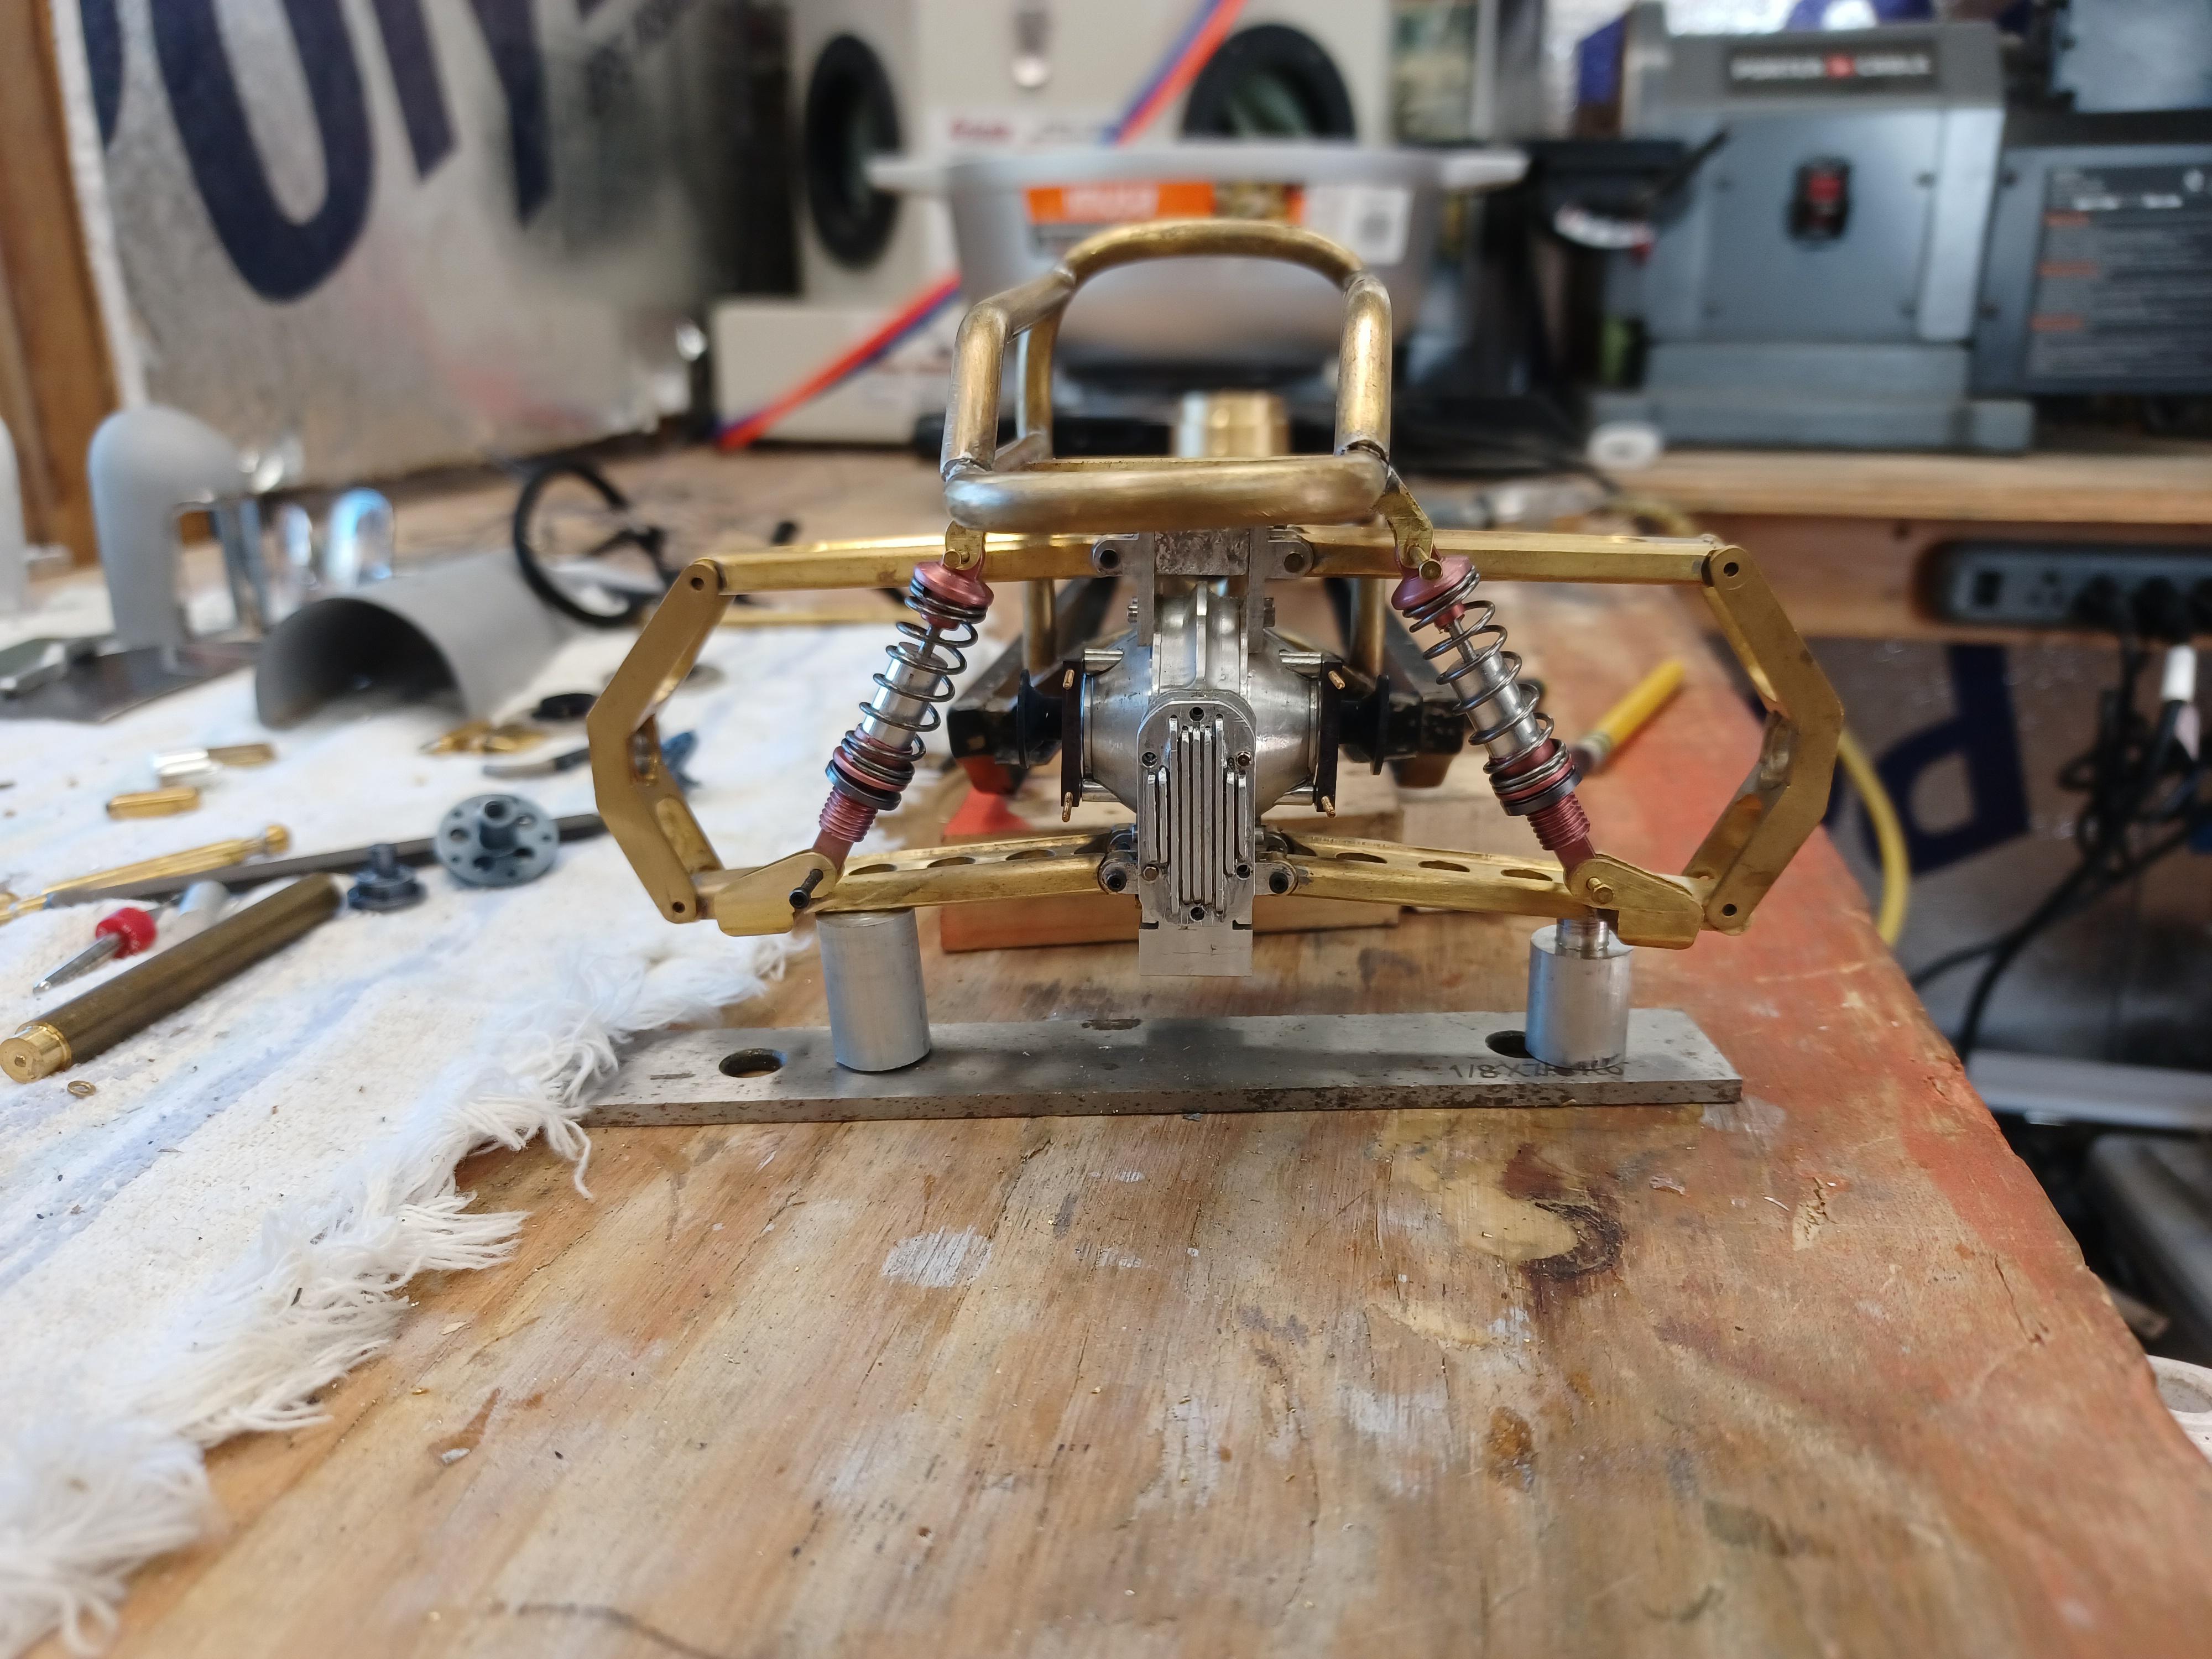
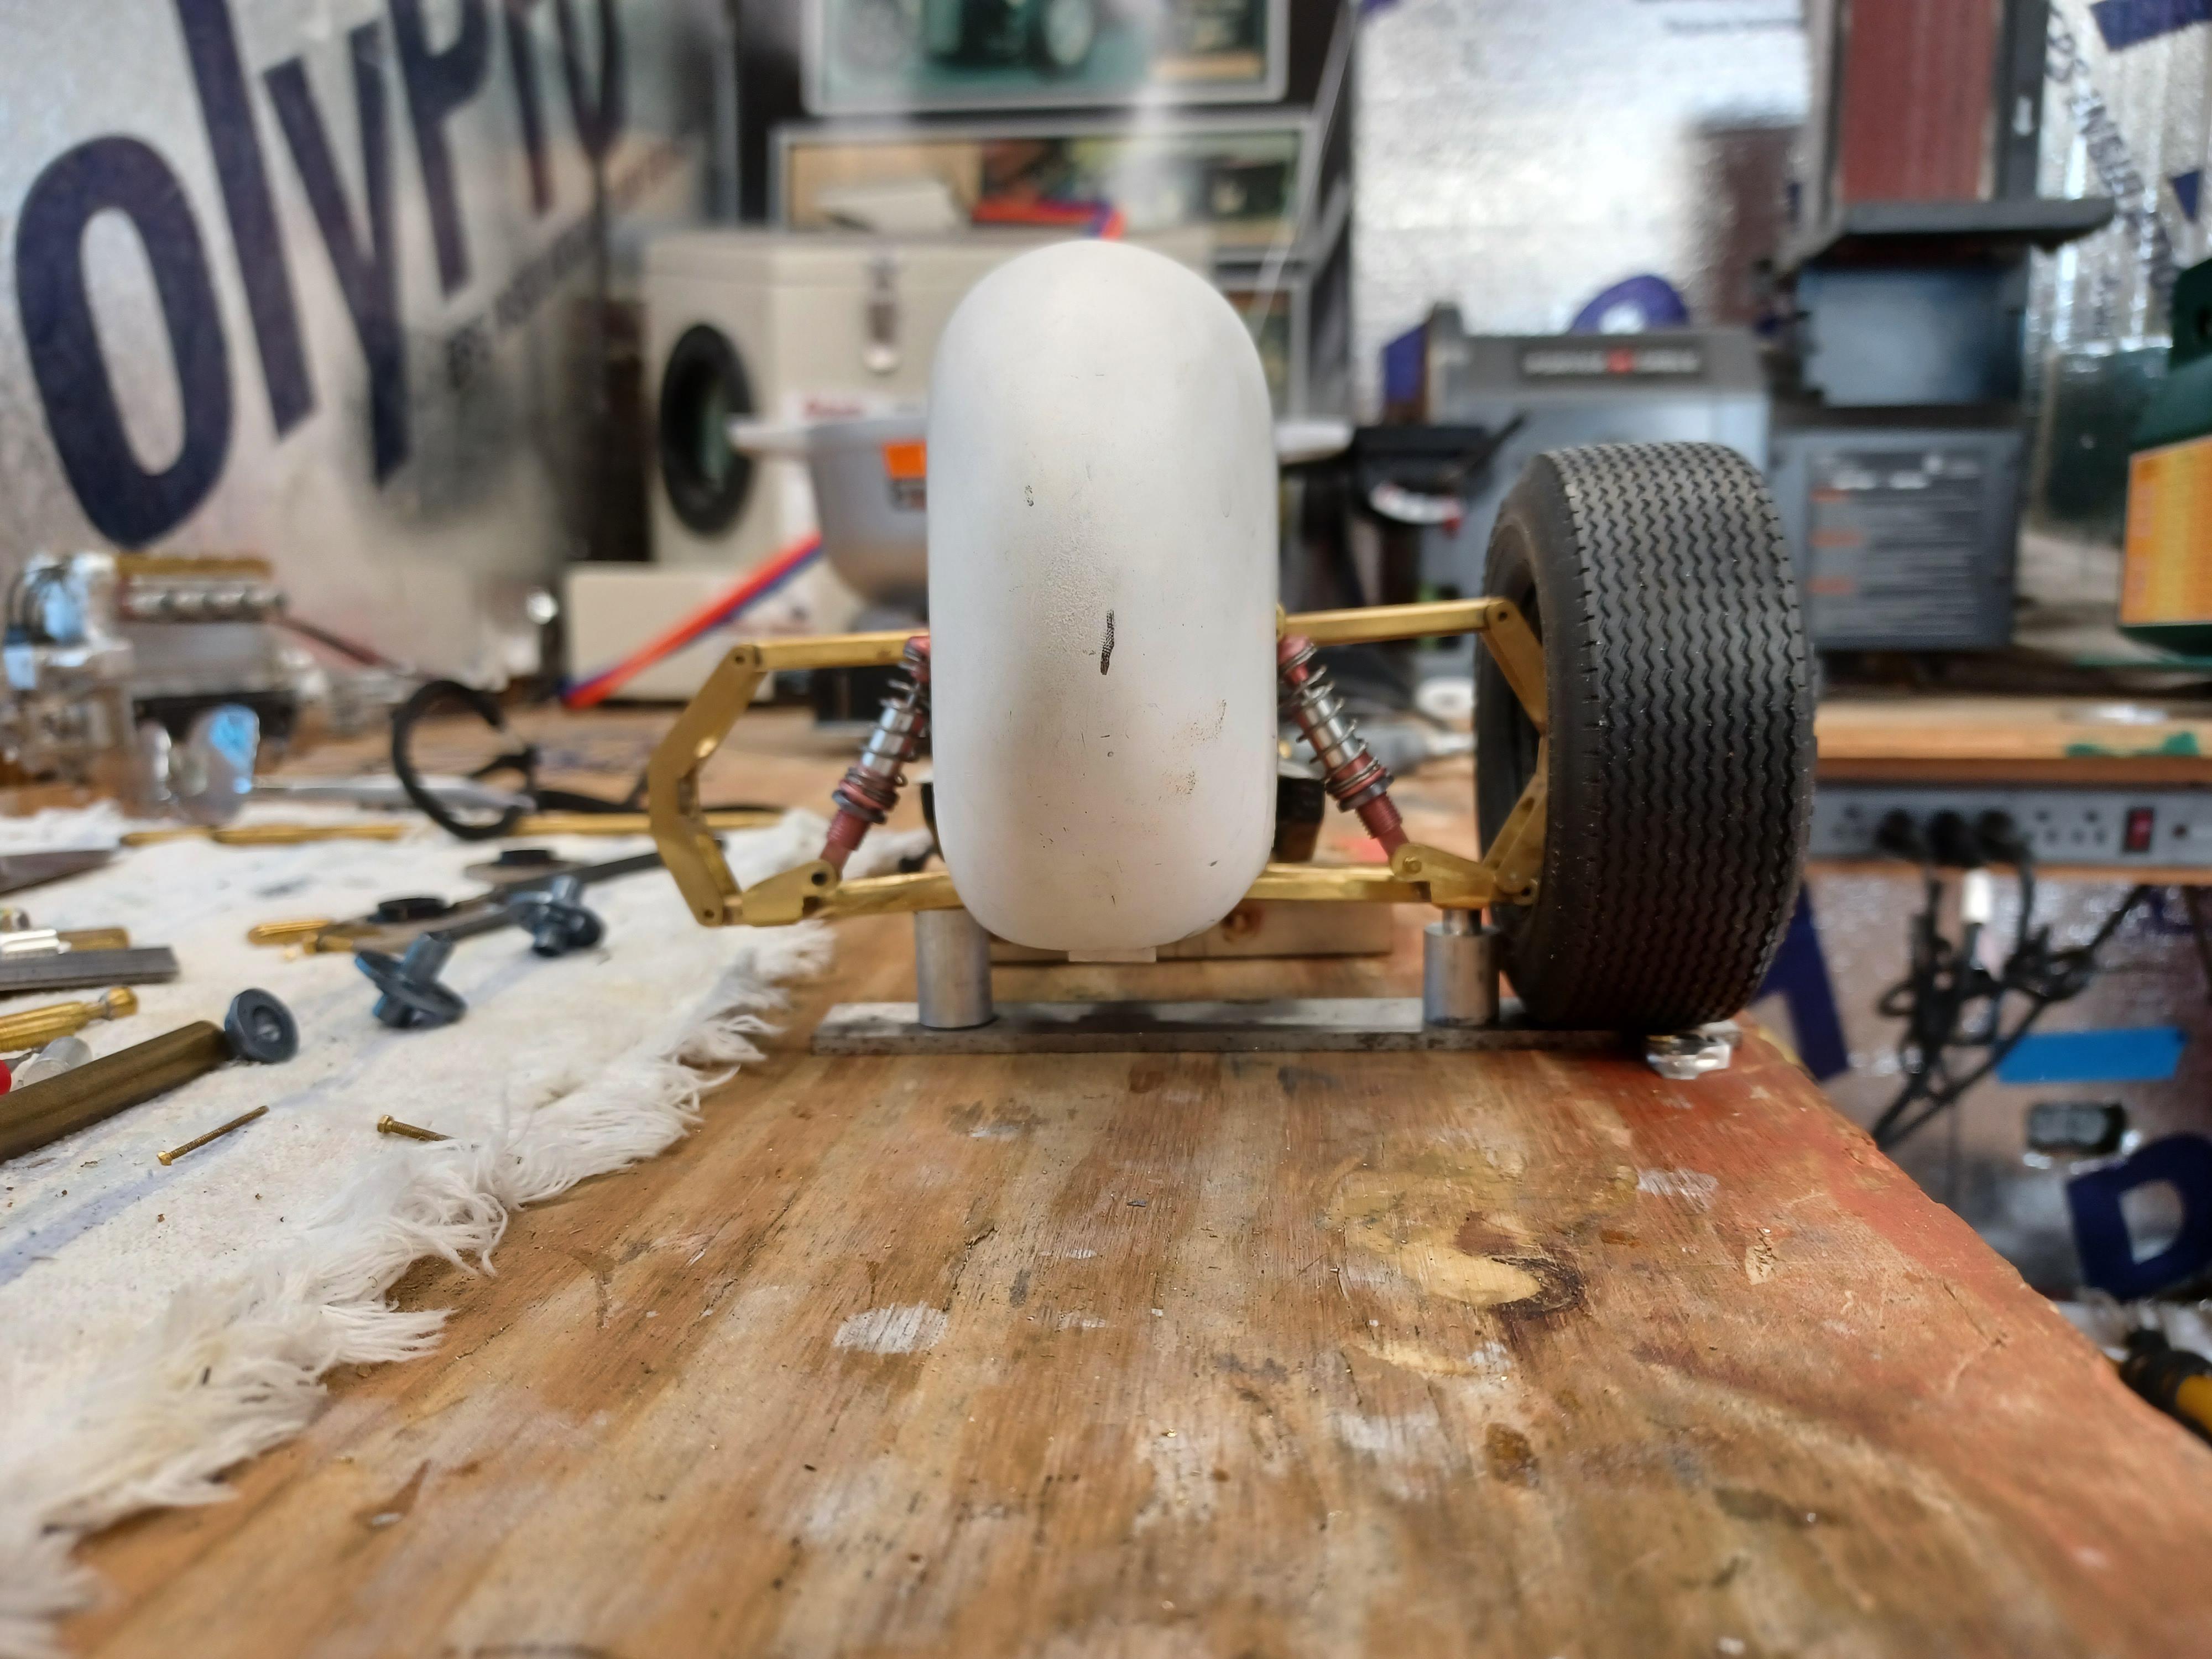
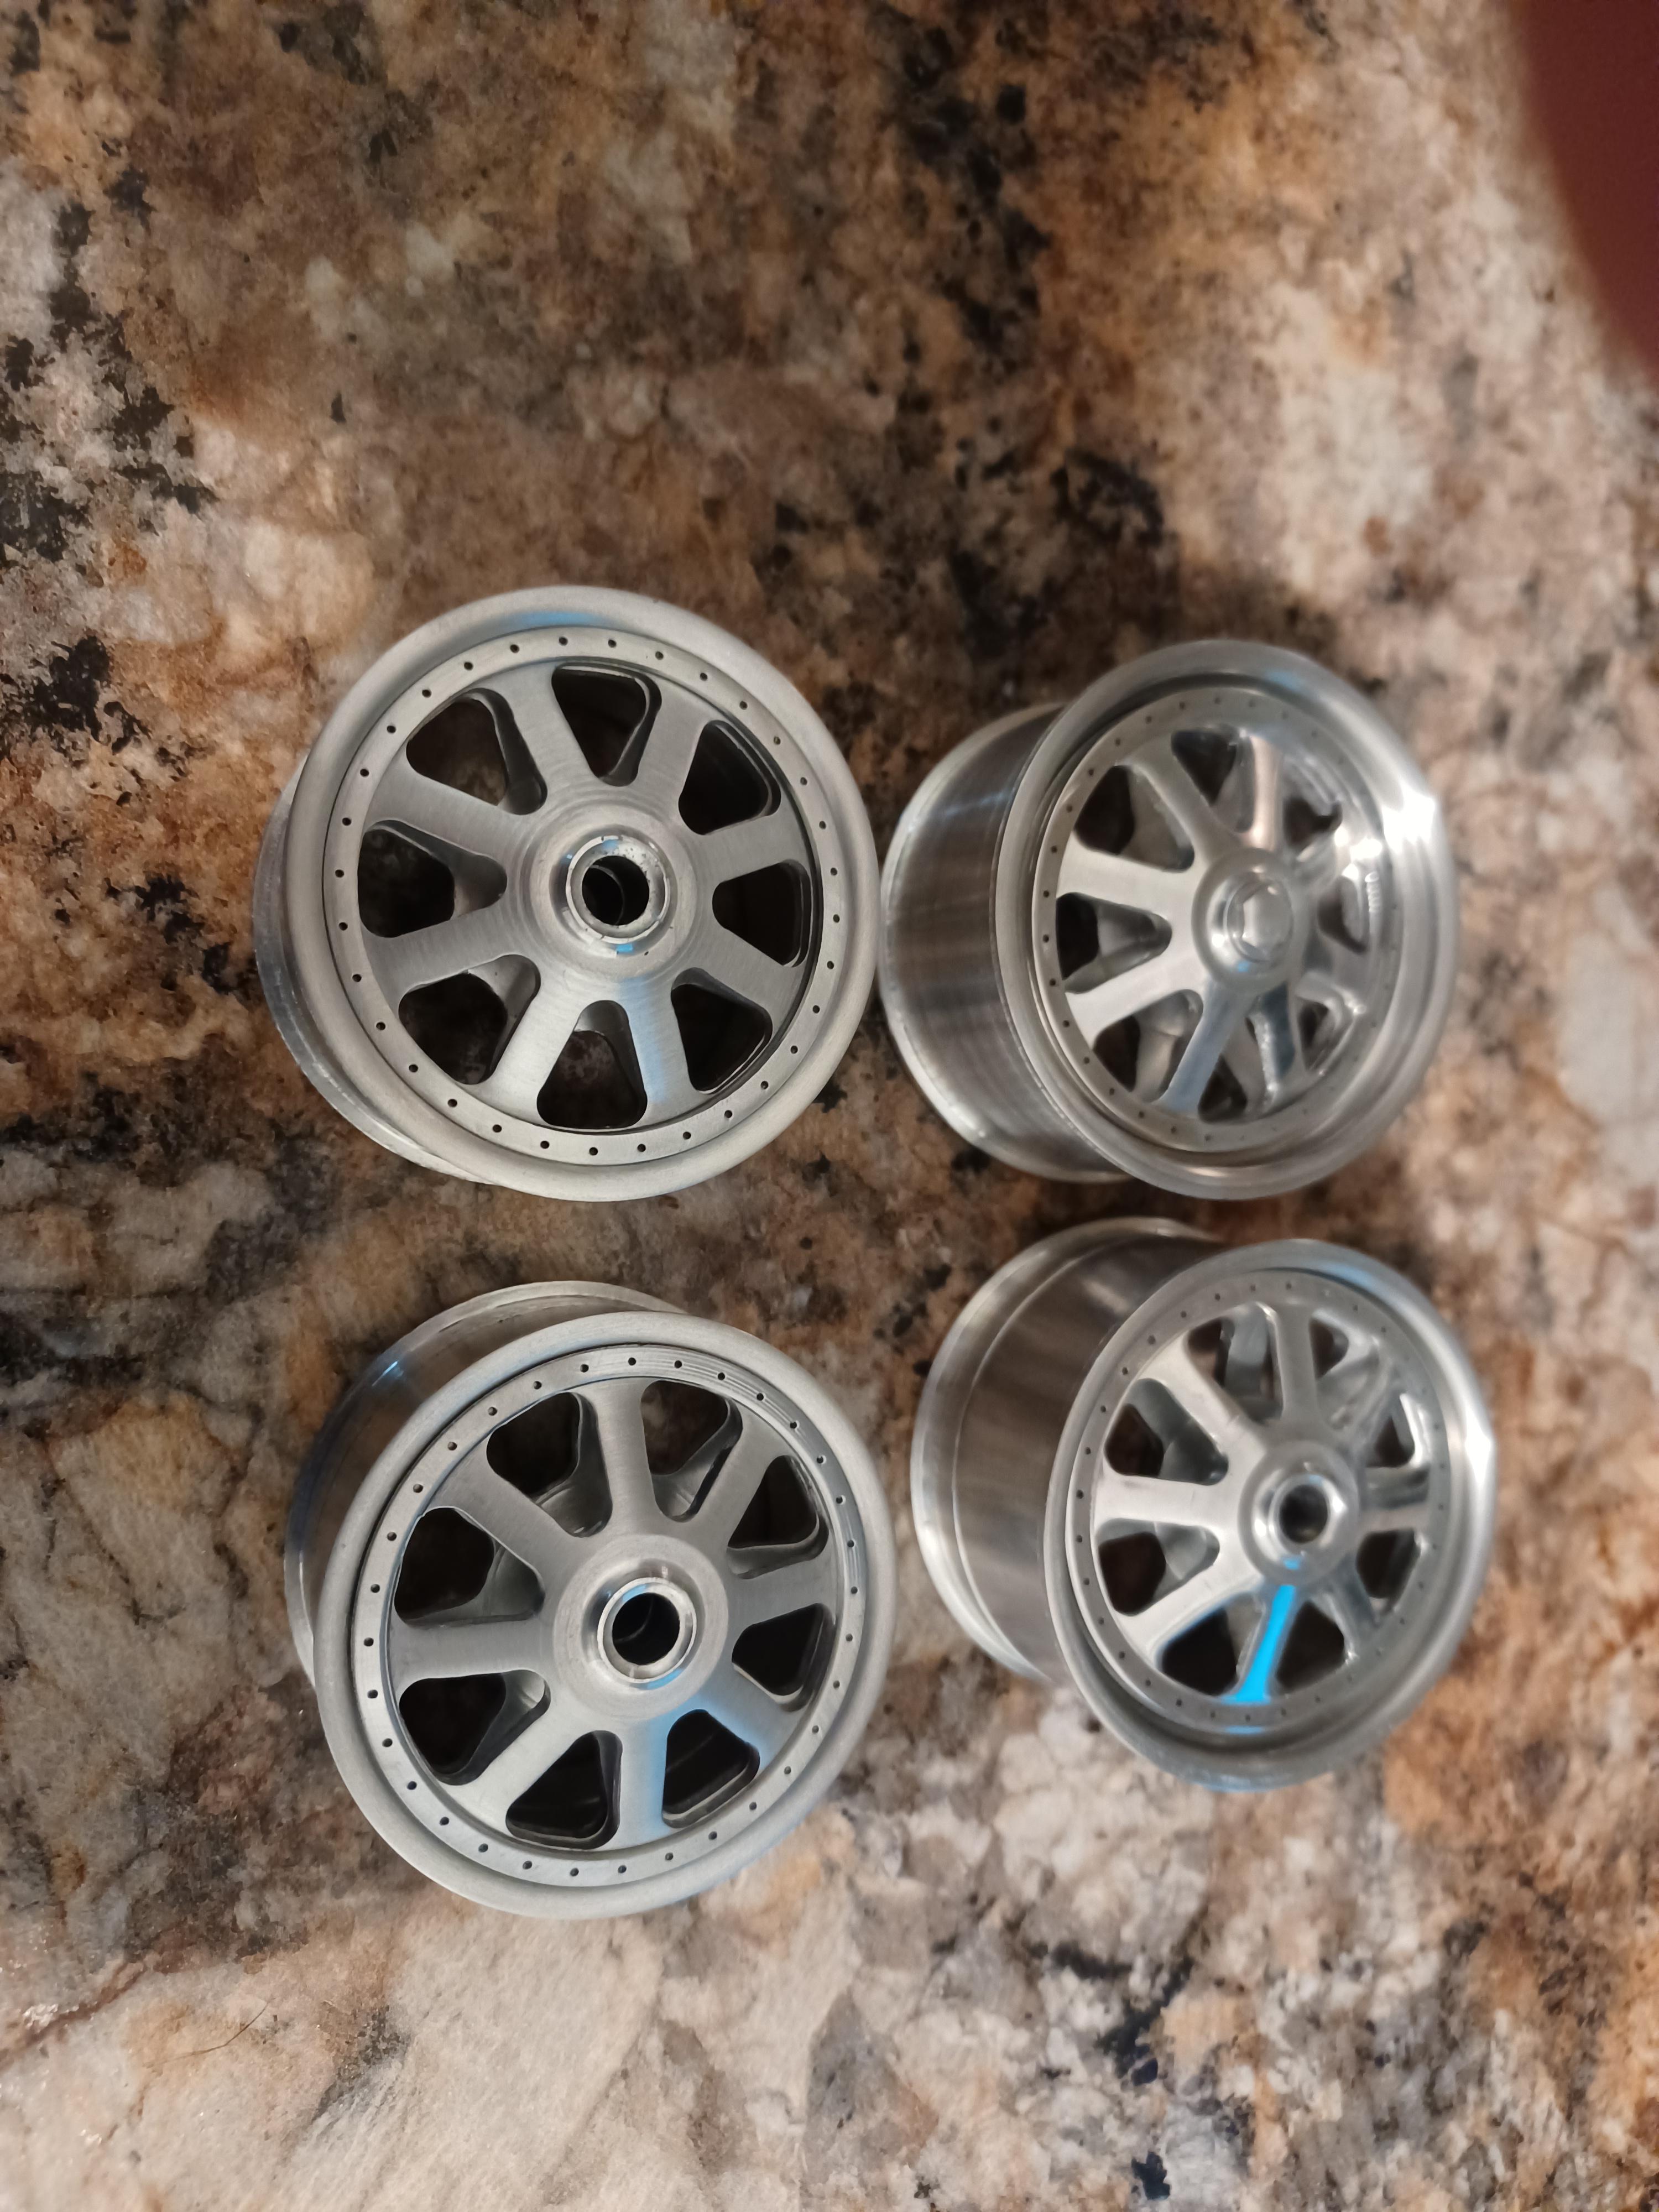
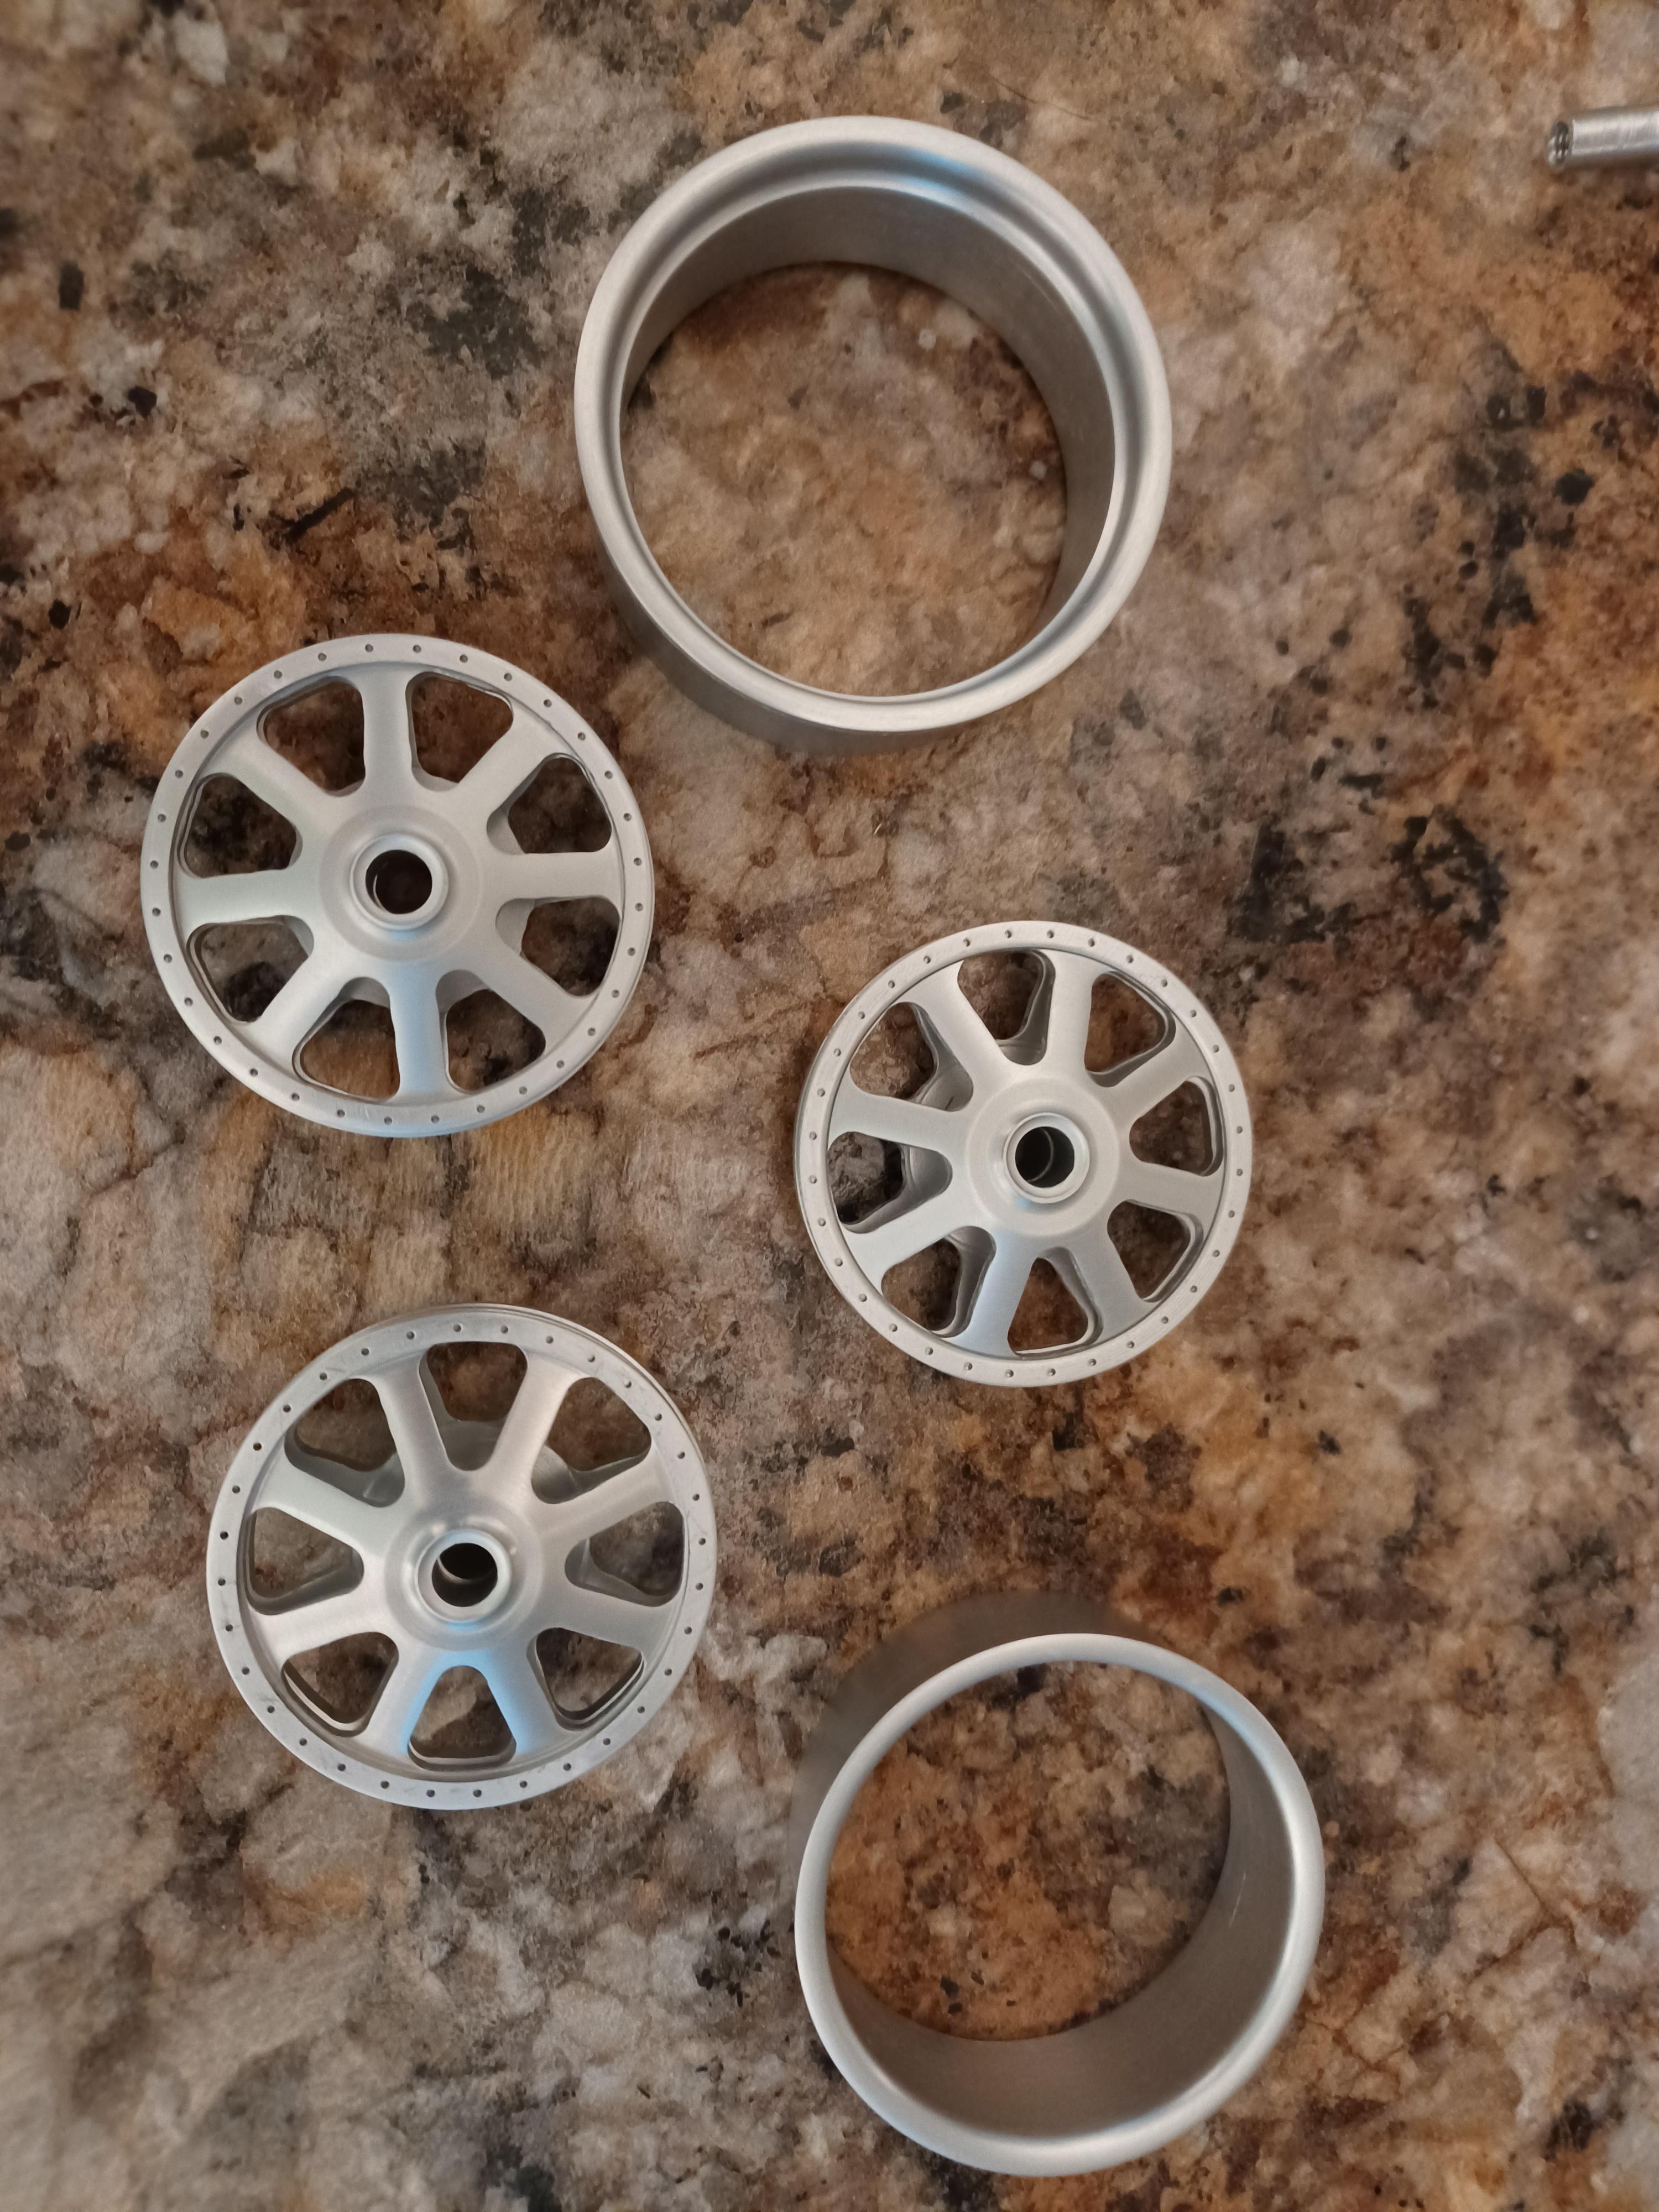
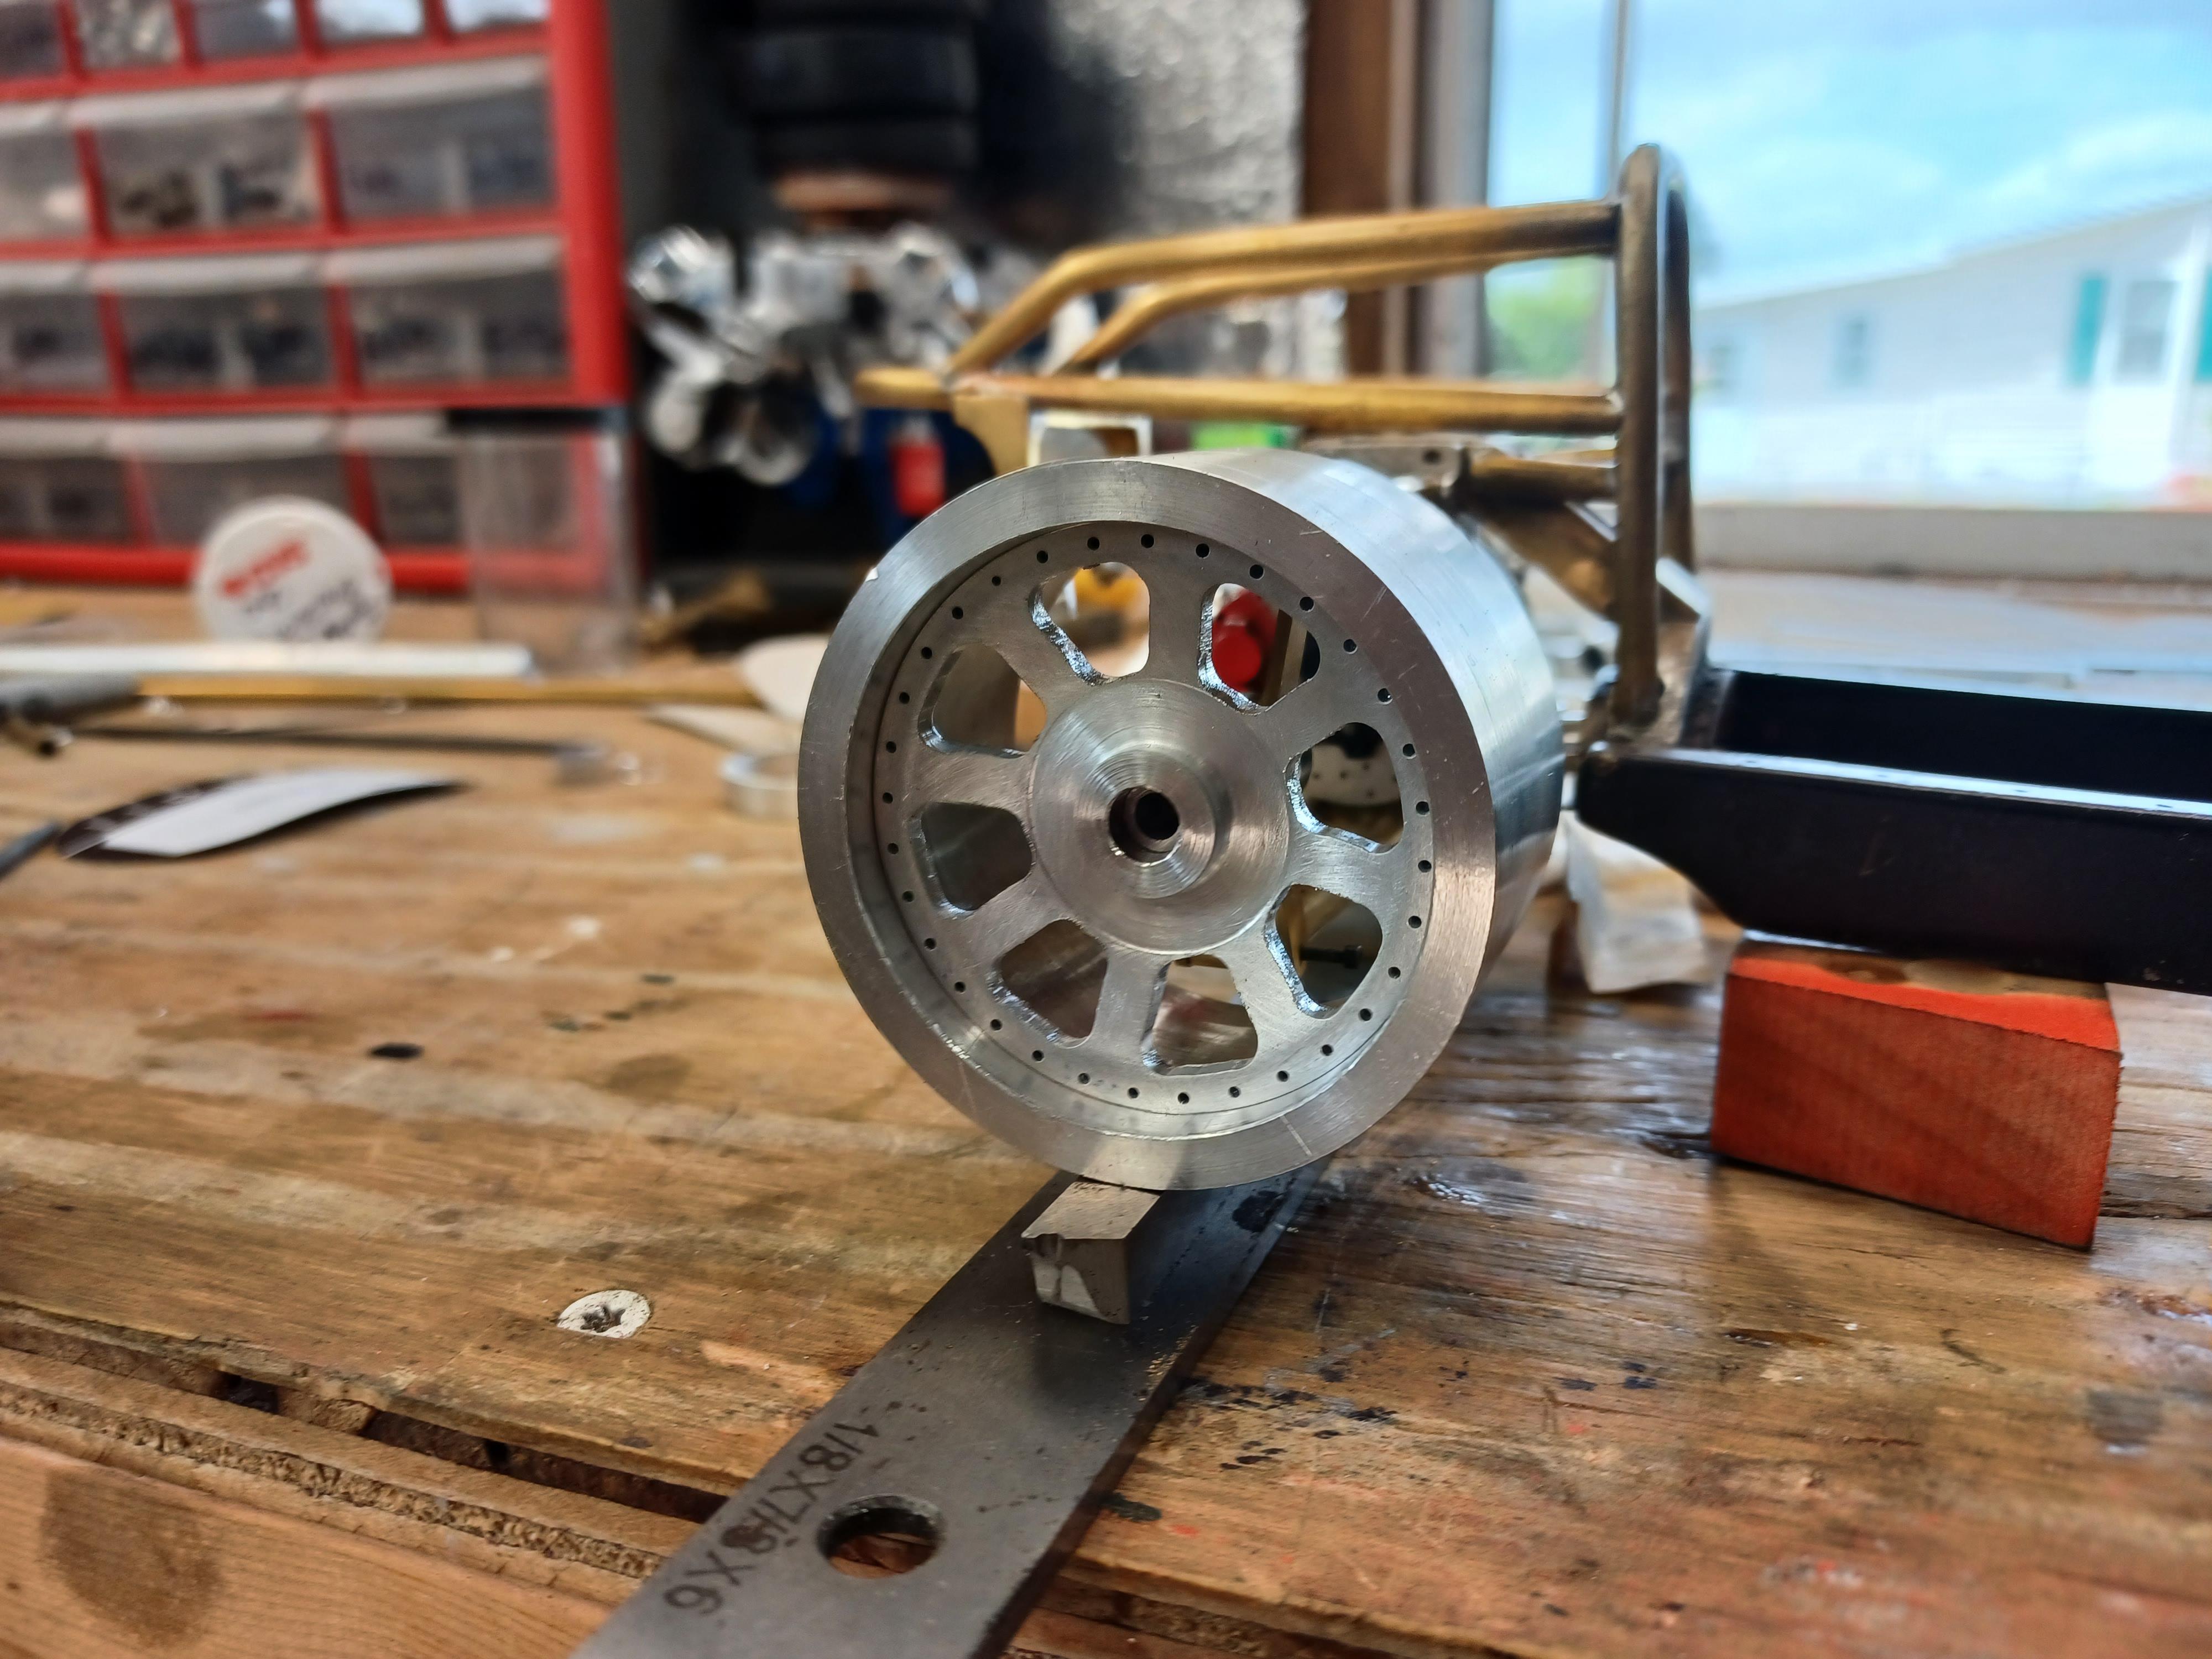
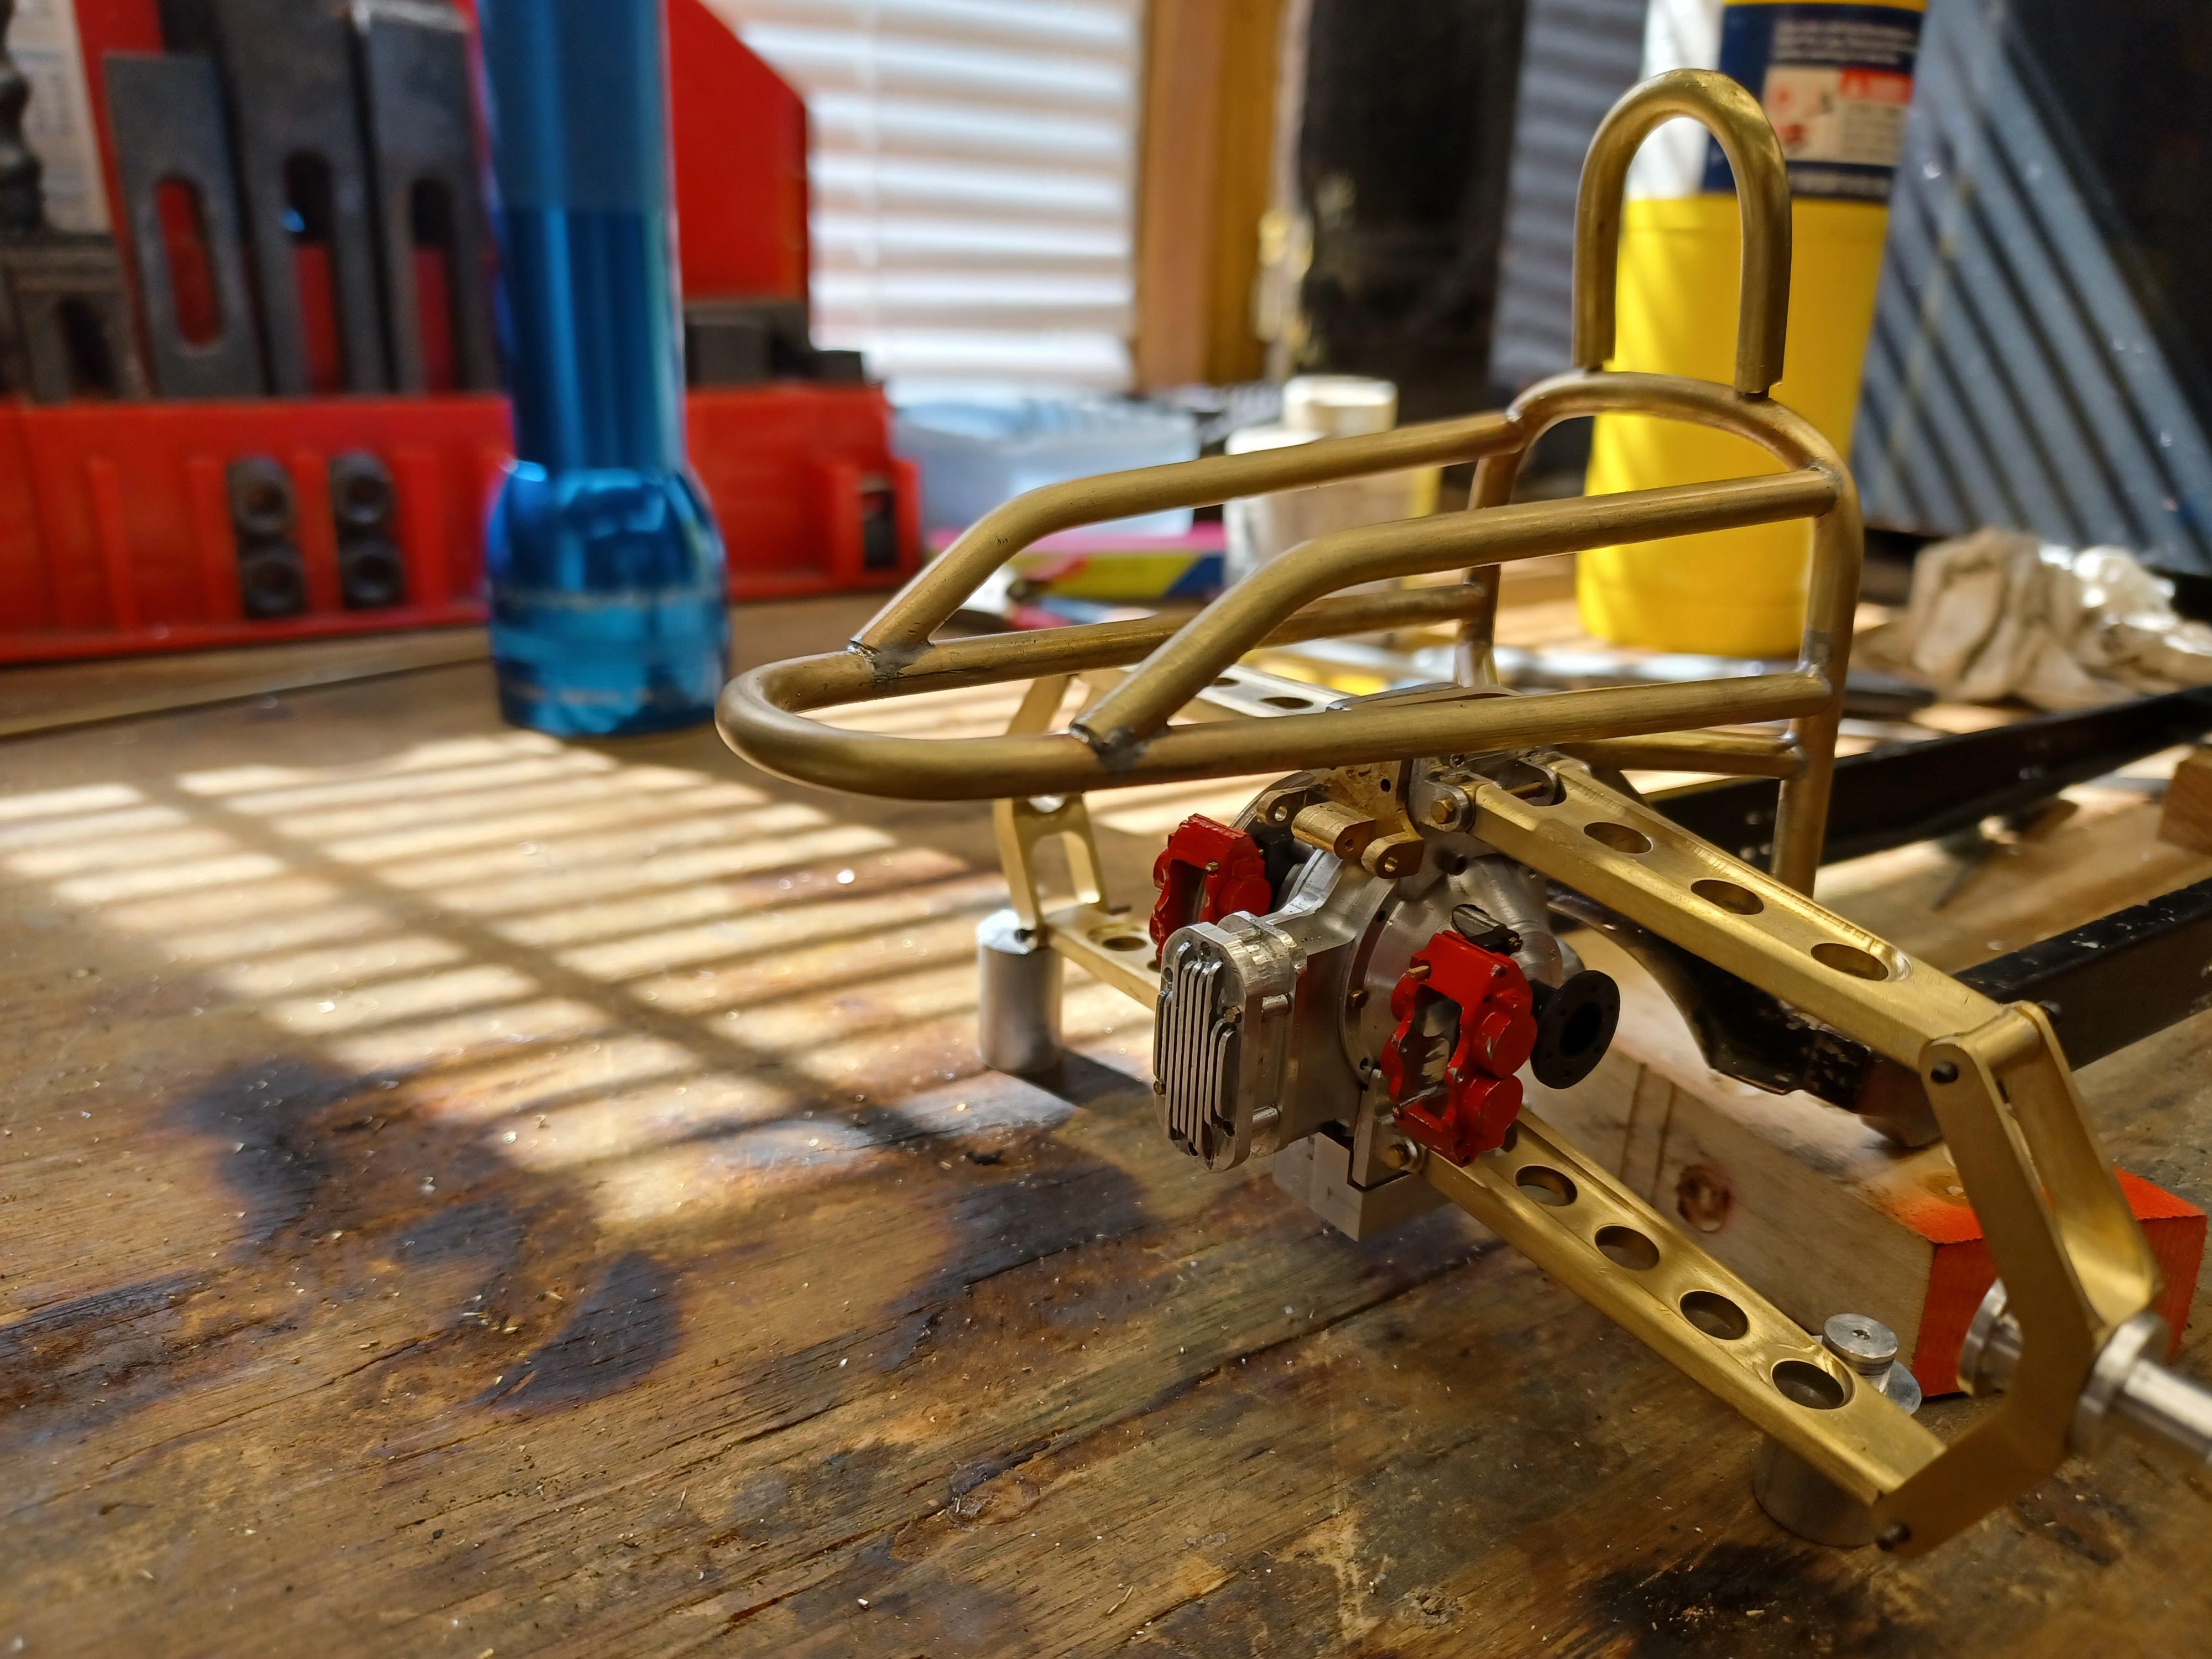
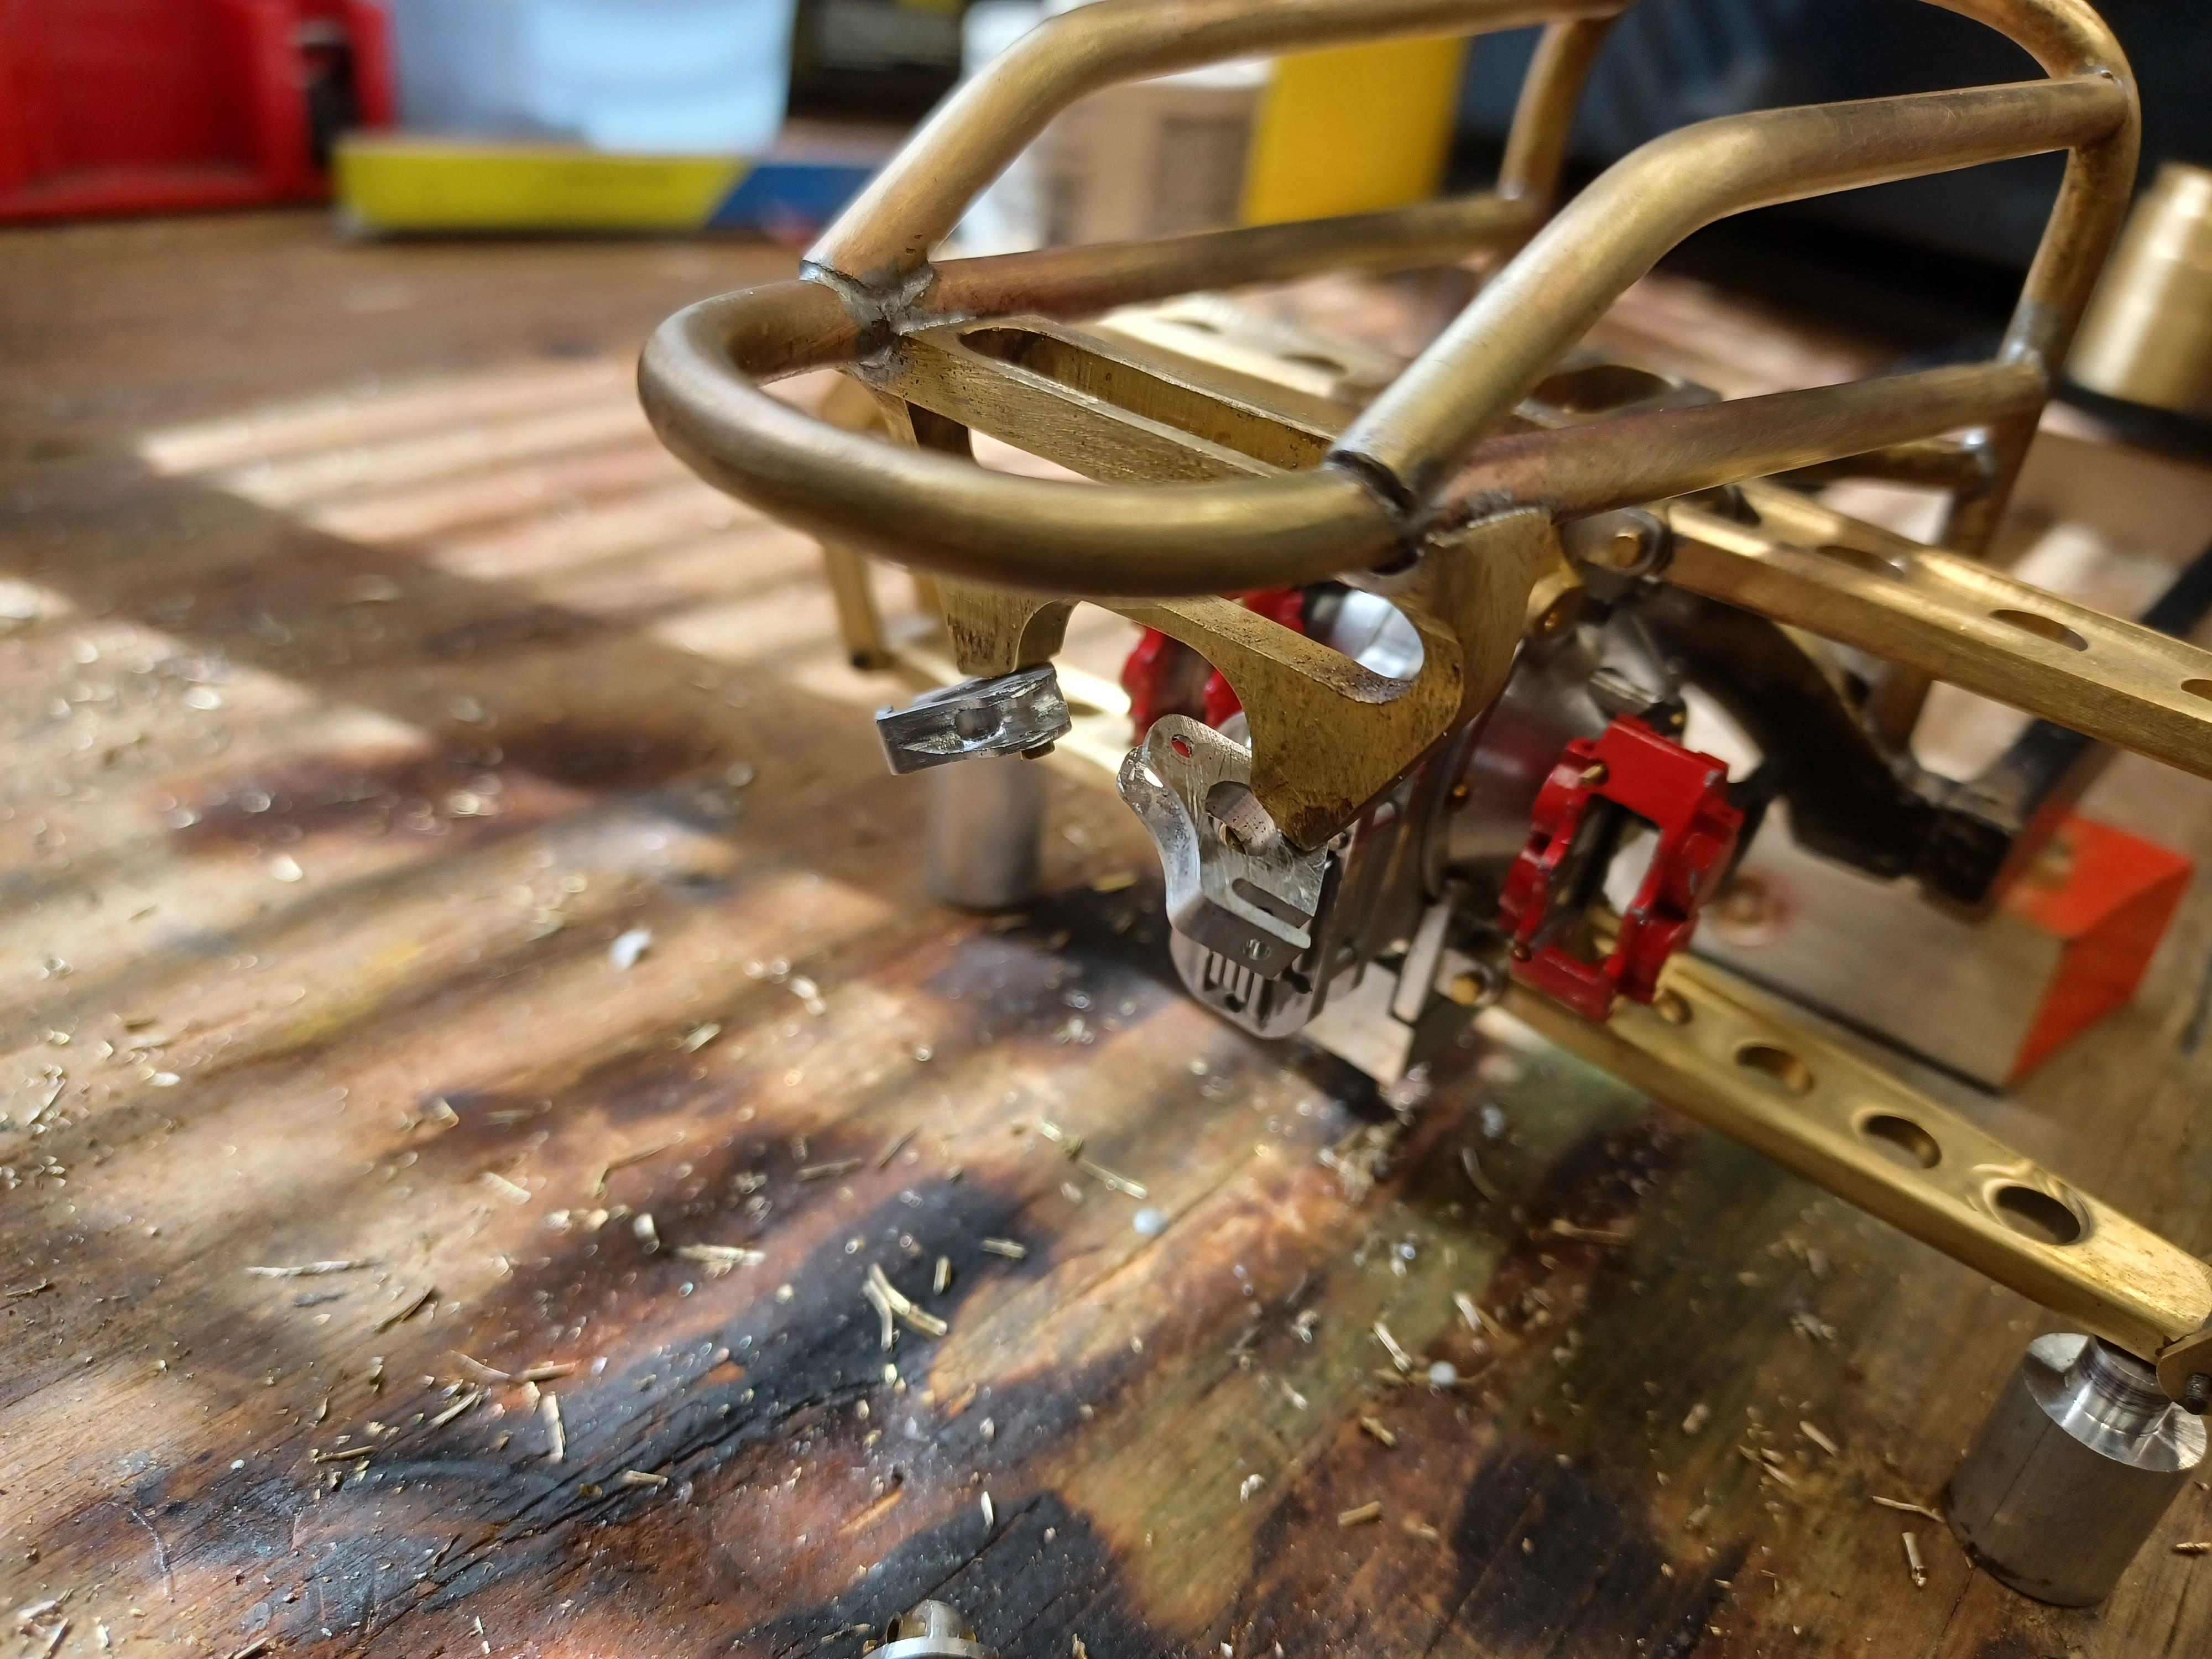
i have finished the tires and wheels. i think they look pretty good. i am working on the steering and i have to finish the front rotors. i cast the tires over size and machined them to size. i used ziploc disposable bowls to make the rough casting.i got a good start on the front end . got the 4 bars end mounts made and now the coilovers and steering. i have to remove the crossmember in the front. hope you all have a nice holiday.
-
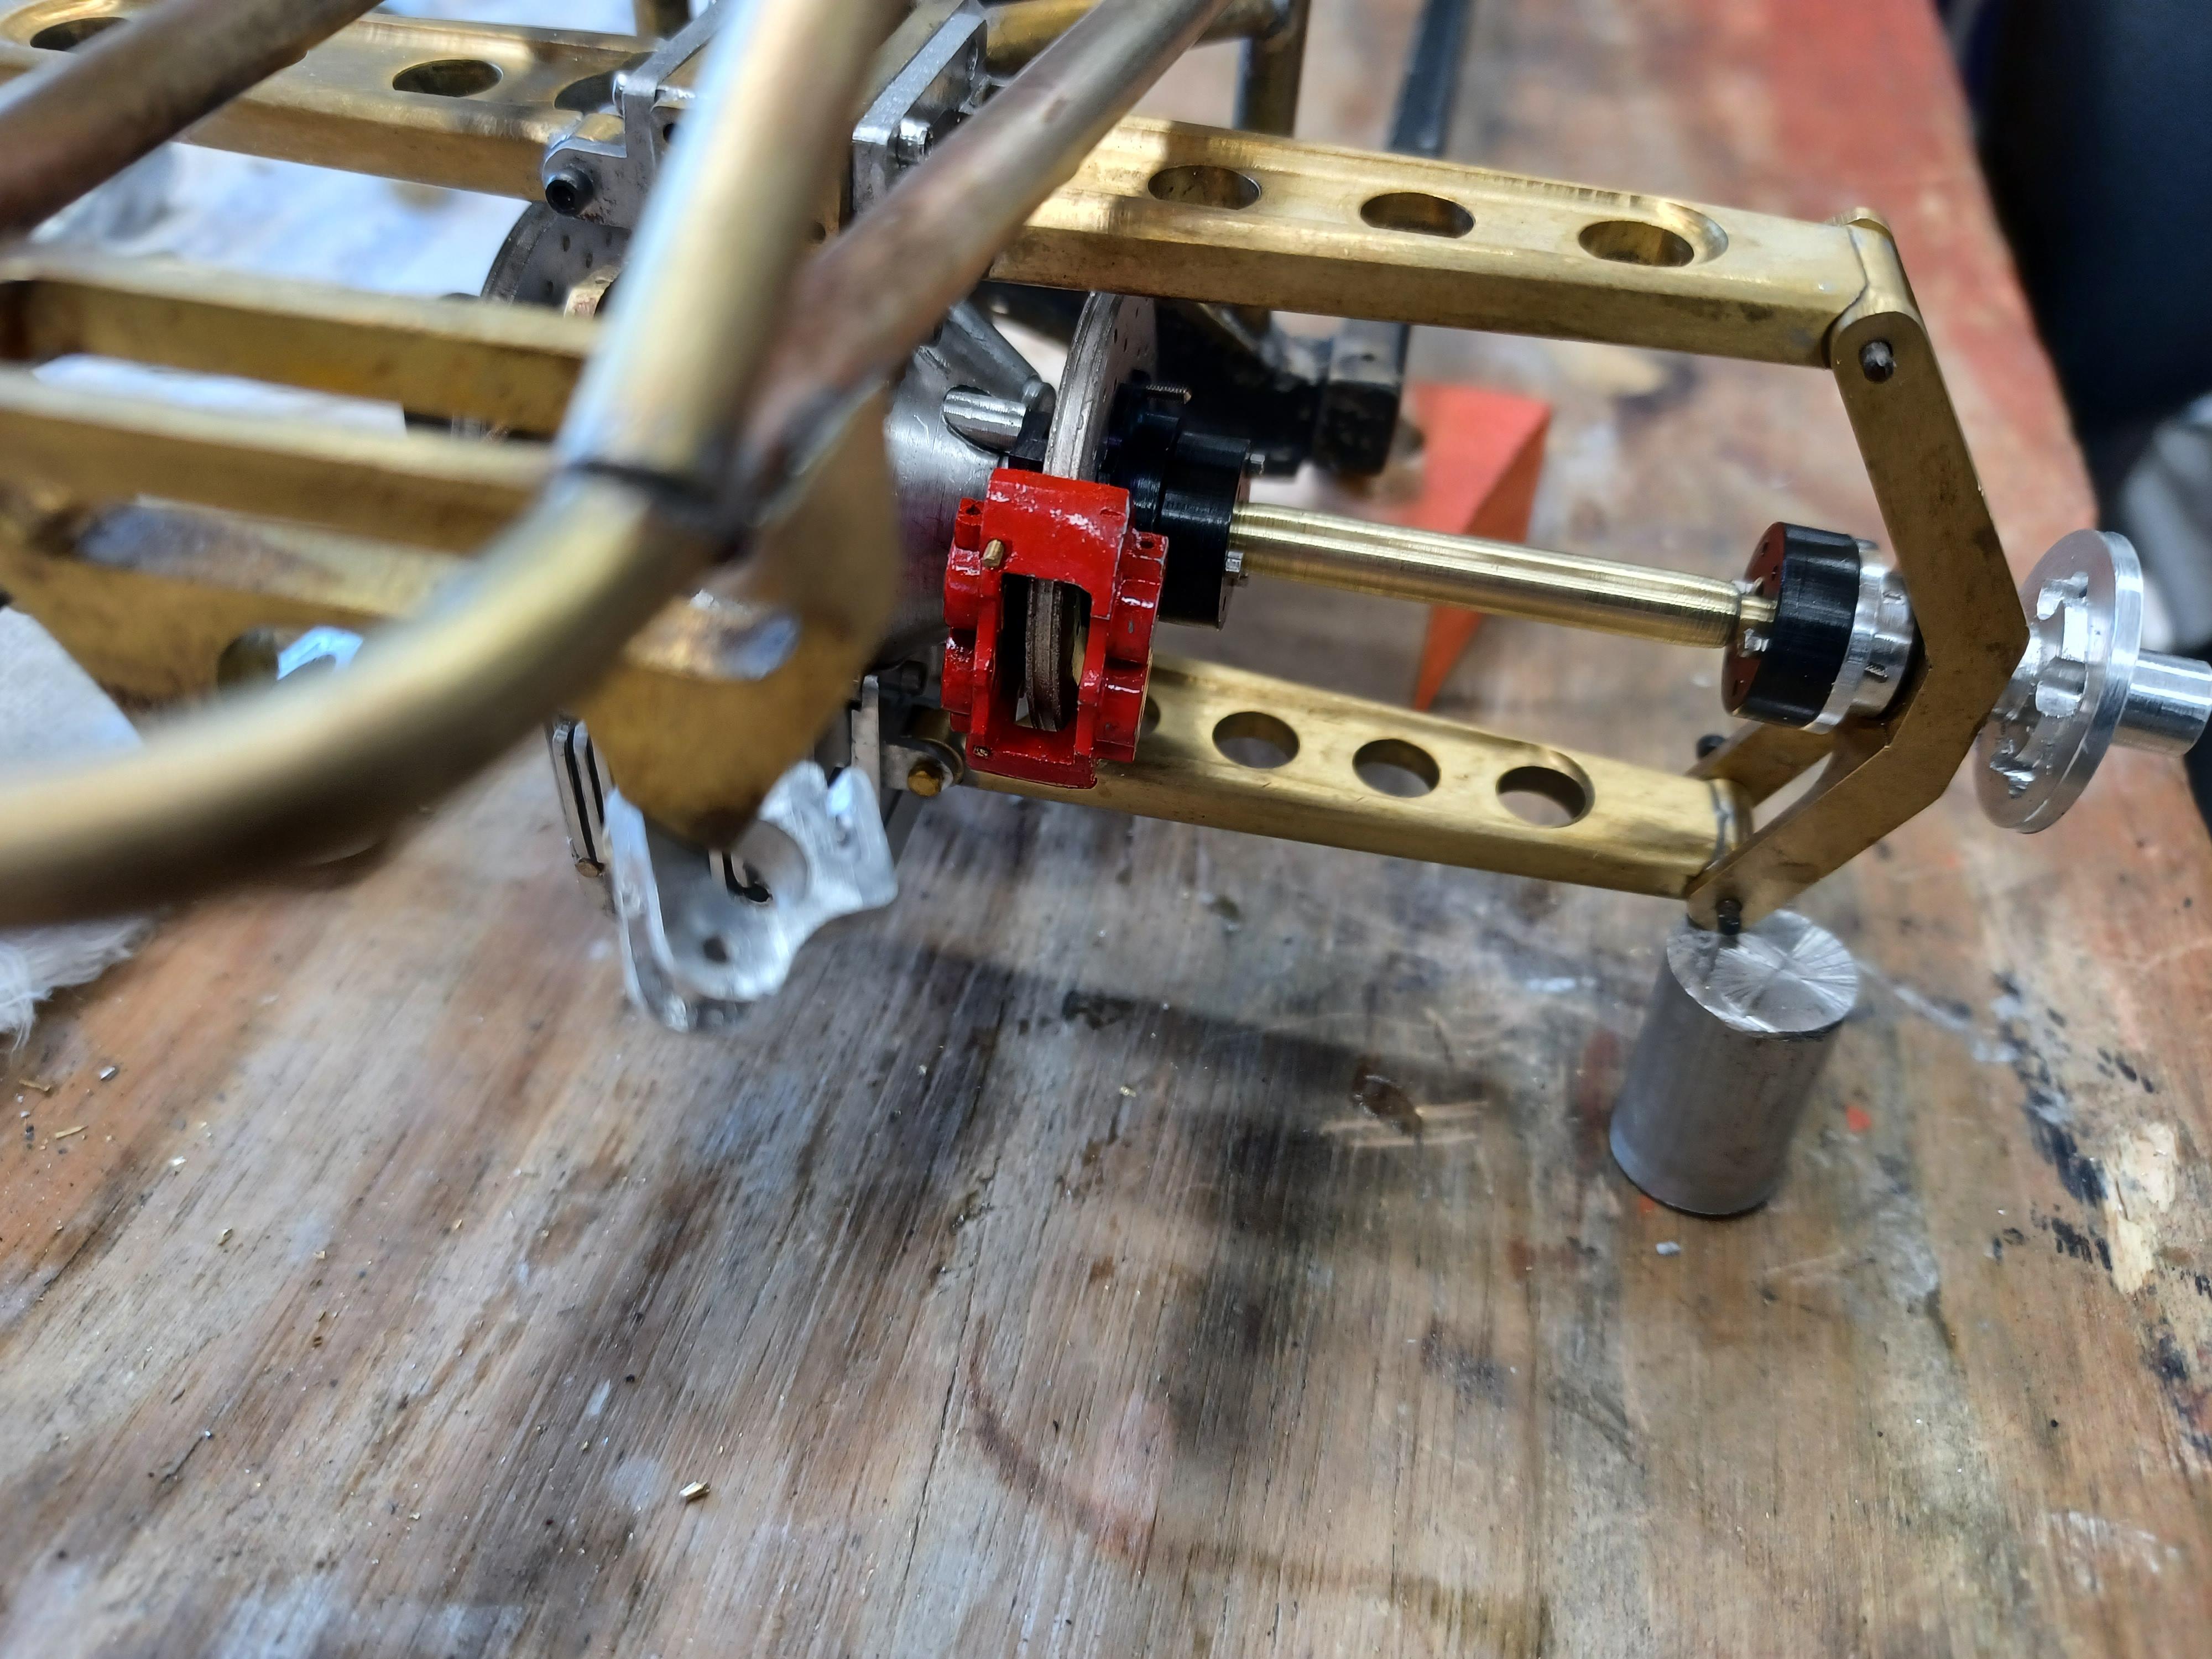
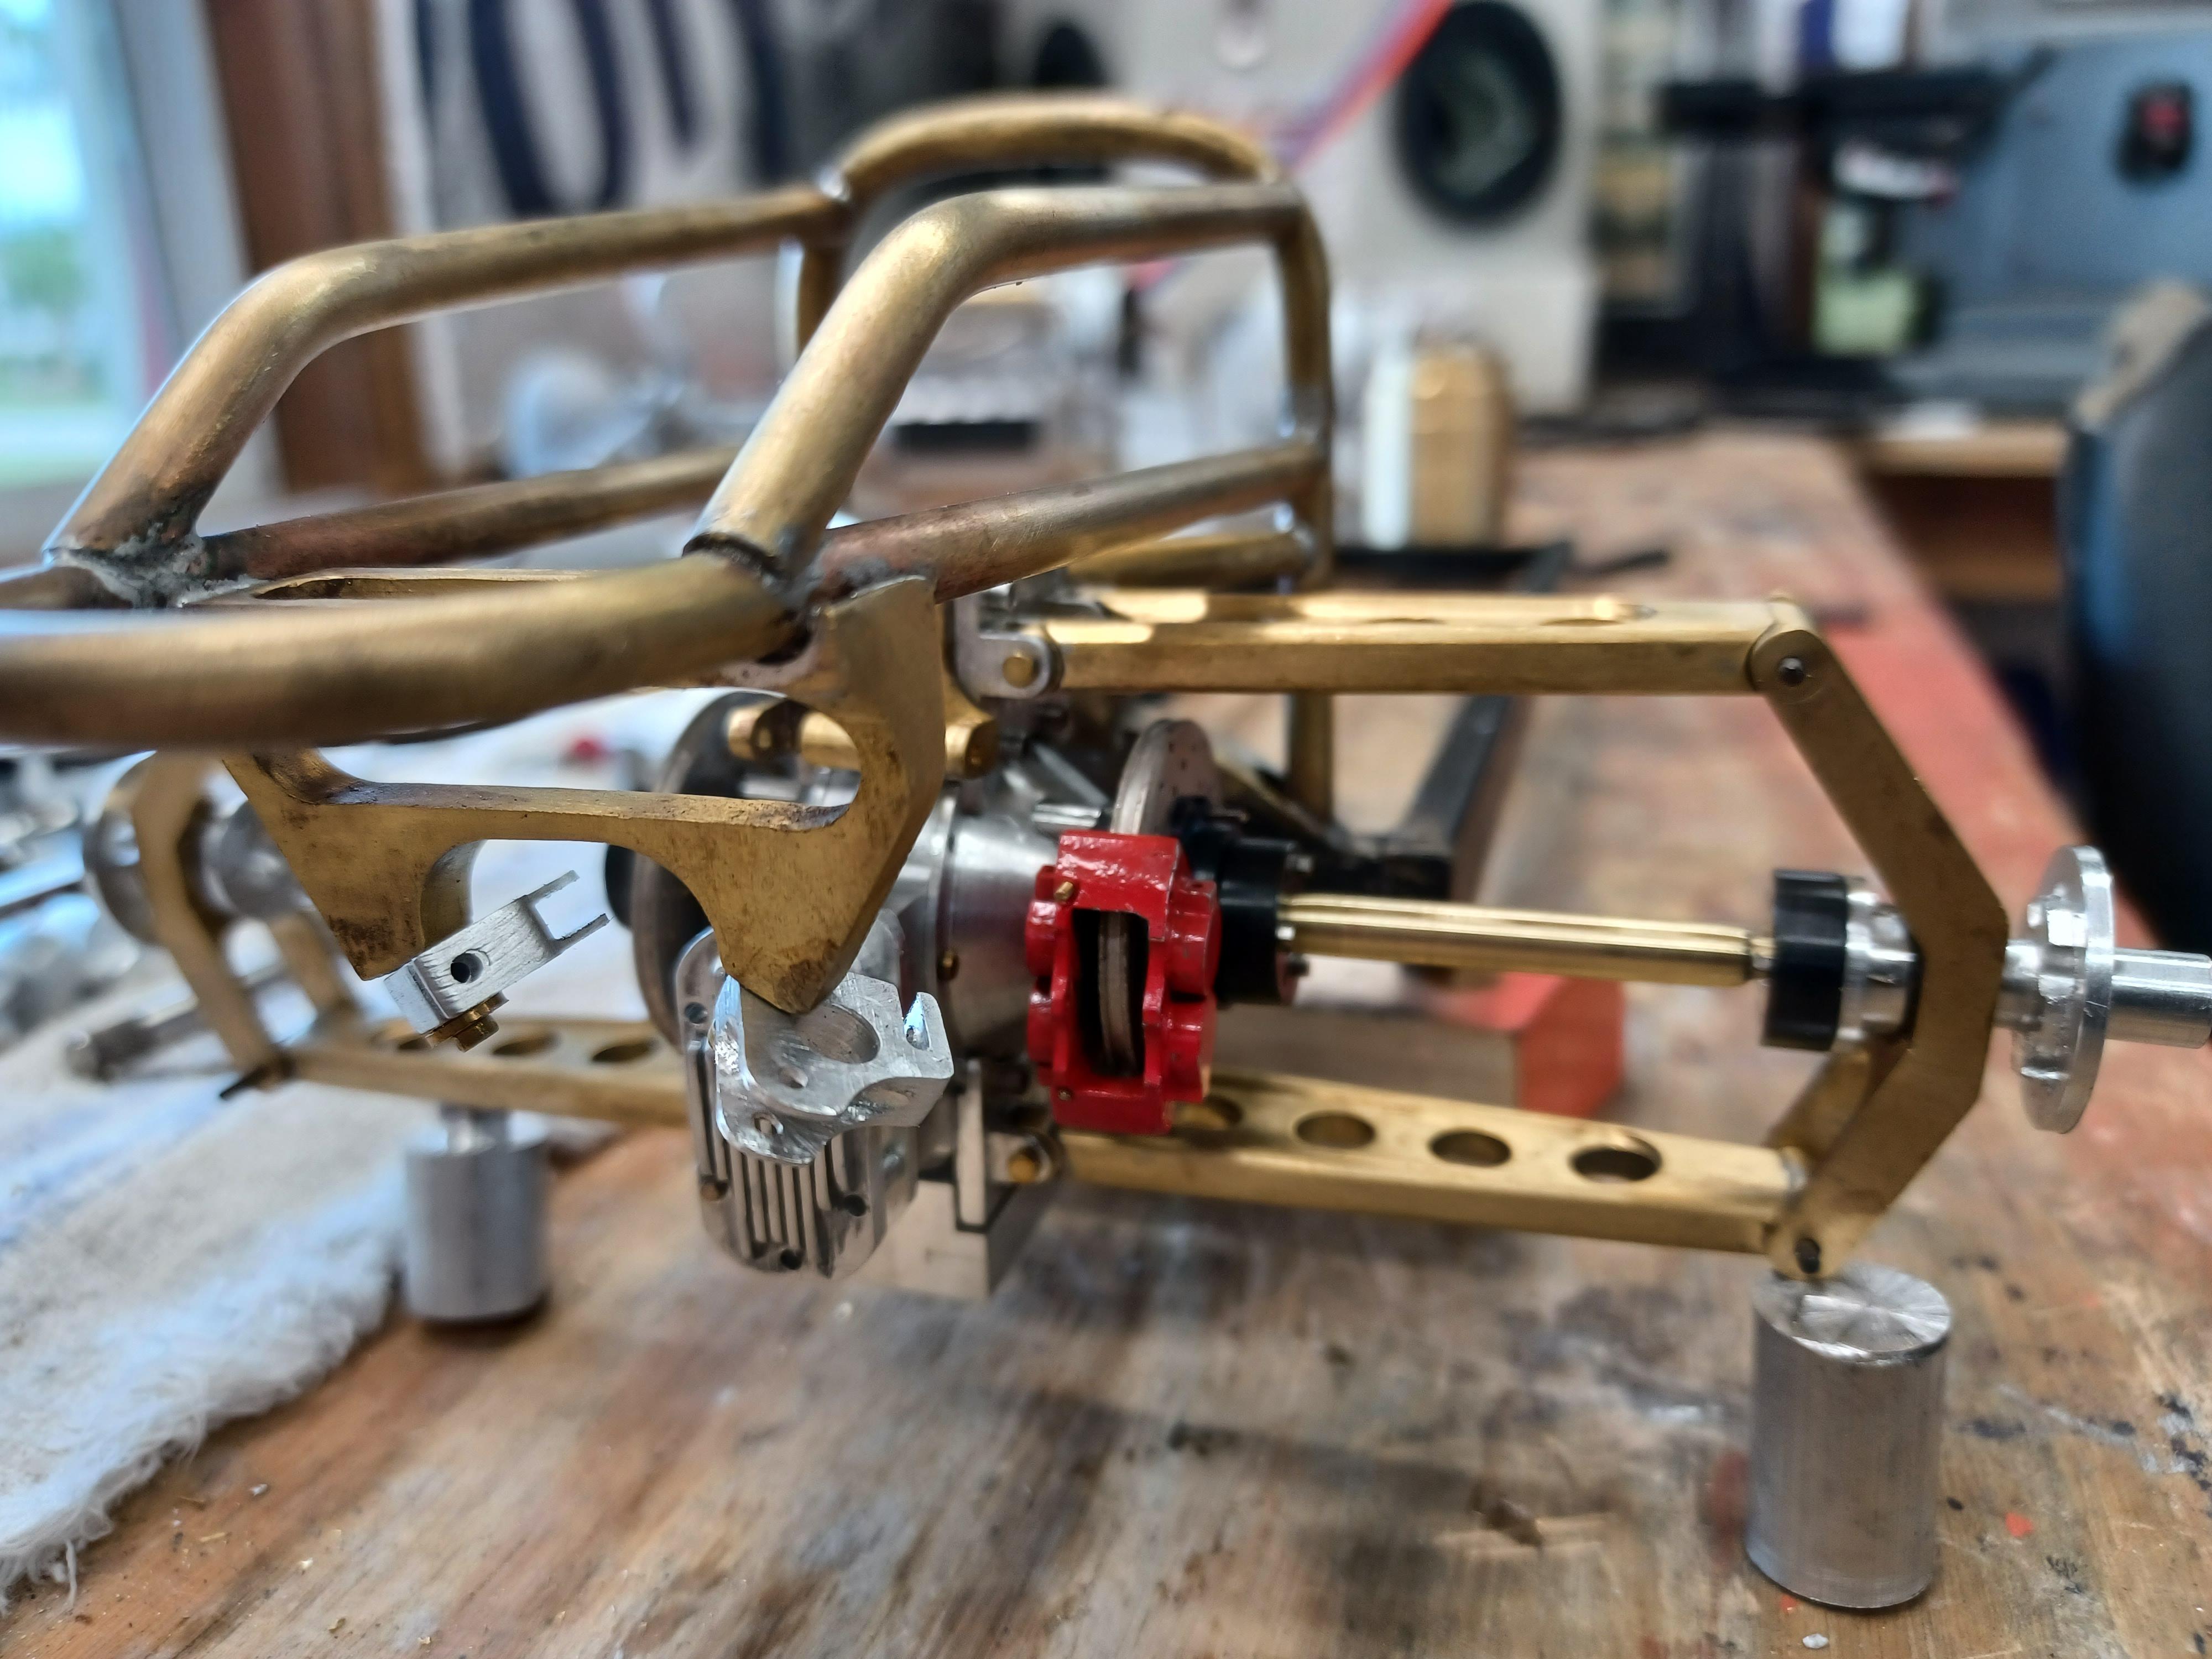
got alot of the frontend parts made. the rivets arrived so i put the last wheel together. large 6 piston wilwood calipers. got to try to find some wilwood decals. does anyone know where i might be able to purchase some really thin leather?
-
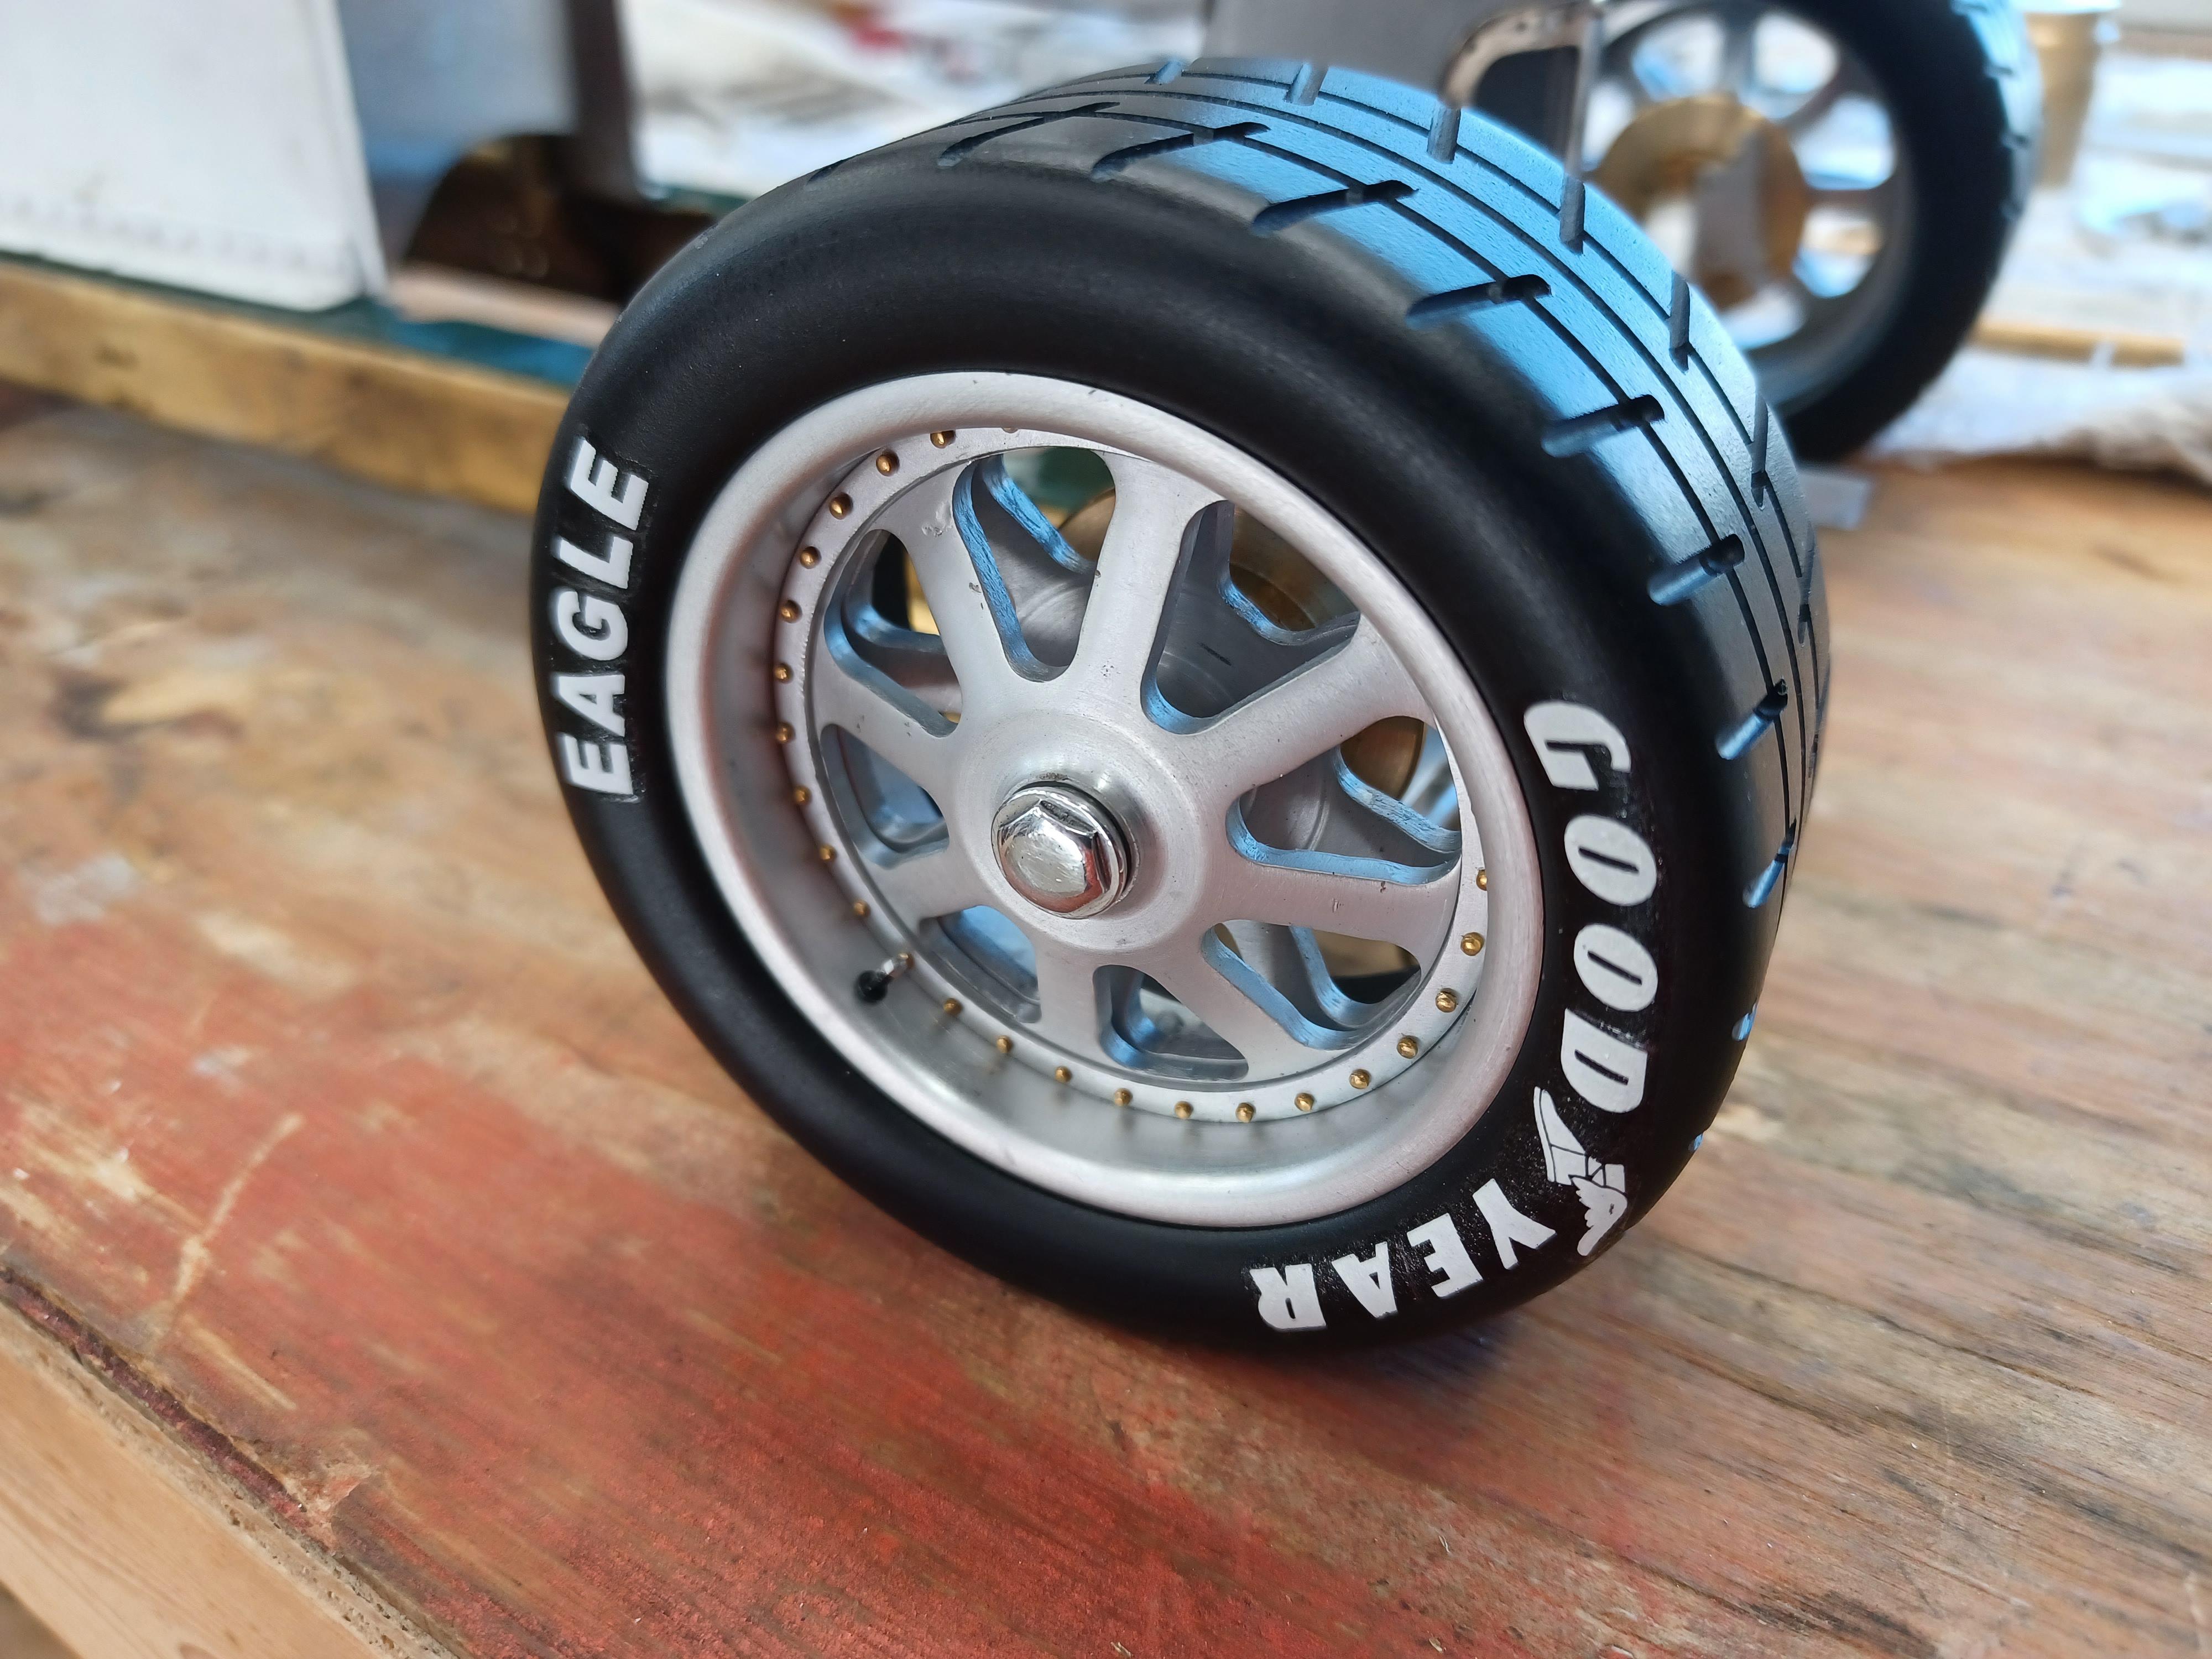
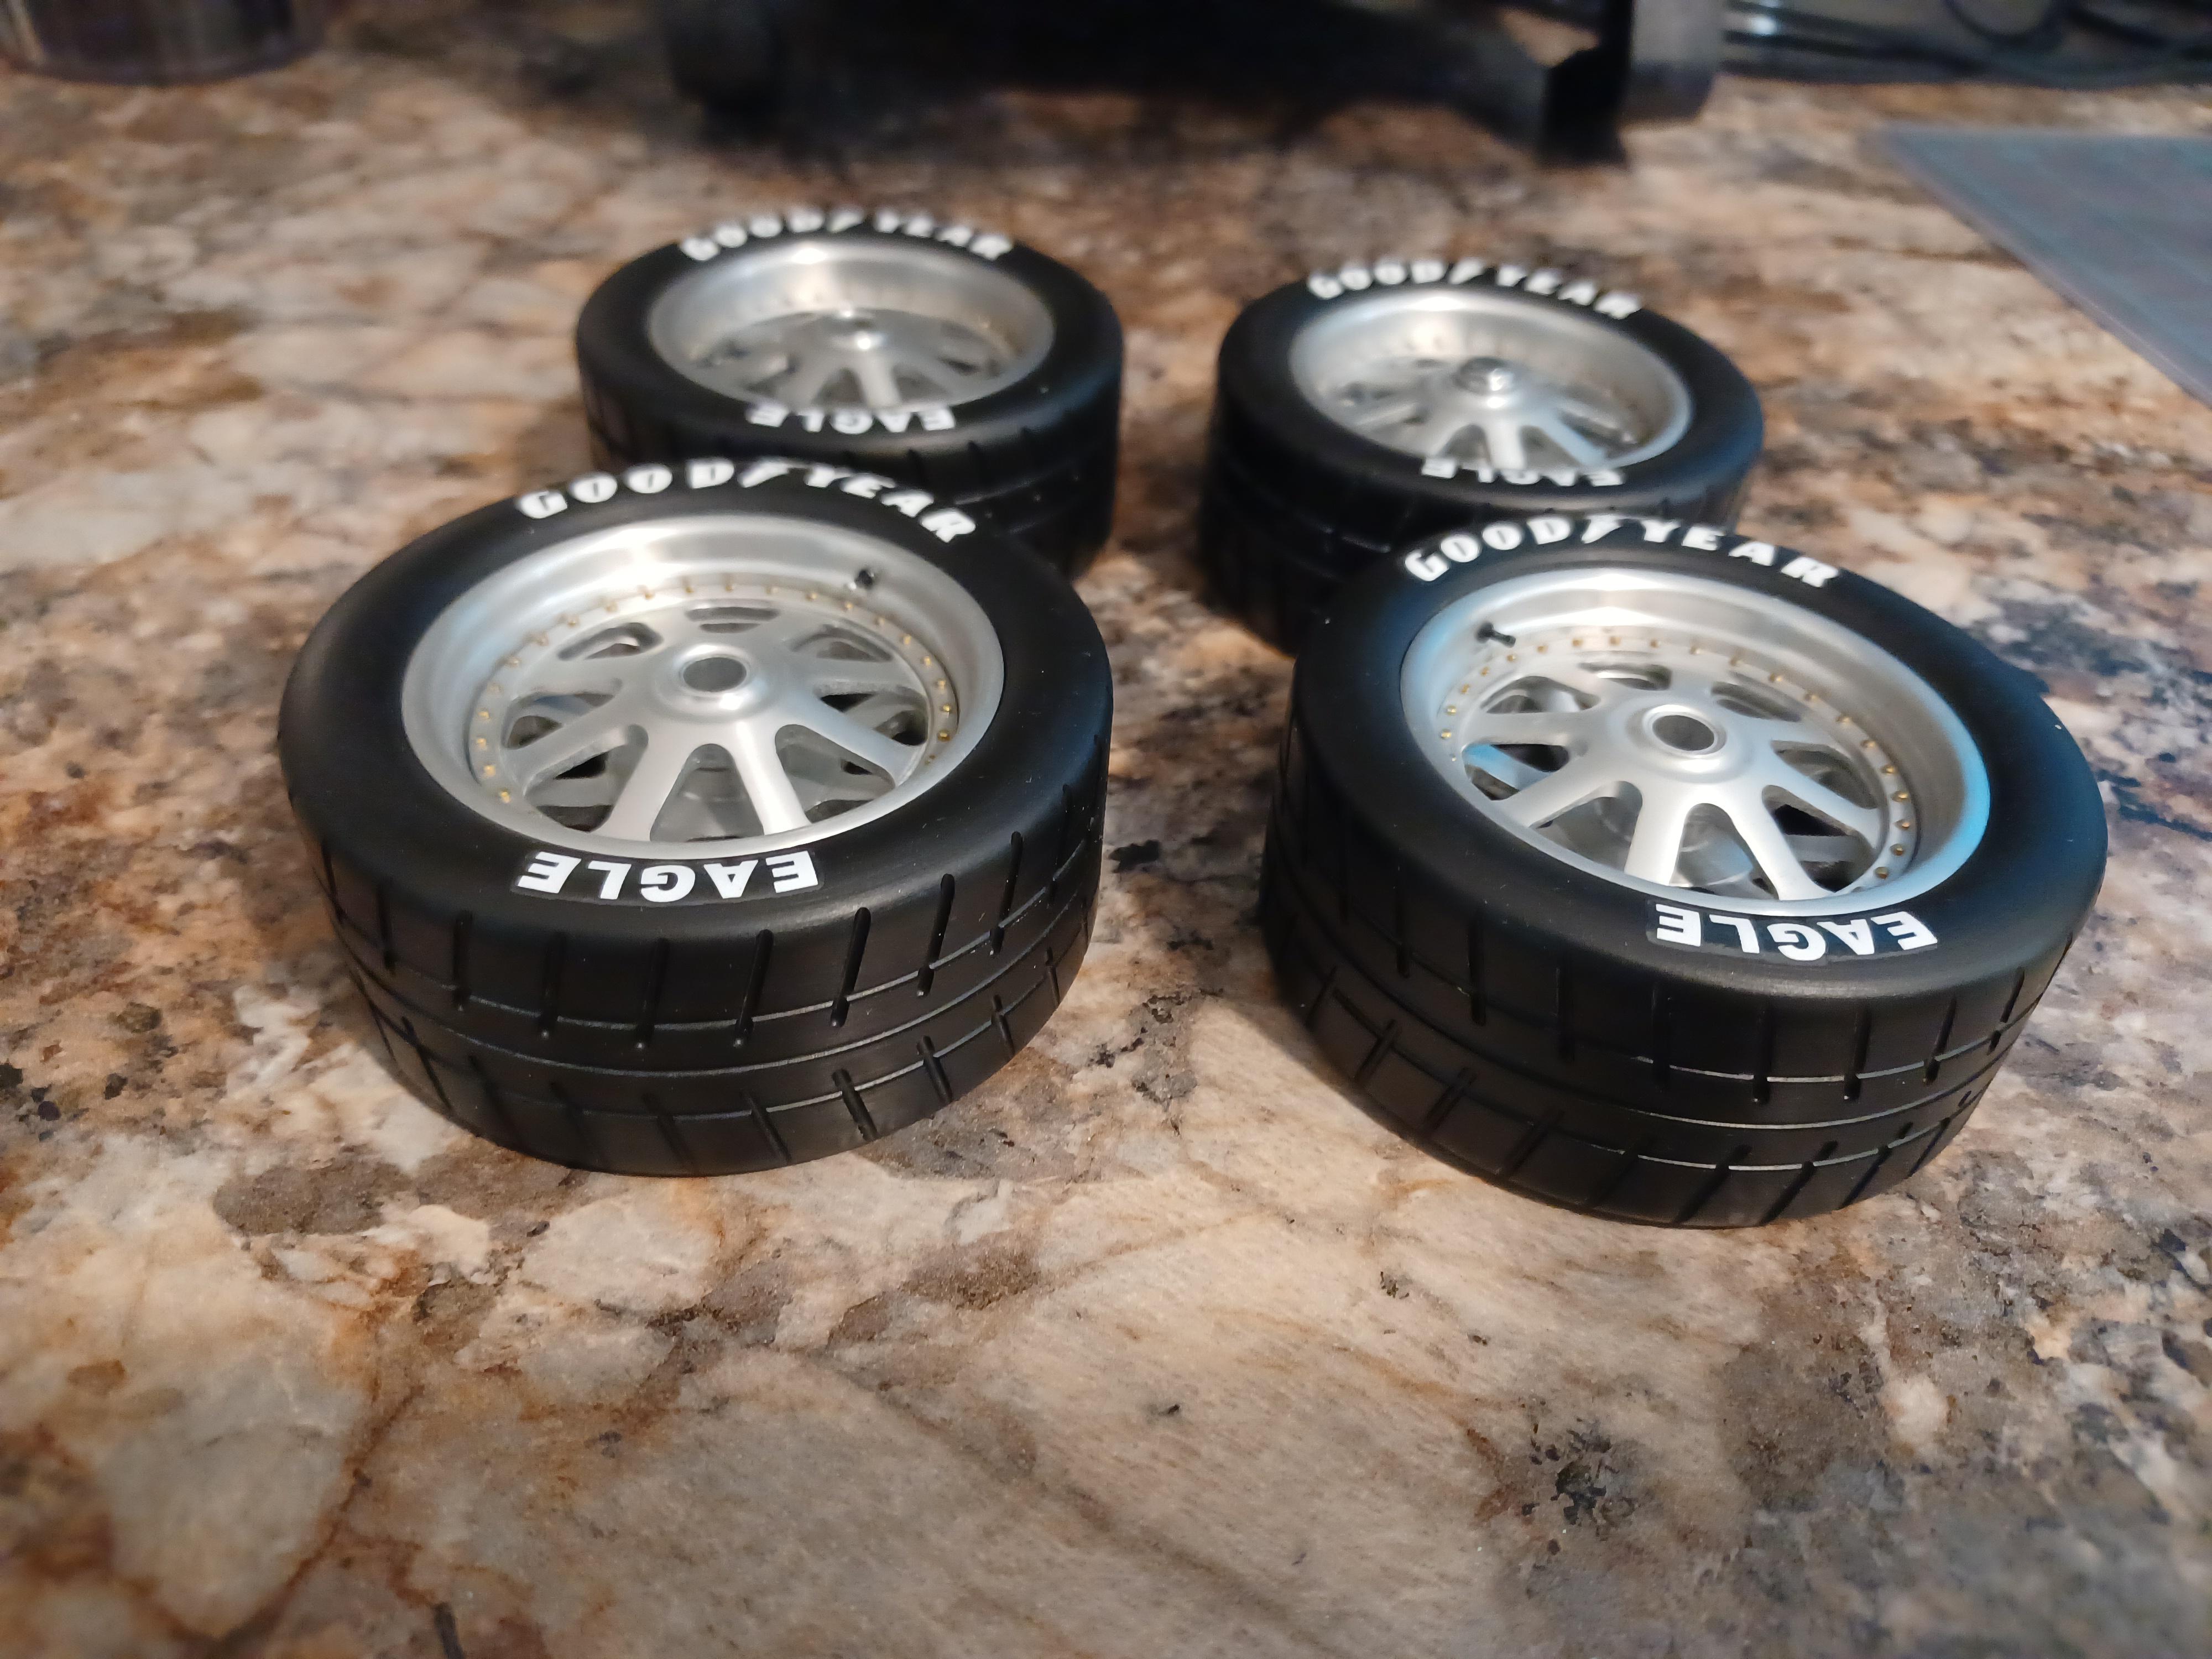
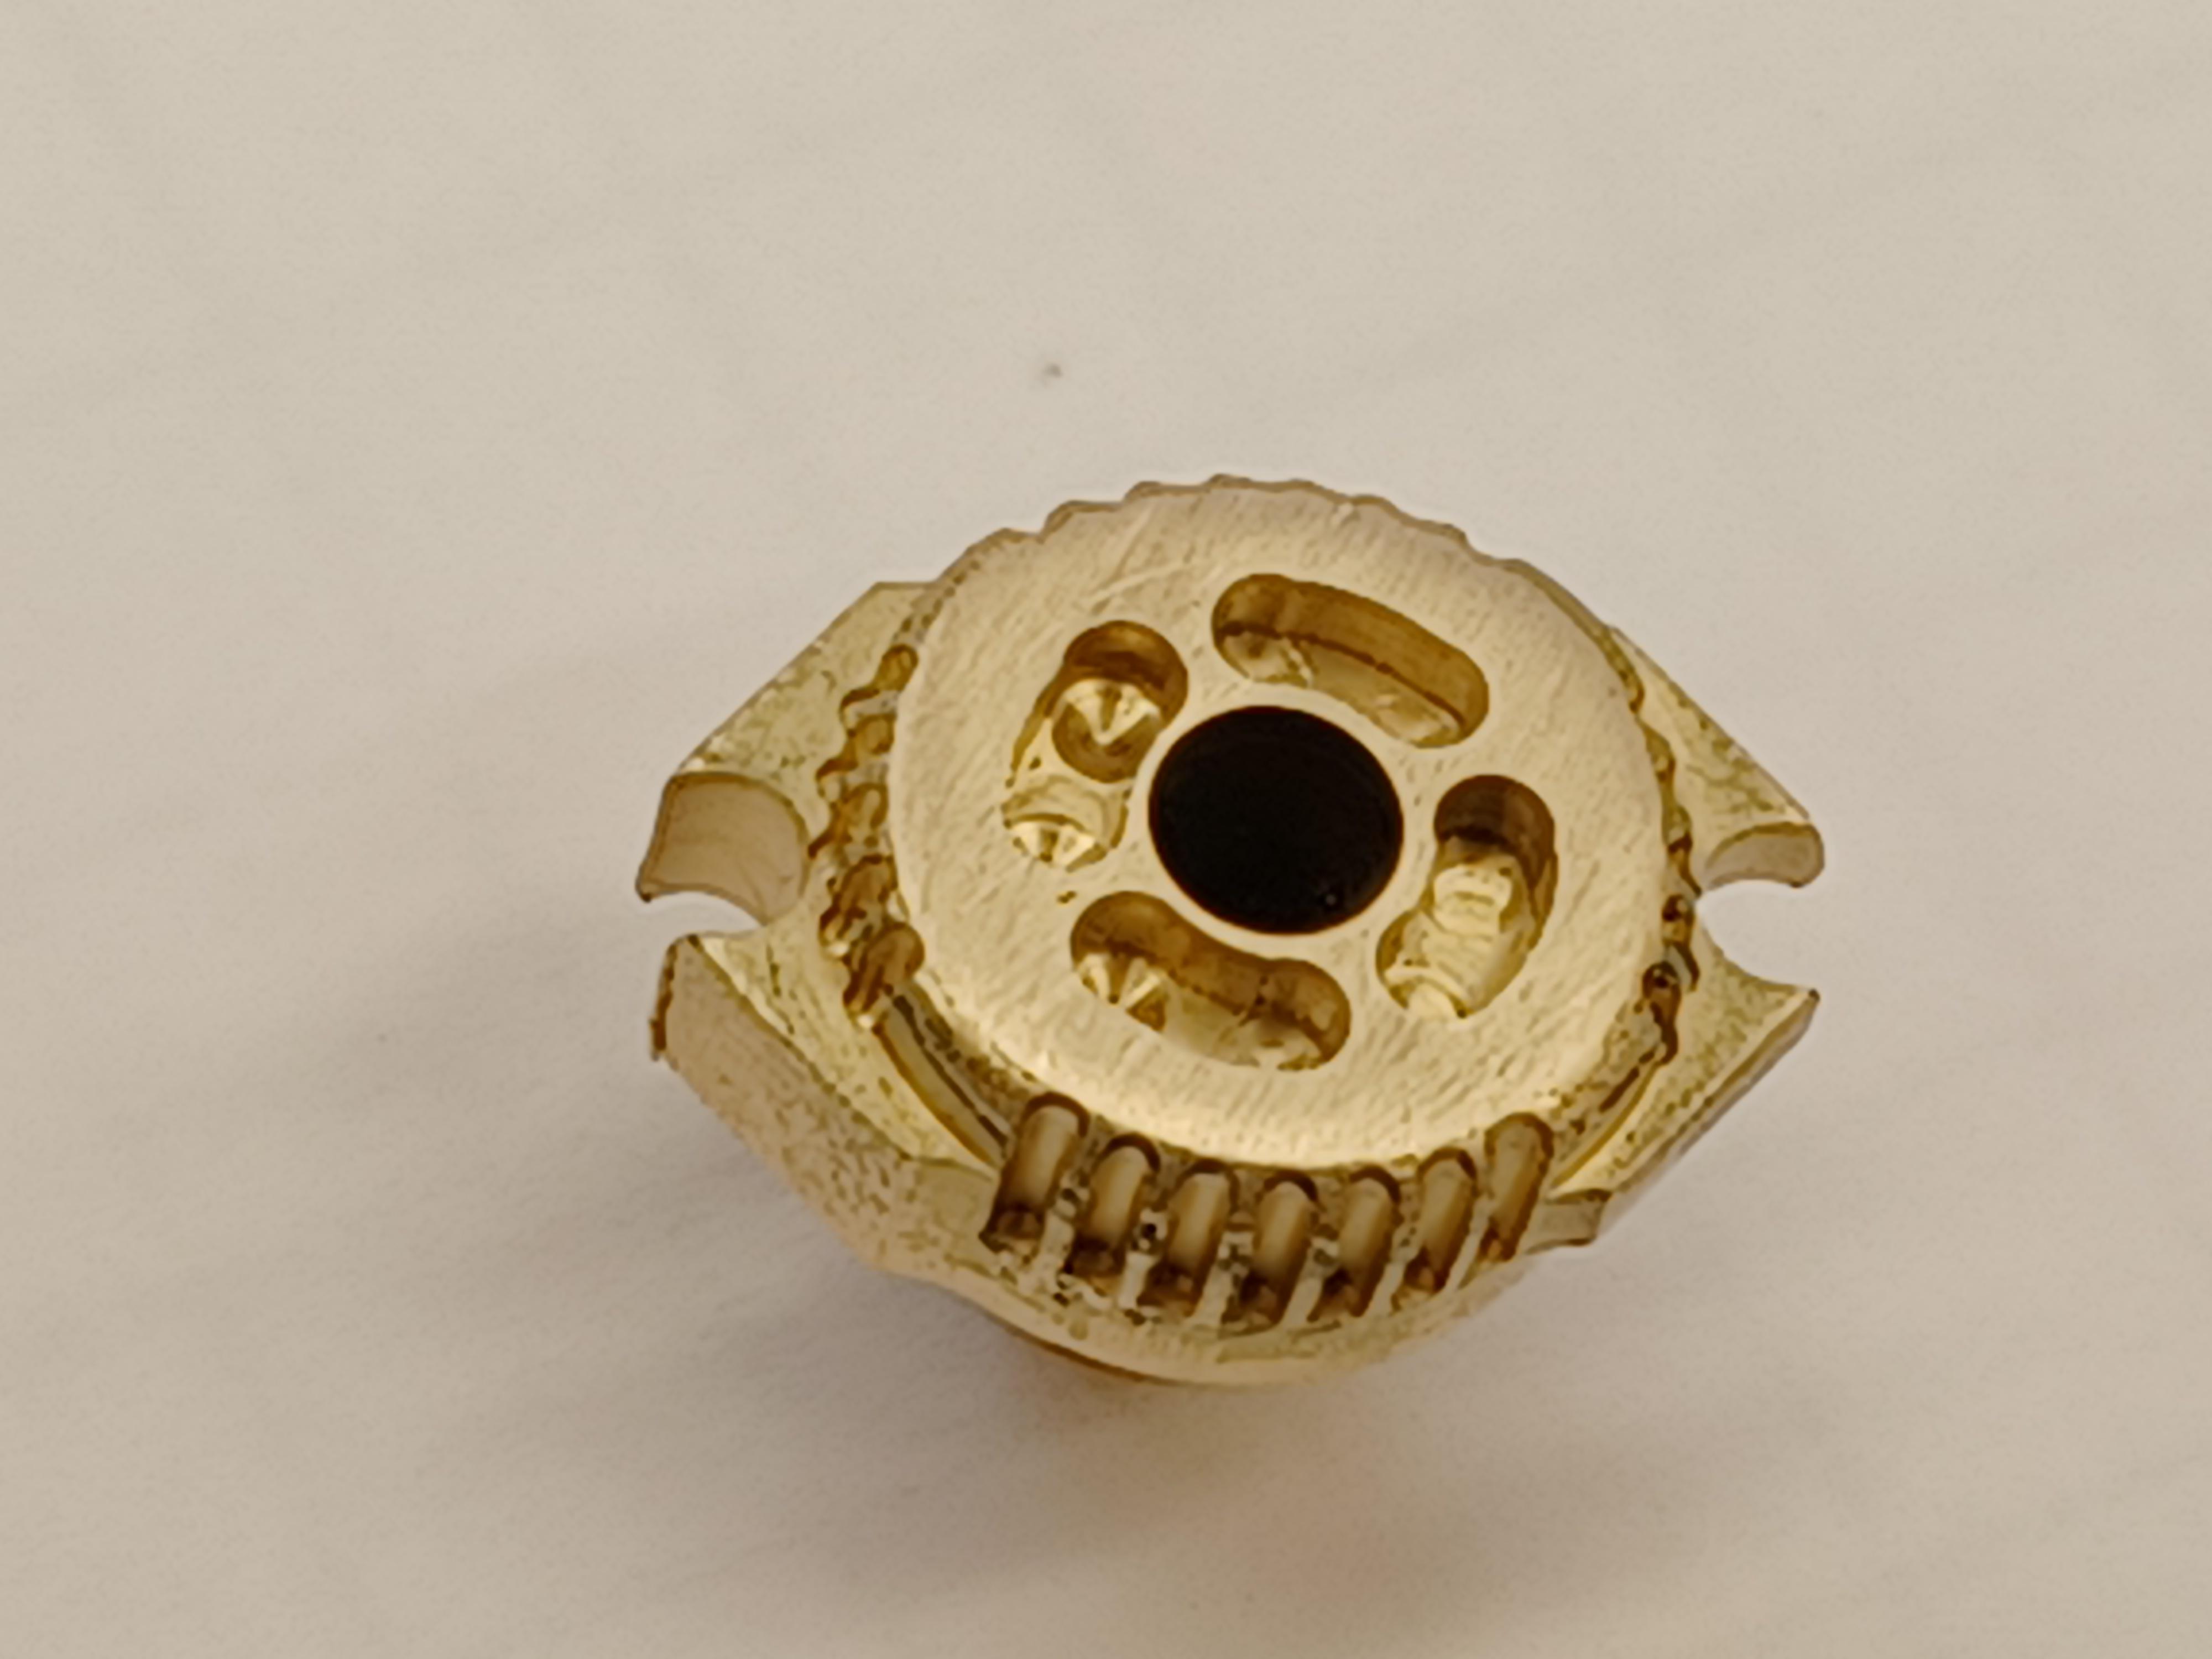
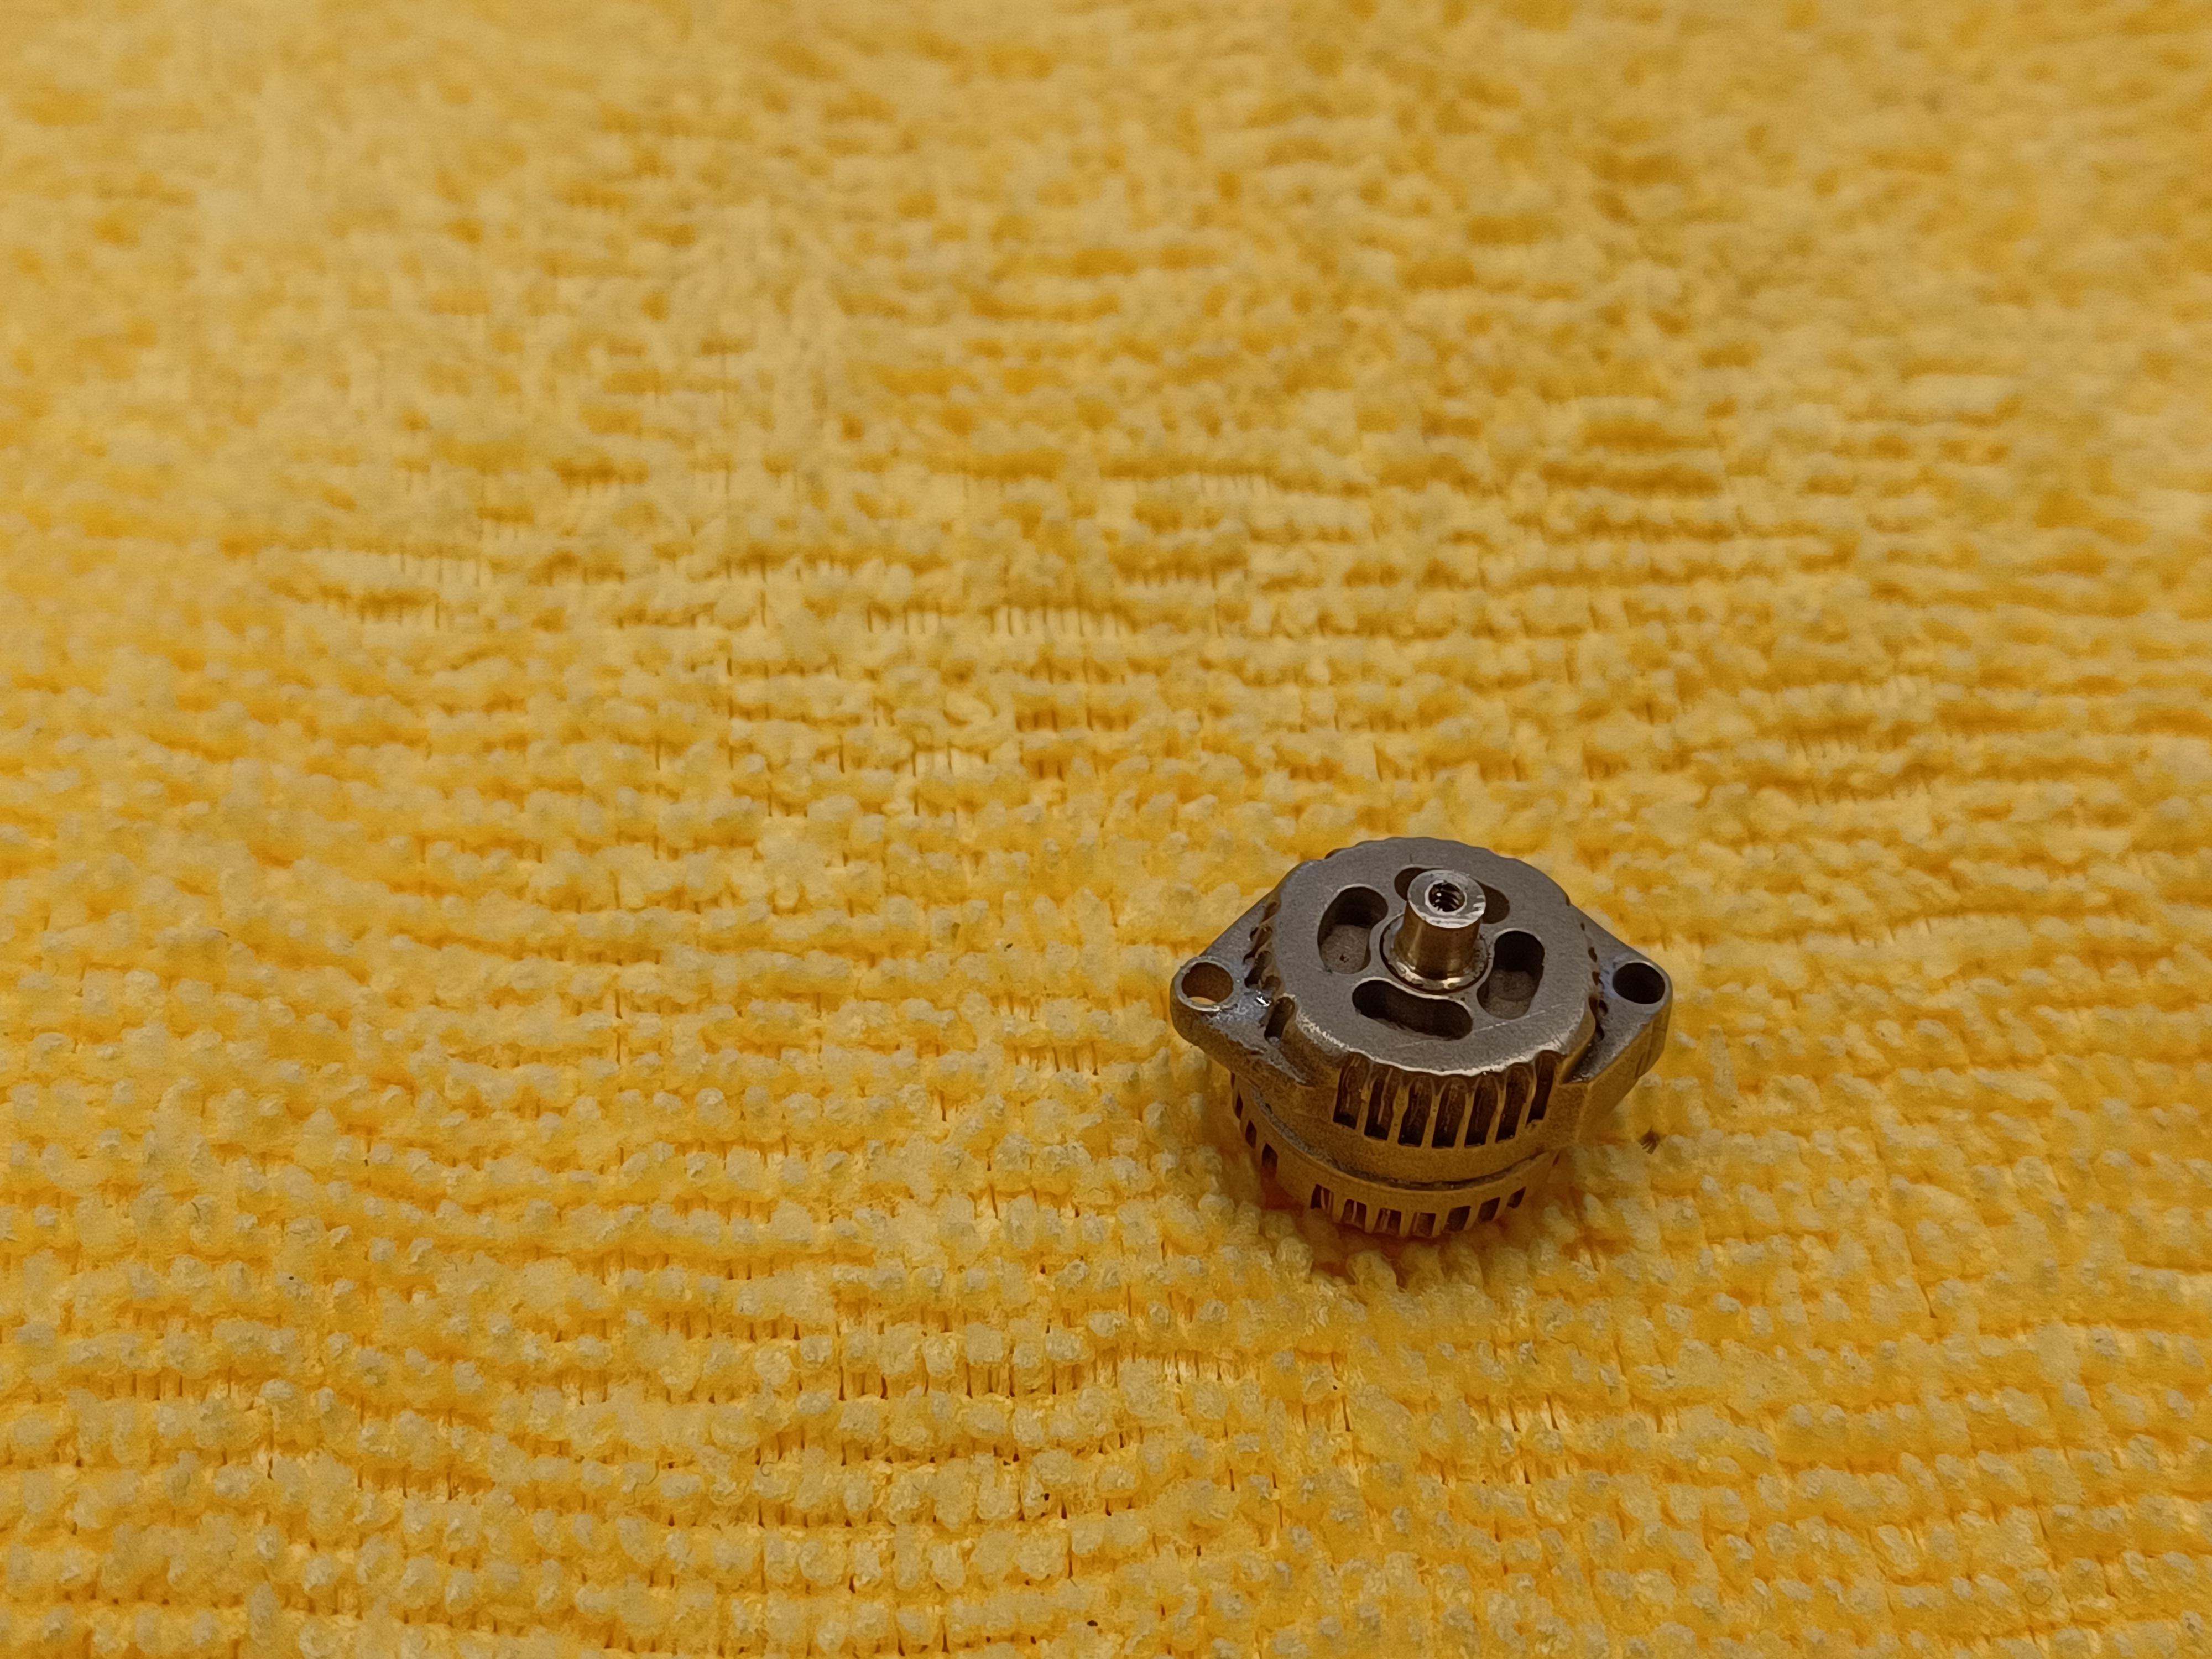
yes andrew,just anodized with no dye for color . just keeps them from corroding. i think it leaves a nice finish.hi daniel, thanks for looking. hope you enjoy.128 rivets. 3 pieces in the center of the wheels. 3 times 128 holes ,thats alot of holes. i havent counted how many allen head bolts i need from rb motion just for the engine side plates.i am going to get a part time job so i can afford this project.
-
so many awesome parts to look at.fuel tank,battery and radiator tank. very nice ! i am glad you are finding more time.is it winter way up there yet?
-
i andrew ,the pictures are pretty cool. hi francis. put the wheels together, ran out of rivets after the third wheel. i had ordered more but they are not here yet. i think they look good they came out the way i planed. started on the front axle. should be finished soon. then i will polish it and anodize clear.got the alt. mounted . and started final assembly of the engine.
-
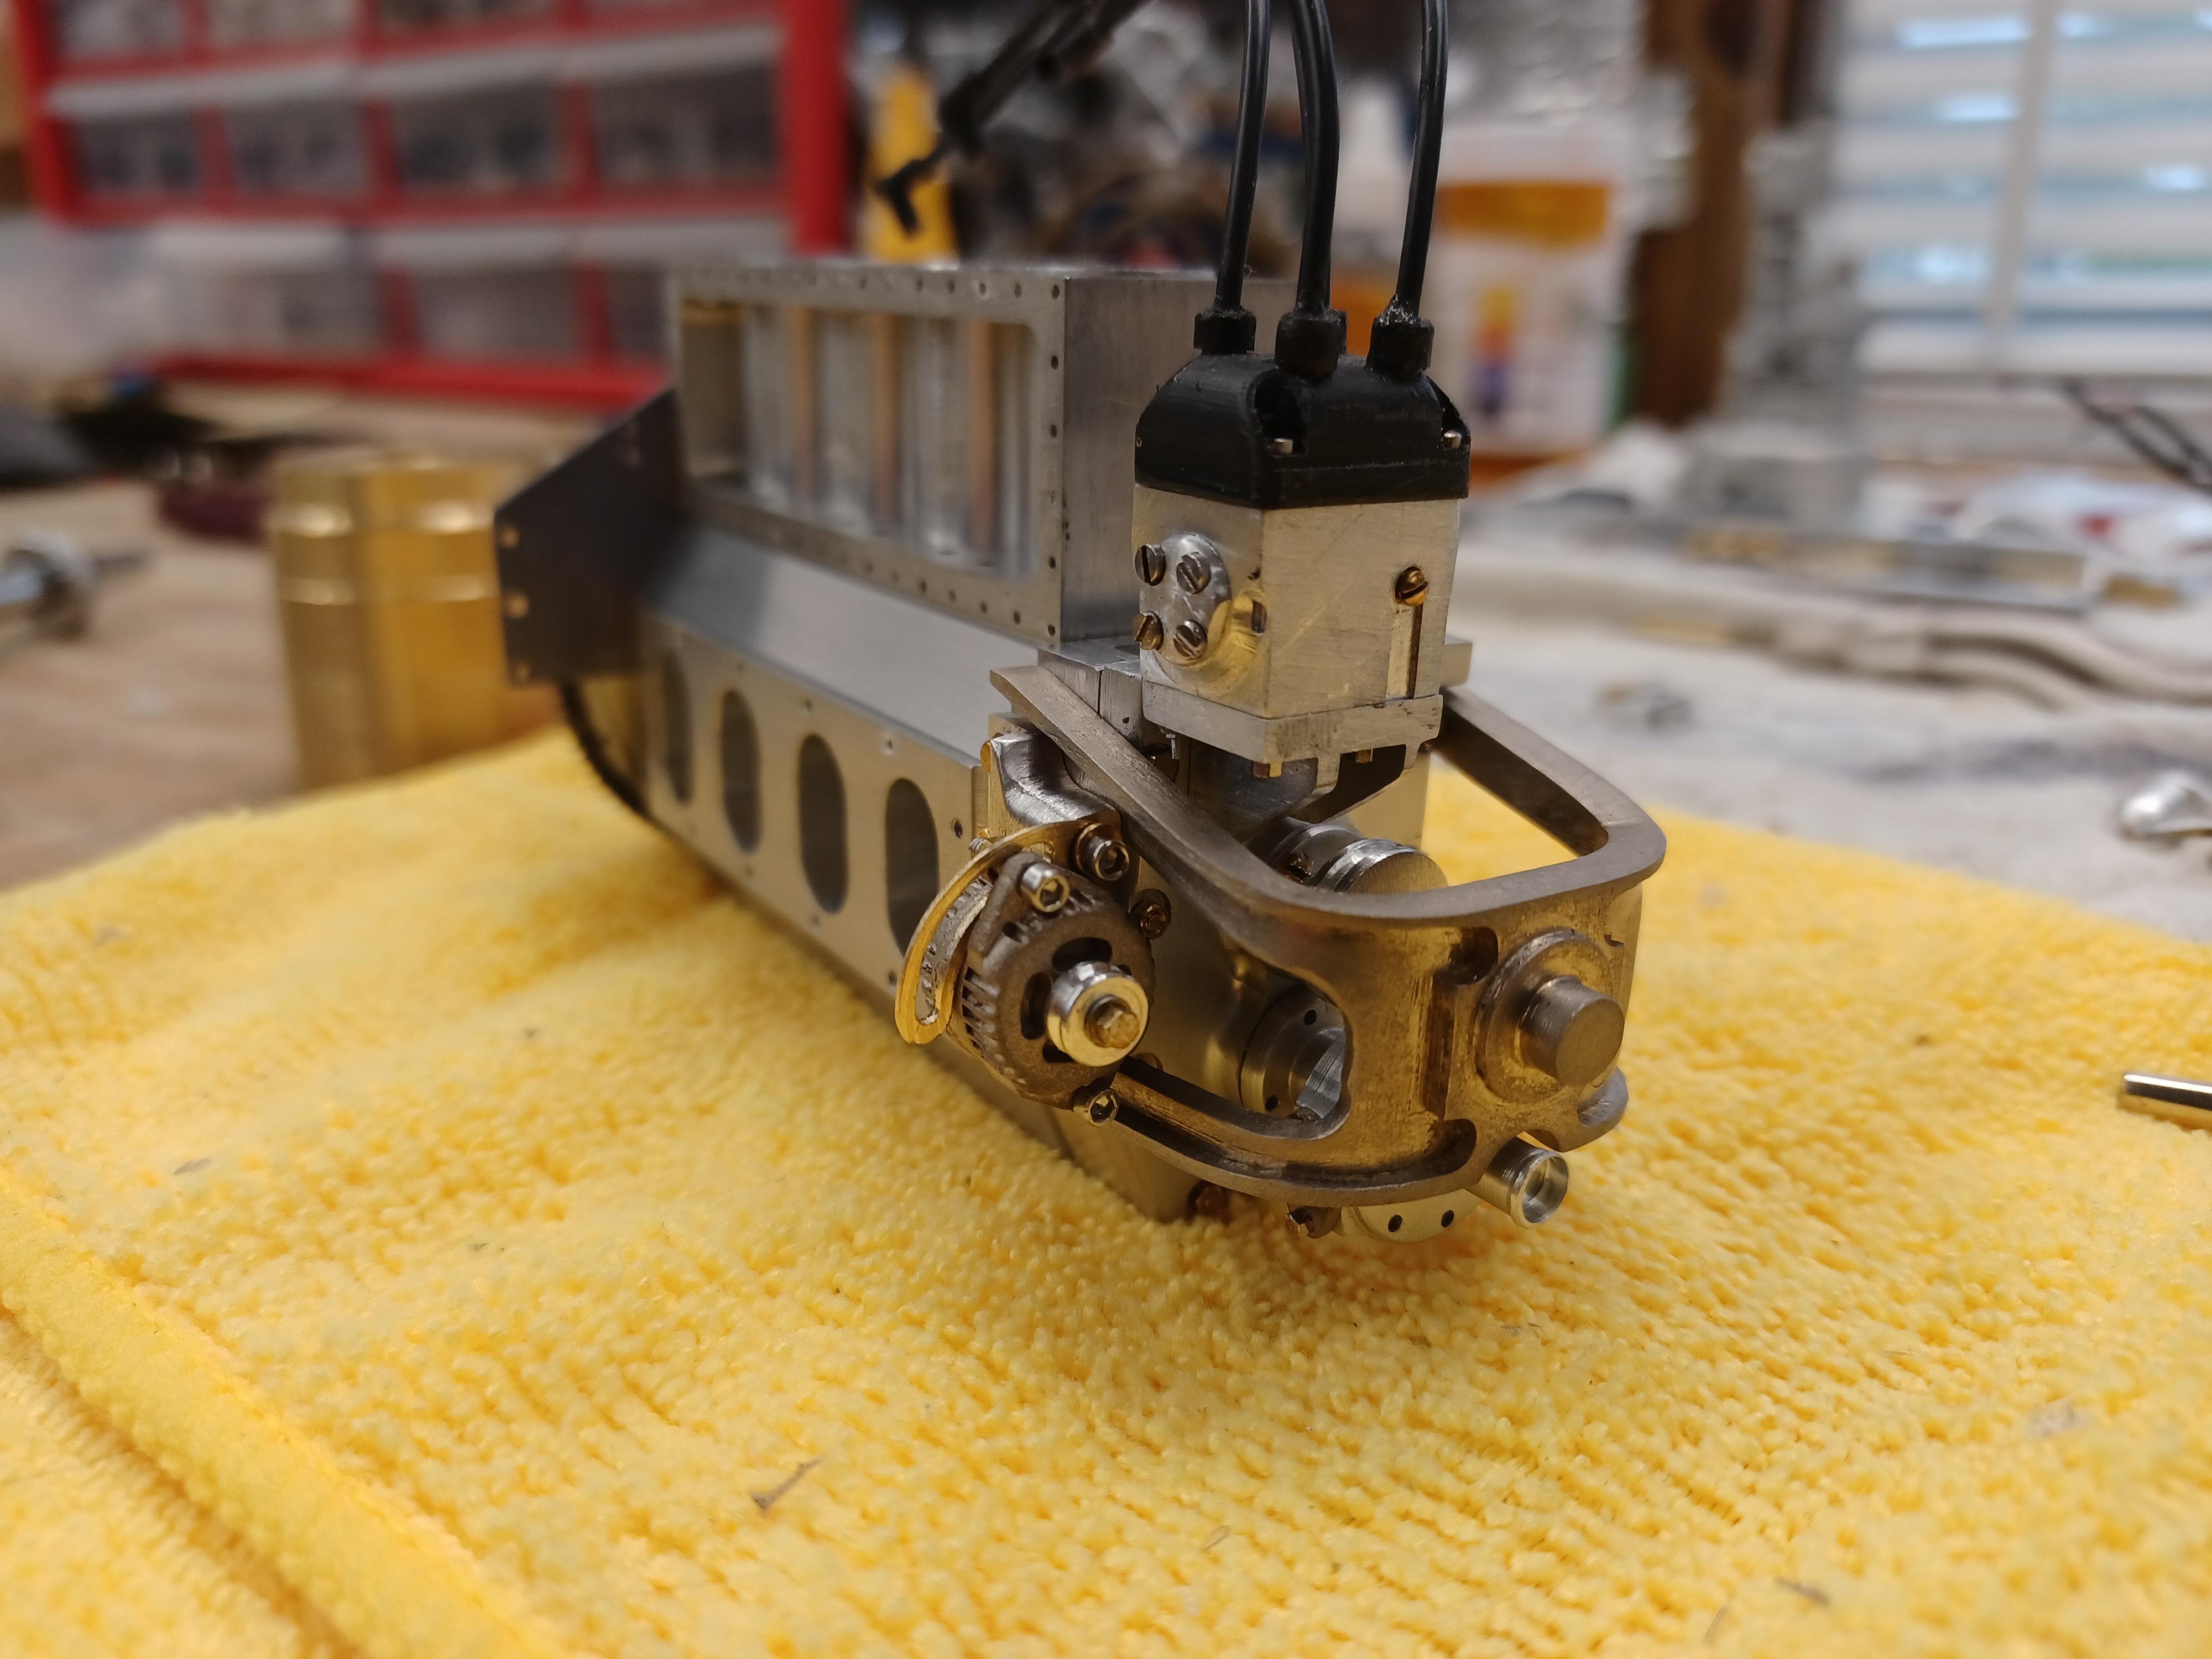
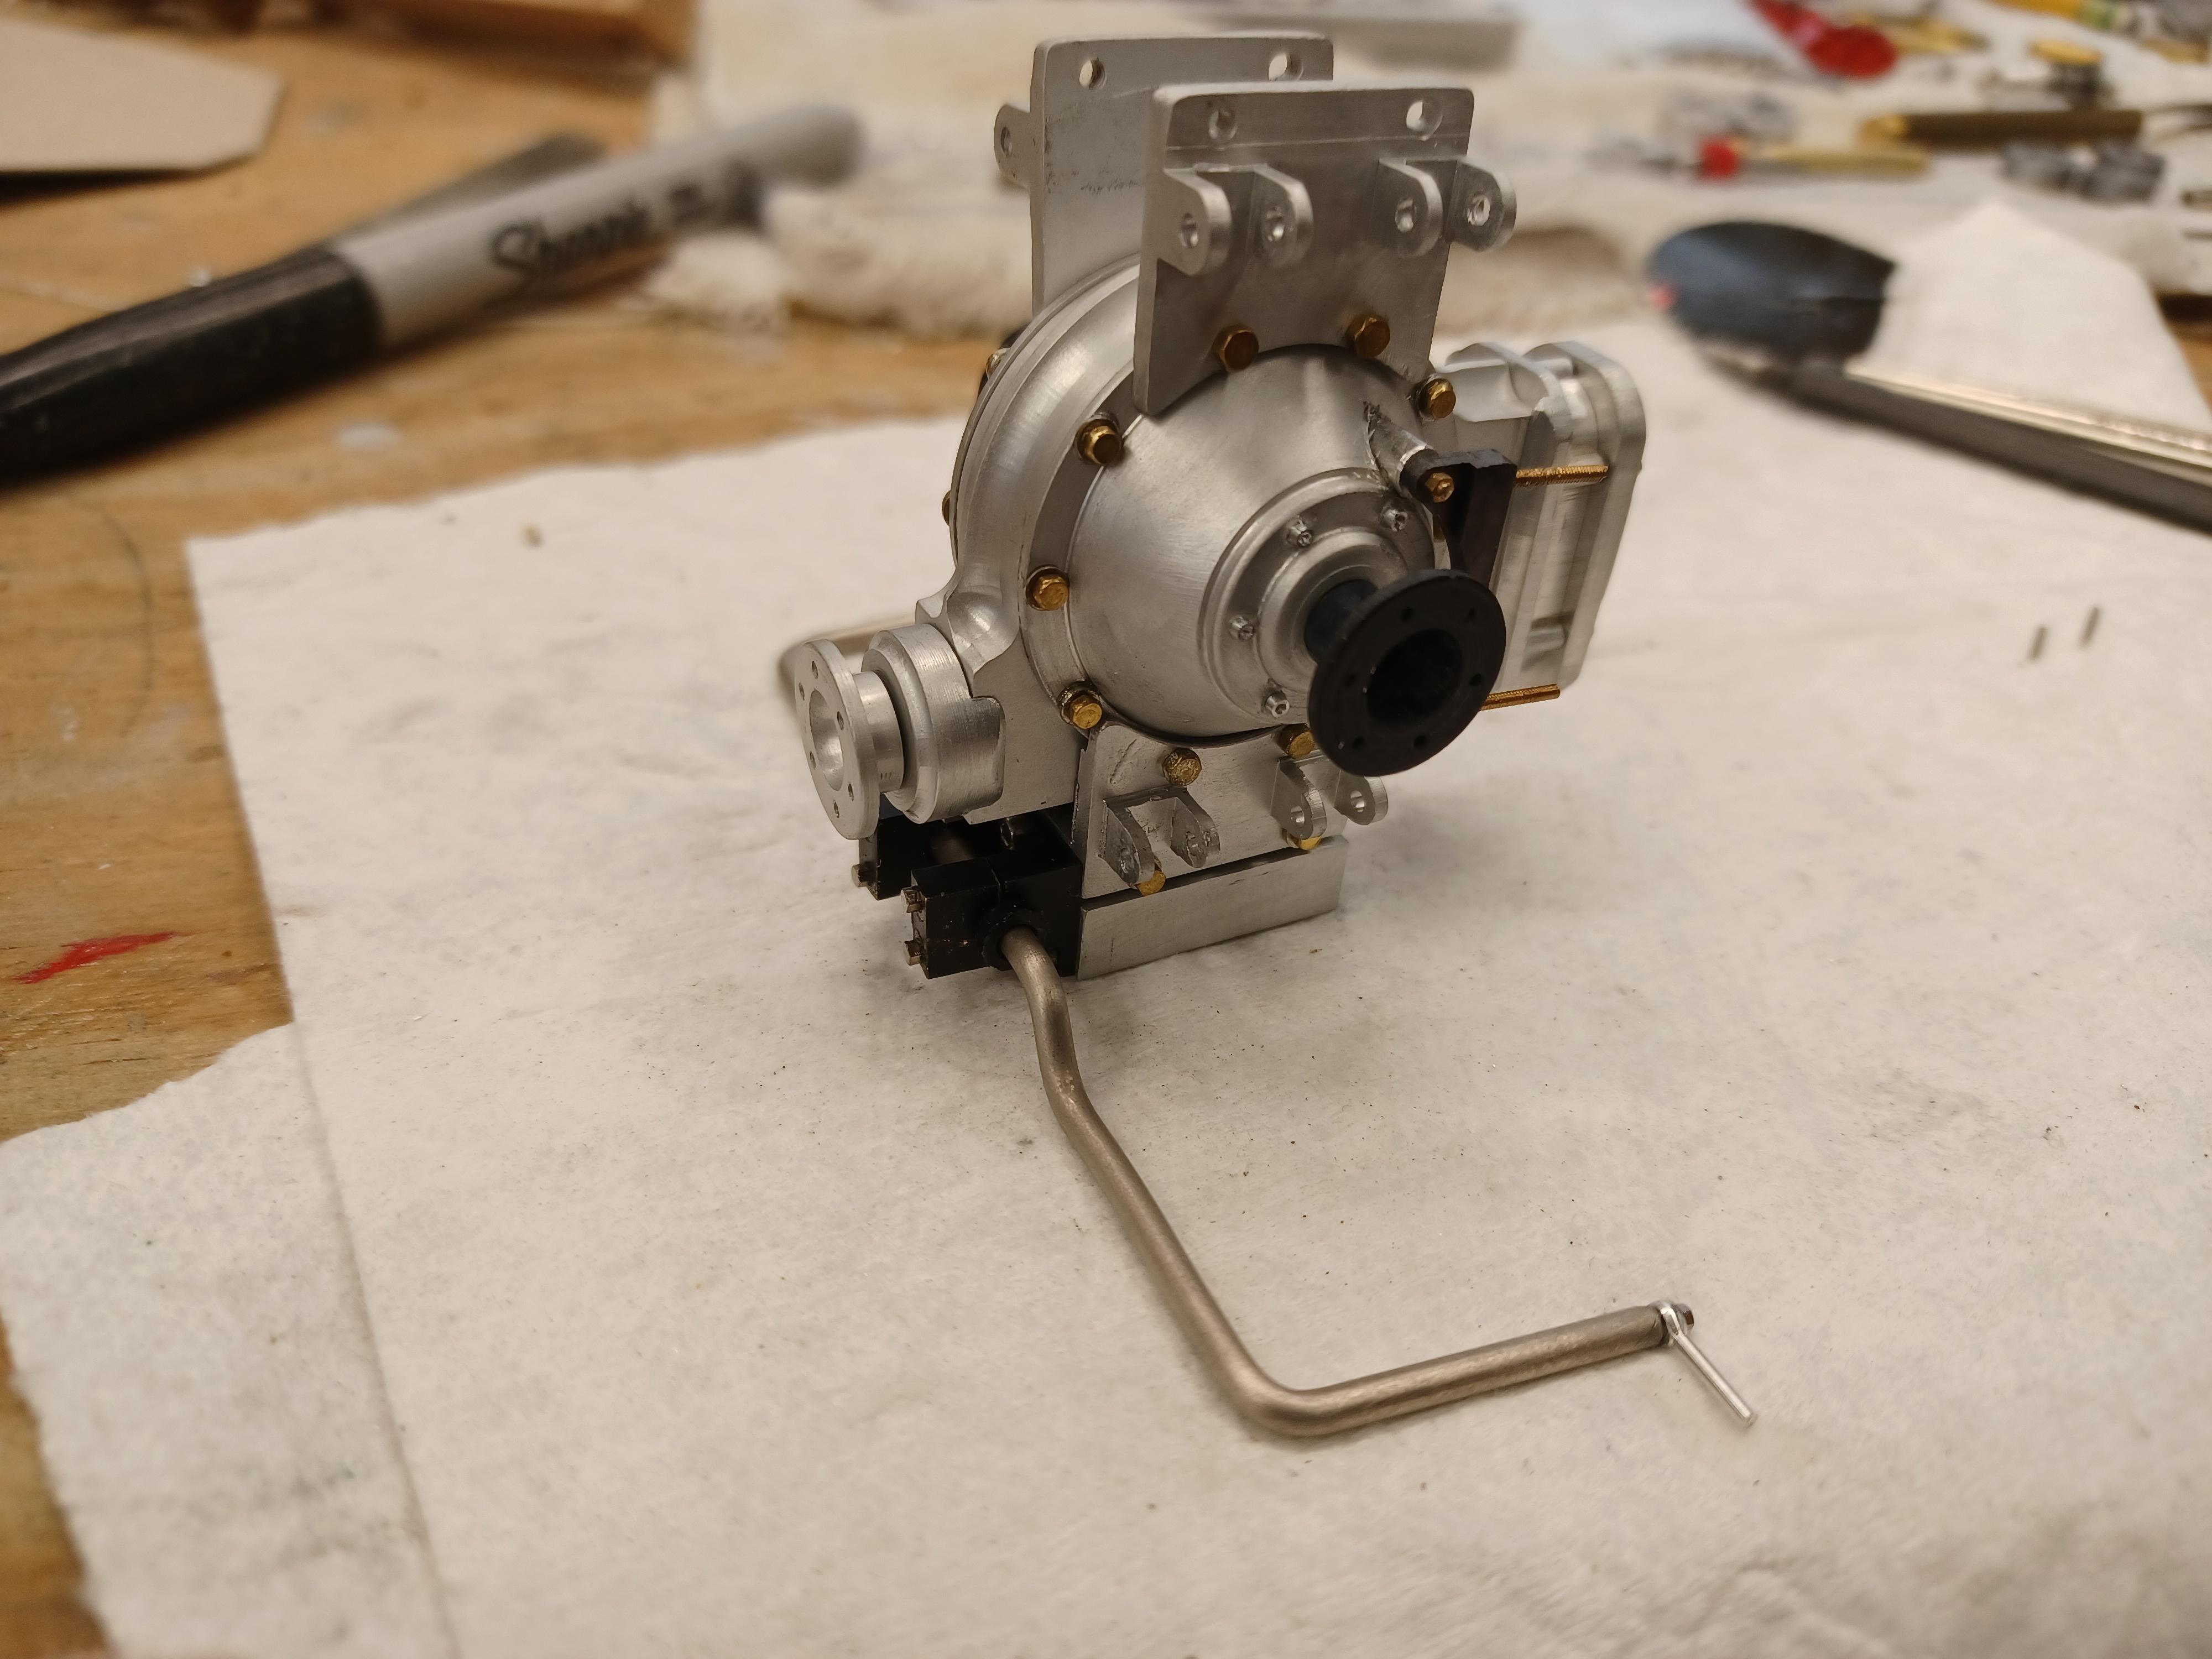
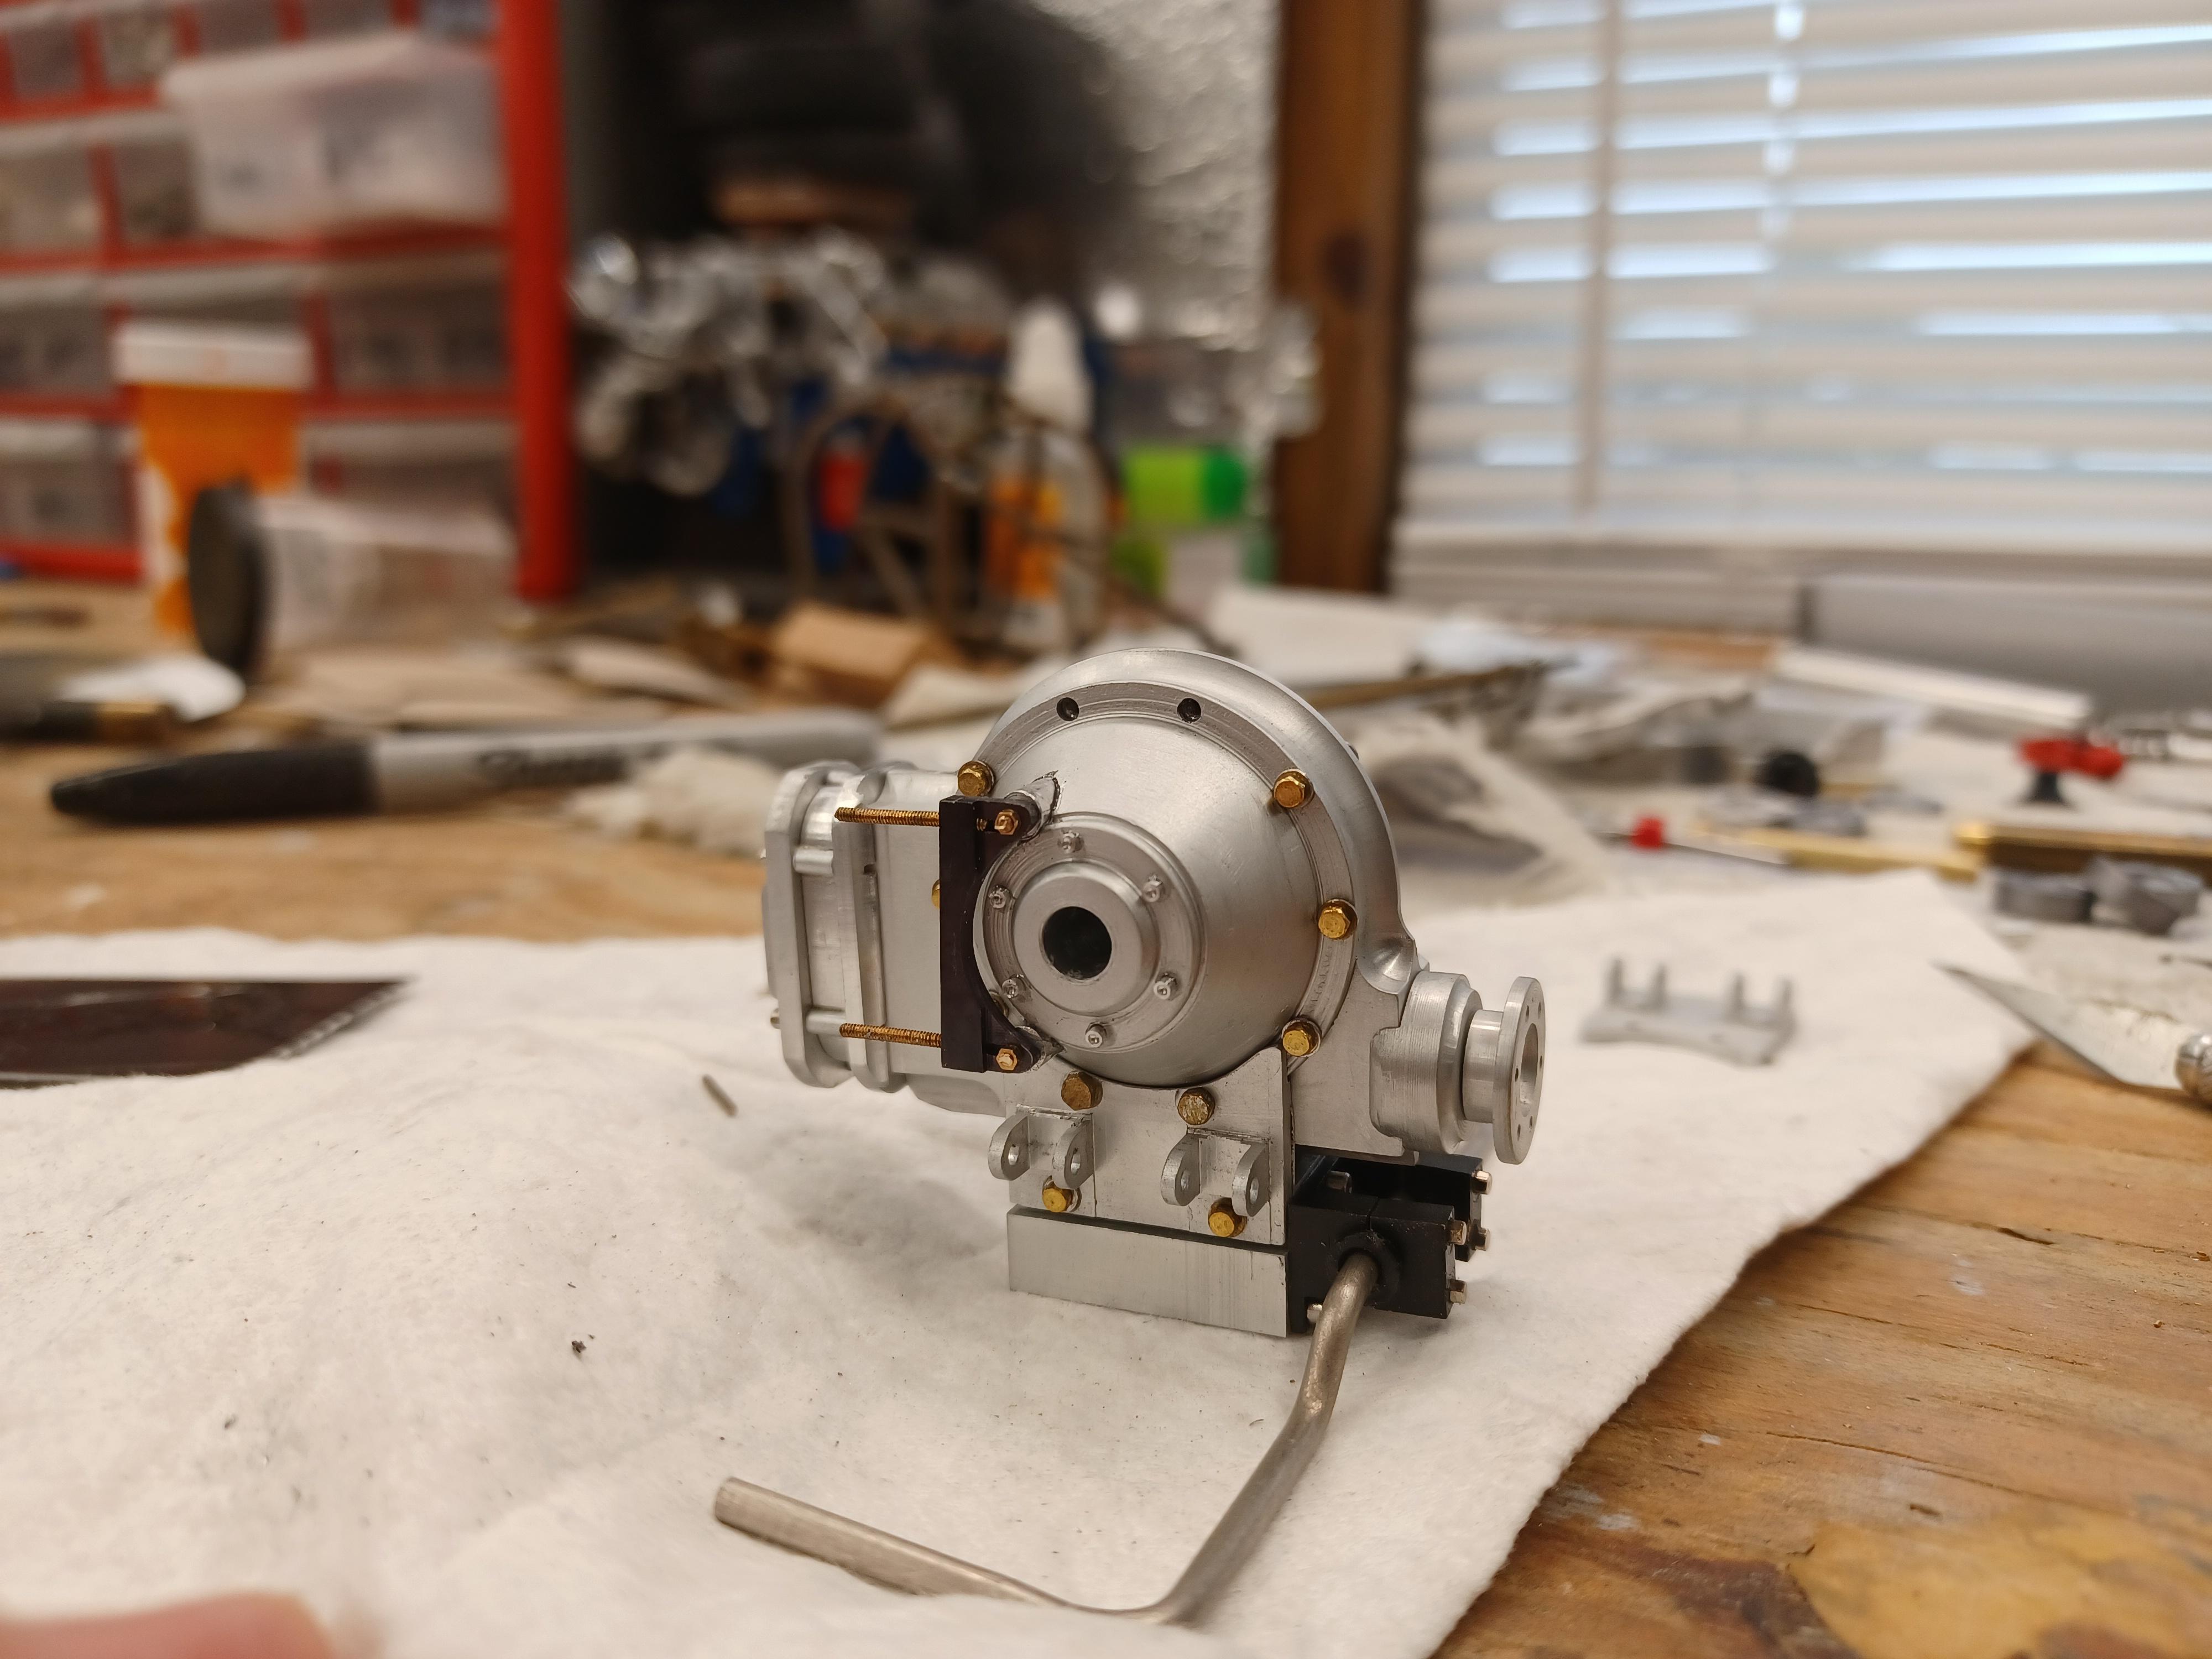
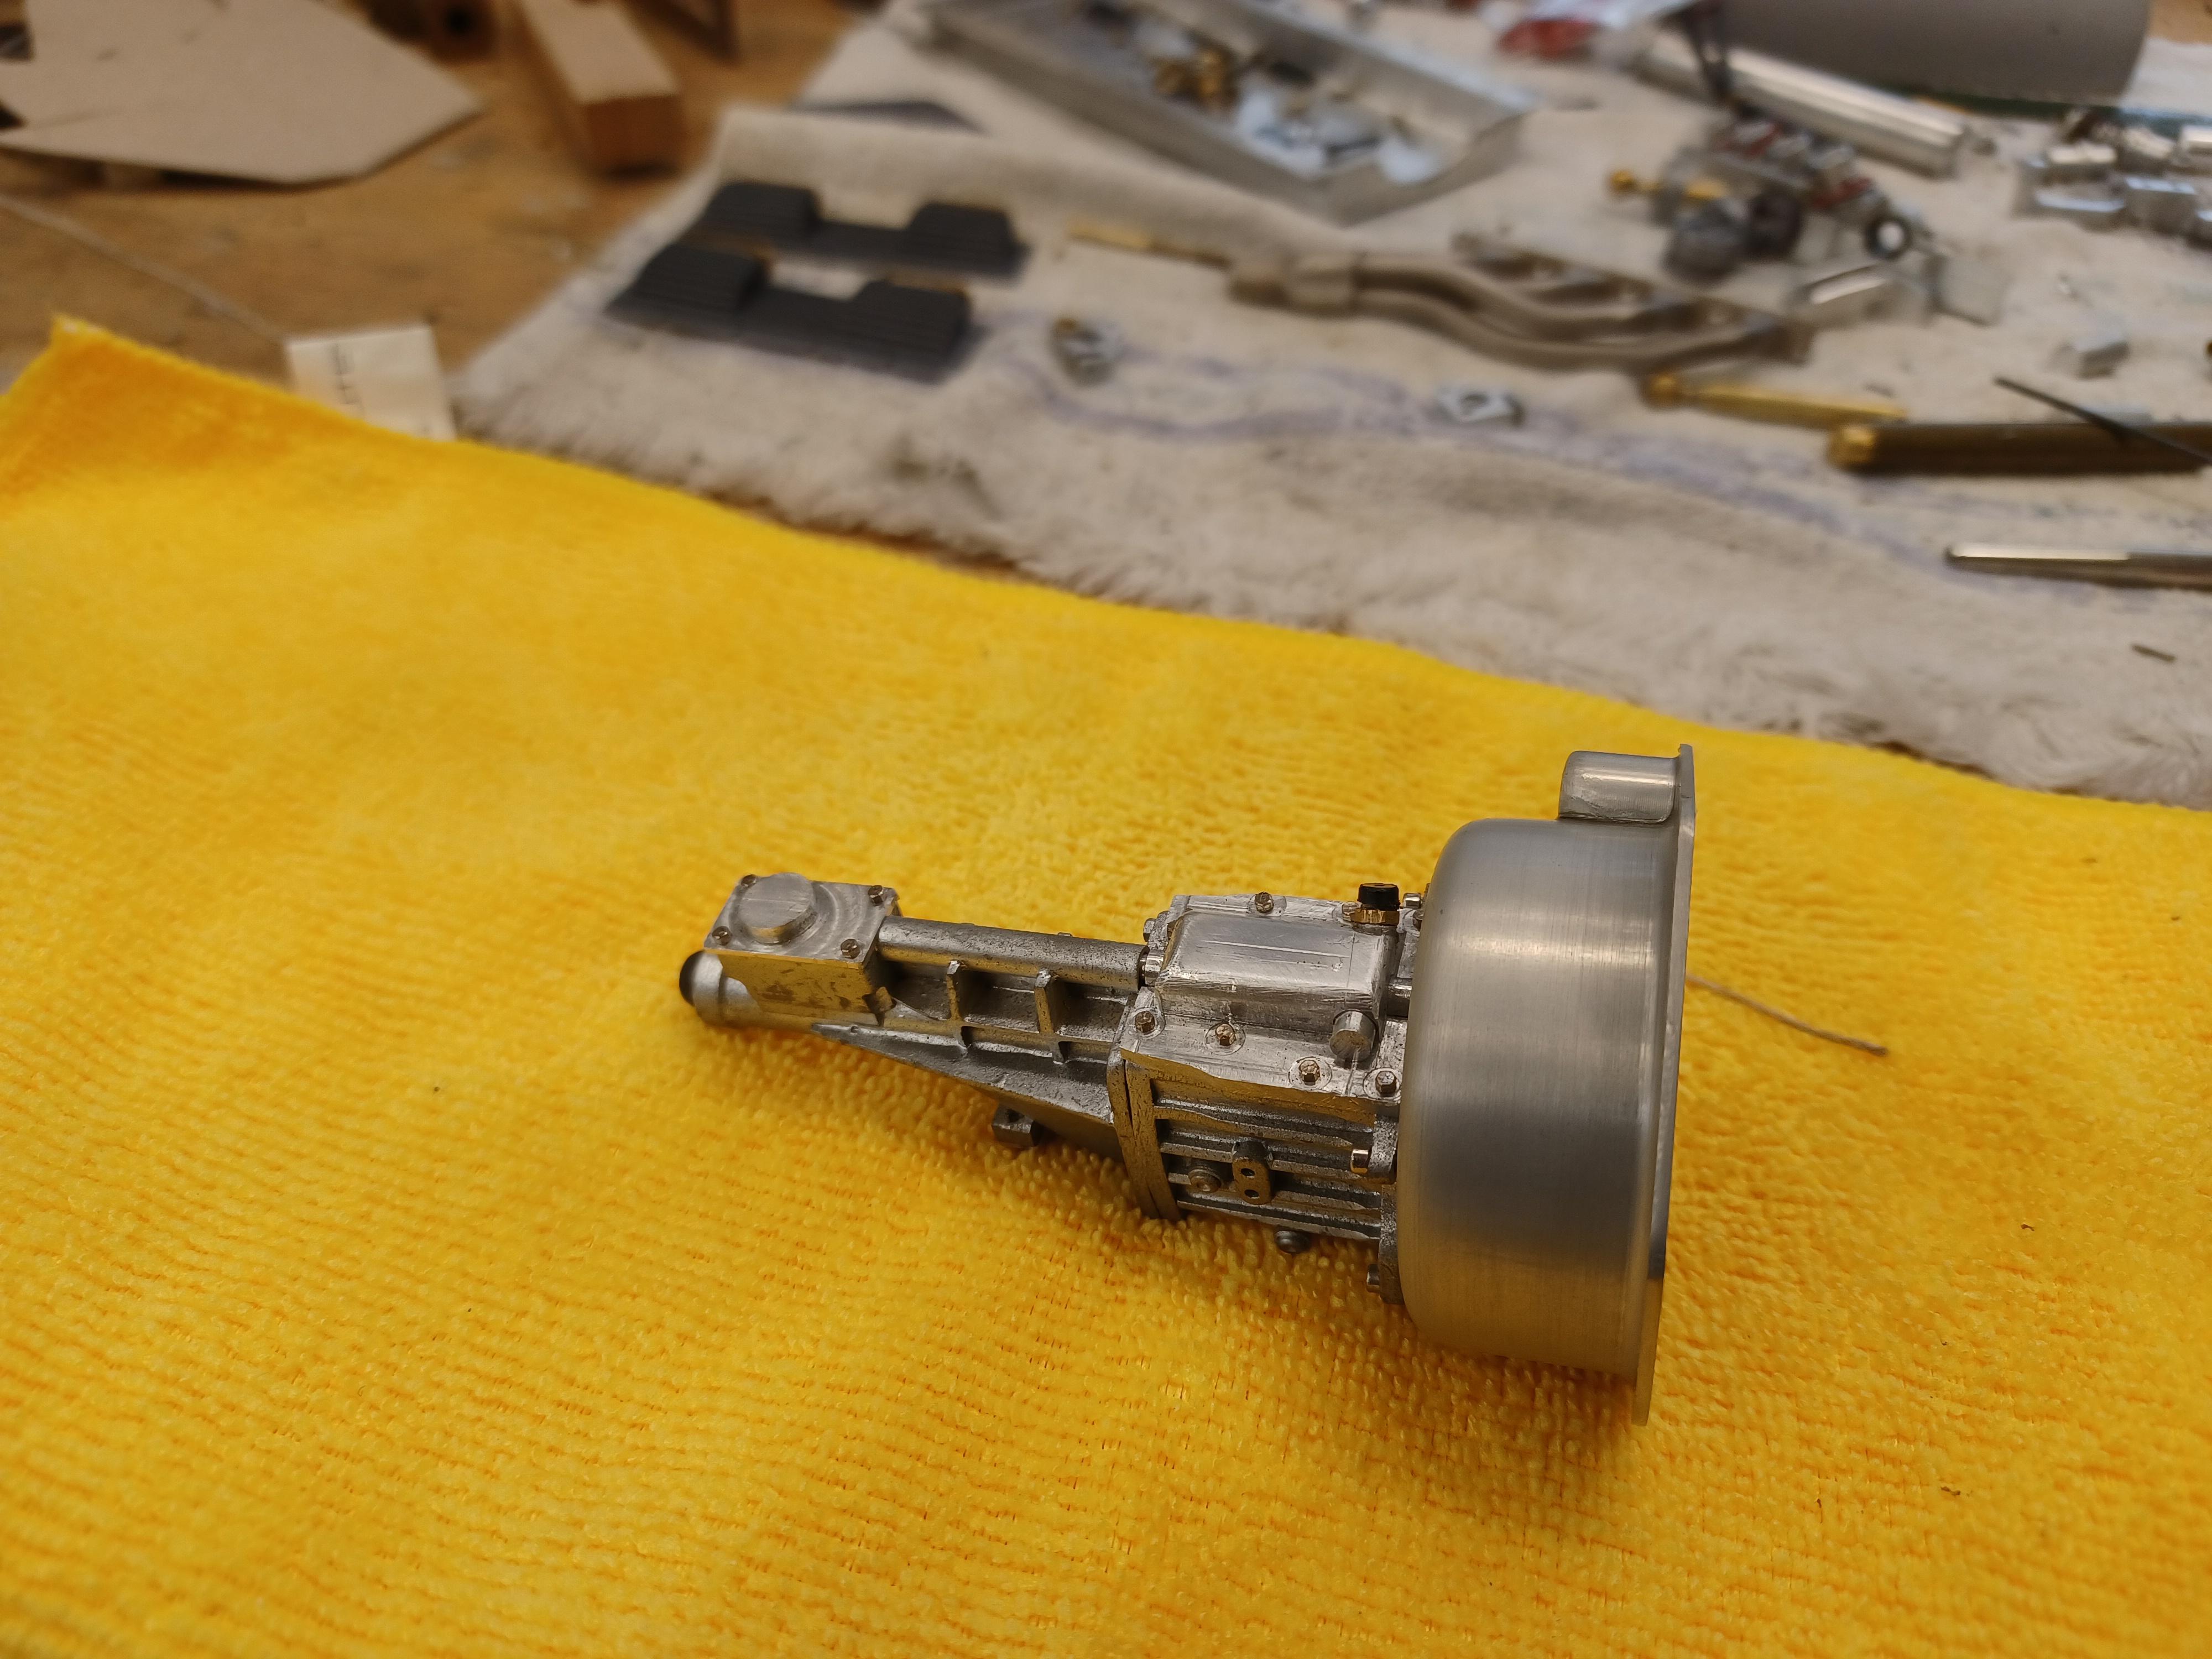
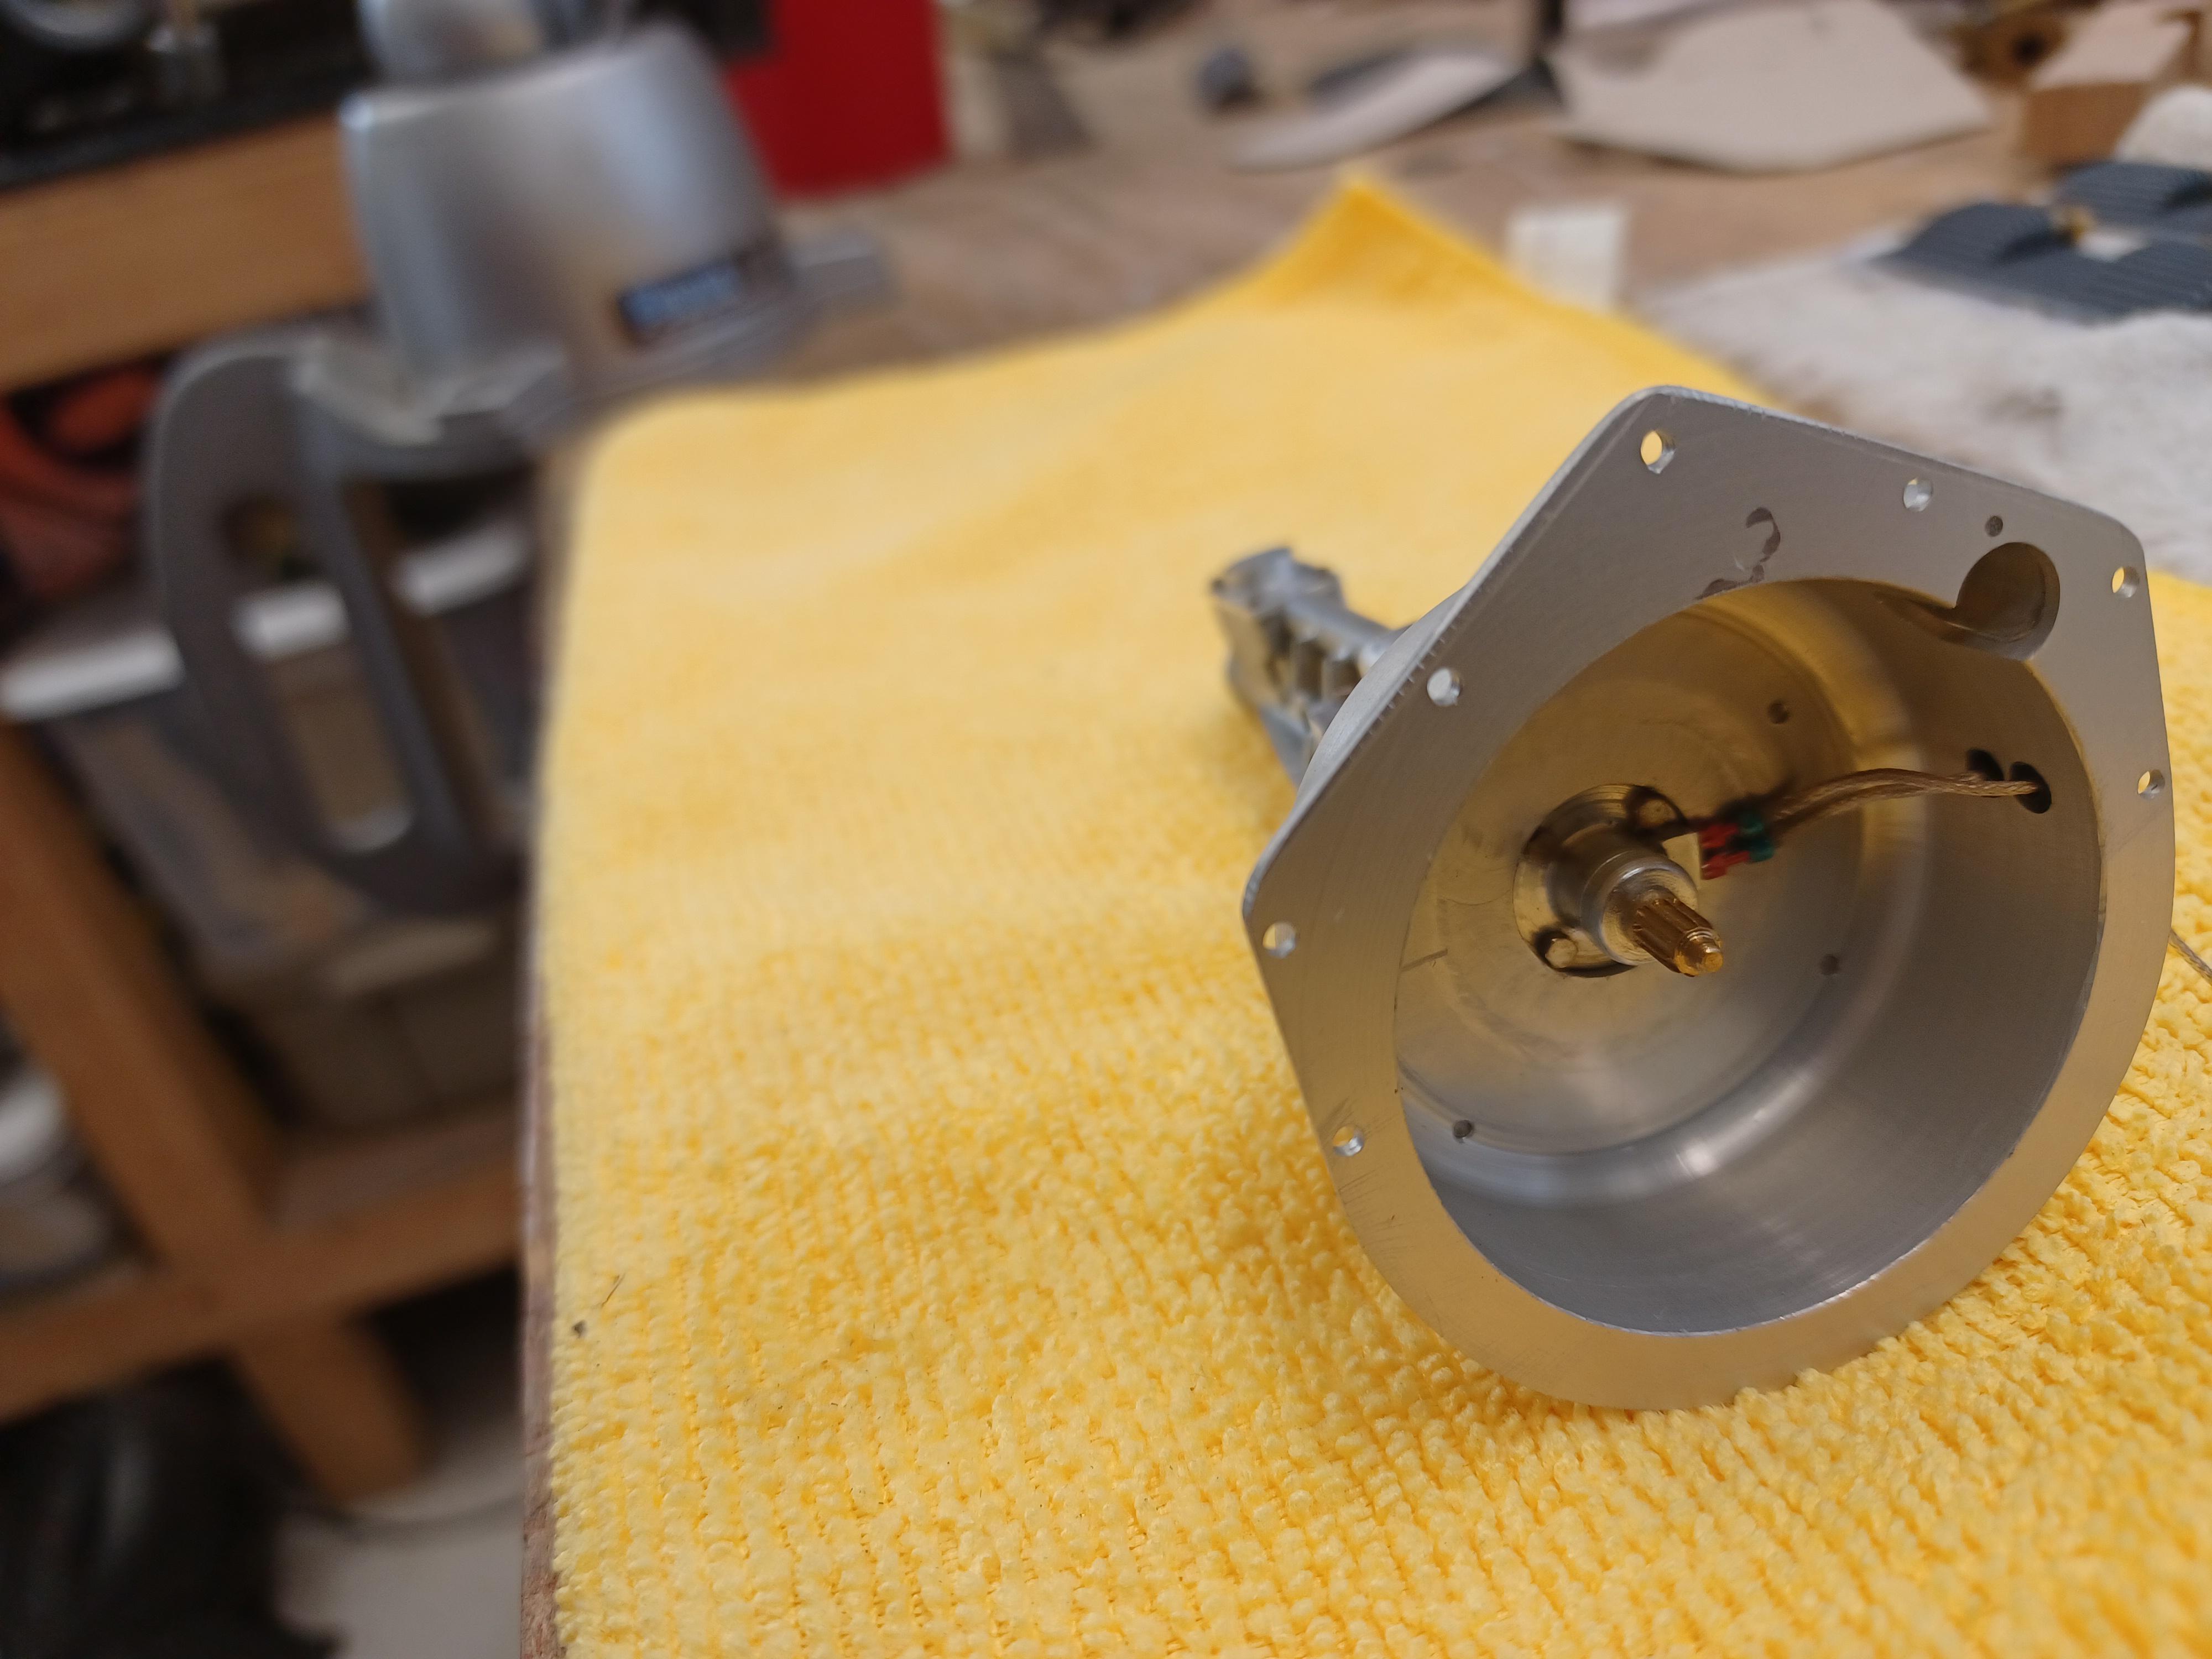
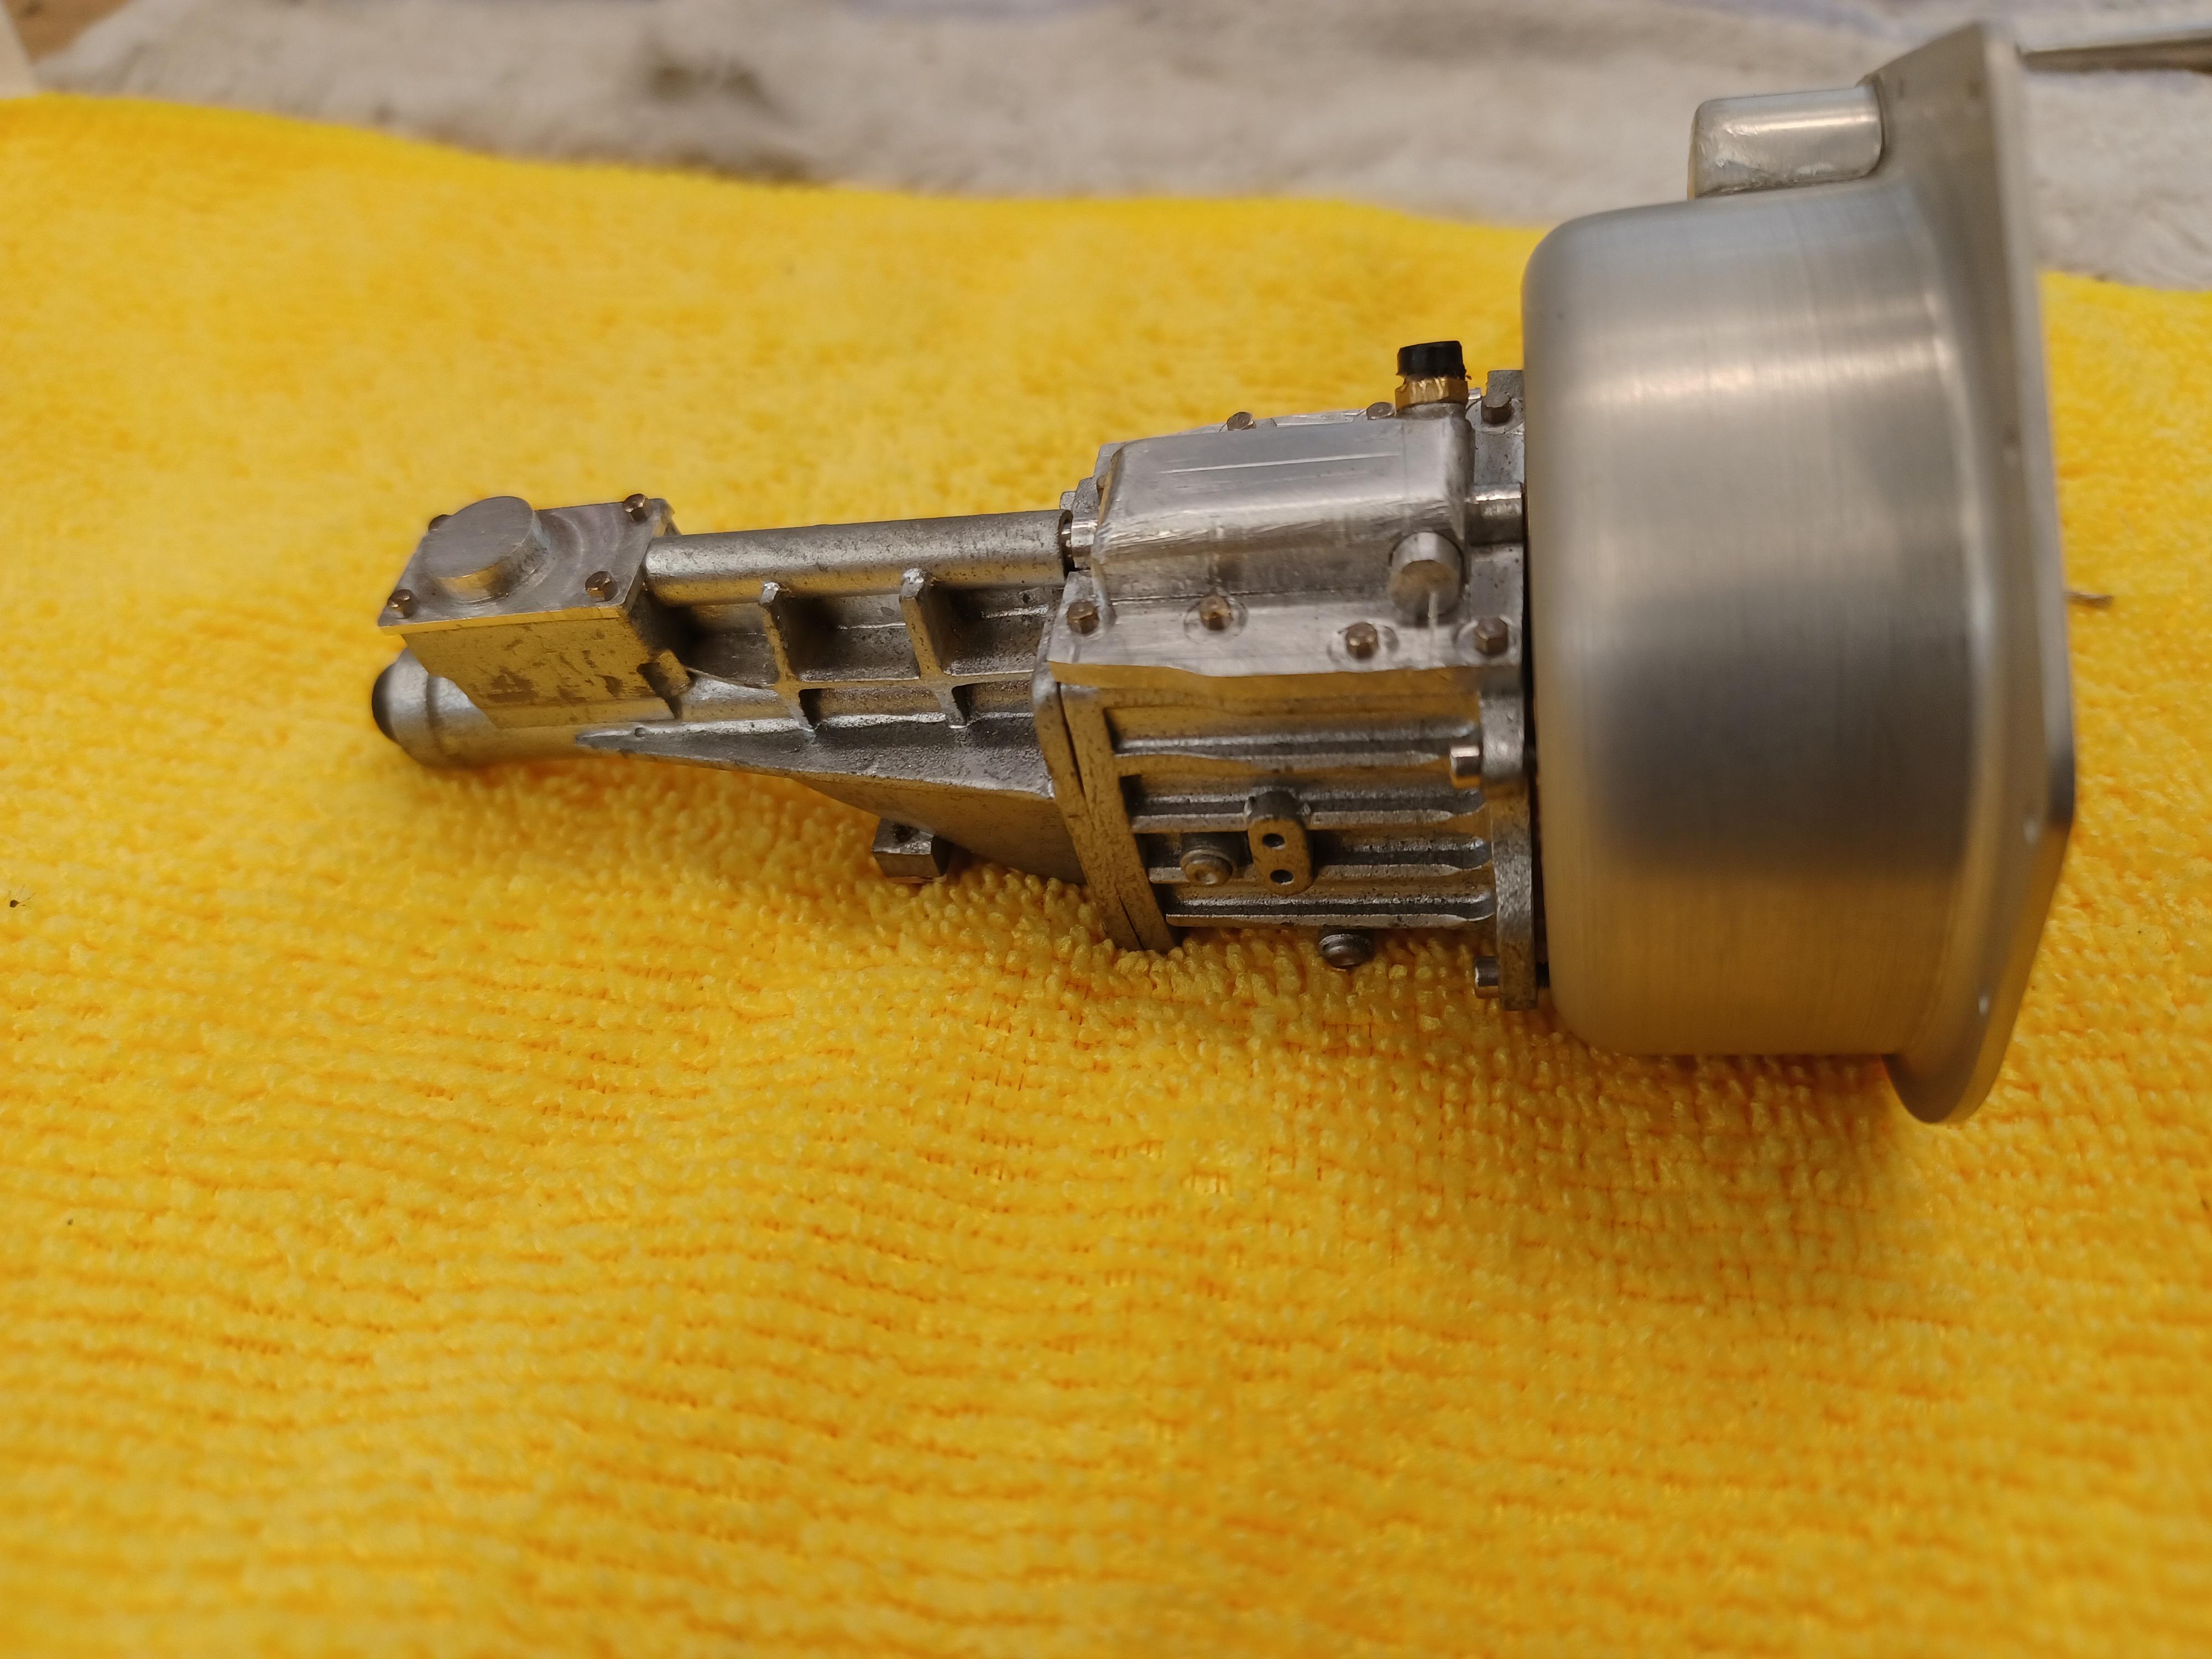
doing some plating and anodizing to try and put together a few larger assemblies, the rear is went together well . just finished plating some parts. anodized alot of engine parts this week, mostly clear. the transmission and bell housing is assembled including the hydraulic throwout bearing. still have to do a shifter. started taking the old paint off the chassis. almost finished with the alternator and mounts.hi Tim thanks for your comments, your brakes are awesome. hi Pat thanks for looking. nice to hear from you Scott. Francis tied a couple of new things in my anodizing and nickel. some were better some i found know difference.
-
1
-
-
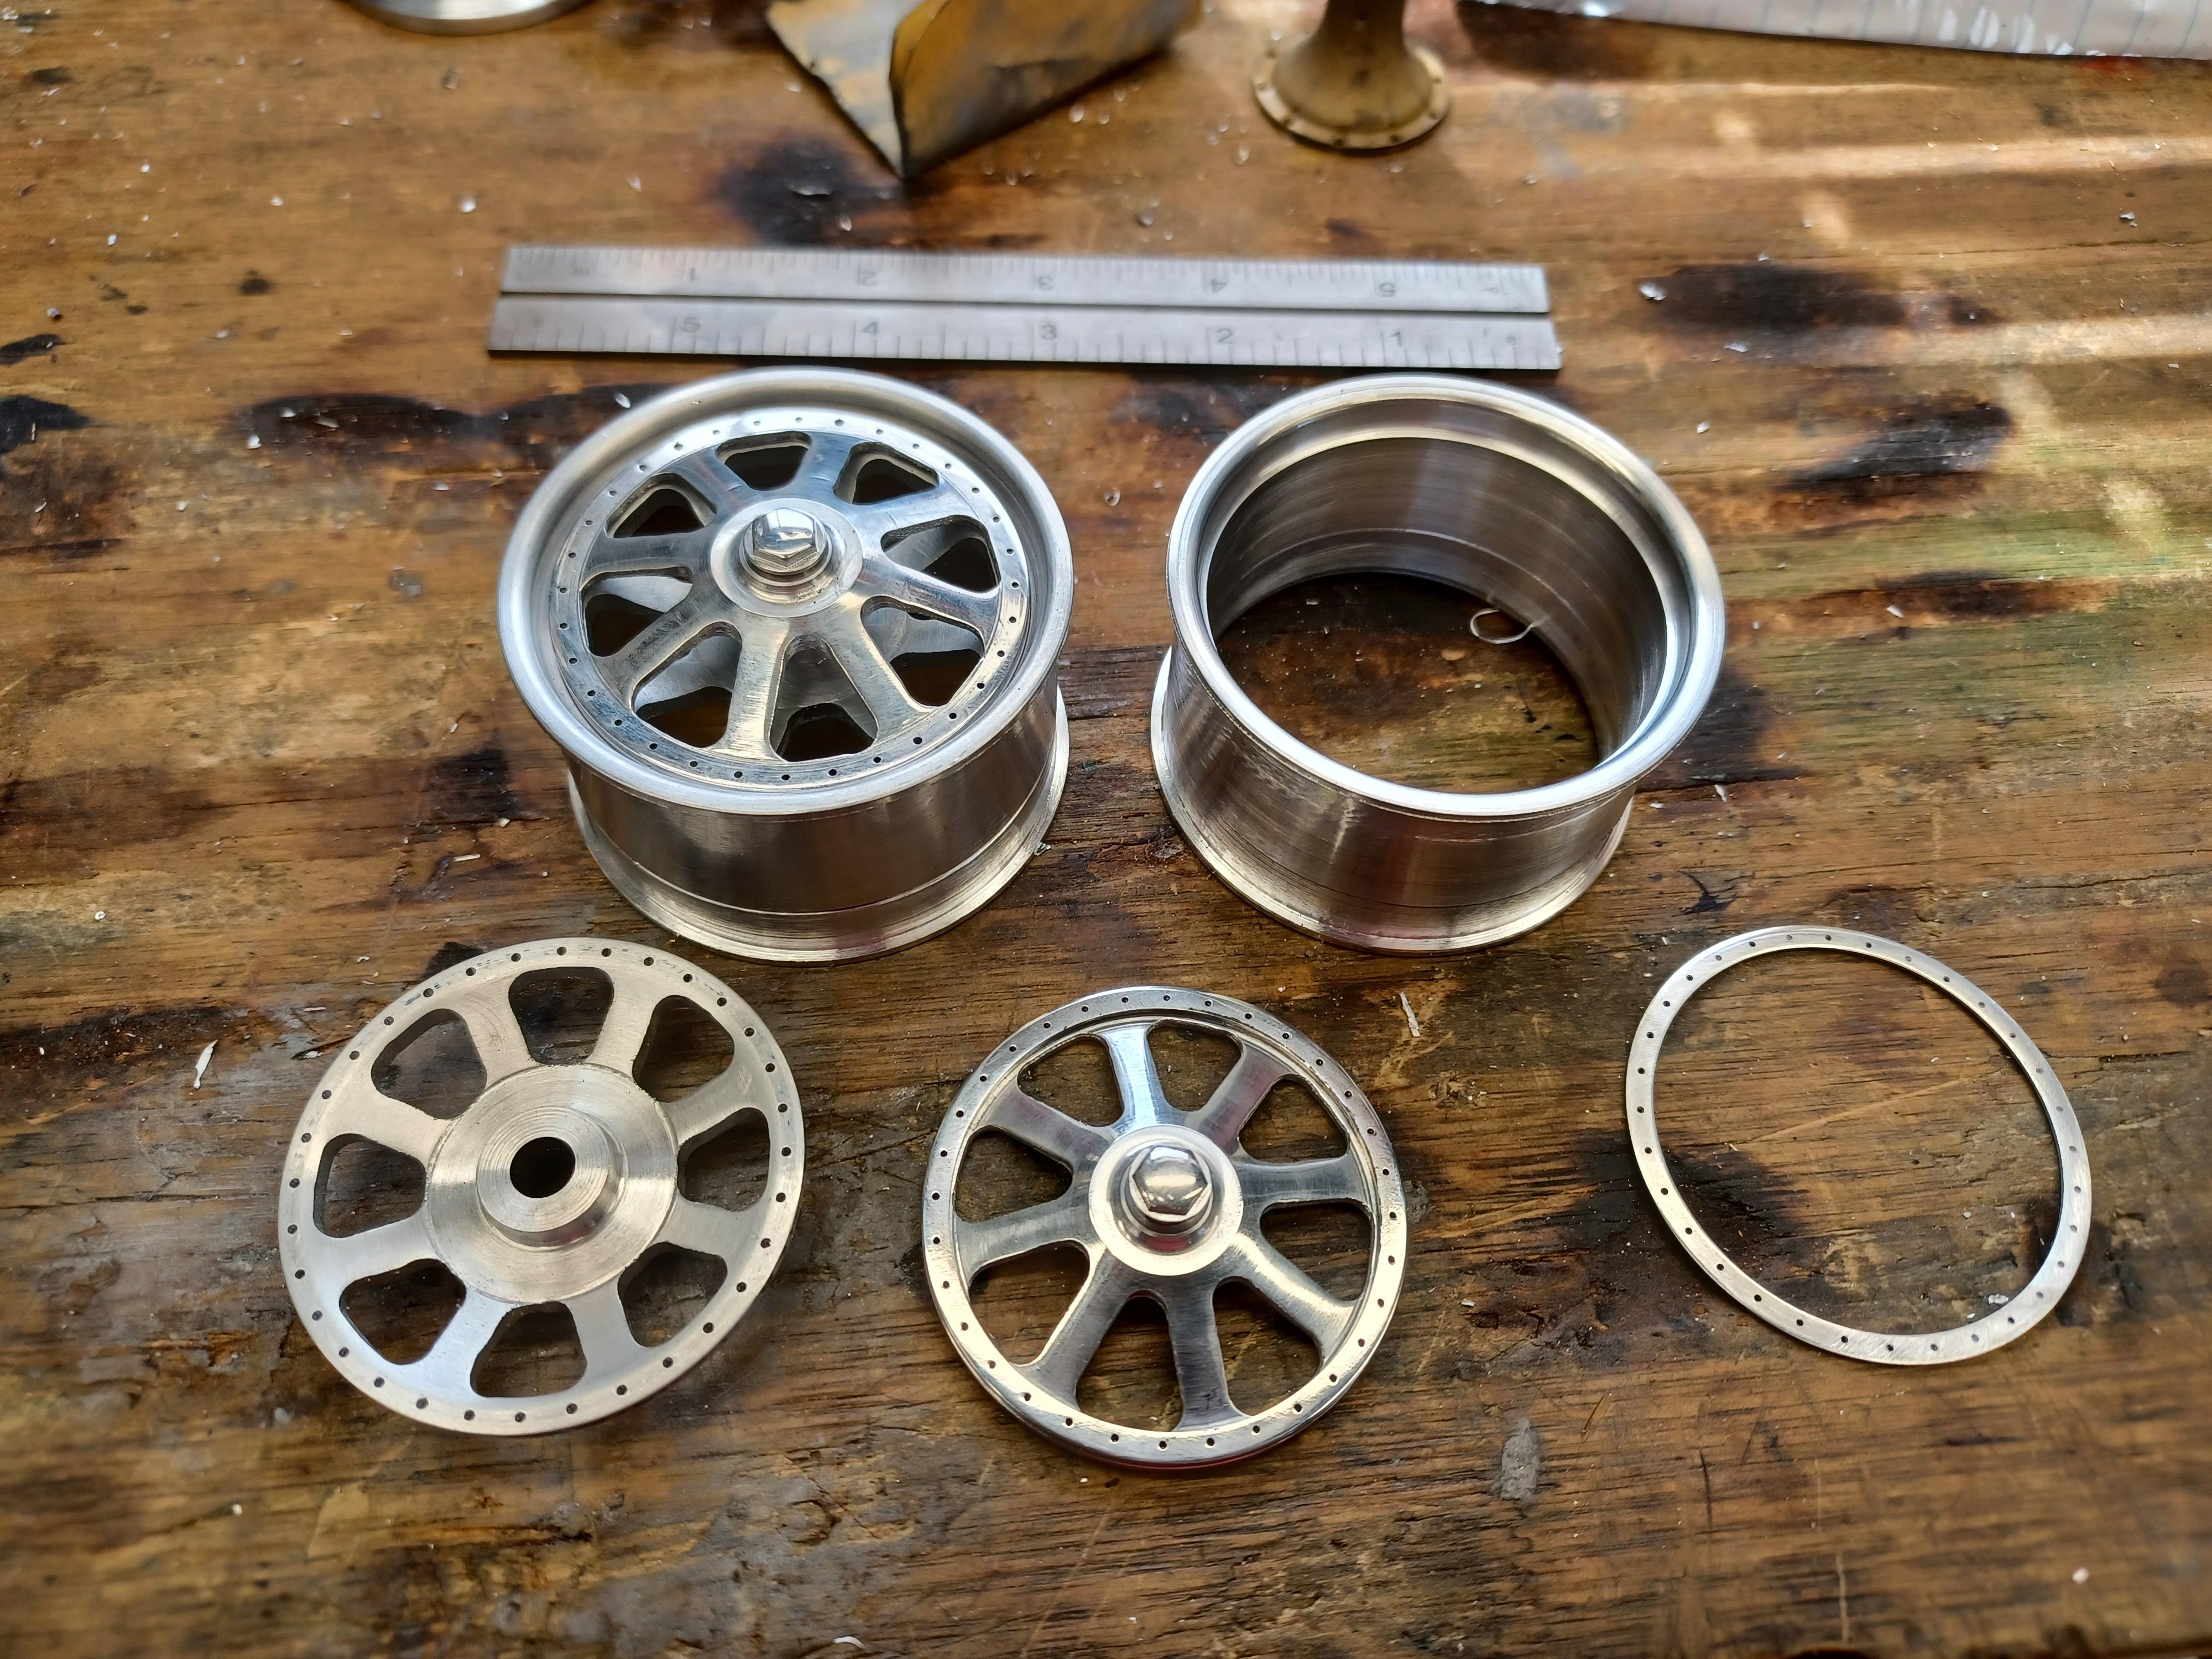
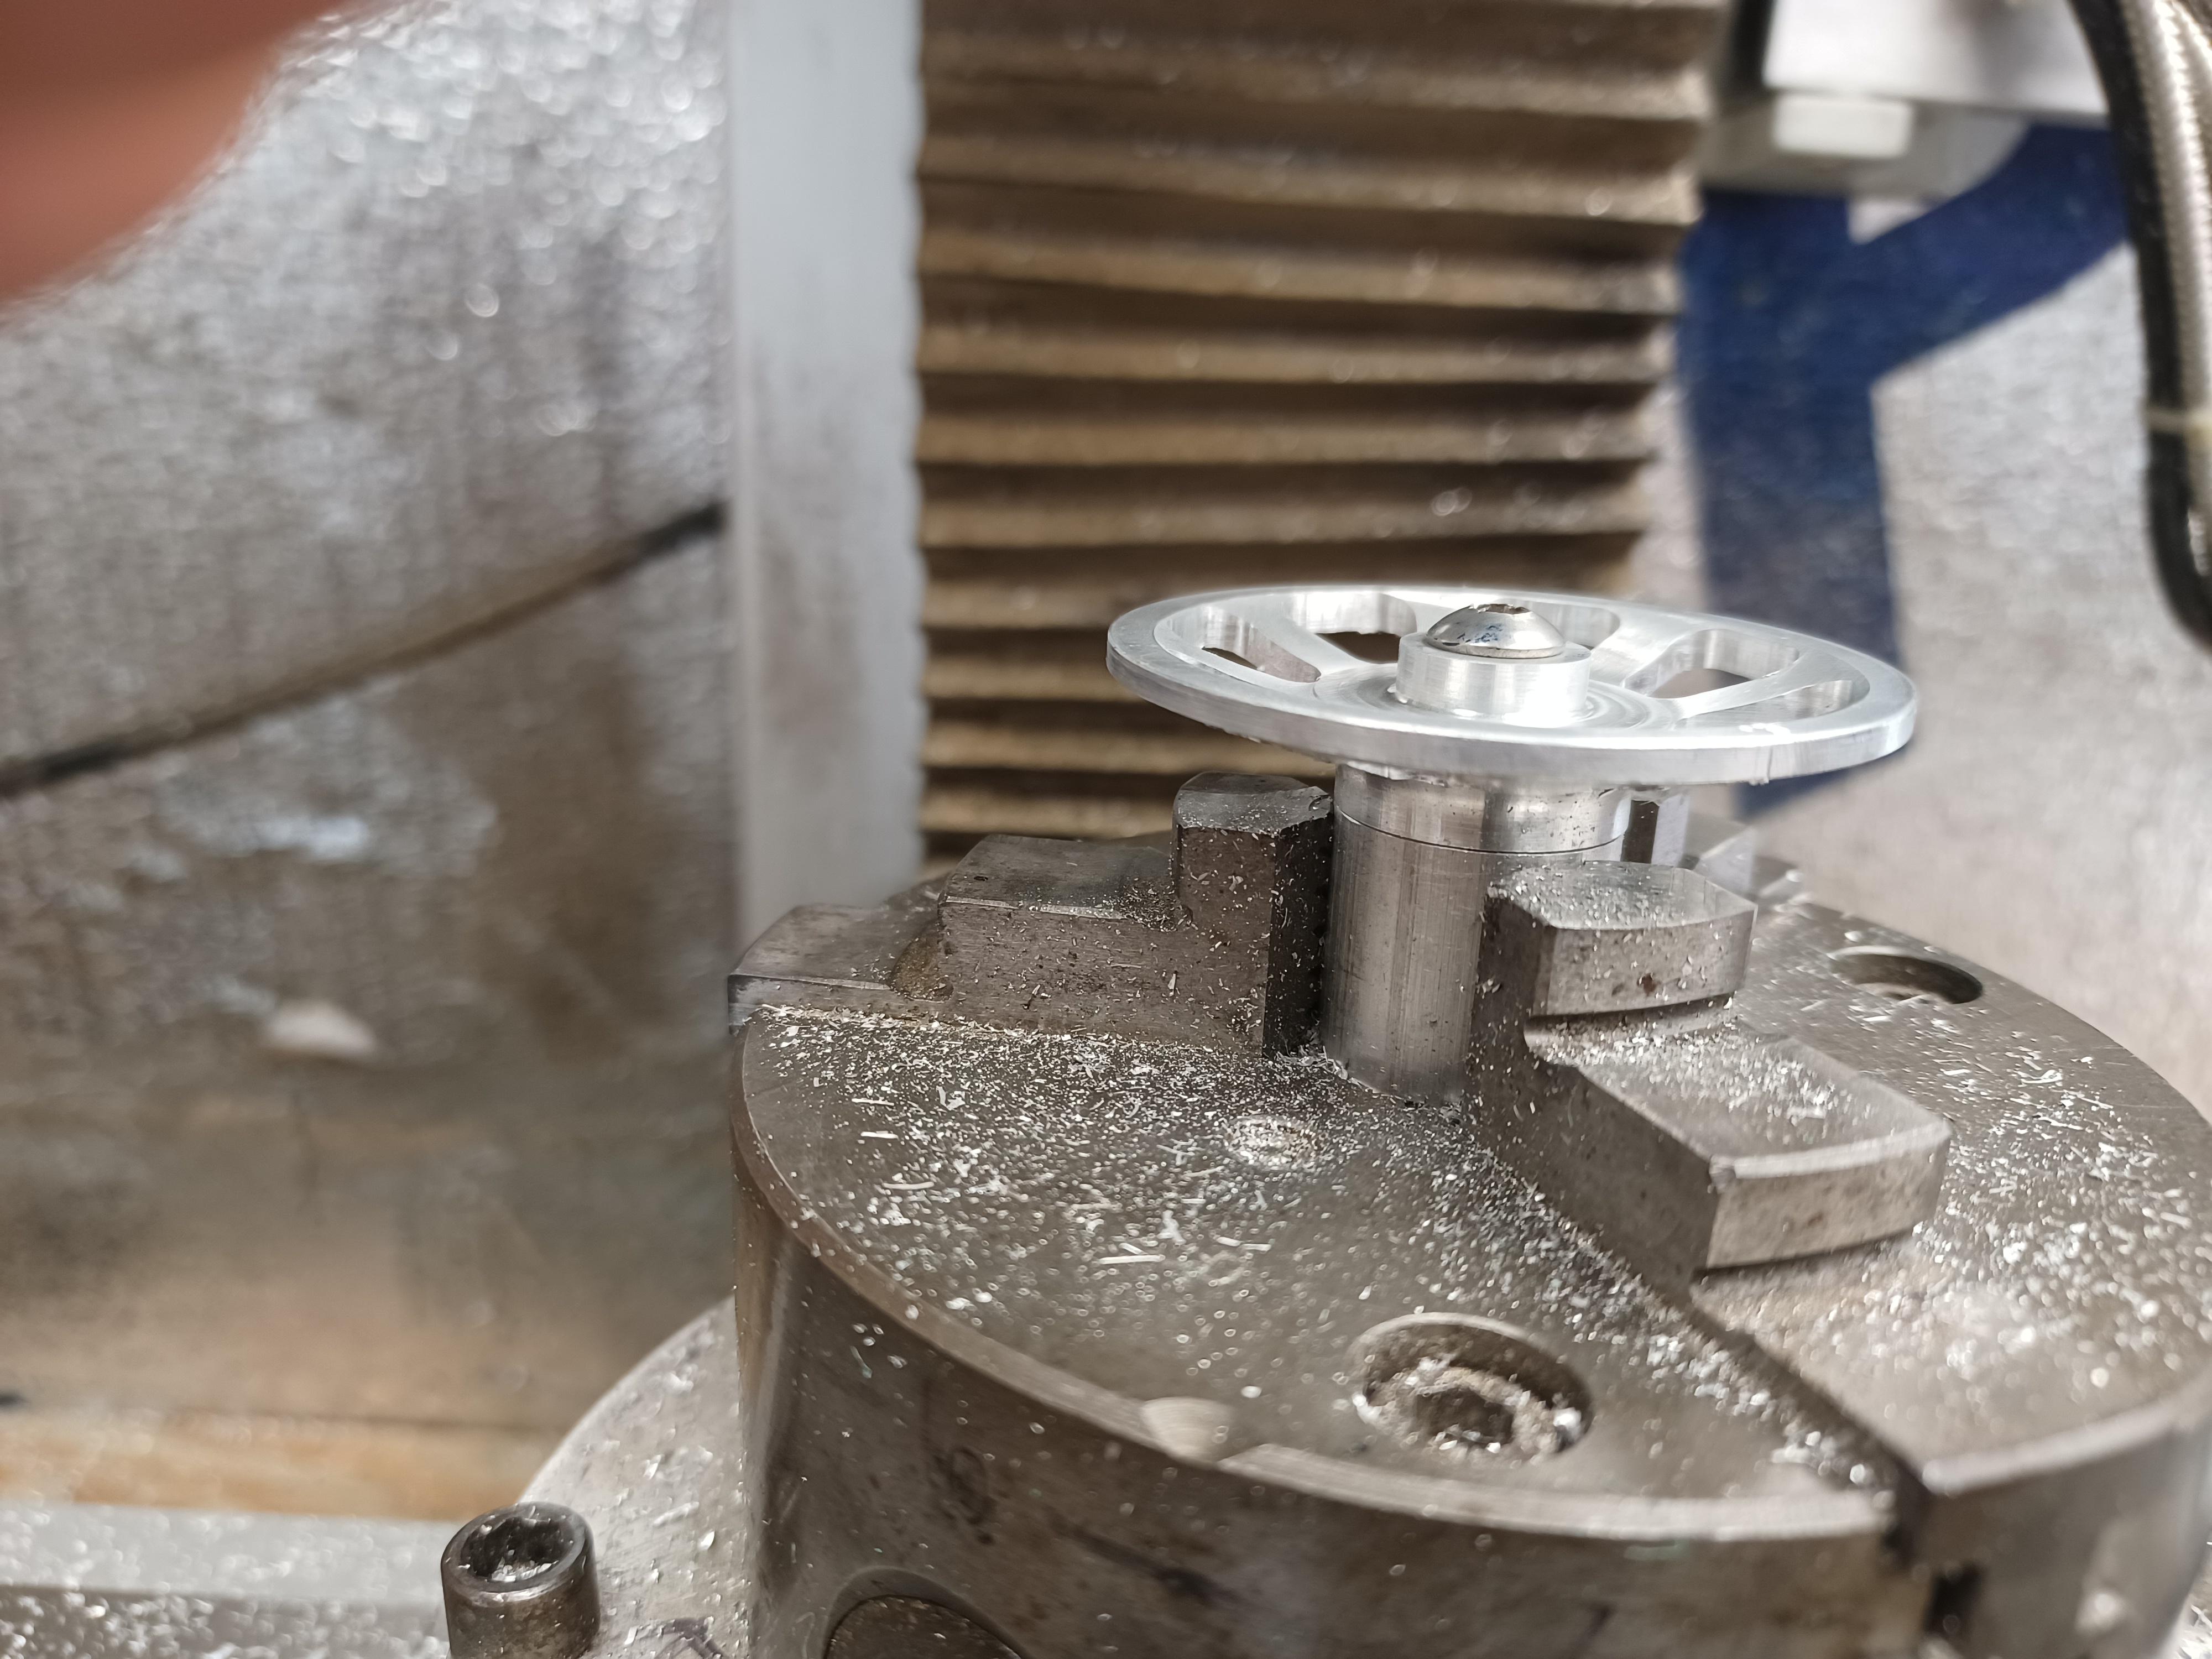
hello claude. nice to hear from you ,thank very much. i hope you continue to enjoy. i think i have all the wheel parts made. had to strip and reanodize some.i will try to assemble them this week.i left them just aluminum but clear anodized for protection. got the shocks made and could not work out a proper way to do them in a laydown position so i mounted them vertical.i think they look alright. rear sway bar next.
-
easyoff seem to work fine. i watched a video using rust and stain remover for laundry,looked like it worked well also. i fill a small container enough to submerge the part completely,let it soak about 10 minutes.
-
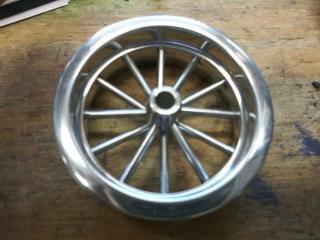
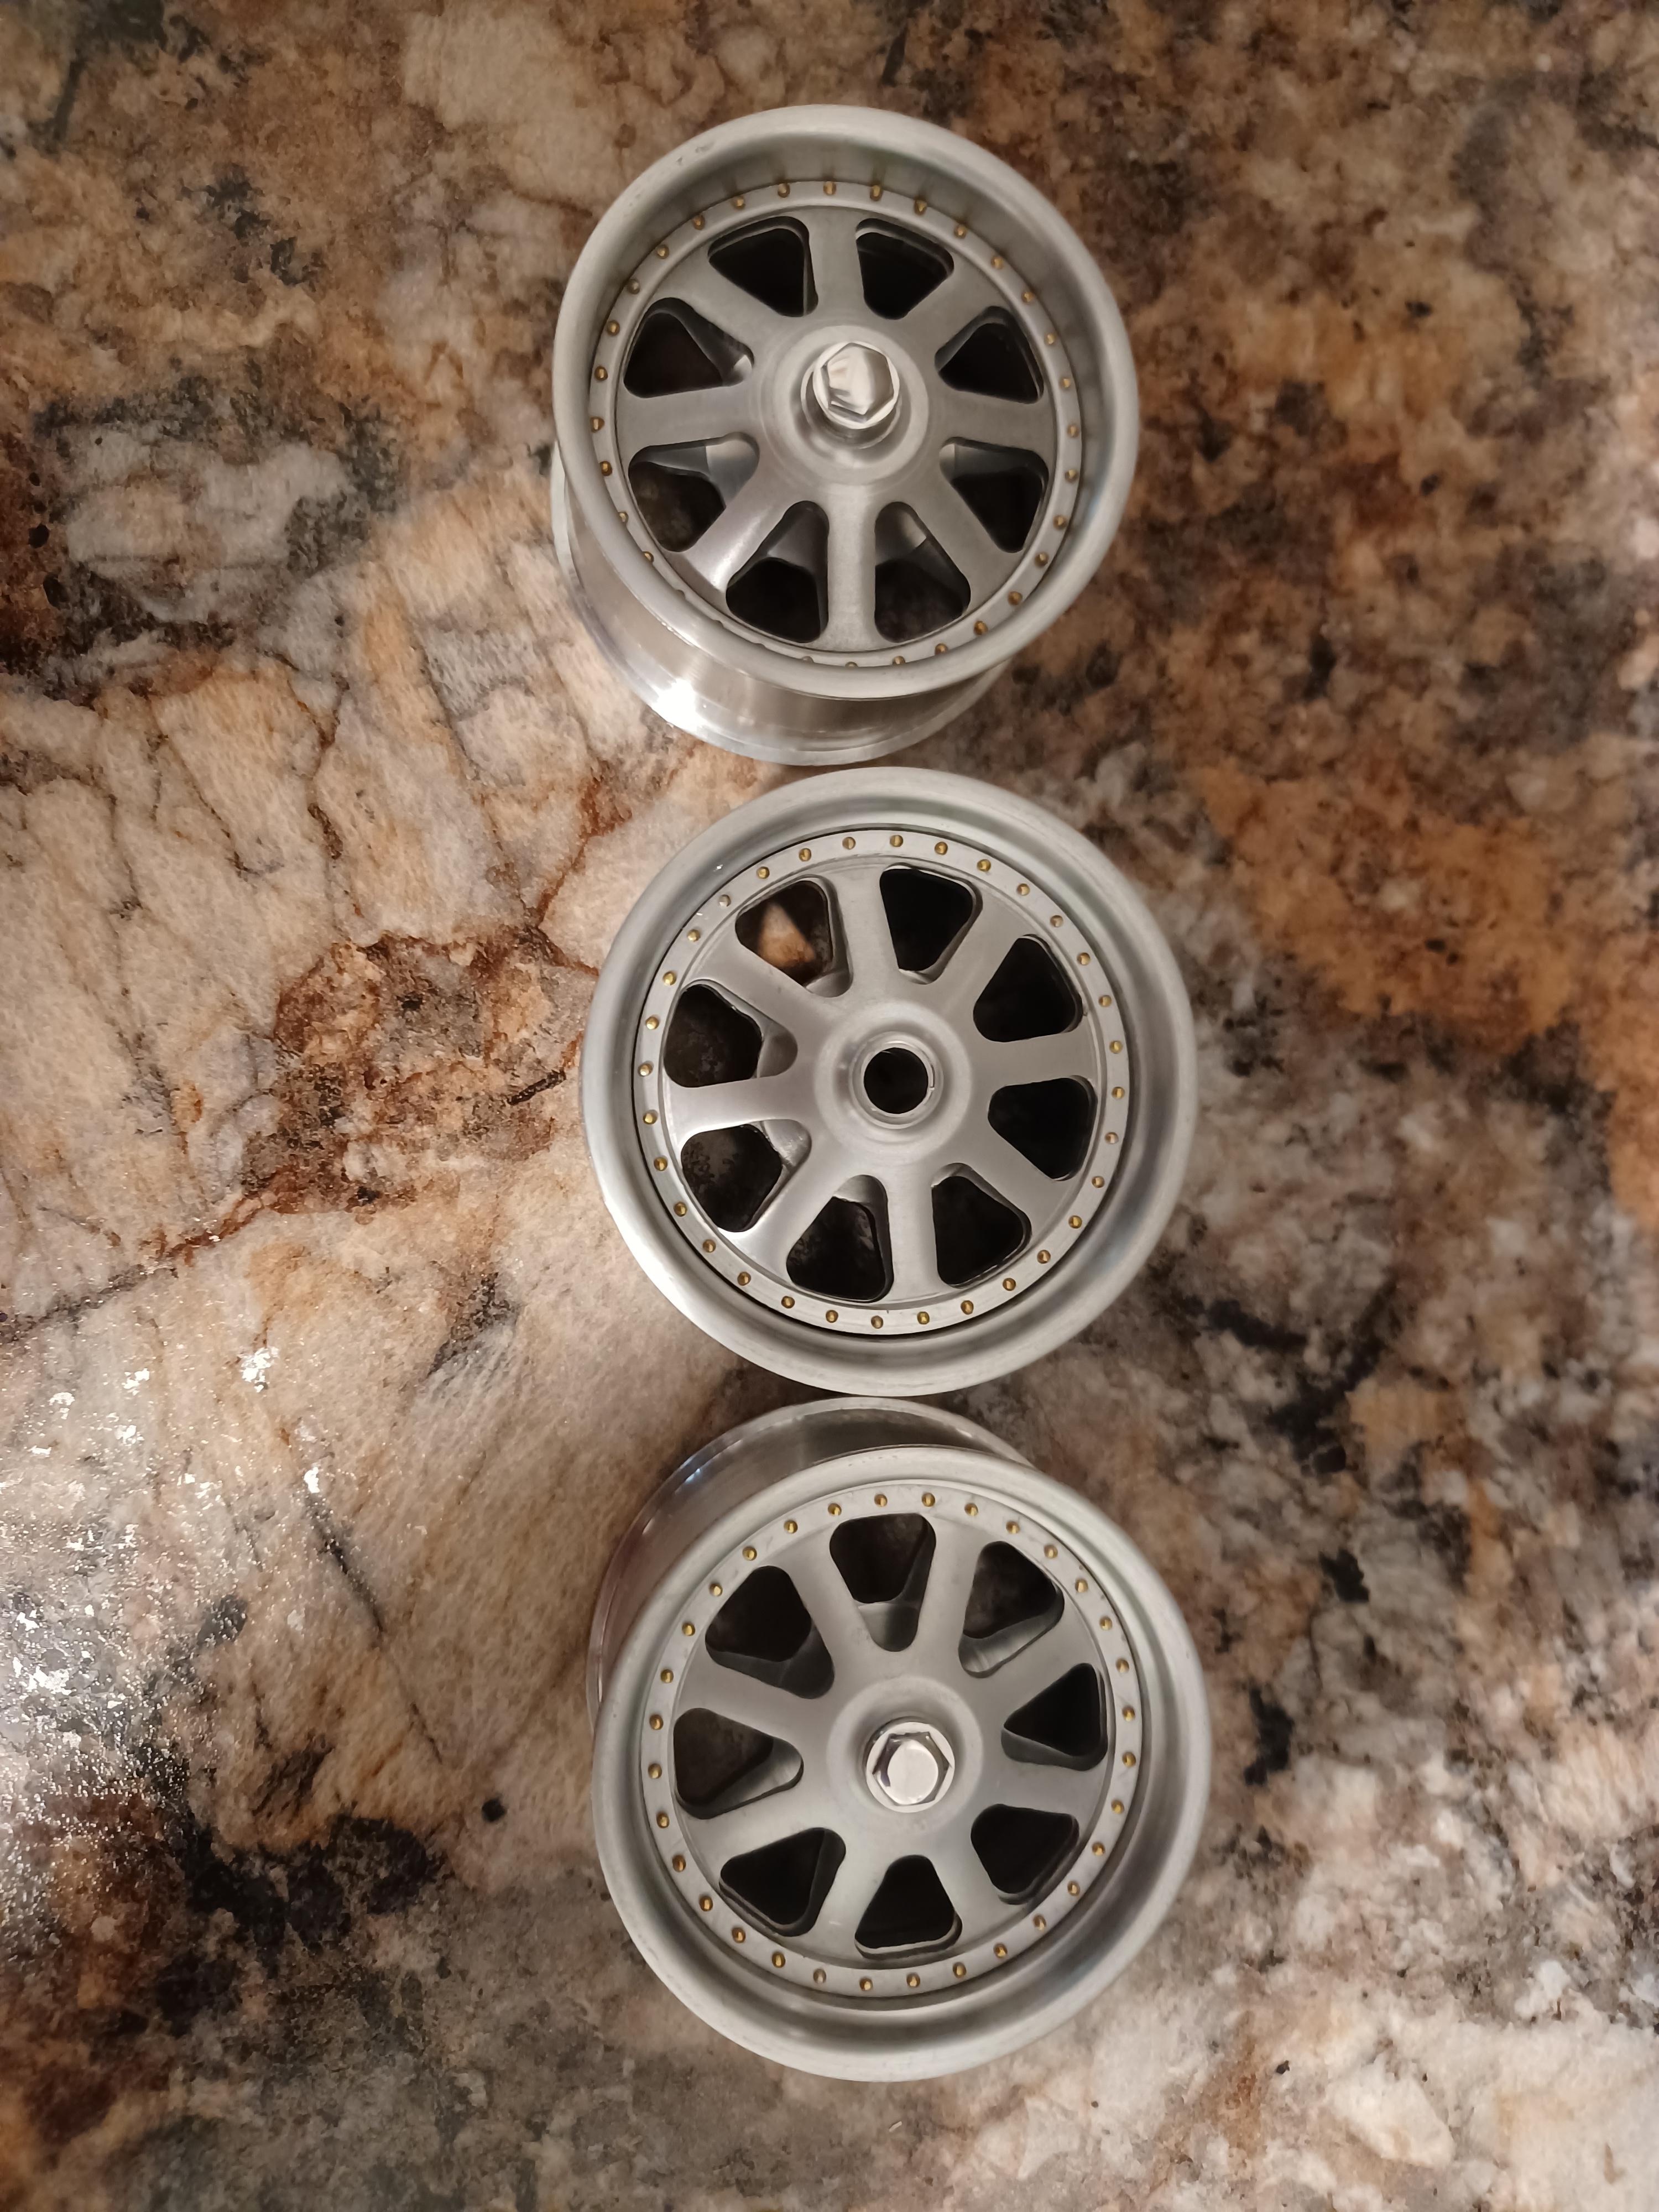
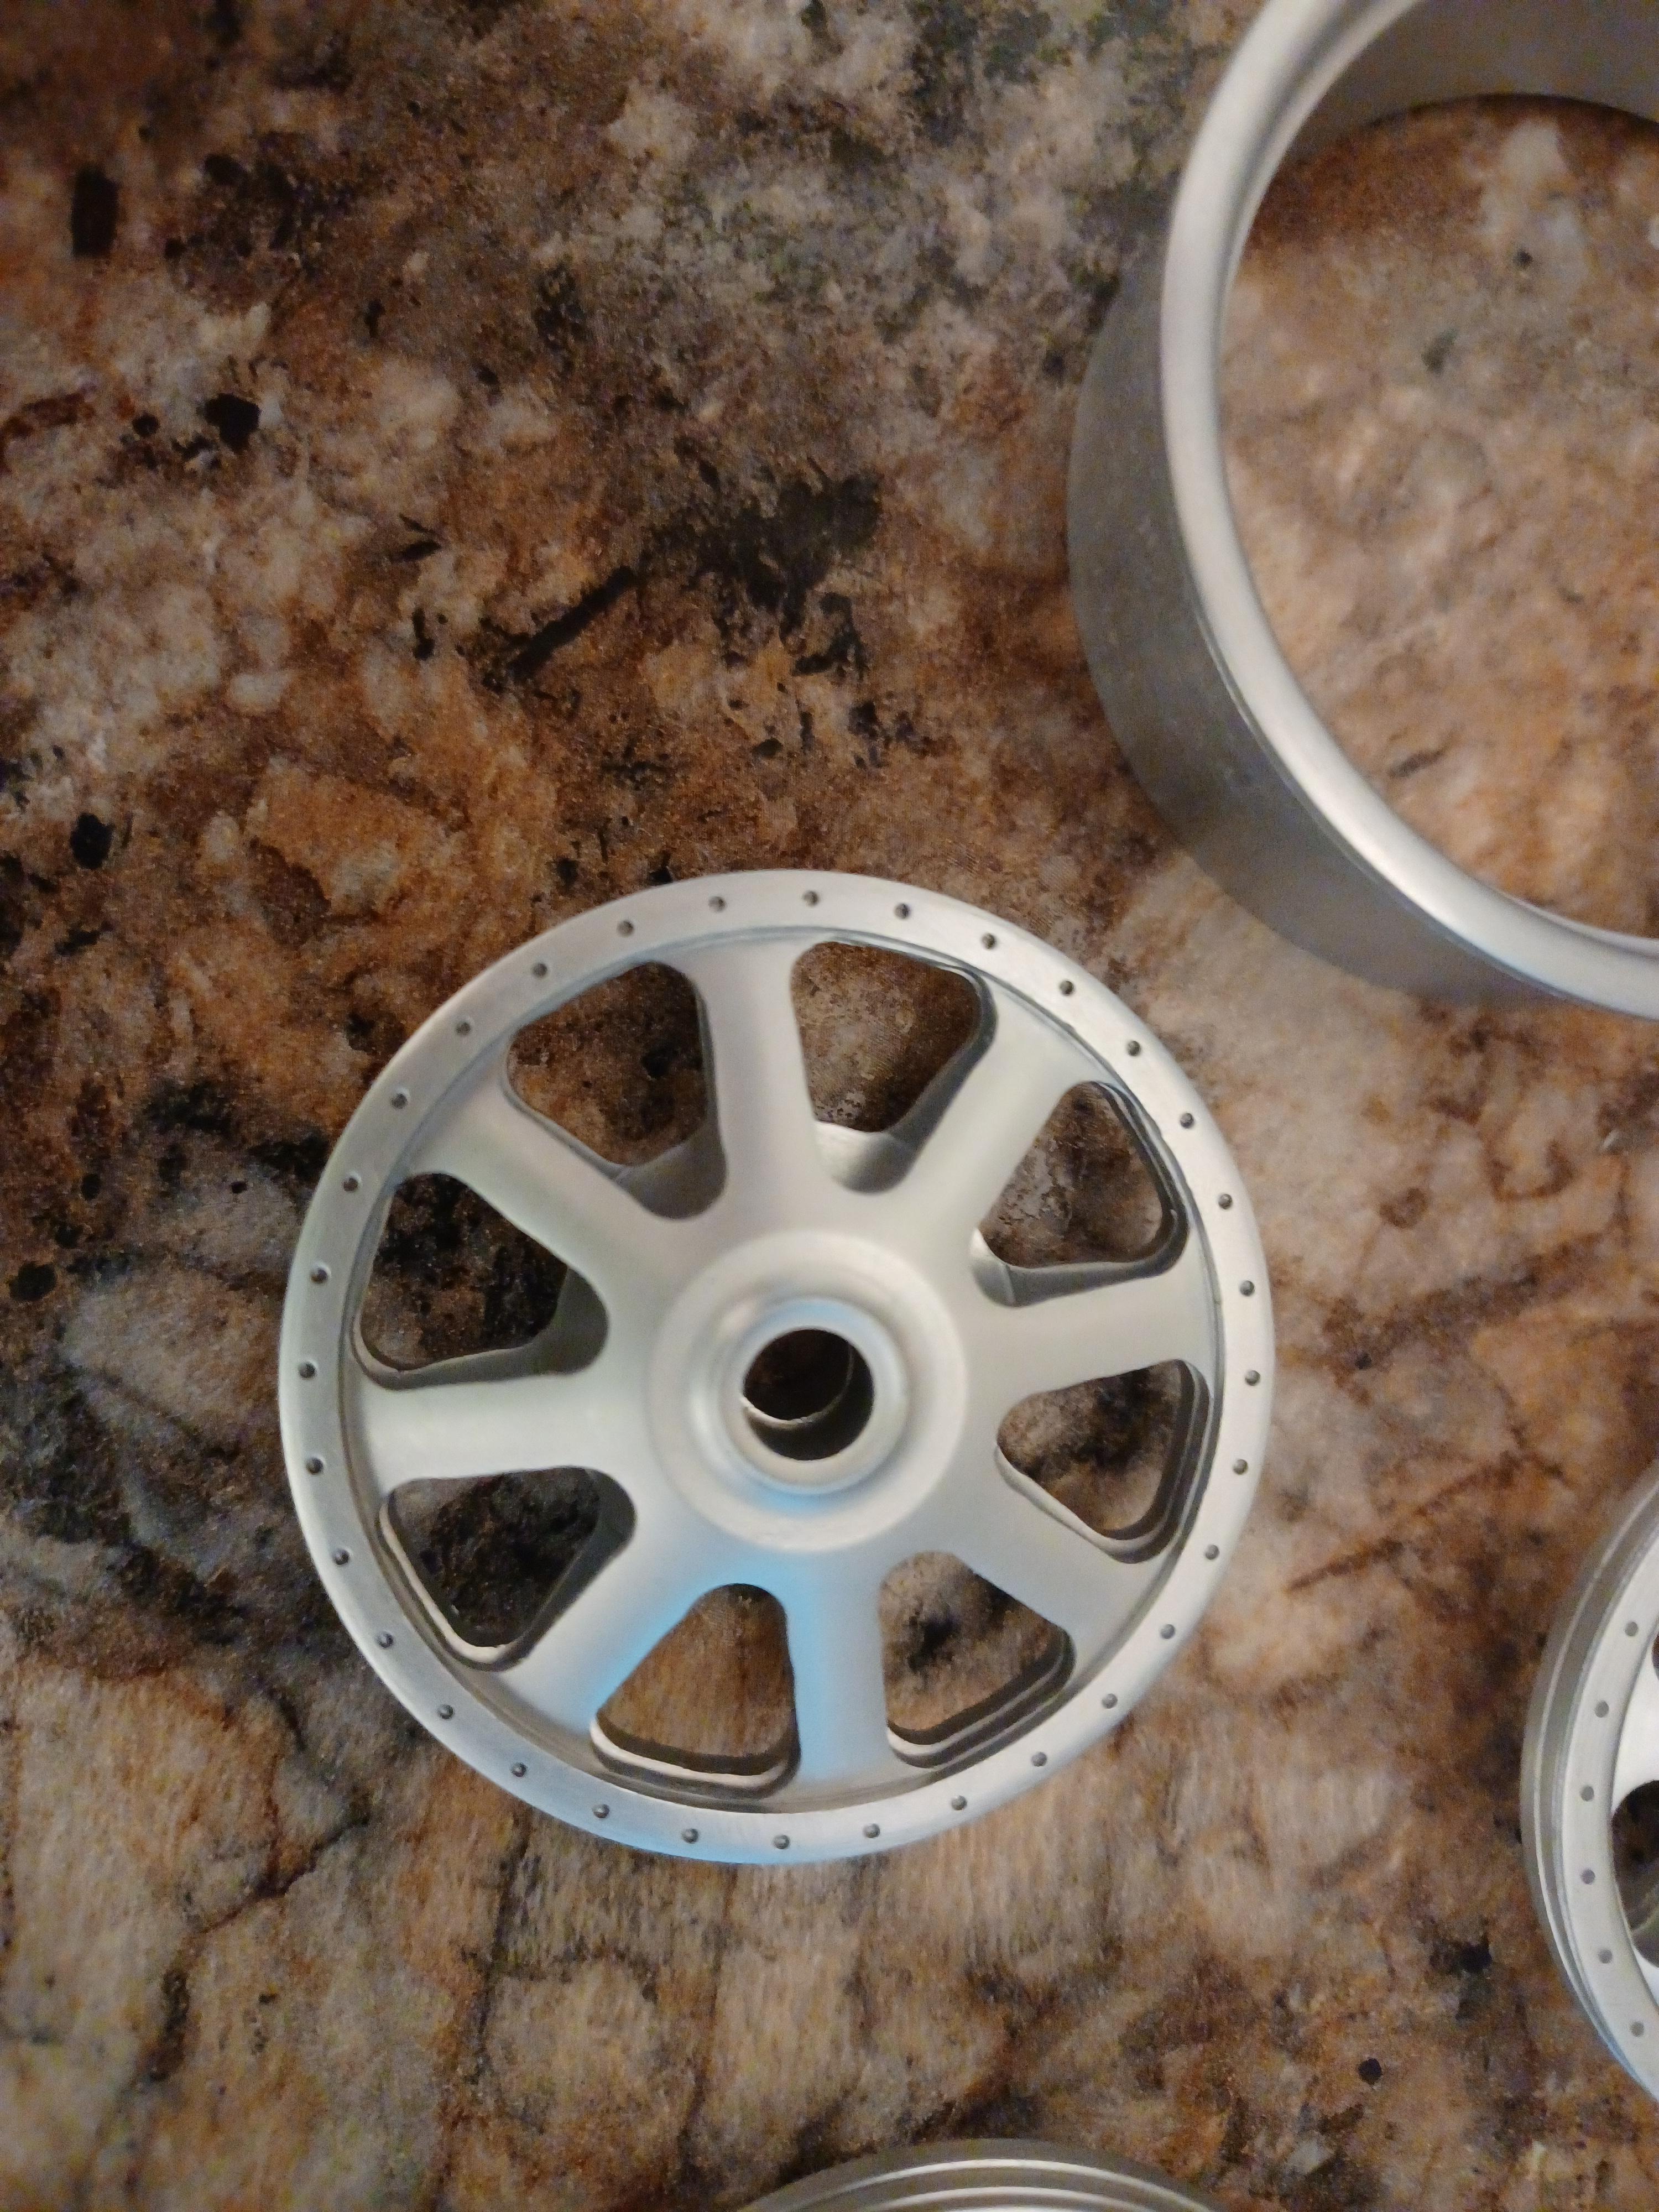
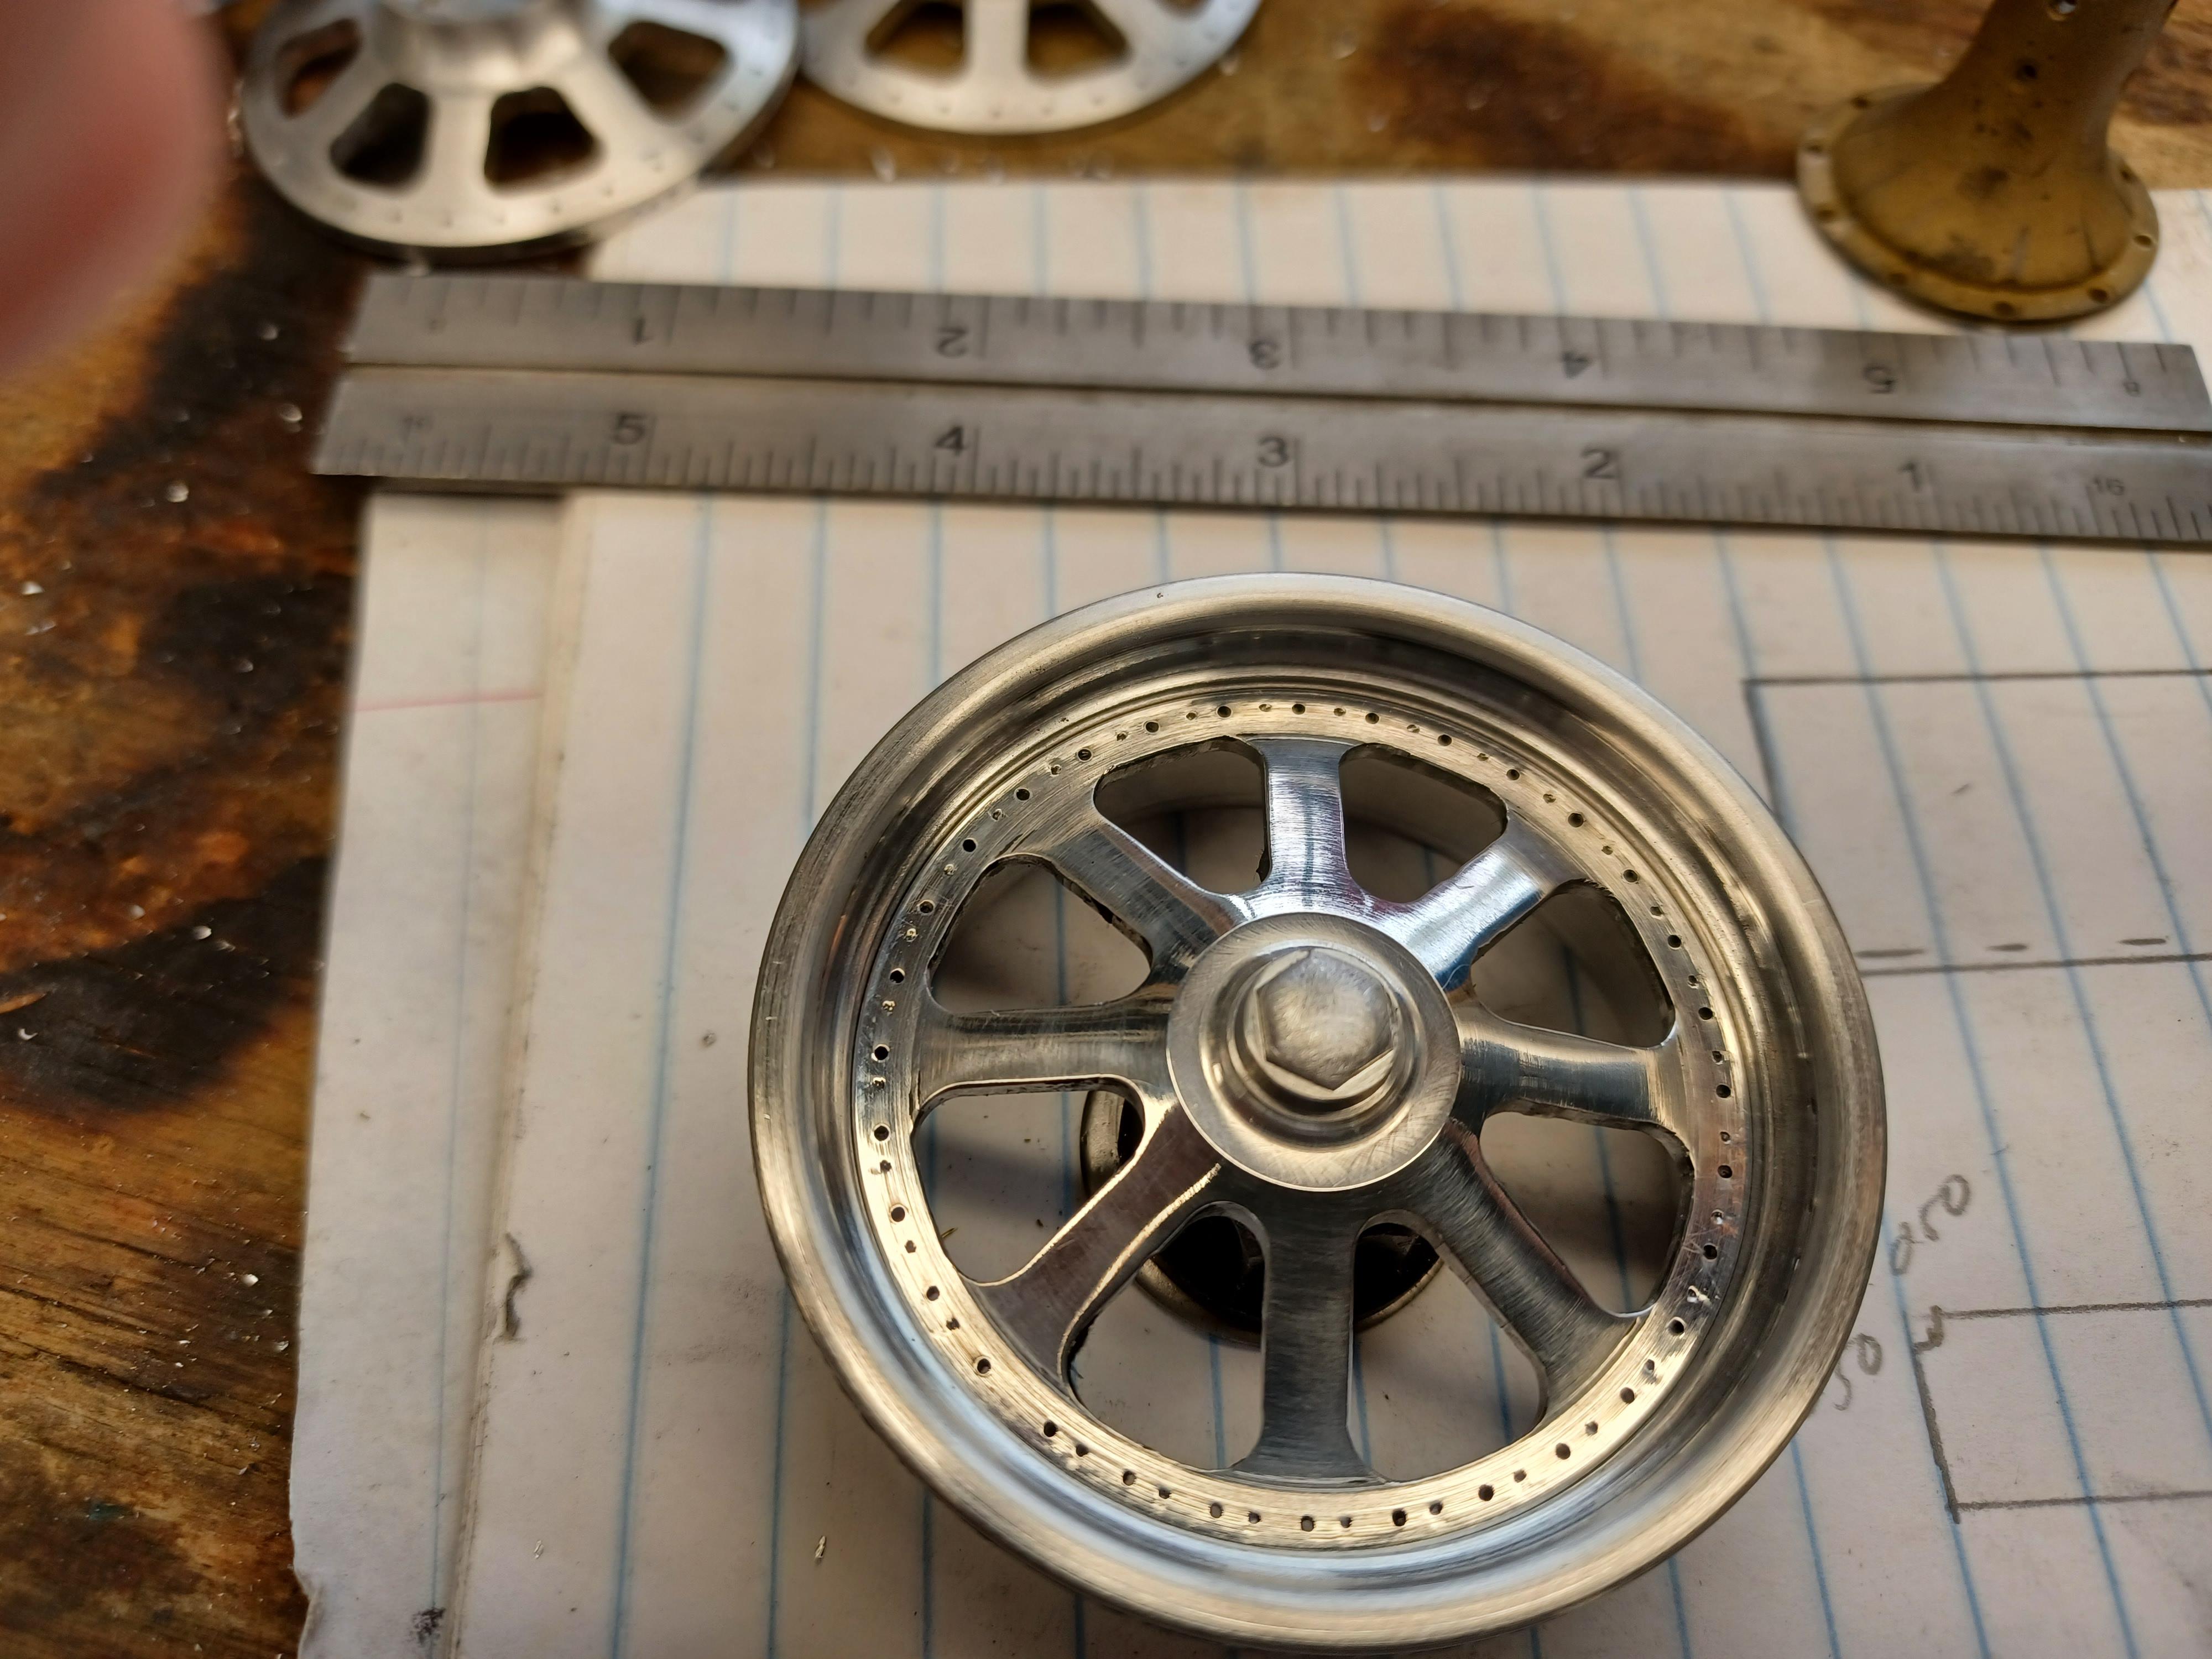
thanks francis,nice to hear from you. hi andrew glad you are still looking. i haven't made up my mind because i have modernized the engine ,the 5 speed transmission and the rearend, so the car is more suppose to be a modern version of an old car. the wheels are also modern just made in to somewhat look like the t35 wheel and they sure are wider. the rear is 18by 10 and the fronts will be 17 by 9. when i make the tires they will be fairly tall , not supper low profile. i have polished one and it looks pretty nice. the centers are a press fit so i haven't and can't press them together until i decide . i am making the fronts now and i have plenty to do so they can be set aside for a while. i can anodize one to see what it looks like and very easily strip it. something to think about ,no hurry. any comments on fenders or not?
-
2
-
-
looking good andrew. the distributor boots look great. i think we all worry to much about the small stuff. in are world its all small stuff. in your case 1/24 very small
-
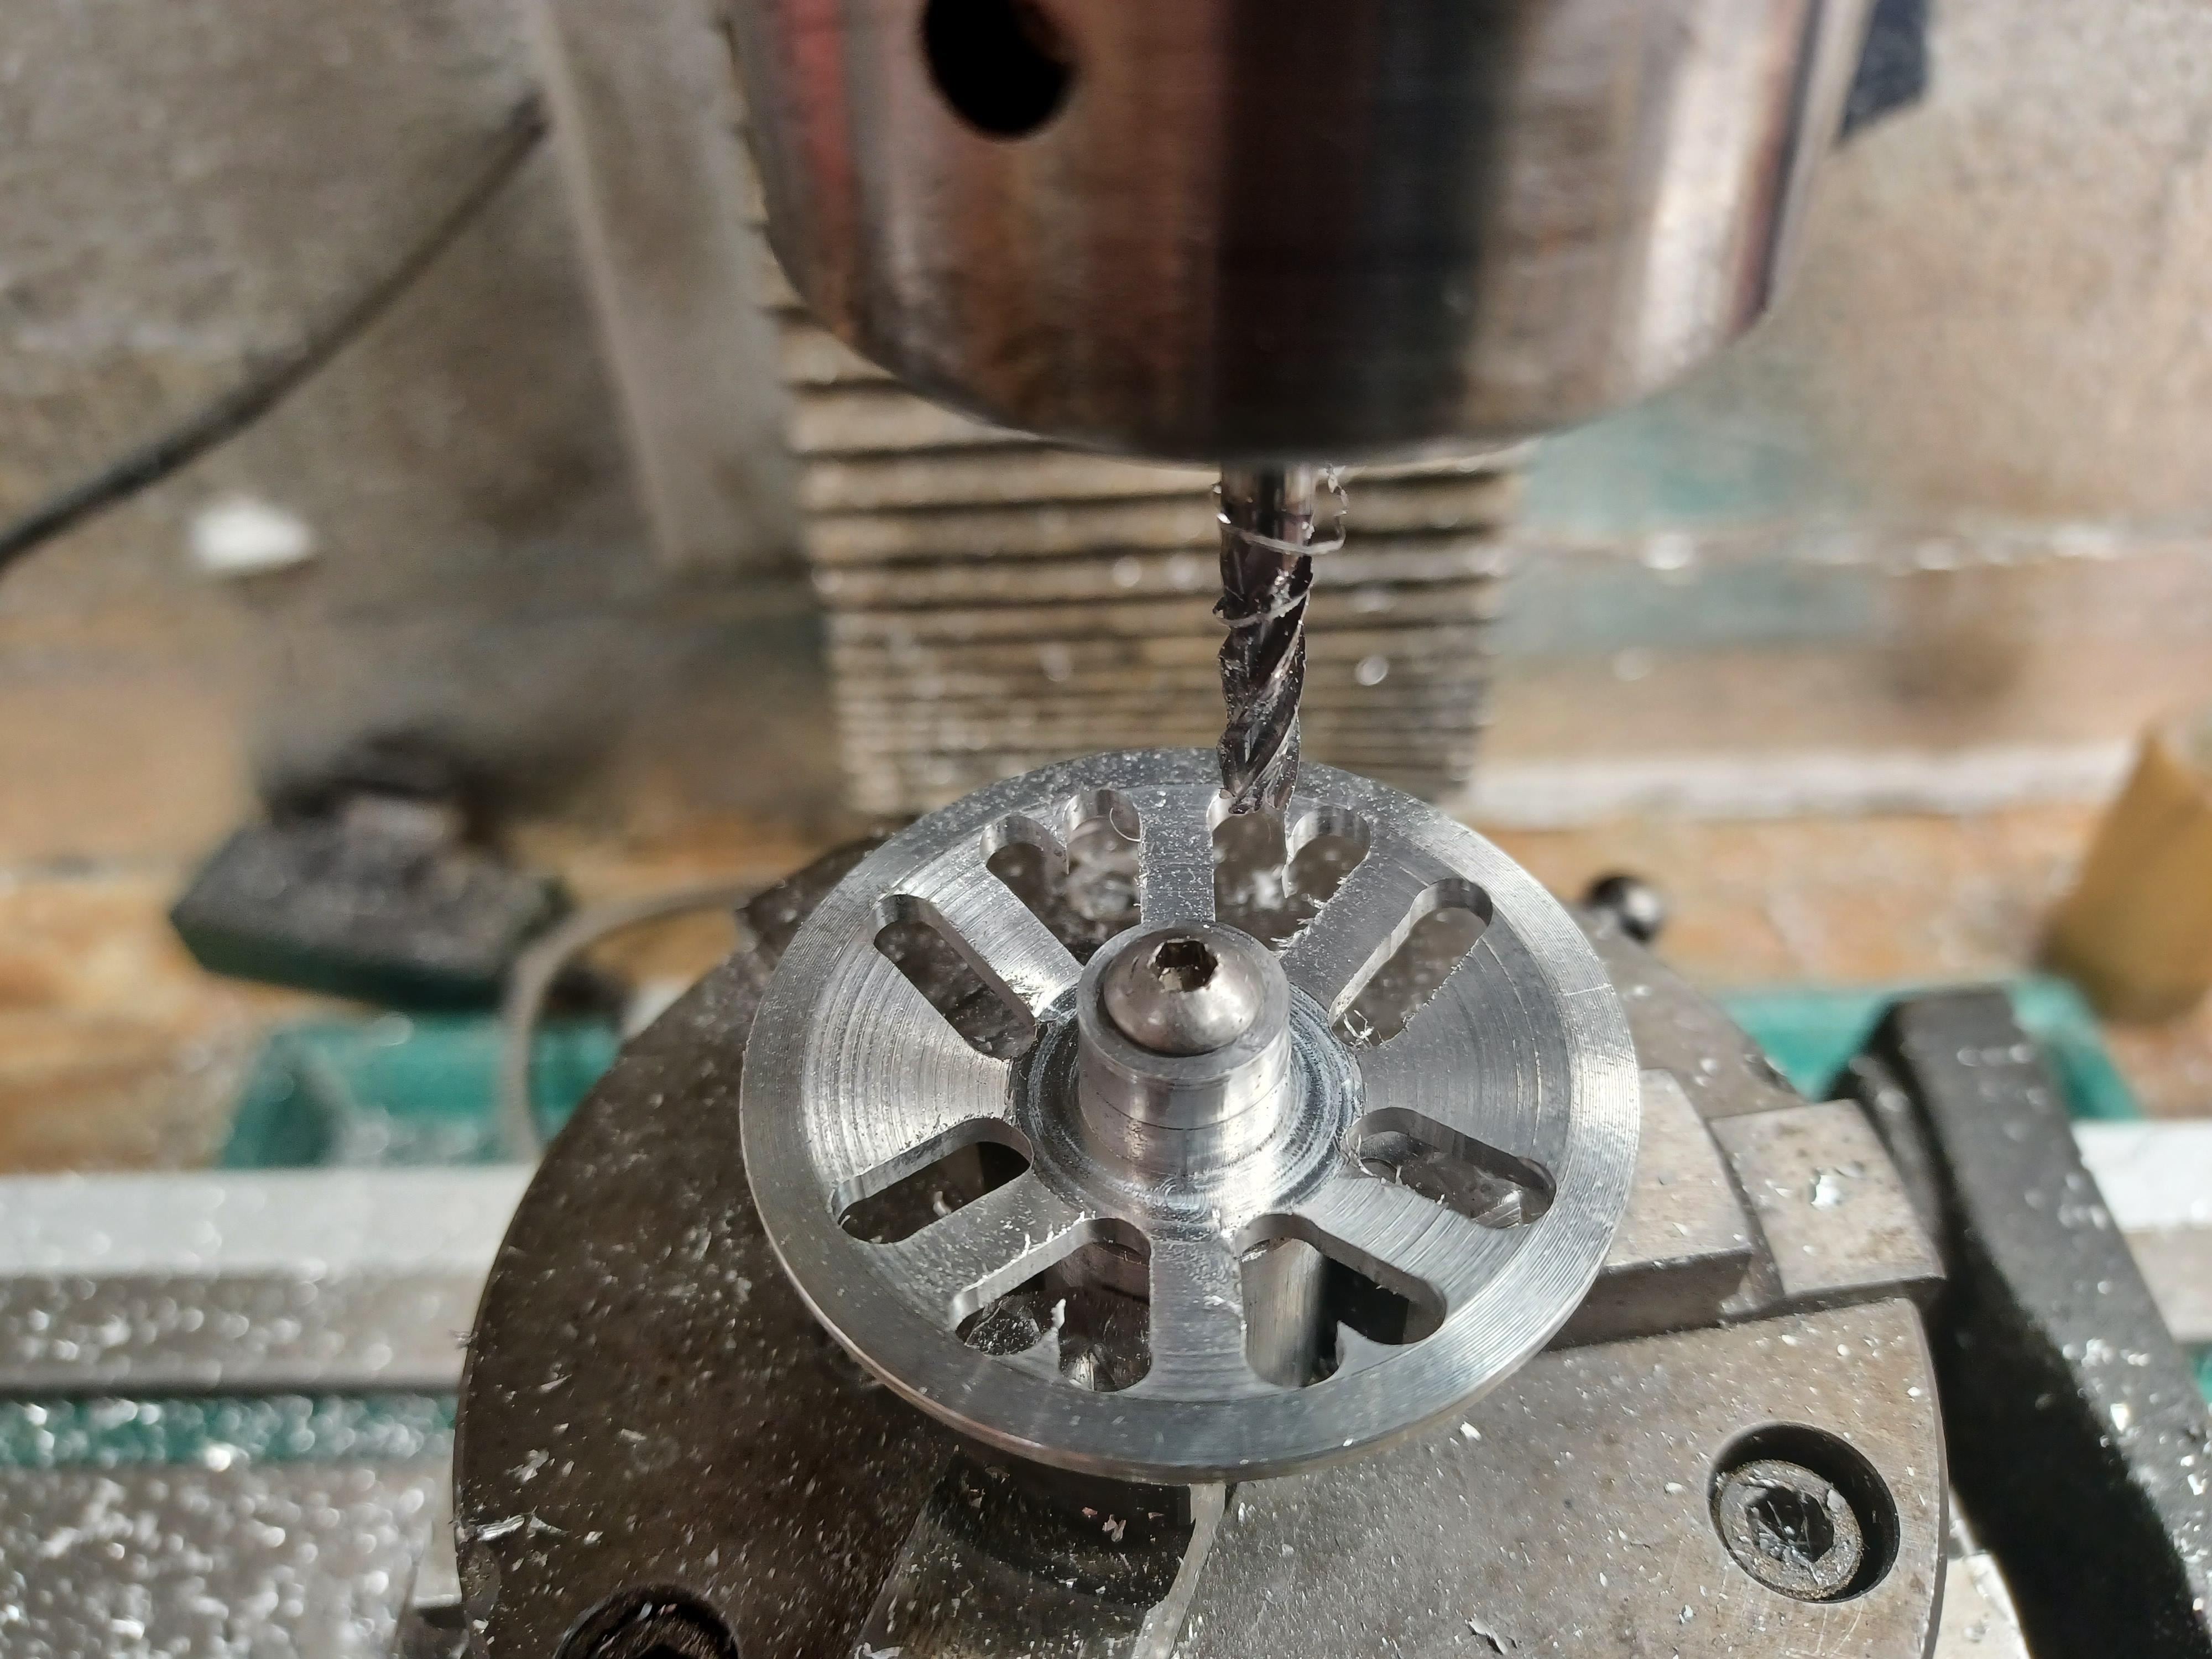
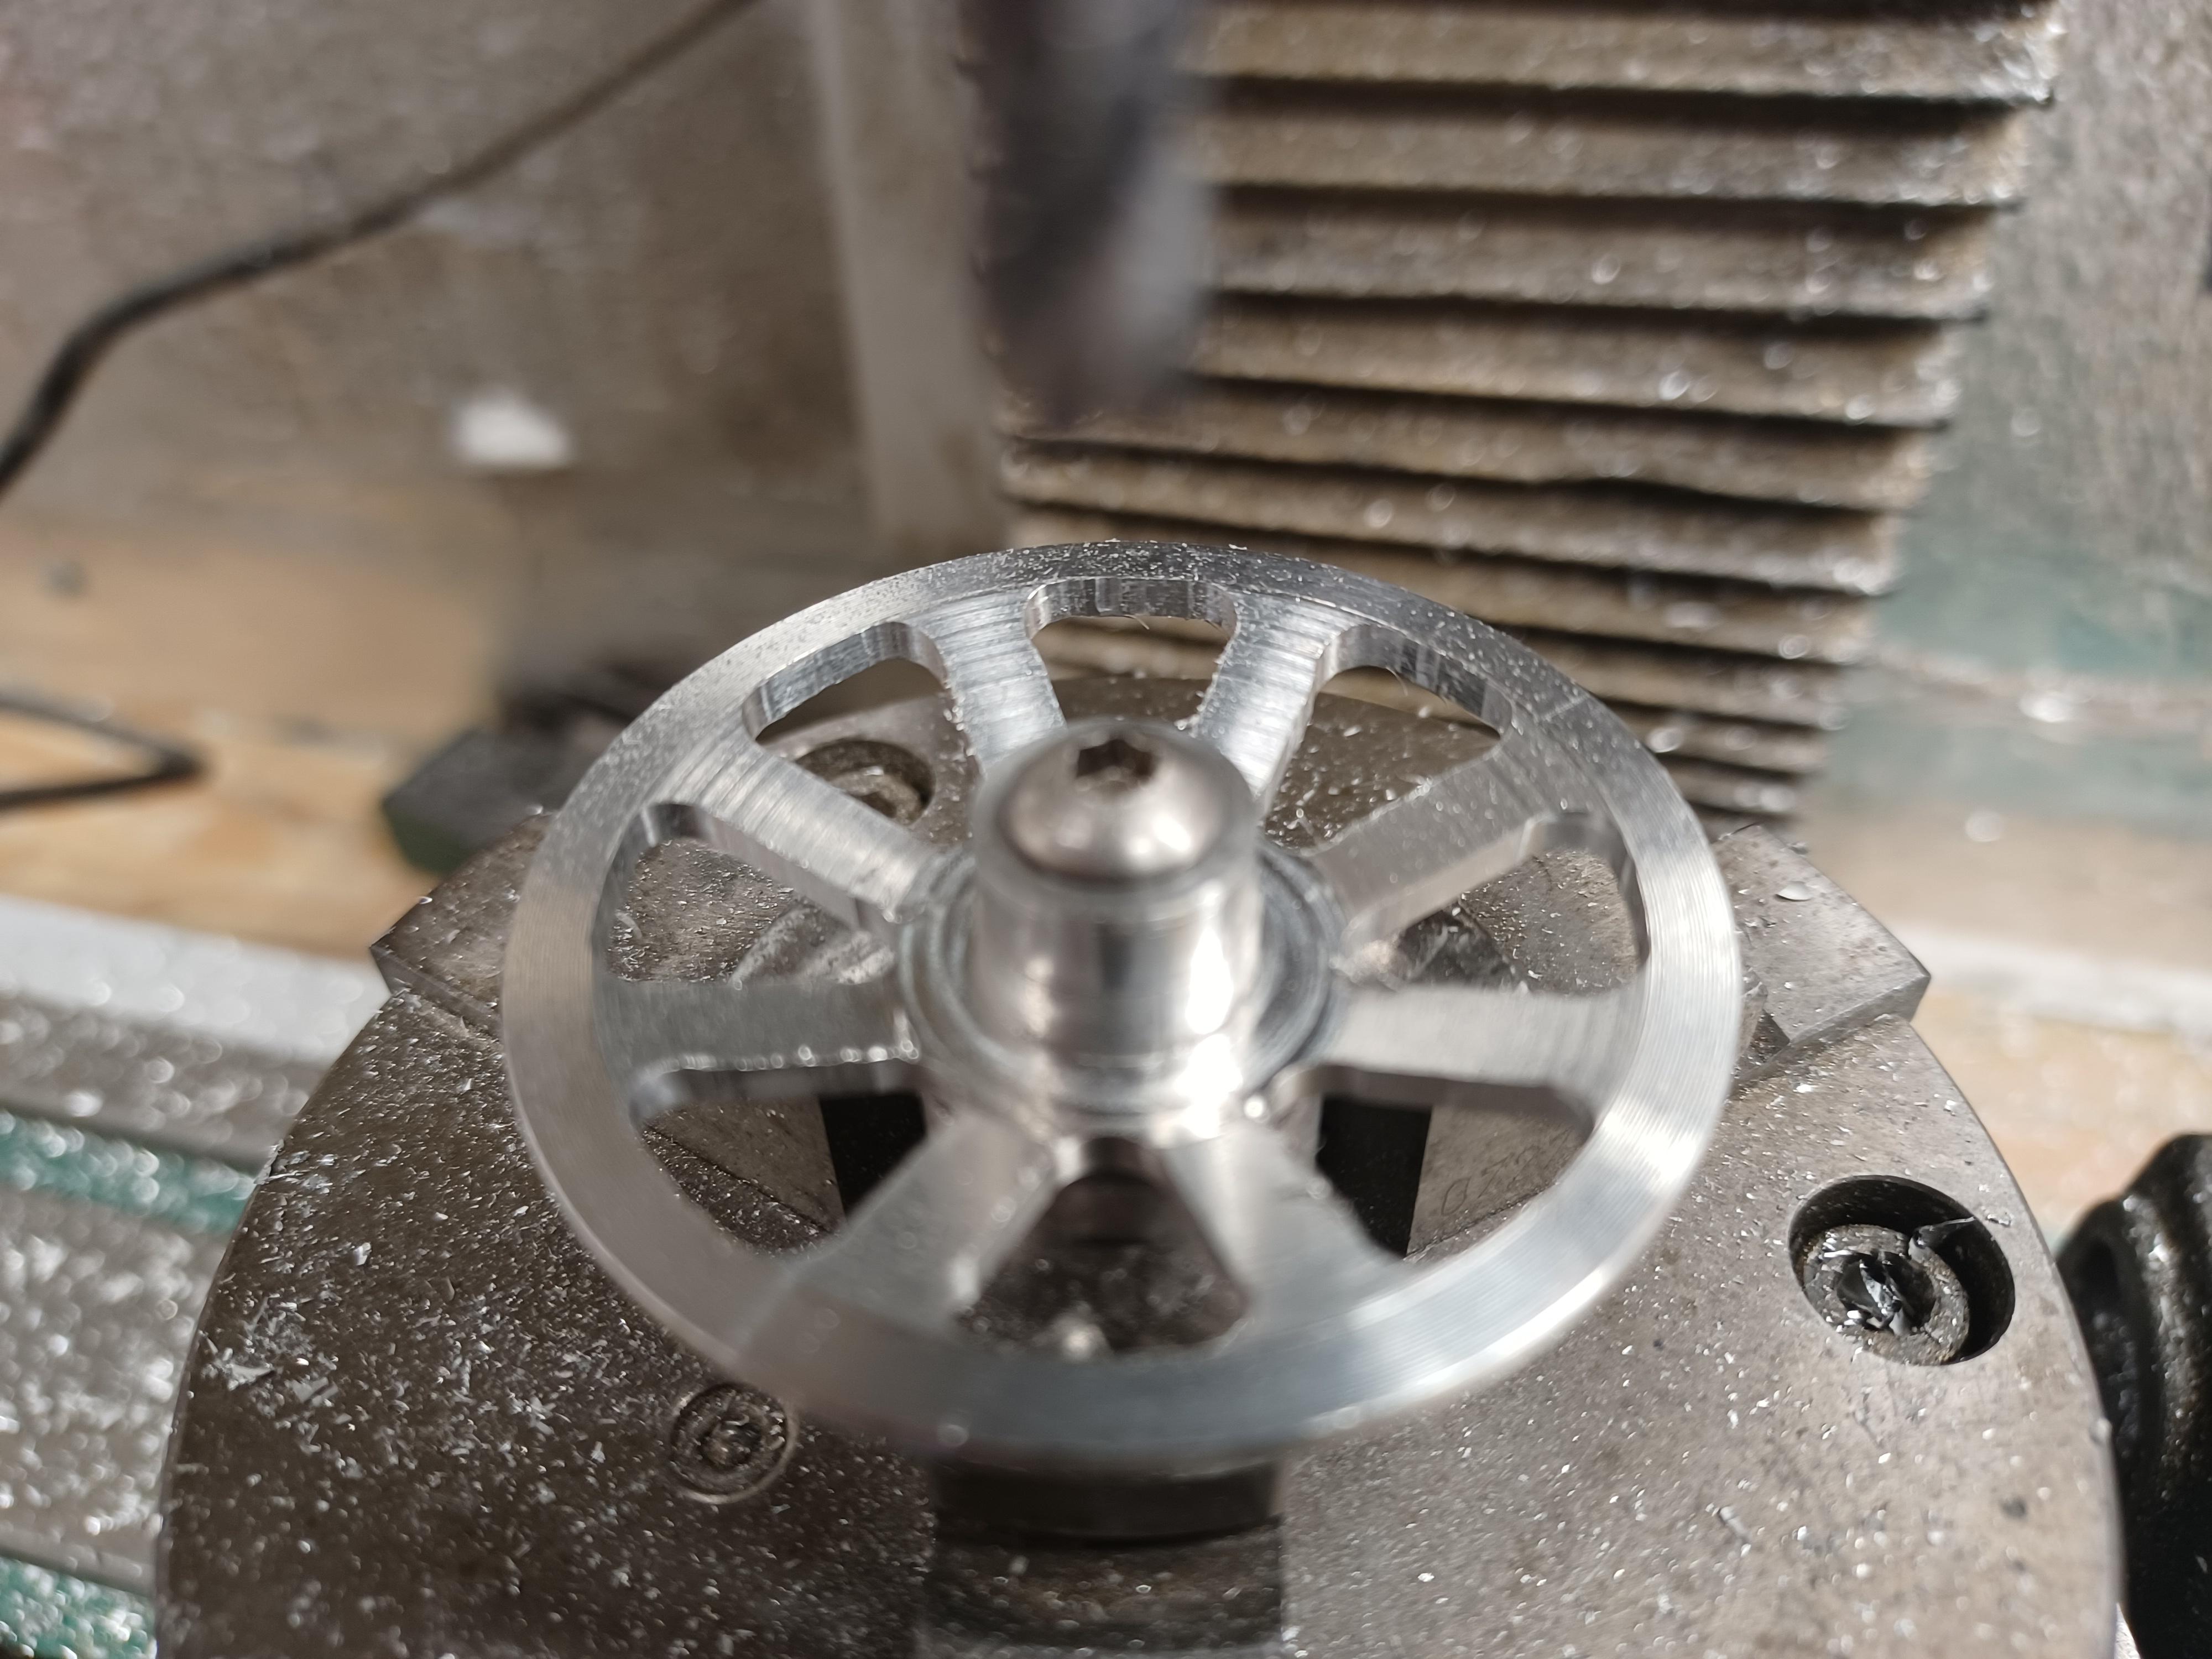
nice to here from you art. i have been figuring out how to machine the inner wheel parts and i have made the inside half that butts to the hub on the axle. pin drive with center nut. the outer half is going to be almost the same with as the inner half with a smaller center. i am trying to decide if i should polish the rim and anodize the centers black or try to polish the whole wheel . opinions welcome,please. i dont know what color the car will be yet.that could make a differents.i took the idea for these wheels from the bugatti t-35 ,one of my favorite cars of all time. i am also trying to decide on makin fenders or having side mounted fuel tanks like the lancia d-50 another favorite. all that is a little further down the road. here is a few pictures. the axles and the cv joints have a 1/4 inch ball on each end and the 2 half of the cv half half of the 1/4 ball cut into them so they can rotate and travel up and down.
-
hi ira, thanks for looking and your kind comments. i hope to have more pictures this week. i am working on the rear shocks and the rear wheels.
-
i am using horizontal laydown shocks sort of like formula 1 on the backi started on the shocks today. the mounts for the shocks are soldered on. part of the roll cage is in. the small hoop threw the body has pins from the big hoop so it removable .soon as the rear suspension and the 3 drive shafts are done finished i am going to start on the wheels and the molds for the tires. i dont know what the wheels will look like yet but i several ideas.still looking at picture on line.thanks ira and scott.glad to hear from you francis.
-
WOW i was happy with my brakes till i saw yours. Amazing. your work boggles the mind! hope you are well keep up with the pictures.


charlie libby 1935 indy style road car
in WIP: Other Racing: Road Racing, Land Speed Racers
Posted
nice to hear from you greg. francis is amazing.i visit his thread alot. try to stay warm up there and happy new year