laemtao
-
Posts
29 -
Joined
-
Last visited
Content Type
Profiles
Forums
Events
Gallery
Everything posted by laemtao
-

AMT ‘66 Chevy Nova Pro Street/ MPC ‘72 Vega Drag
laemtao replied to laemtao's topic in WIP: Model Cars
Please hold any comments if you don’t like Oprah cuz this is for her.
-
AMT ‘66 Chevy Nova Pro Street/ MPC ‘72 Vega Drag
laemtao replied to laemtao's topic in WIP: Model Cars
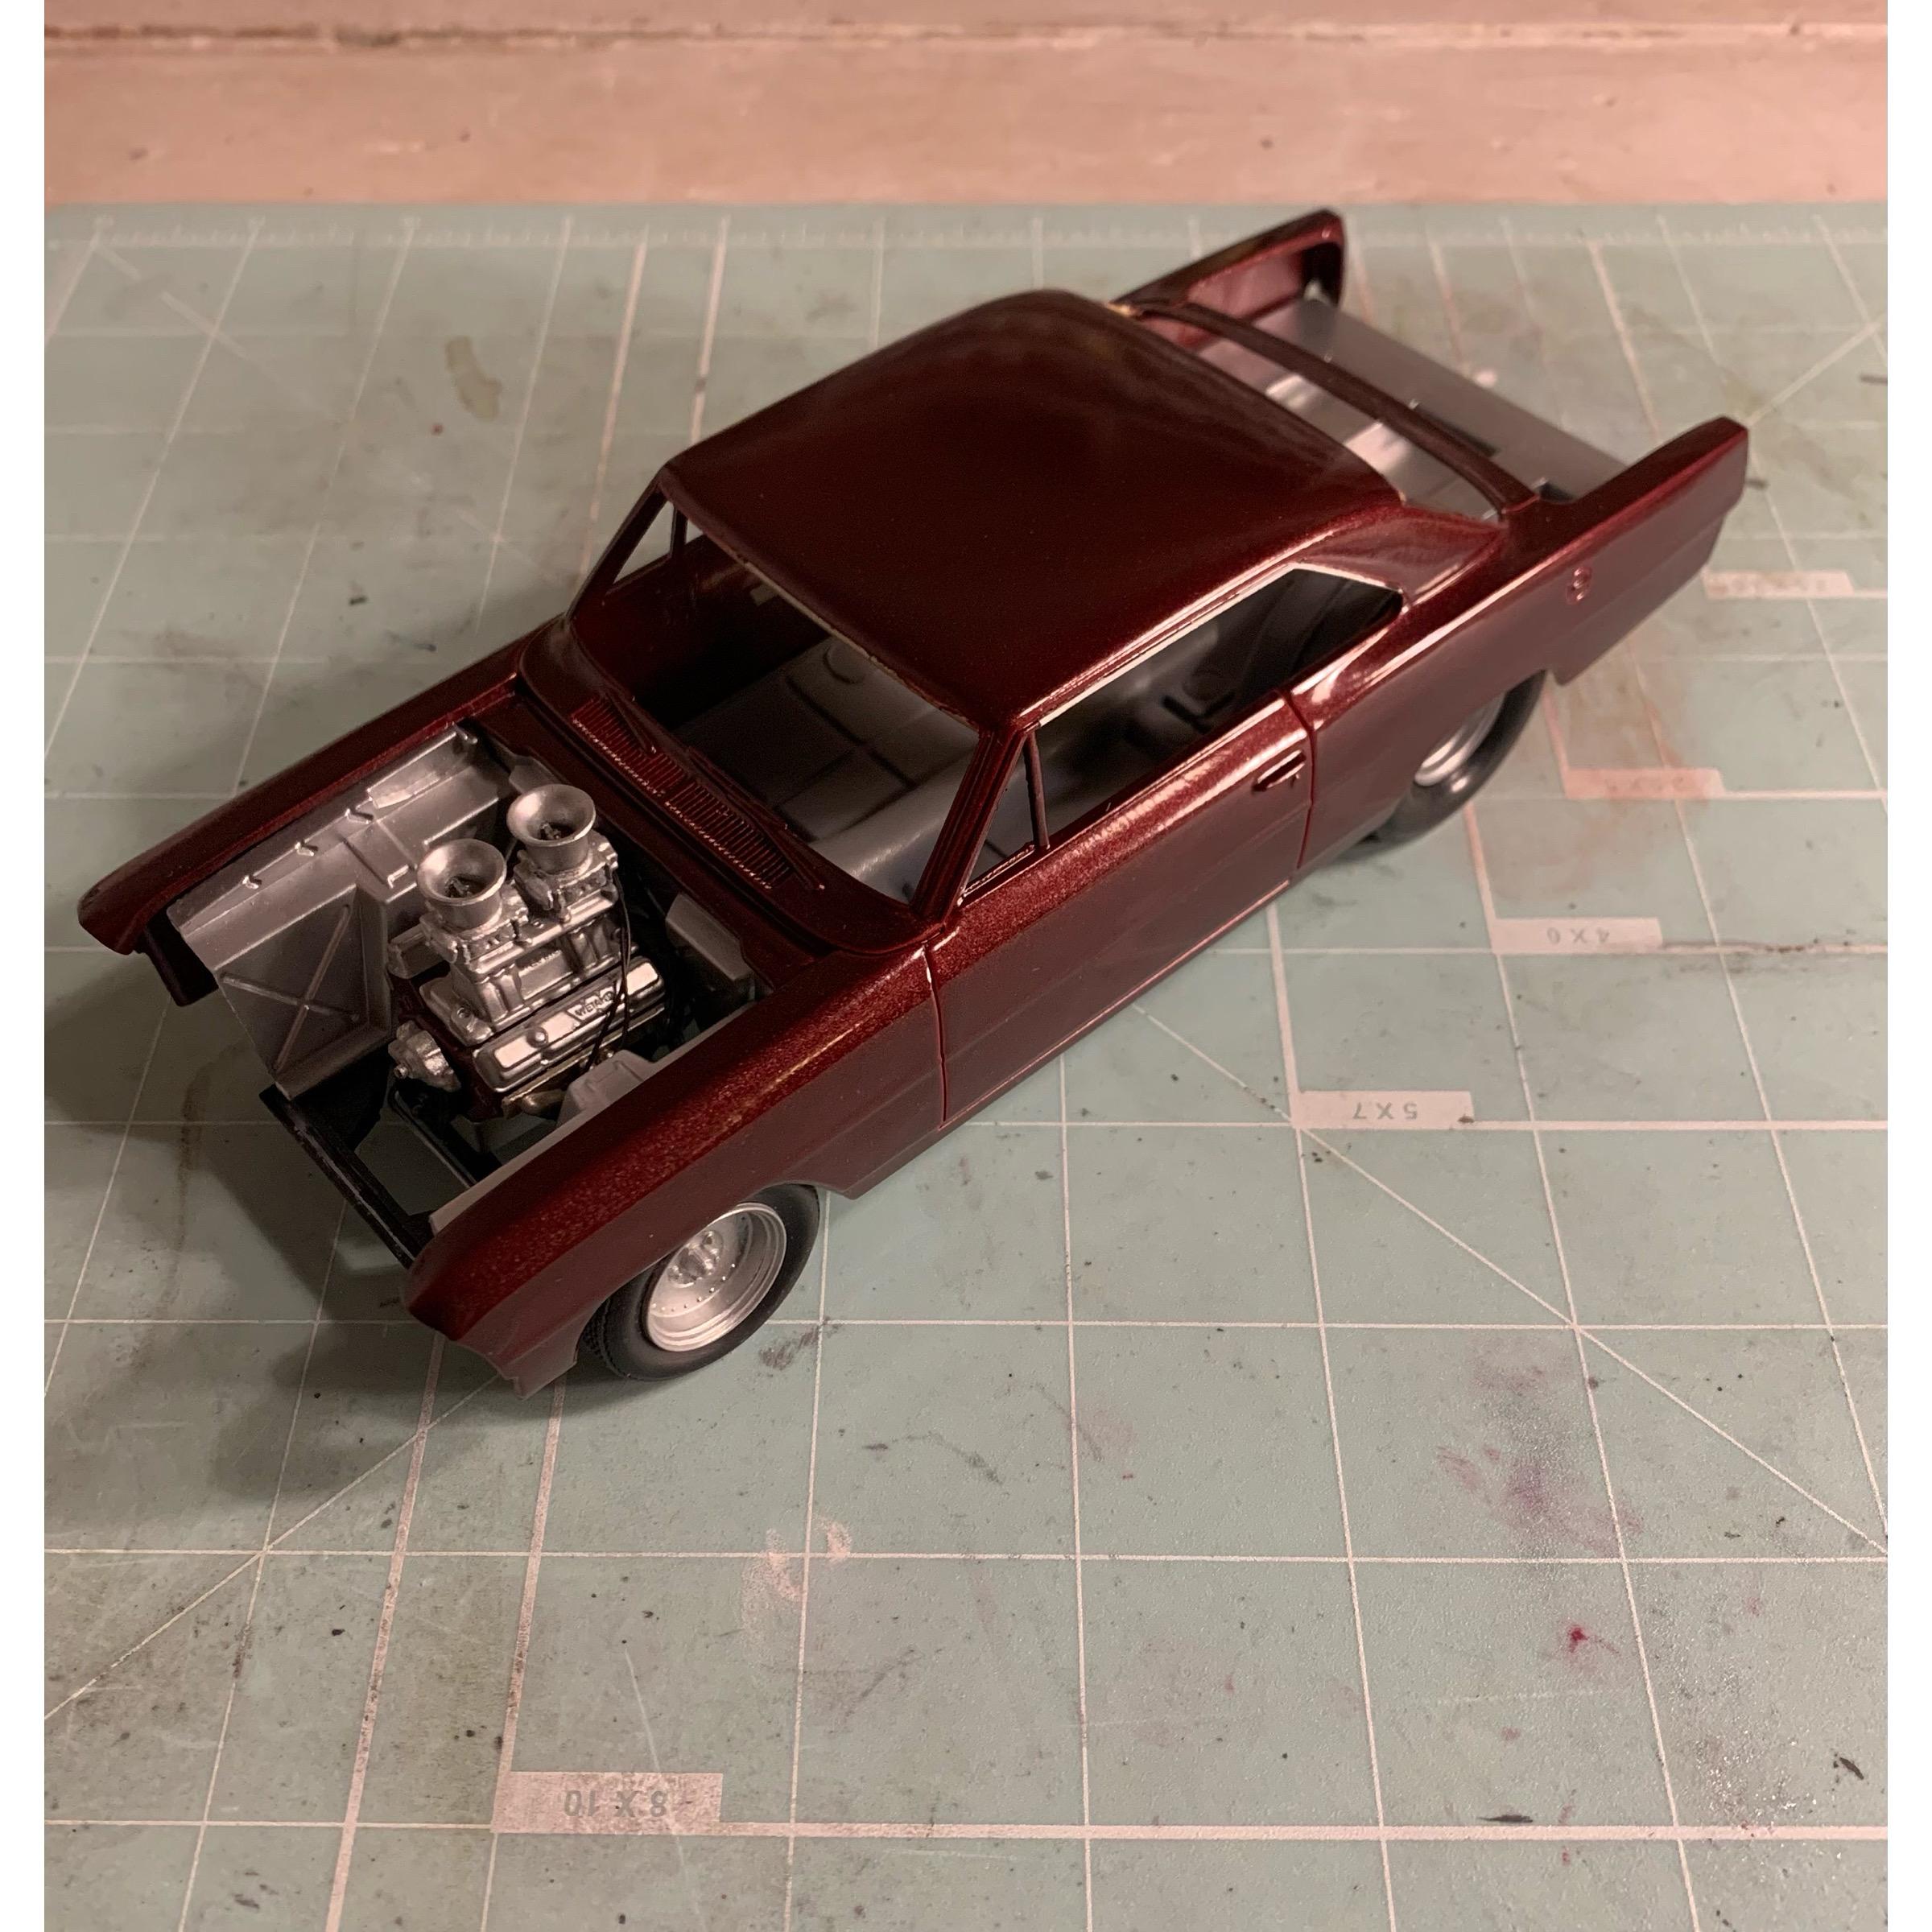
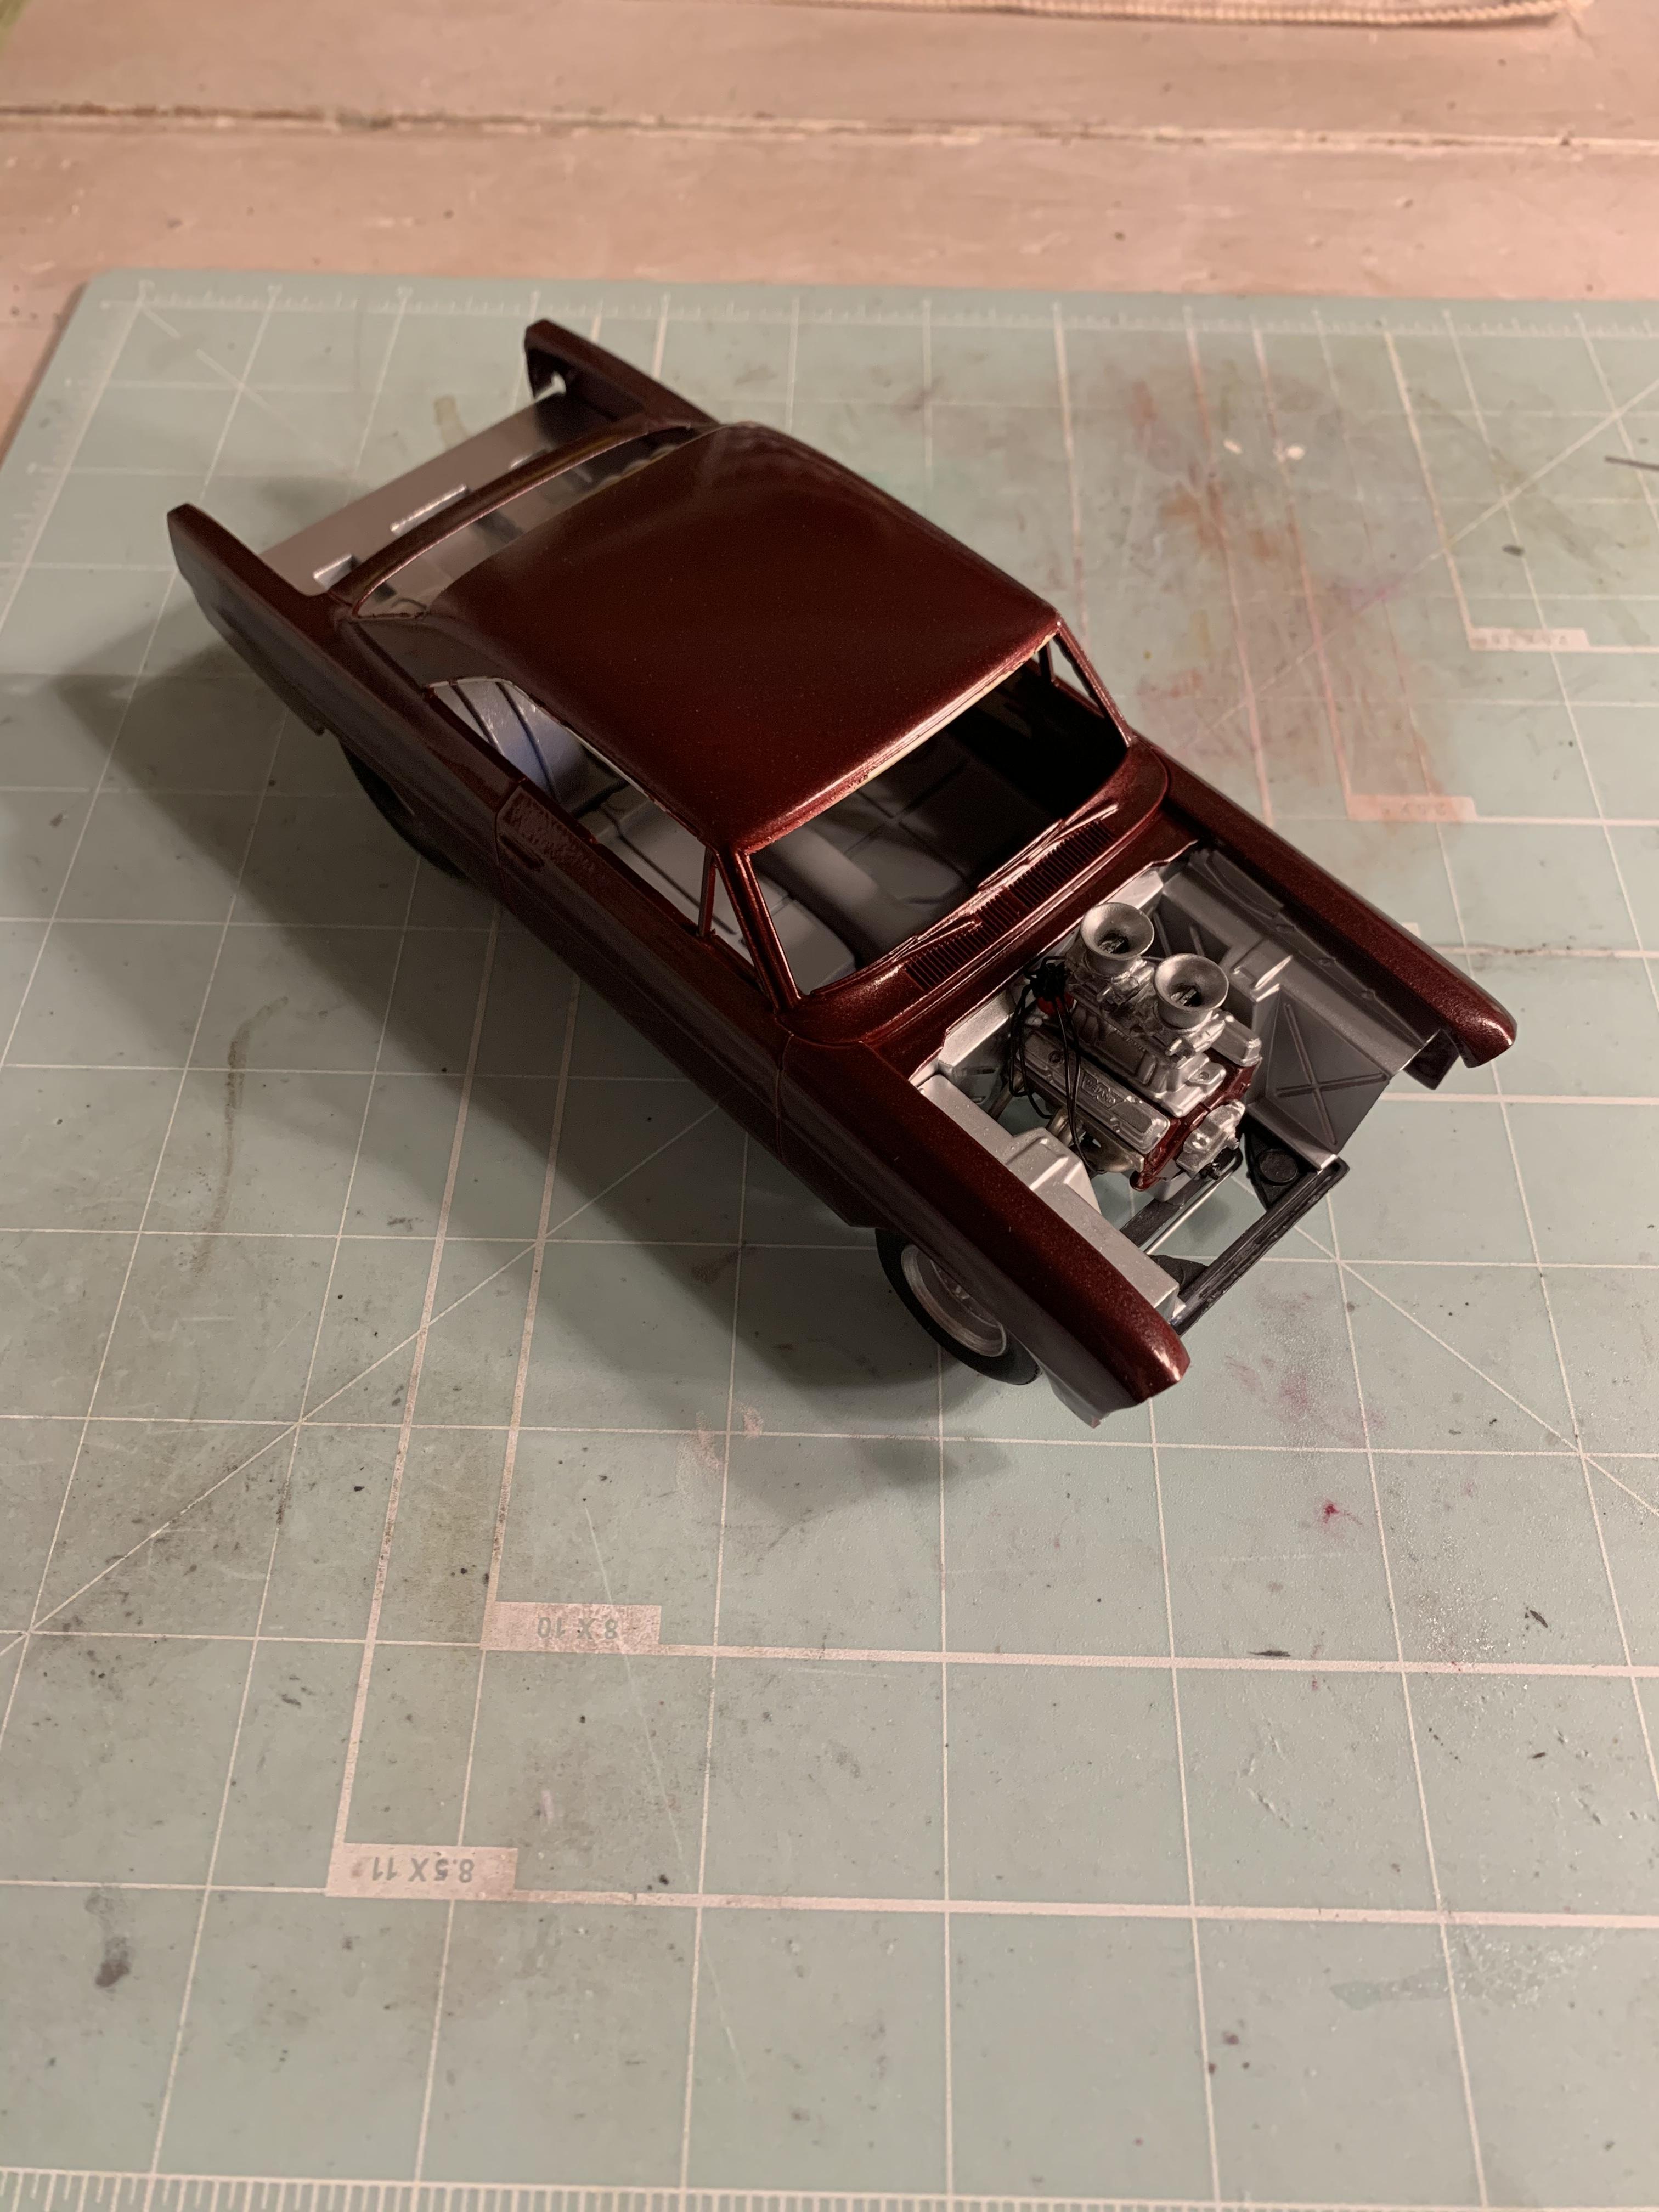
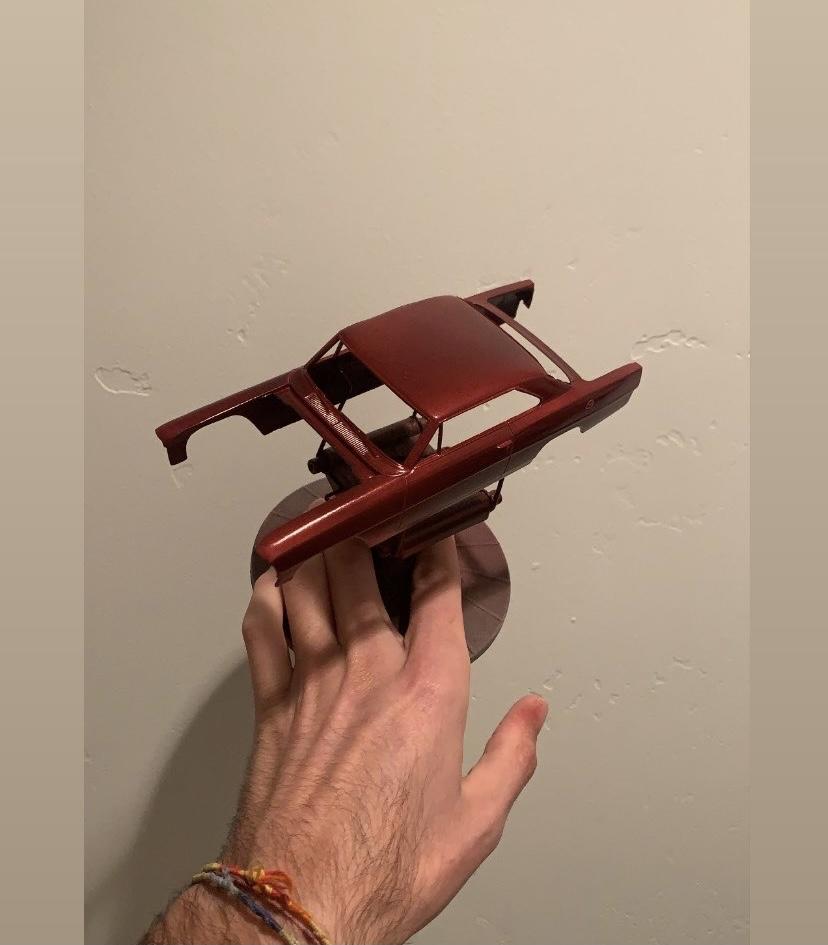
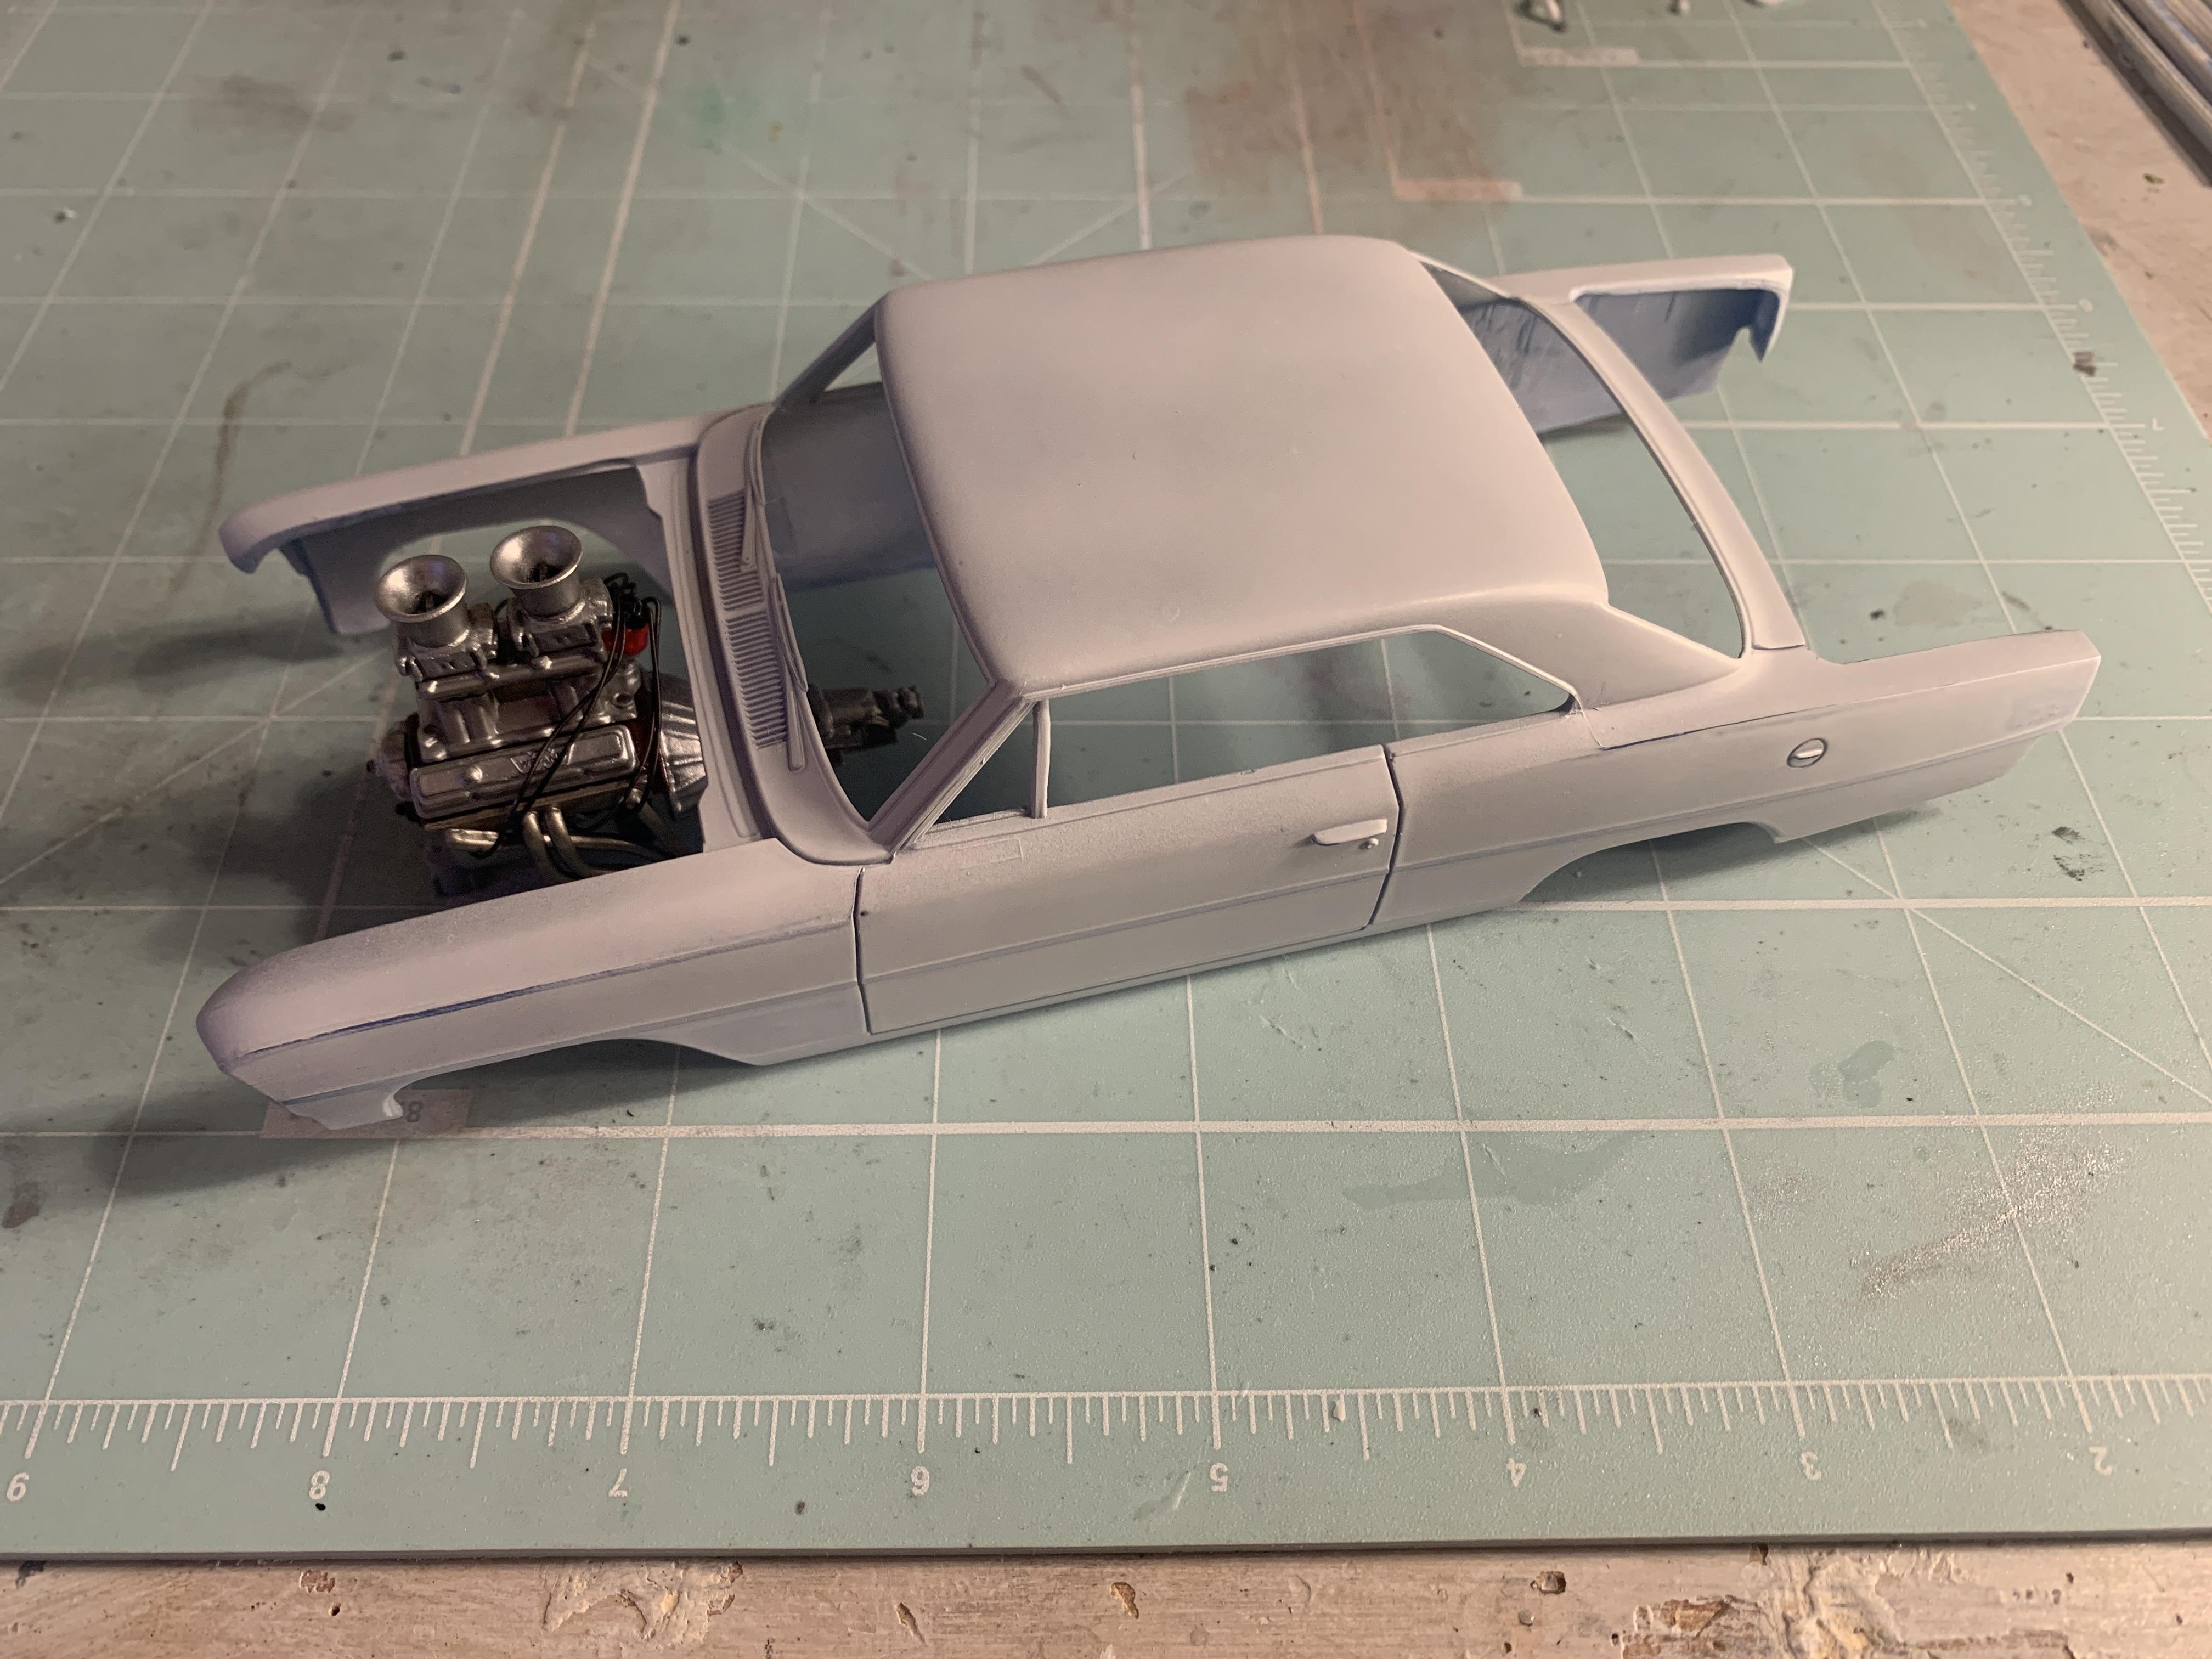
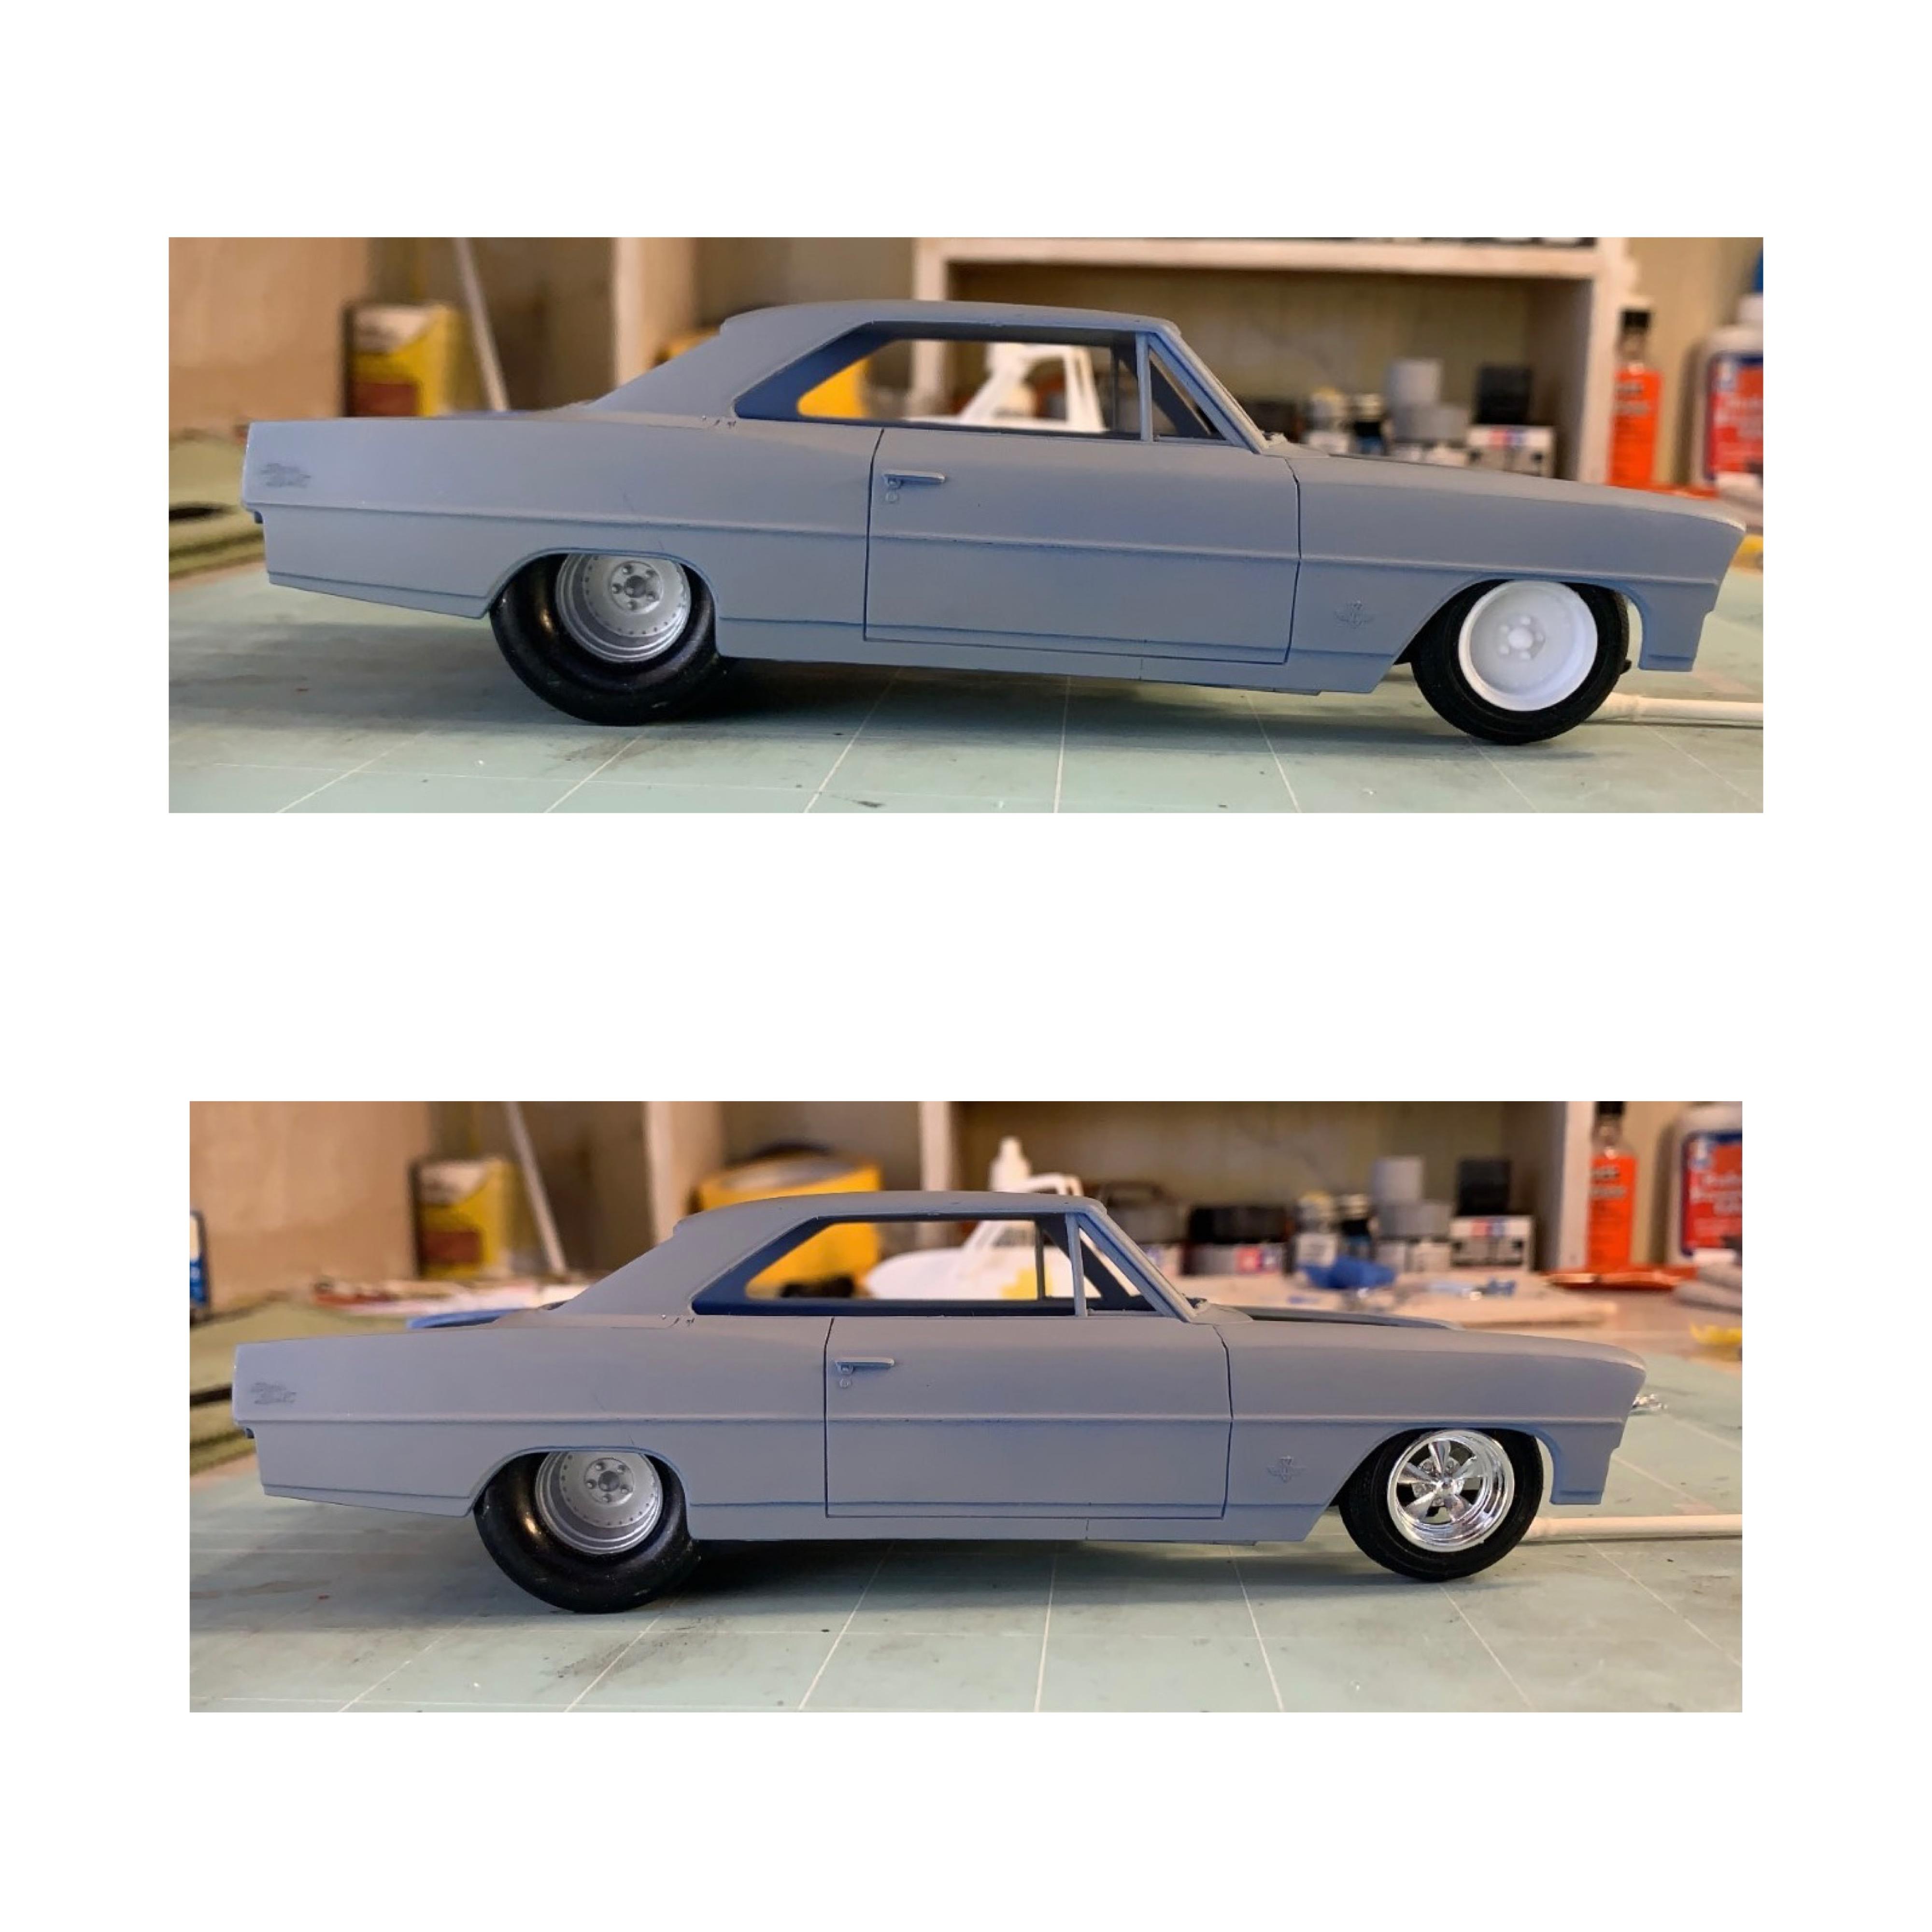
COLOR PREVIEW: burgundy red few more layers and sanding. i also ordered side interior panels from another ‘66 Nova to use some nice PE on it, I know earlier I posted I would scratch build it but after researching the kit found a cheap set on eBay. Yay!
-
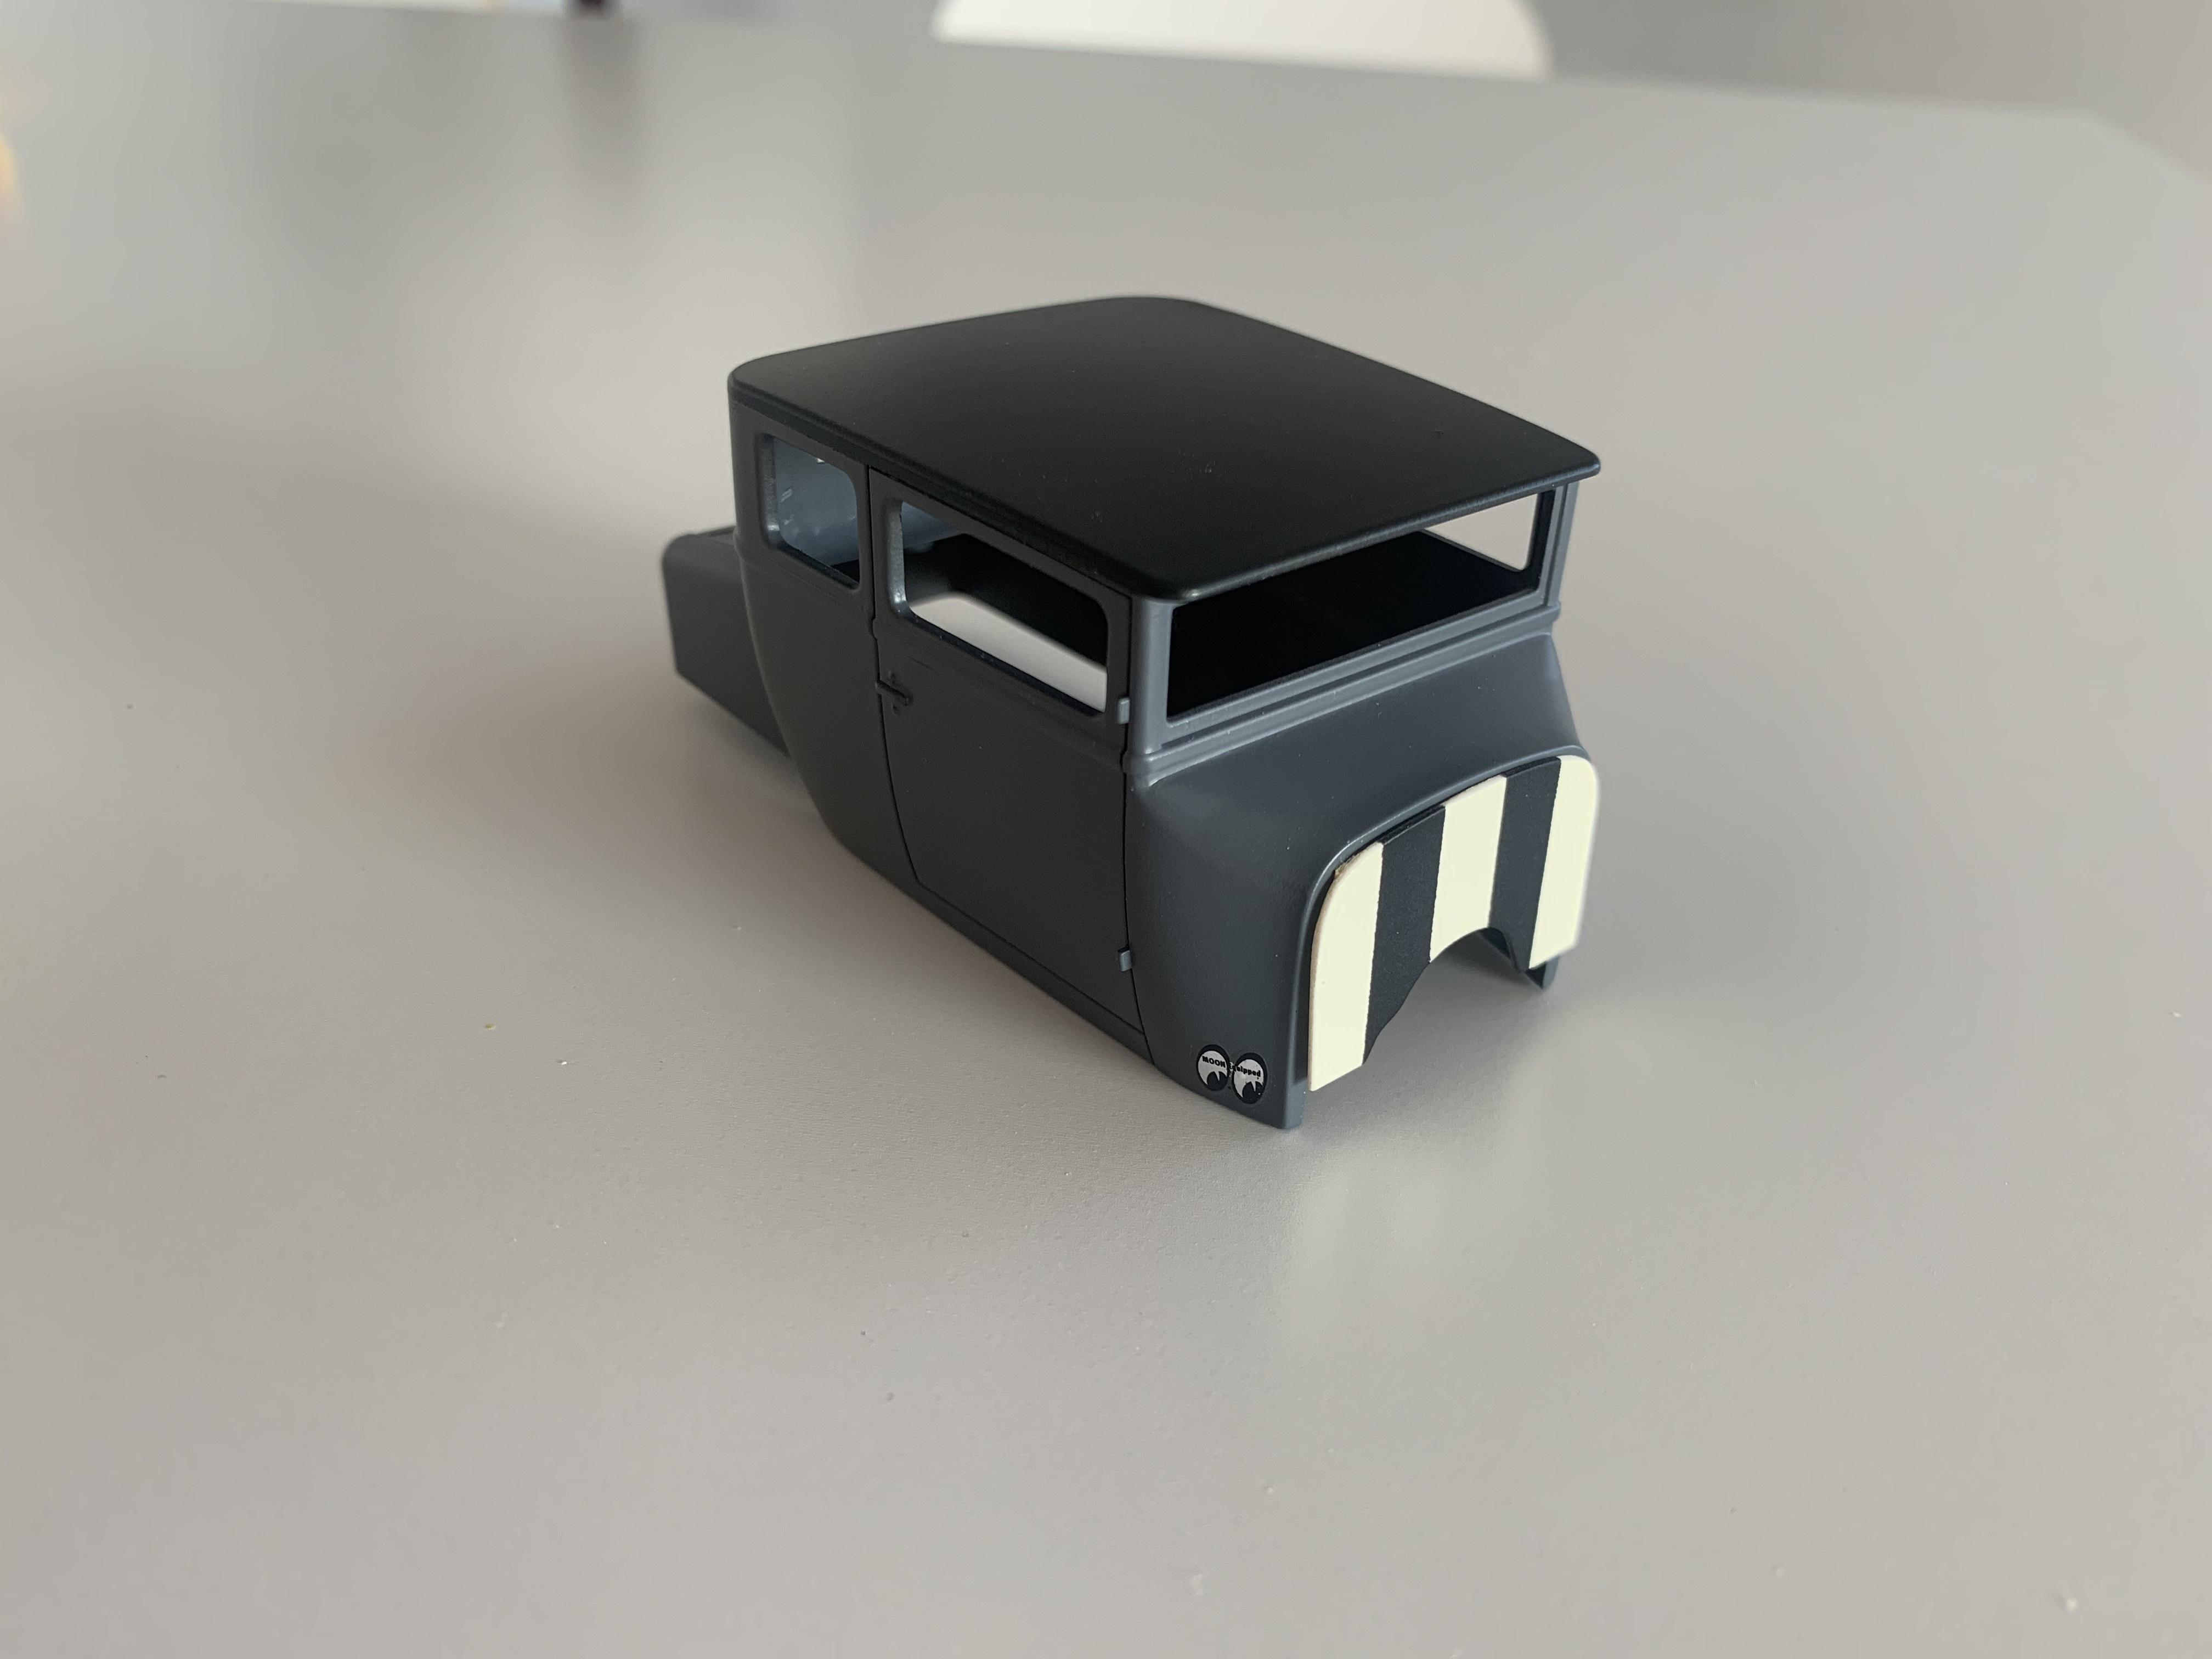
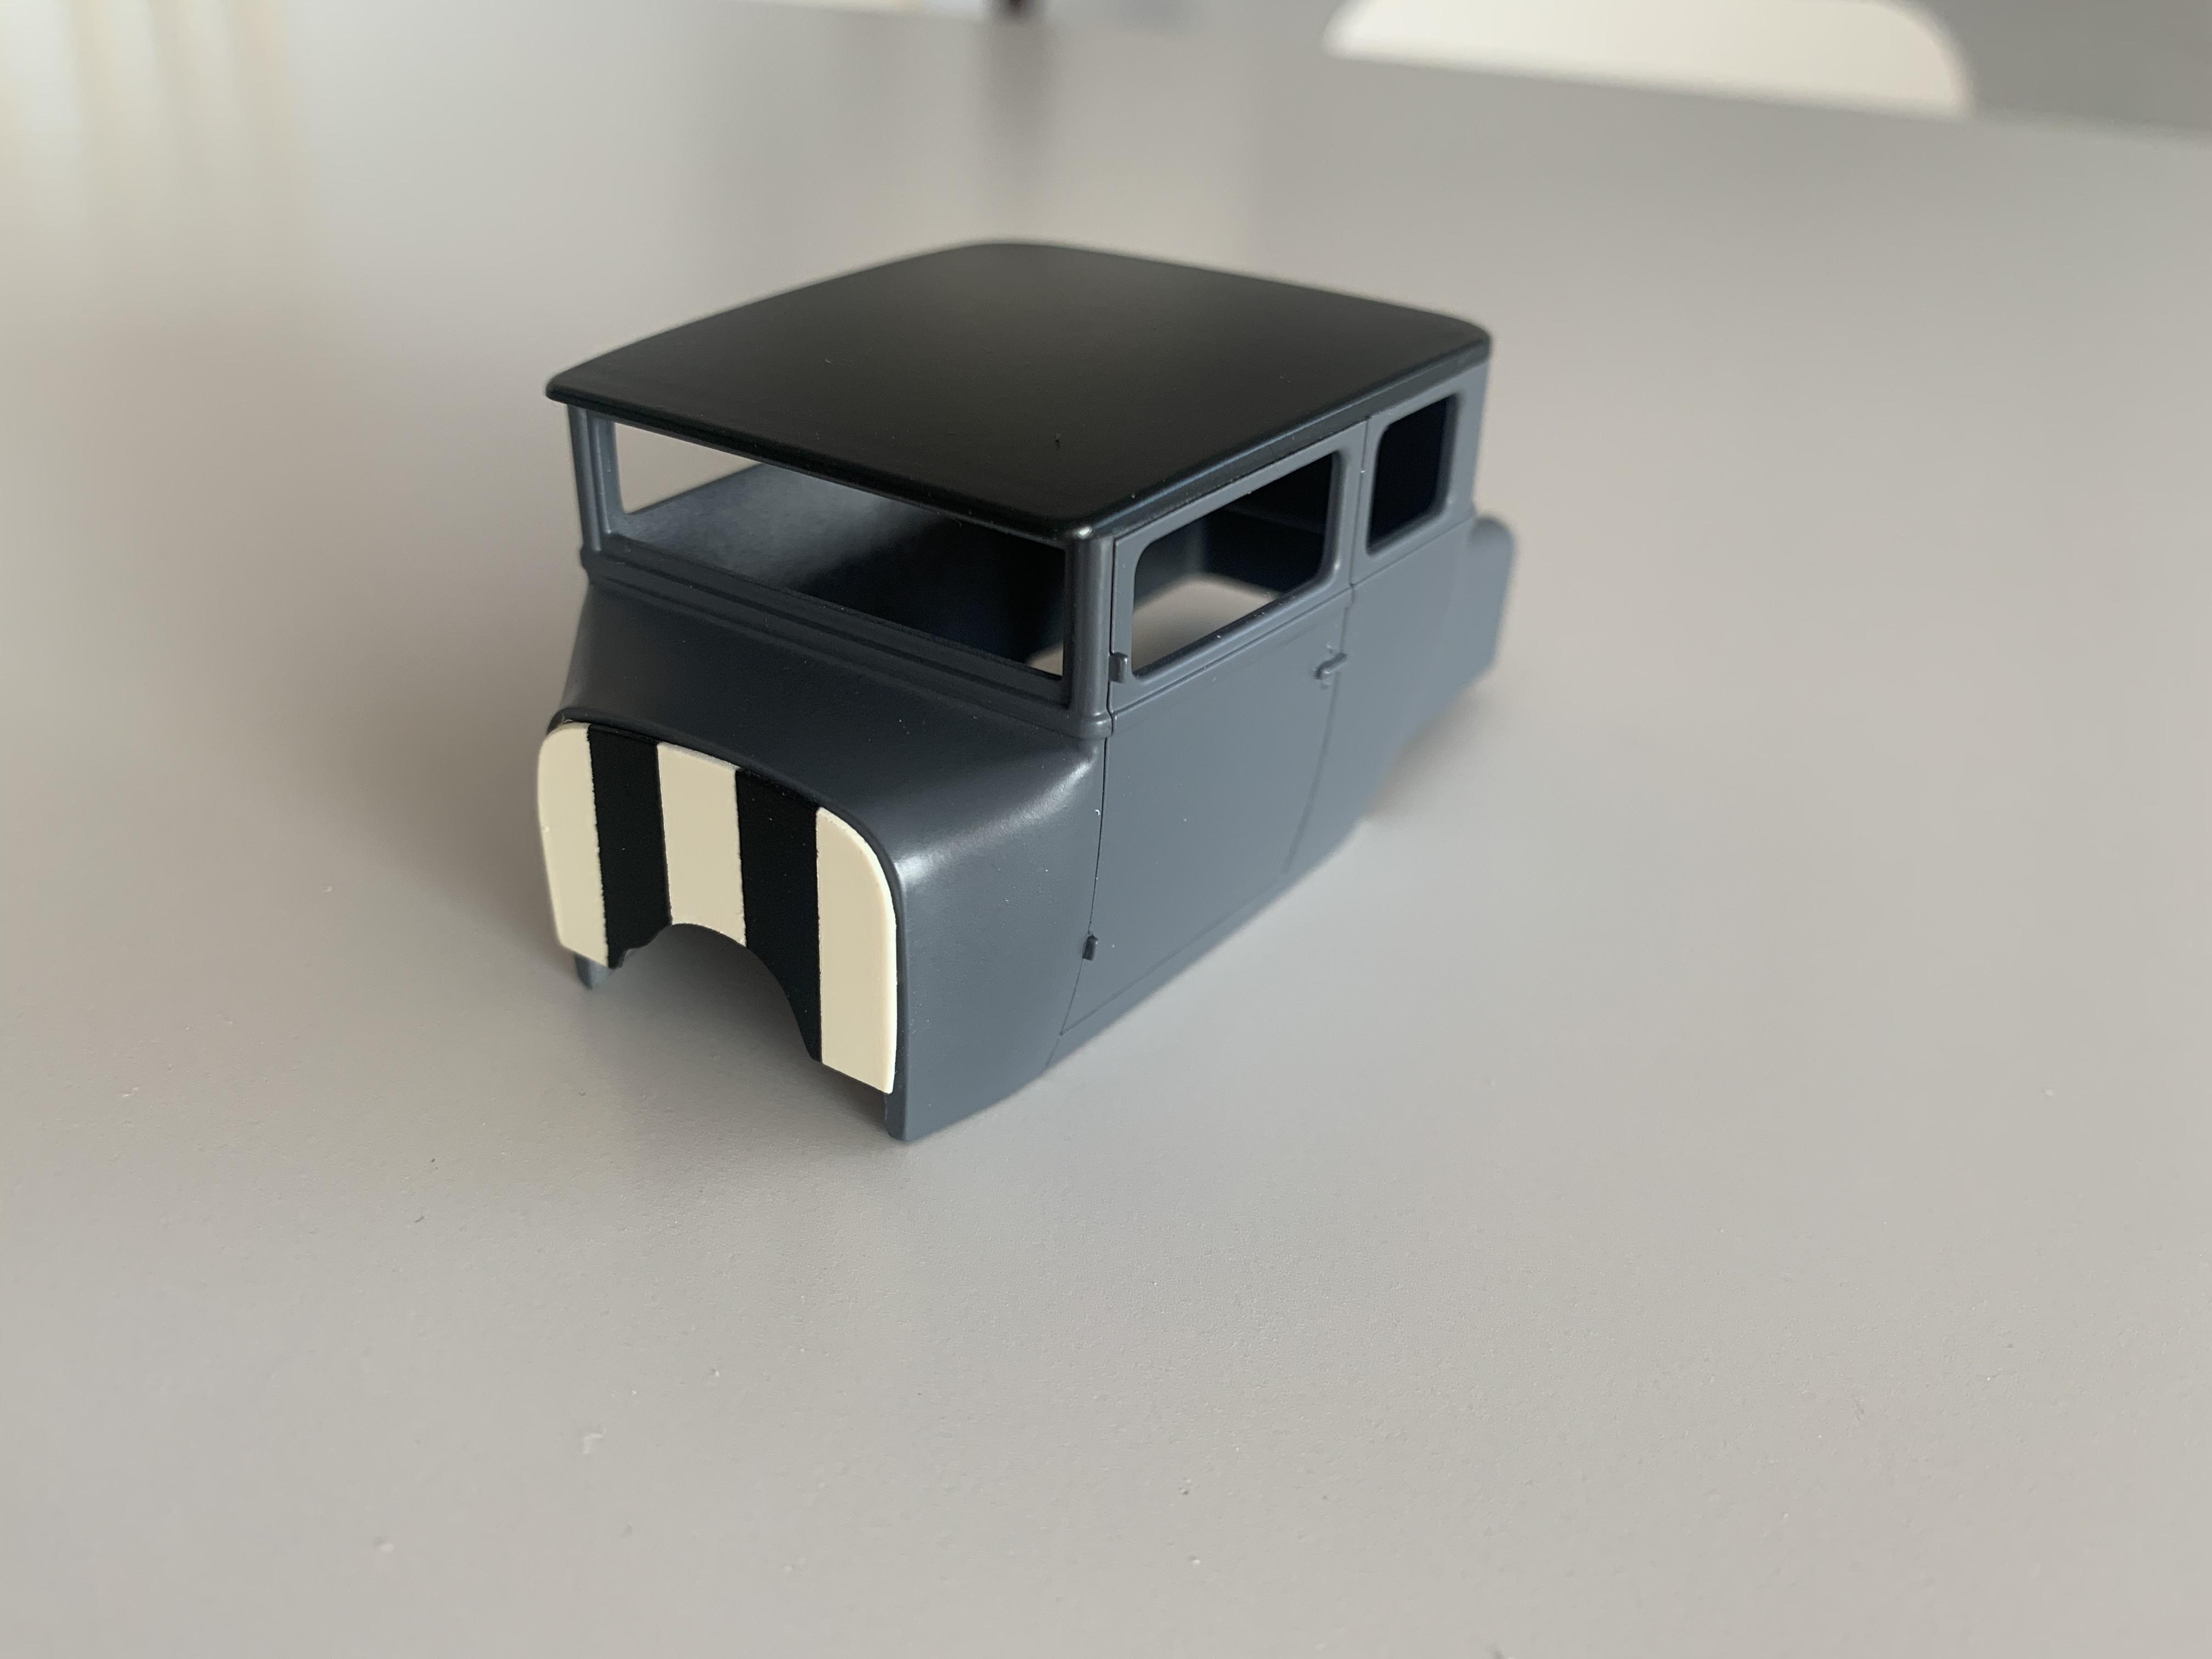
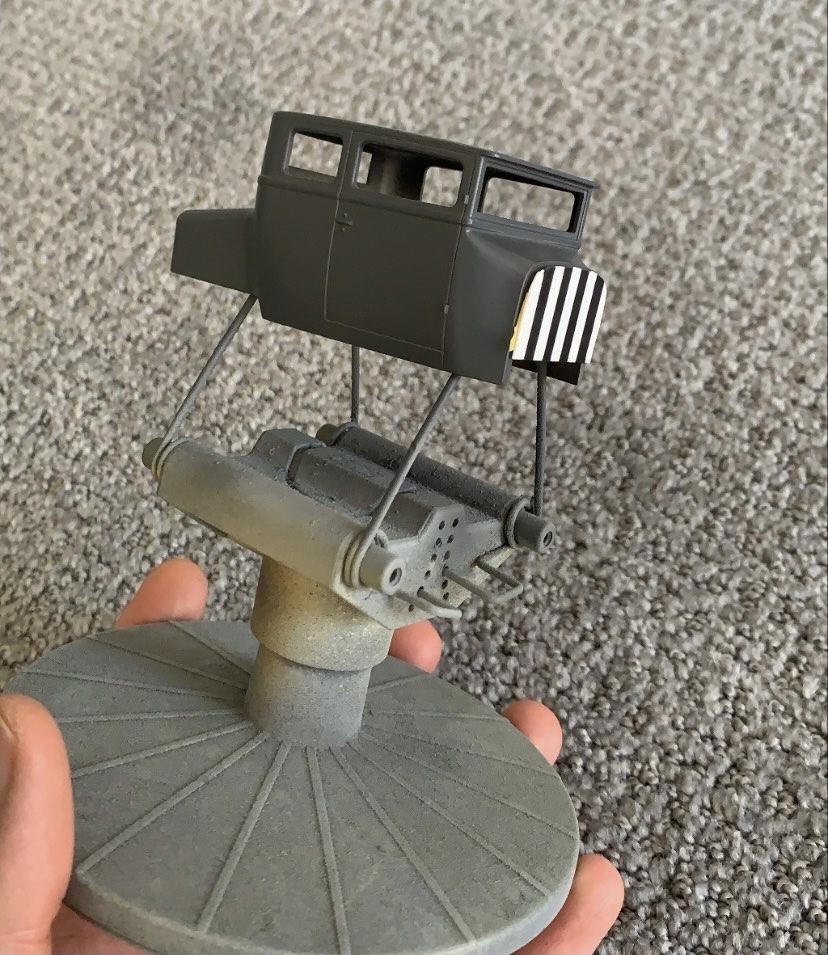
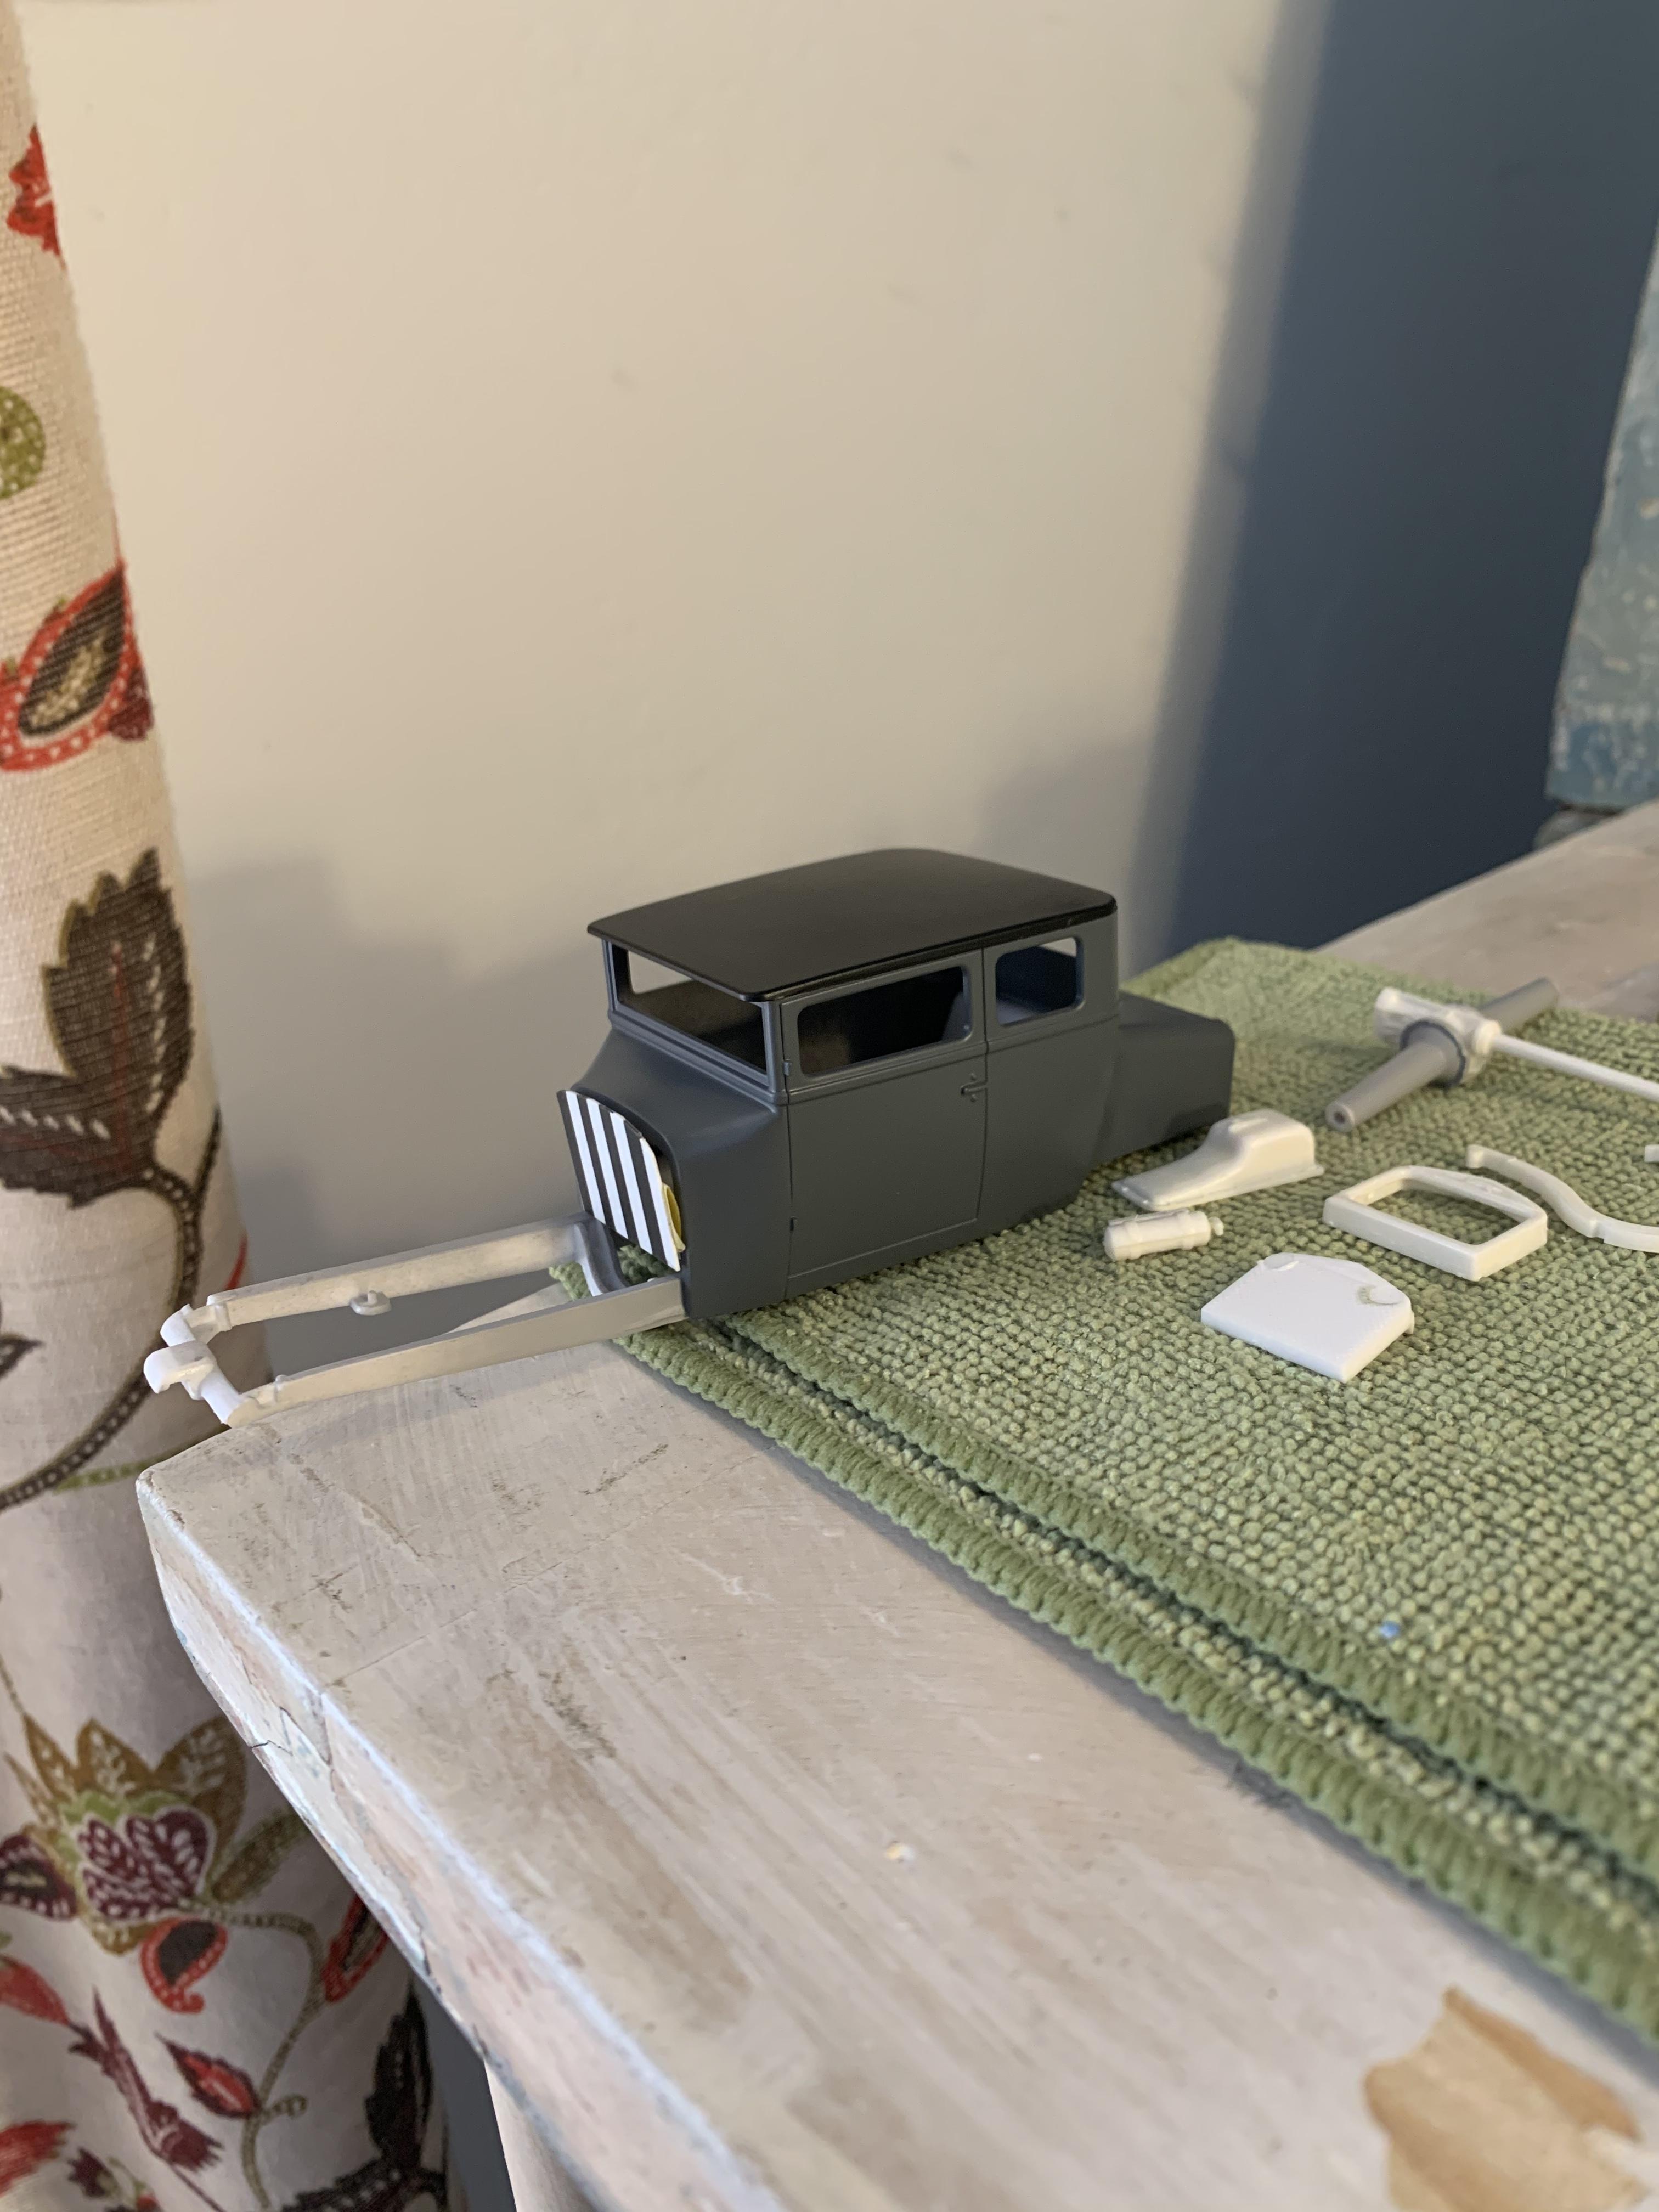
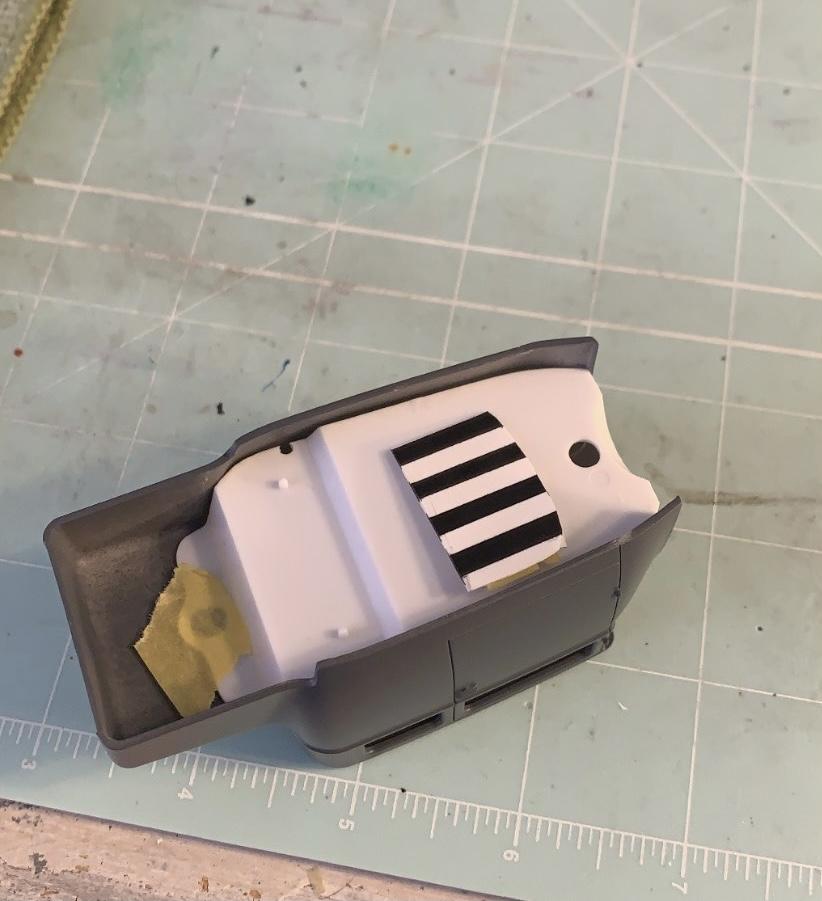
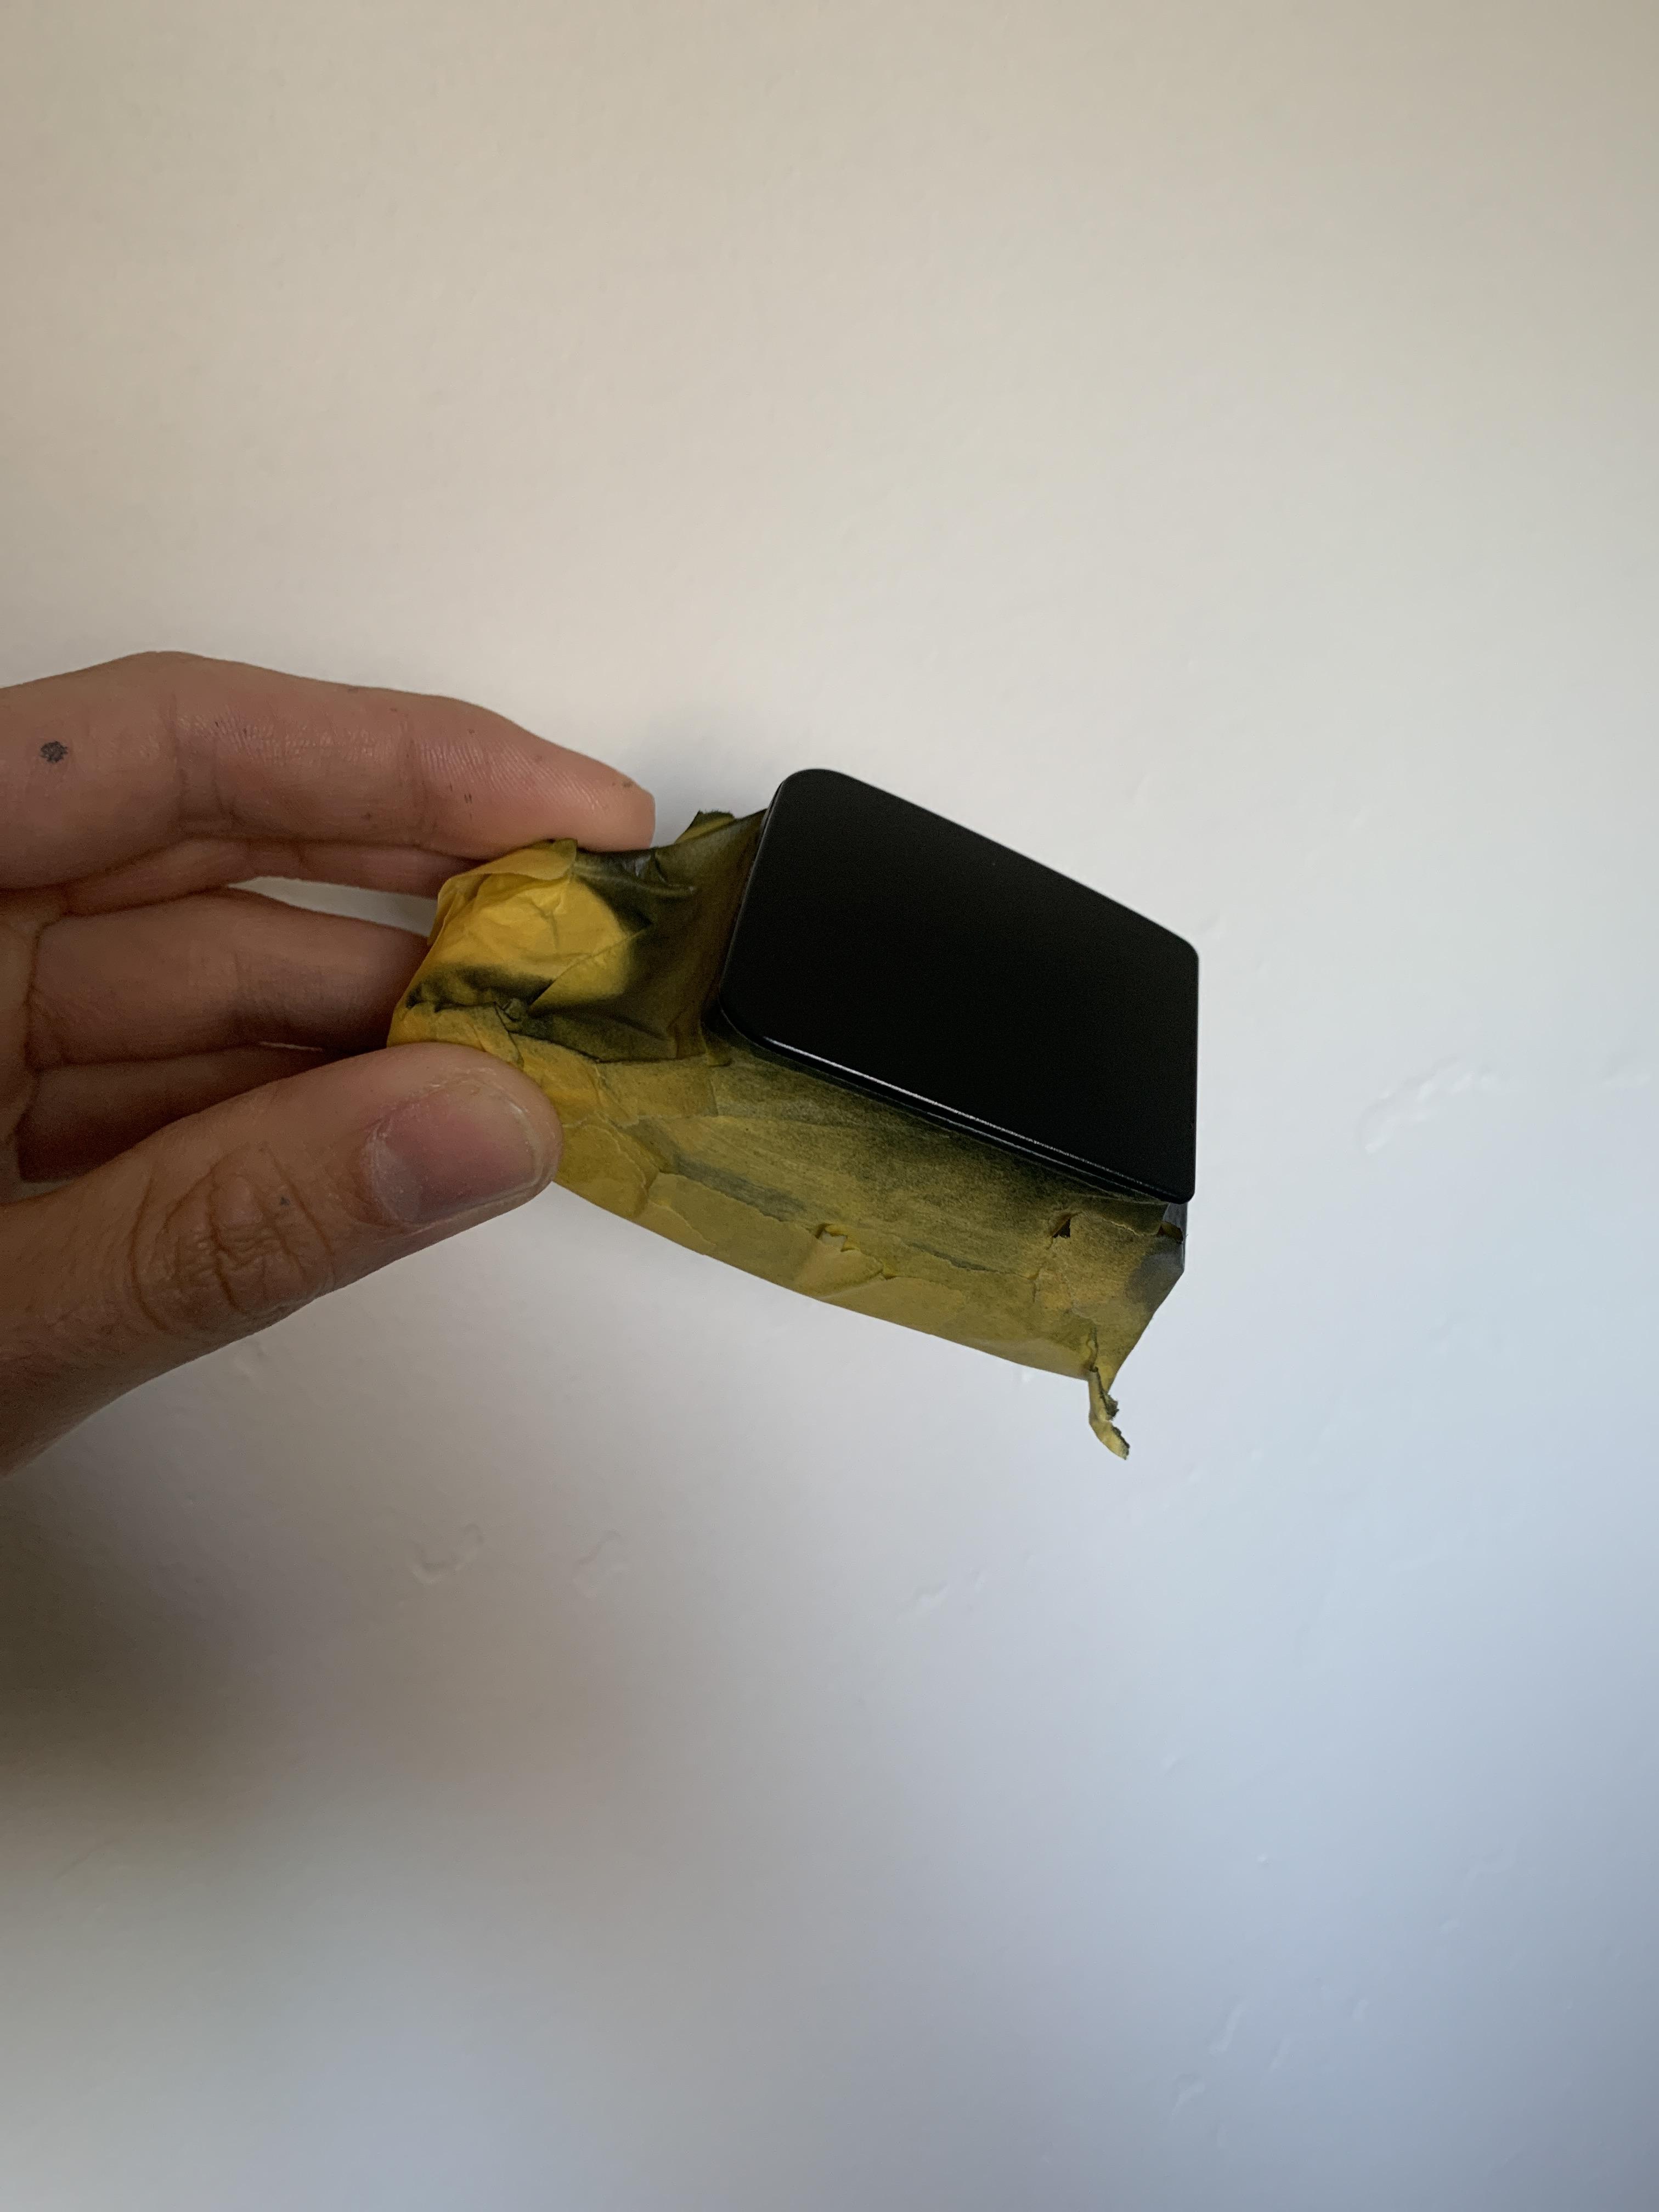
Invasion stripes for the 1925 model T firewall, I’ll stretch the stripes to the undercarriage so when I place a mirror under it will pop out too. Time to get the lines to match up, fingers crossed. I also used cream instead of the typical white for the invasion stripes. It fits better for my color scheme and whats a 1925 model t without a touch of cream.
-
AMT ‘66 Chevy Nova Pro Street/ MPC ‘72 Vega Drag
laemtao replied to laemtao's topic in WIP: Model Cars
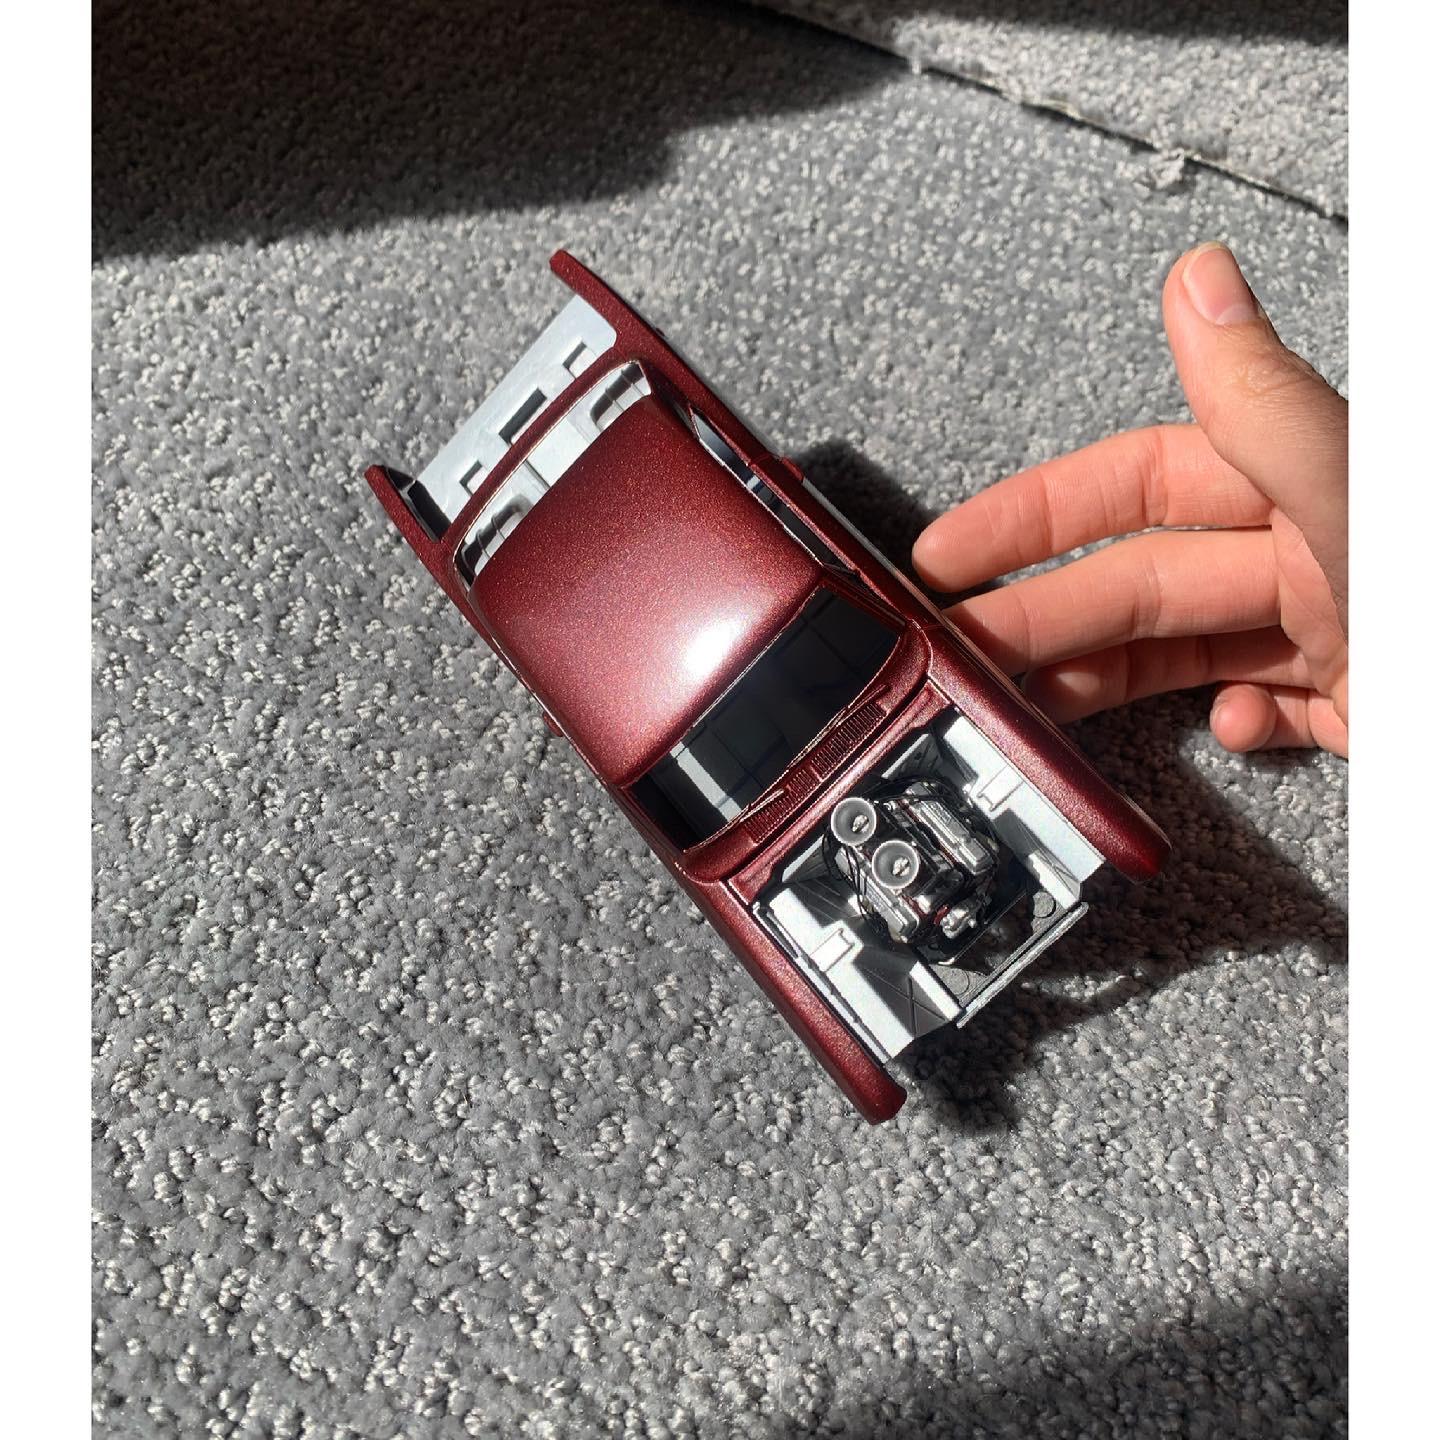
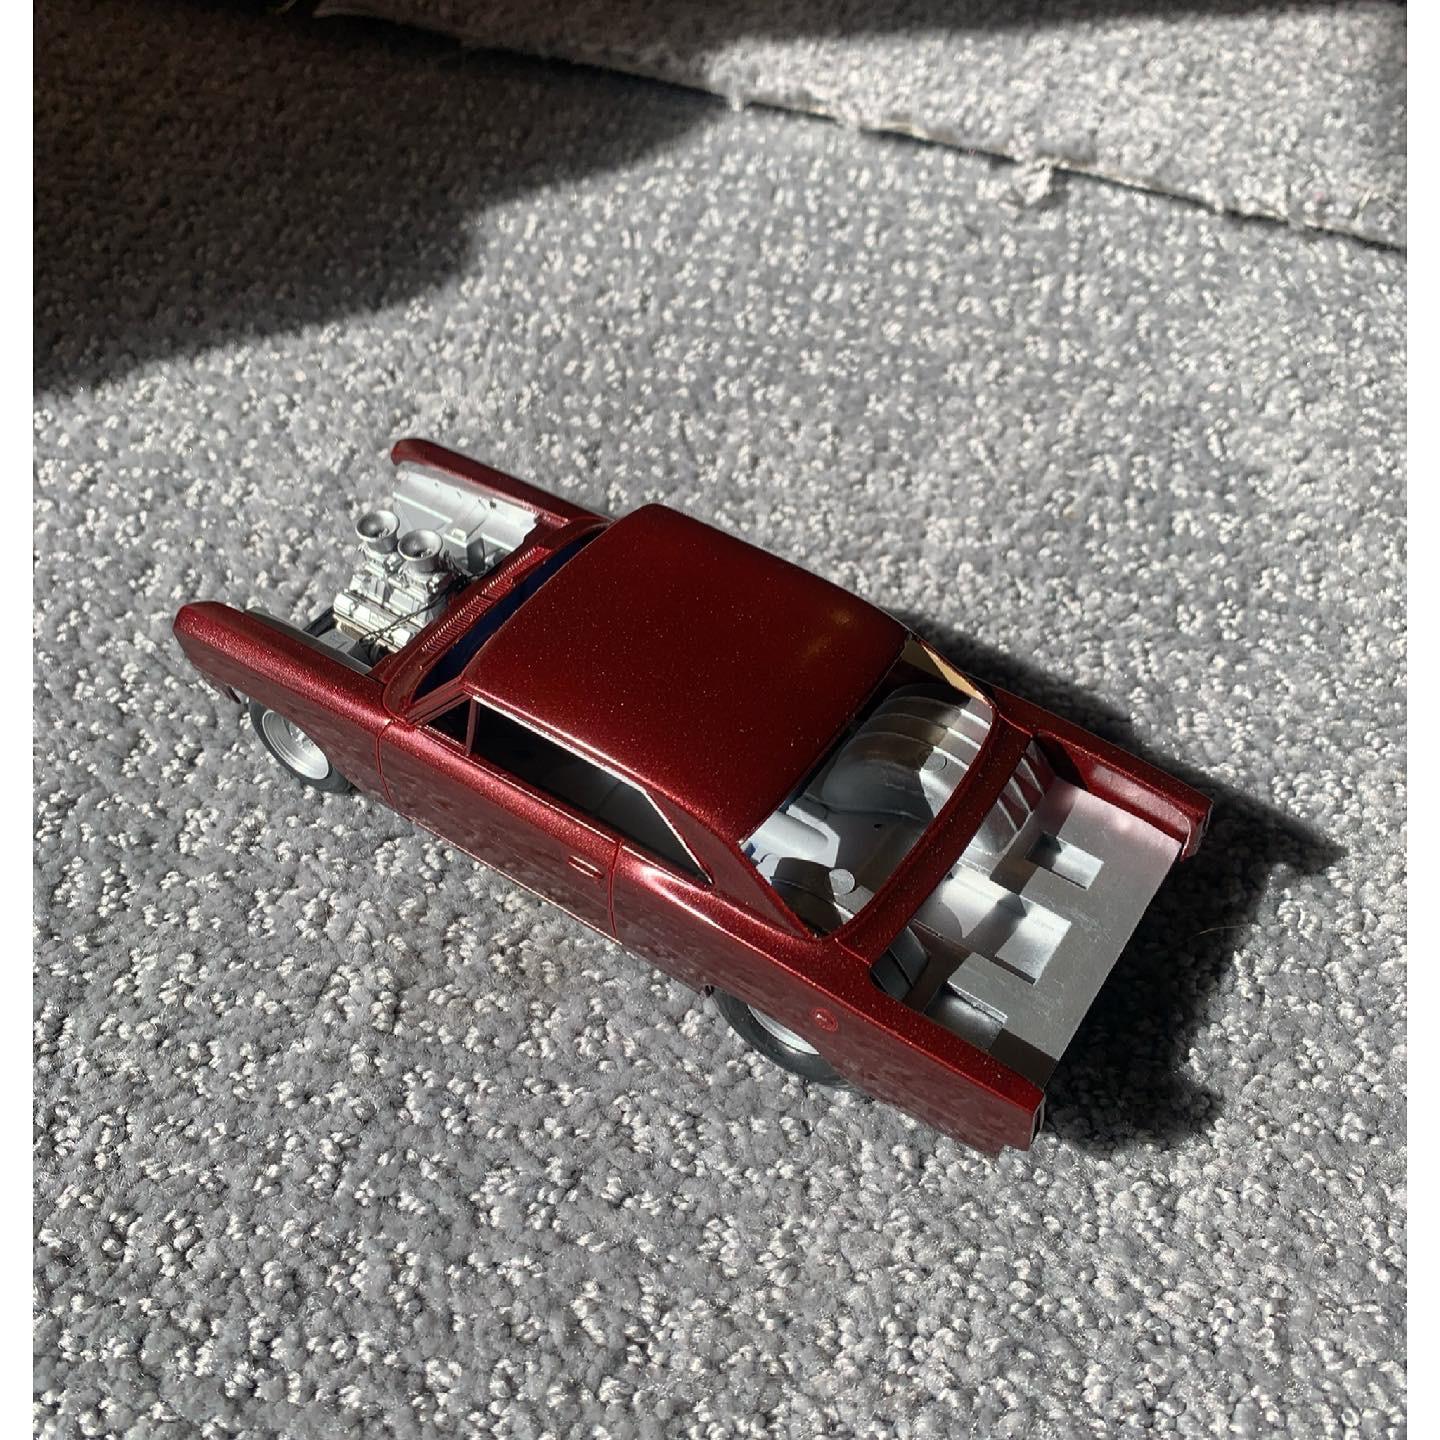
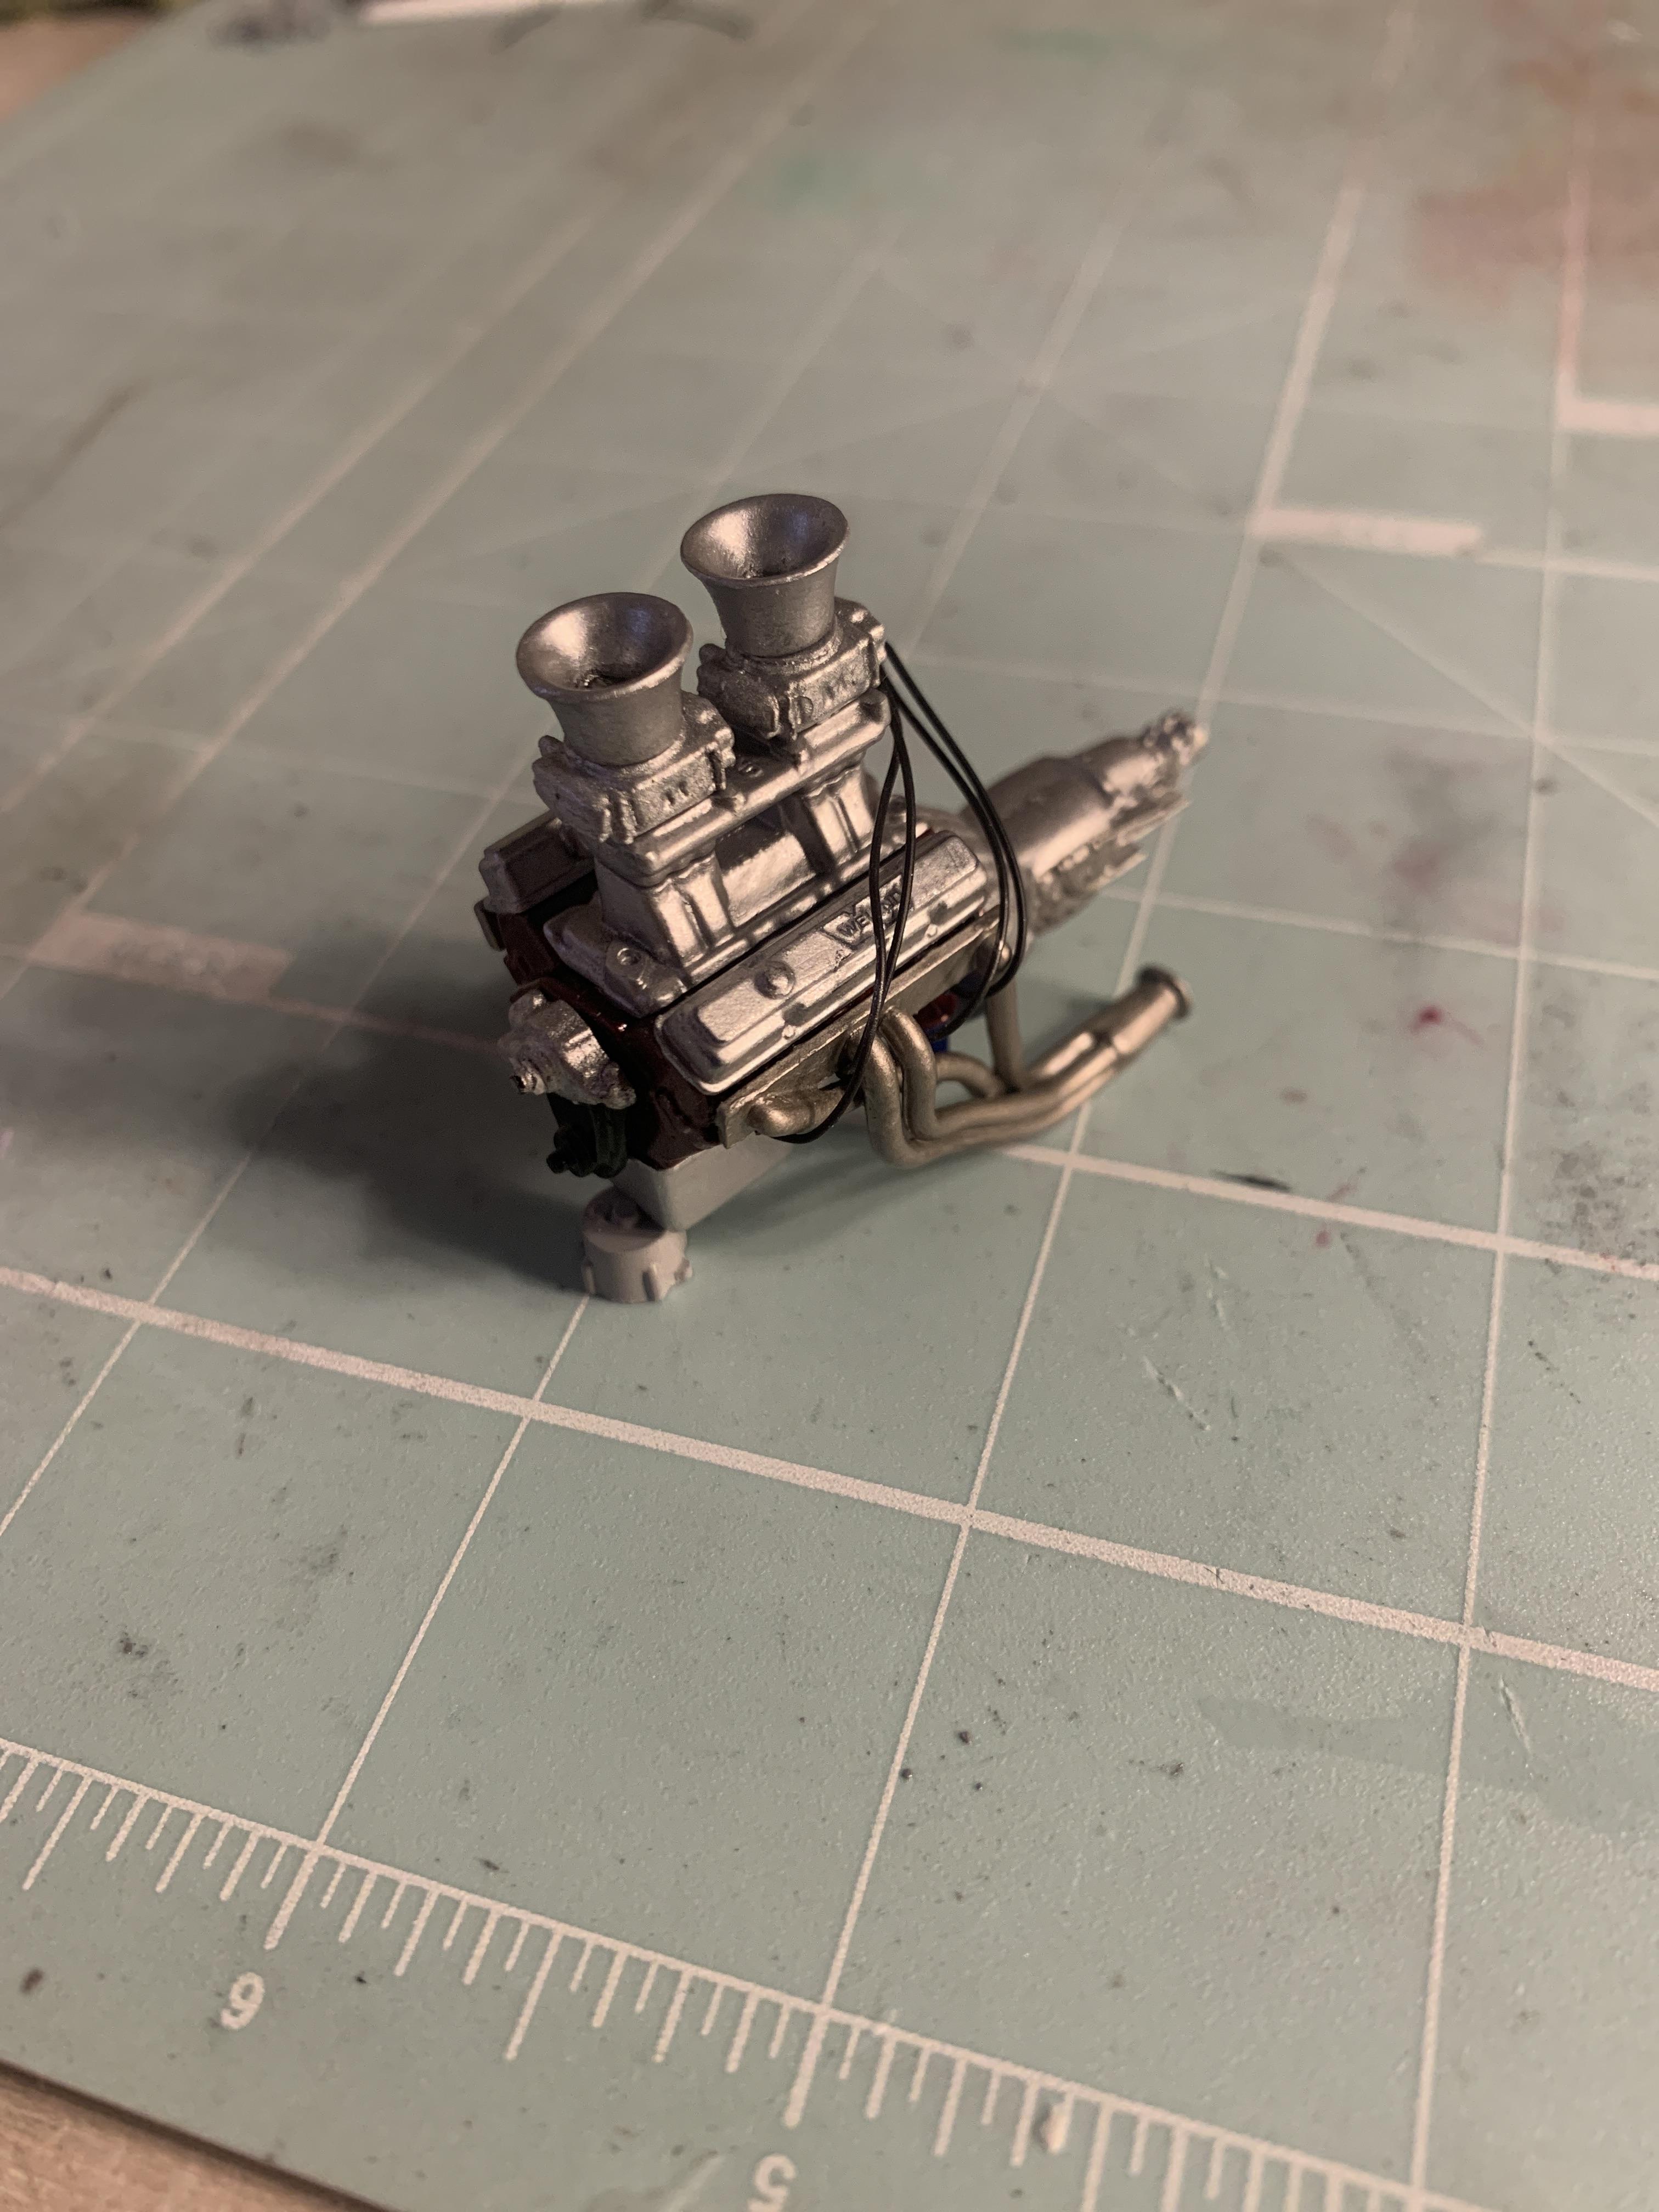
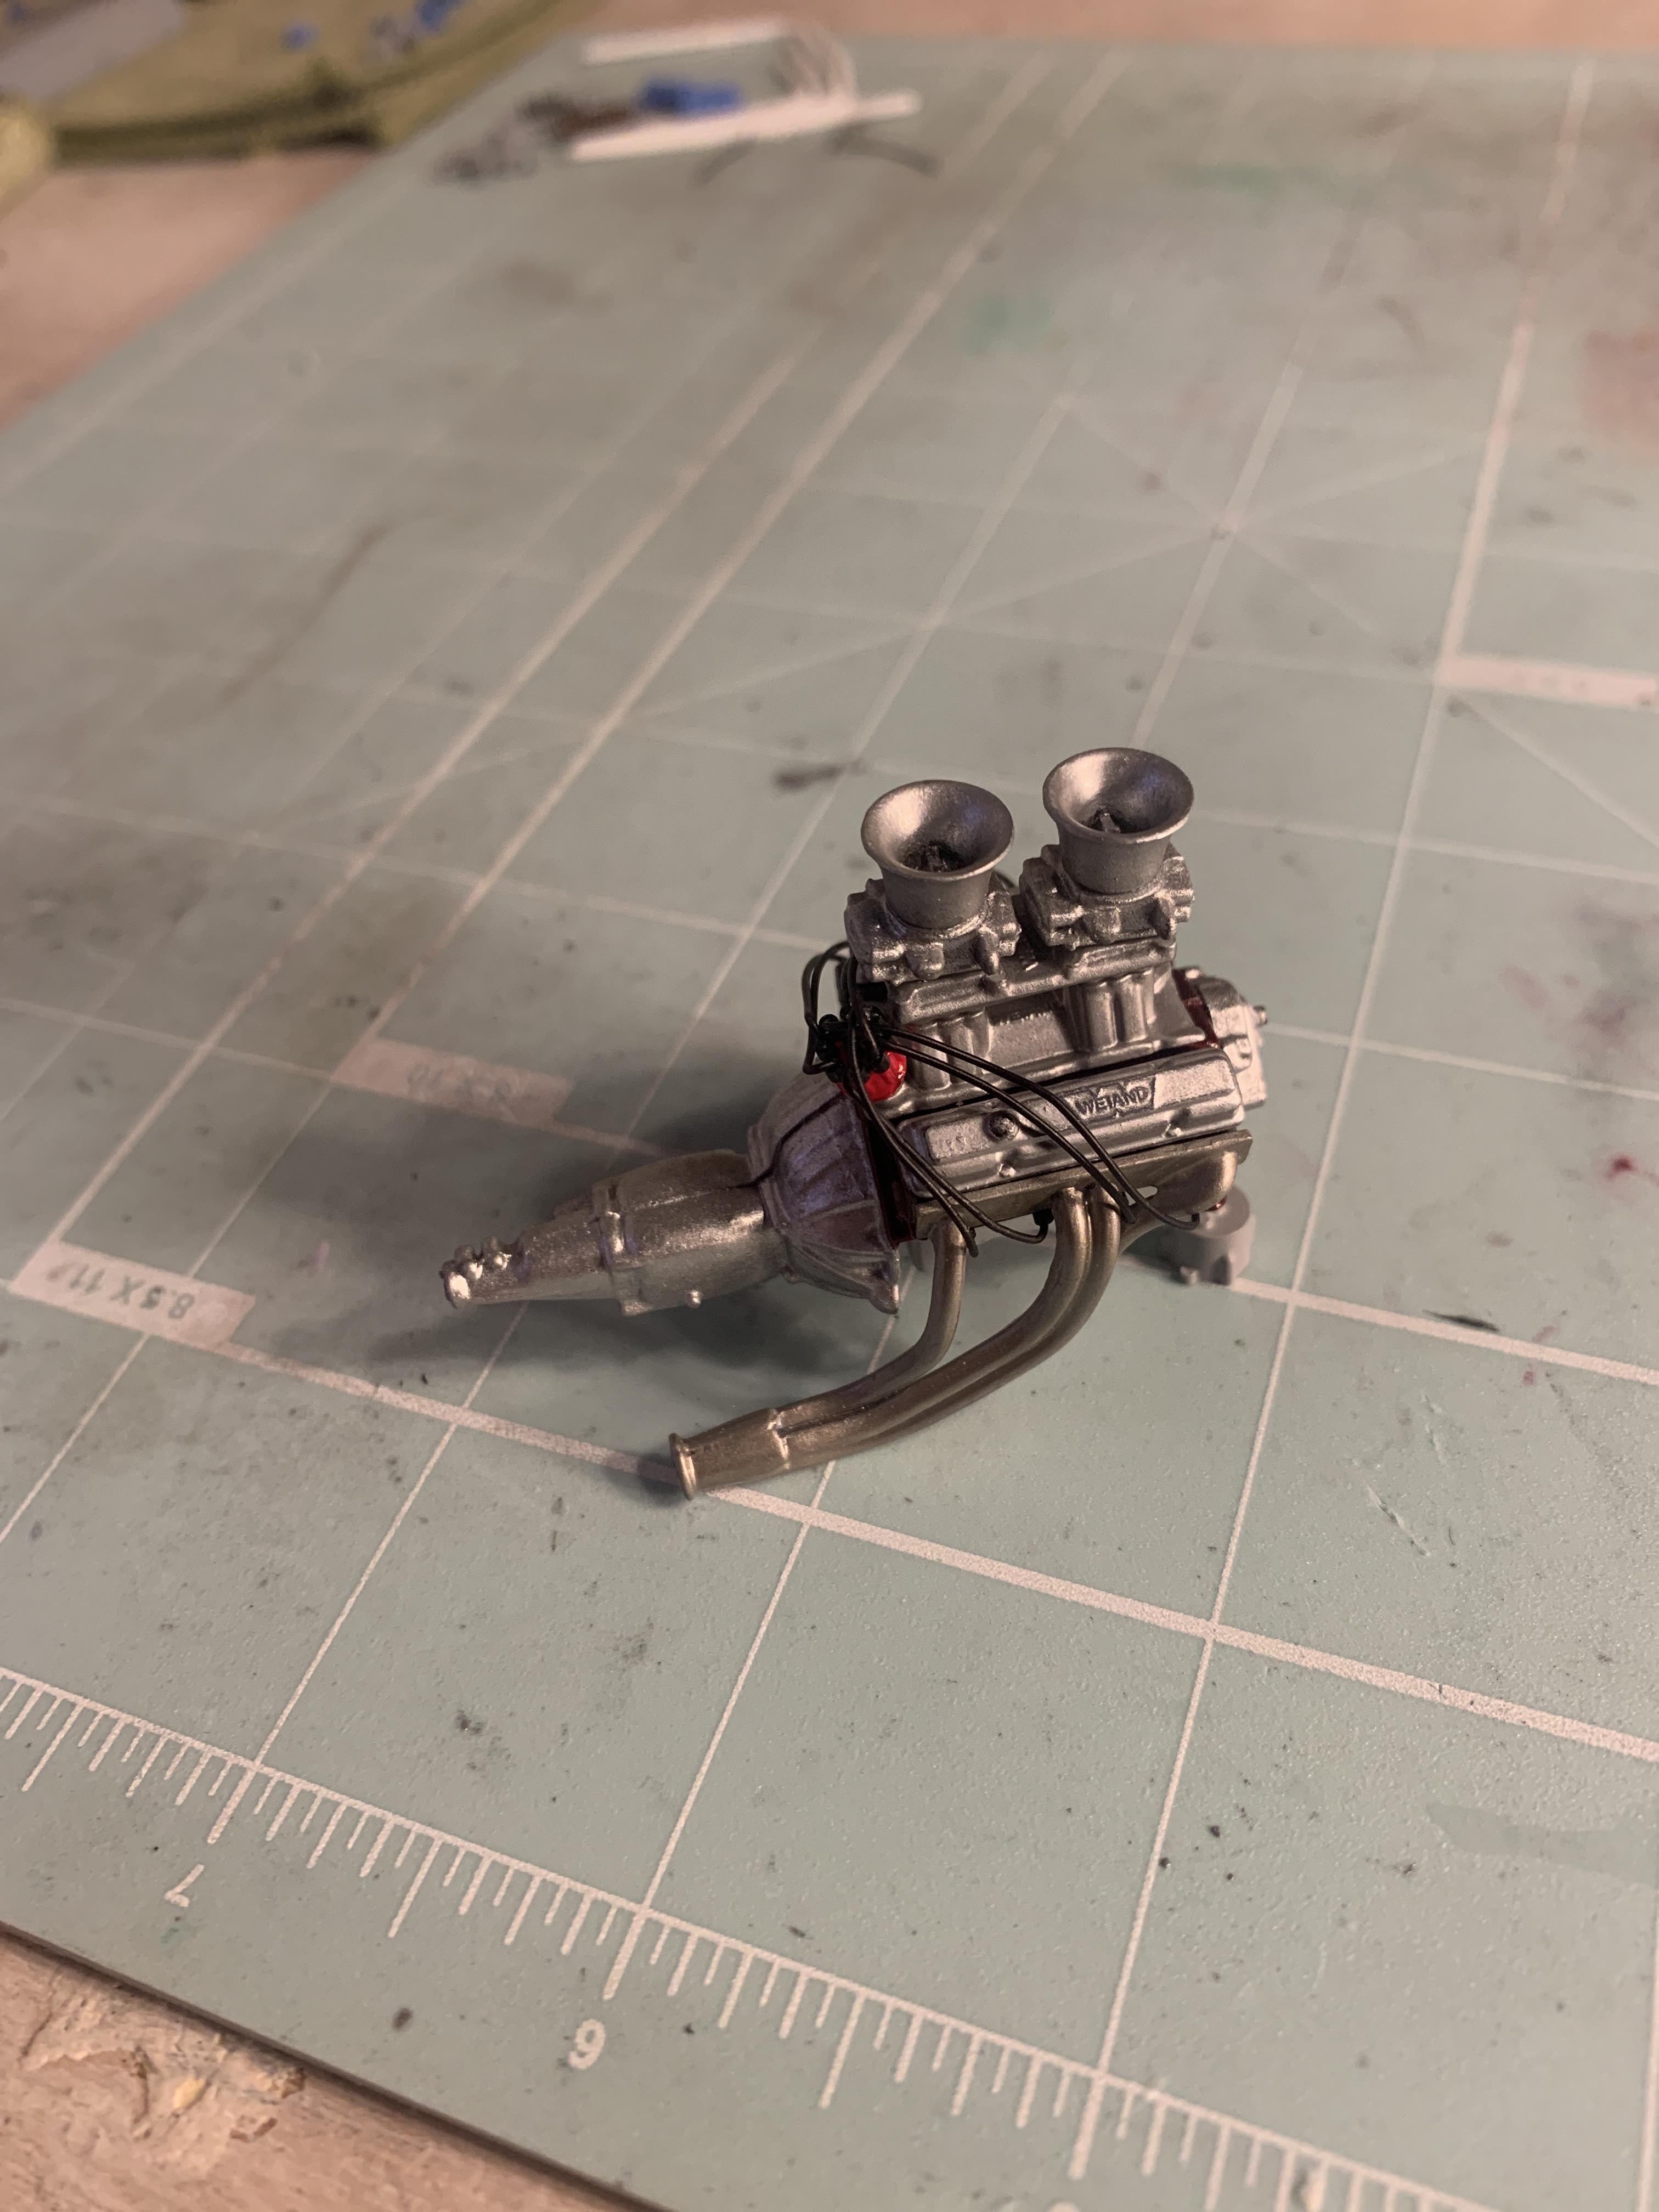
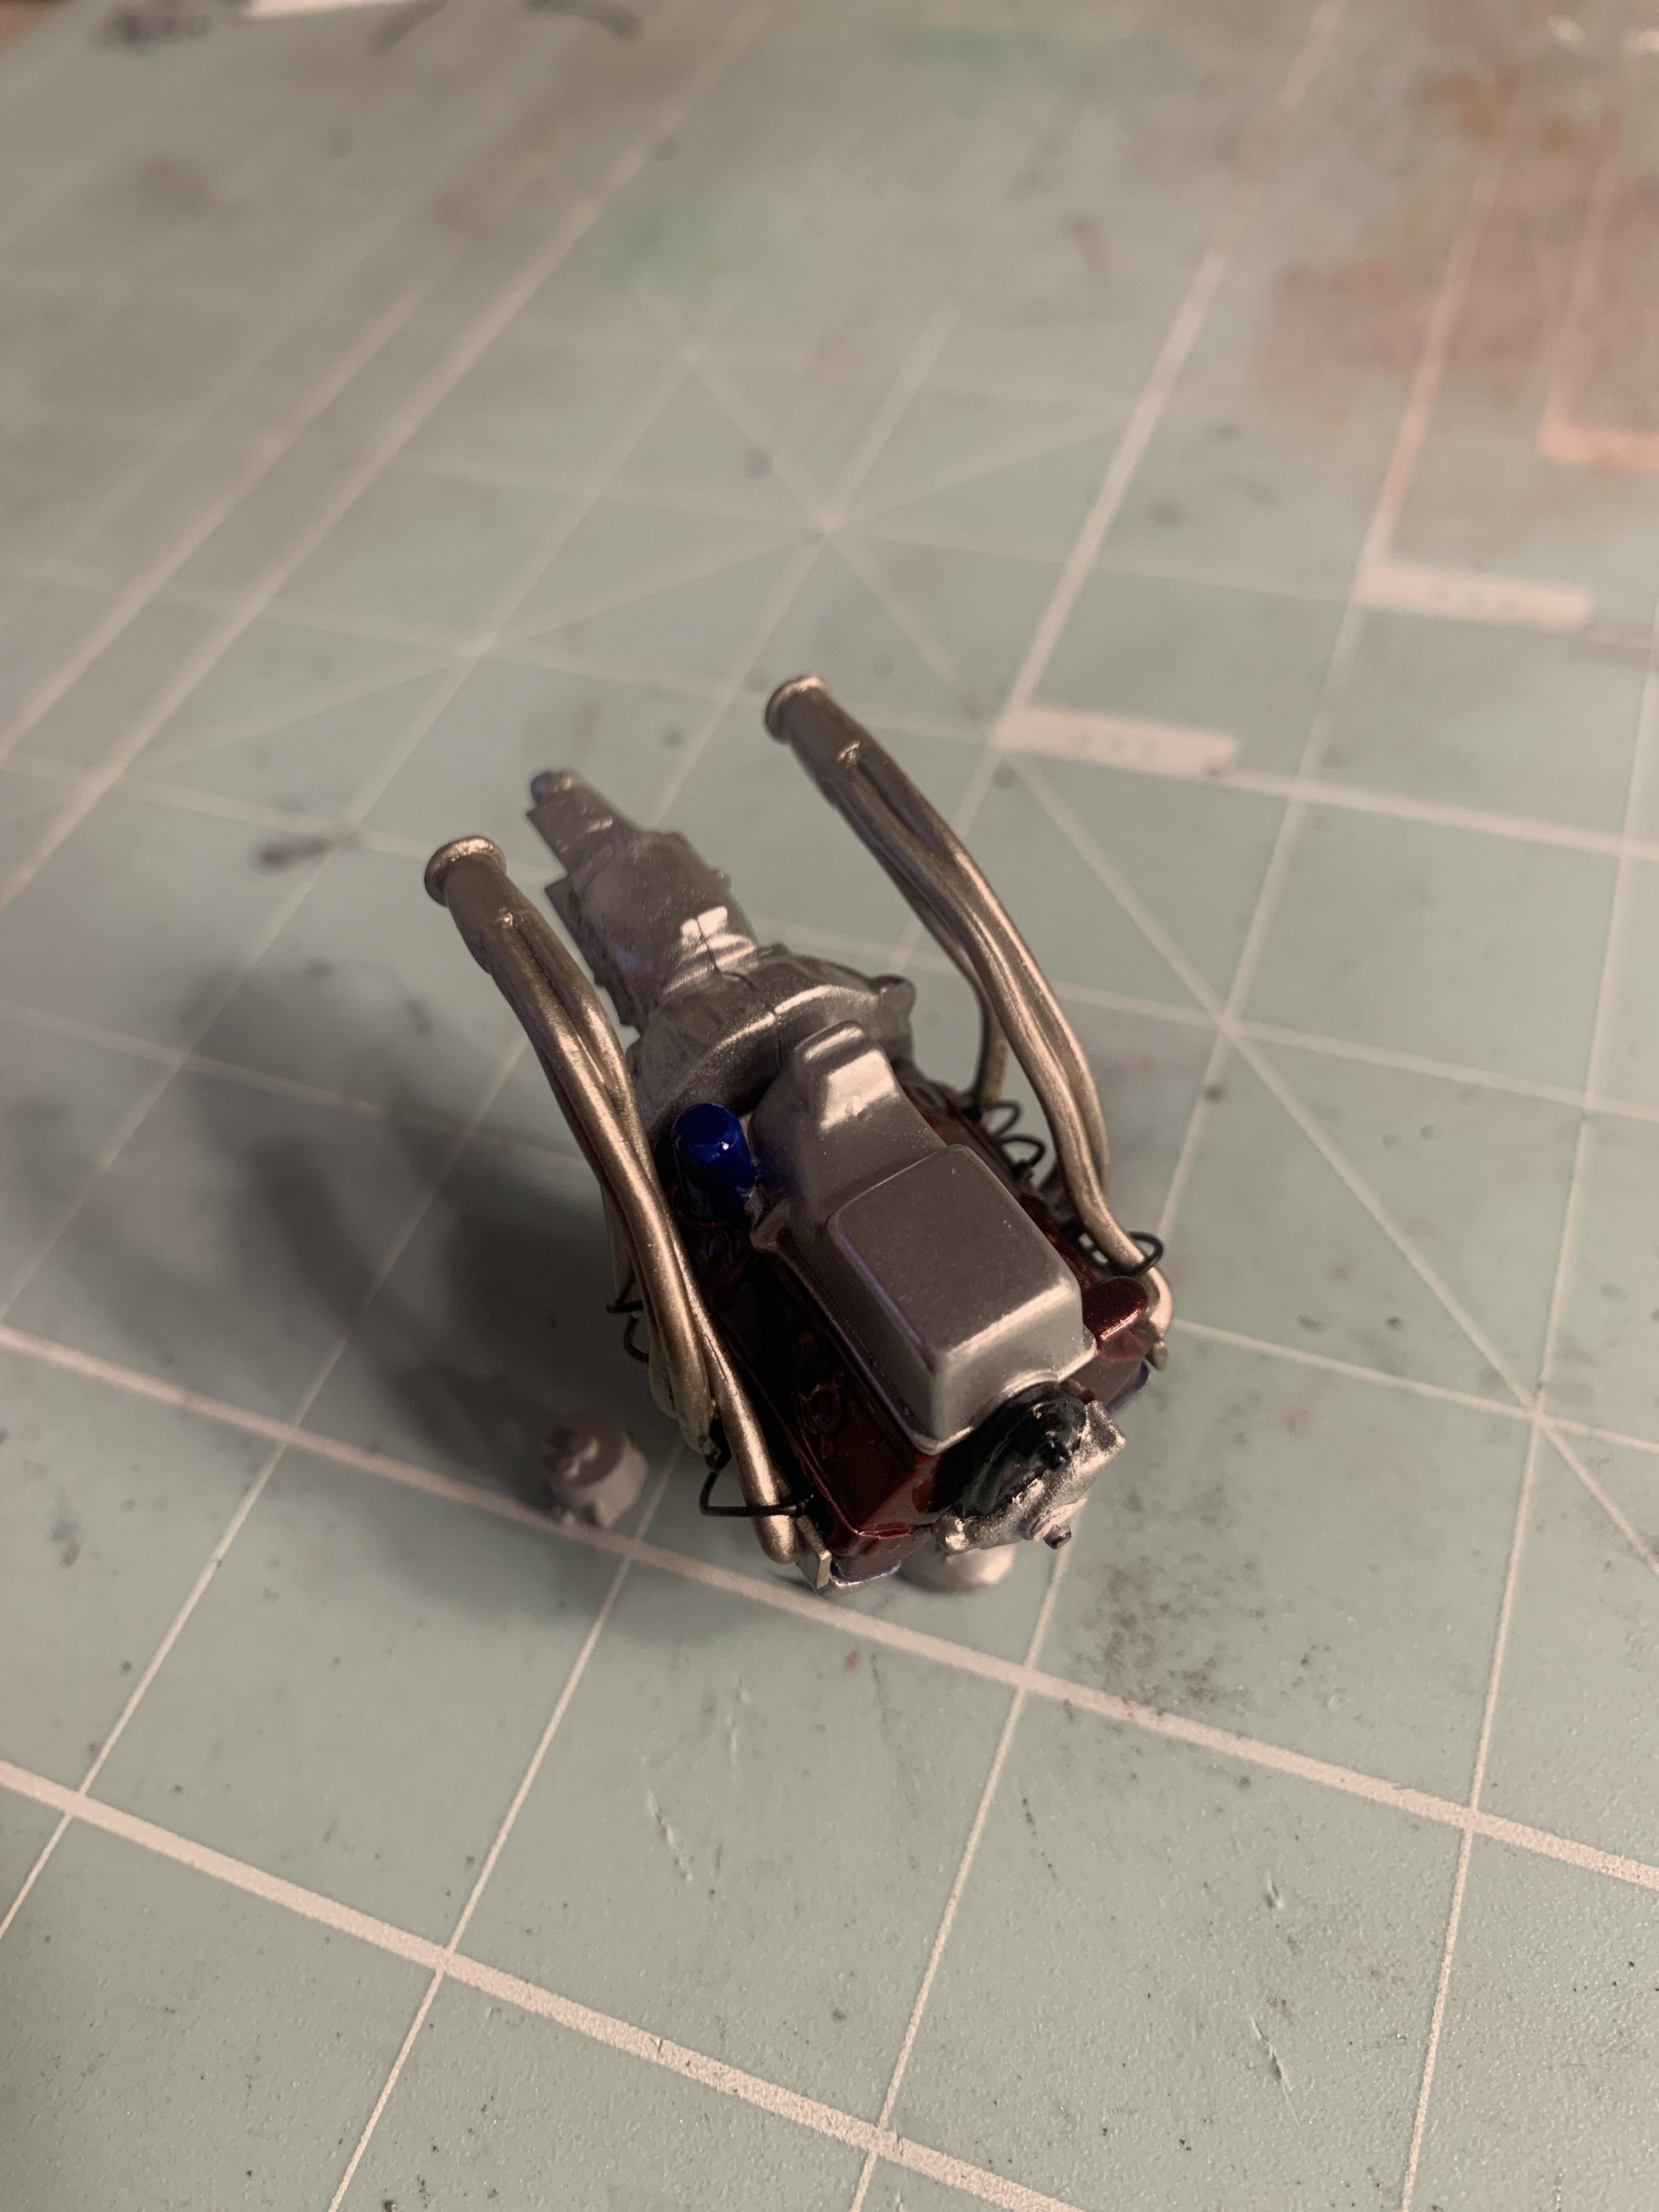
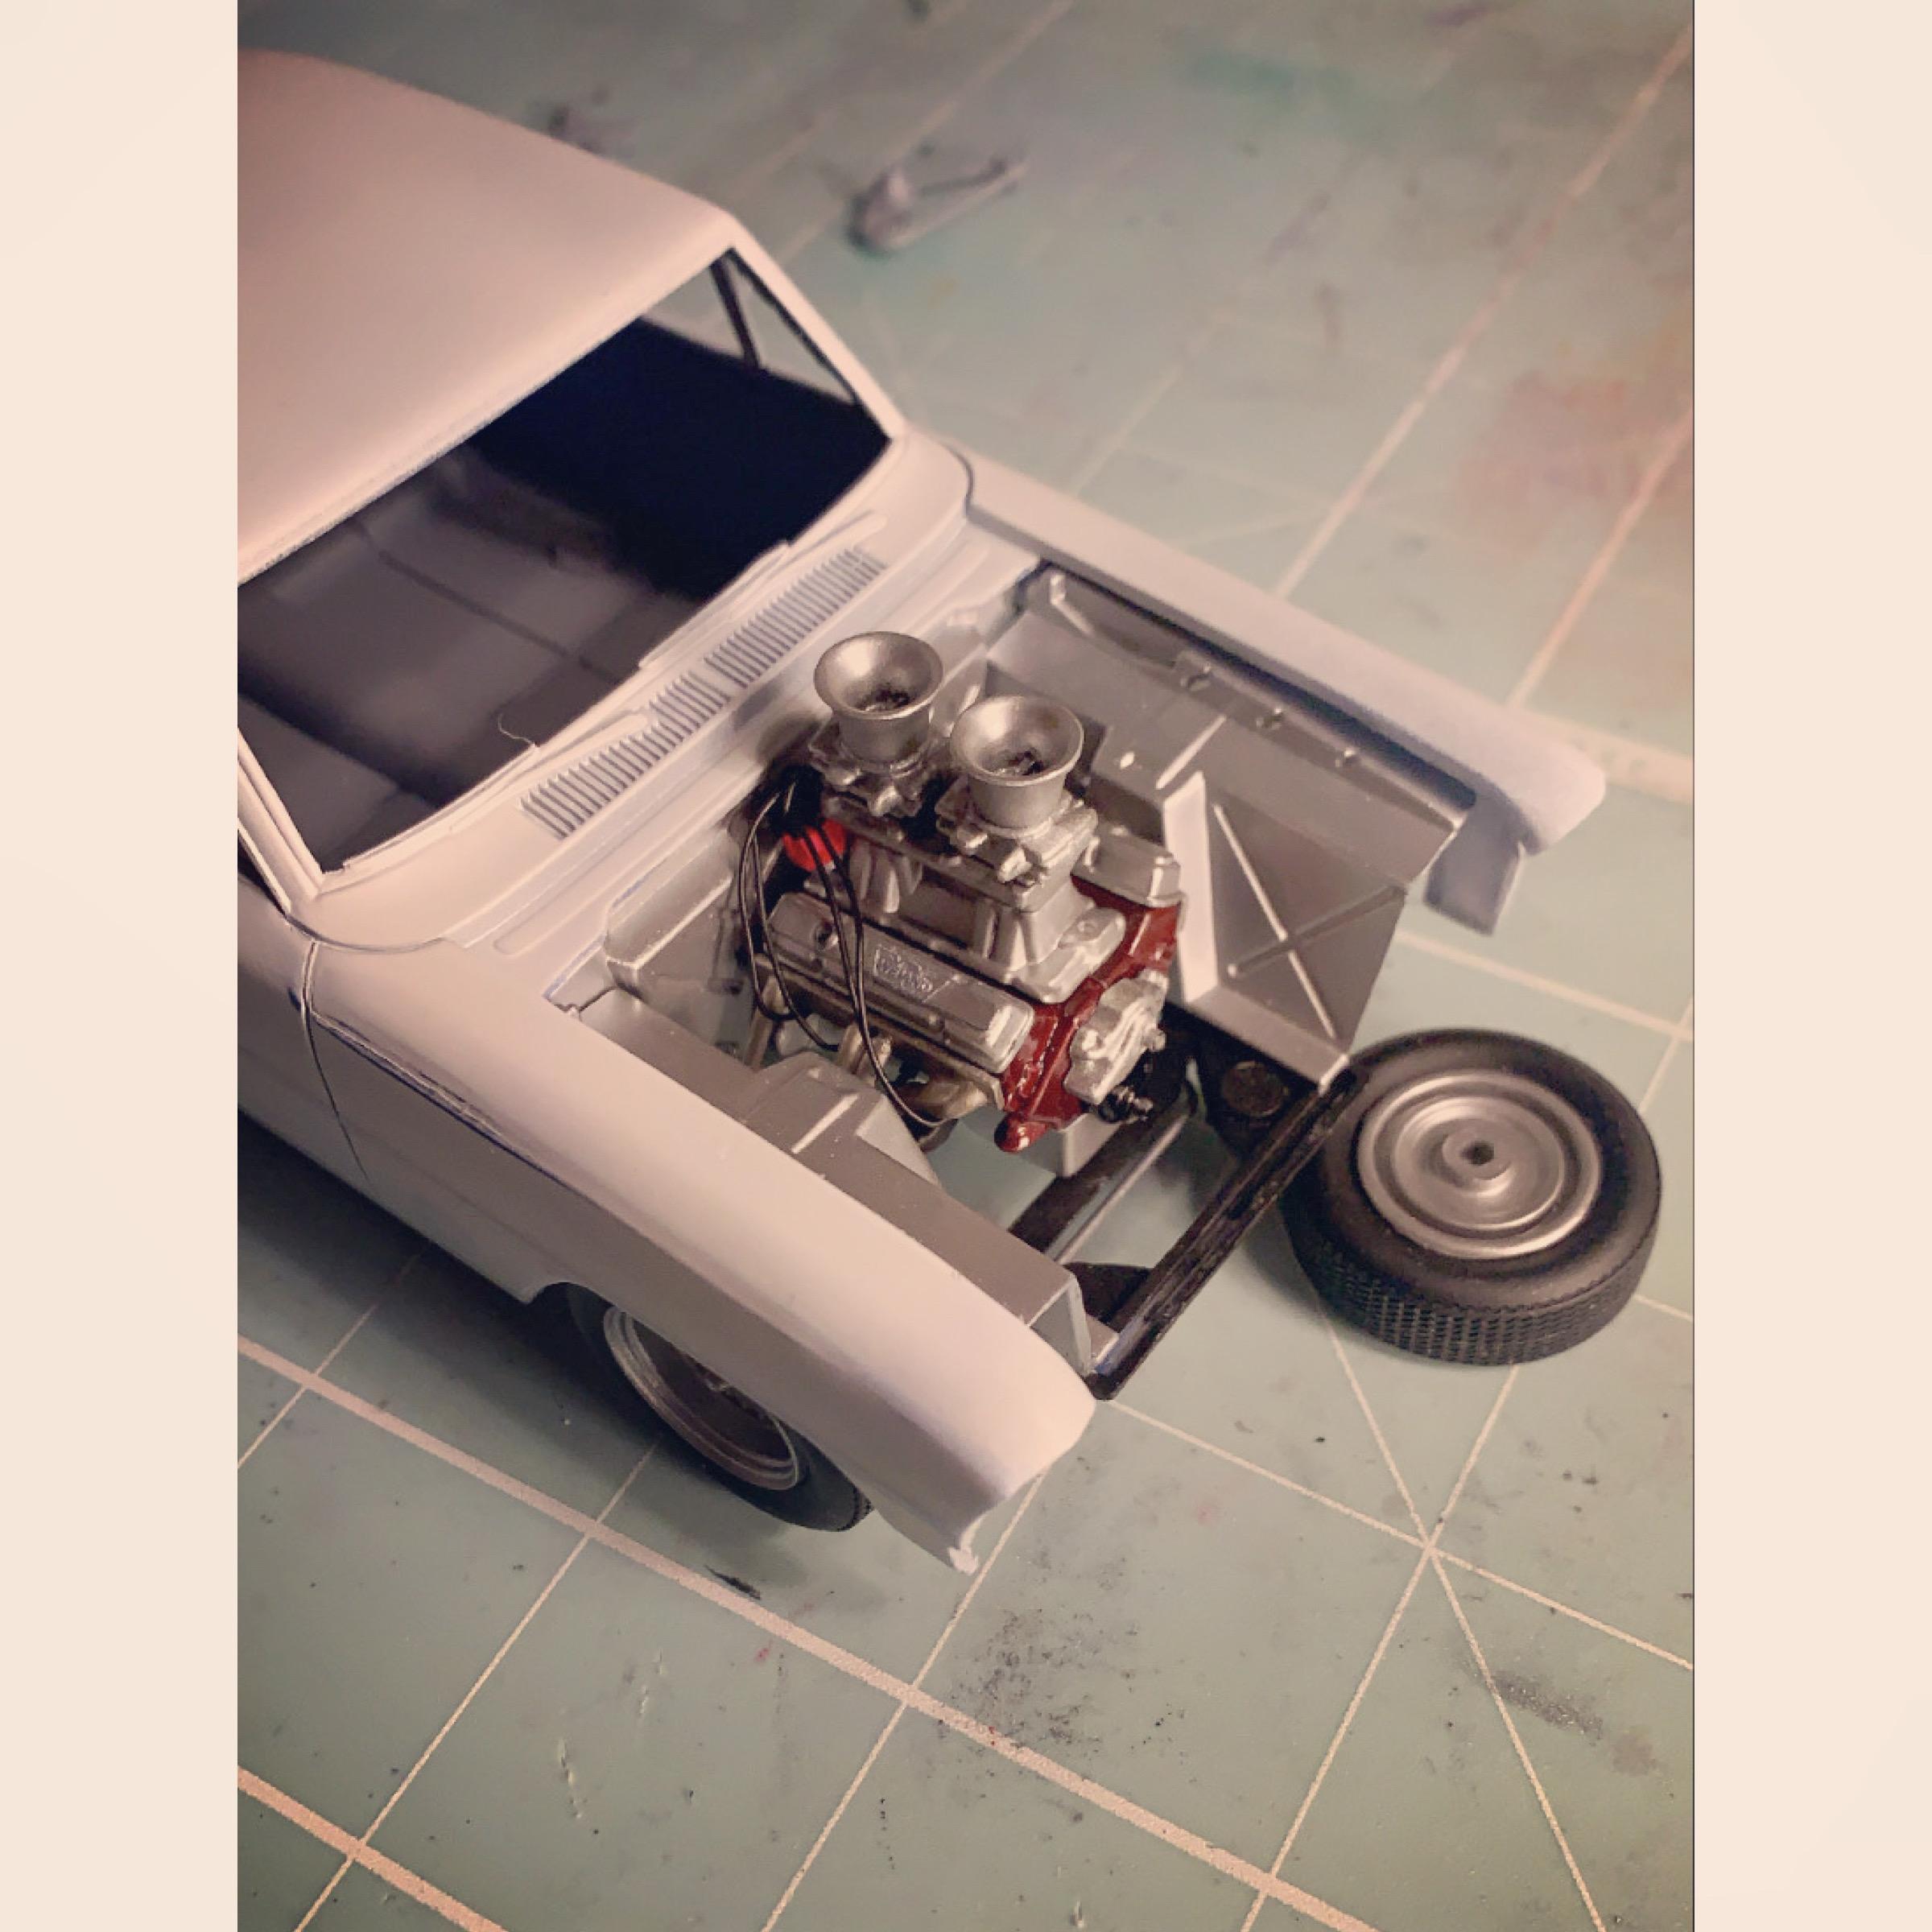
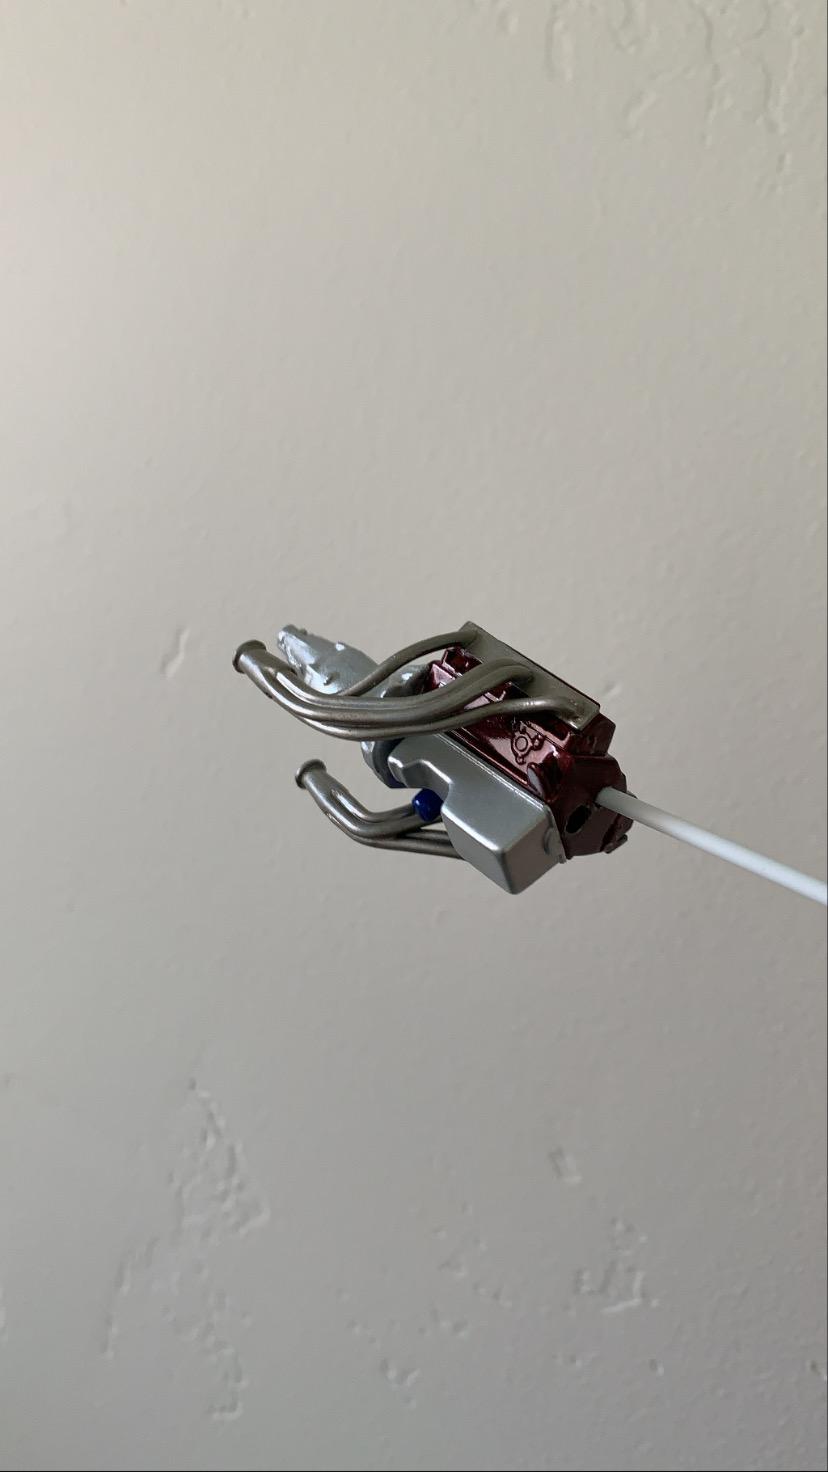
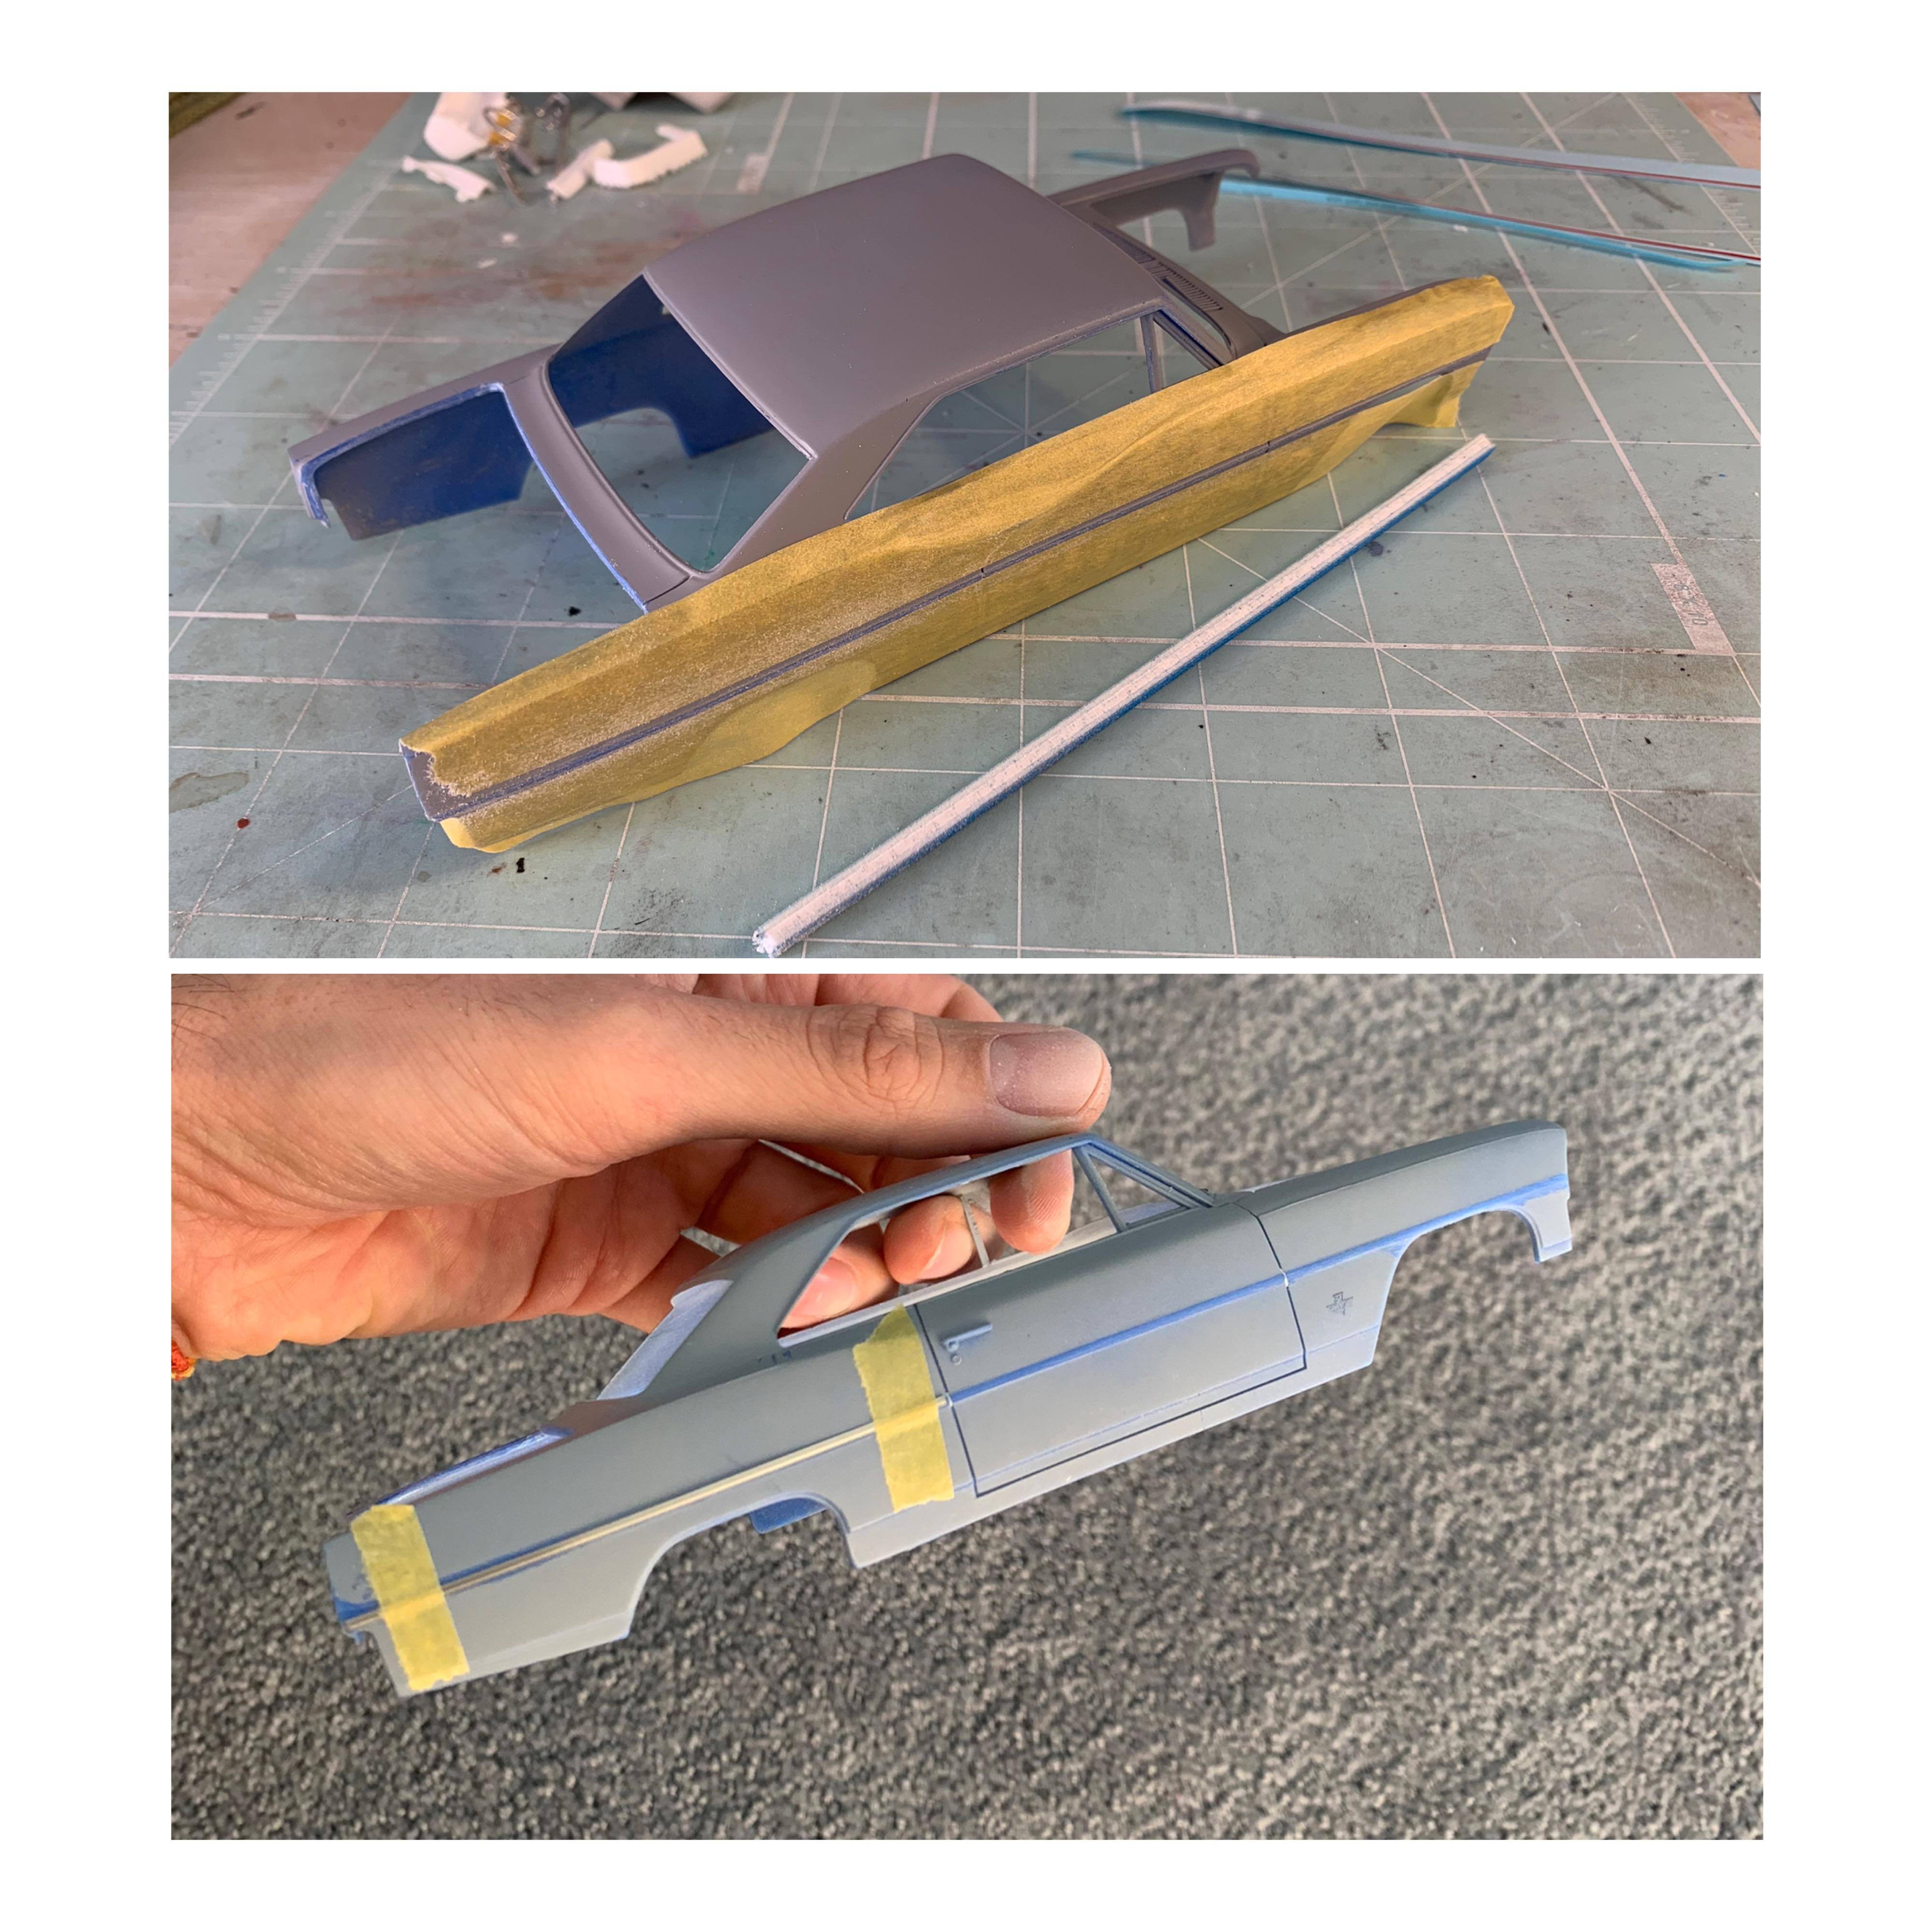
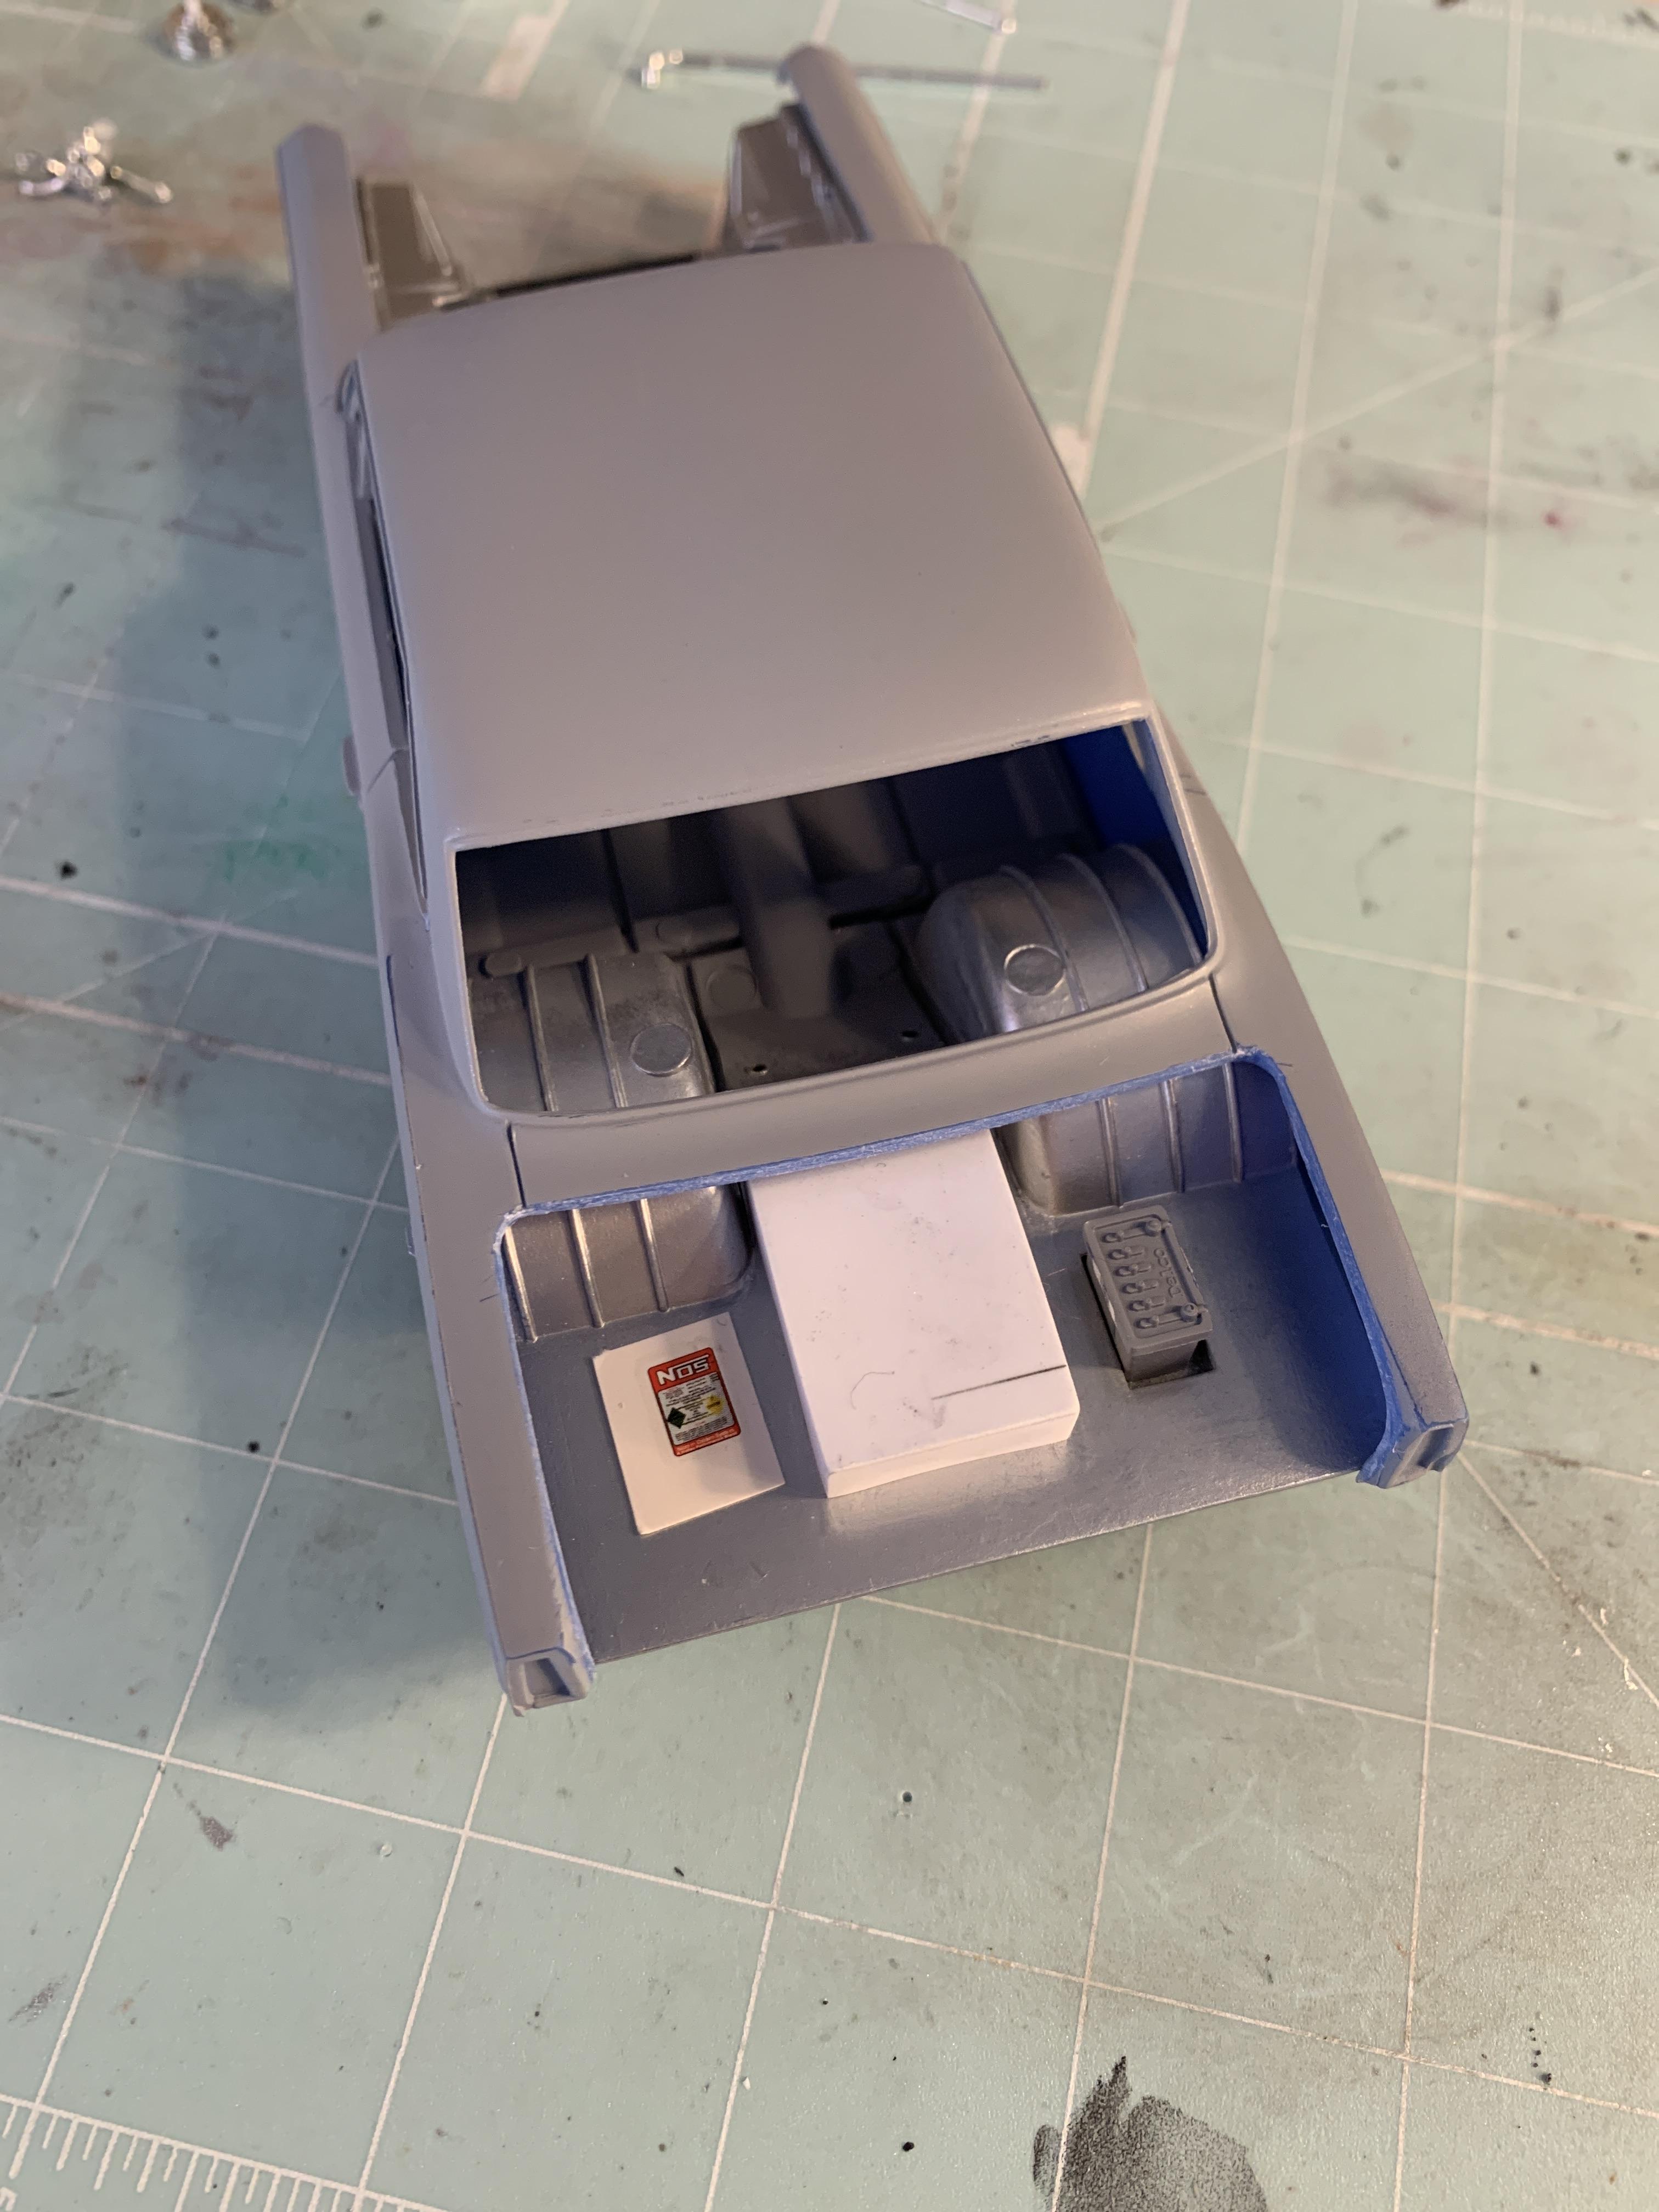
Finished up wiring some of the Chevy block for the ‘66 Nova Pro Street build. I paired the 8 cables in 2 and will clean up the “hang” whatever you wanna call it once placed in the engine bay. I’m really hoping it clears the firewall. I test fit the engine prior to the new distro so we will see. Still have a lot to go on the engine. the engine block is coated in model masters burgundy red and the body will soon get the same treatment. 5 or 6 different shades of silver were used it got a little chaotic so forgot.
-
Thank you very much. I don’t have an airbrush so I try to stay with the Tamiya or mr hobby sprays they lay thinner and smoother, If I am building factory stock I’ll dip into the testors/rustoluem spray pot but that’s rare and spray far away with those and many many small layers and also only certain colors from them. But the biggest thing is wet sanding between each layer I paint even my primer layers and I also spray only when the humidity is 35% or lower the can says 50% but it’s best lower and never start a spray over the plastic always passing. It’s tough tho sometimes I’ll get an occasional “orange peel” section (rare with Tamiya) sanding helps but spray cans can only do just good not great. Oh well it’s fun. sorry if that was long but I hope someone reads this and benefits from it. For the moon eye decals I may just do one side of the cab the sheet has 2 but may just do that side. There is a cool AMT tnt decal maybe for the other side but it’s red and adds color I might not want for this build. Who knows it’s in my mind so probably gonna happen.
-
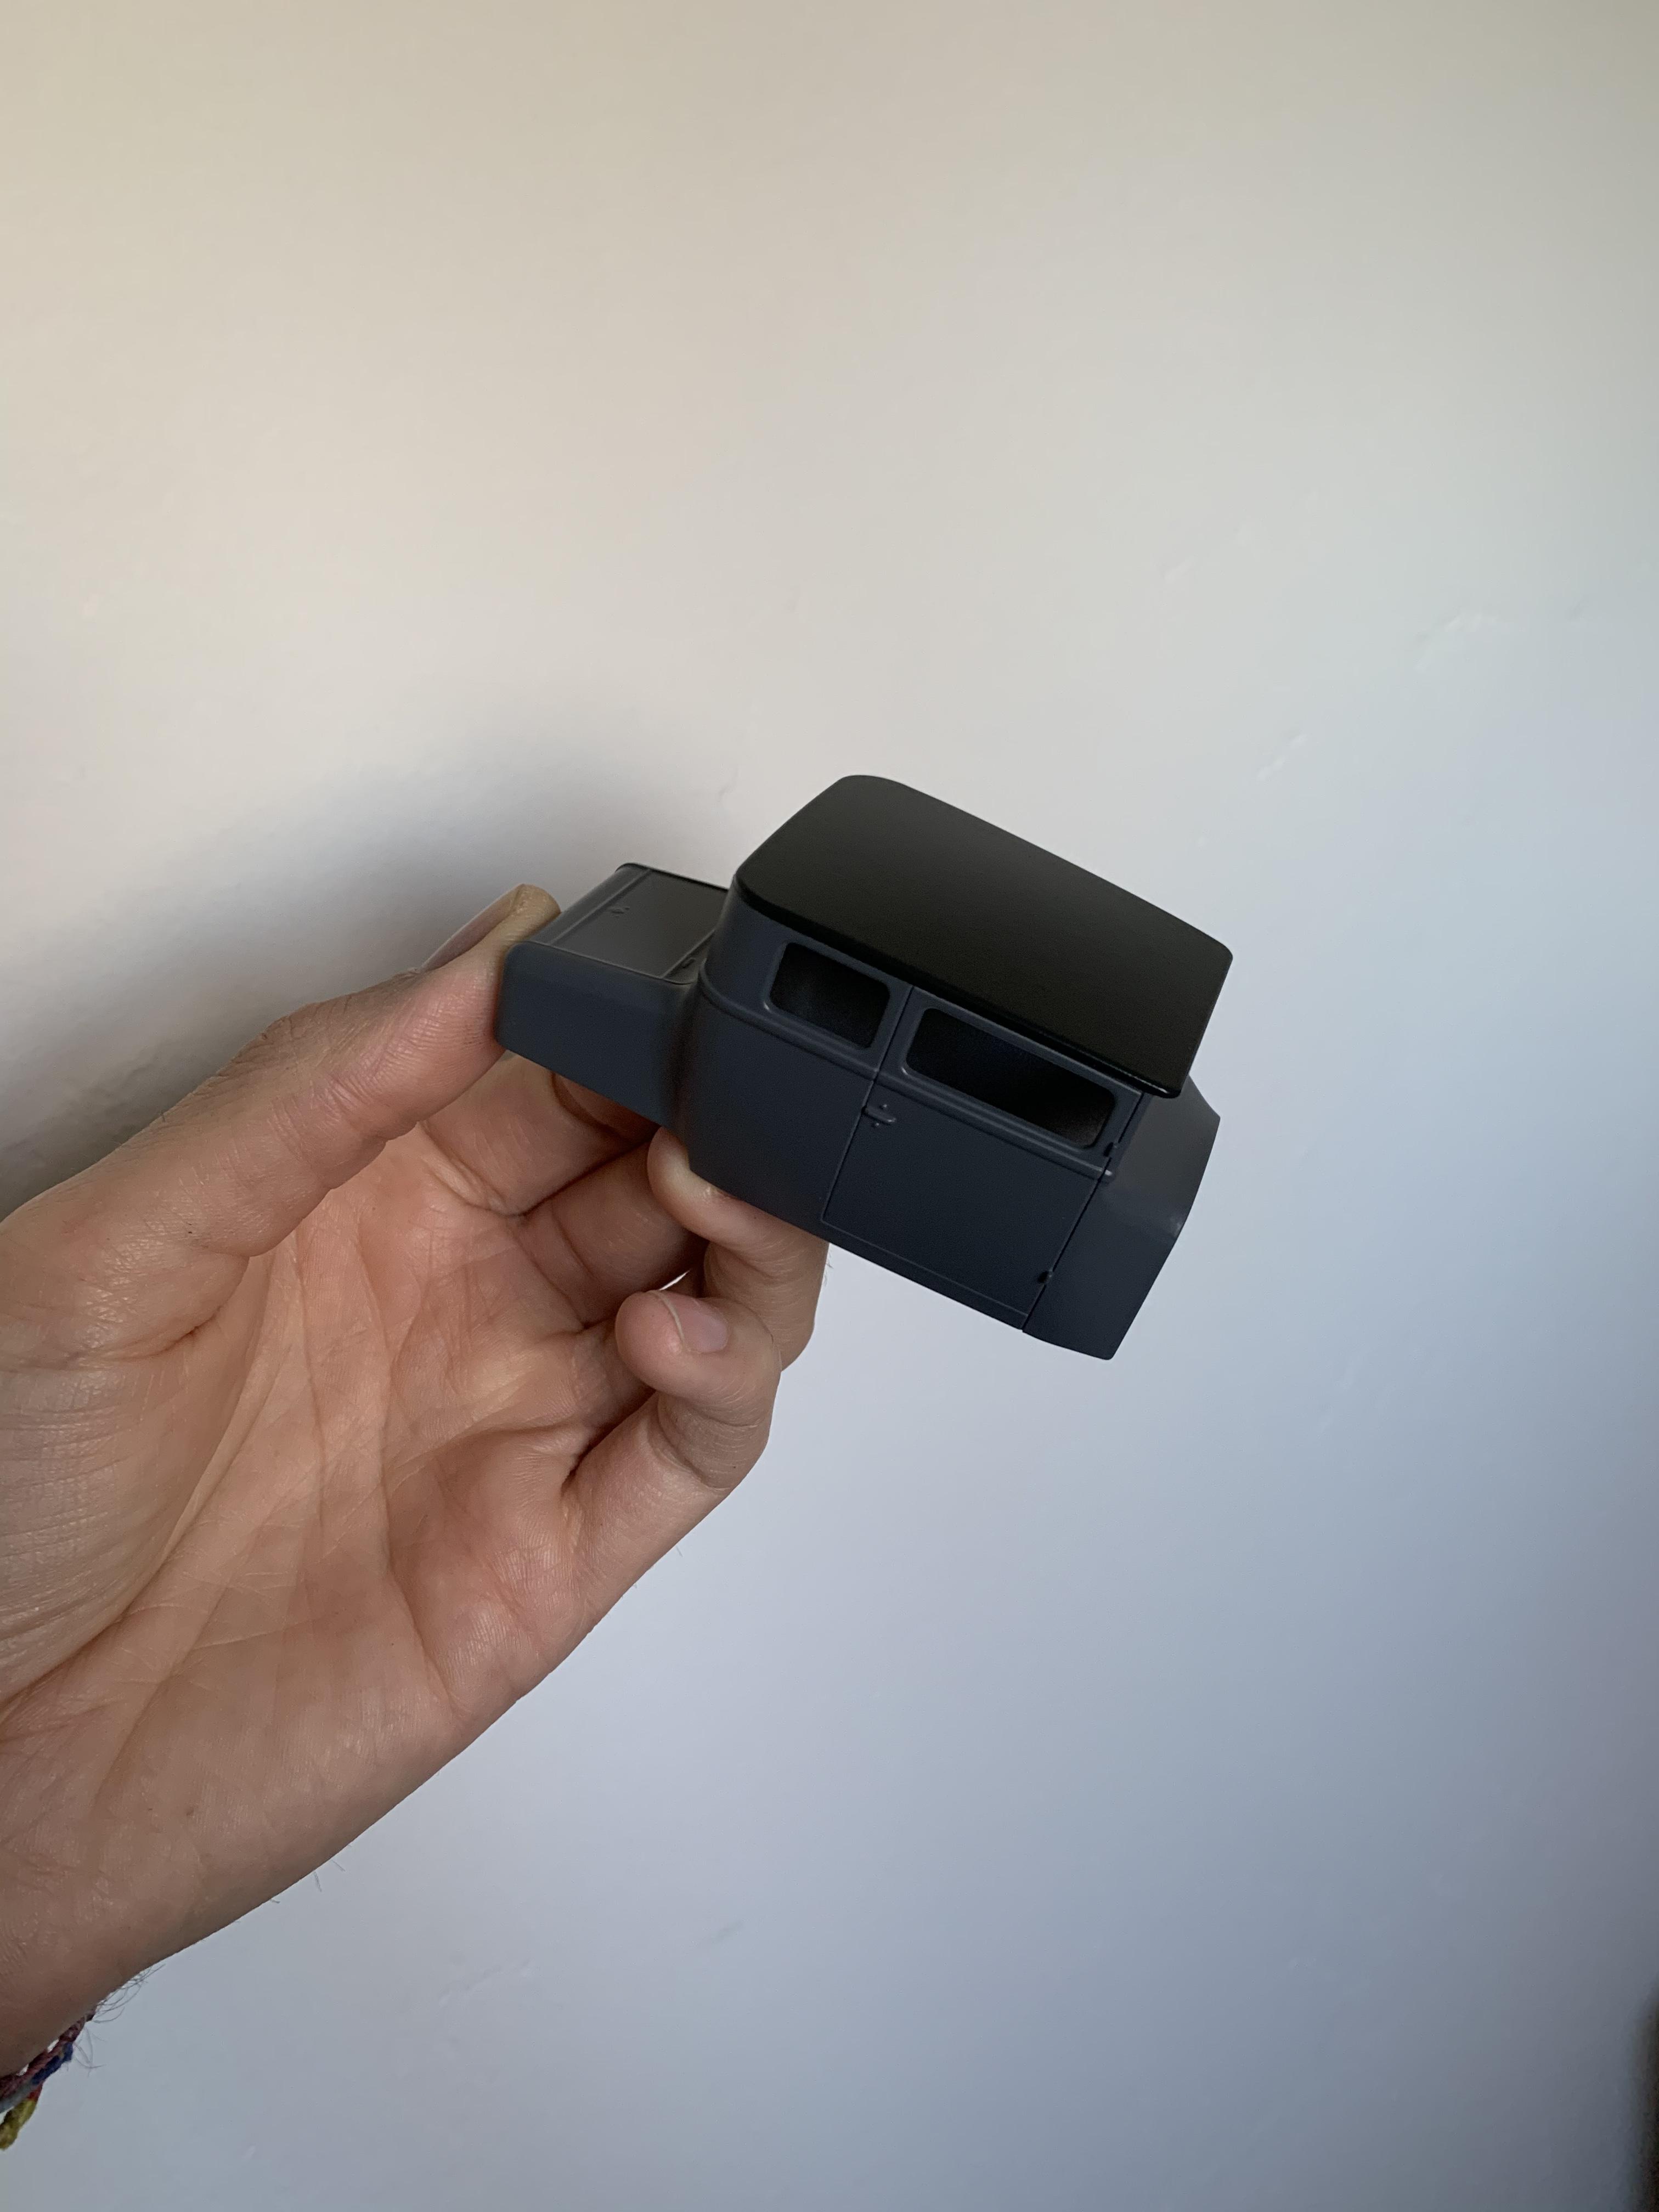
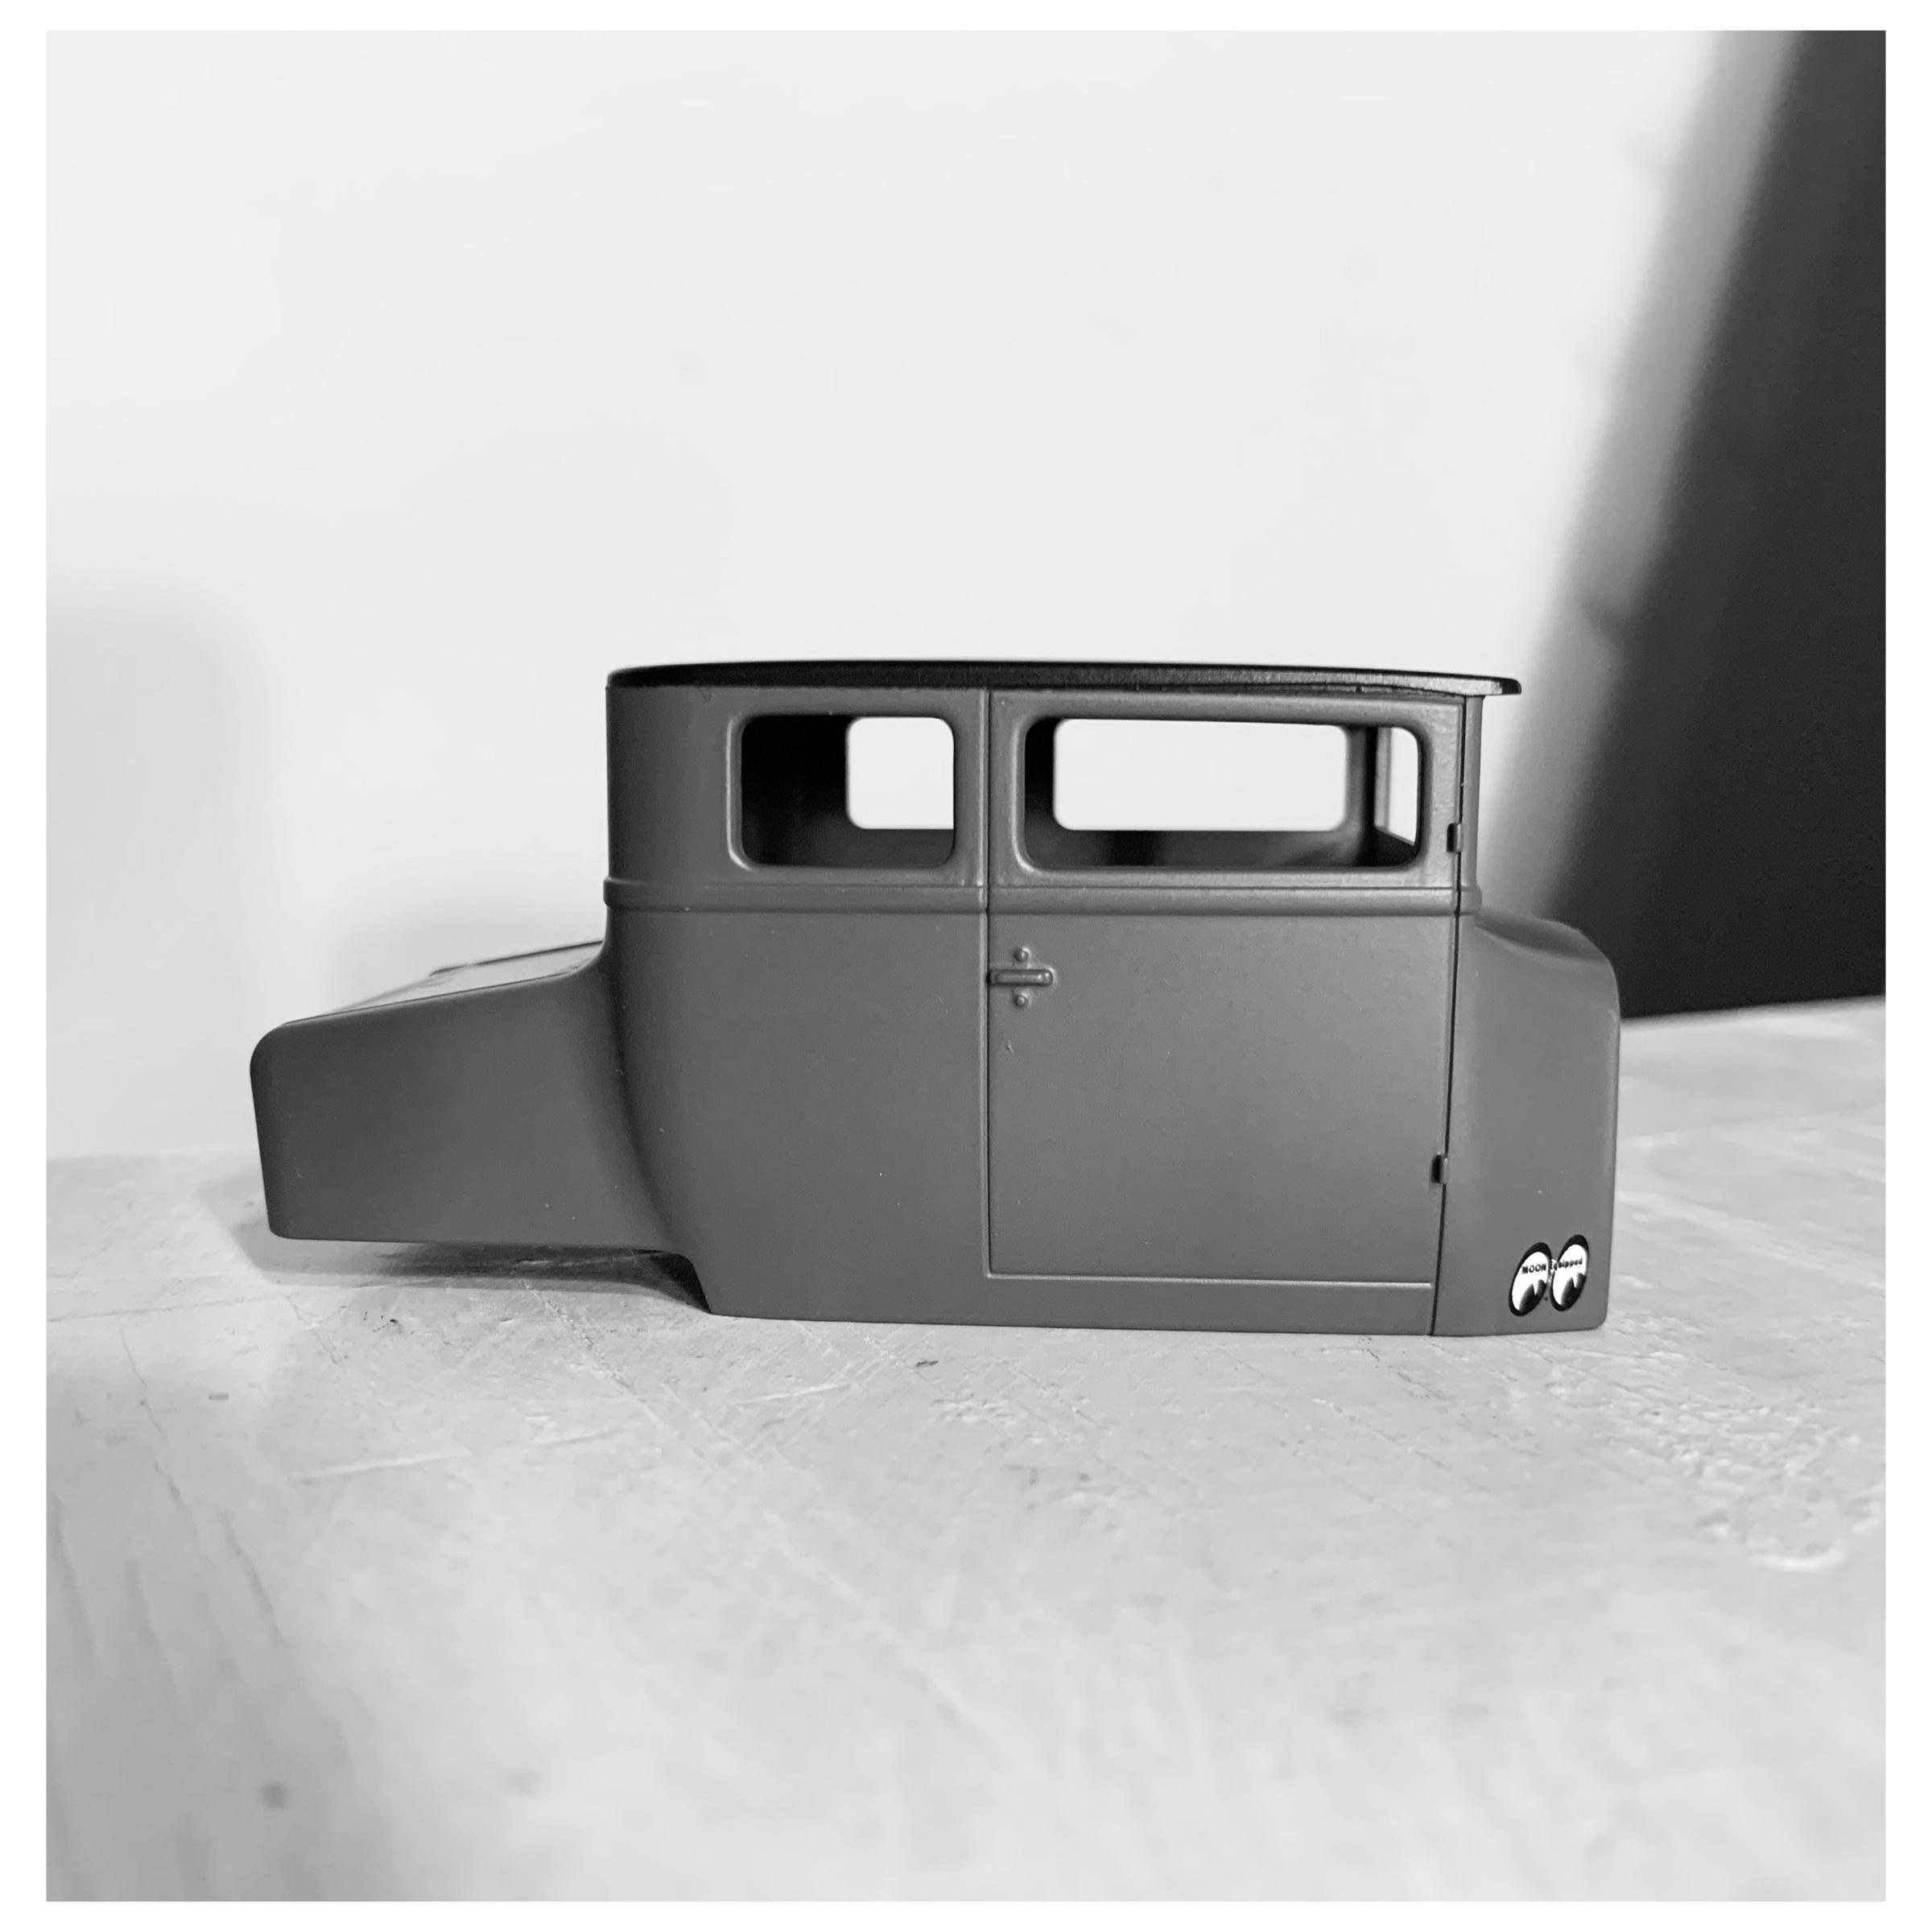
Kit: 2020 AMT 1925 Model T kit this build is the chopped version, once done I’ll build the stock version that comes complete in kit as well. body paint: Tamiya ts-4 and roof Tamiya ts-63 style: not sure taken colors from fighter jets I have researched and some styles hence added the stripes. Mainly a chopped hot rod I guess. the firewall and under belly floor panel will get the stripe design. The stripes was a test so gonna redo and finalize that design. gonna use the Lincoln engine from kit. Stripped all chrome for the tree. Using the rear tires from the lastest ‘29 ford not the drag slicks it came with. Scratch building some bomber seats with a leather affect on the bottom. moon decals will be added. But expect something bland in color and simple.
-
'68-72 Chevy PickUp rummors about reissue?
laemtao replied to Sergey's topic in Truck Kit News & Reviews
Just wait y’all are gonna get excited what’s dropping this year. ? ? -
This a fantastic upcoming release. Mix in the Baja Bronco lift and beefed up 4x4 parts aka some fireball model work and you’ll have yourself an awesome build. Keep it a pickup to hold gas tanks, extra buggy tires, maybe an extra rack in the back, etc. move that spare bronco tire to the grill for clearance out back. You’ll have a sweet race rig/team car. Excited about this release even if it’s the 3rd of the 1st gen bronco release in a decade.
-
AMT ‘66 Chevy Nova Pro Street/ MPC ‘72 Vega Drag
laemtao replied to laemtao's topic in WIP: Model Cars
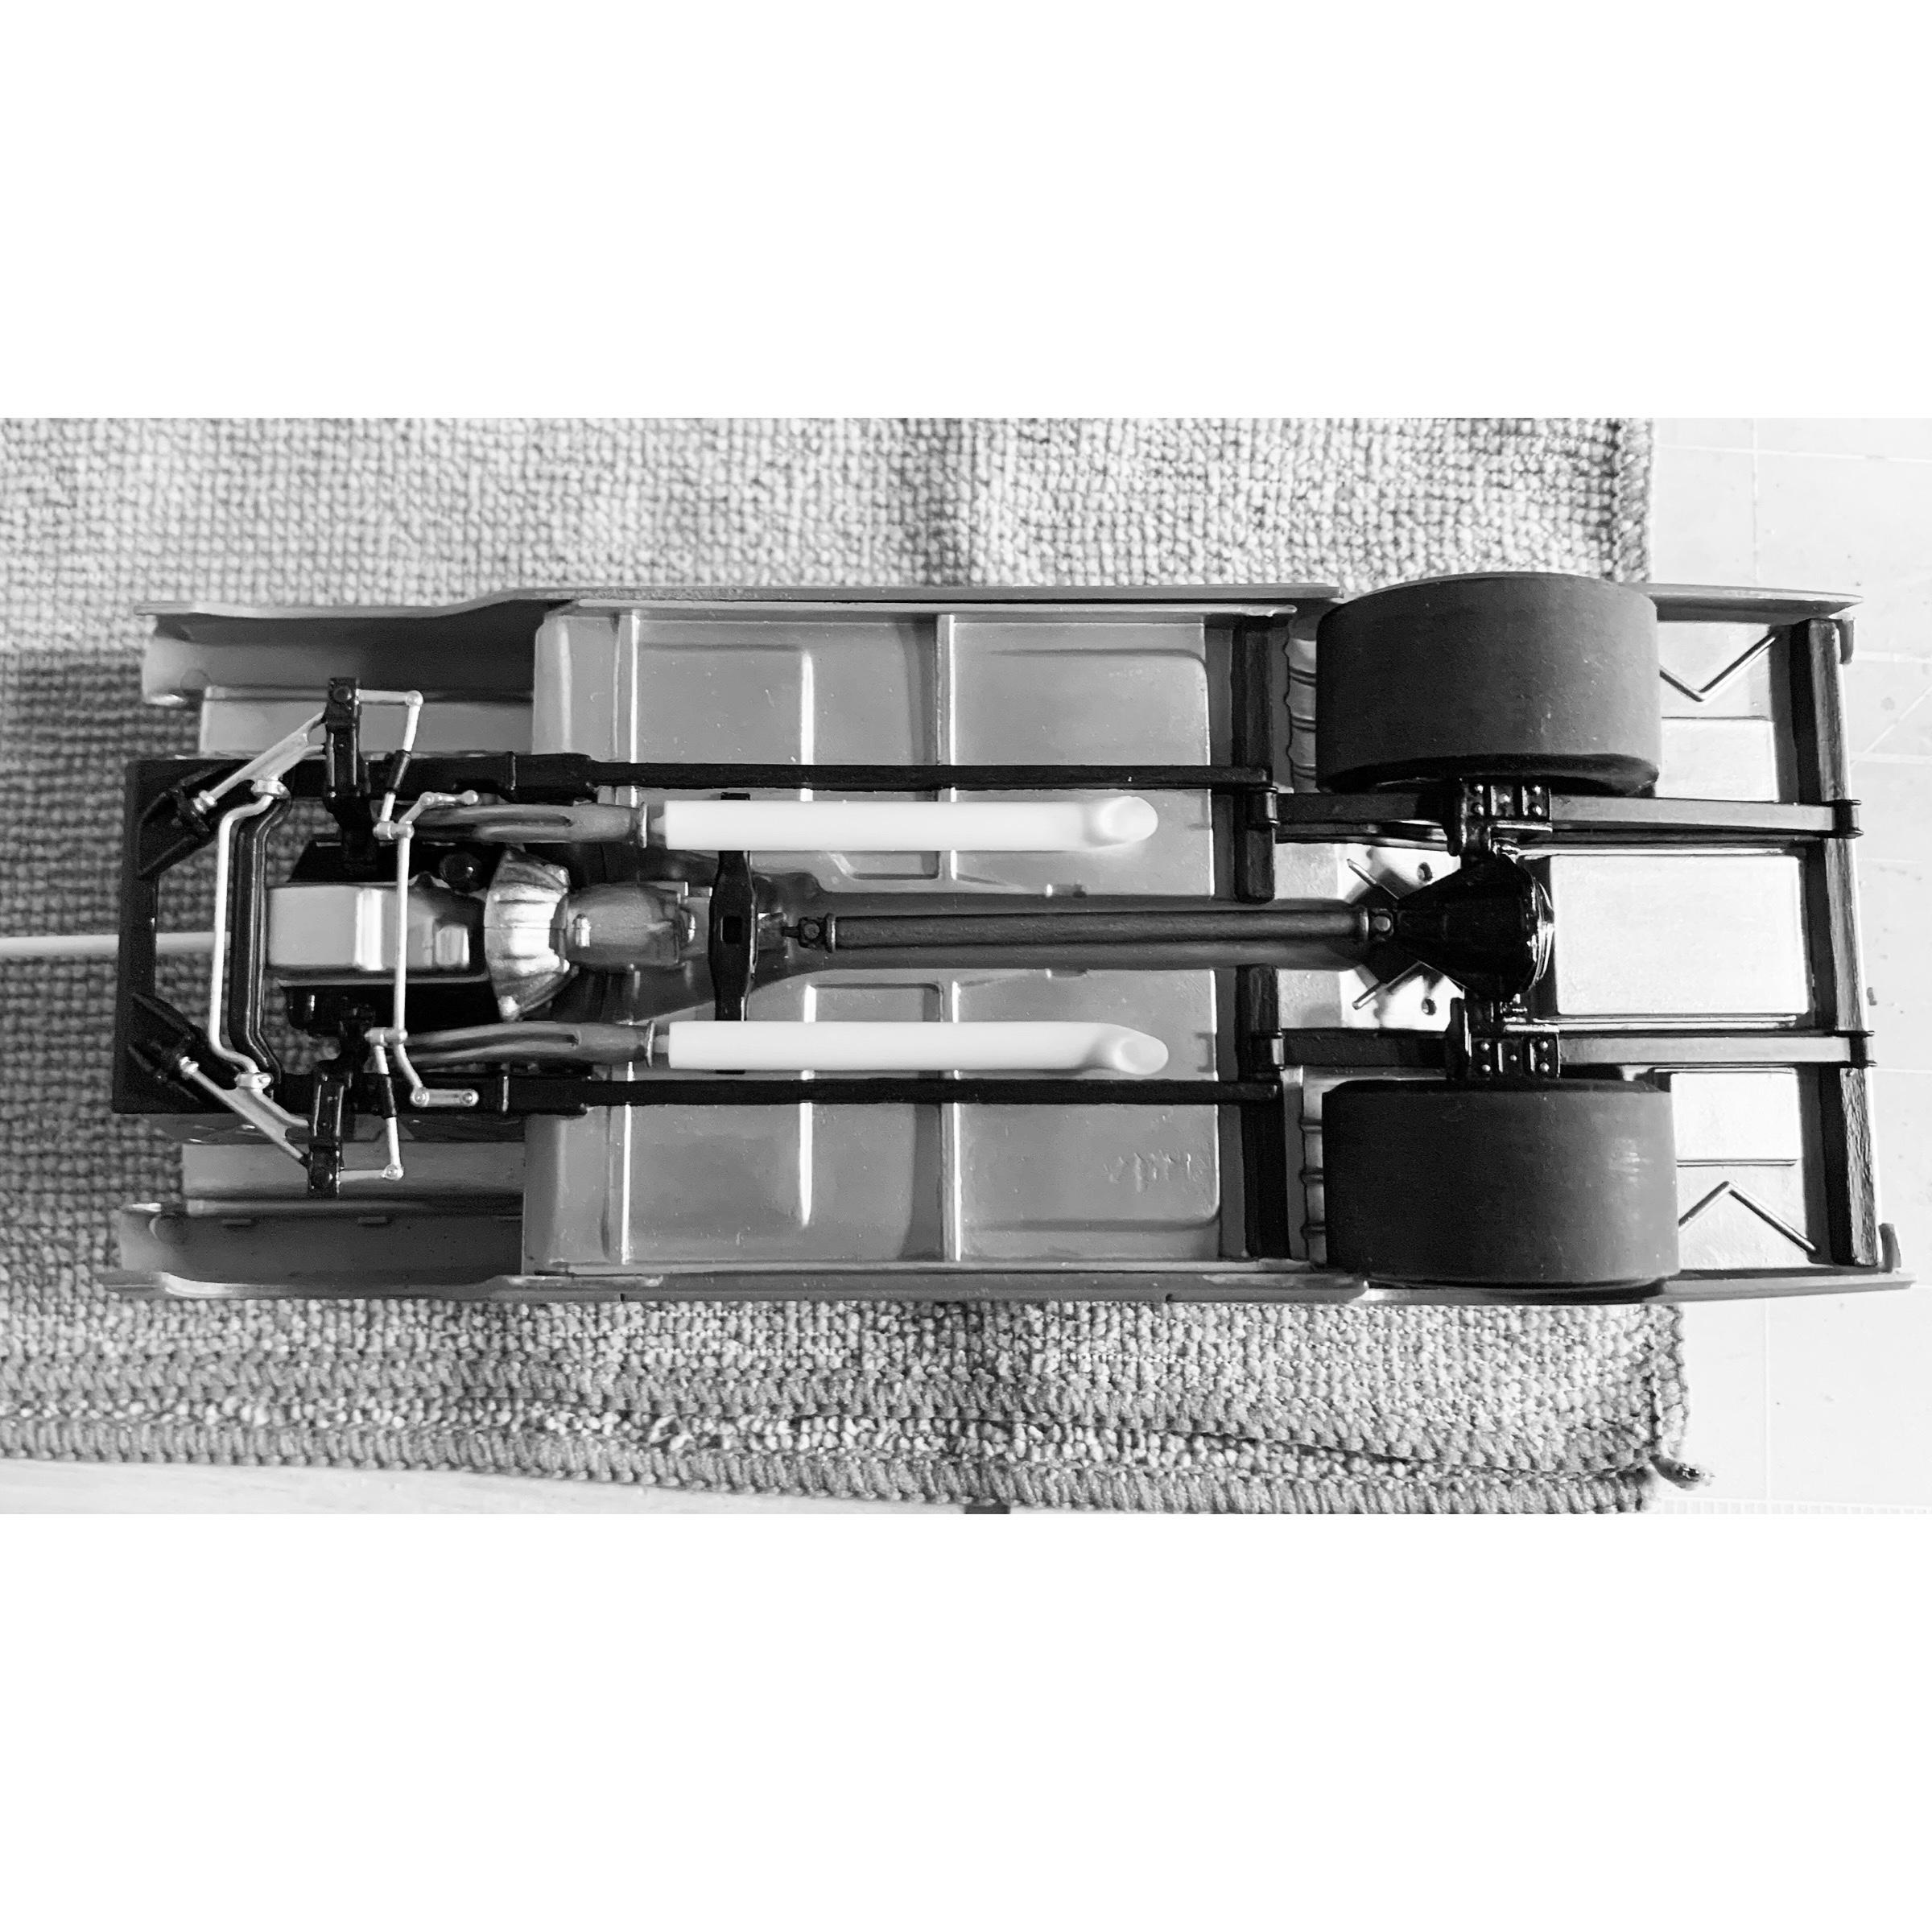
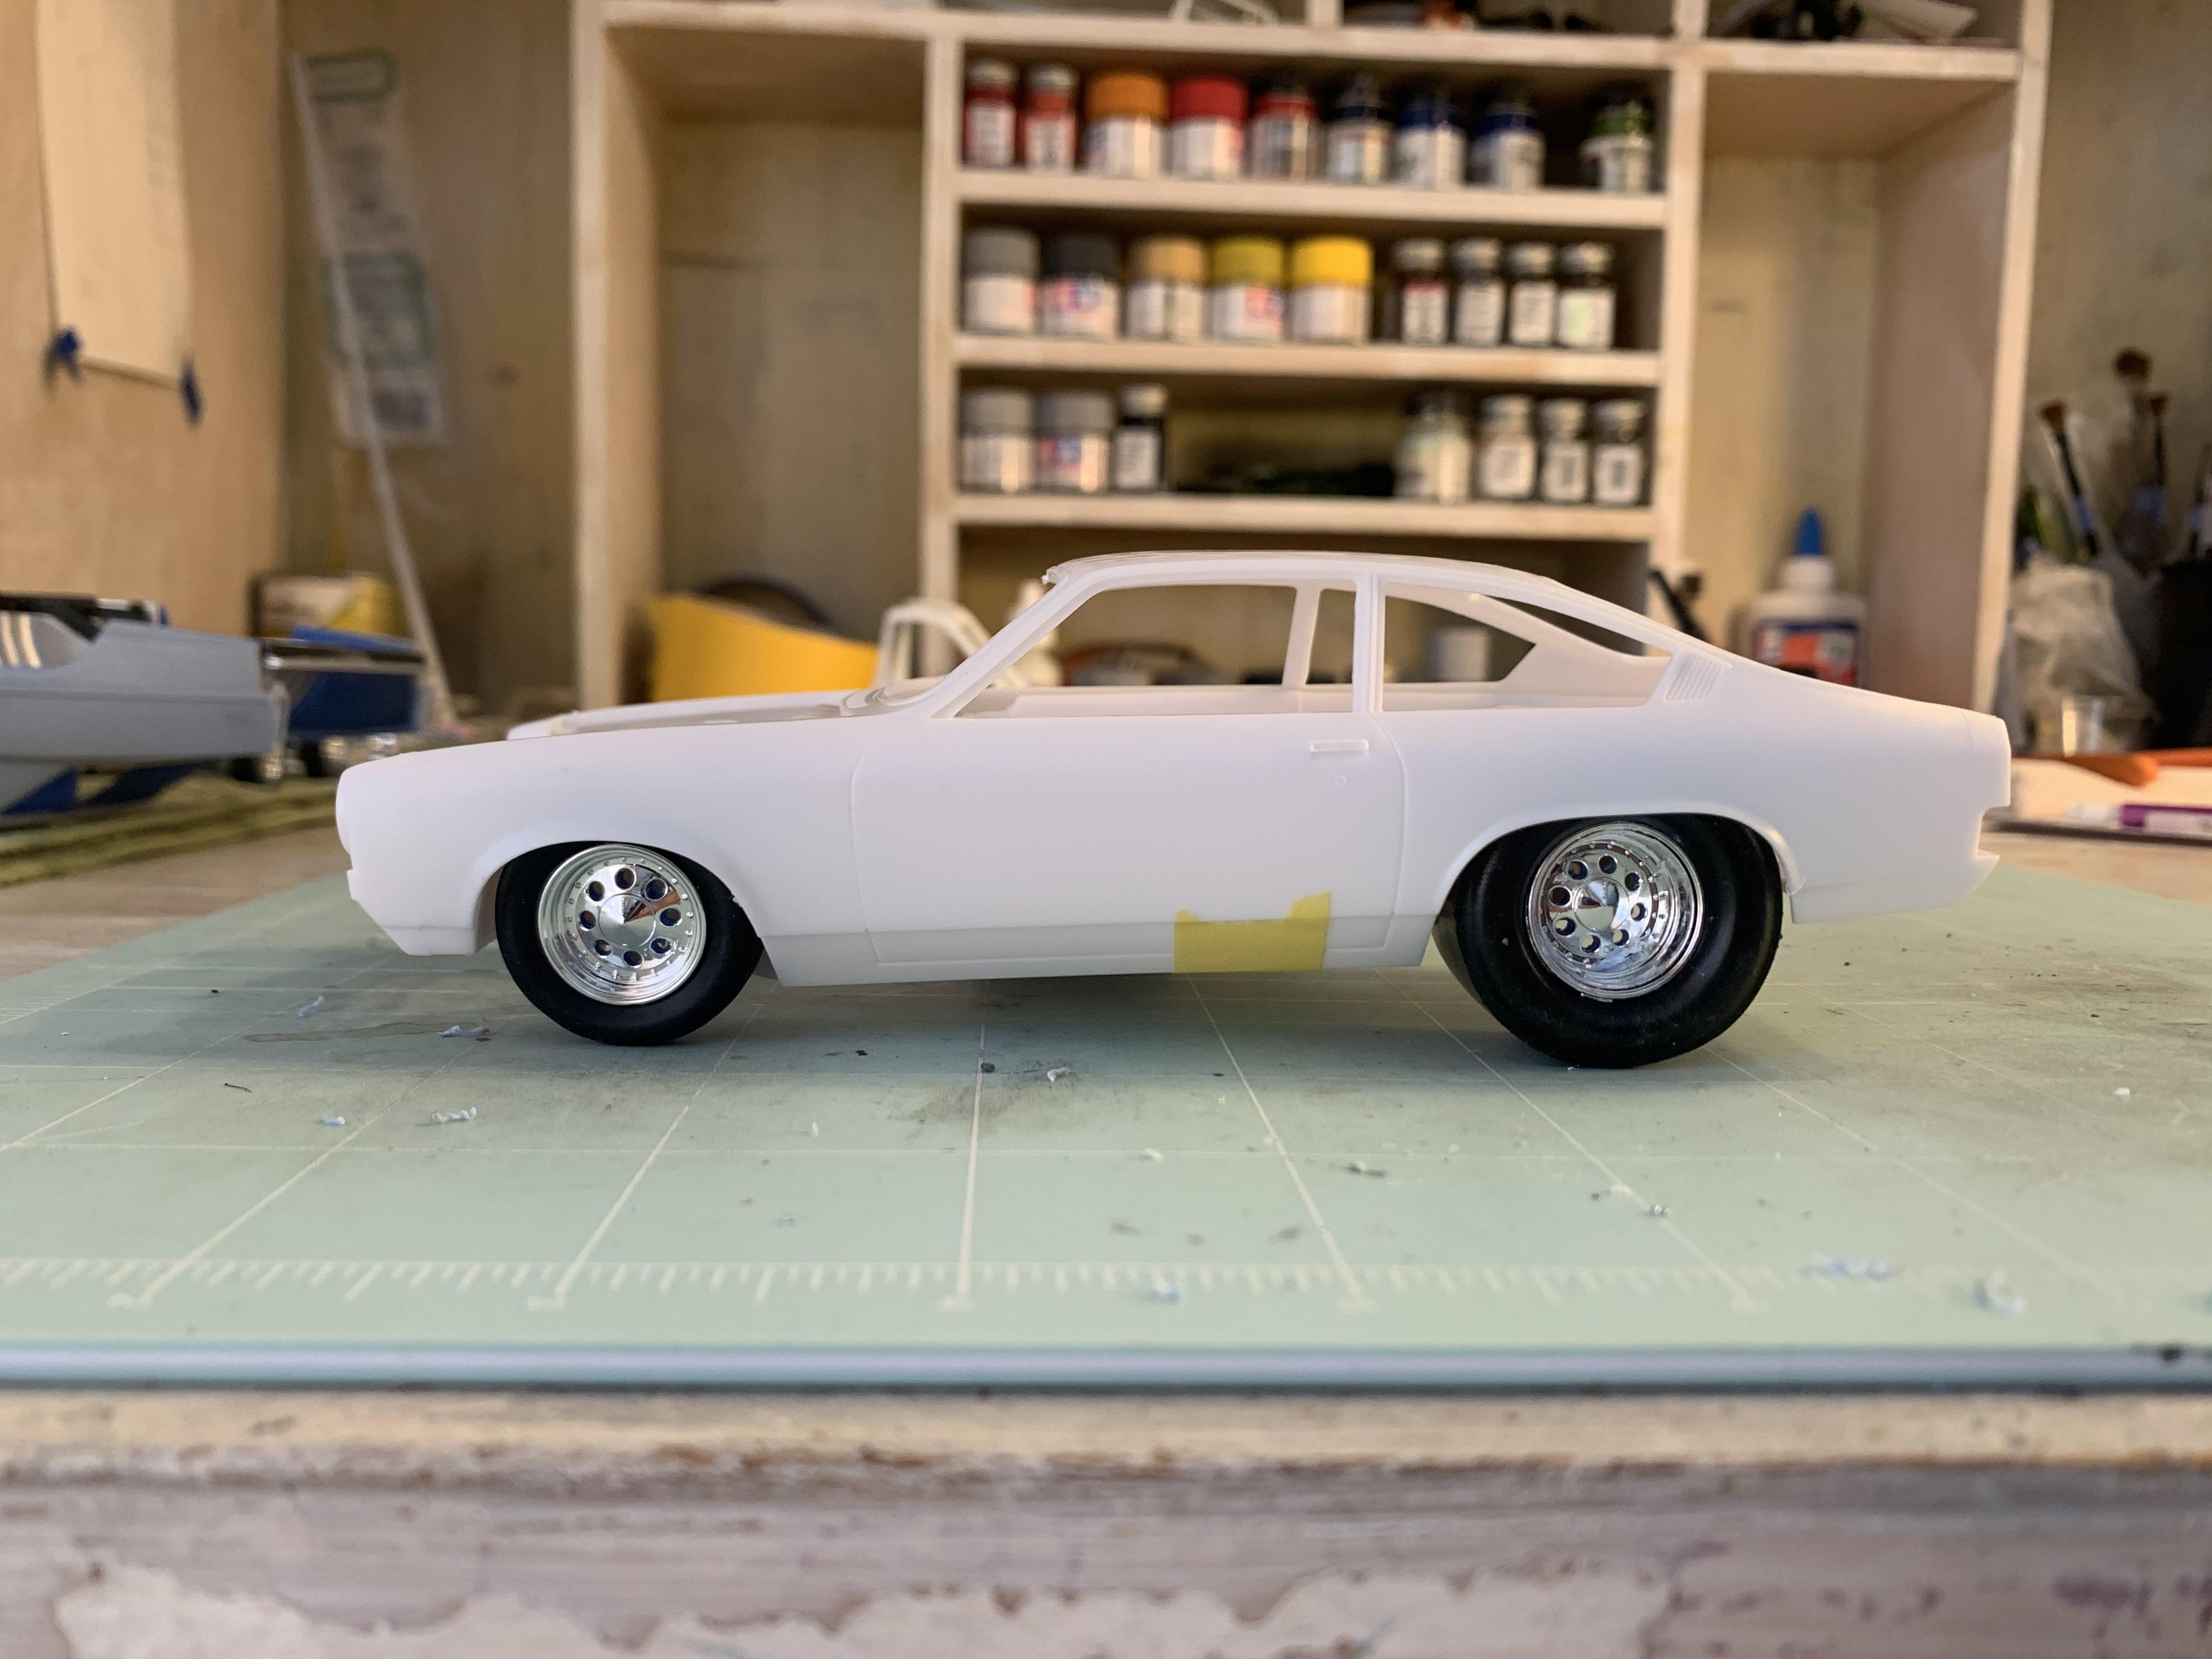
engine progress for the Nova the kit 327 (I think/hope) needs wiring and top half next. also finished up the chassis on the nova, awaiting the engine mount! Sanded down the trim to barely a bump to add the PE strip down the side. Left a little bump to create lift for the thin pieces of PE.
-
Here to introduce myself, signed up about a week ago. Put a couple builds in the WIP section. Started building late 2019 after not building for 15 years aka when I was a teen making glue bombs. Joined my Local Model Car Club in San Diego, it’s been great and glad to be back in this Hobby. Gonna be moving to Wisconsin this summer and saw a club out there and I couldn’t remember the club near Milwaukee. If anyone can help me, Thank you! Keep building rad models y’all.
-
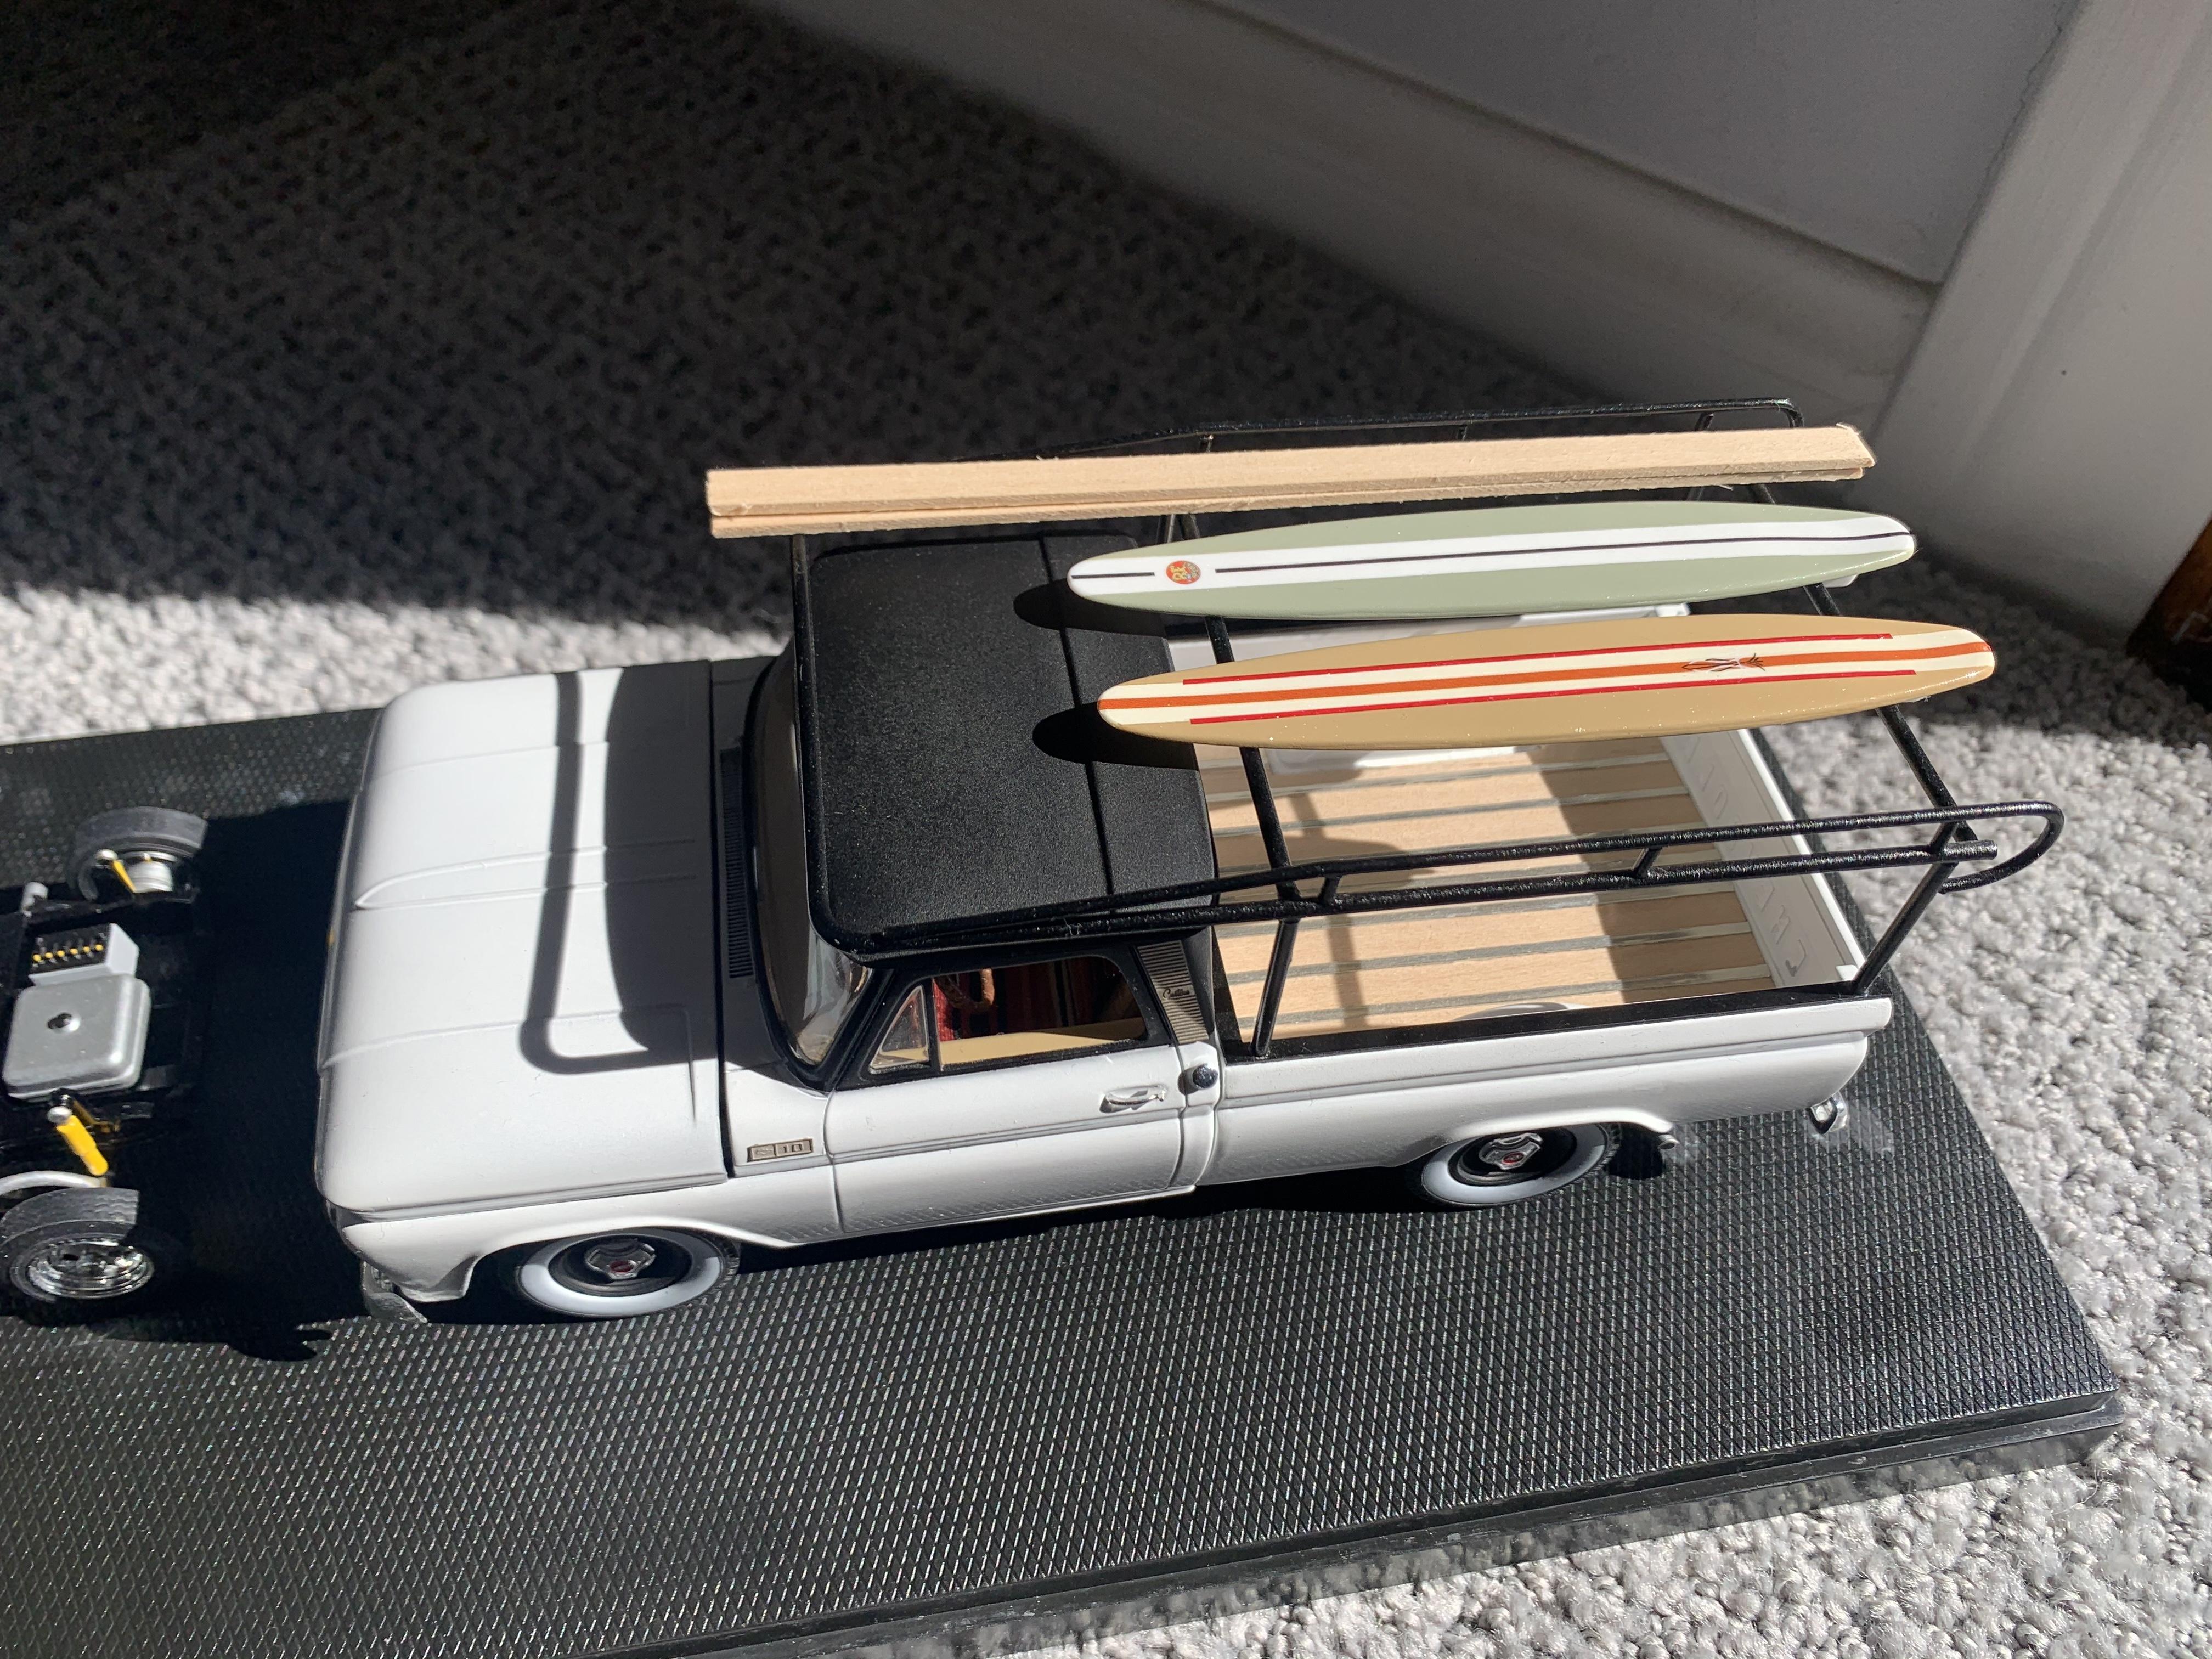
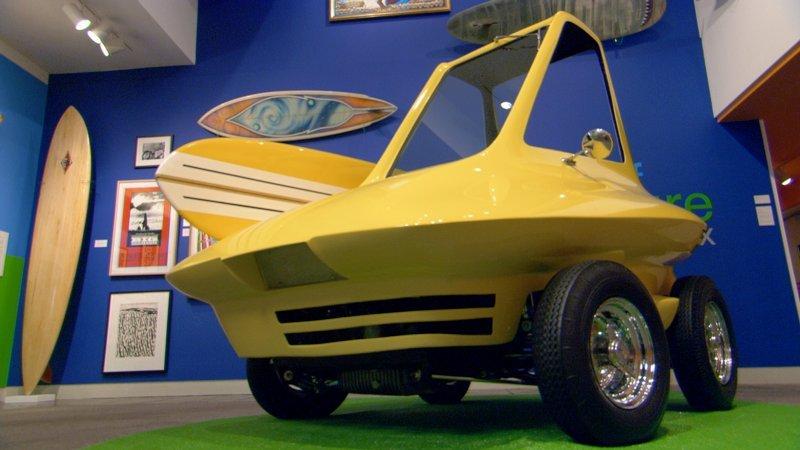
Wicked cool! I have a screenshot of your kit from a couple weeks back, the trailer idea was awesome. Great job on that build. The rubber tires that the kit came with are great for other trailers/campers. I am trying to find another Surfite to just pull the tires from.
-
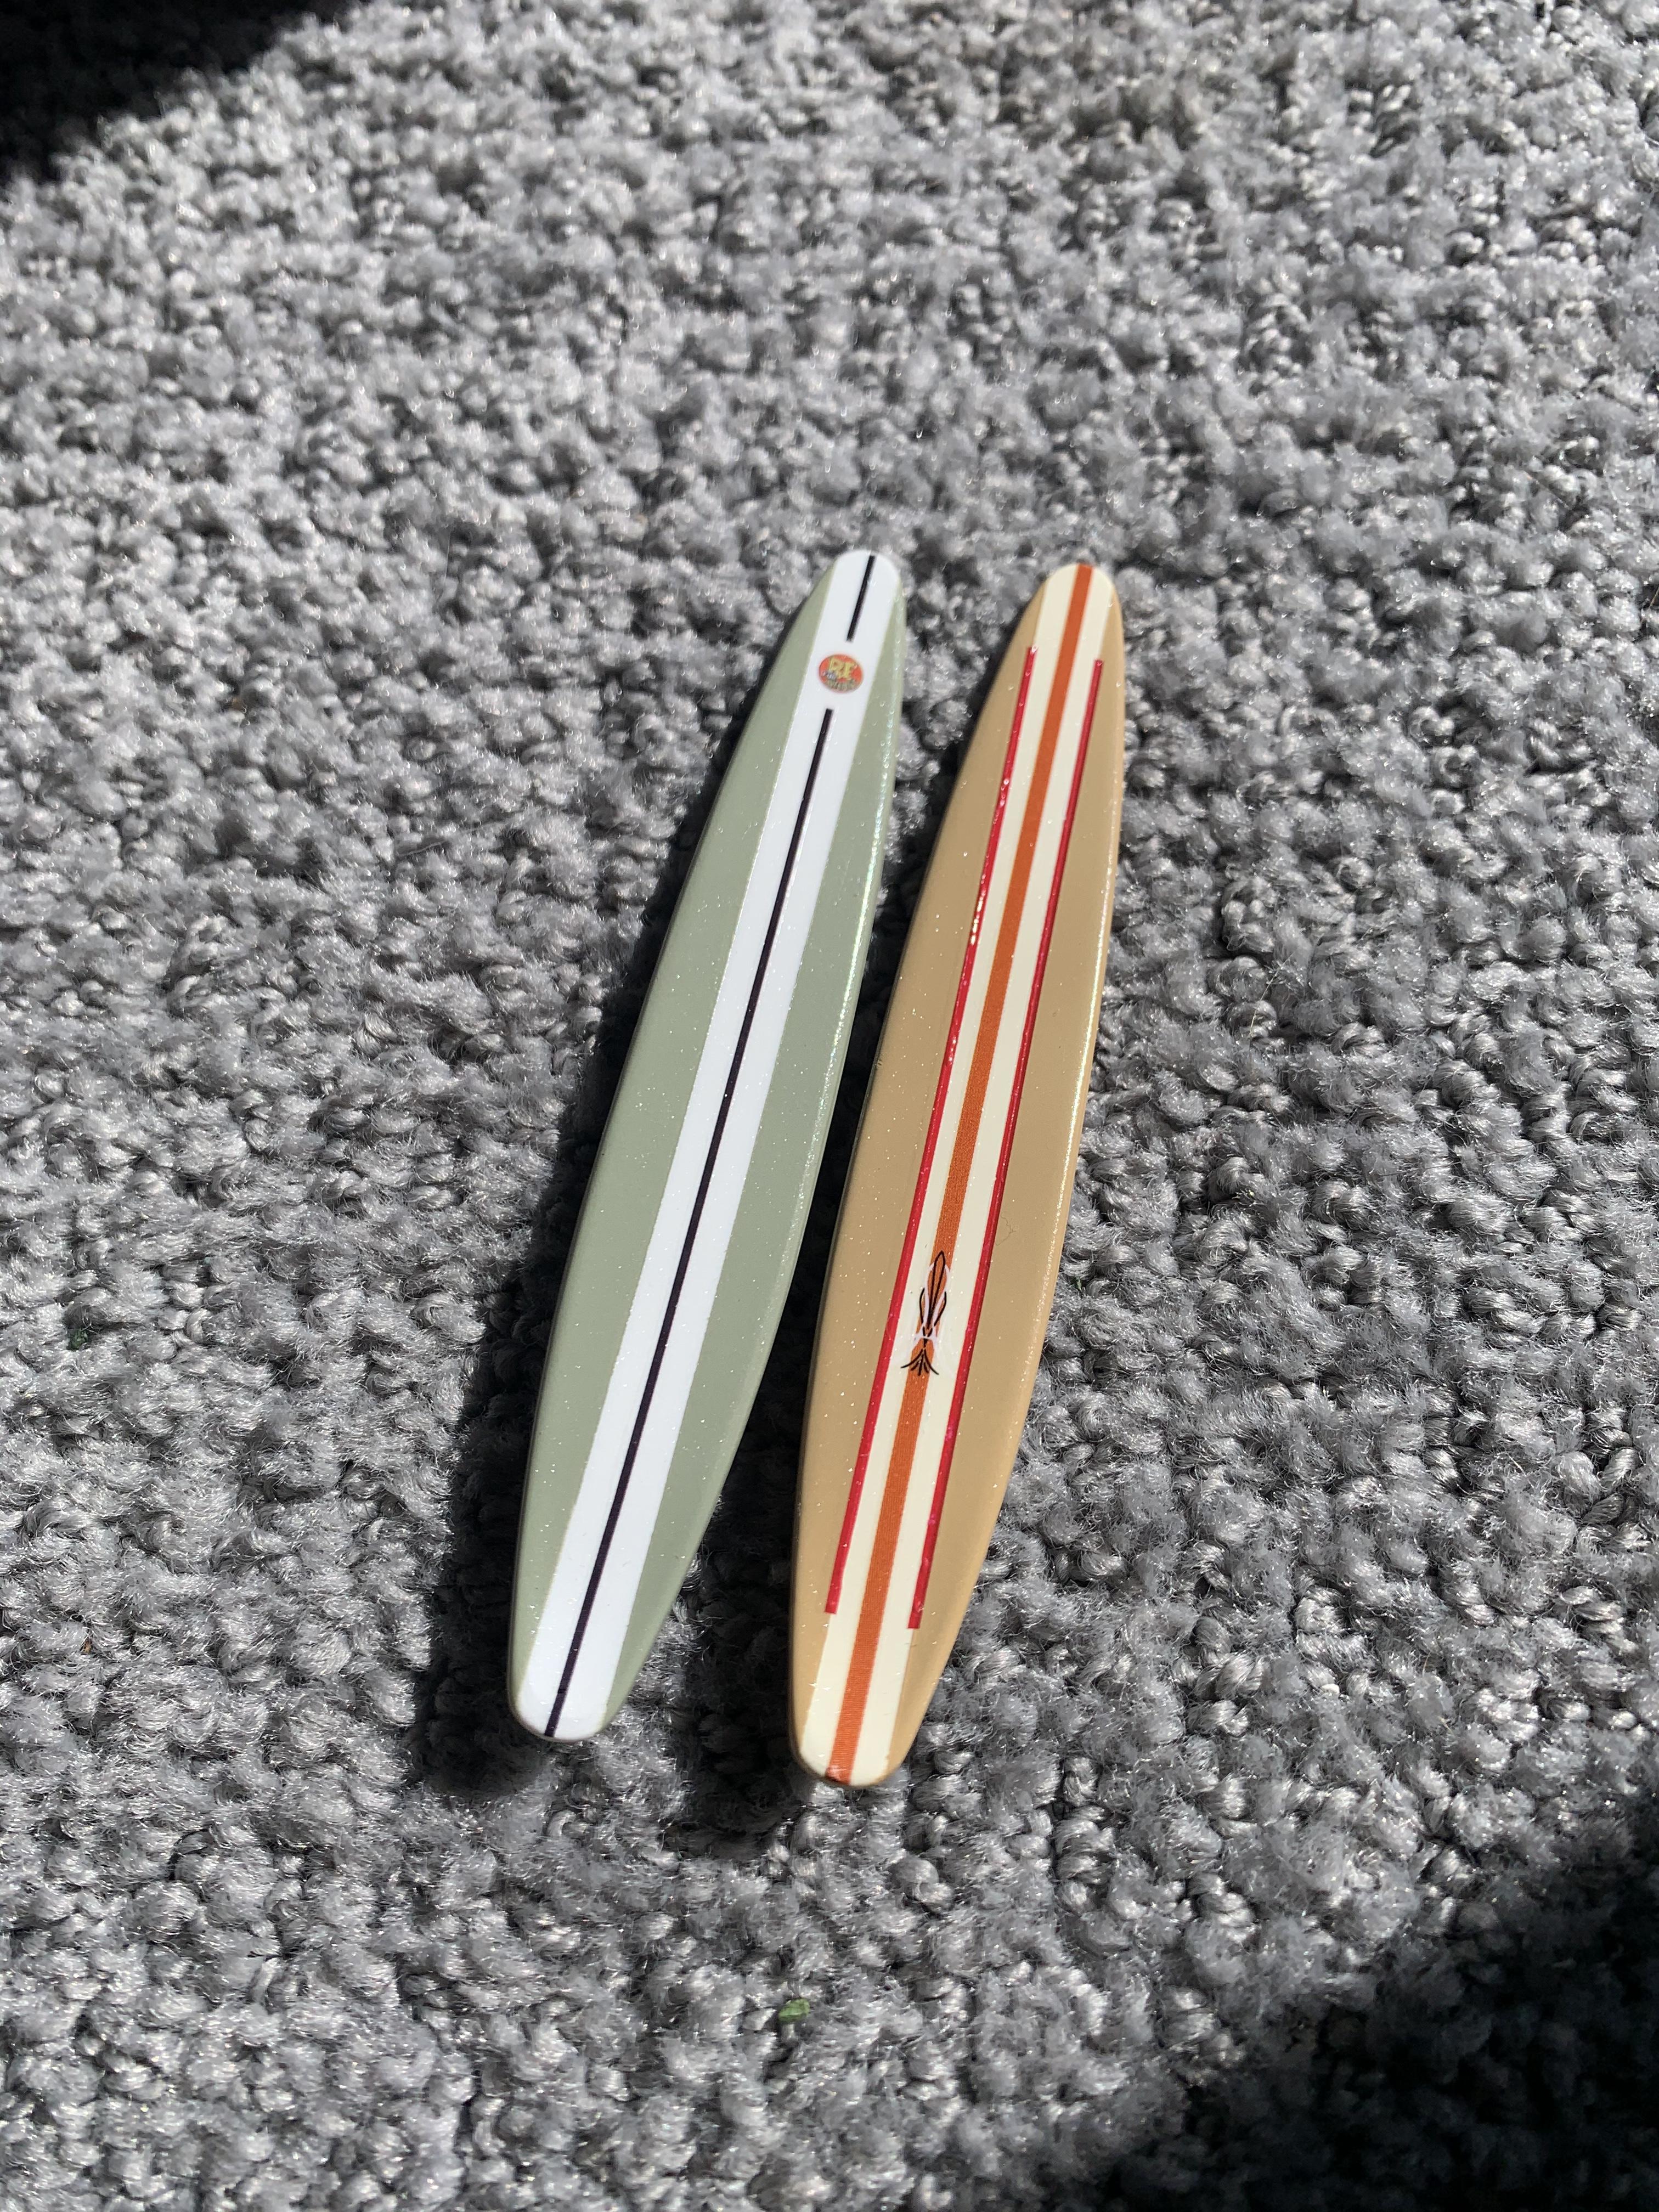
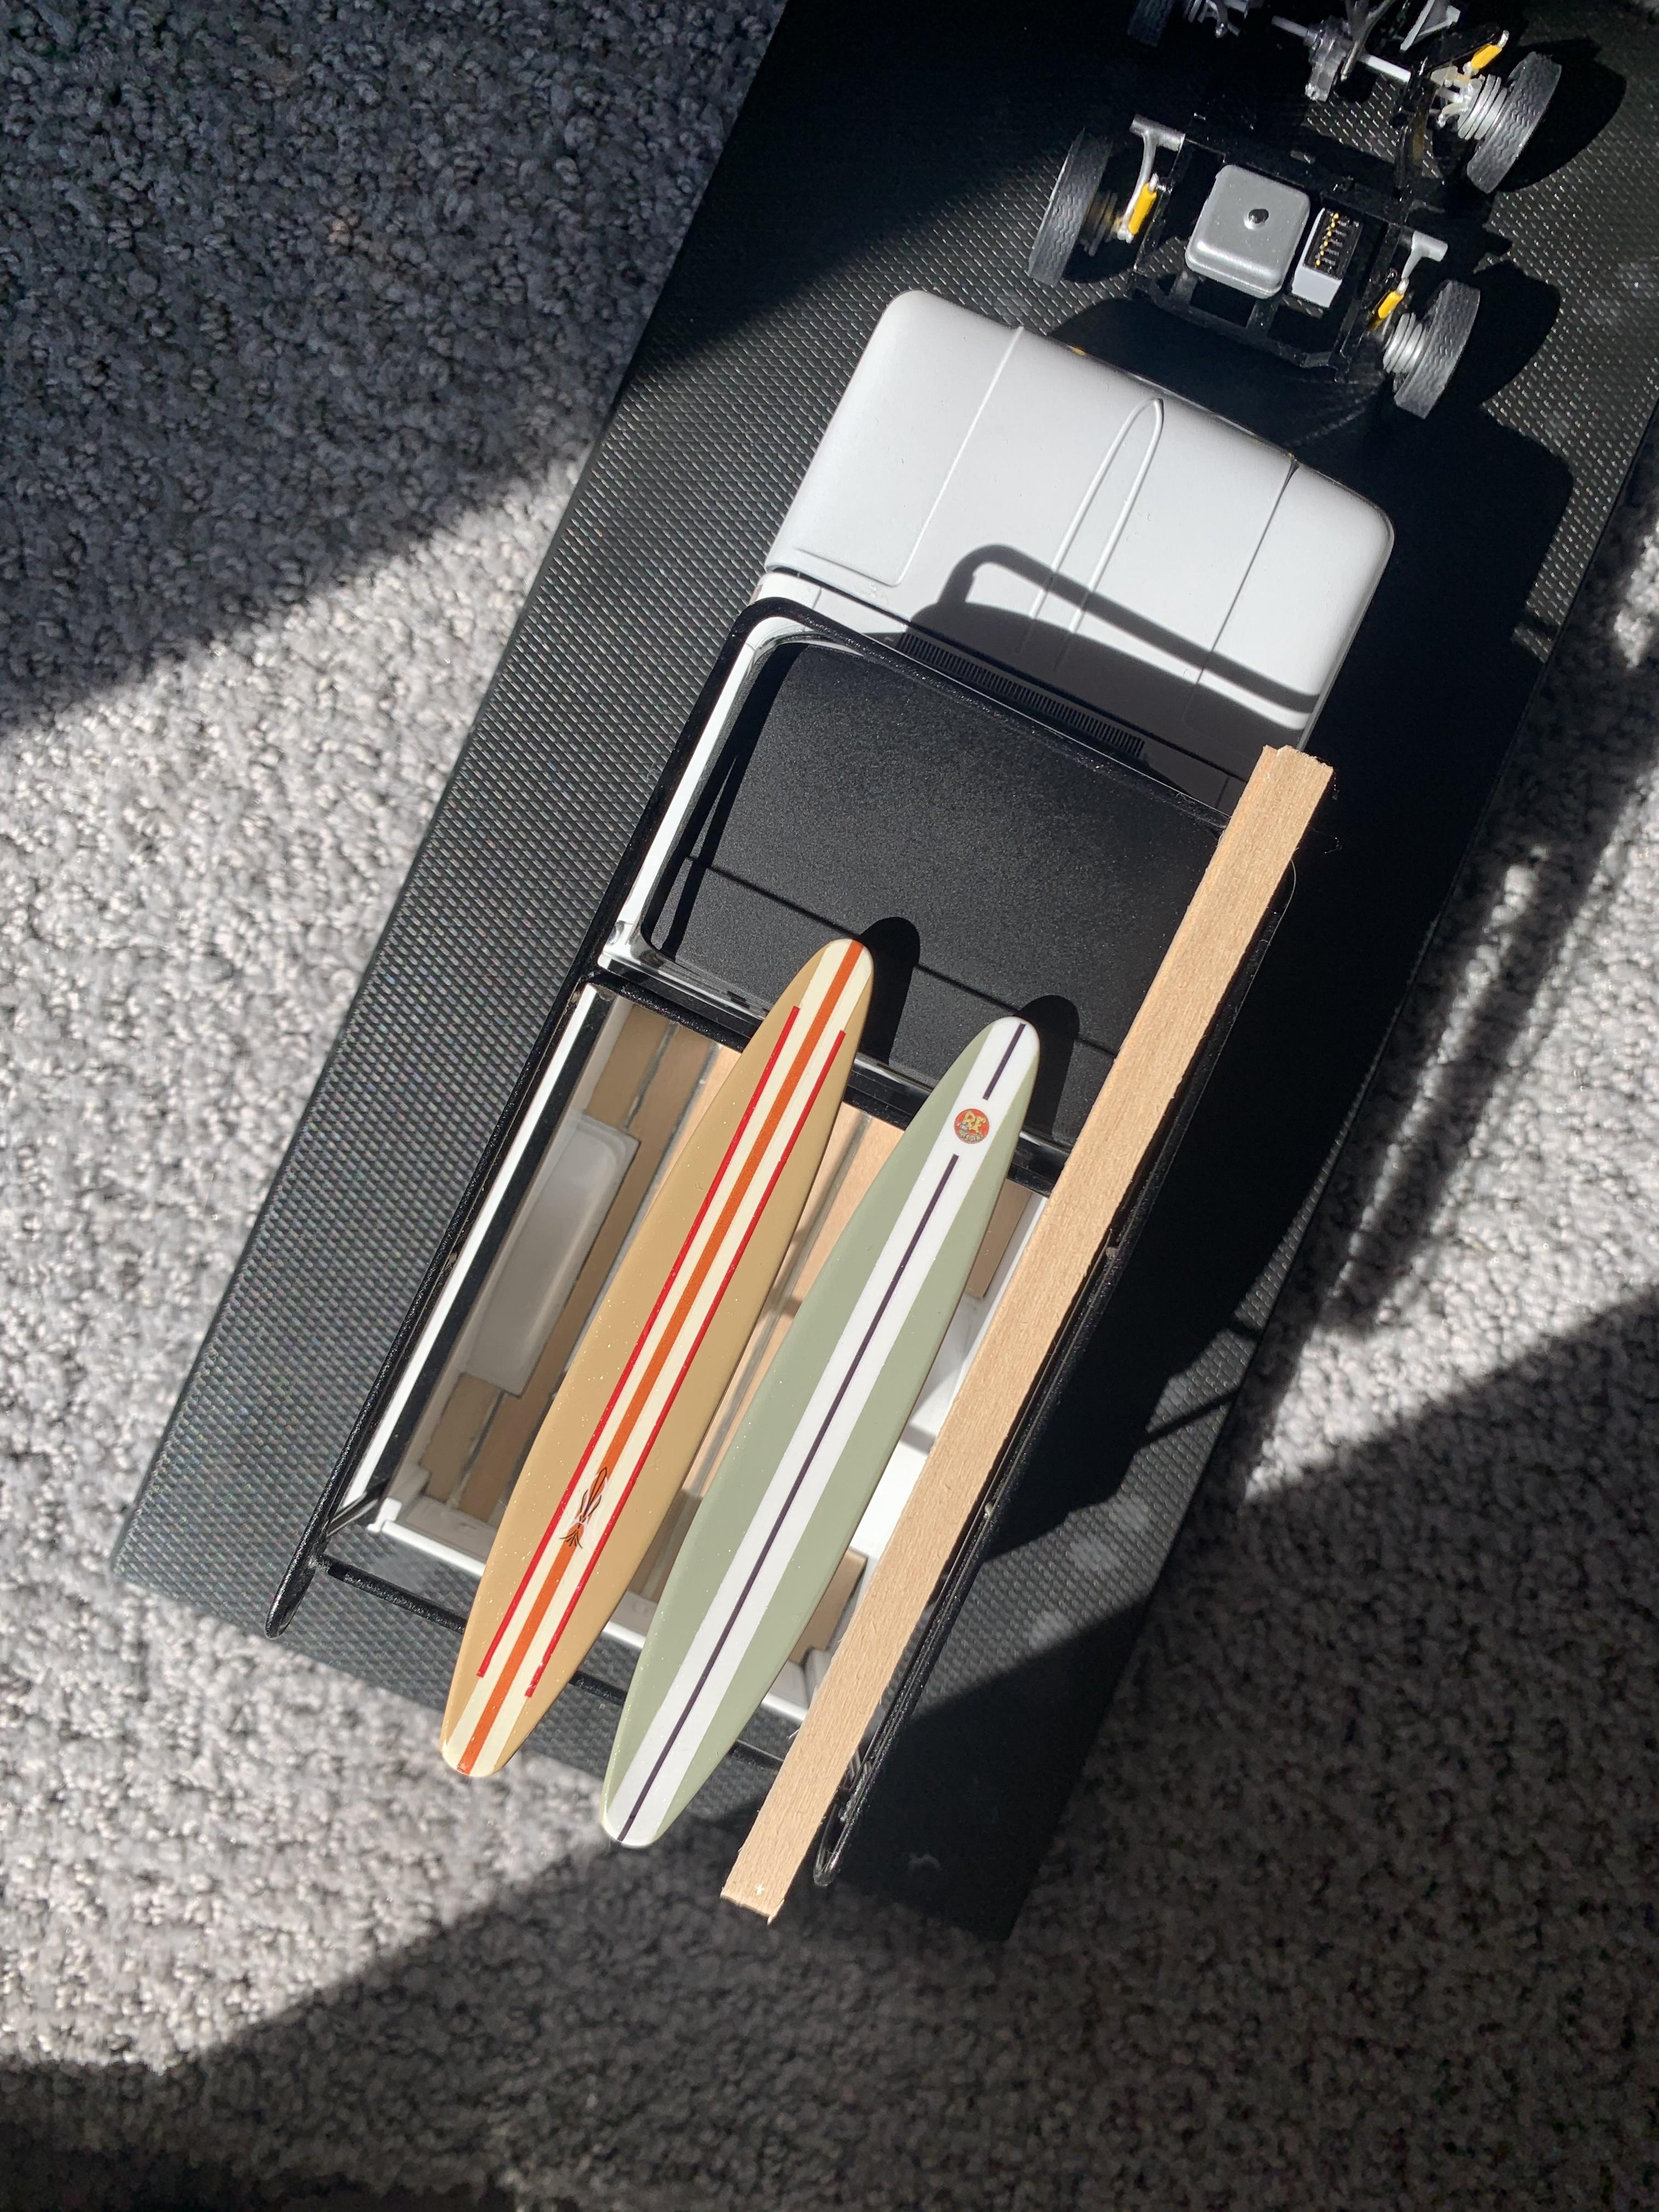
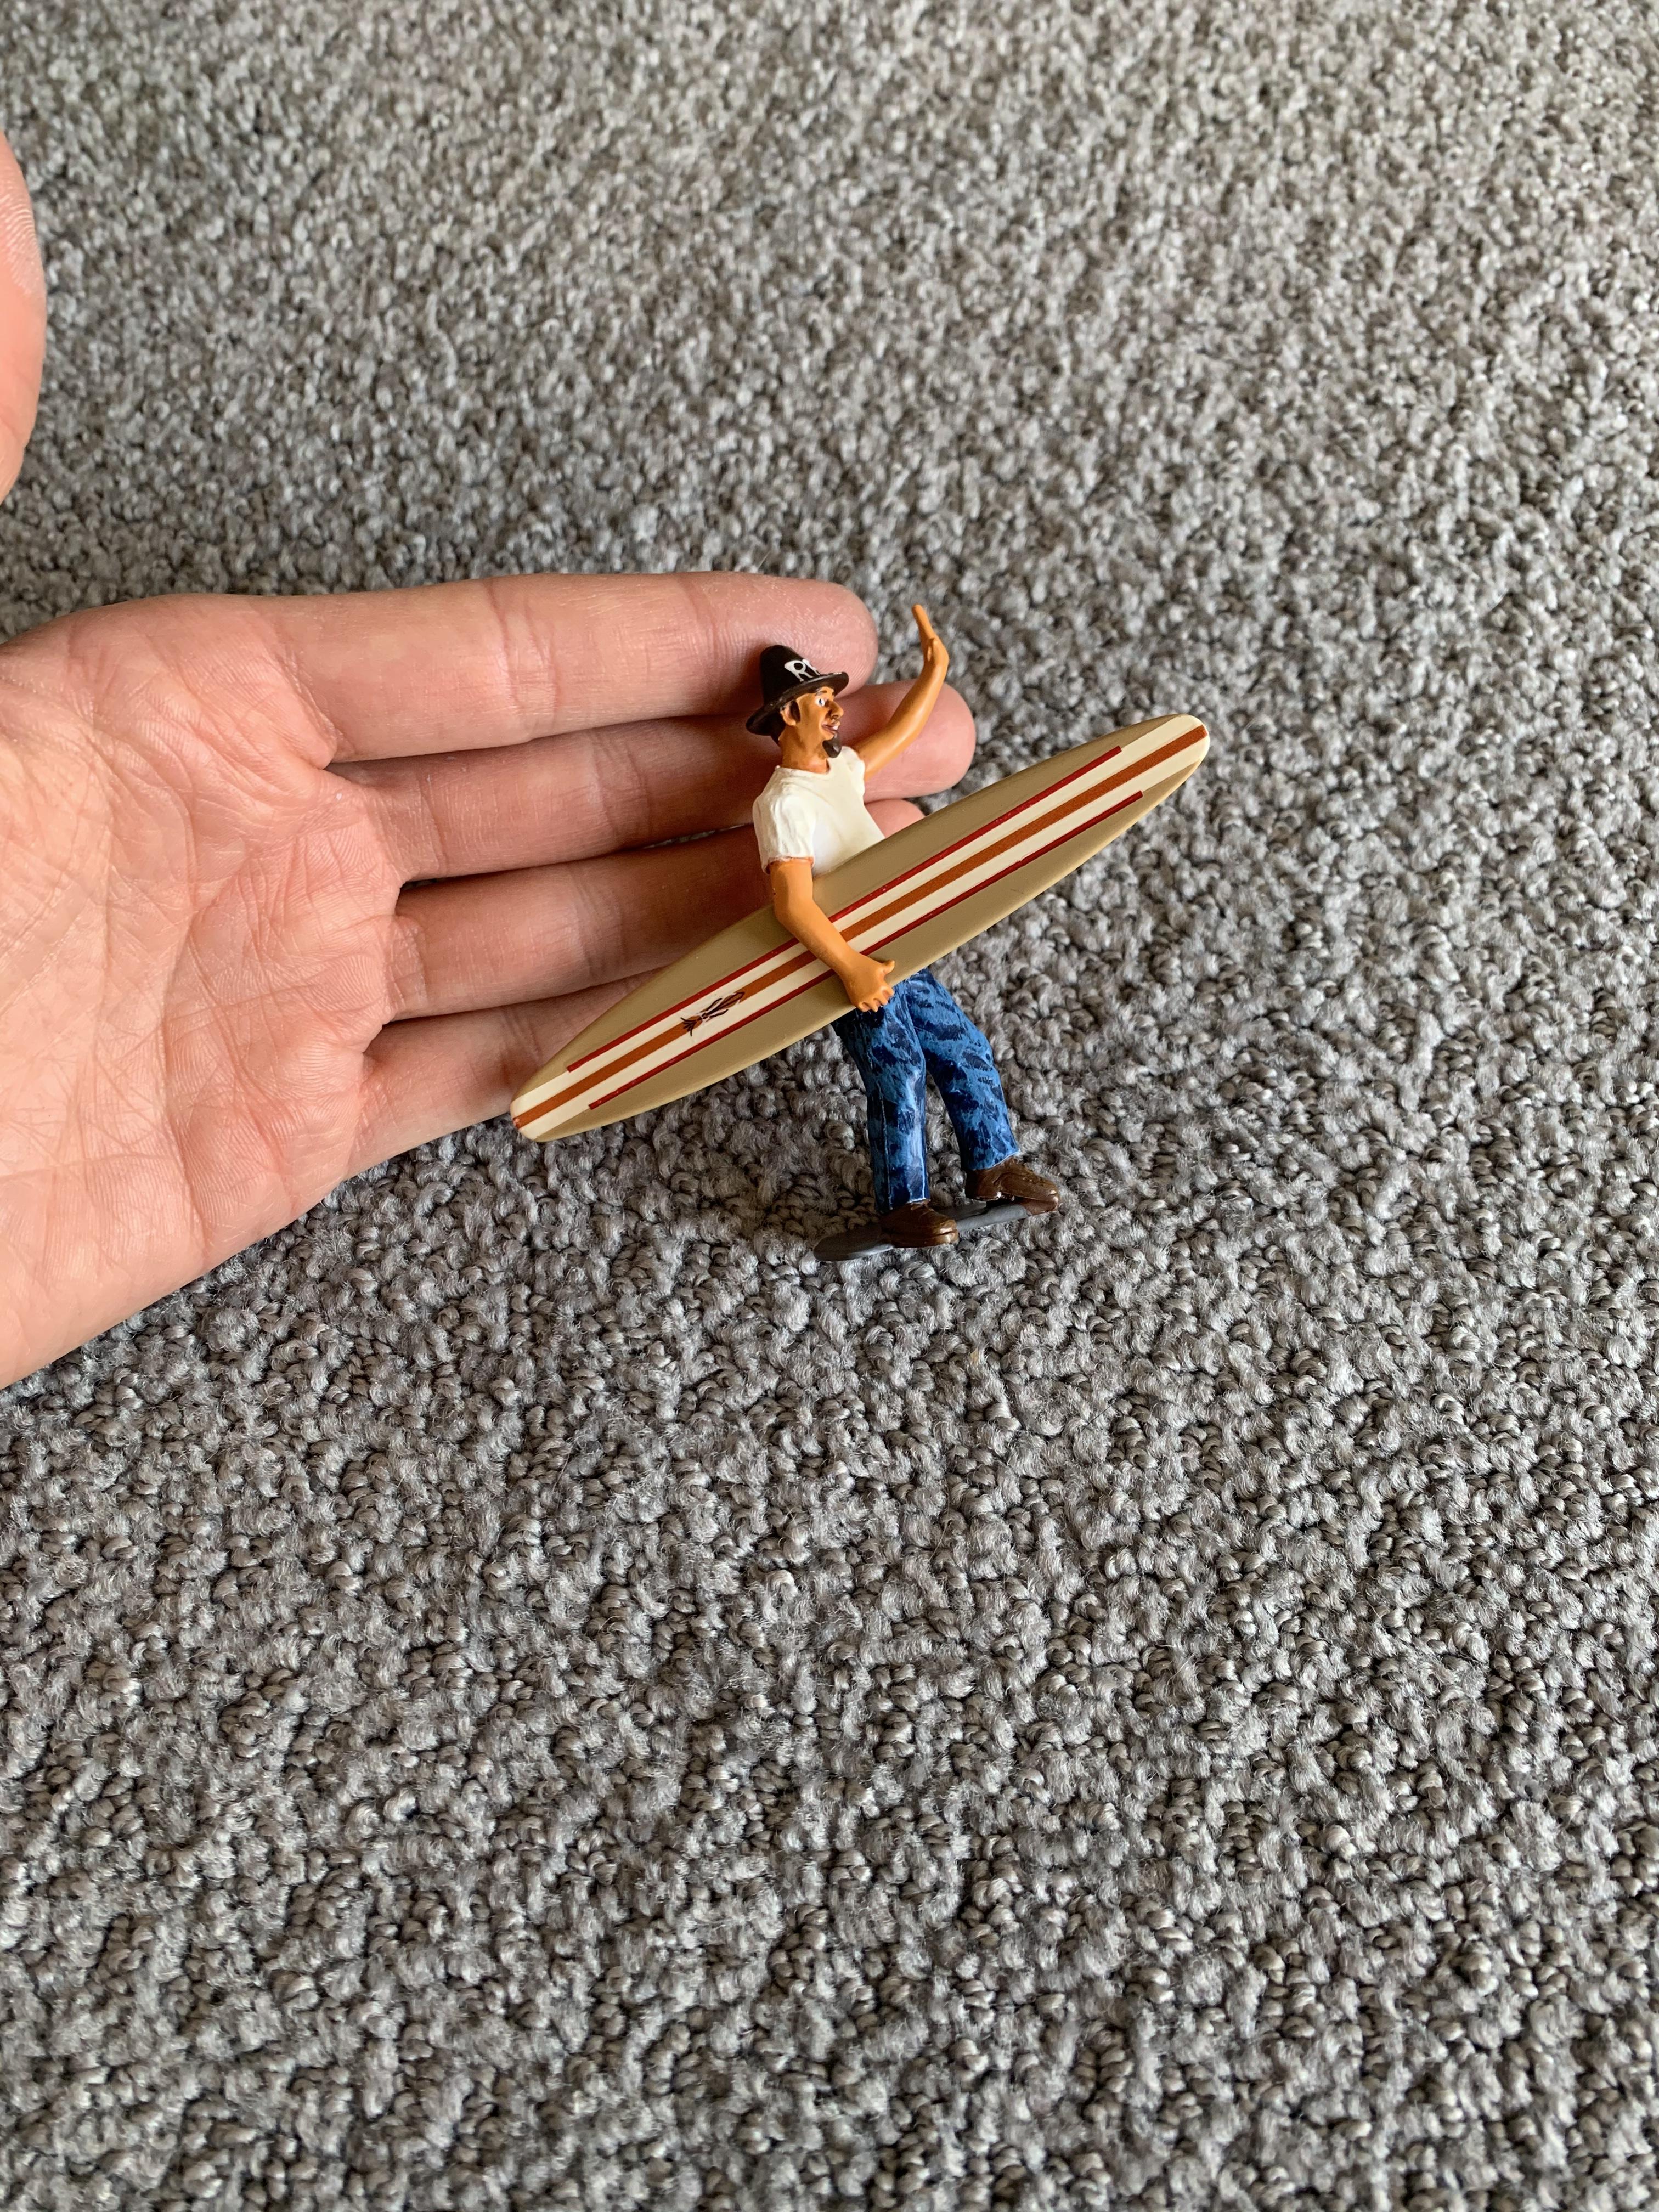
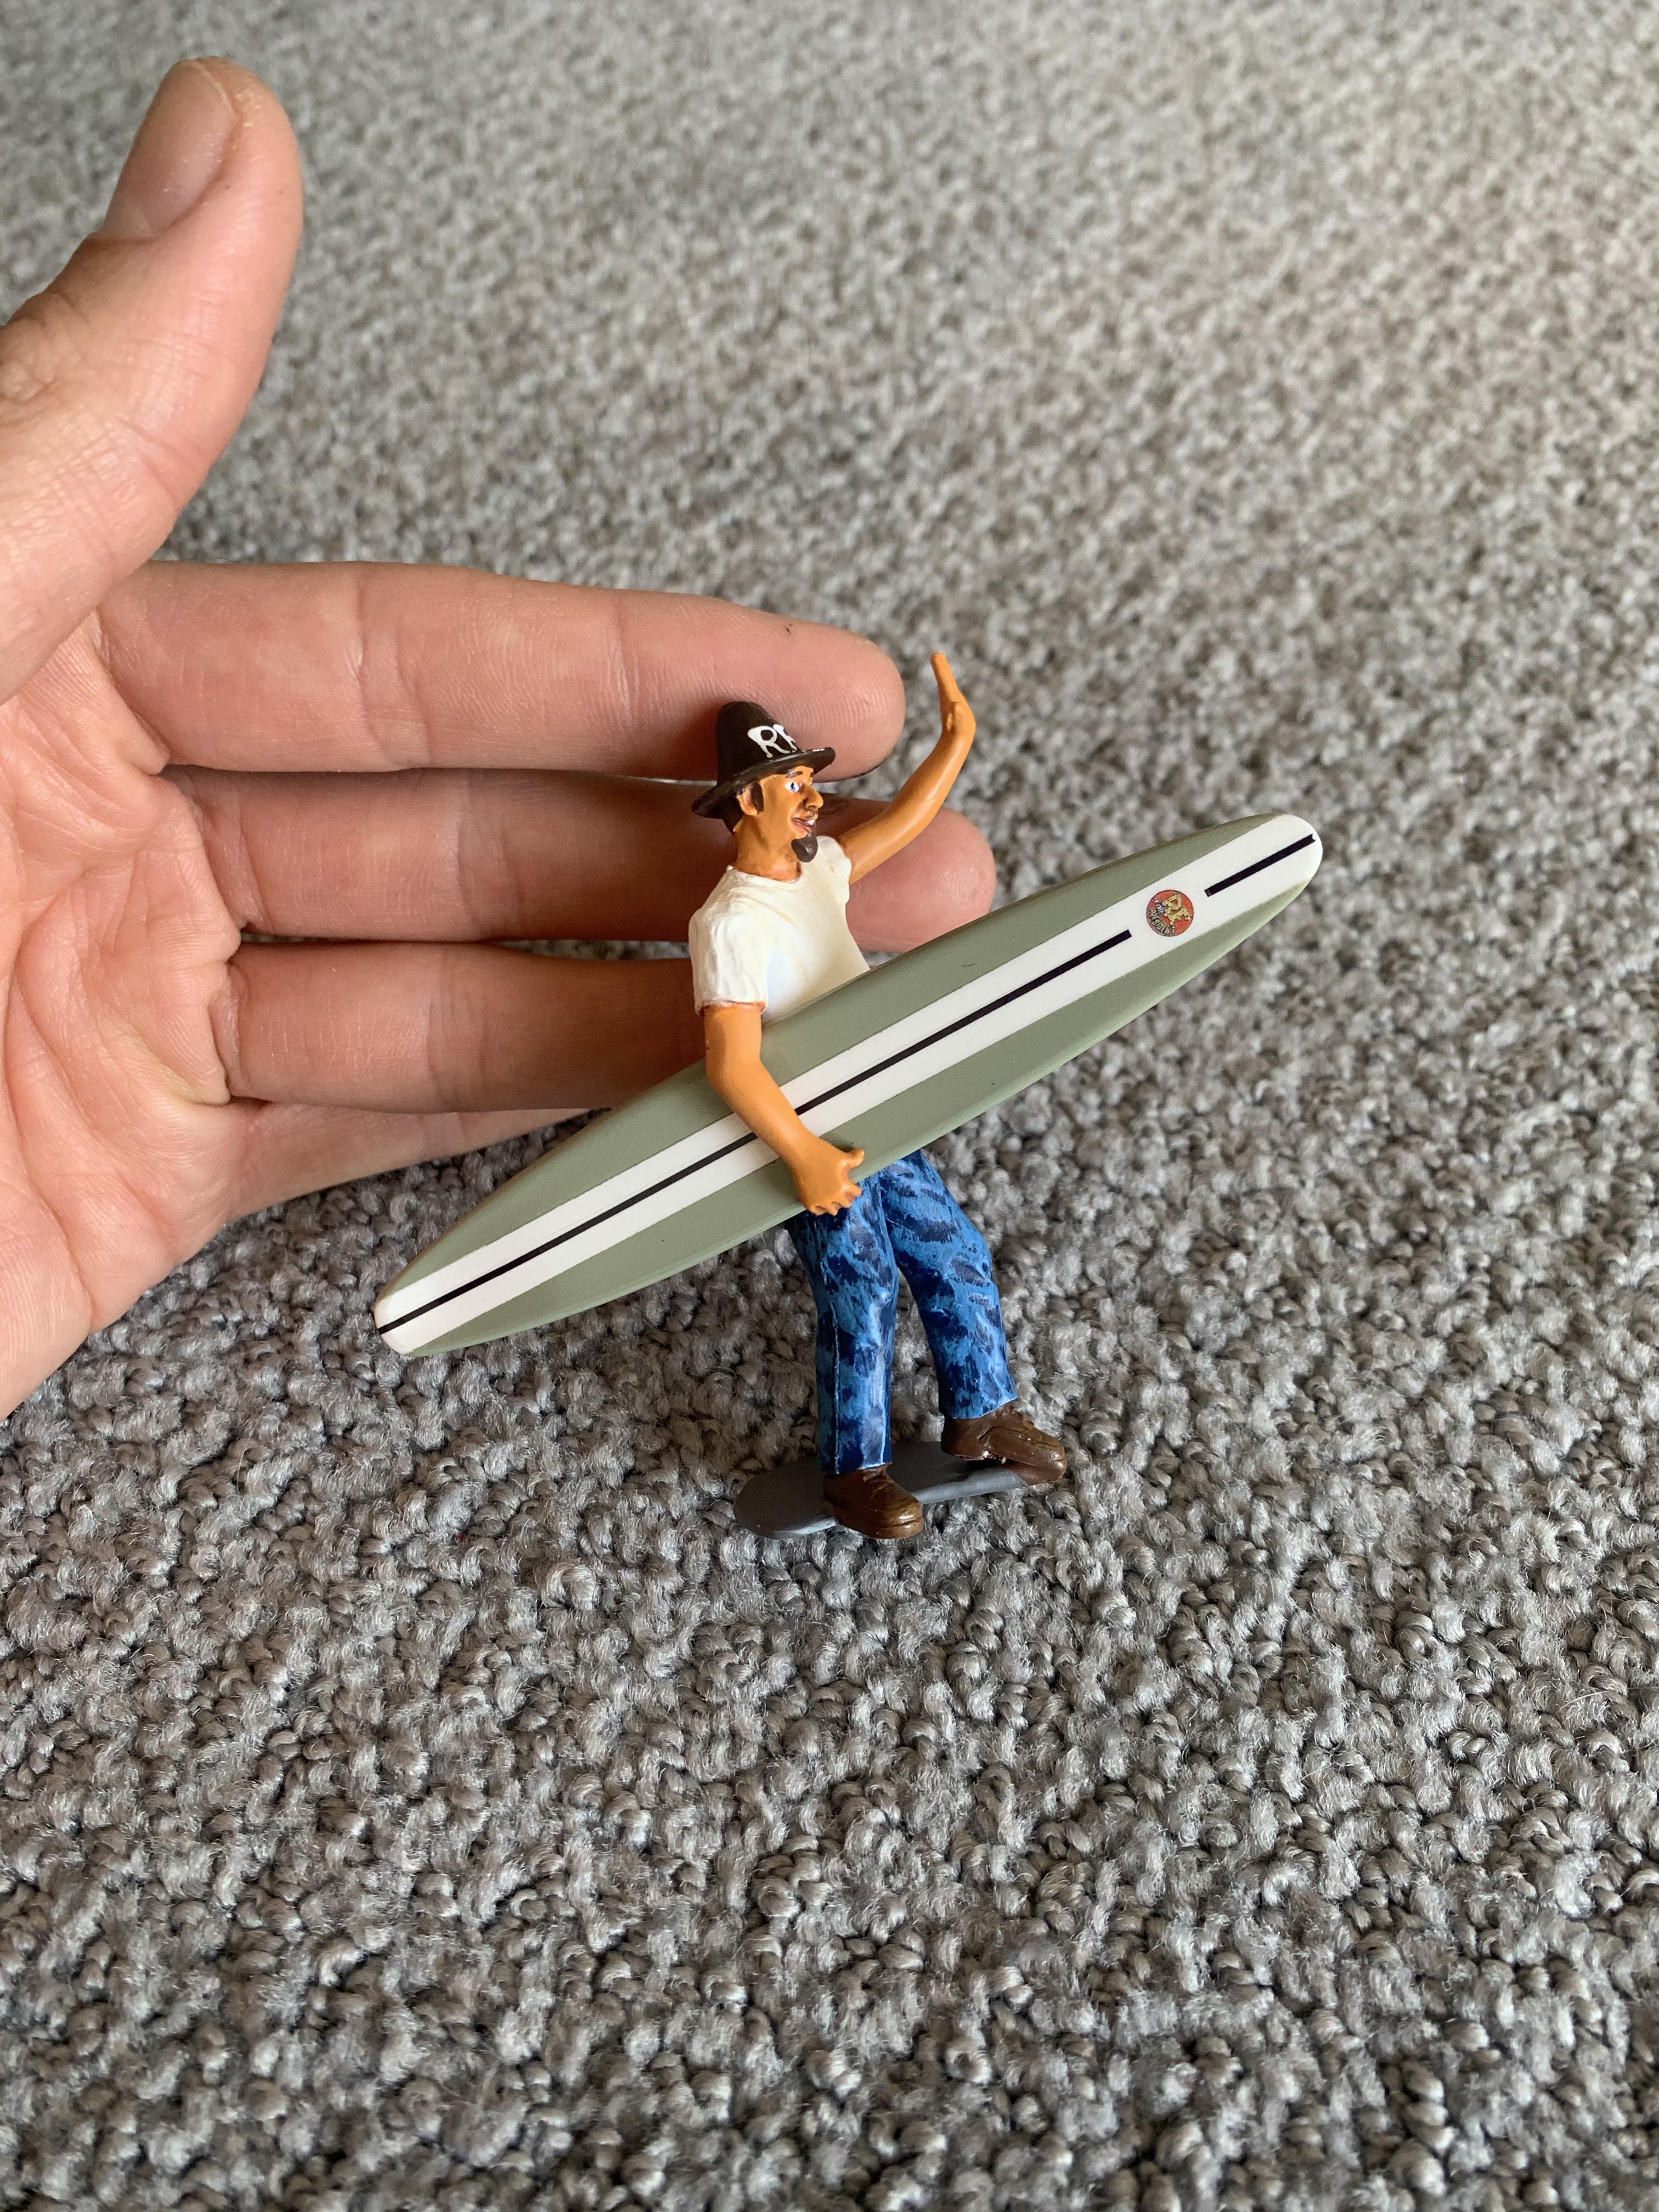
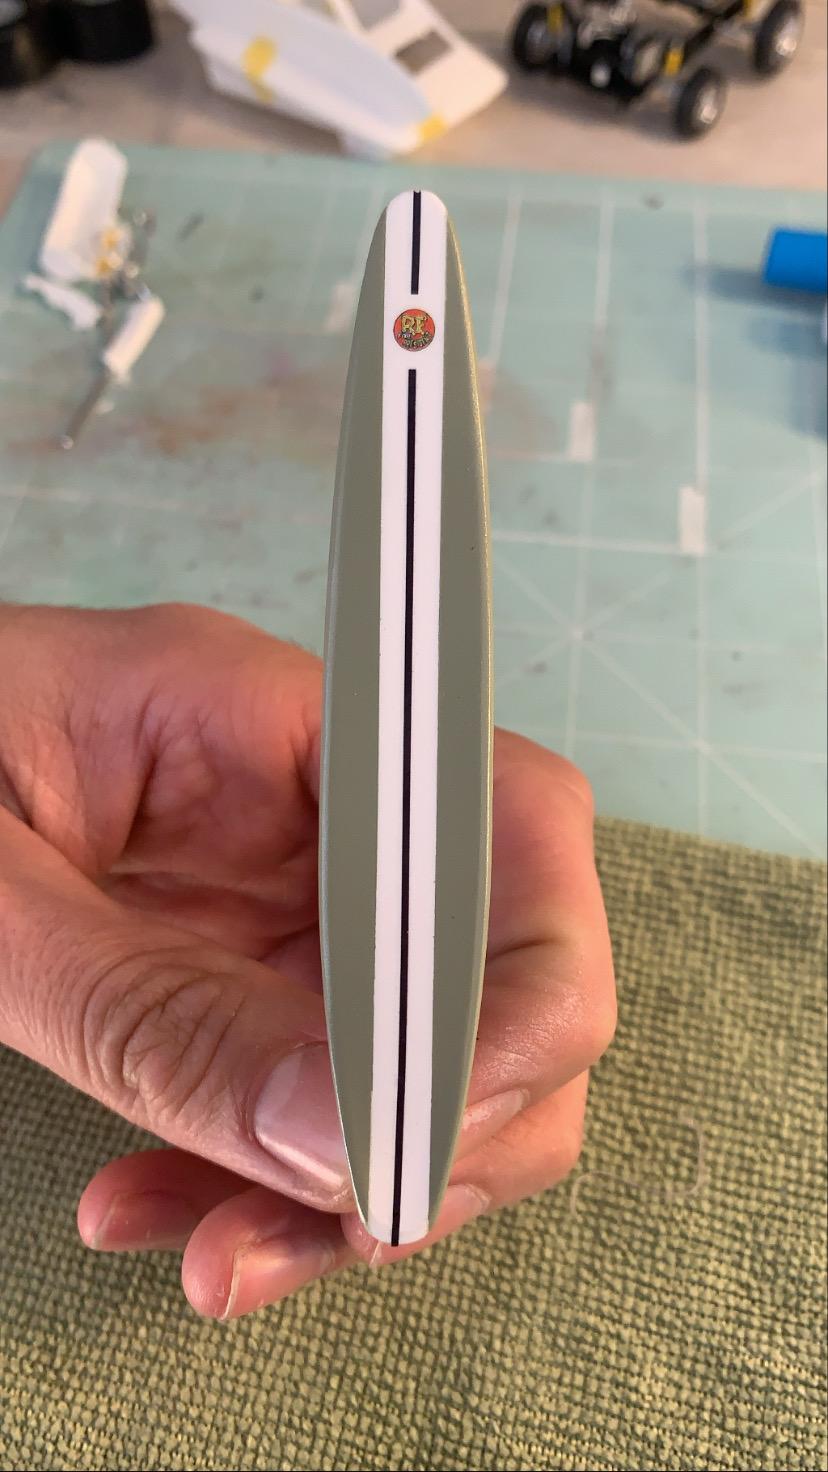
Testings out the New Boards. The red stripes were being a little fussy so had to shorten them to keep a symmetric design. Added a pinstripe on one for Ed Roth. They have a clear pearl coat so pop really well in light (no photos)
-
Yeah I am only ditching the shack cuz of the space on the surf fin does not have room for it and that shack is awesome and can always be a great piece for another kit. May sell it too since the surf van just got released and maybe a potential project for someone. Was super stoked about the 12” rubber tires. I did buy some 12” 3D printed tires for a camper project but they didn’t do justice so I will most likely get another kit to grab those smaller rubber tires. and yeah the body gaps aren’t too bad it’s mainly the rear bumper and spot where the board wraps in the rear that will require some more work. That’s my next step once I get the vents done. by the way just spent 2 weeks in Milwaukee and MODEL EMPIRE is hands down one the coolest shop ever, I like going into a shop and talk with owners/employees.
-
Oh boy!! I’m not even sure what I’ll use yet most likely some sort of clay and acrylic paints. I thought of resin but time and money, the clay will be much easier. I’ll def show that process as well.
-
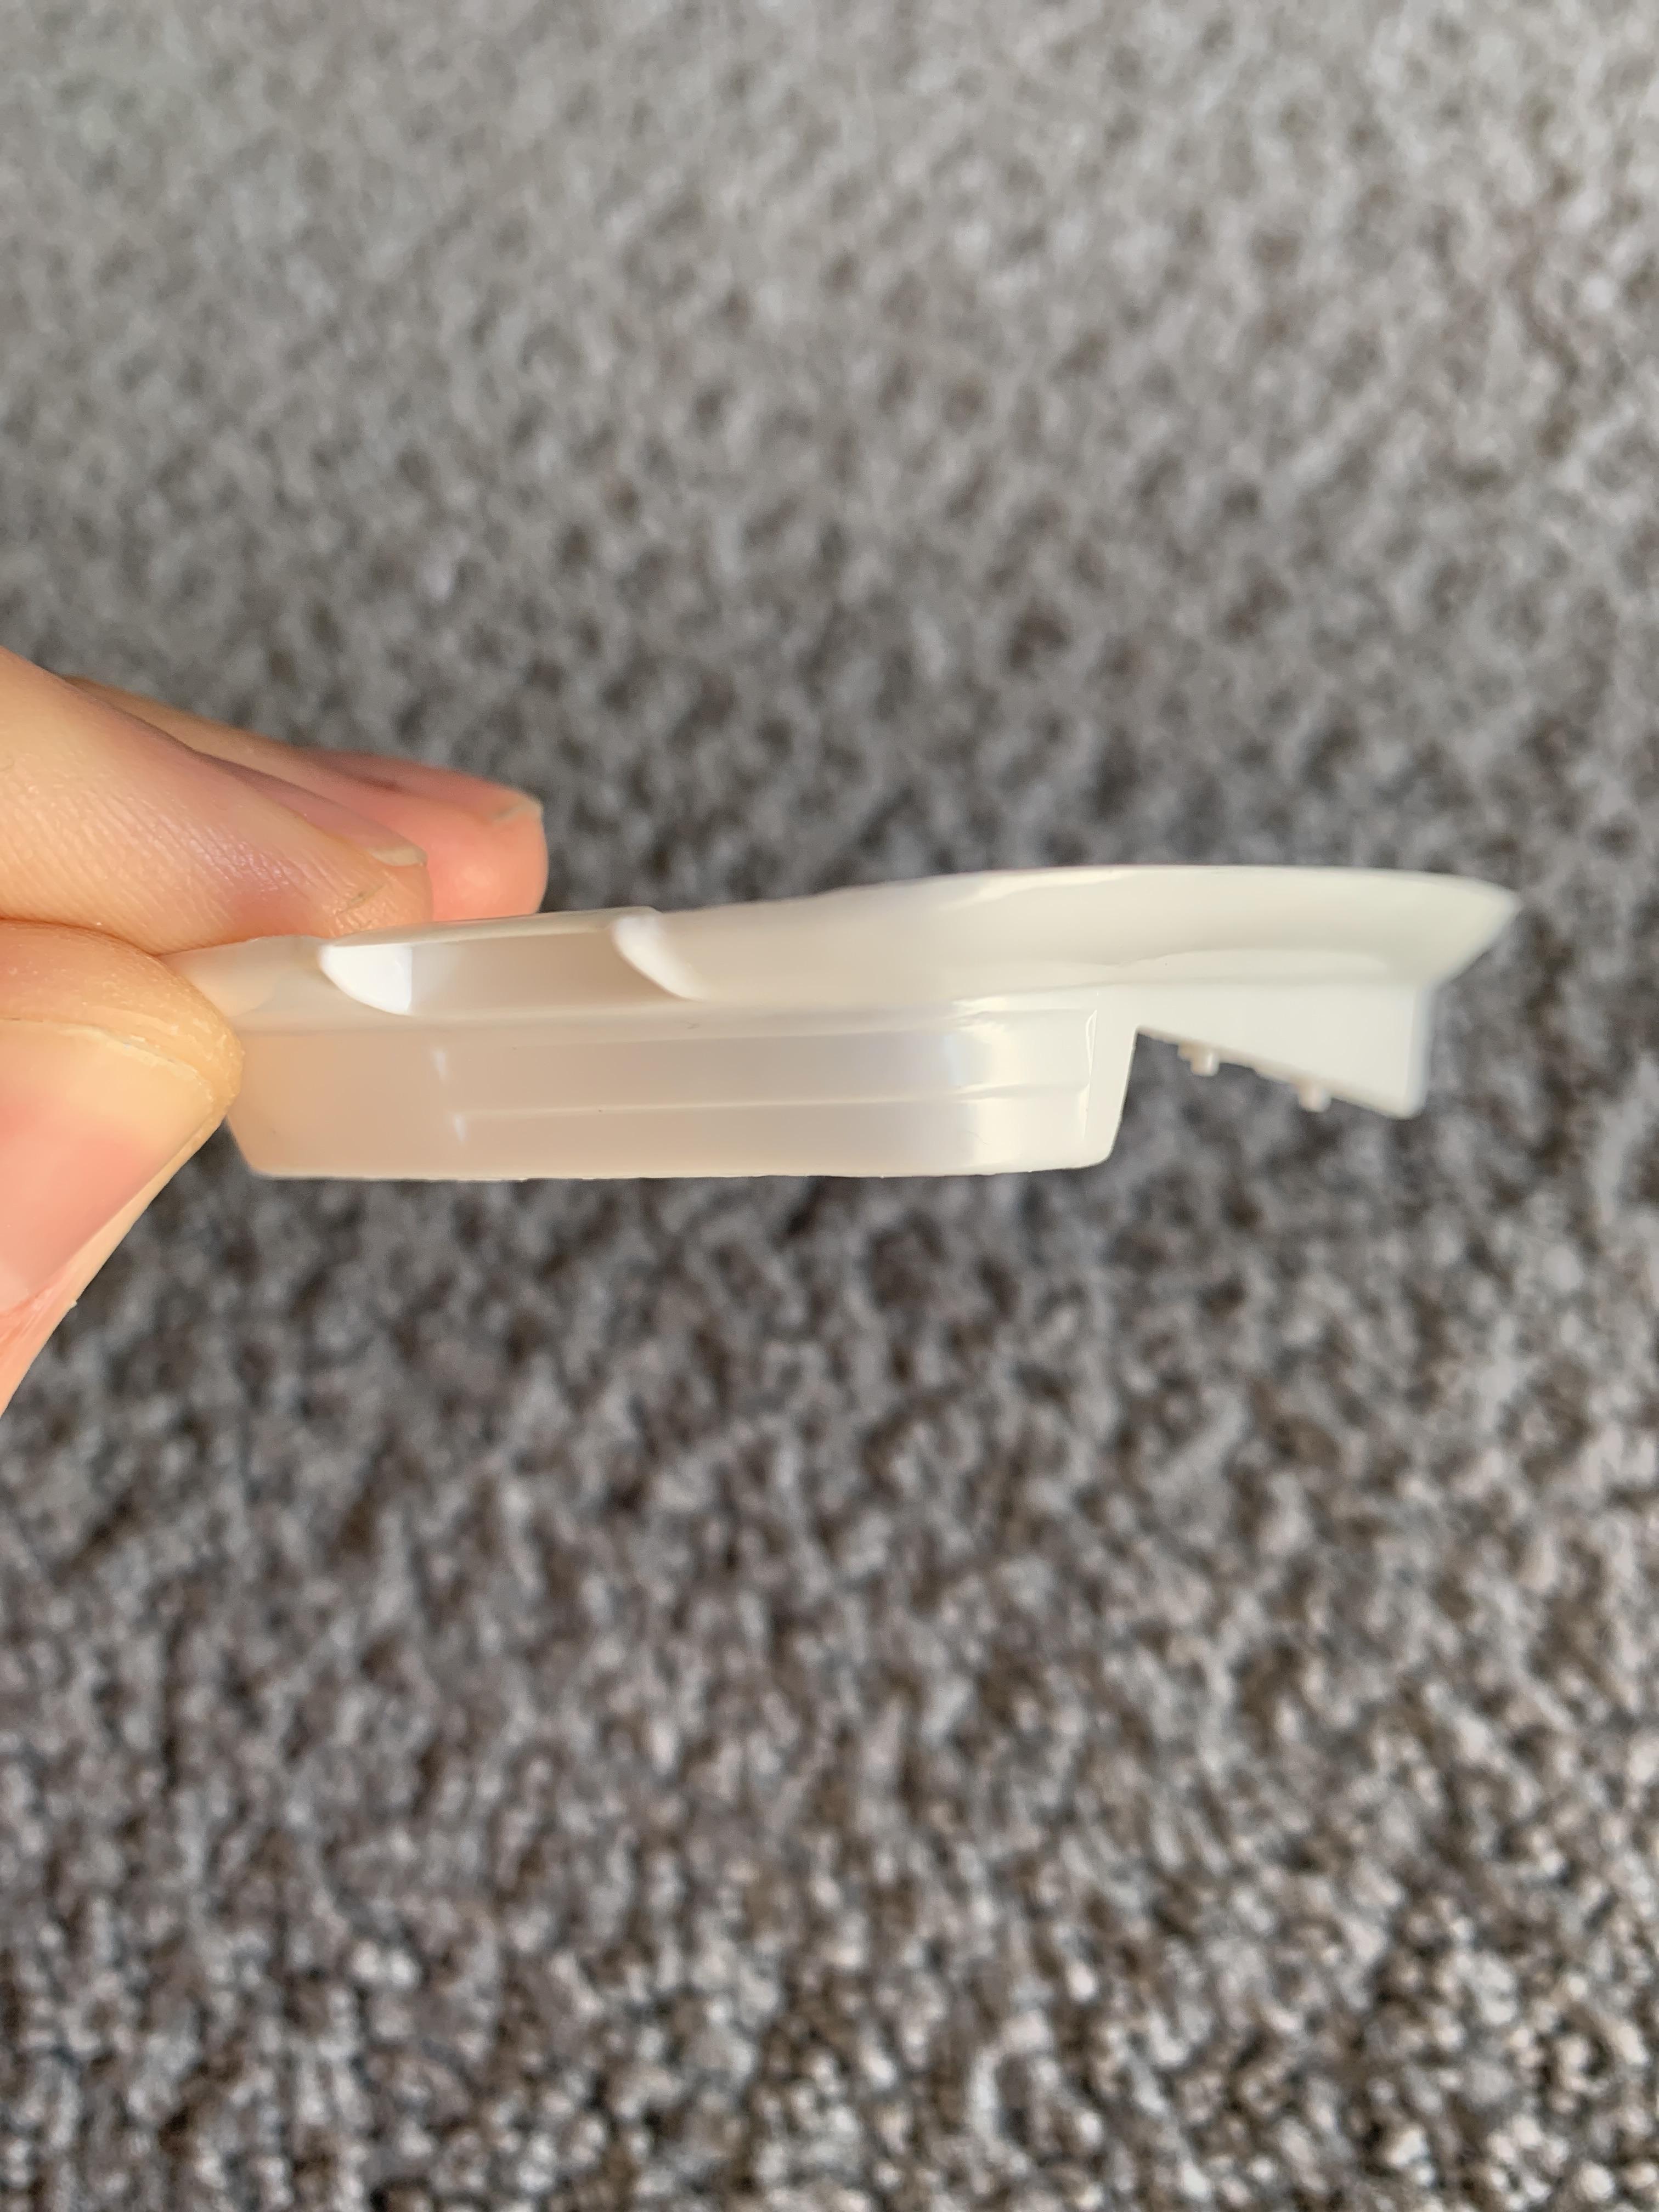
This is not the specific board for the Surfite. The kit has 3 this board will be apart of the diorama so testing my skills before I tackle the board that will sit on the car. The board is one of 2 you can have the Ed Roth figure holding.
-
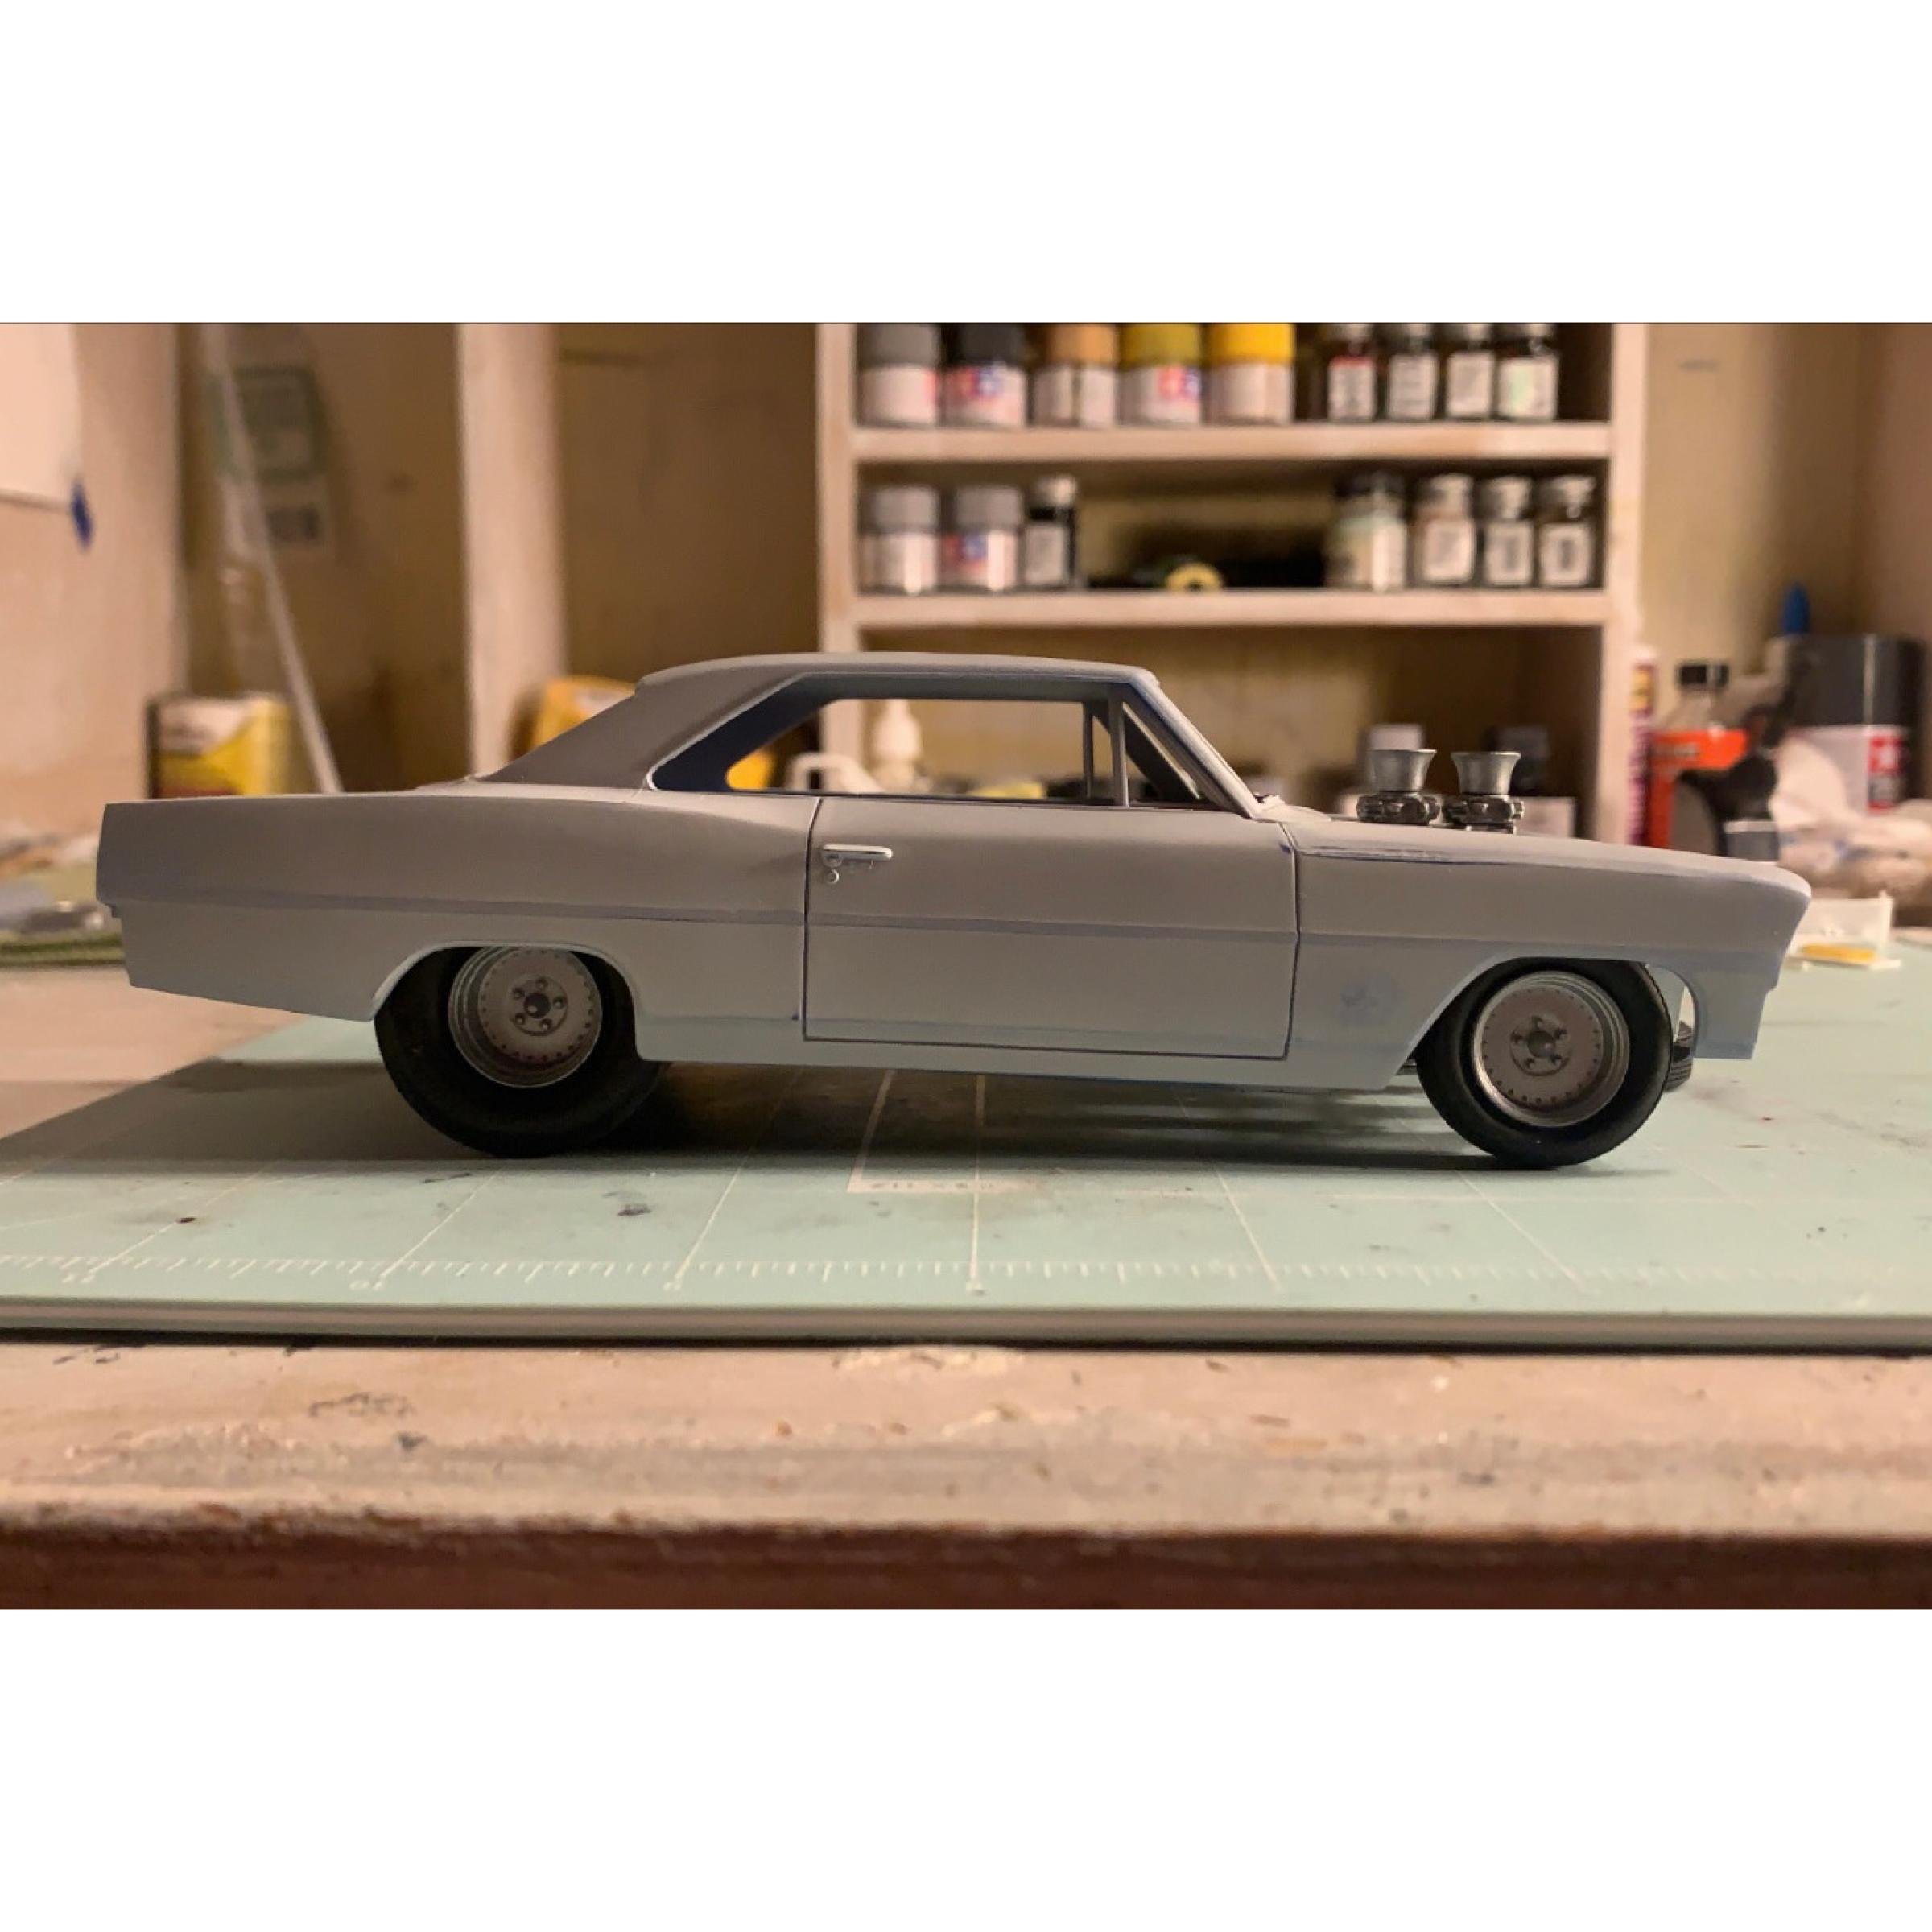
First stance mock up and it sits perfect! Always always fit and fit and fit more!
-
AMT ‘66 Chevy Nova Pro Street/ MPC ‘72 Vega Drag
laemtao replied to laemtao's topic in WIP: Model Cars
Using the wheels from the ‘66 Nova kit for the Vega. Let the kit bashing begin. I drilled out the center circles.
-
Thank you. Yeah I cut the body out right there and gonna 2 new pieces of styrene there. I’ll update a picture later. I am gonna try and mimic that extra drop on the bottom right vent.
-
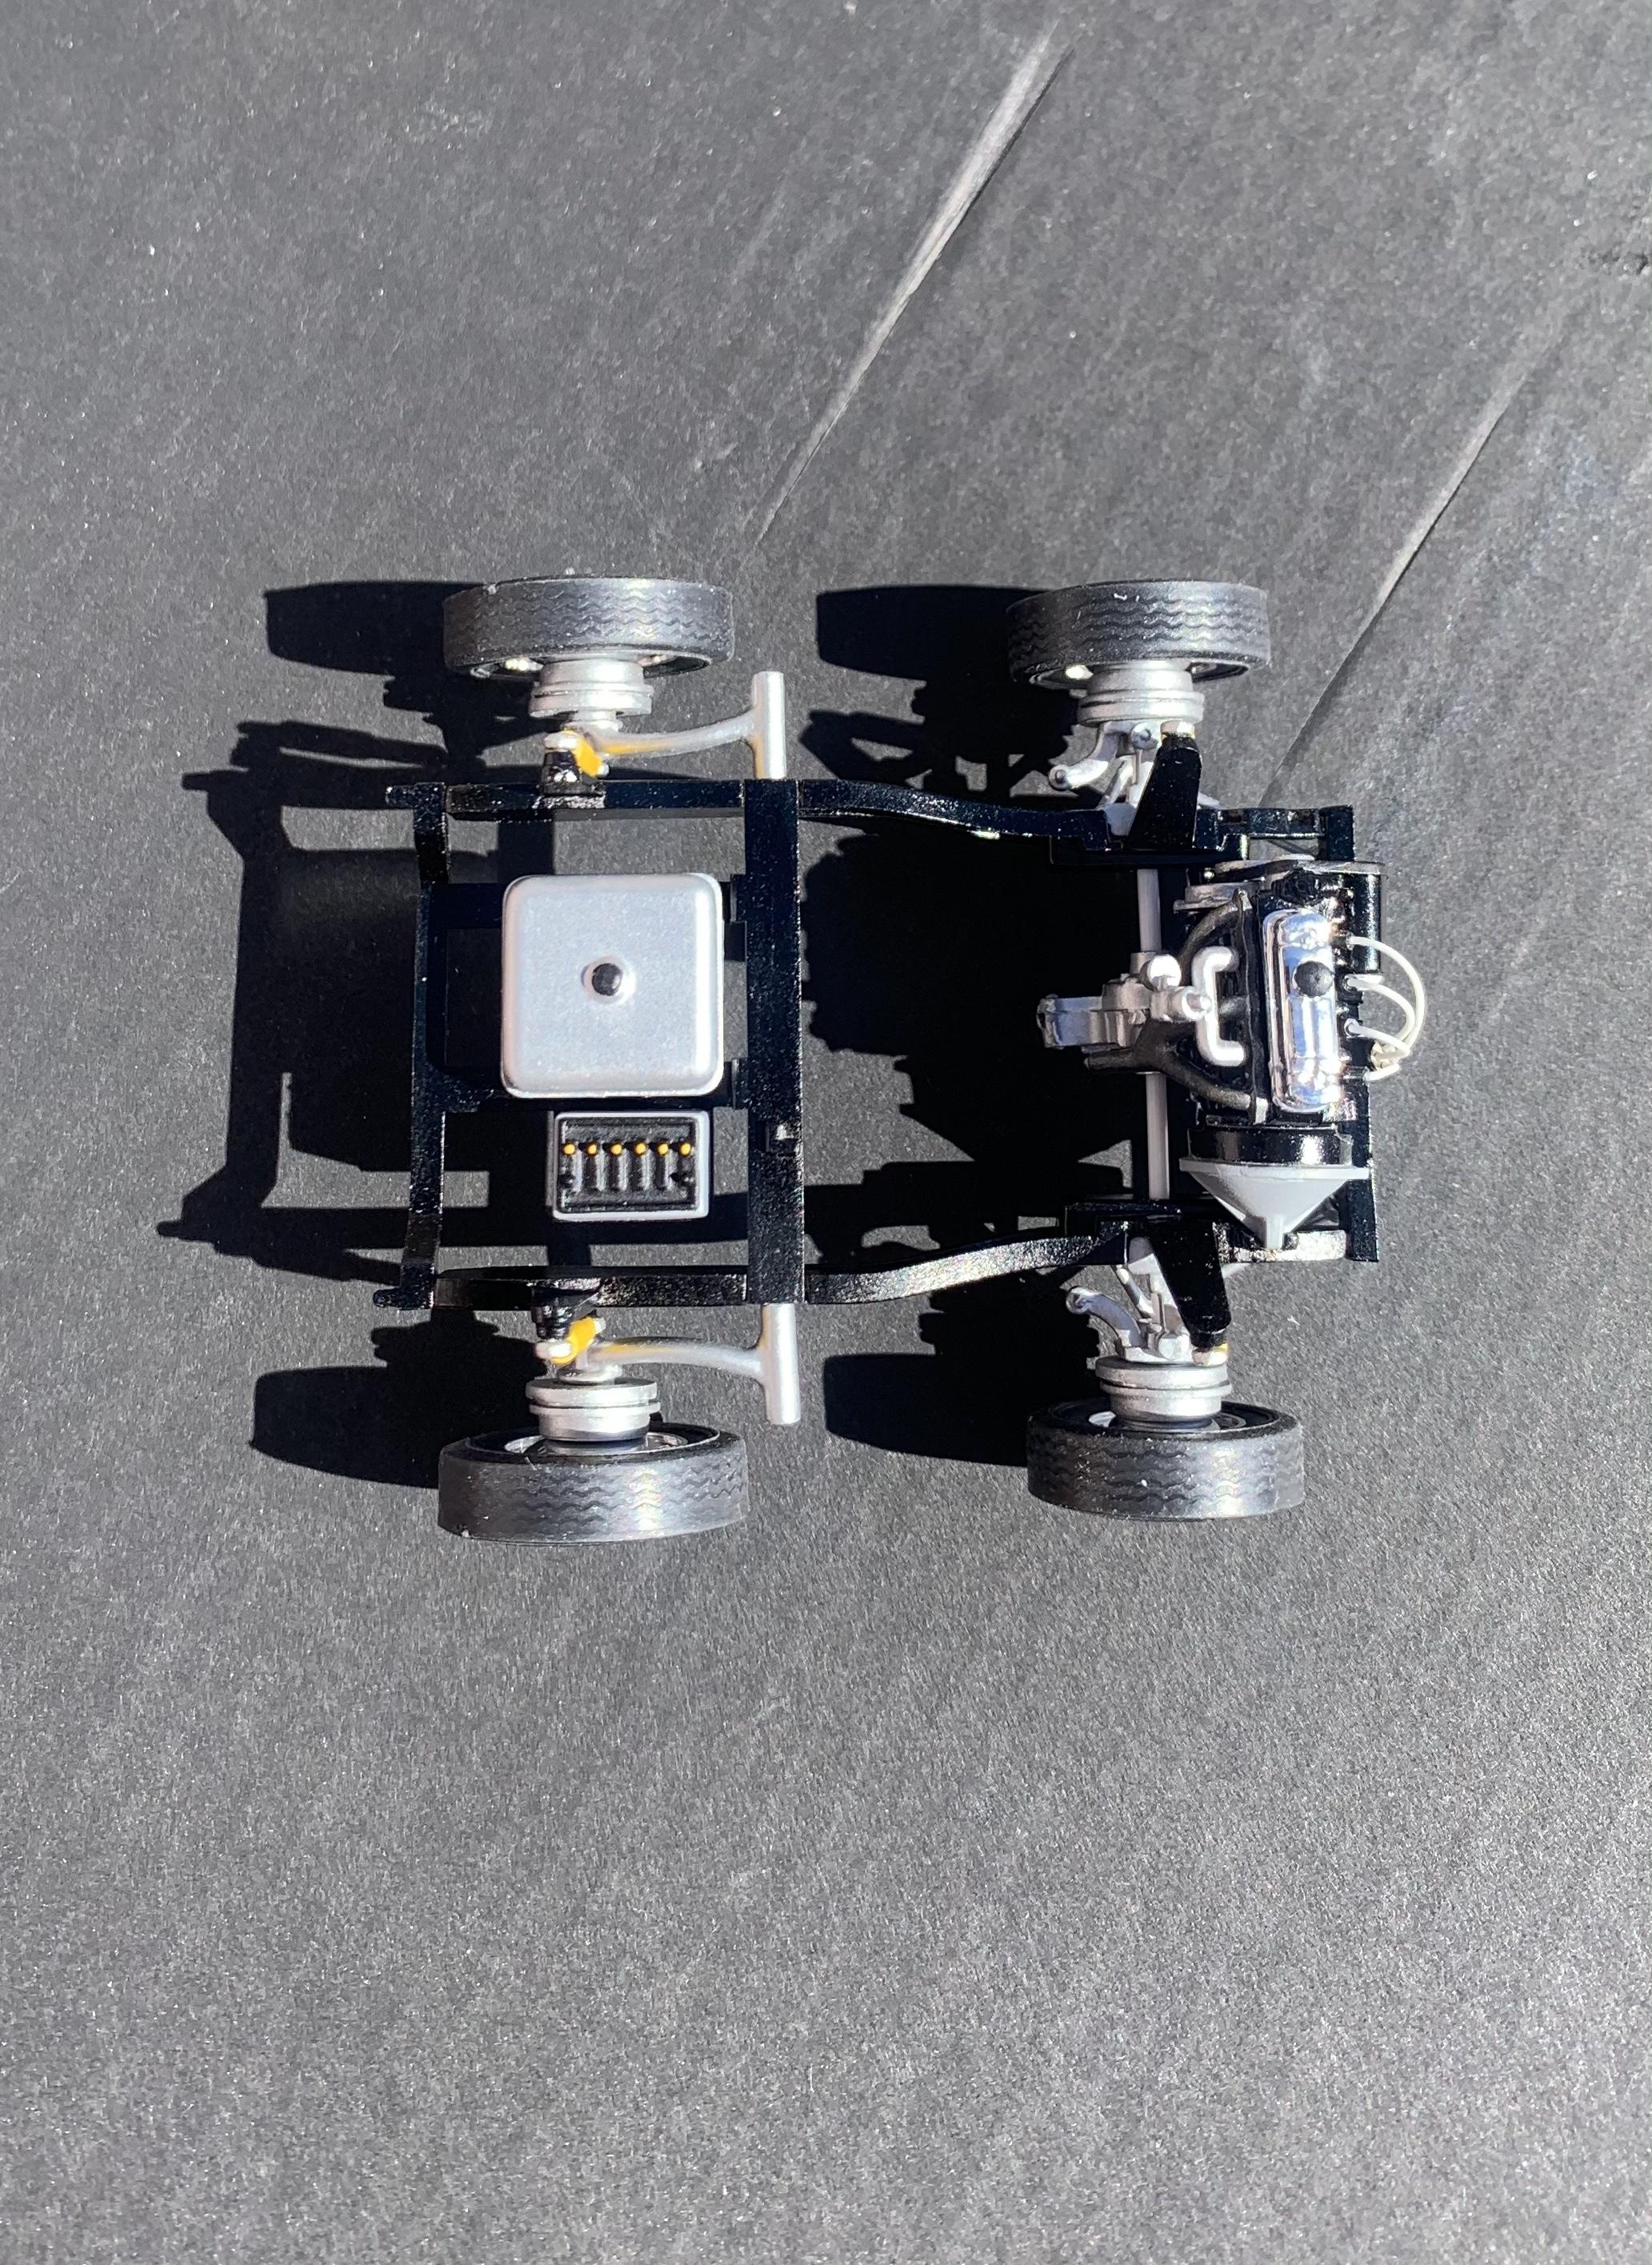
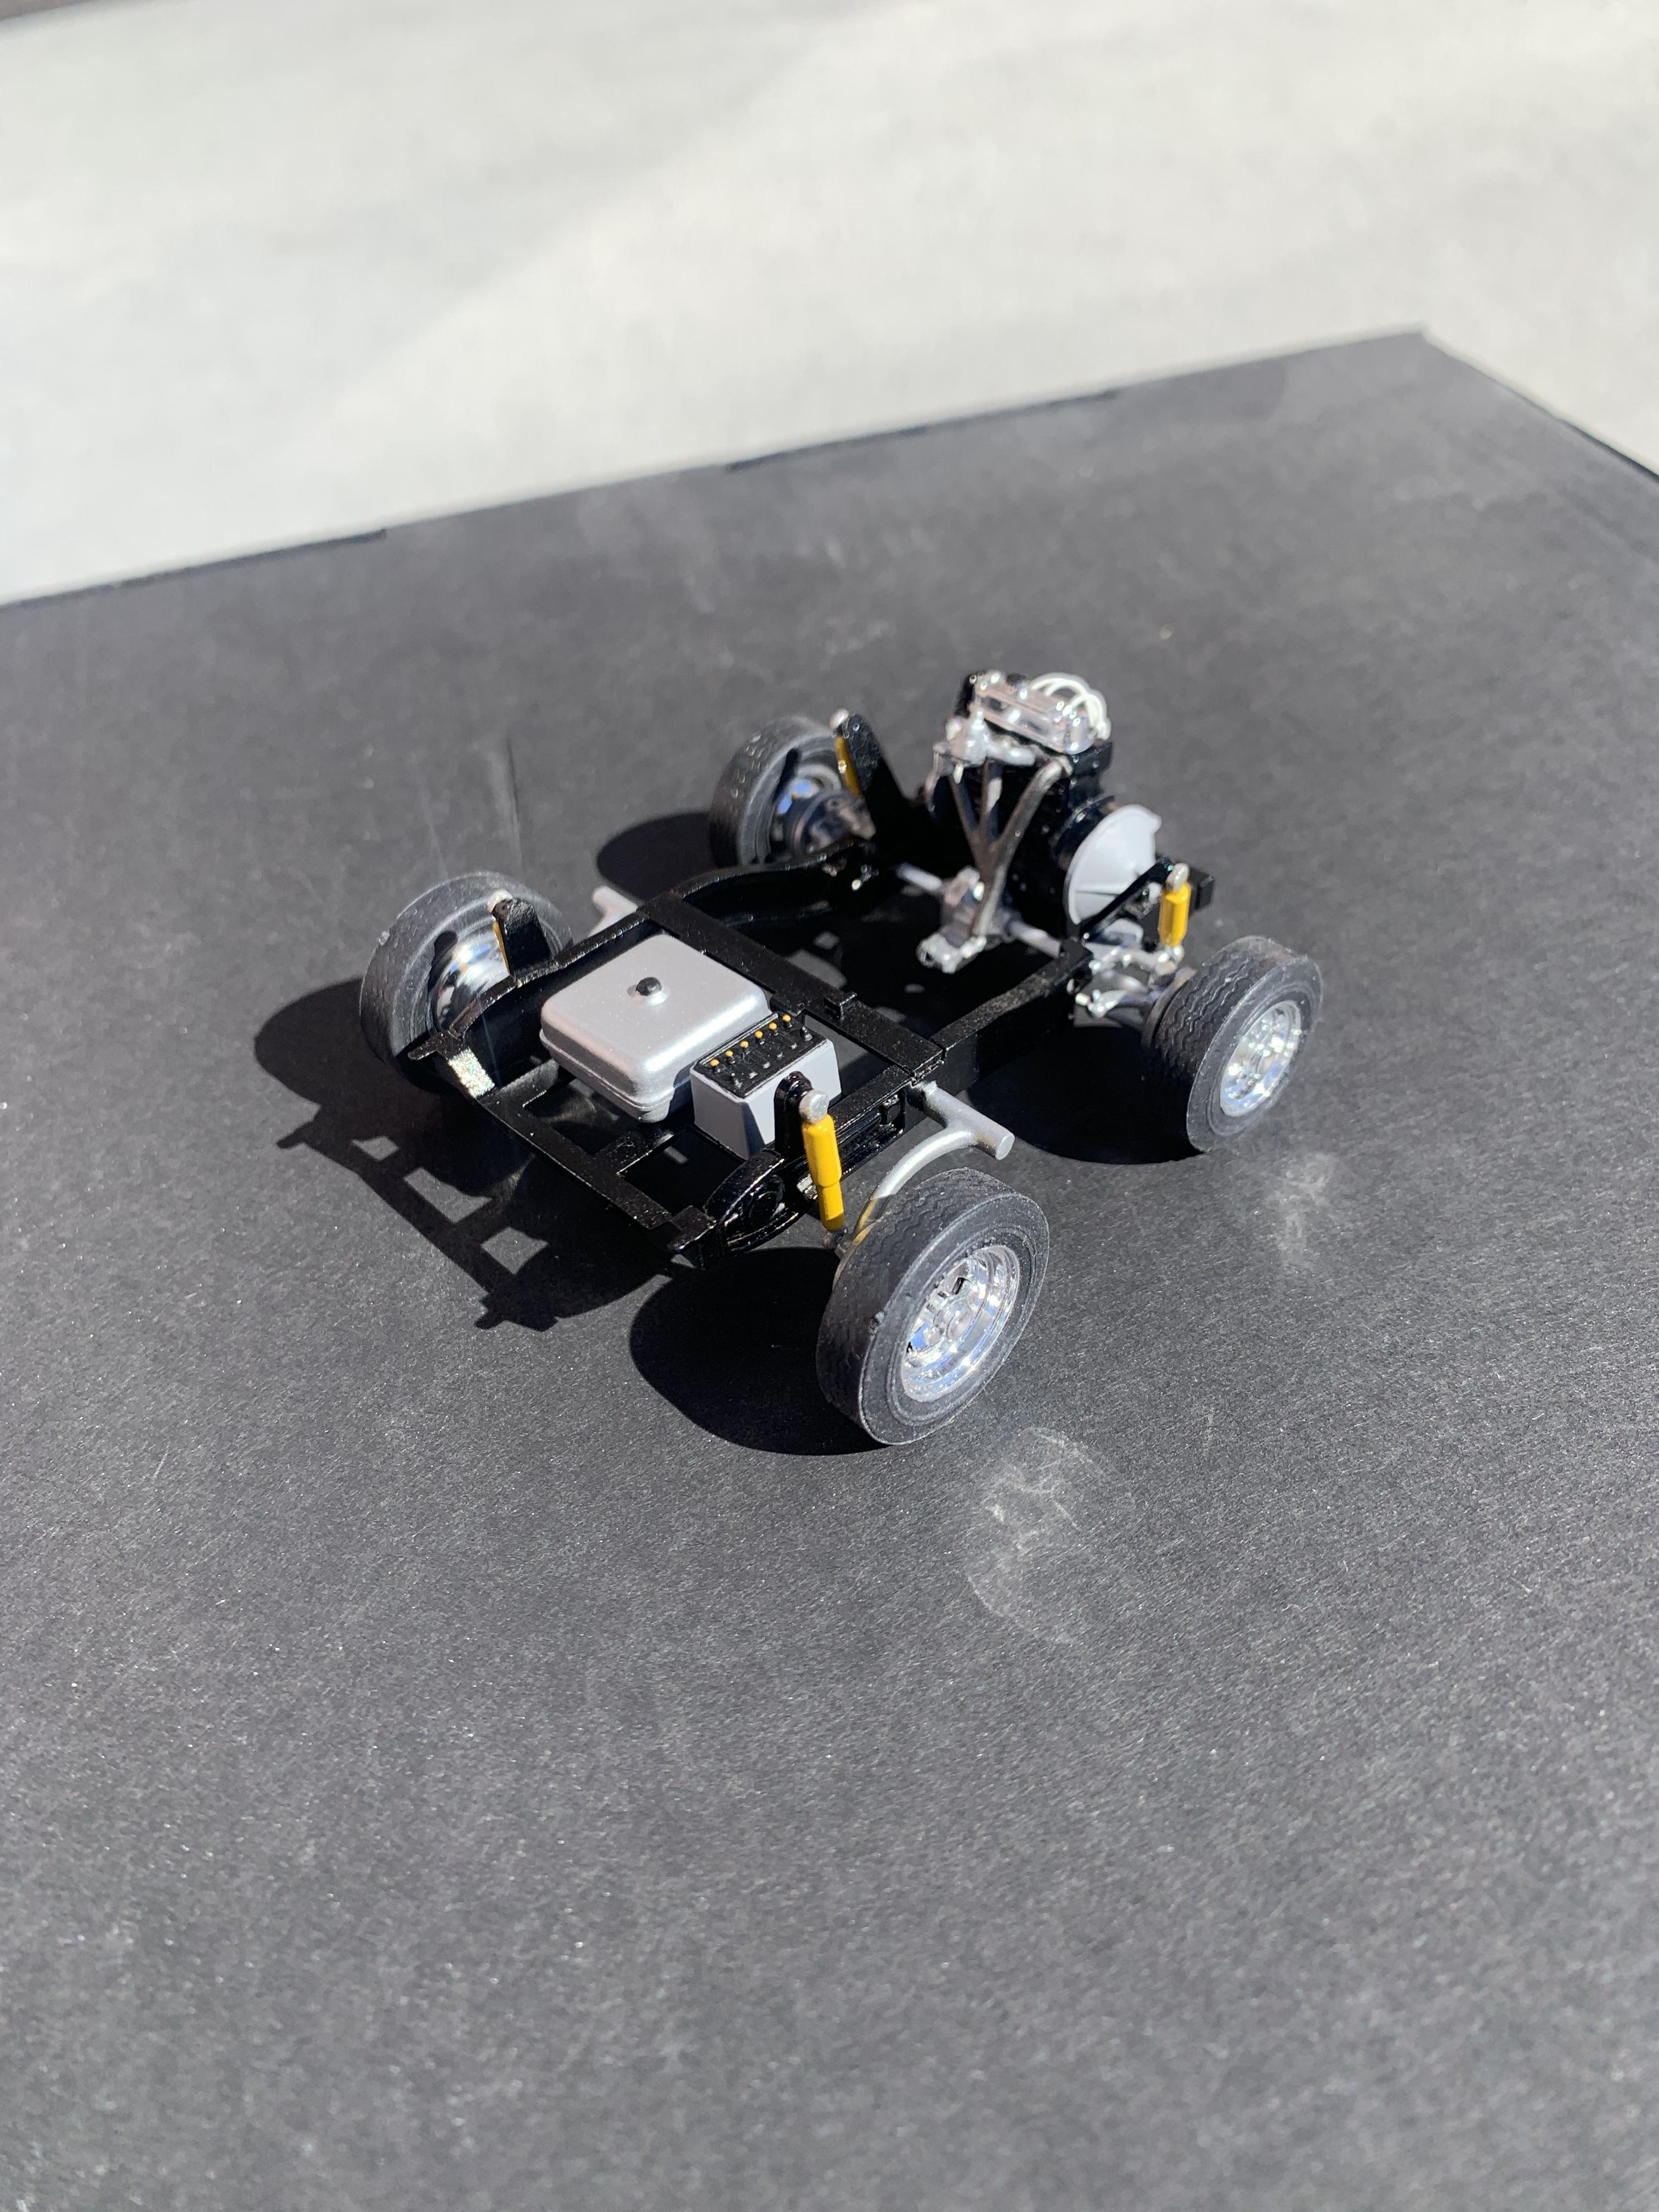
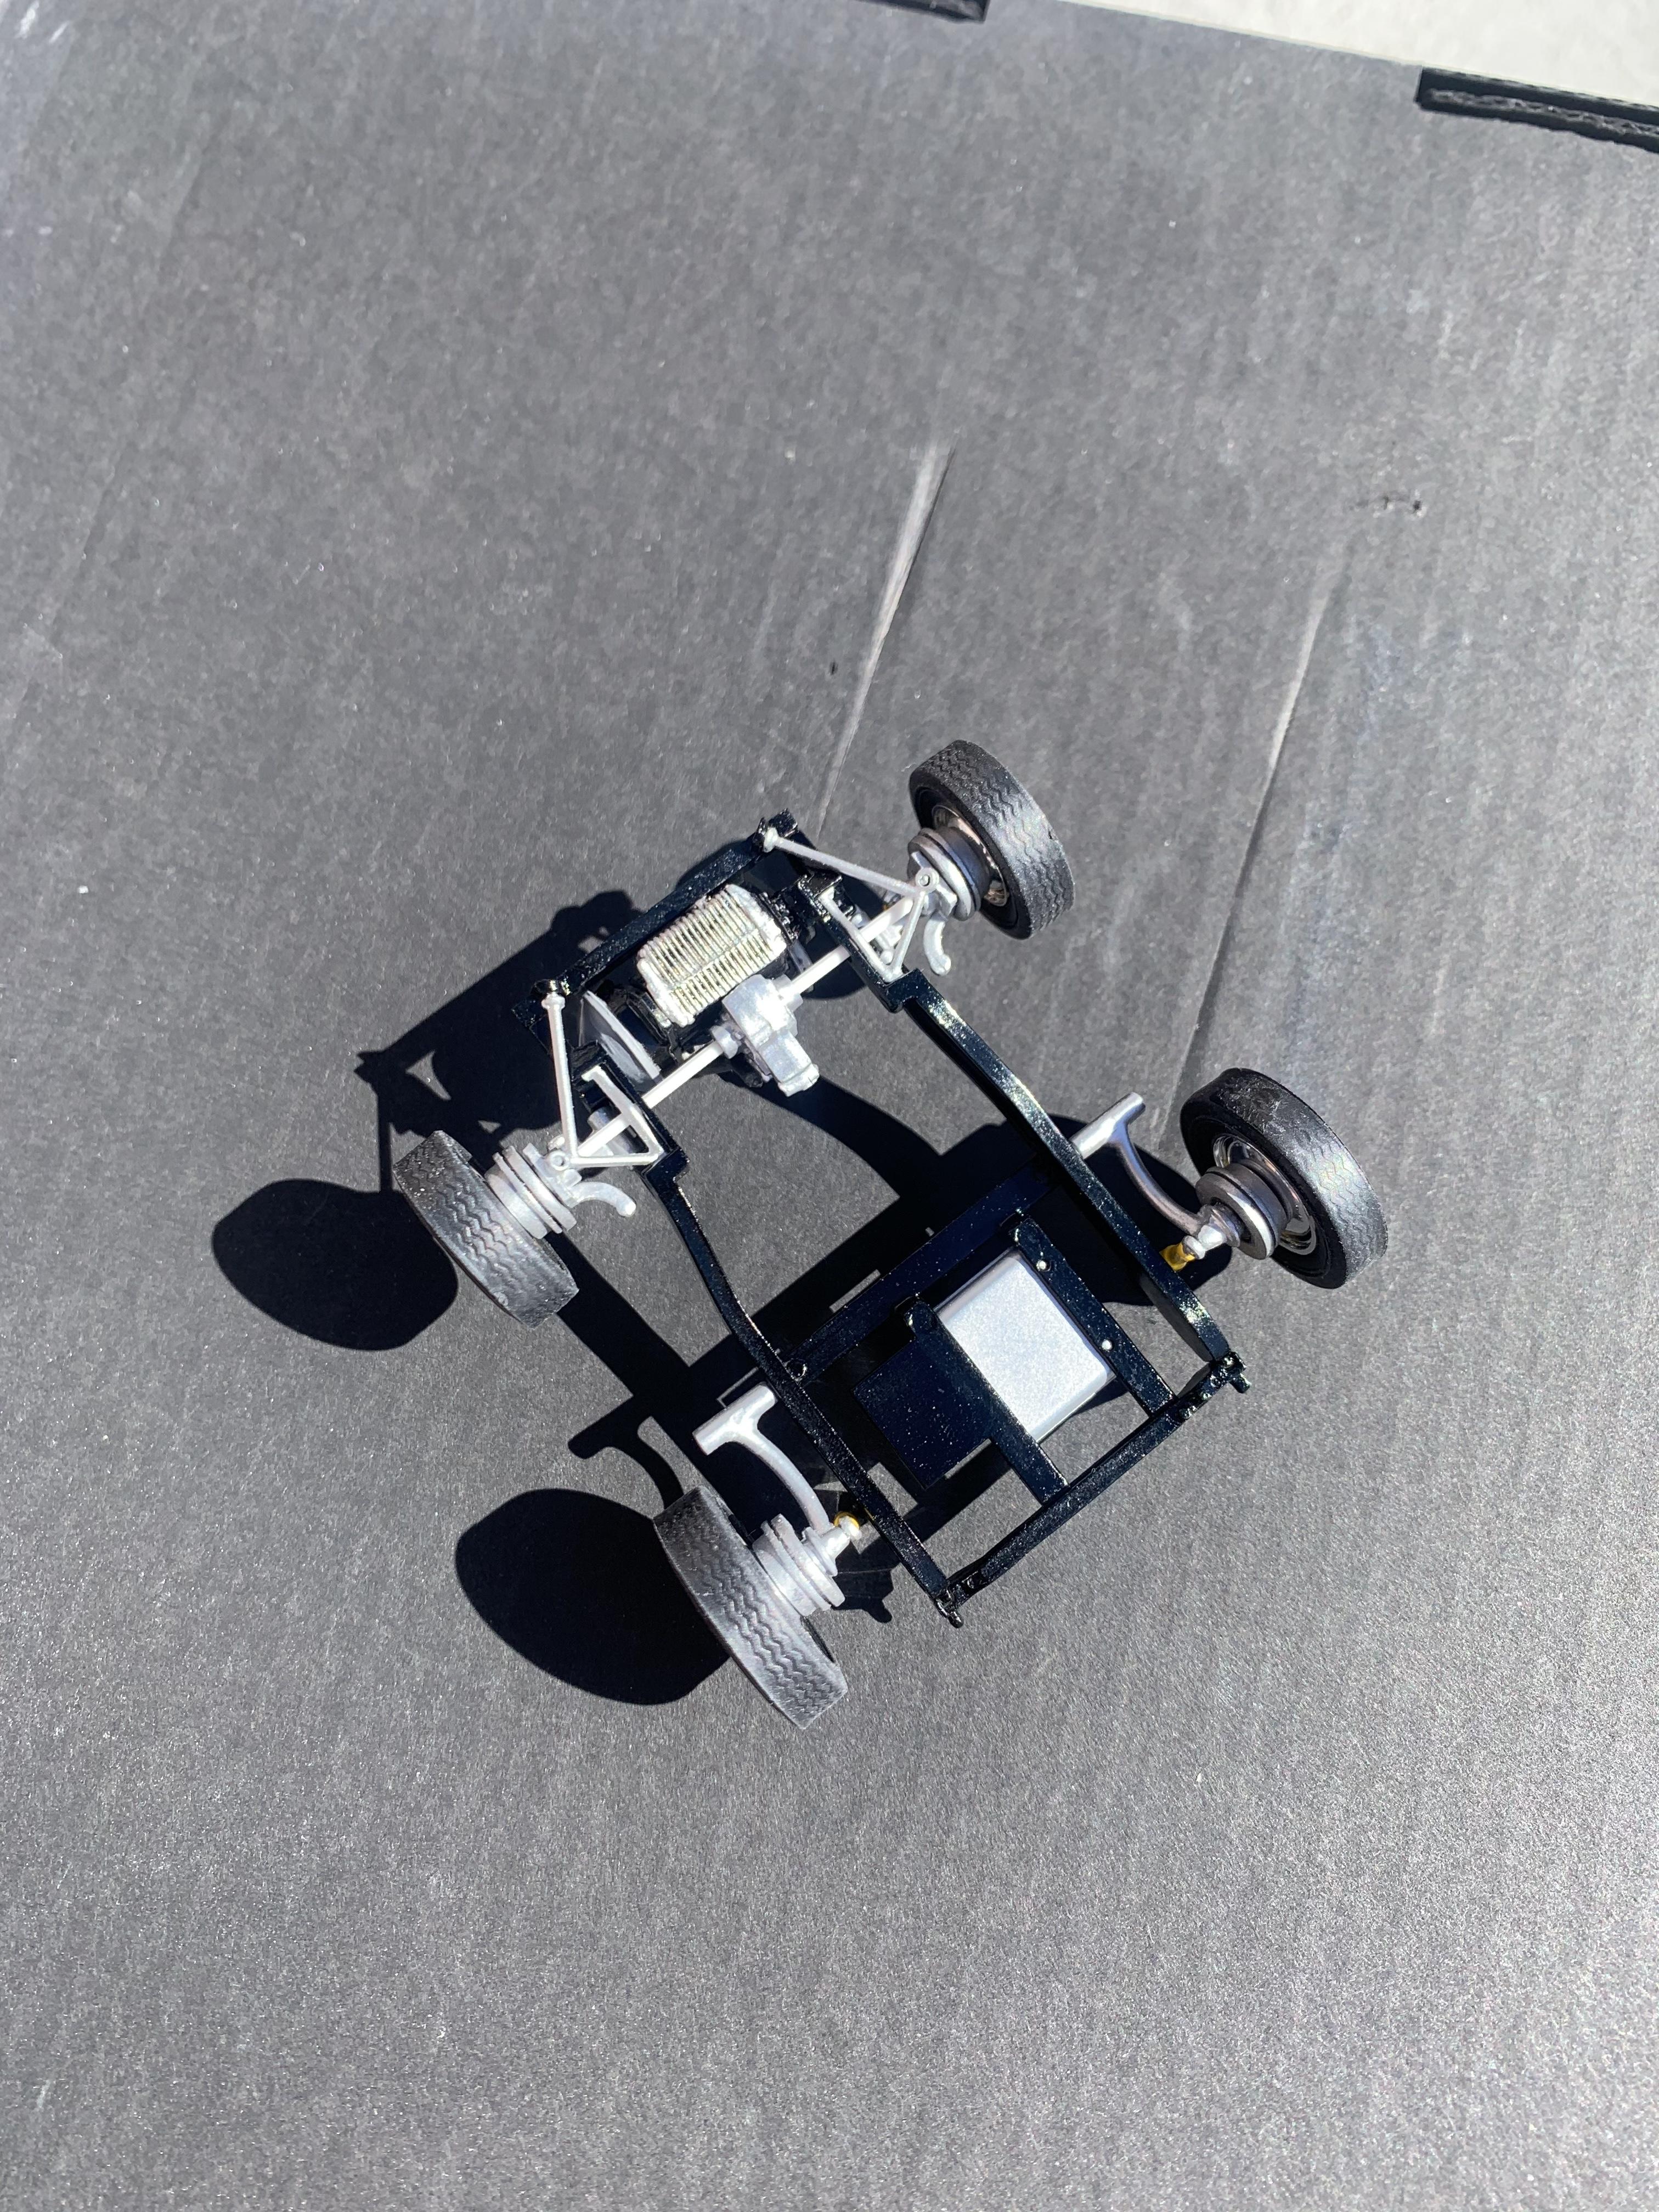
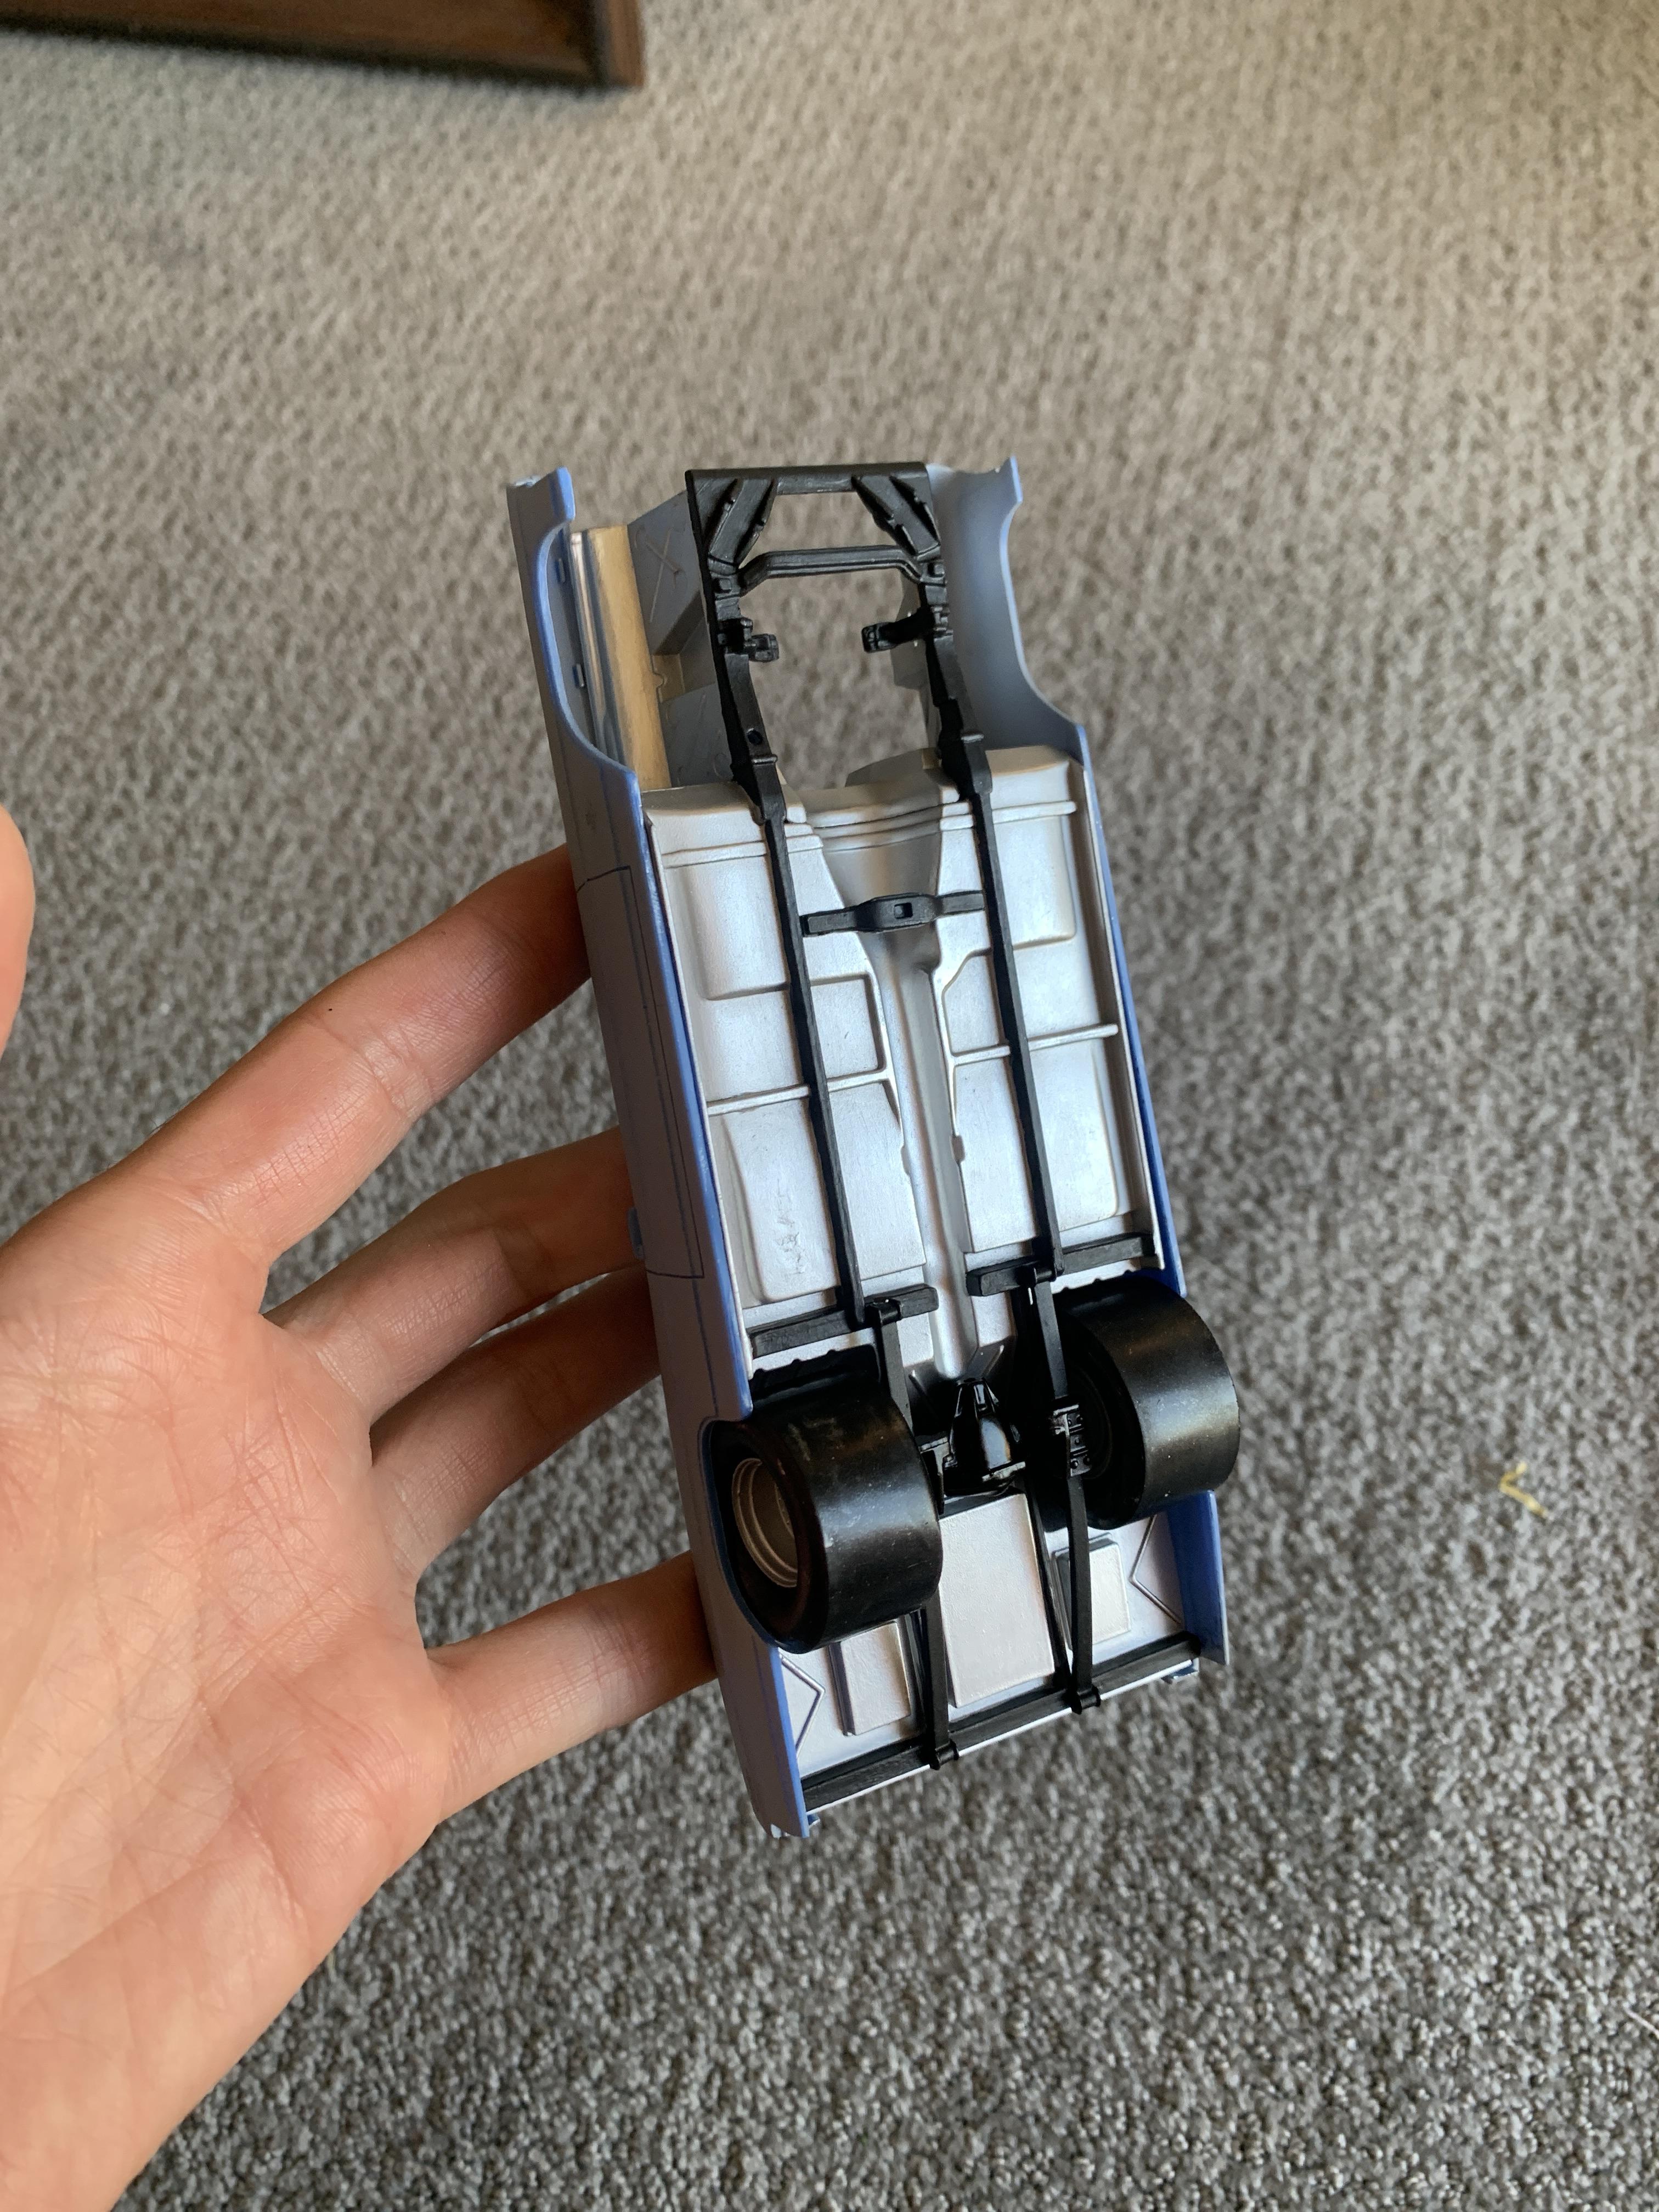
Rolling chassis completed and engine at 95% completed: add radiator, hose, starter and fan. little dusty in pictures
-
My Task for the day: replicate the two vent slots along the left front of the Surfite. The kit comes with 2 black decal stripes but with such minimal view of the engine I want to show it and replicate the 1:1. 2 options: I drill tiny holes and shave along to make two vents, OR just take the whole side out and replace with evergreen styrene and add a separation strip in the middle. of course while maintaining a clean look! also you can see the mold the lines begin to fall in a bit but on the 1:1 it’s smooth all the way across. SO IT BEGINS! Also rolling chassis coming next.
-
The Surfink is a awesome kit, I saw it on a reissue list for this year. I have never worked with resin so I may just to clay for this diorama. Also thought about making a little crab after seeing it on a surfink! Once I get to that stage of the process it will most likely happen give the beach scene more spice than just a tsunami about to crush my little yellow Surfite! Thank you for sharing that picture
-
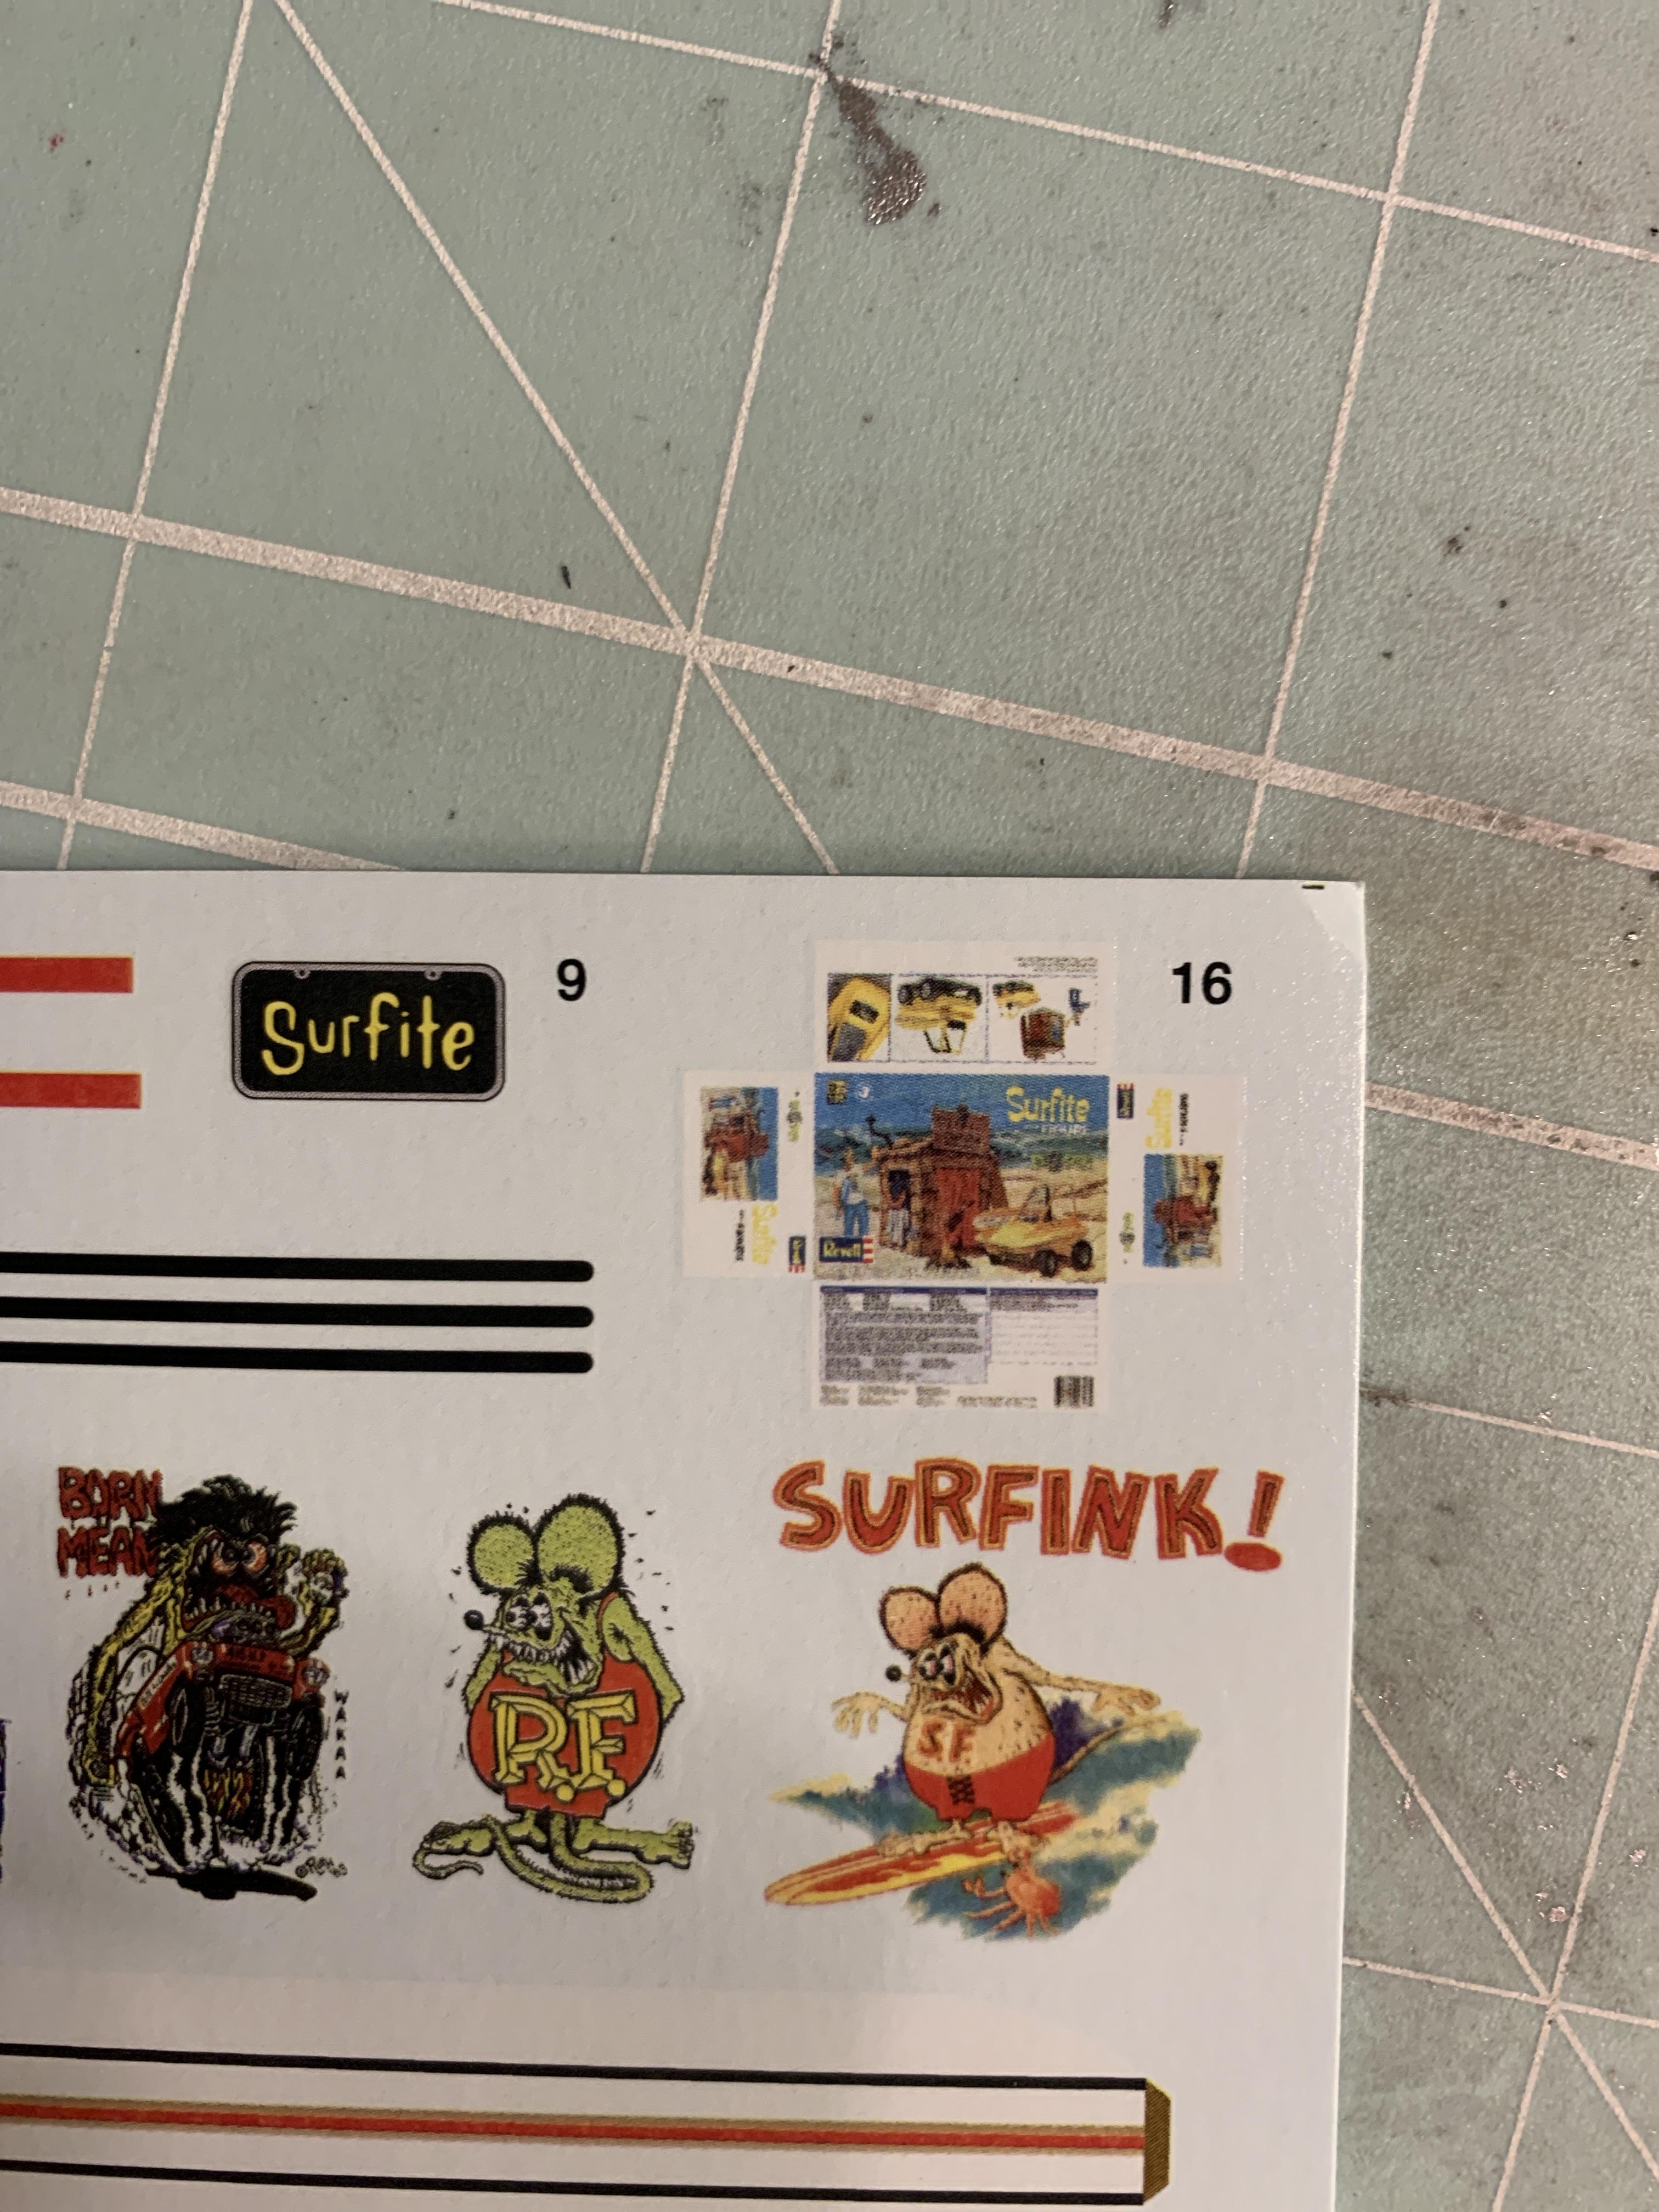
Thank you Very much! I hope I can recreate the wave in a cool Roth style. And I just peeked at the decal sheet. Which has a mini Revell Surfite box so maybe build a mini box and “bury” it on the beach diorama part aka have it sticking out of the sand just slightly
-
Wicked cool story, he seemed like a pretty cool dude. And great work on those 3 Roth kits and hopefully you can get the other 2 finished. I am def gonna get another Roth kit once this build is done.
-
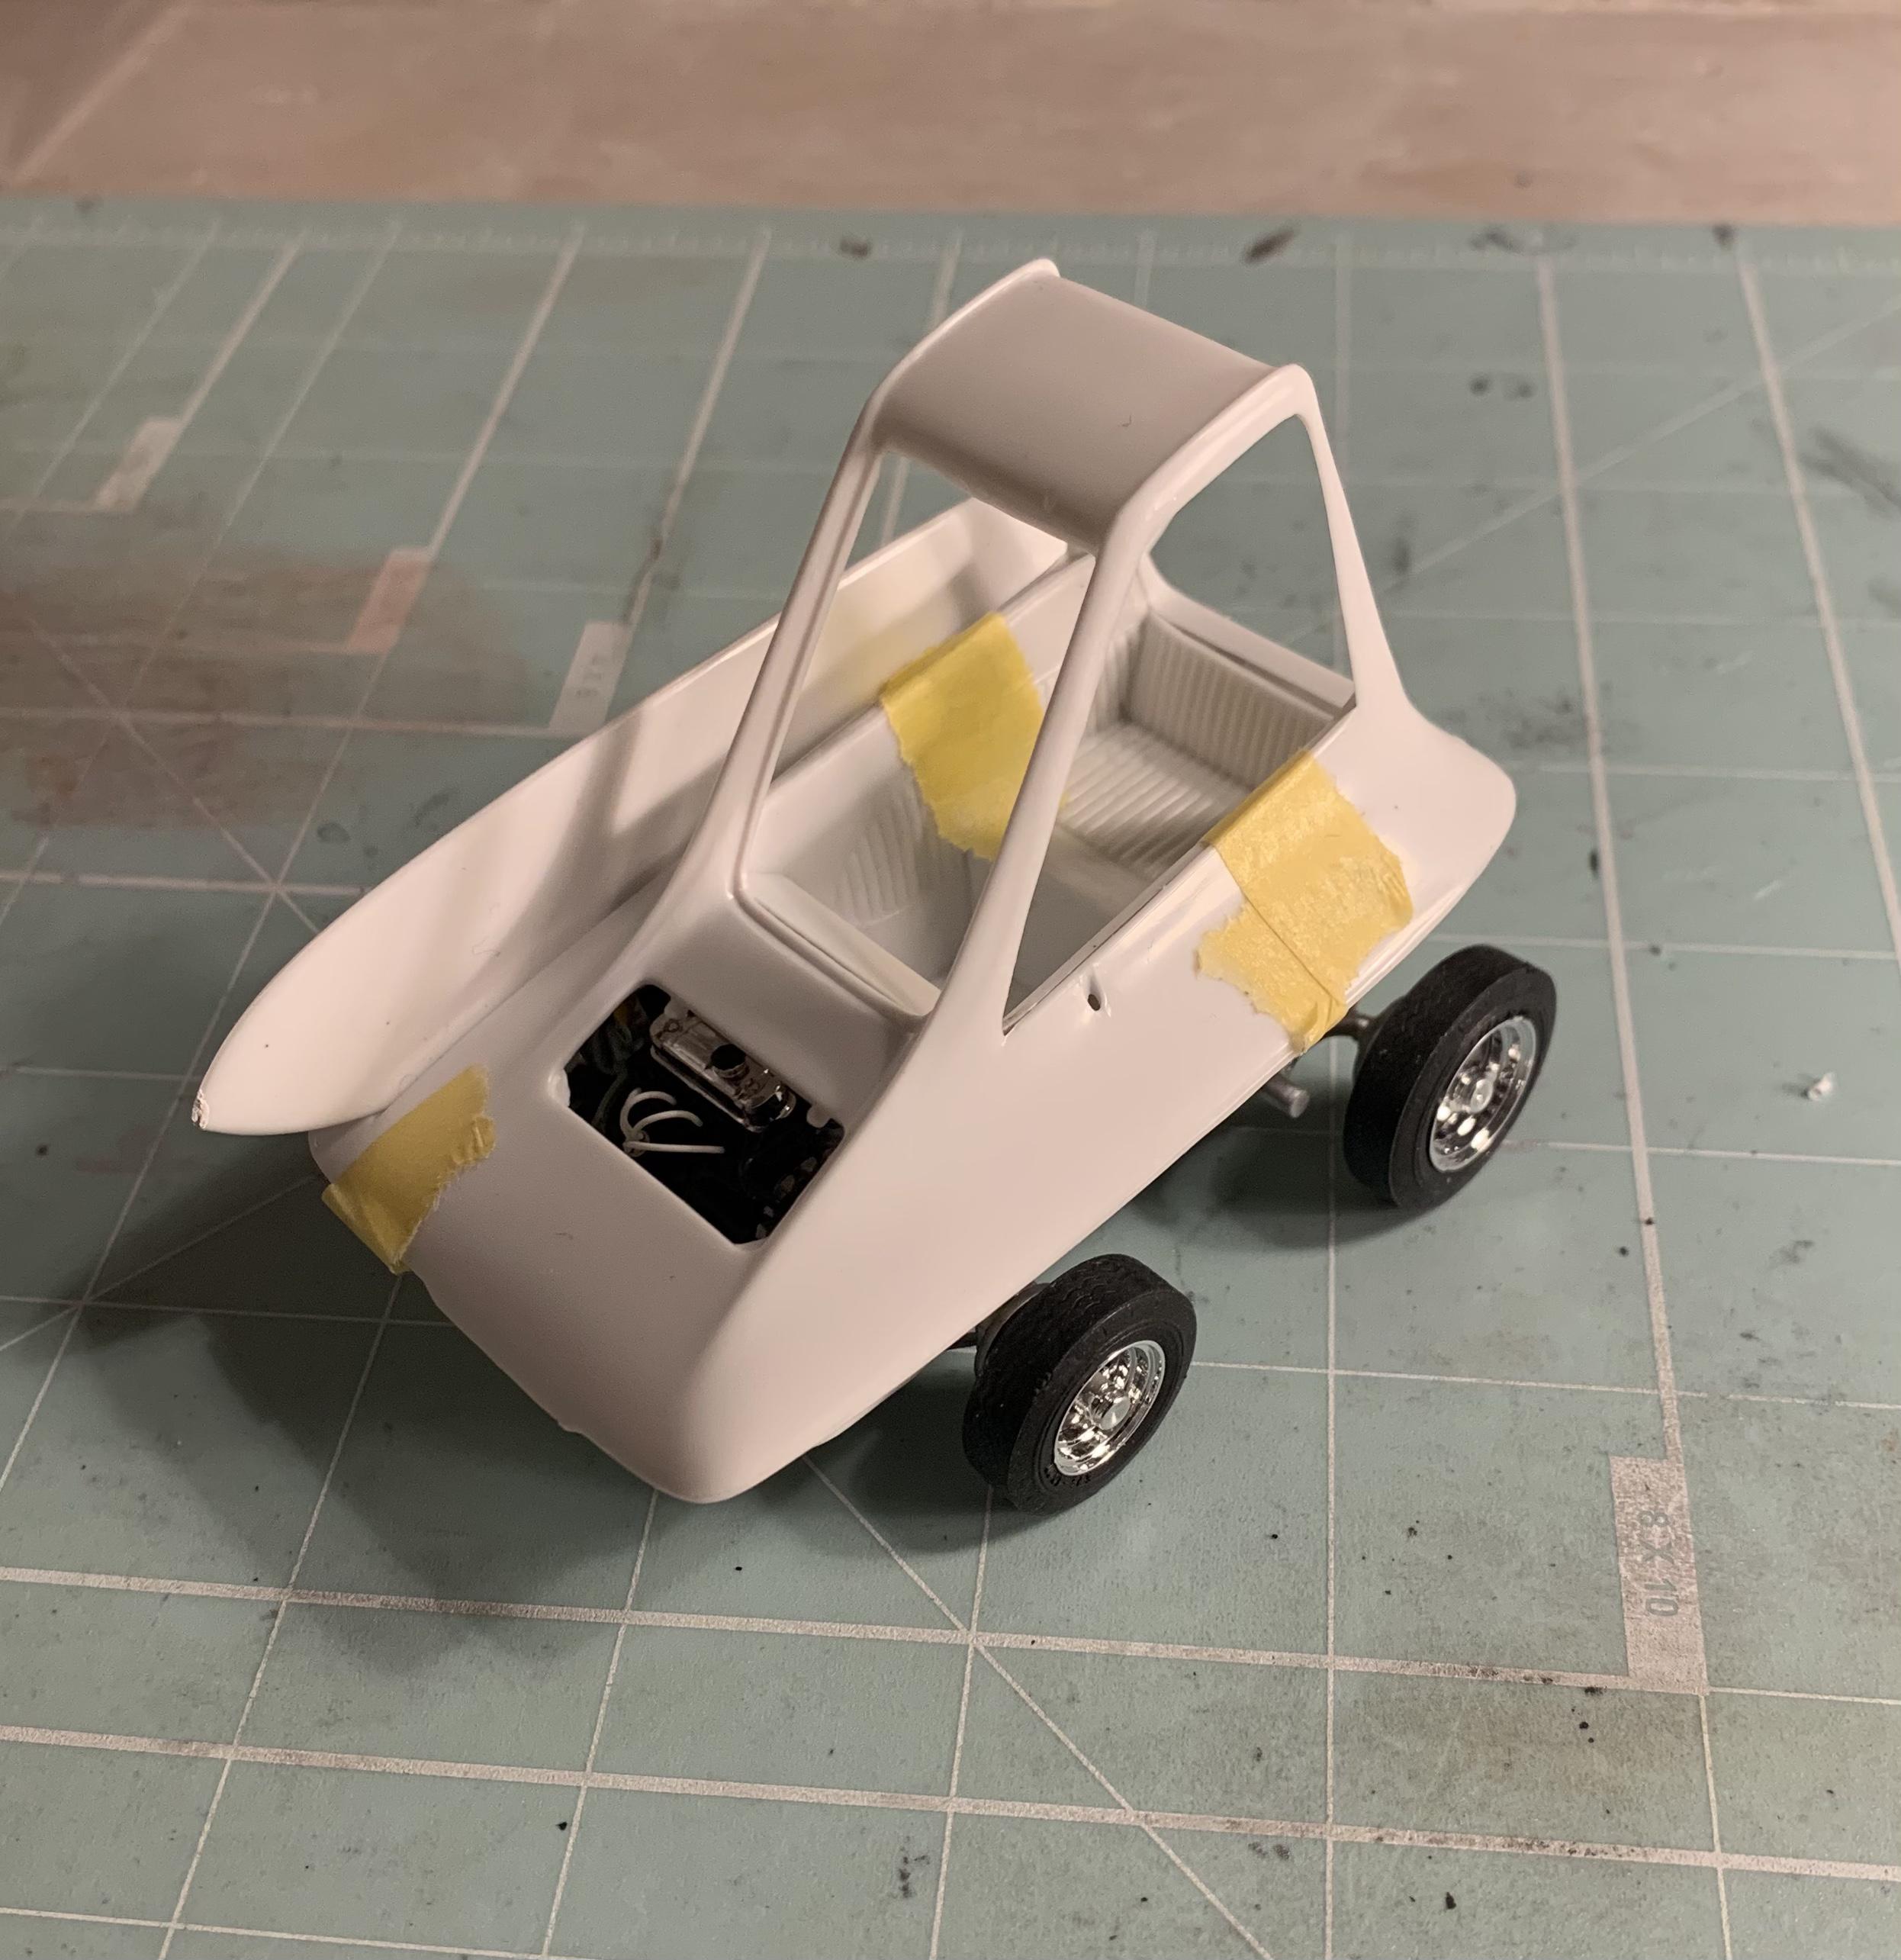
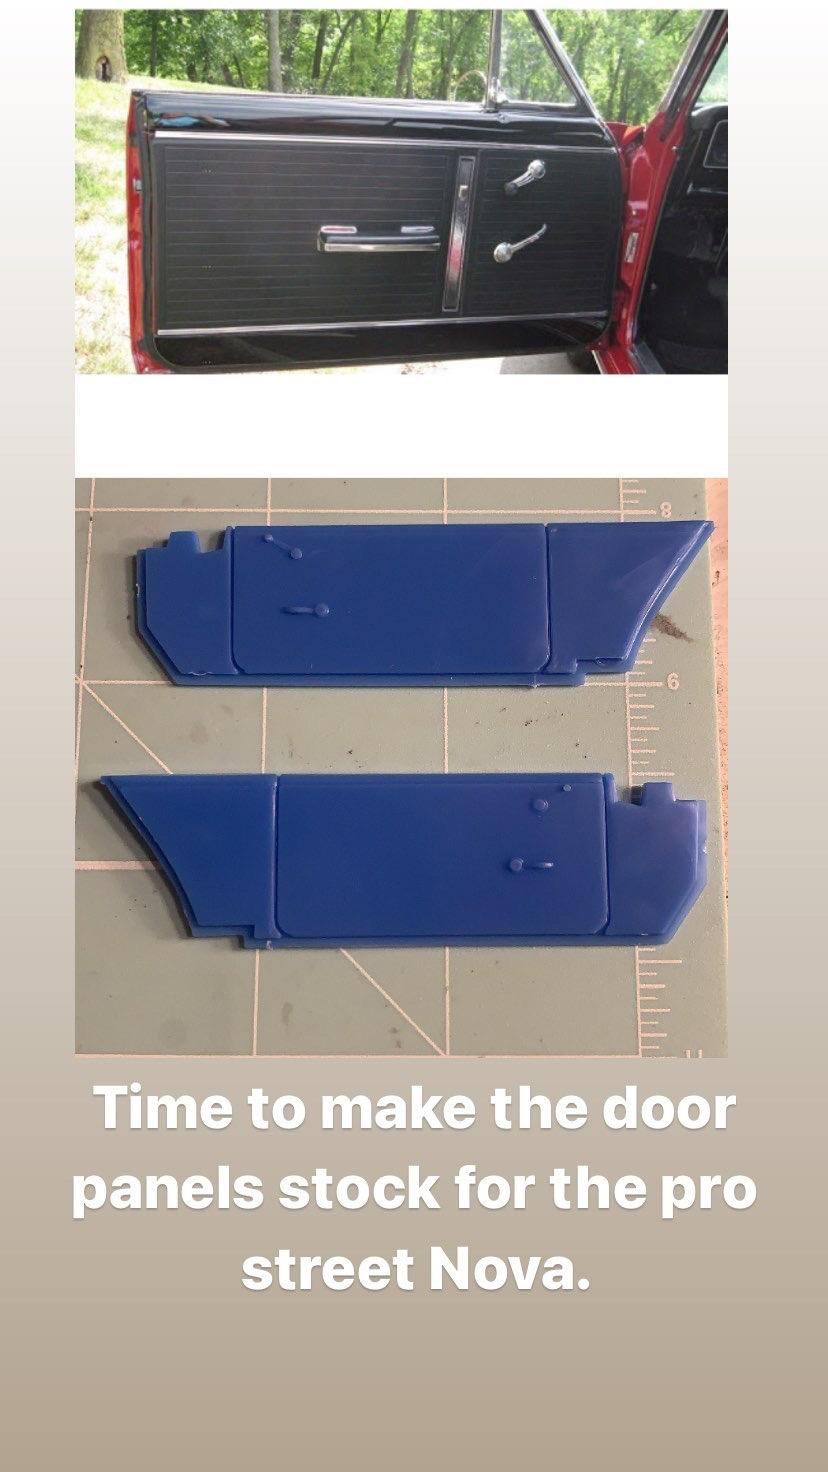
The nova will get a pro street build and the Vega will get more drag build but I’m kit bashing them together. 1966 Chevy Nova and 1972 Chevy Vega Nova Paint: Tamiya Maroon with Tamiya Clear Pearl over Maroon Vega paint: still thinking, maybe a blue shade Model Car Garage Photoetched sheet will be added. I cut the trunk out to showcase the fuel tank, add a NOS bottle and the Delco Battery, will be fully routed/wired. will lower the stance just slightly, Interior will stay stock, with a scratch built 6 point roll cage. Toughest challenge is I have no clue about this setup but will give it a shot, also the door panels are smooth so gonna scratch the factory stock panels to keep interior factory stock and the PE sheet will help pop the details.
-
Thank you very much. It’s an awesome little kit. I watched a Roth documentary’s couple weeks back and purchased the kit halfway thru the movie and it’s going from there.