AaronM
-
Posts
74 -
Joined
-
Last visited
Content Type
Profiles
Forums
Events
Gallery
Everything posted by AaronM
-
1/12 Tamiya Wolf WR1 (With a Twist)
AaronM replied to AaronM's topic in WIP: Other Racing: Road Racing, Land Speed Racers
That’s the one. Obviously there’s scope to adjust things a bit more to suit the lines of the Wolf. -
1/12th Italeri Alfa Romeo 179 /179C
AaronM replied to AaronM's topic in WIP: Other Racing: Road Racing, Land Speed Racers
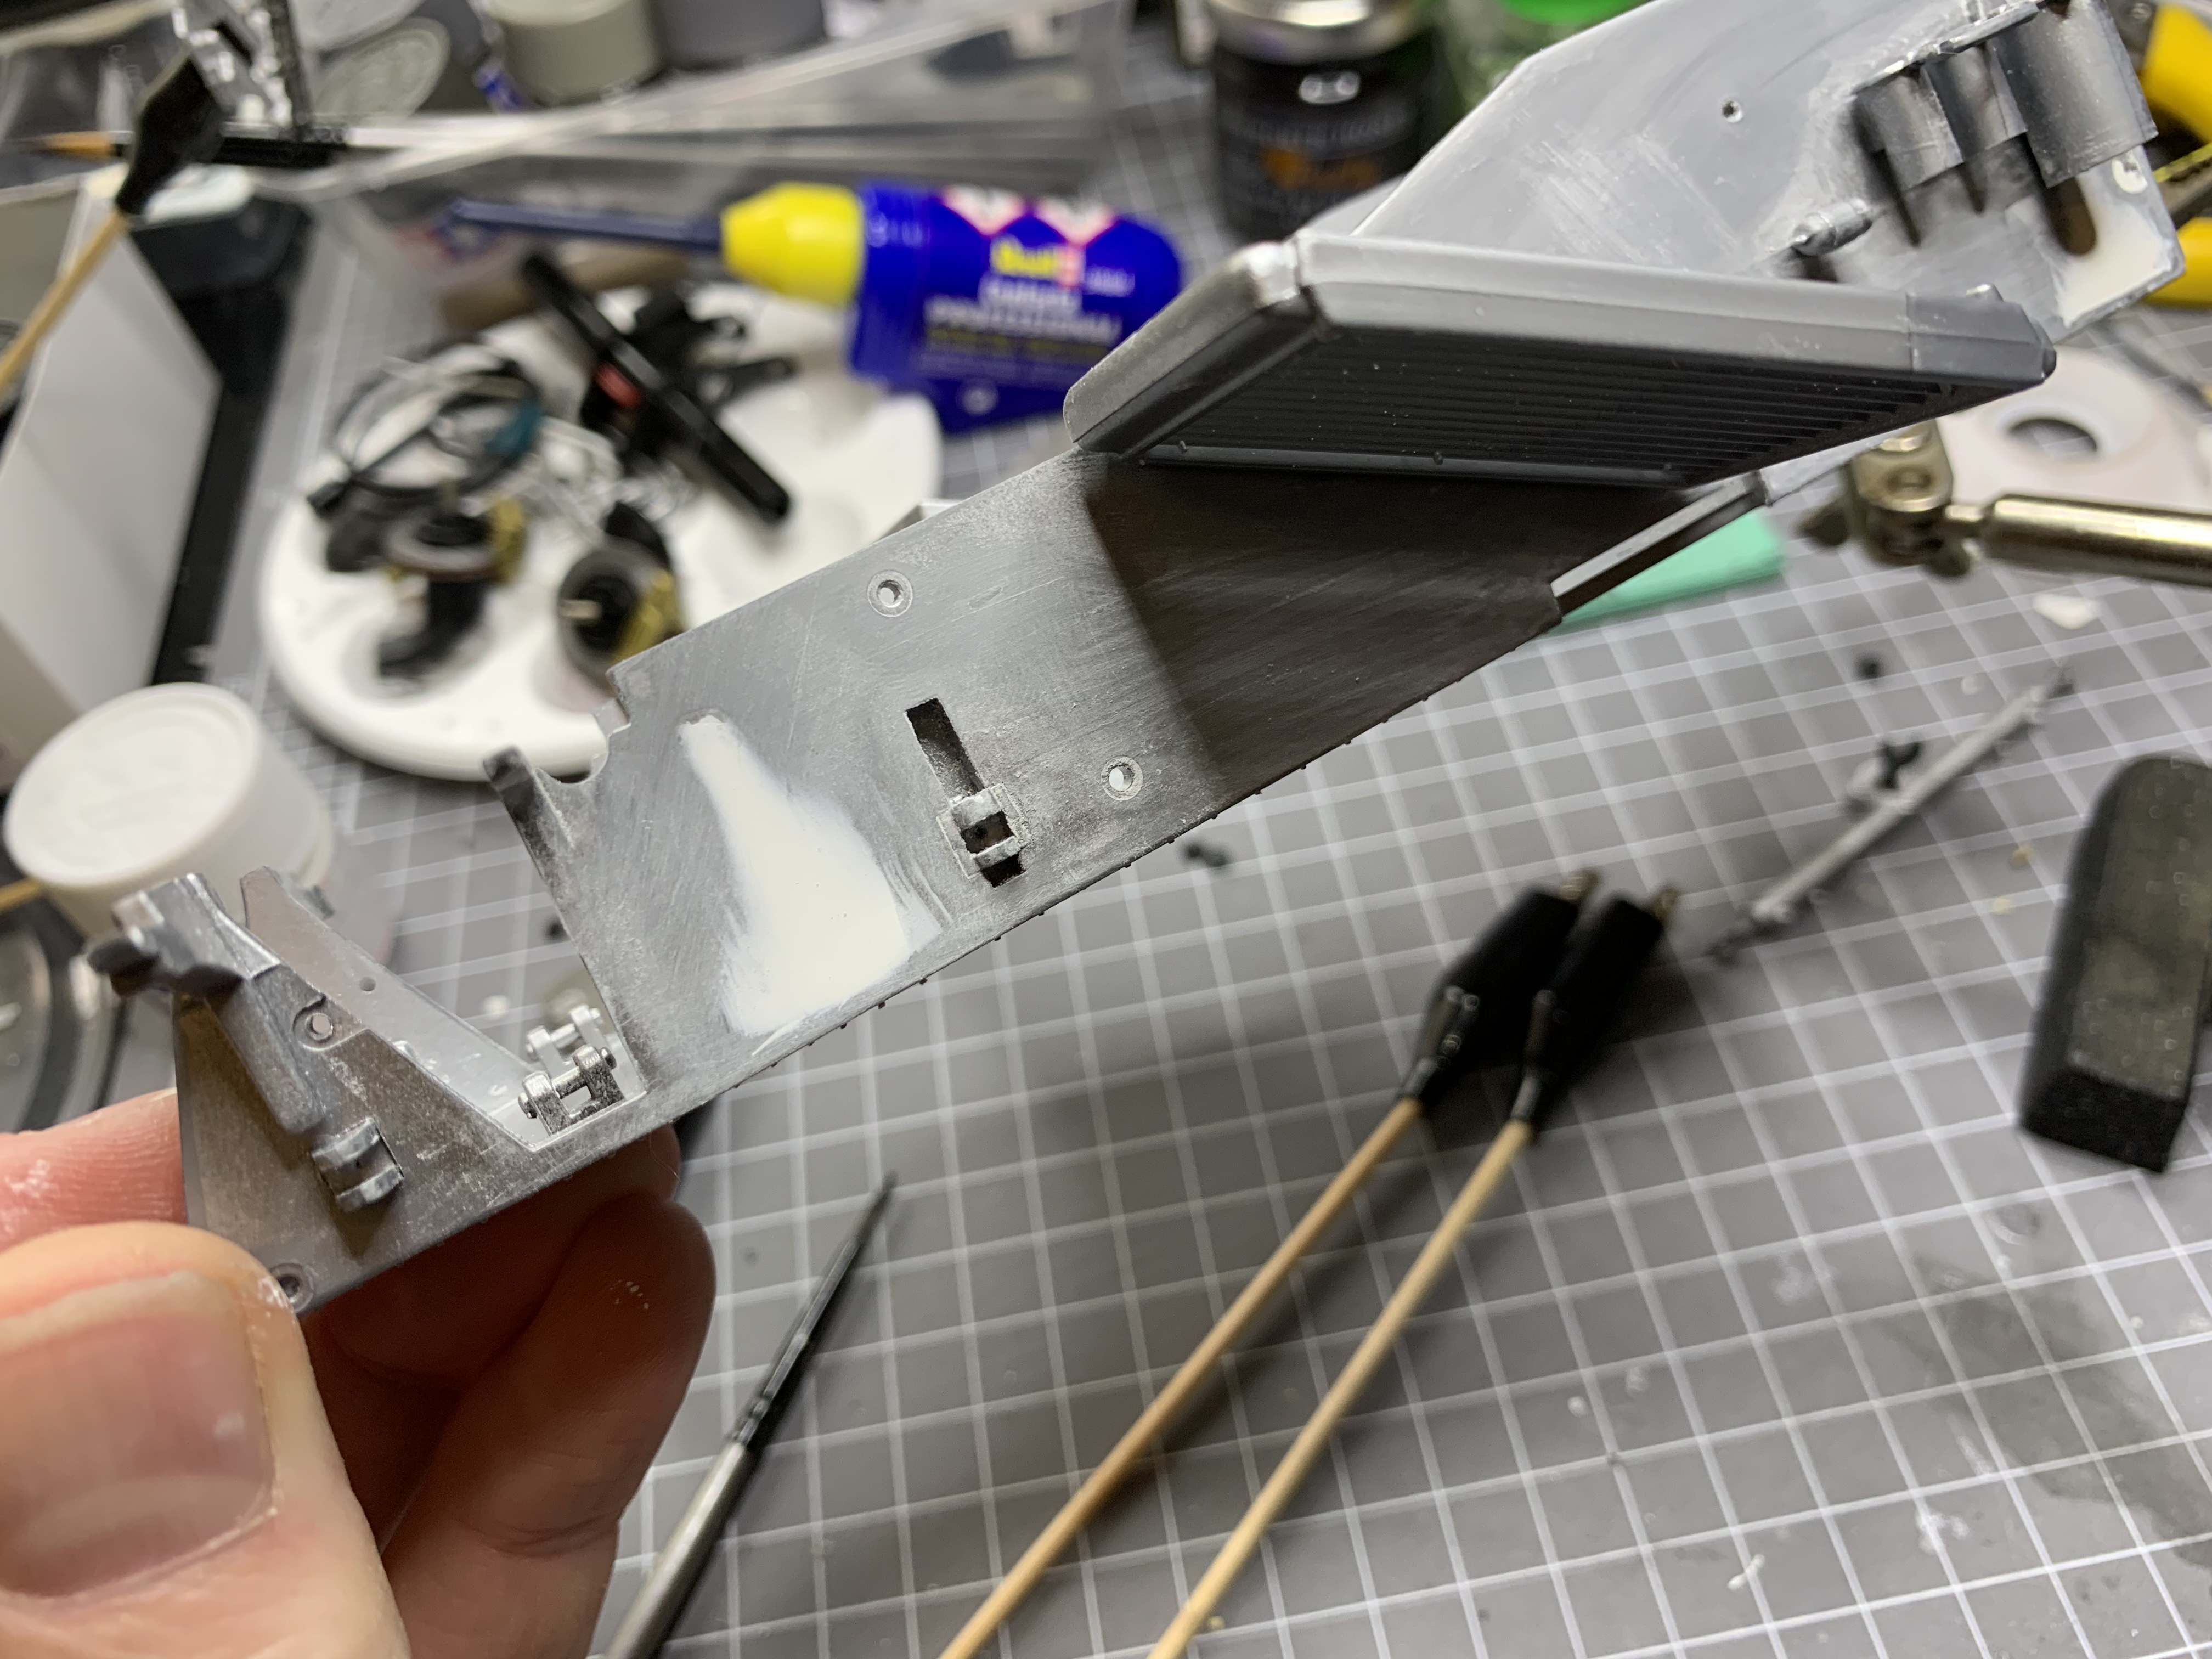
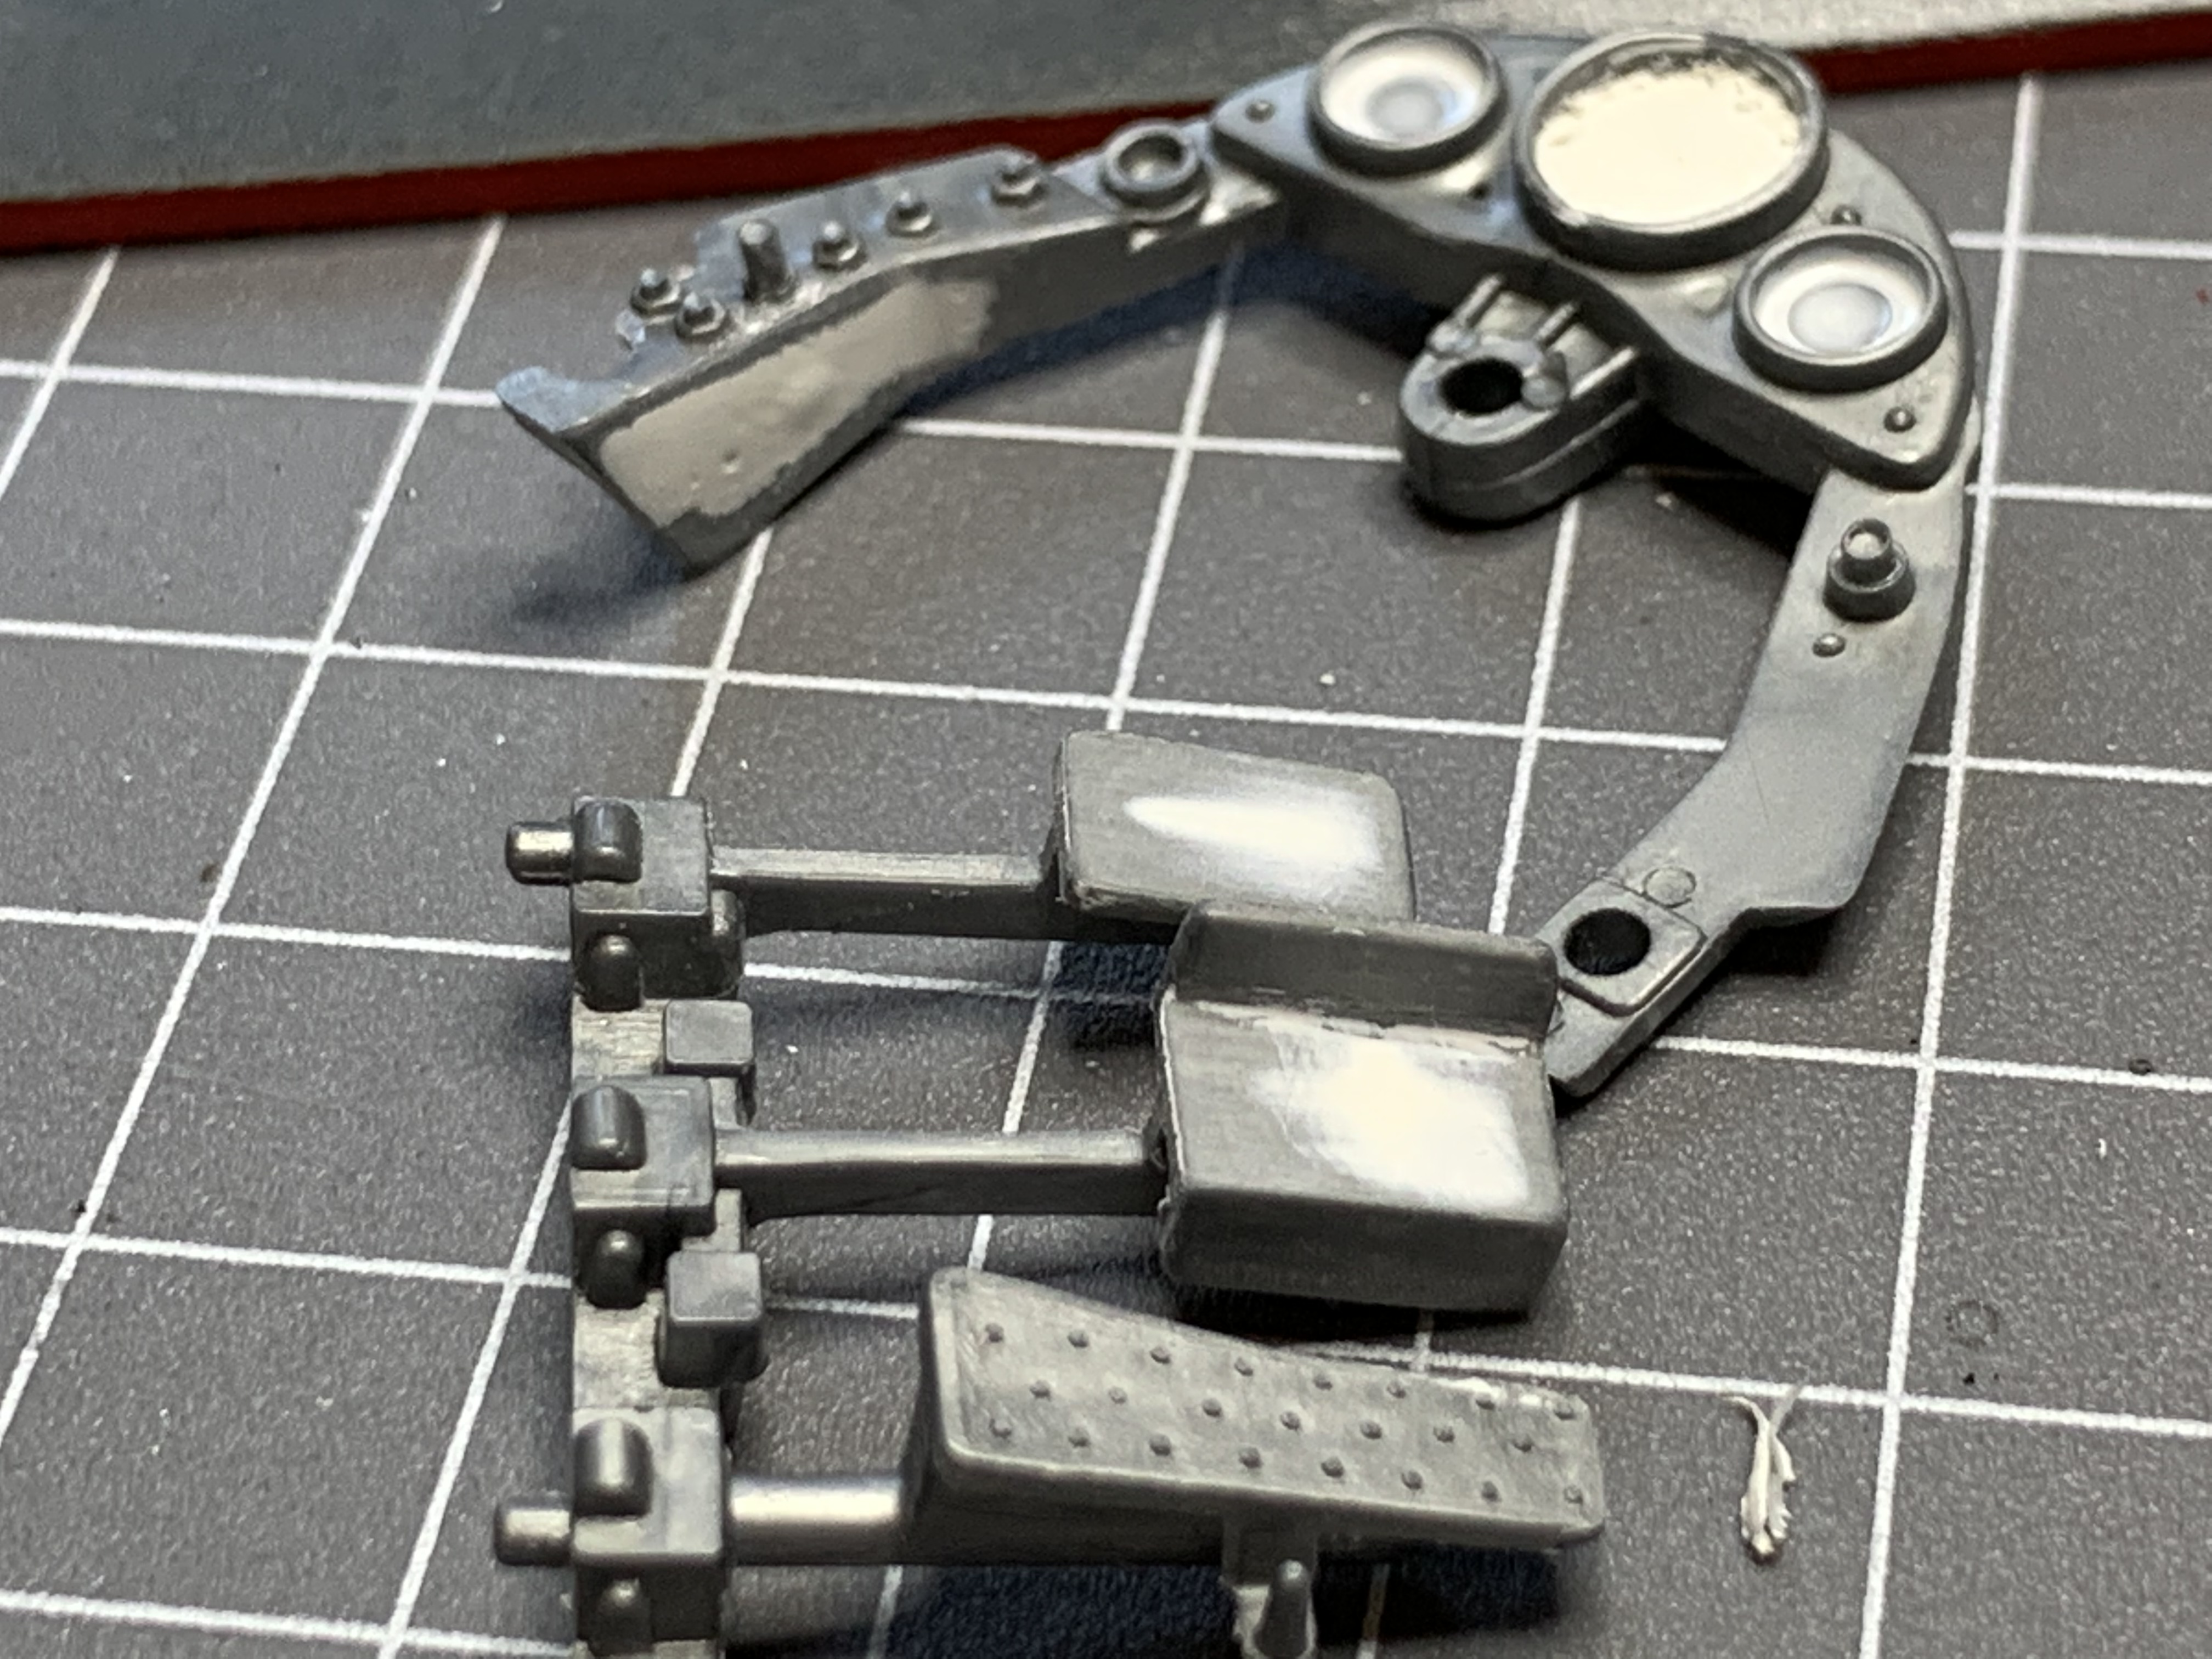
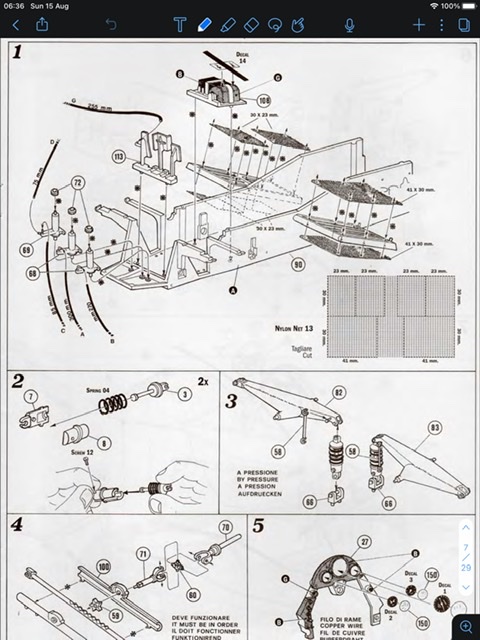
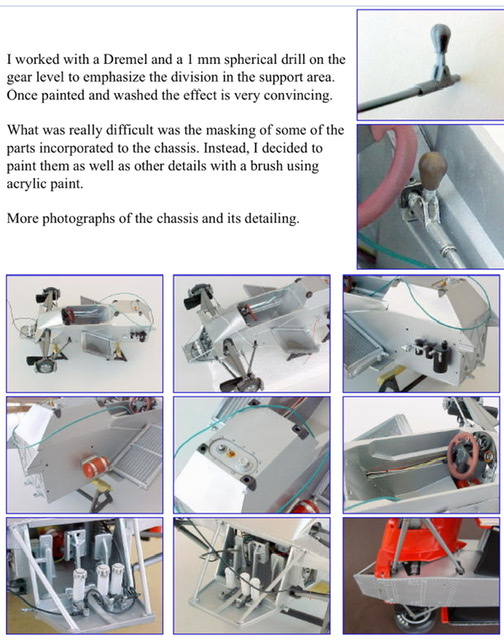
brake and clutch masters nearly done. Just have to paint the lids (I’m doing black lids) and add a little wash to bring out the detail a bit. Testing the rack, steering shaft and instrument fit. Have to make sure the universal joint turns correctly etc. Getting an idea of how the instrument panel fits. Finally bonding the two chassis sections. Then filling the join, then more sanding.
-
1/12th Italeri Alfa Romeo 179 /179C
AaronM replied to AaronM's topic in WIP: Other Racing: Road Racing, Land Speed Racers
I’m still sanding! After looking at some other peoples builds I think the amount of effort that I’m putting into prep will pay off. having to fill the pedal pads and so on because of the styrene shrinkage is a disappointment.
-
1/12th Italeri Alfa Romeo 179 /179C
AaronM replied to AaronM's topic in WIP: Other Racing: Road Racing, Land Speed Racers
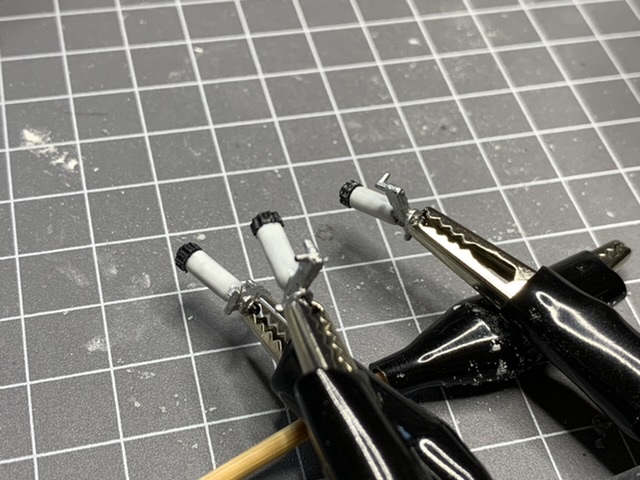
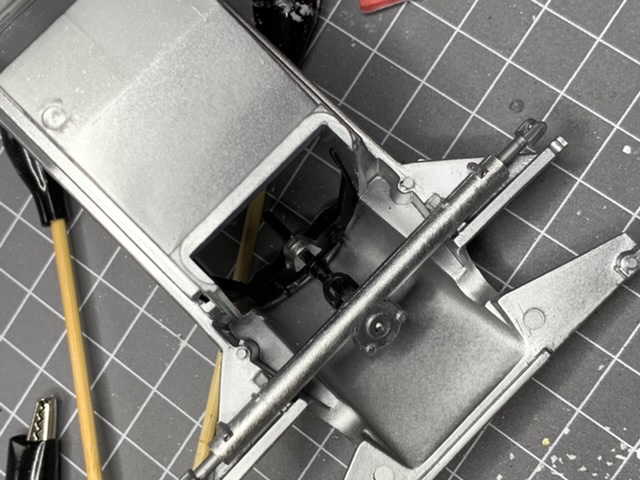
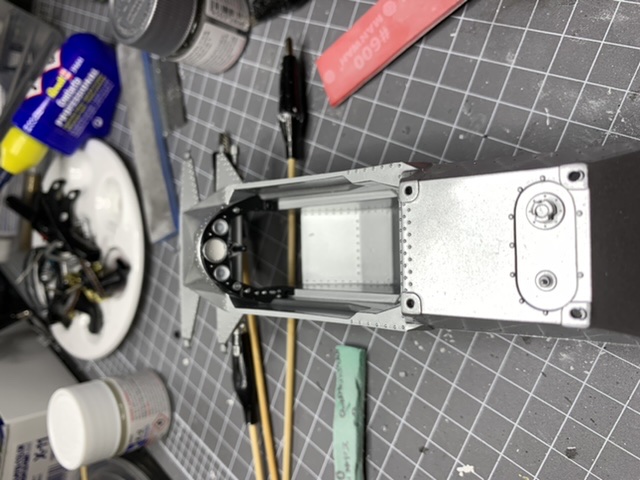
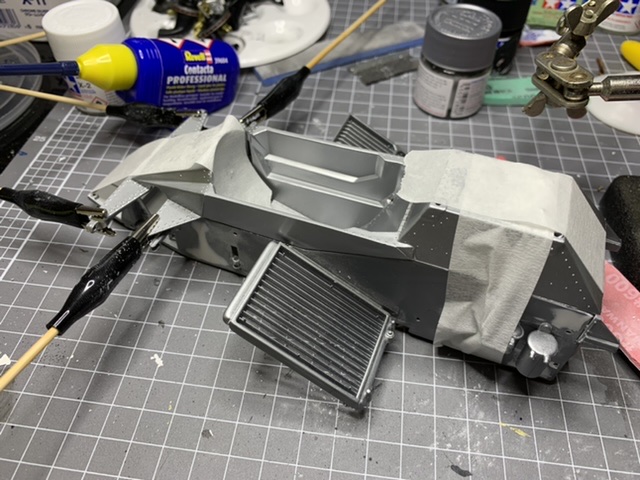
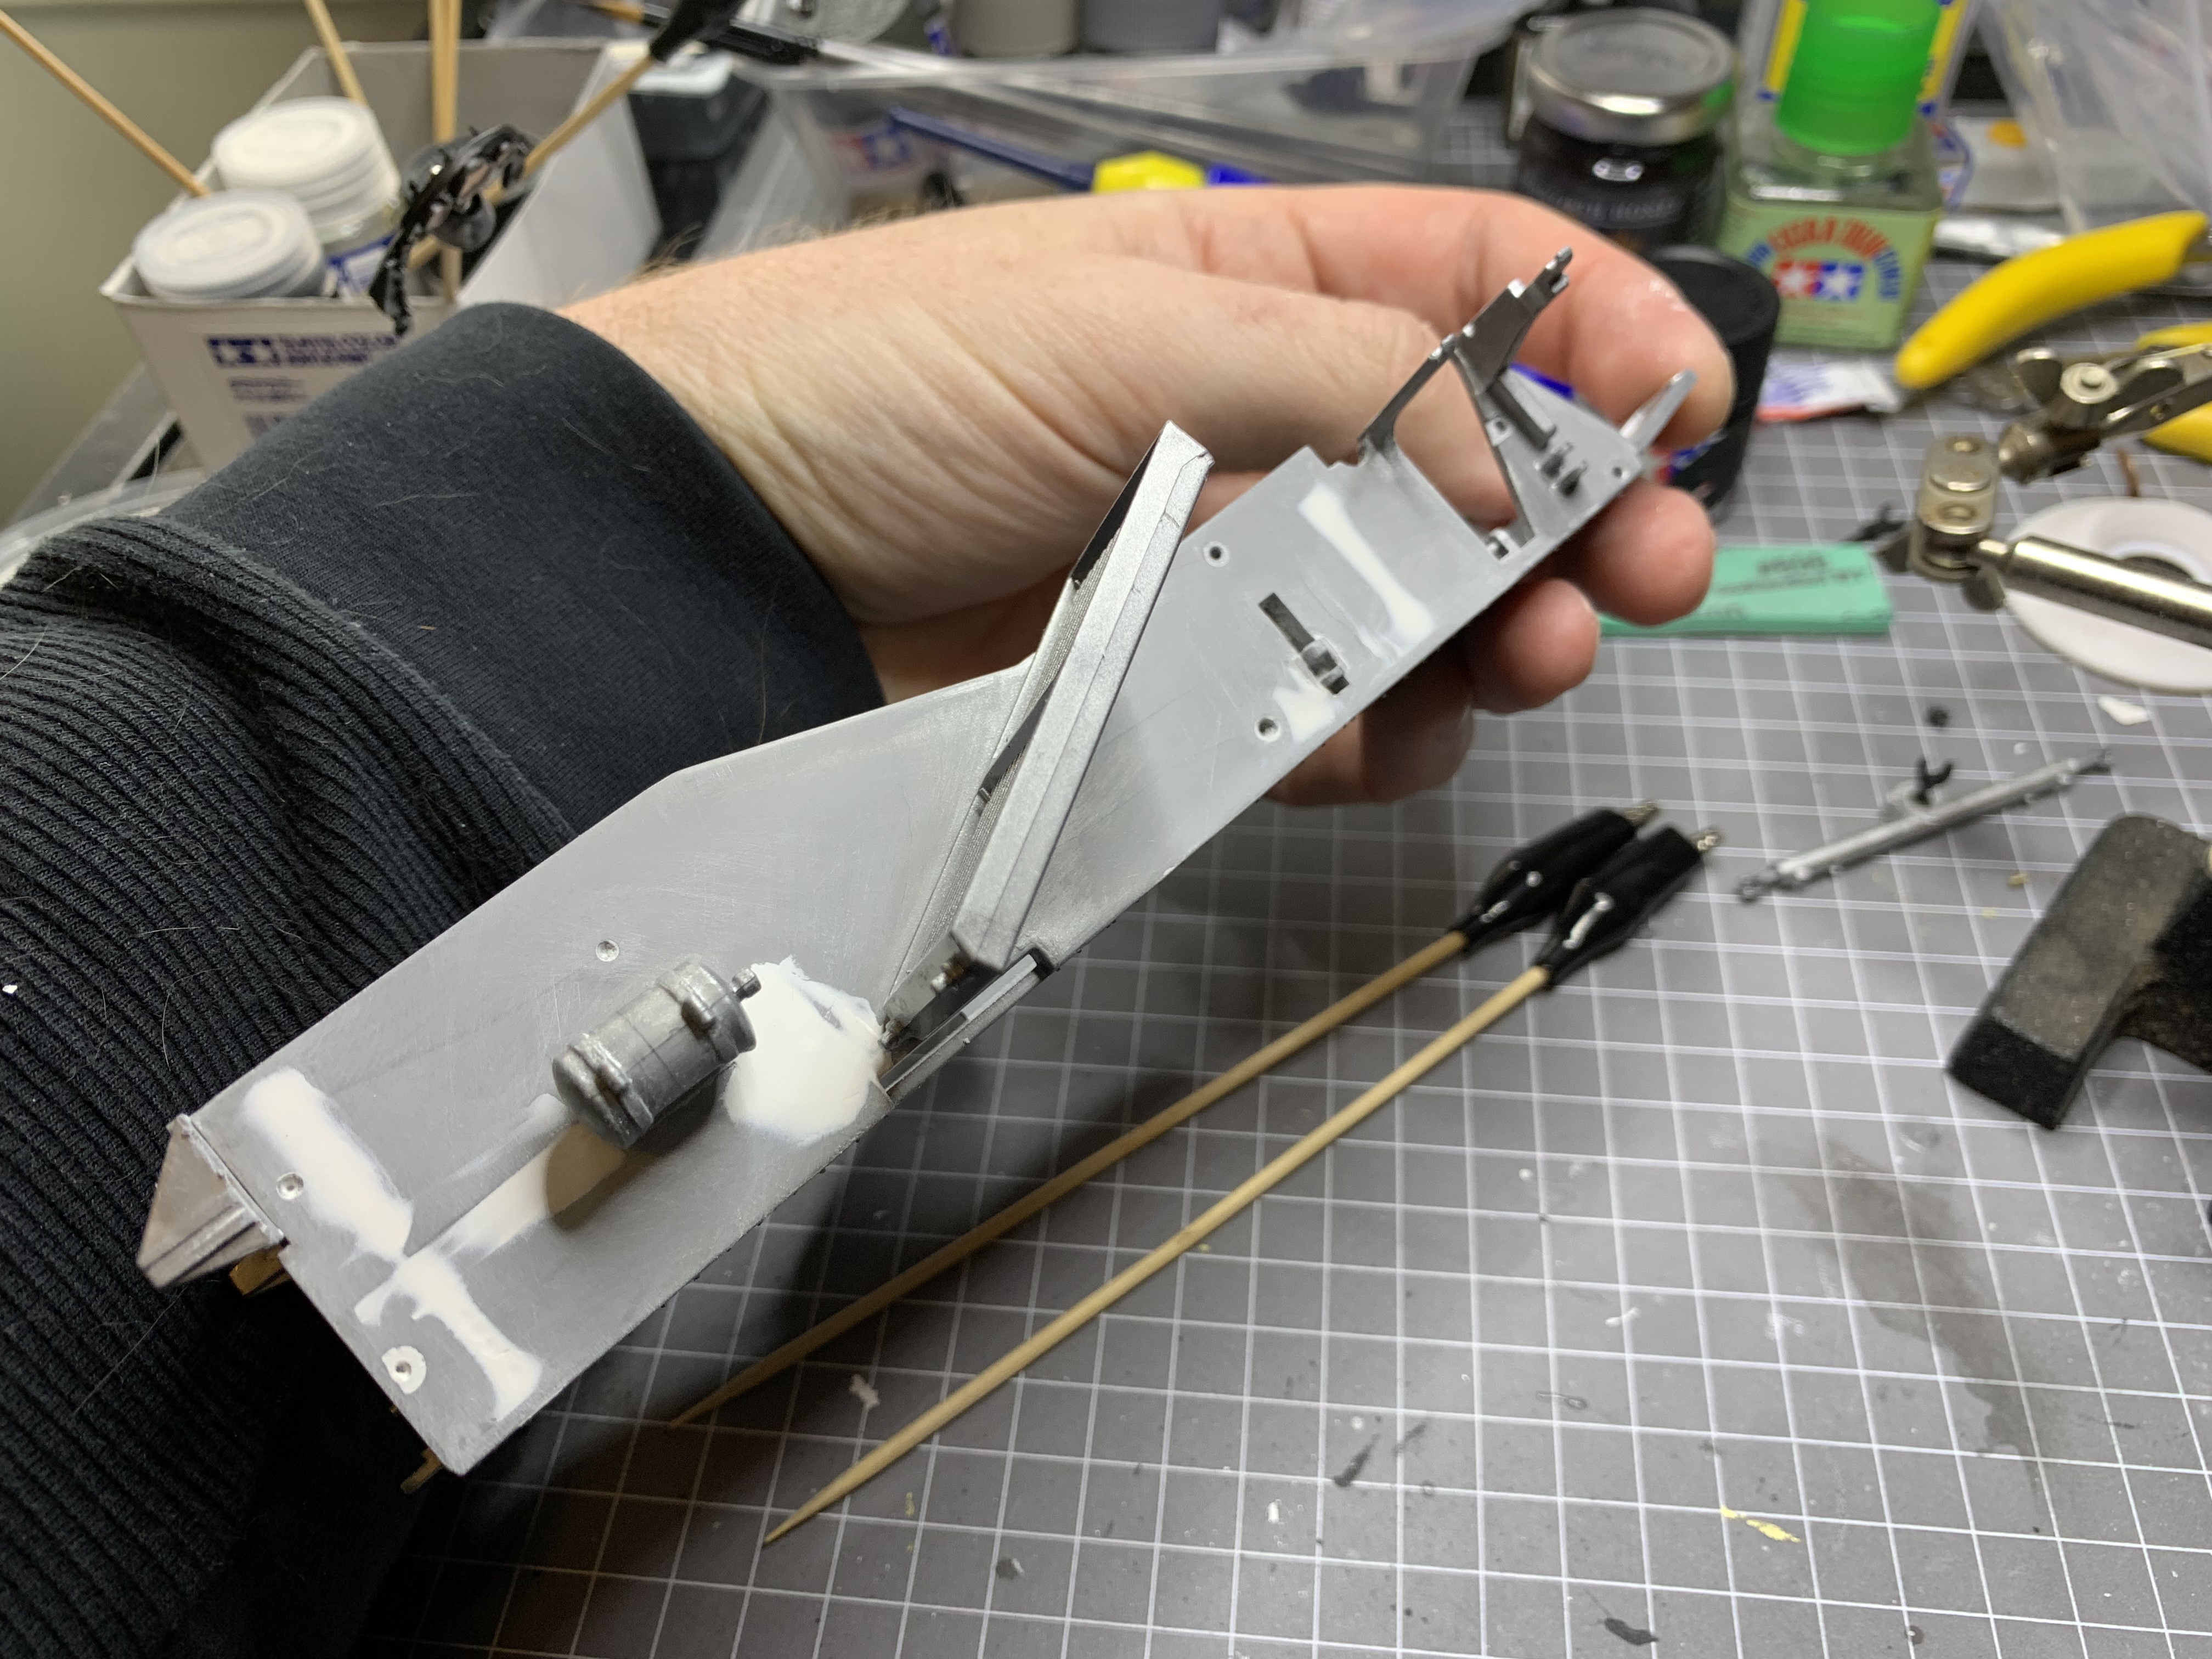
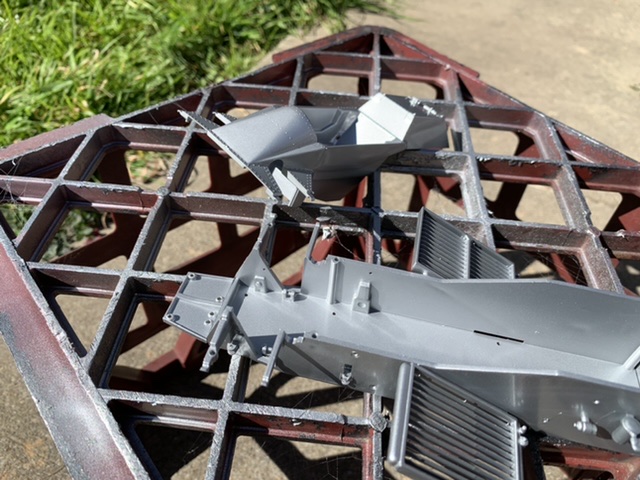
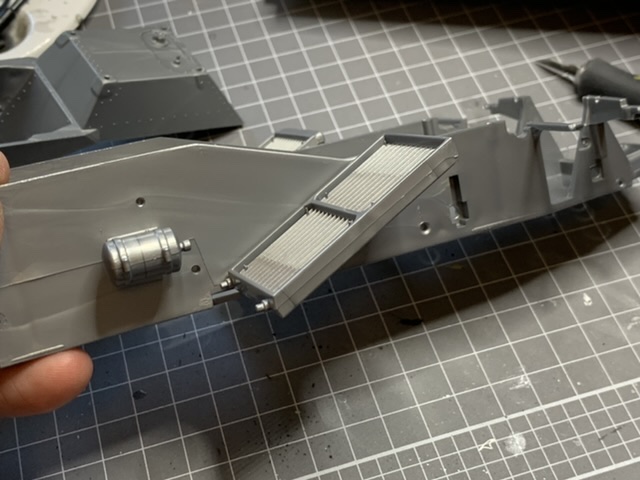
I’ve decided to work along with the Modelersite guide and assemble the tub halves ASAP before painting the exterior of the tub. However I figured spraying the inside elements would give me a better finish if anyone took a good look down into the cockpit or up the footwell. Tamiya Gloss Aluminium spray works so well. A side effect of spraying the inside was that the overspray on the outside acts as a guide coat for the sanding. The mould line on this side is too bad to sand away and instead the step will need to be filled. It also highlighted some depressions from shrinkage of the plastics. I’ll try to fill these. While I think it’s acceptable for an “alloy” tub to have some waves in it, such a severe dent is definitely not a realistic feature. Putty is a new thing to me (this being the 2nd kit since coming back to the hobby after a 30 year break). I’m getting better at the application. I see sanding in my future. I see a lot of sanding in my future! Built and painted the steering rack. It’s chrome silver, and will be masked up whe I spray the exterior of the tub. I’ll brush paint the steering arms as I add the finer pint details to all the elements on the tub exterior.
-
1/12th Italeri Alfa Romeo 179 /179C
AaronM replied to AaronM's topic in WIP: Other Racing: Road Racing, Land Speed Racers
I’ll give it a good attempt. It’s all a learning curve for me I am keenly awaiting the re-release of the McLaren MP4/2 - and should really pick up the Mefistofele as it’s F1 of sorts from another era completely! Still this is enough to well and truely convince me that Tamiya really are a benchmark -
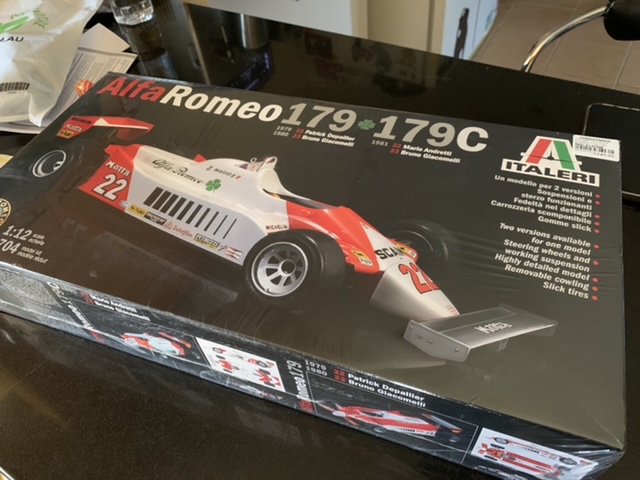
A few weeks ago I saw this on the Local Hobby Shop shelf and it was a “I’ll have that” moment. It was a spur of a moment that made me start it today, but first the ugly truths. Box art looks great. The build manual is terrible. Very few indicators of colour, it’s a colour print of a third generation copy! So I ponied up the cash and got a guide from Modelersite. It at least gives alternative angles photos and some basis for colours etc. So much stuff is molded as part of the main chassis tub. That would be great if there weren’t some terrible parting lines and mould flash etc to clean up. It’s also going to be a real “challenge” to paint around. When the two halves are brought together the joins are going to need a massive amount of filling. I guess that’s why the Modelersite guide suggests bonding them together before painting, which is exactly my plan now too. Ive glued in all the hard mount points for the front suspension. Hopefully I can blend them well enough. More really difficult things to paint around. I assembled the steering rack, as it has to be built in as part of the assembly. I will start basic paintwork next.
-
1/12 Tamiya Wolf WR1 (With a Twist)
AaronM replied to AaronM's topic in WIP: Other Racing: Road Racing, Land Speed Racers
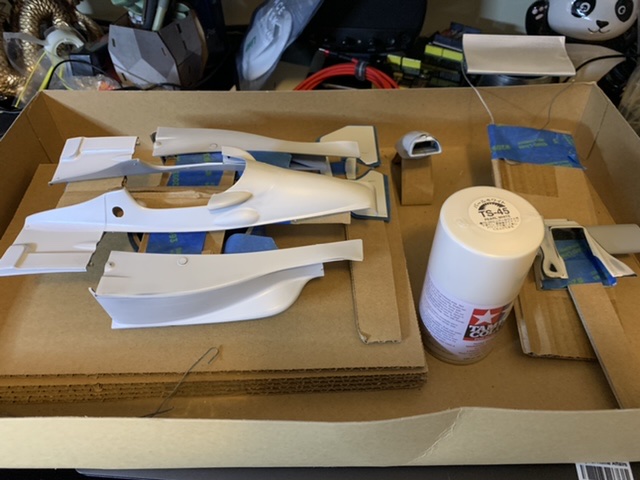
Not much progress on this as I have to try and get final Pearl White coat on the body. Hopefully I have enough paint because we are locked down pretty had at the moment and that means no browsing around for paint.
-
1/12 Tamiya Wolf WR1 (With a Twist)
AaronM replied to AaronM's topic in WIP: Other Racing: Road Racing, Land Speed Racers
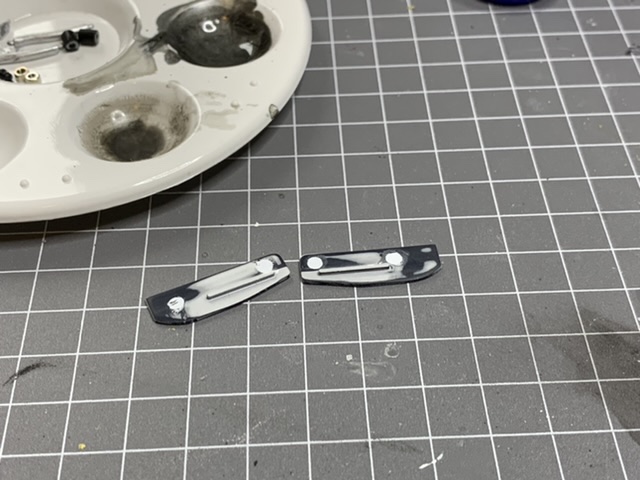
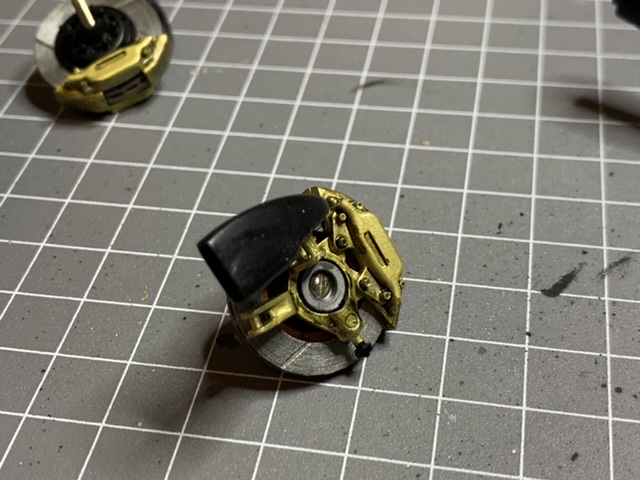
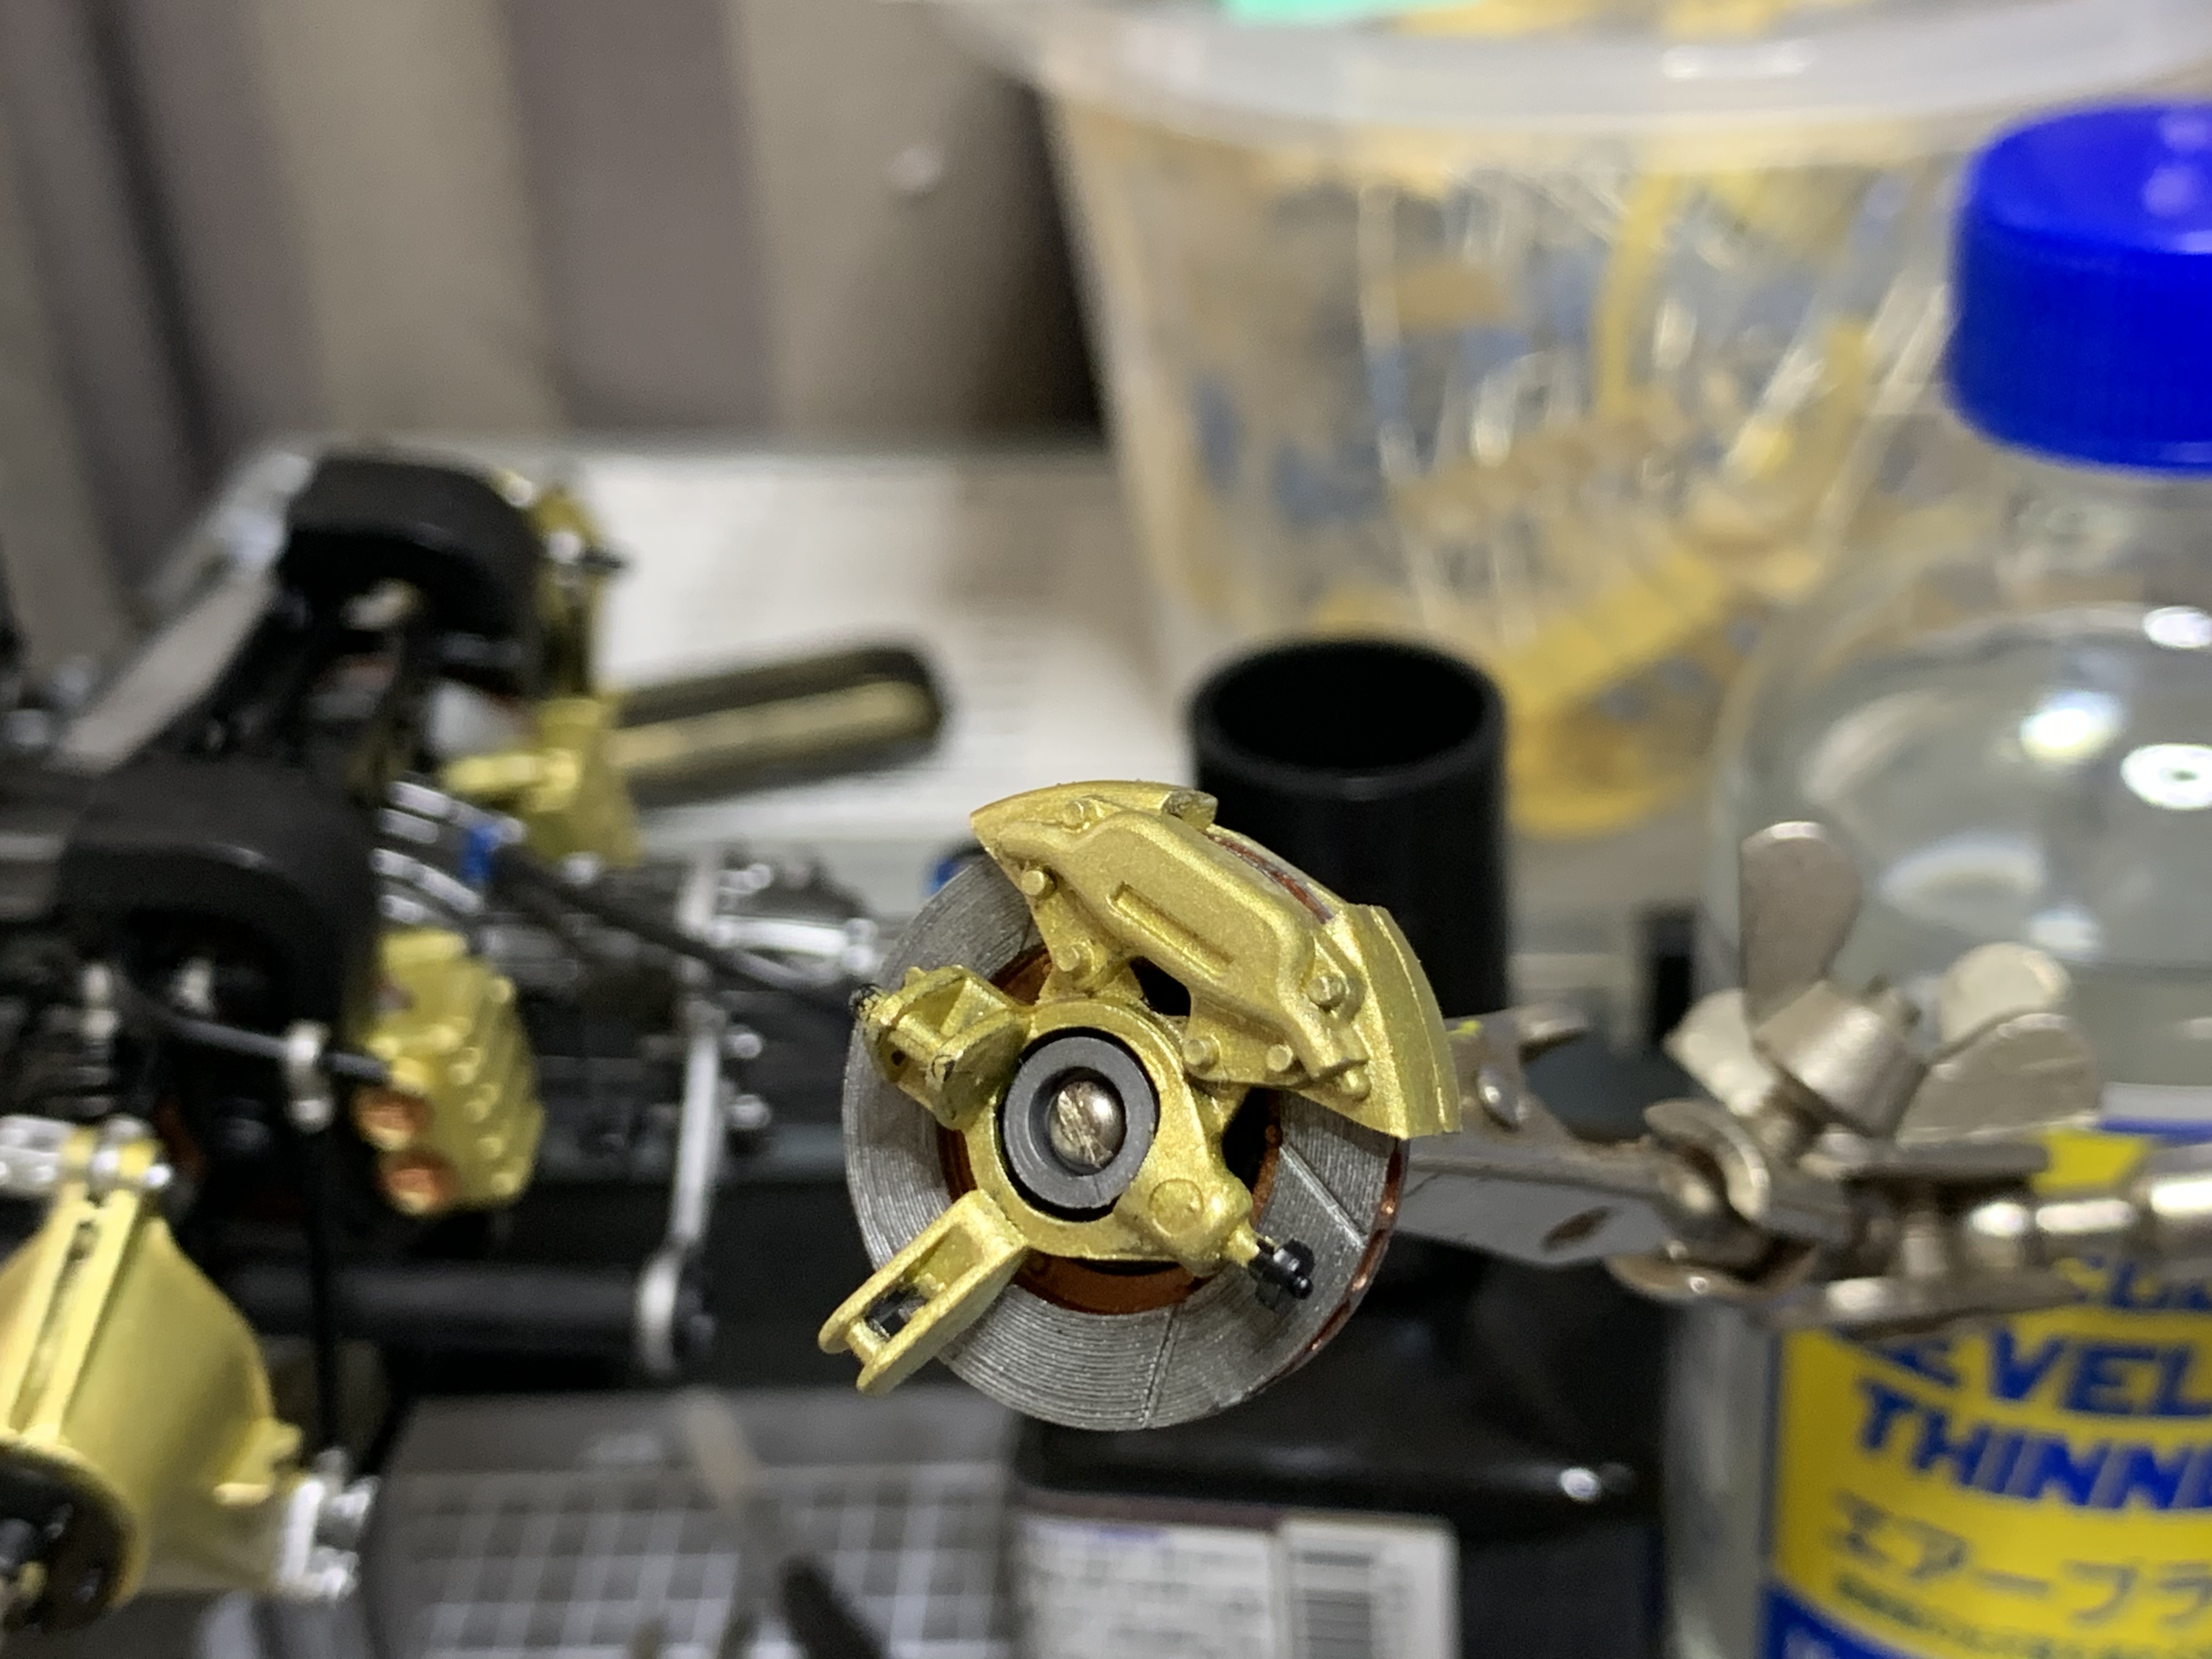
From unsightly divots, to blobs and back to a smooth surface! I guess this is an example of how through the build I’ve come to learn about building better, and the steps necessary to do so. I made a wash to dull down the brightness of the calipers and make more of the feature details stand out. I’m exceptionally happy with the result. It’s really important to me that I give things I’ve not done before a go, push myself to continuously improve etc. At the rear end I went back to Mr Color Weathering Finish. It also did what I needed and because it’s not based on the same solvents as the paint it’s easier to work with. In any case I’m glad I tried it and will continue to attempt to up my paint game in the next build.
-
1/12 Tamiya Wolf WR1 (With a Twist)
AaronM replied to AaronM's topic in WIP: Other Racing: Road Racing, Land Speed Racers
Thanks. Legitimately 30 years maybe 31. Been doing microelectronics/drones, 1:1 car stuff and so on in between and nothing like tapping the skills I’ve had to develop. I actually look at it and still see a lot of room for improvement. I’m a bit short on sanding supplies and tools, and my painting is a bit hit and miss. As winter draws to a close here I’m hoping to do some airbrushing on the next one. Have to invest in some more tools for that though! -
1/12 Tamiya Wolf WR1 (With a Twist)
AaronM replied to AaronM's topic in WIP: Other Racing: Road Racing, Land Speed Racers
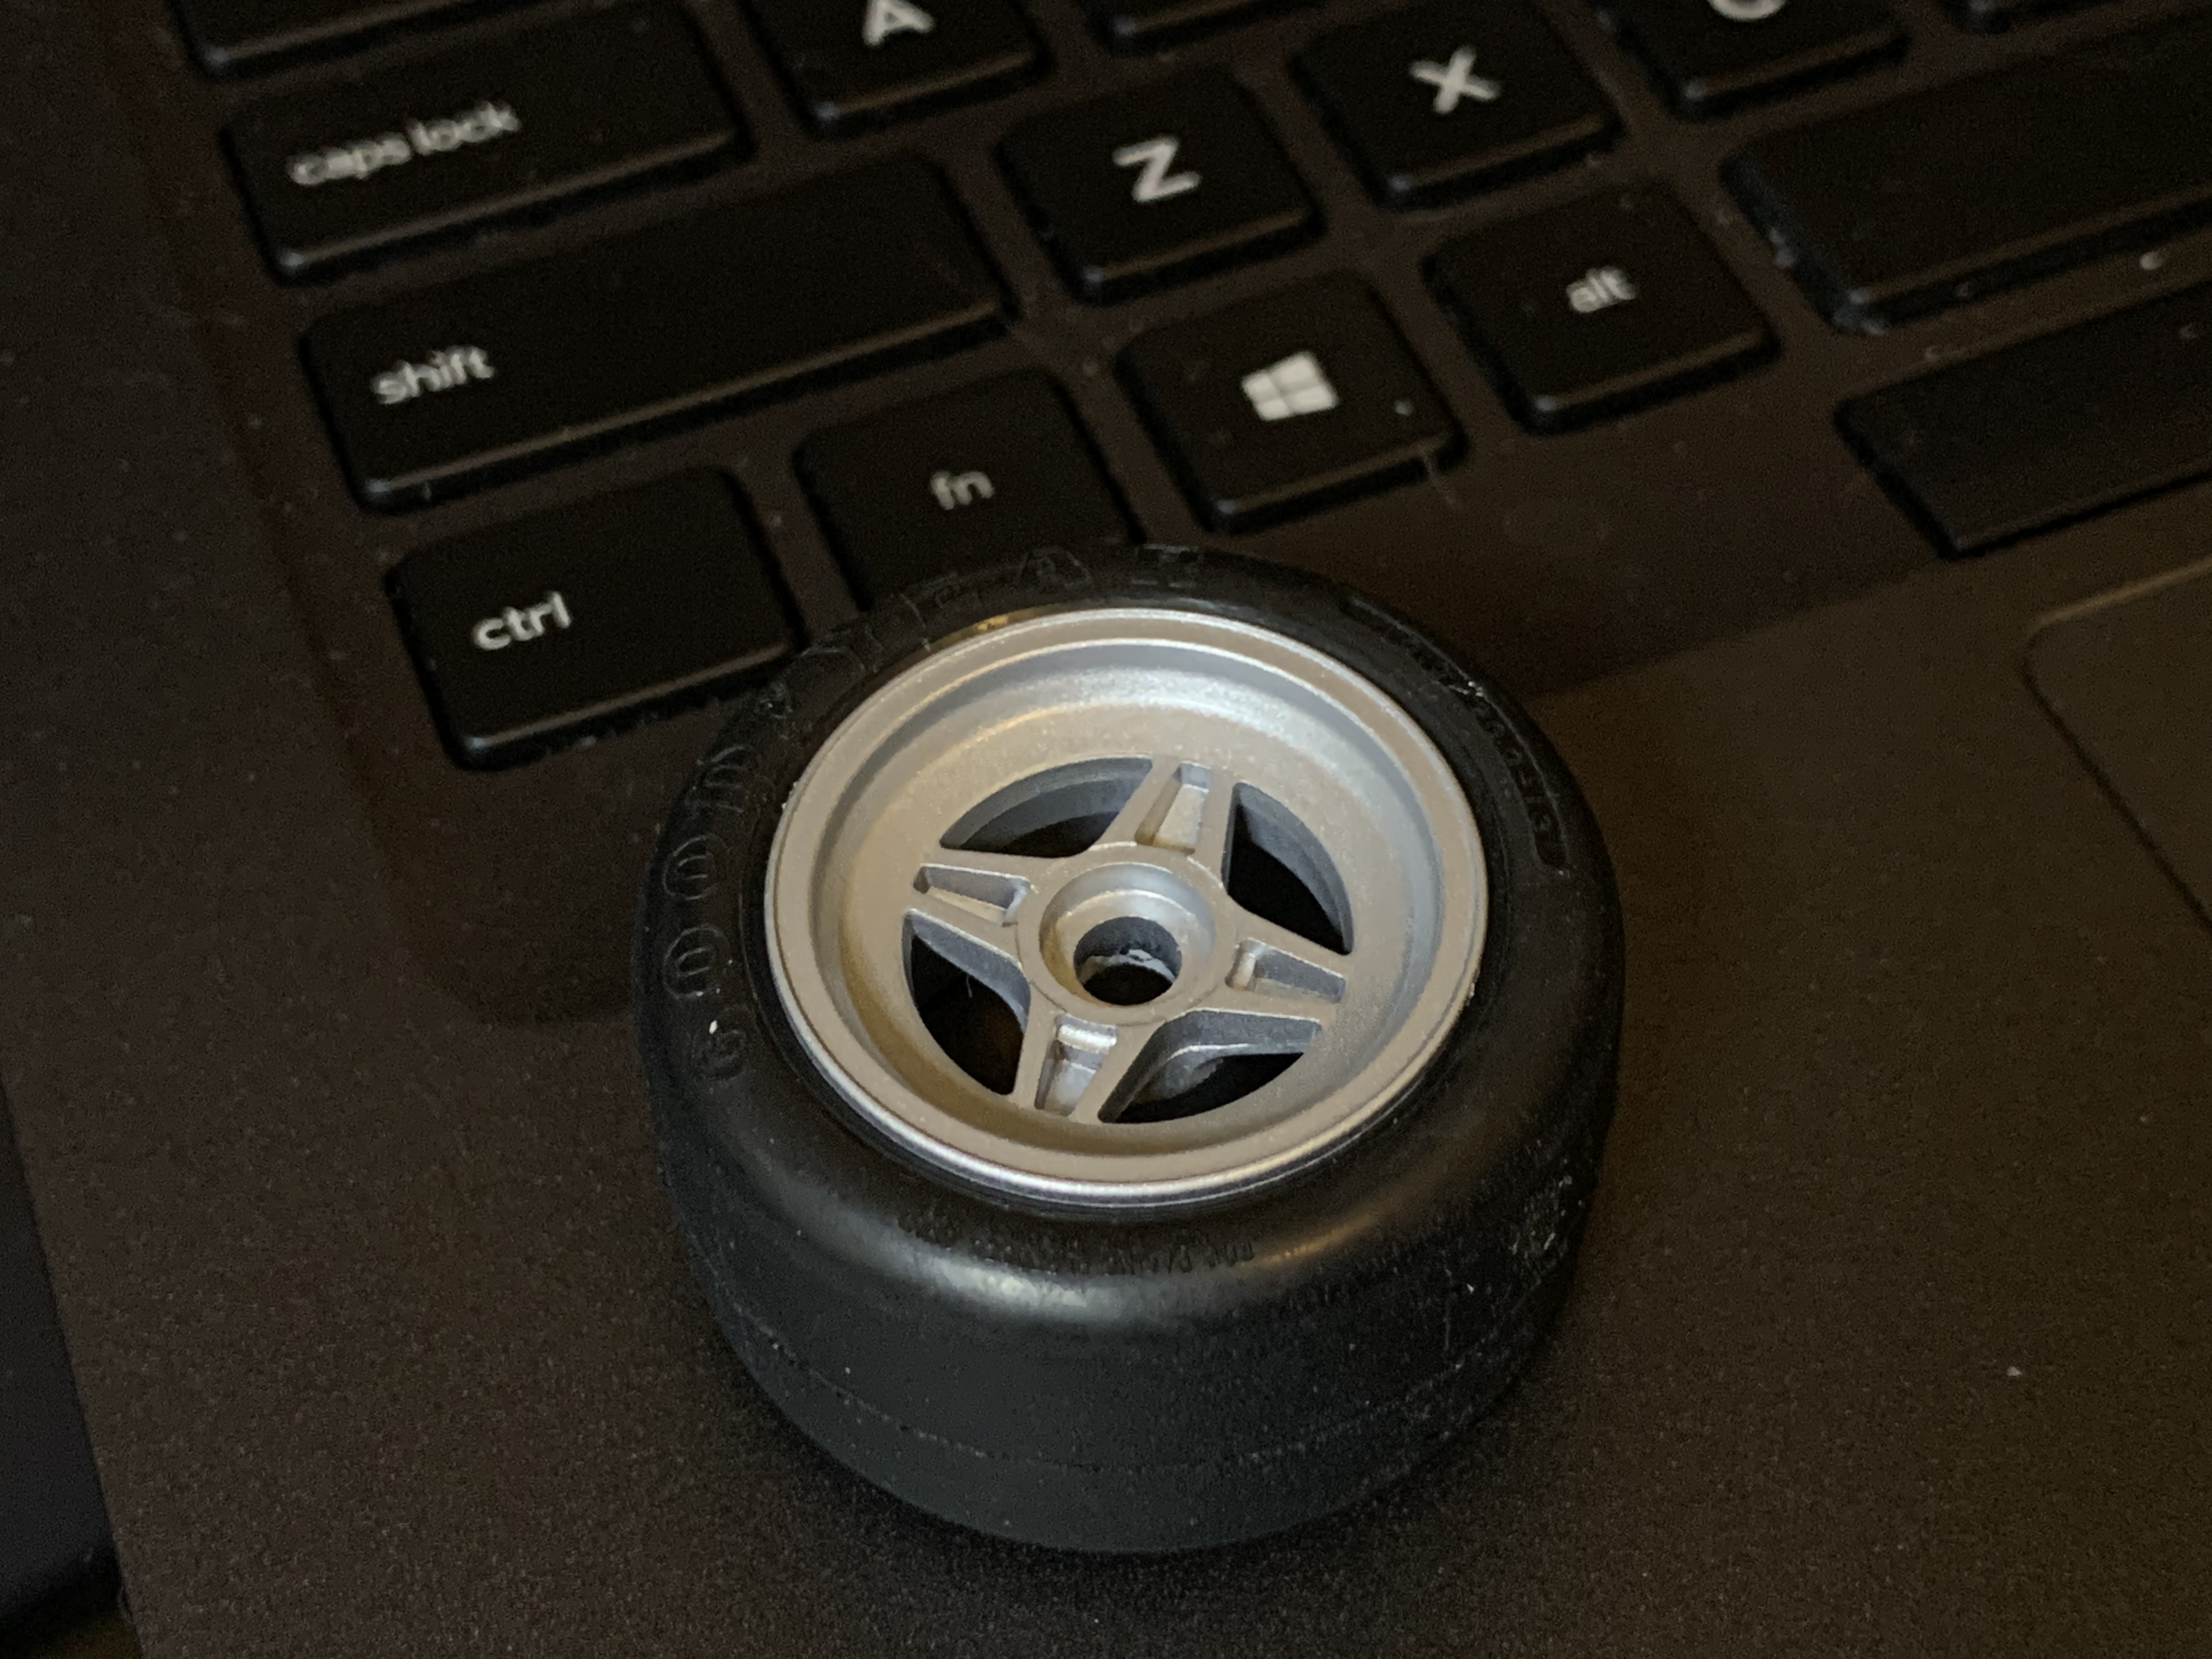
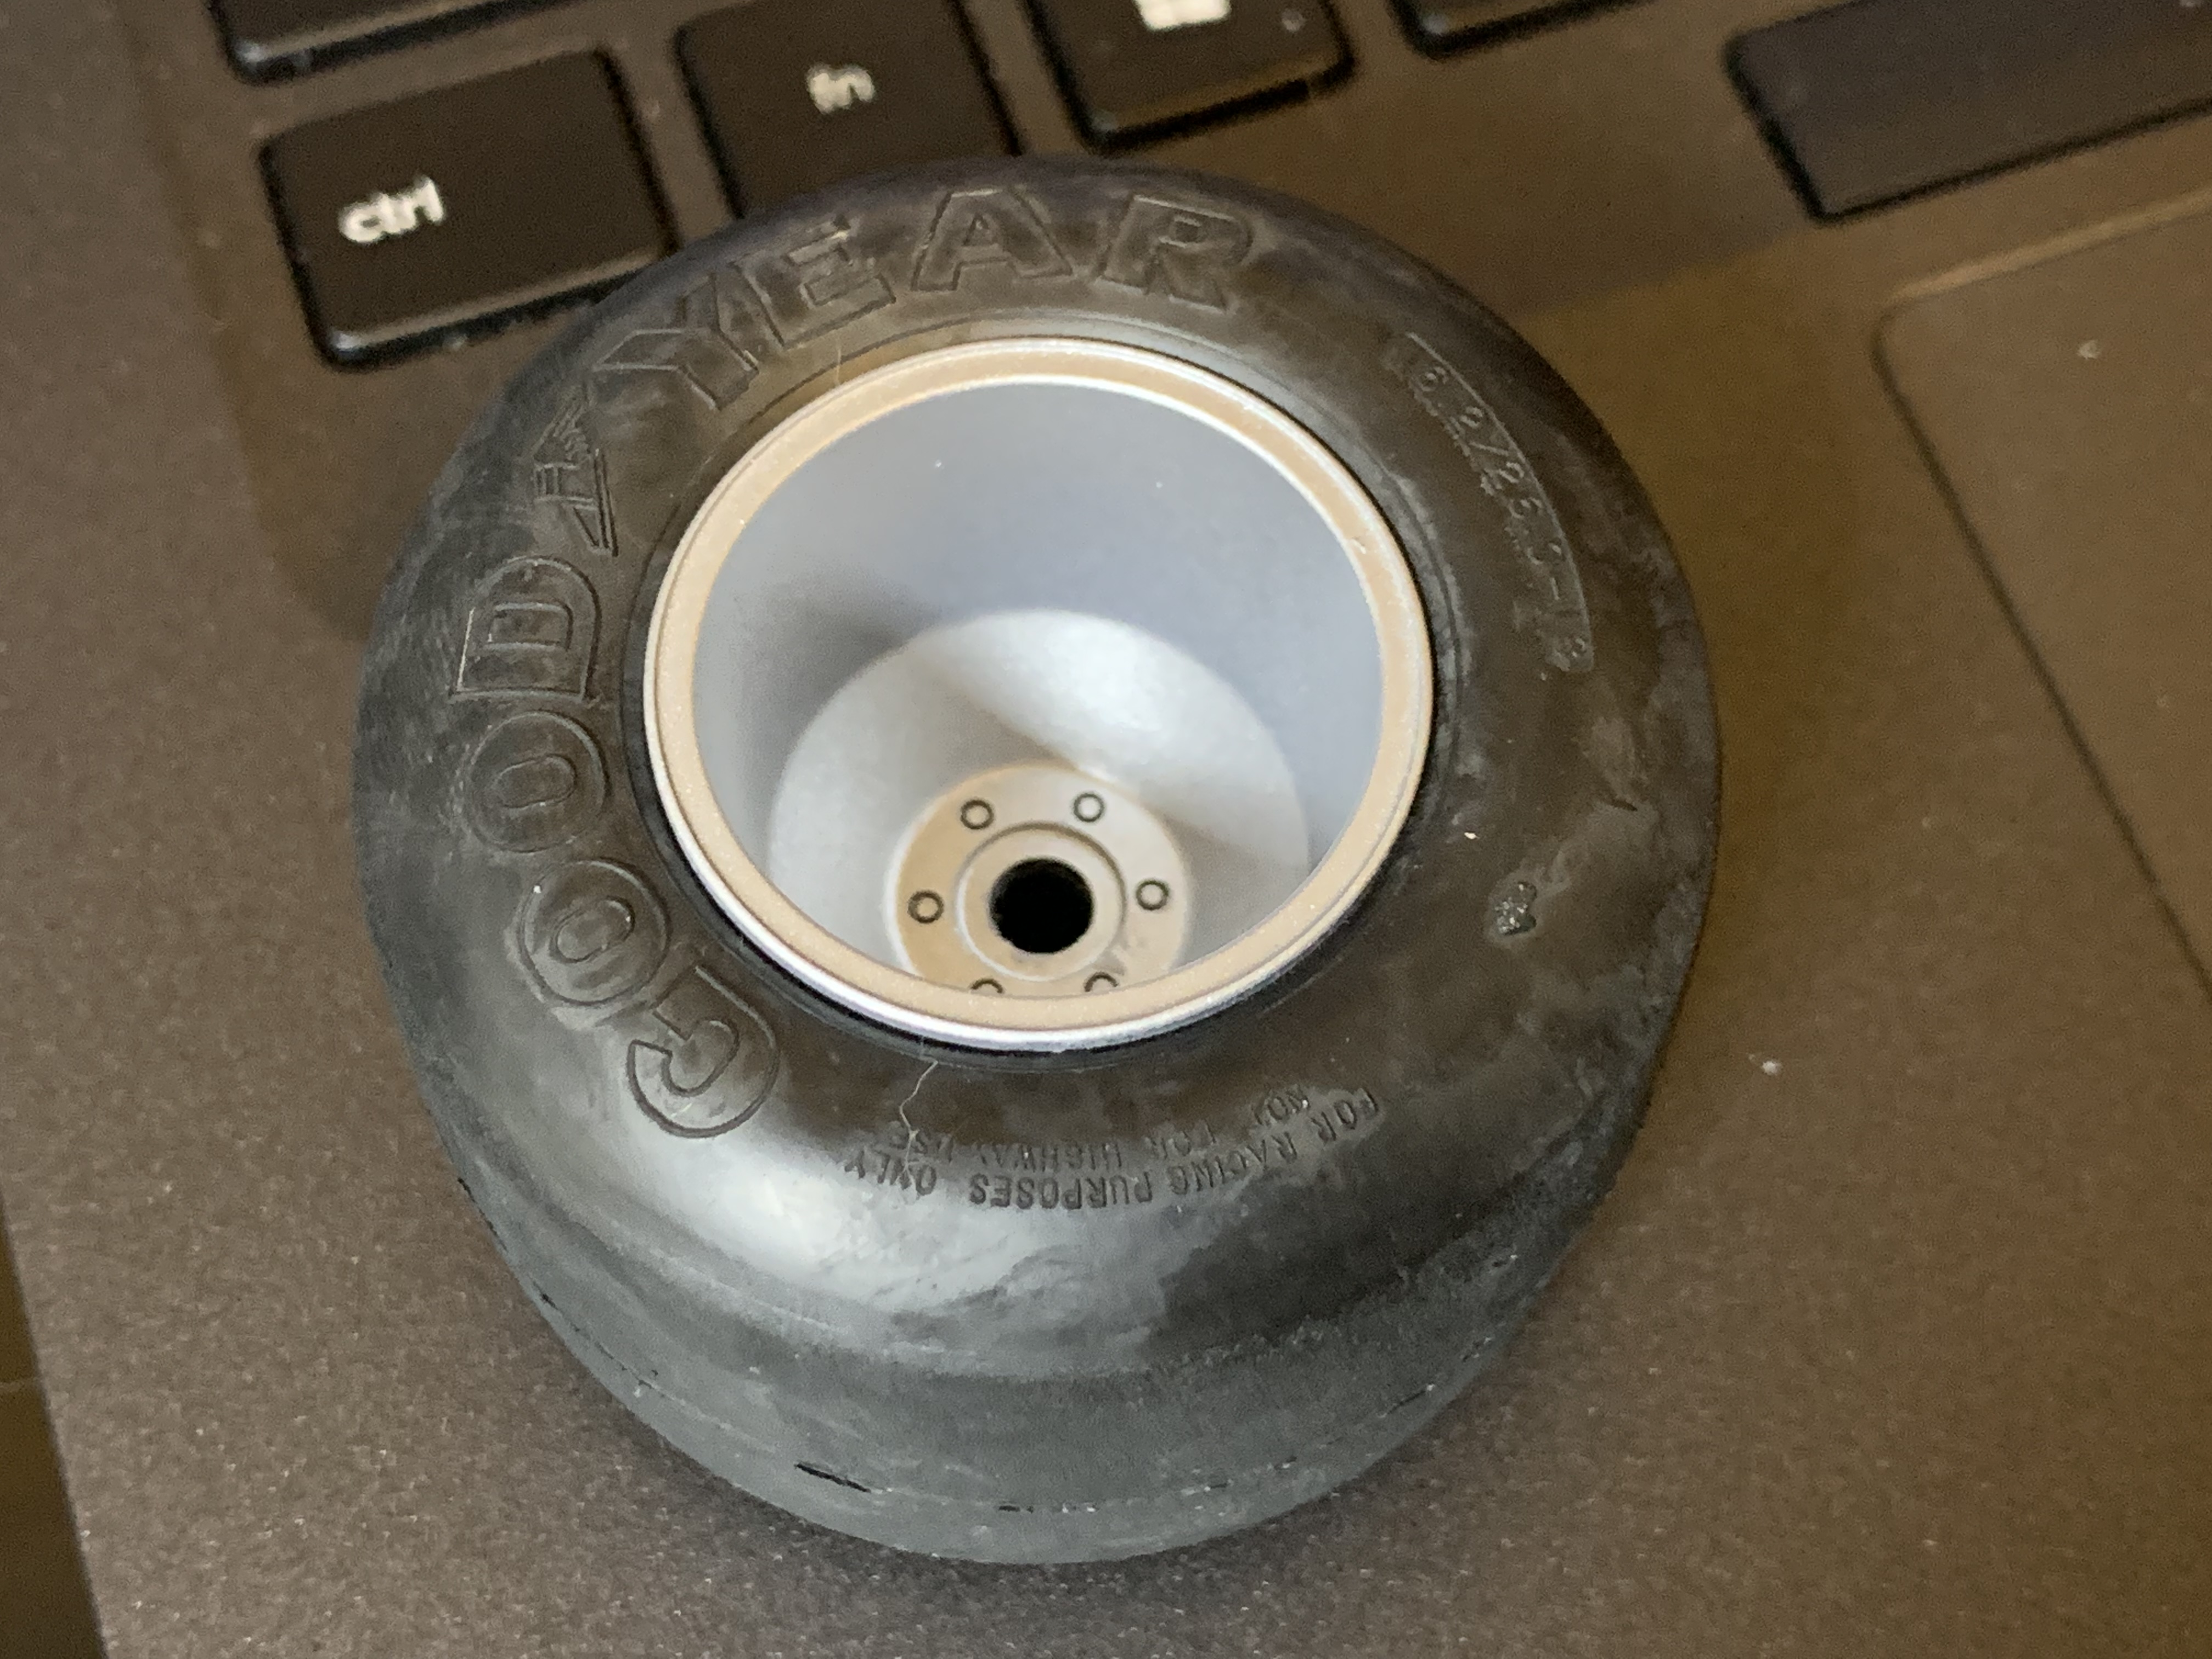
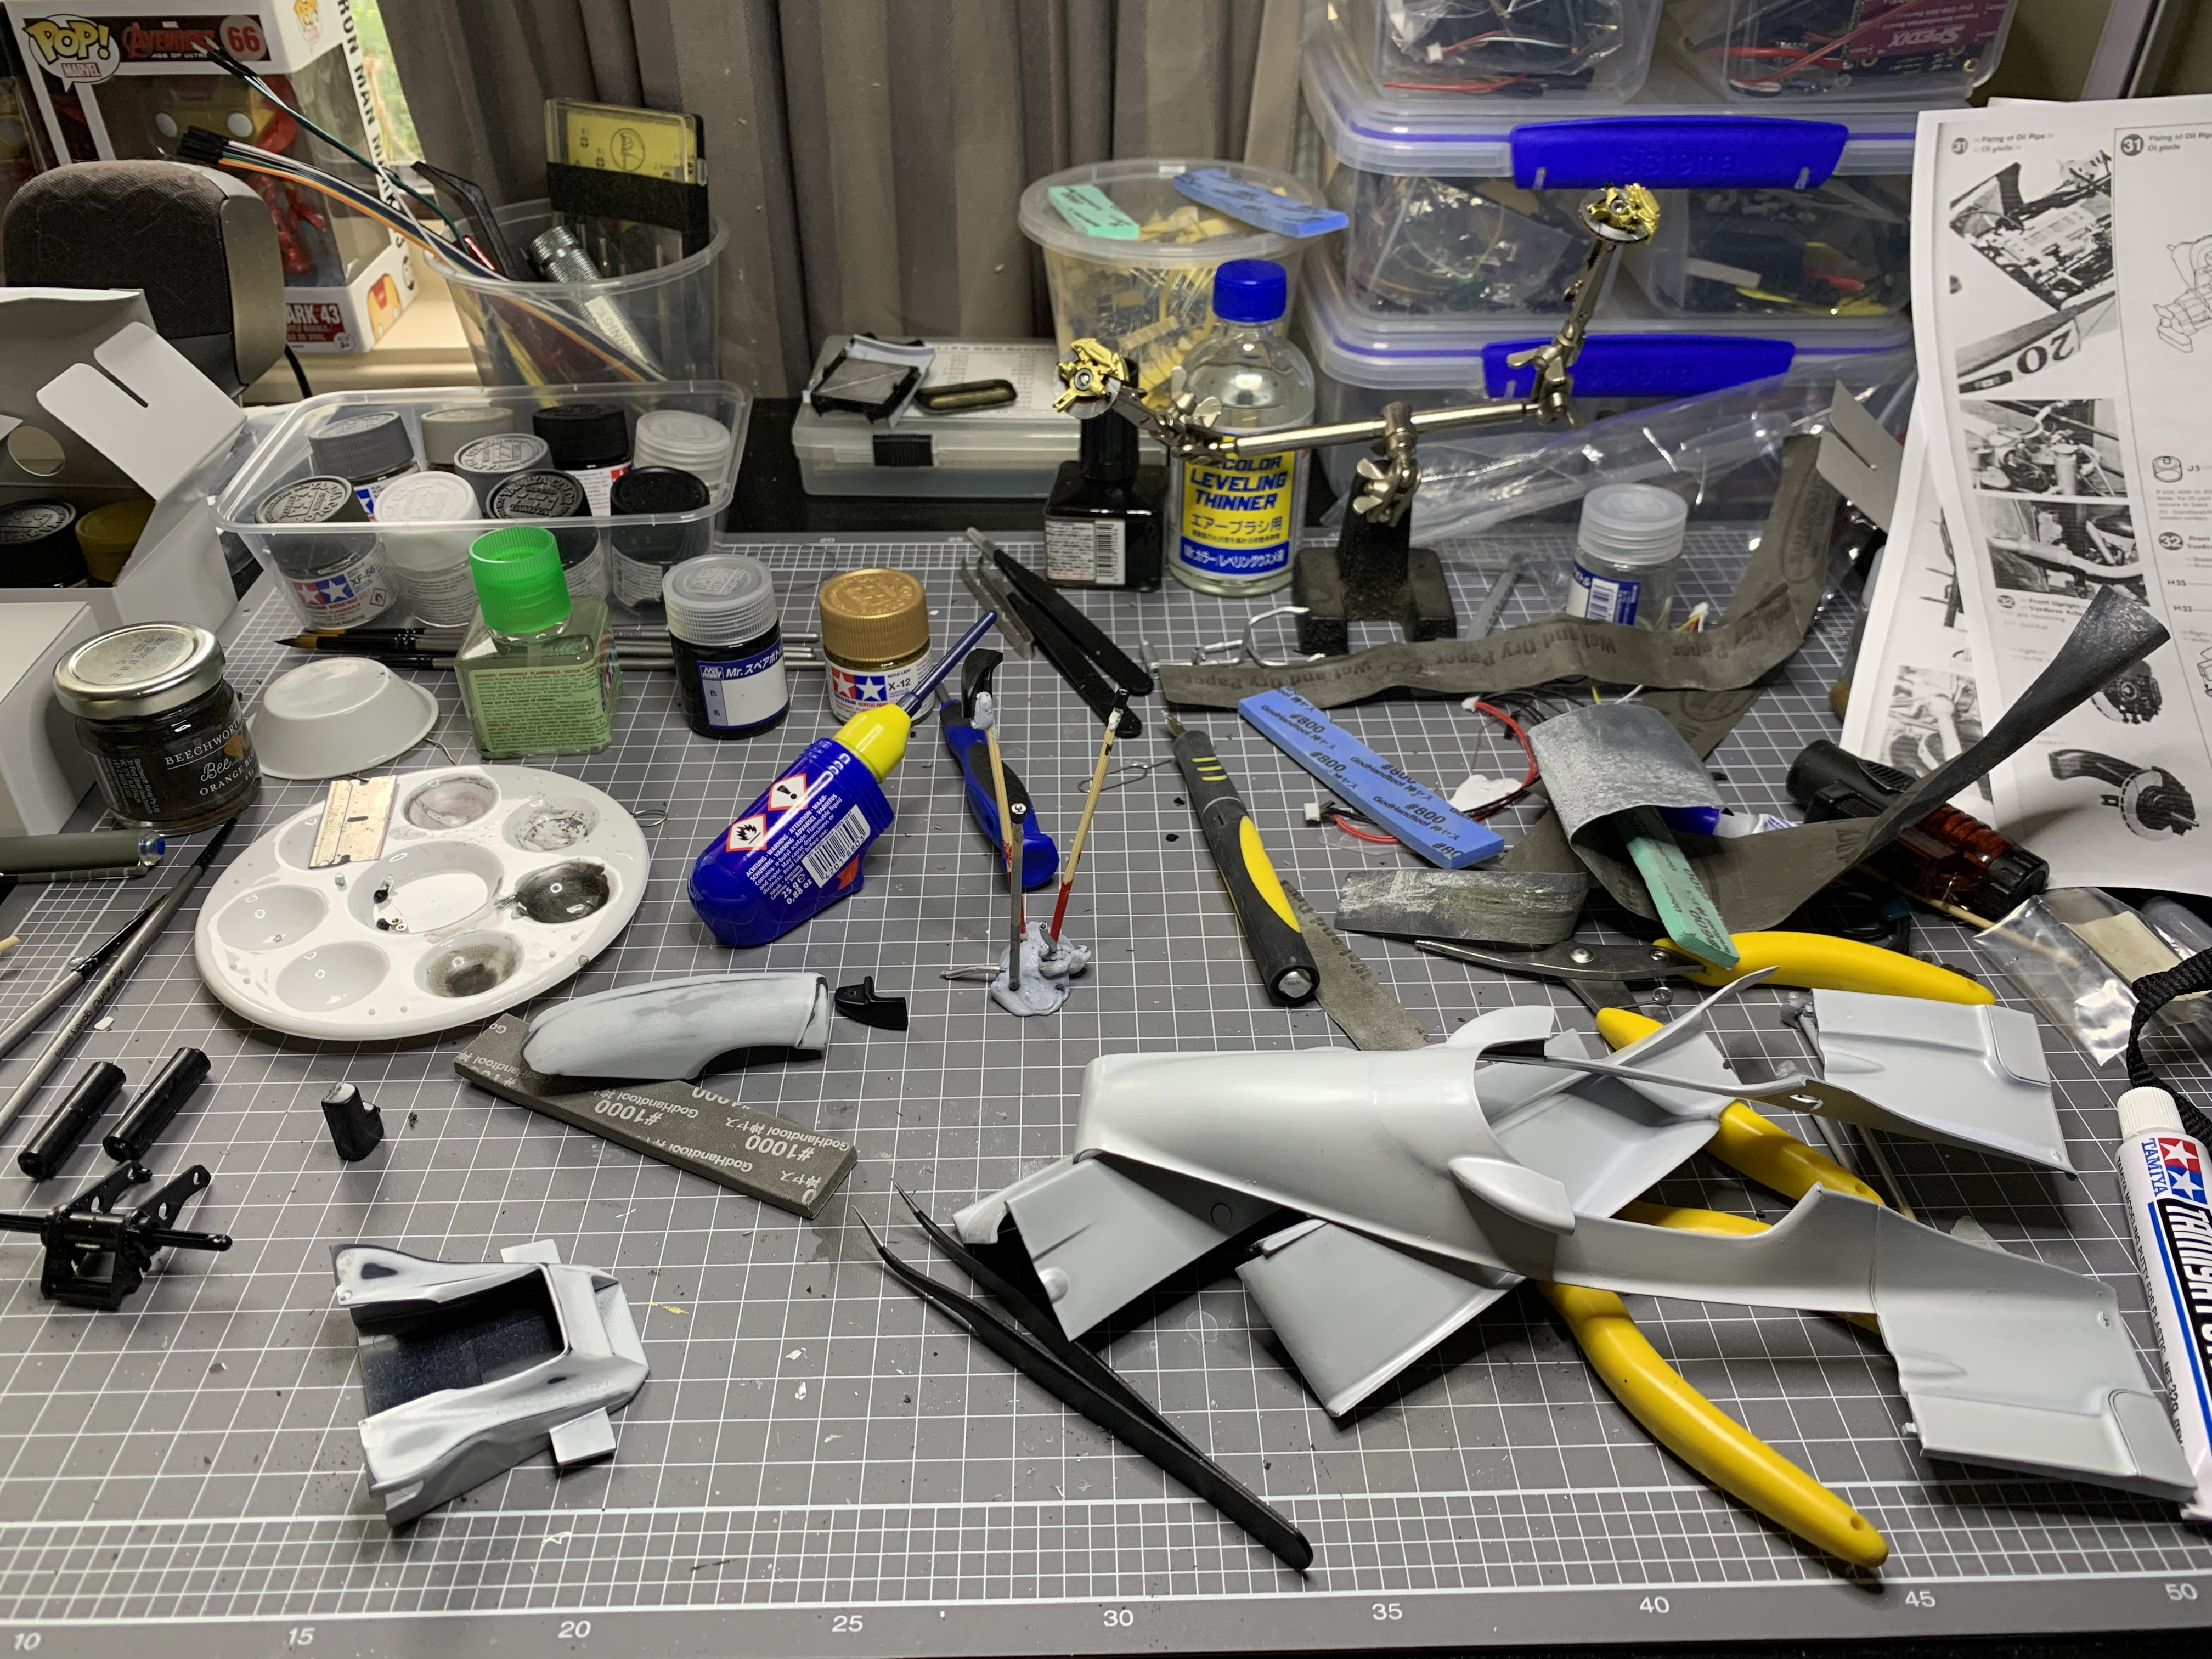
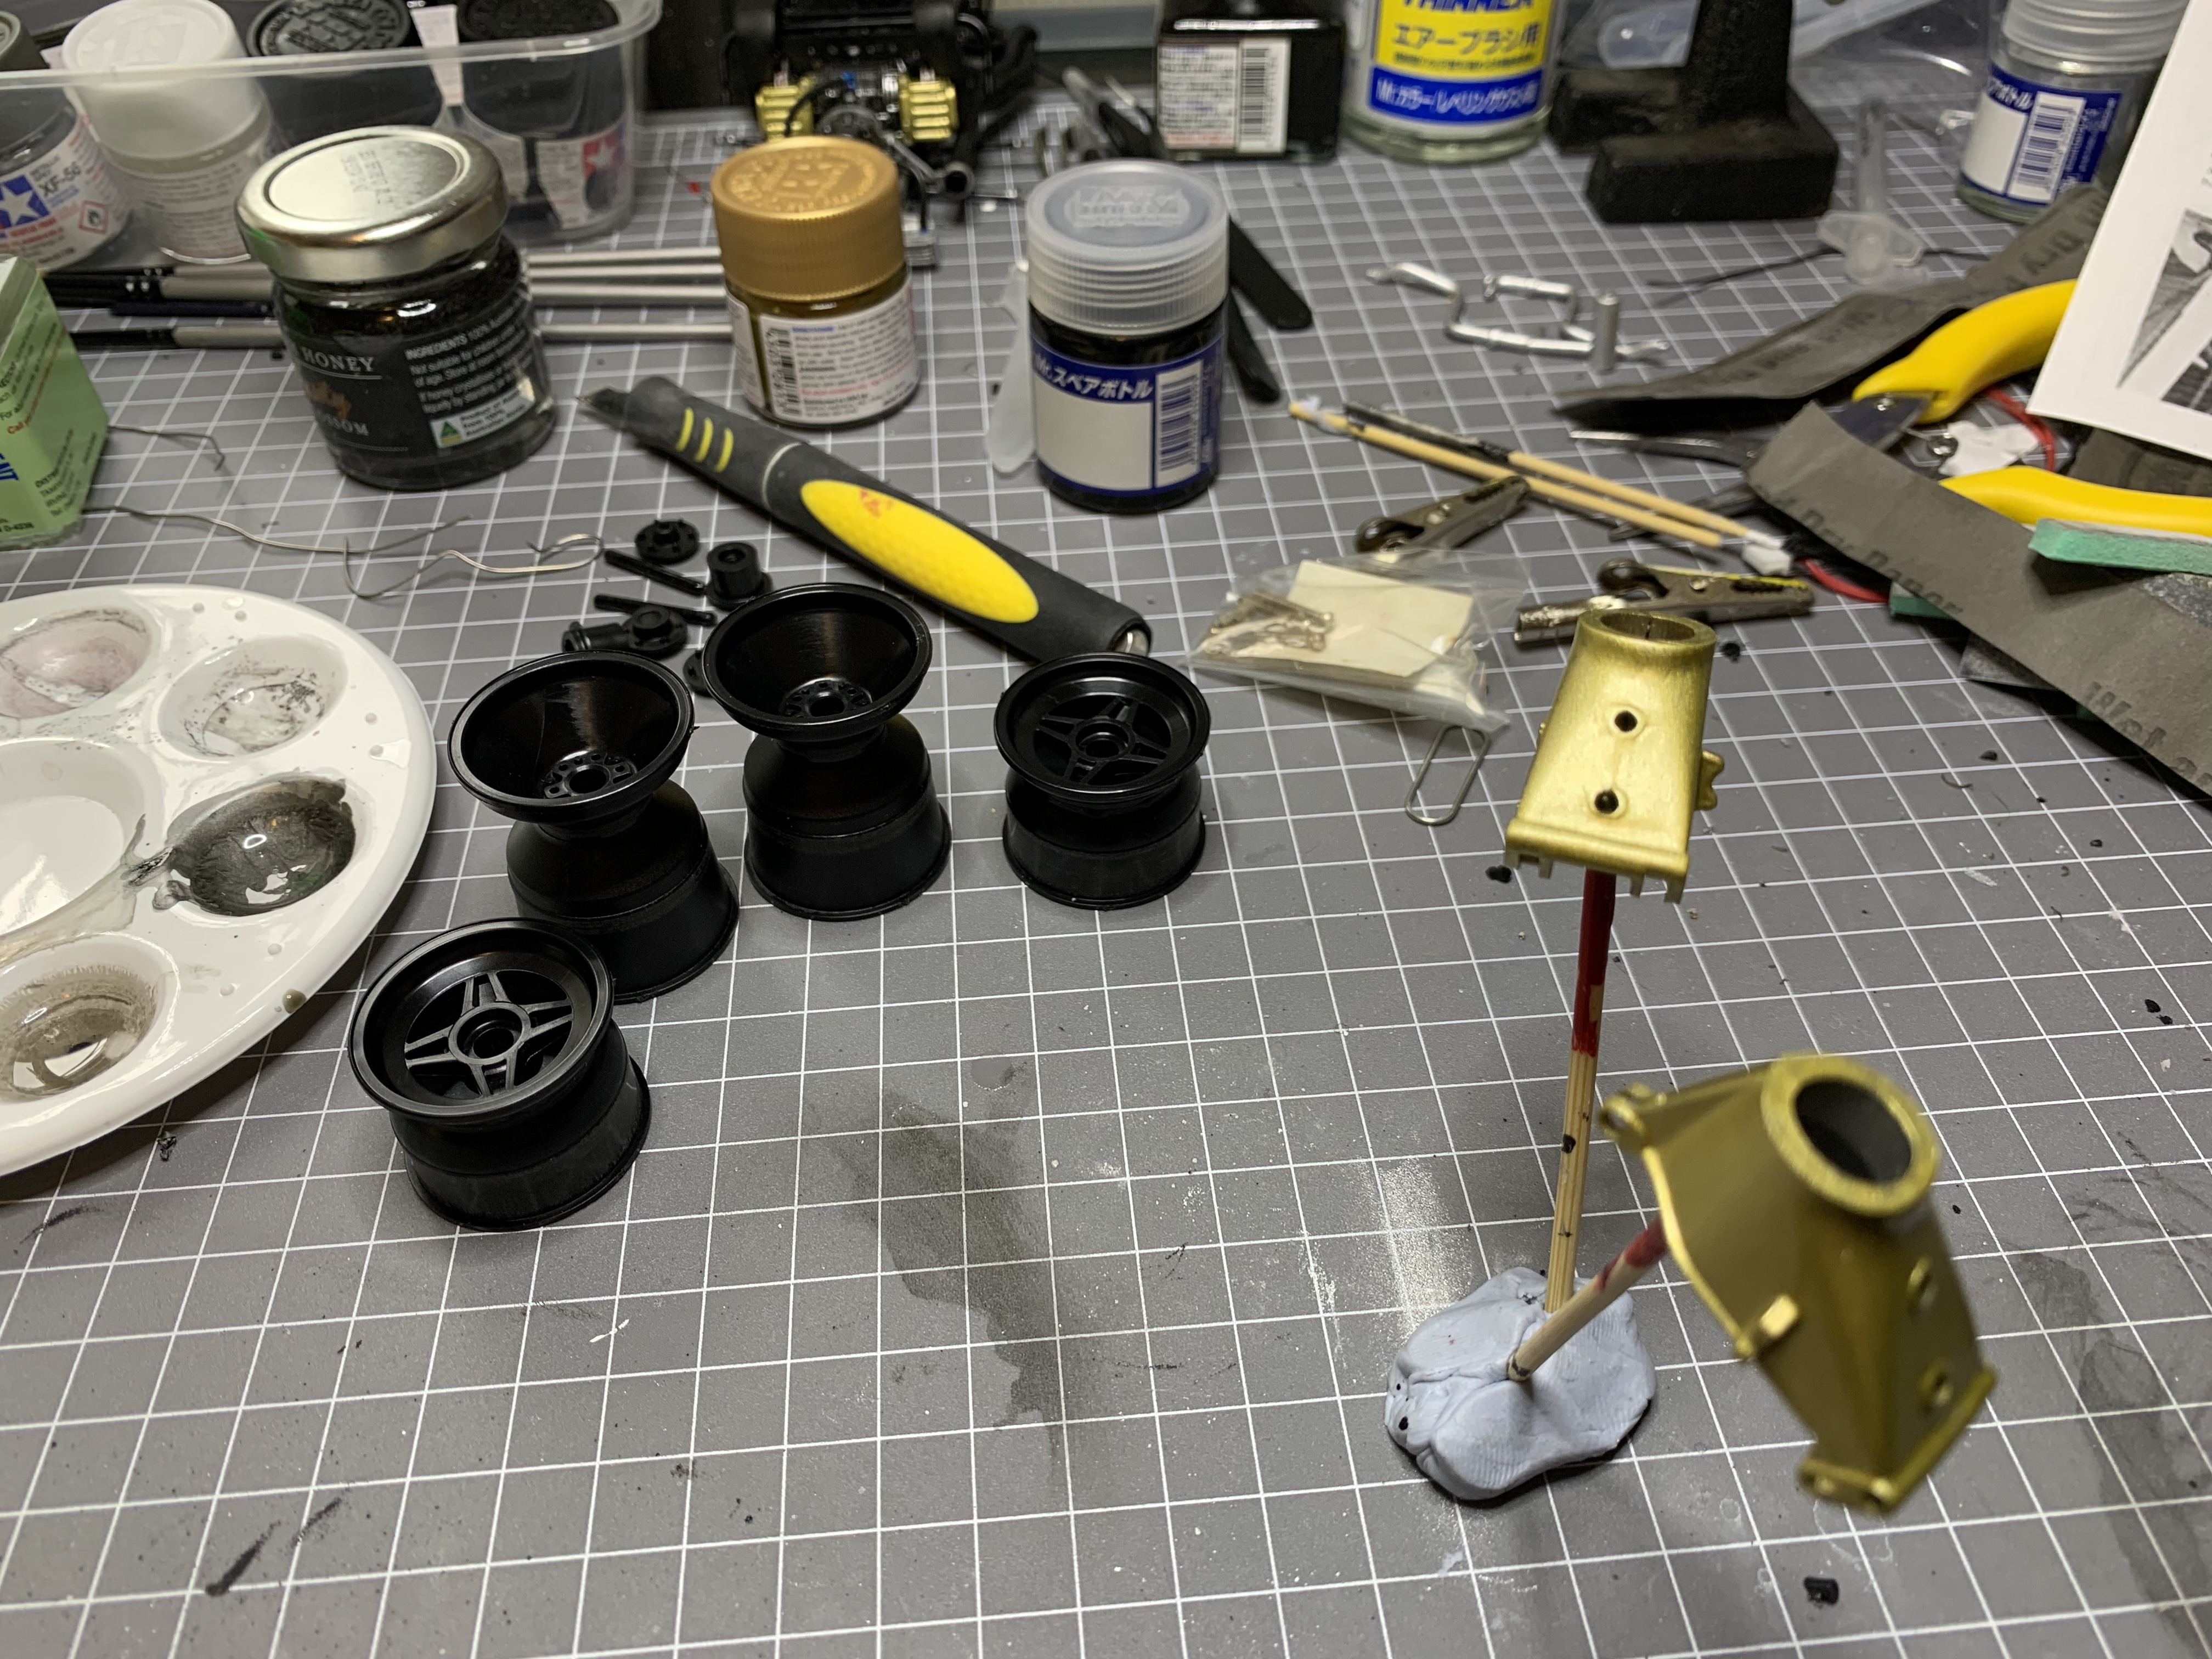
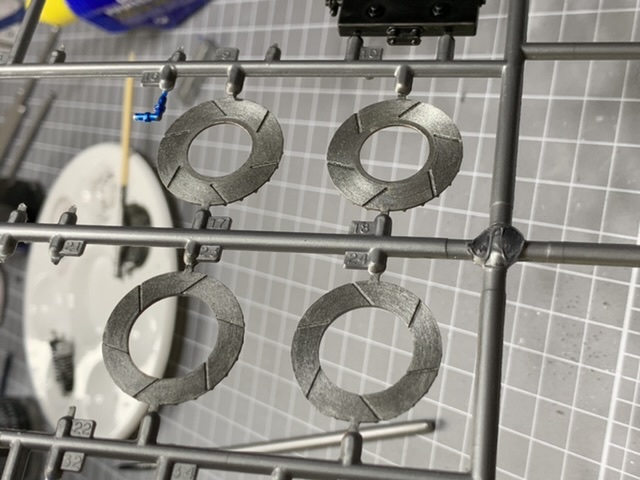
Painted up the wheels and mounted the tyres. Built up the front uprights and assembled the brake discs onto them. Last but of structural assembly has commenced (wing mount). I really need to work on my workspace tidiness for my next build. Filling some moulding divots on the inside of the front wing end plates.
-
1/12 Tamiya Wolf WR1 (With a Twist)
AaronM replied to AaronM's topic in WIP: Other Racing: Road Racing, Land Speed Racers
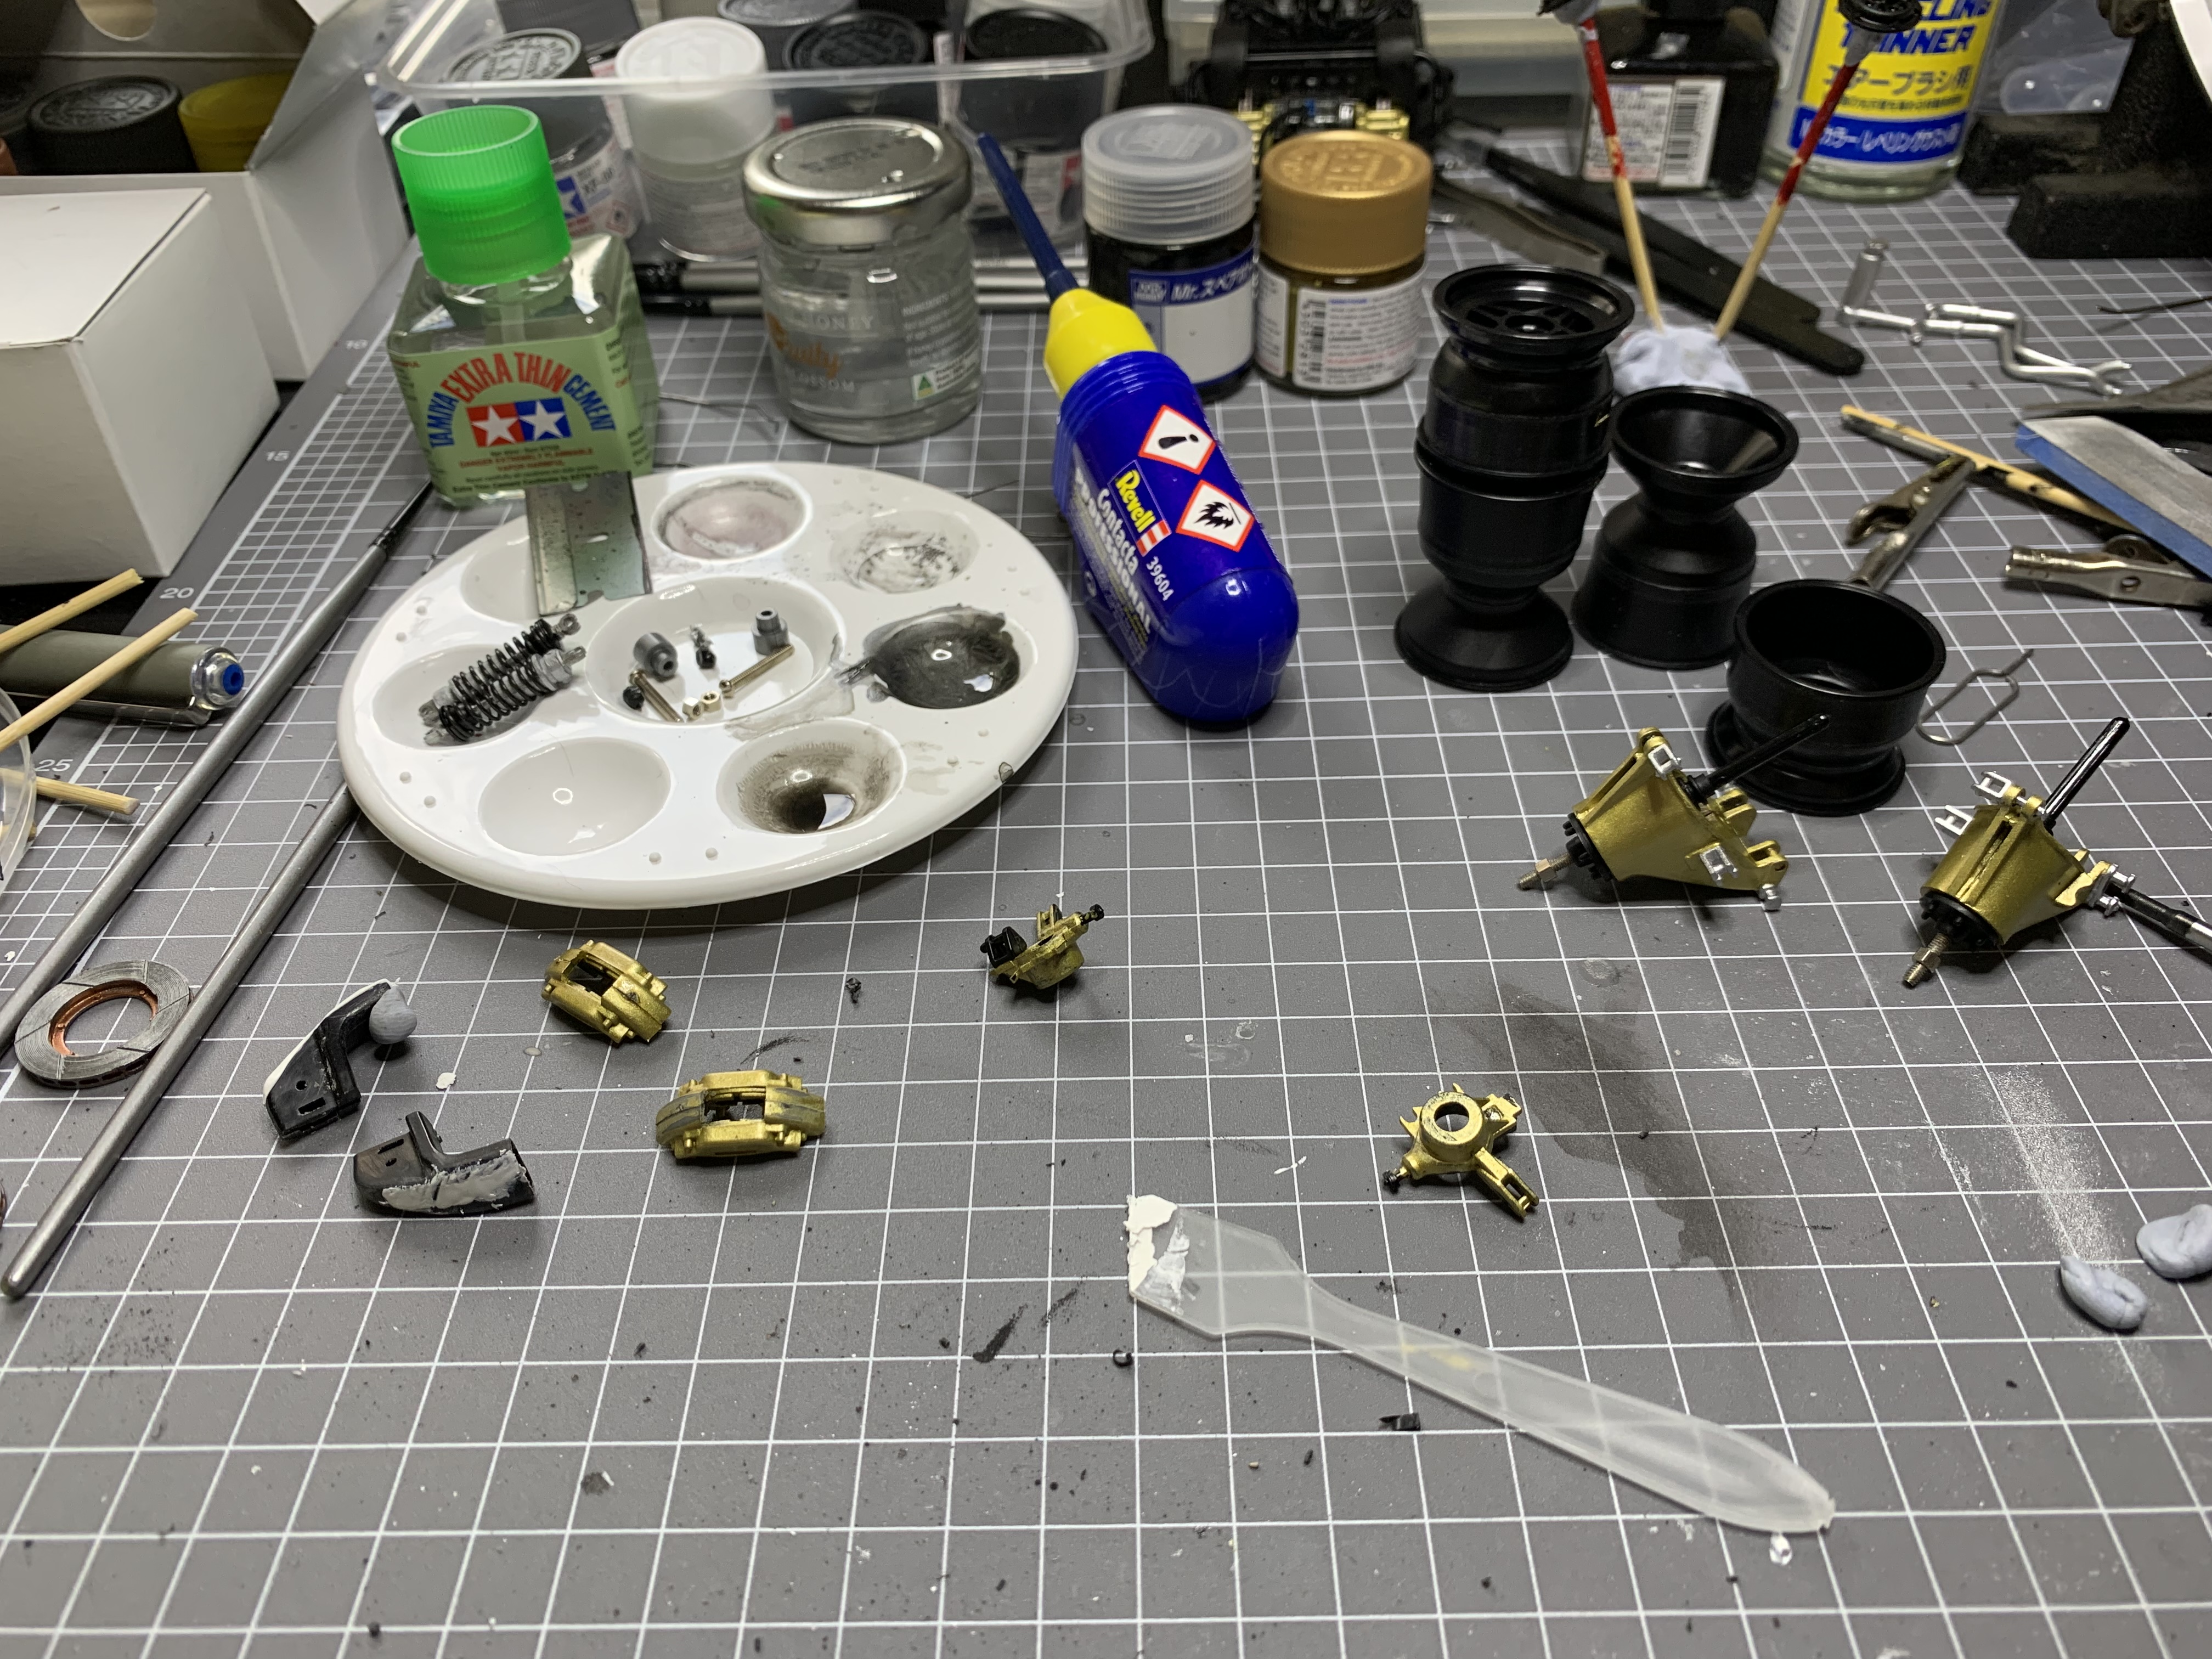
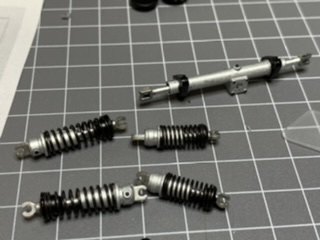
had a shock fail on install so bit of a build hiccup there. Calipers and uprights for the front. mock up fit.
-
1/12 Tamiya Wolf WR1 (With a Twist)
AaronM replied to AaronM's topic in WIP: Other Racing: Road Racing, Land Speed Racers
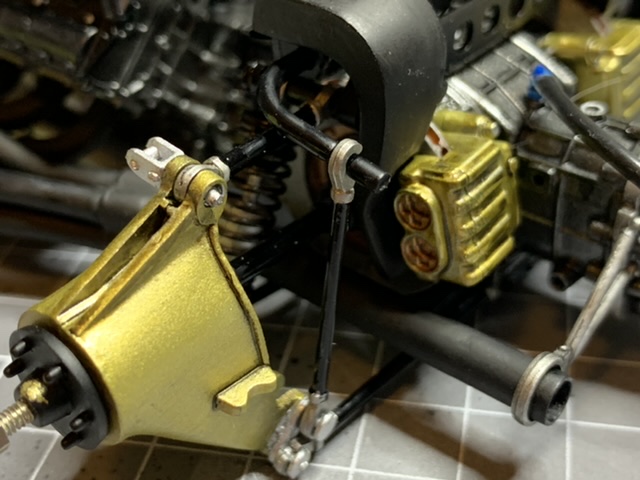
Headers were finally attached to the engine this week. Left a lot of time for them to cure into position and started back this past weekend by building up the rear uprights and starting work on the fronts. Prop and glue and lean and prop. The instructions aren’t great at describing how this should be done and at what angle so I eyeballed it and hope it all fits. Both sides done. I’m still pretty happy with my efforts on the build. I’m starting to understand more about when and where to invest prep time and ho much further I need to go with prep. Rear uprights started. Wheels assembled so I can paint them. Attaching all the suspension pickup points to the uprights. Starting to put together all the sud-sections for the front uprights. Haven’t really started to work on fixing up the paint problem on the body yet, but once the weather improves I will have to get into that, then make the mask to paint the blue sections. I think I’ve got 2 or 3 weeks of work left.
-
Italari 1/12 Renault RE20 Turbo
AaronM replied to kpnuts's topic in WIP: Other Racing: Road Racing, Land Speed Racers
Protar/Italeri did a McLaren MP4/2C and Alfa Romeo 179/179C. The Alfa was a recent rerelease (like your Renault) and there are some about. I think the McLaren is a real-soon-now rerelease. I’m hoping to get one of each just to broaden my range of 1/12 F1 kits as Tamiya has a heap of 1970’s stuff and not much of that later period. -
Basic “Detail Up” Resin Parts or STLs
AaronM replied to AaronM's topic in Car Aftermarket / Resin / 3D Printed
Hose and wire clamps will be a thing I also need to think about. I’m in the 1/12 and probably 1/20 & 1/24 scales and looking at the specs of my resin printer I can definitely have it print the things I want in the sizes needed. Learning the software, and fine tuning the accuracy of design versus ease of use/print is probably my biggest concerns. Hence looking to see if people are sharing these sorts of things (I don’t even mind buying a half decent set of designs) -
1/12 Tamiya Wolf WR1 (With a Twist)
AaronM replied to AaronM's topic in WIP: Other Racing: Road Racing, Land Speed Racers
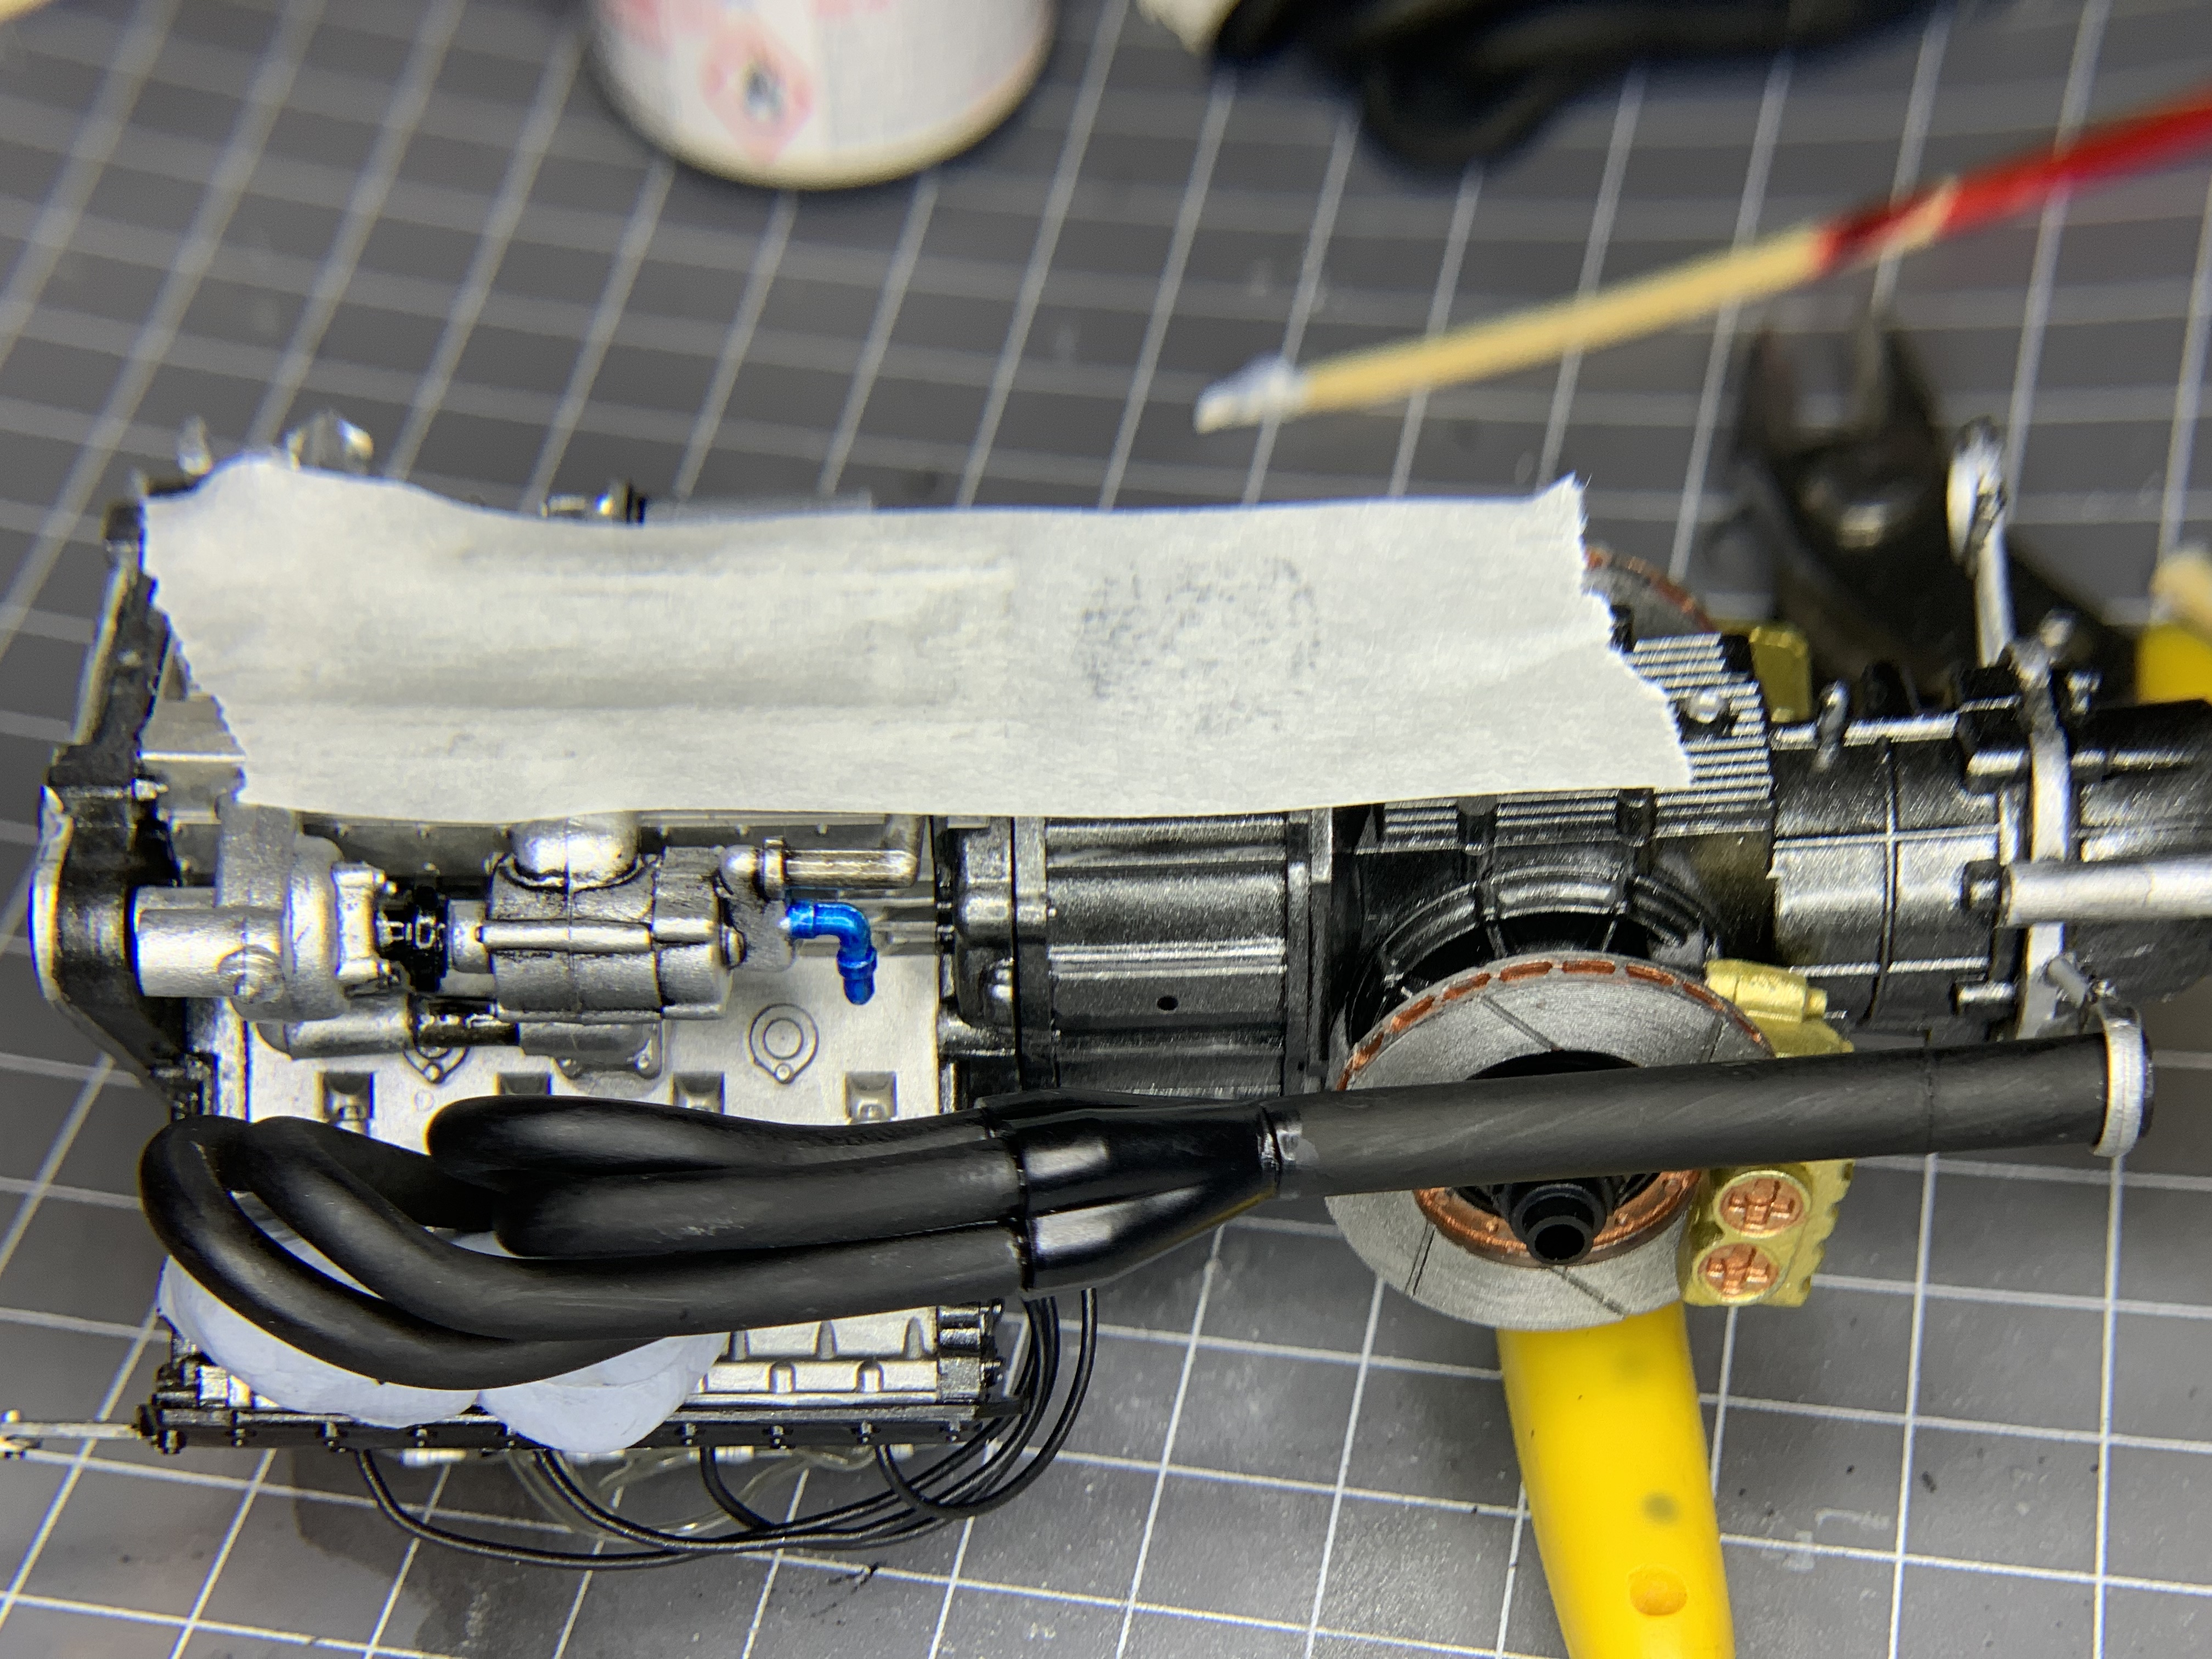
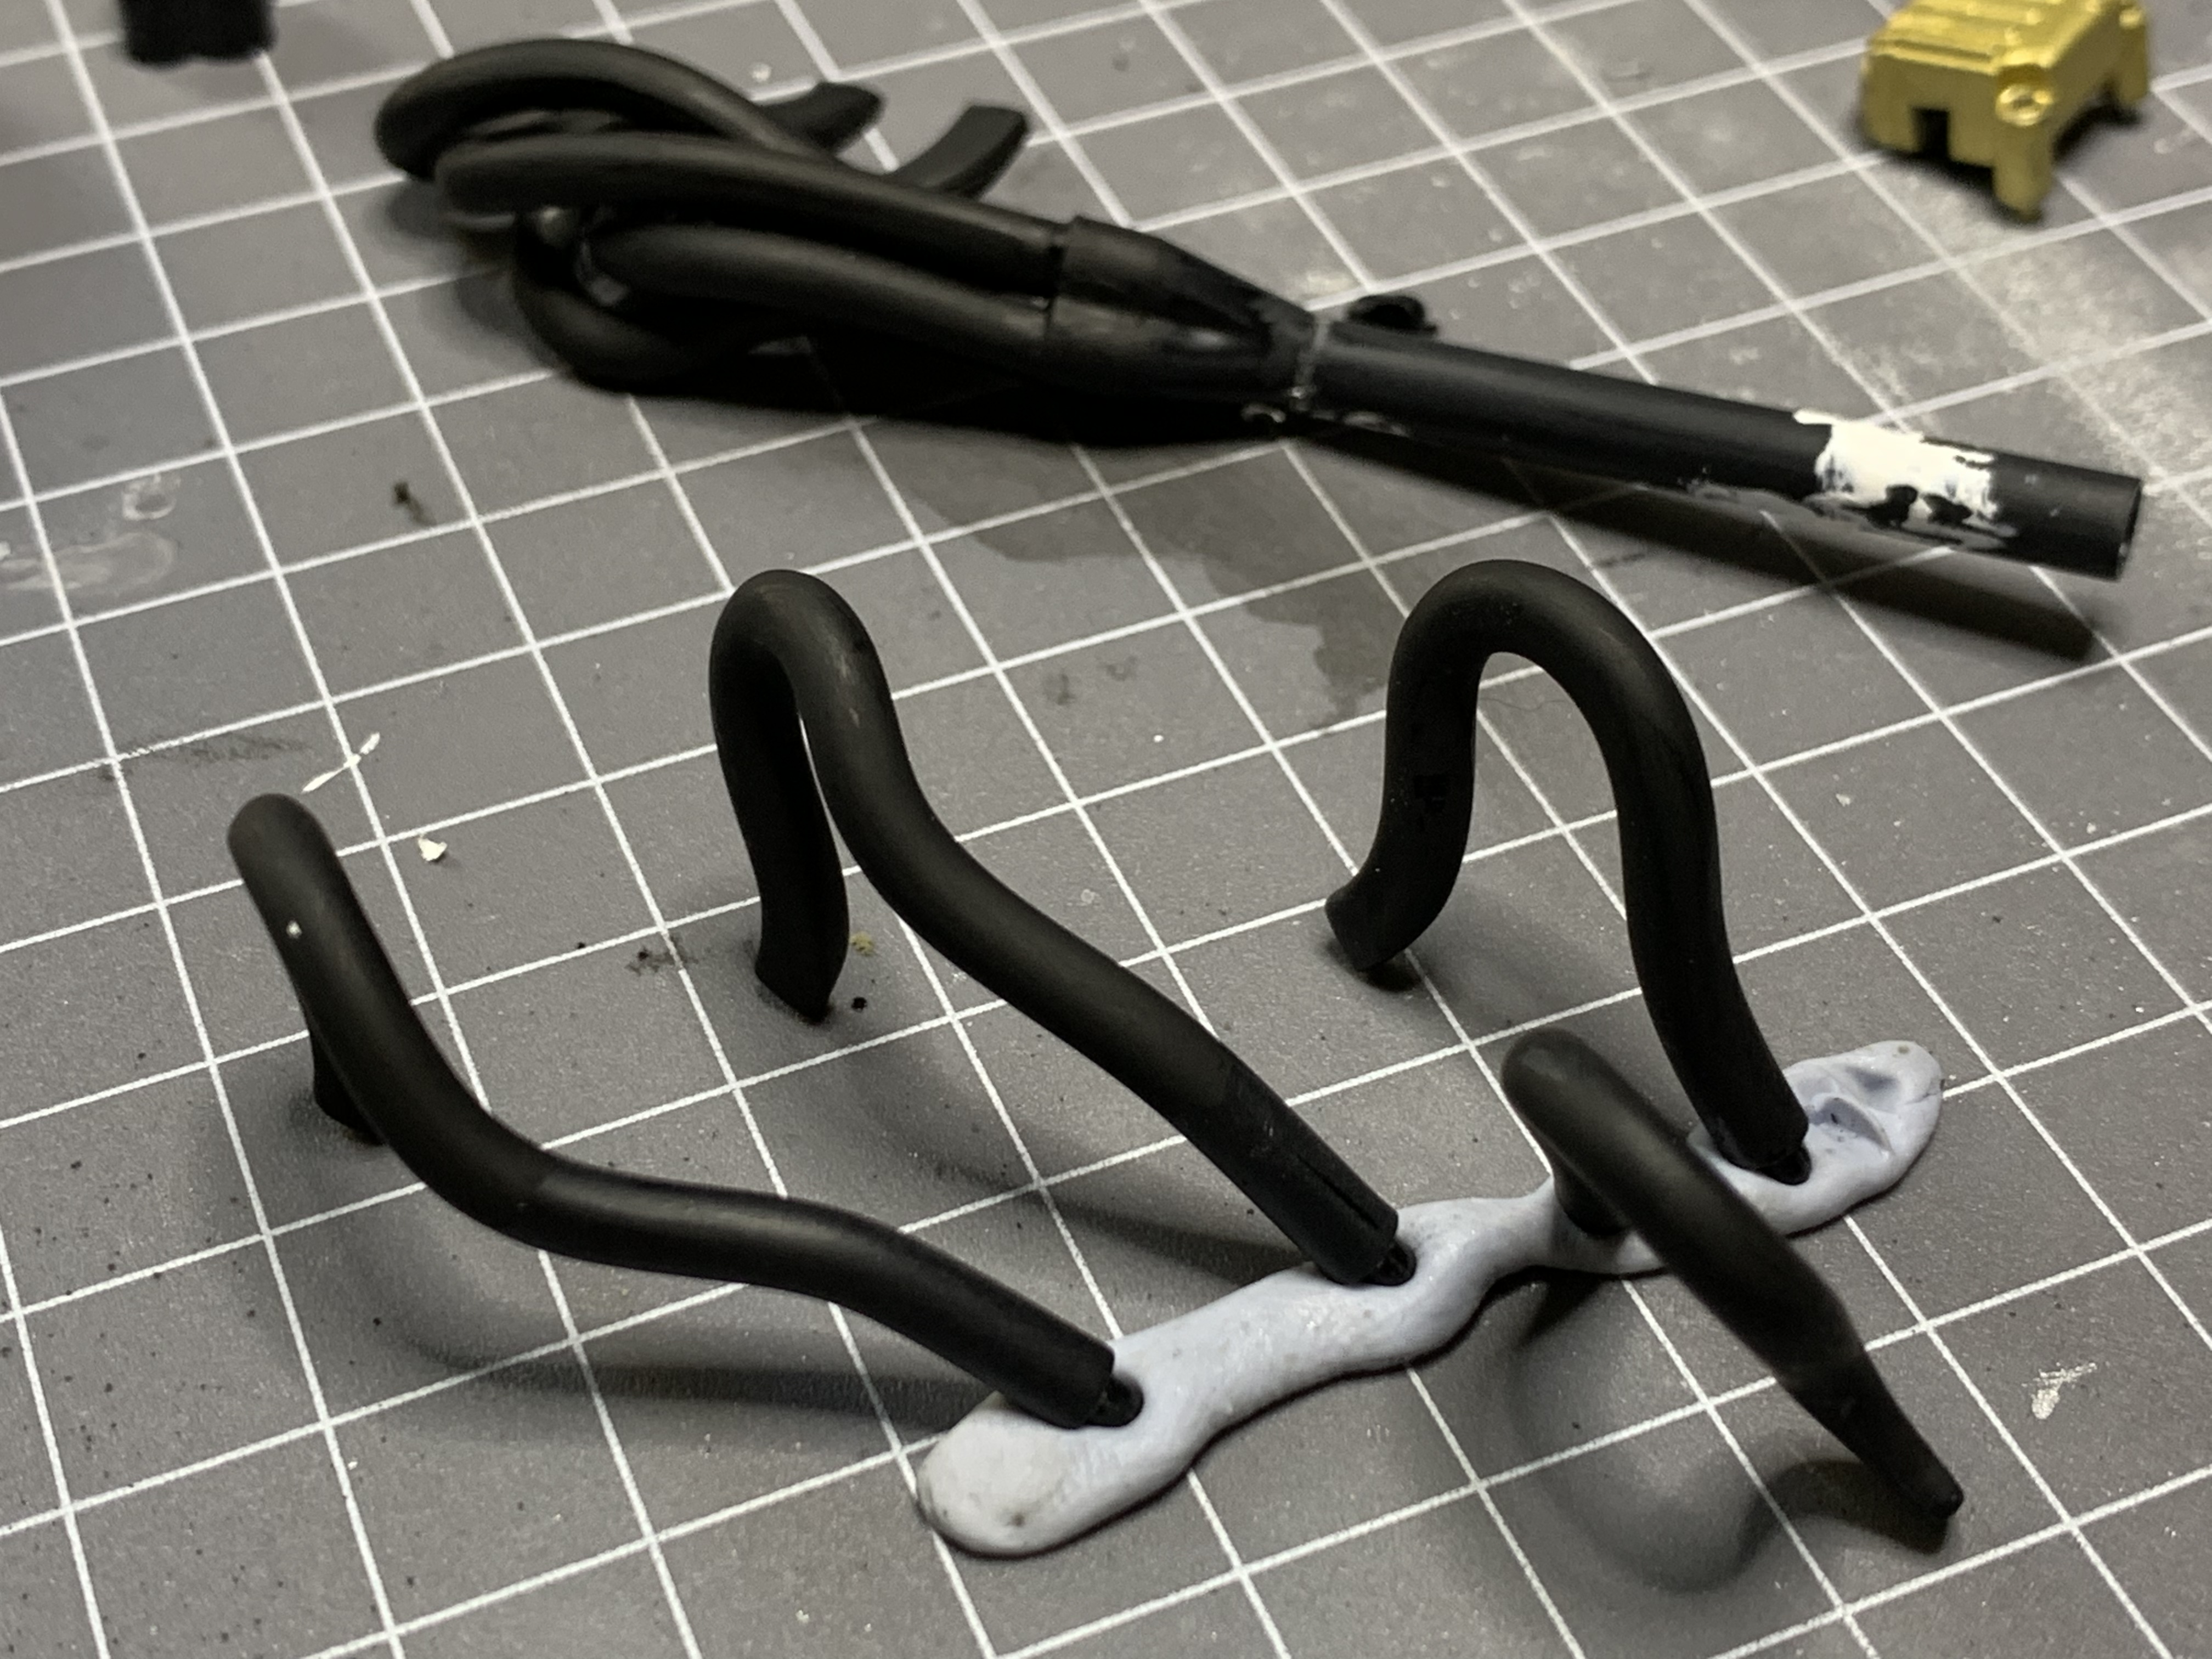
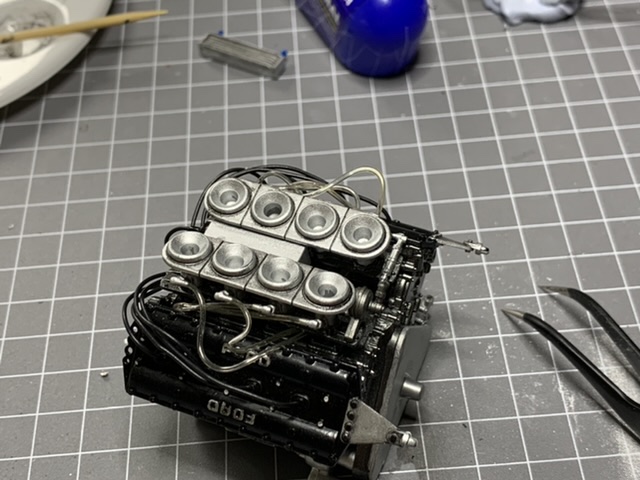
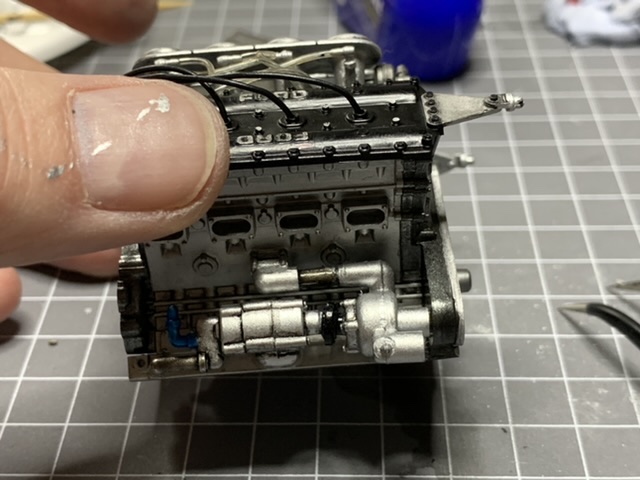
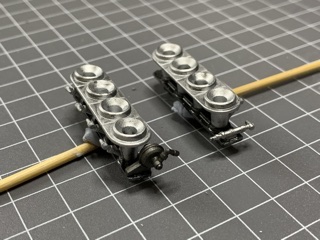
Moving on I built the header with the engine and gearbox temporarily attached and didn’t glue the header to the engine yet so it could be cleaned up and painted in on piece. Once this side was done and the glue dry I realised just how much more prep I should have done. So for the next side I scraped parting lines, filled mould imperfections and sanded, sanded and sanded. Then everything’s had two light coats of matt black. The already built header in the background is “ok” but I had to fix up a fair bit and some bits just won’t have the paint finish or smooth pipe that the good side will. This is all part of the learning process. I made a custom mix of paint for the steel of the brake rotors - pretty much 1:1 metallic grey and titanium silver. It really came up “just right”. Cat fur flying about and some “bottom of can” problems trashed my bodywork painting - rookie mistakes on my part, but I can rub back and recoat - no harm done. started to feel a bit depressed that it was not going to look good and that I am eating time etc. disillusionment phase I guess, so got the engine and gearbox sitting next to each other. I feel better now. Next side of headers waiting for the glue to dry. Once they’re set up enough I’ll do some paint touch ups and finish the weathering/line highlighting on the engine and gearbox. Paint up both headers with their final coats and start work on the rear suspension. Im upping the attention to detail with mould lines and sanding etc so progress is slower but I think doing that will make me feel 100x better about the results.
-
Folks, I’m coming back into the hobby and loving the extra detail I can achieve these days just by being having access to the Internet to learn so many ideas and techniques. But what I’m really intrigued by are all the great Resin detail up parts available. My first build back has already taught me about needing some varieties of AN fittings, bolt and nut heads plus pipe-flare fittings to add brake lines to 1/12th calipers etc. Anyway the price and availability of these detail up parts is immense as everything has to come via online shopping, and not one store ever seems to have stock of the range needed and a fair postage cost. So I would like to 3d (resin) print them. Are there any STL or CAD files that people are using for these or should I just start drawing up my own?
-
Bentley 4.5L Blower - Revell
AaronM replied to Mixalz's topic in WIP: Other Racing: Road Racing, Land Speed Racers
Am looking forward to how this comes together as I was eyeing off the kit myself -
1/12 Tamiya Wolf WR1 (With a Twist)
AaronM replied to AaronM's topic in WIP: Other Racing: Road Racing, Land Speed Racers
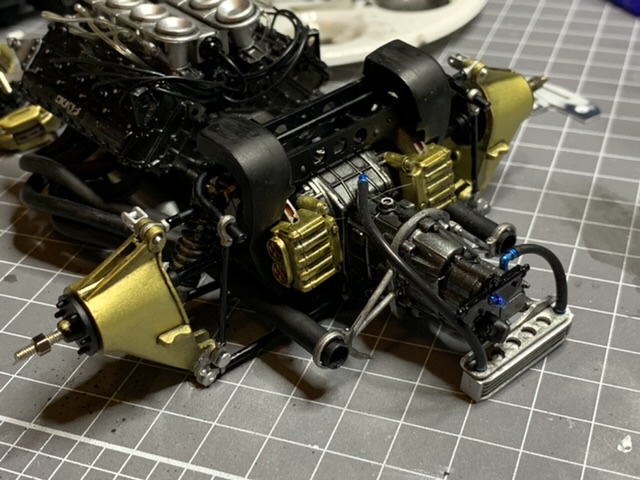
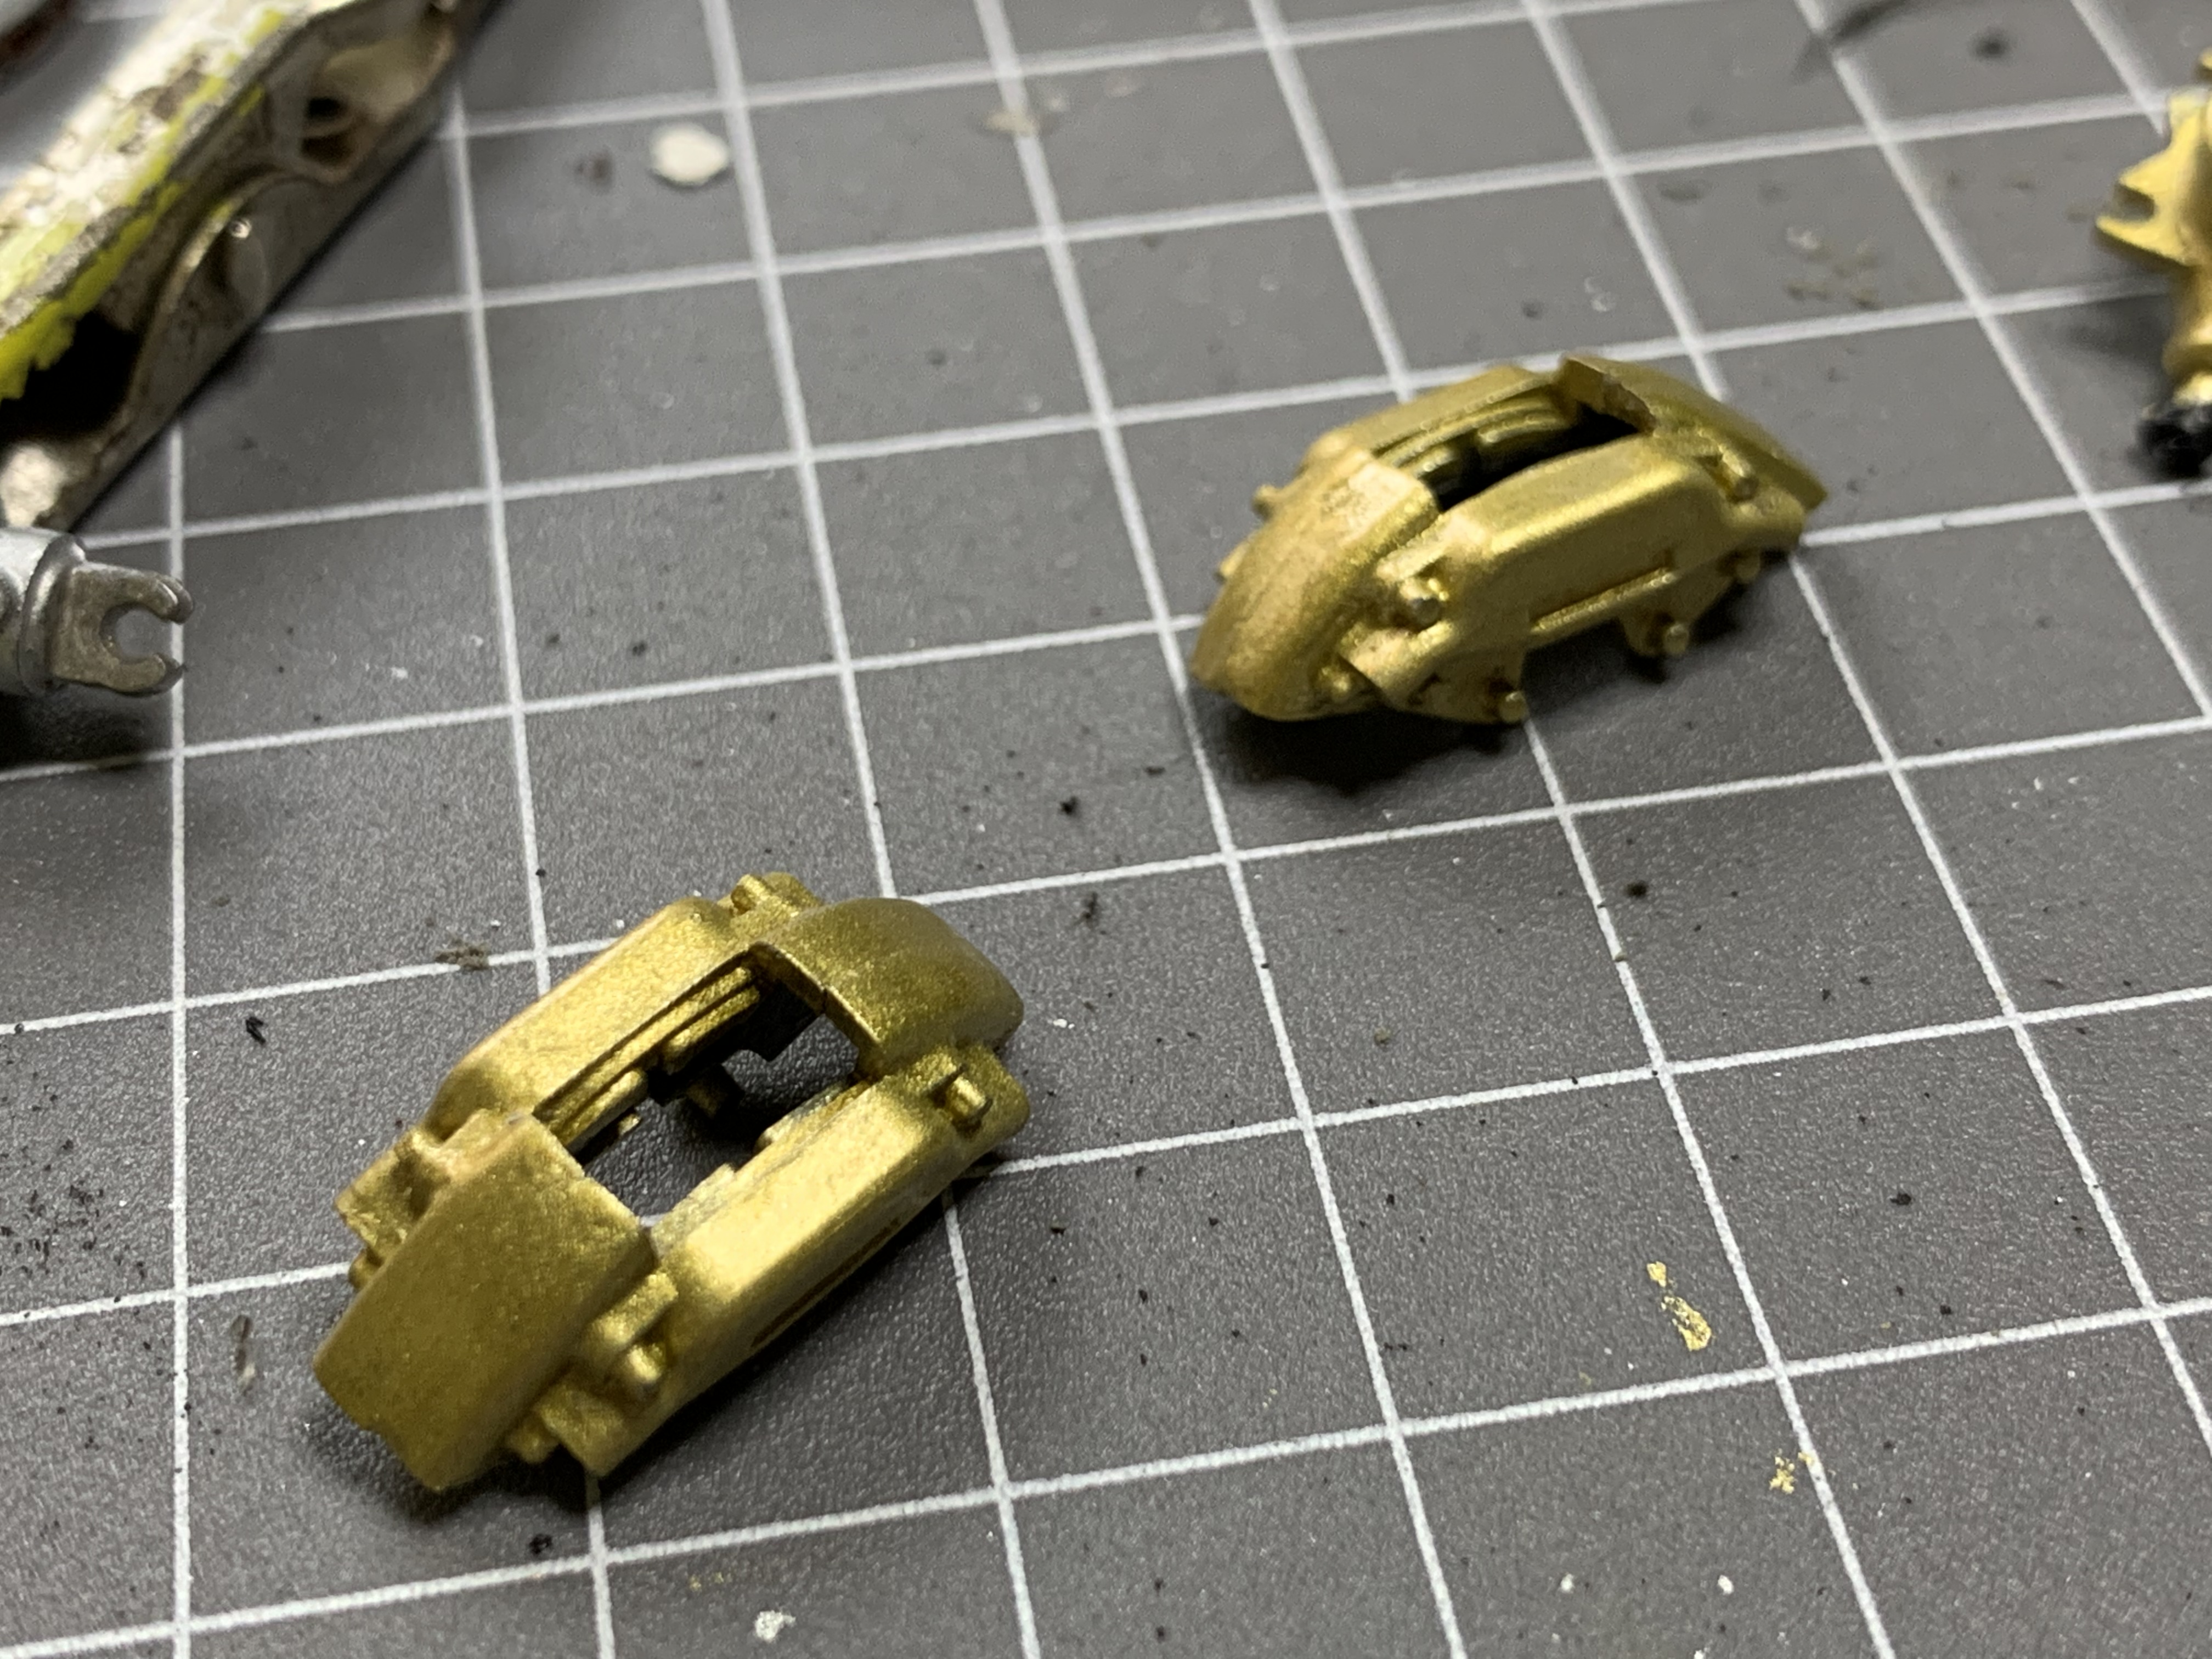
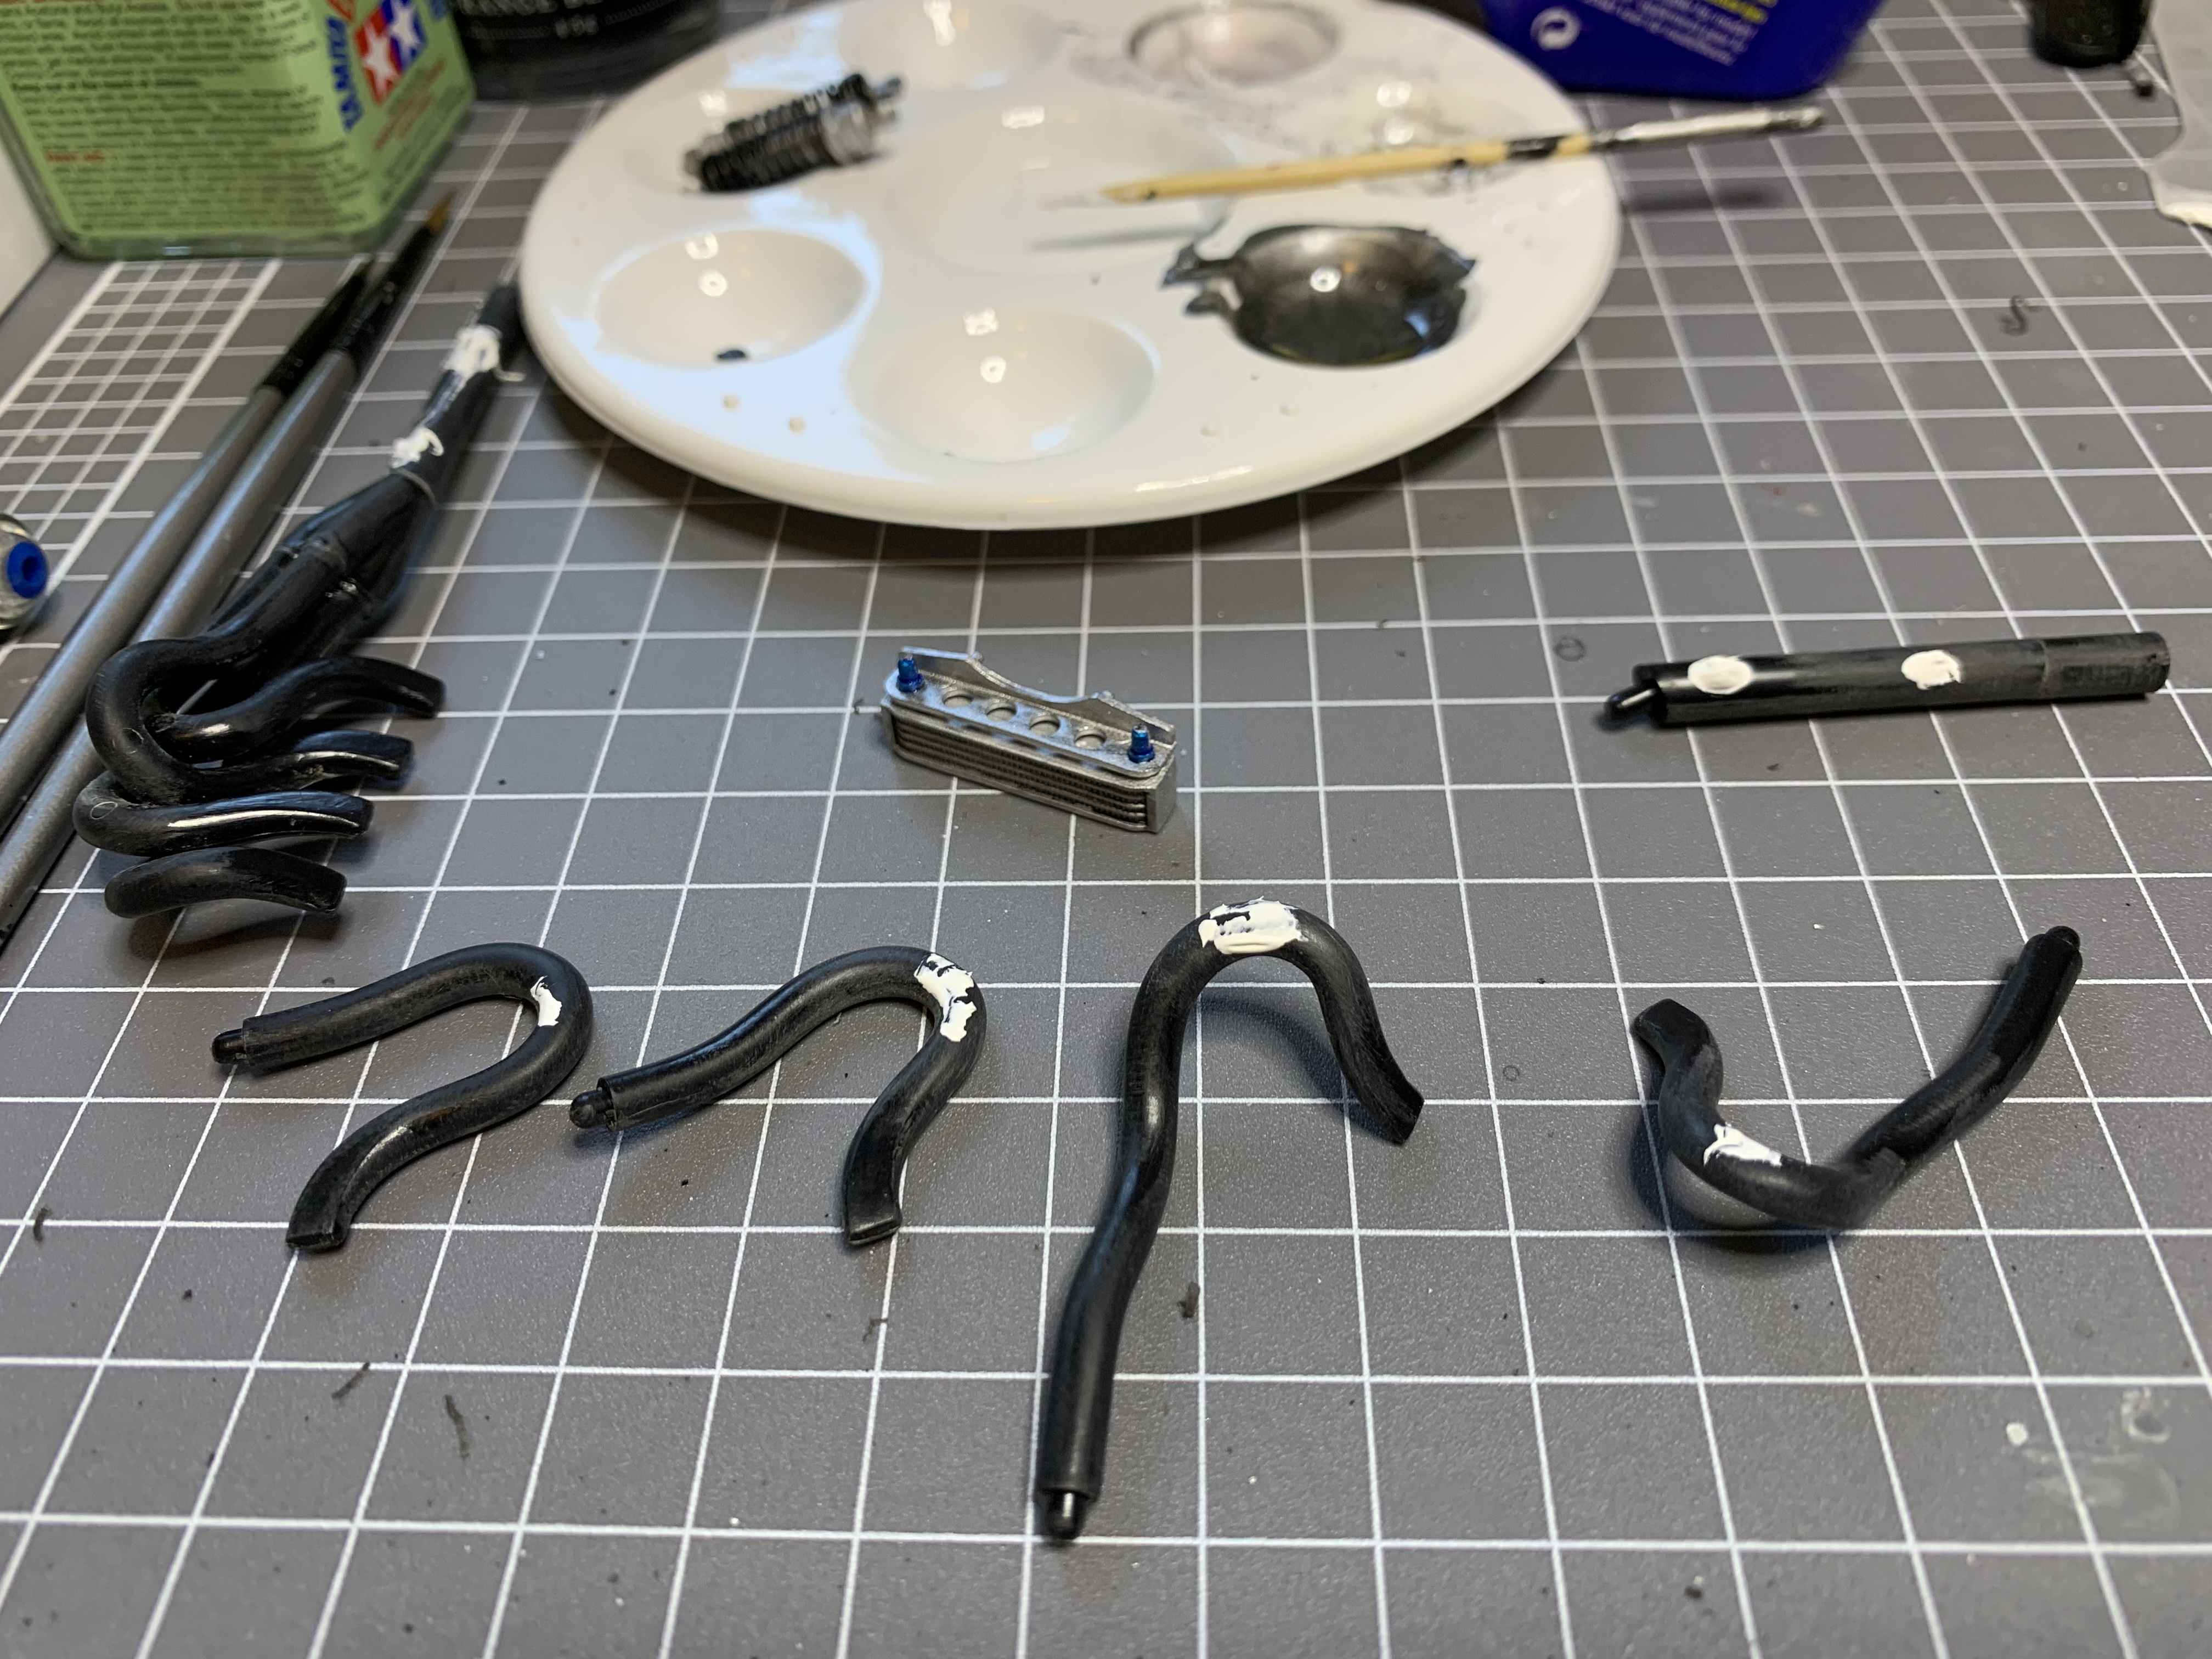
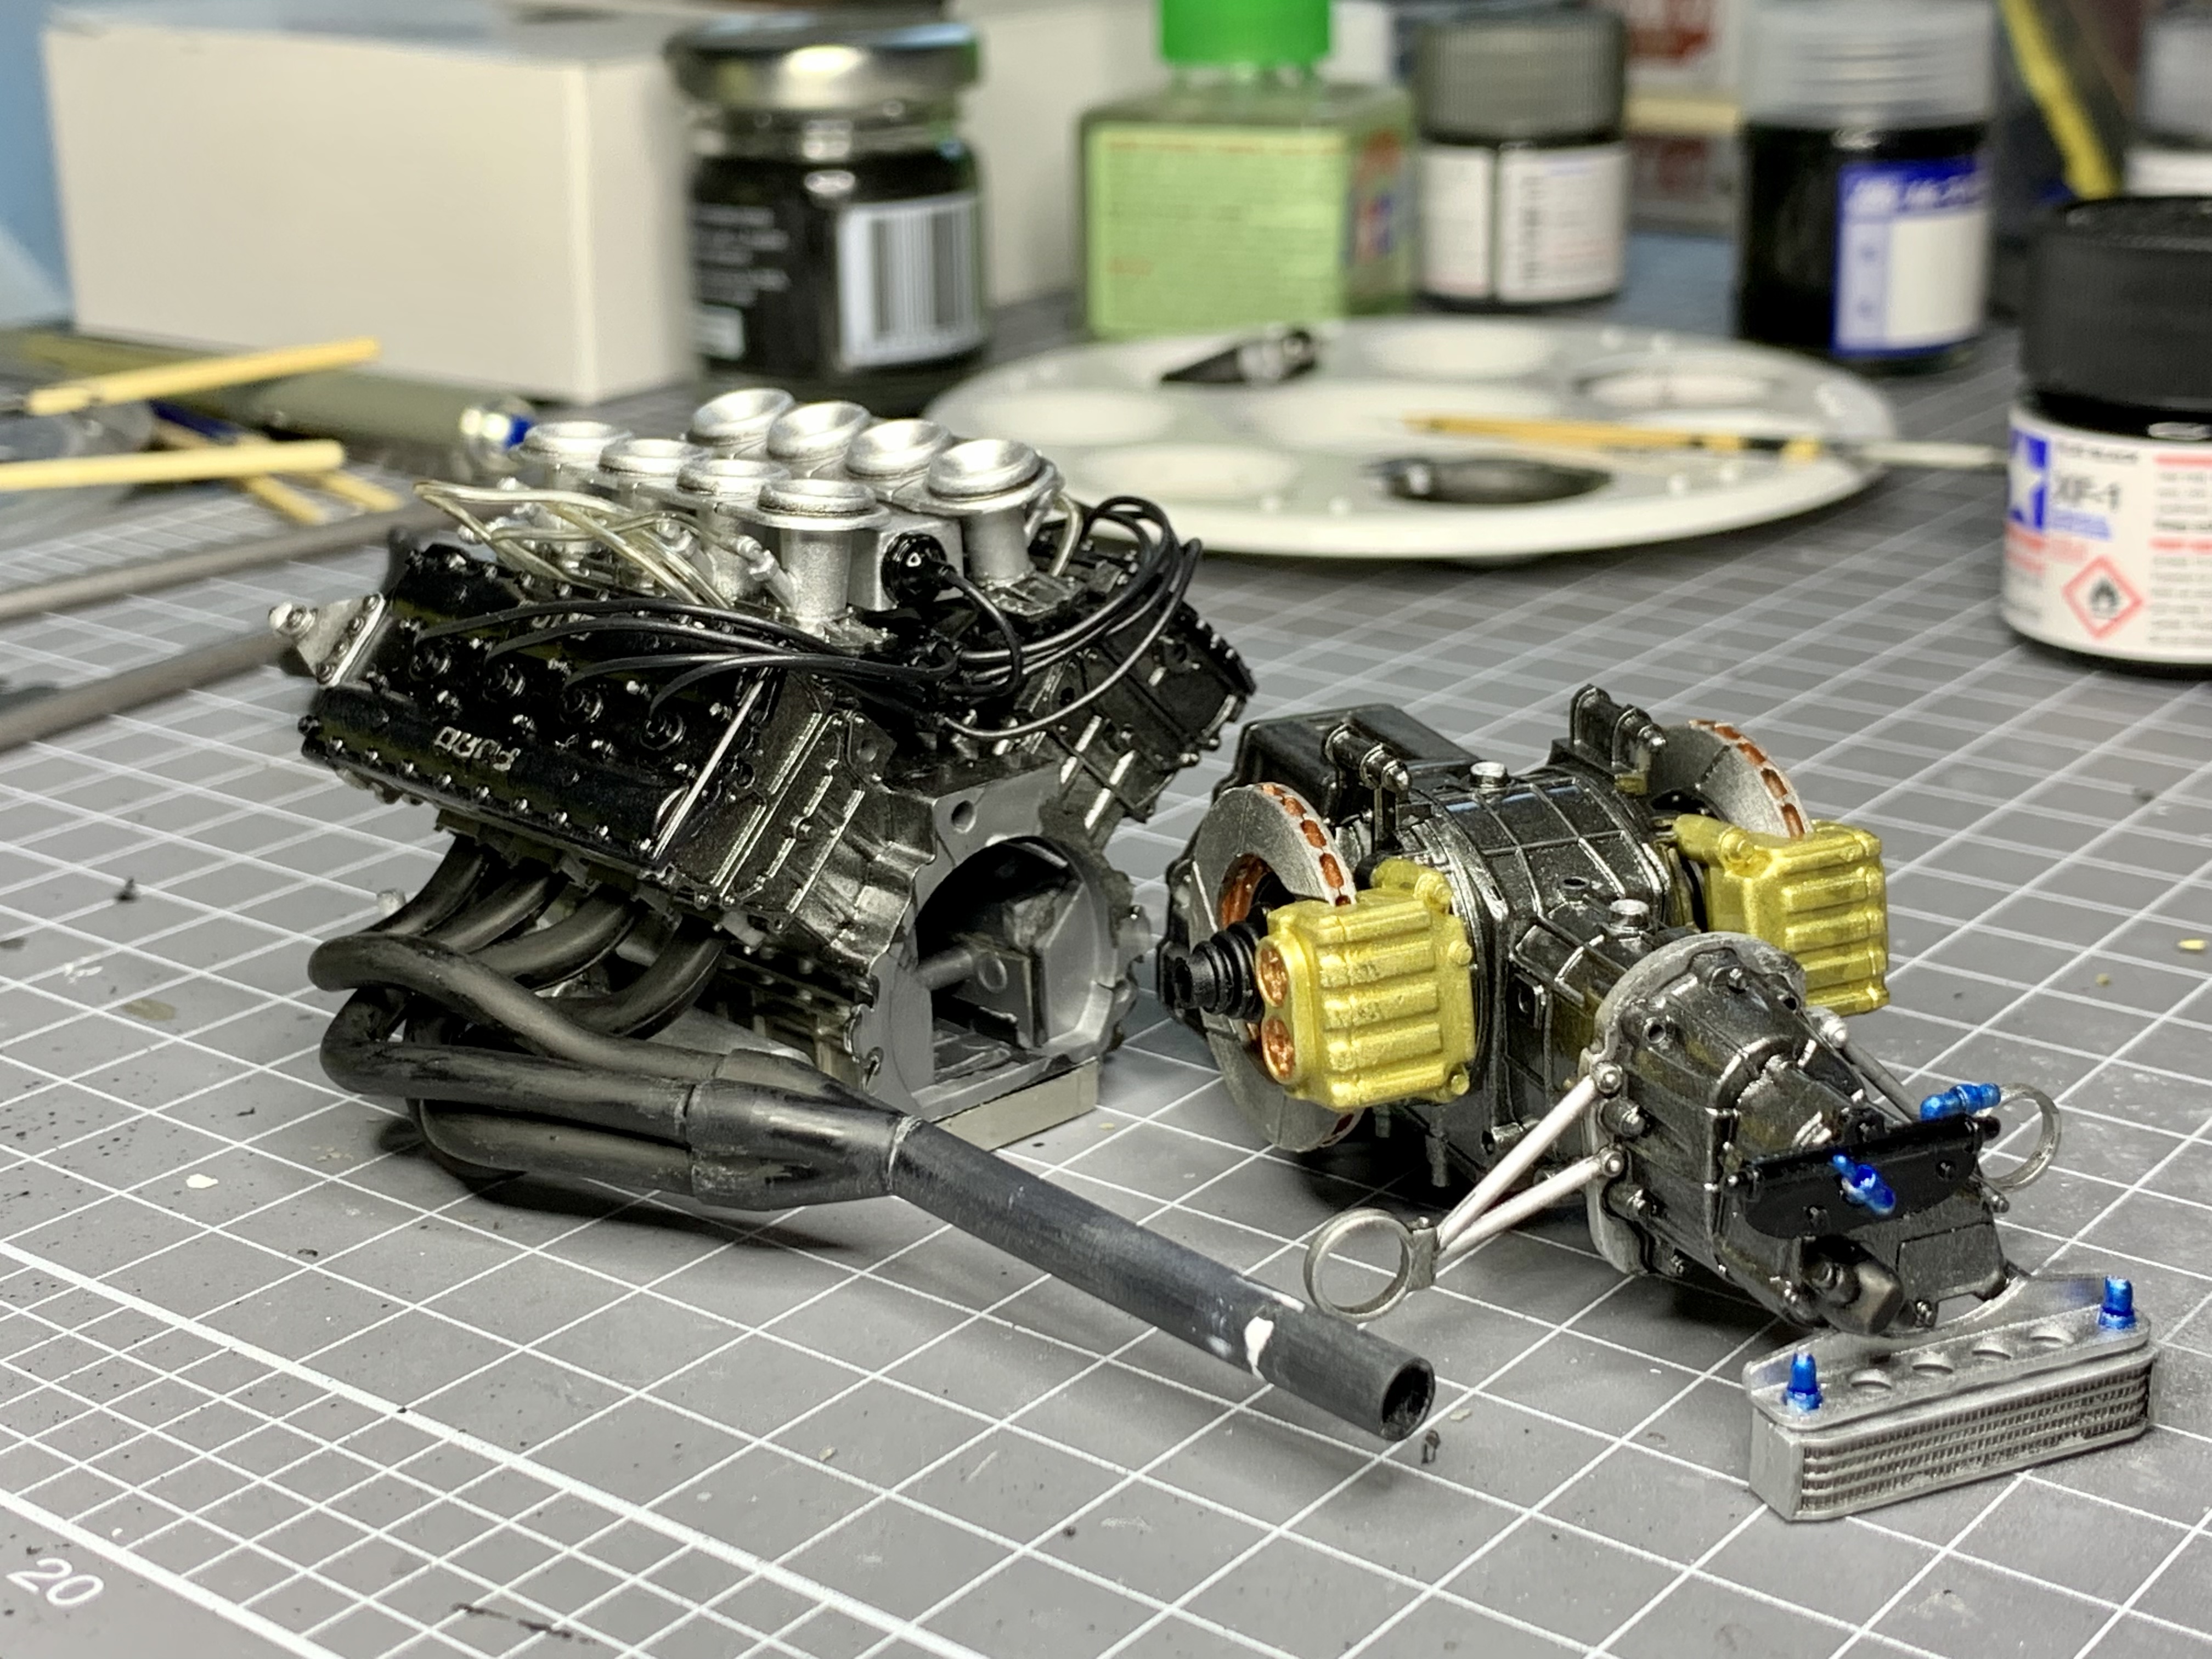
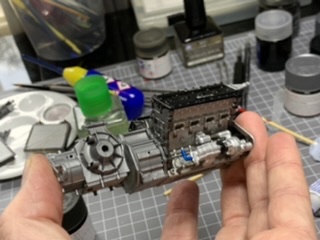
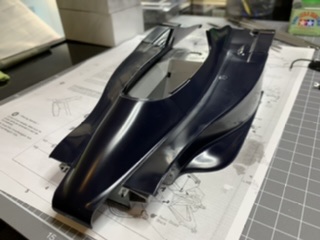
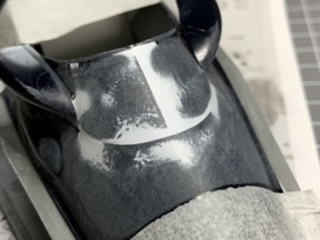
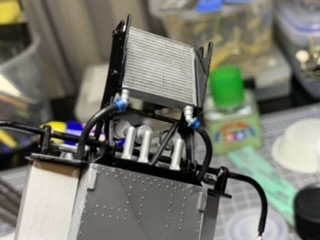
Got out the weathering finish and started putting a bit of character into the engine. Its amazing how just letting some shadow lines and dirty edges form changes it from being “too clean” to being more realistic. Mixed my own colour for the brake rotors to get a better shine without being bright silver. A test fit of the engine and radiators. Unfortunately I had a paint mishap with the body so it will need a fair bit of stripping and repainting.
-
1/12 Tamiya Wolf WR1 (With a Twist)
AaronM replied to AaronM's topic in WIP: Other Racing: Road Racing, Land Speed Racers
In other news my 2021 Release BT44B kit is on the way. It’s going to be an interesting comparison between the two. I’m hoping to do much better with the Brabham, get more fine details right, and address some of my build quality shortfalls. -
1/12 Tamiya Wolf WR1 (With a Twist)
AaronM replied to AaronM's topic in WIP: Other Racing: Road Racing, Land Speed Racers
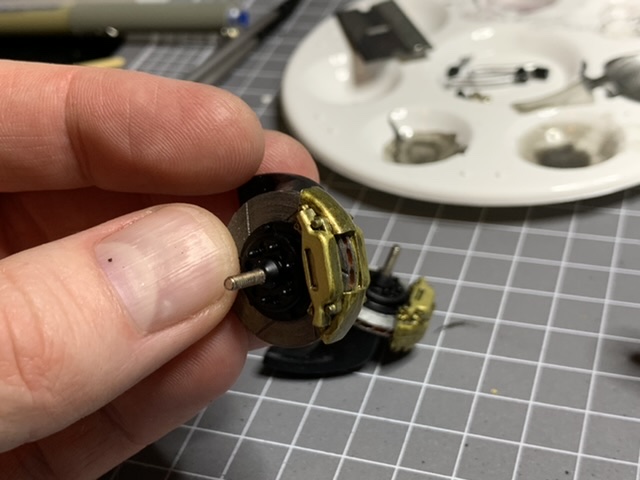
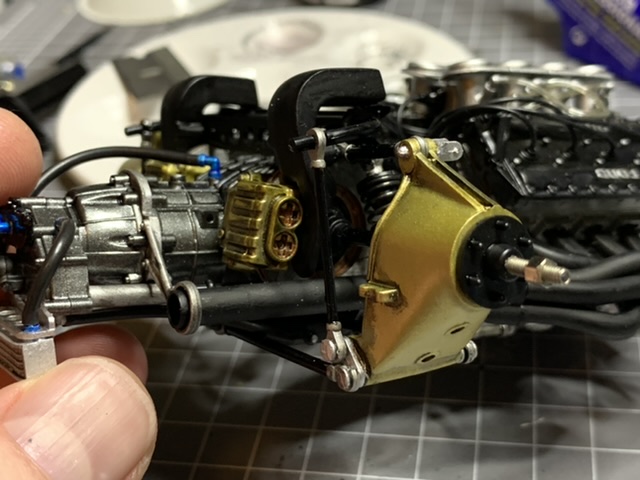
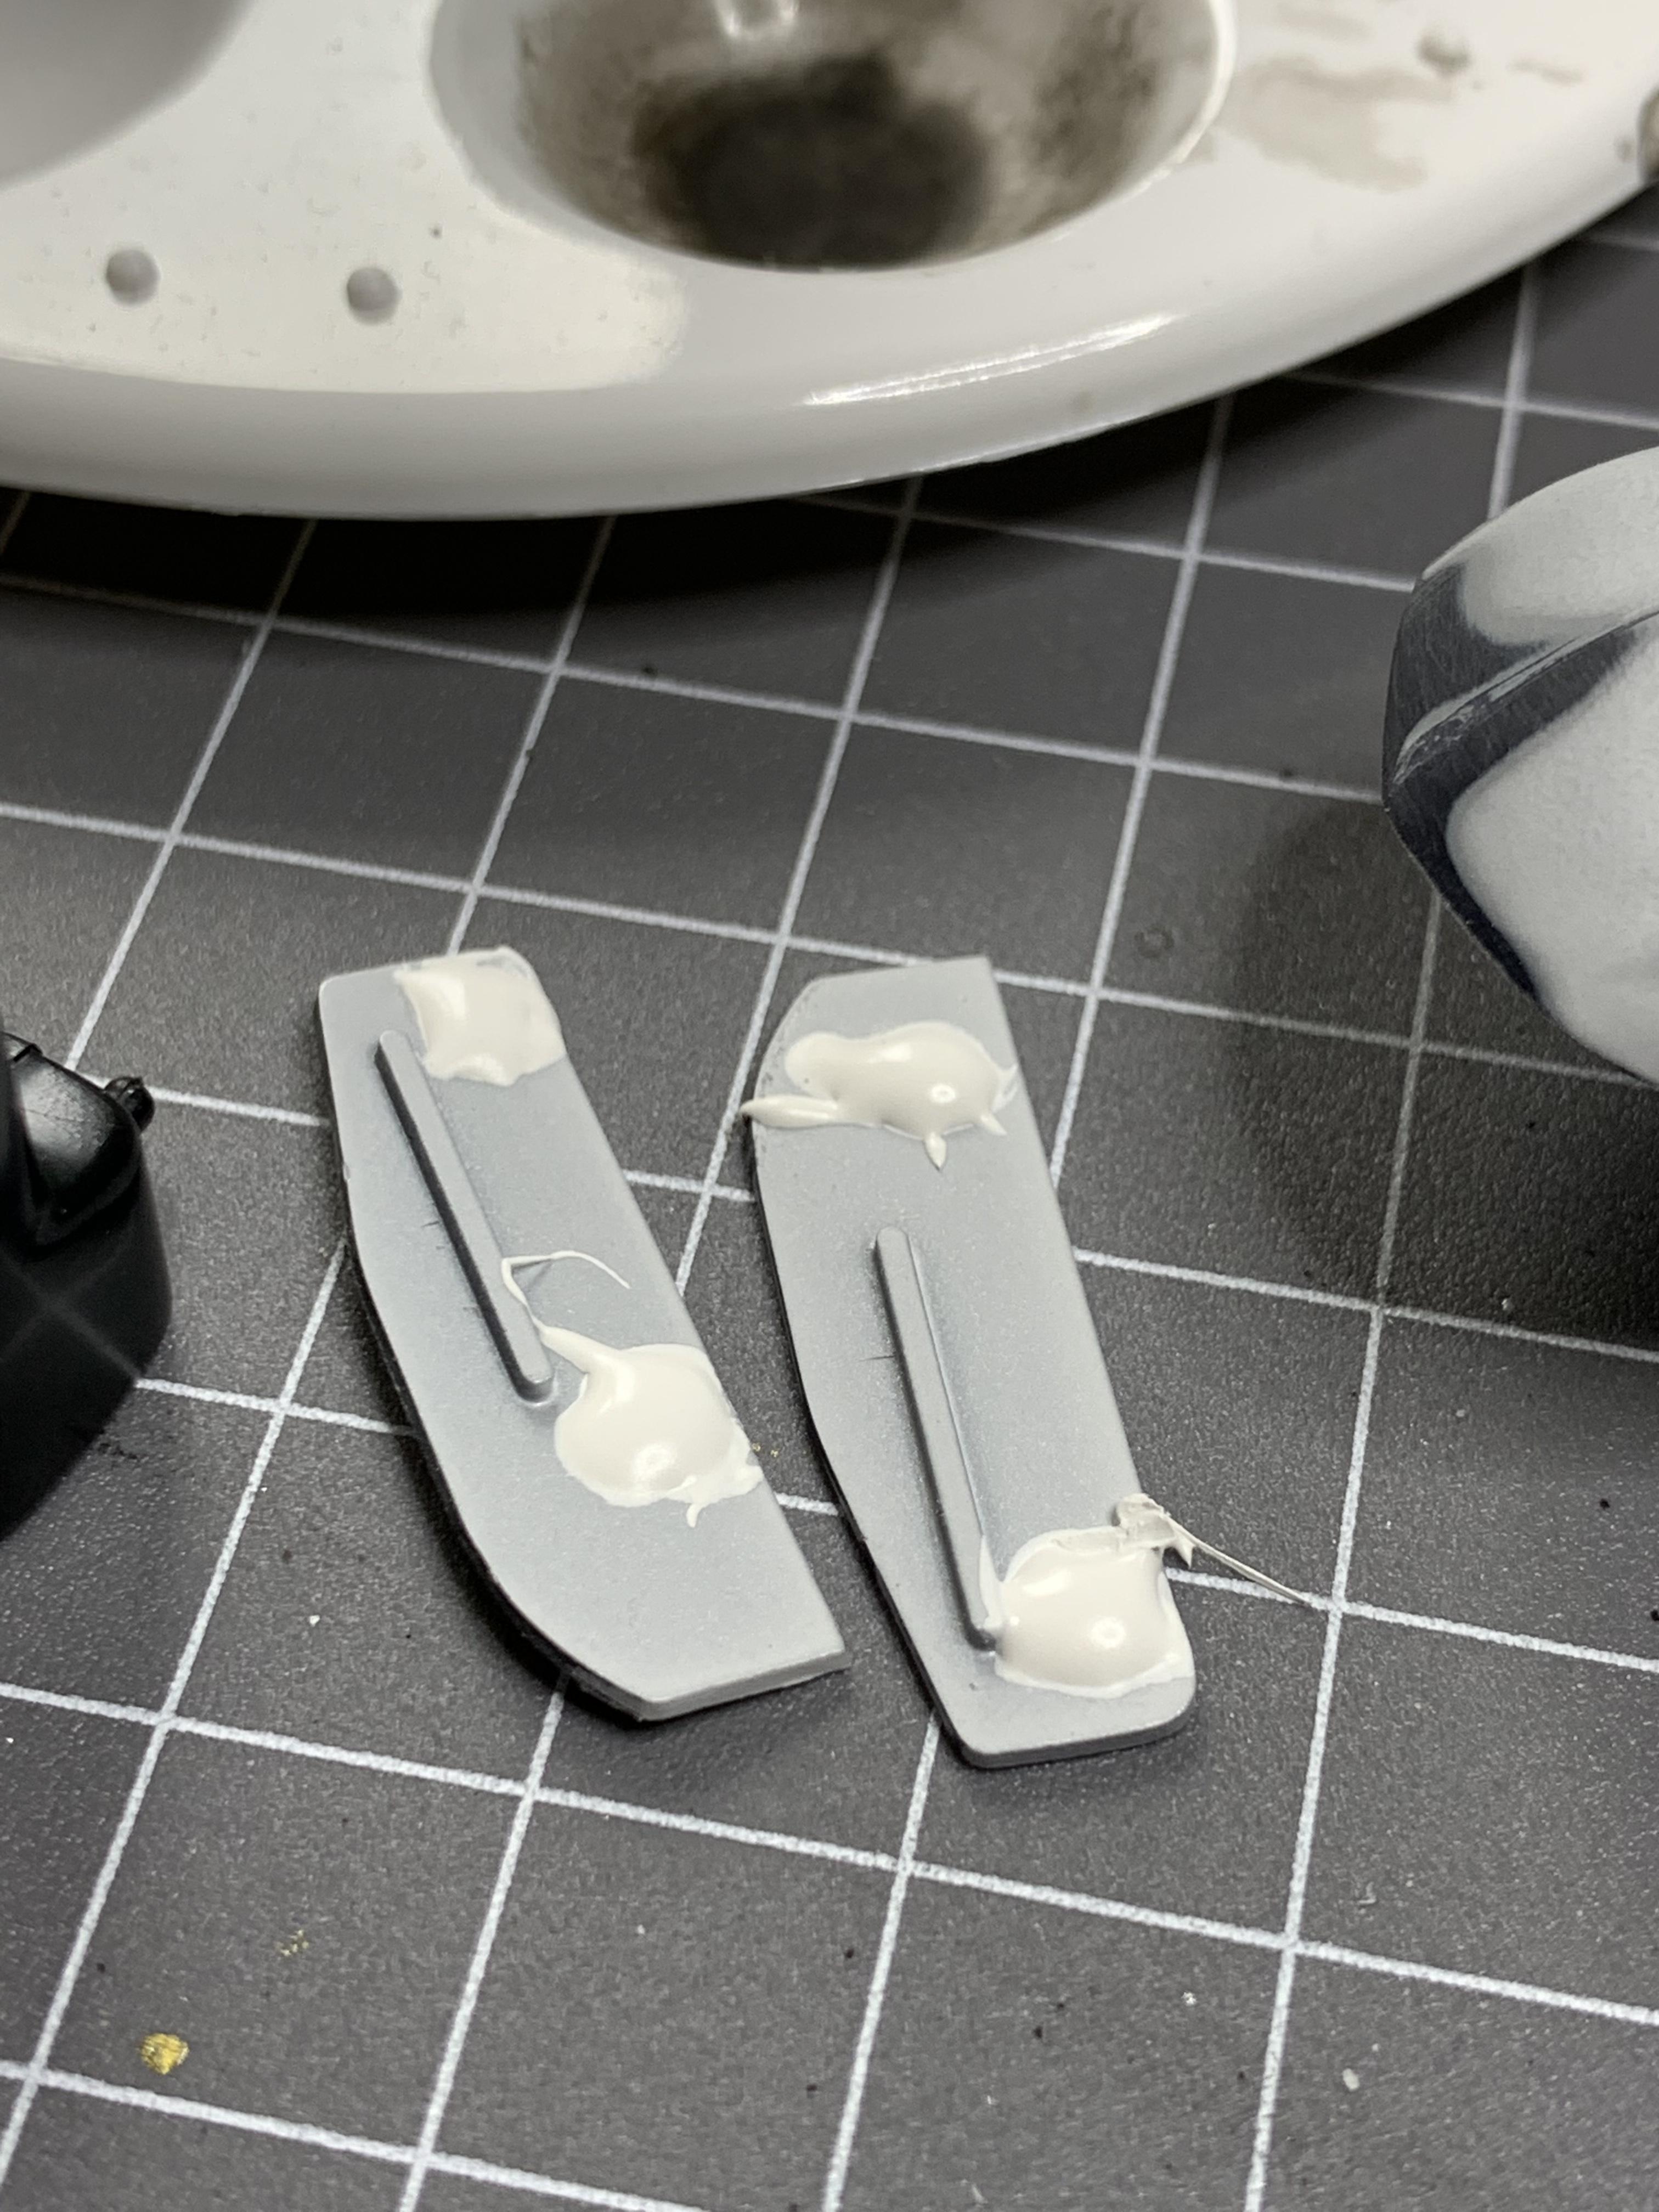
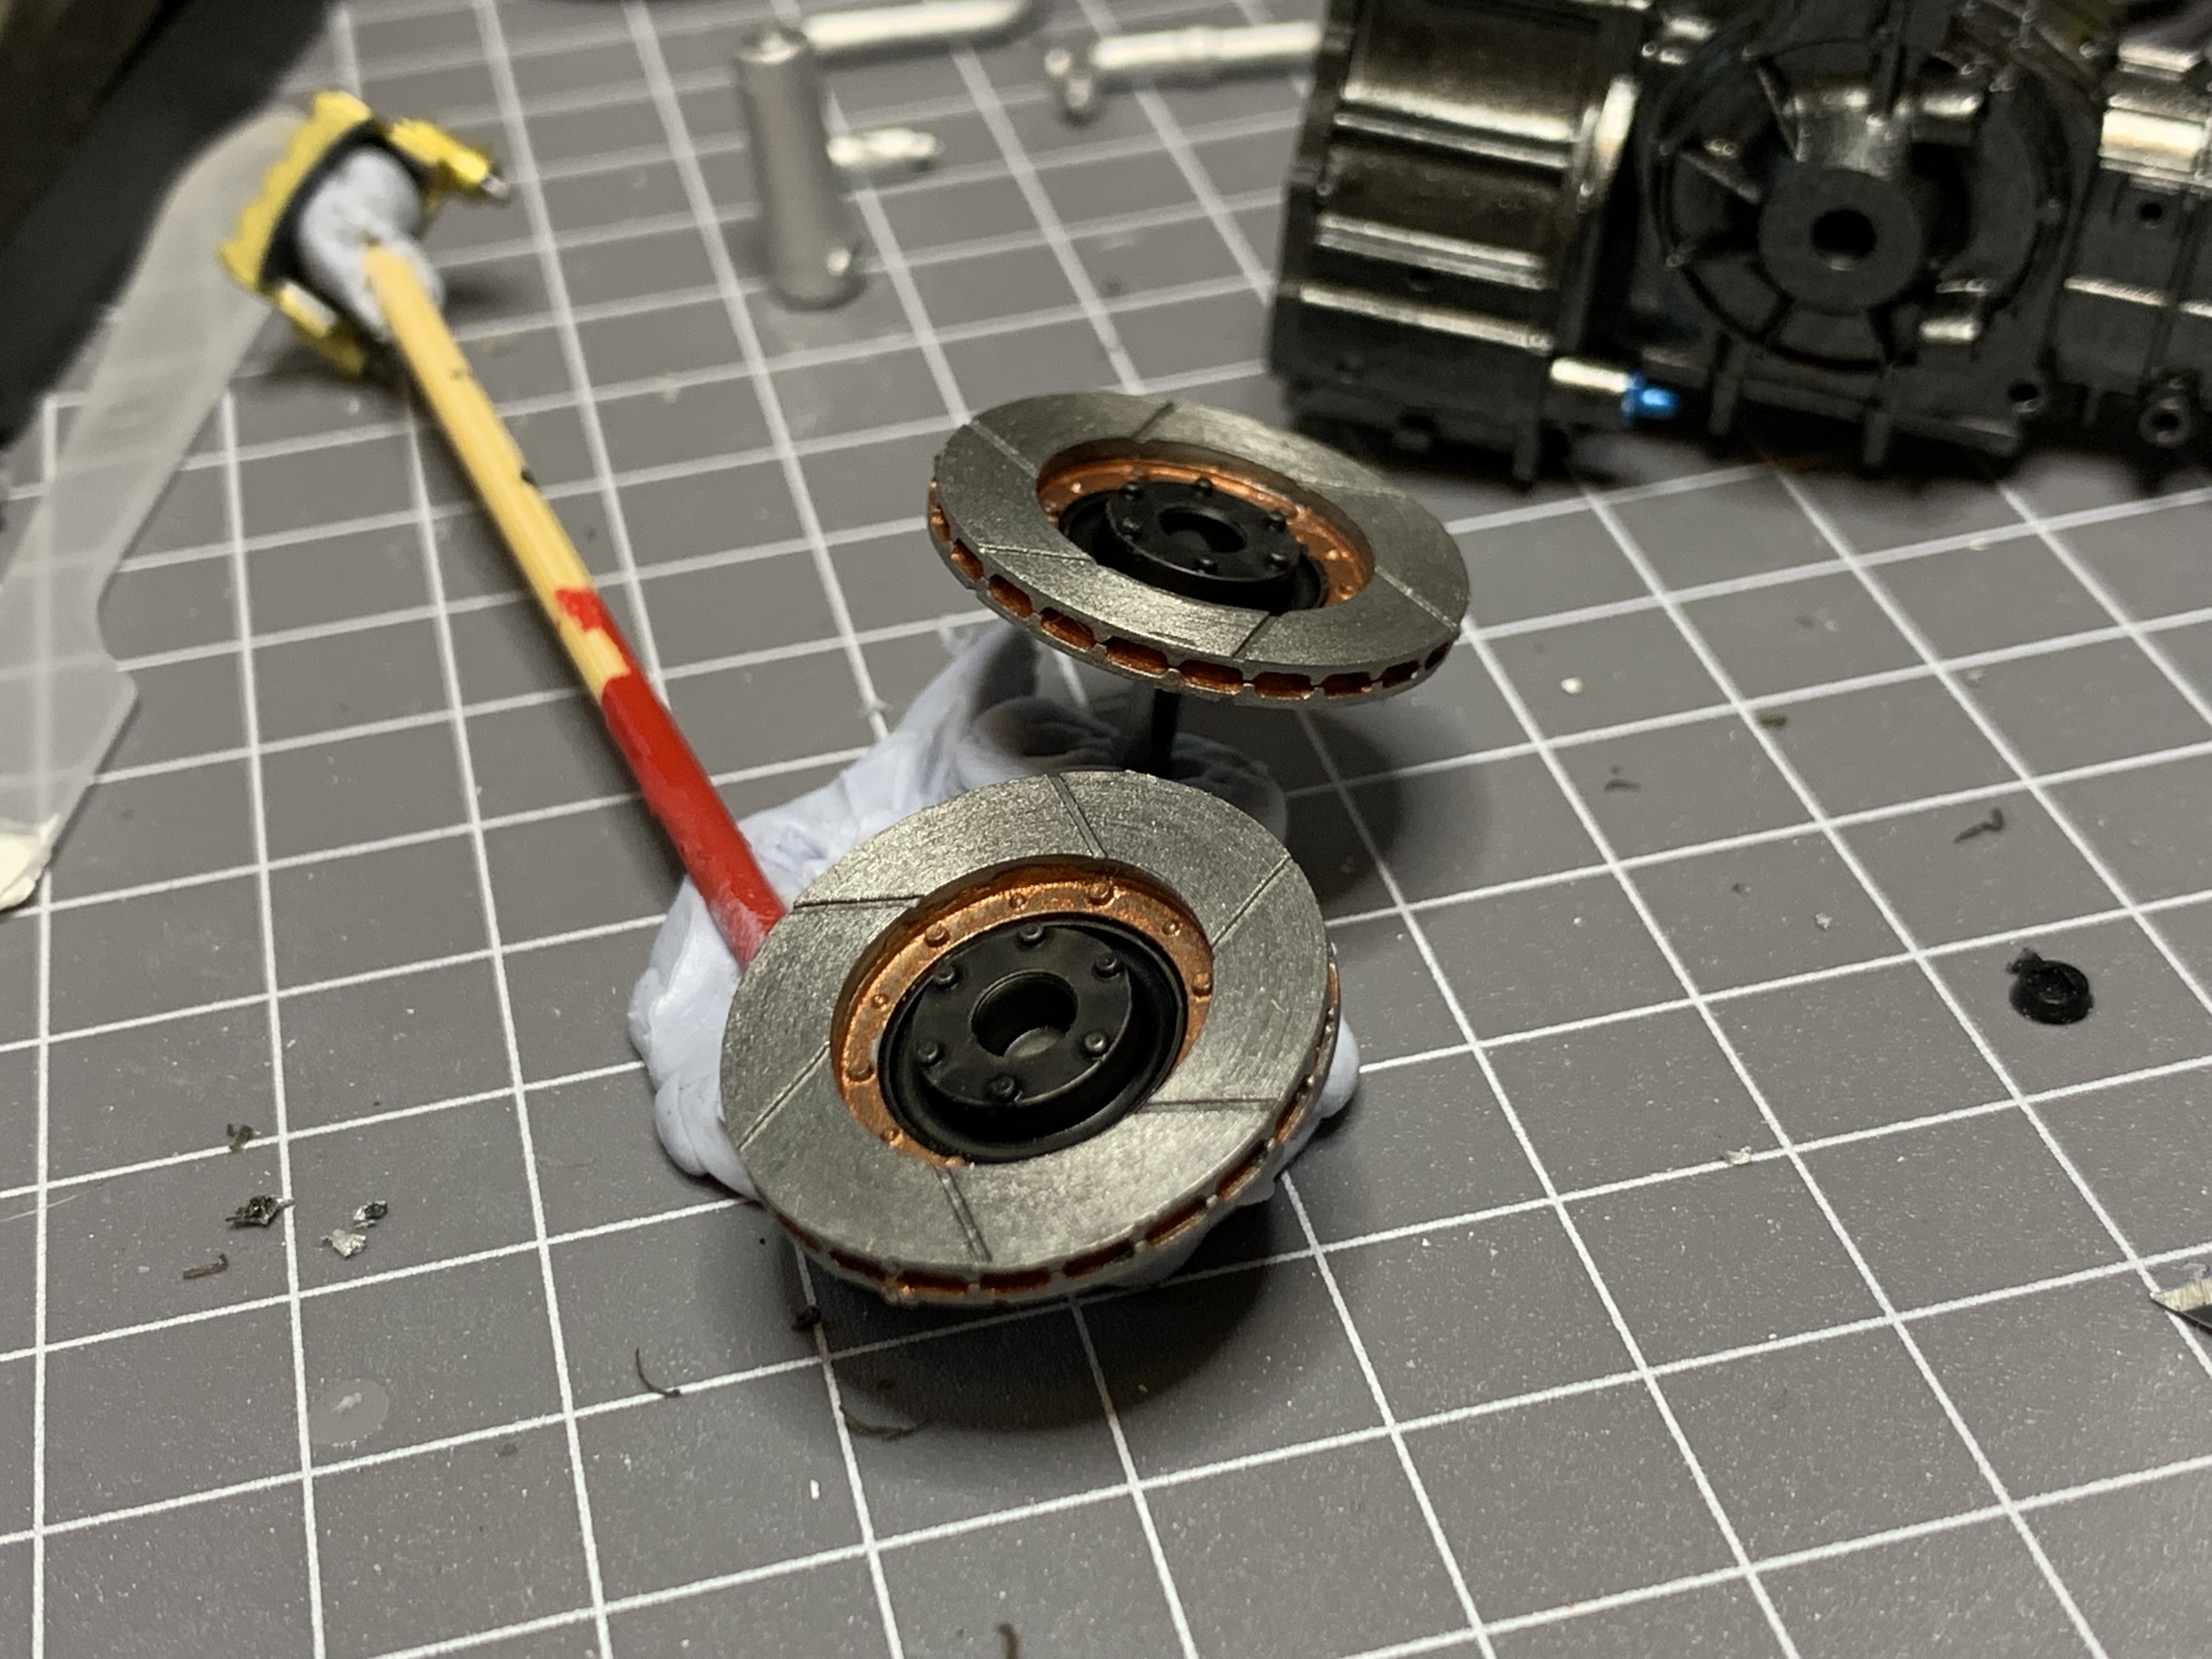
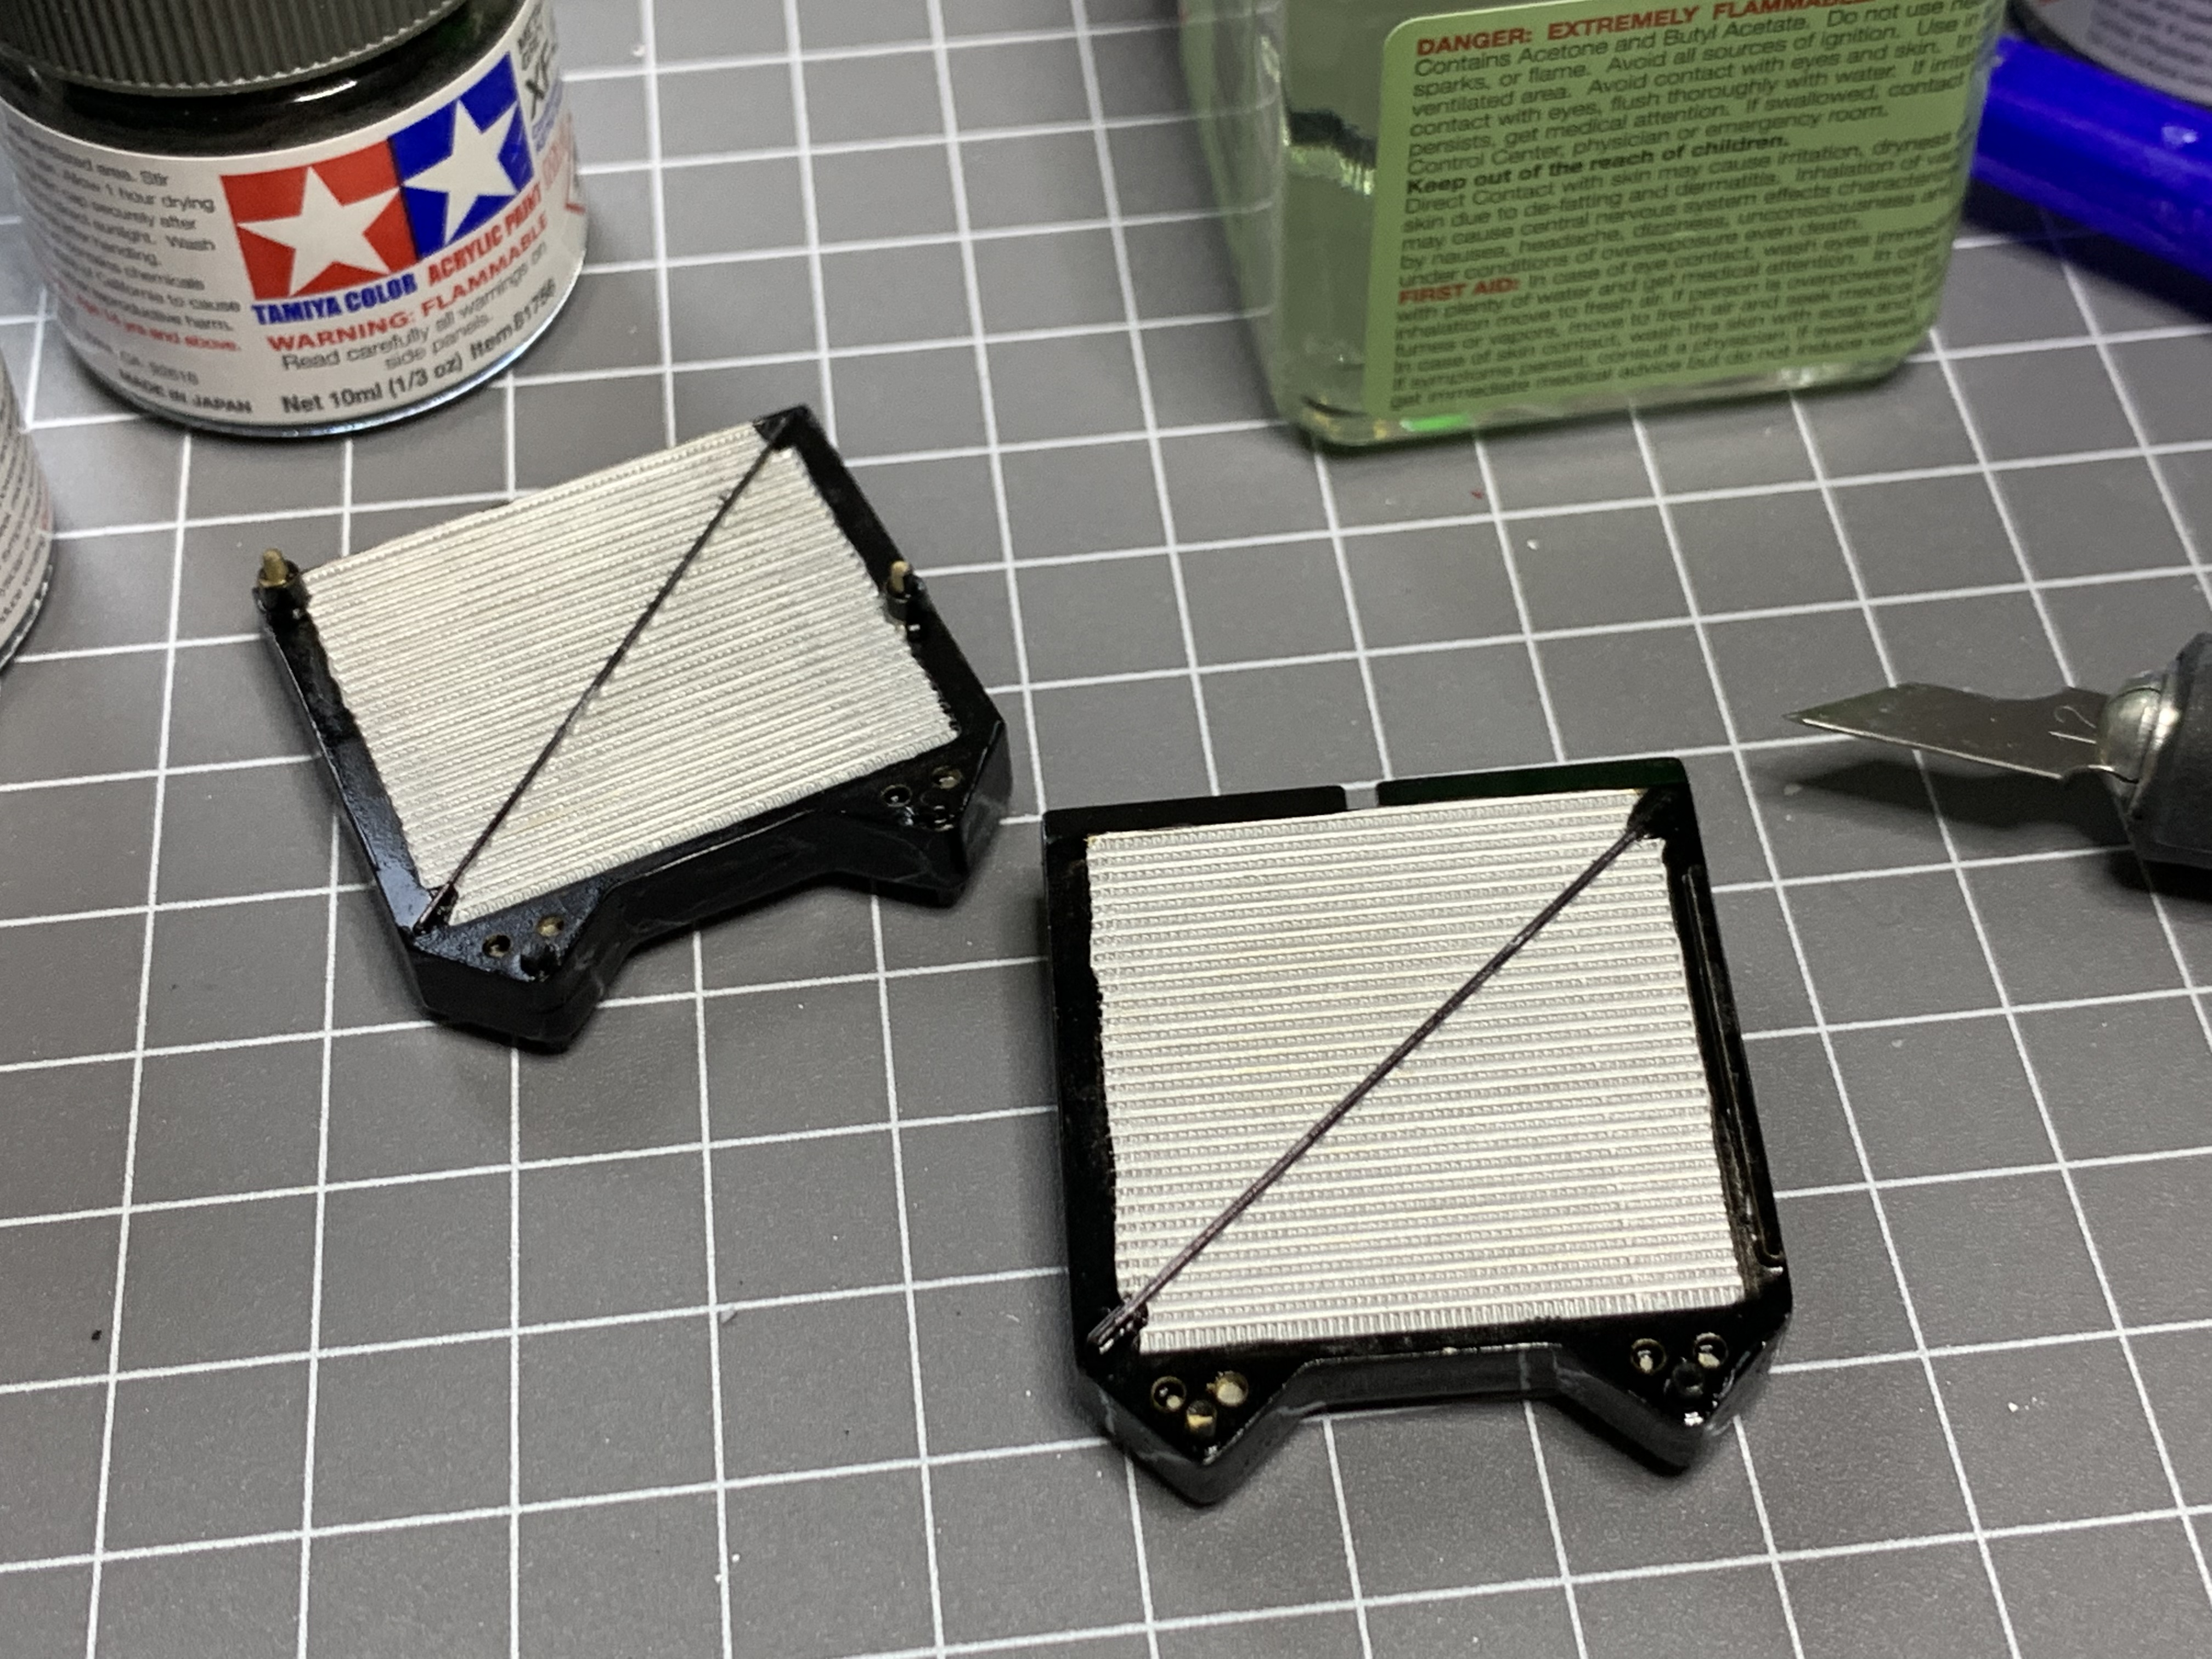
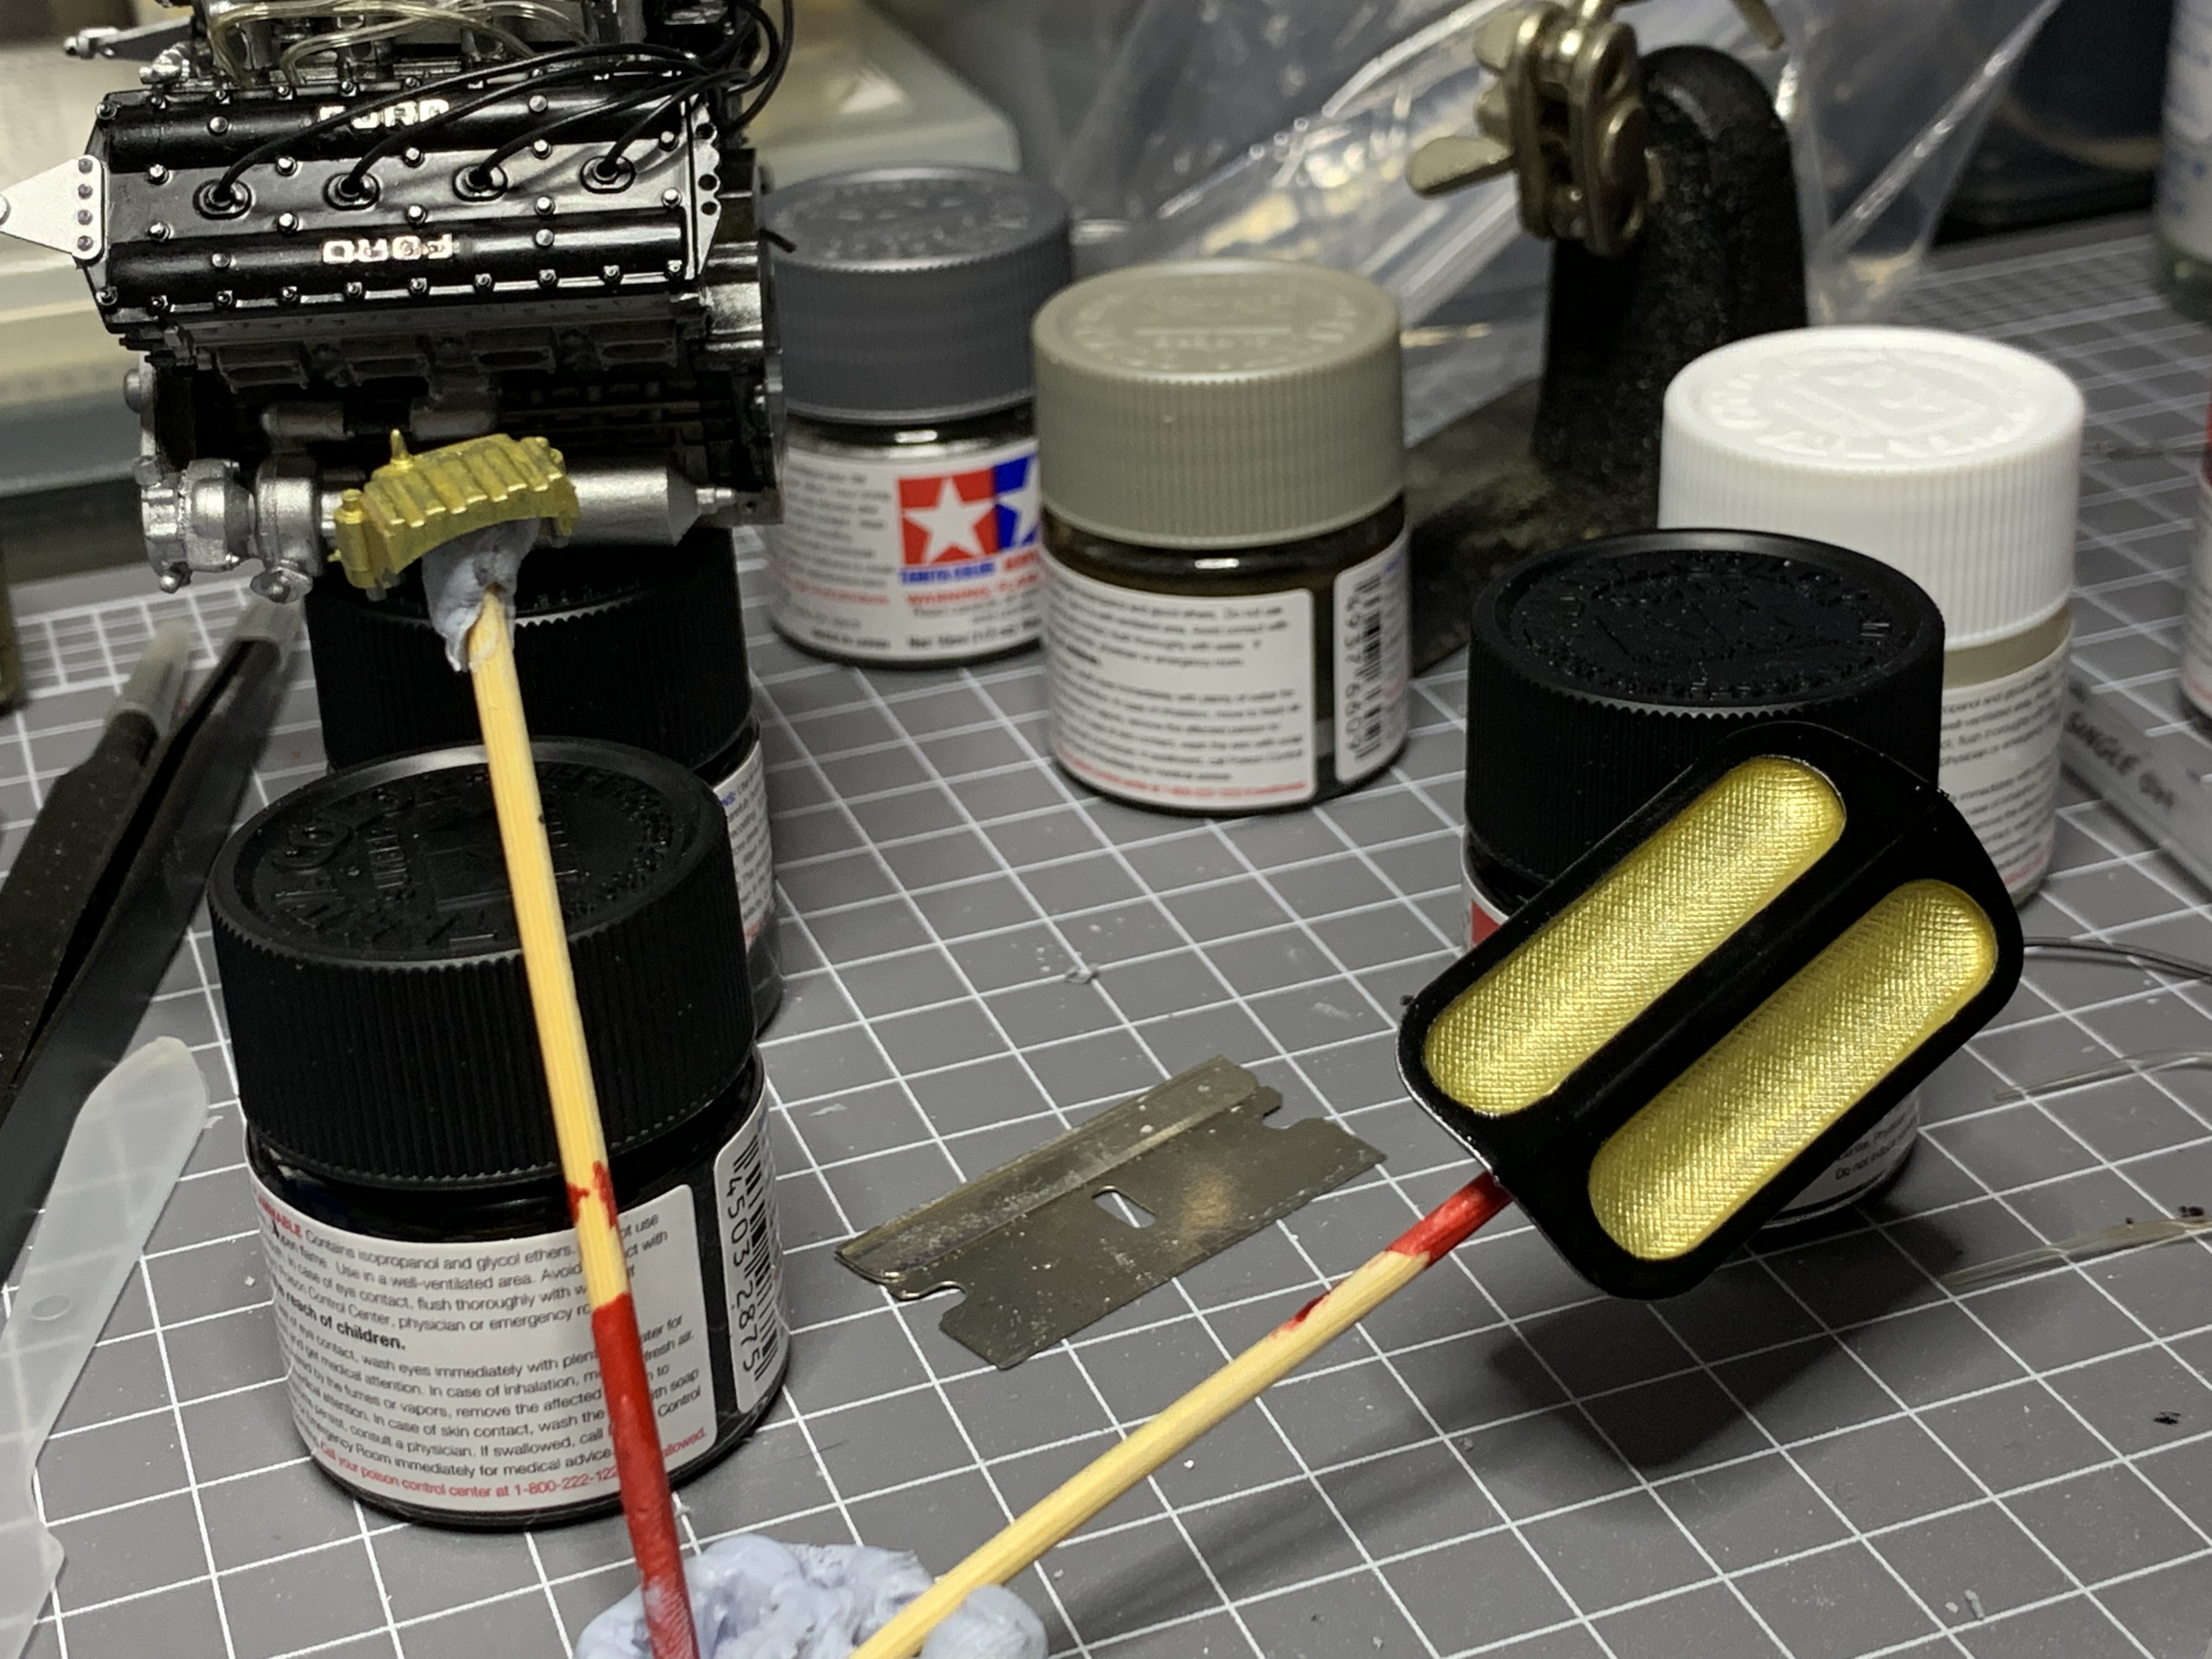
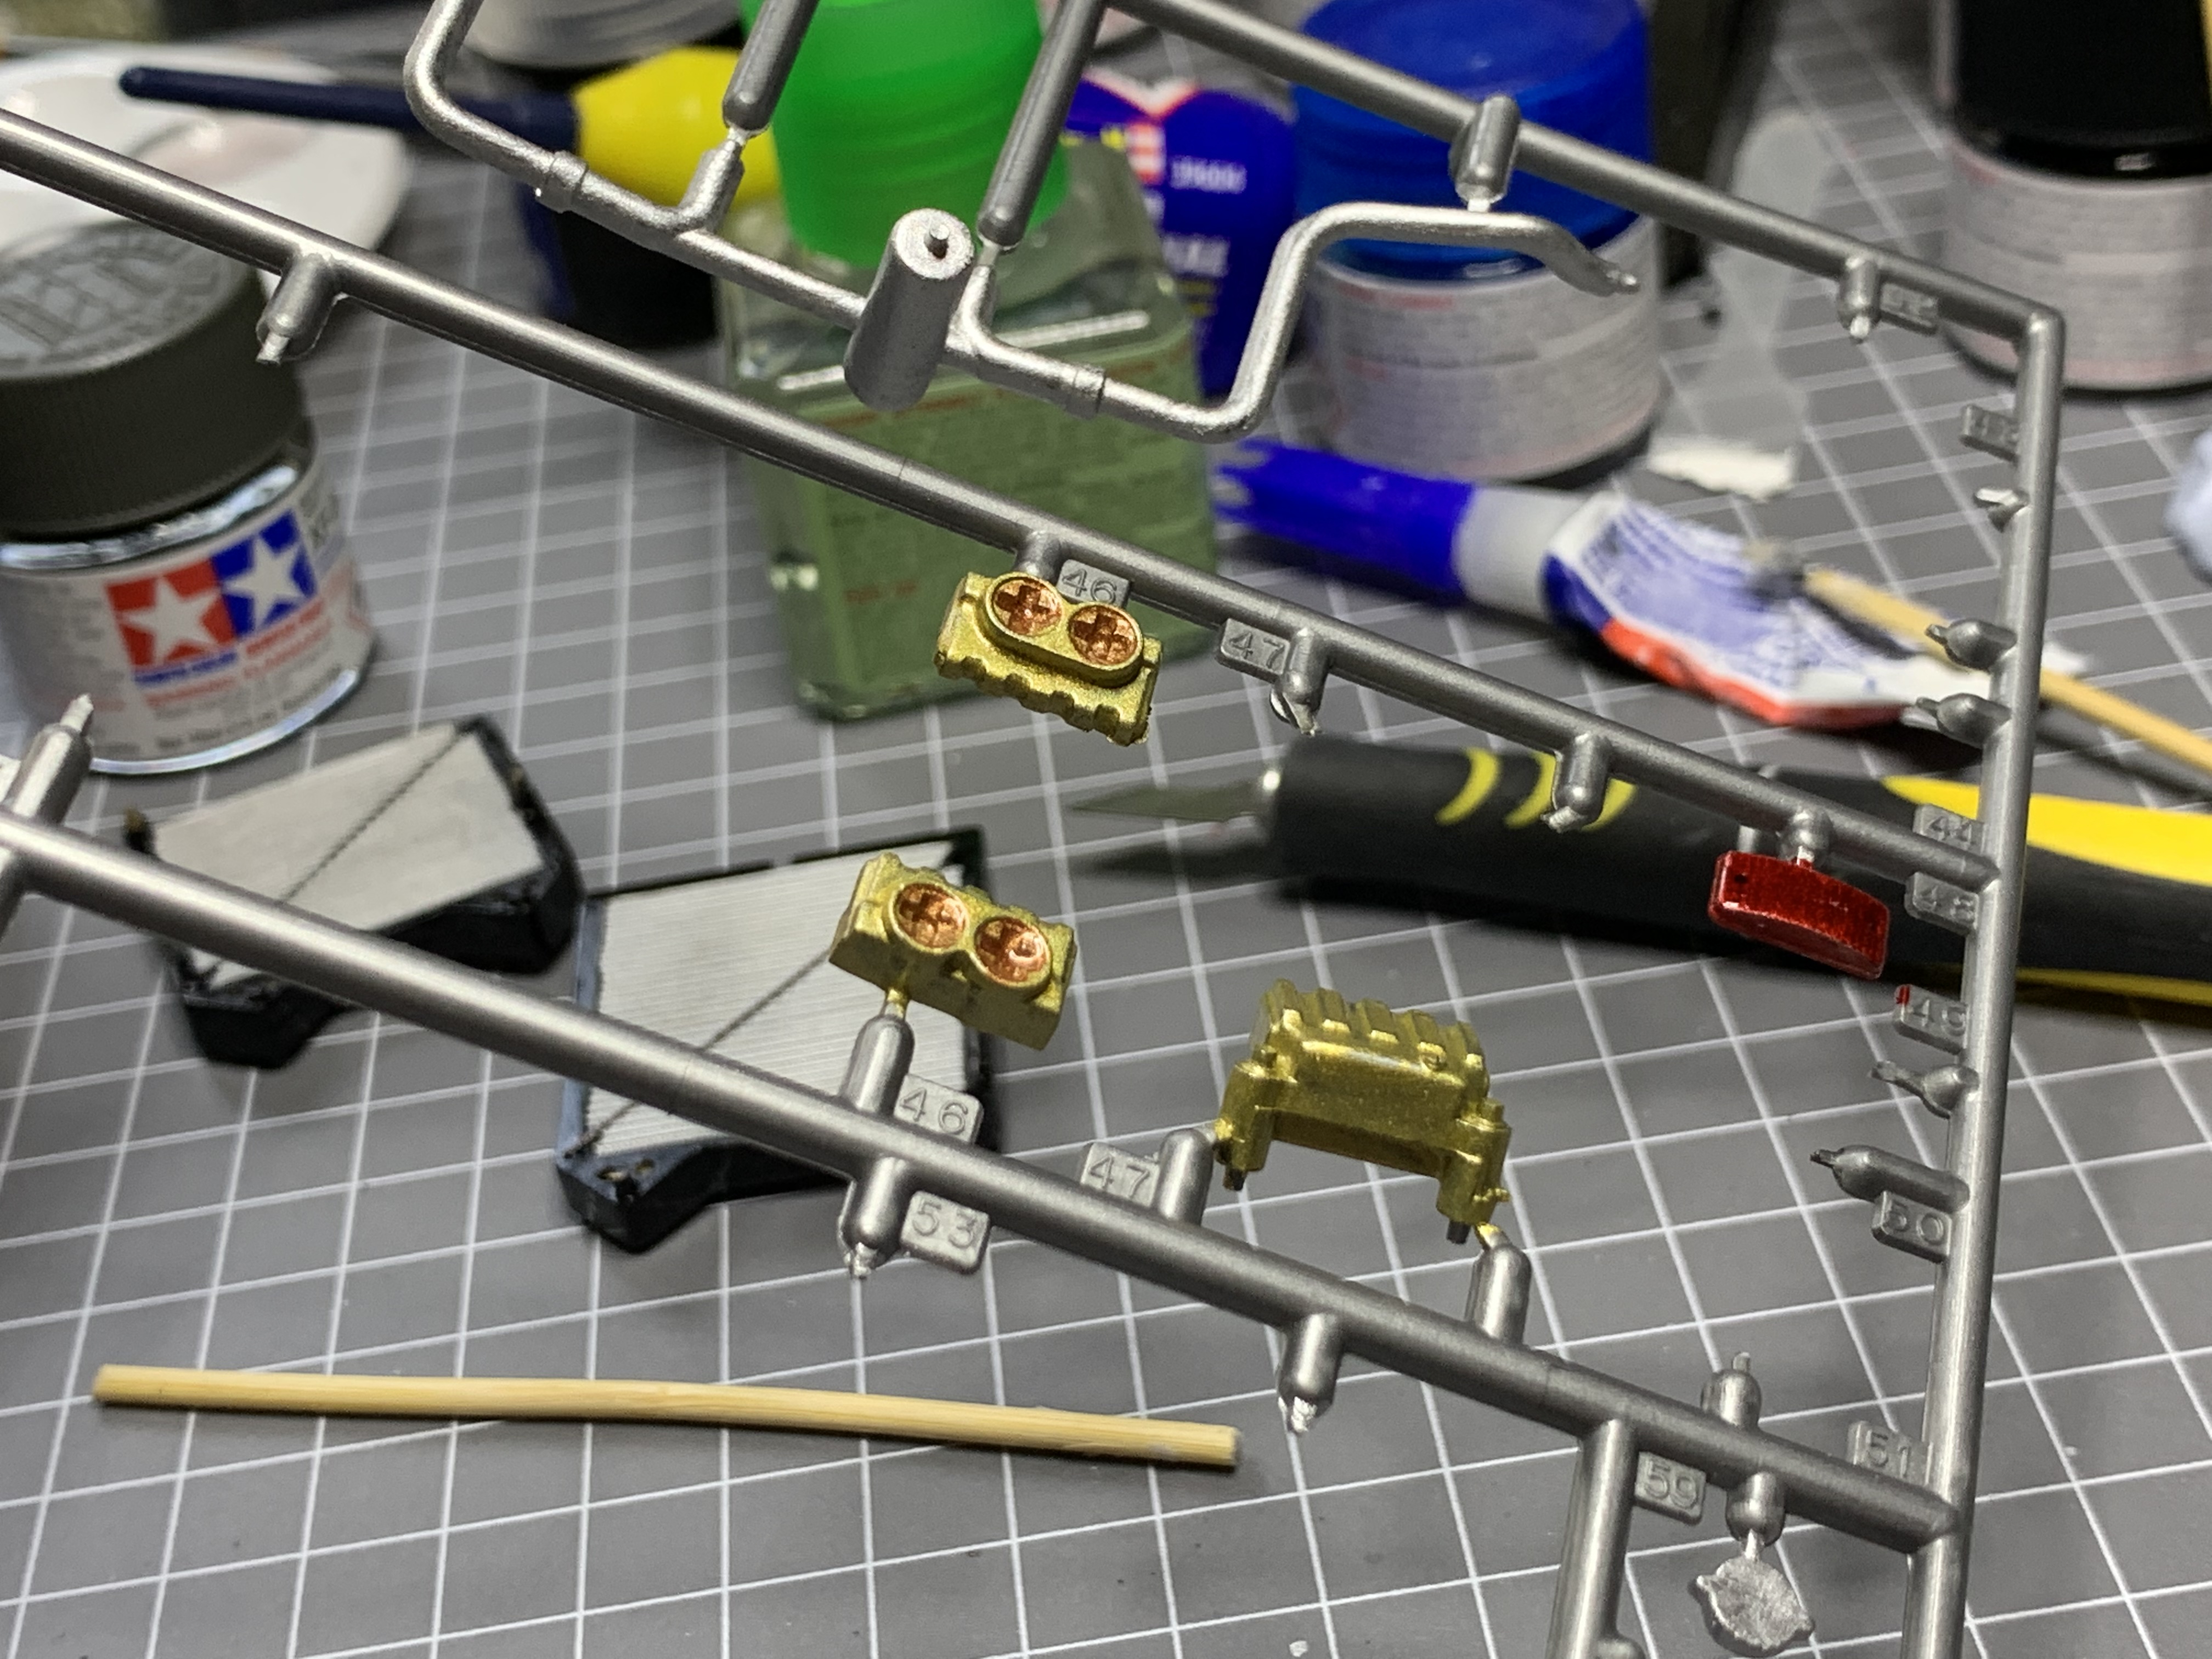
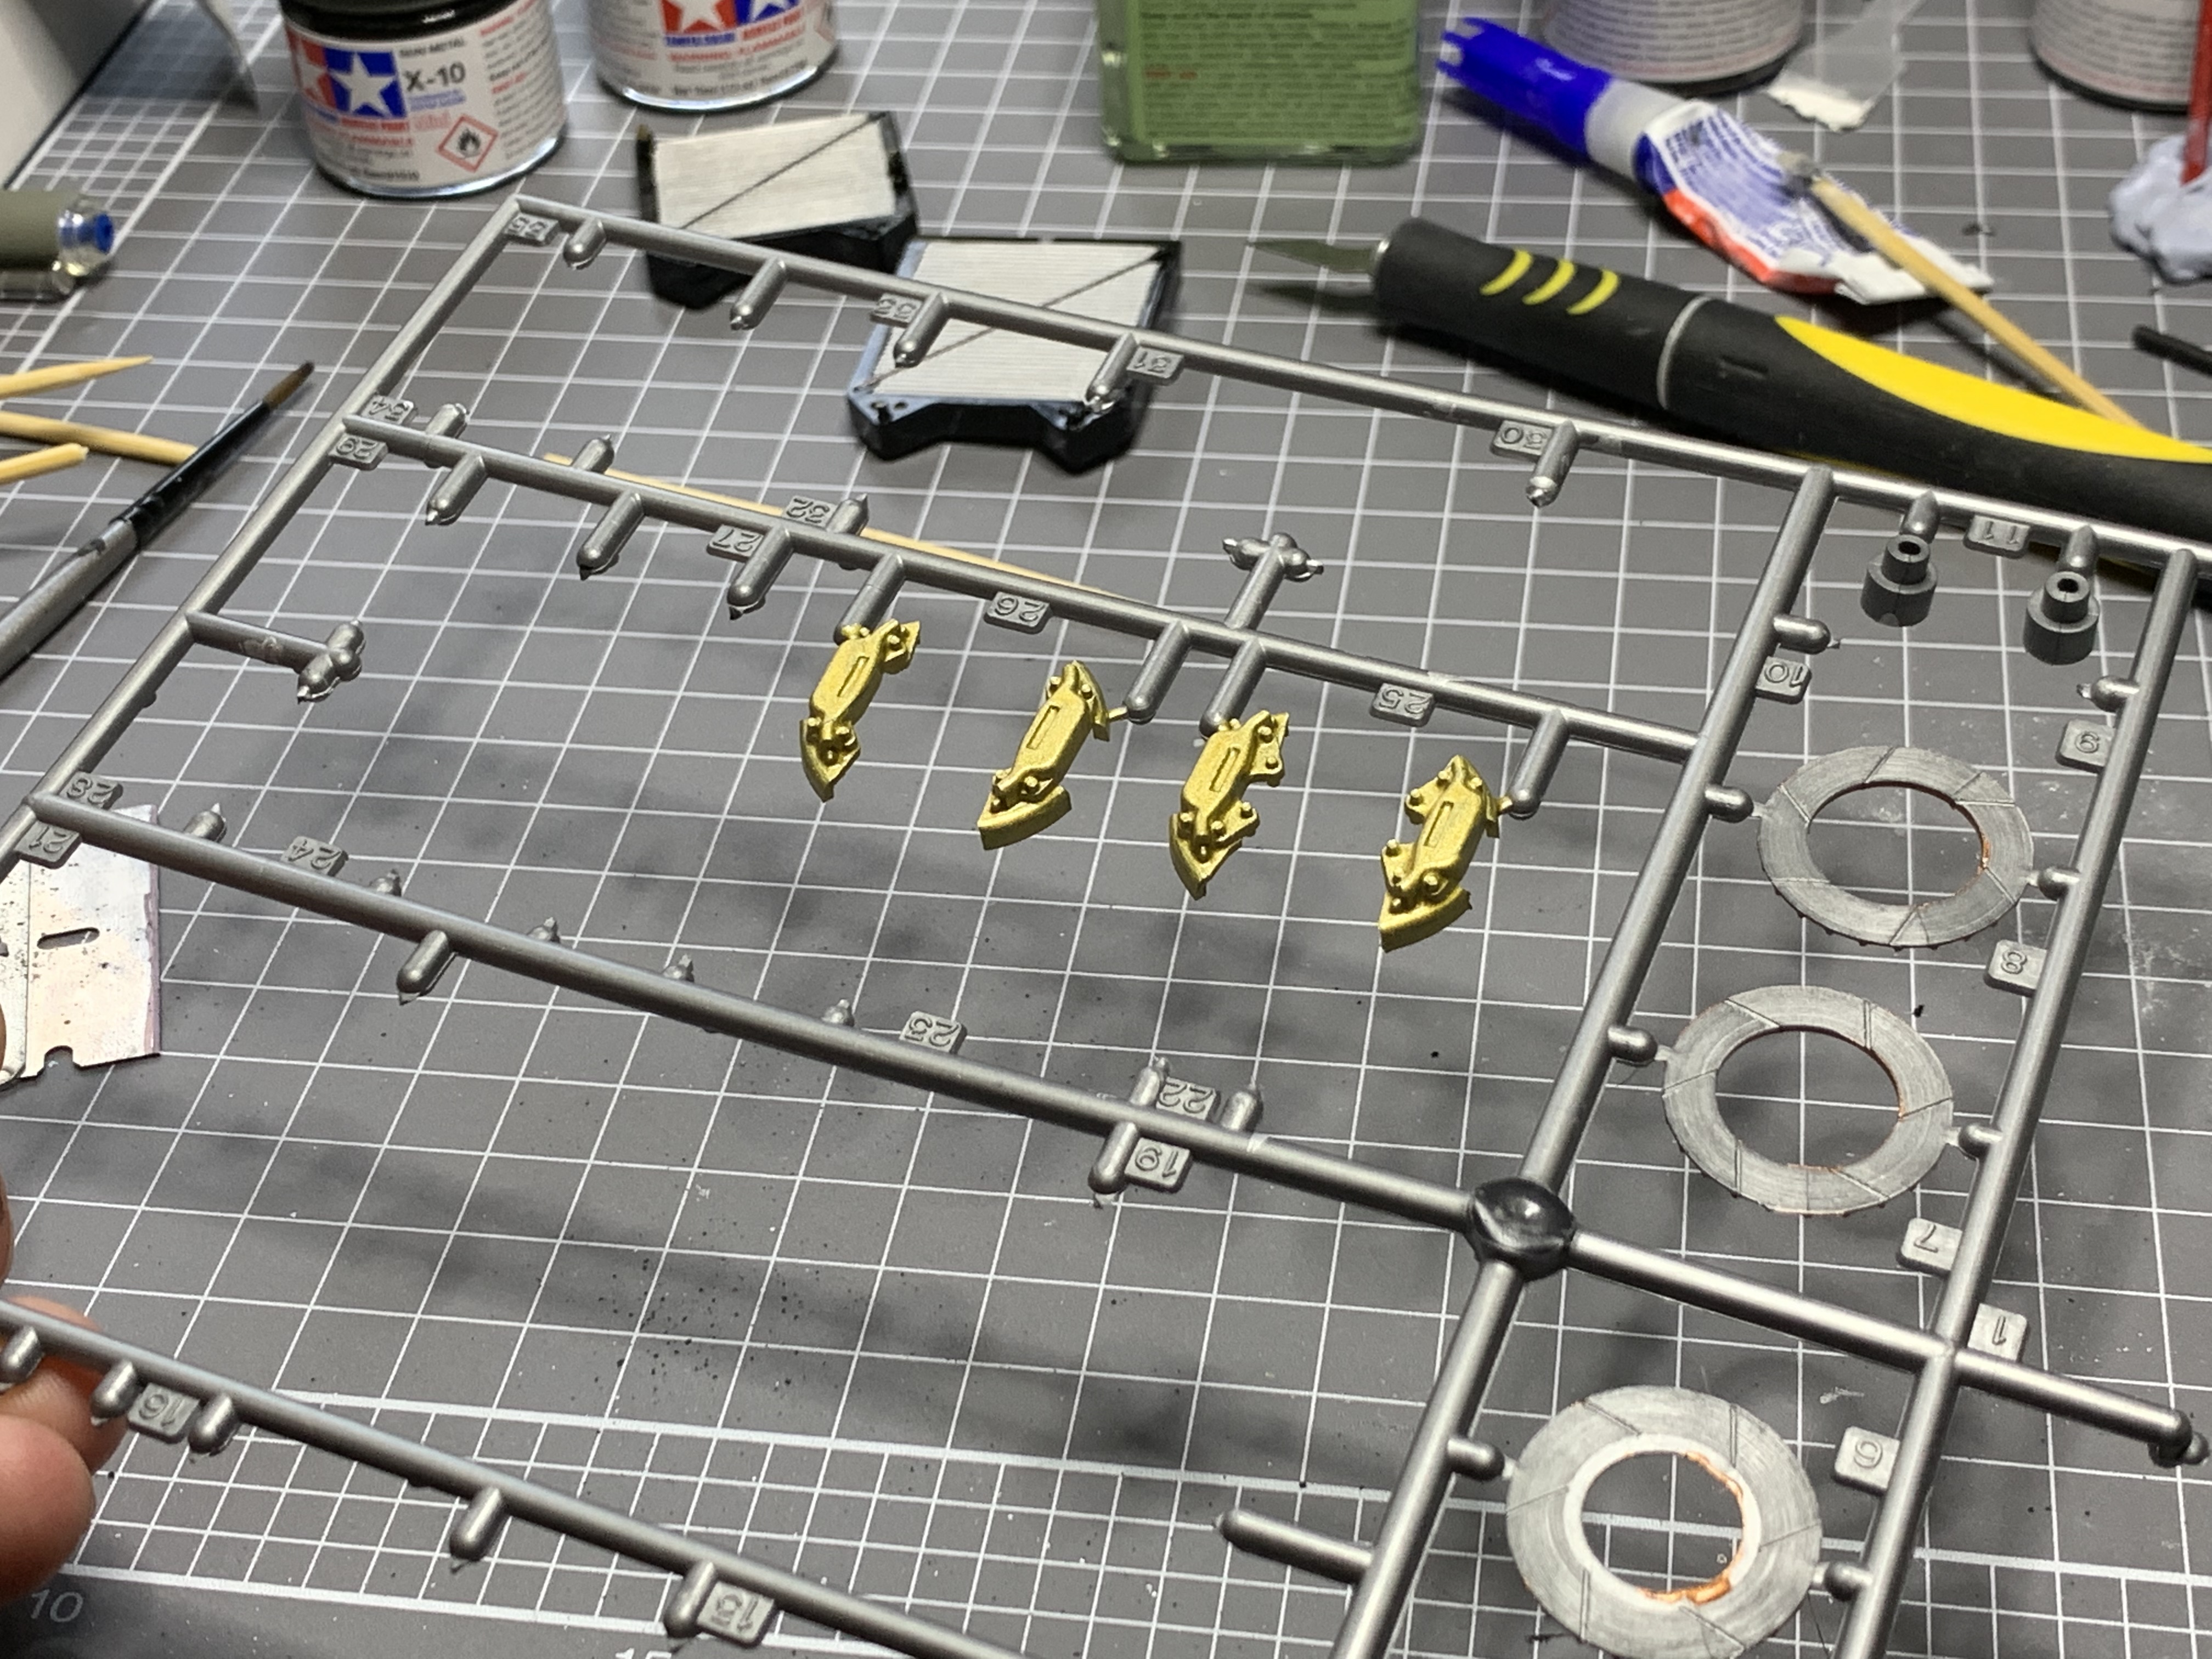
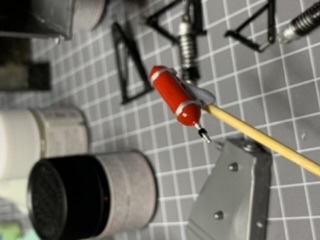
XF-56 brushed on heavy and left to level and dry for a few days. Water radiators mostly done. Sharpie and a razor blade as a guide to colour the brace. I’m use some weathering to blend the edges a bit. Inner airbox section and a brake caliper. While I’m not following the kit or Wolf paint scheme closely I’m trying to keep some of the Wolf DNA under the Stark Racing colours. This means gold stays for uprights, gets in the calipers and the “mesh” of the screens over the intake. knuckles down and paint all the suspension rods. They’ll need touch up and sanding when in situ. Nice to knock the majority off though because it’s time consuming to do smoothly. copper for the brake rotor innards. This tip came from one of the detail guides and I guess is meant to mimic a sprayed on copper finish to minimise the impact of corrosion or heat cycle related seizing of fasteners. Gold front calipers will attach to gold front hubs (matching the gold rears). Will be interesting to see how that effect works out.
-
1/12 Tamiya Wolf WR1 (With a Twist)
AaronM replied to AaronM's topic in WIP: Other Racing: Road Racing, Land Speed Racers
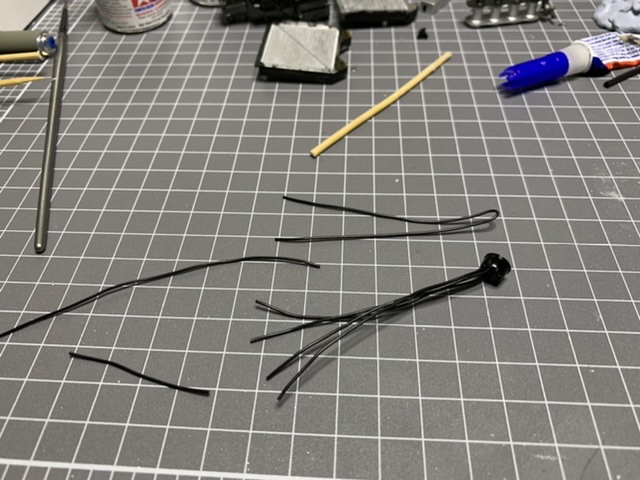
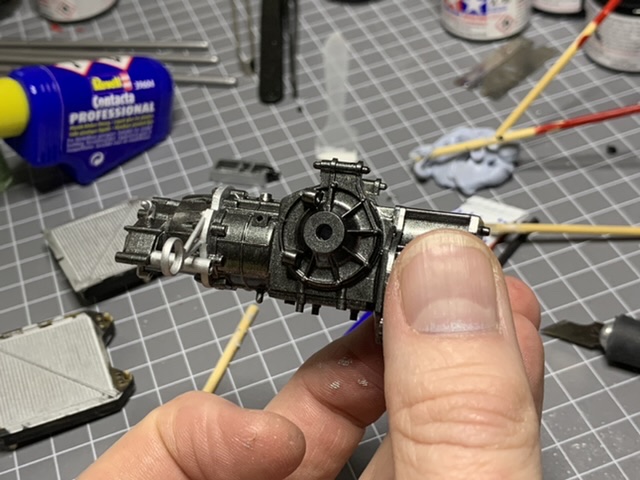
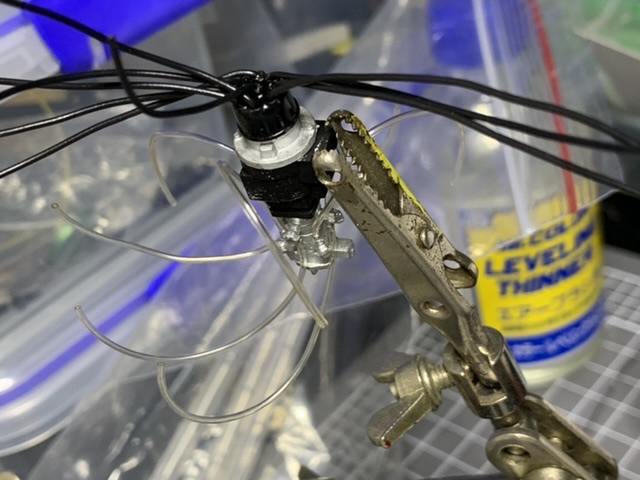
An assortment of subsections needing to be assembled. Distributor wires being loaded into the cap. Gearbox painted and assembled. fuel distributor and ignition etc all set up ready to fit into the valley. do you see my mistake in assembly? Yep, got the end piece of the fue block wrong orientation and had to cut it off and rotate 180 degrees. Doh!
-
1/12 Tamiya Wolf WR1 (With a Twist)
AaronM replied to AaronM's topic in WIP: Other Racing: Road Racing, Land Speed Racers
Thanks. It’s the first model building and painting in all those years too, although I do a lot of microelectronics and stuff so have reasonable practice with fine motor skills. I think the biggest difference is having the money to simply buy the paint colours, thinners and all the other stuff to make the process easy, plus having move patience to learn the chemistry and techniques. I would like this to be better and the next ones will be (have a 1/12 Ferrari 312T4 here, a 1/12 Brabham BT44B and Alfa Romeo 179 on order). And all that’s a build up to the 1/12 Renault RE20 Turbo I always wanted when I was a kid (it was on the high shelf in the local hobby shop). -
1/12 Tamiya Wolf WR1 (With a Twist)
AaronM replied to AaronM's topic in WIP: Other Racing: Road Racing, Land Speed Racers
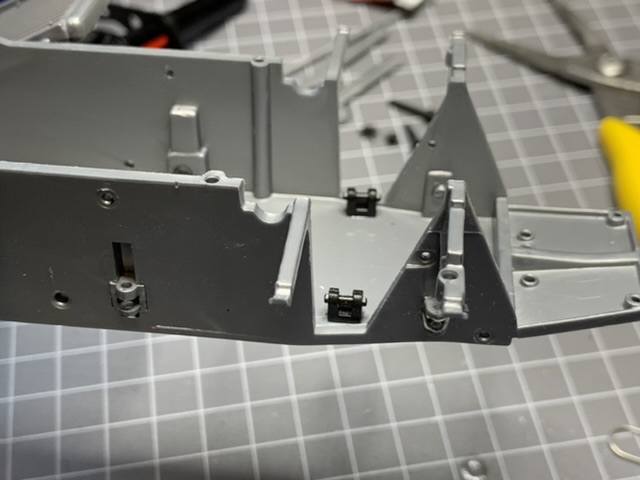
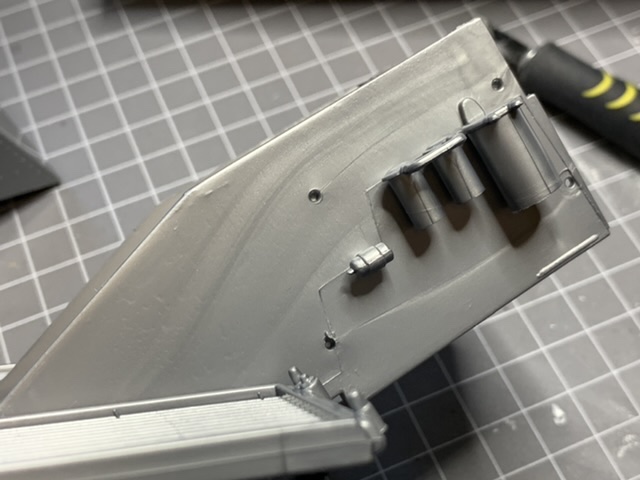
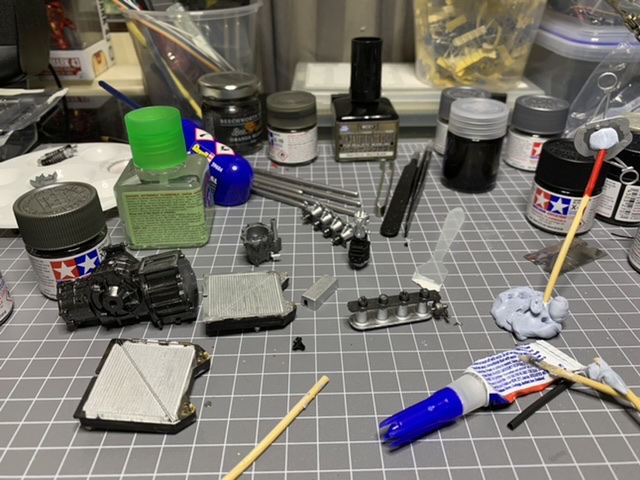
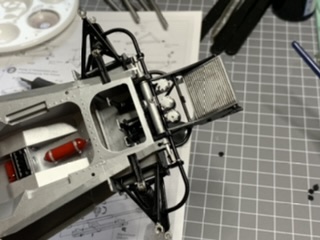
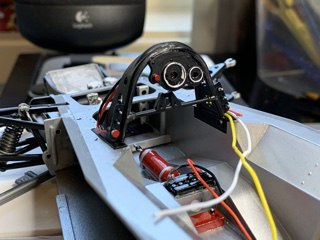
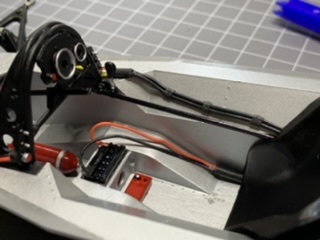
Sprayed the chassis tub with a Tamiya rattle can. It came out ok Front end of the tub, suspension etc. Hand brush painting (no I don’t have an airbrush) all the fine details! Rear bulkhead. I’m proud of this with the anodised look of the fittings etc. Cockpit with some extra wiring and little touches of extra silver on the switches. Velocity stacks built up Closer and closer to finishing the cockpit. Engine and gearbox being dry fitted.
-
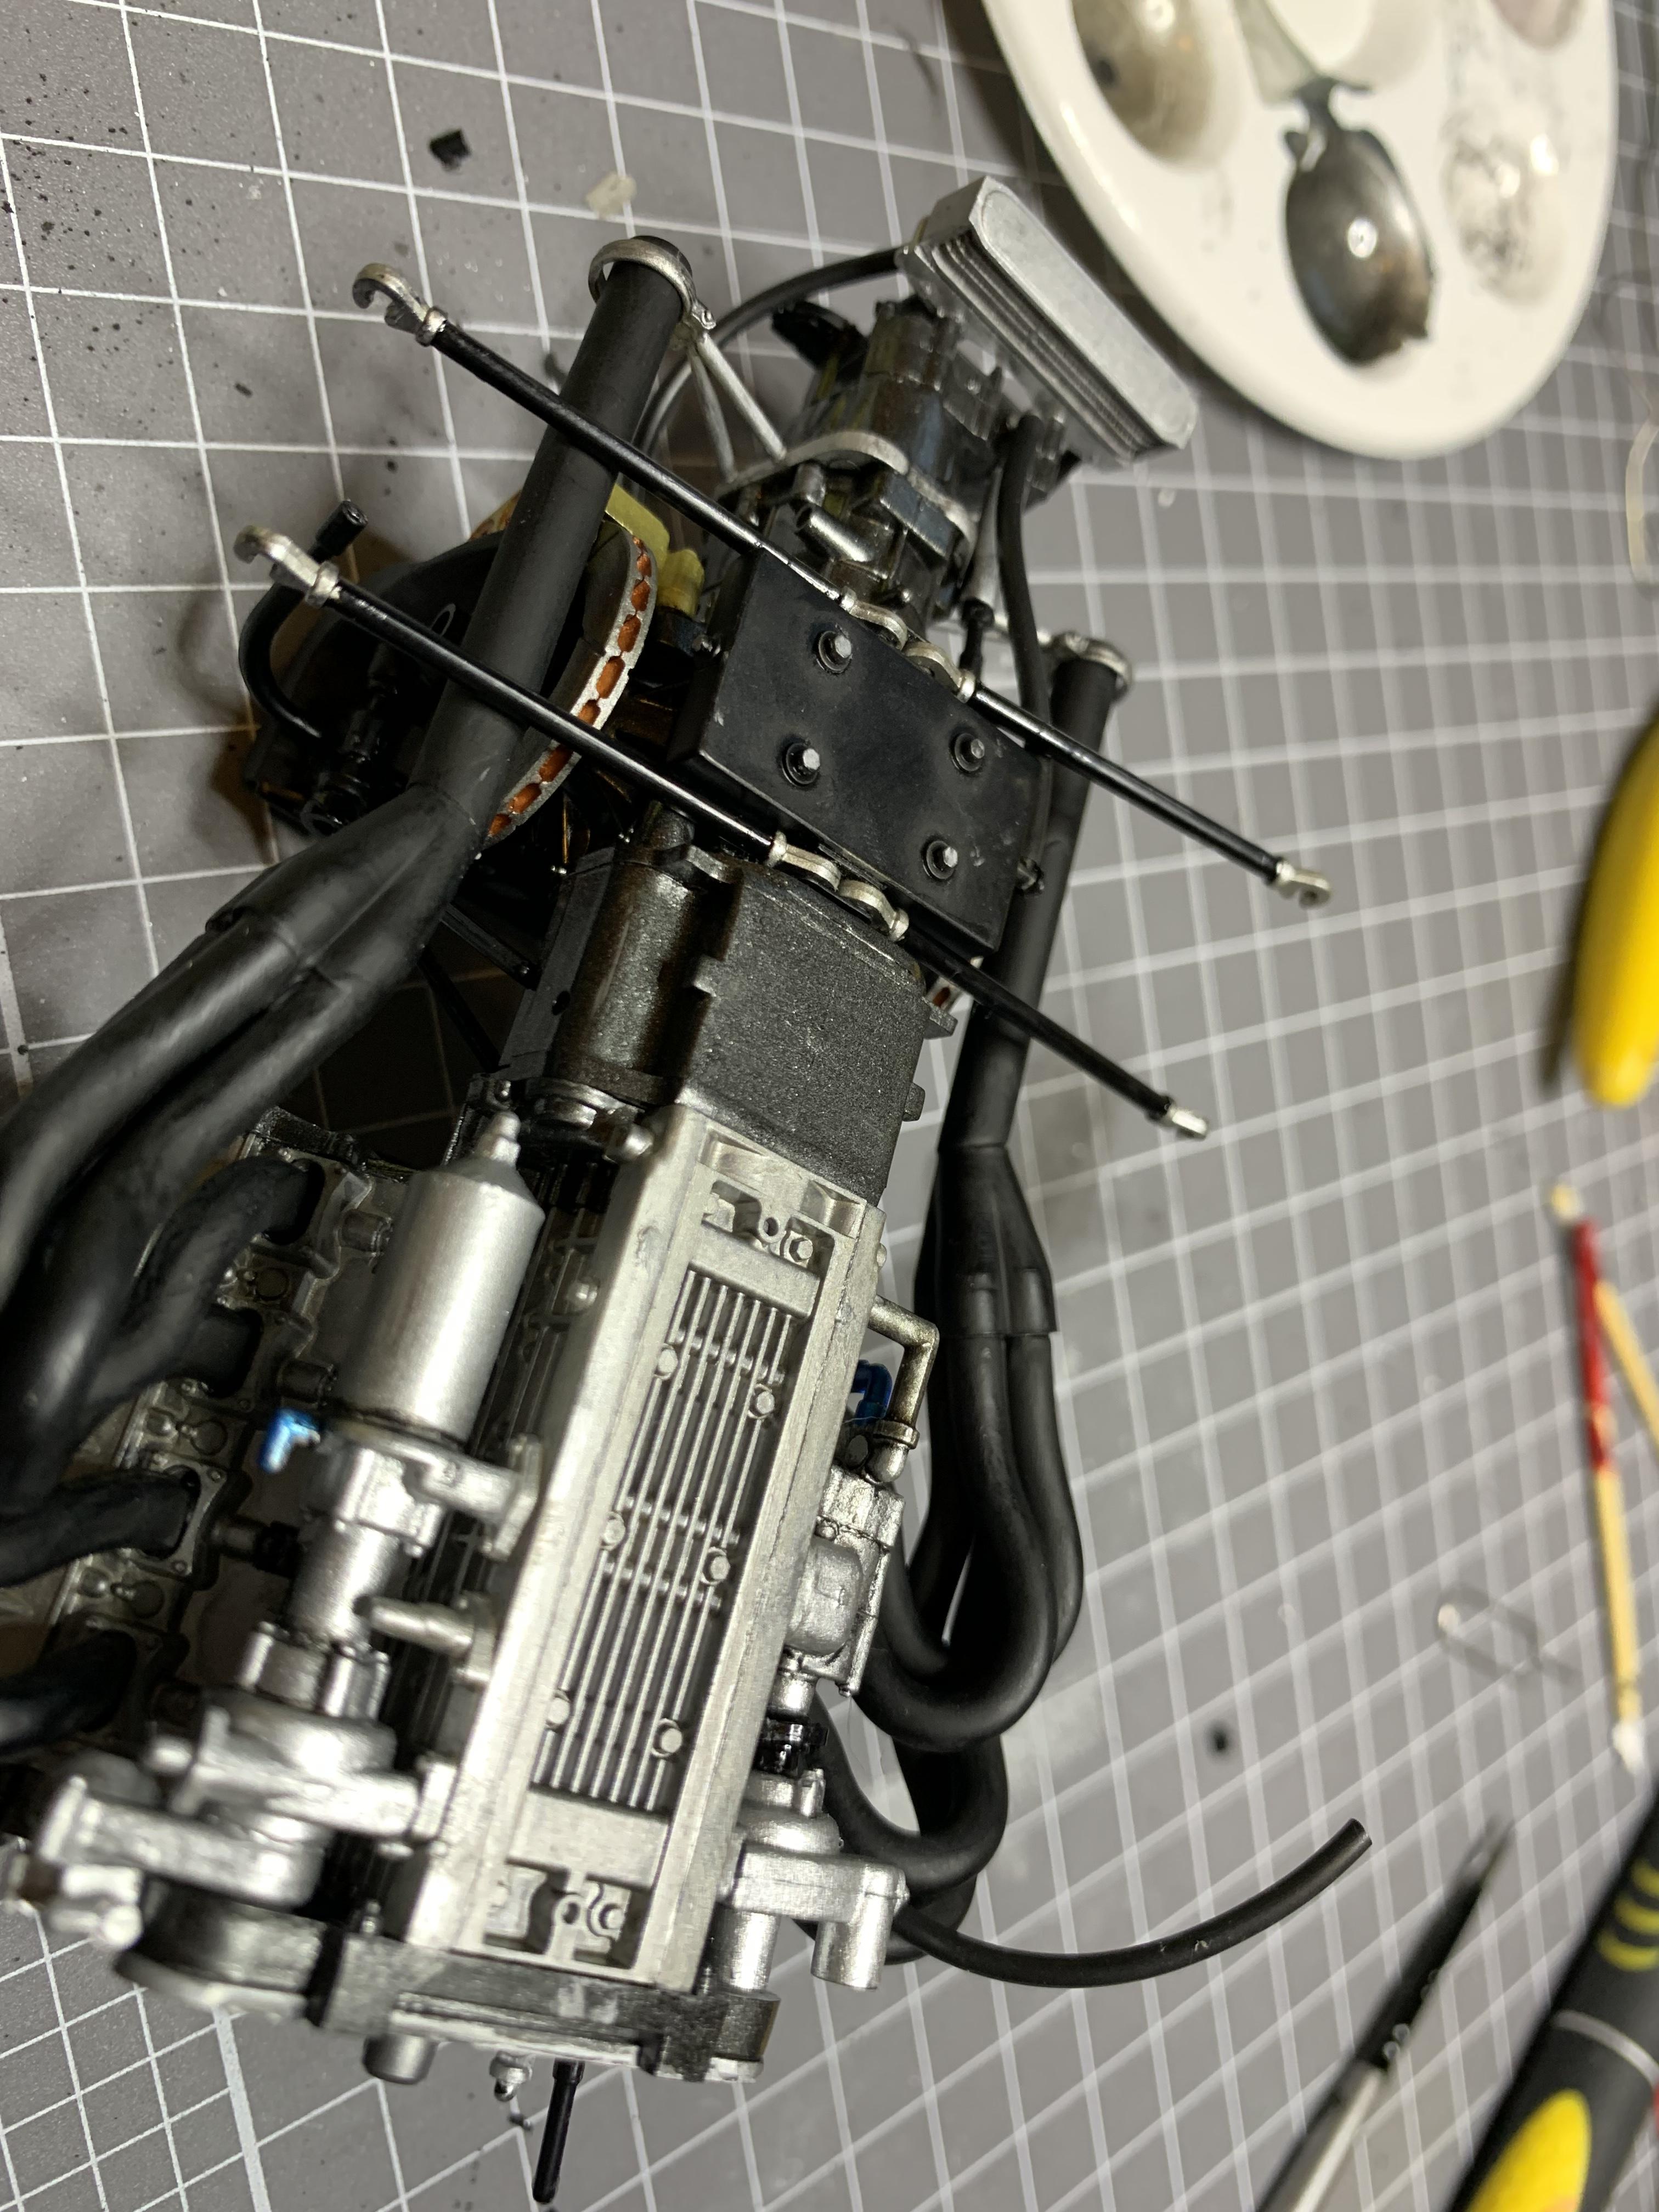
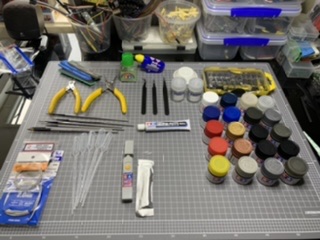
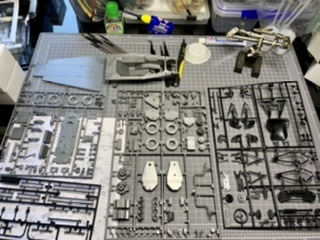
Full confession, I last built model kits in my early to mid teens. Now I’m past mid-forty and having a go with the hobby a again. So I sort of have a rough idea of what to do, but am way out of date when it comes to contemporary tools, techniques and build materials. The Build: It’s a Tamiya Wolf WR1 F1 car - my kit was bought via eBay and is a genuine 1st release kit - so it’s about 43 years old itself! However instead of the original paint scheme it’s being painted up more in line with the Stark Racing livery from the Ironman 2 movie. This has given me some freedom to tweak other things in the build (the movie is set in circa 2010 Monaco and the race is for historic F1 cars) like bringing out some different colours and details. Fresh paints, tools and new work mat! Cost me a fortune but have to start! All sprues and parts accounted for! The first completed bits. Lots of minor detail changes. Still getting my “build practice” Test fit of the body parts over the chassis, thankfully it all fits well. Getting my fill and sanding practice! Front bulkhead, oil cooler, plumbing and so on all together. Some weathering on the cooler as well.