hobbyfella
-
Posts
64 -
Joined
-
Last visited
Content Type
Profiles
Forums
Events
Gallery
Everything posted by hobbyfella
-
I’ll just throw a few more

-
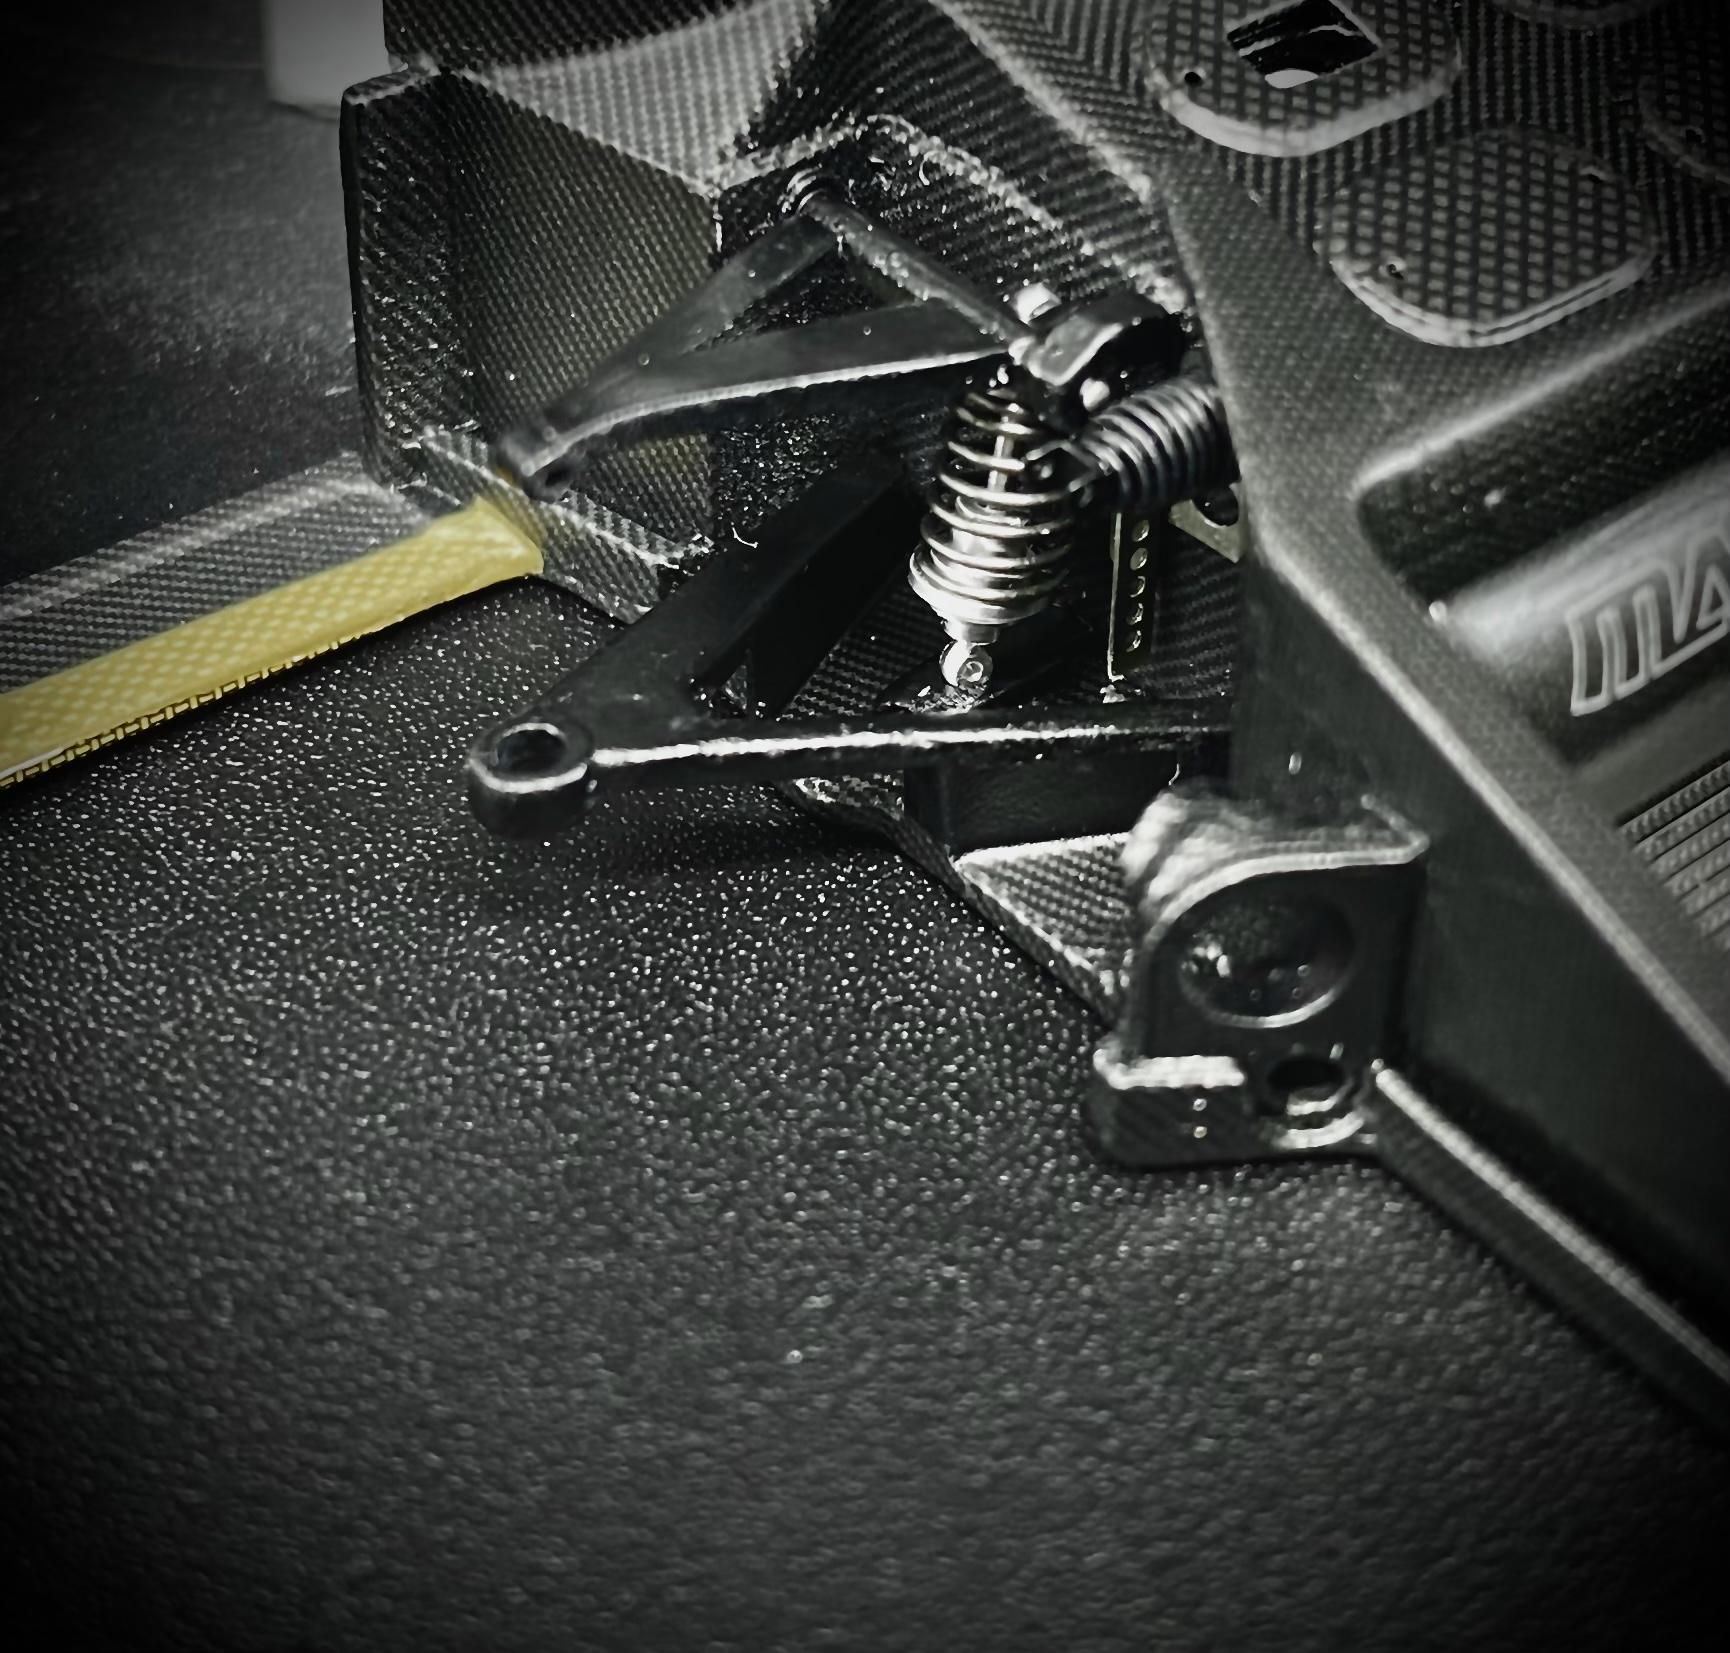
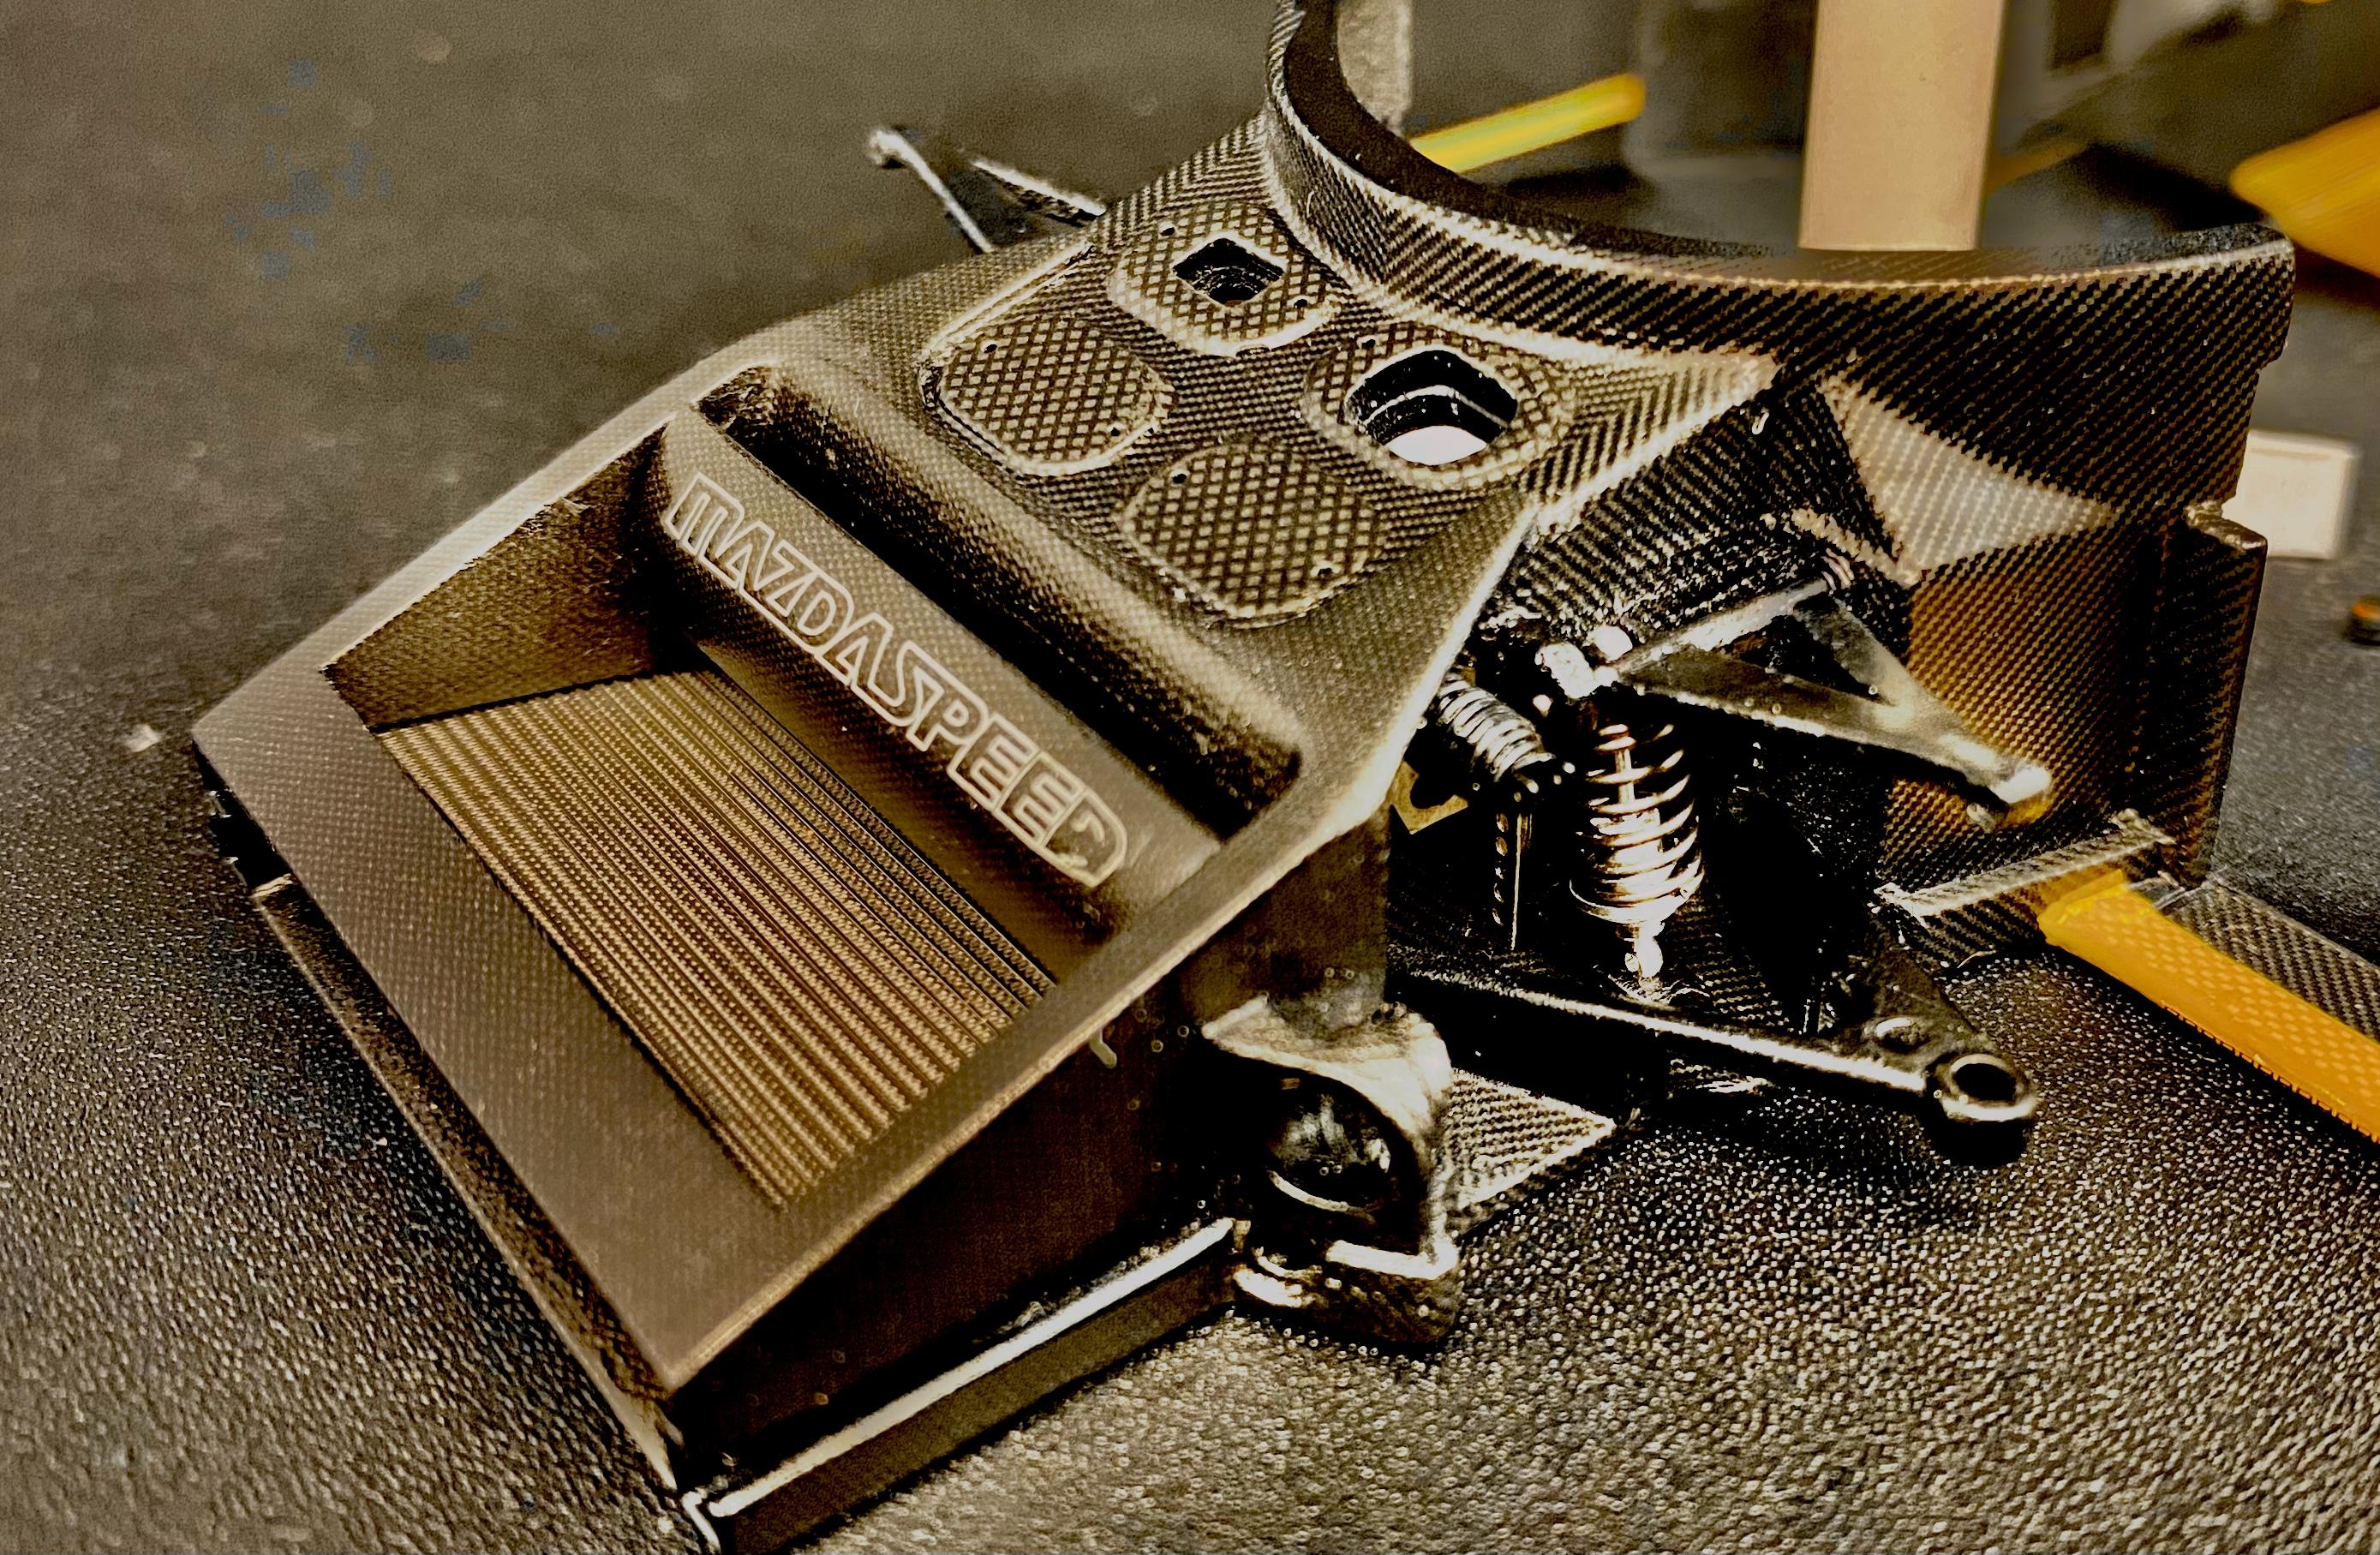
The reason I don’t post much is due to a lack of support, why take all this time to take pictures if nobody’s going to look at them? Right? Got the upper A arm support do dadd’s added. UV glue does the job, then sanded back to form, bla bla bla…
-
Shocks are on
-
So I split the front clip, and used L stock in order to make the front slide on and off.
-
I split the front clip, and used L stock in order to make the front slide on and off.
-
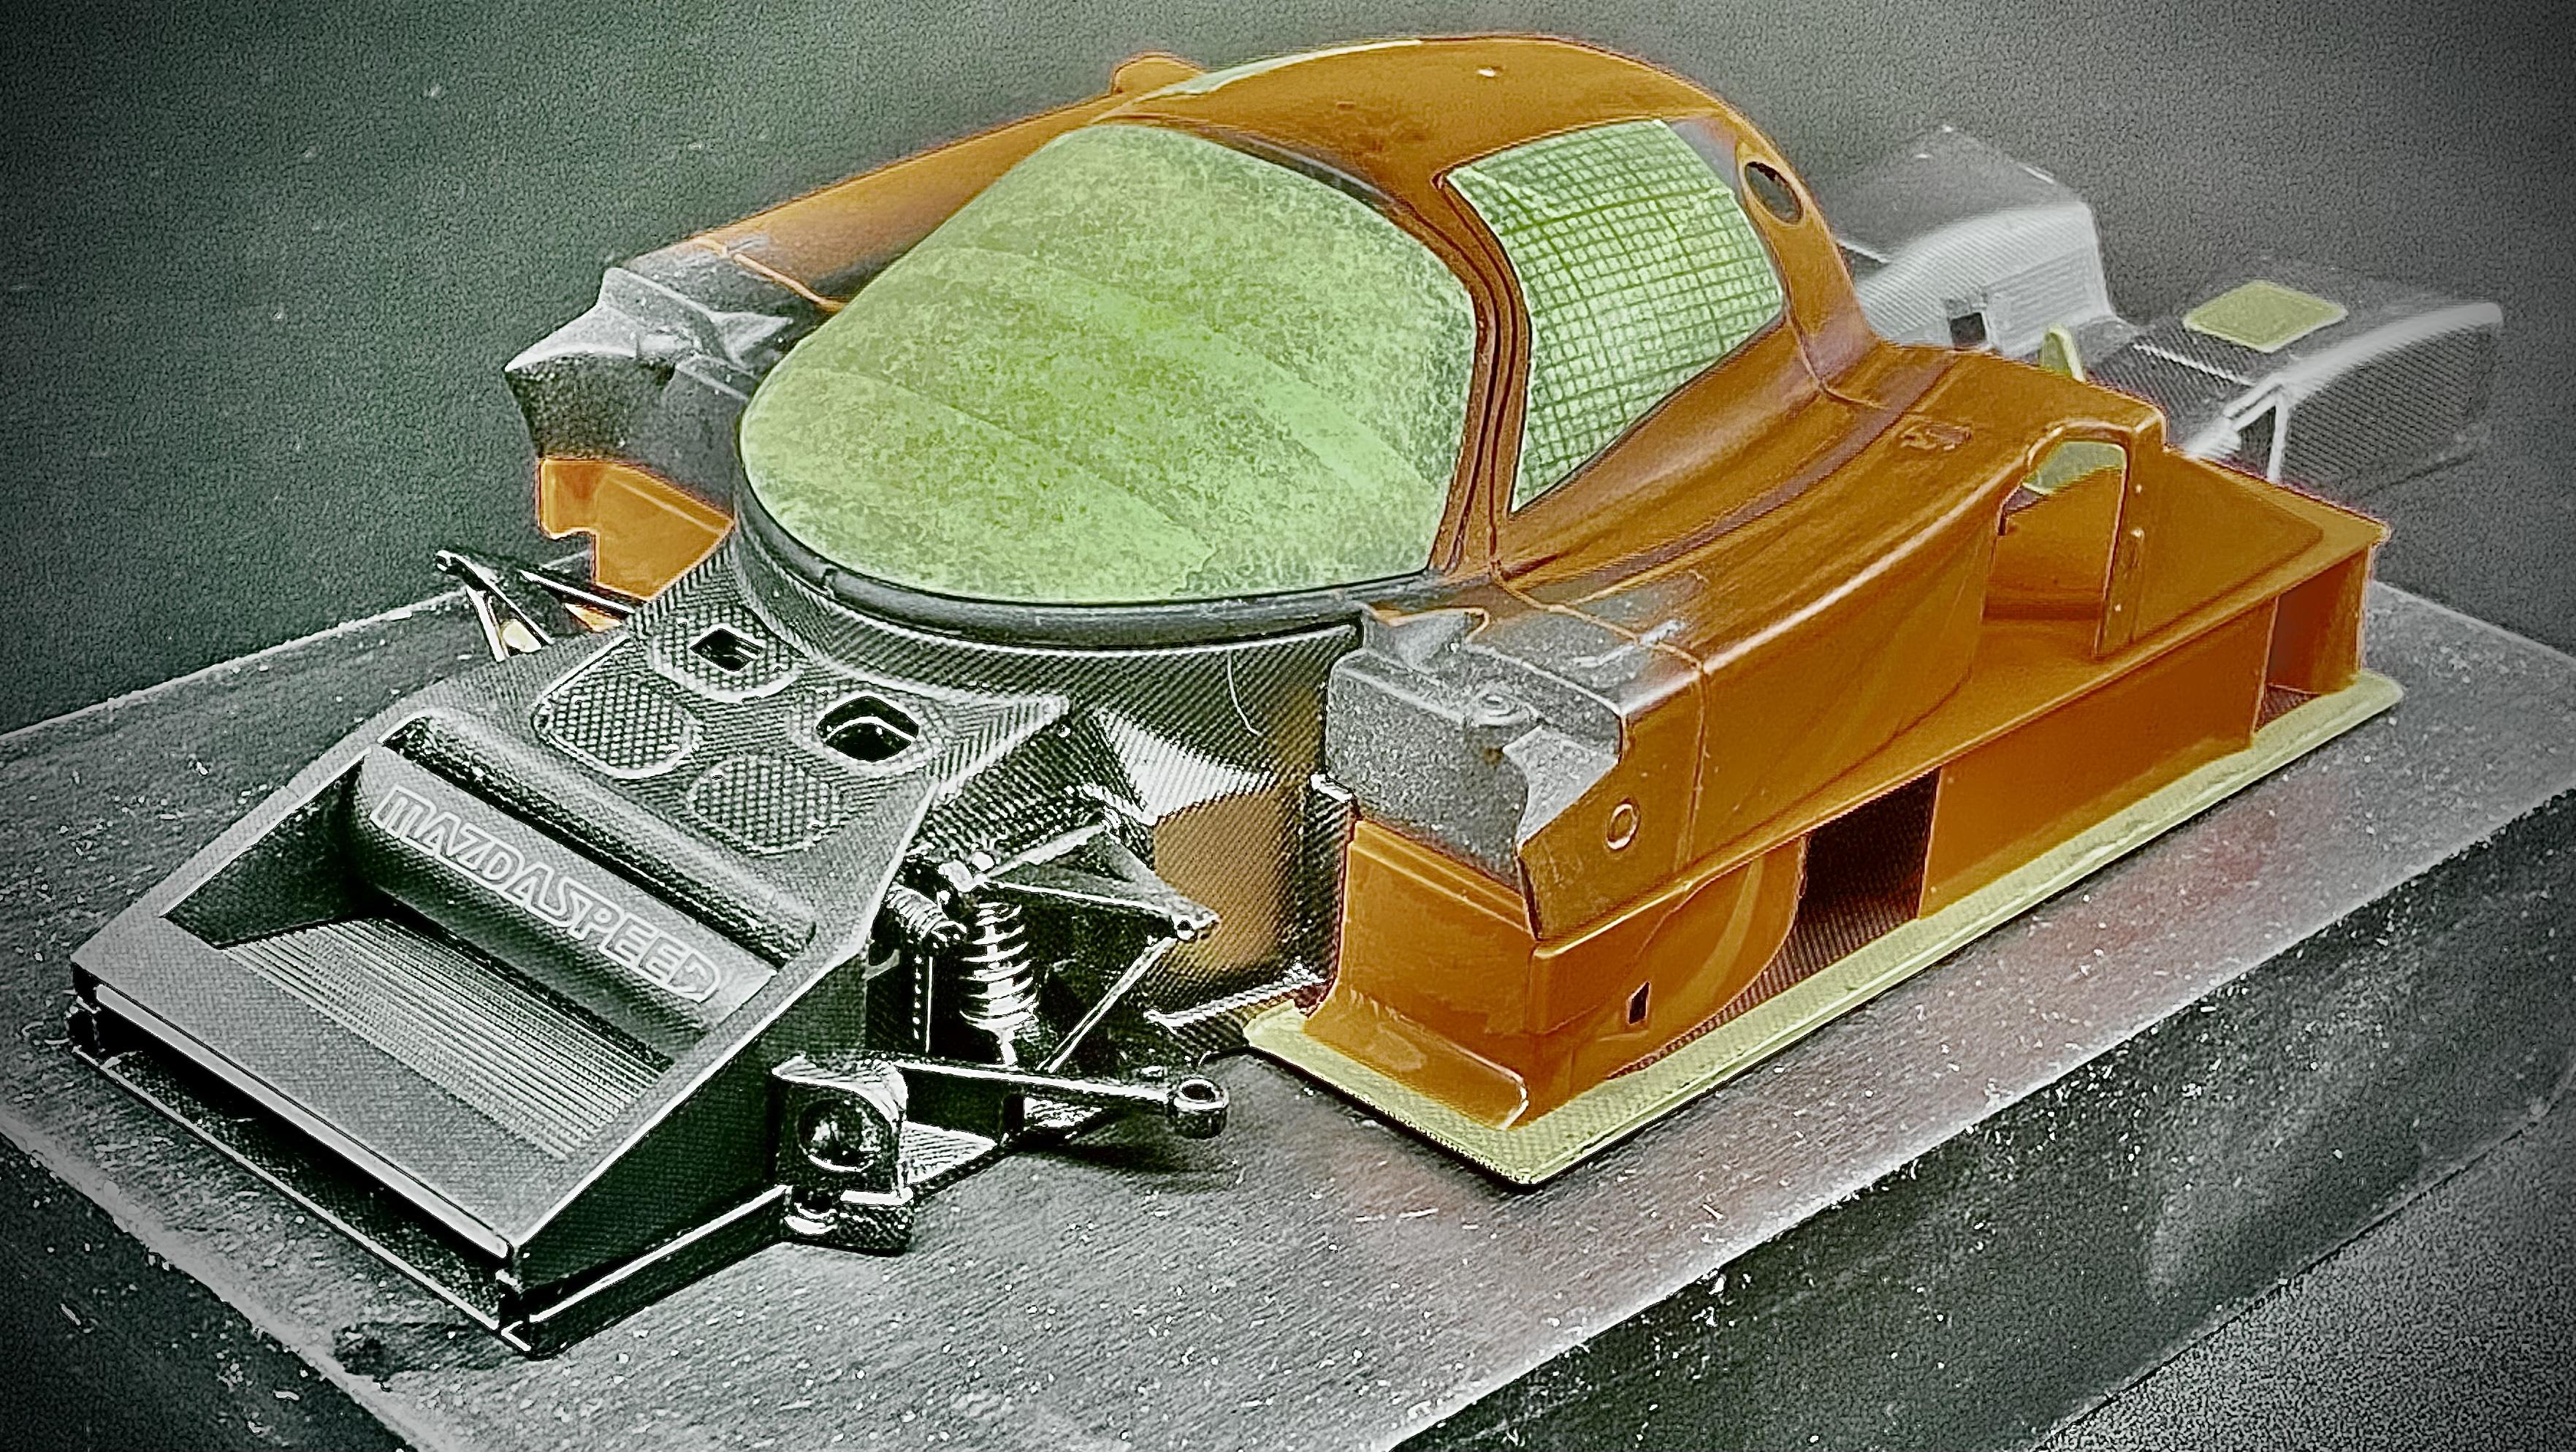
I couldn’t stop and take progress pics, so here’s where I’m at today on the chassis. I’ve been trying to replicate the actual carbon fiber pattern on the original version, which is hard. Every car is different. So I’m using a little artistic “direction”.
-
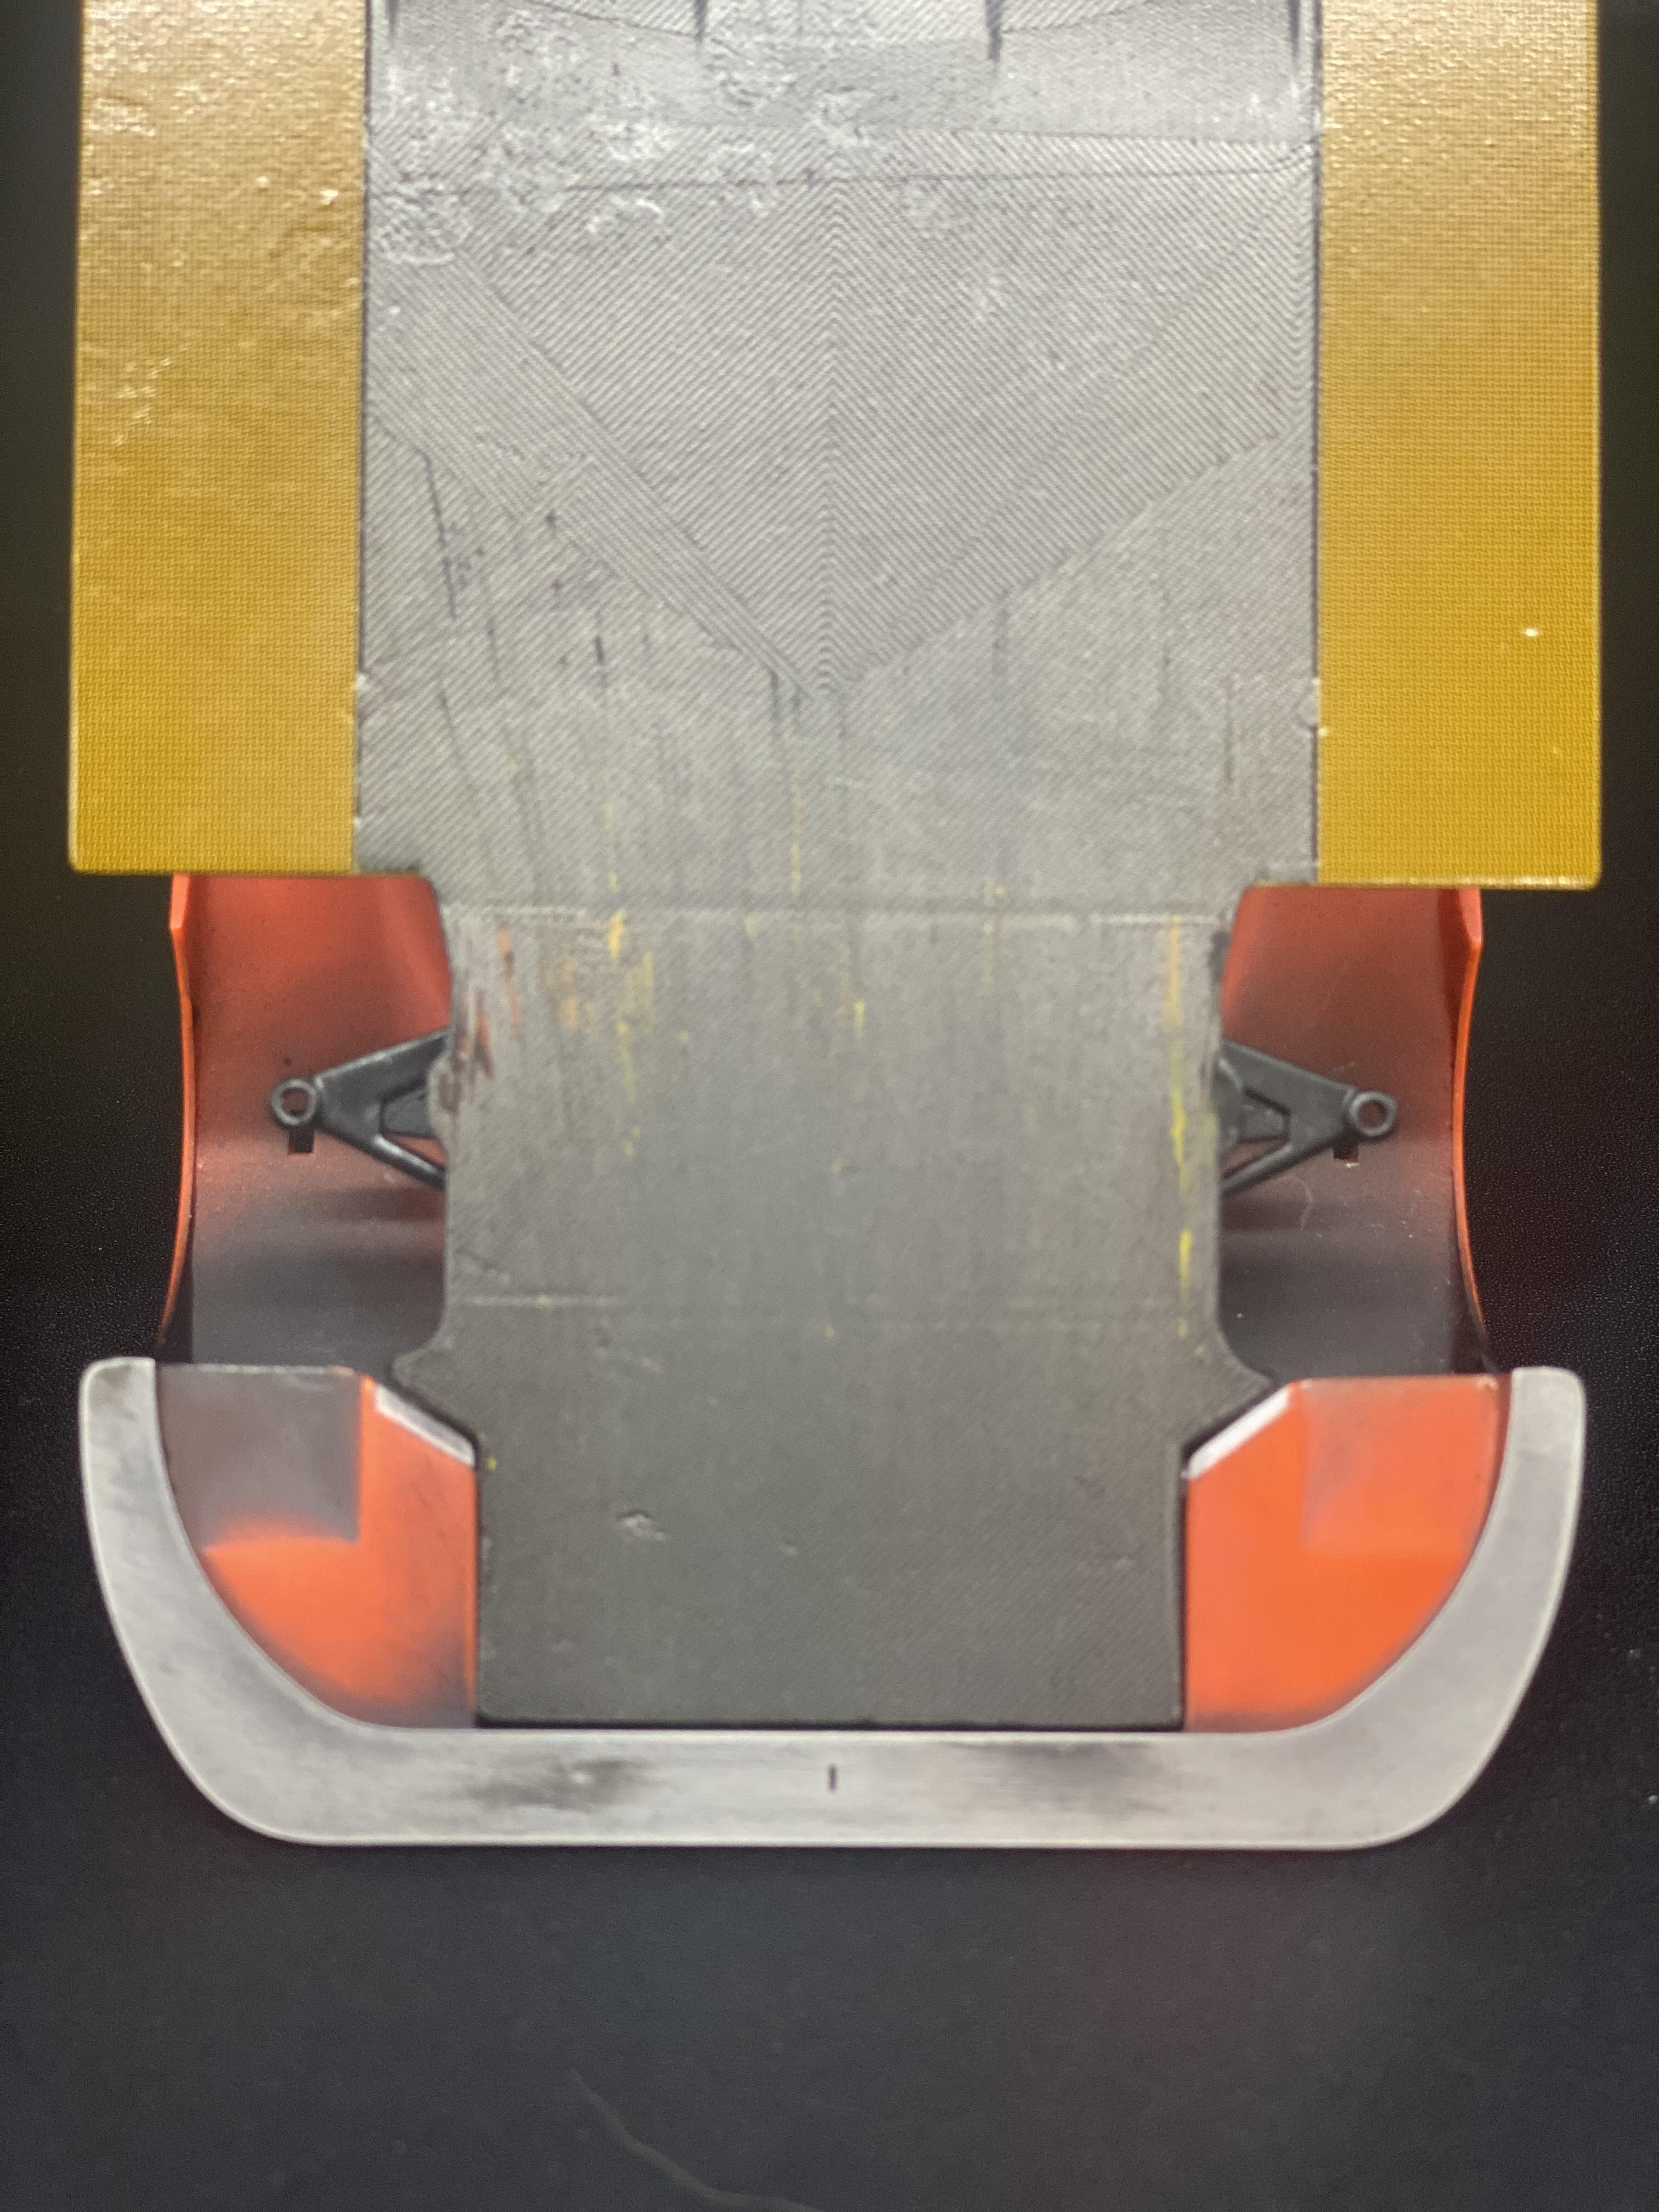
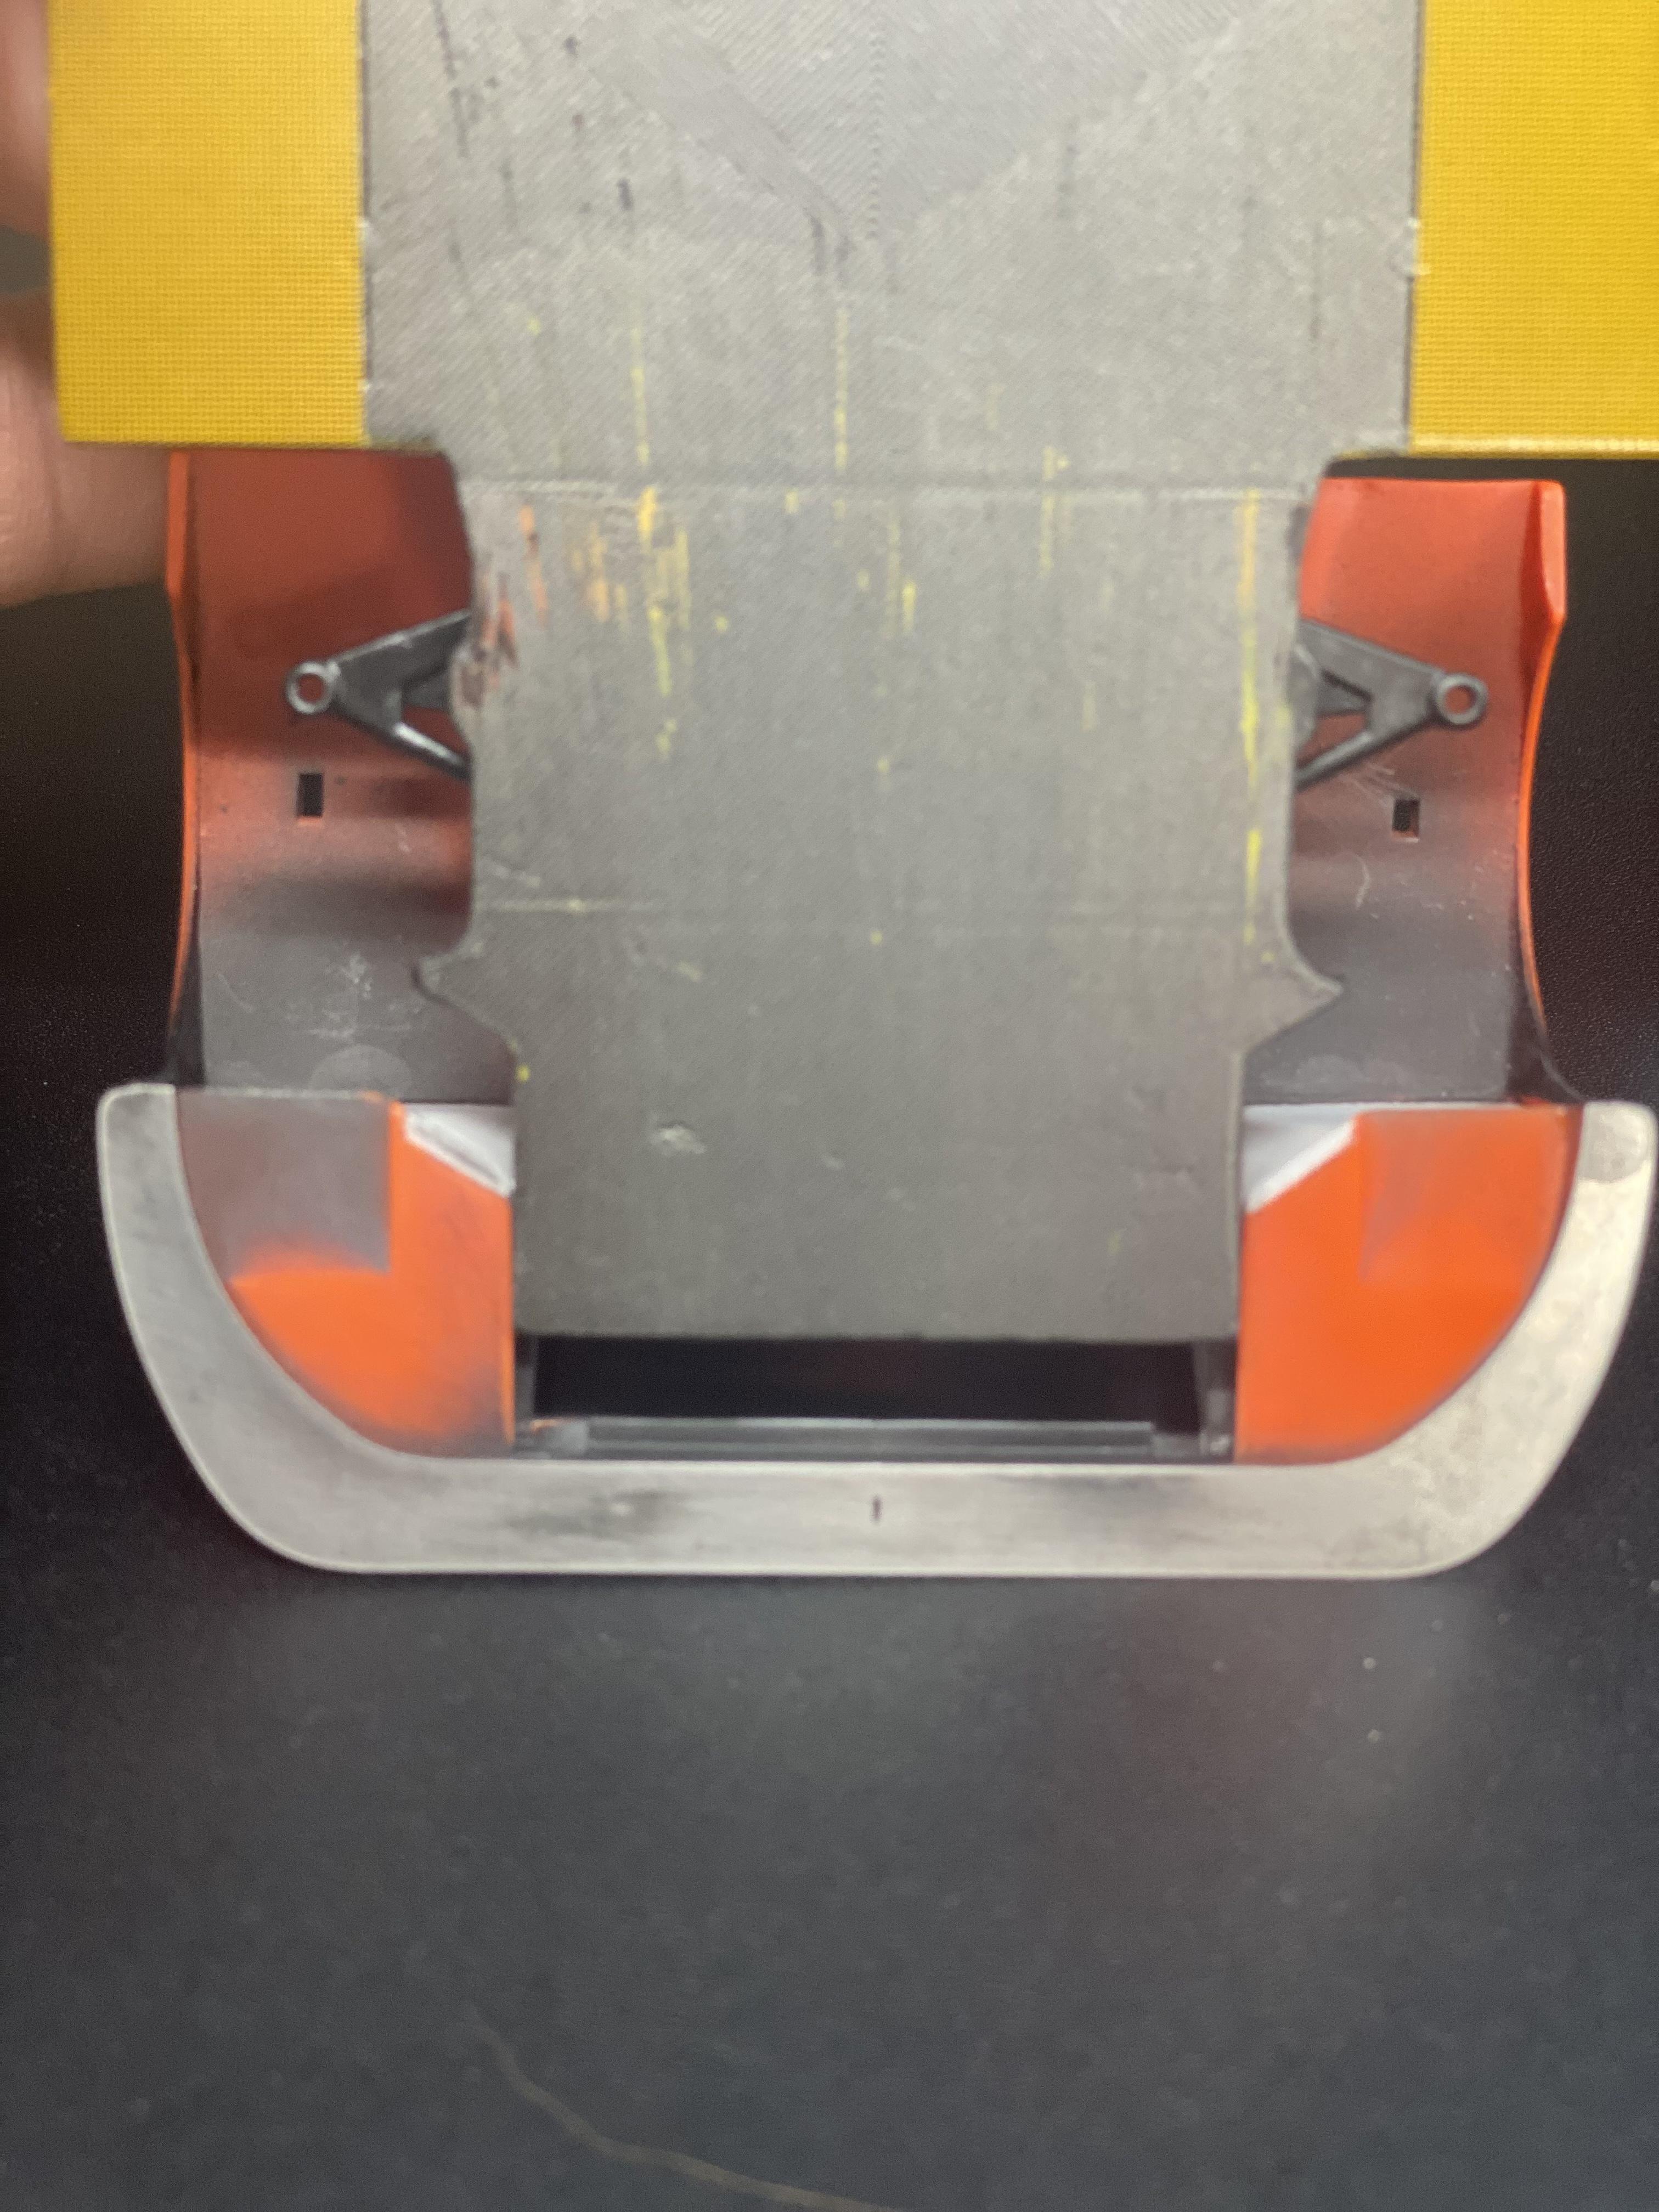
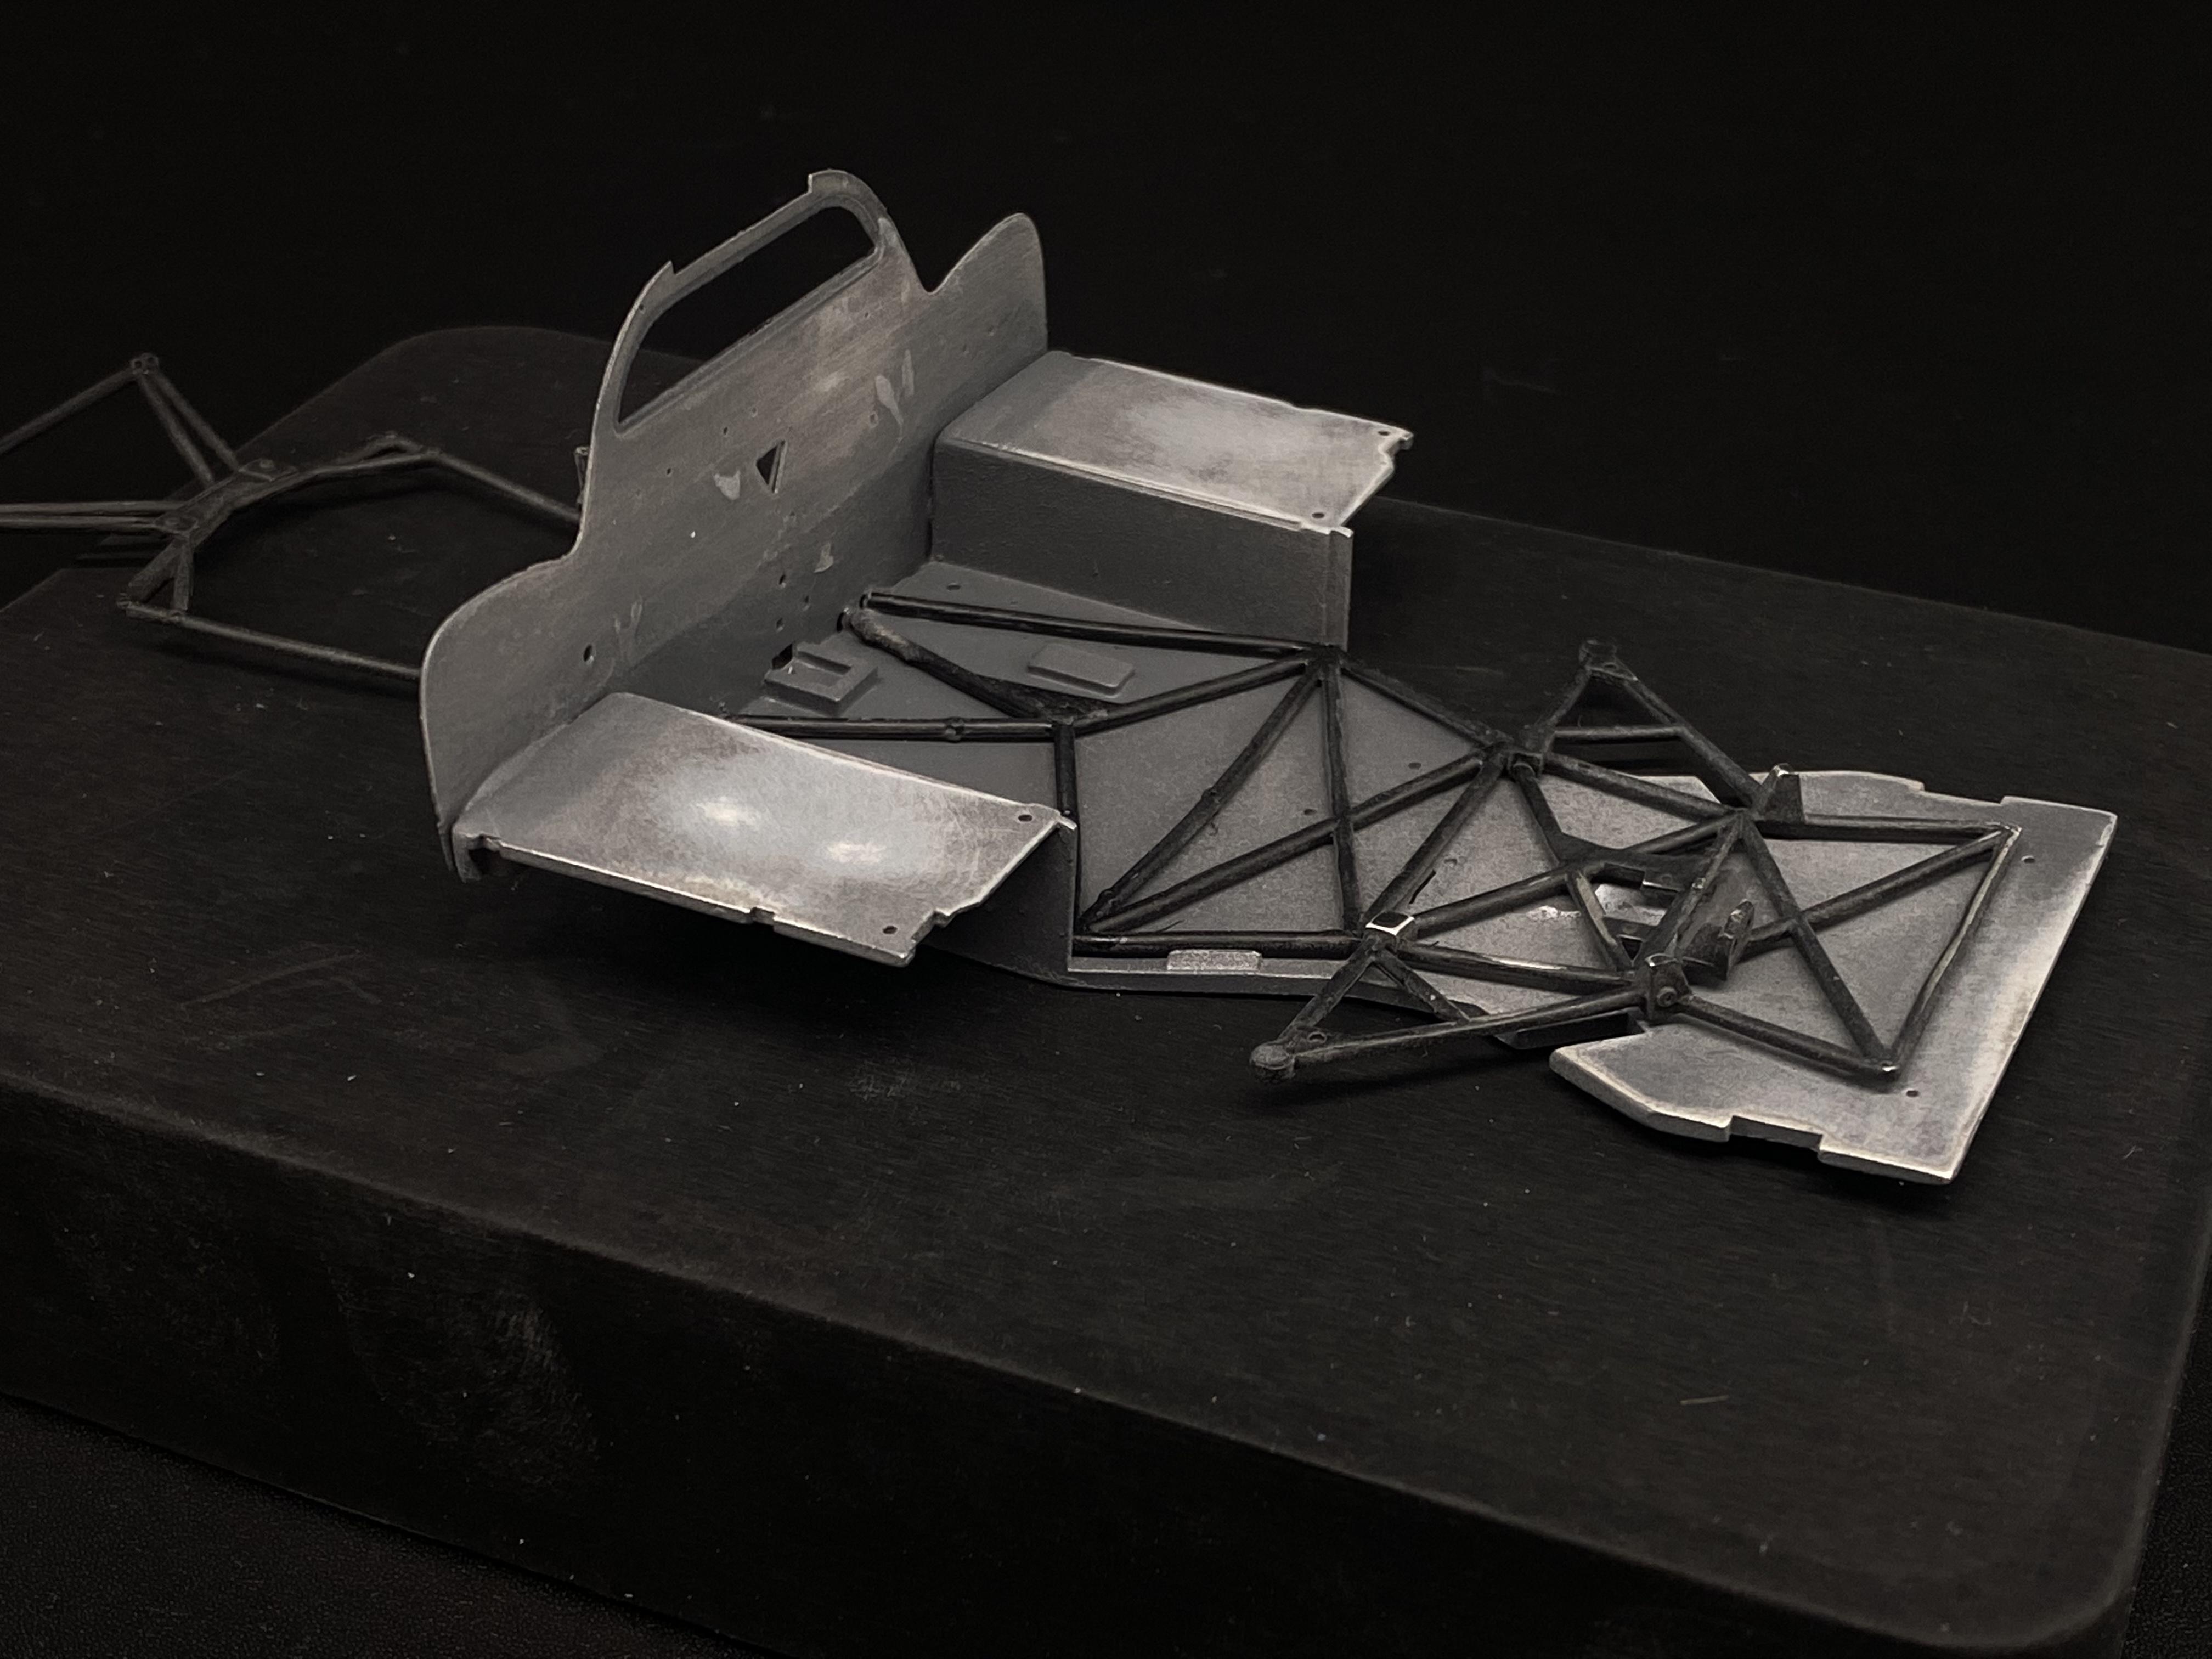
I started working on the chassis, this is where it needed a lot of work. kit piece
-
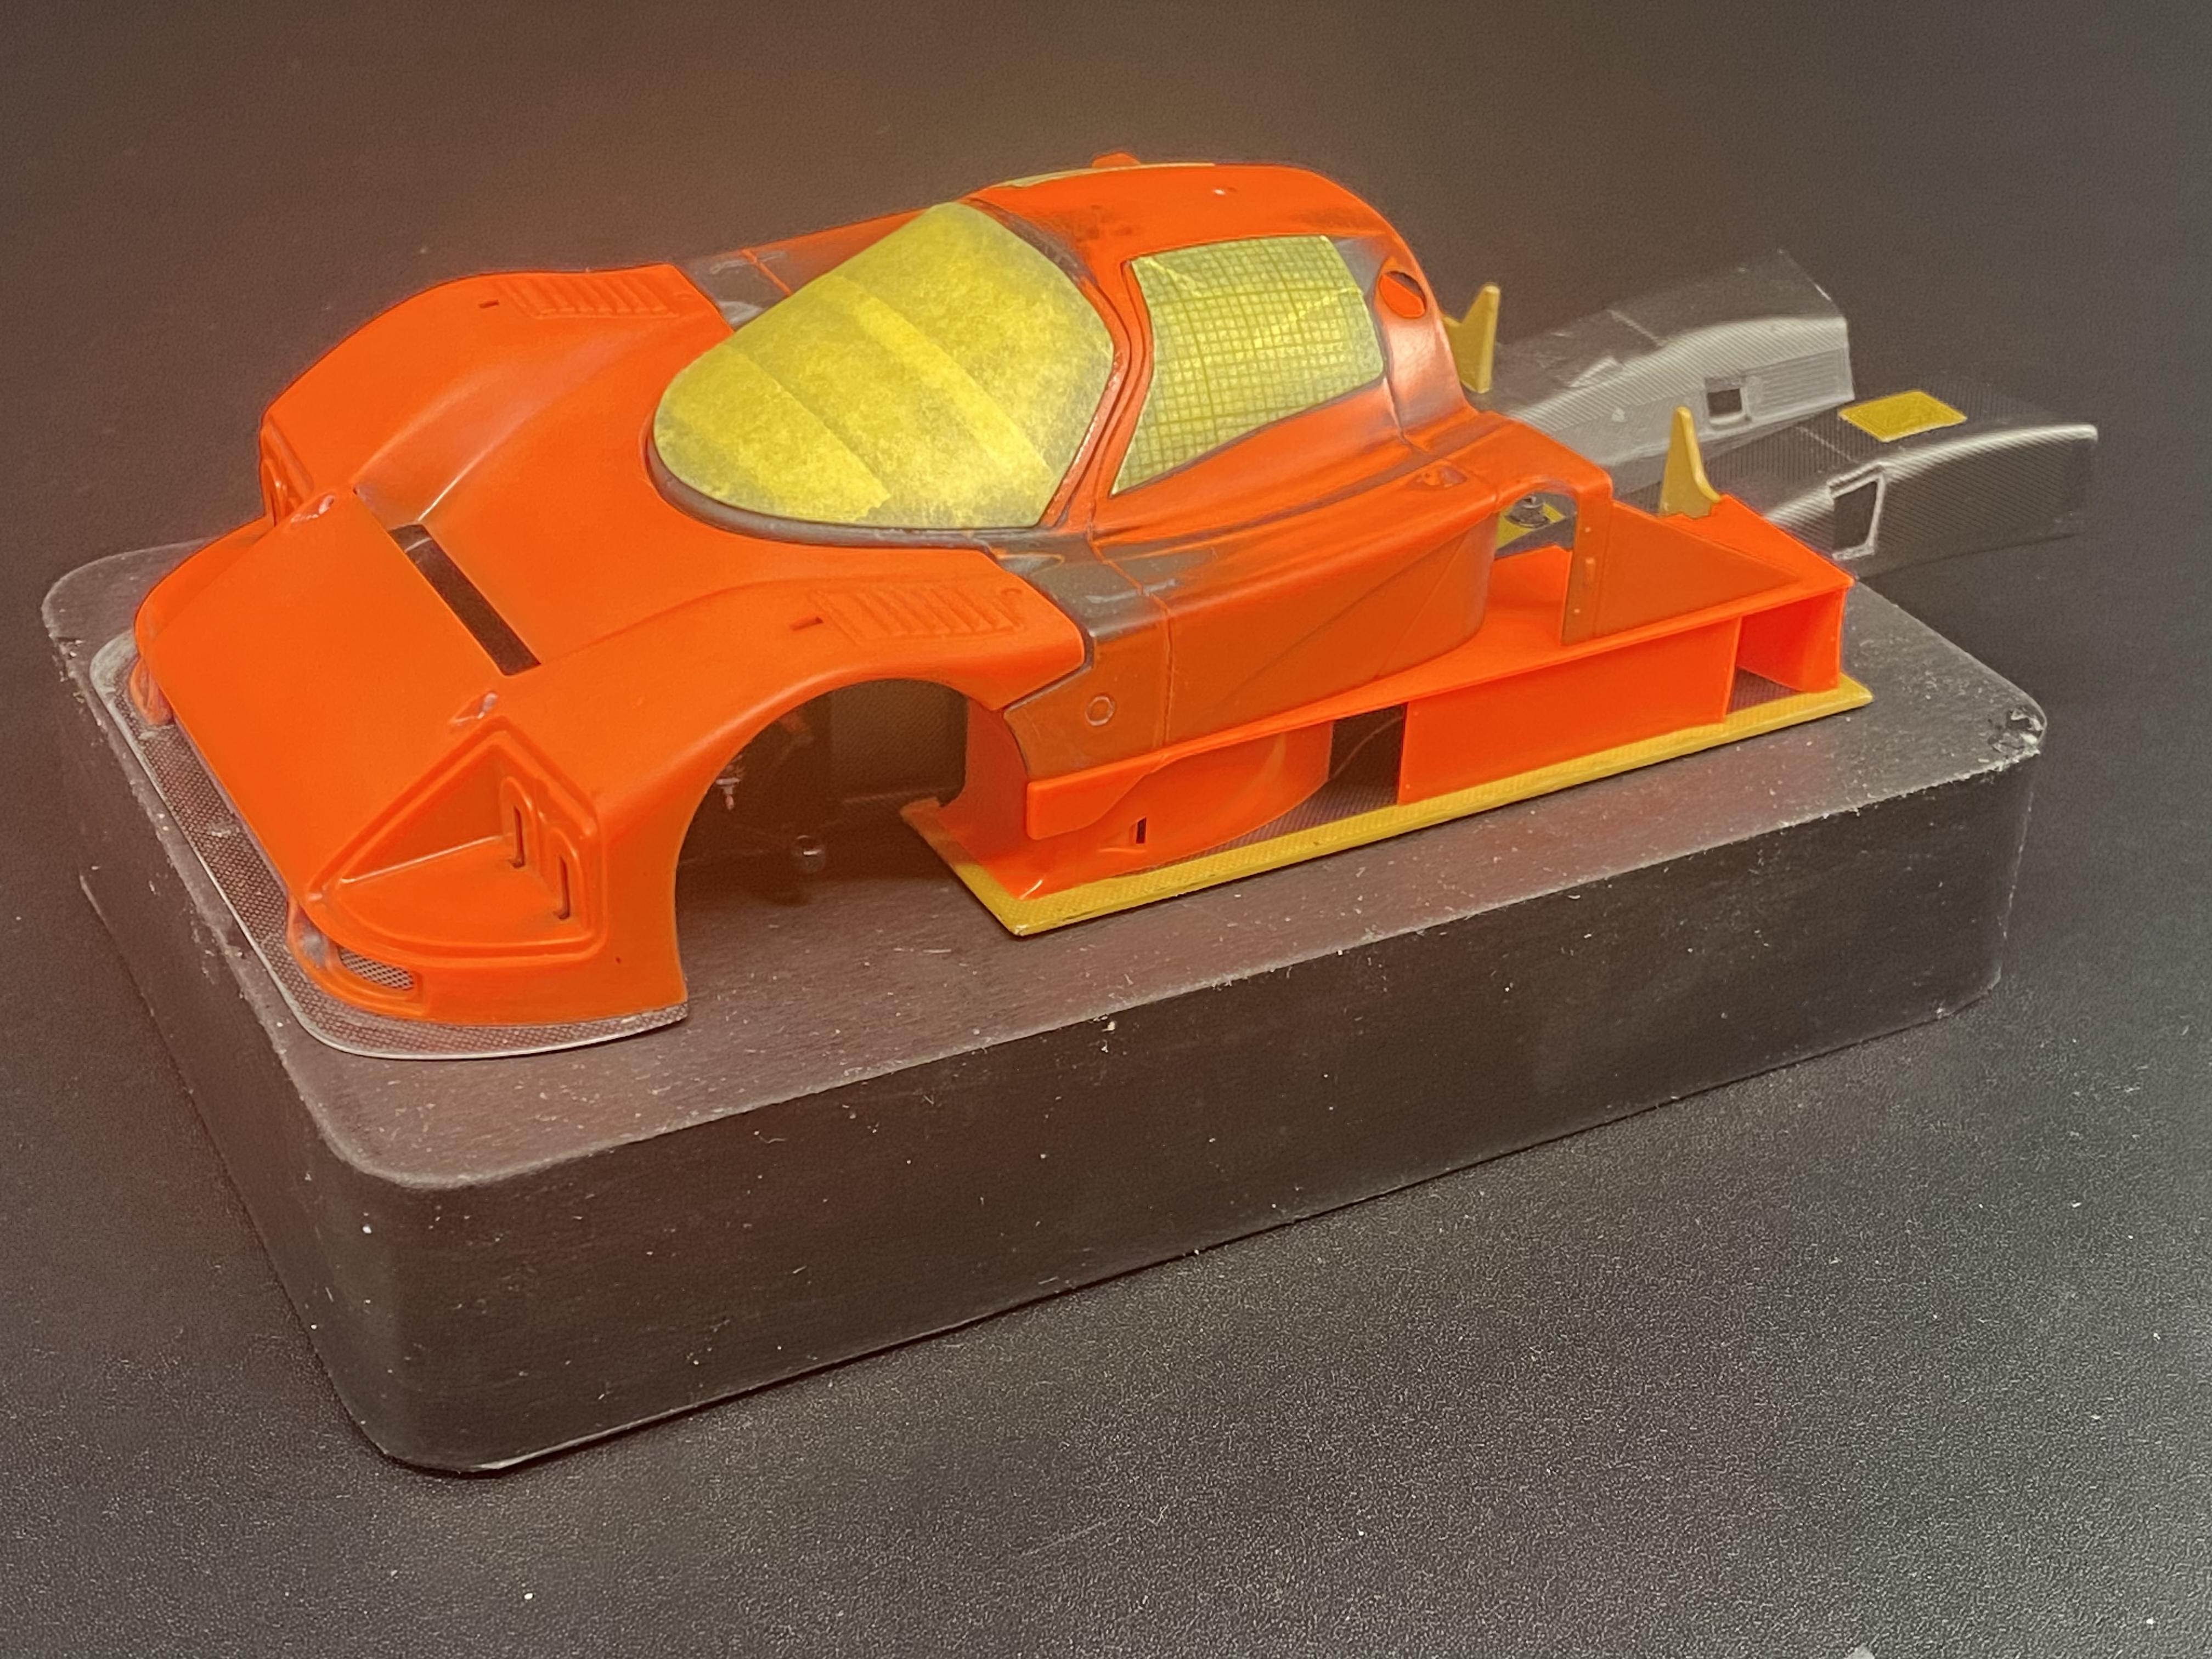
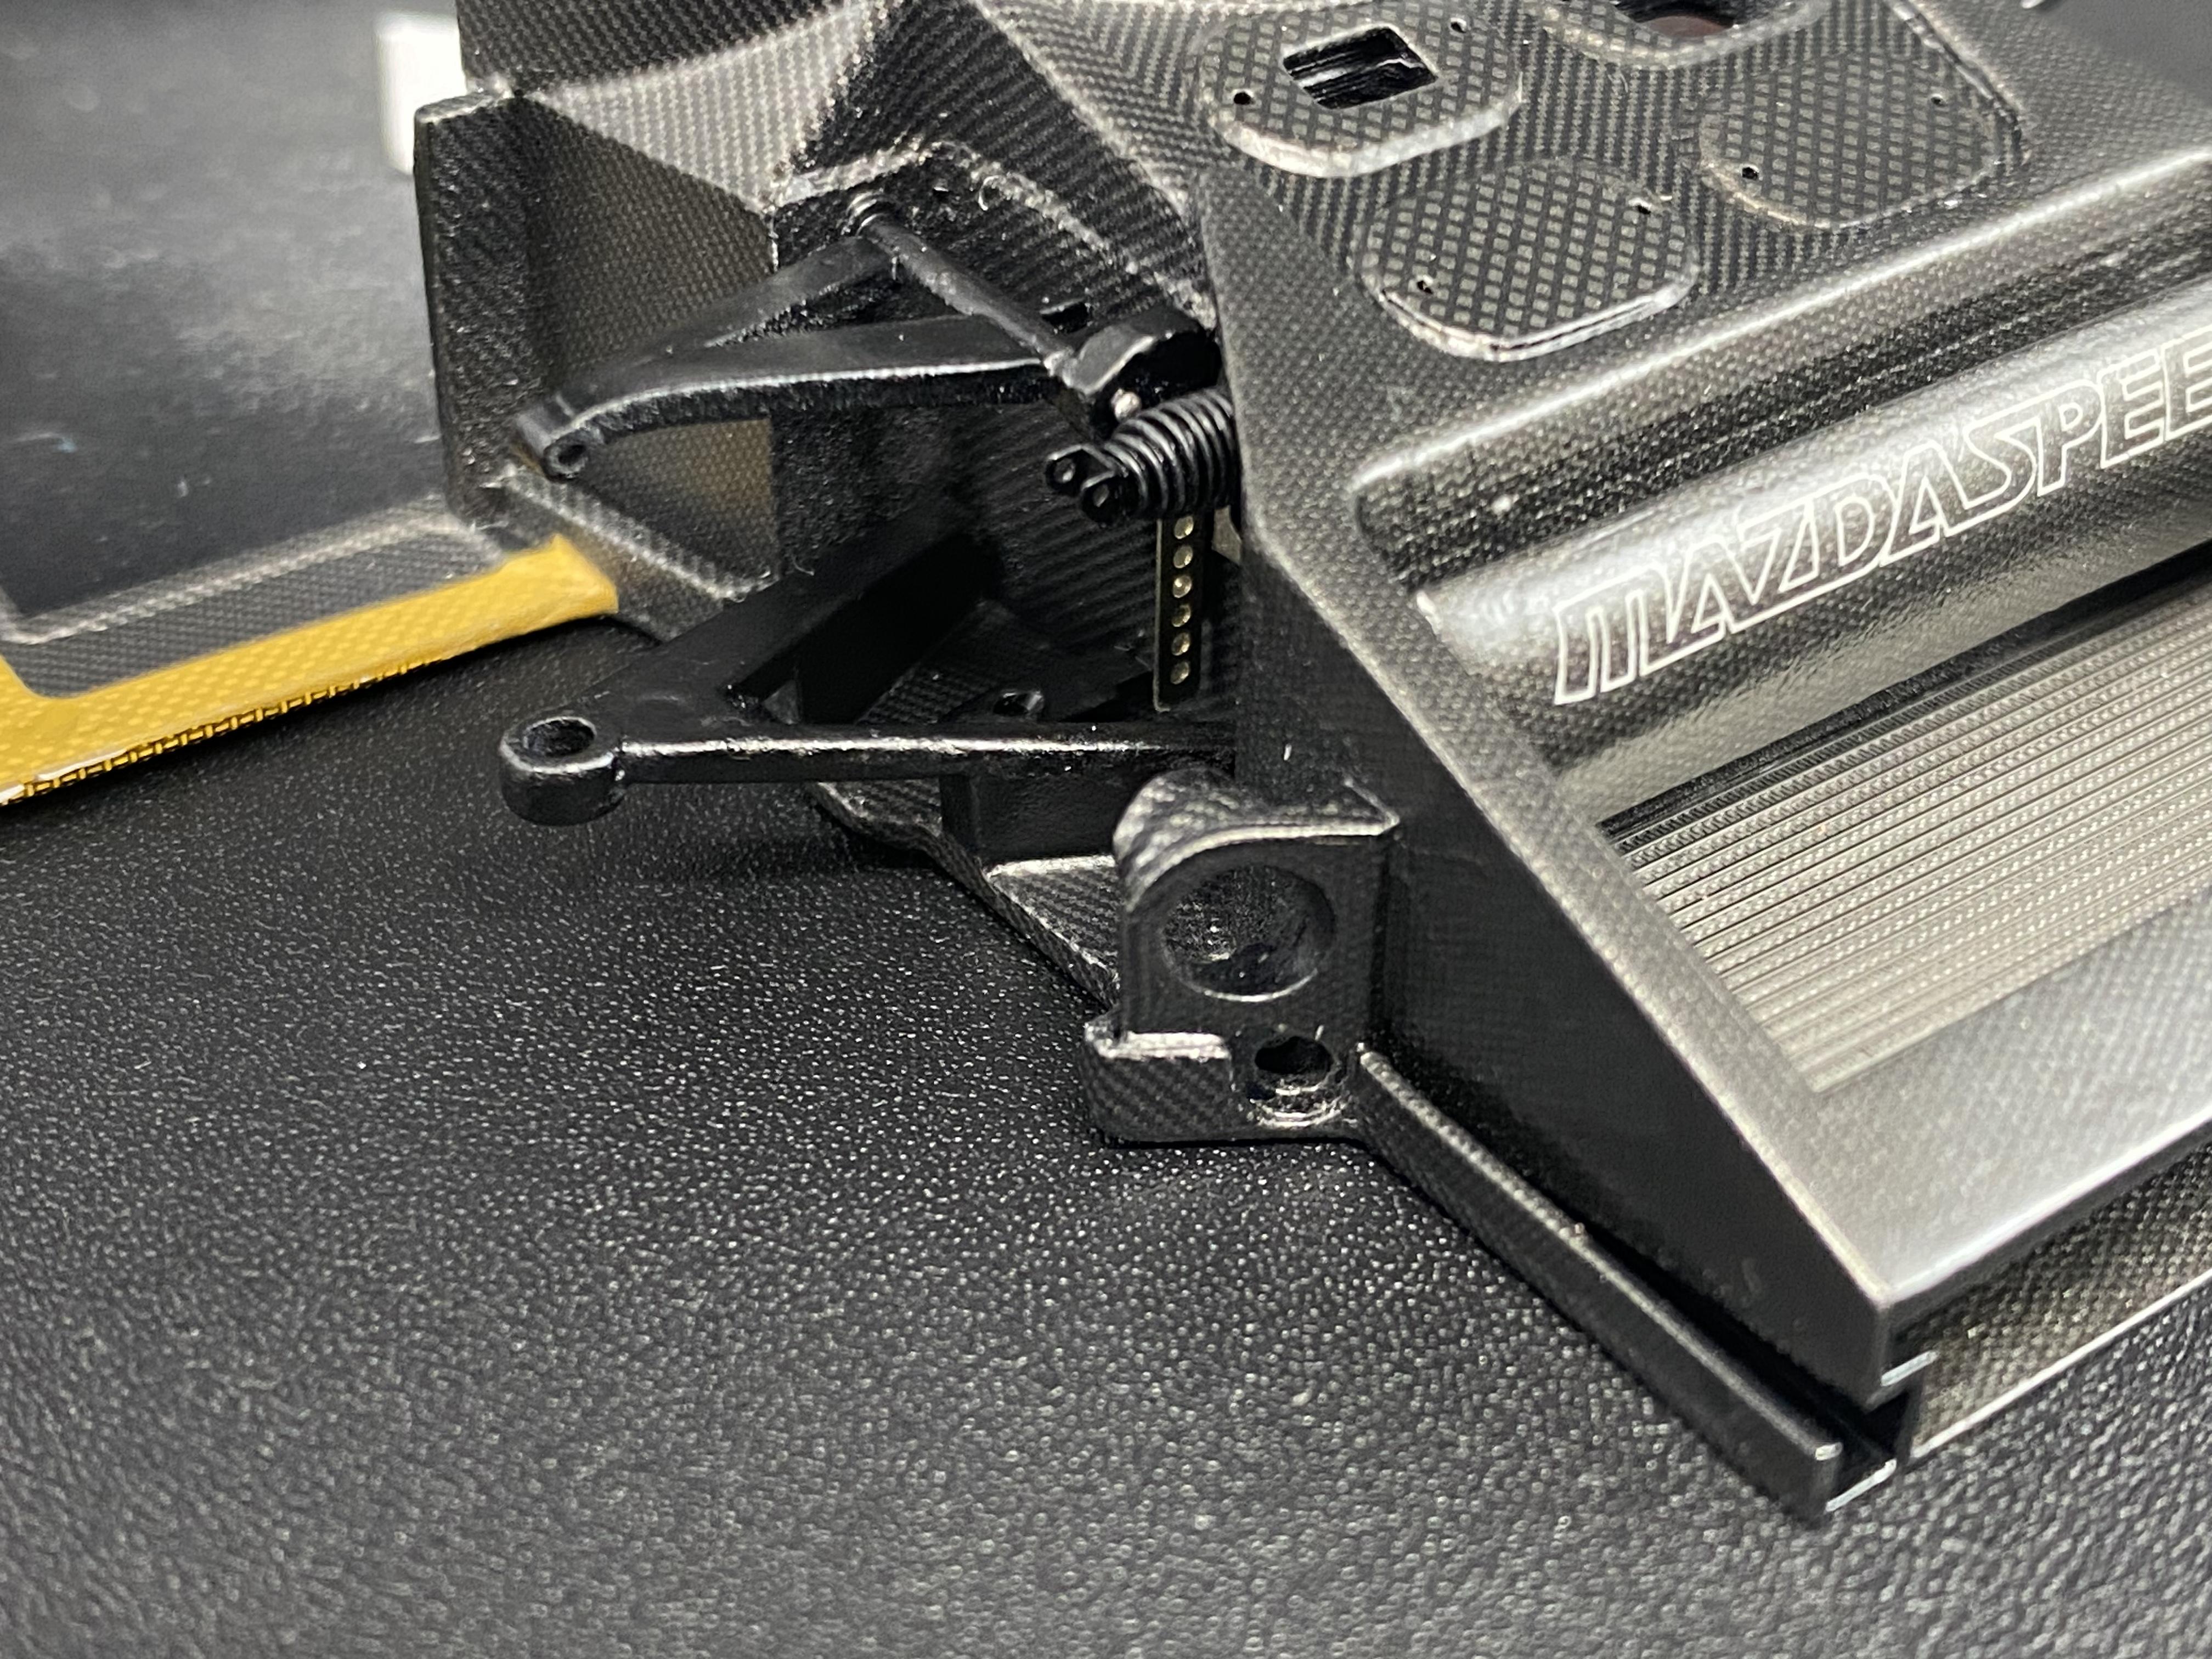
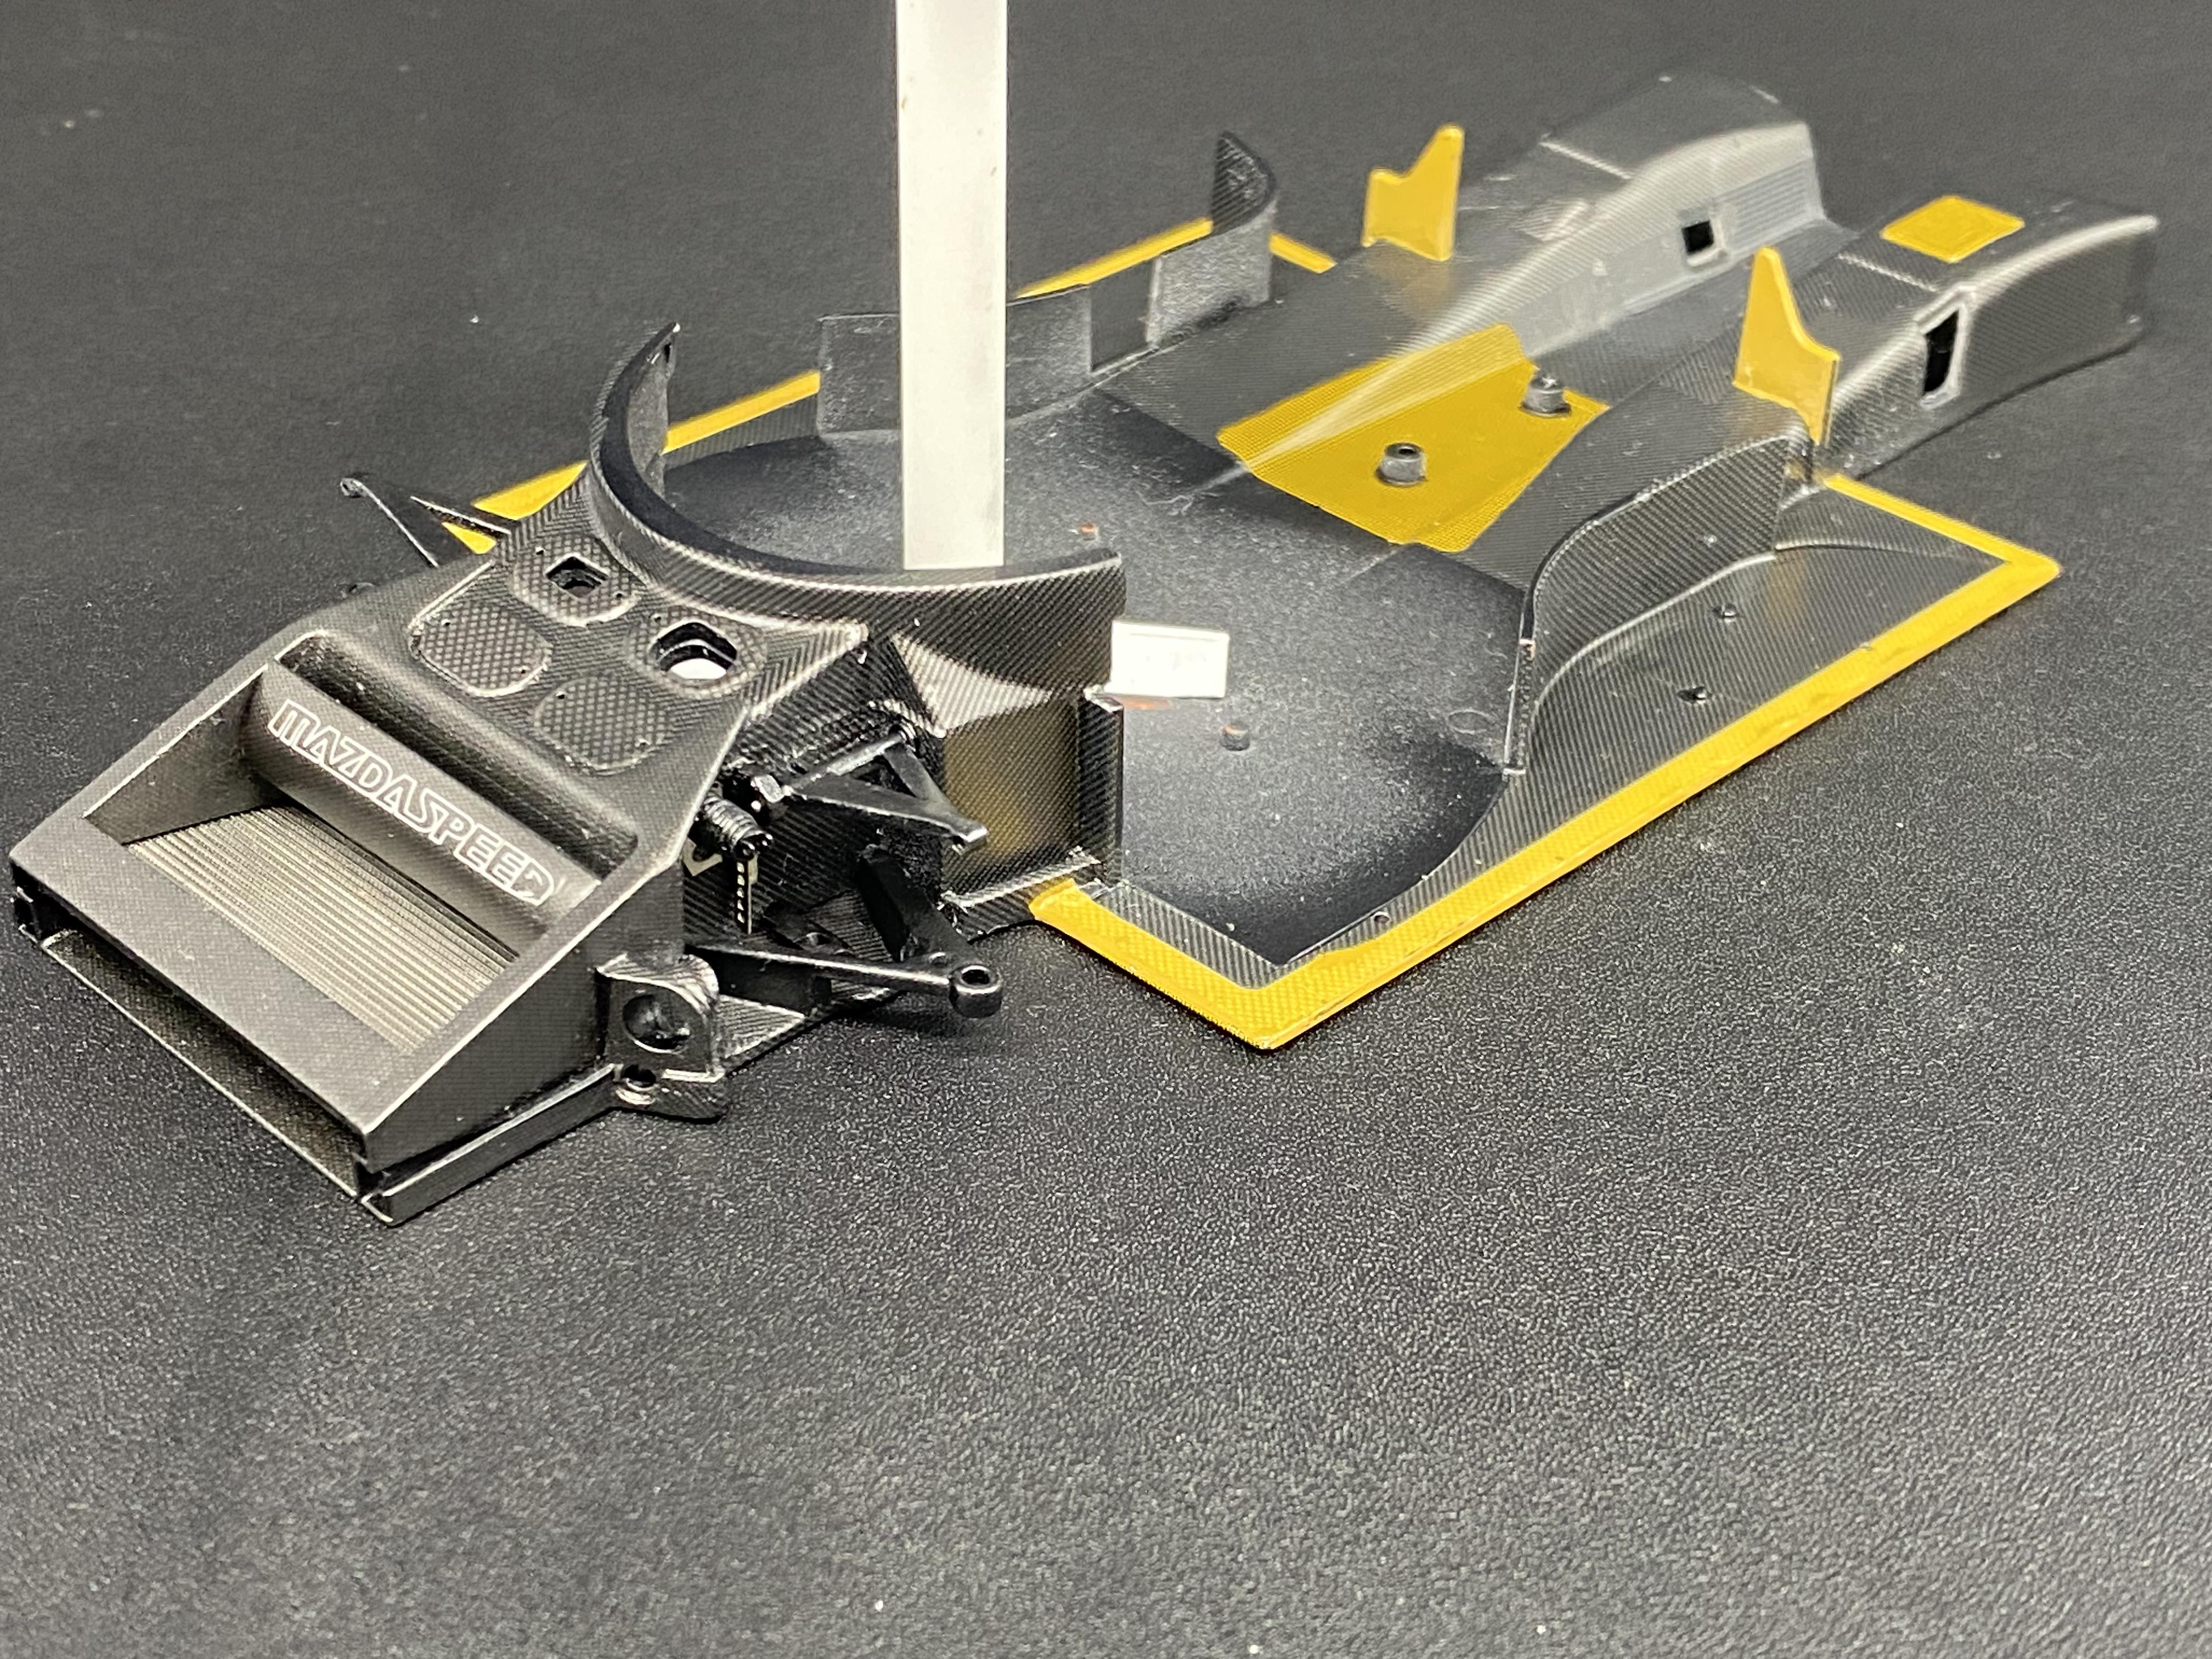
I started working on making the clips, the front clip between the windscreen and monocoque has been most challenging, but I have a solution… The major construction comes when trying to line up the top and bottom parts, such as the spaces between the body and vents/intake on the kit, this took massive amounts of modification, my recommendation would be to save the money and scratch built it Doing it this way, you have to consider how the engine goes in and the bottoms part of the body, not to mention, how the heck are you going g to line all this up to paint this livery?
-
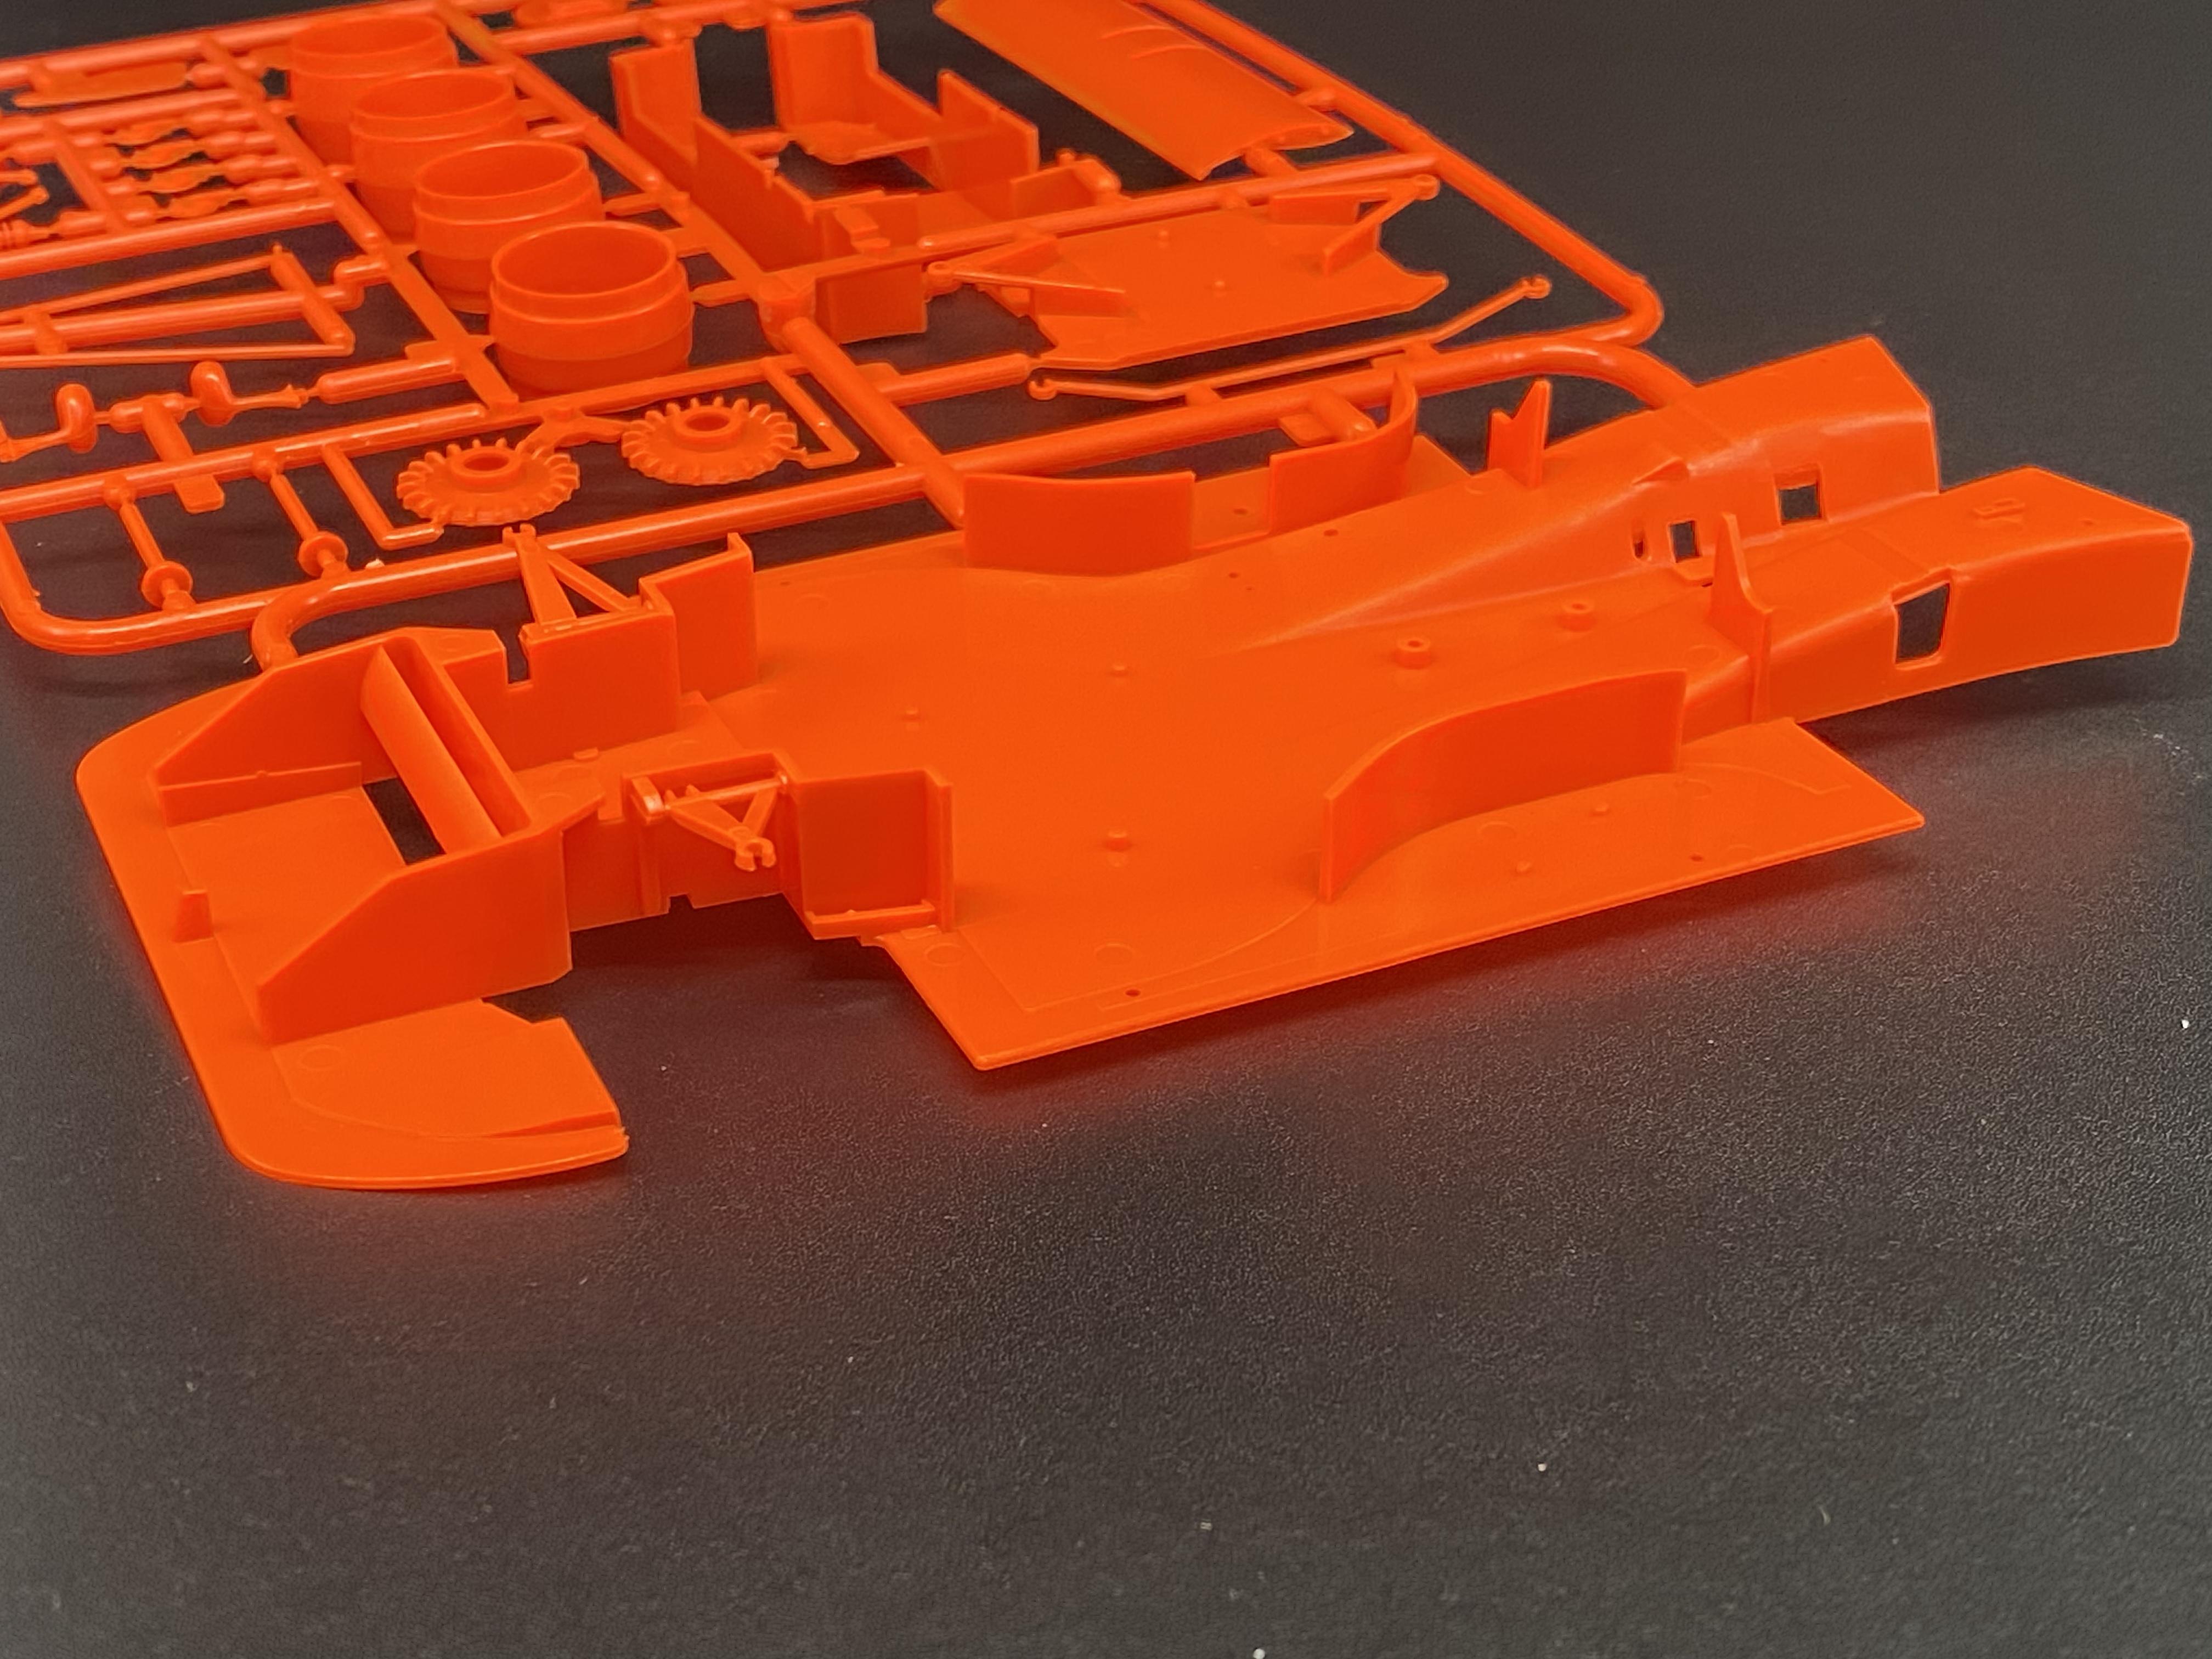
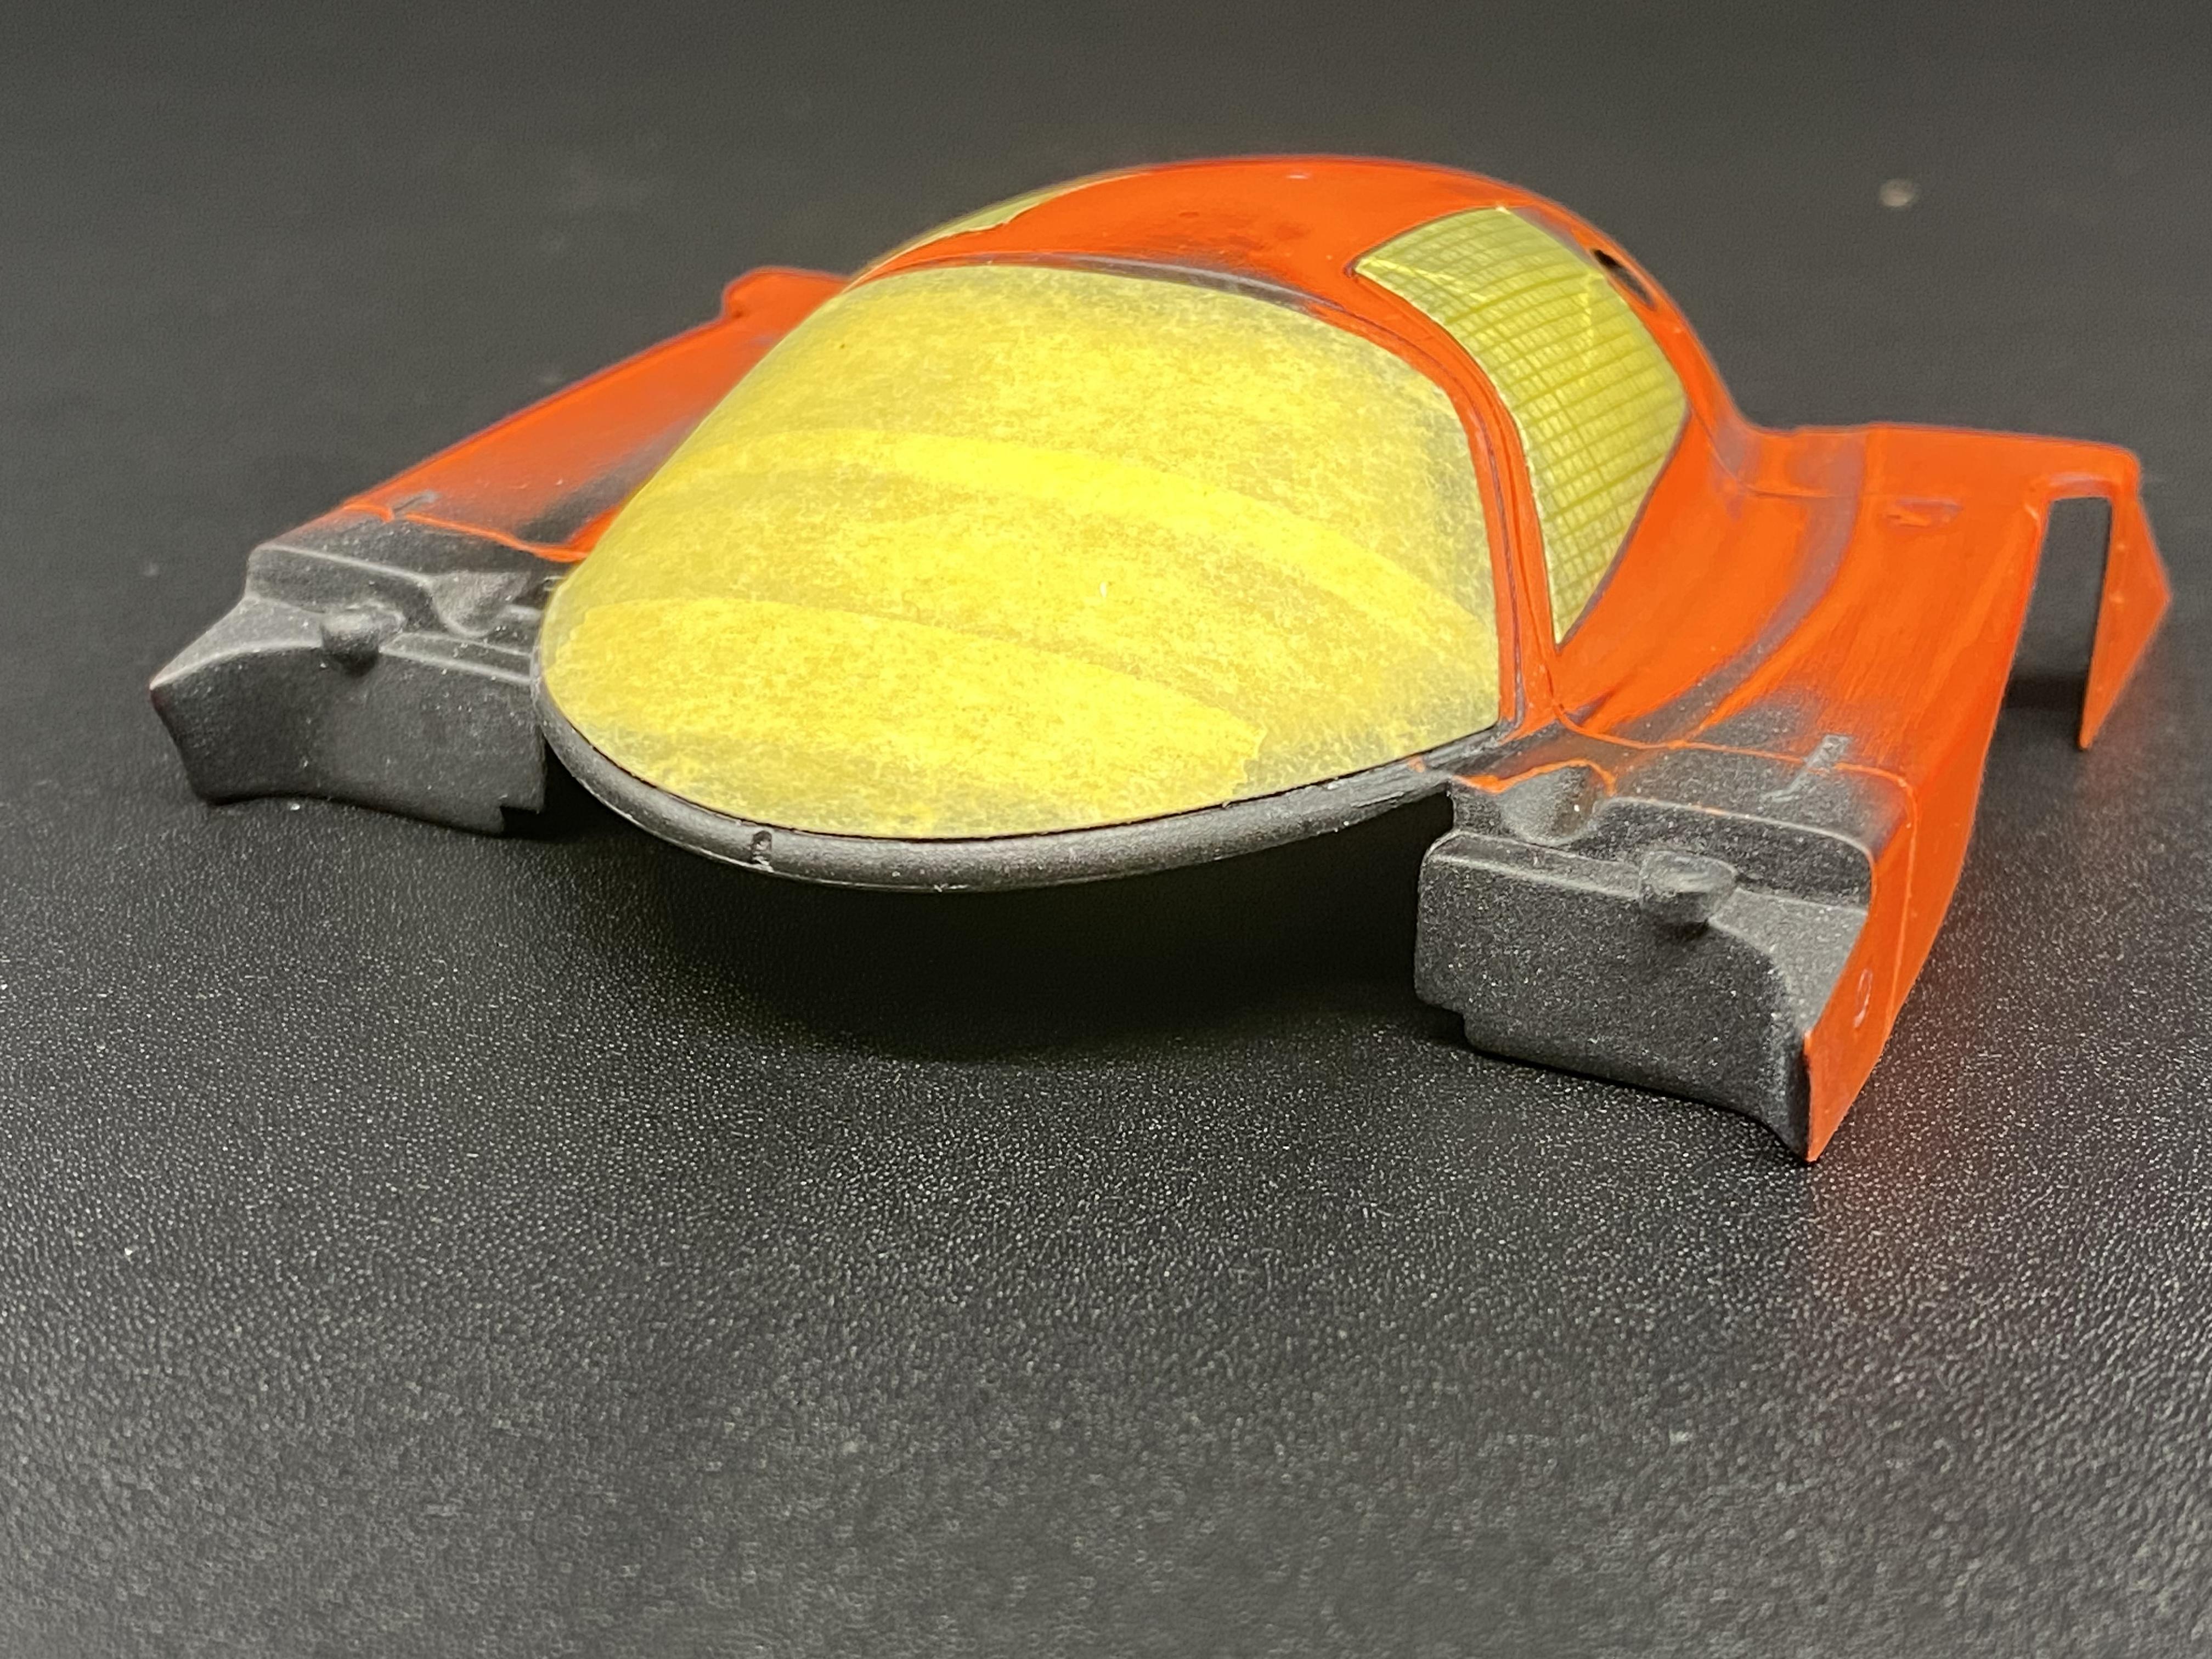
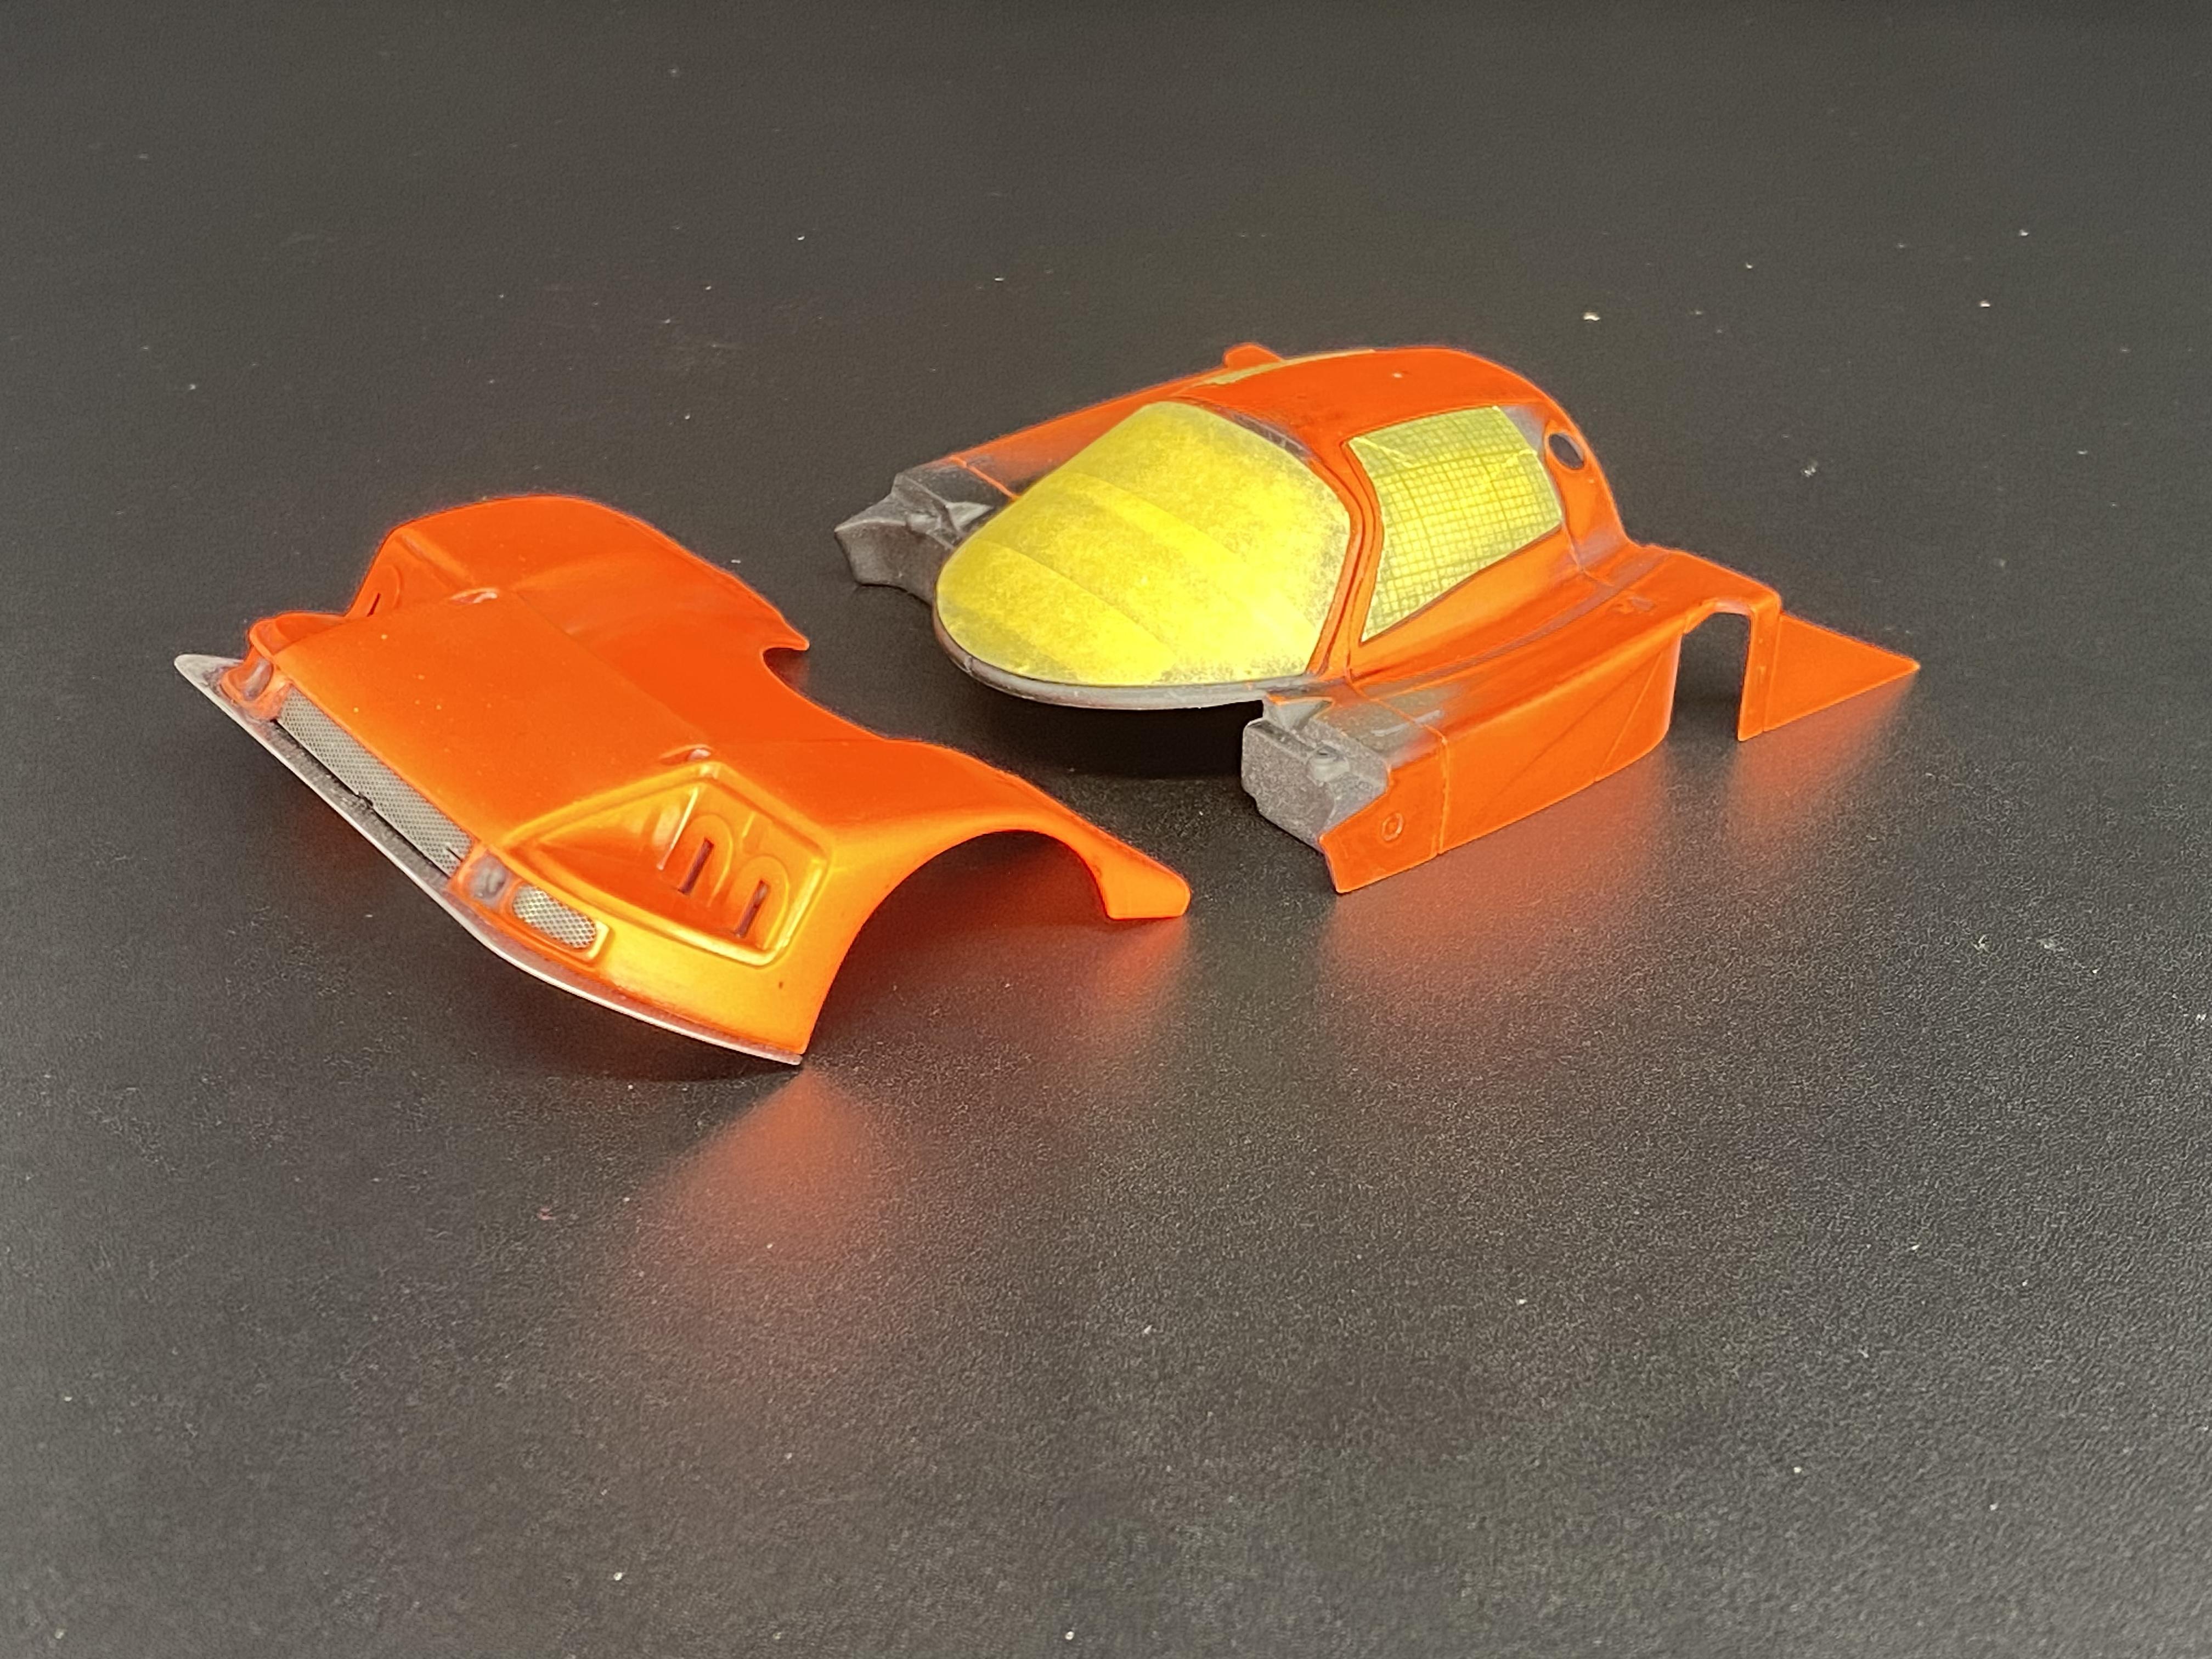
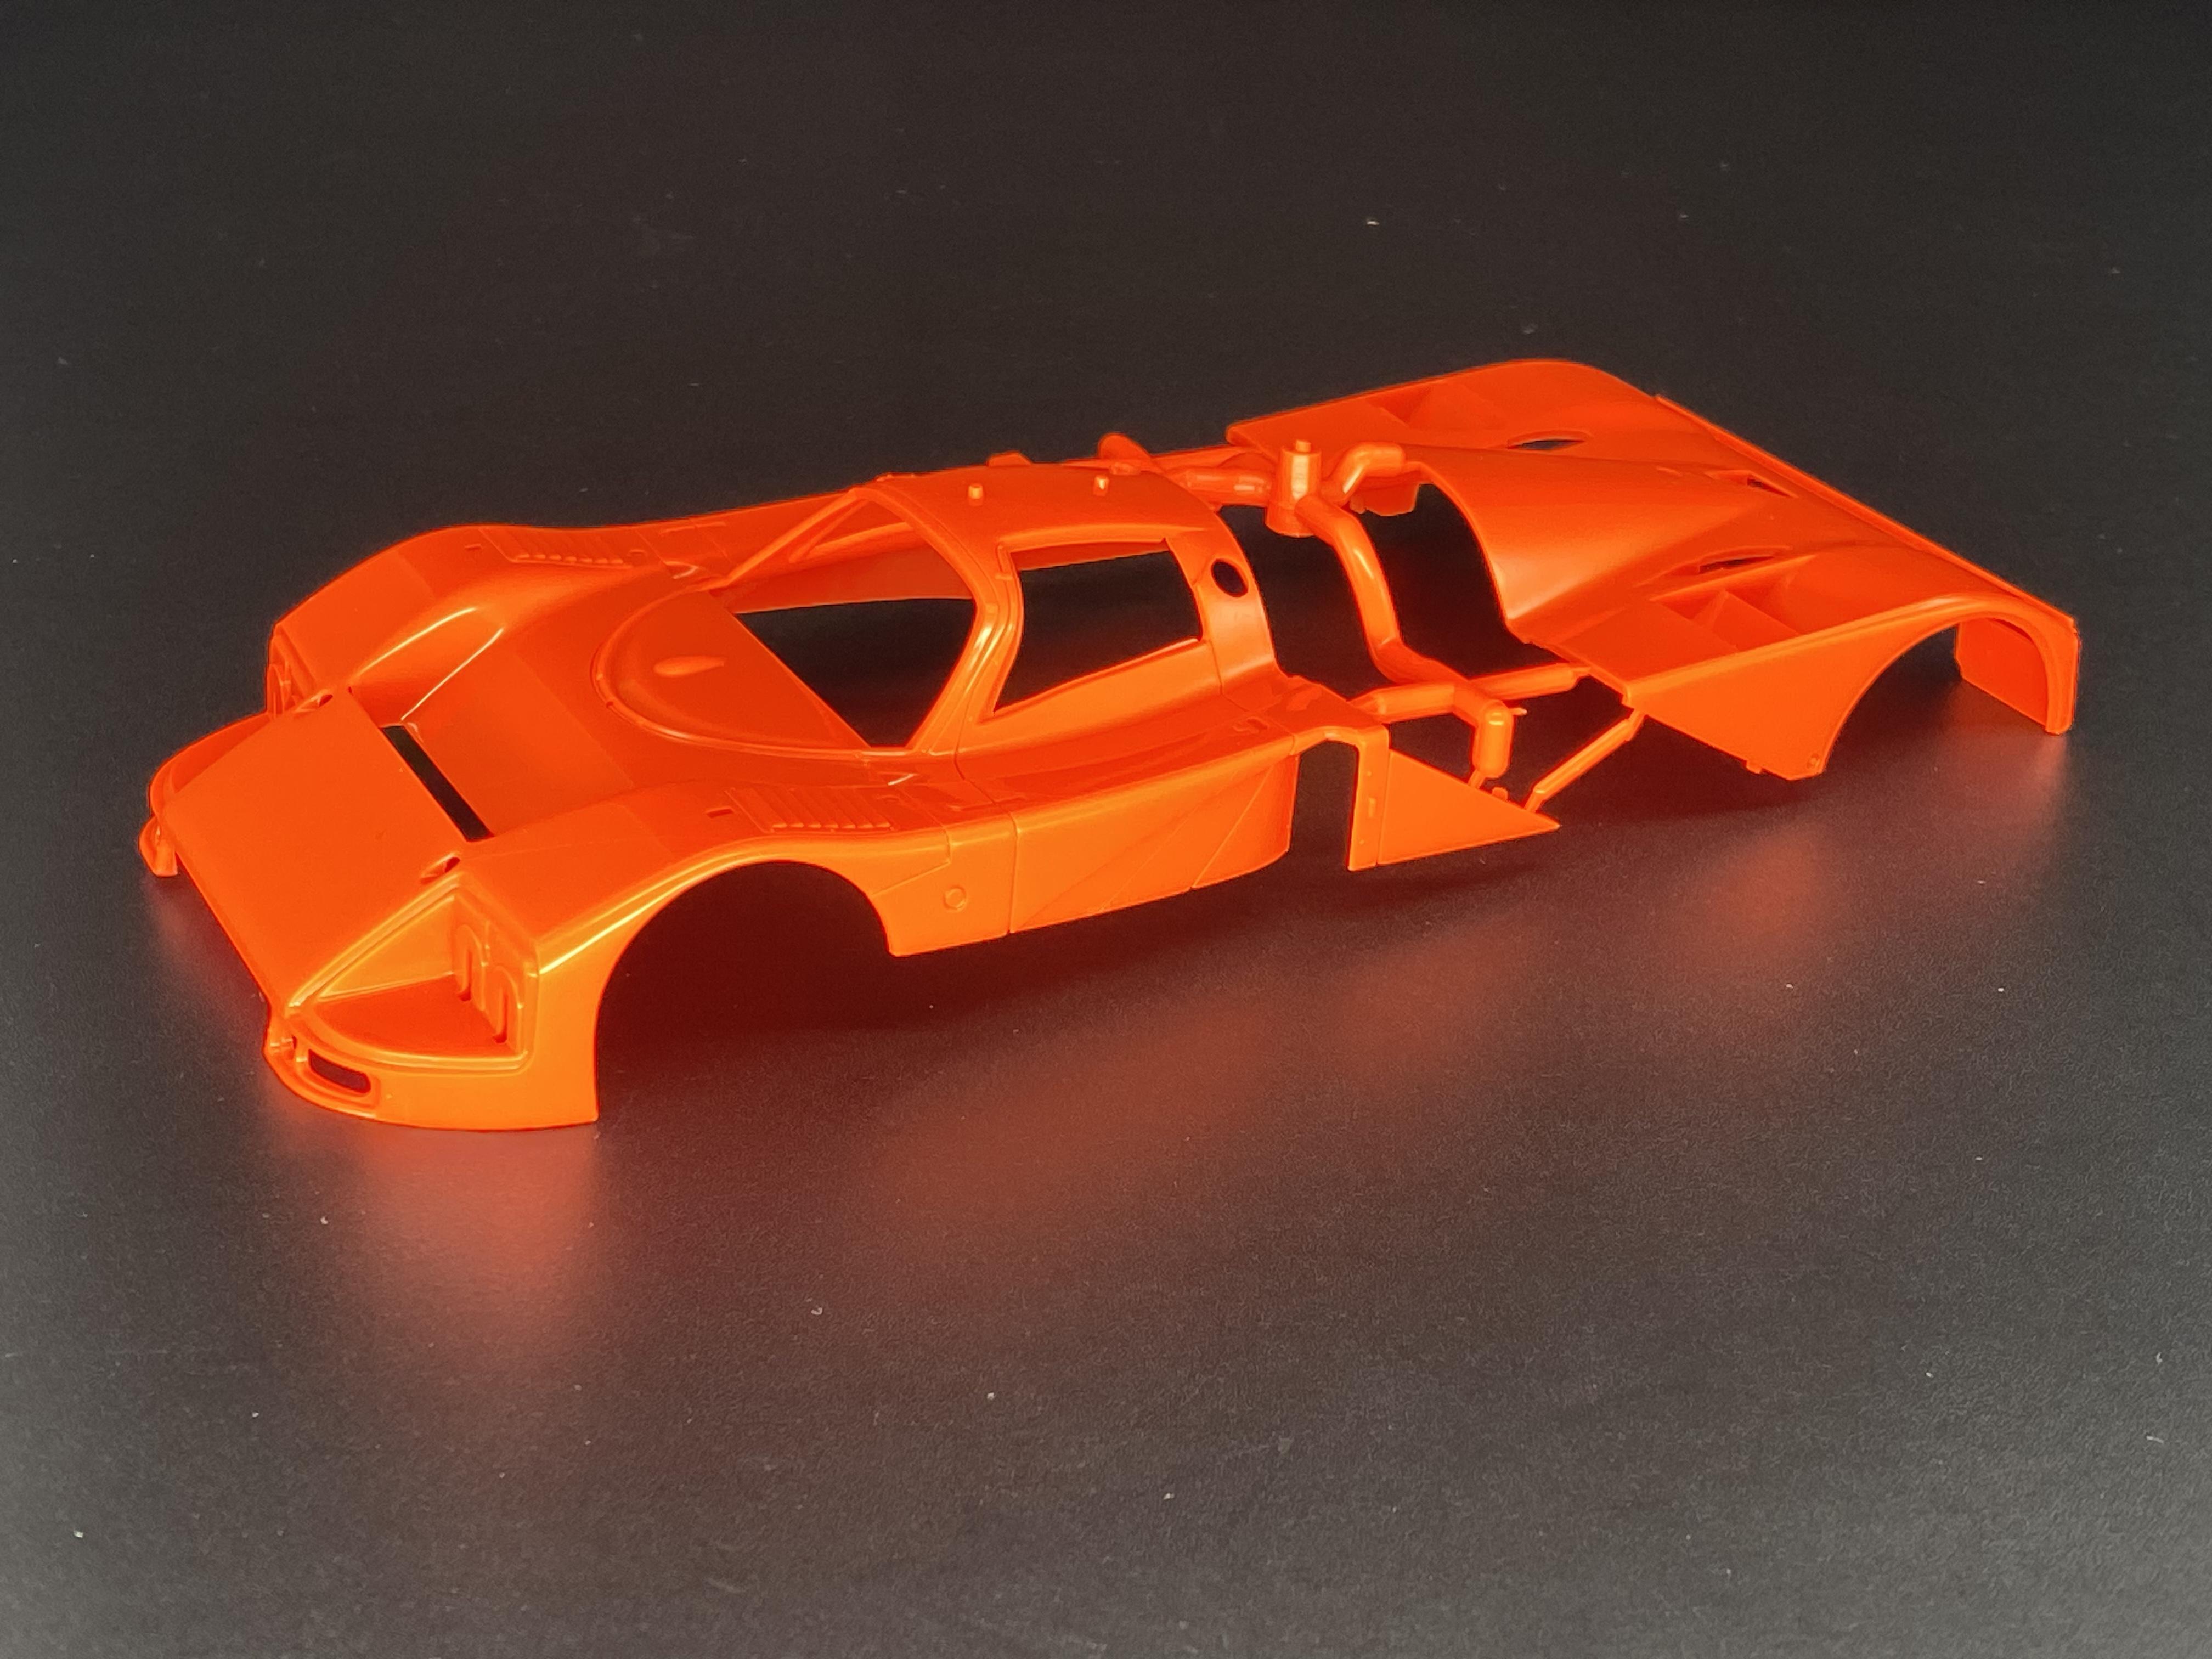
I started working on the body, in order for me to do what I wanted it had to be separated, of course… This is how the body comes from the box.
-
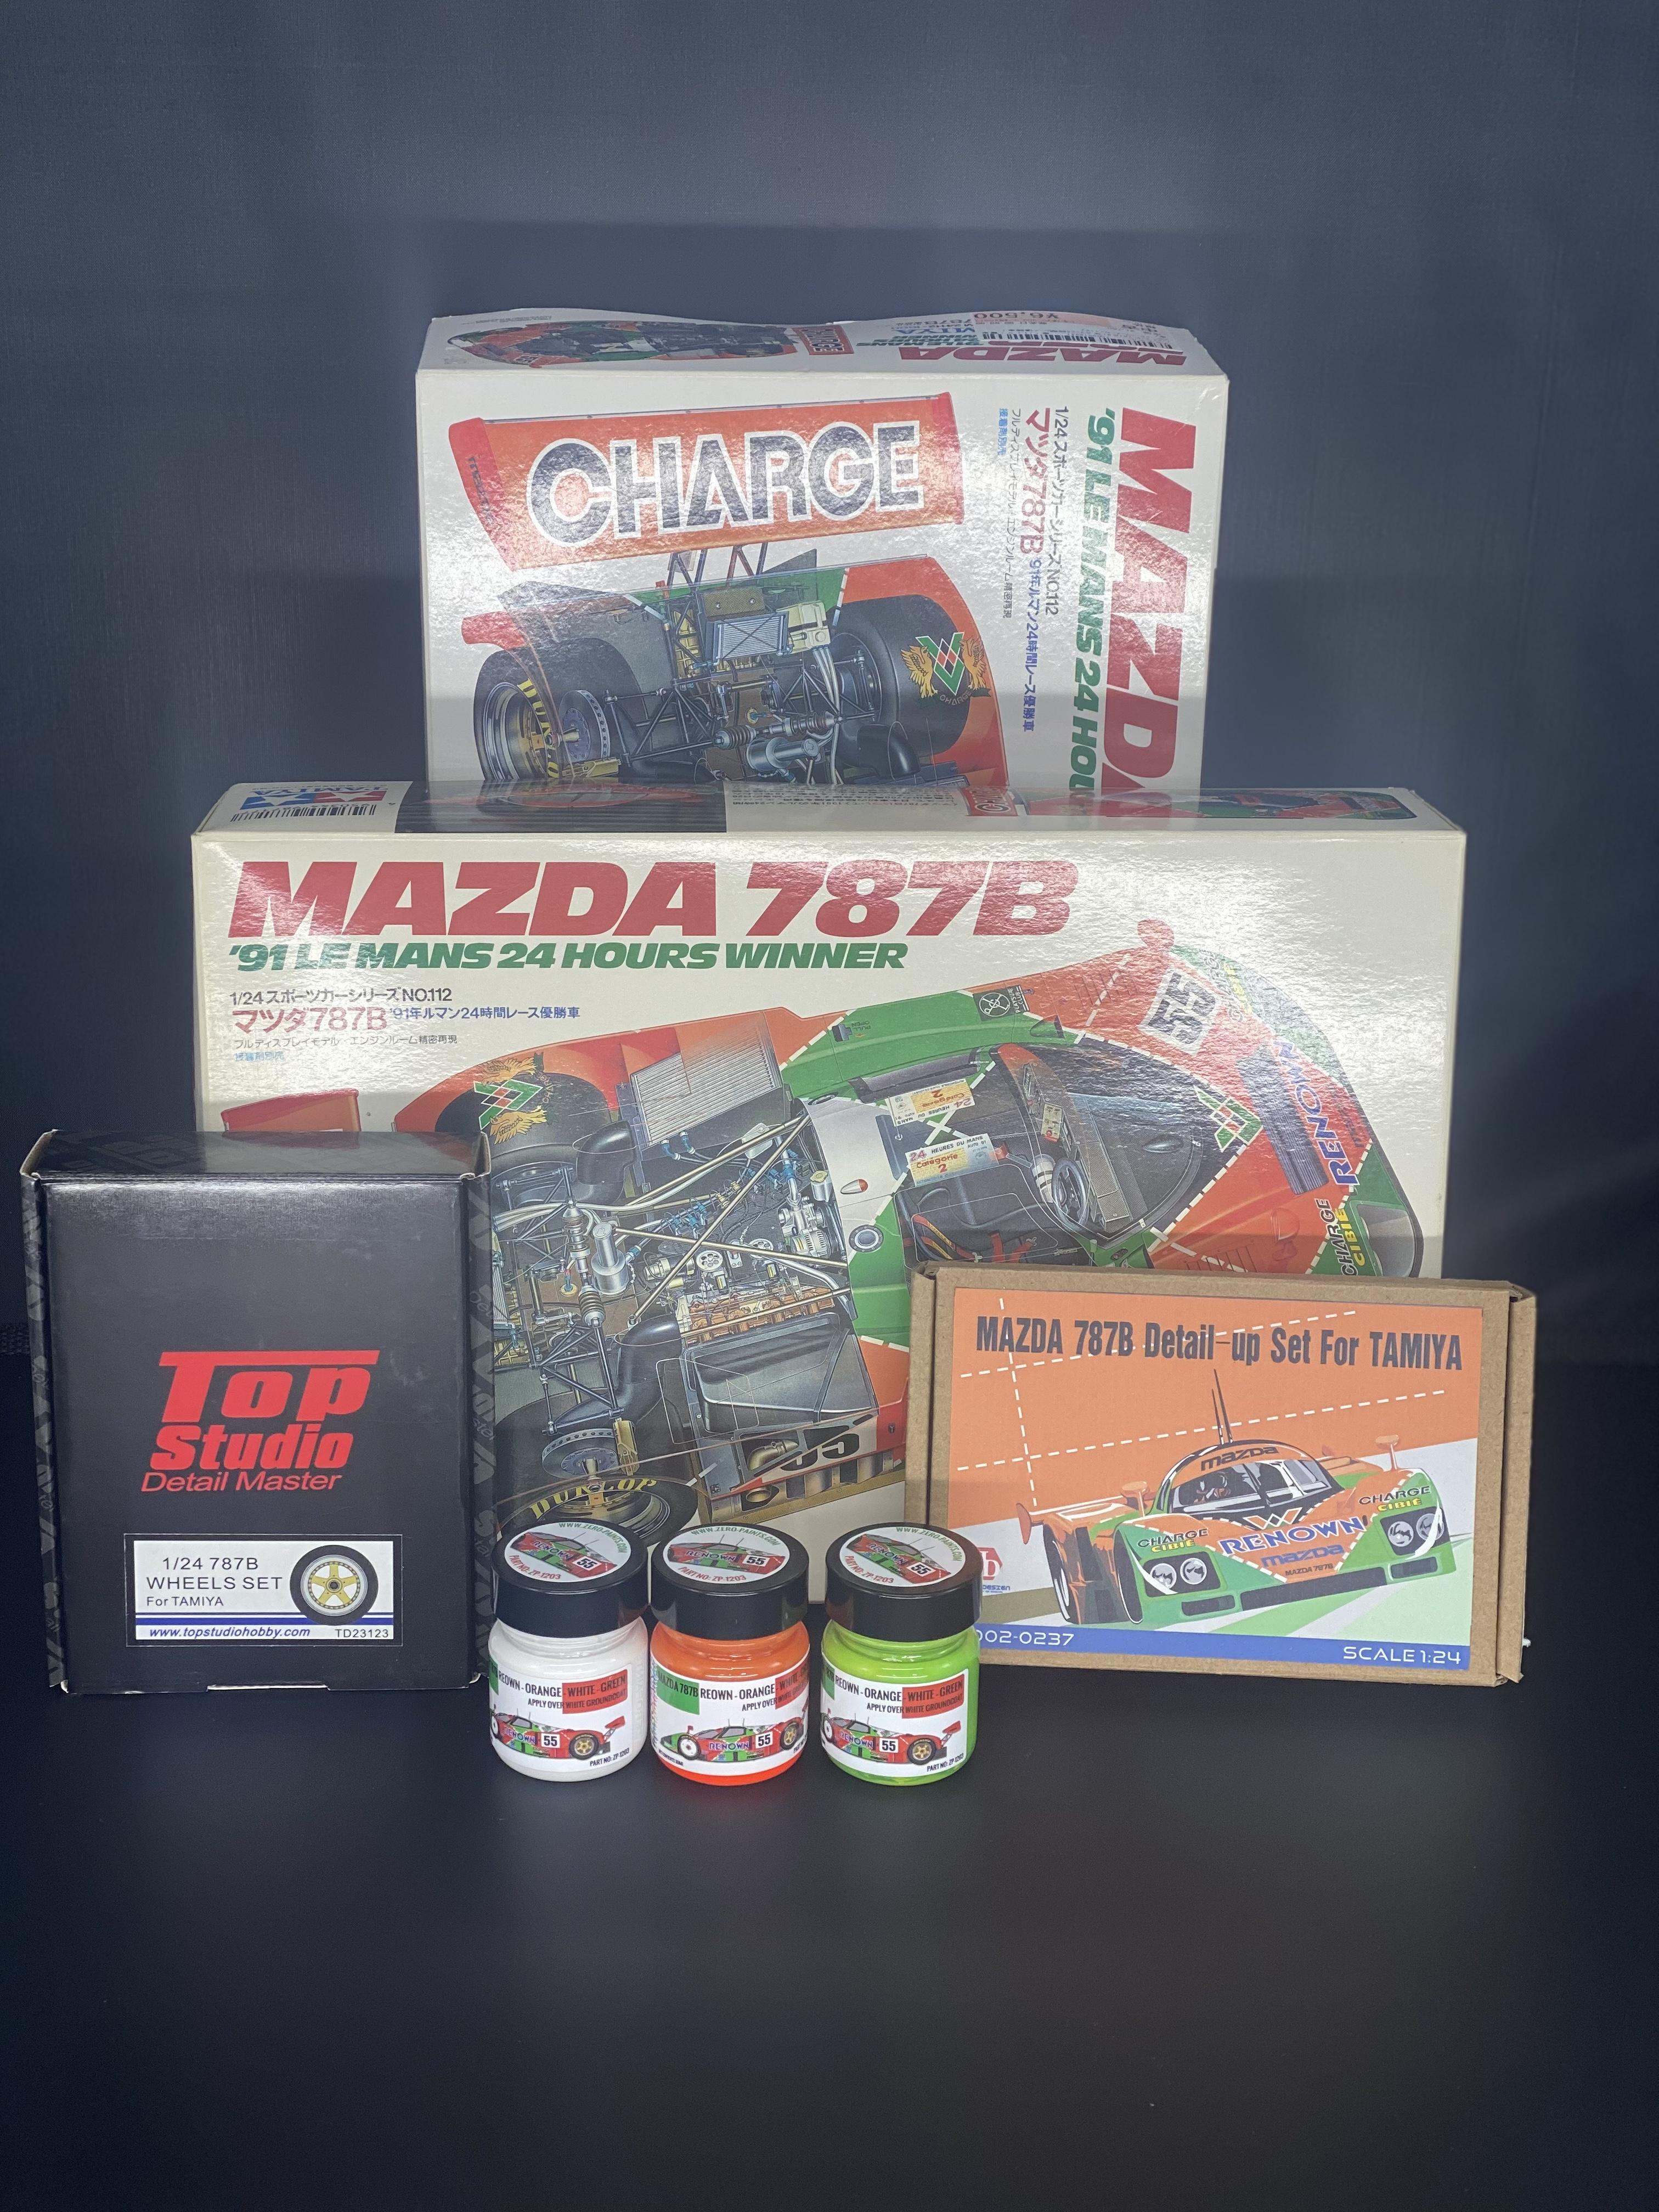
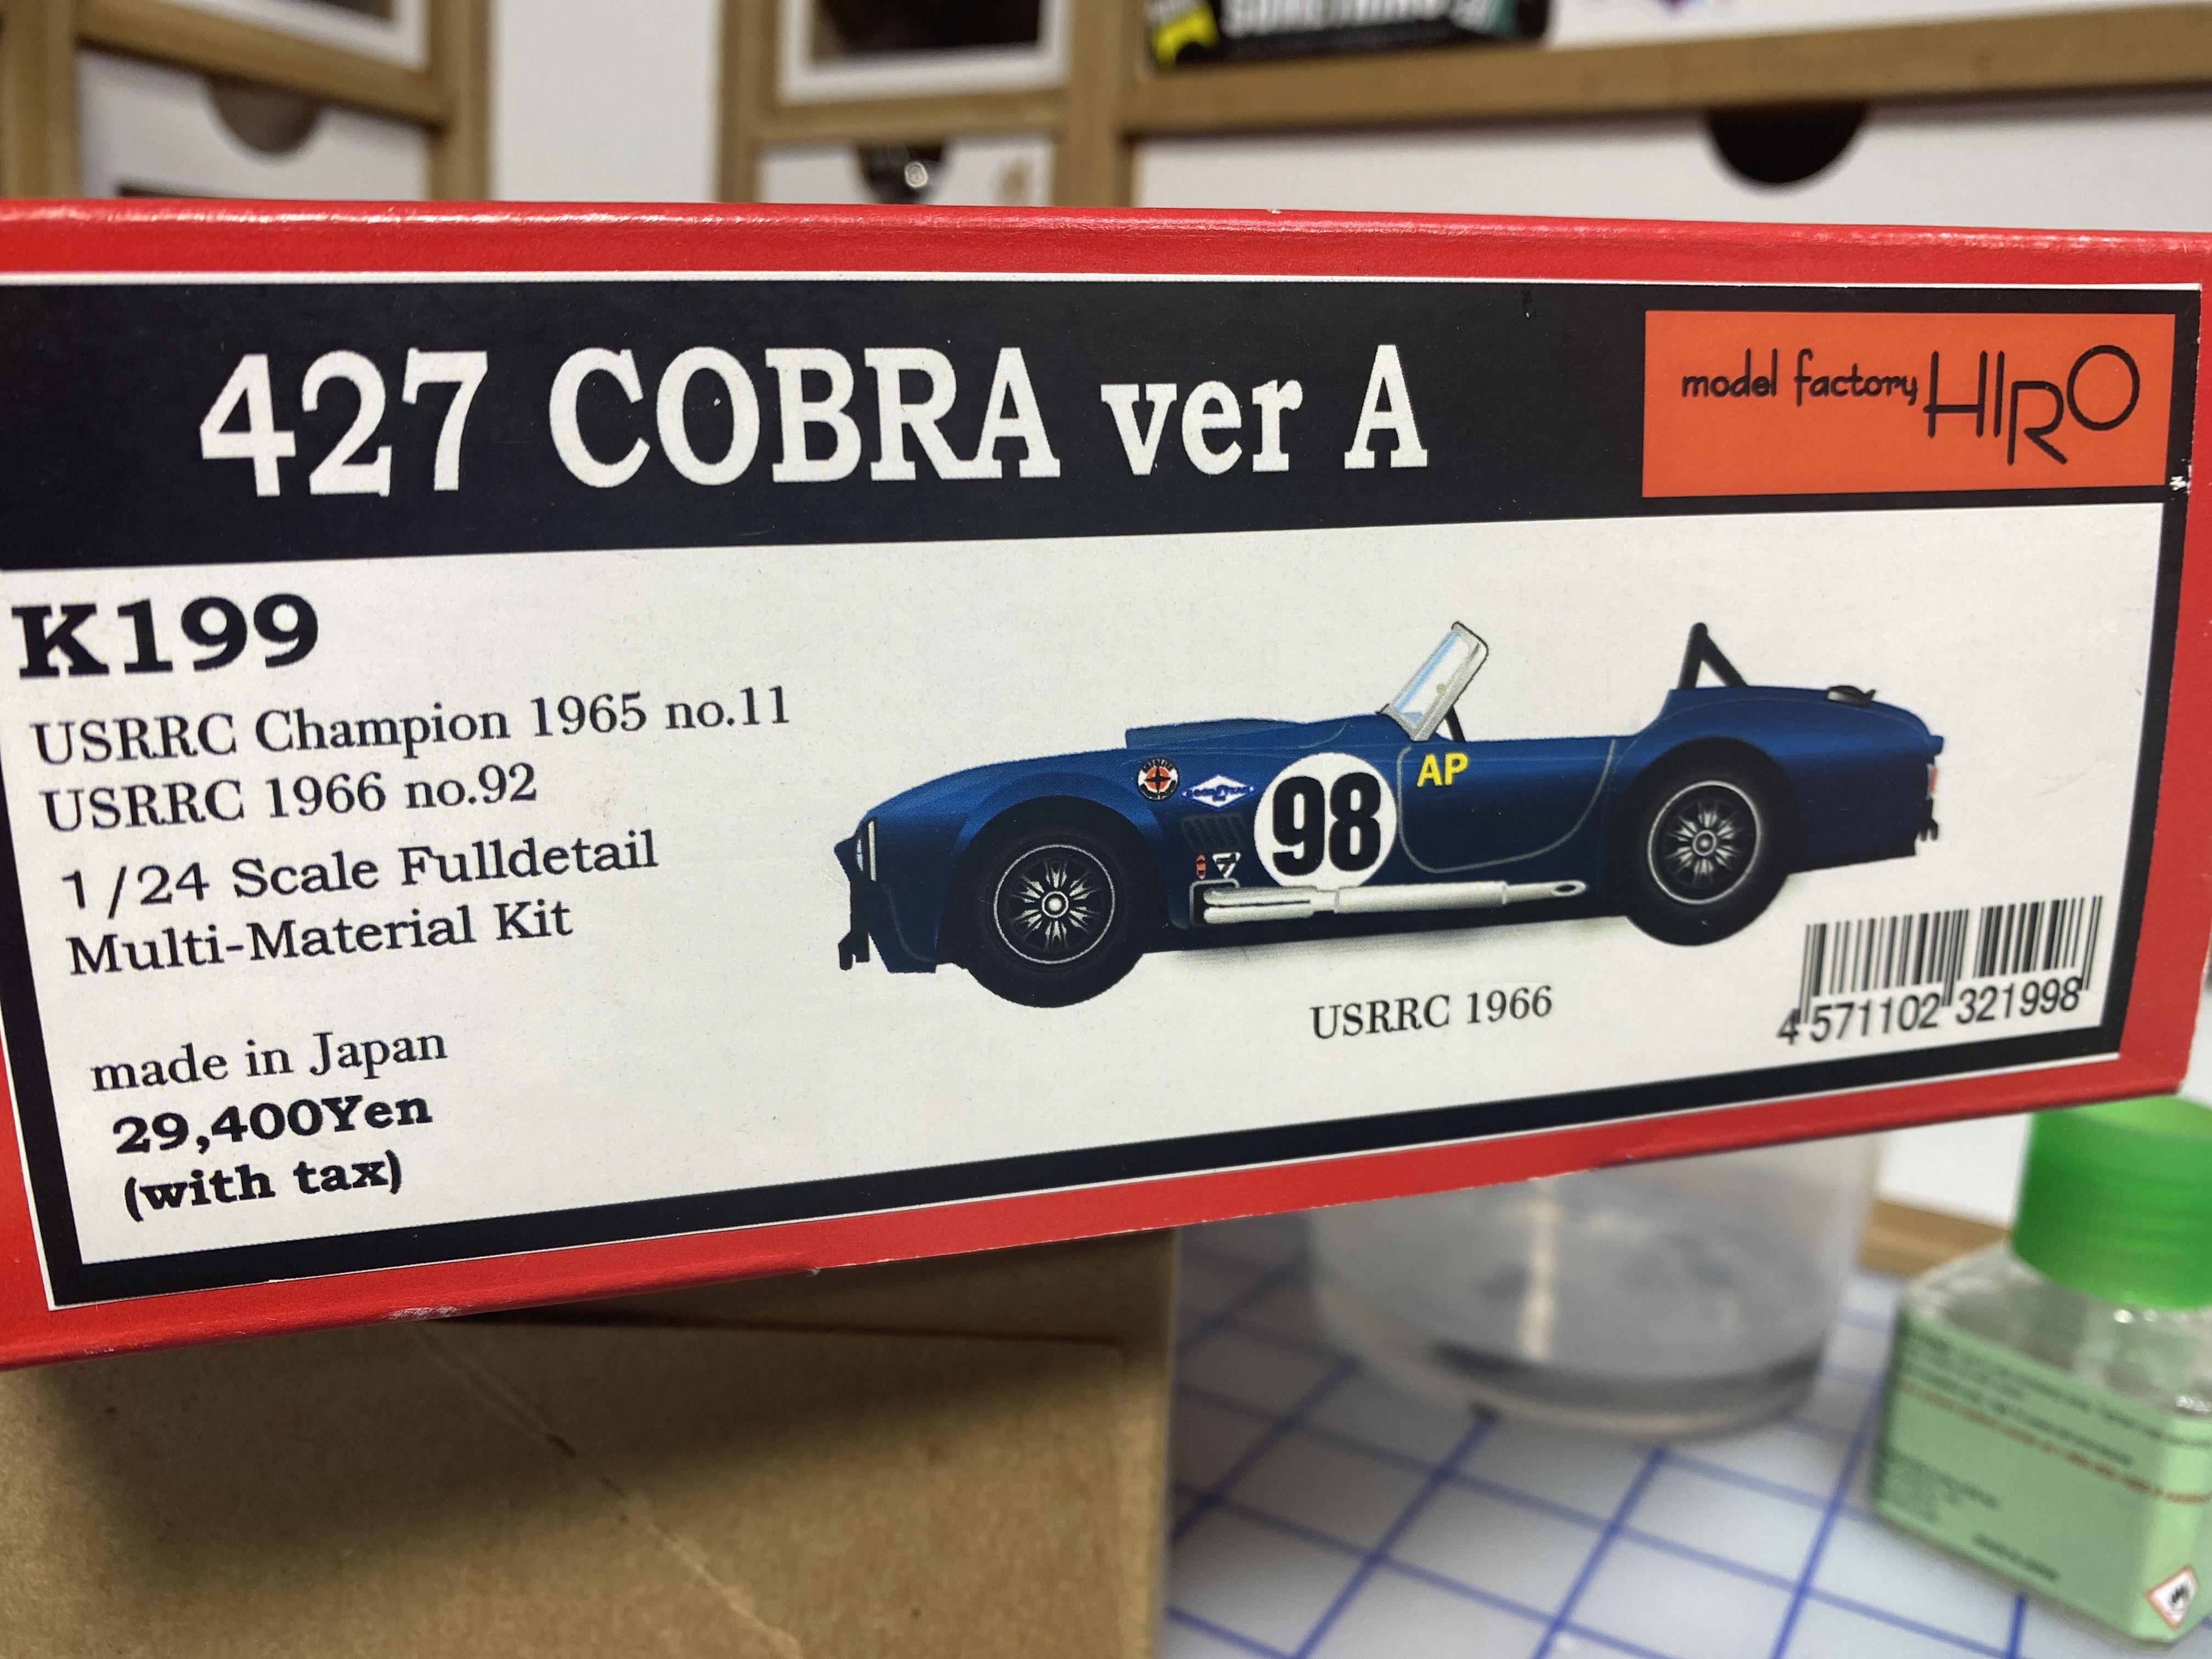
I started collecting for this kit 5 months, to a year ago. There’s many many builds of this kit, a search will show, I think everyone has one. I wanted to put together every single aftermarket transkit, part and decal available for this kit and combine it into one. so this is my attempt. Tamiya base kit (I am using two, you’ll see why) Hobby Design PE set HD02-0237 MFH photo collection book, MHB-6 Studio 27 Decal ST27–CD24026(which suck! waste your money!!!!) Top Studio Detail Master Wheels Set TD23123 Zero Paints set ZP-1203 i also have some print parts from eBay which aren’t readily available that I’ll incorporate With all that being said, there are a BLAH_BLAH_BLAH_BLAH load of scratch built parts, box parts, stash parts, etc.
-
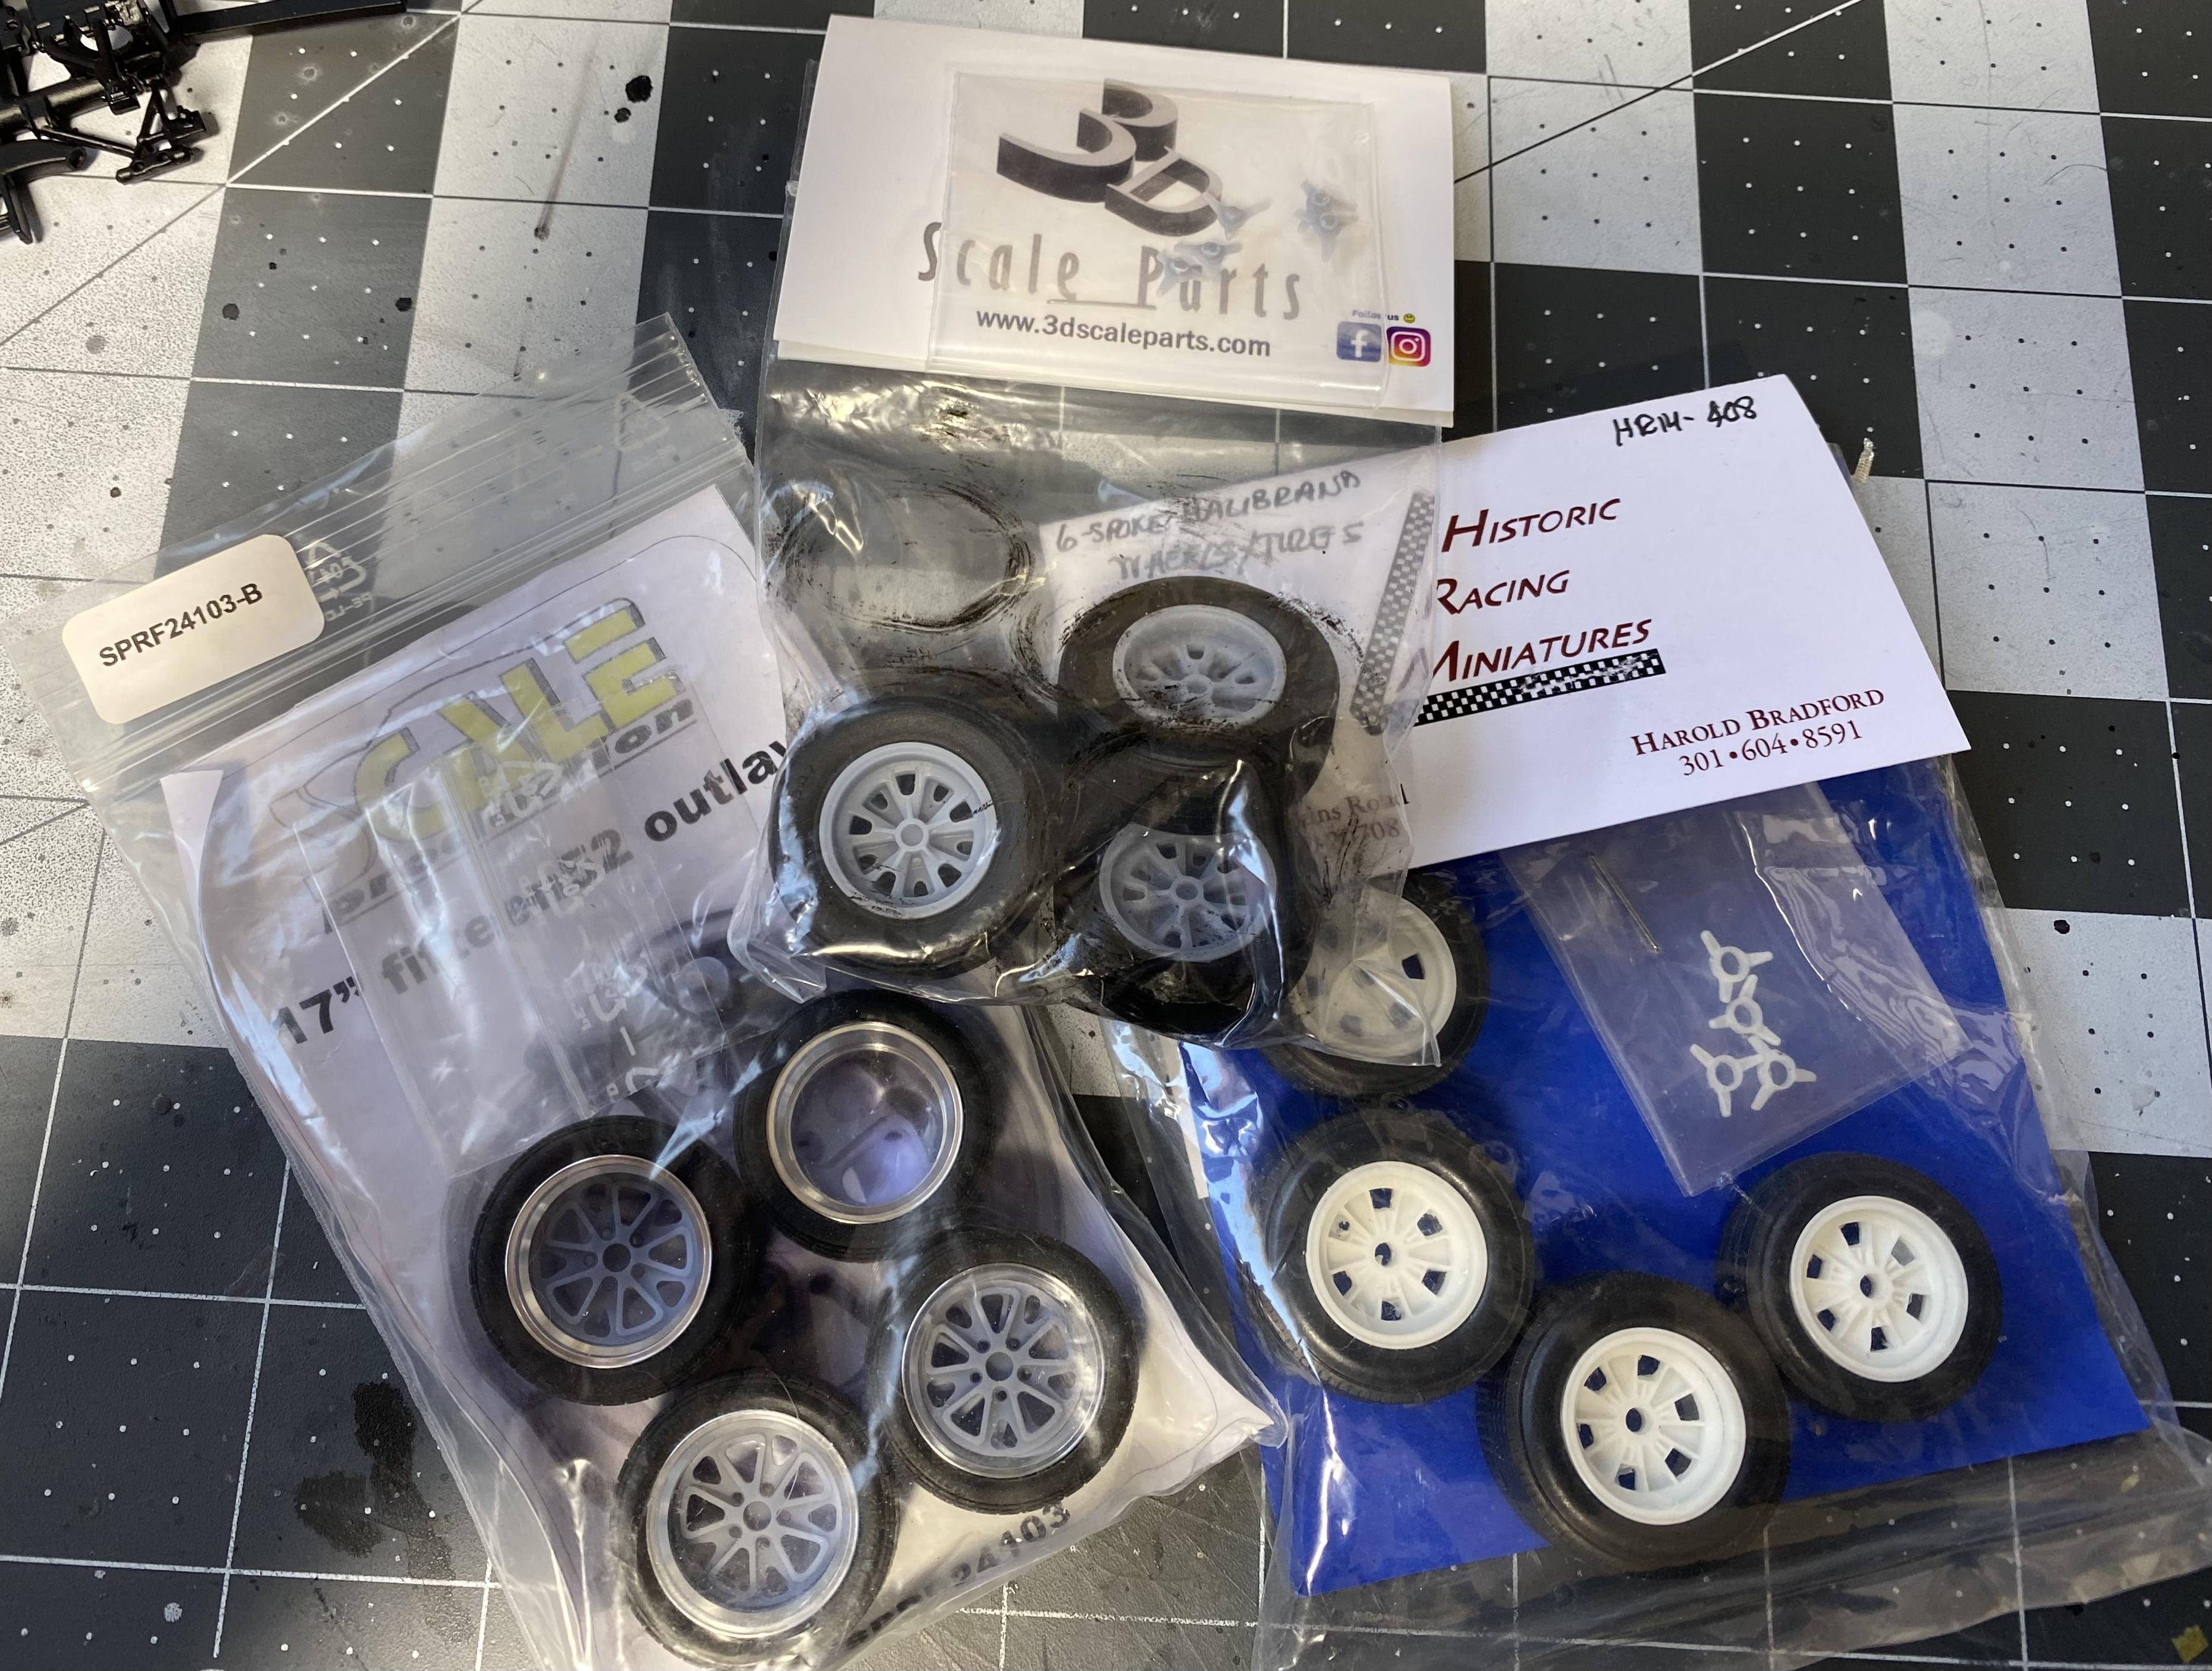
Wheels are going to be tough! I may have to mix and match!
-
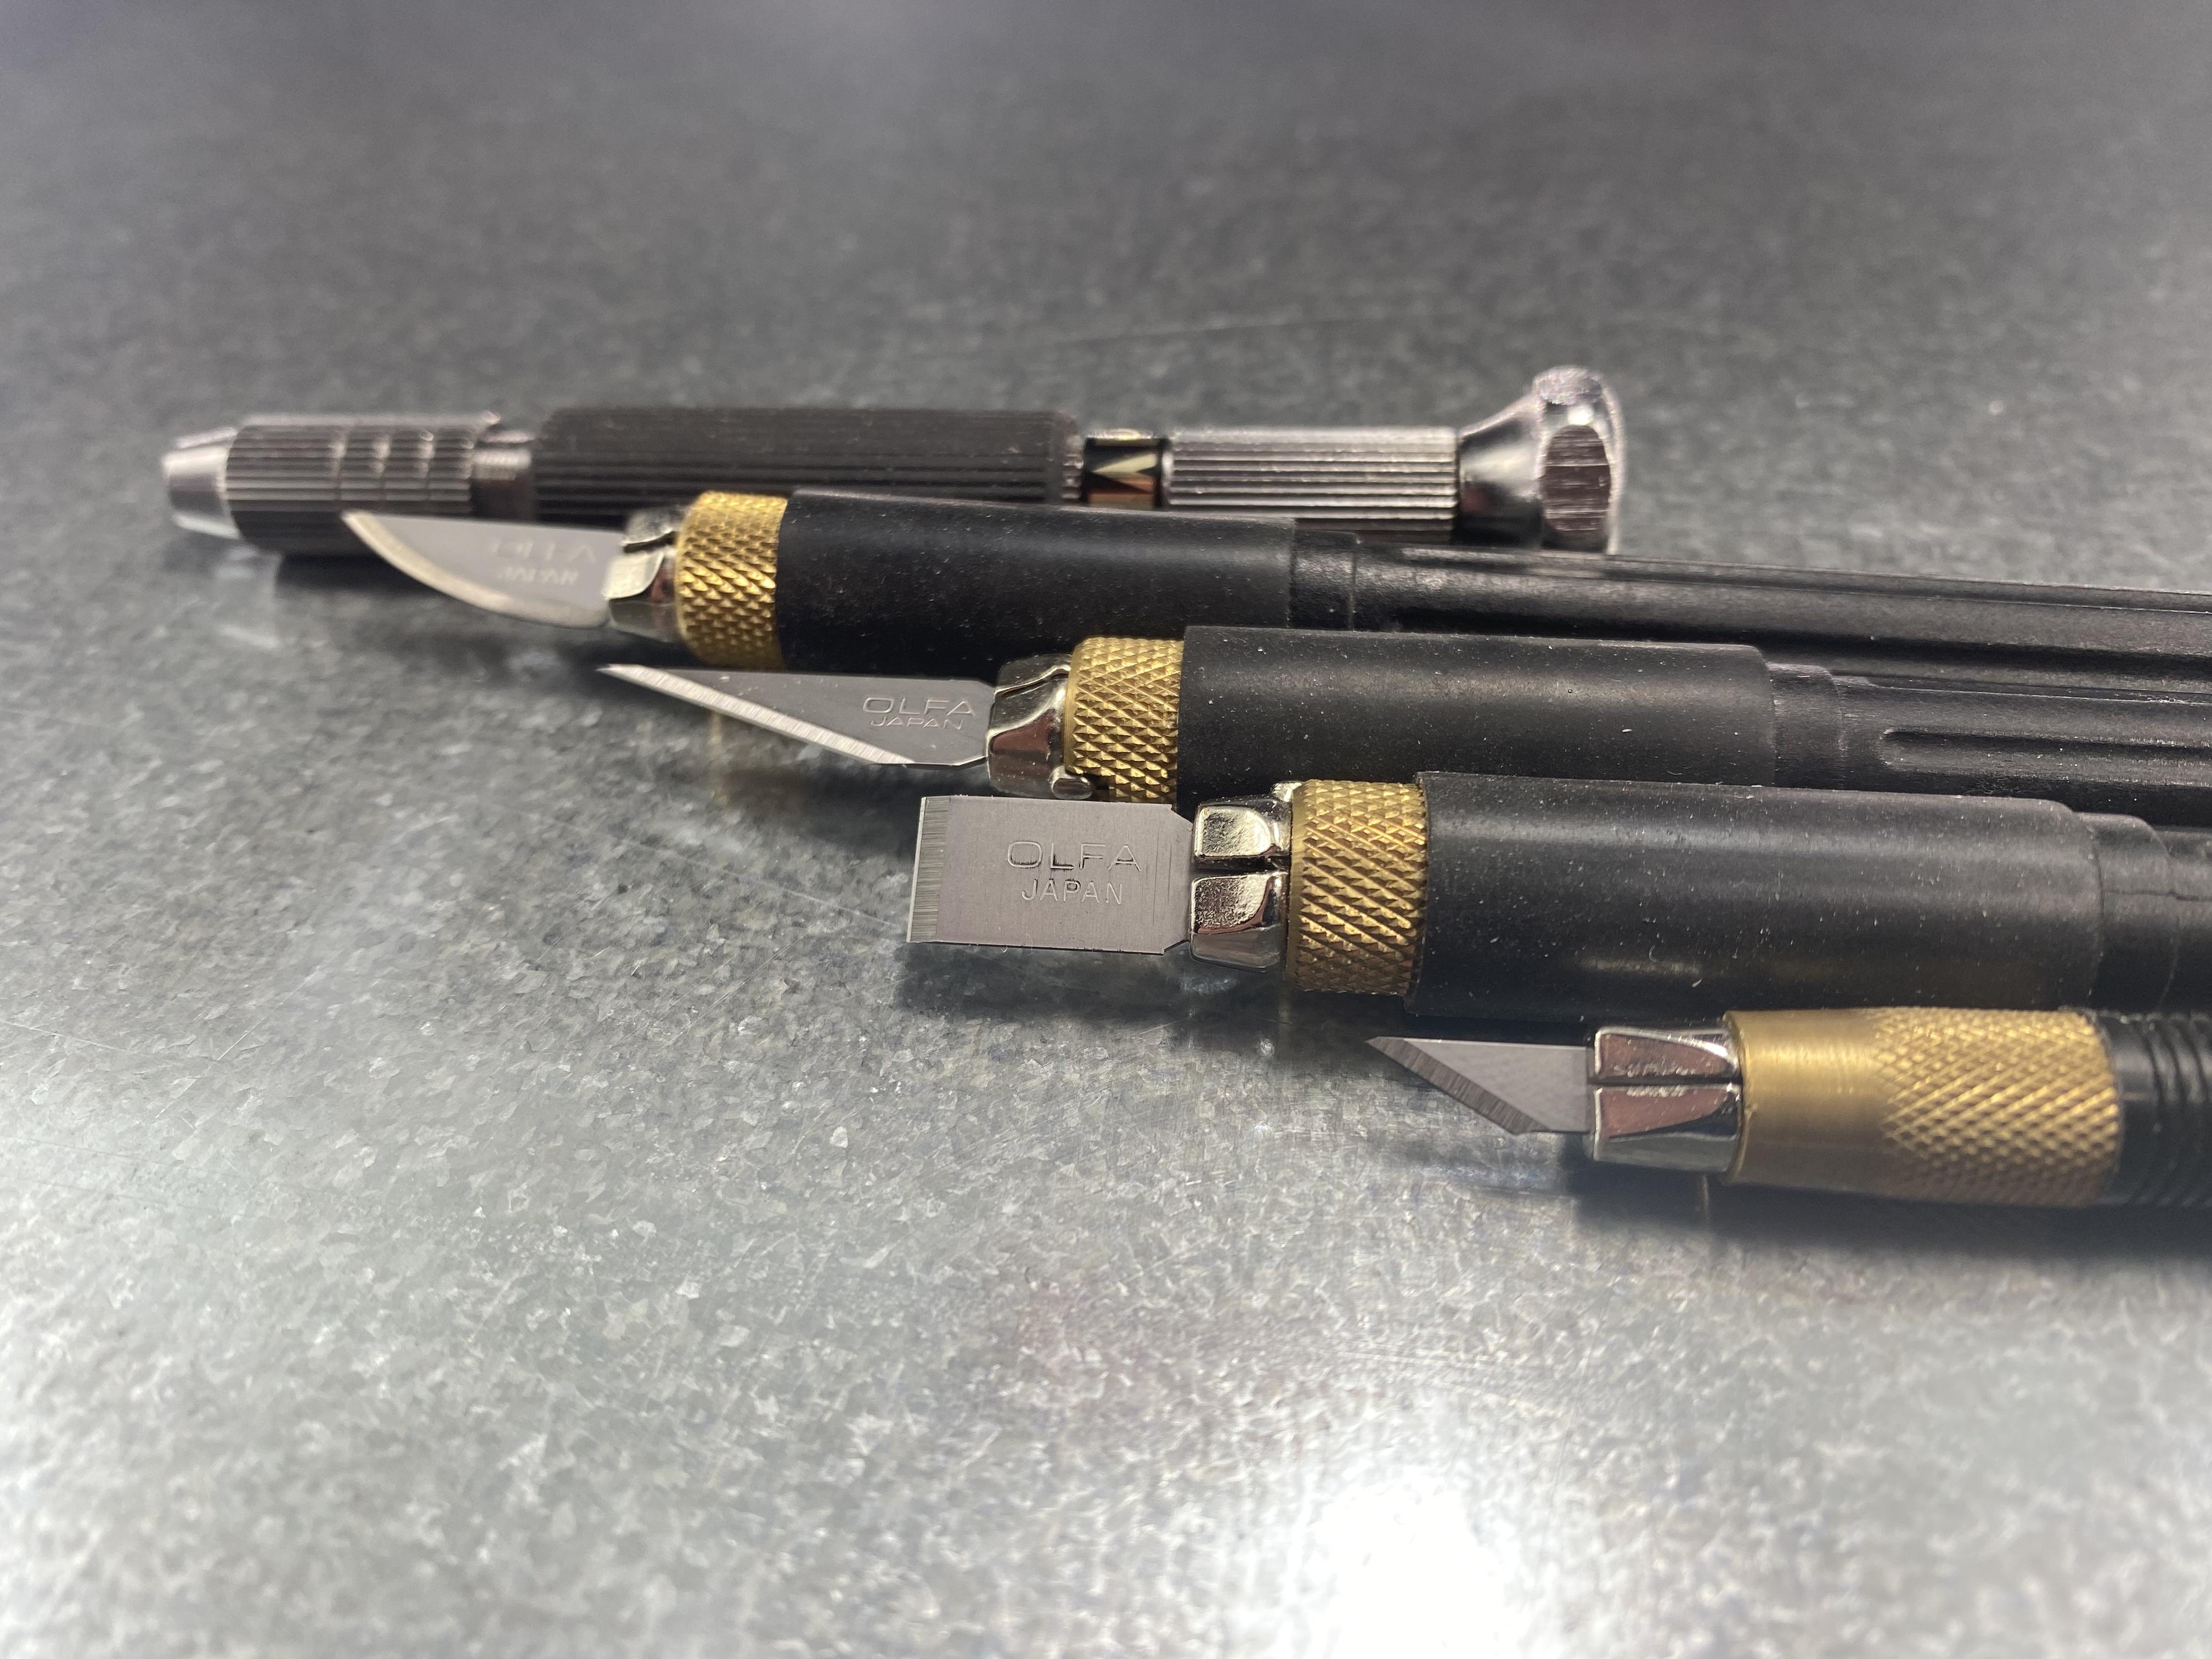
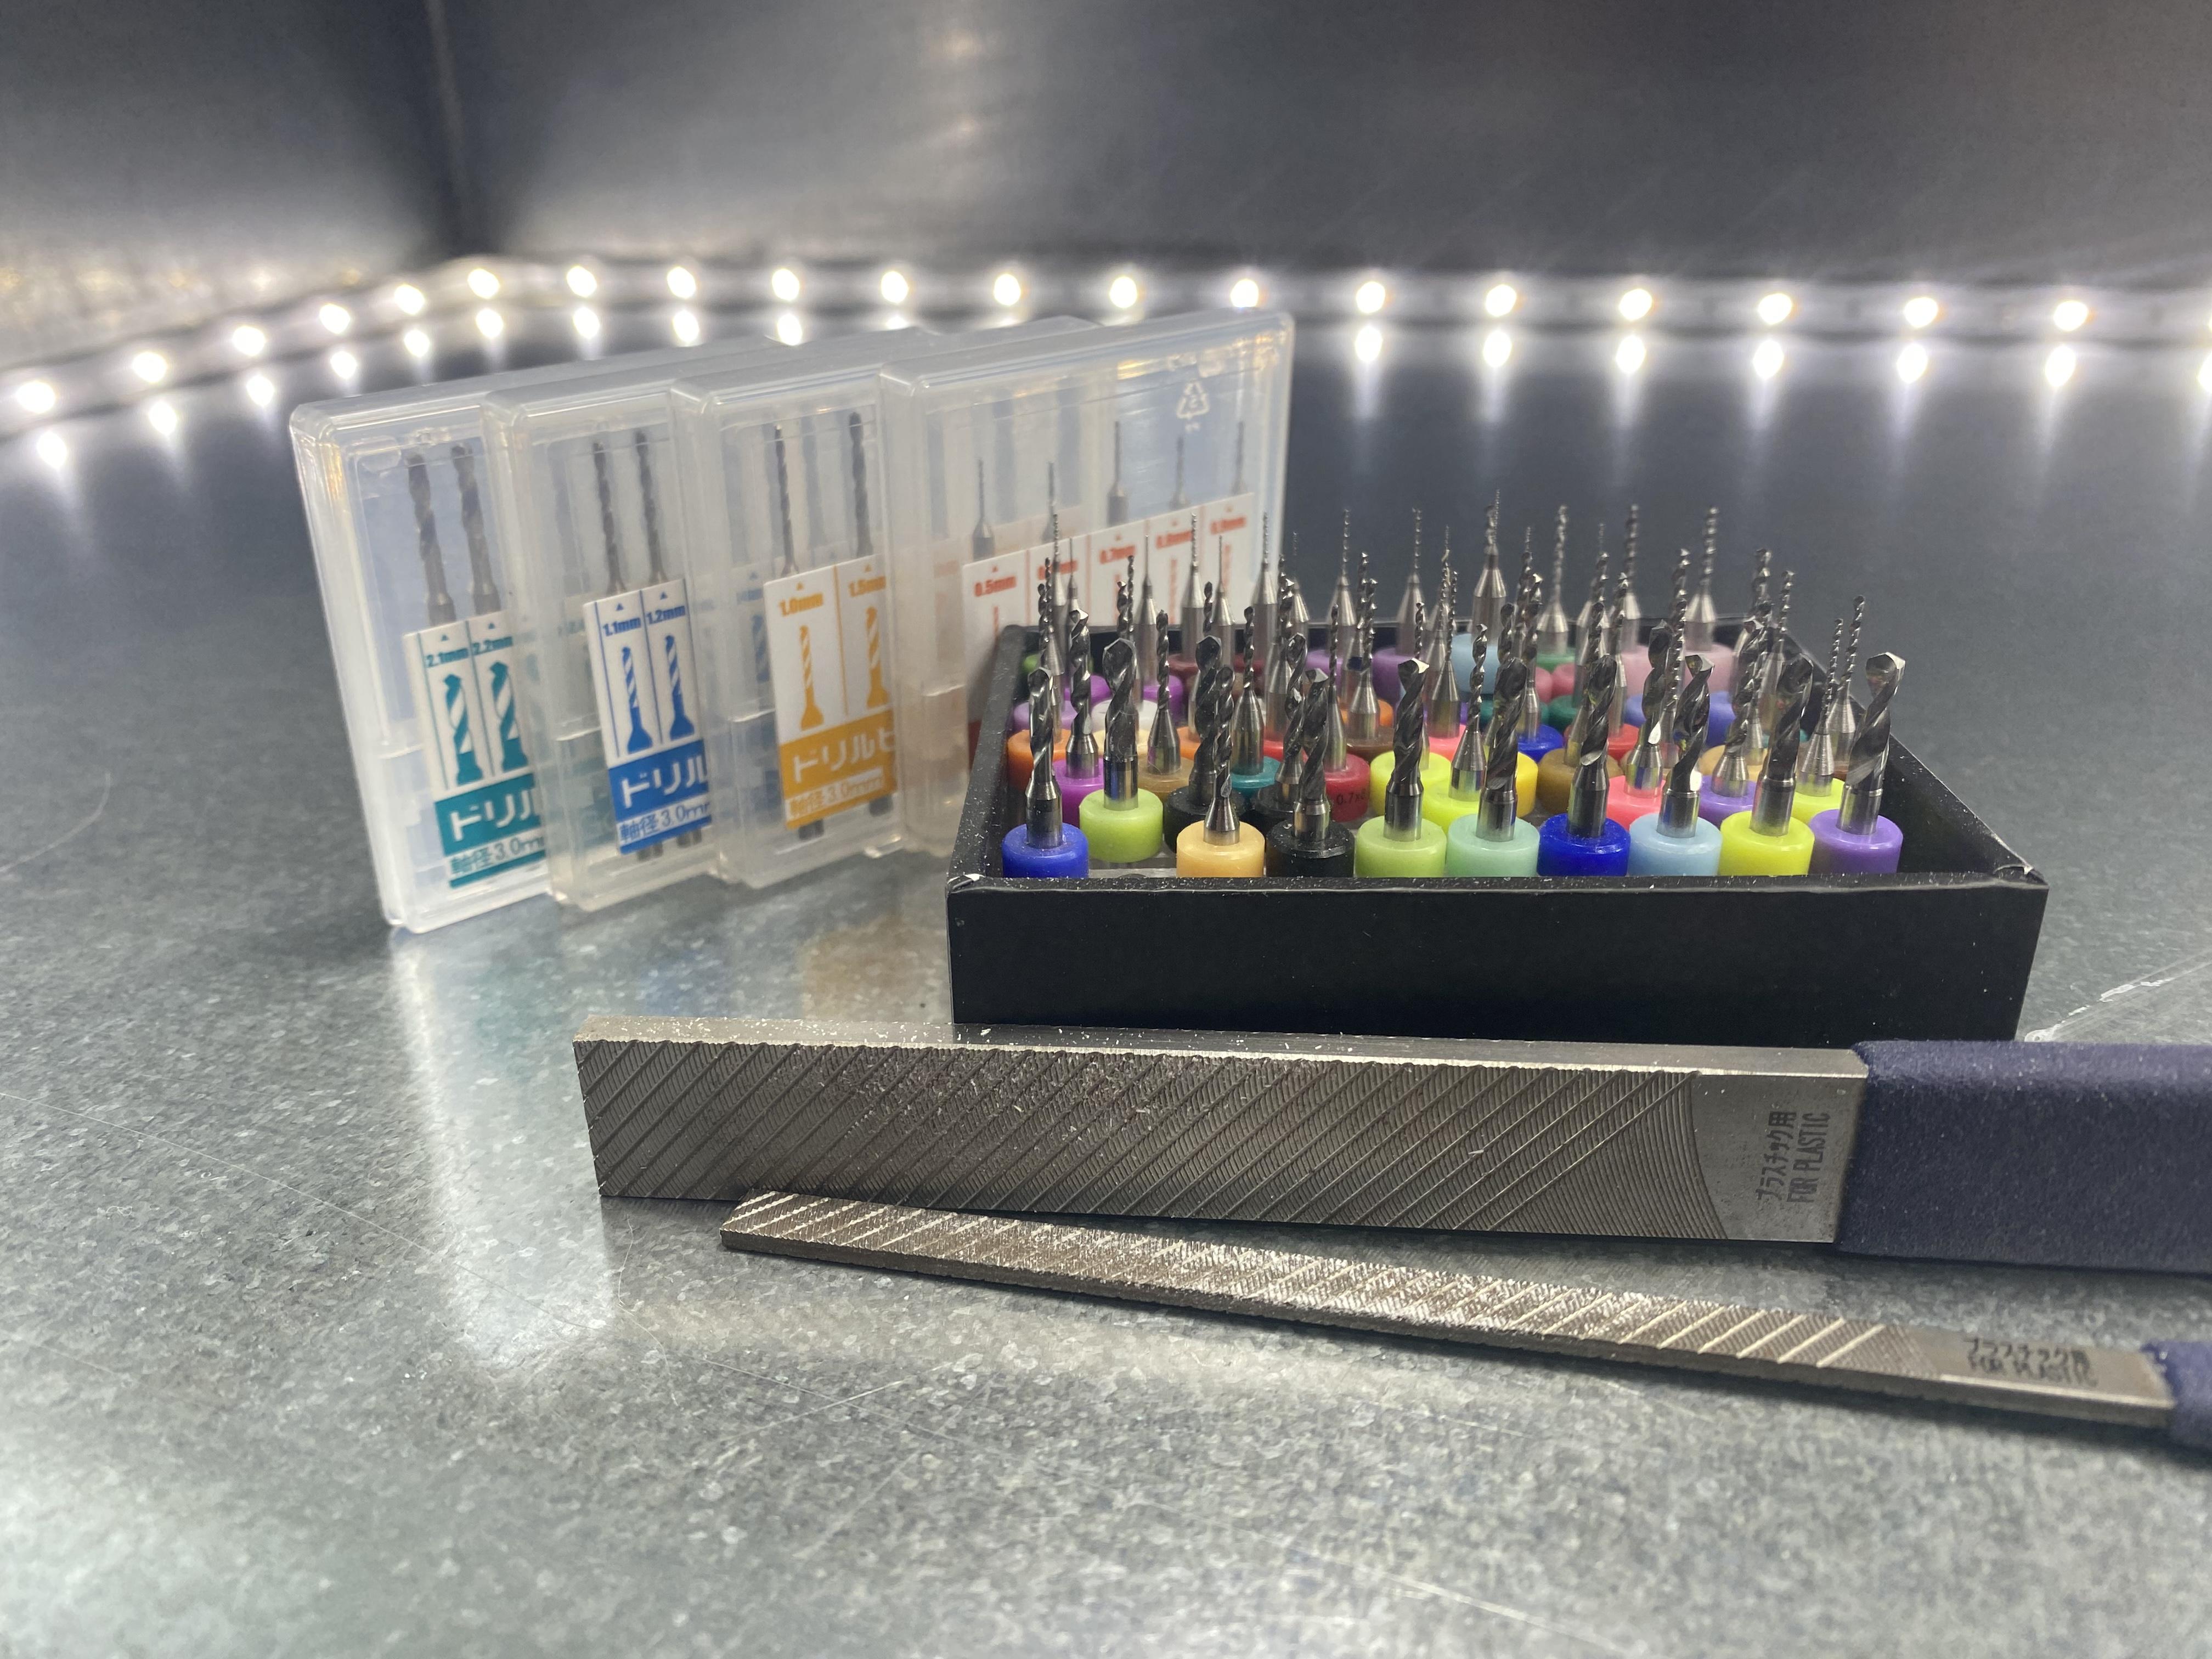
The tools
-
Bringing in a few extra kits and pieces to complete this one! some other junk!
-
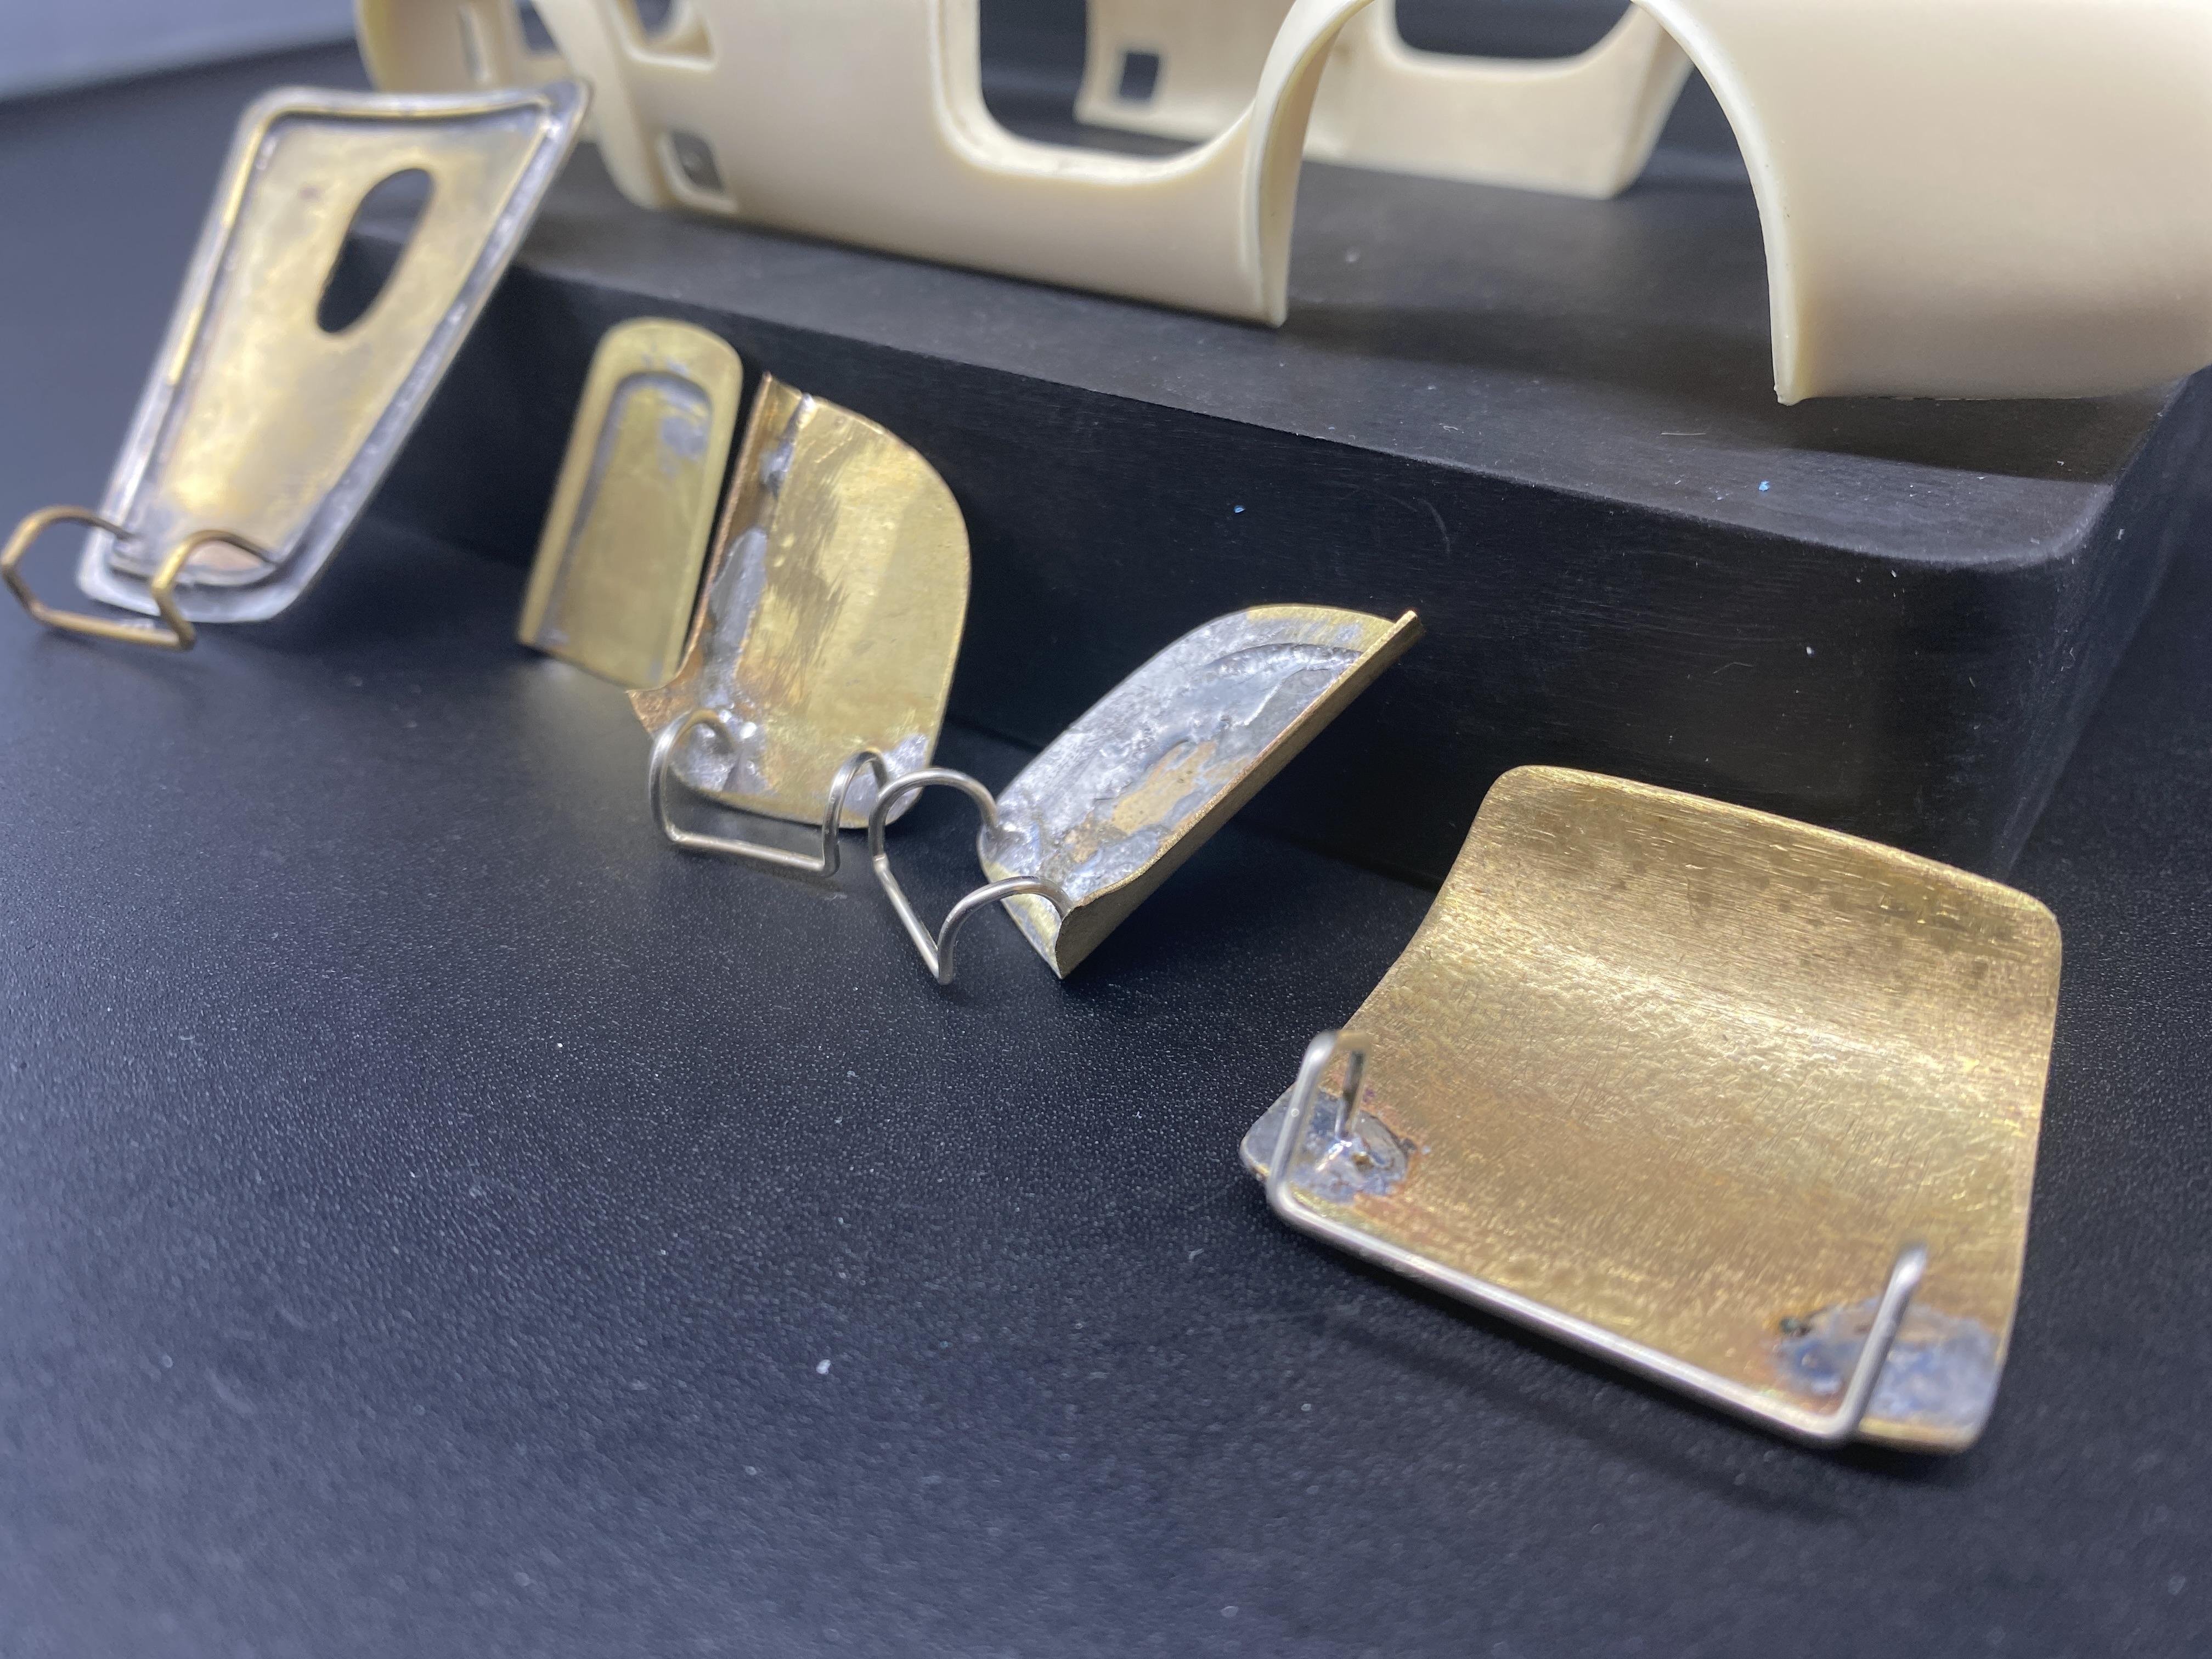
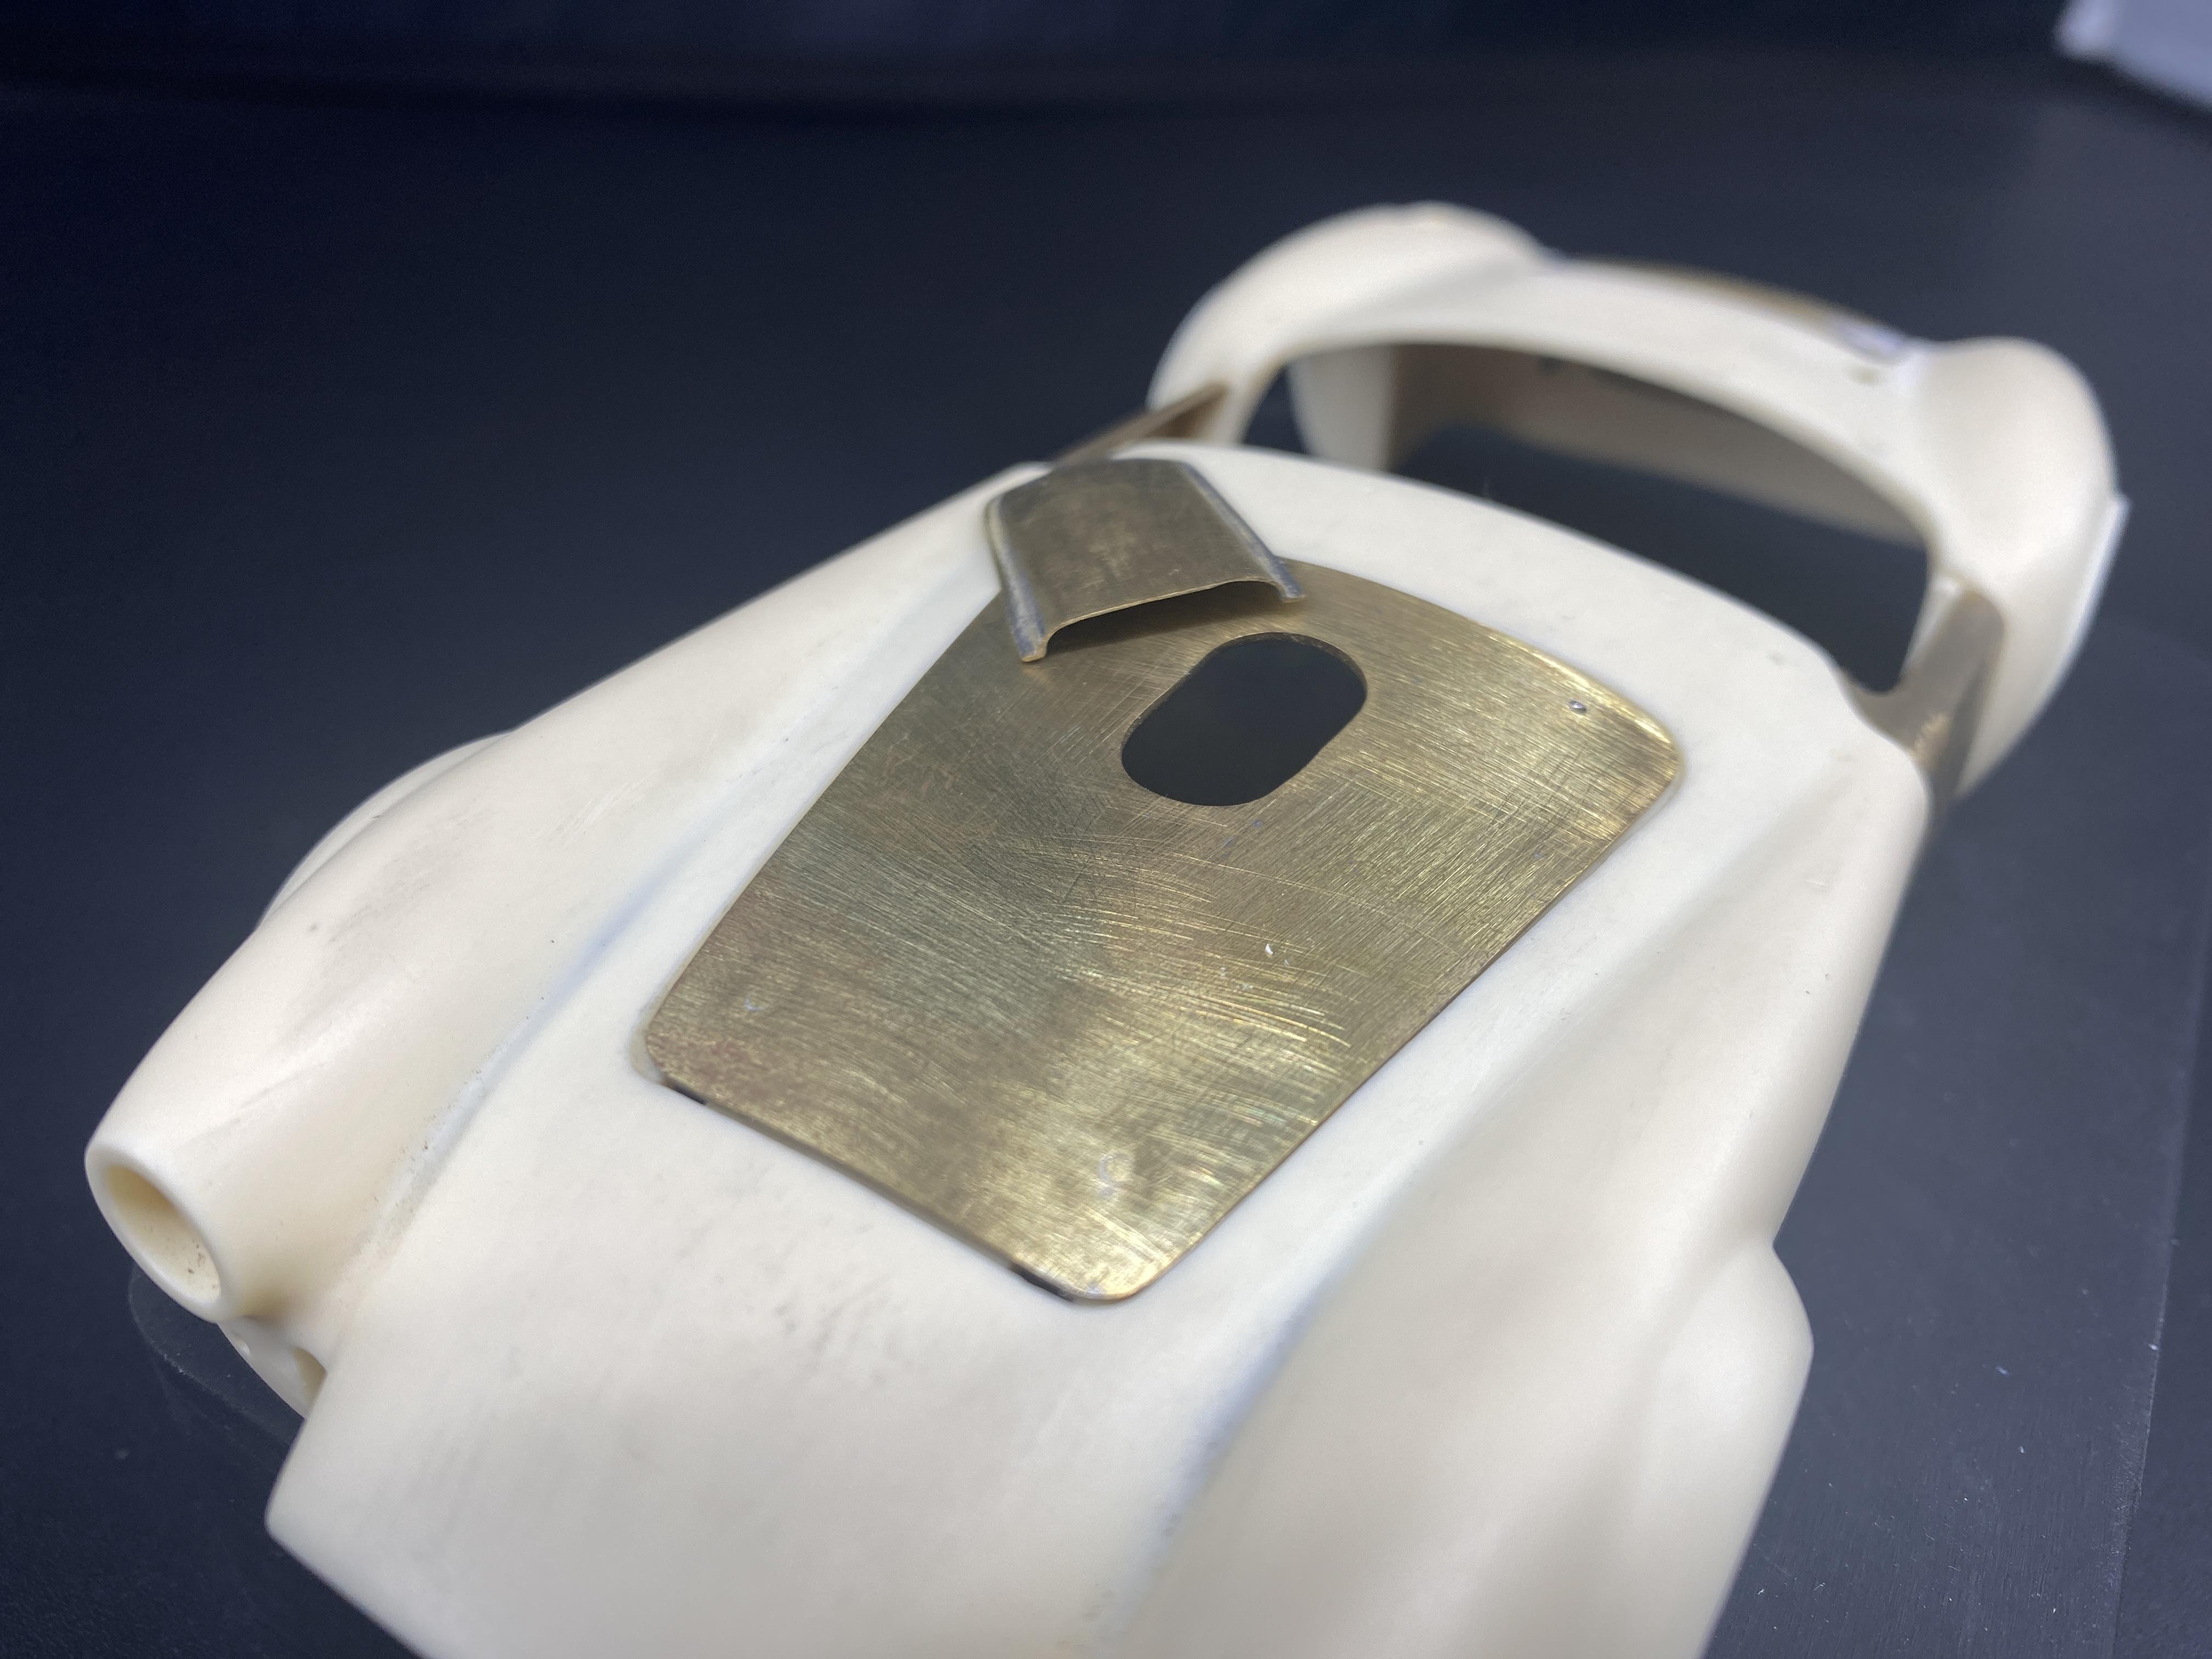
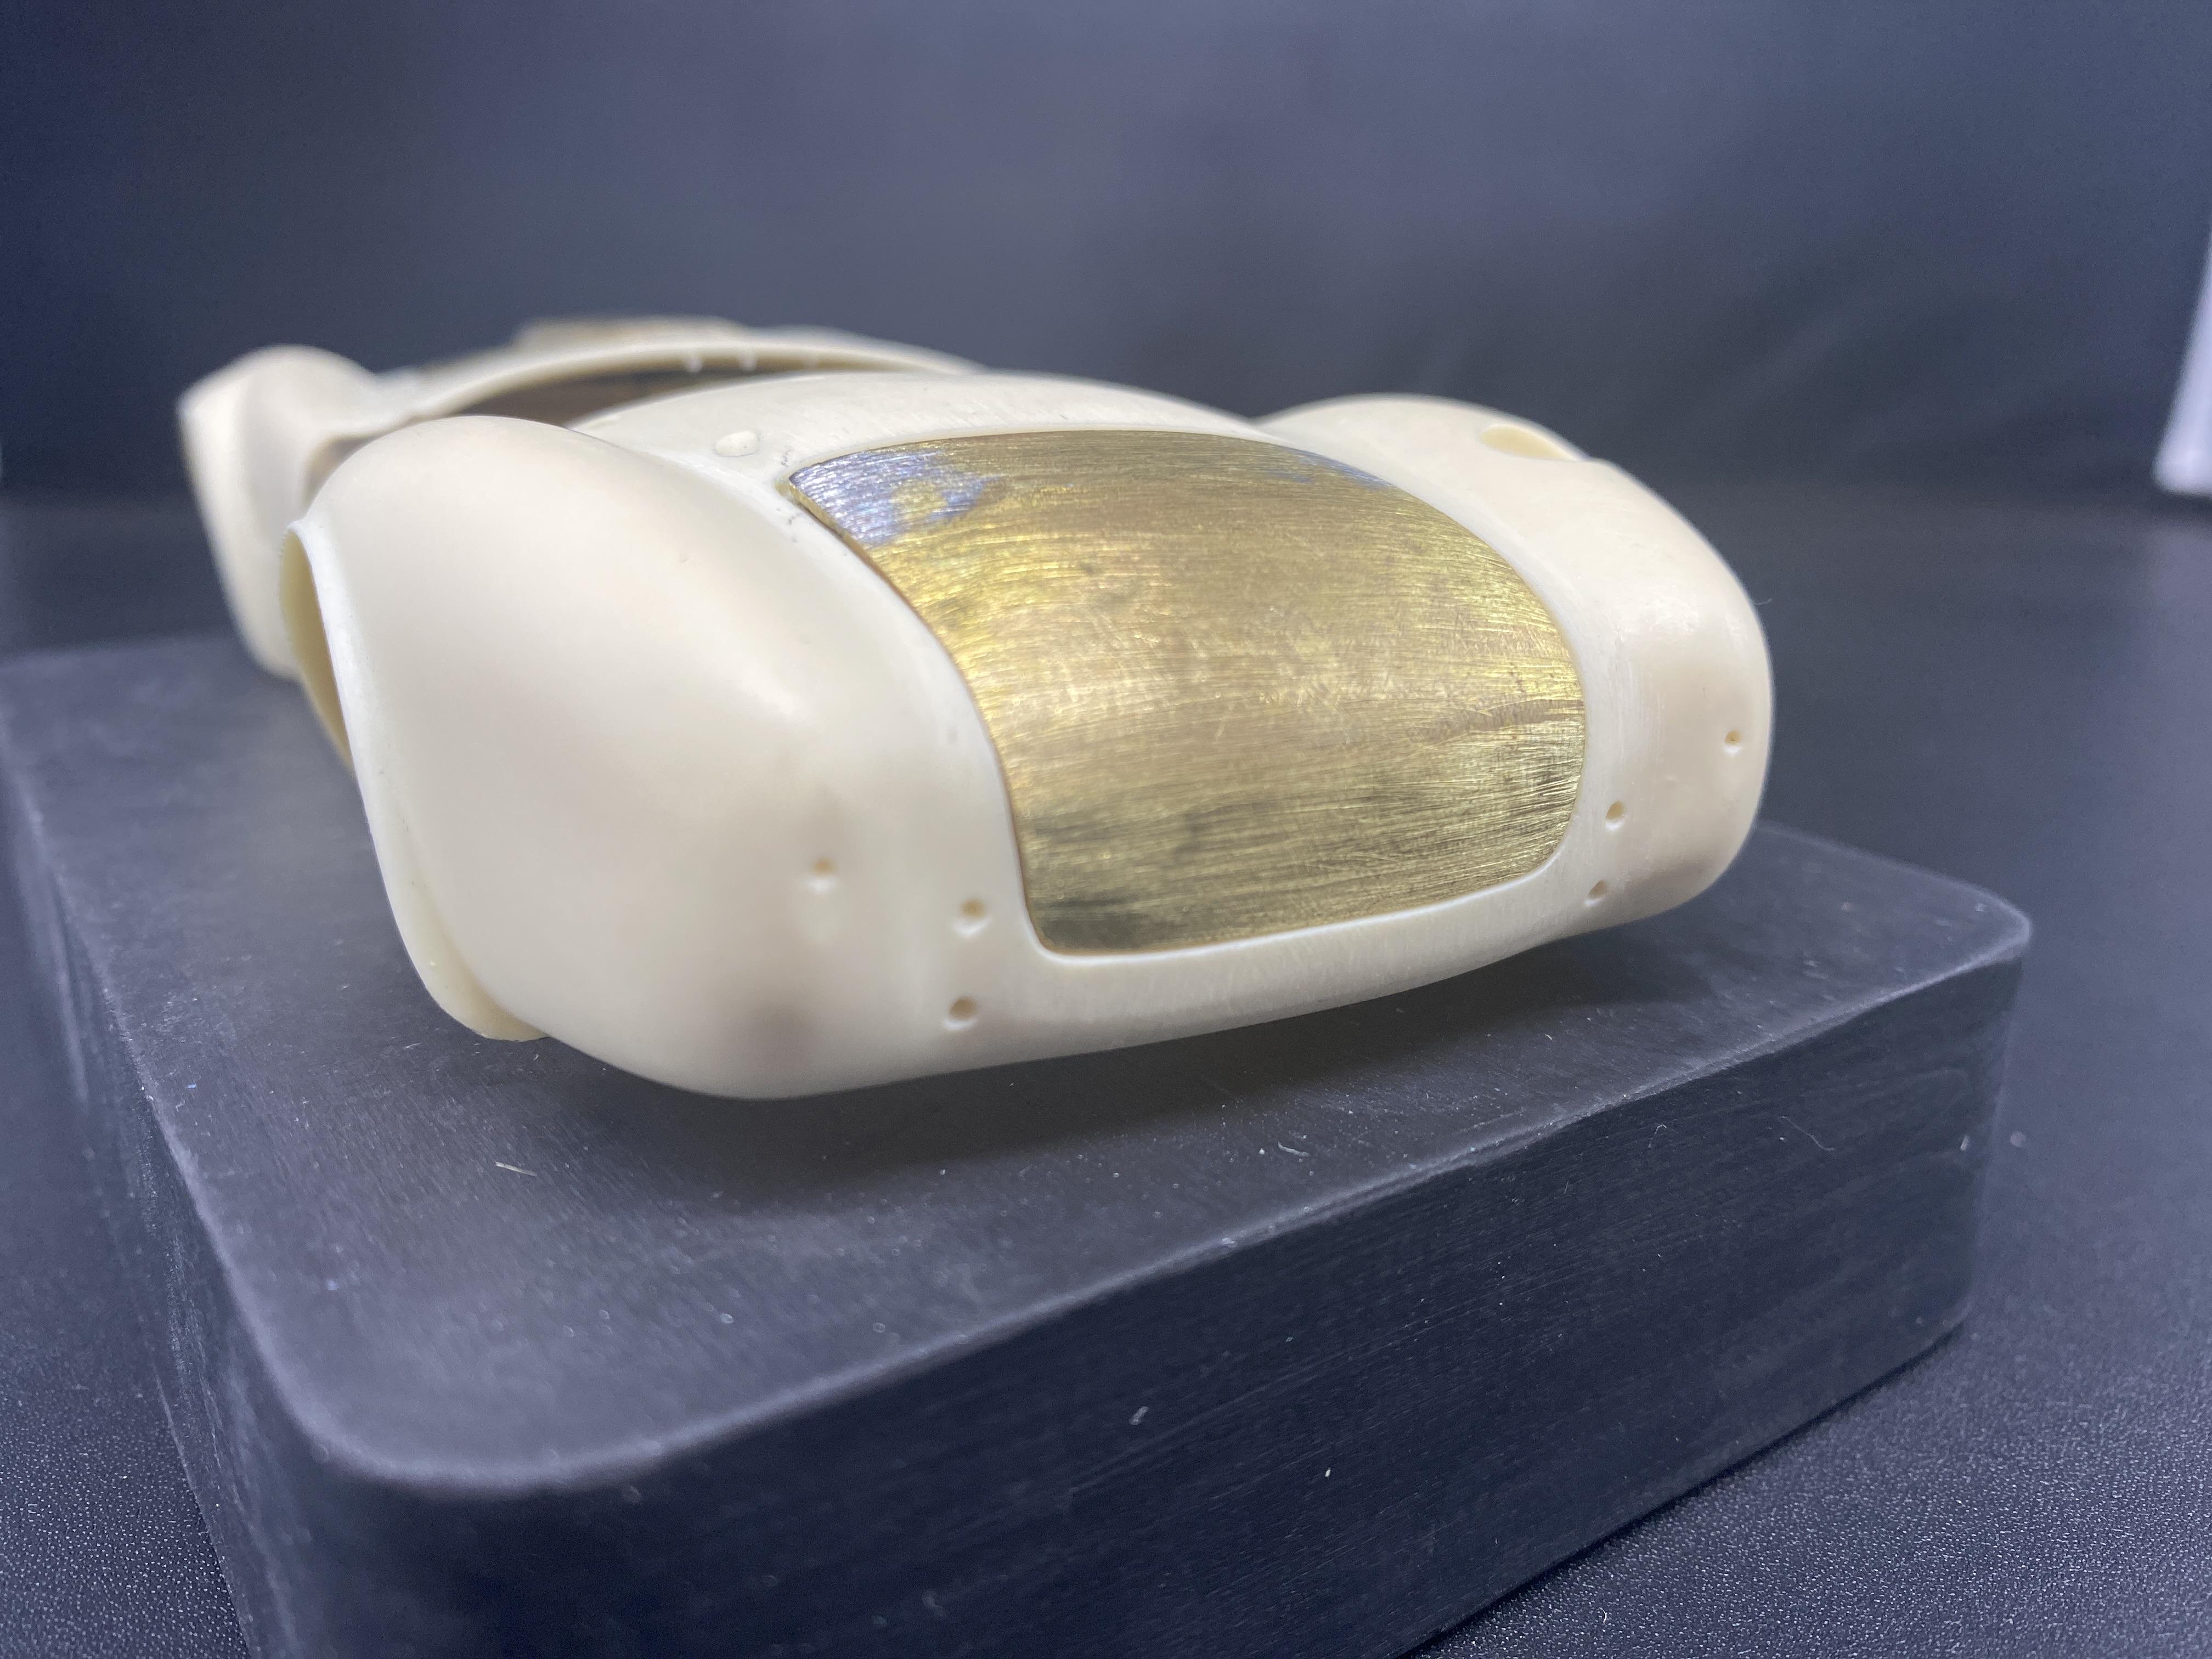
All hand hammer pounded, rounded, welded with hinges. Their all too big, I’ll take them all off and replace them.
-
Here’s the low down dirty picture! All I was left with was the body. I made the hood, doors, boot and scoop. the rear trunk was a mother f78ck3r! I think I did this six times!!! still isn’t right, compared to the last five, it’s close!
-
I sold off a lot of my collection and kind of quit building for a while. I sold a couple high end kits on eGive and they reached out to me afterwards. We ended up becoming friends and I wanted to start building again.
-
As a first issue, as many of their issues I bought almost everything Model Factory Hiro made. I was a huge fan of Alex Kustov, builders back then who got these kits and went for it. Since then the Japanese builders have taken these to another level. this is one of those…. My favorite car of all time. unfortunately this and a shell is all I was left with. A box and body, literally…. I had the body, but no guts, so I started in. mind you please I just dug this out of a box, my brass work is a bit old. It’ll need some touch up.
-
Among my many other ongoing builds I am going to attempt a “few” day build. The subject kit Now come the choices of parts…
-
MFH 1/24 Porsche 917K Gulf
hobbyfella replied to hobbyfella's topic in WIP: Other Racing: Road Racing, Land Speed Racers
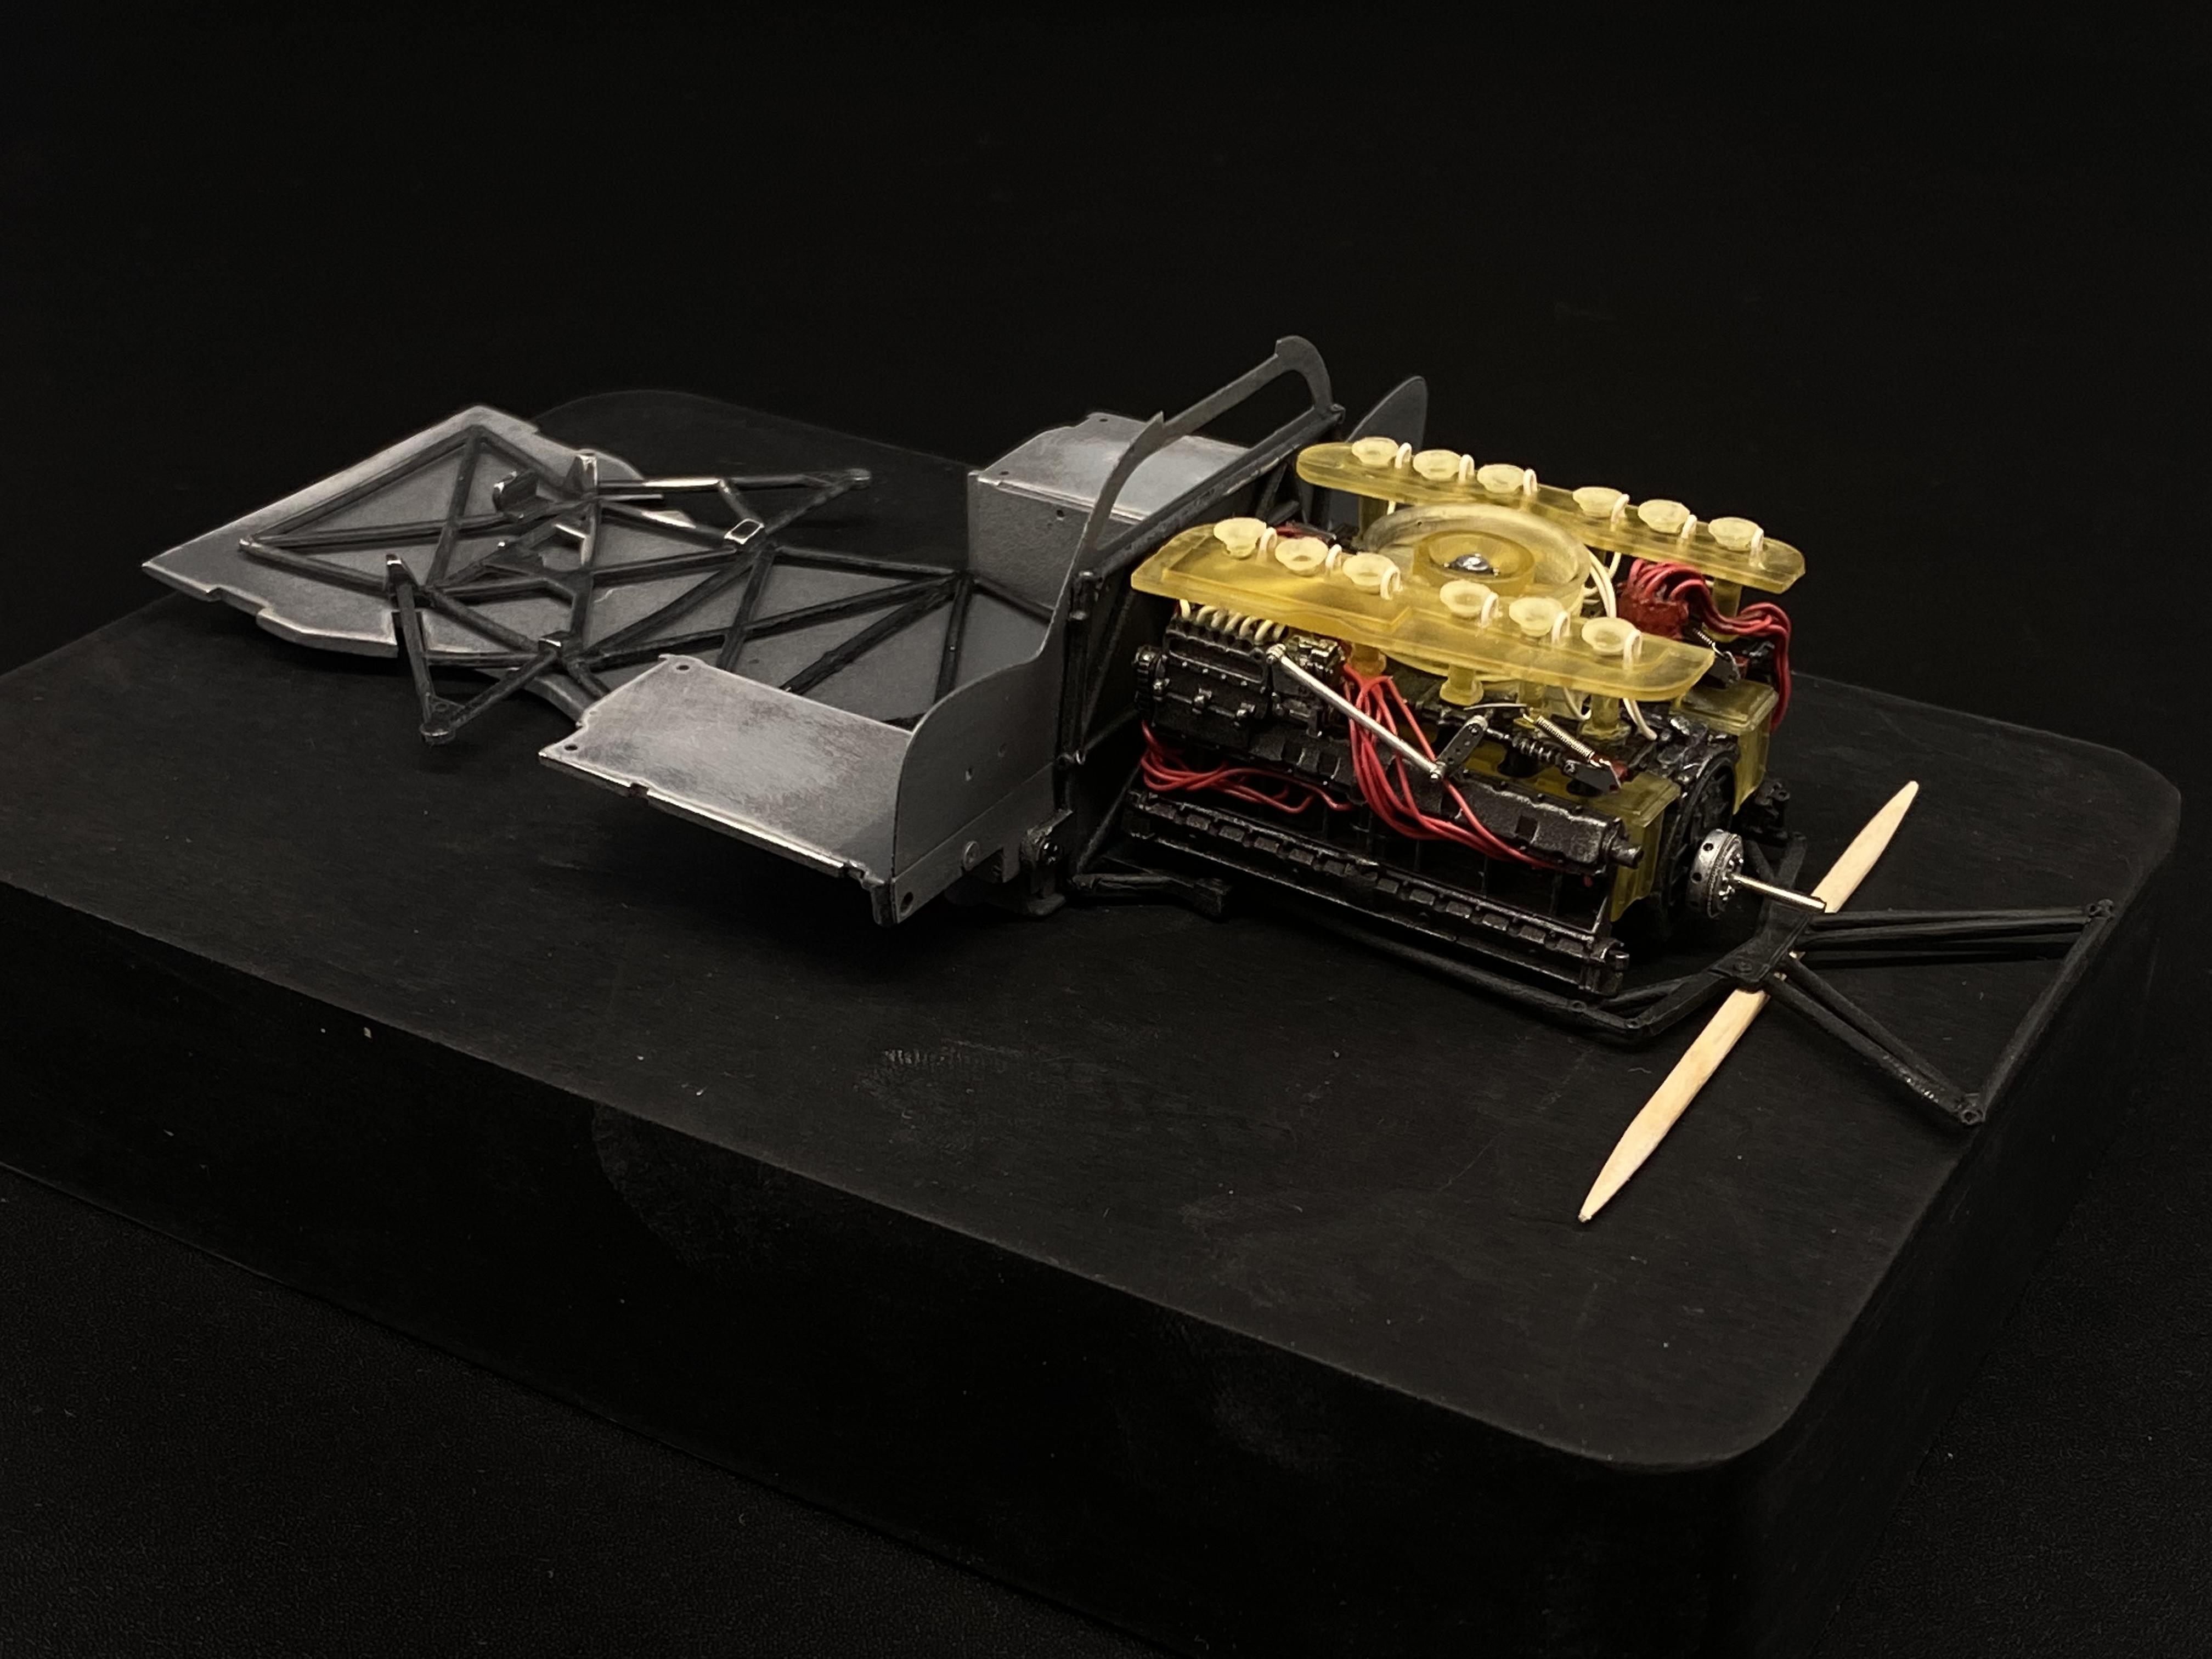
Who can resist a little mock up? can you even imagine driving this cart with that friggin engine behind you? Put on your ear muffs!!!
-
MFH 1/24 Porsche 917K Gulf
hobbyfella replied to hobbyfella's topic in WIP: Other Racing: Road Racing, Land Speed Racers
Complete catastrophe!!!! Ahhhahahah!!! I put the bulkhead/firewall on backwards! What in the literal Chuck!!!??? MFH instructions only show you an exploded picture of what “should be” the way to put the kit together. However, you have to skip ahead and plan for every part in every direction. My mistake was I didn’t recognize the four small holes on the US driver side, instead I put them on the UK driver side. You can see in picture #1 vs the picture below. So…. Thank goodness Bobs makes “de superglue” lol. A heavy soak, unscrew, re sand, re prime, re paint, re screw. This may be better though, now it looks weathered and race driven. I guess that’s where the build is taking me…
-
MFH 1/24 Porsche 917K Gulf
hobbyfella replied to hobbyfella's topic in WIP: Other Racing: Road Racing, Land Speed Racers
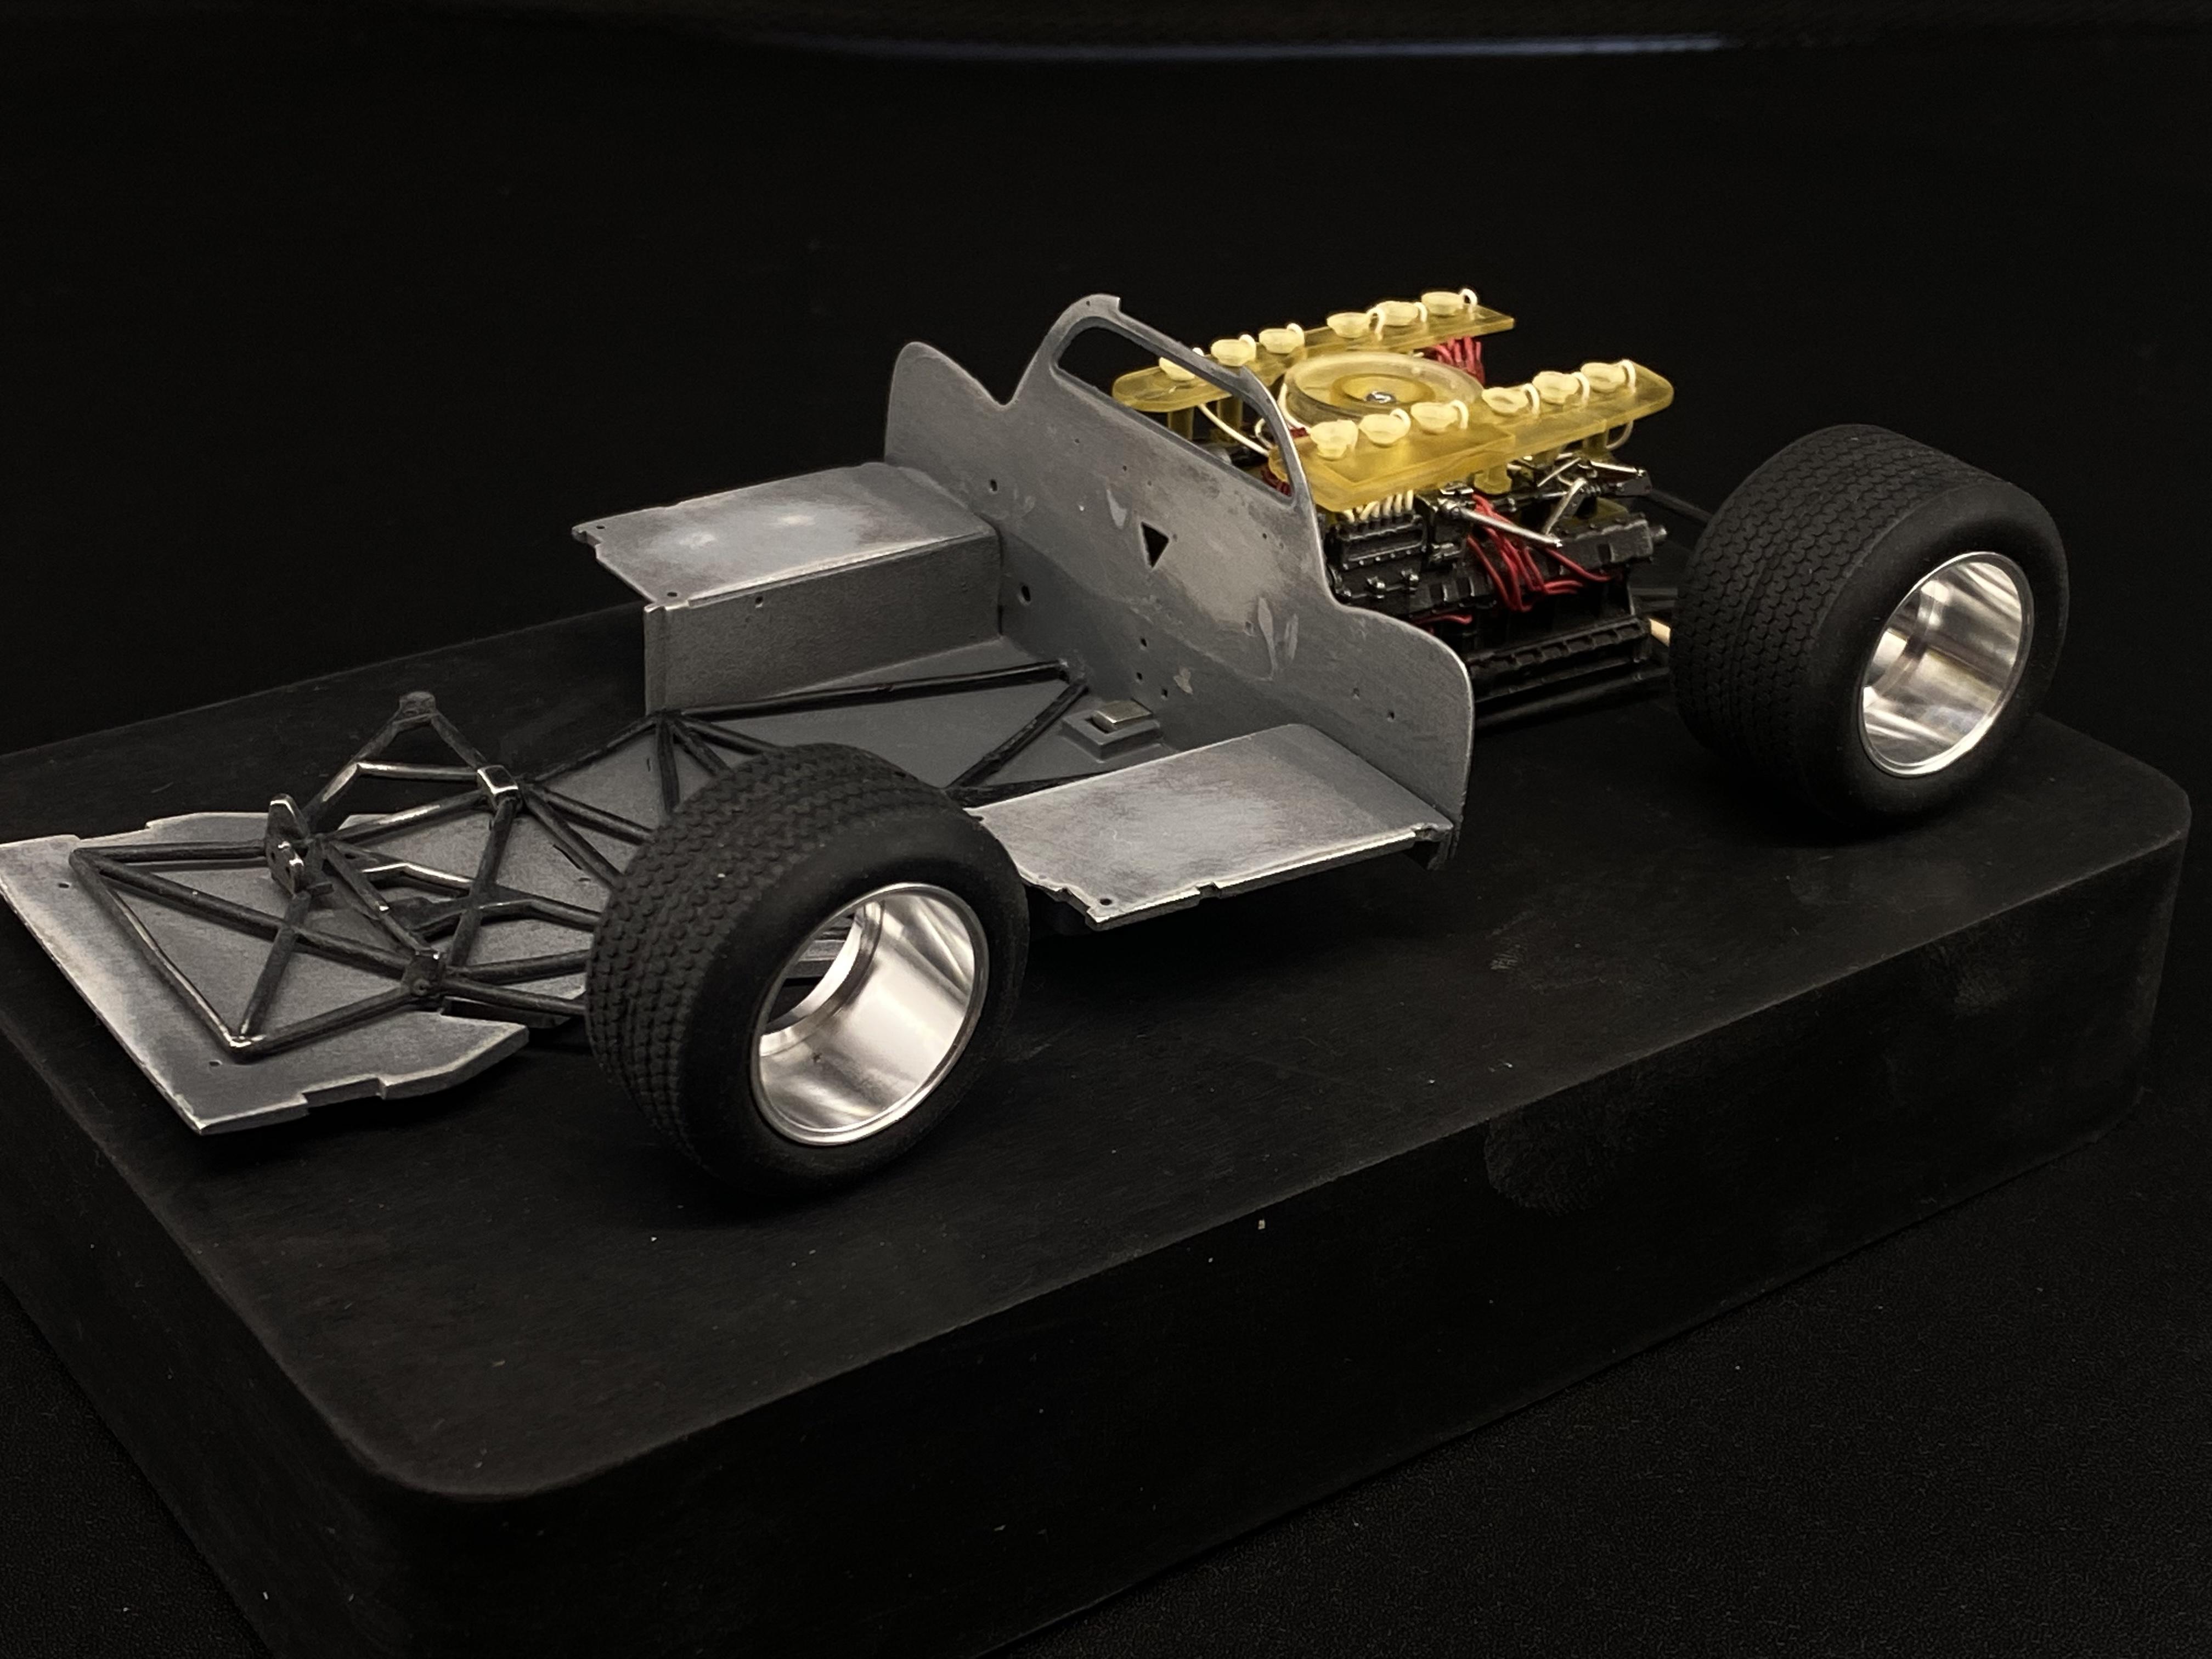
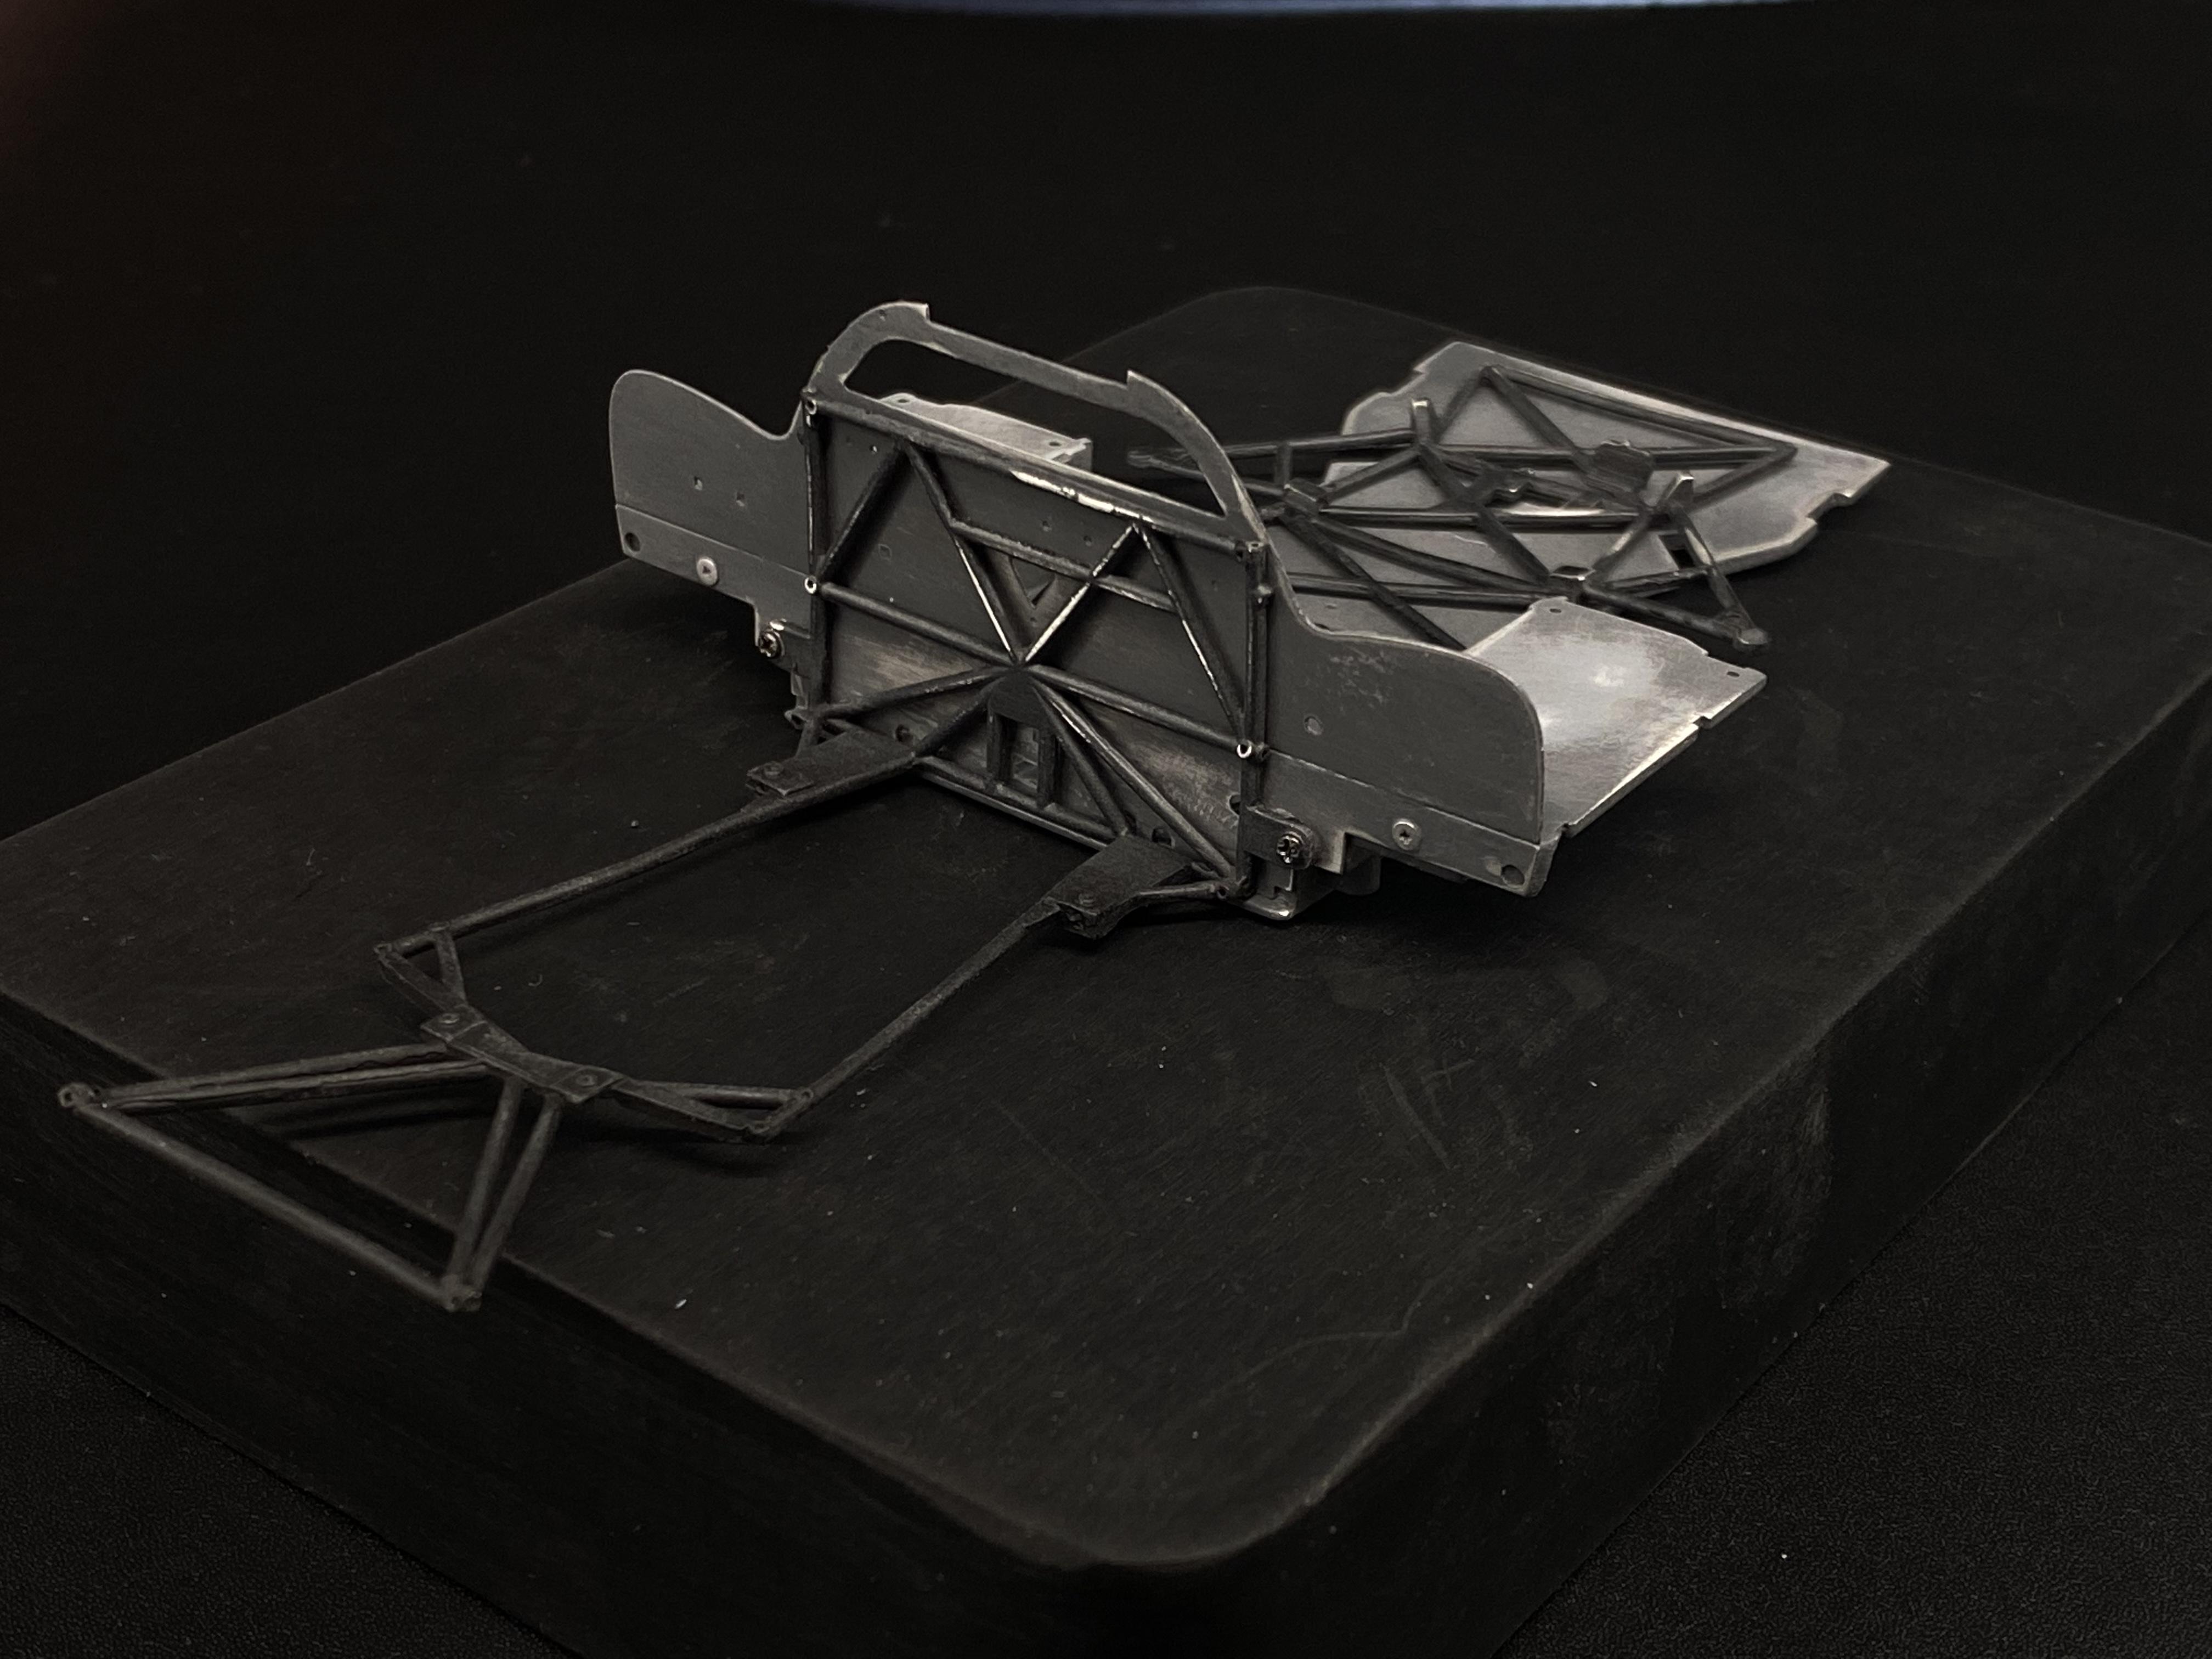
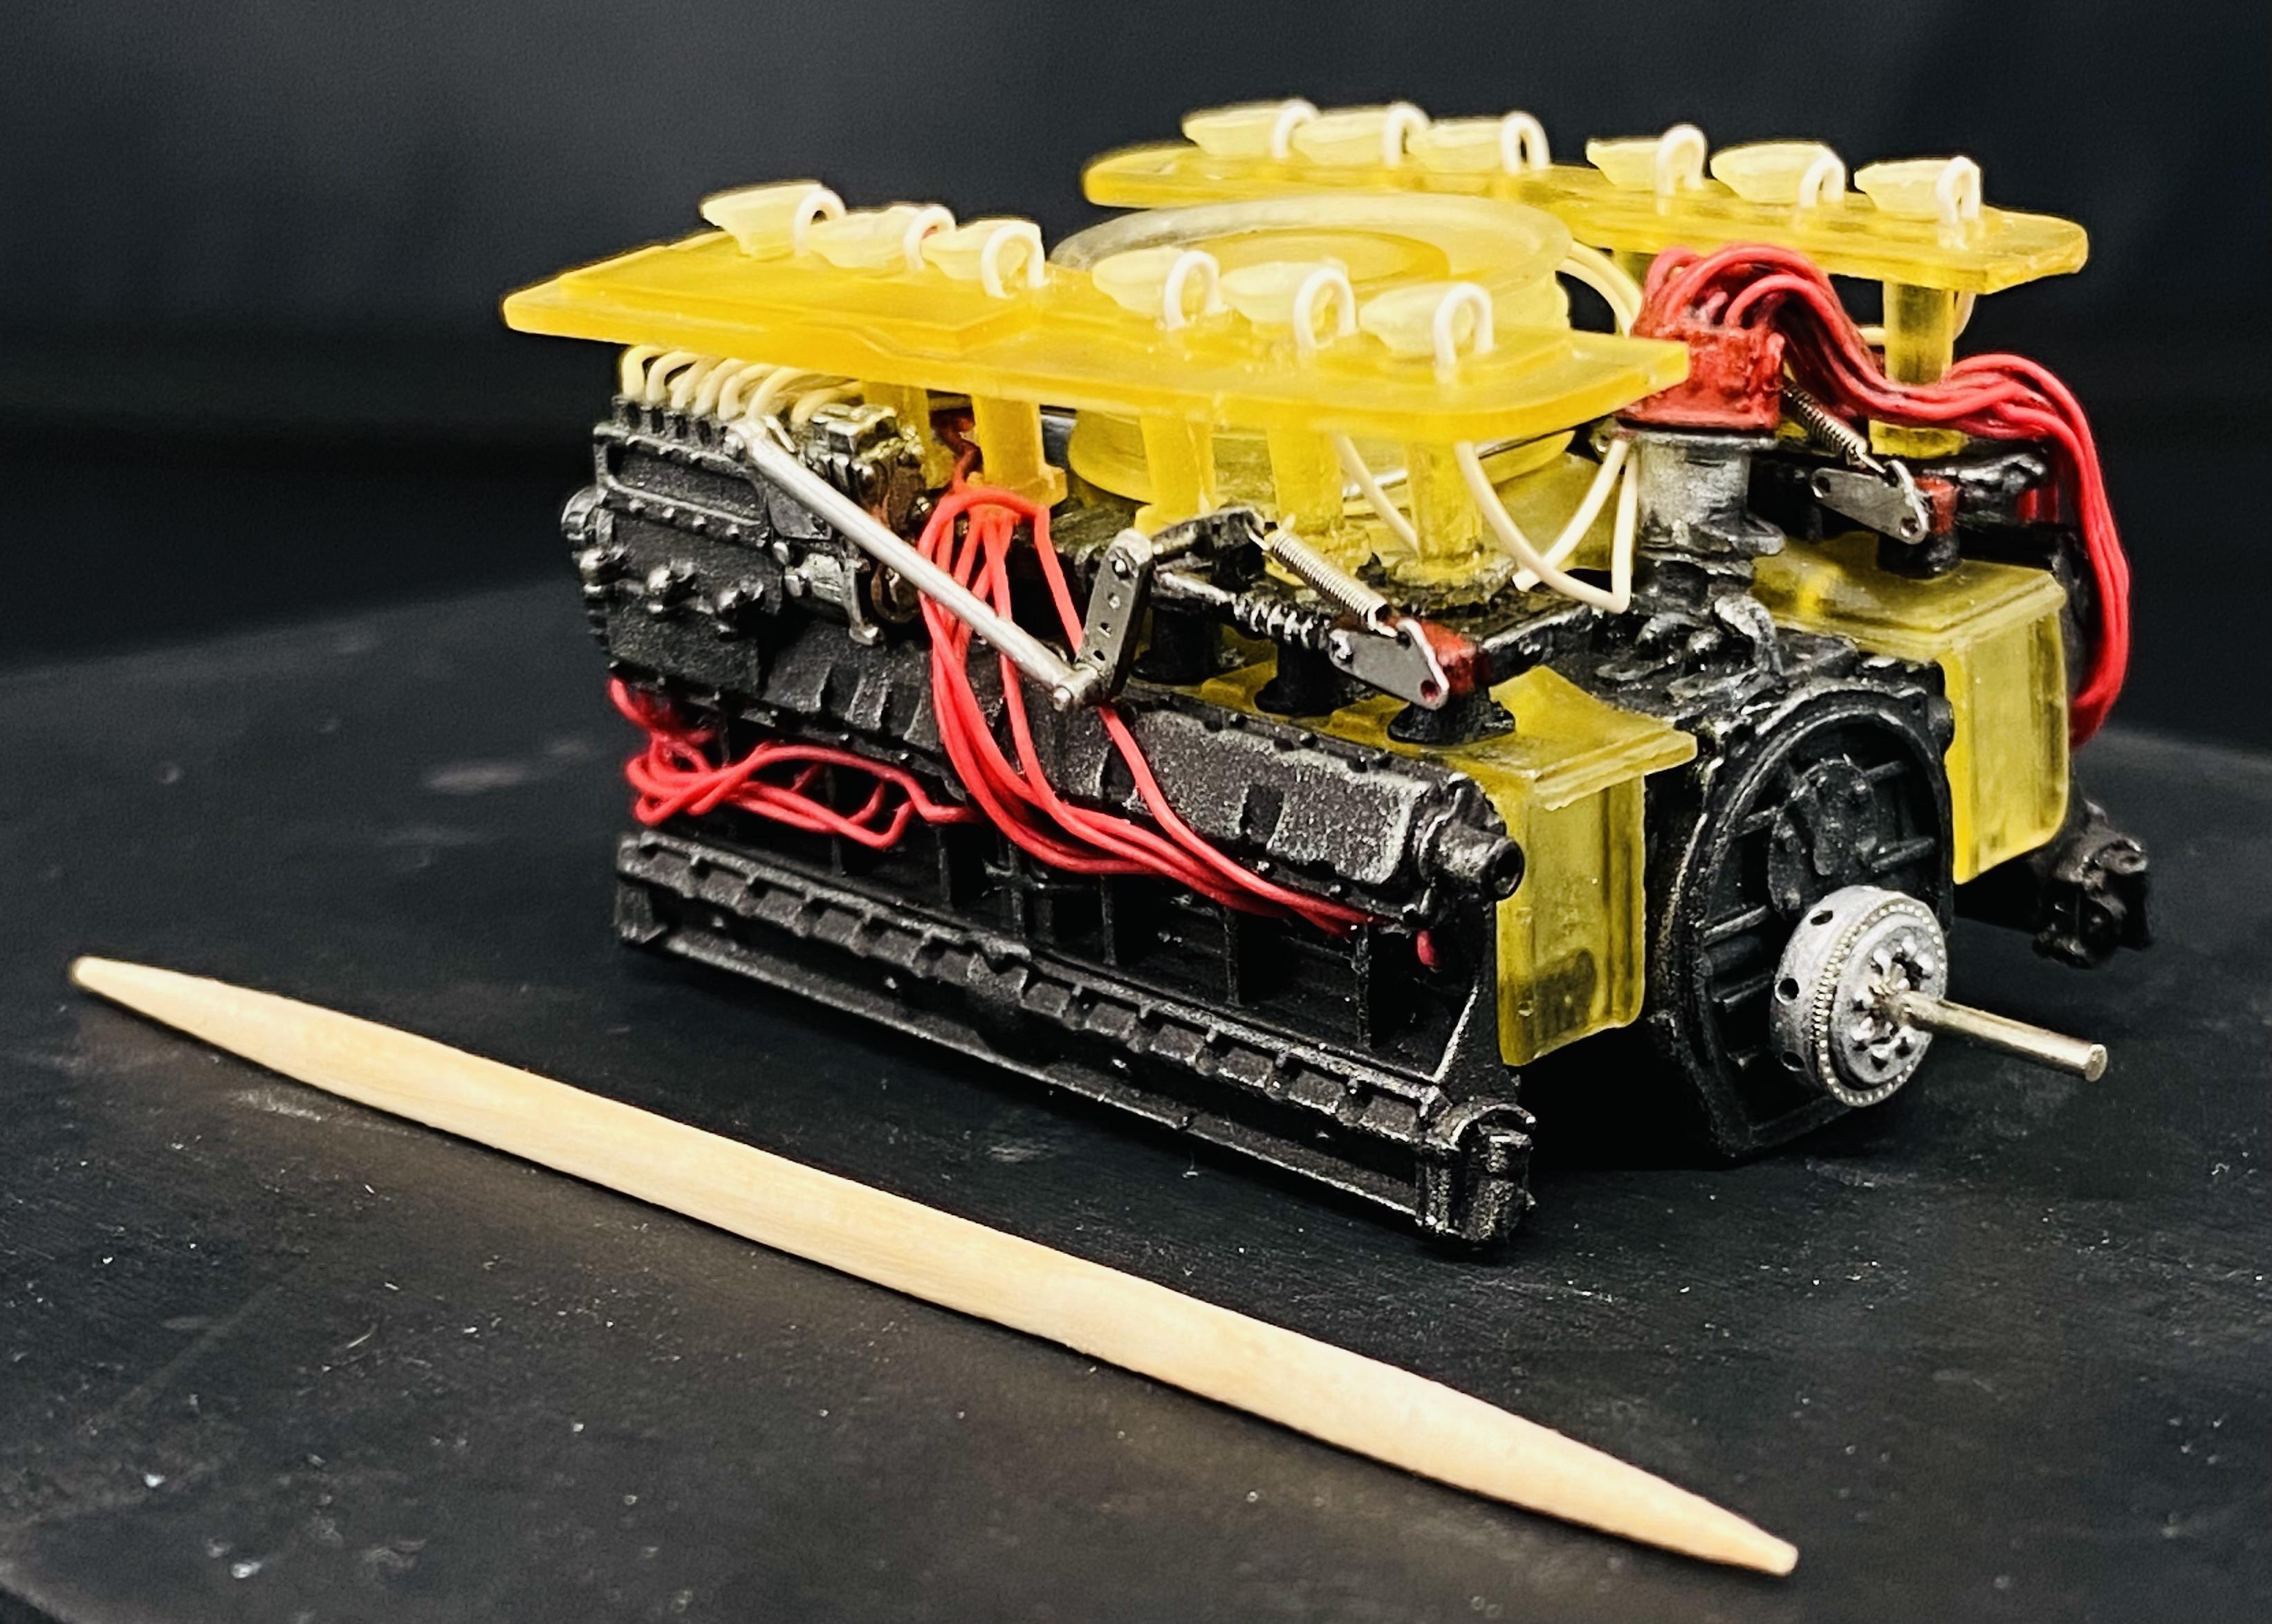
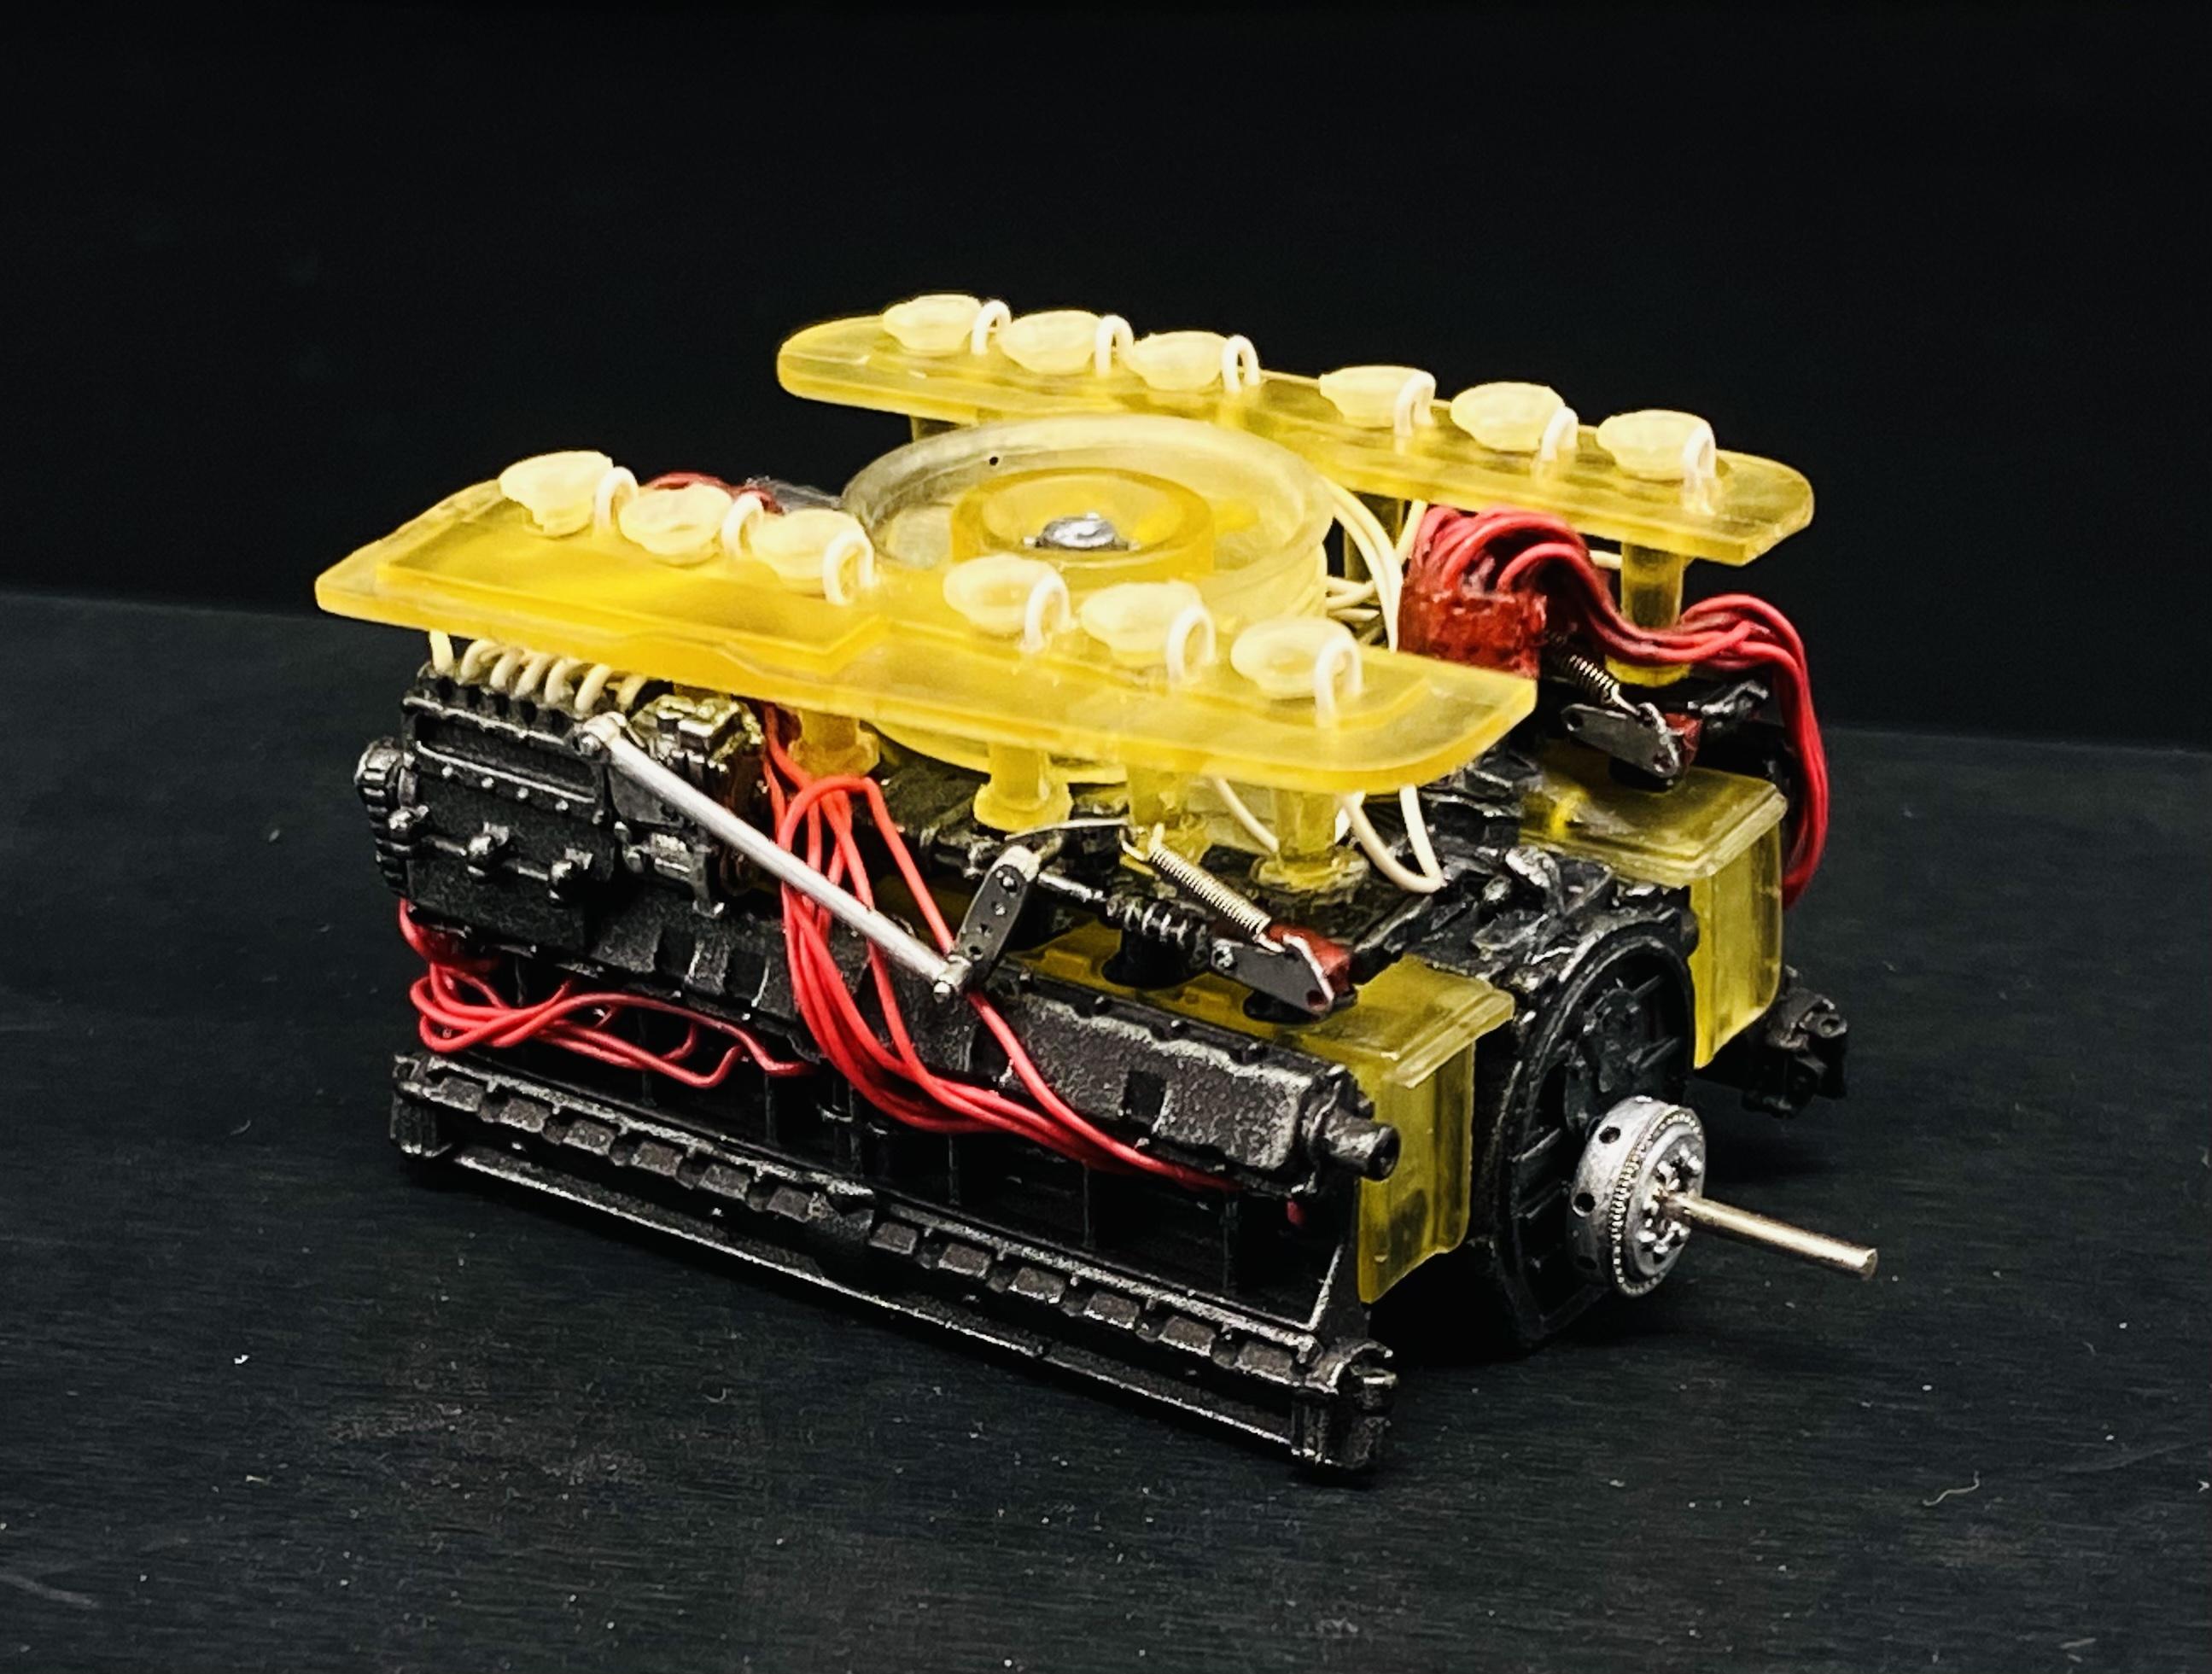
And a toothpick for comparison. I’m ready to move on to the next phase of the build, but I’m still on instruction 1.
-
MFH 1/24 Porsche 917K Gulf
hobbyfella replied to hobbyfella's topic in WIP: Other Racing: Road Racing, Land Speed Racers
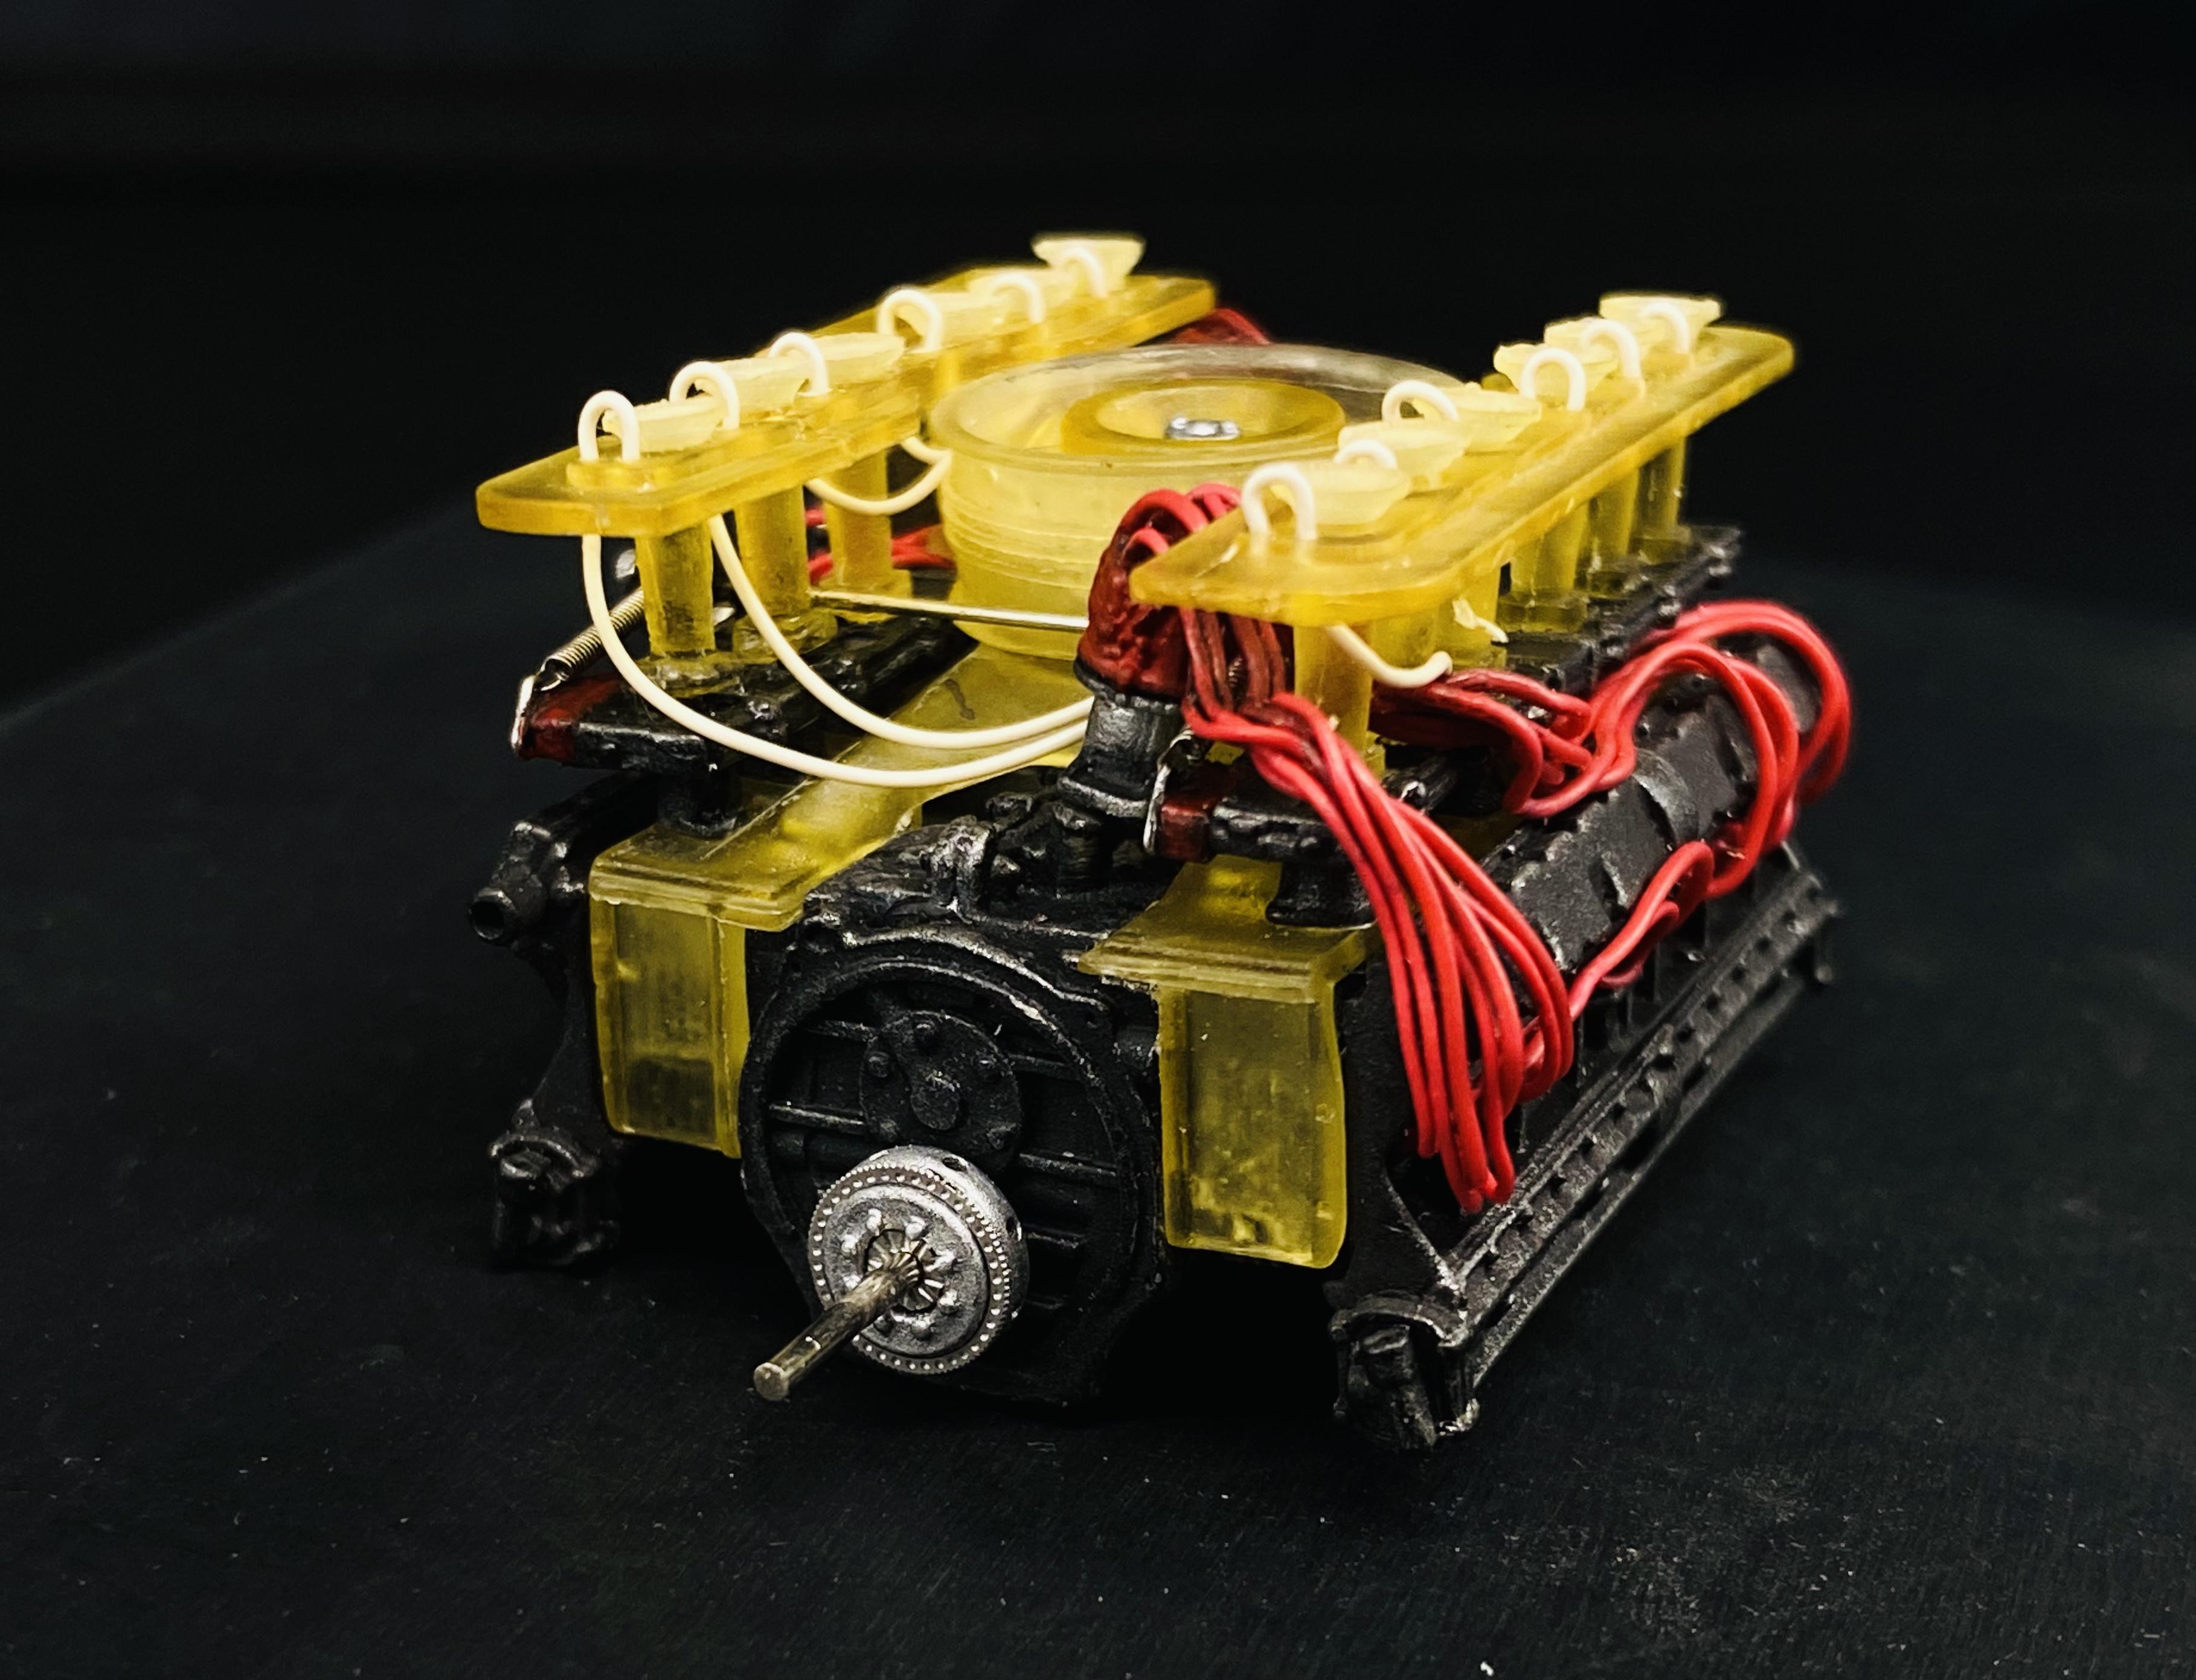
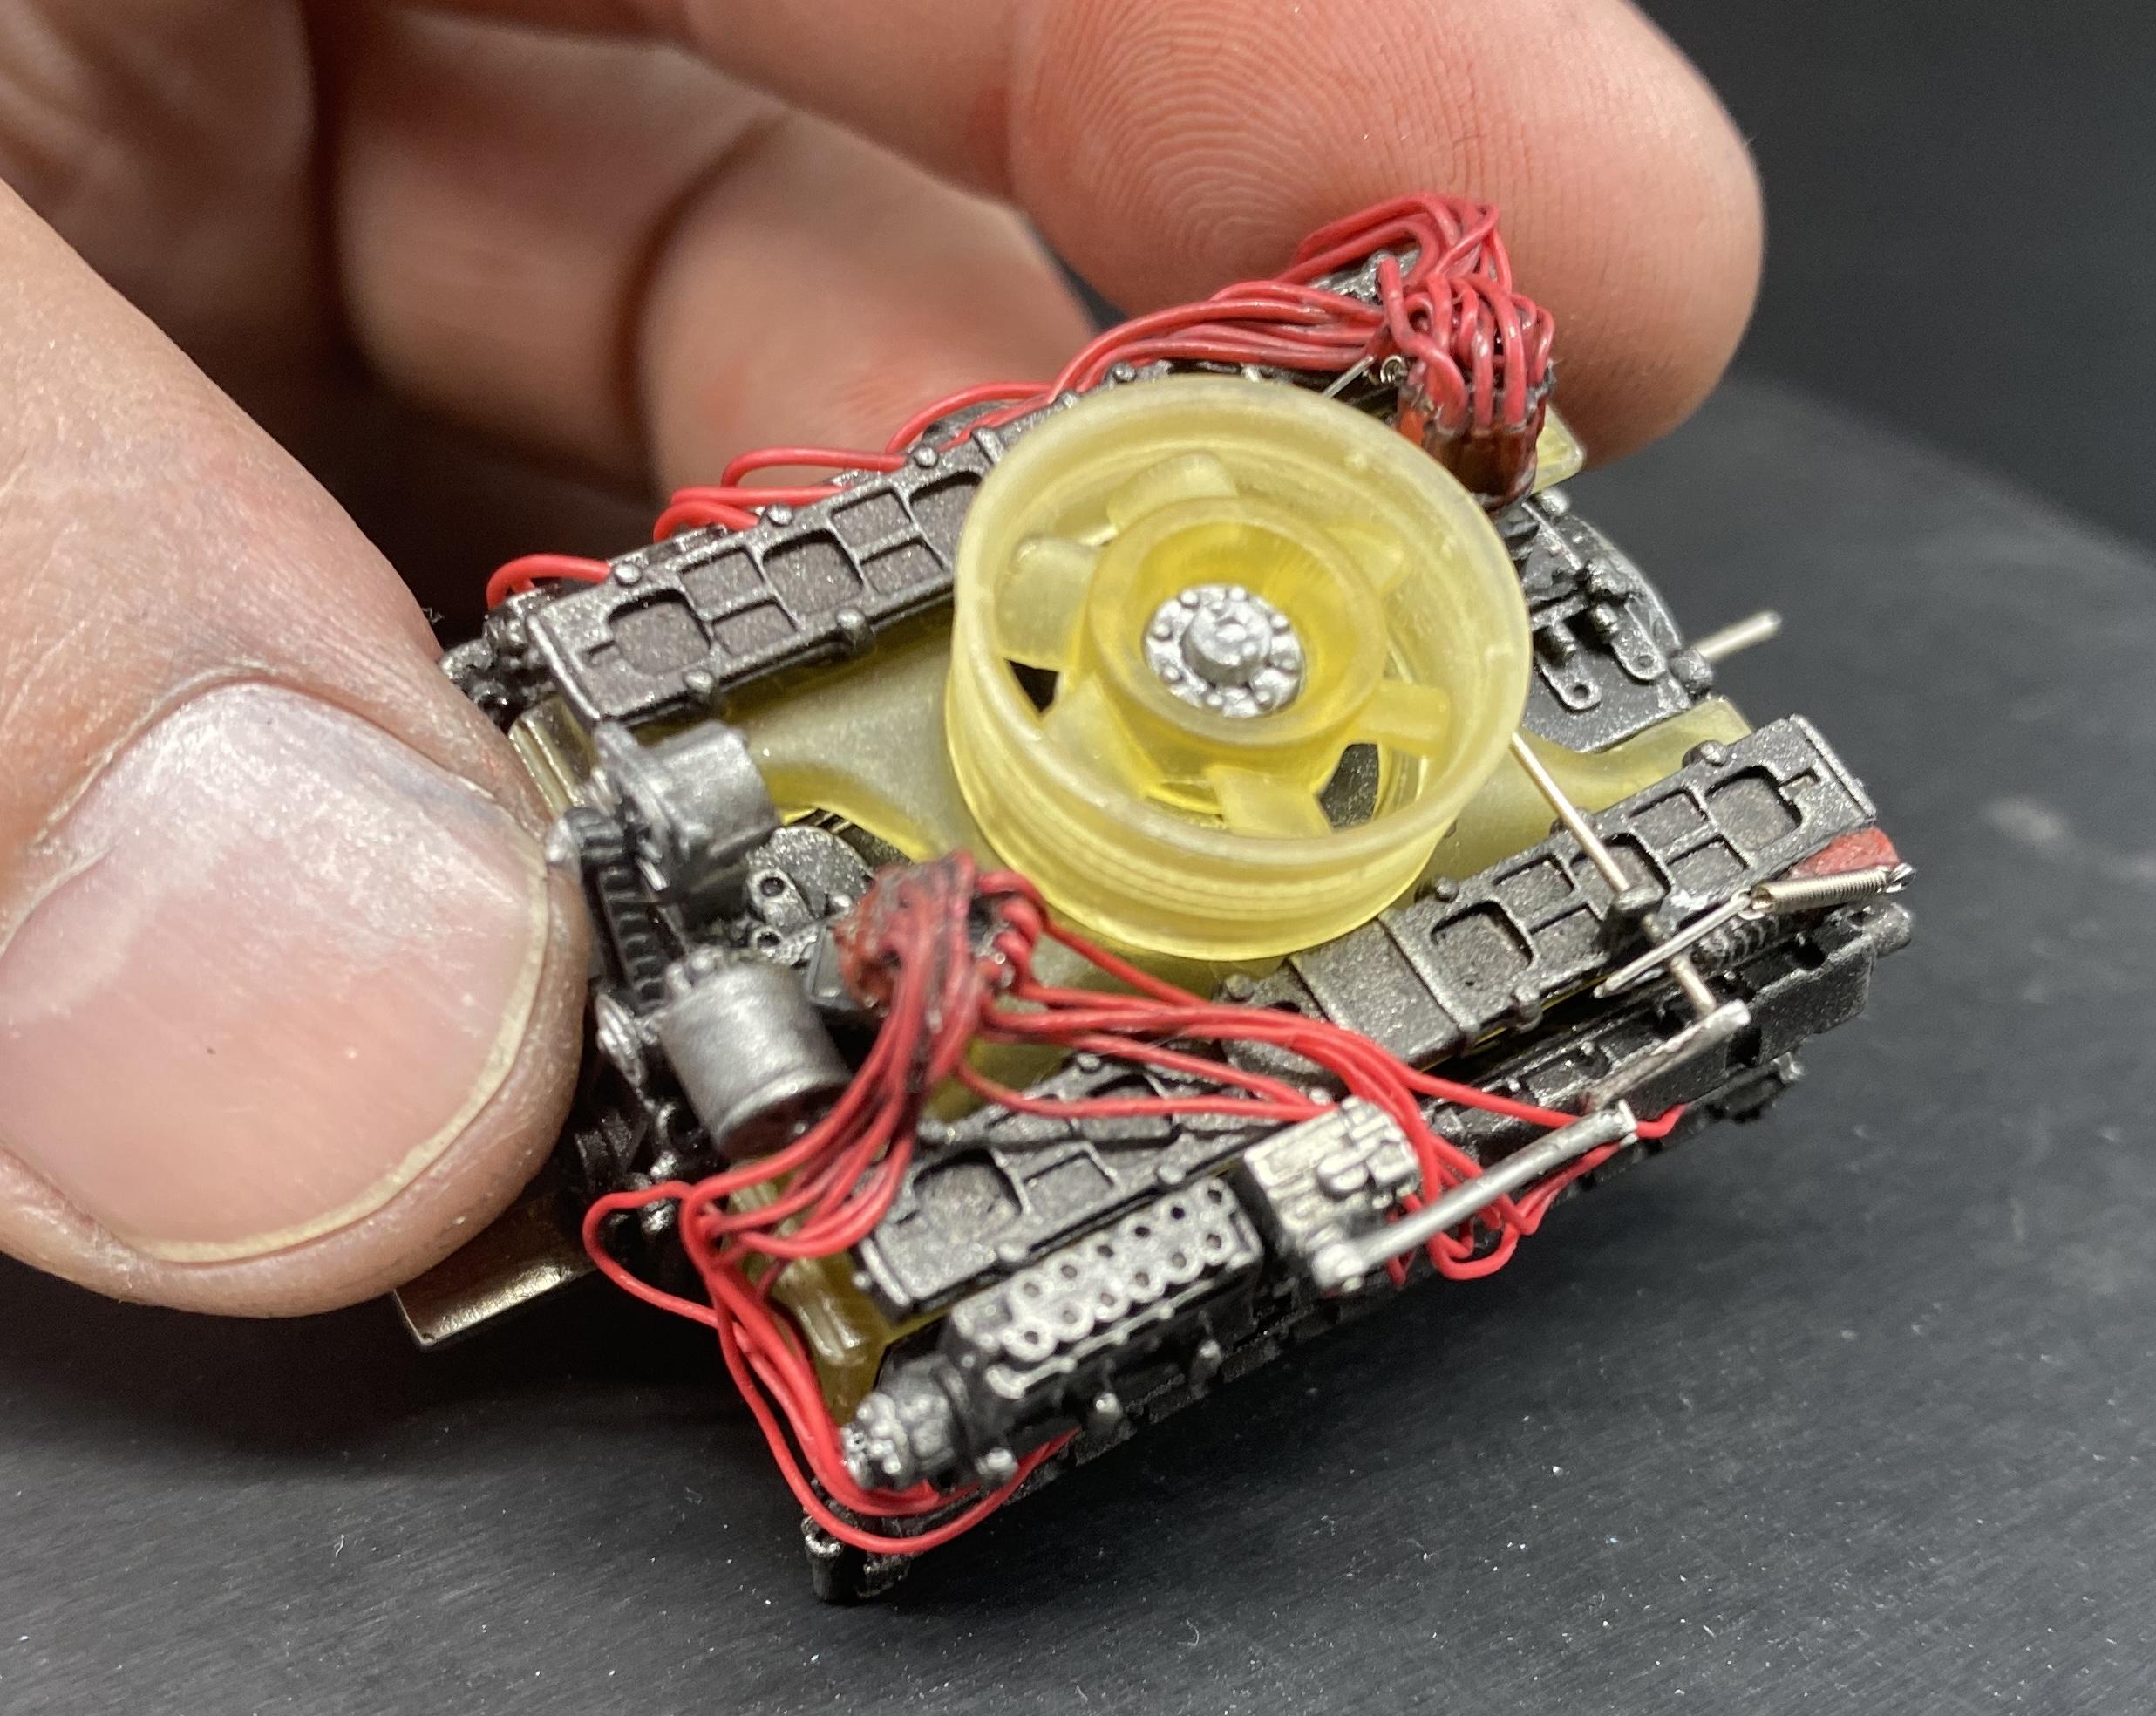
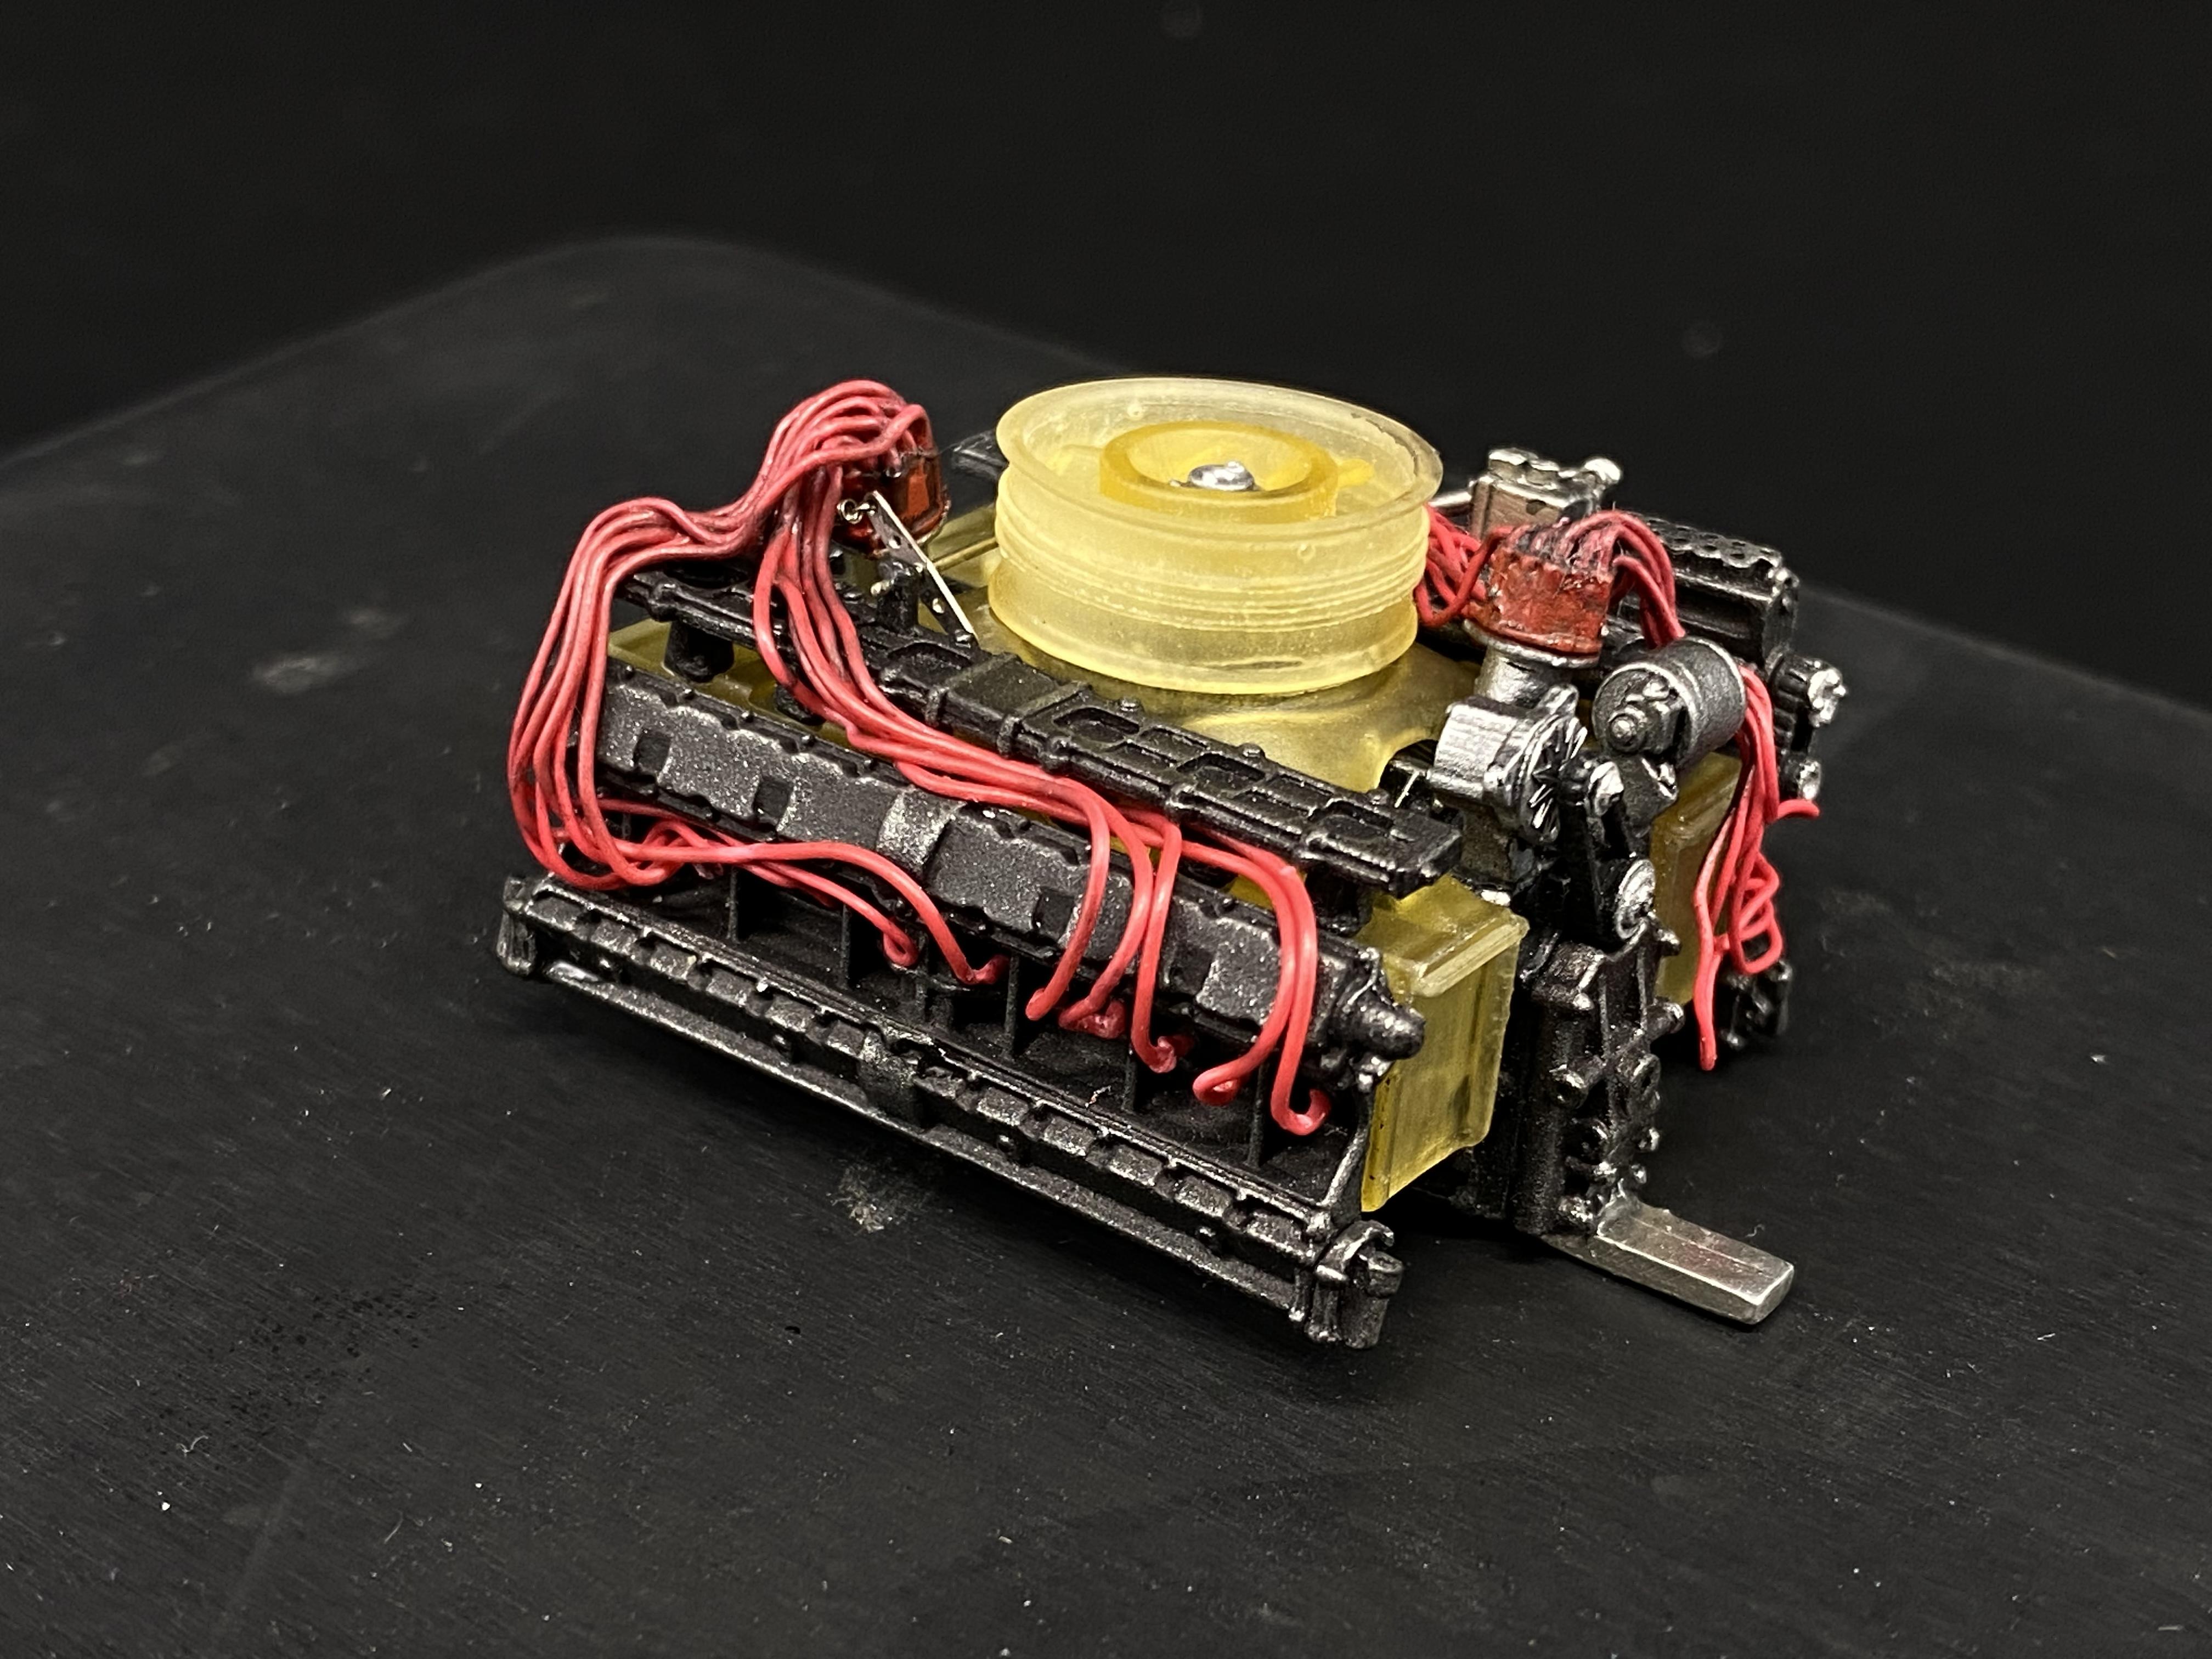
Thanks fellas! BTW, Pierre, congrats on the Corvette Grand Sport! Fantastic build! I was inspired by your work up so I picked up two of the kits, two sets of PE and two sets of decals, got half way through the chassis and had to walk away. I managed to get the majority of the wiring done, and what a job! Two distributors, 12 wires each, and 12 wires for the injectors. So 36 wires on this tiny thing where there’s very little room, and no room for mistakes. I broke several bits and had to dig them out or push them through using another bit. Steady and slow…
-
MFH 1/24 Porsche 917K Gulf
hobbyfella replied to hobbyfella's topic in WIP: Other Racing: Road Racing, Land Speed Racers
-
MFH 1/24 Porsche 917K Gulf
hobbyfella replied to hobbyfella's topic in WIP: Other Racing: Road Racing, Land Speed Racers
Test fitting along the way is required on these kits, many many times