hobbyfella
-
Posts
64 -
Joined
-
Last visited
Content Type
Profiles
Forums
Events
Gallery
Everything posted by hobbyfella
-
MFH 1/24 Porsche 917K Gulf
hobbyfella replied to hobbyfella's topic in WIP: Other Racing: Road Racing, Land Speed Racers
And this is where I’m at! I feel like 1000 holes drilled.
-
MFH 1/24 Porsche 917K Gulf
hobbyfella replied to hobbyfella's topic in WIP: Other Racing: Road Racing, Land Speed Racers
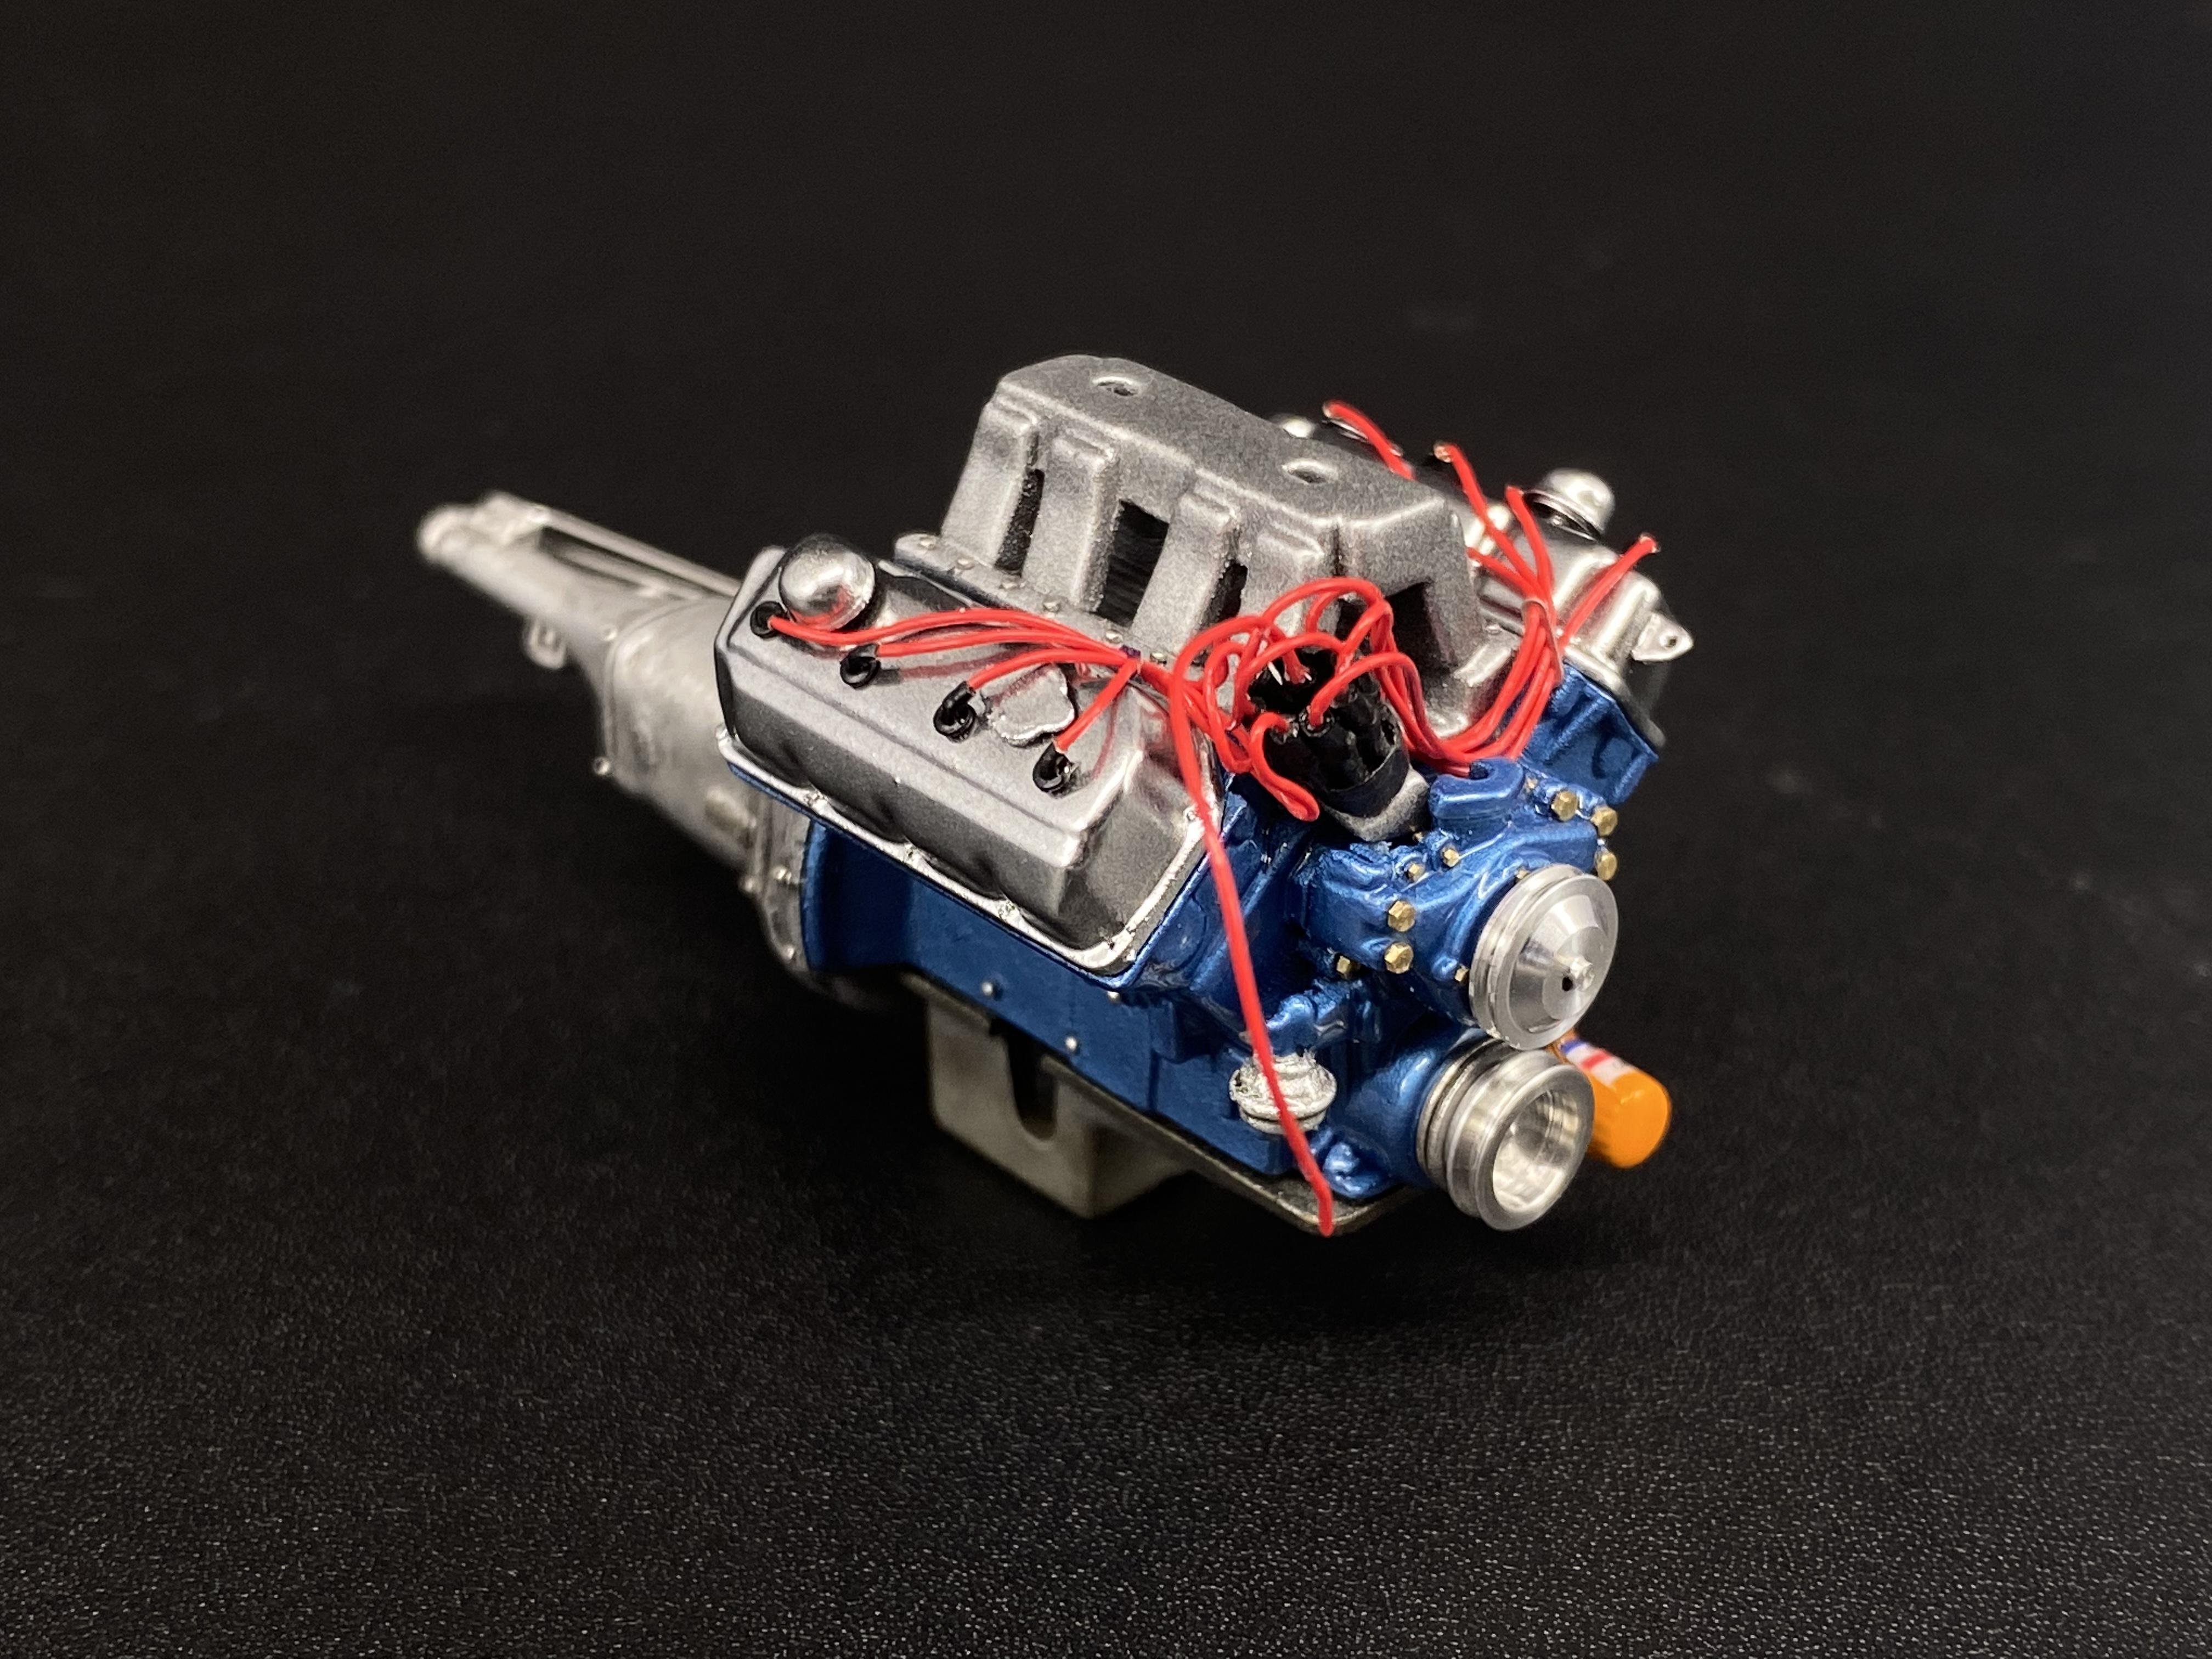
After all the polishing, hand sanding and drilling out all the holes, this is where I’m at. Half the engine wires are done. I use Tamiya metal primer from the can on the raw metal followed by Splash Paints primer on everything. Then paint every part with an assortment of Alclad metal colors, and lightly weather.
-
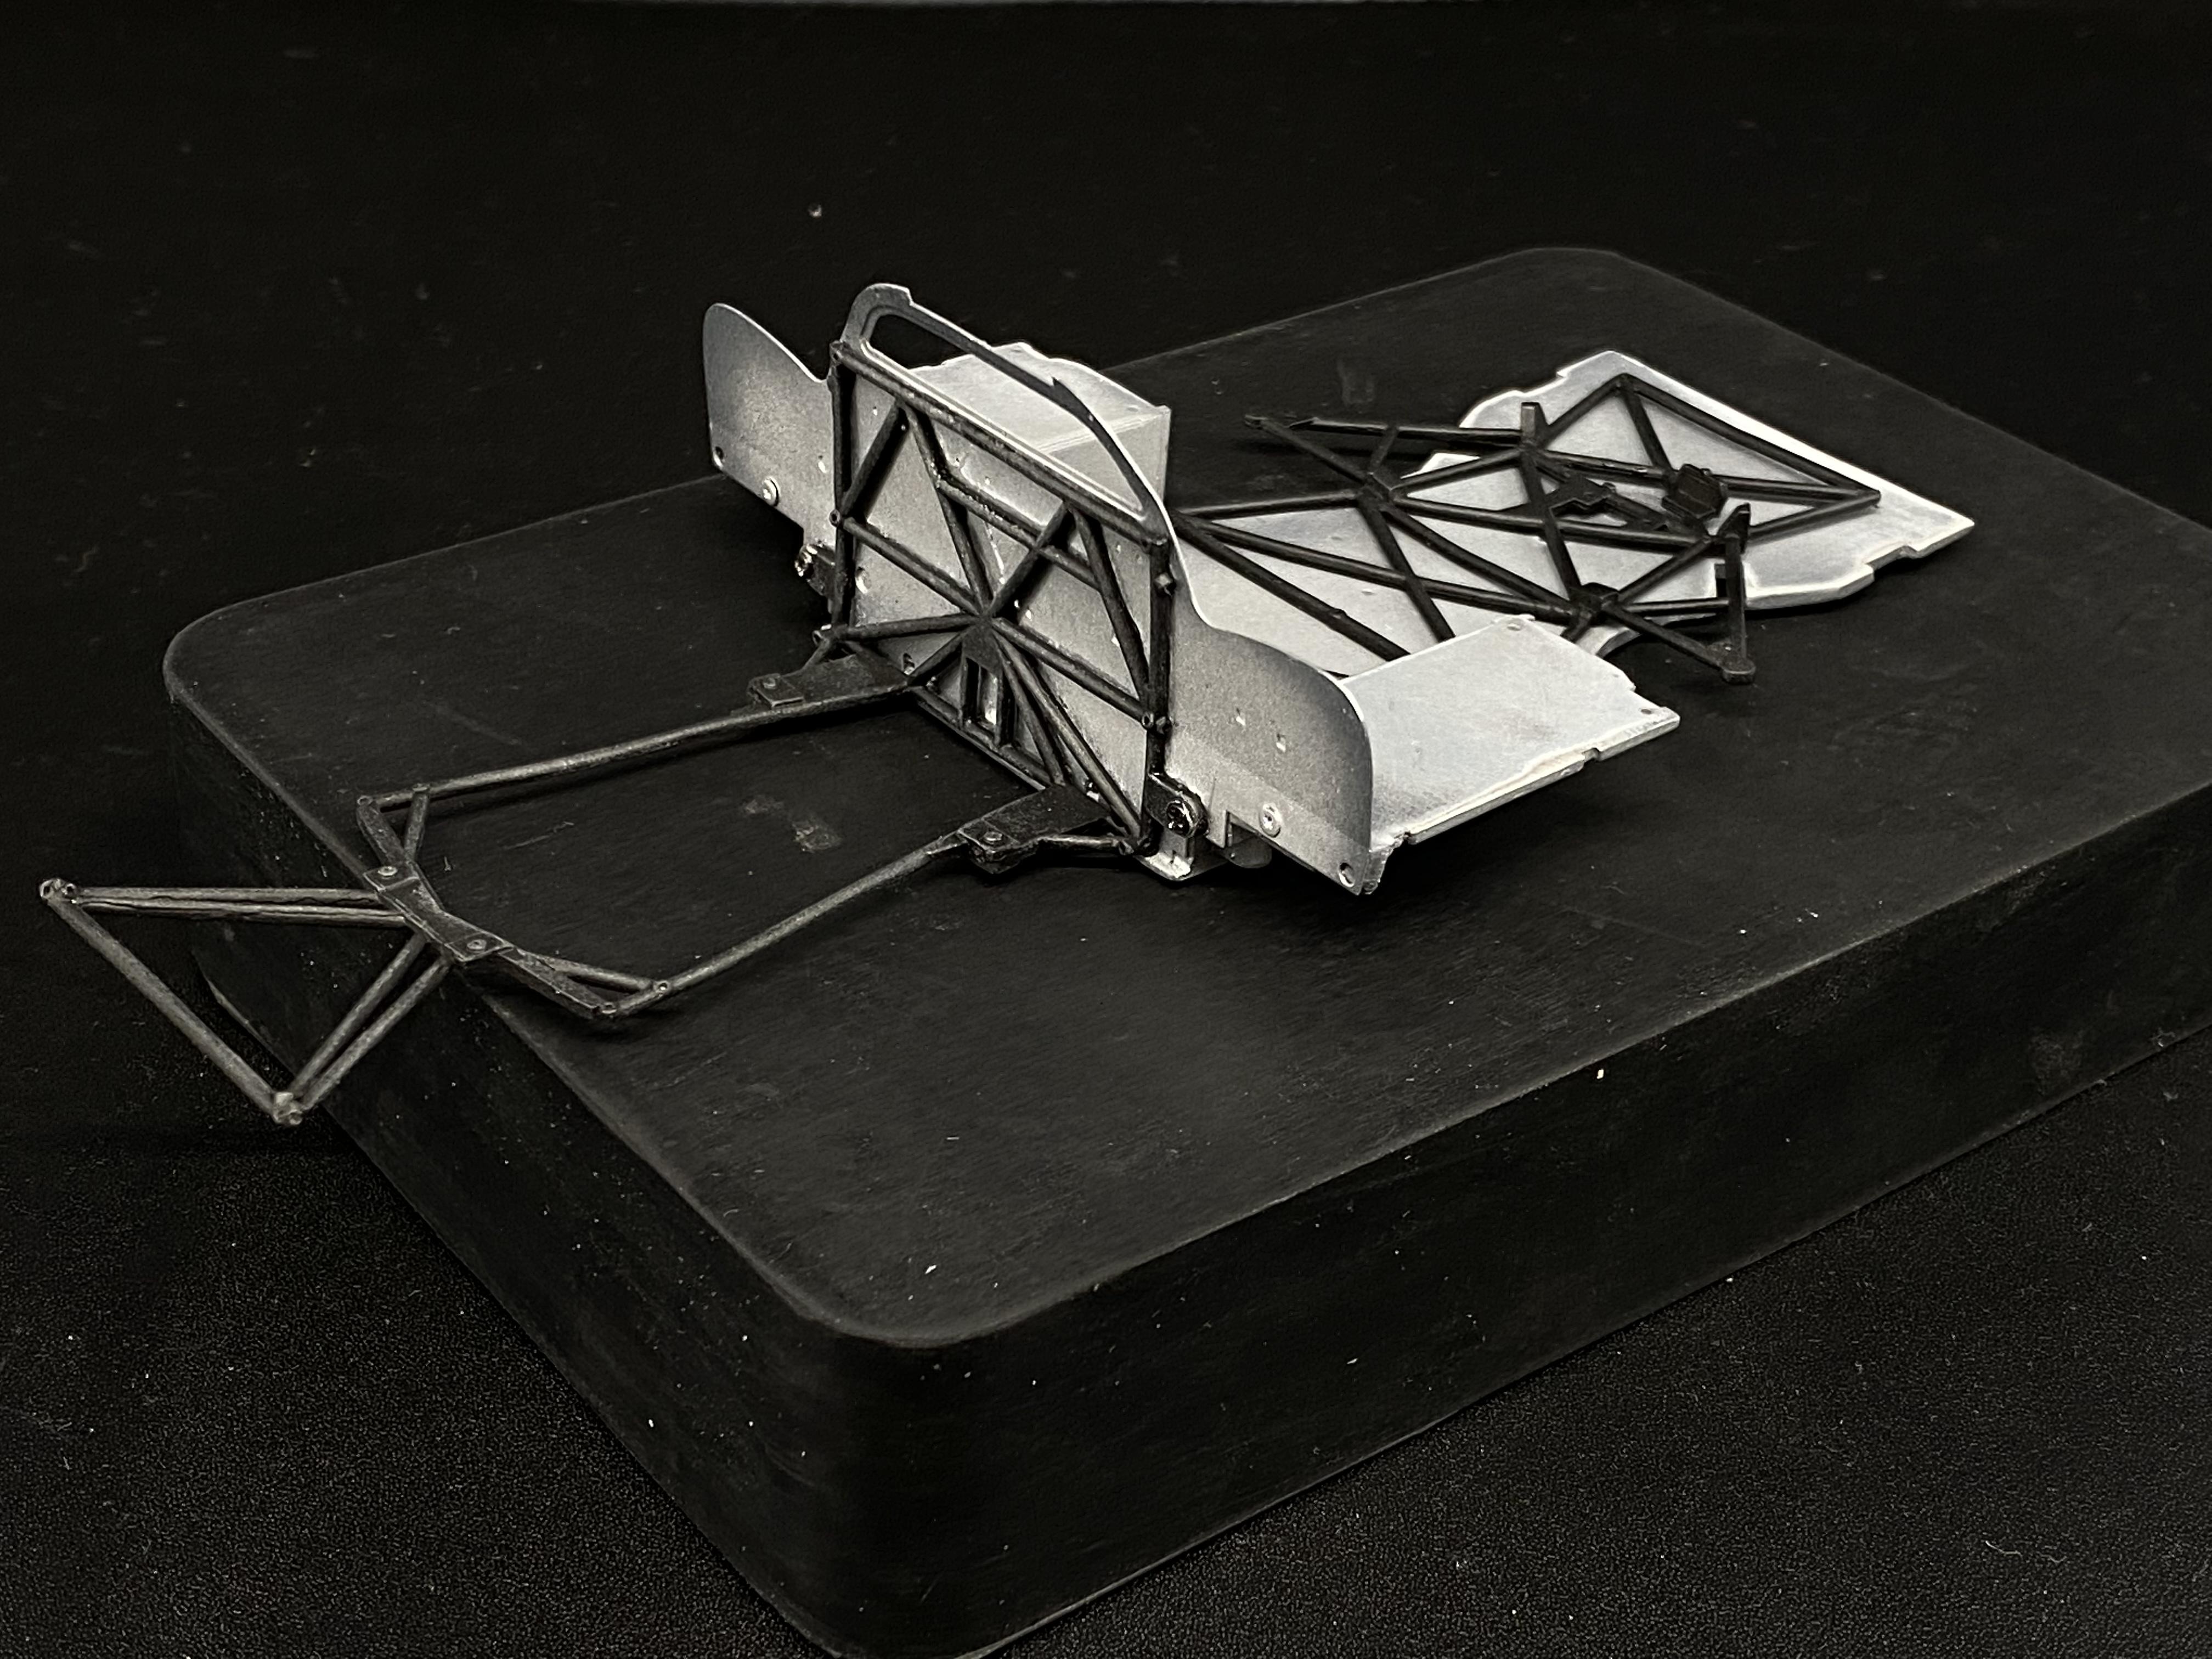
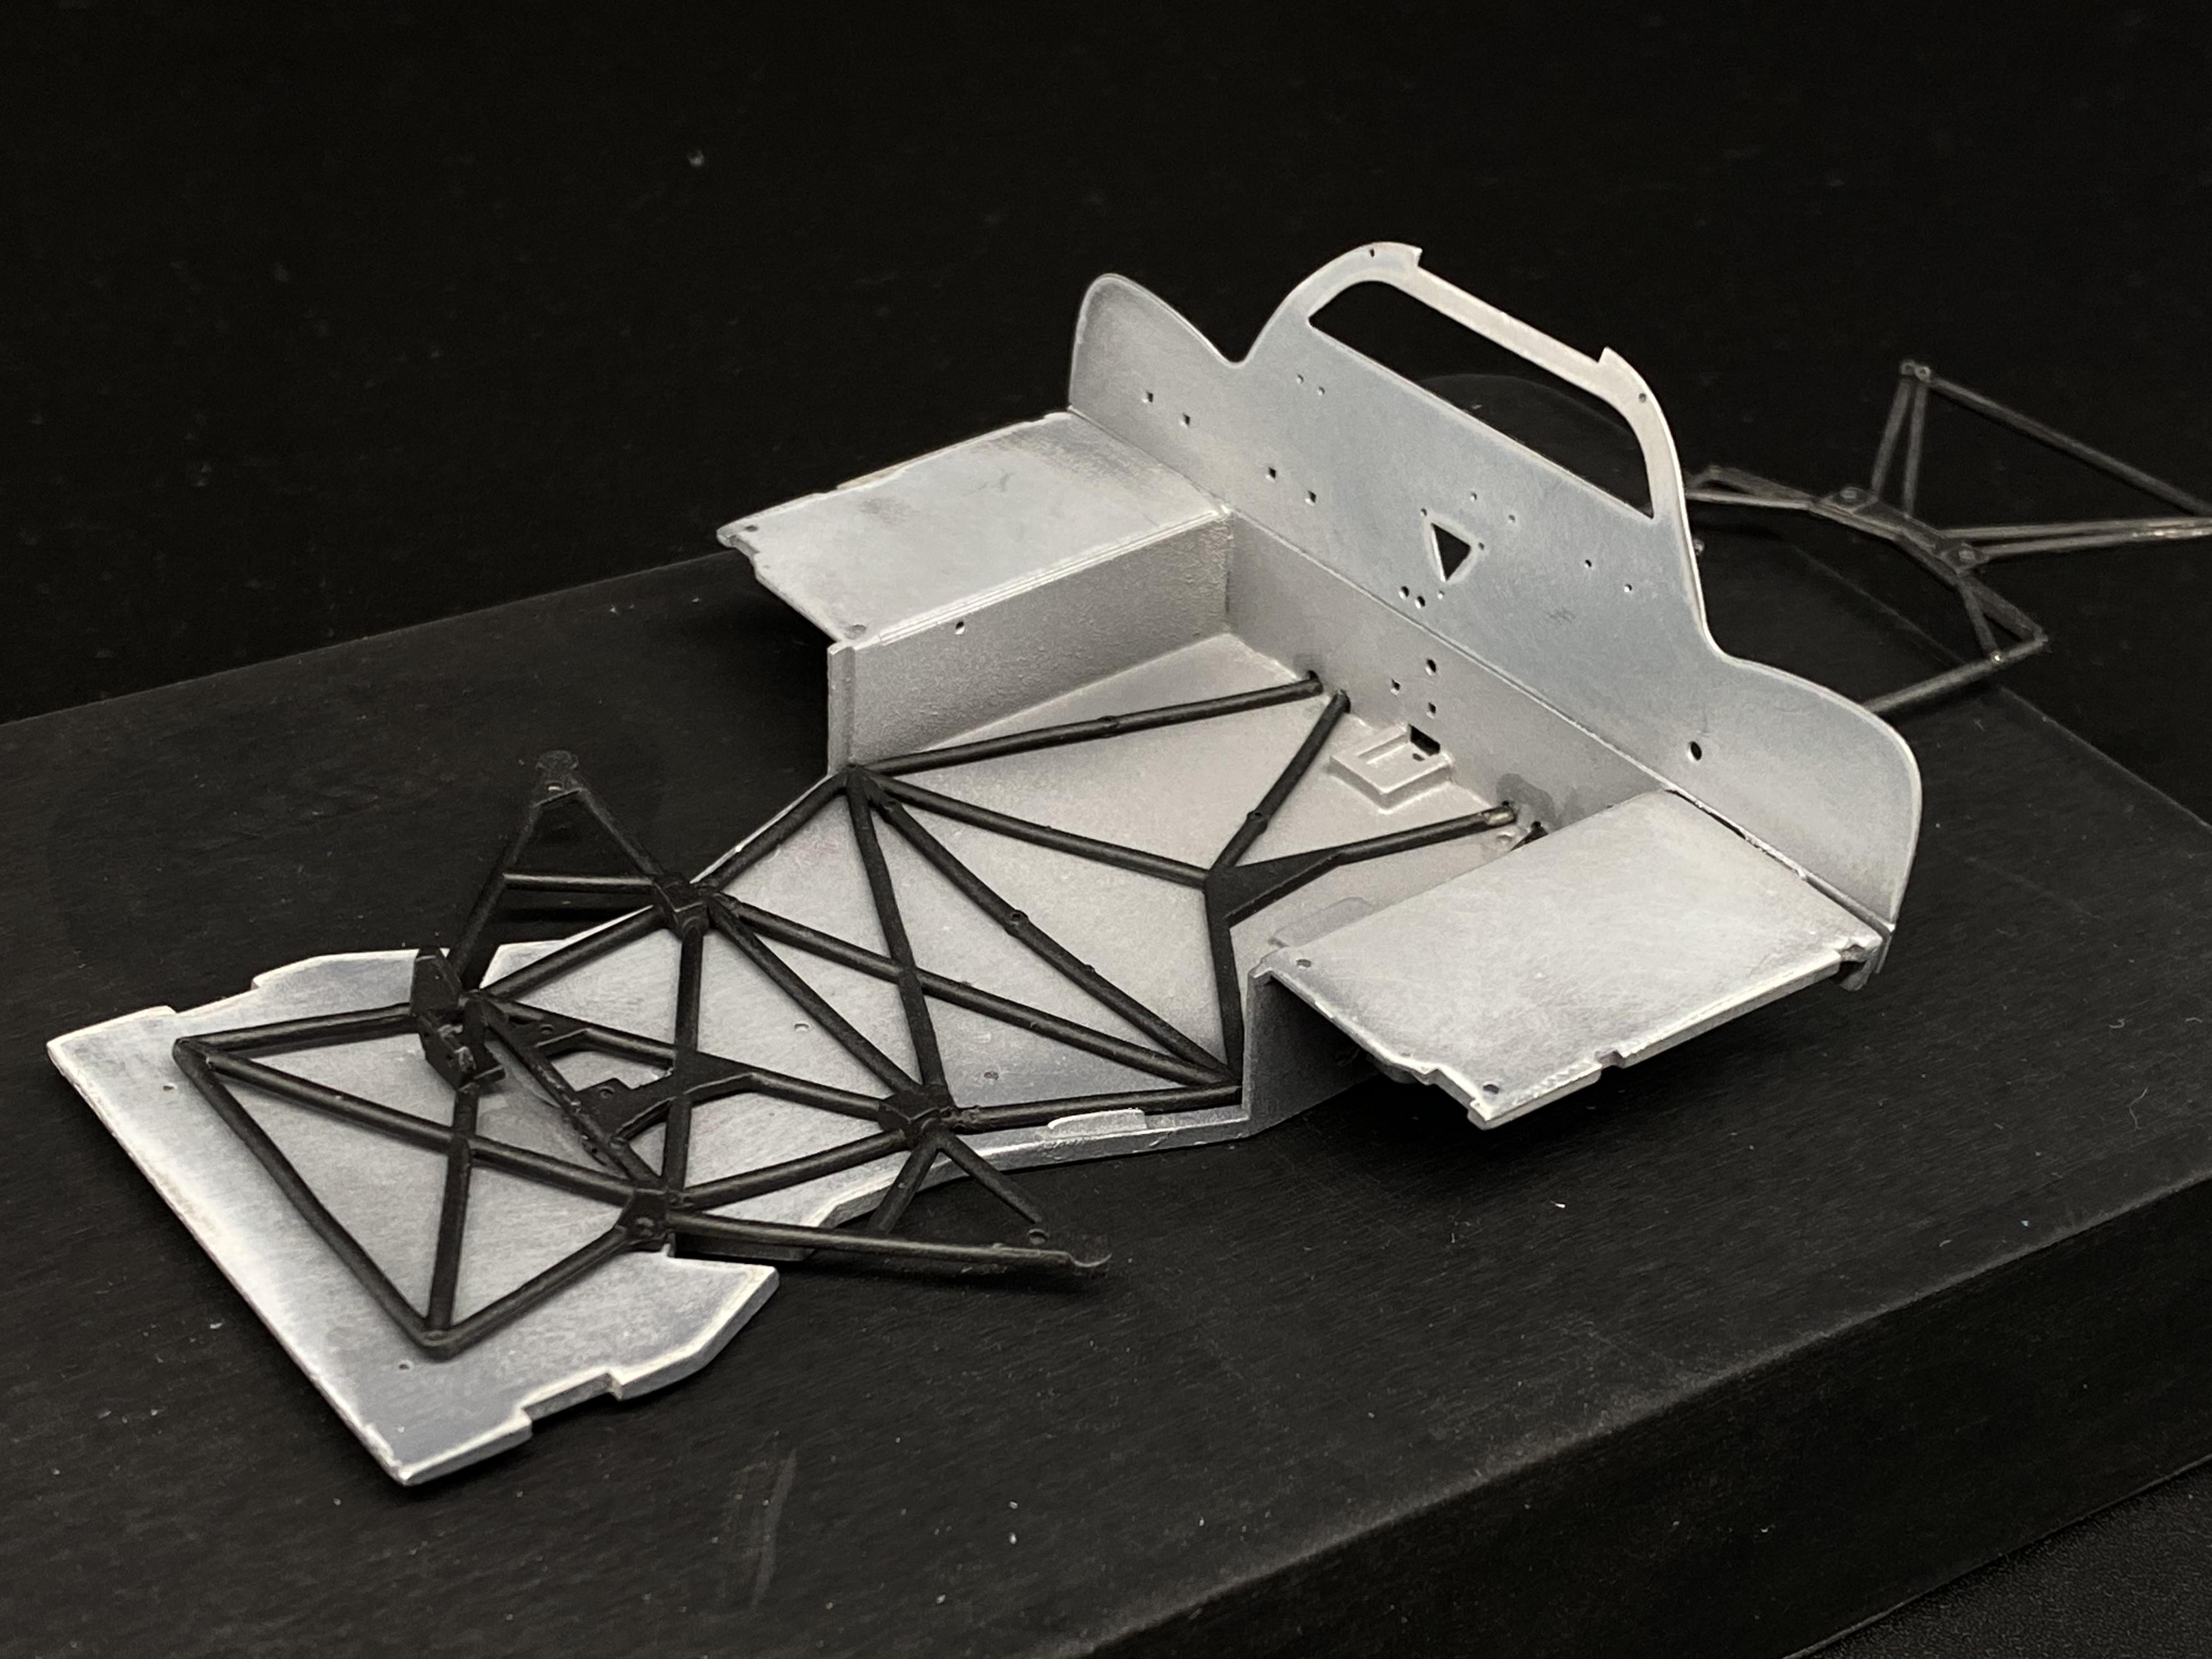
Good day everyone! I’ve been tinkering off and on for the last couple months but haven’t dove into a serious build until now. It’s almost been too hot to even work in the shop during the afternoon and evening hours, and with no AC it’s not really worth sitting there trying to build while sweating. This is a Model Factory Hiro 1/24 Porsche 917K, Gulf livery. I’ve been wanting to build this kit for a long time, so here we go. There are 100’s of white metal parts in this kit, many of them being the chassis and tube frame which feels like looking at a snakes nest in the box. Some bending into shape and re working the parts is required, drilling out every single hole is also required. It’s pain staking work, but once it starts coming together you can start to see the payoff. This is hours and hours of cleaning. MFH kits need a lot of cleaning up. I put all the parts in a magnetic tumbler, after three rounds using progressively smaller mm stainless steel media rods, the parts come out polished and clean. The major flash still needs clean up but the tumbler definitely saves multiple hours of sanding and prep. After usually just two washes they come out pretty clean and ready to go.
-
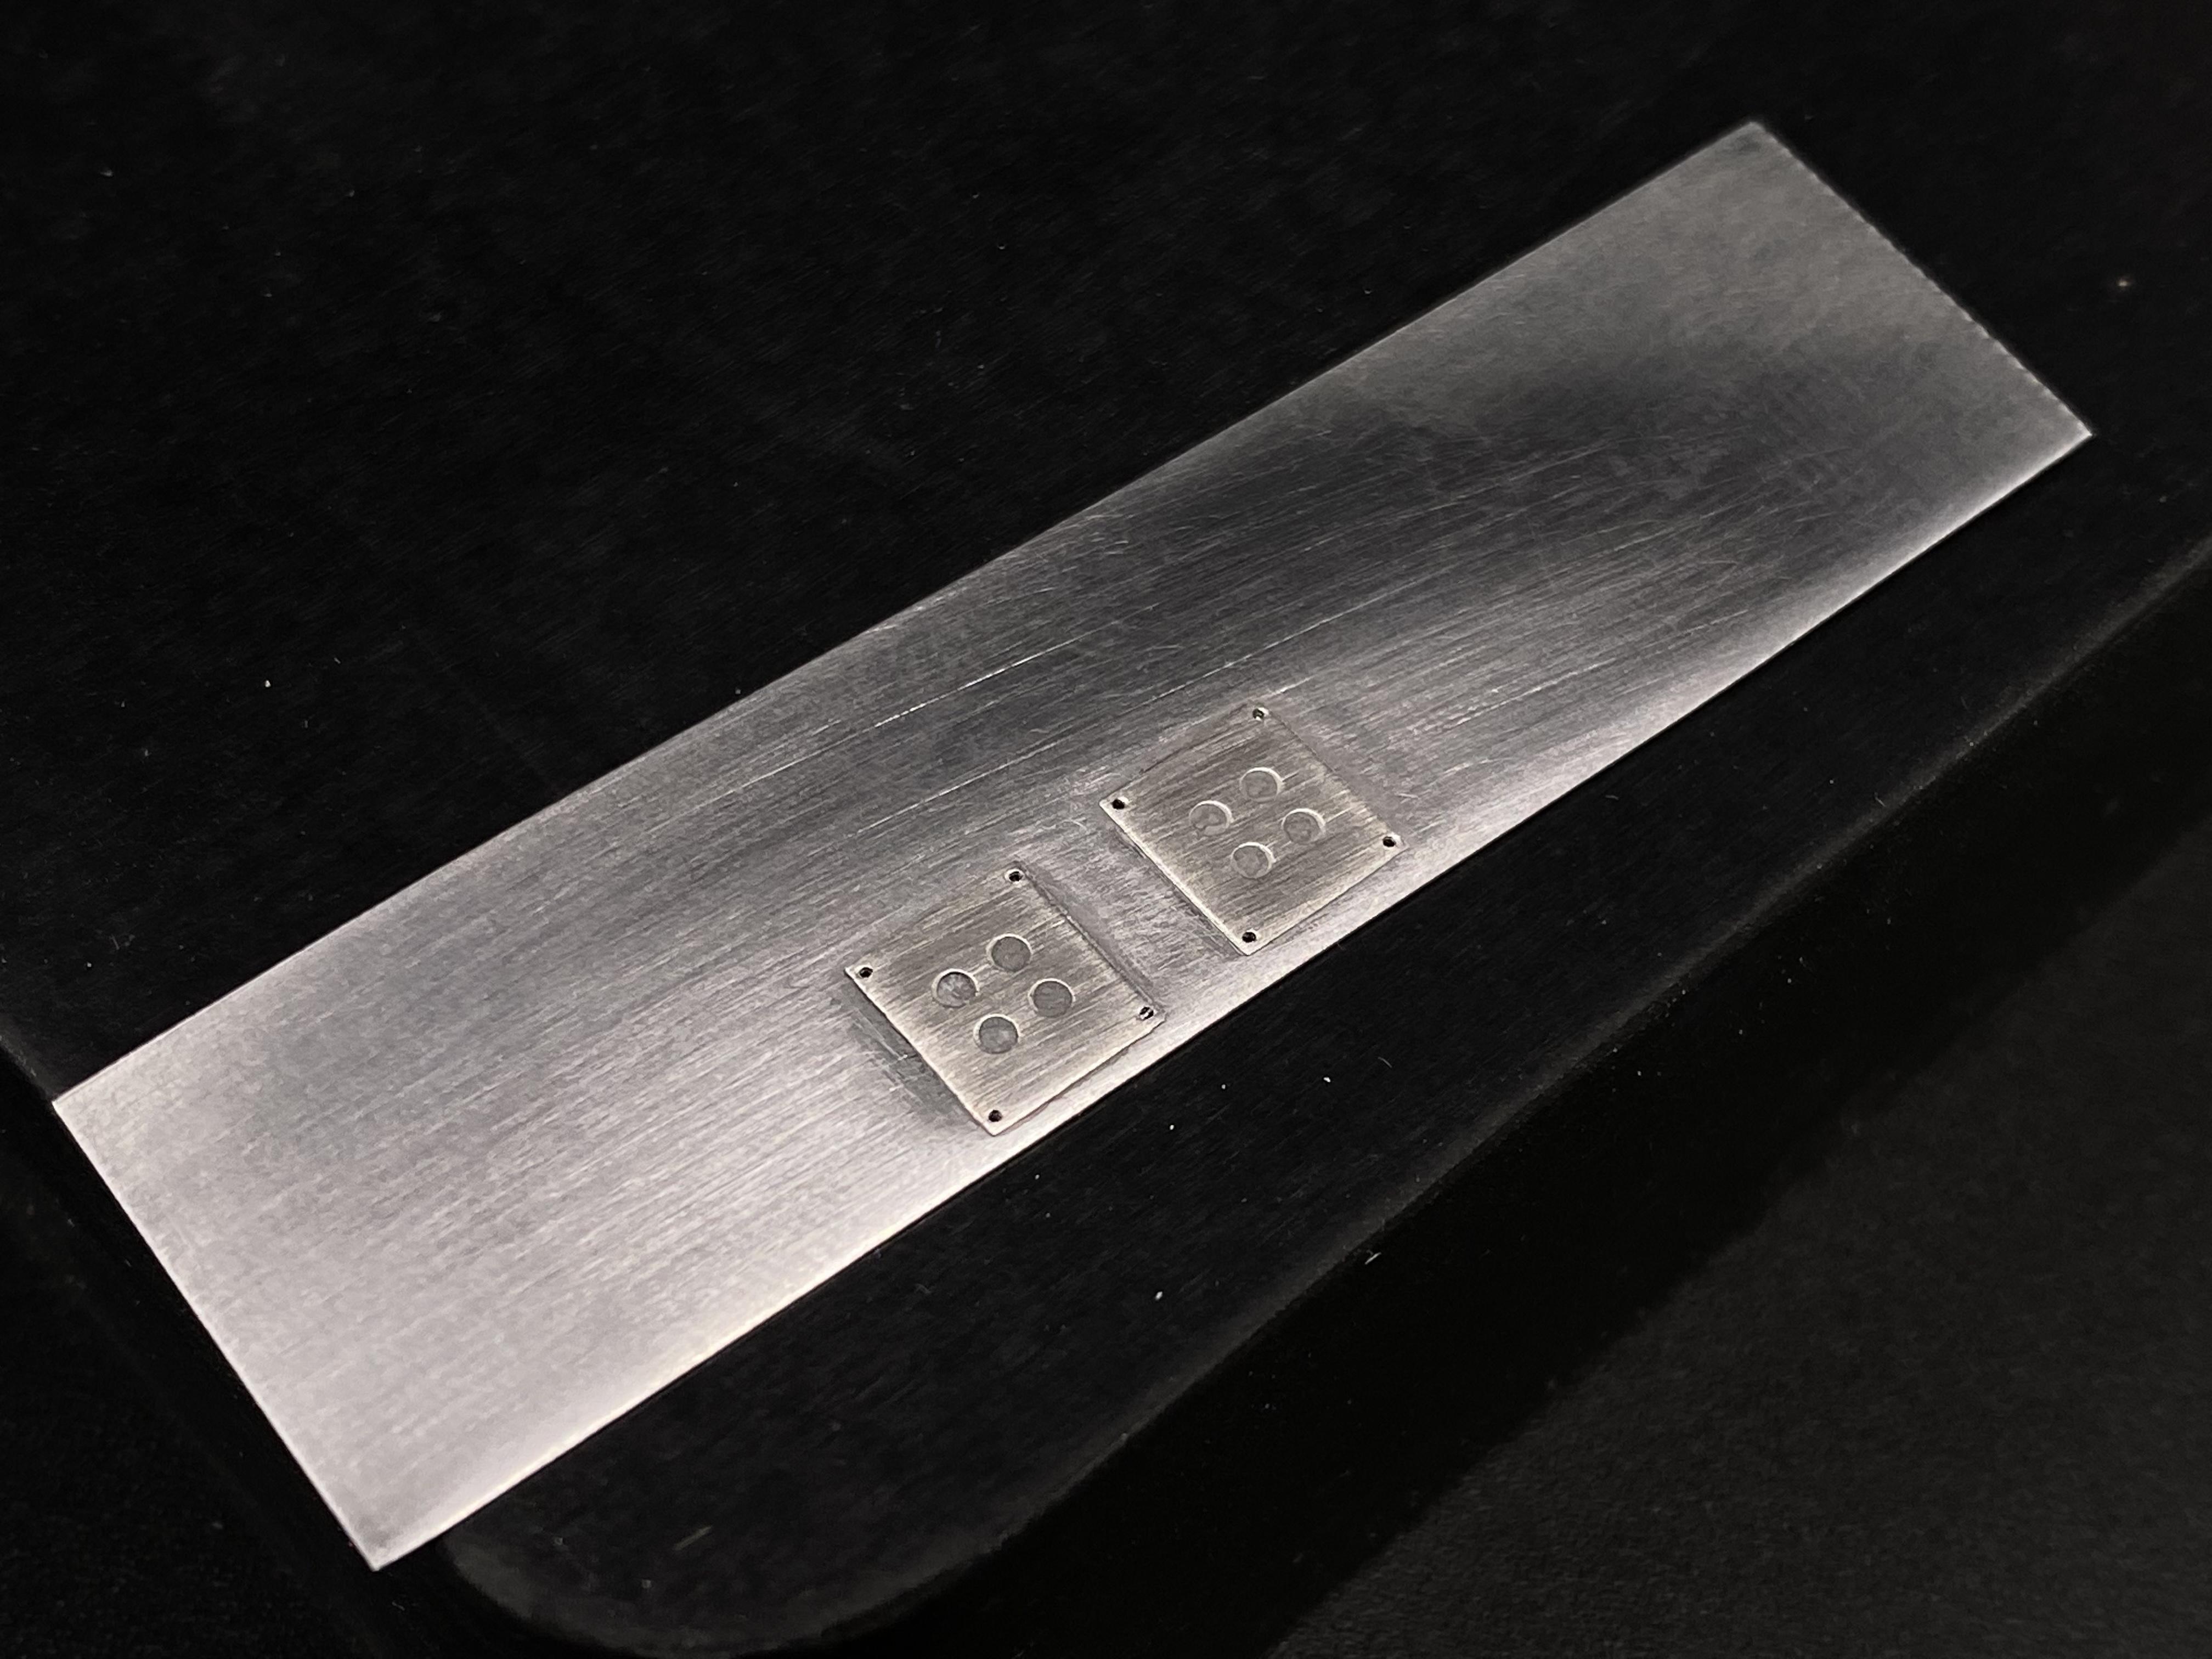
Thank you everyone for your kind comments! As we all know it brings us all motivation to build each other up. The bolts I use are all insect pins from Japan, I buy them 100 in a pack for $5. If one goes flying across the room i don’t have to freak out because I just lost a dollar! I’ll post a picture of the brand if you’re all interested. Let me know… Albion metals is a UK company, Sprue Brothers is the only place in America that Stocks their stuff, that I know of. It’s tubing so small you need magnifiers to work with it. The final game changer for me was buying every single Hozan tweezer I could find. They are superb tools usually used in labs, but for detail work there are no better.
-
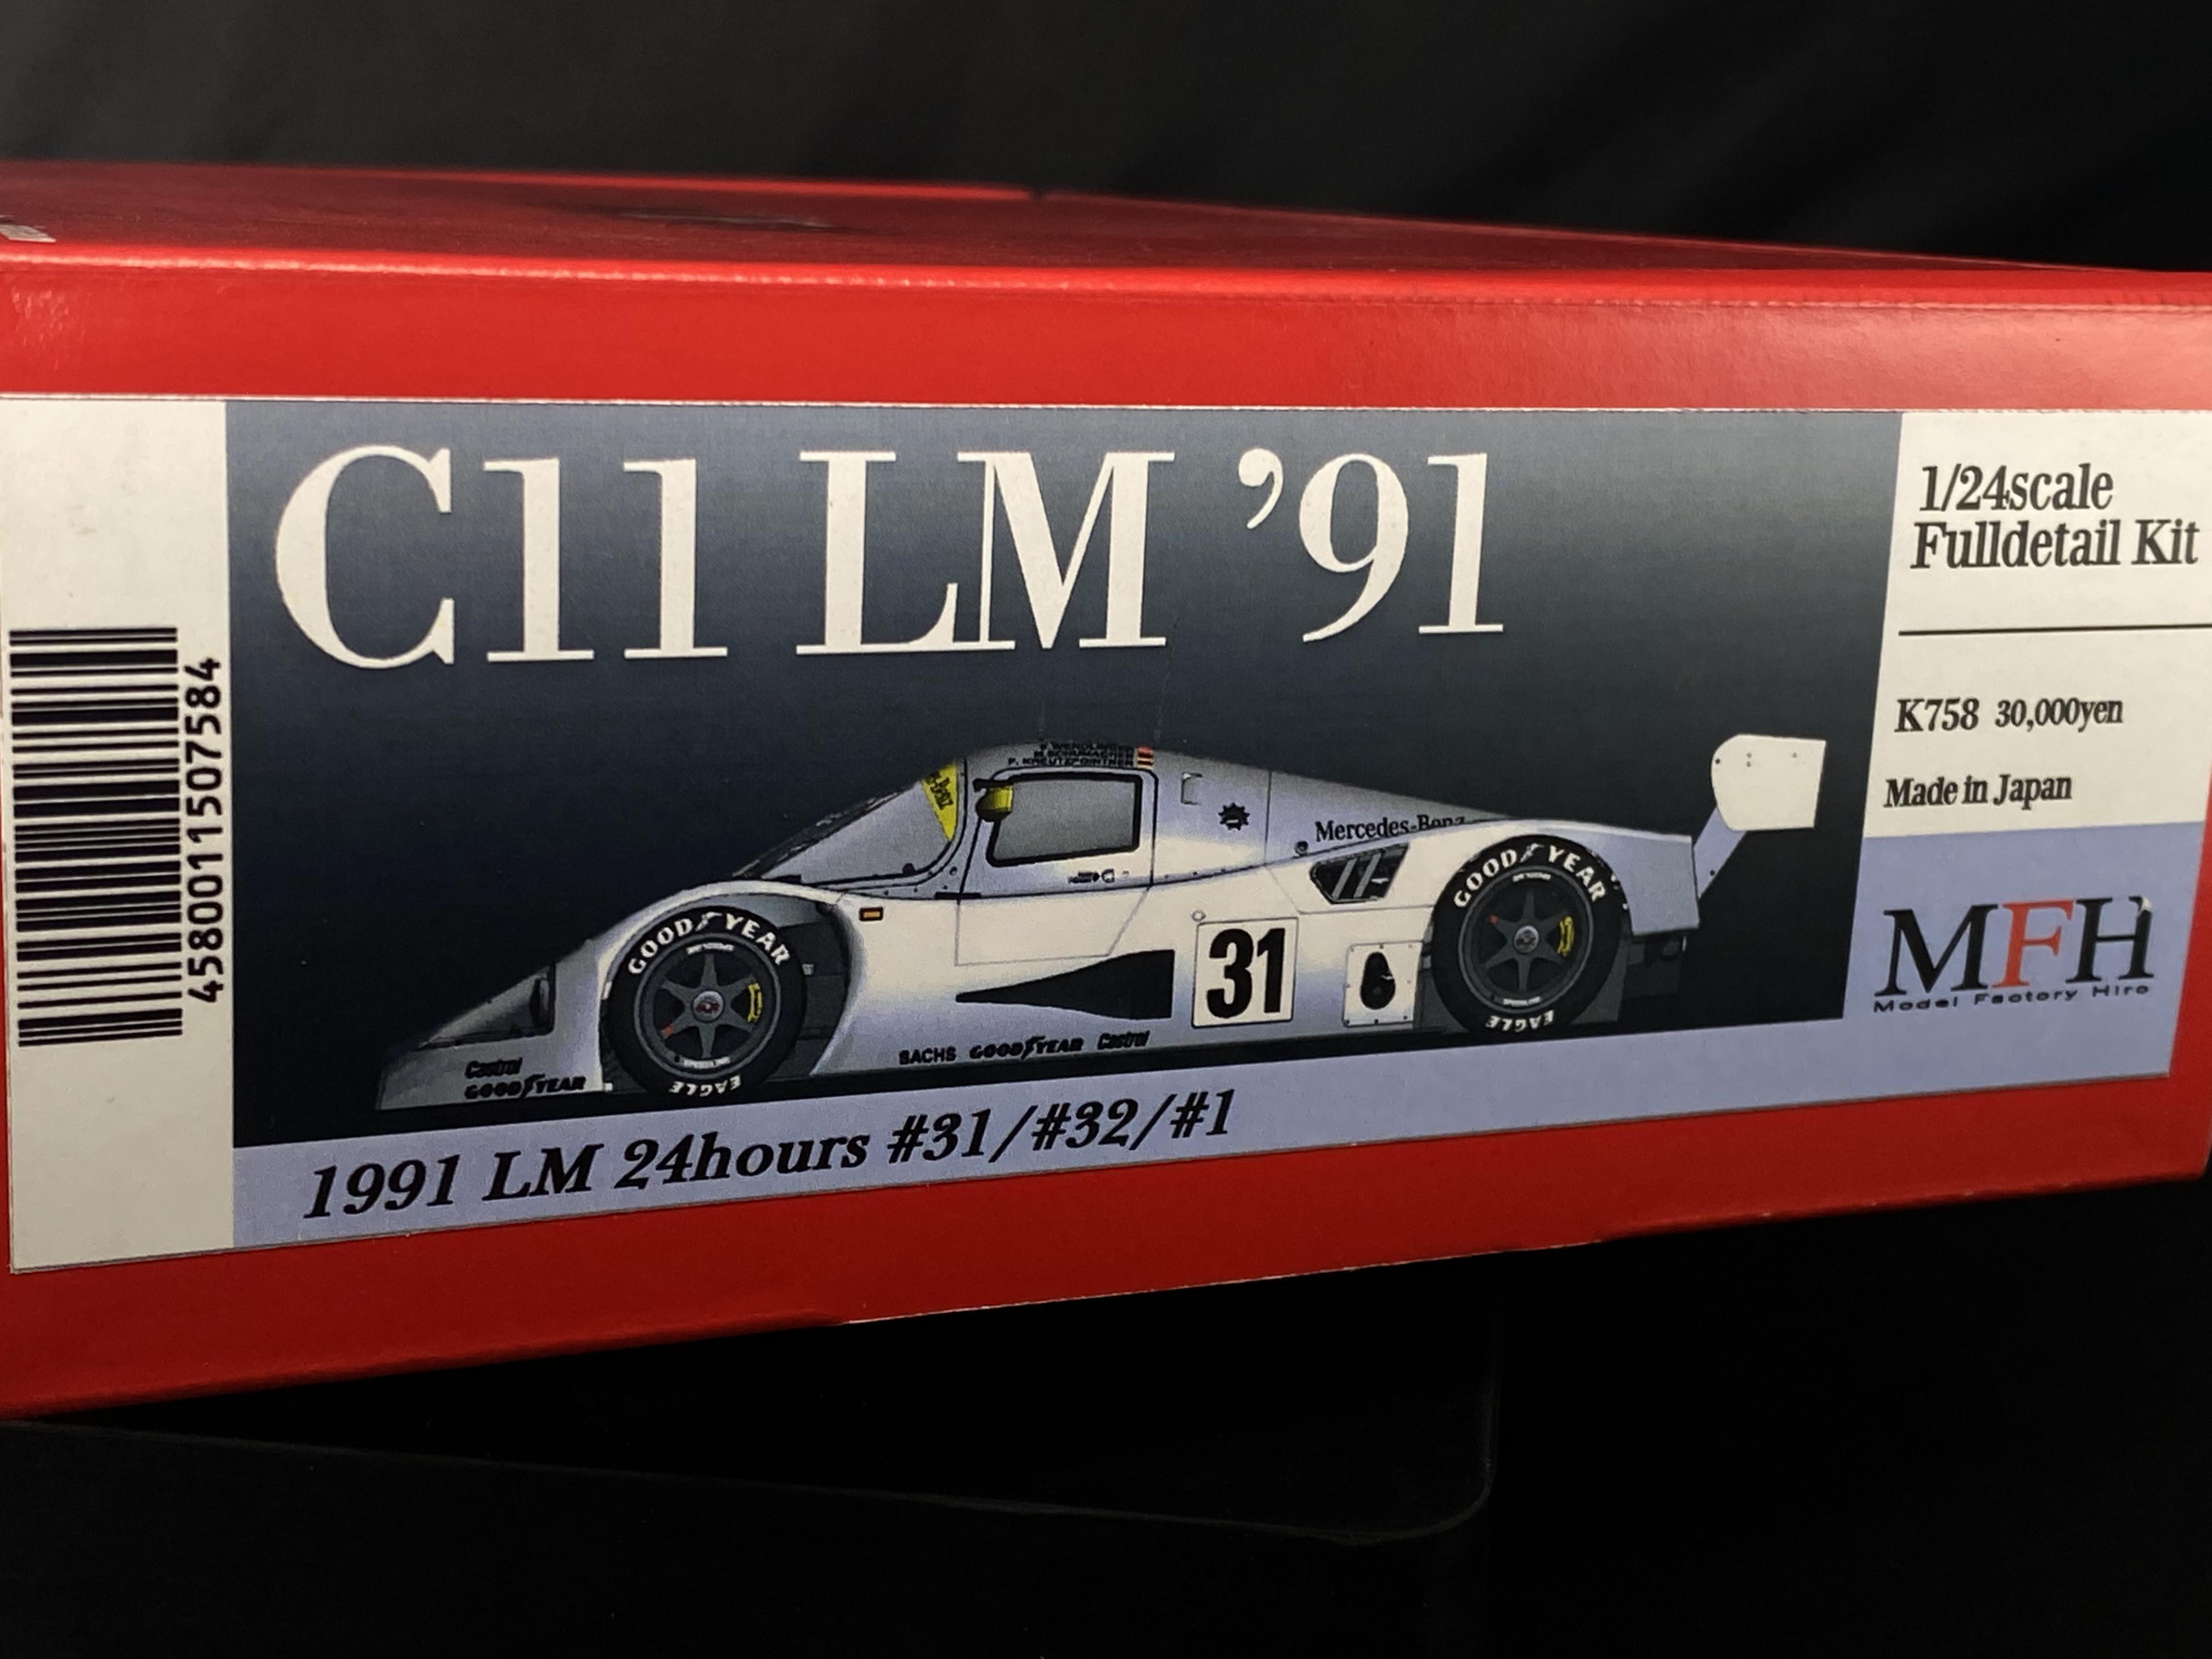
Next… GT40 street back on, maybe finish the Daytona? Start the C11, or dive back into the Nova F40!!!
-
For those still watching, the tires and wheels were a struggle. Kit tires were shameful. Found some slicks on eBay, also bought about $300 in other slicks just to find out the $8 ones on eBay were the trick. Splash paints, thank you for making my colors all the time, within hours of my request!
-
And my final update for the weekend… I got the chrome on. I used Hasegawa’s Mirror Chrome, it’s like stretchy rubber chrome tape, hard to explain. This was my first time using it. Learned a lot and it’ll be better next time. All the wires ran and touch up painted. Radiator got work, etc etc. too much to mention. It’s coming along and hope to be done soon, my mind is already on my next build. ?
-
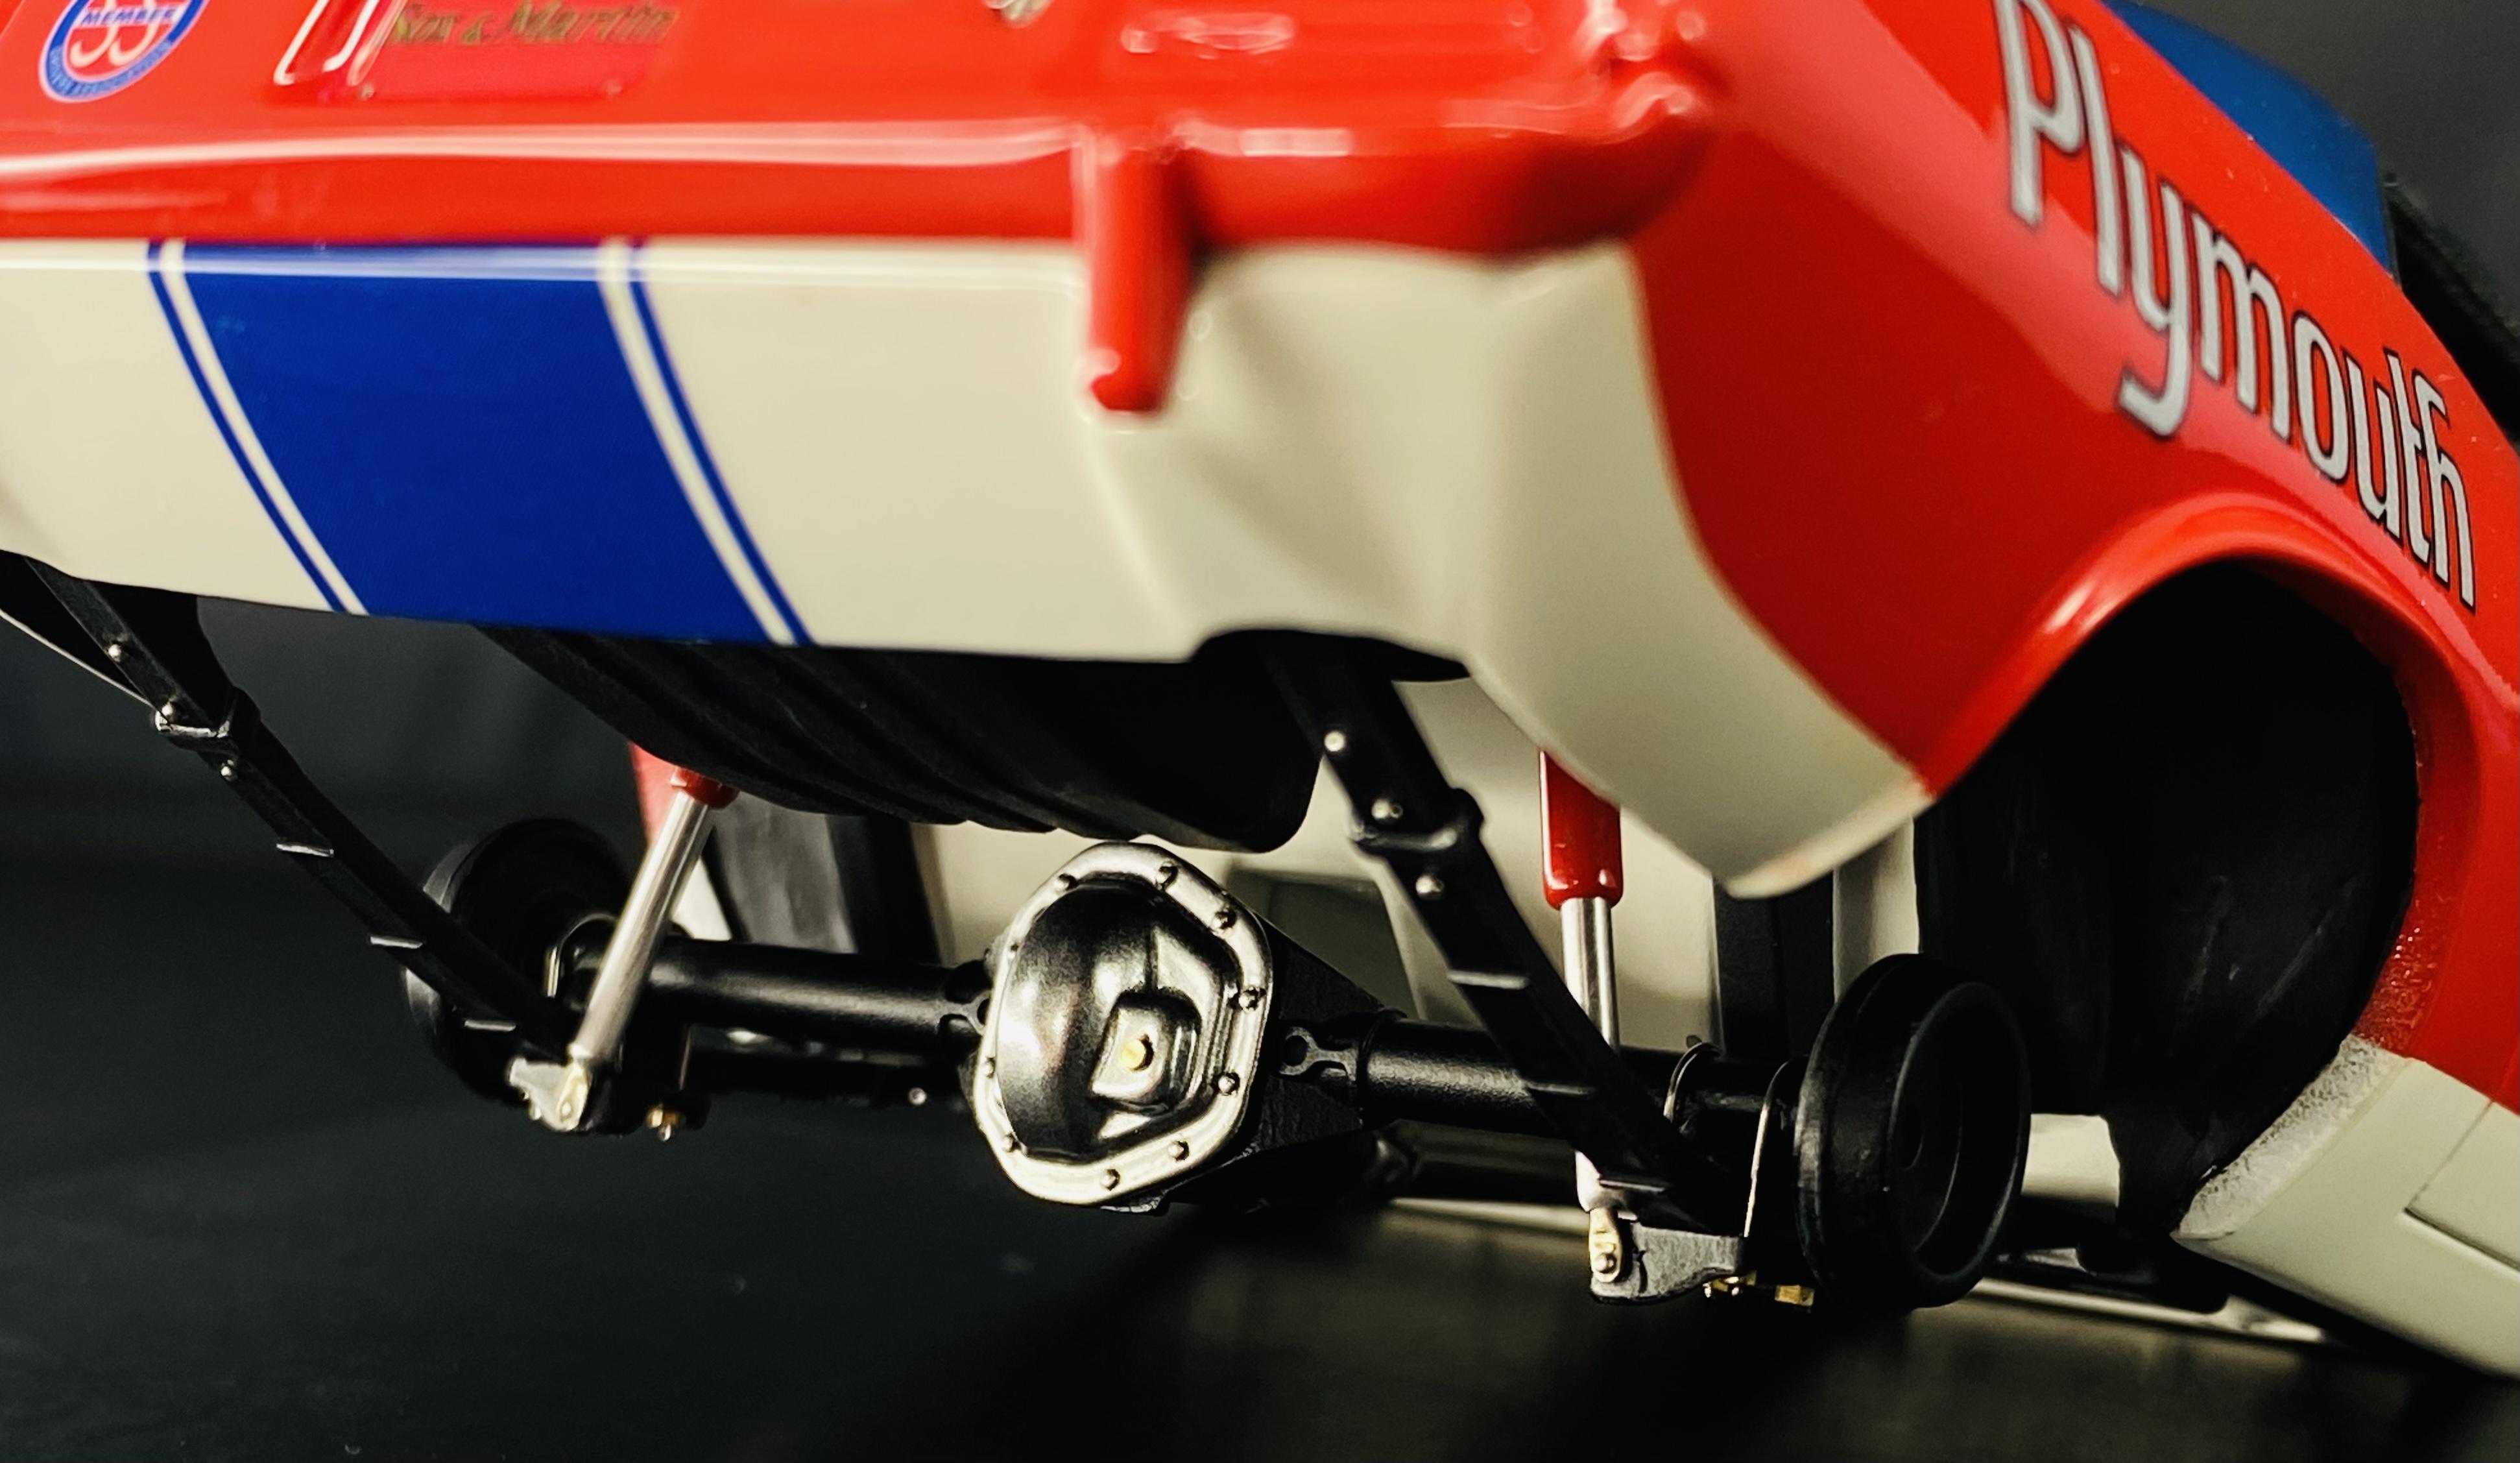
I couldn’t use the kit shocks, alum tube and Albion silver nickel tube, squished at the end, hole drilled then carefully sanded to make the ‘shock mount’. ??? and my 10 week old dog chillin like she owns the Chunky Lemmon Milk… -Kevin Malone - The Office
-
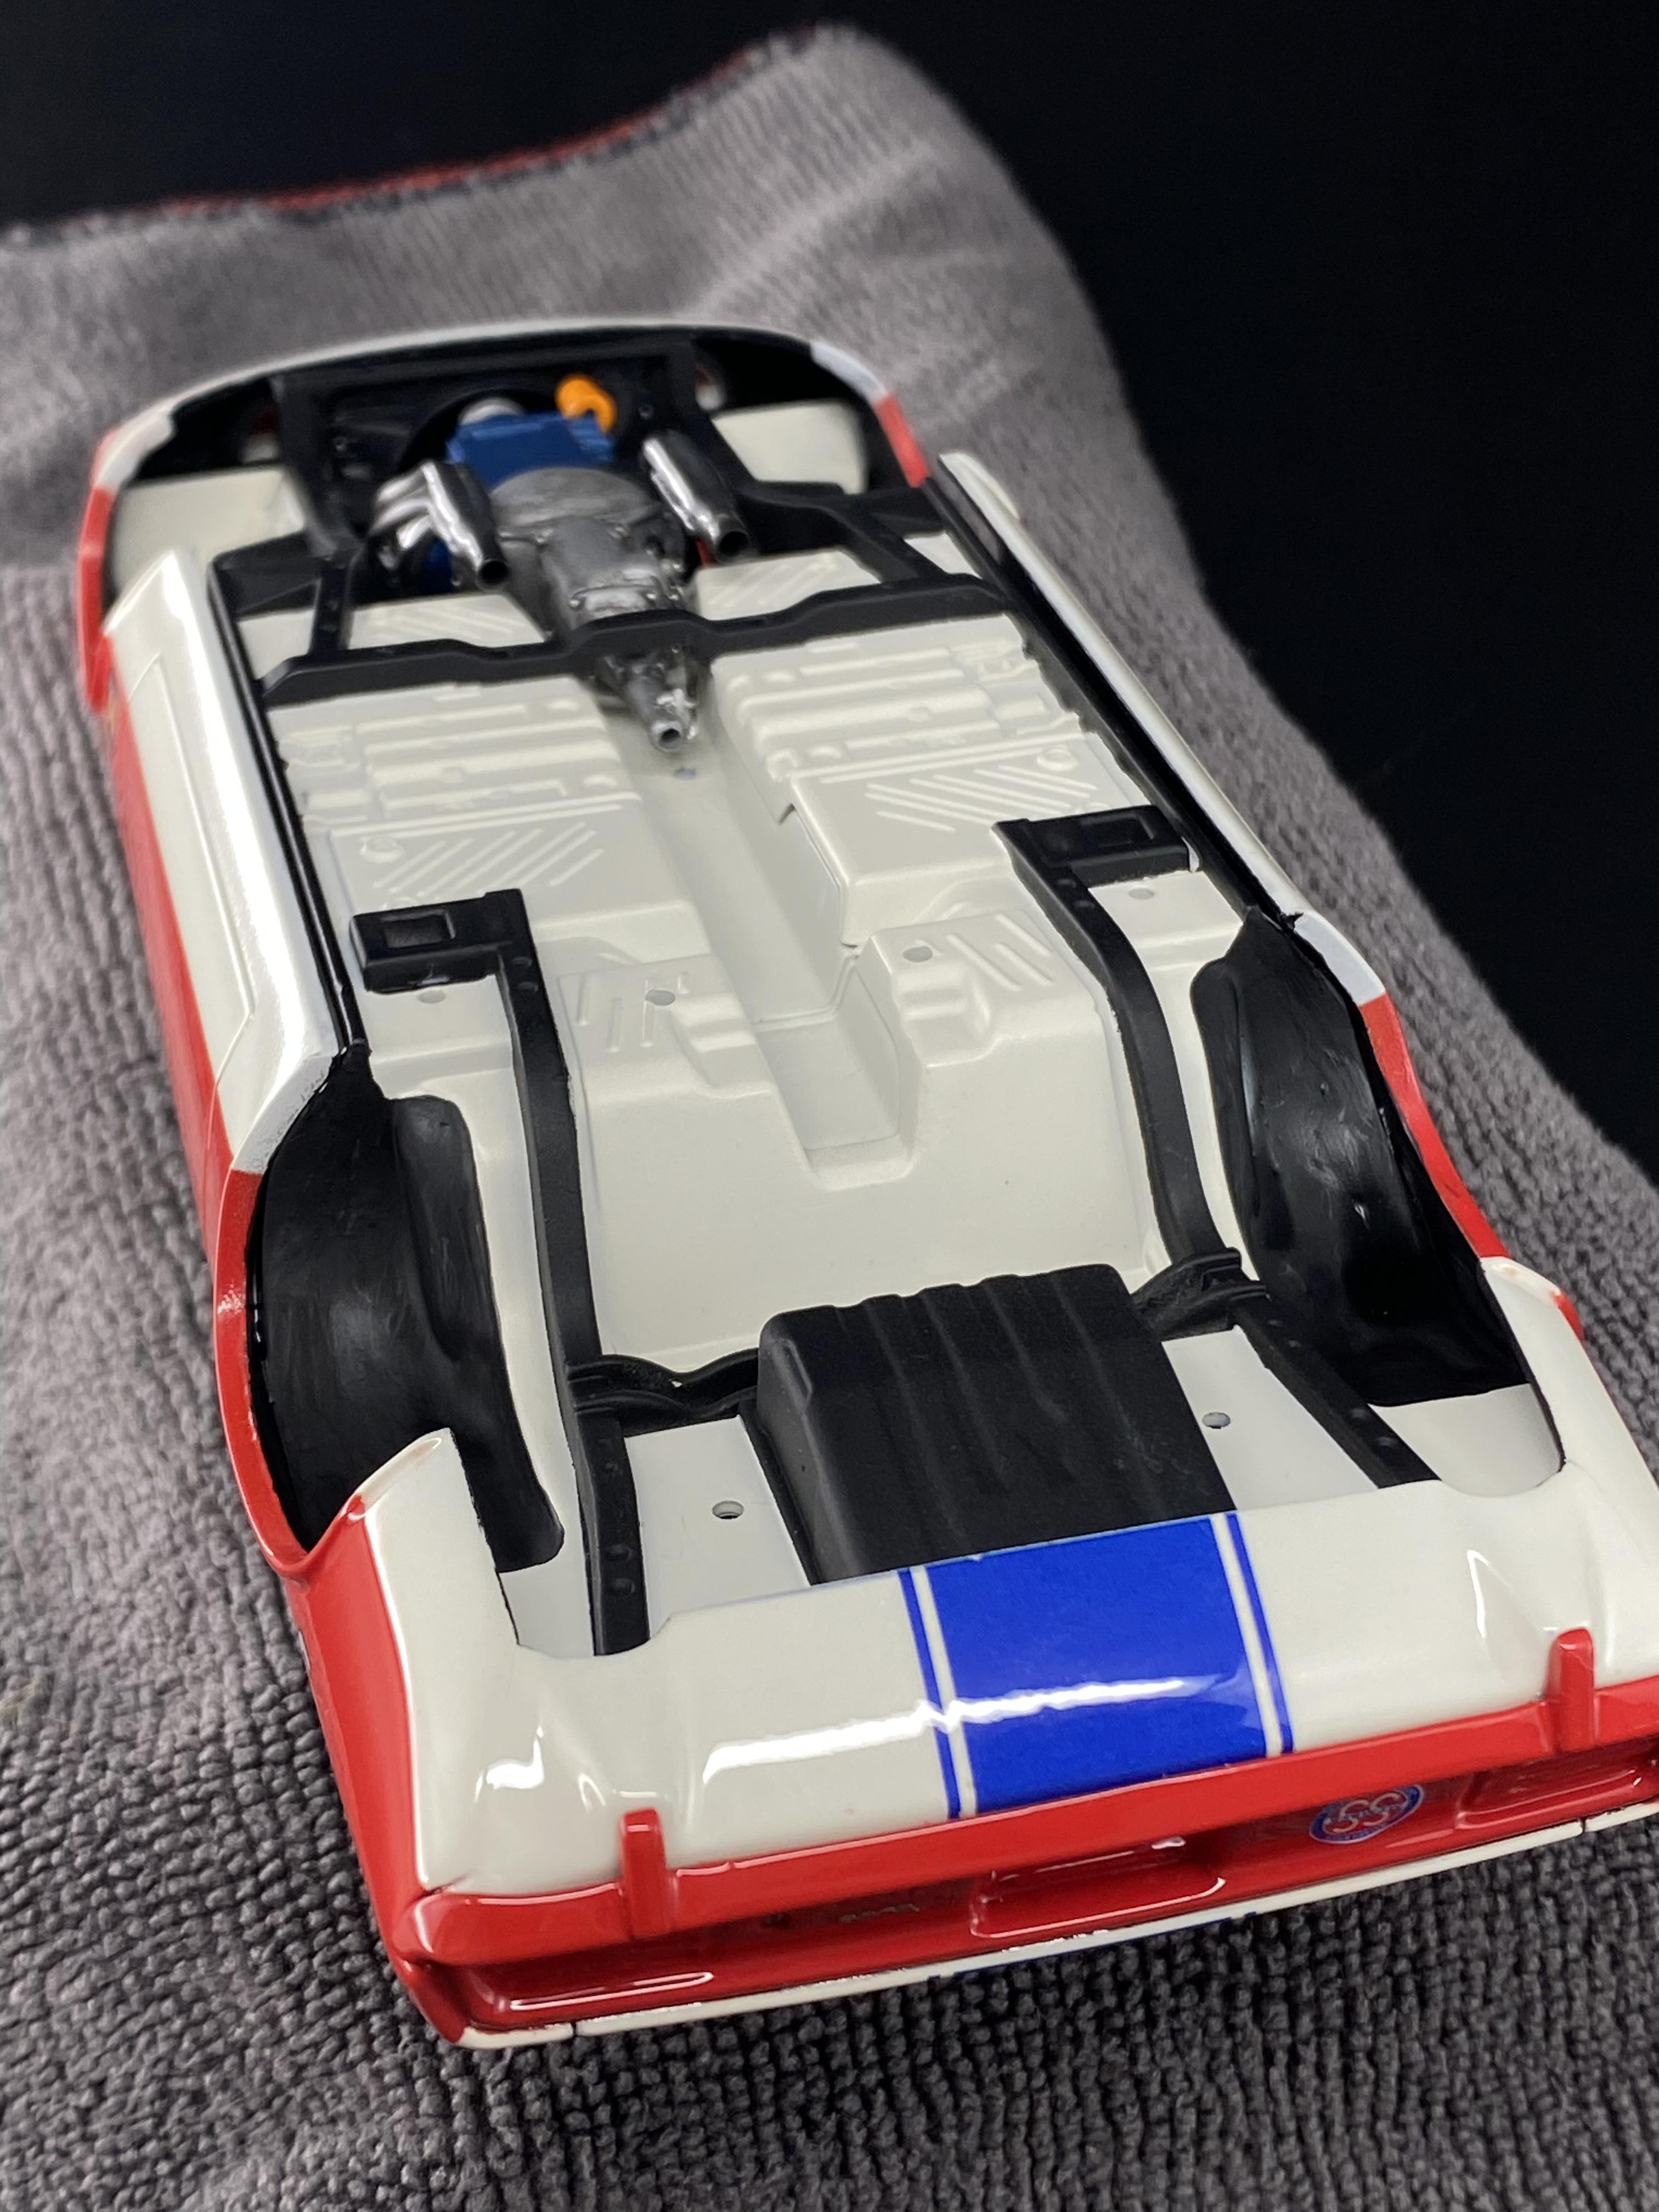
Windows in, headliner painted, all the interior details added, I’ll spare you those pics. Then chassis married to body. And after 37 test fits, modifications and reassembles, it’s final glued.
-
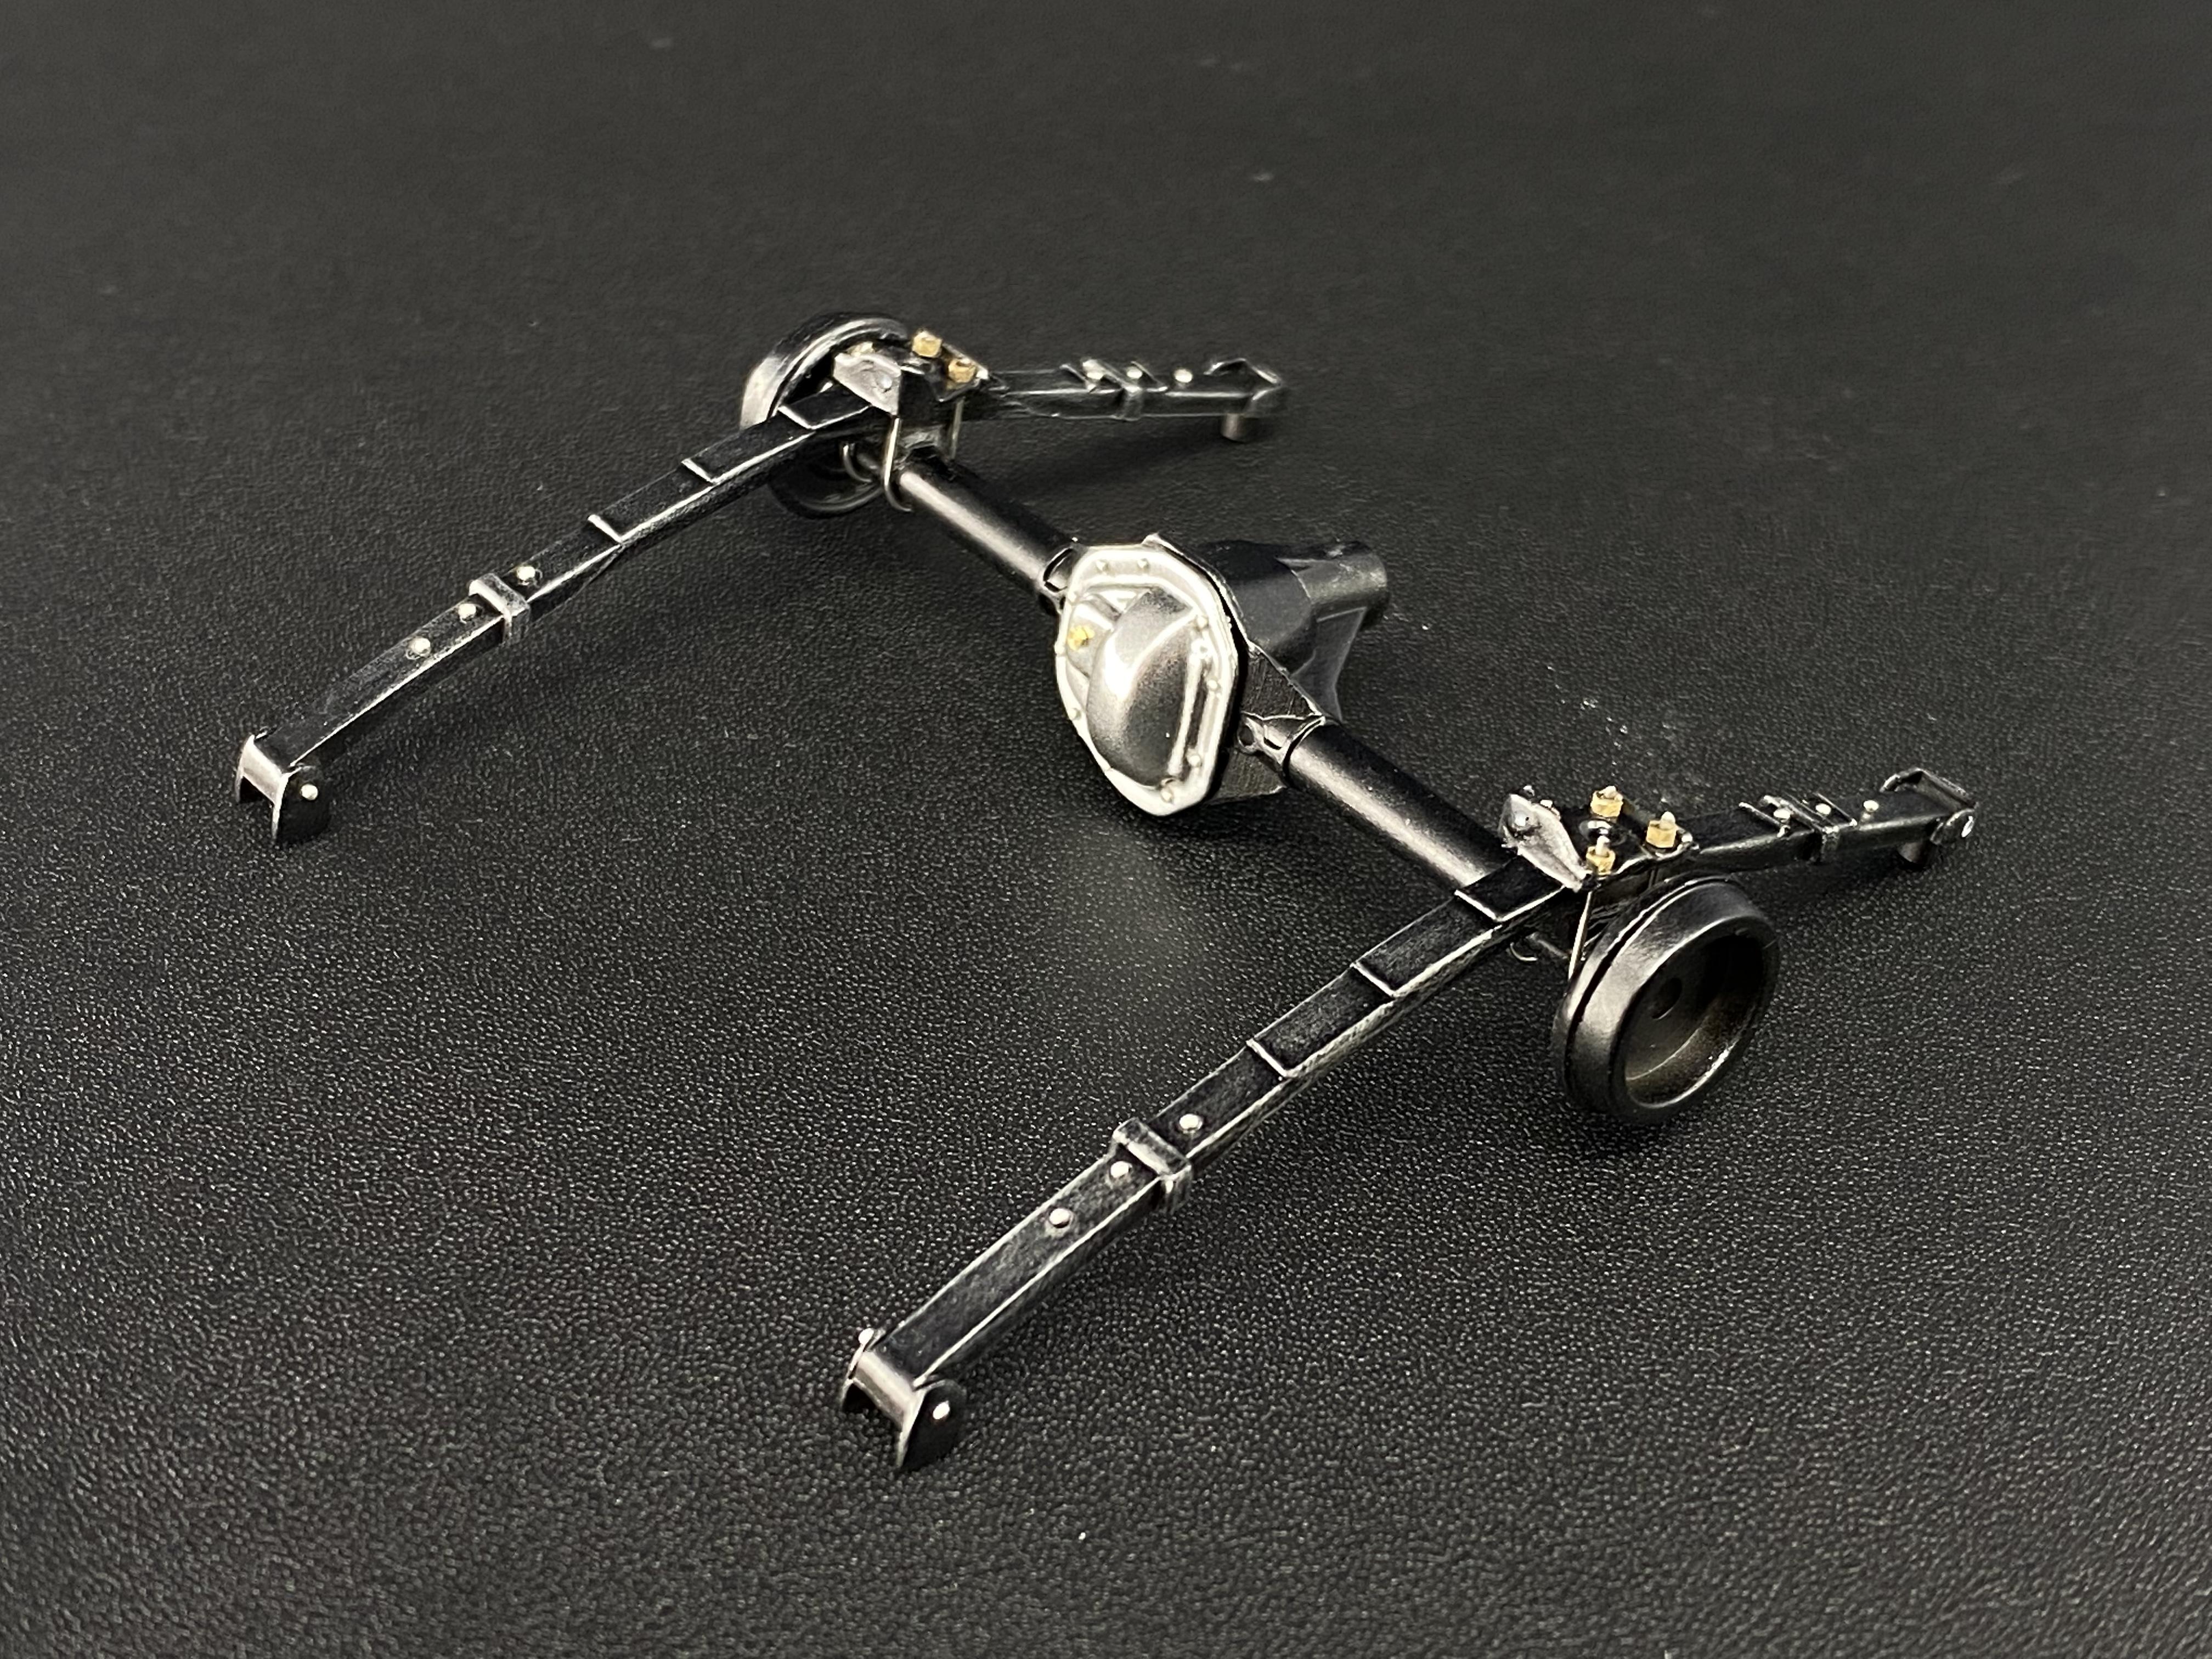
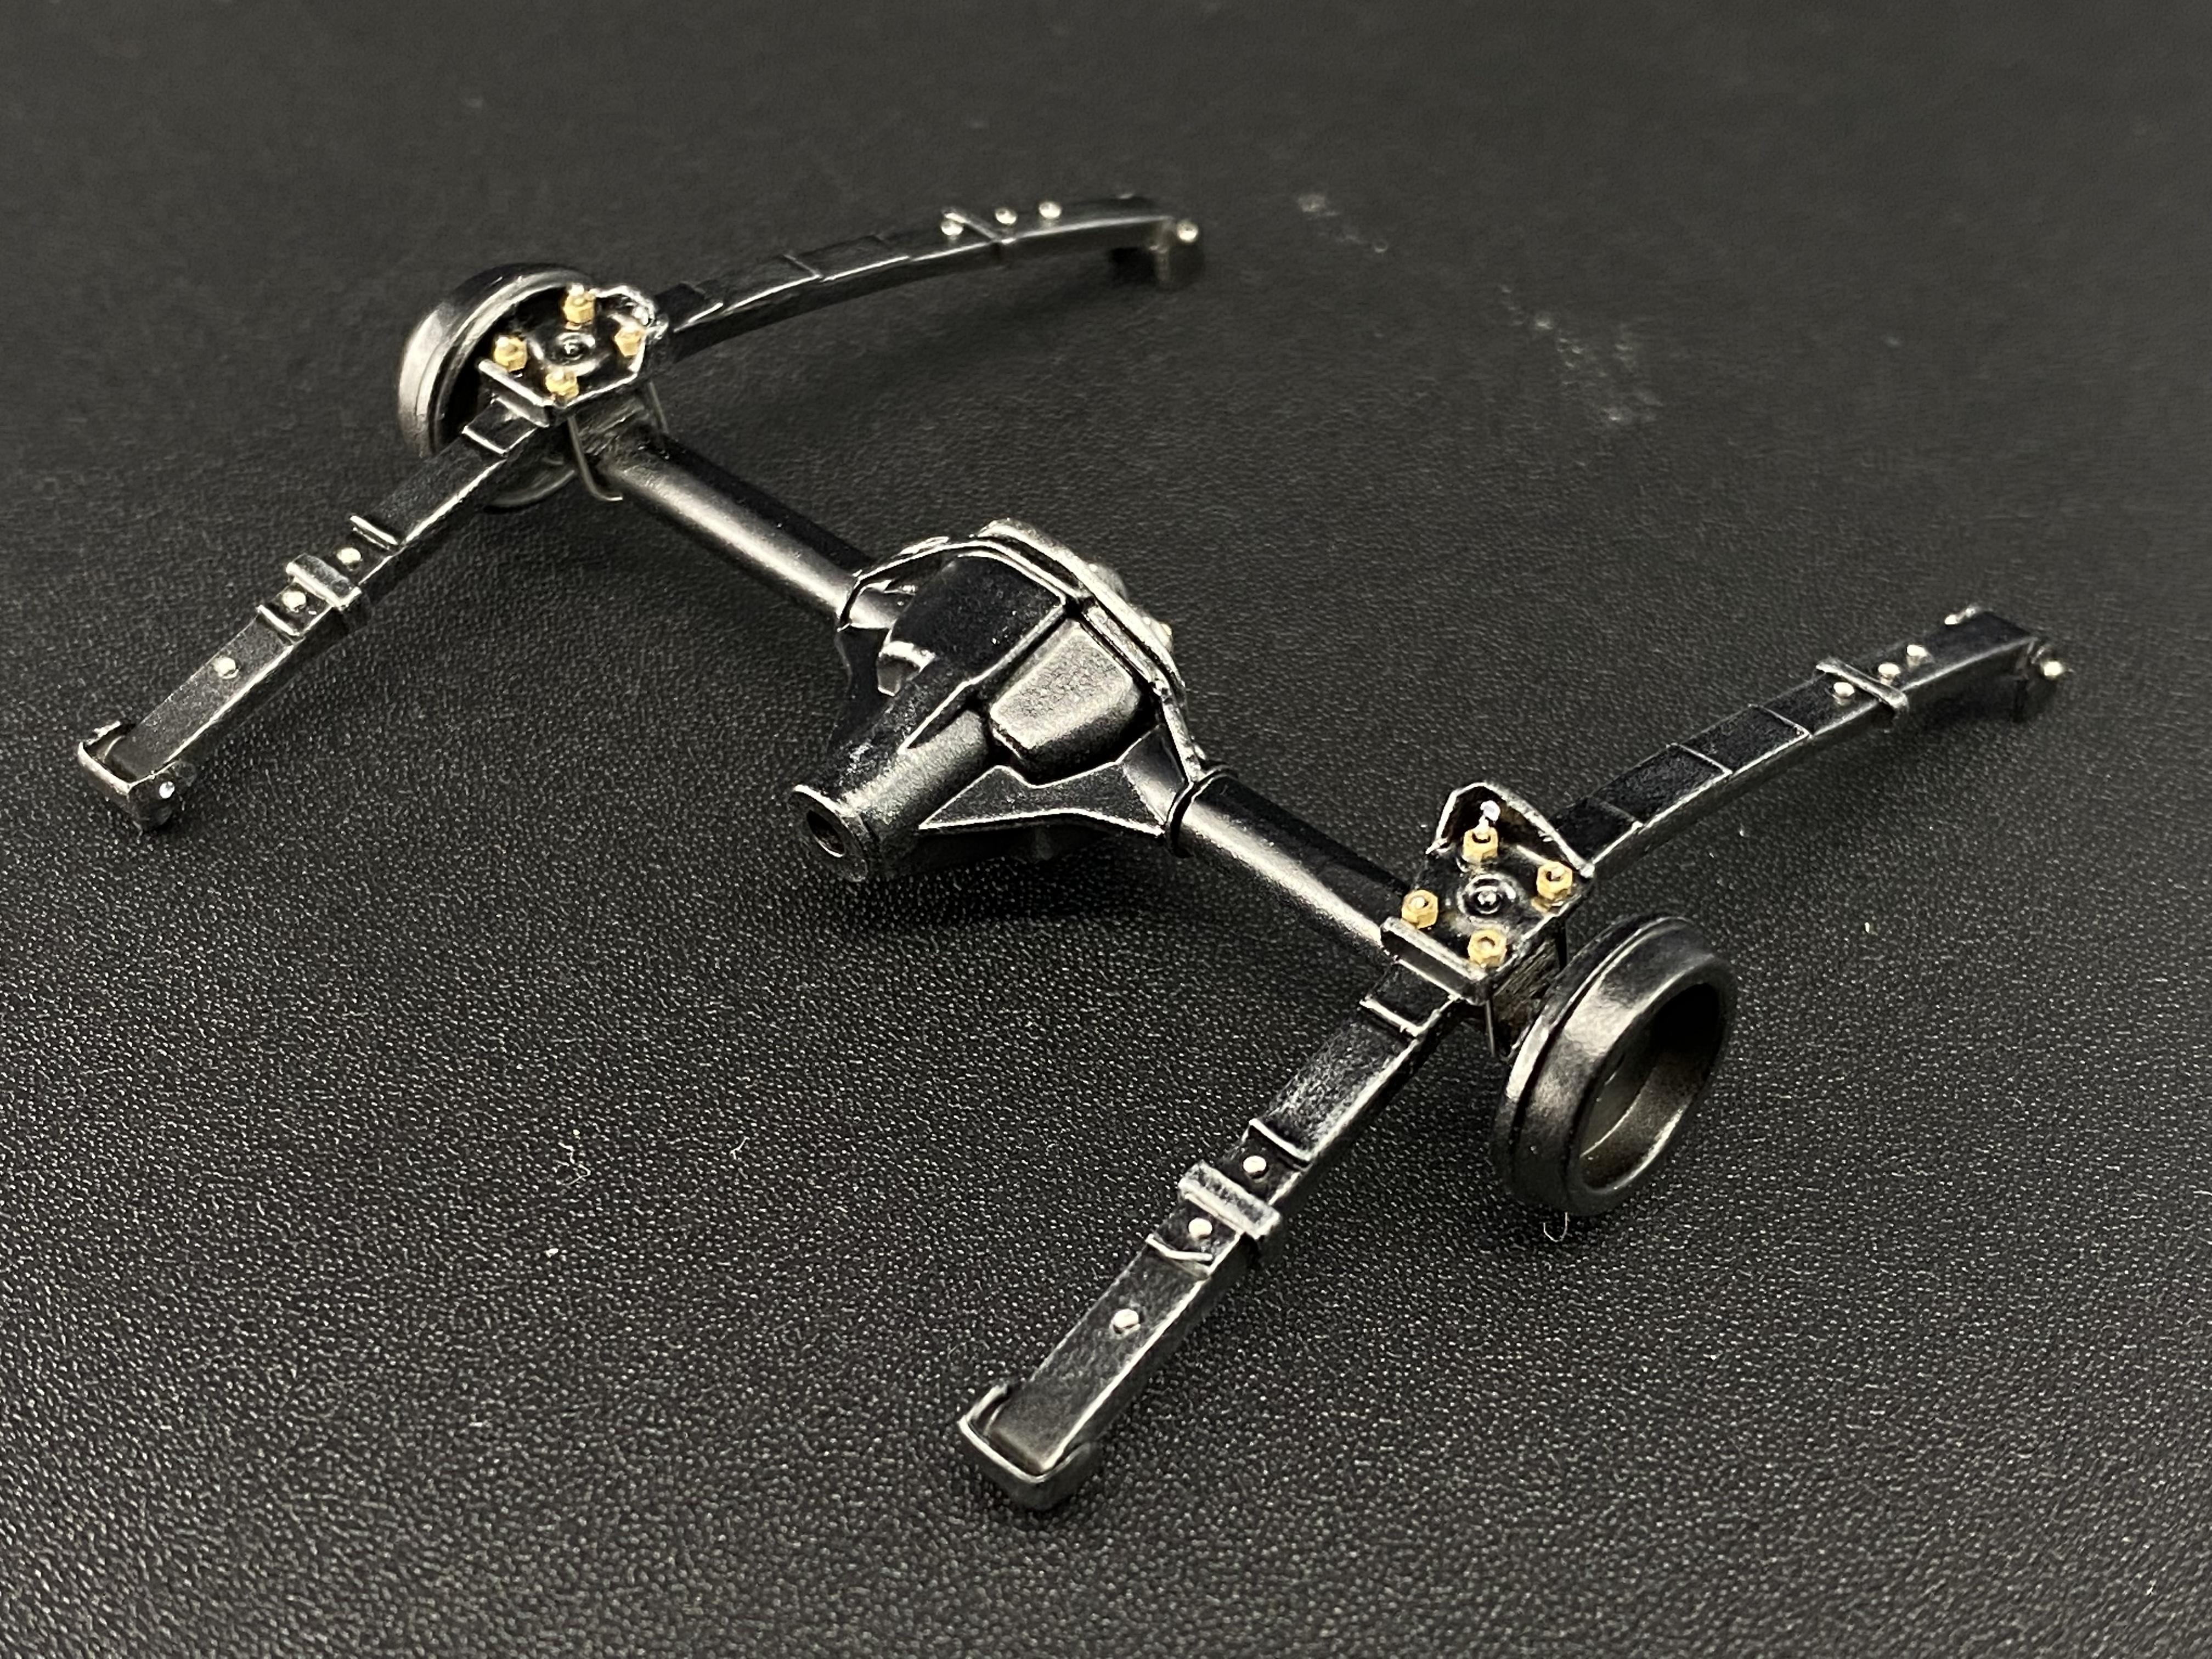
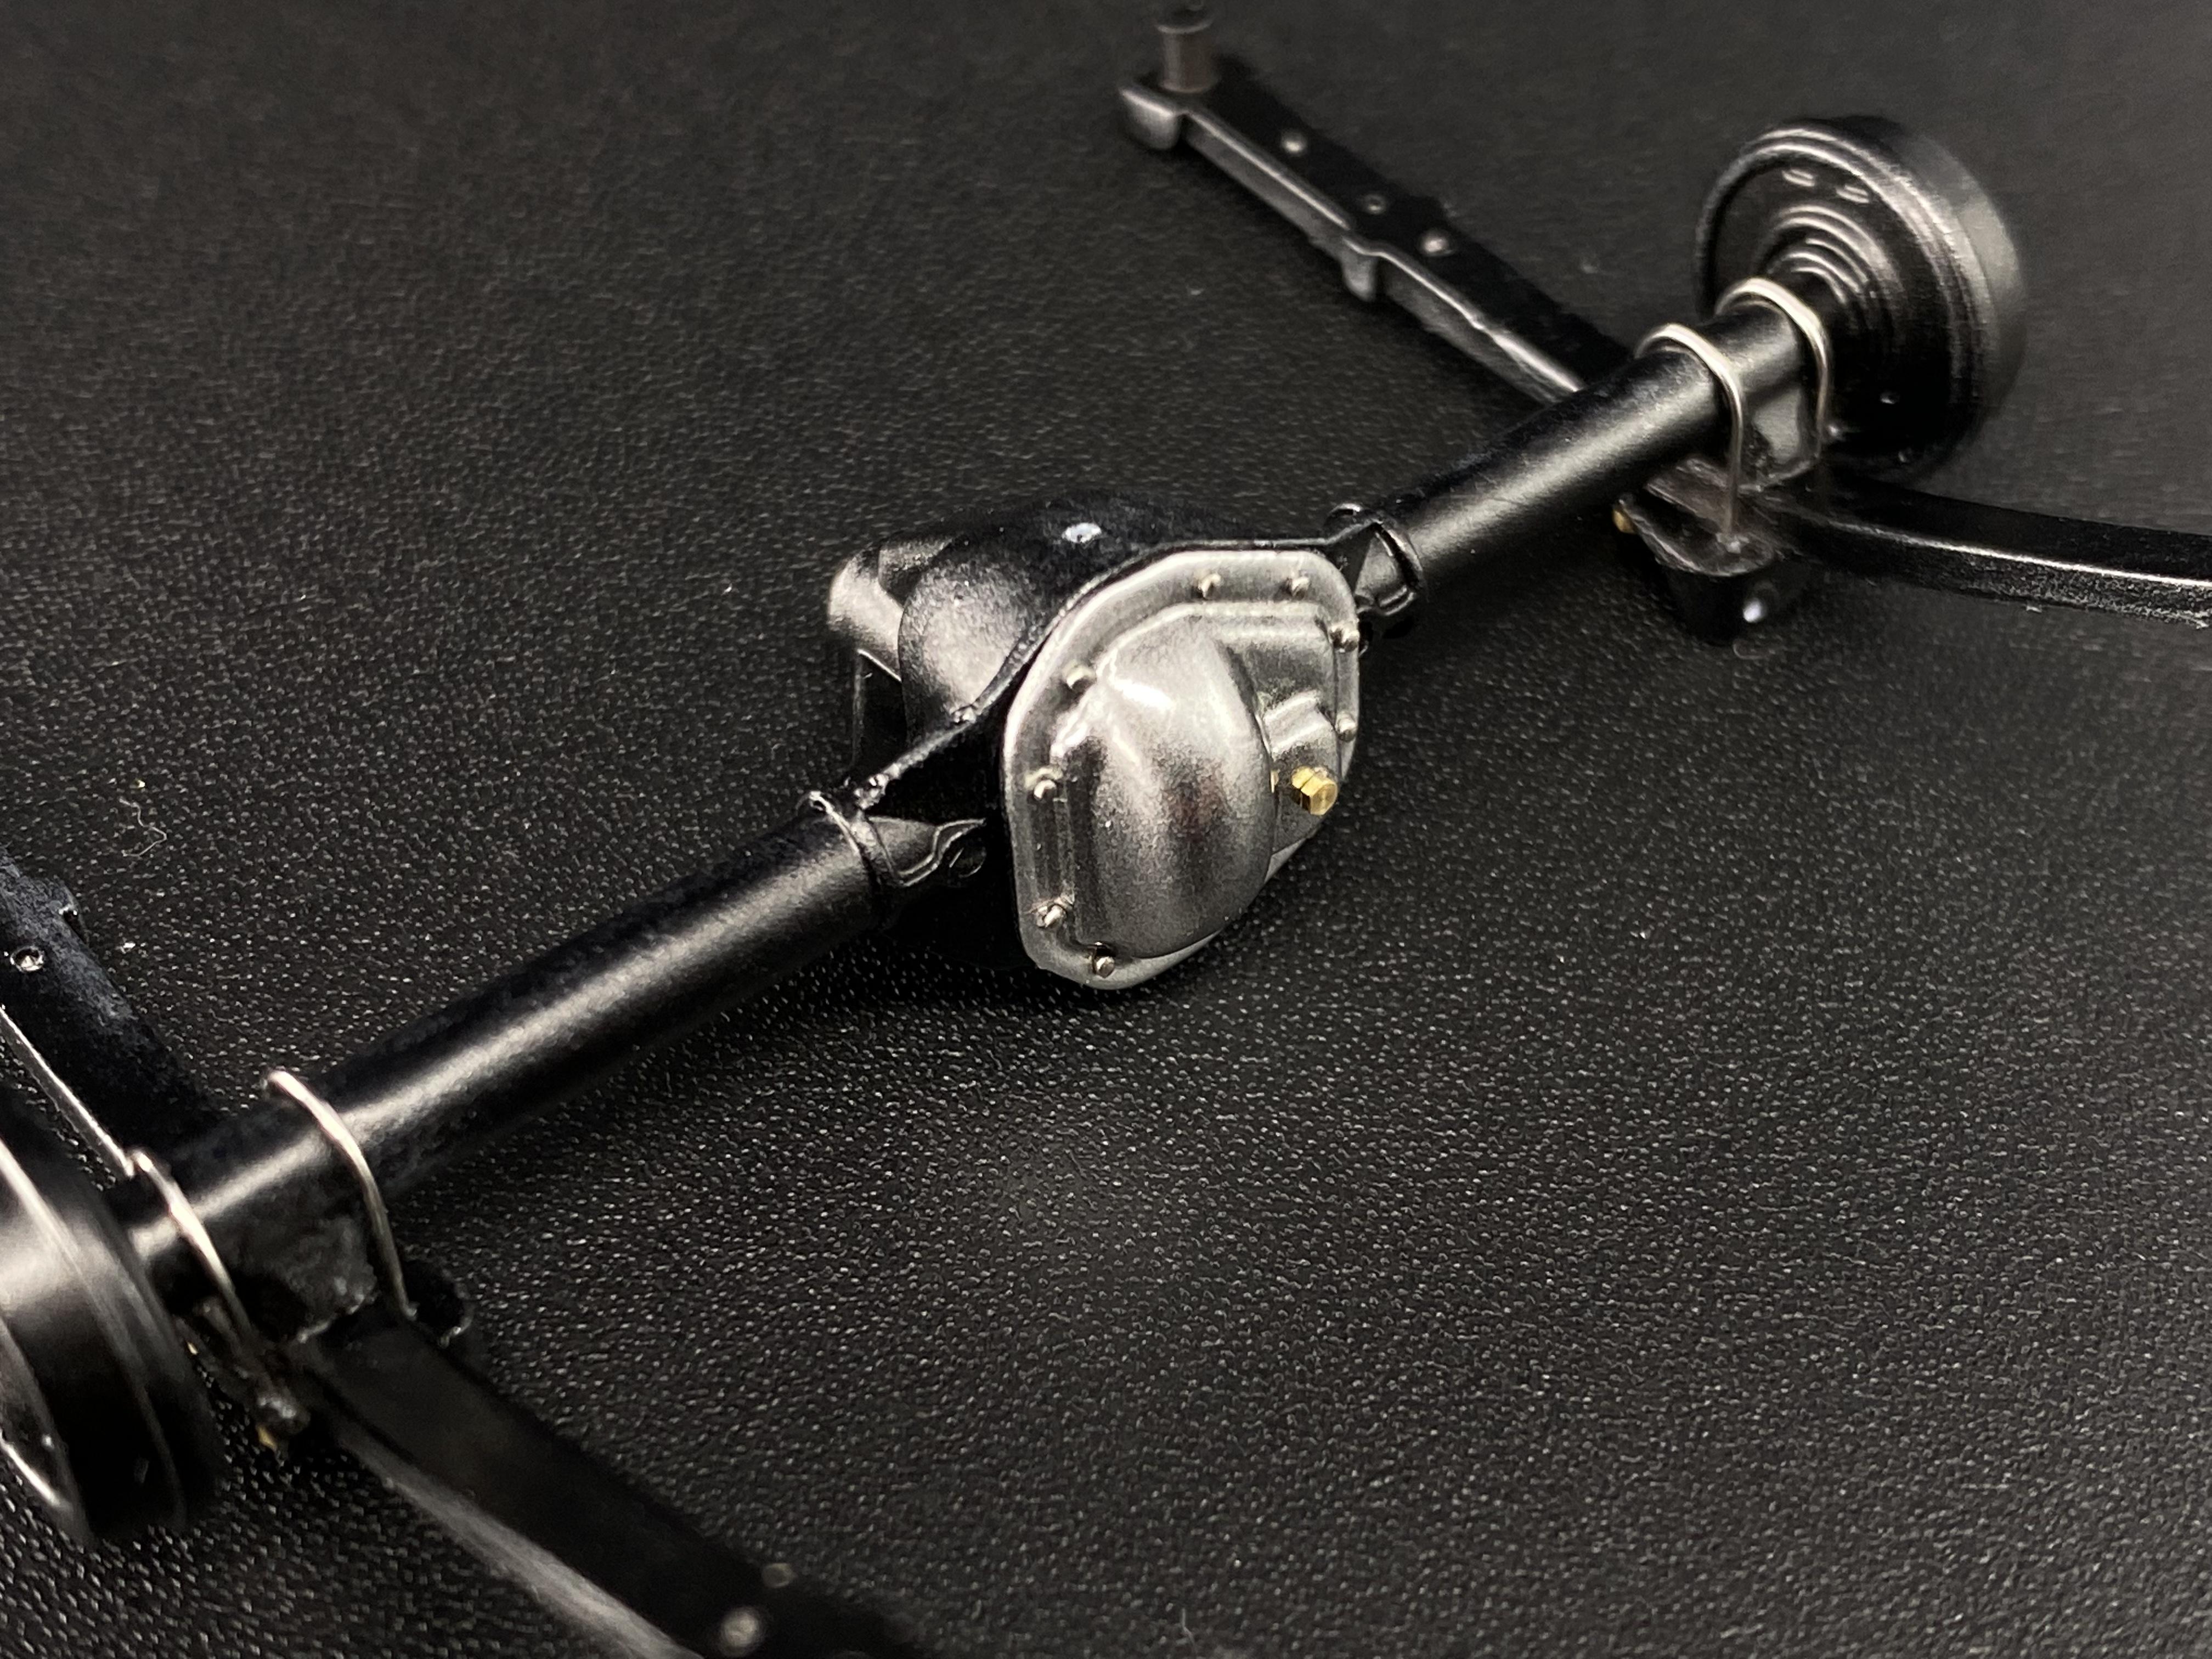
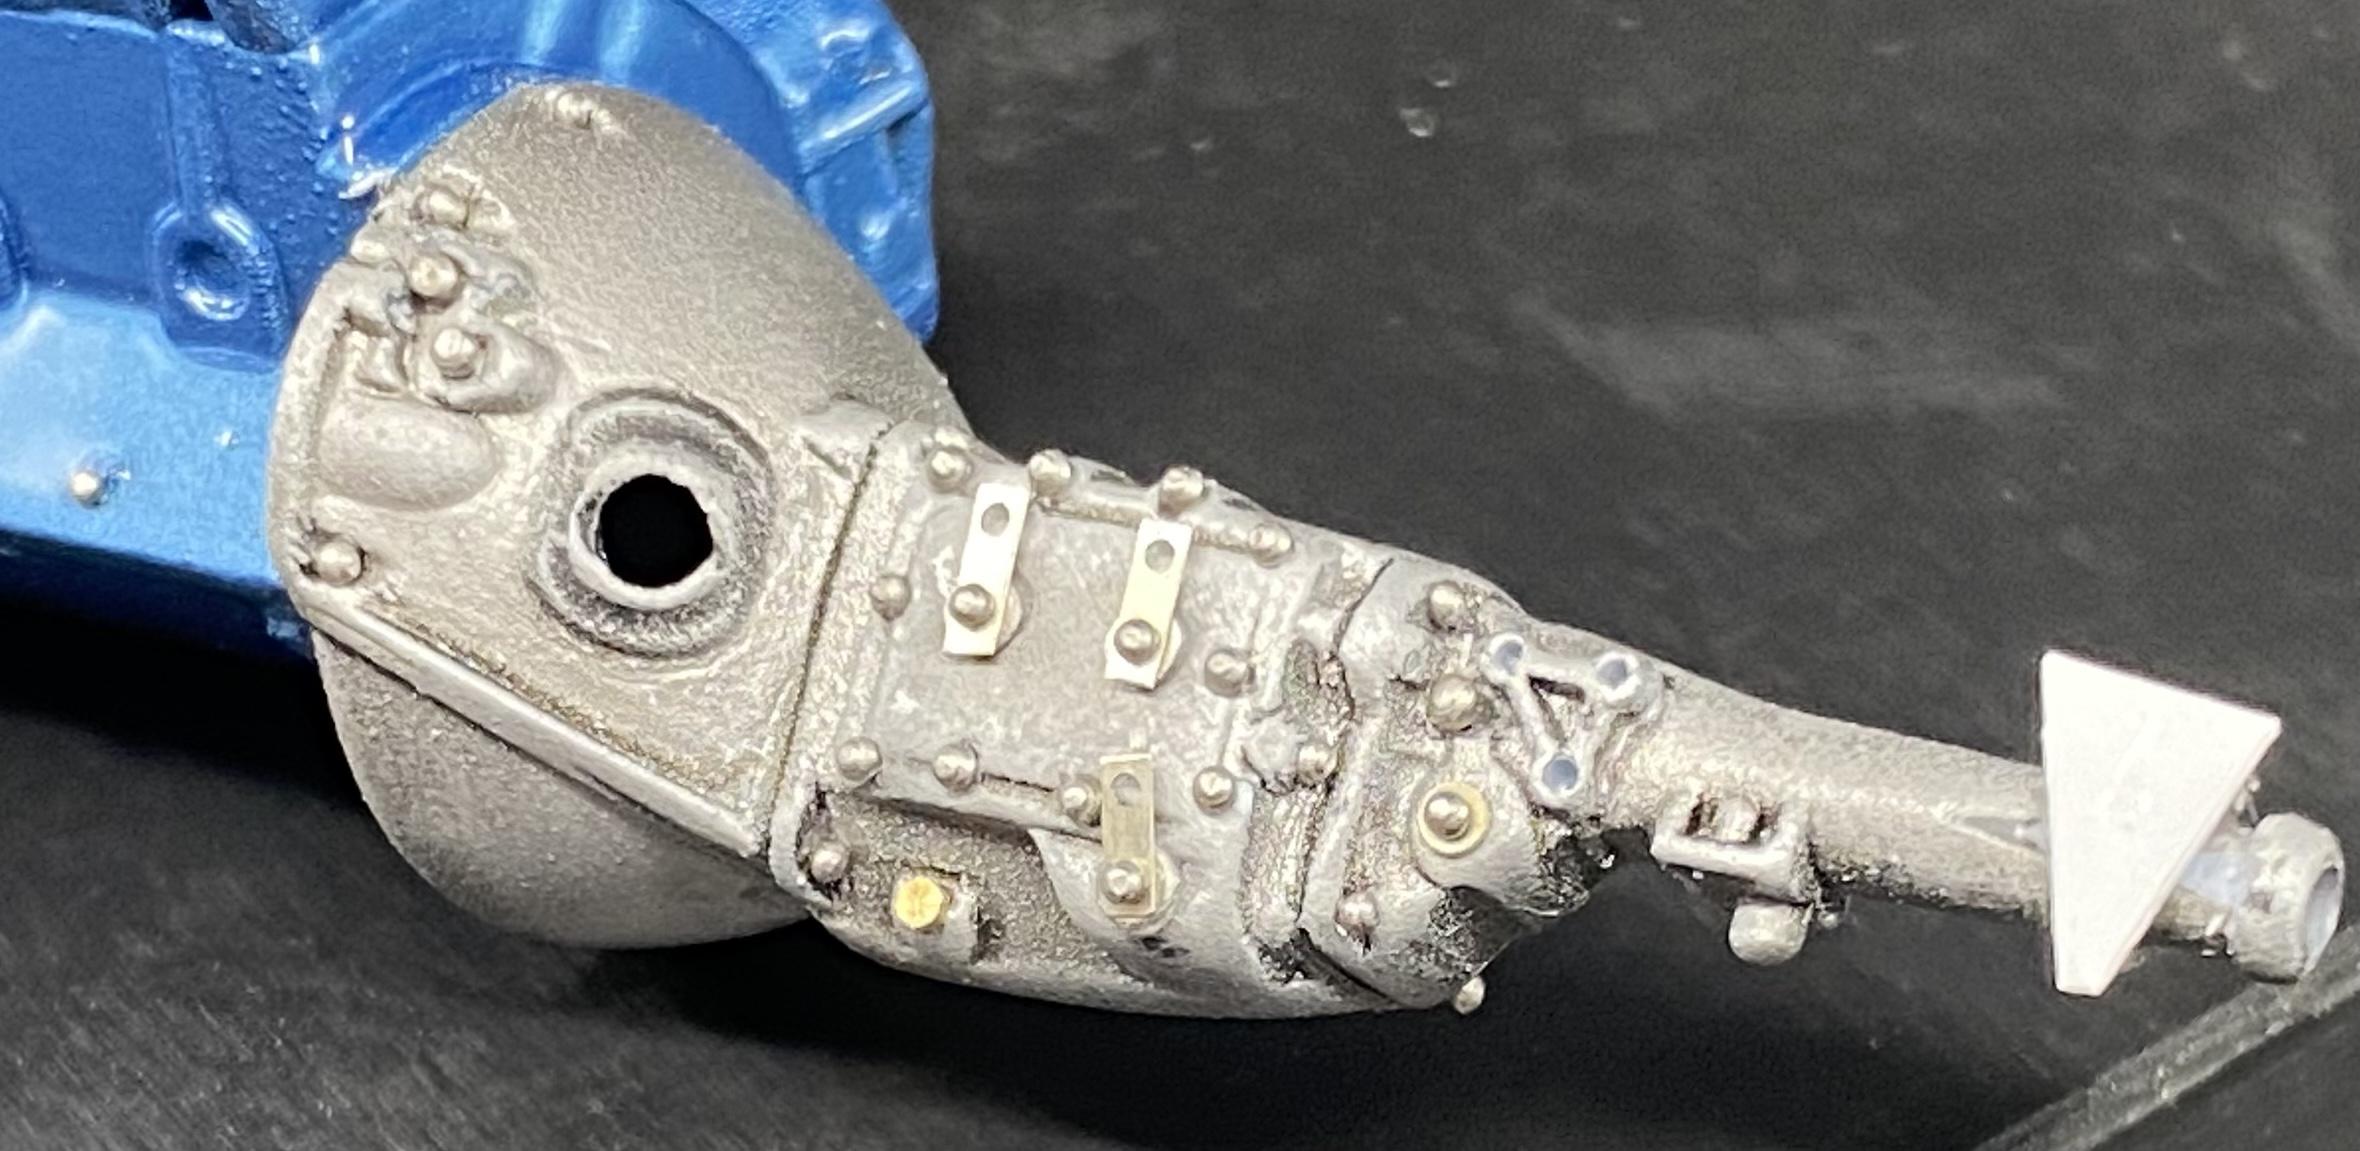
Did some work on the rear end this weekend. There are 6 kit parts… 54 total parts for the assembly I shaved off all the molded in bolts, sanded the U bolts off and started going at it with the pin vise.
-
Clear coats over the decals are down and dry. It has not been polished or buffed yet, so I’ll still hit it with 3000 again, get all the final chrome on then do the final clear.
-
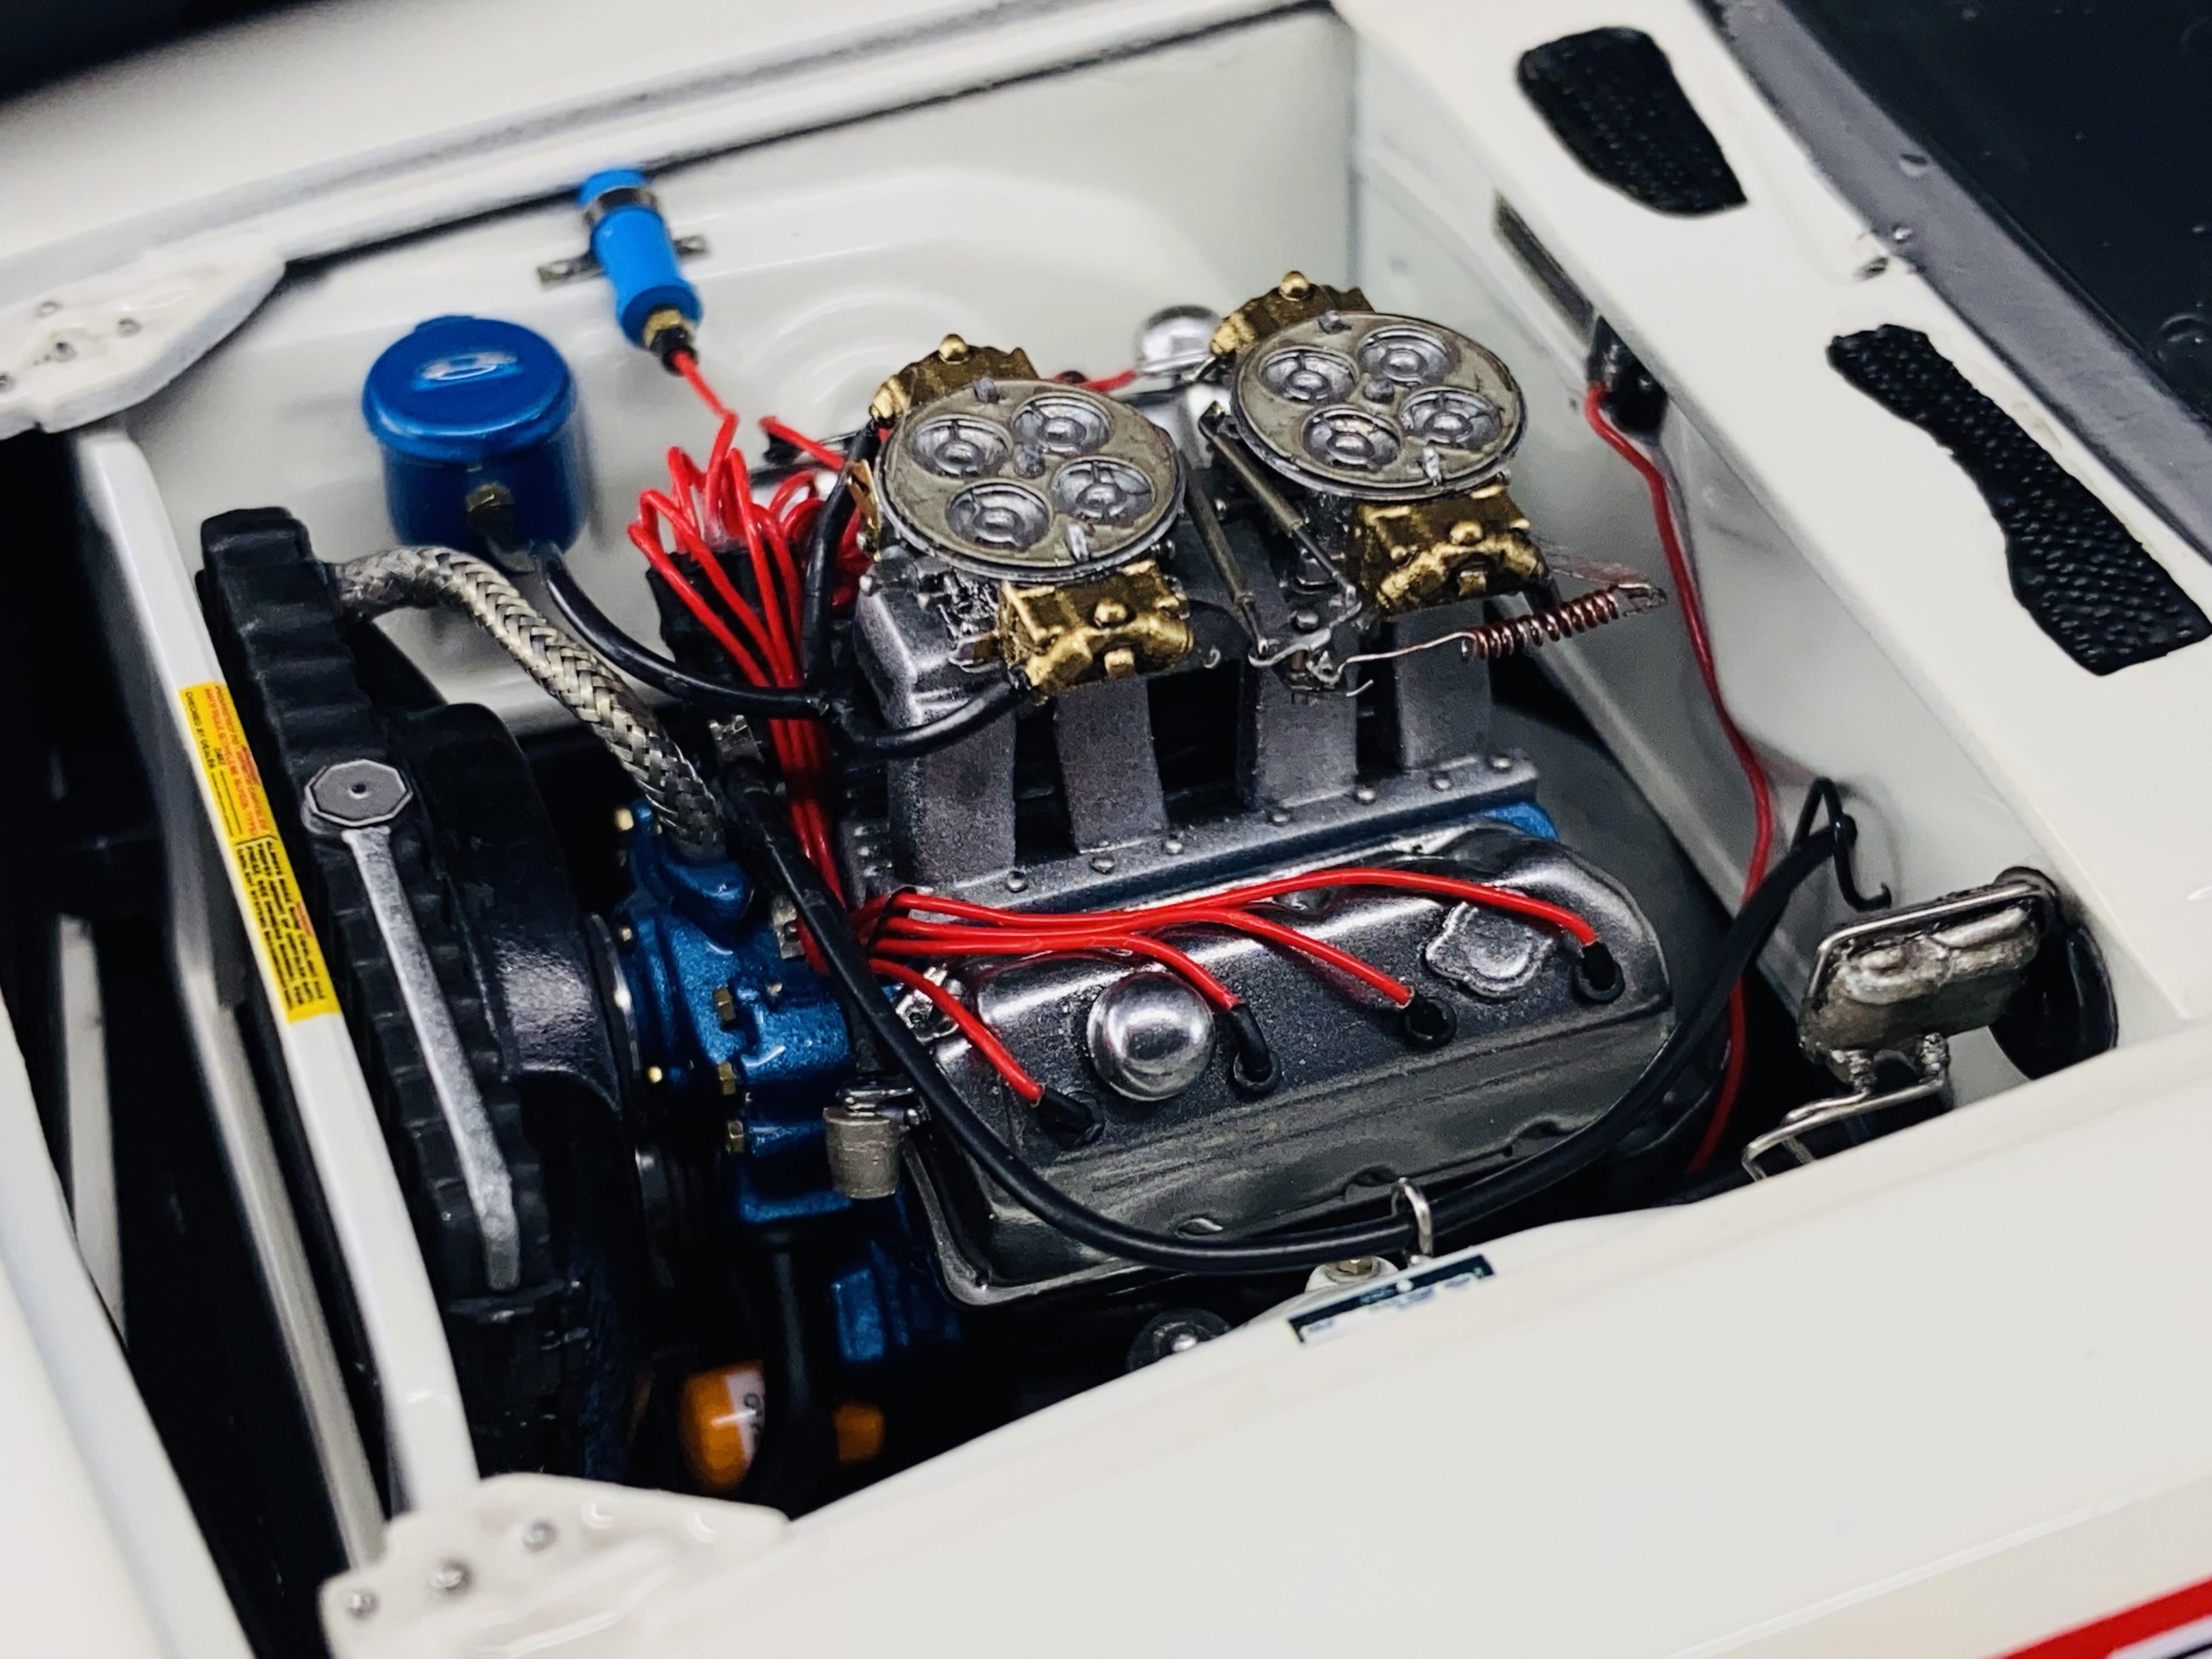
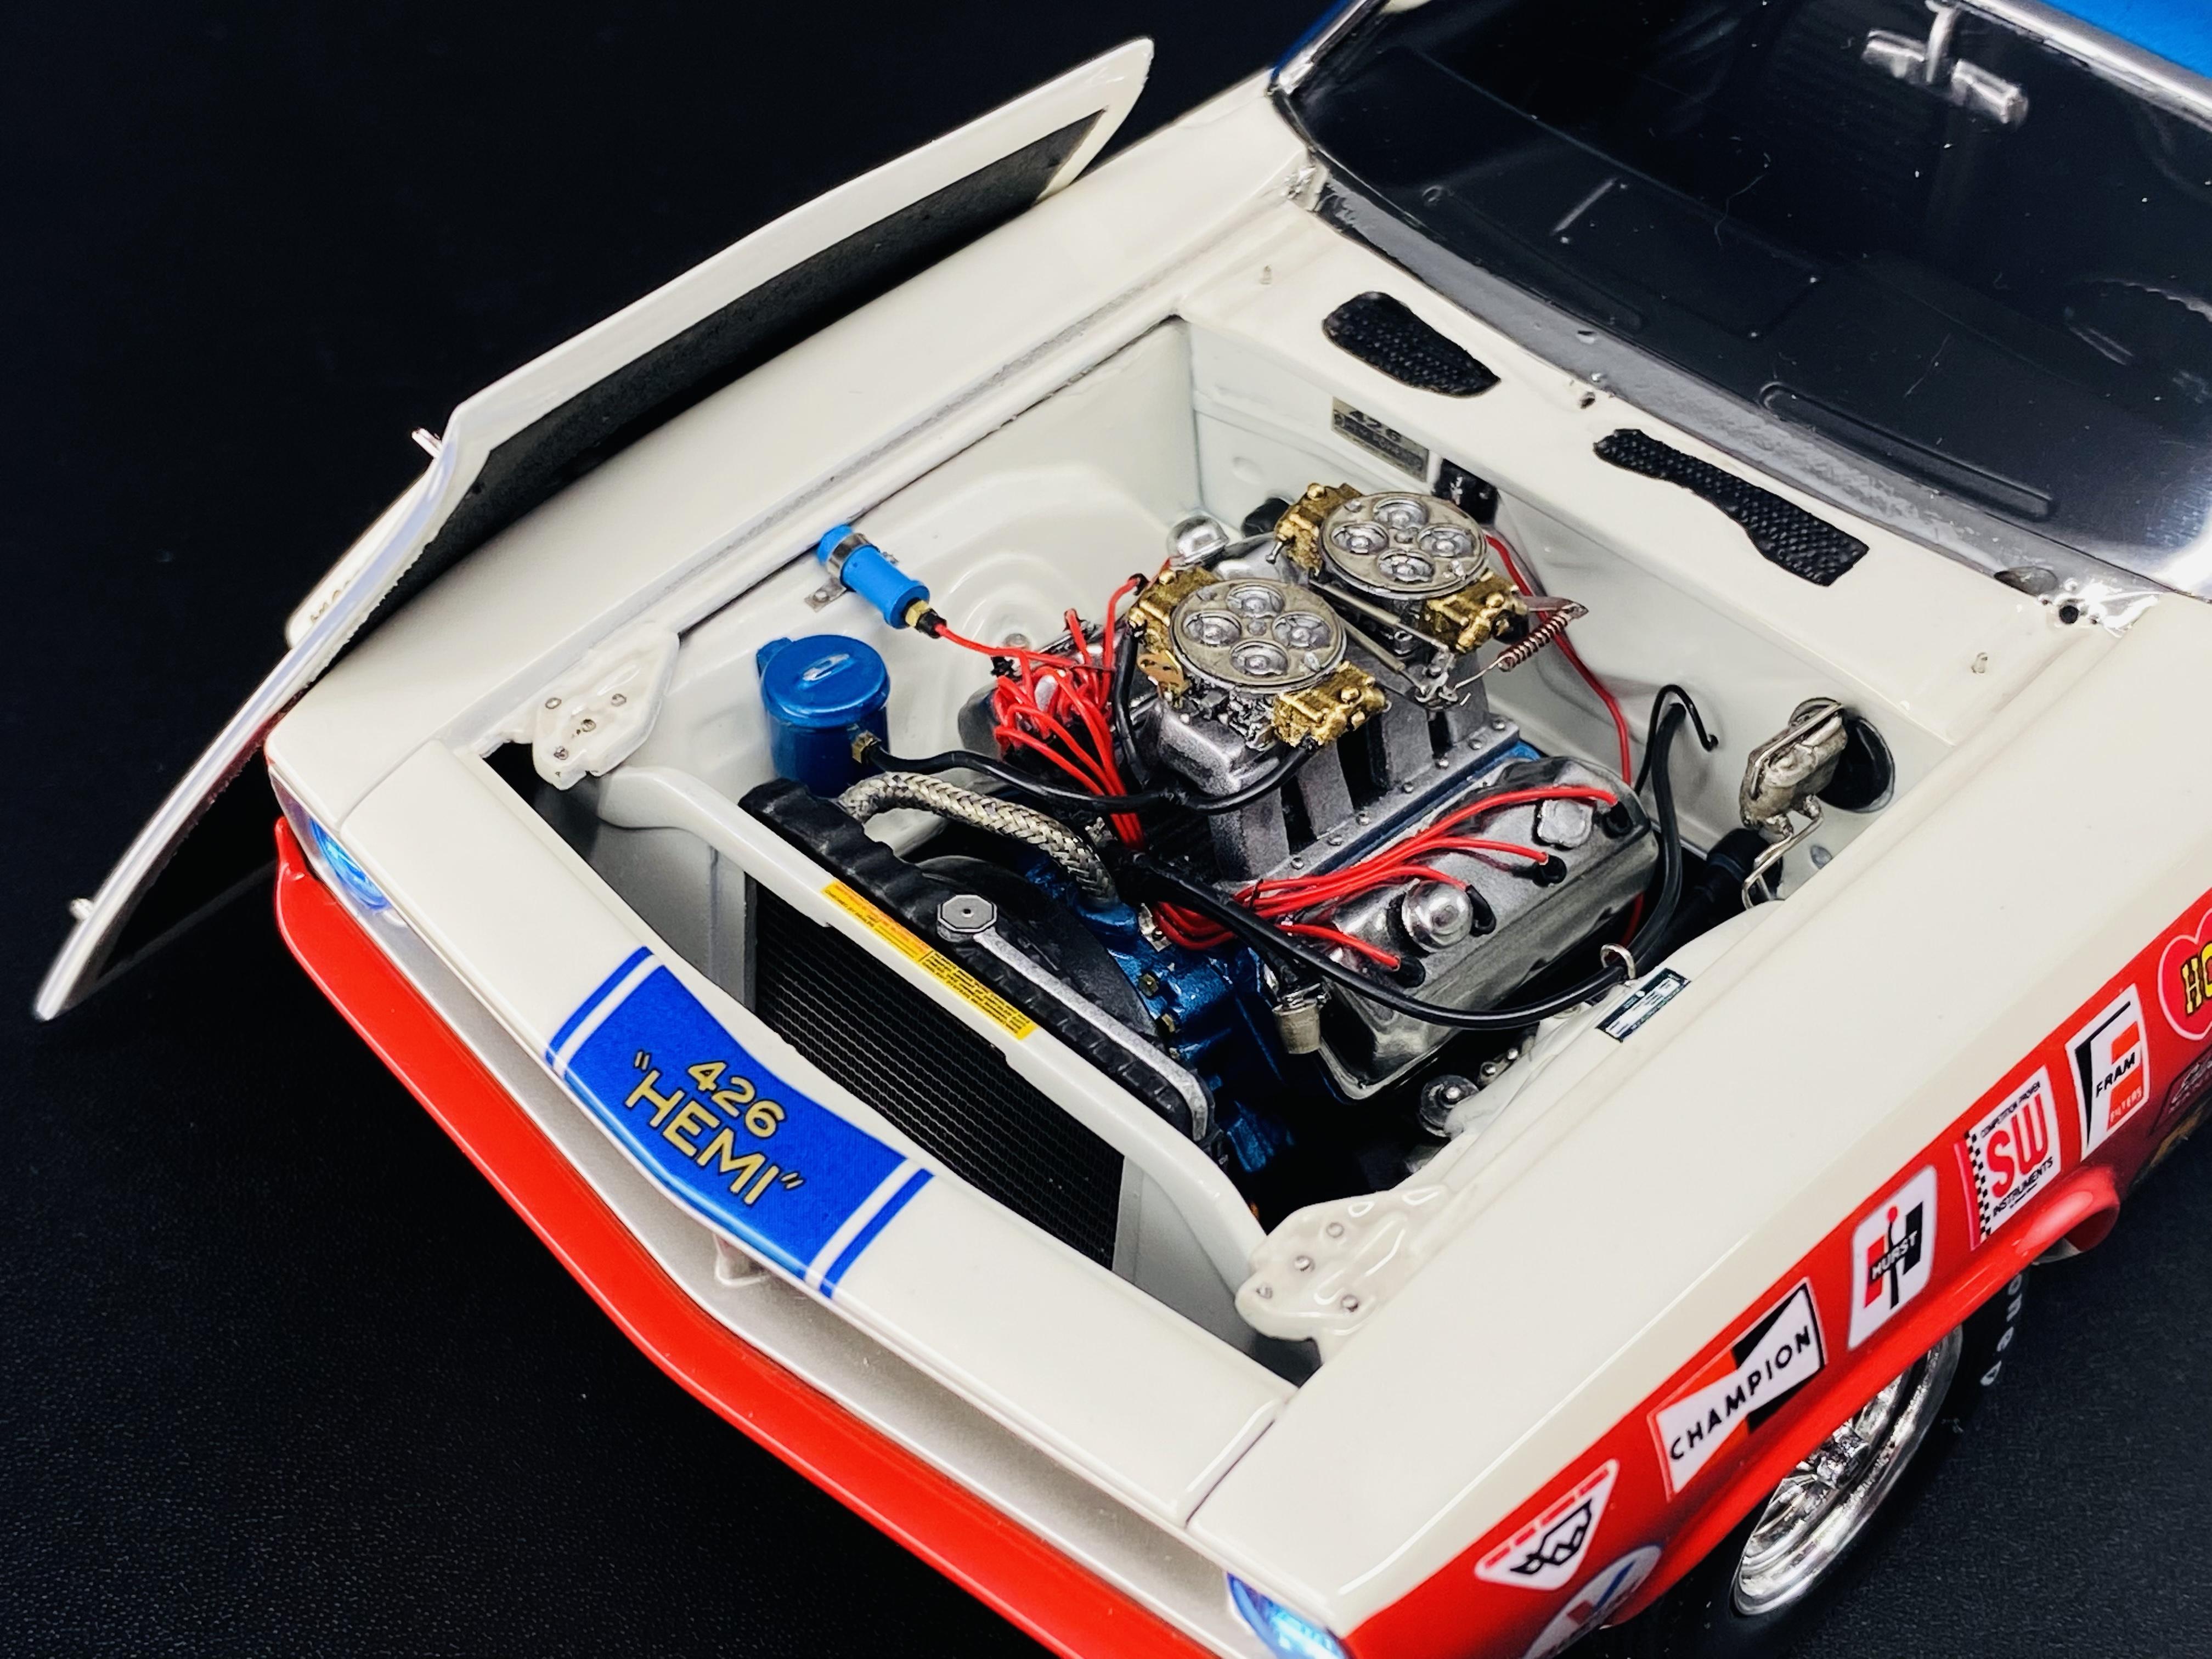
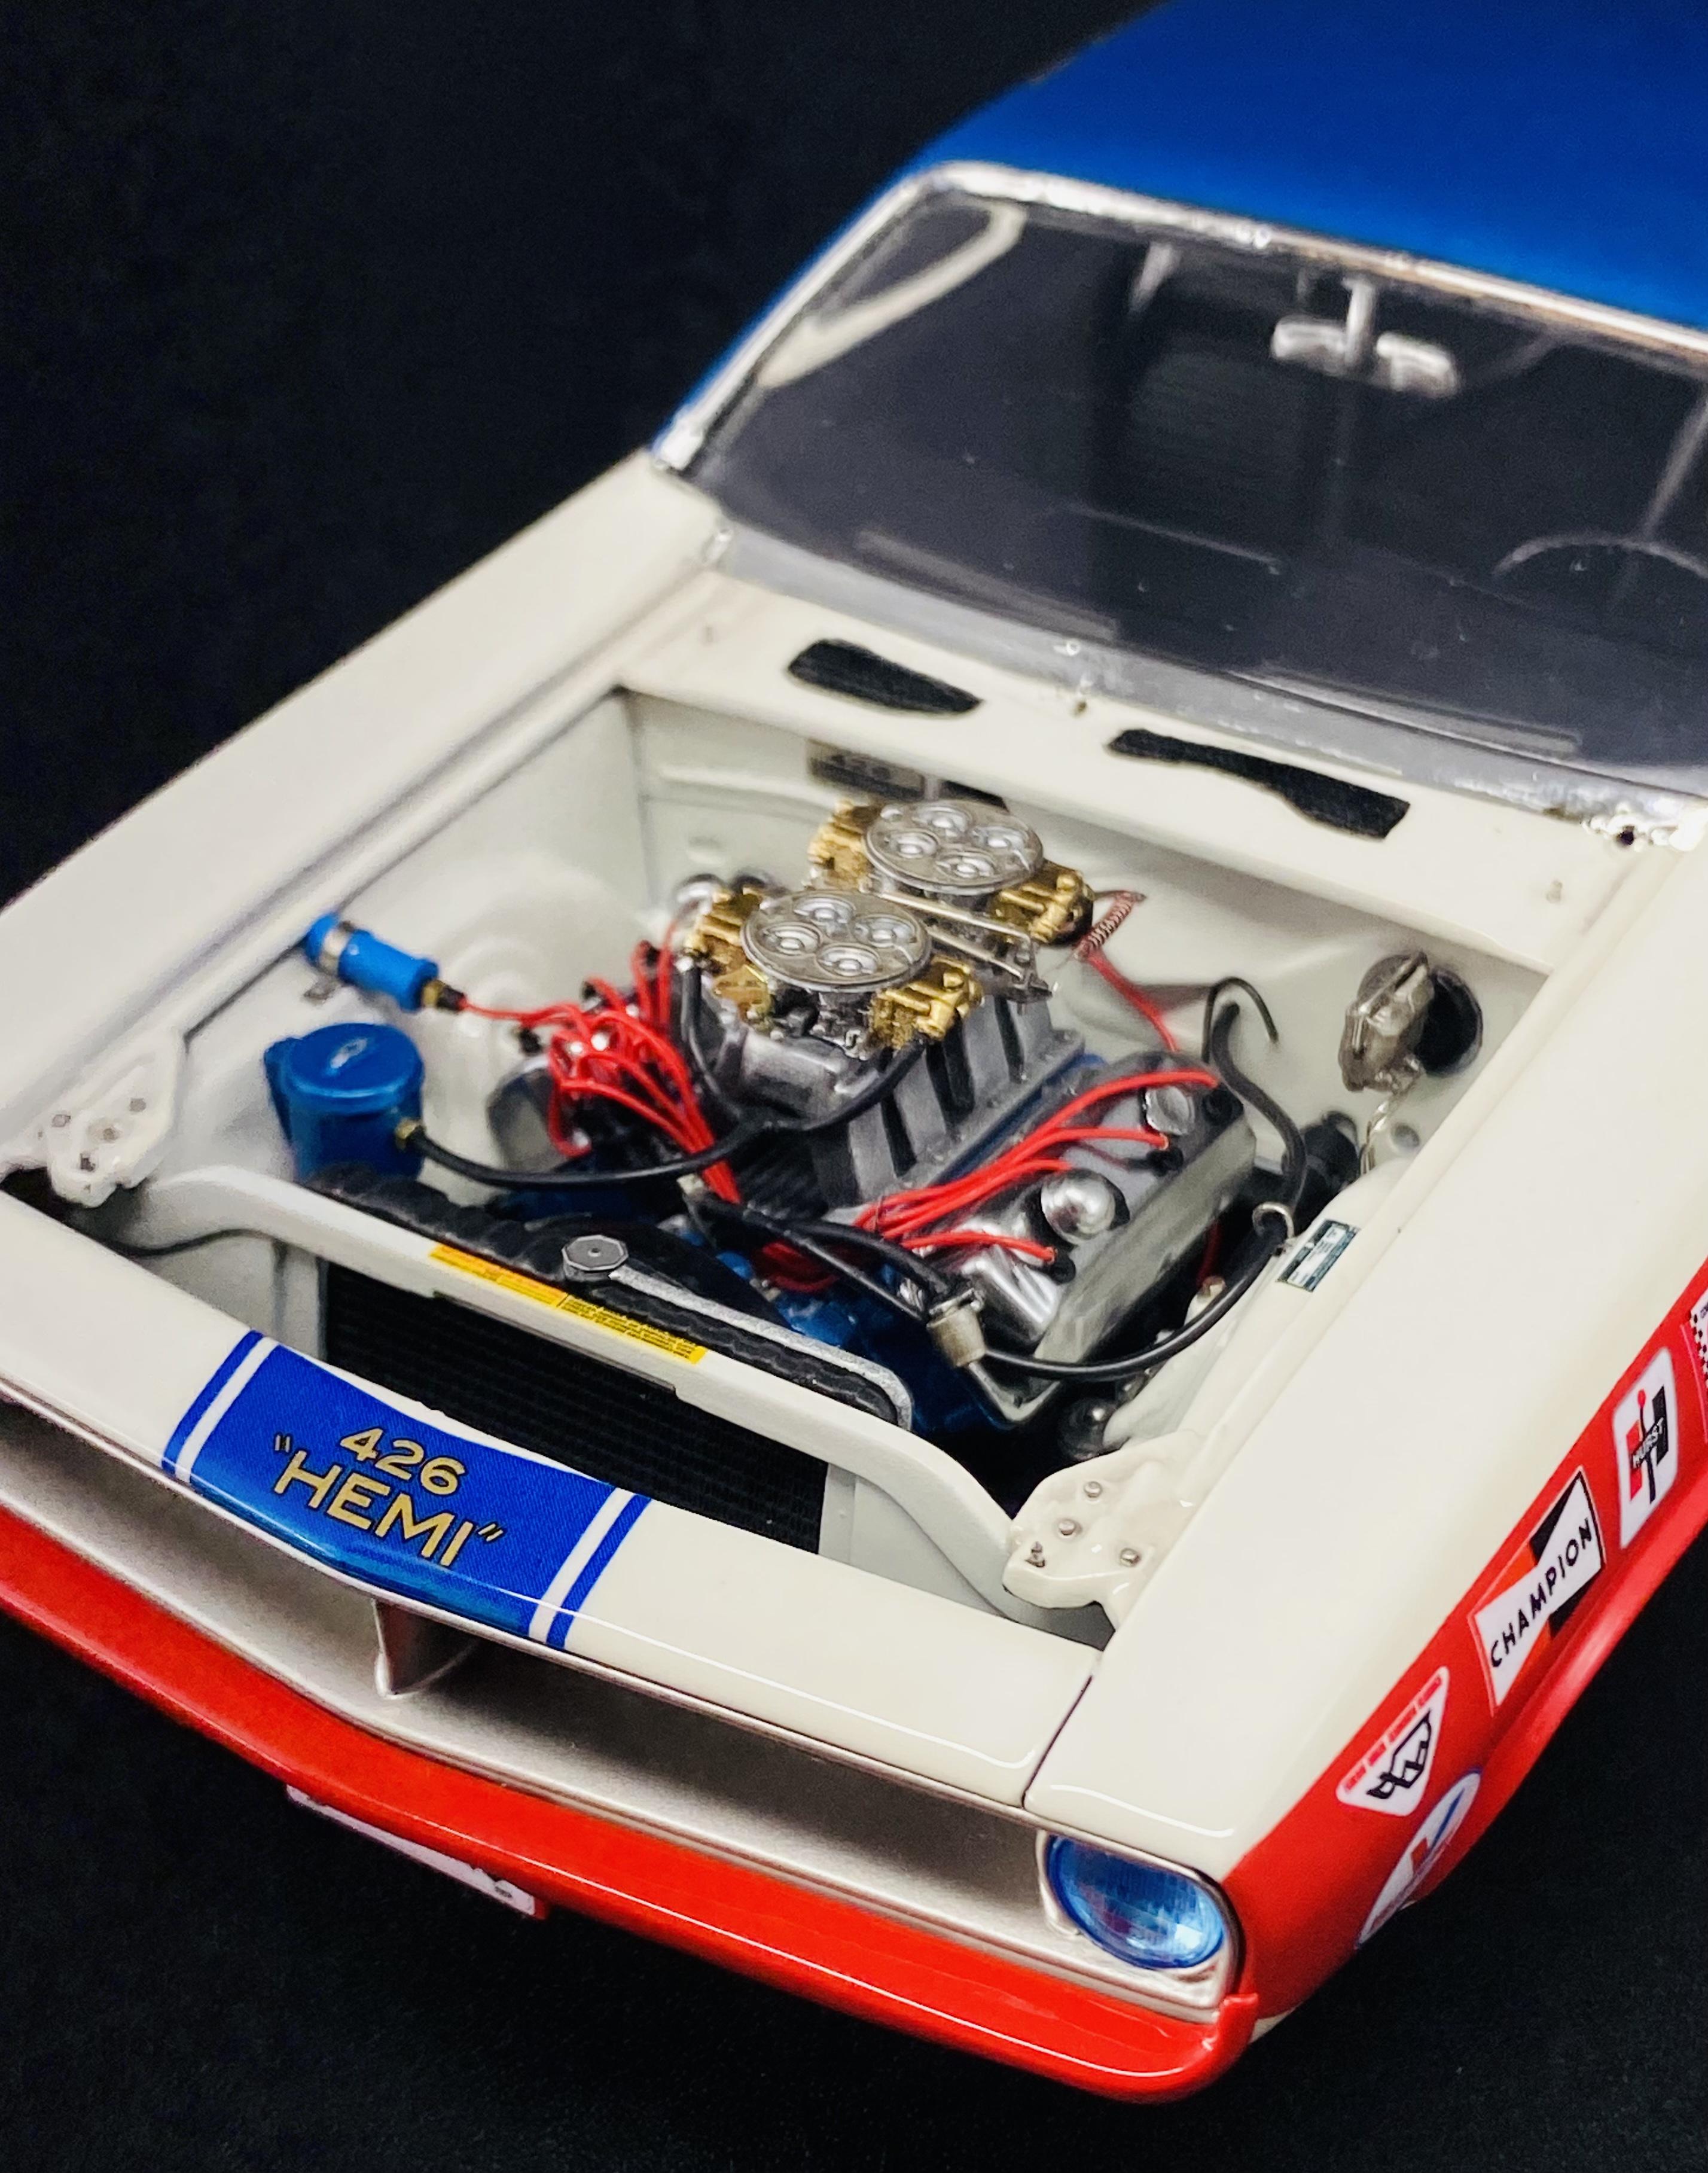
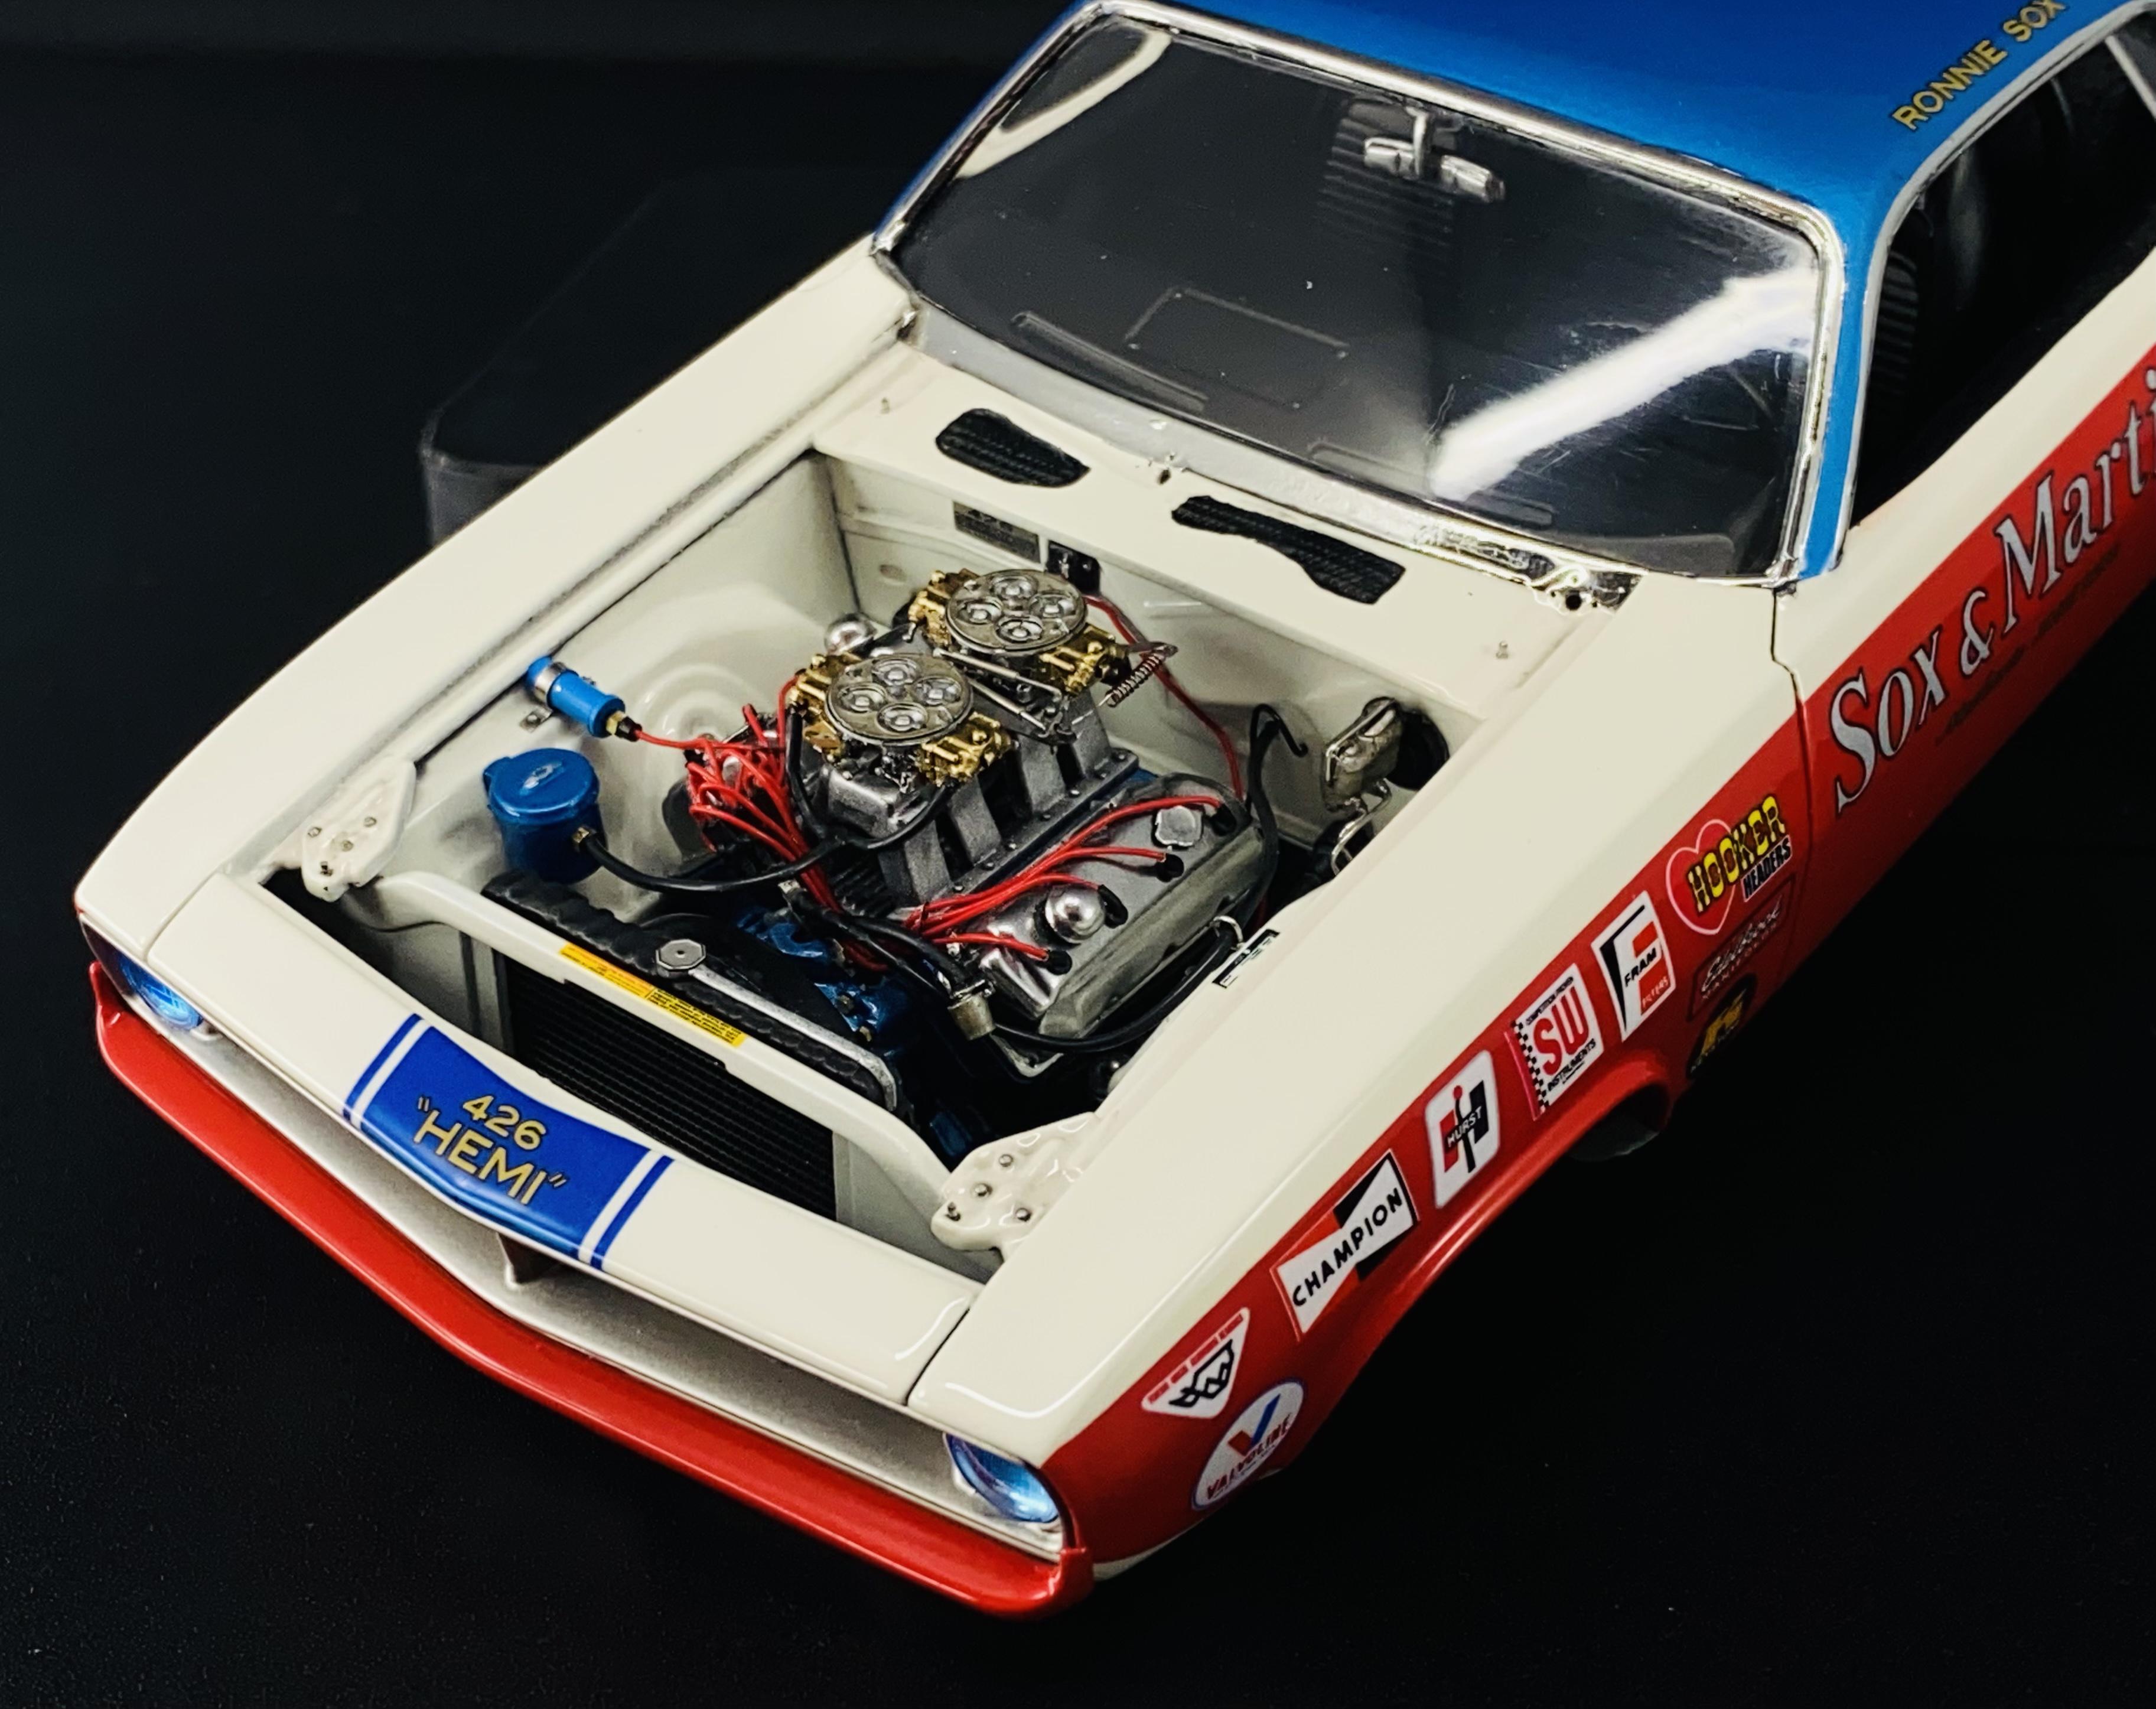
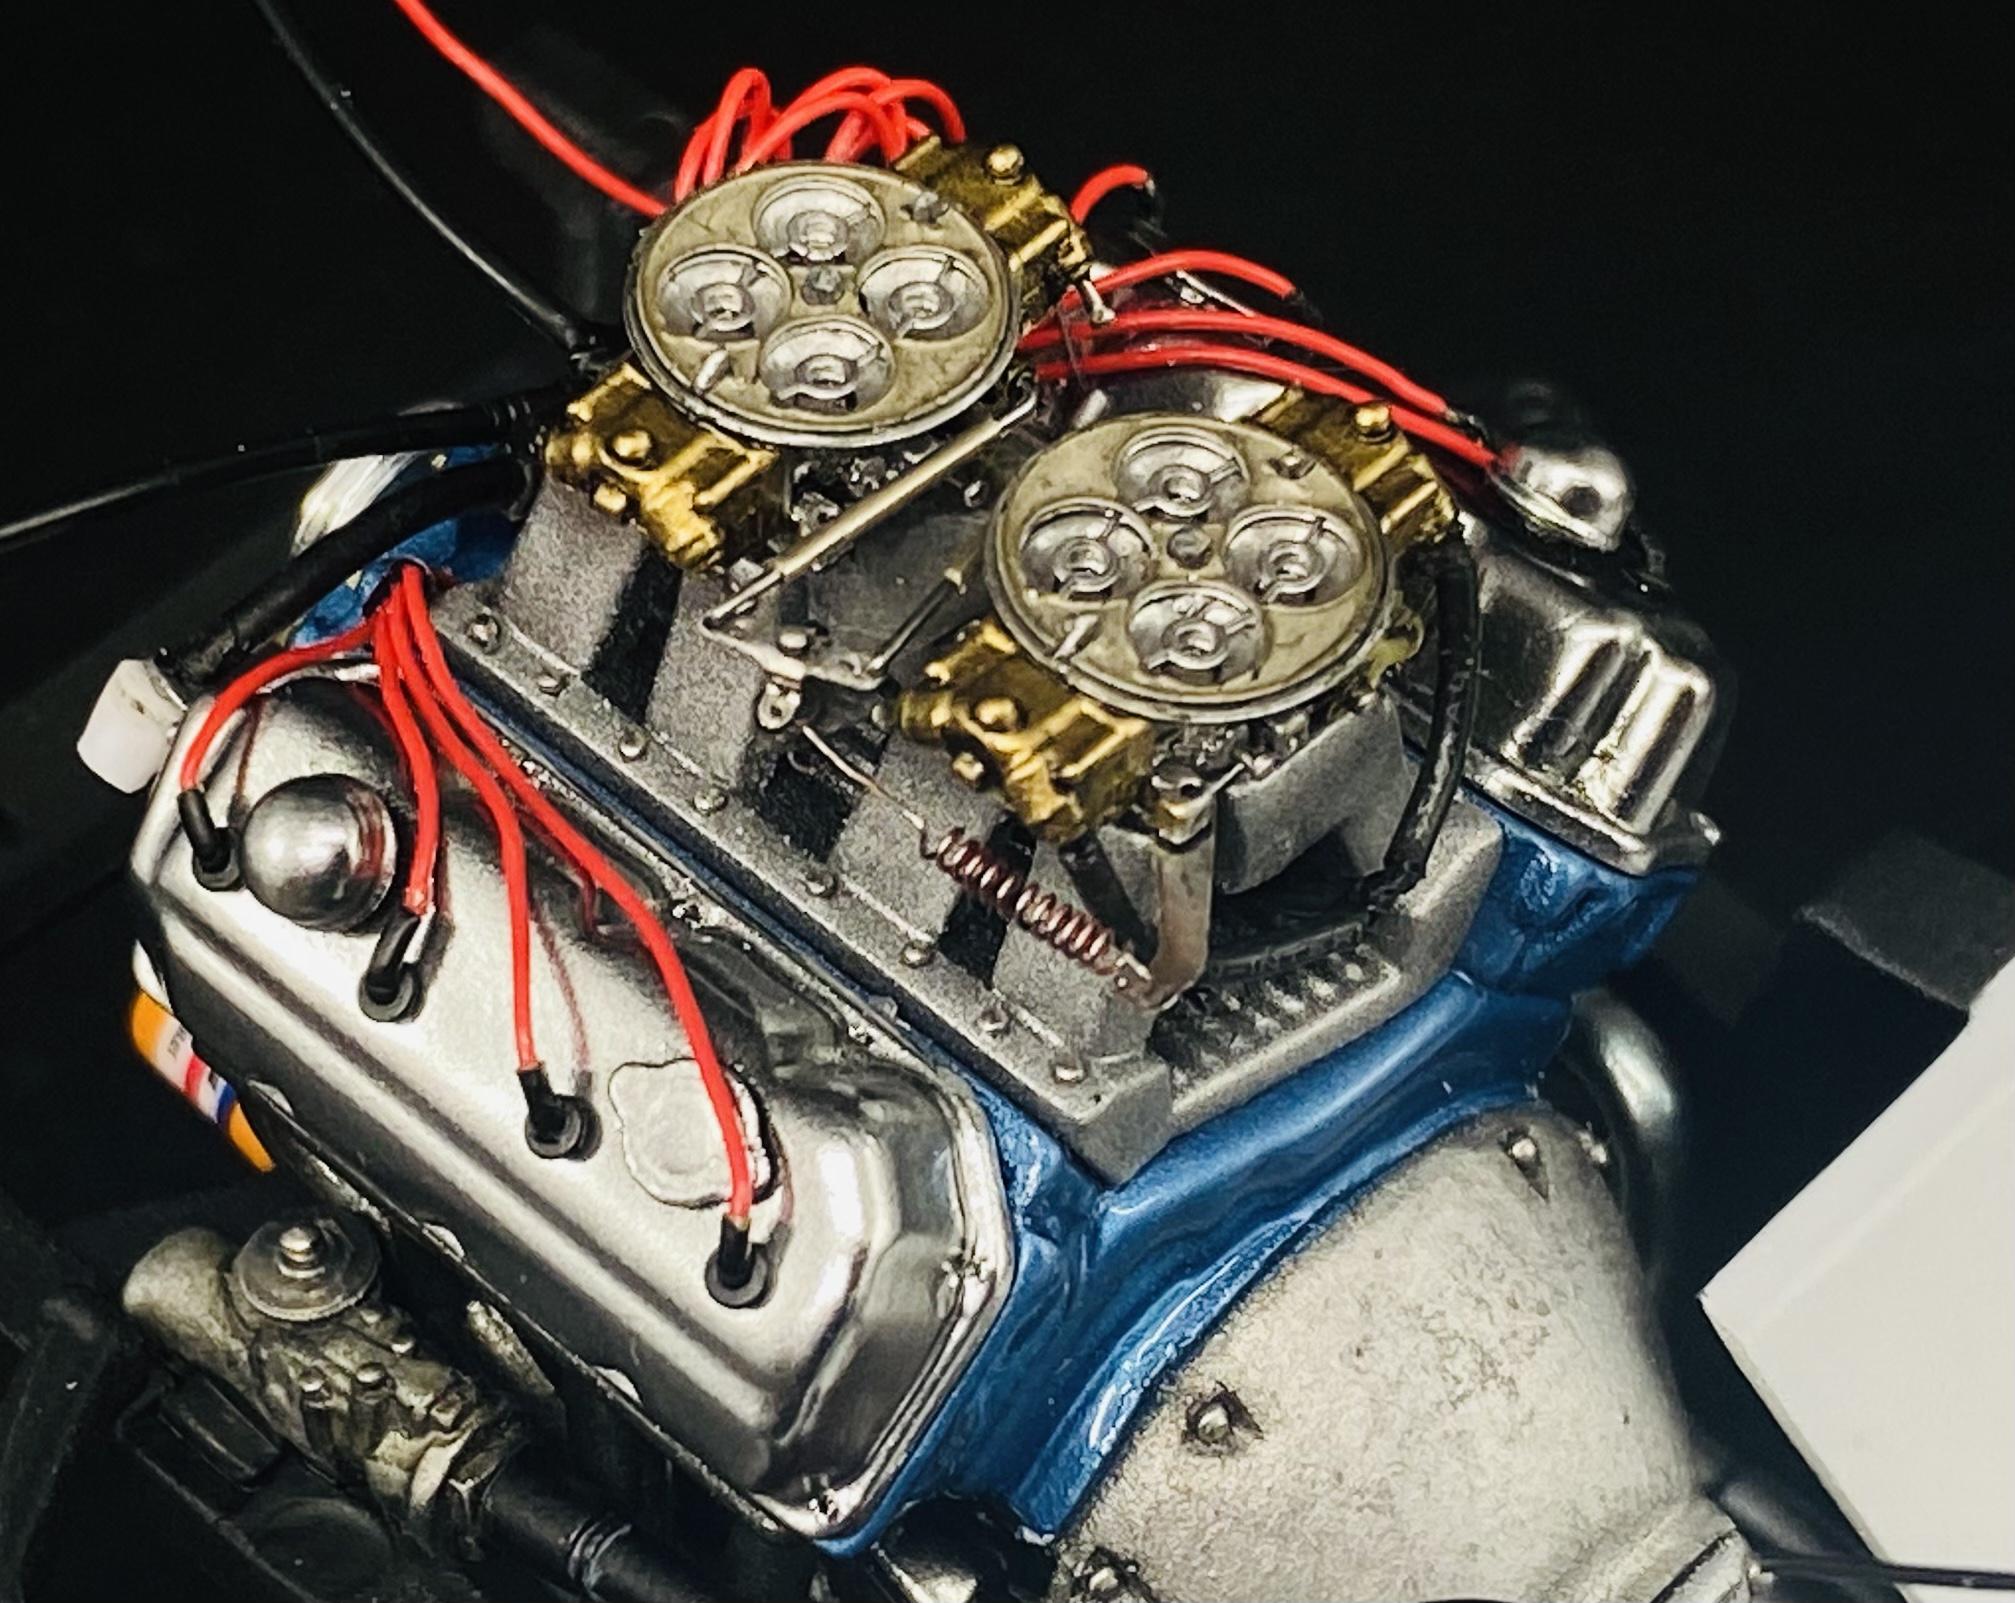
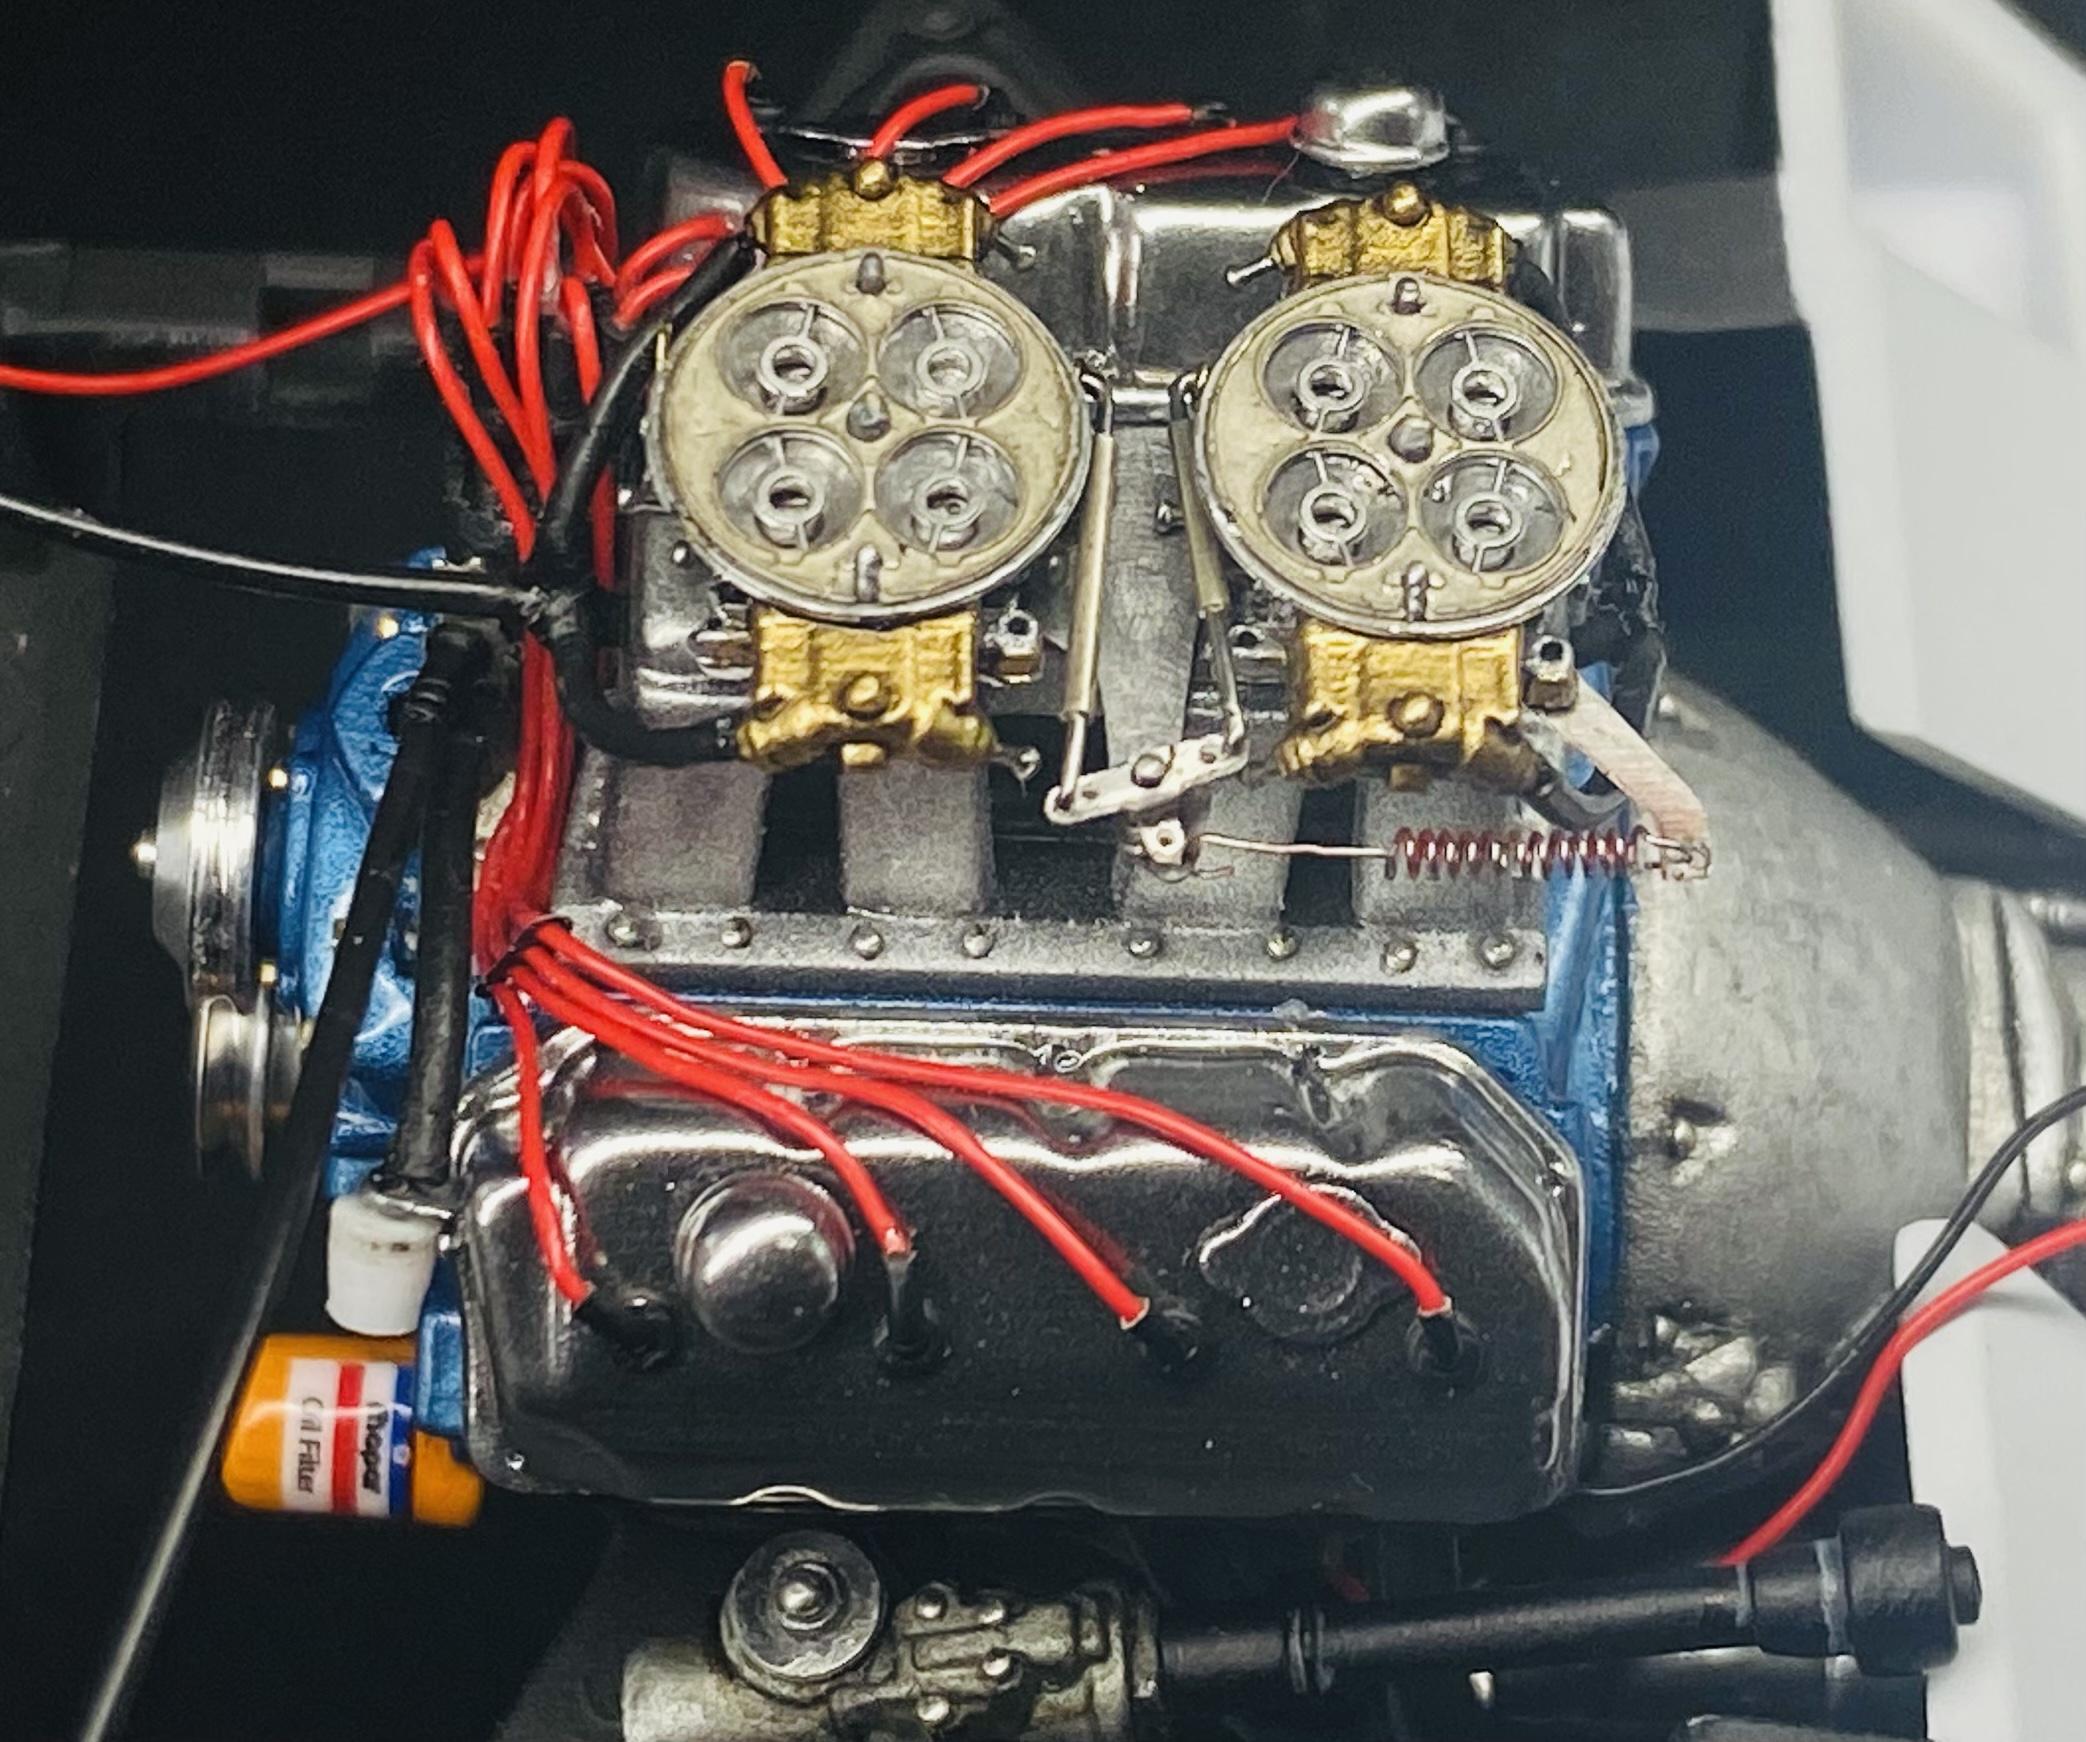
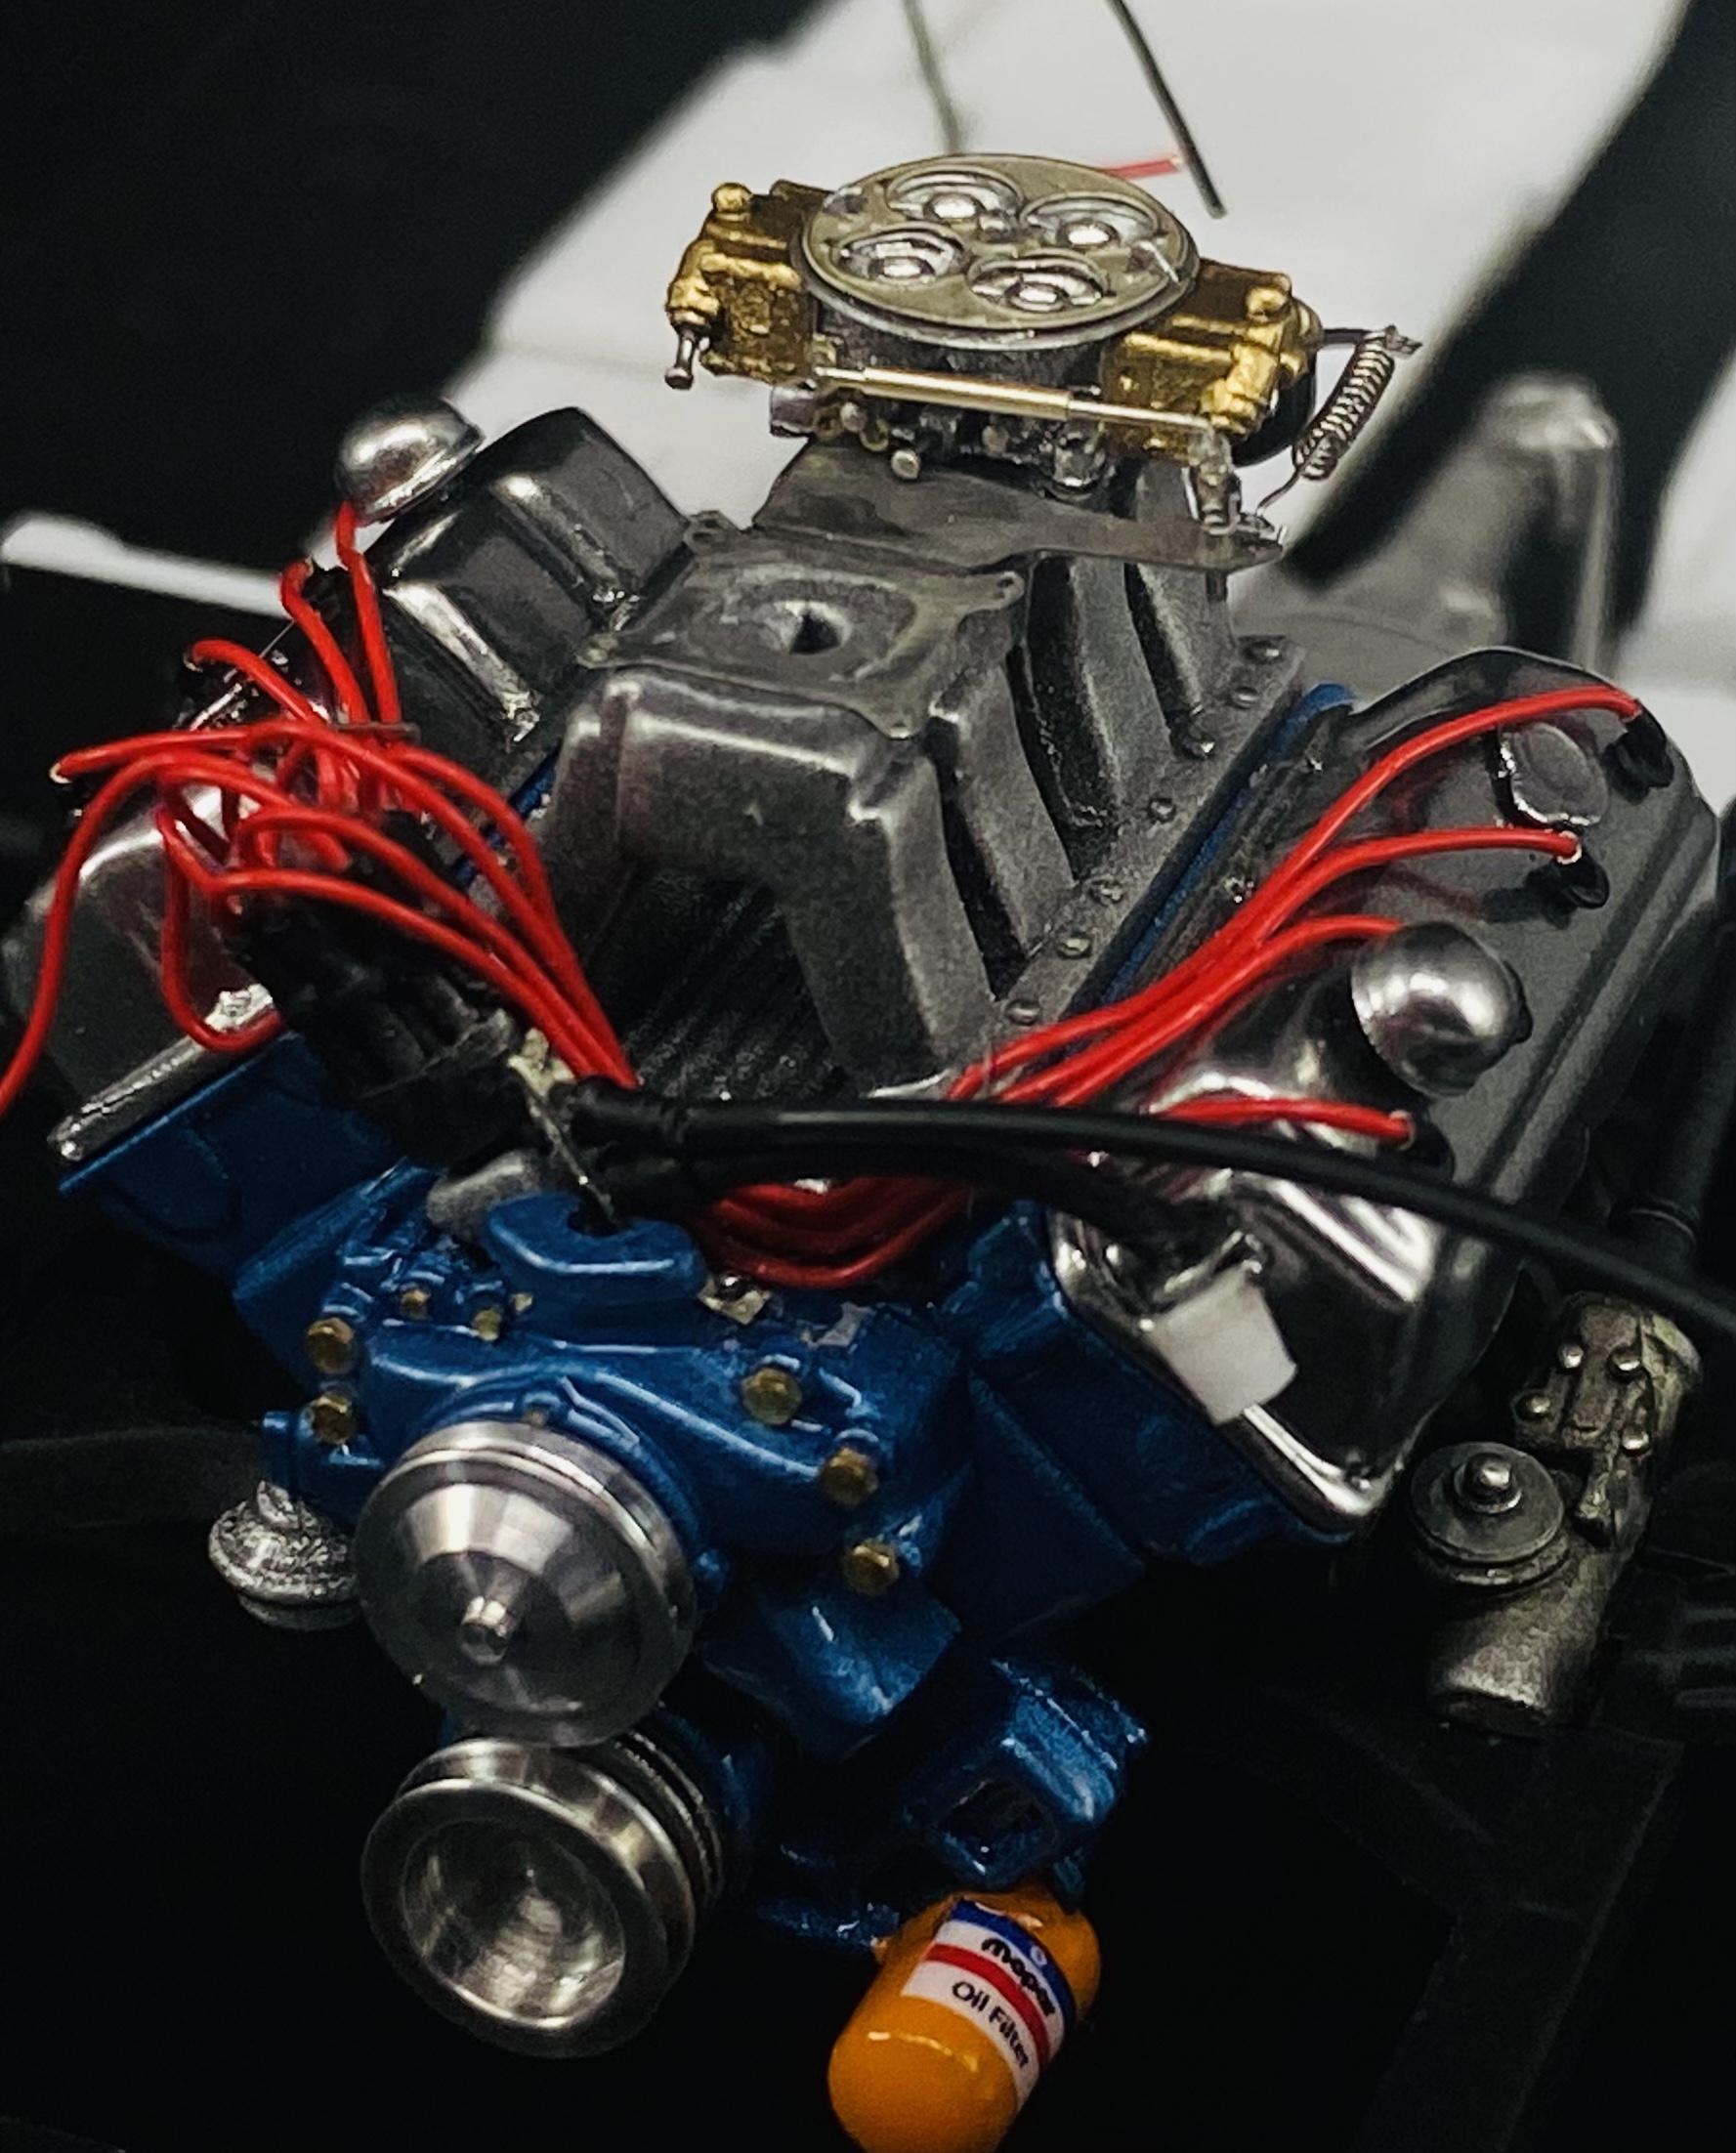
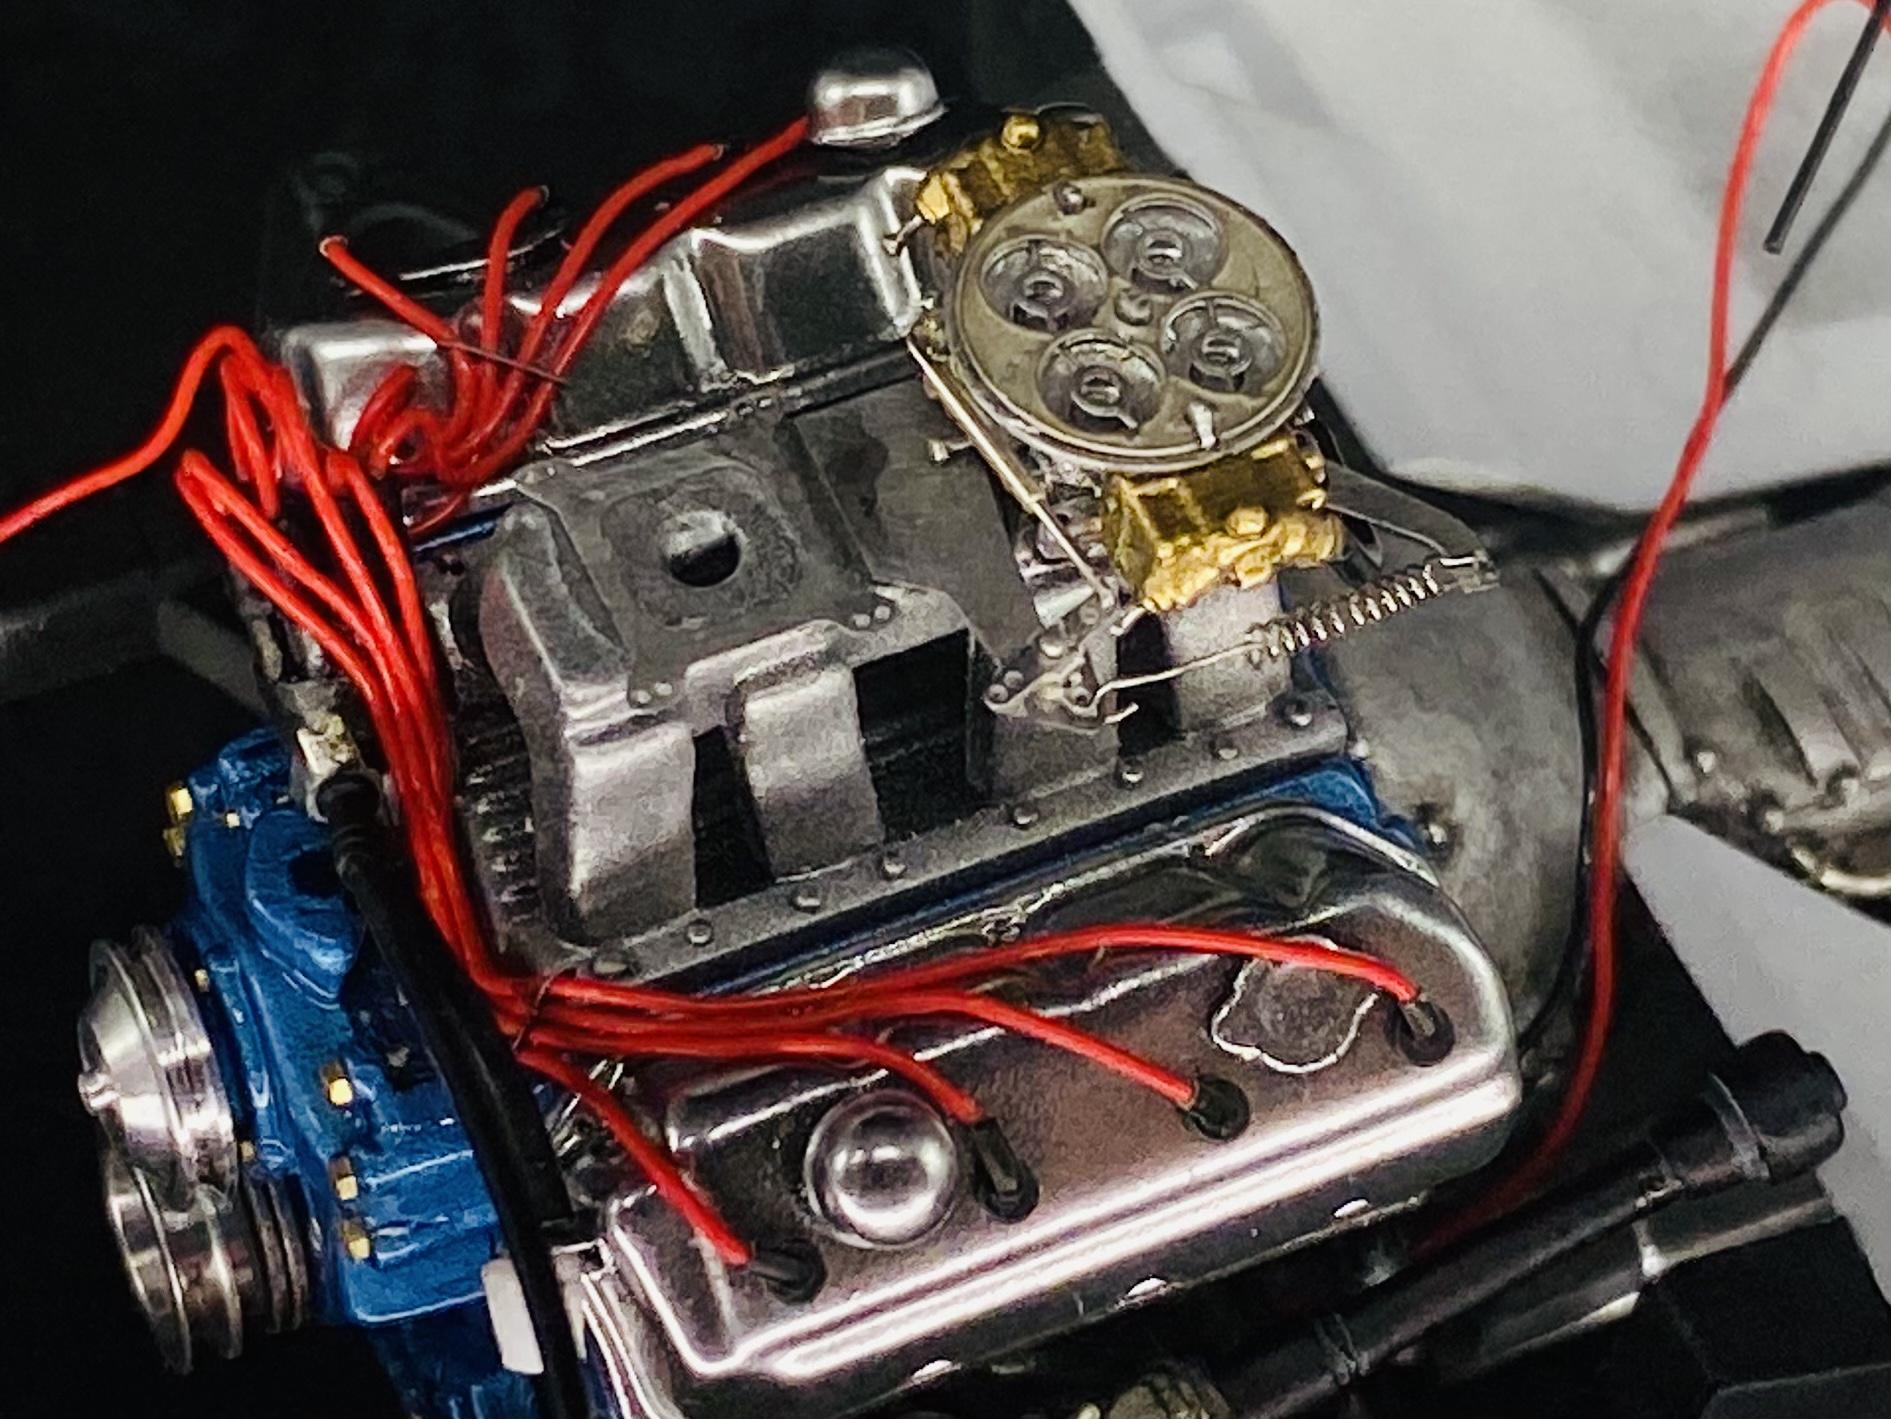
Carb 2 added and detailed. Futurattraction carbs are awesome! So far all his products have been great, so glad I stumbled upon his site! Linkage made from Albion nickel silver tubes and insect pins. Carb PE parts are detail master from linkage & hardware set DM-2420.
-
A small update, I’ve managed to get both carbs painted in Alclad pale gold and aluminum. I decided it would be easier to work from the back of the engine forward installing one at a time and detailing it as I go. One down, one to go. thanks as always for looking
-
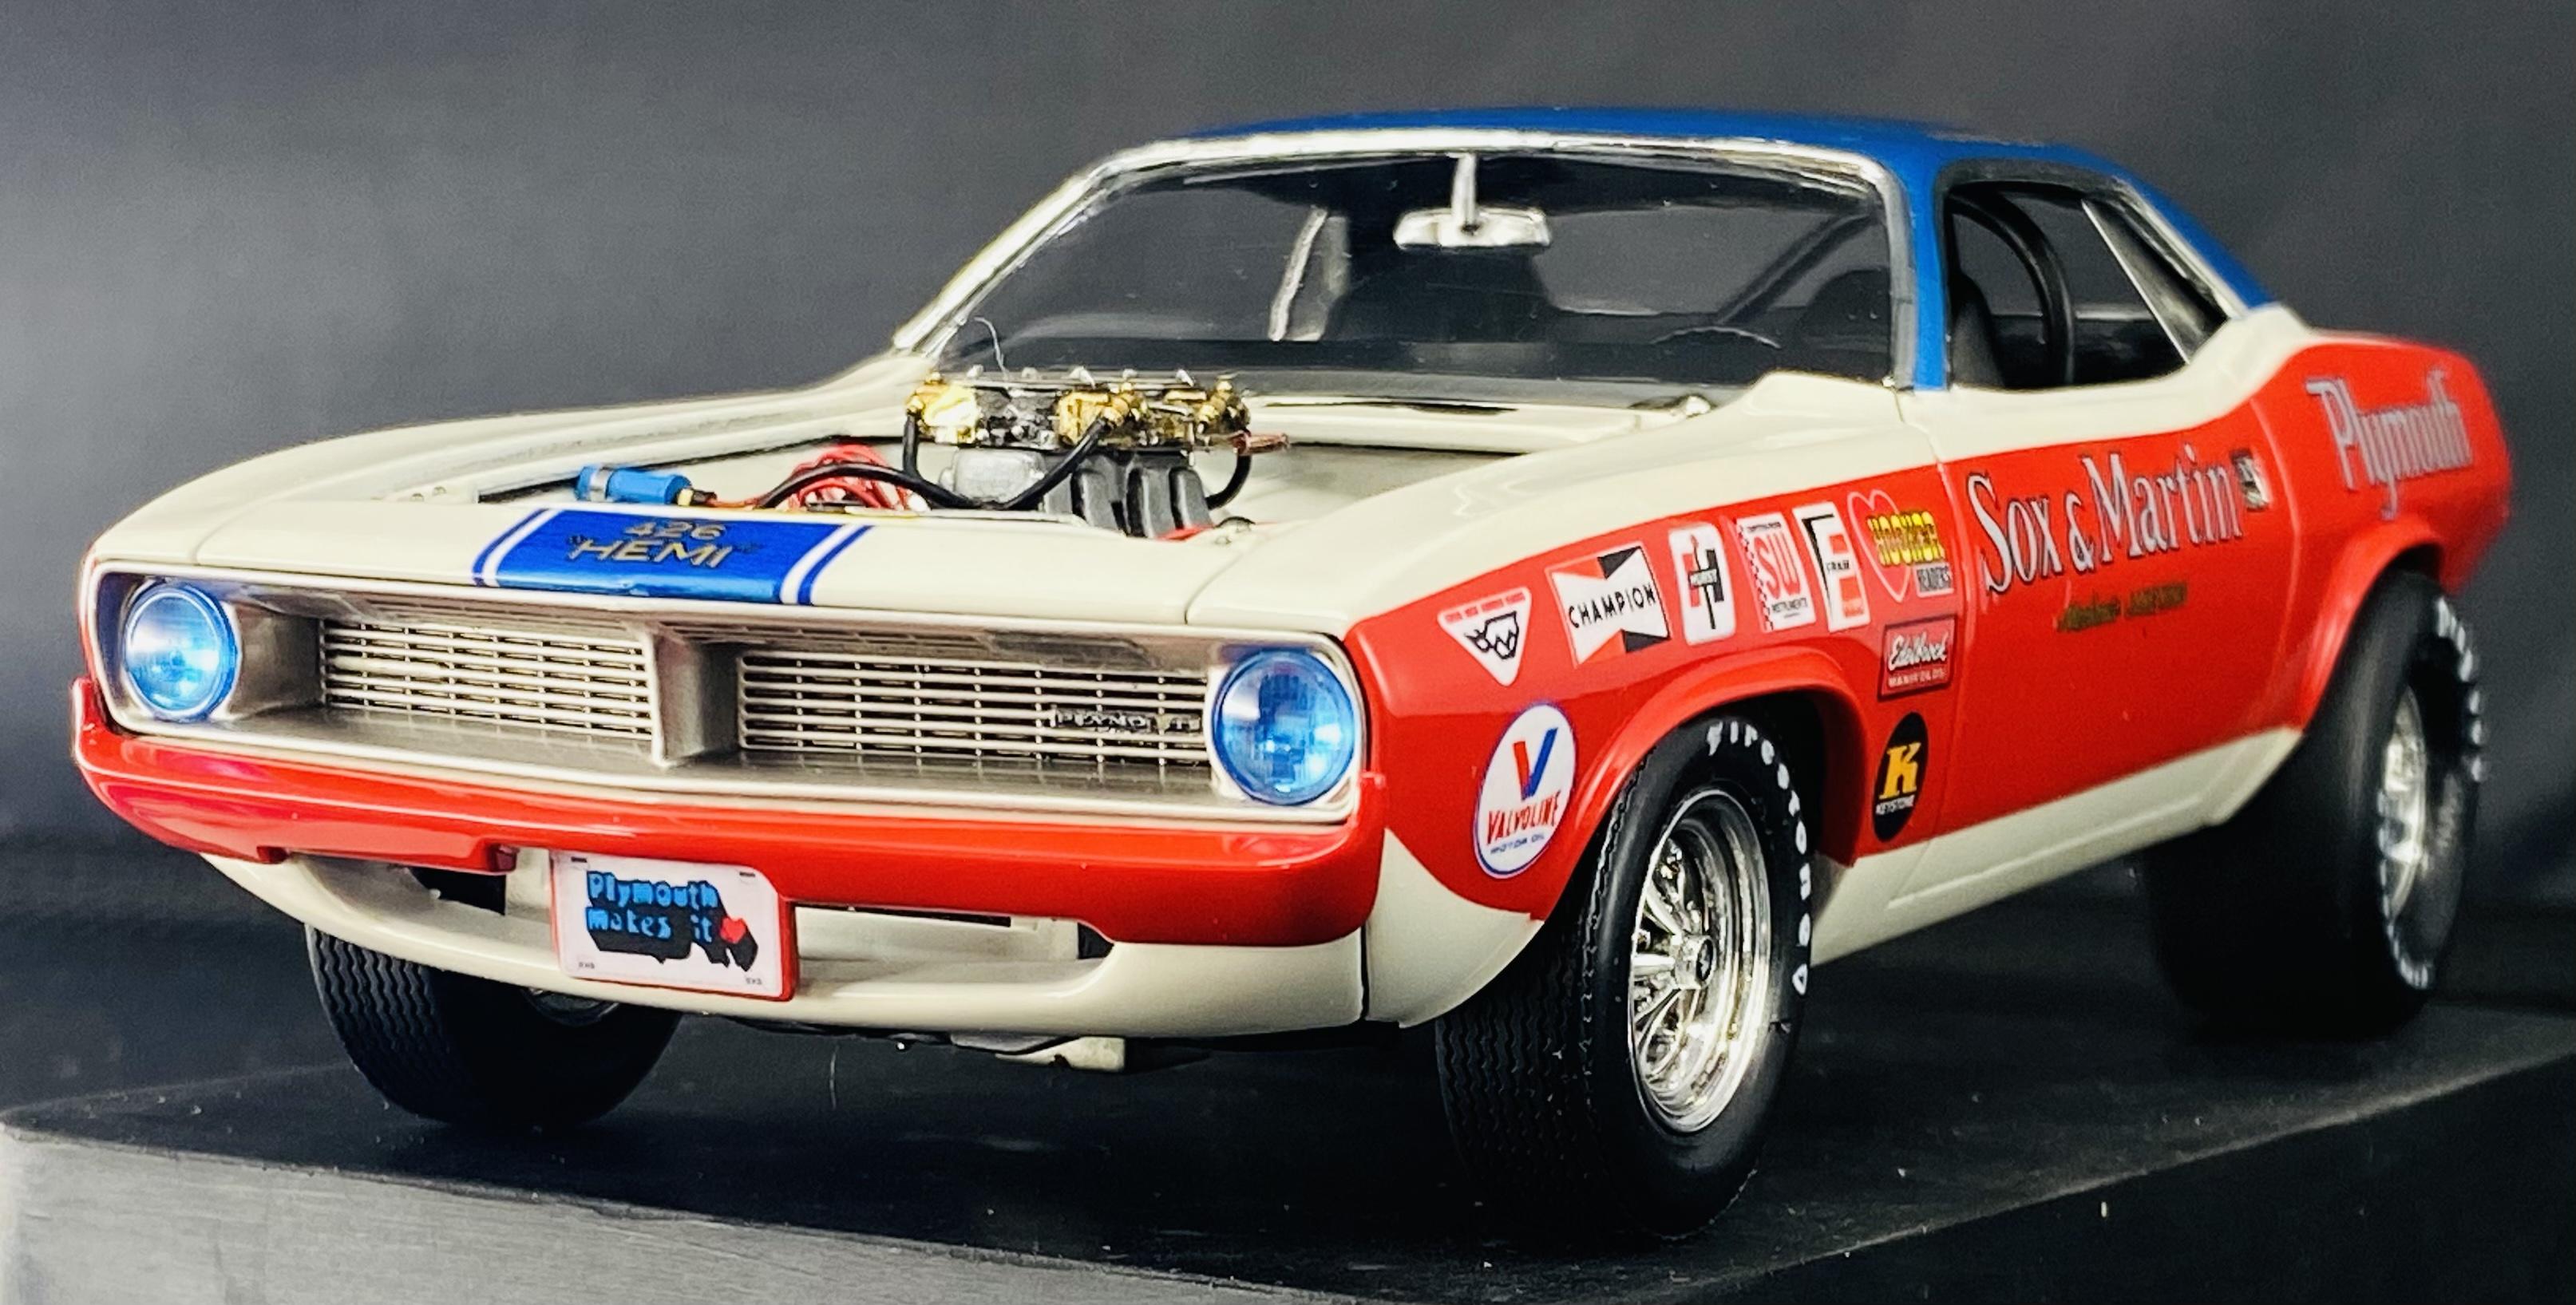
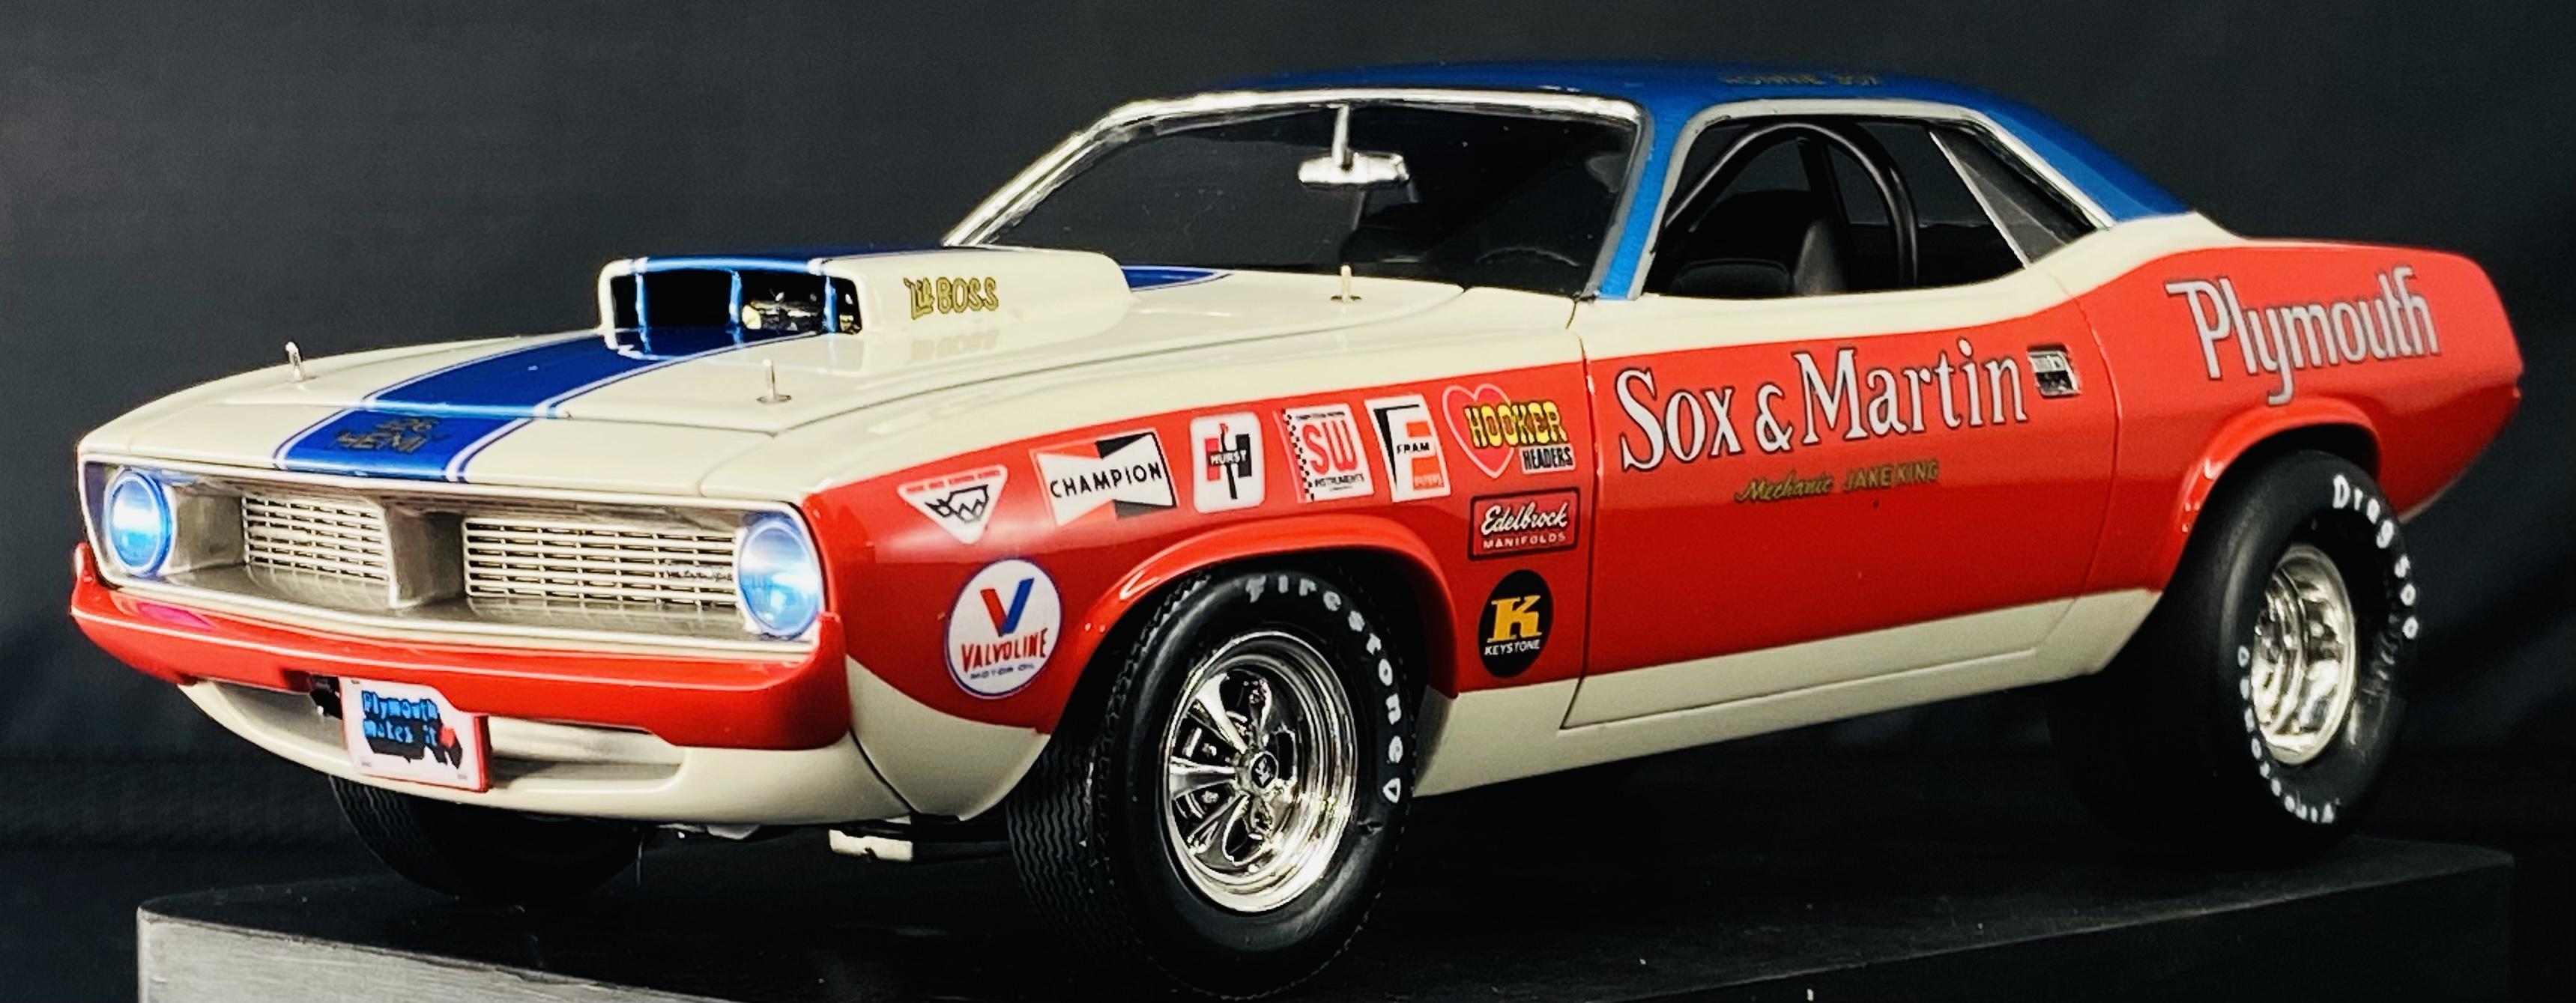
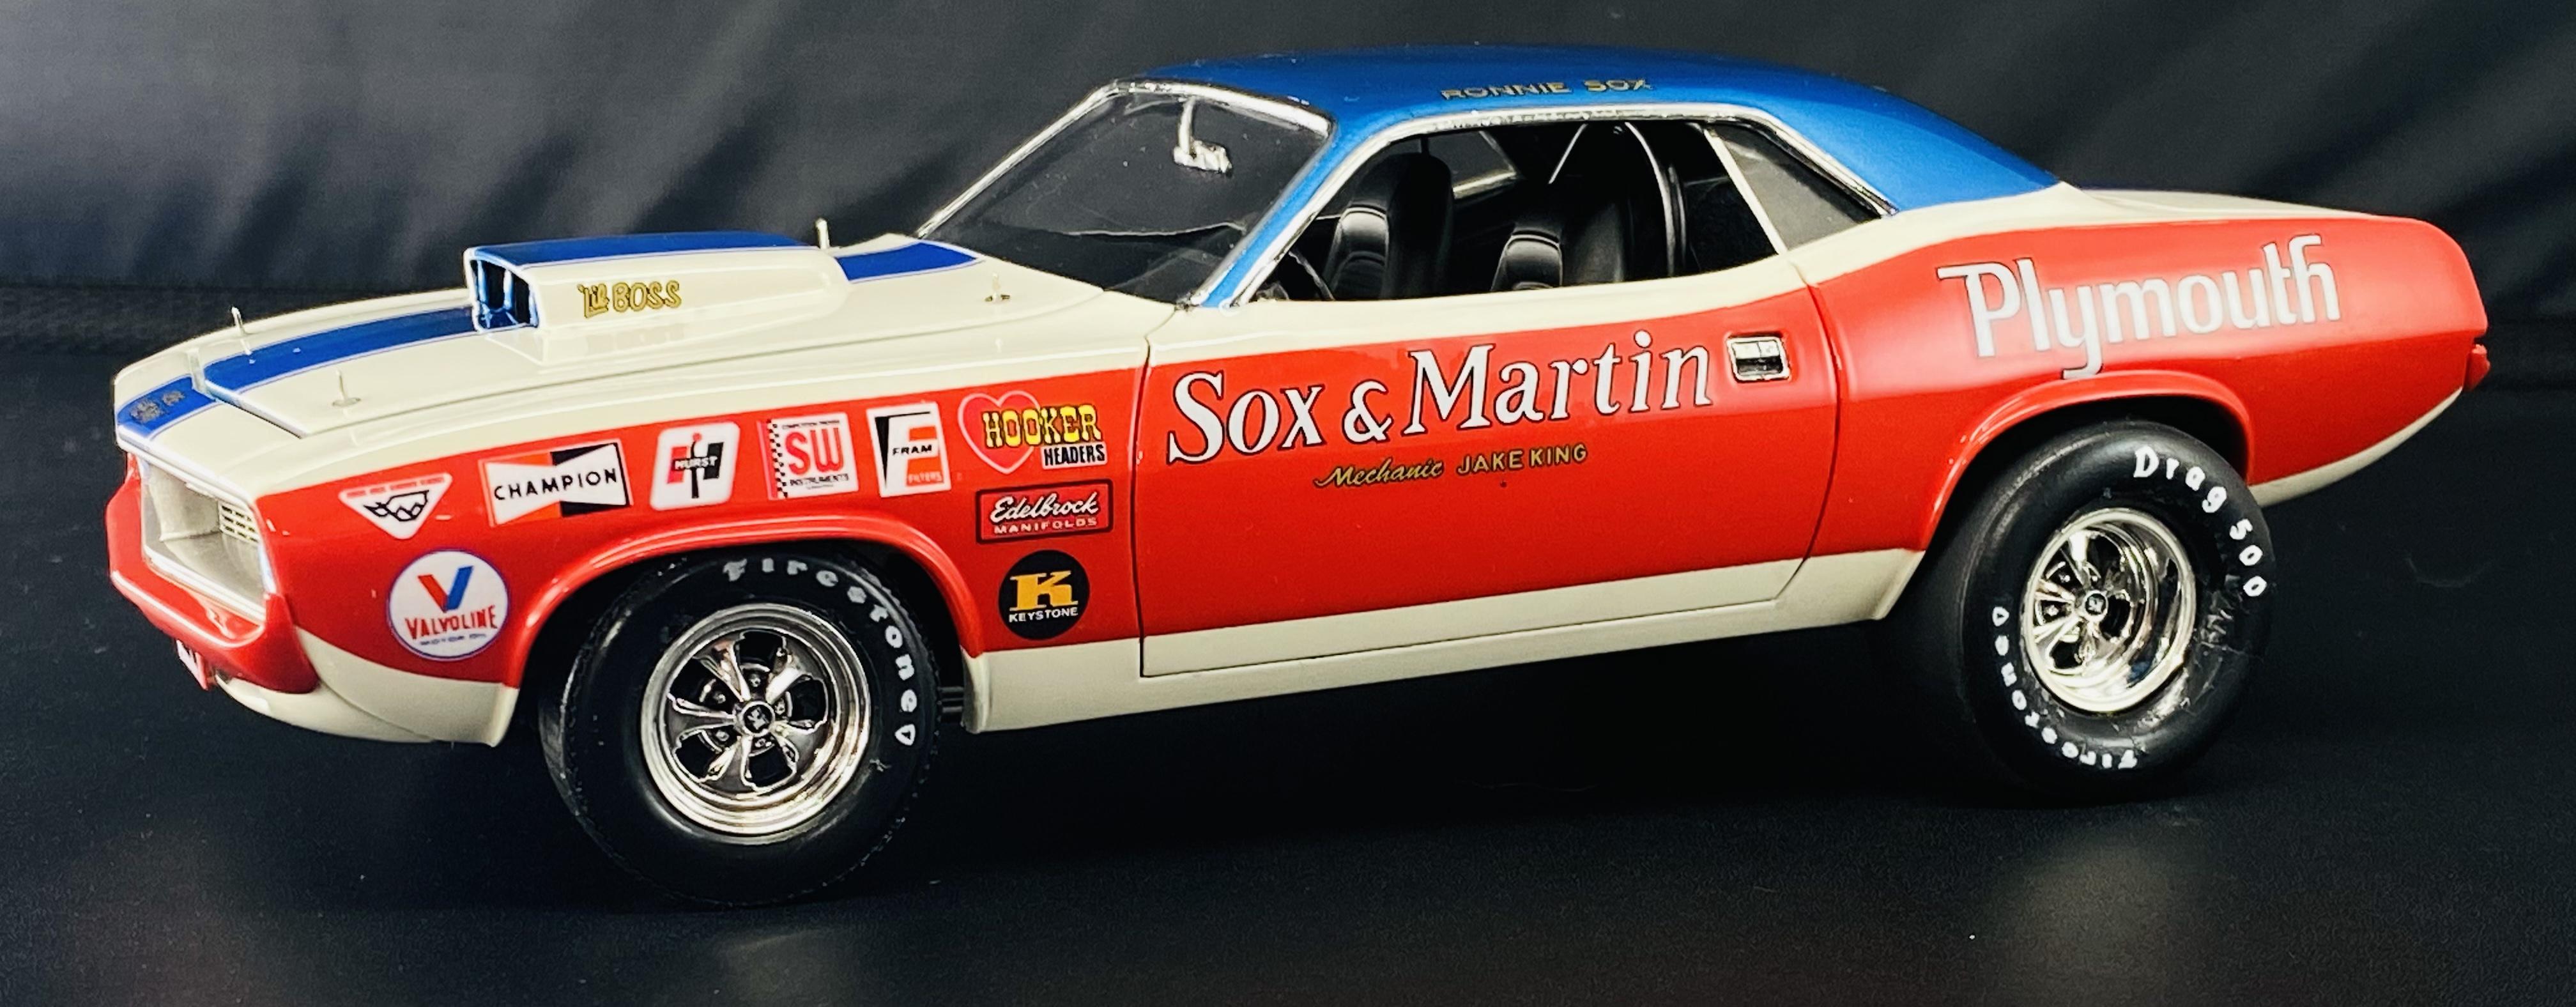
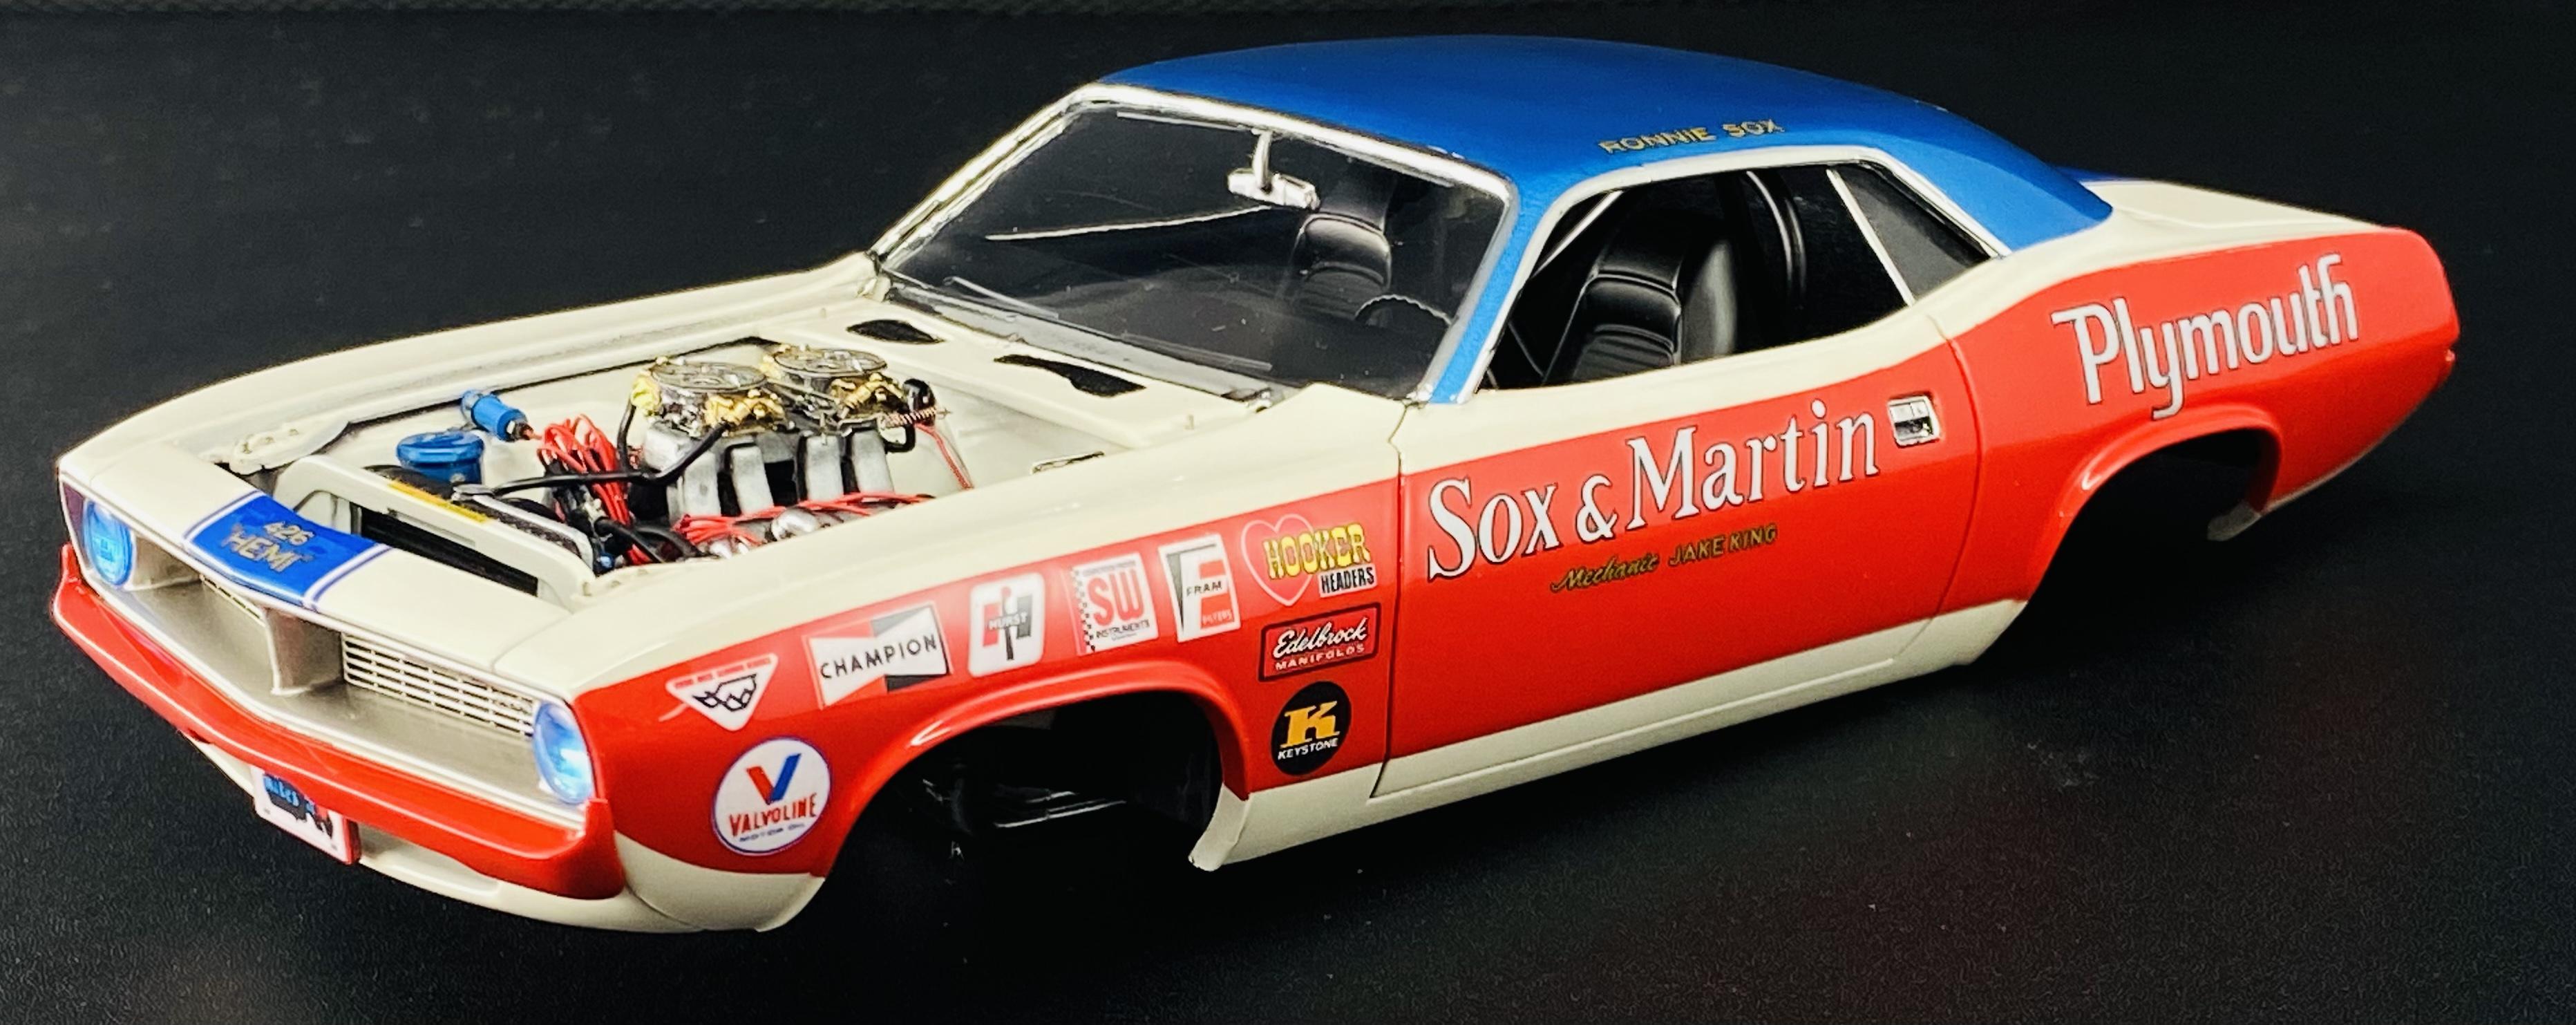
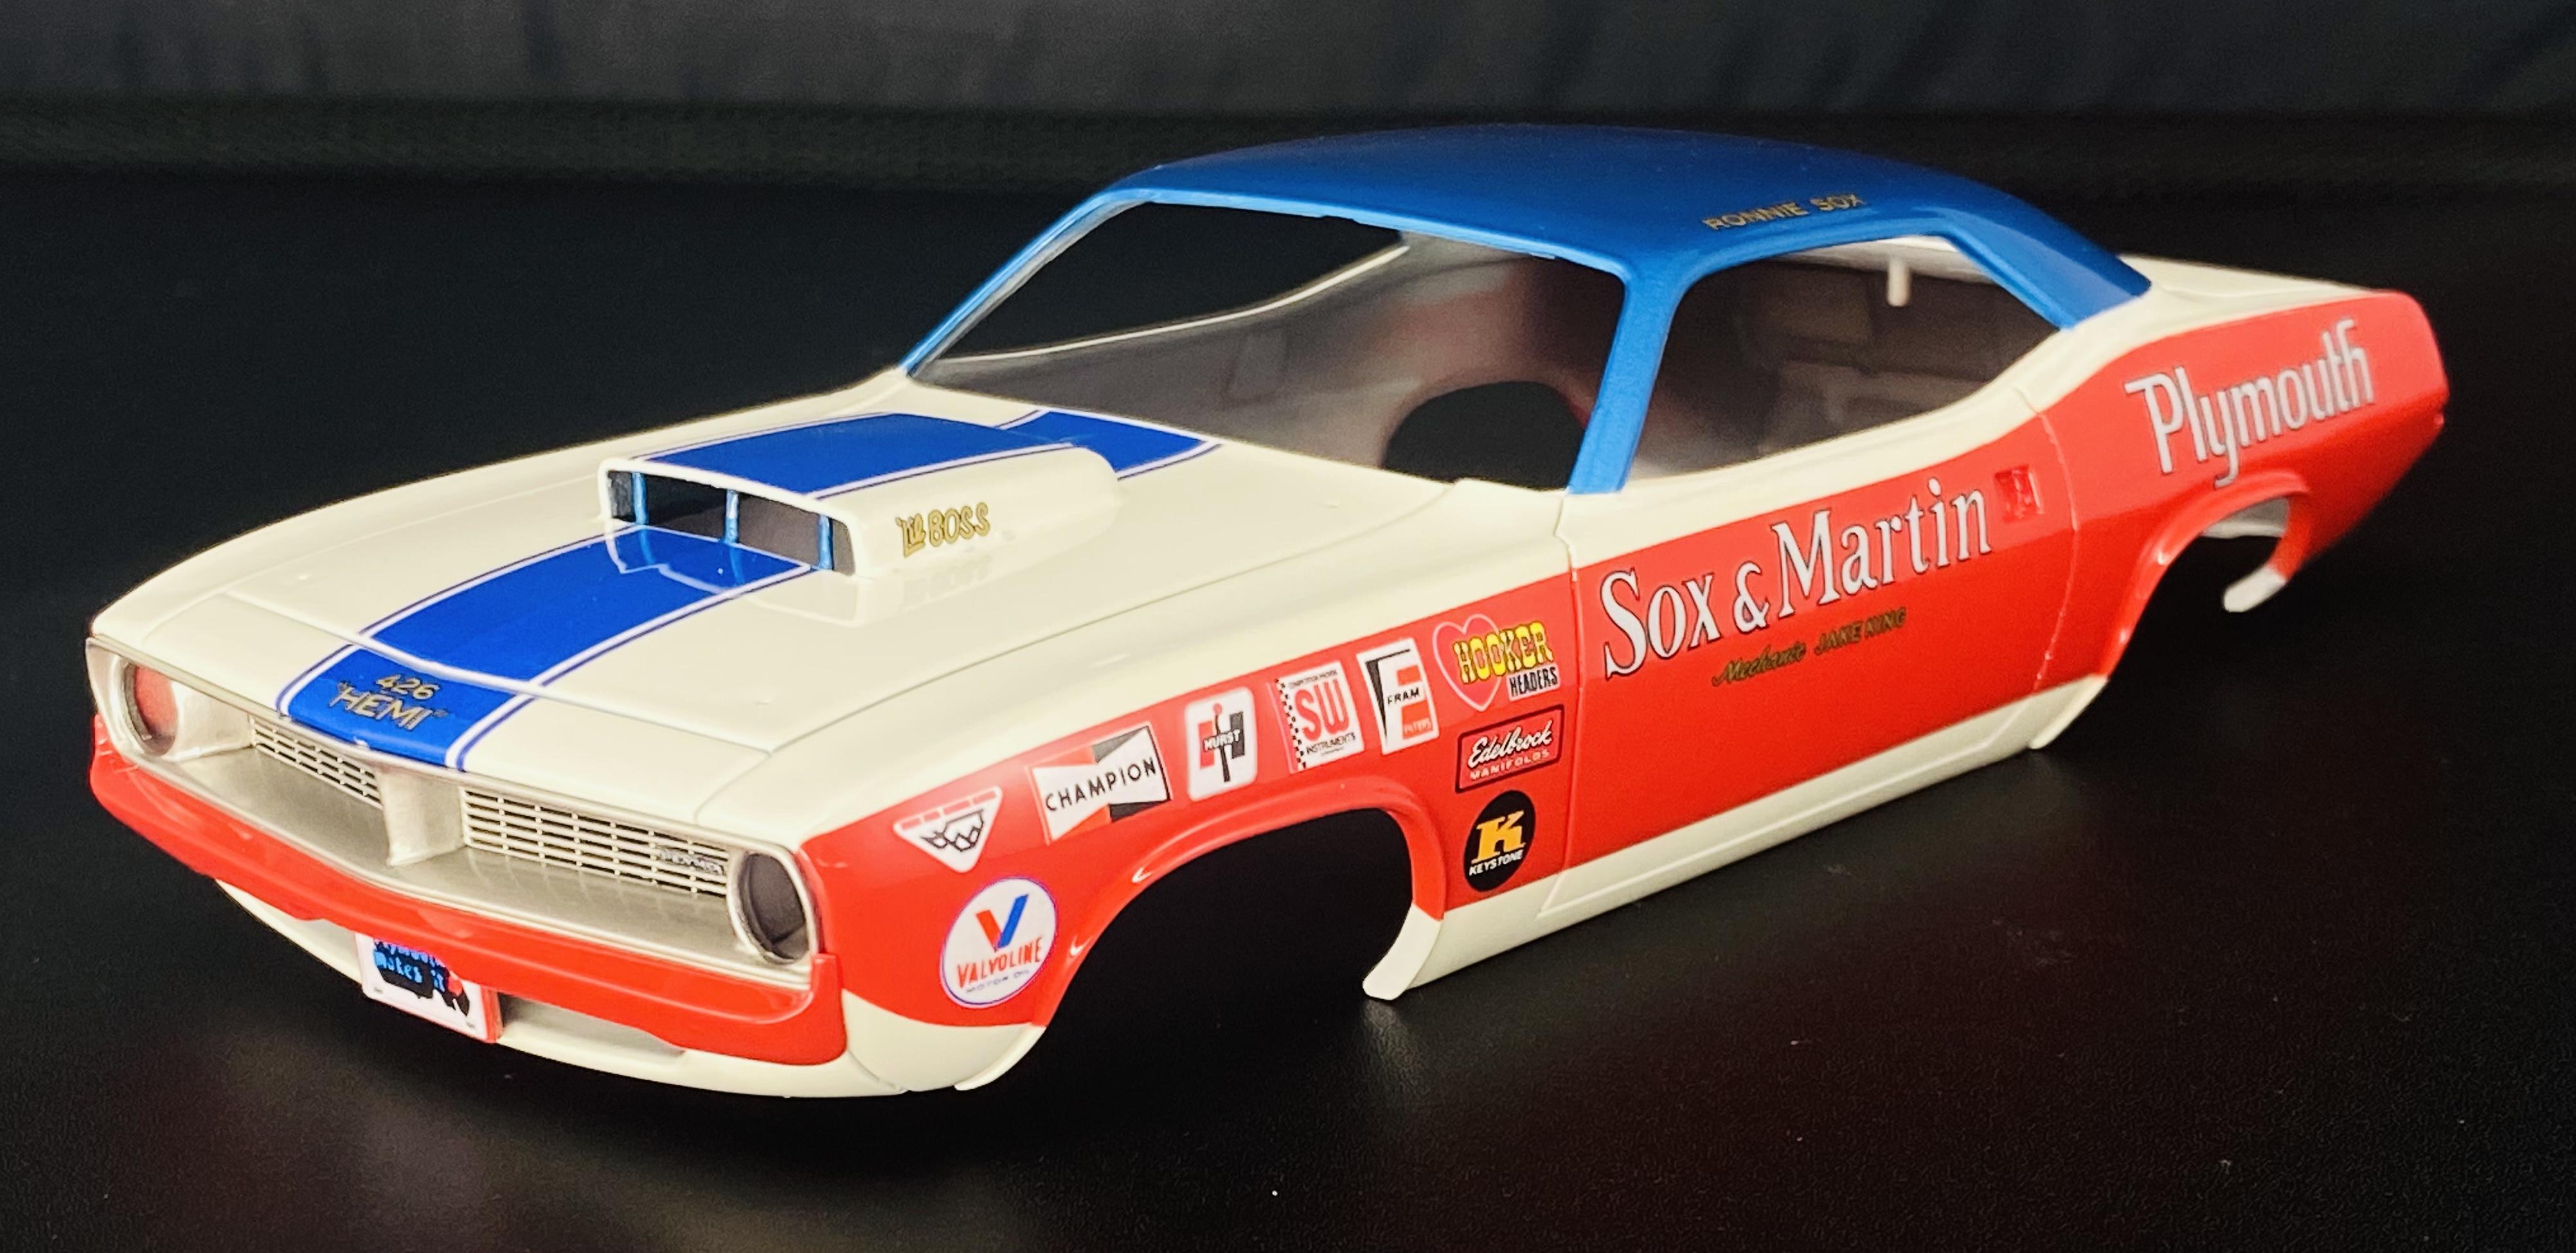
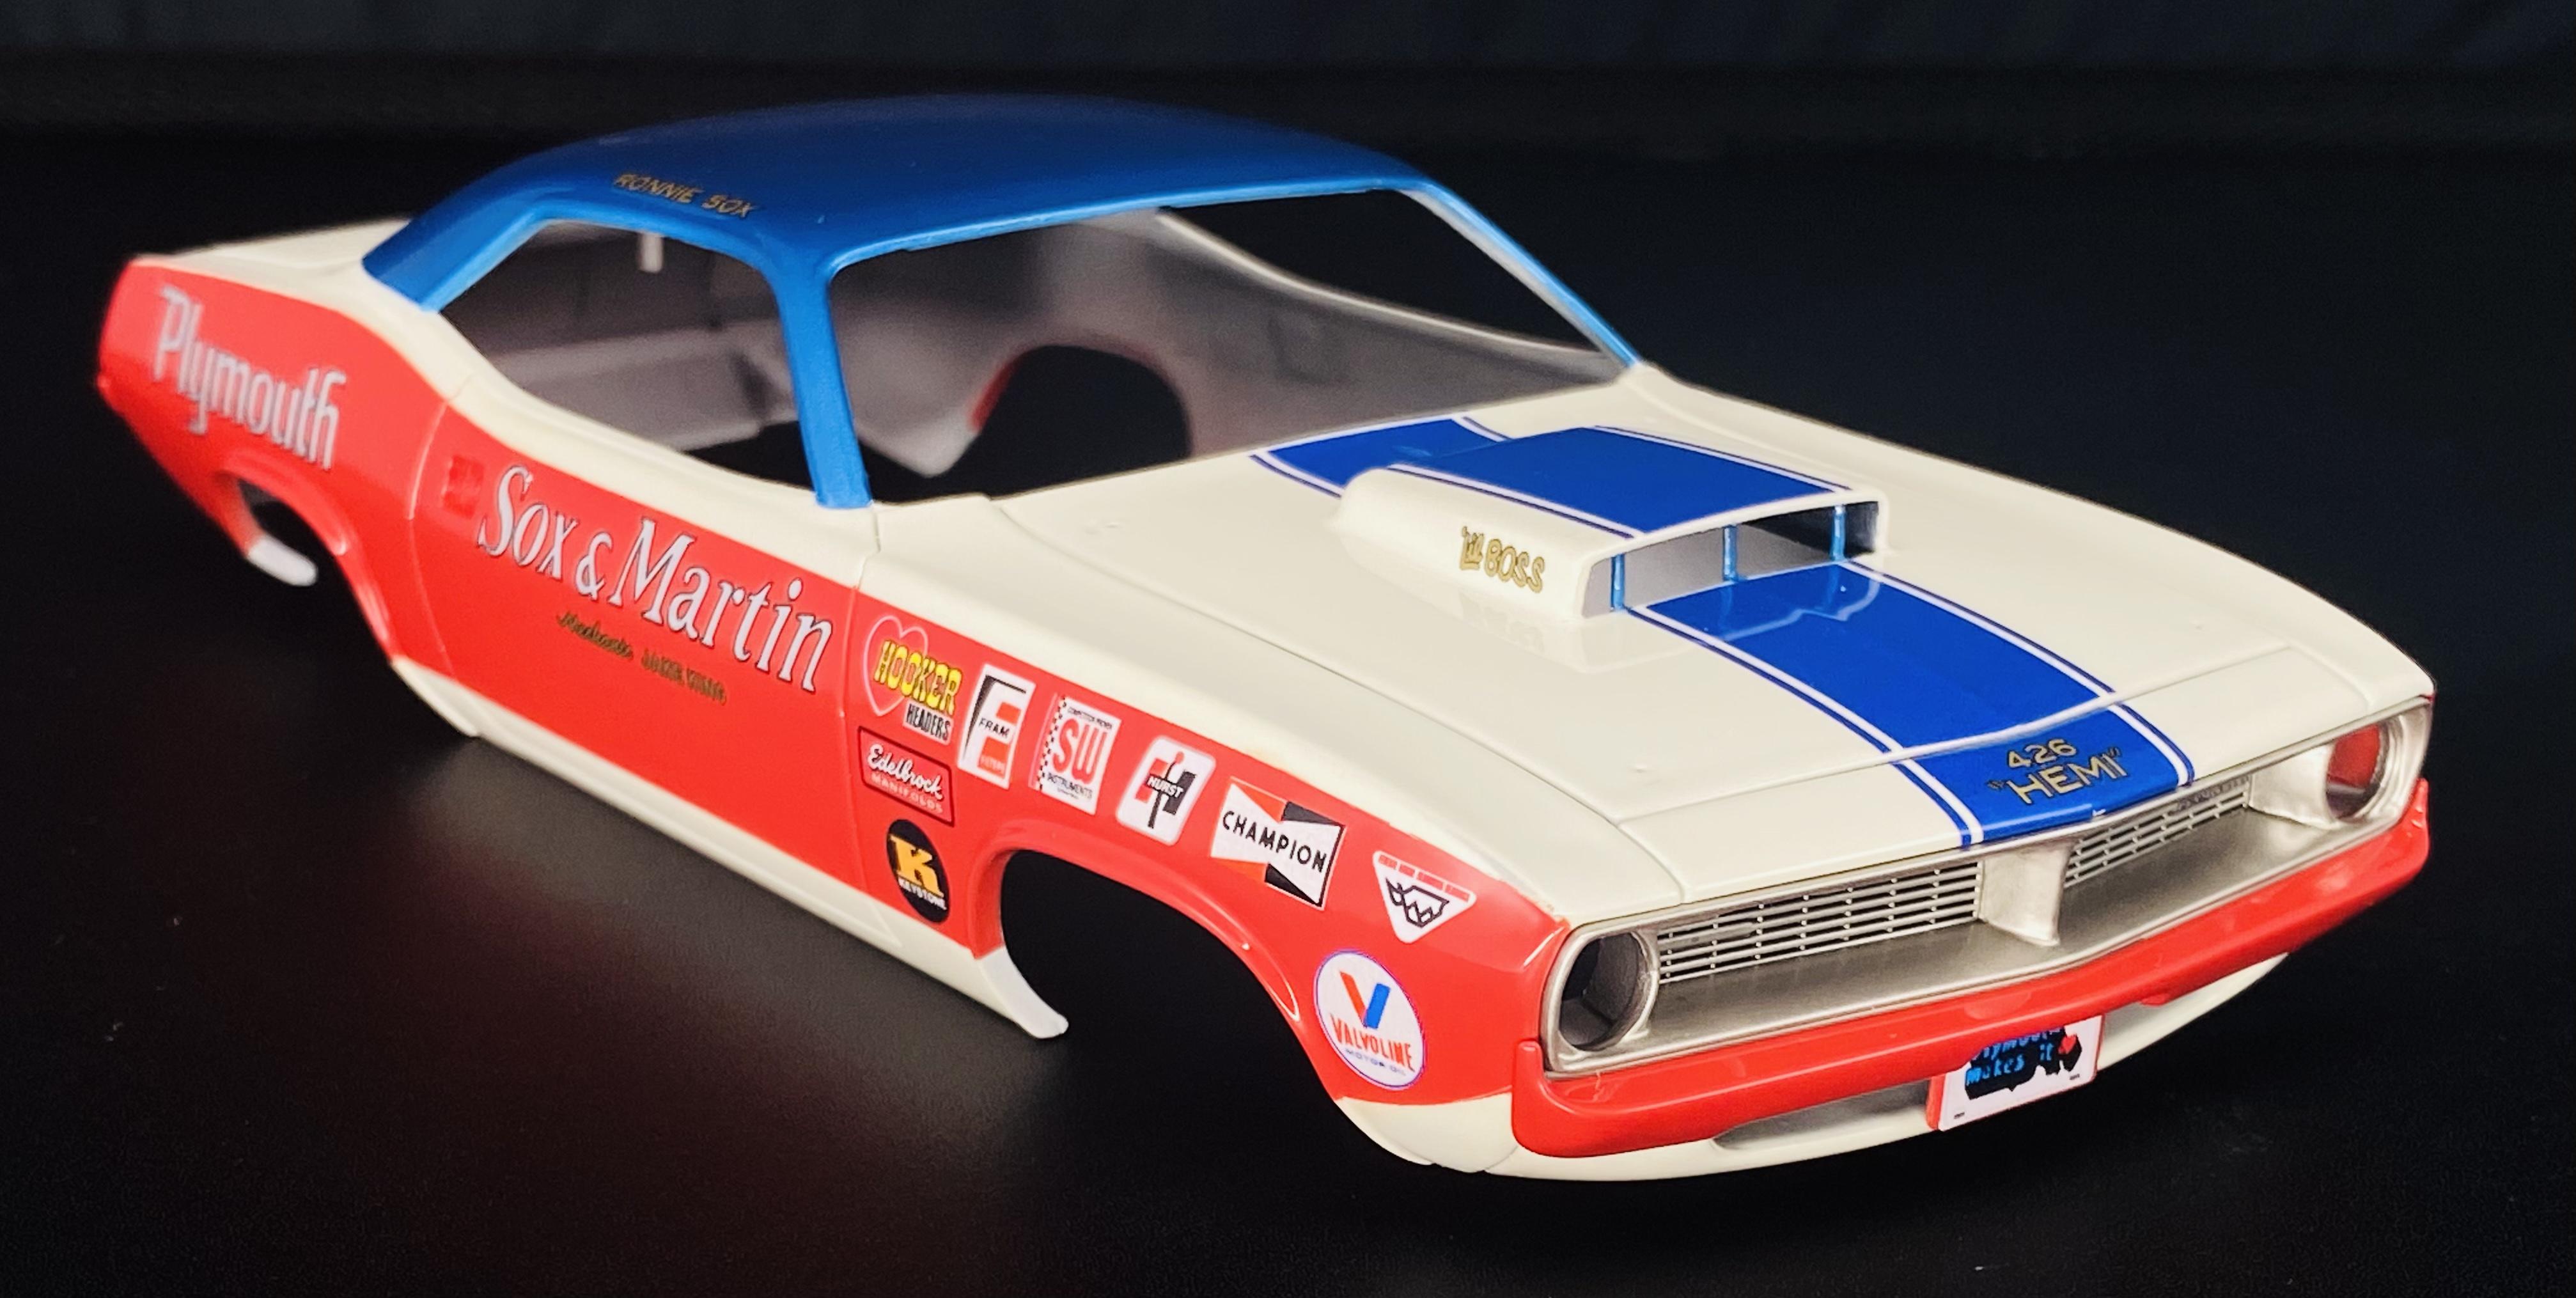
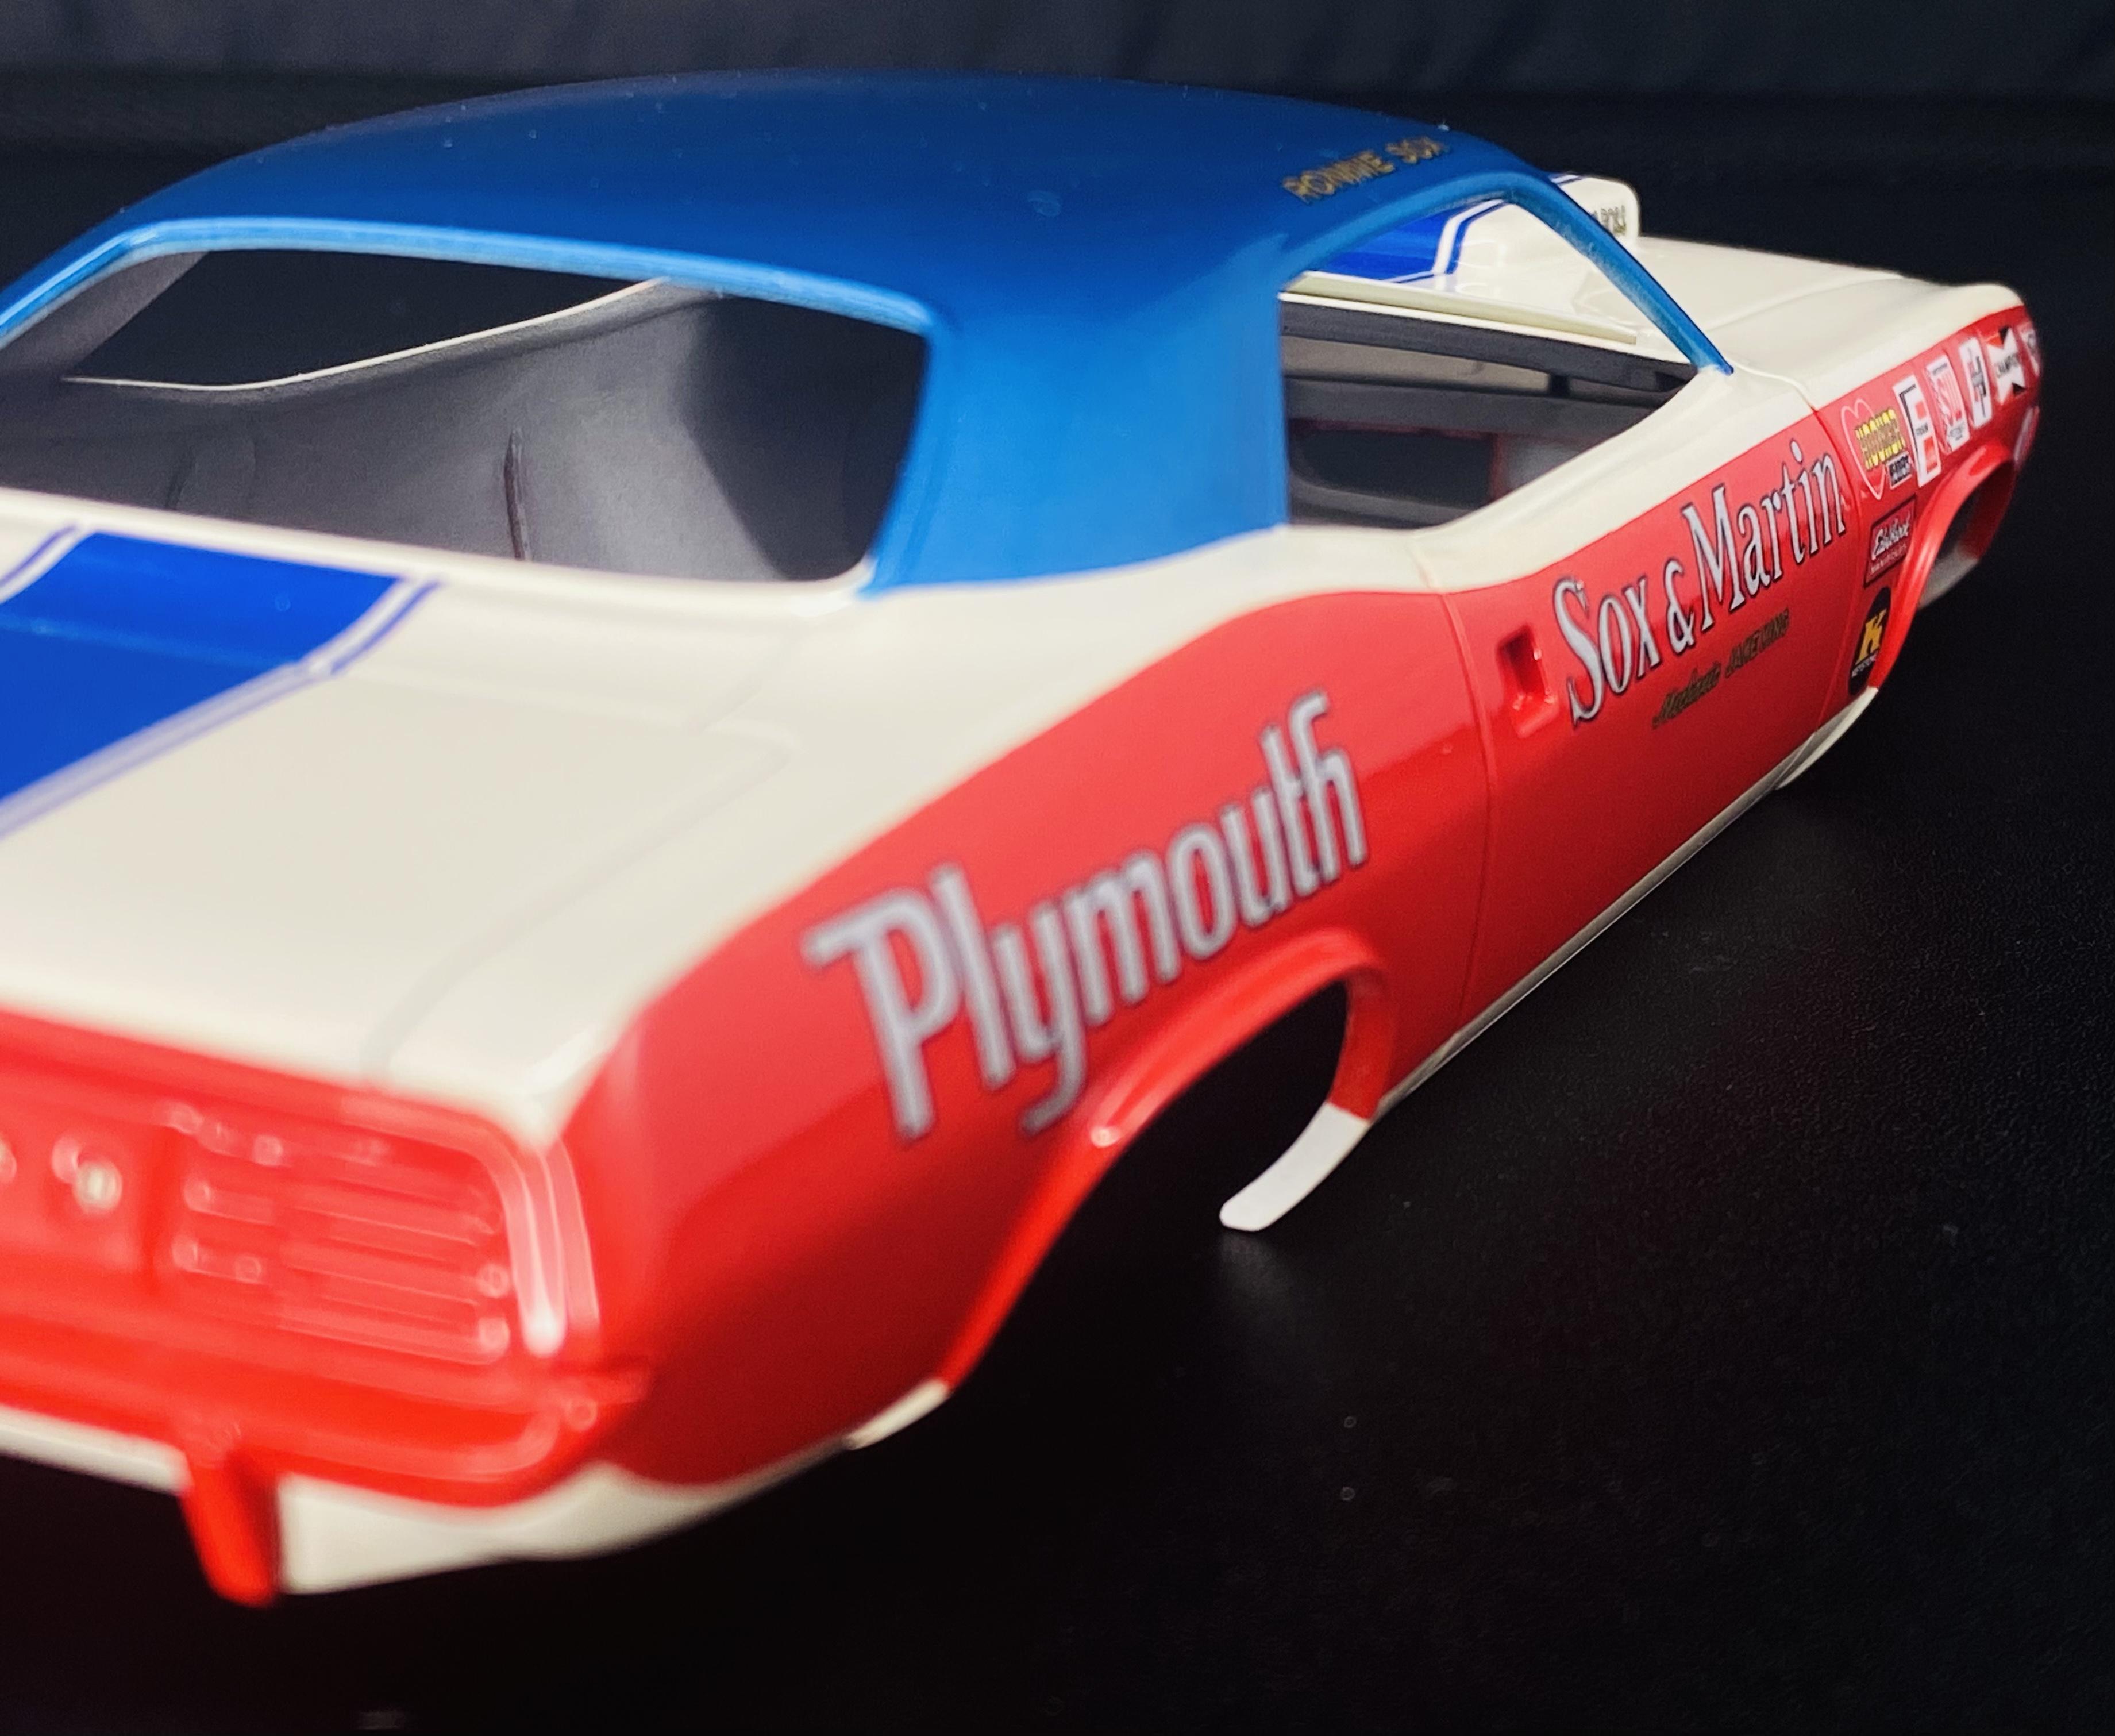
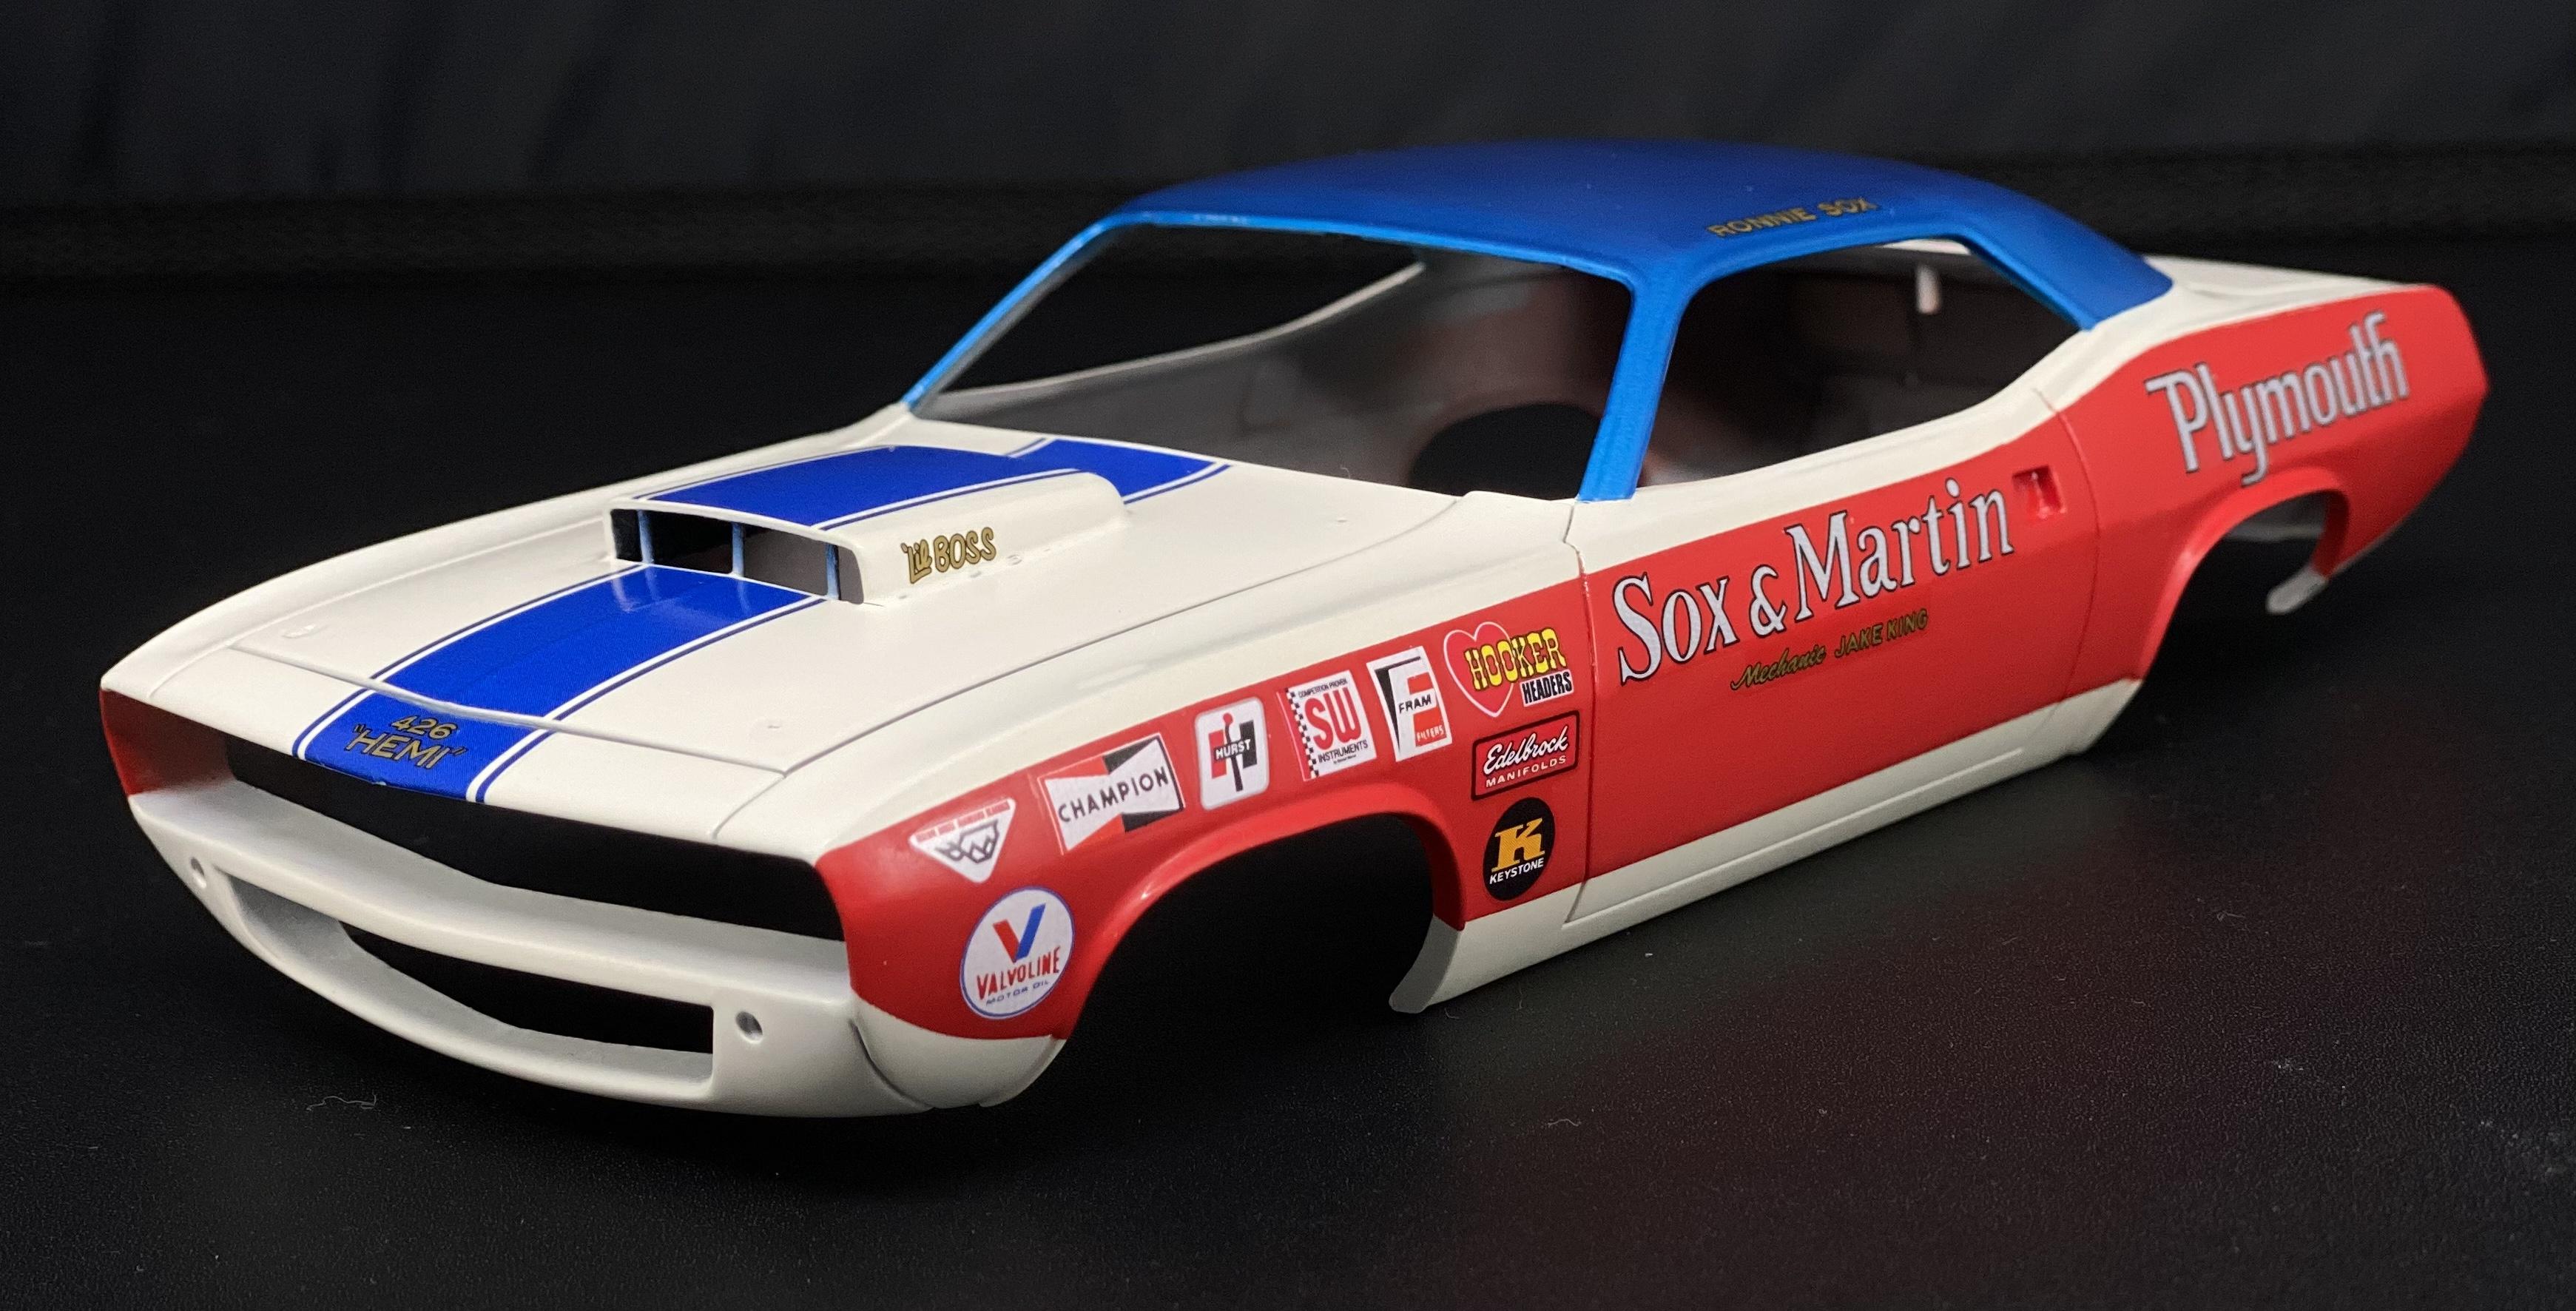
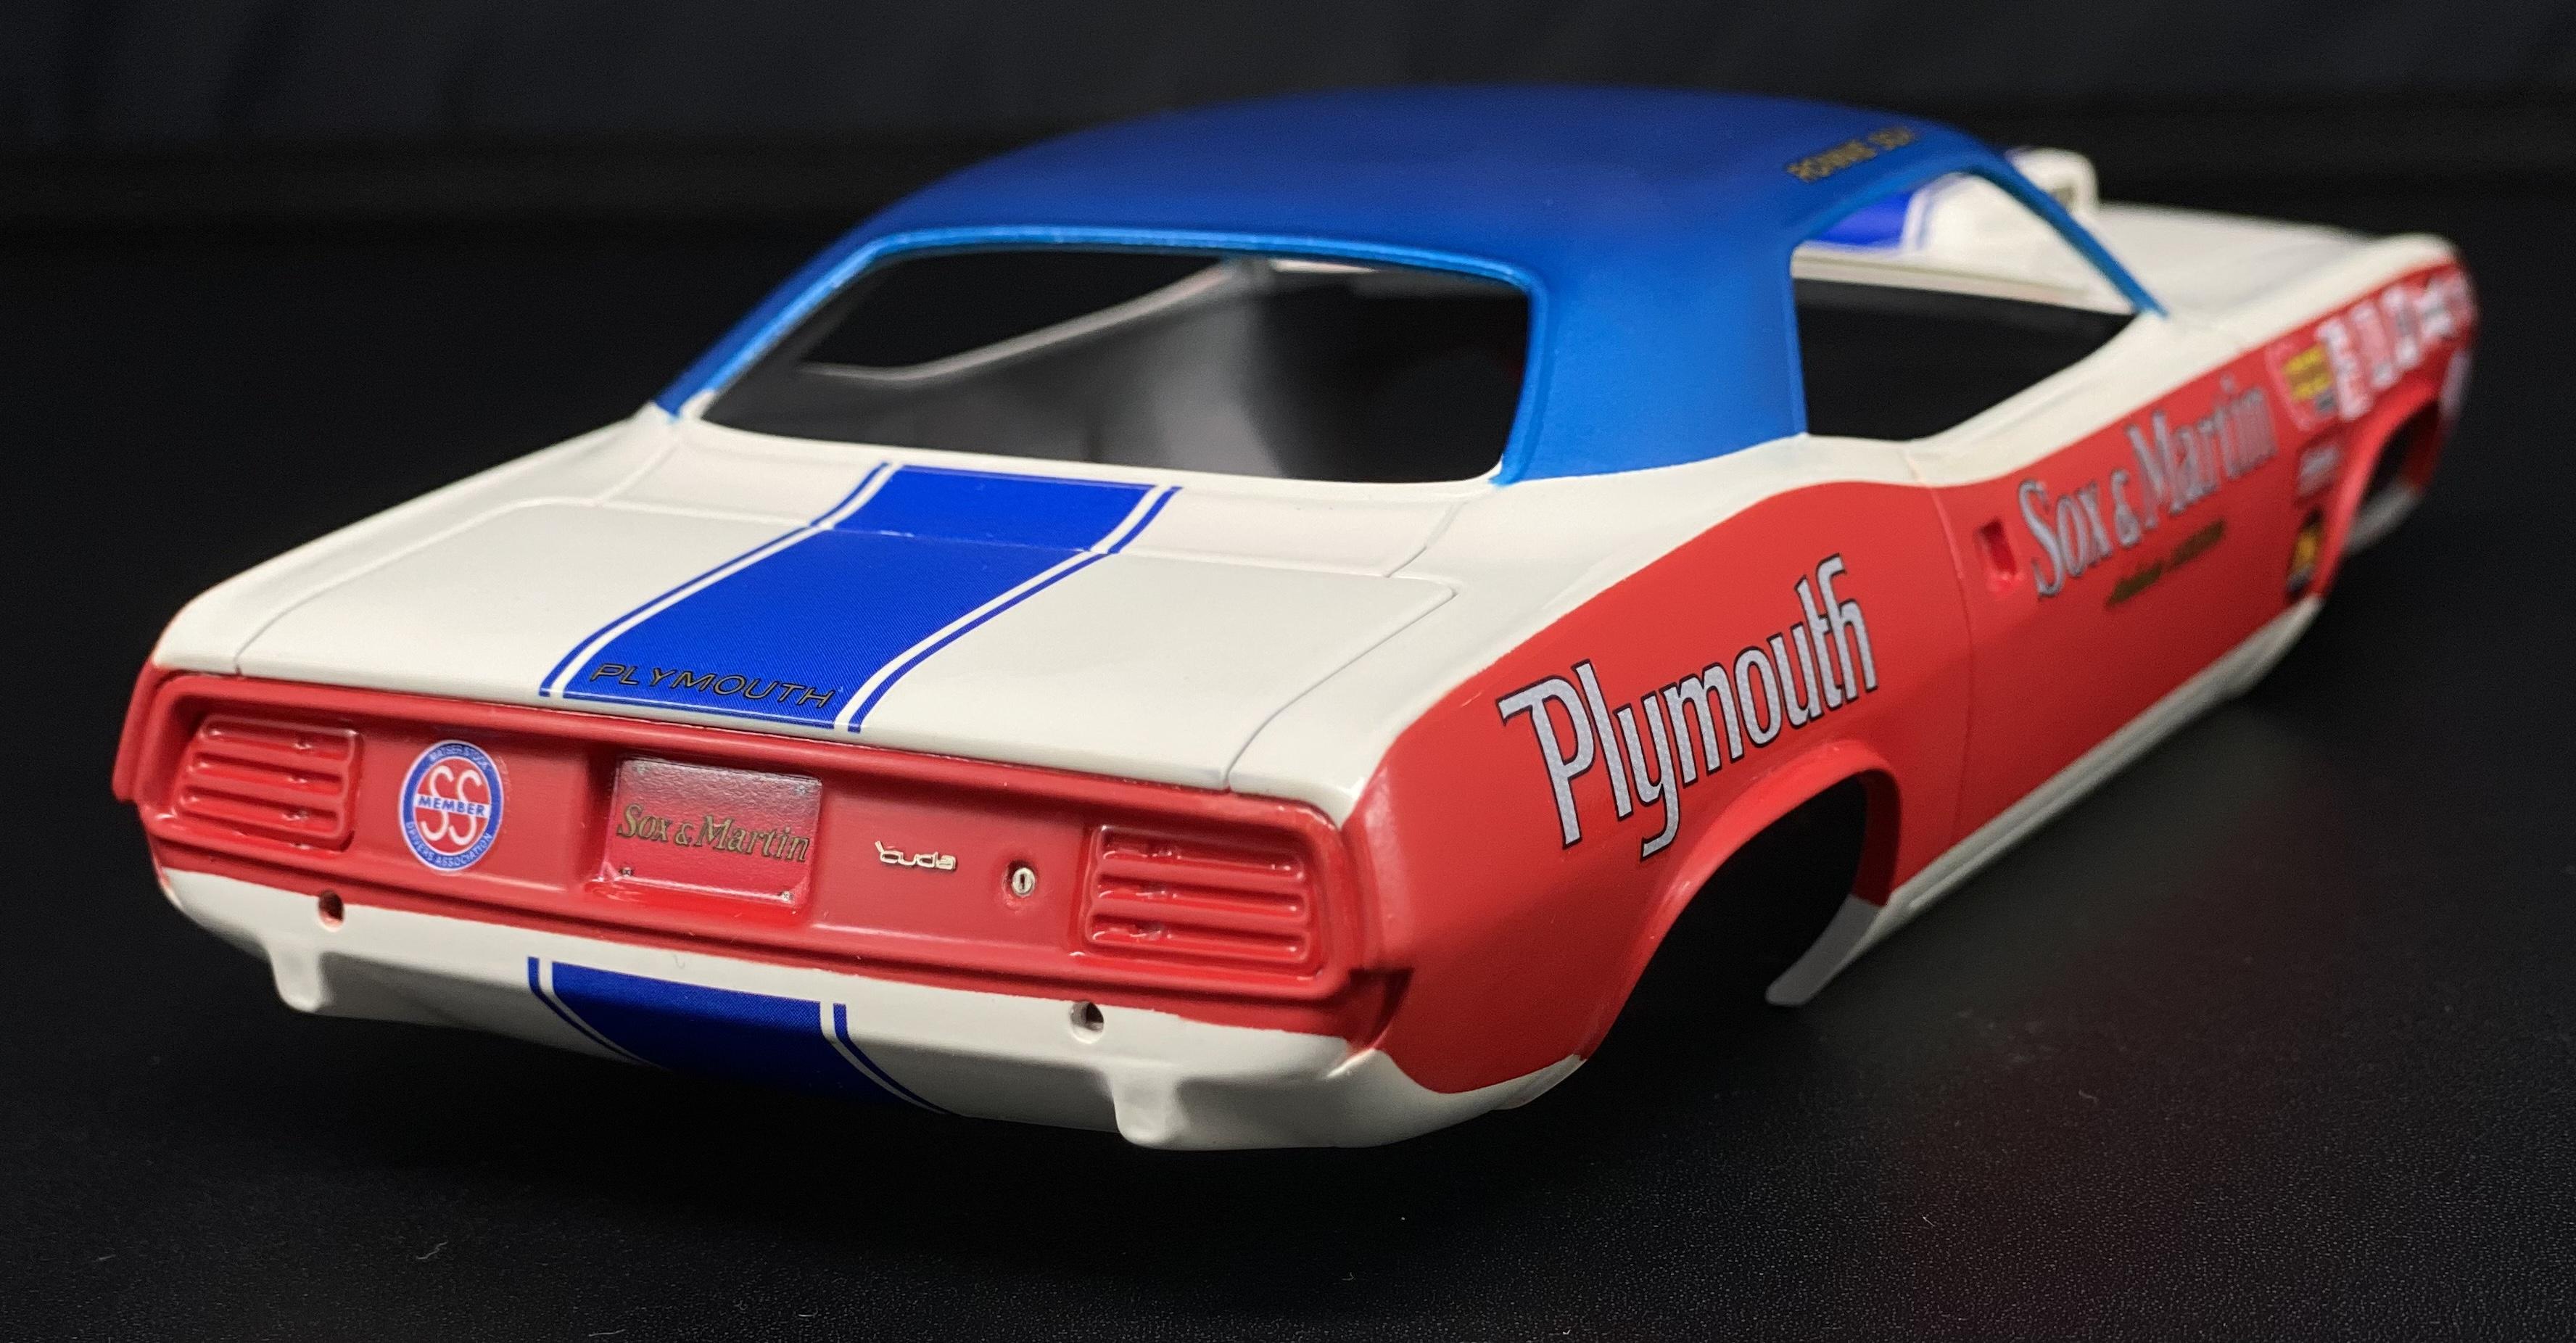
Decals on, over a mist coat of 2k clear, then a heavy wet coat. I then sanded that back with 3000 and applied these. the Revell decals may as well have been cardboard, very very thick! in this case, Revell fails horribly and made their decals way, way too short for the stripes. I also had to pull the Fram, champion and Valvoline decals from the Johan kit. Cuda PE part added to rear and a very small PE trunk lock.
-
It doesn’t look like much, but it’s a 2k clear coat, sanded down with 3000. I do this to flatten and define all the lines without sanding through the multiple colors. then I sandwich the decals between the clear coats…
-
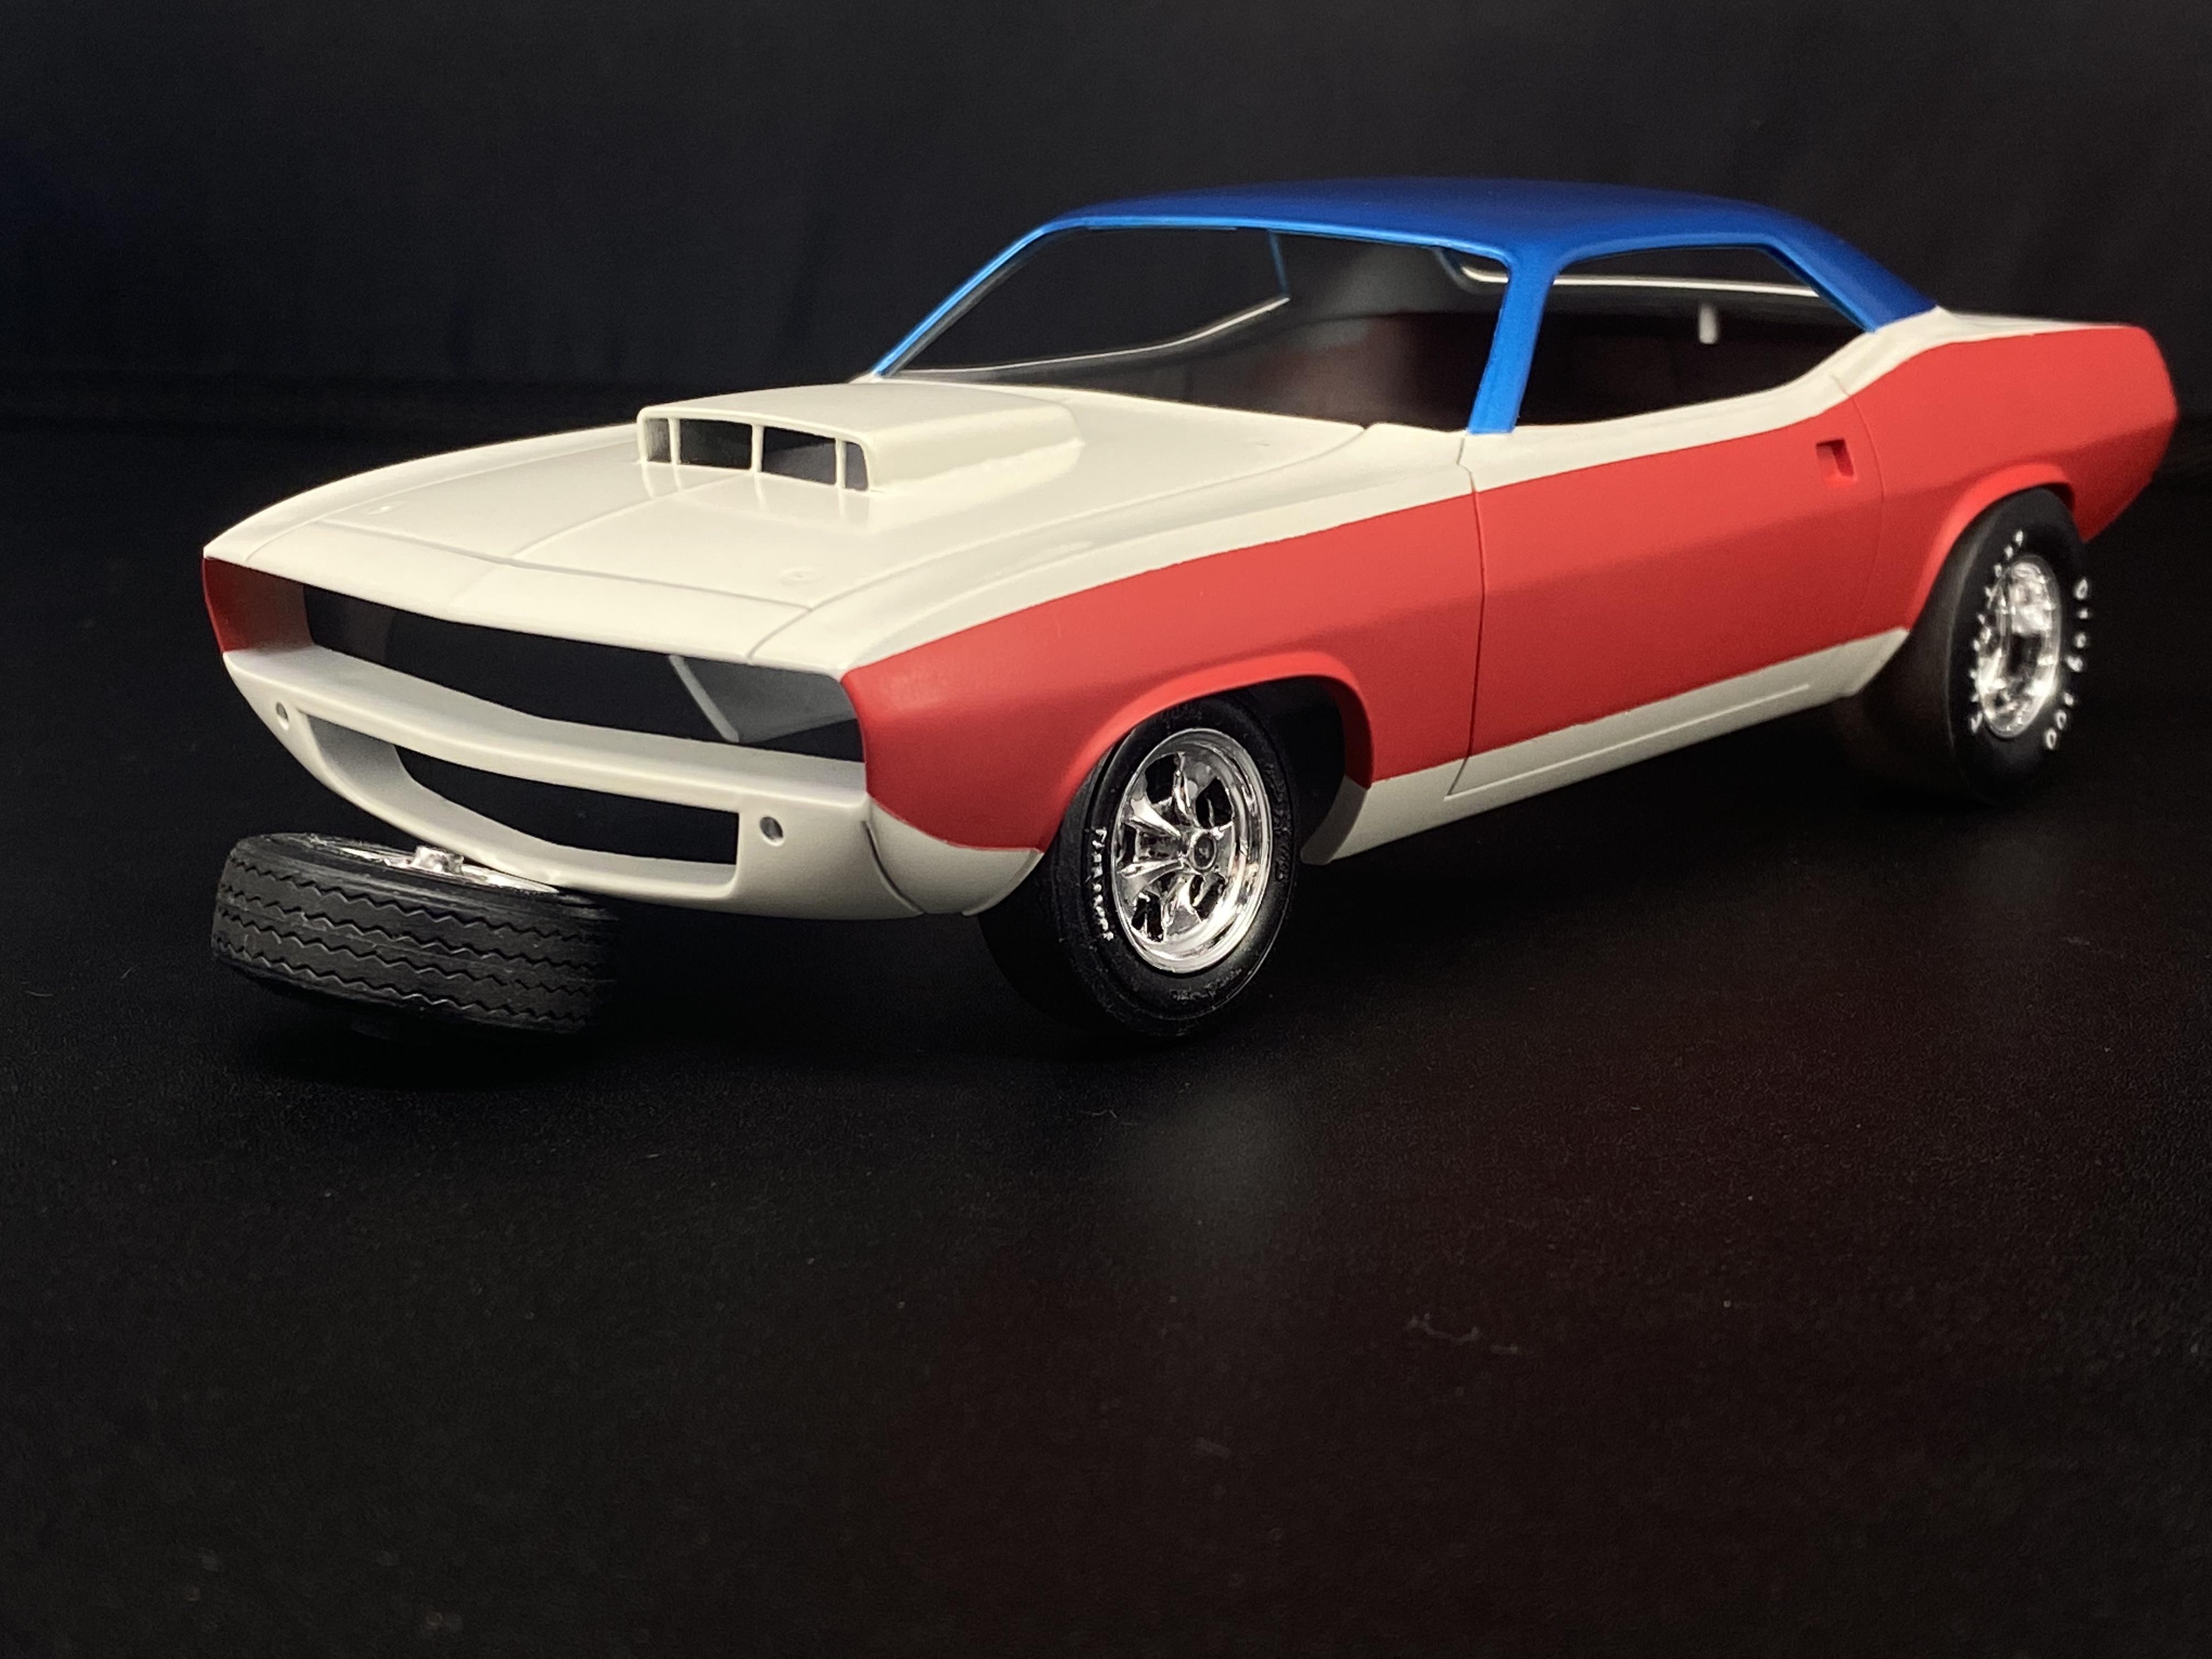
I agree with you on the body shape, but unfortunately I started the Johan kit many many years ago and didn’t like the direction it was going so I figured I’d give this a try. Thank you for the comments everyone! The carbs are proving to be tricky, I’ve started and restarted a couple time now, hopefully I’ll have an update on those soon This is also a completely different type of build for me, I usually build LeMans cars, 60’s, 70’s Italian/European cars. Drag and straight line cars is a whole new animal for me.
-
Body is in color! For years I’ve been a fan of Zero paints, and still am for some things, but I have to say, Splash Paints have been just awesome! Their primer is just unreal, first of all, colors are fantastic and so forgiving and literally dry within minutes it seems like. It also doesn’t hurt that Splash Paints is less than 100 miles away, so I don’t have to wait several weeks to get them from over seas. Their 2k clear is also amazing! If applied correctly it doesn’t even need to be polished. and who could resist setting it on some wheels. These are from the Johan kit, so not what I’ll be using in the end, but you get it.
-
You’re off to a great start! This is a great kit, and with the Hobby Design detail set it’ll built up nicely. I really like what you’ve done on the lower rear diffuser! Awesome work! Fair warning, the silver kit decals for the body are a nasty mess. They crack and split if you look at them wrong. I got so far as to change the body color on mine and get after market decals. Maybe I got a bad set, maybe I need more practice on decals. Can’t wait to see what you do with this! Following!
-
Next up is the difficult process of working out the dual carbs. It’s going to be fiddly for sure. The kit parts look like a blob of plastic and won’t work at all.
-
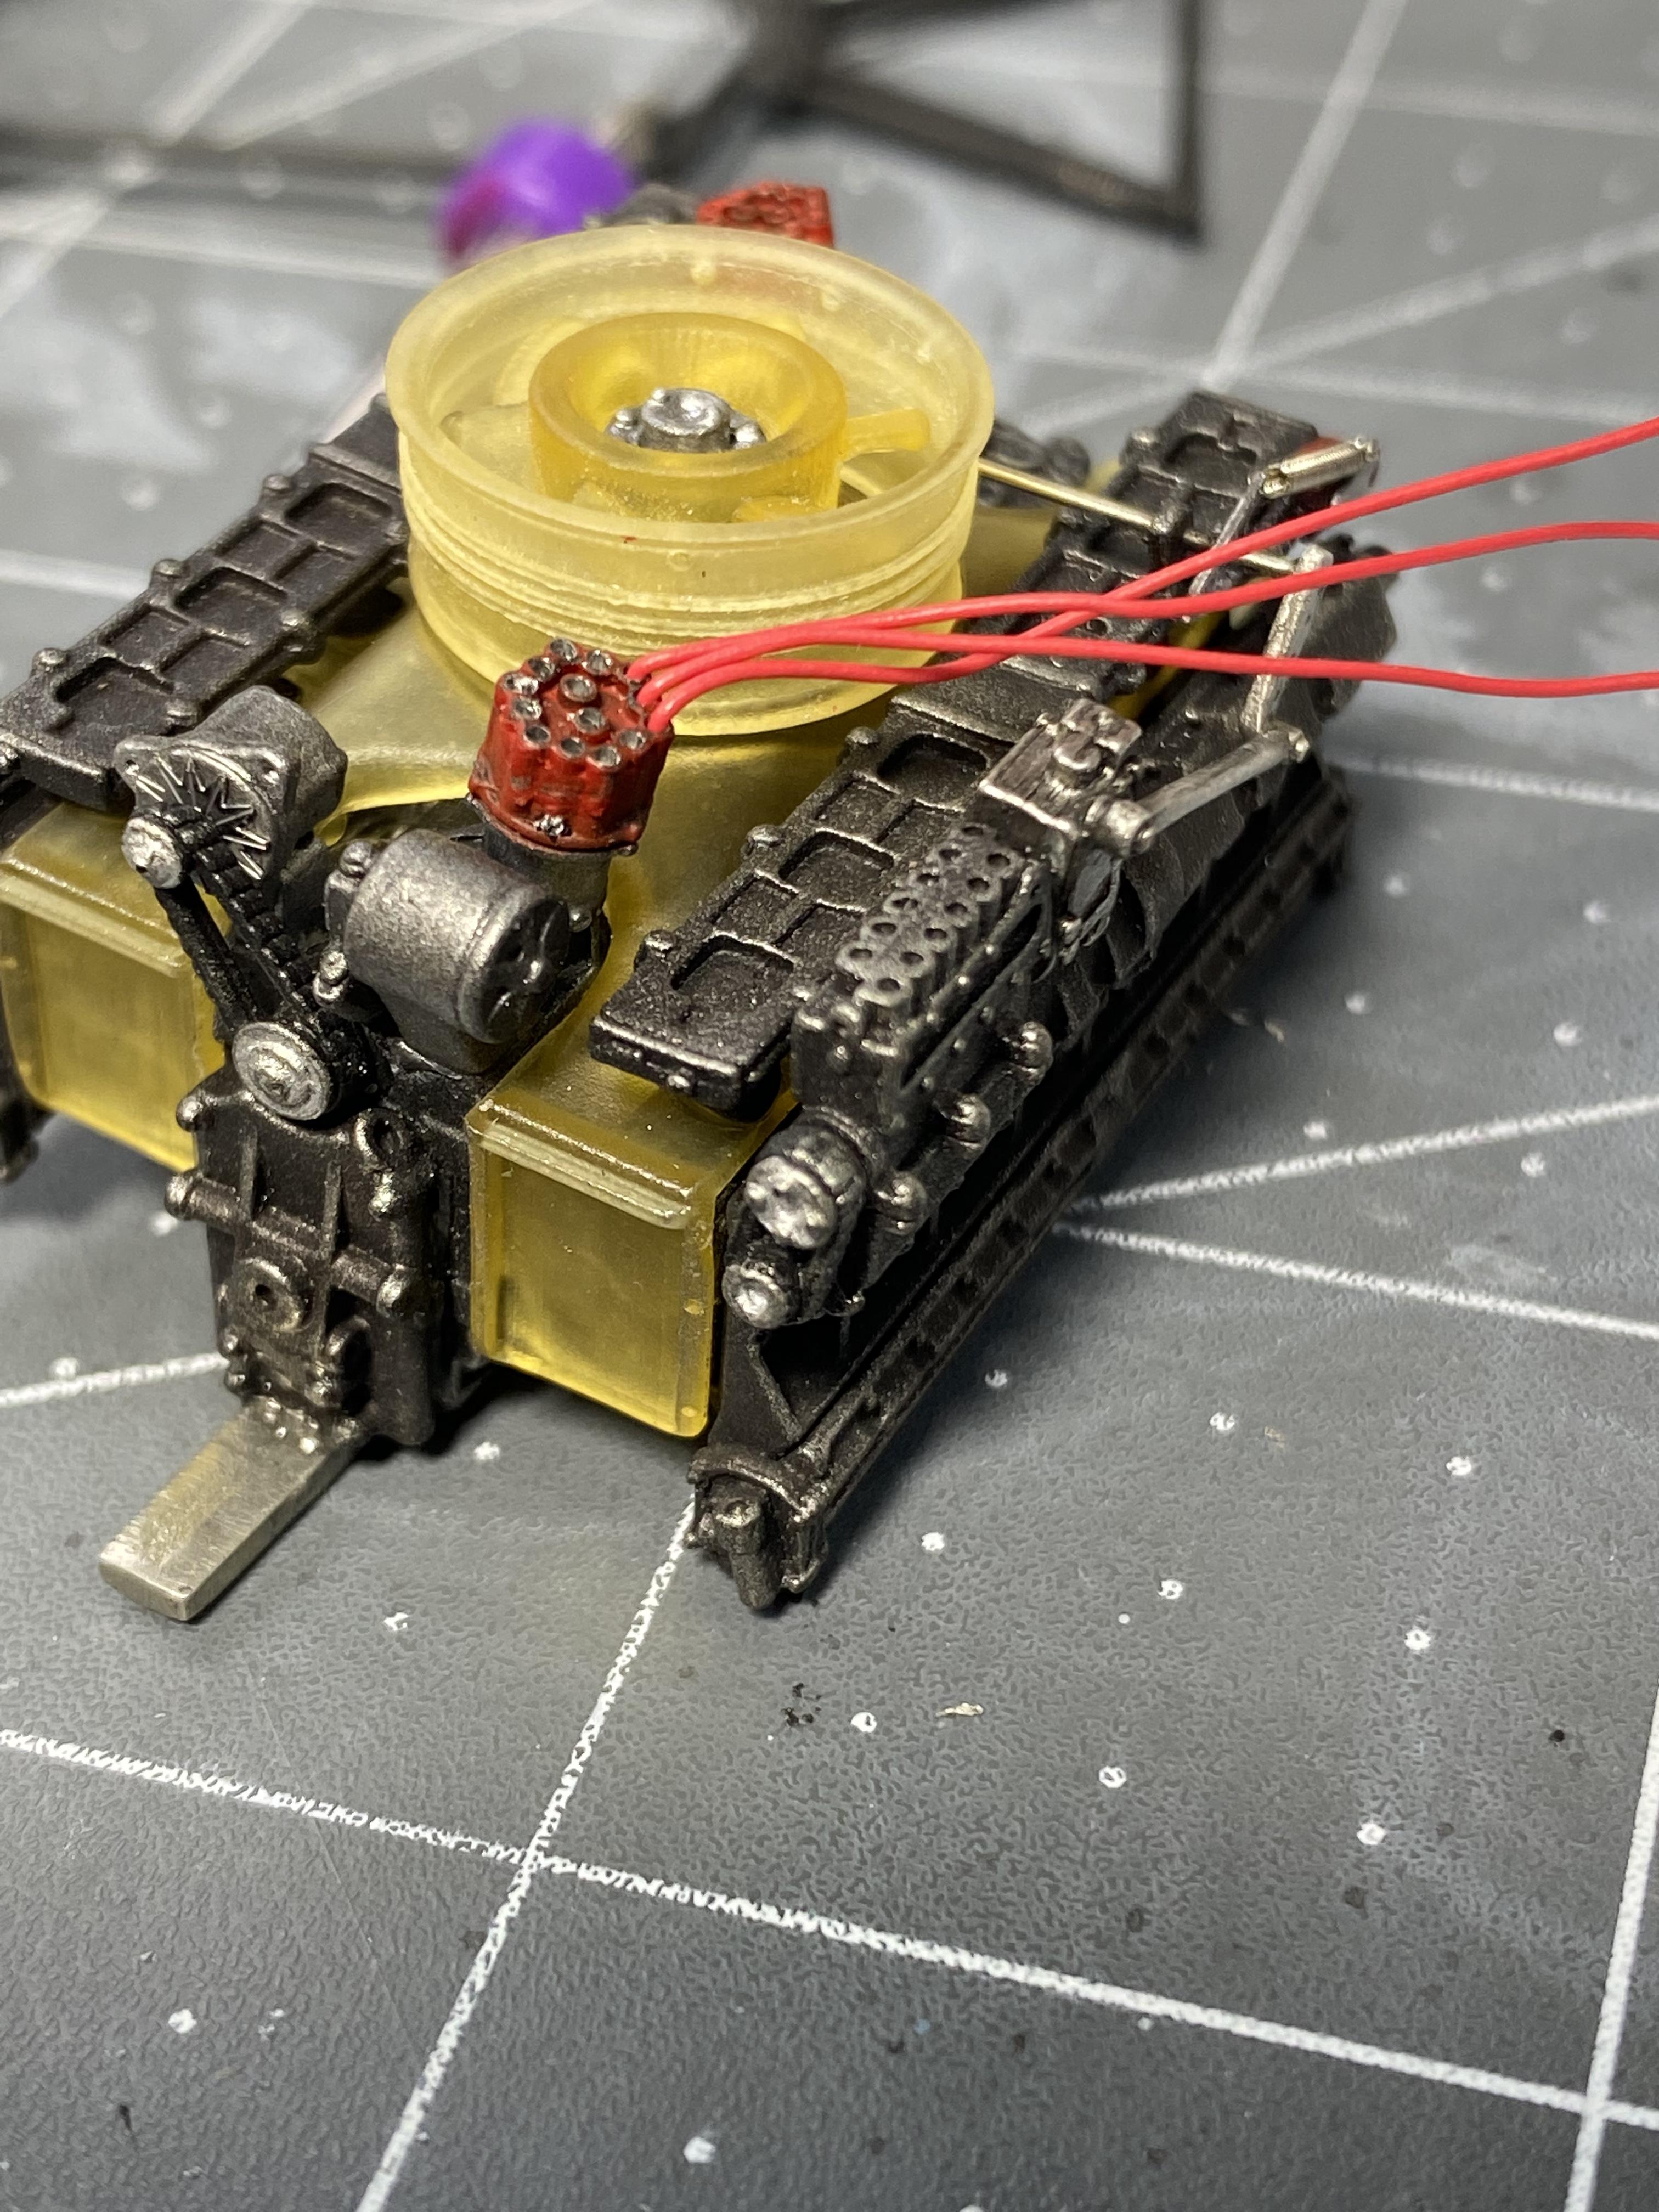
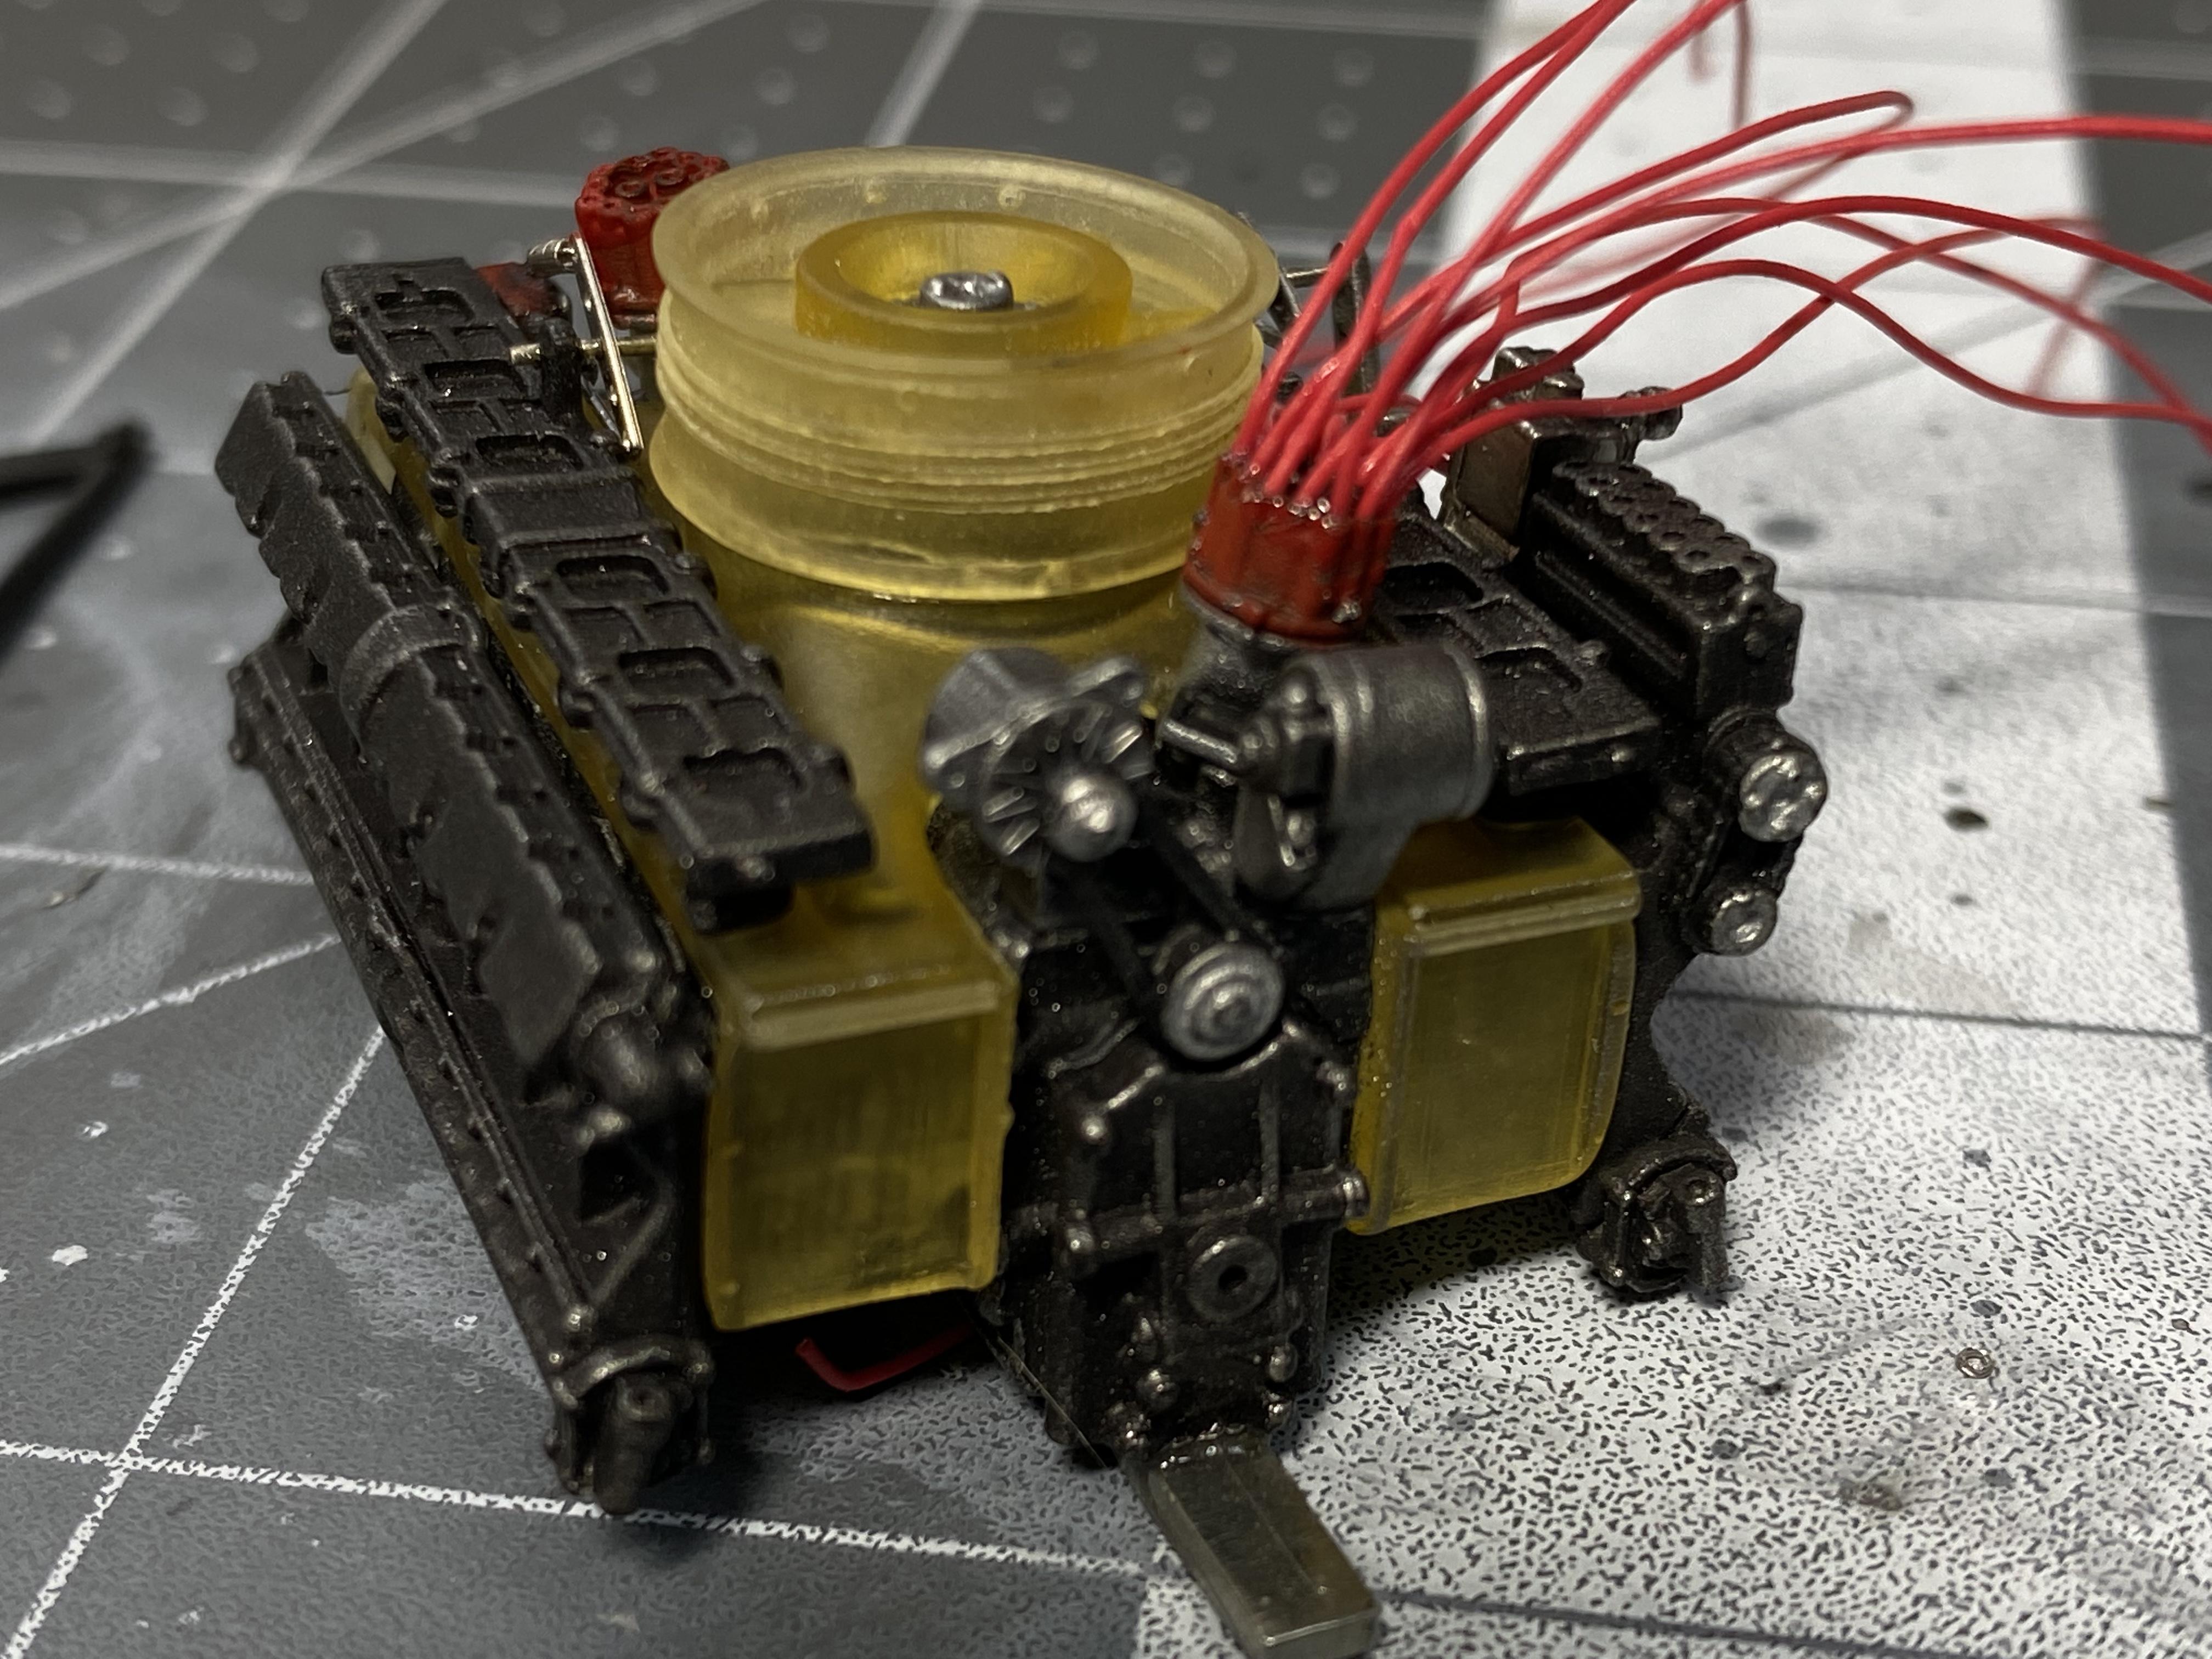
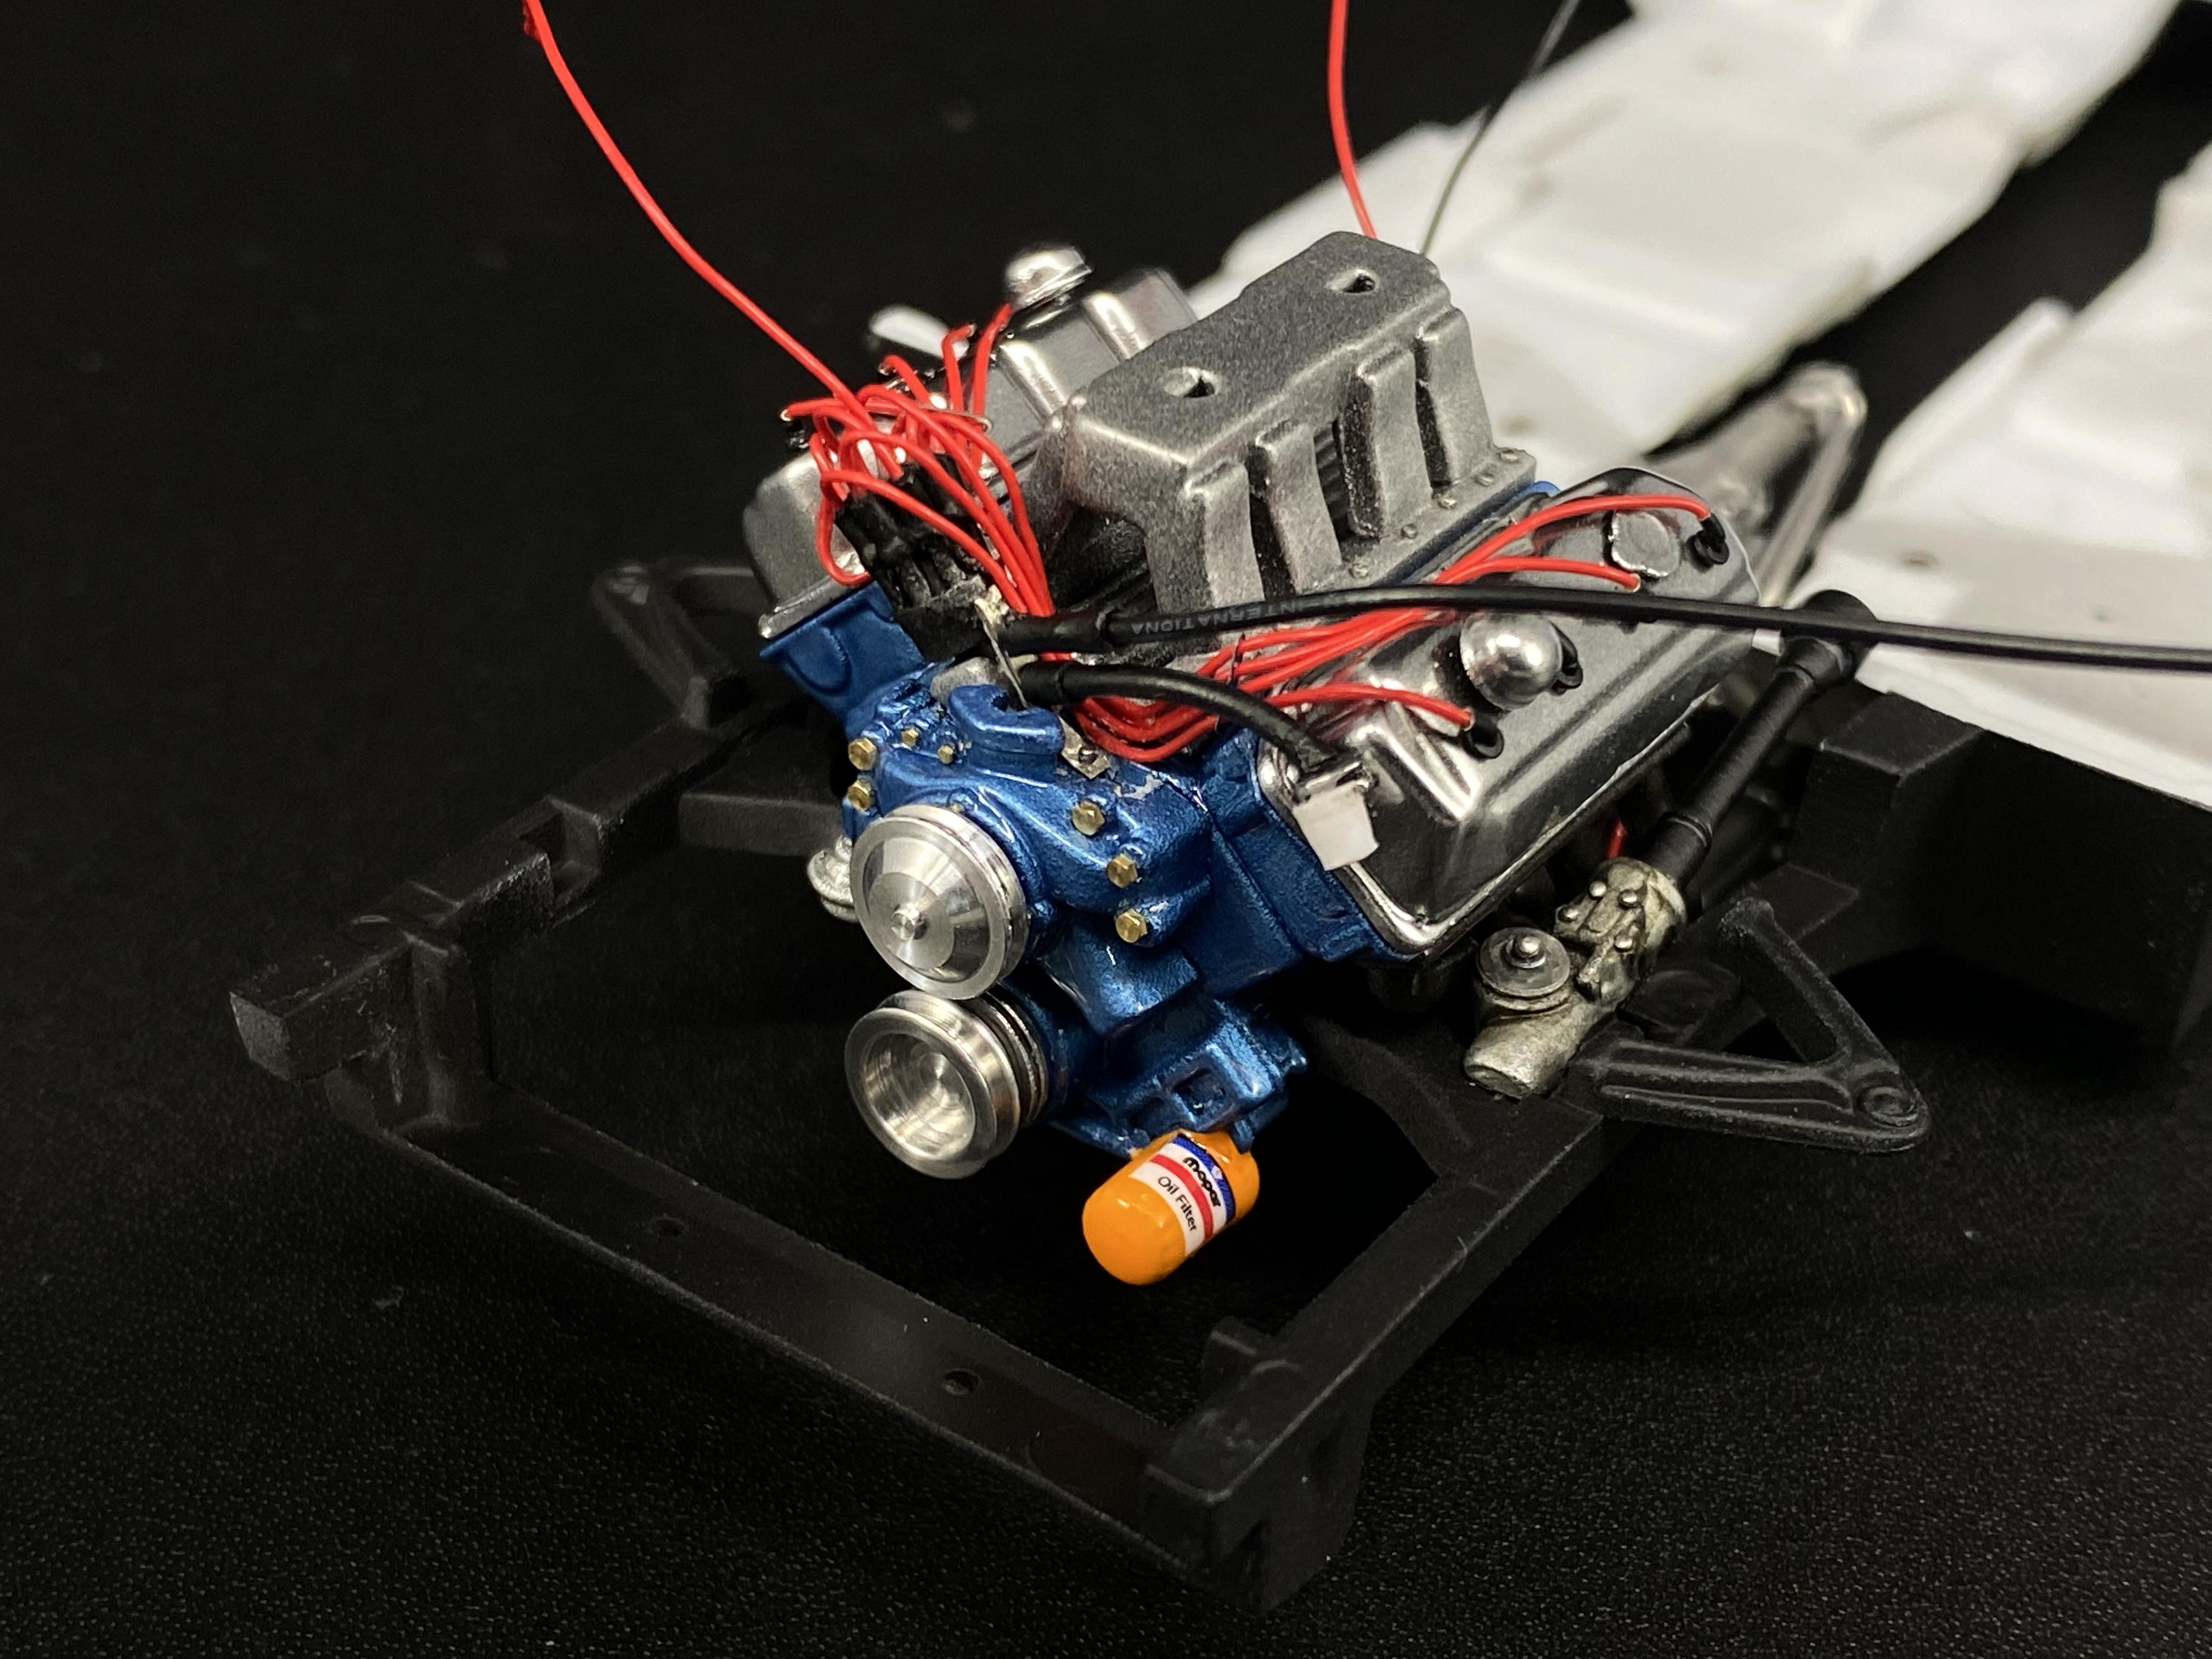
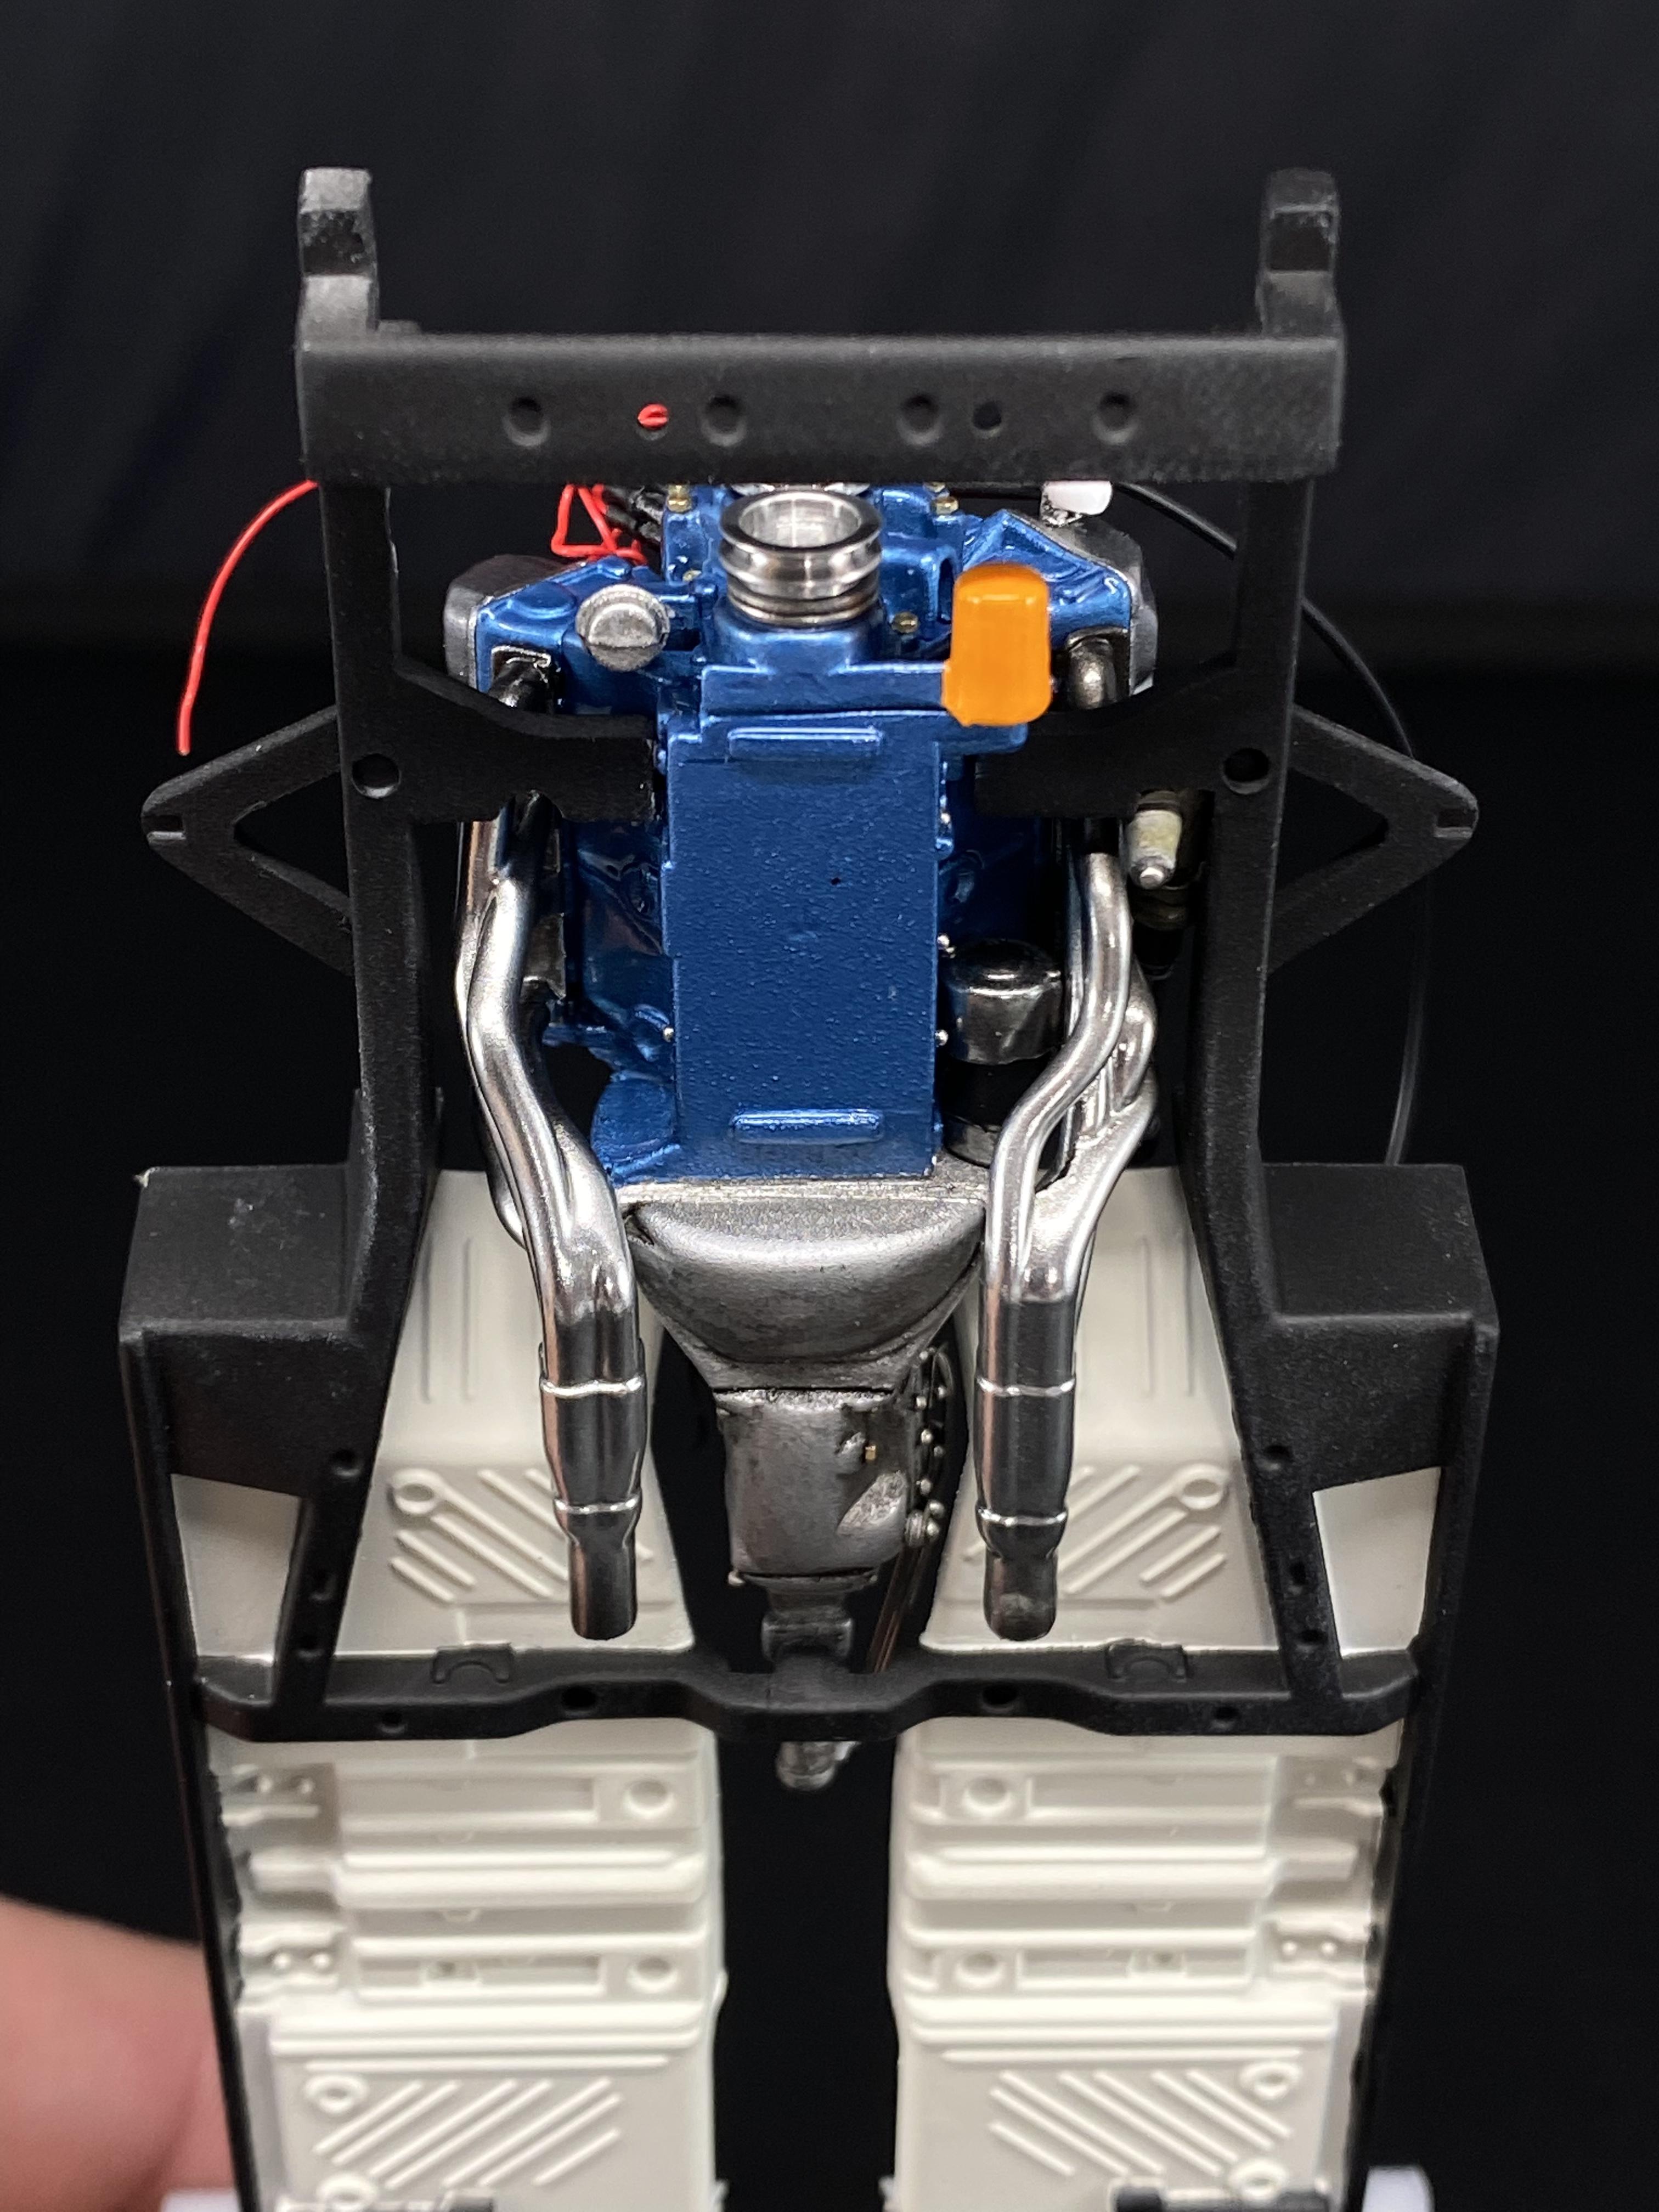
Which brings me to this morning, mostly wired and installed into the chassis.
-
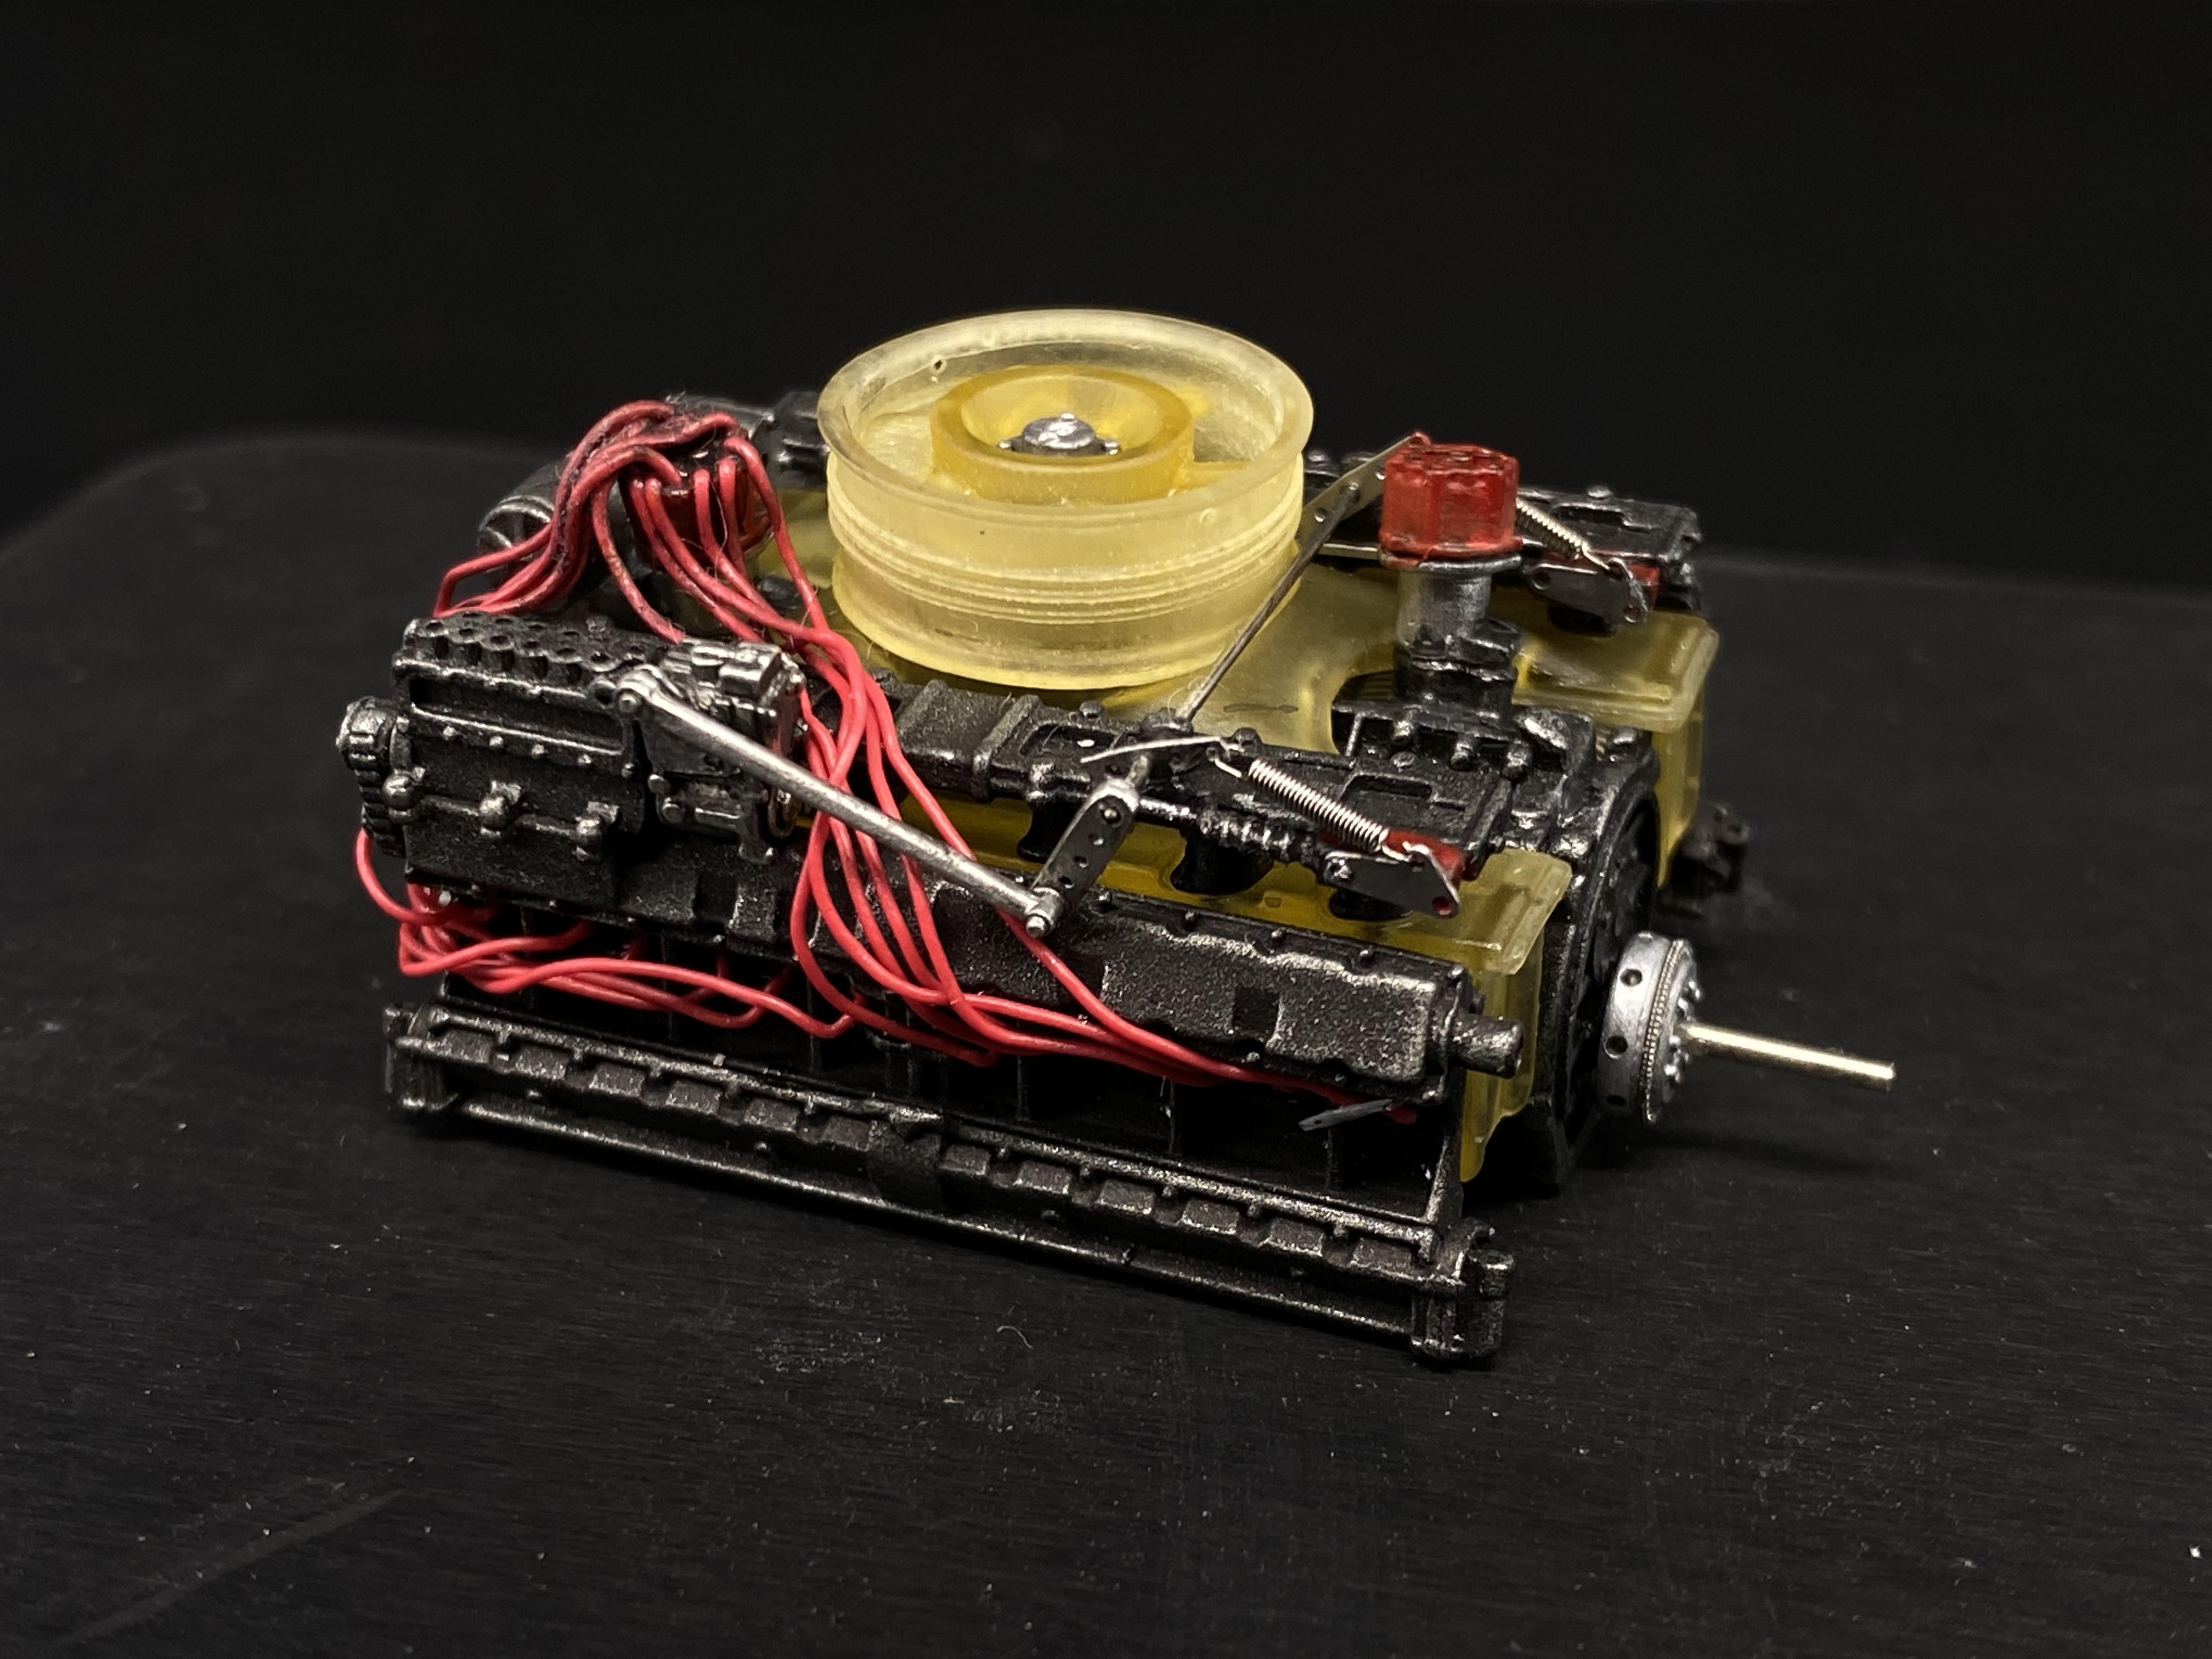
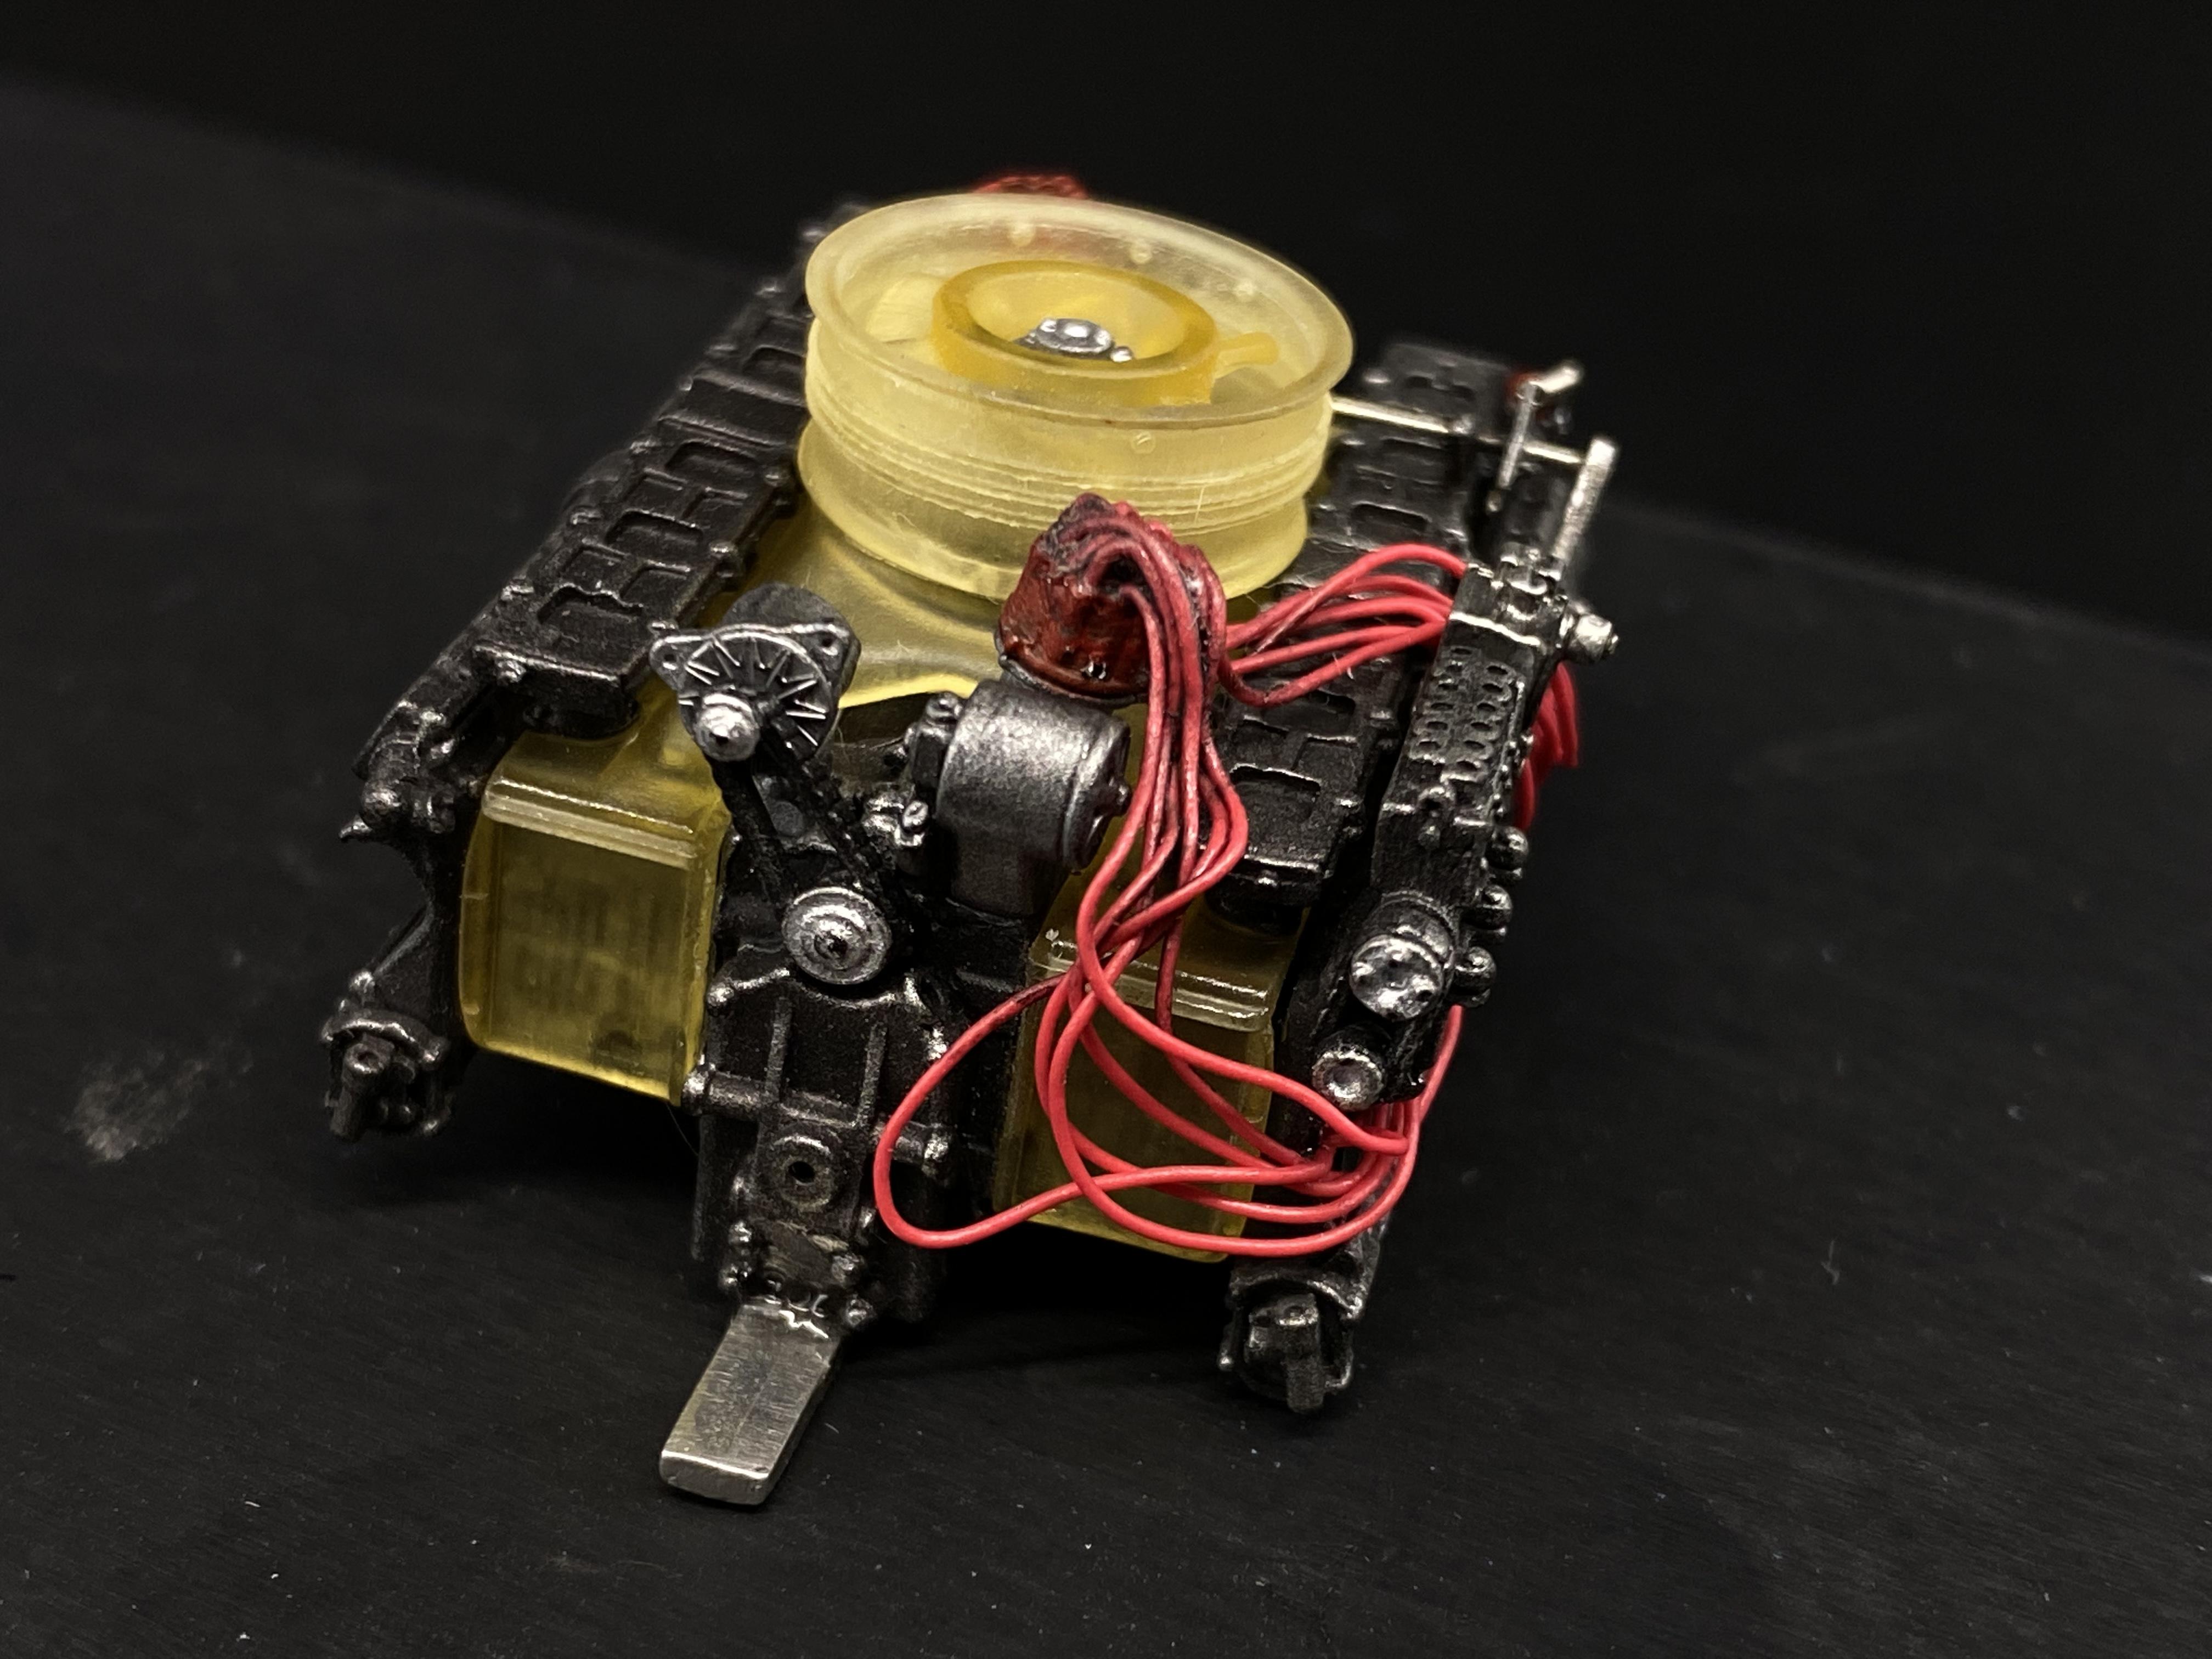
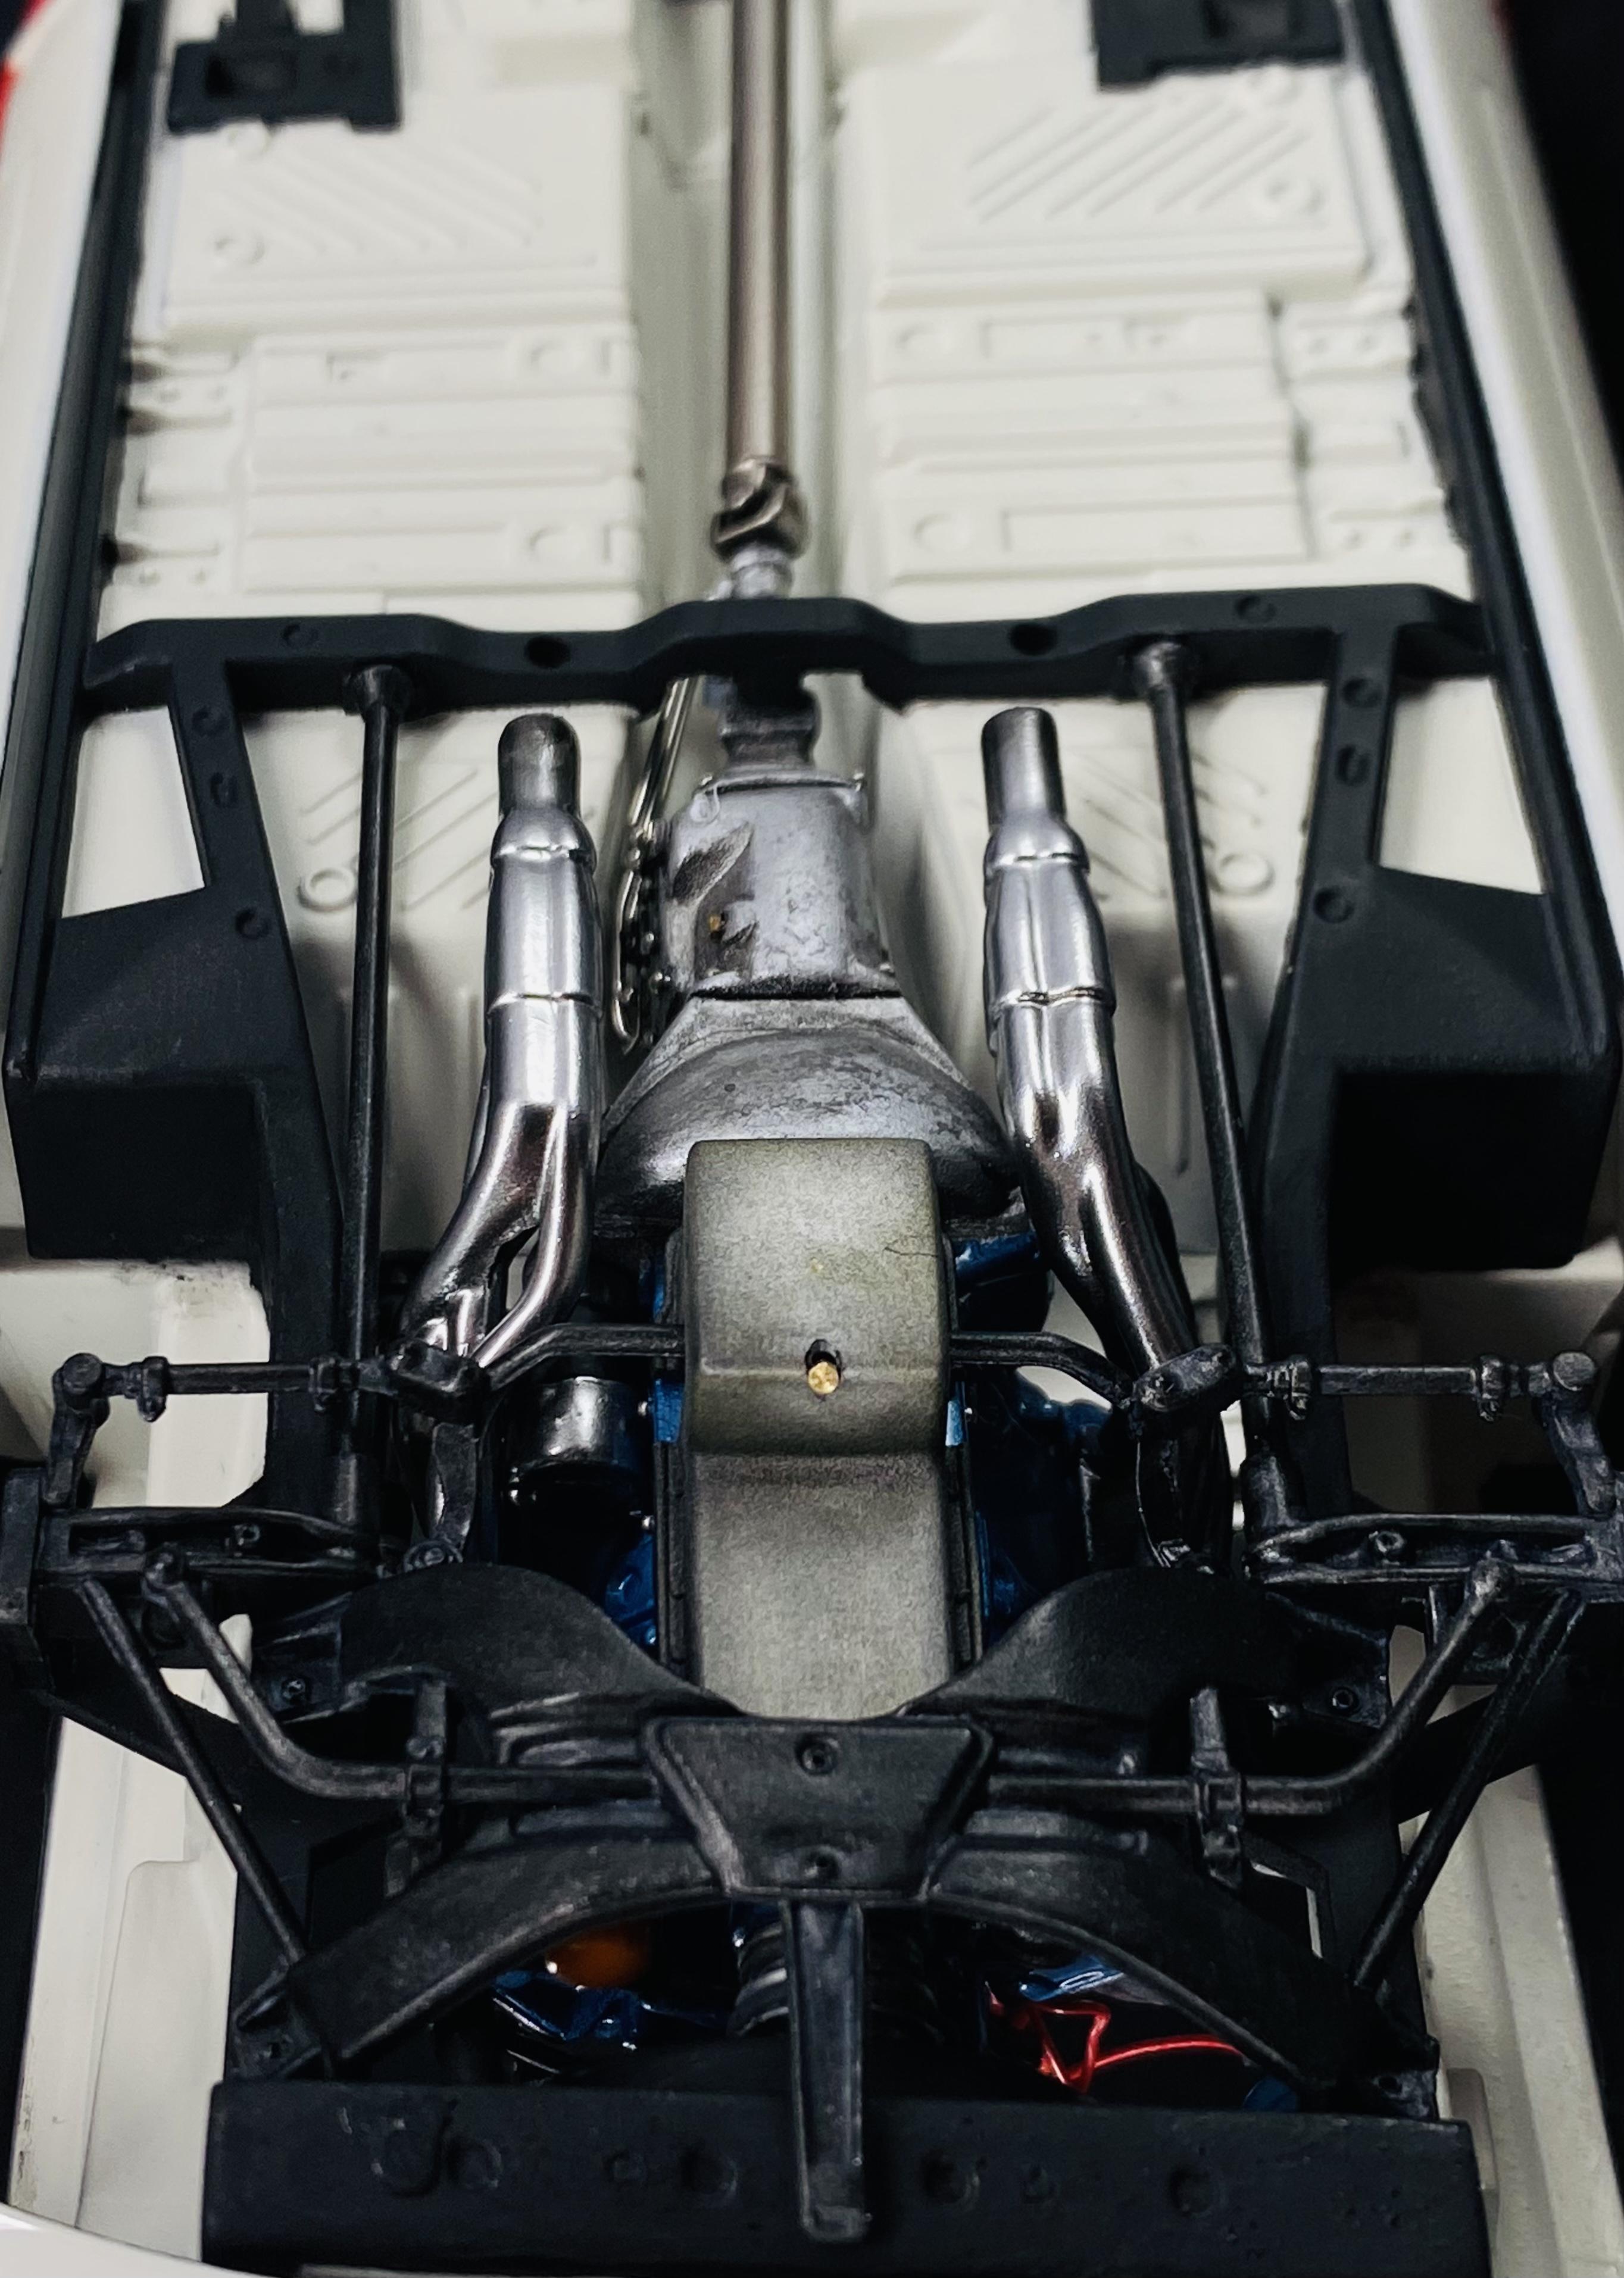
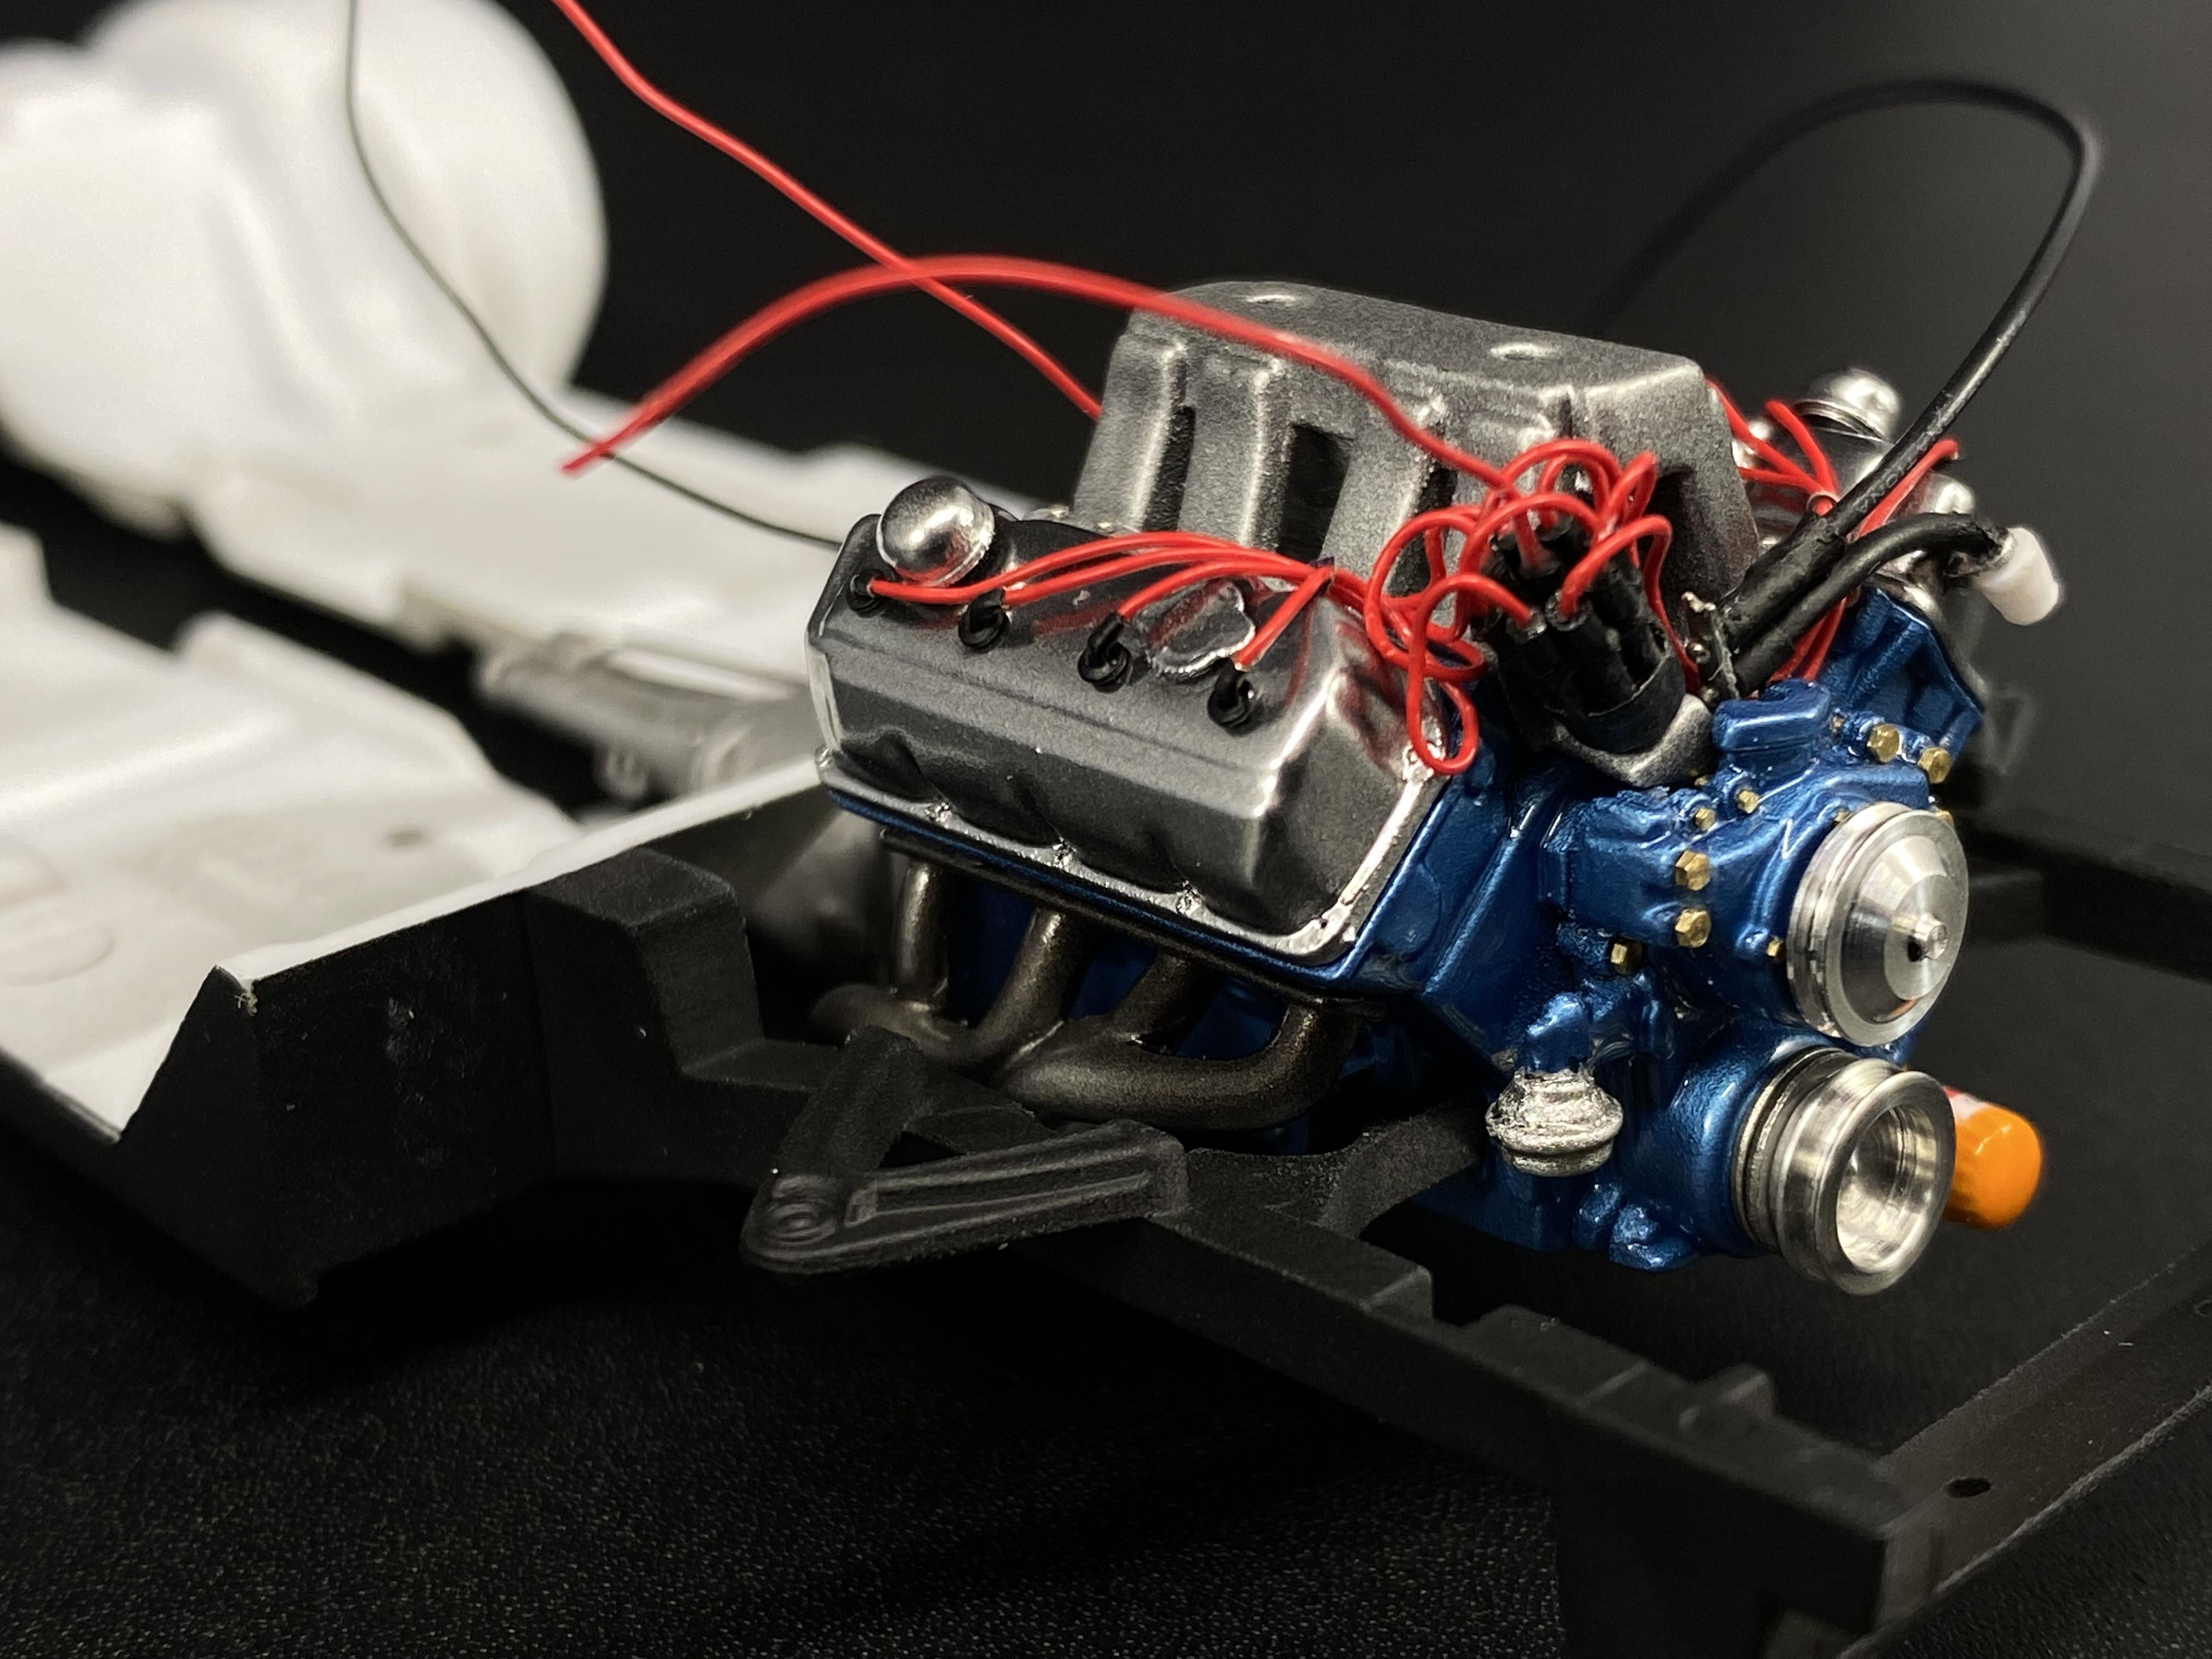
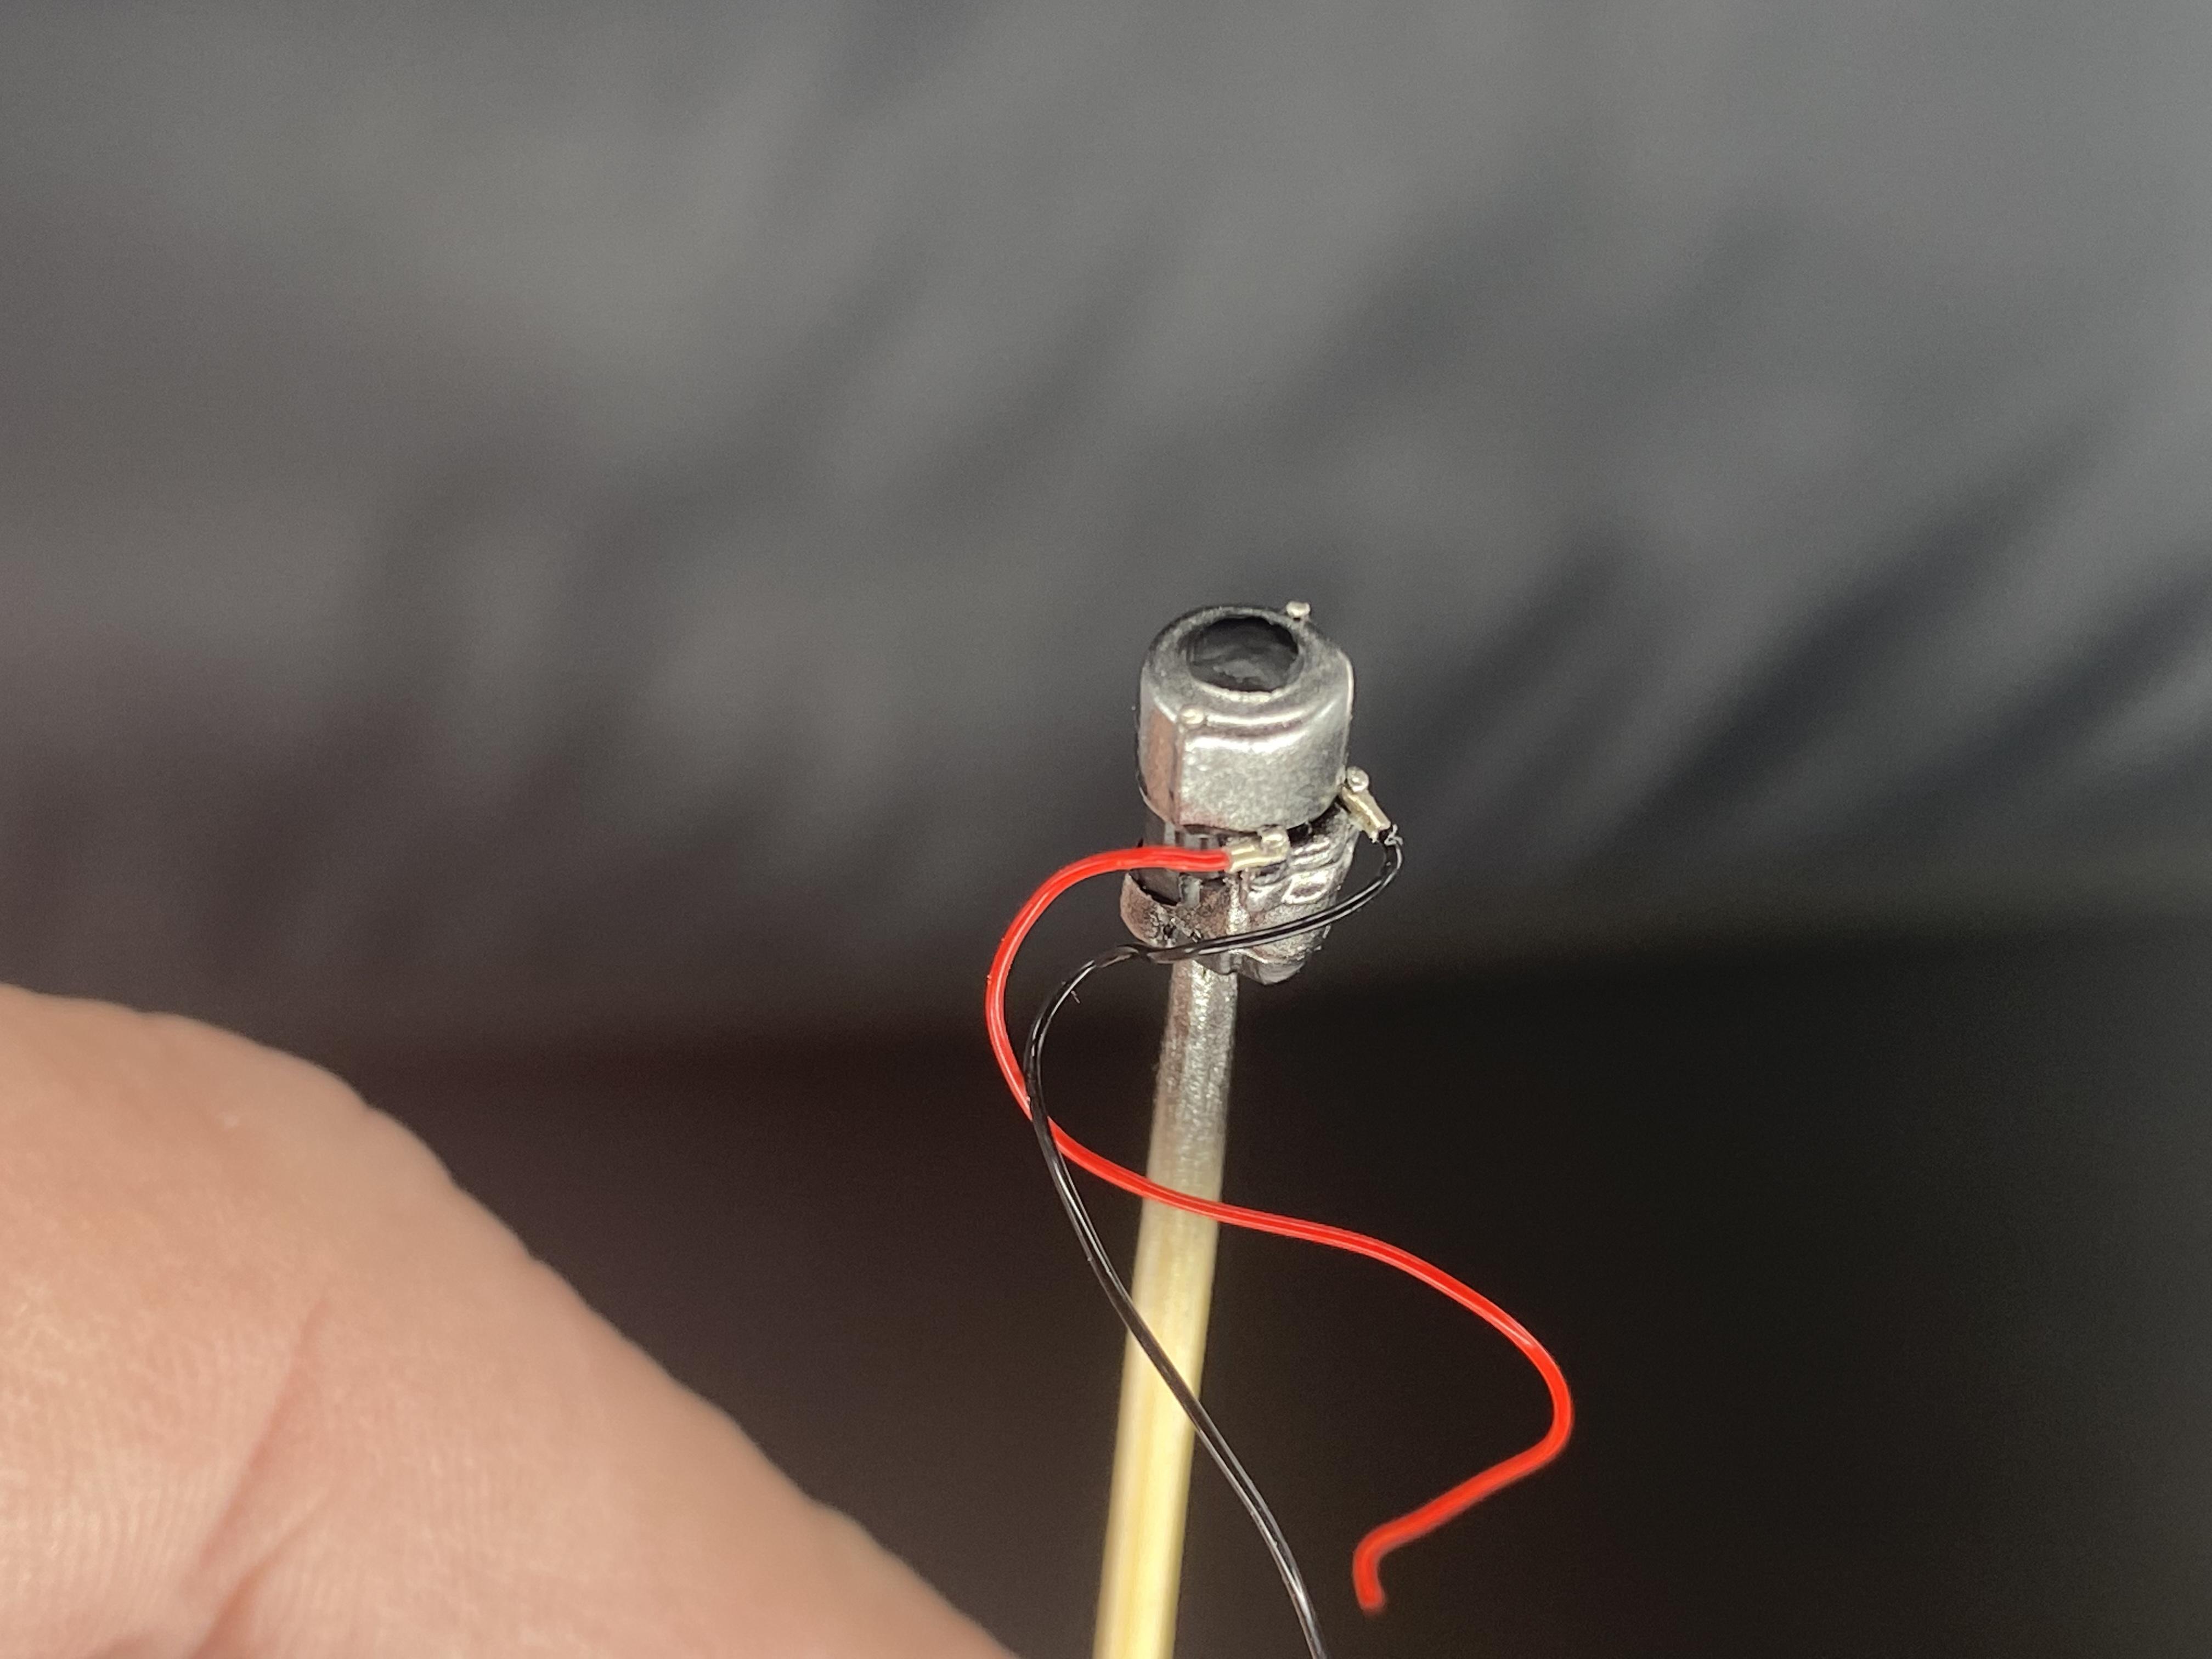
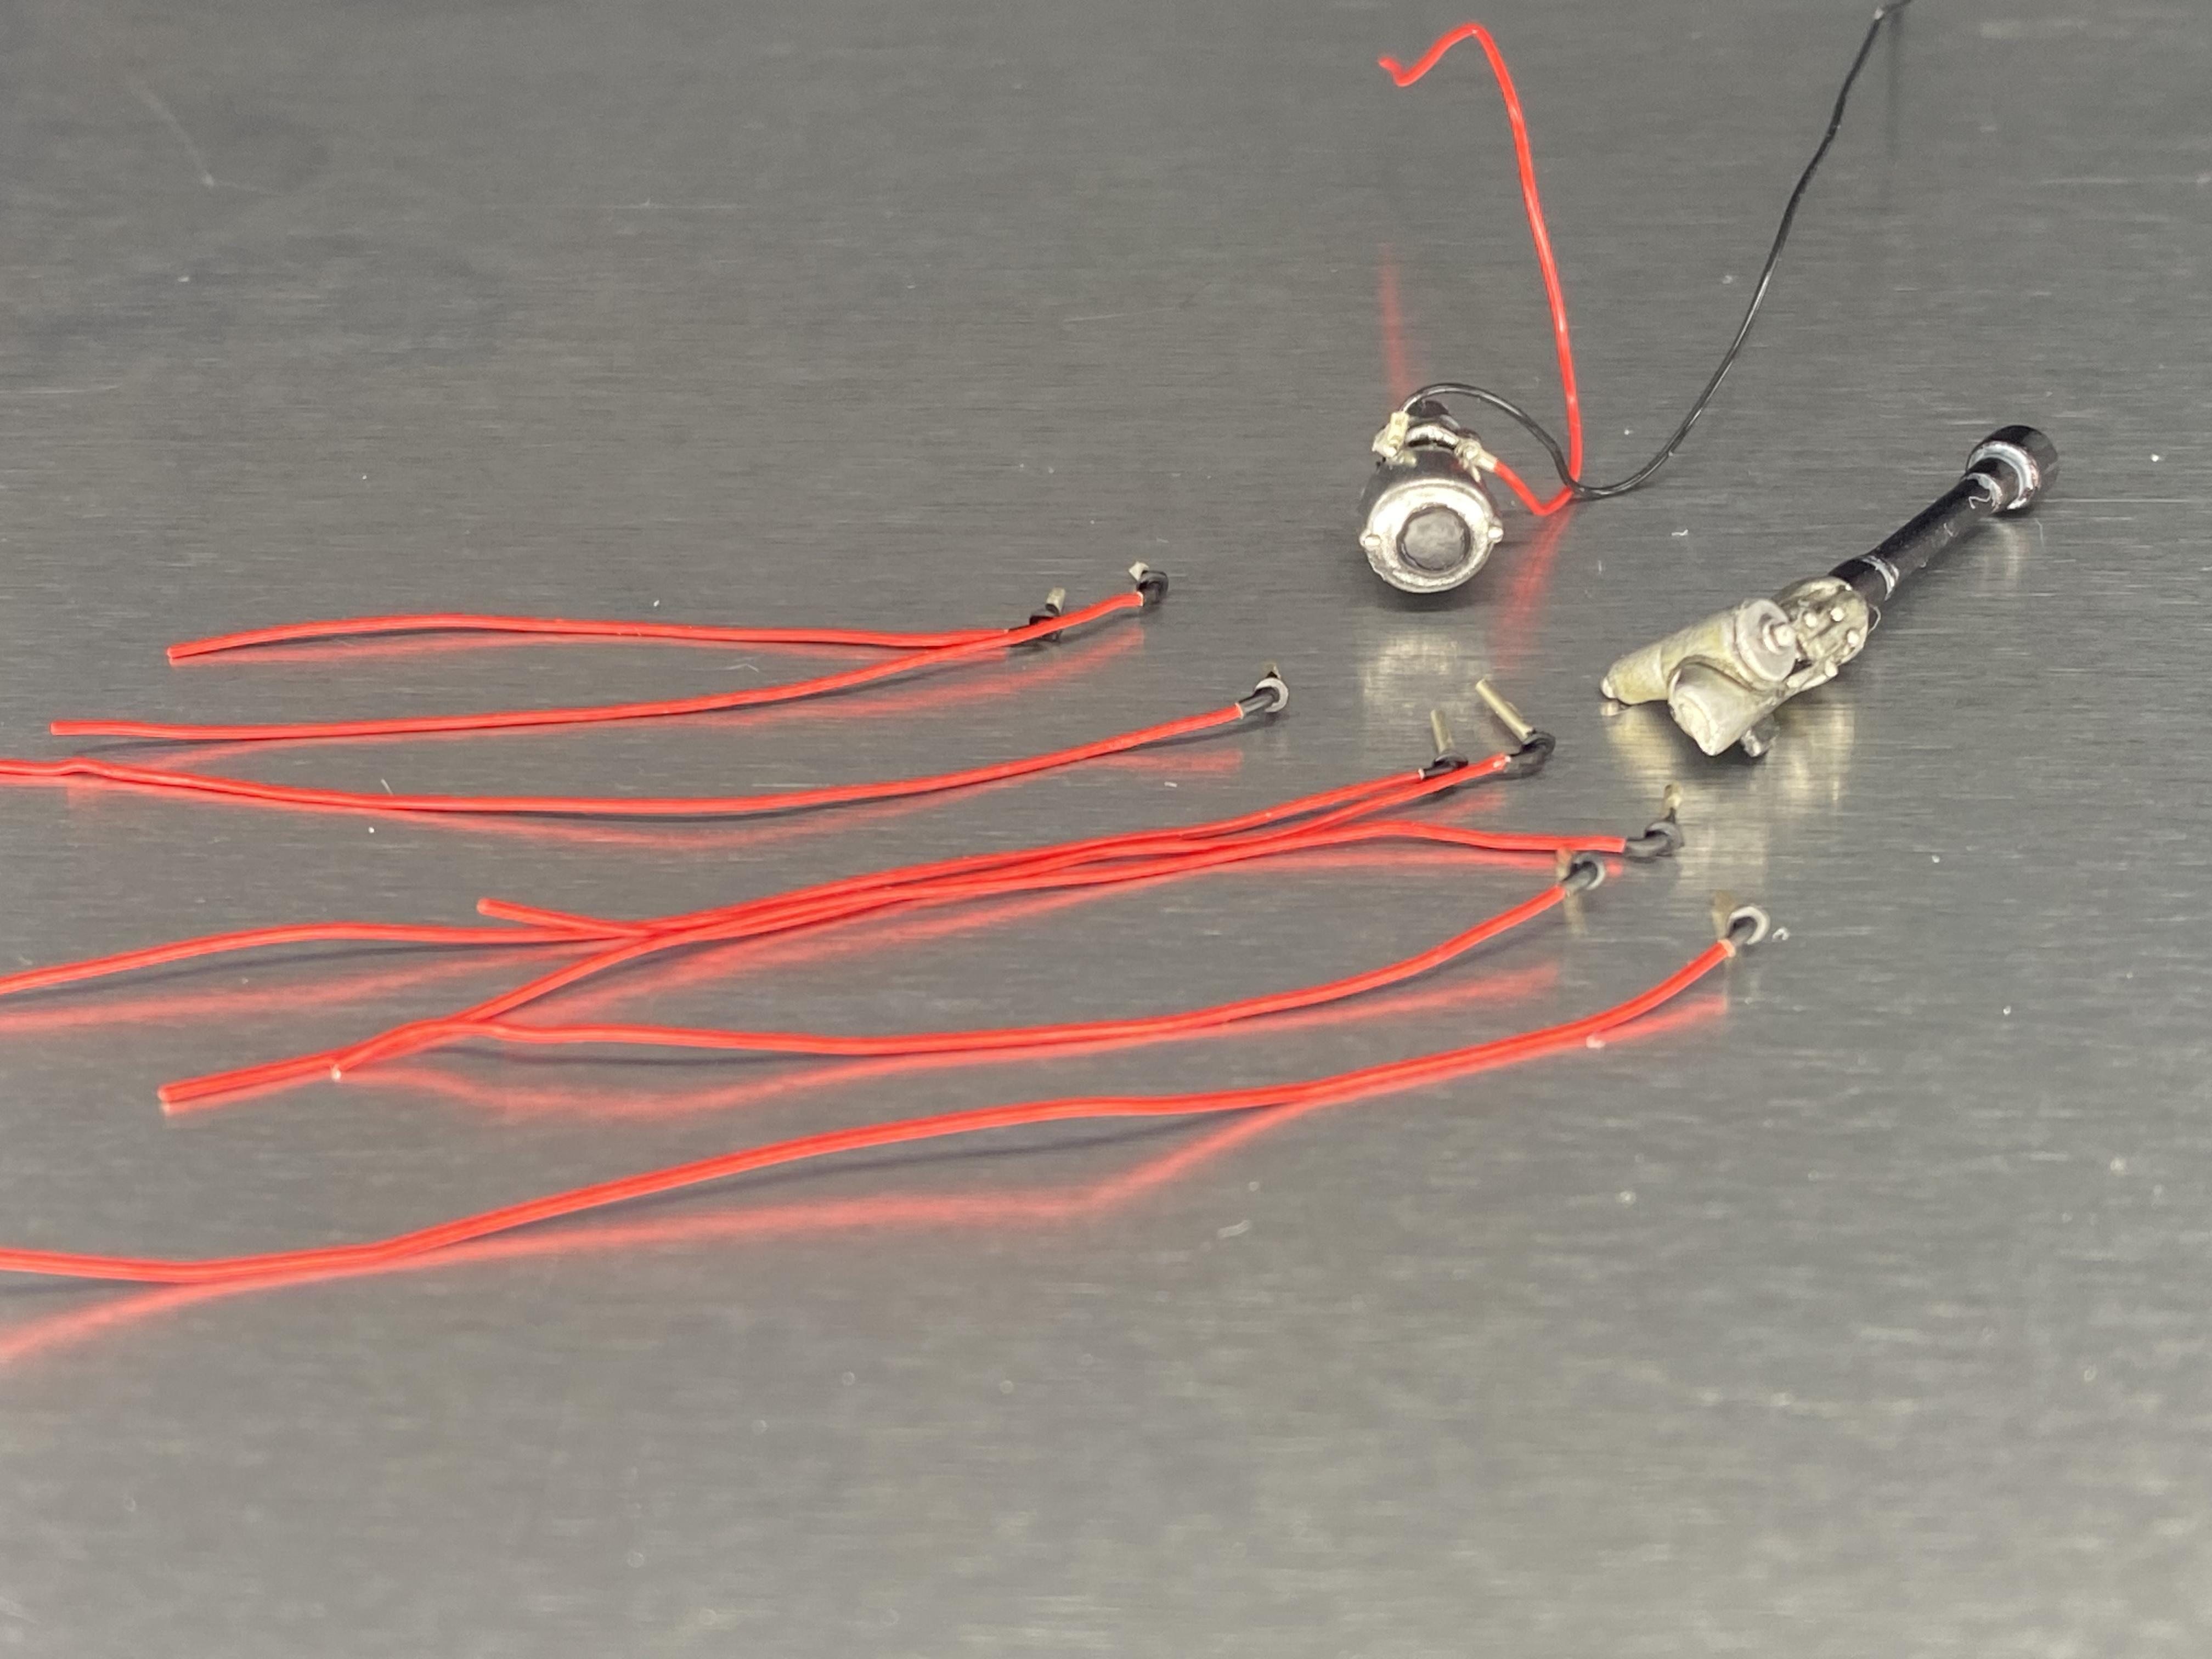
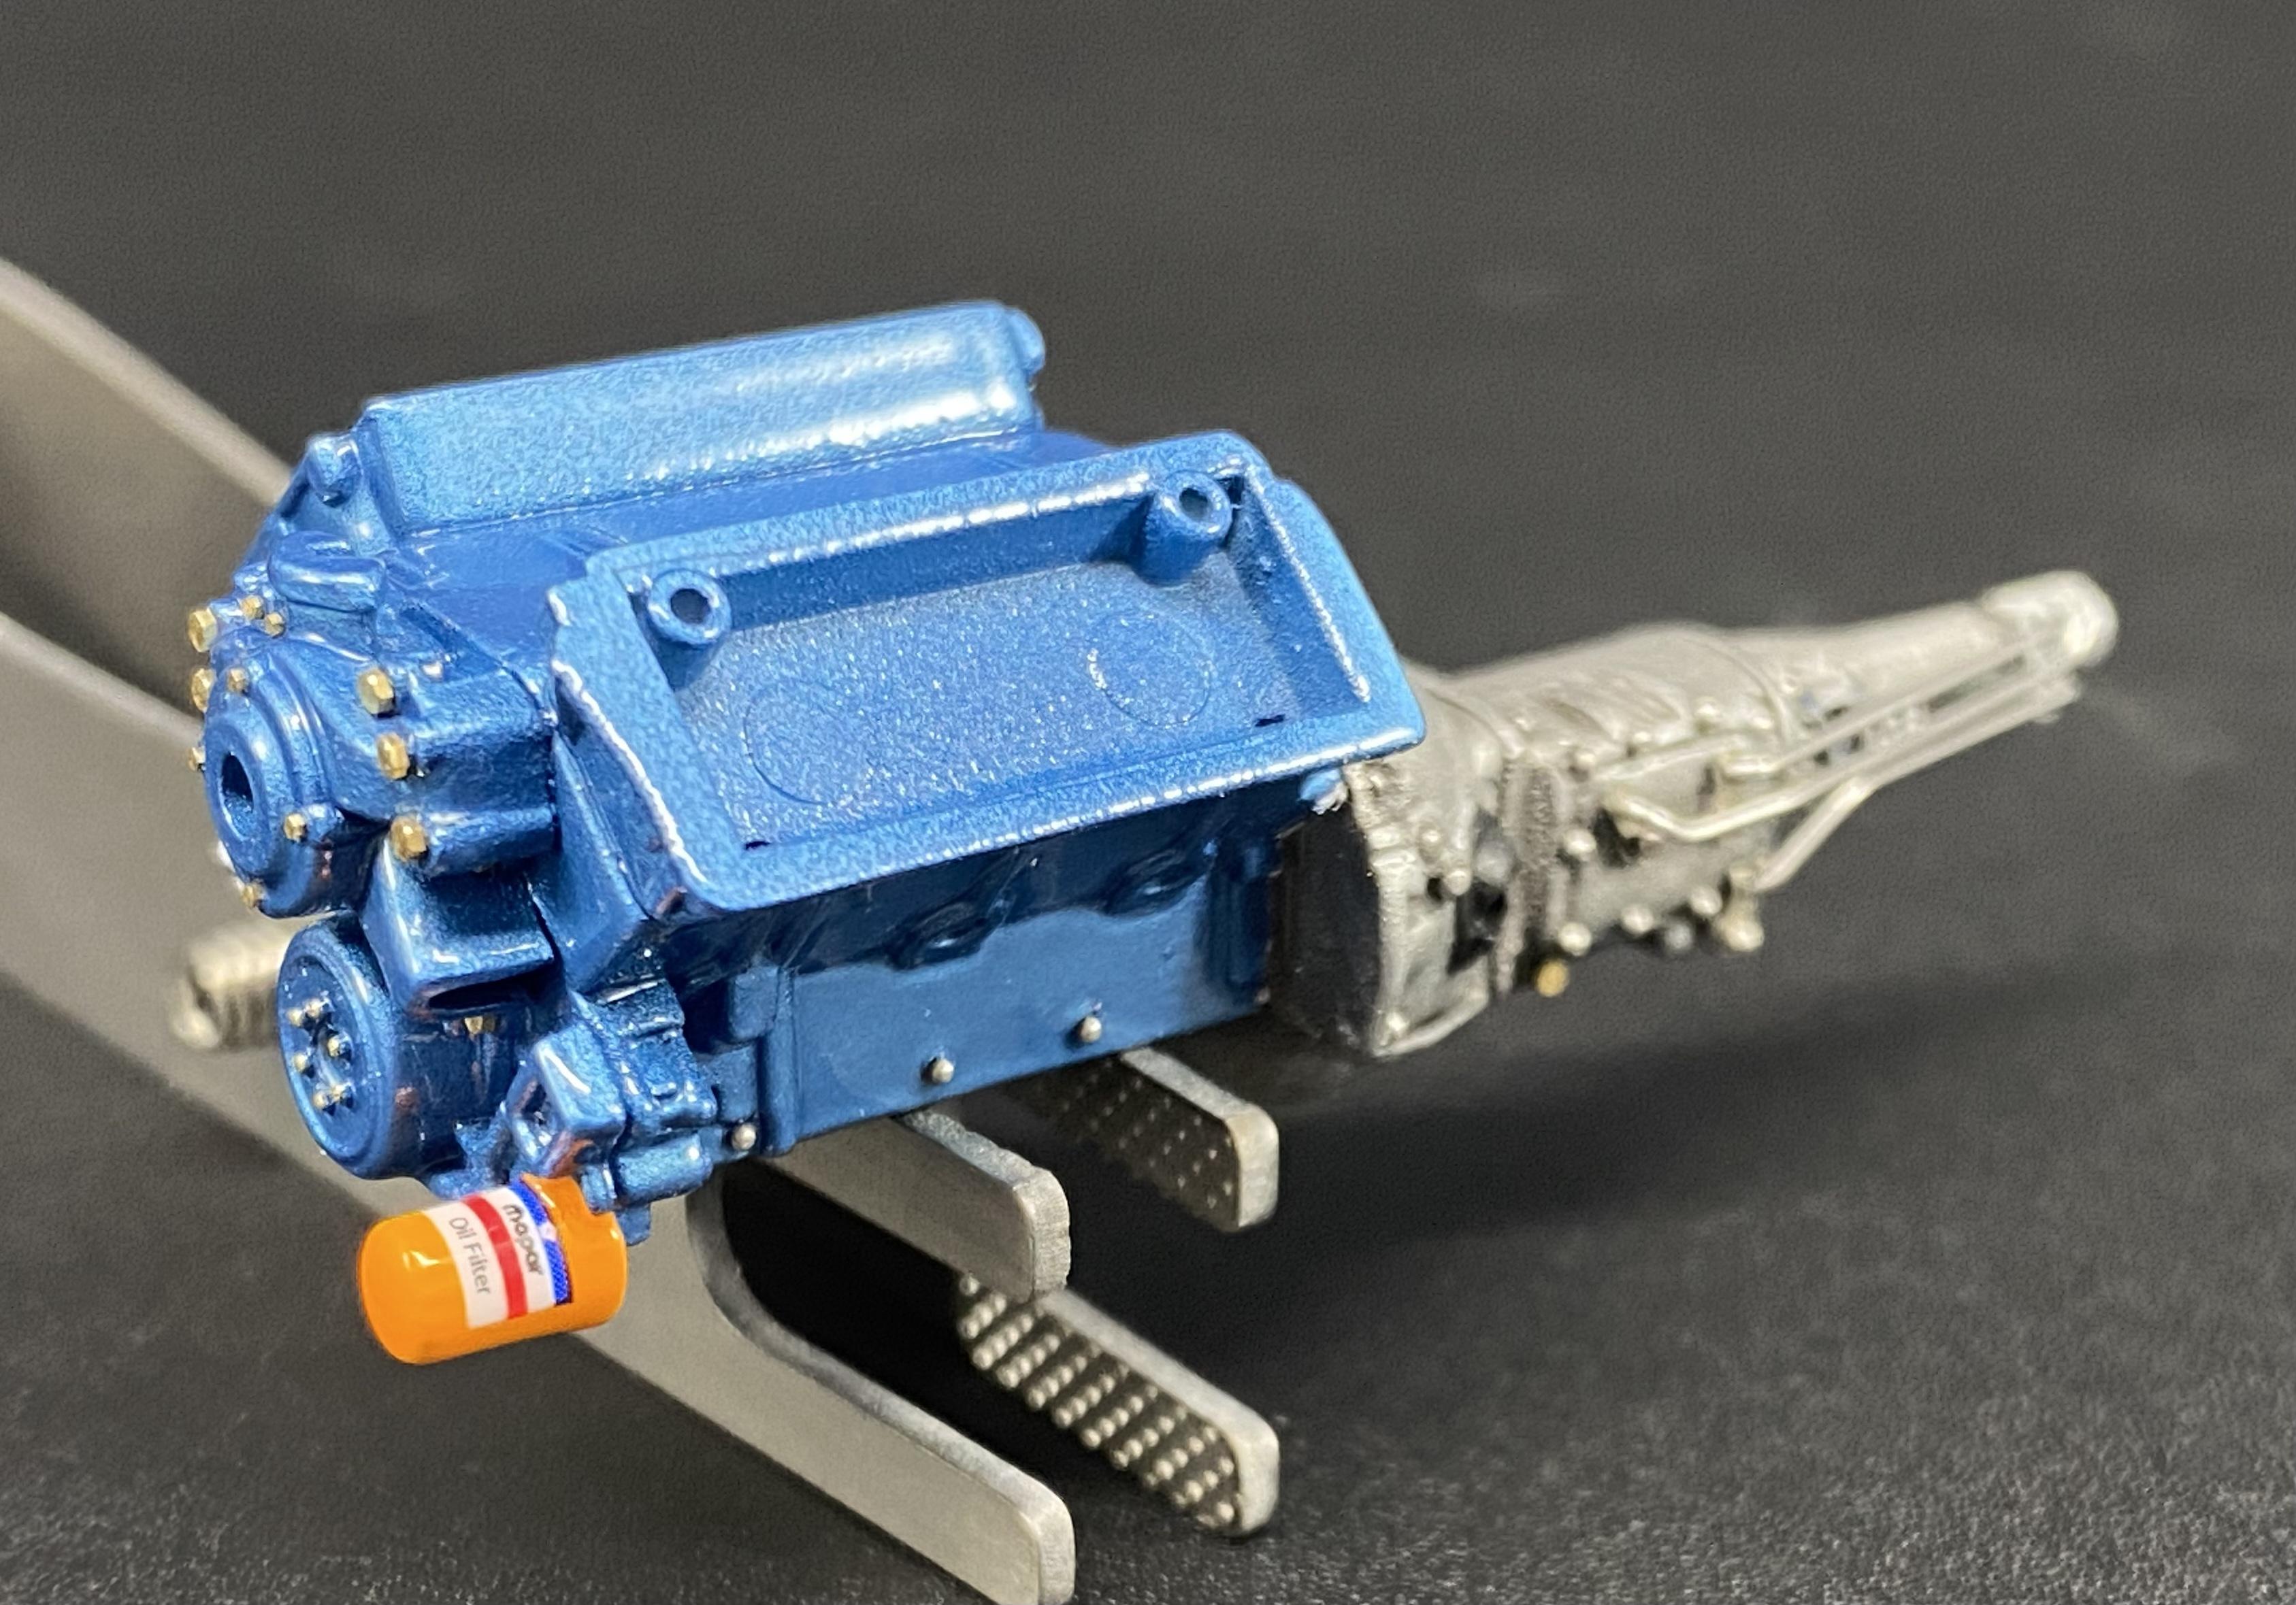
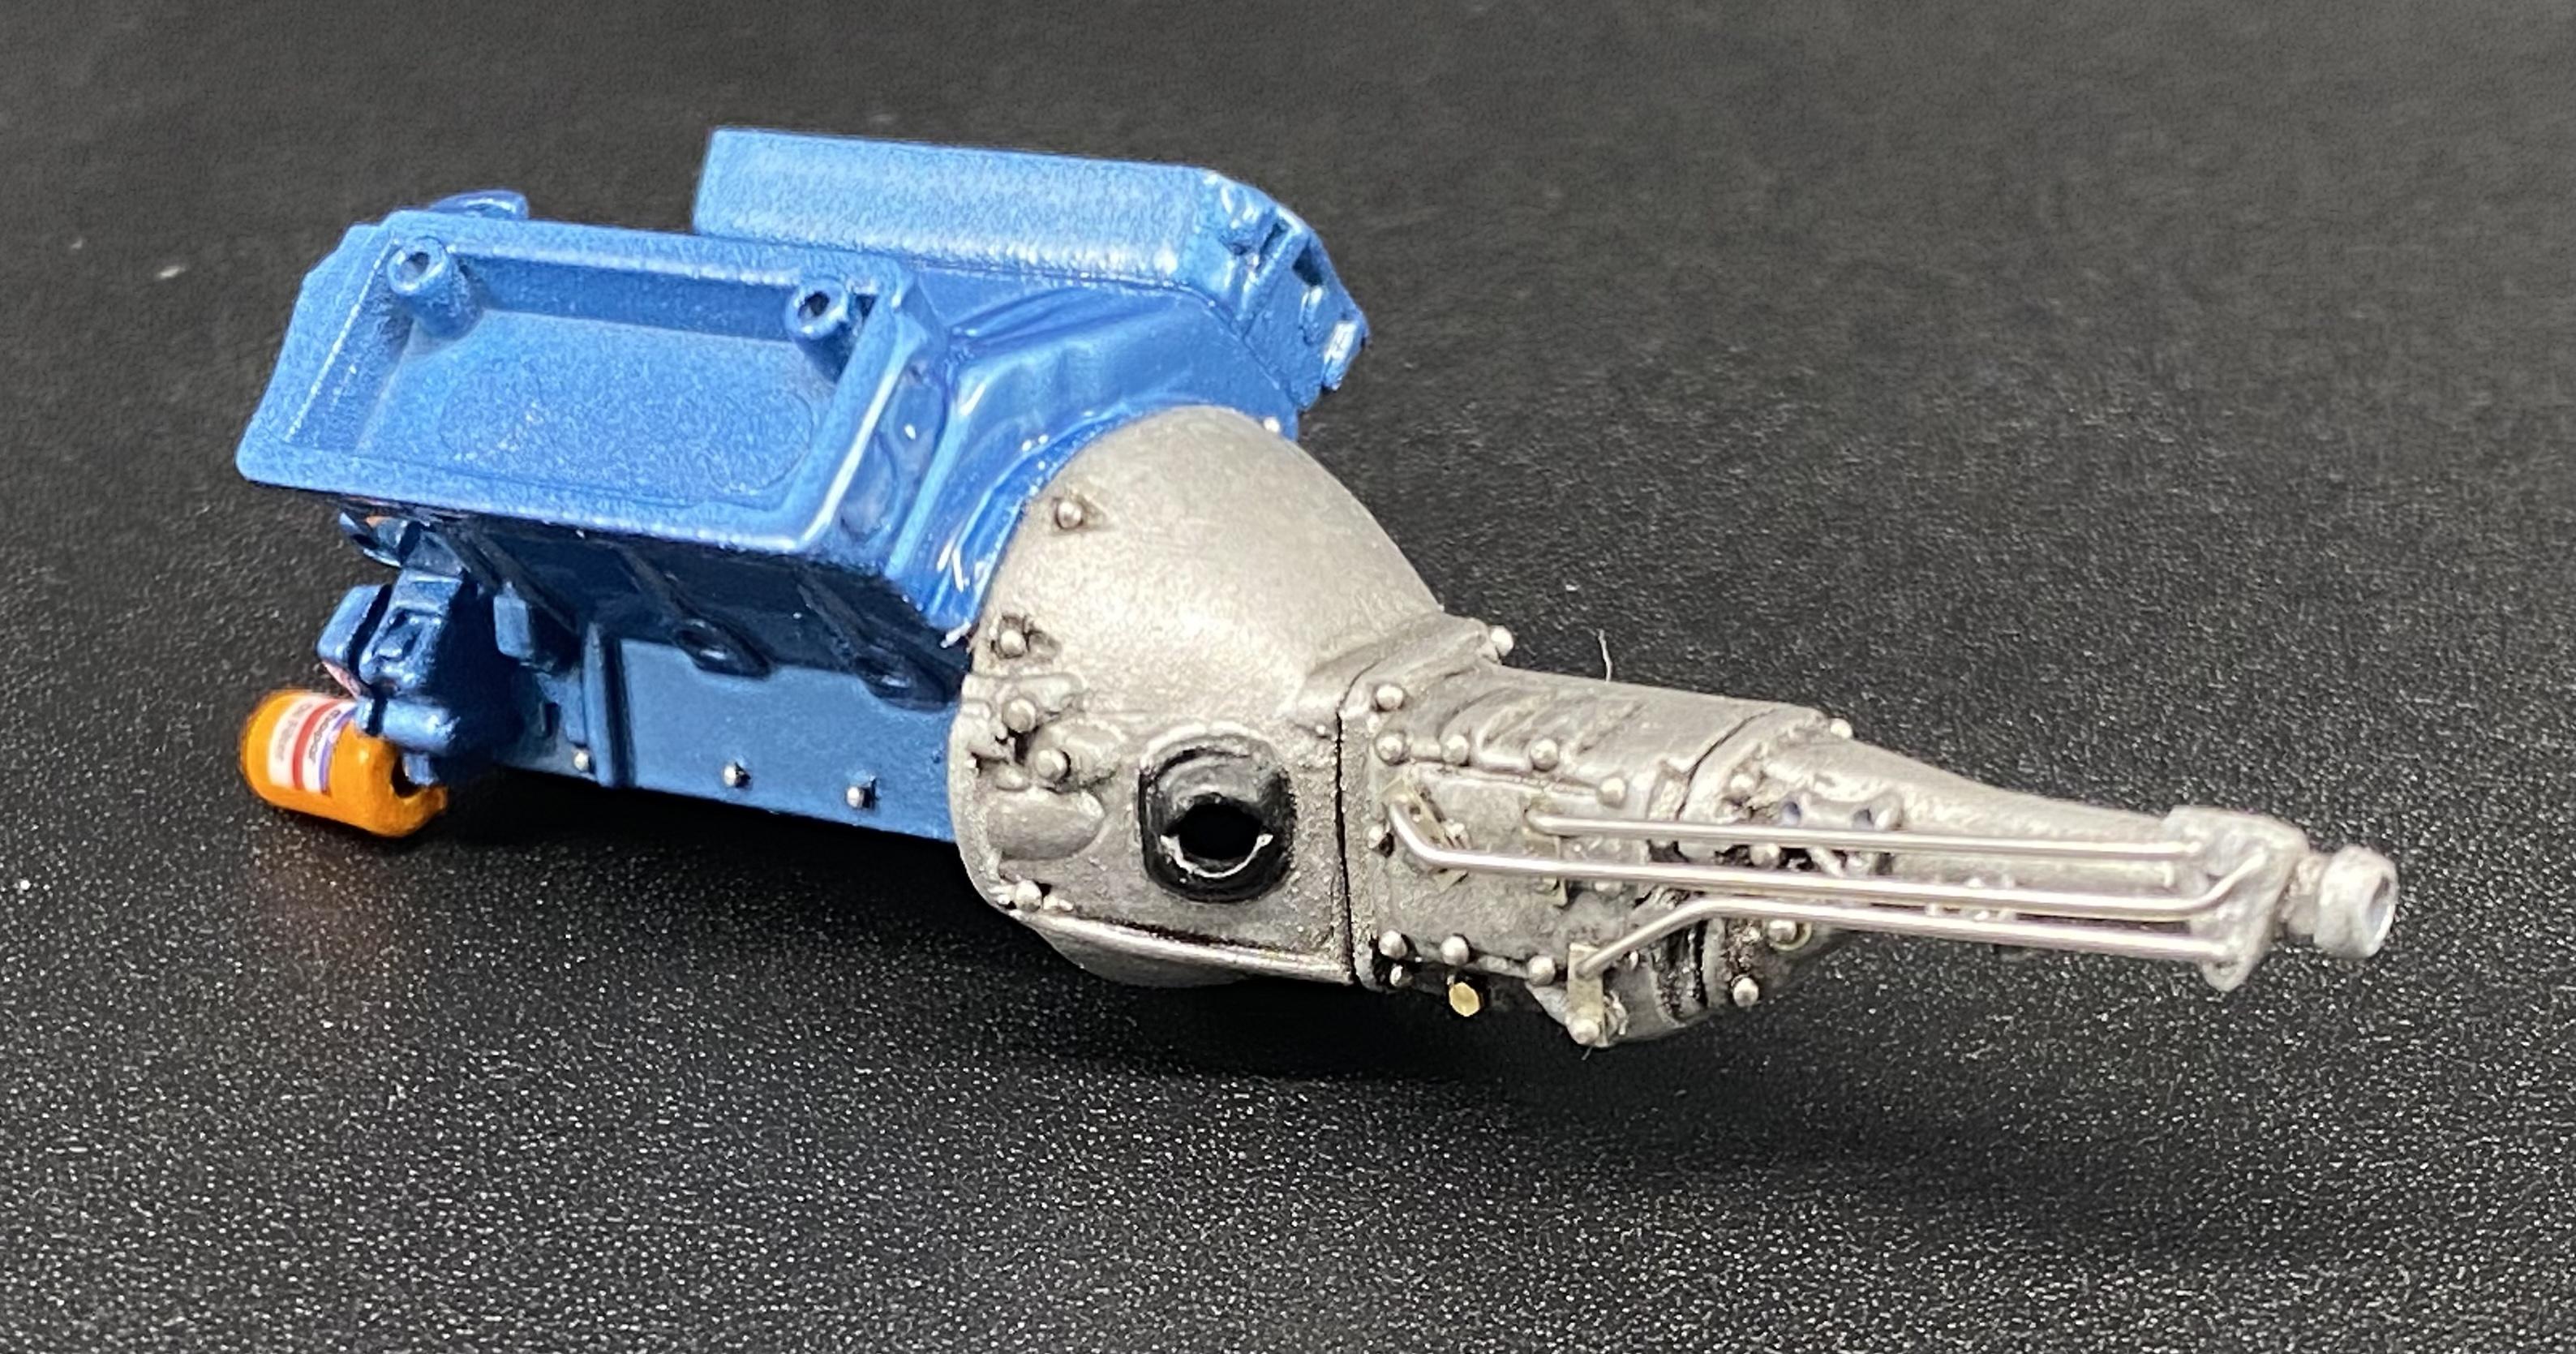
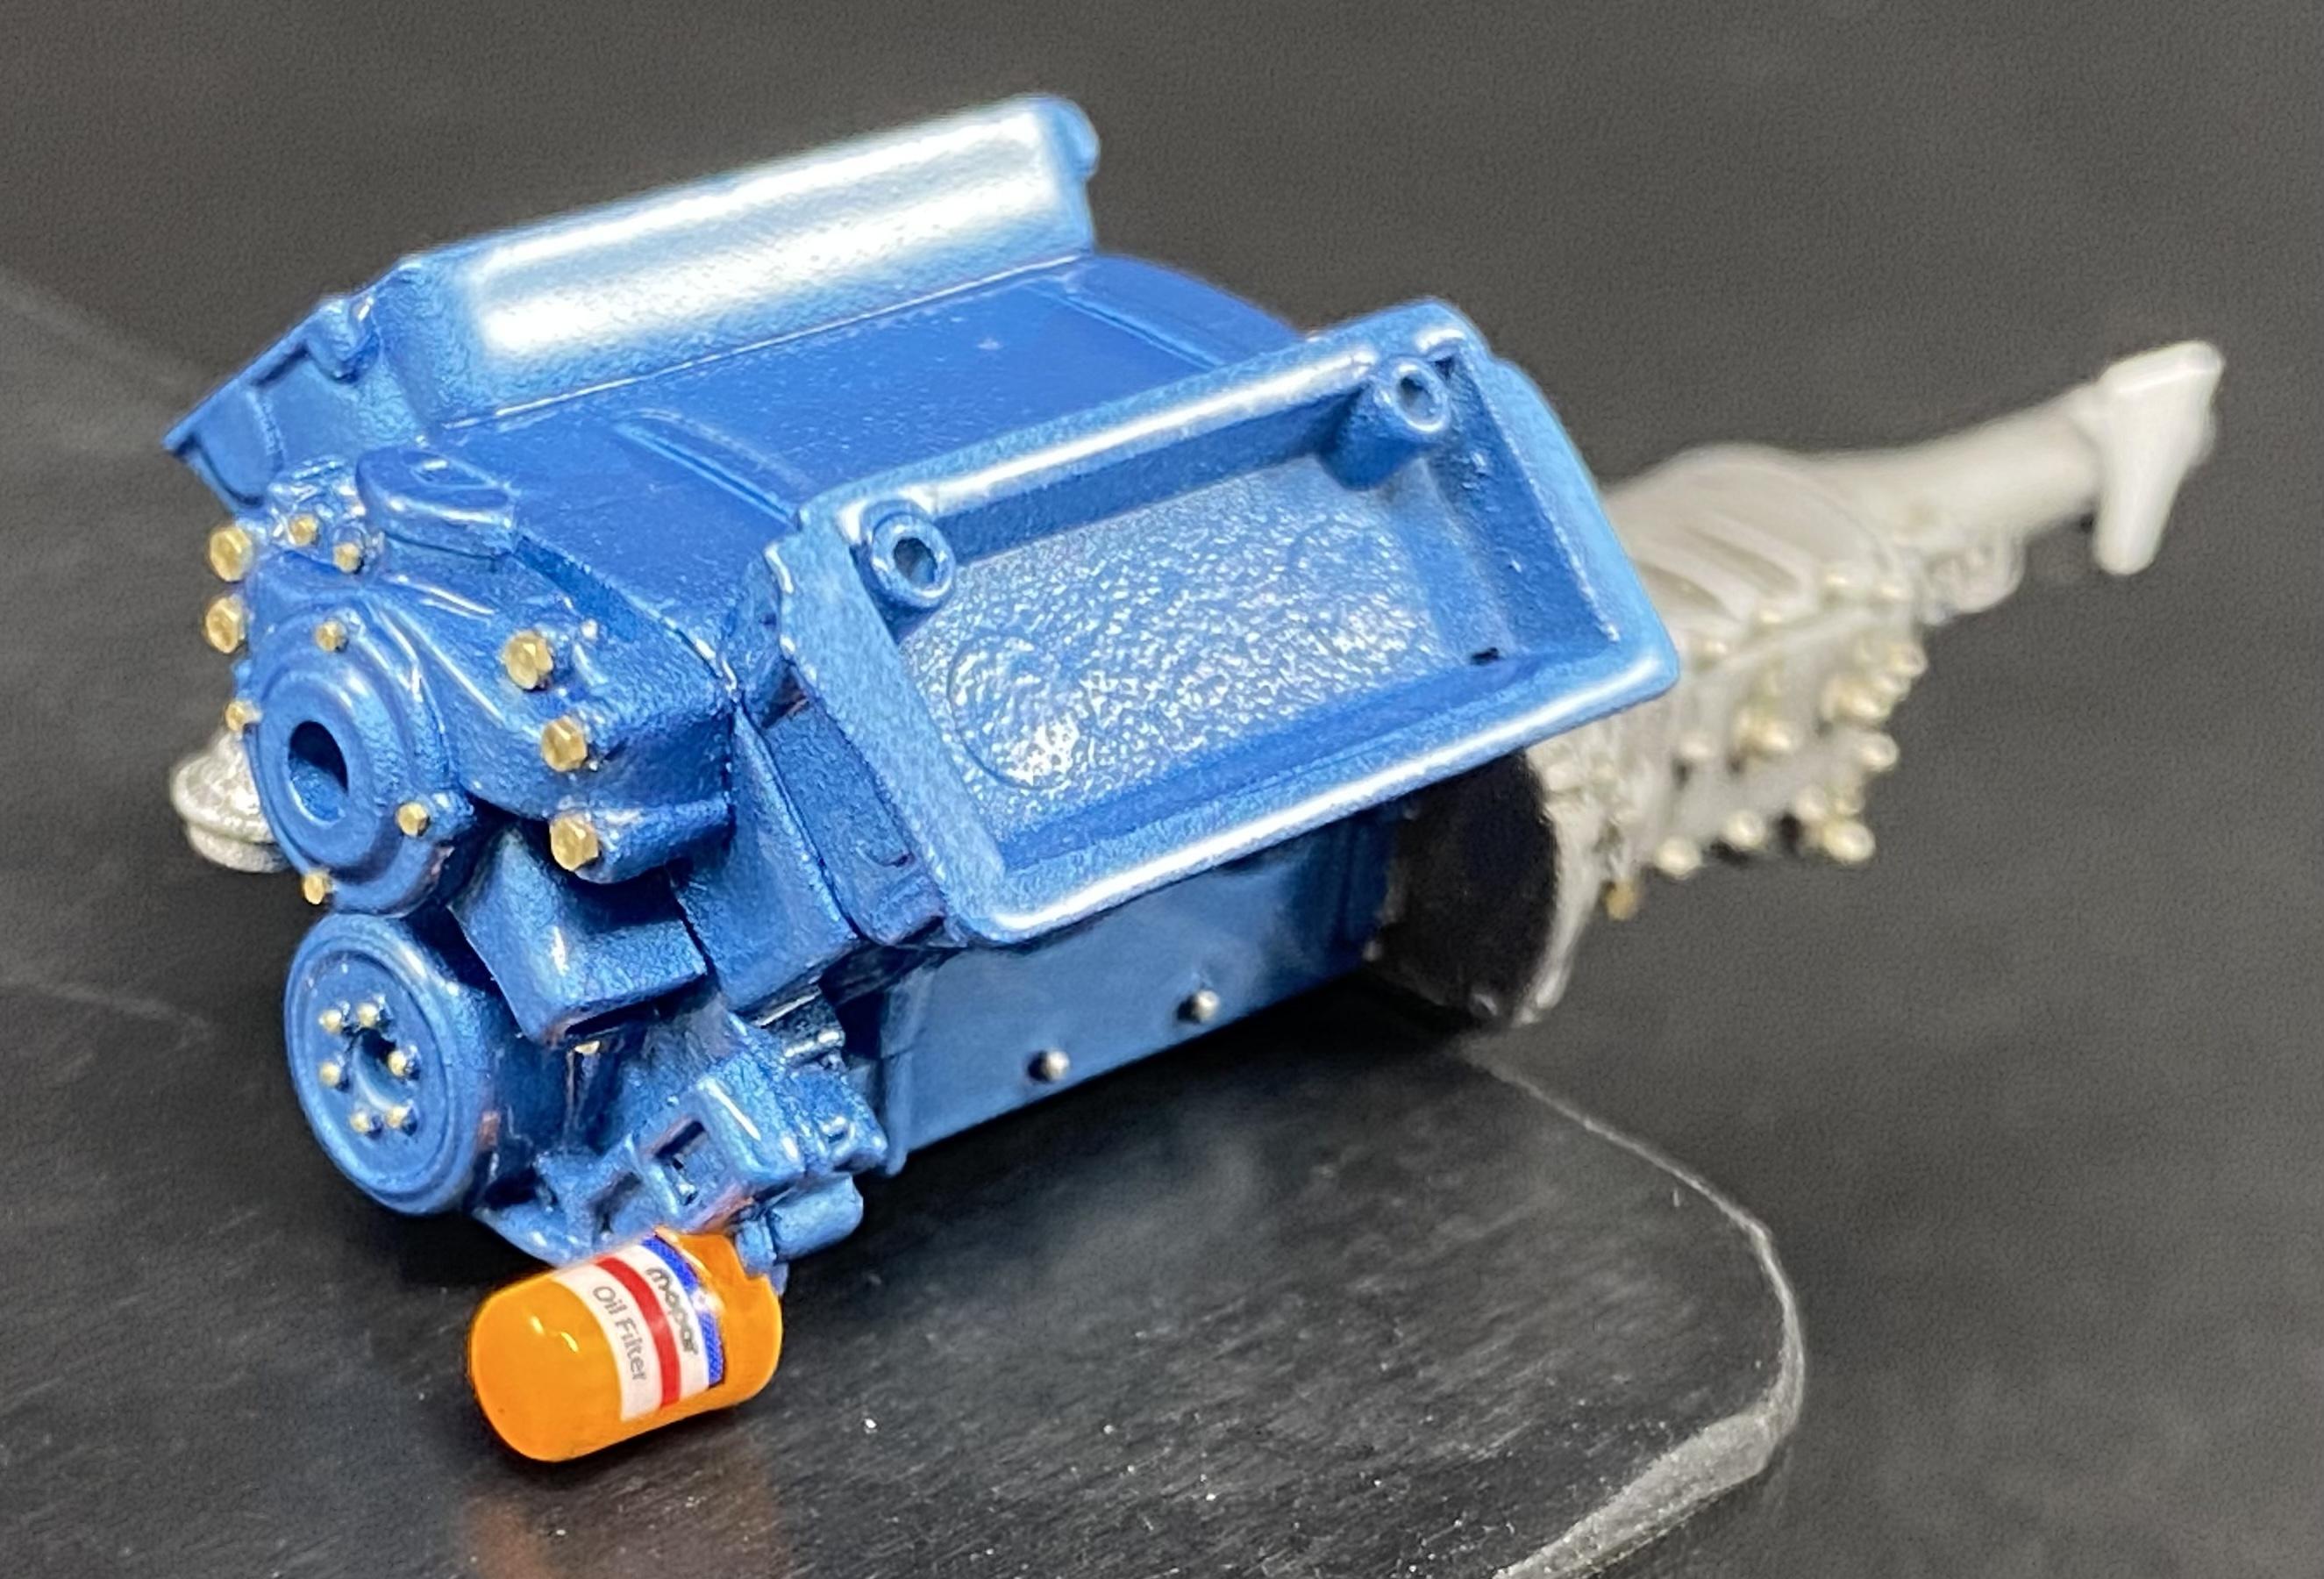
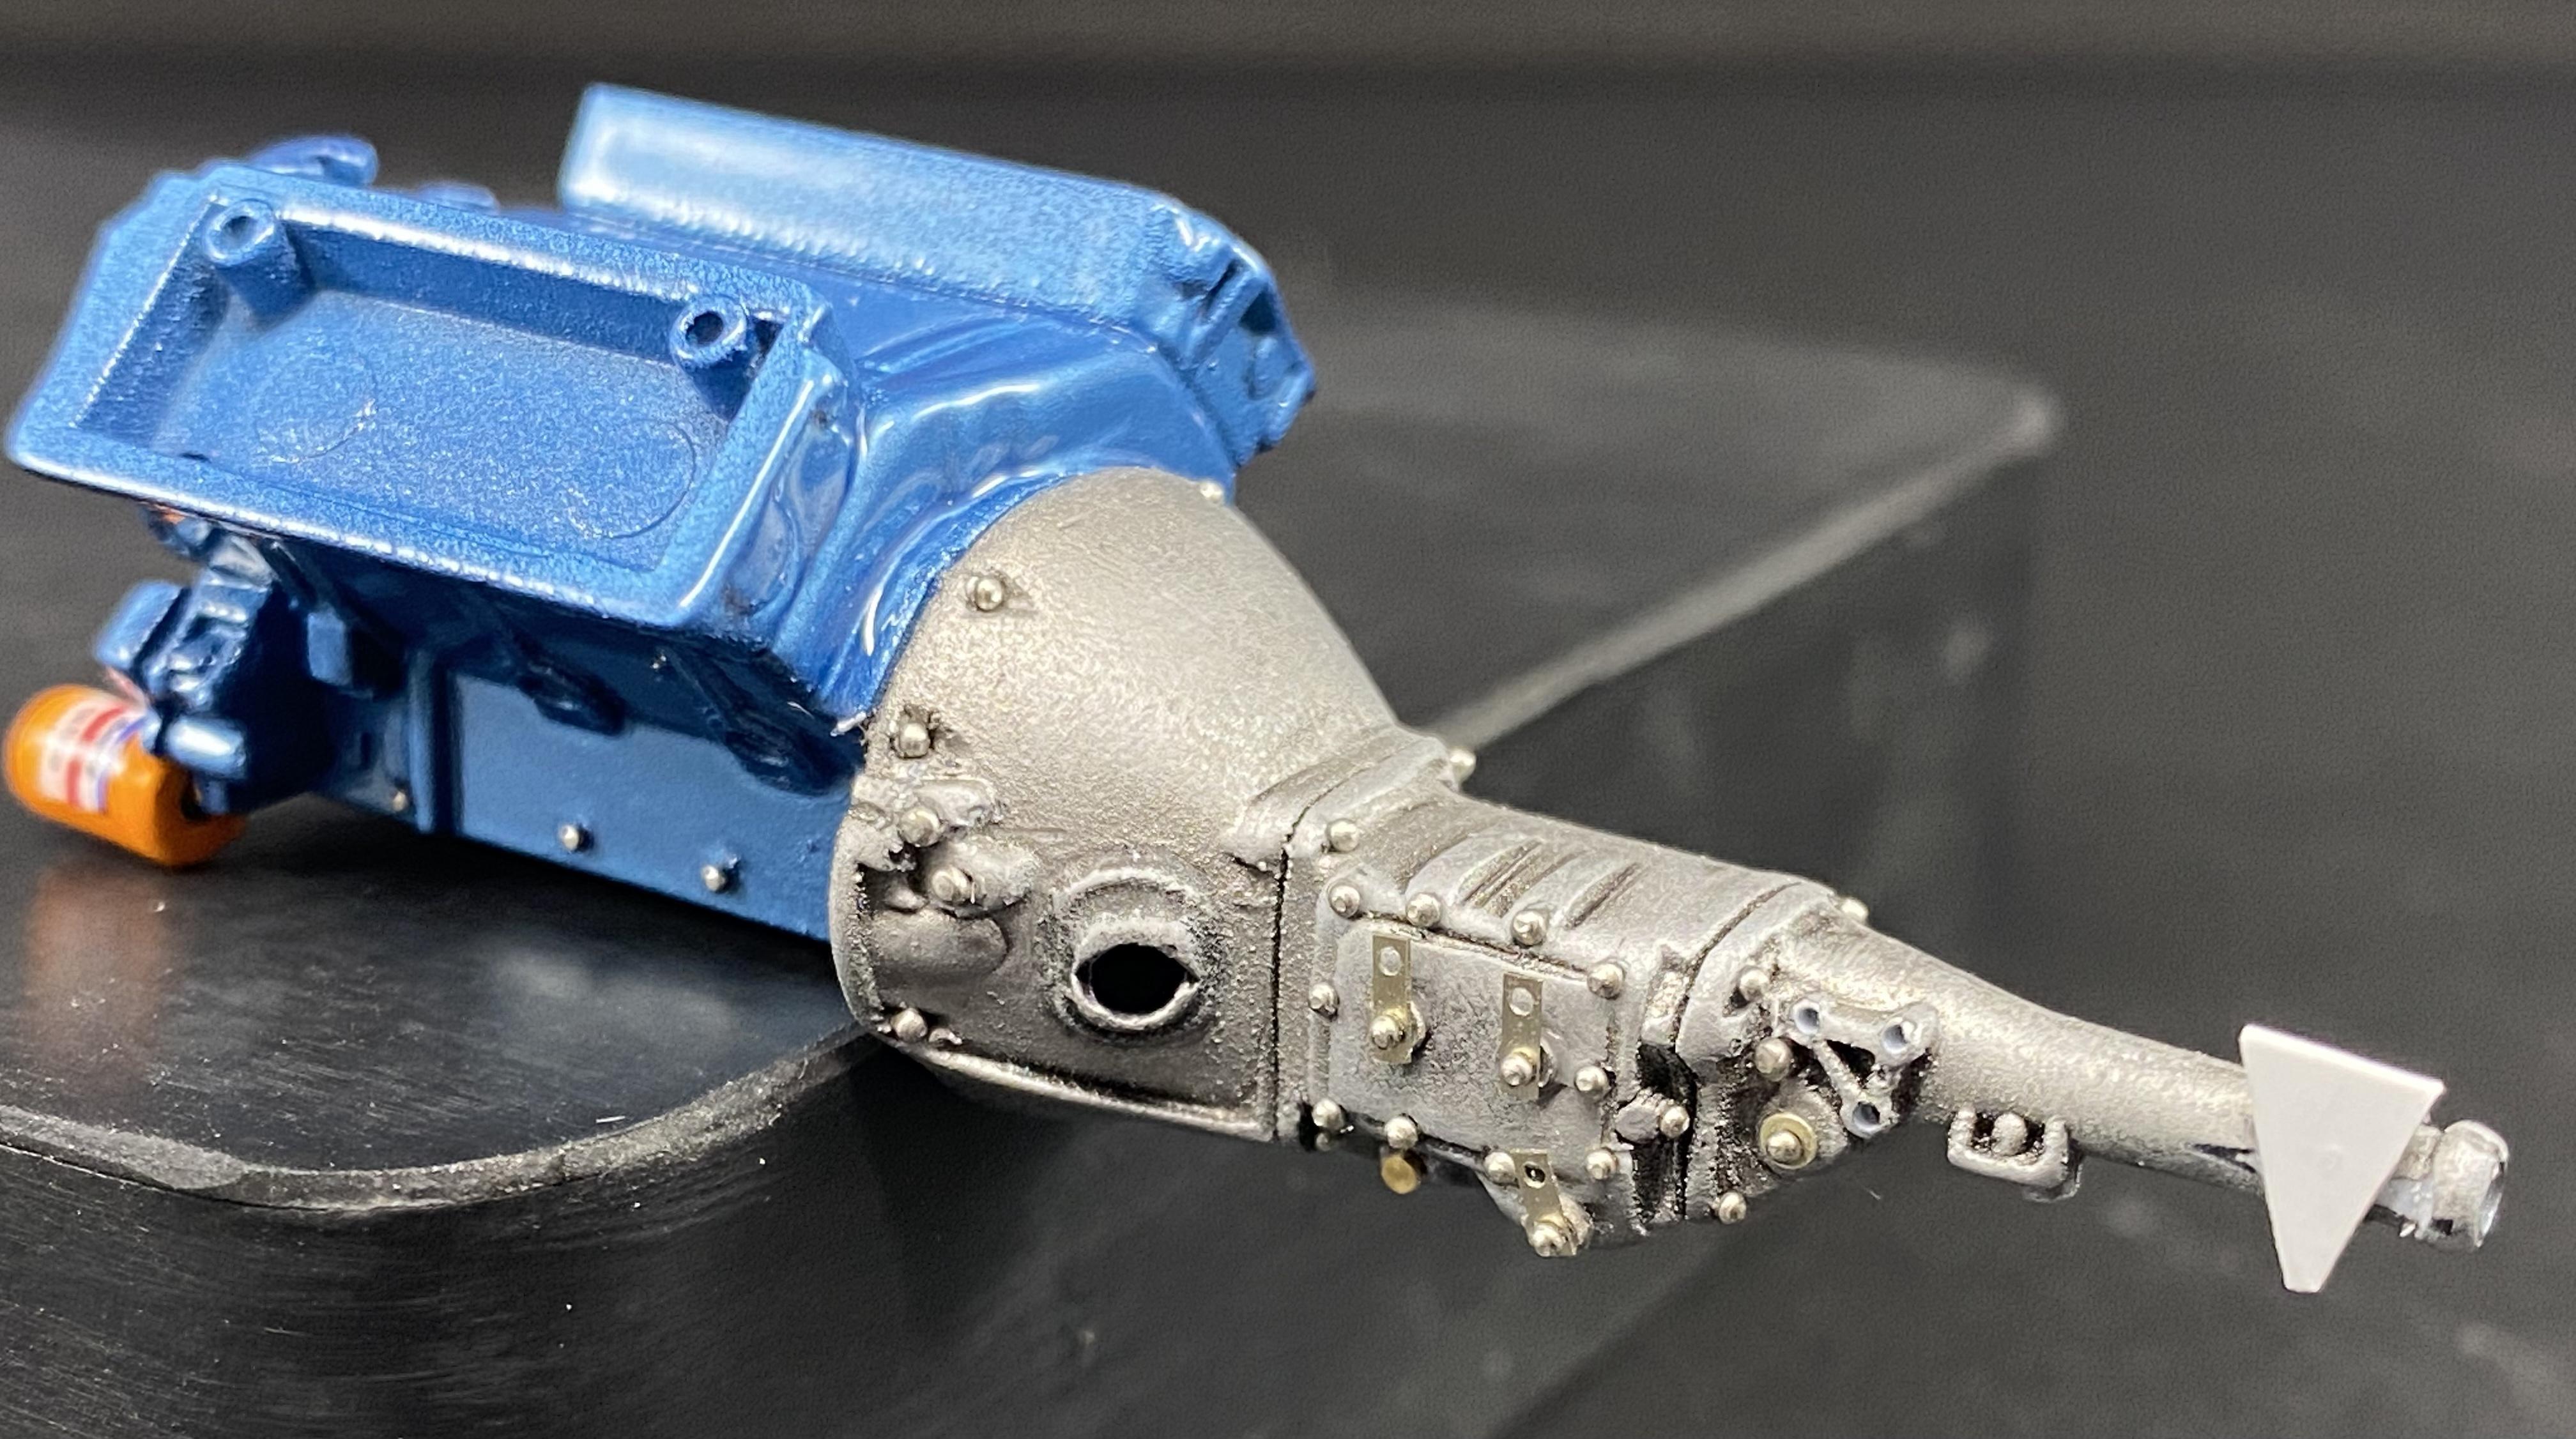
Back and forth from the body to the chassis and engine. I got the starter painted in Alclad airframe aluminum for some contrast, and wired up. Scratch built connectors from Albion nickel silver tubing. Drilled out all the bolts on the steering, and made up all the plug wires. Each wire includes the wire, nickel tubing and a washer. Then carefully painted black and installed into the covers, which were stripped and painted Alclad chrome. breathers also replaced with RB Motion parts, and PE oil caps.
-
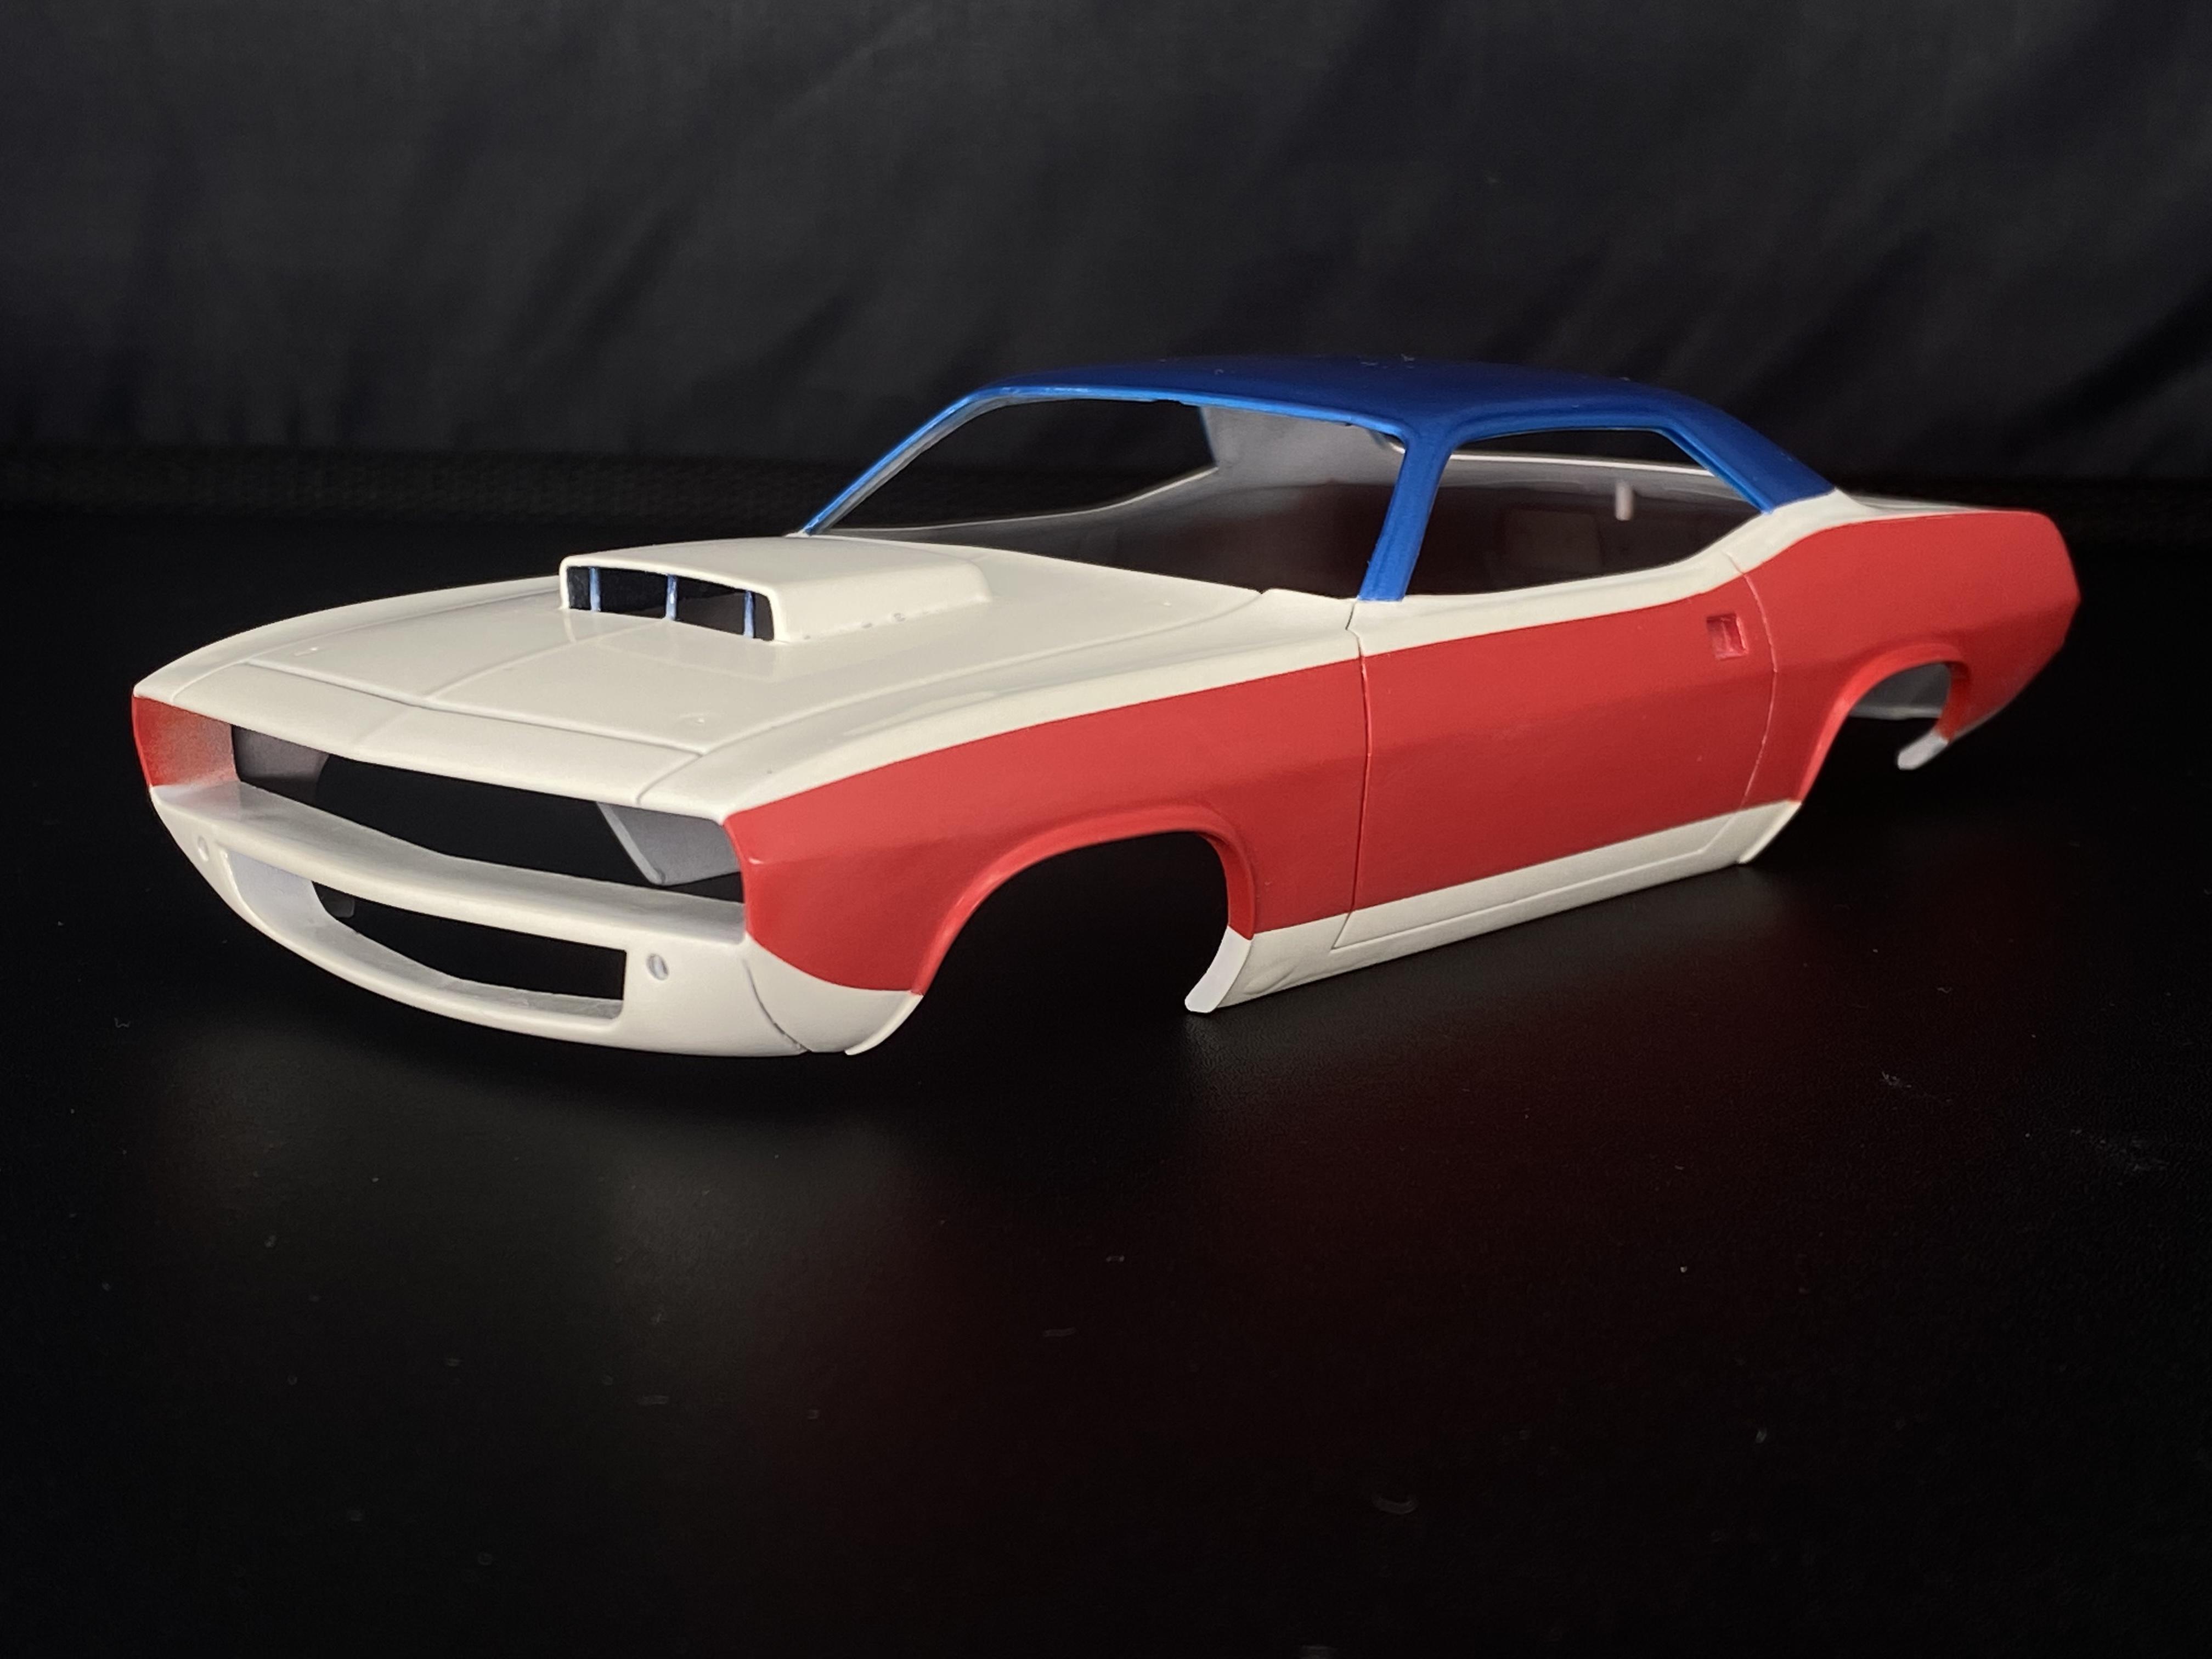
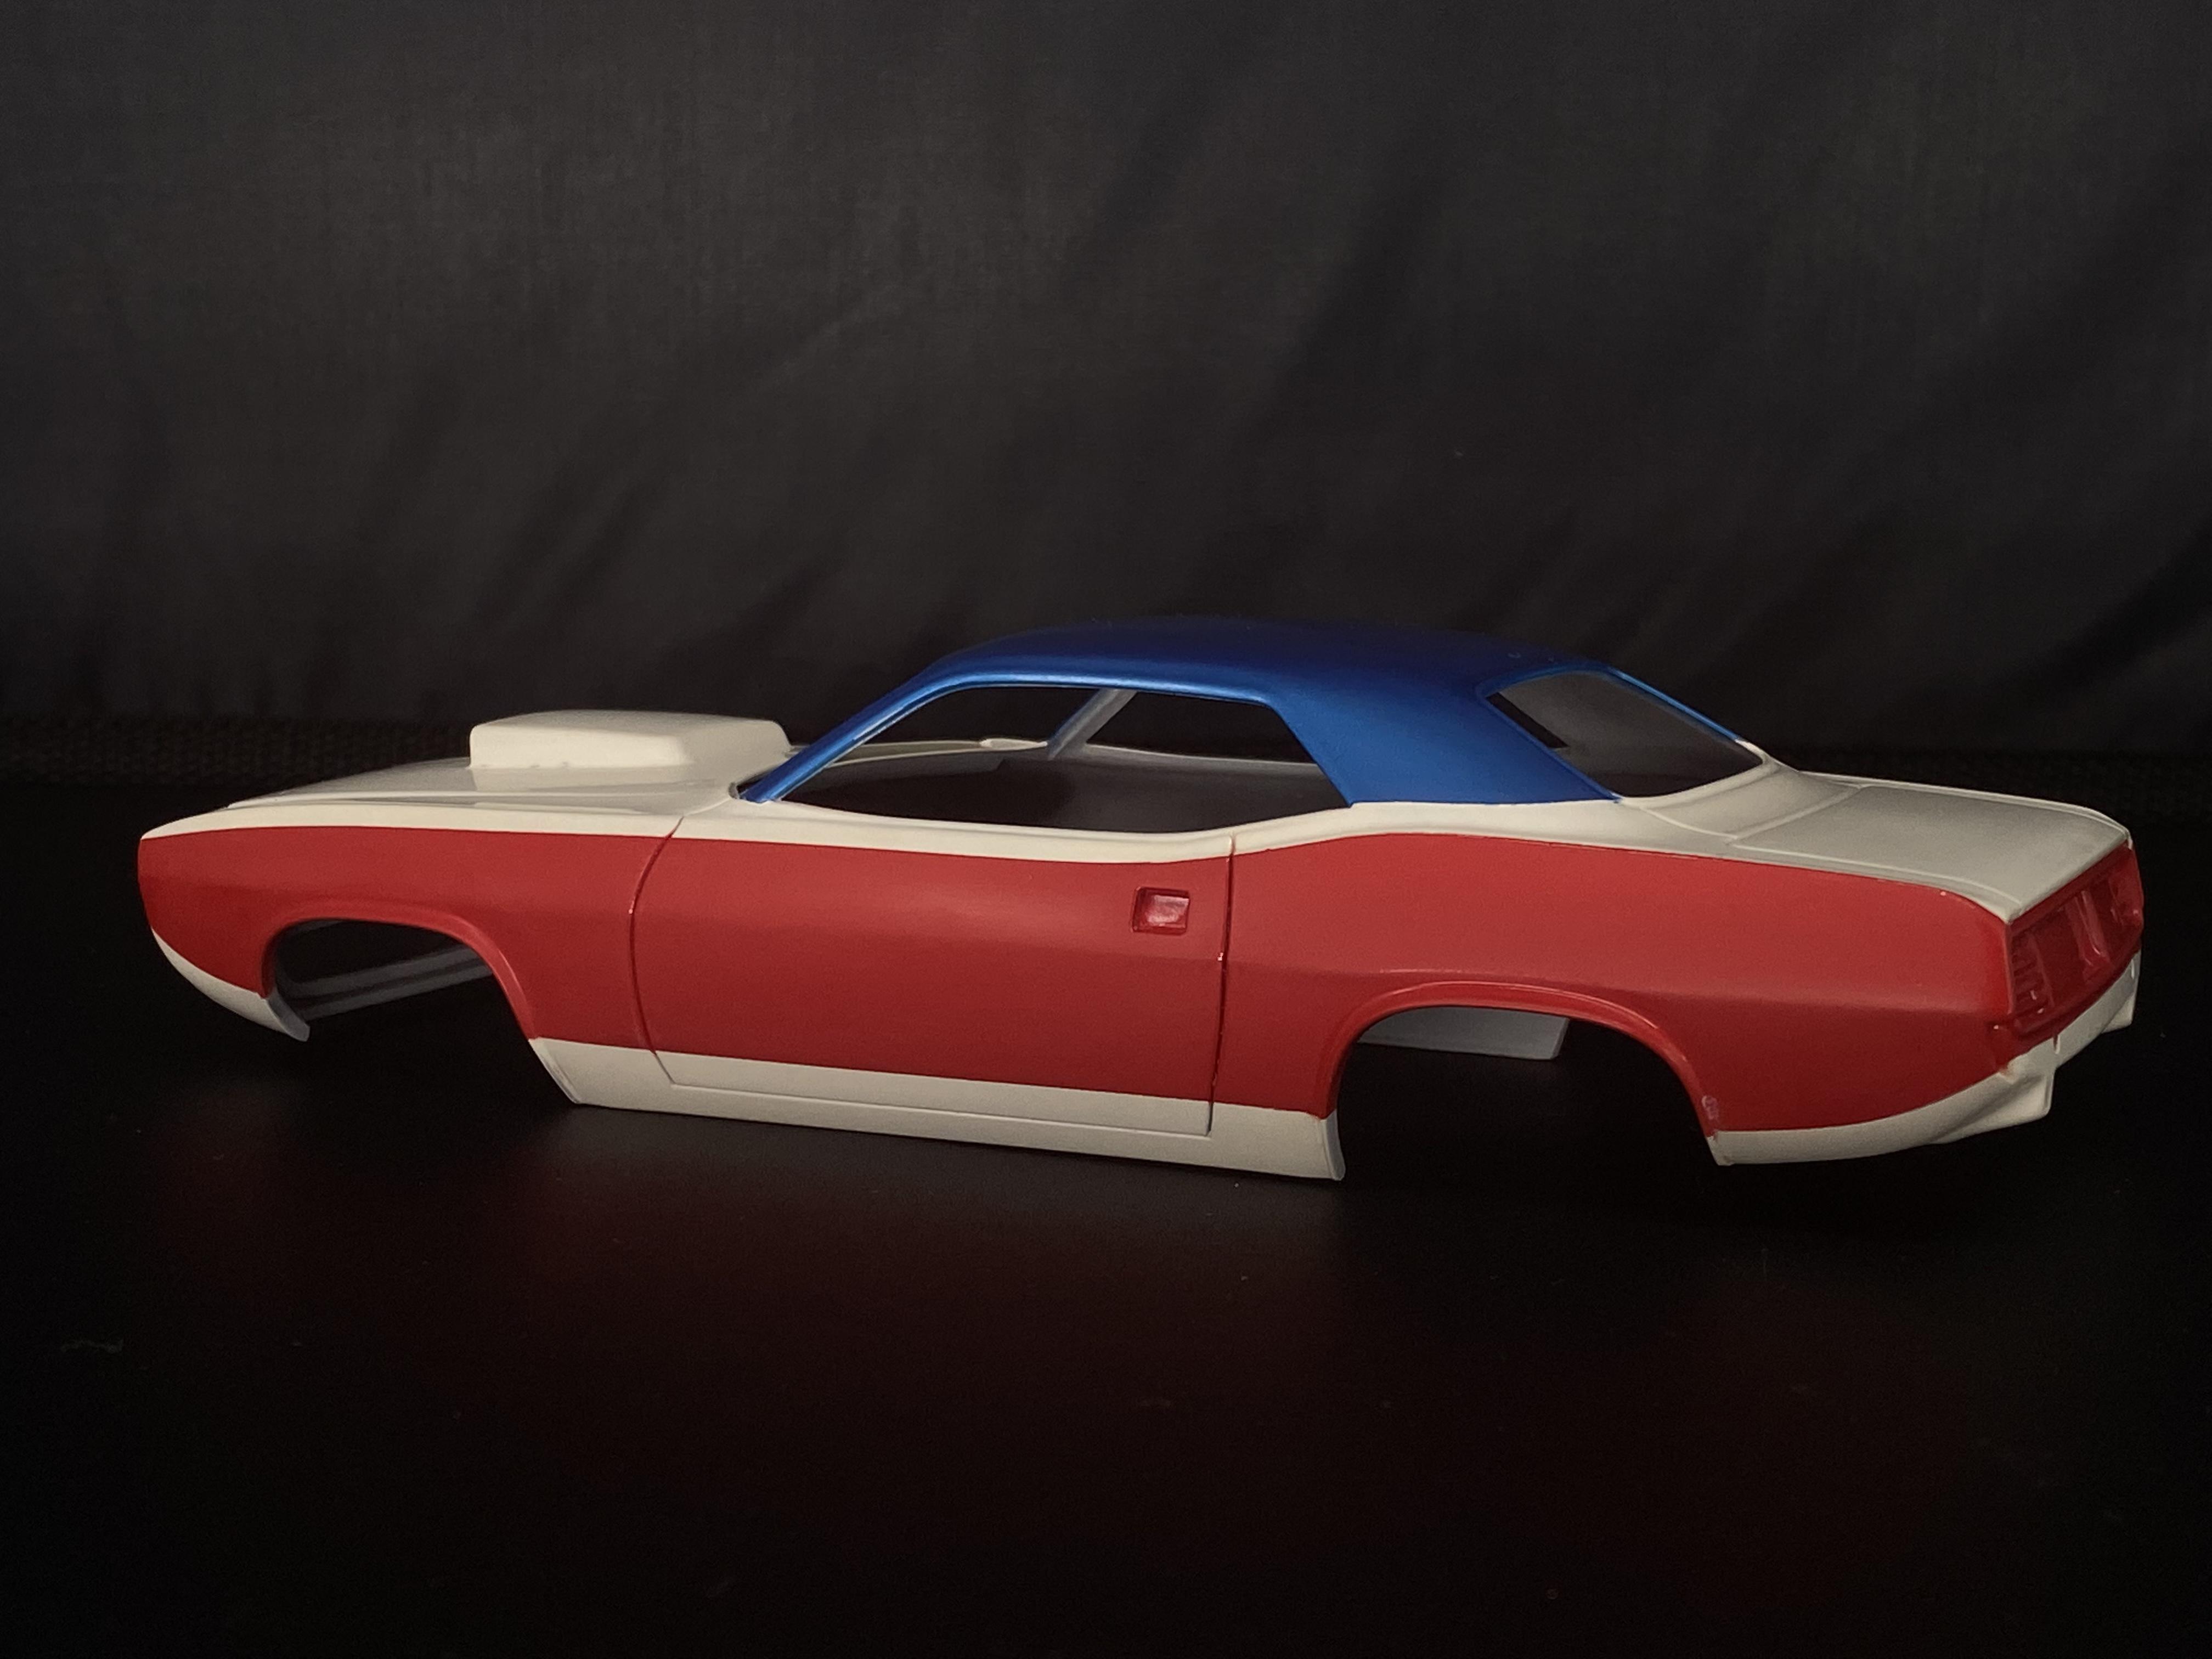
Body sanded, primed, again, and again, and again. Finally put down some Whimbleton White by Splash Paints. Next will be taping off for the red and blue.
-
Got the shifter linkage all connected. The reverse linkage is supposed to drop low and go under, however, the trans mount/cross member in the kit chassis will not allow for this. So I made the adjustment.
-
I started with the engine. Primed and painted LeMans blue, (which is the wrong color), all the bolts cut, drilled and replaced with brass, trans painted Alclad aluminum, and drilled out all the bolts. i cut up and drilled some holes for the trans linkage, just looking at reference pictures and making it up as I go. the shifter mount on the kit was way to small and fragile, no way to get anything to stick on there, so I glued a new piece in, I’ll get the holes drilled, then I’ll file it down to size.
-
This is the inspiration, a good spread of pictures online for reference. For a quick build it’ll work. Plus it looks bad a$$! Added a little sheet to the interior, I like to button everything up like this, there no reason for it now, but when I was going to open the doors I started working on the inside to stabilize the body and interior panels.