harti20
-
Posts
222 -
Joined
-
Last visited
2 Followers


Recent Profile Visitors
2,614 profile views

harti20's Achievements
MCM Friend (4/6)
-
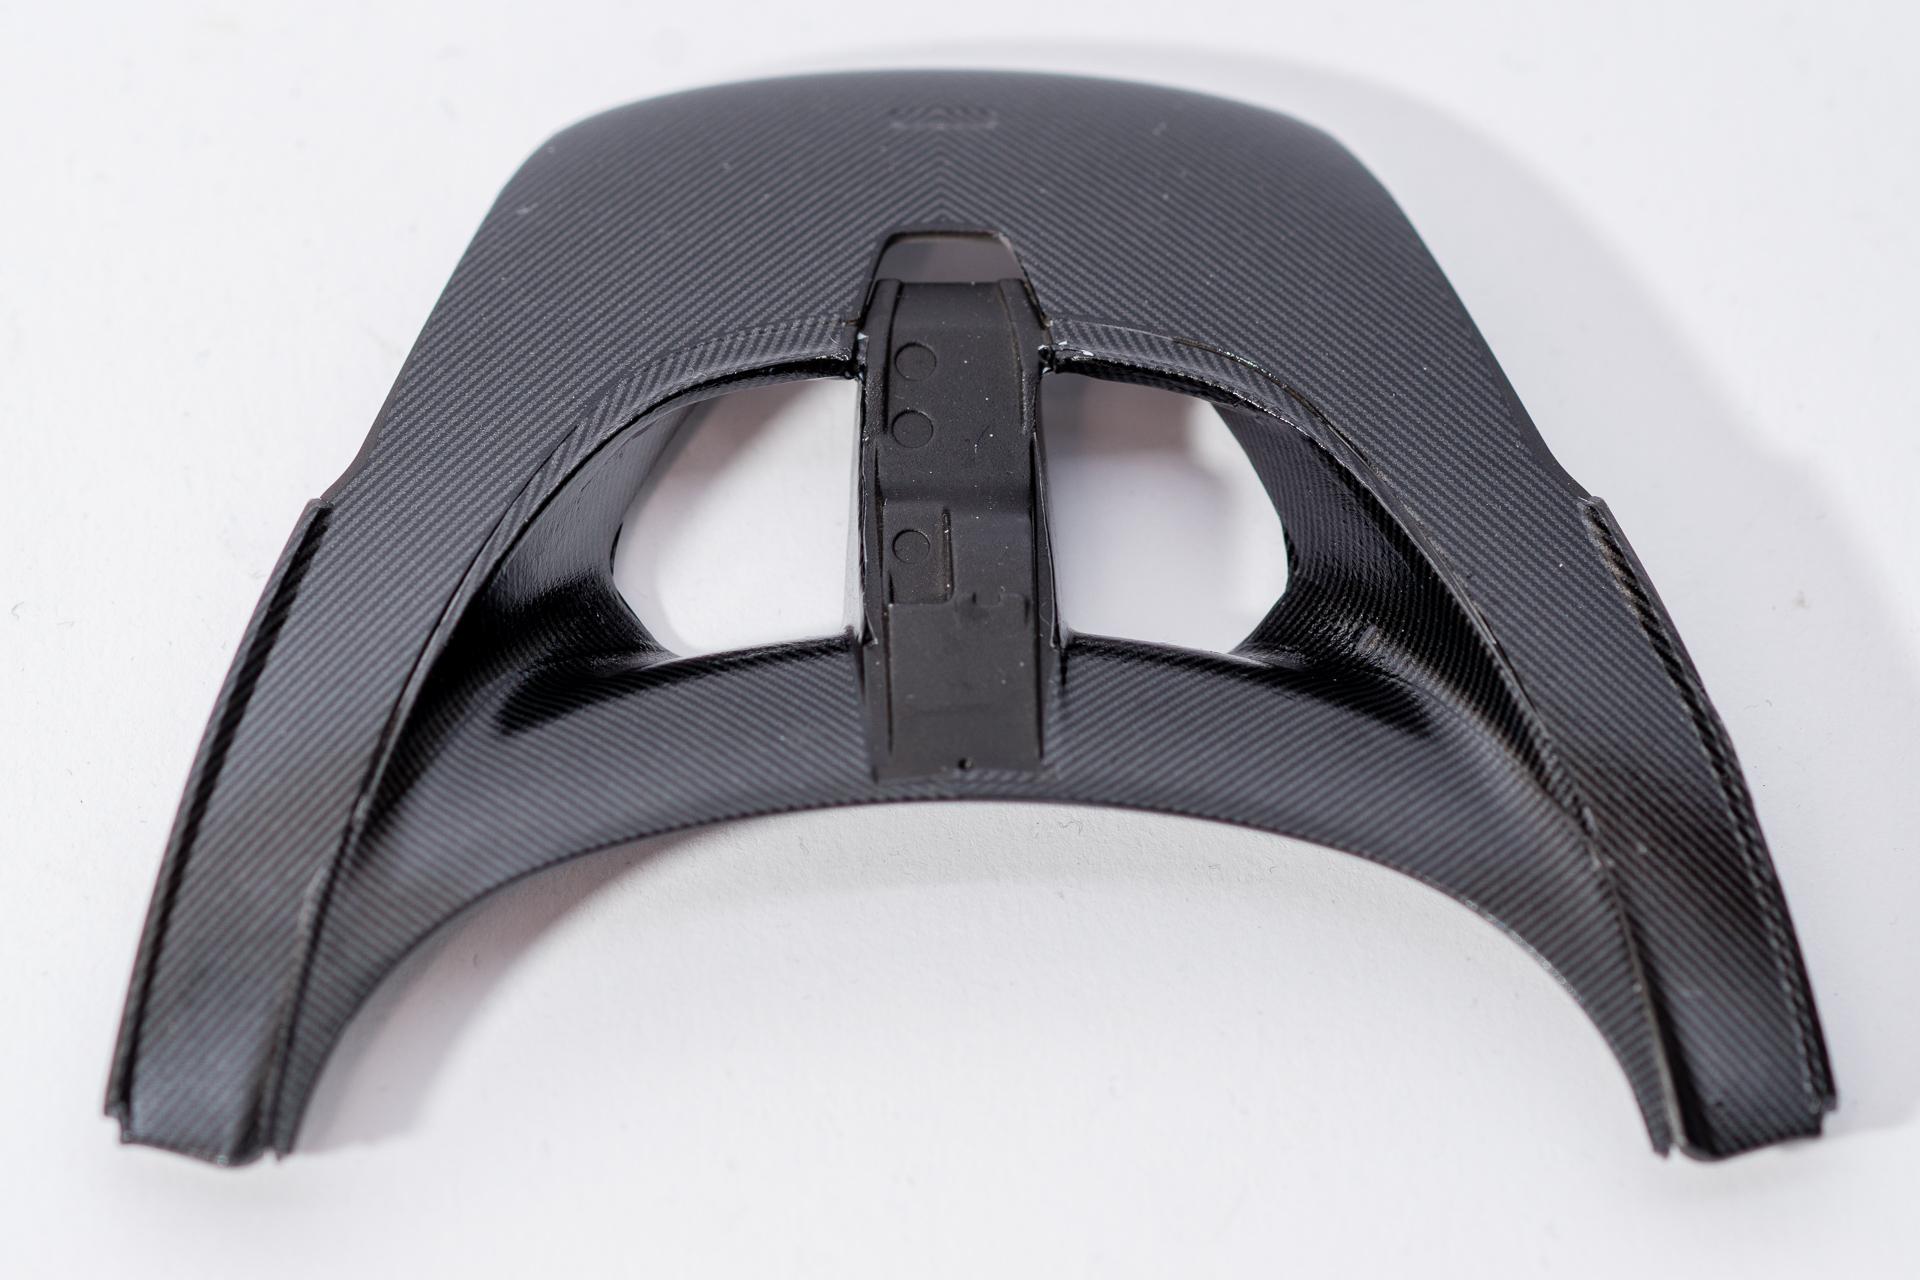
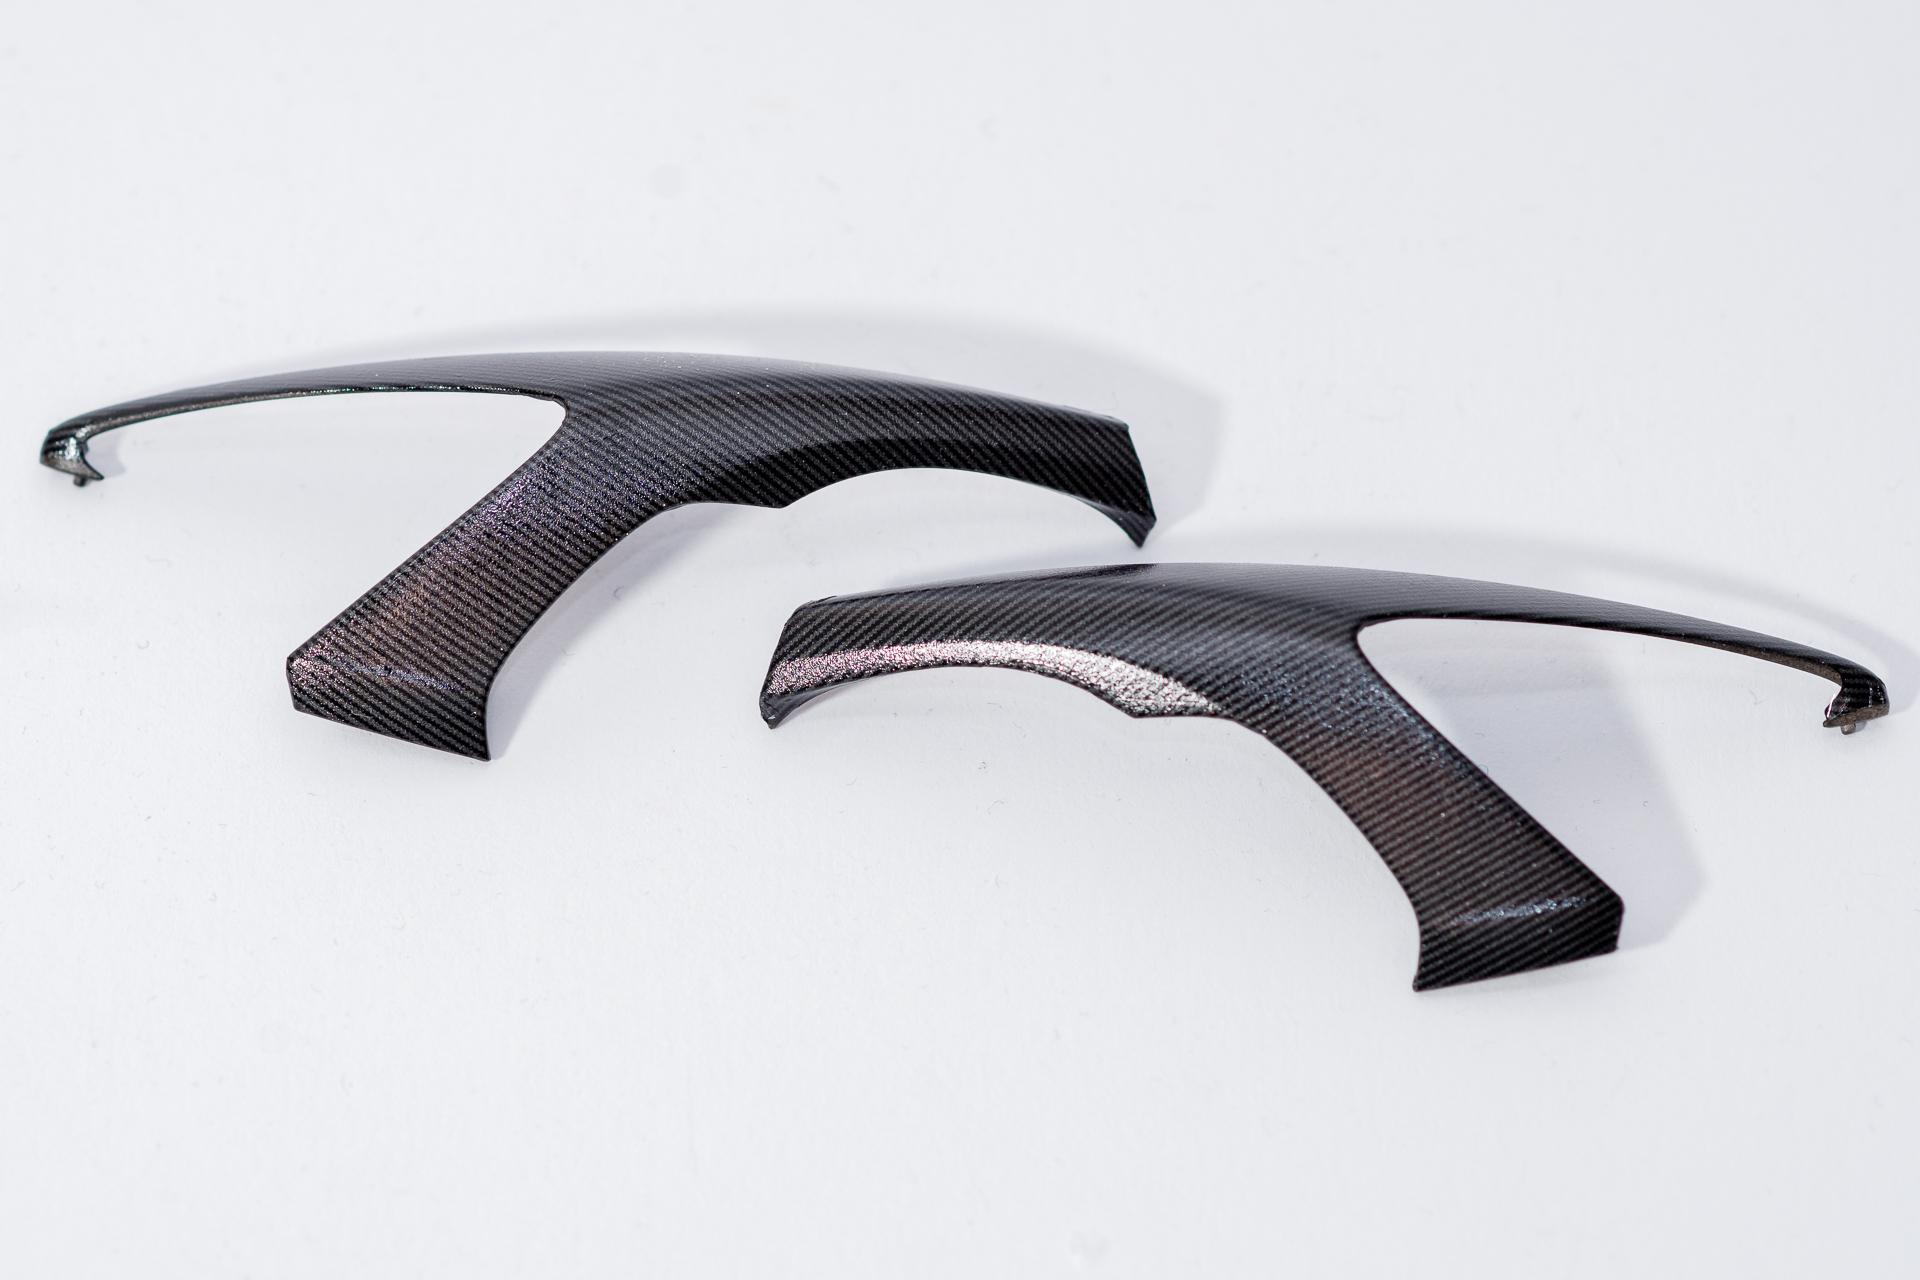
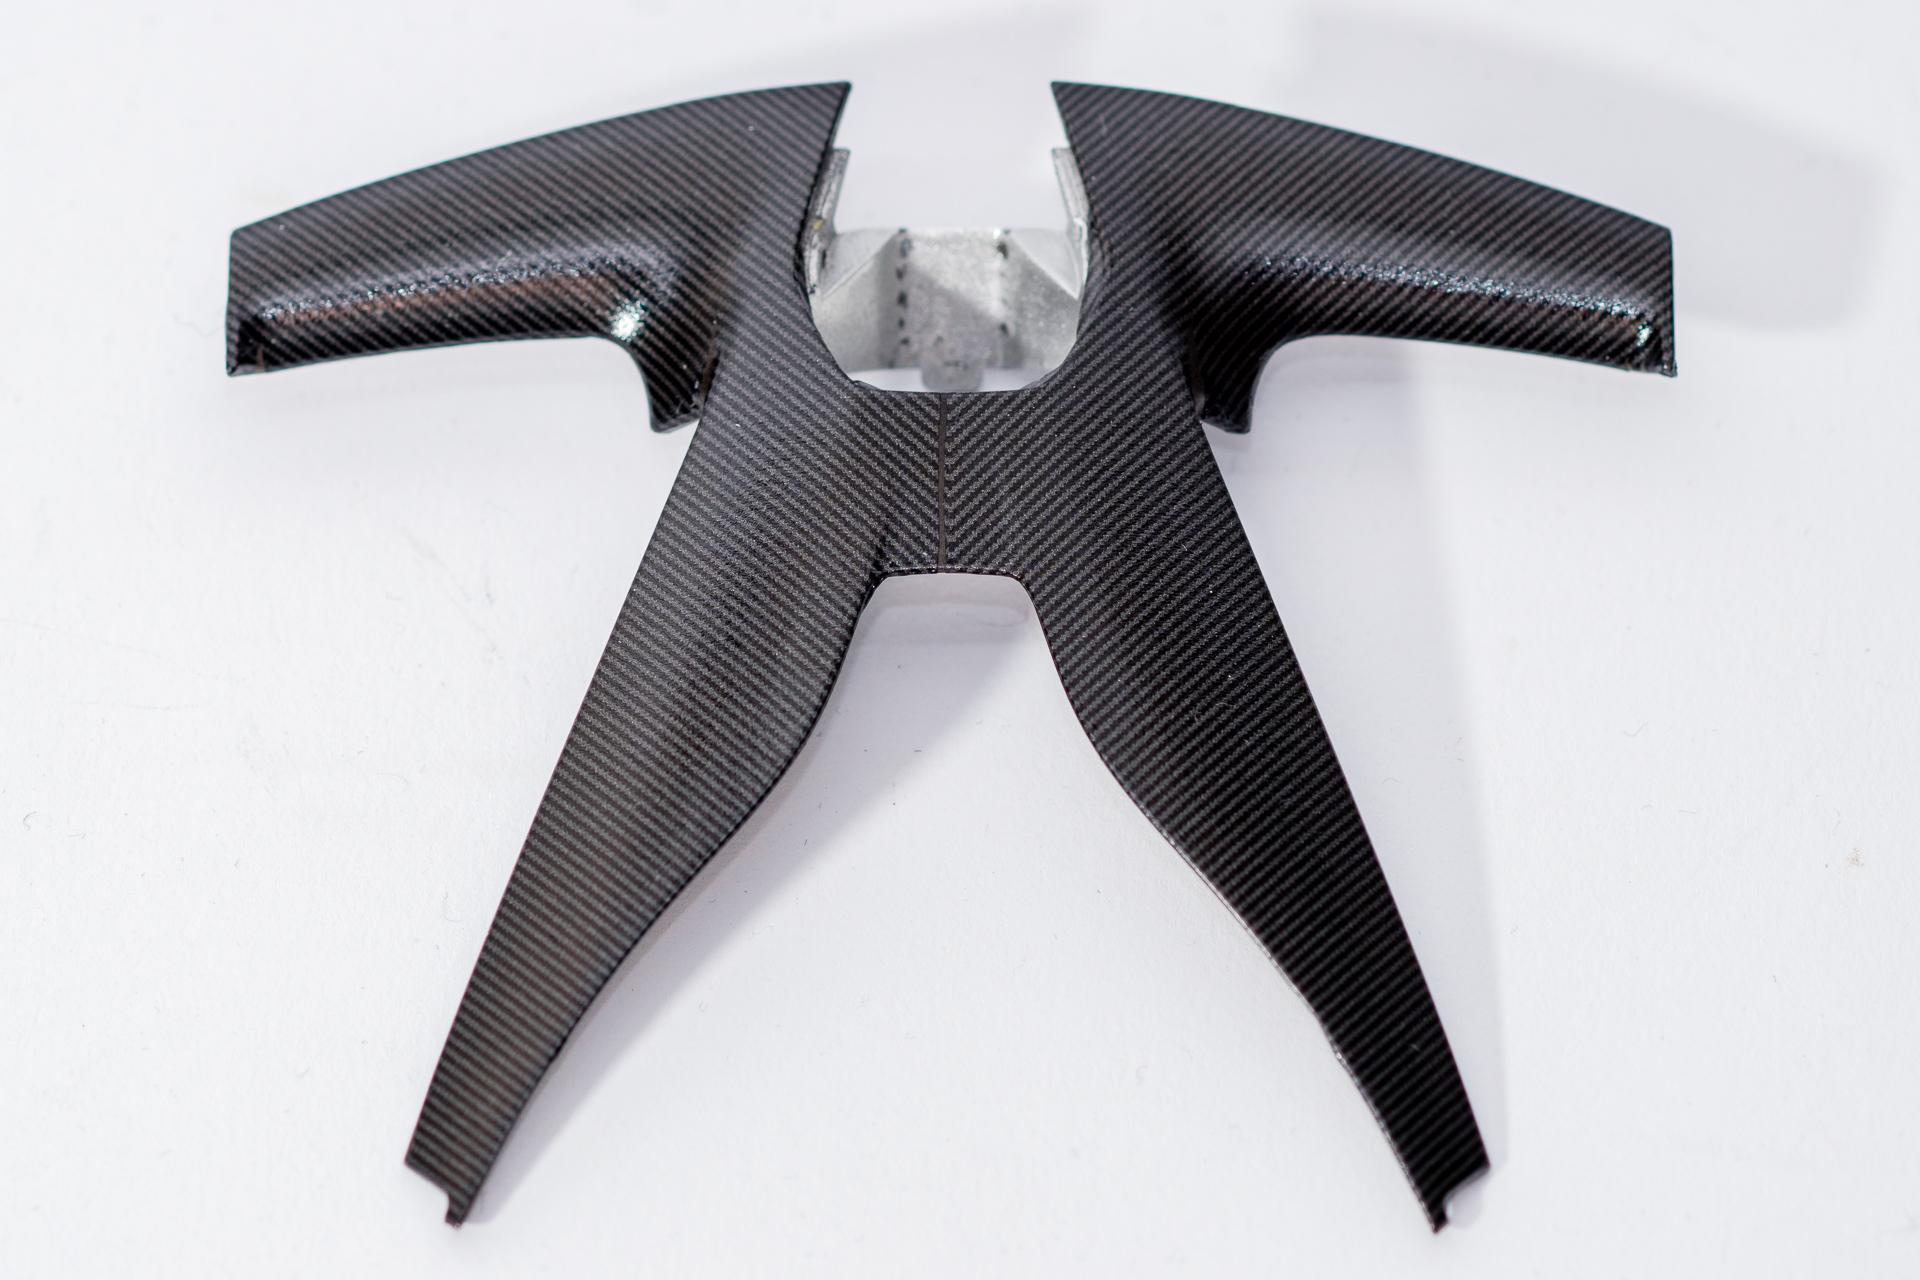
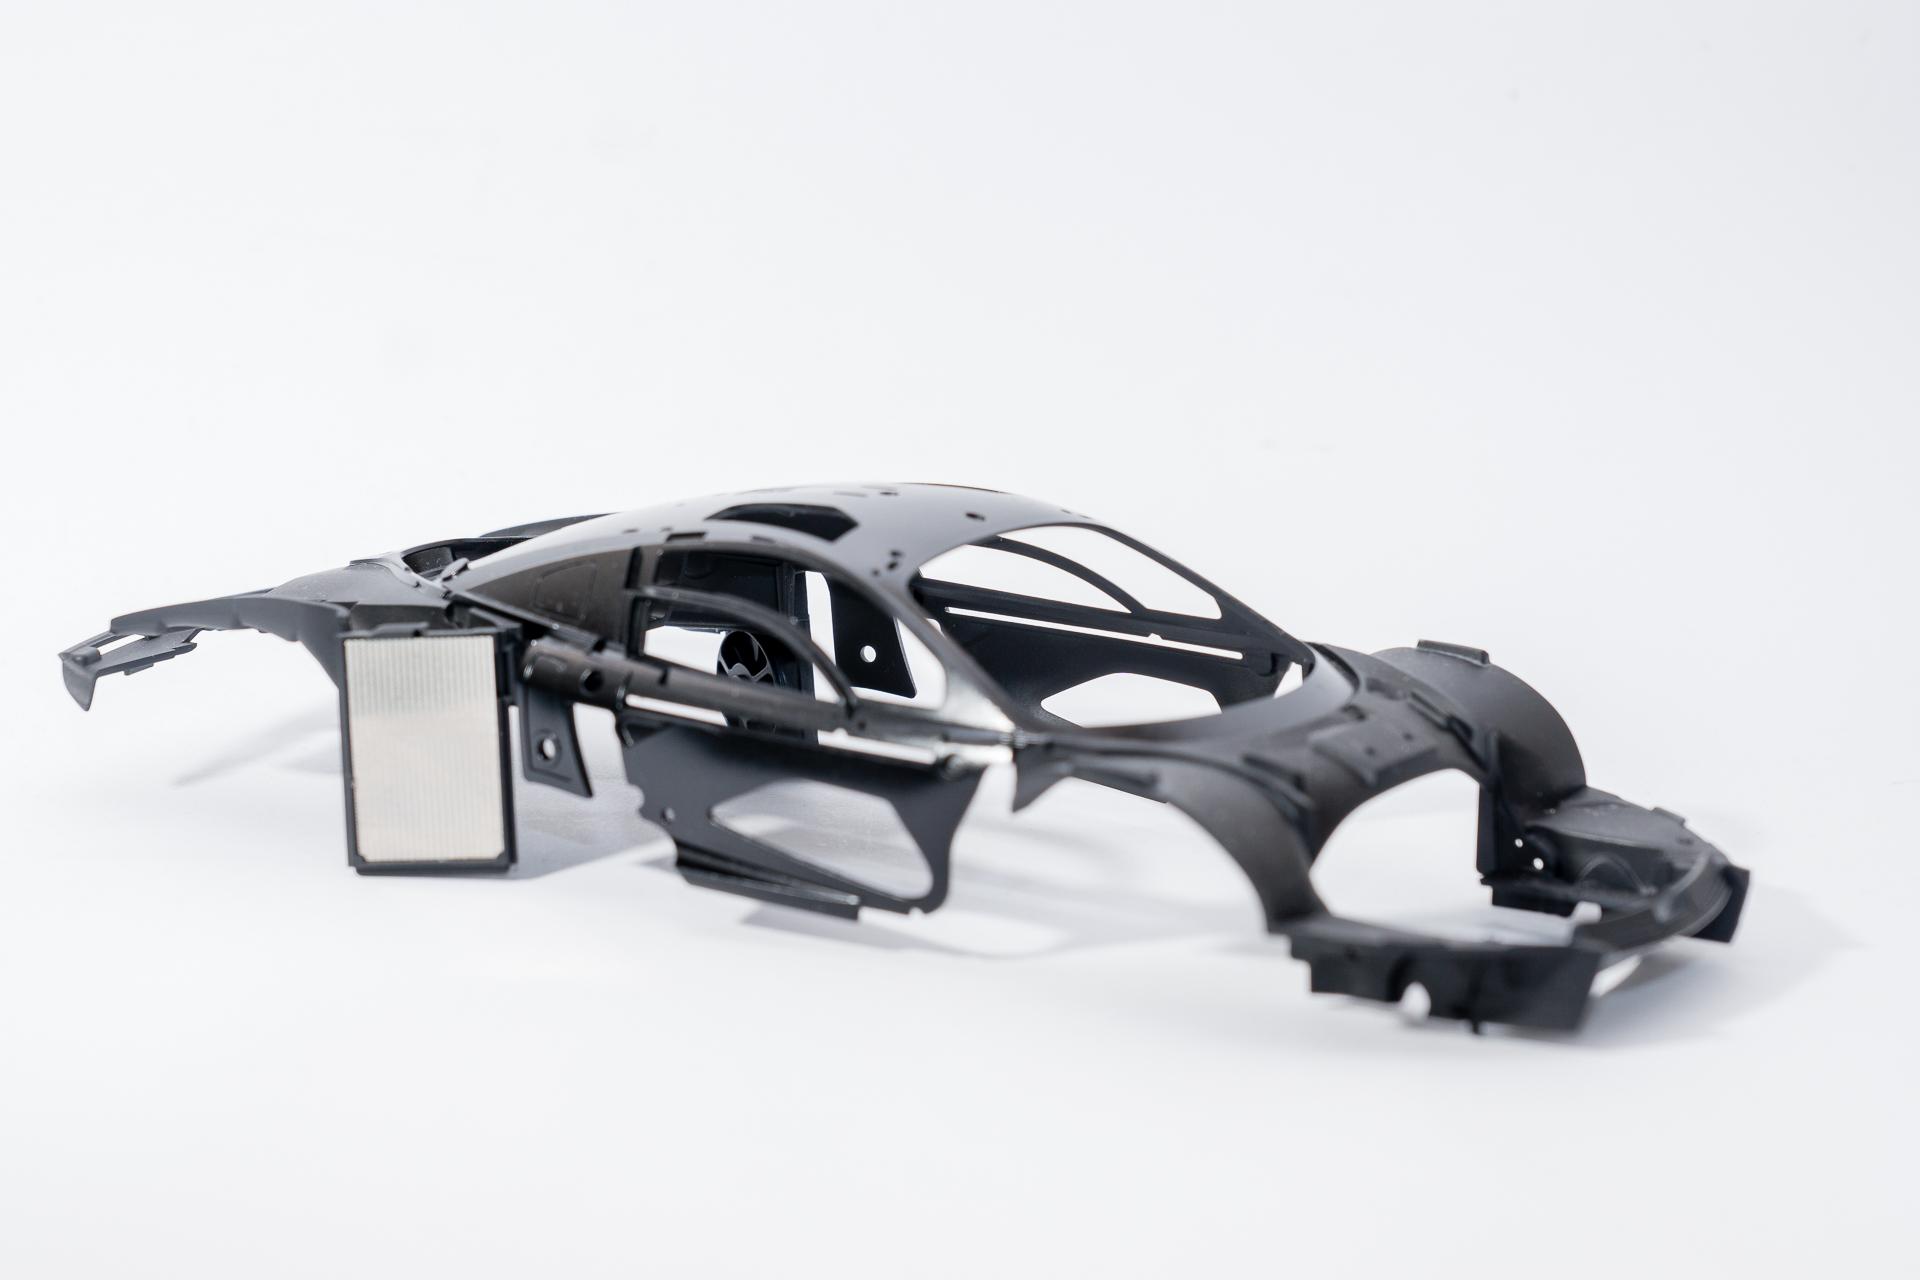
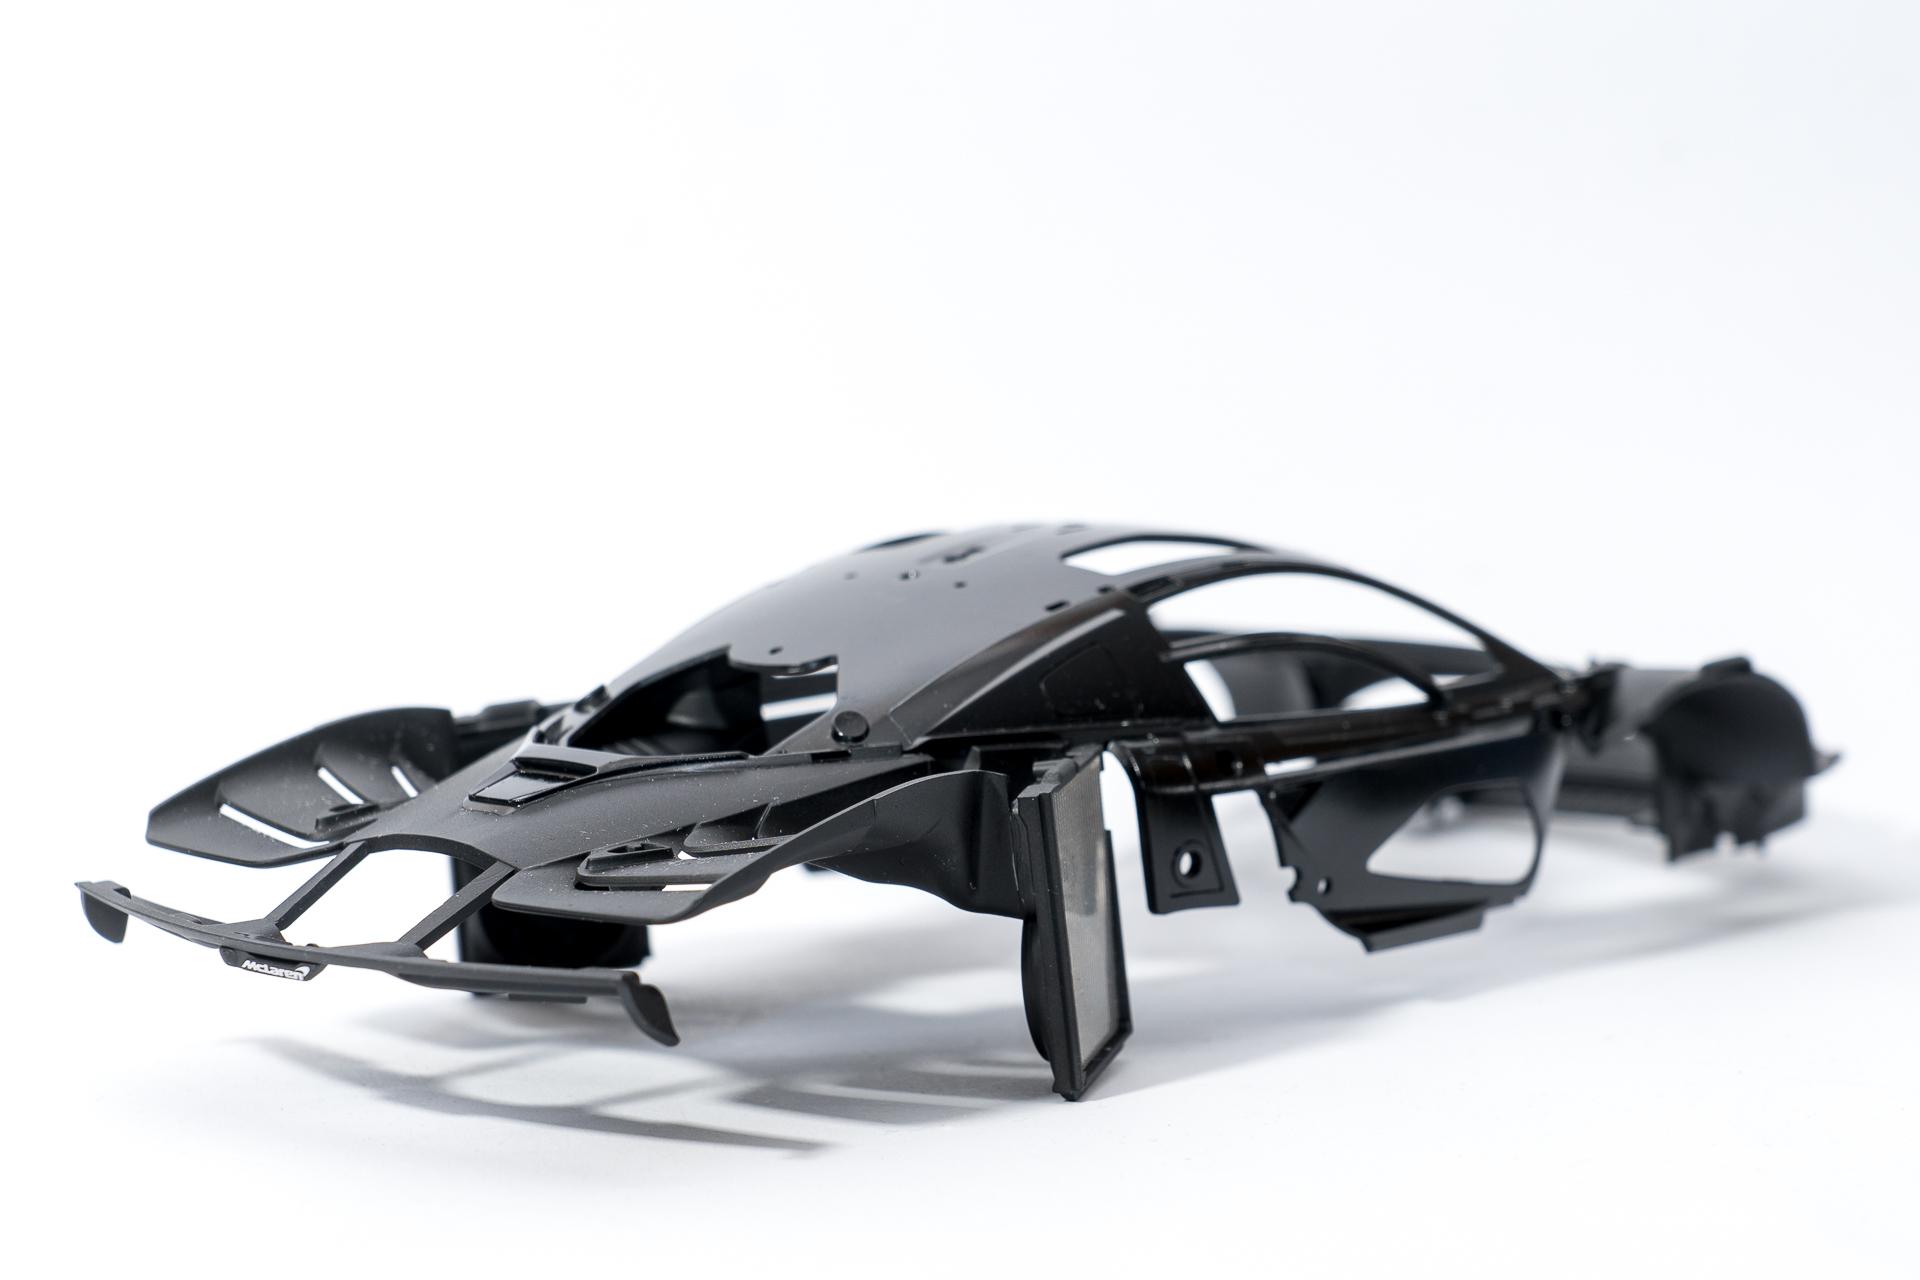
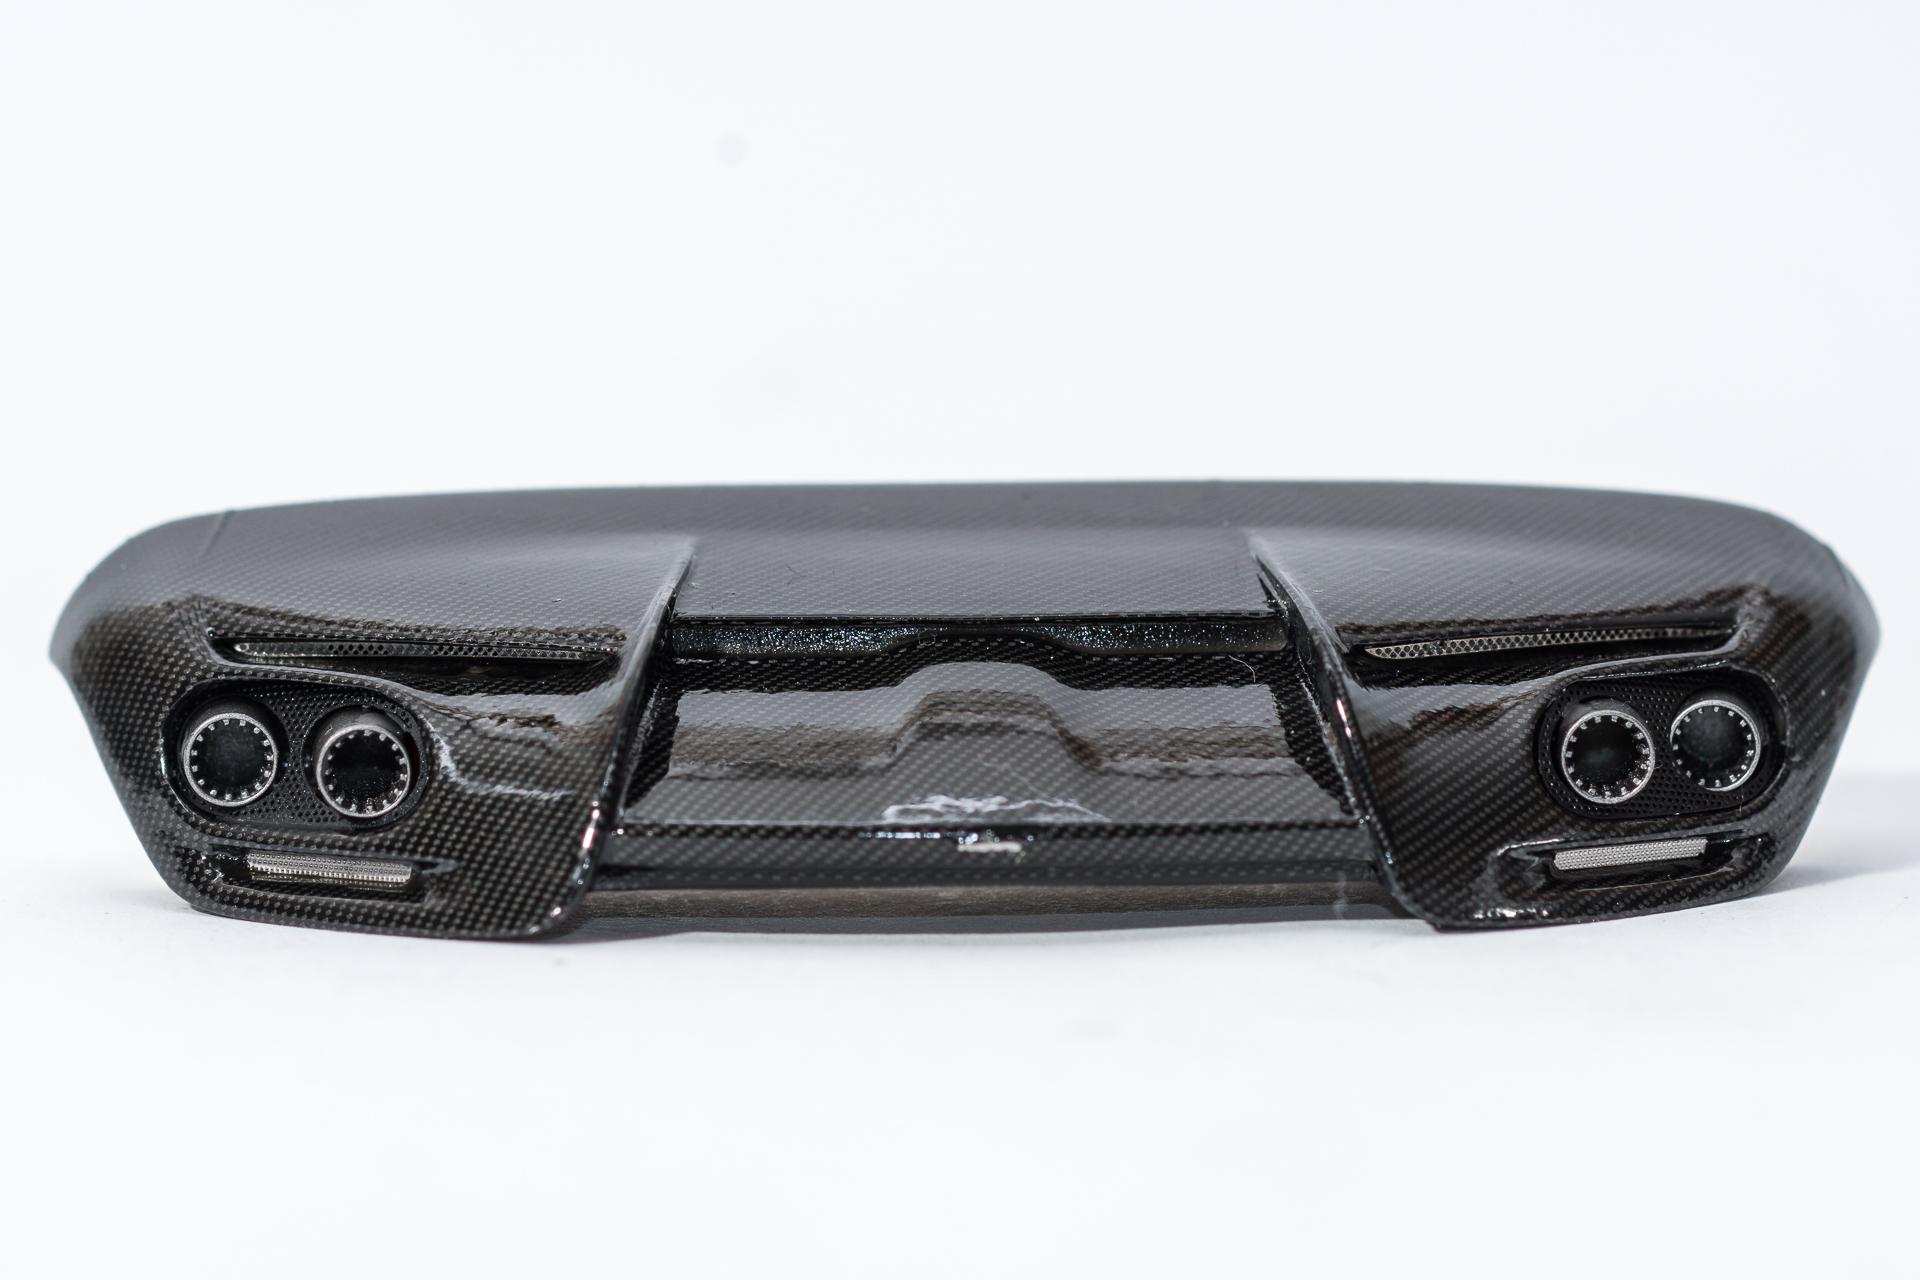
Hi all After having finished the Morgan and a Shelby Mustang it was time to continue with my McLaren Senna. In my opening post I wrote, that I didn't manage to add CF decals to one part at the back of the car. As this very part is quite large and therefore will be noticed if not decalled, it was crucial for this build to get this covered. Otherwise I would have had to switch to another color scheme for this build. So I first tried to finish this part. For this reason I made my own stencils a few weeks (or months, I don't really remember exactly) ago. Last weekend I tried it and was quite successful. The difficult spots are the ones in southwest, resp. southeast direction from the silver exhaust opening in this picture. The curve is so extreme that it's almost impossible to cover it completely. There is a small triangular spot on each side where there is no decal, but for the moment I can live with that. If necessary I think it would also be possible to cover that up with small patches. As this part turned out so well, I decided to continue with more CF decal work on more body parts and finished some of the front parts Then I masked off the monocoque and painted the upper part in gloss black. After that the first metallic sticker and the PE grilles have been applied. That's it for today. I think that now, where the most complicated part (at least on the exterior) has been completed, the updates will follow in a more timely manner Urs

-
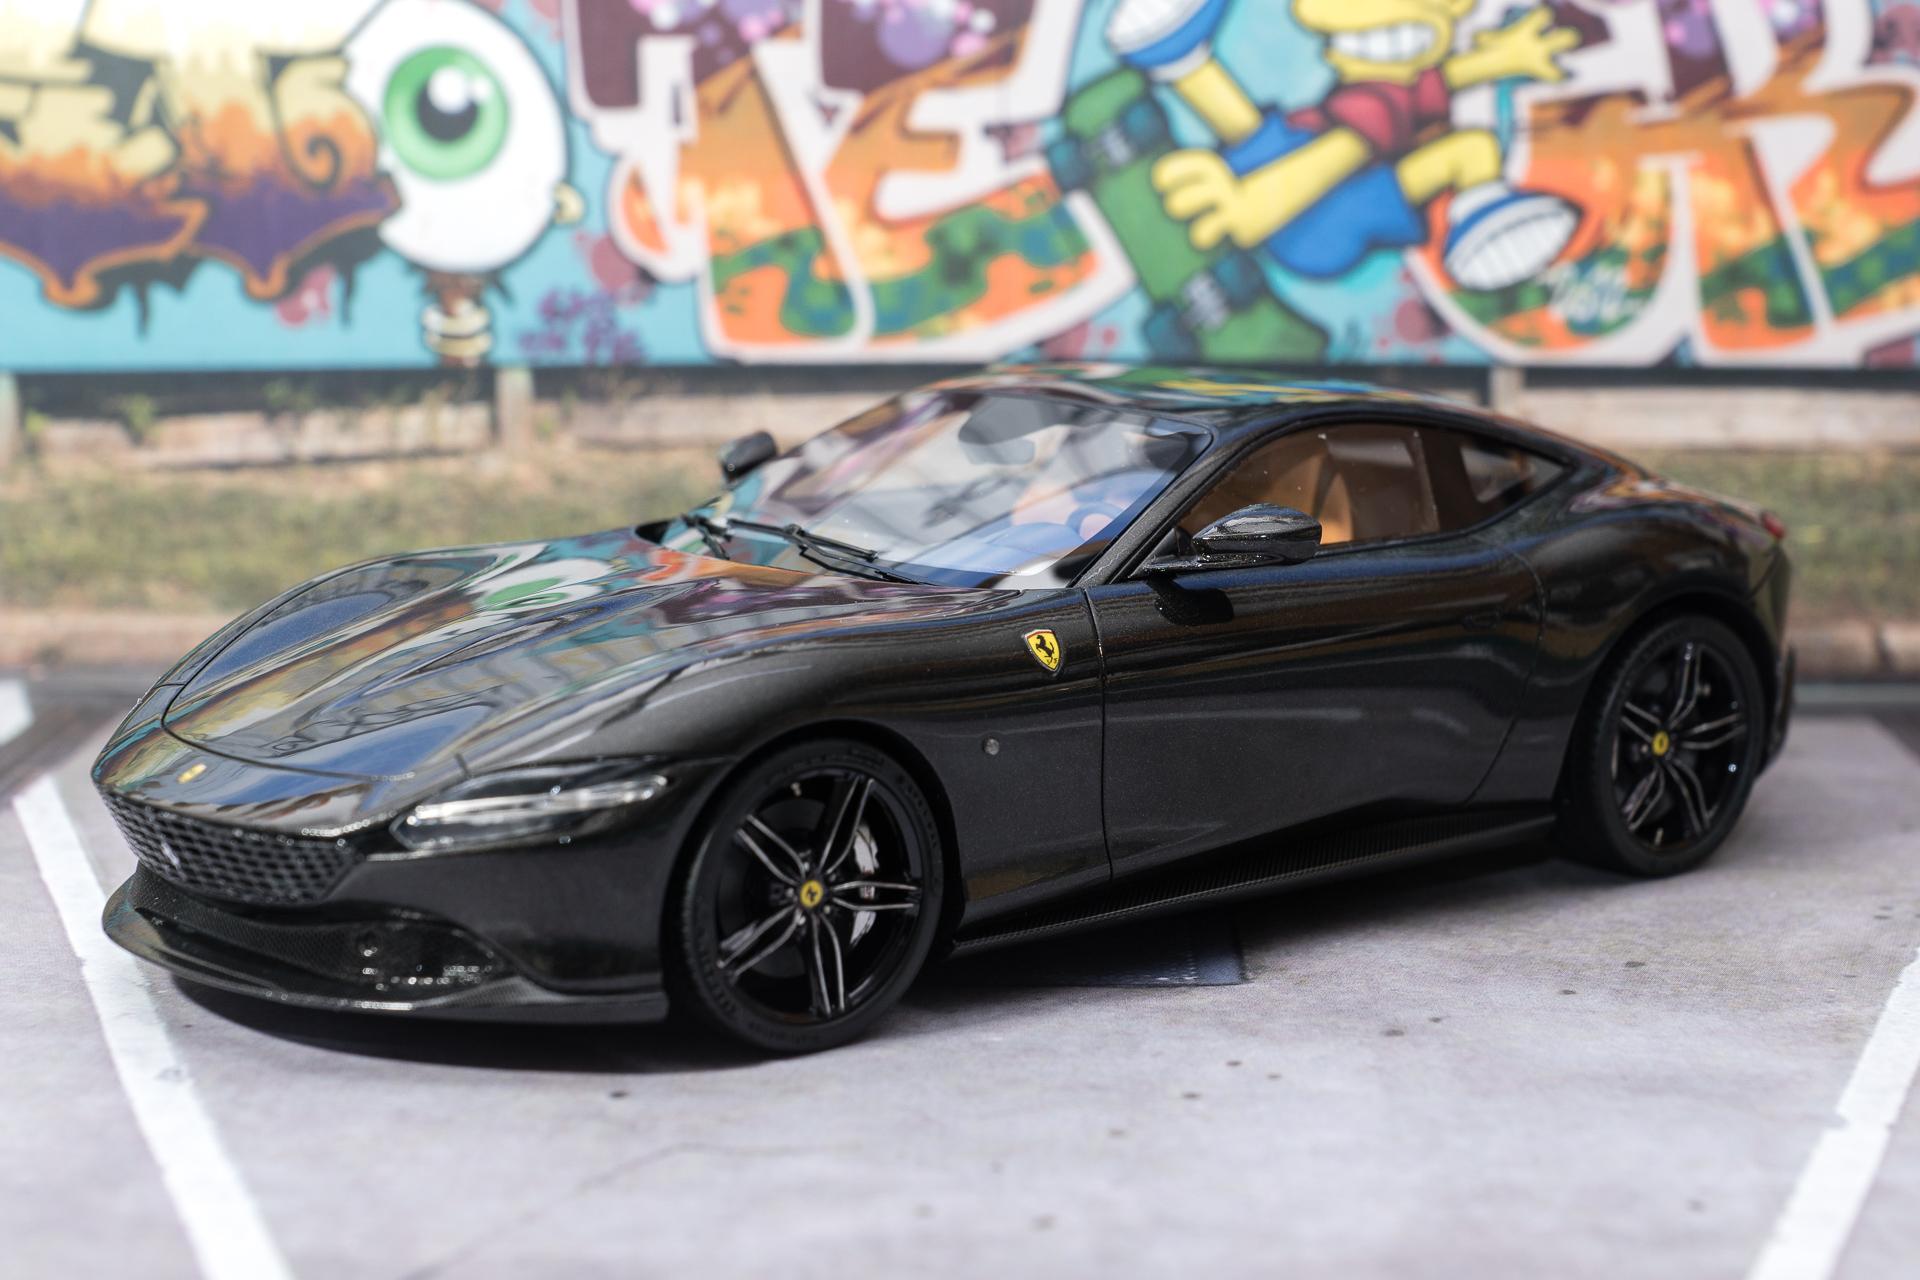
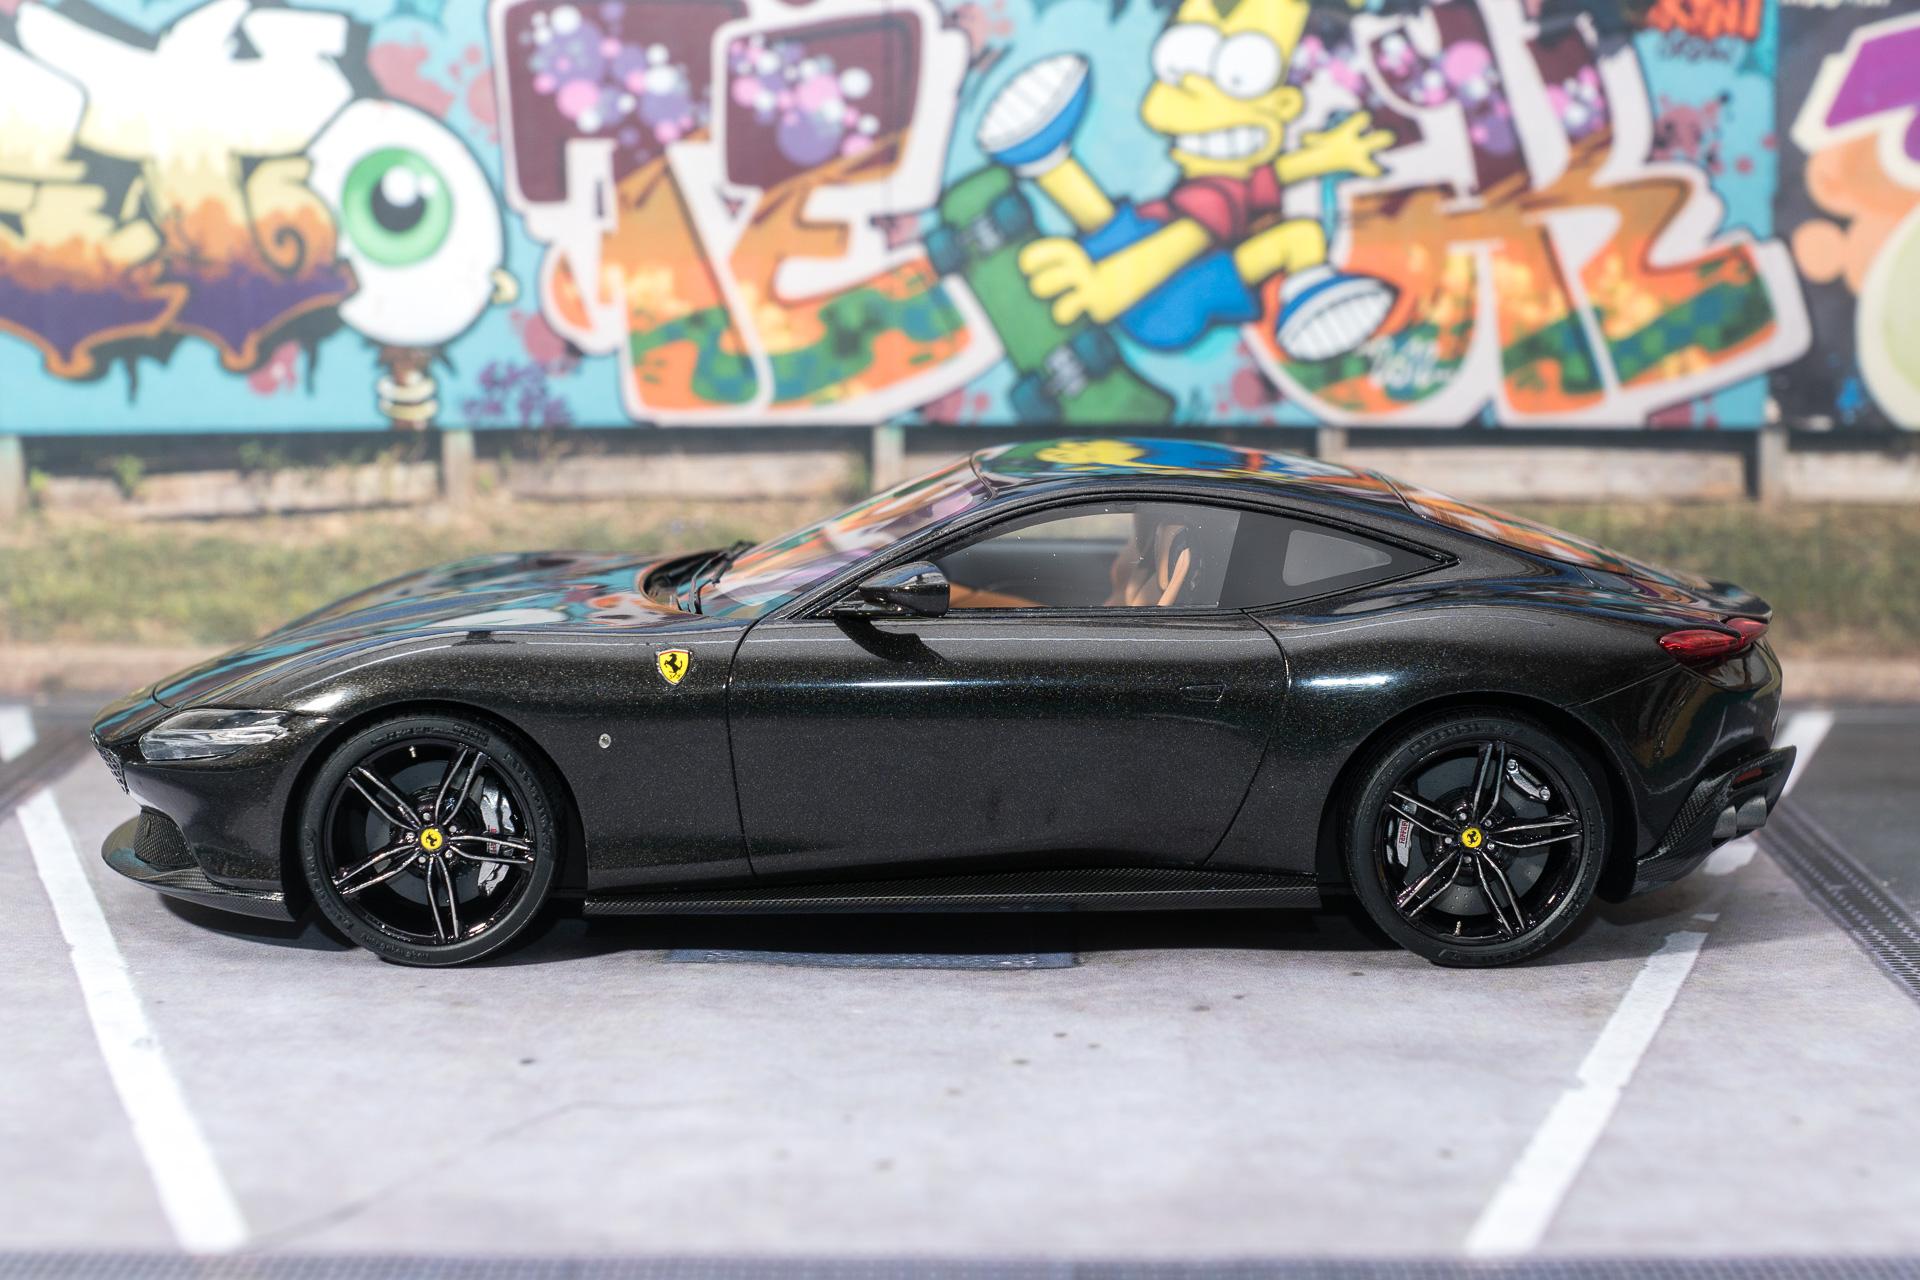
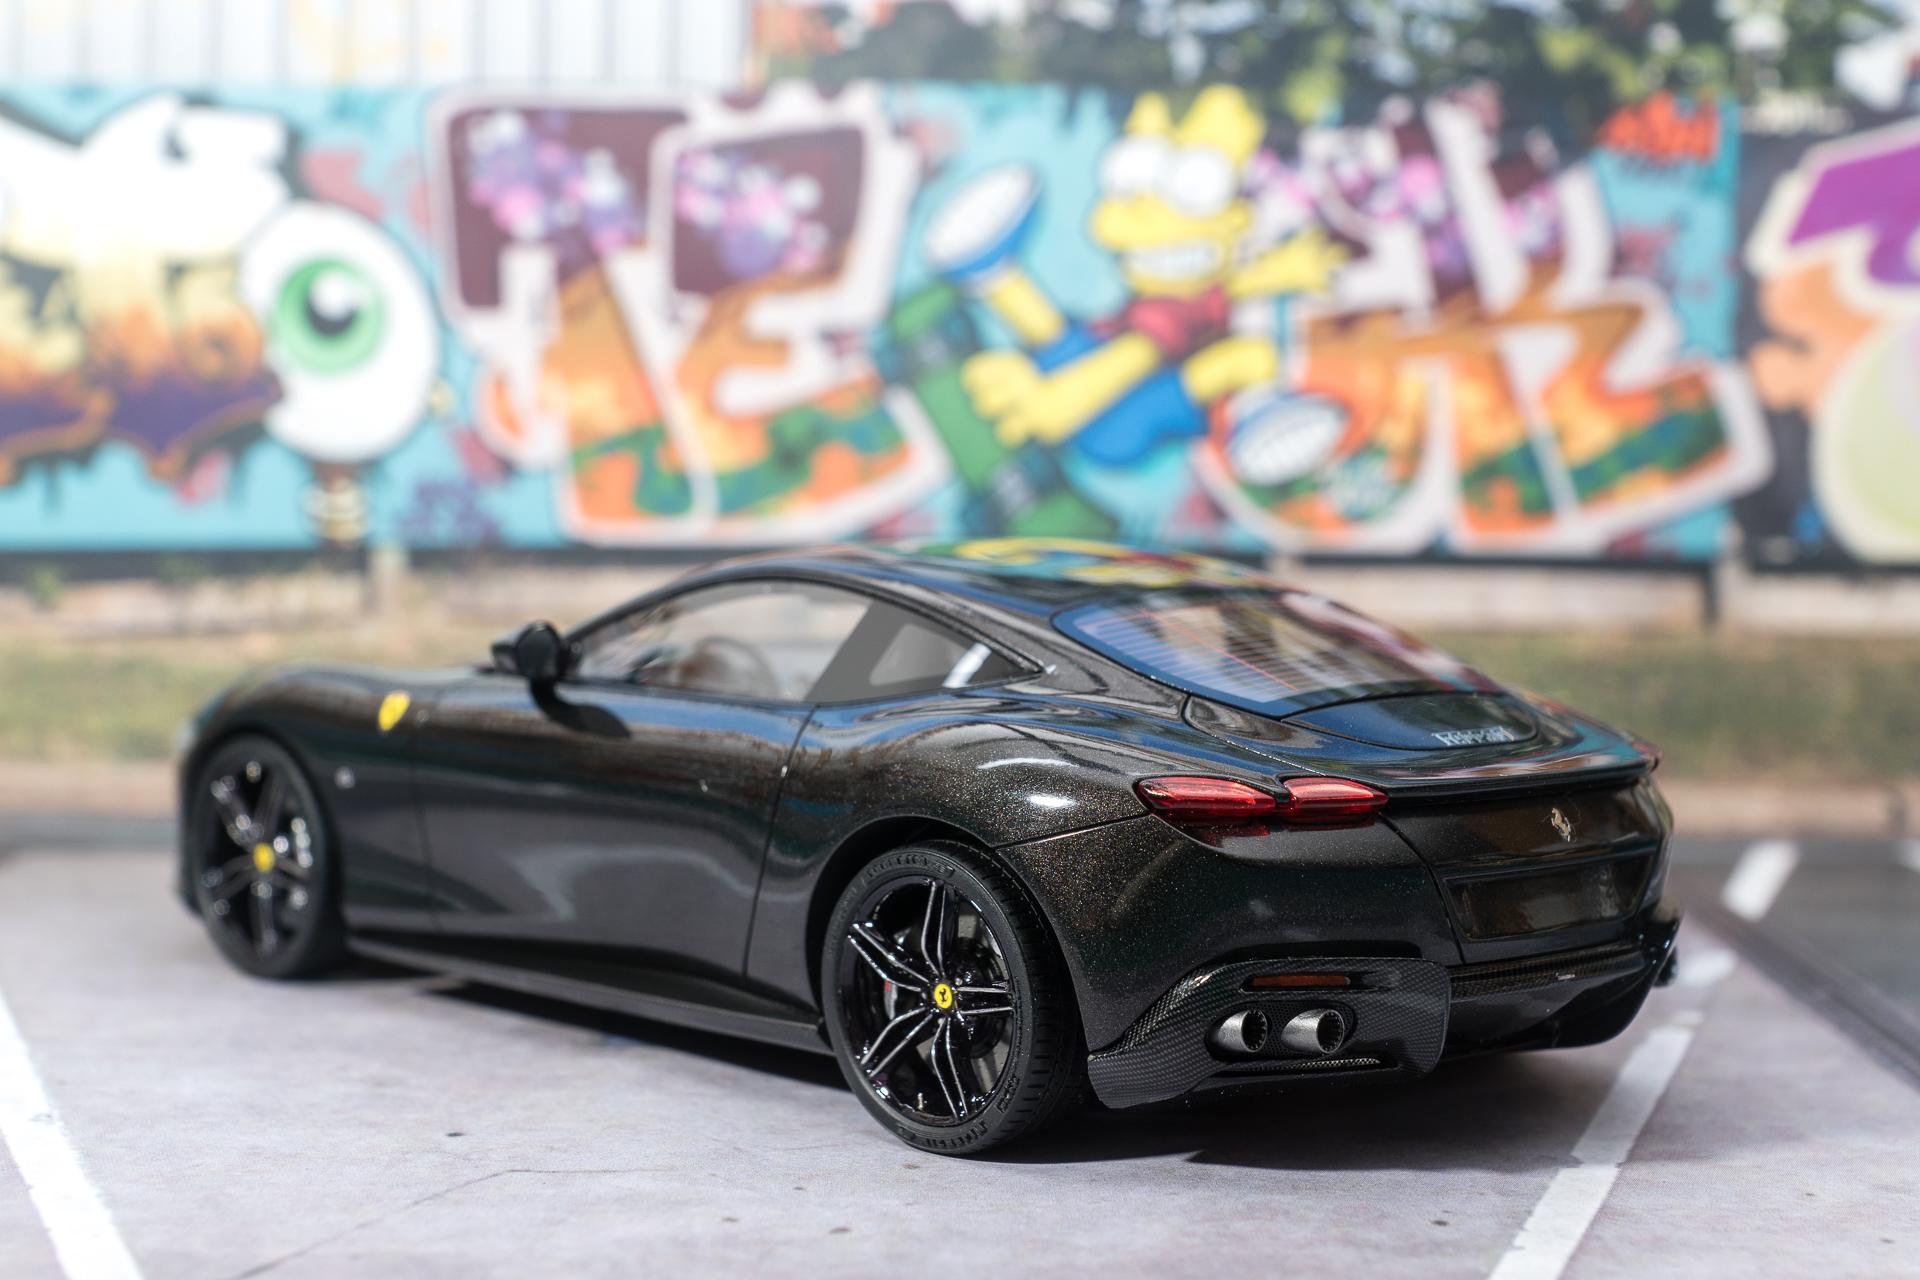
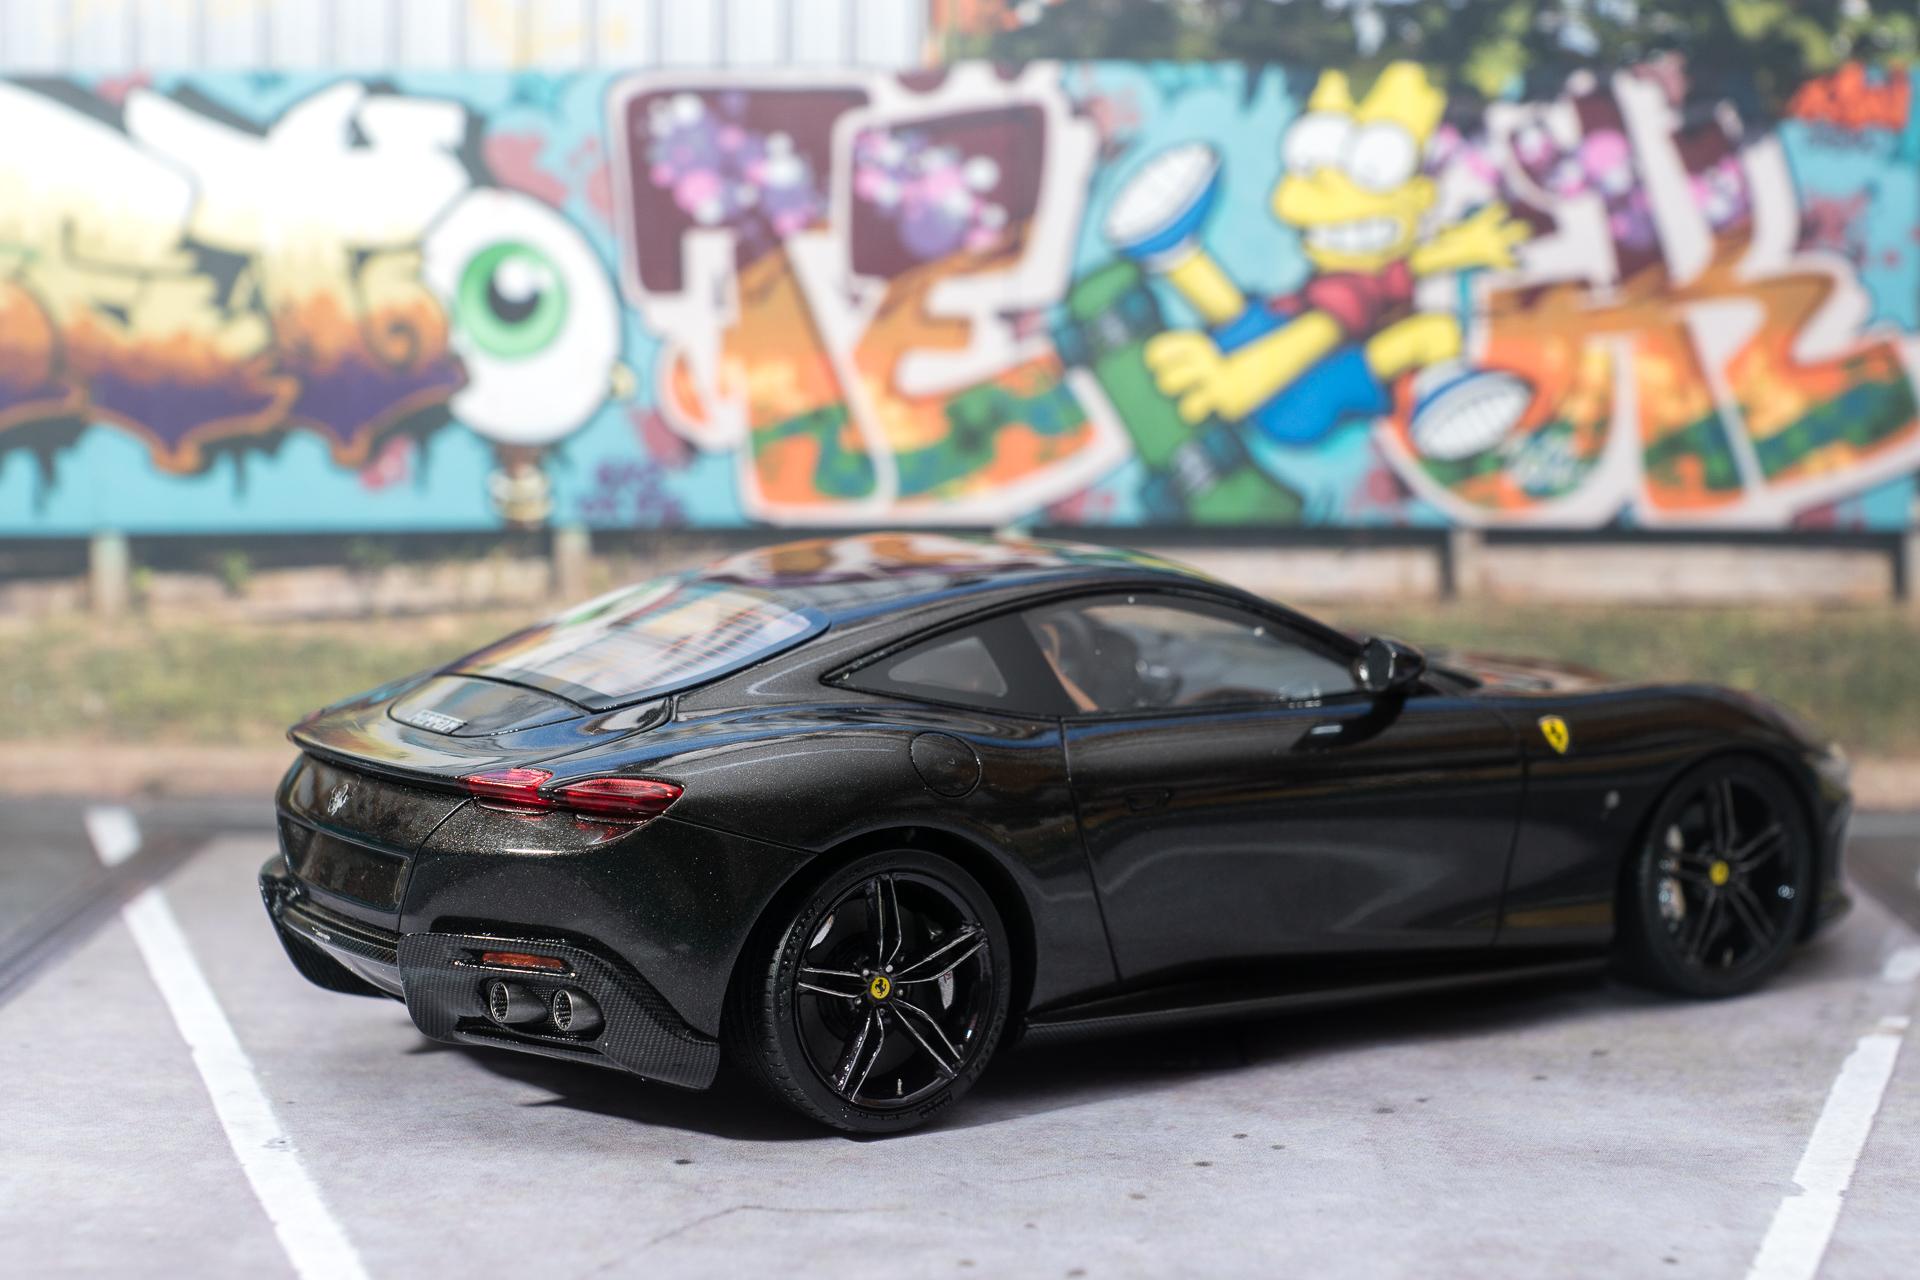
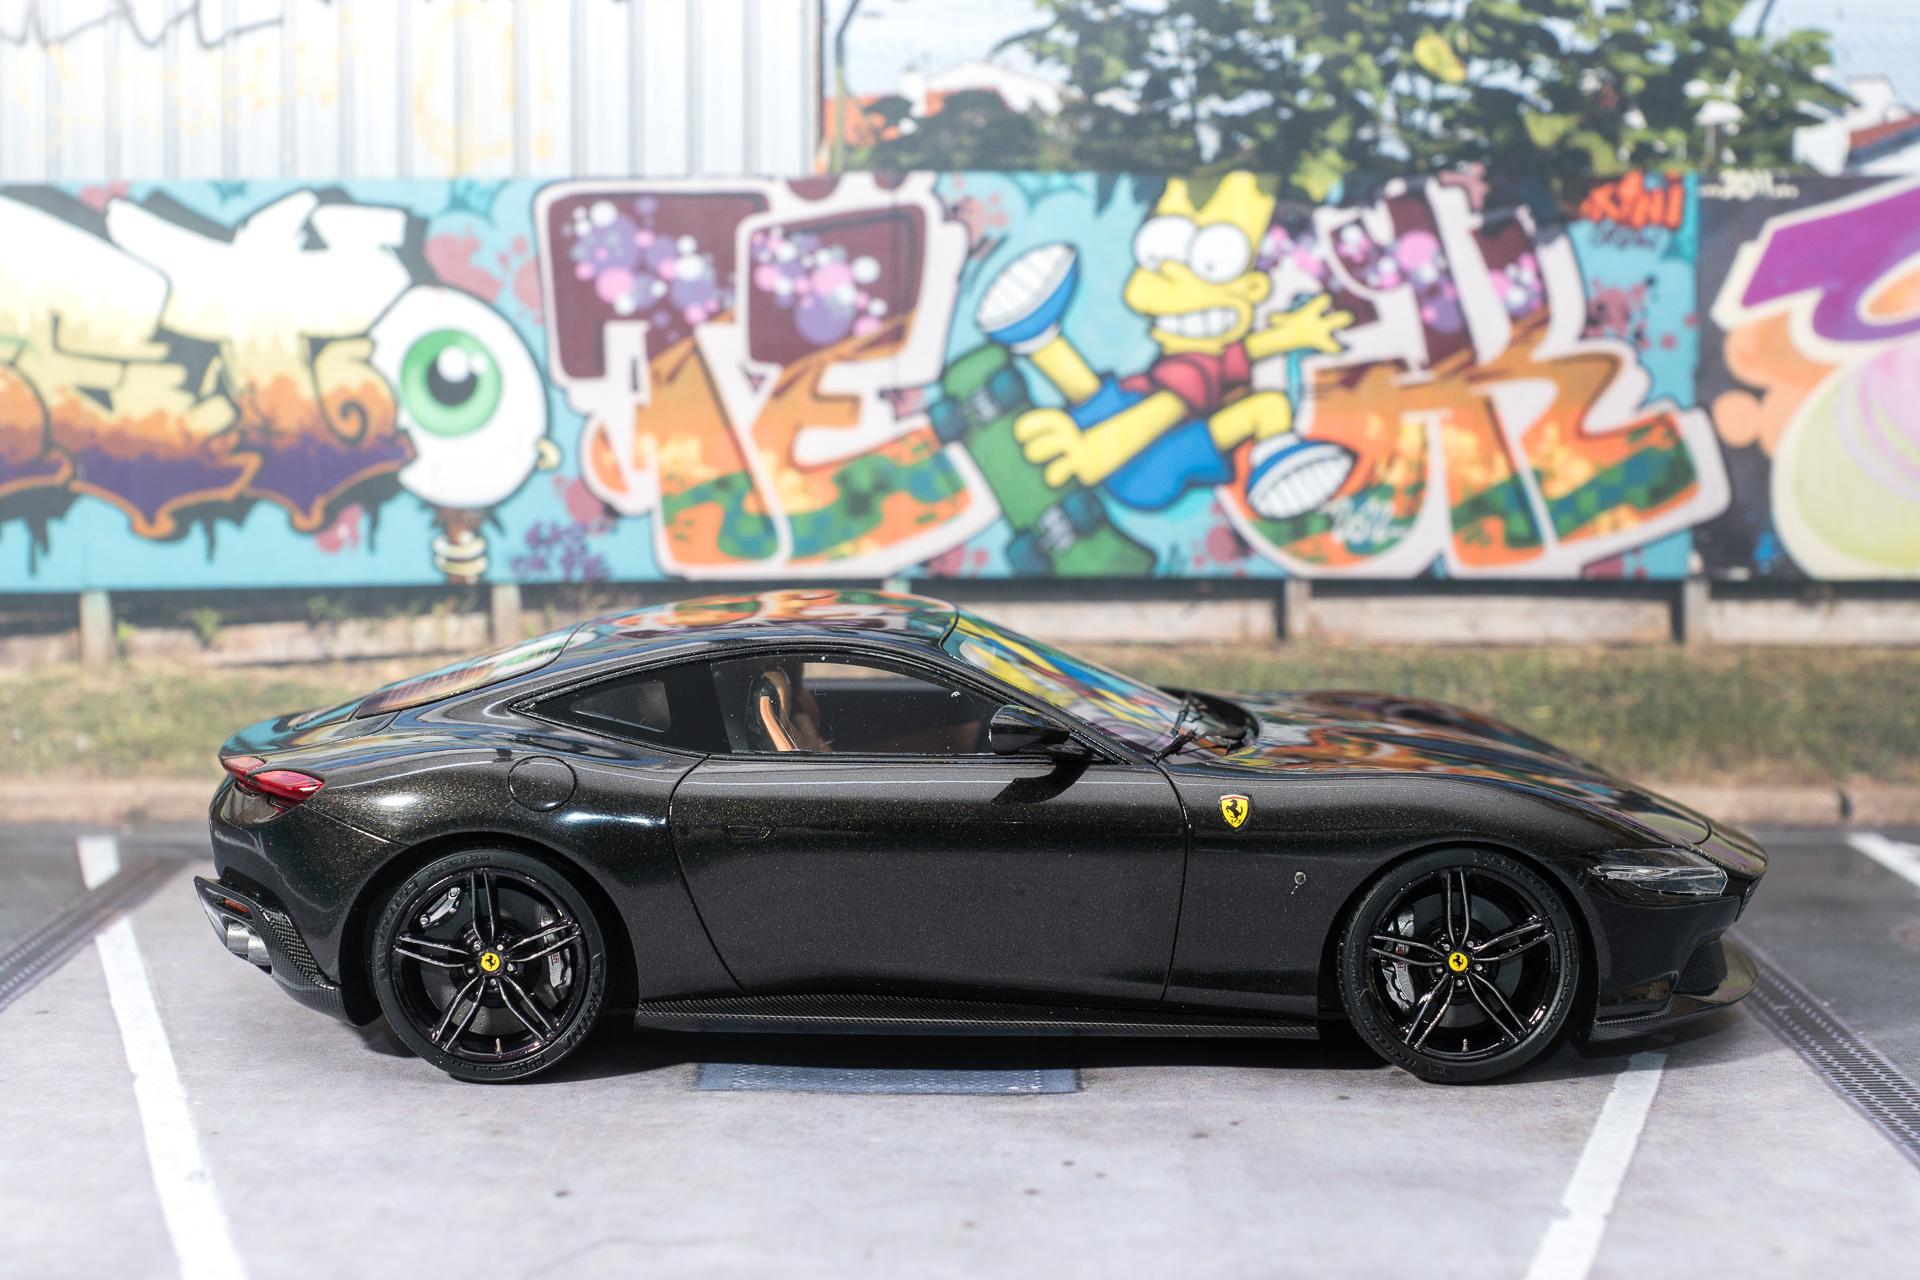
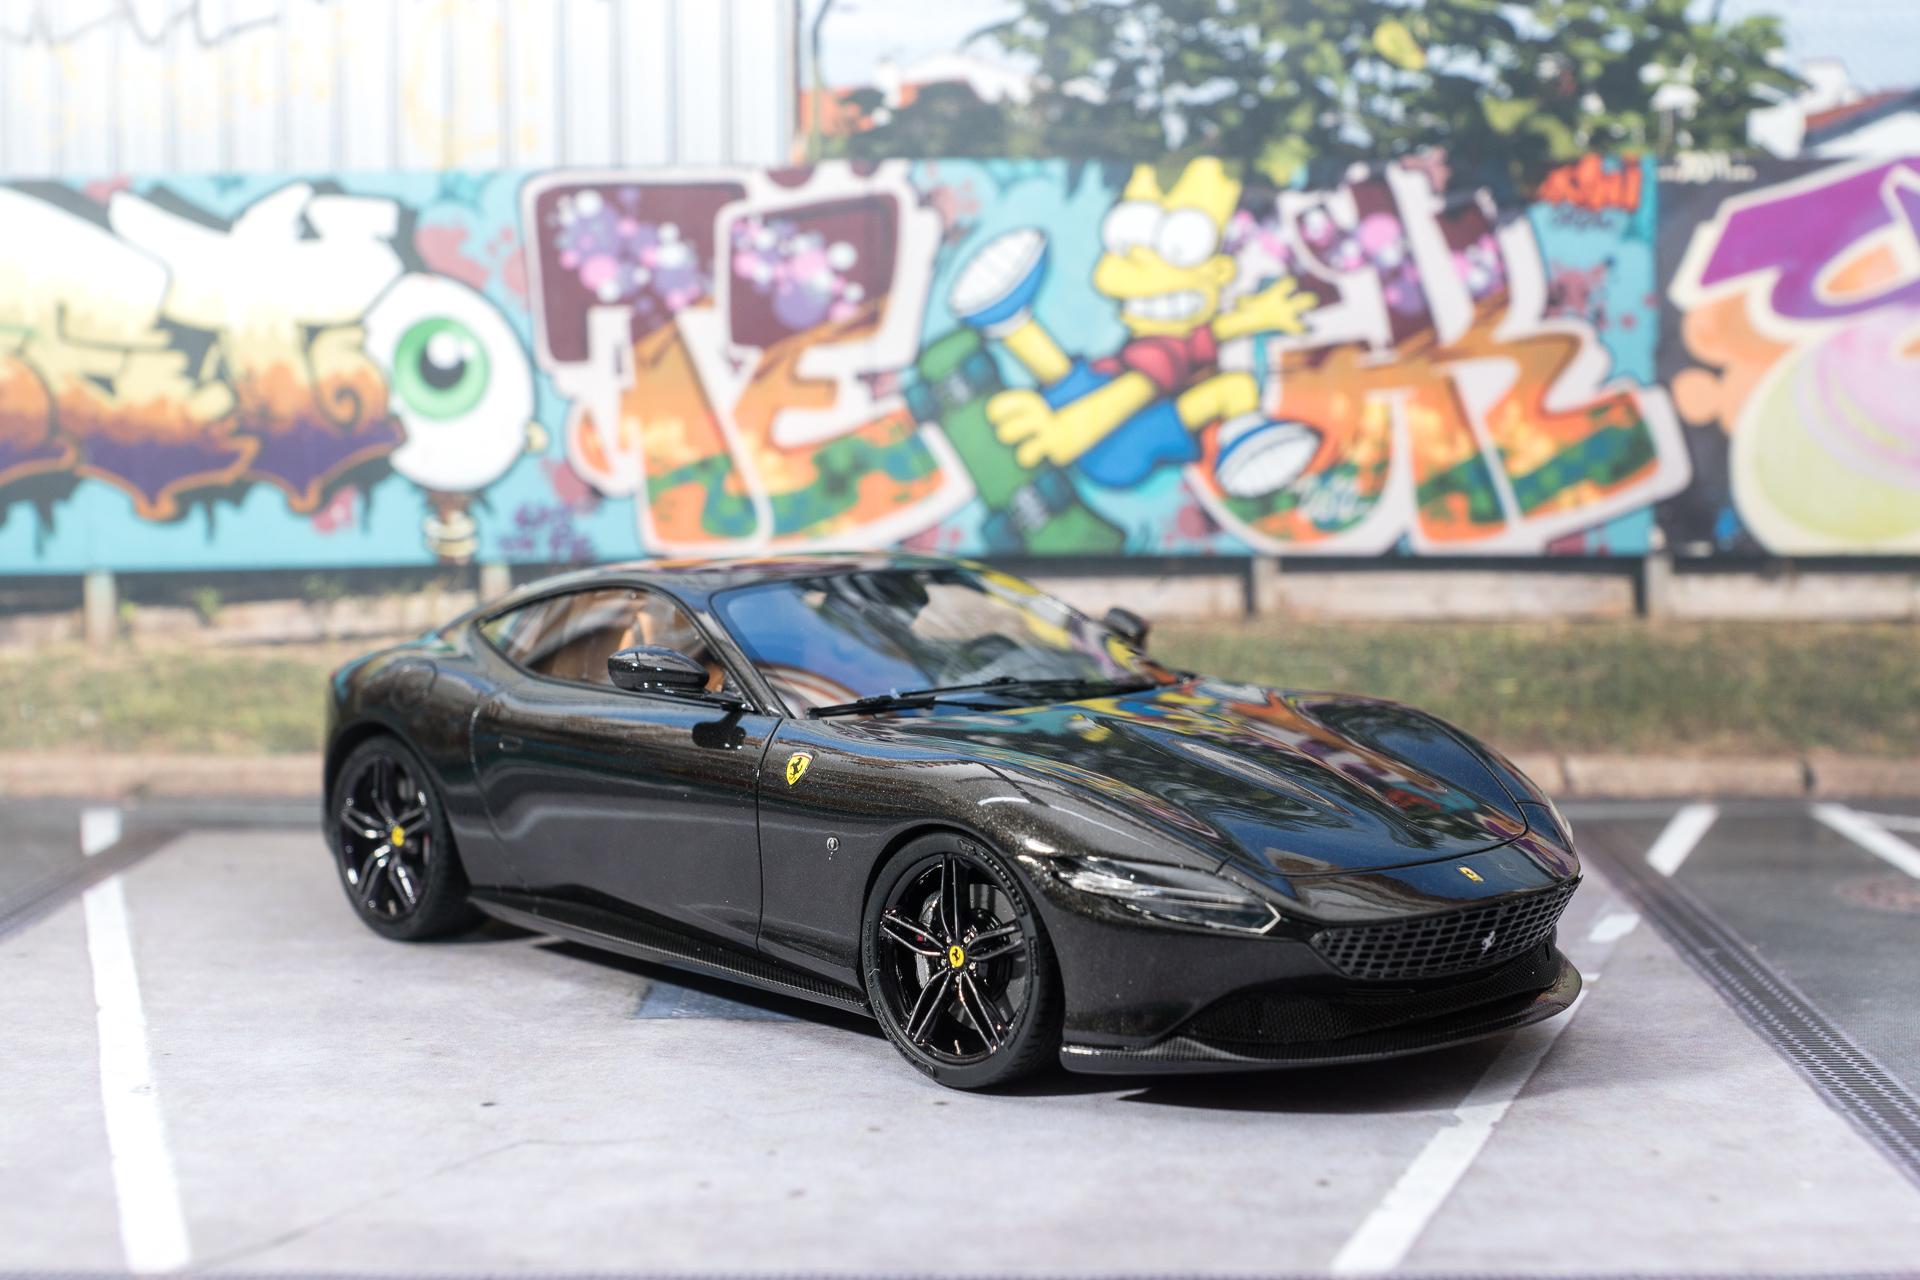
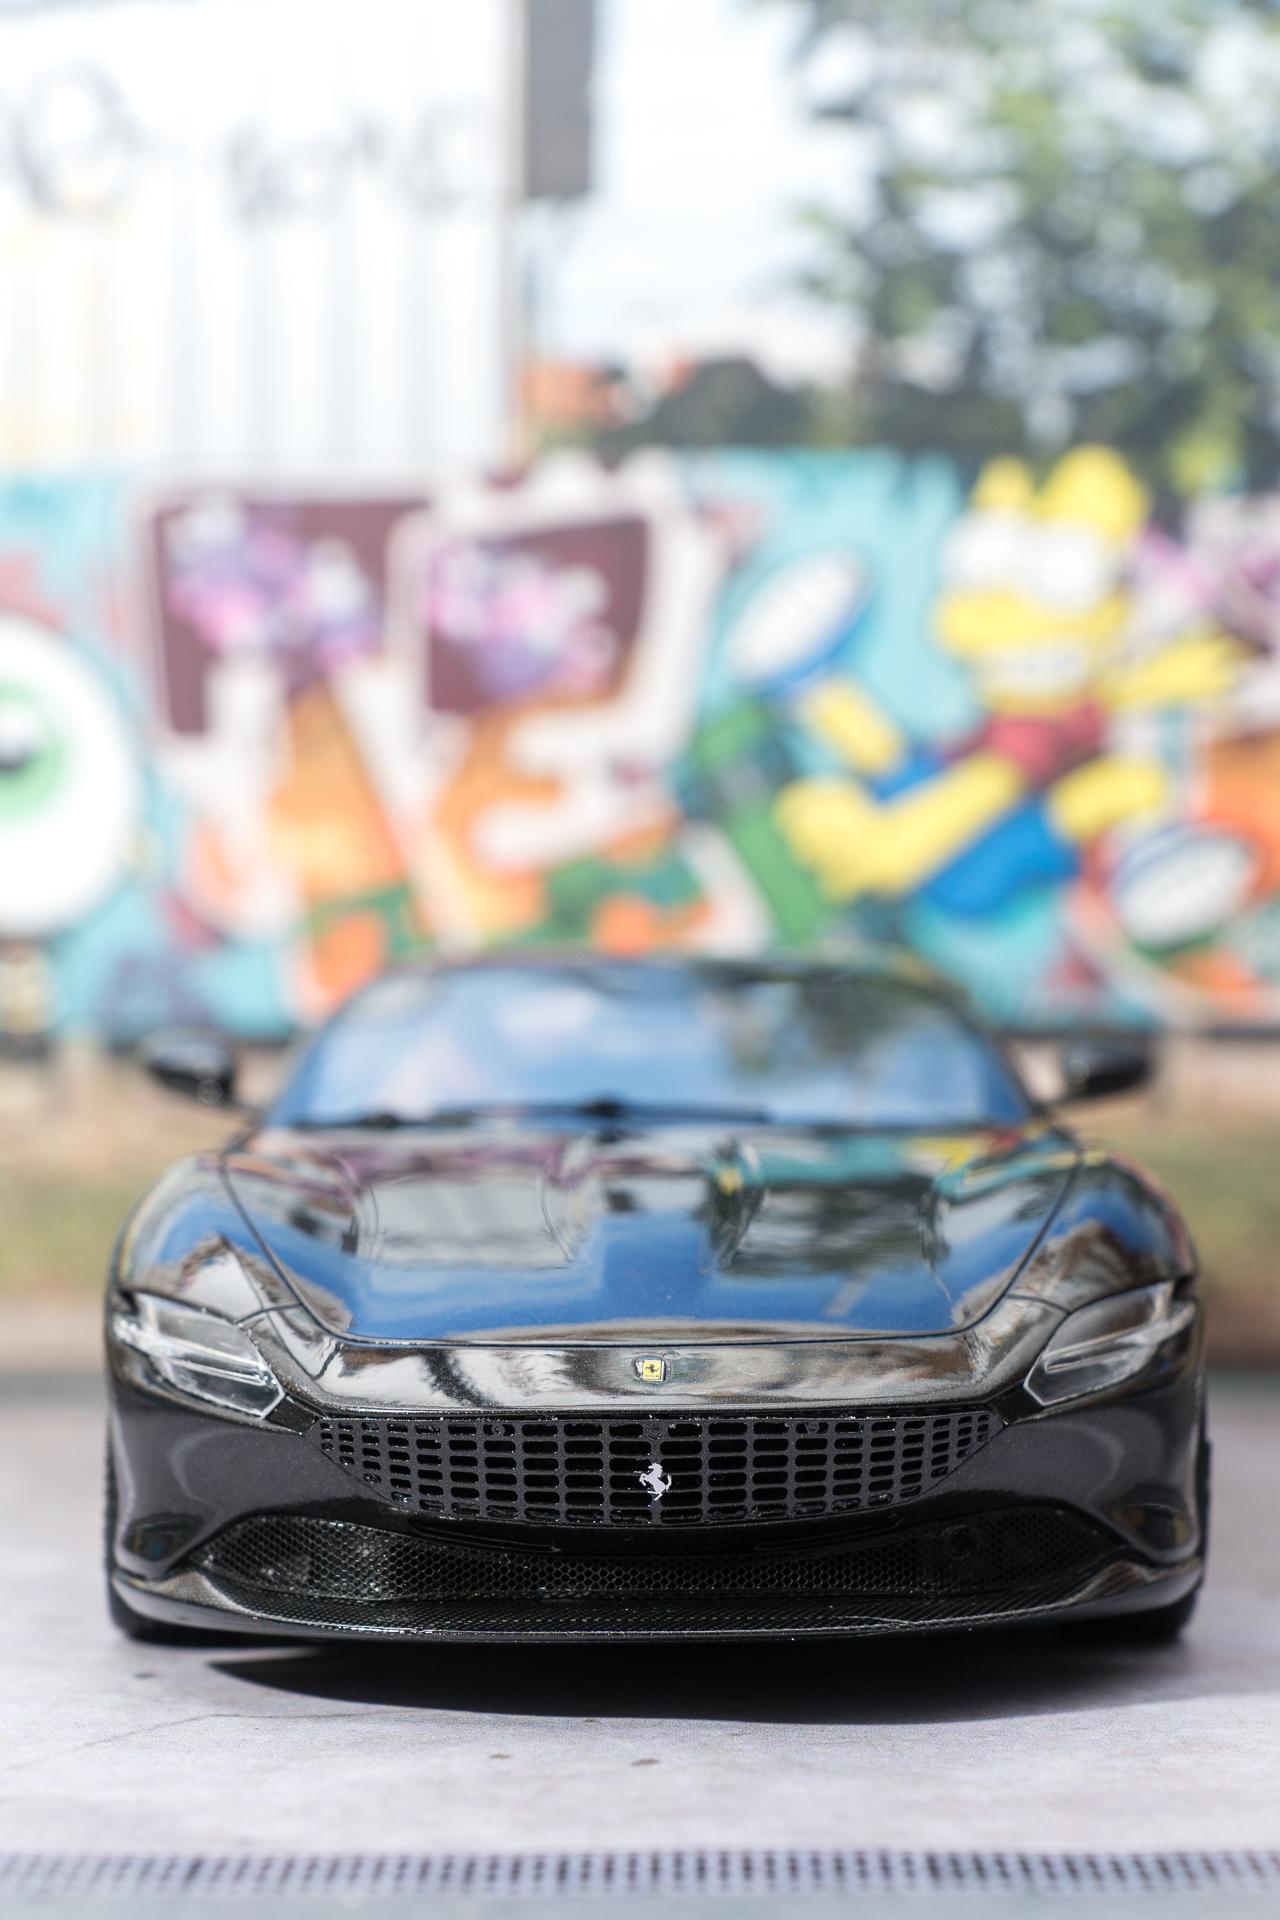
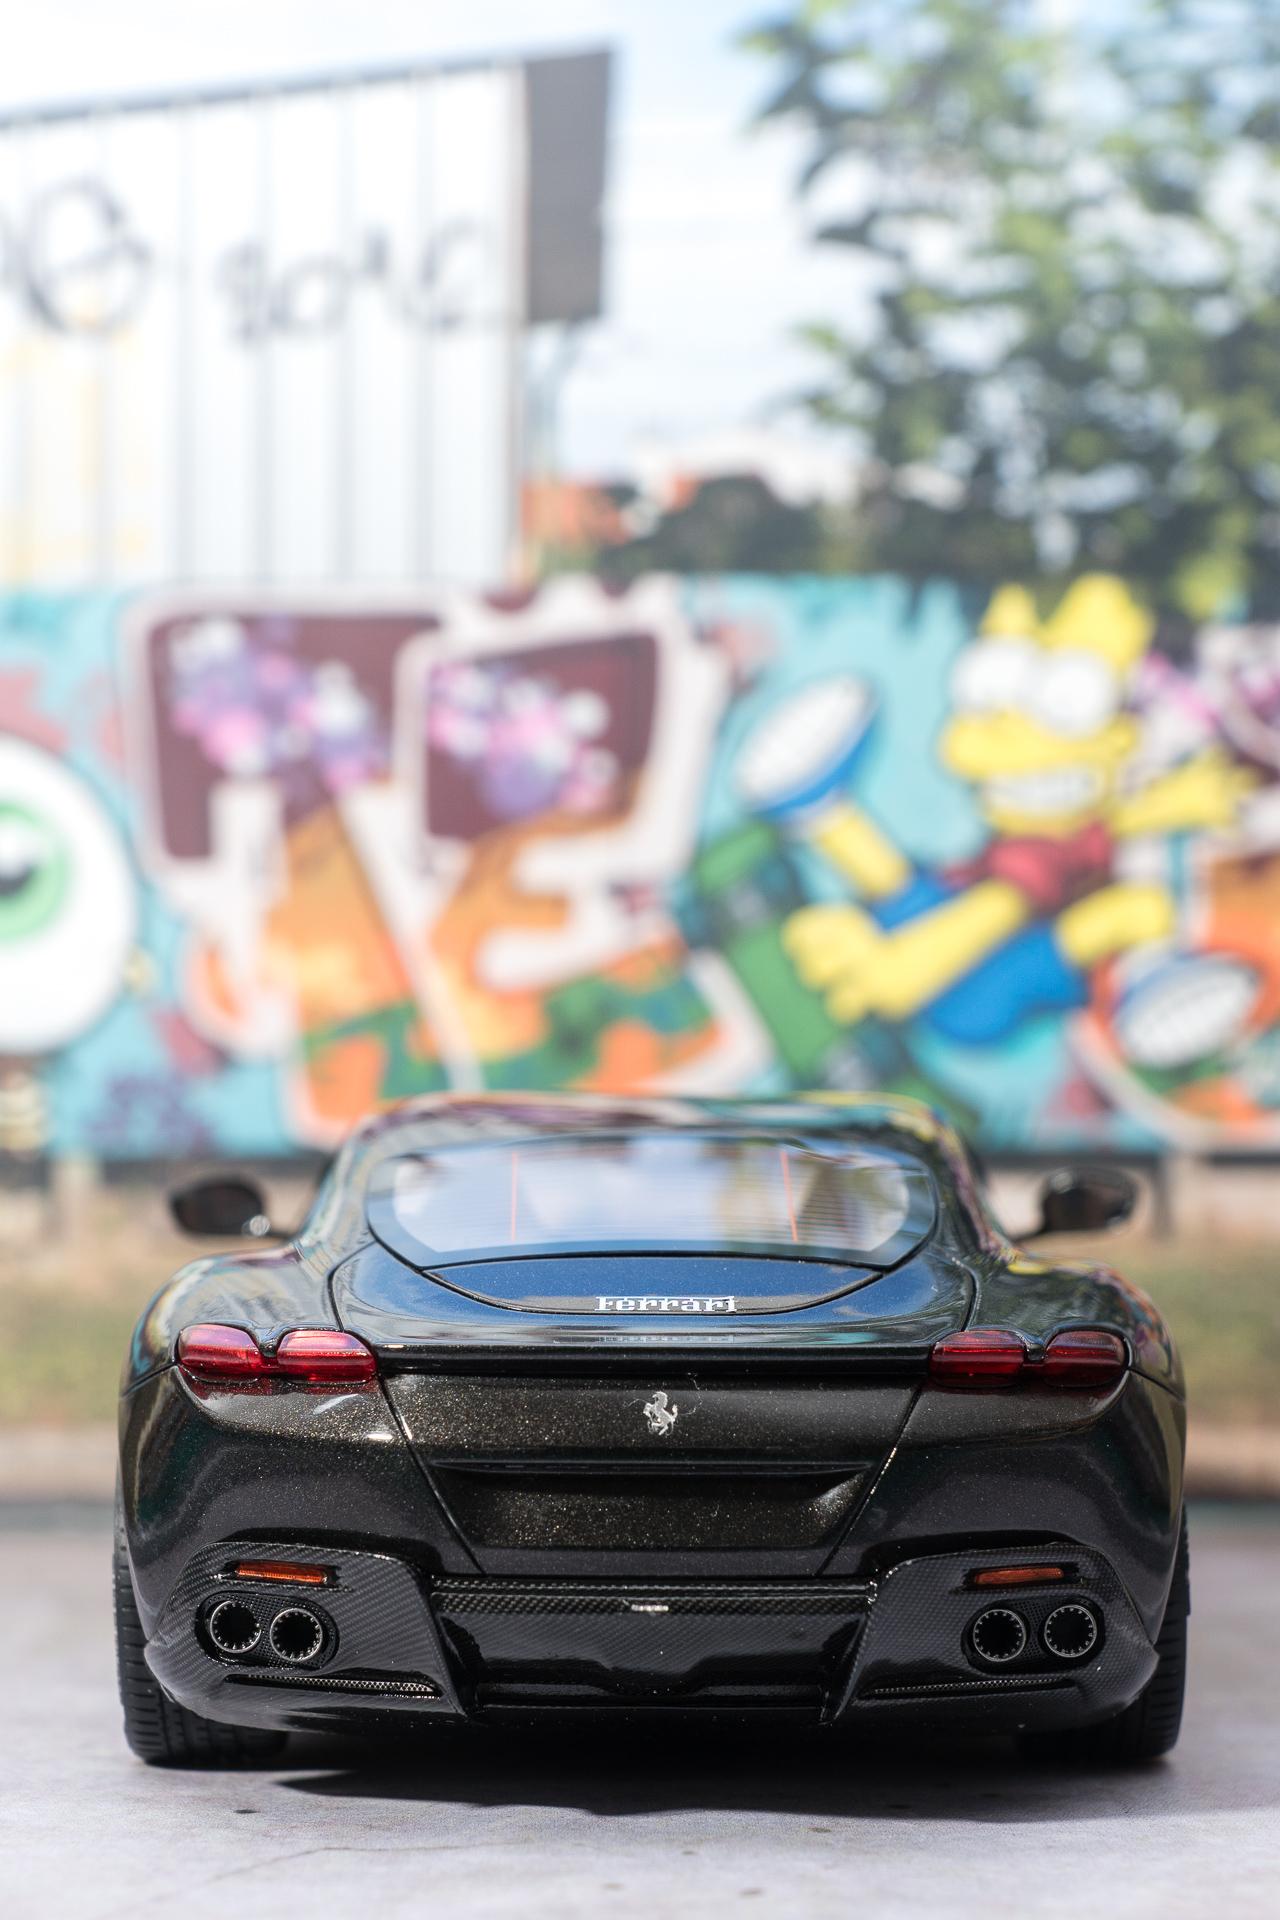
Hi all Thank you very much for all your kind comments As I mentioned in my last update on Good Friday, there was a relatively high probability that I would be able to finish the Roma over Easter. In fact, I was able to fit the last parts this afternoon and complete the build. The assembly was actually quite relaxed from A to Z and was a lot of fun. The only exceptions were (as usual for me with the alpha model kits) the windshield wipers, where I still haven't found a clever recipe for how to assemble them, and the underbody. However, the problems with the underbody were self-inflicted, so I should have known better. Traditionally, the underbody of the alpha model kits is attached with screws. Just as traditionally, however, the holes in the body provided for this purpose are firstly too narrow and secondly too short for the screws supplied. As I'm always worried that the body might crack if I just throw the screws in, I always drill them out a little. Of course, I only think of this when the underbody needs to be attached, i.e. at the very end. One of the last things I did today was to widen the holes and fit the underbody. While drilling, I kept removing the chips from the drill bit and blowing away the loose ones. After the car was back on its wheels, I noticed drilling residues on the windshield, so I took the anti-static brush to wipe them away and found that they couldn't be wiped away because they had somehow gotten into the interior and were stuck to the inside of the windshield... 🙄 I didn't dare to wipe the window again, so now I have to live with the yellow resin residues lying around in the interior... But enough talk, here are the pictures of the finished Ferrari Roma. As usual, better ones will follow the next time I was in the studio Urs
-
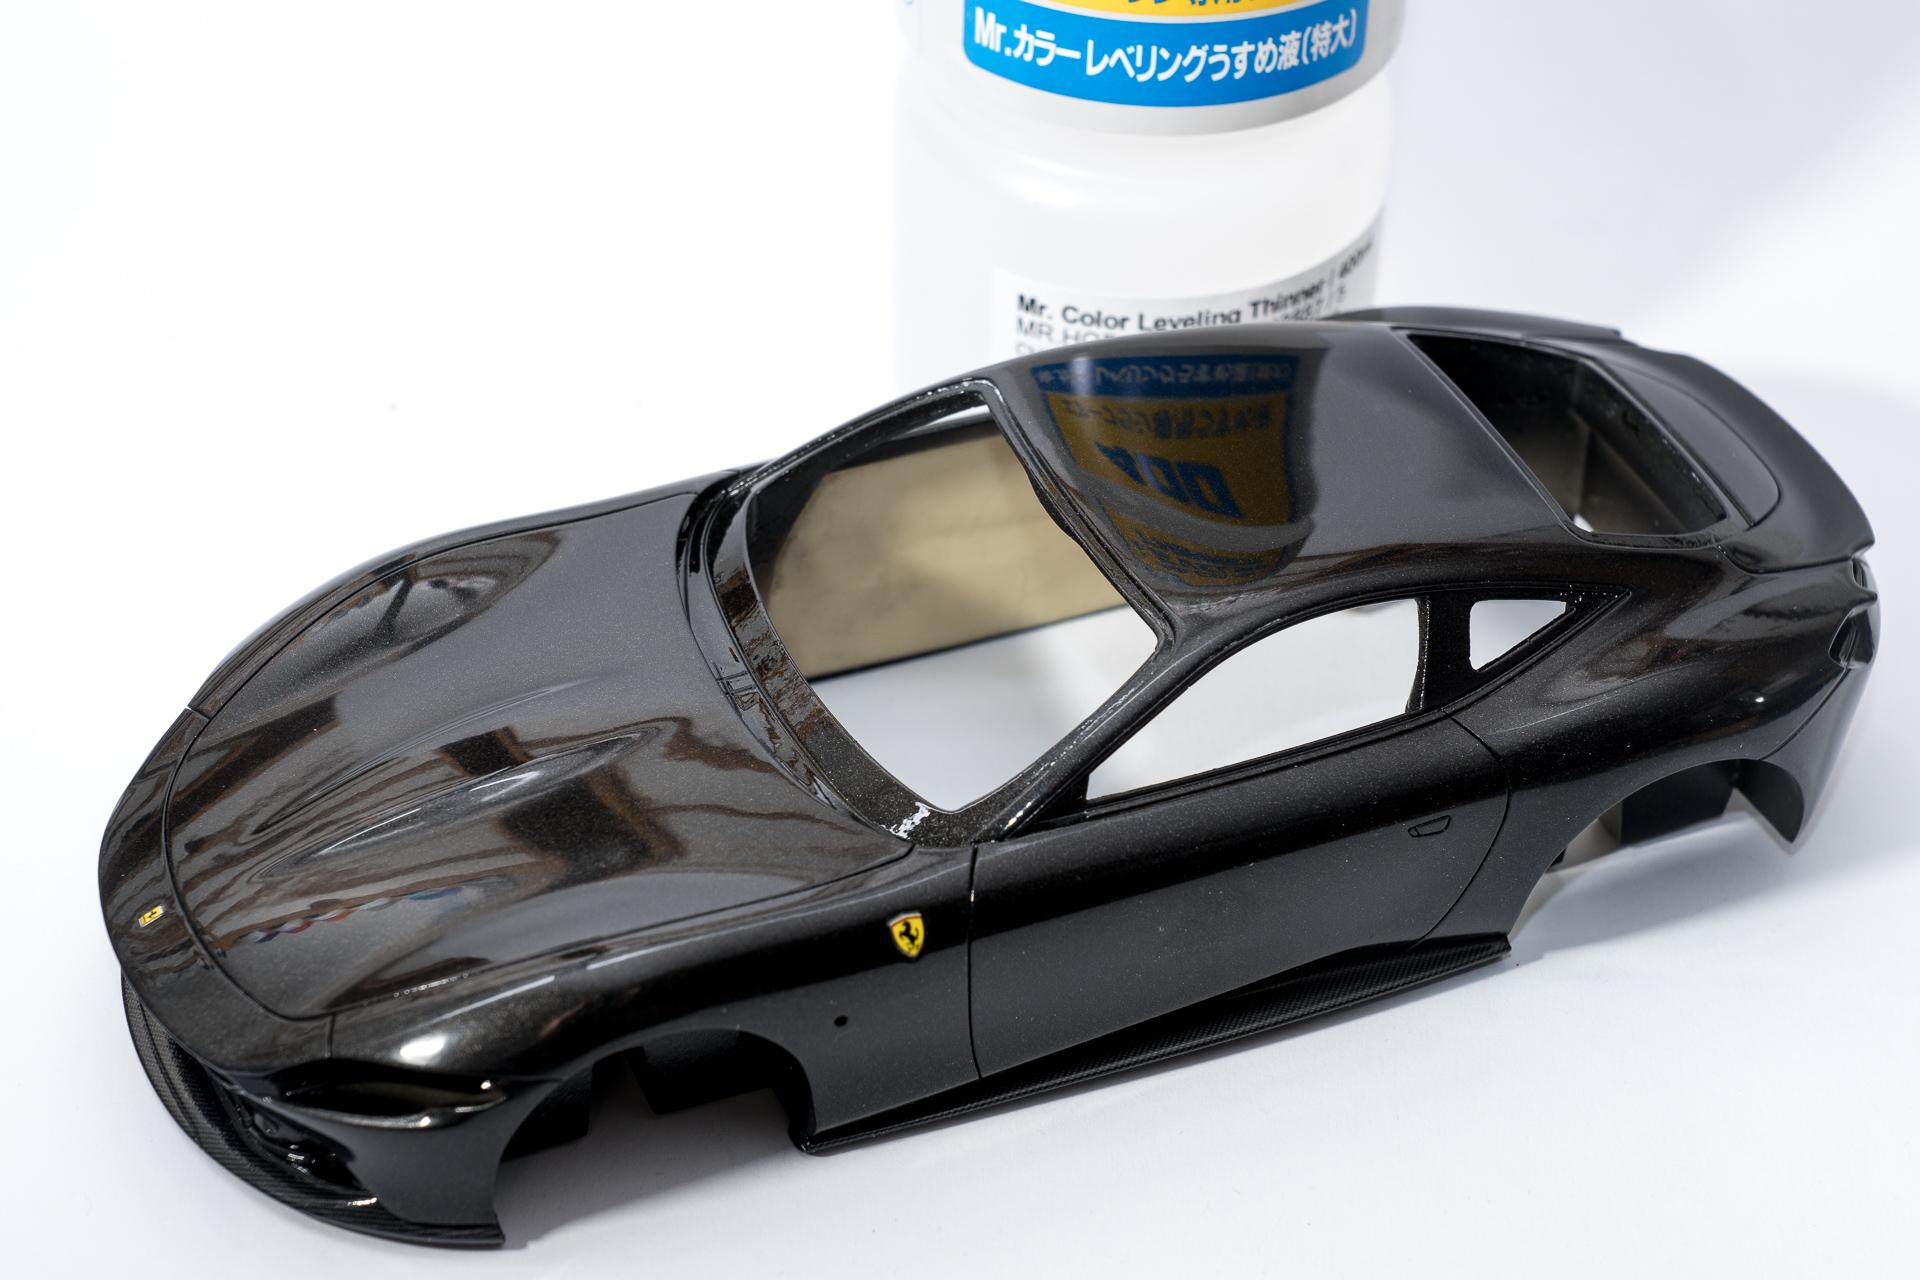
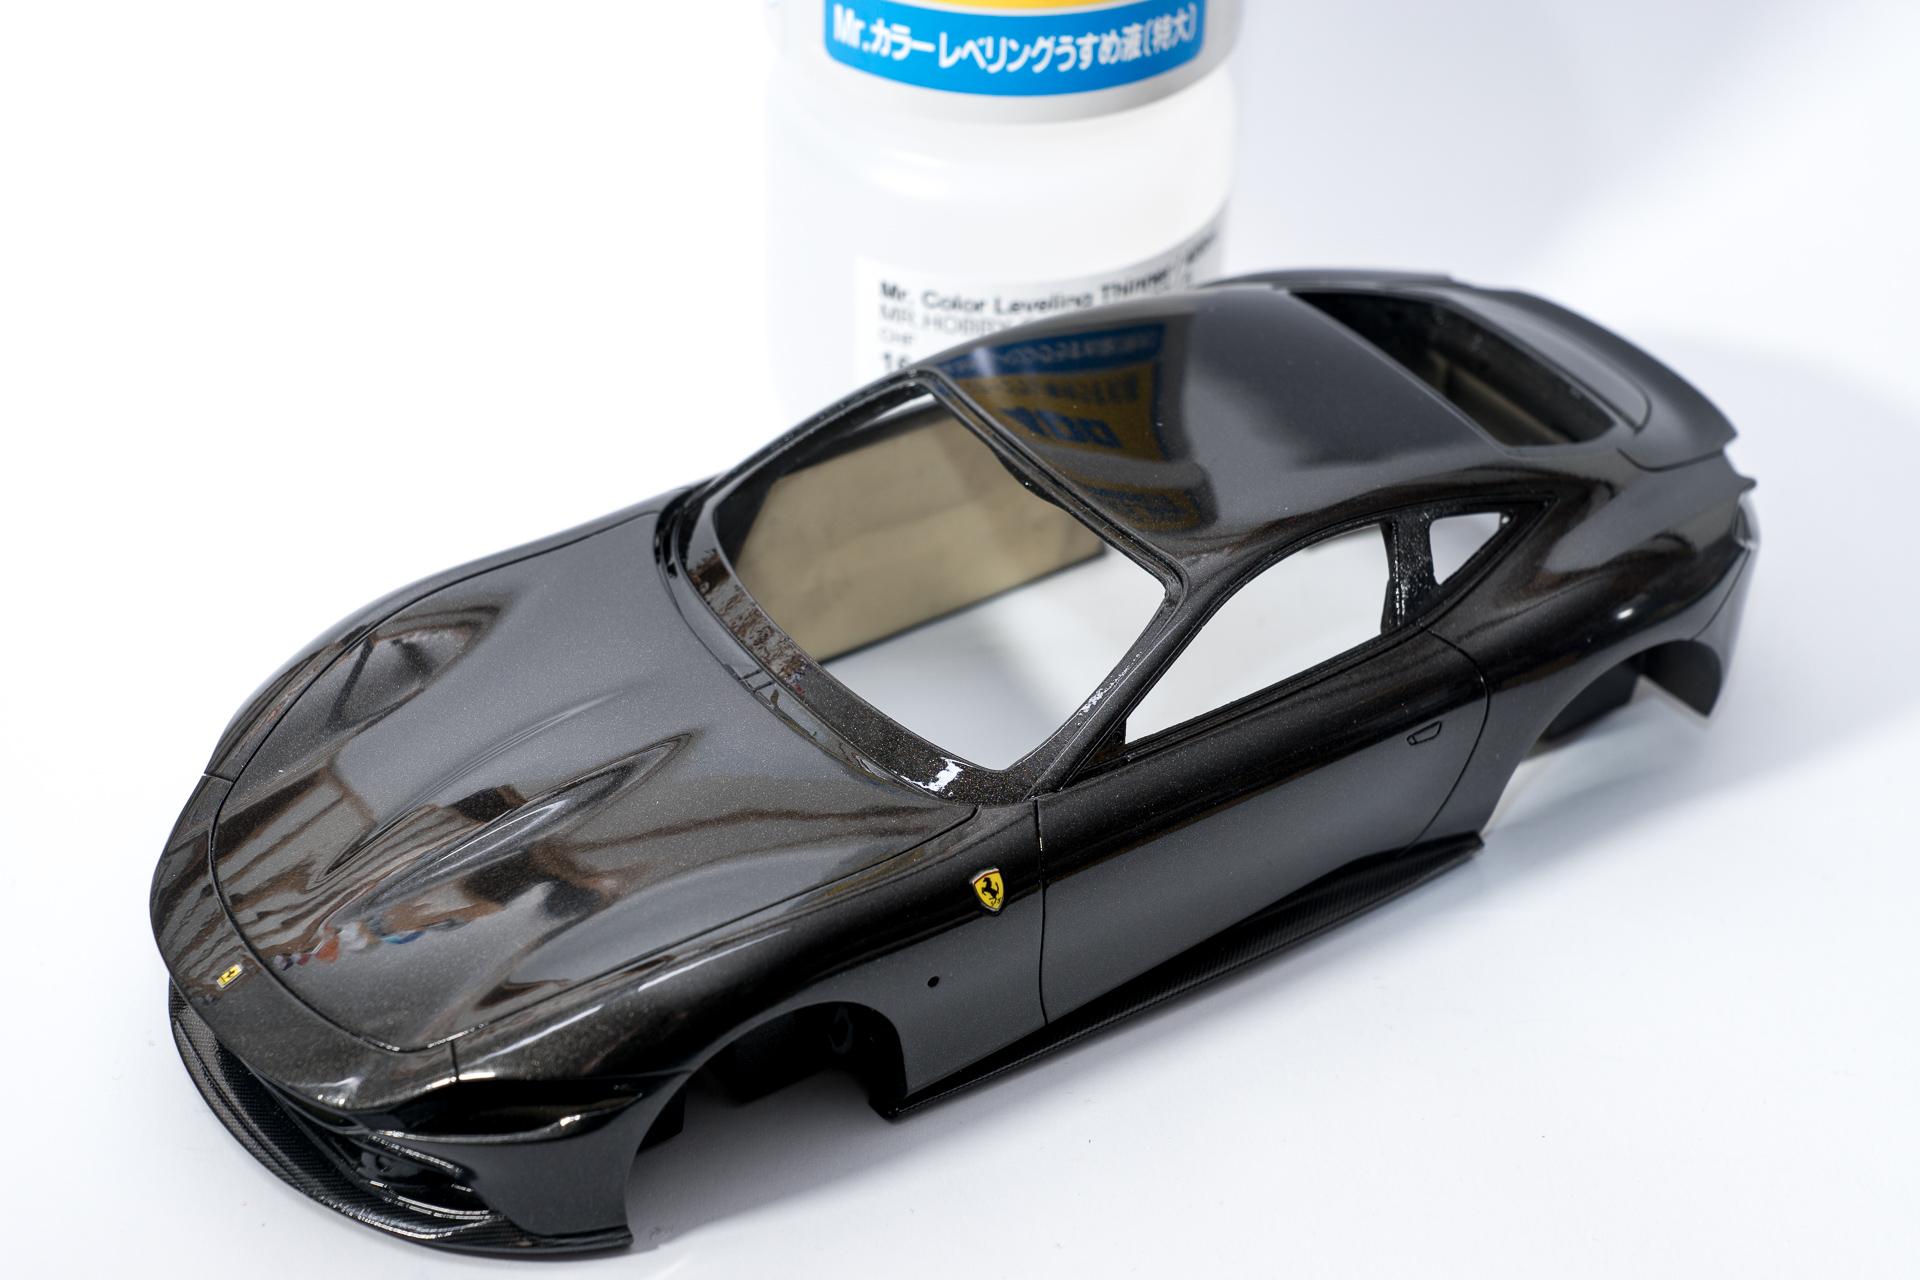
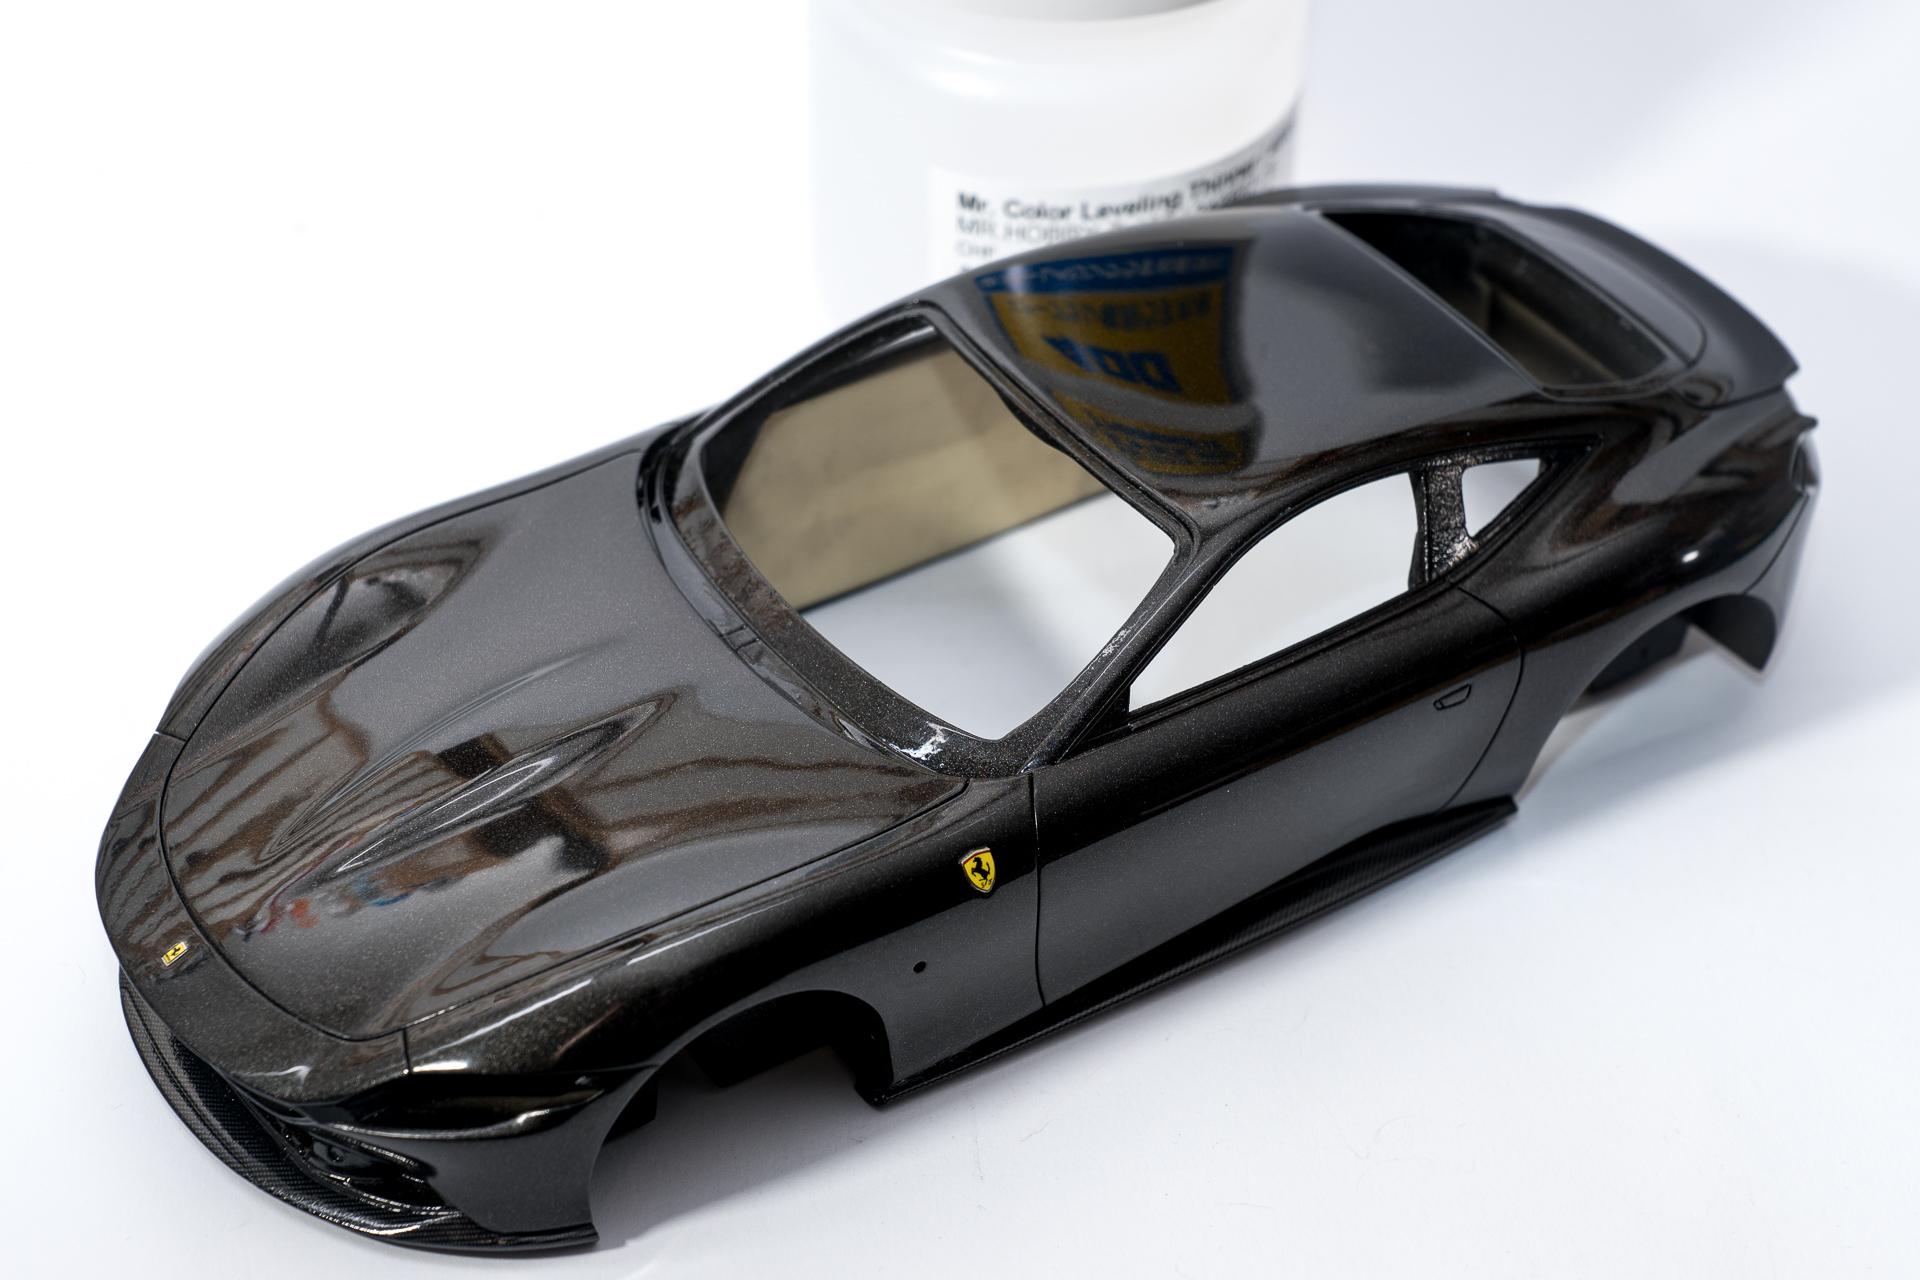
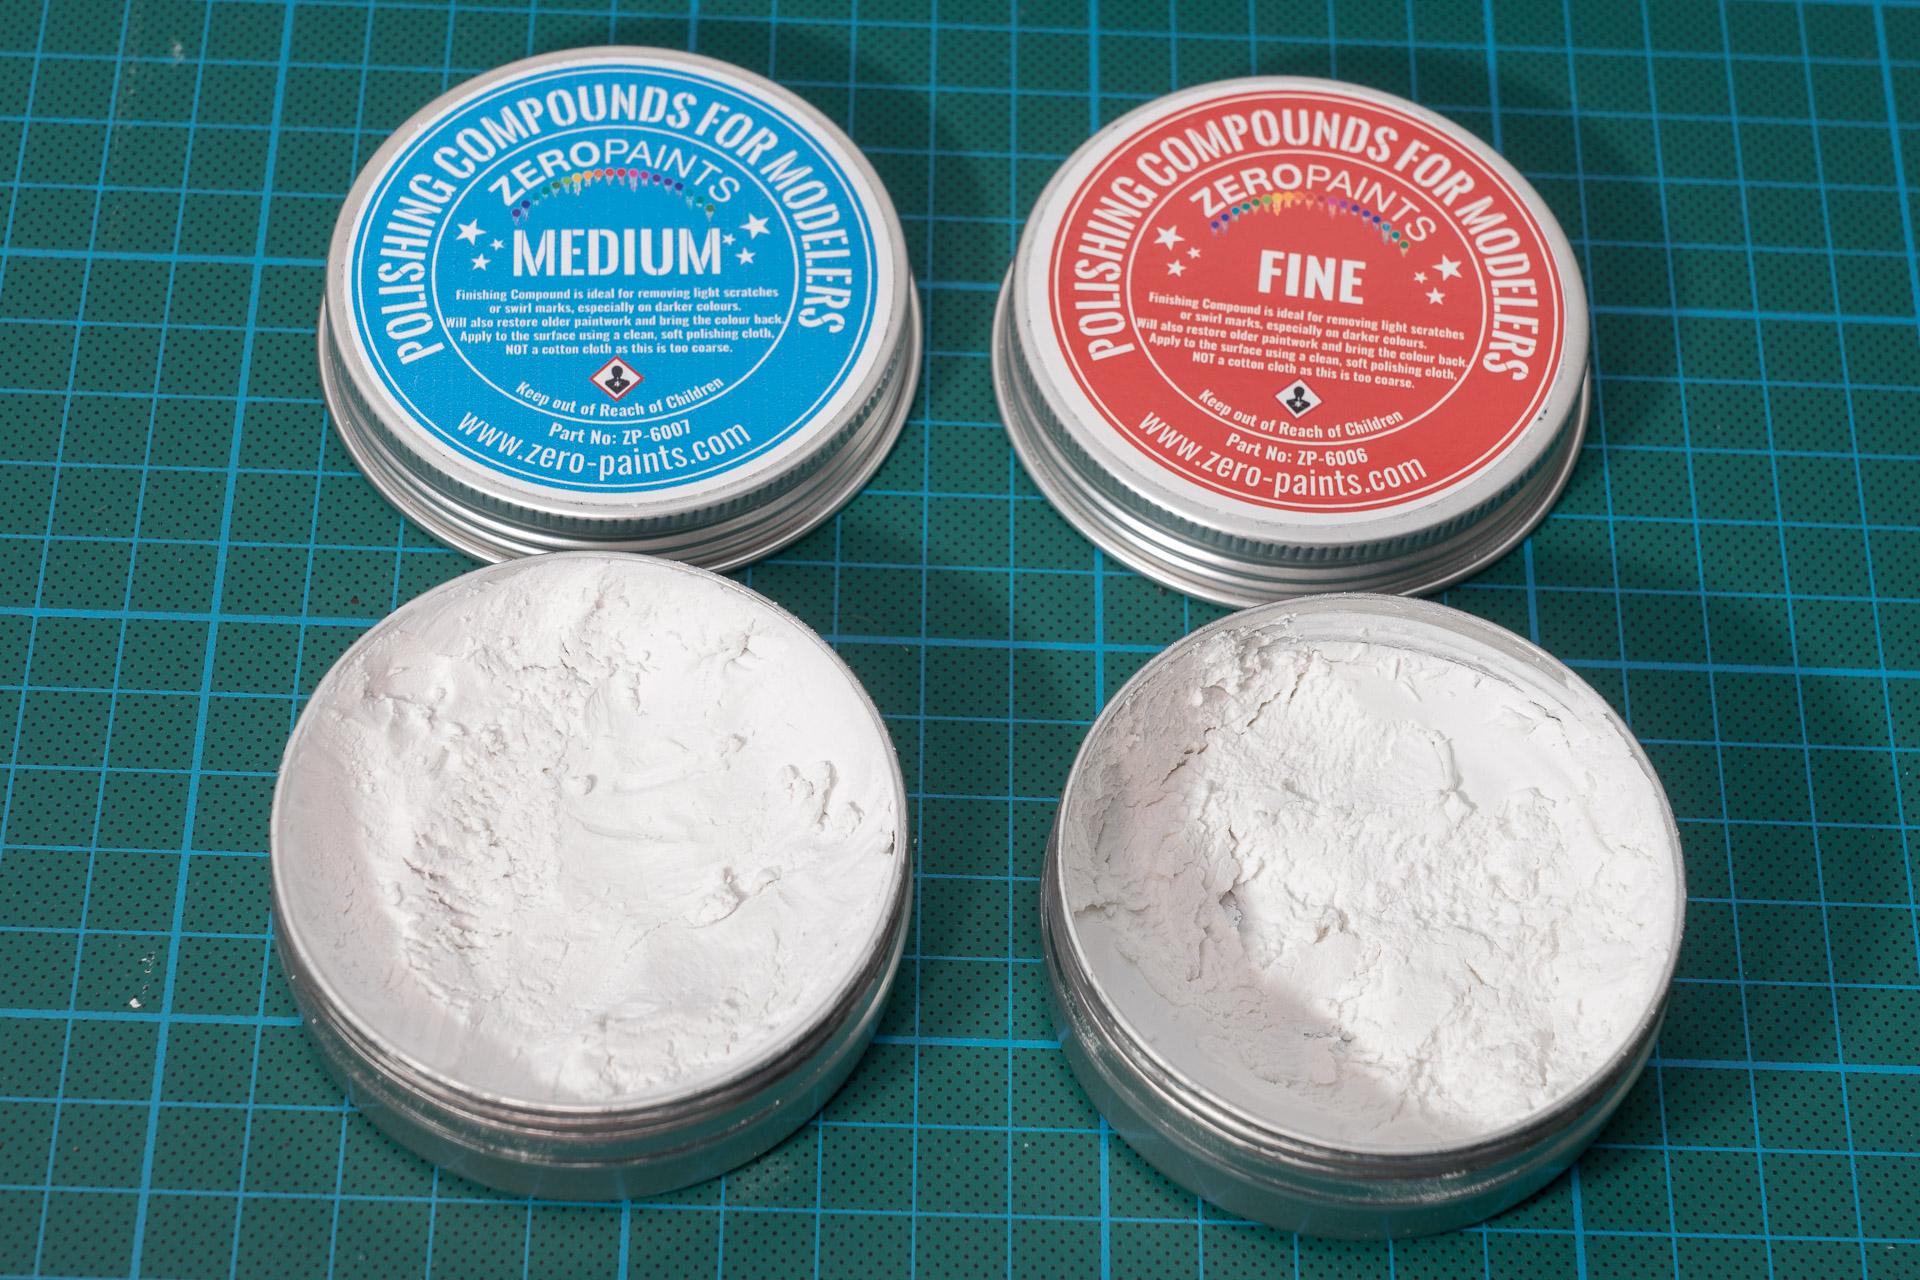
Hi all Thank you very much. Today I only have a small update, but one that was quite time consuming. To remember again, how the body looked like after 6 coats of clear After letting the clear harden for a few days, I started sanding and polishing the body to get that deep shine I am looking for. After about 2 hours of sanding with 3000 grit Tamiya sanding sponge it looked like this. The goal of this sanding step is, to get an even, flat surface which looks quite dull compared to before After this I continued sanding with some 4000 grit sanding pad from GodHand Followed by 6000 grit sanding pad from GodHand Increasing the grit to 8000, again with sanding pads from GodHand And finally with 10'000 grit sanding pad As you can see in these pictures, the shine is gradually coming back. Every grit took me another 30 minutes to sand the whole body. After that I started polishing using the coarse polishing compound from Zero Paints After this step I wanted to continue with the next step, the medium polishing compound by Zero Paints. Unfortunately I noticed too late, that the compound had dried out too much and made some deep scratches to the roof, so that I had to start over sanding the whole roof from 3000 grit all the way up to 10'000 and polish it again with the coarse compound. Happily it was only the roof, so I could finish it quite quick and then continue with the blue polish from Tamiya. To finish the polishing process I wanted to give the fine compound from Zero Paints a chance, but when opening the container, it looked even drier than the medium one... So, I decided to use the white Tamiya compound instead, which was still fine even if I bought it long time before I bought the Zero Paints compounds. That's the second time I bought polishing compounds from Zero Paints and the second time this happens (well.... the first time they already arrived like this...) 😒 However, after polishing it with the Tamiya compound it looked like this Every polishing step took about another 30 minutes (well, the second one took longer, as I had to re-sand and -polish the roof). To finish the treatment of the body, I eventually applied some Tamiya Modeling Wax and that's the way how the body looks now. I have to say, I'm quite happy with the result So much for today. I think that maybe I should be able to finish this build during easter Urs
-
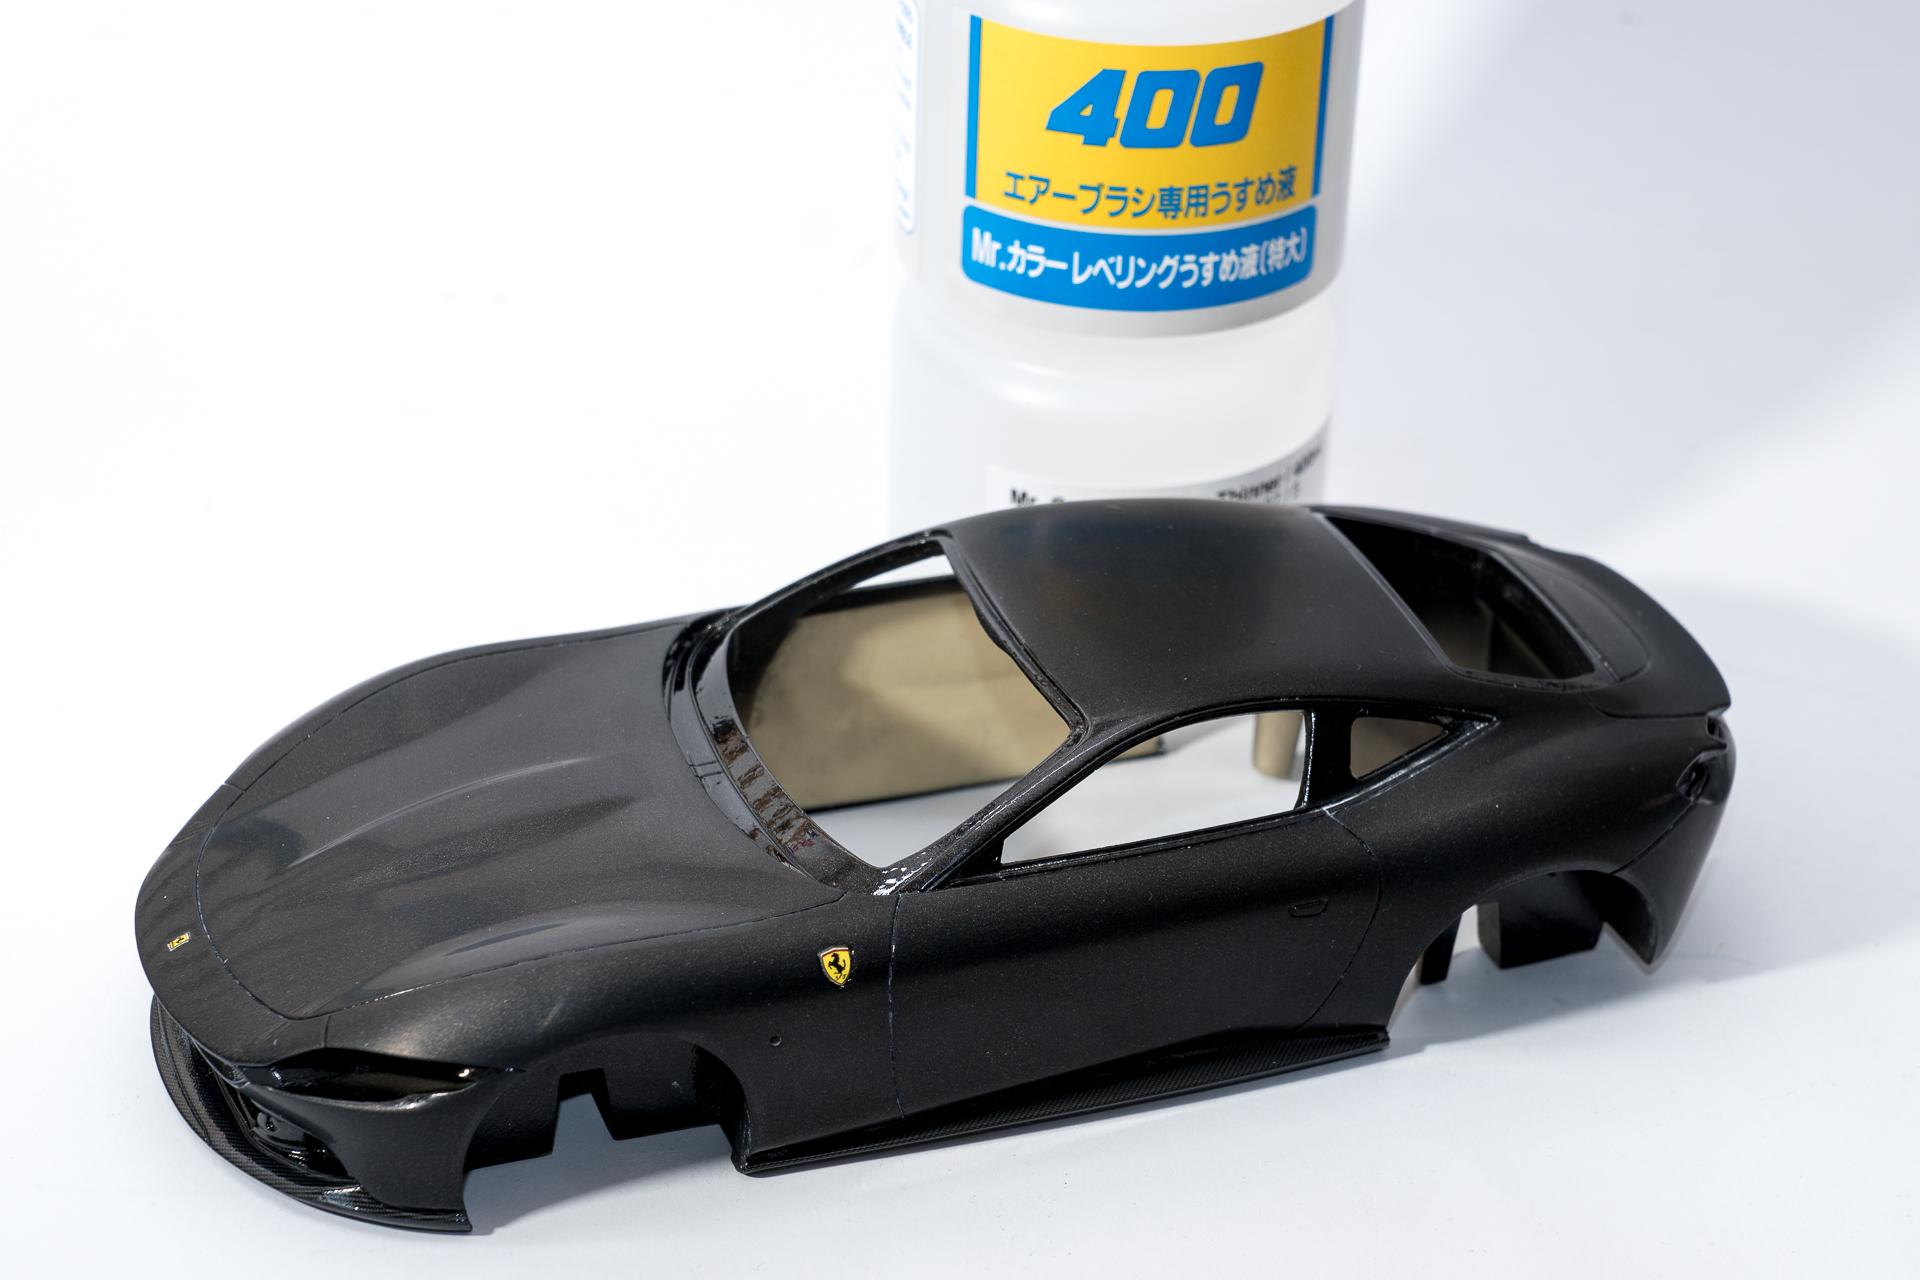
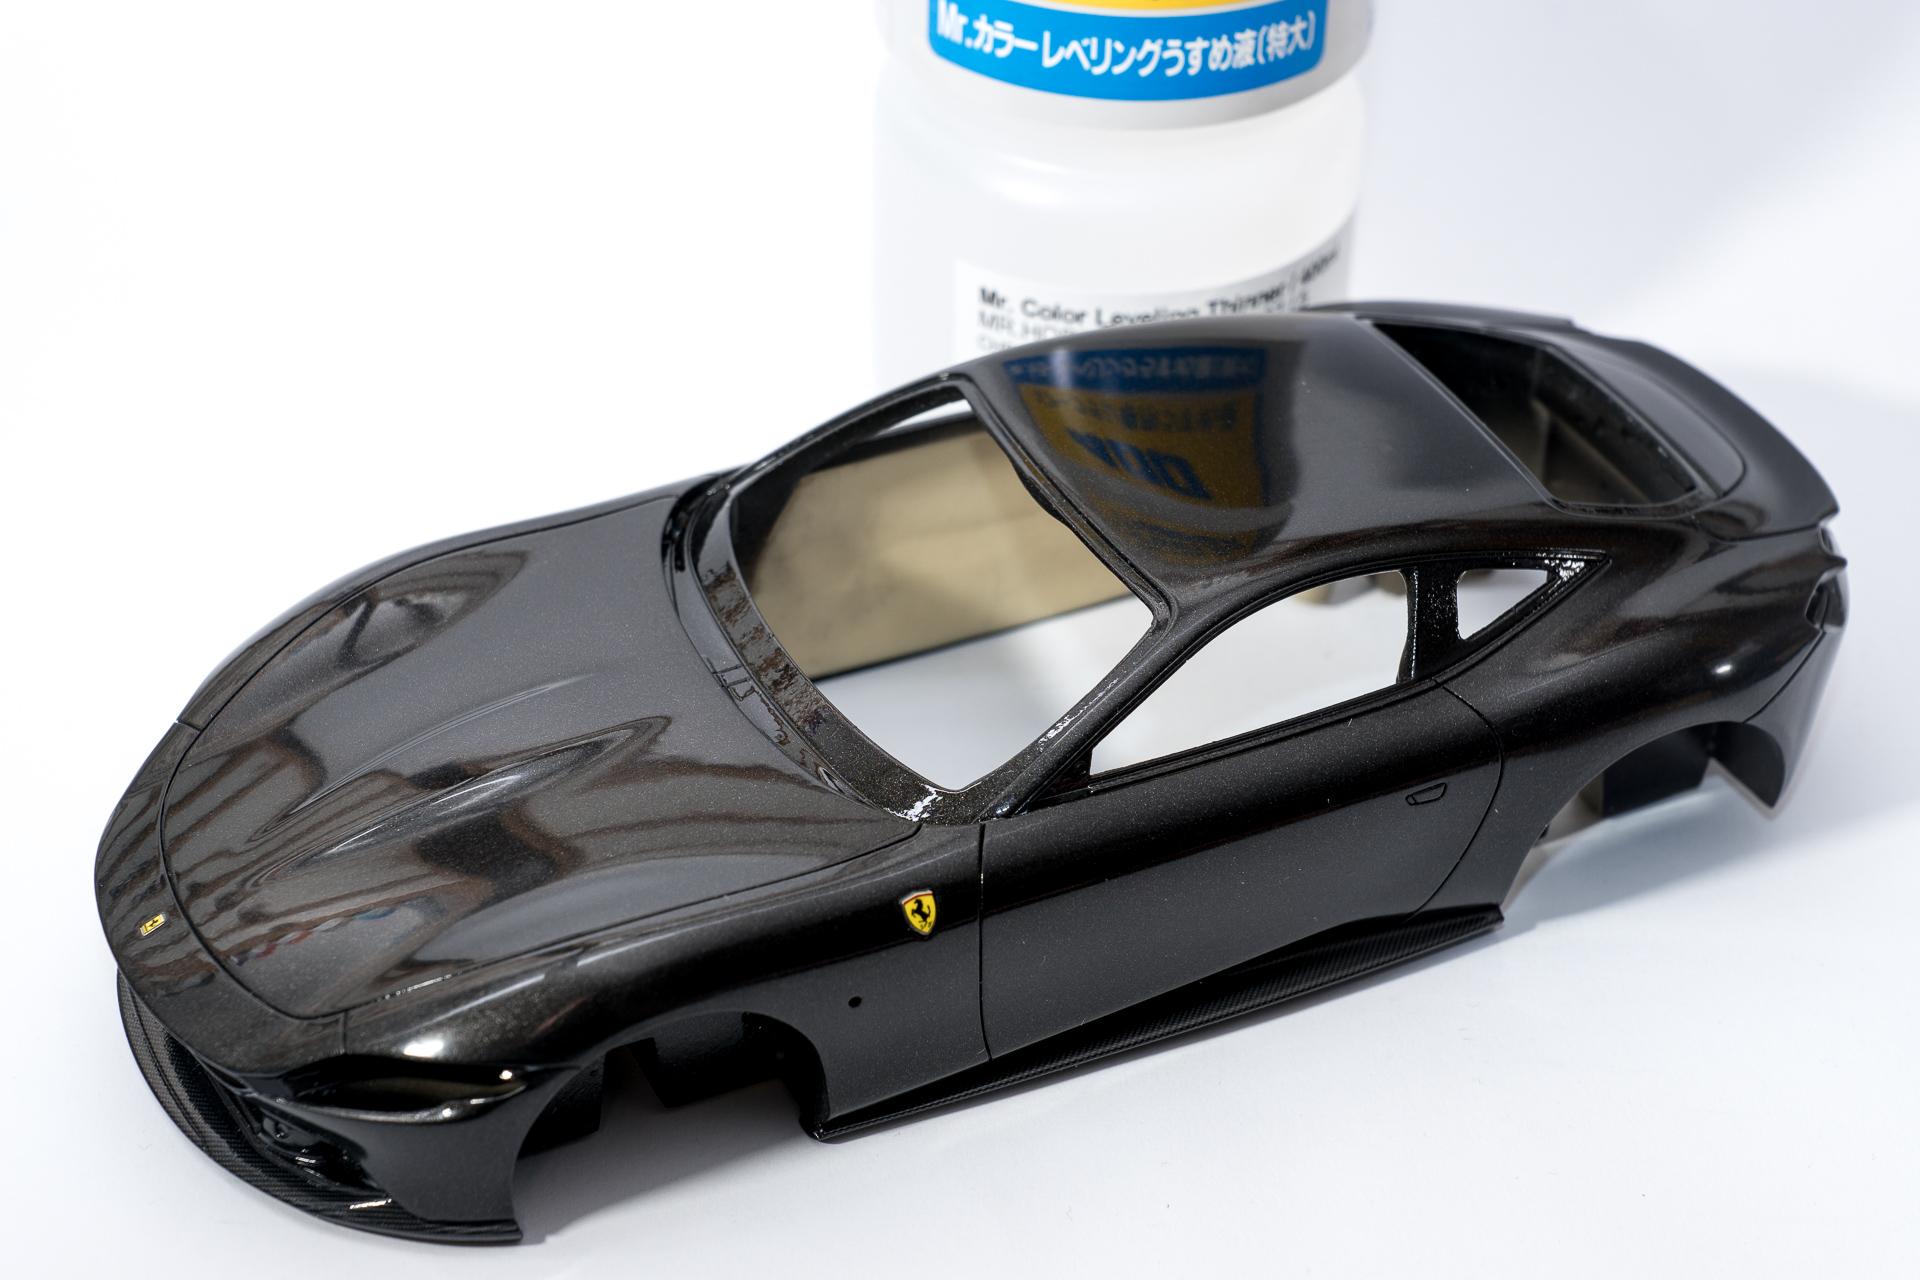
I know, I know... it's my first non-red Ferrari... 😁 Thank you very much for your comment. Although I'm a little disappointed by the look of the paint, I was hoping to see more of the metallic effect. Maybe it will look better after sanding and polishing... Thank you very much
-
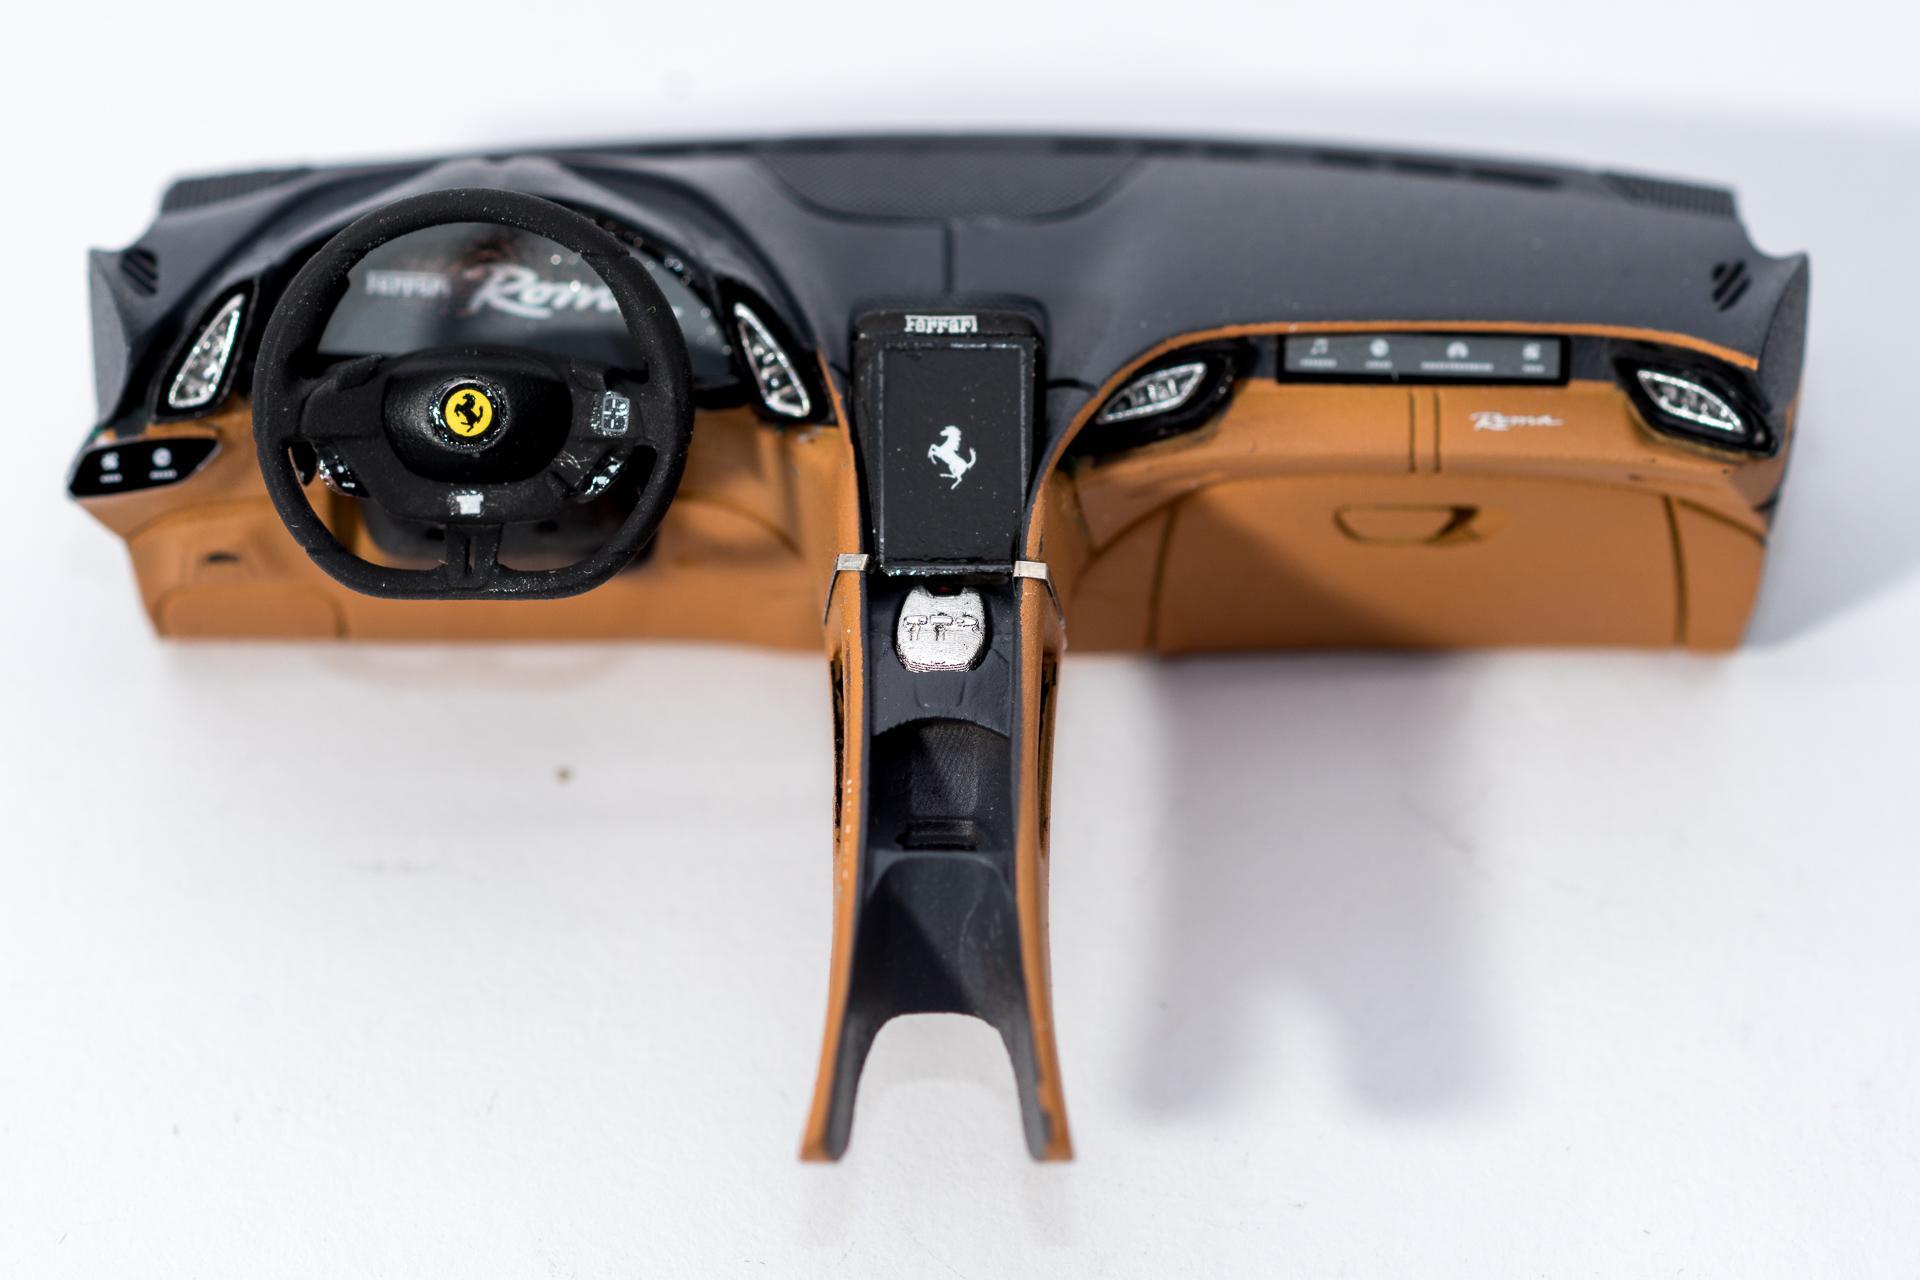
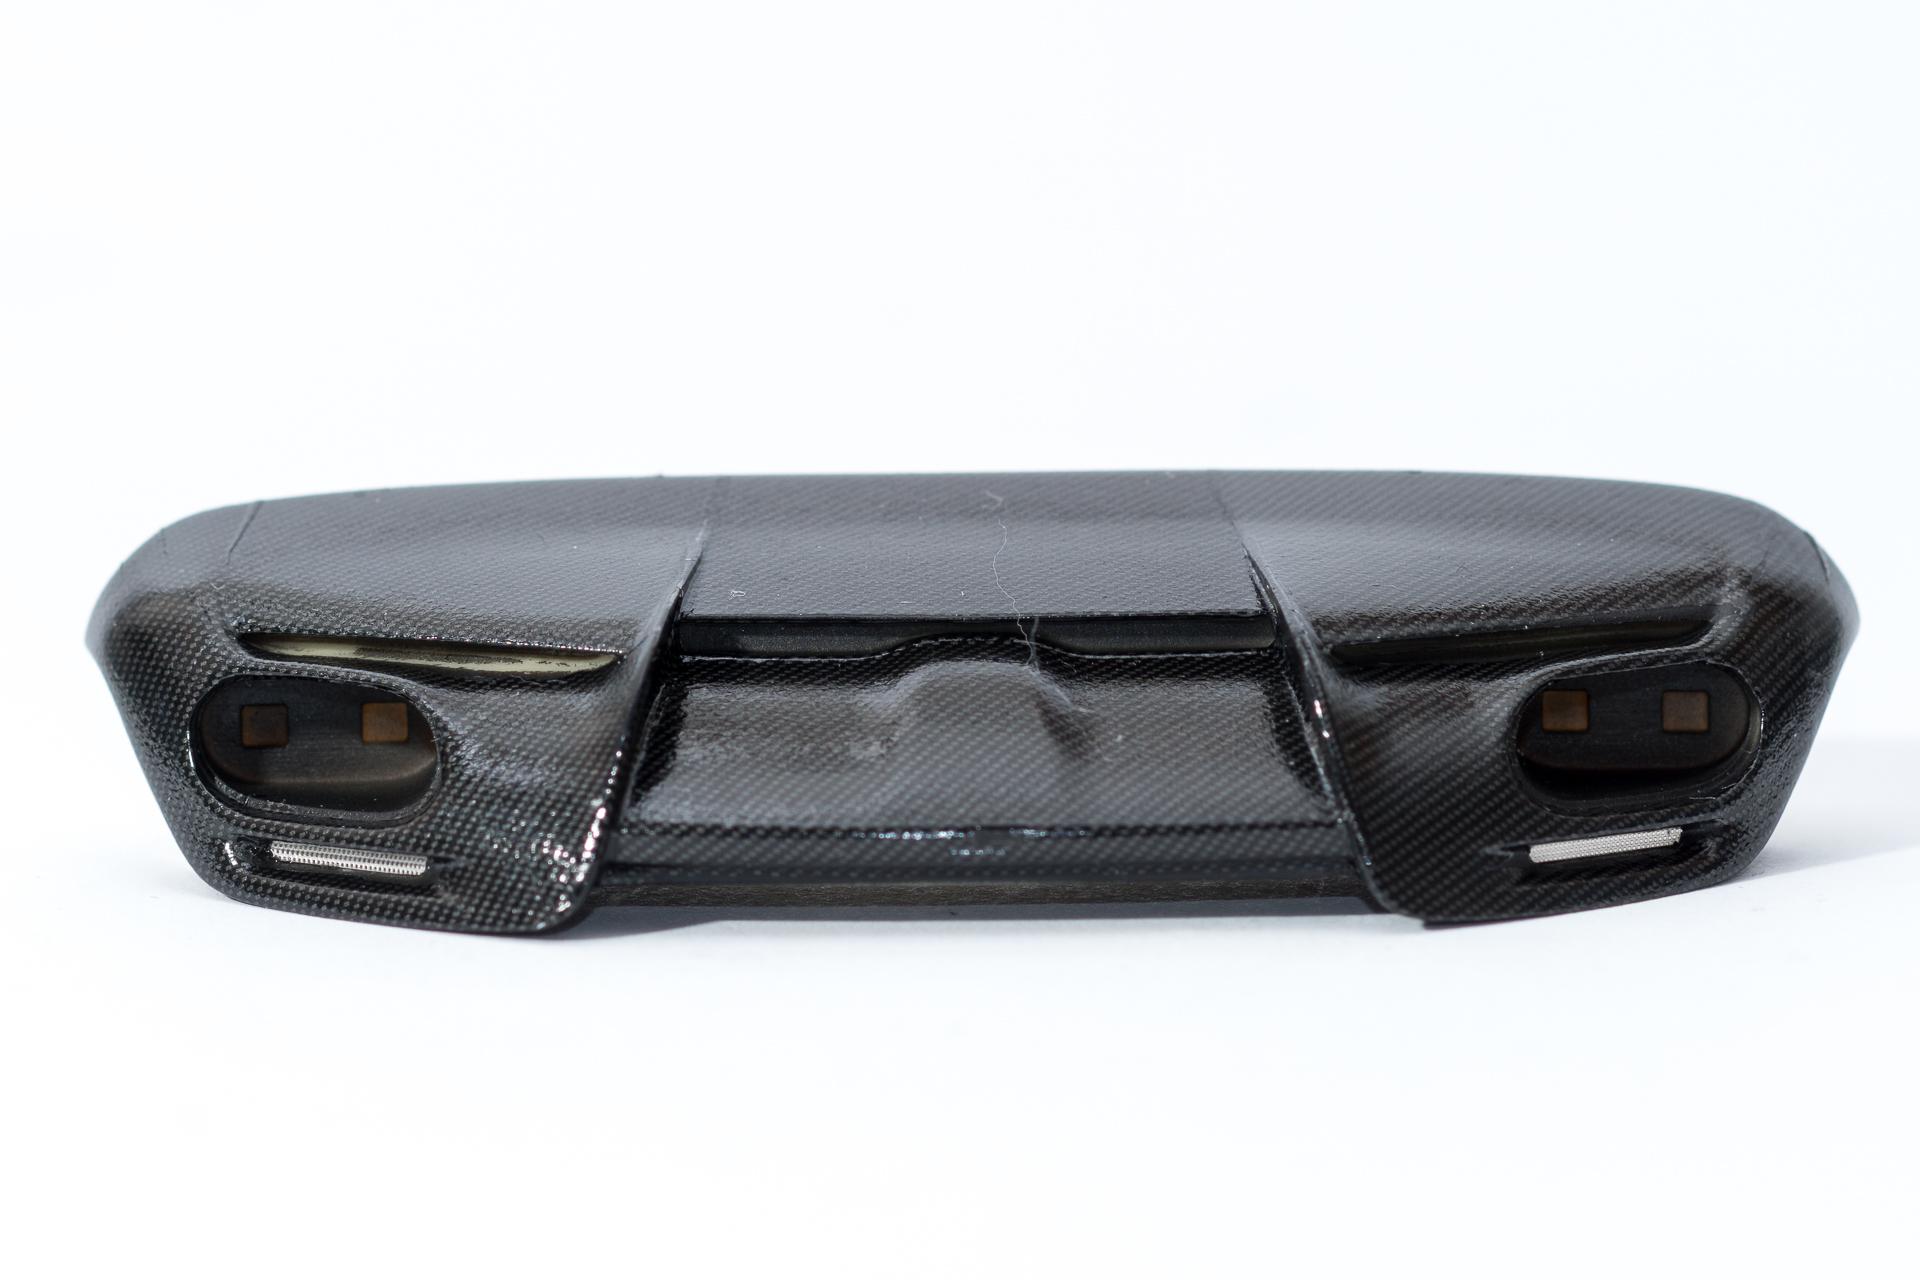
Hi all Thank you very much 🙂 The interior has been mostly completed. Now I'll only have to install the seatbelts, the seats and the middle console / dashboard. The dashboard / middle console part has been completed And on the diffusor the exhaust pipes and the meshes around them have been installed. The only parts missing now on the diffusor are two small red clear parts. But as I dropped every single piece at least 23 times yesterday before I was able to attach it to its position, I gave up and will attach them later... And finally the body was clear coated and left to dry and harden for a few days. Now I'll soon start sanding / polishing it and once this is done, it will soon be time for final assembly That's it for this week's update Urs
-
Thank you very much for all your kind comments 🙂
-
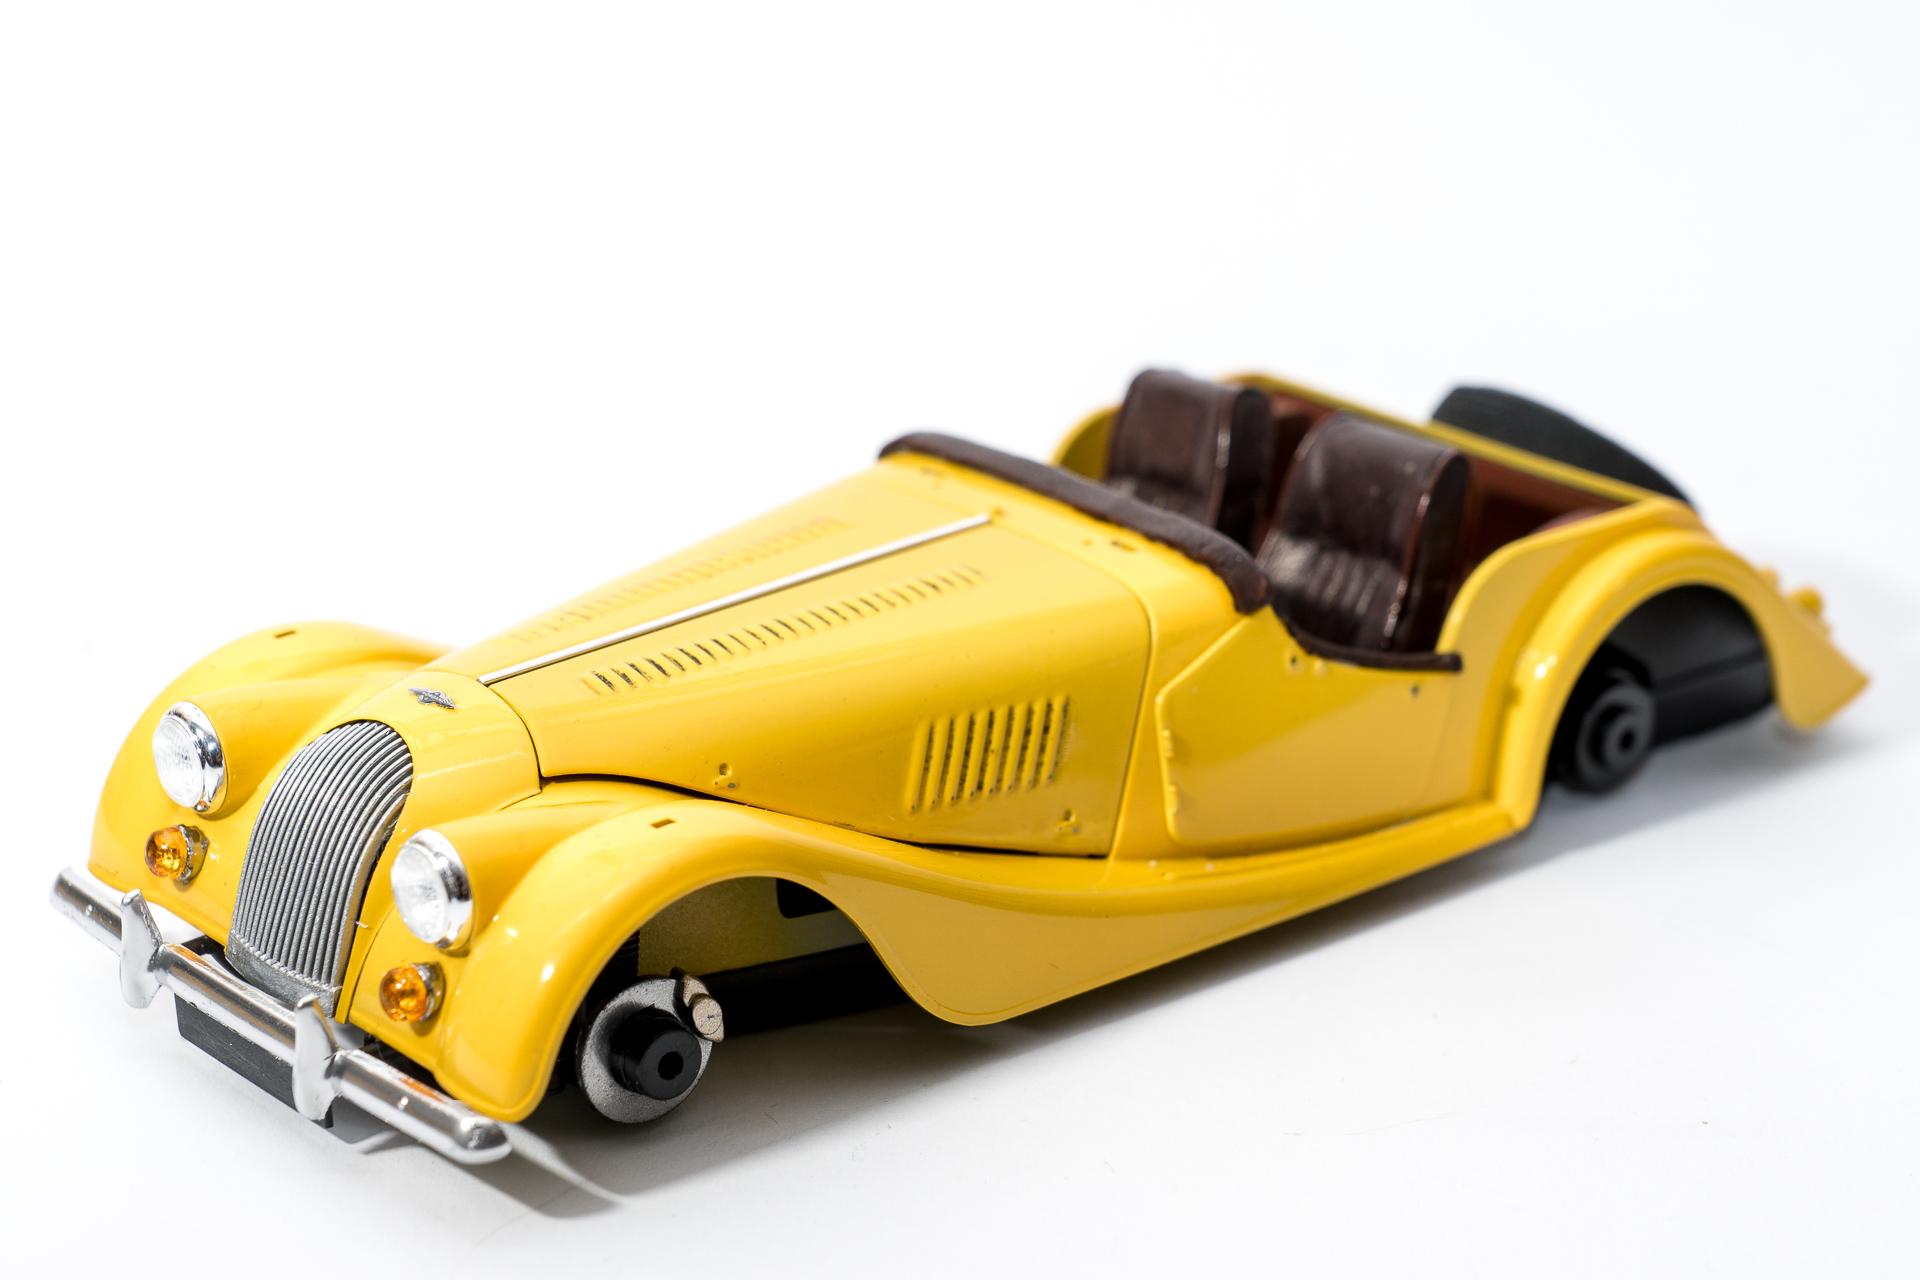
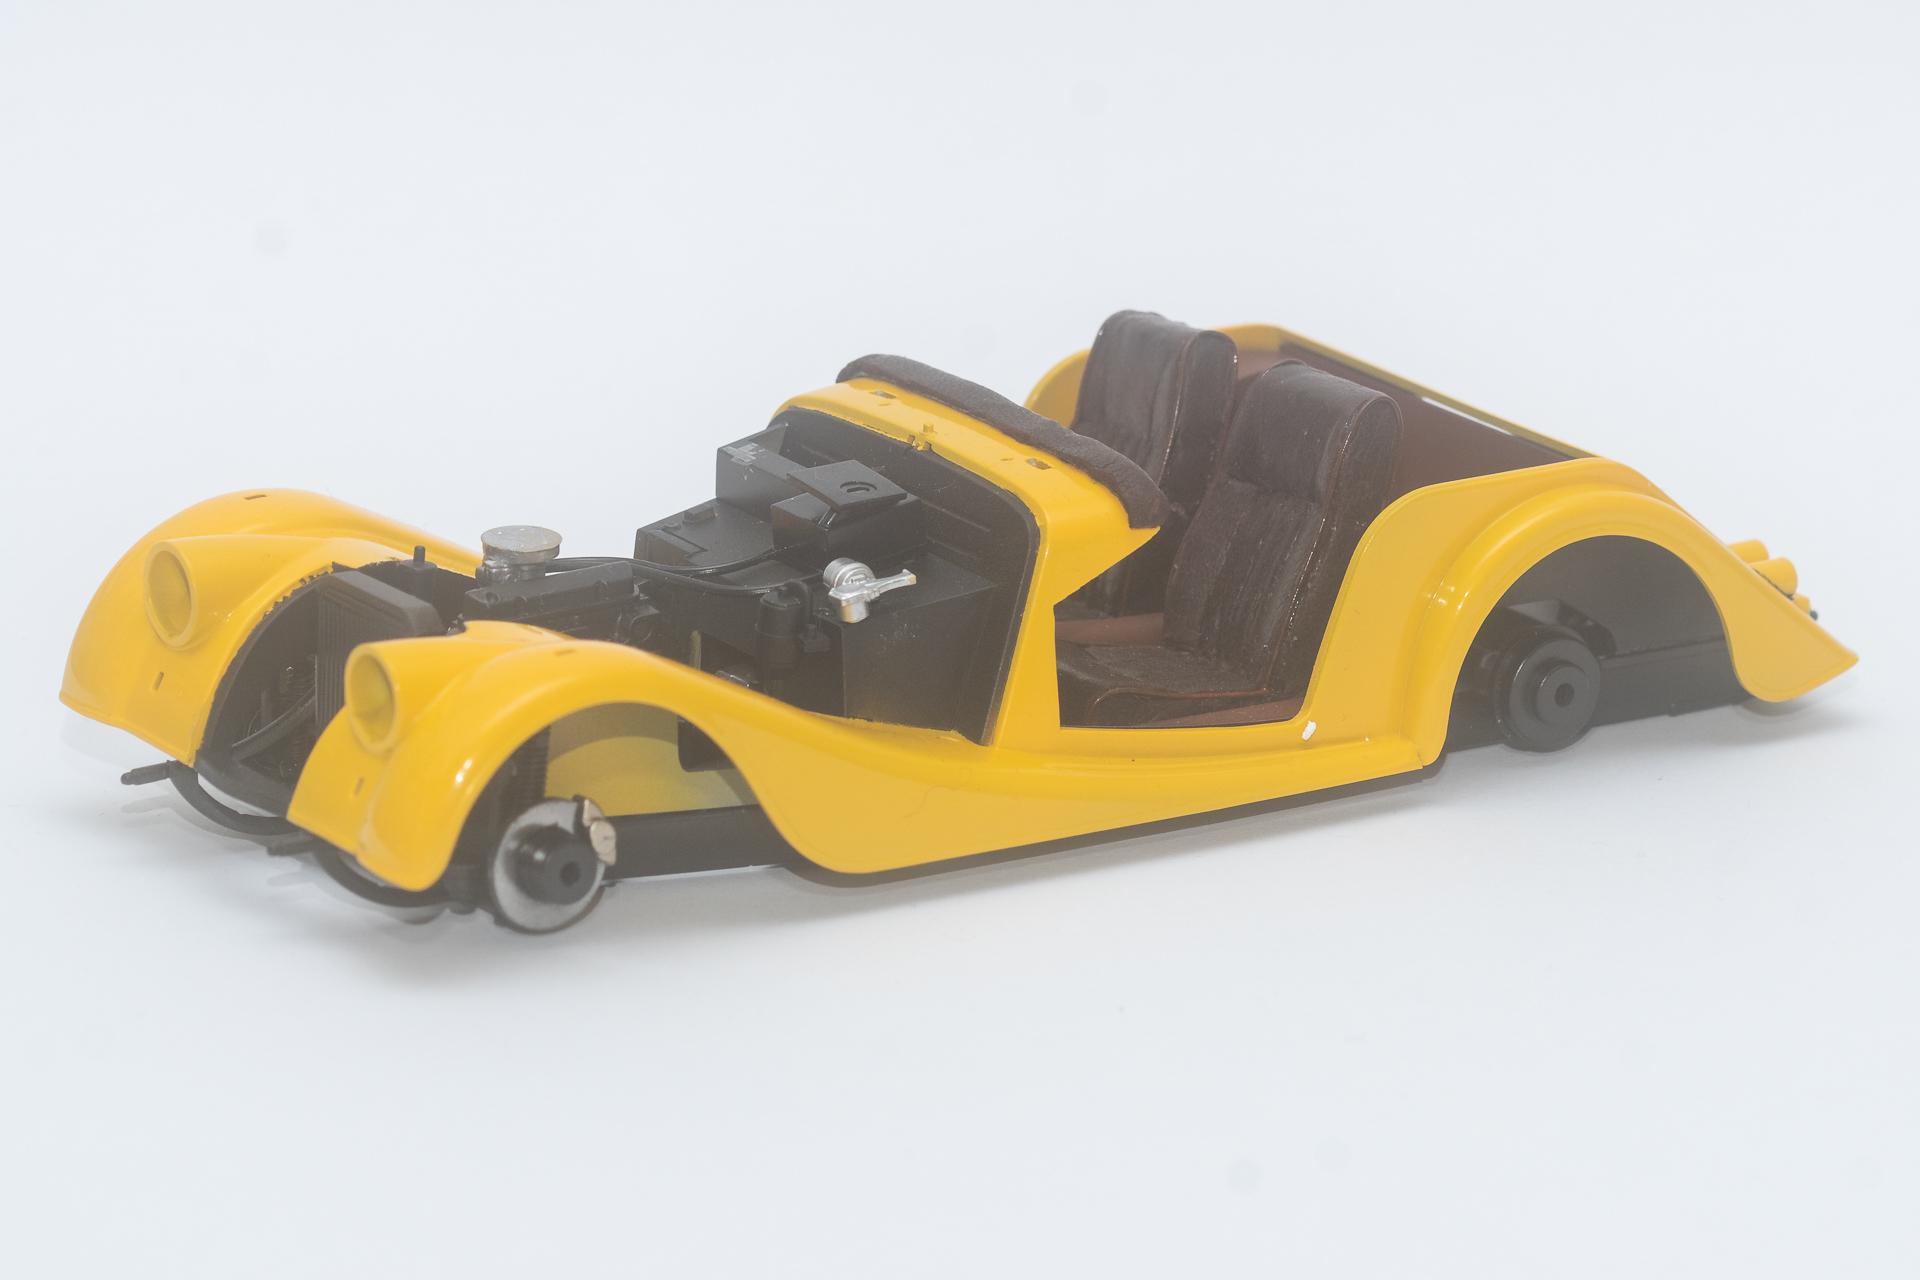
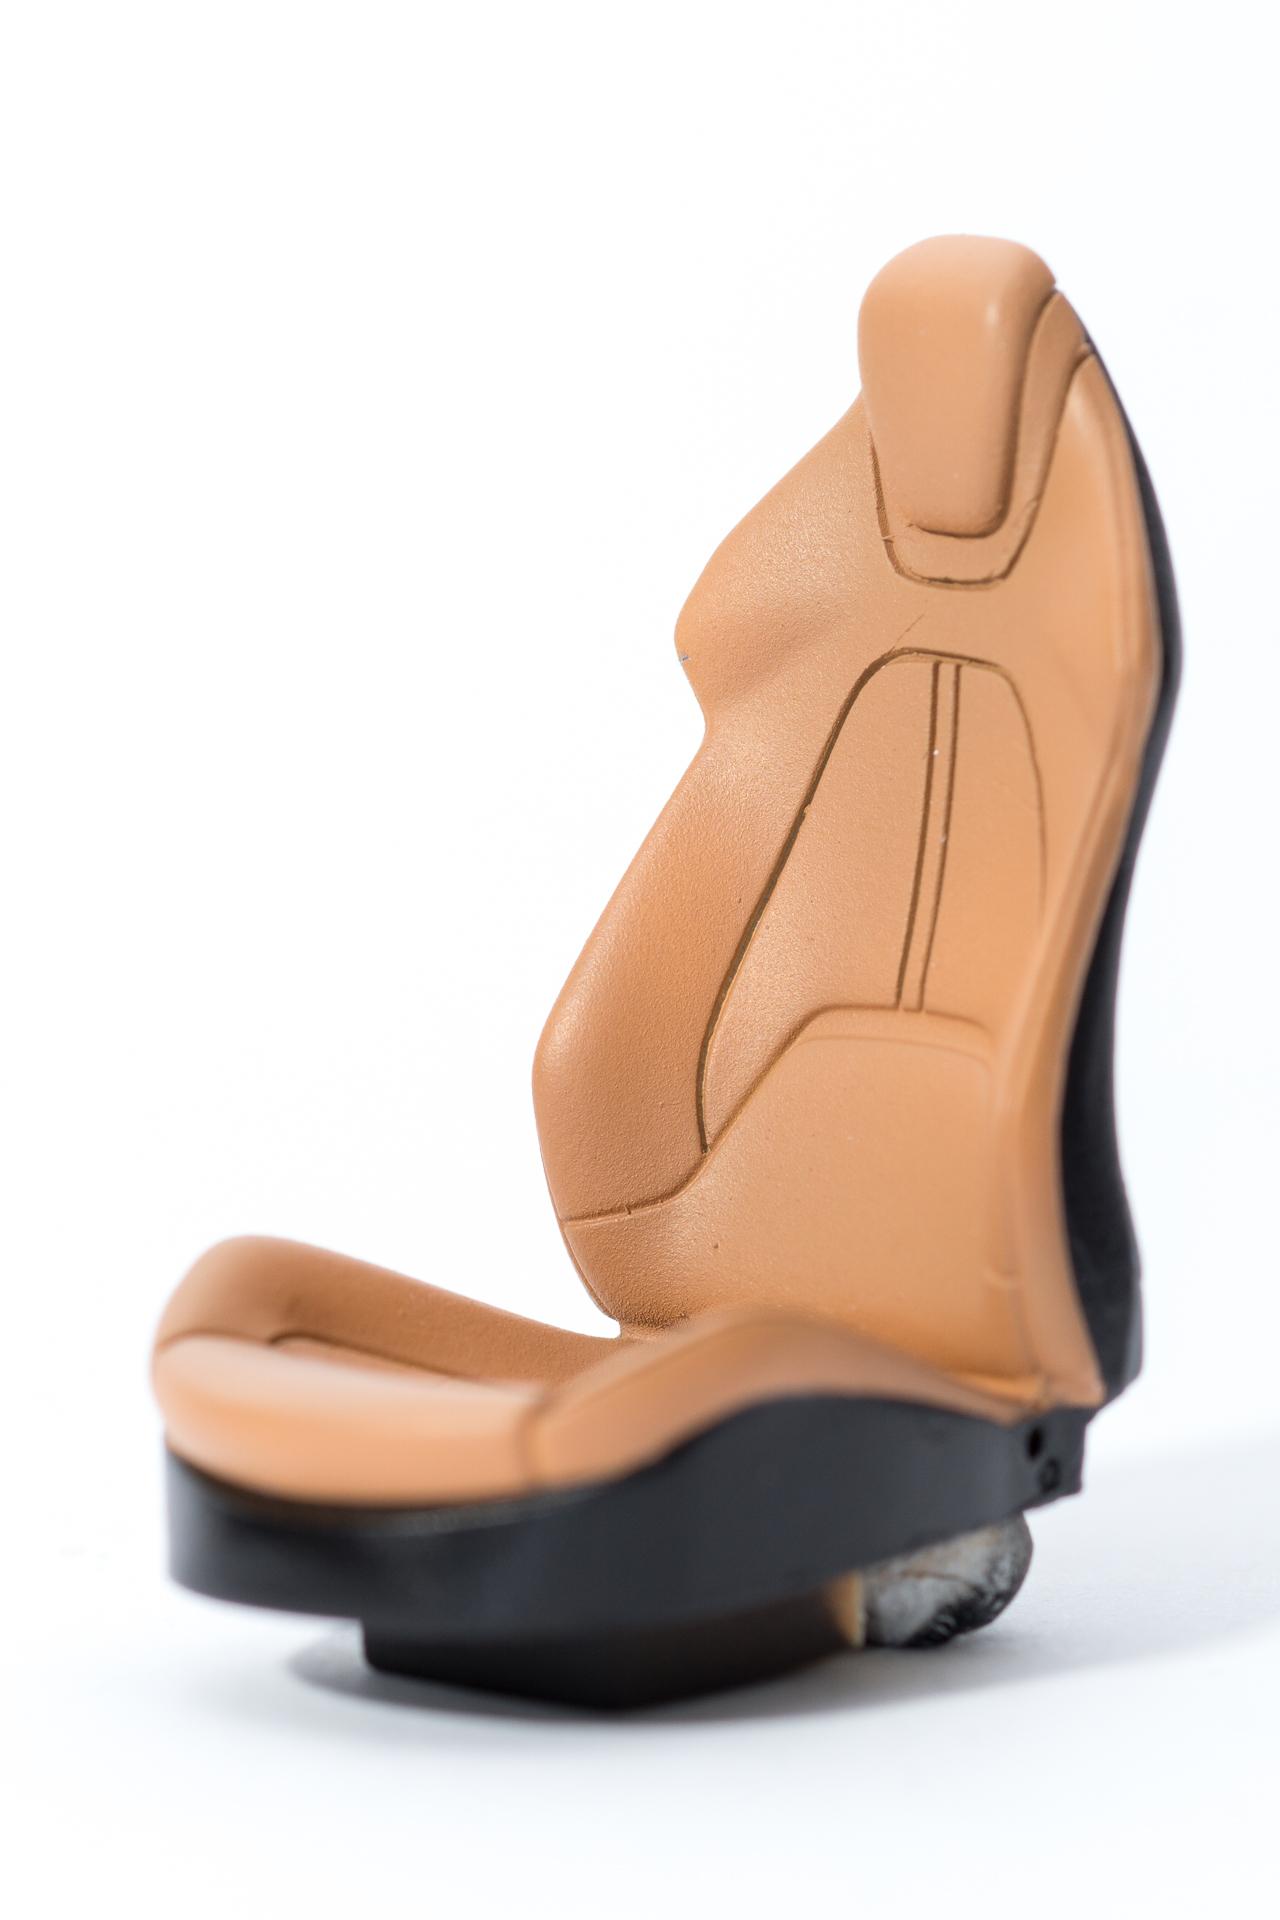
Thank you David Happily it can't be seen that well in the pictures. I had to repaint the engine hood and the yellow turned out much lighter than on the rest of the body. Also the look of the seats is something I'm not really happy with. And in general most of the leather work is way too thick. but this time I wasn't able to skim it even more without damaging the leather... 😞 Thank you too, Donald. But as I said, the seats are one of the points I'm not really happy with. Maybe I'll get used to it over time, but as I wasn't happy with them already two years ago, I doubt it 😉 Urs
-
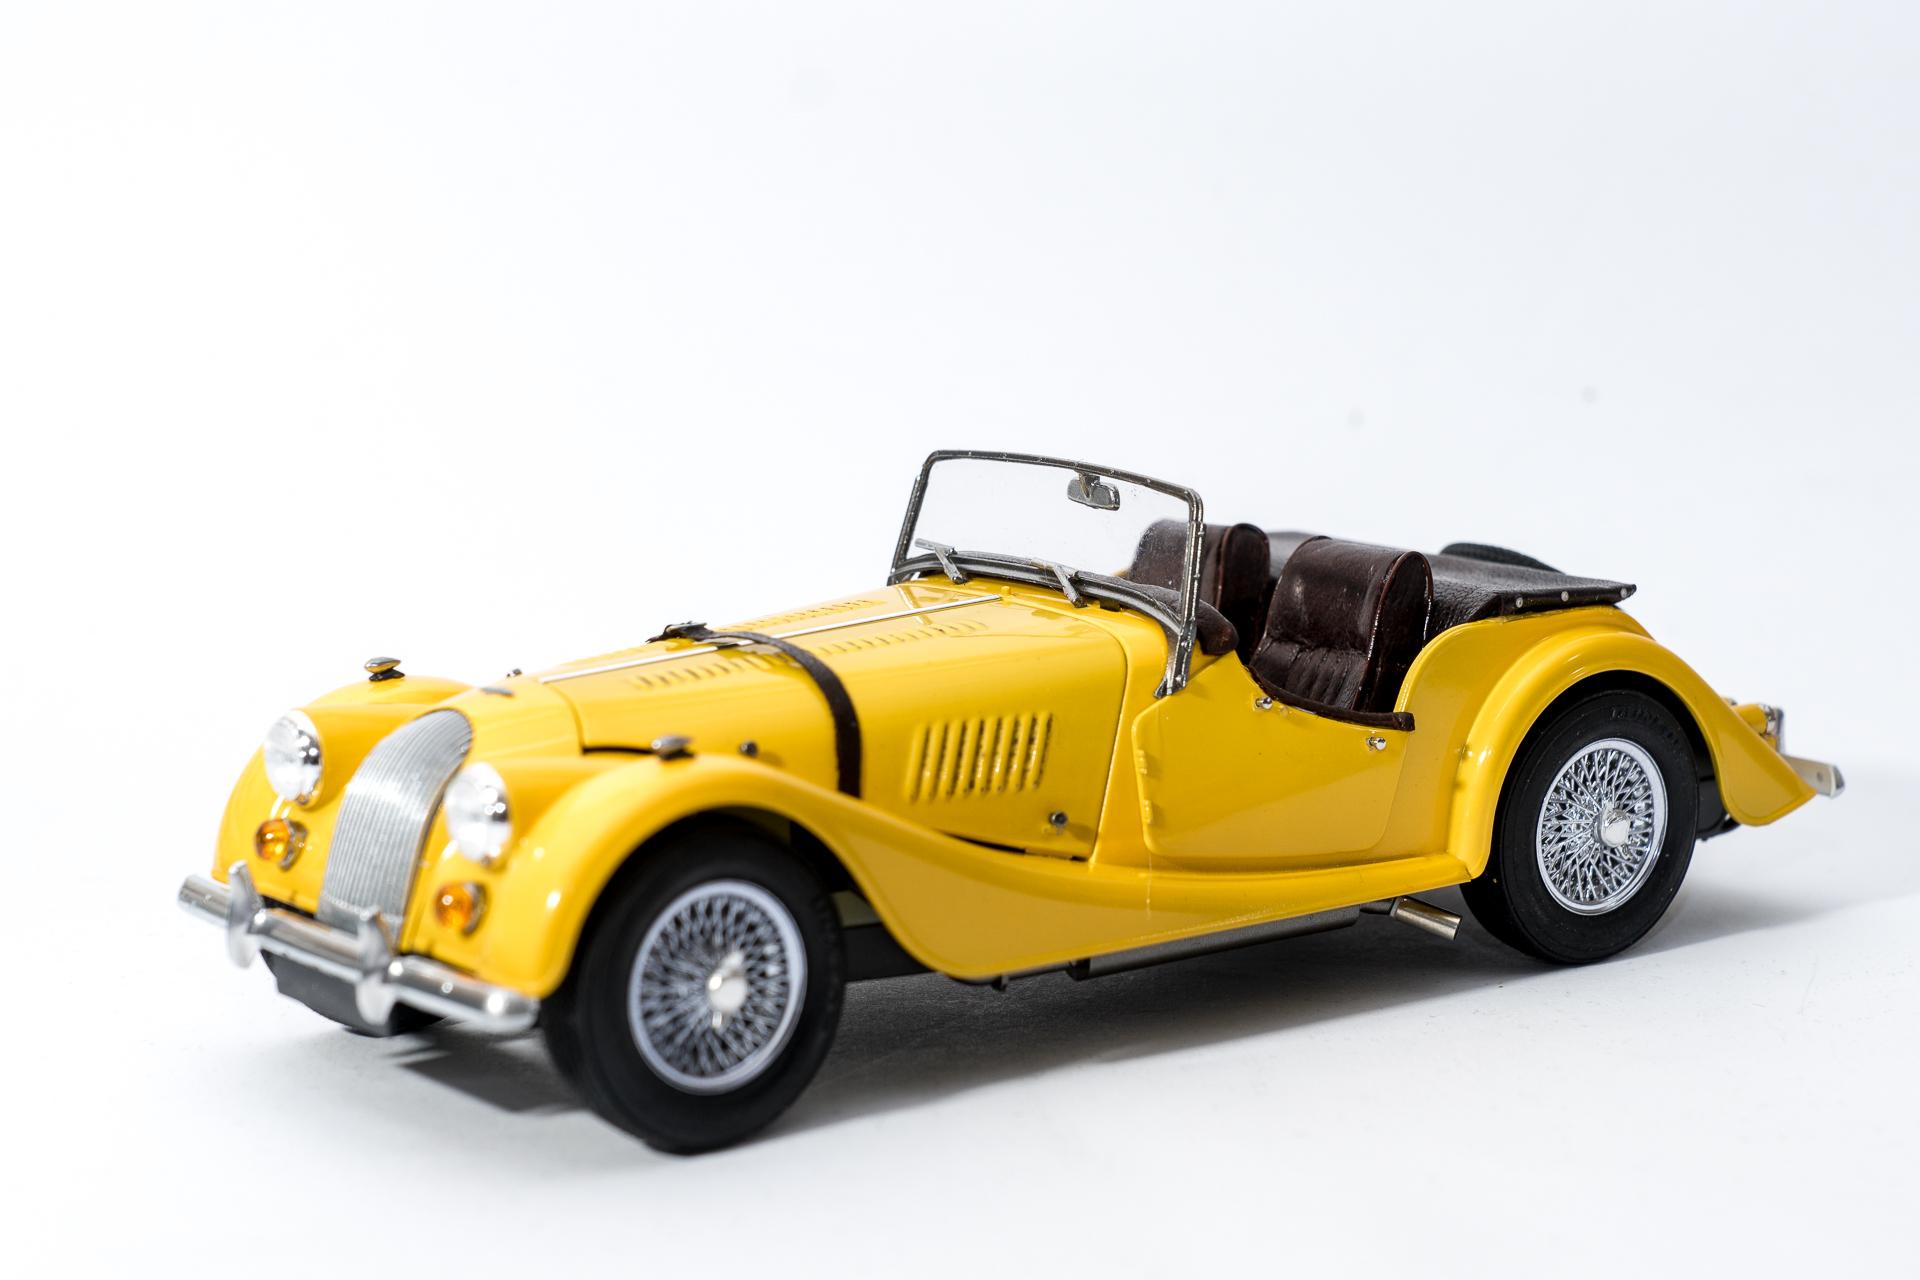
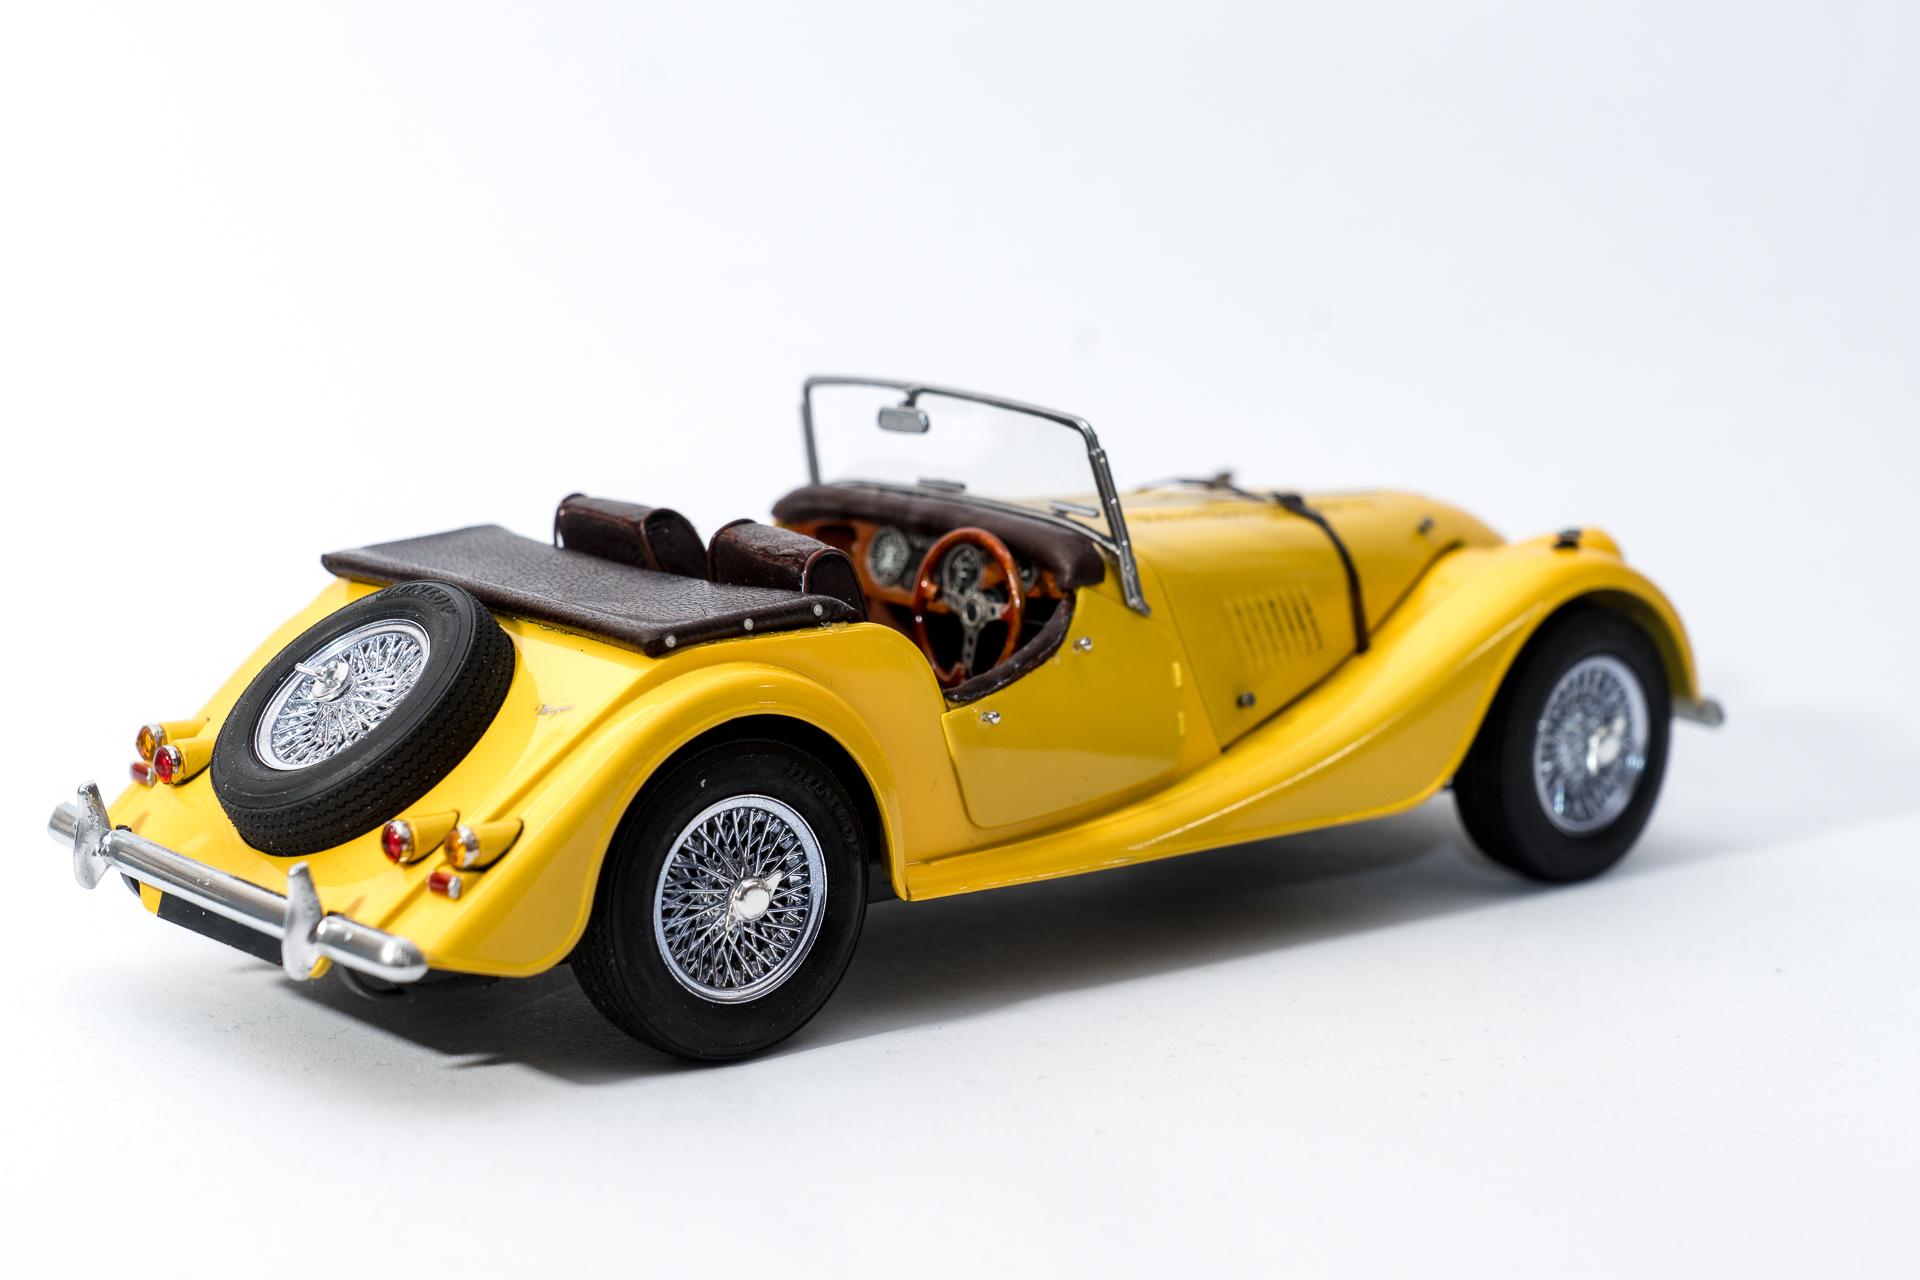
Hi all Long time no progress on this build... To be honest, after my last posting I was just too frustrated by the results achieved so far that I put the box back on my stash and started new projects. There also was one problem I didn't really know how to solve, I only knew that I wouldn't use the black rubbery folding top provided in the kit. As I came to a halt with the build on my Ferrari Roma because I had to wait for an opportunity to clear coat the body, I decided to pull this box out of the stash and finally finish this car. But most of the time I forgot to take pictures of the current progress, so I can only show you how it looked like two years ago when I put it back to the stash Then it progressed to this state, about one week ago And yesterday it was finally the time to attach the last few parts and calling it done 🙂 I'm not really happy with the final result, but I tried to at least bring it to an more or less satisfying end. More and better pics will follow as soon as I went to the studio for the next time 🙂 Urs
-
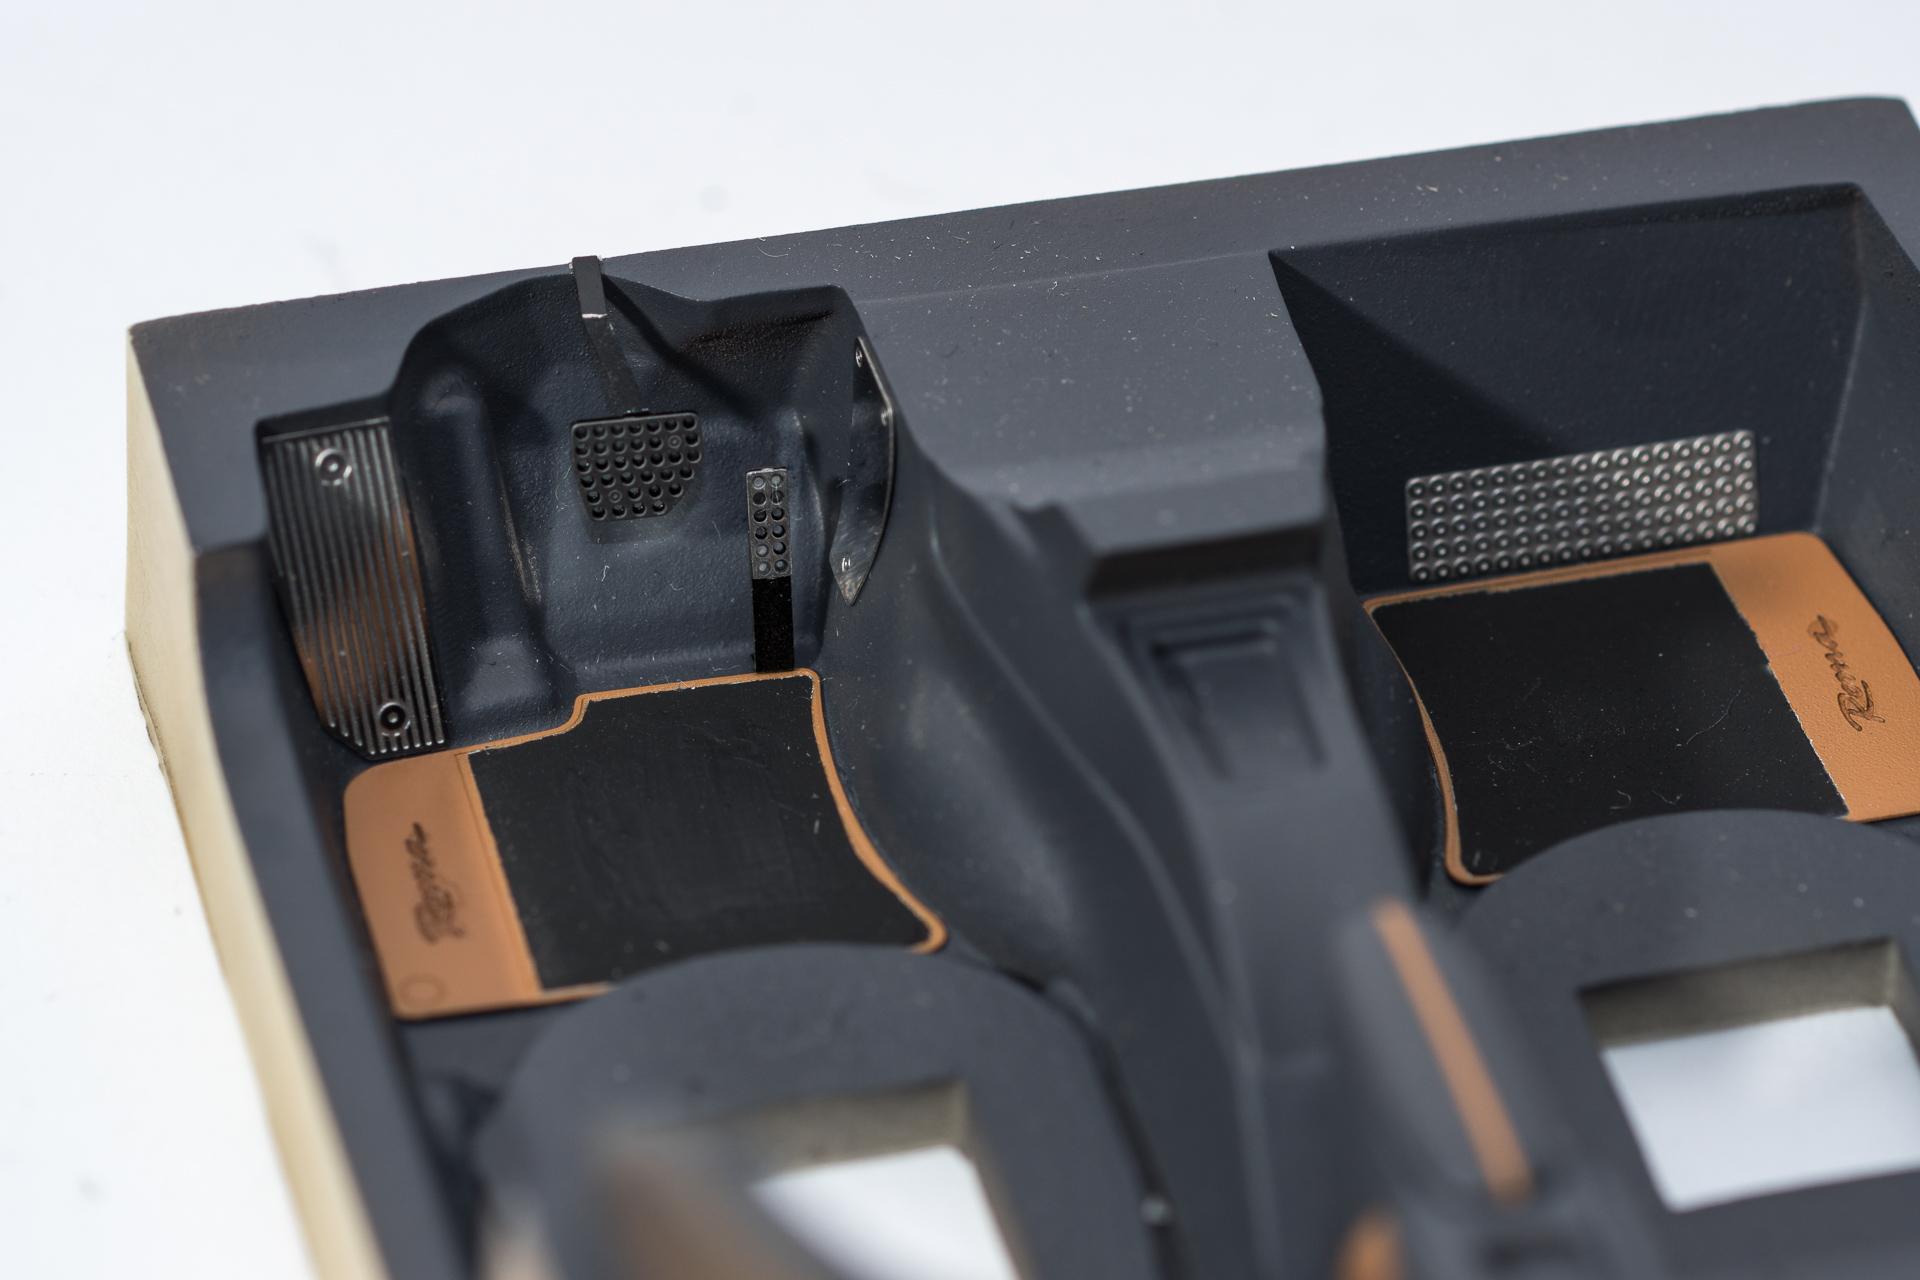
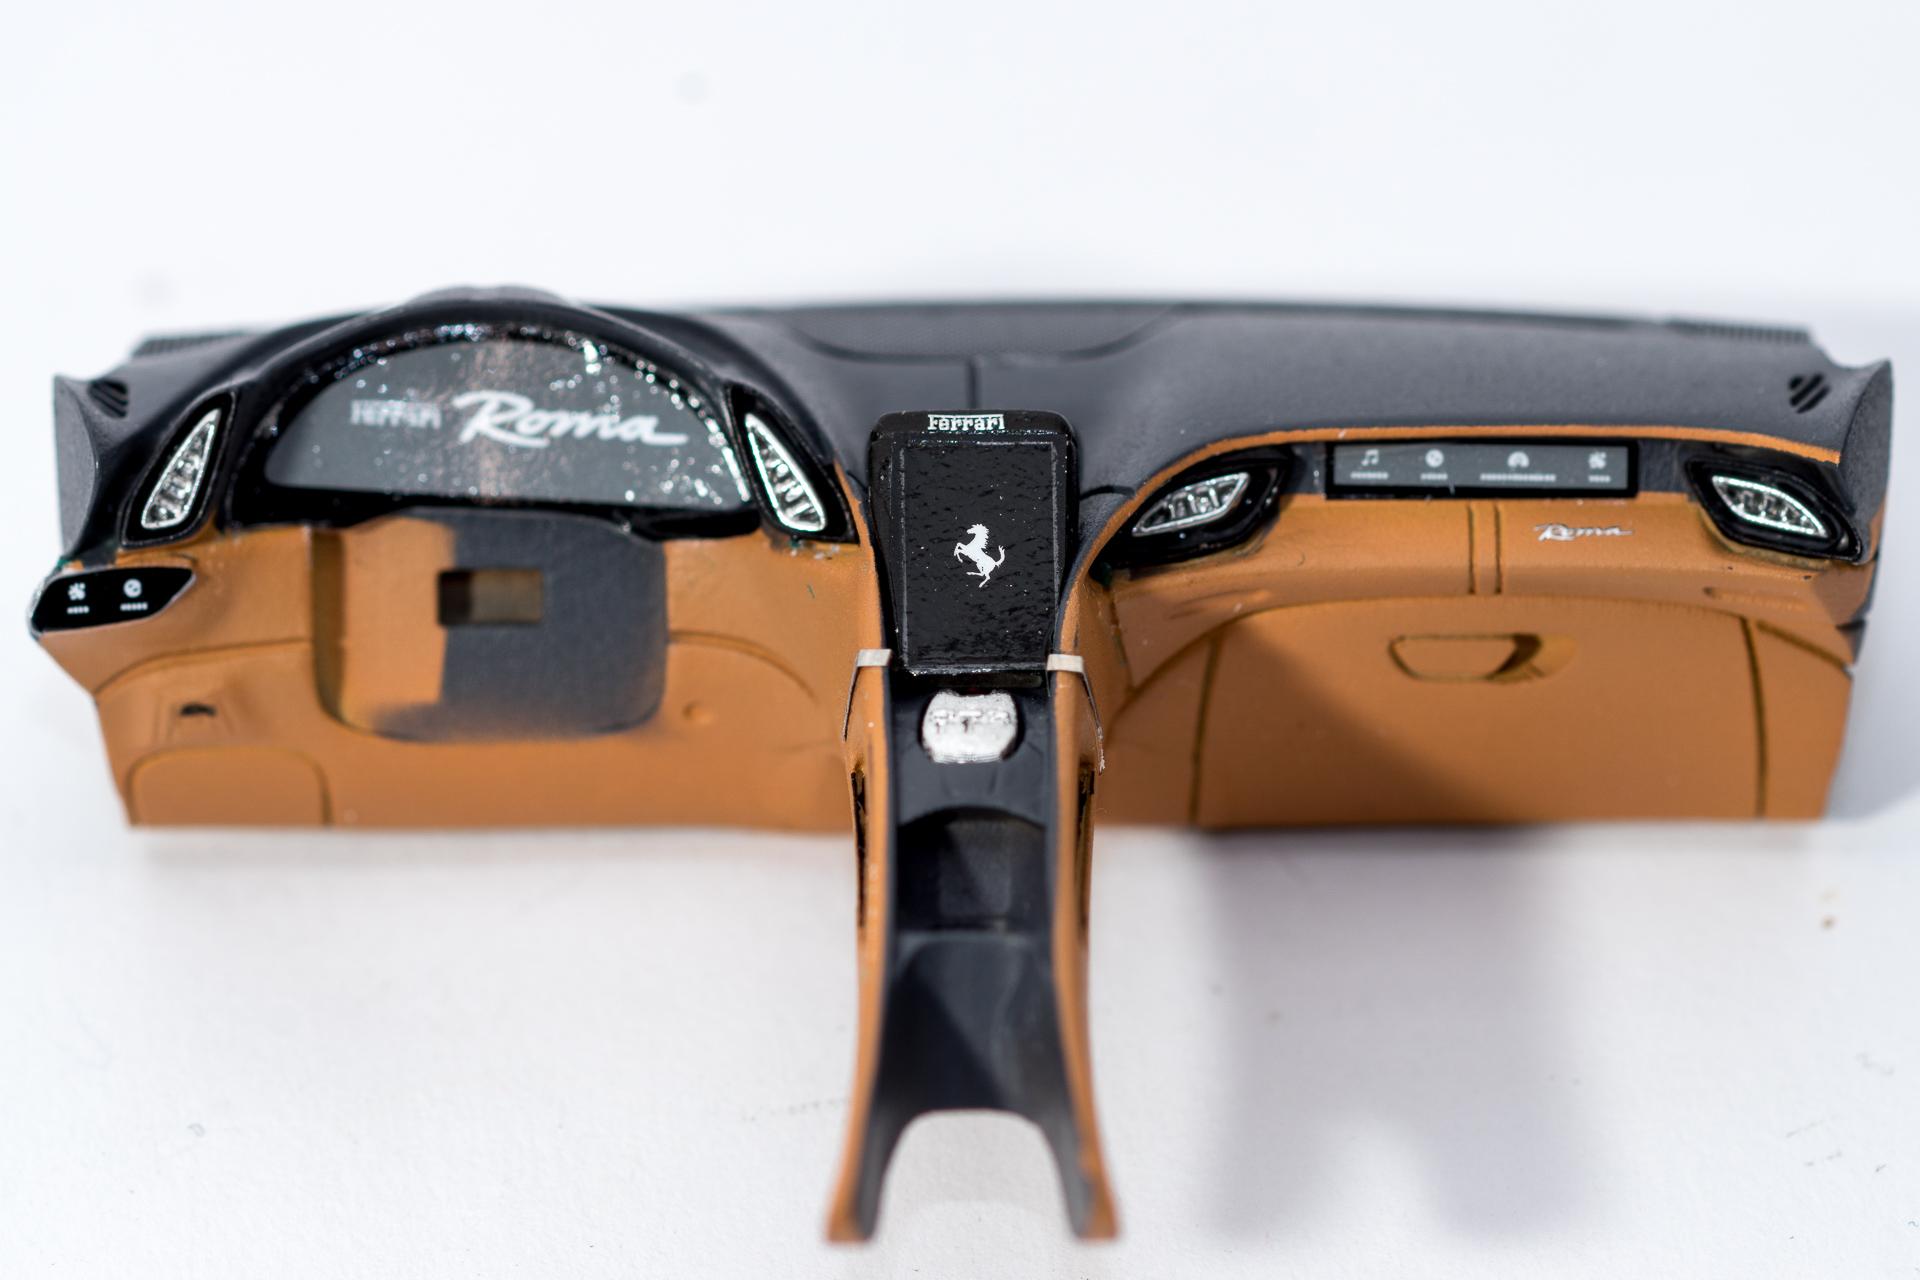
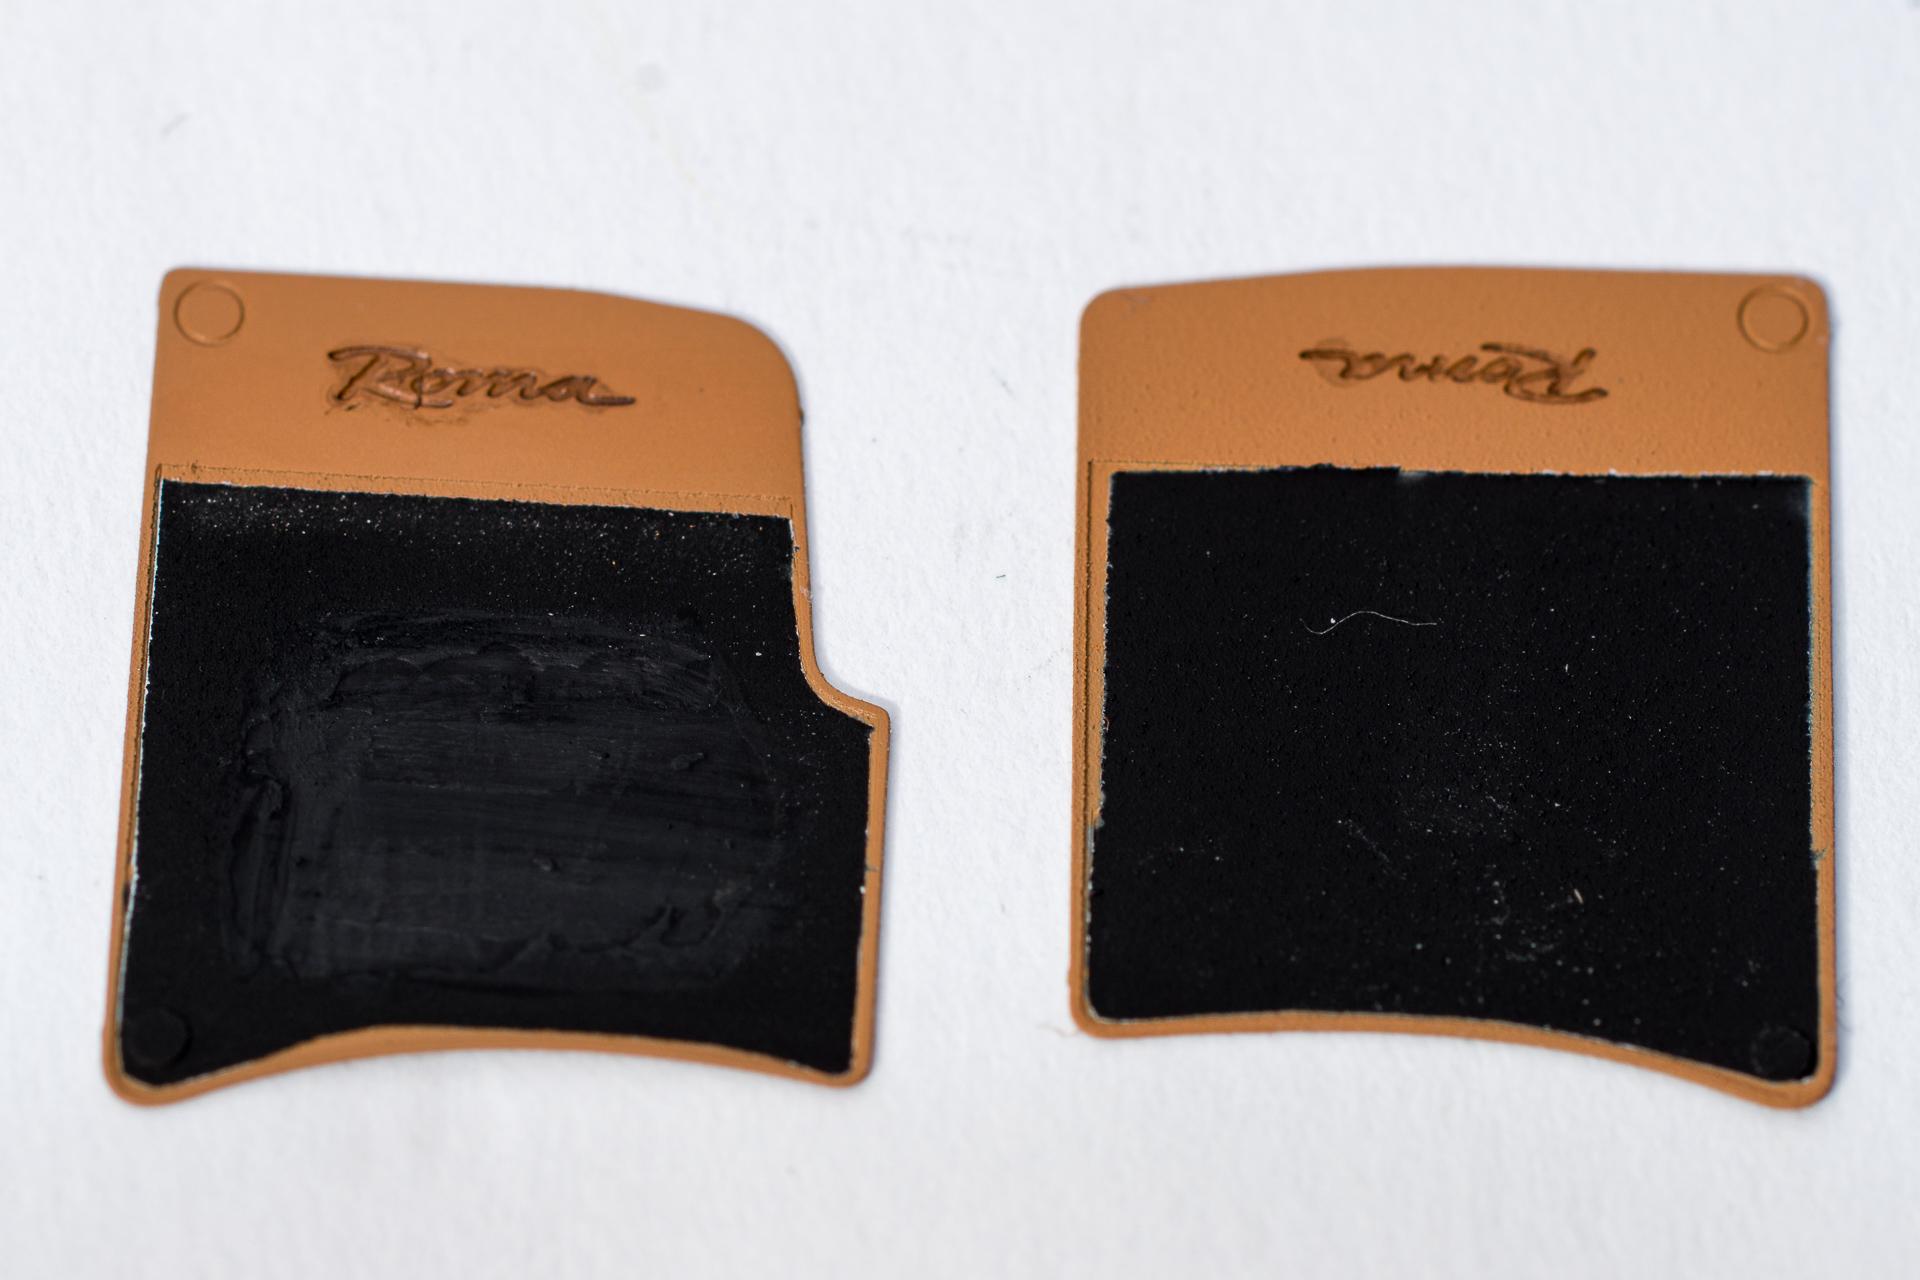
Hi all Unfortunately I didn't have that much time to continue this build during the last two weeks, but nevertheless I reached a point where I can't continue without clear coating the body. I hope I'll be able to do so upcoming friday, if not then surley / hopefully / maybe one week later First of all the floor mats have been painted. For the "Roma" lettering there are two decals provided in the kit, but only in red, which I thought wouldn't really match with the rest of my interior. So I decided to use some Tamiya Panel Line Accent Color Brown instead, let that flow in the lettering's recesses and wipe it off the surrounding faces with a moist q-tip. I only saw on this macro that I didn't manage to wipe it off completely in some spots. Also the black parts look much worse in this pic than in reality, as it is the case so often... After that the steering wheel was completed, with a total of 5 decals, measuring only 1 x 1.5 mm partially. Usually I tend to do without such small decals as they almost aren't visible in the end and because they usually stick everywhere but in the spot where they should when I try to apply them. But somehow I must have had the luck of a good moon-/star-constellation as this time most of them went on without any bigger issue The dashboard was completed too. Unfortunately I didn't notice that the large instrument-cluster-decal went on quite lopsided until it was too late. But as hardly anybody will be able to see it in the final model, I can live with that, even though it annoys me... And finally the headlights have been completed and are now ready to be inserted in the clear coated and polished body, once I had the time to do so That's all for now. Maybe there will be a larger gap until my next update because it's now depending on when I'll have time to clear coat the body. Urs
-
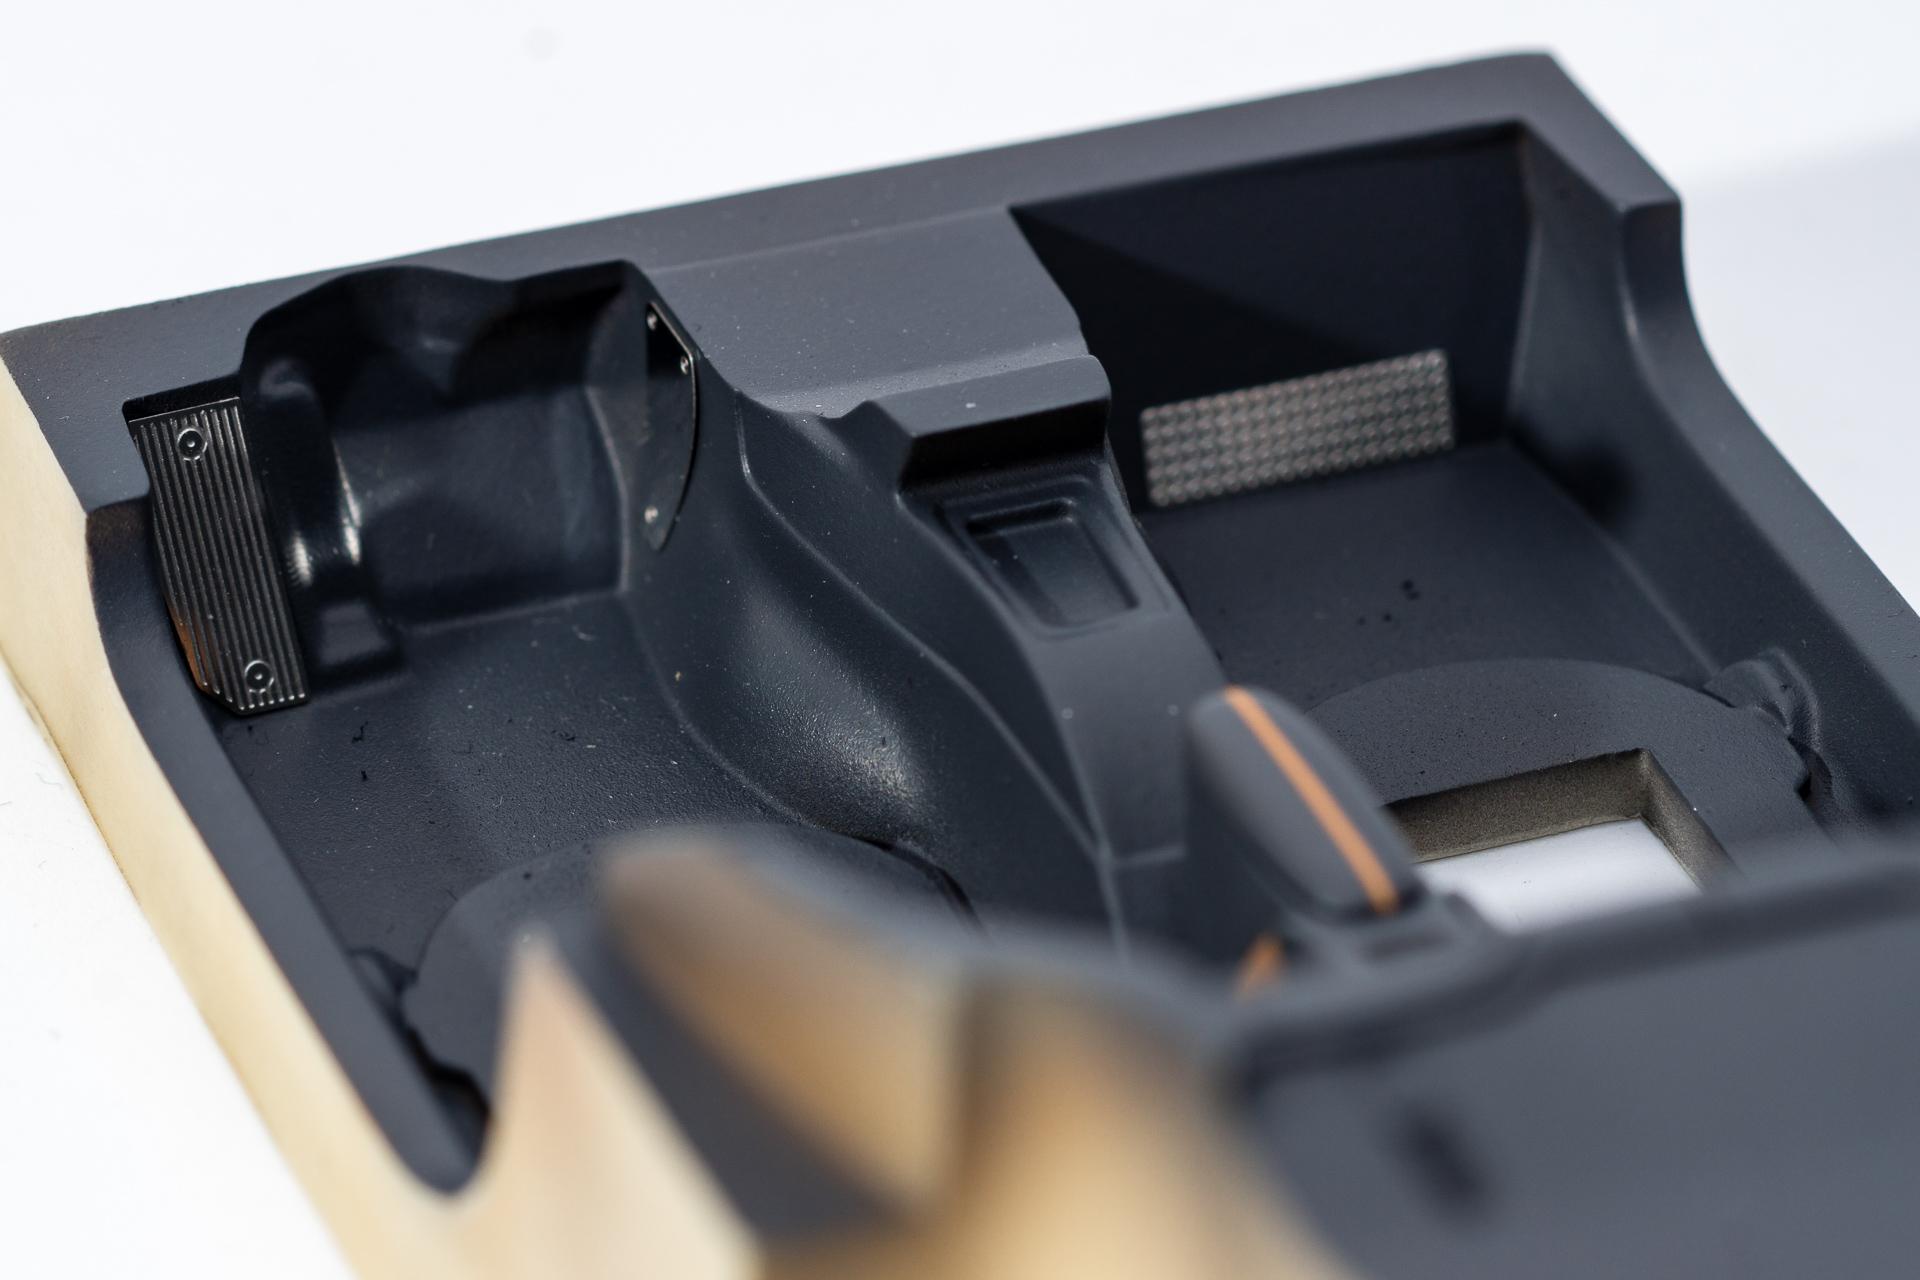
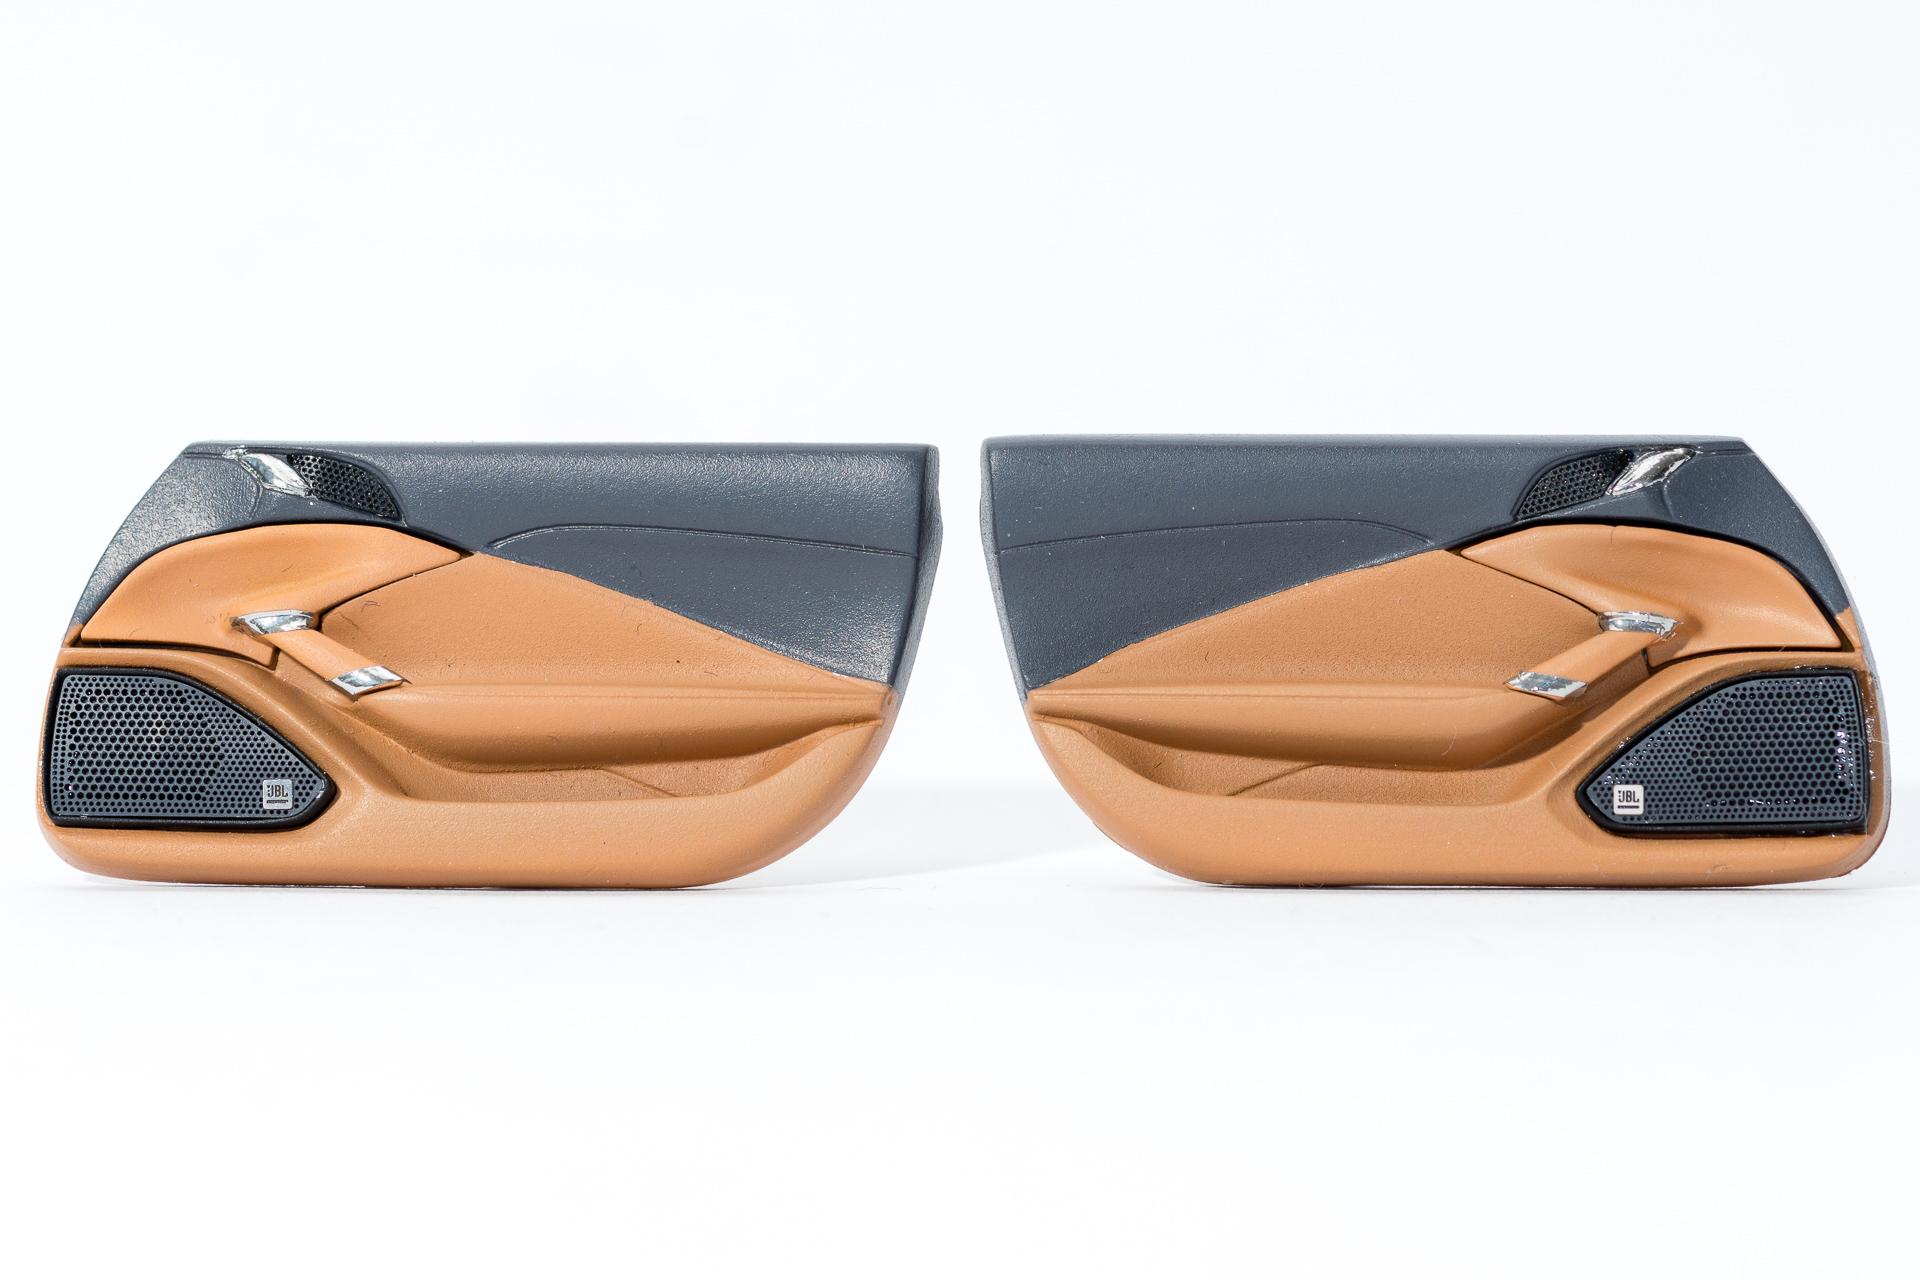
Hi all Unfortunately I had to postpone clear coating as my son caught a flu just before his school holidays, so he was at home on my intended clear coating day. And as this 2K stuff is quite aggressive, I only use it when he's at school to be able to give the whole apartment a thorough vent before he comes home. Now I think I'll have to wait until mid march for my next attempt at clear coating. But first of all nobody is pushing me and second there is enough other work to do on the Roma (and the McLaren Senna and a figure I started some time ago and an additional build which runs alongside and... I think I just have too many concurrent projects going on at the moment...) First of all the painting of the rear seat has been corrected. After that the buckles for the rear seats and the first few PE parts have been installed. Additionaly the grommet (I hope it's called like that ) had to be removed because I noticed that i misinterpreted the instructions and these parts should have been attached to the inside of the body. The spot where I had installed it first won't even be visible once everything is put together... After this work on the dashboard continued And finally the door panels could be completed. Each panel consists of a total of 6 individual parts which makes painting much easier That's it for this week's update Urs
-
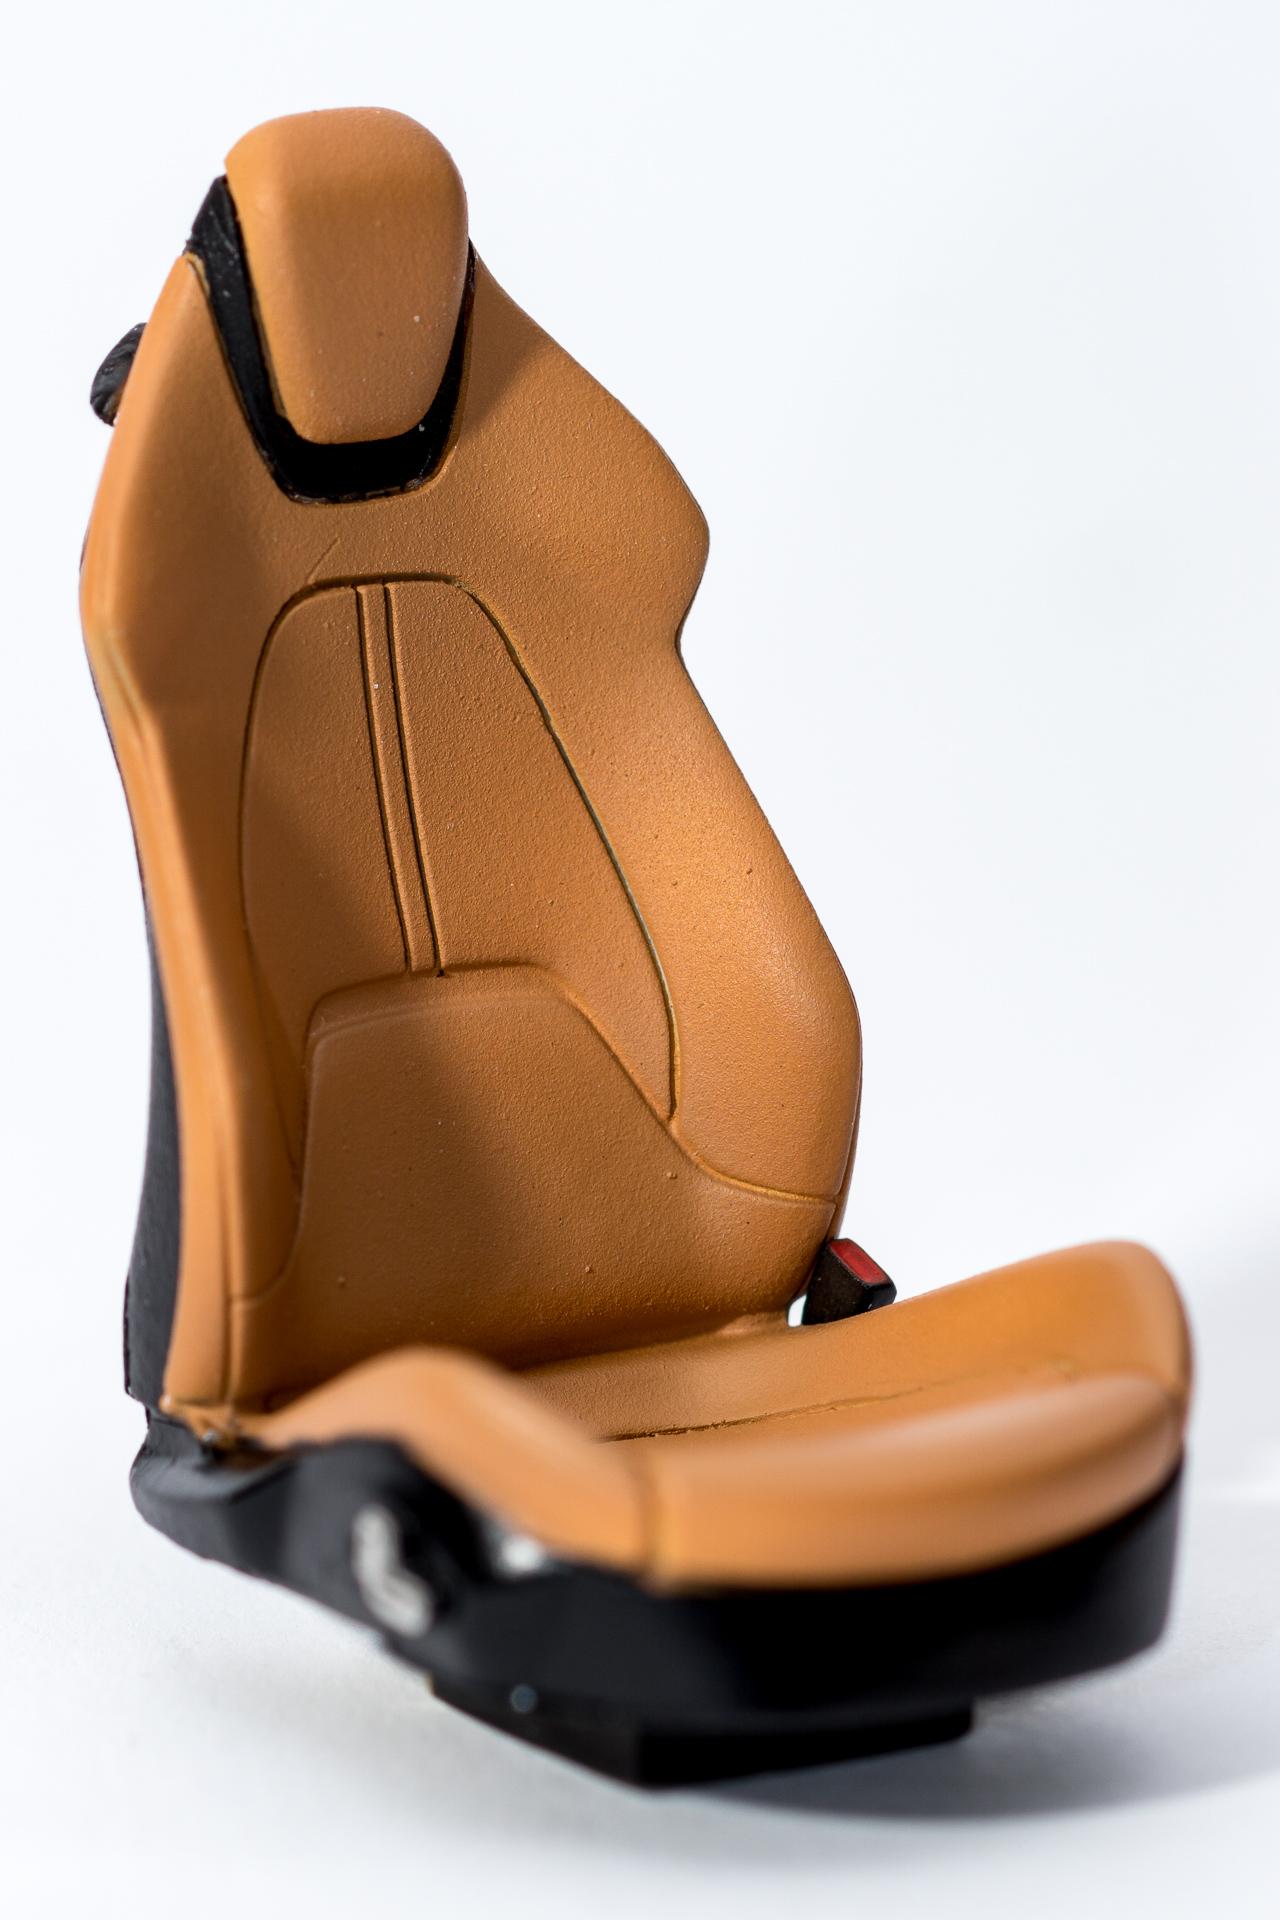
Hi all Thank you very much Unfortunately I didn't find that much time to continue this build this week as I would have liked, but there is some small progress I'd like to show you Let's start with the pic where I had a minor shock moment when editing the photographs for this W.I.P. As you can see, the brown areas are of different size... 🤔 Luckily the reference pictures show that the driver's side is correct, so I'll only have to cover some brown with grey. The other way round would have been a little more laborious. Then the Ferrari badges have been applied to the body. Therefore the body is now ready to be clear coated. With a little luck I will be able to do so upcoming friday And finally the seats have been completed. As mentioned in my last update, the badges for the headrest are slightly too large, but in my opinion they're ok the way they are. And I think nobody will really notice it, unless he/she is a Ferrari Roma expert That's it for today's update. I hope I'll be able to show more next time Urs
-

1:16 Gunze Sangyo 1937 Rolls-Royce Phantom III Sports Saloon
harti20 replied to Anglia105E's topic in WIP: Model Cars
Looks like a good start on this one. I bought this kit soon after getting back in the hobby almost 10 years ago, but didn't start it yet. Mainly because I wouldn't know where to free up some space to display it once it's finished I'll be following your build with great interest -
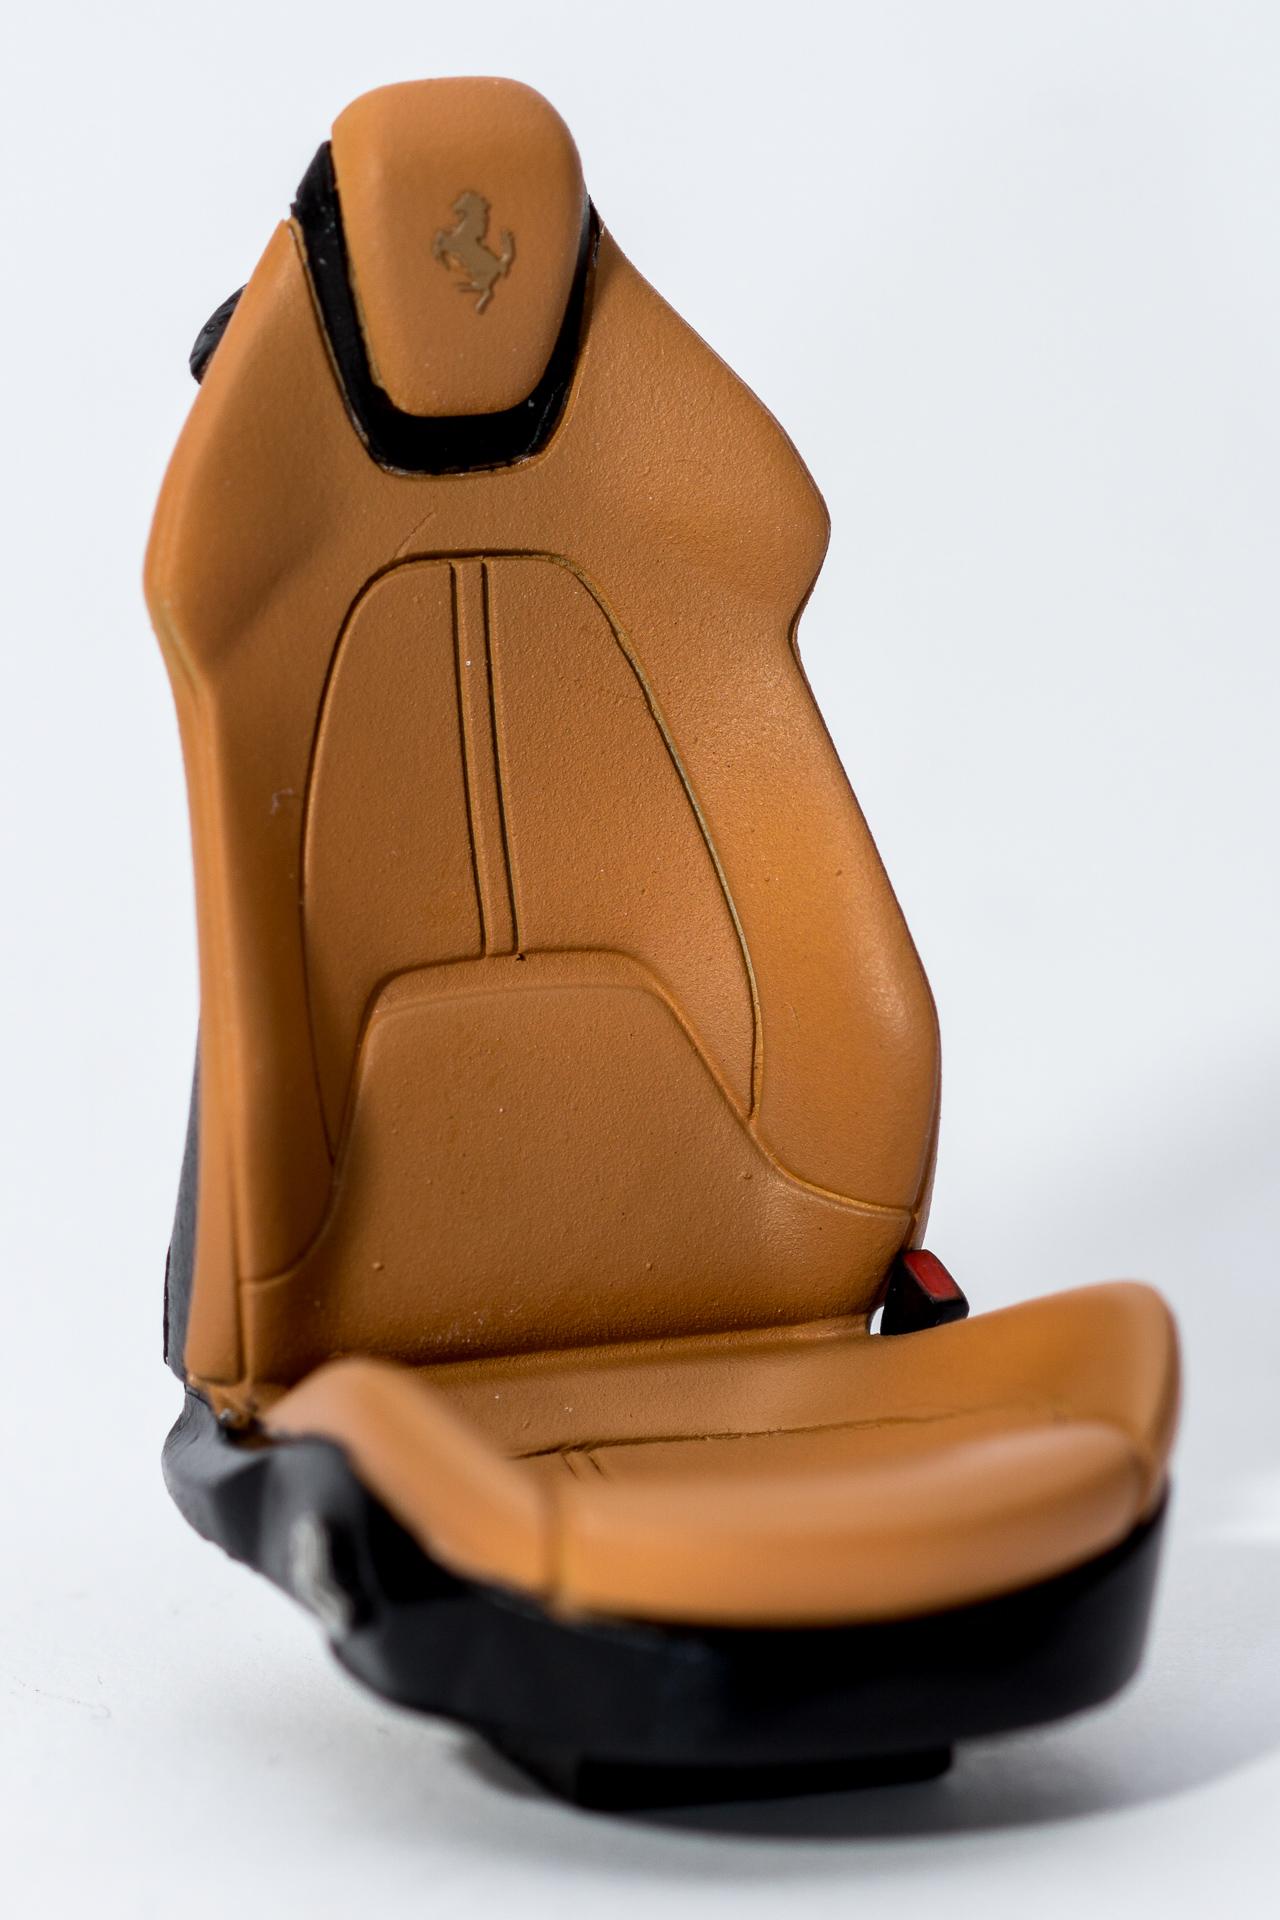
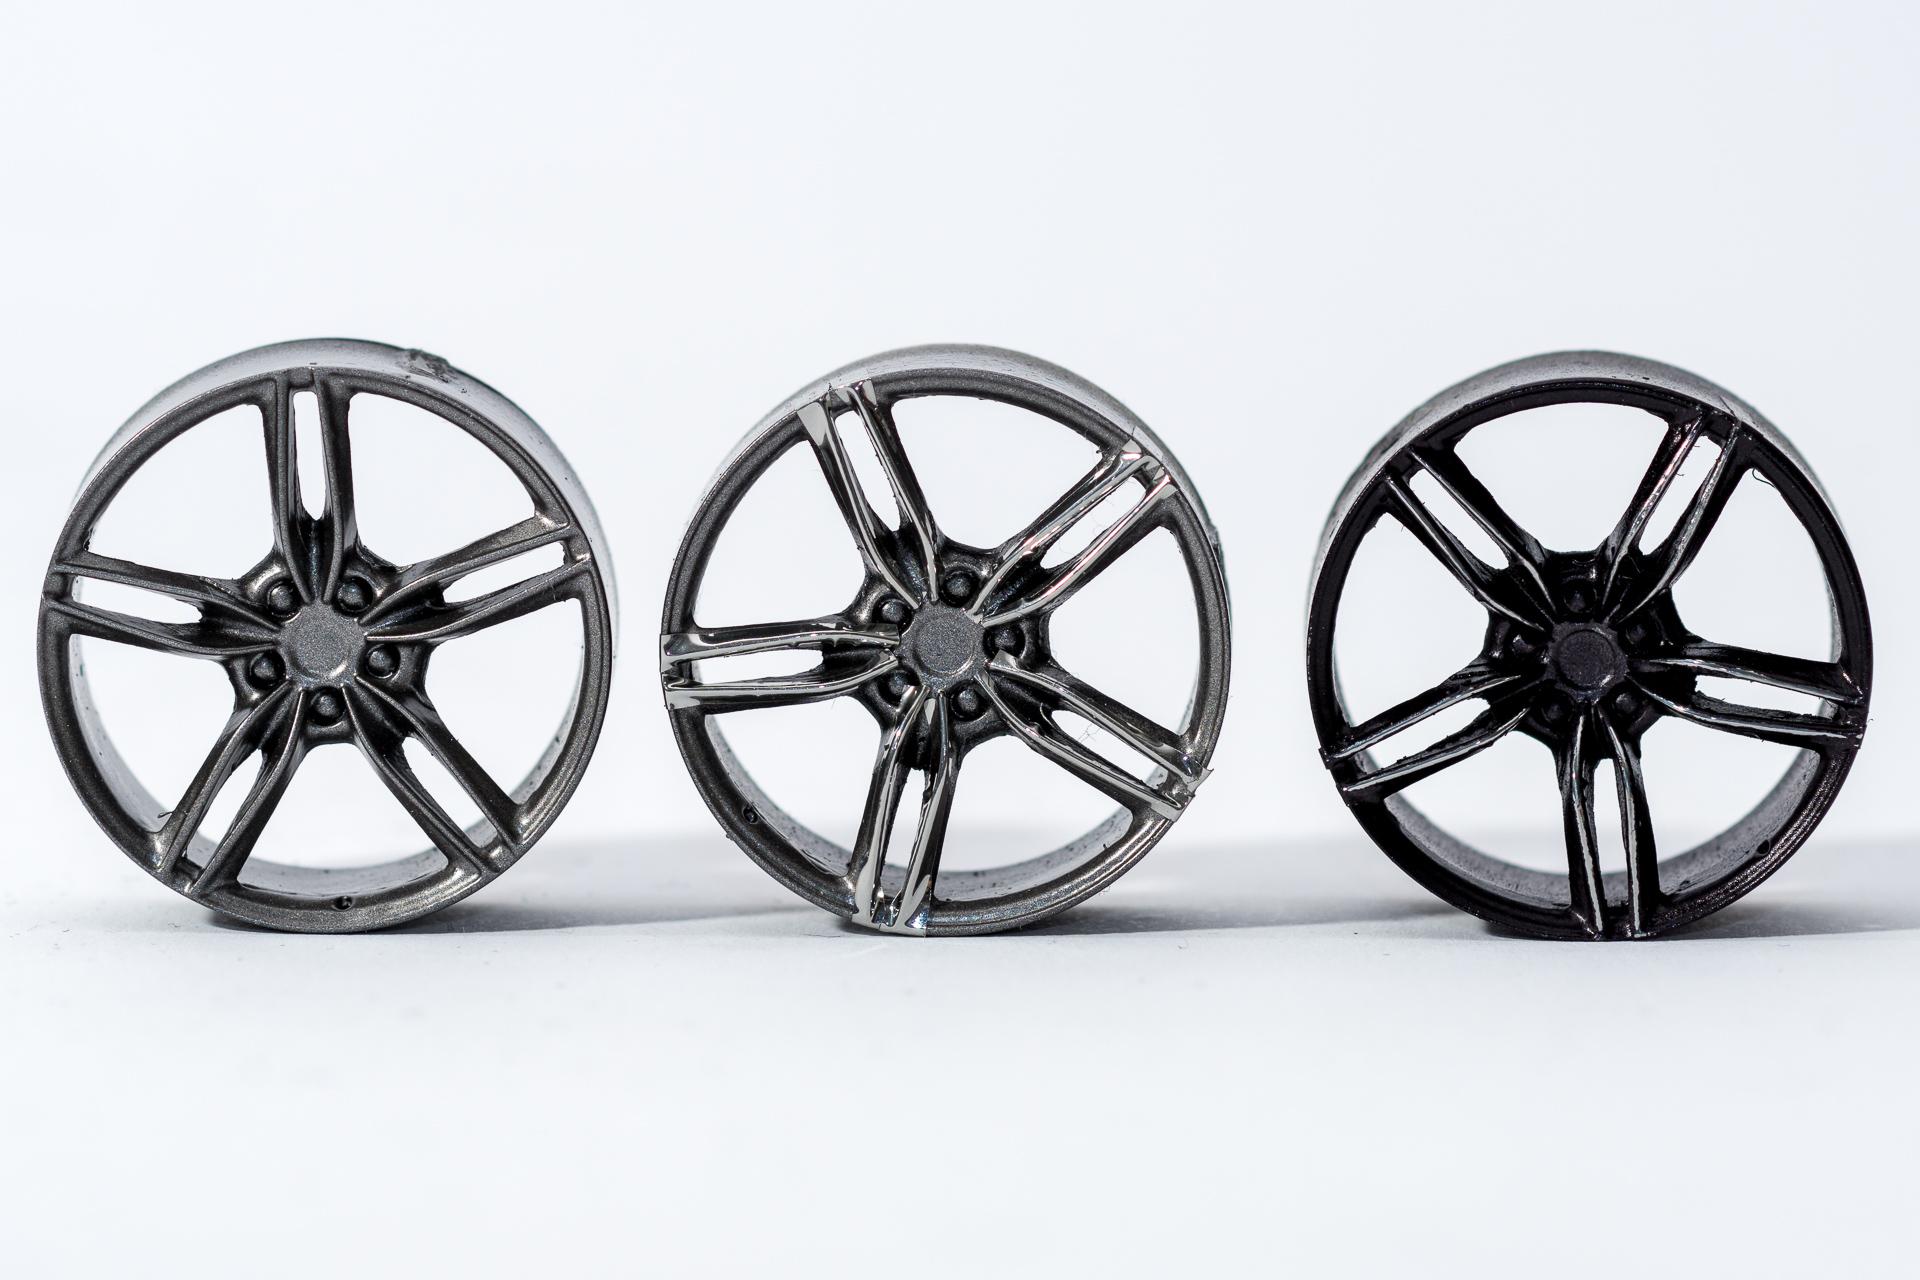
Hi all Don't worry, I will continue to post pictures Thank you The last few days I applied the few carbon decals on the body. Also the PE parts for the Ferrari logos have been attached. Just in case the carbon is not that obvious in this picture: It's the splitter and the side skirt After that, the diffusor received its last pieces of carbon and the first few PE parts. There would have been a decal for the unpainted spot, but somehow I didn't find out how to apply it correctly. In the only way it made sense to me, the pattern didn't match at all with the surrounding decals. So I decided to do without it and paint this area in black one the clear coat has been applied. The rims have been painted with Alclad Magnesium first (rim at the left in the picture underneath), as I thought, Gunmetal would be too dark. But then I had the idea to apply some Hasegawa Mirror foil to the spokes, paint over it and remove the paint on the foil afterwards. But as you can see on the rim in the middle, there was almost no difference between the Magnesium and the mirror foil, so I decided to paint it in Alclad Gunmetal anyway. The (almost) final result can be seen on the right rim in the pic. It's only almost the final result because I had the idea to apply some nuts from a 1/12 MotoGP detail set. So far I didn't take a picture of the really final result 🙂 Finally the seat has been completed. Whereat... it's only nearly completed too 😉 Just when I thought, I had it done, I saw that there is a Cavallino Rampante on the headrest. alpha model provides you with a red decal for that. But by looking at pictures of the 1:1 seat, the horse seems to be embroidered and therefore has a certain thickness. So I looked at my leftovers from previous builds and found two PE parts, which are a little too large, but still acceptable. As the embroidery on the original seat is a little darker than the rest of the seat, I'll use black primer before applying the same brown (Ferrari Cuoio) I used on the seat. That's it for today's update. With a little luck I'll be able to finish body work prior to the start of my son's school holidays, so I could clear coat it before Urs
-
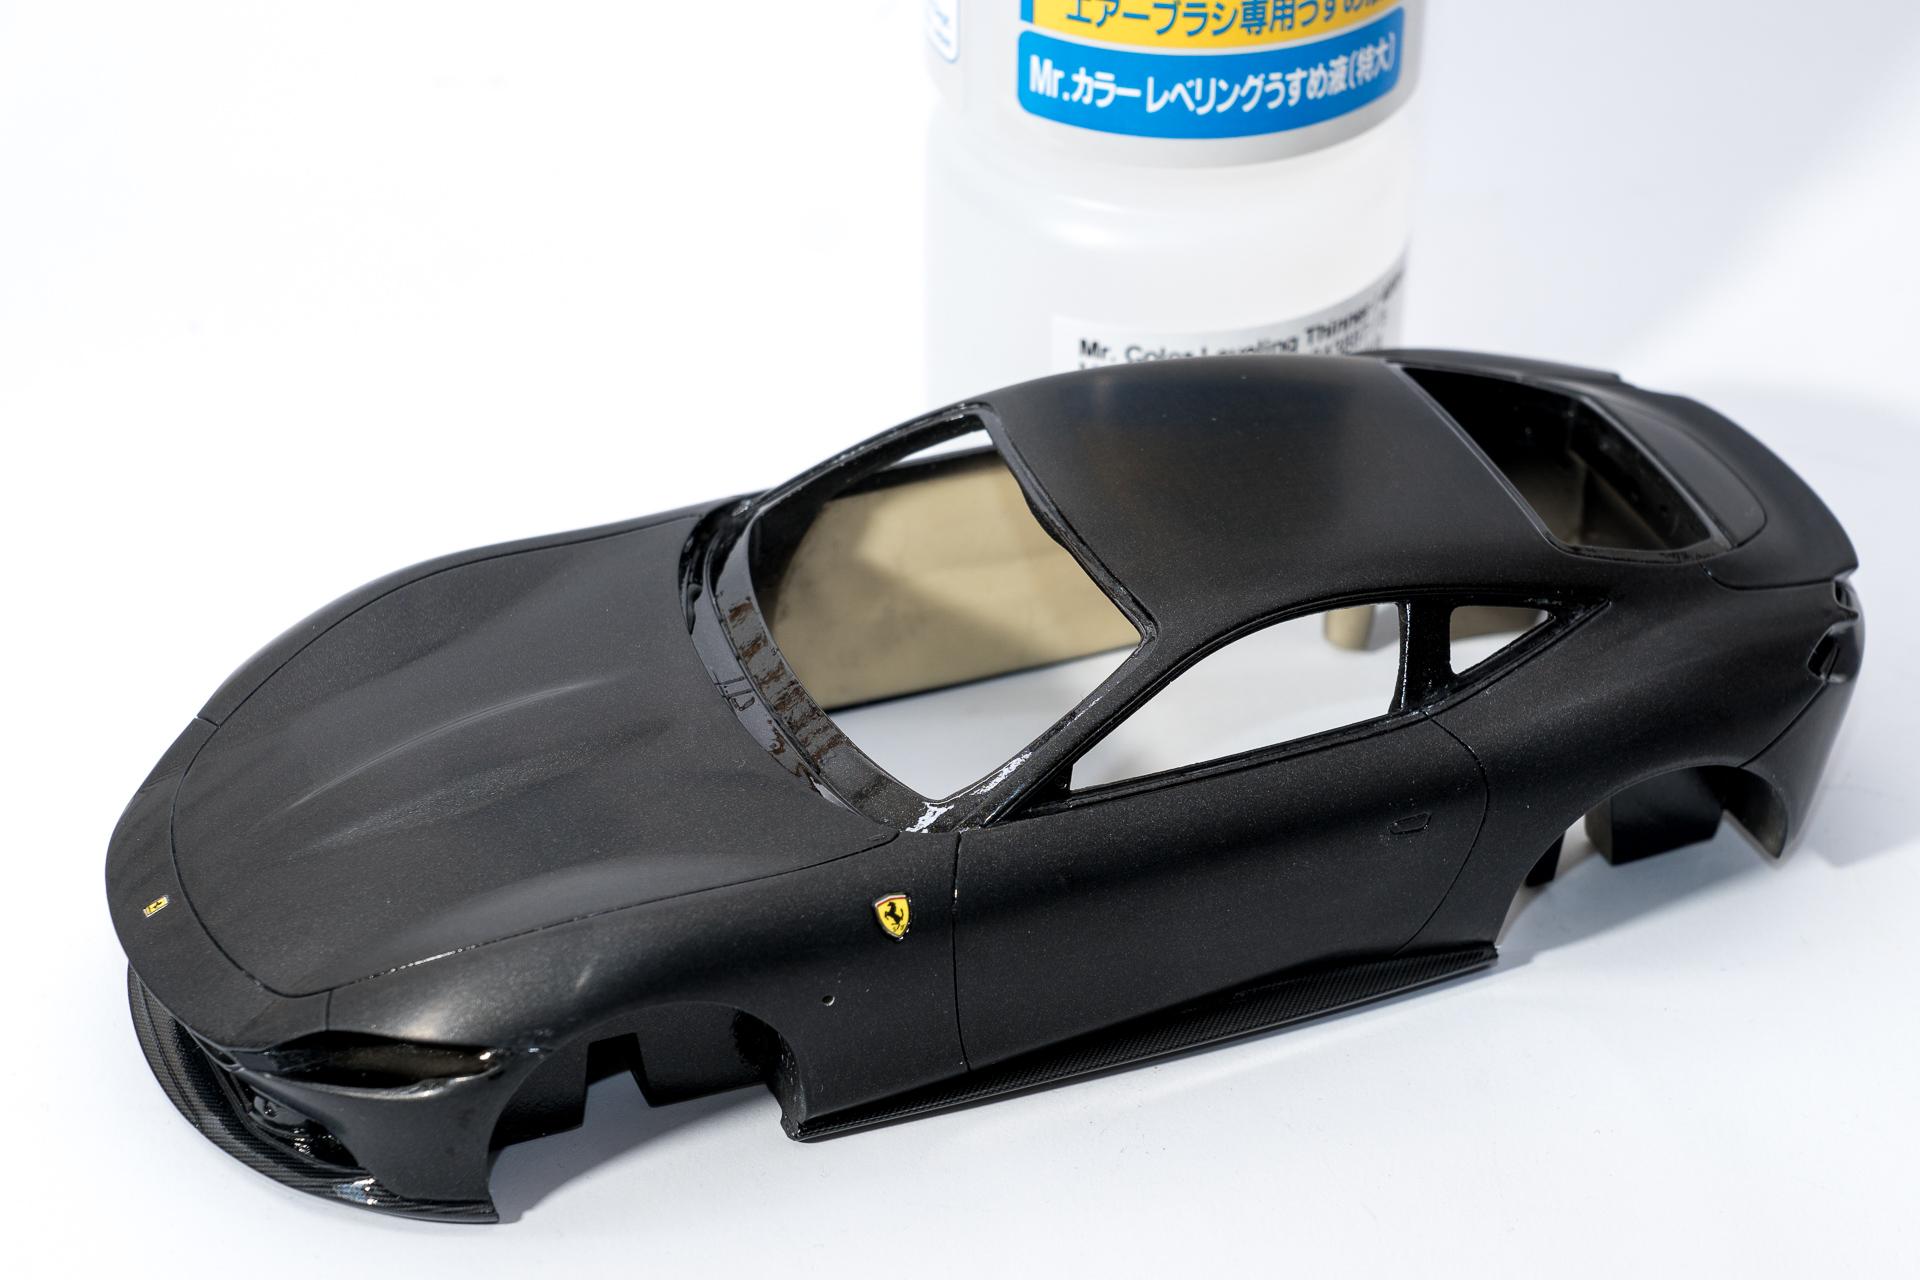
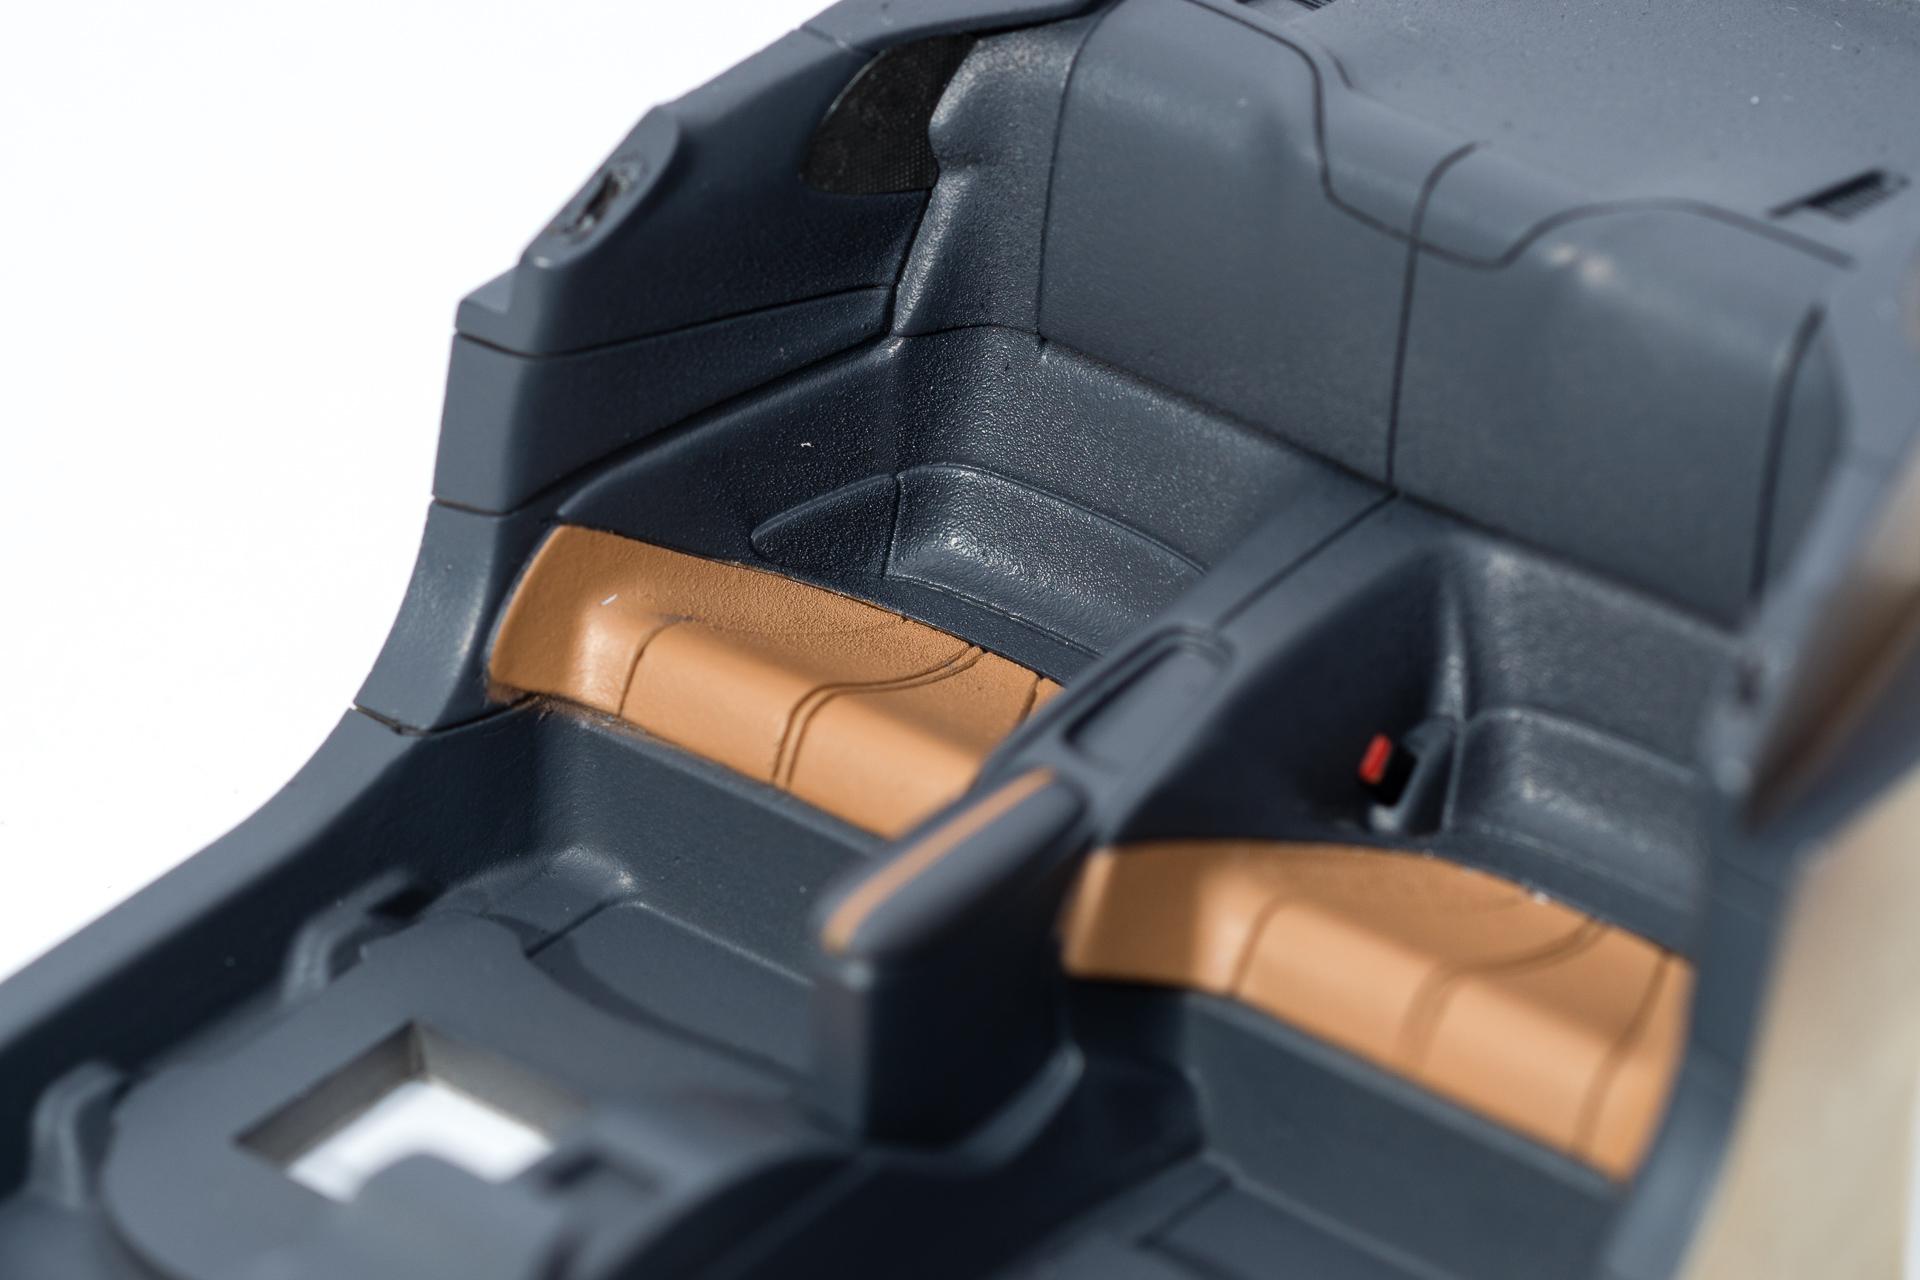
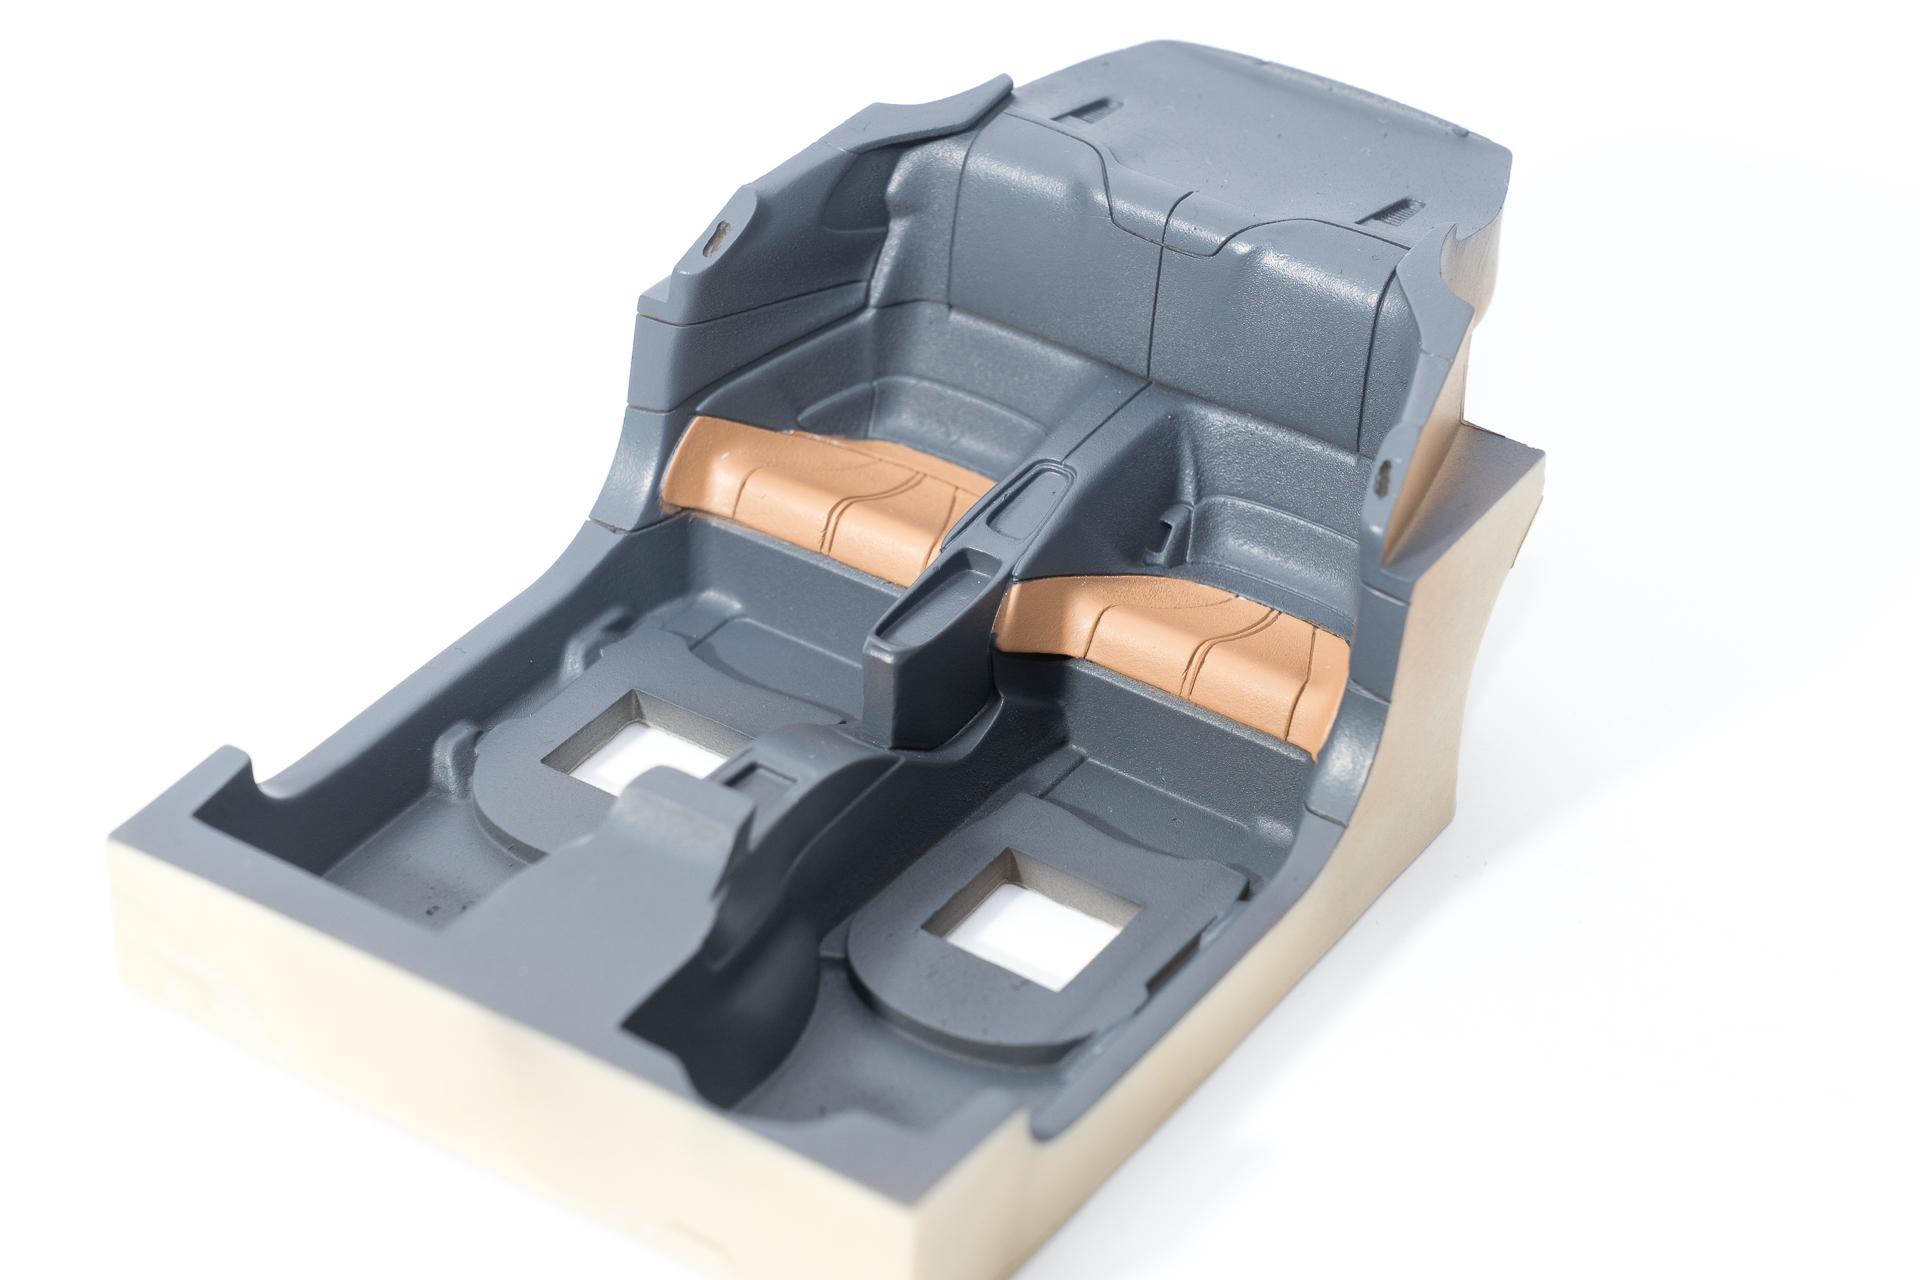
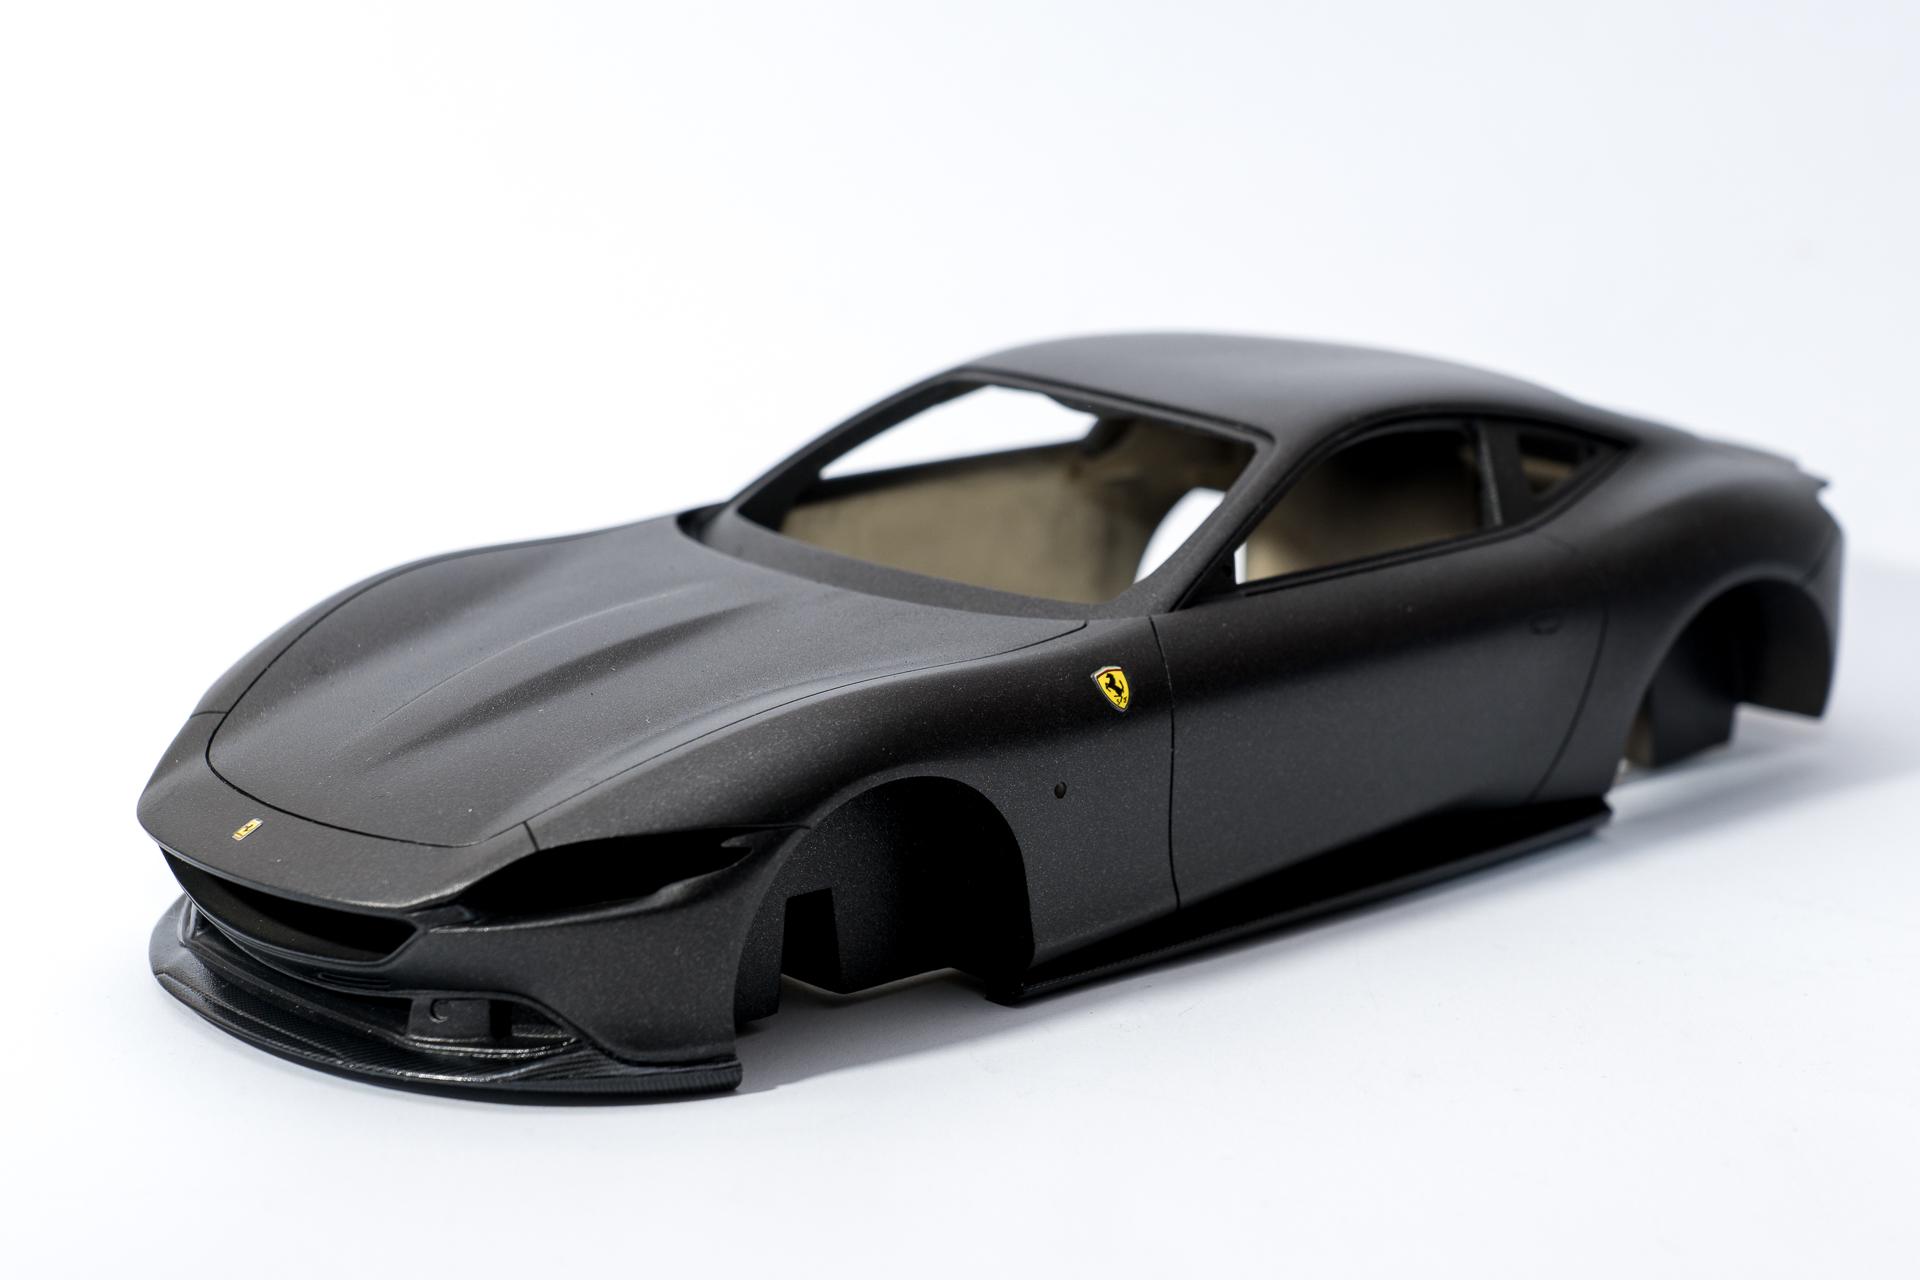
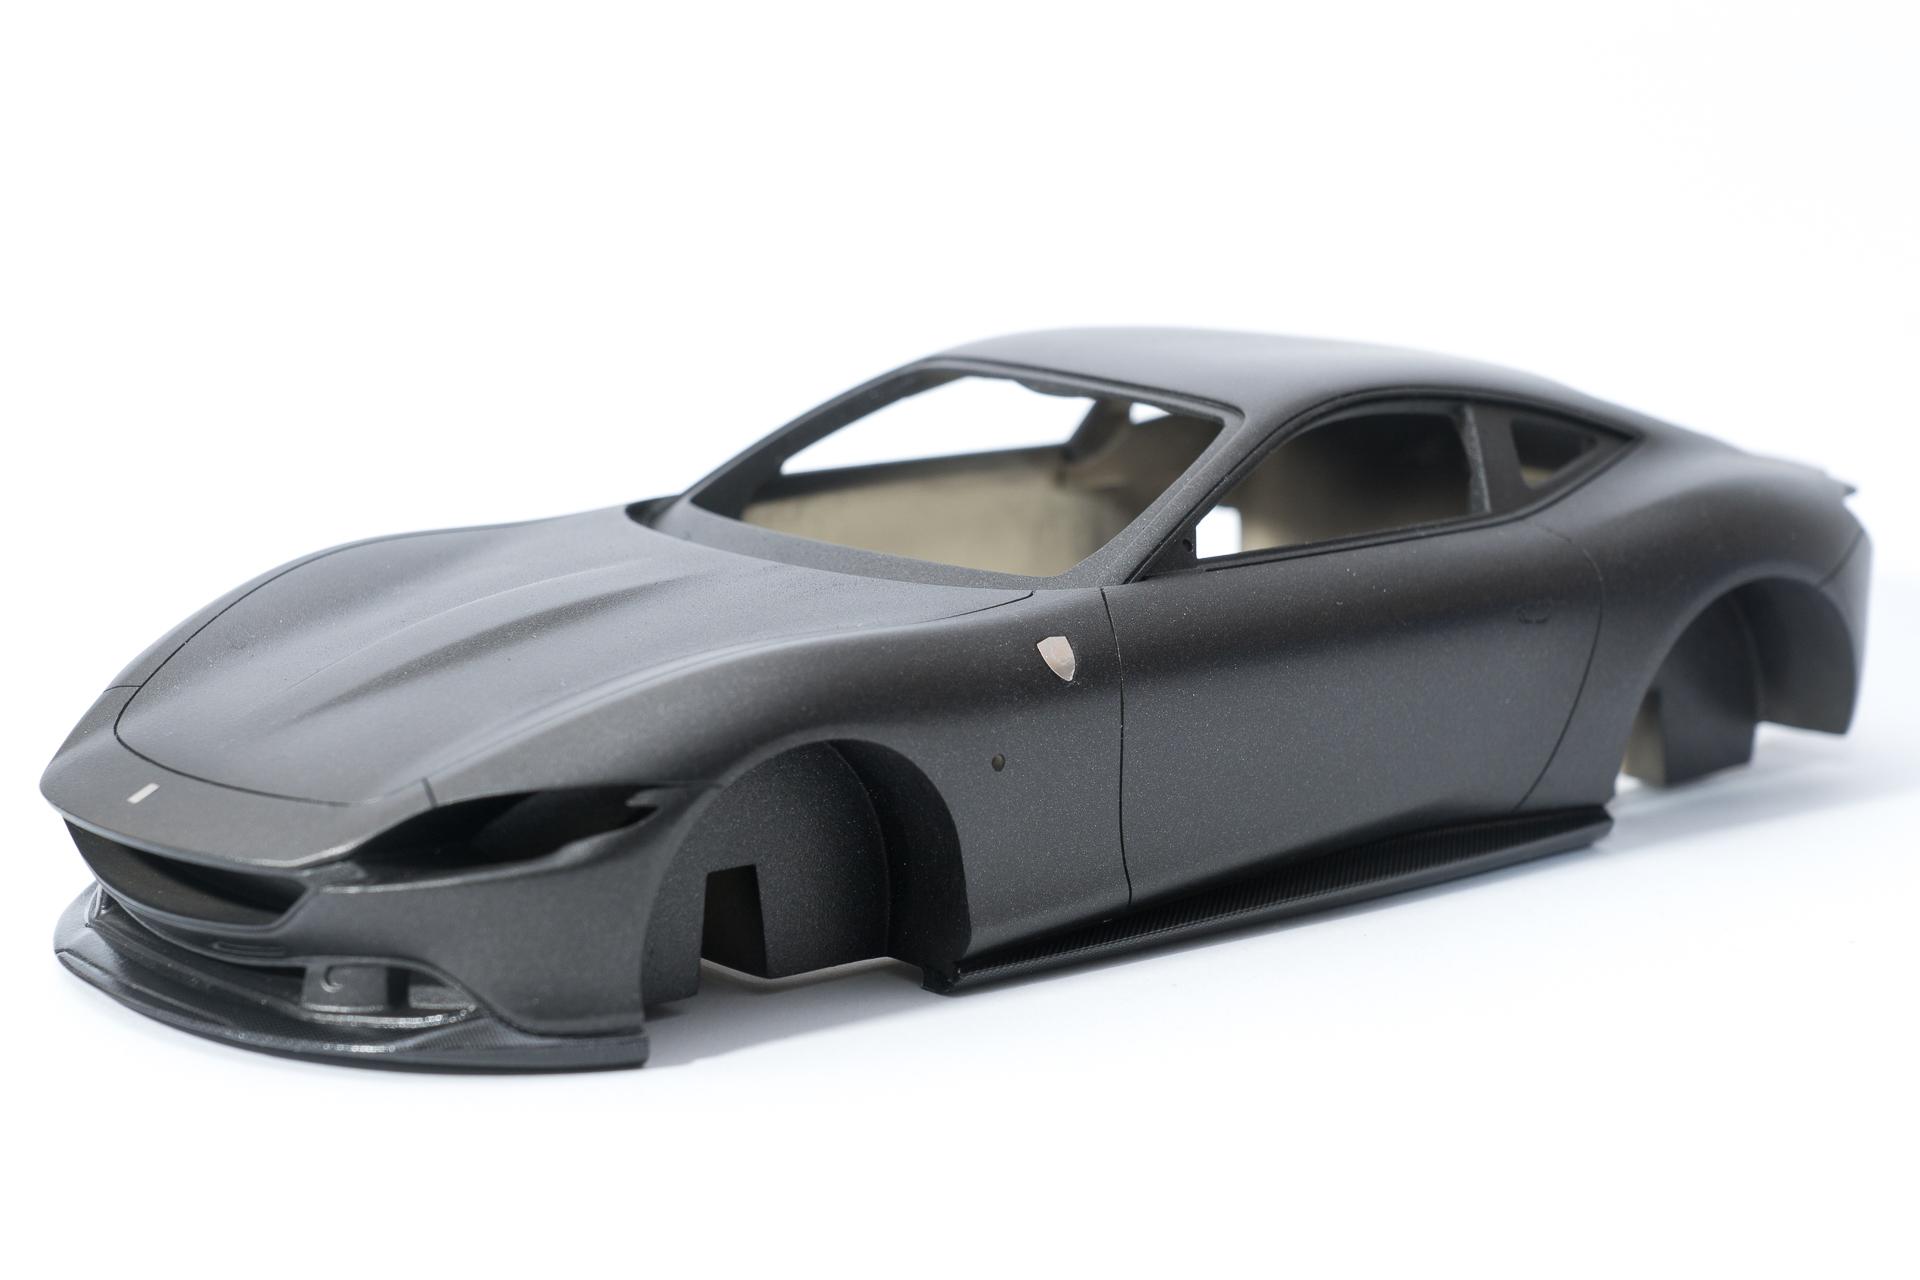
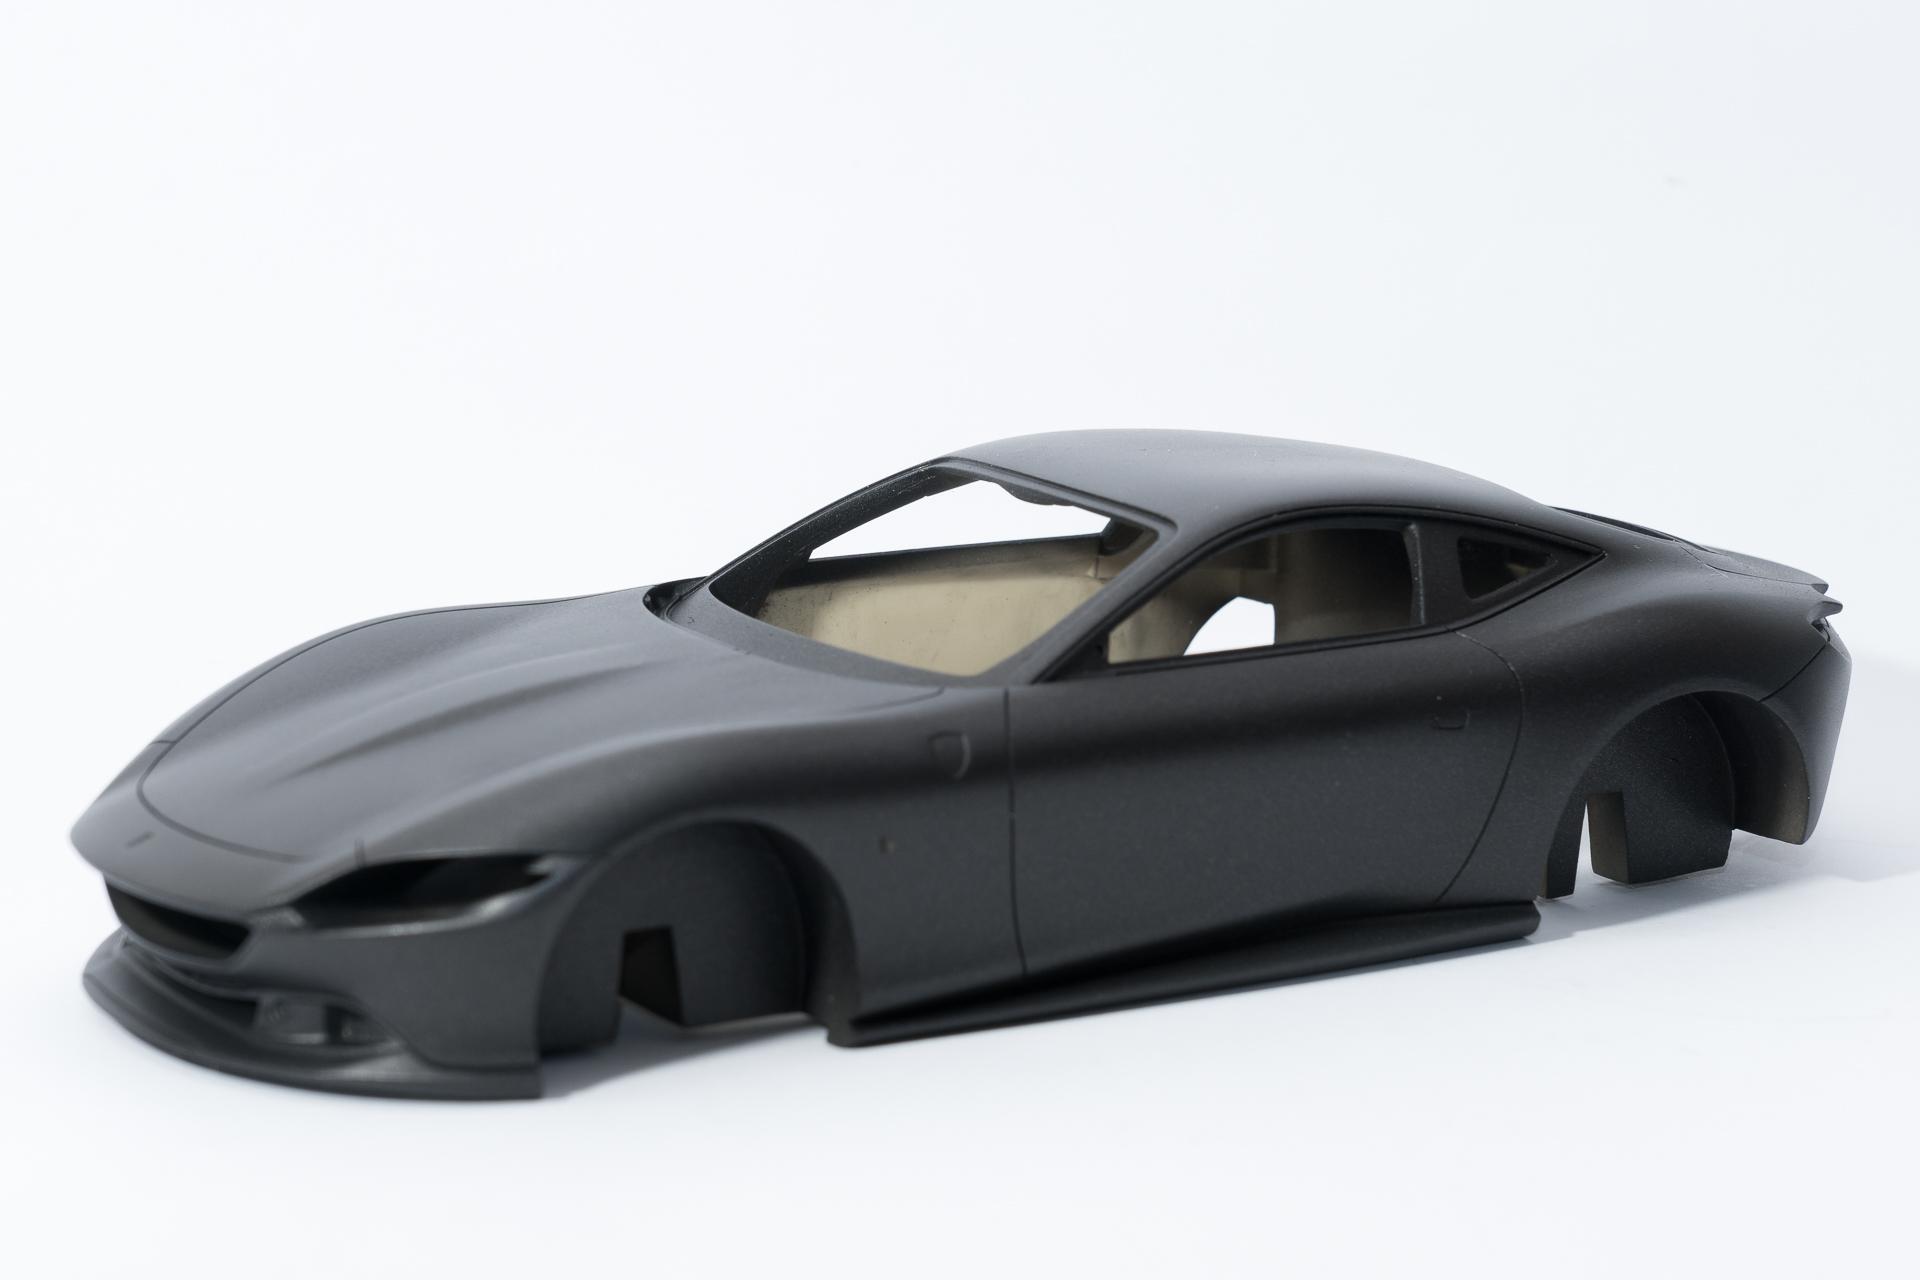
Hi all Thank you very much As mentioned in my previous post, the body had some spots where I had to sand it to get rid of dust, so I repainted these spots afterwards and after that was done, the whole body got two more layers of paint. Soon I'll apply the few carbon decals and the Ferrari badges As the primer's grey was much darker than I had it in mind, I first sprayed the interior white, before applying Ferrari's Cuoio paint. I was so pleased by the color that I changed the color scheme of the interior to have more Cuoio and less black surfaces. One of the seats has alreday been masked and painted on the backside. Now I'll only have to paint a small area around the headrest in semi gloss black and add the additional parts, then this one will be finished and ready for final installation That's it for today's update. I think I'll be able to show more of the interior next week and maybe also a body that is ready for clear coating, with all the decals on Urs
-
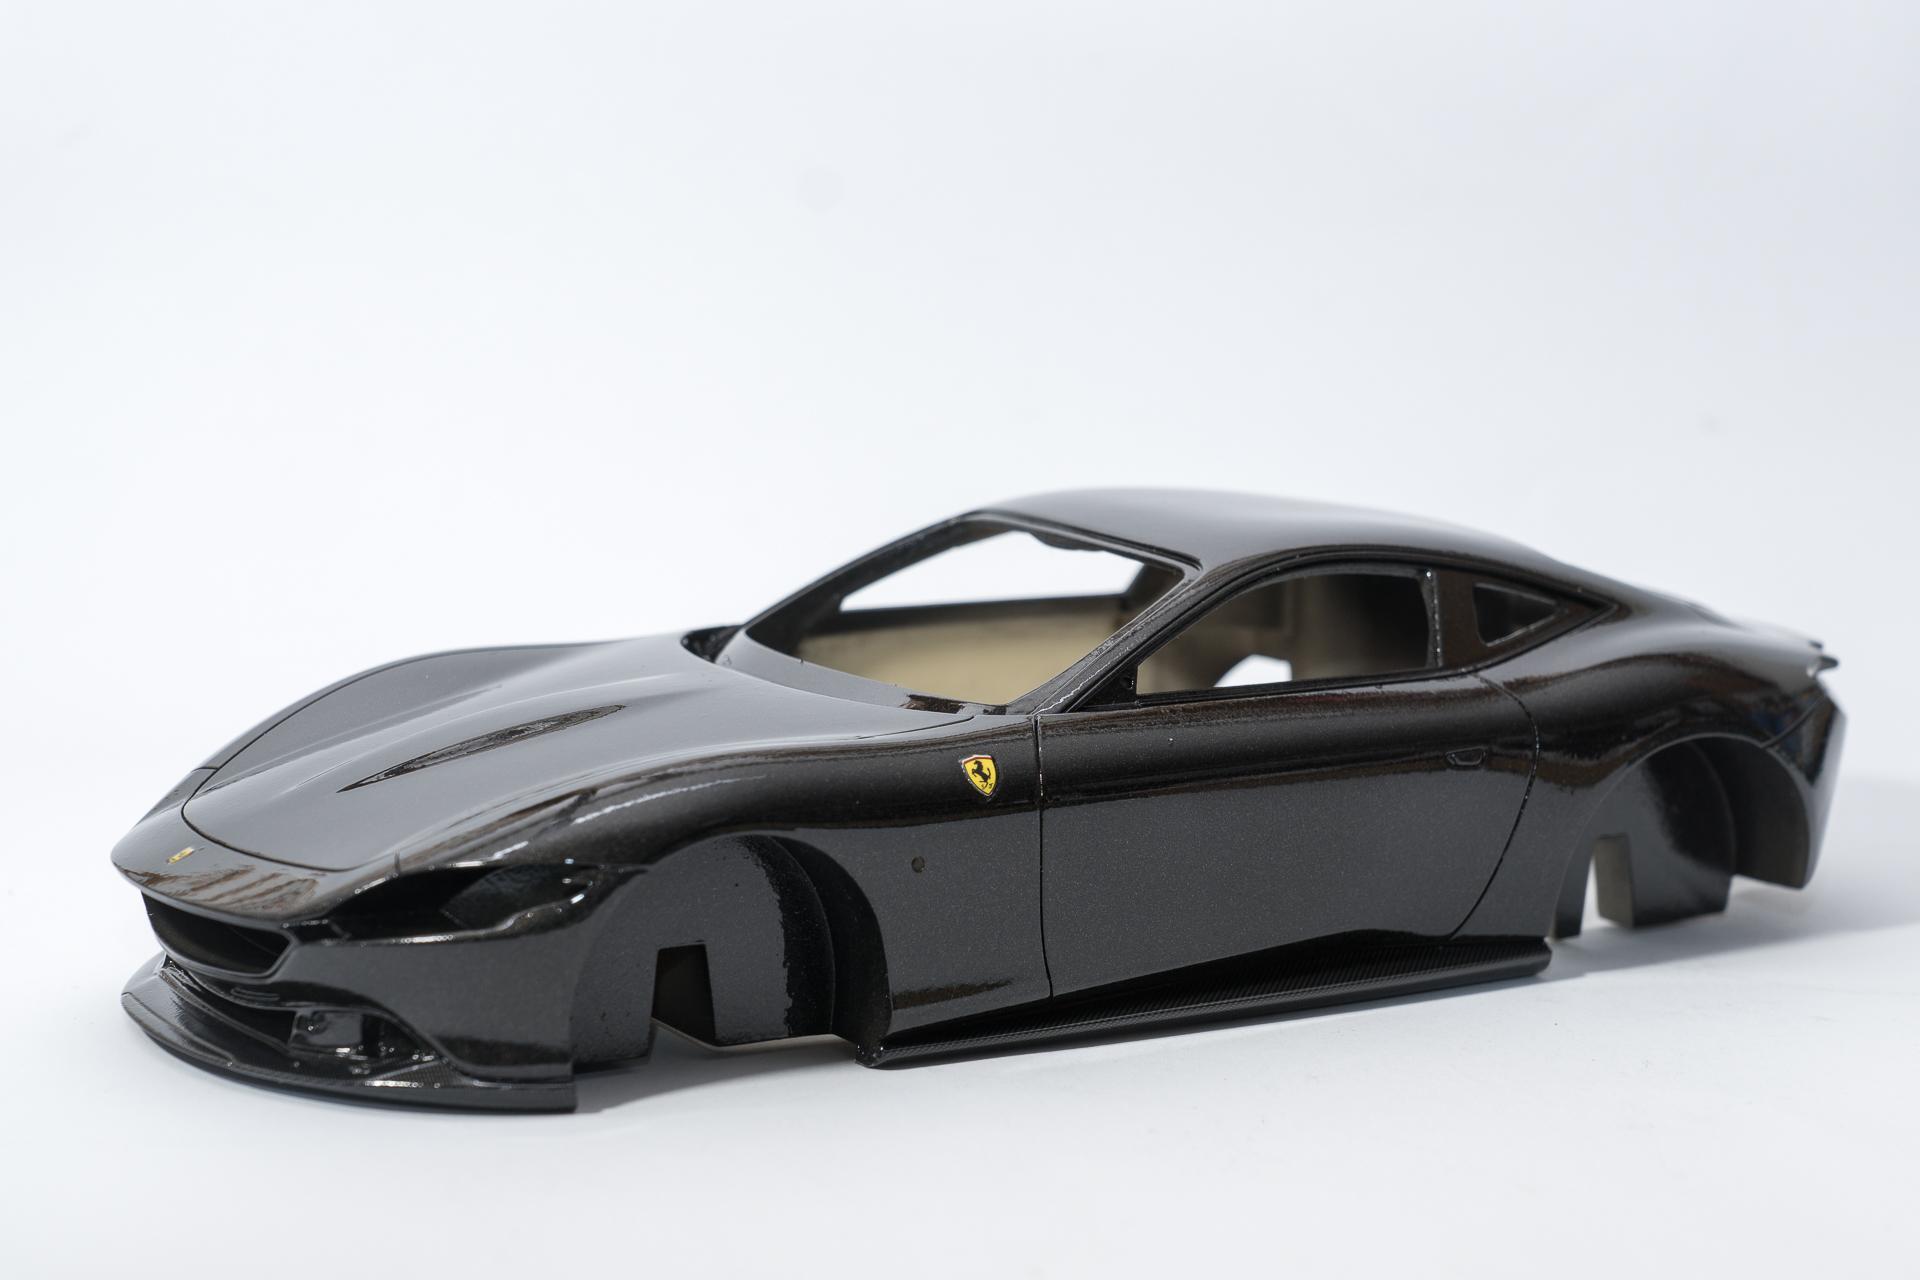
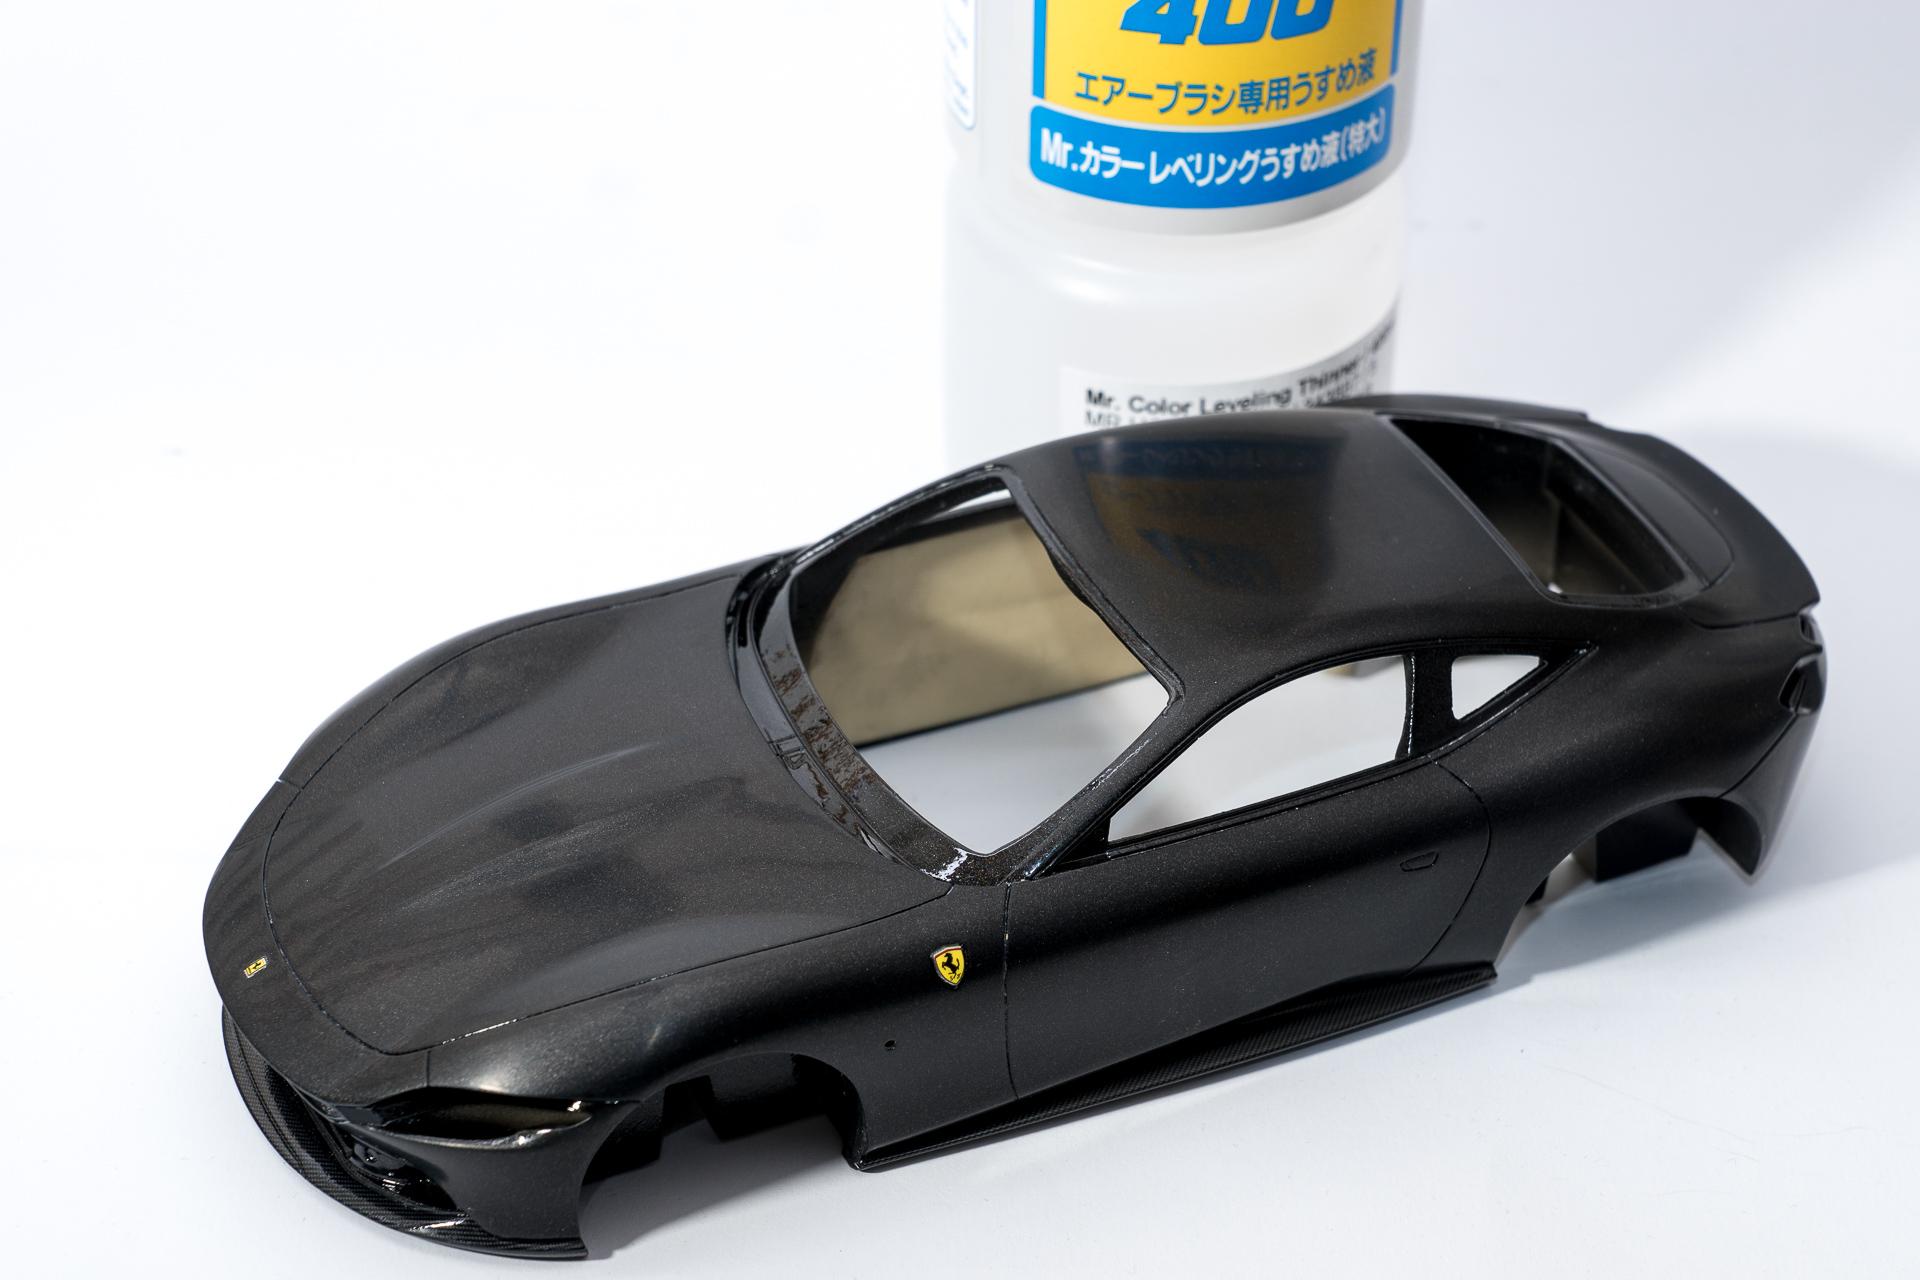
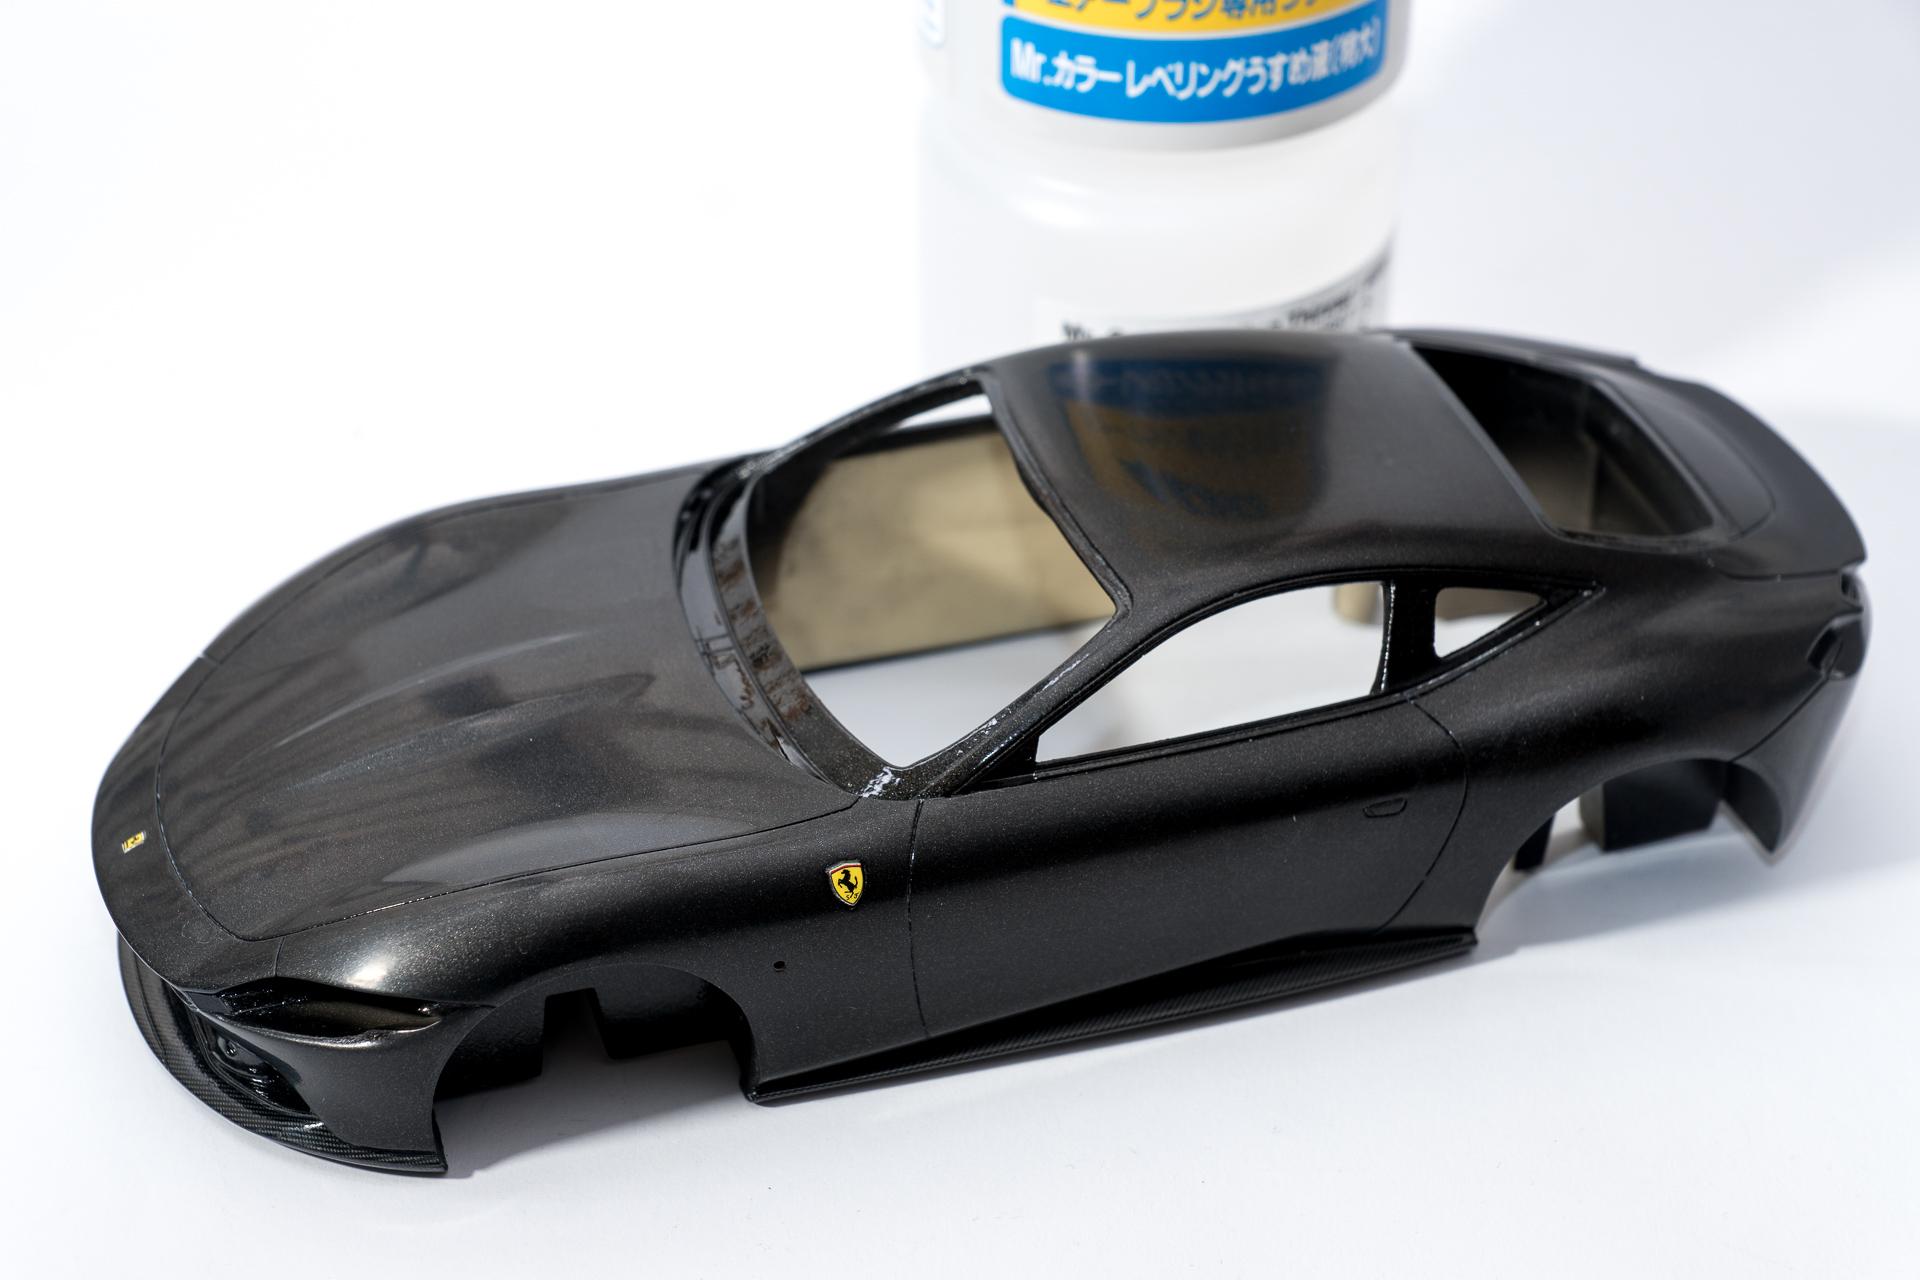
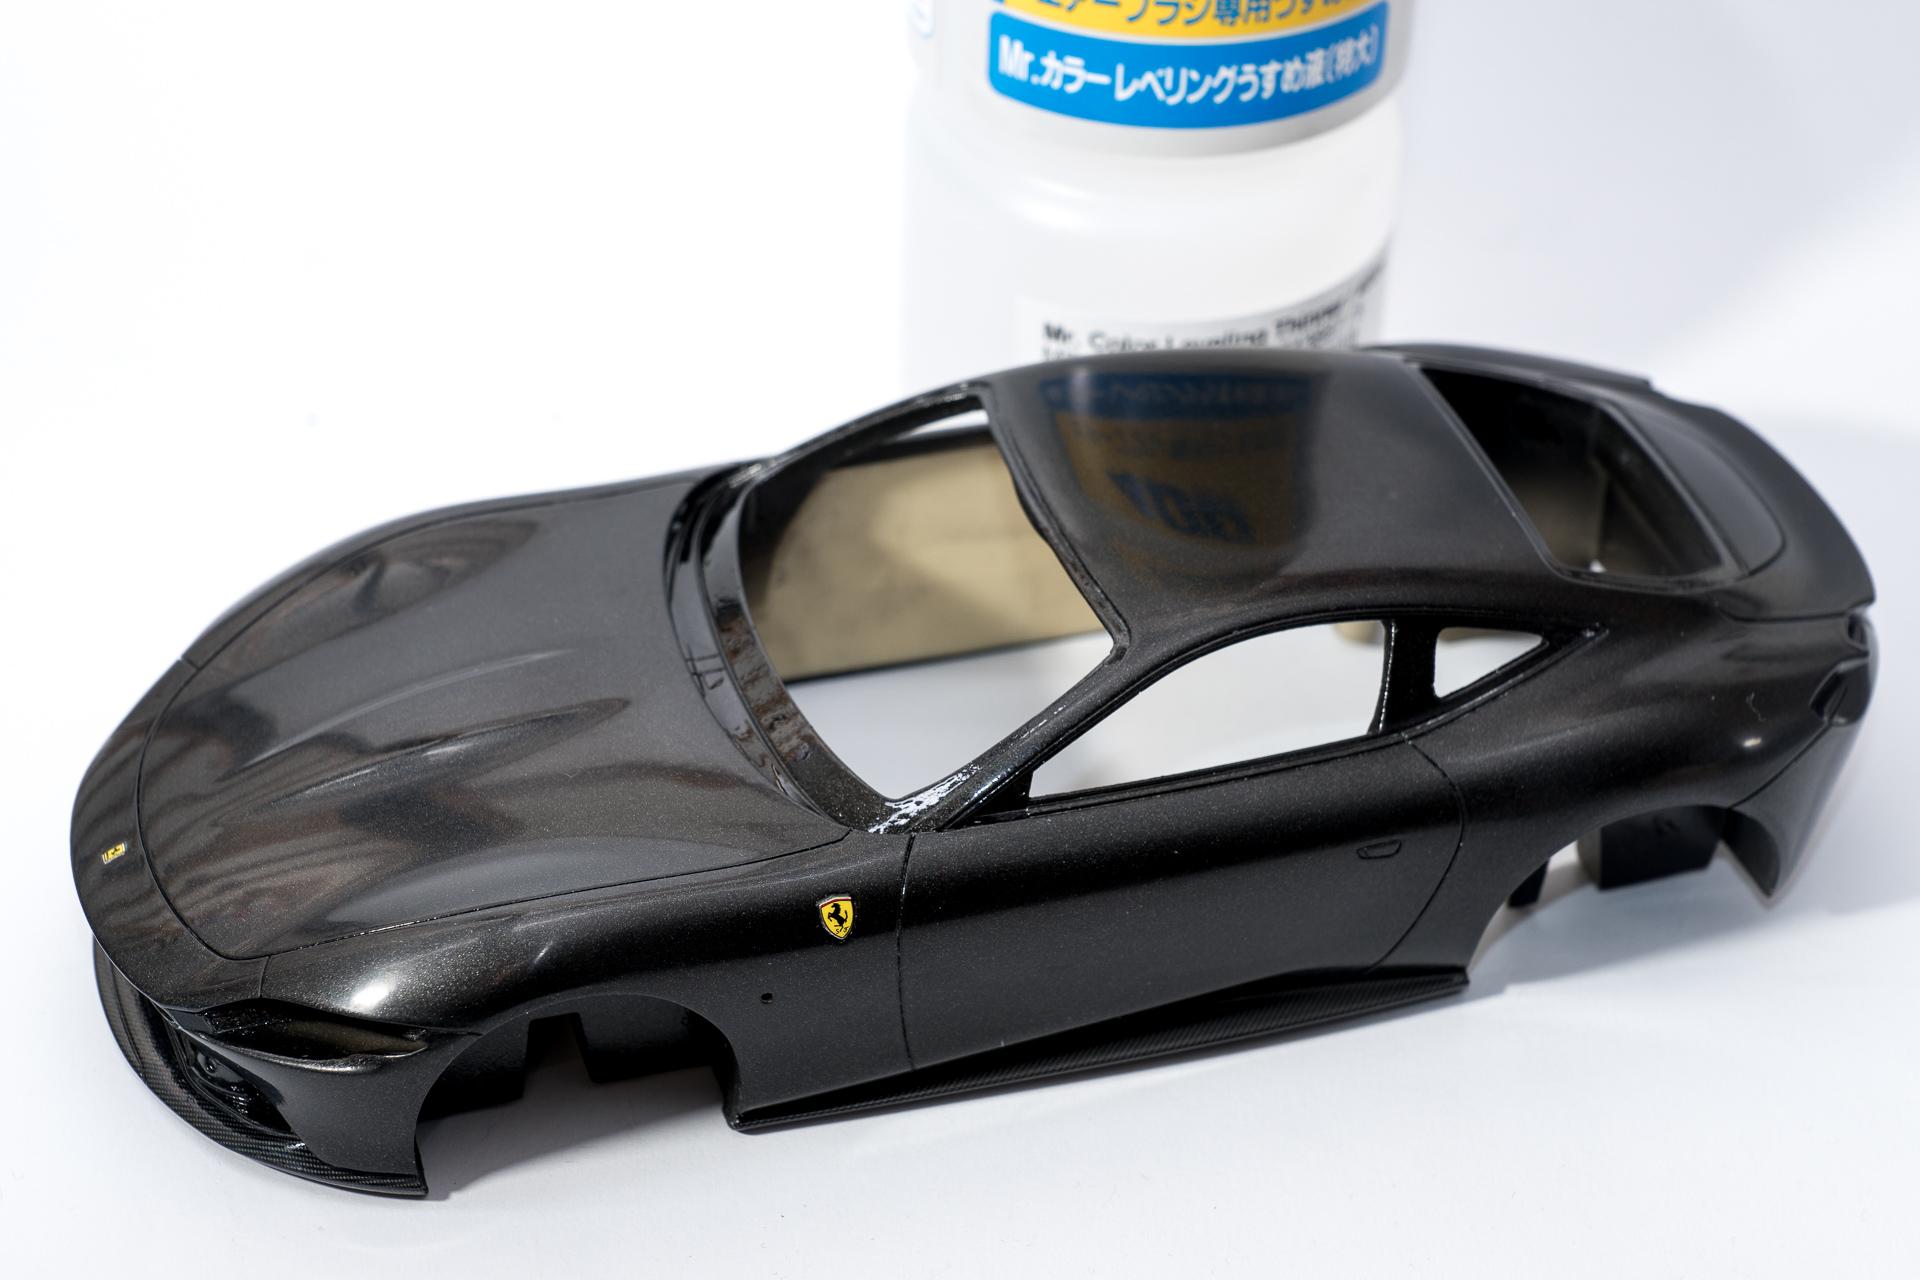
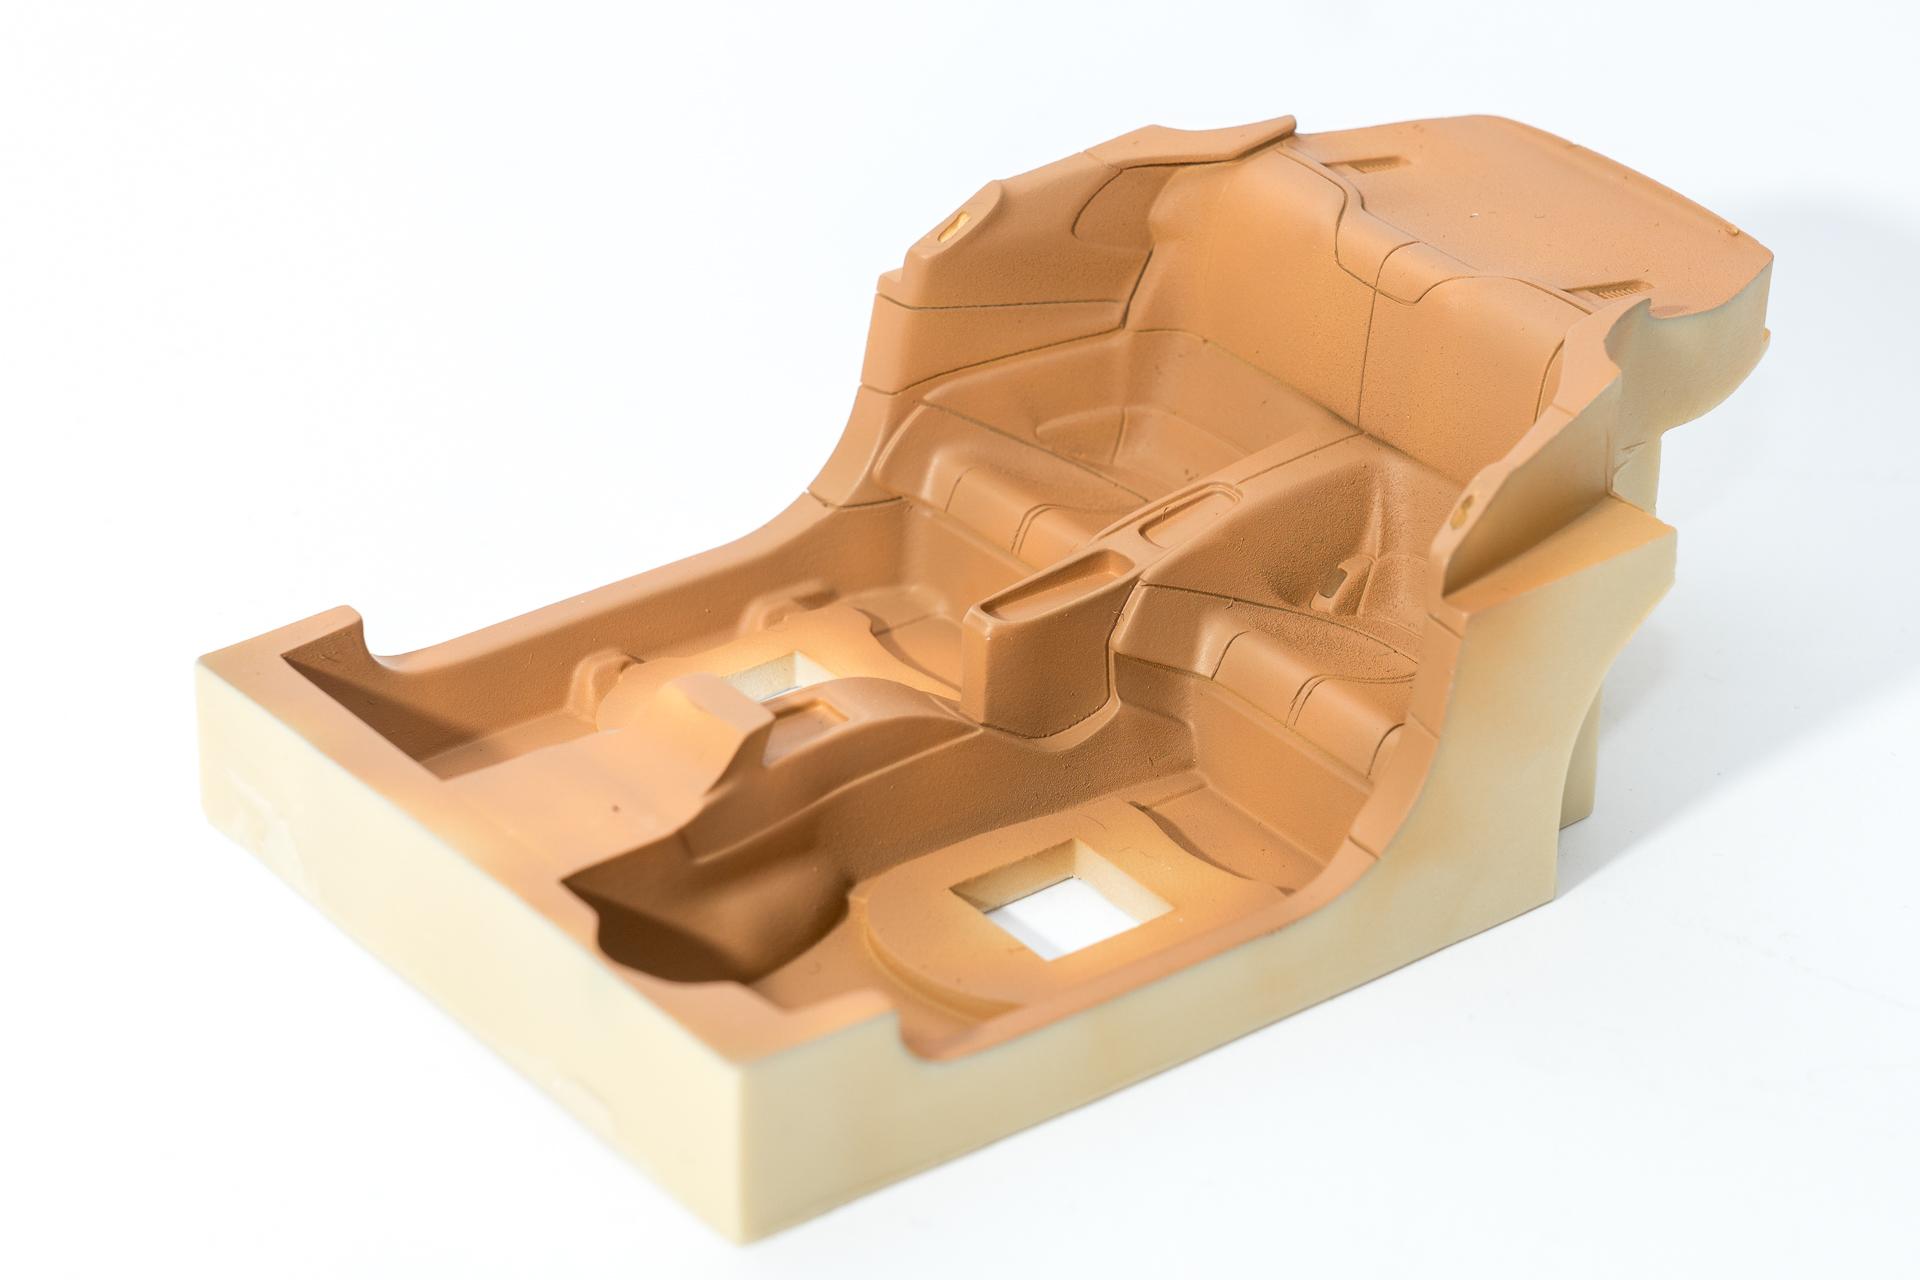
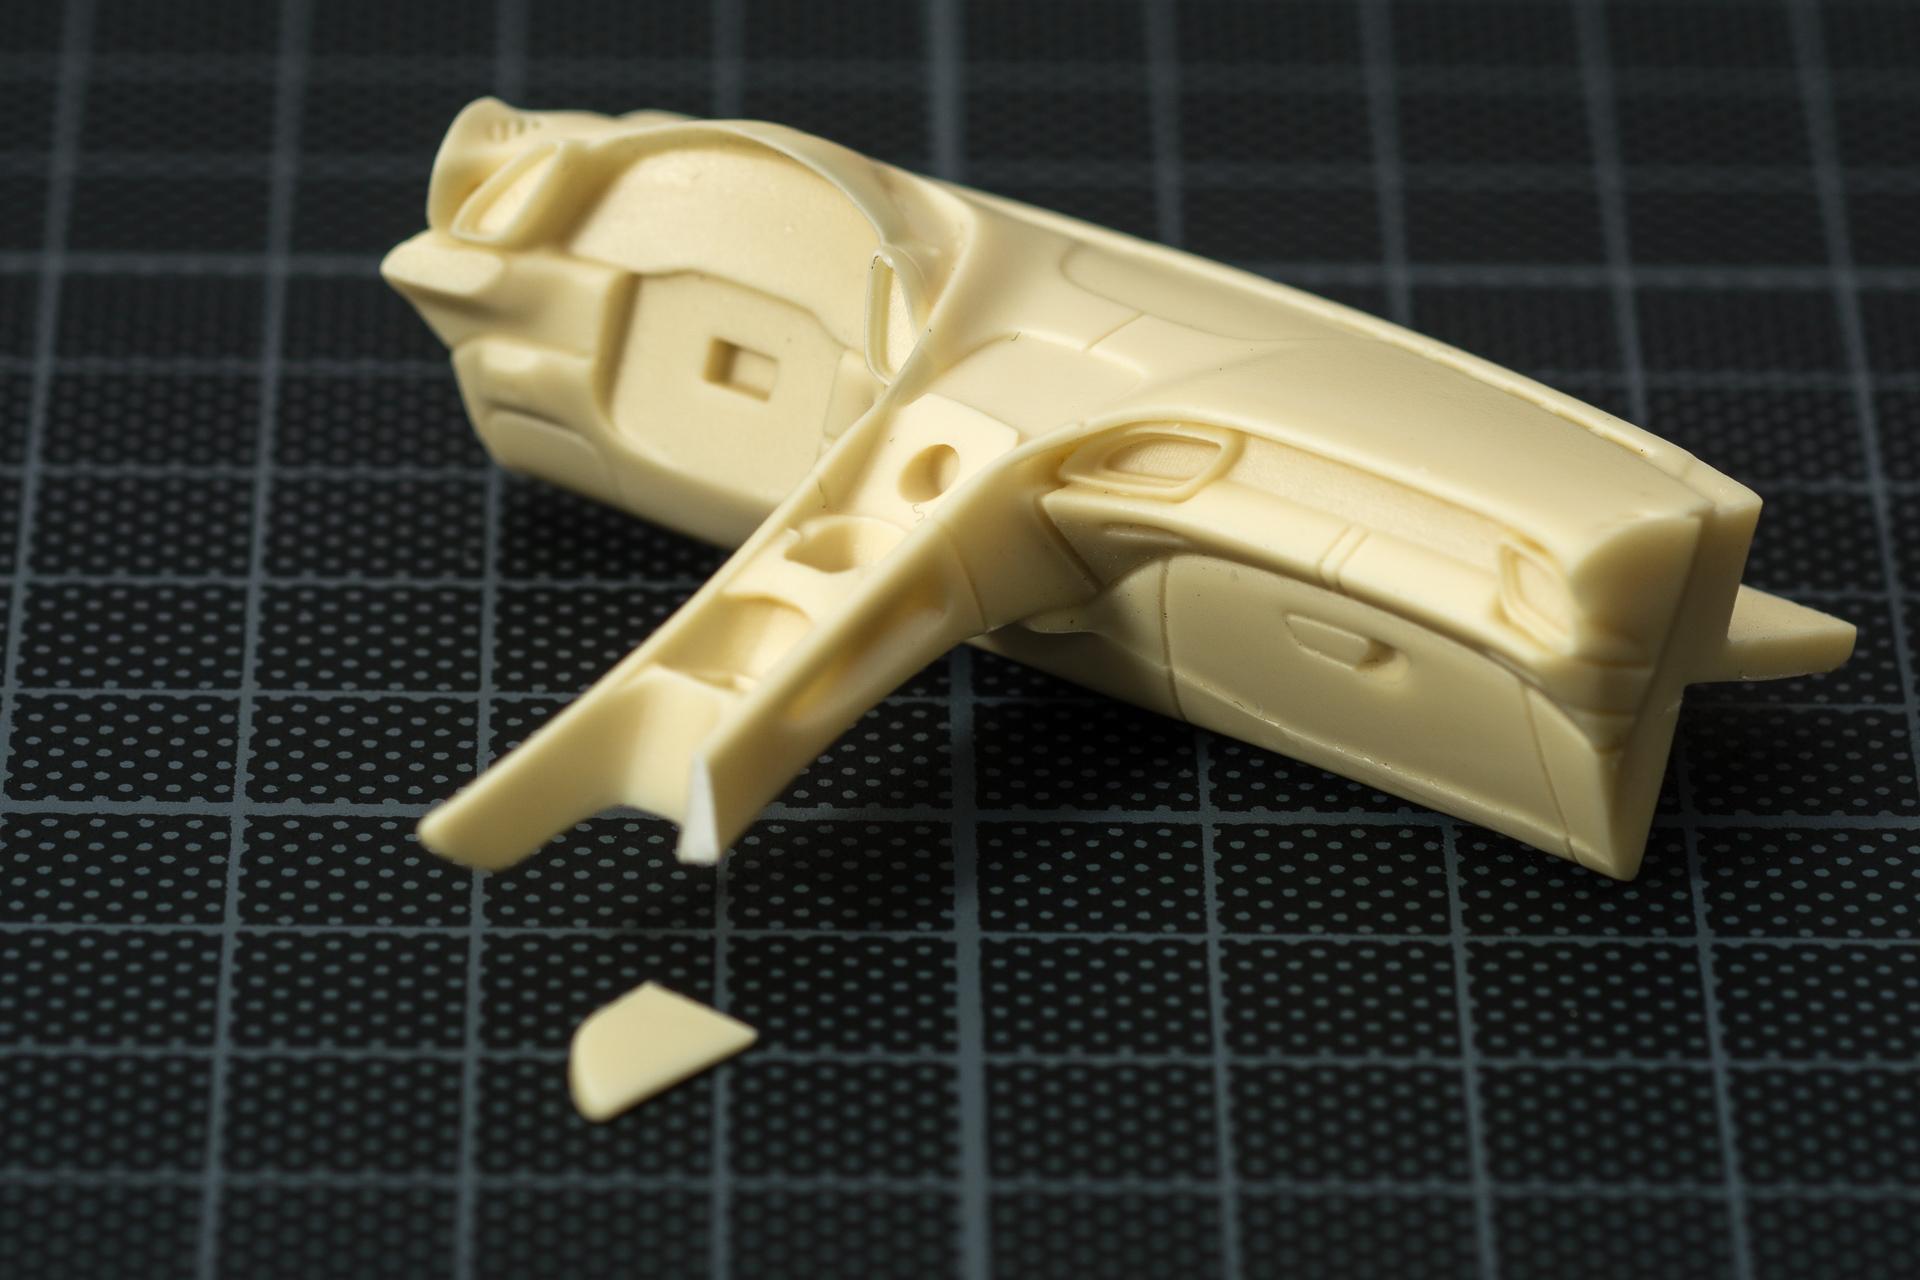
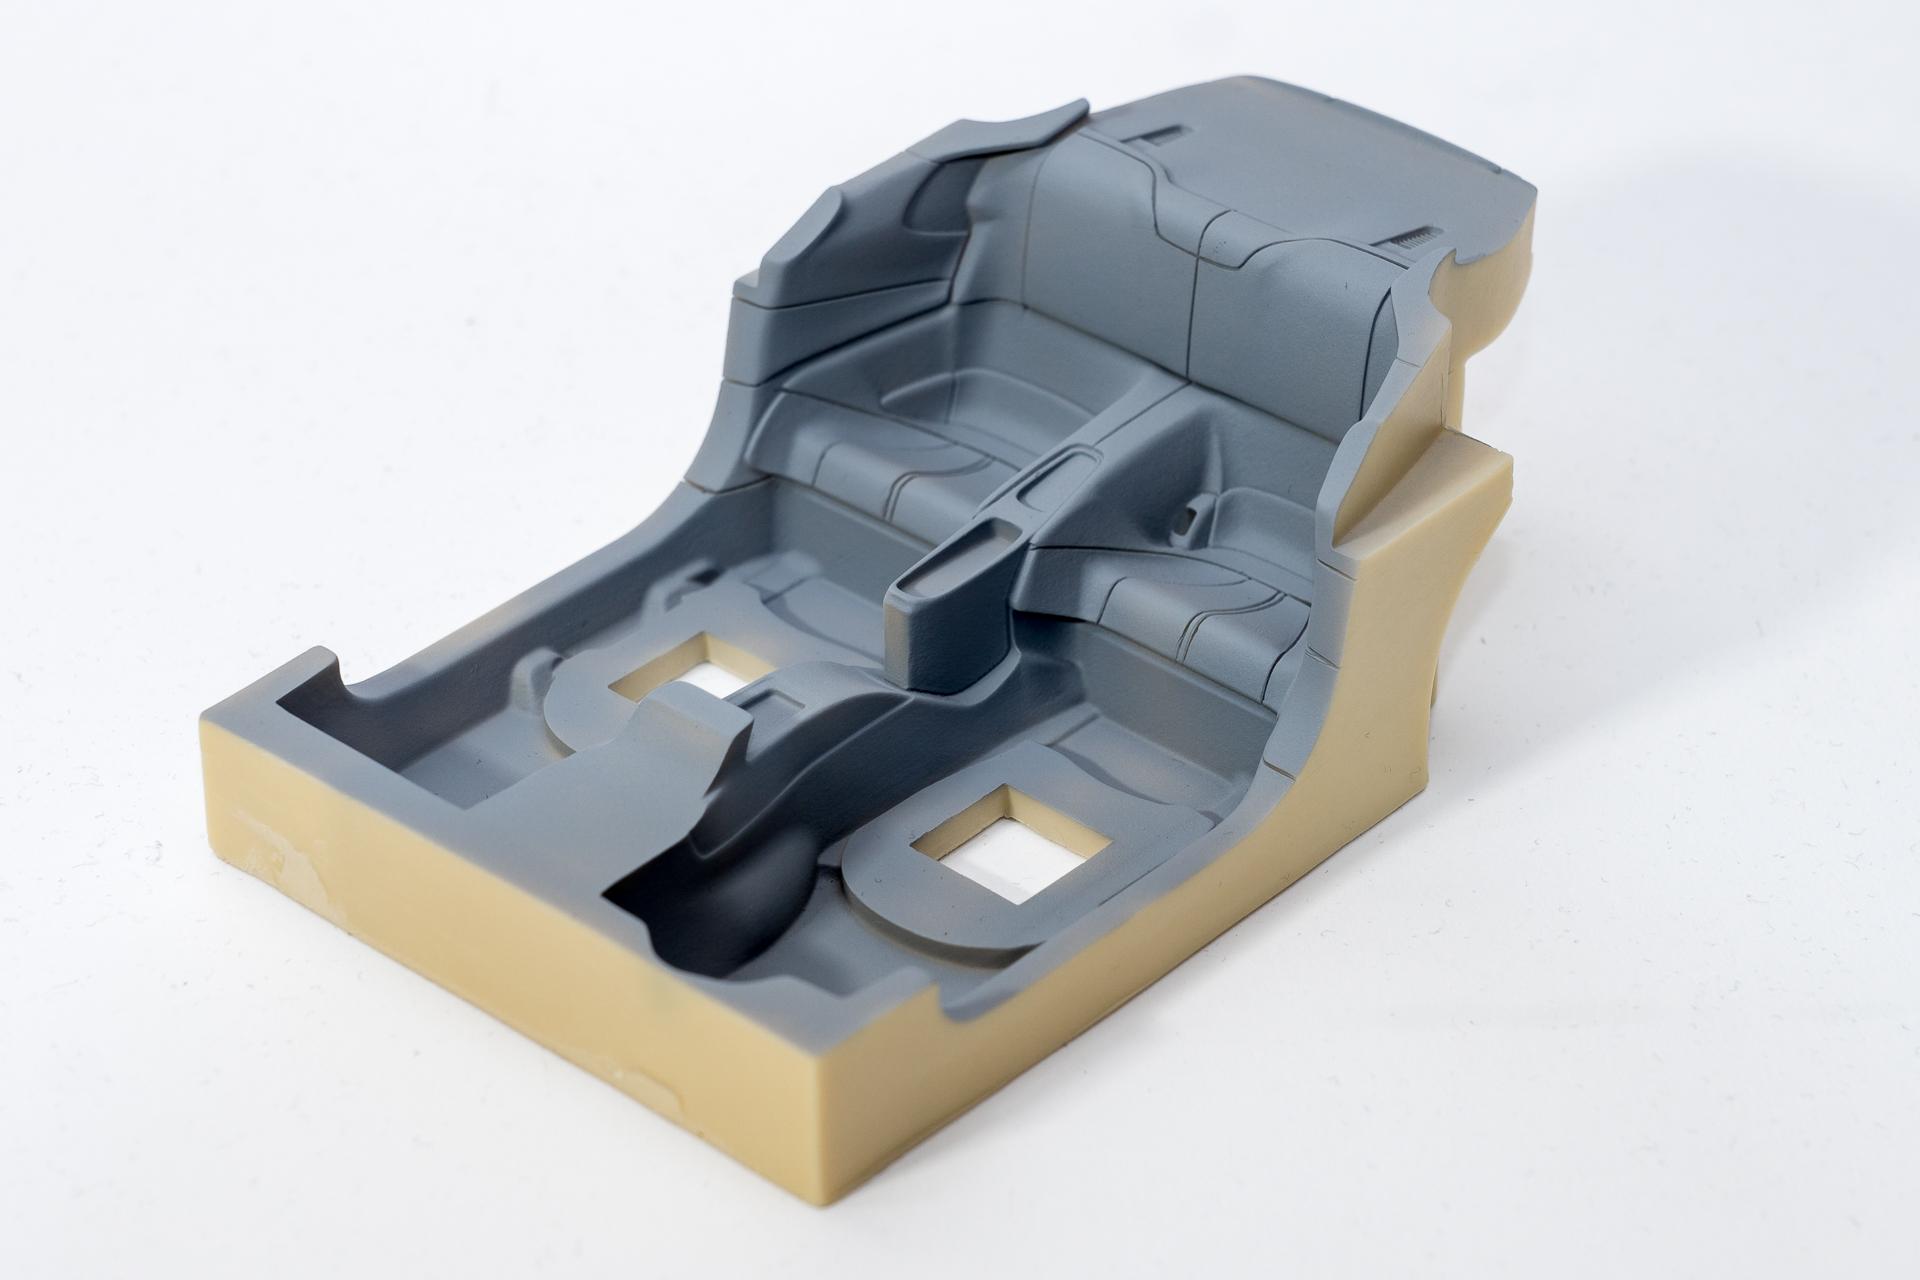
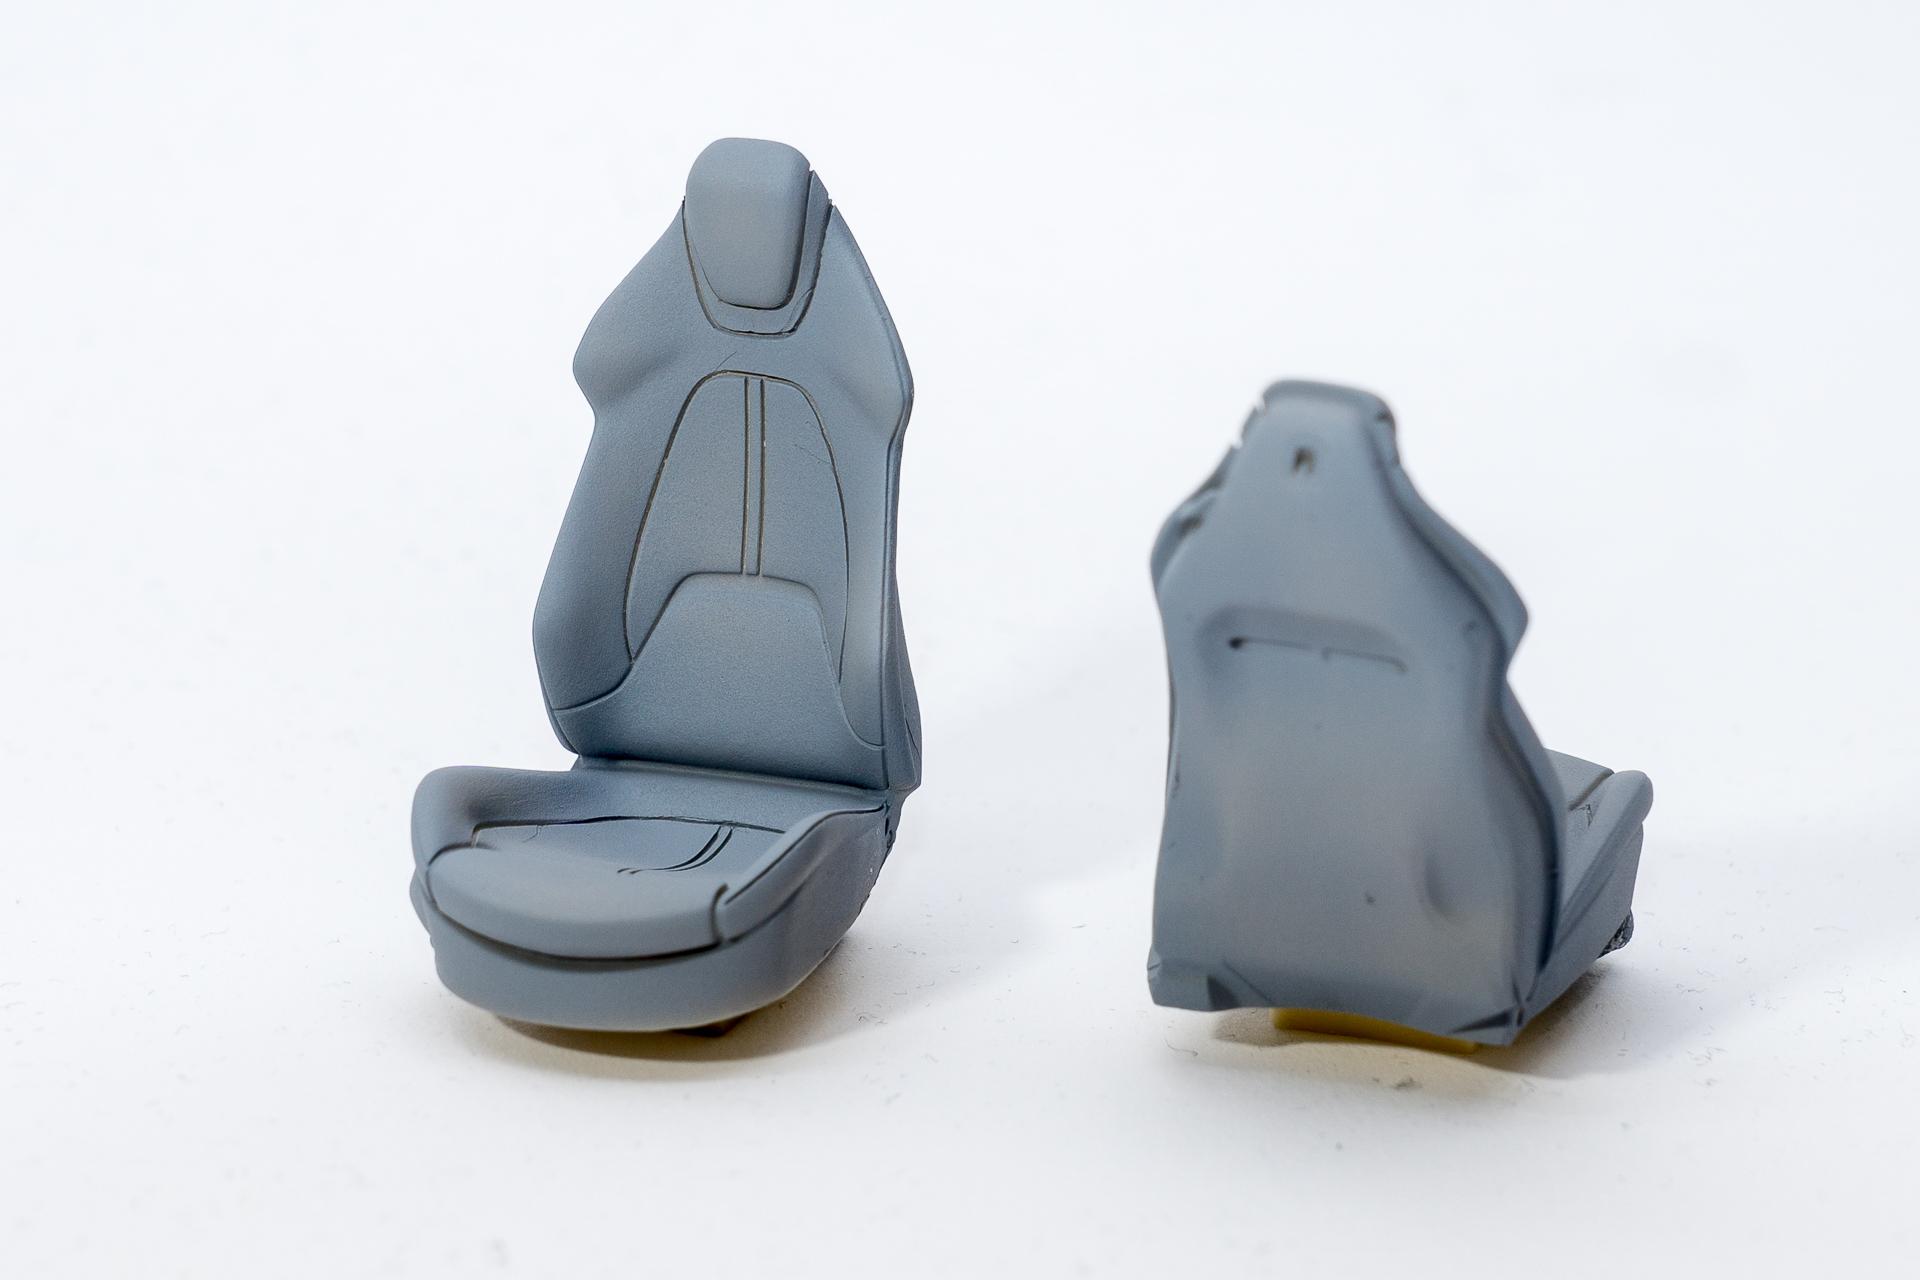
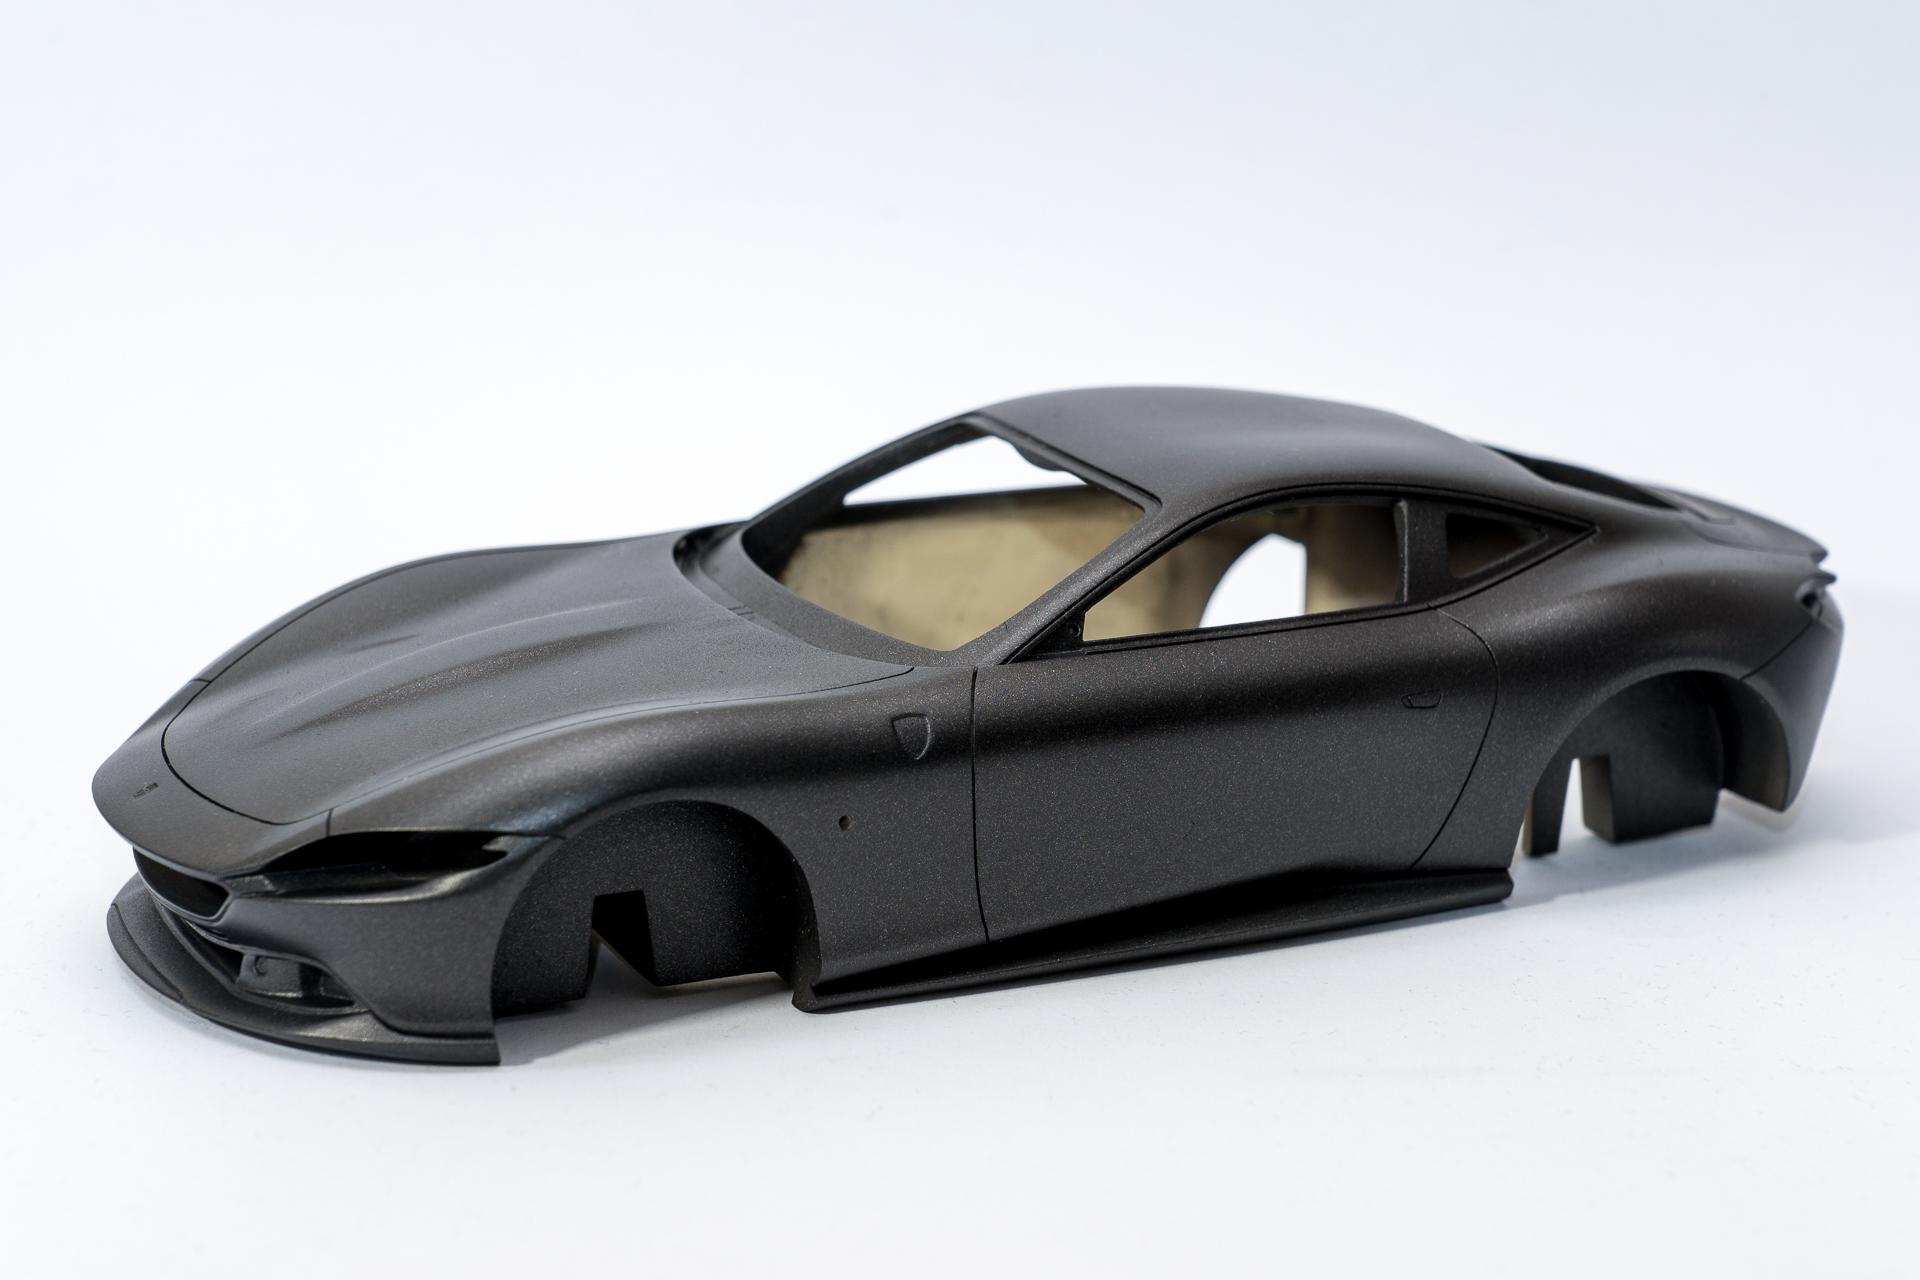
Hi all After having finished the Lamborghini Aventador Roadster it's time for another italian sports car, but this time it will be a prancing horse from Maranello. I had three different models to choose from: the Ferrari SF90 Stradale, Ferrari Roma and the Ferrari Monza SP2. I would have loved to start all of them, but had to decide for one of them. For the Roma I already had a color scheme on my mind and had the paint needed at home (both points would have been true for the other two builds as well). But the decisive factor was that the paint had already been opened for another build I finished some time ago and I had the impression that I had to use this paint quite soon. So of course I picked the SF90 Roma from the shelf... 😁 Up to know not much happened. All the resin parts have been cleaned (although I have to admit that there was very little cleaning needed) and the one piece that arrived already damaged has been fixed. After that all the parts have been primered so that I'll be able to handle them without the need of wearing gloves The damaged part as it was inside the box and after fixing and putting on some primer. I think the repair turned out quite ok Finally I also put some coats of primer, followed by some thin layers of paint on the body. On the front hood I had to sand some dust, so I'll go over these spots again with paint and maybe I'll give the whole body some more layers before adding the decals and clear coat. This time the carbon work will be on an absolute minimum, so that motivation should stay on a high level, not like on my McLaren Senna (yes, it does still exist) 😉 Wednesday I should receive the interior paint ordered, so I should be able to start with the interior next weekend Urs