bo_ells
-
Posts
39 -
Joined
-
Last visited
bo_ells's Achievements
MCM Regular (3/6)
-
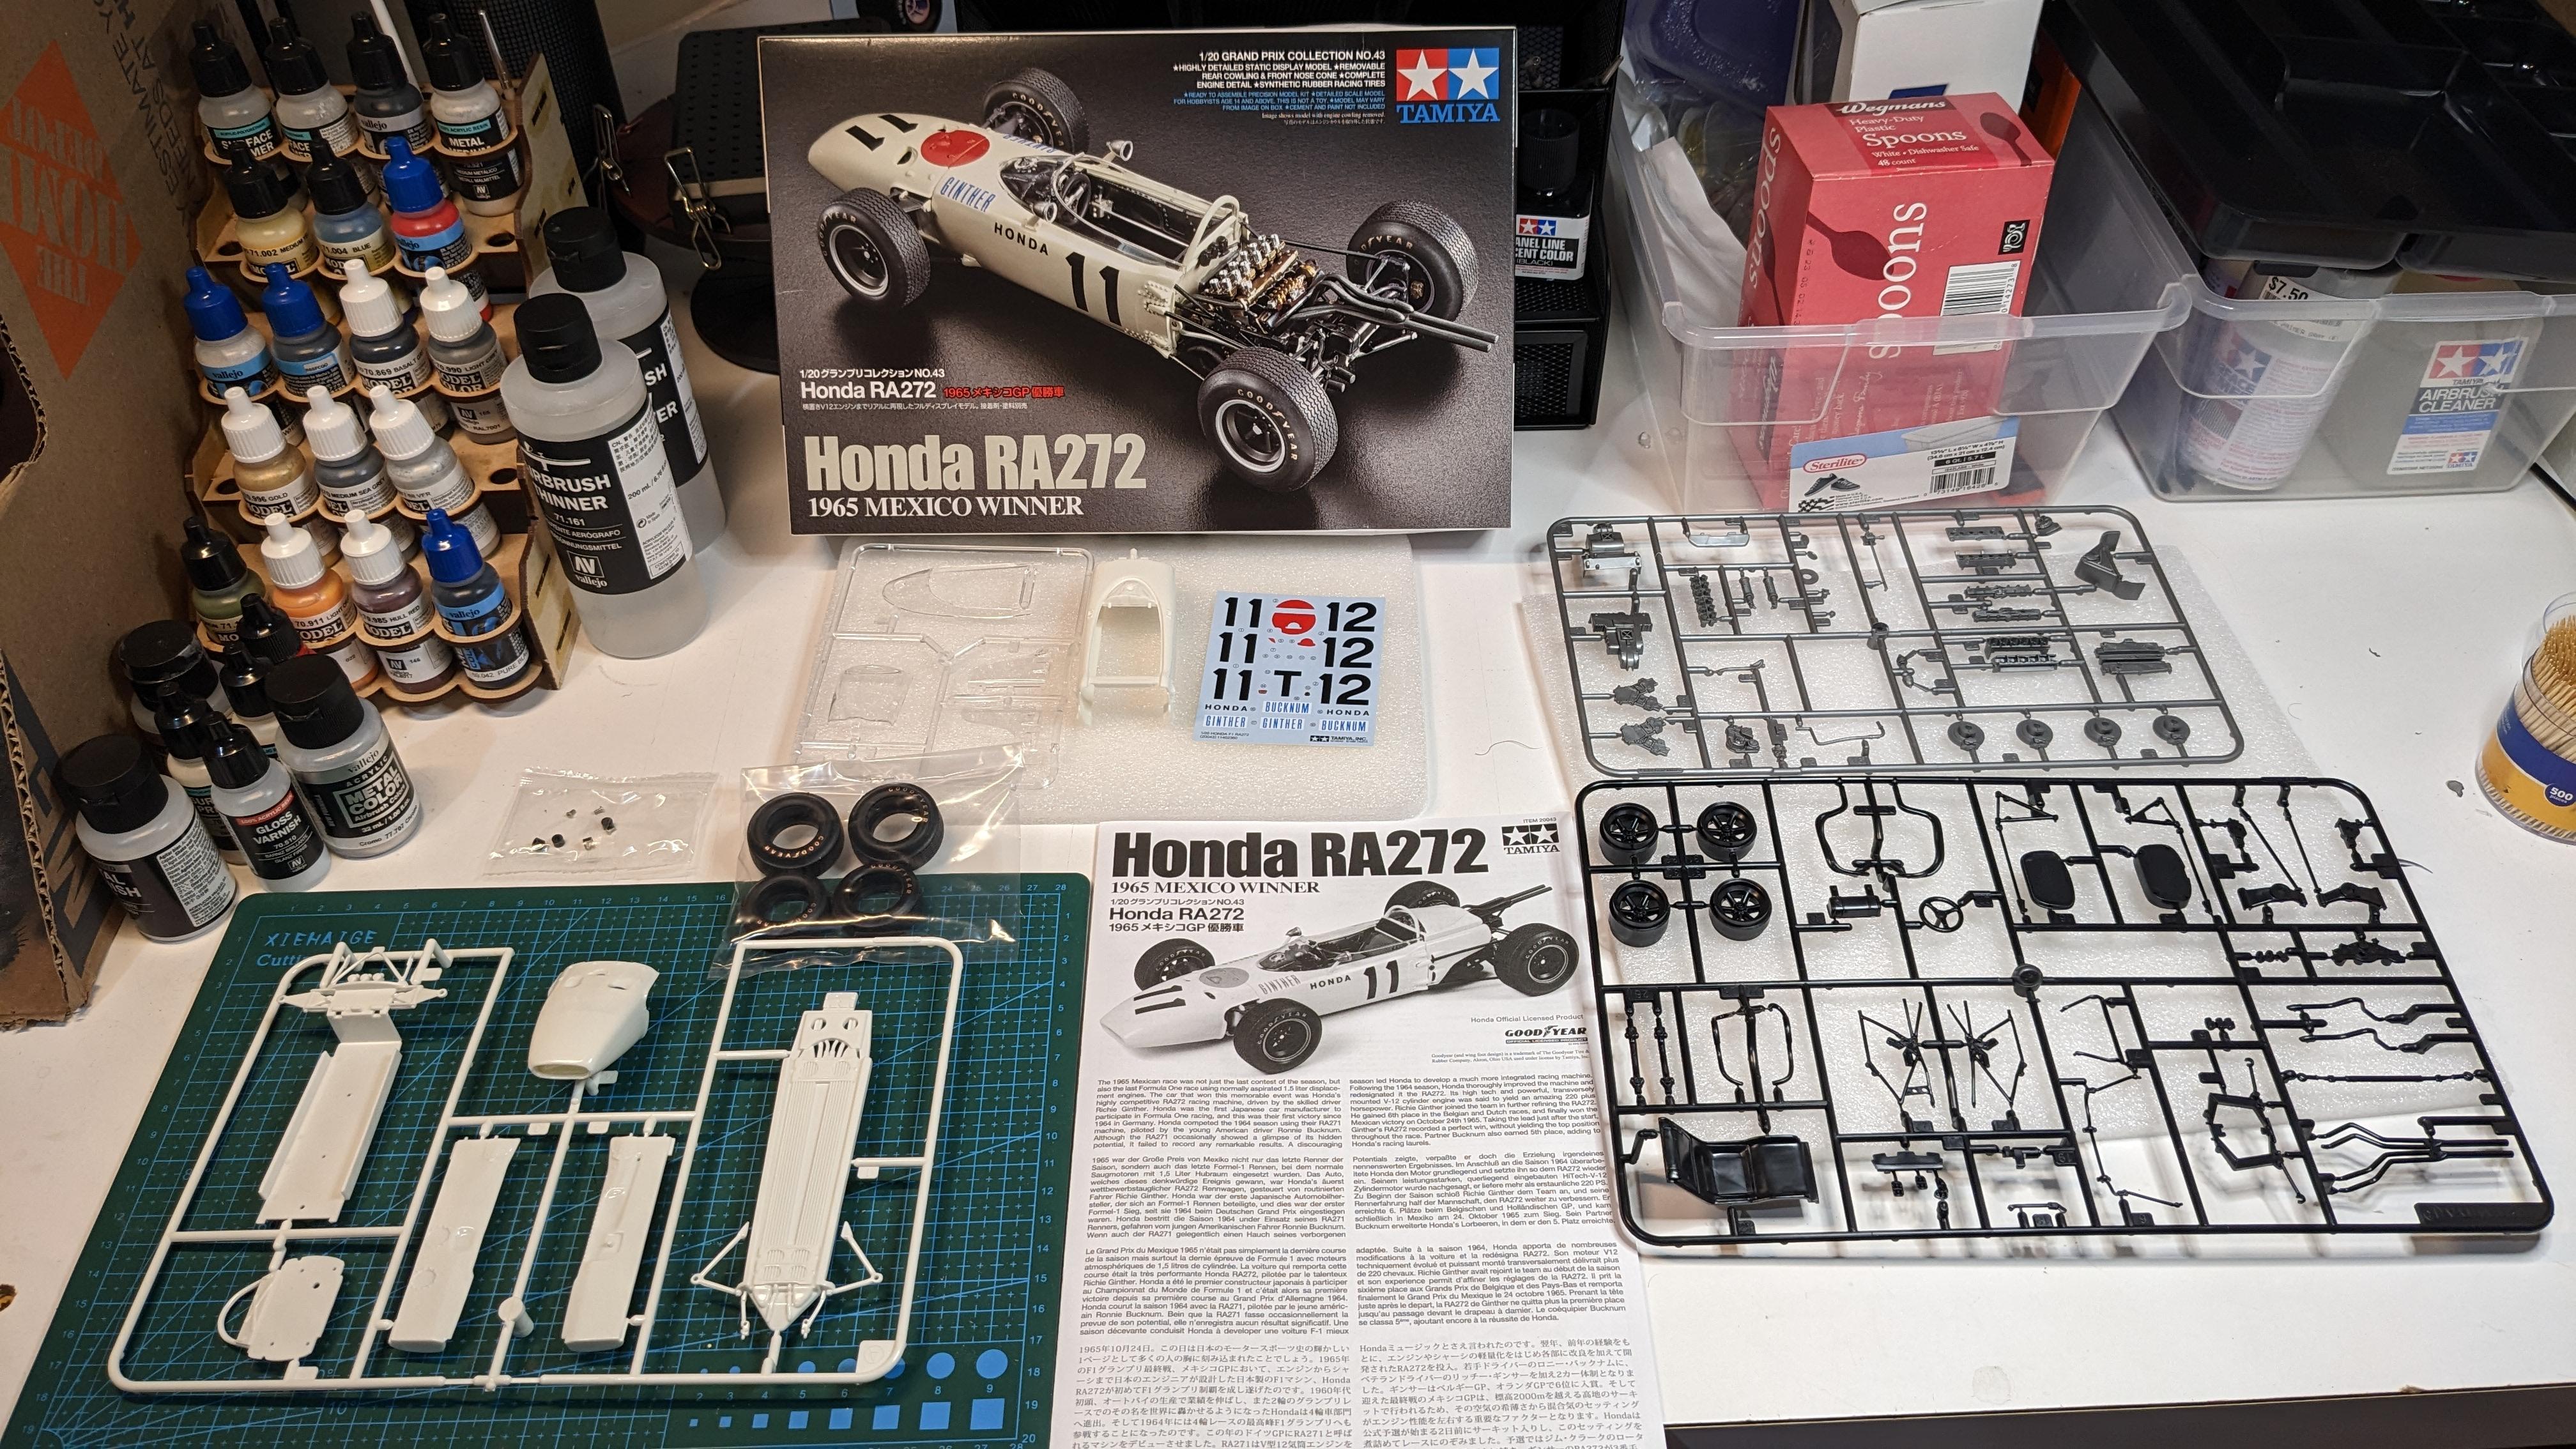
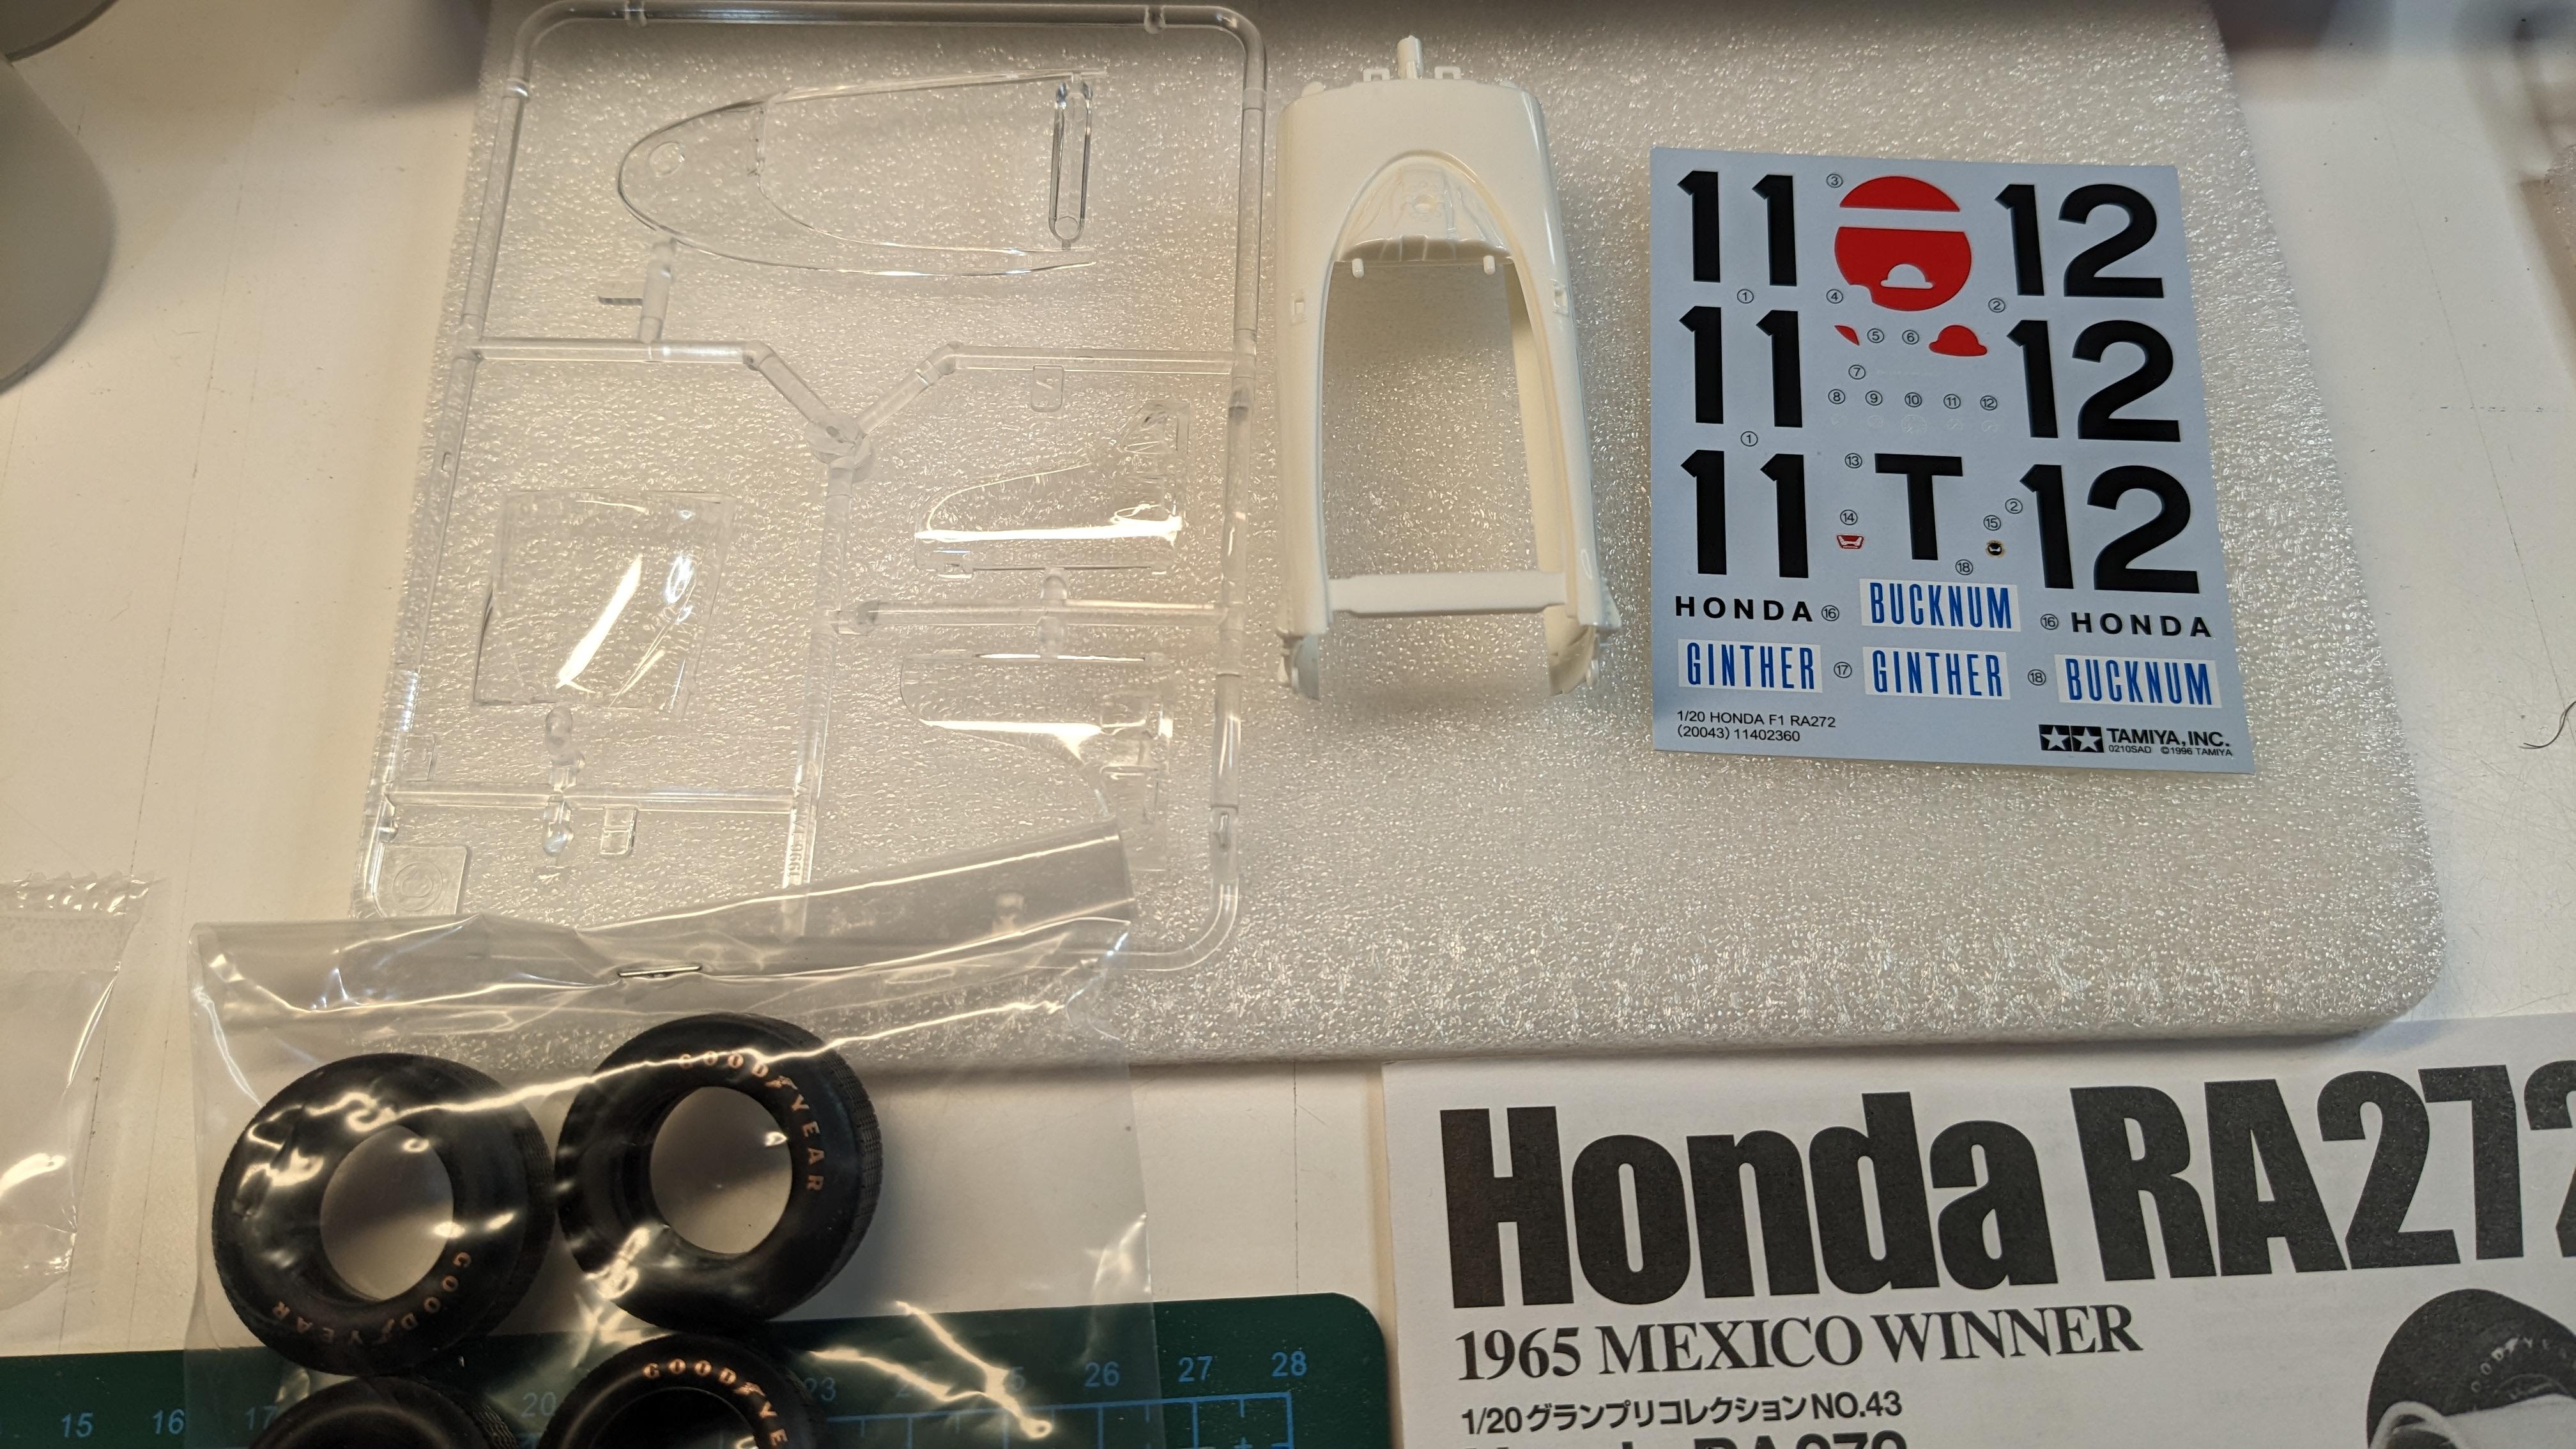
Tamiya RA272
bo_ells replied to bo_ells's topic in WIP: Other Racing: Road Racing, Land Speed Racers
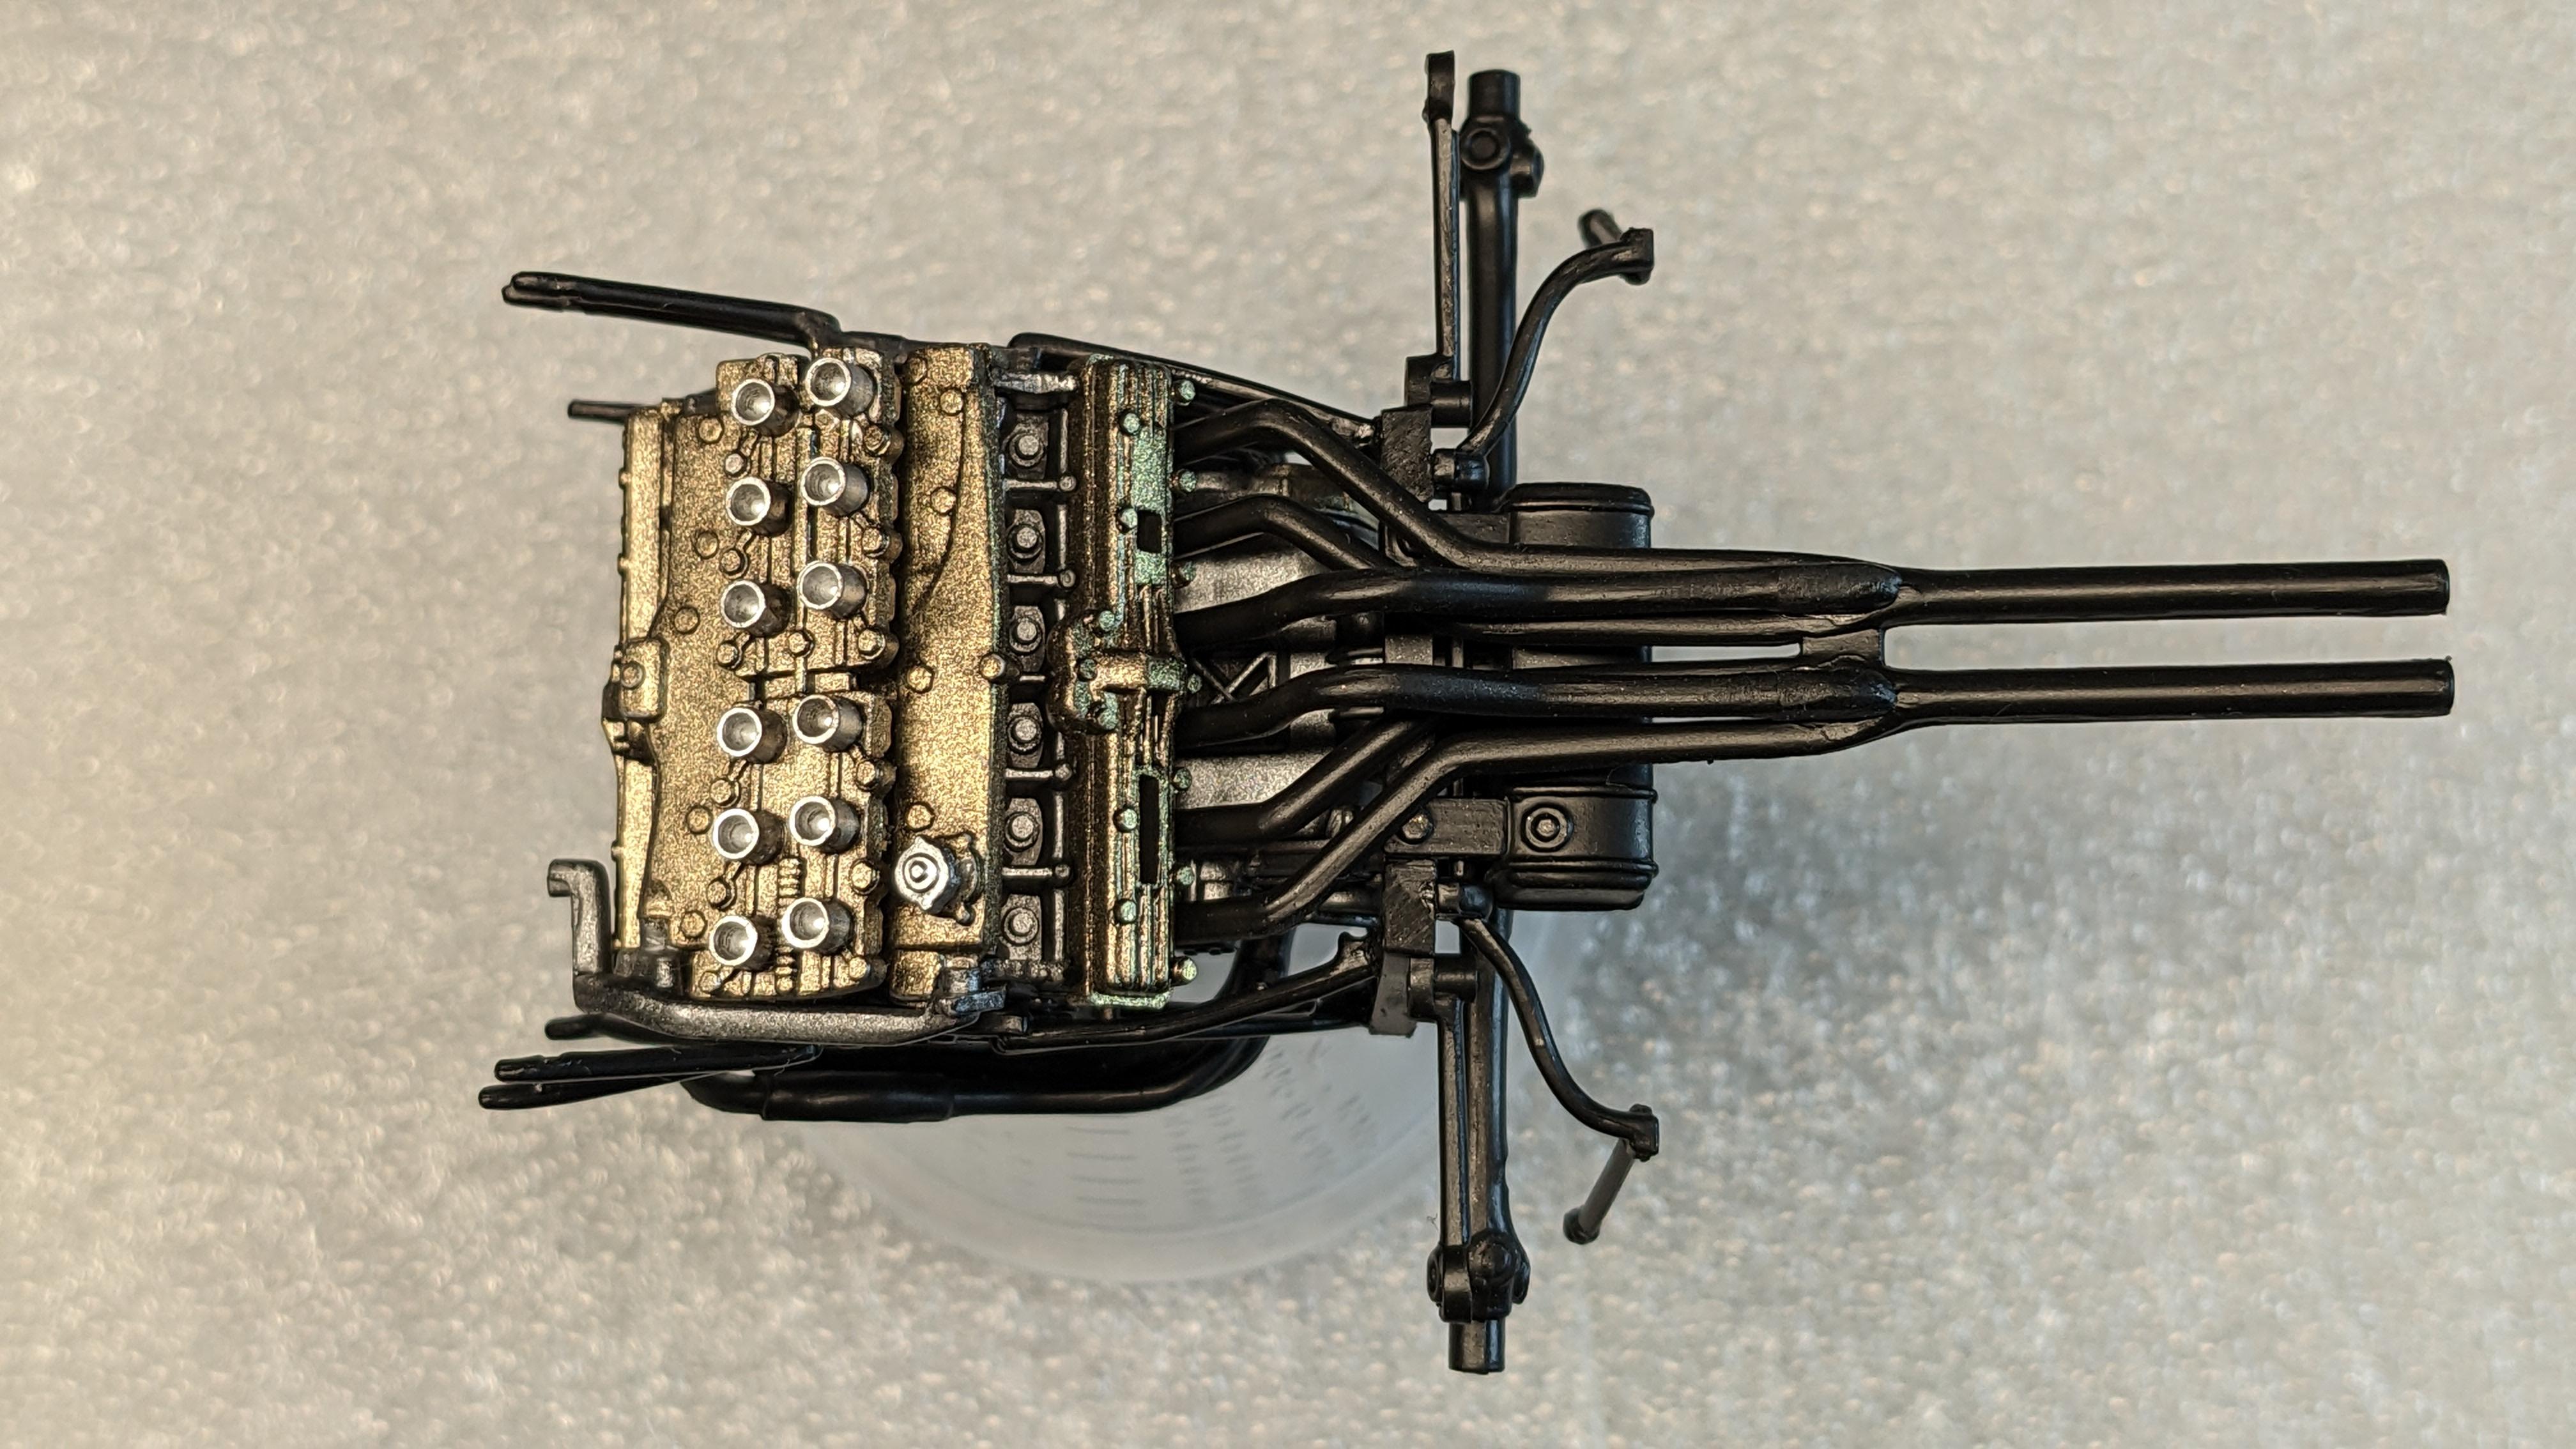
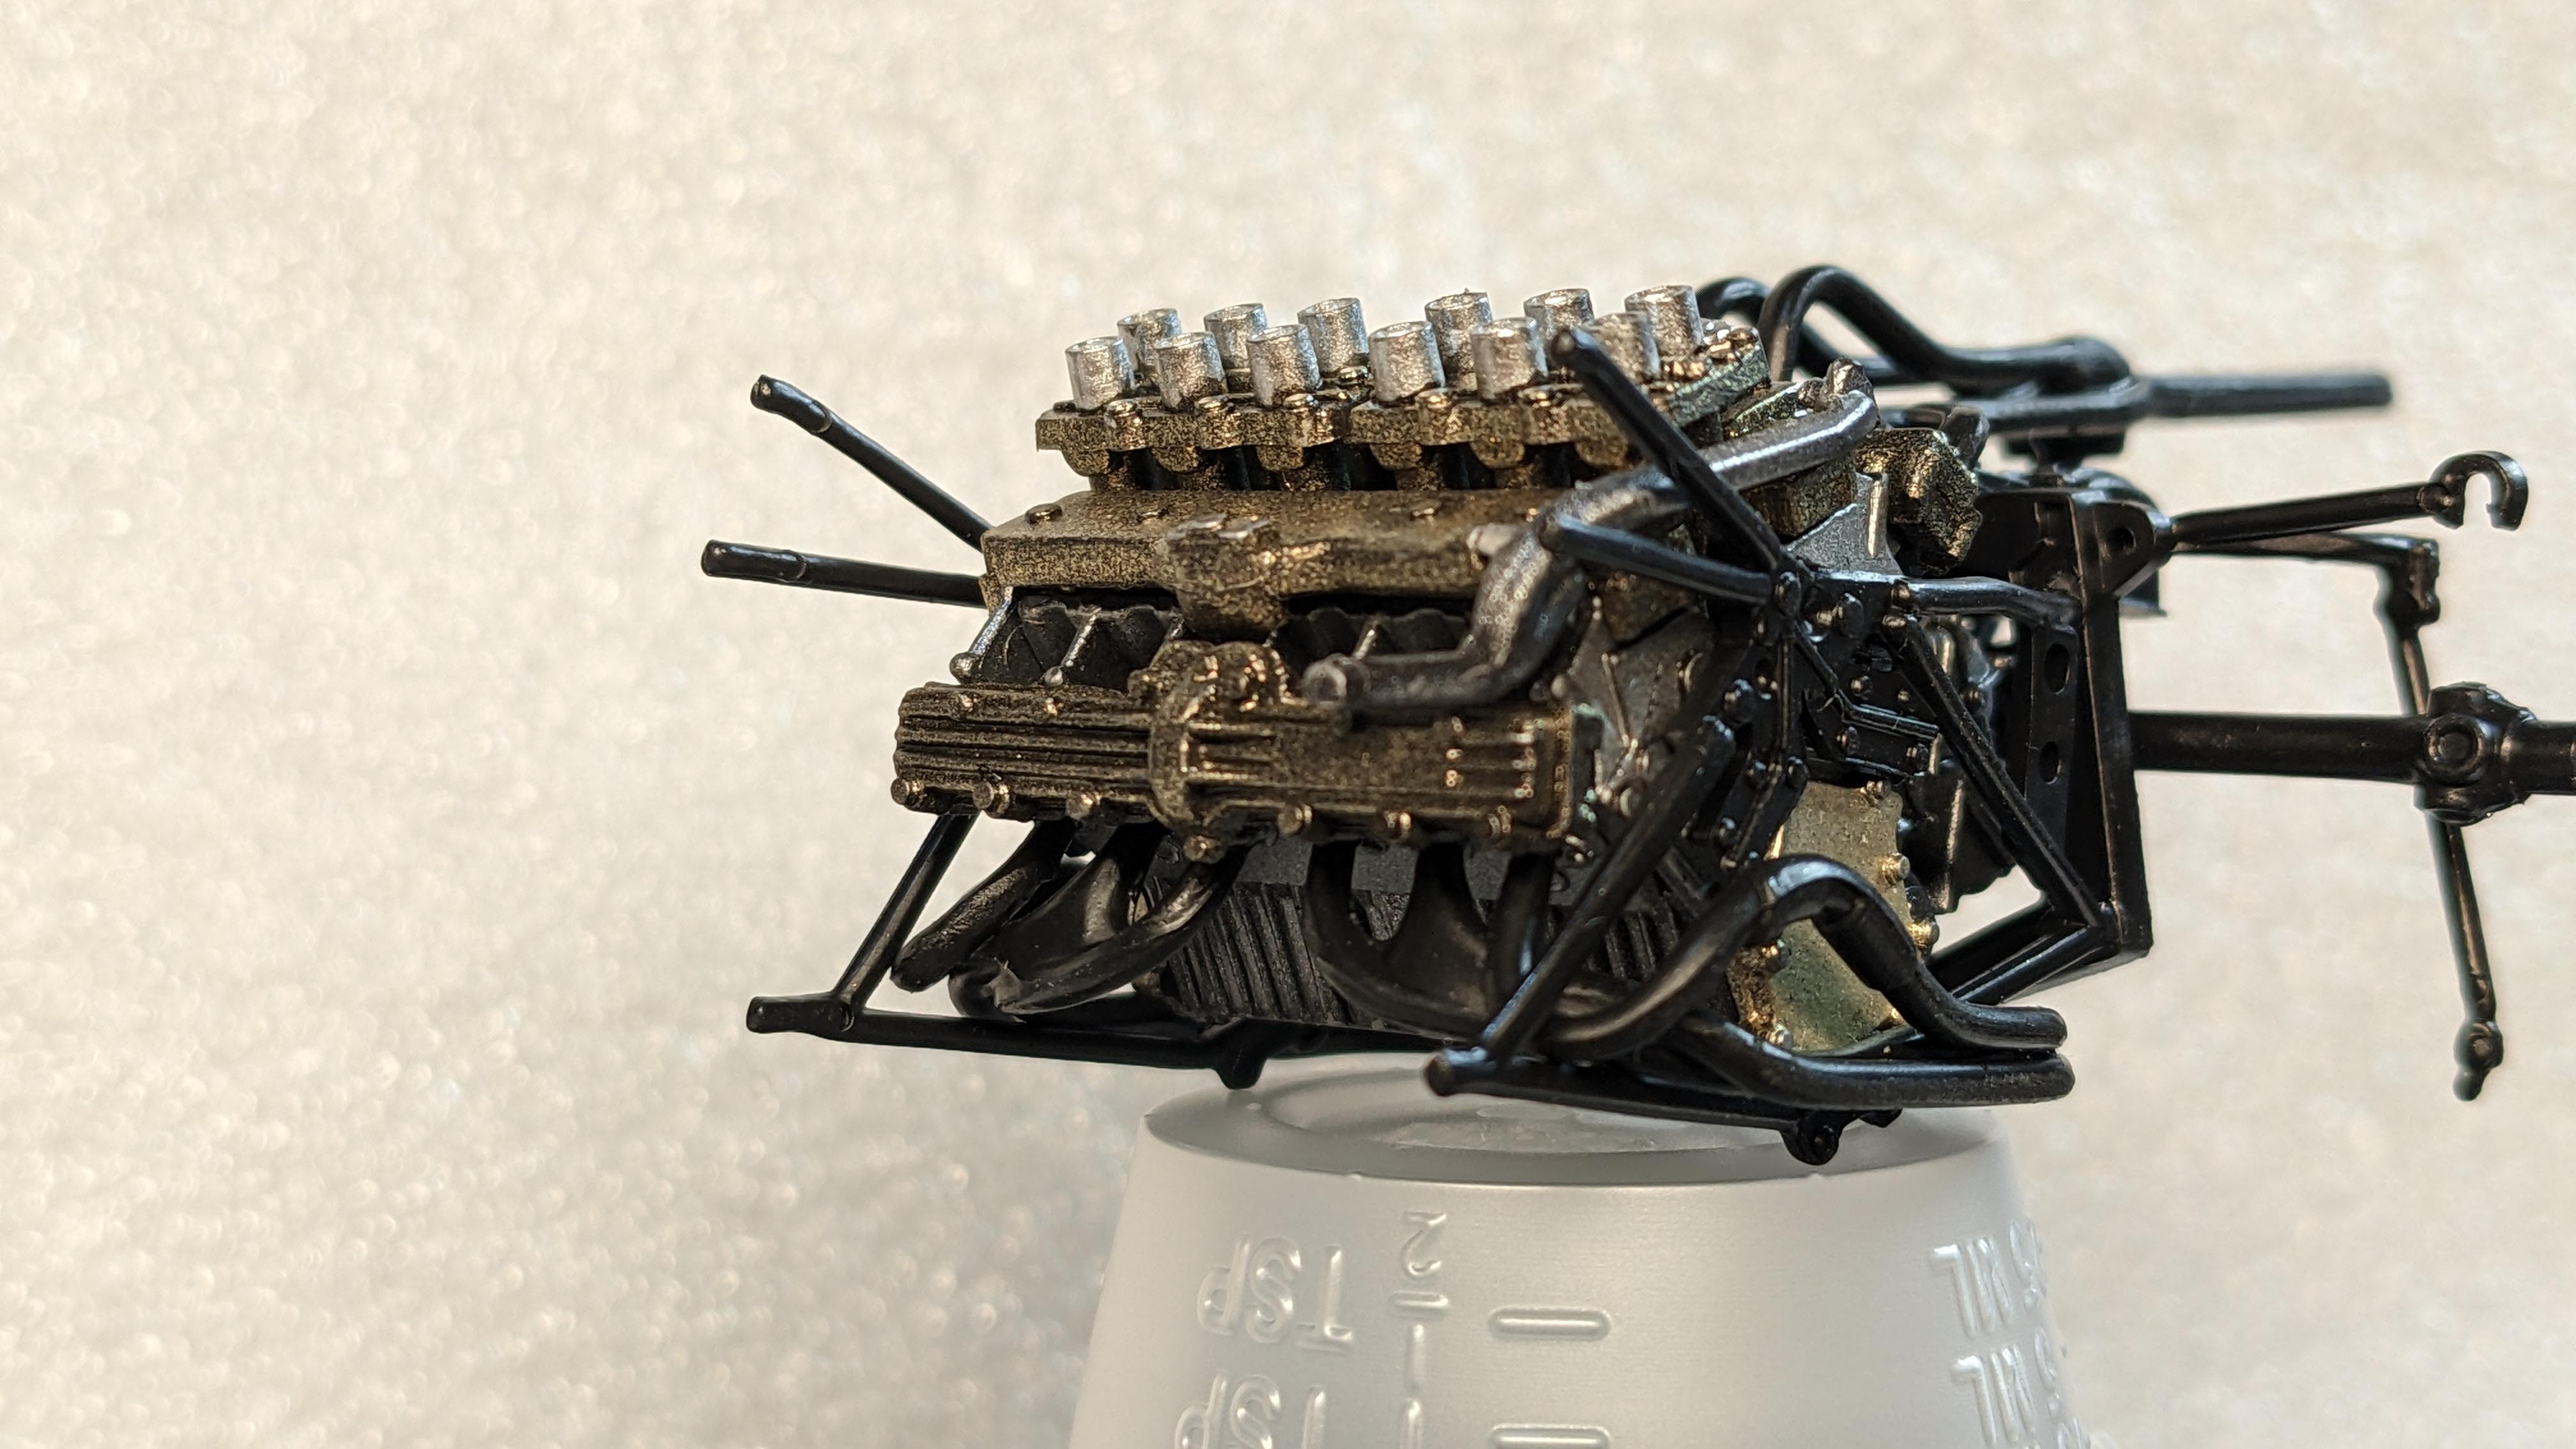
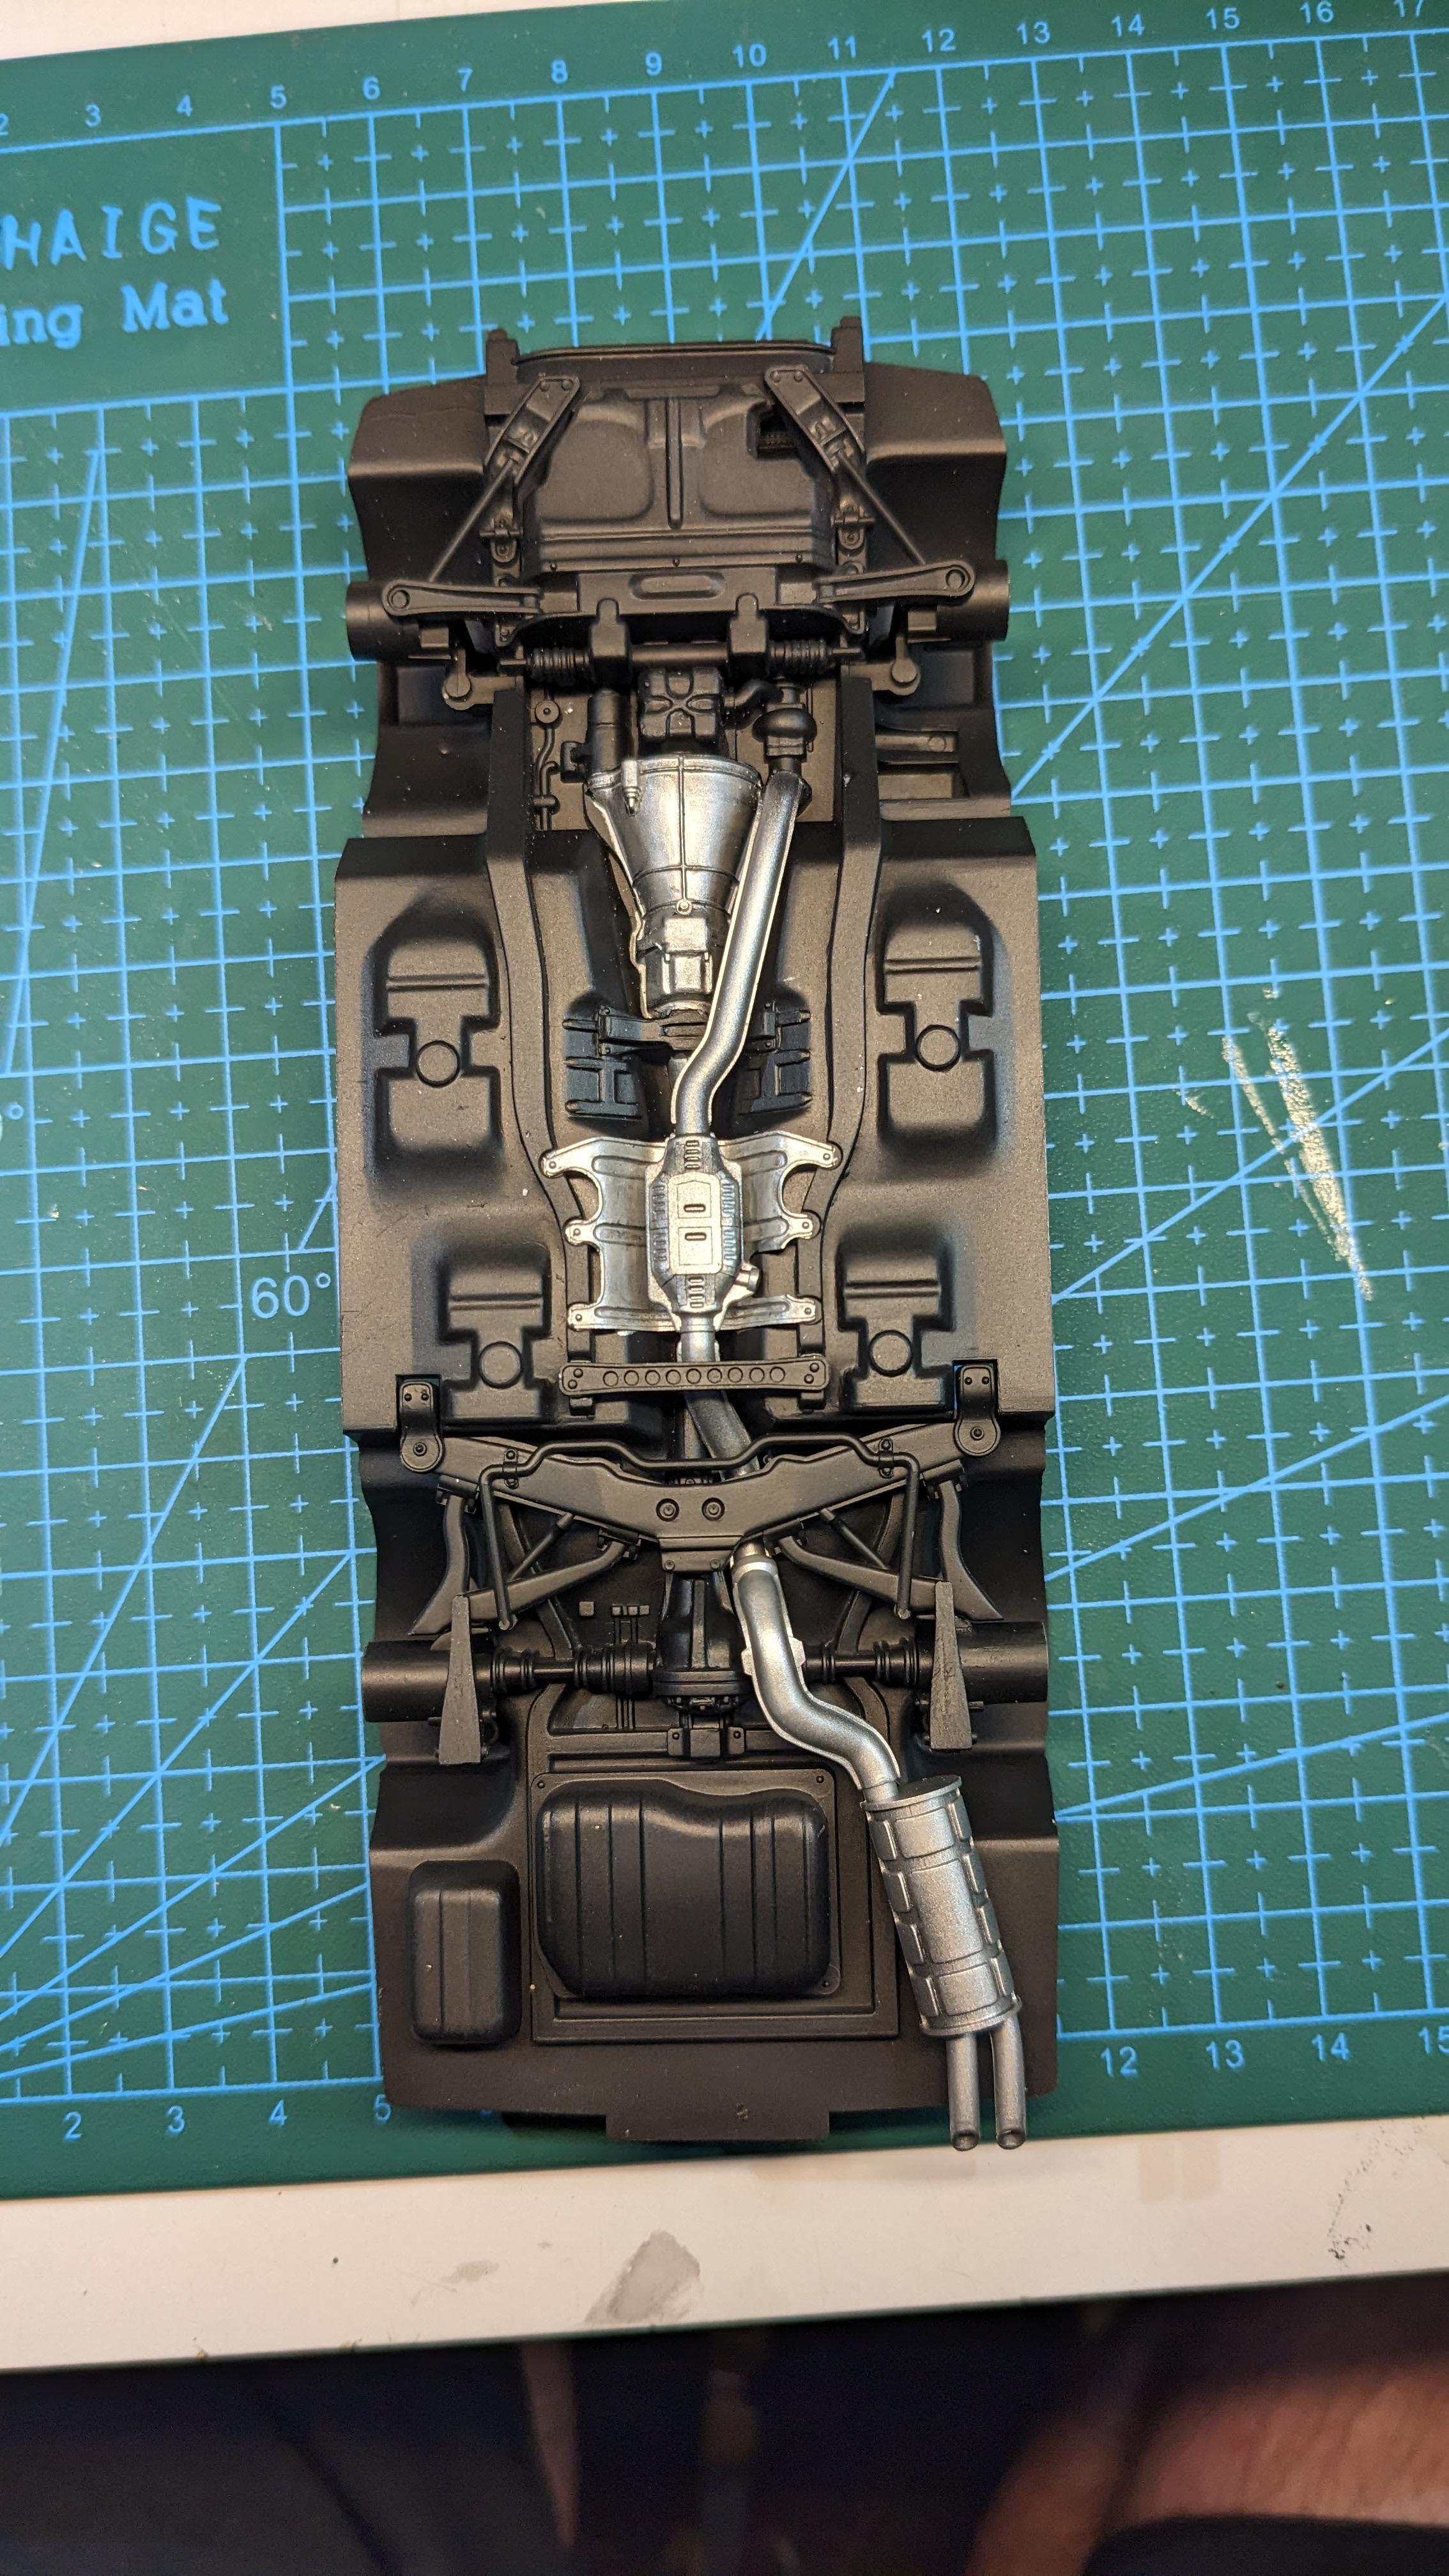
Got the engine mostly done. Amazing how things go from scattered parts to just fitting. The exhaust pipes get glued together and somehow line up exactly with the engine heads. Still have the 5-color distributor to hand paint. That'll be a challenge, but it's pretty cool so far! Also a peek at the kits I grabbed at a show yesterday. MR2 was an impulse grab because it's a Fujimi kit and I've always liked that body style, and the McLaren should be fun, too.
-
Tamiya RA272
bo_ells replied to bo_ells's topic in WIP: Other Racing: Road Racing, Land Speed Racers
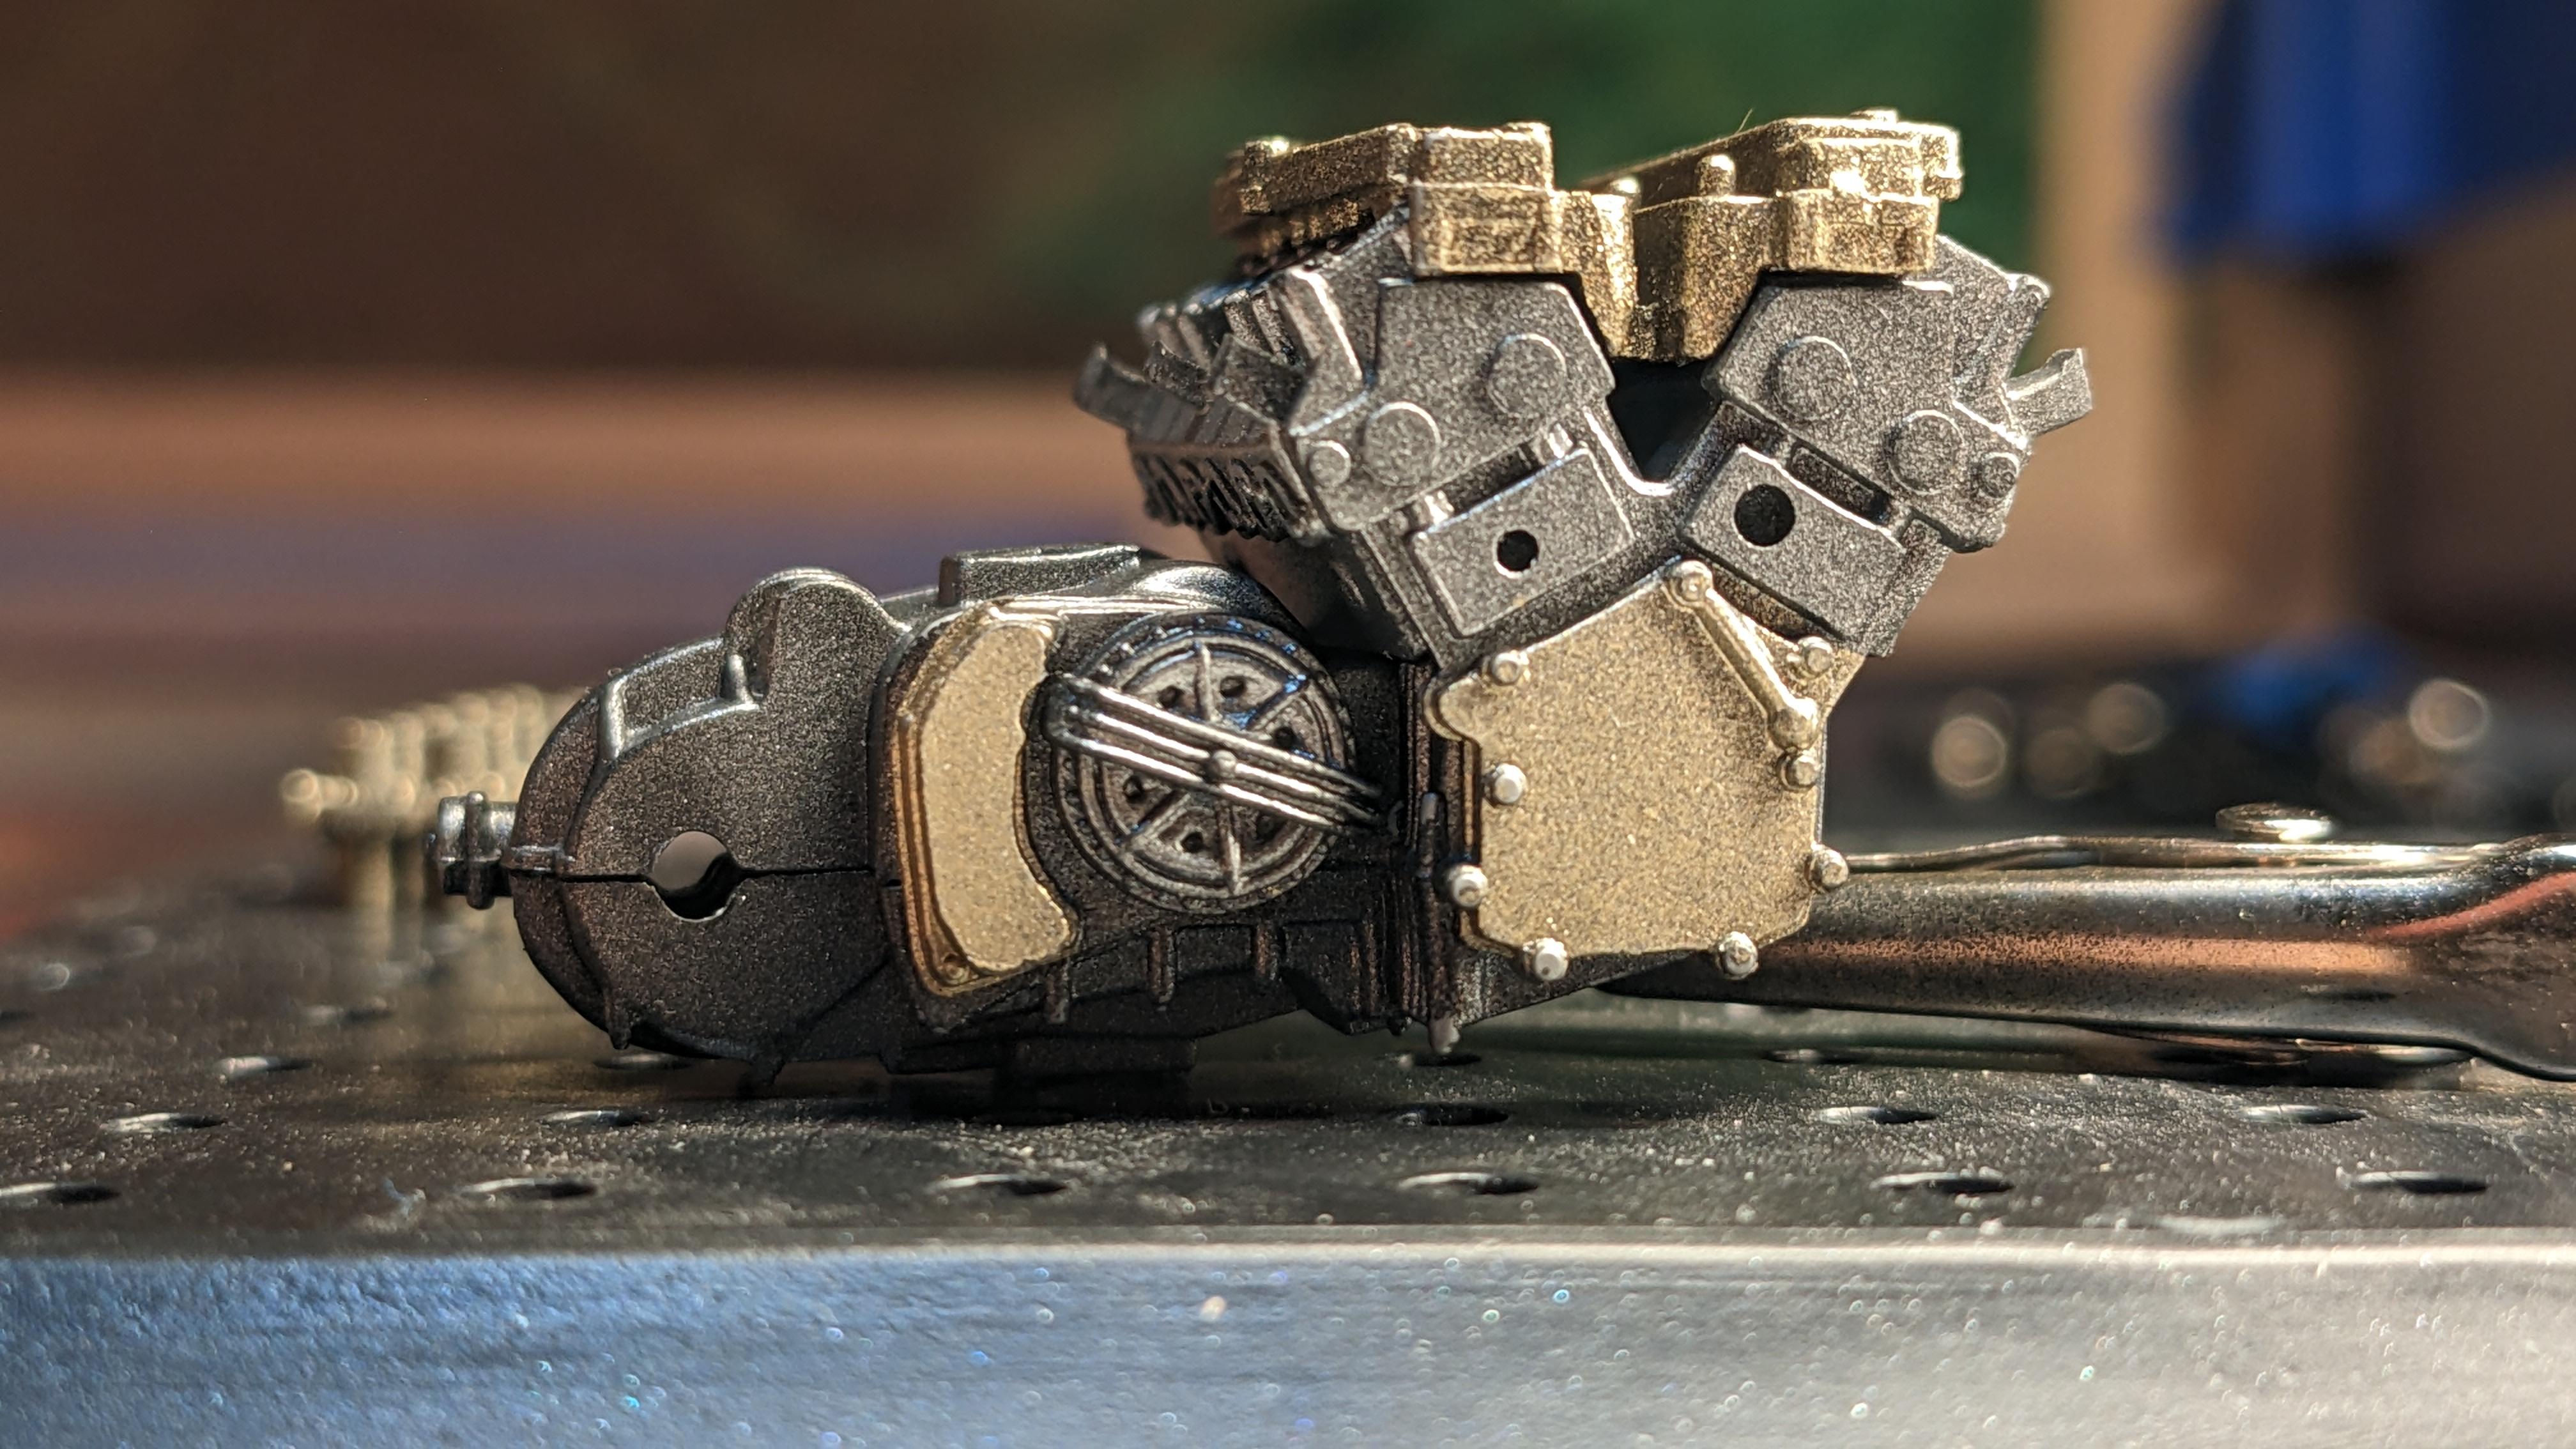
Got the core engine parts primed and painted, including the parts getting the aluminum/gold mix (except for part of the distributor- has to be hand painted due to size with like 4 different colors on it). Masking wasn't perfect, but still came out pretty good I think. Next up is a bit of chassis support for the engine. Hopefully I'll get it at least sanded later today.
-
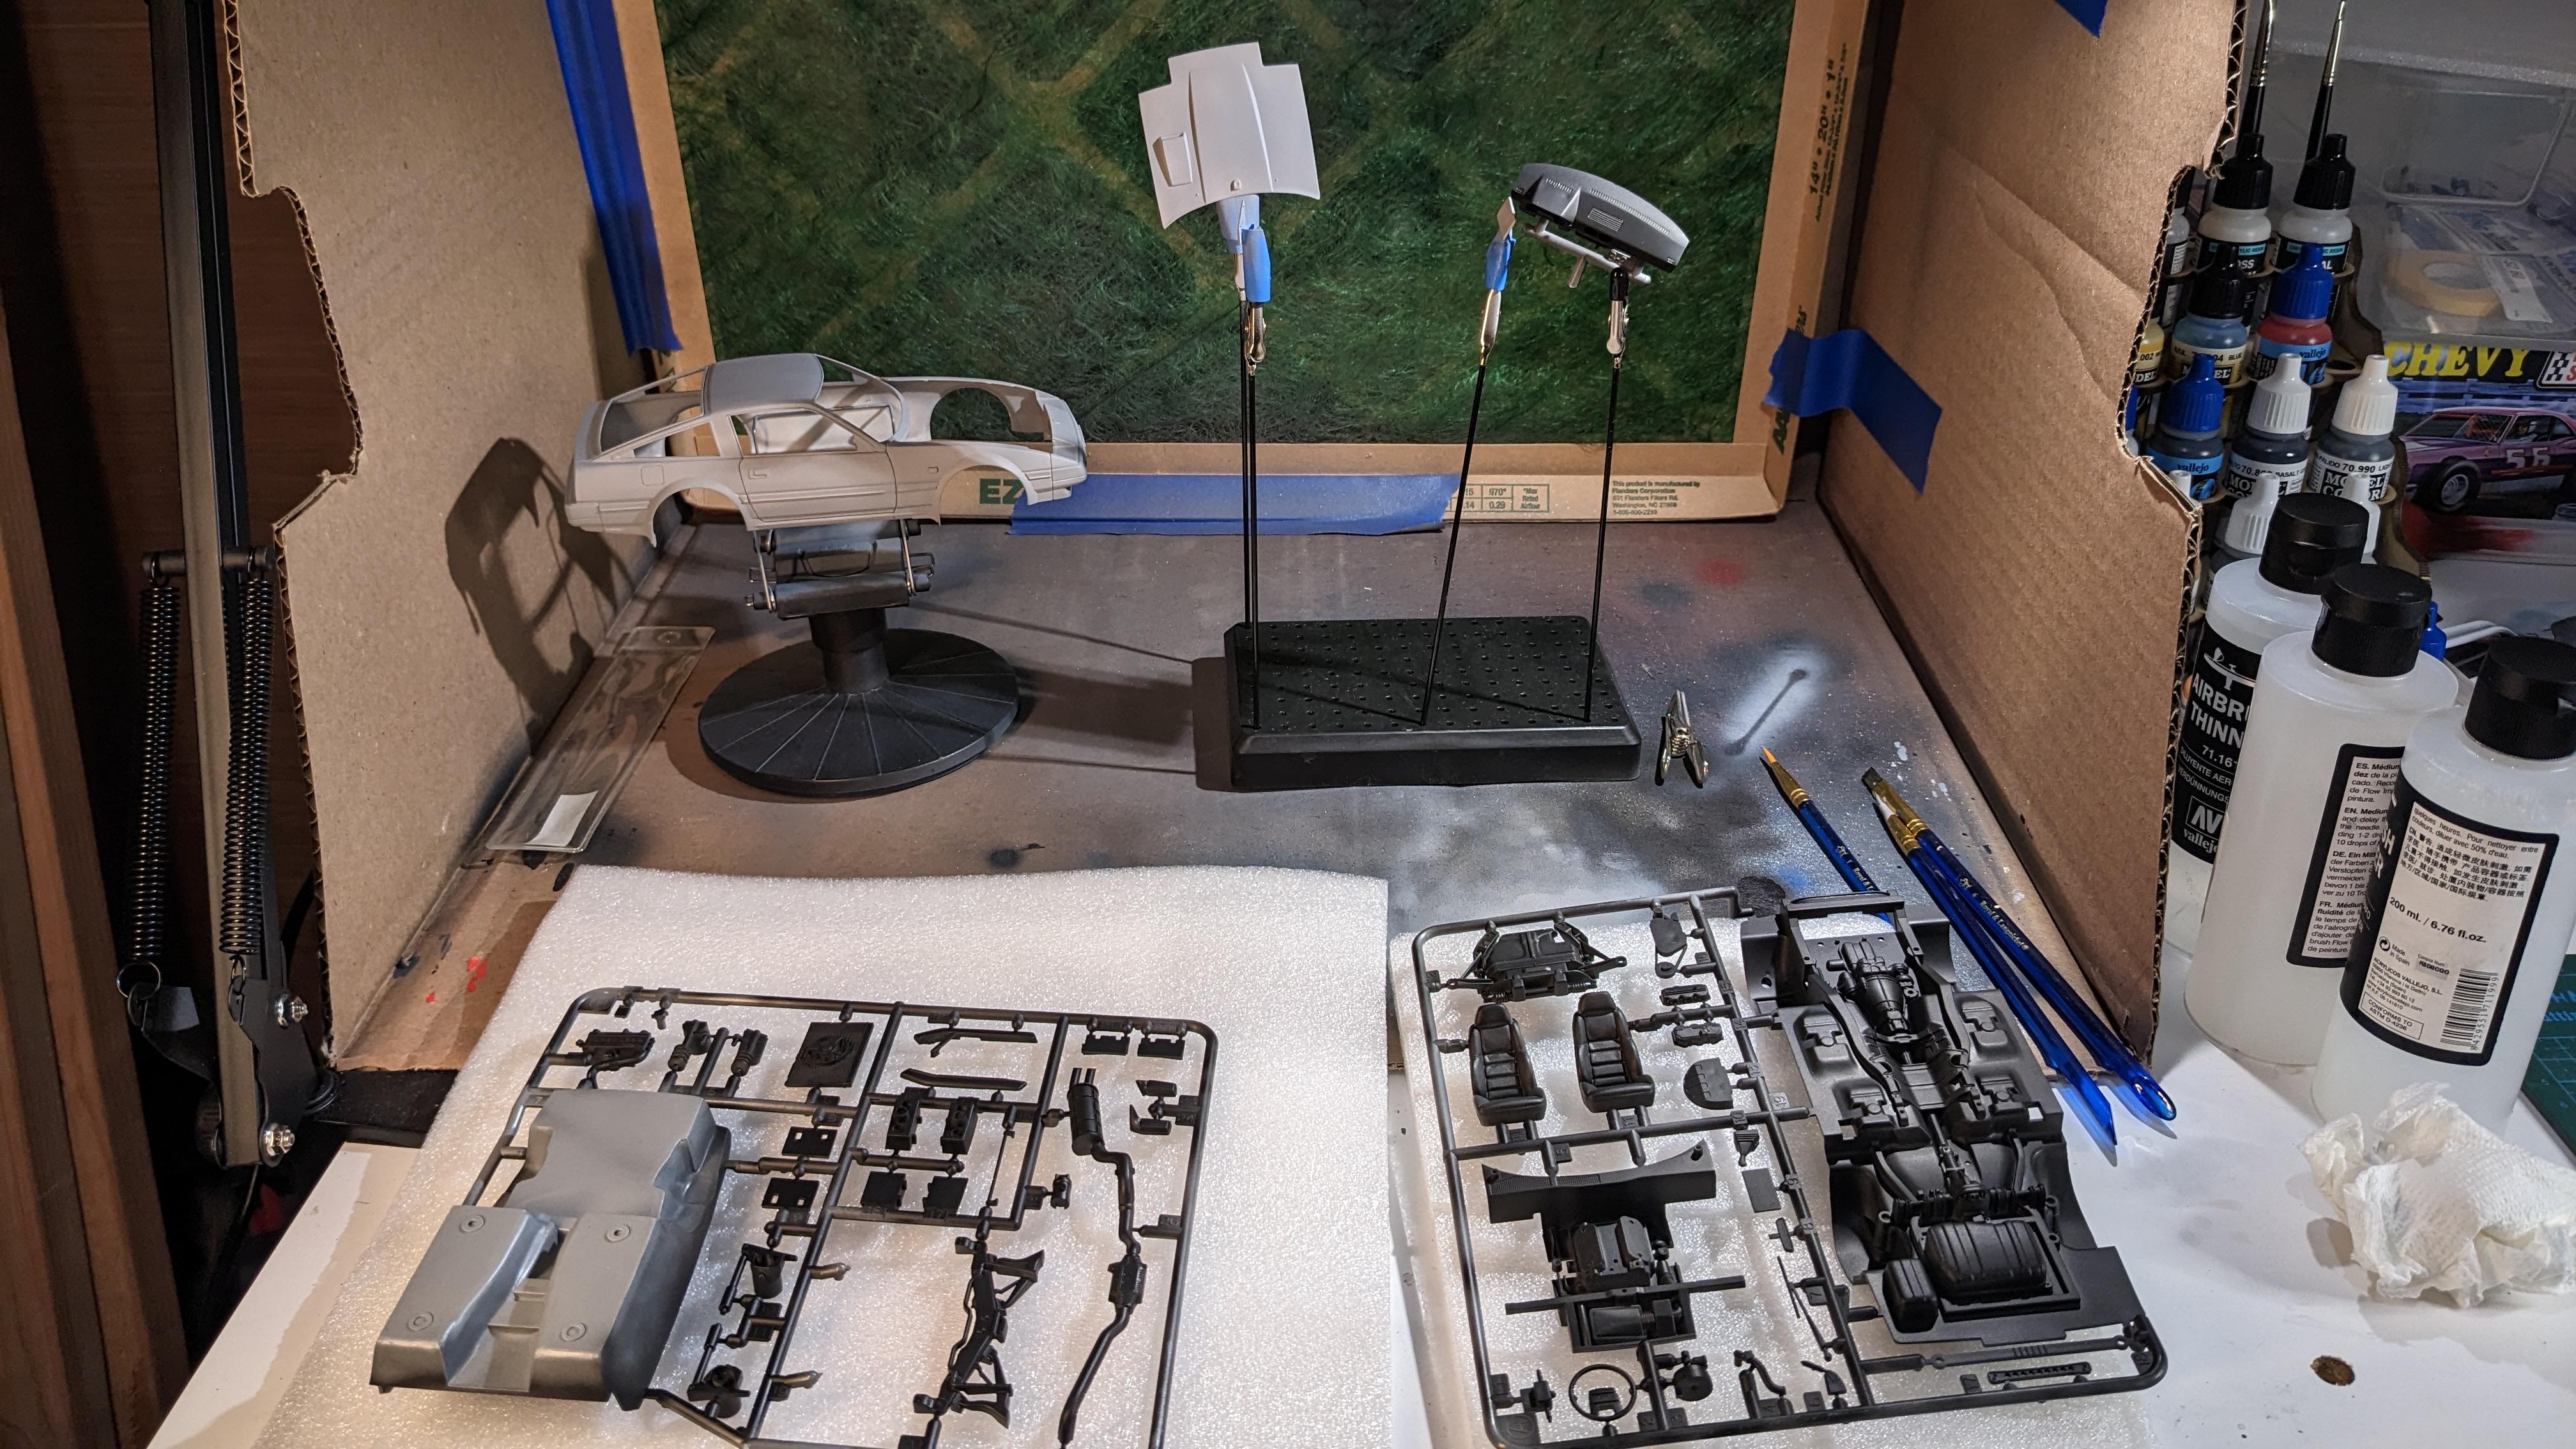
Got back into modeling because of F1. Sat down randomly to watch Silverstone 2021 and was riveted. Girlfriend got hooked a couple races into 2022. She got me this for Christmas, and I've done a couple practice kits up to this point. Don't have a way to setup good ventilation for enamels and lacquers, so I airbrush with Vallejo paints. Body will be primed outdoors with Tamiya primer and the called for body color. Skimming the instructions, the color mix for the engine parts looks fun (aluminum with a smidge of gold, metallic). Might be a bit before I have an update. Lots of sanding on little parts to get the mold lines knocked away, and most of my bench time is on the weekends. If this goes together as well as the Tamiya Nissan Z31 I just built, this should be a blast!
-
Thank you! Yeah, I realized I had my pressure set high after I did the gloss coats. One more thing to check next time!
-
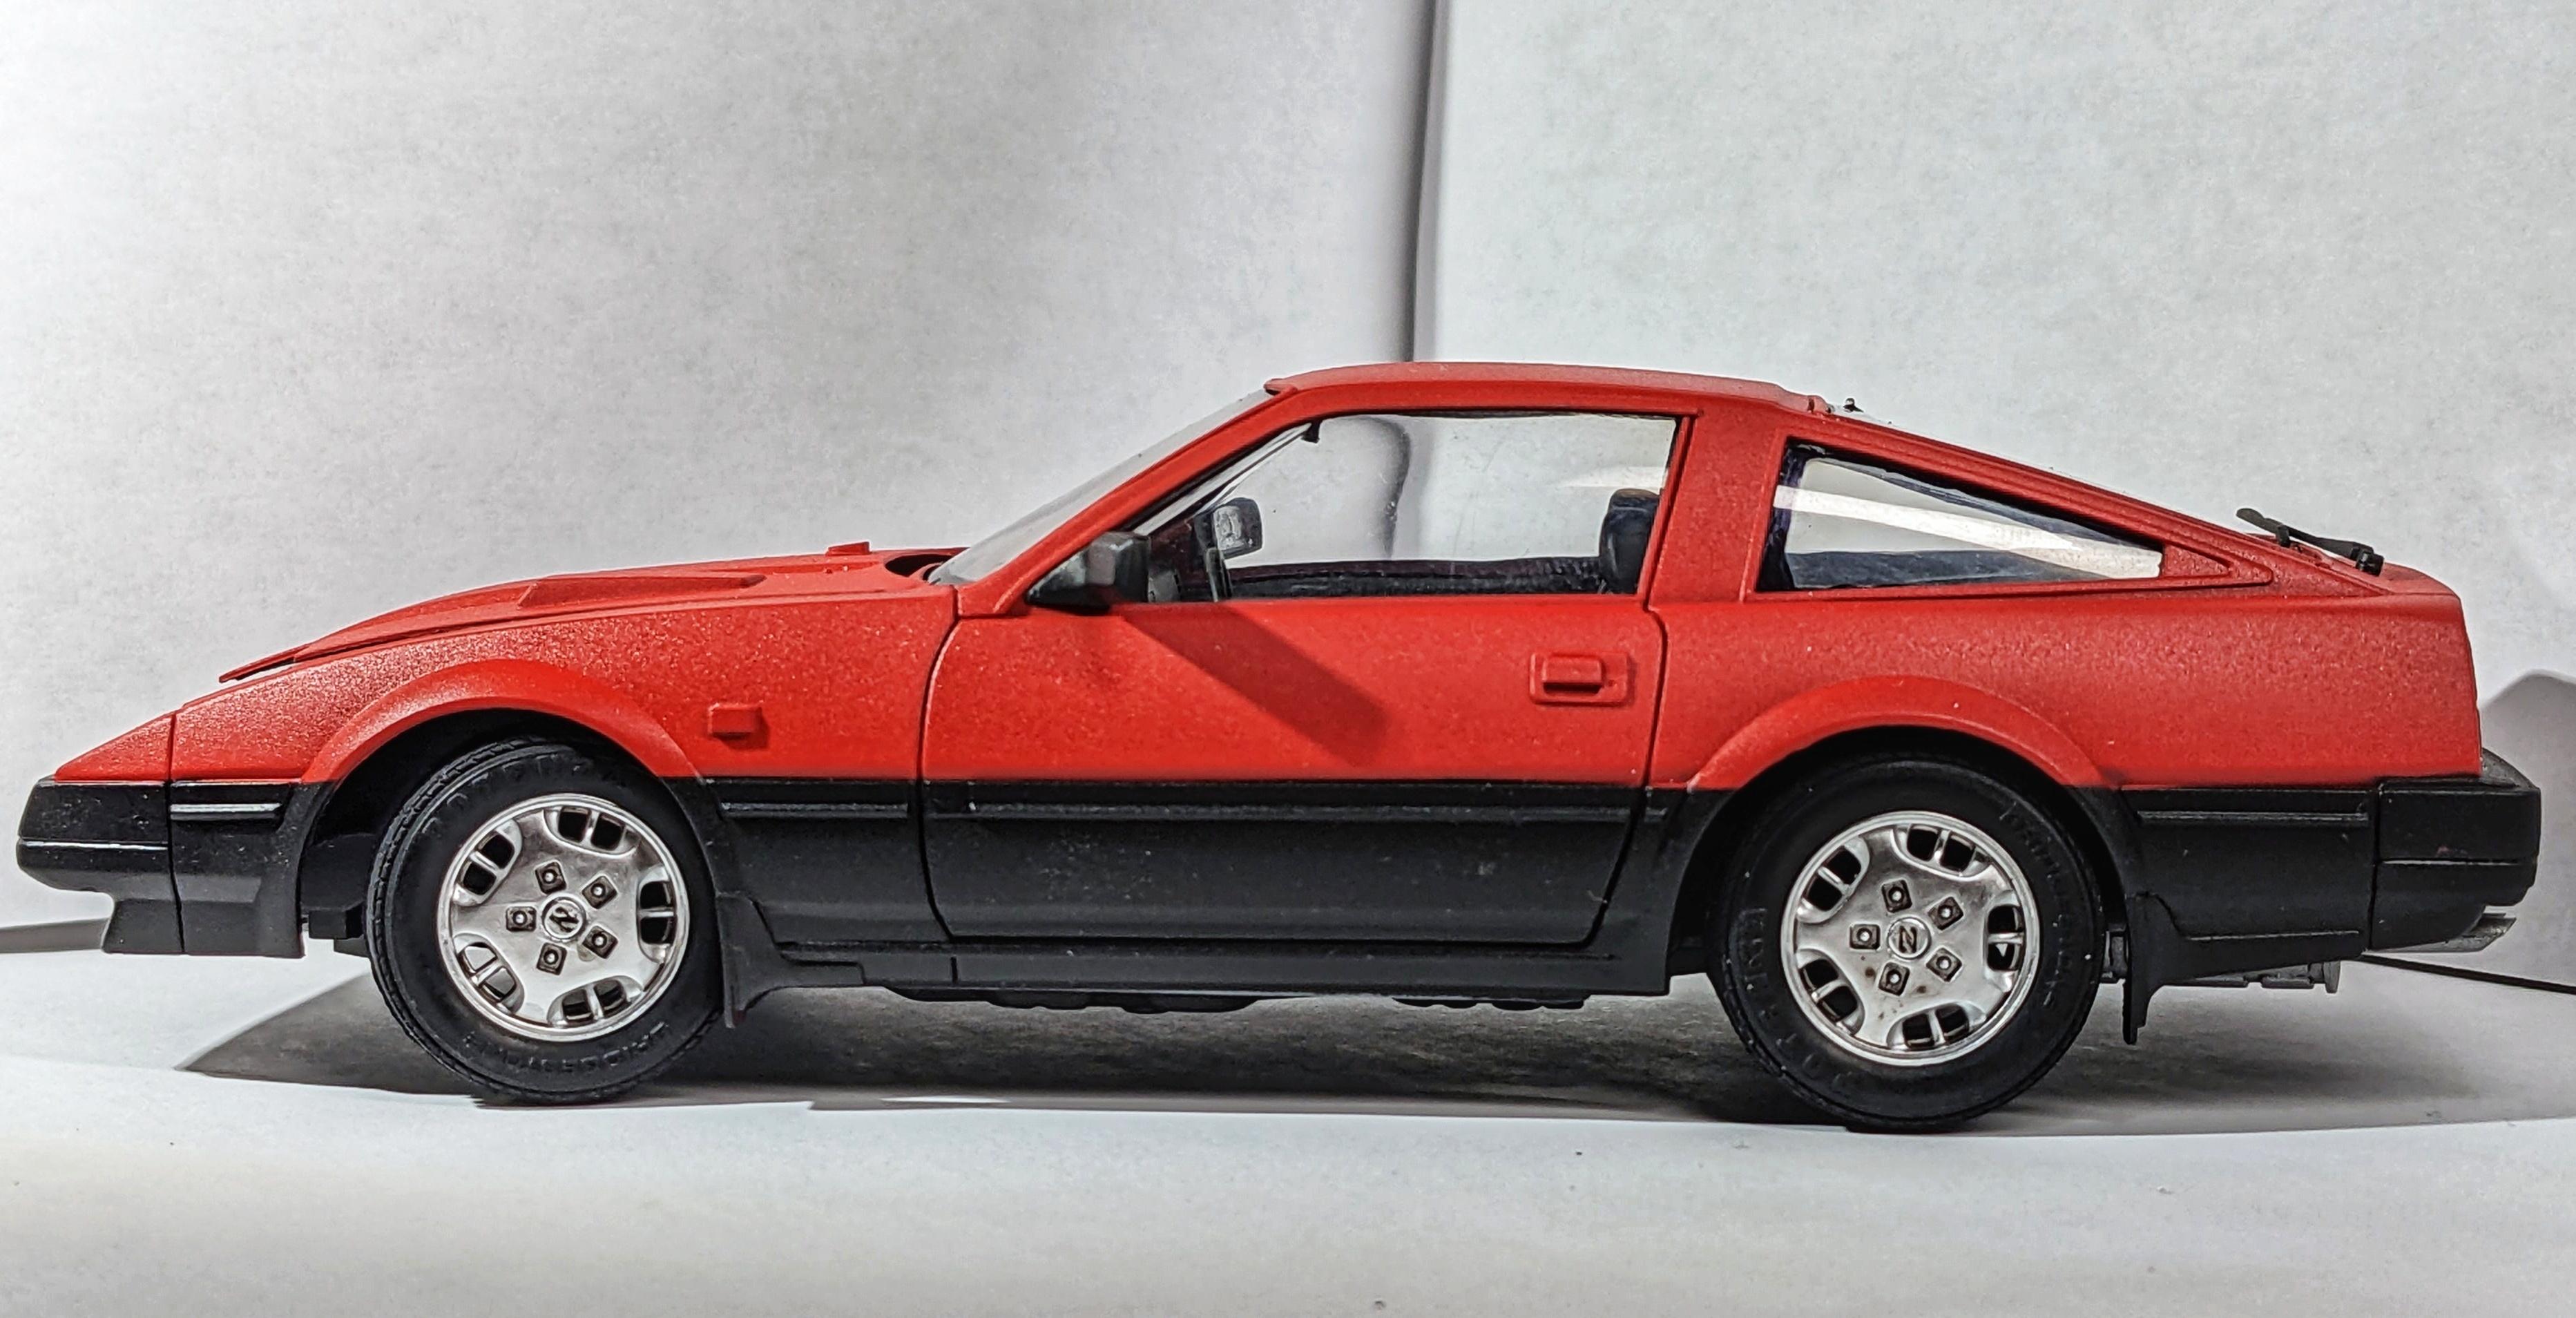
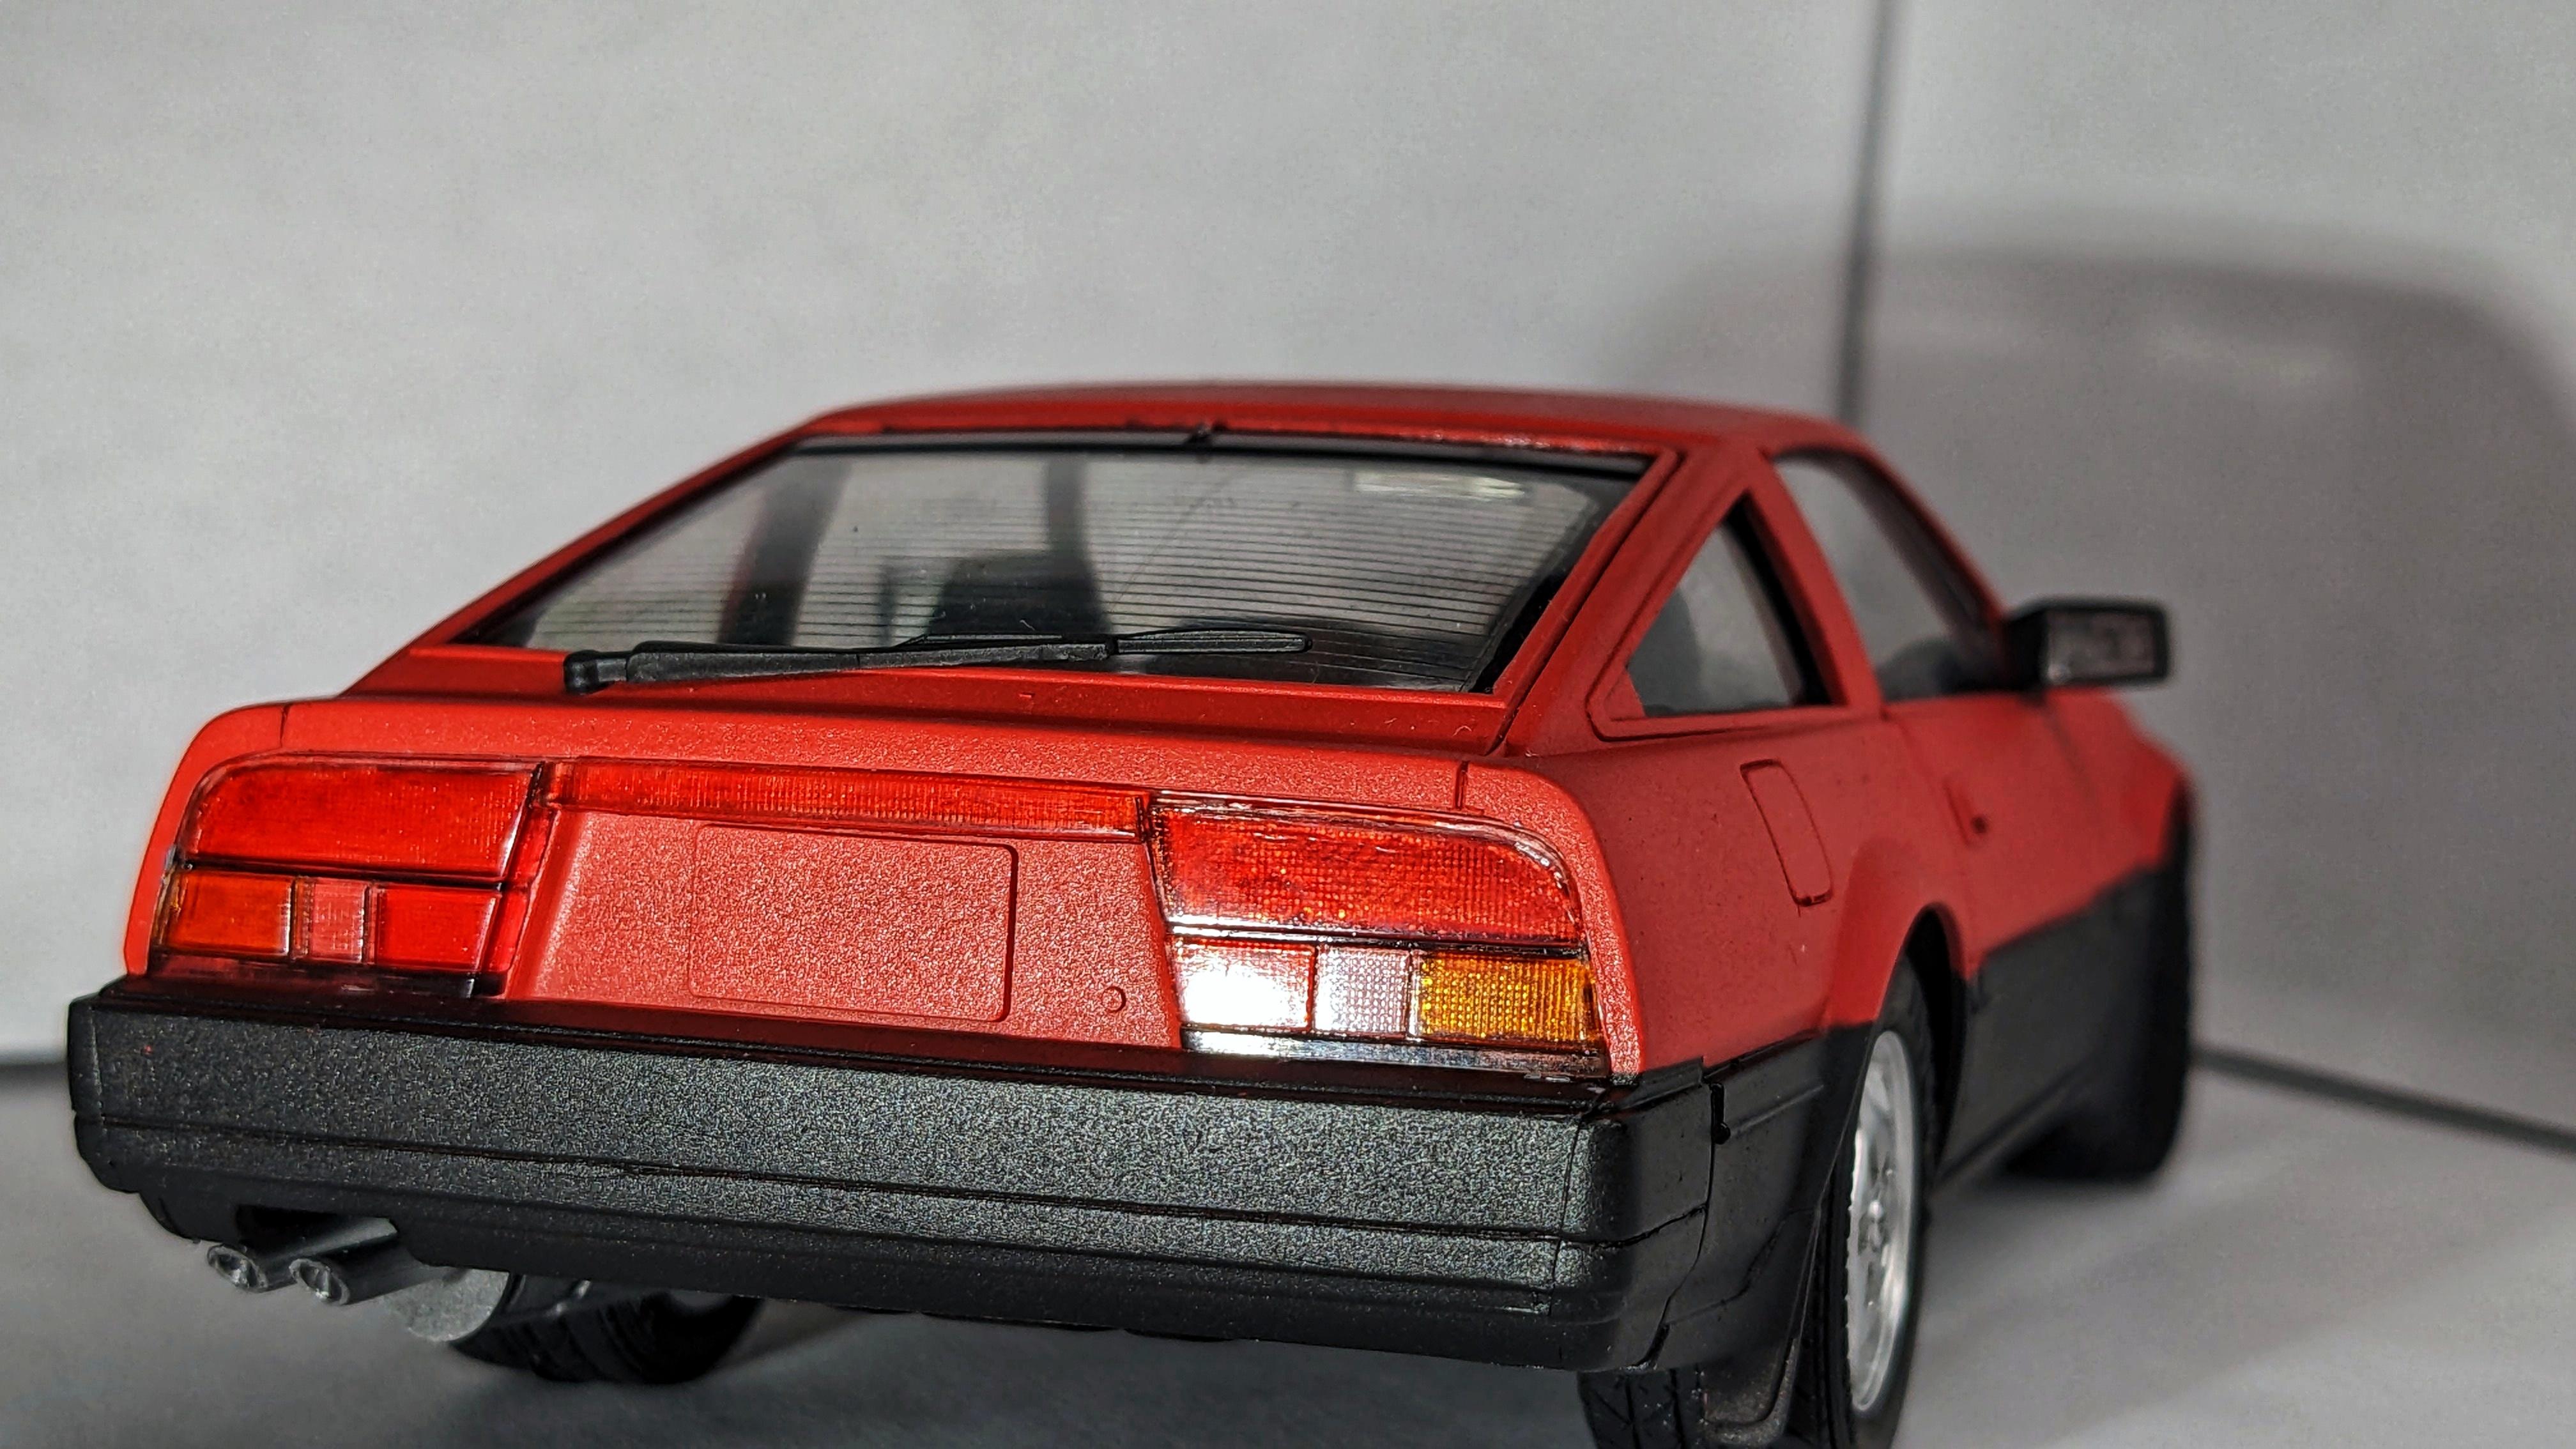
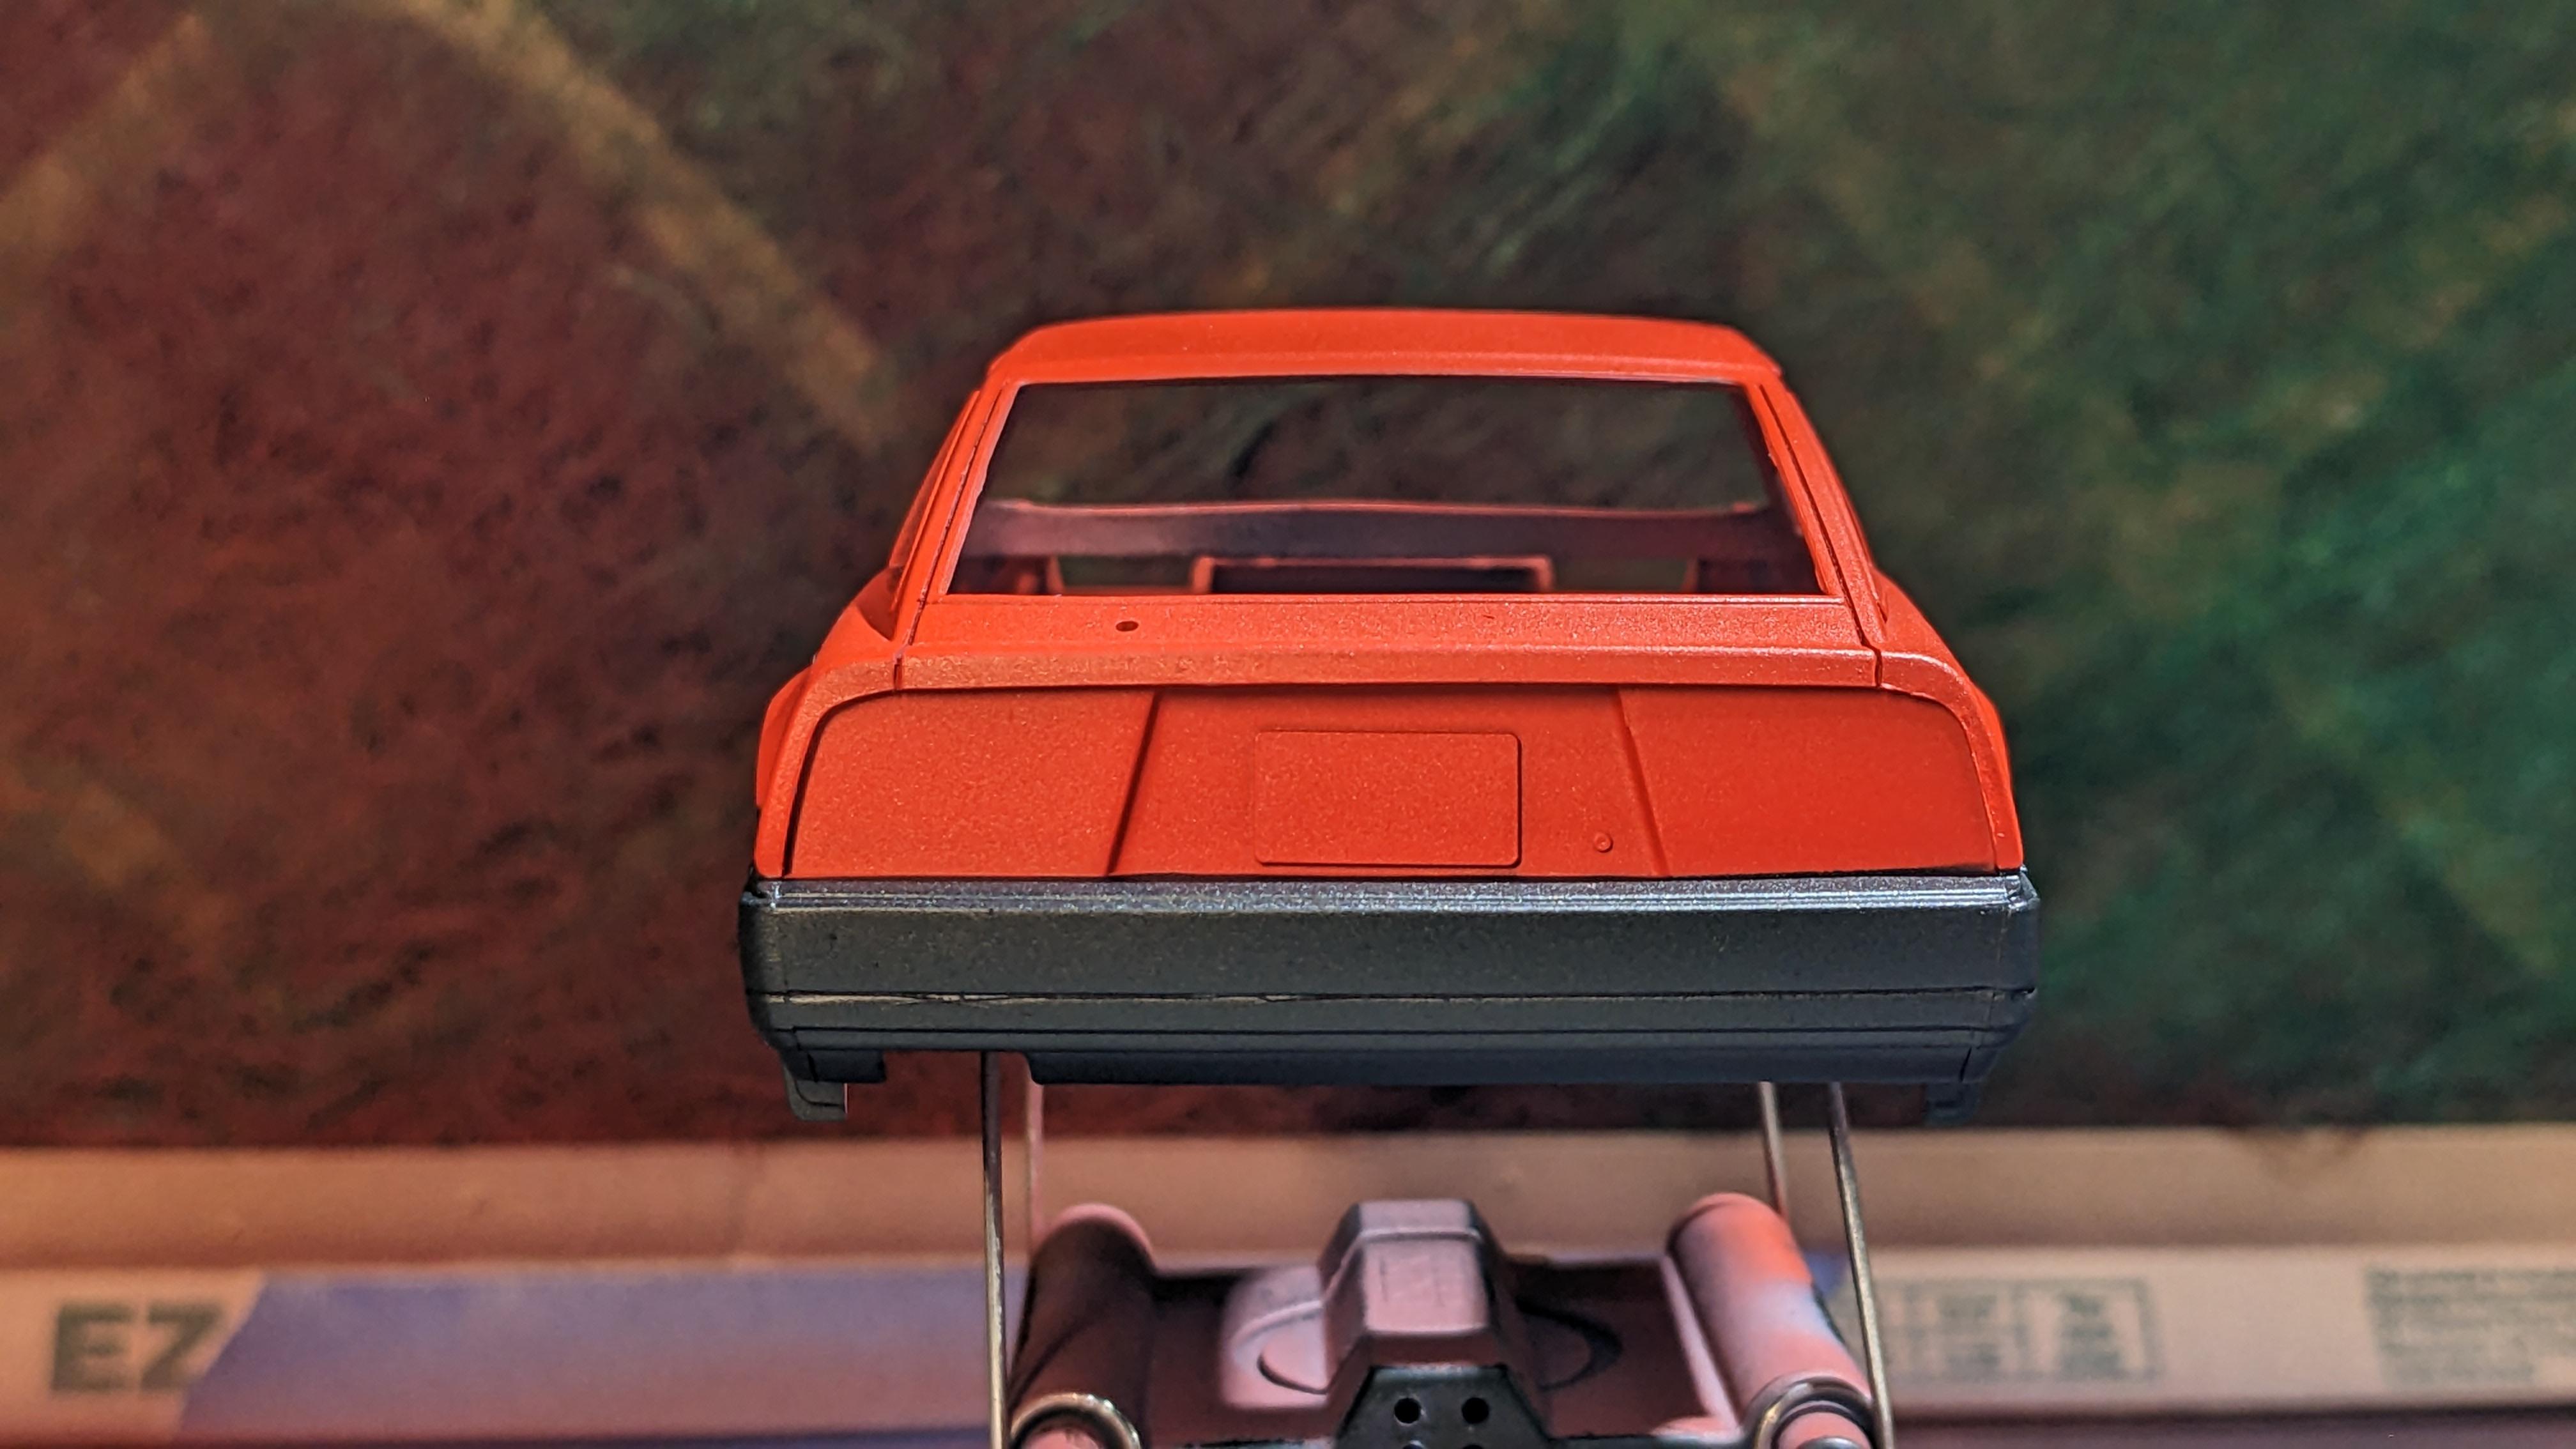
Pretty much done! I will do the decals on this one, but not till at least next weekend most likely. It is definitely a aix-foot looker, and my phone camera was very generous to the red 😂 Build was generally a lot of fun. The headlights were a little fiddly at final assembly. I gave up on masking the windows and used a sharpie (if the windows were individual and not a single unit, I feel like I could have gotten it down). Tamiya clear is awesome, but hard to use. Look forward to what it can do. Fun learning, and a neat little shelf piece...on to the Tamiya F1 Honda RA272!
-
My third project, Tamiya VW beetle pickup 1966
bo_ells replied to Blueberry_no1's topic in WIP: Model Cars
Absolutely awesome. Wrapping up my second kit and the ide of kitbashing is cool, but not in my immediate future 😂 -
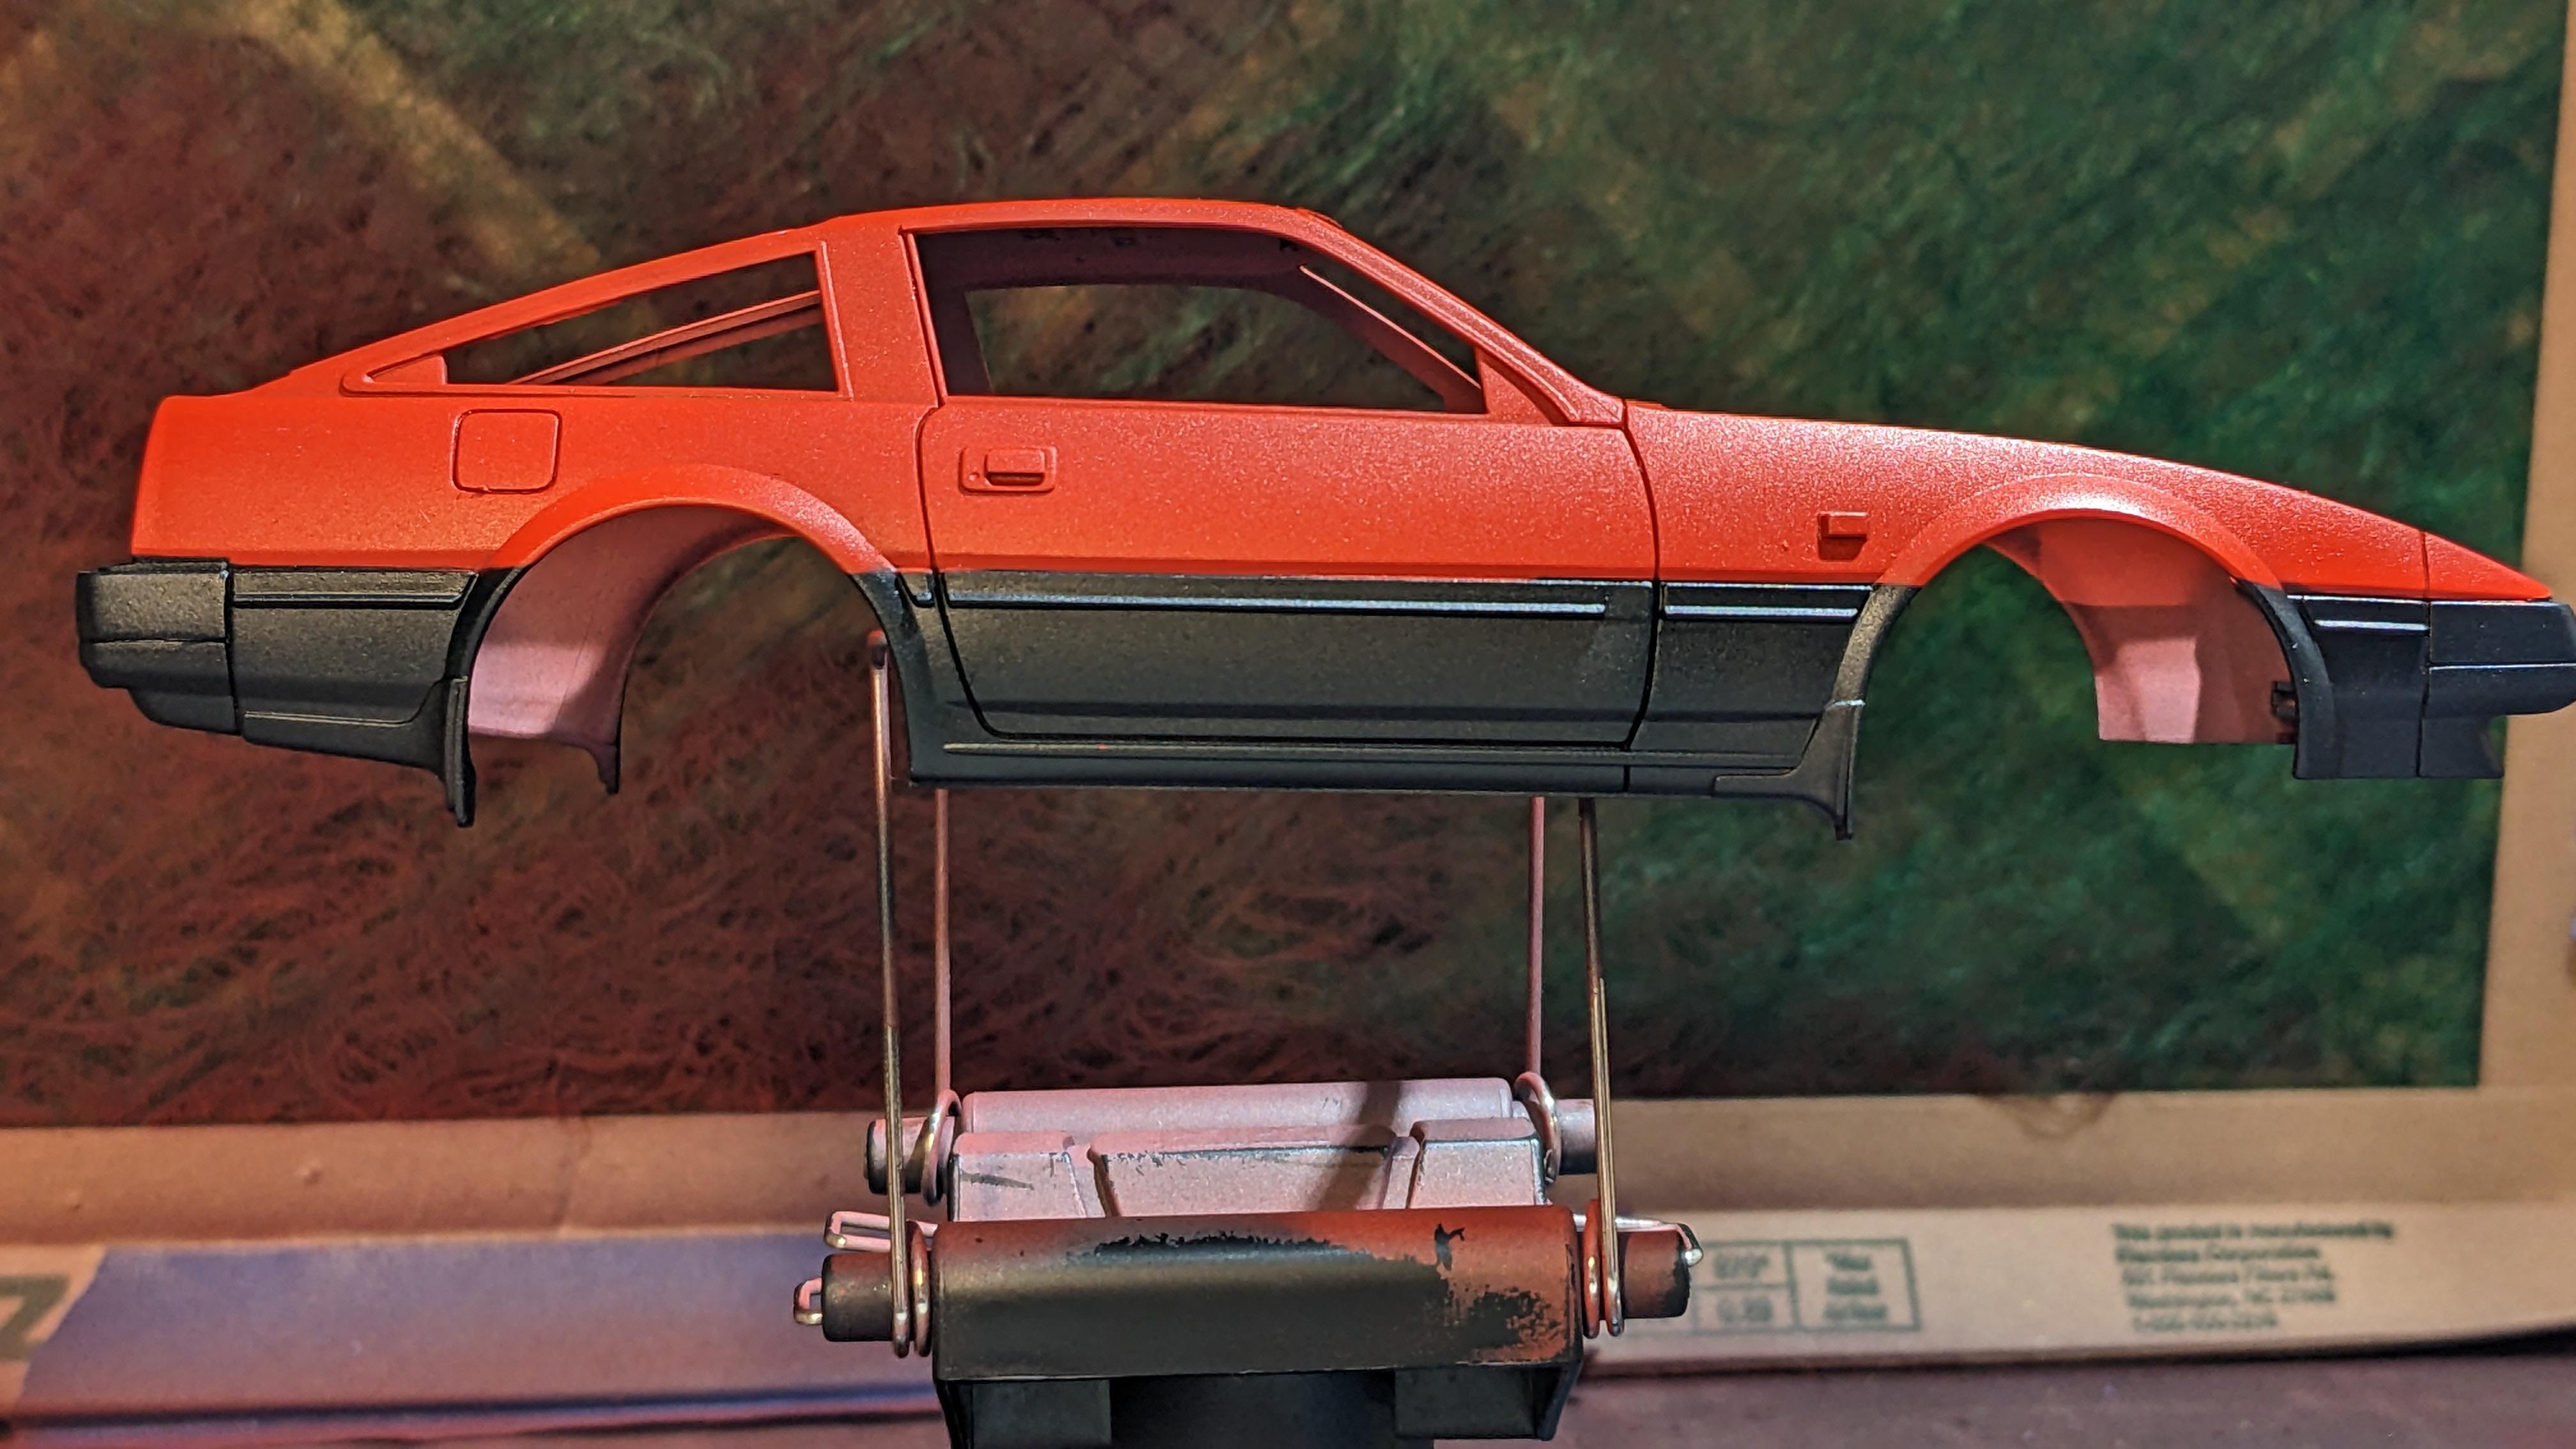
Got a little wild this morning and decided to go for the two tone 😂 Masking wasn't perfect but it came out better than I expected. Completely different look. Was planning to do just the lower trim. Got some good lessons with the airbrush- control and spray patterns.
-
Still getting there 😂 Modeling is good my ADHD, but hard as I usually have about an hour of focus at a time before I risk getting frustrated with something and rushing, creating a mistake of some sort. Tamiya panel liner is amazing. Tuned up the rims a bit in the before and after pics below (didn't realize I had the center Zs misaligned :/) and touched up the engine head. Body needs a good wet coat of the gloss finish. Think the primer is too dark and holds the red back a bit. Ultimately decided to go with a black interior to keep it simple. Still working on the window masking. Picking up some 40mm Tamiya tape. Was close with what I have. Also goobered up the white brush paint on the battery and reservoir tank in the engine bay. Have some ideas how I could mask off the area and spray it next time.
-
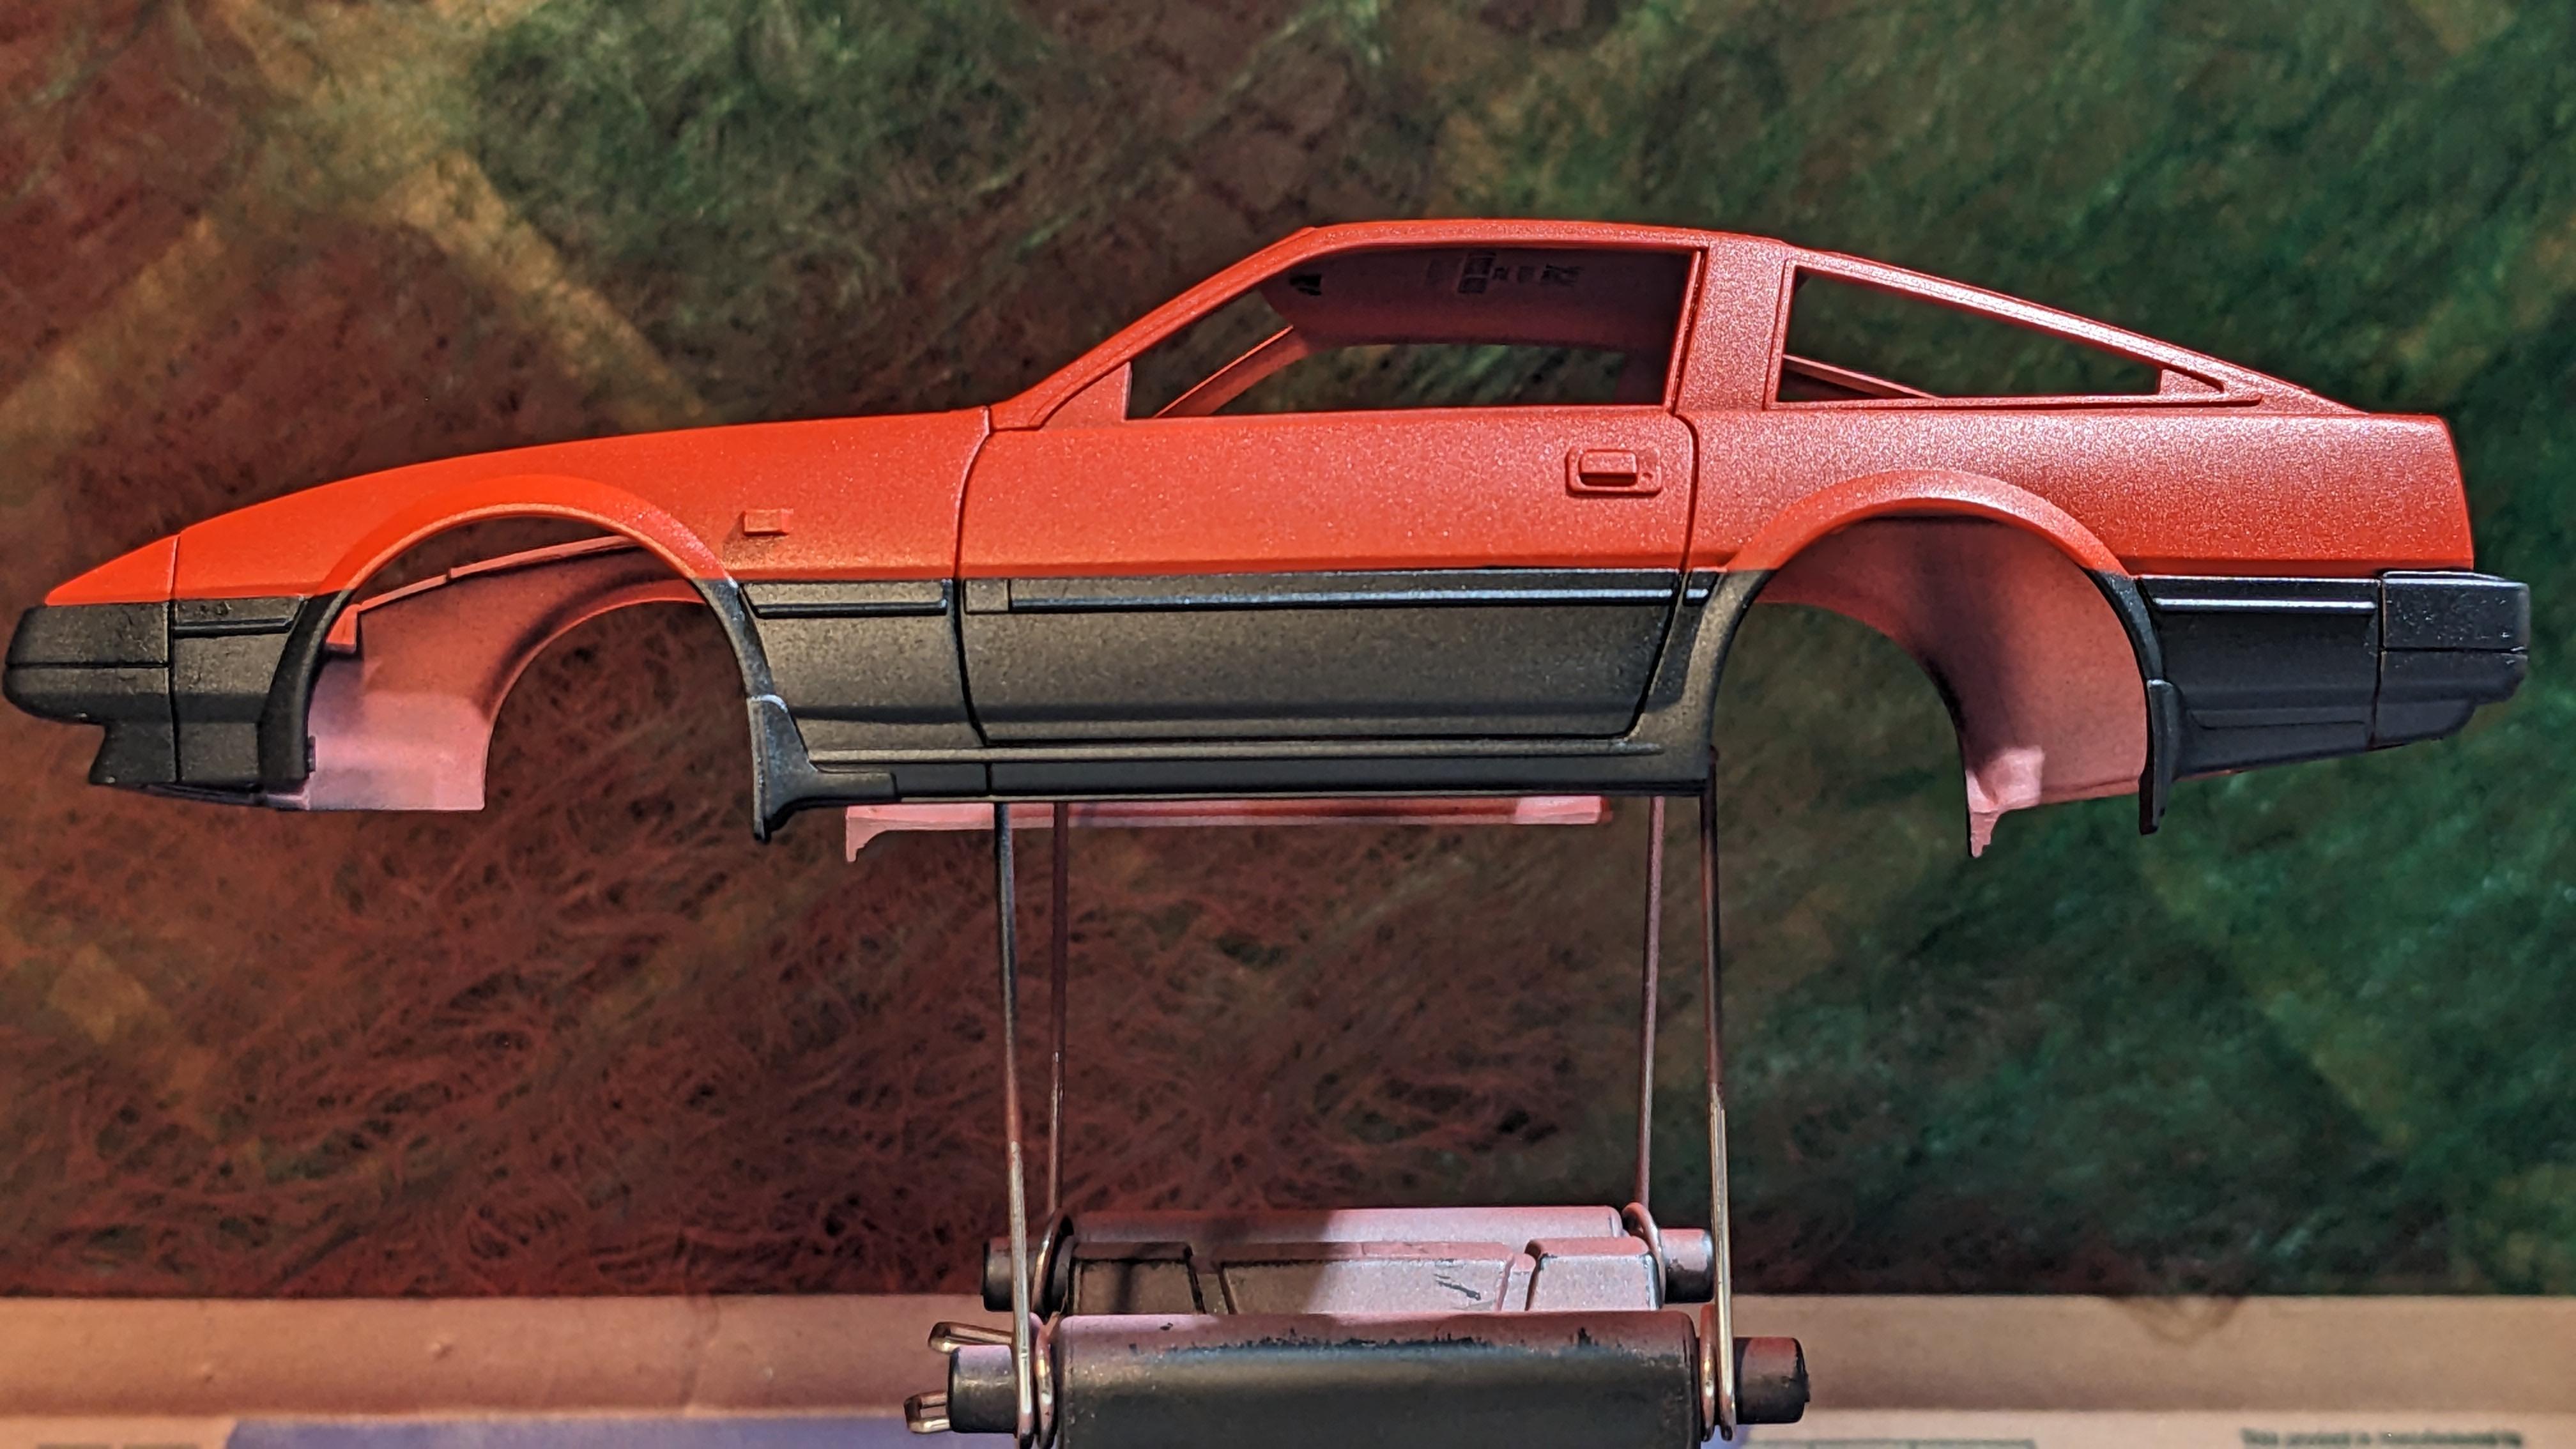
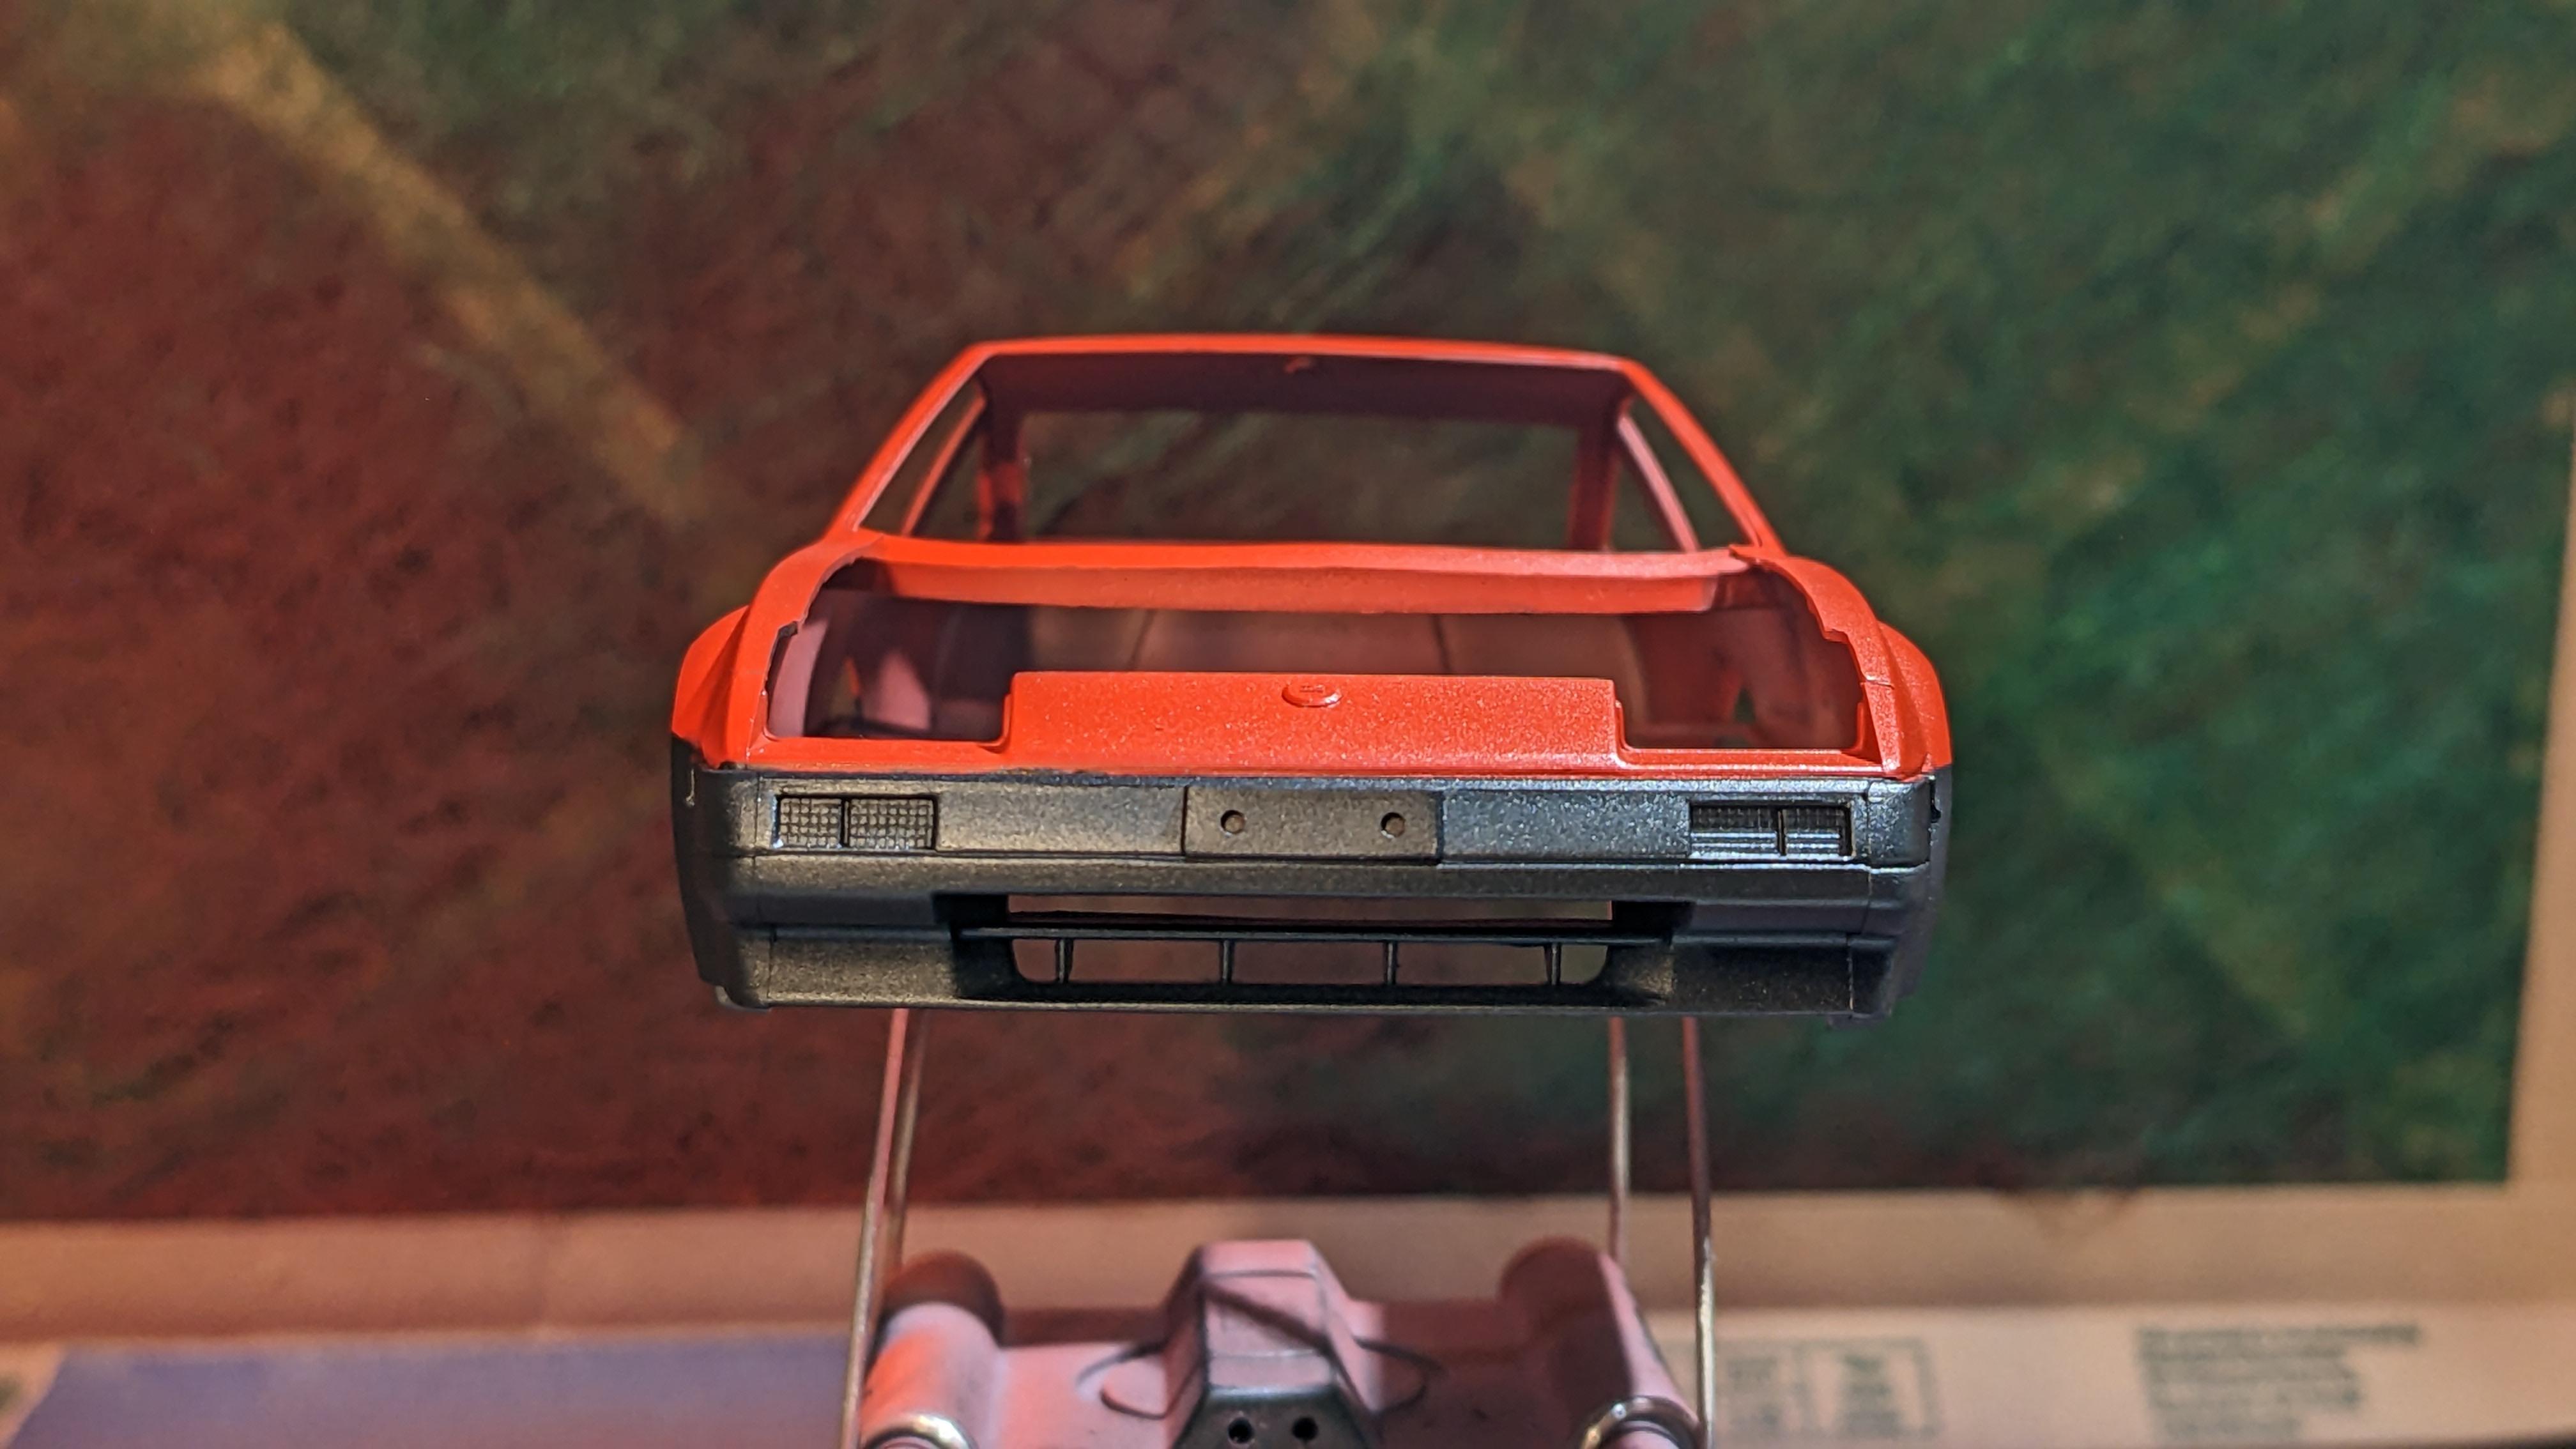
Couldn't find any precut masks for this kit. The next gen Z32 model has some, so that'll be good form when I build that one later this year. Think I'm gonna have a number of Z models over time 😛 Don't think the layered var ish really did anything for this. I think I like the varnish over paint only better. Layered is on the top/right in the pics. Photo isn't super representative, but the layered seems duller, which makes a bit of sense.
-
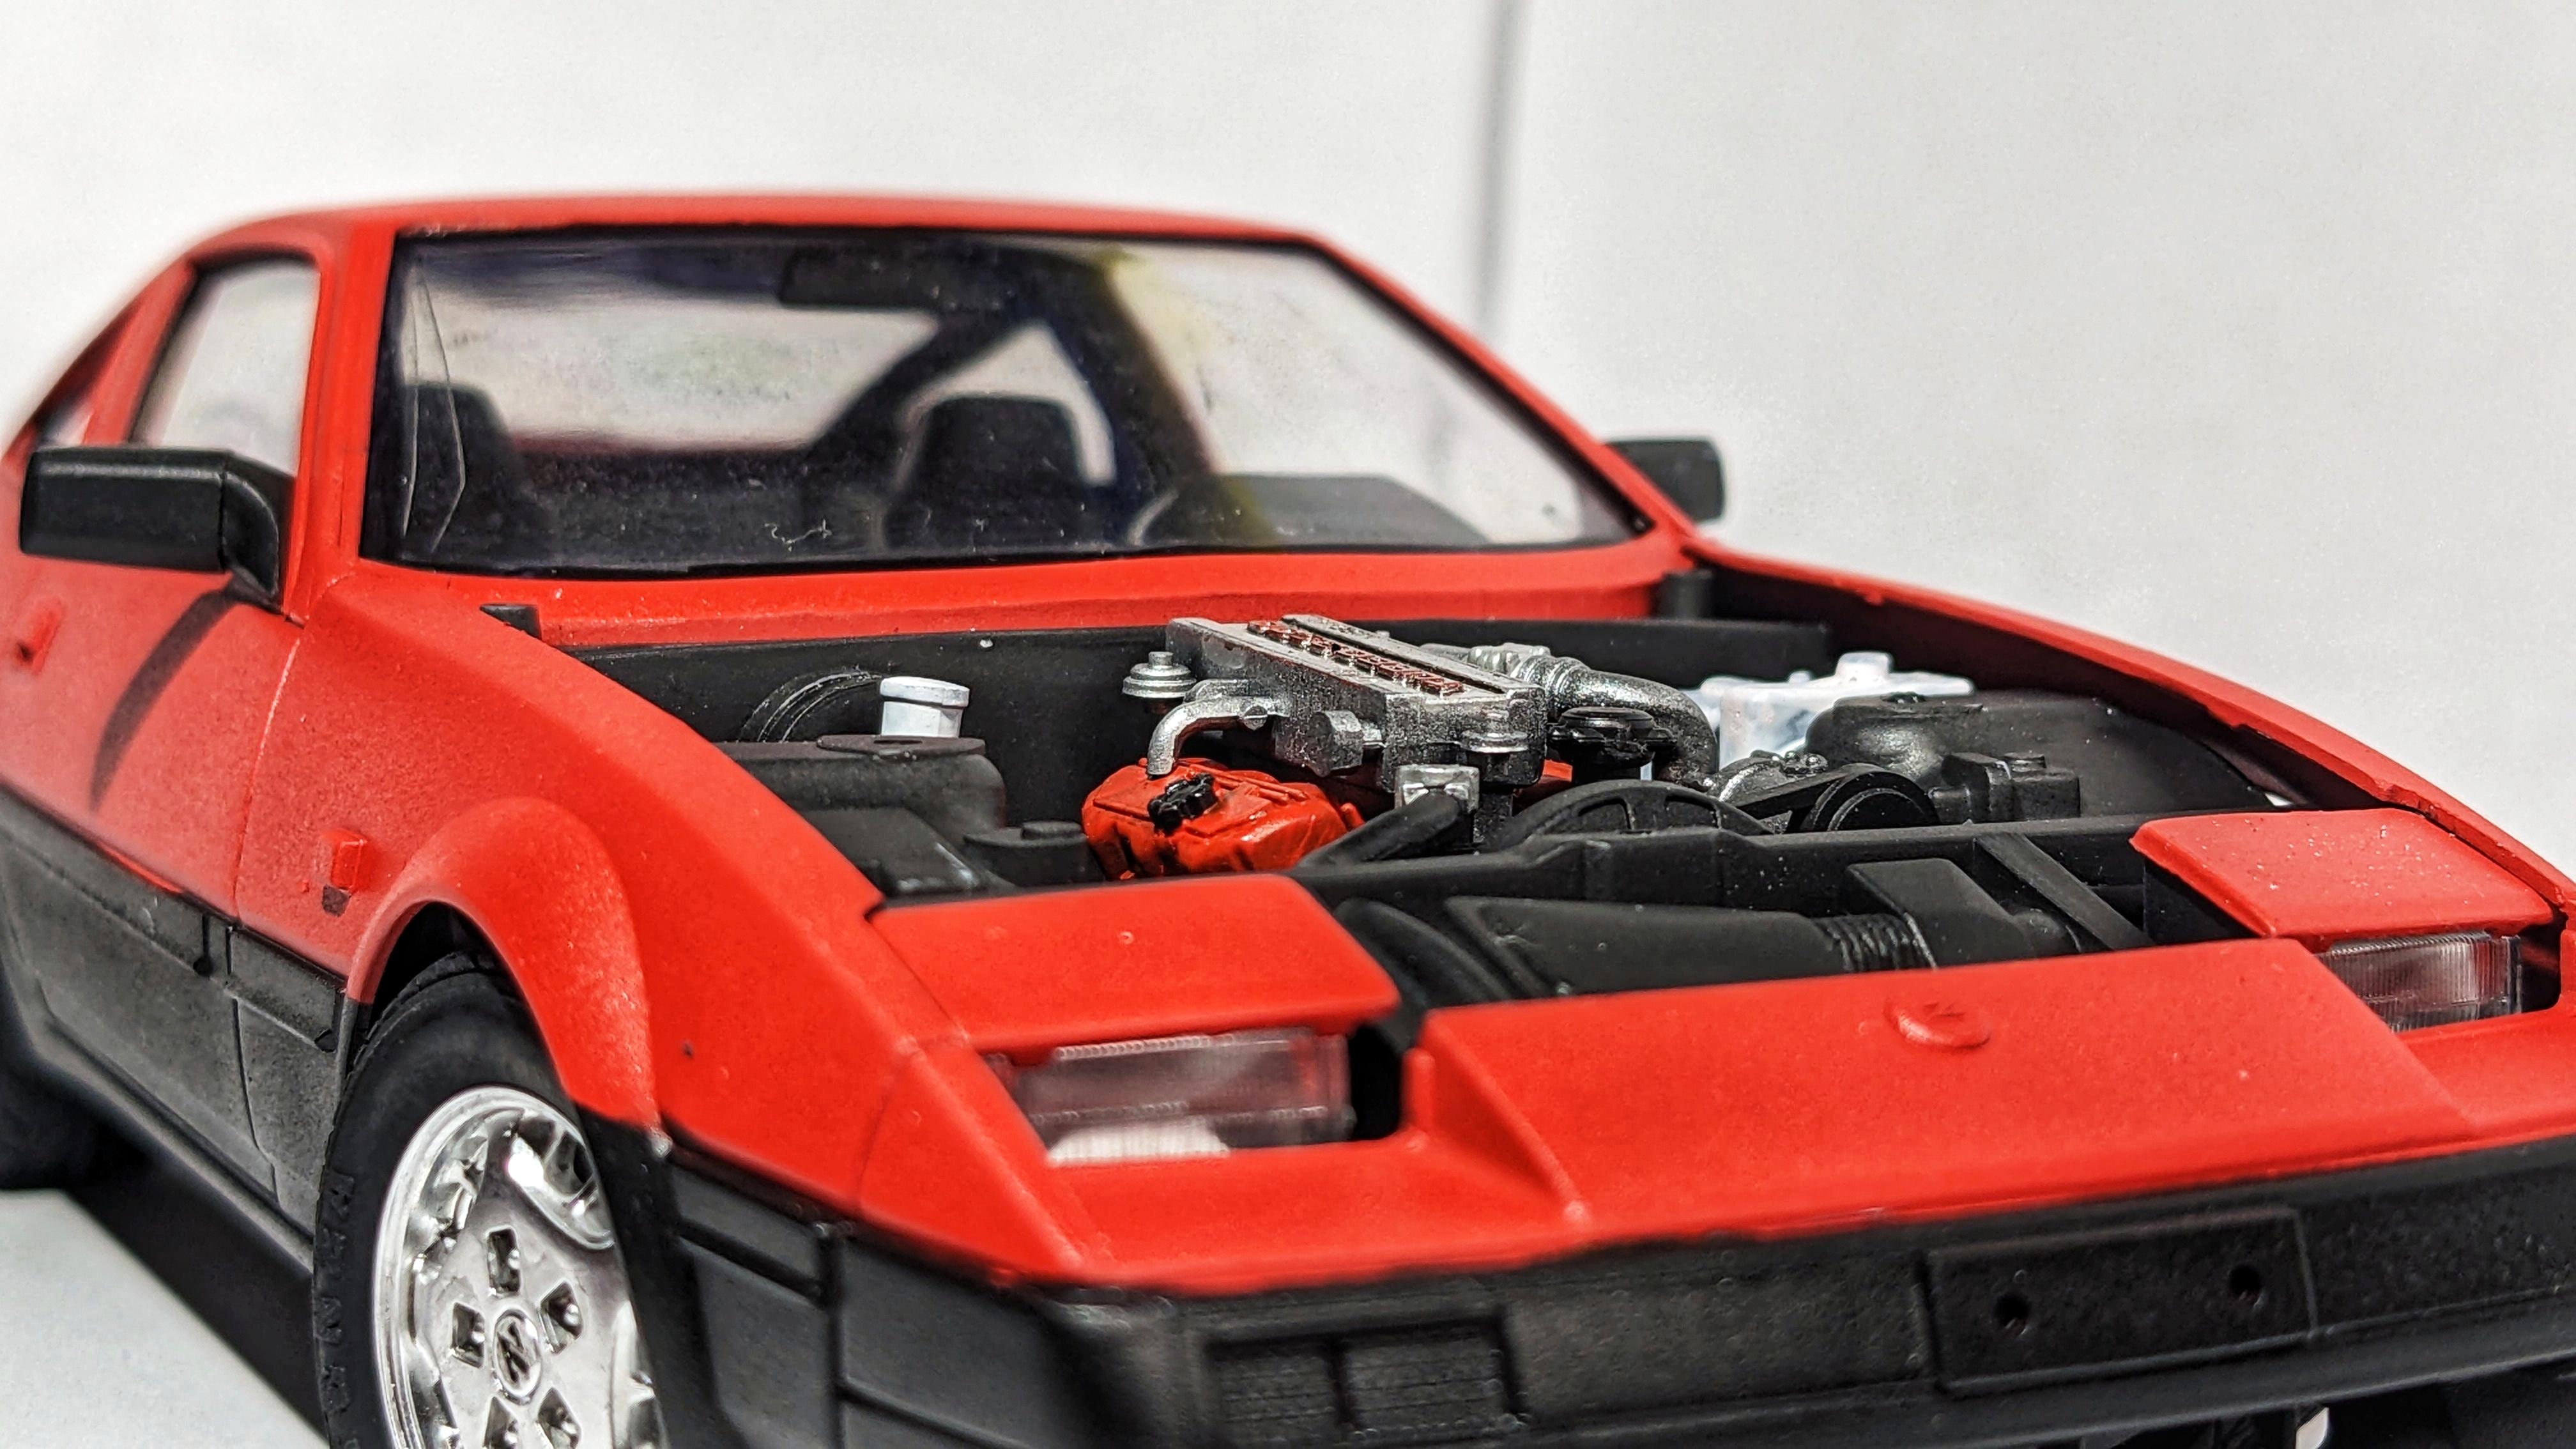
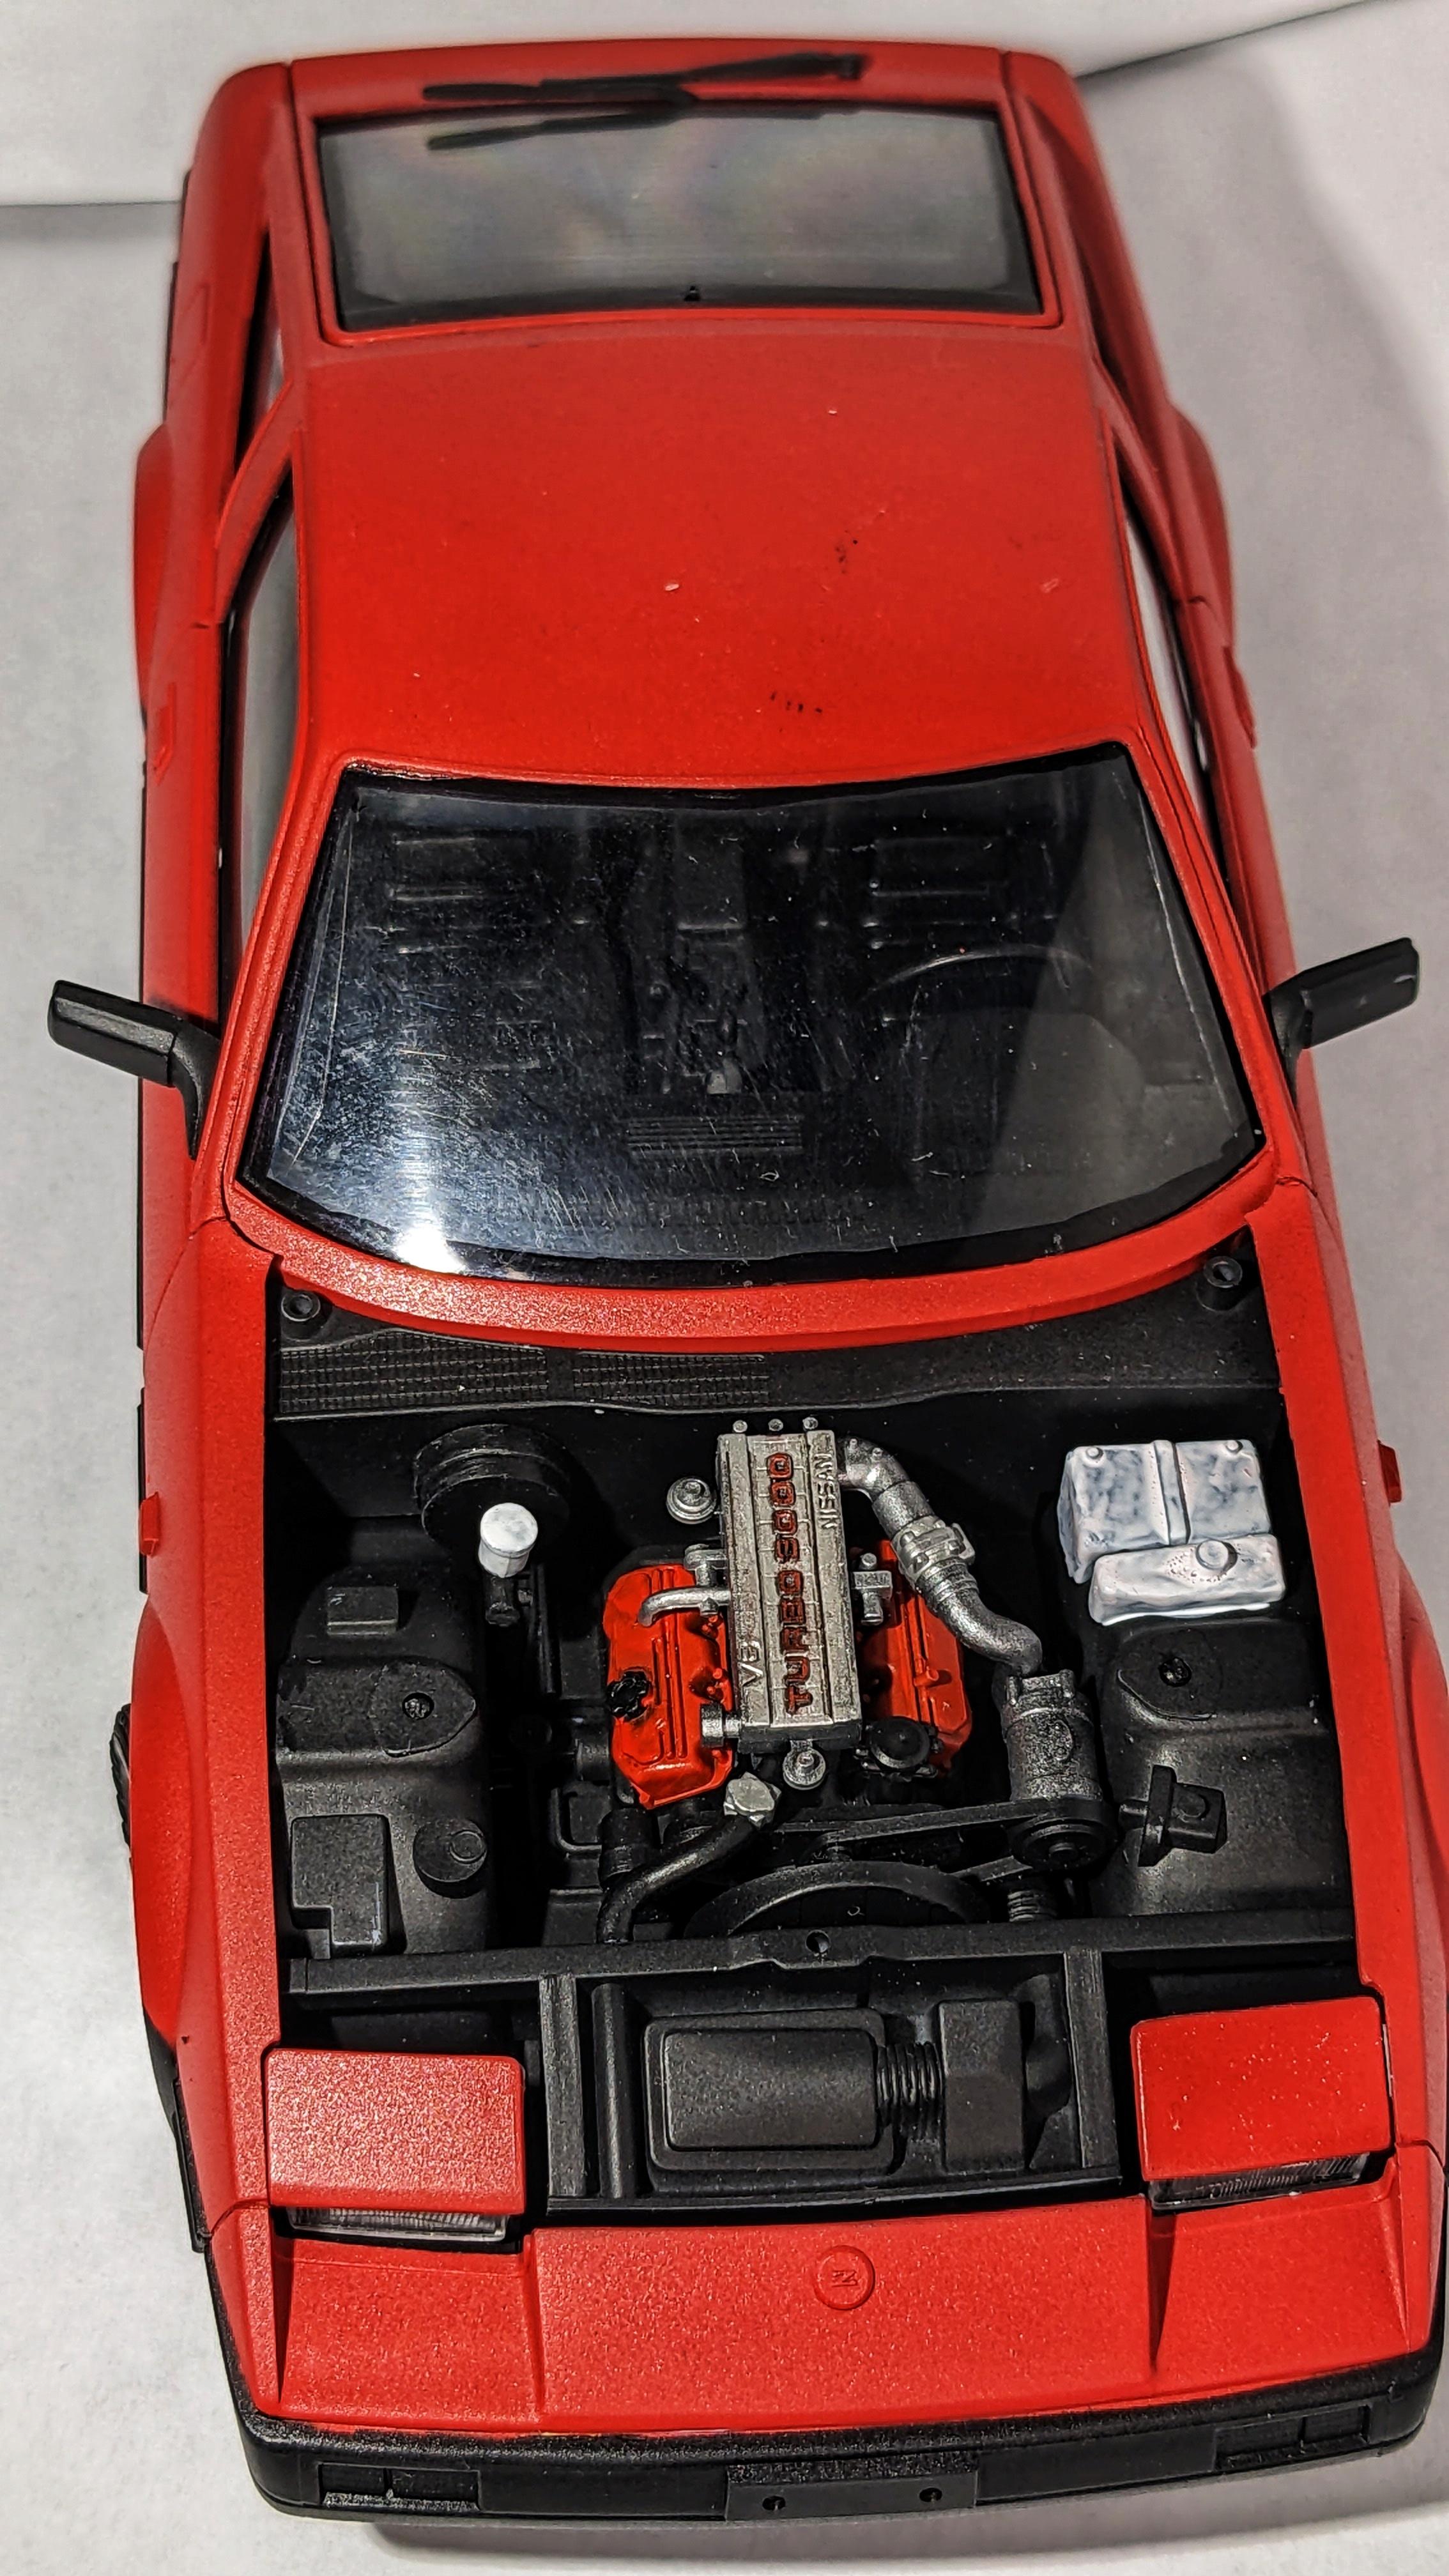
Oh, and I totally inverted the red on the engine because shocker, my ADHD kicked in and I didn't need no reference photo 😂 I actually made a bit of a mes with the dry brushing, and one of the fingernail paint detail brushes my girlfriend gave me was perfect to touch up the silver. I was a bit timid to try it on the recess lettering.
-
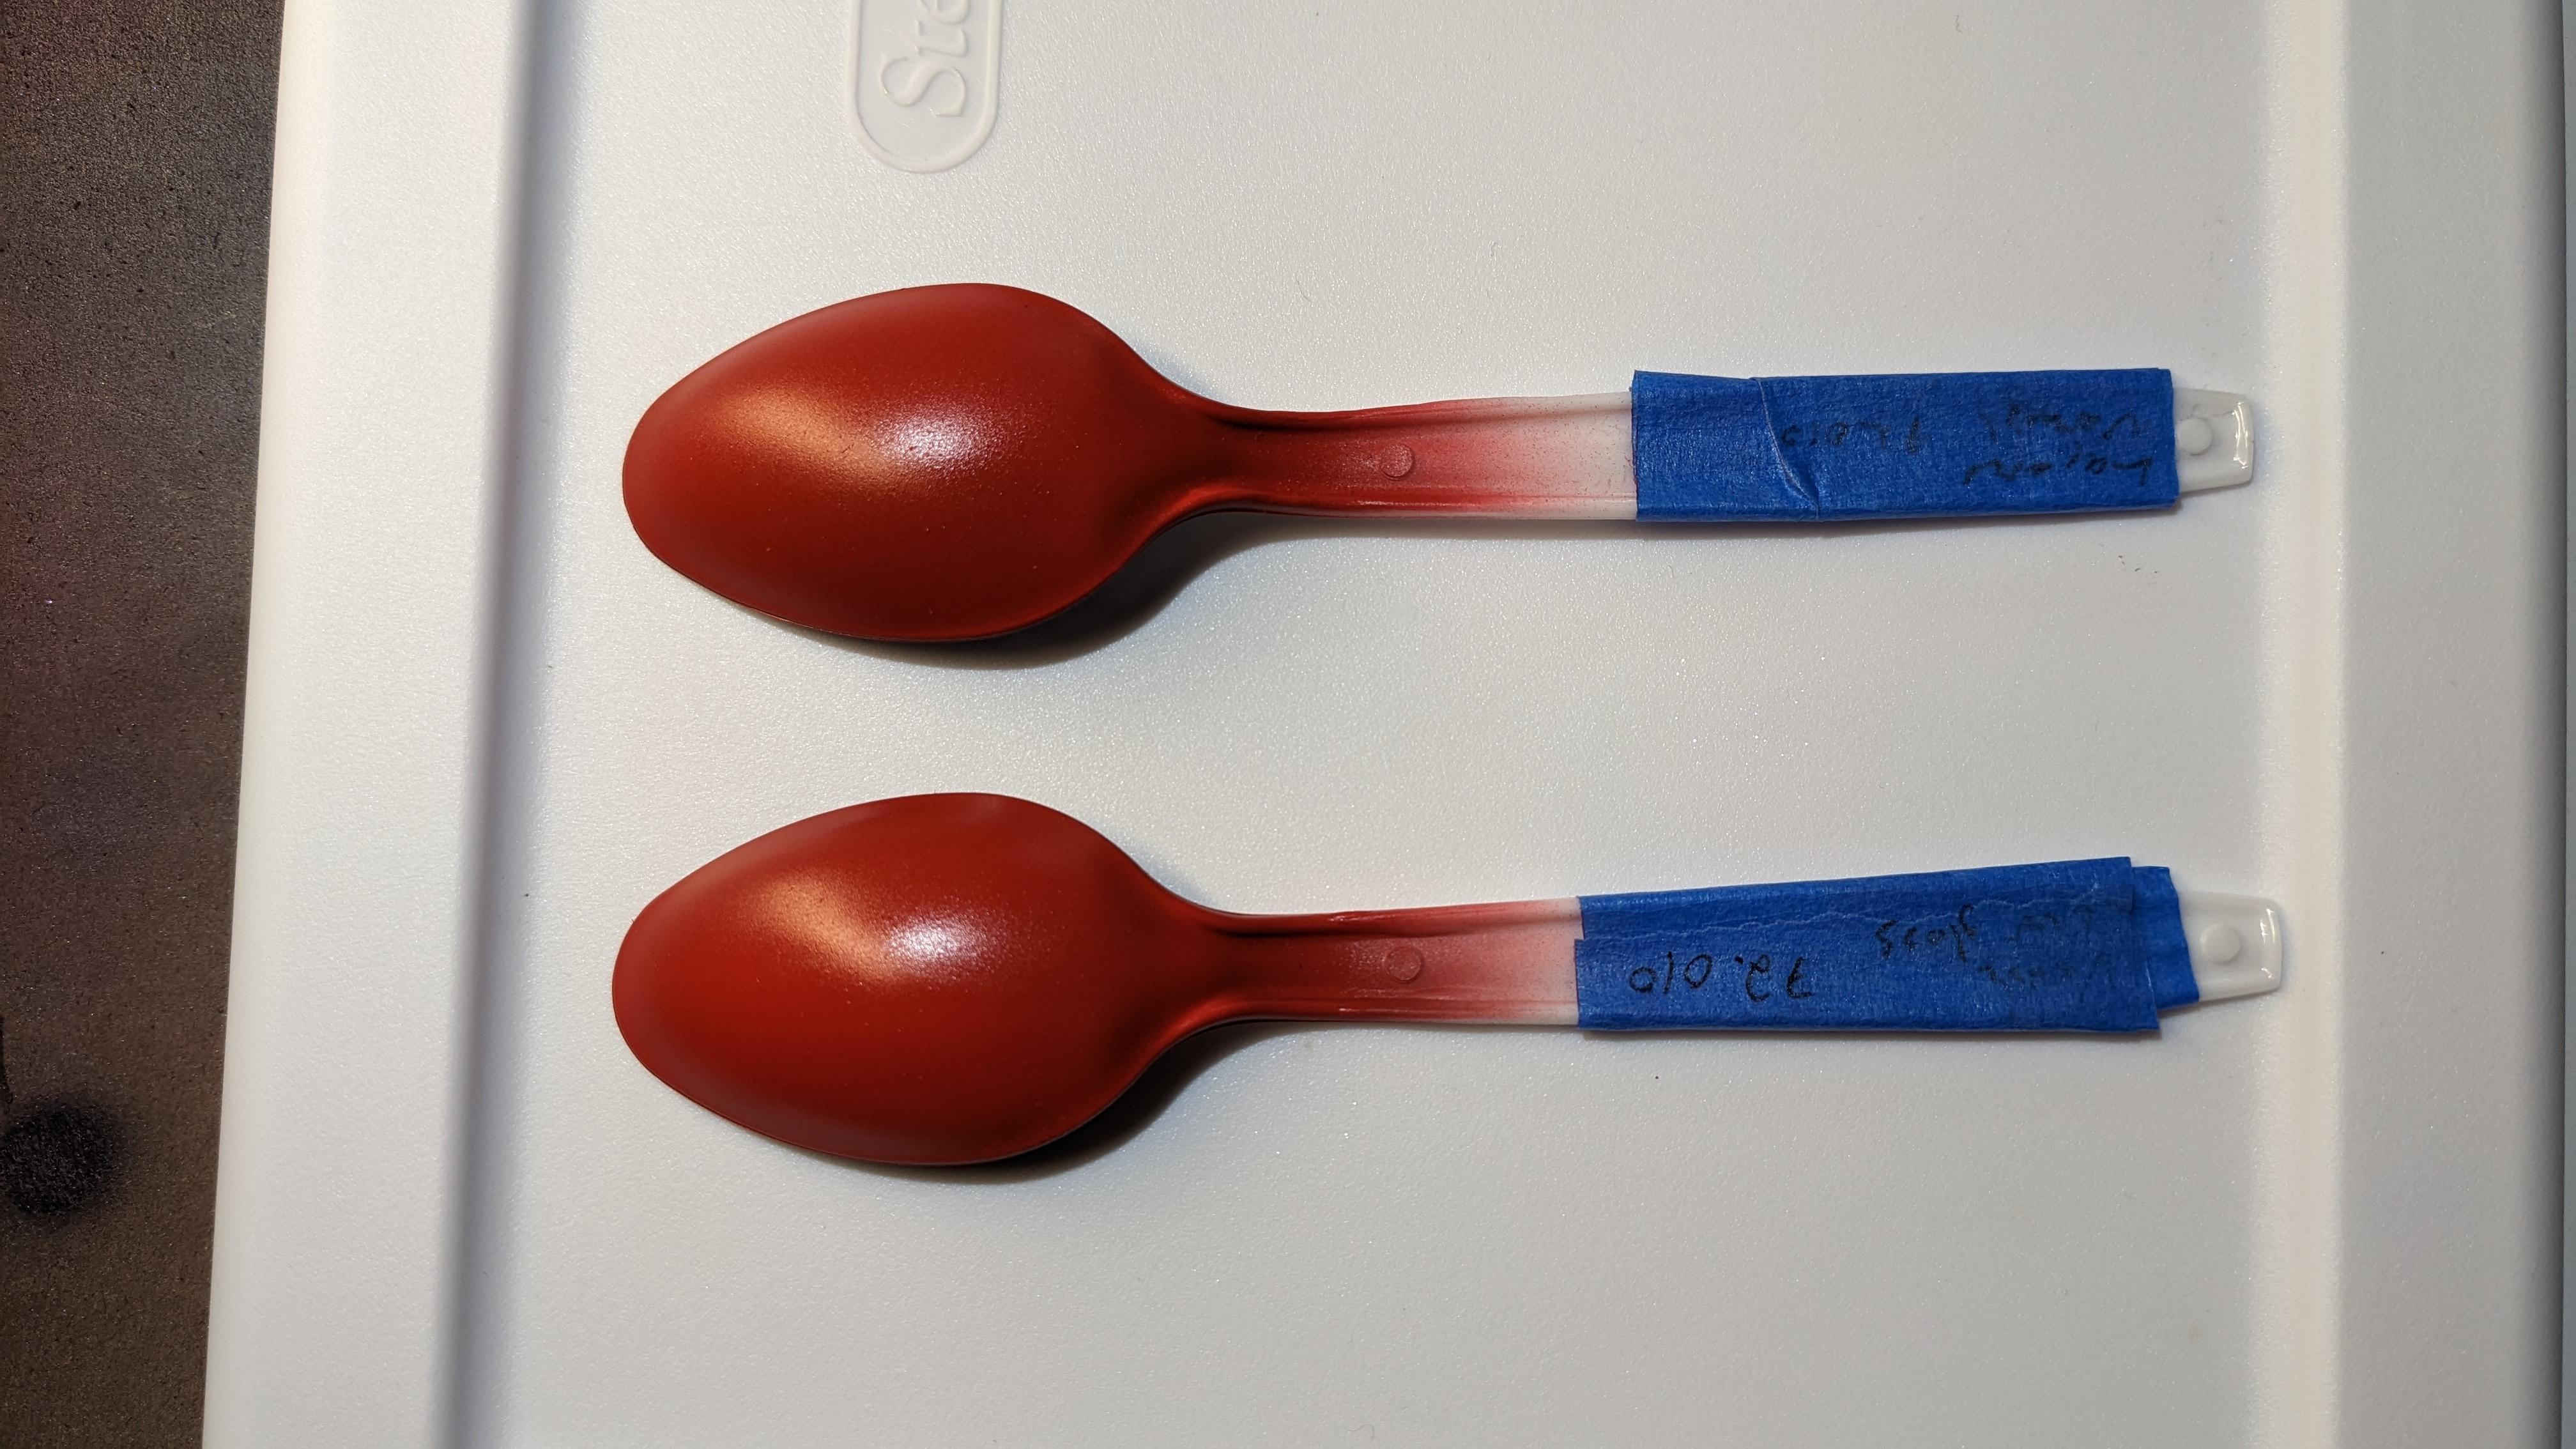
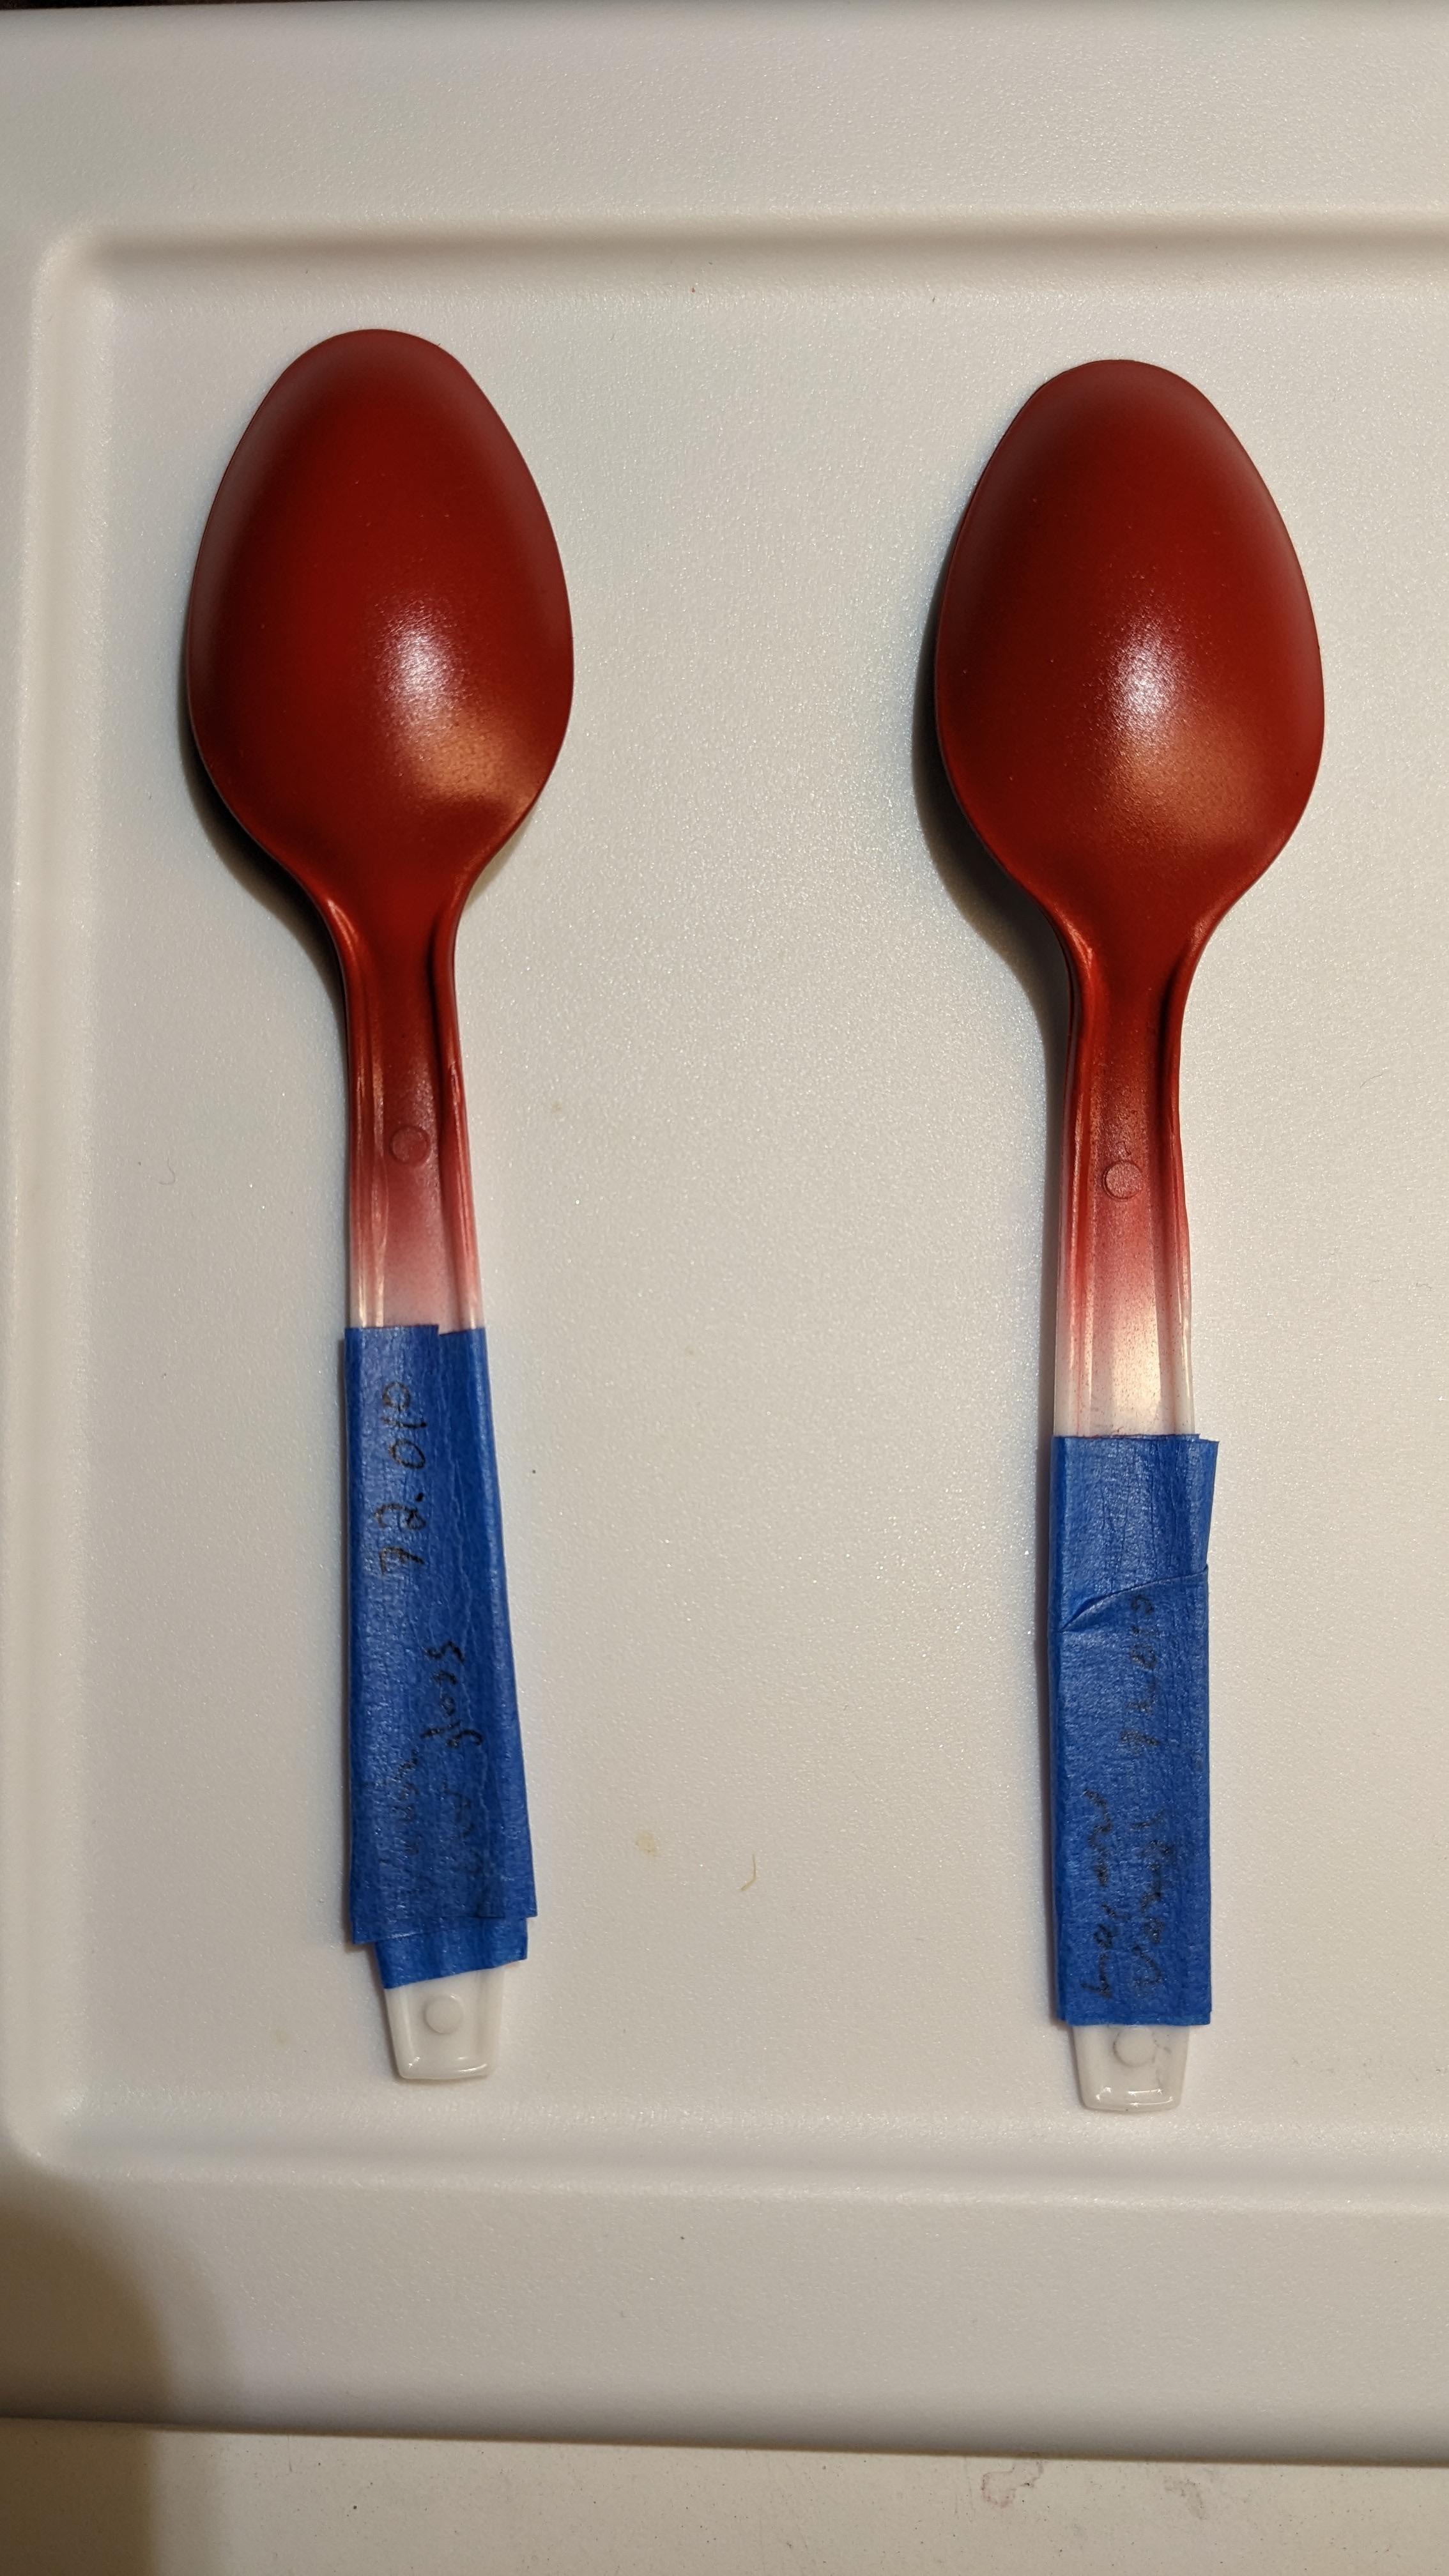
Got the engine bay assembled. Tamiya cement really sets fast on Tamiya plastic. The AMT kit seemed to take forever to set. The knives were two colors I was testing for body paint. The top one is the red and a clear varnish, the middle gloss red and clear varnish, and the bottom a color from Mission paints my girlfriend saw at the shop and insisted I test 😂 Kinda hard to see in the pic, but the gloss red has some extra pop, so I'll go through the testing in my last update hopefully this evening. Have to get the interior painted up and find a pencil to mark the windows for masking.
-
I've got a couple plastic knives I tested some reds on while I was out of spoons. I'll try to remember to post them up later. Will be testing a couple application ideas to see what looks good. A video by a guy who uses Vallejo paints and does a lot of gundam has a method for chrome using layers of black primer, gloss varnish, then Vallejo metallic chrome. Looked good on YouTube, so I'll be trying some spoons in grey primer: red with gloss medium over varnish gloss and then getting gloss varnished. I'm also curious what the gloss medium would do to the primer, so I'll trying spoons with primer, then a coat of primer plus gloss medium, then the layers listed above. I know it won't be as eye popping as enamels and lacquers, but without the ventilation needed, I won't be using those anytime soon, and maybe there's a way to get something good.
-
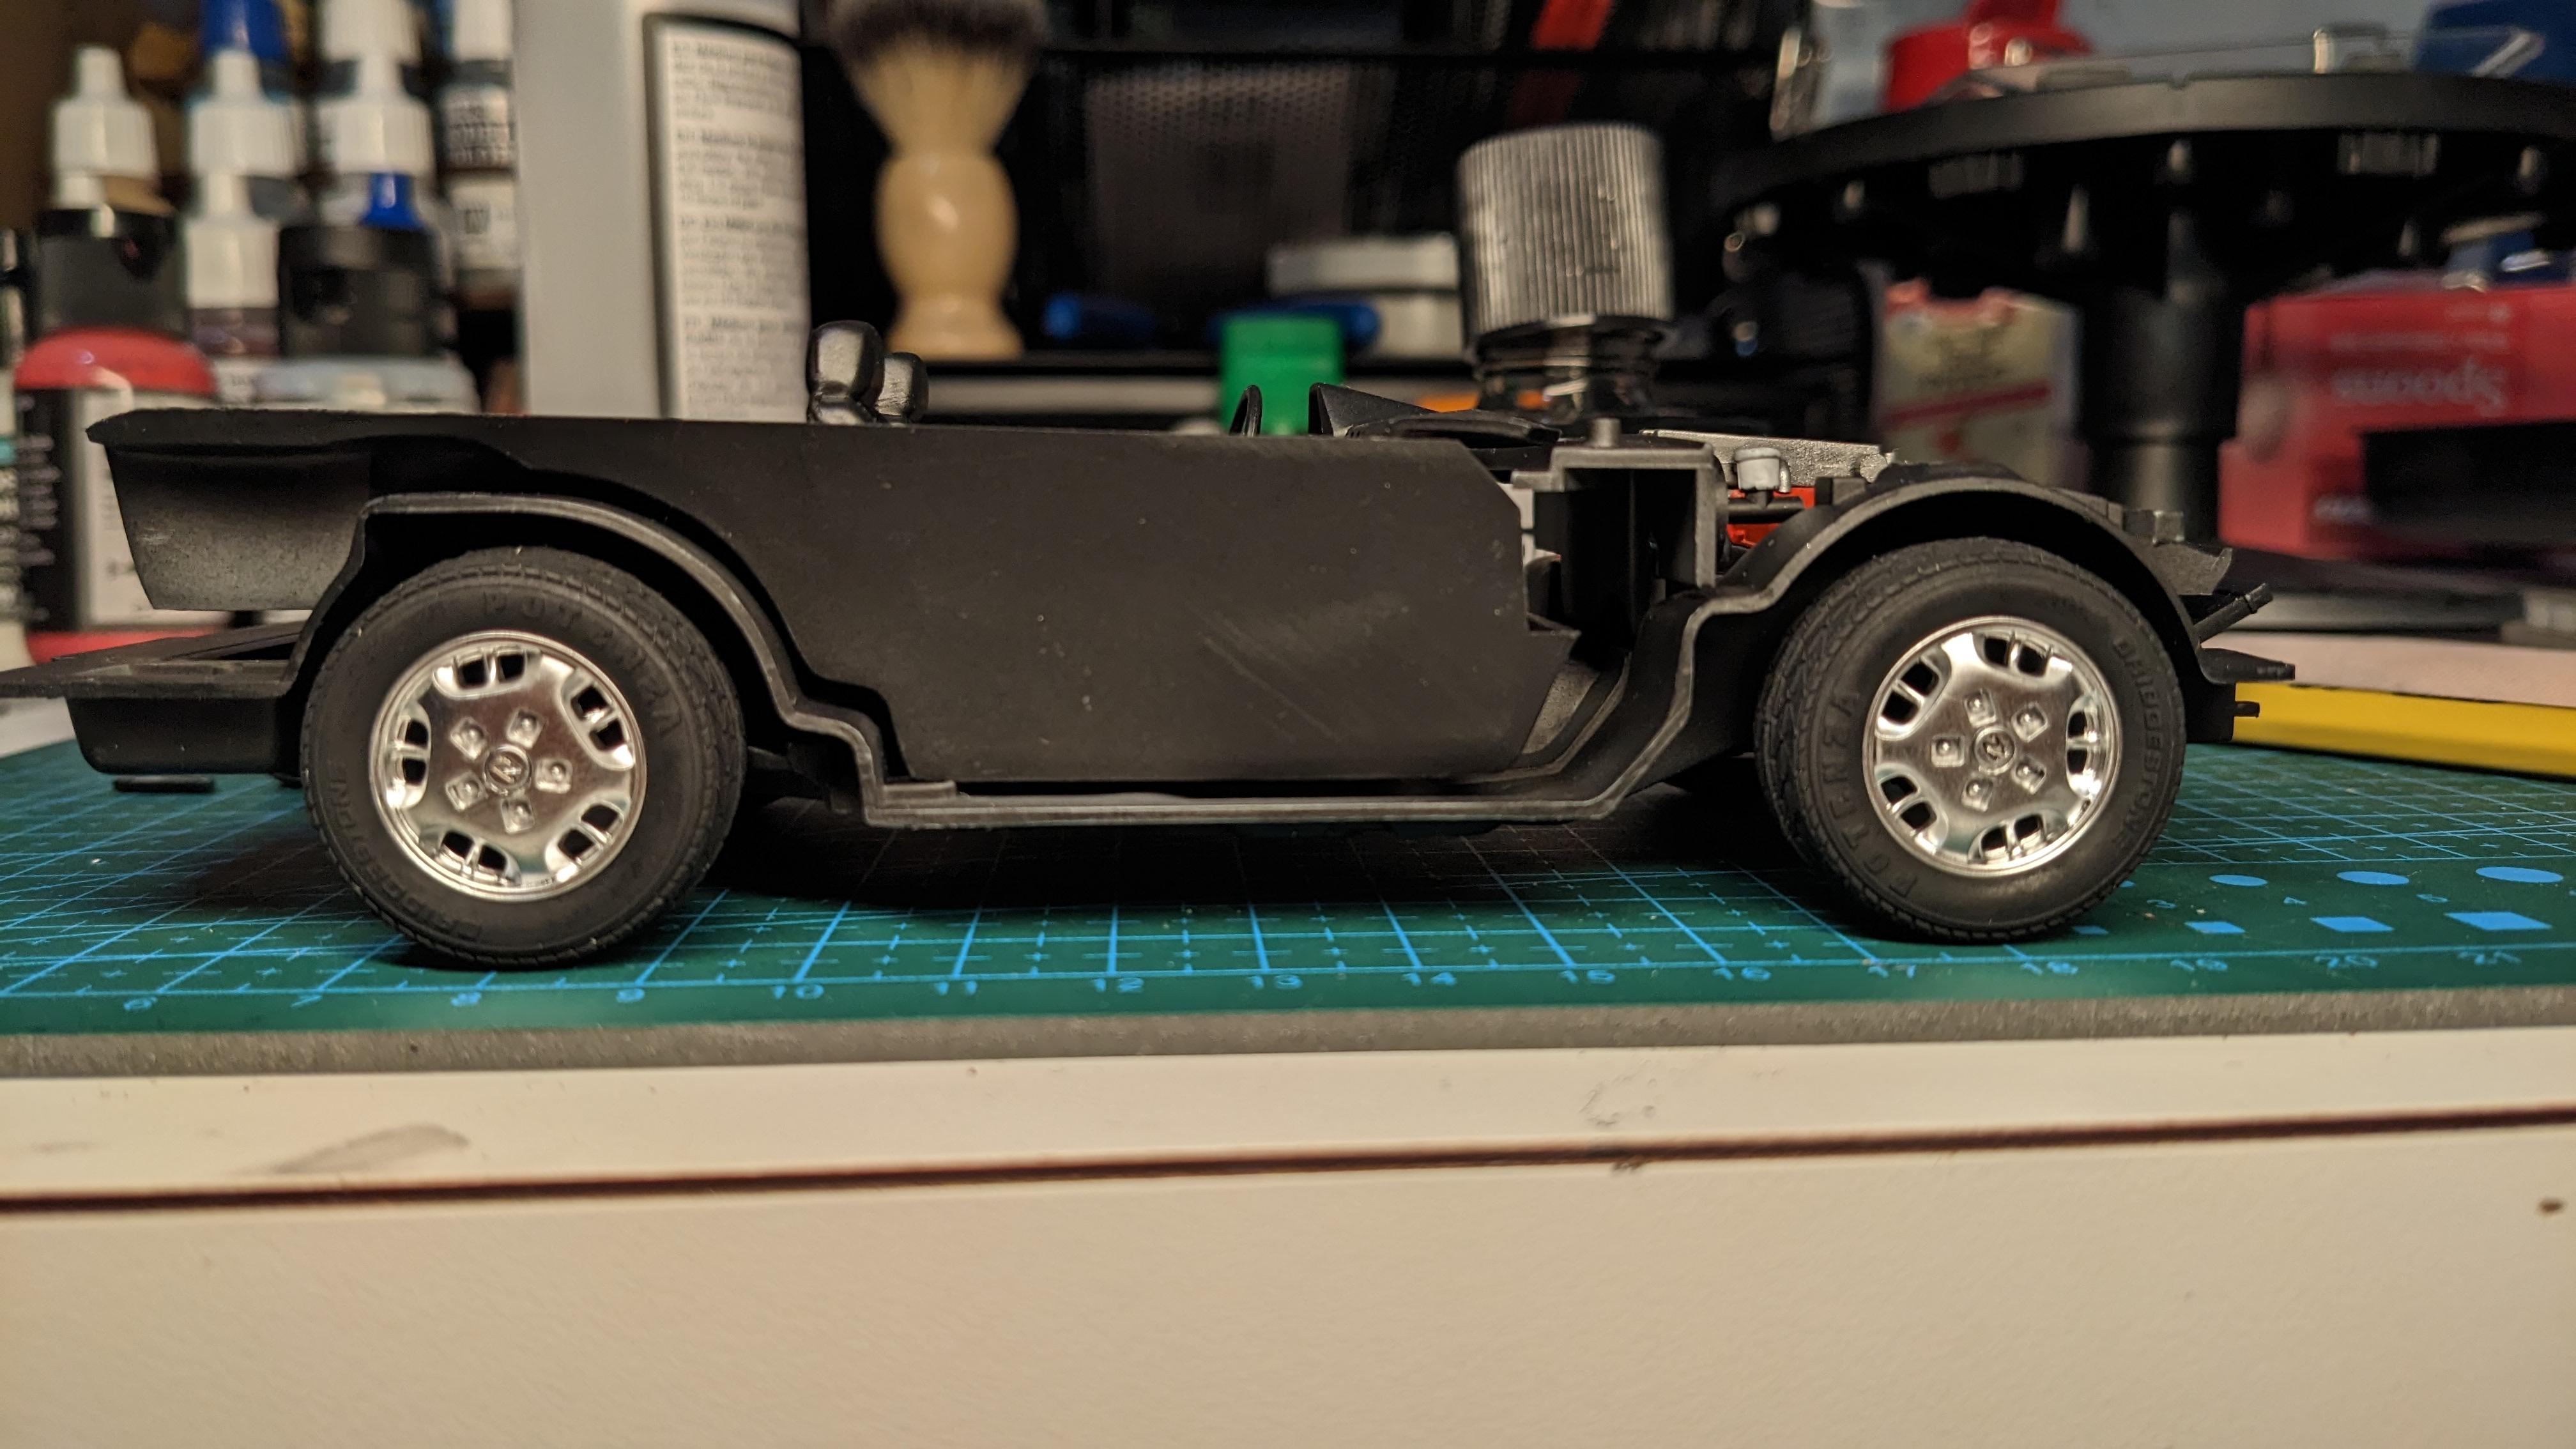
Progress has been slow with some busy weekends (and maybe a new obsession with Car Mechanic Simulator 21 :p) Got the chassis and bottom bits done. Am blown away with how well a Tamiya kit goes together. I didn't realize it had adjustable front wheels and was a little anxious as I assembled and it just... fits. Nothing like the first AMT kit where everything was wonky. Was hoping to get engine bay done, but I goofed the oil fill cap and need to strip that head, so hopefully I'll have the engine done next weekend. Also need to decide if I'm tackling the window masks next after that or if I'm going to get some flocking and give the interior a go with it. Or both 😂 Wish I had more time to play with modelling, but such is life.
-
Such a cool build! Fantastic
-
Started my second kit this week and it is blowing me away how much nicer it is than the AMT 66 Chevy Stocker! I've seen this kit (Tamiya 24042) get good reviews here and on Reddit, and it's already a blast. Prepped it earlier this week with a gentle wash, did a little scribing of the major panel lines and got the first pass of primer done. I took a stab at doing the first prime with everything still on sprue to keep it a bit more organized, and also get it all done at once. One issue I had with the Chevy Stocker was I was trying to prime each step as I went, and it made me slower than I could have been. Should have split the sprues into smaller chunks to get better coverage. I also learned I have not been cleaning my airbrush as well as I thought. Got very sputtery doing the grey on the body, and I had to do a total tear down and cleaning before coming back to finish. I've been doing bunch of casual research on the kit to see what colors and trims it could have been off the showroom floor. It appears to have features that straddle either trim levels or Japanese/American/Canadian markets. I think all the American turbos had spoilers, and this kit does not. There were one or two other little details that didn't exactly match the reading I've done, but I did find a forum talking about the earliest '84 Z's and apparently the first 5000 turbos were hardtop, and the t-tops came after, so maybe those first cars had some variations lost to time. My plan is a glossy red body. I'd like the lower body trim to be black, so I'm going to have to learn how to mask it. Also have to learn how to mask the windows. The interior will probably be red. Might go with black leather seats in there, which might not be realistic, but could look good. The dash detail is amazing. Not sure I'll do it as much justice as it deserves. Was thinking of doing a little engine wiring, but the way the plug wires route on this, they get mostly hidden, so maybe wiring will be the next kit. I use Vallejo acrylics, a mix of Mecha, Model, Air and Game- whatever color grabbed my eye and imagination at the store. They mix well, and I've got their gloss varnish to hopefully make the body pop. Primer was straight Mecha black for the interior and mechanical bit. Although I literally just realized I left the headlights in that spue lol...we'll have to figure out what kind of recovery is required there. The body I did with a 20:1 Grey:Mecha Black. The grey was going on so light on the body I could barely see it when I started, so I added just that touch of black and it made it a lot easier to work with.