Vette_lover2004
-
Posts
48 -
Joined
-
Last visited
Vette_lover2004's Achievements
MCM Regular (3/6)
-
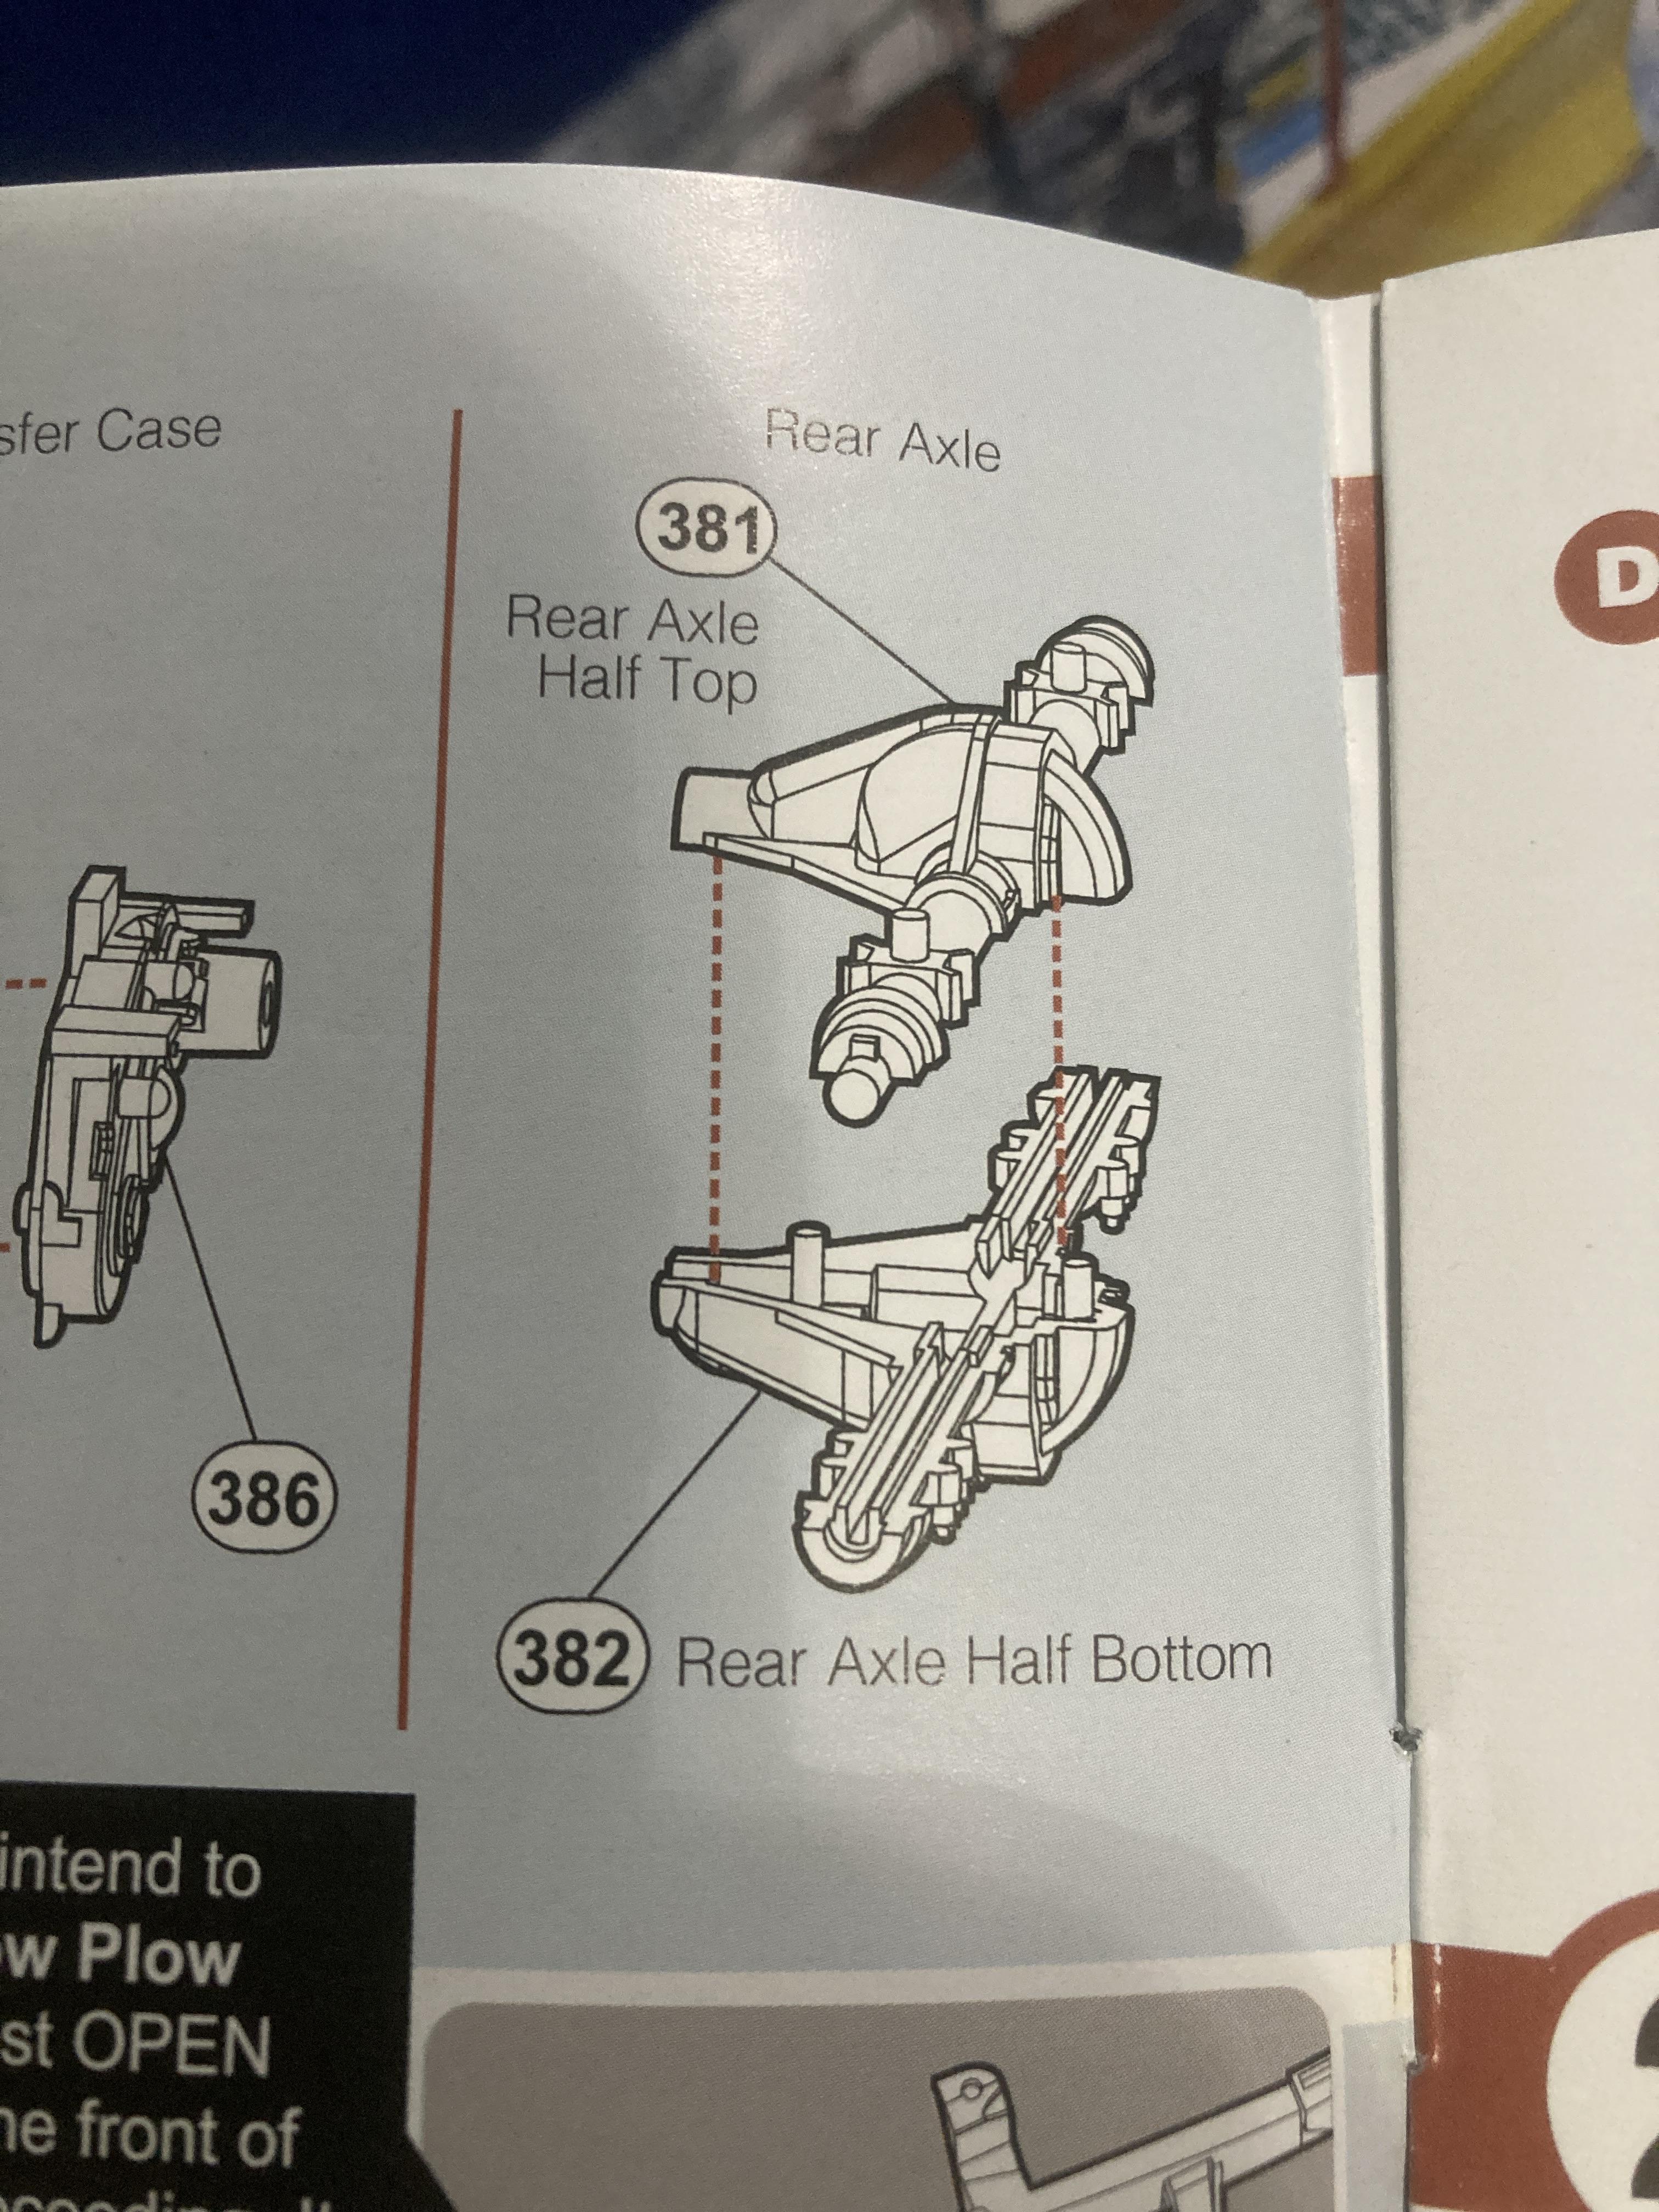
Hey All, I’m in need of the rear axle from the Moebius F-250 kits. In those kits it’s listed as part numbers 381 and 382. PM me and maybe we can work out a trade. Thanks

-
I need to do one of those myself. Looks good. I’m really hoping Moebius gives us a proper 73-79 F series kit soon. No camper special bedsides.
-
What is the best glue for glass/clear surfaces?
Vette_lover2004 replied to AlbertS's topic in Tips, Tricks, and Tutorials
Not sure if this has been mentioned yet. I use jewelers glue. Specifically, GS-Hypo cement. I get mine at Jo Ann Fabrics. Dries crystal clear and has a very strong bond, so make sure you have it exactly where you want it as it cures.
-
It comes with them. I noticed the cab in this Coke monster truck reissue, is having bow out of the A Pillars…looks like I might use a 454SS cab as the plastic seems more rigid…
-
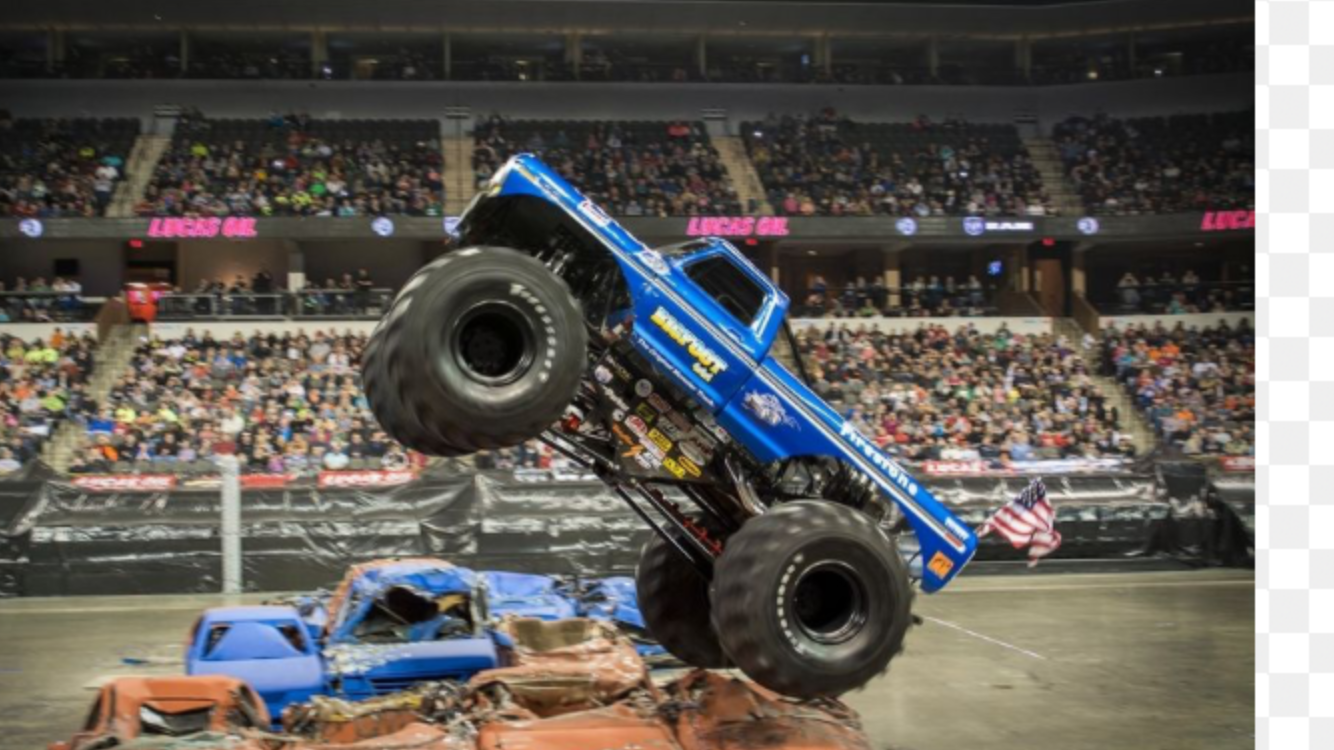
I don’t think my work surpasses anyone’s. I just build what I like and what looks good to me. I feel that’s the greatest part about this hobby. Freedom of expression and a spectrum of skill sets represented by young and old. Asfar as the bedsides go, that was quite a challenge so early into my return. Motivation was high and I guess I just wanted it to appear correct to my eye. I get it wrong sometimes, sometimes I get lucky, sometimes the stars align. Yesterday, I was working a roll cage in an AMT 95 Monte Carlo Stock Car… It wasn't going how I thought it should…moved on to something else to pass the holiday free time. Moebius Ford trucks are a great way to break the frustration…glad I bought a lot of them… Especially the plow truck…great kit btw…you should give one a go if you’ve not had the pleasure yet… And a pic of Bigfoot…why not
-
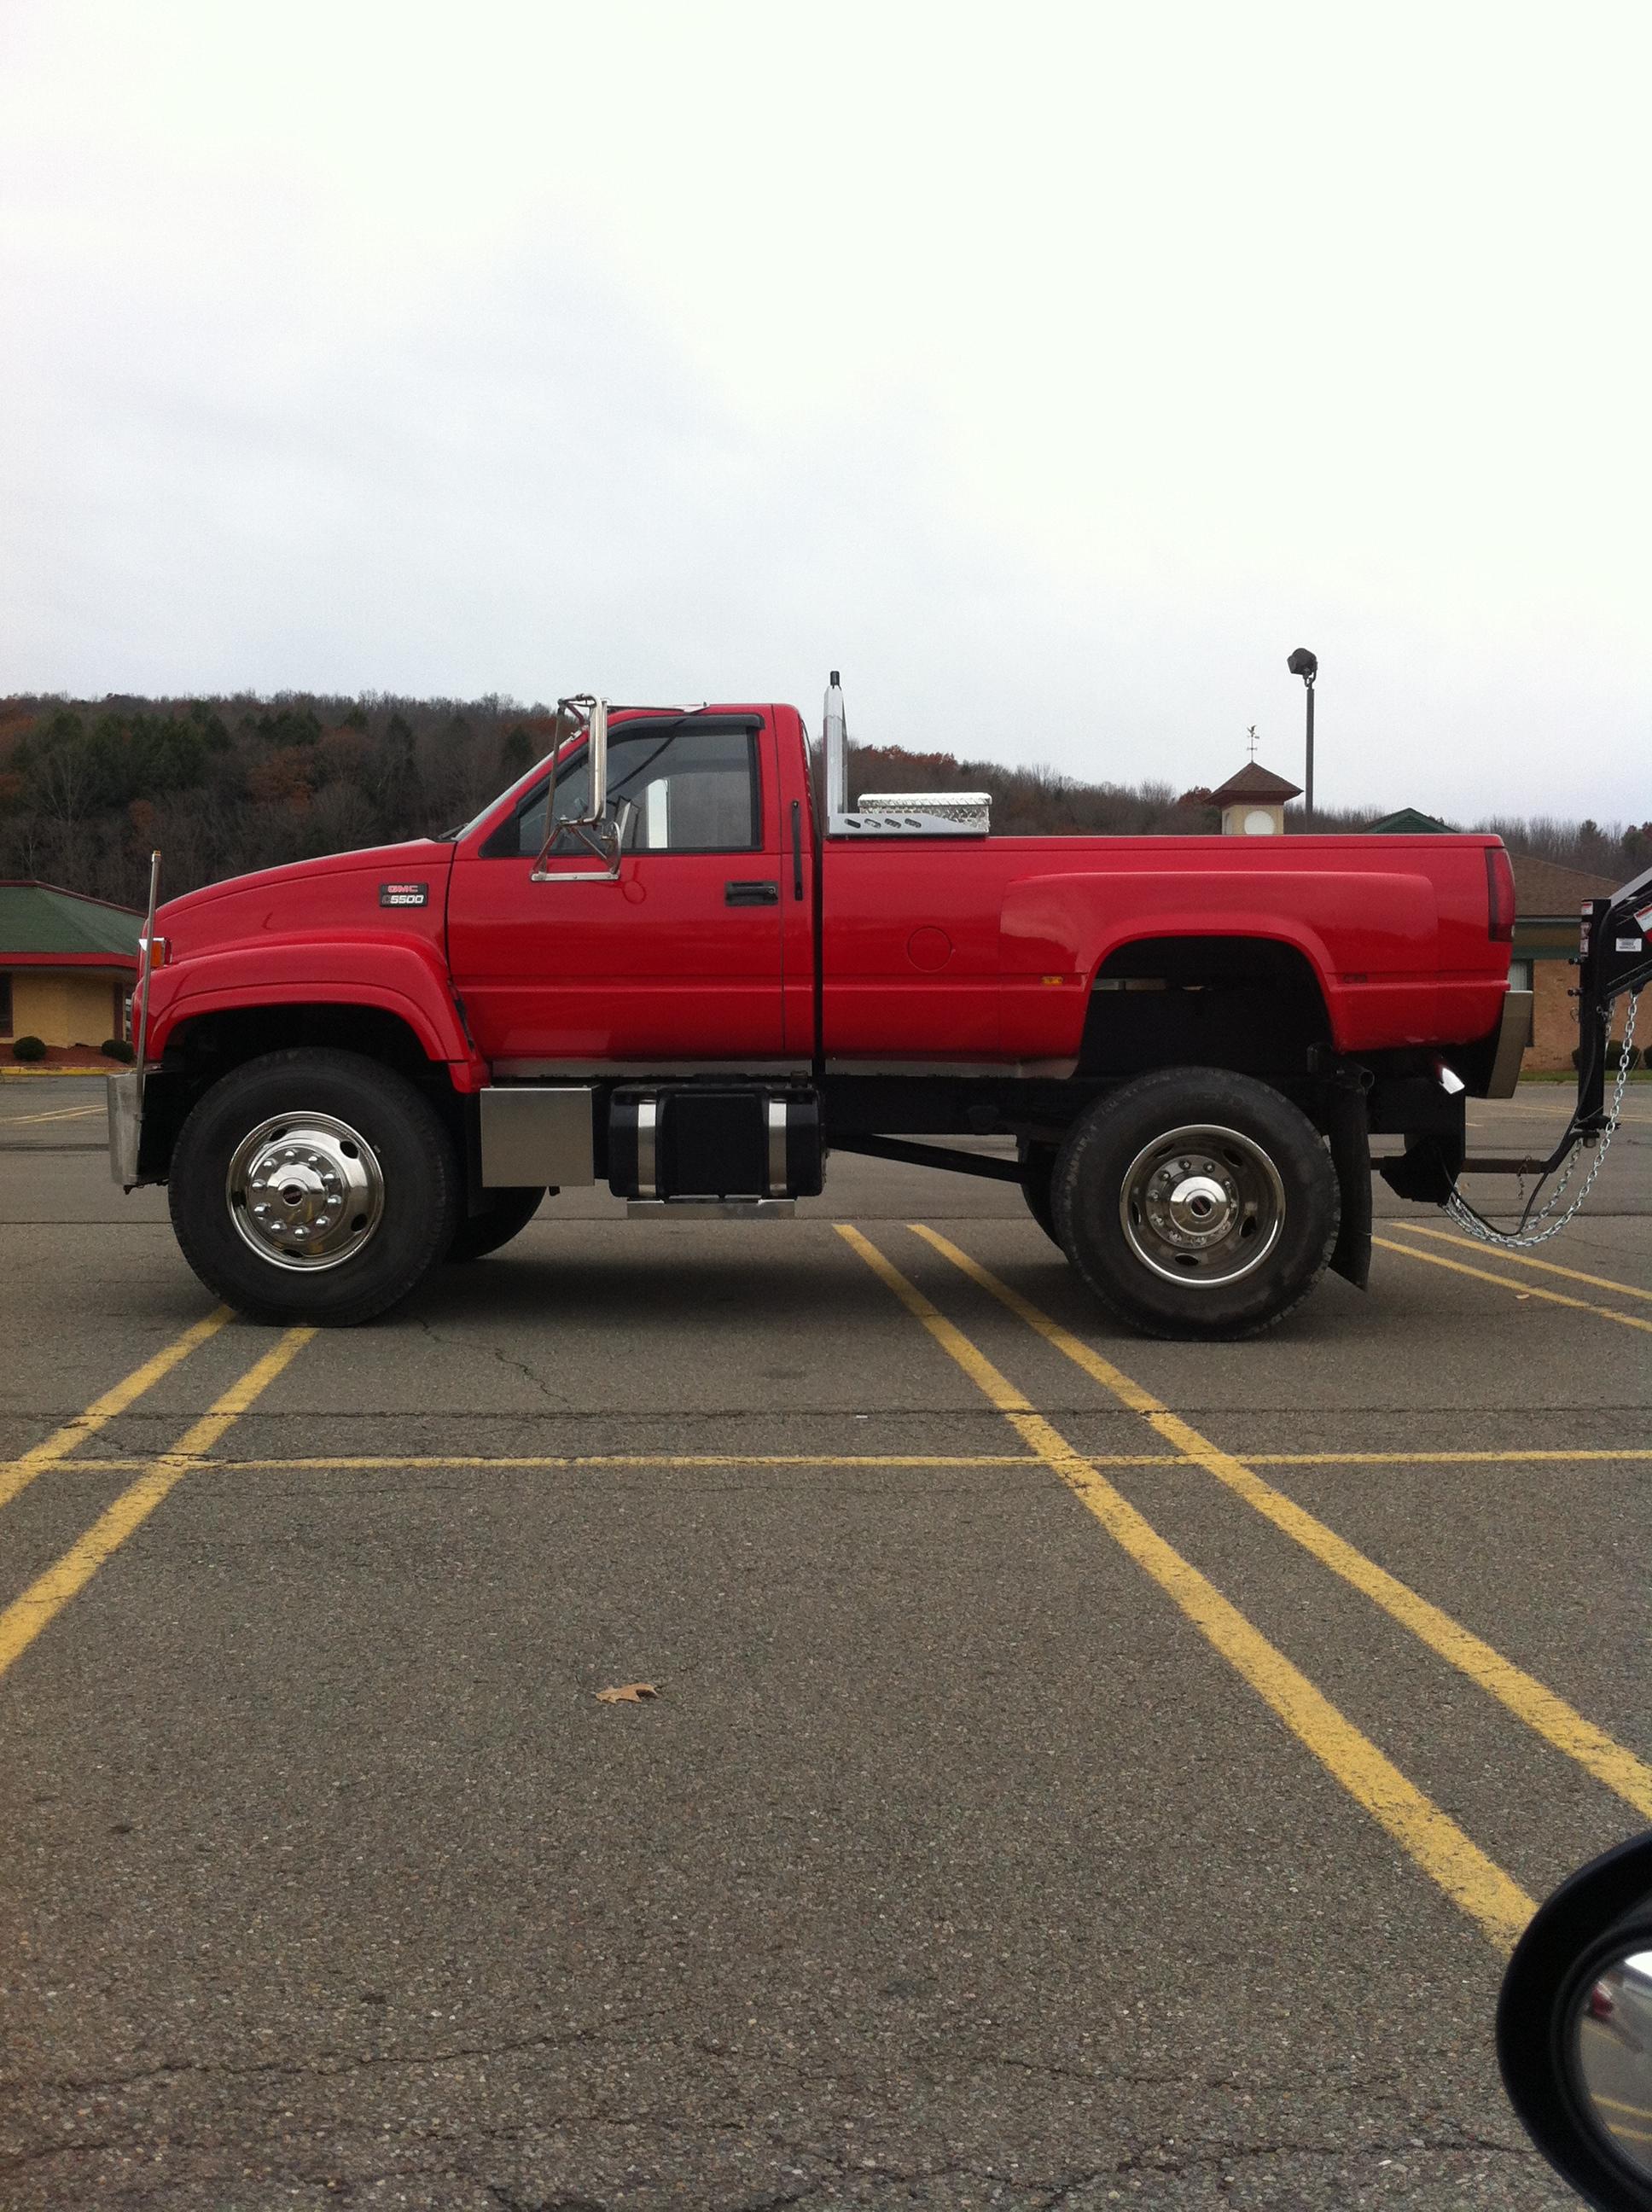
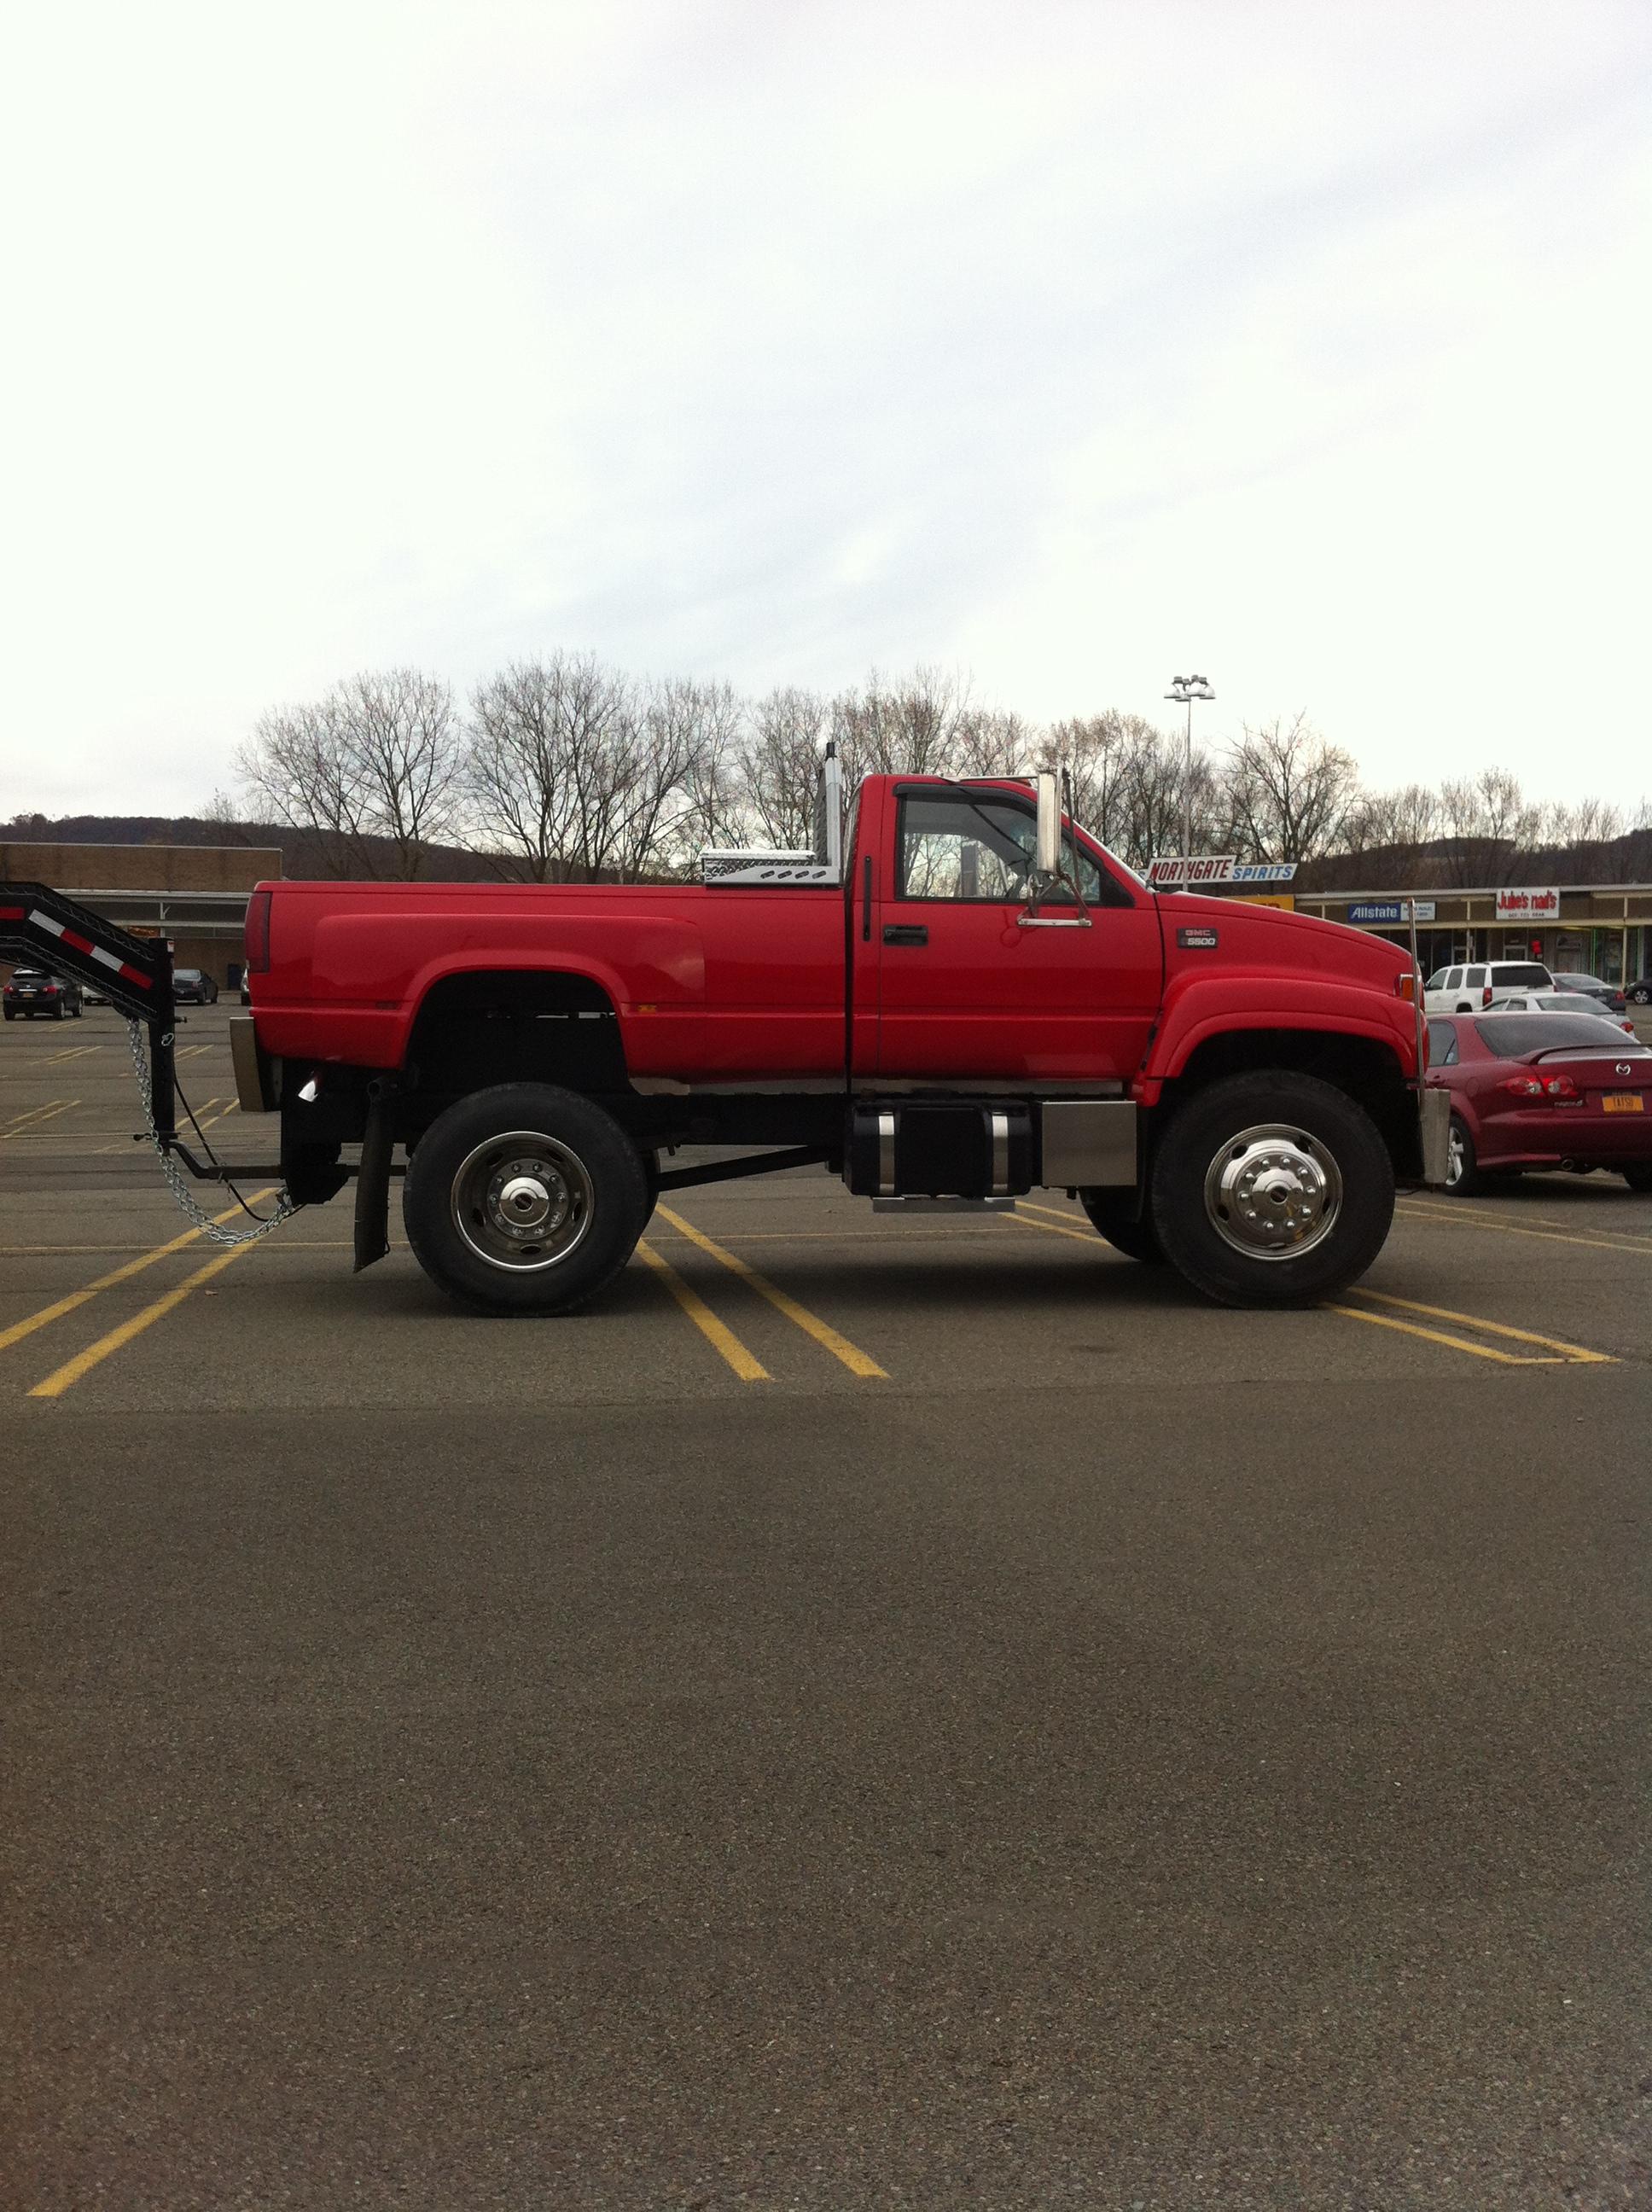
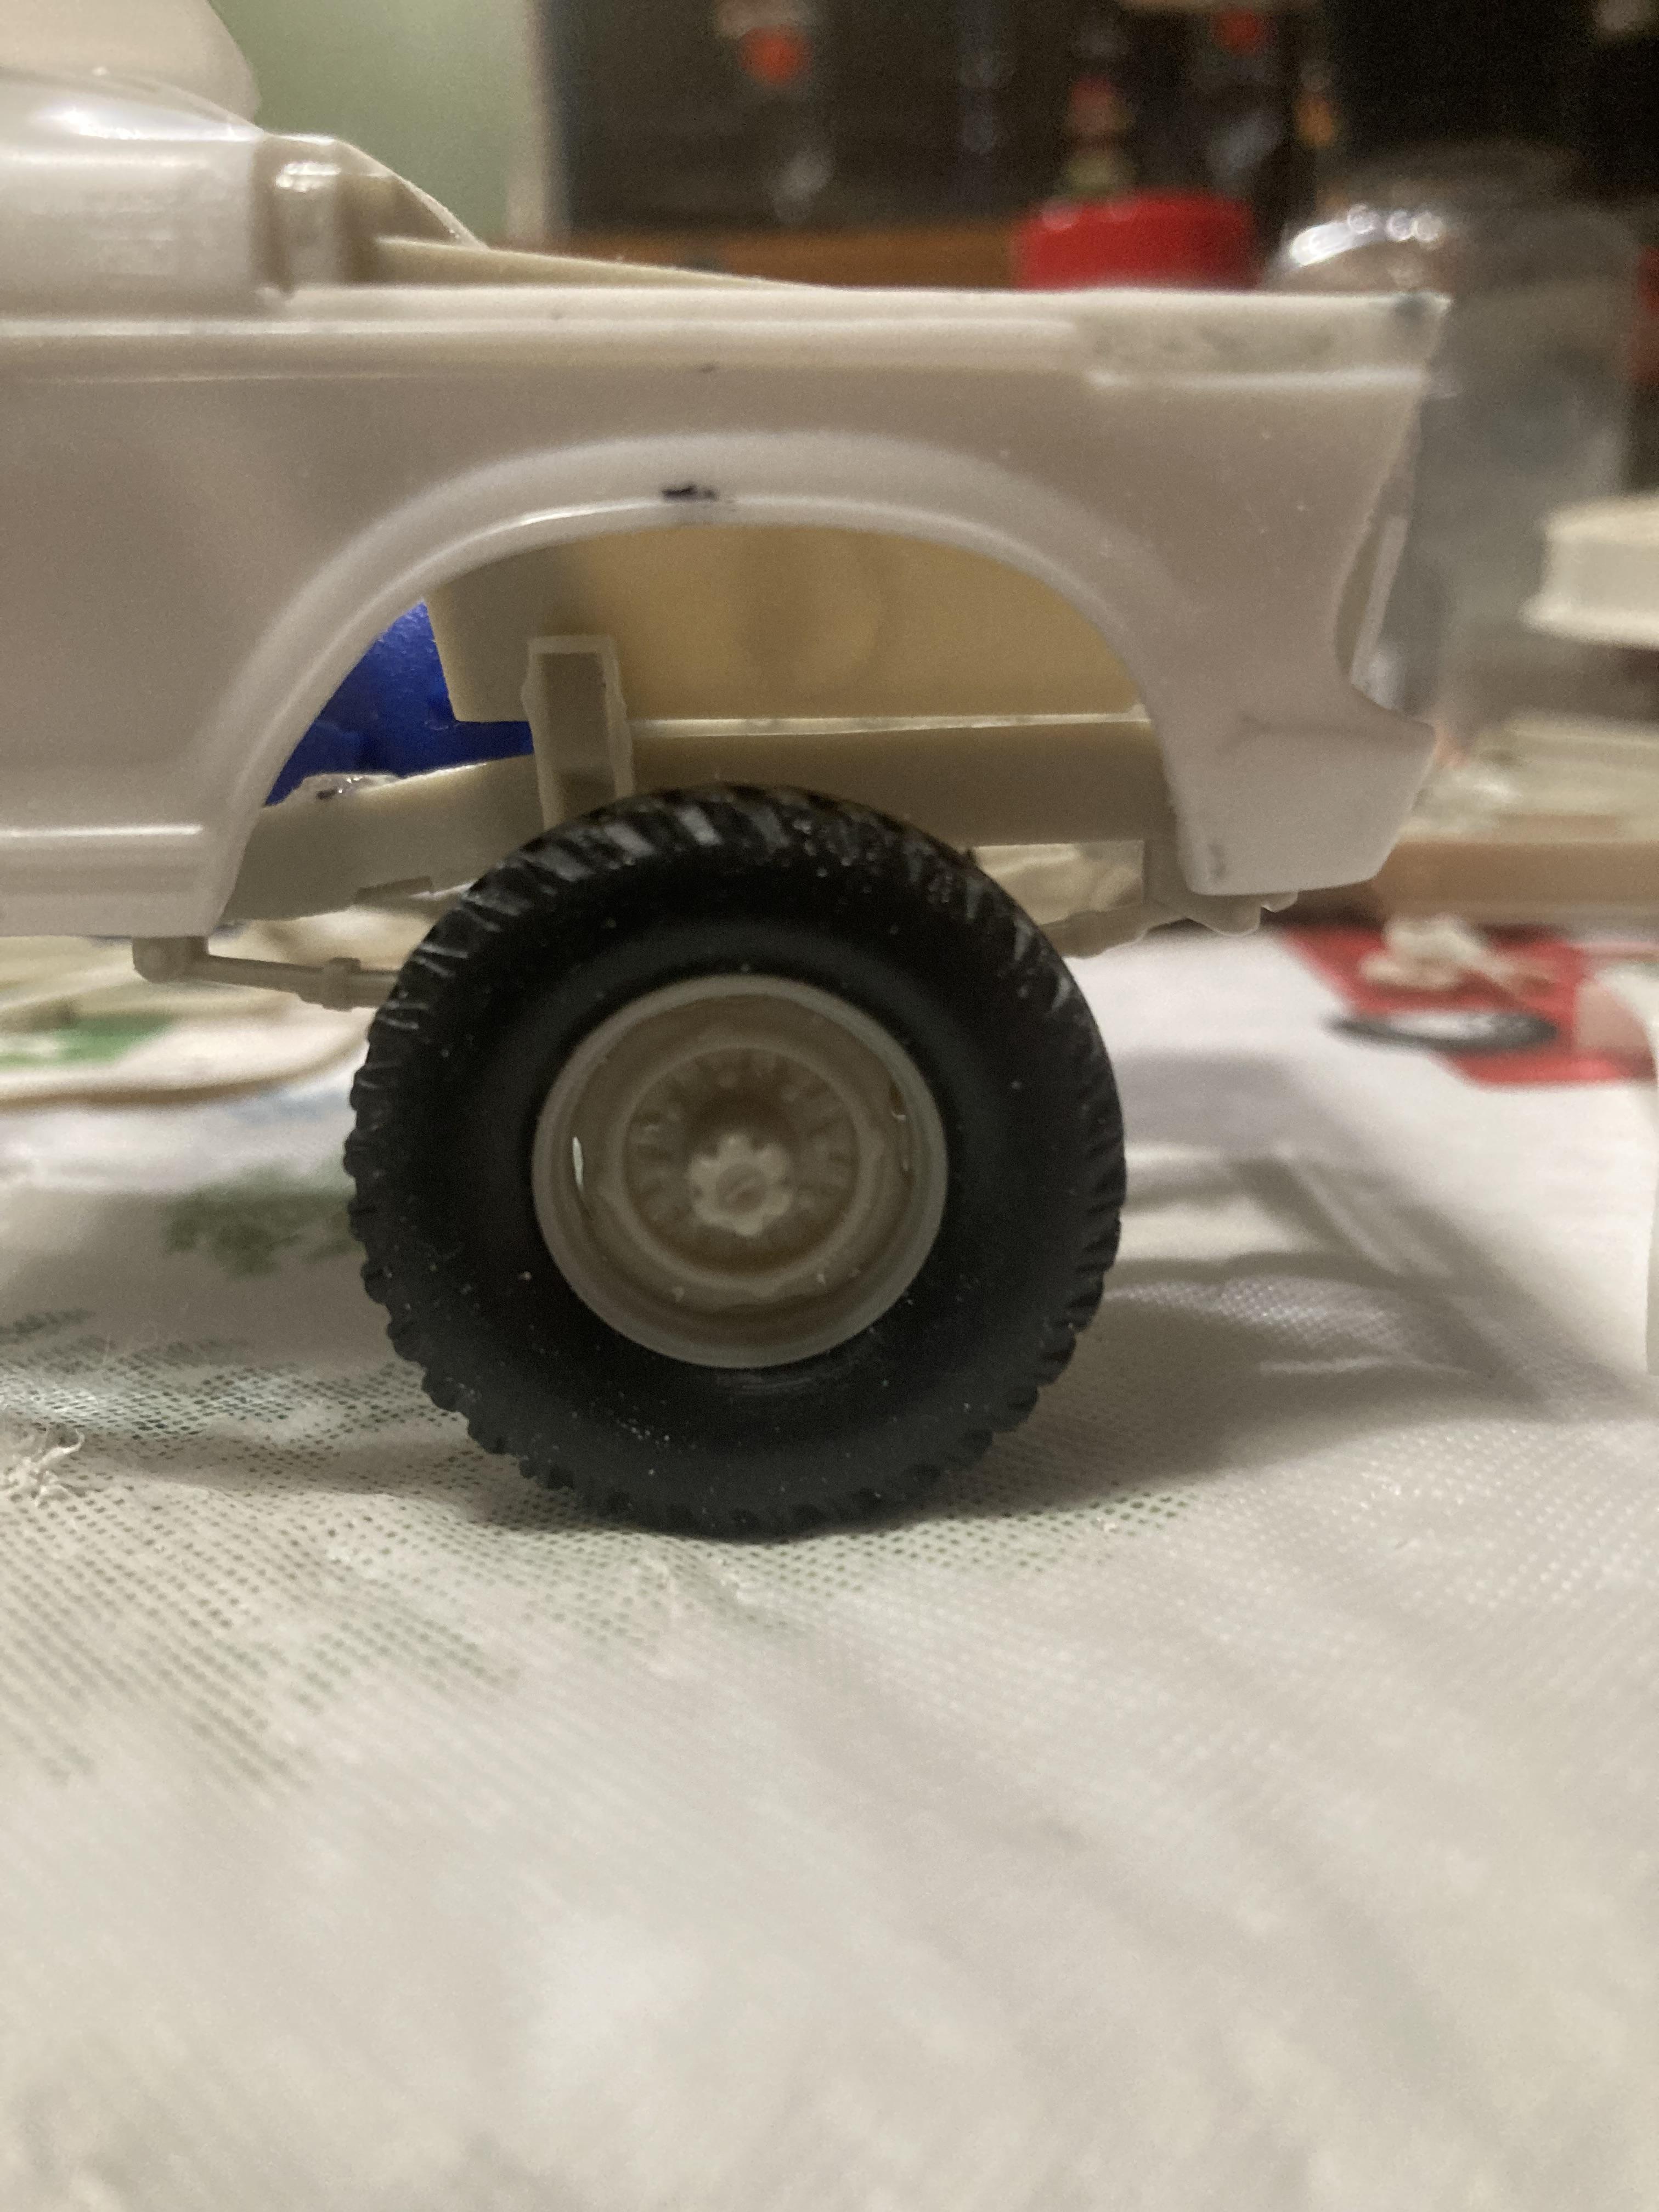
Stock? Are you referencing the real truck or the model? I was under the impression that the real trucks were conversions from regular commercial straight trucks. Most I’ve seen on the web are much longer frames, where they unbolt the rear springs, slide them forward to the center of the dually bed wheel openings, drill holes, and bolt them back in place. Then, they bob the frame, and install a shorter driveshaft. As far as the model, the ones I’ve seen on here were all extended cab trucks. I’ve not seen anyone do a regular cab truck. I figured it was probably a welcome addition. I’m debating on making it 4WD. I need to get the Louisville frame built now, then decide on how and where to mount the cab. I was looking for some smaller rims and tires. The 20” rims/tires that come in all the AMT kits are far too large for this truck. 19.5 tires are a better size, and I think that’s what the real truck was wearing at the time I took that photo. If I go 4WD then all bets are off at that point and it just might get boggers and a decent lift. I’m also deviating from the 1:1 truck and installing a roll pan from the slammed release of the C3500. I saw pics of a real one like that and I felt it cleaned up the rear nicely. A friend of mine, who is a master machinist, wants to make an oversized hitch ball for it, just for laughs.
-
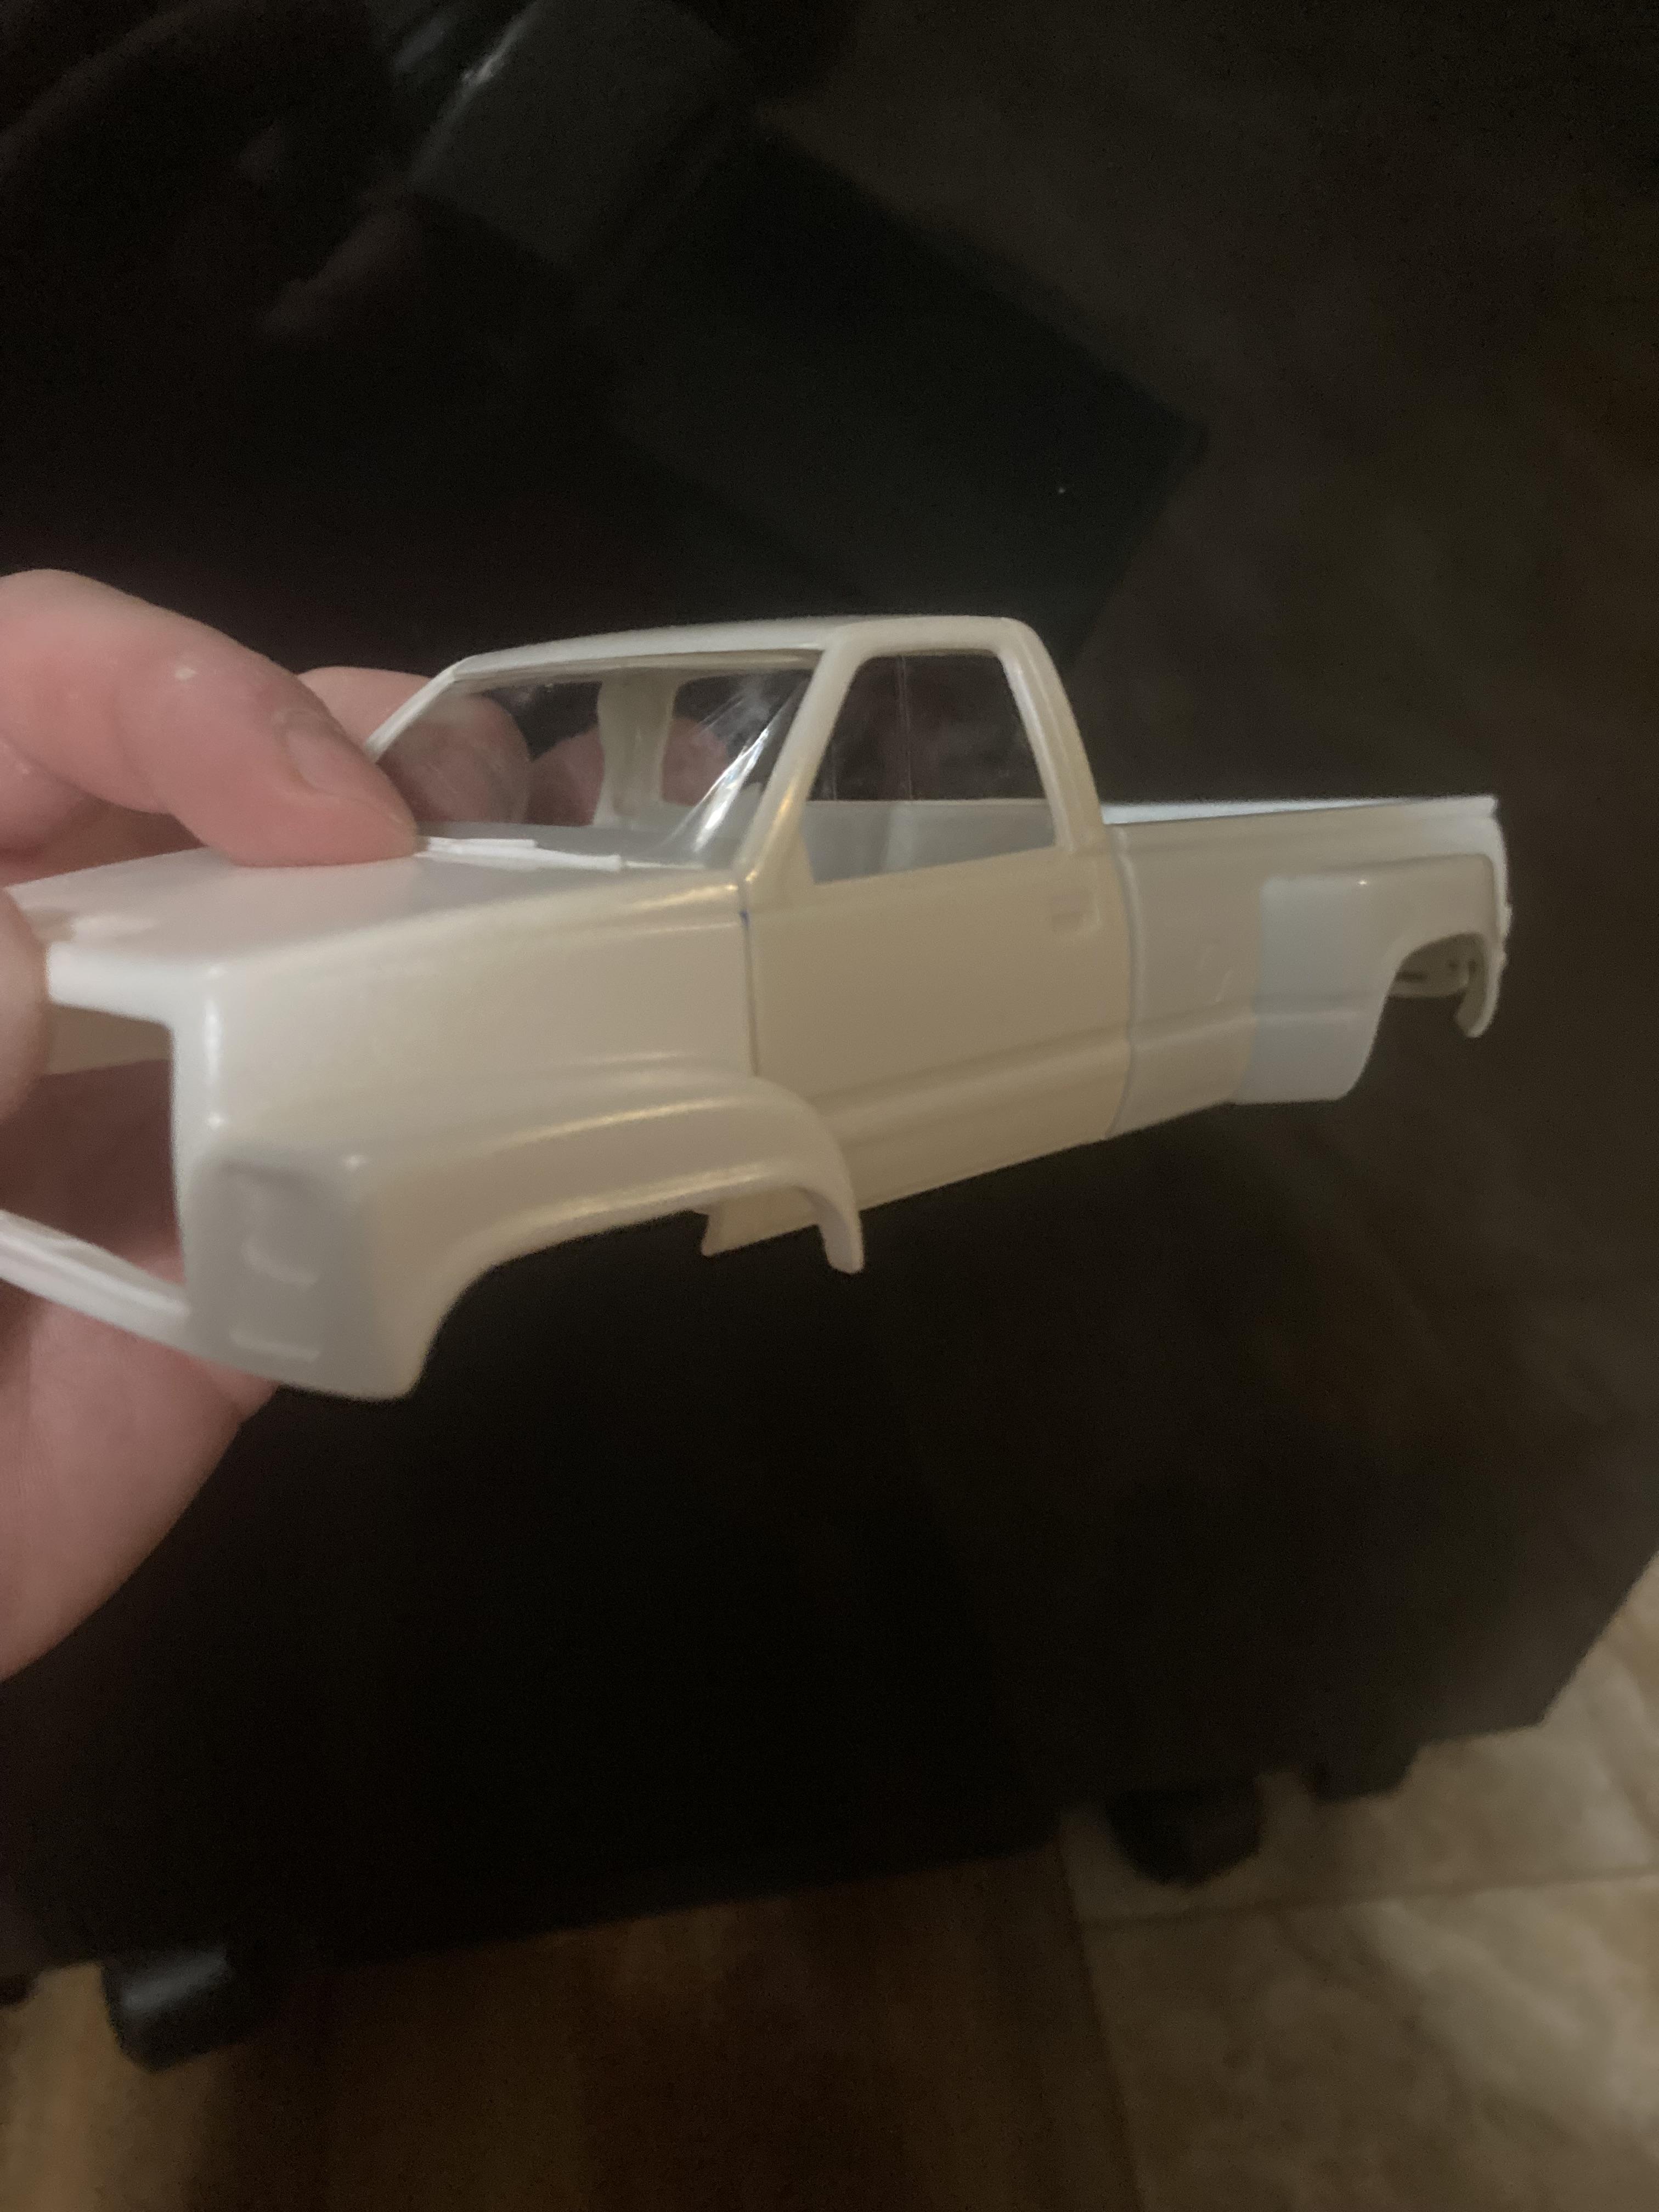
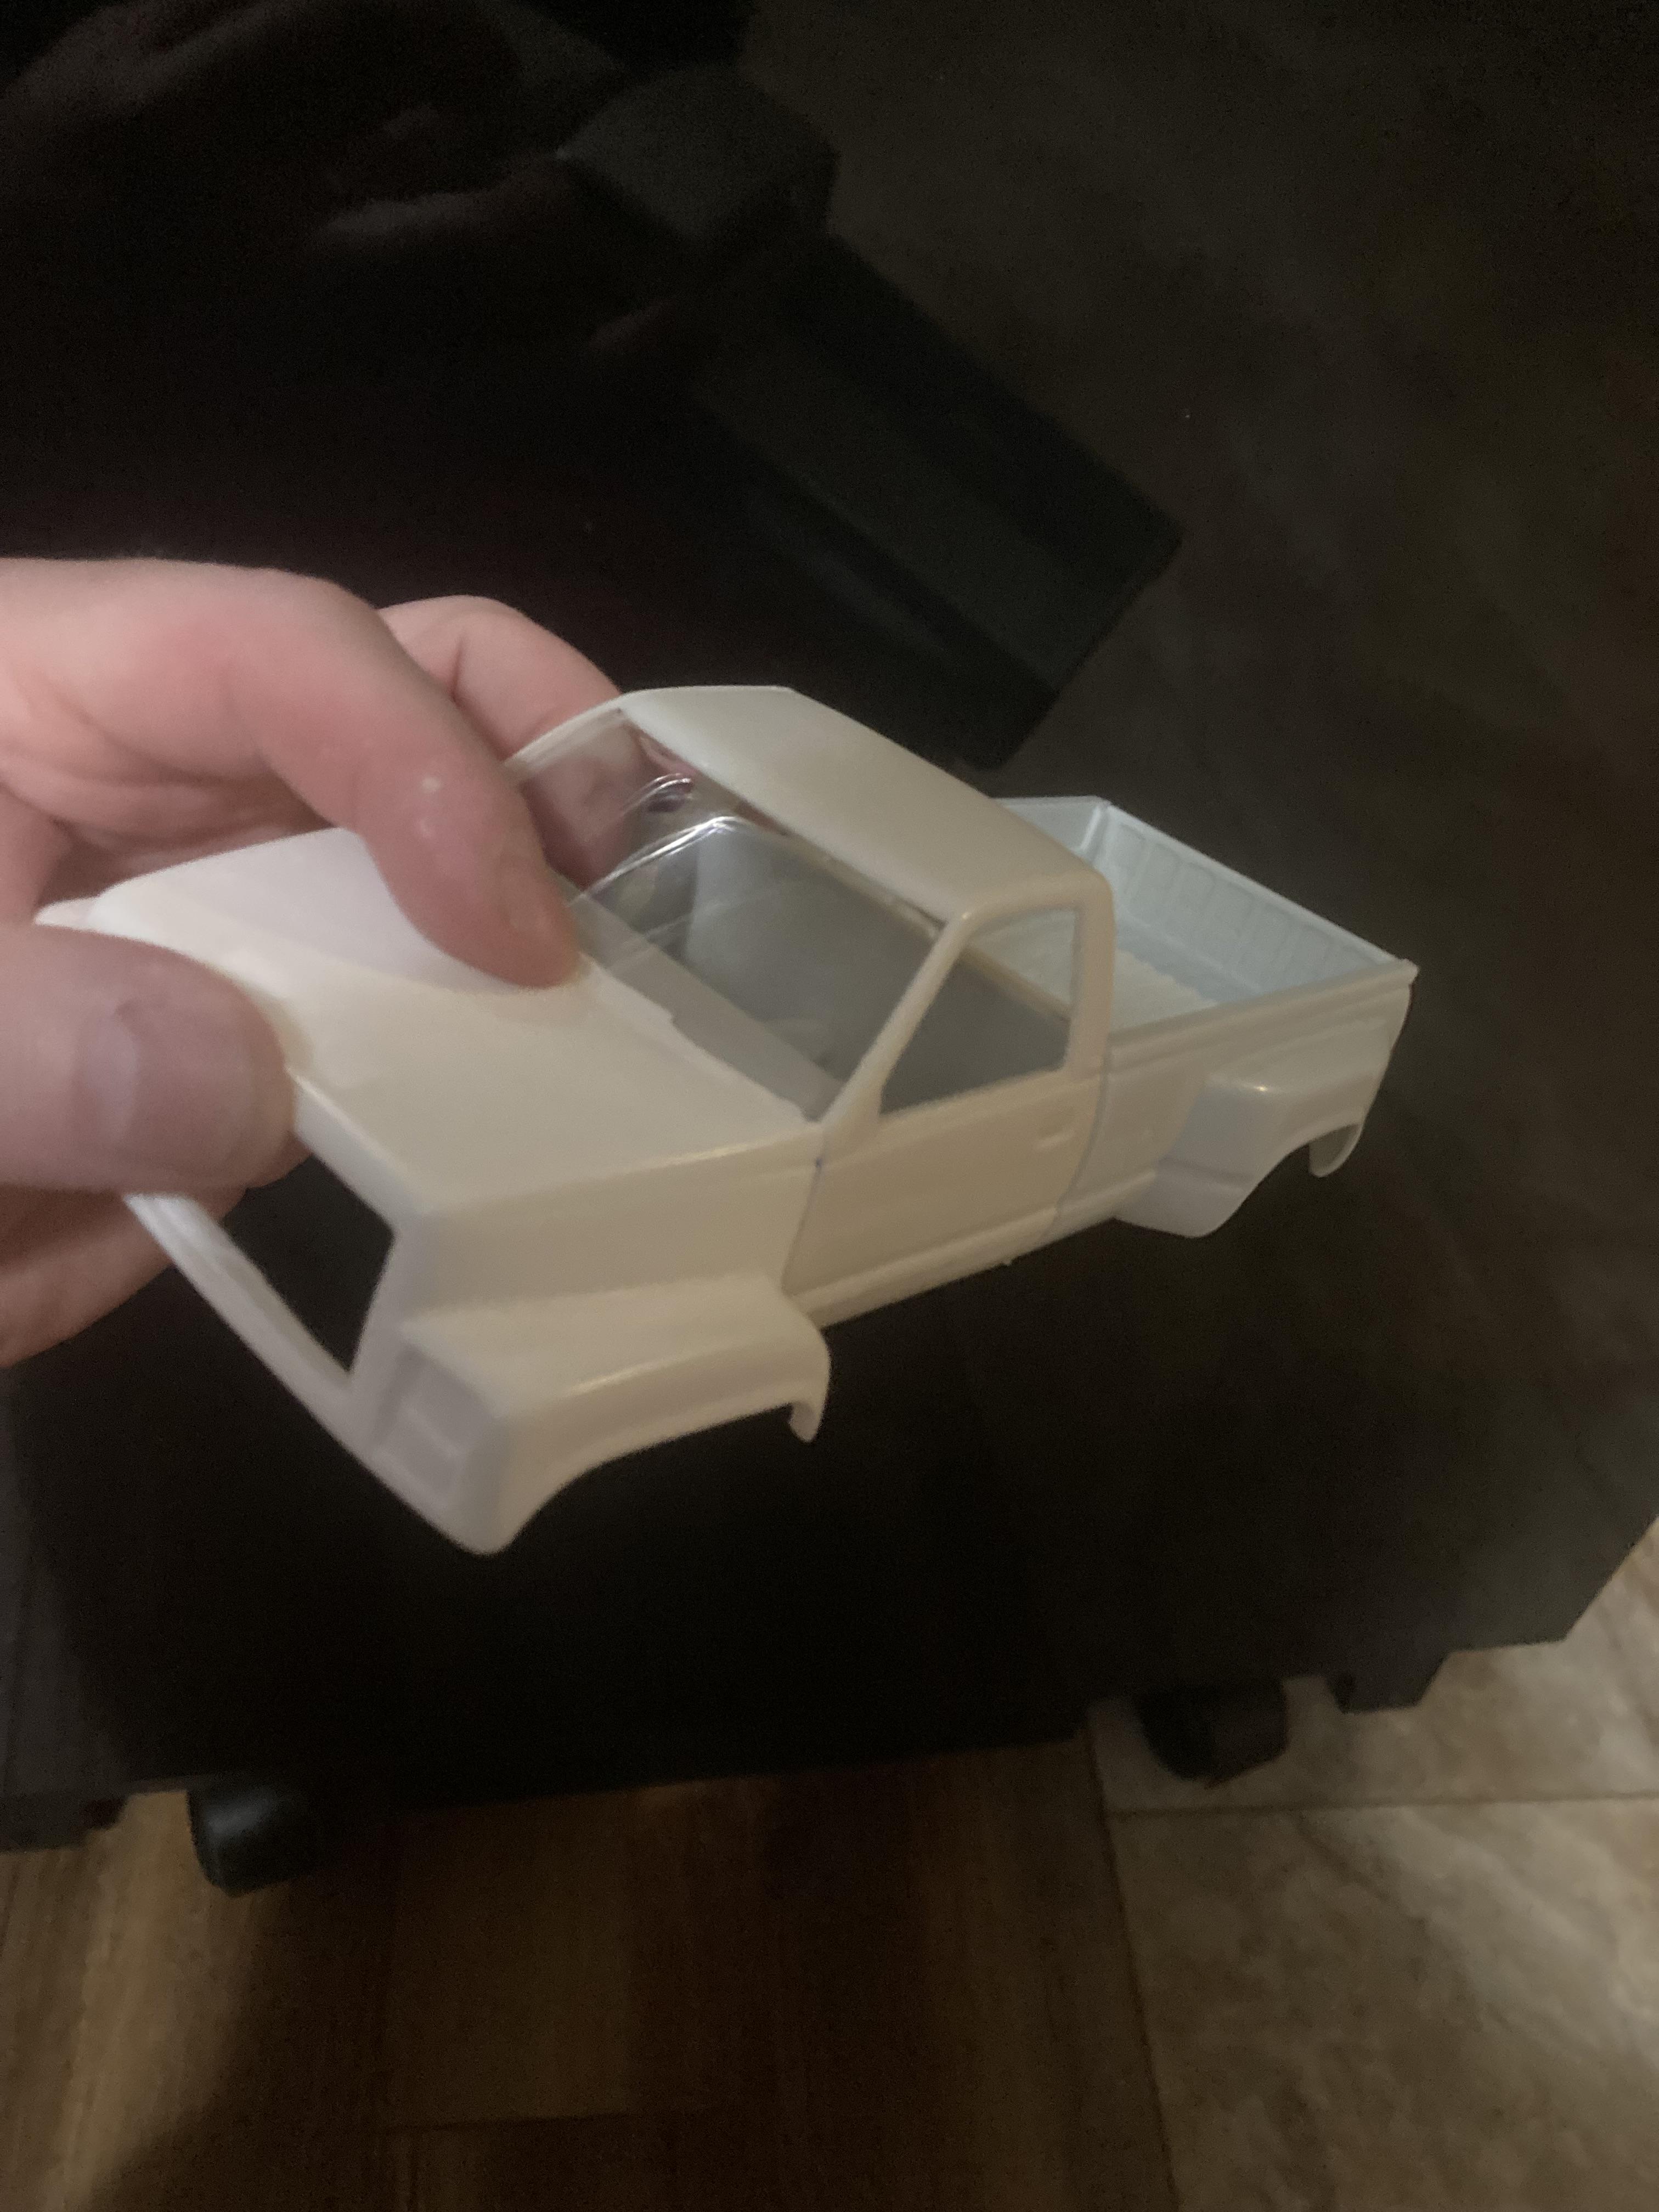
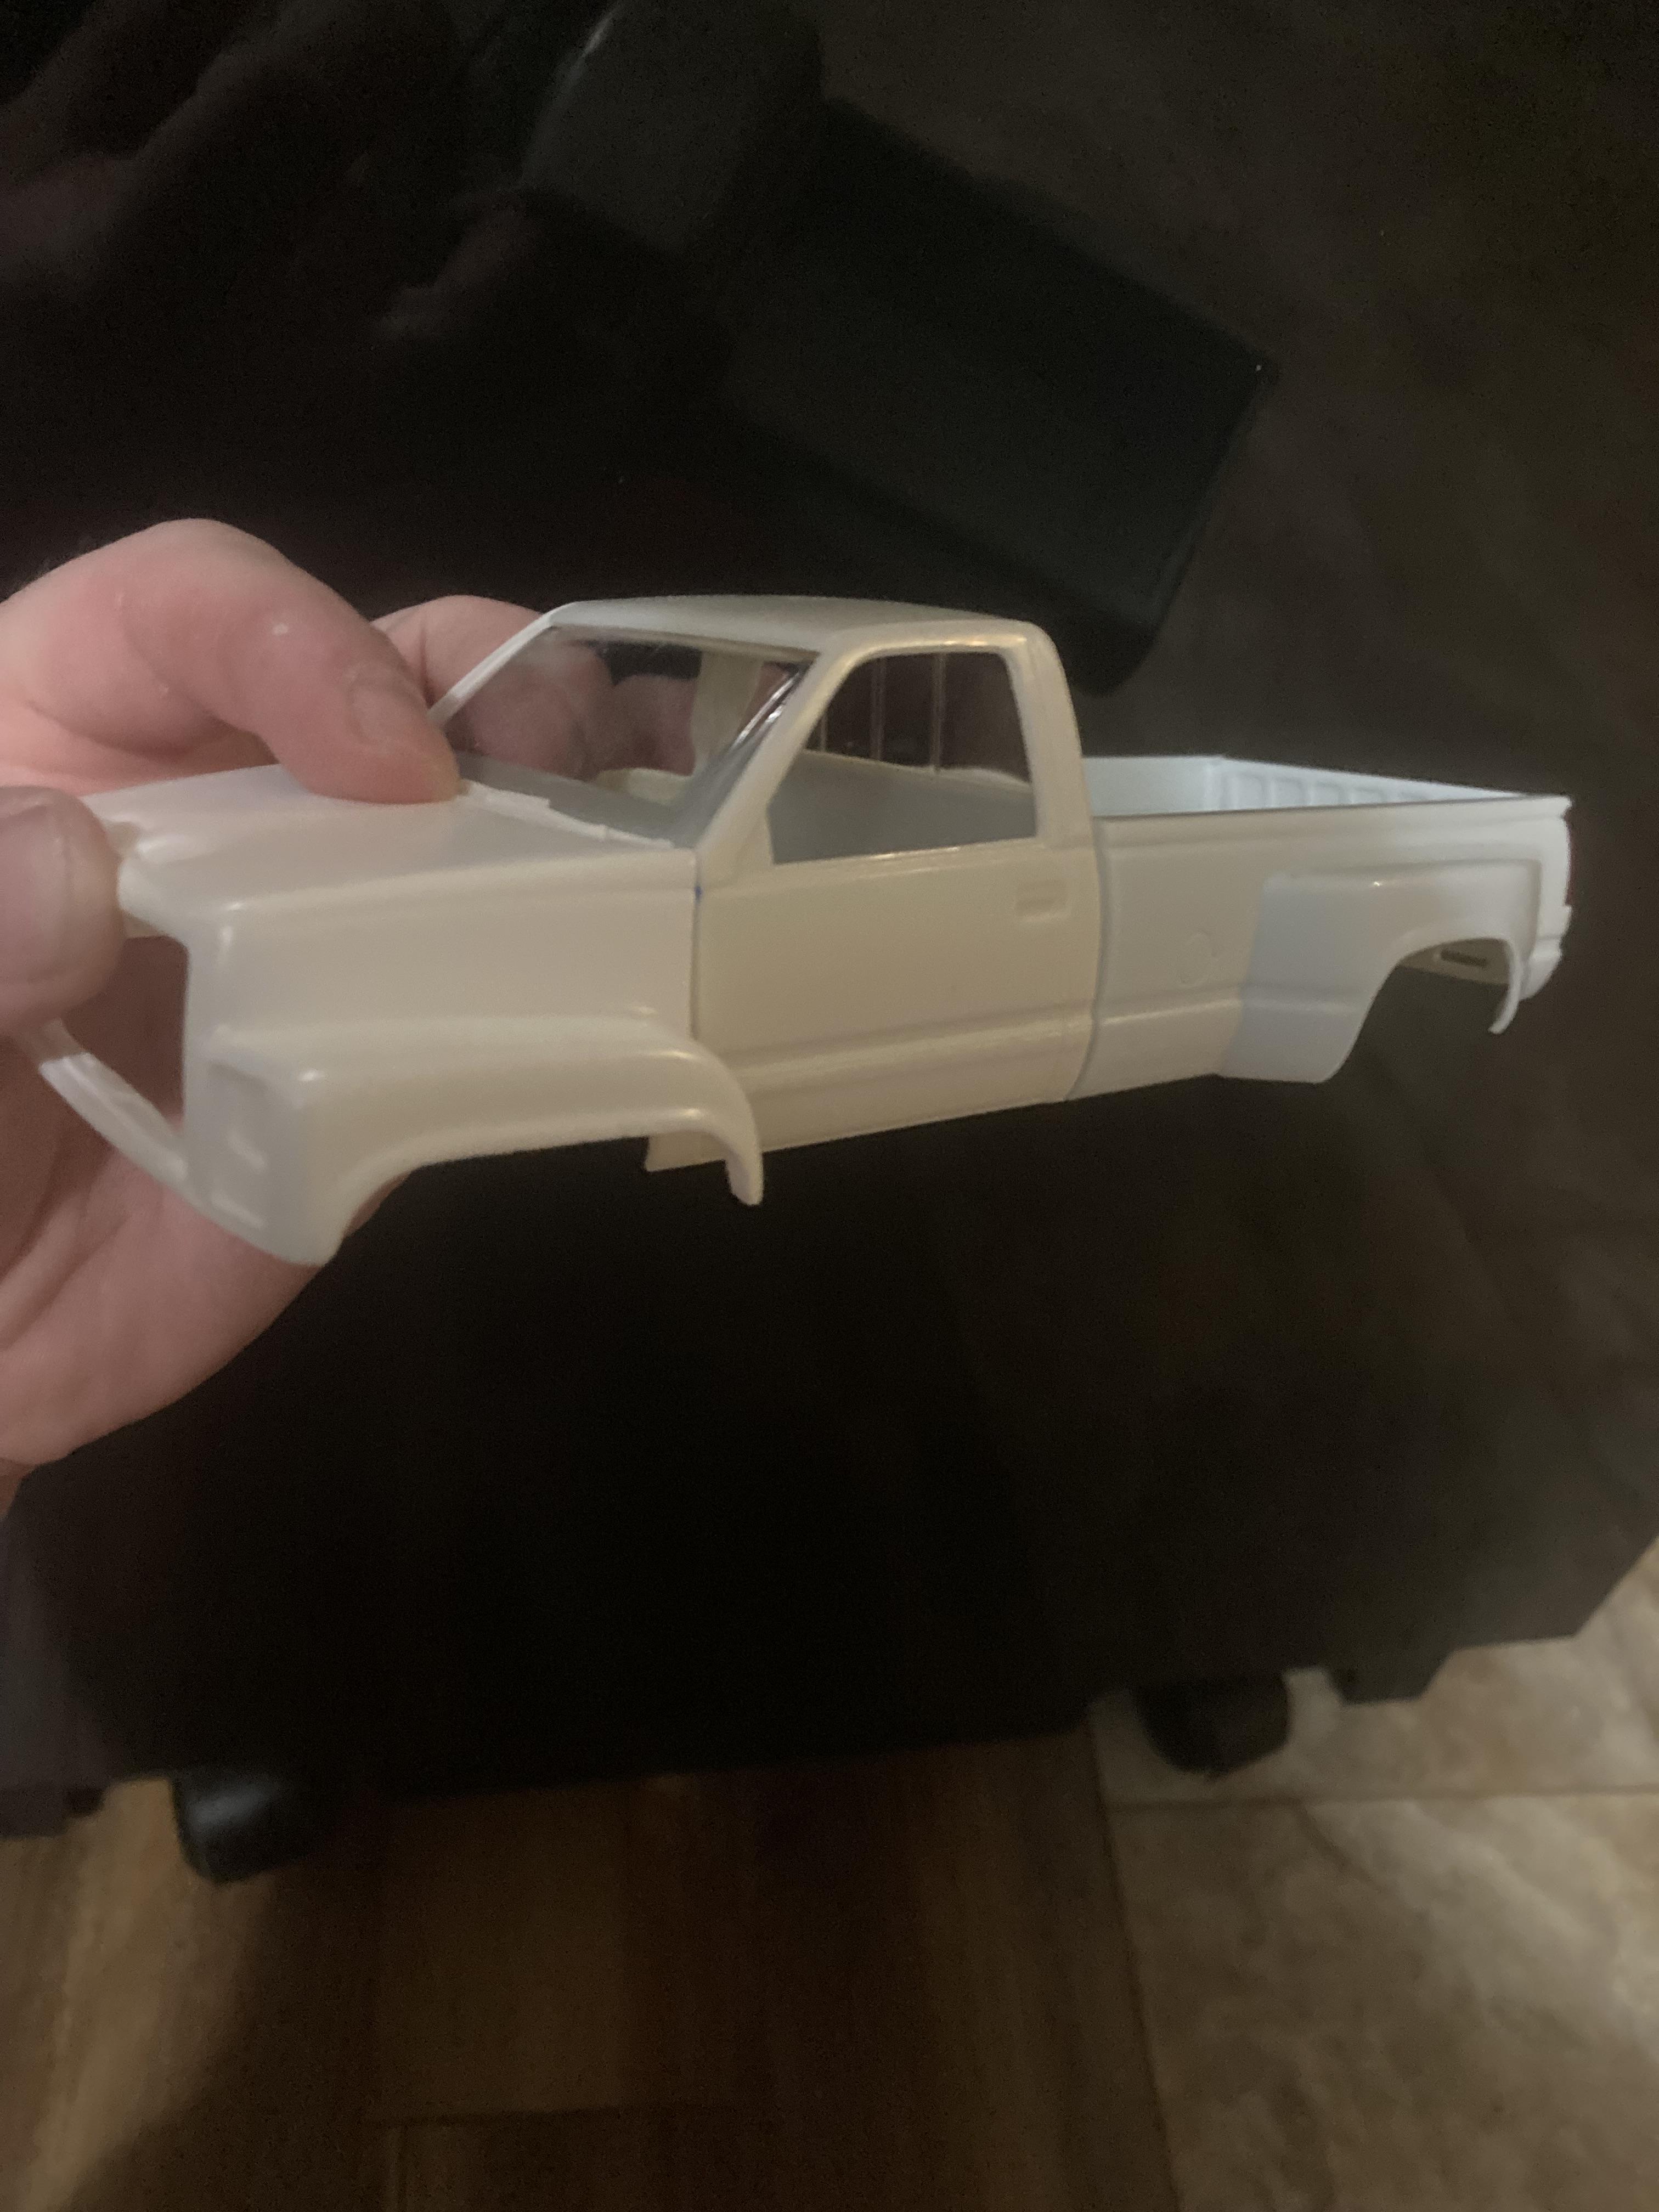
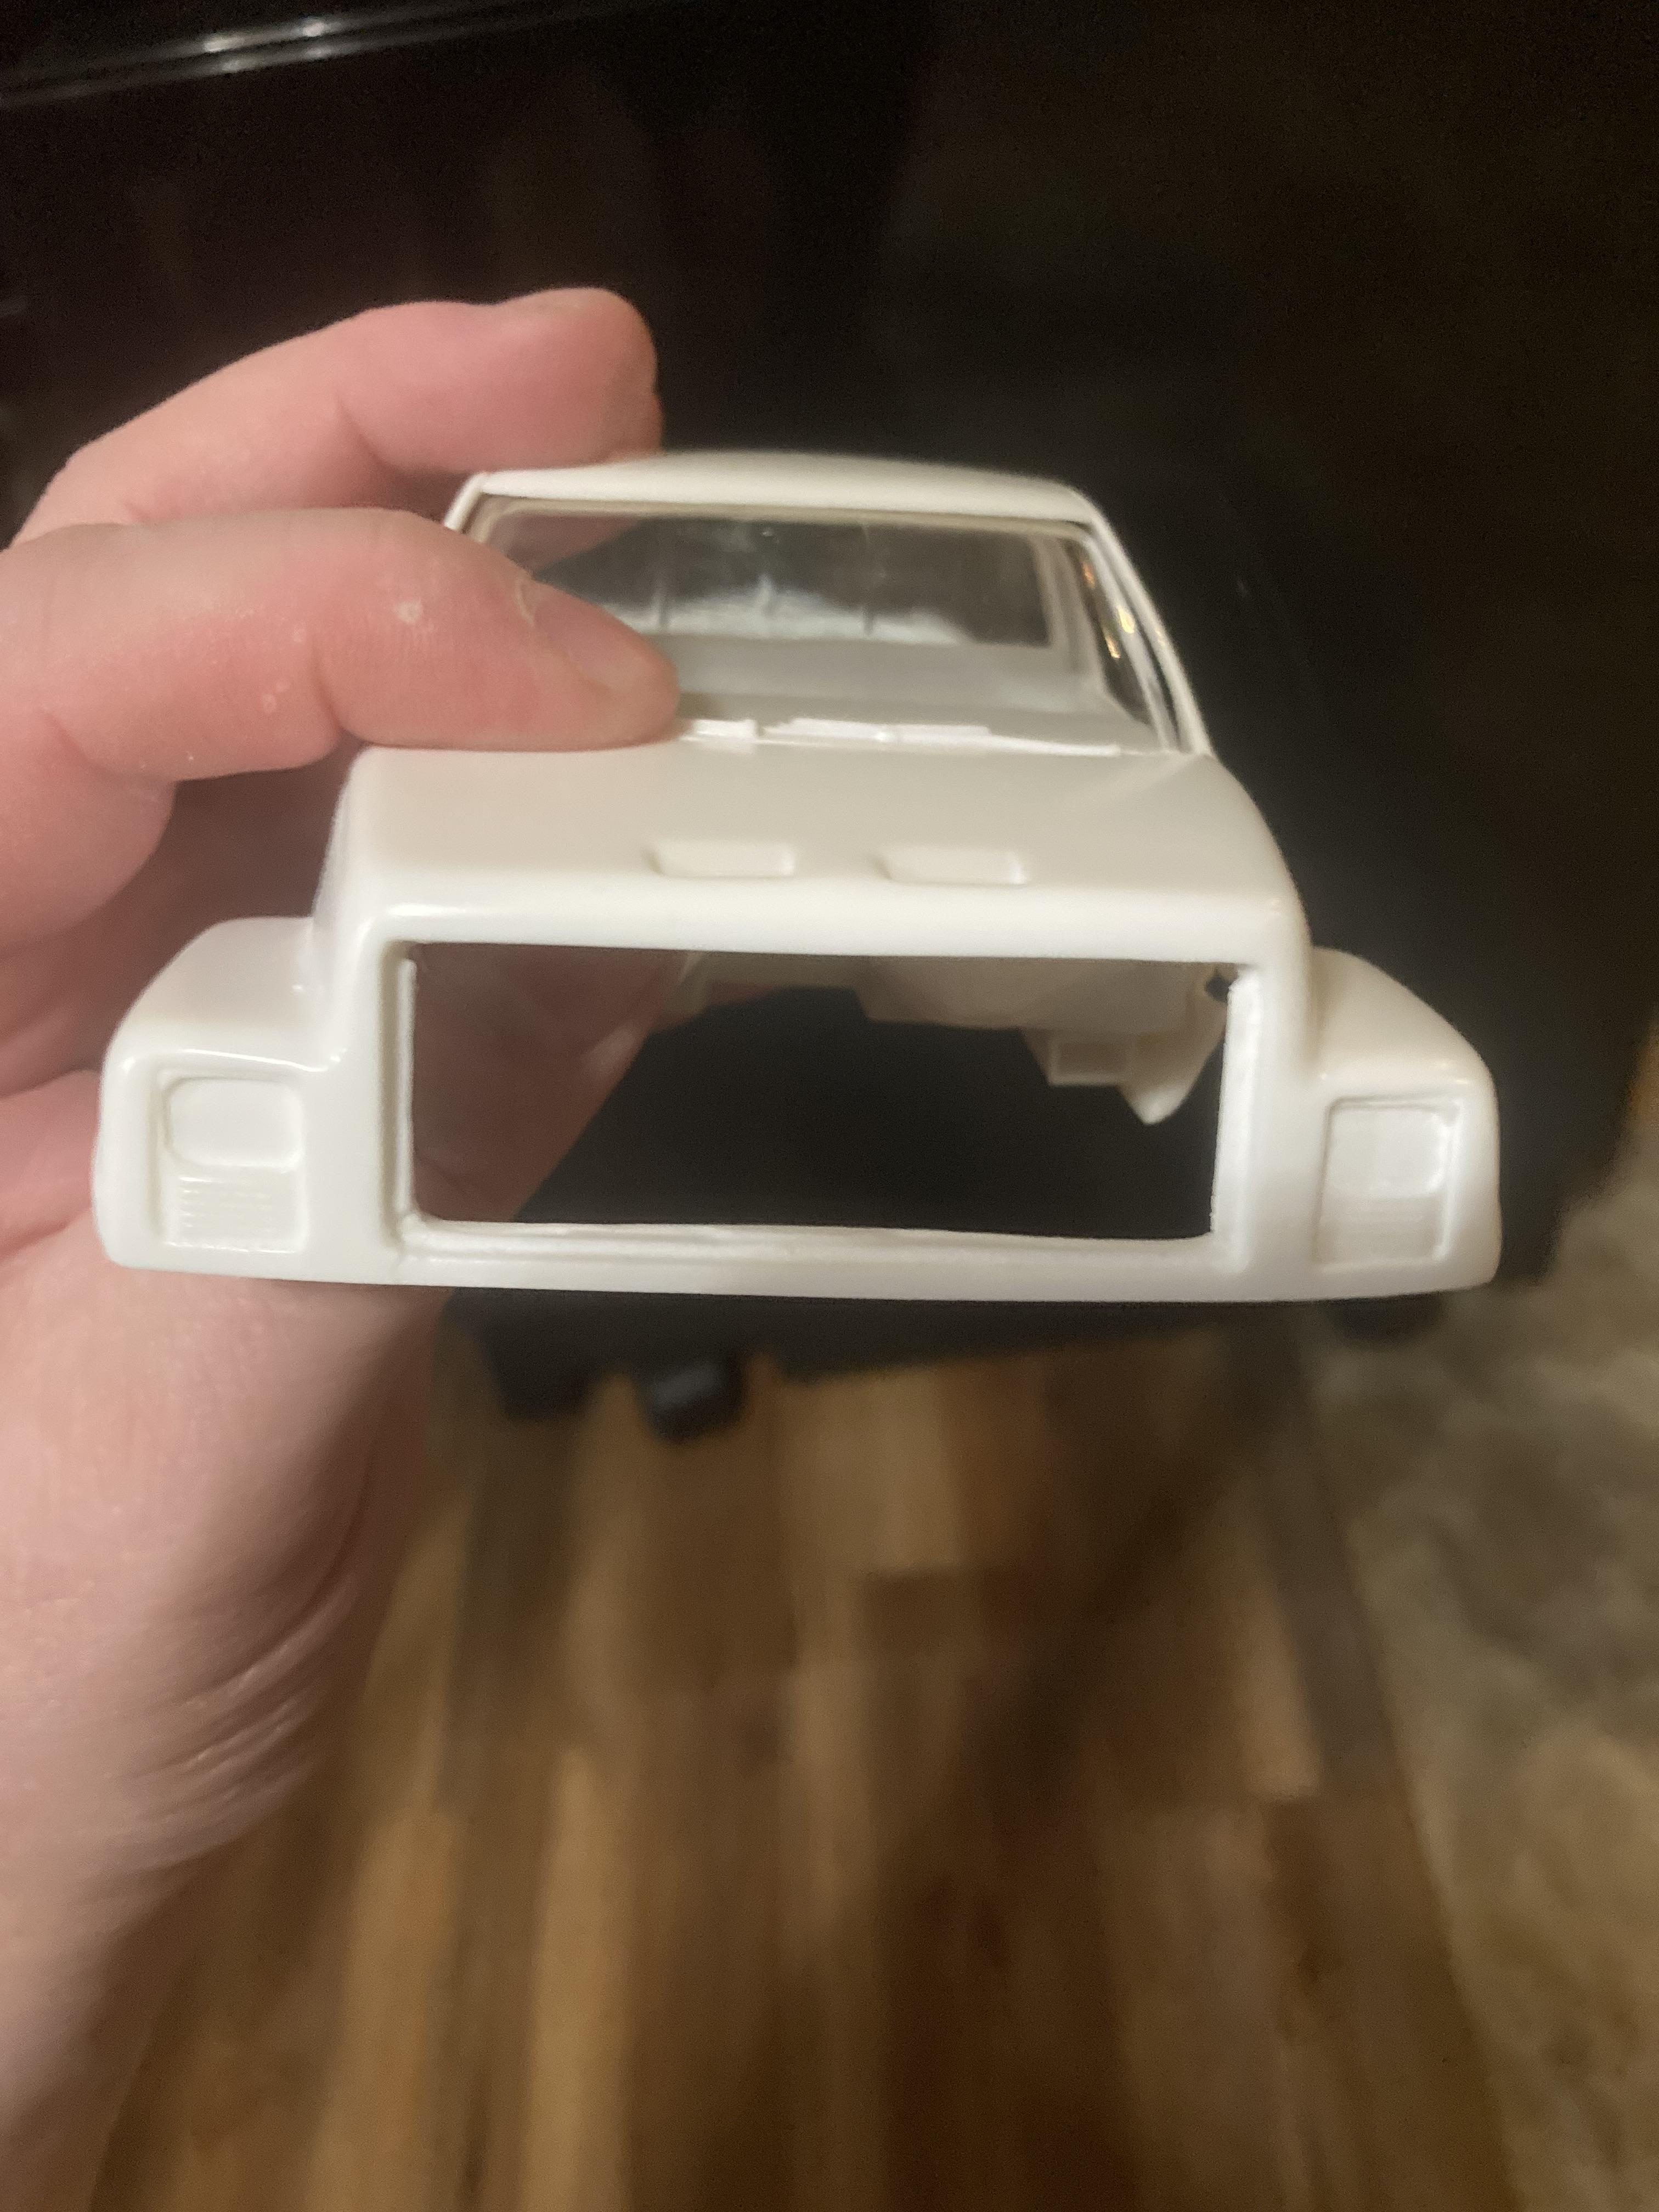
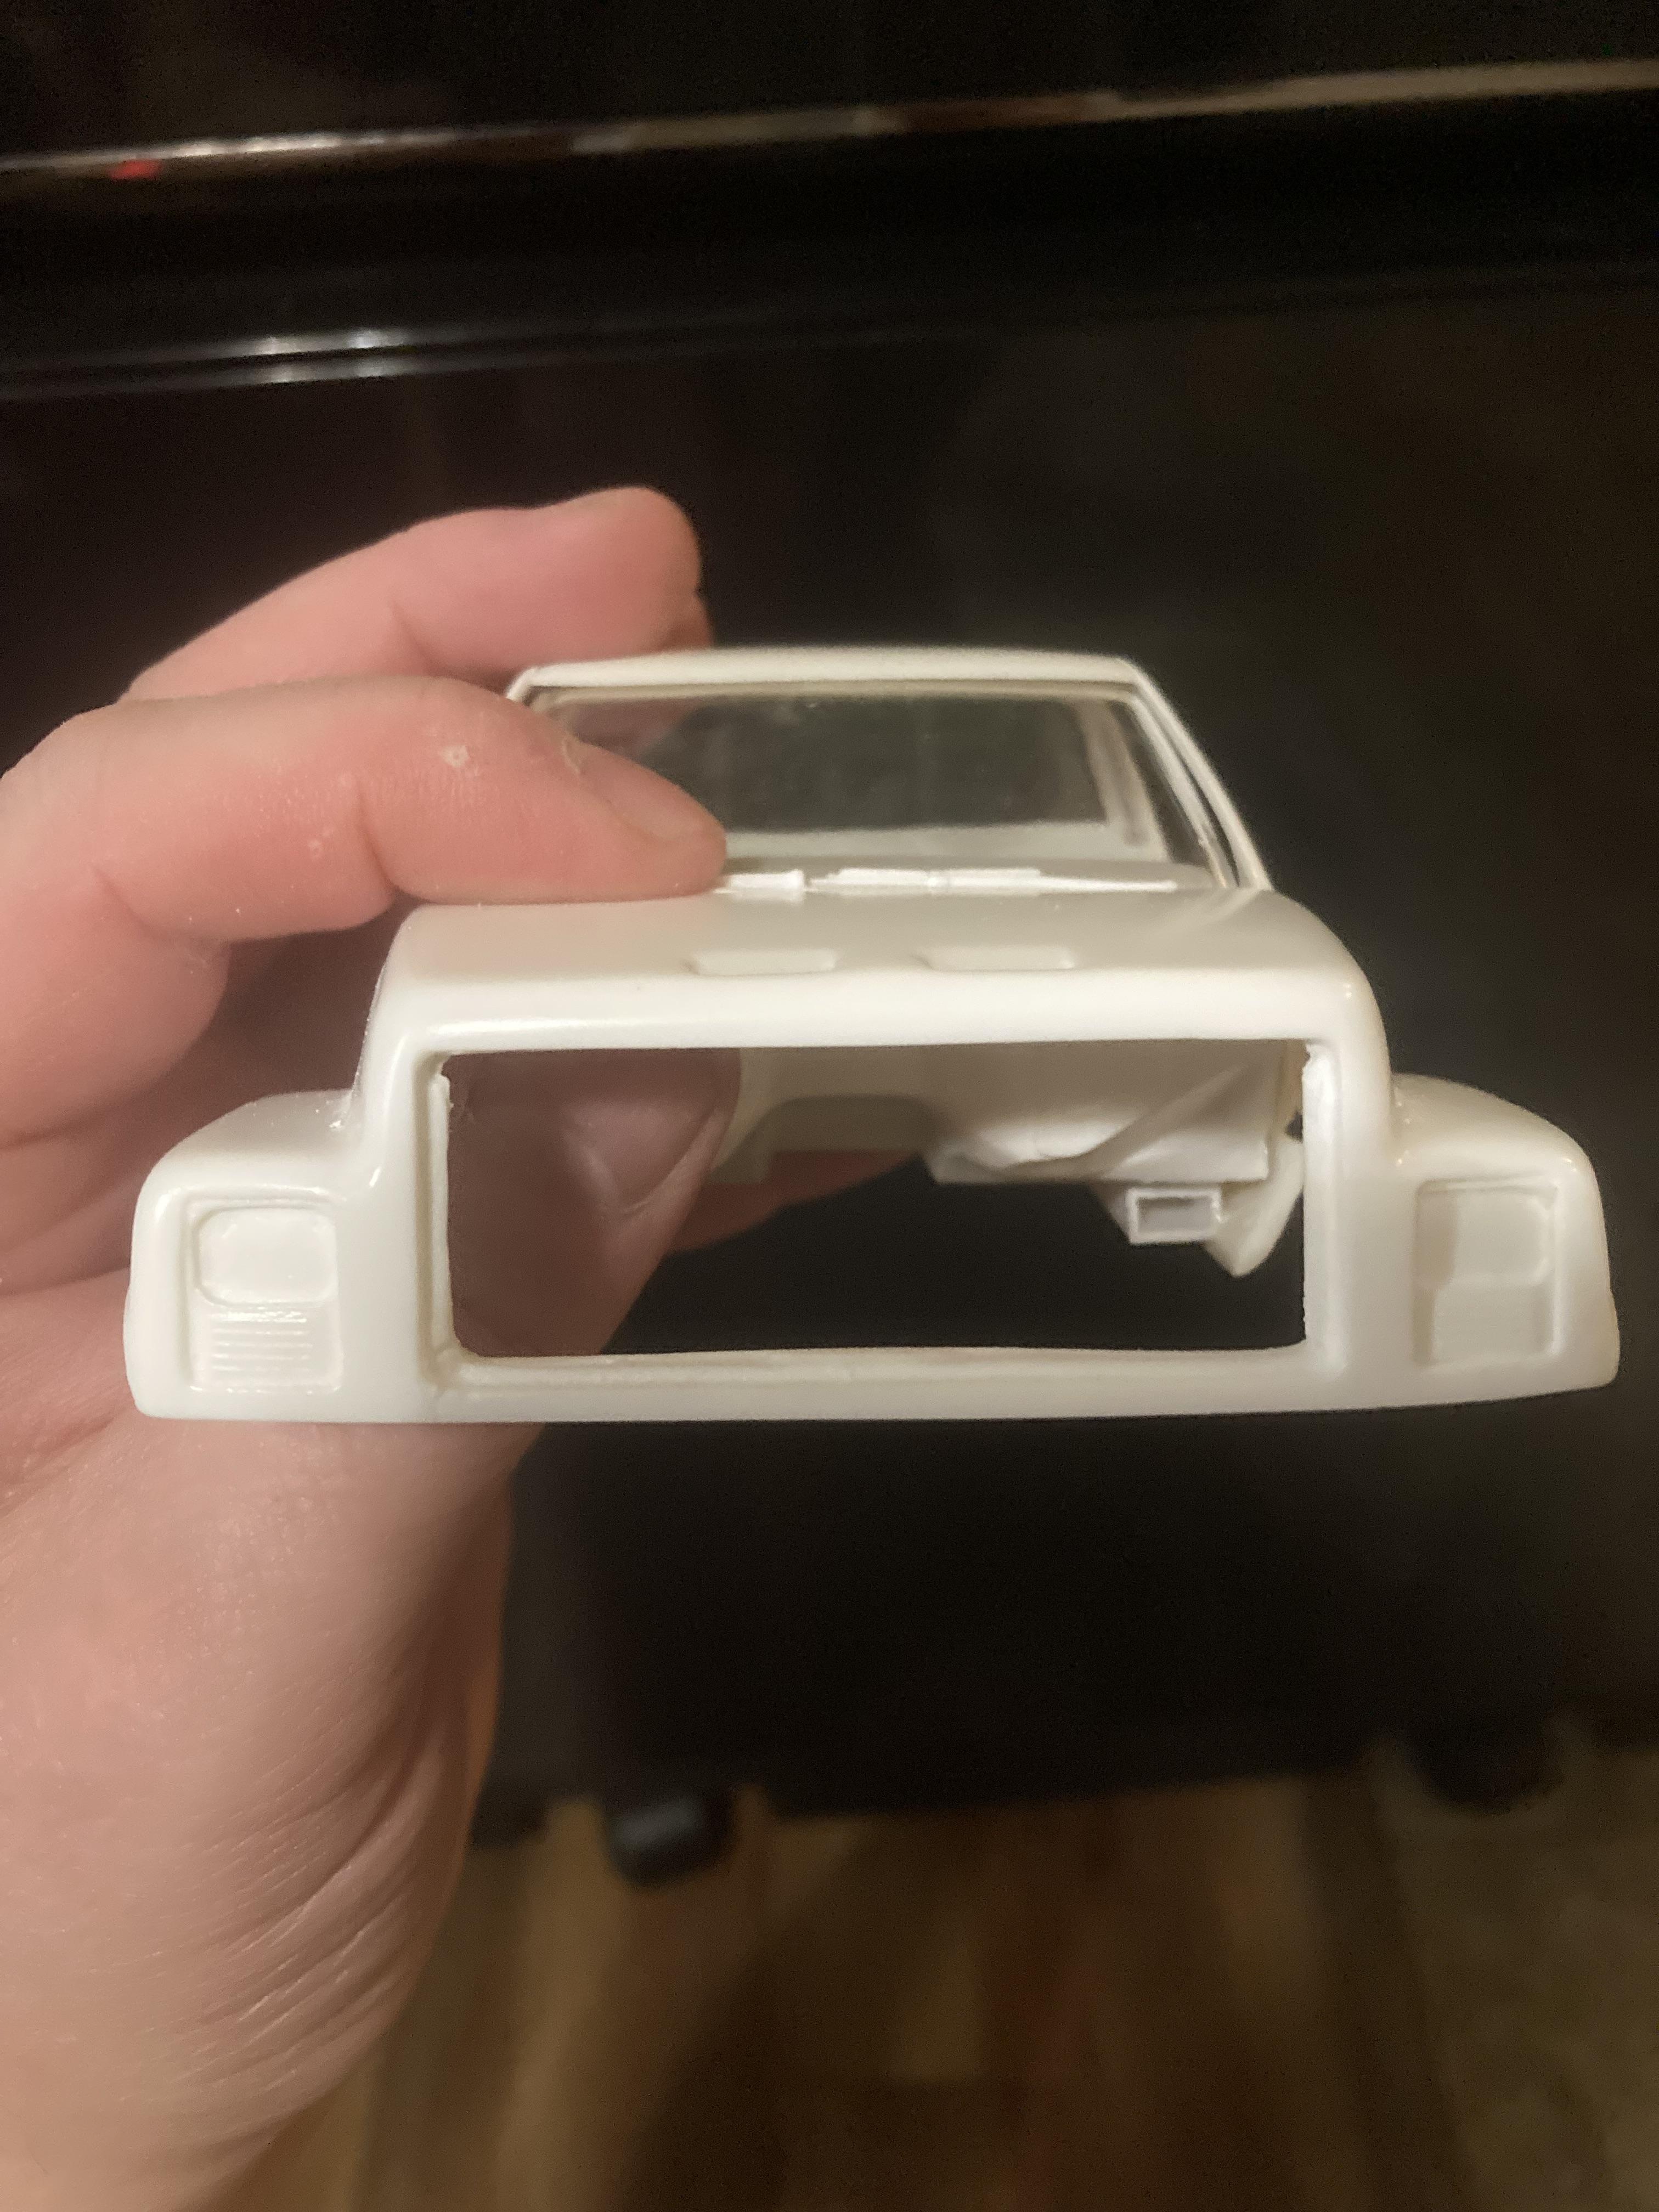
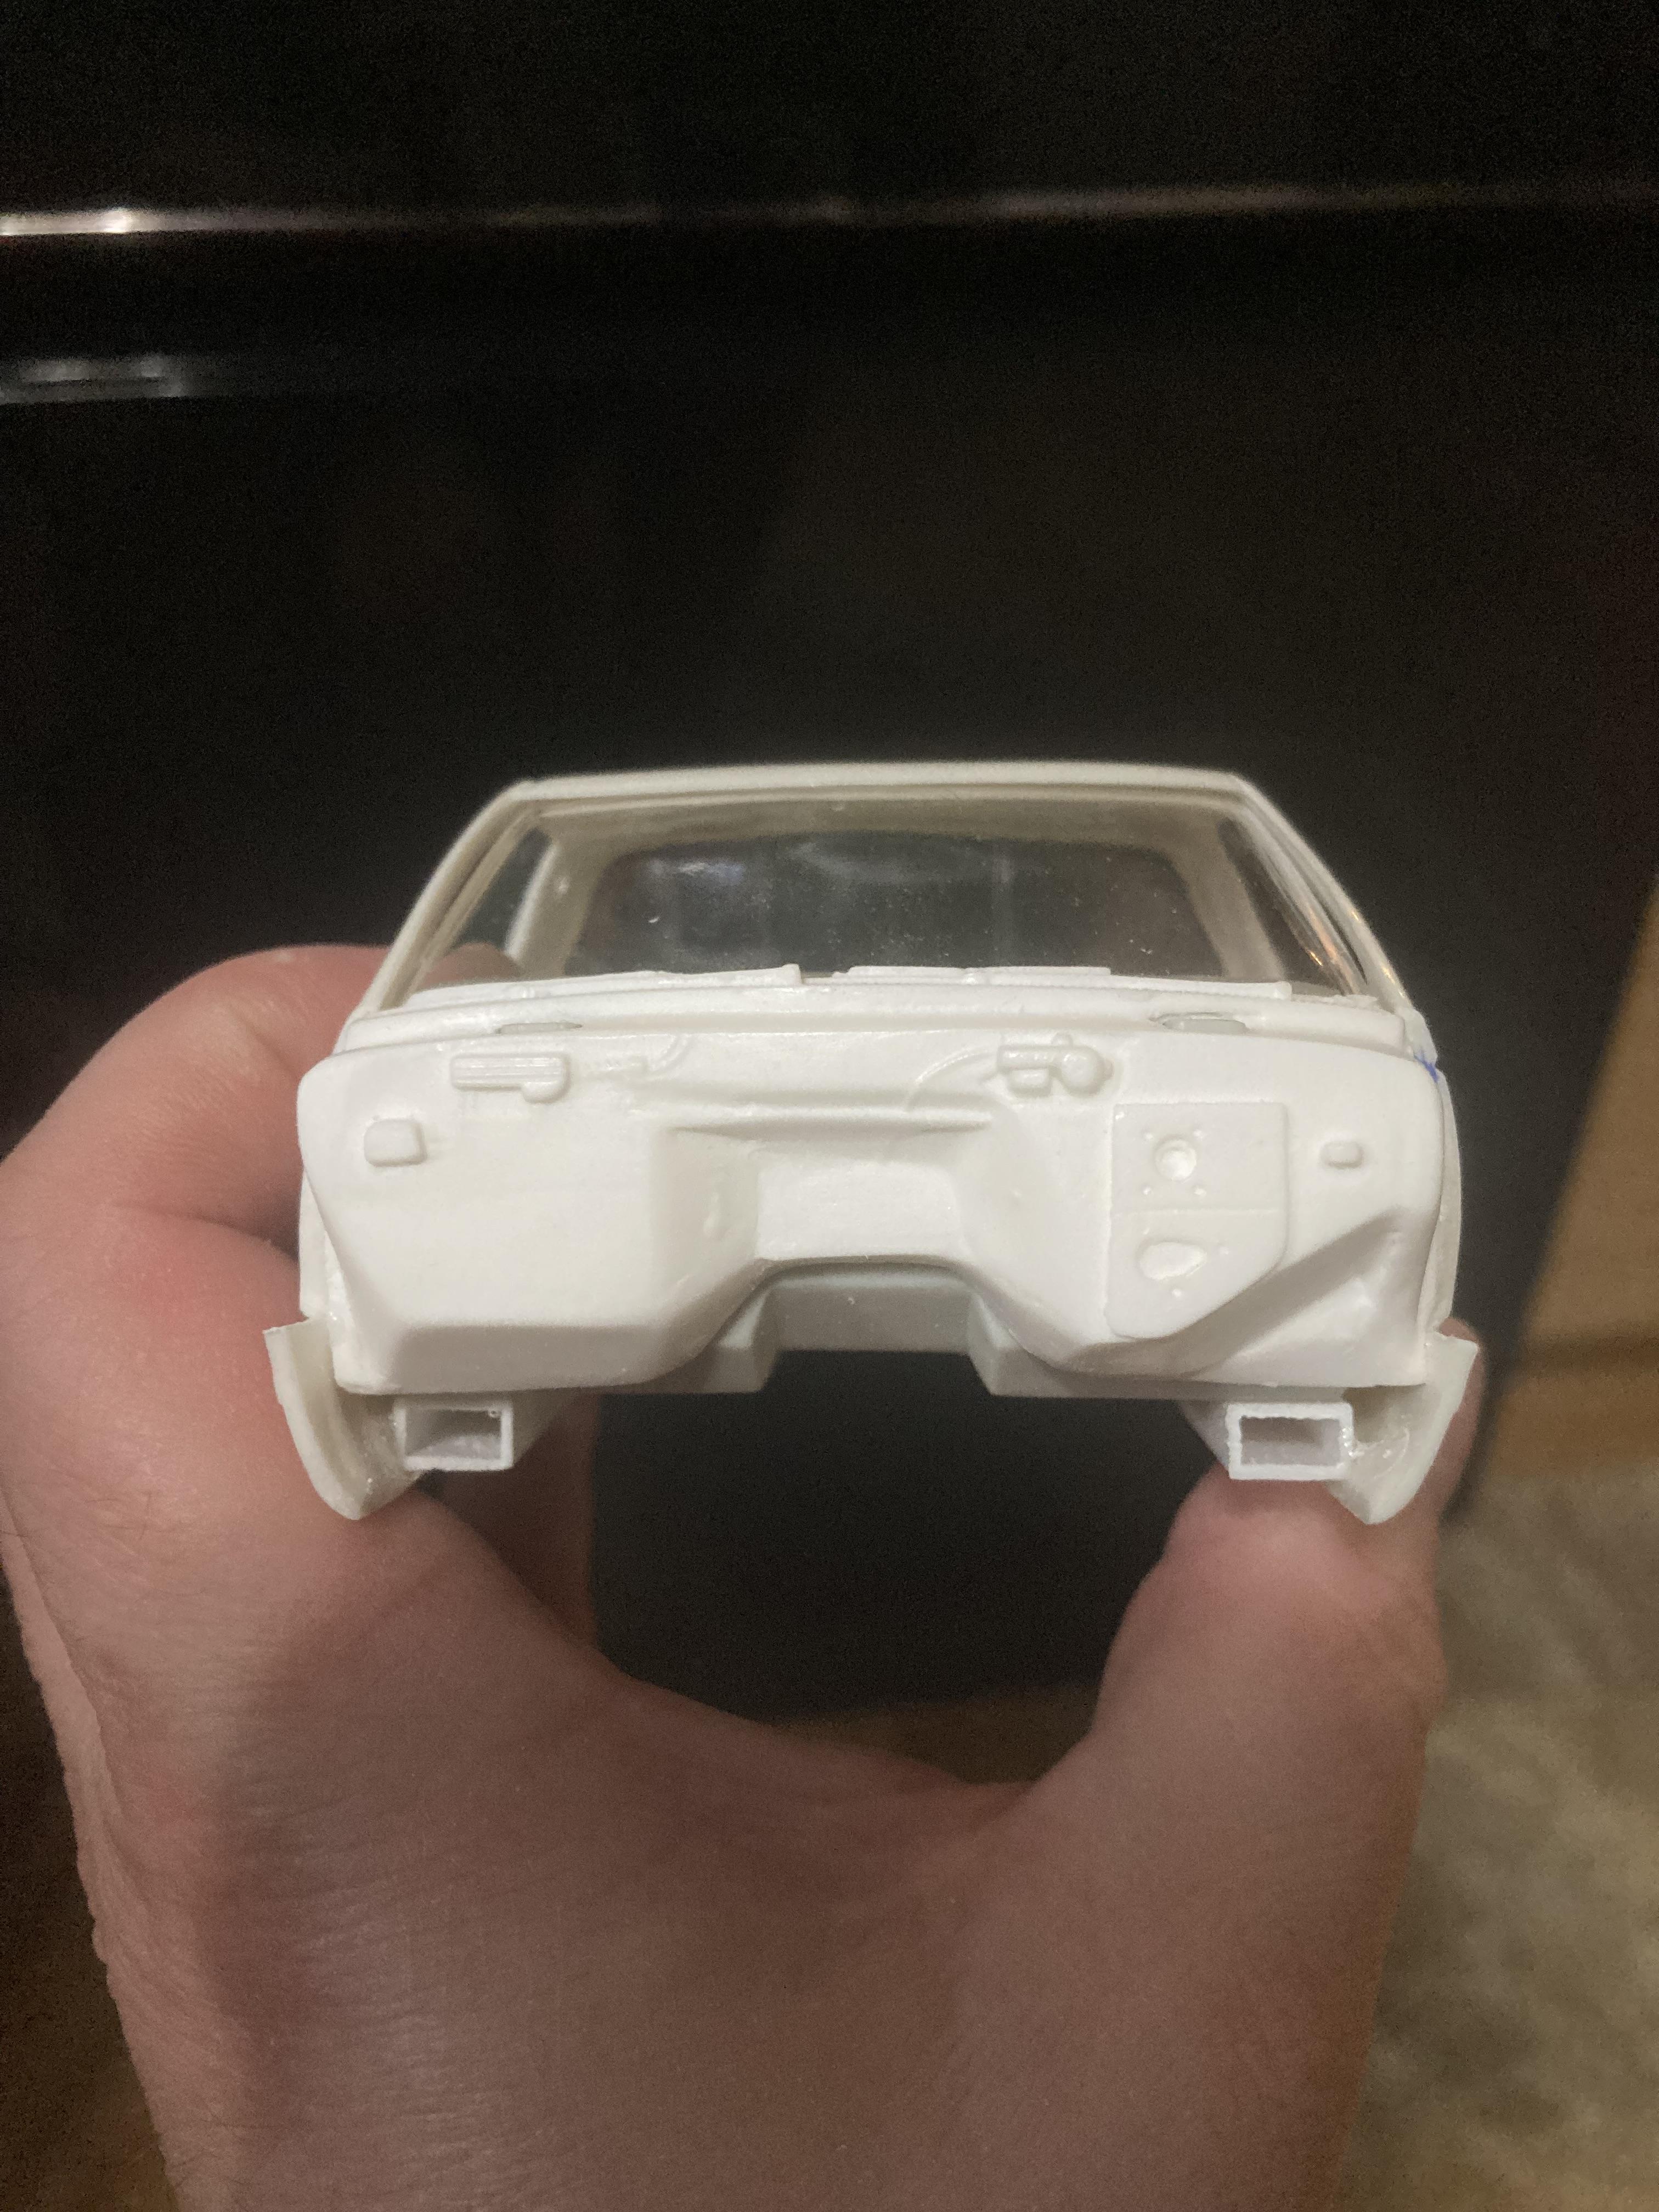
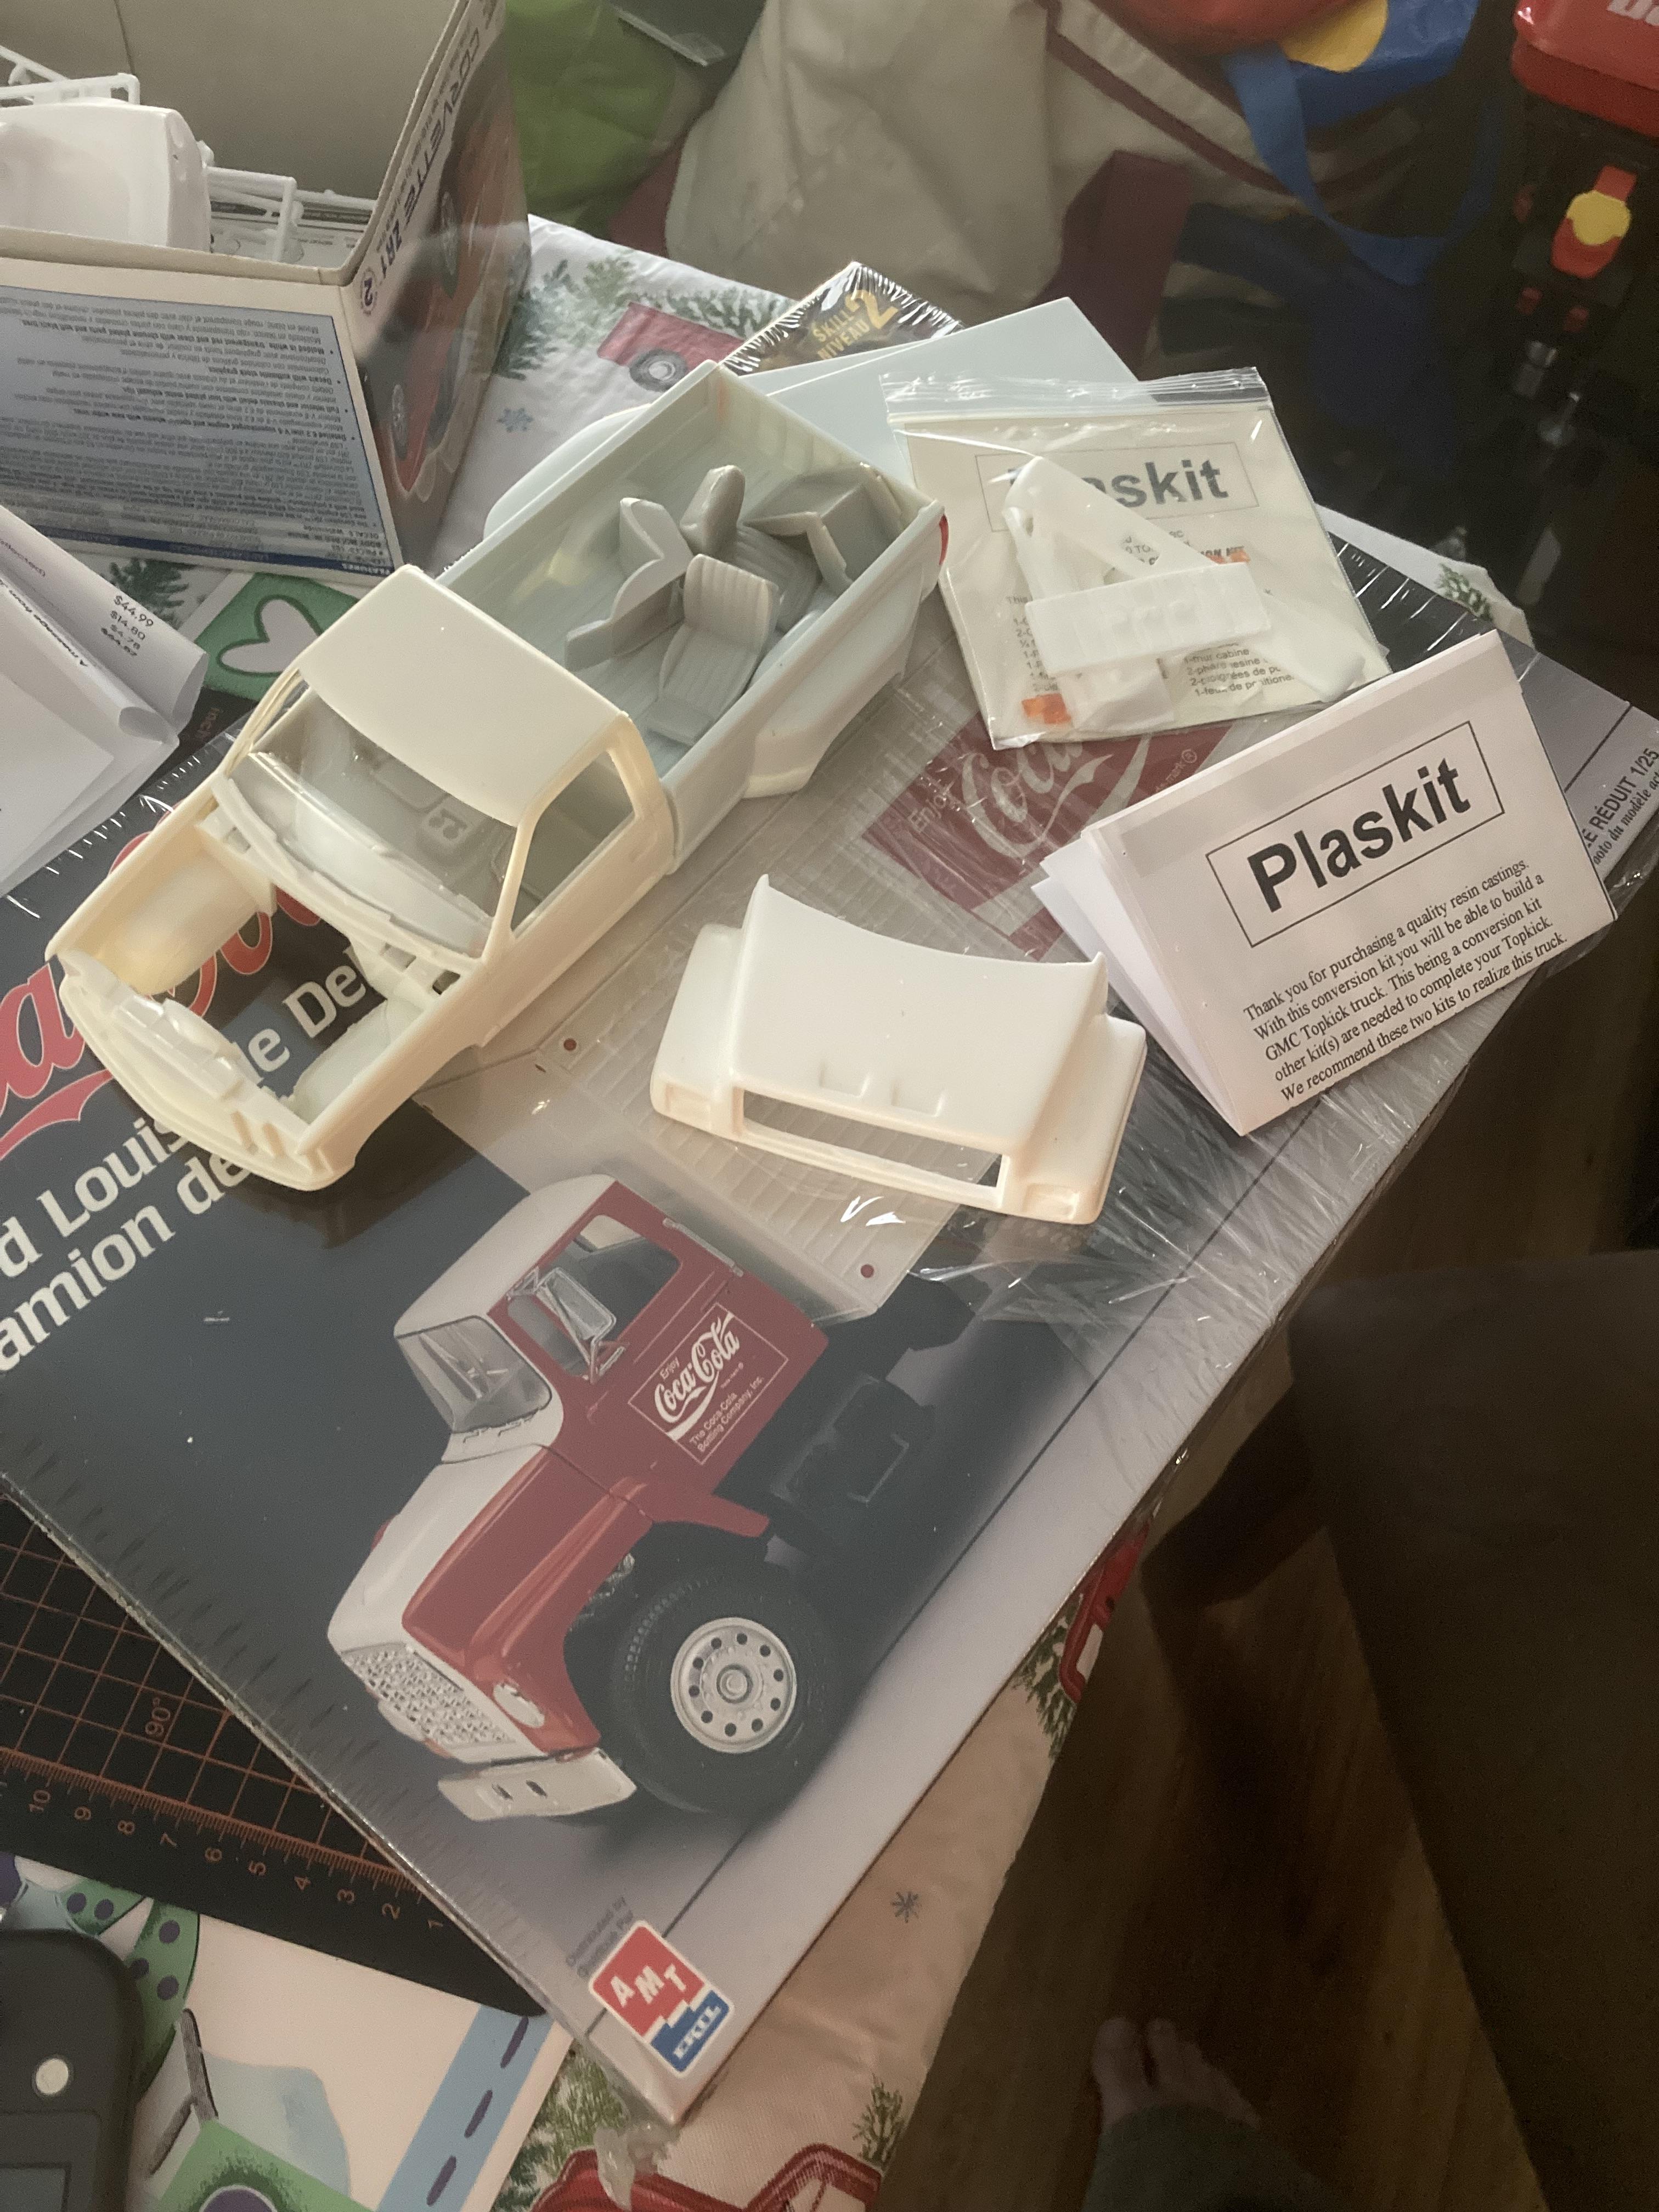
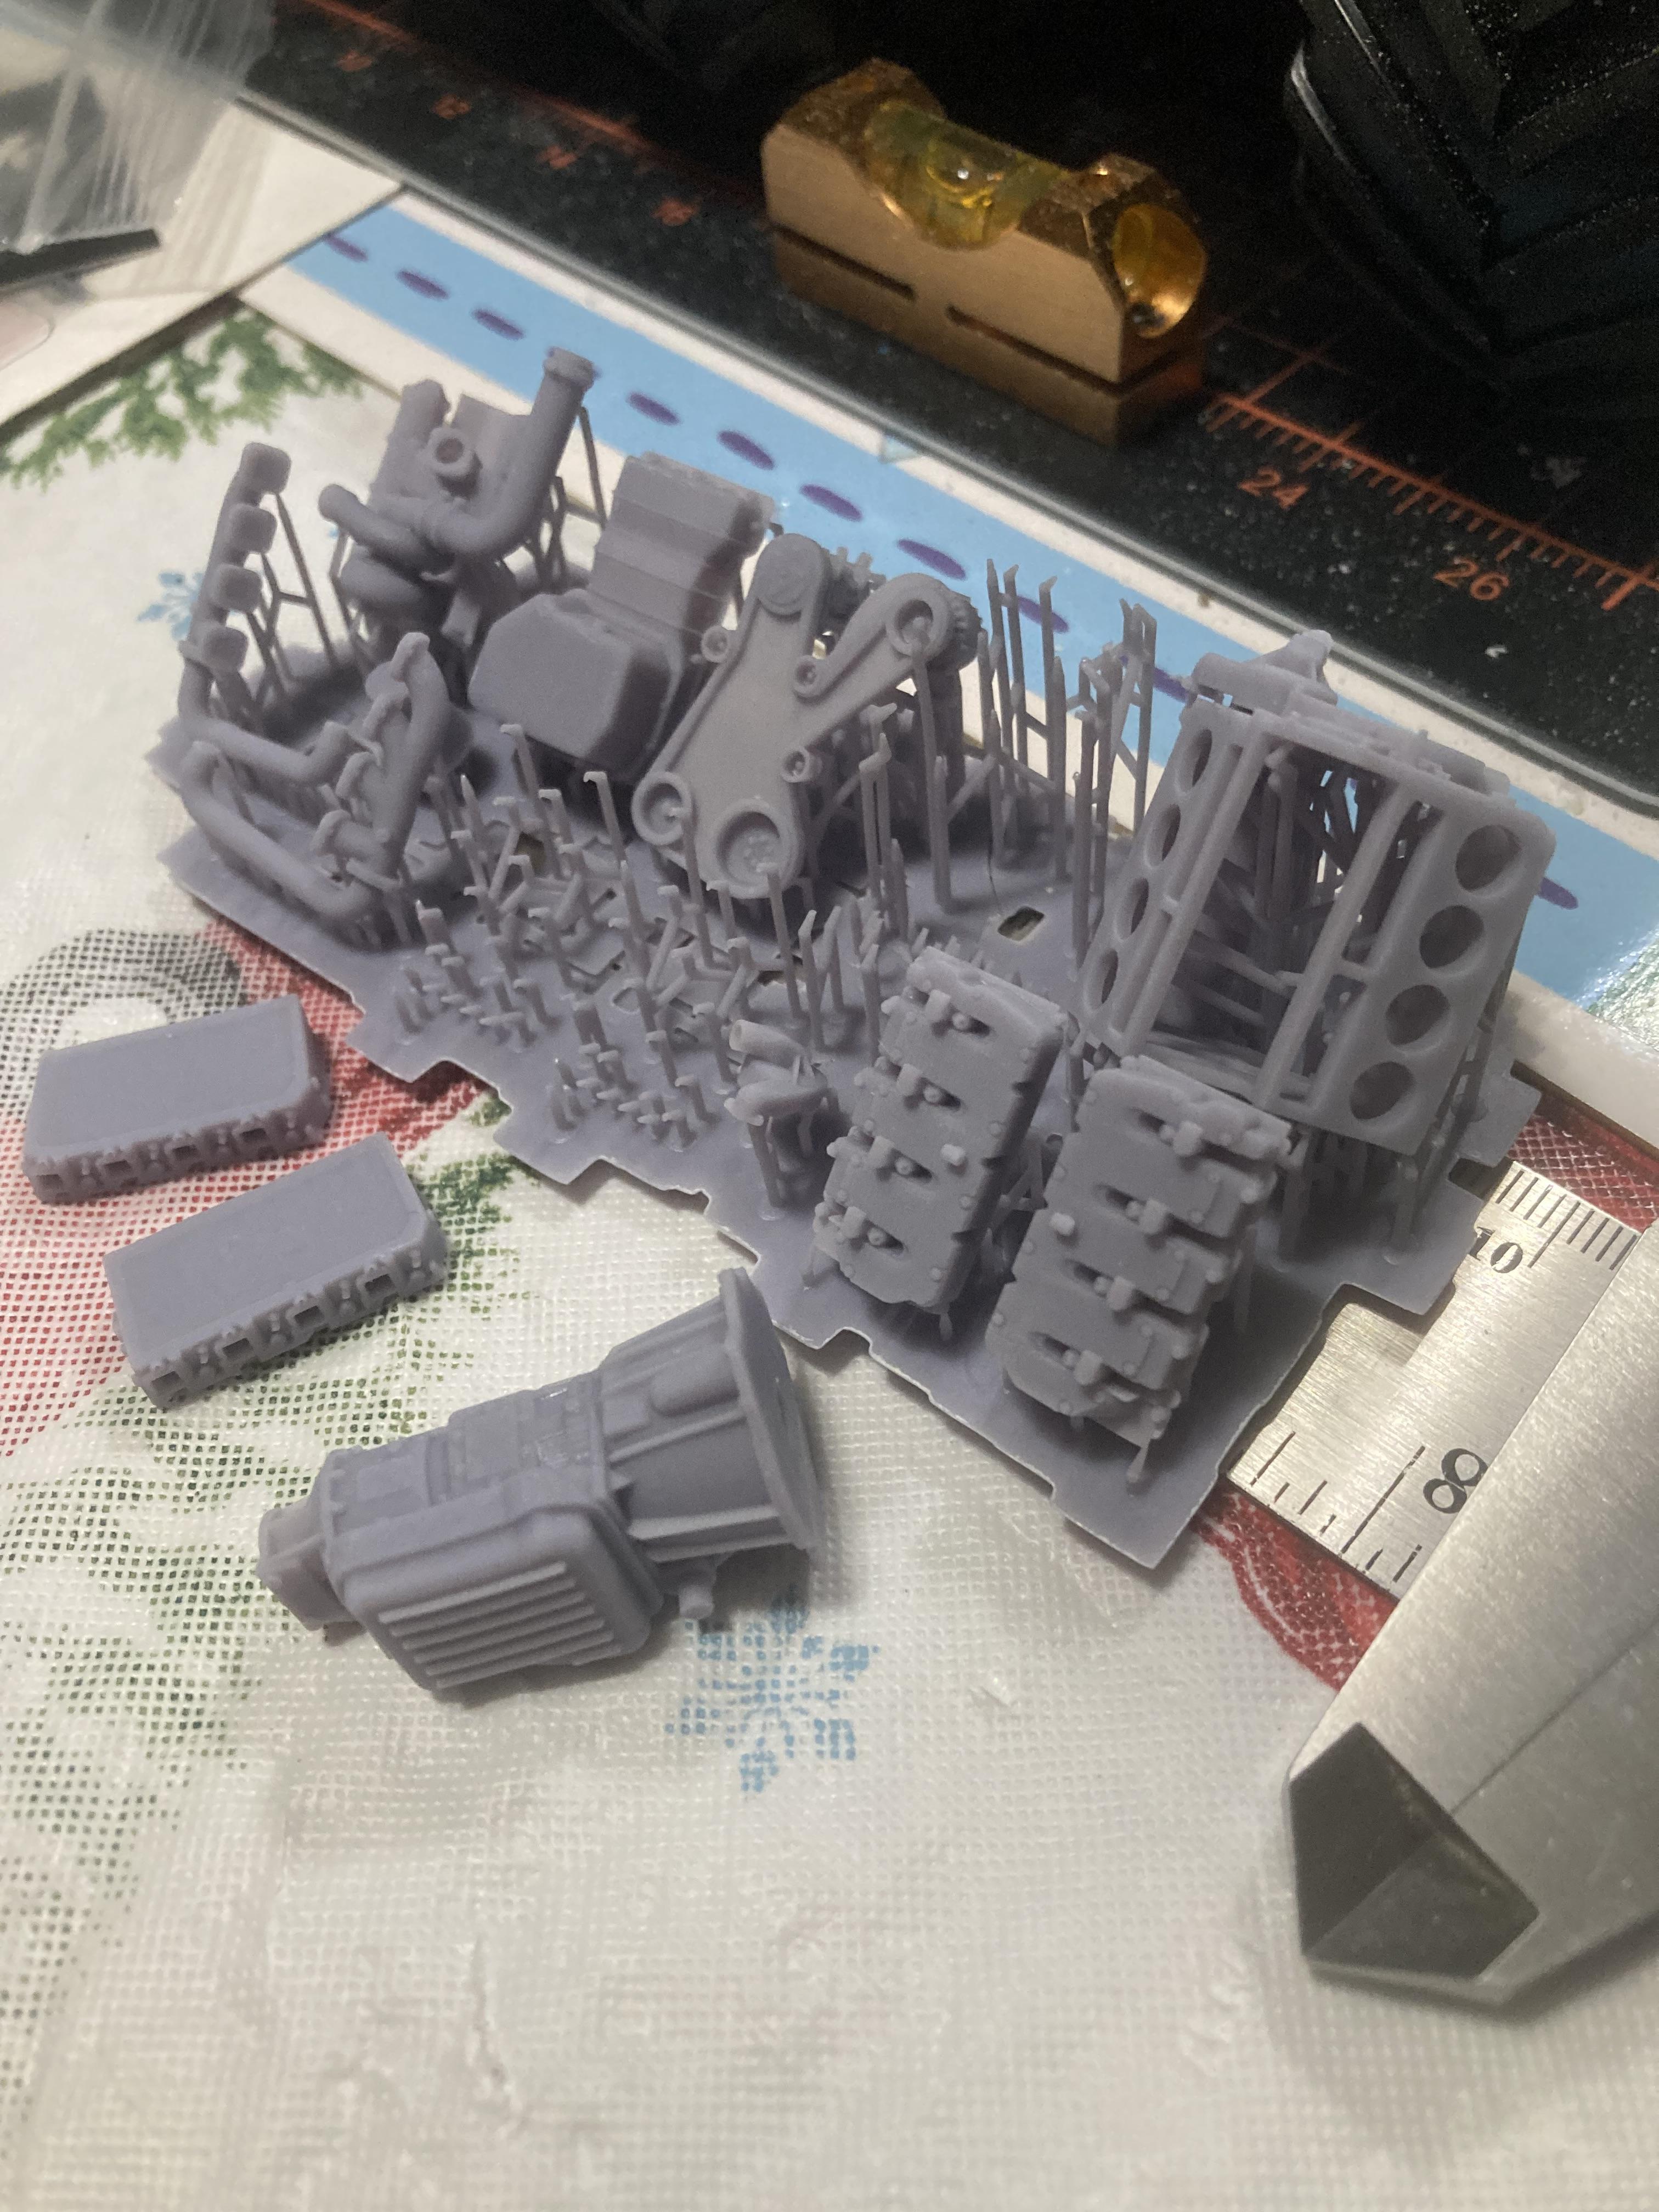
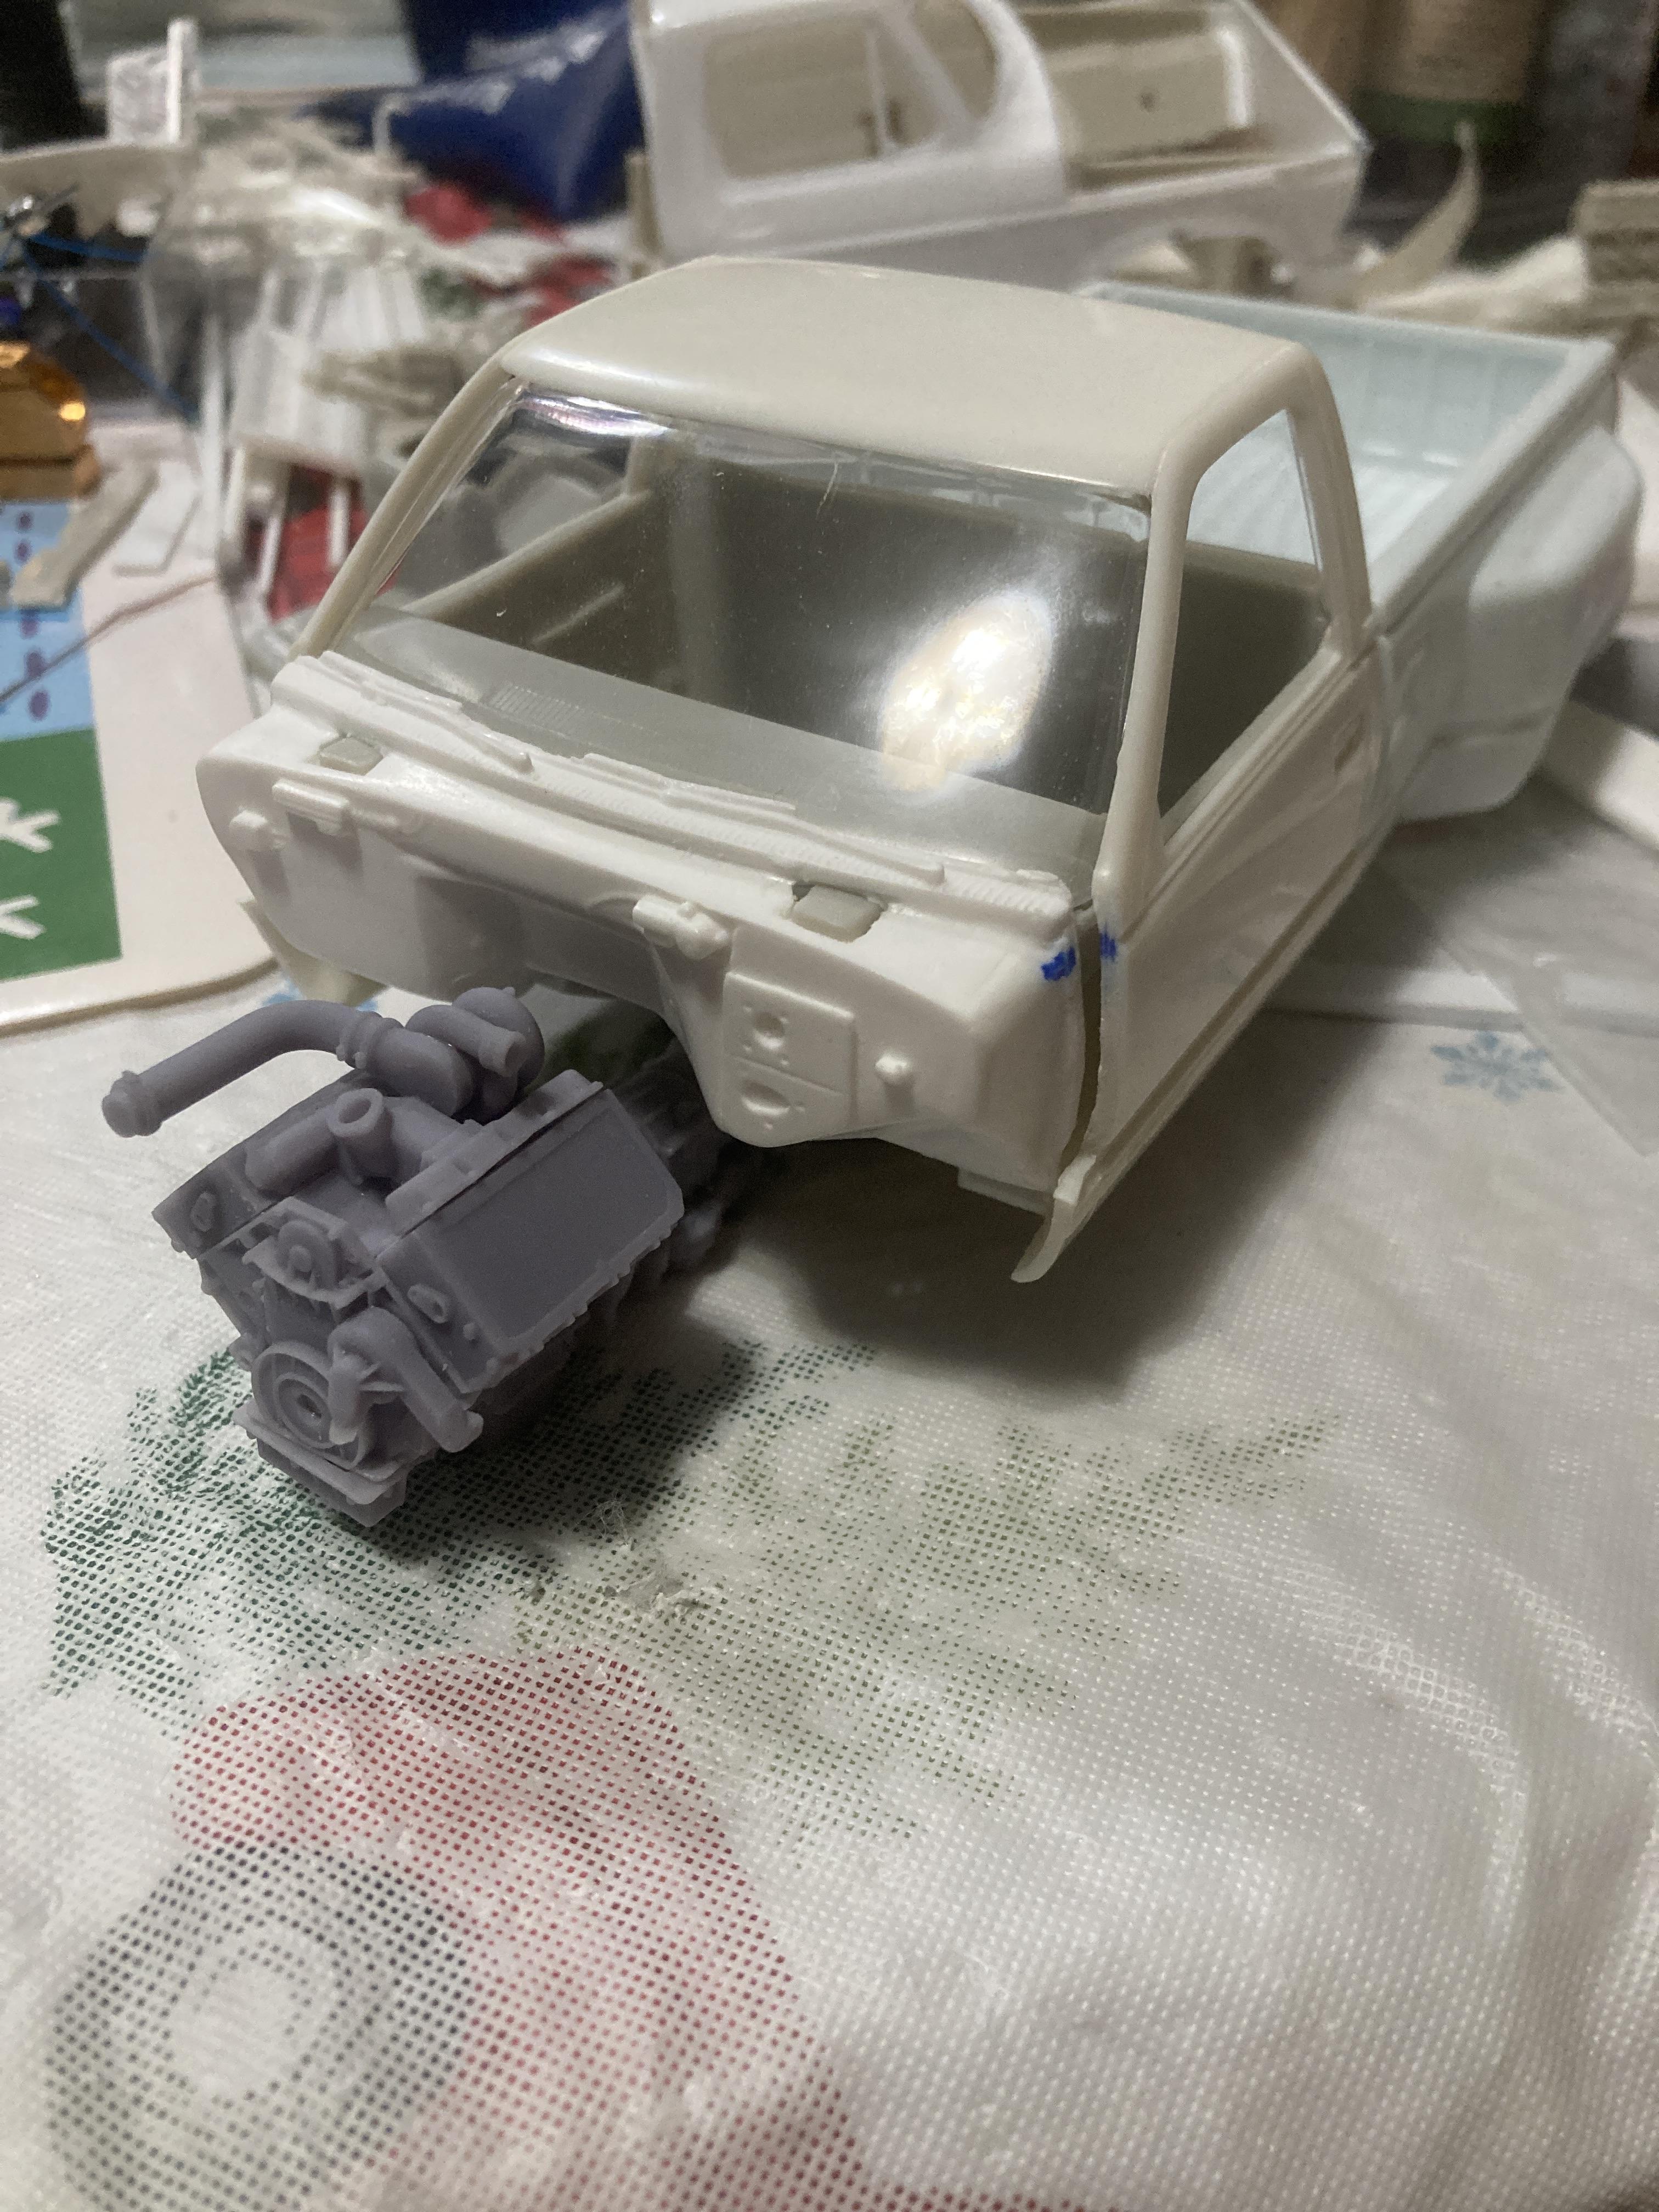
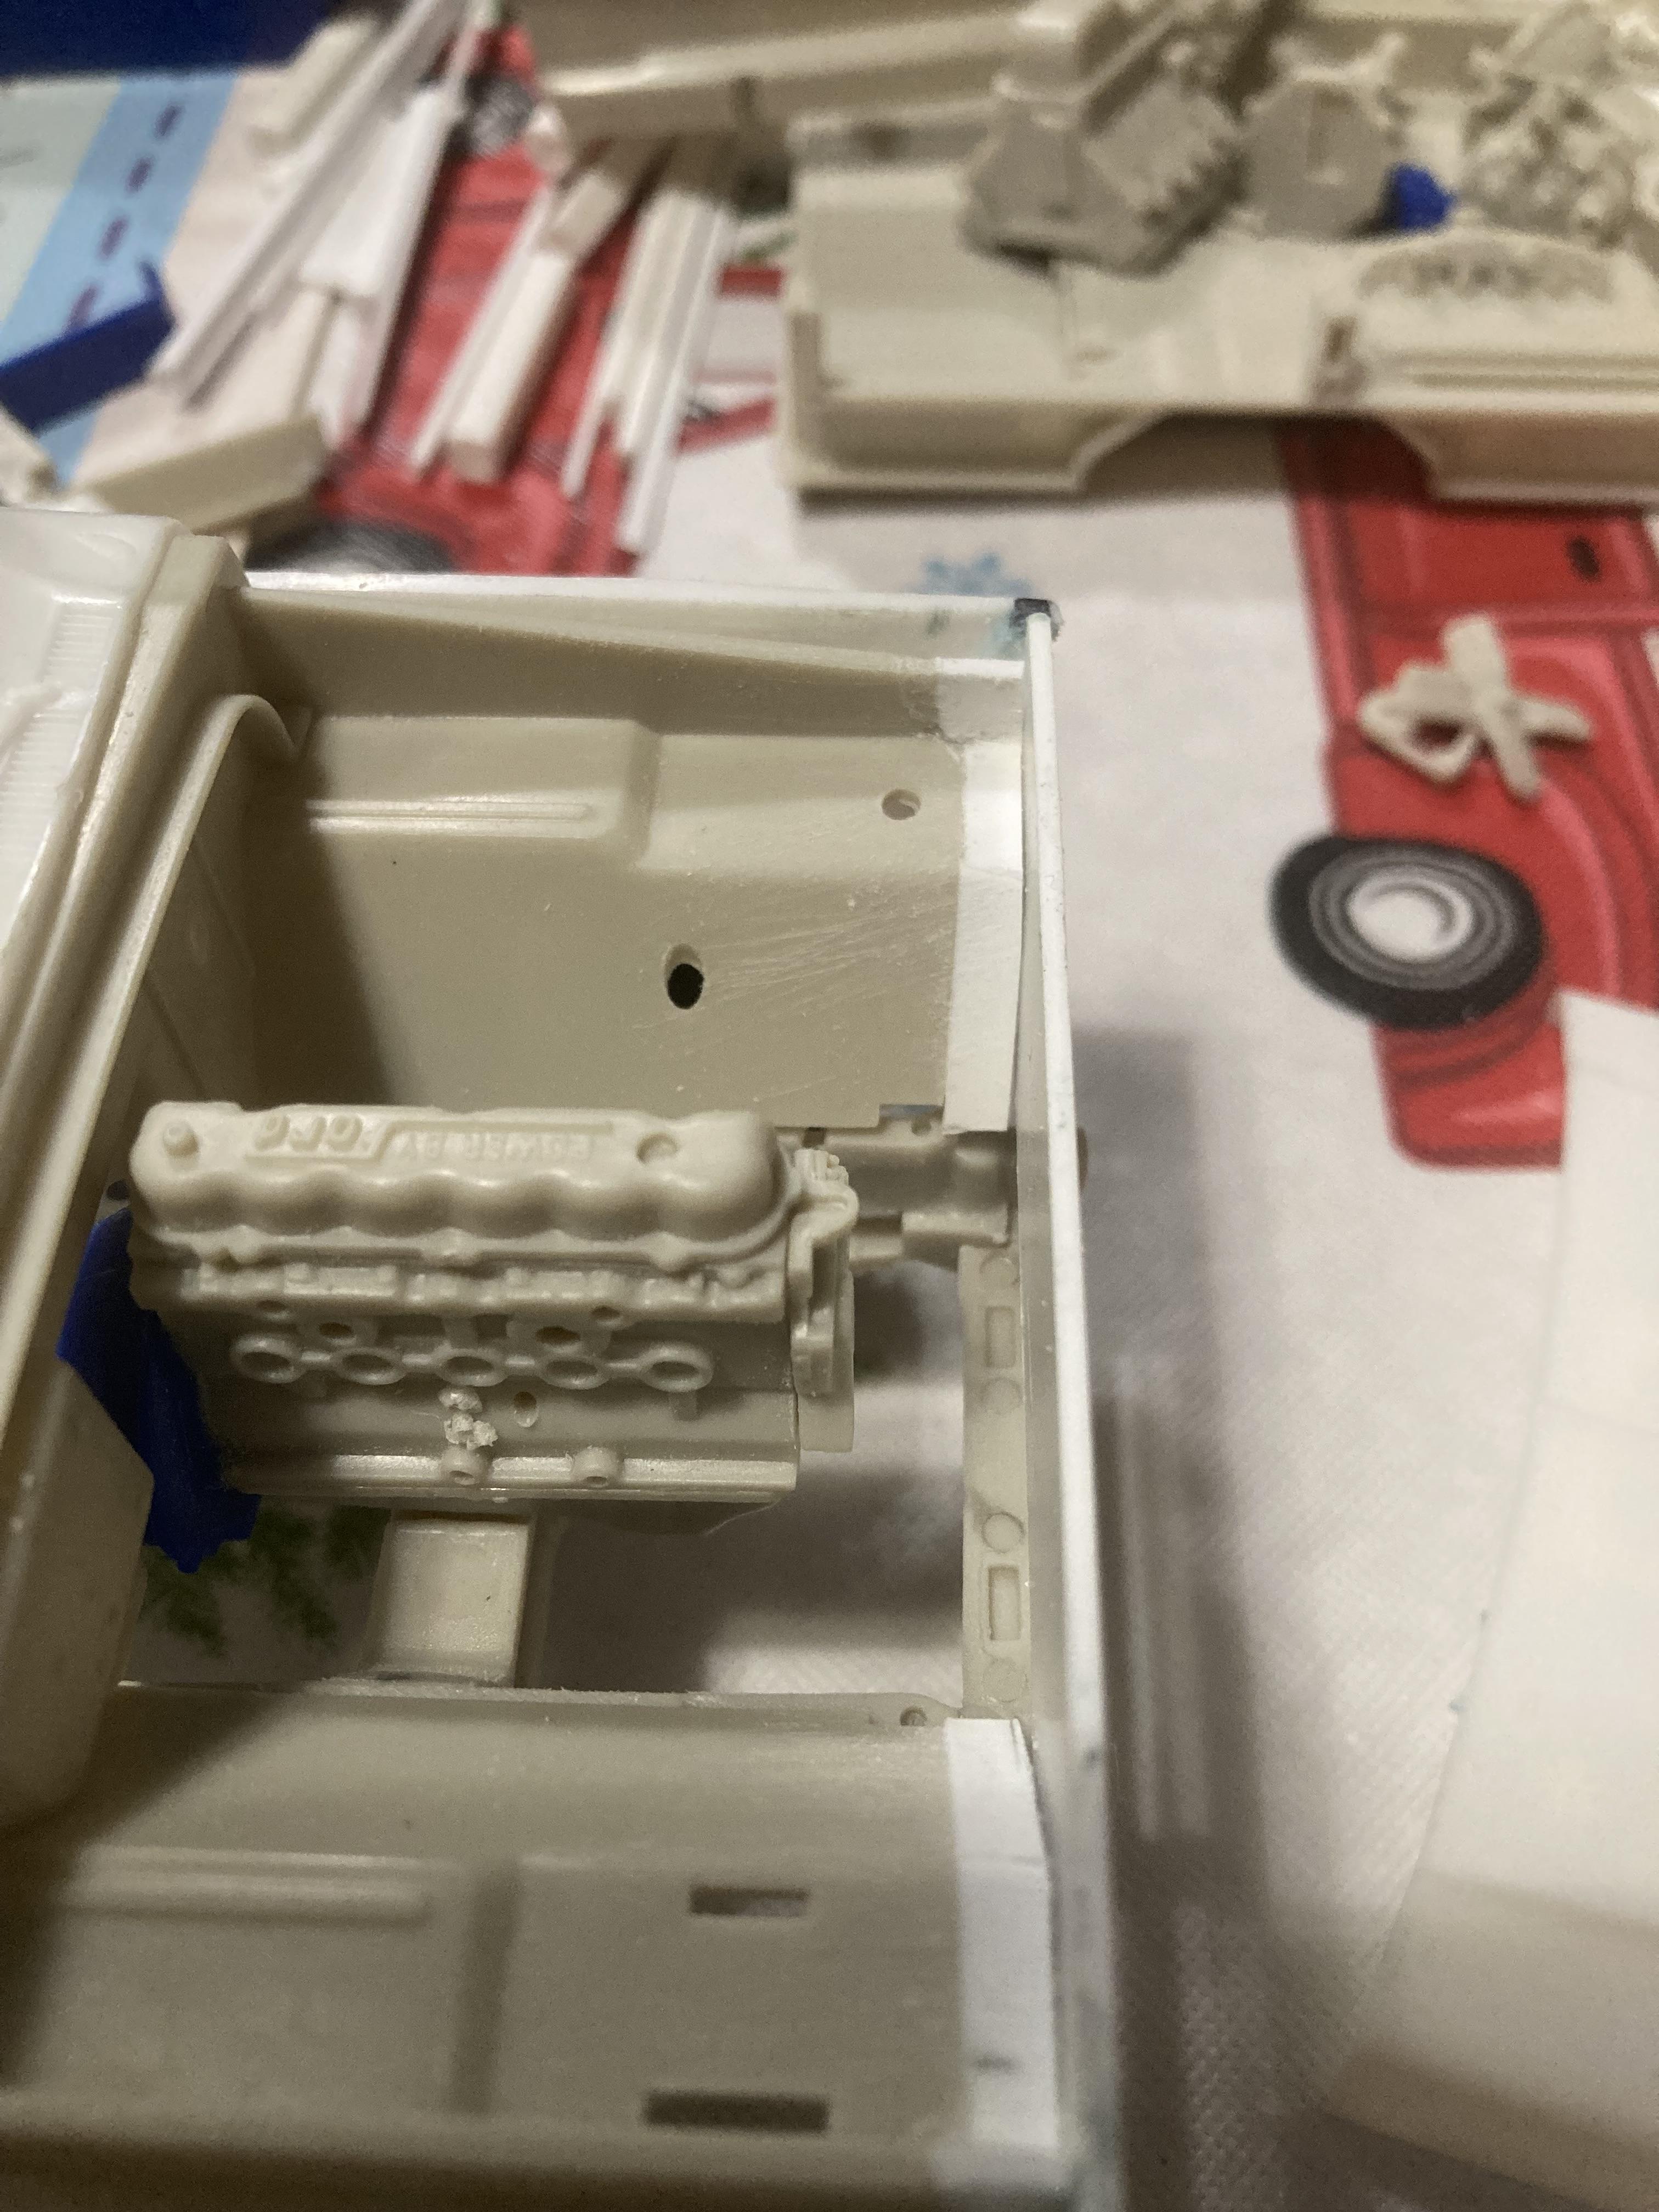
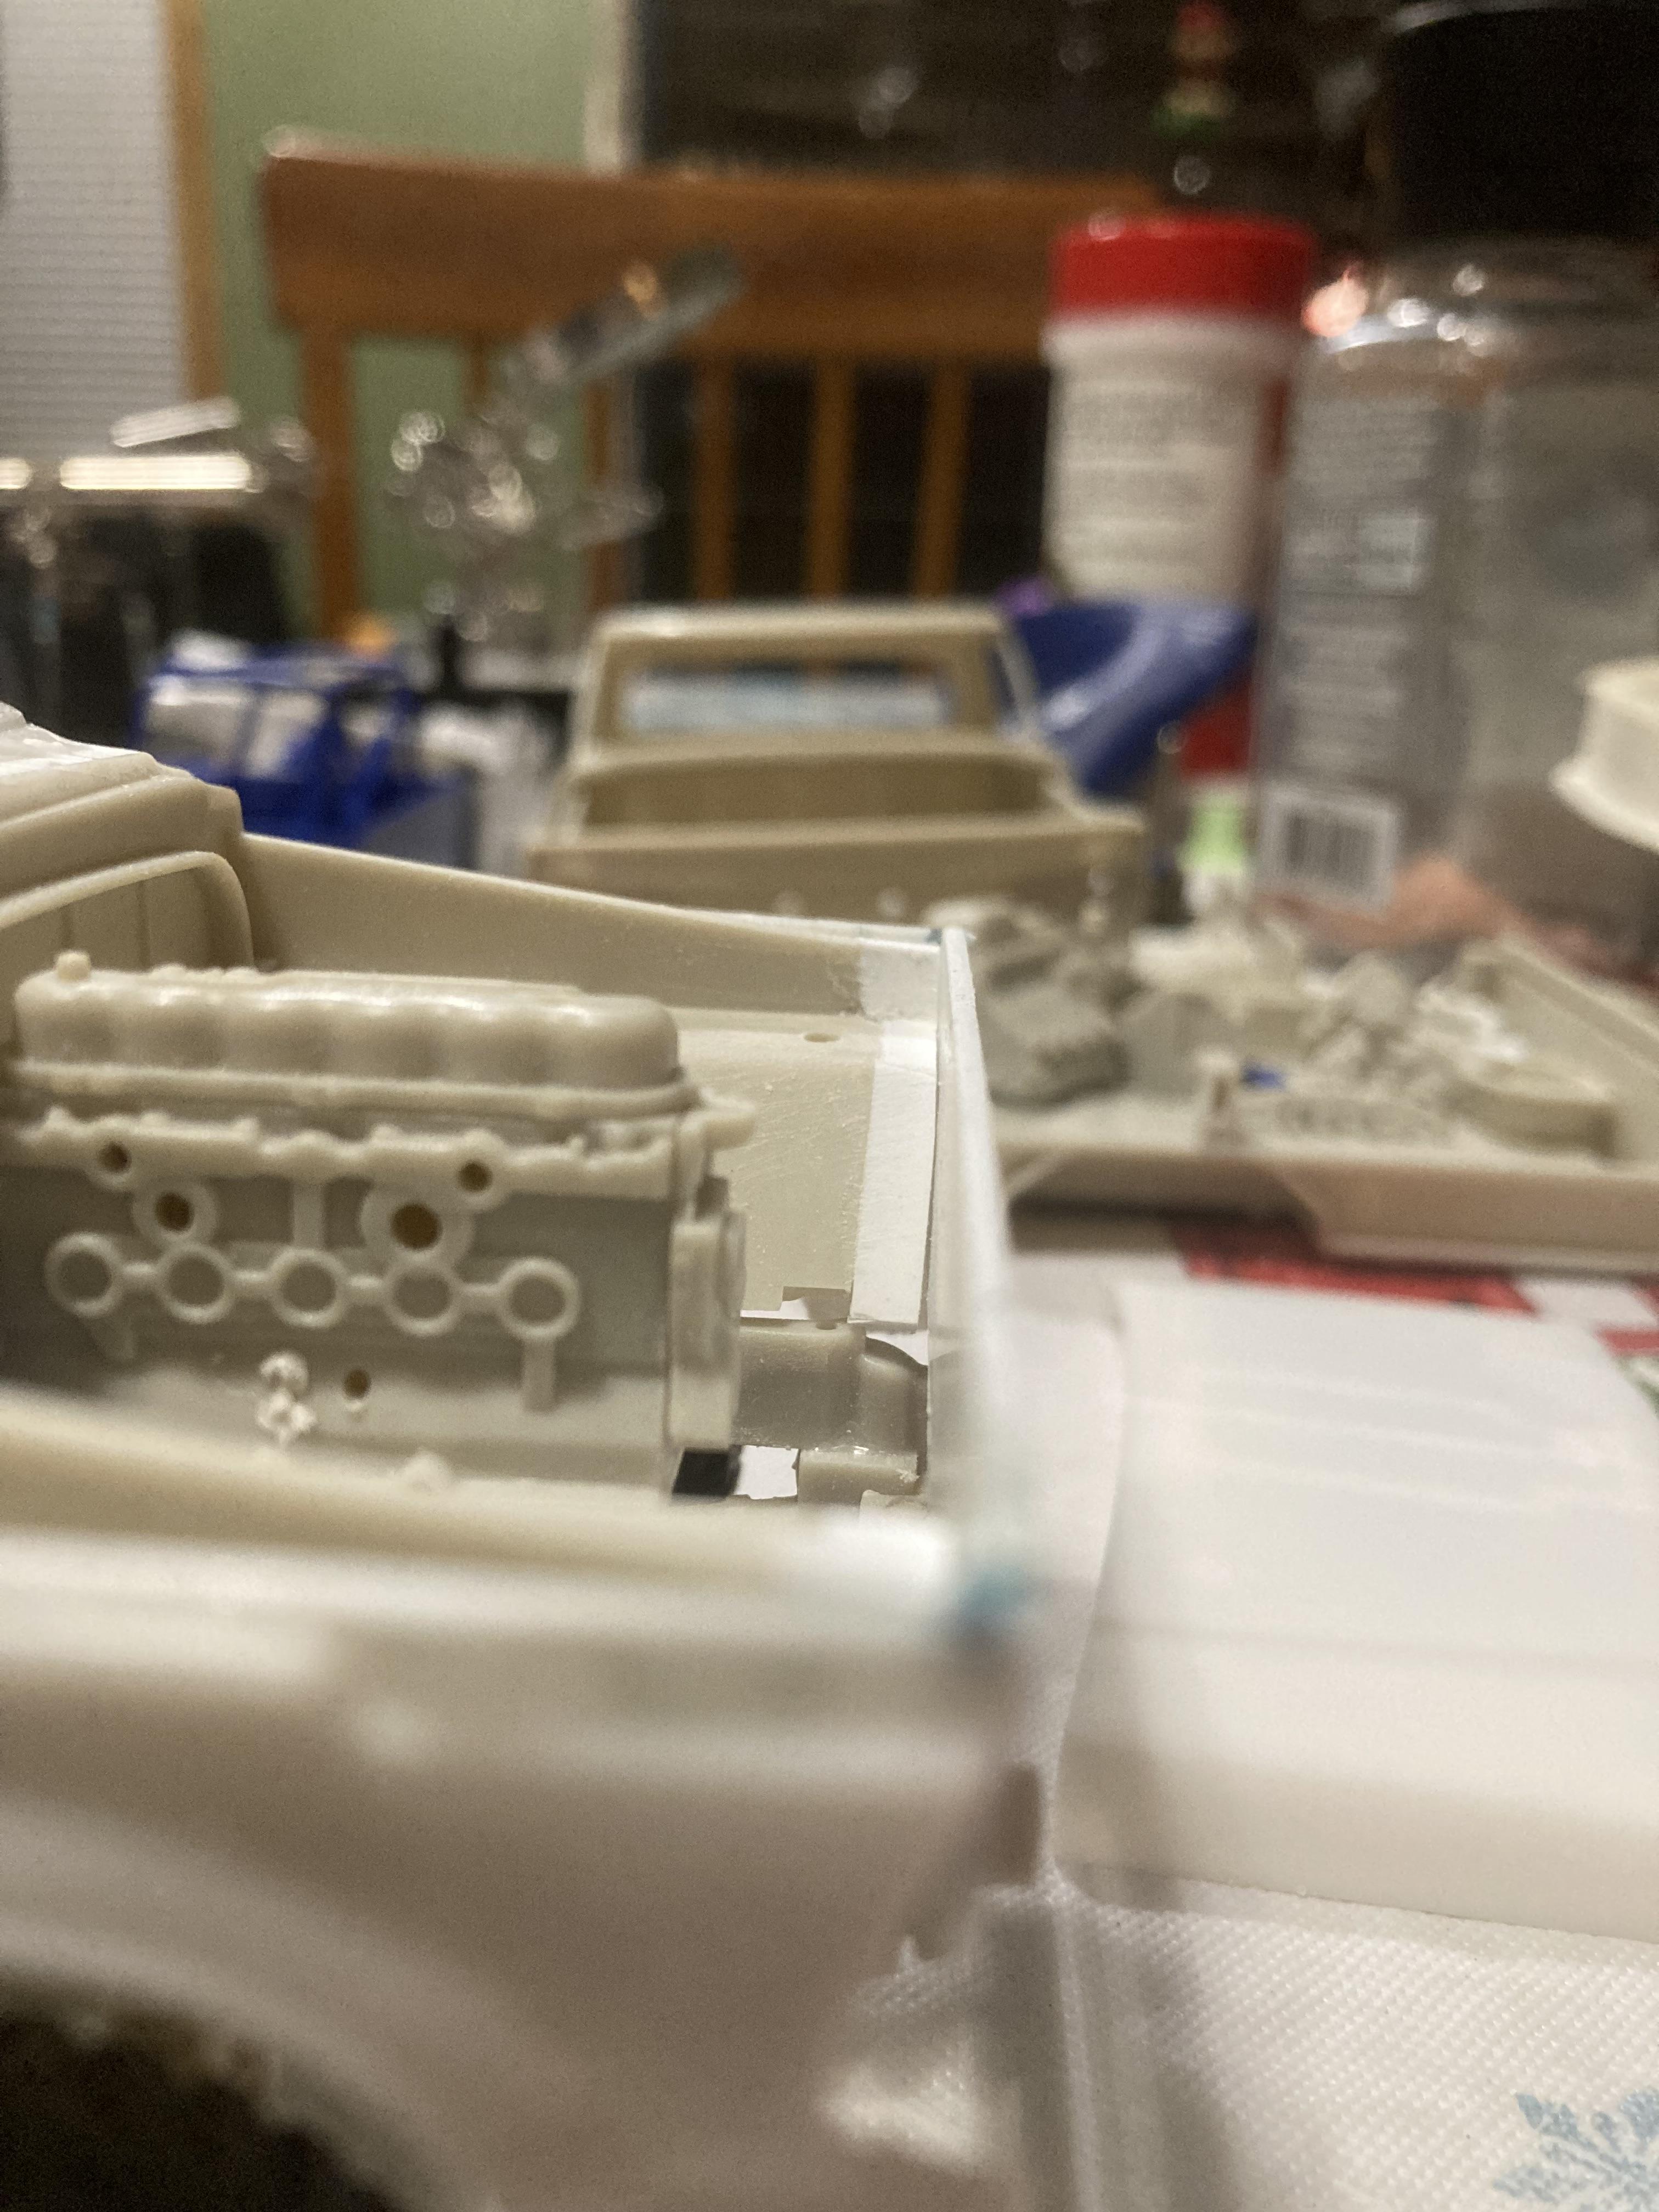
I’ve been slowly getting parts and kits together to finally start on this one while waiting for other projects to set up. Years ago, I saw one of these 1:1 conversions. I snapped a few pictures and kind of always wondered where that truck ever went after that. I never did find out but it always stuck with me. Since getting back into the models, I’ve been able to finally recreate that same red truck I saw many years ago. The conversion has to start with a base kit. The AMT 88-98 Chevy truck cab and dually bed from the snap kit is a start. Next is the actual hood conversion from Plaskit of the Topkick truck. And, a donor frame/chassis is required. I am using a Coca Cola Ford Louisville straight truck. I settled on an Iceman Collections Duramax/Allison combo for motor-vation. The conversion kit itself is pretty straight forward. Cut off the fenders just above the body belt line and the cowl area. This leaves you with the cab ready for the interior and firewall conversion piece. There is one problem. You can’t glue the firewall in place permanently. You’ll never get the interior tub out. You need to the interior tub to align the firewall, so everything matches up as it should. My solution, was to glue in rectangle sections that tuck in above the backside of the door line, that allow the tub, glass, and firewall to slide in as a sub-assembly. Once everything is painted. The firewall can be CA glued or epoxied in place. Then all the other attachment points that hold the interior tub can be affixed as well. There is defintely some minor fitting required, and you must take your time to get this right, or risk ruining the cab, or worse, the hood. I did notice, that the cab extensions do not sit properly, and will need to be built up to mate with the hood. This is probably best to do, once the cab and hood have their final places, before paint. As far as the Duramax engine goes, it was a pretty straight forward assembly. There are no instructions, but you can watch a few YouTube videos and all will be revealed. That’s what I did and as you can see it’s together about halfway waiting on paint. I figured this was a fairly interesting subject matter, and I don’t see these trucks often. Rarely, is a better word. Not many models have been made of these Herculean pickup trucks. Might as well add one to the fold.
-
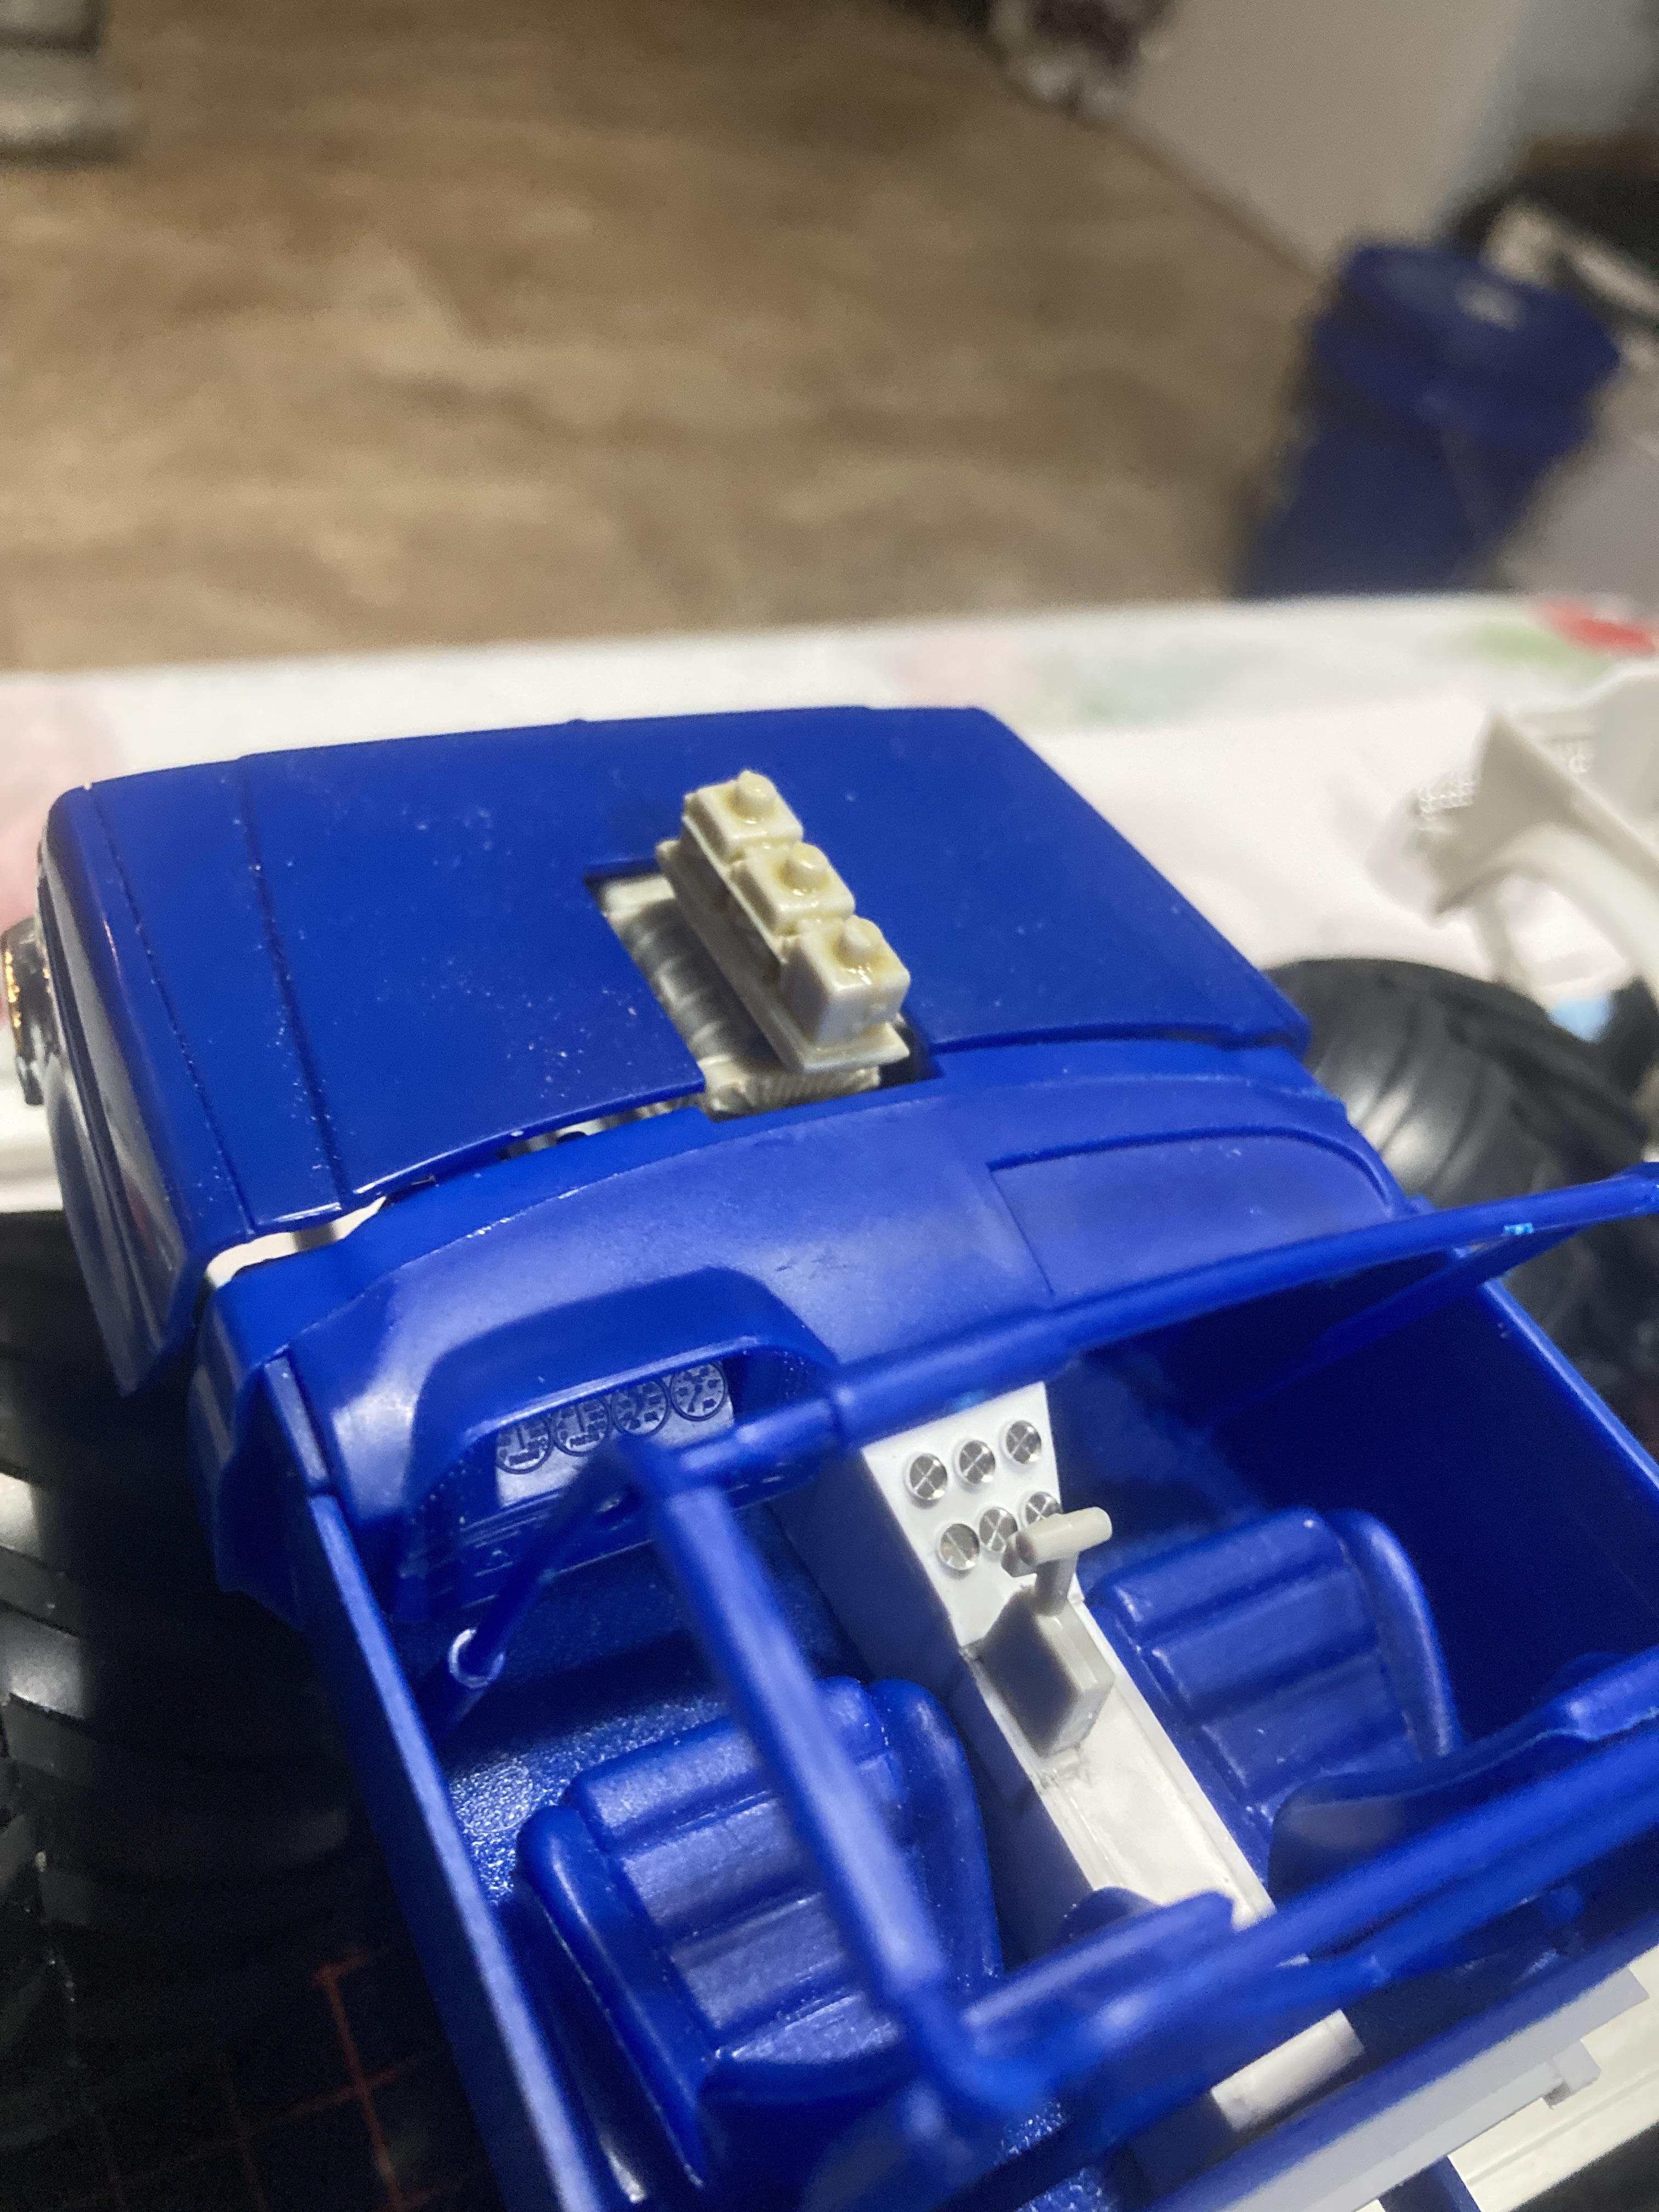
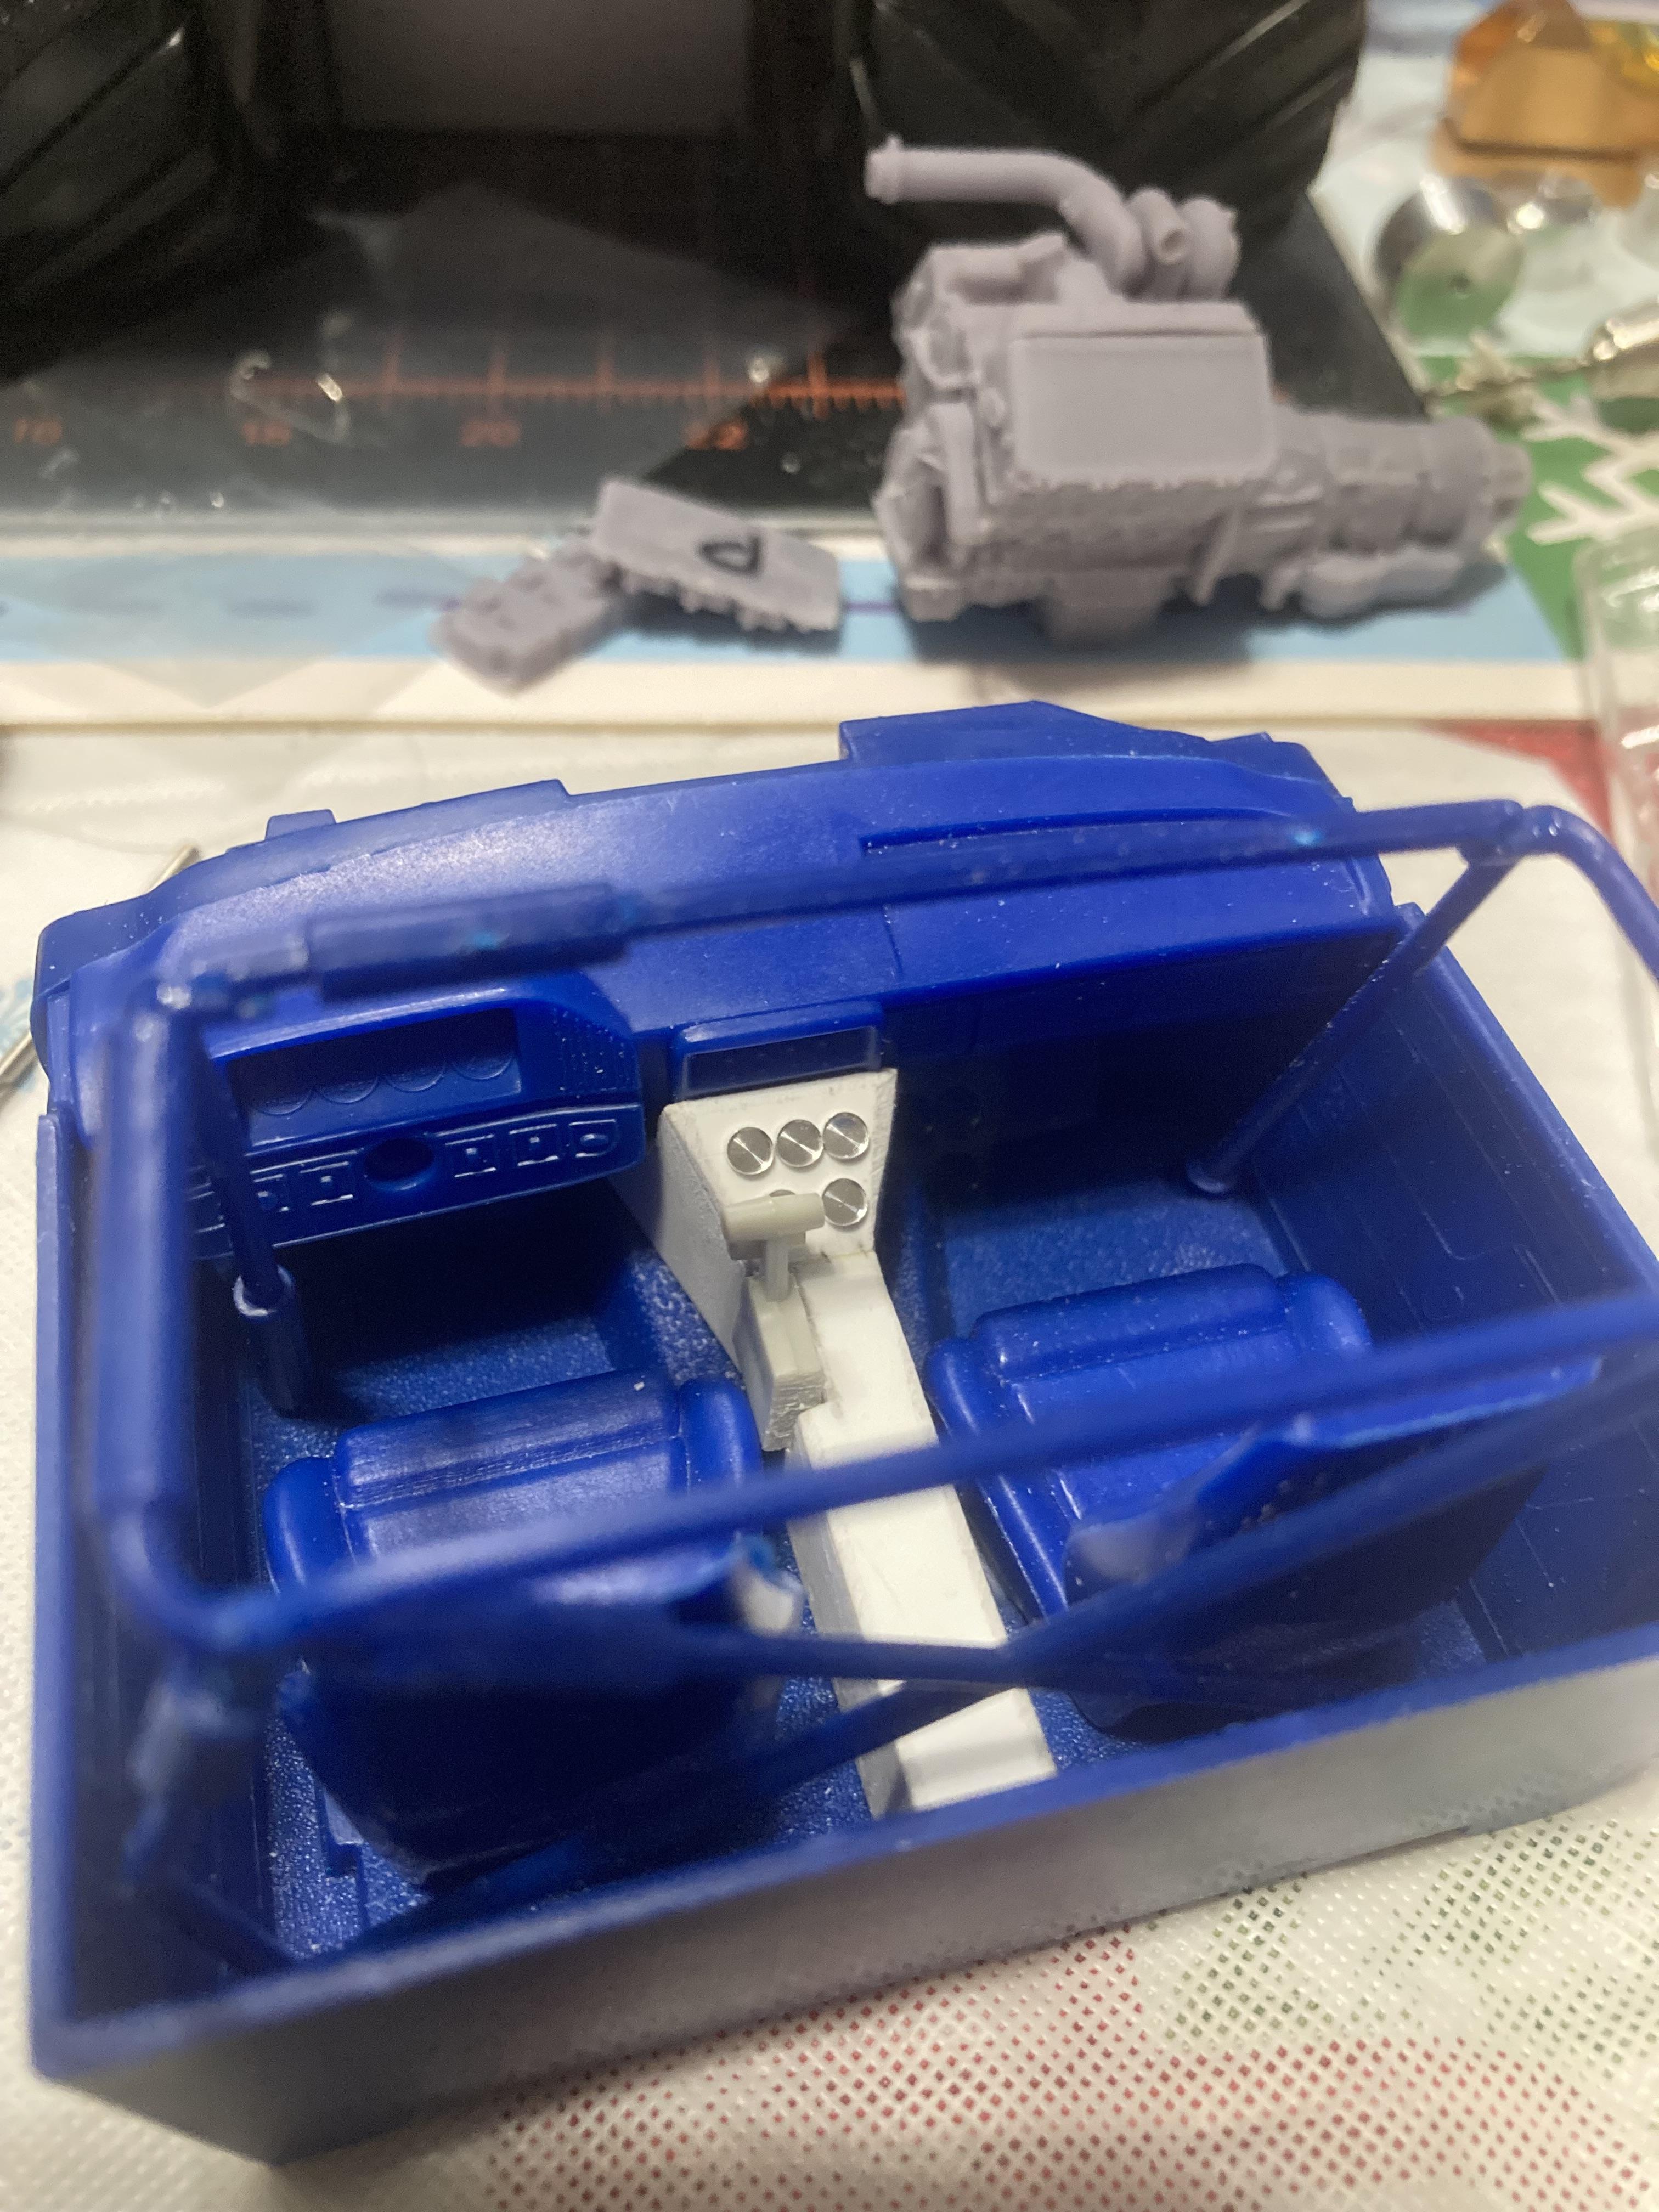
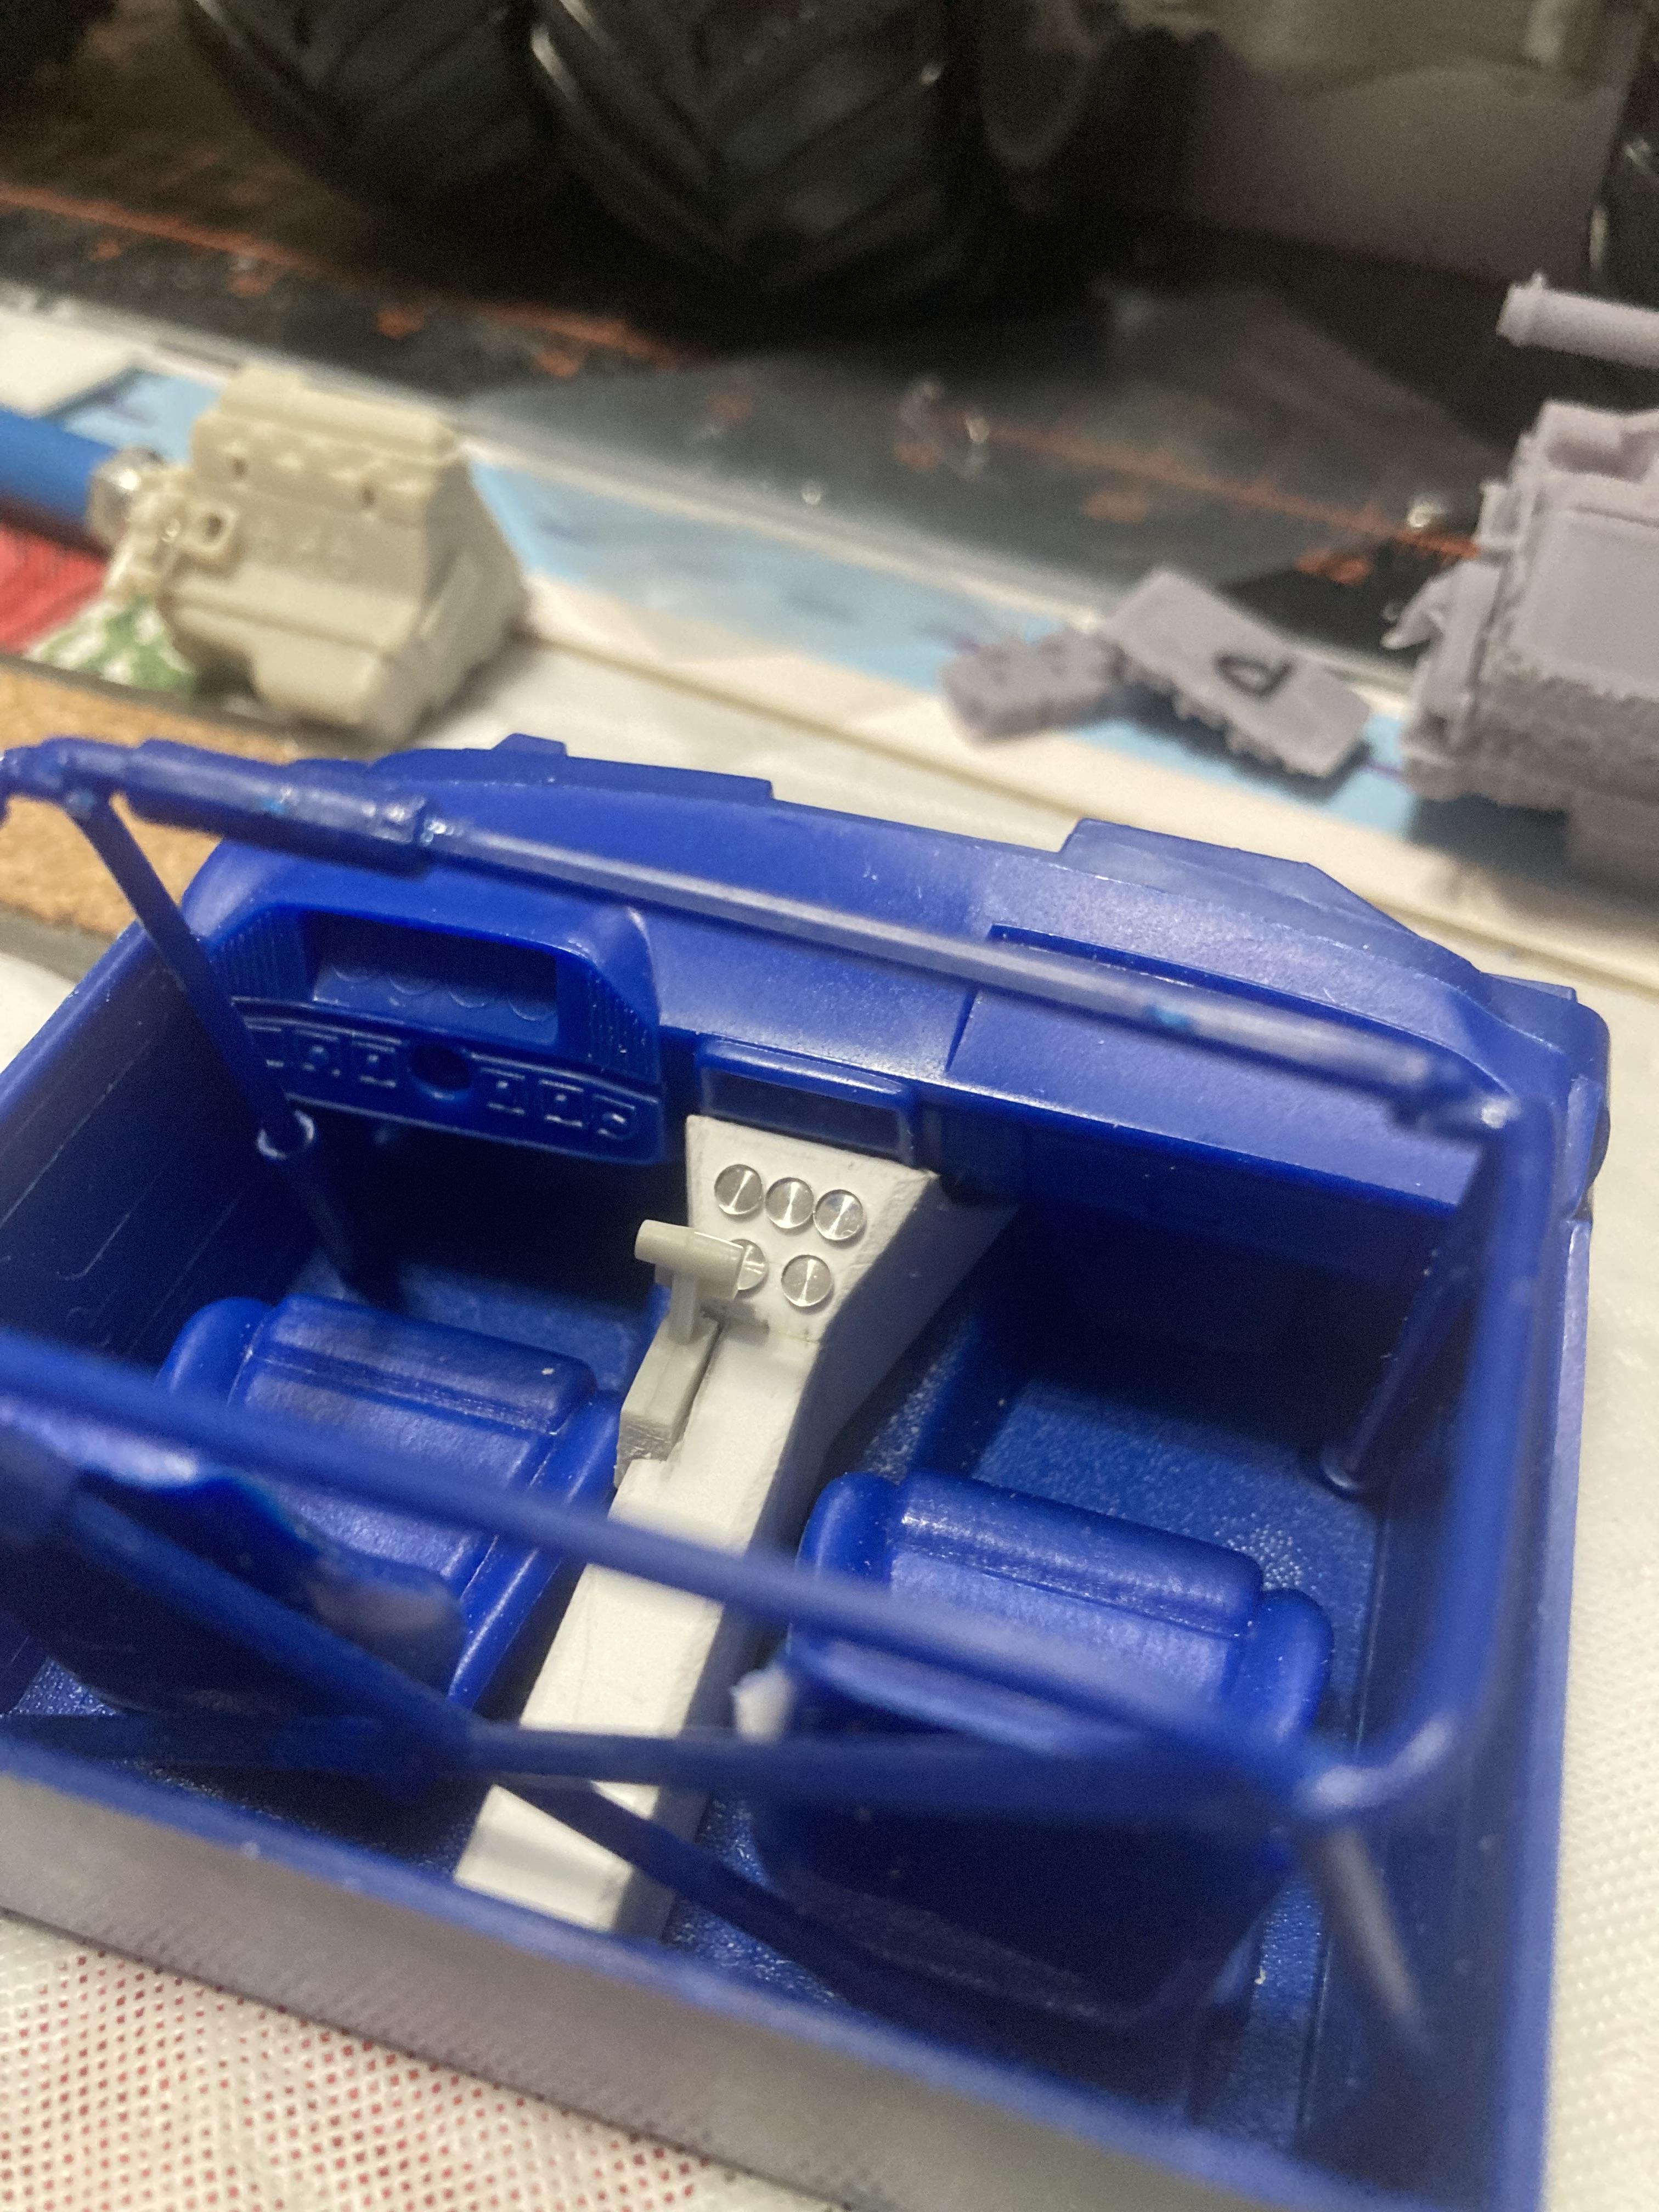
Small update… I decided I didn’t like the center console I’d made for Bigfoot 3…So, I started over. I made it wider, but the same height. This allowed me to add the 6 gauges I was looking to have on the upper panel. I also made one for Bigfoot 1, and decided I wanted only 5 gauges, as it is the “older” truck of the two. I’m not sure I like it. May pull it off and make a new panel…I’m struggling with the alignment because the gauges are so small, and my eyes aren’t as good as they use to be. When I drill them out with a pin vise, I think it’s off just enough as I step up to the larger bits. And to my eyes it looks off. I’m still resting on this one. Merry Christmas everyone.
-
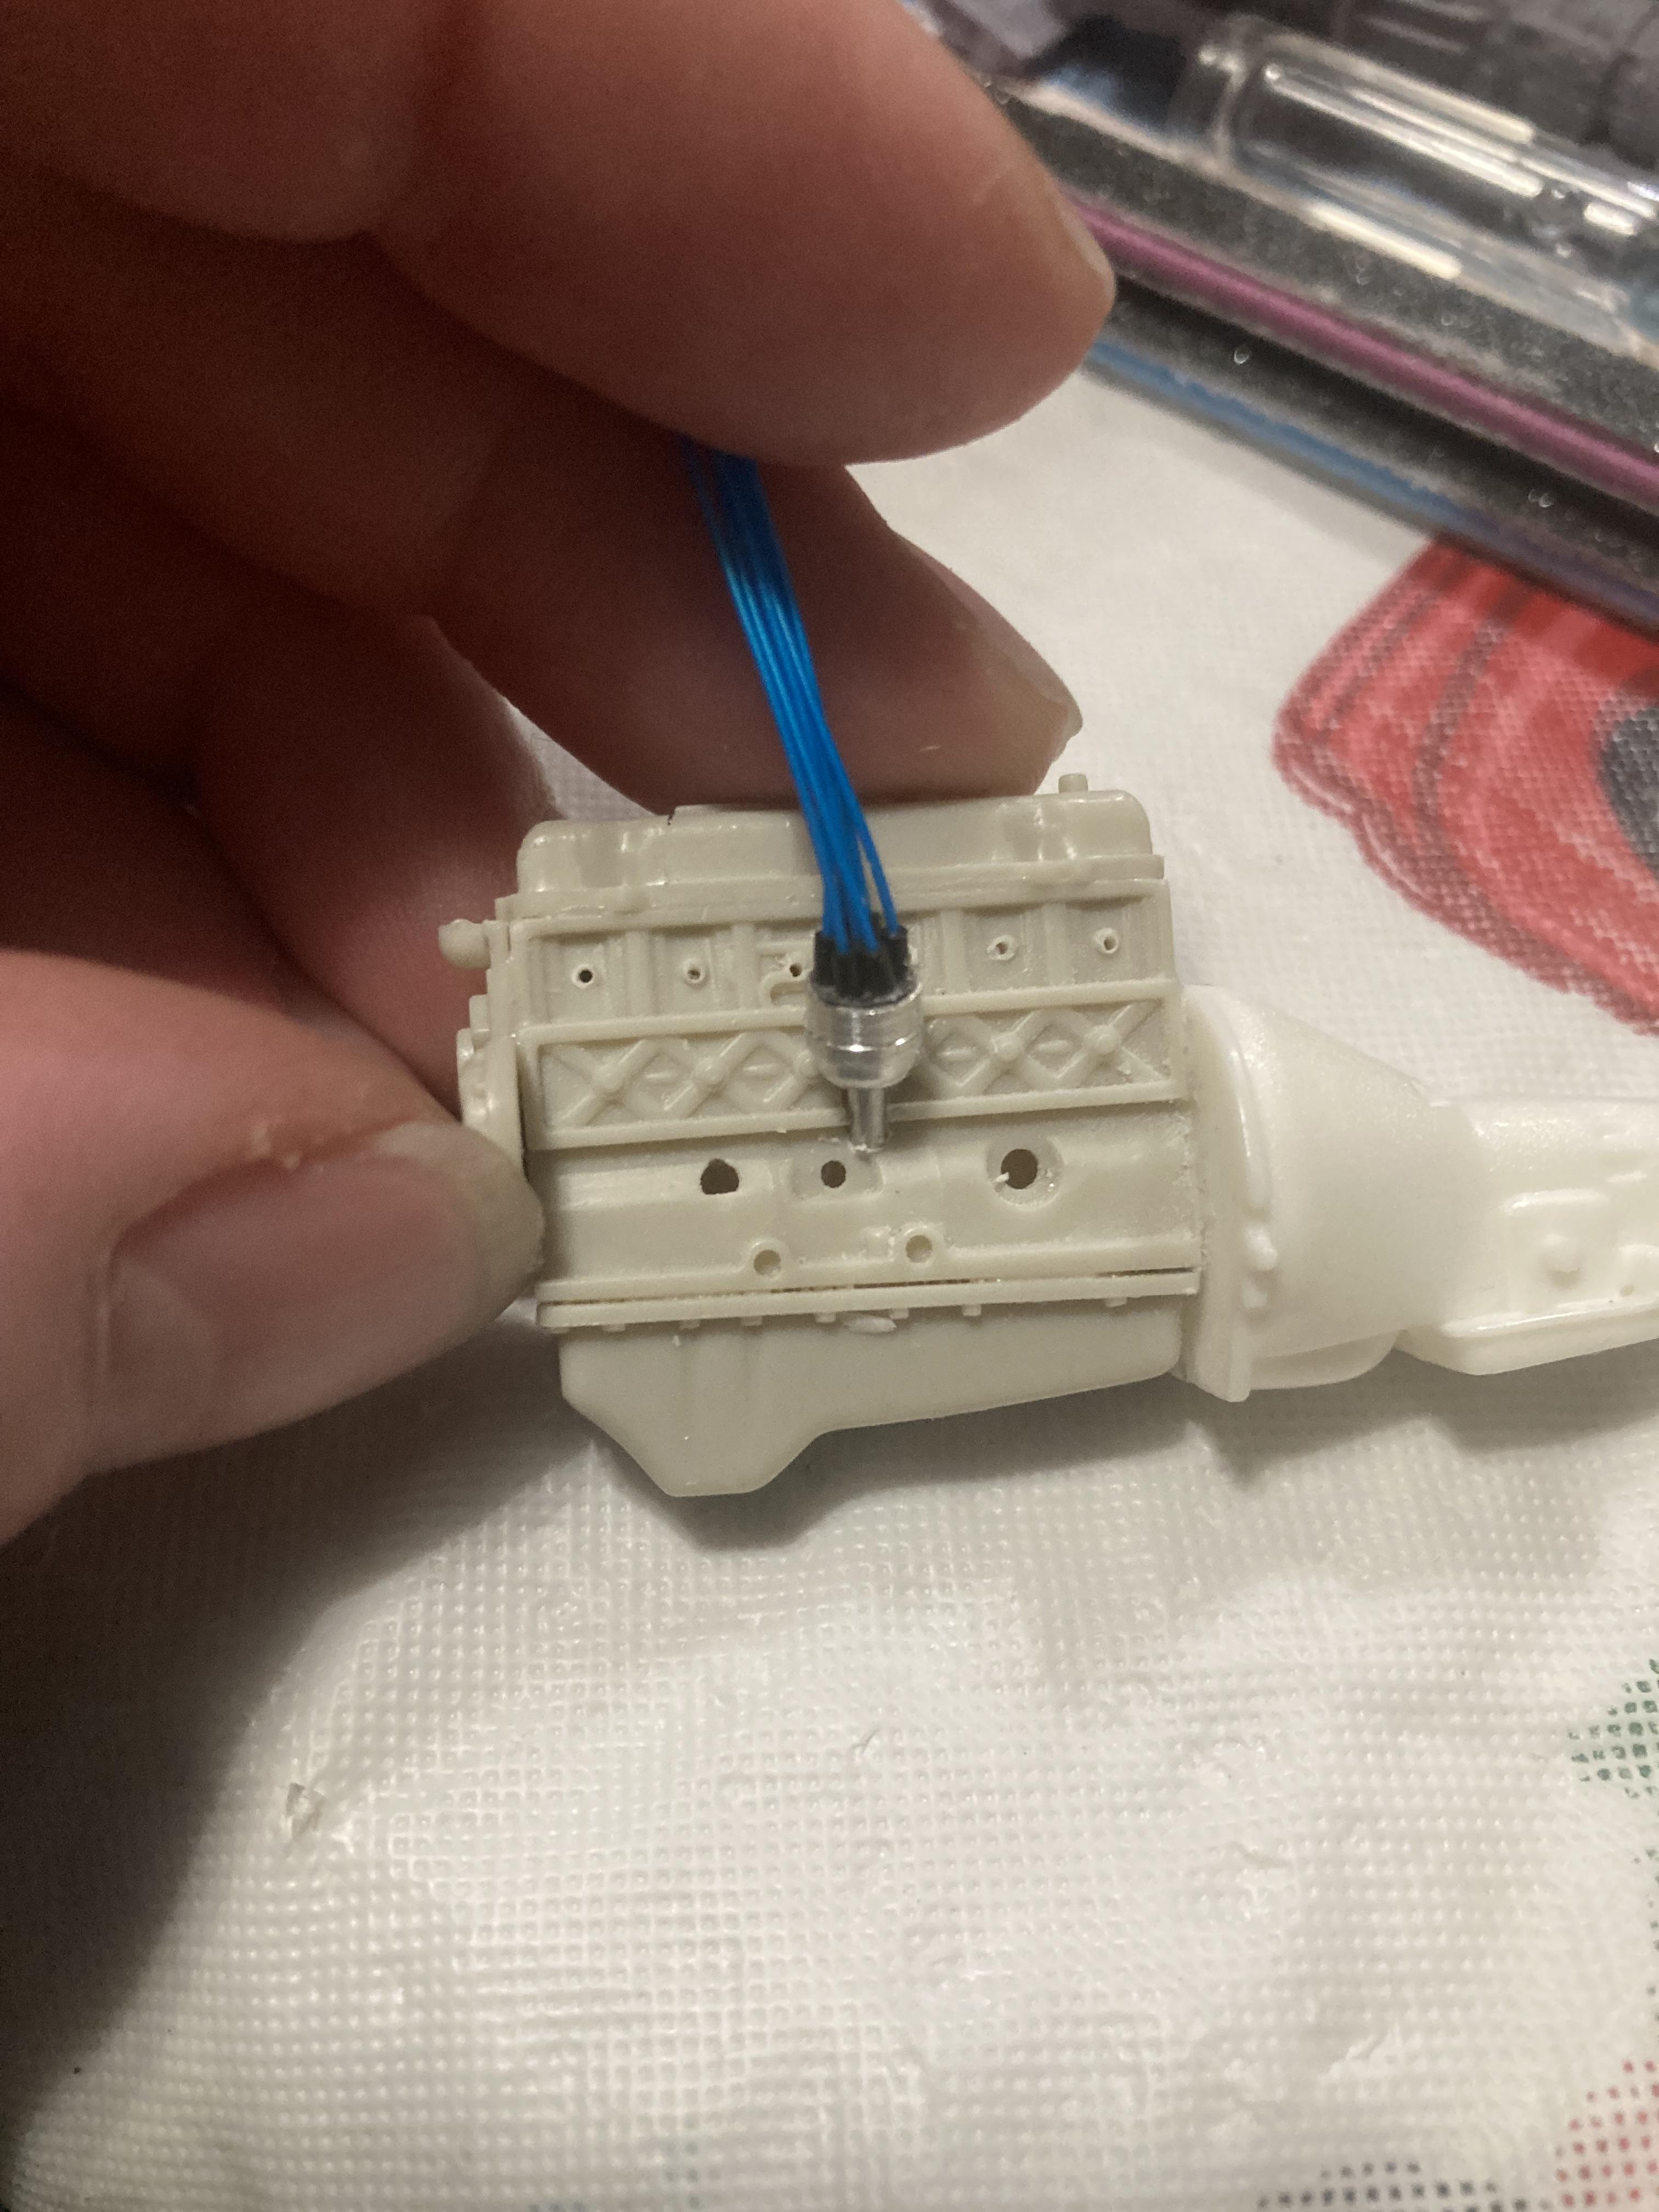
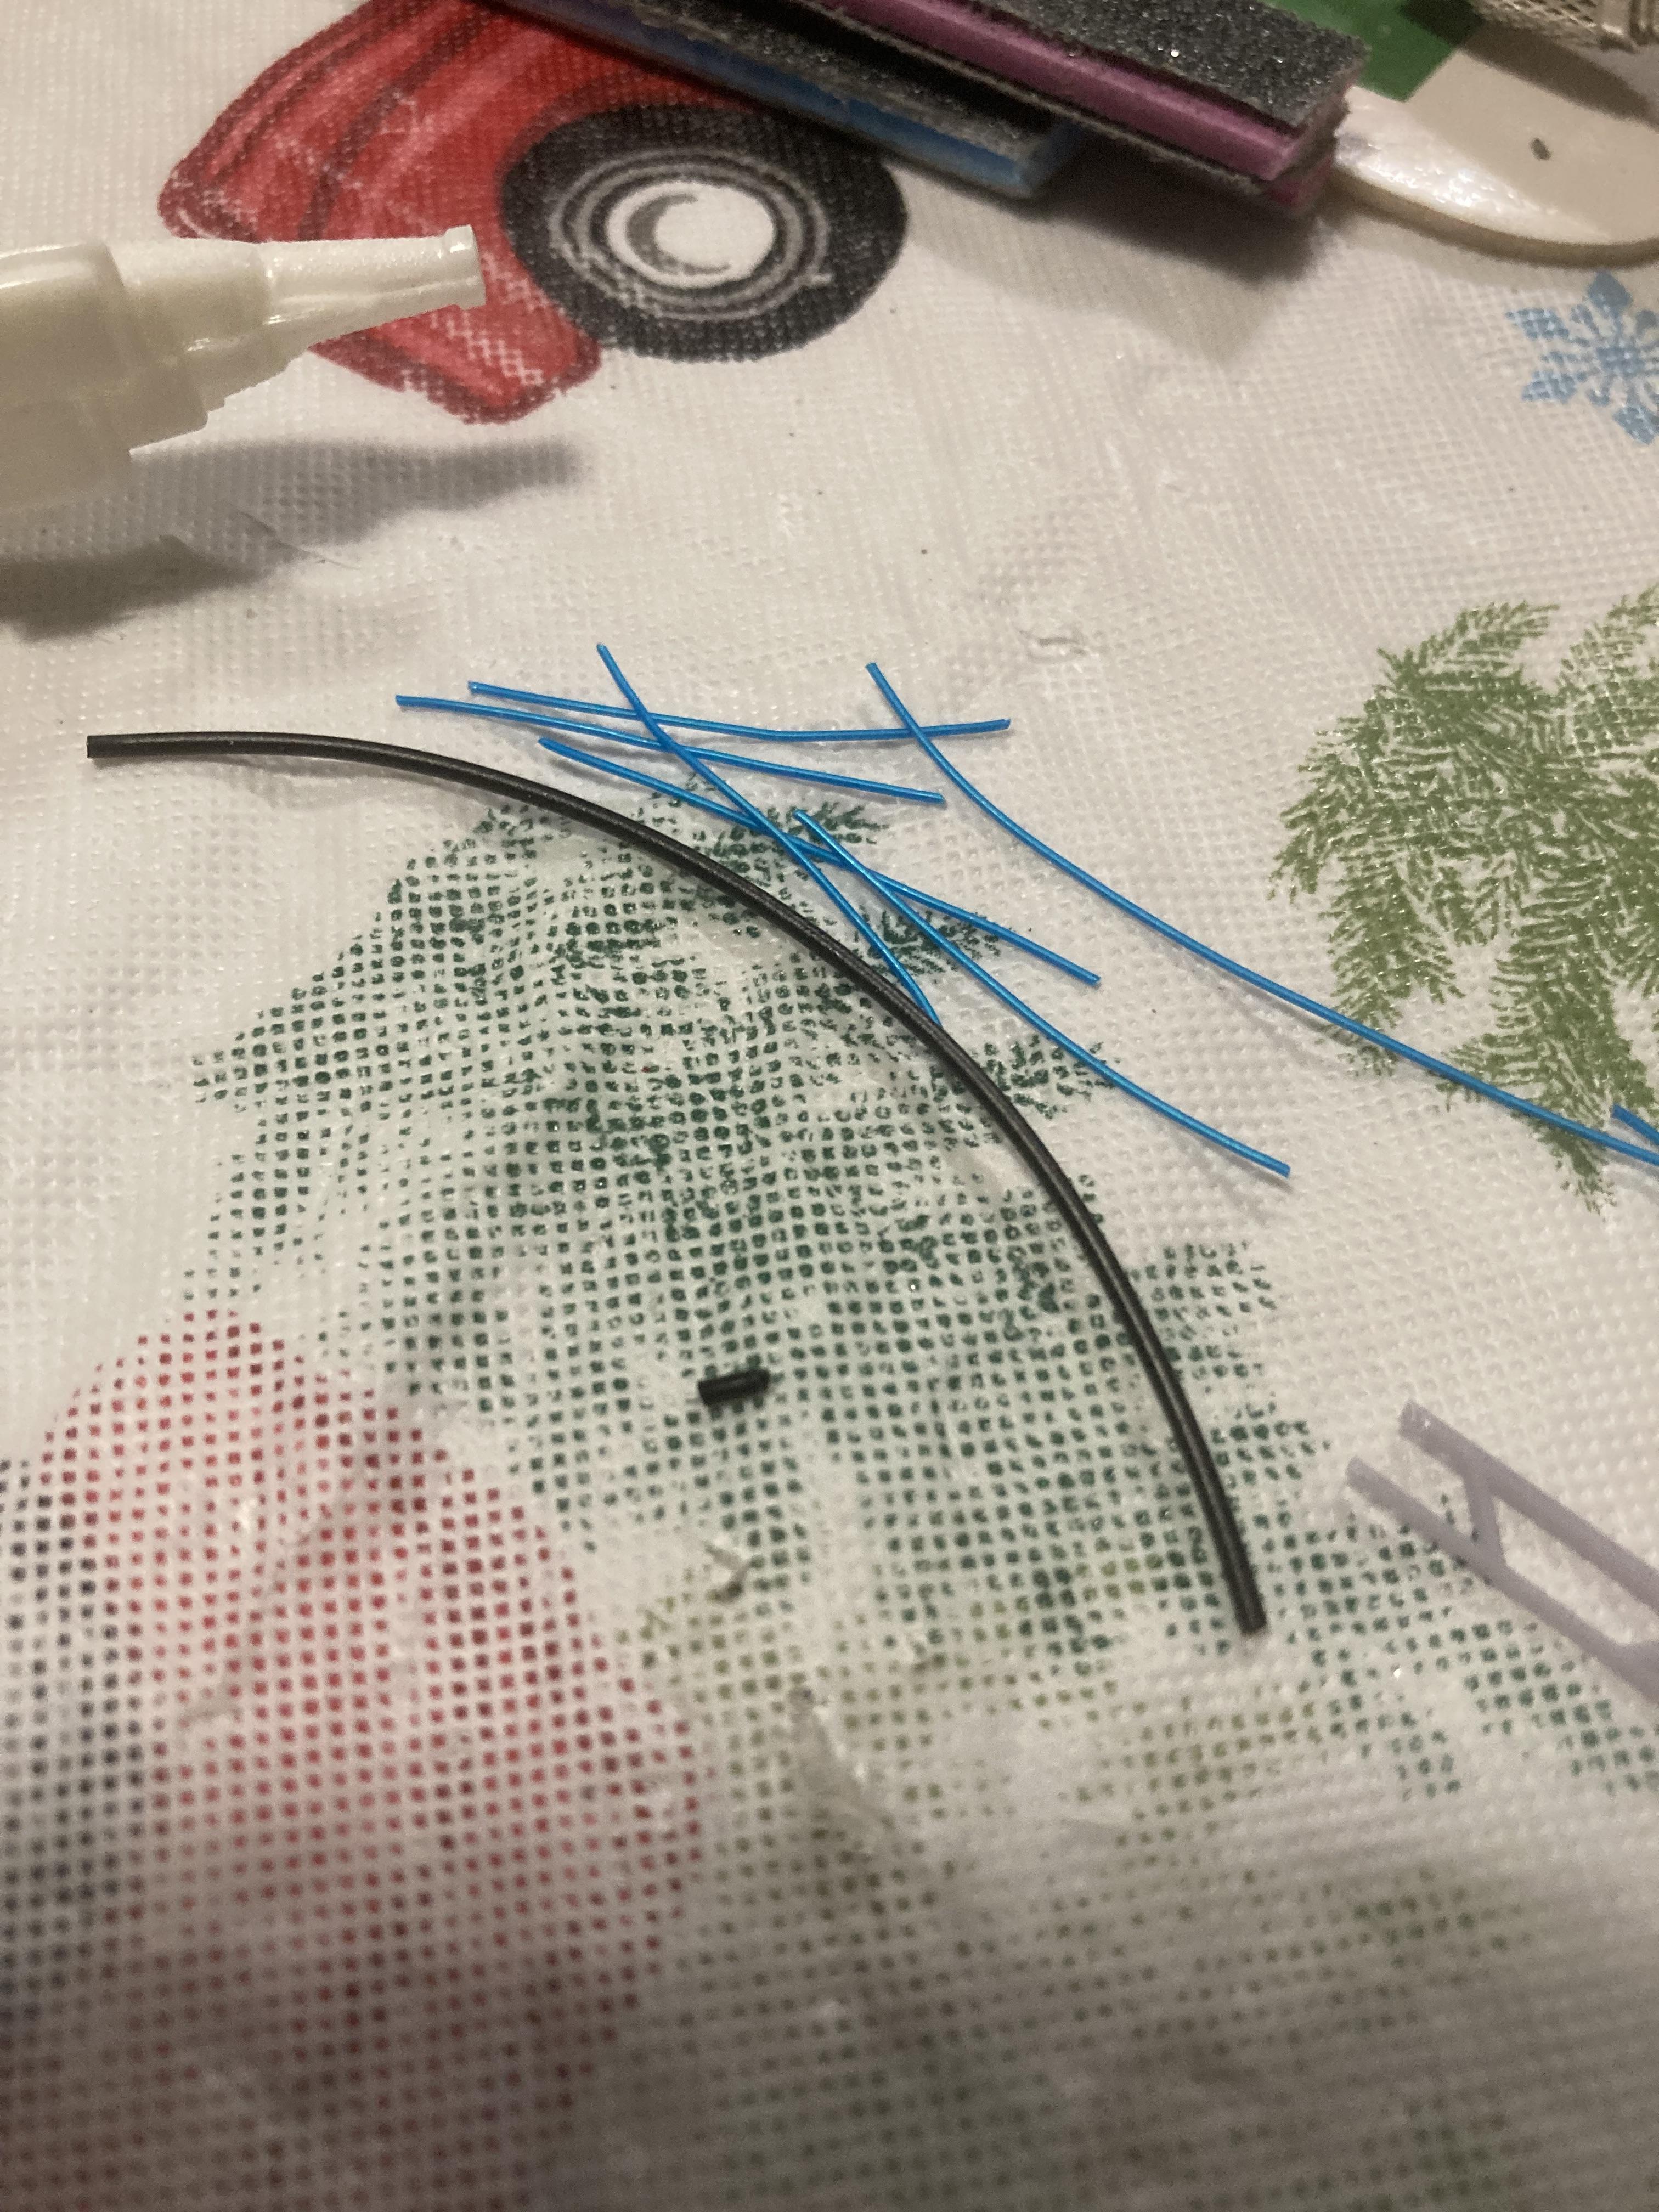
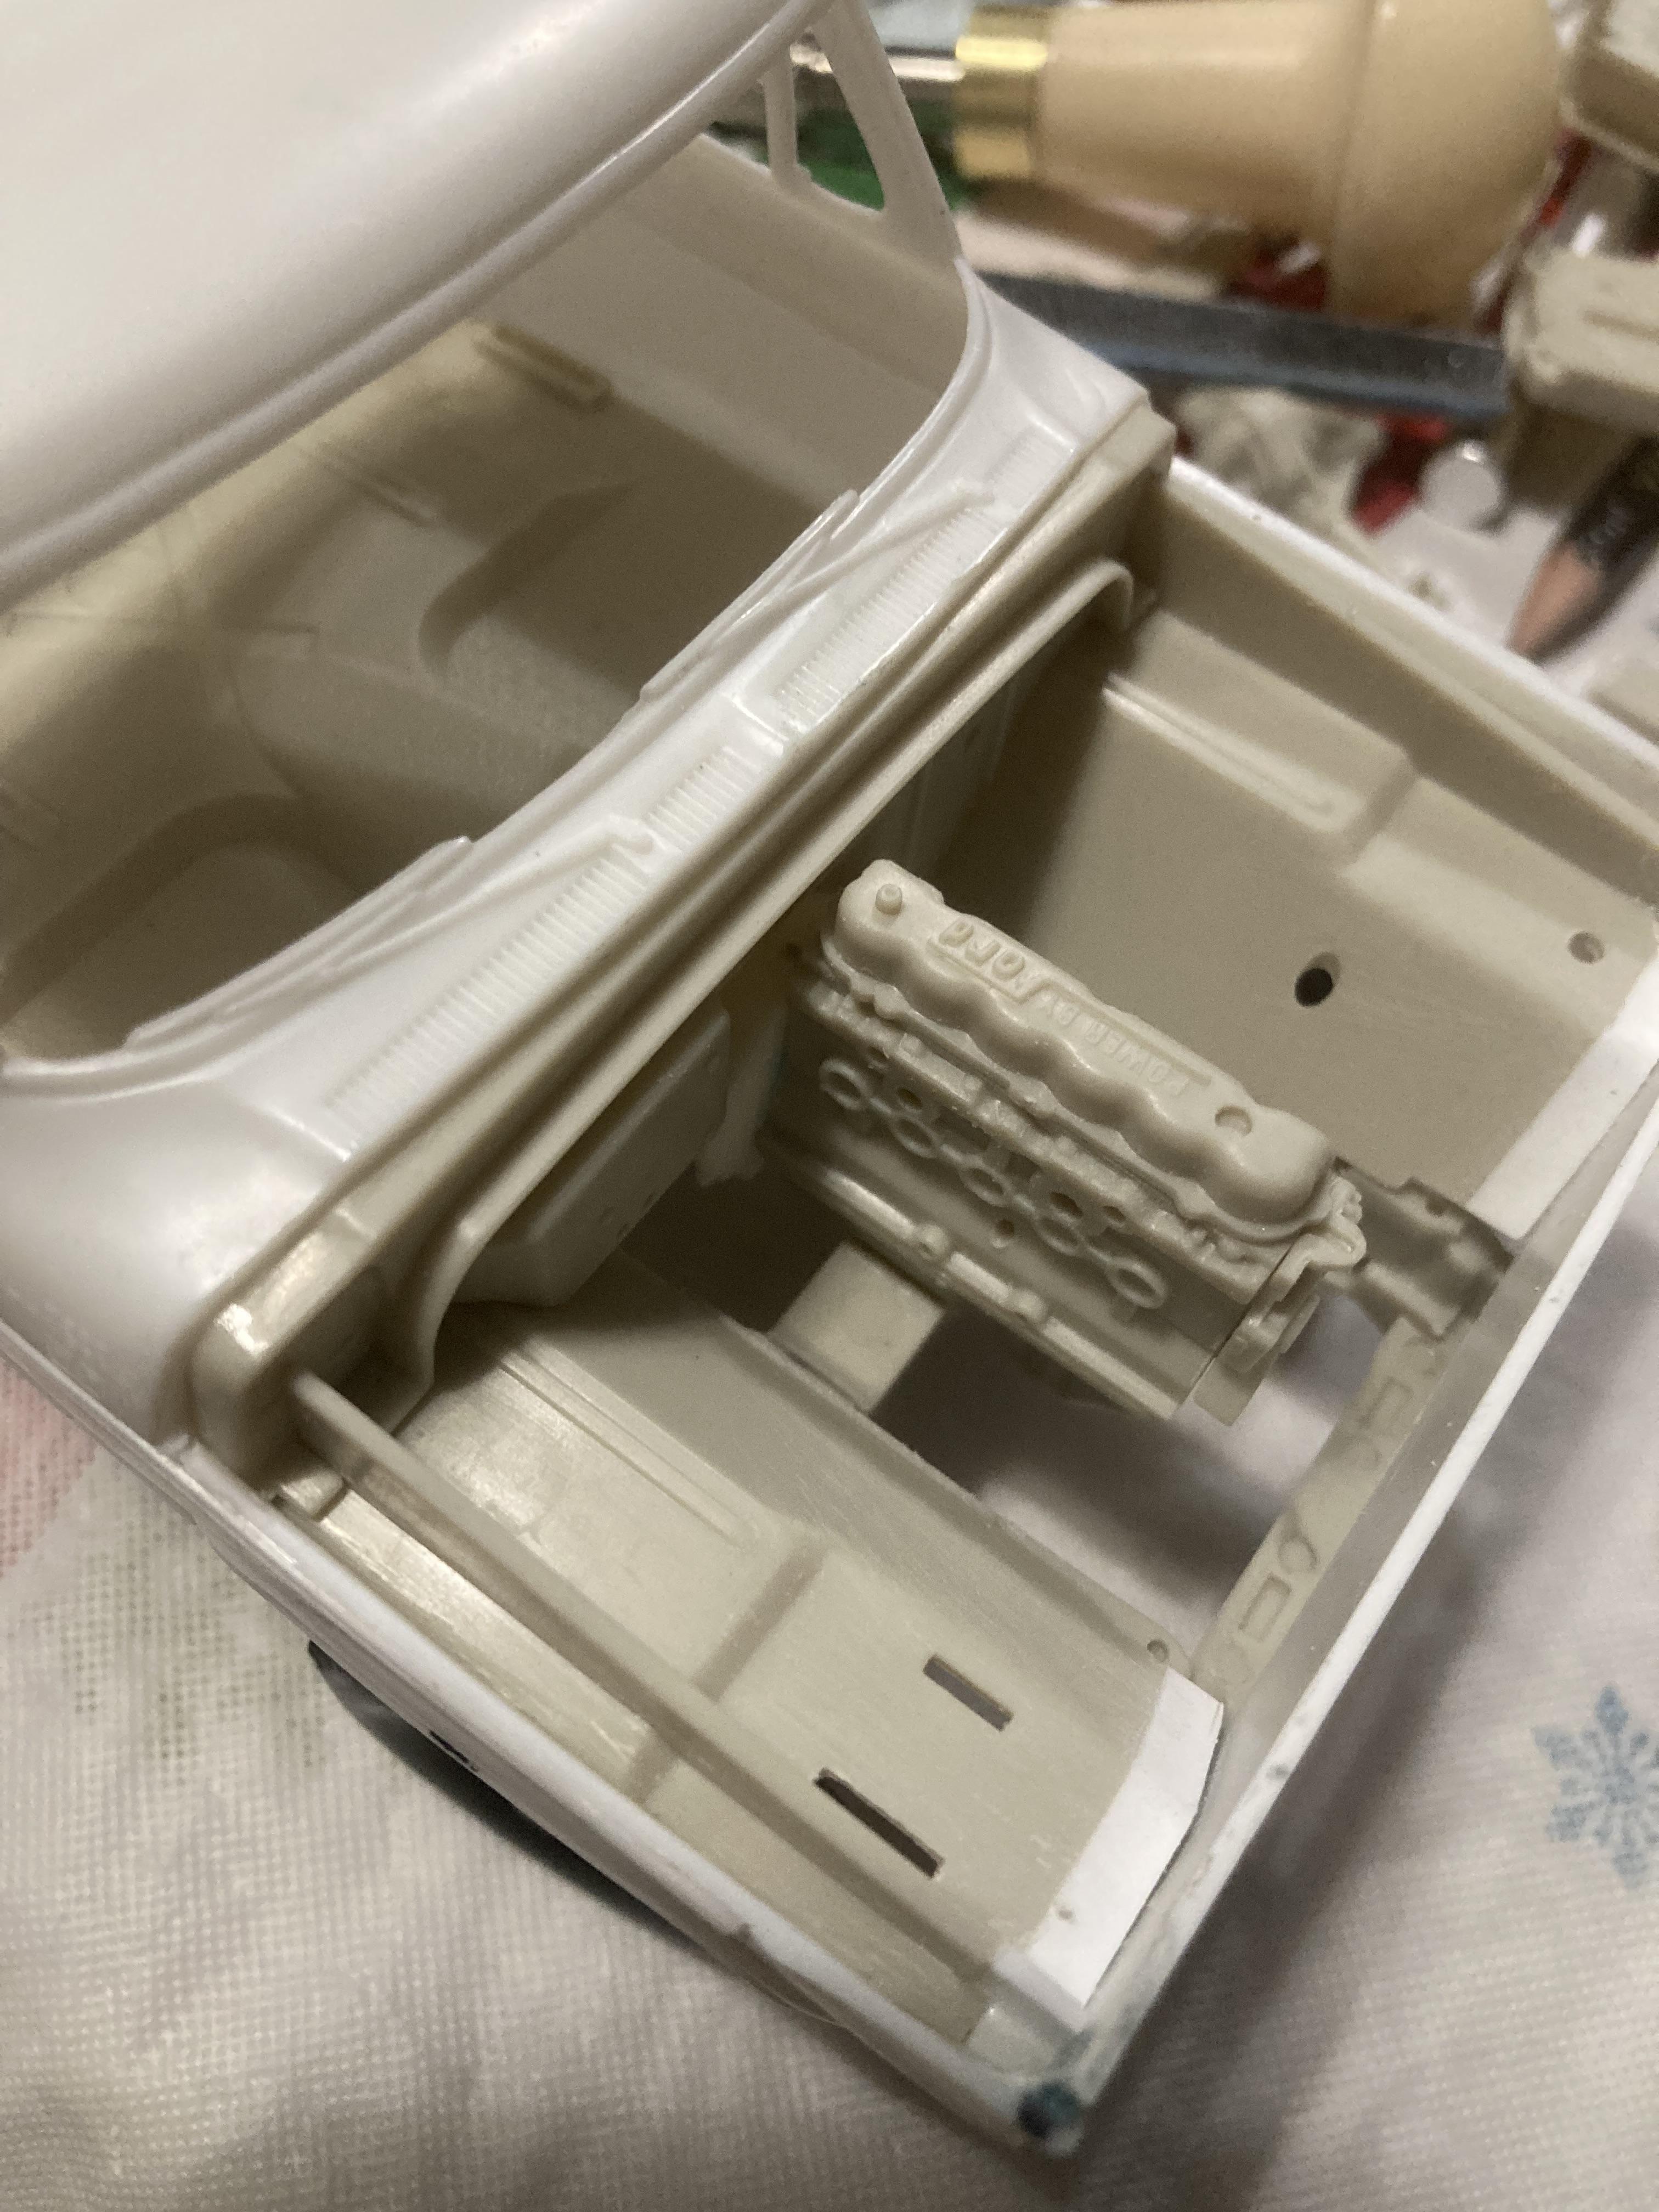
Small update… worked on getting the engine ready for wiring. I drilled out the spark plugs in the moebius engine, and tried to do the same for the distributor. Didn’t go well for the distributor. I’m now using Detail Master kit DM-3205. I subbed out the red wires, for blue. And I used the black larger gauge wire to make boots for the distributor side. This took quite some time, because the blue wire I clipped has a sharp edge that would catch the insulator boot. Once I got that finished I moved on to fitting the distributor. The distributor has a fairly large diameter base, and a long tube for the drive housing. I was able to trim the tube down, and drill into the engine side to get the proper angle I needed. But, the distributor is large enough that it keeps it from sitting like it should compared to the real engine. I’ve made do with the detail master part, as I’m not going to gouge the engine to make it fit. It will have to suffice at the angle it’s at. Most probably wouldn’t notice initially anyway… For anyone needing to know the Ford 240/300 firing order, it’s down below…
-
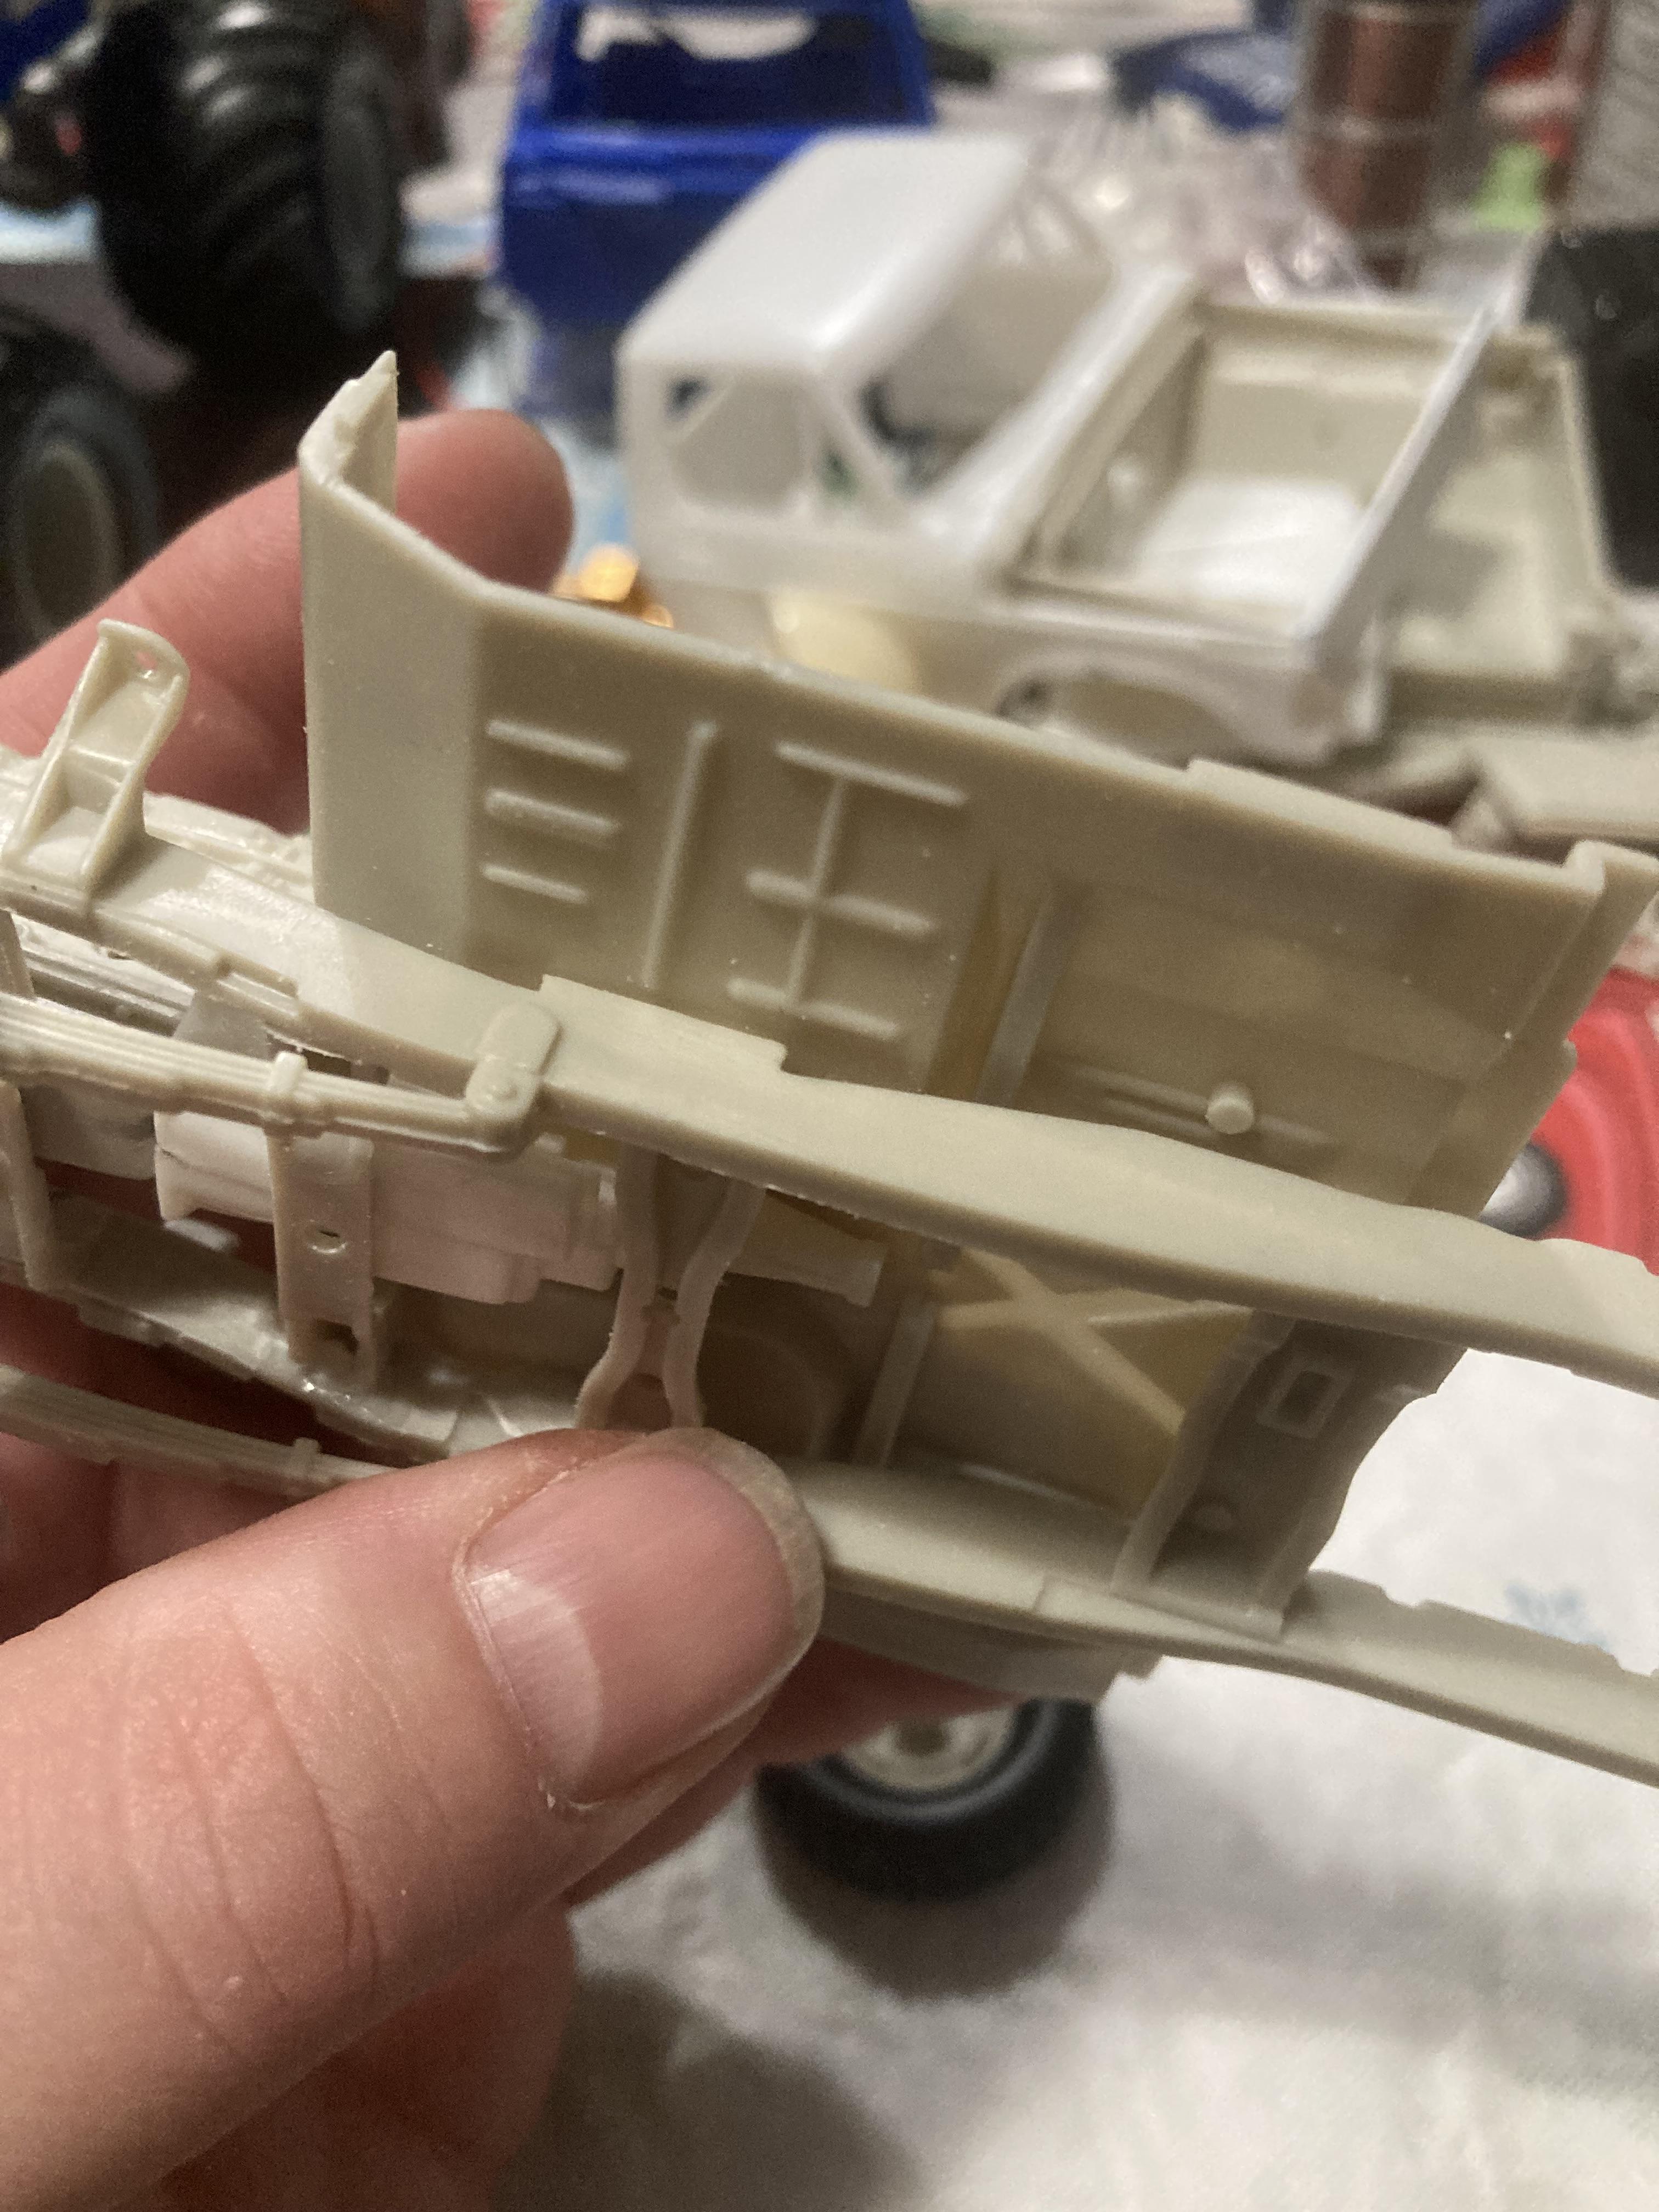
Update… As with Bigfoot 3, I worked on this truck today, because I had the day off and it’s cold and windy outside. I decided to work the floor down into place. It had been rubbing the top of the transmission bellhousing. It only missed settling into place by a couple millimeters. I sanded the underside of the transmission tunnel until I got the floor to settle into its home. The floor gets thin in this area, but it’s just enough that the floor drops down where needed. As you can see, the interior tub lines up with its firewall in its correct location. And everything is lined up properly. I mocked the bed into place to be certain I had enough room there as well. It sits perfectly against the cab without binding to nestle into place. I think the major hurdles to getting the two kits to work in harmony are largely out of the way. Now it’s fitting the interior and dash, and then everything will be figured out, it’s time for paint and detailing. If anyone can lead me to a 1974 Ford F series grille, I’d be very appreciative.
-
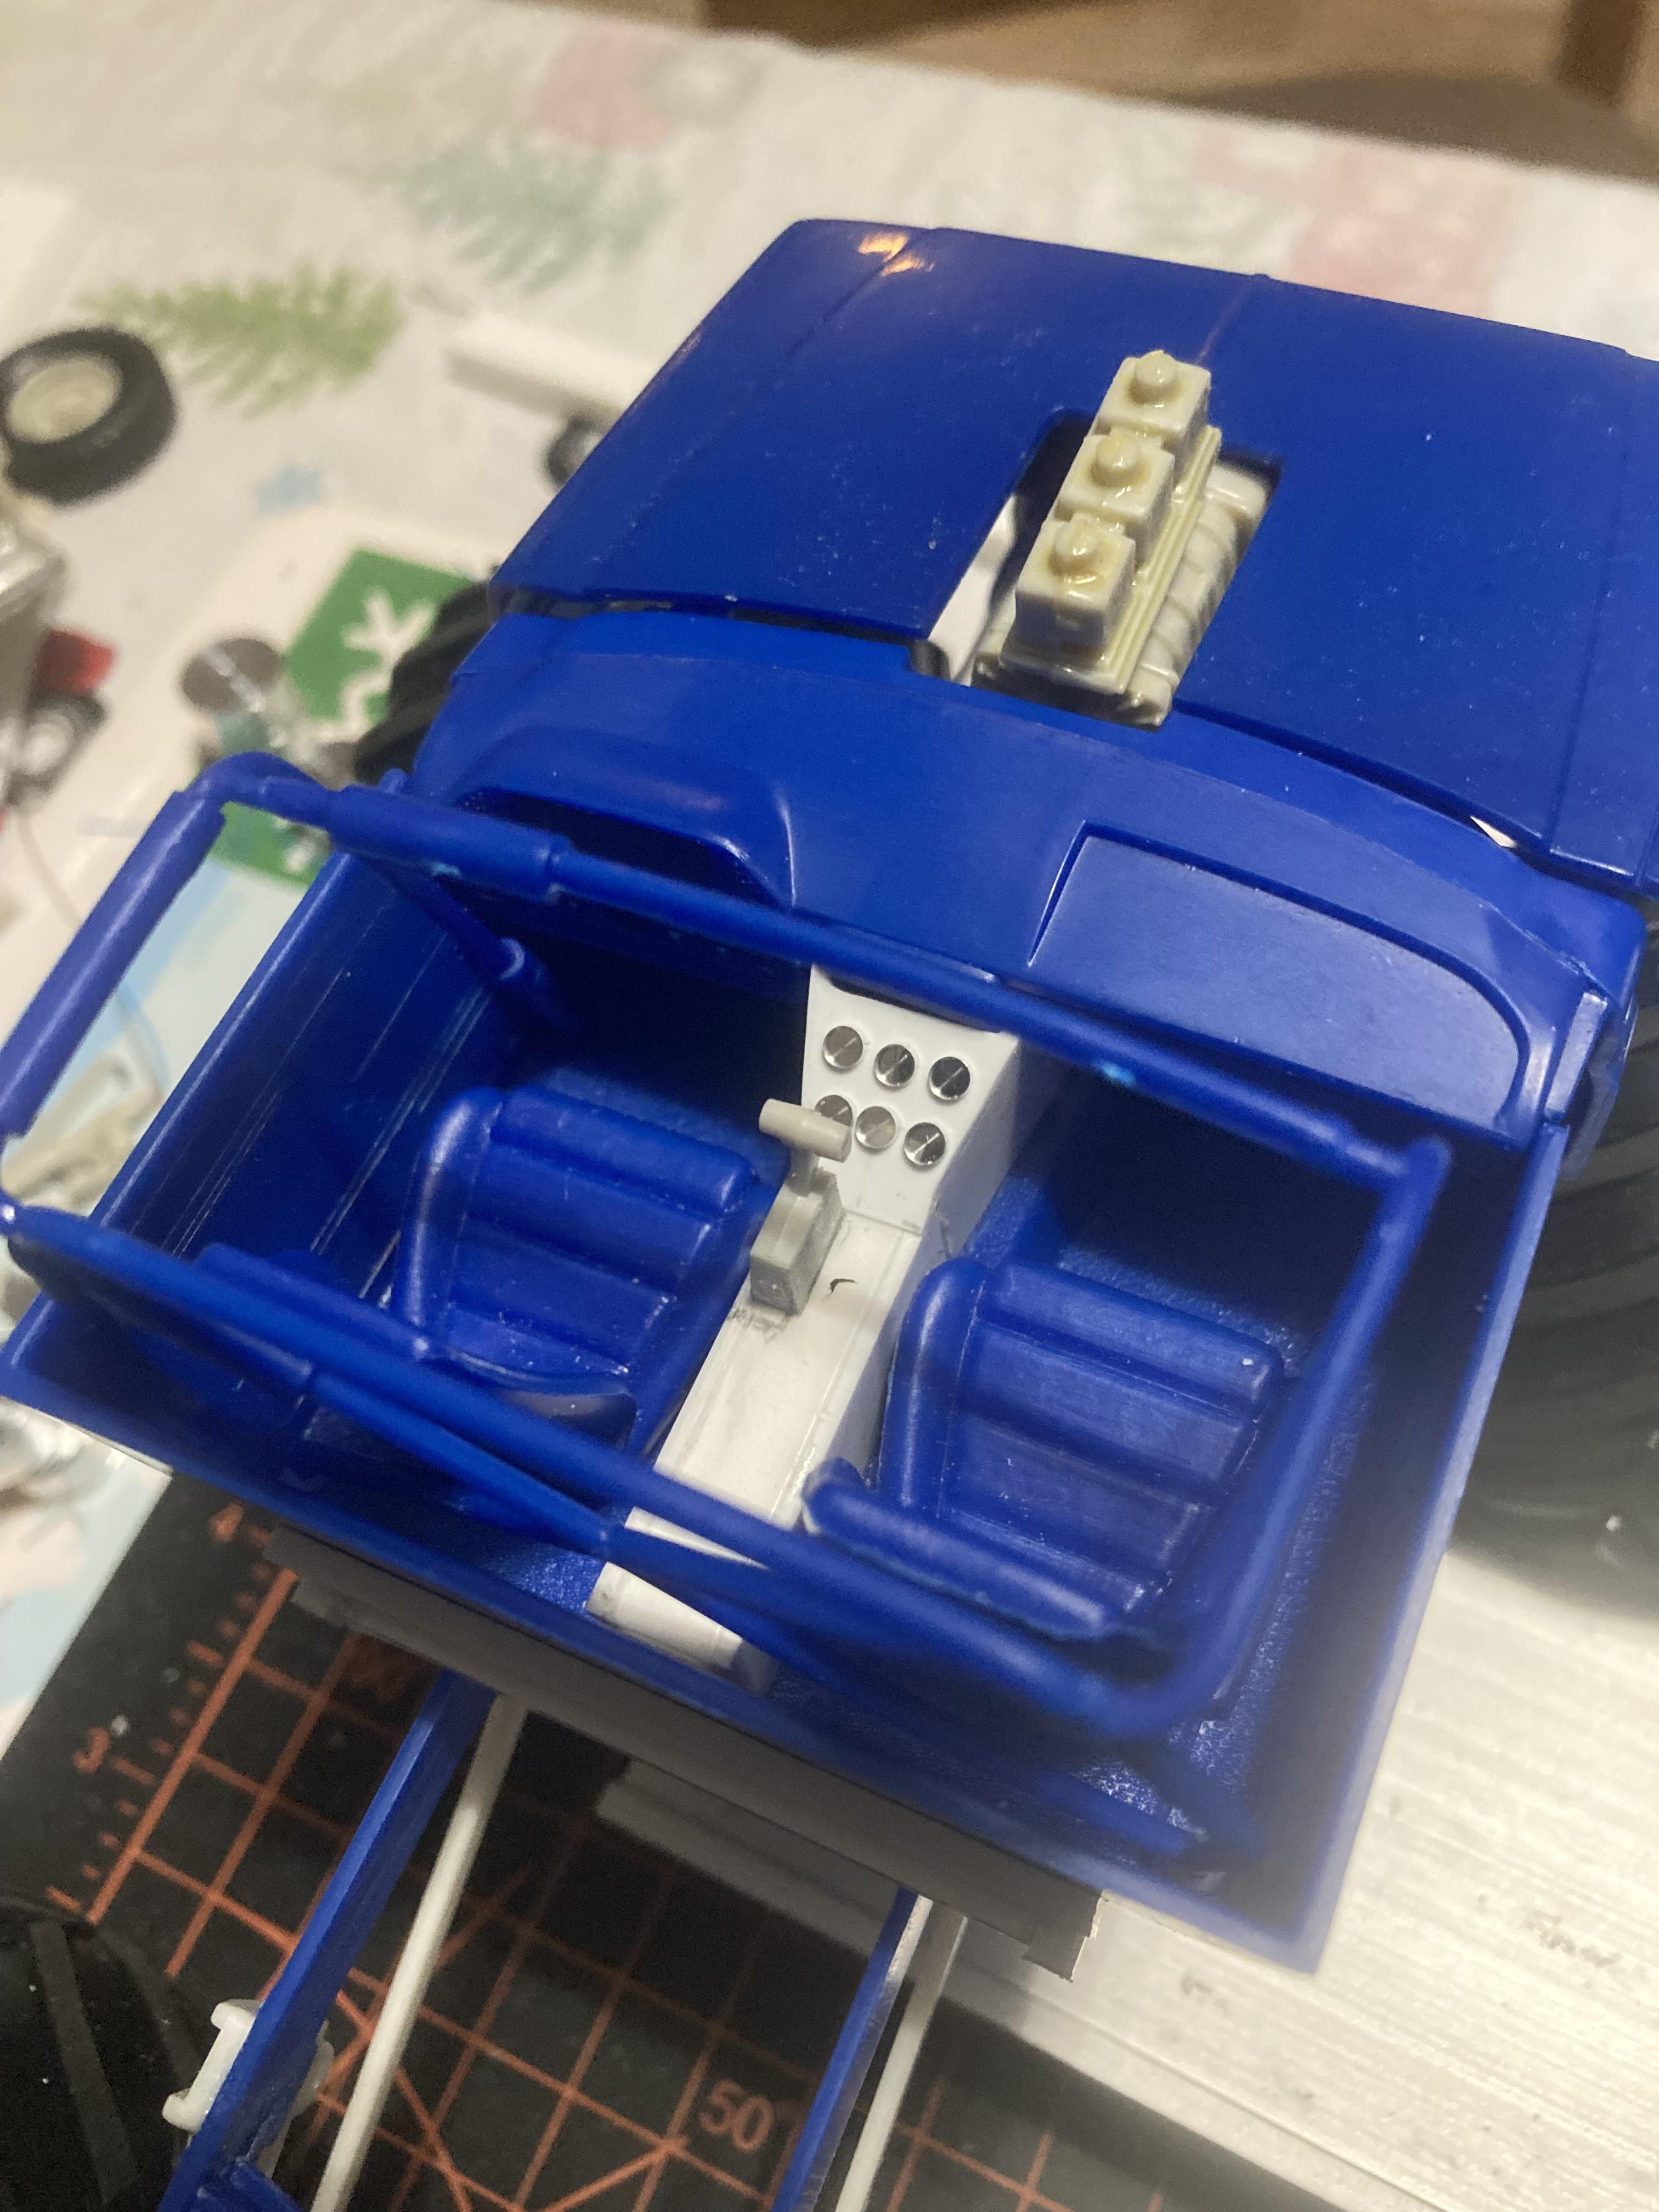
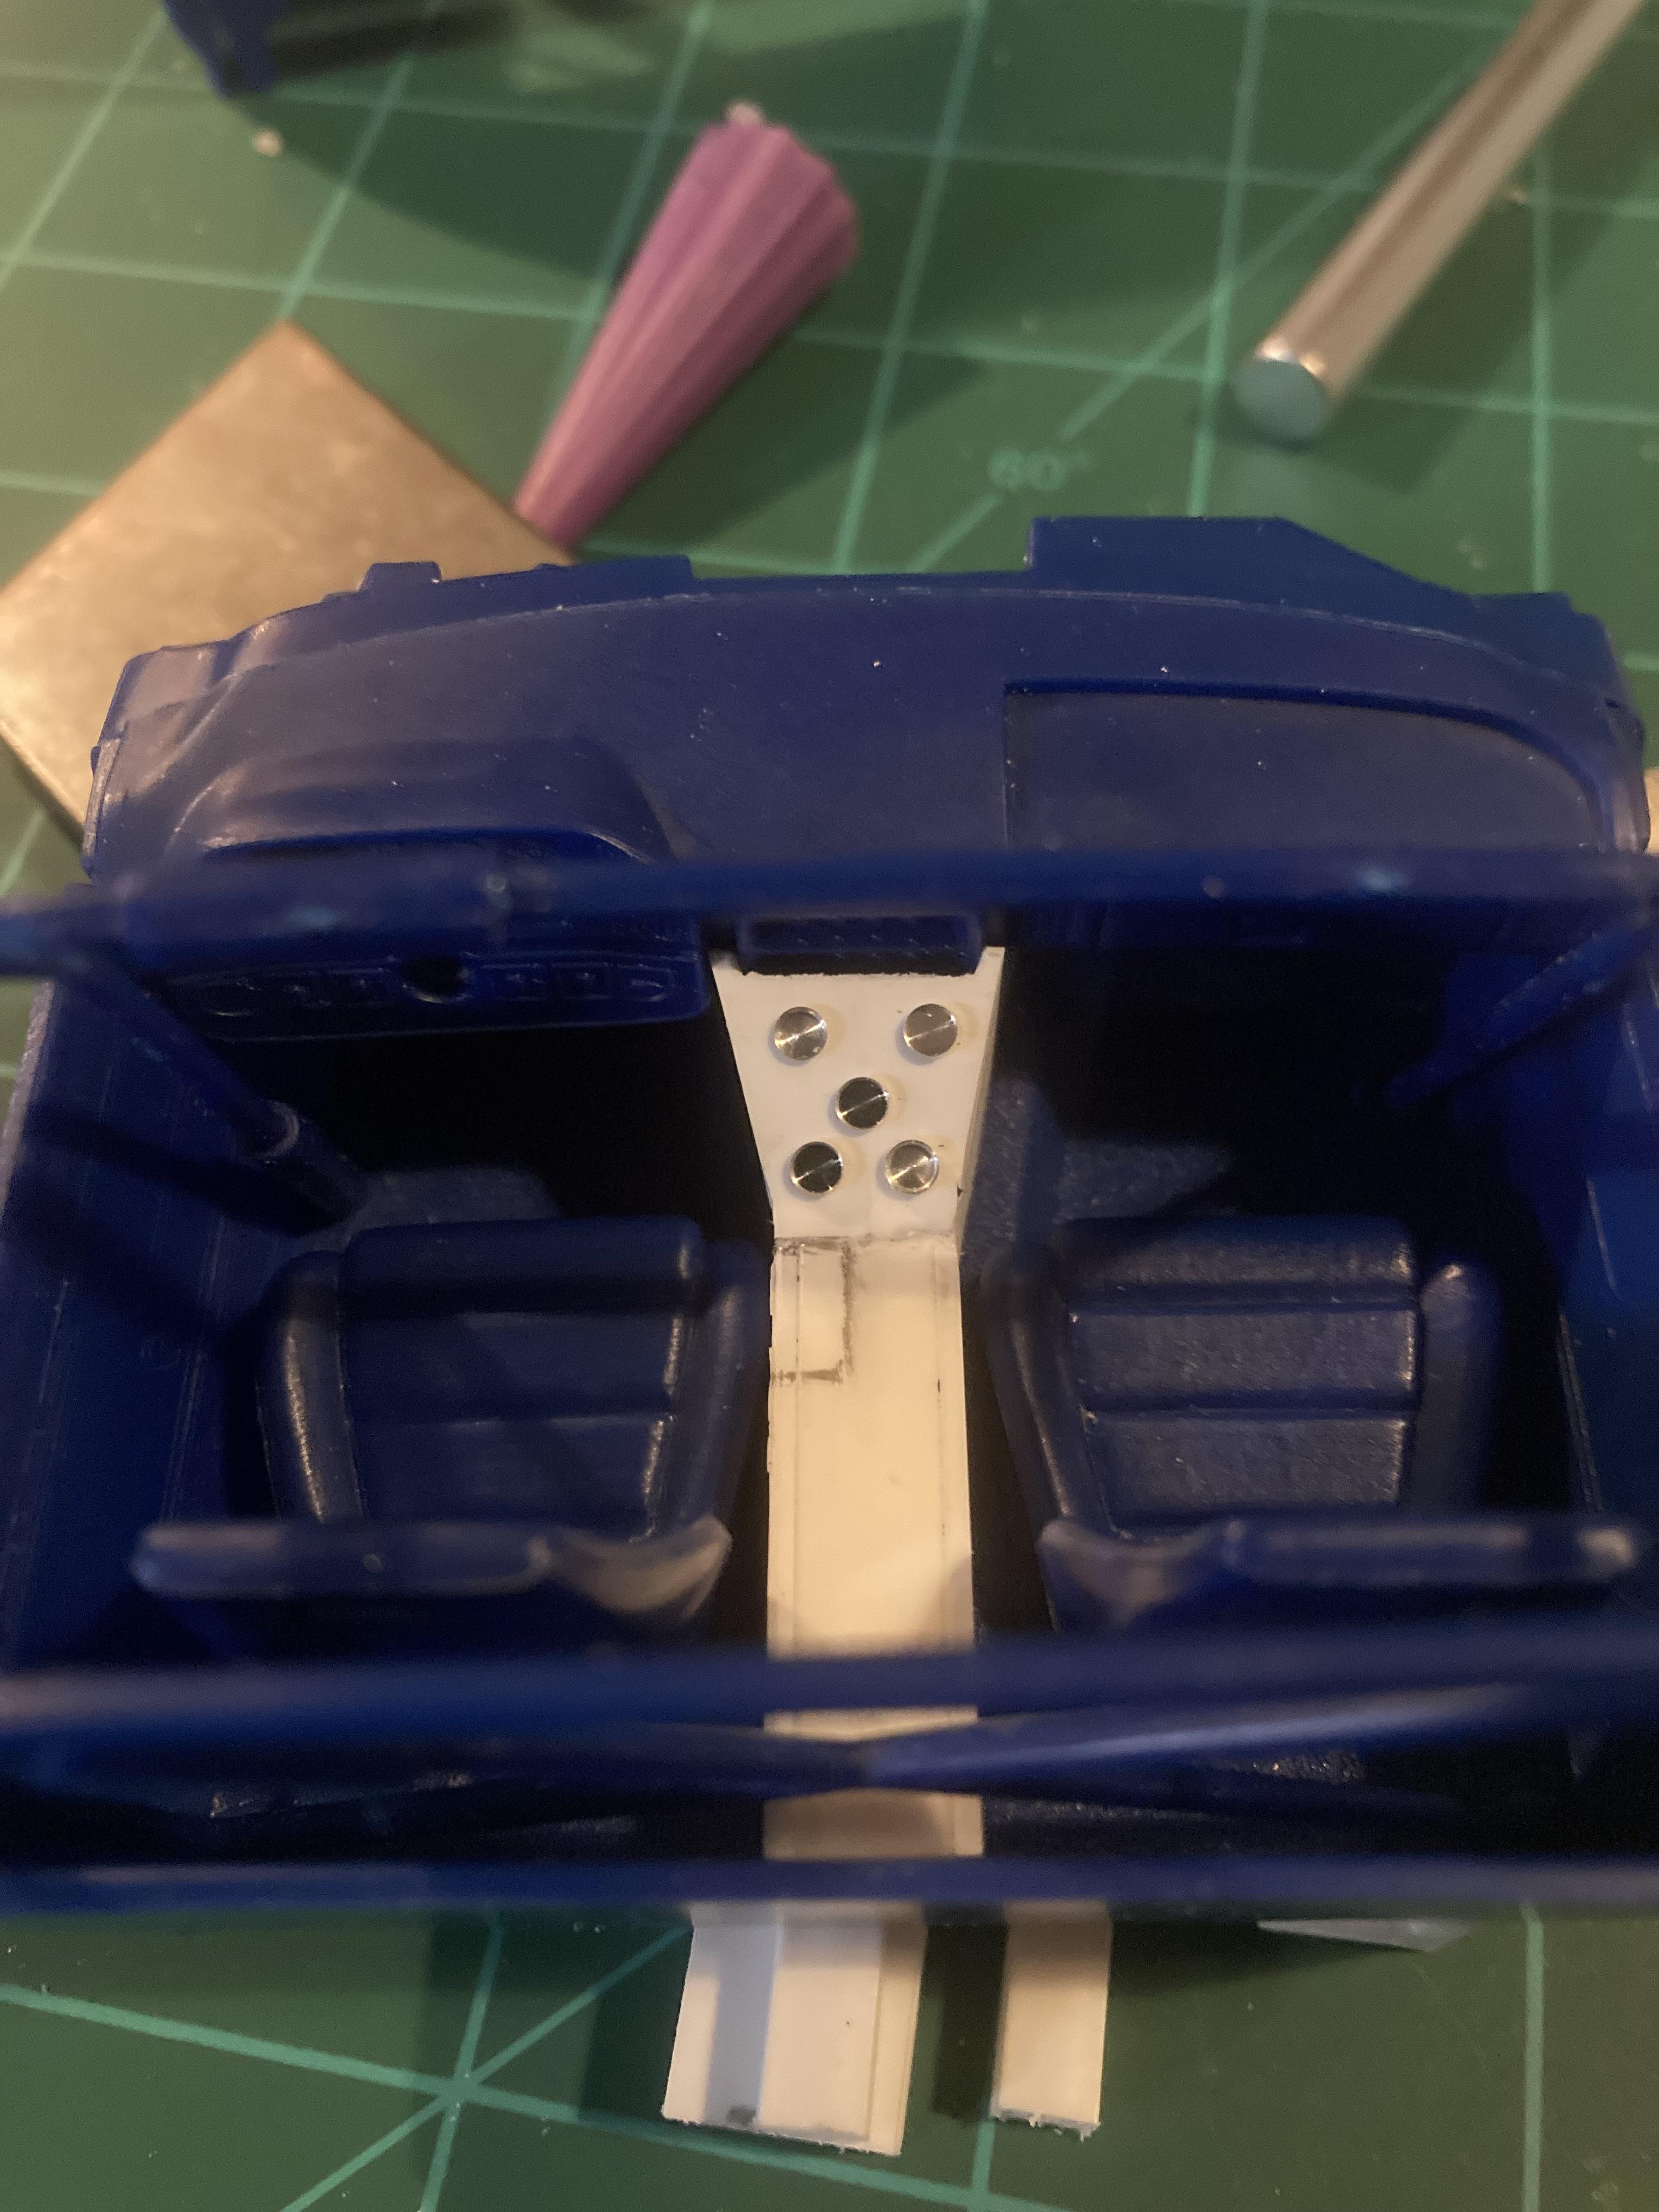
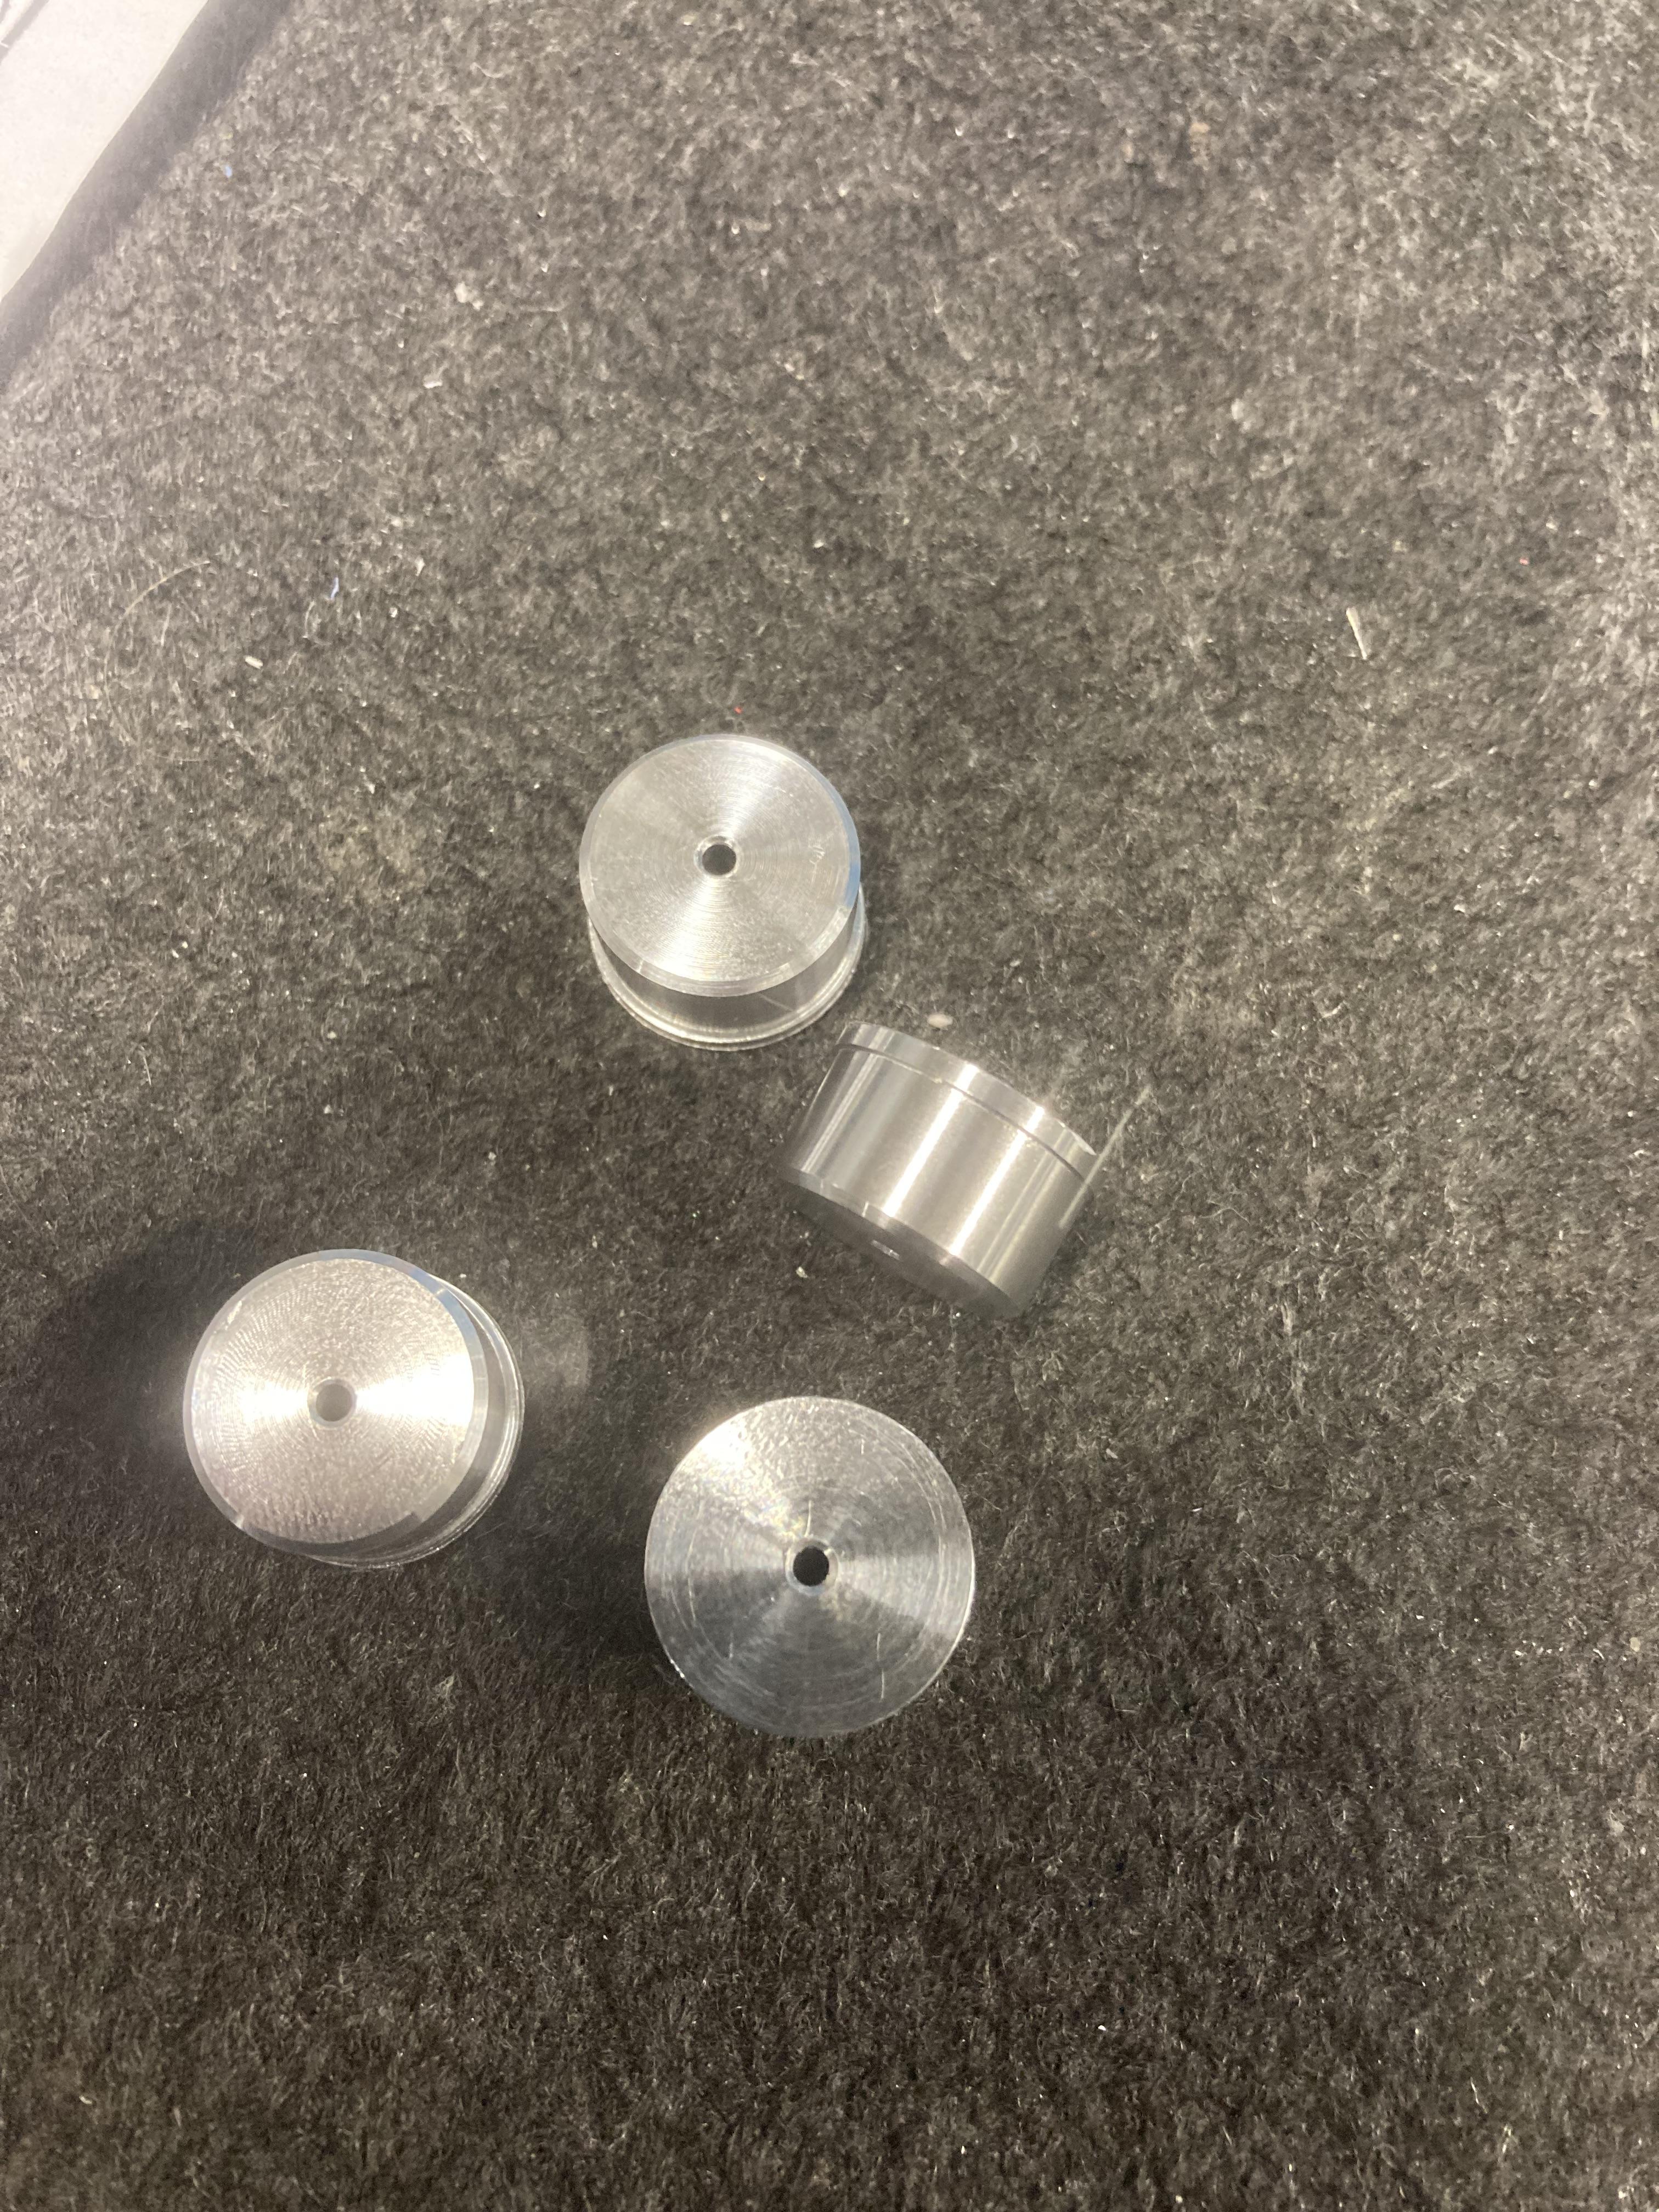
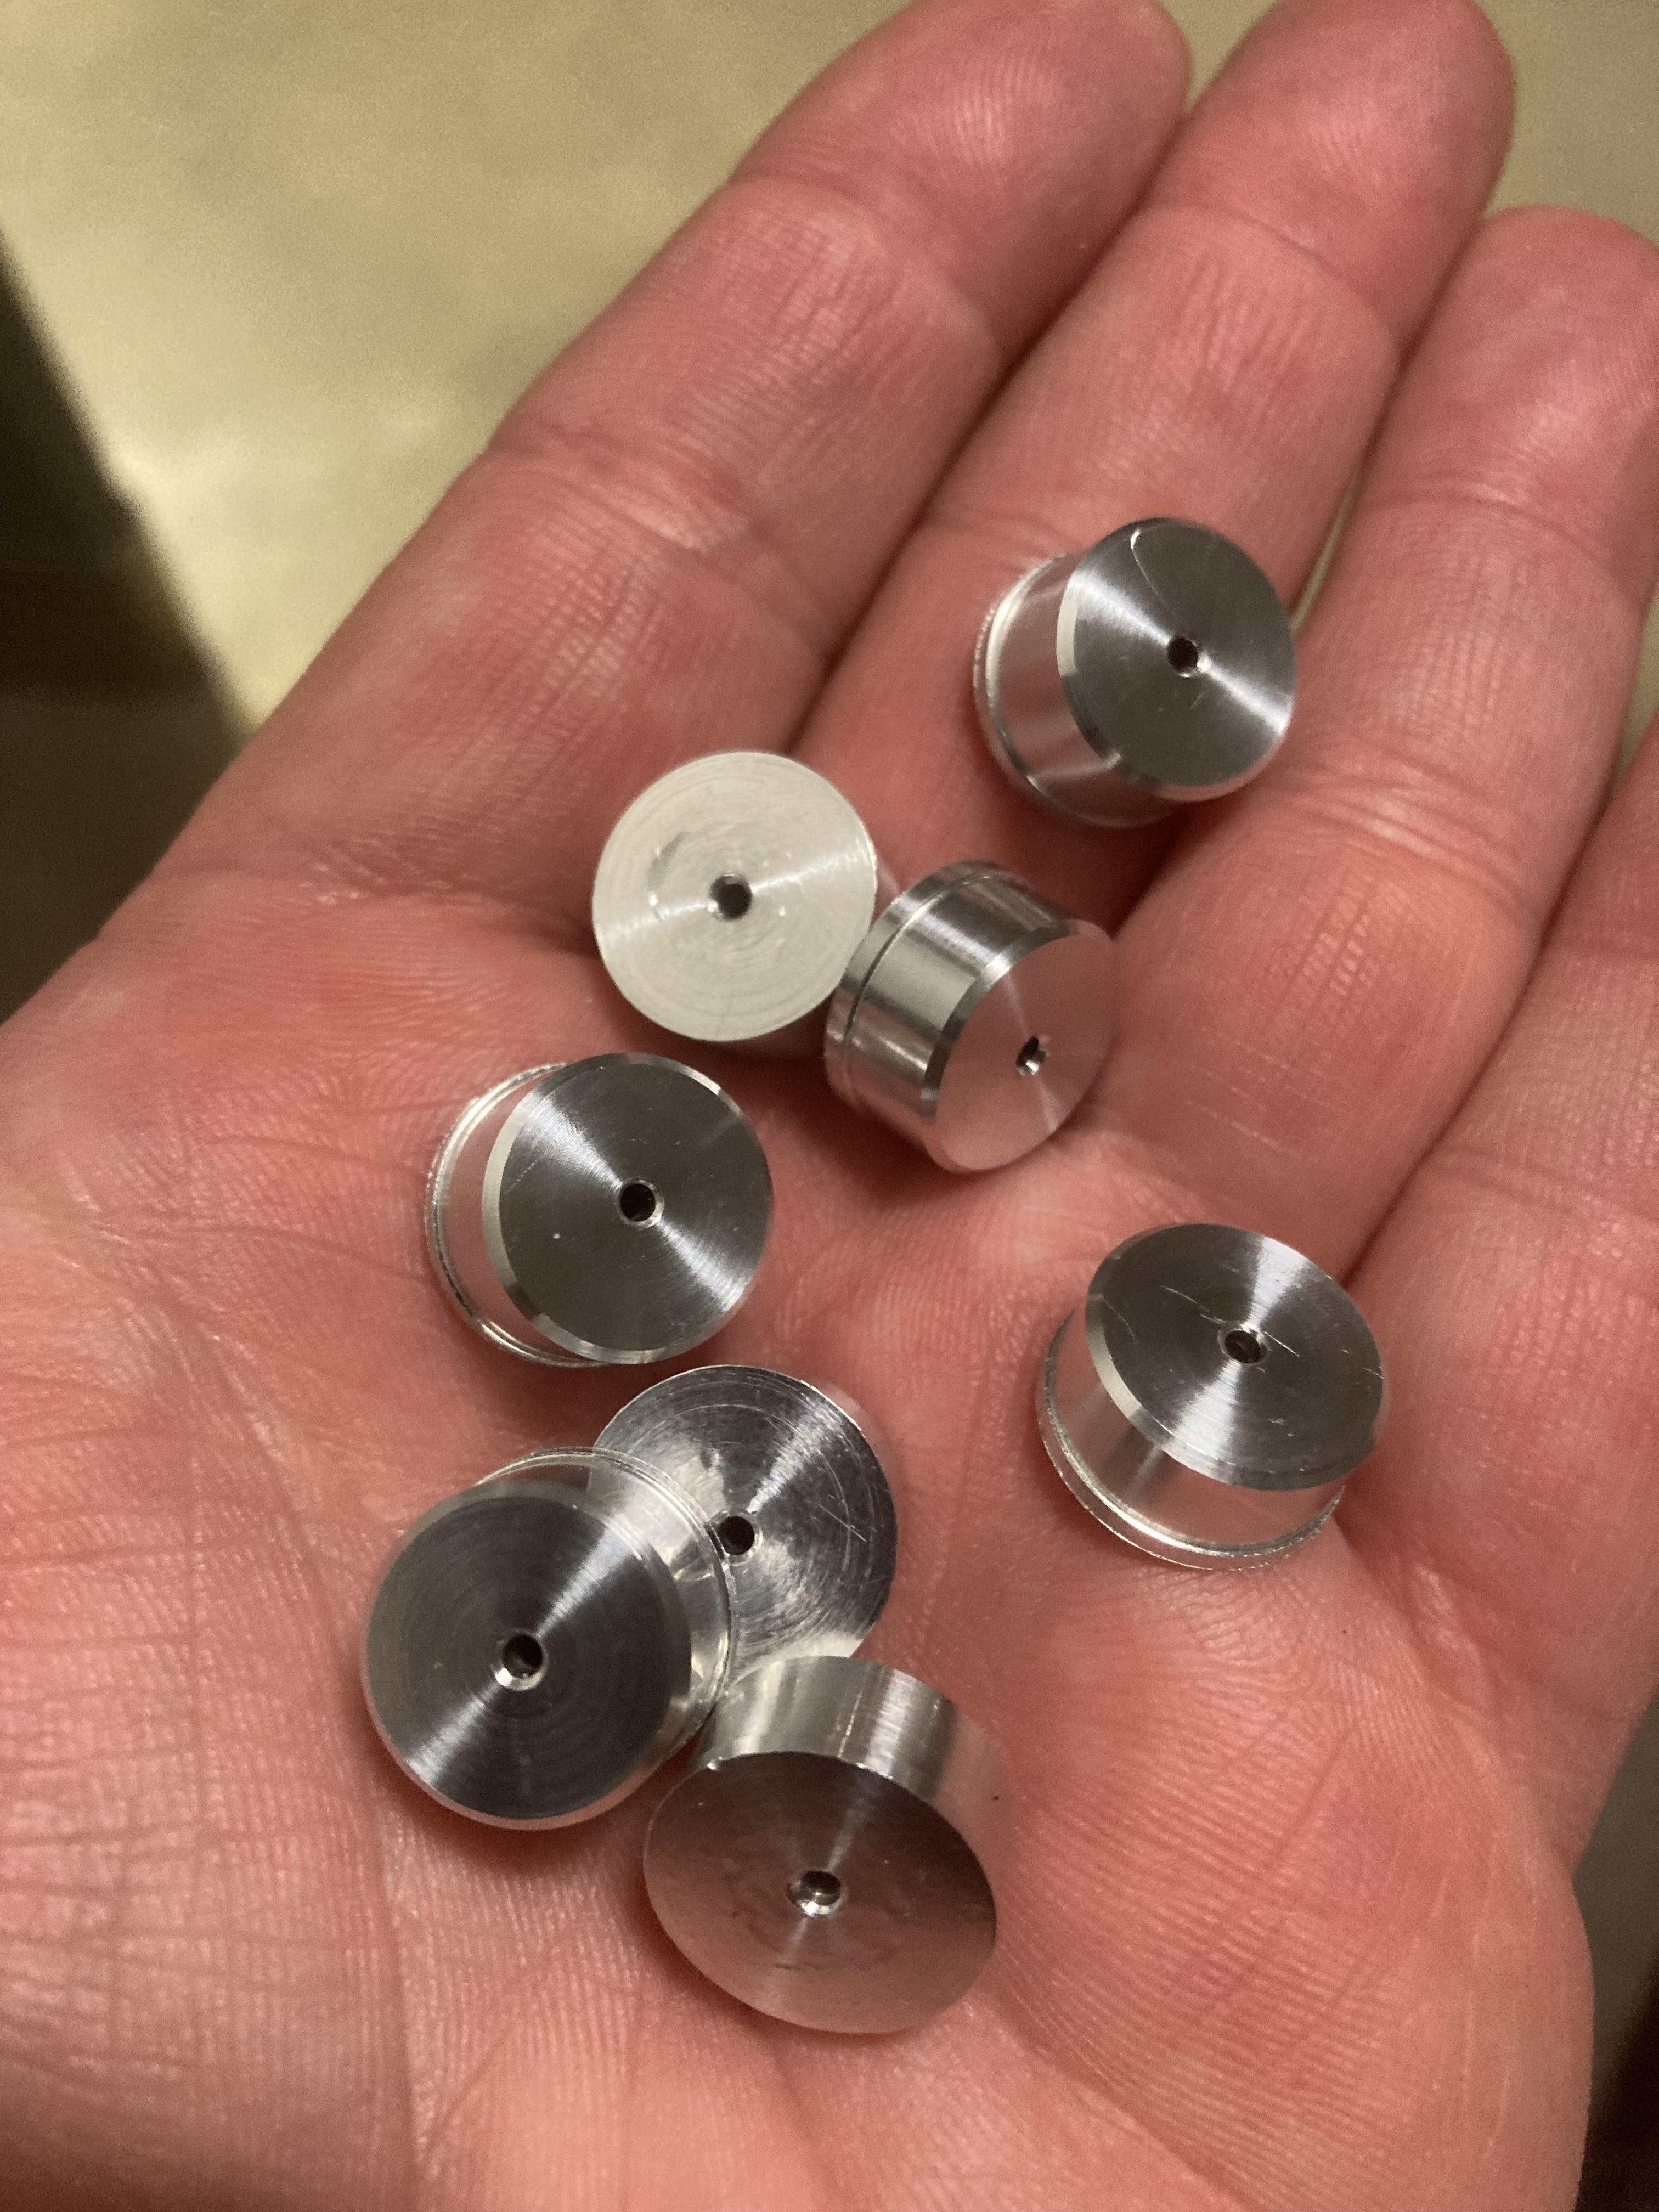
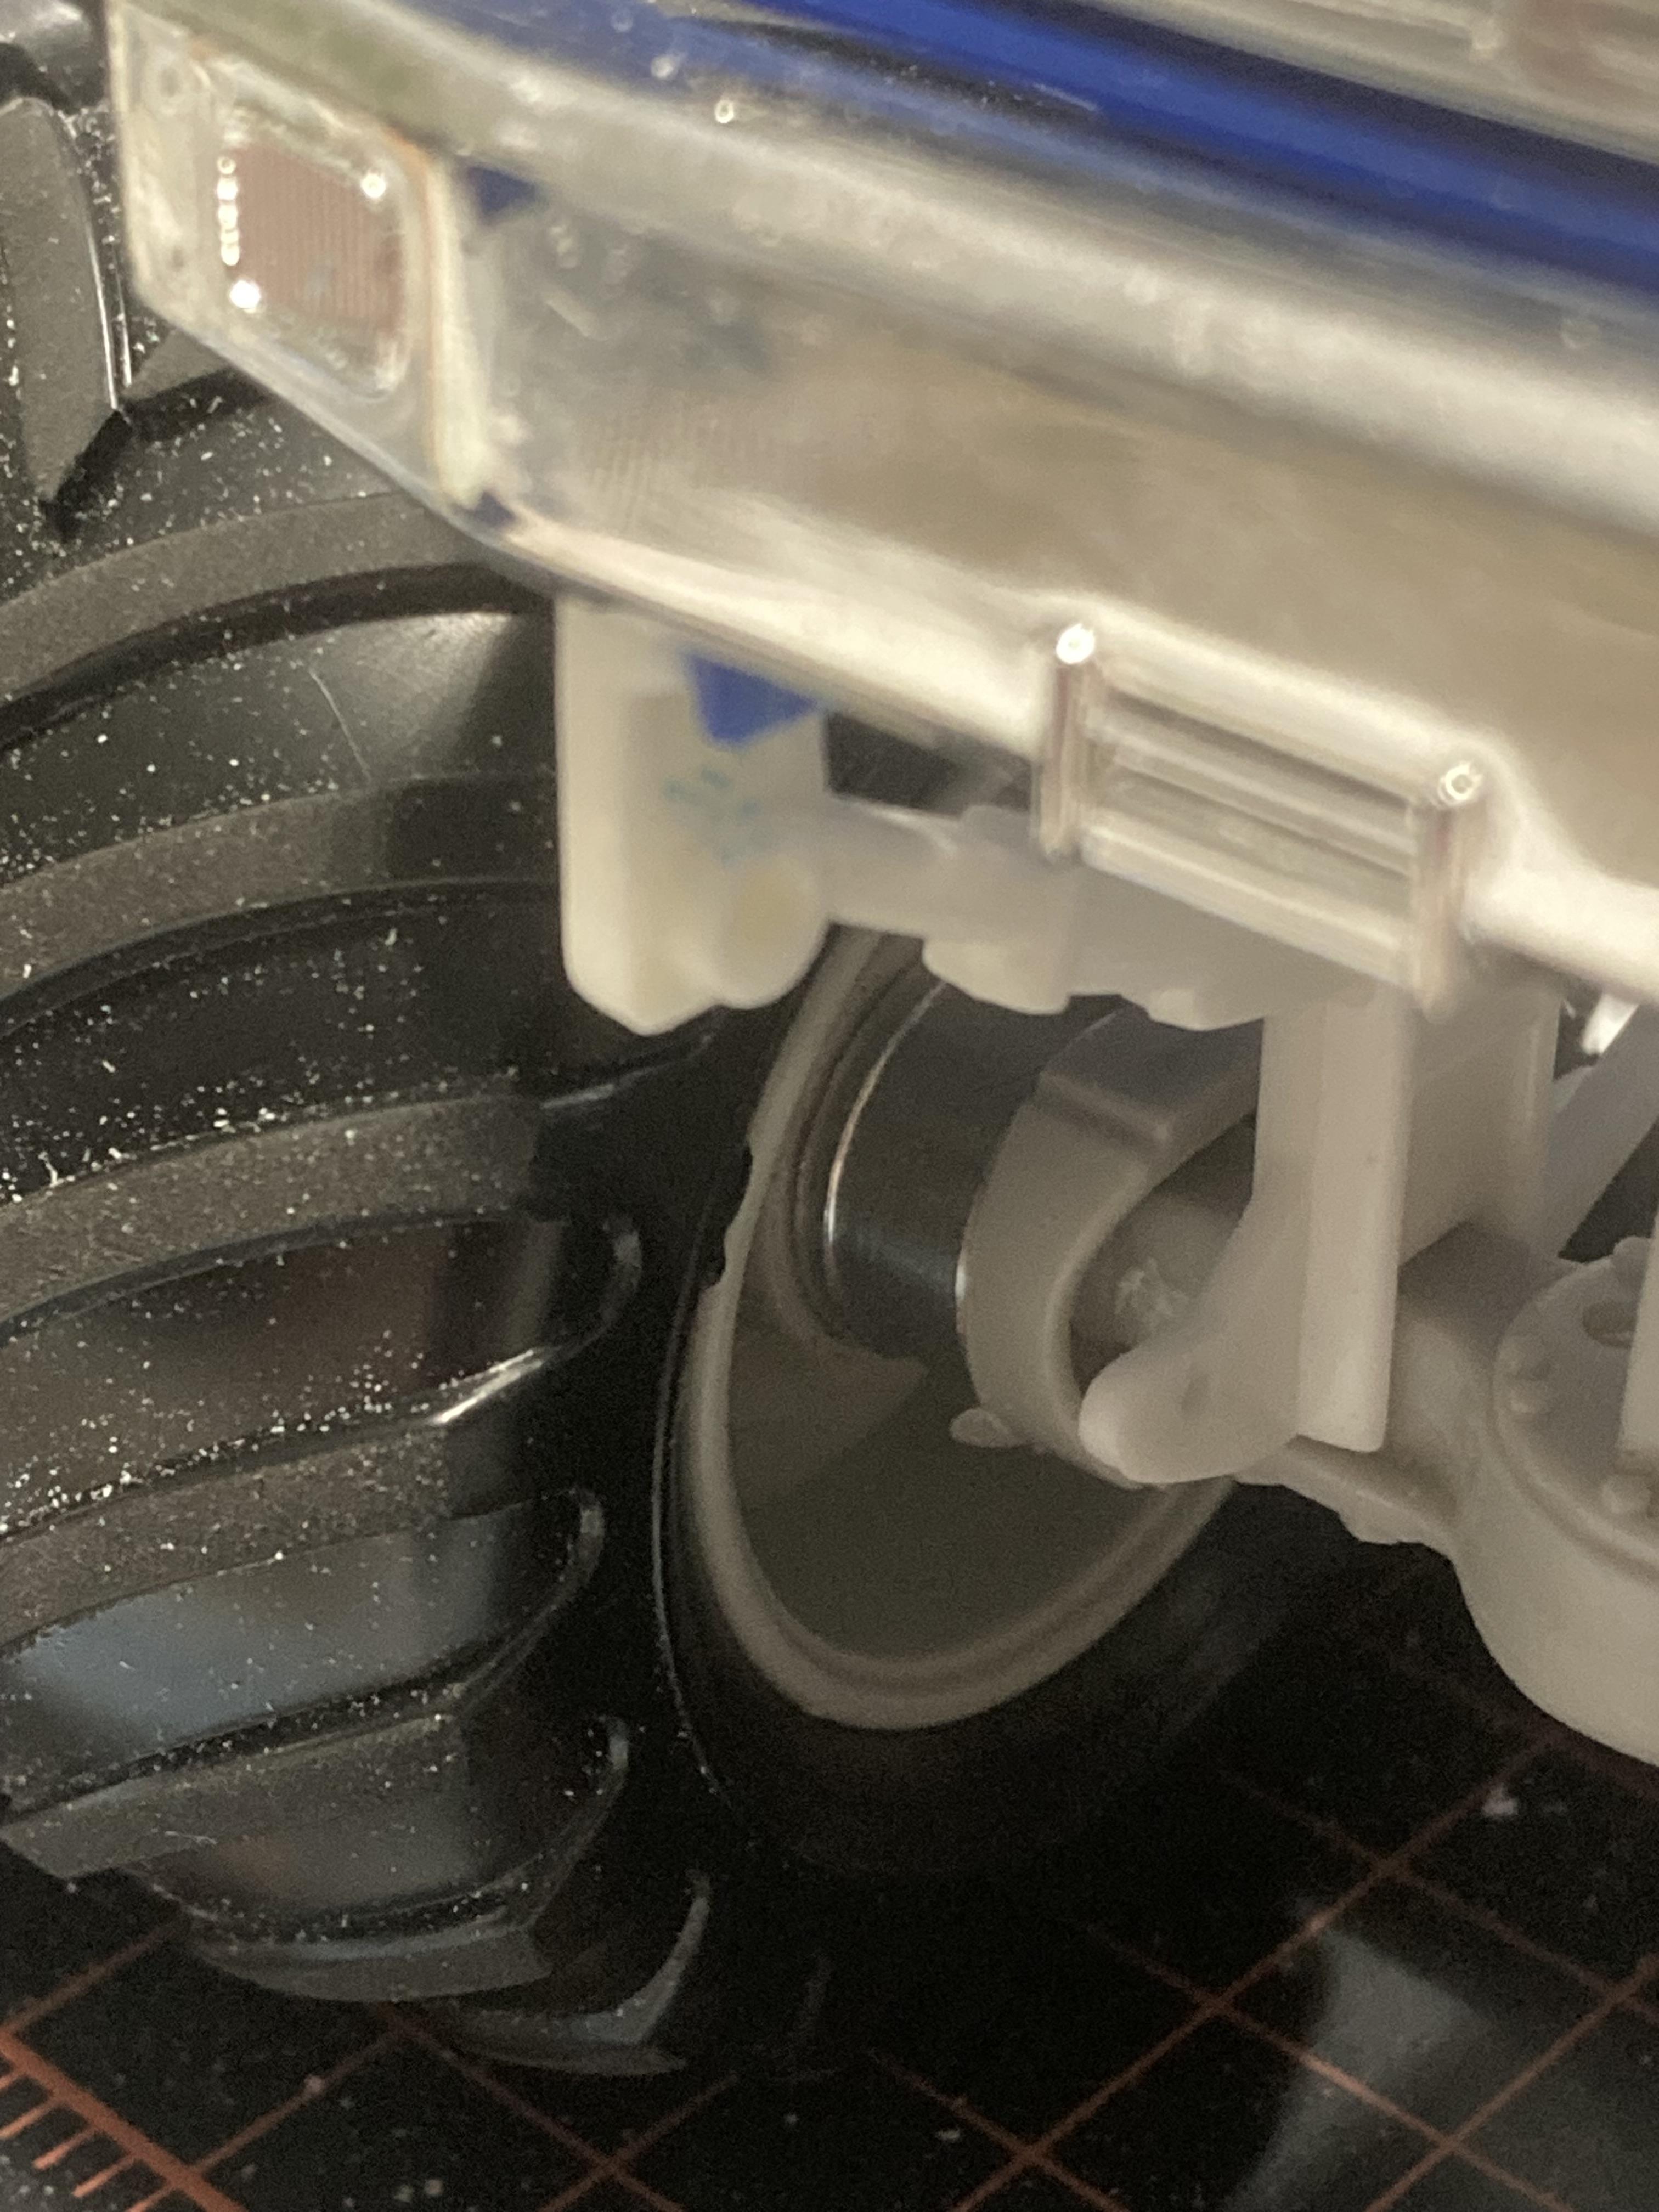
Update… Had the day off from work, and it’s cold and windy. Decided to work on BF3 today. I have the great fortune of working in a machine shop. BF3 needed some wheel spacers/planetary hubs to take up the space behind the wheel and axle combo I force matched, to have the planetary hubs, BF3 ran. So, I made some. I made two widths and settled on the narrower spacer. They came out great and space the tires just slightly wider than BF1. I’m okay with this, as planetary axles are typically wider, due to the addition of the hubs gearset housings. Next, I tried my hand at measuring out and fitting six gauge faces into the center console, made specific to BF3. Well, six gauges wasn’t going to happen, and I had to settle for five. I almost had to pull the gauge cluster plastic up to redo it, but all the gauges laid in nicely on the top row and the second row was good enough and evenly spaced, so I left well enough alone. I did try to get six gauges in there. I think it looks pretty good. It definitely adds another bit of interest when looking in through the cab windows. I still need to do a console armrest pad, and the RII box and mount. I will also need to start placing the large tach and smaller gauges on the dash.
-
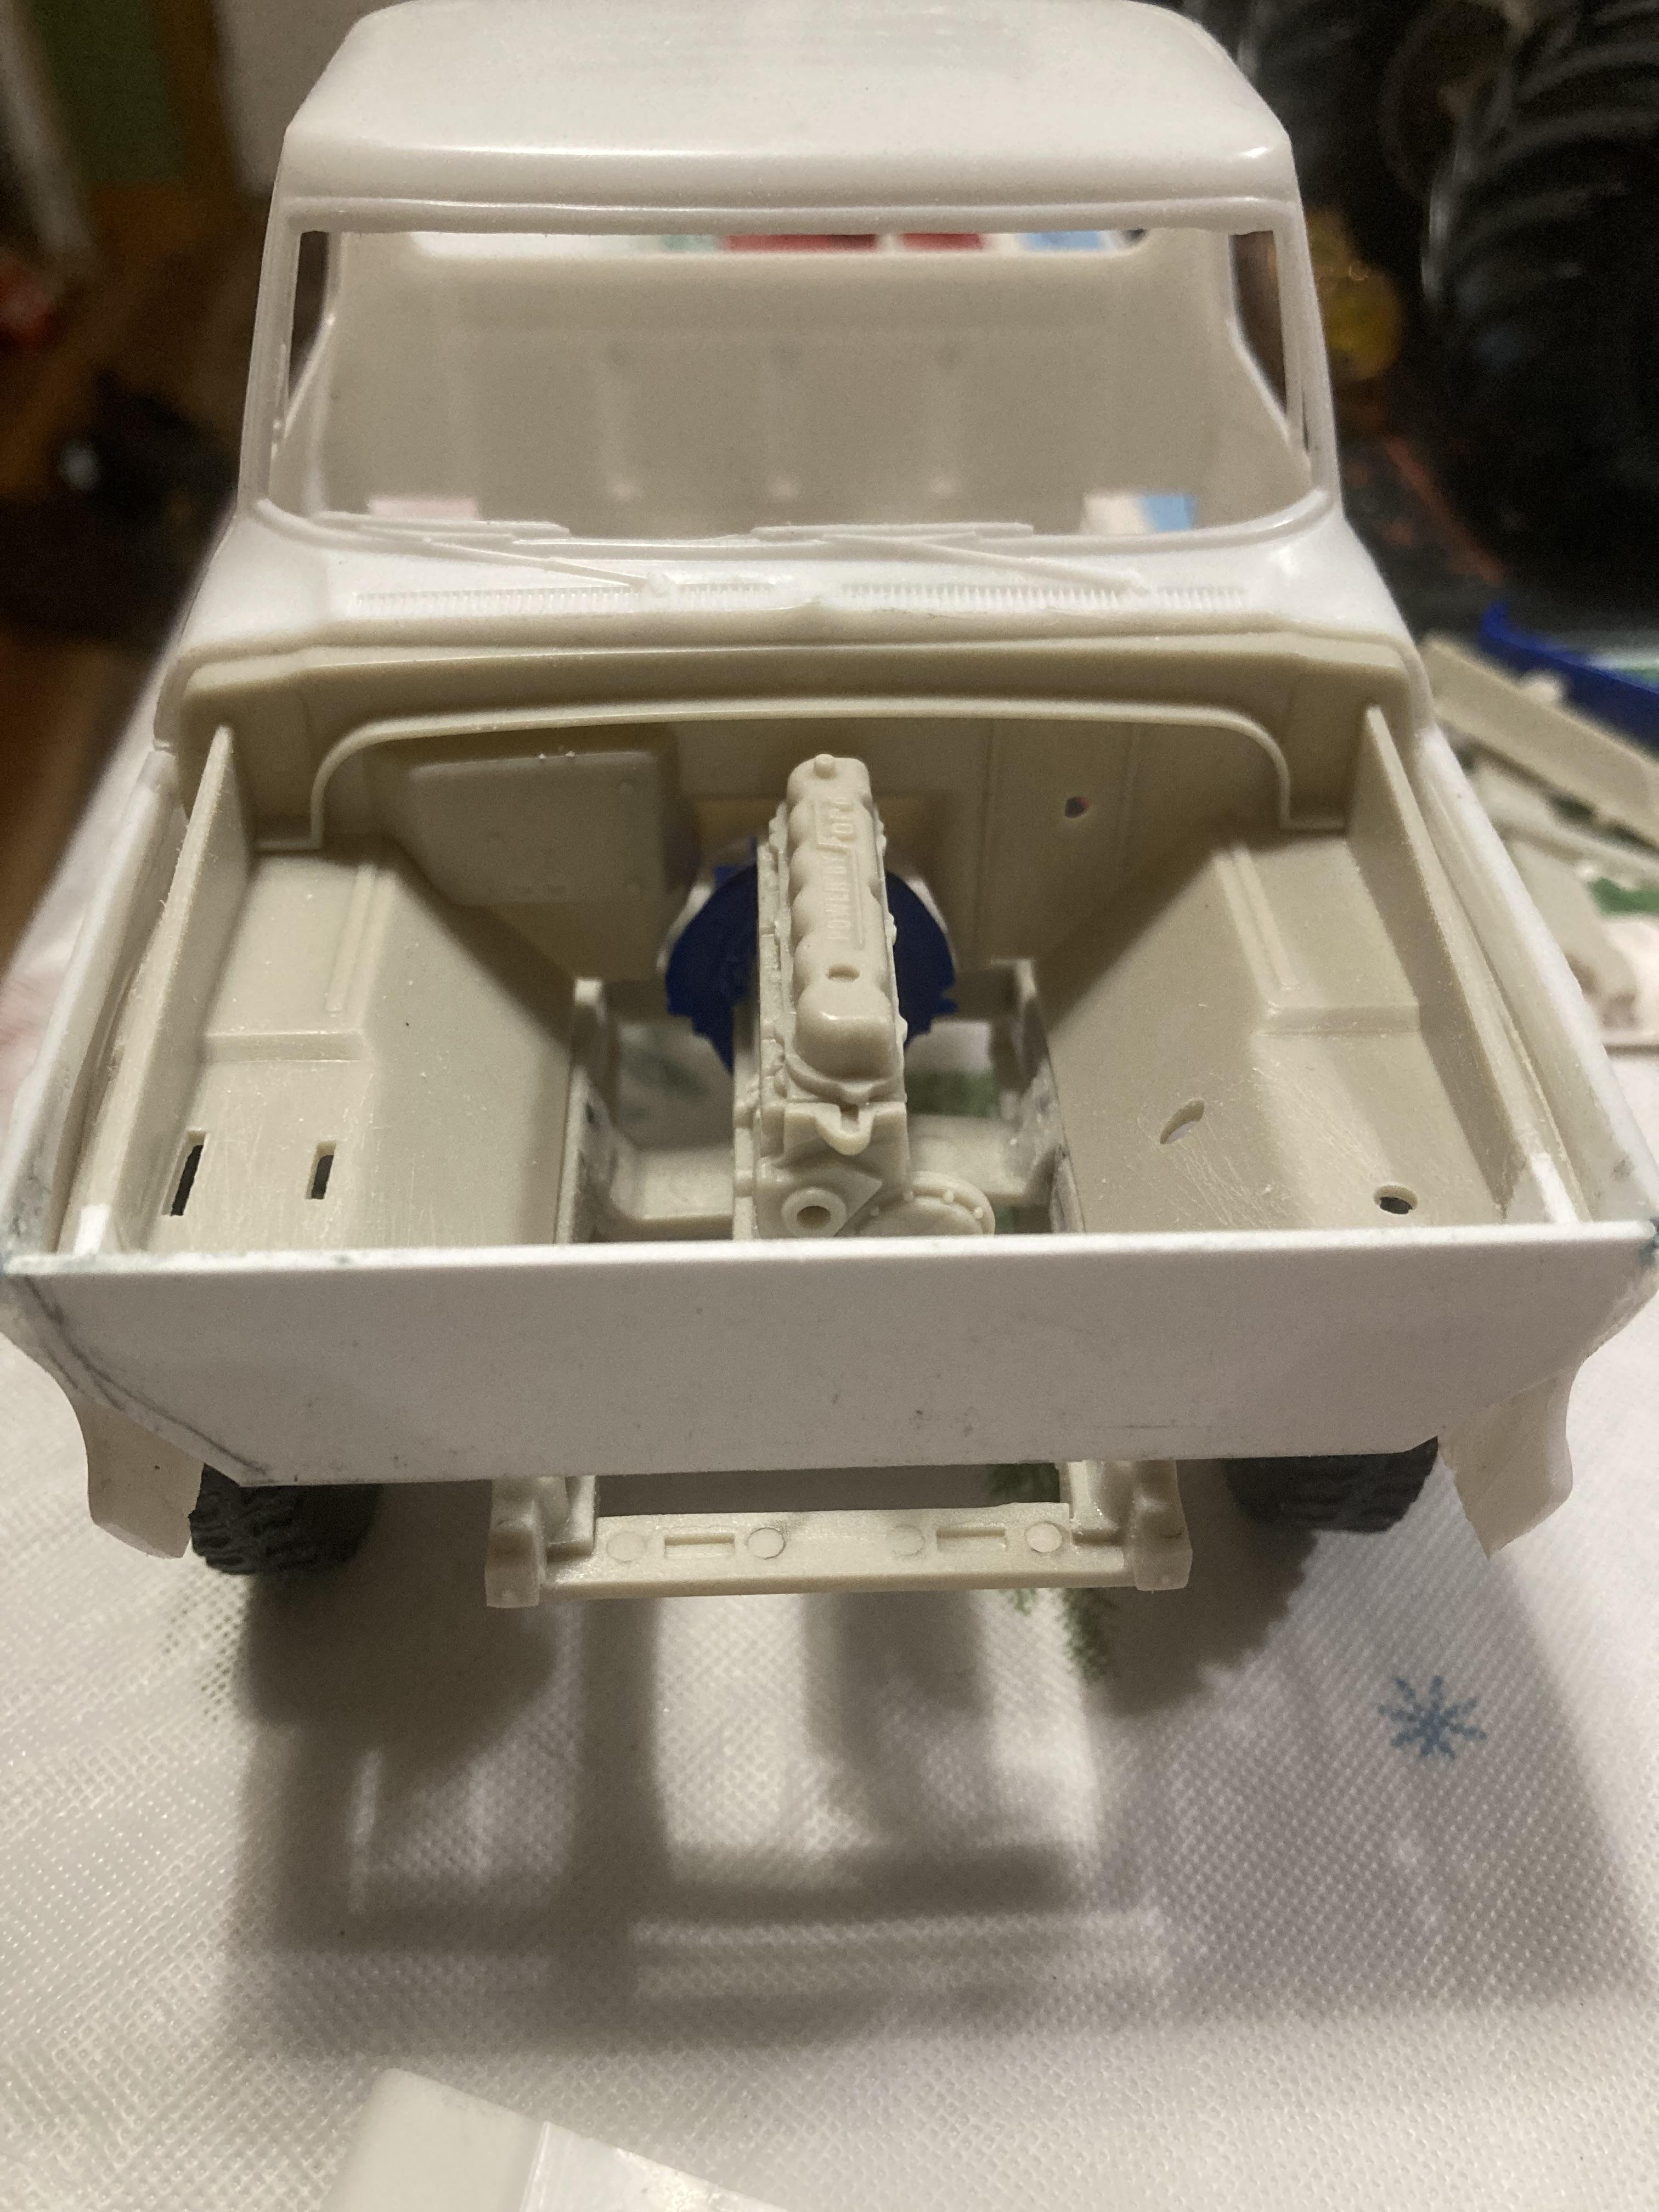
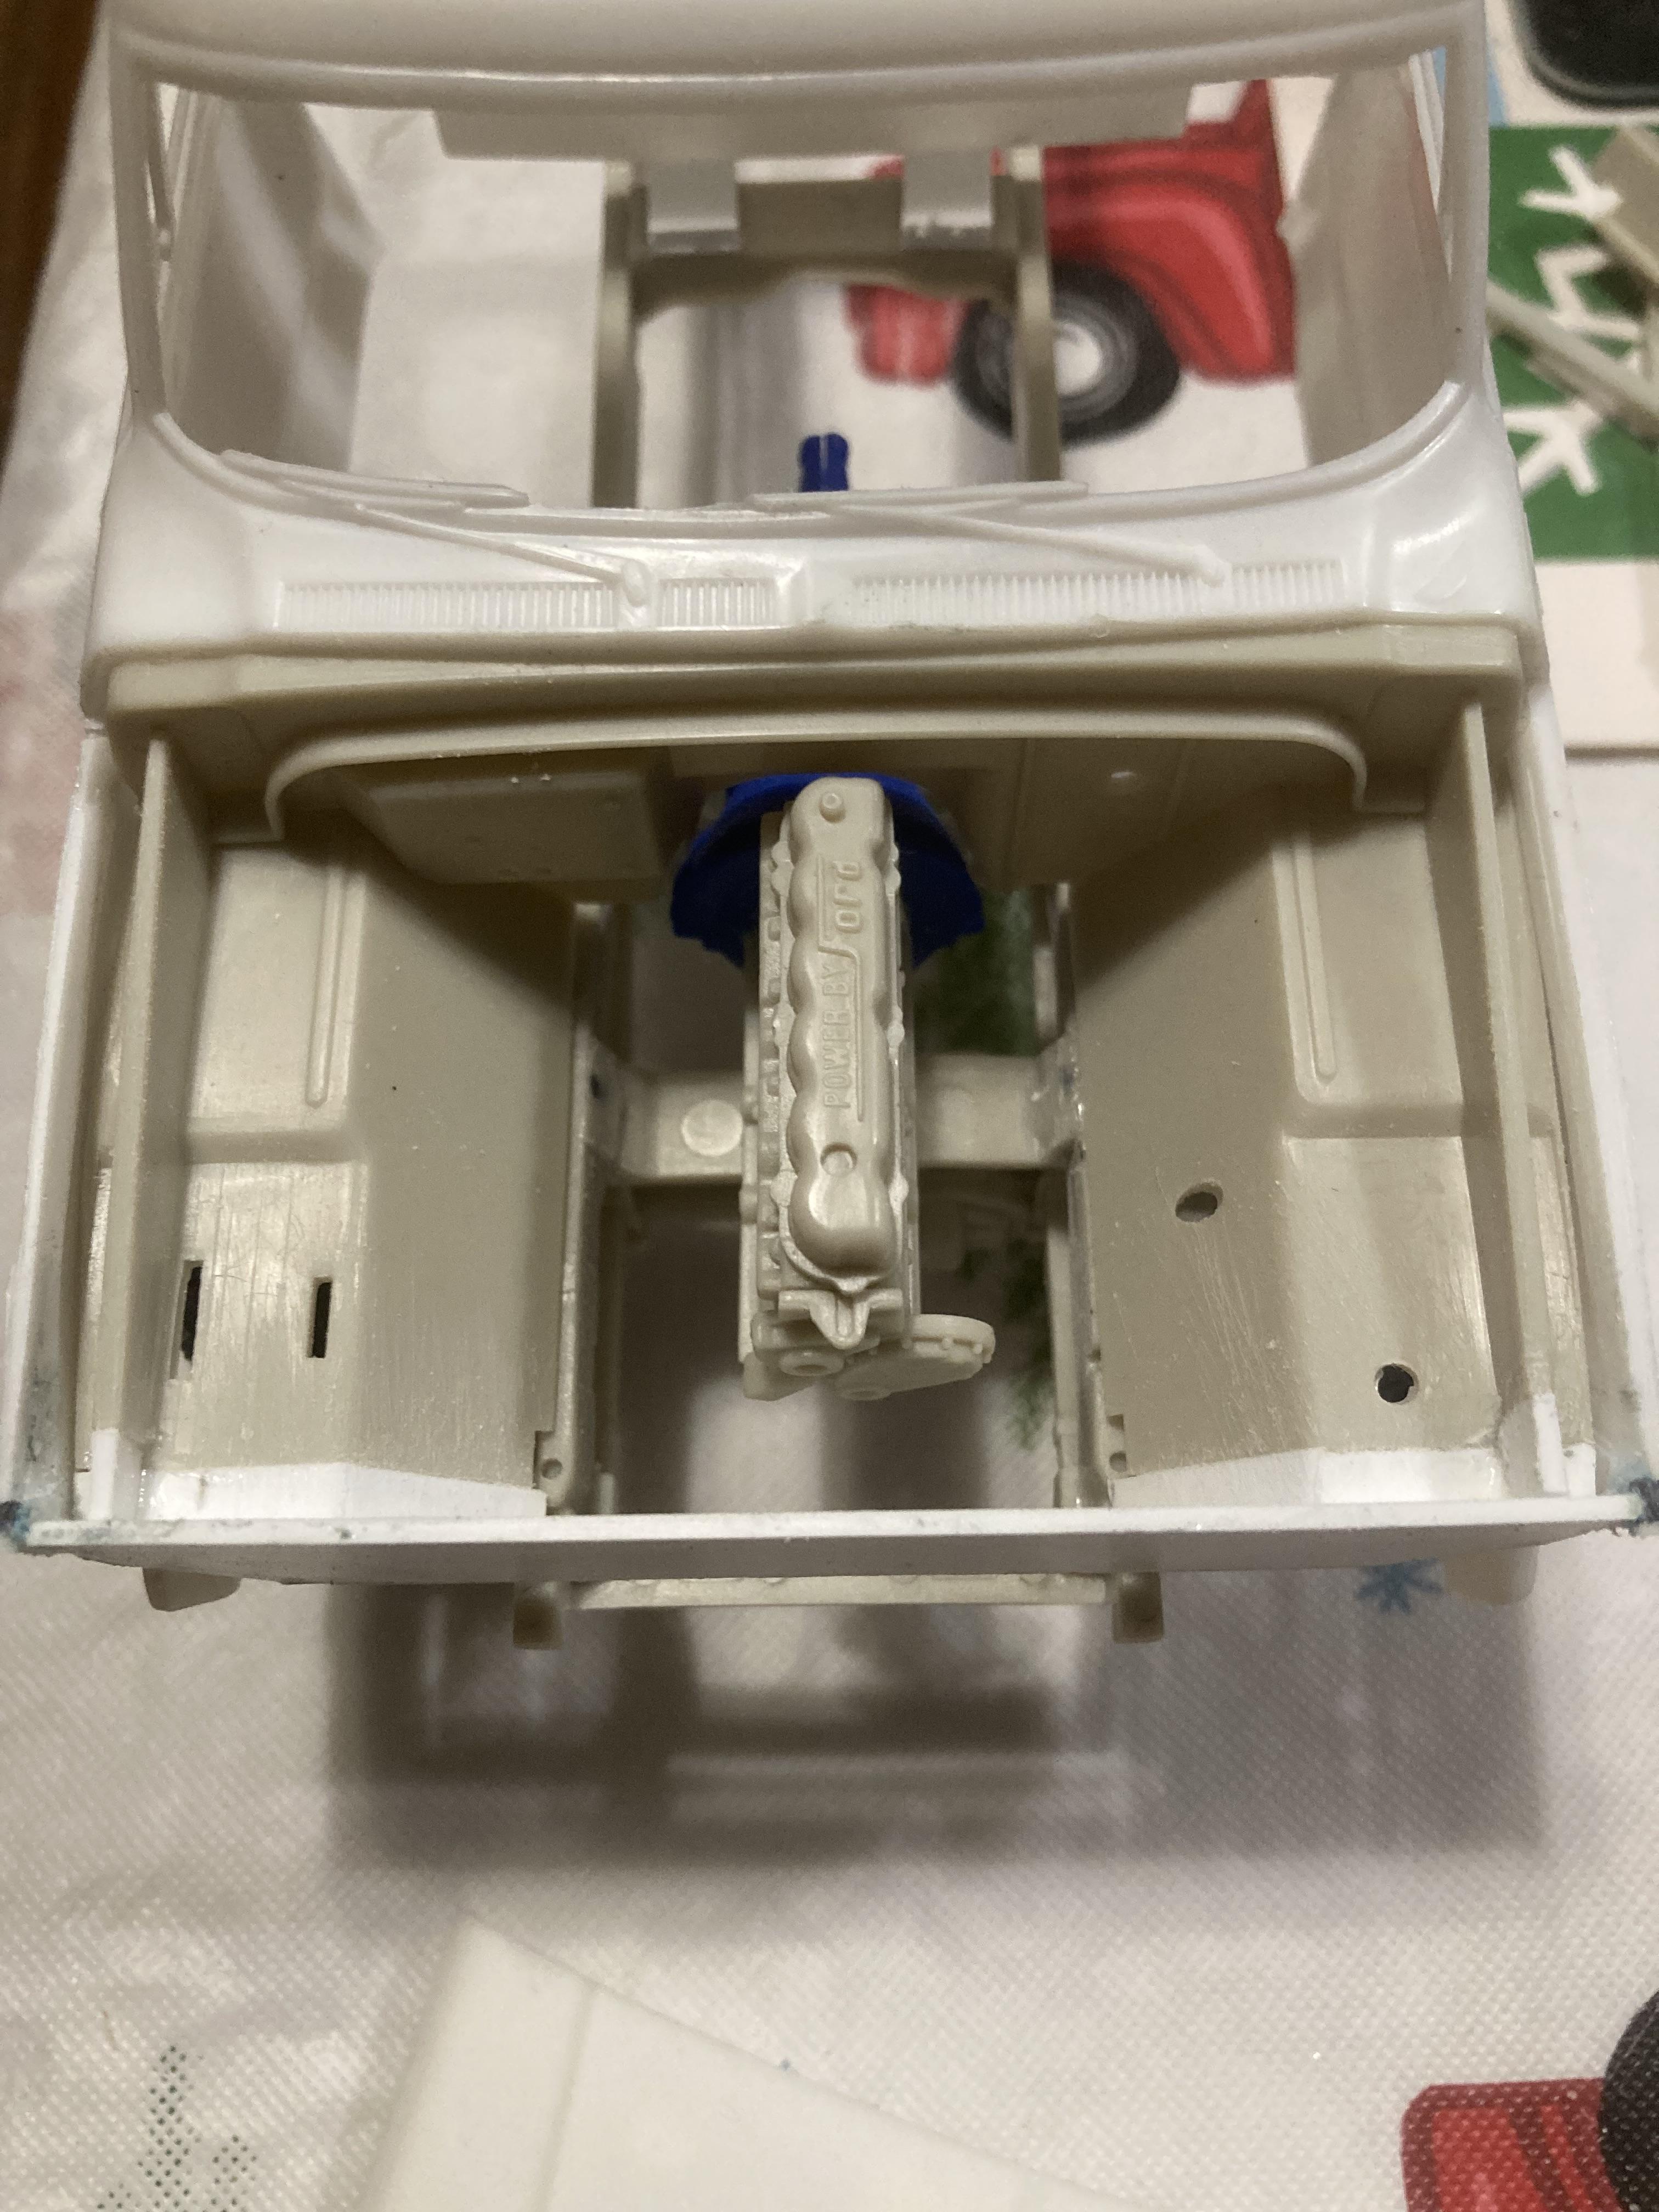
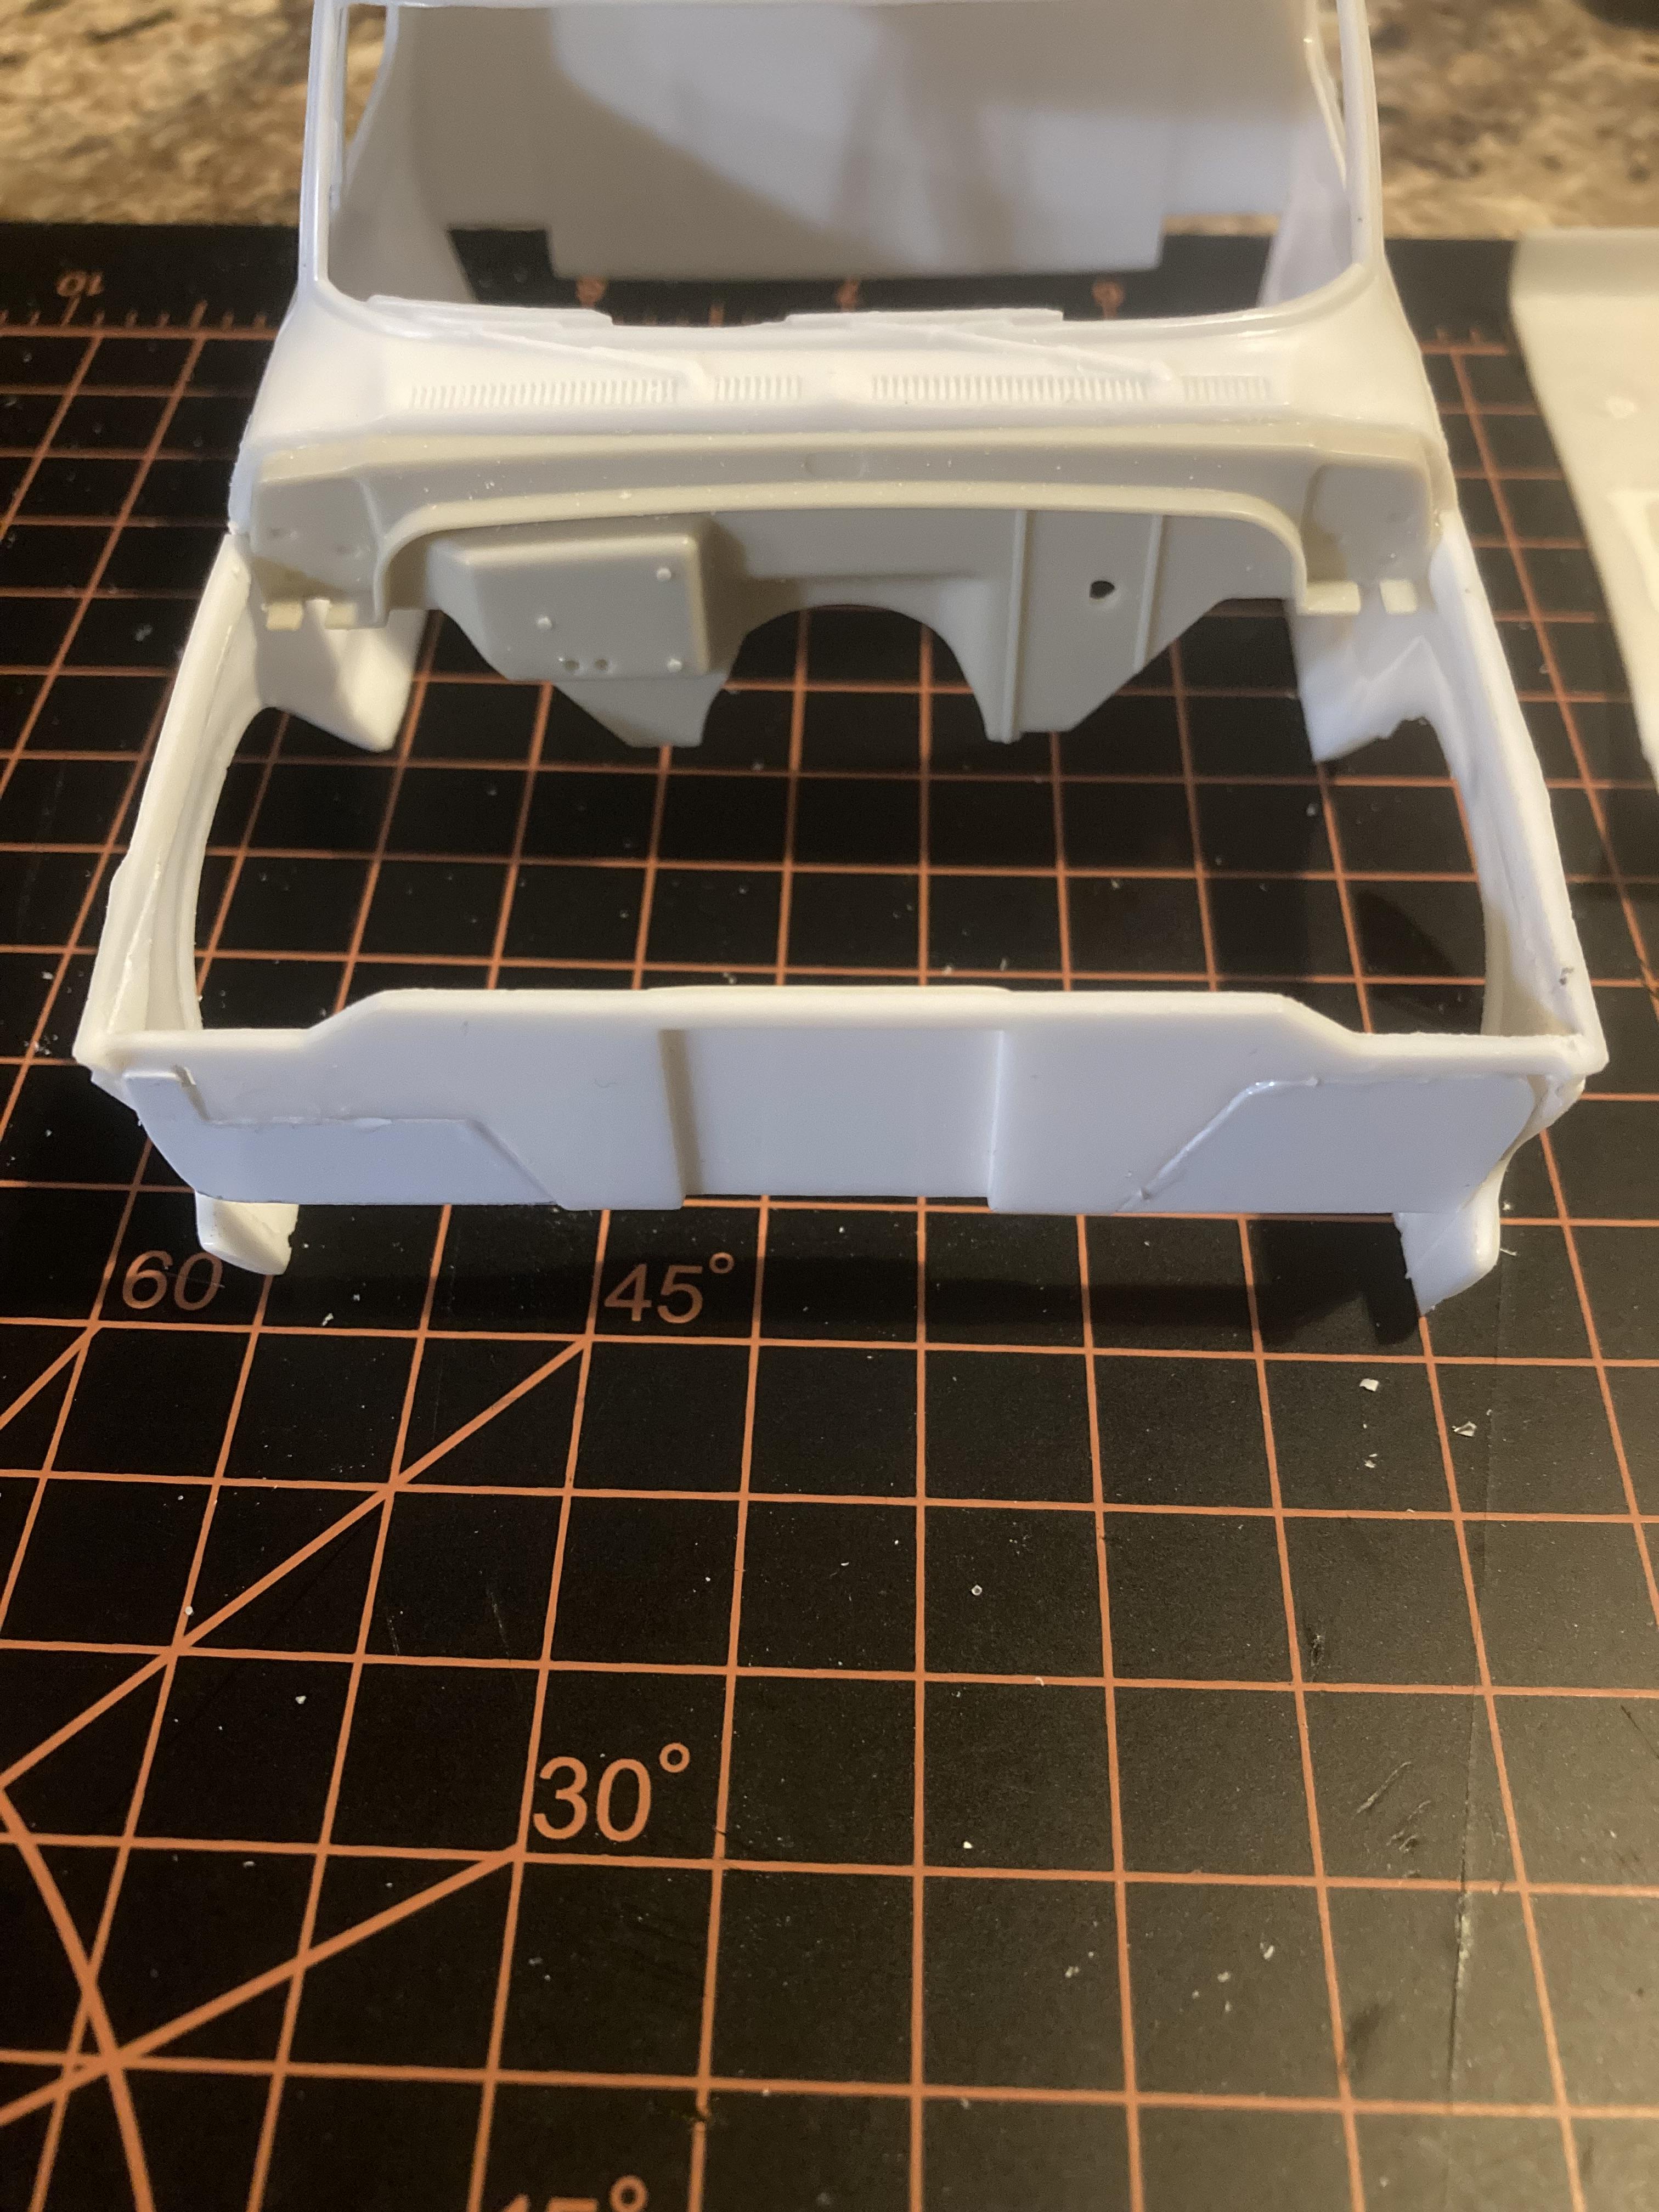
Decided last night that I didn’t like the radiator support and cut it out. I also made the decision to move the engine forward slightly. Doing both of these things, I feel, netted me a better result. The cab now sits exactly where I need it, and the engine is just off the firewall. This also allows me to fit the moebius core support with hood latch, and the radiator of my choosing. I now have plenty of room forward the cooling fan. This has also centered up my wheel to wheelwell position. Amazing what a scale 3” can do in terms of looks
-
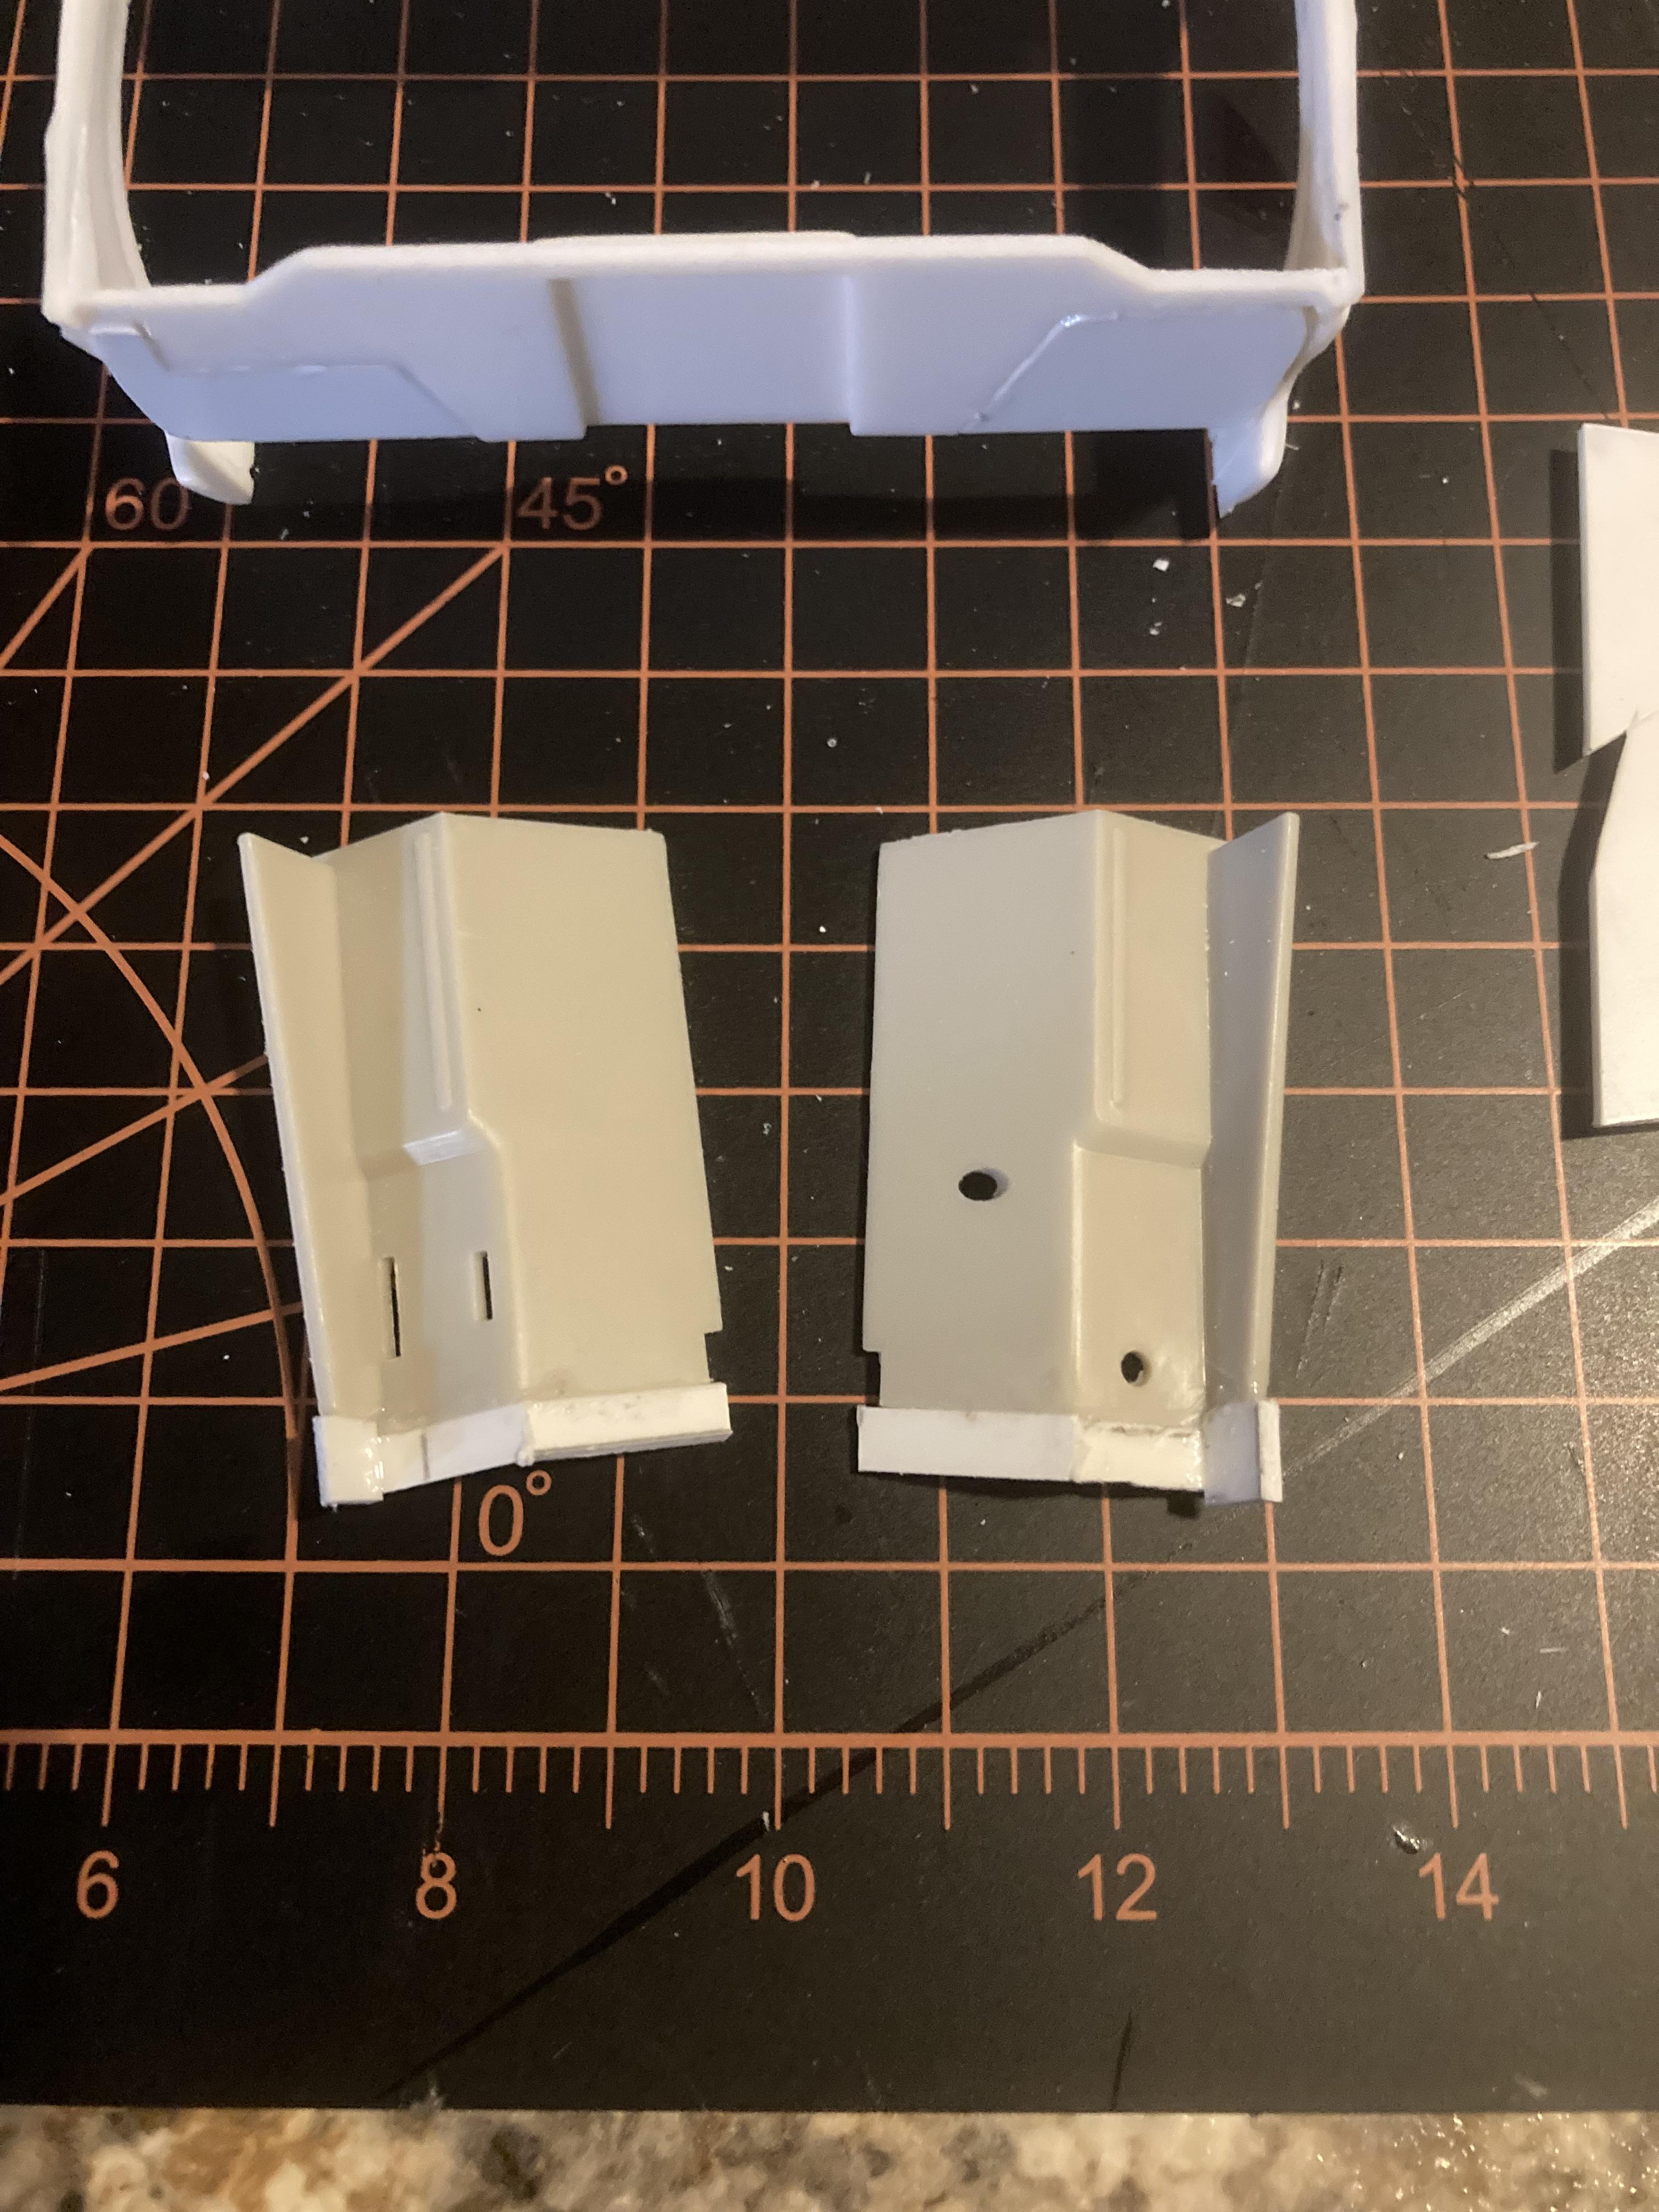
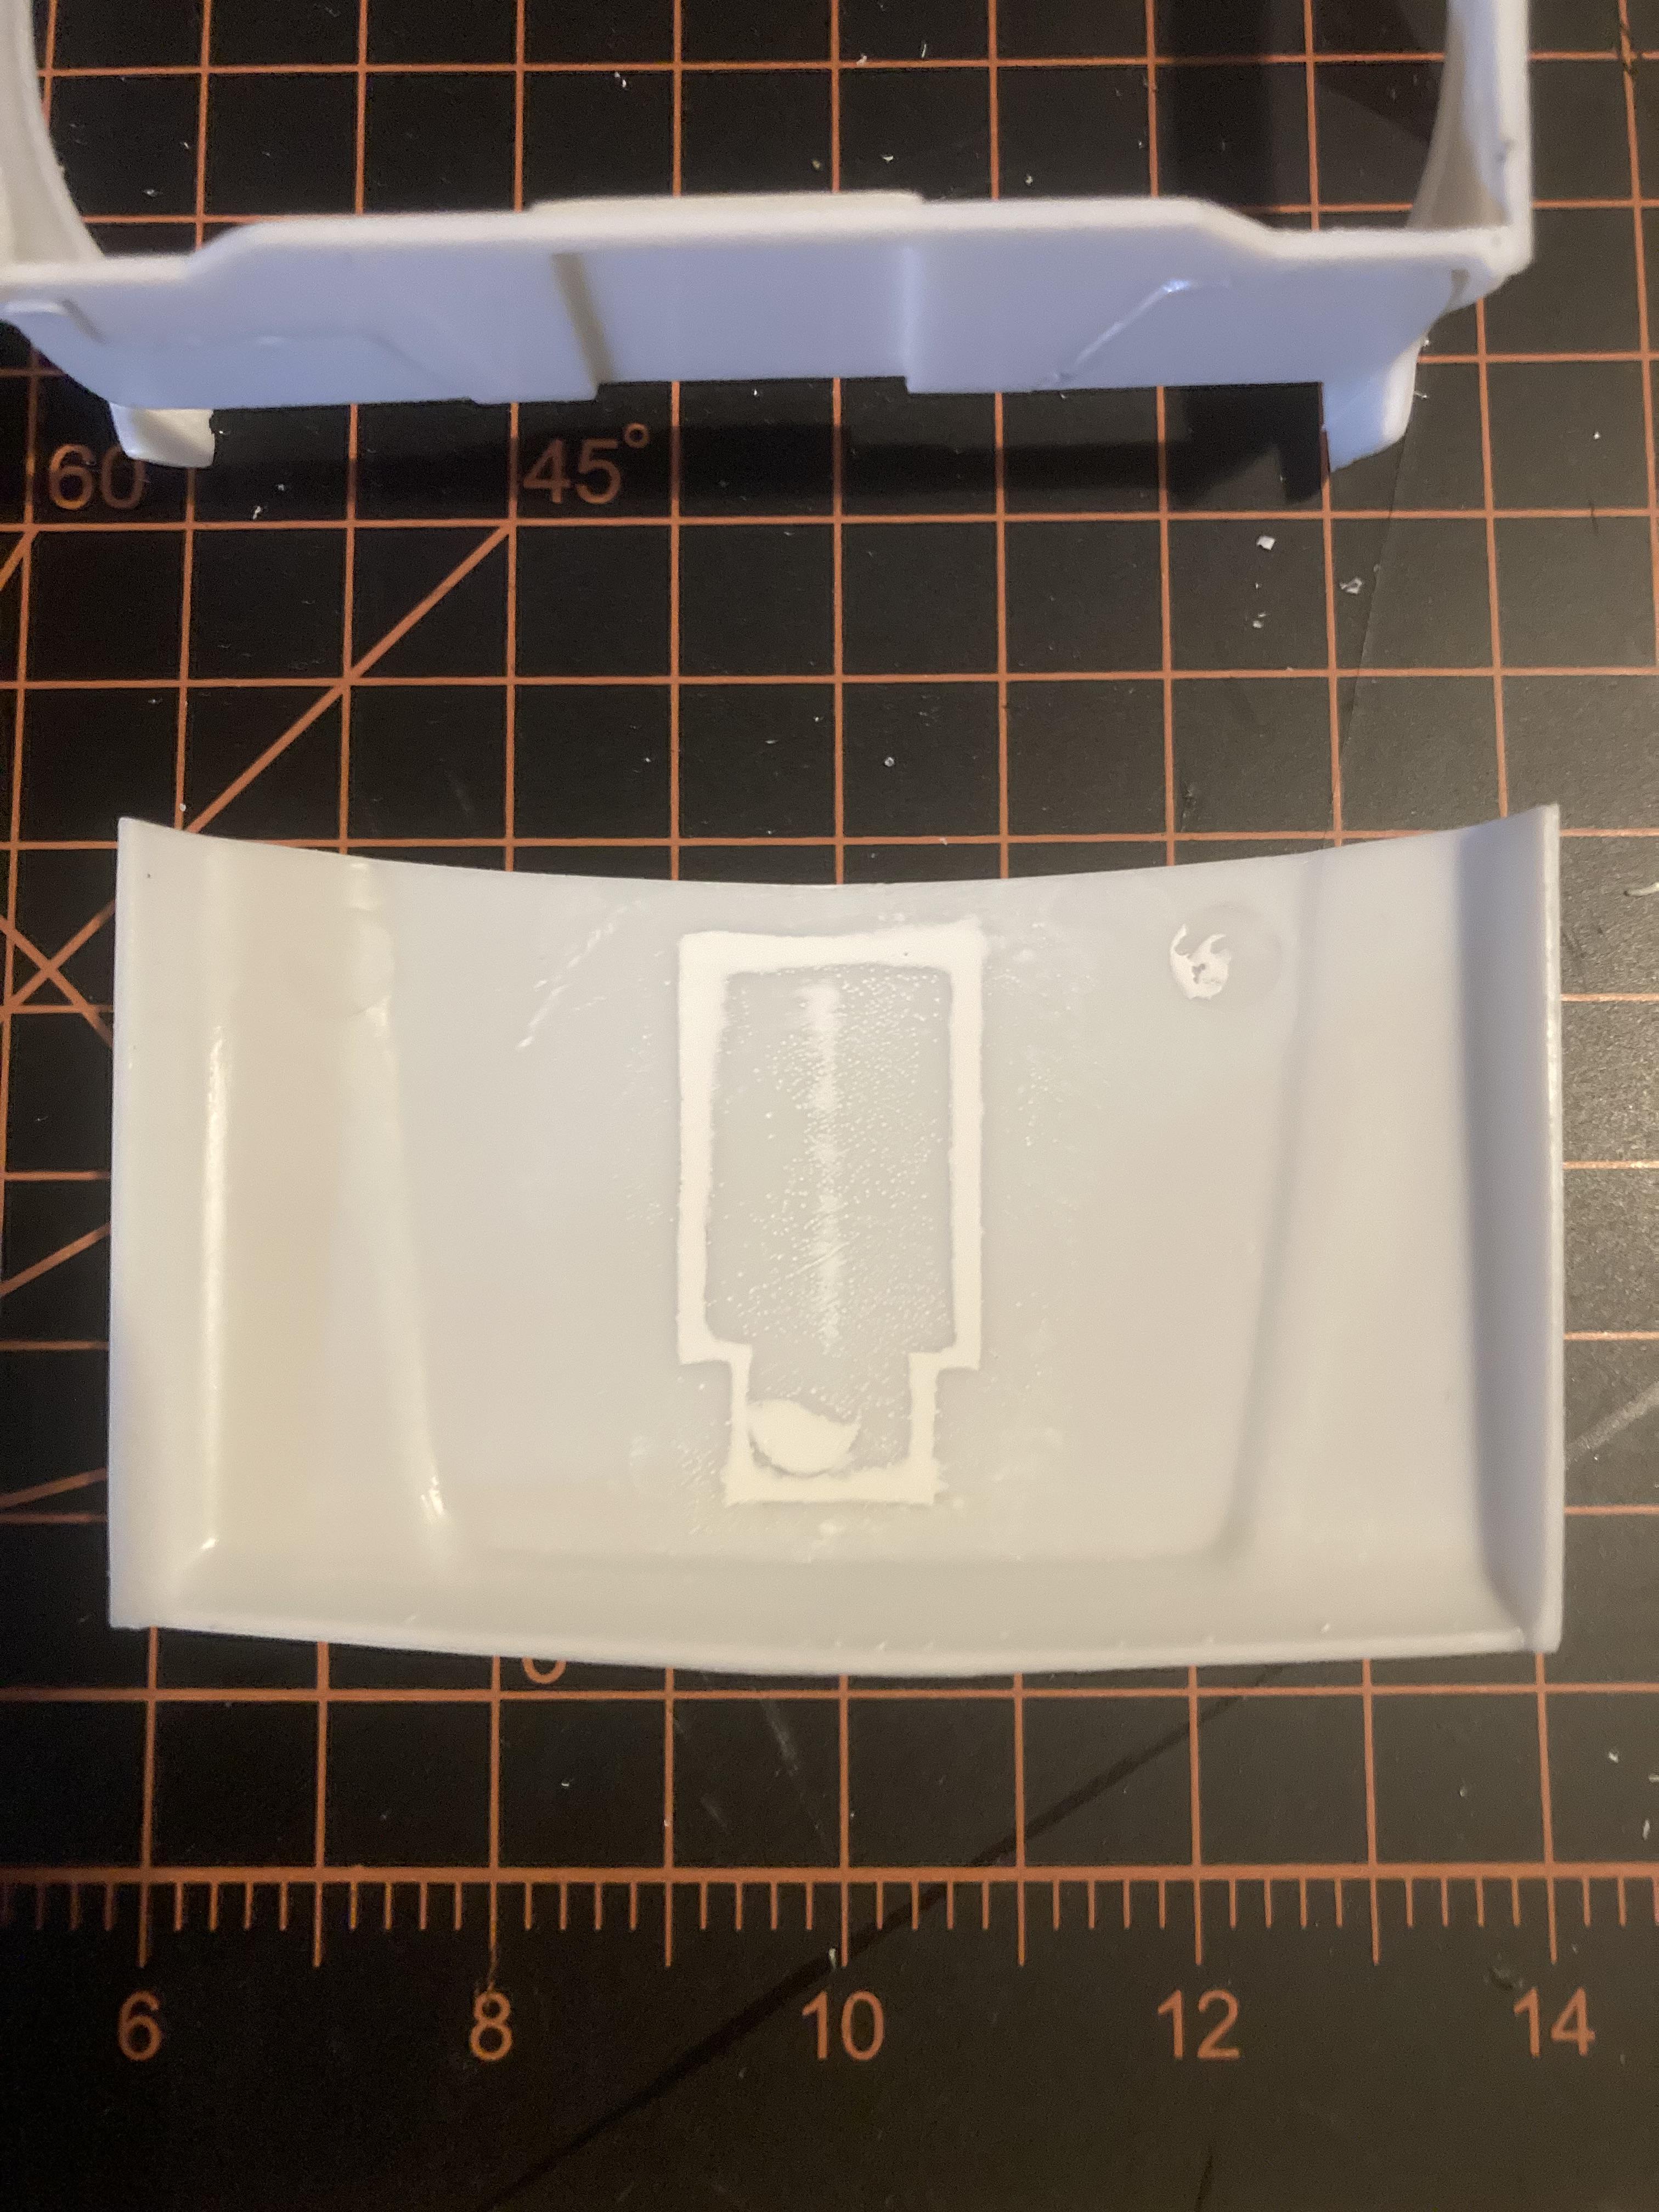
Update… I worked on the inner fenders tonight, to add some length to them to take up what was lost during their removal from the 72 ford cab… I also puttied the hood cutout for the blower. I believe this is a remnant from the Bigfoot 1 release using this body. Since I’m building a stock truck, it needs to be filled in. There are also large ejector marks in this hood, and I’d rather use this hood on this build than take the one I borrowed from Bigfoot 1. It has a slight bow in the middle, but it’s the next best one I have. I may have to slowly heat the hood and splay it outwards in hopes of taking some of that out. If anyone has any suggestions, I’m all ears. The other modification I made, was to the radiator core support. On the AMT kit, the fenders support this, and nothing else. By removing the entire engine bay, I was left with only thin strips of plastic holding the core support to the fenders. Now that the inner fenders are being lengthened, these will now tie into the core support and strengthen this area. From there I can work on removing the molded in radiator, in preparation for the moebius 6 cylinder radiator which is narrower. I believe this trend continued for the straight six into the 80’s. Not sure, but if someone knows, please let me know.
-
Sweet!
-
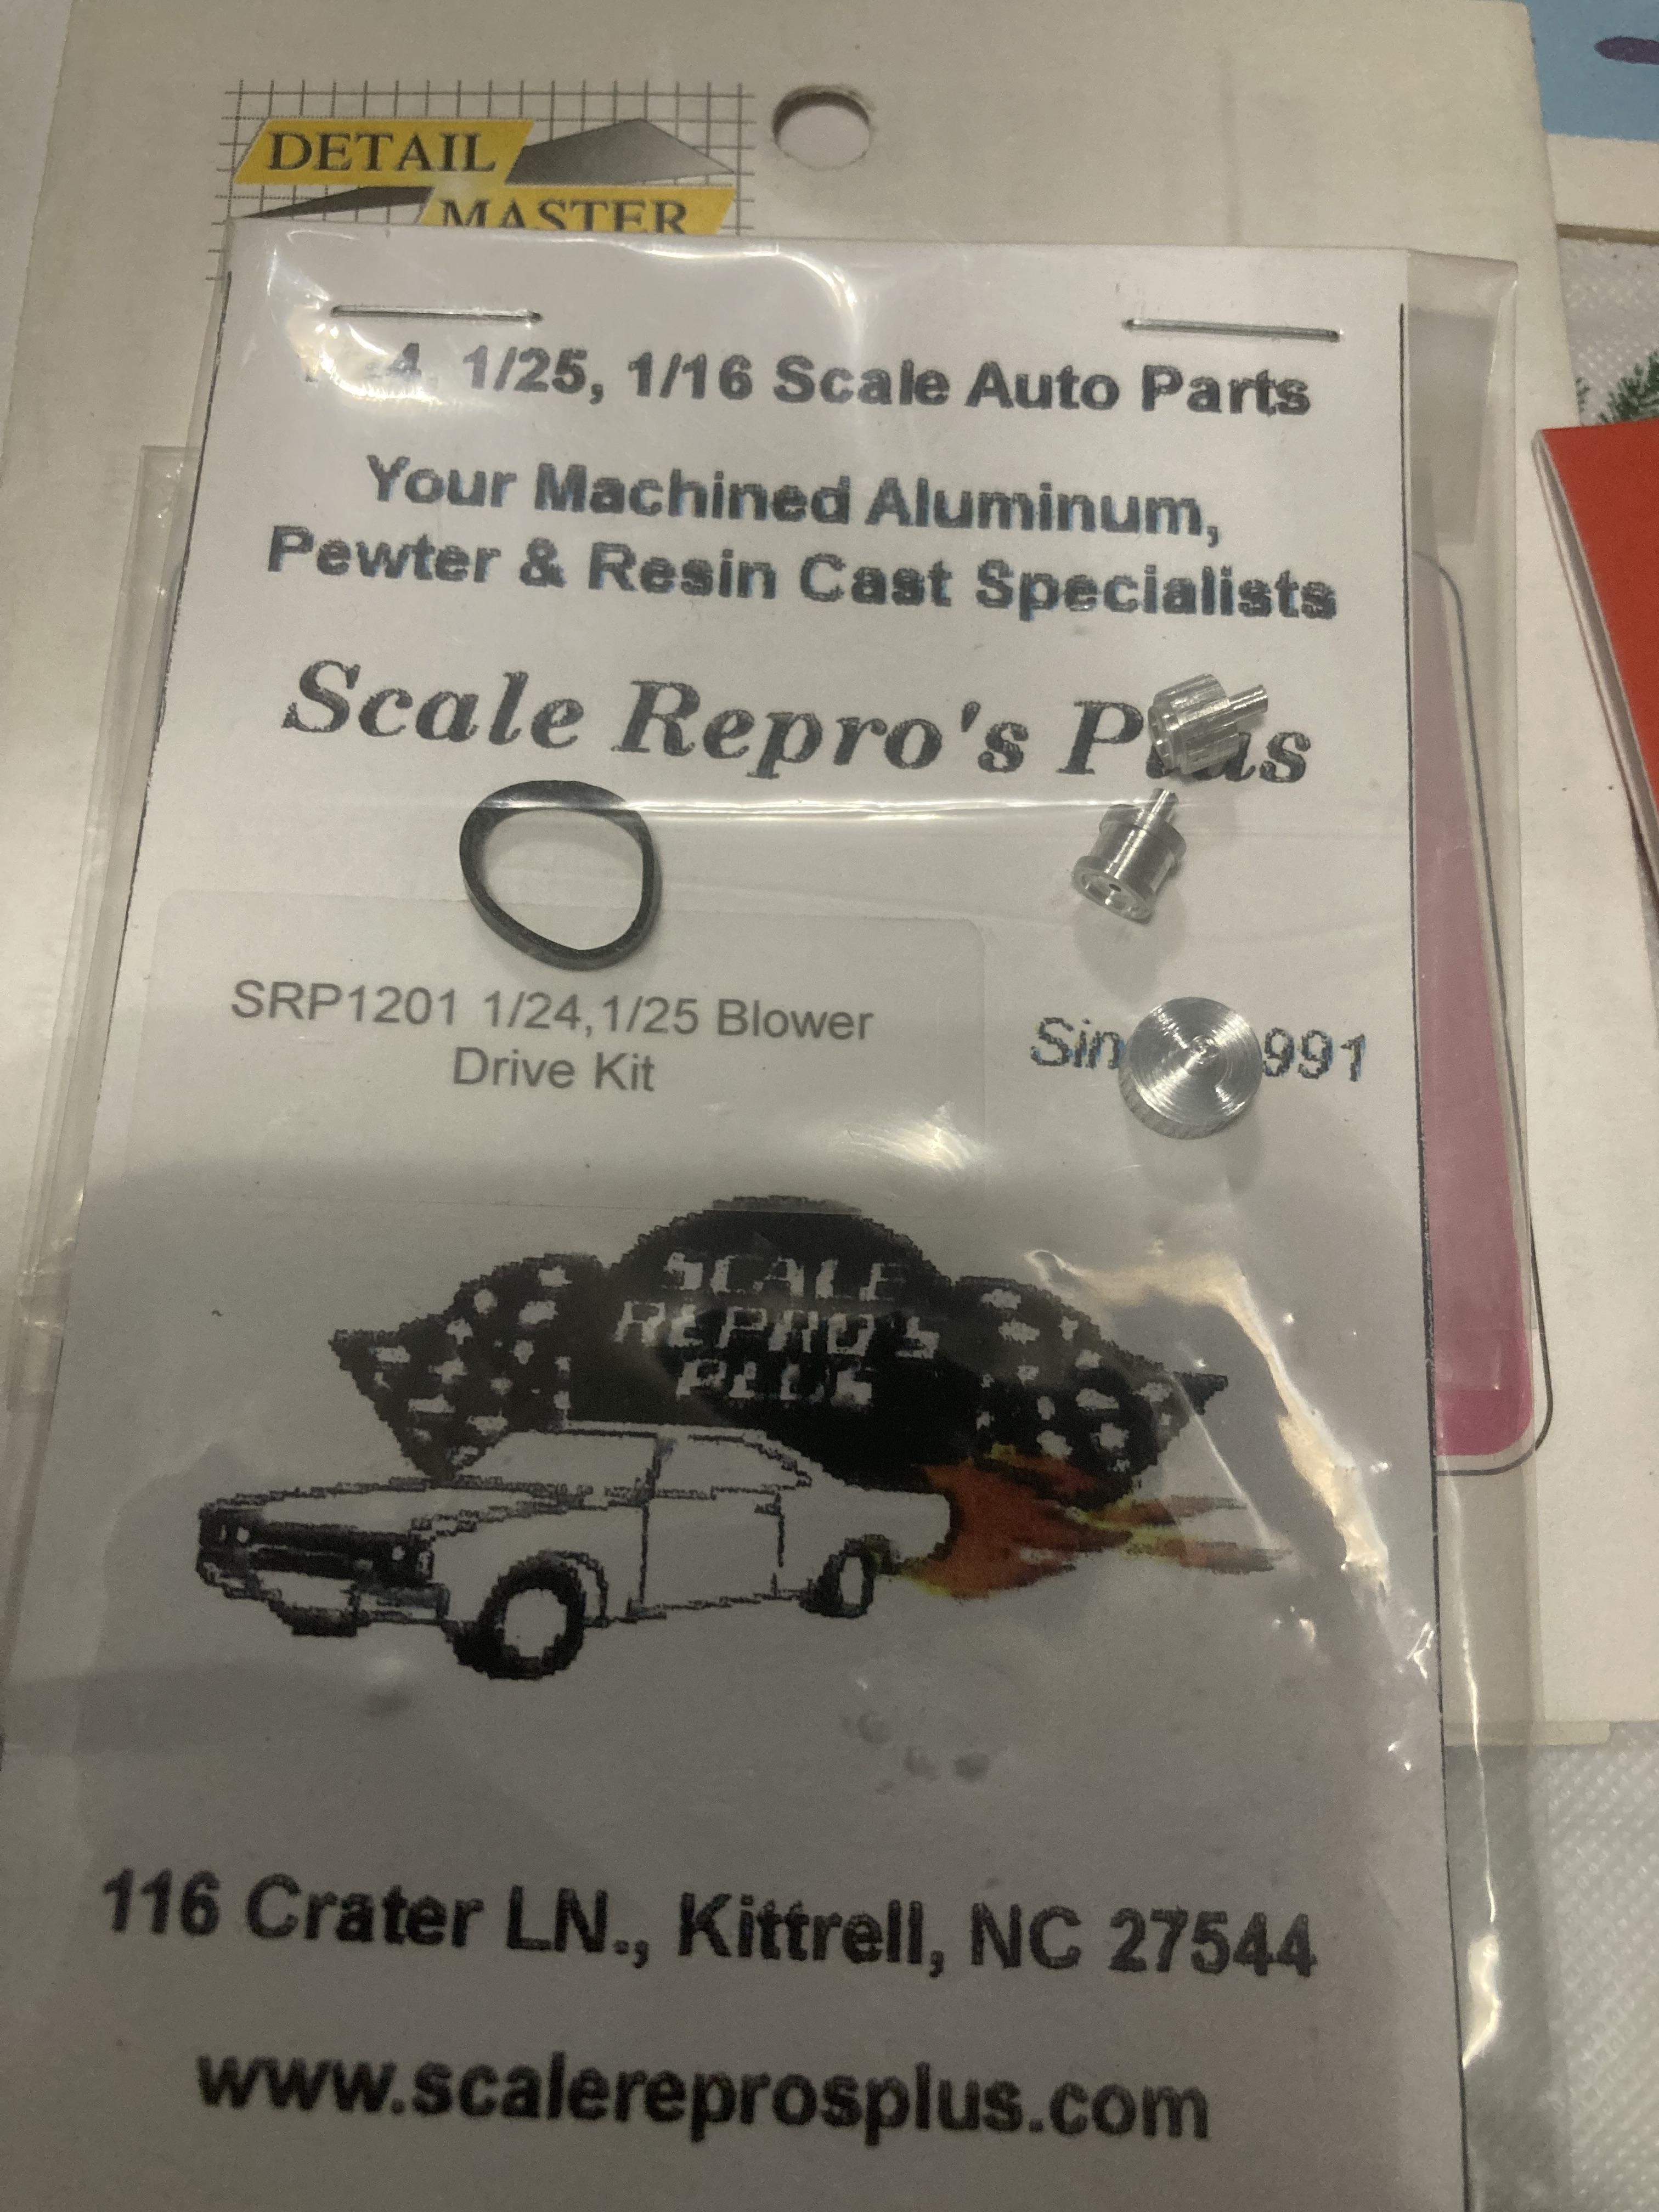
I did forget one thing. I got some blower belt pulleys from Scale Repros Plus.