-
Posts
277 -
Joined
-
Last visited
Content Type
Profiles
Forums
Events
Gallery
Everything posted by TheBEAUMONTGURU
-
Canadian 1961 Pontiac Laurentian conversion
TheBEAUMONTGURU replied to TheBEAUMONTGURU's topic in WIP: Model Cars
-

Canadian 1961 Pontiac Laurentian conversion
TheBEAUMONTGURU replied to TheBEAUMONTGURU's topic in WIP: Model Cars
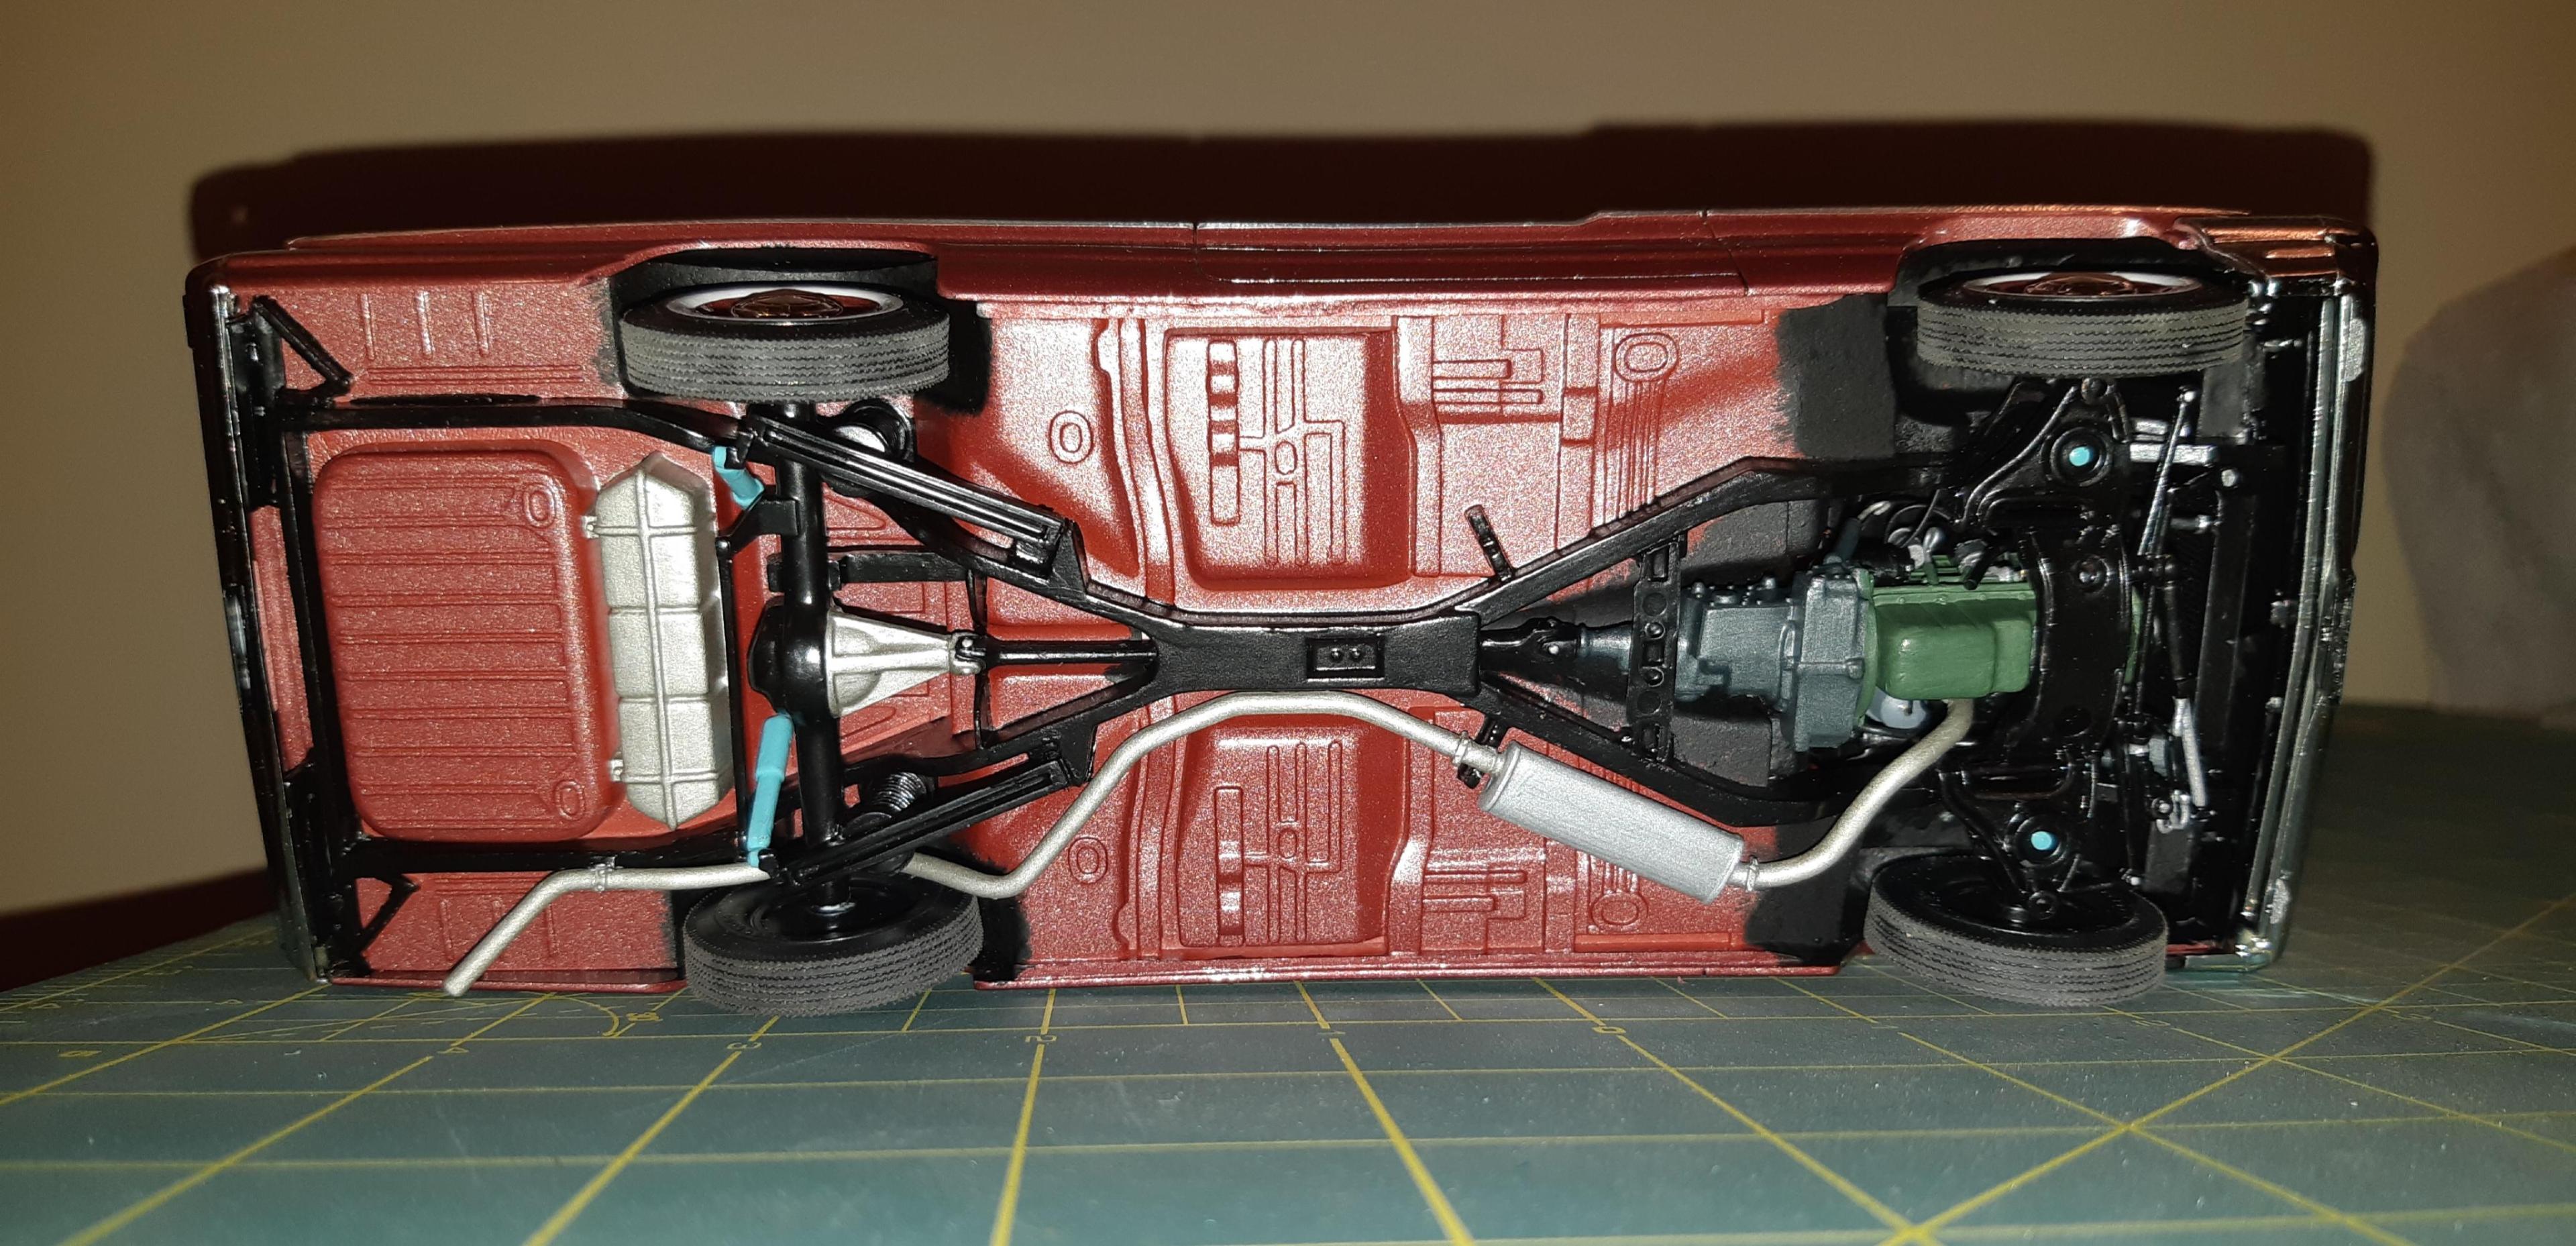
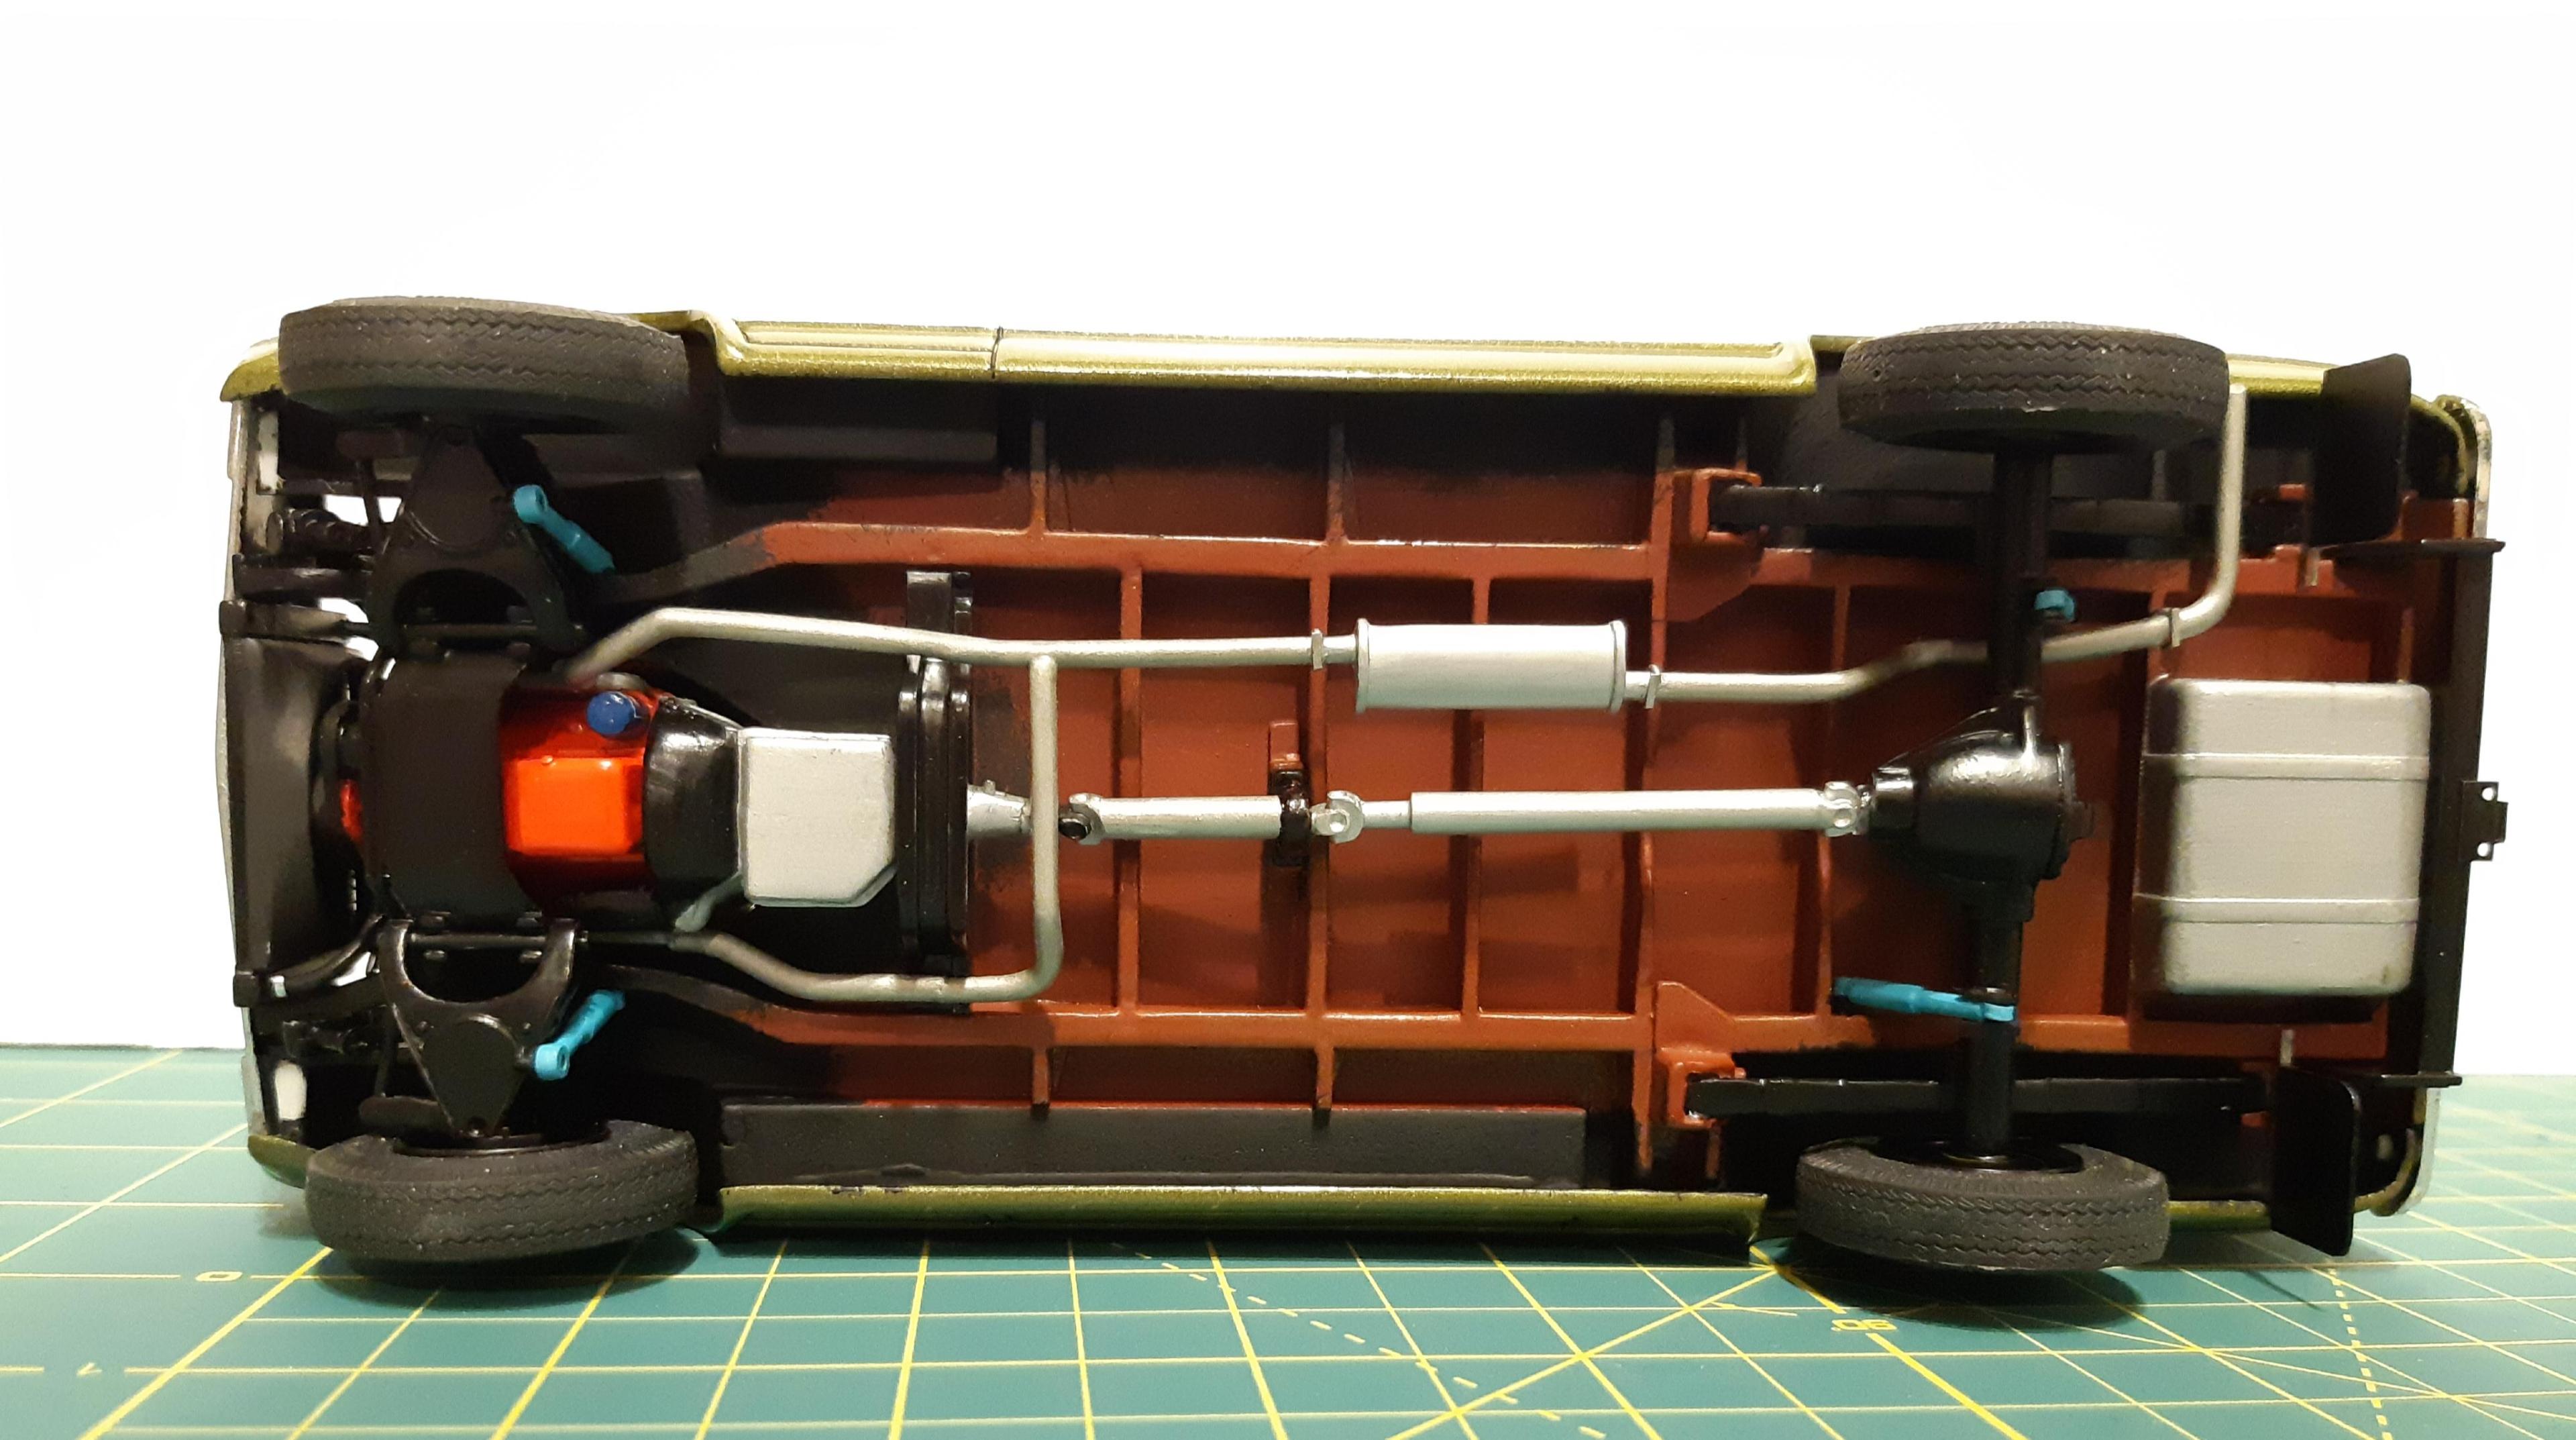
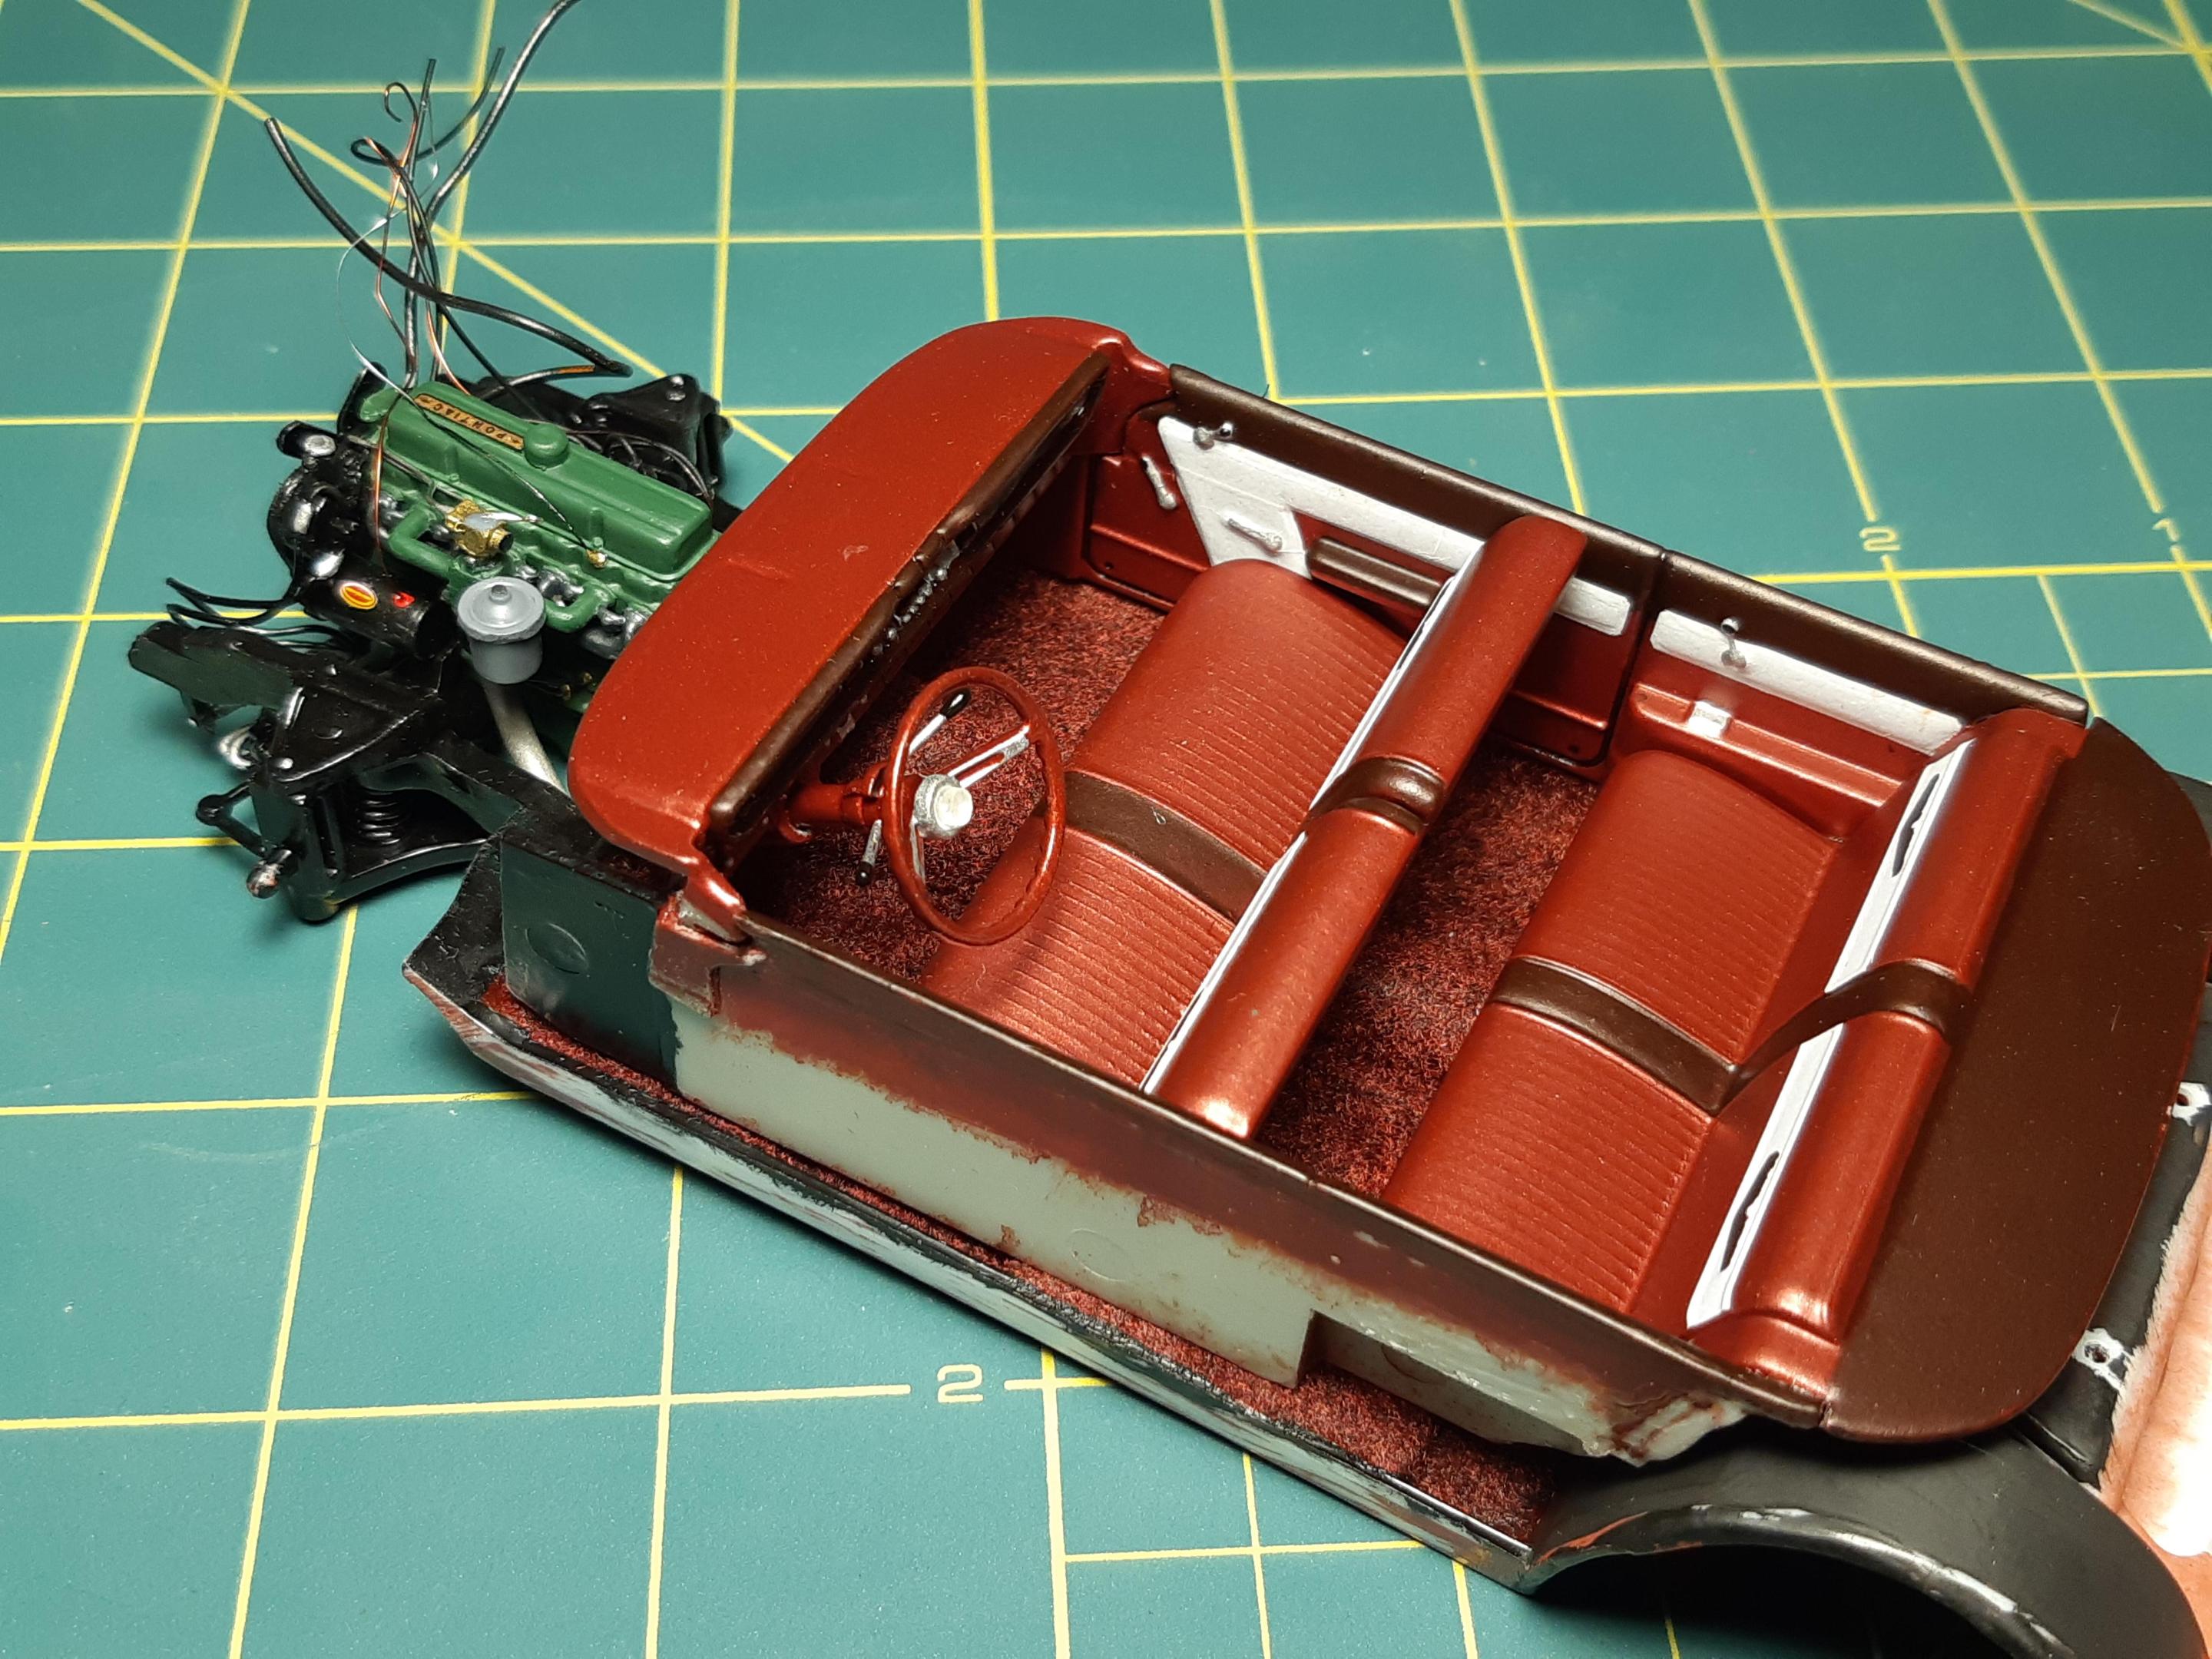
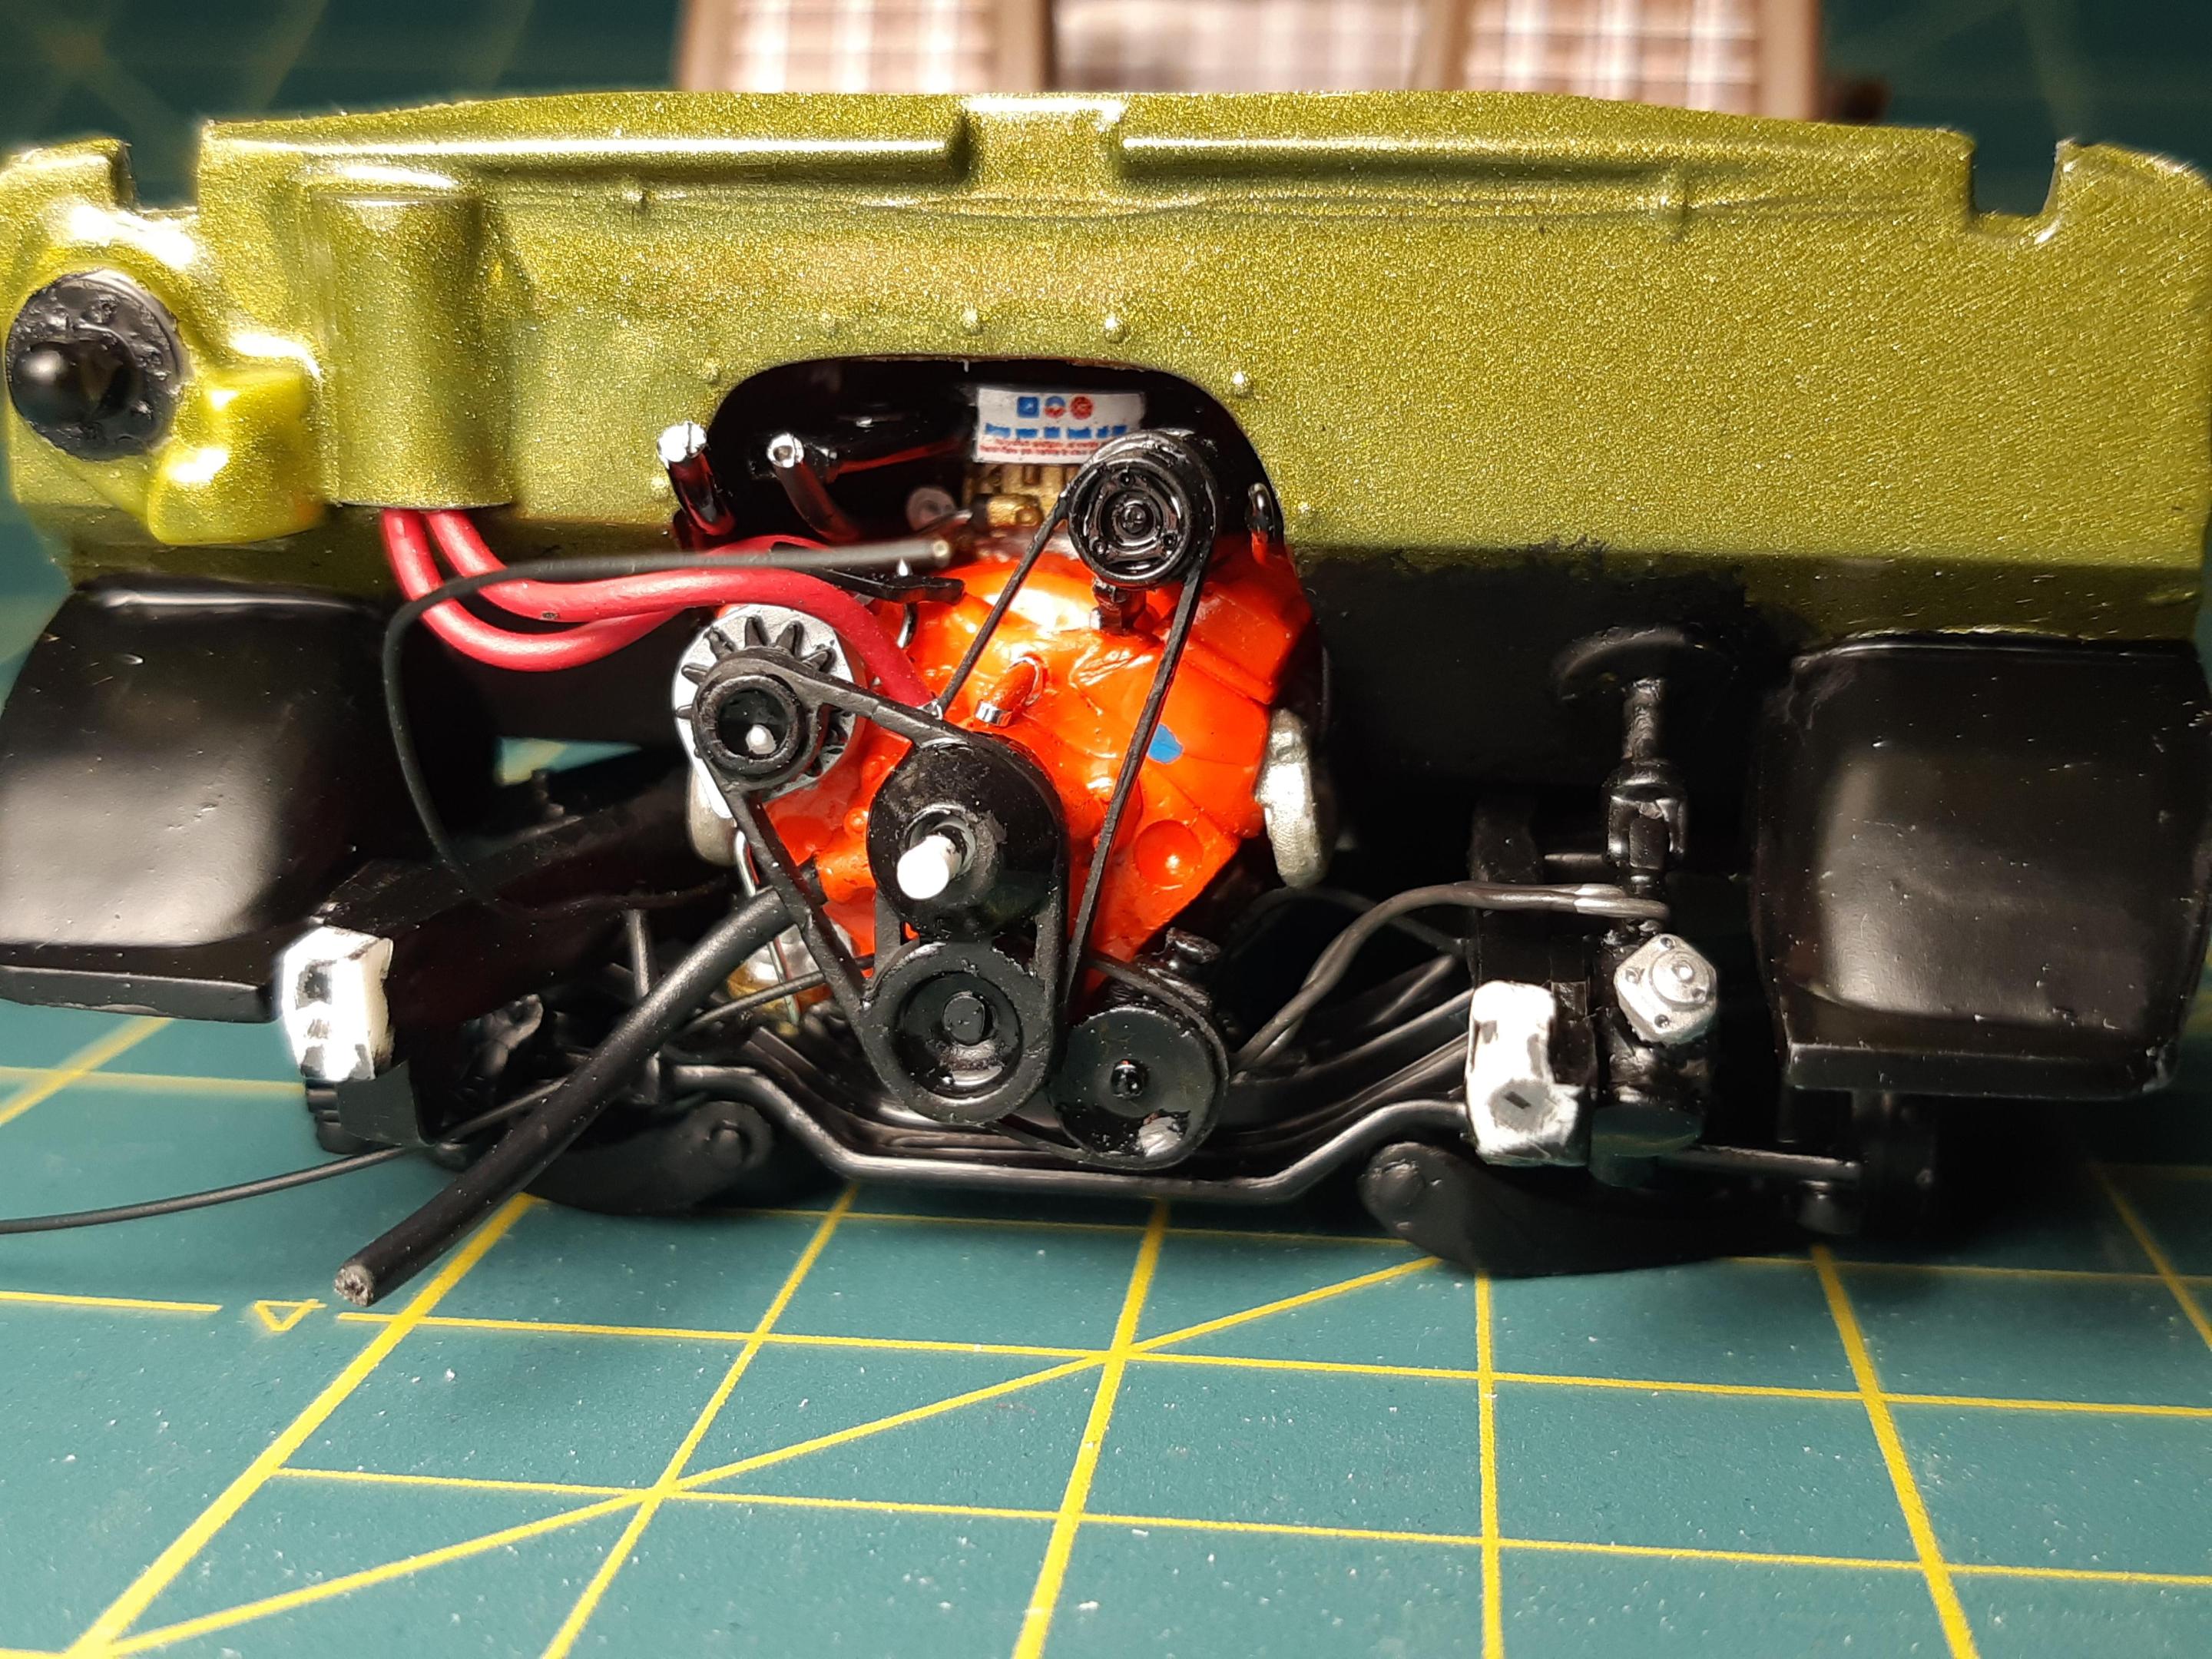
A few more details and some foil work. Here is some of the underside during final assembly. I didnt go too crazy underneath, and with the color its hard to tell i have red oxide primer with the body color overspray. The exhaust front section is hand formed to meet up with the 6cyl properly. You have to look close to see my P/S slave cyl details. -

INFINI MODEL sanding sticks
TheBEAUMONTGURU replied to NOBLNG's topic in Tips, Tricks, and Tutorials
Thanks for the tip Greg. I will have to give them a try. Did you buy them Locally?? -

A slightly more accurate Grumpy's 66 nova
TheBEAUMONTGURU replied to TheBEAUMONTGURU's topic in Drag Racing
Thanks guys! i really enjoyed building this one. The hardest part was researching and finding pics of the real car. -
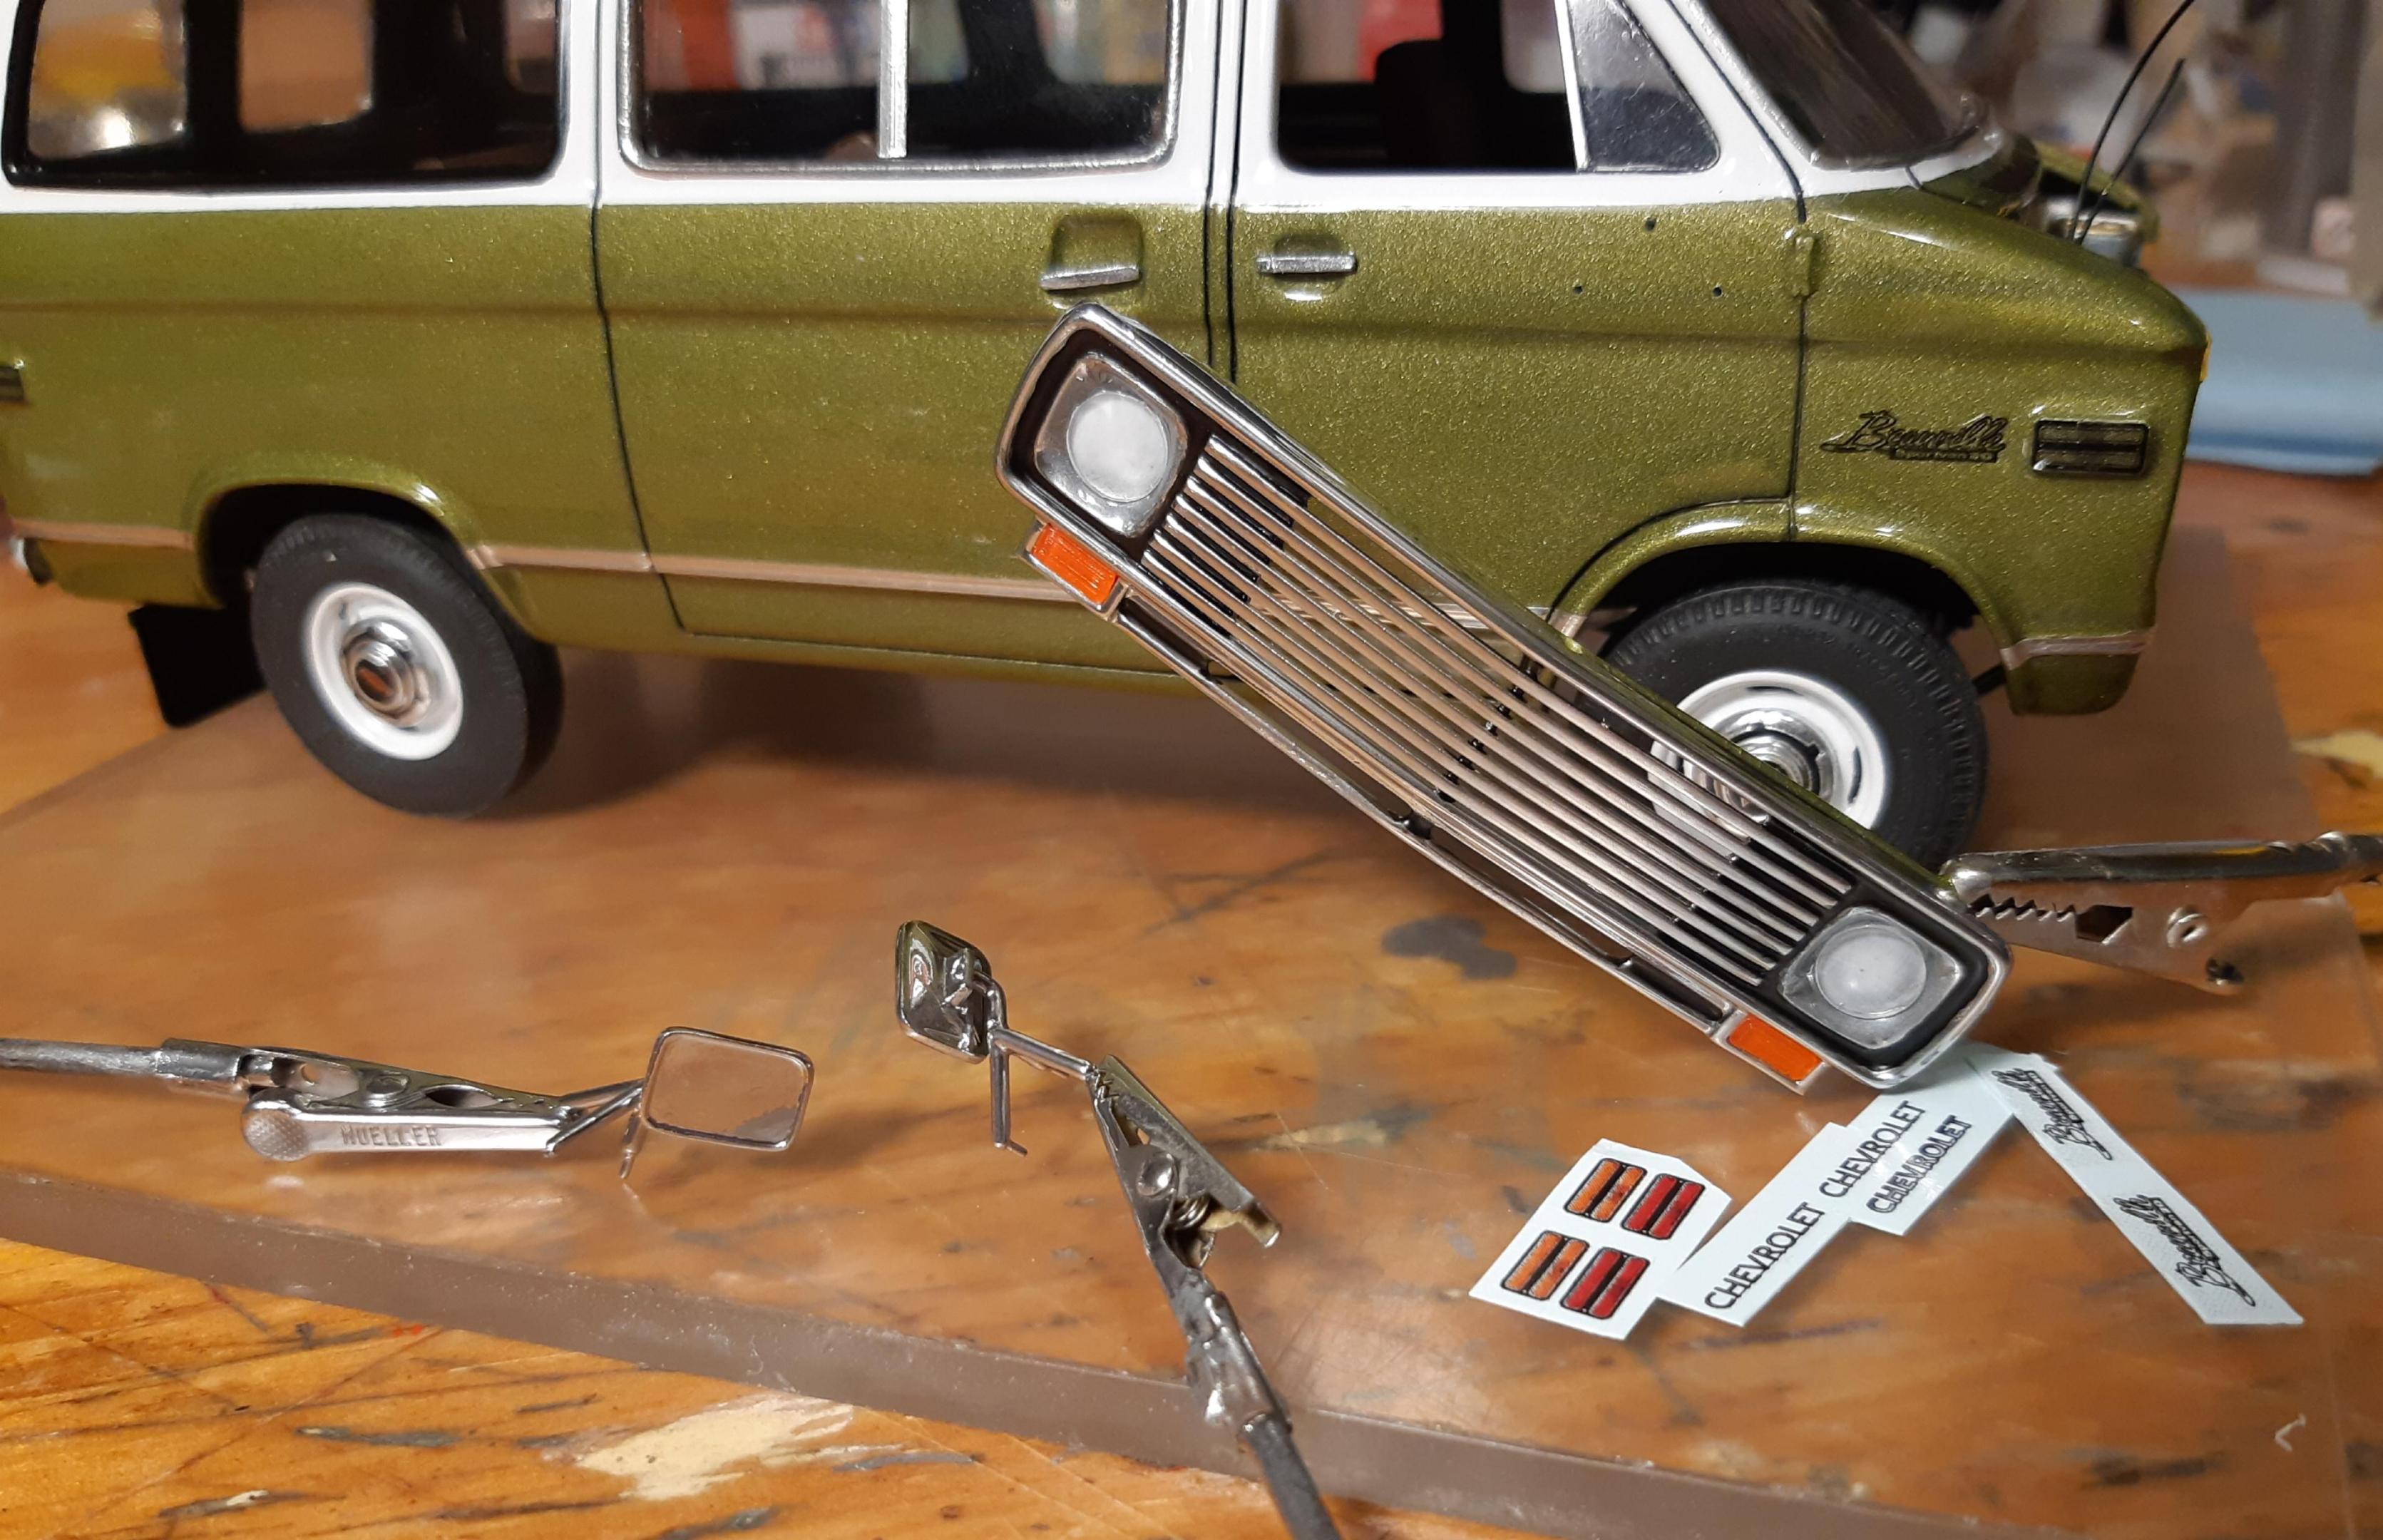
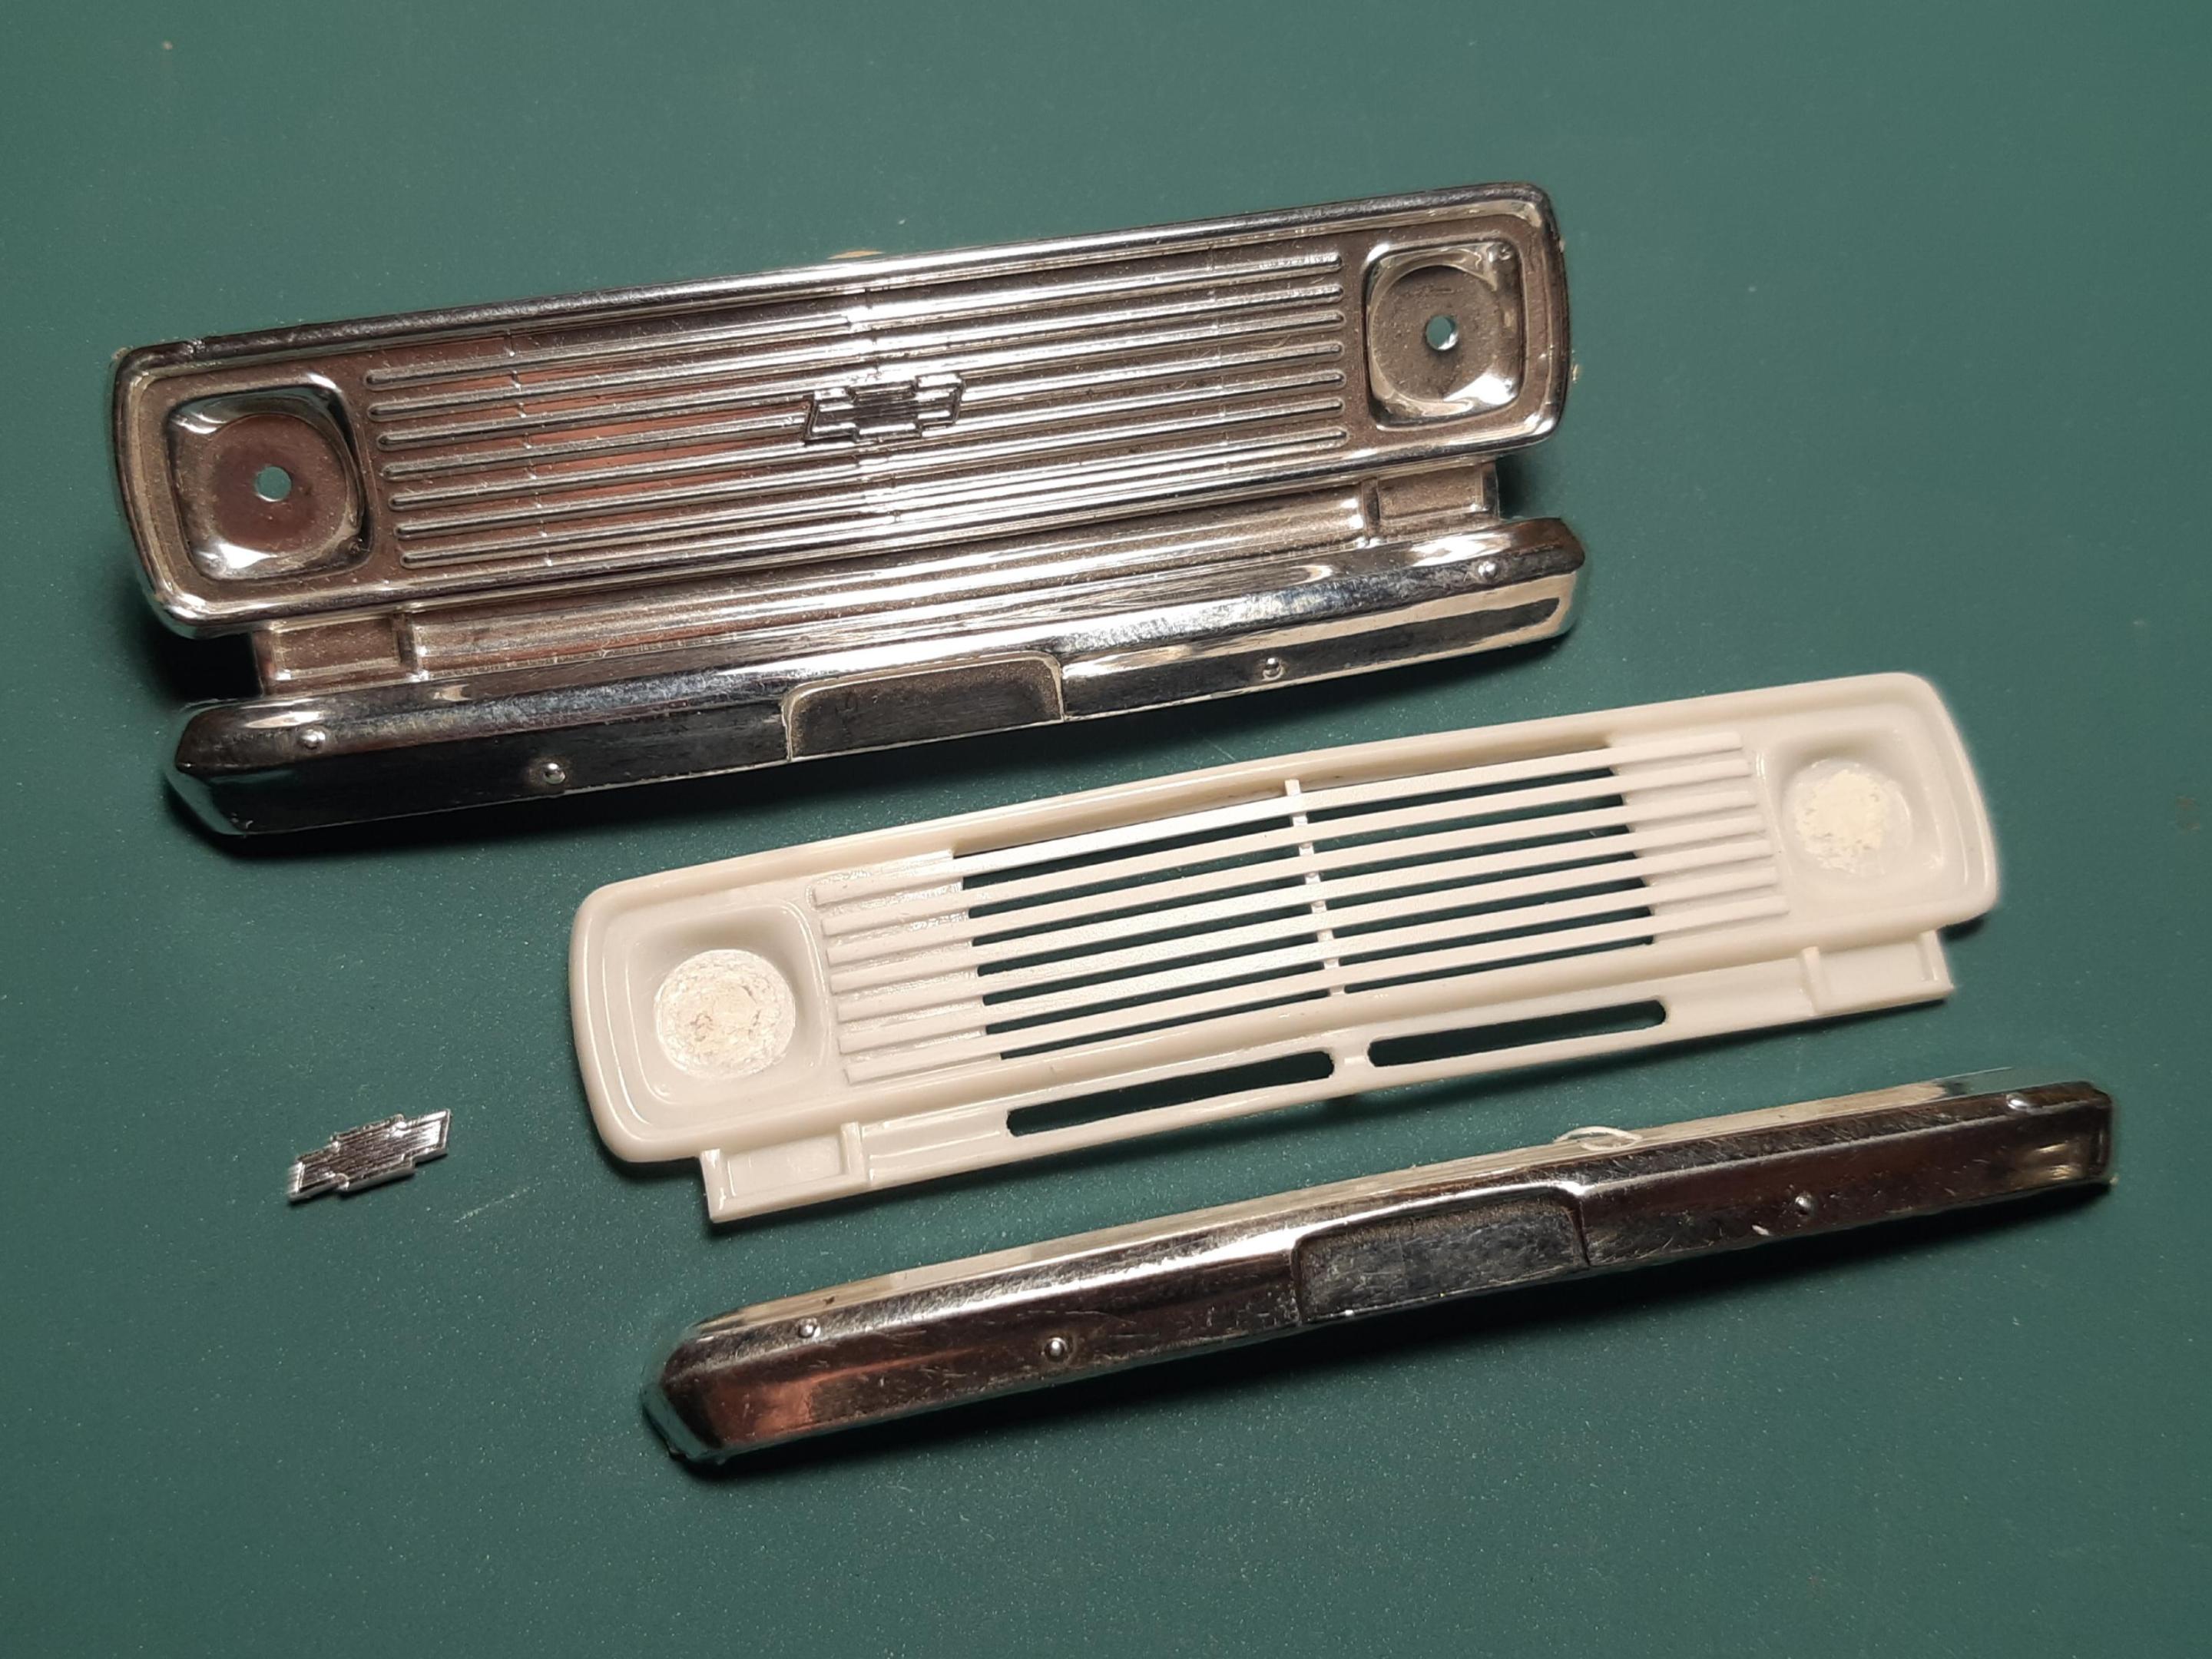
I painted the grill and front bumper with the new revell chrome, sprayed straight out of the can. very good results, but you still have to be careful handling. The outside mirrors are from the kit, but i added a thin framework around the glass for a more realistic look, also sprayed the revell. Ignore the white headlights in this photo as my Microscale is still drying! Also note my decals i made in photoshop for the side marker lights, BEAUVILLE Sportvan 20, and the CHEVROLET rear door emblem. I also have my new scratchbuilt door handles in place in this pic.
-
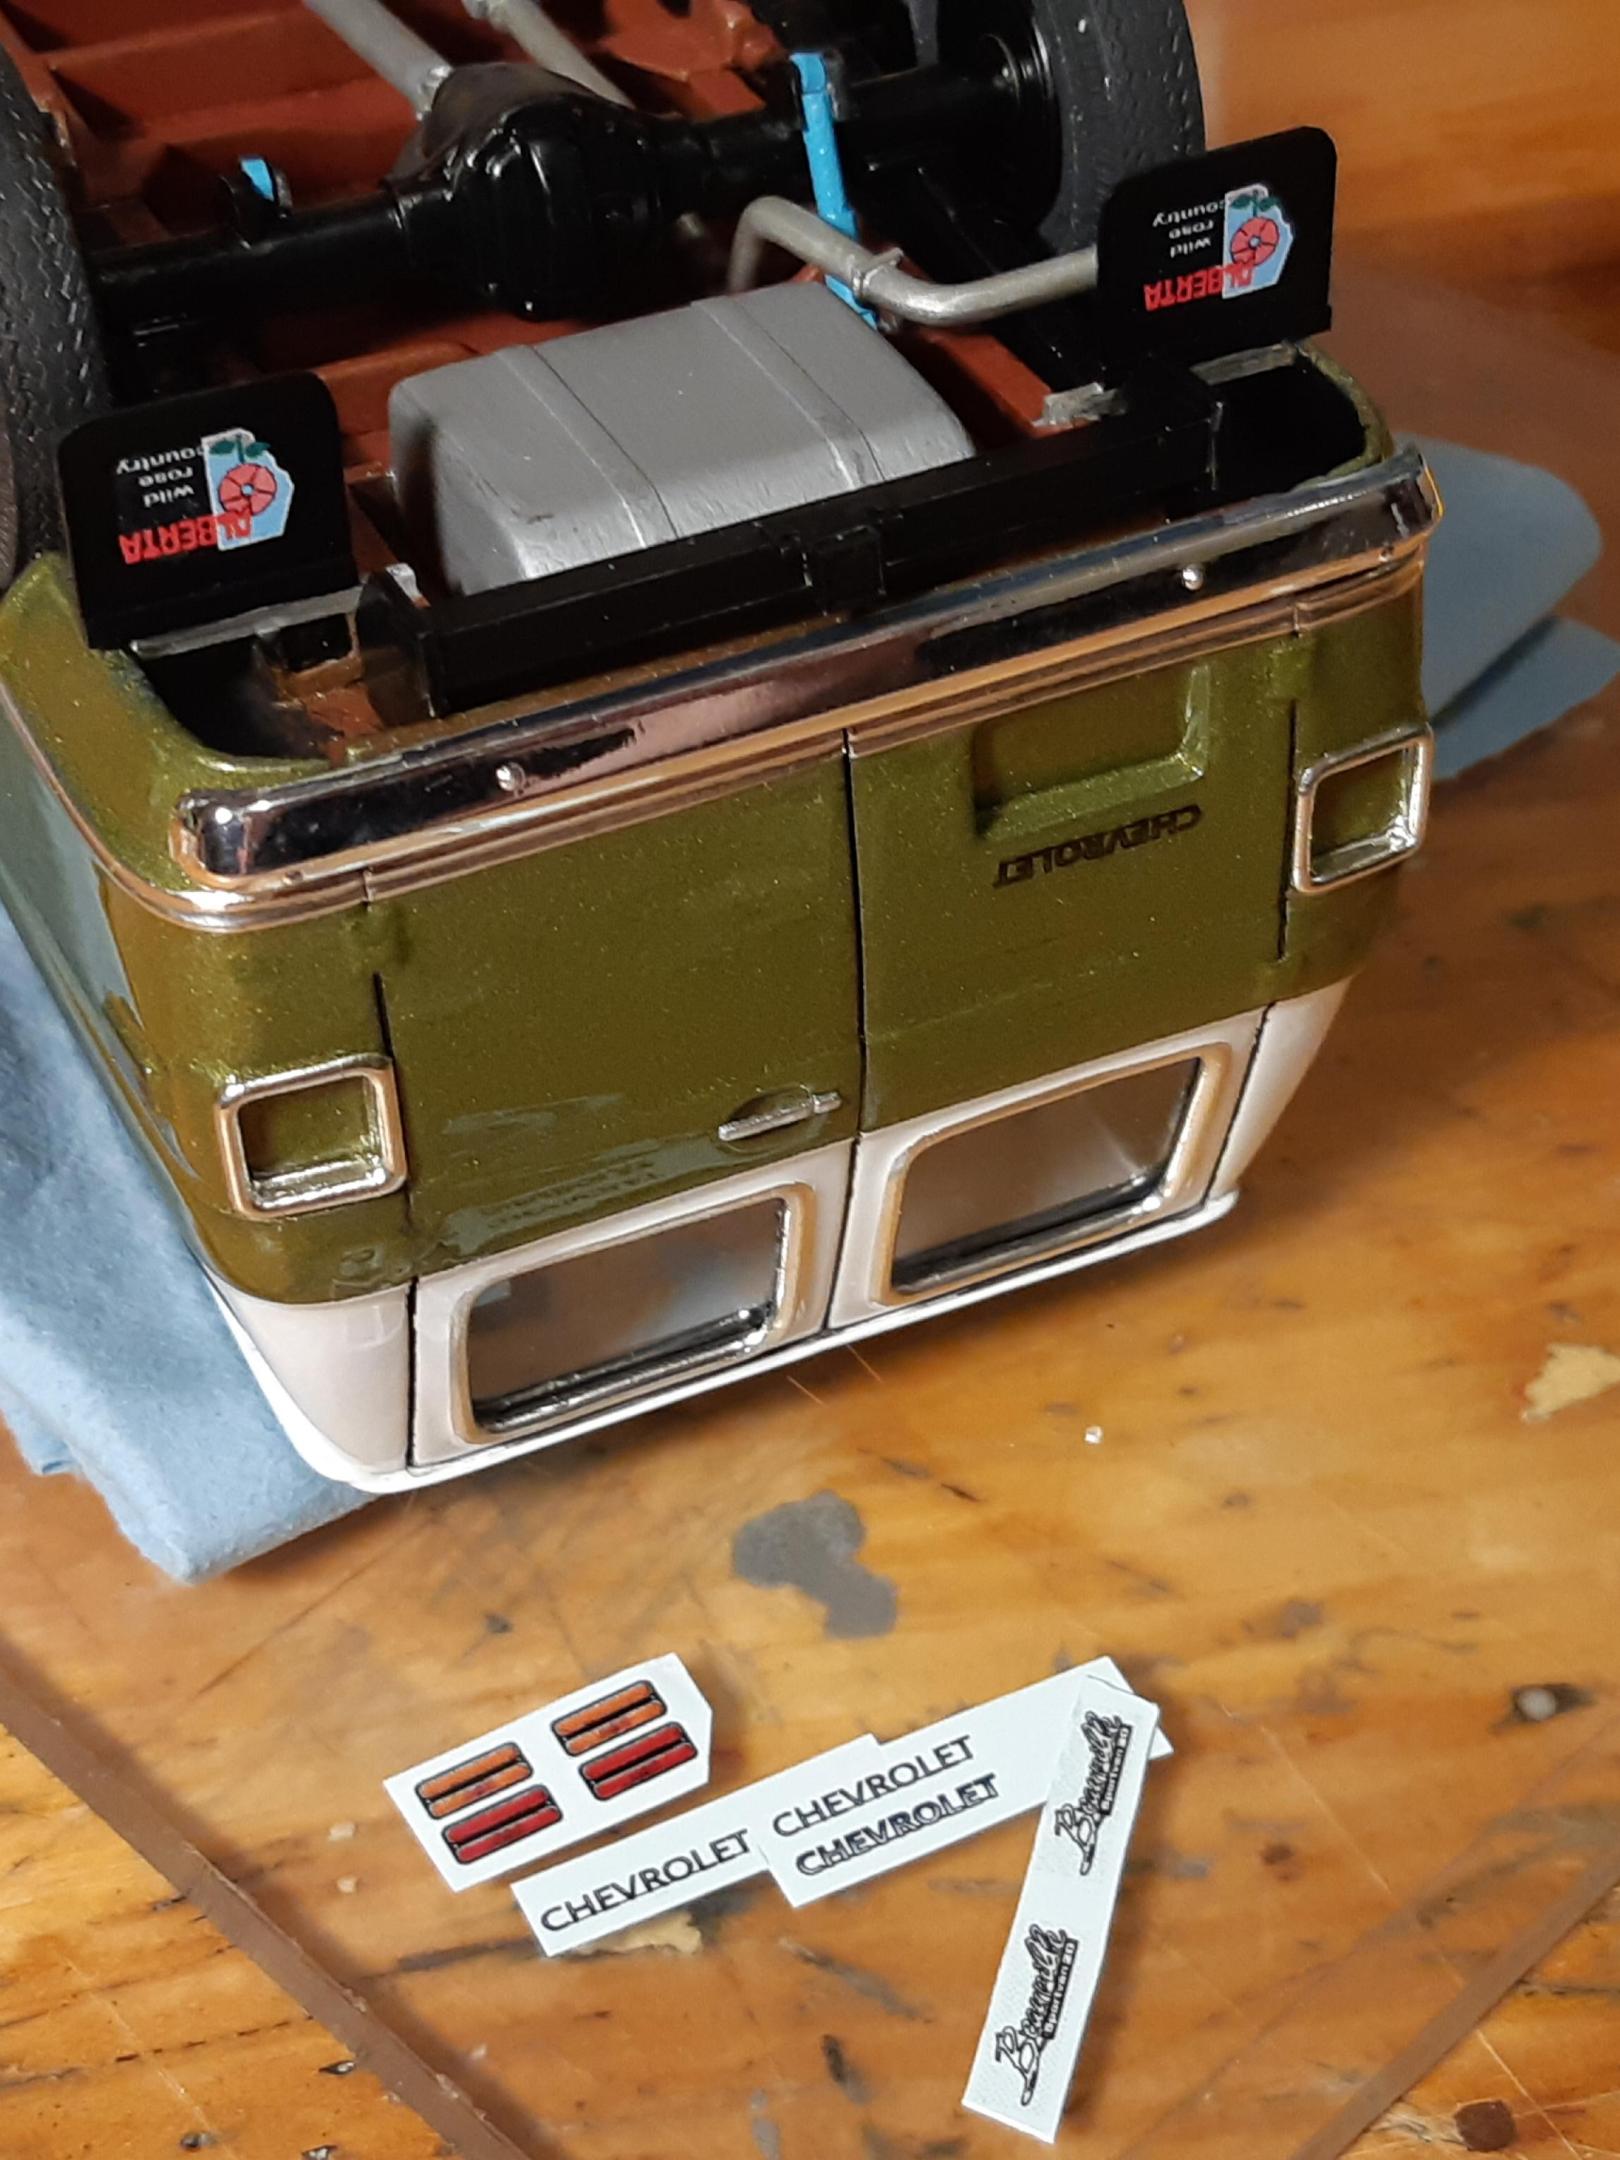
Thanks for all the positive comments!!! I hope my build inspires you to built a better MPC van kit, its got a fairly crisp and well proportioned body lines, but the rest of the parts sure need work! HA! Here is some of the bottom. I made up a set of vintage Alberta Canada mudflaps, these things were on just about every farm Pickup in the 1970's. The trailer hitch is scratchbuilt from evergreen square stock. I updated the diff with a nice 12 bolt cover, and scratchbuilt the shock from tubing along with new mounting points, all the kit stuff i junk! The exhaust is modified a fair bit to make it fit right and the front and rear tires have been relocated to fit the wheel wells properly, again a detail the kit really lacks.
-

Canadian 1961 Pontiac Laurentian conversion
TheBEAUMONTGURU replied to TheBEAUMONTGURU's topic in WIP: Model Cars
thanks for all the kind words guys! its a really fun build. -
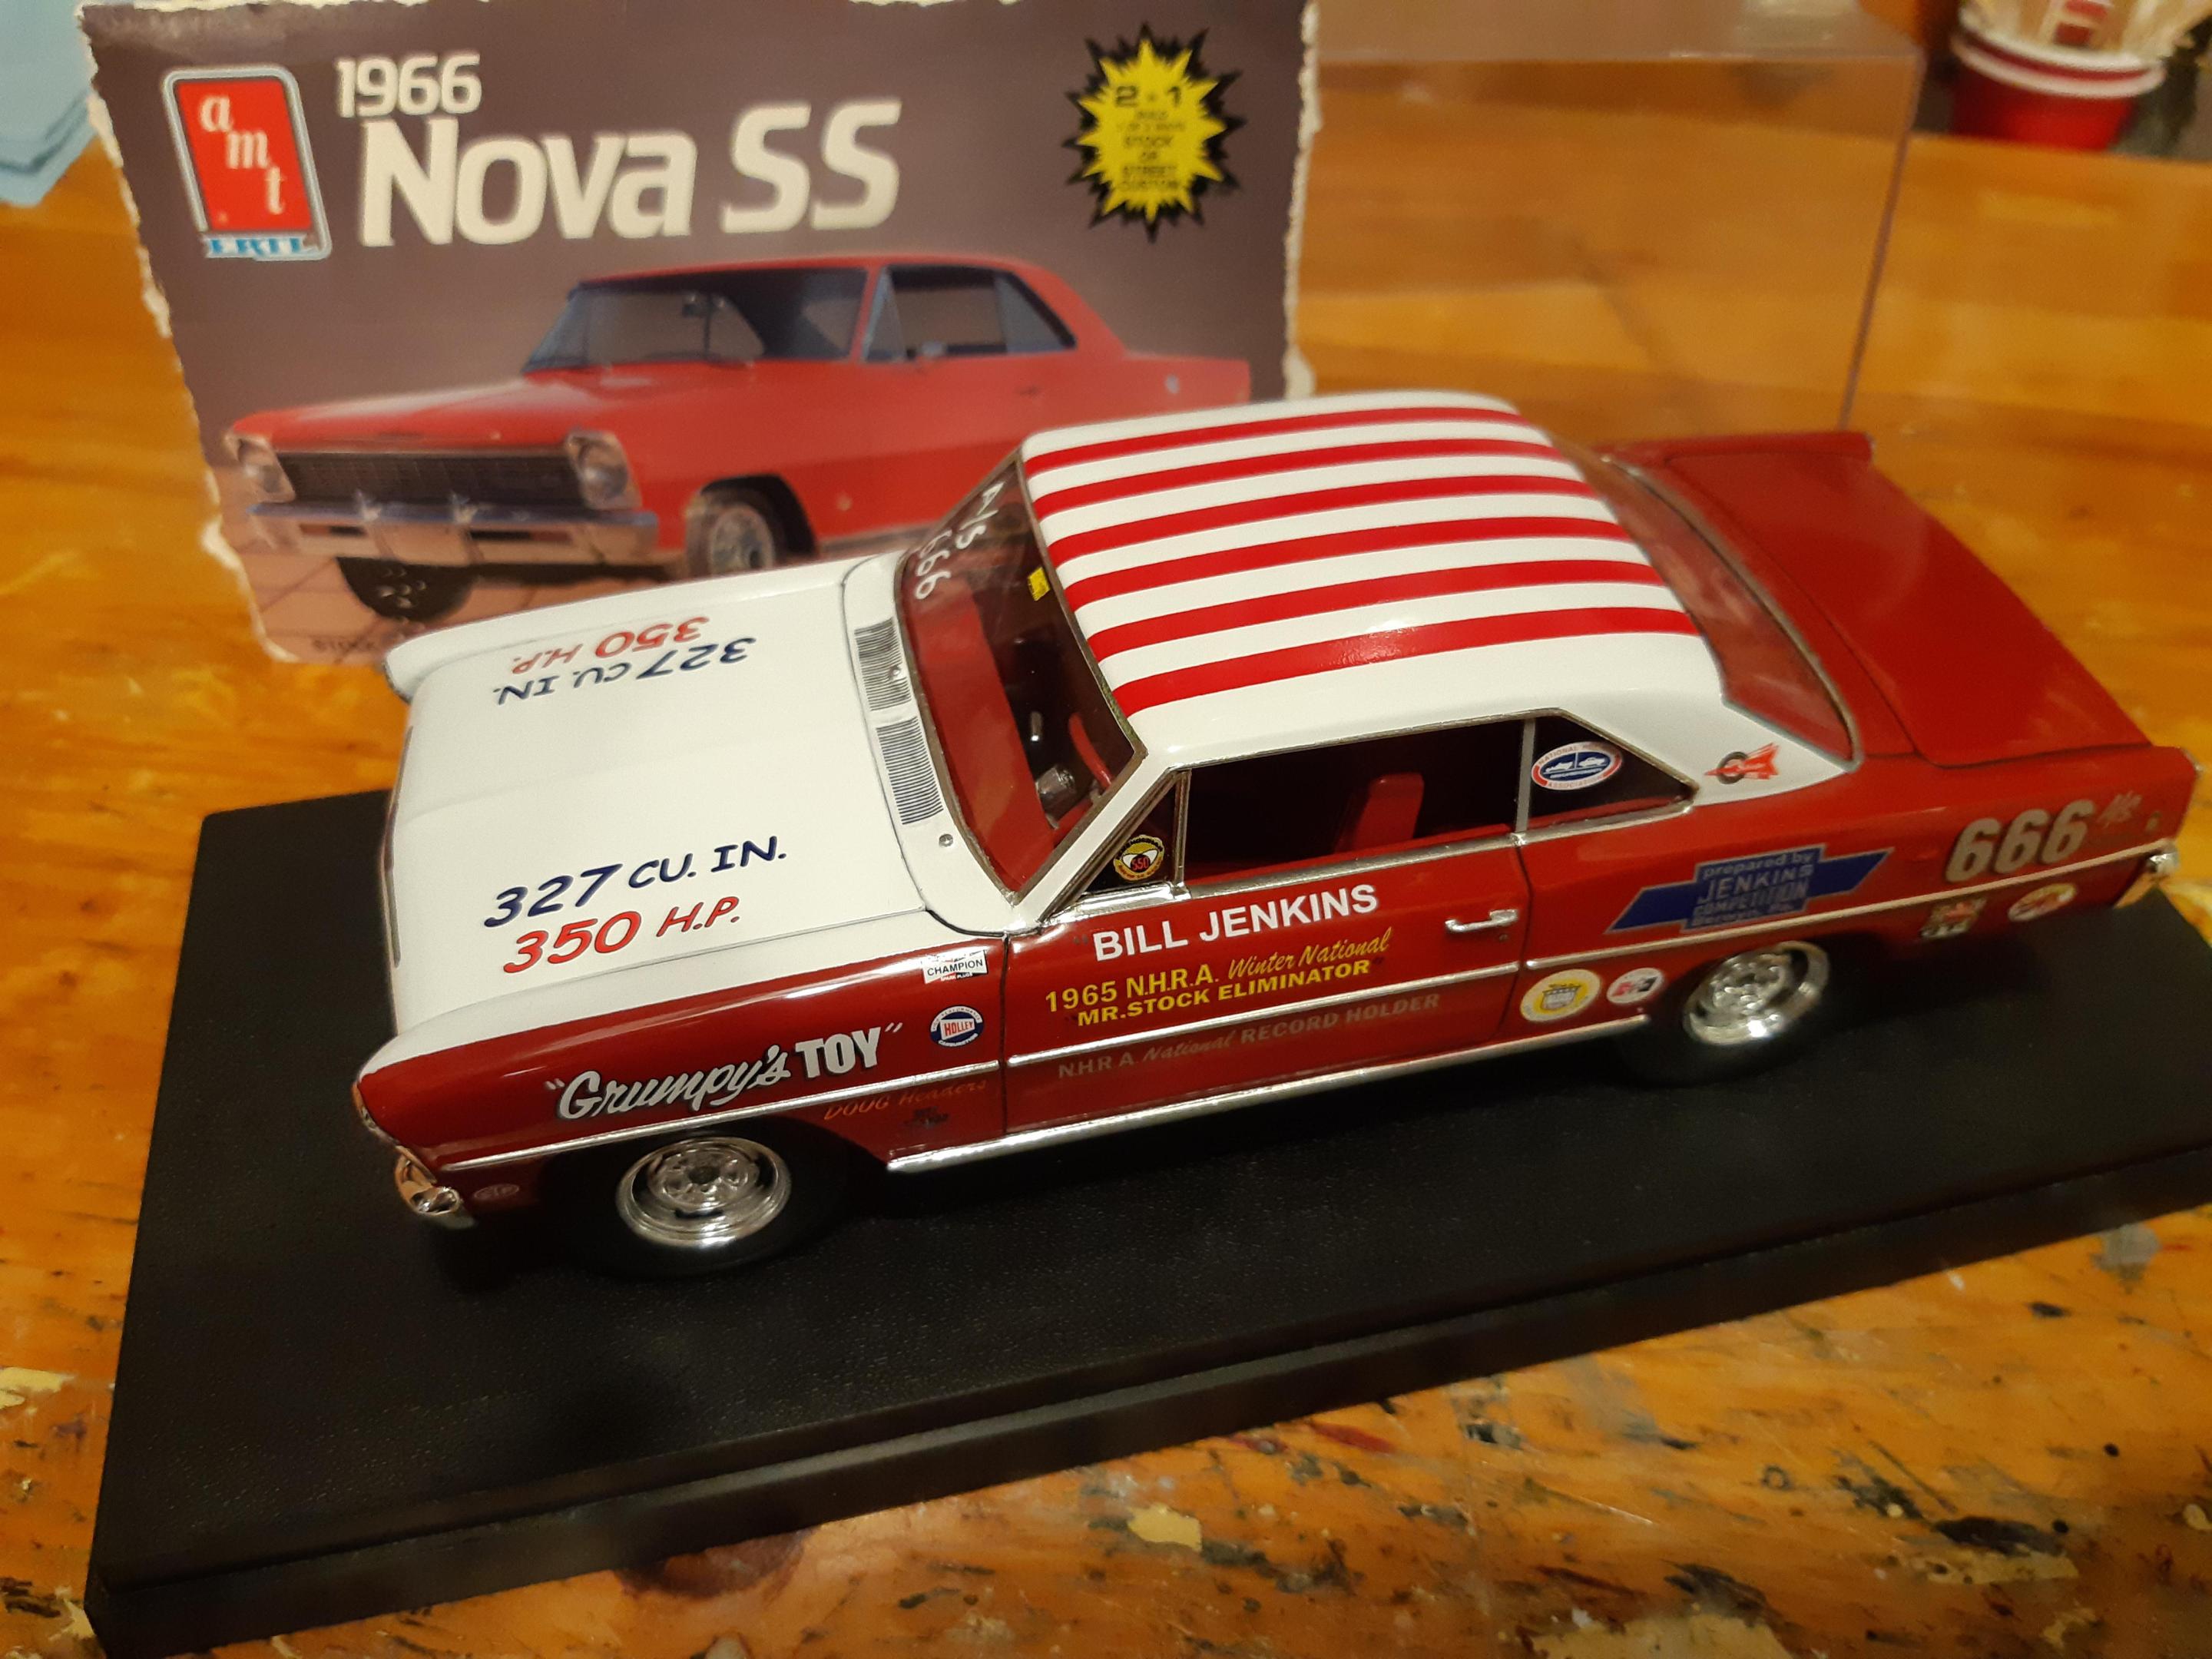
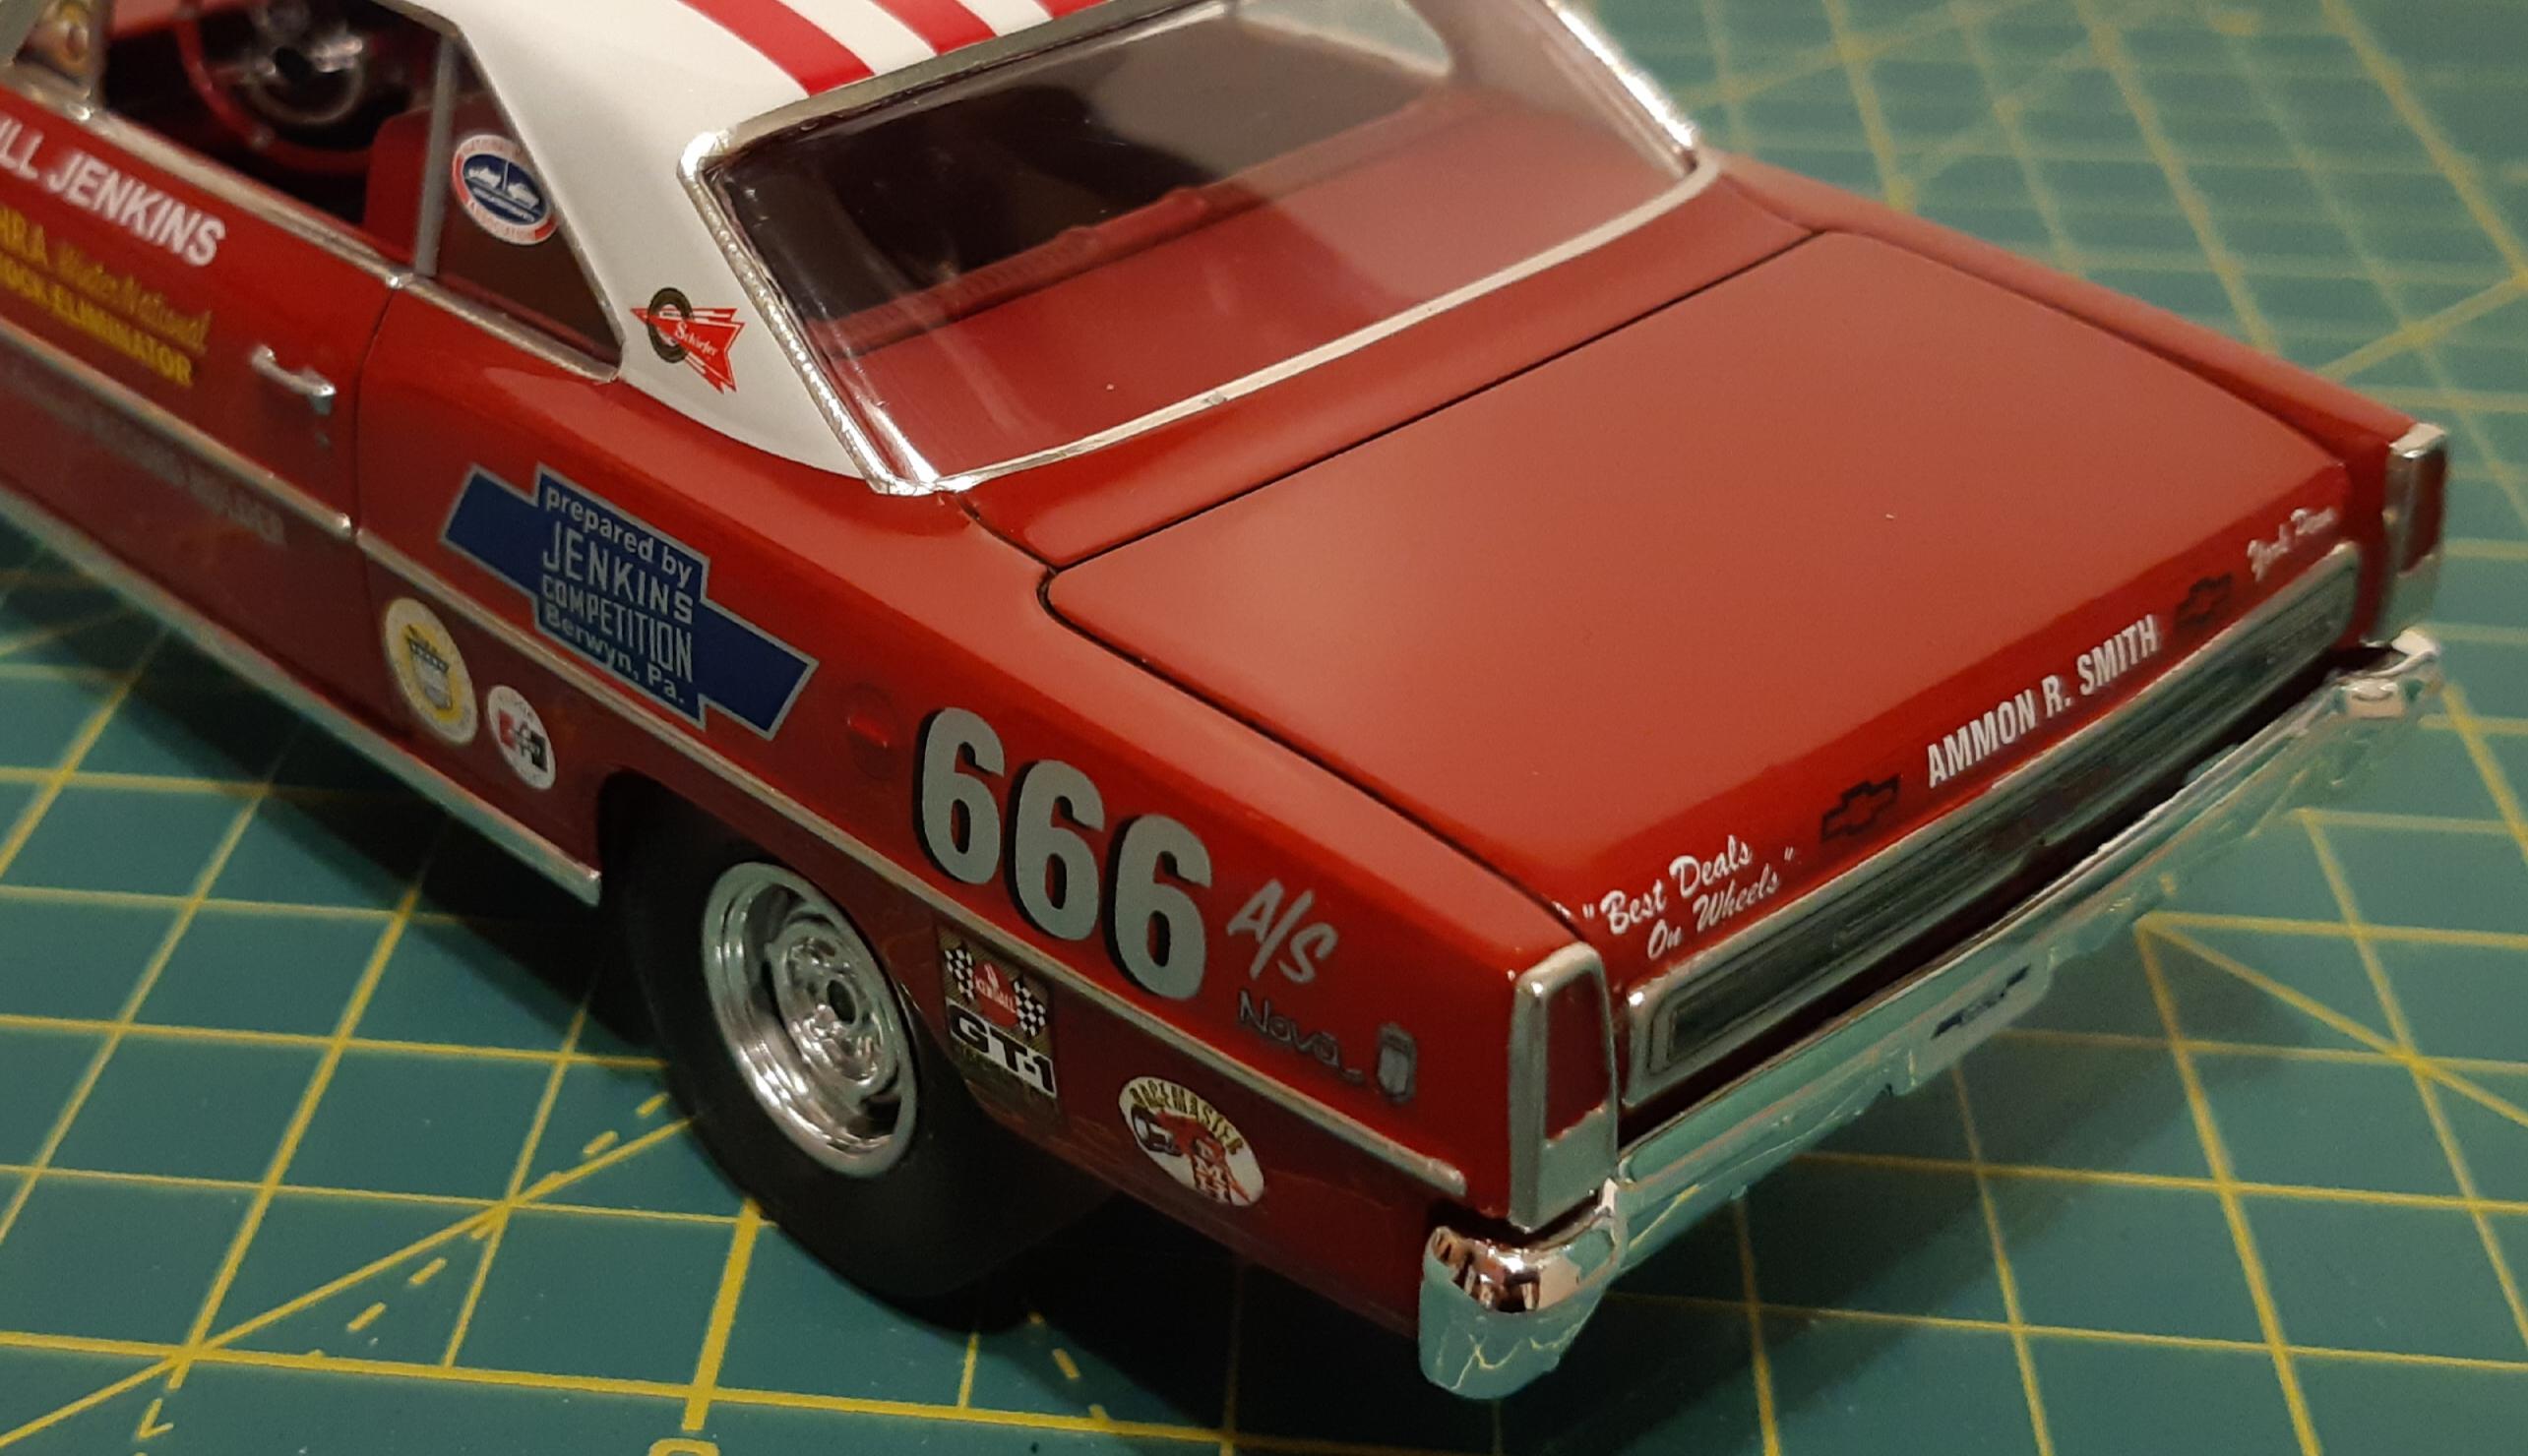
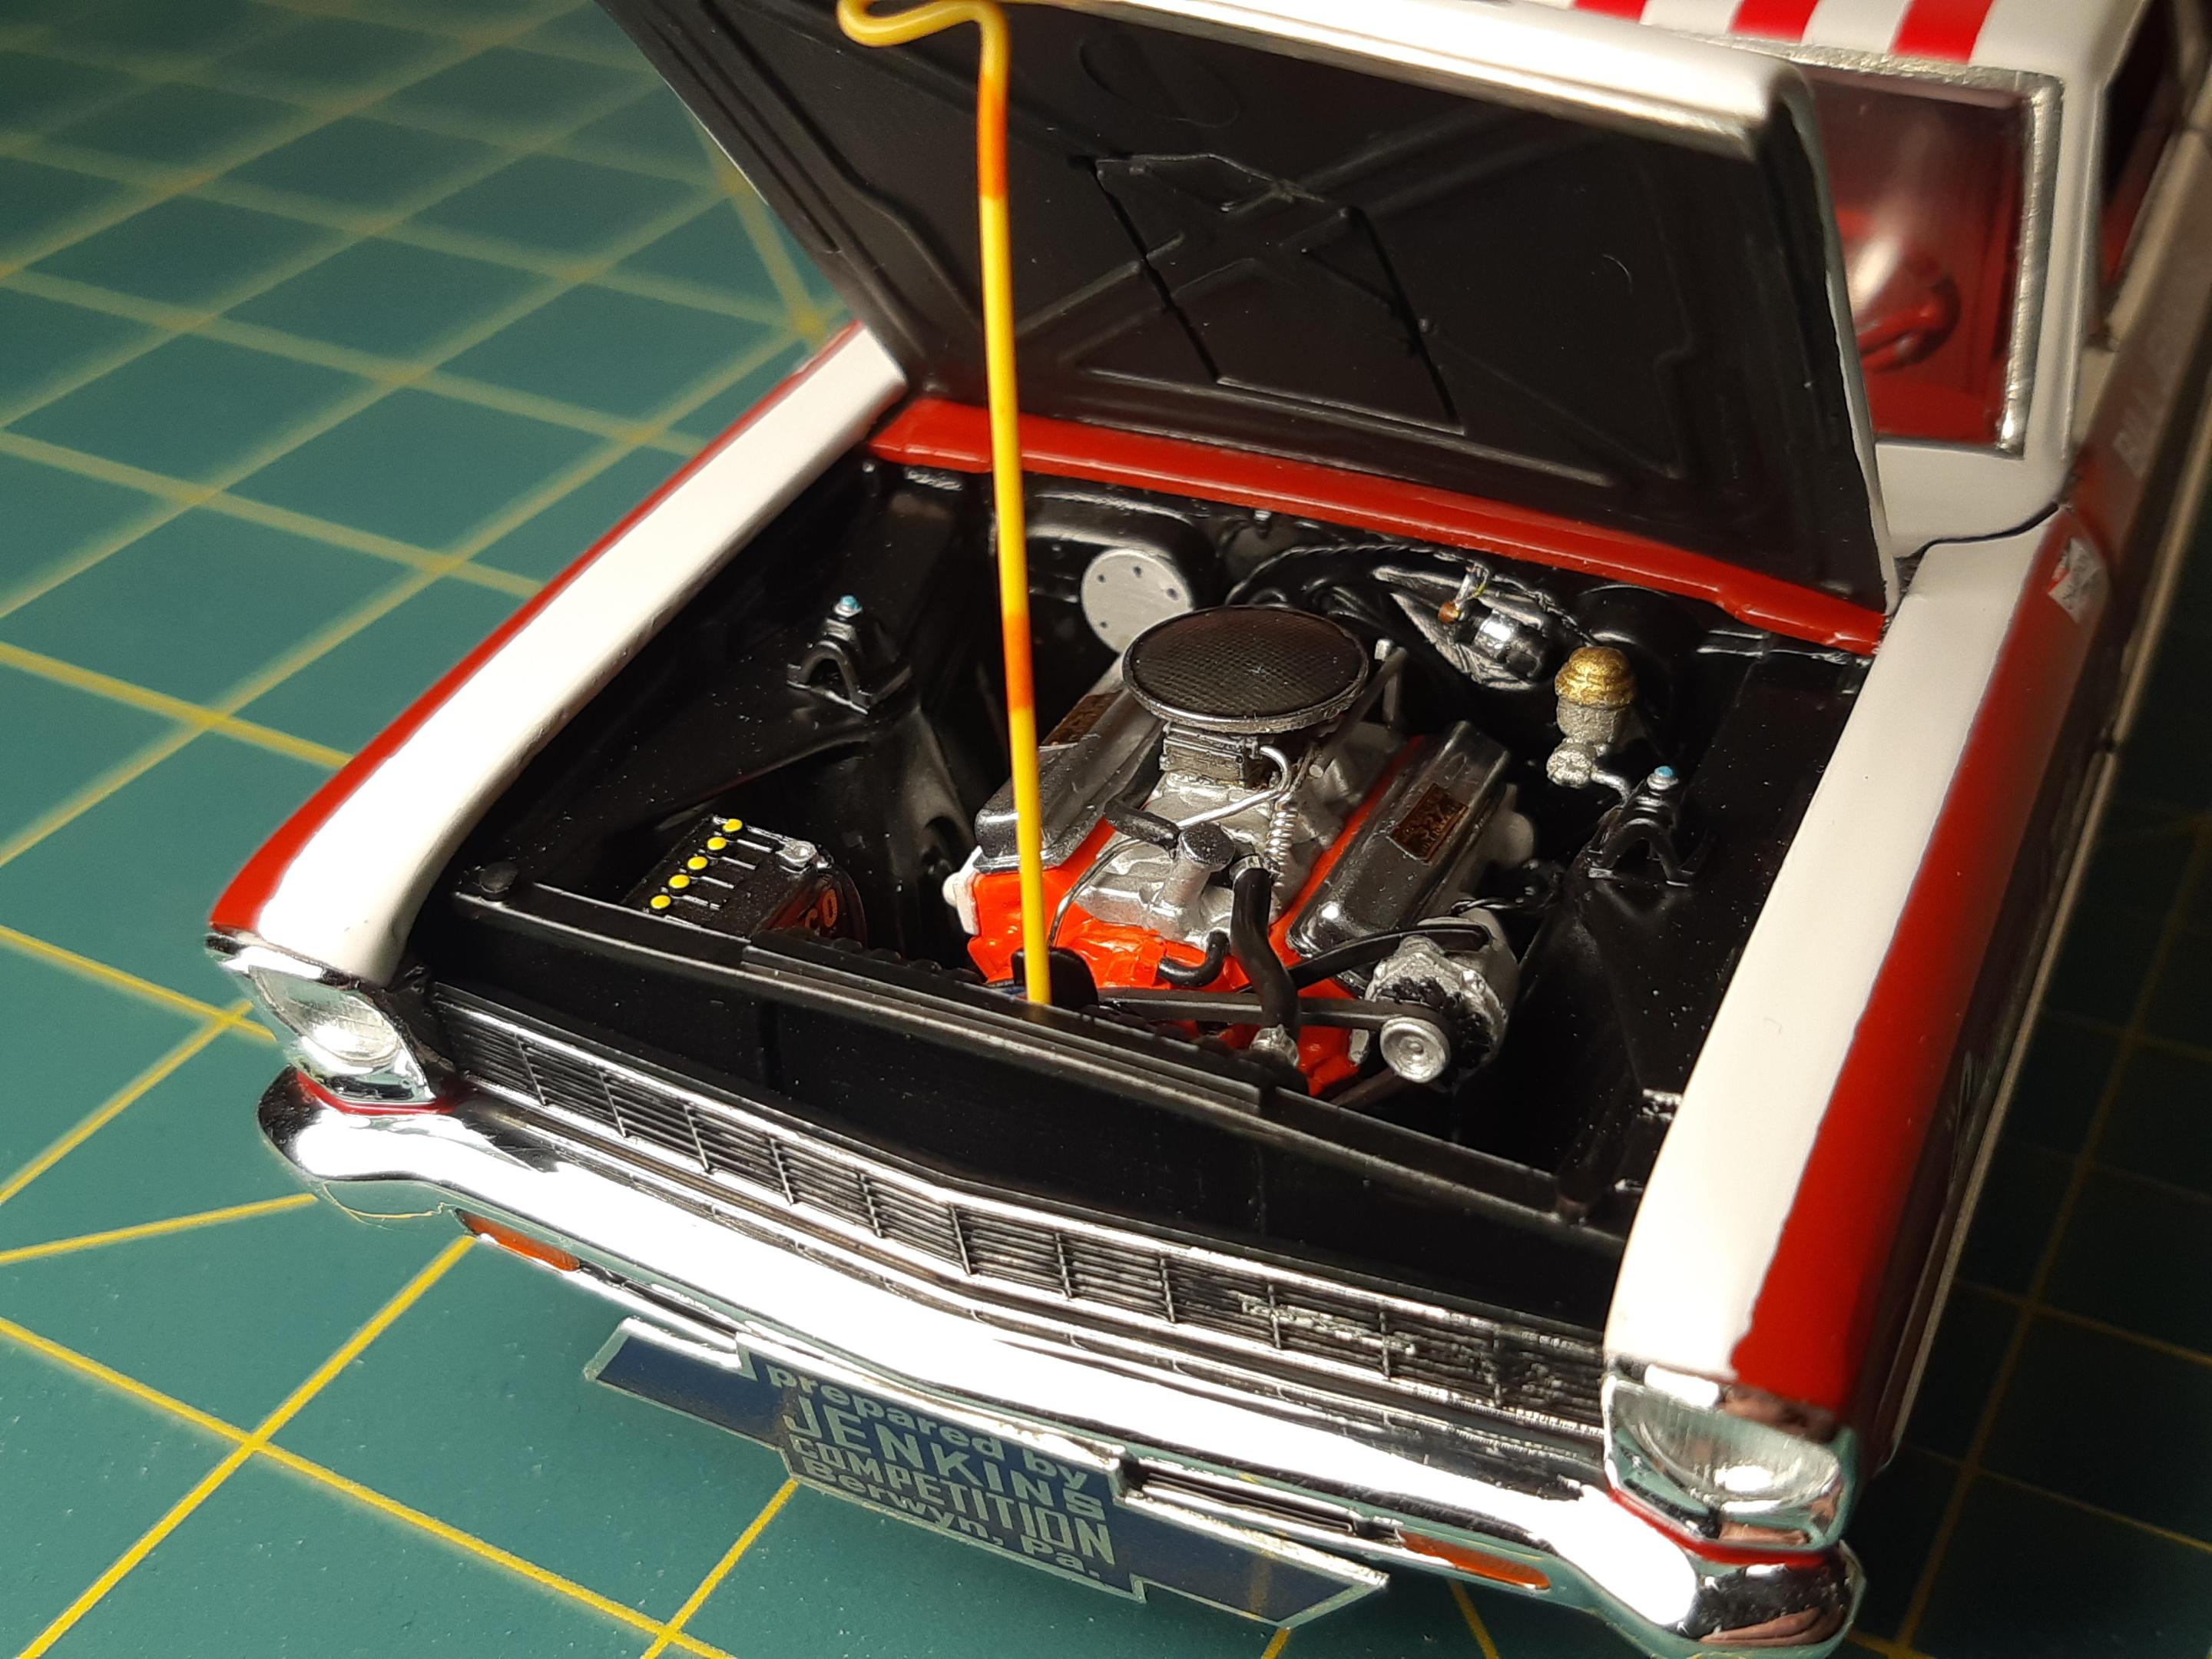
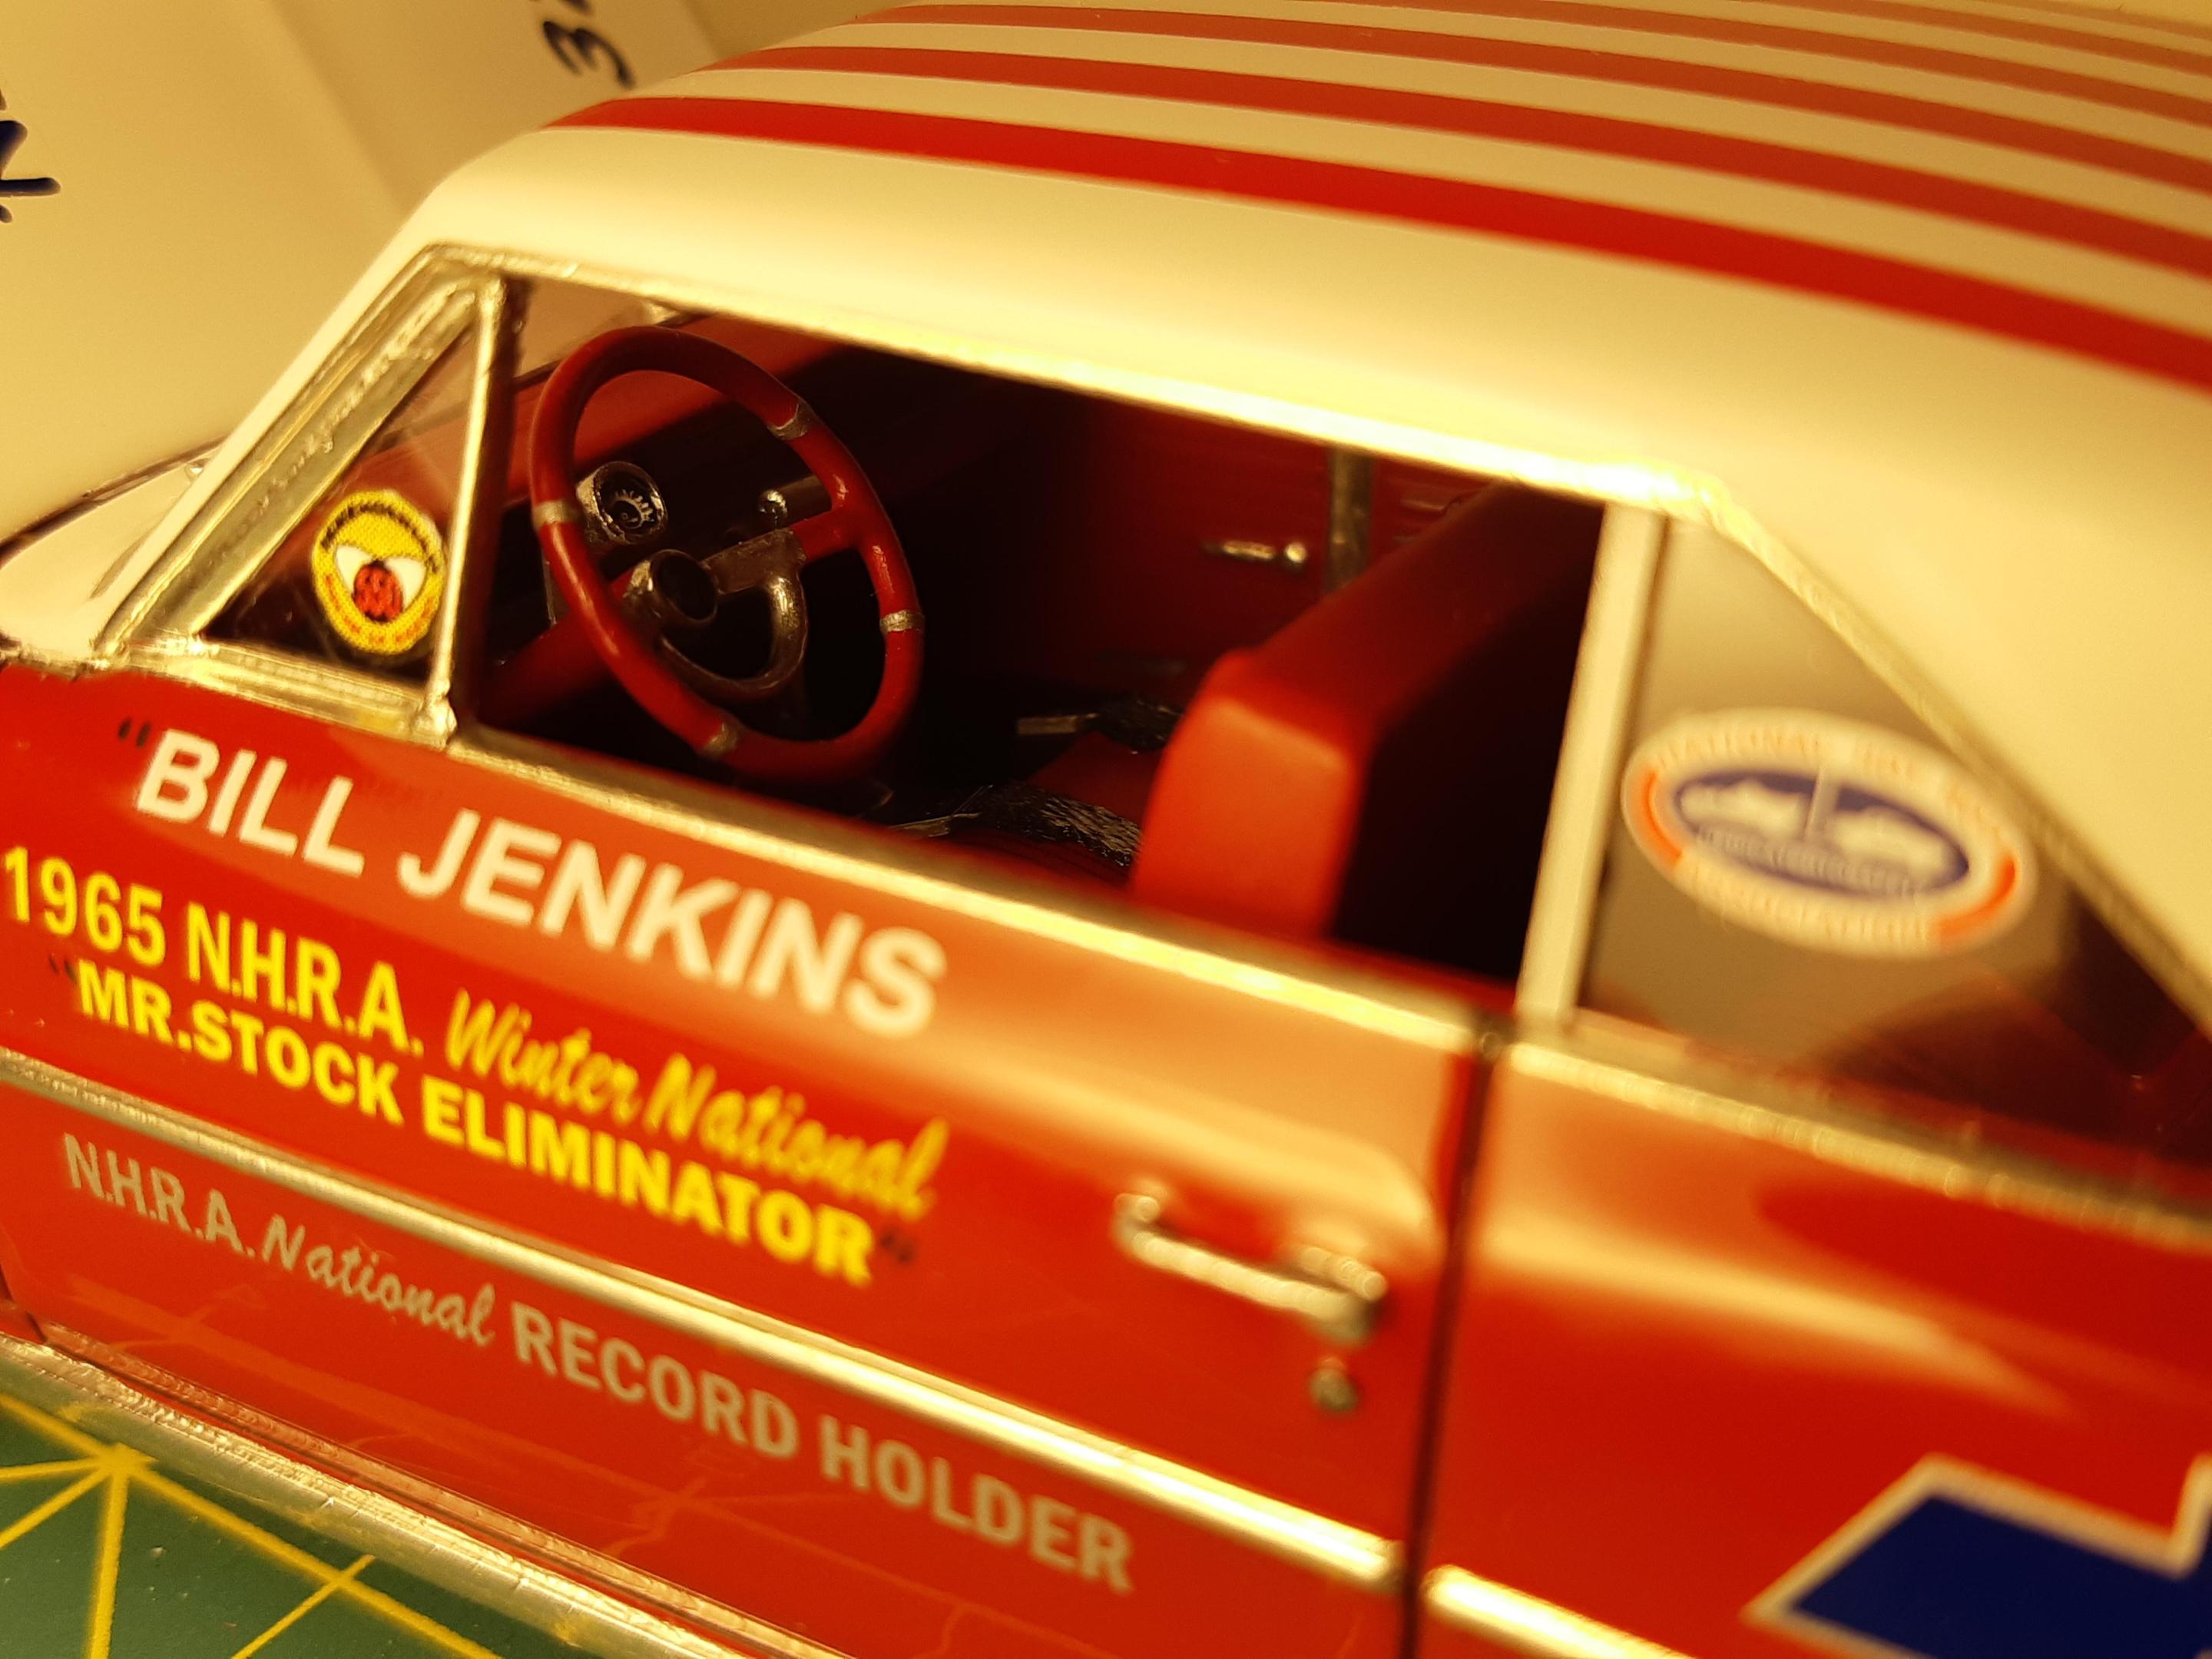
Here is my version of Bill Jenkins Red and White 66 nova. I started with an old original stock release AMT kit that was already built by a friend. So i took it apart and rebuilt it! I converted the car to a Base Chevy II nova rather than a SuperSport. Grumpy's car was NOT a Super Sport. I added rocker mouldings and side trim with evergreen strips, Sanded off all the seat pattern and added a parts bin bench seat with some cloth pattern decals. then tried to make it look more accurate with some guages, radio delete, heater delete, 4 speed shifter, etc. Underhood i should have painted the engine all black in true Grumpy style, but i thought it would wash out all the detail. I changed over the valve covers to some better proportioned ones from the parts box. I took the SS off the grill and reconfigured the tailpanel with a custom made NOVA decal to hide all the SS stuff. Wipers are deleted, i used decals for the cowl vent lines and opened up the doorhandles. The decals are a mix of Slixx and Gofer. Wheels are parts box painted with Molotow(i know i know should have left them silver but they look so good chrome!). Paint is Ancient Dupont Centari single stage Ember red and Ermine white. I ended up making the GT-1 decal and the Racemaster decal because they were not included on either decal sheet. The stance of the car had to be altered considerably to get it right. Im happy with the way it turned out. There was so many little changes needed to make it a more accurate replica of the real car, but it was worth it! Thanks for Looking
-
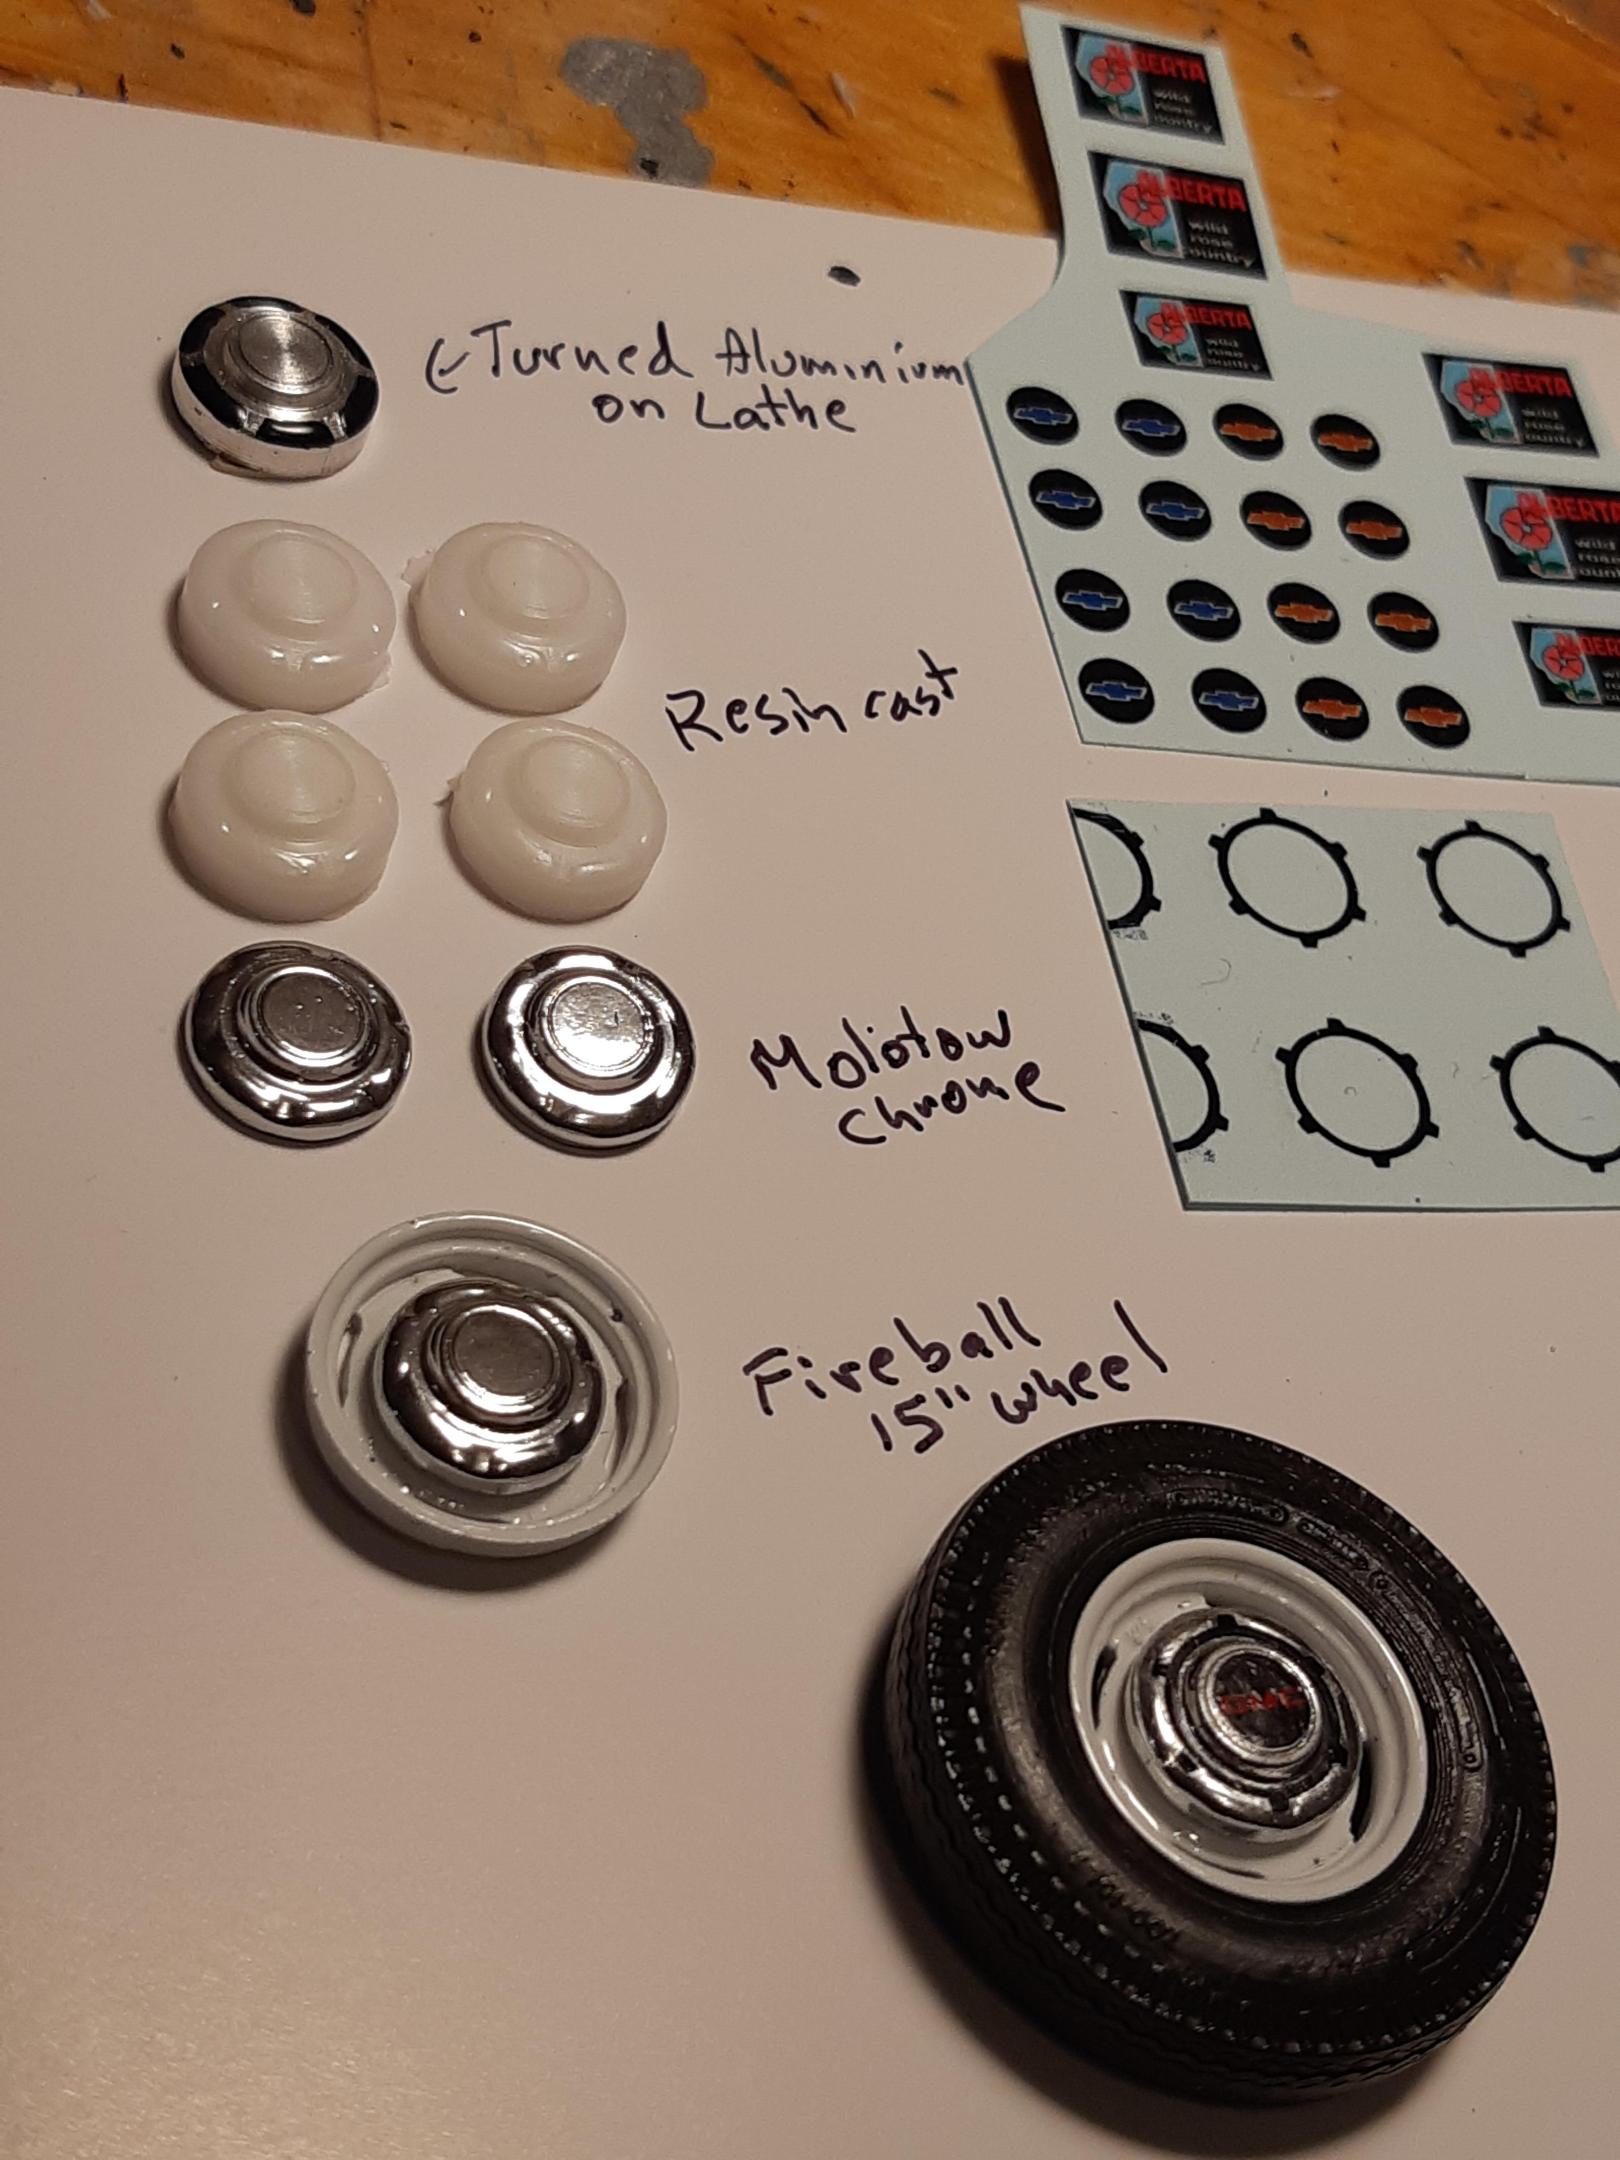
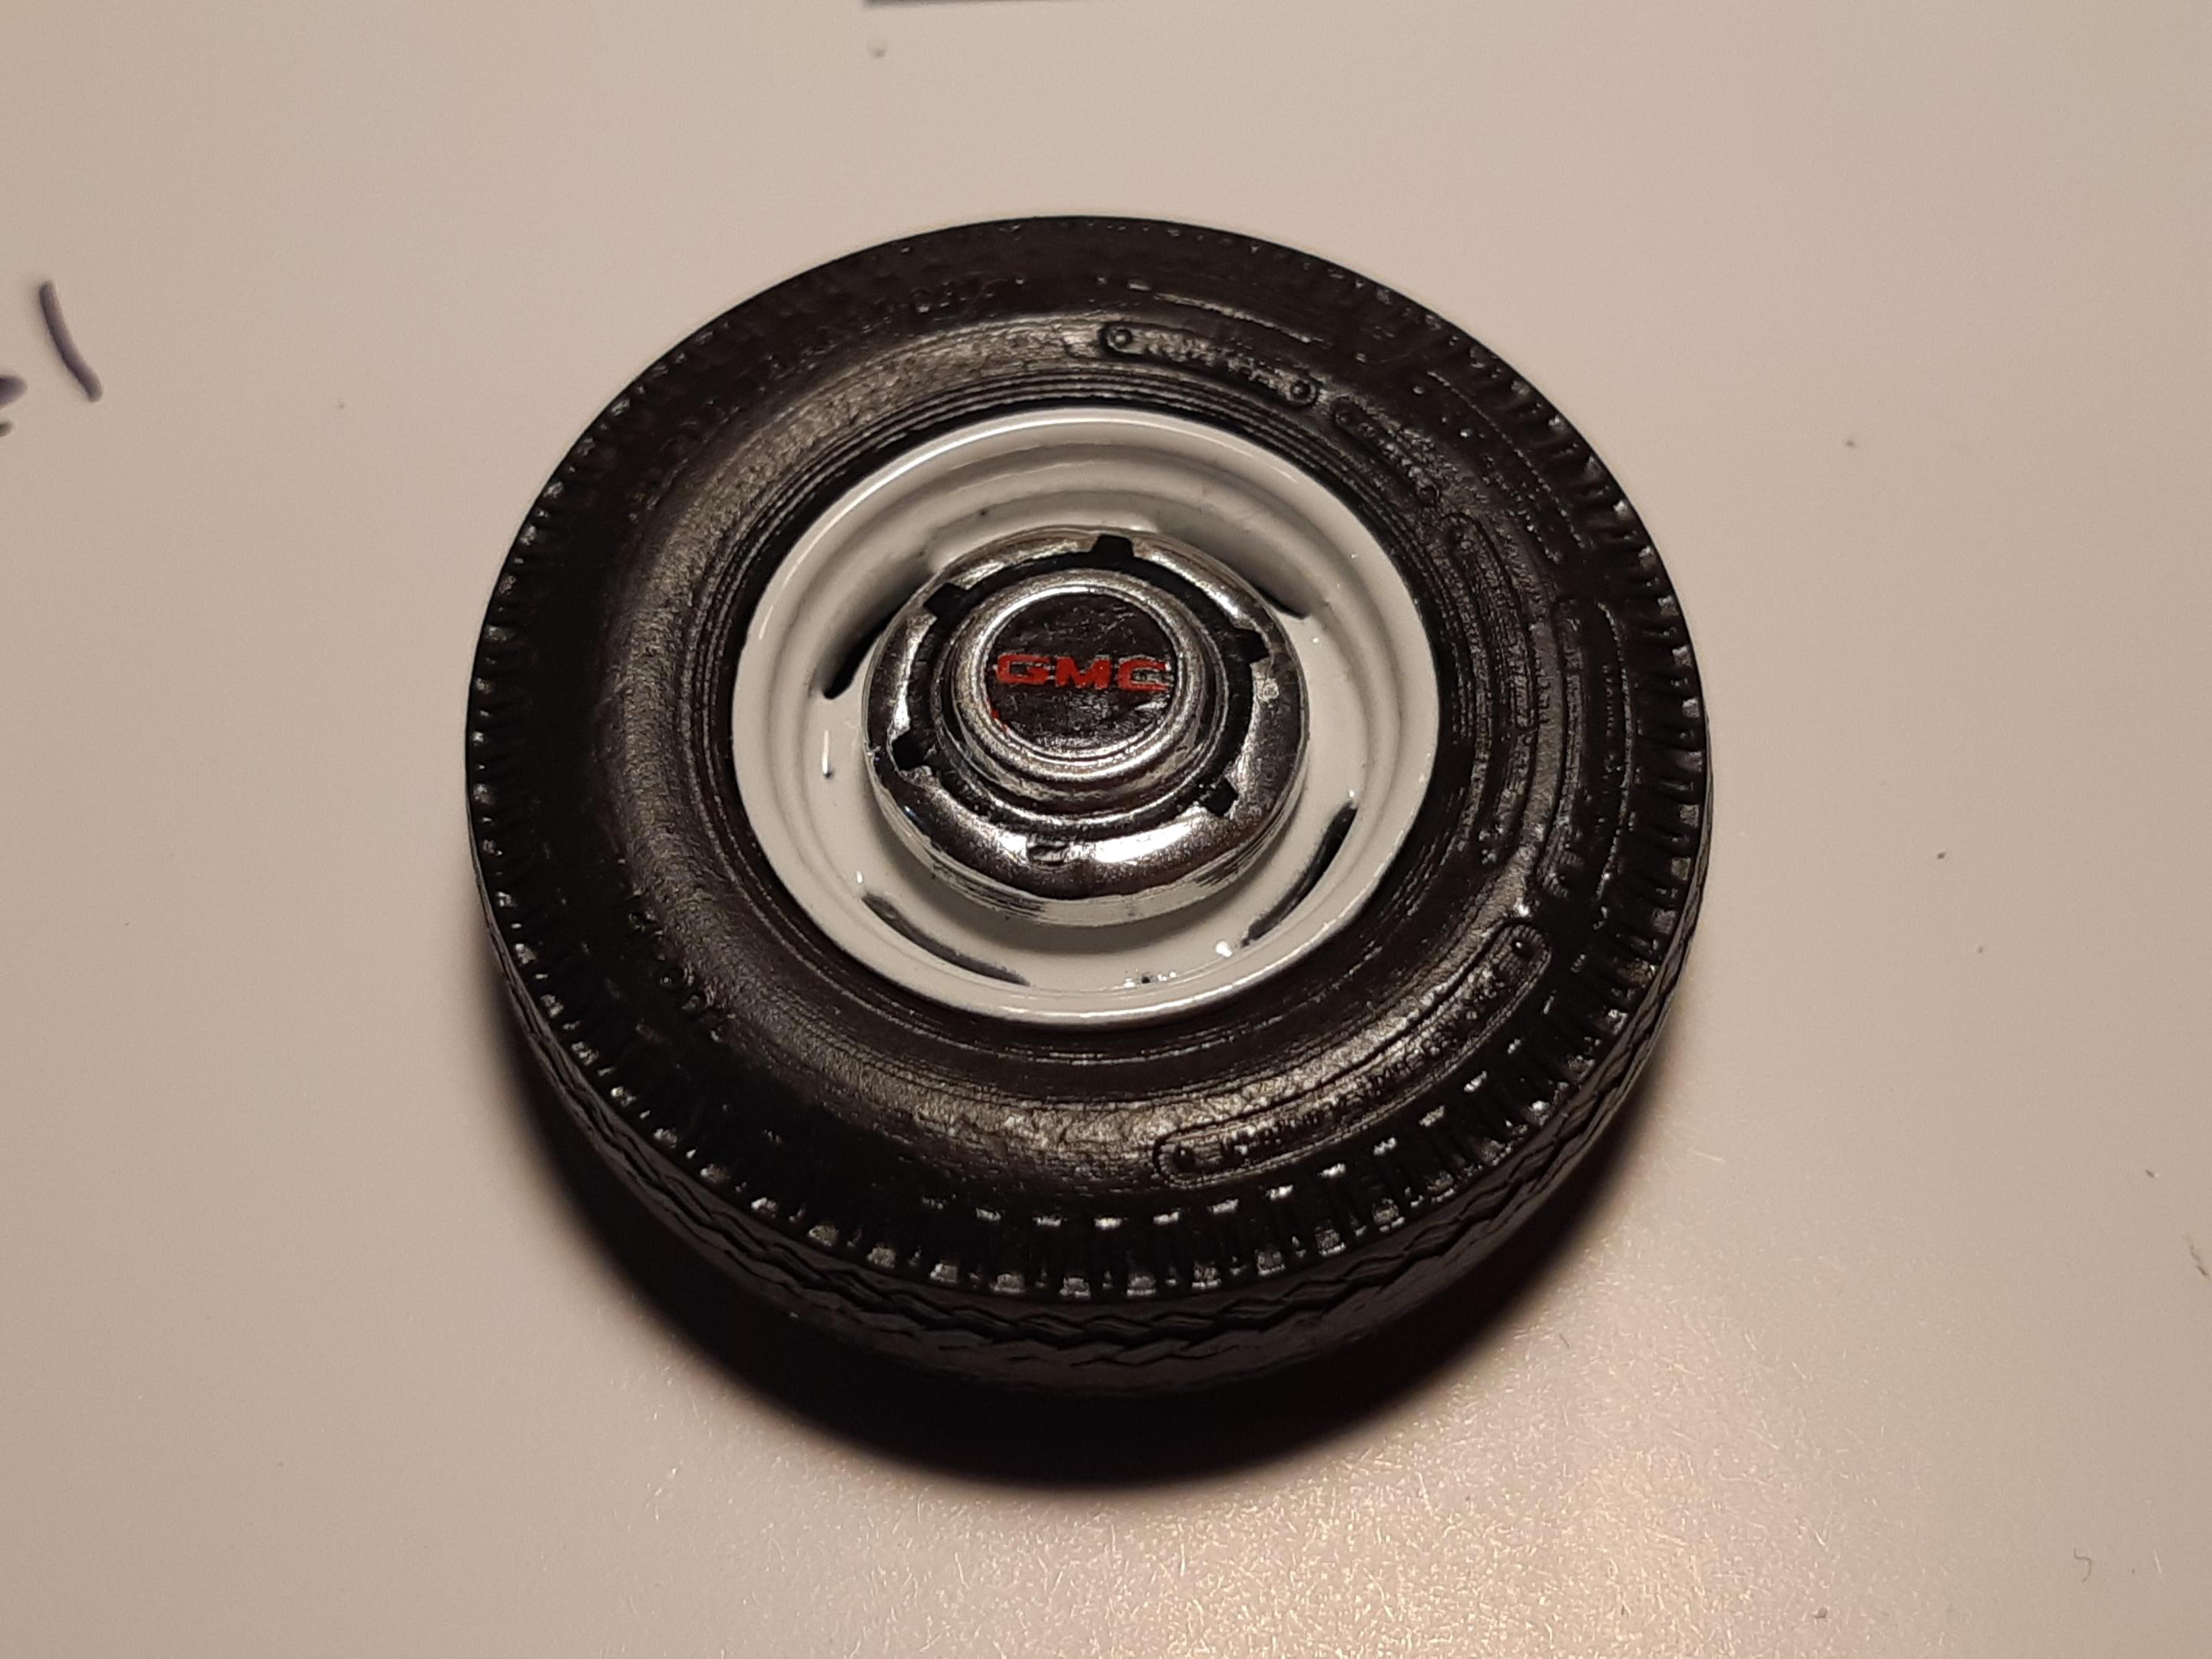
This was a massive project in itself. the kit has the most horrible version of a truck dogdish i have ever seen. So i decided to turn one out of aluminum on a metal lathe. I added some raised areas seen in black and then cast them with the Amazing white resin. Painted them with Molotow sprayed out of an airbrush. The decals for the centers were done in Photoshop and sized acordingly to fit the resin castings. I printed Blue Bowties, Ochre Bowties, and GMC versions for future projects. The wheels and tires are Fireball 15" 70's era truck bias Ply, they look awesome!
-

Canadian 1961 Pontiac Laurentian conversion
TheBEAUMONTGURU replied to TheBEAUMONTGURU's topic in WIP: Model Cars
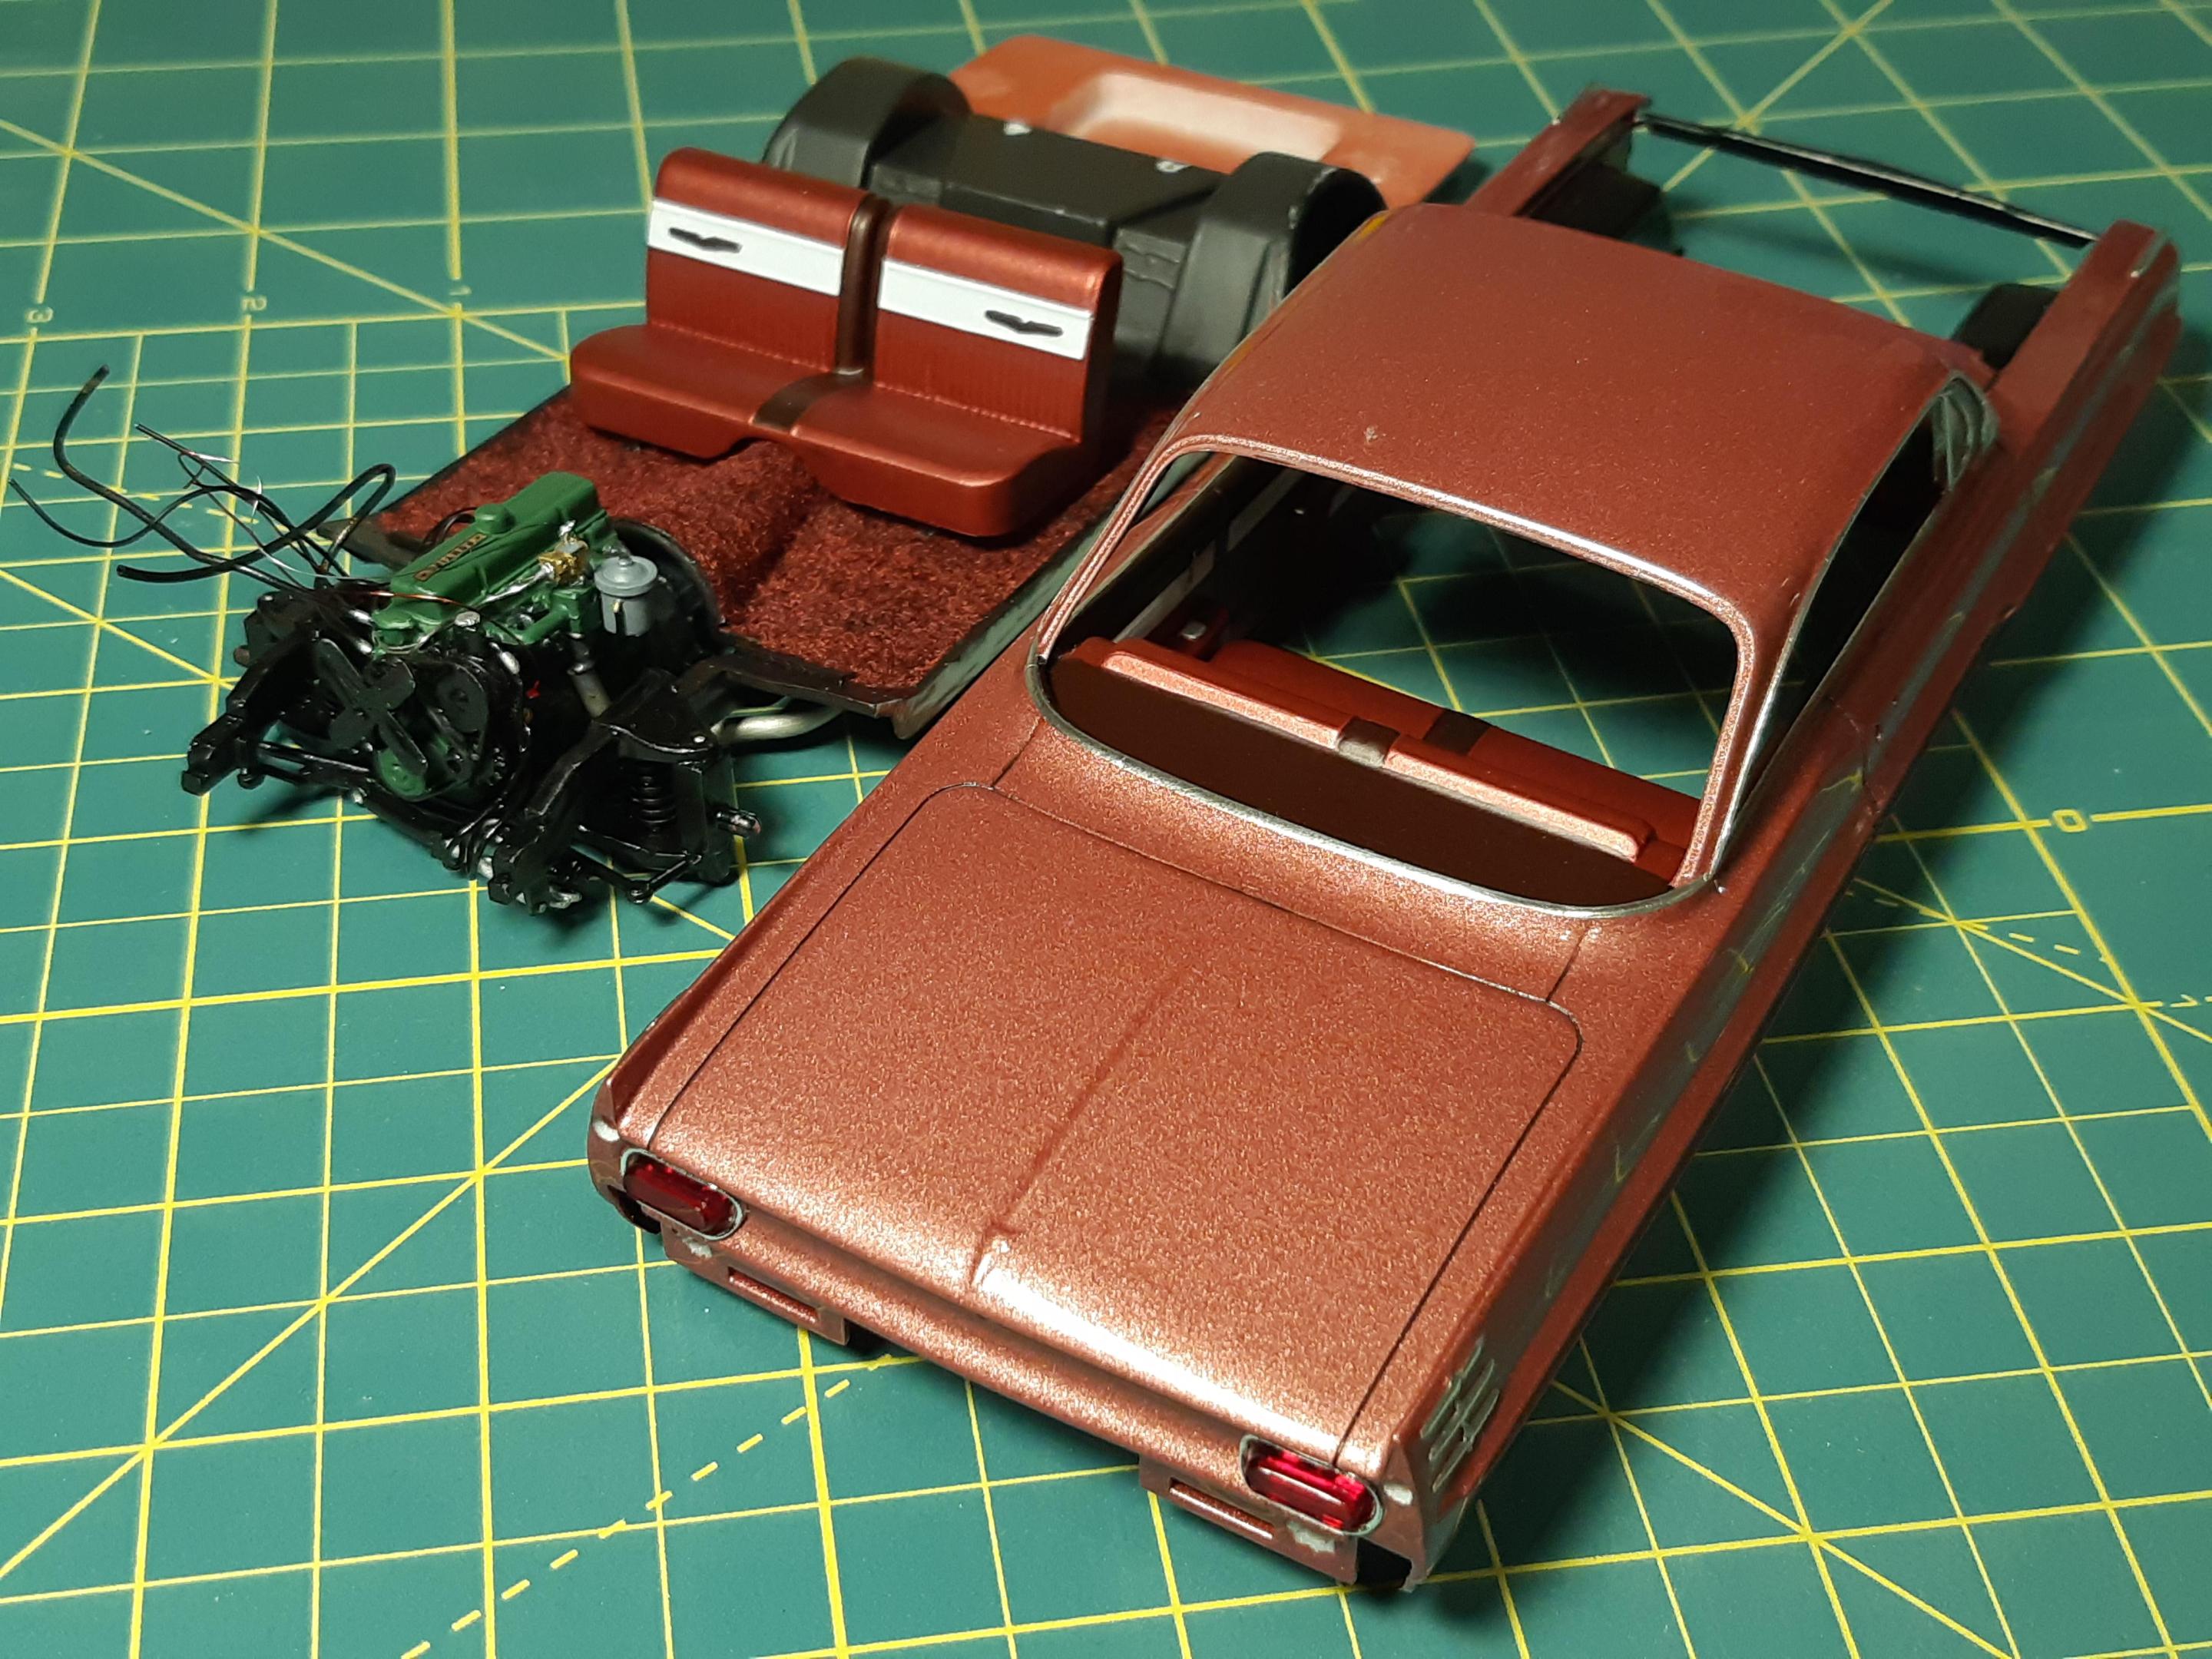
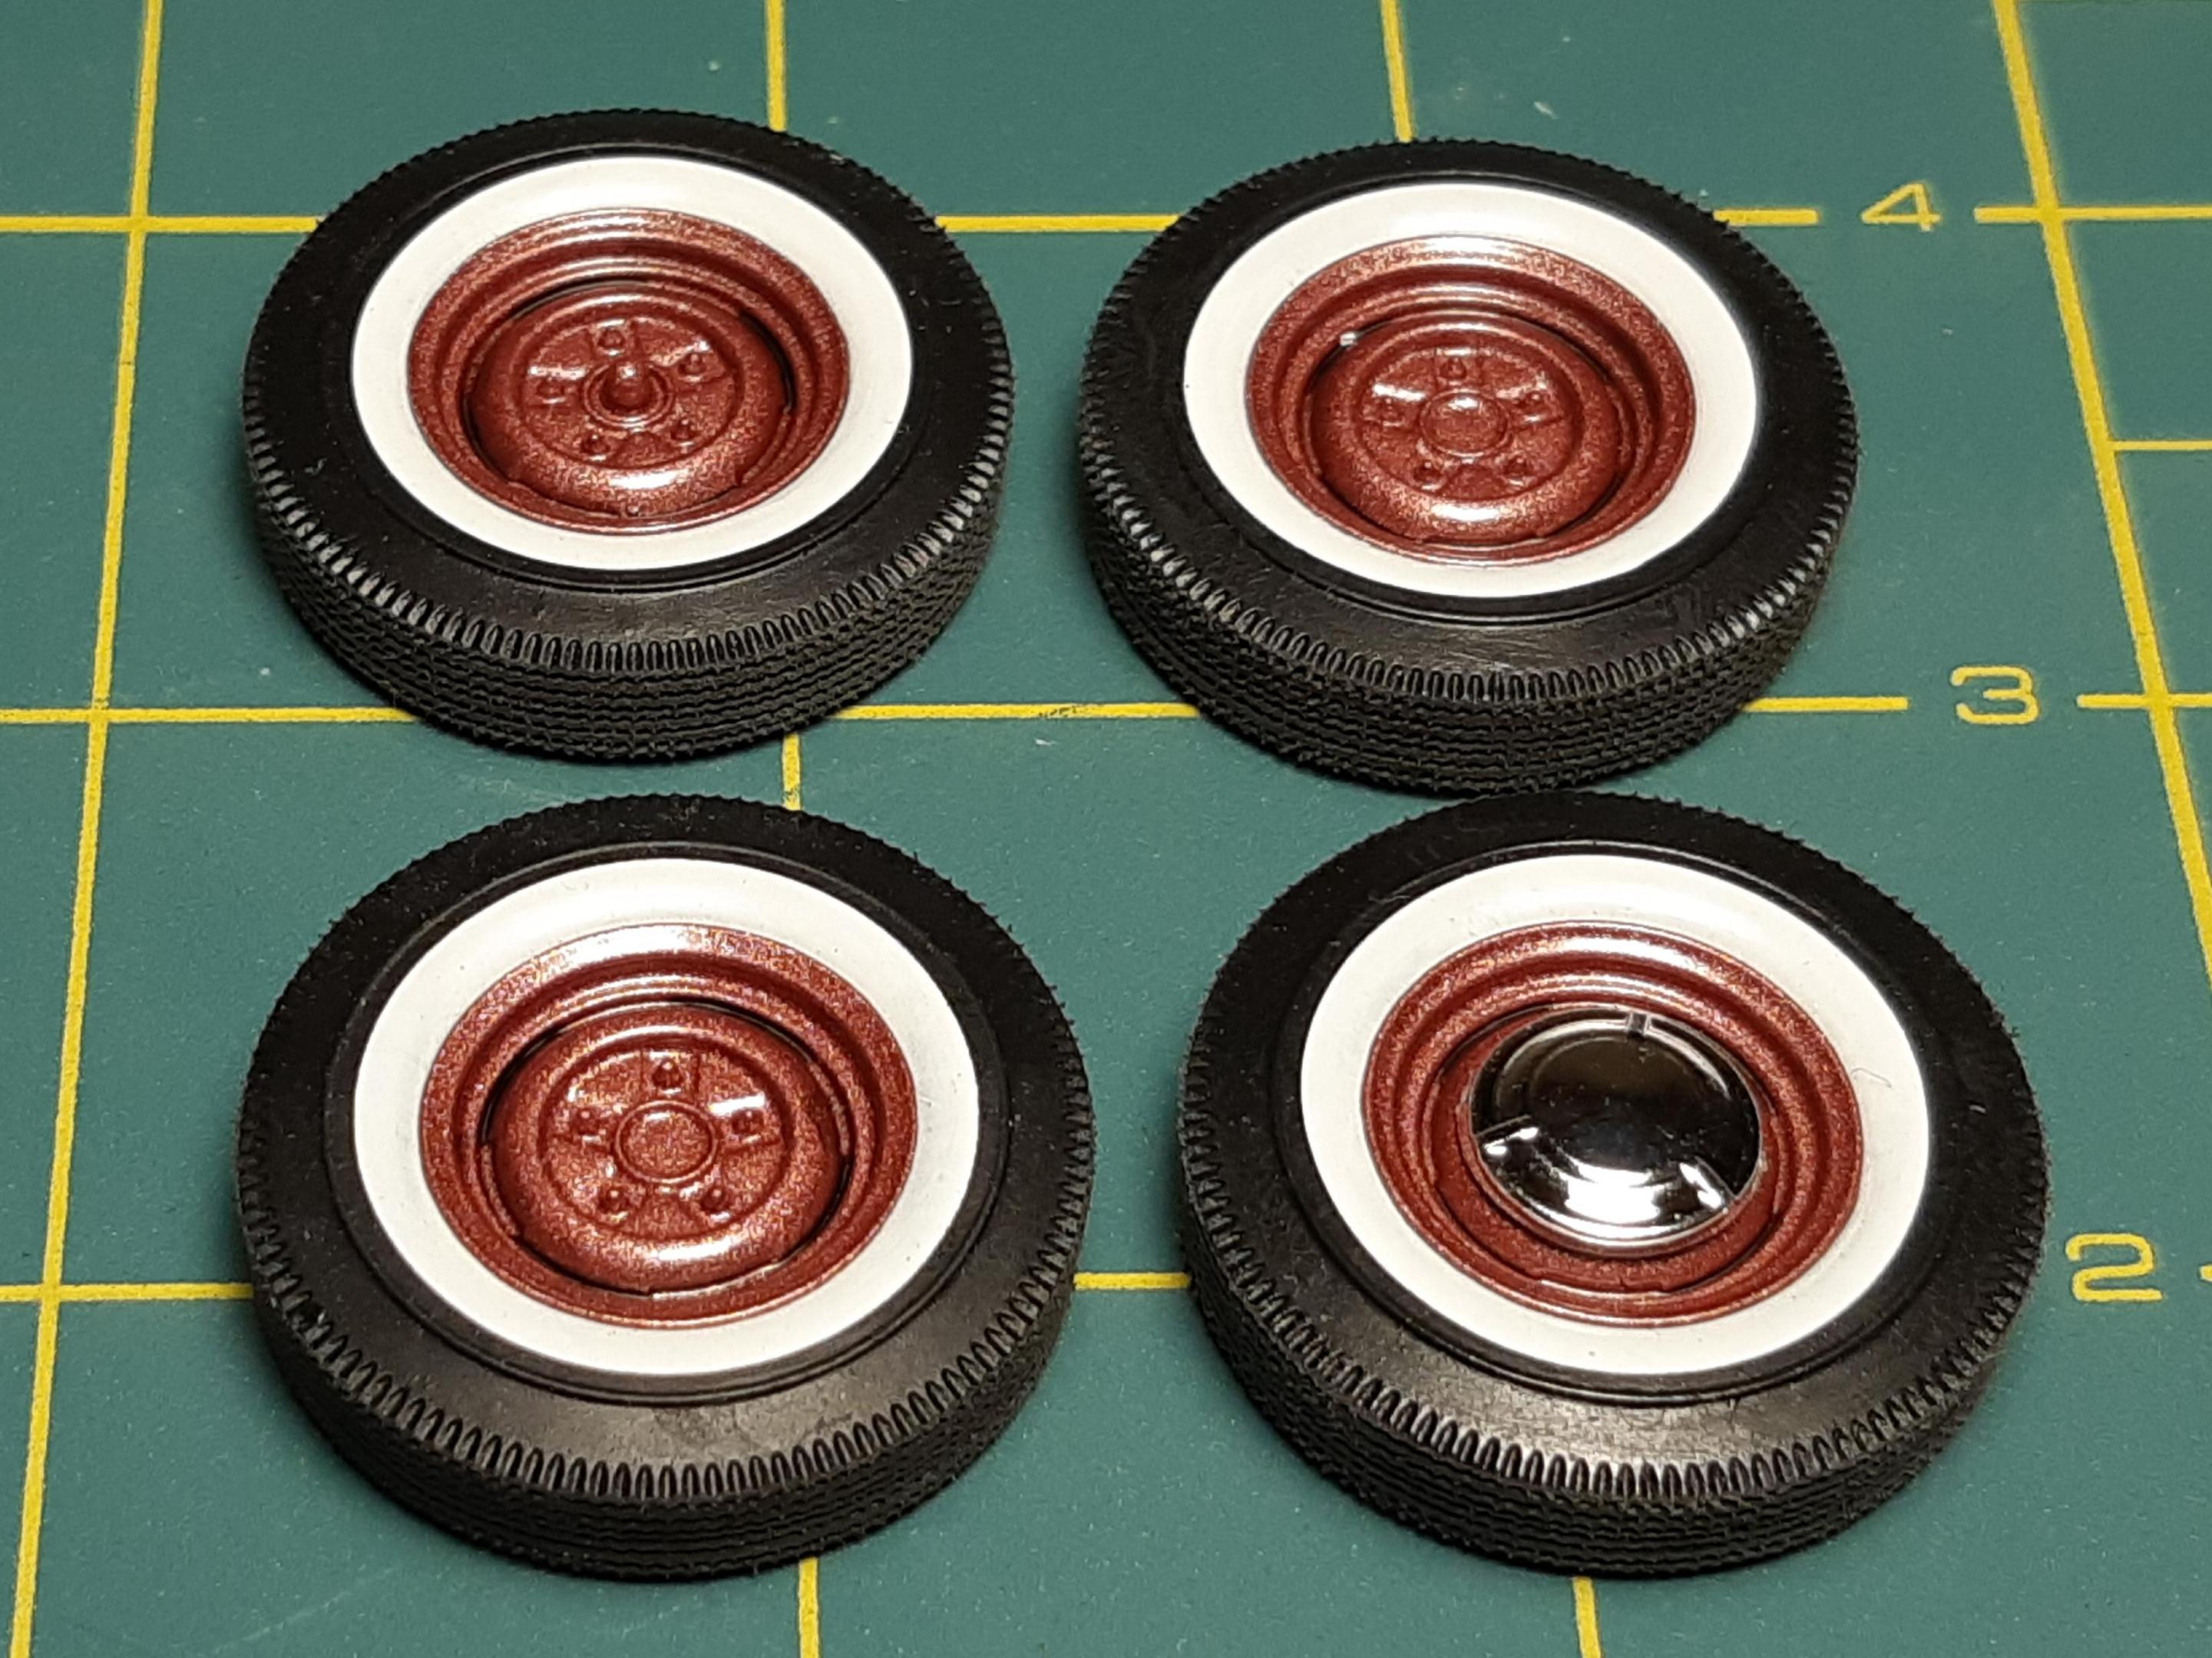
Here is the interior finished and the engine installed, some plumbing done. I found the 1961 pontiac brochures all feature wide white walls, by 1962 GM was using pinstripe whitewalls. So, WIDE WHITEWALLS it is!!! gotta keep it stone stock. I cant remember what these tires are from, but they fit nice and look correct. Dogdish caps are a must on this build. -

Post pics of your six cylinder engines!
TheBEAUMONTGURU replied to Lucius Molchany's topic in Model Cars
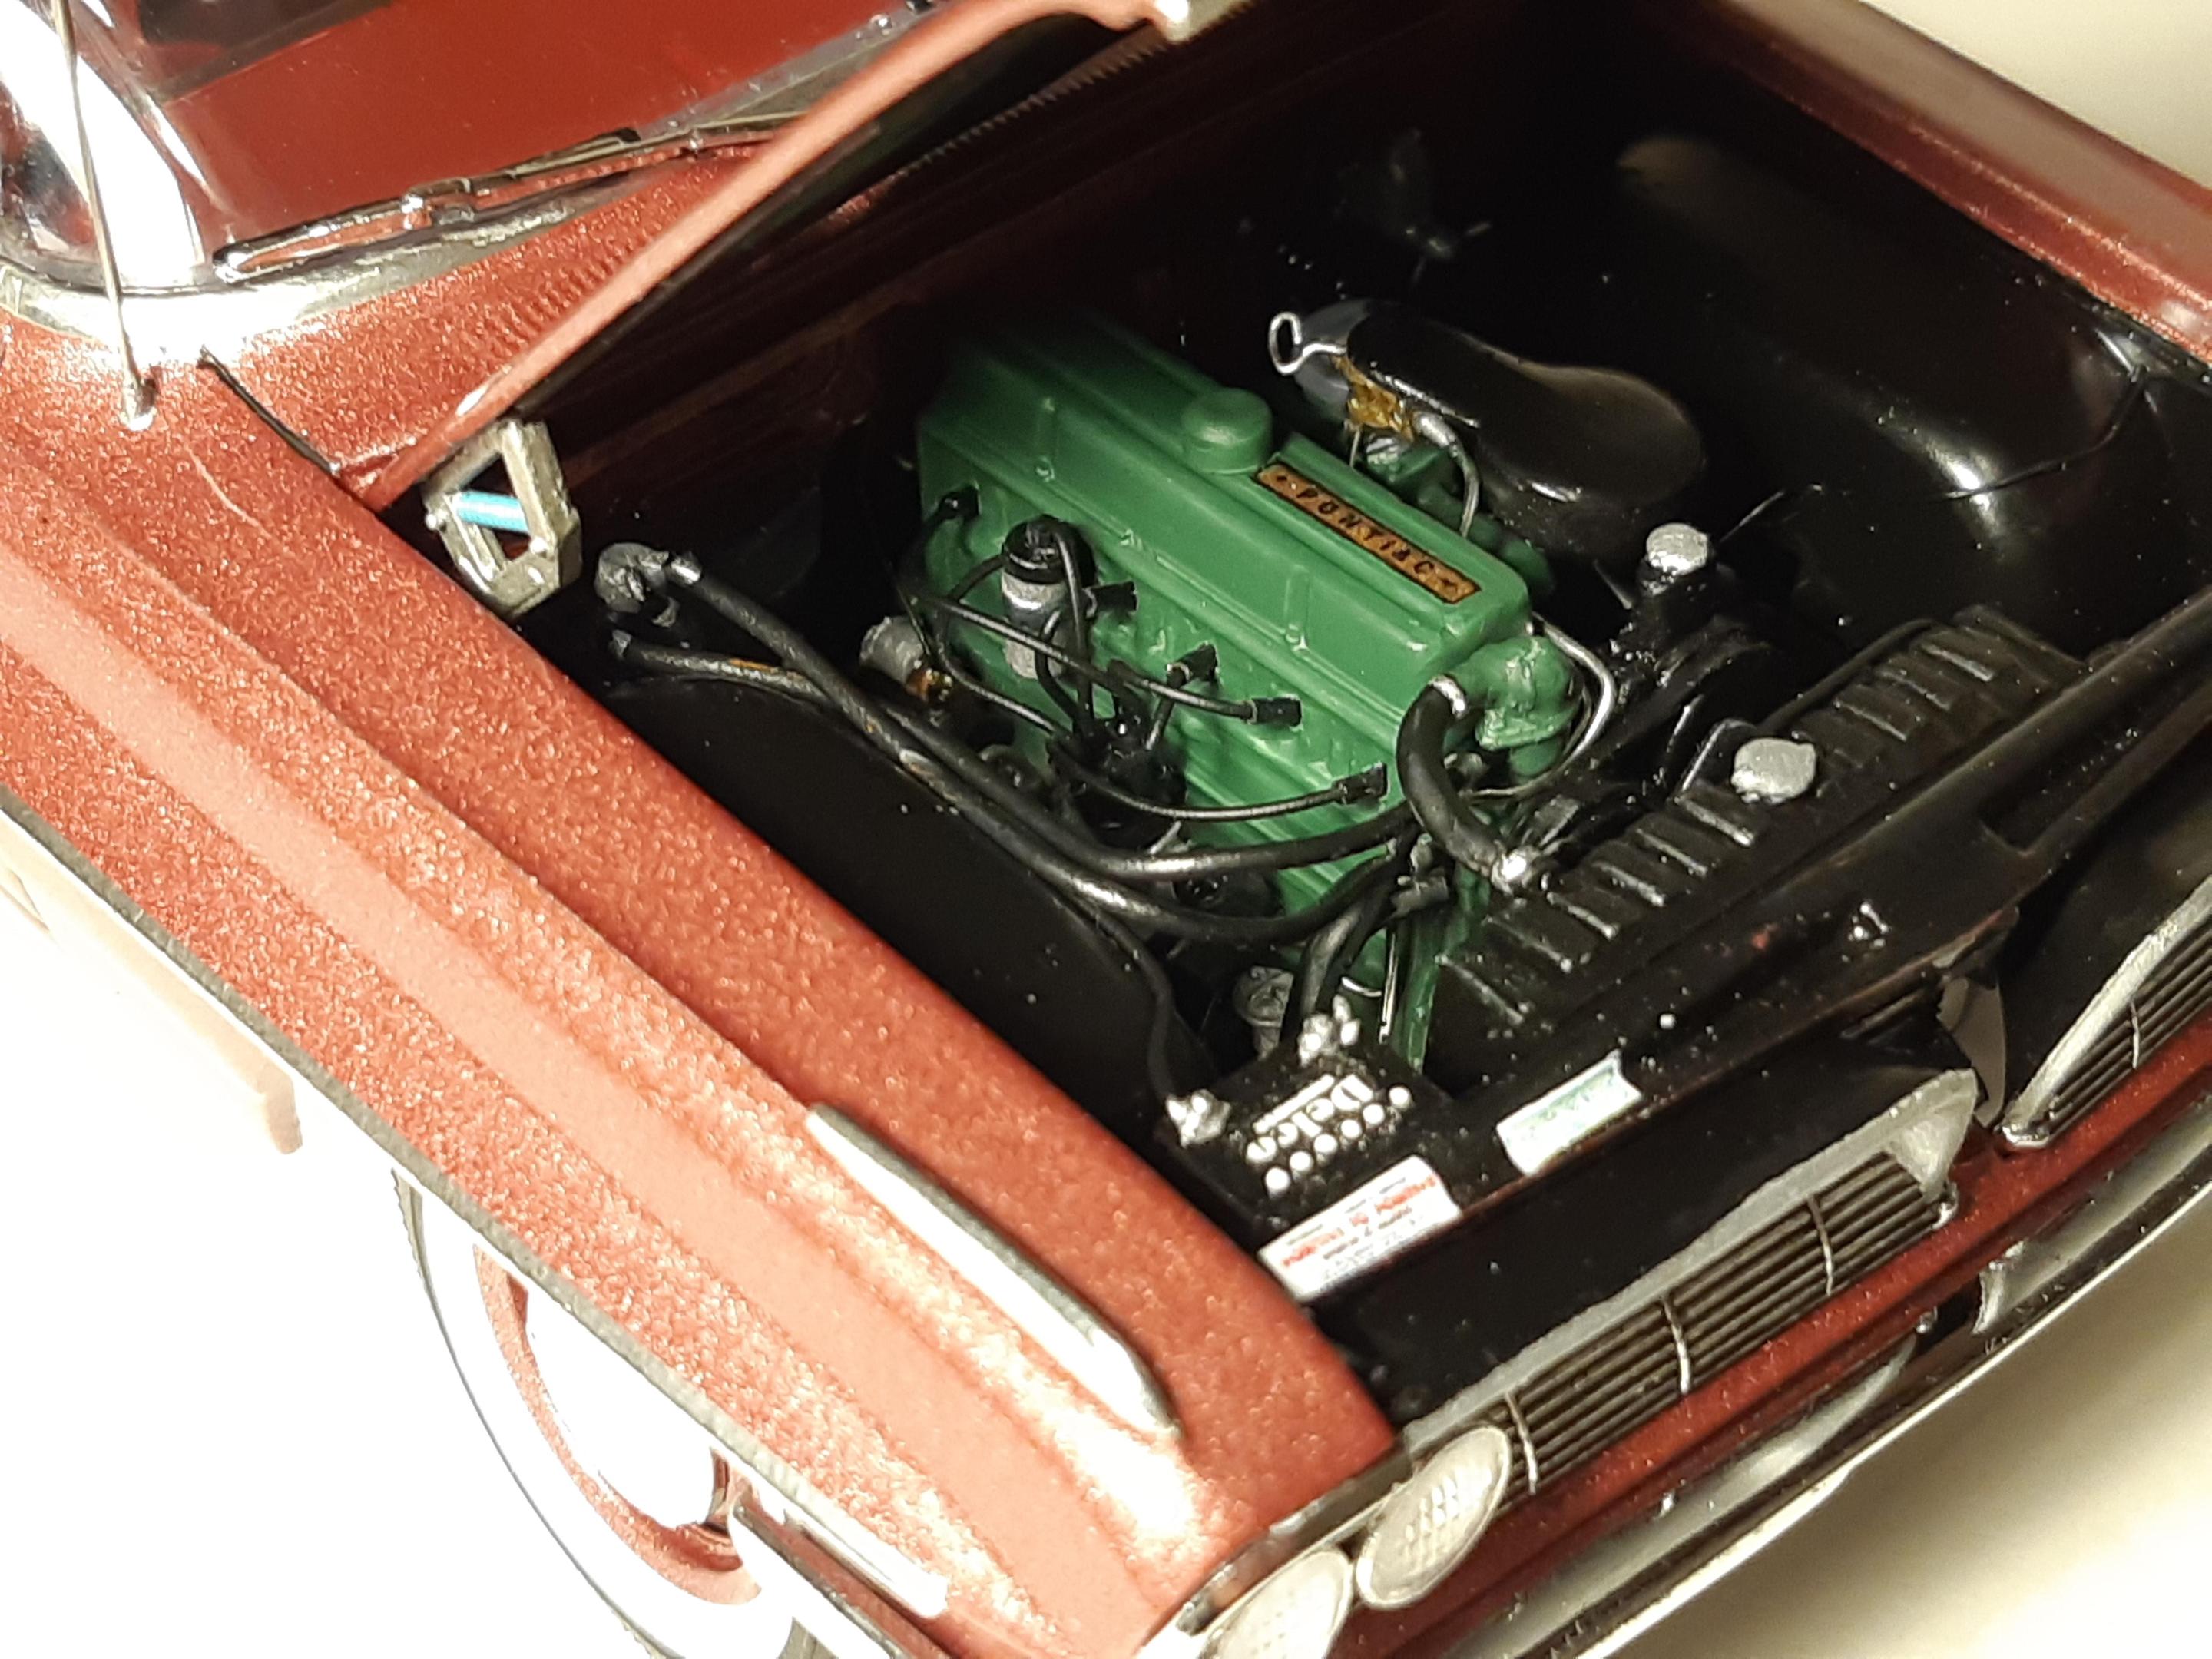
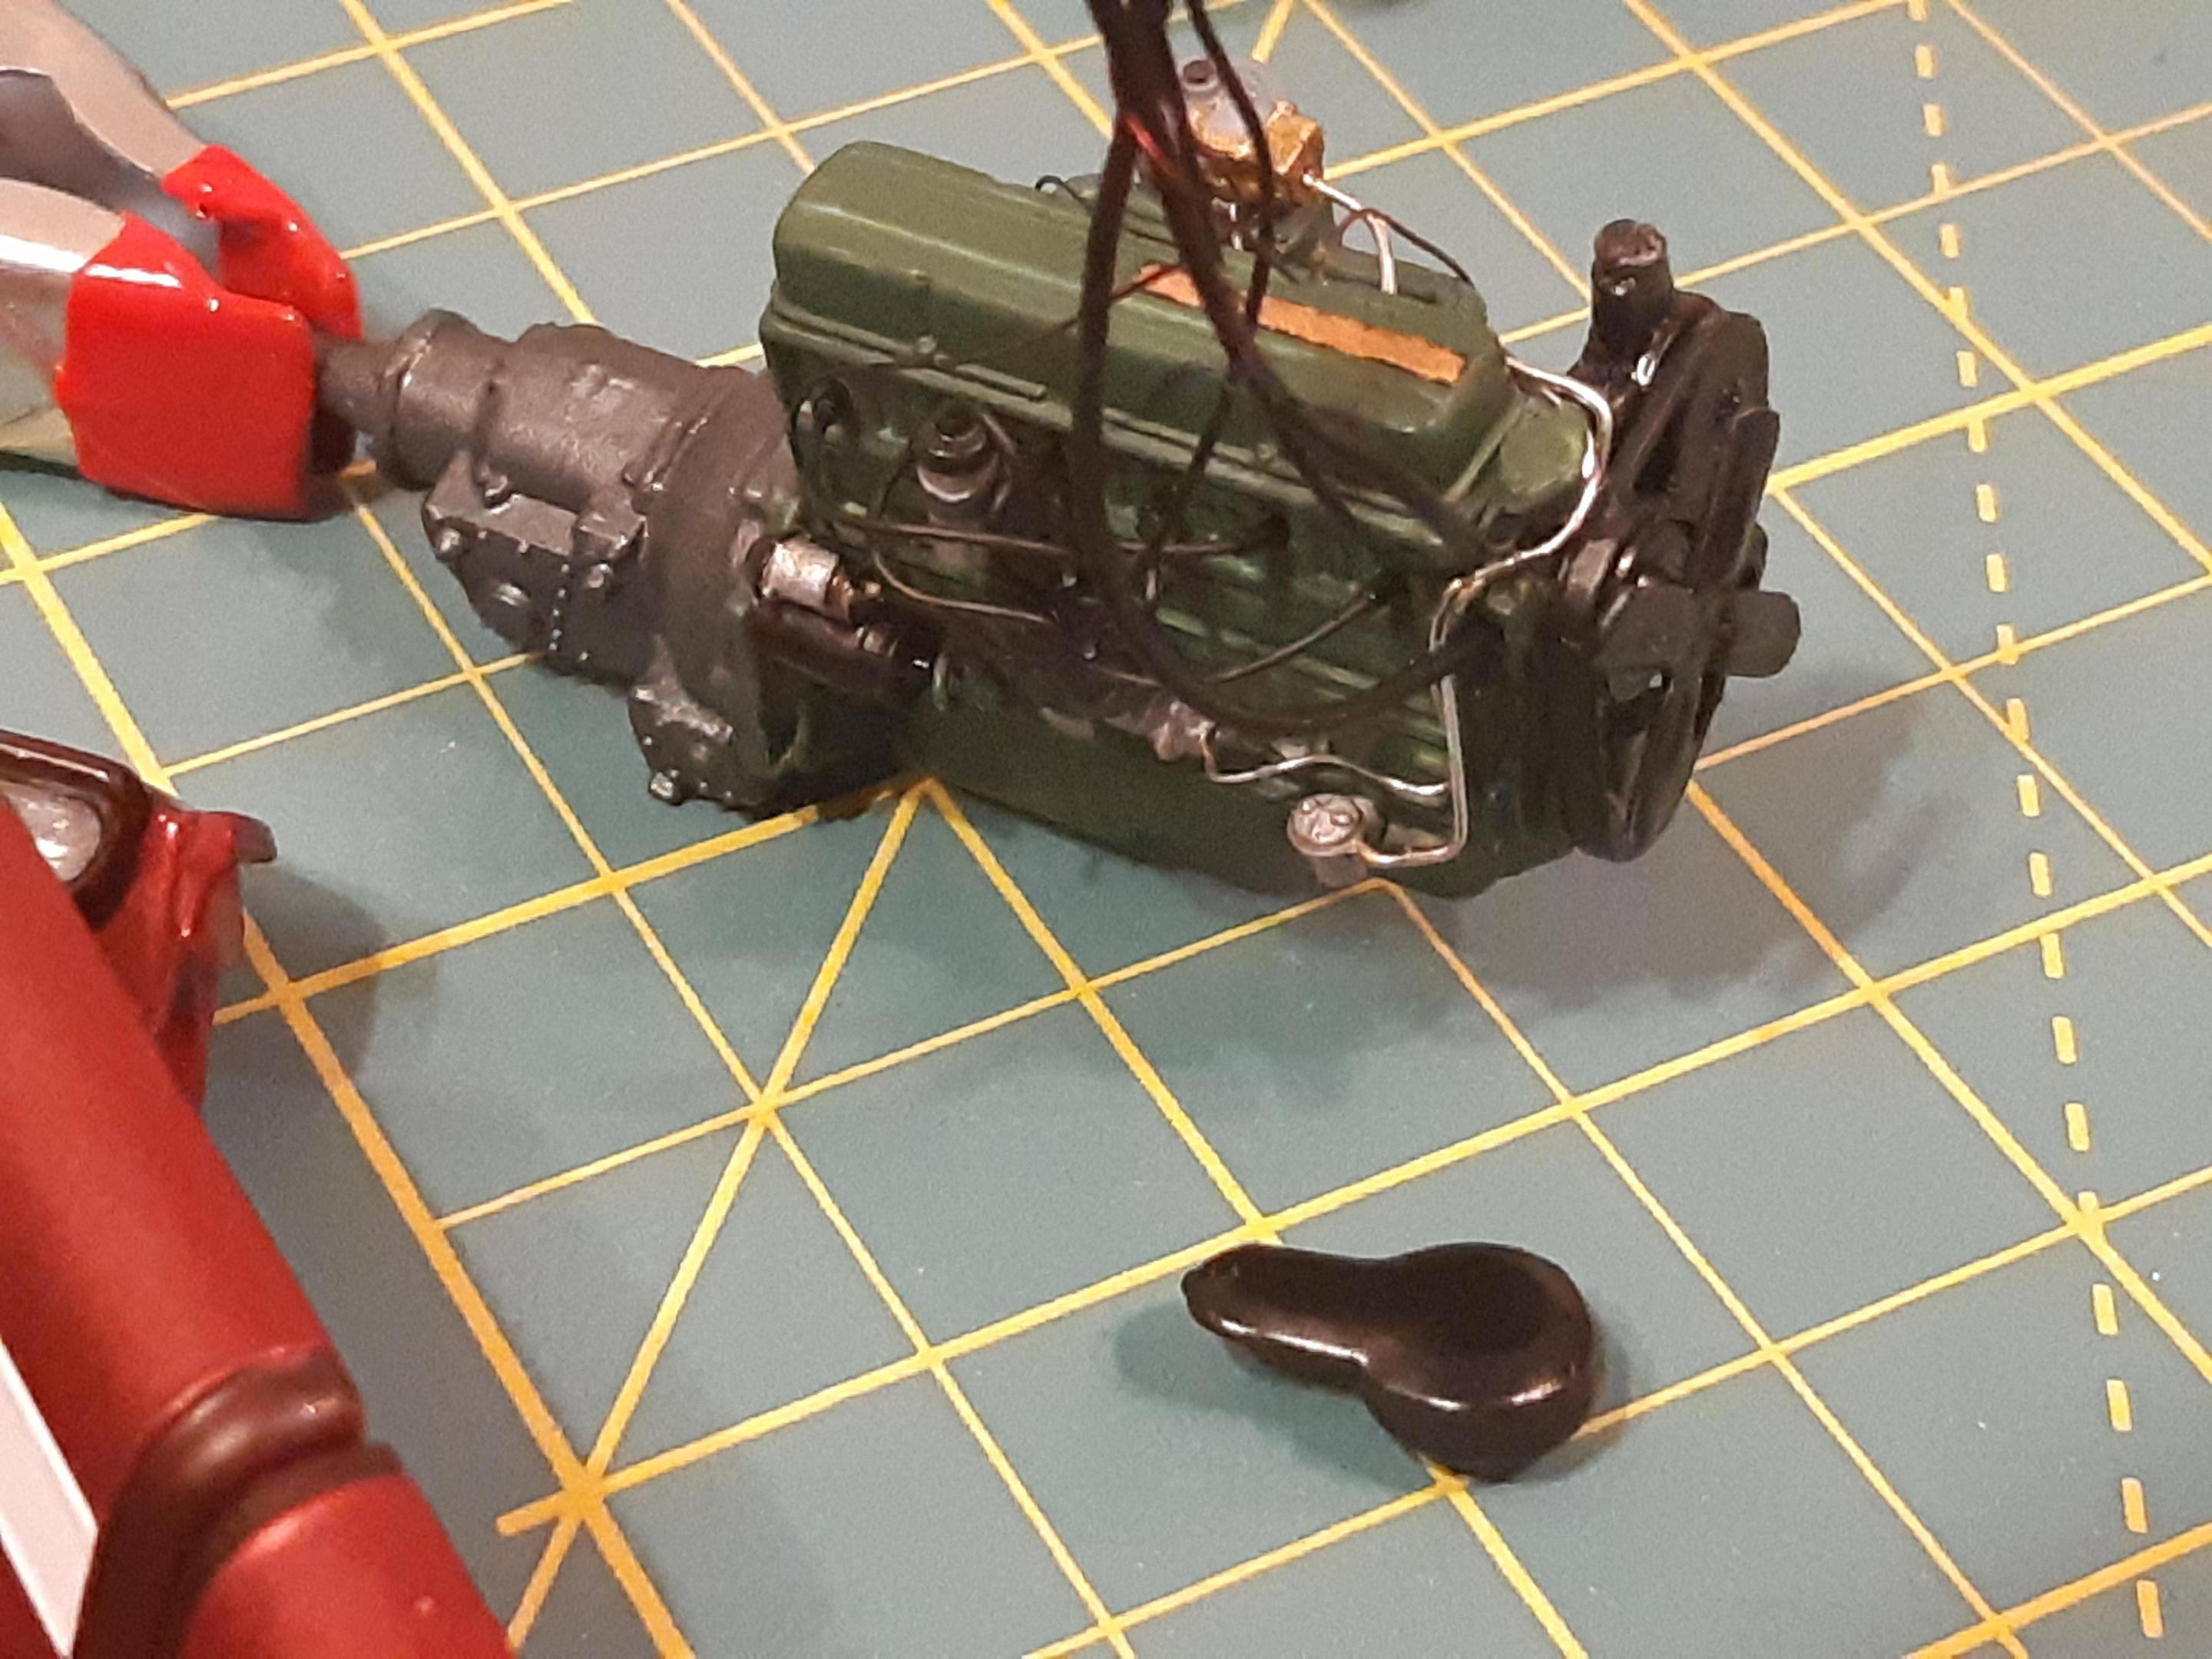
And a 261 CID stovebolt in my 1961 Canadian Pontiac Laurentian. Lots of mods and scratch building too -

Post pics of your six cylinder engines!
TheBEAUMONTGURU replied to Lucius Molchany's topic in Model Cars
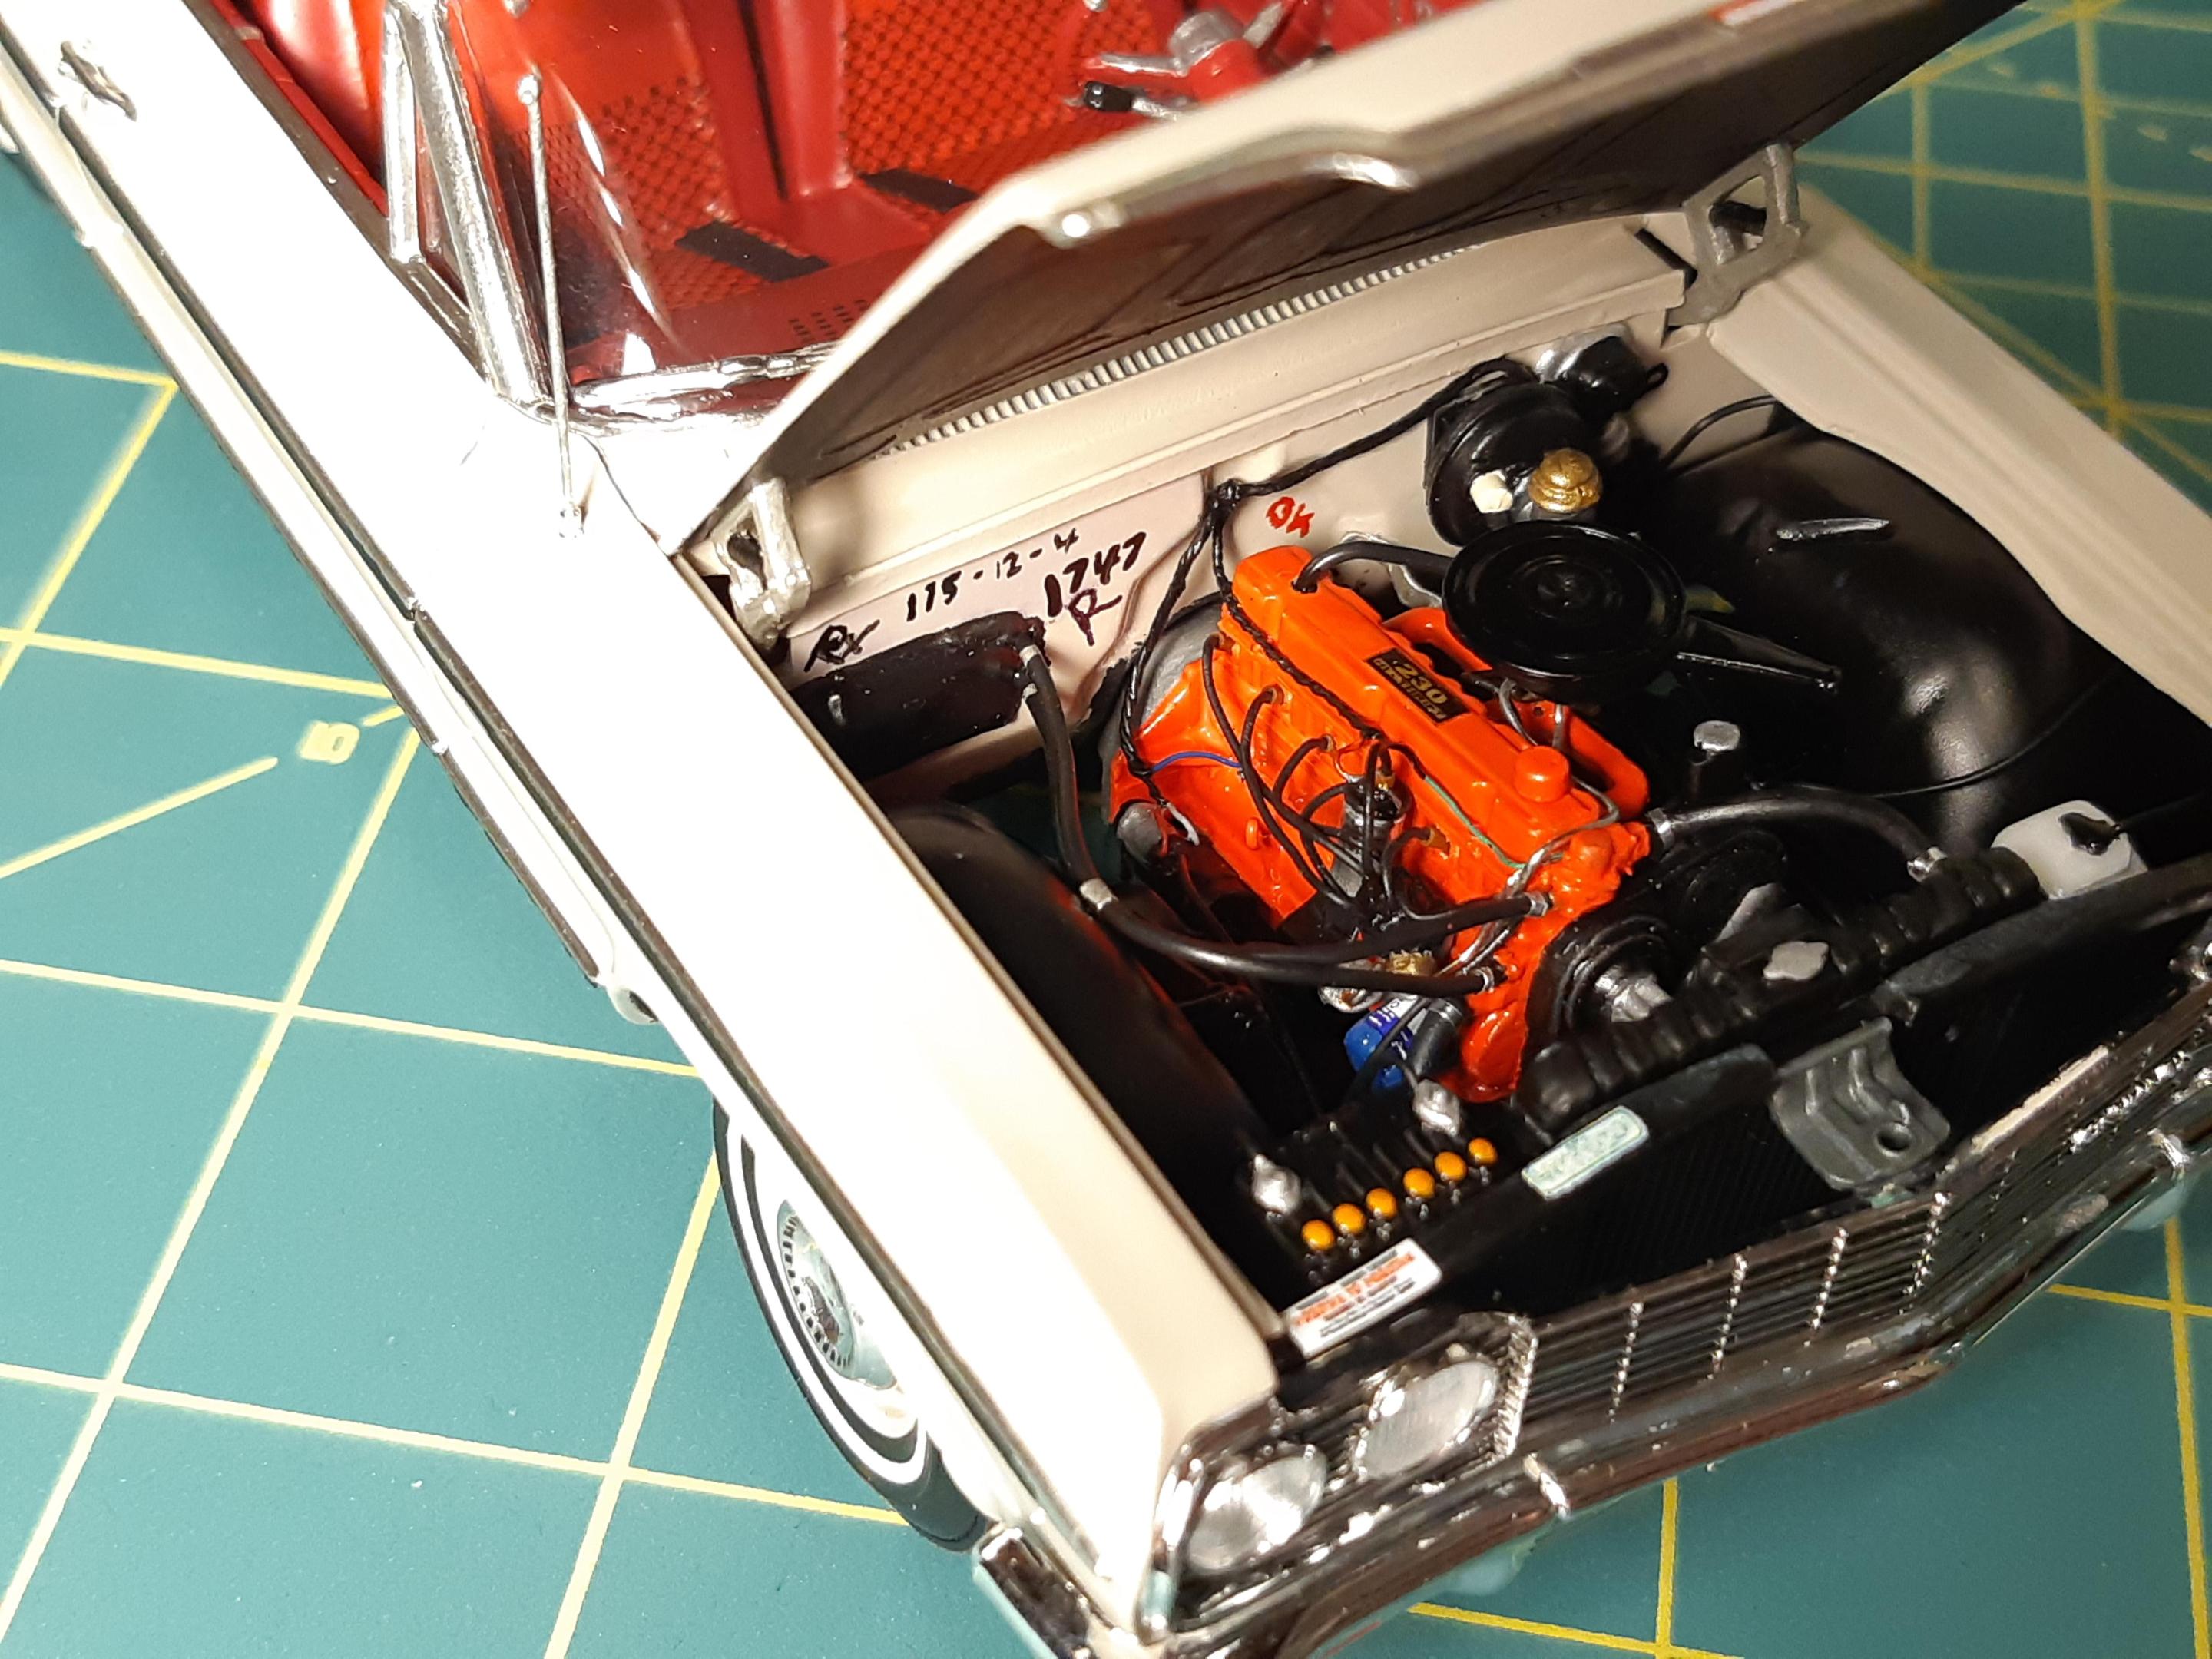
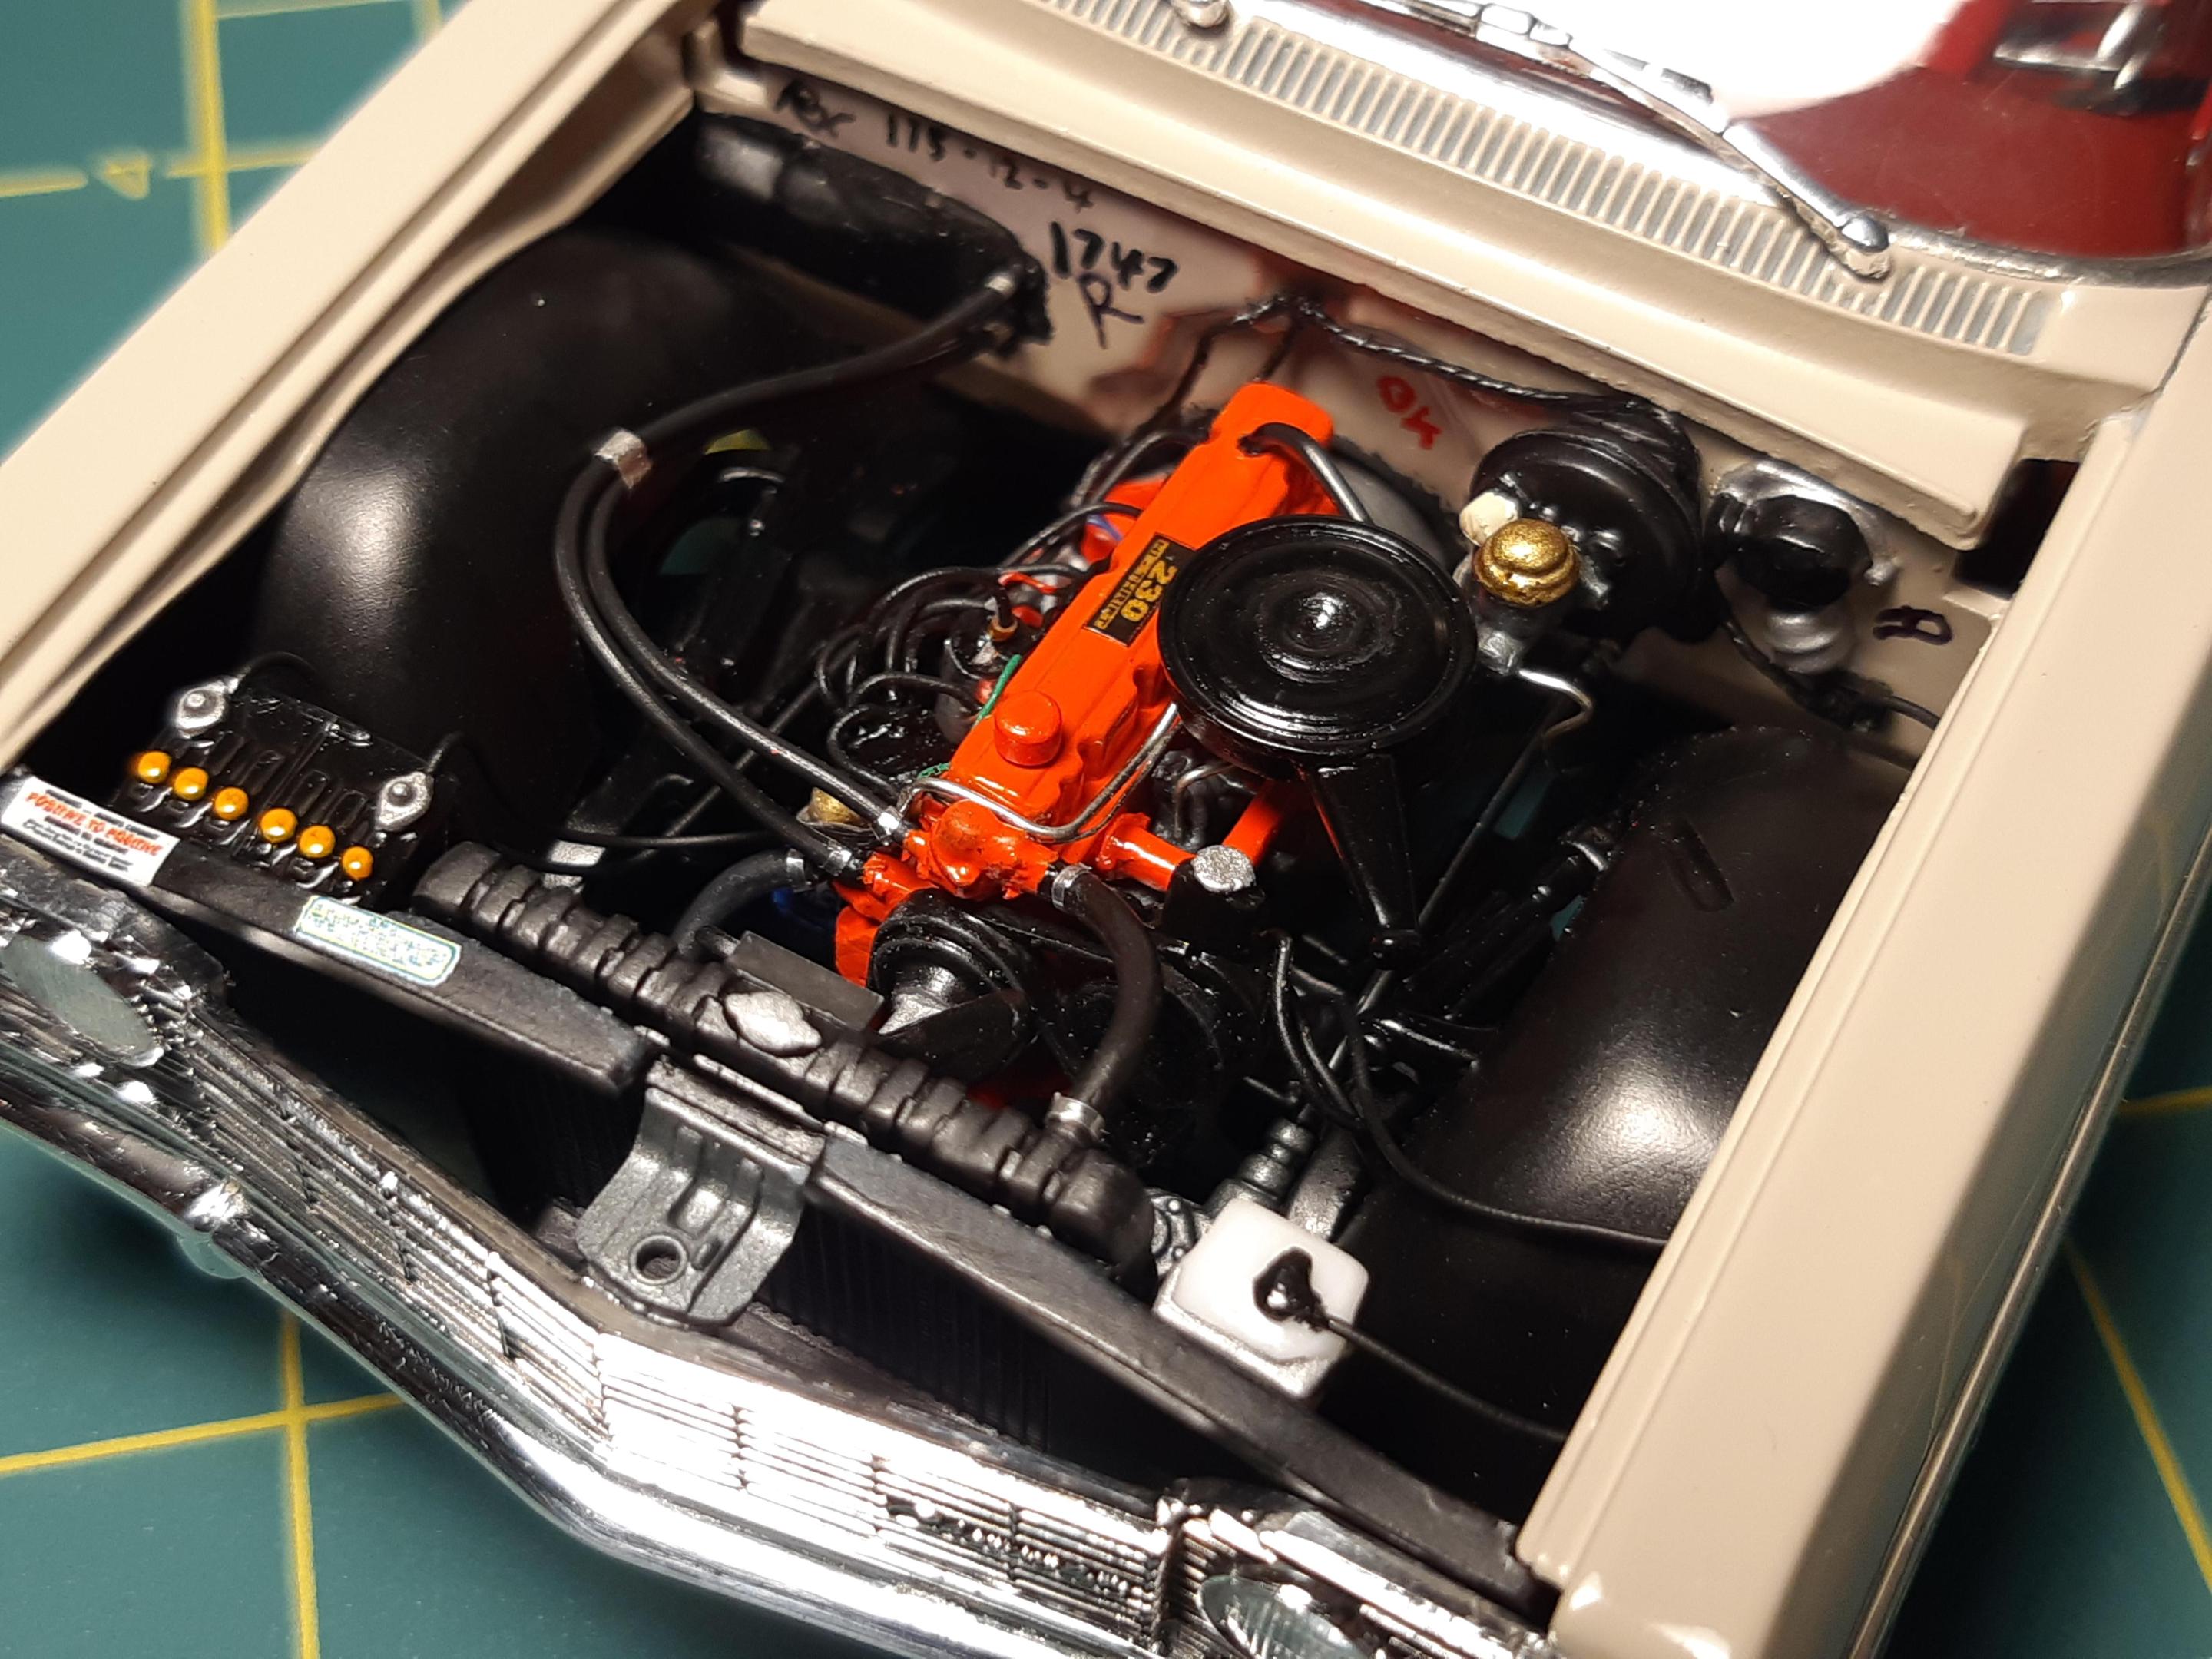
I've done a couple 6cyls. Here is a Trumpeter 230 that i heavily modified and installed in a Revell 1964 impala with PS, and a scratch built aircleaner -

Canadian 1961 Pontiac Laurentian conversion
TheBEAUMONTGURU replied to TheBEAUMONTGURU's topic in WIP: Model Cars
Im going to build this one with a stone stock correct looking 261 ci engine with a cast iron powerglide. I want to add Power steering too. Im using the 61 truck kit along with a cast glide from the 65 nomad kit. The power steering pump and all steering arms and slave cylinder, belts and funny looking aircleaner are all scratch built. An yes 61 canadian pontiac 6cyls were green color. -

Canadian 1961 Pontiac Laurentian conversion
TheBEAUMONTGURU replied to TheBEAUMONTGURU's topic in WIP: Model Cars
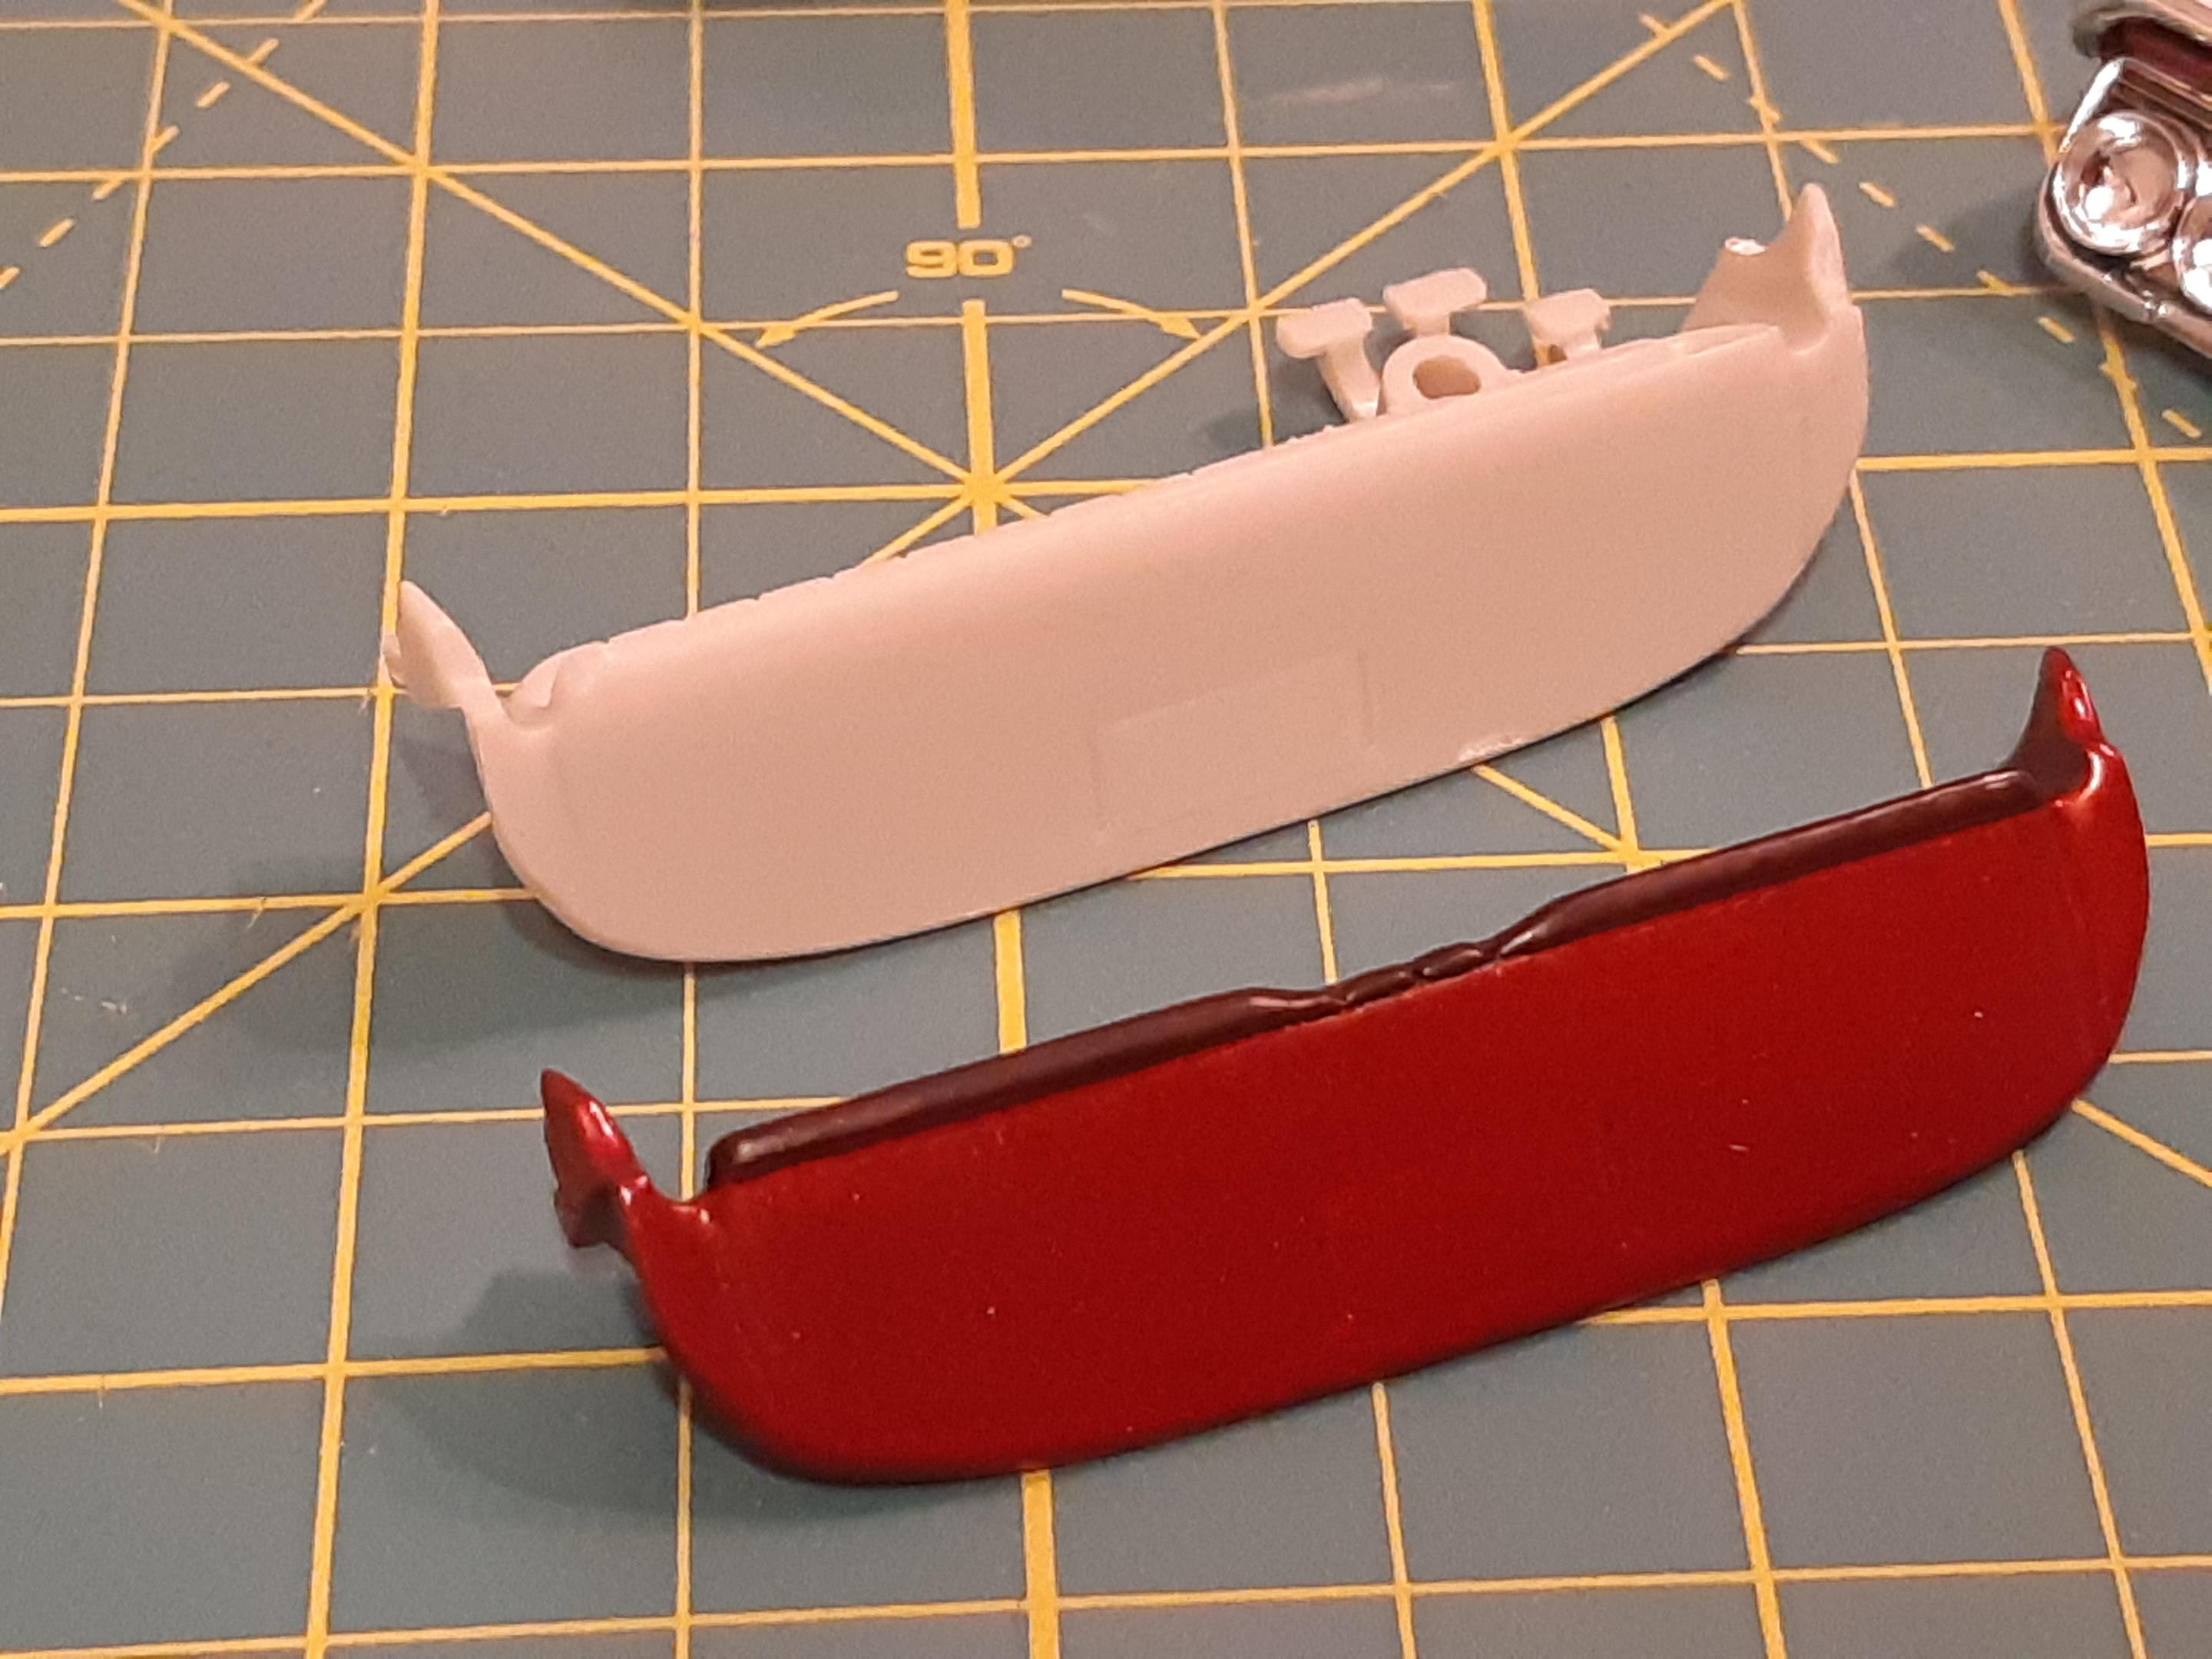
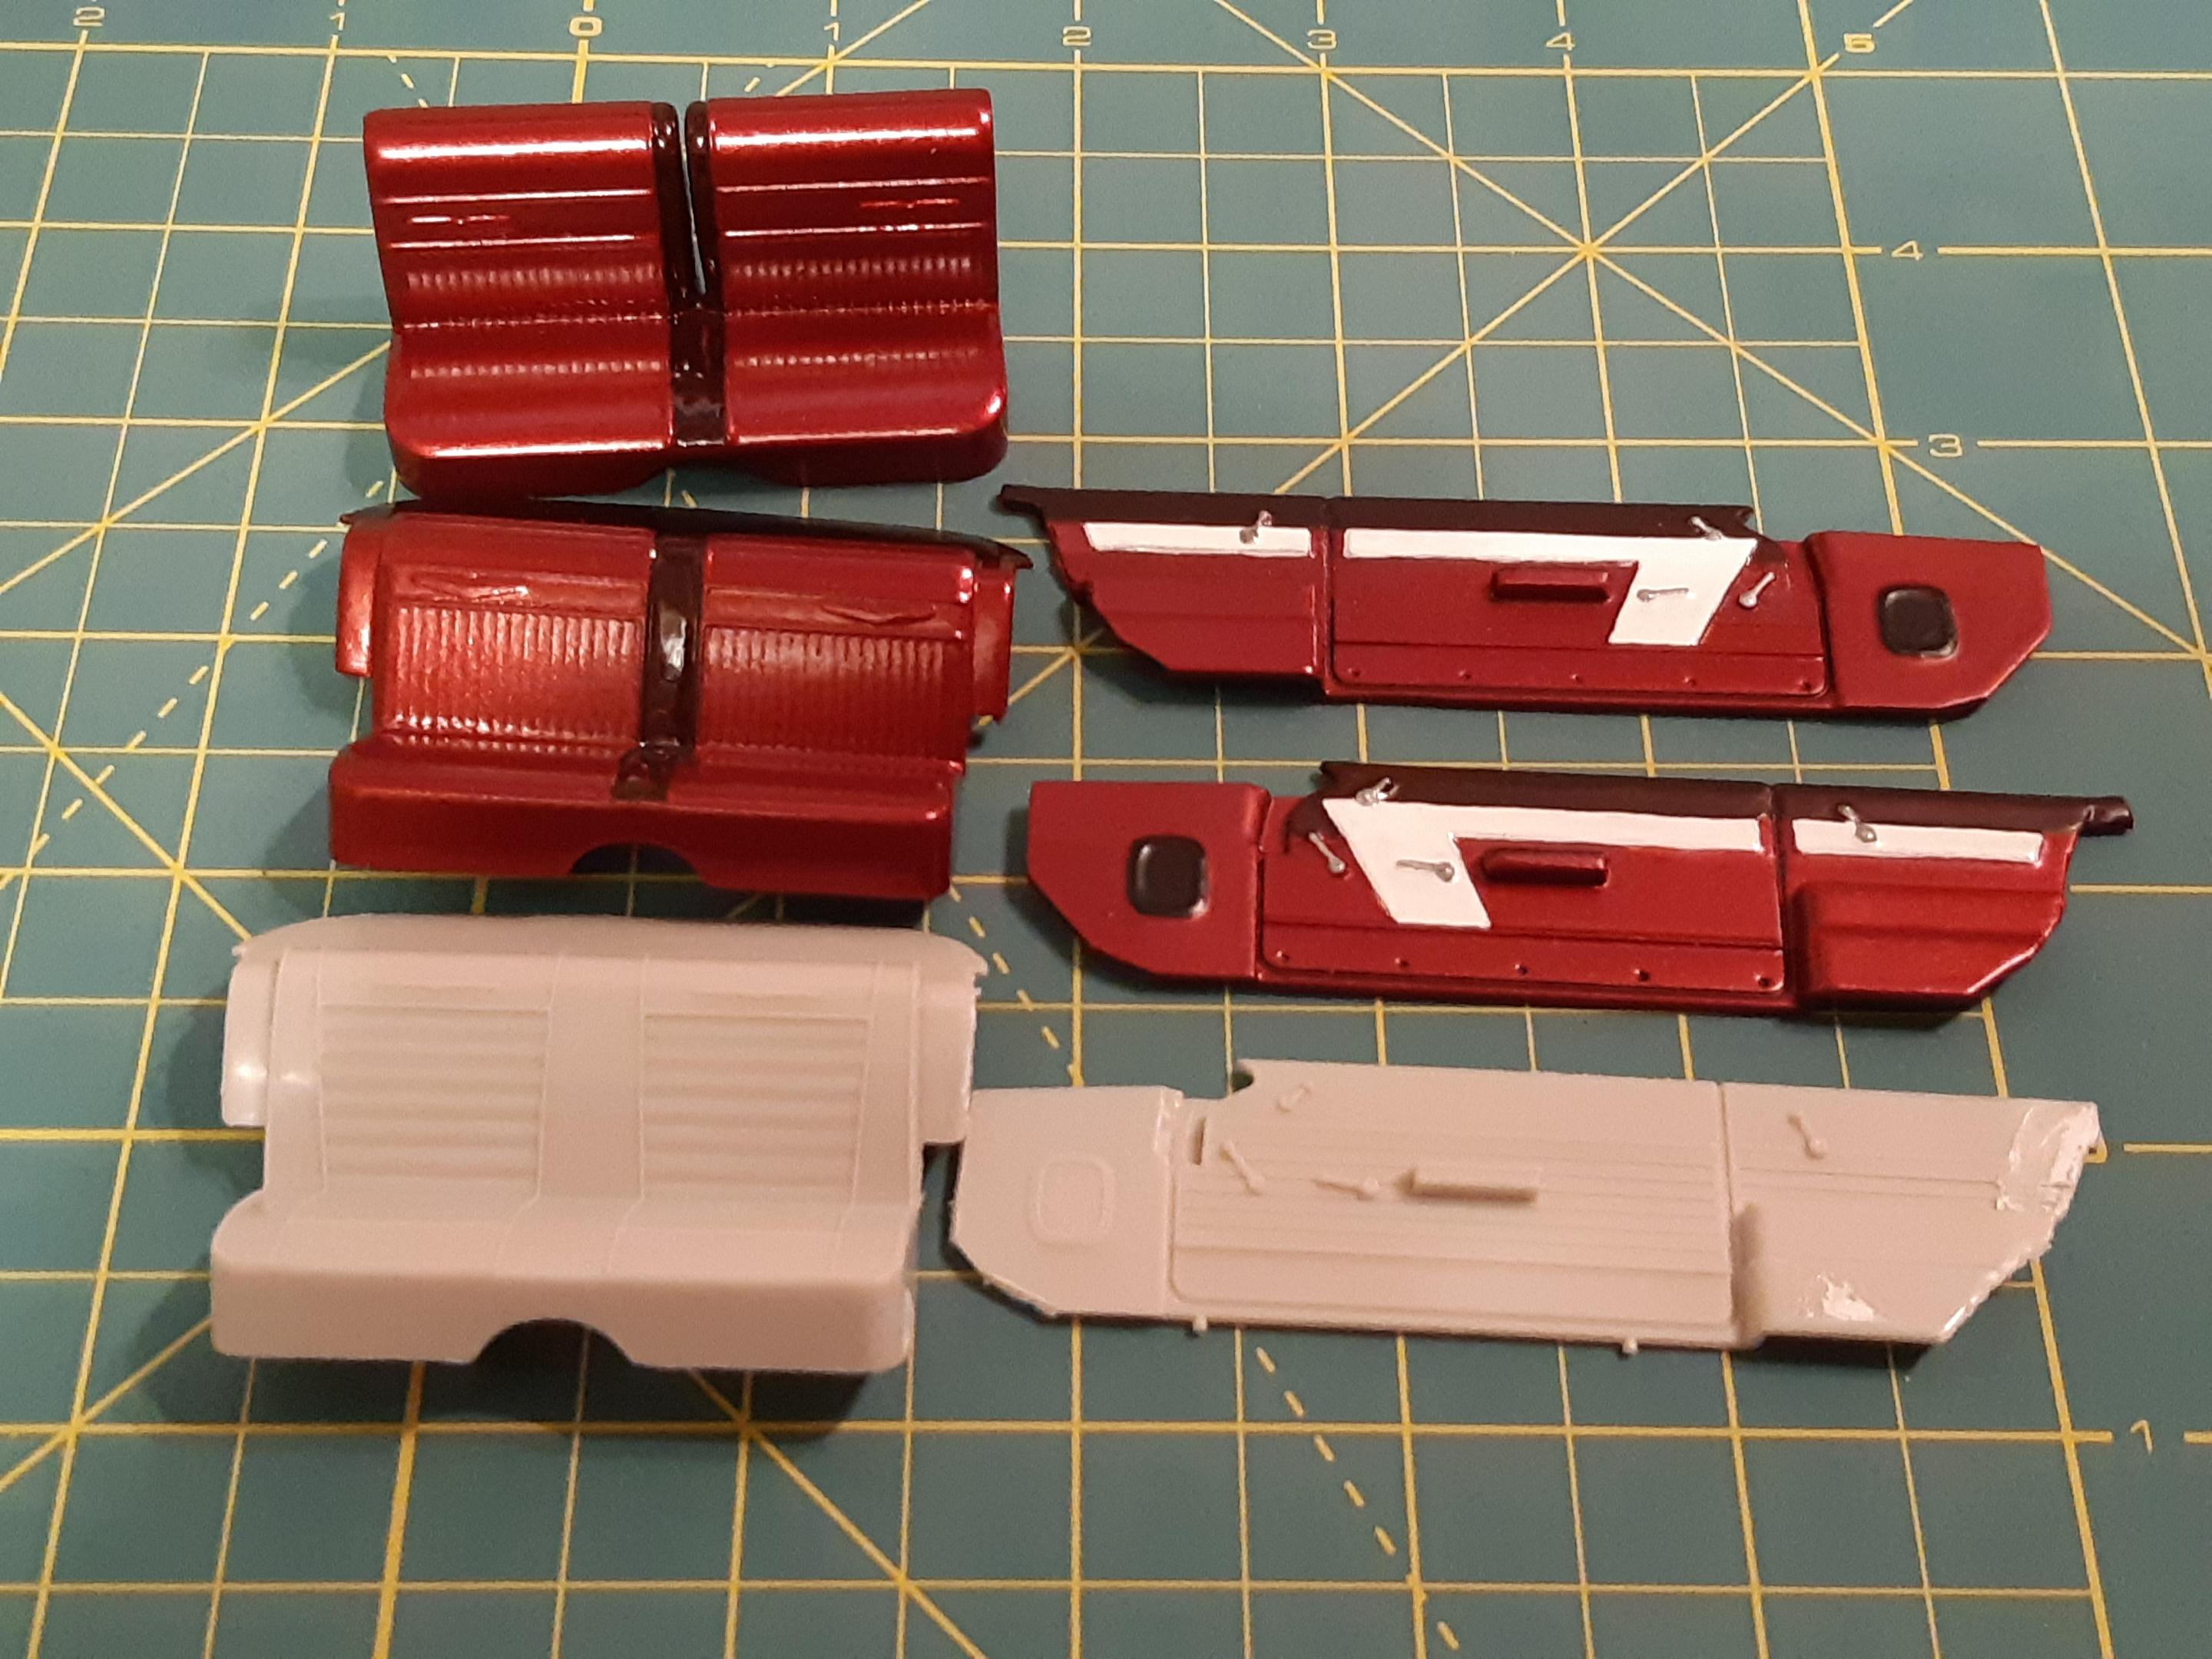
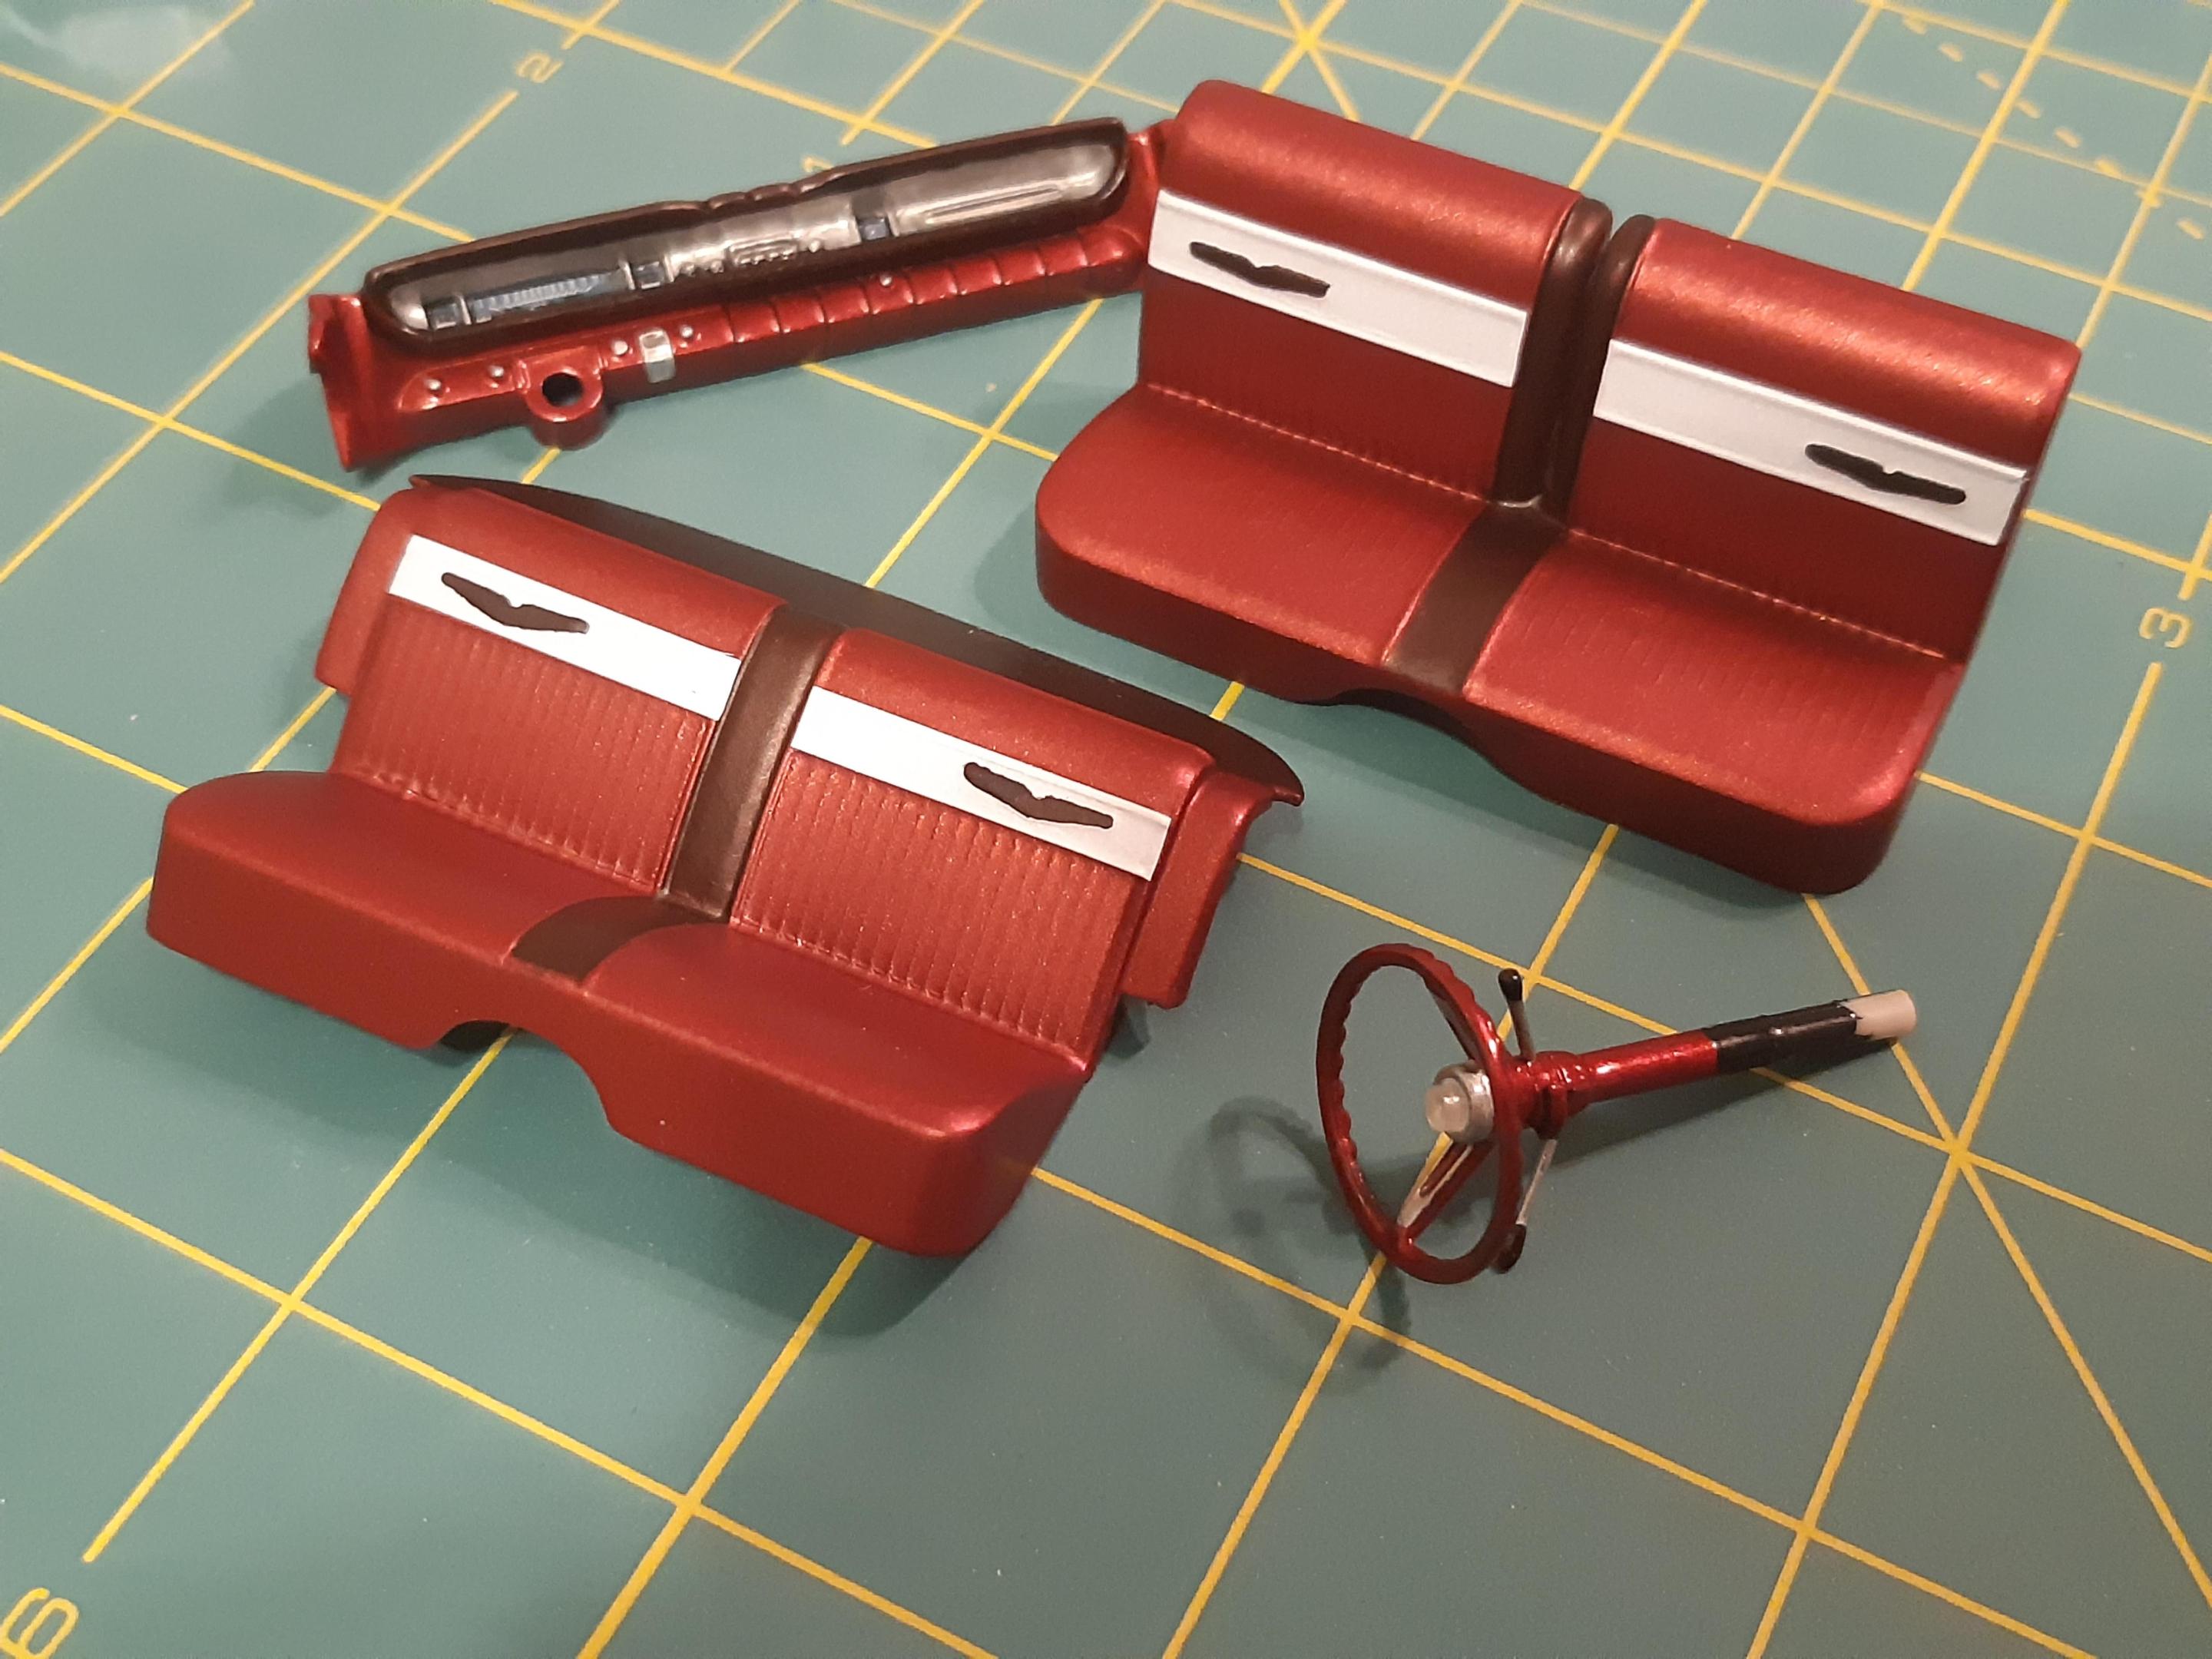
here is the interior detailed mostly. i fixed the incorrect dashpad on the kit, all 61 pontiacs should have the little indent in the center both US and canadian as far as i know . I used white decal sheets for the seats and panels. I had to replace teh pontiac wheel with one from an AMT 62 Belair, then make a clear horn cap to create a totally accurate 1961 Canadian Pontiac wheel -

Canadian 1961 Pontiac Laurentian conversion
TheBEAUMONTGURU replied to TheBEAUMONTGURU's topic in WIP: Model Cars
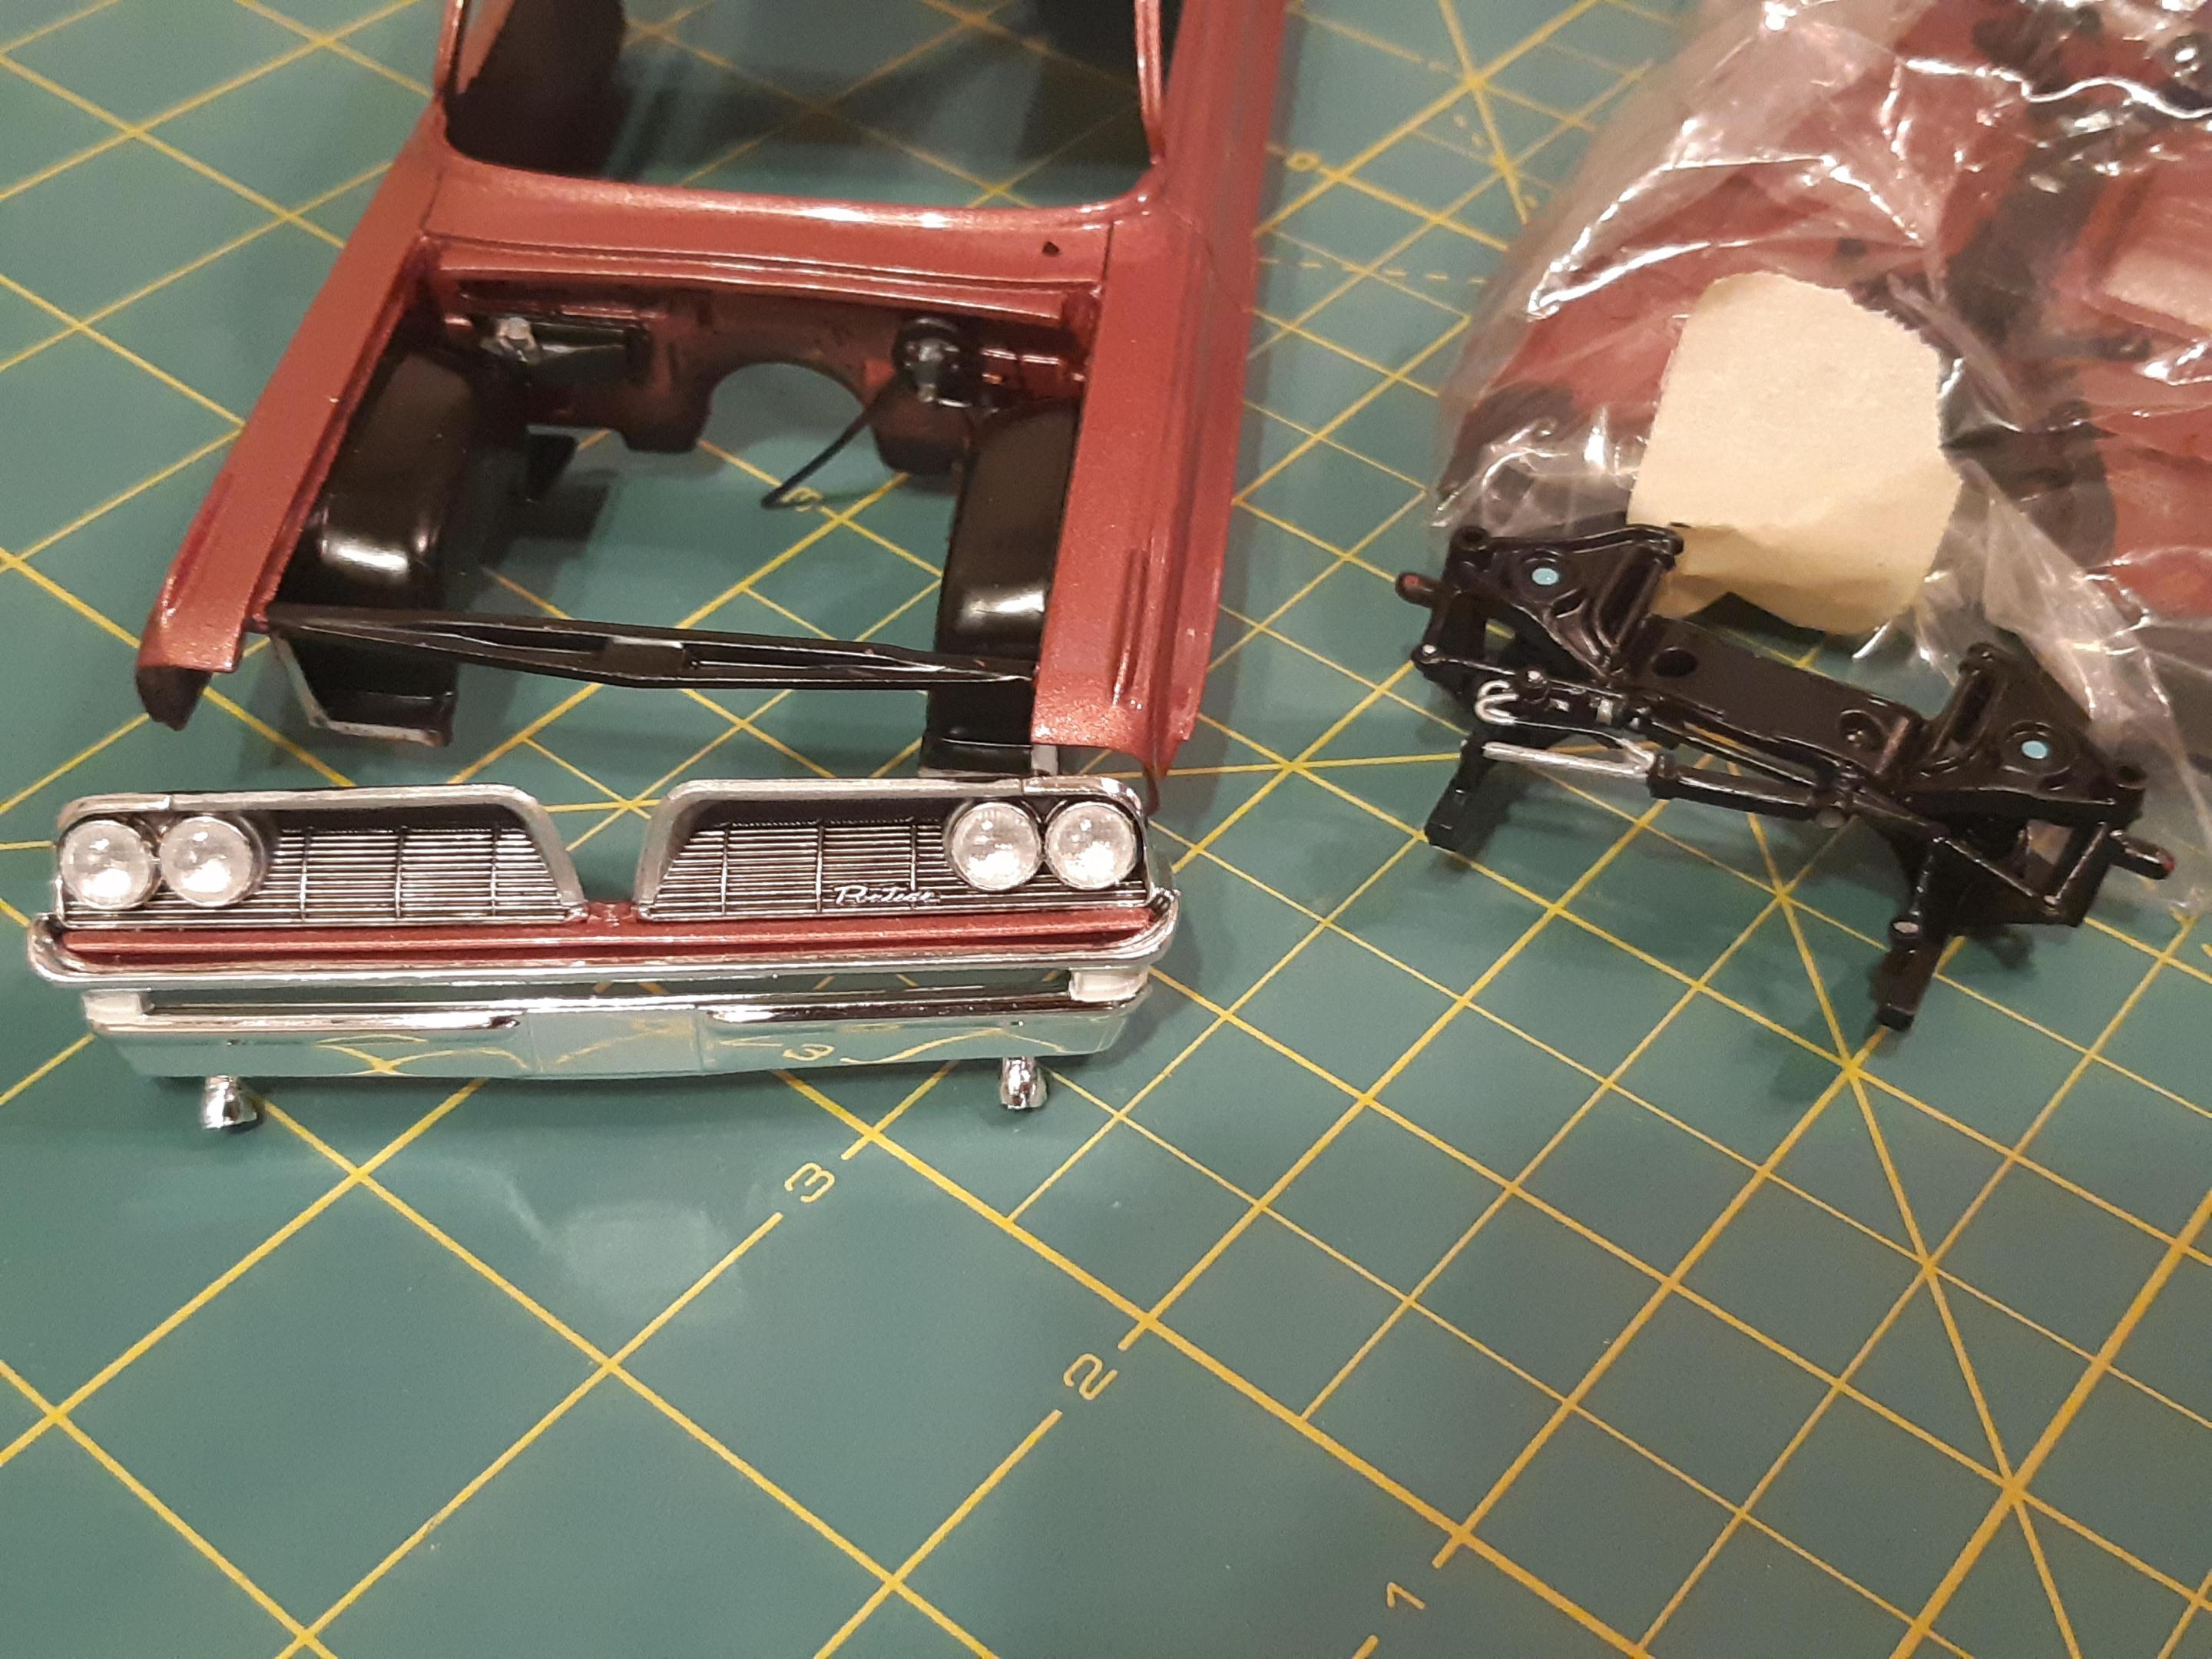
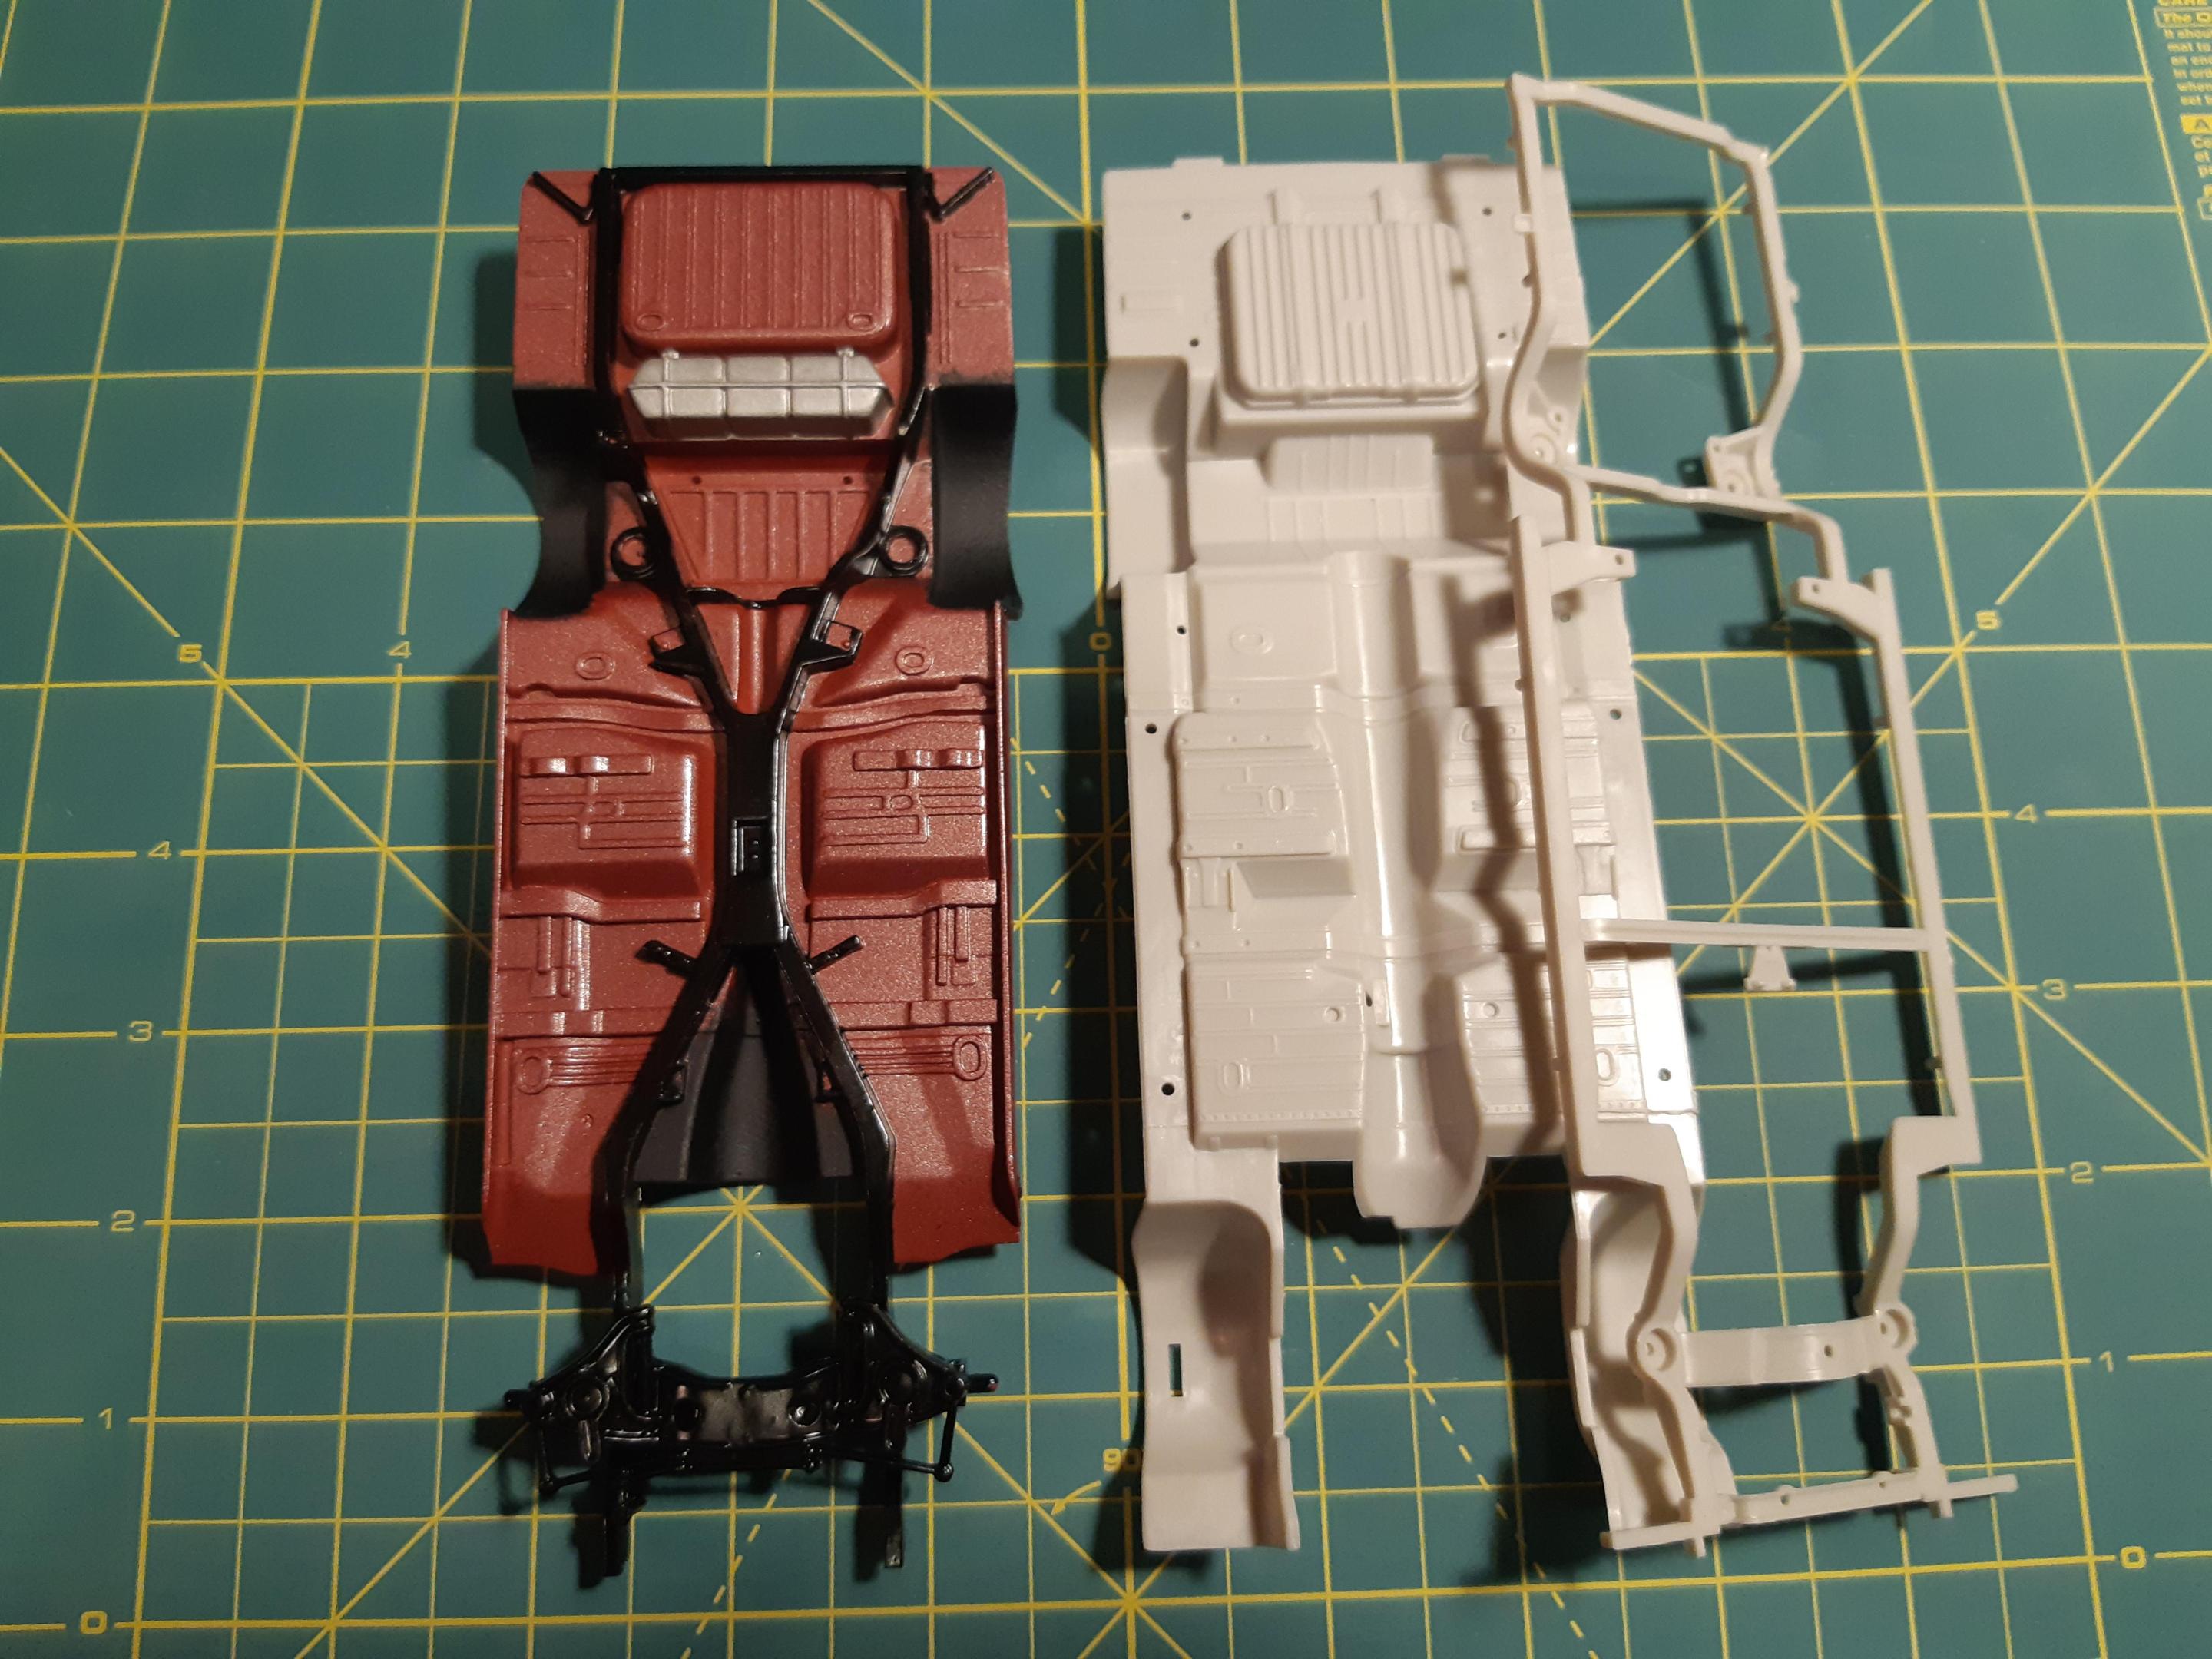
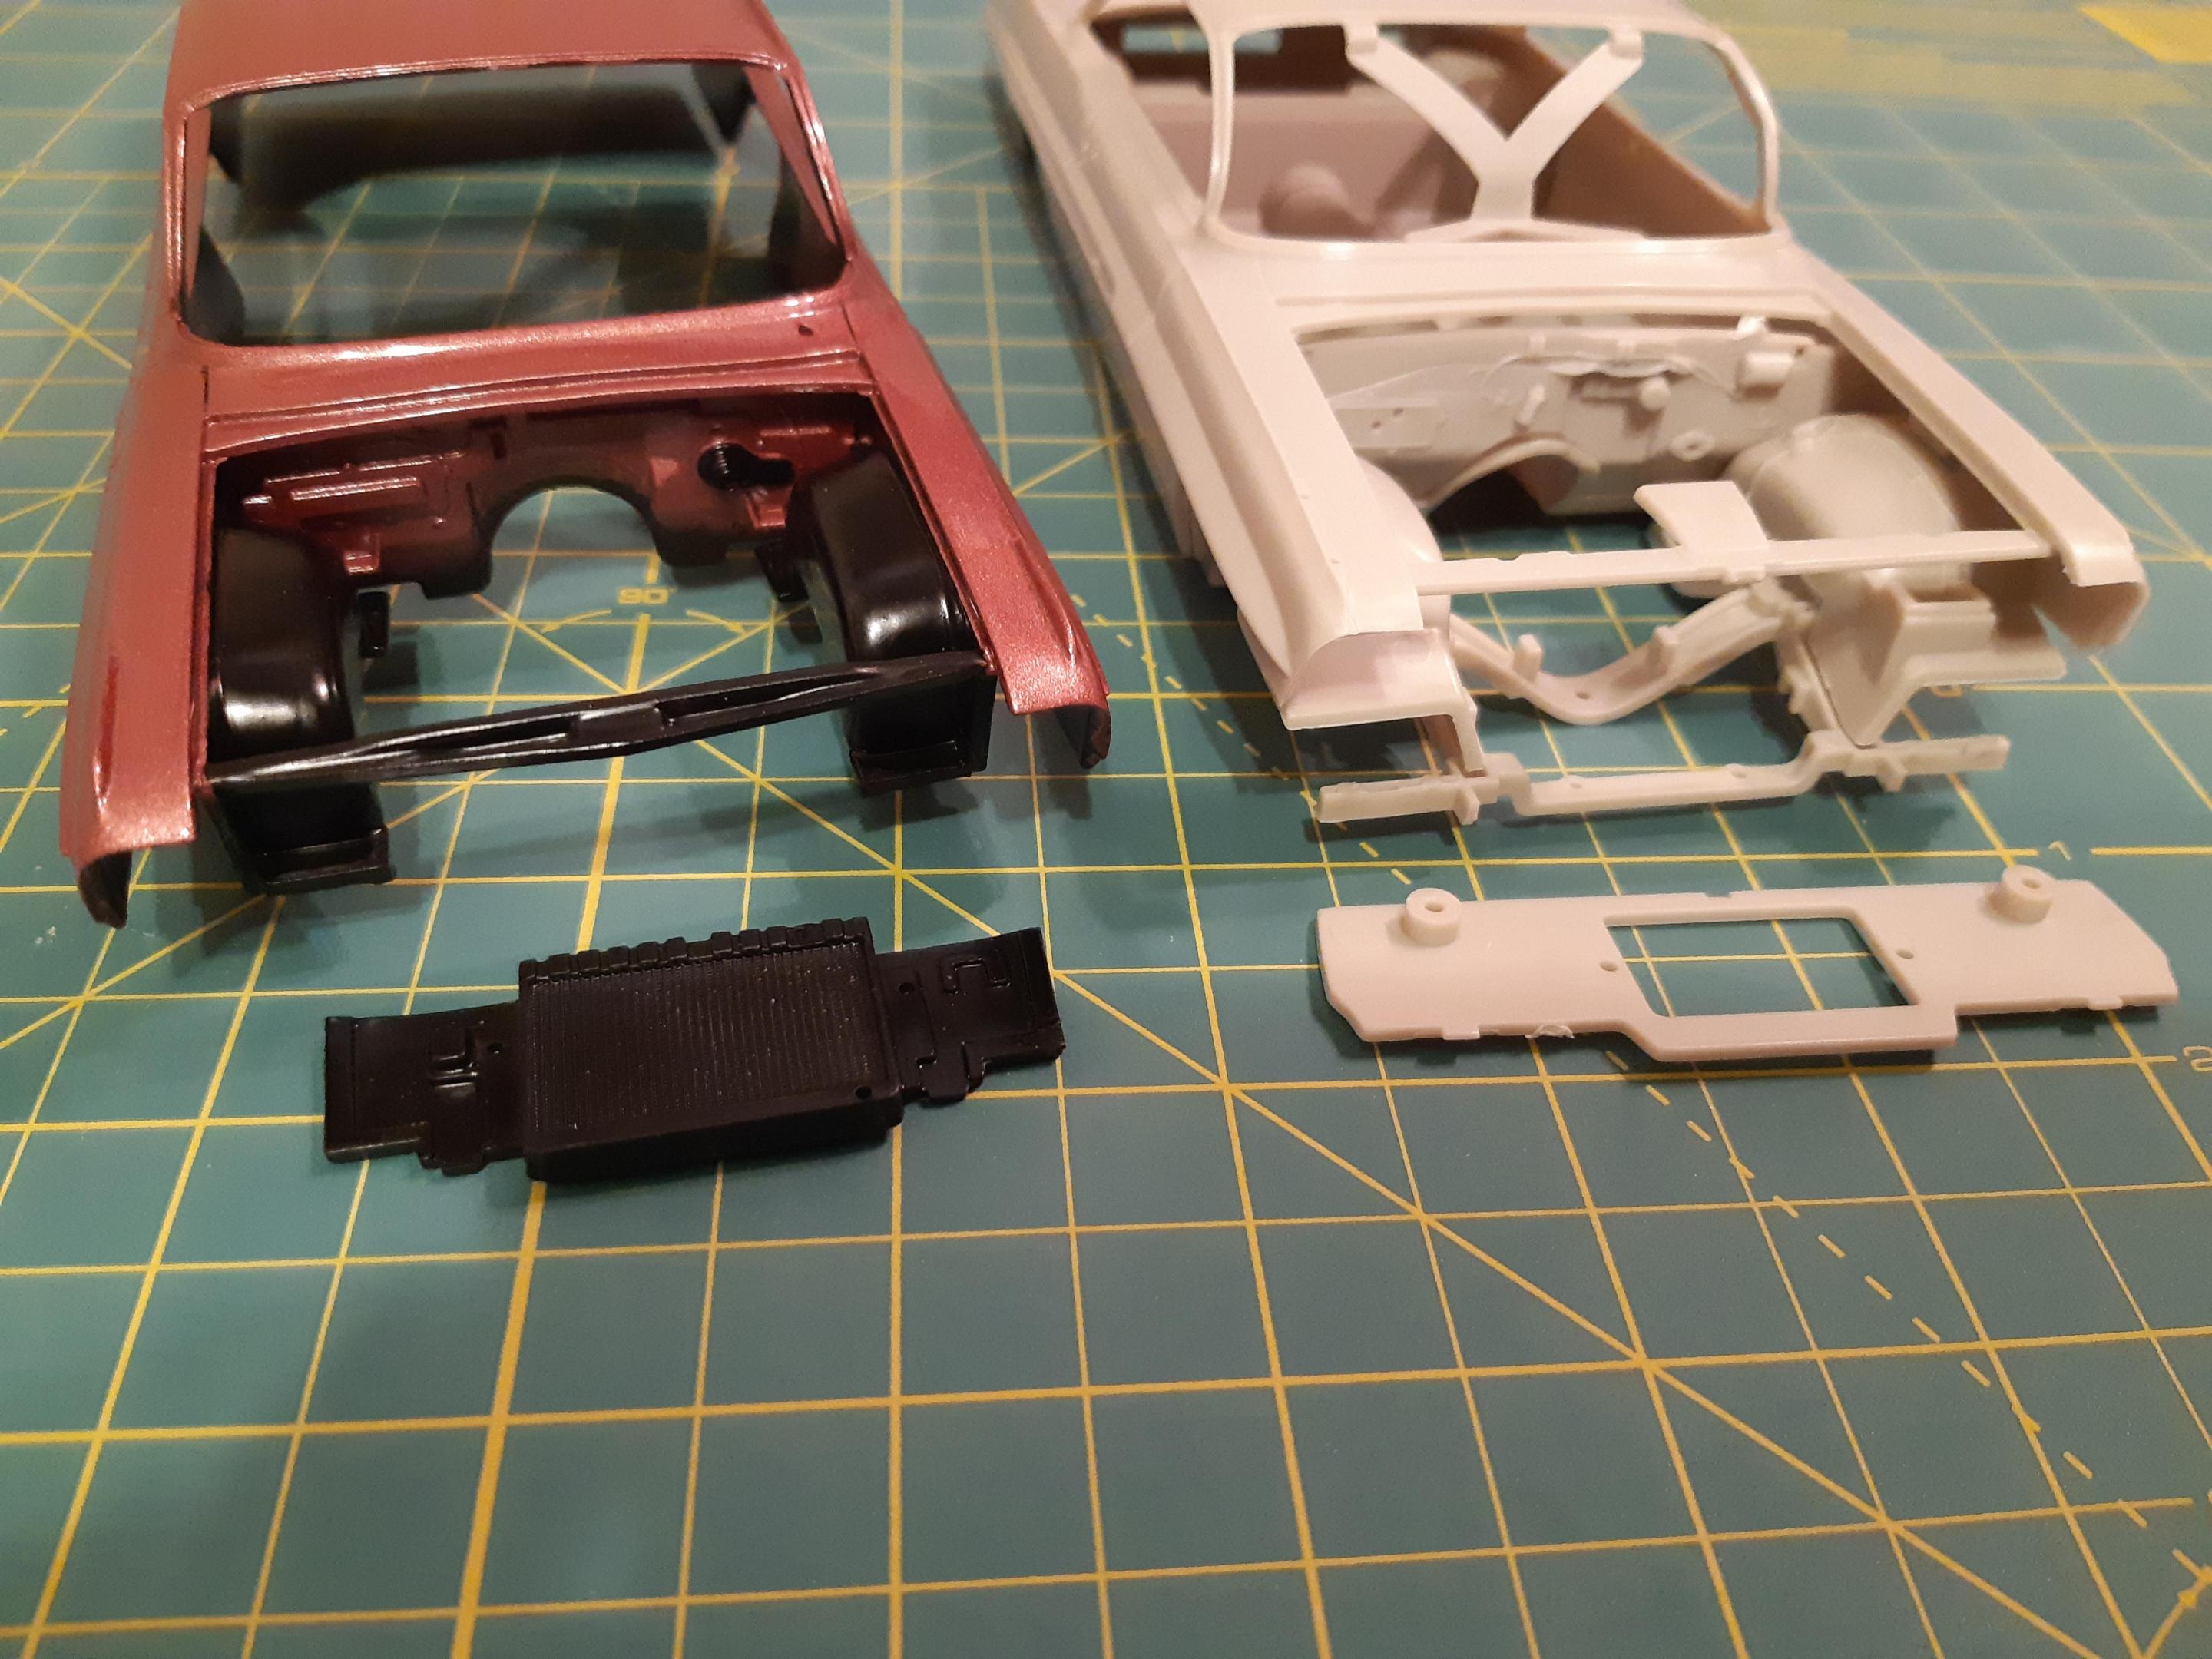
Im going with the most awesome 1961 color(IMO) Dawnfire mist. here i painted the body with PPG omni Single stage automotive paint. Here is a comparison of my laurentian(chevy Xframe floorpan) vs the kit pontiac one. And my new inner fenders, firewall and rad support. all used from the impala to create a super accurate canadian pontiac -

Canadian 1961 Pontiac Laurentian conversion
TheBEAUMONTGURU replied to TheBEAUMONTGURU's topic in WIP: Model Cars
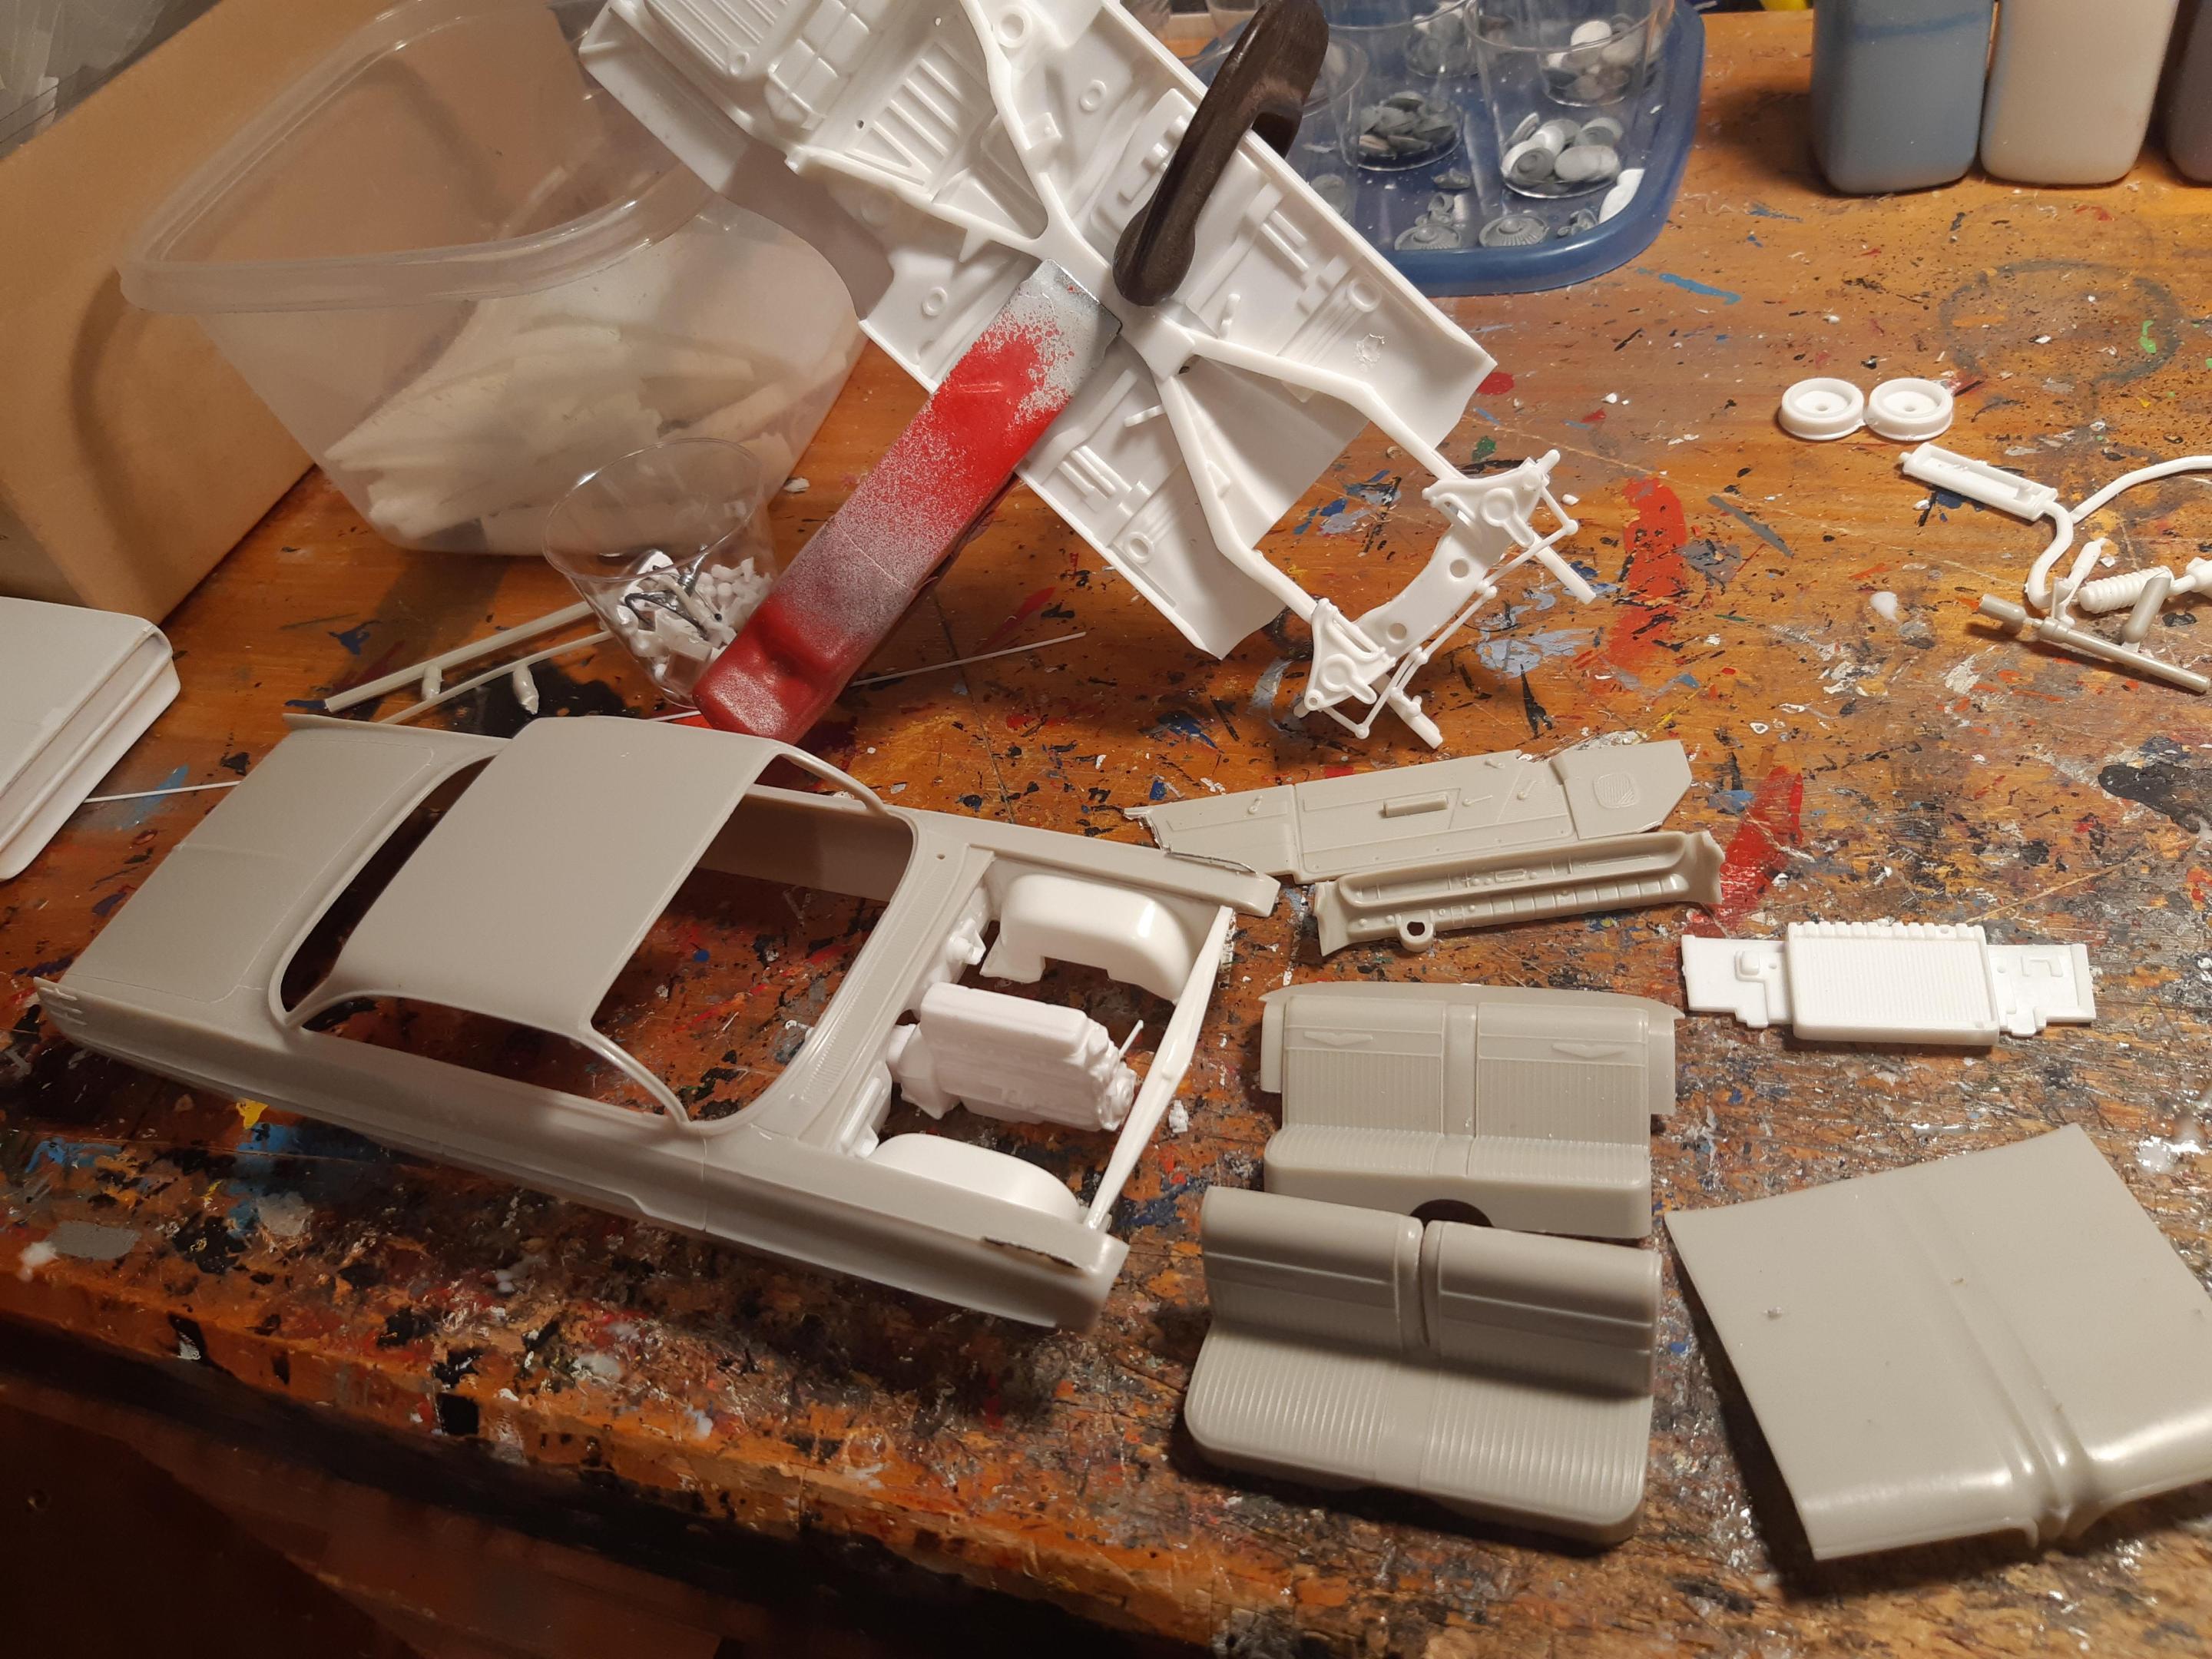
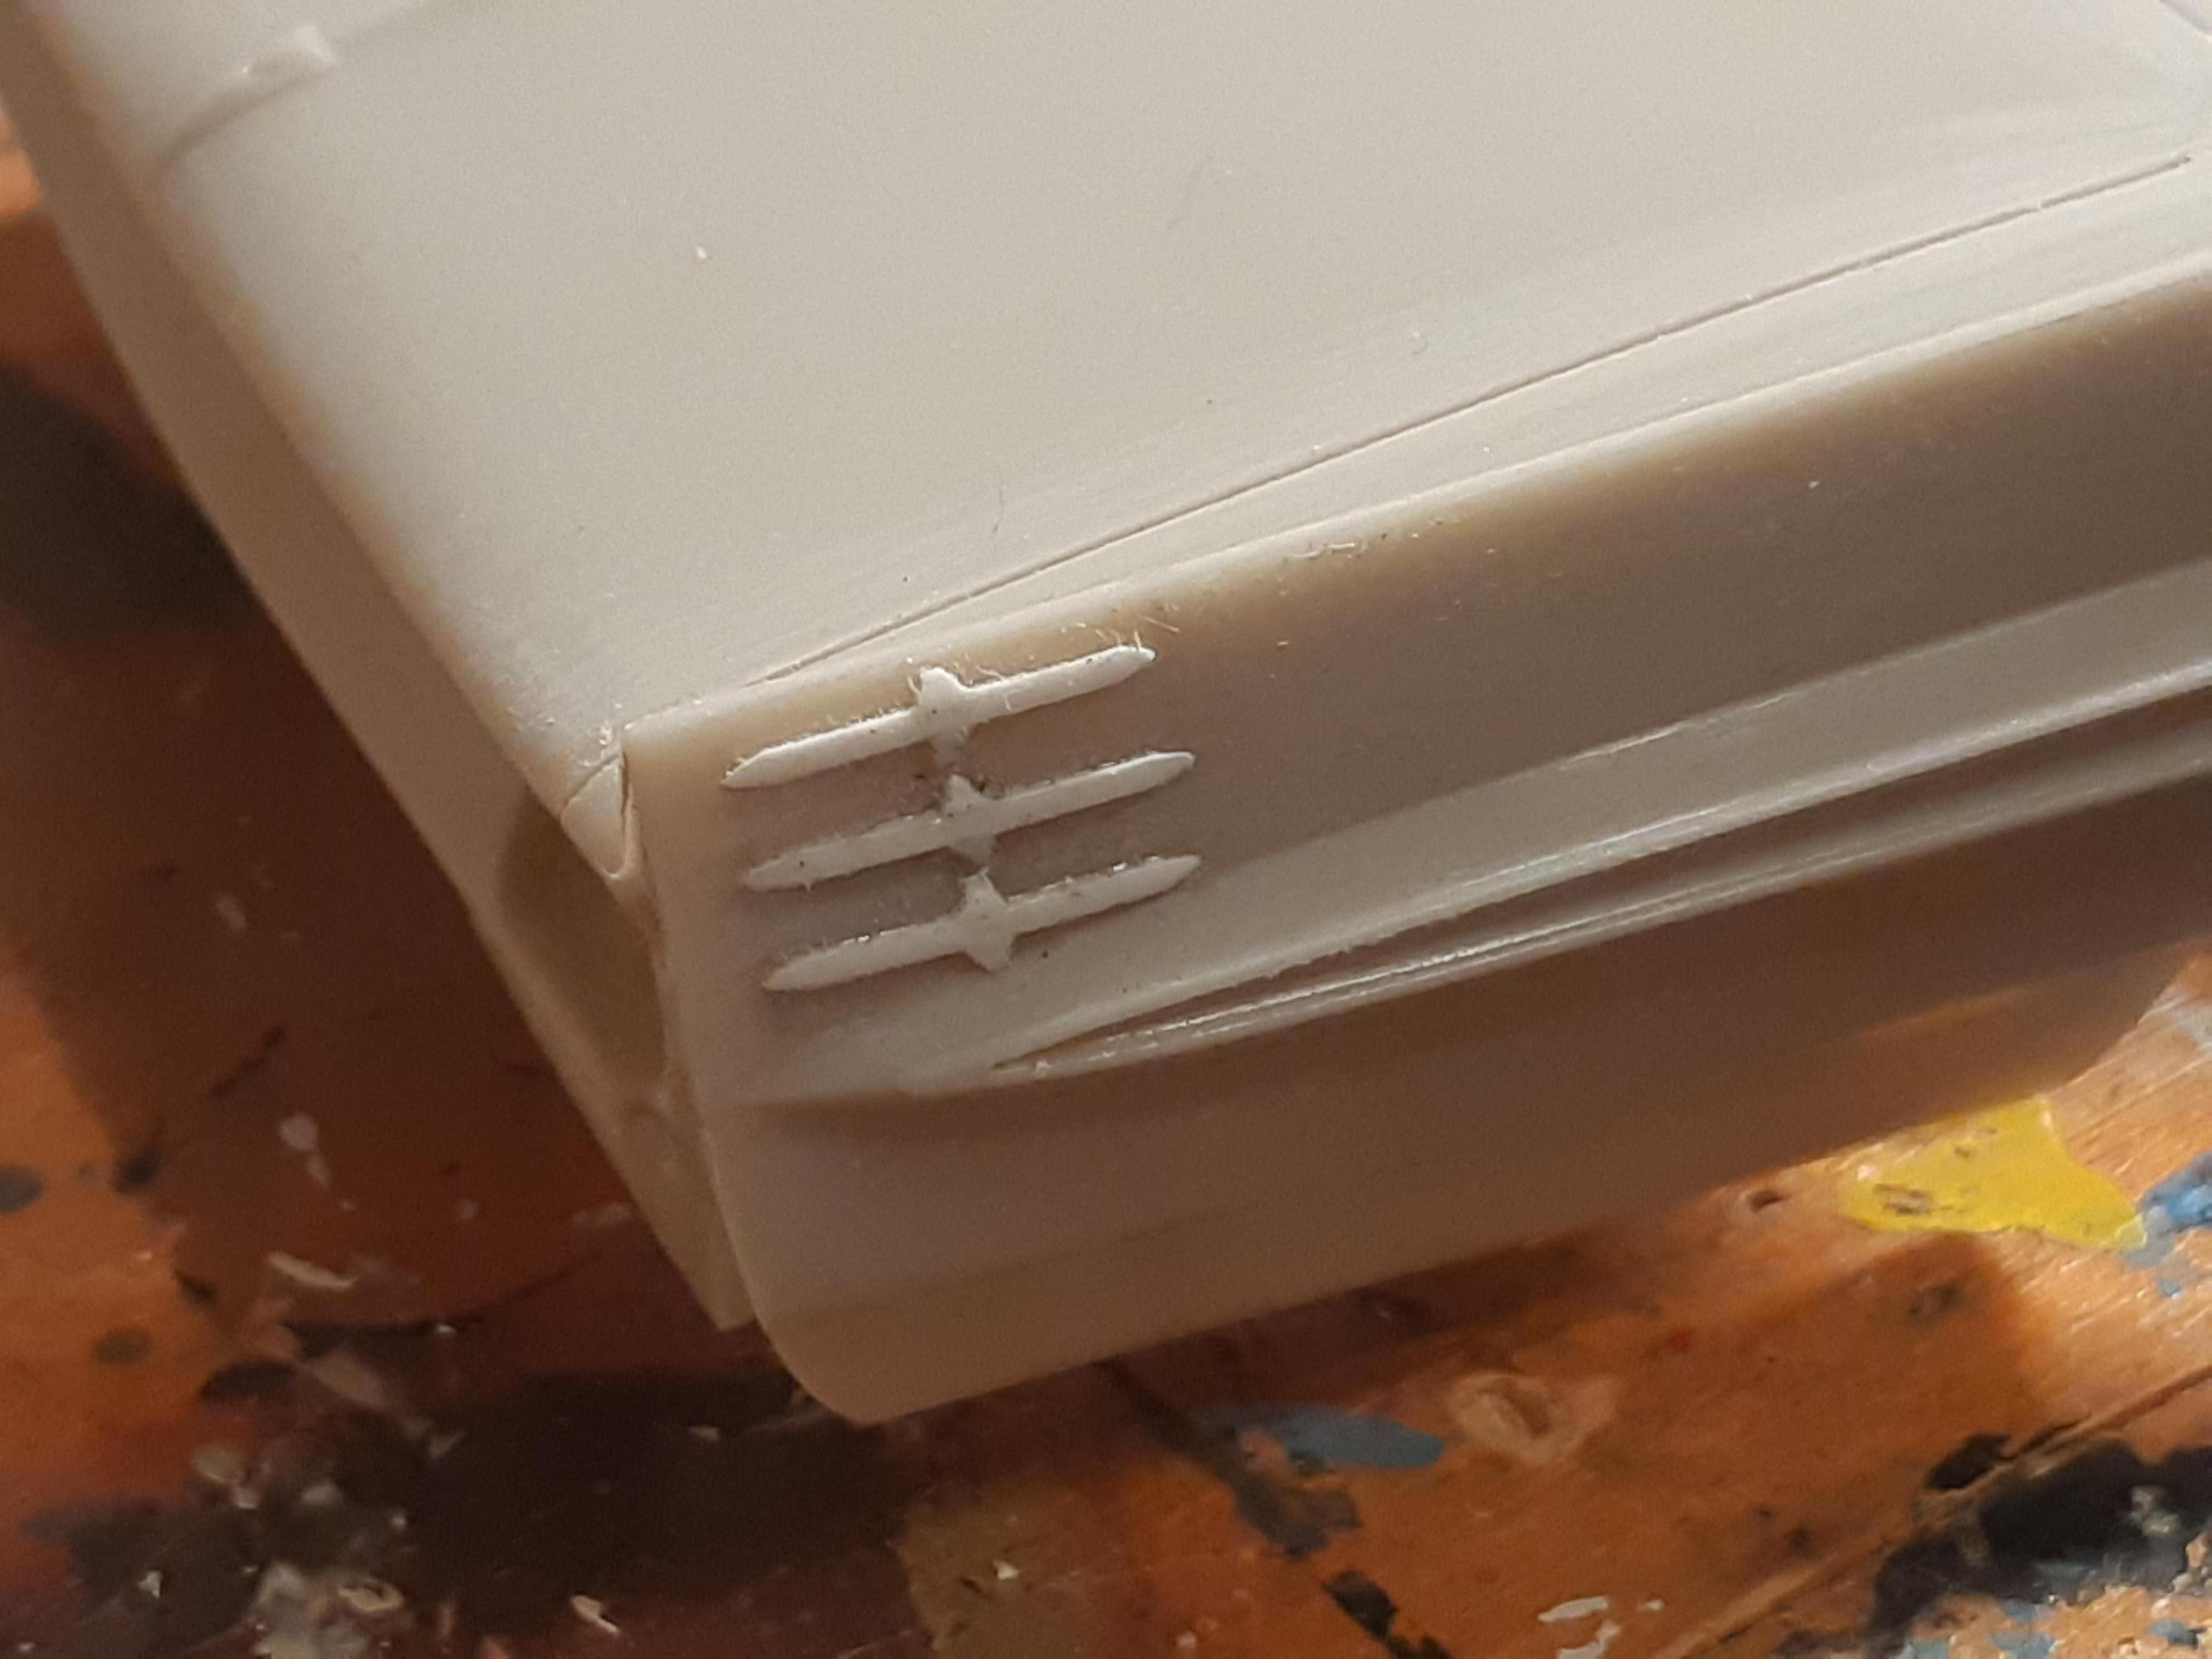
I want to build this as a Laurentian 2dr hard top. In canada pontiacs use chevrolet frames, floors, firewalls and engines. bodies and interiors are a bit of a amalgamation of other models of 61 US cars. When you lift the body off a canadian pontiac, everything left on the ground is exactly the same as a chevrolet. So let the scratchbuilding and kit bashing fun begin!!! here i have cut out the entire engine bay from the 61 impala and grafted it into the ventura body. the ventura side trim is the same as a laurentian with the excpetion of the laurentian having the 3 stars on the quarters, so i had to make them. THe interior is the same as the Catalina, so i had to buy both kits to get all the right panels -
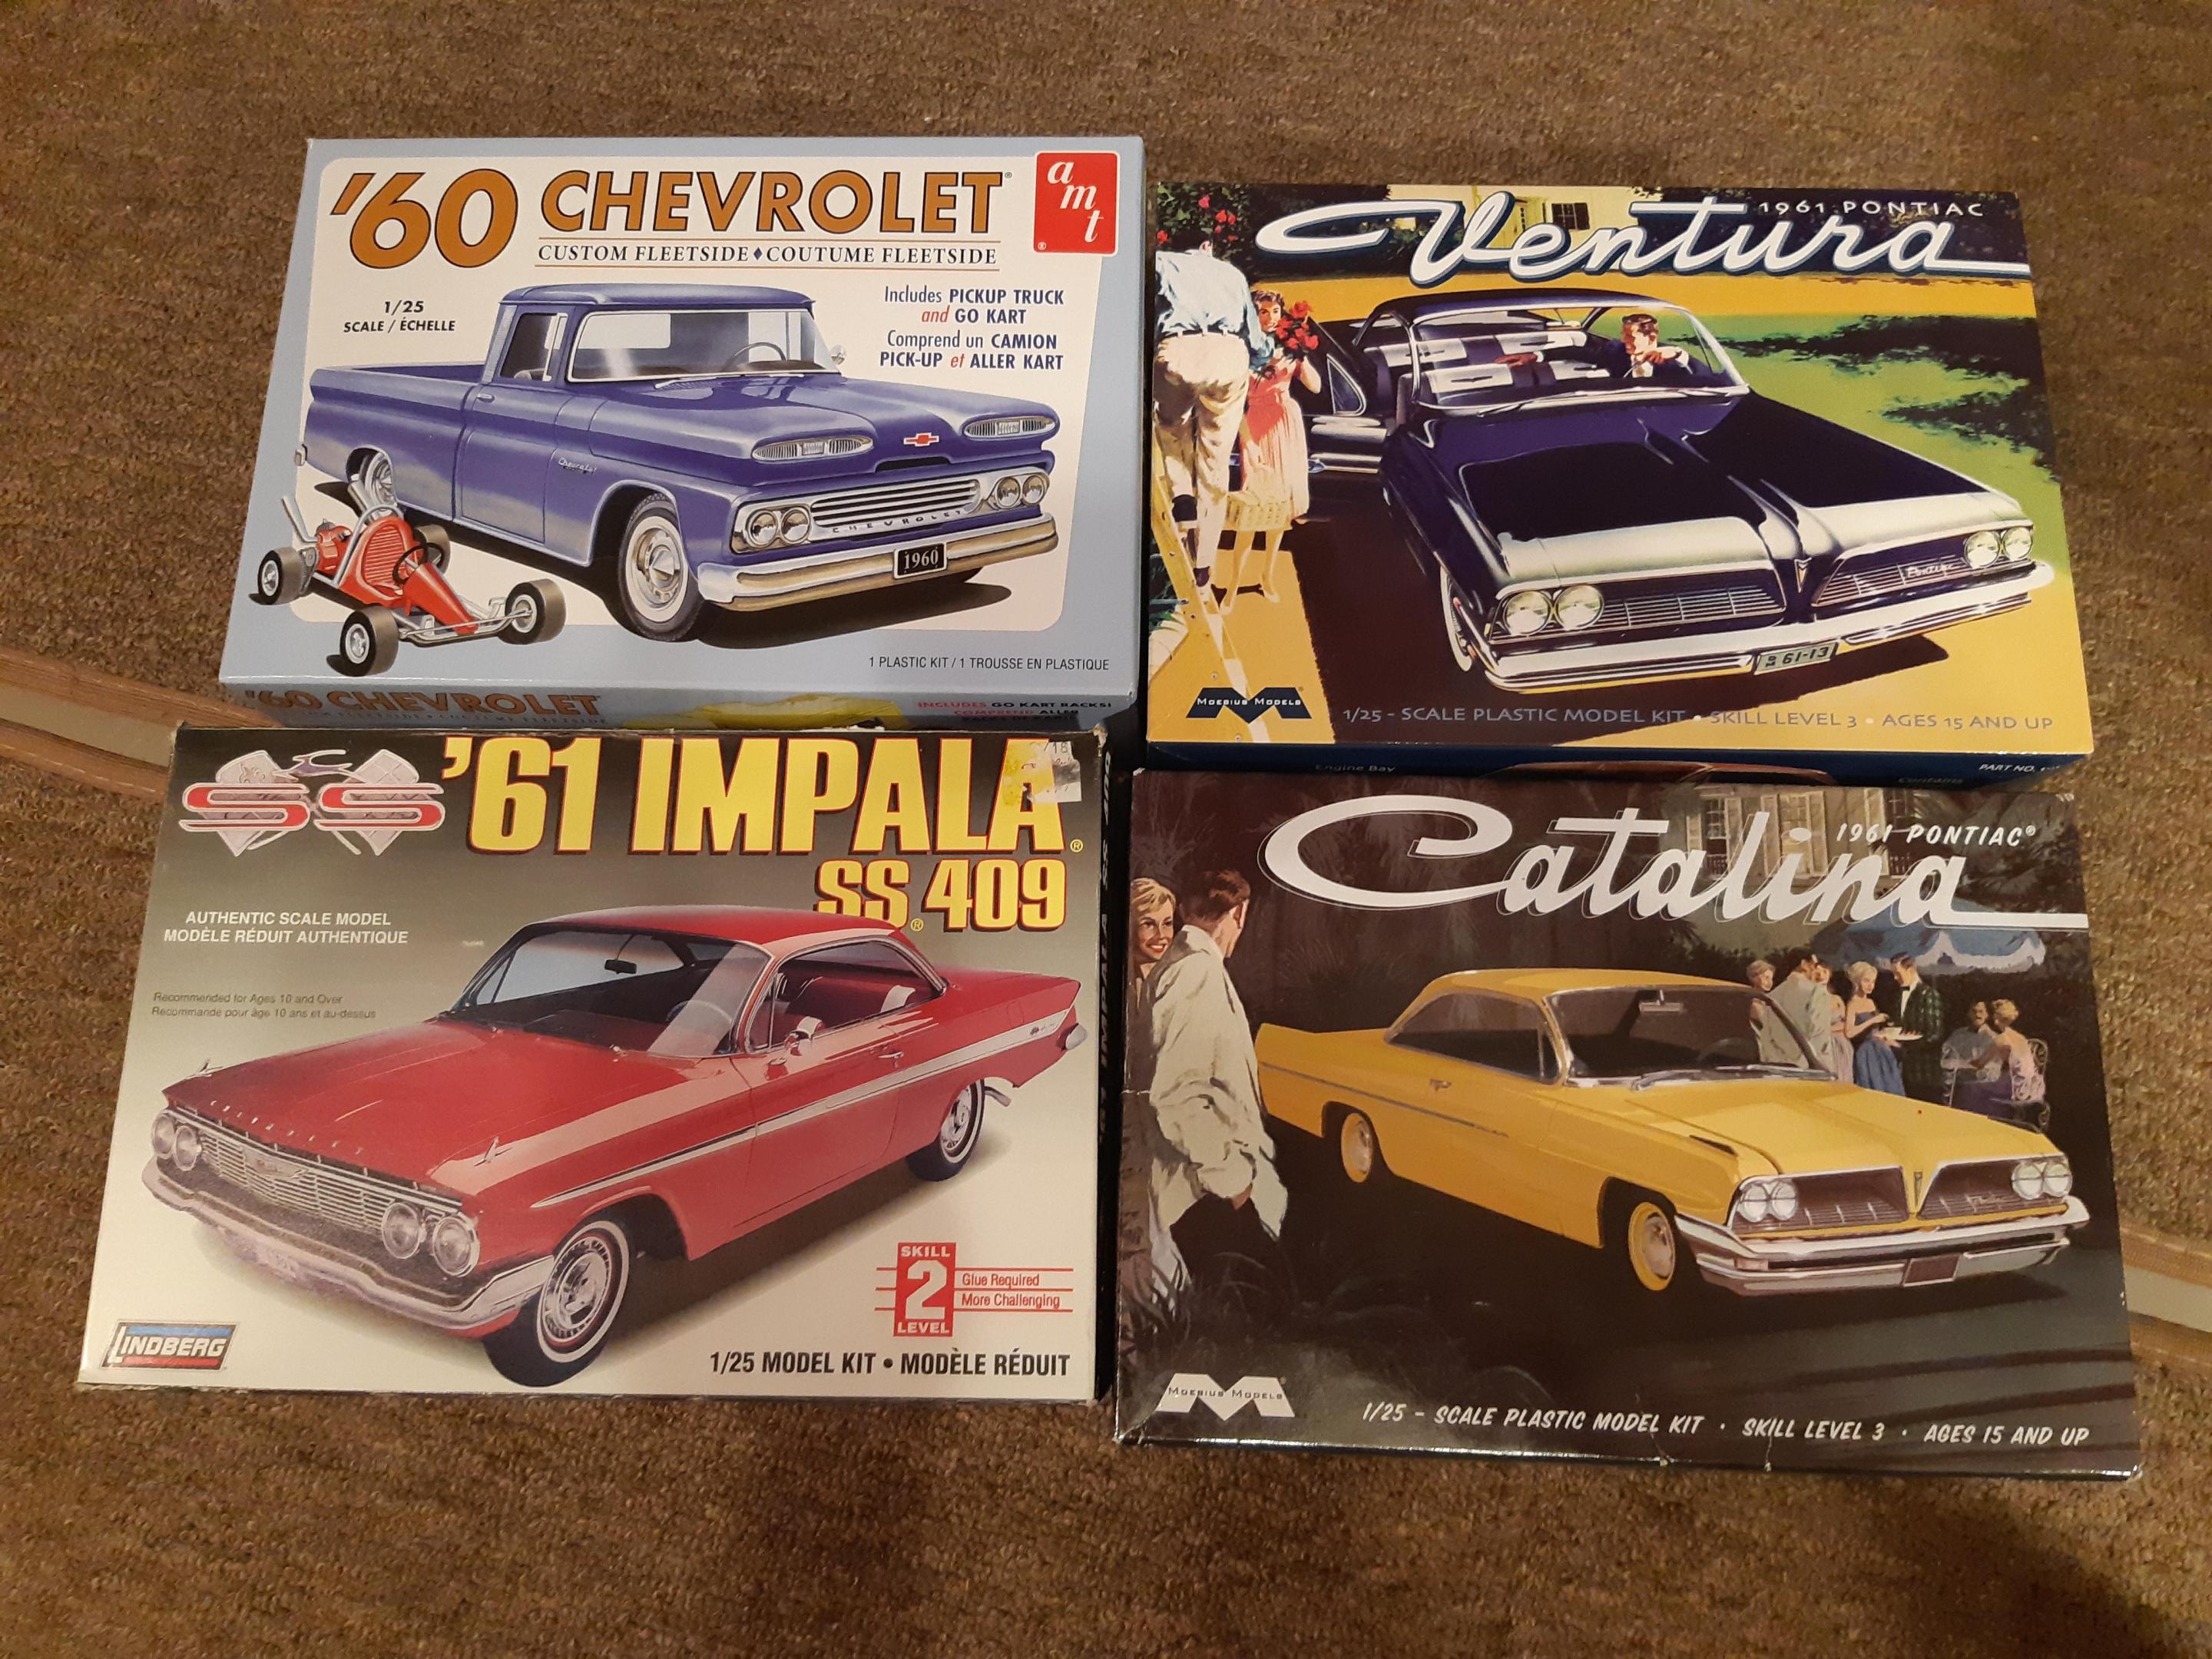
Since i live in Canada, i wanted to build a Moebius 61 pontiac CANADIAN STYLE!! Its going to take these 4 kits to do it
-
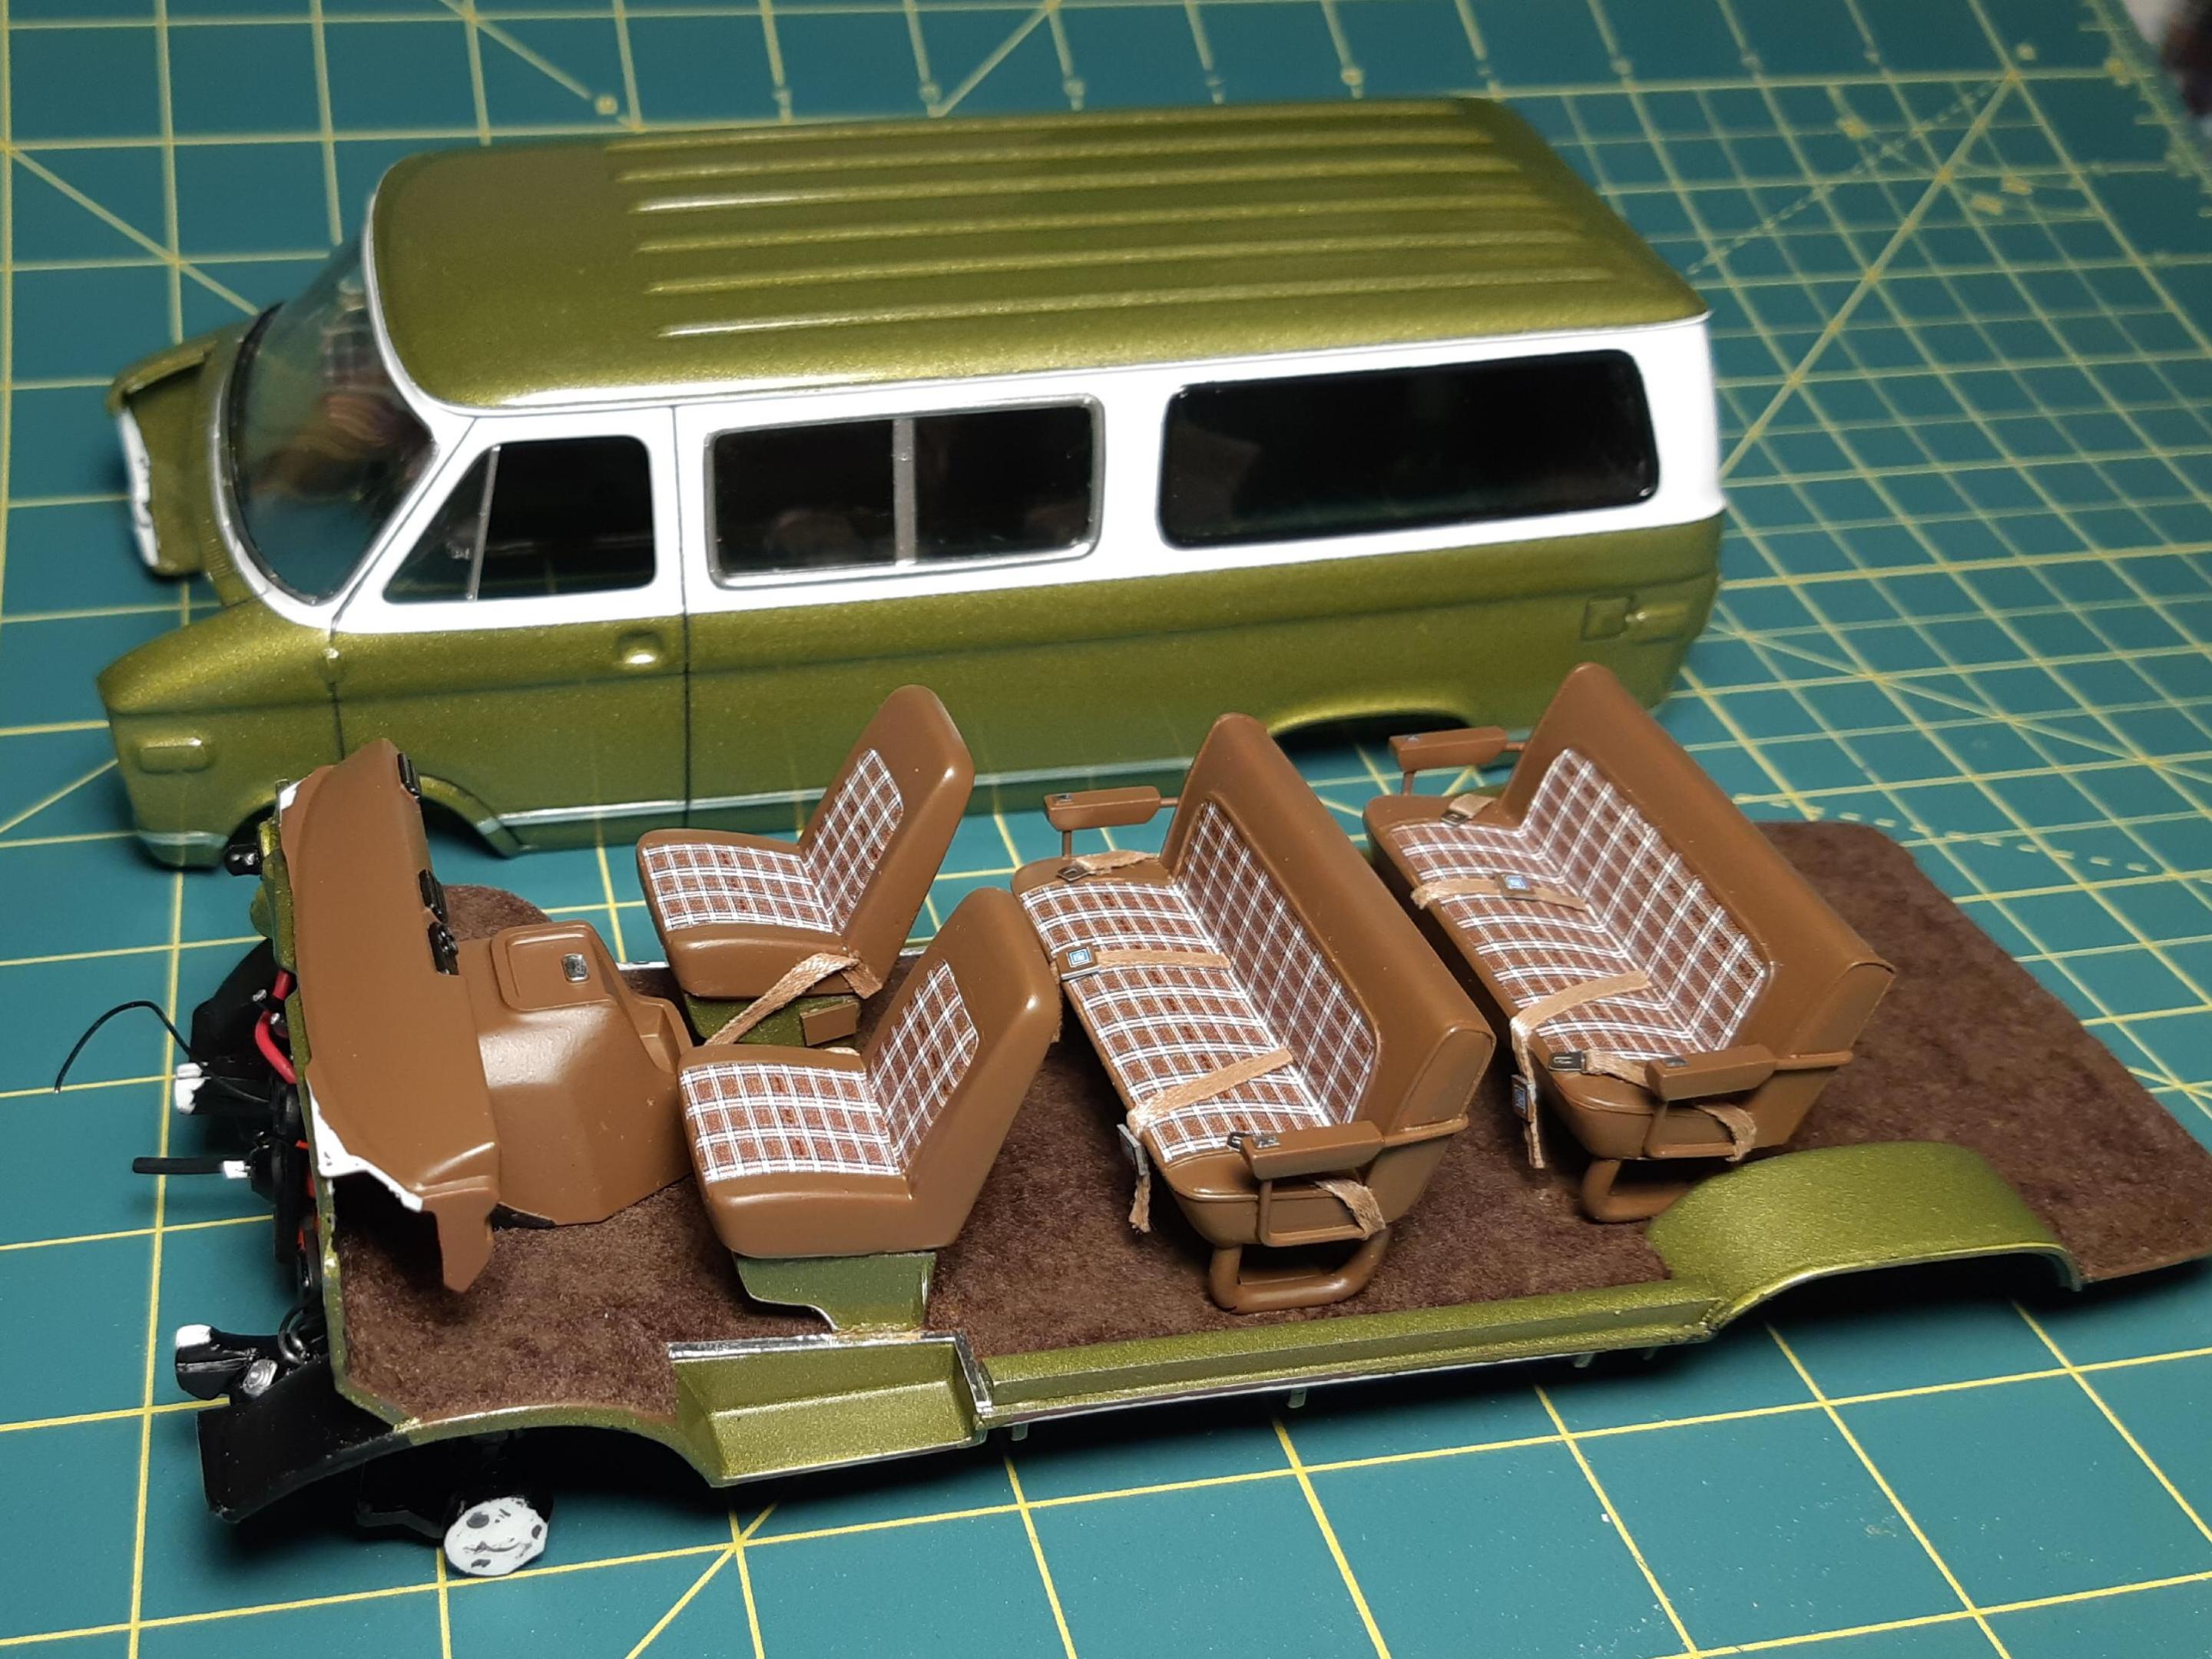
More engine detailing, added a steering box and steering column and rag joint and hoses, also added a heater box and blower motor. None of these details are in the kit. The body and interior are coming together. note i decided to make things difficult and 2-tone the body. Flocked carpet, seatbelts and photoshop GM buckles
-
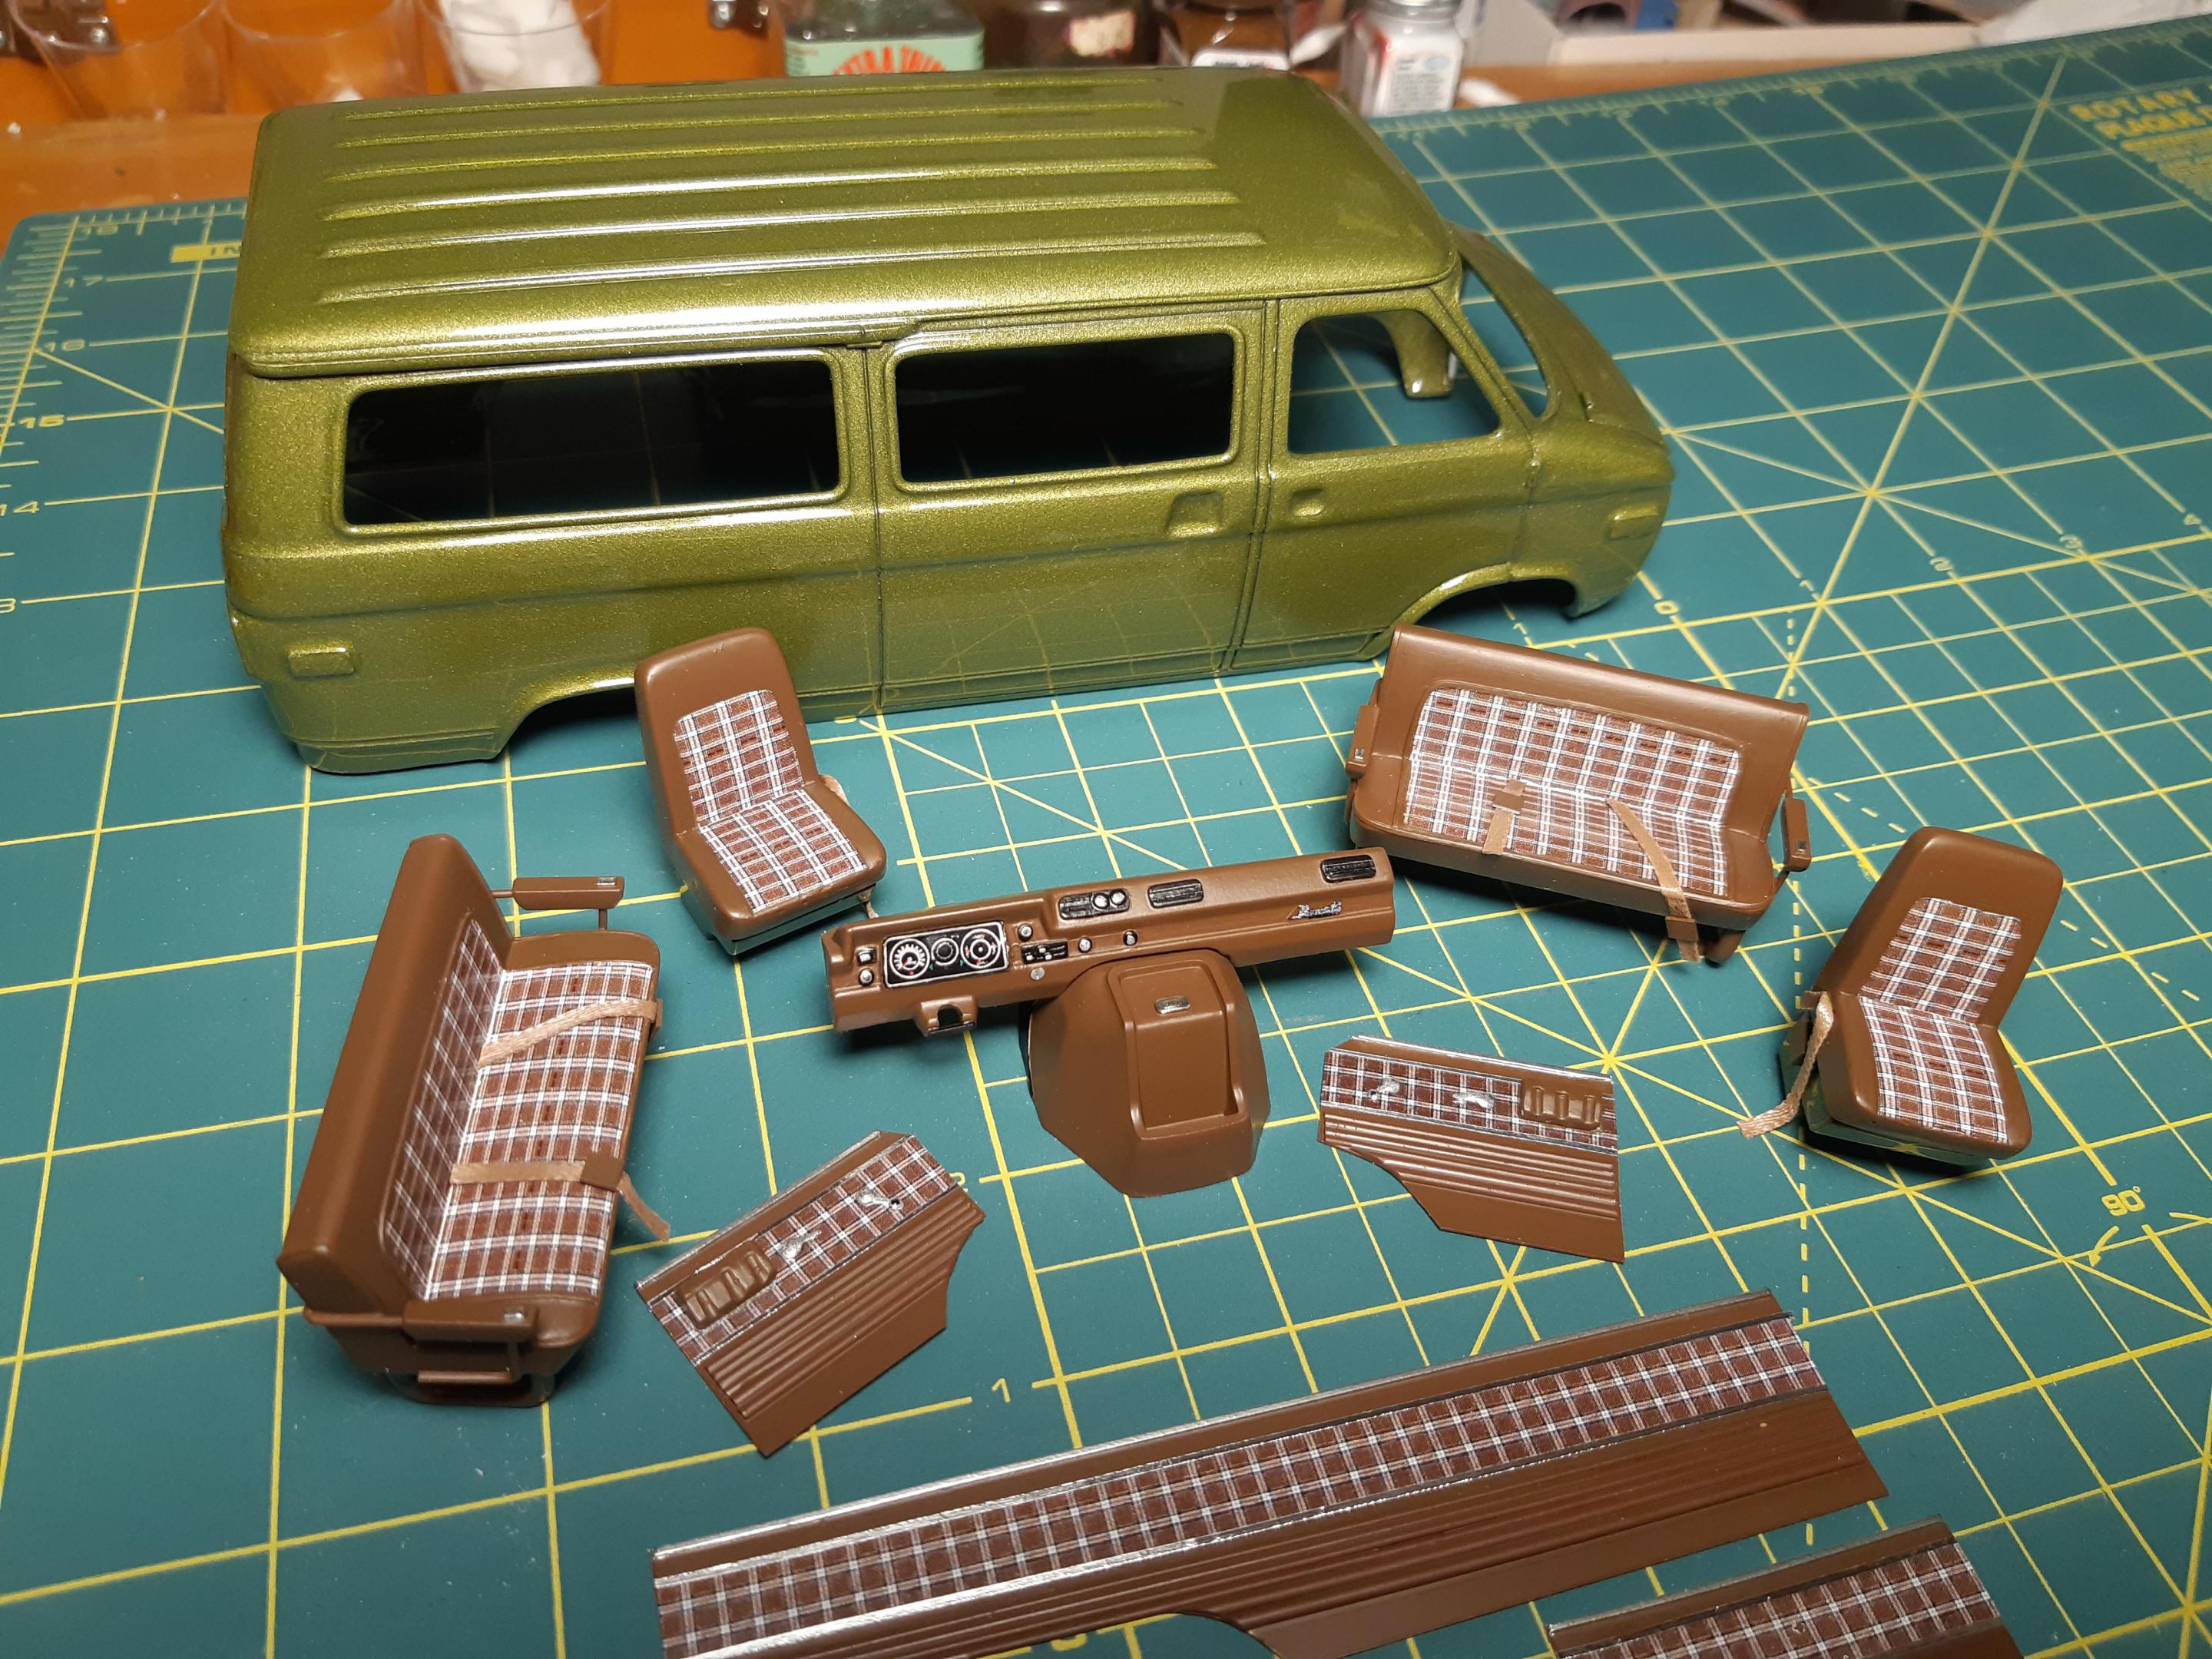
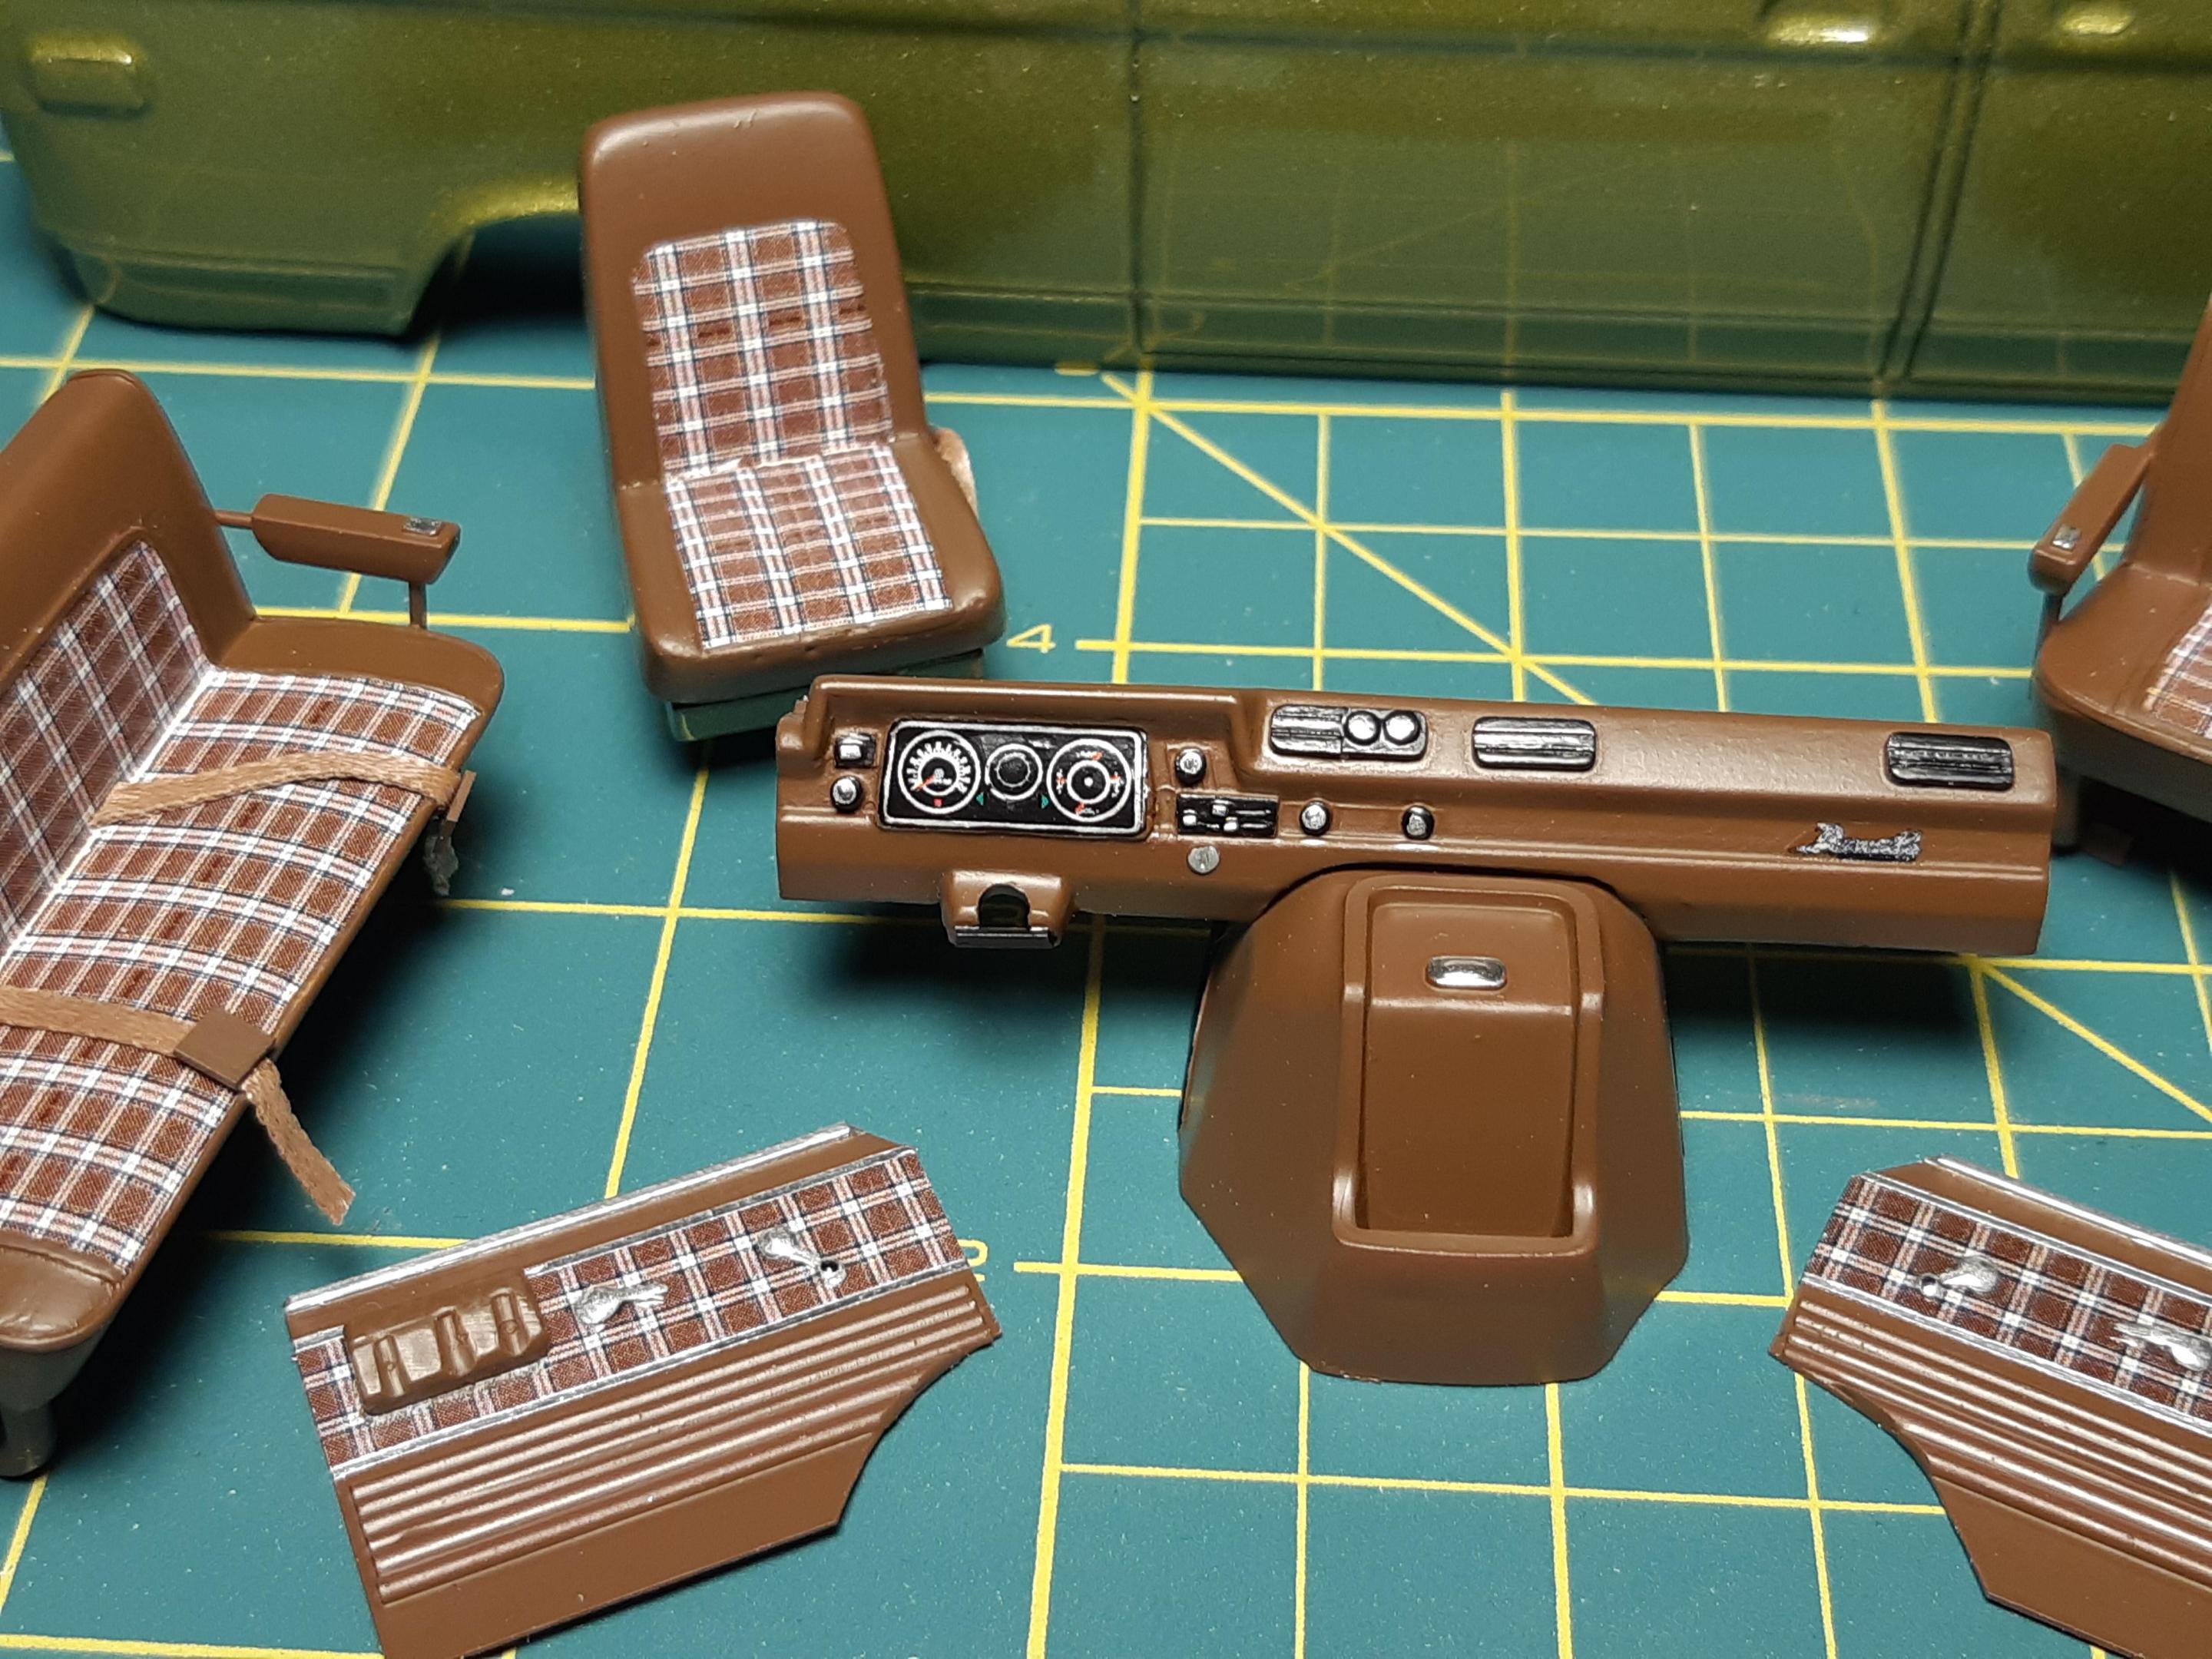
The interior mostly finished. a made separate interior panes that will glue into place. all made with evergreen strips. i foiled them and custom made some tartan uphoustry pattern decals in Photoshop then printed them on decal paper. i also did a correct guage cluster in photoshop too. Here we also see the body now painted using PPG OMNI automotive single stage urethane. just like the real ones!
-
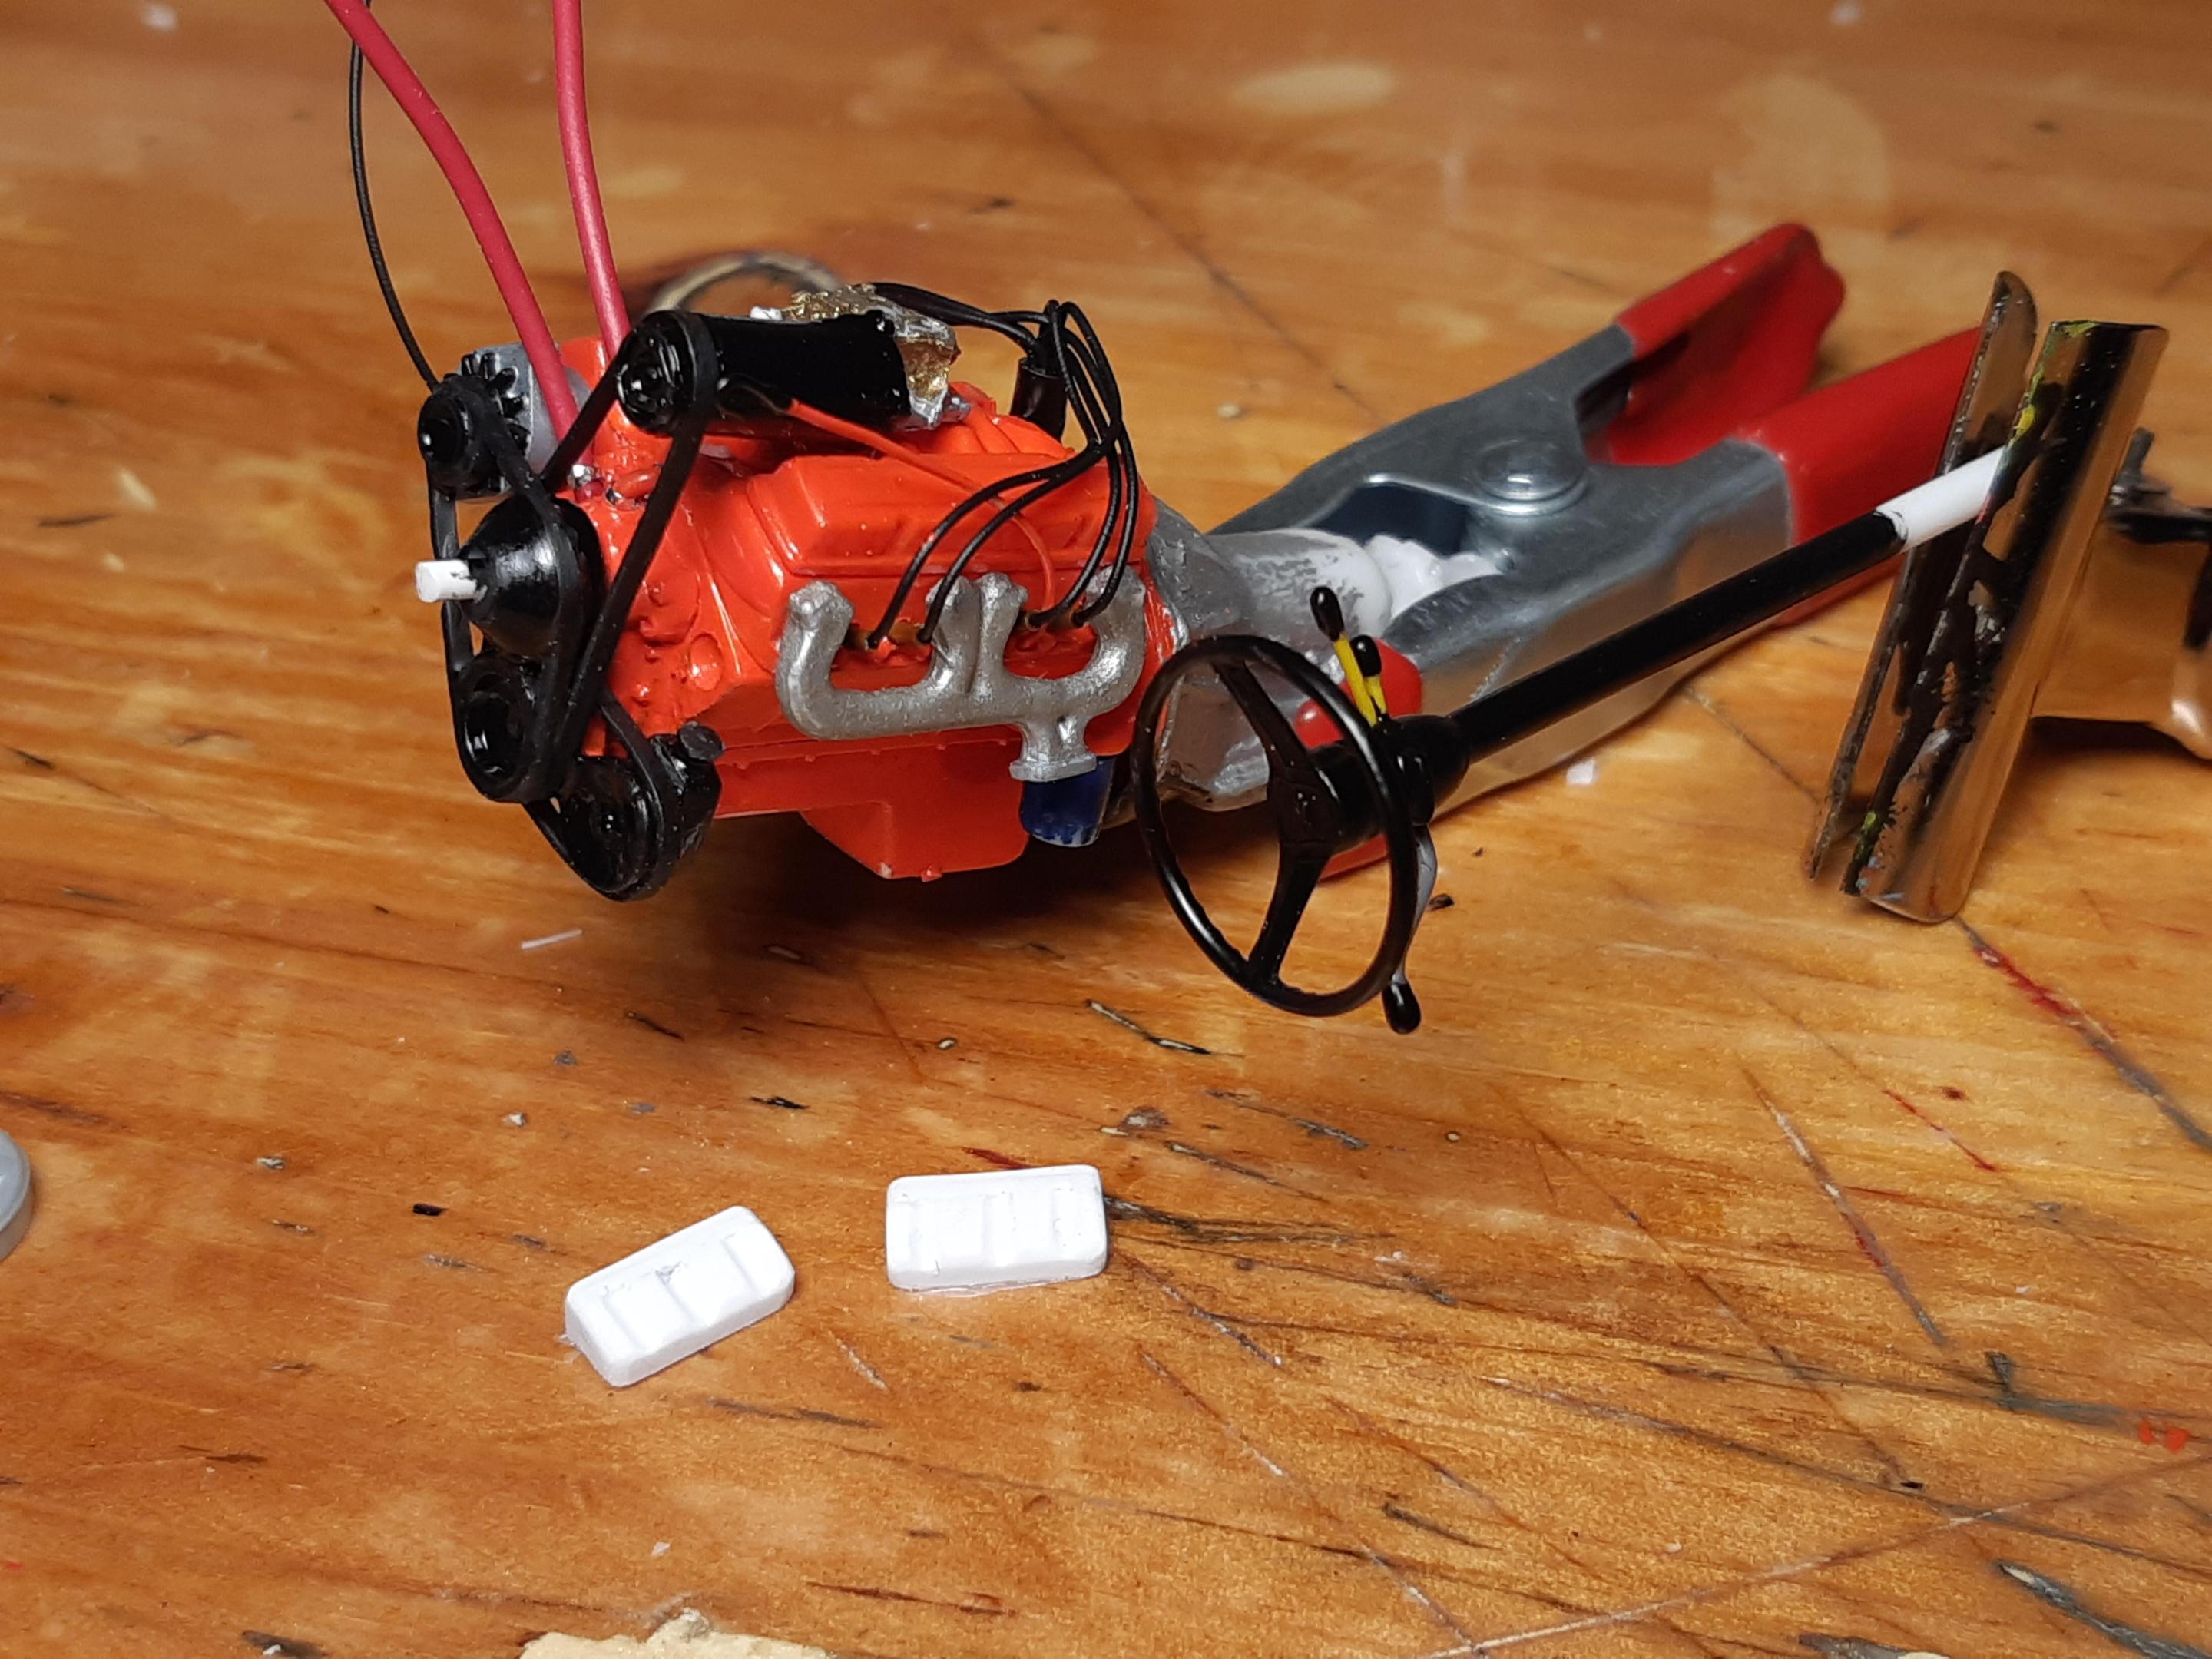
Here is the engine detailing started. I swapped out the valve covers for some better ones, and scratch built all the pulleys and belts for the A/C and the power steering. minimal wiring as it will mostly be hidden under the floor. i used a fireball carb and have made a better steering column(added a lever to represent a tilt wheel. and made all the PRNDL indicator. the little white parts are scratch built front armrests
-
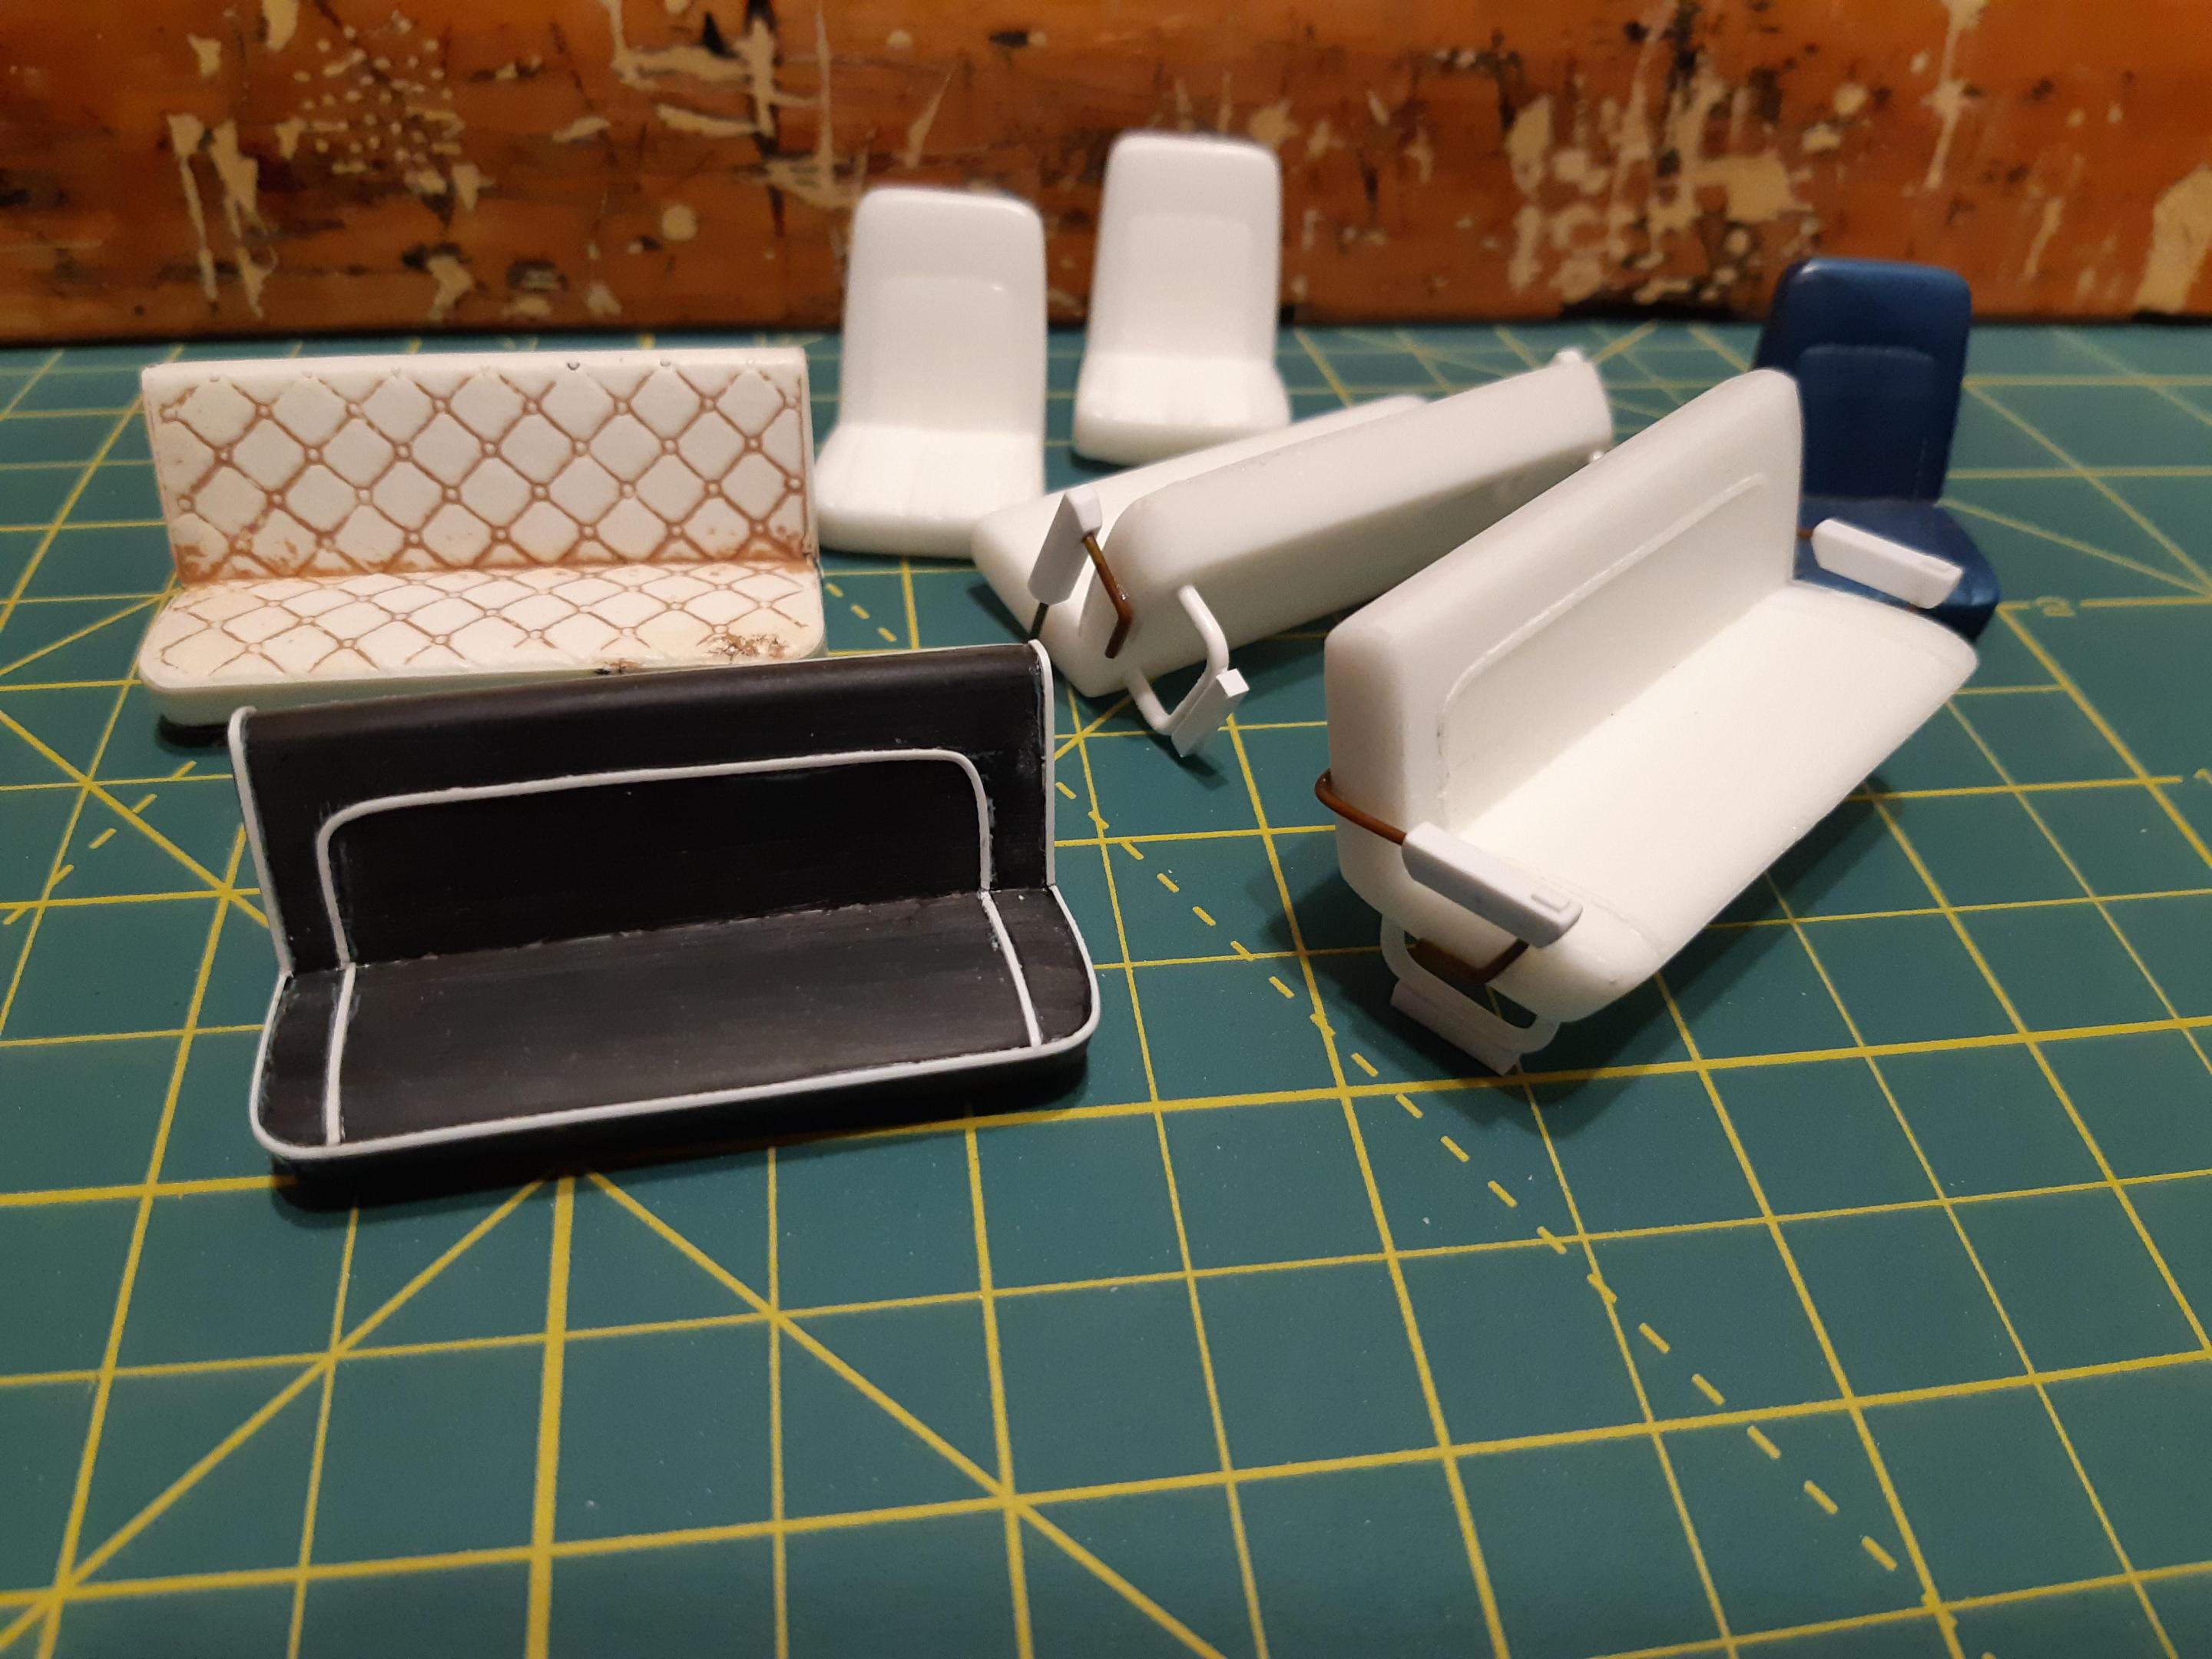
Here are the seats, i tried resin casting them but too many pinholes so i sanded off all the button tufting and made my own patterns using evergreen strips. i bent up some plastic tubing and scratch built a set of armrests. the front seats are custom built by cutting up a parts box one and resin casting a pair. Stay tuned for more later! And thanks for looking.
-
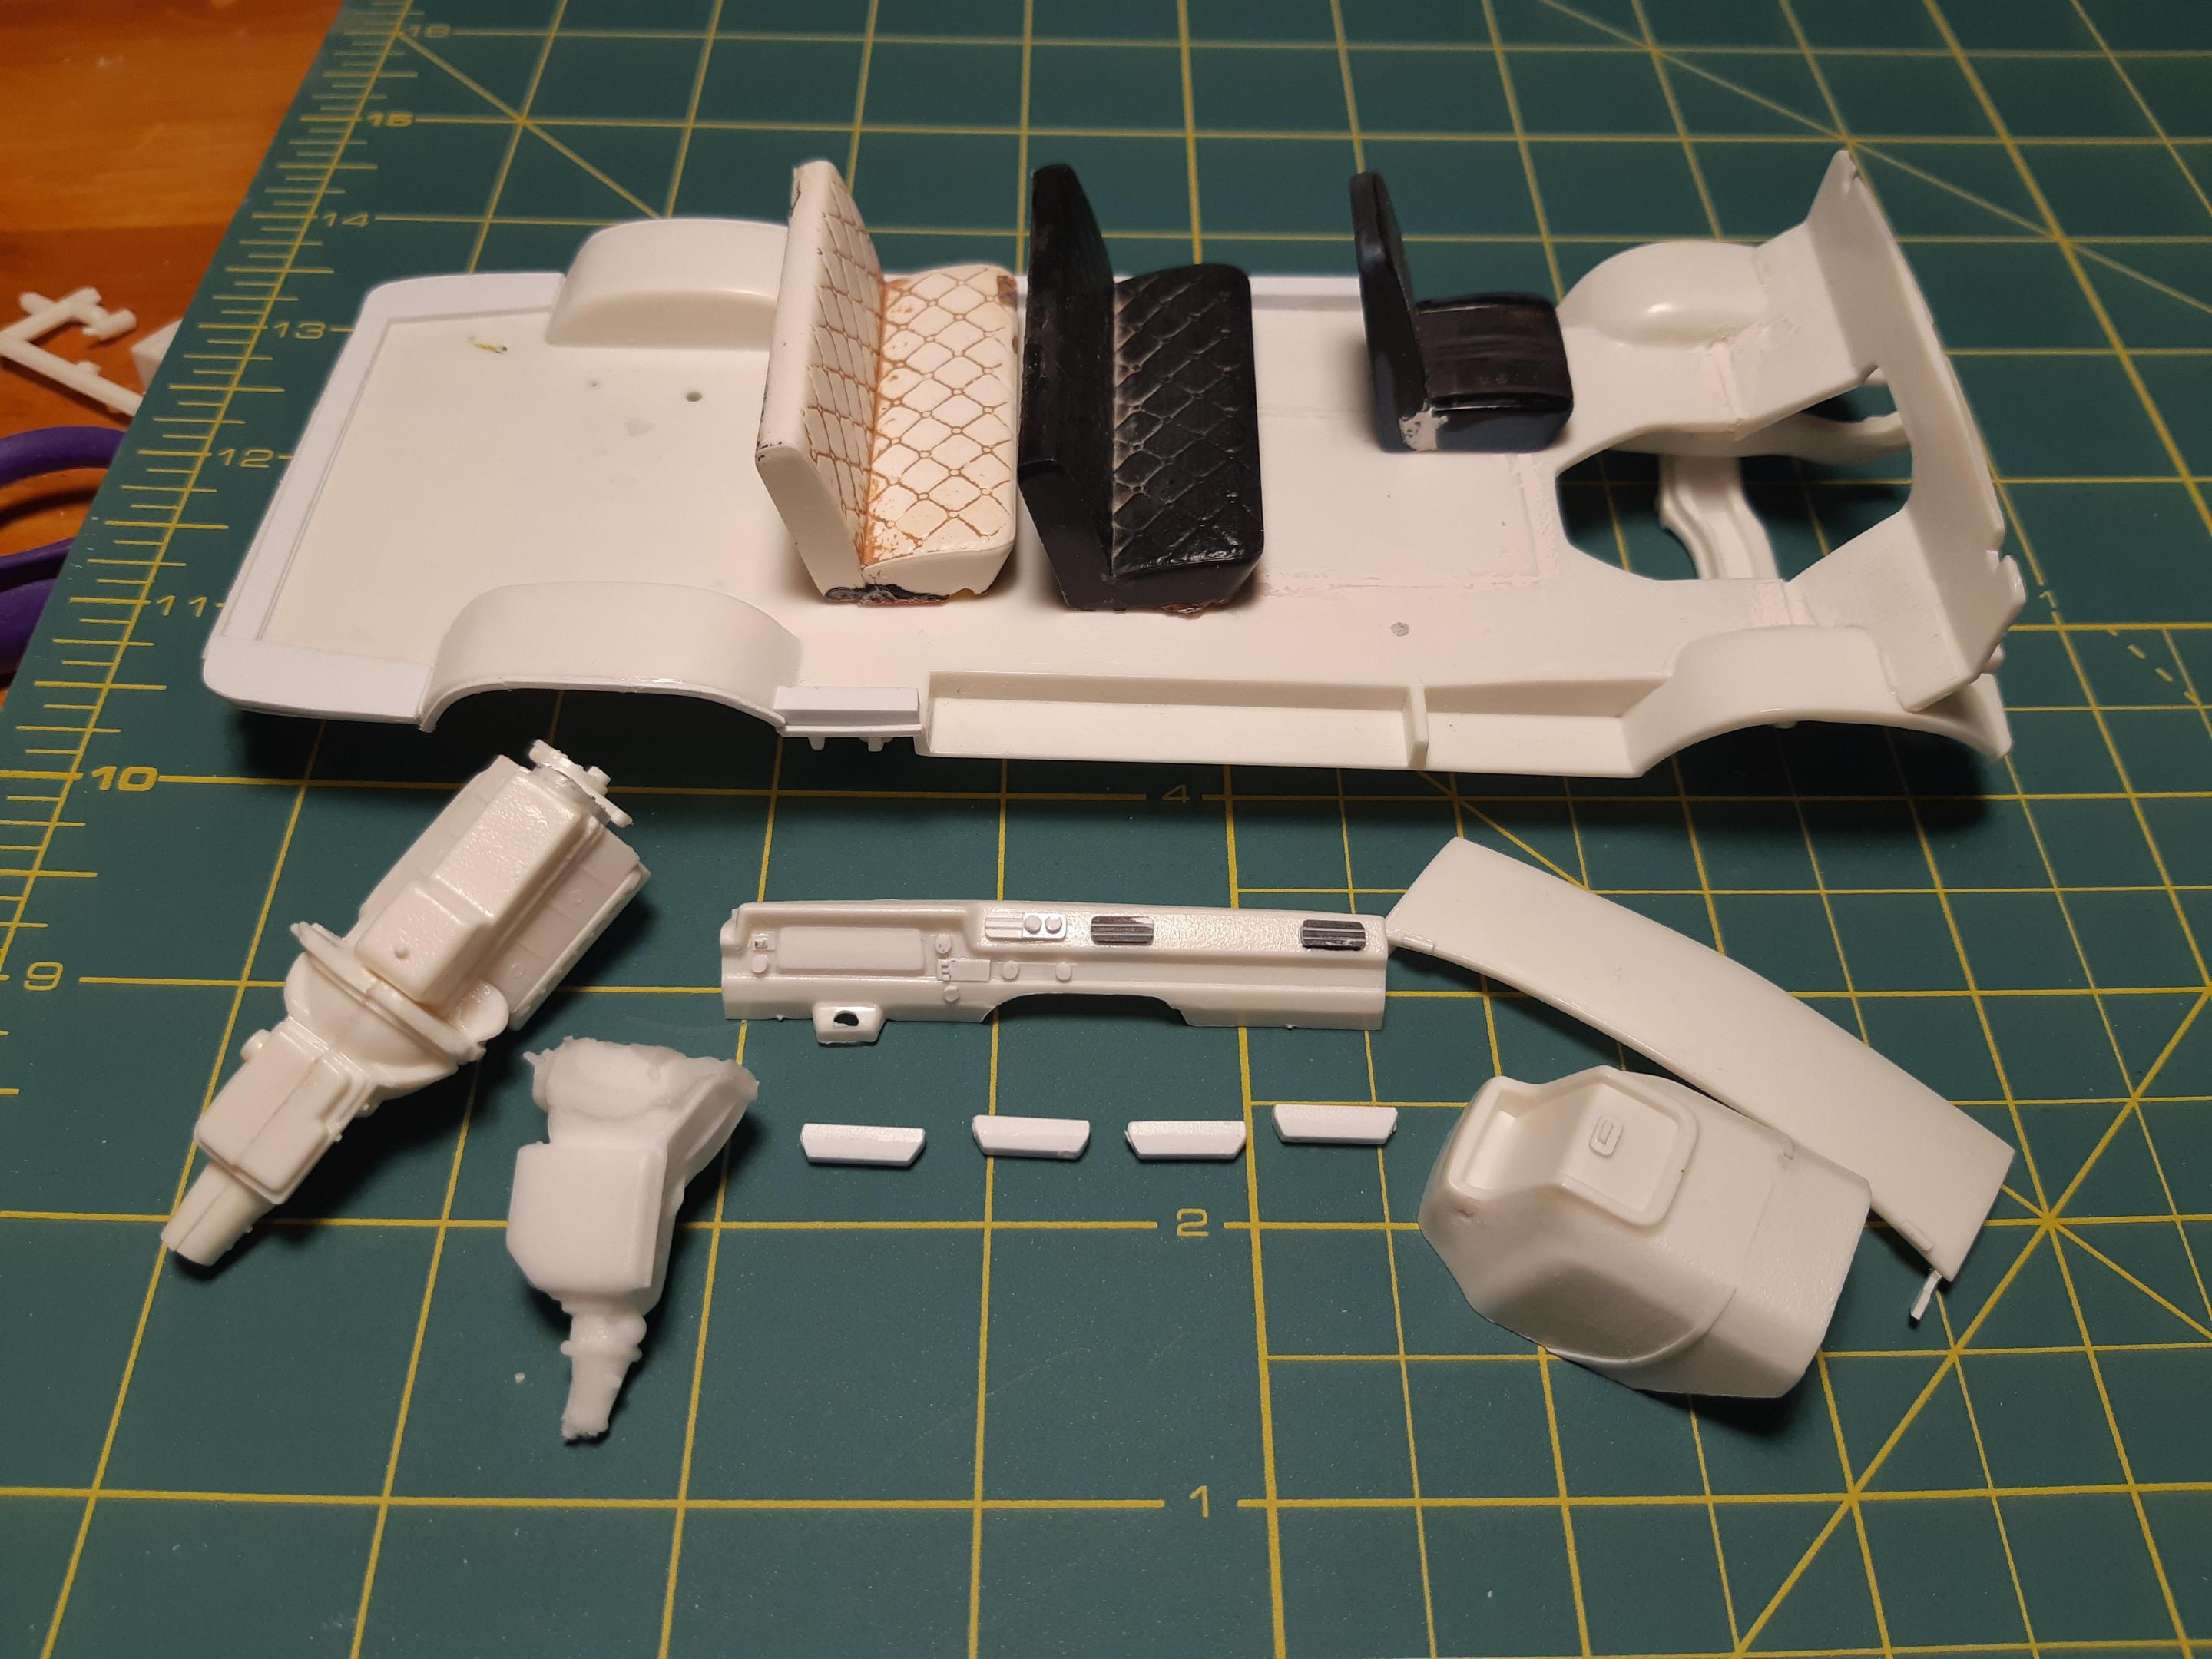
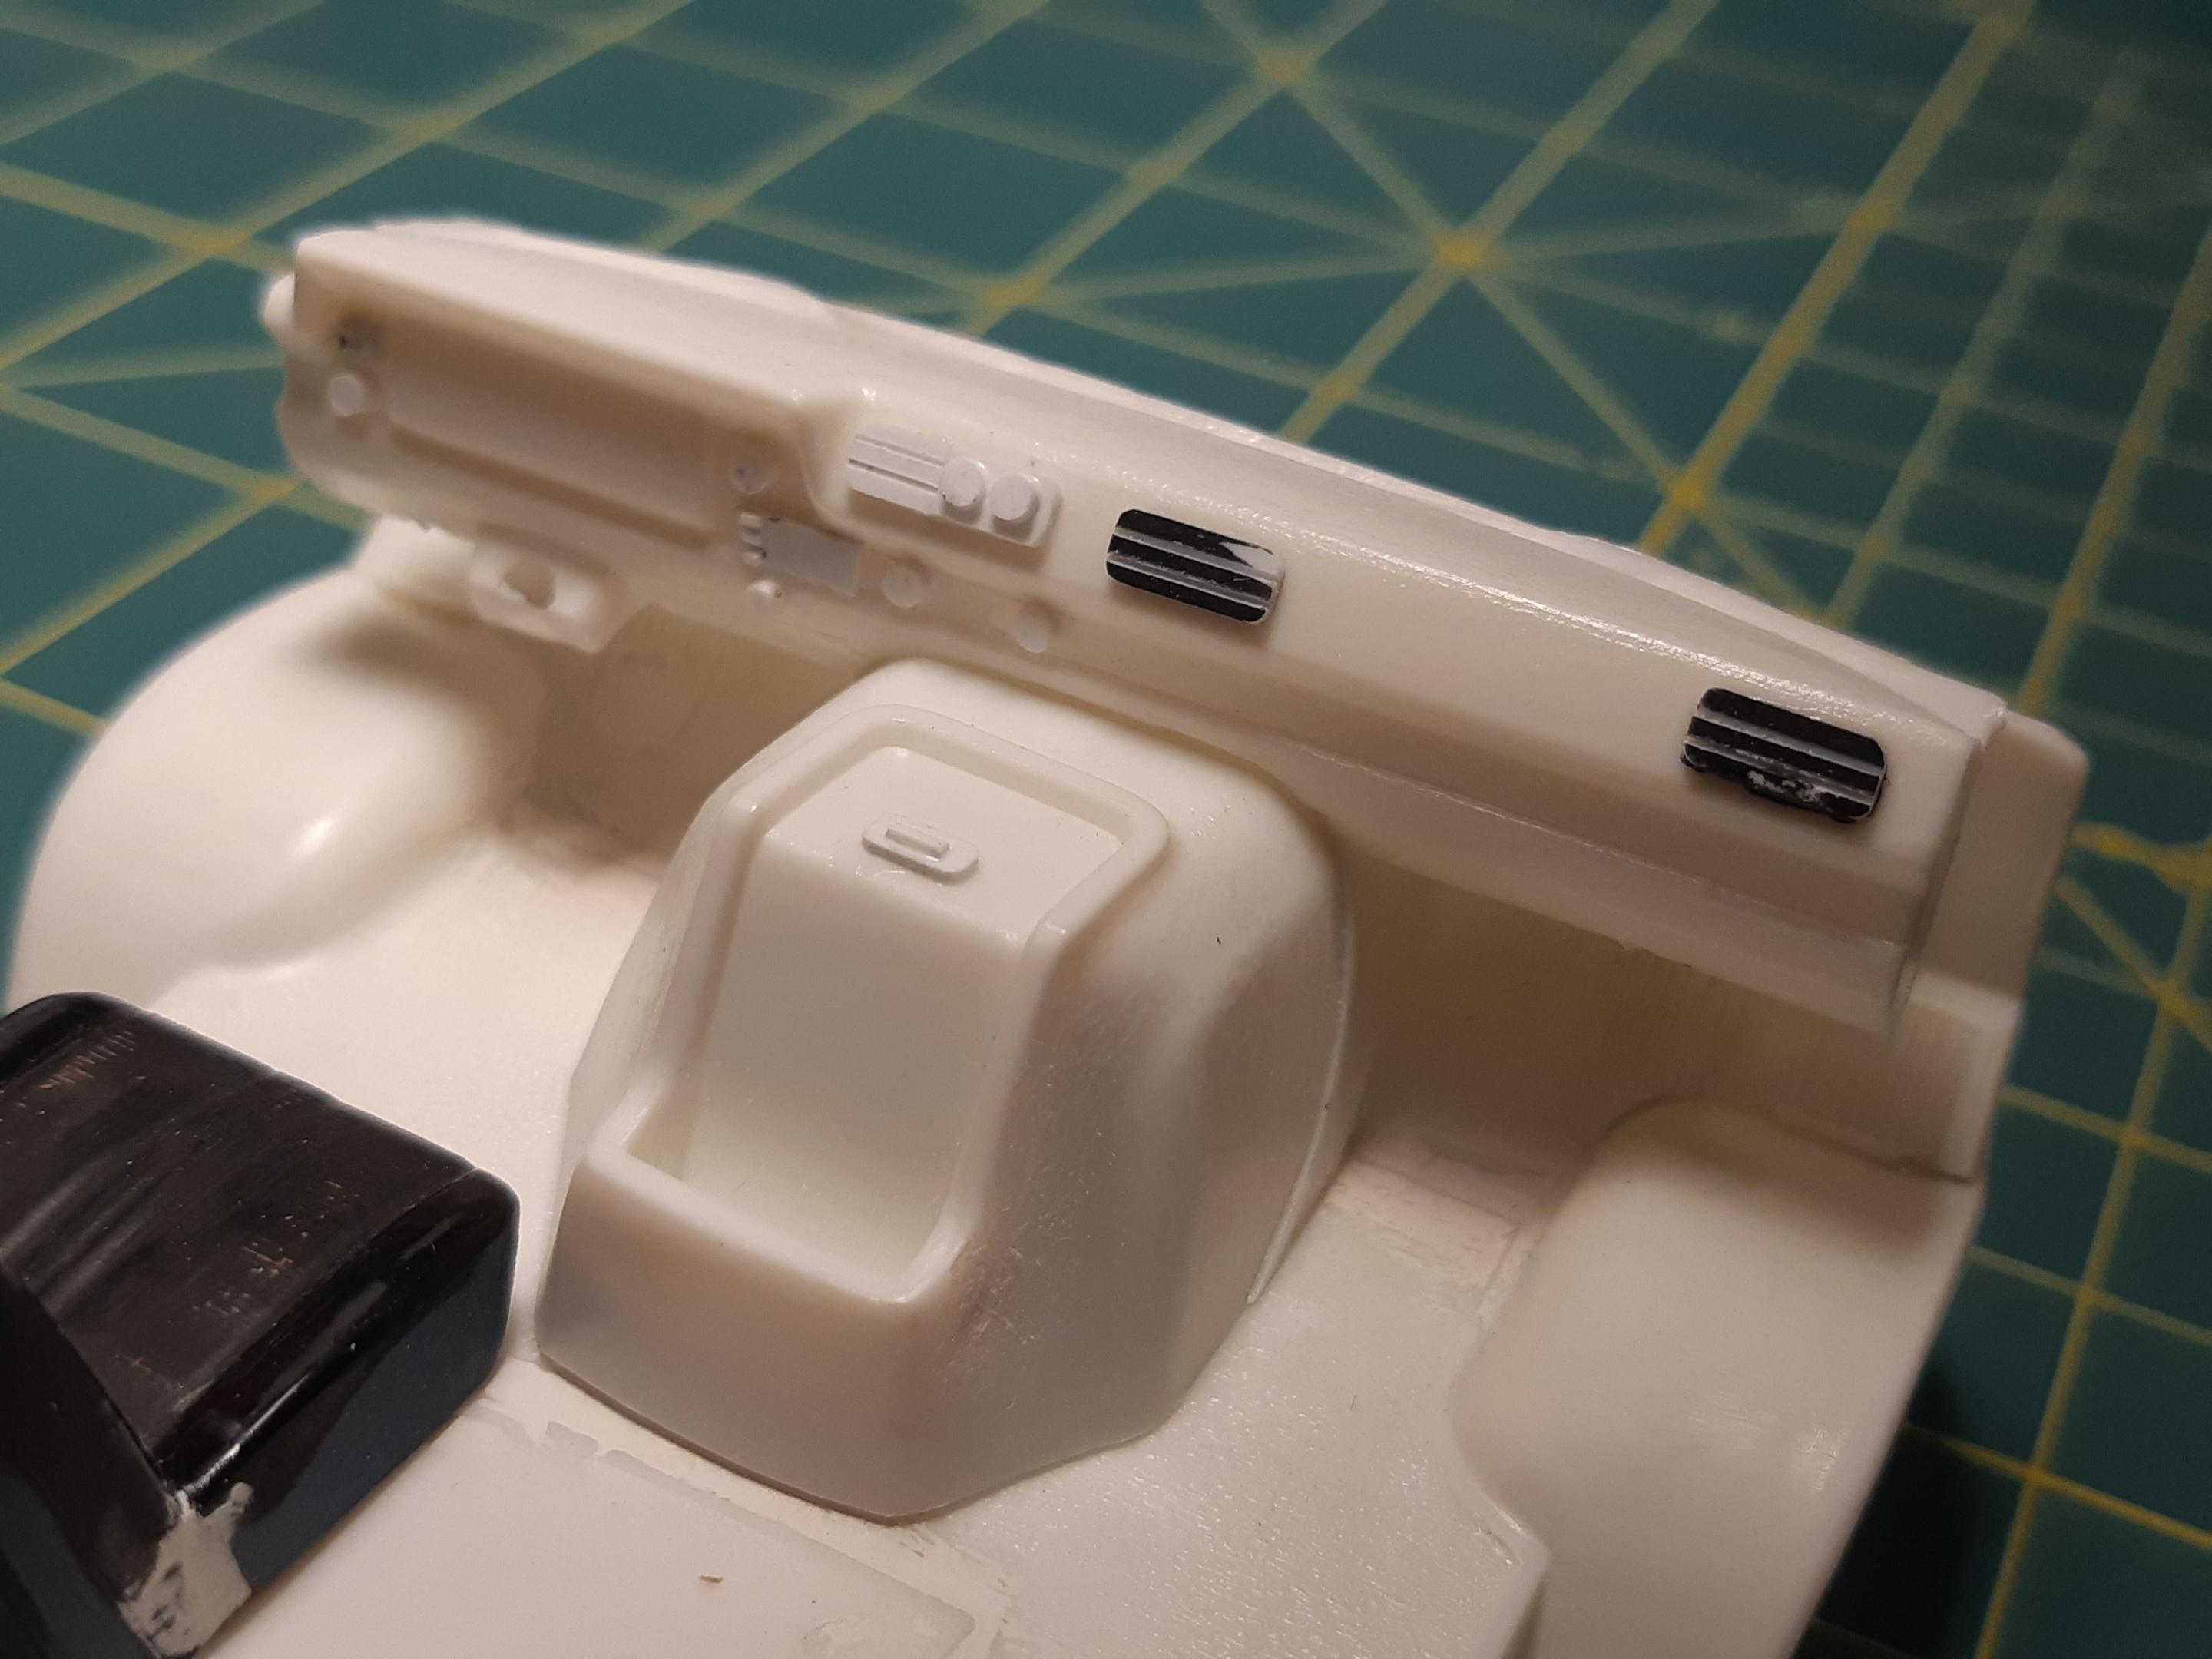
Moving on to the interior details. I have a clear vision of how i want this van to look. Here is what i am going for based on original GM brochures. I want this model to have a 350, TH350 Automatic with Air Conditioning. Here i am making all the A/C vents and controls on the dash from scratch. i also modified the ashtray to be in the proper place. and updated the knobs and the heat controls to represent a 73 van dash rather than the 1971 kit form. The rear seats are from the parts bin, lucky i had 2 the same, the button tufting will be removed later. armrest and a more accurate resin th350 replaces the wierdly shaped kit transmission


