55fireflite
-
Posts
5 -
Joined
-
Last visited
55fireflite's Achievements
MCM Member (2/6)
-
I realize this thread is already five years old as I type this, but someone else may be like me, needing to strip the chrome in a Salvinos Jr kit, and find it in a Google search, so it was worth responding. In my case, I wanted to drill .020 holes in one of their carburetors for fuel lines. Since were dealing with actual chromium here, which is harder than iron, you might as well try using a microdrill to bore into an actual car bumper. Another effective method has been discovered for stripping these parts: muriatic acid. Muriatic acid is available in the paint section at your local hardware store. I paid 10 bucks for a gallon. Here's how it works. First, BE CAREFUL, this stuff is nasty. One whiff should convince you. Wear gloves, and a chemical respirator is a good idea. (I only needed about 2/10 of an ounce in medicine cup for my carb, so I just kept my face well clear or it.) Place your part in a plastic container and add just enough muriatic acid to barely cover the part. Come back 24 hours later, and the acid will have turned green. Drain off the acid and replace it with fresh acid. Repeat for 7 to 10 days. If you are doing this in the evening, it might help to gently swish the parts around in the morning, a little oxygen may help the process along. No scrubbing of the part is necessary. Rinse with water when chrome is gone and you're good to go.
-
Paint disaster. What went wrong?
55fireflite replied to 55fireflite's topic in Model Building Questions and Answers
Oh, and the irony with the locomotive paint coming out so glossy, is model trains look toy-like if they're shiny, so once the decaling is done, the whole thing gets spayed with clear flat. -
Paint disaster. What went wrong?
55fireflite replied to 55fireflite's topic in Model Building Questions and Answers
That's the primer showing. Point taken. Especially since I always have a spare body sitting by the paint booth so I can test out the airbrush. All I had to do was grab a fresh one and give the whole thing a full paint job and check the results. Probably me showing my cheapskate side (comes from my Dad). My local hobby shop recently got in a new paint line call Cobra Motor Paints by Ammo, which includes some factory stock and racing colors. I picked up a jar of 60s Ferrari Rosso Corso and light brown leather. I already have a spare body ready for a full test before it goes on project car. I didn't mention it in my initial post, but while I have been using MCW paints for a long time, I've been way less than satisfied with the results. Specifically it's the level of gloss. I got back into modeling during COVID after maybe eight years. One of the first kits I painted was the 58 Imperial that's out now. I used MCW 58 Imperial Dark Turquoise with a stainless roof panel, and it looks fantastic, nice and glossy. Other bodies have been less so. I can get it to lay out perfectly smooth, but often it looks more like semi-gloss. The 55 Chrysler 300 came out that way, smooth but not very glossy. I had the same problem 15 years ago. The gloss level seems to depend on the day of the week, the phase of the moon, and what I had for breakfast. Weather doesn't seem to make a difference. I just re-sprayed a chassis component for long-term NASCAR Daytona project out of the same jar I used earlier, and it came out a little shinier. I've gotten so frustrated with it I wanted to try something else. I get very consistent and very glossy results with Tamiya. I just airbrushed a Tamiya Alfa Romeo Giulia Sprint GTA body and chassis in Italian Red and it came out PERFECT. But Tamiya only has so many colors to pick from. One thing worth noting. I used to have an HO model railroad, and I hope to have one again someday. About a year ago I decided to paint/repaint some locomotives to display on my bookshelf. MCW has a line of railroad colors now, and I ordered some CSX yellow, since I couldn't track down any from Badger Accuflex. HOLY COW, that's the glossiest result I've ever gotten from MCW, and it flowed out beautifully. The water-based blue and grey fr om Badger went over it with no trouble. I see on their website they are offering a lot of their car colors in the new enamel formula. I'm thinking next I'm looking for paint, I'll give MCW's enamel a try. And yes, I'll do a full spray-out on a test body first. -
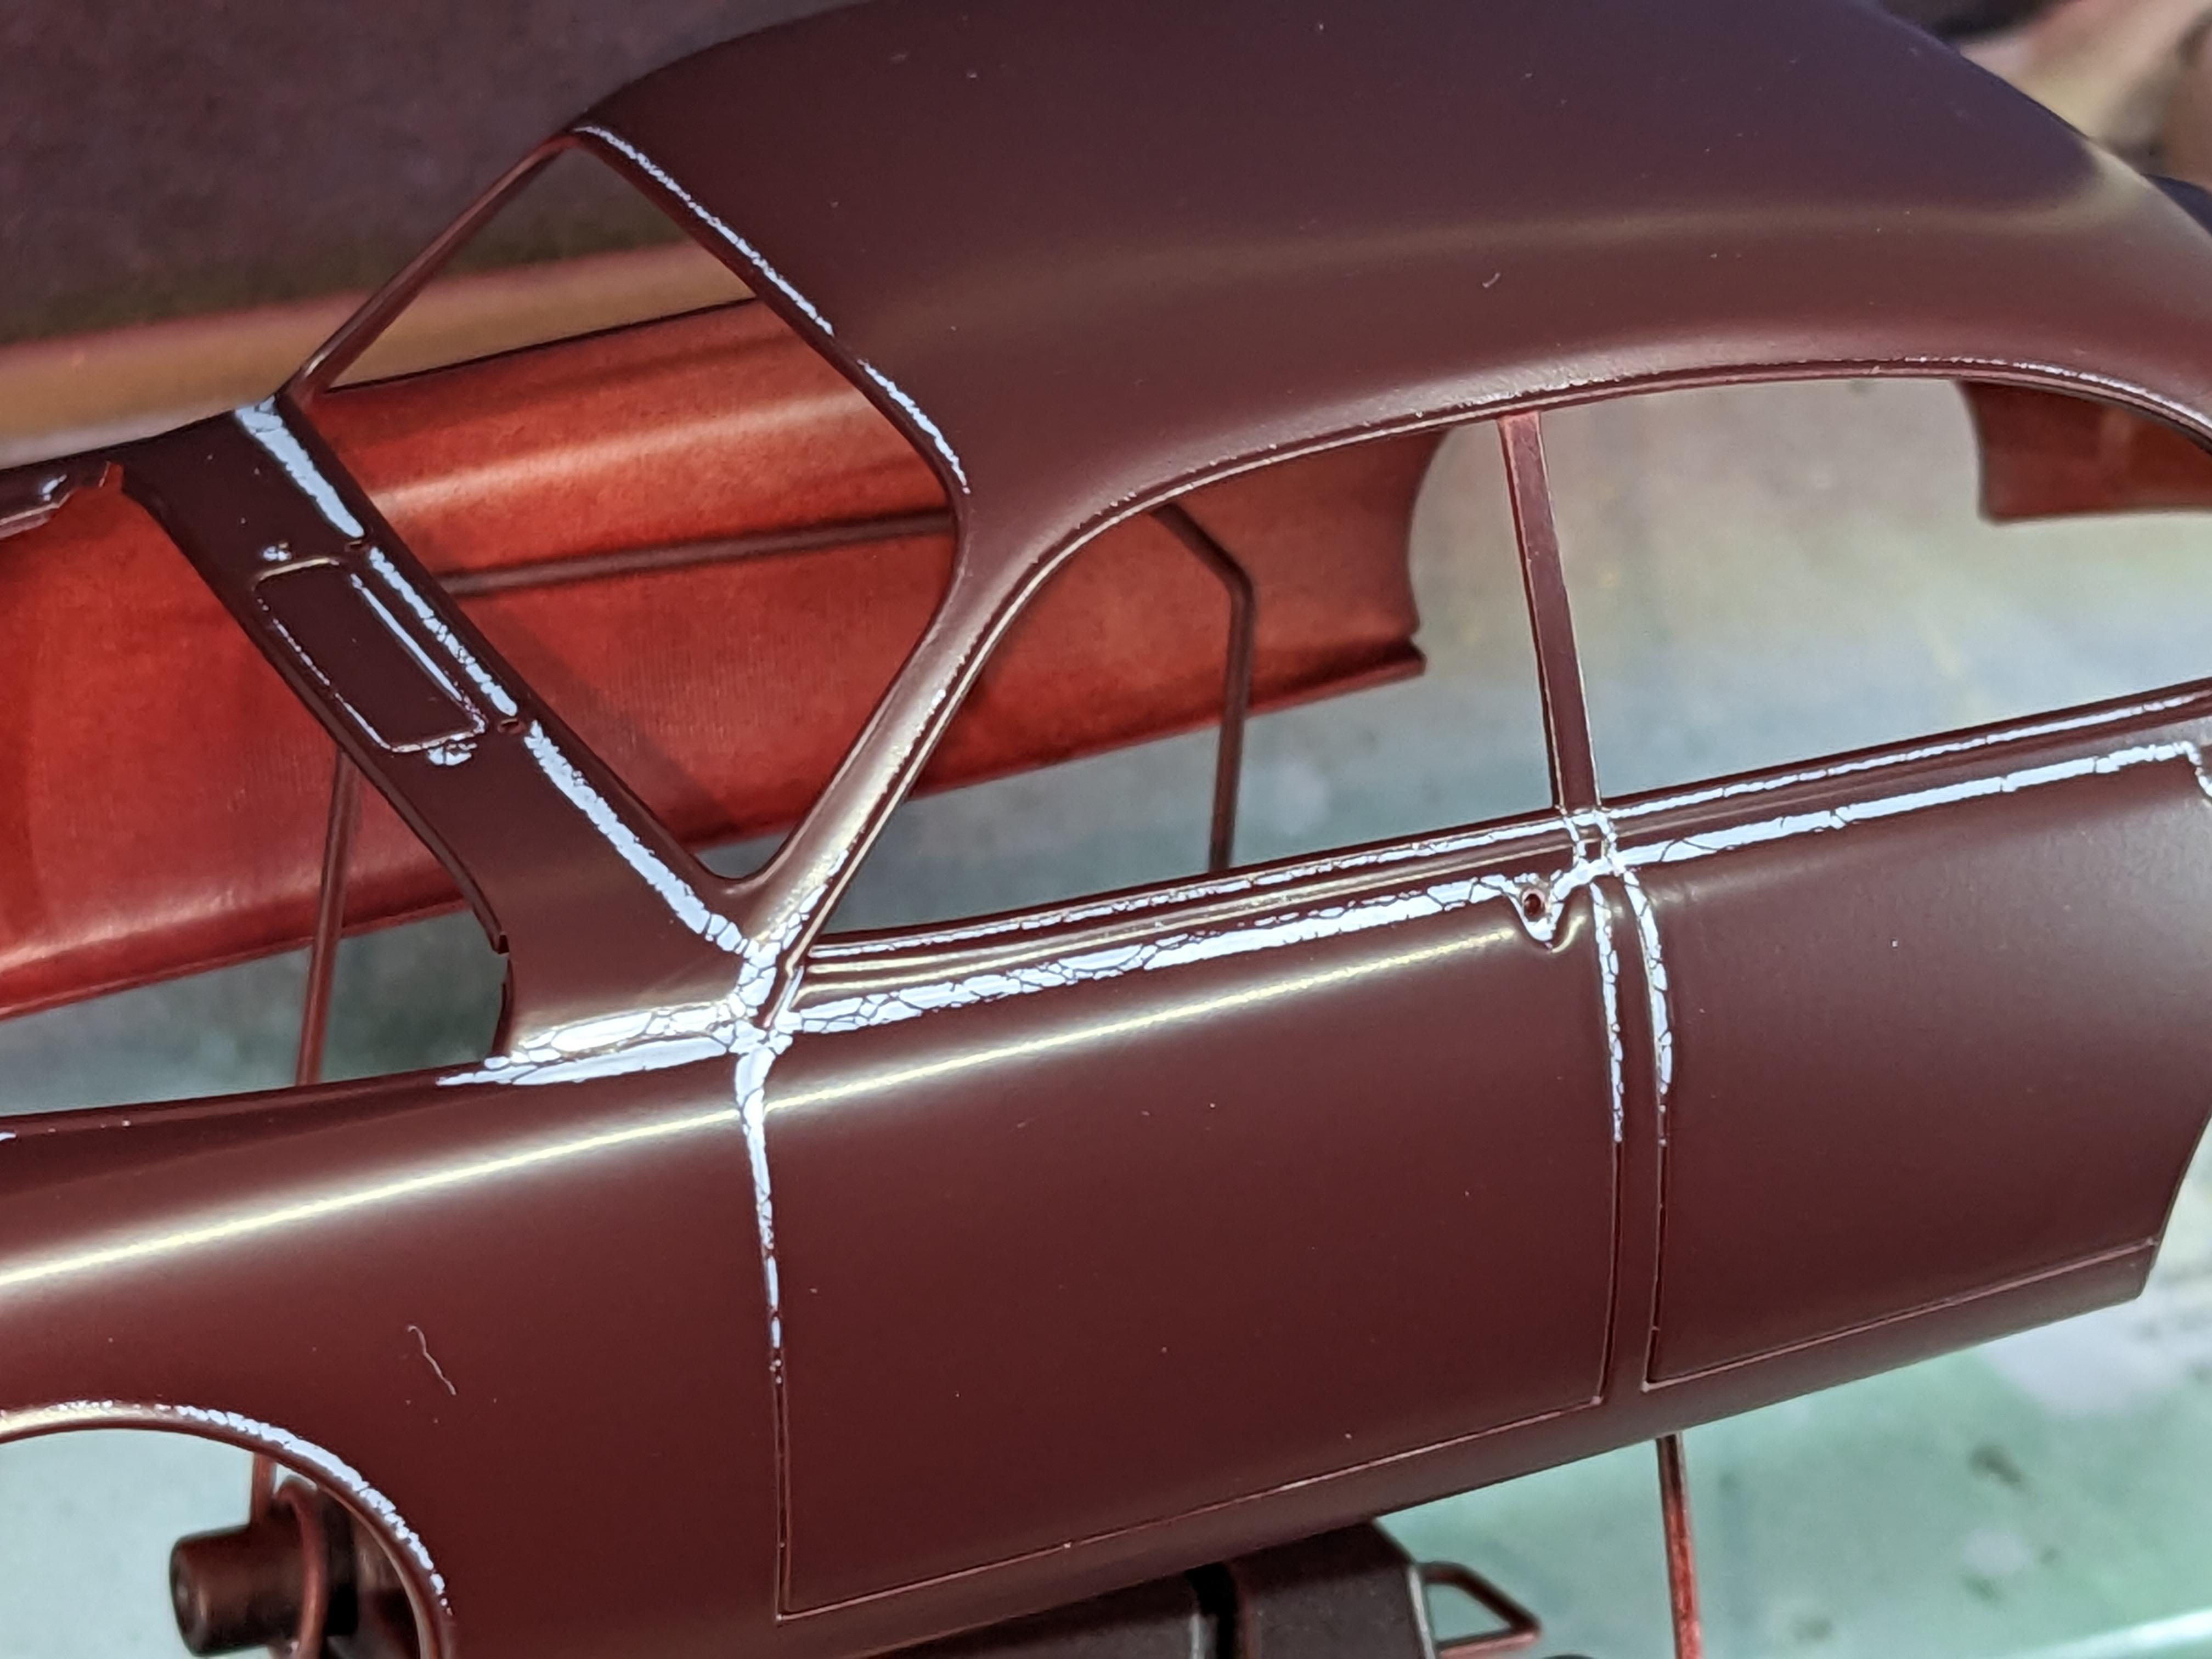
I have a Tamiya Jaguar MK2 sedan kit I wanted to paint in a dark red, and decided to give Splash Paints a try. I ordered some Ford maroon and bottle of primer. I sprayed the Splash primer, let it sit for a few days, and then sprayed the on the red. I used it straight out of the bottle as recommended, 20psi with medium needle in one of my Badger airbrushes. Everything looked great, so I set it aside, cleaned the airbrush and painted something else with Tamiya or MCW paint. When that was done, I set it aside, checked on the Jaguar and WHAT THE.......? Complete disaster. The paint shrank back from all the body seams. I painted for years with Tamiya, MCW, Badger Accuflex and Duplicolor and have never had anything like this happen. I know lots of people are using Splash paint with success, so what could have gone wrong?

-
Greetings, I have a long-running project to build a K&K Insurance Dodge Charger Daytona based on an original 1970's vintage MPC NASCAR Daytona body, and parts from a variety of kits. The bodywork is done. The MPC kit had a grill over one headlight opening, and I want the version with both stock headlight doors, so I adapted the nose cone from the much-maligned AMT street Daytona kit (based on the General Lee kit). The sides needed a LOT of reshaping, but now it looks great. I found a set of K&K Daytona decals on ebay (now out of production). My question involves the engine. I plan on using a 426 Hemi from an AMT kit, but I need the distinctive NASCAR Hemi bathtub intake manifold. I there a source for one of these in the aftermarket suitable for an AMT Hemi? Thanks, Tom