Mike Holland
-
Posts
80 -
Joined
-
Last visited
Content Type
Profiles
Forums
Events
Gallery
Everything posted by Mike Holland
-
1:16 FED, brass, current project
Mike Holland replied to Mike Holland's topic in WIP: Drag Racing Models
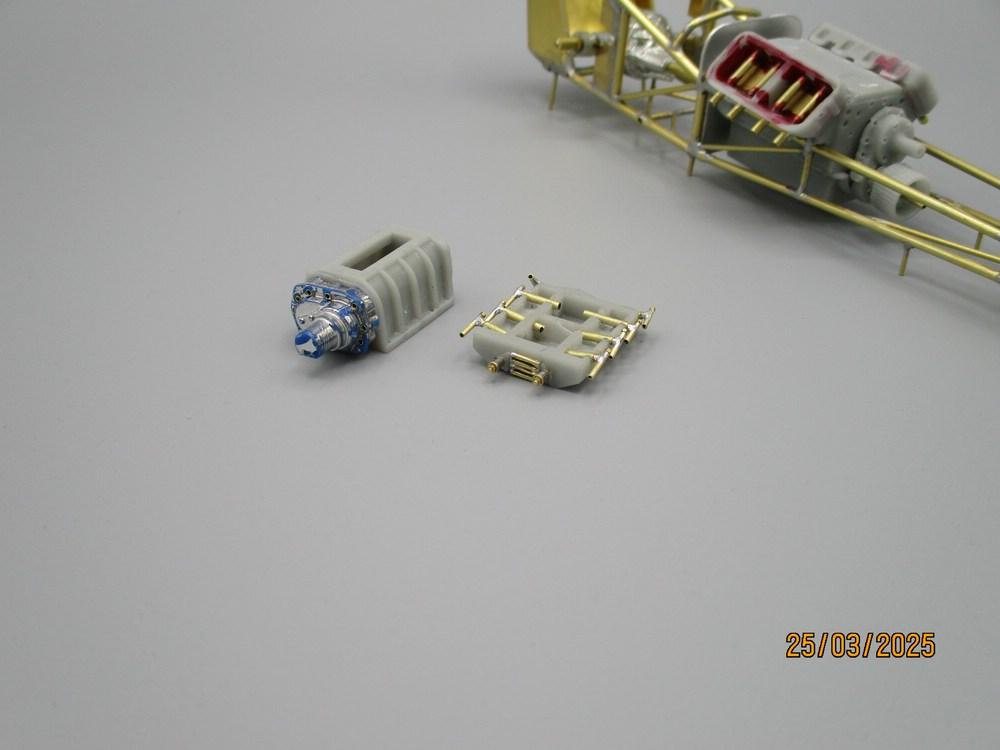
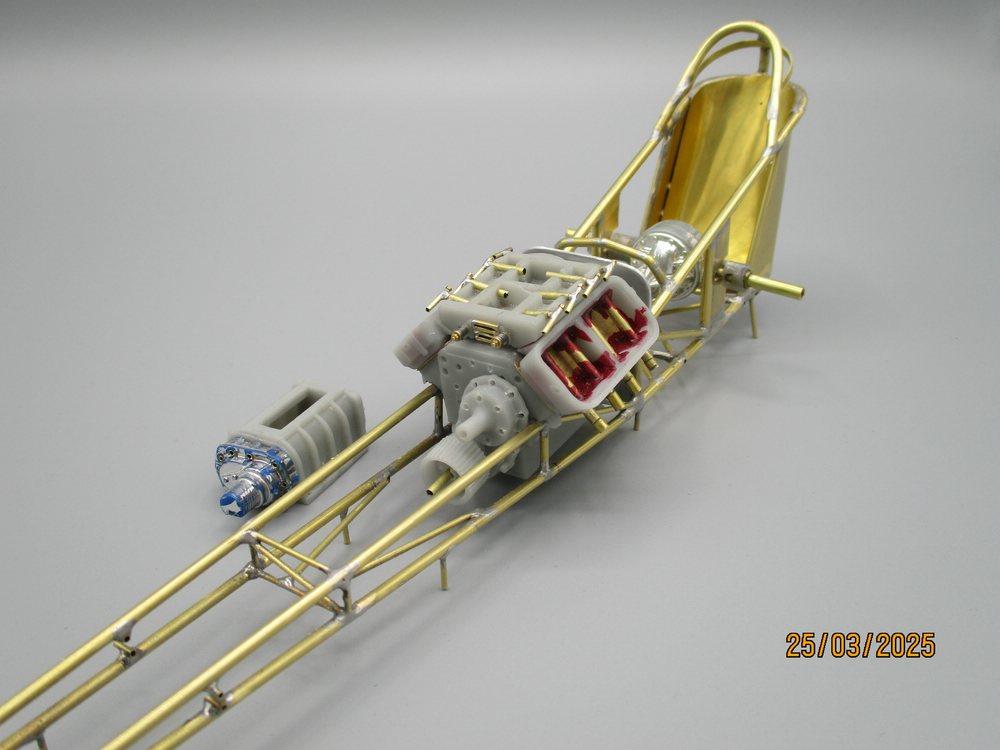
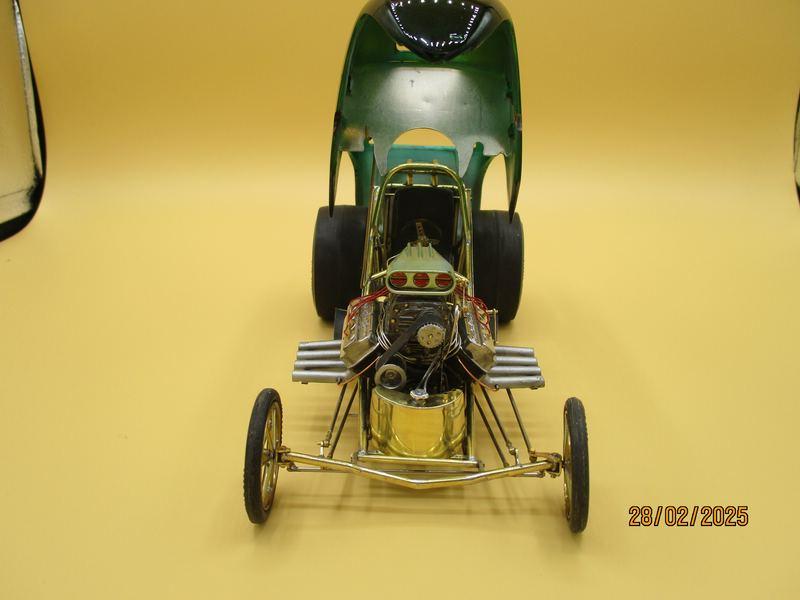
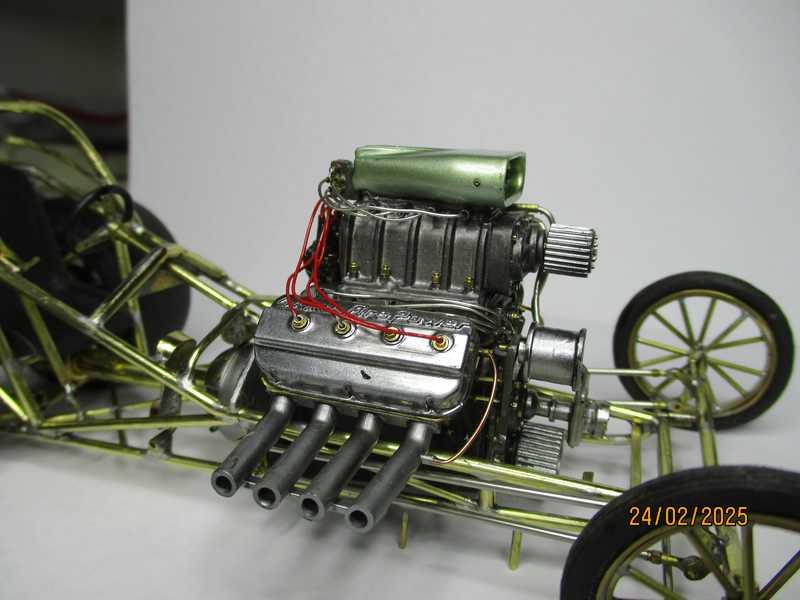
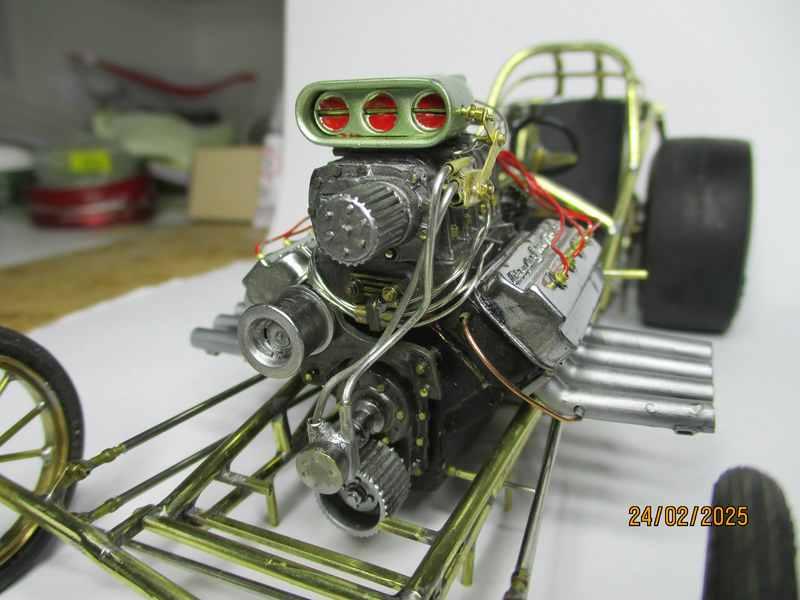
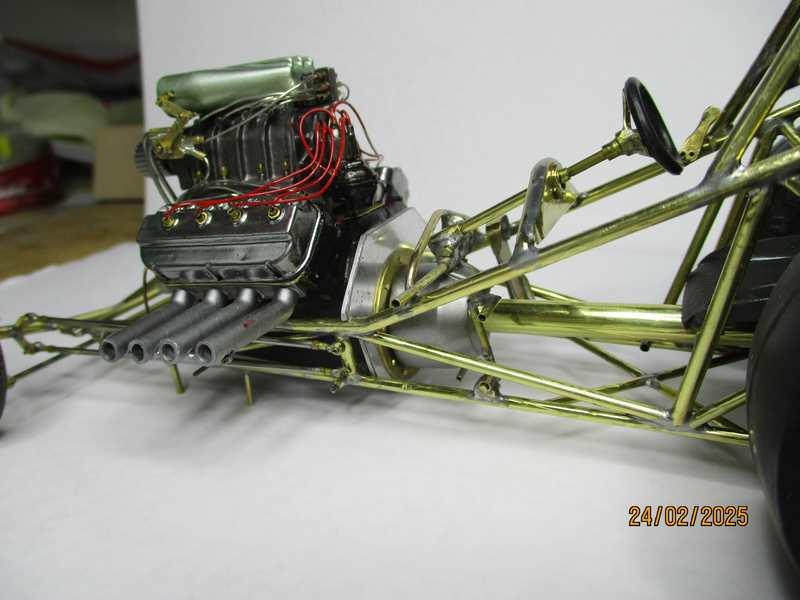
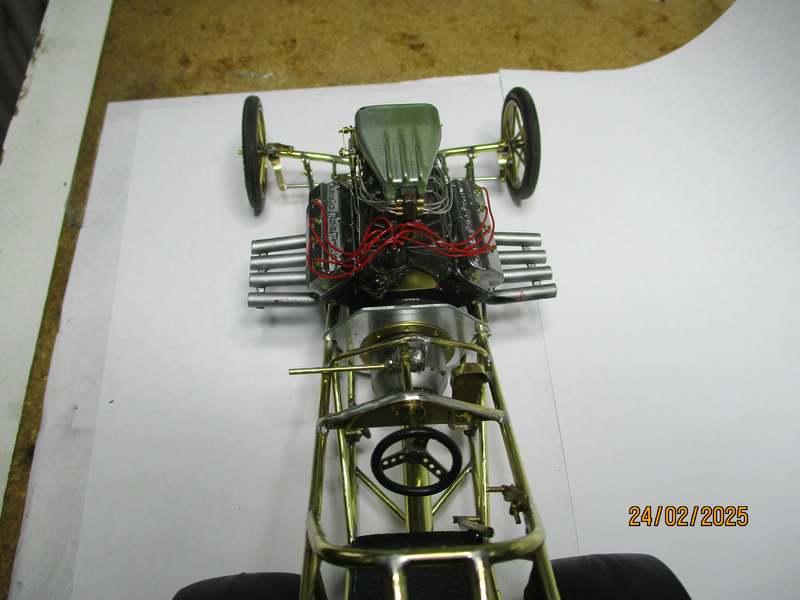
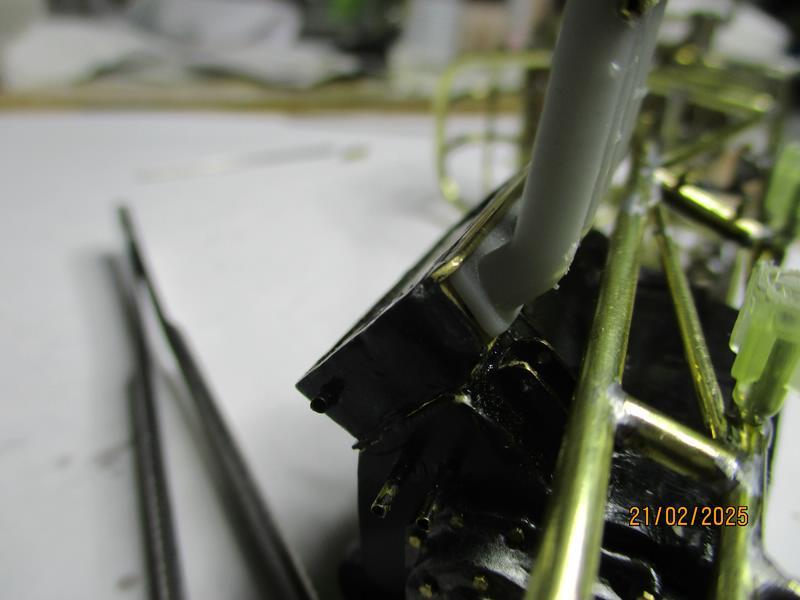
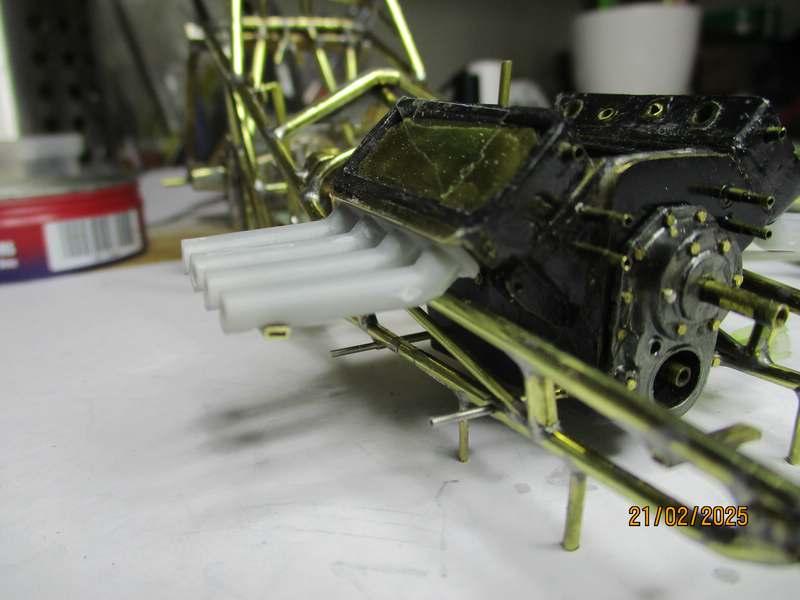
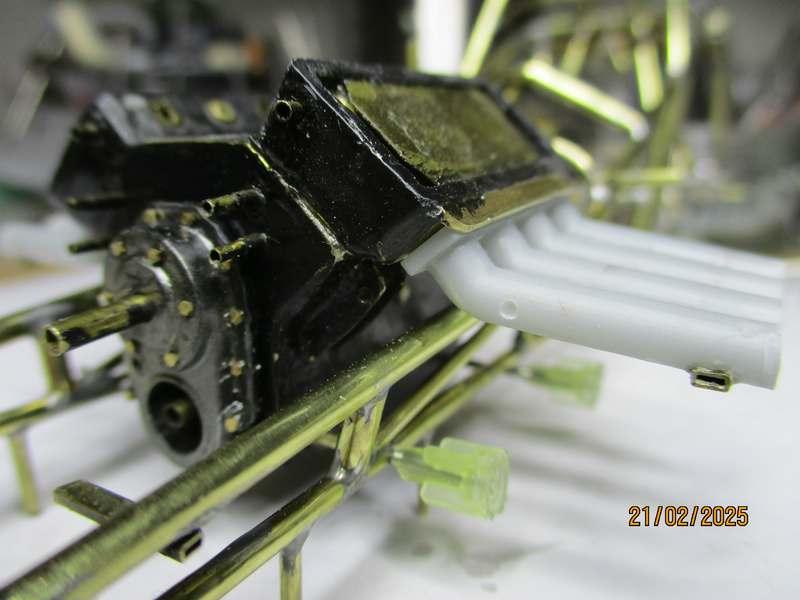
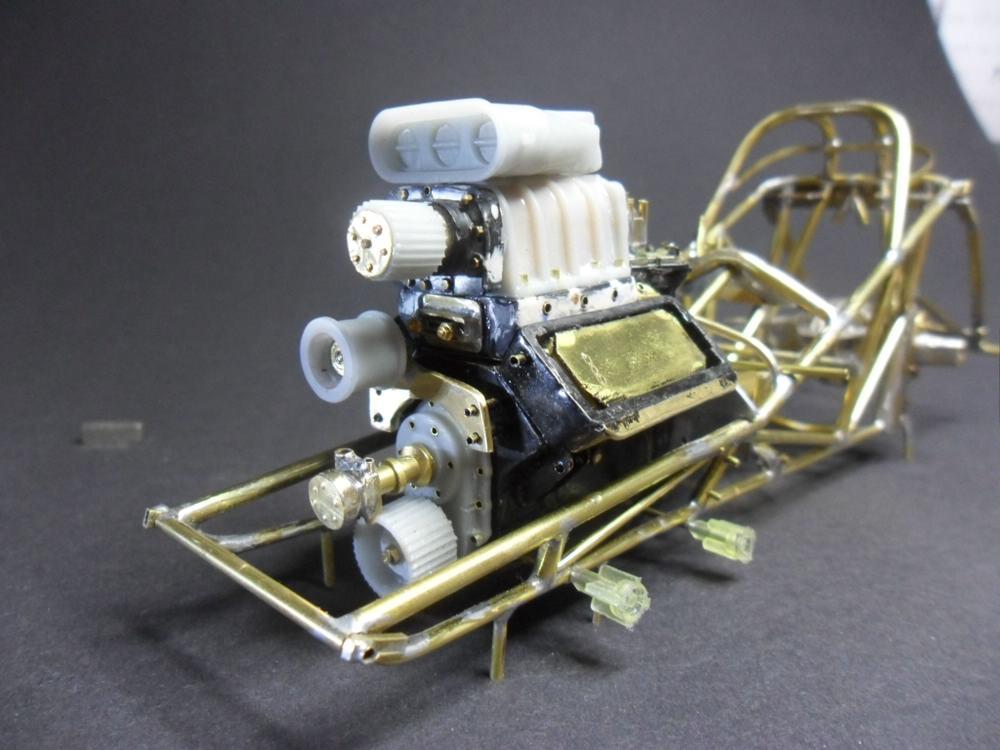
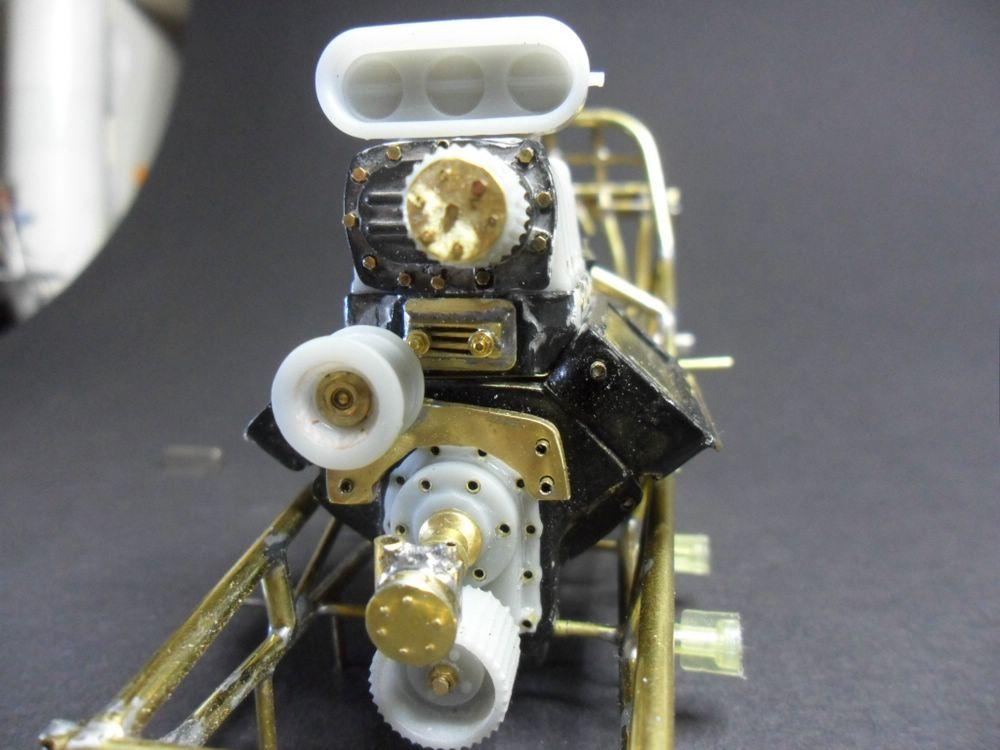
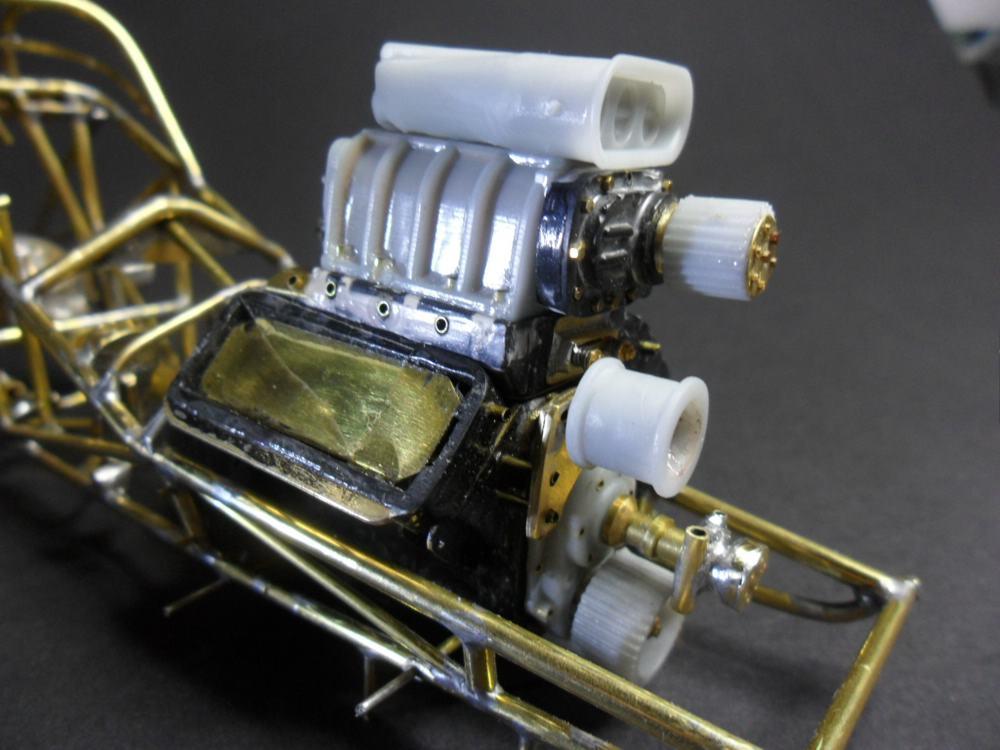
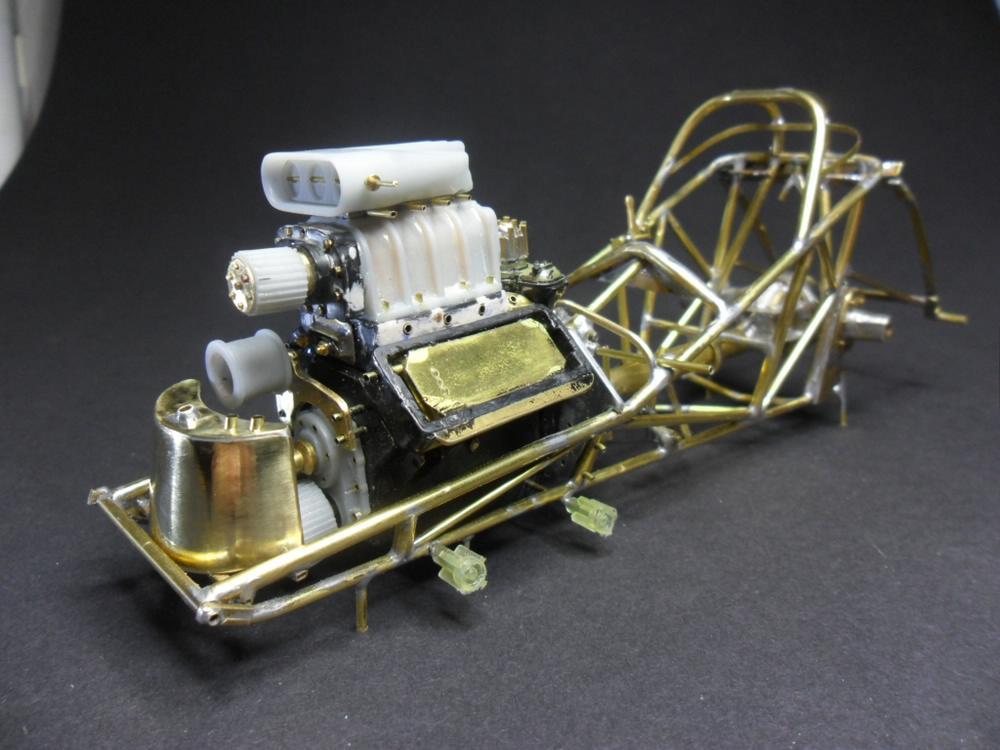
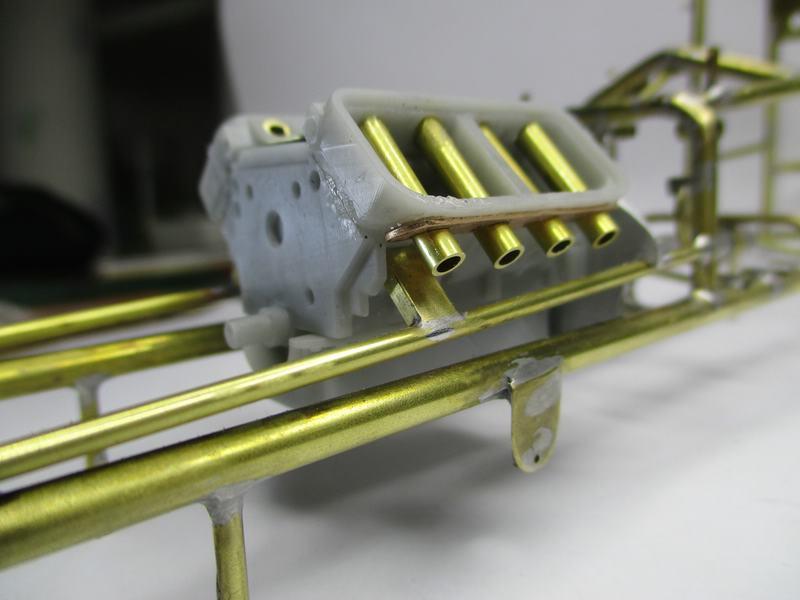
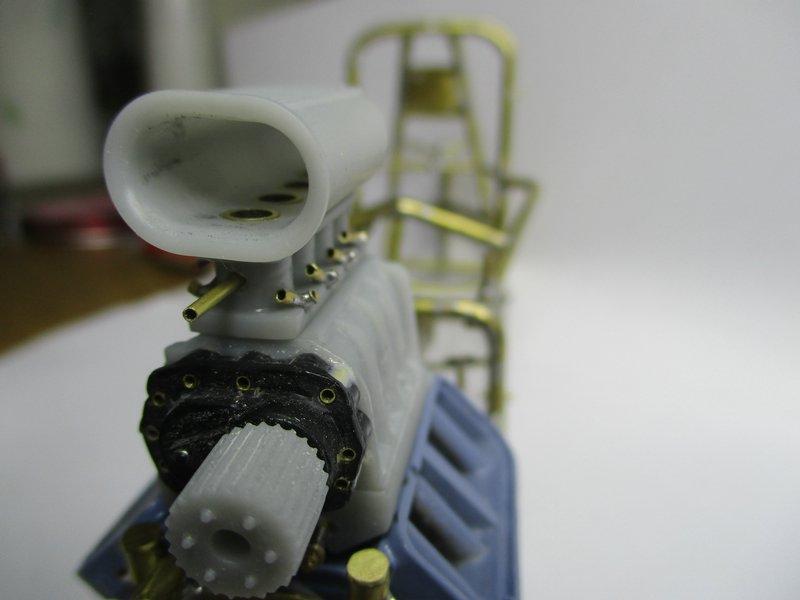
UPDATE; some motor works. Prepping the heads with brass tubes to accept the brass zoomies coming up, which just slide over these tubes. 3D material is so brittle, needing to beef up the pipe connection. The red material around the tubes is a homemade concoction, using ethyl acetate as a medium to melt red sprue leads to desired thickness to apply with a toothpick. The 'soup' dries quickly. Also getting the manifold detailed for fuel lines. The nozzles are movable so that adjustment later on is easier. Thanks for your interest. Mike..
-
1:16 FED, brass, current project
Mike Holland replied to Mike Holland's topic in WIP: Drag Racing Models
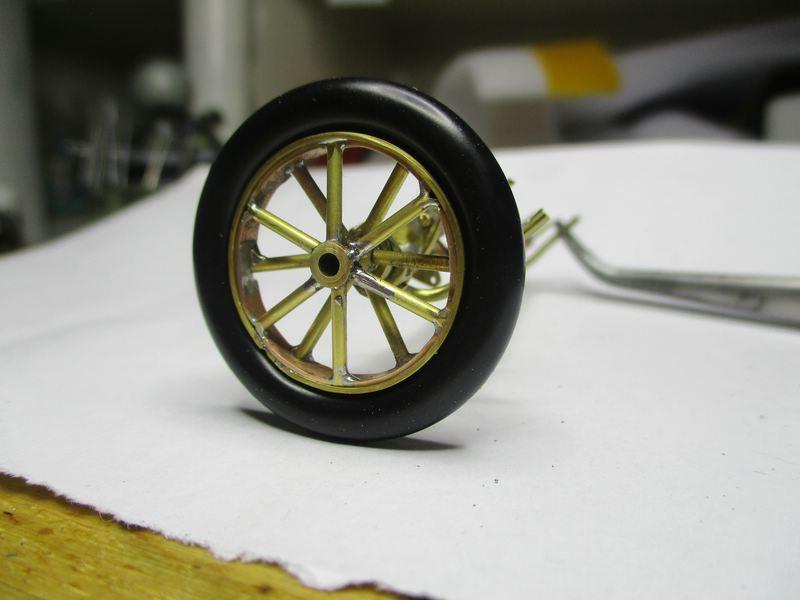
Thanks Jimmy, hoping things work out as planned. Hi Elliot, yep, down low with the tilted down motor....they just kill me. Mike.. Very kind of you, Francis. I'm still at it, the best part is taking the time, piece by piece. Do it once is best. After finding out a new method of lacing wheels without solder has made things much easier. More later about this. -
Daniel, great fix there. QUESTION; 'sprue gloo', is that a trade name, or your own concoction? I make my own liquid filler. The reducer for styrene is ethyl acetate. Using a small jar, cut a mess of sprue leads, like maybe 1.5" altogether. Pour in just covering the styrene bits, wait 20 minutes, then you have applicable goop. Is quickly thinned out if needed, immediately. Apply with a toothpick, works great. Dries in 30 minutes max. But, I just looked online, the stuff in the US is very expensive. Germany is famous for chemicals, so a quart of the stuff is super cheap here. I know of no other liquid filler for styrene, hence the question. Looking good.
-
Thanks much, Larry. Also for your comments on the WIP page. Mike.. Thank you sincerely, Carl. This means a lot to me. Mike..
-
Looking great, Daniel. I agree fully what others mentioned, combining different materials to reach an inspiring result. Especially in this scale. Respect. Mike..
-
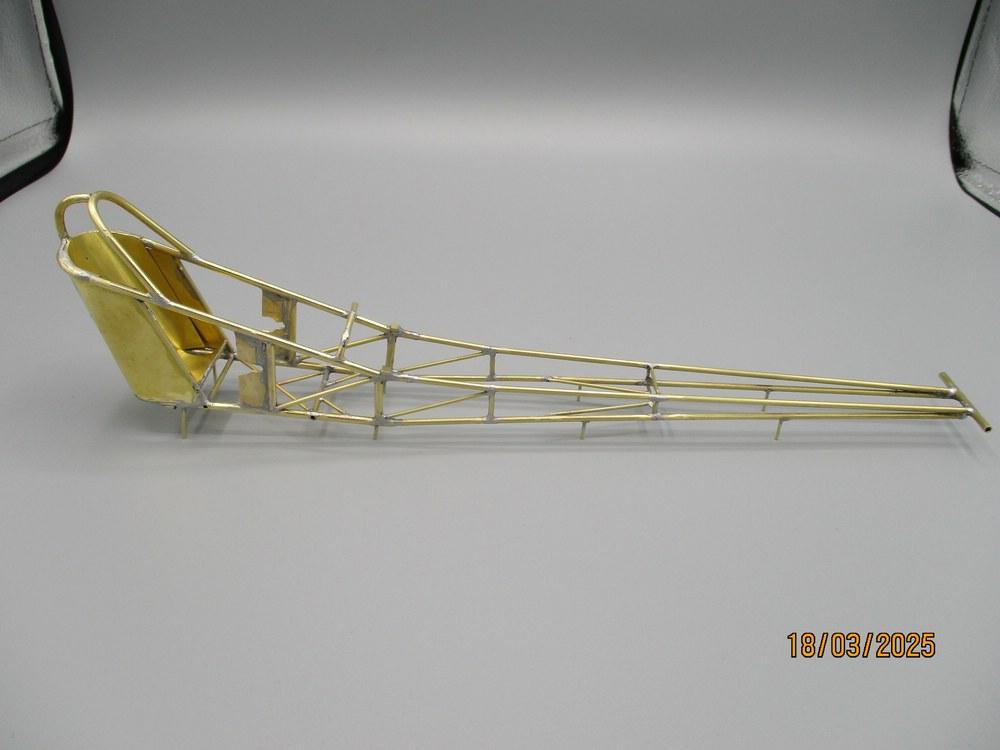
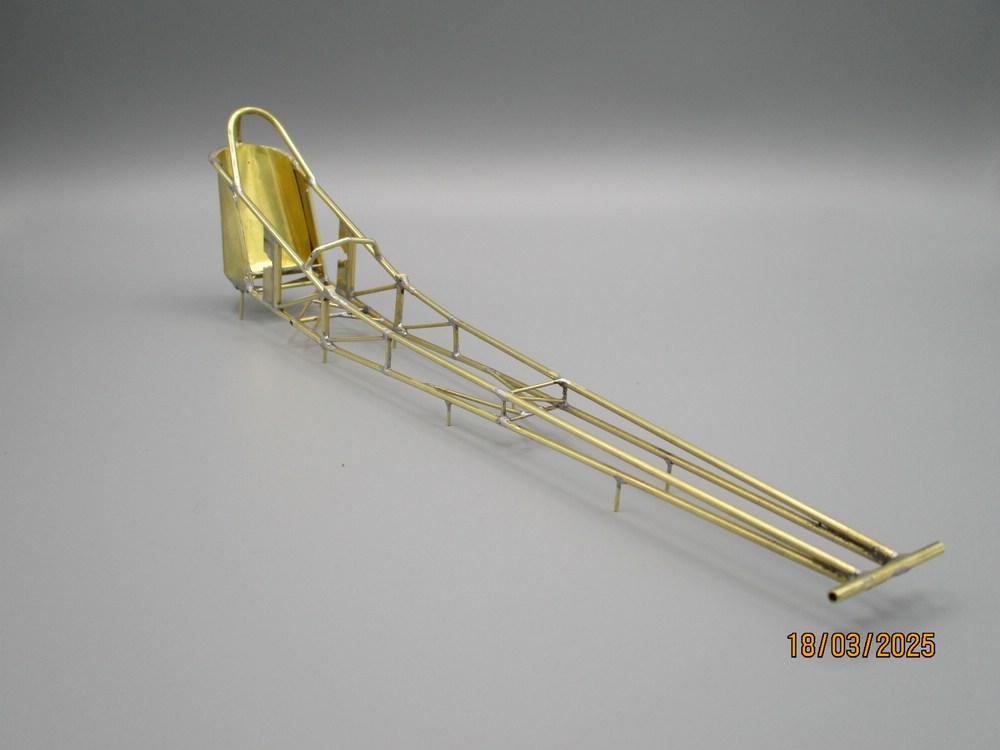
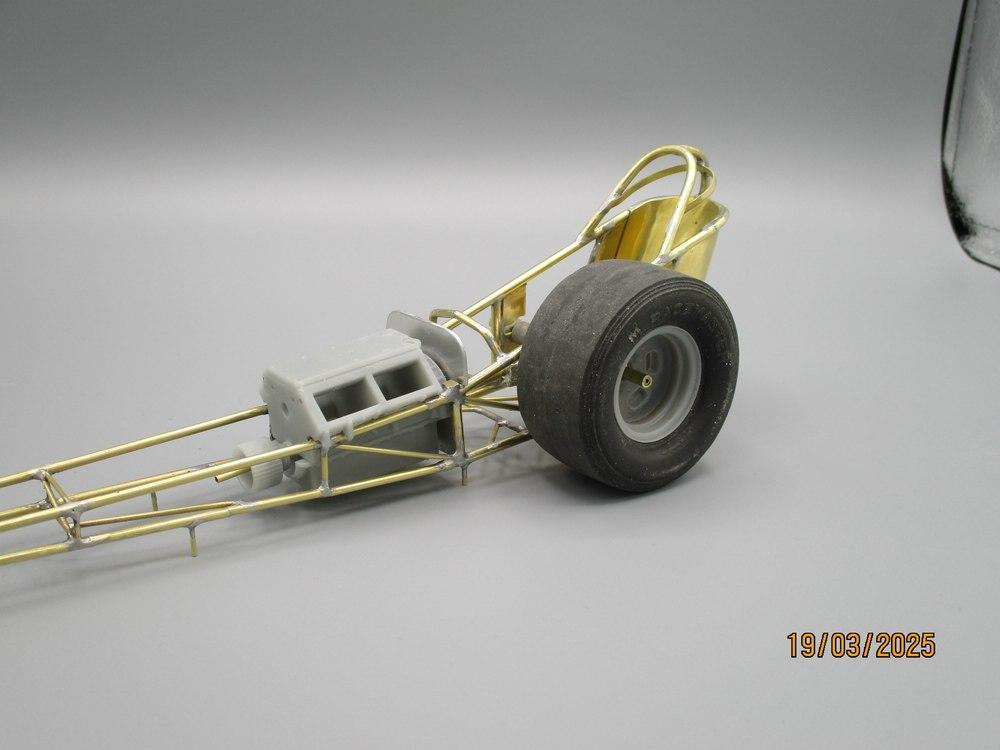
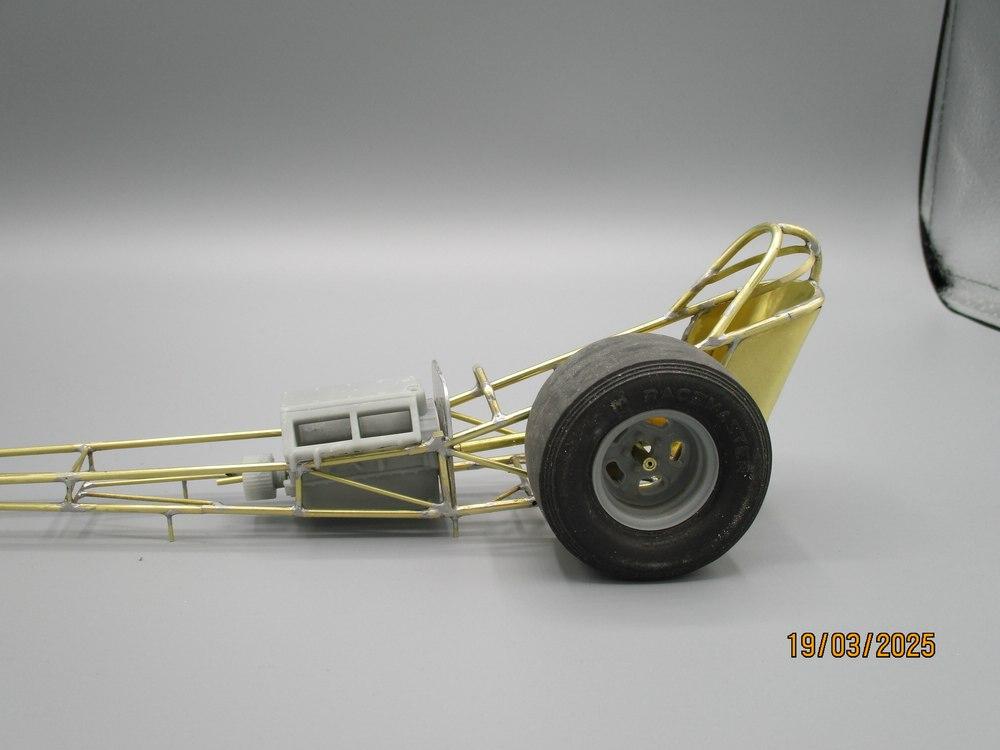
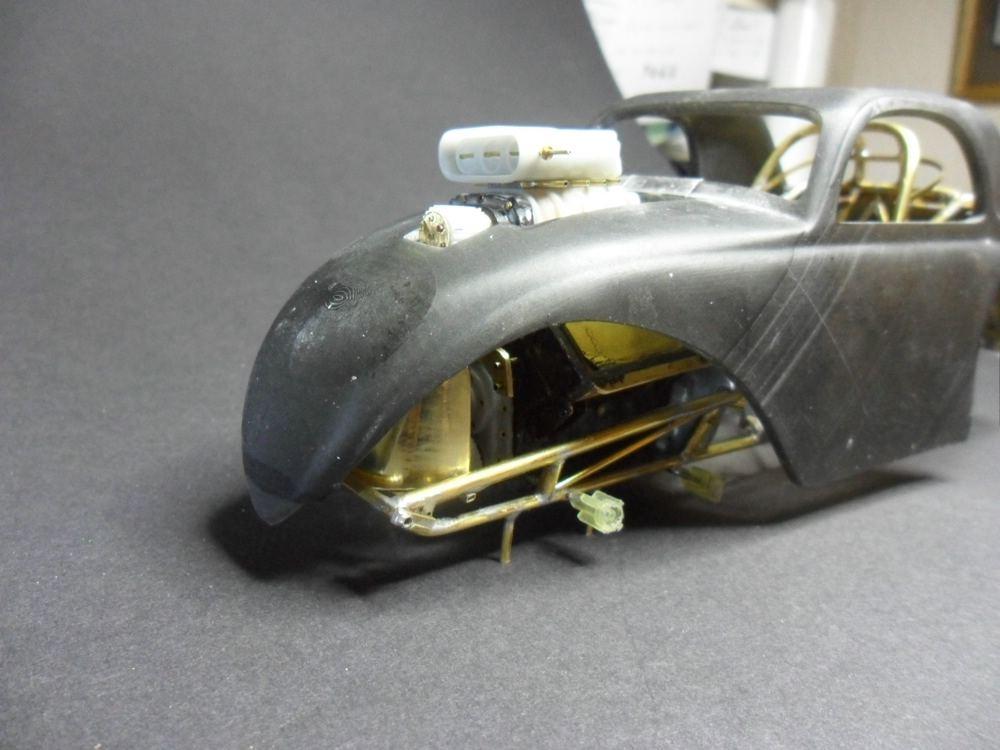
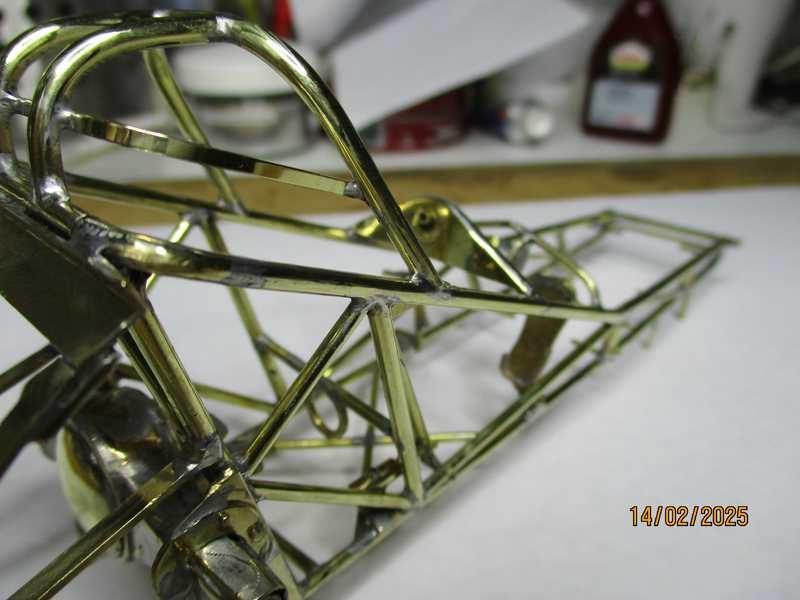
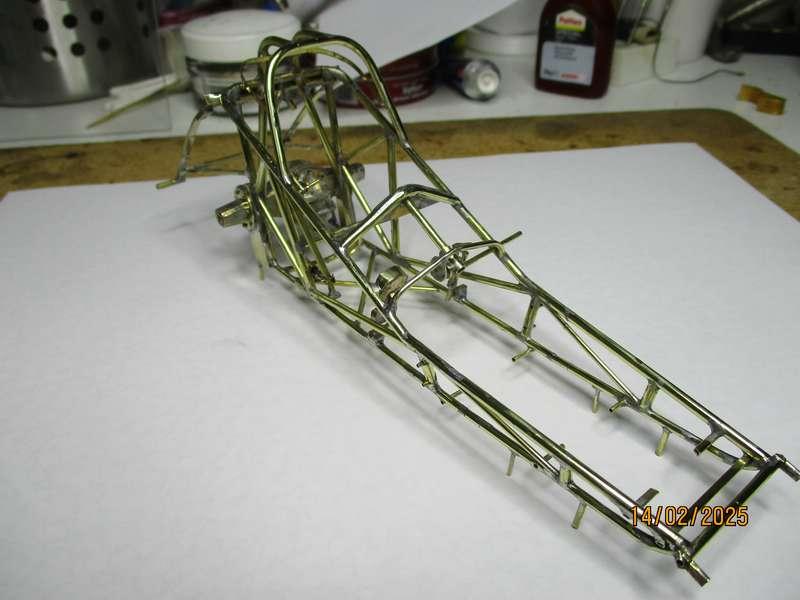
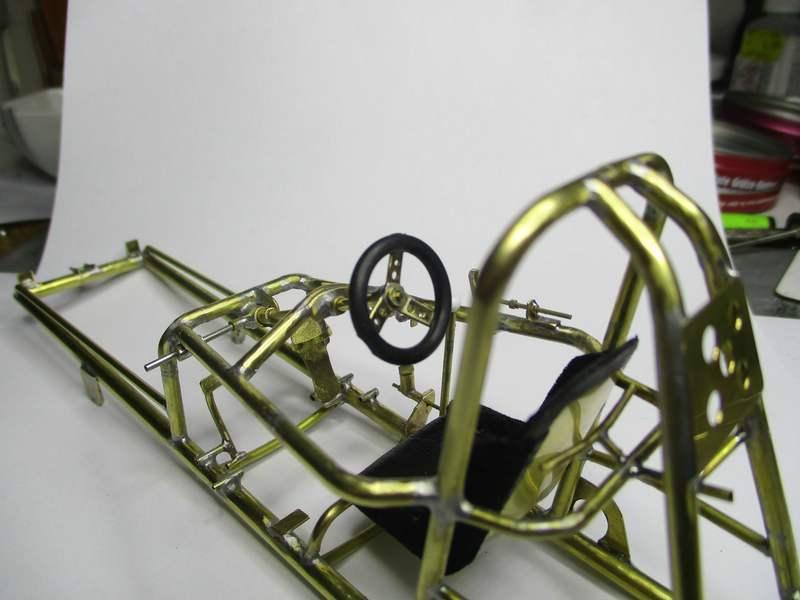
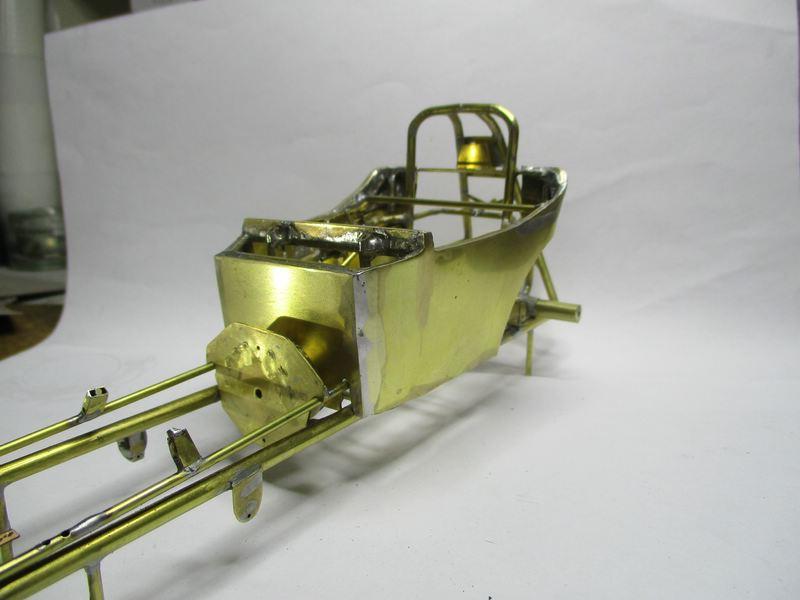
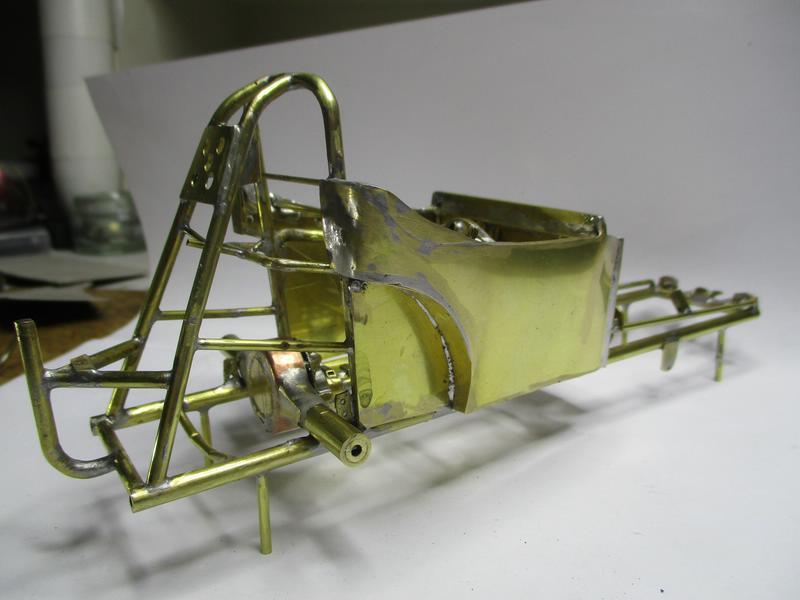
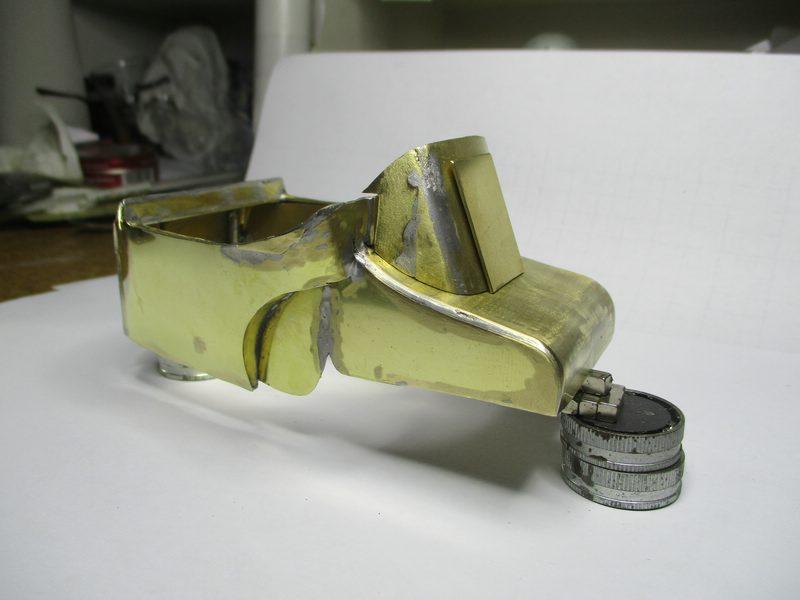
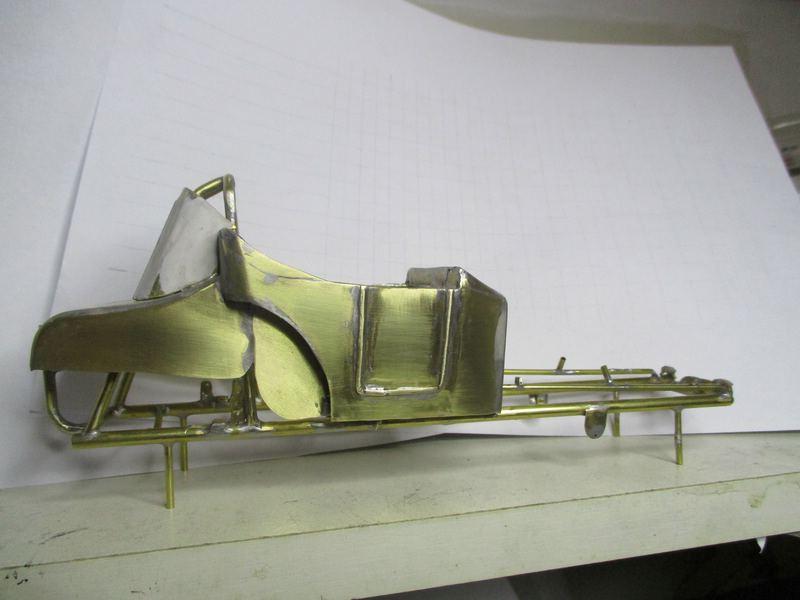
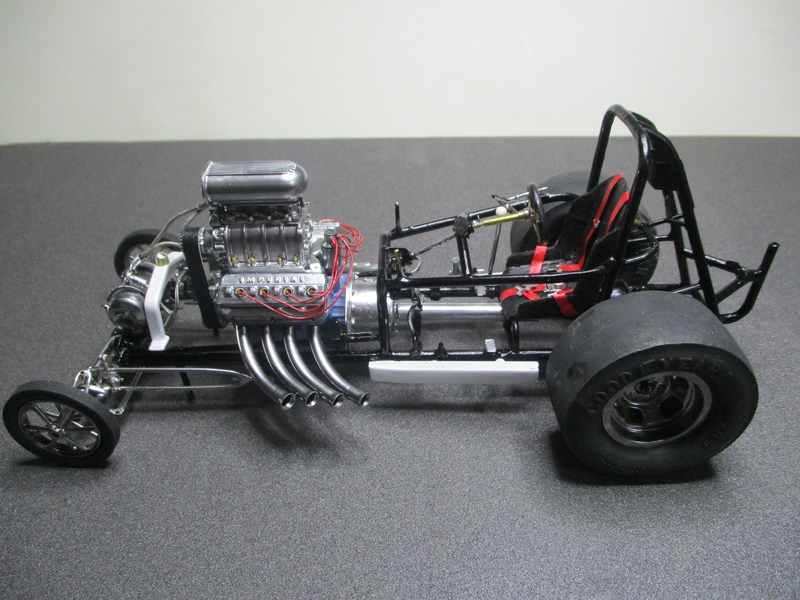
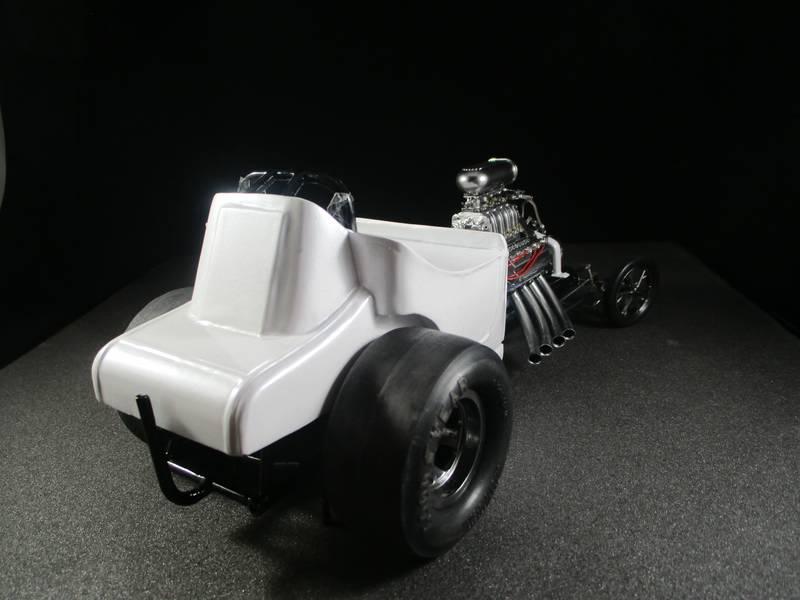
Hello guys, this one is a current WIP. 145" wheelbase, started this past spring, vintage 1965 car. Nothing fancy, just what I really like about the mid 60s, lack of chrome, down low and dirty with huge motors sitting way back!. No frills. Also shown are the 'studs' at bottom of chassis, thus keeping the ride height set throughout the entire build. These are removed after painting, after completion. The bare block sits, drive line established with motor dump, firewall. The car will show minimum of 3" to pavement. More soon. Mike..
-
Very much appreciated, and thanks for the approval, Bruce. Mike.. Thanks Rich! Every time I finish a brass chassis, same thought comes up....a shame to paint it! This one though, only polished. Just different. Mike.. Thank you, Brian. Mike.. Hello Robert. I agree, the FAs do it for me as well. Although the FEDs are a very, very close 2nd. If you are on Facebook, this fellow allowed me to use his chassis for this model. The all steel Fiat project was very well documented, really a treat to view. Finished last spring, now up and running well. FB, right here: https://www.facebook.com/hashtag/noquarterfuelaltered Hi Mike! Am very happy to build once again, just a little slower these days. Thanks for dropping by! Mike.. Appreciated, thank you Bill. Mike..
-
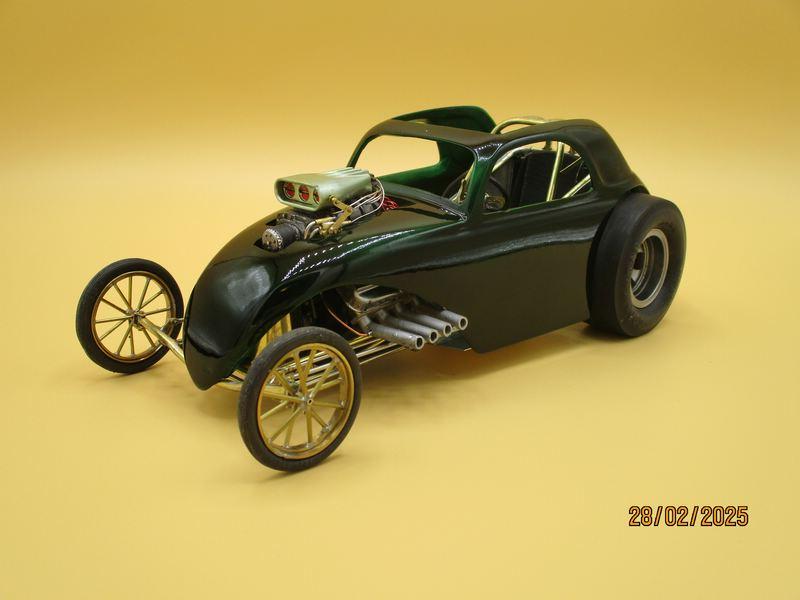
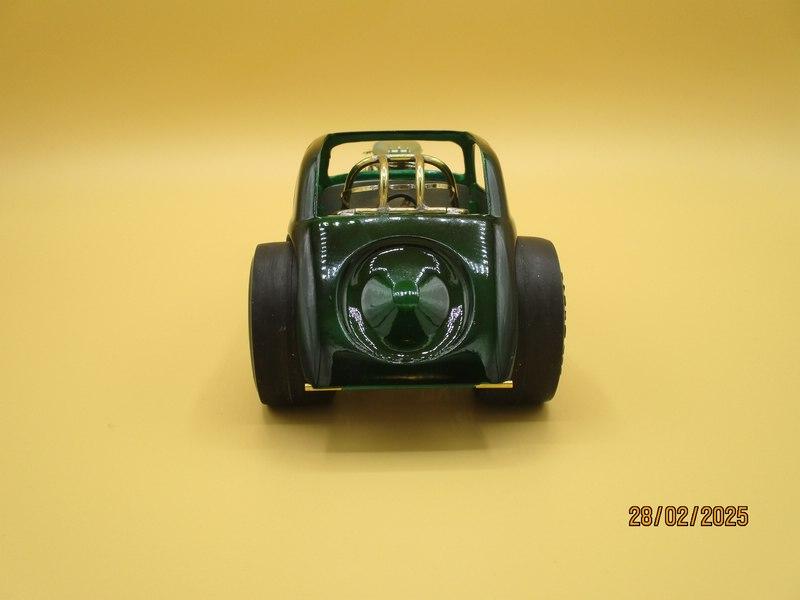
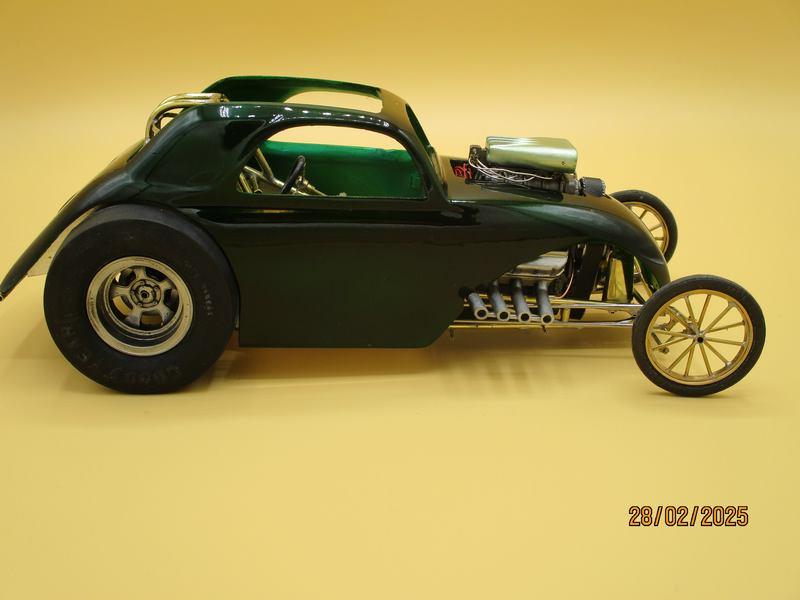
Time to show the finished Fiat. Paint is House of Kolors, blue candy over gold base = nice, deep green. Clear coat has intensive green modifier to add depth. Blower hat has only clear w/ modifier. Many, many coats here. Thanks for viewing. Mike..
-
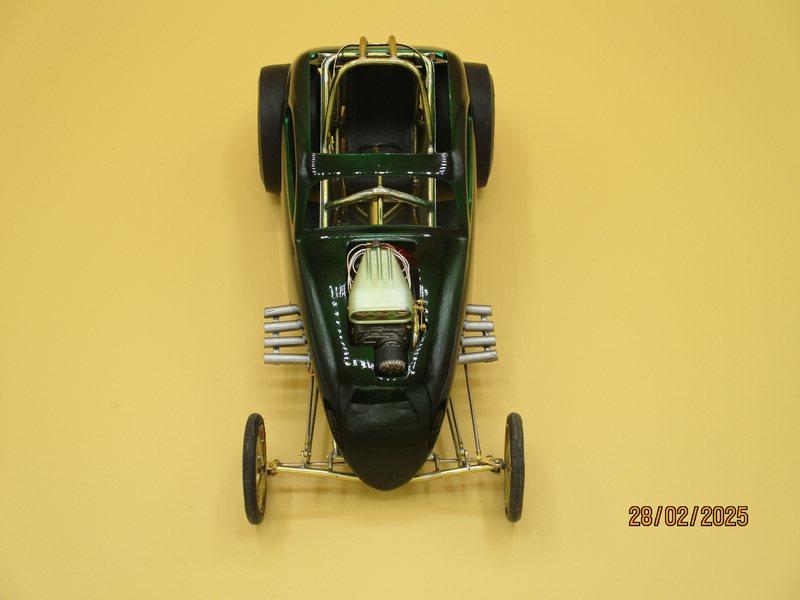
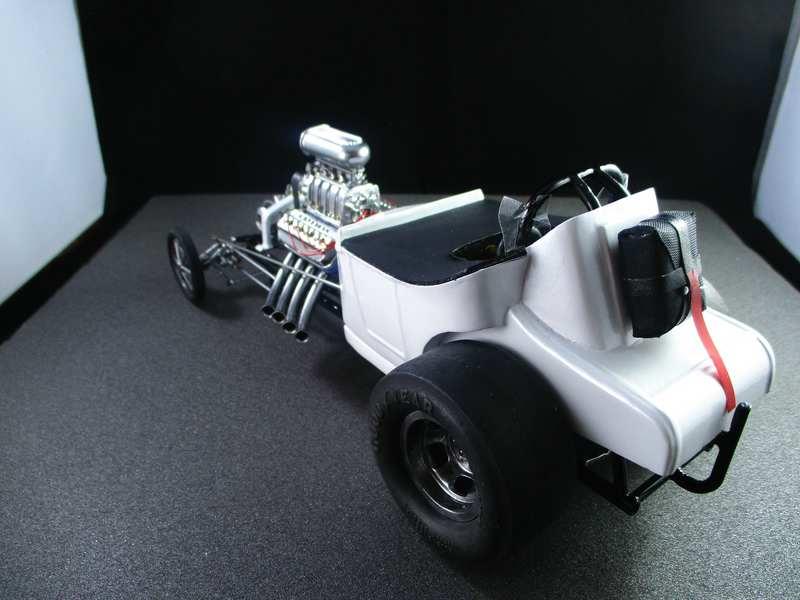
UPDATE: Moving forward, a few odds and ends, polished chassis, clear coat. The tank cleared the hood just fine, but for such a short wheelbase, things get really tight up front. Polished chassis. 3d zoomies.. Motor sits.... OK. Only a few things to add, then paint. I'm moving this now to the 'Under Glass' section. Thanks to all who commented and liked. The car was finished in time for my74th birthday, earlier this year. Greetings, Mike..
-
Thanks Daniel, was thinking the older Hemi suits the car better. Thanks Rich! I decided to just clean up the solder joints more, polish the bare brass and clear it. Been wanting to do it this way for years!
-
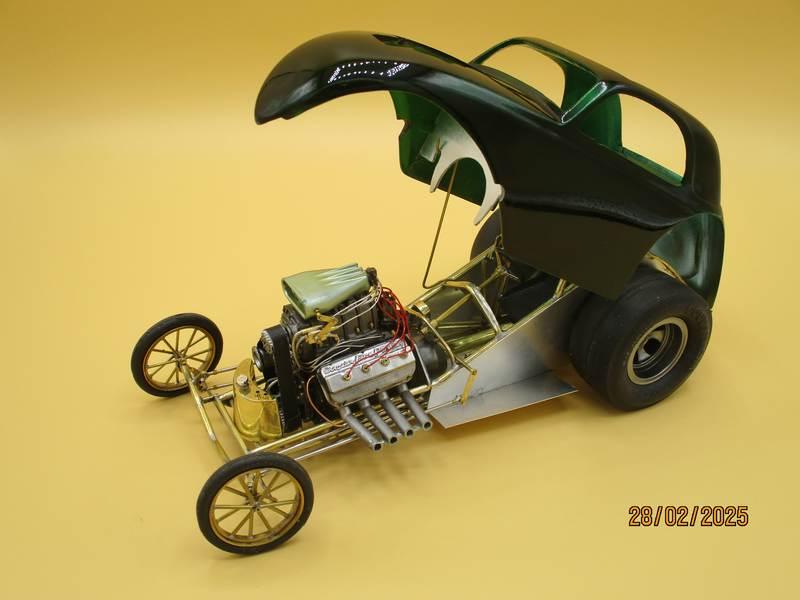
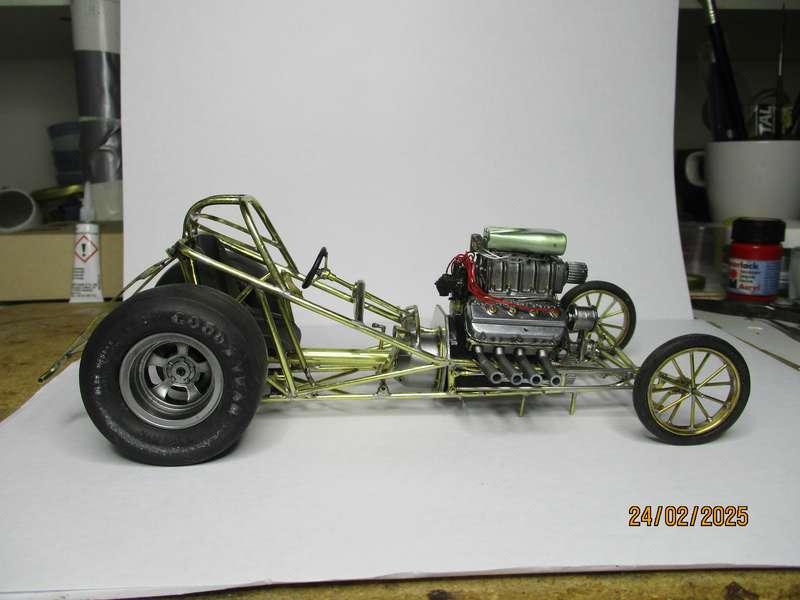
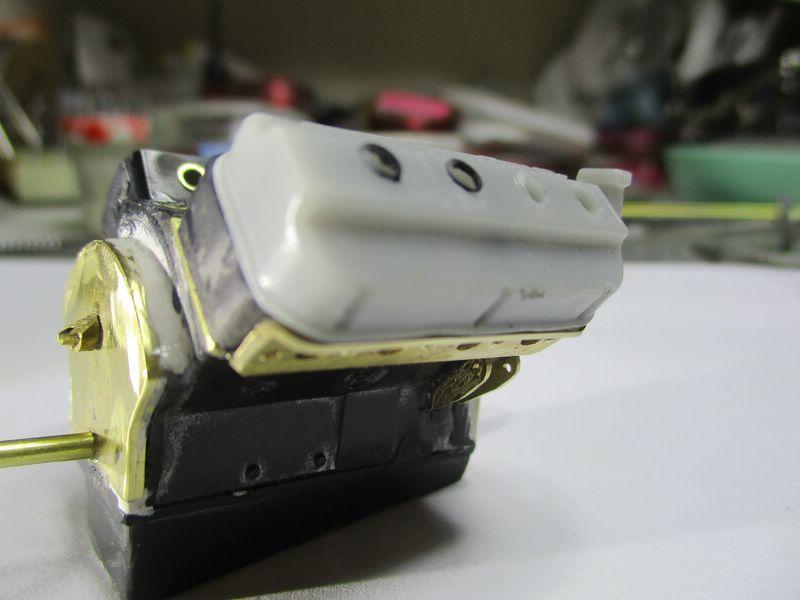
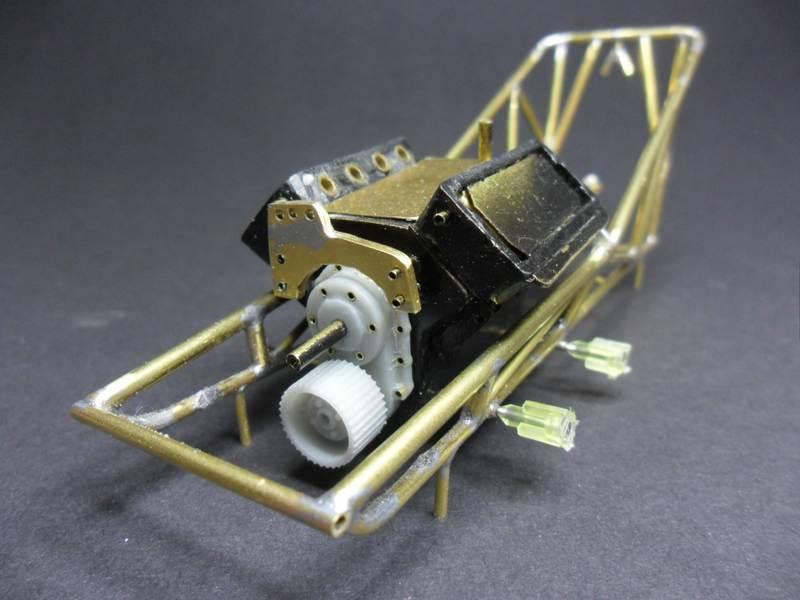
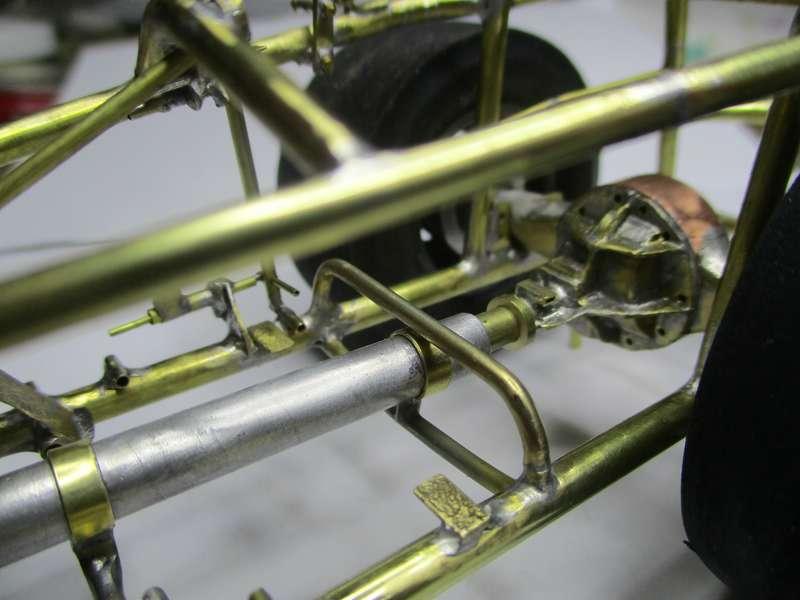
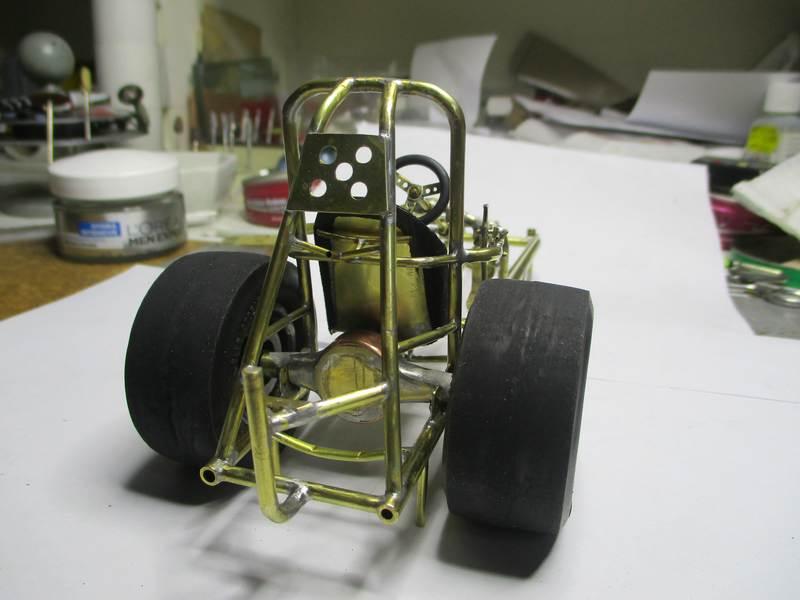
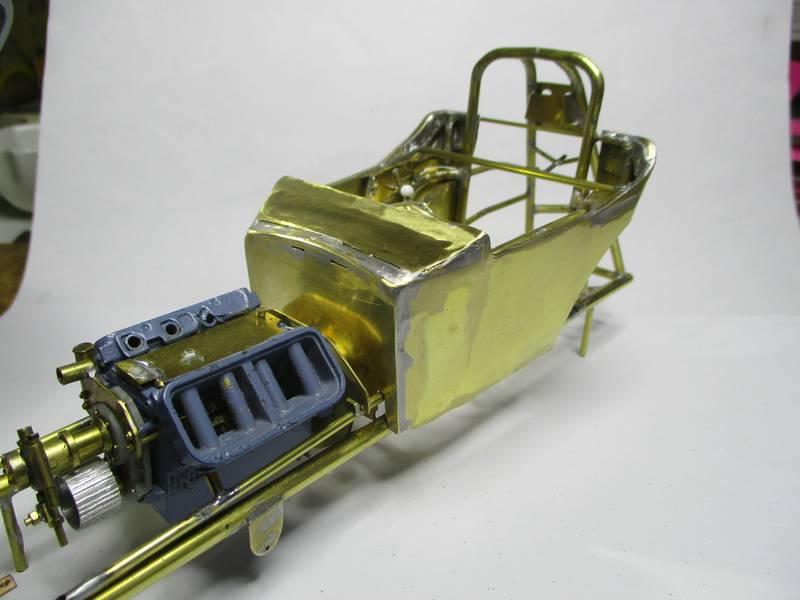
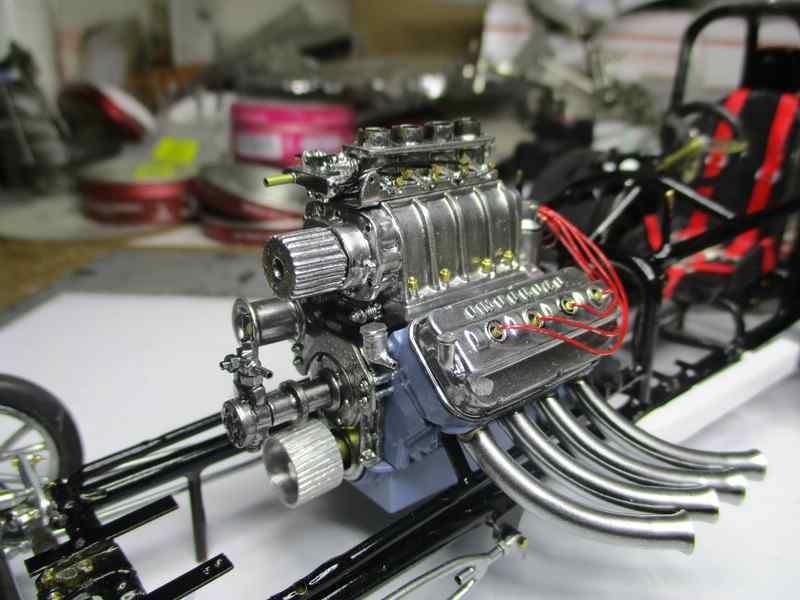
Update: Motor time.. 1. Like with building a real car, choose the chassis you want to use. 2. Get the rear axle, choose the slicks and wheels to be used. 3. Set up the bare block, straight back through the crankshaft to the rear end....one line here. Motor block with oil pan, establish the lowest clearance wanted to pavement. 4. Now, we have the chassis, block in position, rear end mounting points are known. Front end height is known. 5. Now, rear end brackets to be fabricated and mounted to chassis. Motor mounts as well. 6. NOW, we need the chassis to keep this very same height throughout the entire build! No jig necessary! I like to drill holes in the bars below, then affix studs to the chassis to the pavement, at least on all 4 corners. This method will keep at all times the chassis ride height true. Remove the studs after the model is done. Here a few photos of the block sitting firmly in the chassis, even before the roll cage was made. Now for a few motor photos. This one a Revell 426, didn't have a 392 motor, so I just changed a few things. Here the prepped motor, some brass parts will be visible as well the sleeved holes for the later on bolts. Notice the 2 pins, through the brass chassis allowing a removal of the motor at anytime. Sizing things up... Fuel tank. For a scale 94" WB car, things get very tight under the hood. I chose this style fuel tank, very similar to the famous 'Burkholder Bros.' Fiat. Next up, getting some color on this car... Thanks for viewing.
-
Thanks much, Dennis. The entire project was a thrill! Learned lots of inside information. One thing sticks out for me, after a while the project photos were being shown to the entire crew, the ensuing comments from the real car guys were amazing. Made my day! Mike..
-
Marty, very kind of you to show such enthusiastic emotion, very humbling. Fact is, this model goes to the Snizek family. Marty, I'm alone in life these days, all my other car models of this caliber have been accepted by a NHRA Museum in the US. I'm proud to donate. Go for it! Mike..
-
Great to enjoy praise from a Mopar fellow! Thanks dearly for your comment! Mike..
-
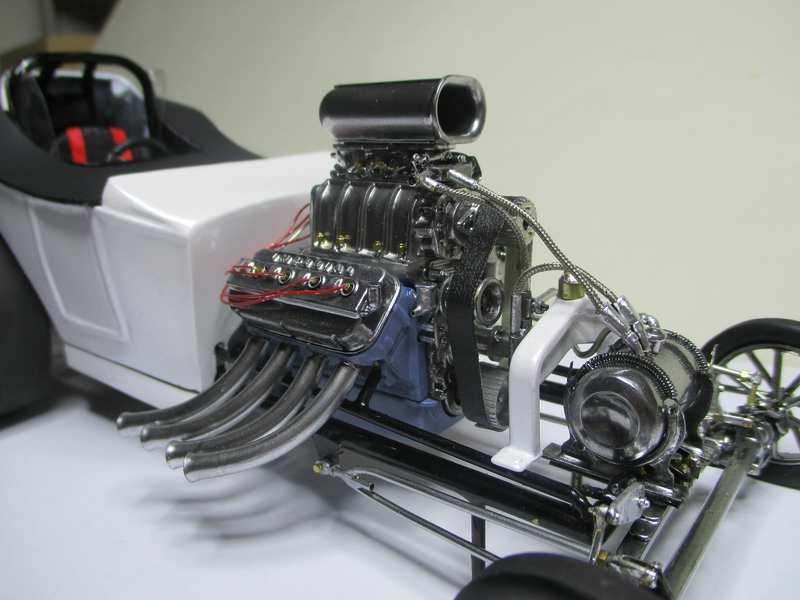
Thank you, Michael! Indeed, the project brought me to new areas that I hadn't previously known. Brass body, an insanely intricate front suspension and other things....for example, the 'Imperial' rocker covers, which were custom-made for this model. Great memories. Yes, I'm proud. Mike..
-
Thank you Chris, a very intense project and am happy with the result. Thanks much for your approval and commenting! Mike..
-
Thanks Kenneth, I've been brass modelling for a while now, luckily getting some right. Thanks much for your approval. Mike..
-
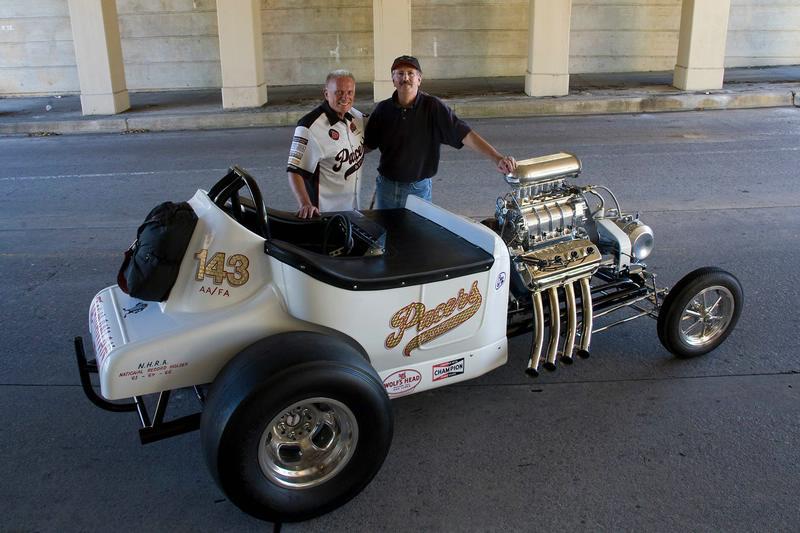
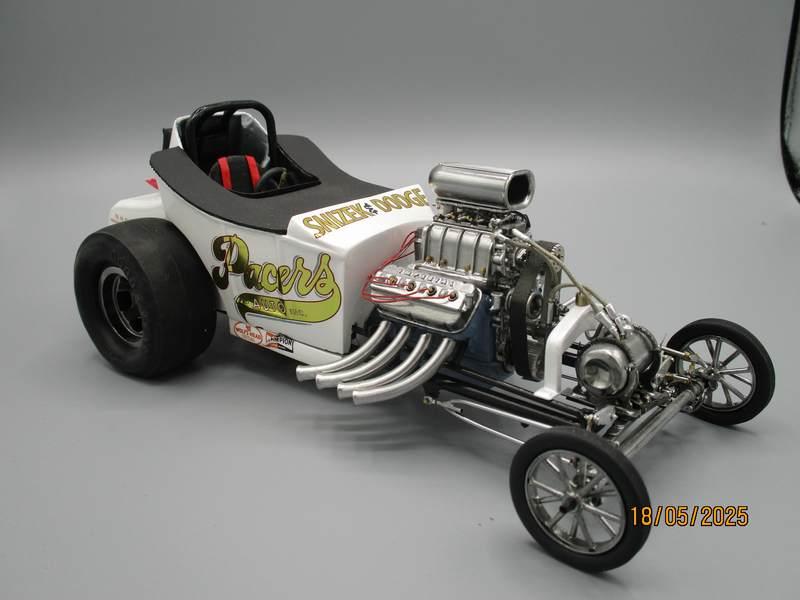
Hello Maurice, surely, the most humbling approval I'd ever expected here on this forum. Thank you kindly for appreciating the scope needed to get this iconic car right. The Pacers Family fully approve, gotta love a white Altered car! Yes sir, I only build big hitters, latest being very early 70s. FAs and FEDs. Thank you, Maurice!
-
Thank you, Bill. I have a few of this caliber on my shelf. Only 12 in all. Being a senior, for me the most important thing being, contact with the real racers. Gain their trust, promising to build their car, true scale. Show these boys what to offer. Show them, step by step, the build sequence. Just, I NEED close up photos, good quality. Bill, this was the most fun part of all! I cherish every single message, every single photo. So much was learned! Yet, time has become the real treasure. So be it. Mike..
-
Scott, thanks much! The project was intense and informative....like now, ask me about a car from then? Such a wonderful adventure. Thank you. Mike..
-
Michael, your words are soothing for my older guy heart, lets me smile. Very much appreciated. Mike..
-
Wow! Hank, perfect words. Upon realizing the real car guys would help a scale modeler build their own car, knocked my socks off. OK! Go for it! Done. BTW, the family loves the model!
-
Terry, thank you kindly. This model is very dear to me. The ensuing project evolved to a daily conversation with the real guys. Back then, only asking the family for details about this special white car... The family were very kind. Then thinking....wow, I want to build a replica......here it is. Thanks, Terry.
-
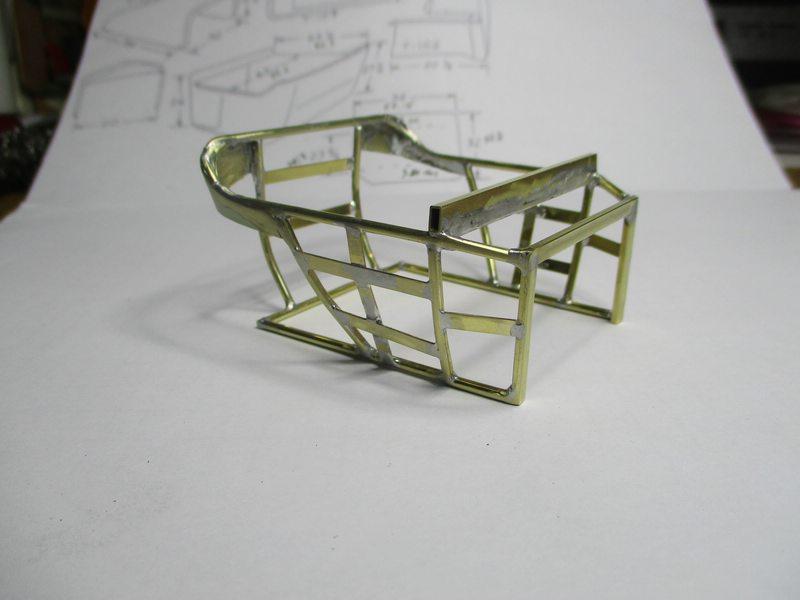
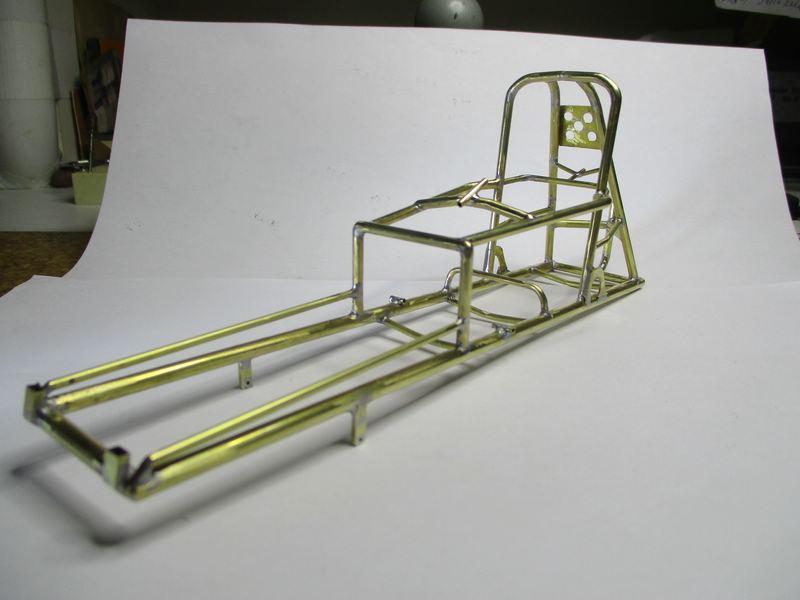
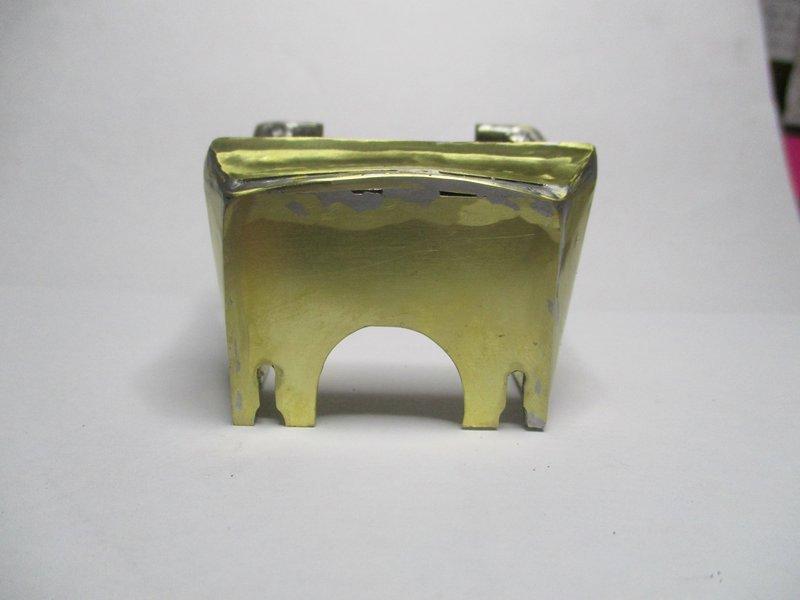
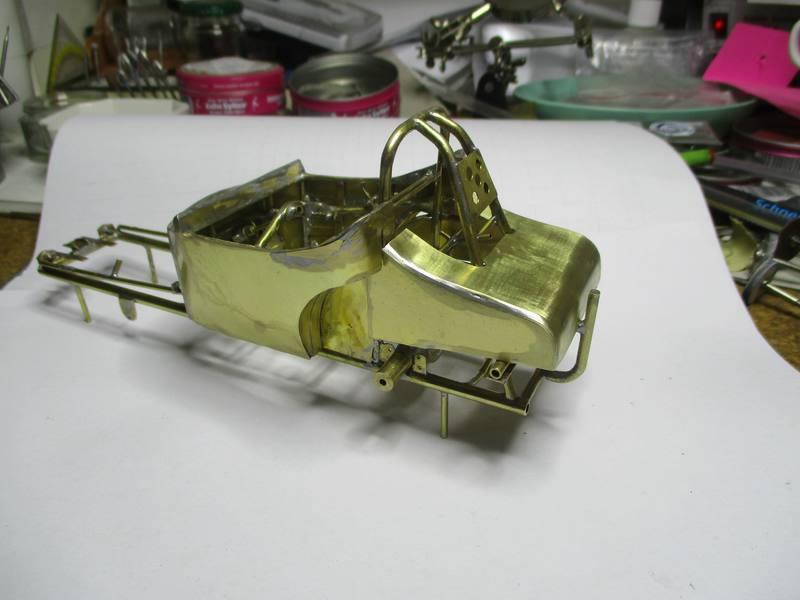
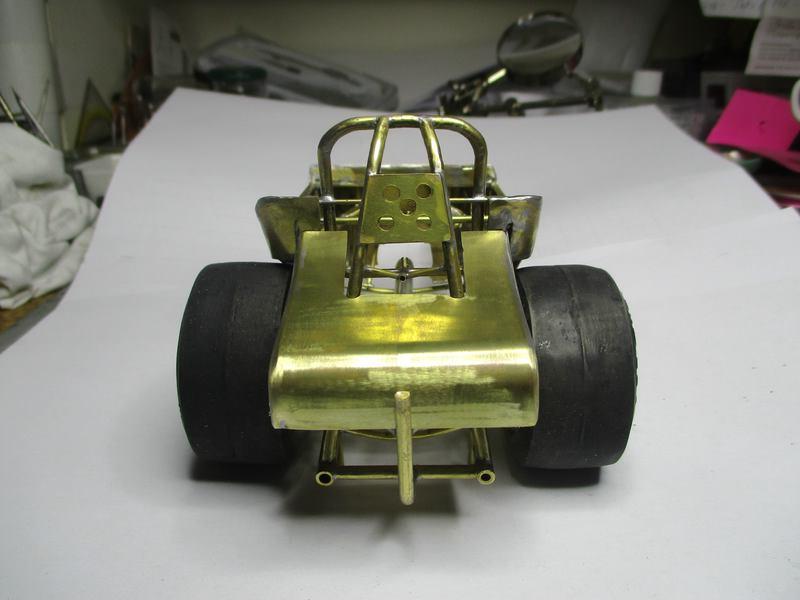
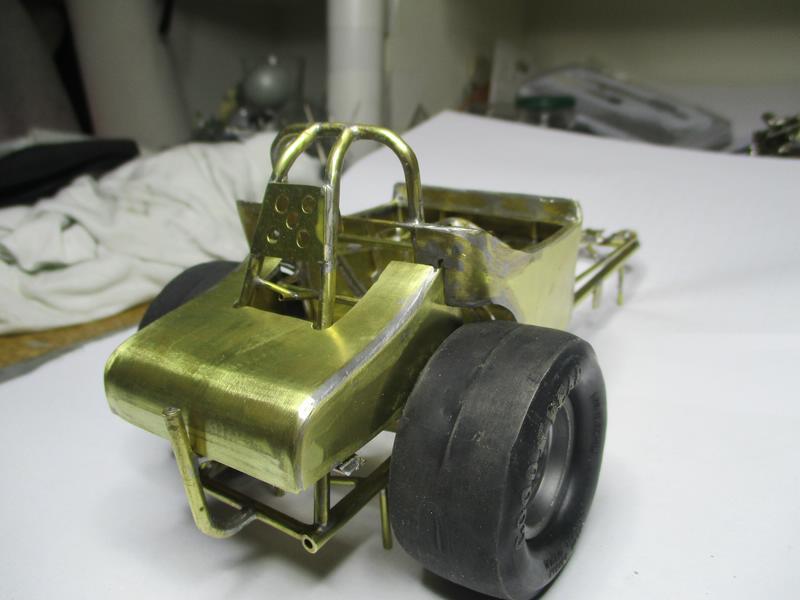
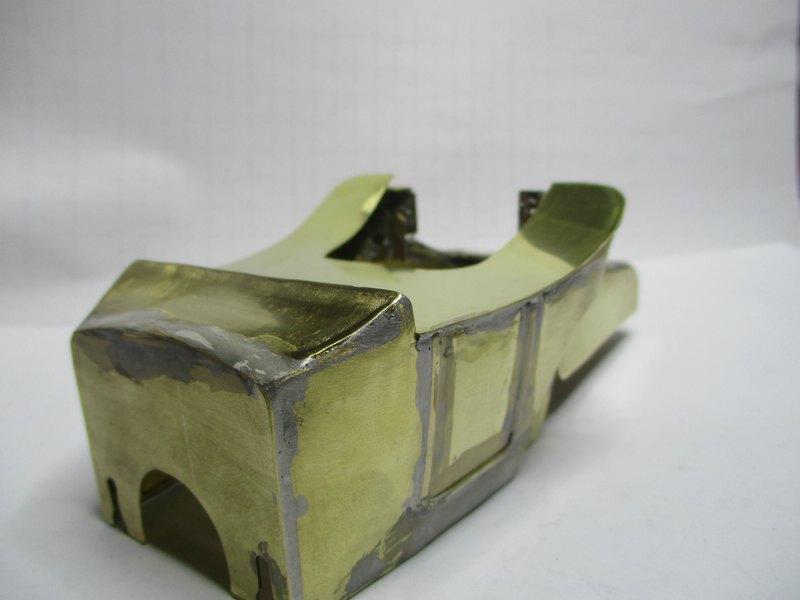
Brass built replica, finished 2020. With the exclusive help of the Snizek Family (builders/owners), 100s of exclusive digital photos showing every stage of the new (replica) car from late 60s. Very intense project. I was not allowed to post w/o family approval! Step by step, first show my build, then wait for approval. This is the finished brass model w/ full family approval. I will not show the original photos of the real build. Here the finished, real car, with founder/builder Mr. Snizek and son Scott, now the boss. Getting started, the tub, from original Ford diagrams, just using more side reinforcement, knowing that bending brass sheet over the tub will need some force applied.... The chassis, was well known and used by many from back in the day. Some interior work... Chrysler Imperial 8 3/4 rear end, 1958... Now the front end. This was dramatic, being the most difficult front suspension I've ever built. Scott only showed 1 step at a time, knowing if it's not right, then the project closes down. I had agreed to these terms at the very beginning. This was the most intense endeavor, going on for a month. Read, back in my best days, working daily on a project! Only 1 photo now....too intense to do a step-by-step photo session.... Front 12 spokes... Body. Now the reinforced tub need to play out... Here the cowl. This was not fun. Needing a concave bend that reaches downwards... The 'turtledeck'.. Here the famous 'hump-back' for which the Pacers were, still today, recognized.... Door molding.. Cover. Motor. 100s of photos, block and some parts are 3d printed, many are my brass additions. Here are 3, keeping this topic short as possible. 1. head preps.... 2. Injection ... 3. All done.. Closing now.... White car... The last photos show a later date. The model was finished late 2020. My best car model to date, cannot do any better. Thanks for viewing, Mike..
-
Fine looking Tasca Ford Galaxie.