
MADmodelDOCTOR
-
Posts
520 -
Joined
-
Last visited
Content Type
Profiles
Forums
Events
Gallery
Posts posted by MADmodelDOCTOR
-
-
I like it! I think I'll order one. Sshhhhh my wife's in the next room
-
On 1/21/2024 at 5:00 PM, Vintage chromoly said:
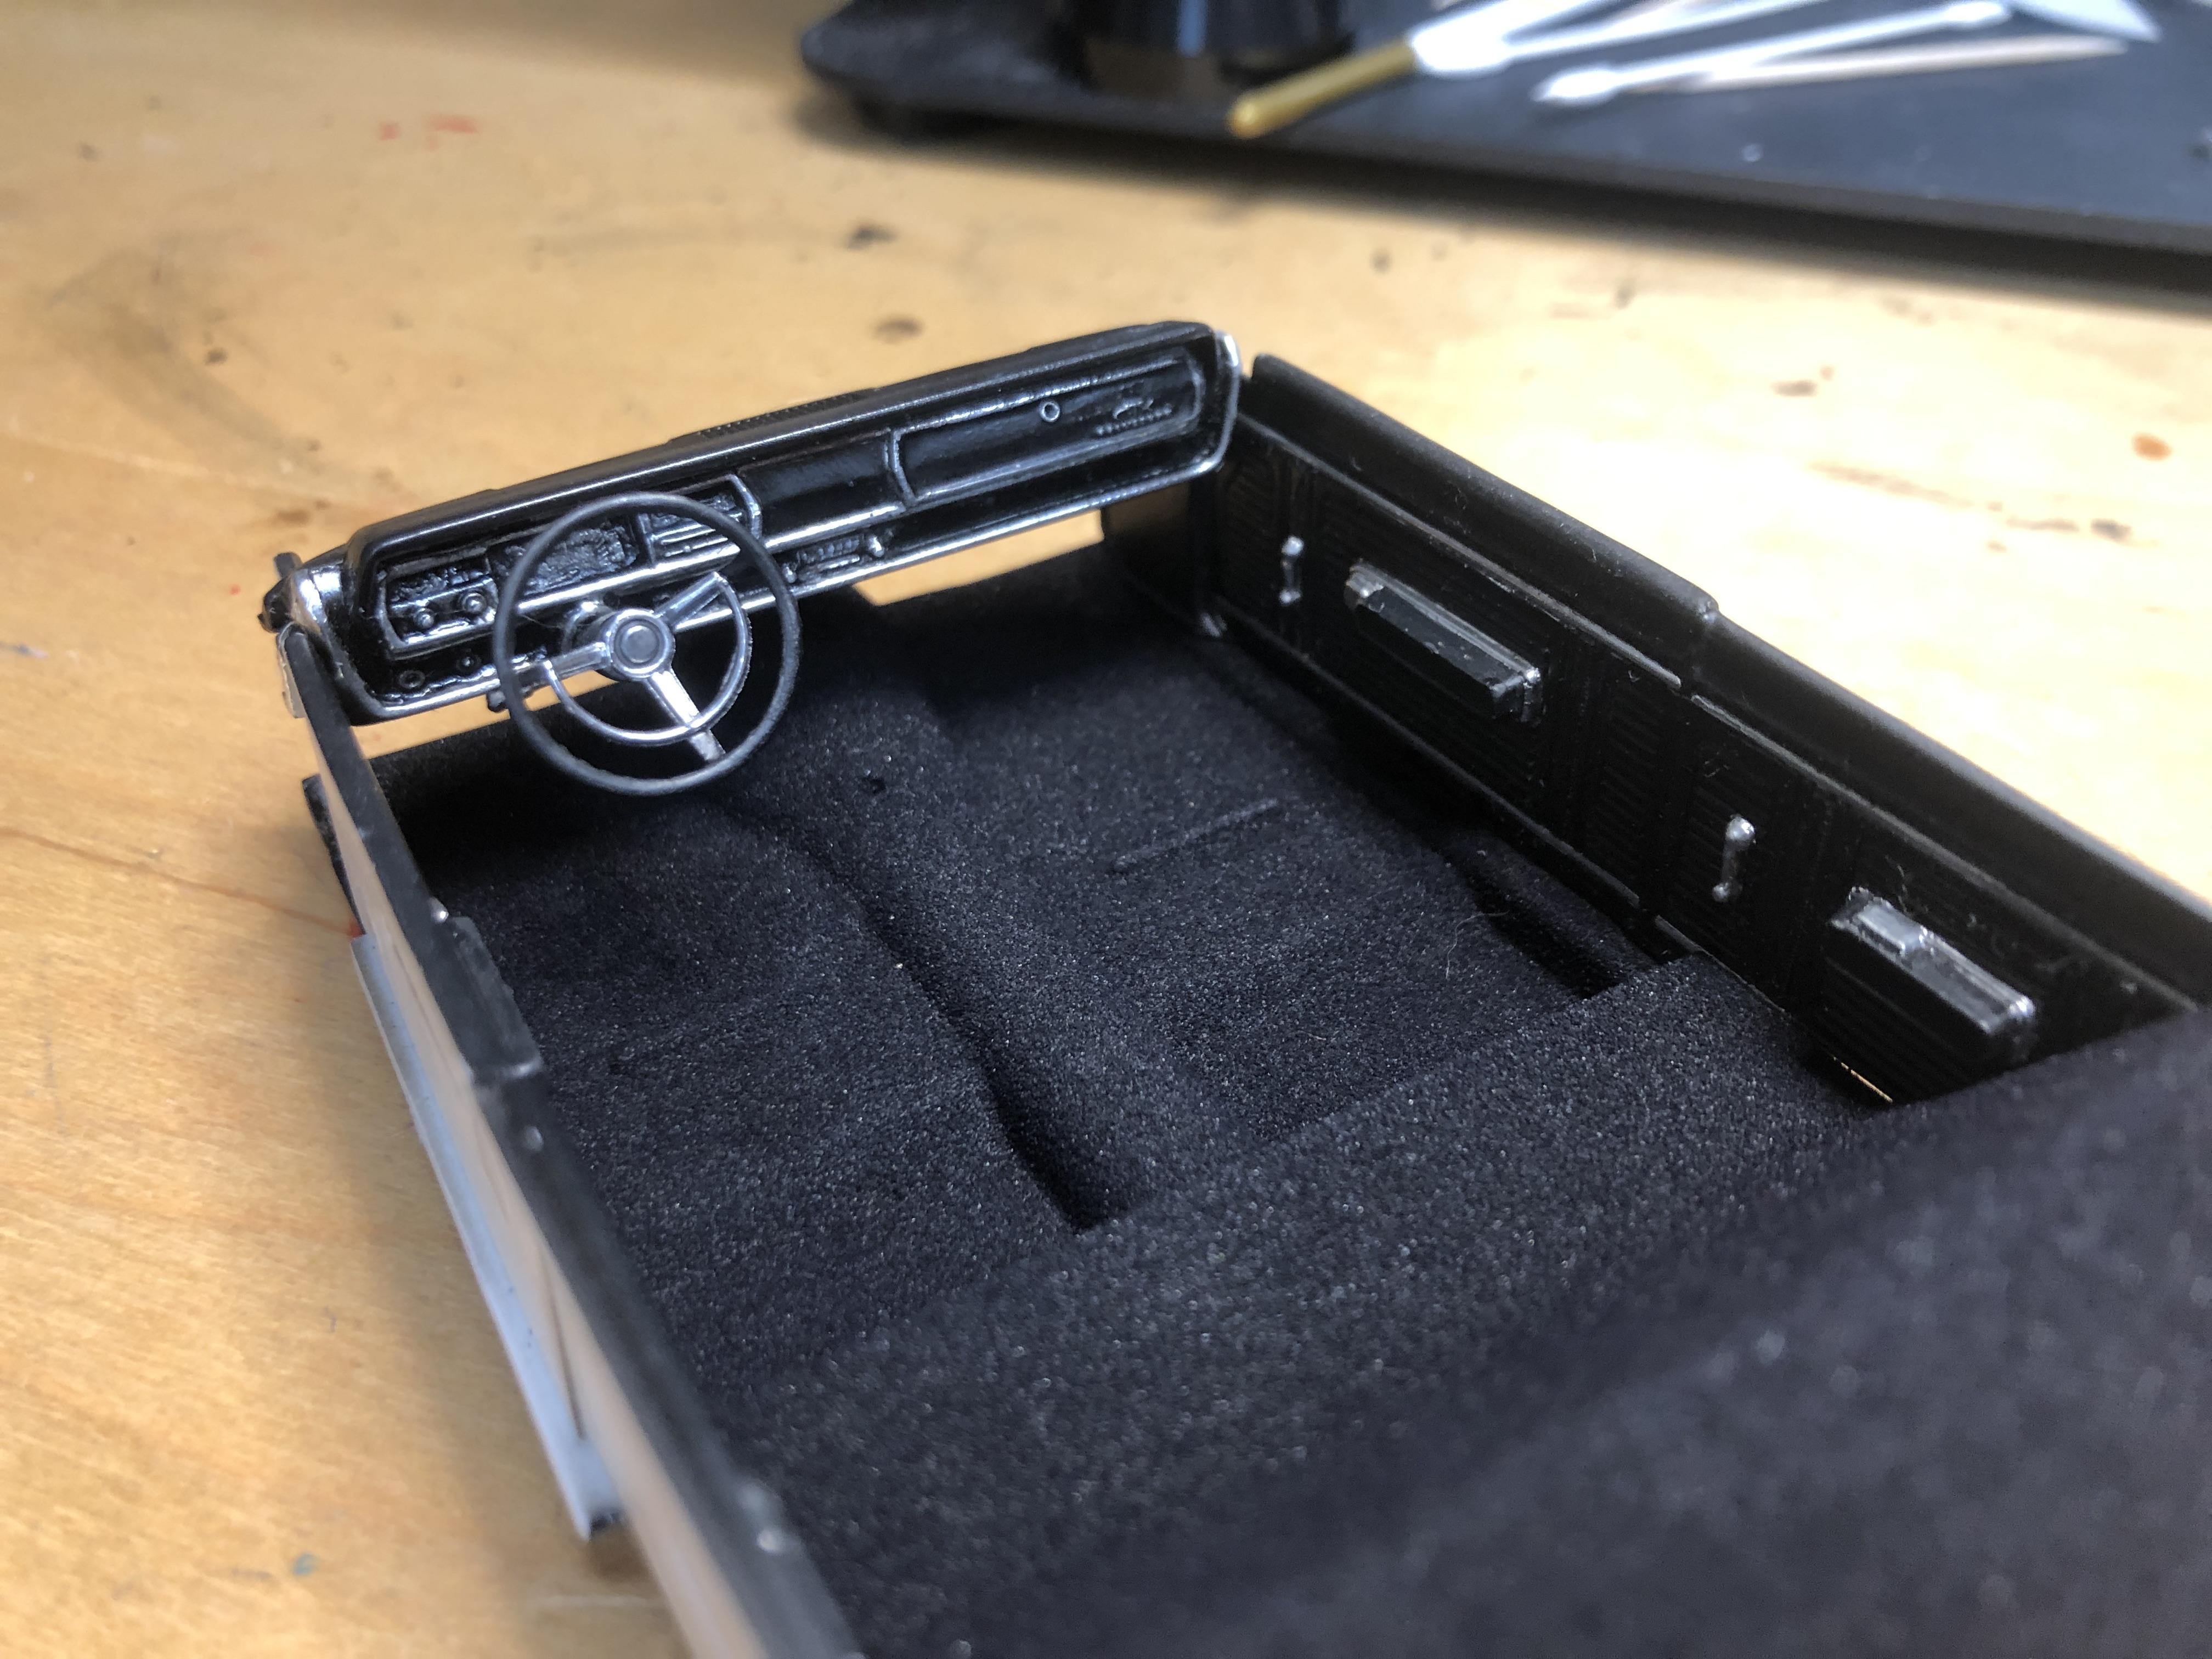
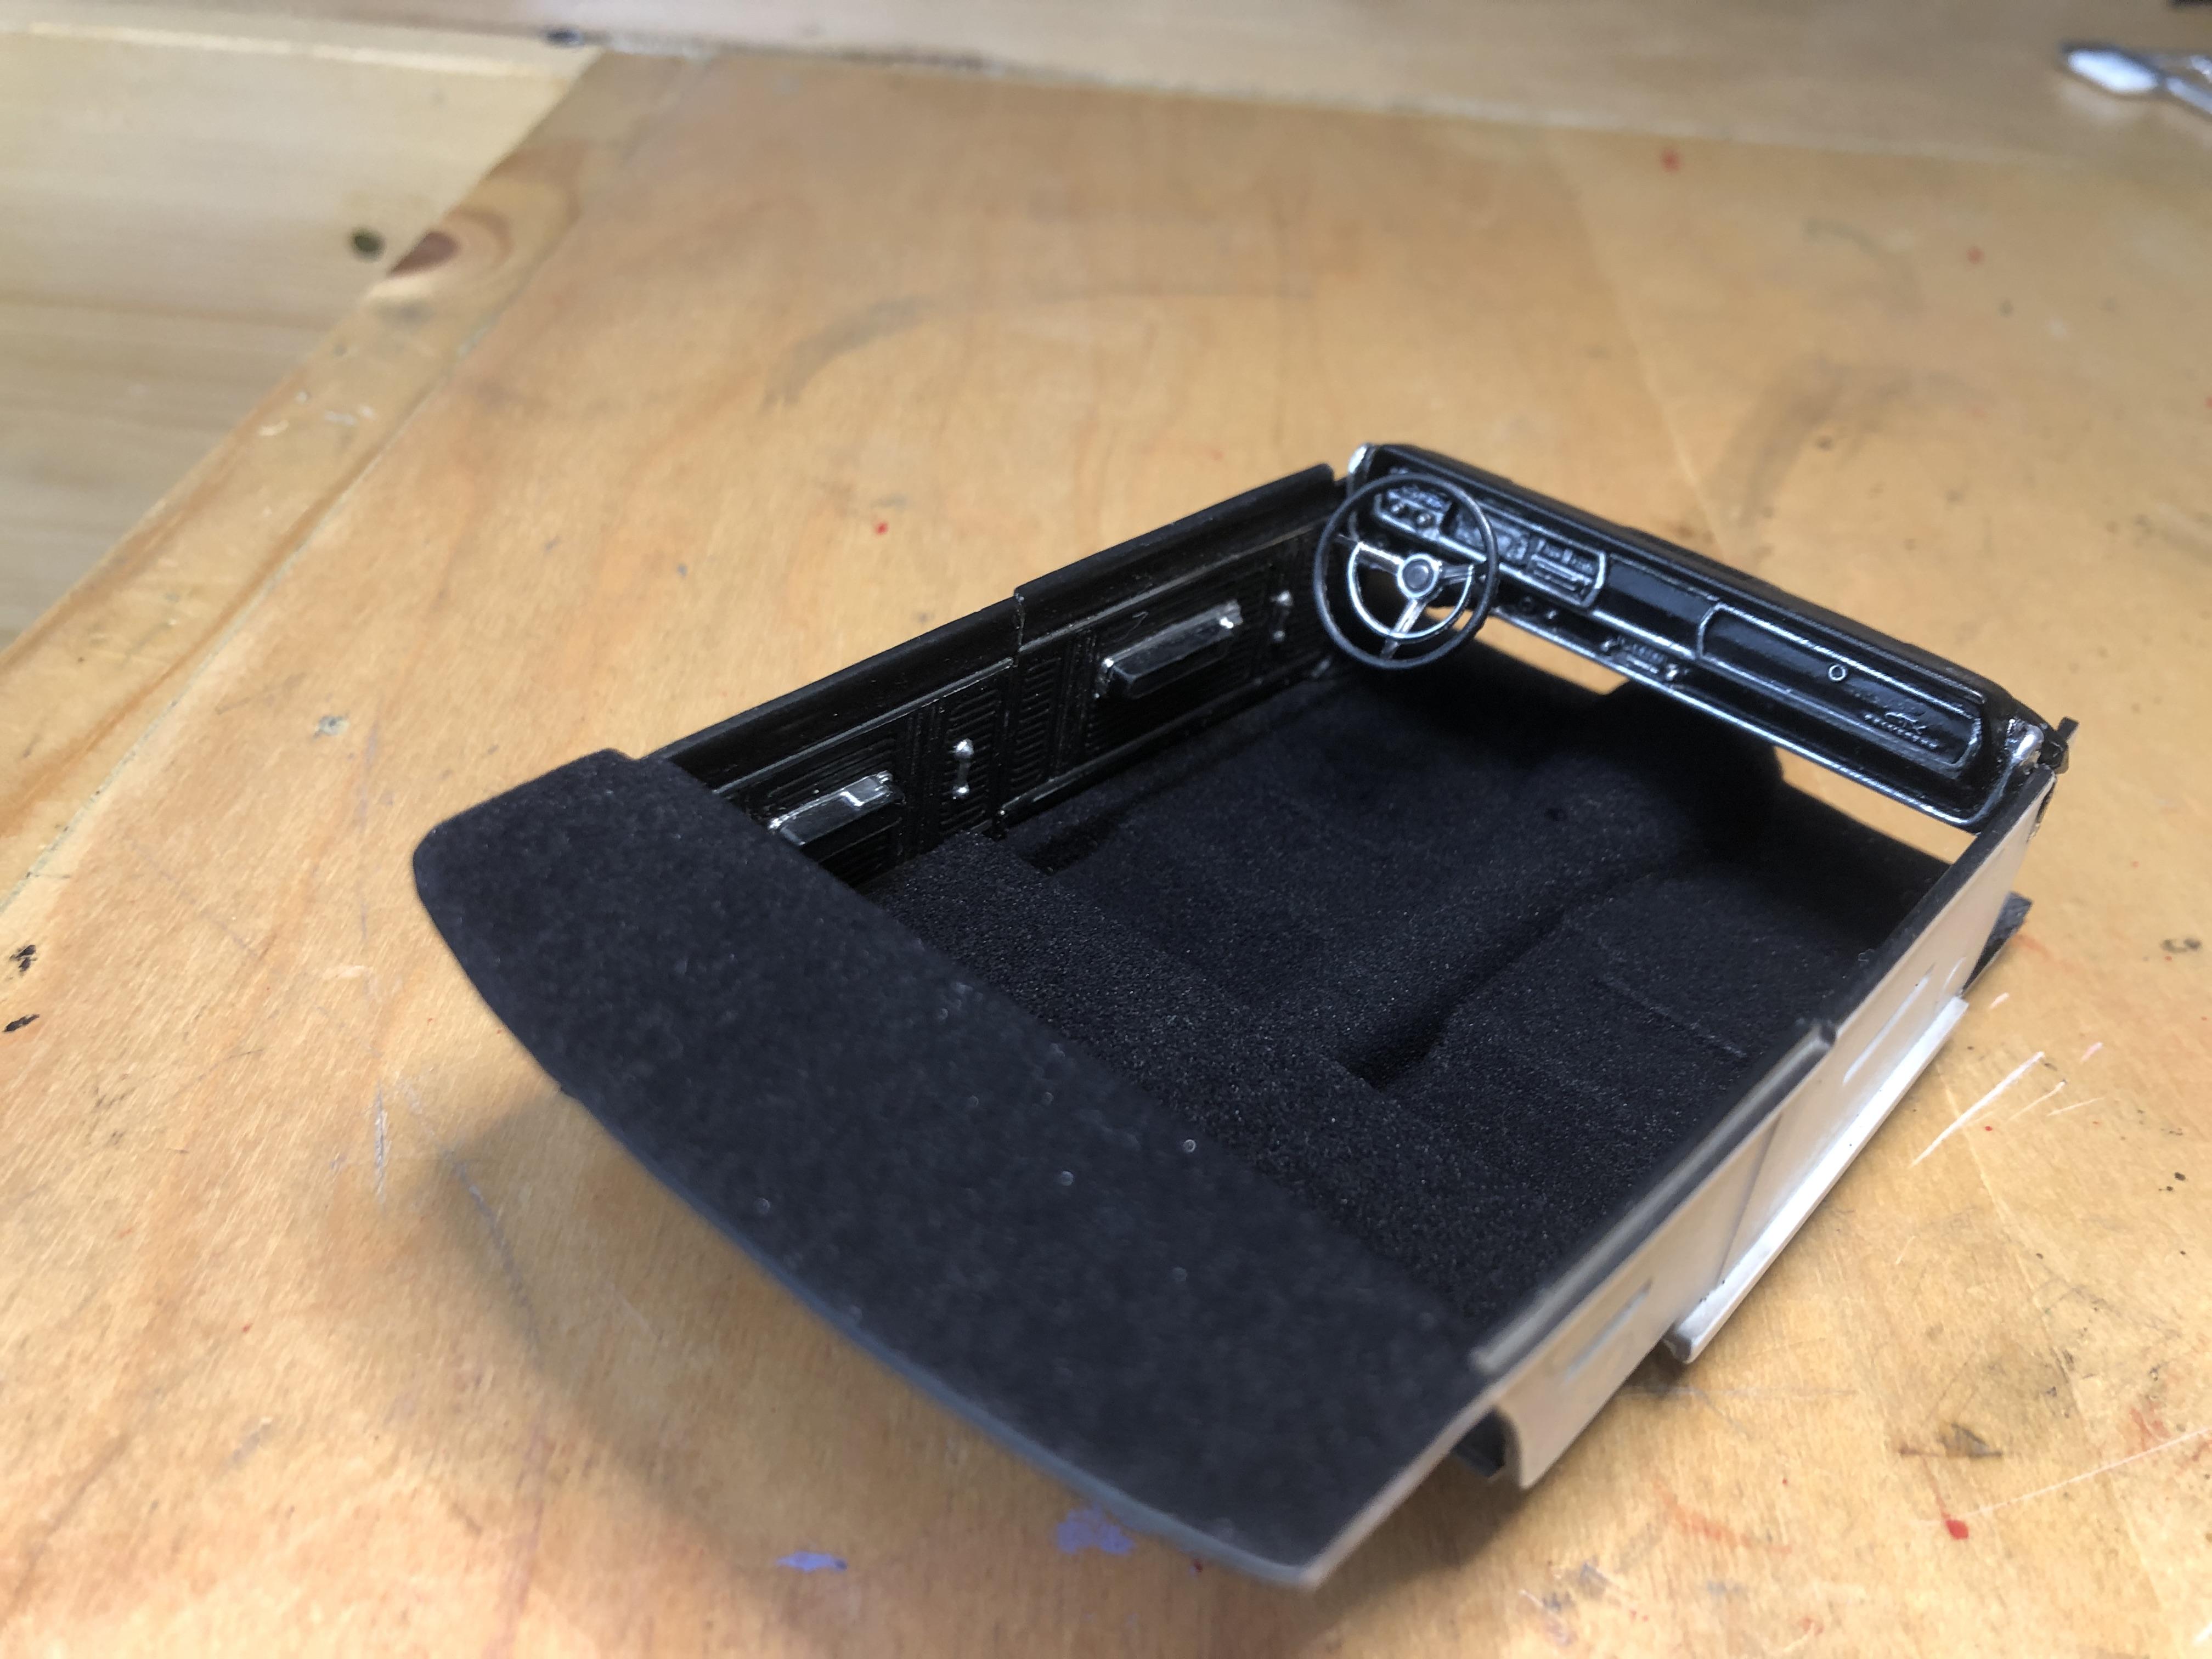
Working on getting the interior together.
I used embossing powder for the carpet.
I need to bash a set of A100 seats from another kit, but I haven’t cracked the donor kit, yet. I hate doing that, but it will likely be my next move.
comp resins has A100 seats
-
 2
2
-
-
On 1/26/2024 at 5:29 PM, magicmustang said:
My JoHan S & M version in my stash is molded in a hideous green.
I had a still have original halfbuillt.had the green one as well
-
On 1/24/2024 at 11:33 PM, Straightliner59 said:
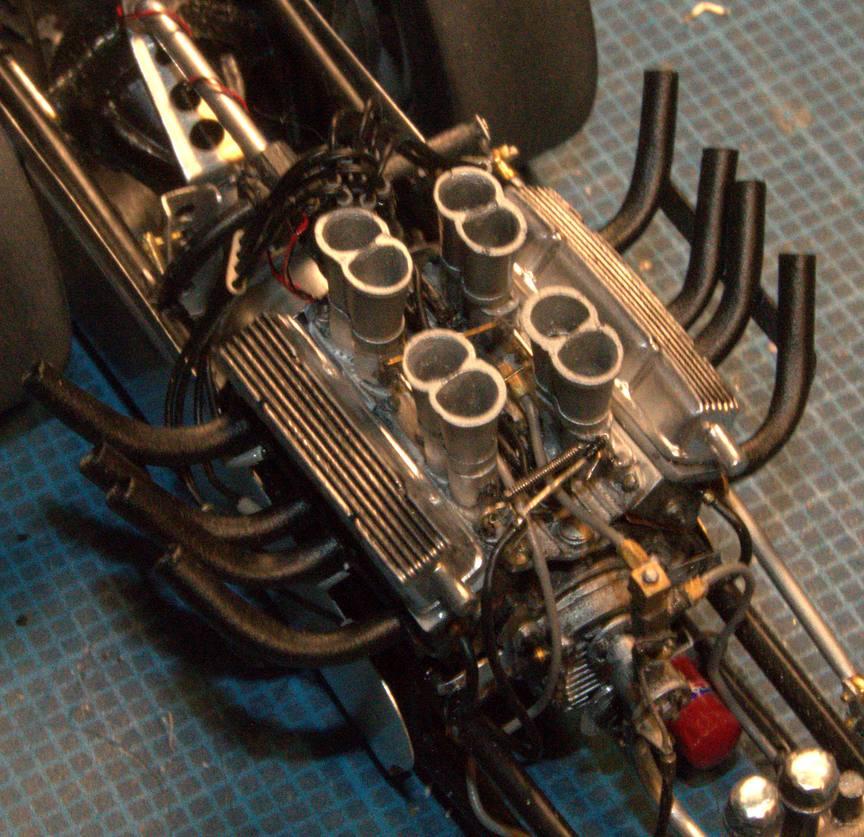
Some of them are quite small, too! I had somebody tell me that guitar strings were too big to use for throttle return springs. I showed him, otherwise!
I still love those Enderle's.
-
1
-
-
that would probably make it a C/GS
-
We never saw one like this, back in the 60's did we fellas.
-
1
-
-
Nice build. But I don't know what to say about the black paintjob!
-
This is a great presentation of this kit.
-
1
-
-
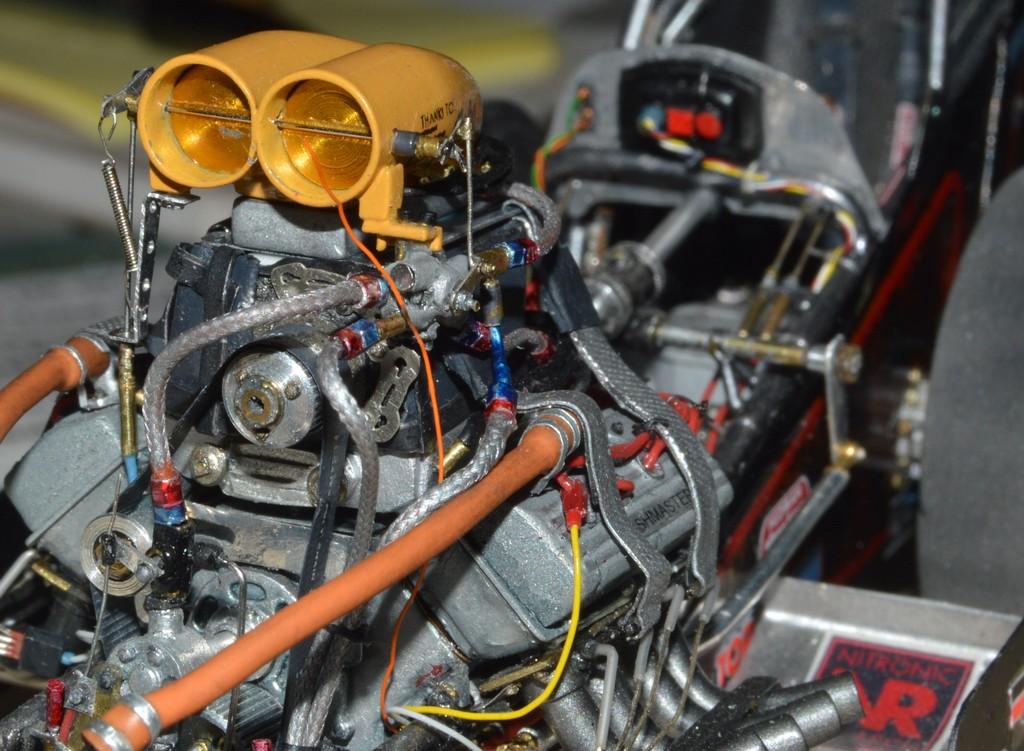
Headers are looking good, man.
-
I just showed this to my wife and said, "now tell me I'm crazy".
-
THIS IS INTERESTING1
-
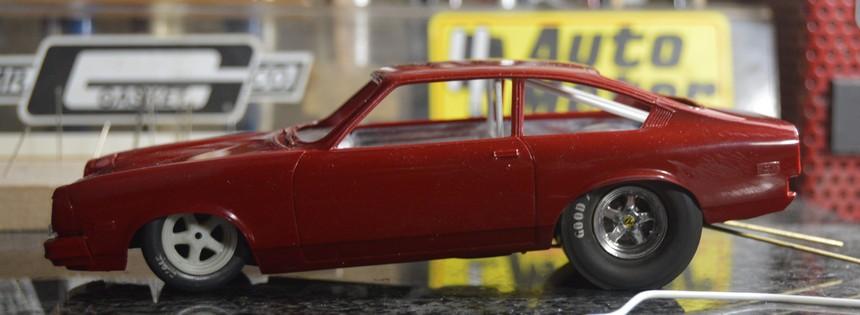
On the chassis, I used the revell z28 and firewall and used kit door panels and dash. A little work it fits well, looks good.
-
1
-
-
On 8/29/2022 at 11:15 PM, Straightliner59 said:
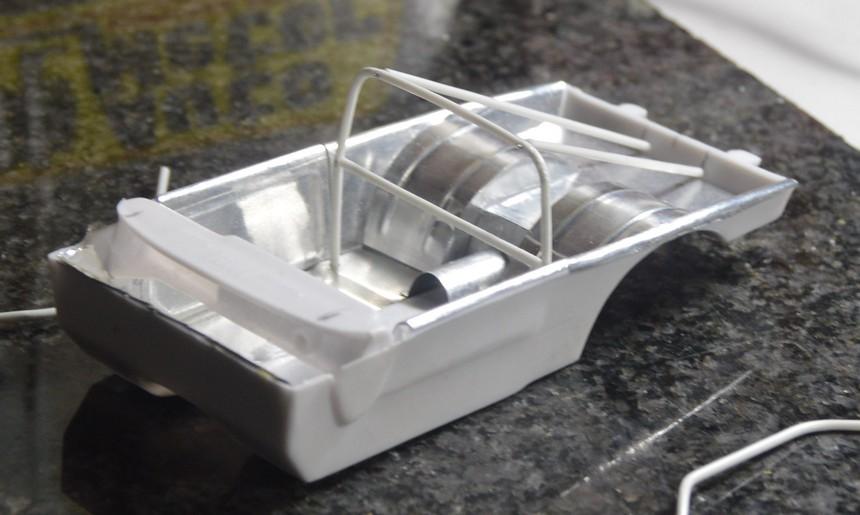
I have the main cage loop built. I think I have a nice cheat figured out for the front lower bars of the cage and the halo section that should make it a pretty simple installation; key word "should".😄 The cage is .060" styrene rod--it's not quite in its place, in the photos. Once it's sorted, I can finish installing the tunnel, and the bits for the shifters. Then, it'll be on to the seats and dash, and a scratched tach for the dash. I've started kicking around ideas for an appropriately-styled (tacky?) '80s paint scheme. Questions, critiques and comments are always welcomed. Thanks for looking!
I would go with fogged candy blue down the middle with purple on the sides, over the candy red base.
-
I love Chevies and drag racing! Looking good. Nice job on wheels and brakes.
-
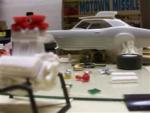
Nice job and cool "museum"
-
Very interesting.
-
1
-
-
They both look great man,
-
-
On 5/20/2022 at 10:14 PM, modelcarcrazy said:
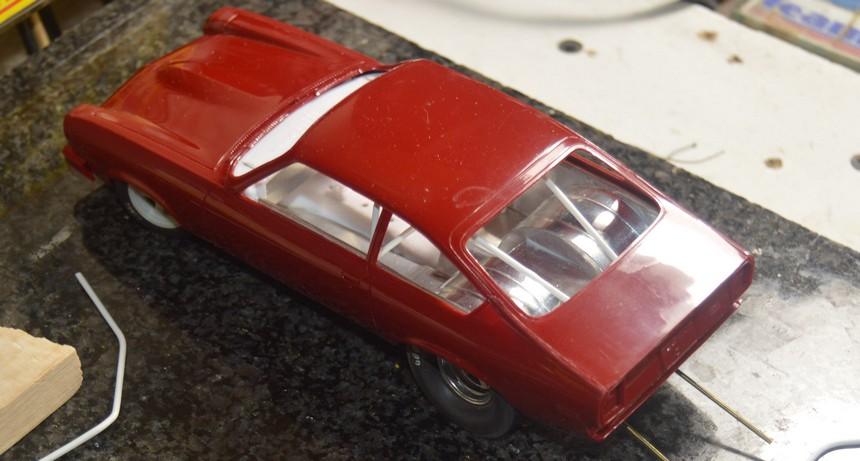
This build started out a little different than most of my other’s. I had a kit of the AMT 32 5 window coupe and when the Li’l Viky kit was reissued, I bought one to bash together with the 5 window coupe. I switched the chassis and engine and all the cool drag parts out of the Li’l Viky into the 5 window. After all that, I was looking at all the remaining parts from the two kits and thought there were enough left over to build something with. The 5 window had a fairly neat looking small block Chevy and a promo style chassis and the Viky had the stock front axle to go along with the body, hood, and grill shell. So after evaluating the situation, I thought what would Tim Boyd do? Therefore, that’s where the WWTBD came from. 😁 I didn’t have to think long and decided he would build a killer drag car with it, so that’s what I set out to do. I began by taking the promo chassis and removing the floor boards and molded in exhaust. I cleaned up the frame and rear axle and used sheet plastic to create new floor pans. In my eyes that was the biggest bang for the buck, as it made the rear axle appear to be a separate piece. I also built up the rocker panels to help close up some of the gaps with the rockers and the frame. I dug through my parts boxes for the wheels and tires and some other parts as well. Most of what I used came in the two kits though. This is my first Tamiya paint job and it won’t be my last, that stuff laid on like a dream. The decals were some from the kit and an aftermarket sheet from AMT. I hadn’t built a drag car in a long time and I doubt it would pass tech inspection,but it was a fun one for sure.
Way back in the 80’s I had discovered the model car magazines on the market at that time. There wasn’t anything remotely close to the internet at that time, so if a person wanted information or images related to model cars, the magazines and some books were the only game in town at my house. So I got every one I could find and I studied them just as hard as I studied for my masters degree. I had a great desire to learn all I could about building and painting models. My favorite contributors were Bill Coulter, Juha Airio, and of course Tim Boyd. There were quite a few others who contributed as well. I learned quite a bit from those fellas and they saved me from heading down the wrong road many times with their willingness to share their knowledge and the great how to articles they created. I would like to thank them for all they have done for the hobby. I’m forever grateful and I’m still modelcarcrazy to this day.🤪
For real, man!
-
14 hours ago, Wolf said:
Thank-you gentlemen for looking in and leaving comments. Much appreciated!
The following is stuff I was trying to get posted last night but kept falling asleep. Every few minutes I’d be startled awake when my i-pad would fall from my hands and smack down on my chest! It’s things like that which remind me that I’m looking at mid life through the rear view mirror. LOL!
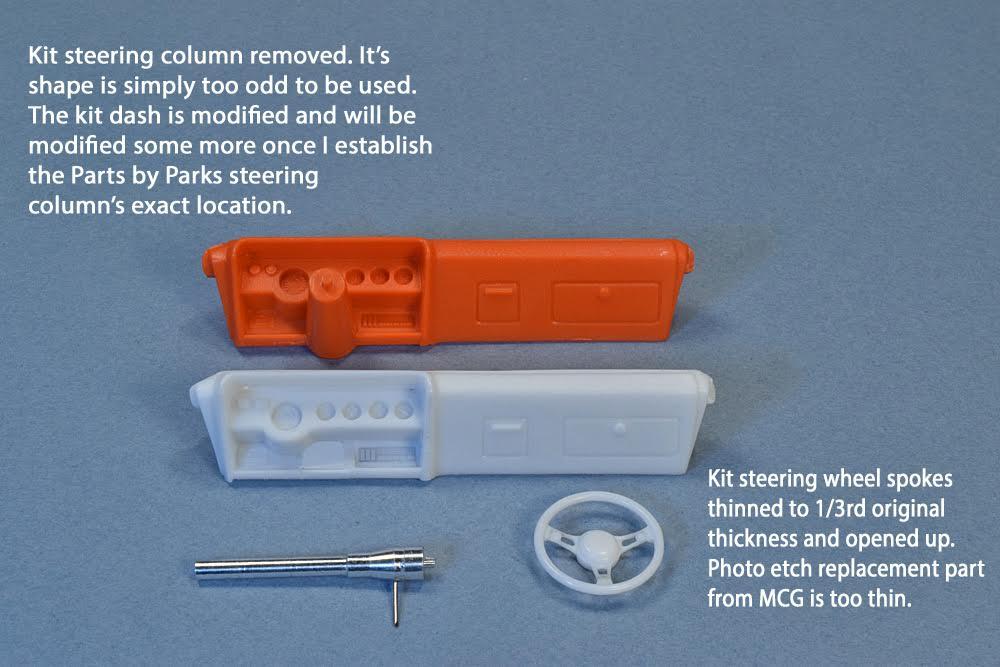
The kit dash and integral steering column didn’t strike me as looking too prototypical so the strange steering column will be replaced by one from Parts by Parks. I’ll have to scratch build the corrugated collapsible section and then add the steering wheel. As far as the steering wheel is concerned I decided to modify the kit piece rather than use the photo etched spoke assembly provided in the MCG set. The photo etch piece was simply too thin to look realistic. I opened up the holes in each spoke and then thinned each spoke by roughly 1/3rd it’s original thickness. Now that it’s been confirmed by John Shoe, the steering wheel will be finished semi-gloss black (for scale effect) on the back portion, and wood grain on the front. I think that’ll look sharp when finished. I’m still trying to decide whether I’ll leave the dash configured as is or modify it to represent the Rallye version the real 1:1 car came equipped with. If I do the conversion I’ll need to source a whole new set of instrument decals.
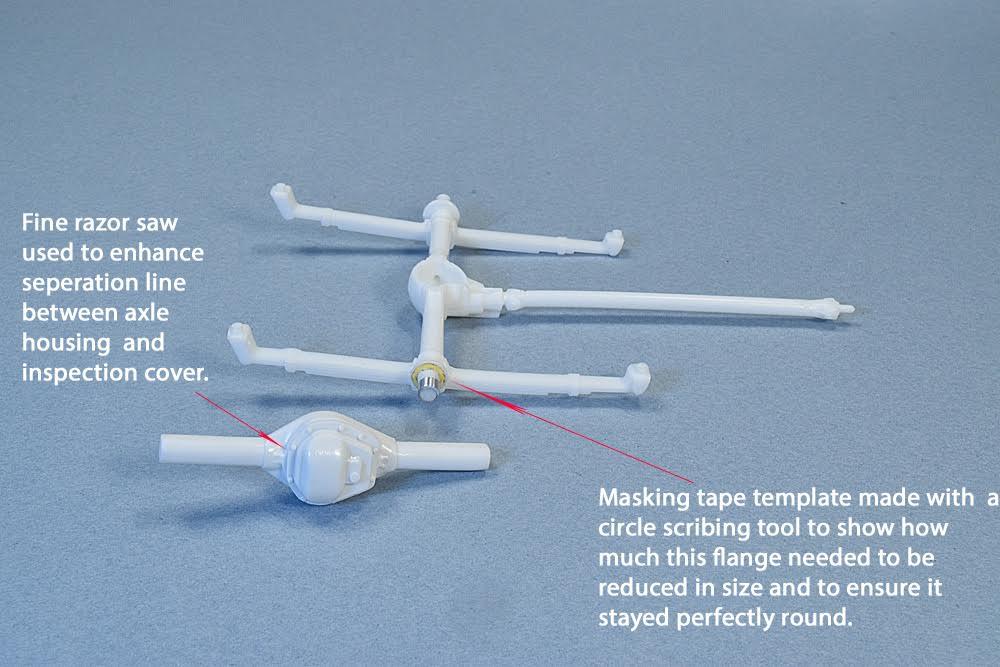
I also started in on the rear suspension and modified the ends of the axle tubes to accommodate the Fireball drum brake wheel backings. These are very nice replacement parts for the kit pieces. They even include the small round protrusion to indicate where the brake lines attach to the brake wheel cylinder. Towards the bottom of the backing plate it’s apparent where the emergency brake cable attaches as it runs through to the self adjustment lever. Finally there’s even a long, thin, but shallow depression on the backing plate to indicate where the slot in the backing plate is located so a brake adjustment tool can be used to do fine adjustments to the brake shoe clearances to the drum. To add extra support for the Fireball wheel backings I added a small piece of aluminum tubing cut to length. The next pics will be self explanatory. There’s also a resin Dana 60 rear end that Is going to require some fettling to install correctly. Here again the aftermarket Dana 60 rear end helps to raise the level of detail provided in the kit.
The next step will be fitting the Dana 60 rear end between the leaf springs and then applying the first layers of paint to some of the assembled components.
Thanks again for looking in!
Cheers,
WolfNo sh*t, man!
-
This is actually crazy. Great job
-
Absolutely correct , Zippi
-
 1
1
-
-
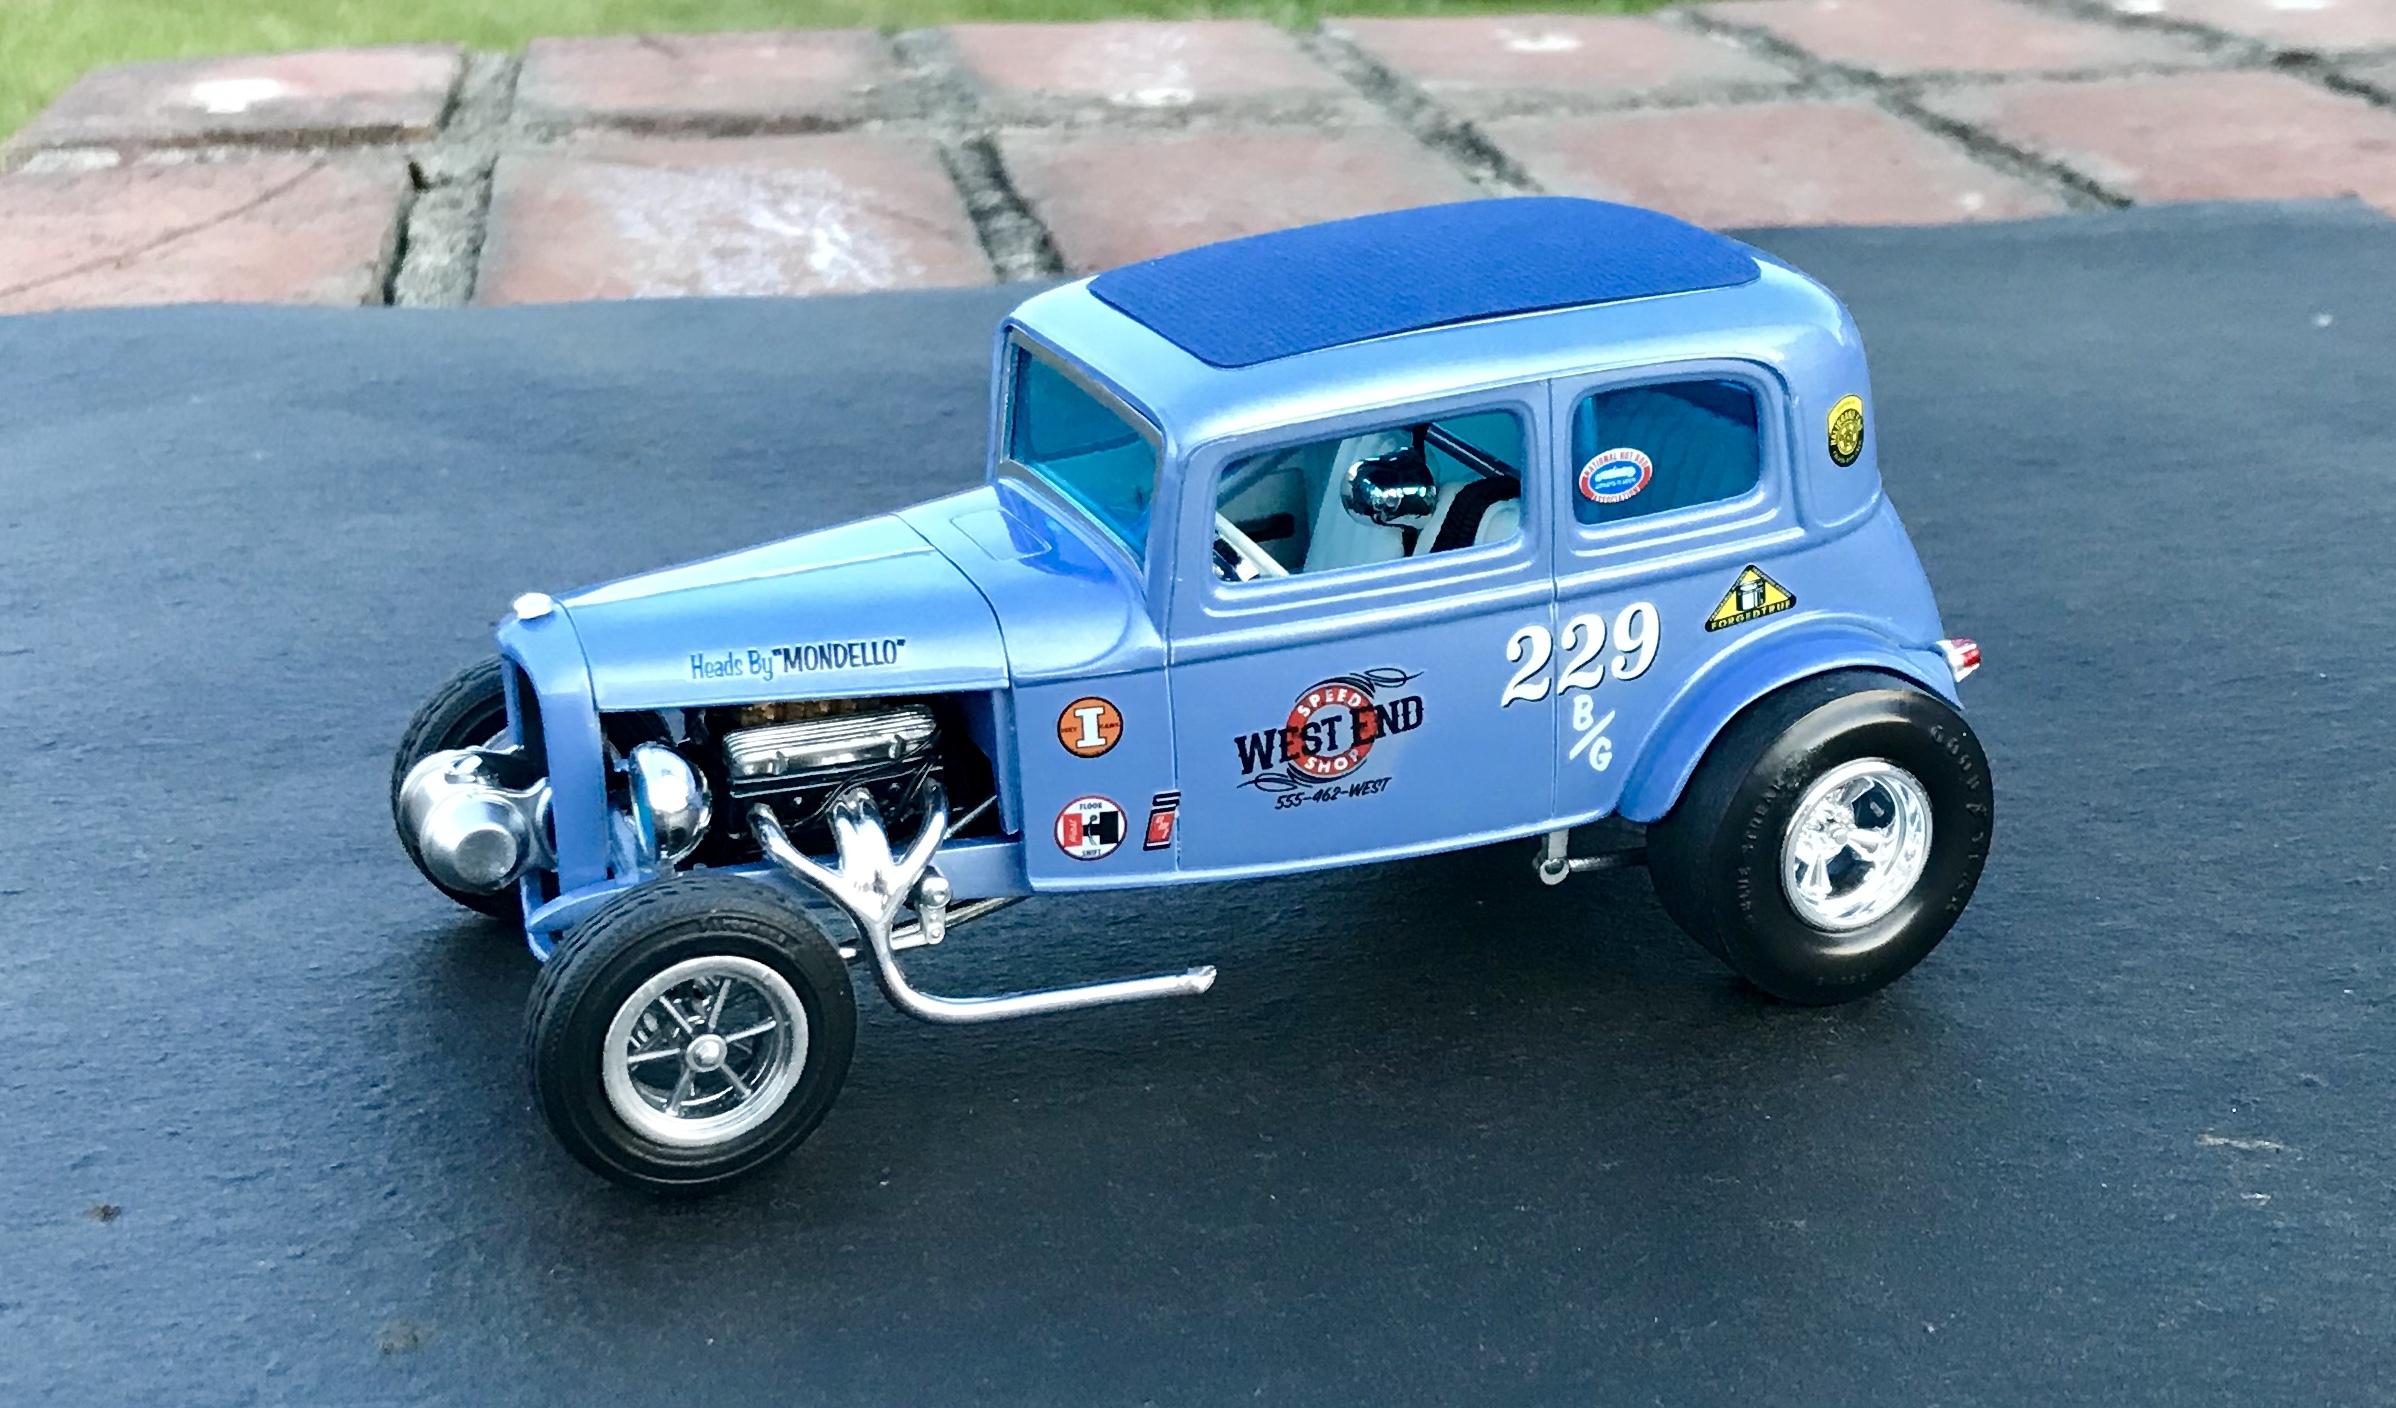
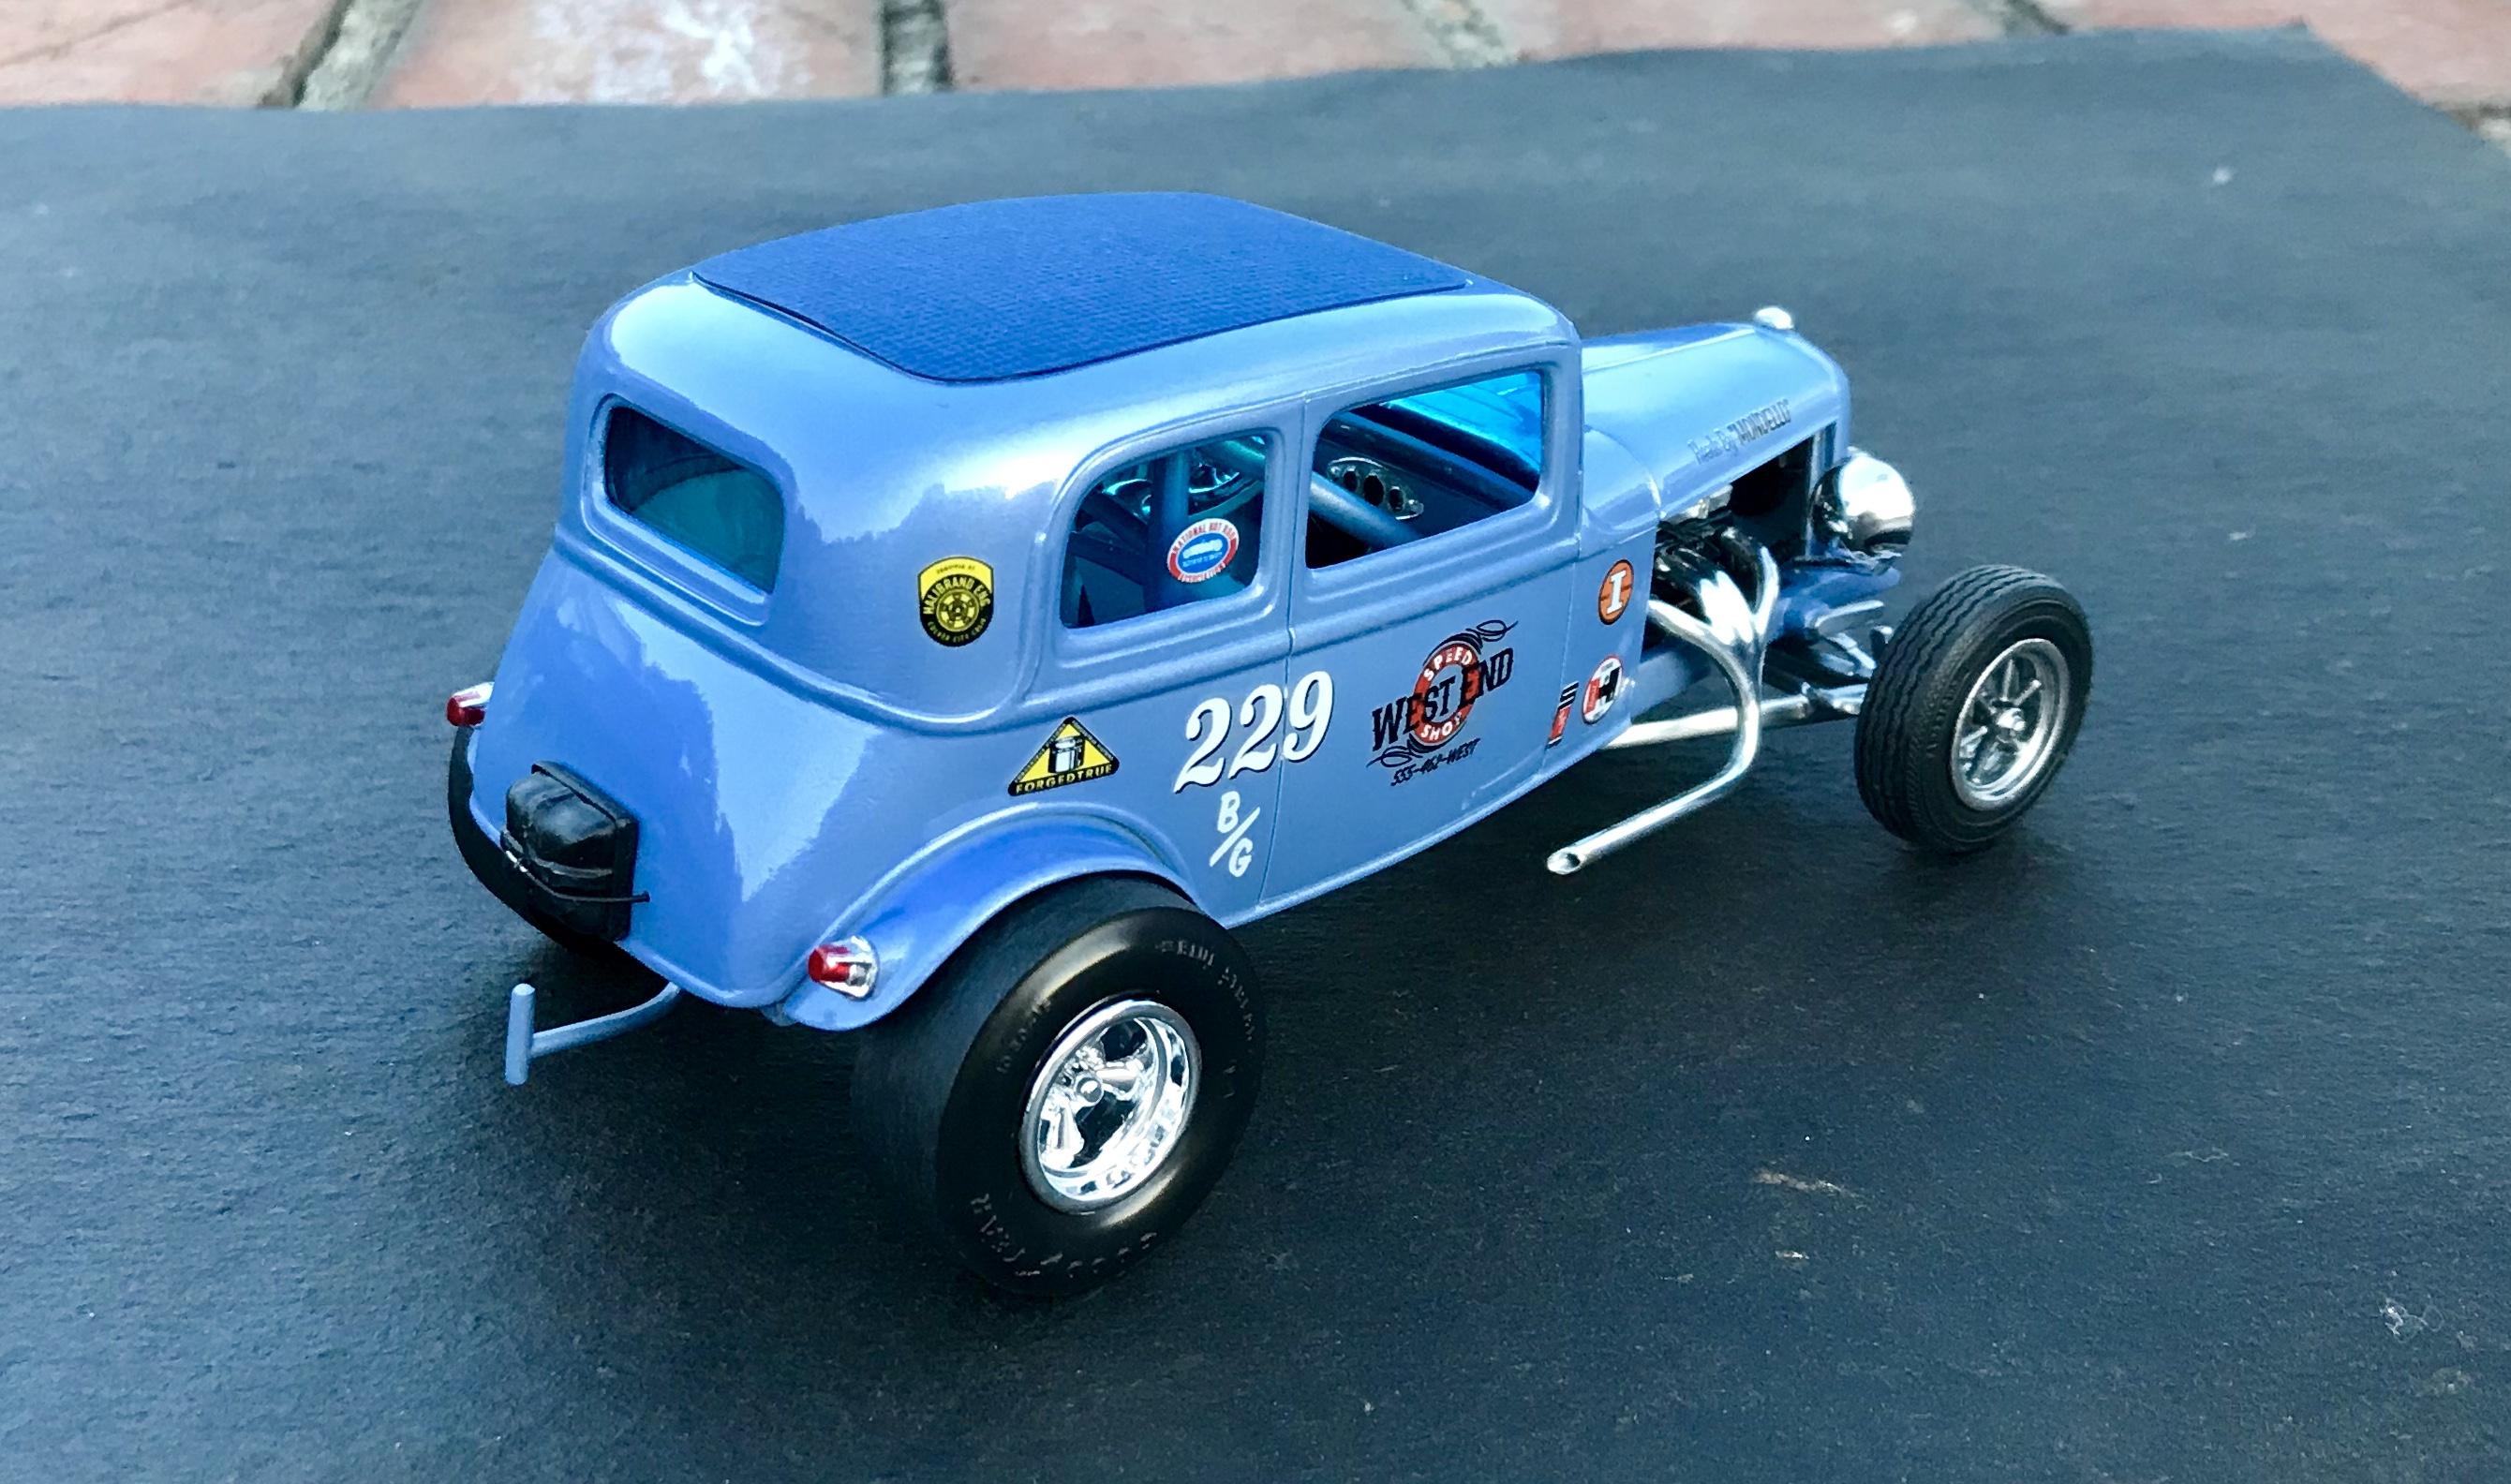
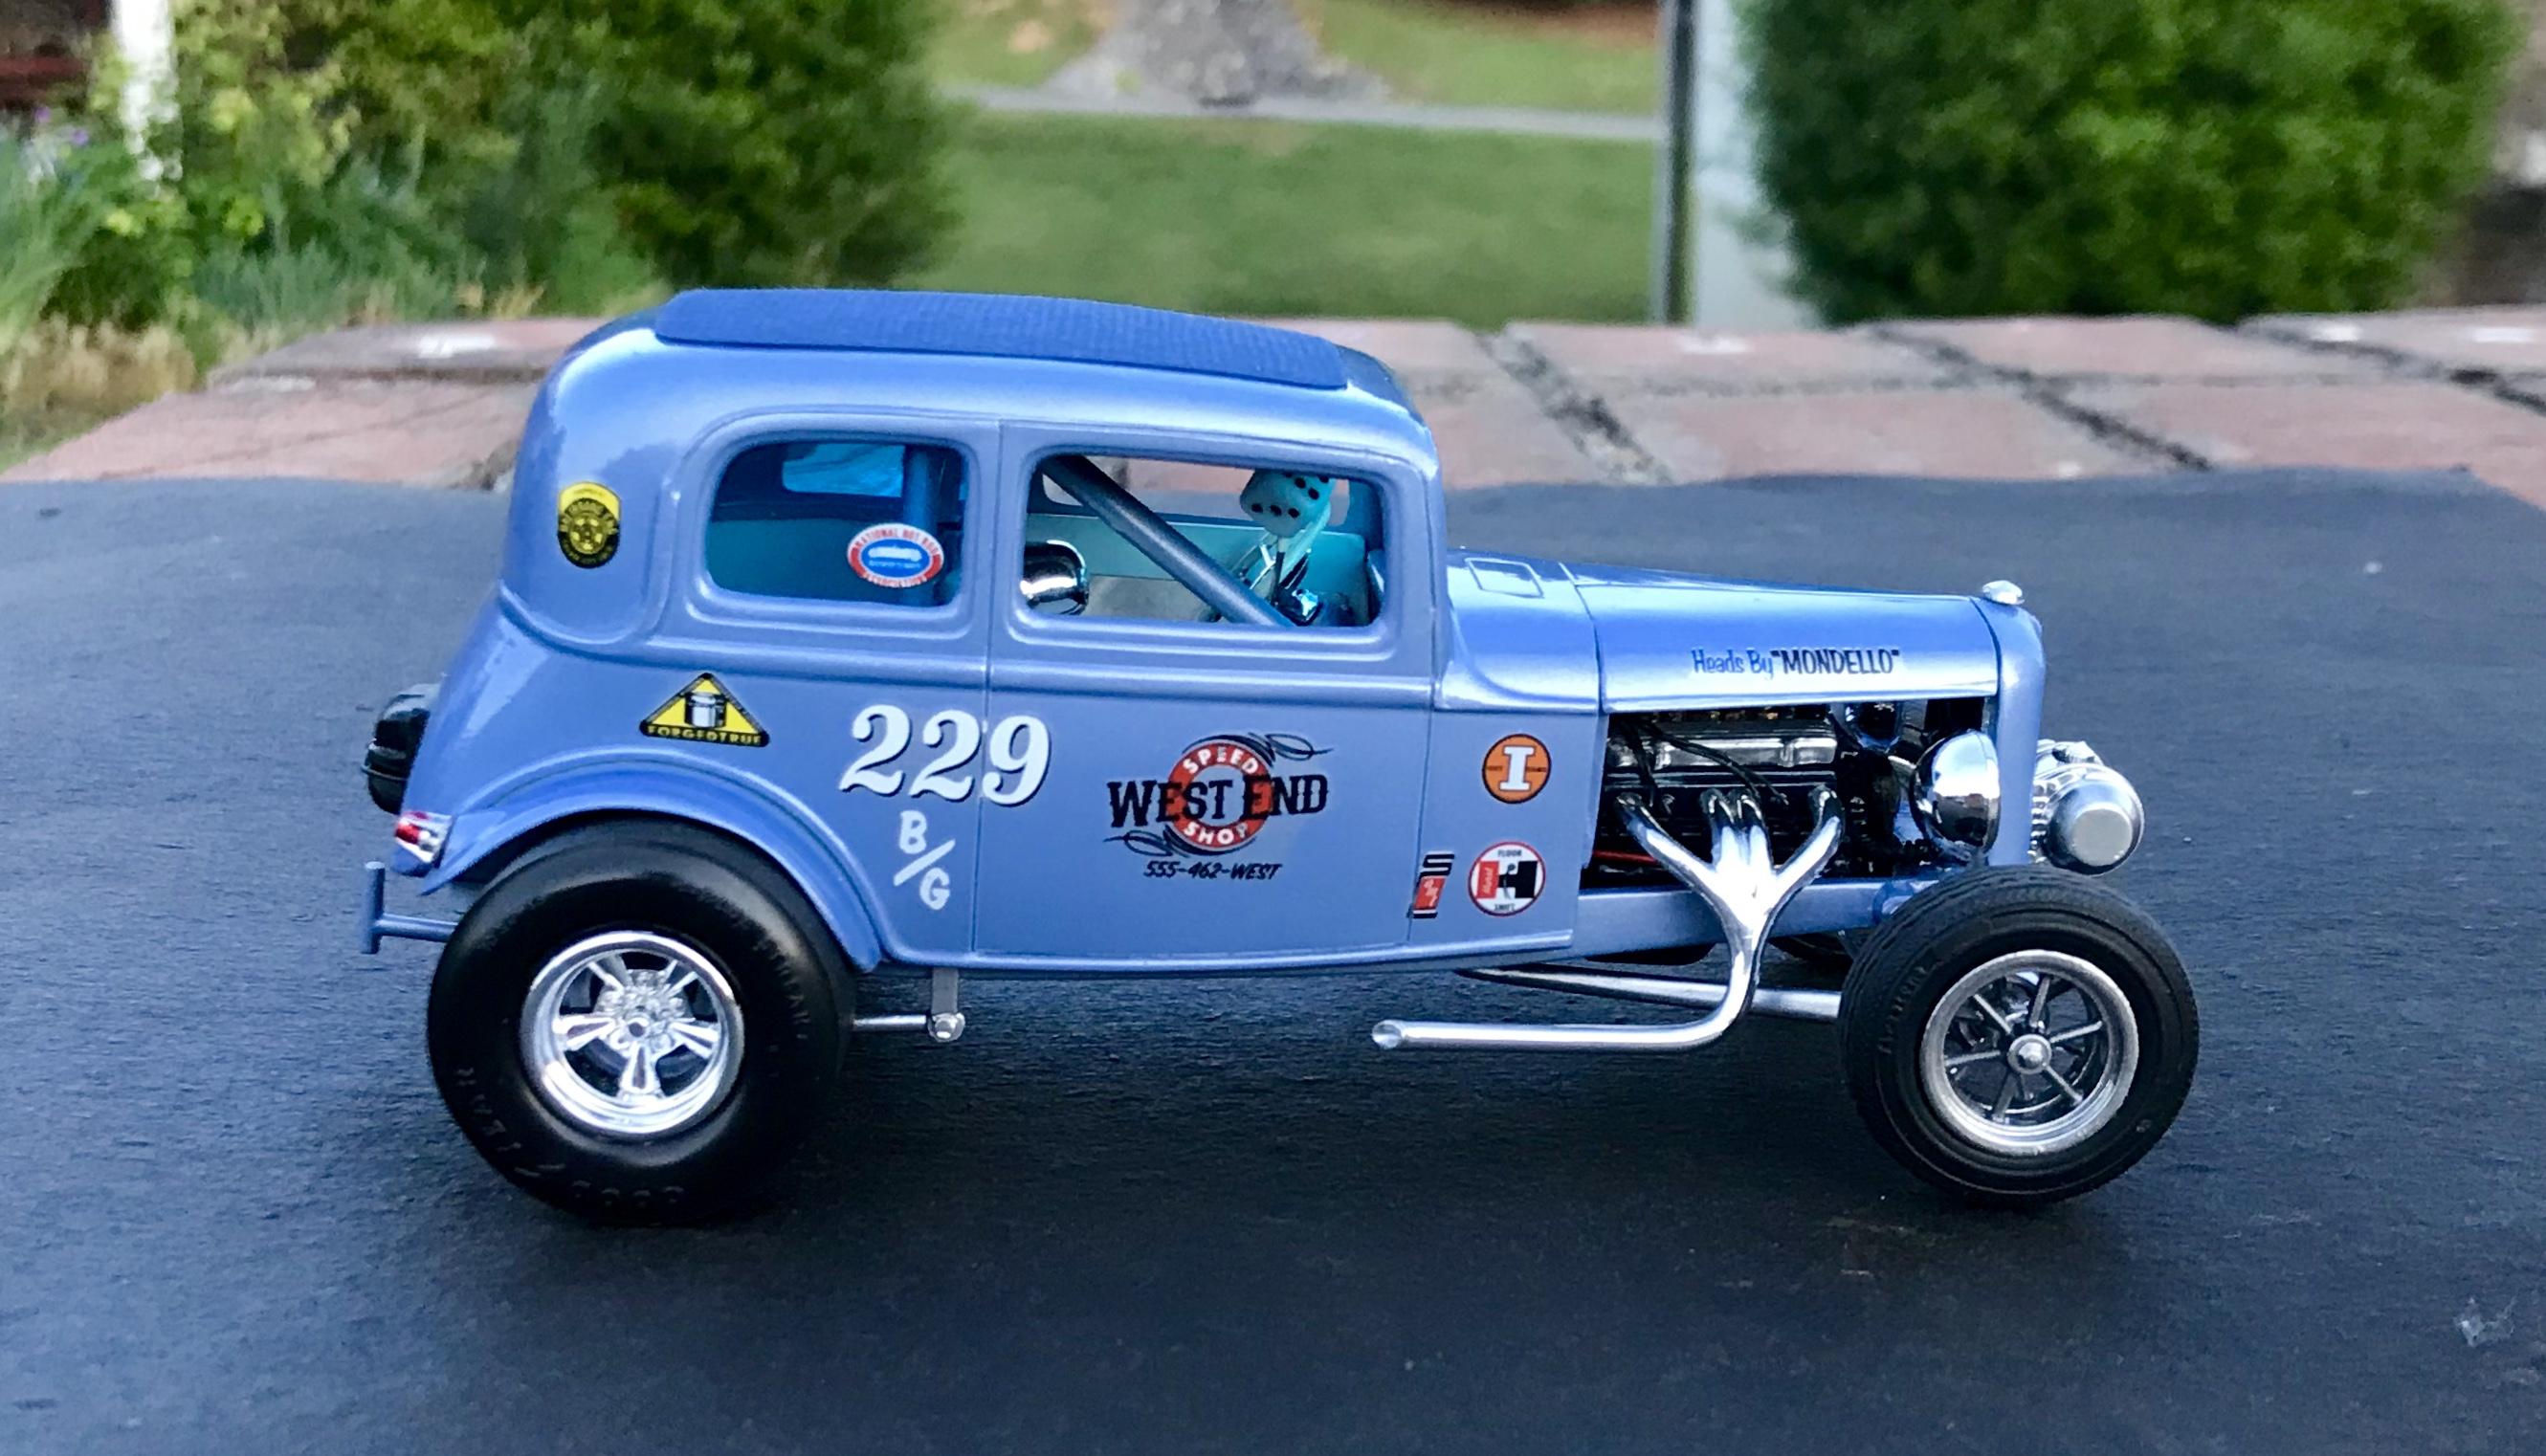
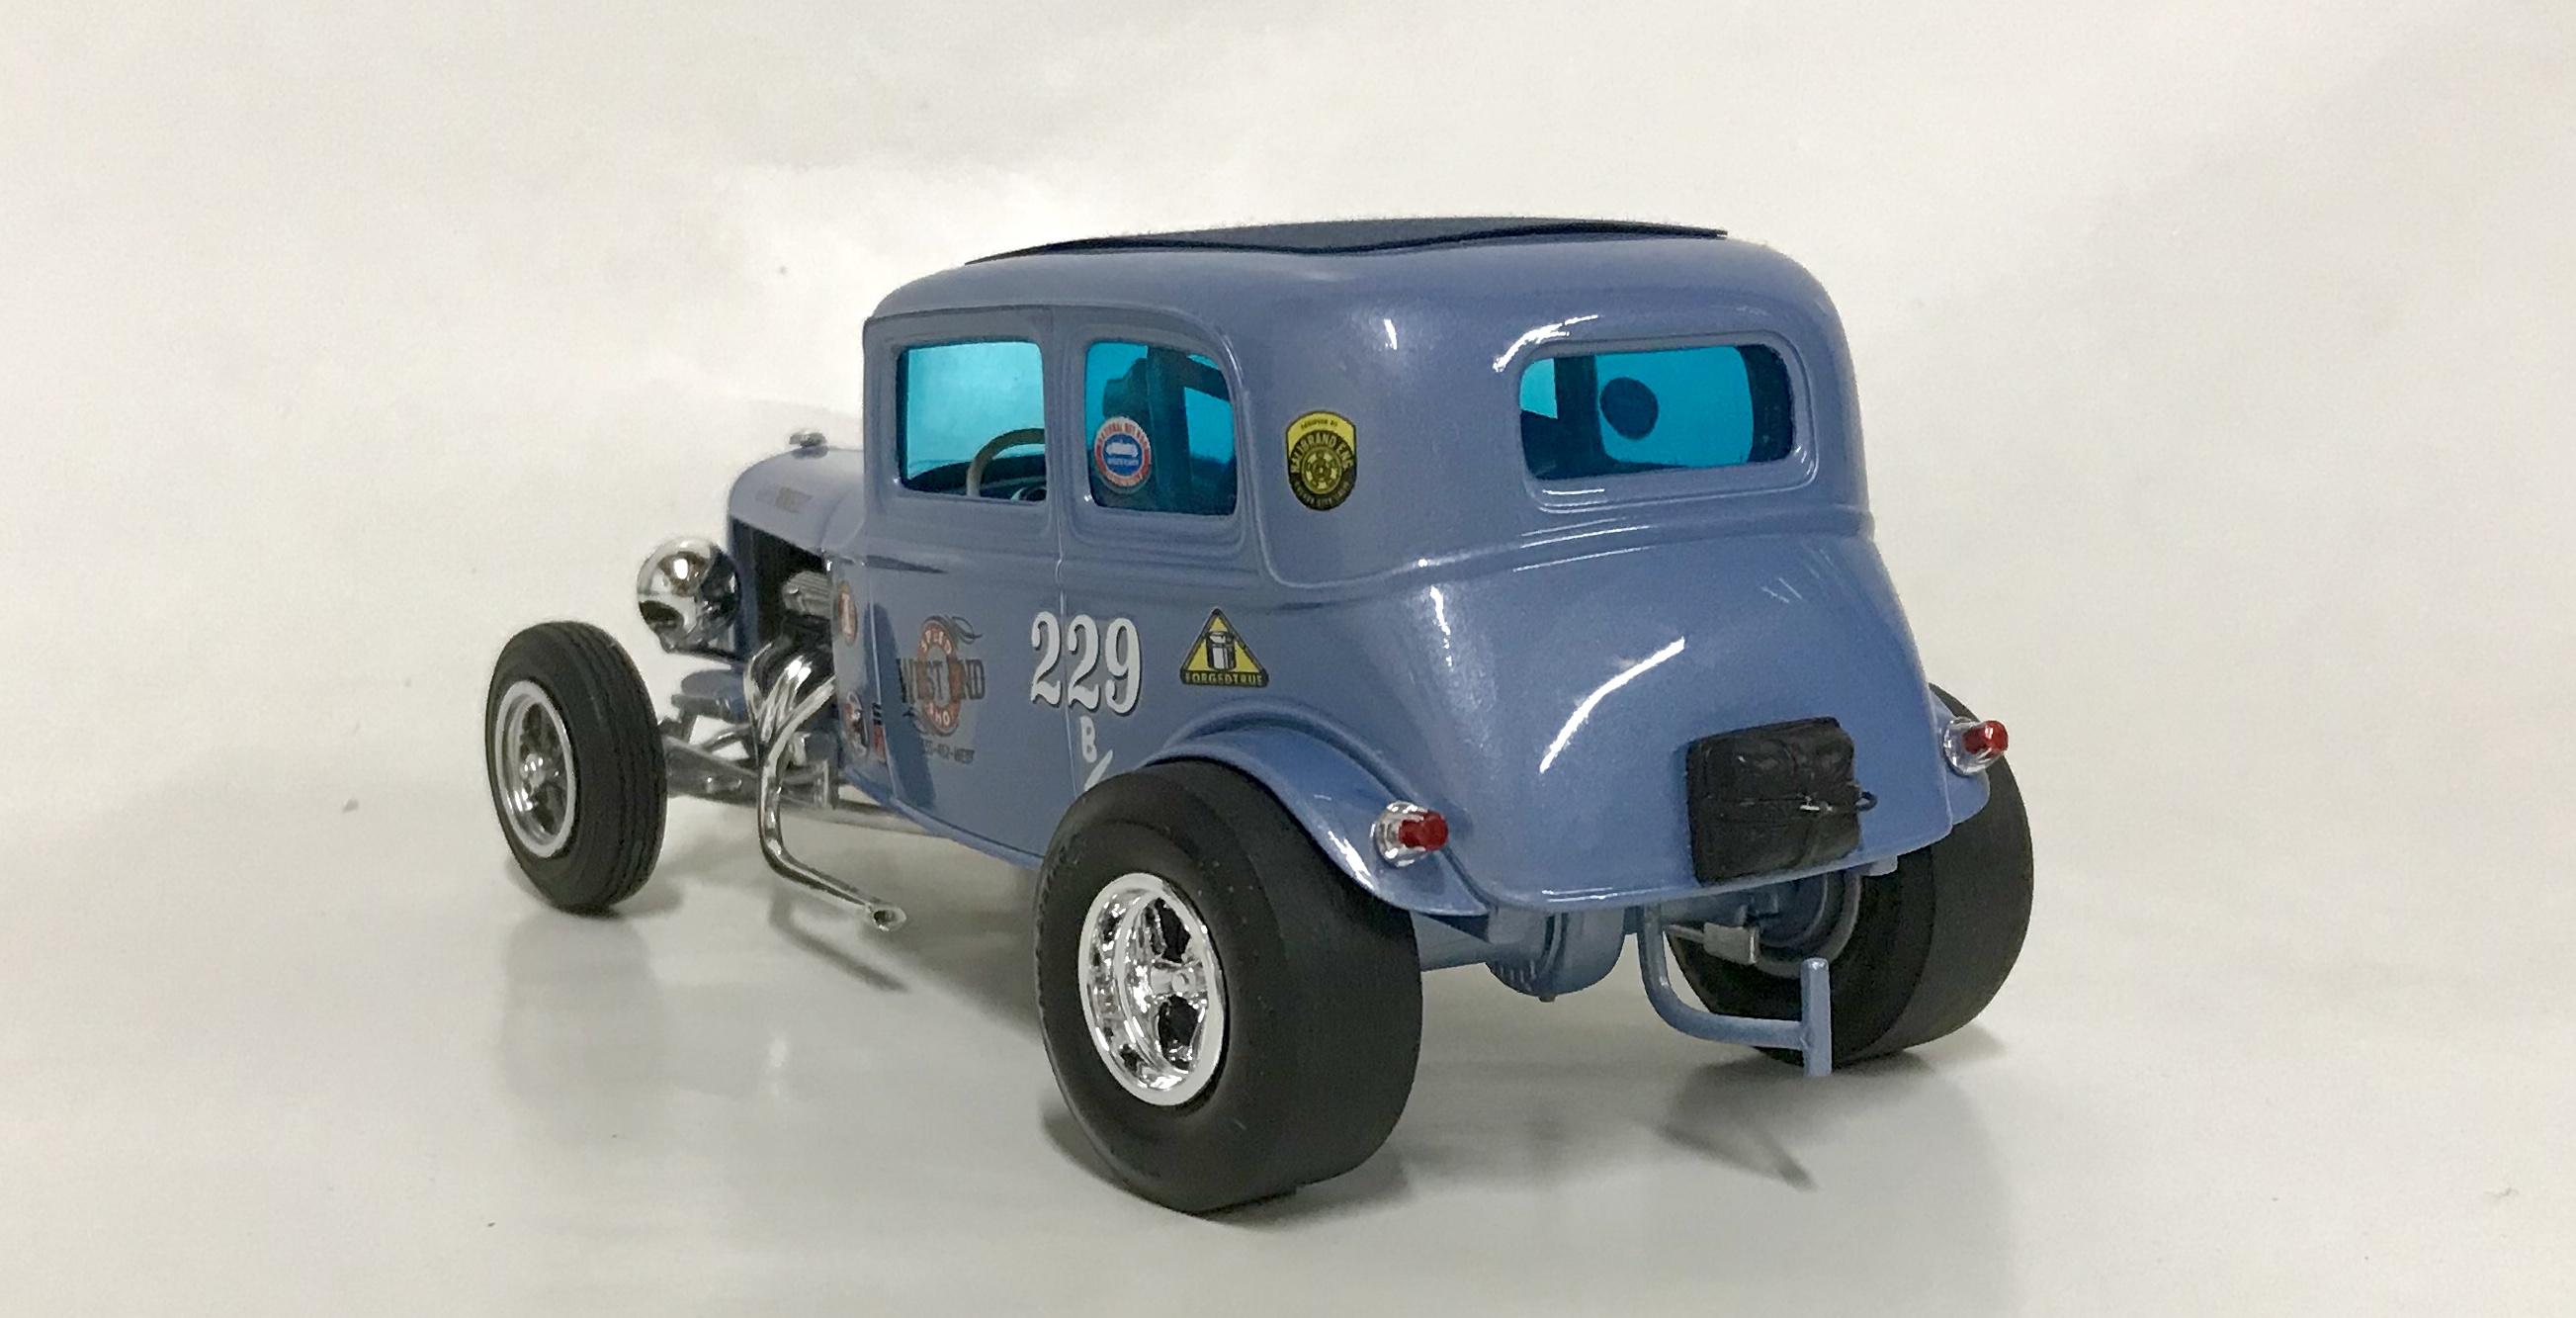
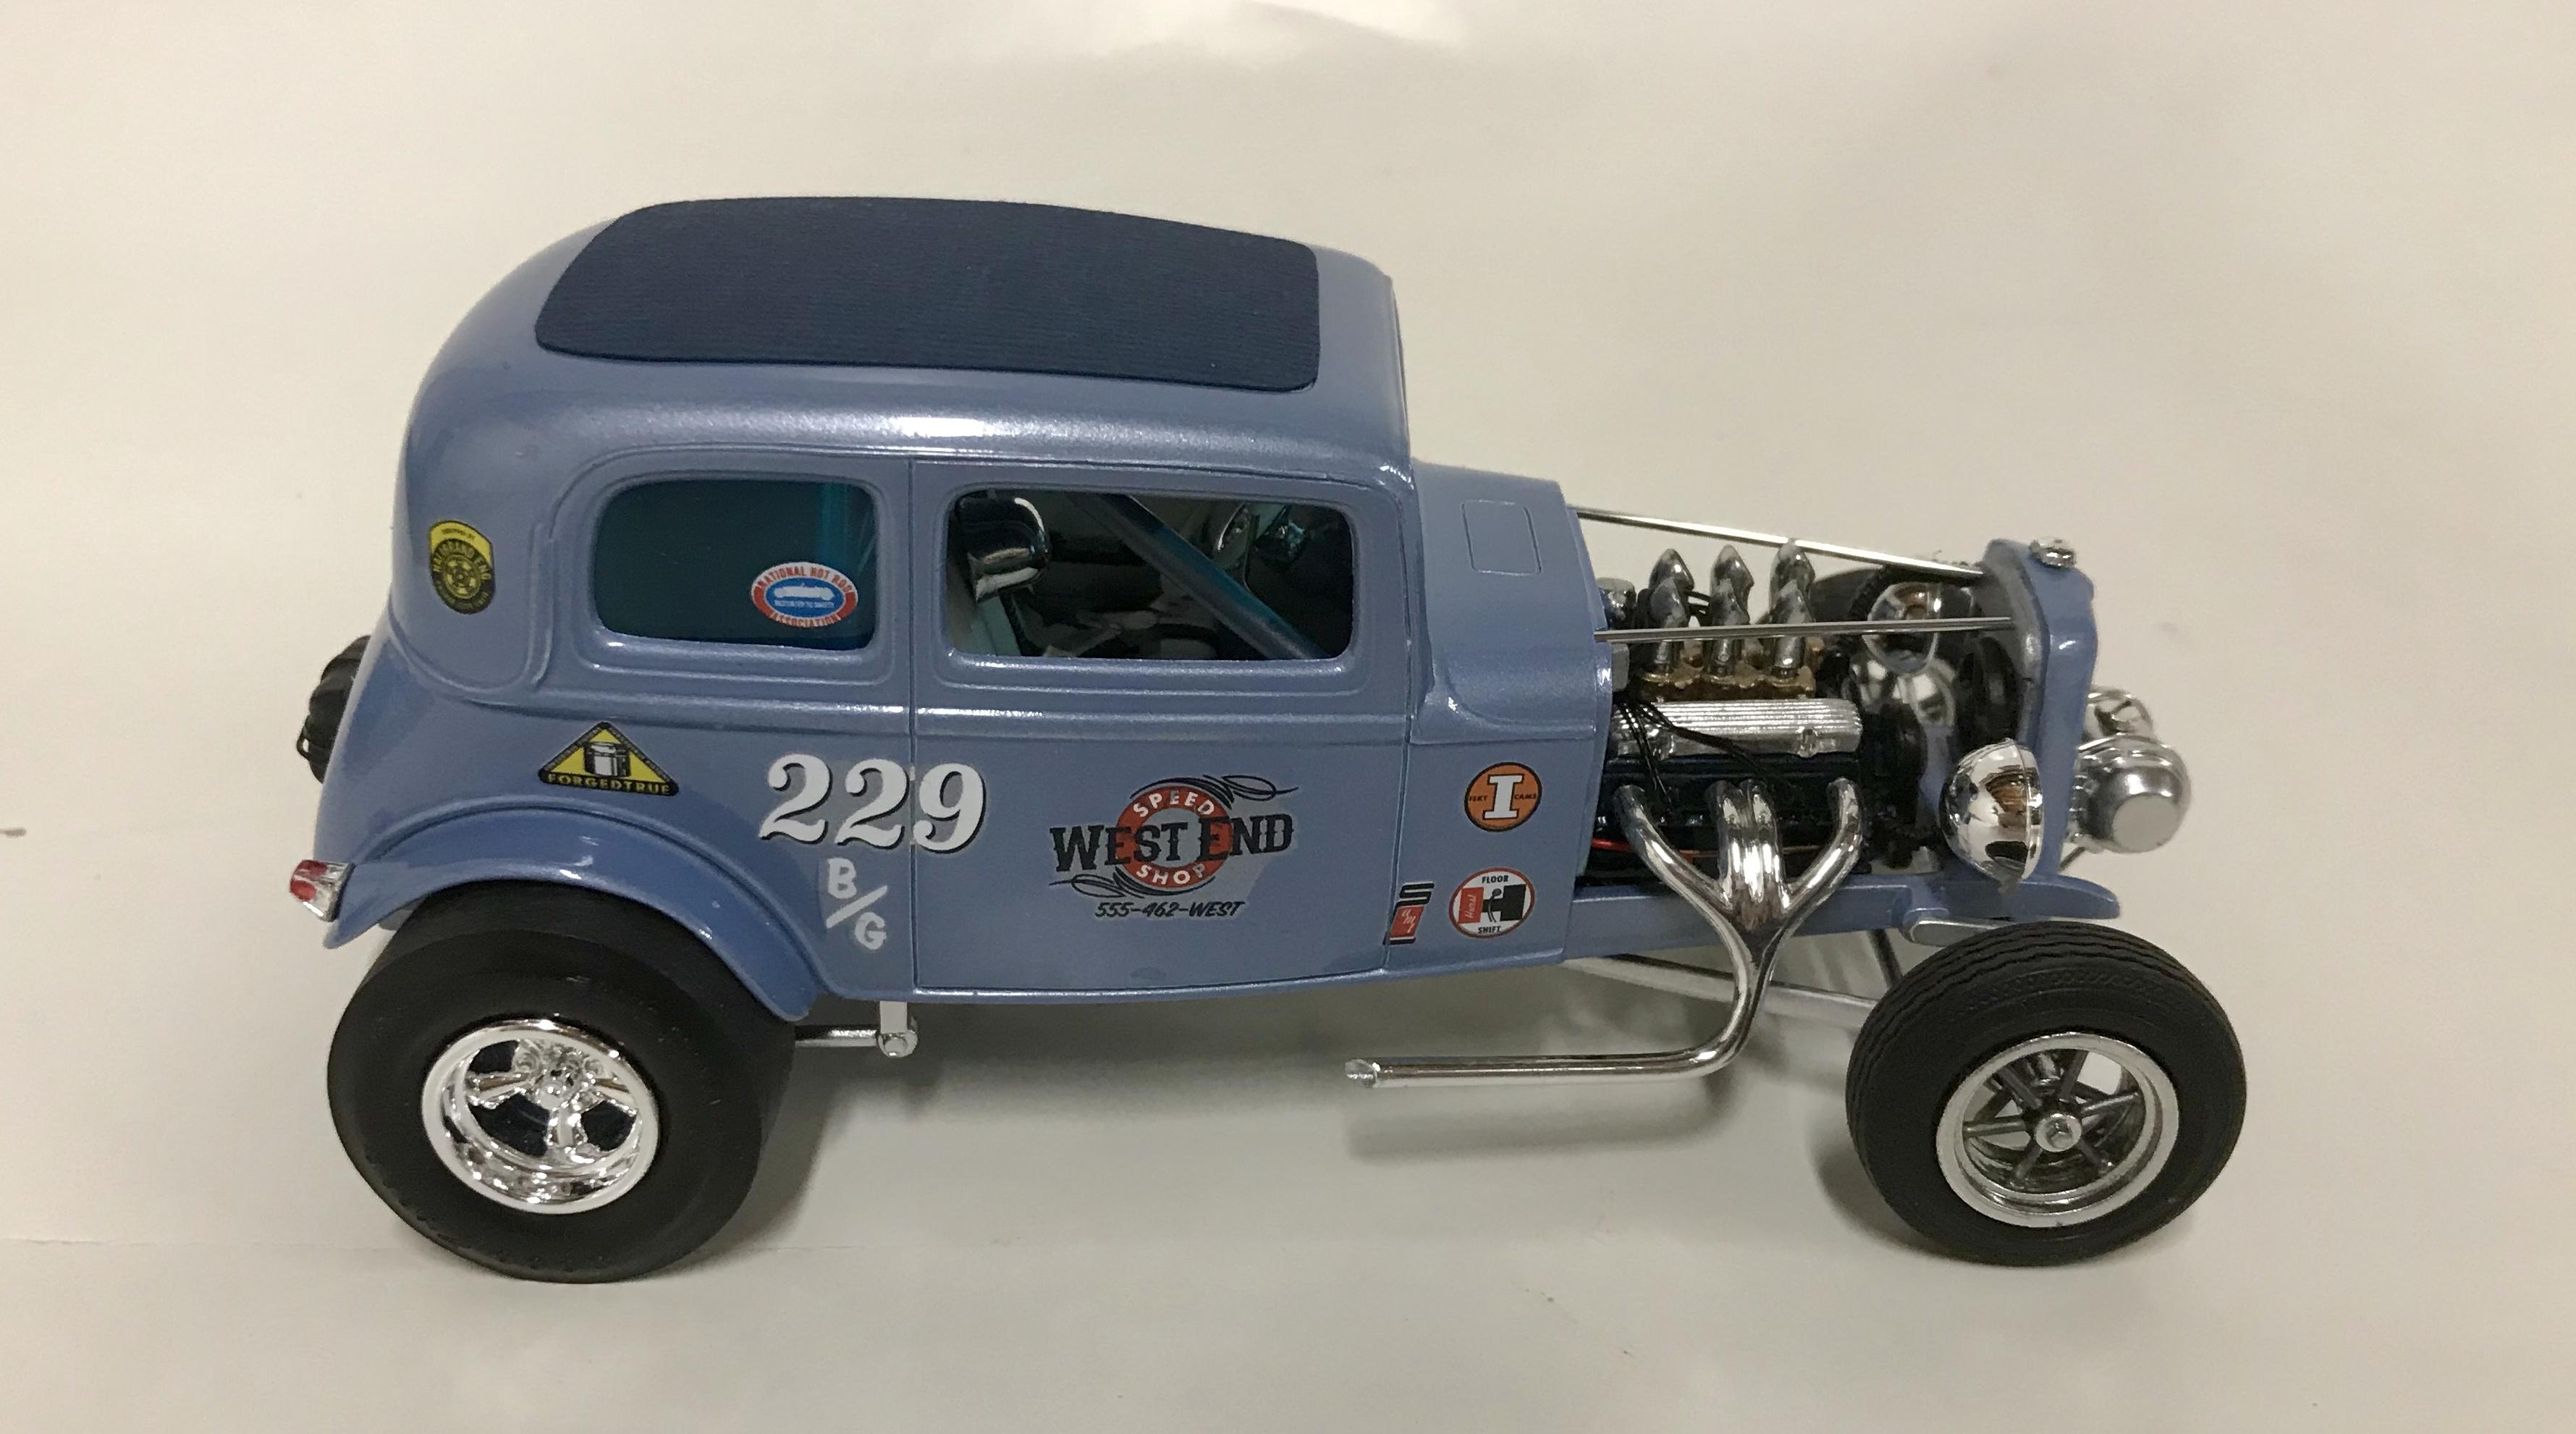
I love a '33 Willys drag car !
-
Tim, I've been following you're stuff for a very long time. Awesome.


Atlantis Fireball dragster
in Drag Racing
Posted
Look's good!