

Romell R
-
Posts
2,765 -
Joined
-
Last visited
Content Type
Profiles
Forums
Events
Gallery
Posts posted by Romell R
-
-
Yeah Shane it almost takes up my whole bench LOL!Man, I didn't realize how big that thing is, untill I seen you holding the seat. That's a table monster for sure !!!
Glad you joined us Greg and i agree with you a model of this scale should have had lots more detail. but im glad i get to add it LOL!What's THIS?? Rom, building in 1/8......and it's a Ferrari no less.......................

Just kidding mate.
Man, you know I do love a good large scale build, and this is 1 sweet build you have right here mate.
The old saying of turning a sours ear into a silk purse comes to mind.
These larger Pocher kits really should have a lot of this great detail already in the kit, such a shame that another high cost trans-kit is also required.
Never the less, I know that with your attention to detail Rom, you will even surpass that level, plus have a hoot doing it.
GREAT work mate.
I got to get a few small details finished or atleast started ....so heres a inside peek.
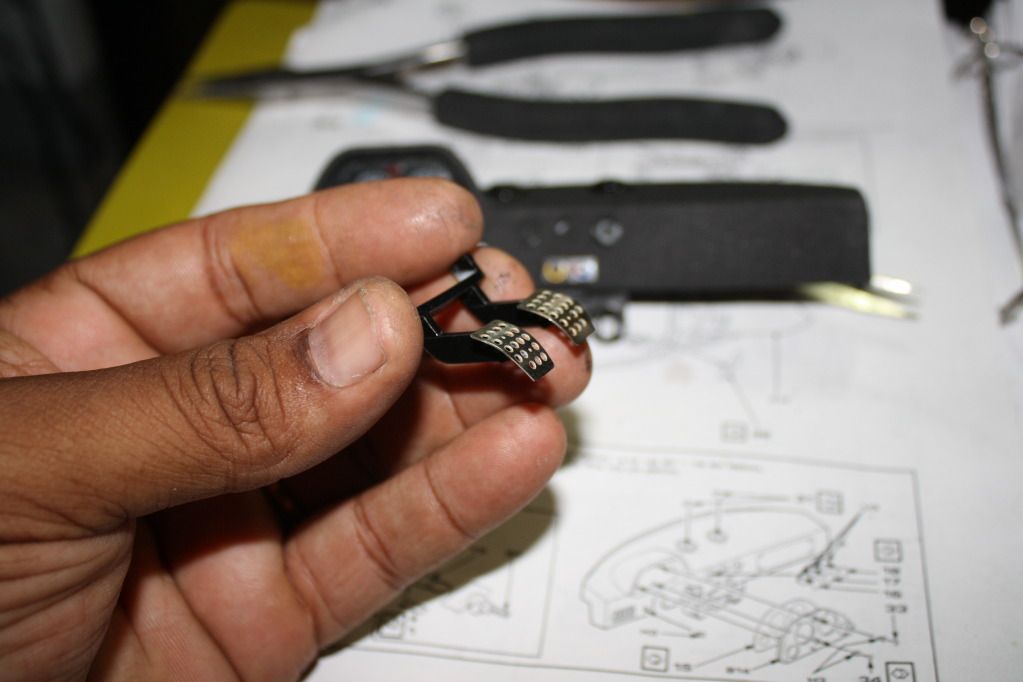
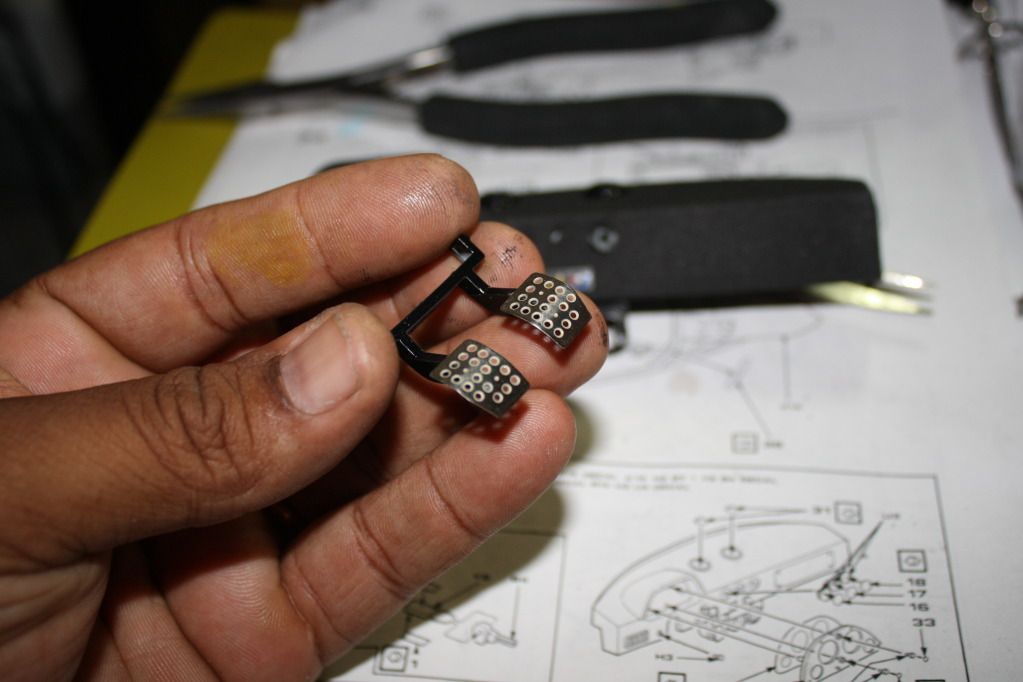
heres the clutch and brake pedels I made them slightly curved like in the real F40
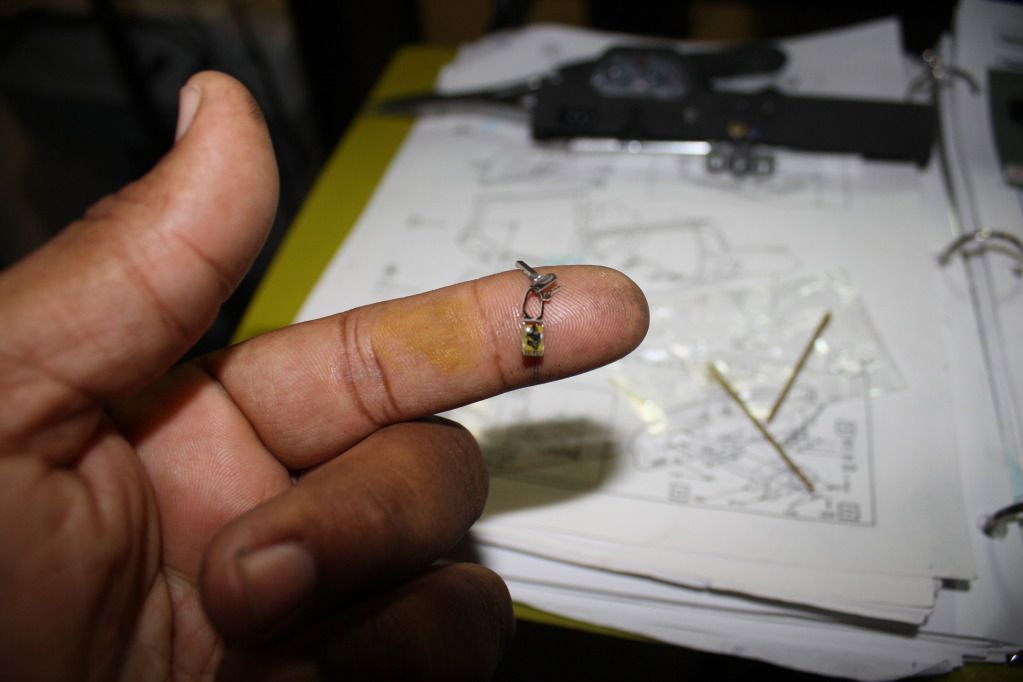
I also soldered together the ignition key and painted the keychain, then incased it in clear epoxy
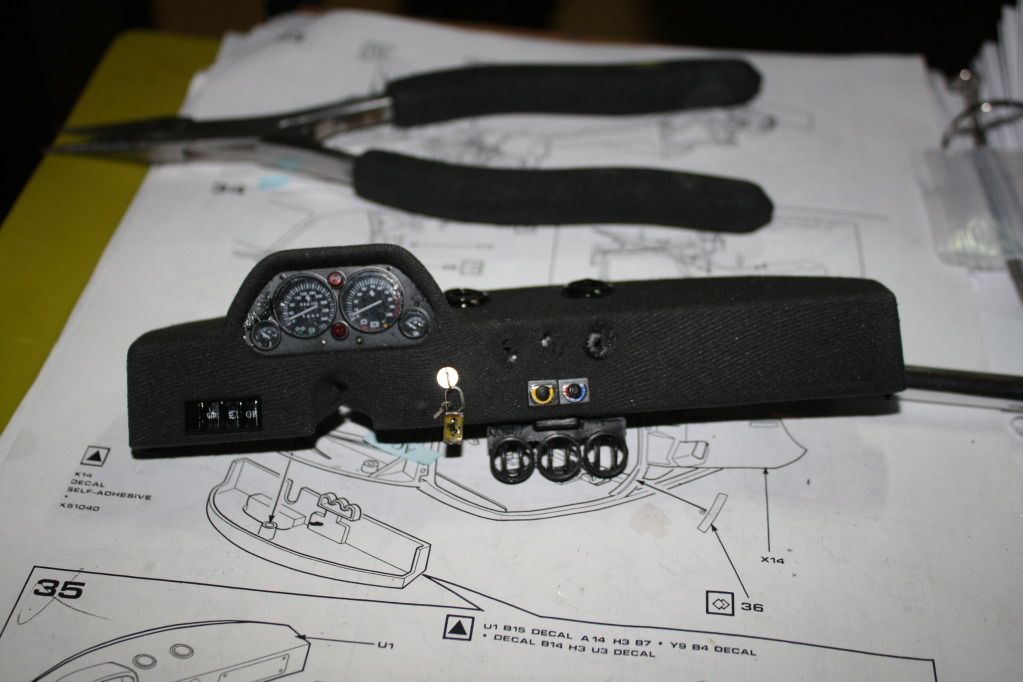
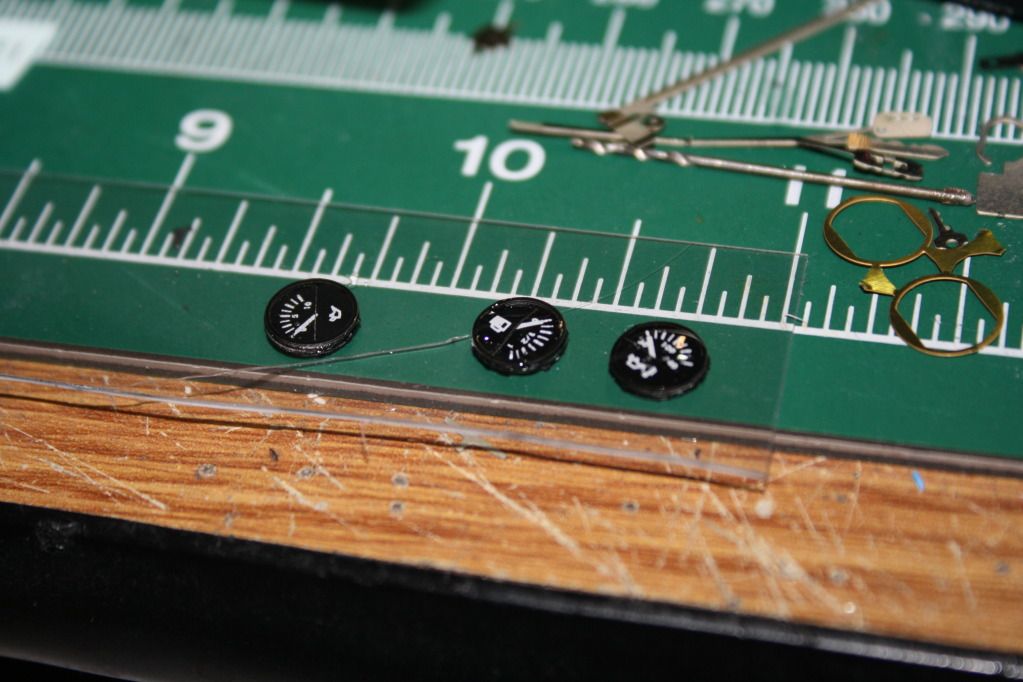
here it is in the almost finished dash , I still have to install the gauges
The gauges are made from 4 differant pieces and I made the bubble lense from clear 5 min epoxy....
these are the air conditioning ducts that fit in the top of the dash , these had to be soldered together also...
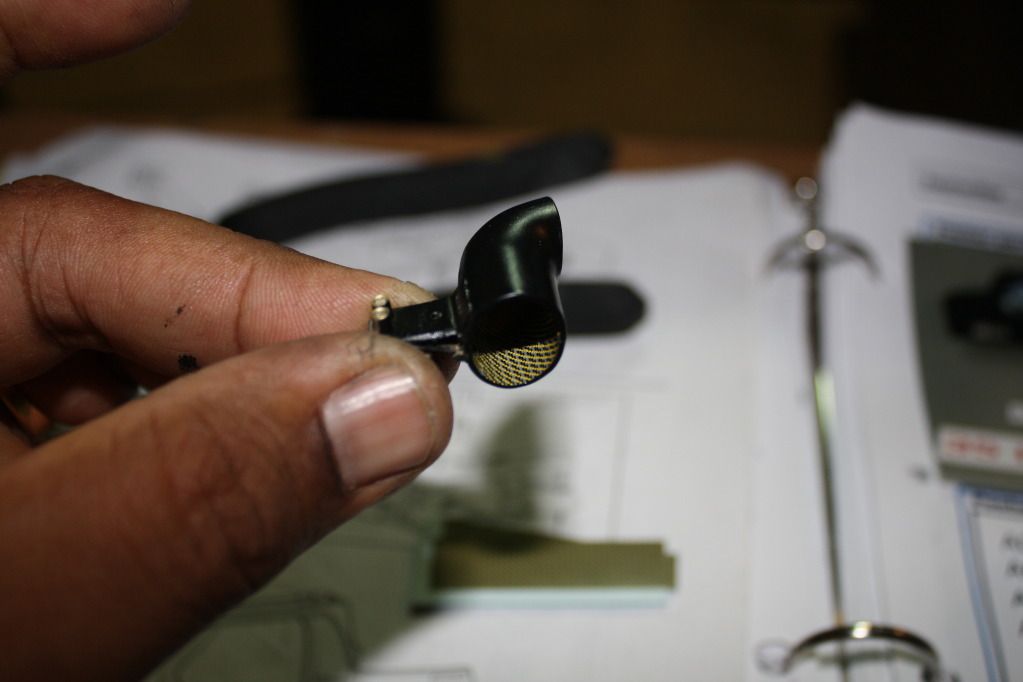
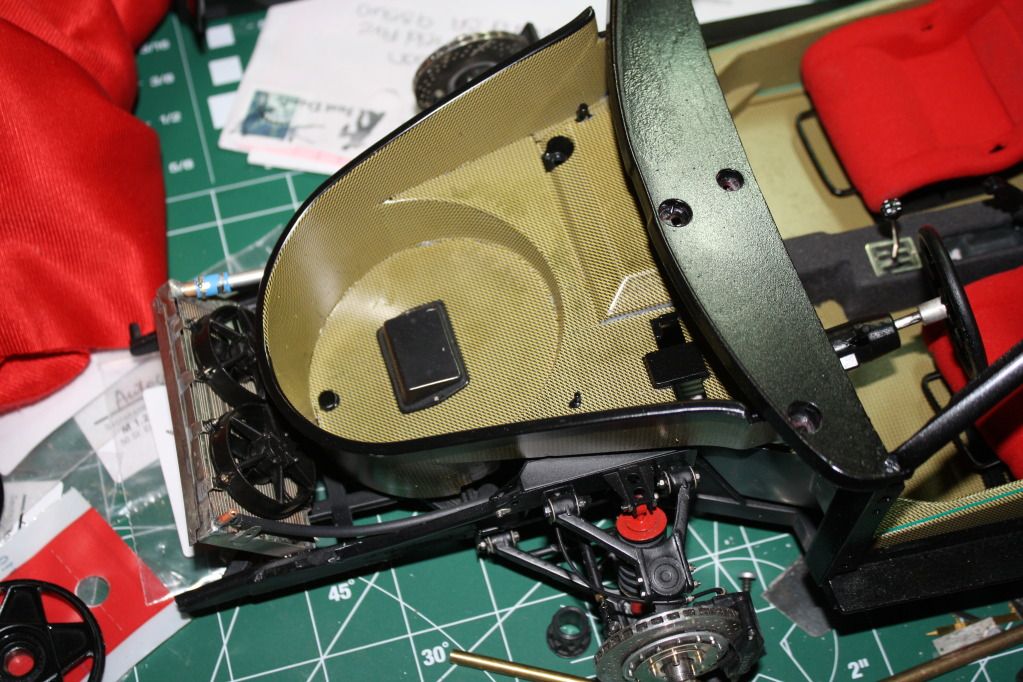
lastly I wanted to show you the brake cooling duct I added CF to the inside
Thanks for joining me see ya real soon!.....
-
Happy??? Man im bubblin over like a kid who has been let loose in Toys R Us with his moms credit card LOL! thanks buddy and I hope youre new 1:1 project goes well for ya.romell, i hope you're happy with this baby!! you're doing an absolutely incredible job!!!!!! sweet stuff, buddy!
Thanks Santiago im glad you like it bro. Hope to see ya next time im in your neck of the woods for a show...Beautiful!!
-
Hey thanks Chris to answer your questions , yes the CF was done in multiple pieces, and yes I did shoot clear over it I used Tamiya semi gloss clear on it. Thanks for stoping in buddy I'll talk to ya later...Rom... Fantastic work my friend. This build is sure coming along and is looking great. that carbon fiber work is very nice. was it done in multiple pieces and did you shoot clear over it afterwards?? Looking forward to more on this bad boy.
-
Hey thanks Art good hearing from ya .......Hey Rom! I haven't checked on this one in too long and I missed all sorts of goodness. It's coming along great. Keep up the good work!
-Art
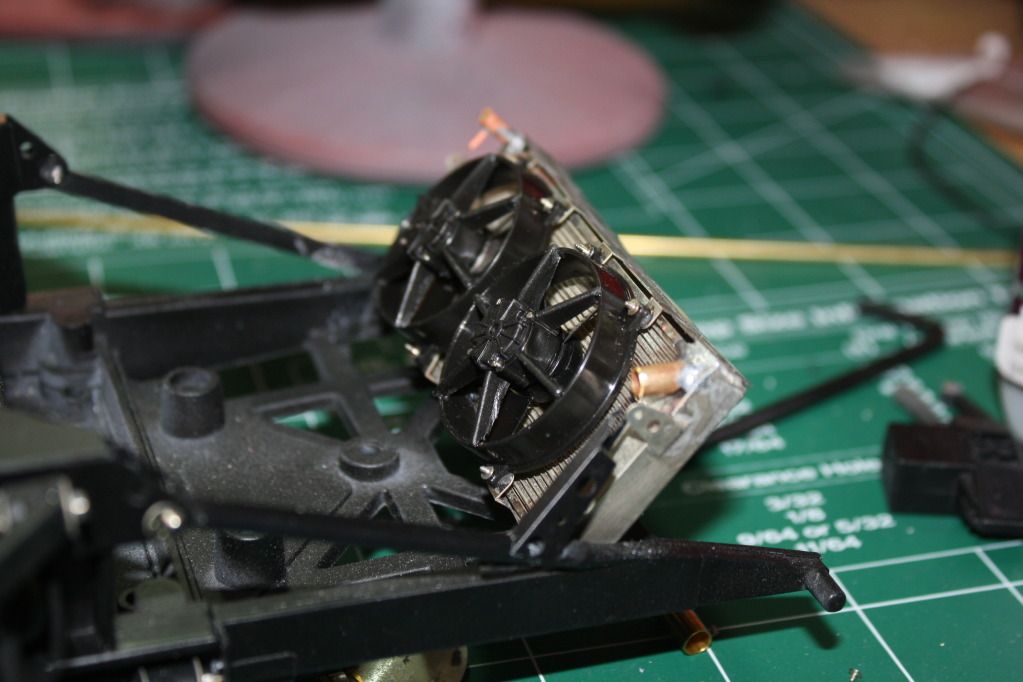
Small update.... I was able to get the front tub covered in CF decal ,I also soldered together the radiator and attached the fans and housing. I dropped the body on just to get a taste of the final look. I hope you enjoy!
Not finished yet it still has to be cleaned up a bit....
See ya soon....
-
Thanks Bill I think im having a lil too much fun on this one LOL!super nice work Rom!! looking sweet!!!
-
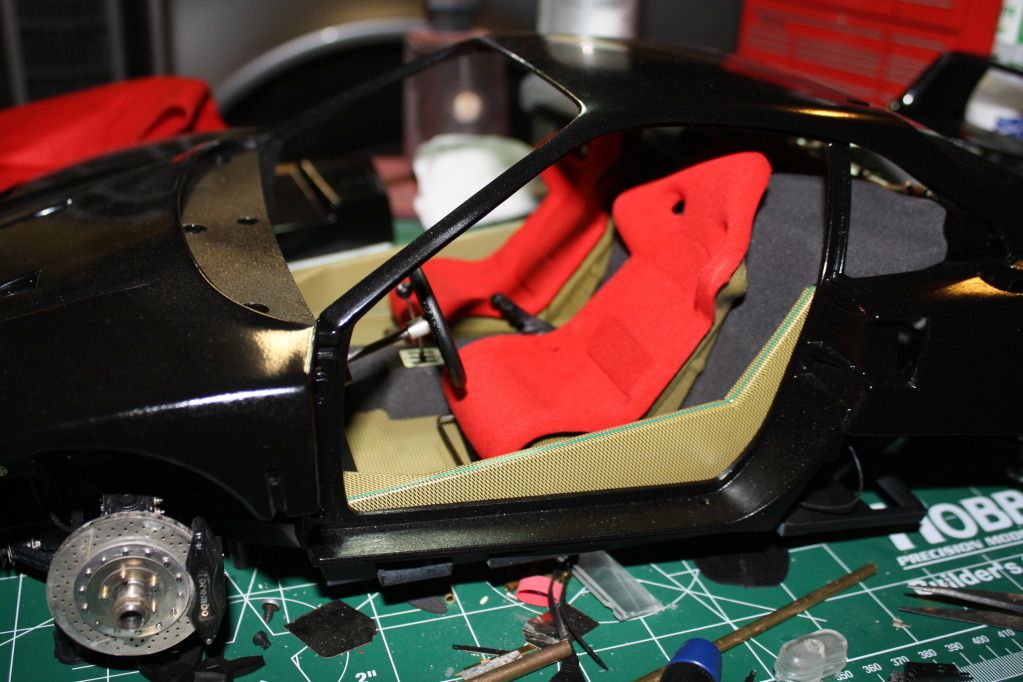
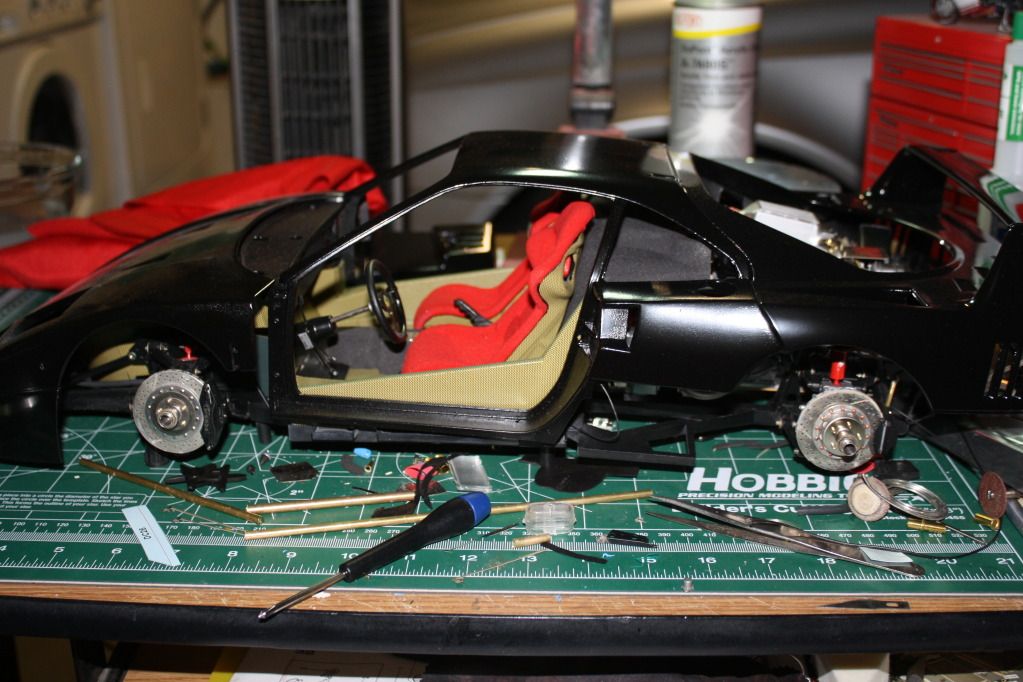
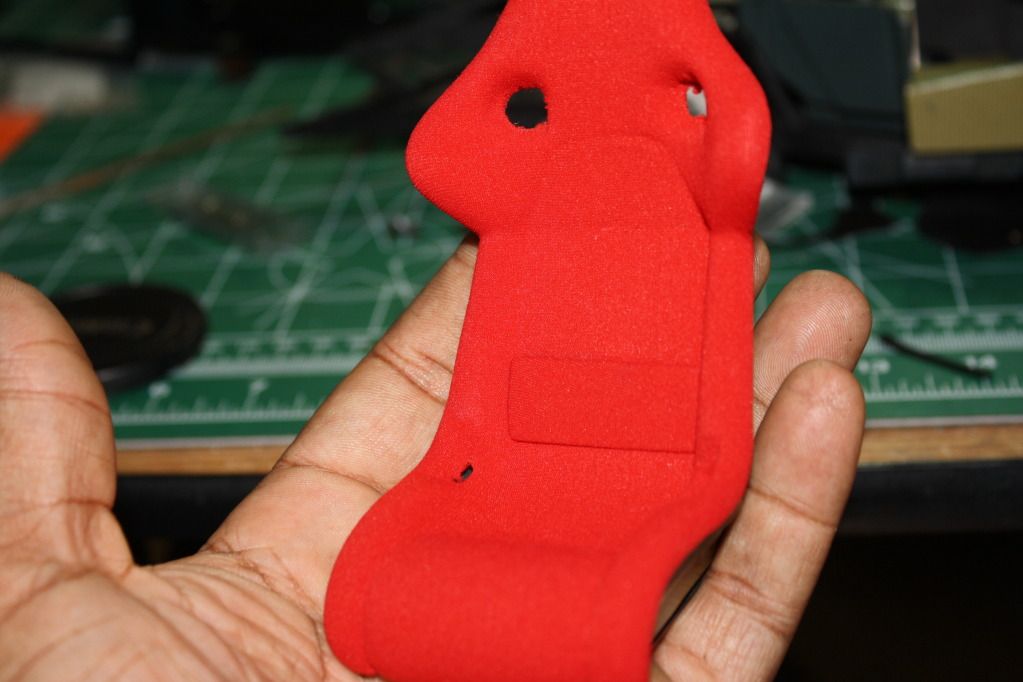
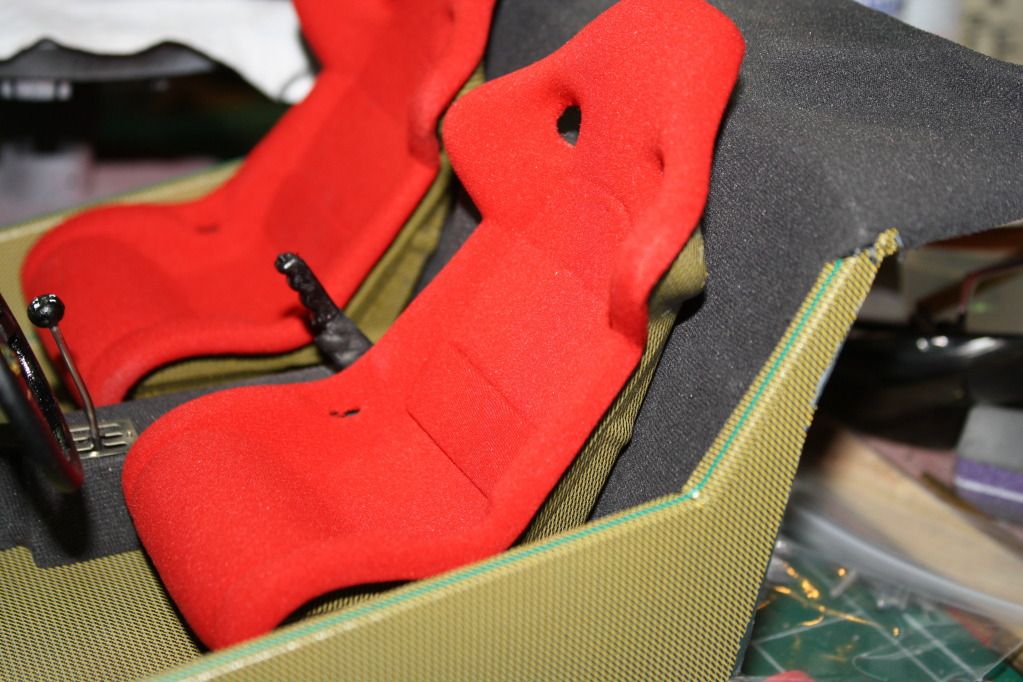
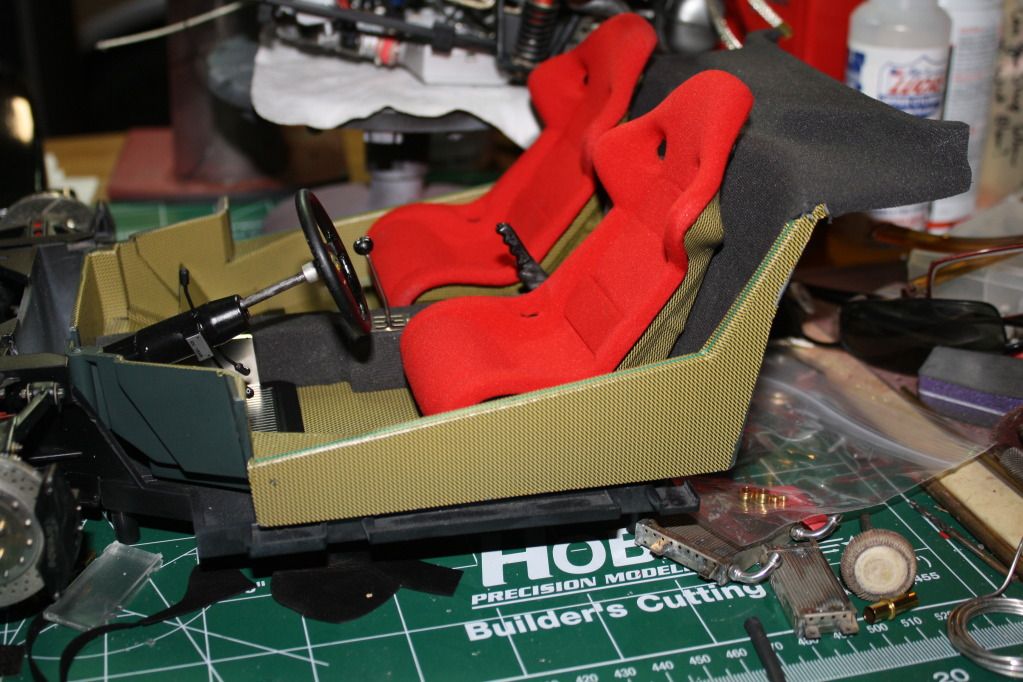
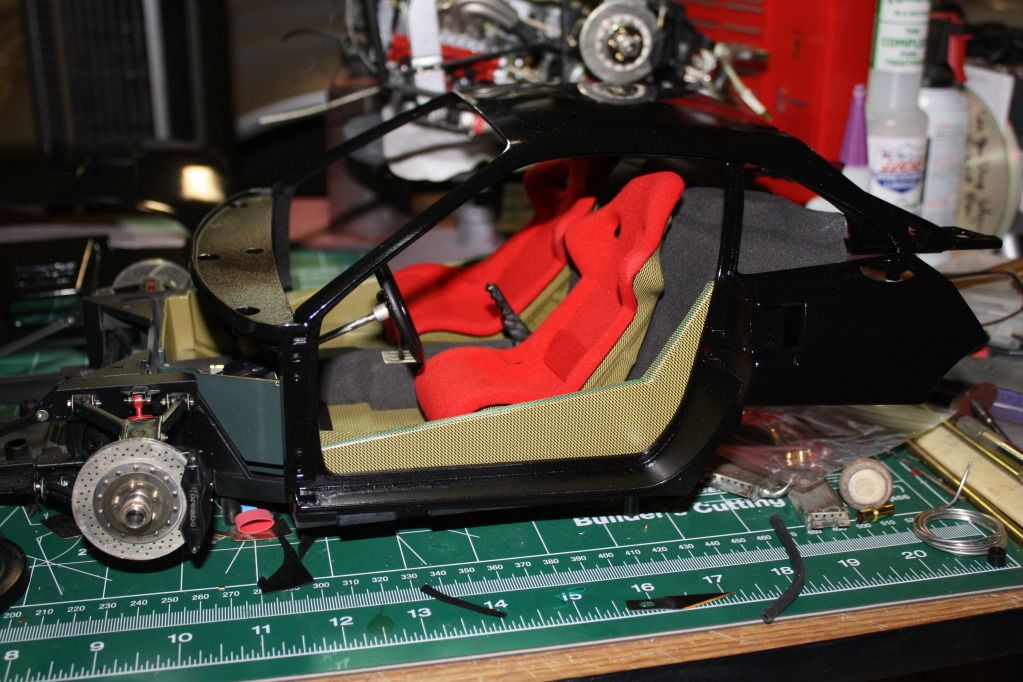
I got somemore work done to the interior , covered the seats with carbon fiber , and red fabric hope you enjoy....
they do look good in the interior pan....
I thought you might enjoy this mock up
see ya with more updates real soon.....
-
I cant wait to see it with the decals , youve done an outstanding job on this one keep up the good work!
-
here ya go bryan hope you enjoy.... http://www.modelcarsmag.com/forums/index.php?showtopic=33704&hl=aftashoxhas this been posted in "under glass" i cant seem to find it.....
cheers
bryan
-
Everytime I watch you build a project Dave it gets better and better. Keep up the Great work my friend you are an inspiration to us all!
-
Outstanding work!, simply beautiful!
-
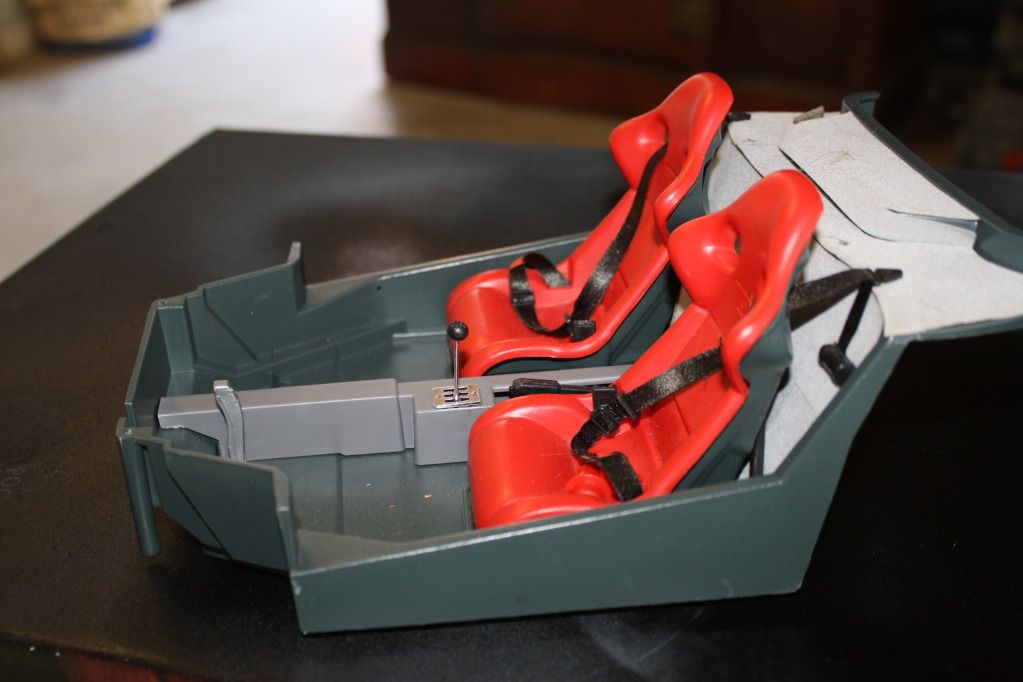
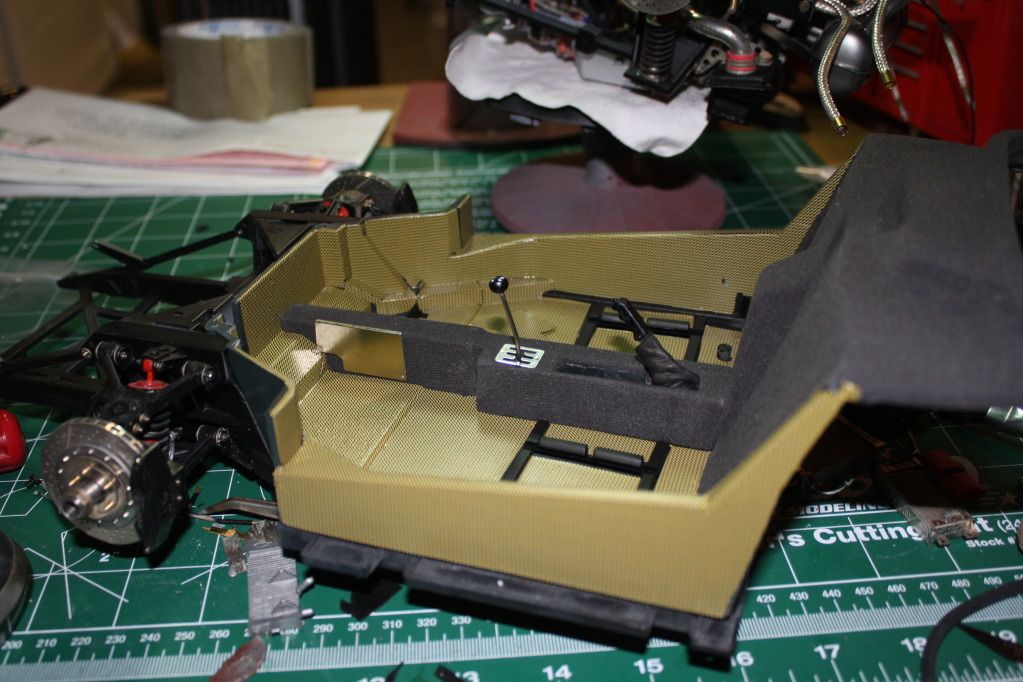
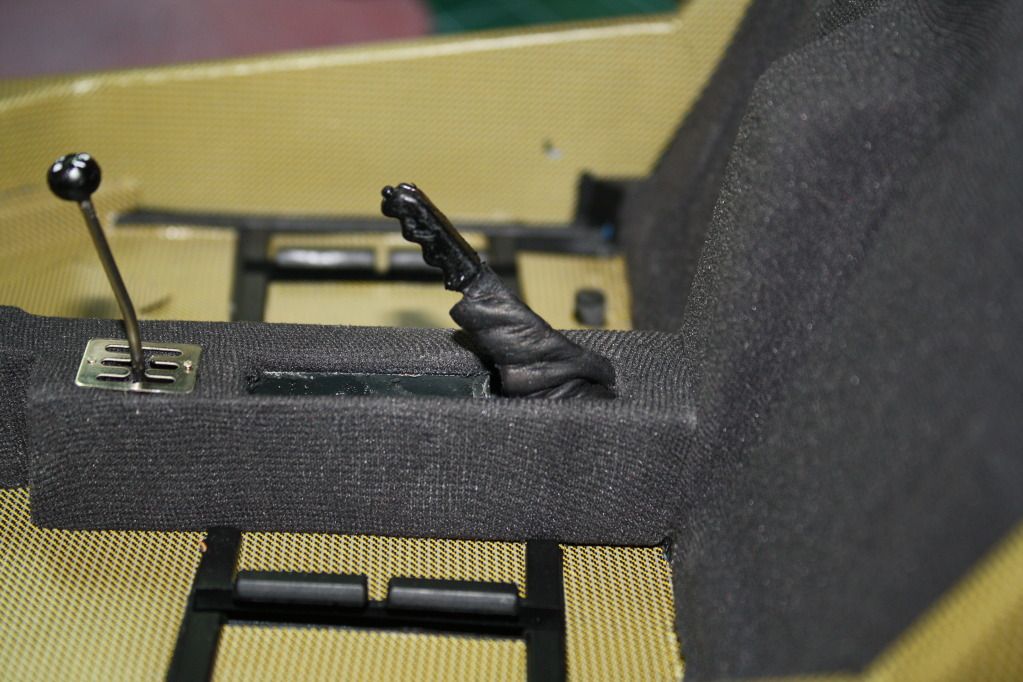
I also wanted to share with ya the progress on the interior. Heres what i have done so far
Heres what I started with.......
here it is with carbon fiber decals and cloth added
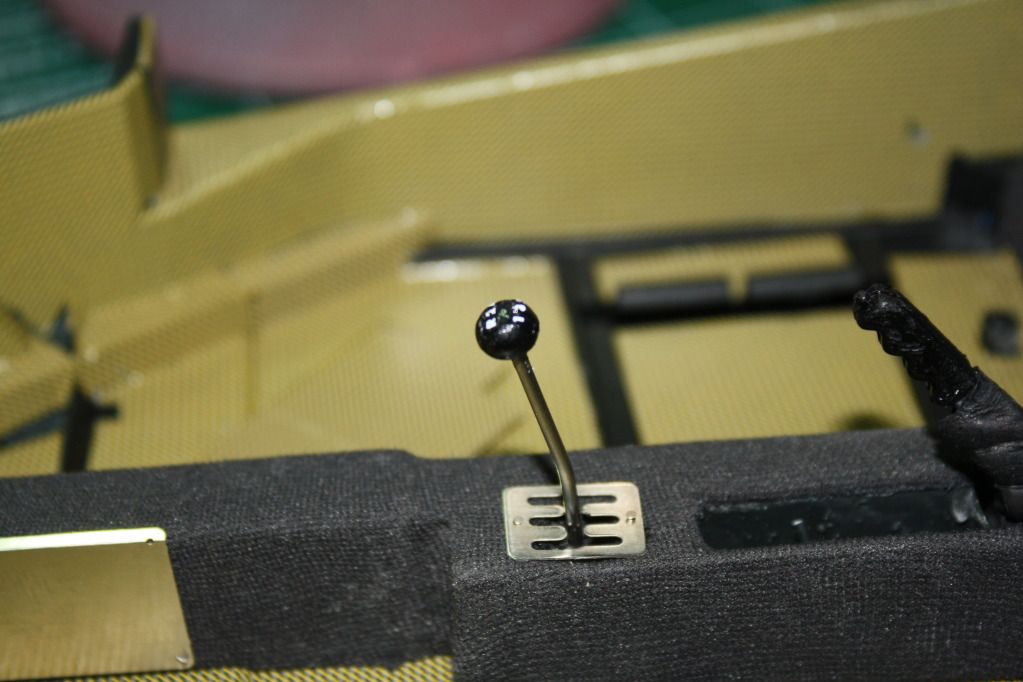
you ca see the leather boot added to the emergency brake....
and the detail of the shift knob here.....
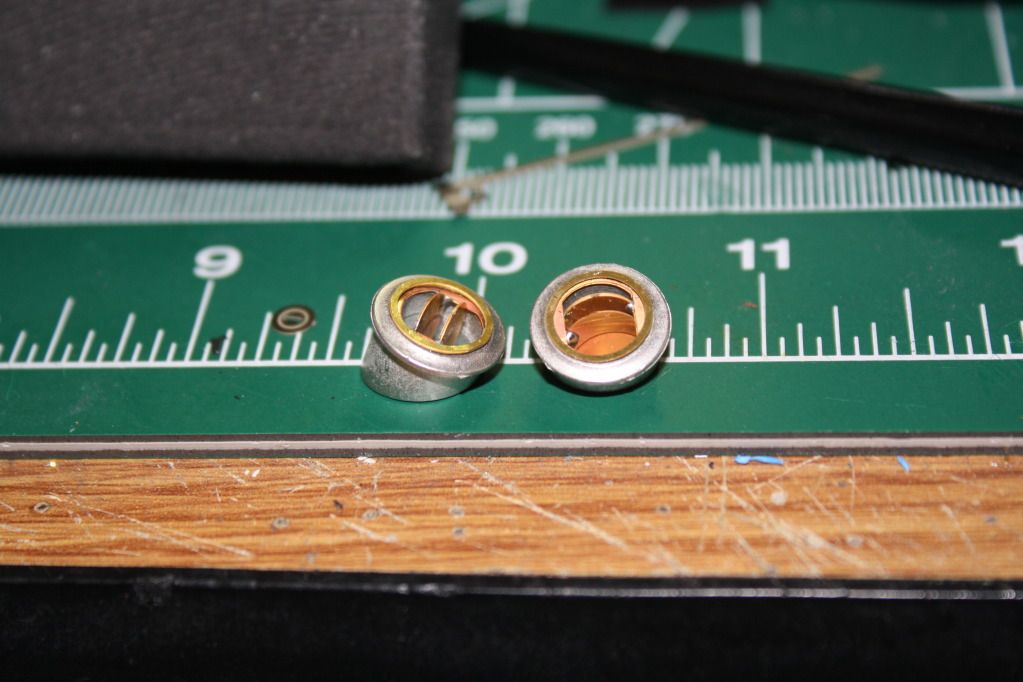
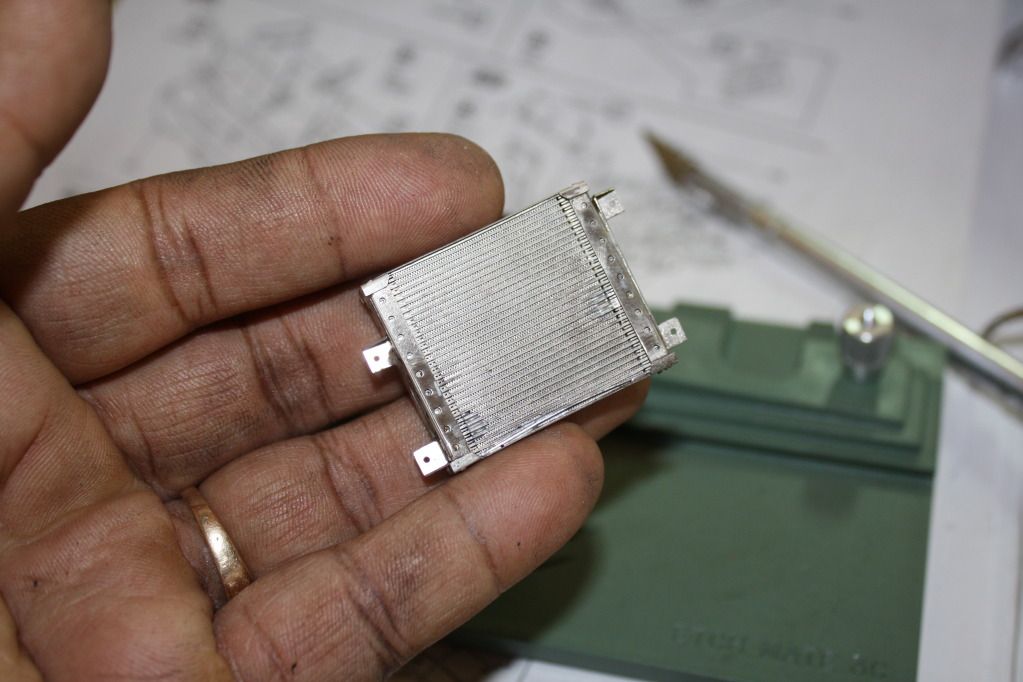
Oh yeah i also finished the oil and tranny coolers today..., only the oil cooler is pictured here...
see ya real soon......
-
Thanks fellas.....
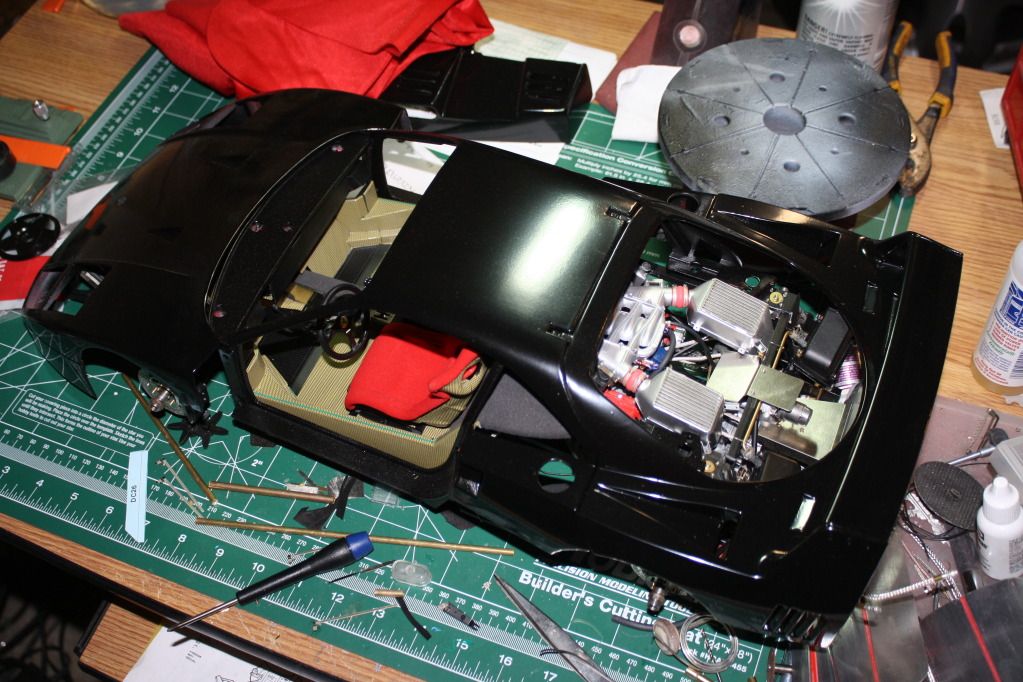
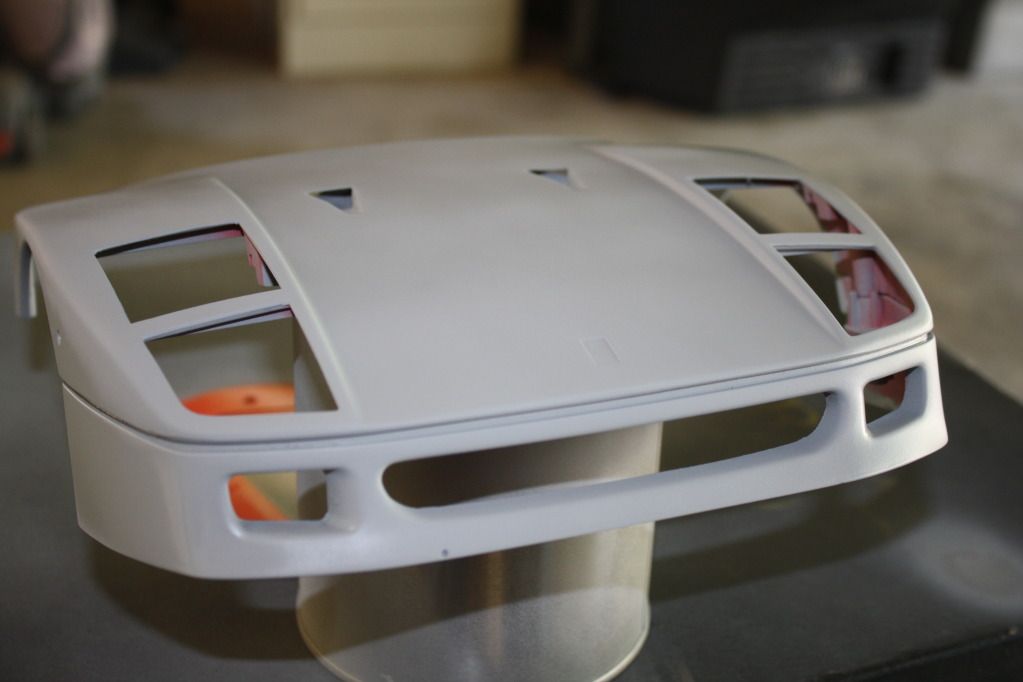
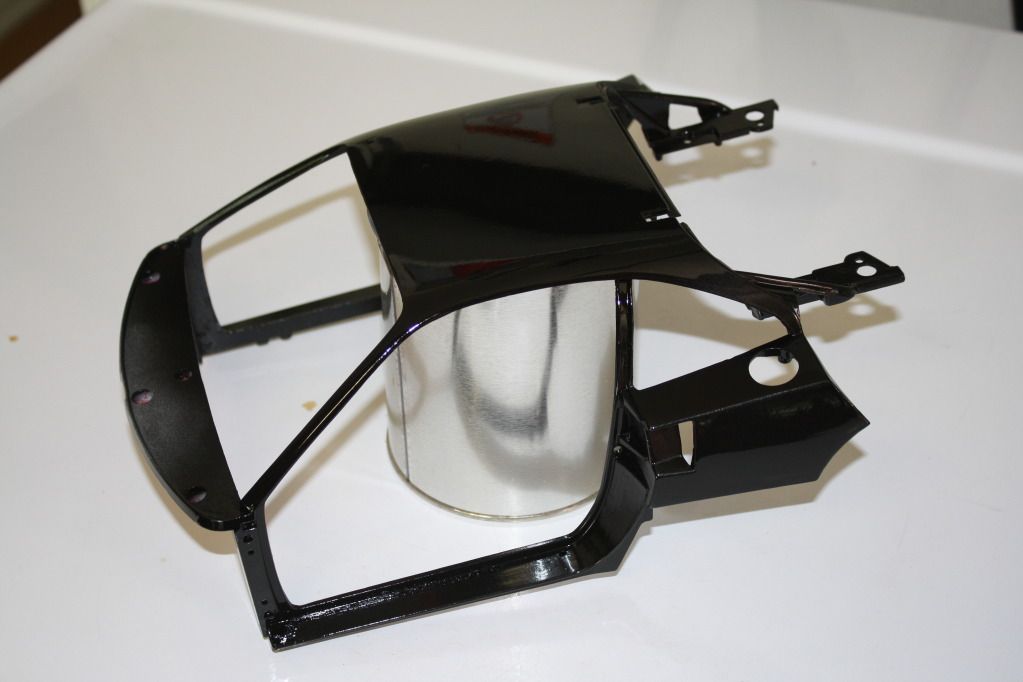
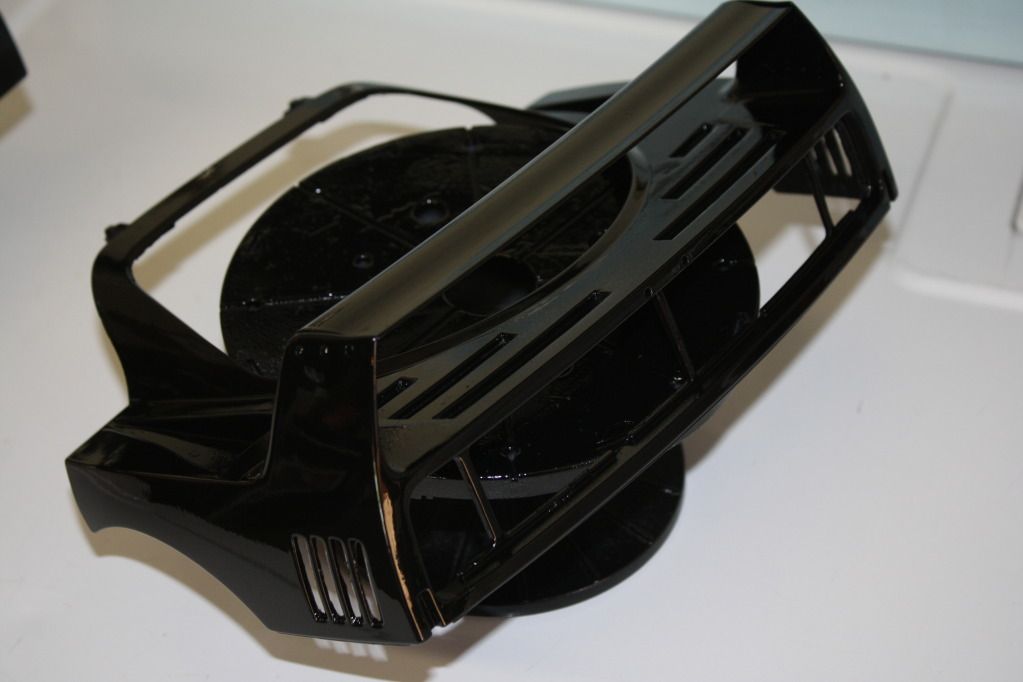
With the F40 being my favorite super car of all times I always felt she looked her best not in Ferrari red or yellow but in BLACK, a dark glossy black! So now it time to get some paint on the body so guess what color I'll be spraying this beauty? You guessed correctly , Black.
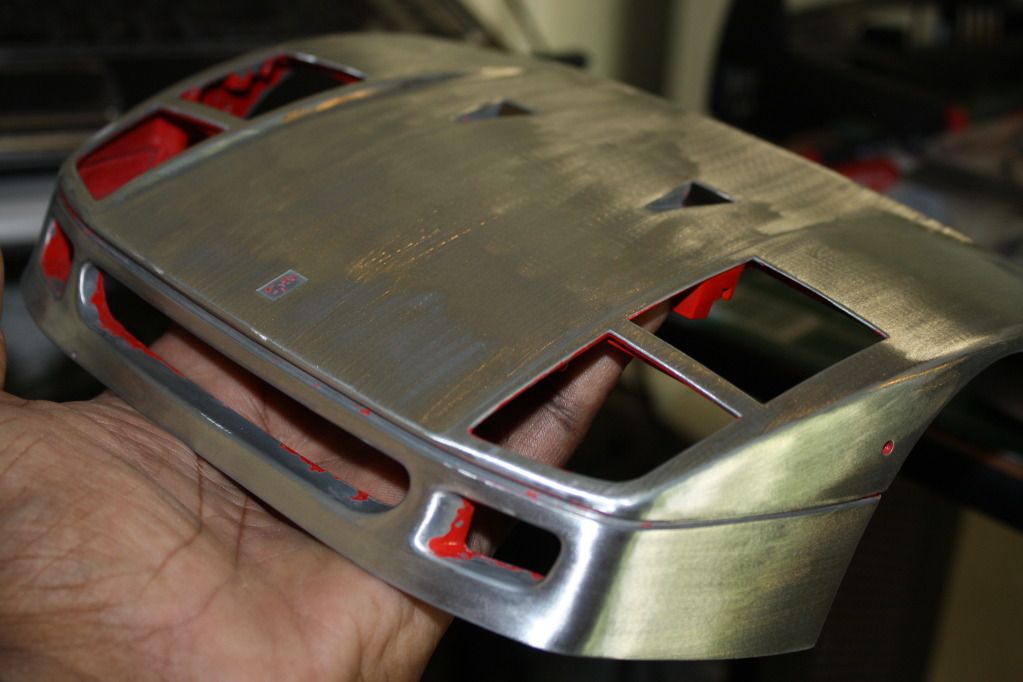
So i gave her metal body one last sanding and warmed up the ol air brushes and got busy....I hope you enjoy the pics.....
body taken down to bare metal
now add a lil primer
and some black paint .....clear coat will be added later....
notice I cut the vents out on the body.....
I'll have more for ya soon....
-
Hey Bryan I did post it in "Under Glass" I cant find it either but if I do I'll send you a link to it.has this been posted in "under glass" i cant seem to find it.....
cheers
bryan
Oh and thanks fellas for your kind compliments.....
-
WOW lots of new (err unseen) faces Good to meet you all....
-
thanks Dave!
-
Thanks Ken but I dont think there is a kit out there with this much detail , im building this kit with the help of the "Autograph Trans Kit" without this trans kit this model is basically a (very exspensive) diecast toy.Rommel; that's amazing!! I had no idea that there was a model kit out there with that kind of detail. You're doing fantastic, putting it all together. There's just so much detail!!
-
yeah its killing my eyes thats what it's doin !! LOL!looks great romell! some seriously tiny stuff goin' on. gonna be killer when it's done.
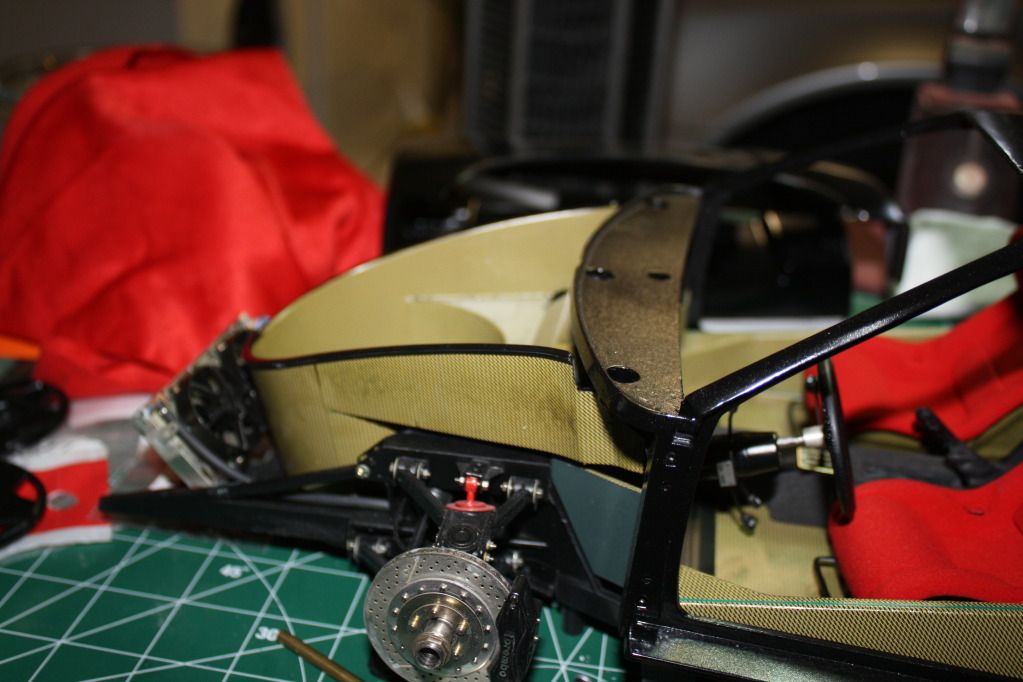
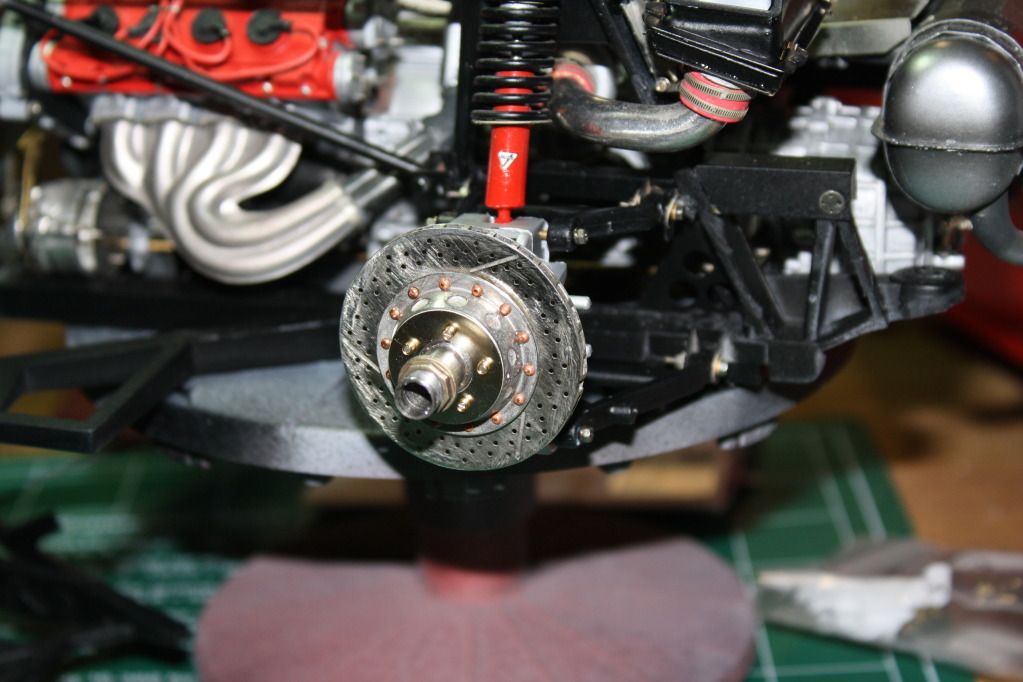
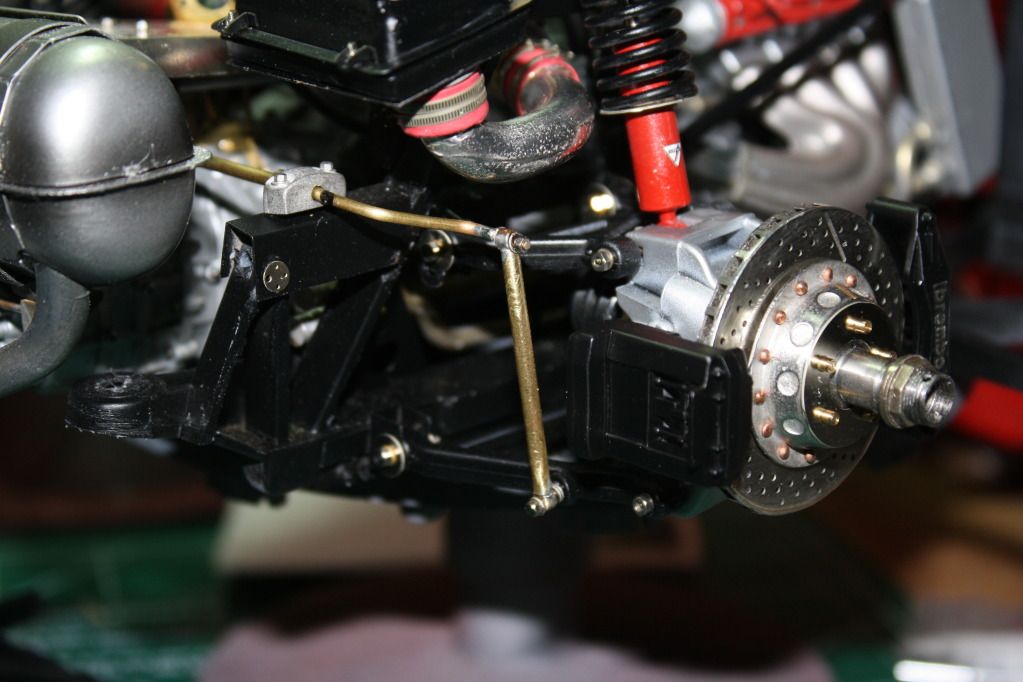
Anyway tha enough babble outta me I hope you enjoy the my small update ..... I was able t sit and work on the rear suspension while I waited on the guys to pick up my Harley and take it to the shop. the brake calipers are only on for mock up as they still need detailing.
here the intake air filters are installed
here the suspension is being installed
And finally the rear stablizer bar
Thanks for joining me.........
-
Hey Dave what scale is that 599 ???
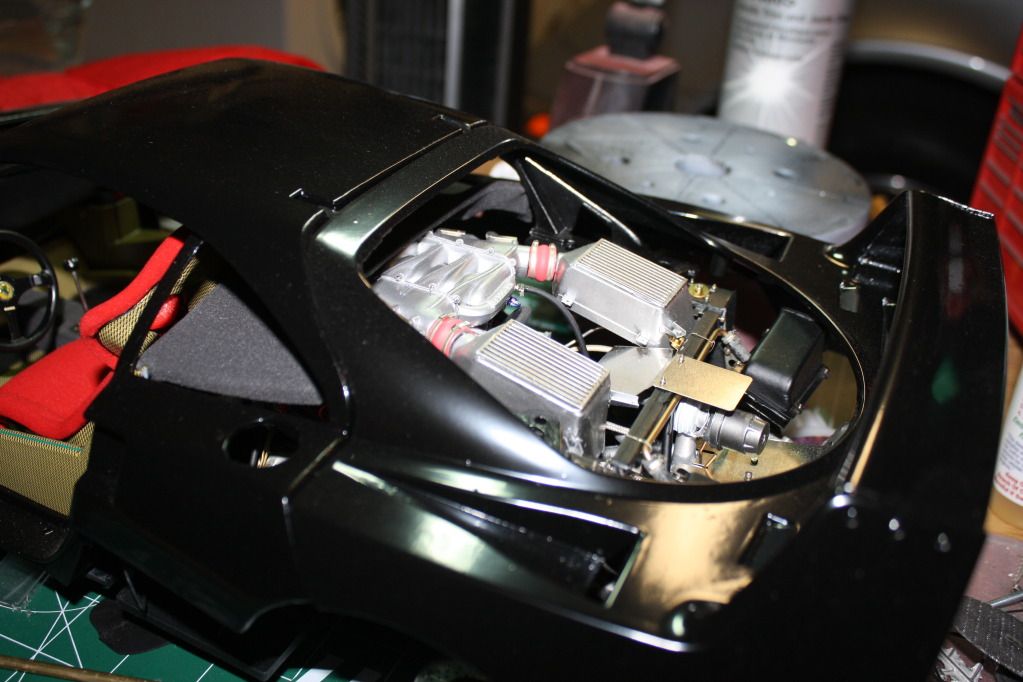
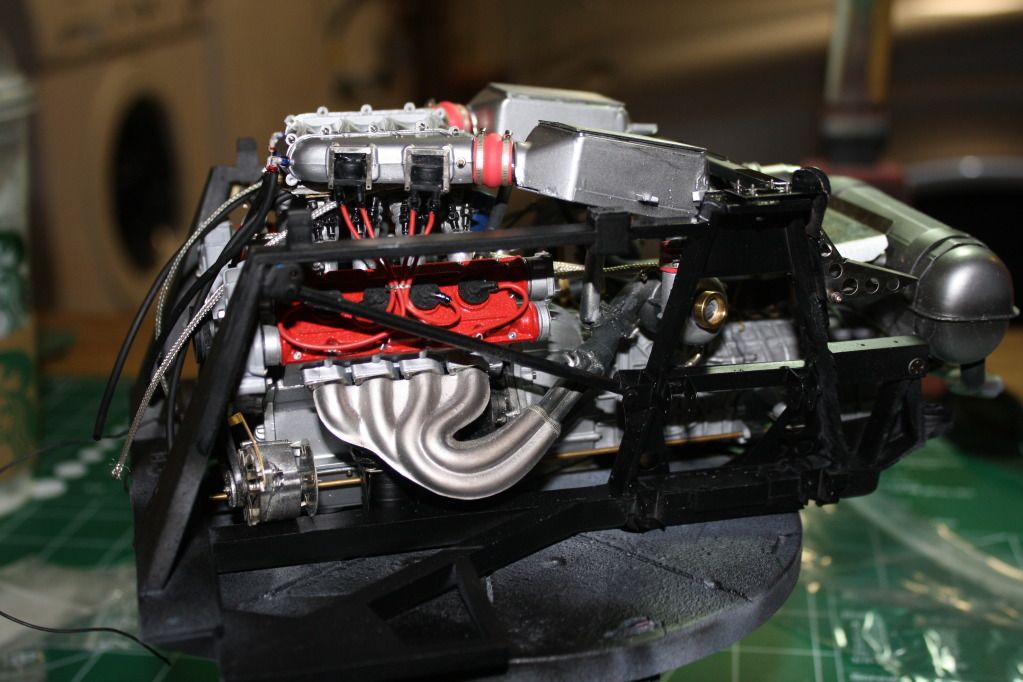
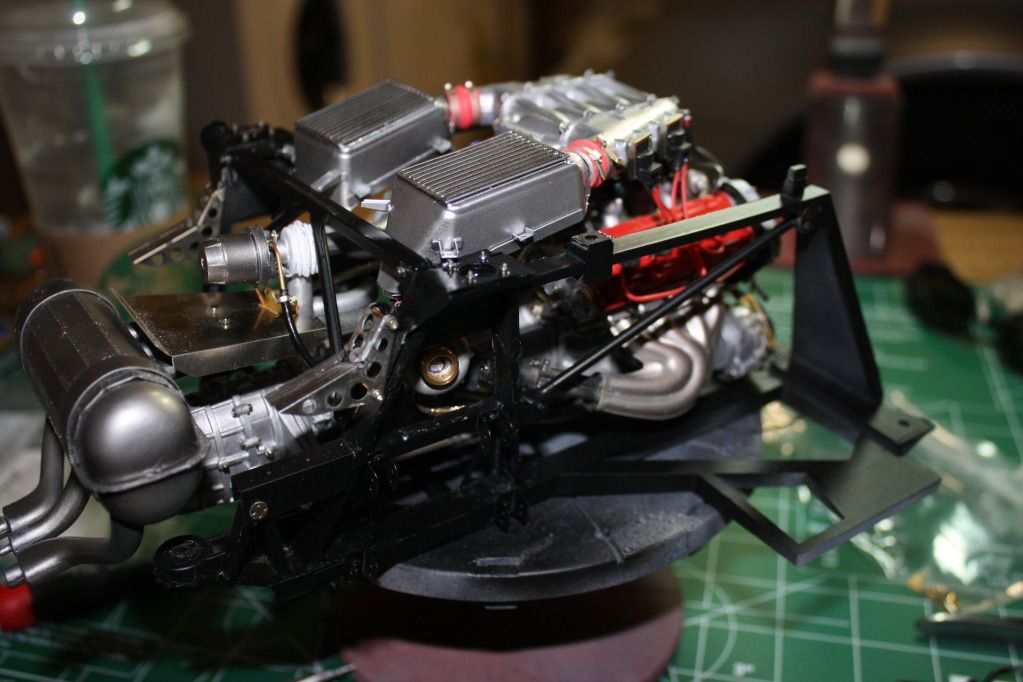
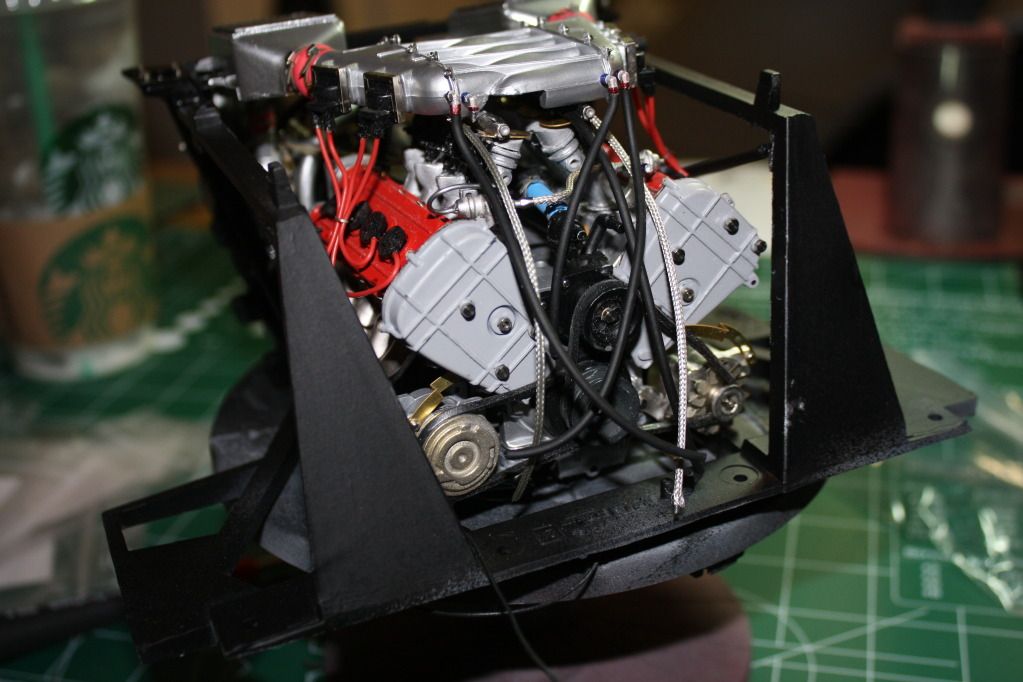
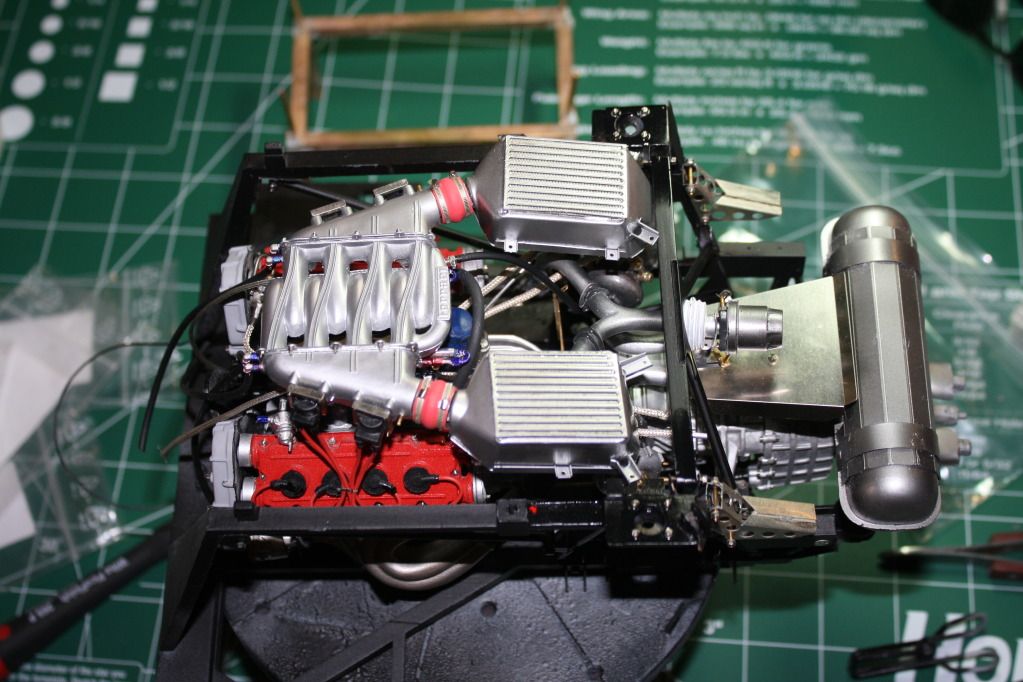
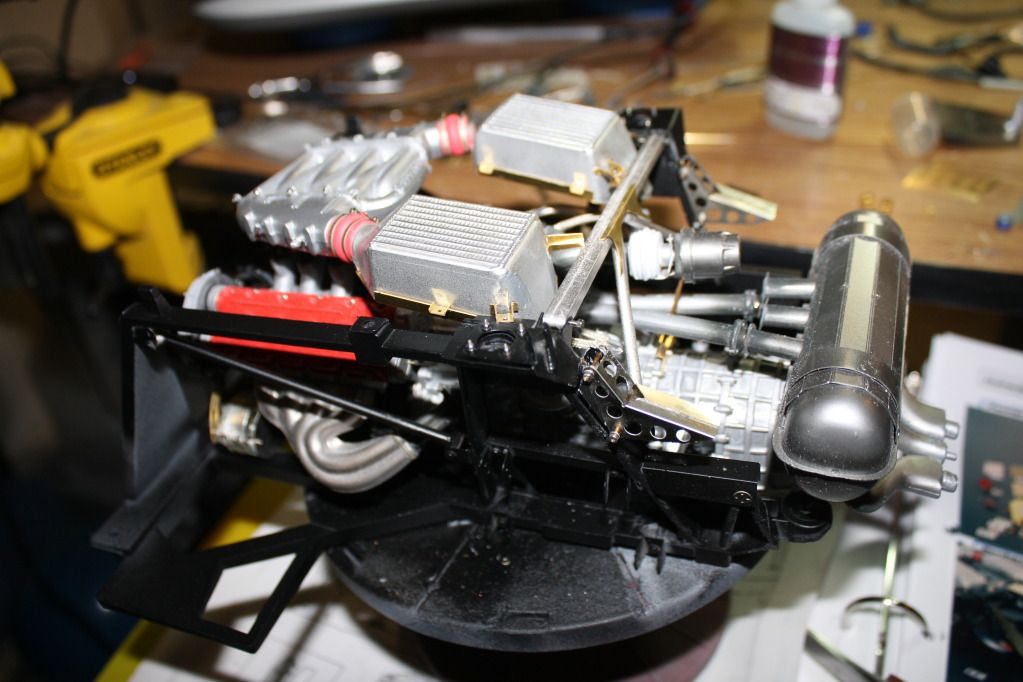
I got some more detail work done on the motor and I set it in the rear chassis I wont explain I'll just let the photos do the talking, I hope you enjoy!
I'll see ya soon.....
-
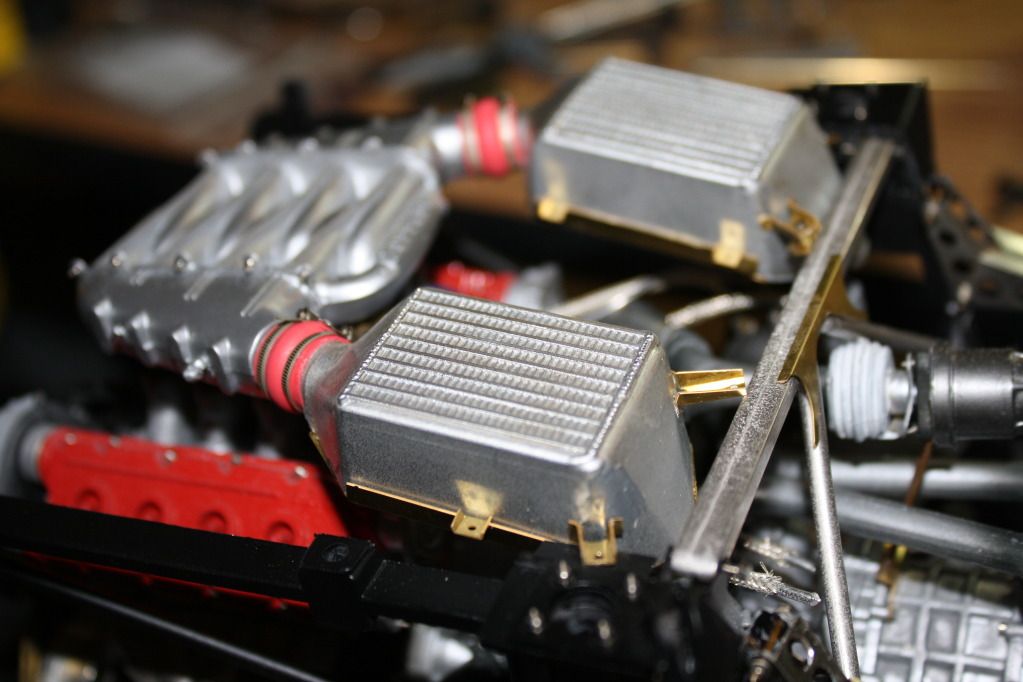
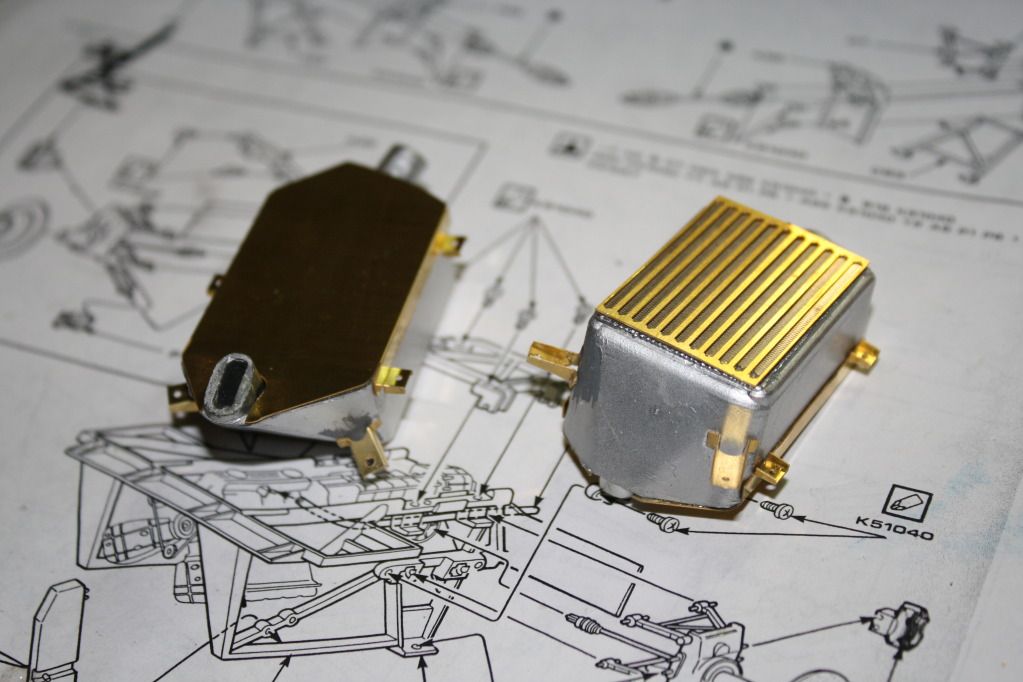
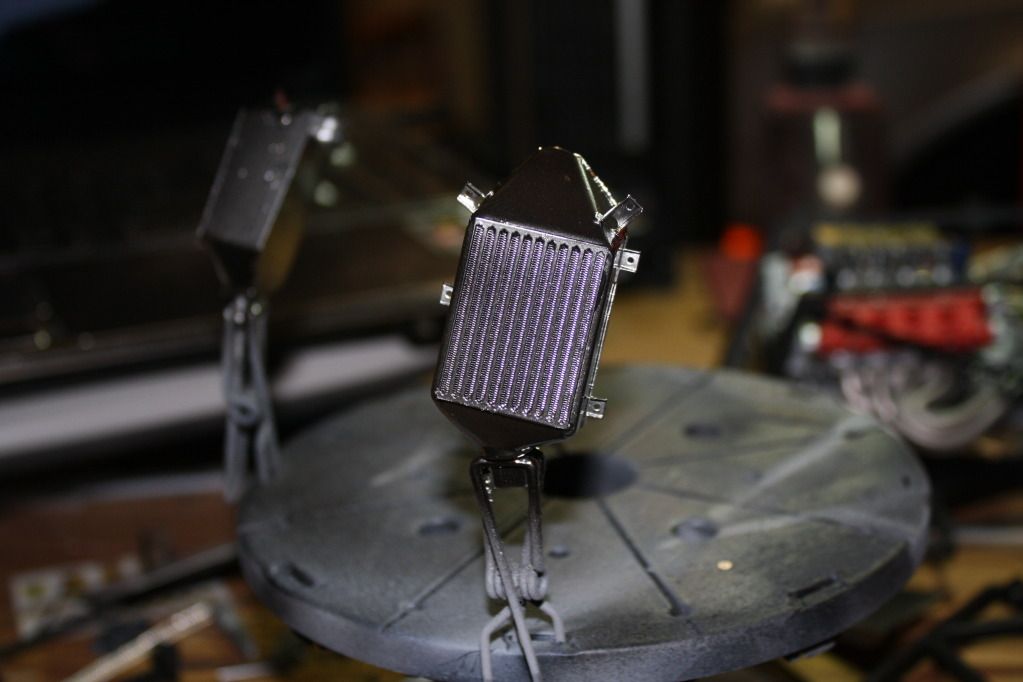
was able to get the intercoolers done tonight , at first I painted them with alclad polished aluminum but it cam out way too shiney so i gae em a coat of Tamiya gloss aluminum I hope you enjoy....
Heres the intercoolers with the P.E. before paint
polished aluminum paint......
final paint.....
Thanks for joining me cya soon
-
Thats just BEAUTIFUL!!!!
-
Yeah Im moving along a lil faster than I thought I would LOL! .....
here another small update, I got some paint on the rear chassis its complete now more pics tomorrow I hope you enjoy...
I'll post the painted chassis tomorrow , thx for joining me.......
-
I have no idea Joe this one will probably sit in a storage box until im ready to show it.... Im glad you found it tho....Not sure how i missed this one, Nice work Rom. That thing is a monster, where the heck you gonna display it lol.
Thanks fellas for your sincere compliments
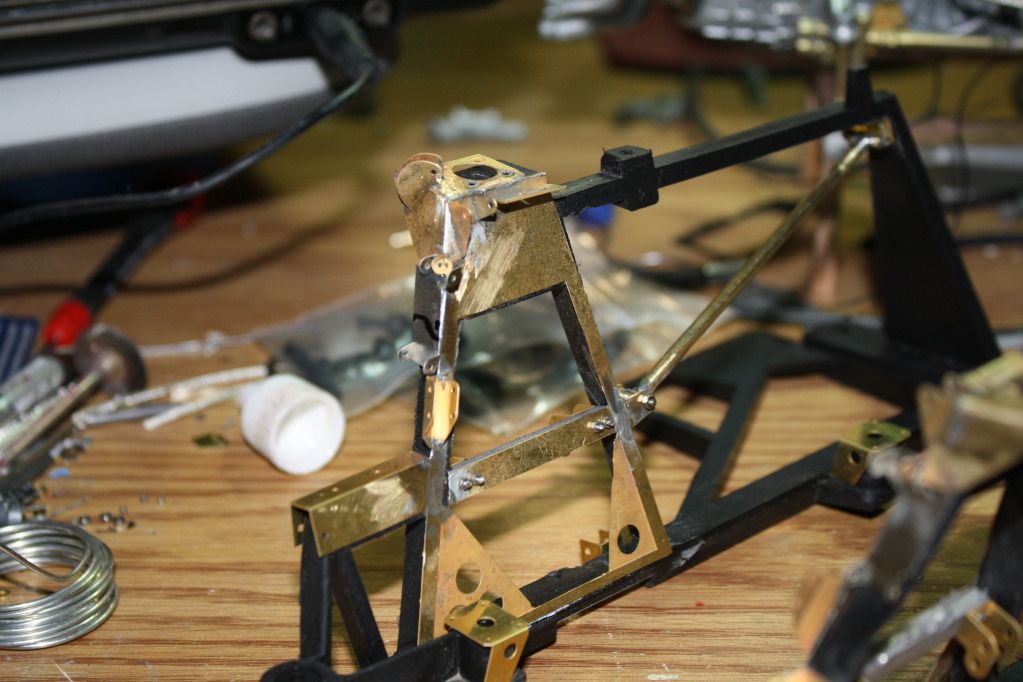
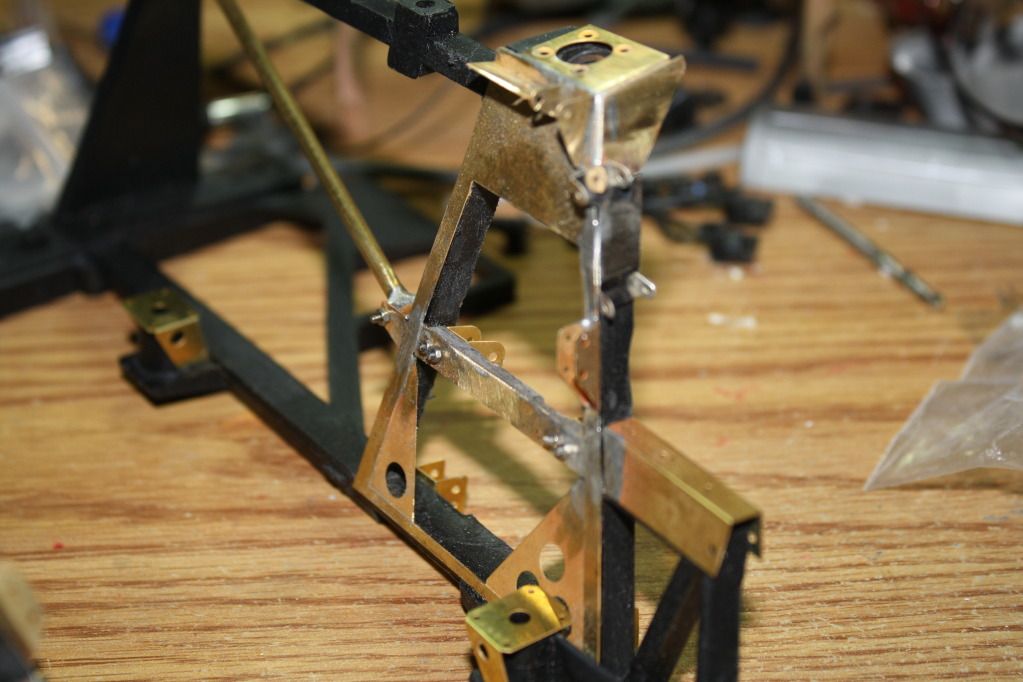
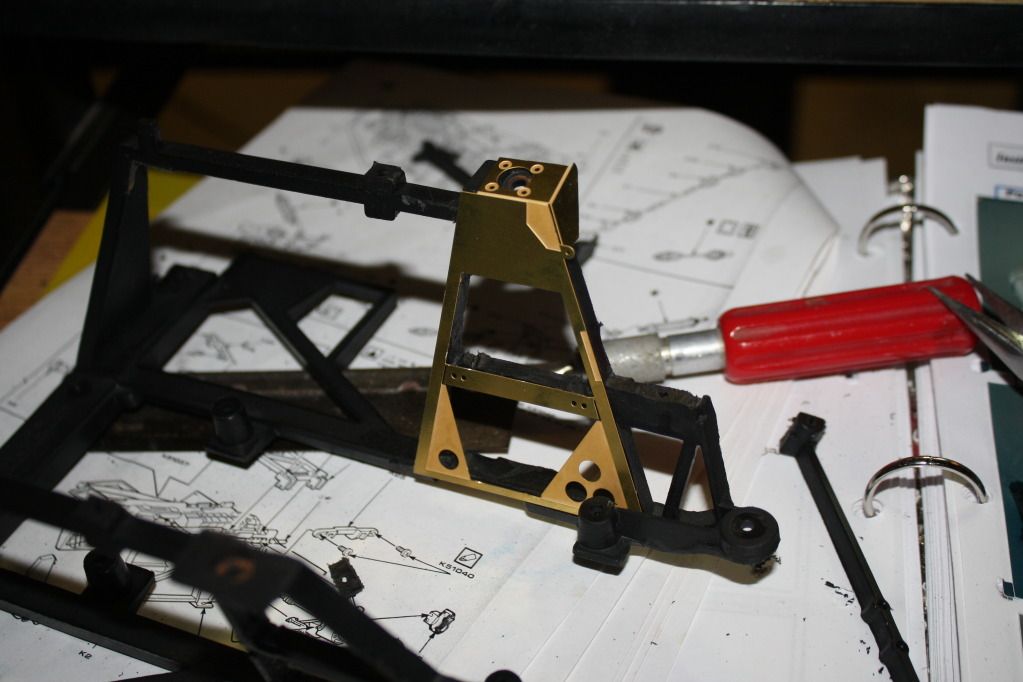
I got started on the rear chassis build last night just wanted to give you some pics of the start of it all
this is a pic of the pile of P.E. that's going on just the rear chassis
Heres the chassis after its been modified
I'll be back with more tonight.......
-
Mike is a friend of mine I told him about it.
-
Not a problem Jim I'll PM you with those names tomorrow......I watch your work for the same thing too! But if you don't mind me asking, can you PM me on here of afew of the other builders that you watch? I like watching things like that myself. Keep the good model building work also man! Oh yea, I'm watching this build as well.
Thanks fellas for the compliments on the build I have a small update for you......
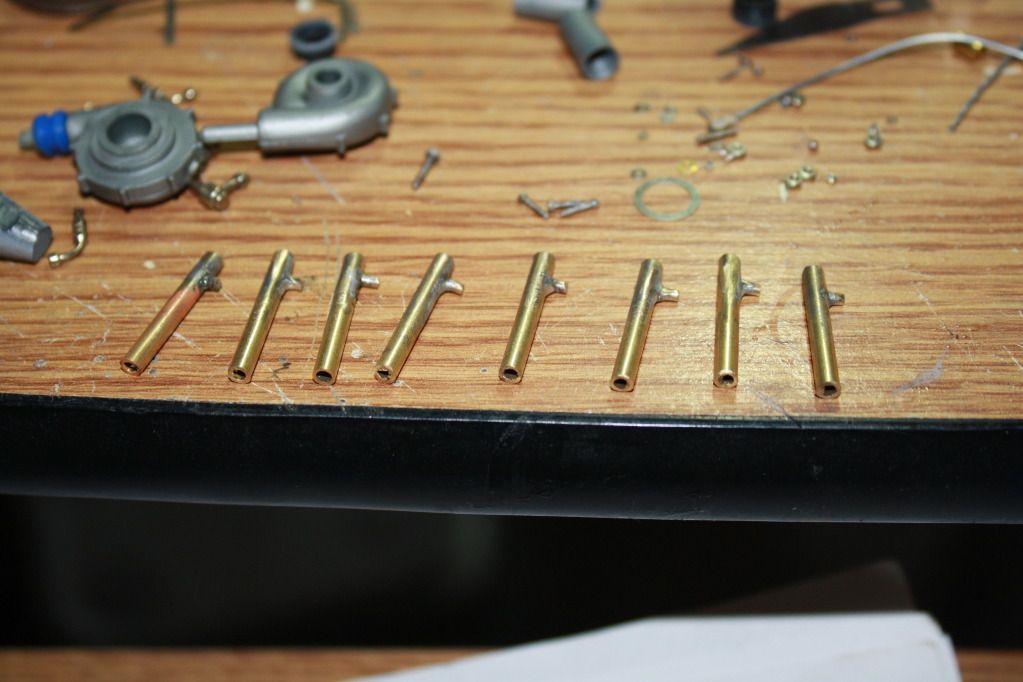
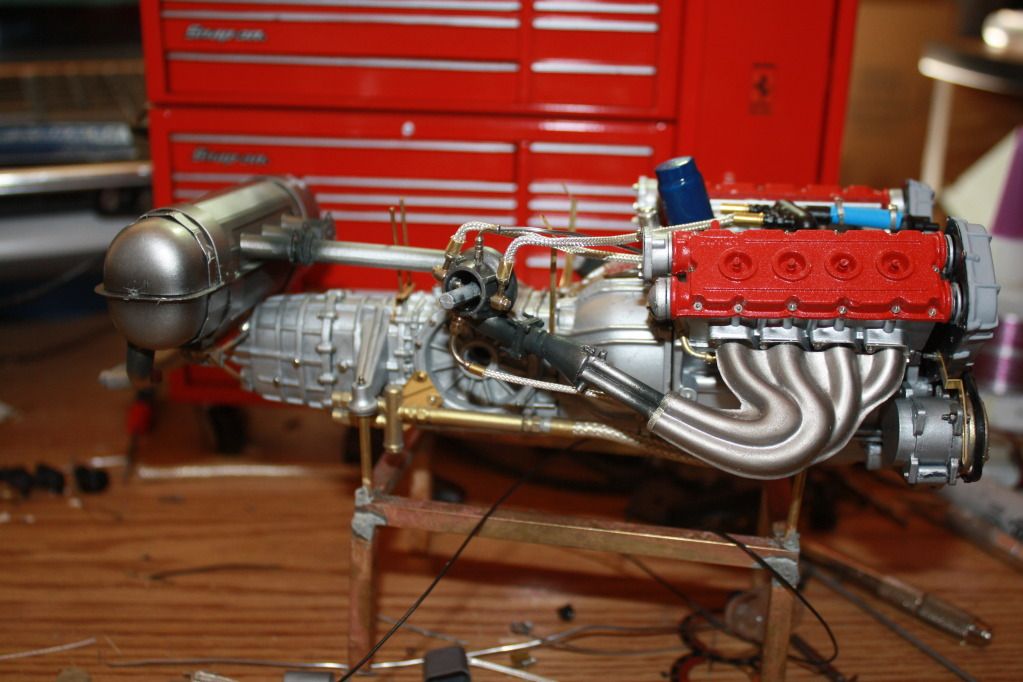
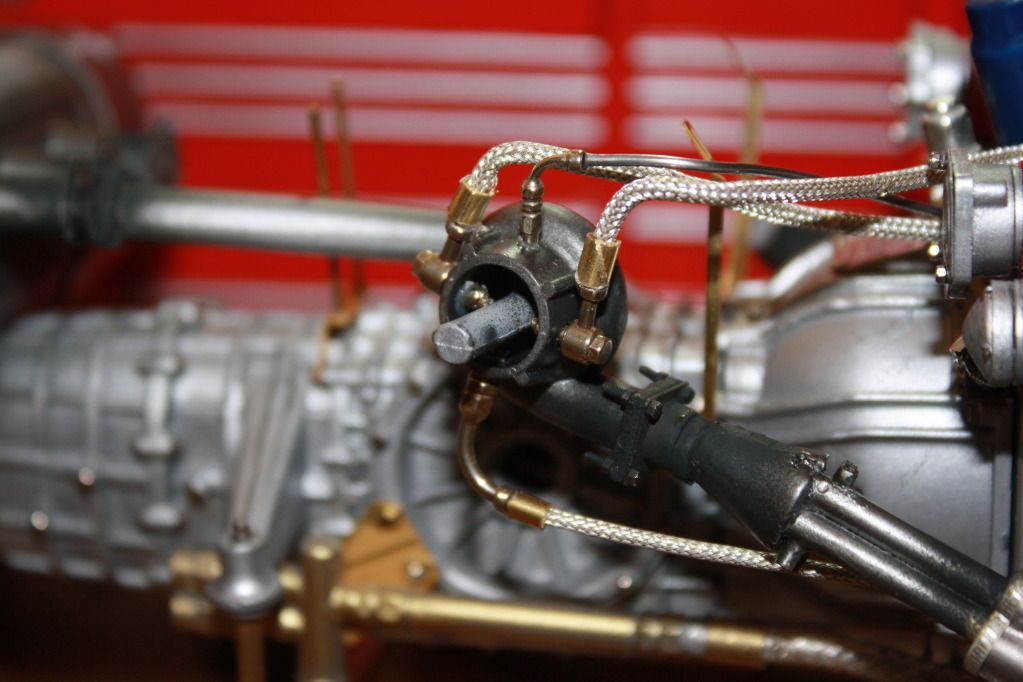
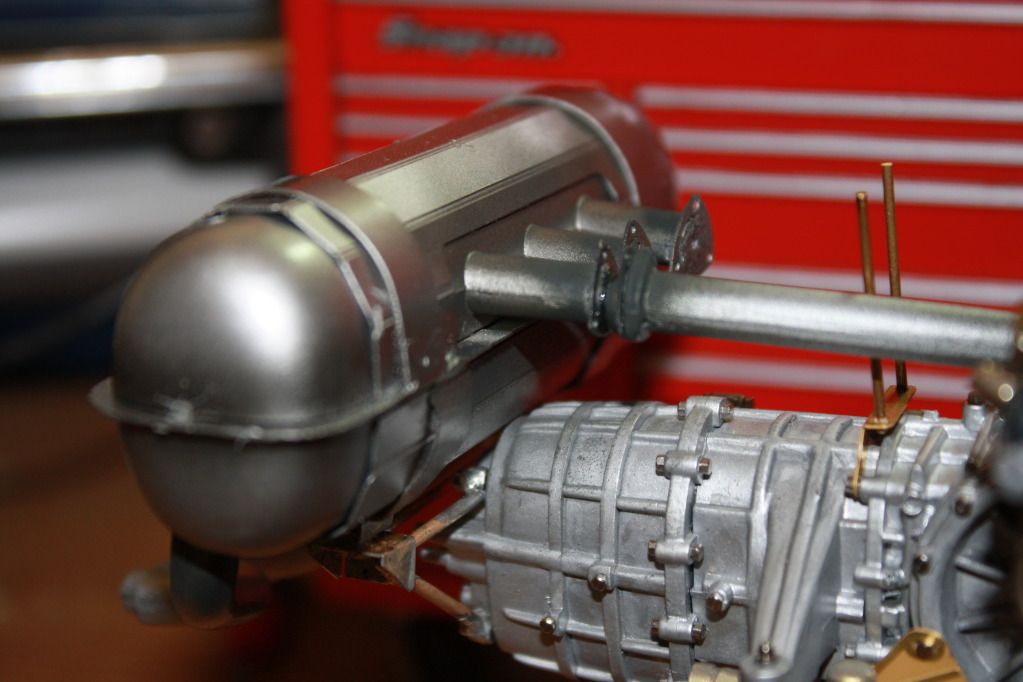
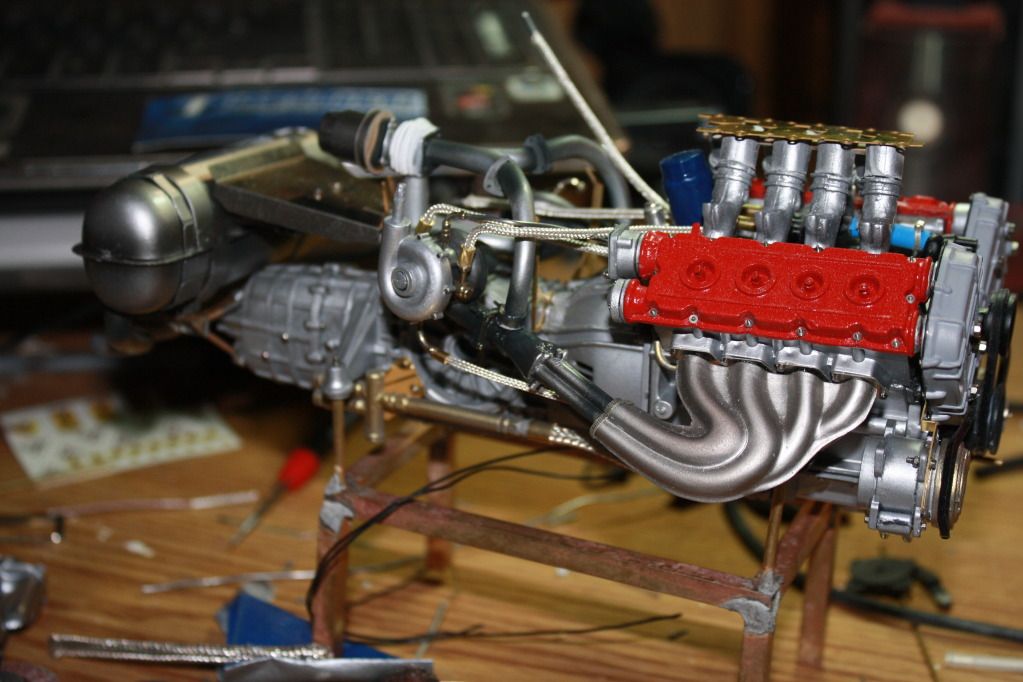
I was able to get the exhaust system installed along with most of the pressure lines I also started on the clean air intake I hope you enjoy the photos
here I made all the exhaust pipes in brass.....
Here the turbo system is started
the clean air intake started.....
Heck at this rate the motor will be completed with a few more days thanks for joining me.....


1/12 hot rod 240Z convertible. Flares, Sept. 30
in WIP: Model Cars
Posted
gonna be saweet!