

seeker589
-
Posts
517 -
Joined
-
Last visited
Content Type
Profiles
Forums
Events
Gallery
Posts posted by seeker589
-
-
RB Motion makes hex pin/nut assemblies and if you want real screws they are available also.
Paul
http://www.rbmotion.com/index.html
I knew they made miniature hardware. But I didn't know how affordable the Scale Hardware line was. The RBMotion stuff is beautiful.
Thanks for the links and tip!
Does anyone else have any suggestions that may be even cheaper? 'Cause I'm, like, cheap!
-
I love it!
Think of the wheelies it will do when the turbo spools-up!
-
For the last two weeks or so I have been a fabricating fool. Now I'm at a bit of an impasse.
This is my build:
I have a bit of a problem. I have used some weld wire (held in with pieces of masking tape) to mock-up the rear suspension assembly. While I am very pleased with how every thing is coming together - the pins looks like dung and I won't use them on the final assembly. All the rear suspension parts are independent parts - each link in the three link is a part.
Upon final assembly - what should I use to assemble the bits? Is there aftermarket bolt detail with a shaft? Since I've made pretty much everything up until now - I am open to anyone's scratch building suggestions also. Would a cut down straight pin with a hex filed in it be scale enough? What should I use on the other end of the pin? A hex bead? Photo-etch bolt heads?
This really has me stumped. I was very excited to venture this far into scratch-building - Now I need some guidance on how to attach said fabbed suspension pieces.
Thank You all for any help you can give me.
-
Progress continues:
Everything was made with various Evergreen and Plastruct stock. The springs are from a monogram NASCAR glue bomb and the rear is from some mid 70s Nova glue bomb I recieved from a former co-worker in a giant bag with other older builds of his.
Here is the rear end and suspension - completed but without shocks:

I made the pins out of weld wire to hold the assembly together - I will be using something else in the final assembly - see question below.
This is what I have so far(minus motor and headlight area):
you also see the VW beam axle for the front. I found some decent VW sized drums in the old '49 Merc kit from AMT. Attaching to those pins at the front will be the clamp for the VW beam - seen just forward of the frame.
I do have some questions. When building the rear suspension - I first used straight pins to mock it up. They became too cumbersome and I them made some smaller pins out of .030 solid weld wire. What does everone else use for connecting independent suspension bits in the final assembly? I kind of remember seeing some plastic detail bolts in MCM. They seemed to have a shaft on them and would work. What do you use?
Thanks to everyone for your encouragement!
-
Peter -
Great looking model! I, too am a fan of international road racing. F1, IMSA, World Sports Car and touring car racing.
I autocrossed and hillclimbed a few years back.
NASCAR hasn't been redneck racing since Earnhardt died. Everyone is way too polished.
-
I like how this build is shaping up. Keep up the good work!
The wedge taper fenders are really unique. I'm looking forward to seeing how they look filled up with tire and wheel.
-
Looking good Peter! I'll be watching this build. I'm planning something similar but with a roadster body.
-
heck I love seeing the oddball's like 6 Cylinder Mustangs and Firebird's, so lets see them, I'll start with my '68 Pontiac LeMans with a 230 I6 and 3SPD Auto combo.
Nick
So lets see those Mighty 6 Cars
Nice build - great subject.
Where did you get a OHC Pontiac 6?
-
That looks great! At least you were still modeling - I stopped building all-together. Now I'm back and teaching myself stuff all over again.
Welcome back - this message board is like one great big family - and the magazine isn't bad either.
-
YES! Buick powered wasn't it?
Yes, all of Max's cars were Buick Nailhead powered. He was quite the Nailhead magician. I'm not much for 'em - the size of the valves really cuts the high RPM air-flow. Today - You can make much more power with a Small Block Chevy - Dollar-for-dollar.
For asthetics - the Nailhead is the winner, however. They just look great.
-
That chassis is beautiful!
Looking forward to seeing this finished.
-
Here is a mild custom '51 Chevy I did for a club build back in 1990:
This is an AMT Merc I started about the time I finished the Chevy. The top is chopped in the rear but not in the front. The rear window is from a Monogram '37 Ford.
This is the hood. The scoops are bubble packaging form some long forgotten item. Various product's bubble packaging has some great contours to it - It is vacuum formed.
-
I was thinking today of how I was gonna make headlight covers for my Vette project I'm planning.
Would you be interested in making a vacuum form of that front end for me?
-
When I grow up - I wanna build just like Scott!
Really nice build, Buddy! I love how this is looking. Your detail level is always something I admired about your builds - The way you cram all that detail into small places and make it look RIGHT.
Keep the updates coming!
-
Really good Mk.1 and Mk.2 Escorts with racing bits to add or not.
VW Mk.2 Scirocco - this is a Berg cup car:
VW Mk.2 Jetta
VW Golf Rally
A really good First gen BMW M3 kit
New tool XKE any or all generations
Full detail Pantera, Mangusta, and Longchamp kits
This is the Longchamp:
A Berg Cup series of hillclimb cars (do a search for Berg Cup and look at the pics - awesome!)
A first generation Ford Transit van.
A really good kit of a '61 Anglia - I wanna build a scale version of the Weasley's from Harry Potter.
A Mallock - one of the only front engined Formula cars:
A racing Caterham:
A Volvo P1800 would be GREAT!
-
Updates:
I didn't want to use the only VW beam I had from the only VW kit I had and it needed to be wider - so I decided to fab my own:
Built out of Plastruct round tube w/wire core and some Evergreen sheet stock. The trailing arms are Evergreen rod.
To make the trailing arms and drill them at all the same angle I made this simple jig with evergreen rectangle bar drilled at a similar angle to the Tamiya piece. I needed to get the right angle. I then used the same jig - with a straight pin glued into the hole I used to drill the arms. I used a hemostat clamp to hold the arm while I wedged a knife under the arm and bent it up at a somewhat similar angle.
Here is what the front suspension looks like so far:
Here it is set in relation to the frame:
Here are some suspension brackets I made out of some aluminum .010 roof flashing. It makes it out to about 1/4 inch thick in scale:
Here are some of the brackets glued in place:
I am planning on a three-link with a pan-hard bar.
Here are the suspension pieces with some of the brackets glued in their places. The springs are from an old Monogram stock car - rear. The shocks will be also.
Hopefully by the end of the weekend I'll have all the rear suspension brackets in place and all the connections firmed up. Finishing the front suspension will be next. I have to solve steering, trailing arm connections to the spindle/brake drum, and beam mounting issues.
Thanks to everyone for your encouragement. I welcome any comments, questions, or observations.
-
I'd park it in my garage!
Seriously - I have seen too many VERY poorly designed homebuilts.
Have you seen the Old Yaller II? It's the yellow #70.
Butt-ugly but fast! Max Balchowski was a genius!
Your car isn't ugly - it has character! I love it!
-
Brilliant build! Very clean.
The XKE is one of the most beautiful body shapes ever created. When you remove all the ugly bumpers and chrome do-dads it truly becomes a pure flowing design.
What color did you use for the body?
-
Kind of like this...
Yup! Like that - only long and low.
There are some bare-bones roadsters scattered around the web. I crossed their idea with Tex Smith's and wanted to create my own.
Thanks for the additional inspiration.
Everyone: Thanks for your encouragement! More to come. I just have to get building!
-
Greetings -
In the Writer's Guidelines and Photo tips section - the Photo Tips link (both 1&2)seems to be broken on my end.
Does it work for anyone else?
-
This build has progressed very nicely. You clean building skills and problem solving (i.e. the tailgate closing problem) has me re-thinking my model building methodology.
I kinda like the "bull-nose" front-end/hood area. I will wait to make a full judgement until it is finished.
If I may ask - what camera are you using and at what settings? My photography is very inconsistent and I wish to improve.
-
Looks Great!
You nailed the stance!
-
Wow... that's some nice junk!!!
Yea - What Harry said!
Very clean build. I looks like a happy car - not one that is trying so hard to be so evil and mean. It seems to me tha the whole rat rod thing is to out-evil each other.
-
Very nice looking model!
Beautiful decal work.


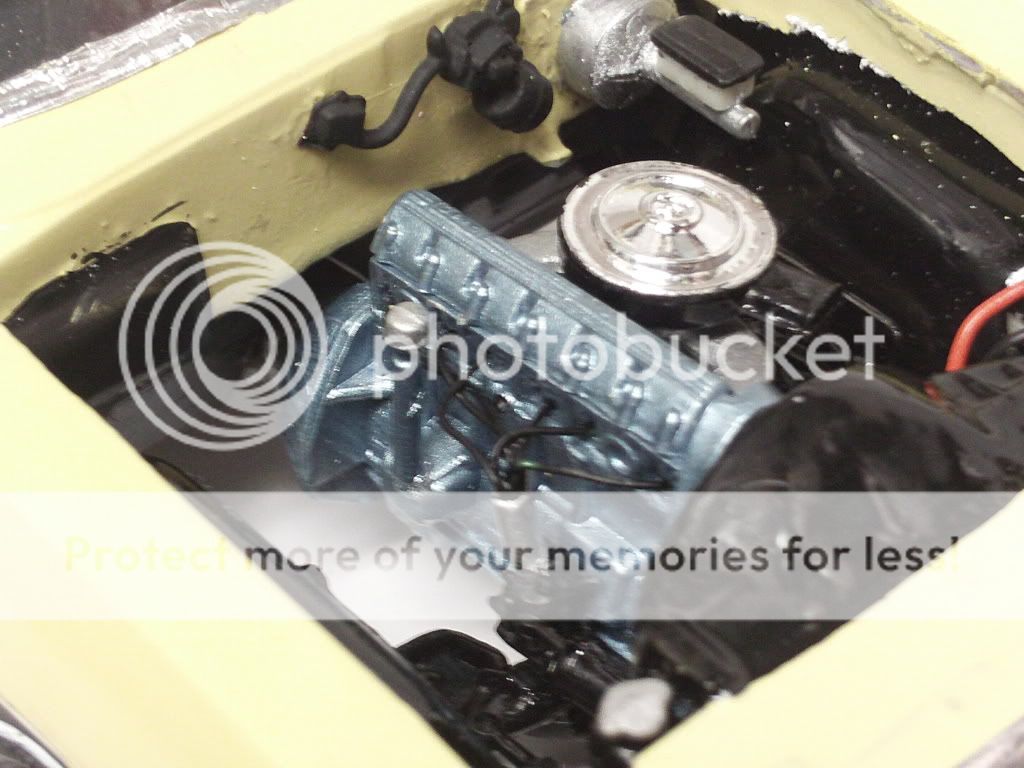


What does everyone use to hold parts together?
in Tips, Tricks, and Tutorials
Posted
Thanks Harry!
I now have to make the decision on if I'm spending big money or little money.