Eero
-
Posts
47 -
Joined
-
Last visited
Content Type
Profiles
Forums
Events
Gallery
Everything posted by Eero
-
Very nice to see this VW 181 coming! This Scale Production VW is based on a 3D-modeling I made some years ago. I then built one from 3D-printed parts. I used Tamiya Beetle as a base and this Scale Production VW Thing will also be based on Tamiya Beetle. My build from 3D-printed parts: http://www.eerokumanto.com/cars/scale-models/vw-thing
-
I don't know where all the photos hve gone but I uploaded some photos here.

-
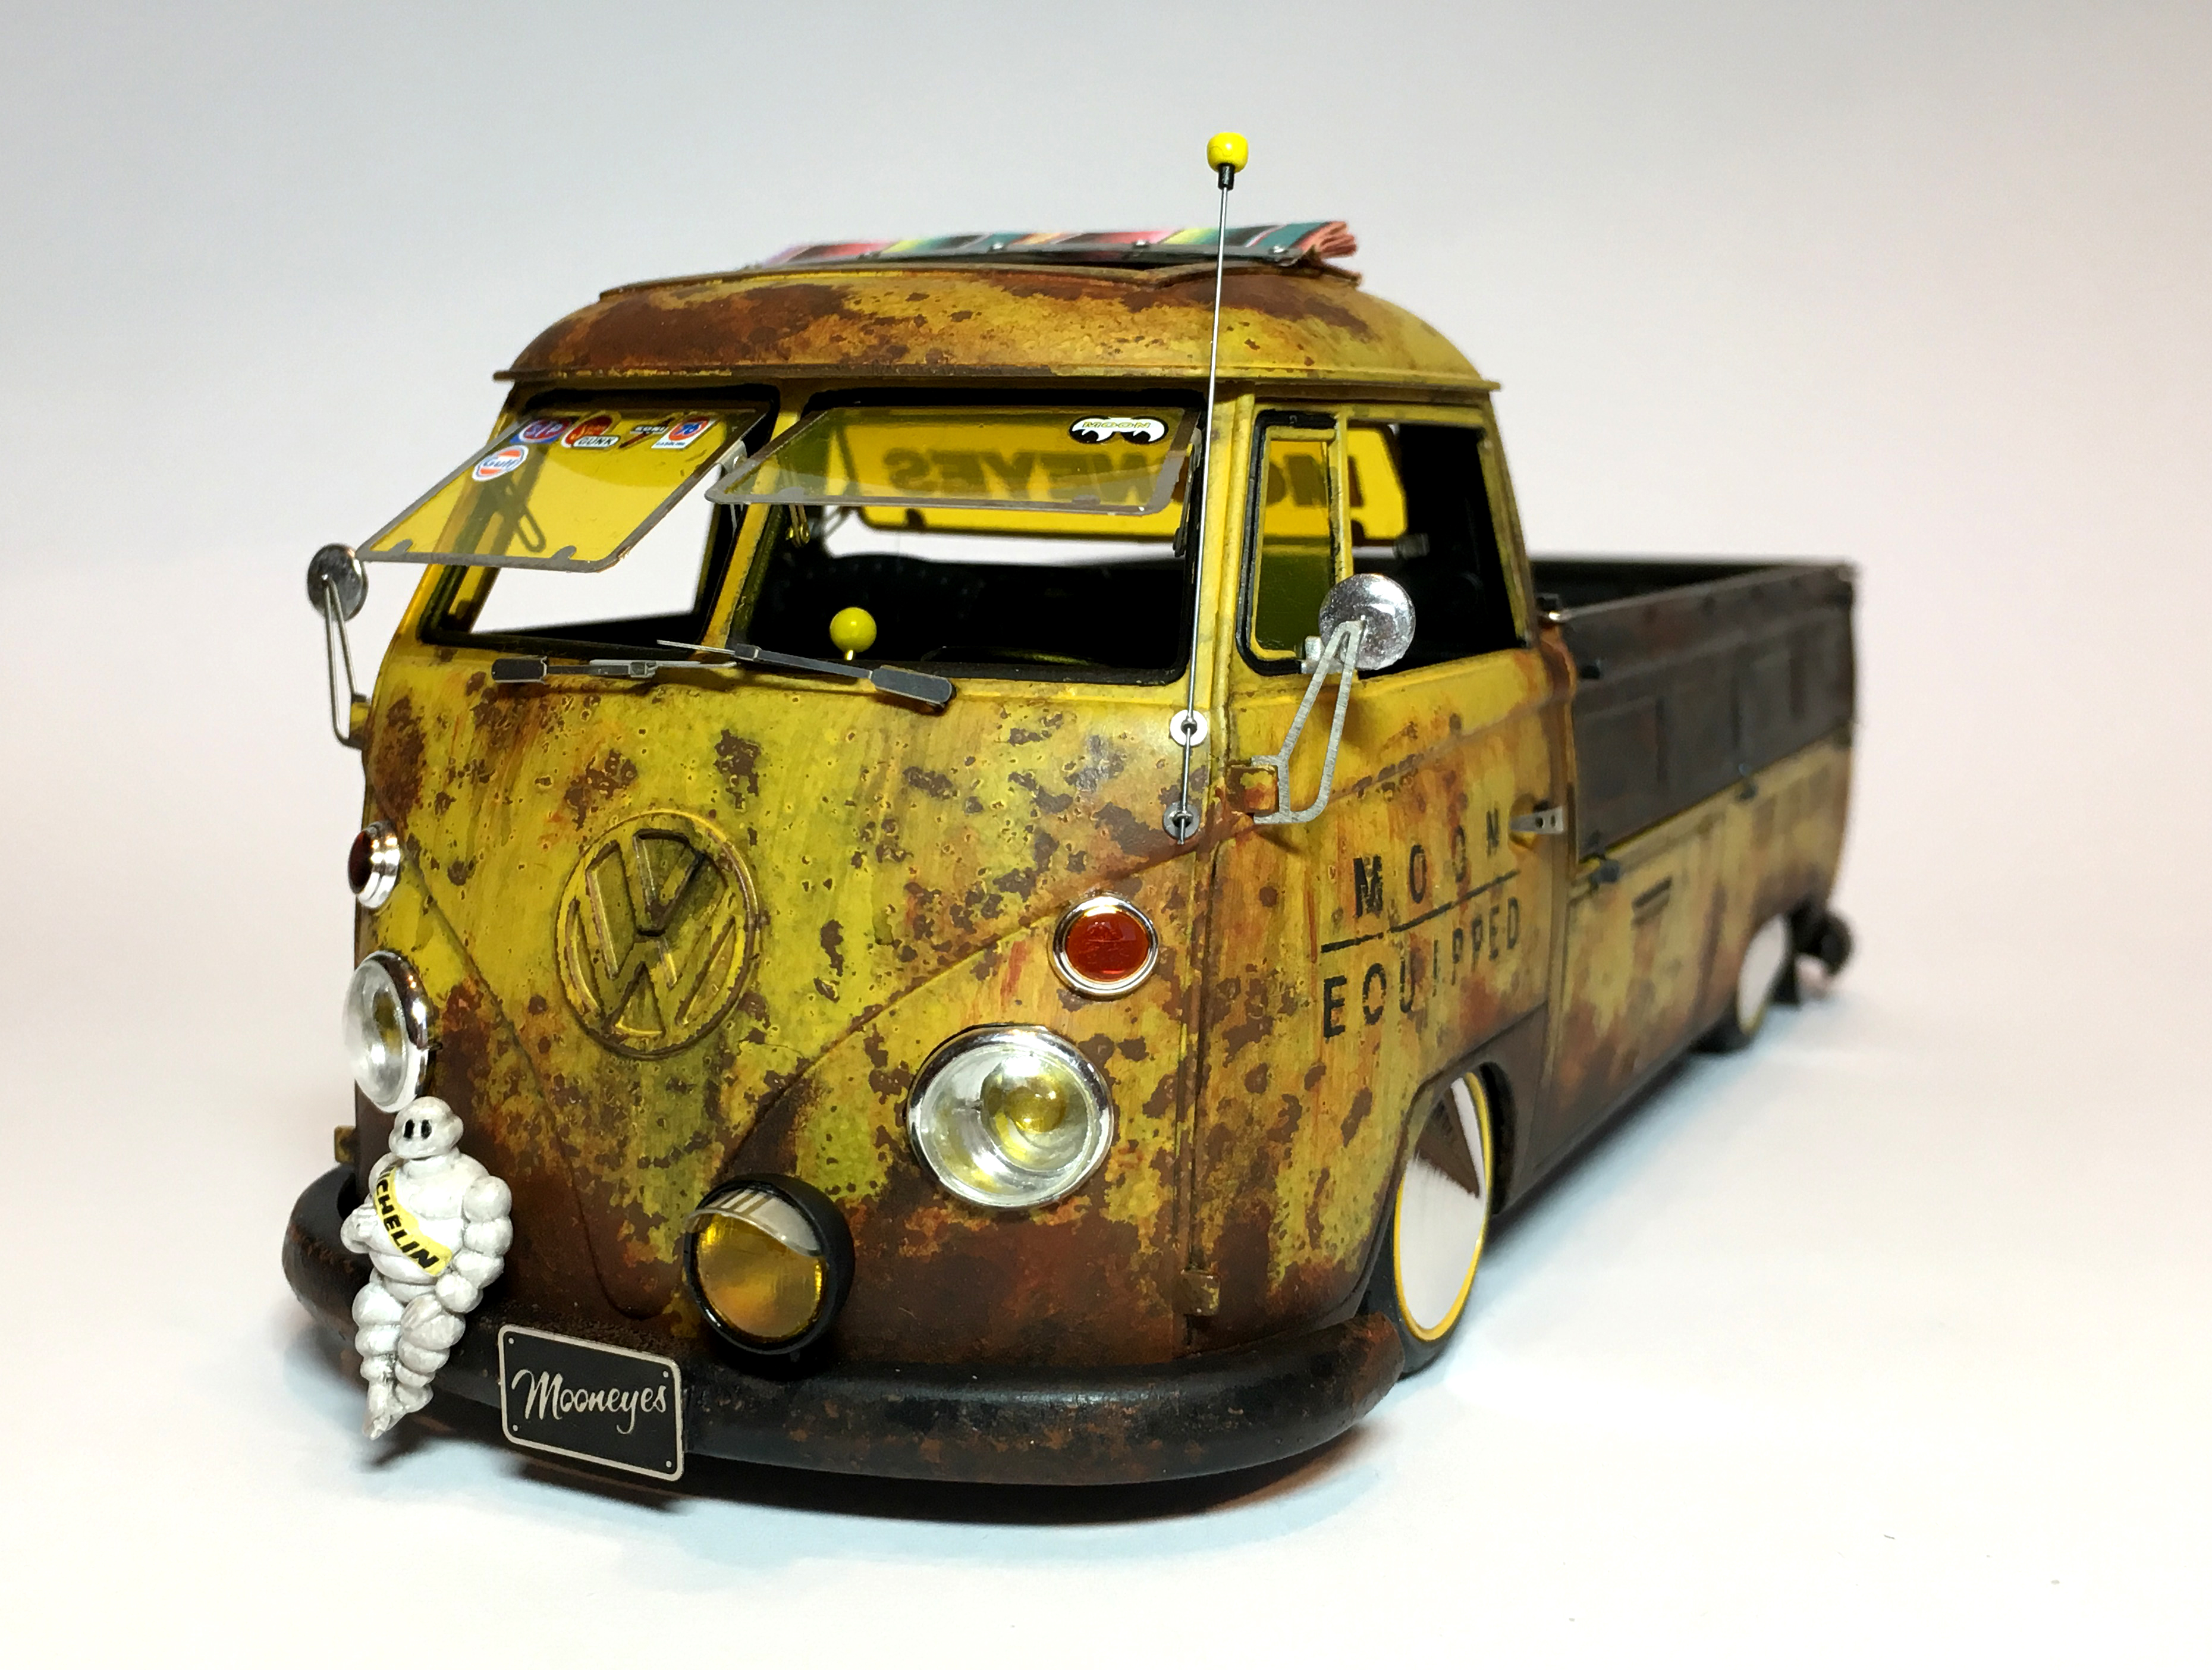
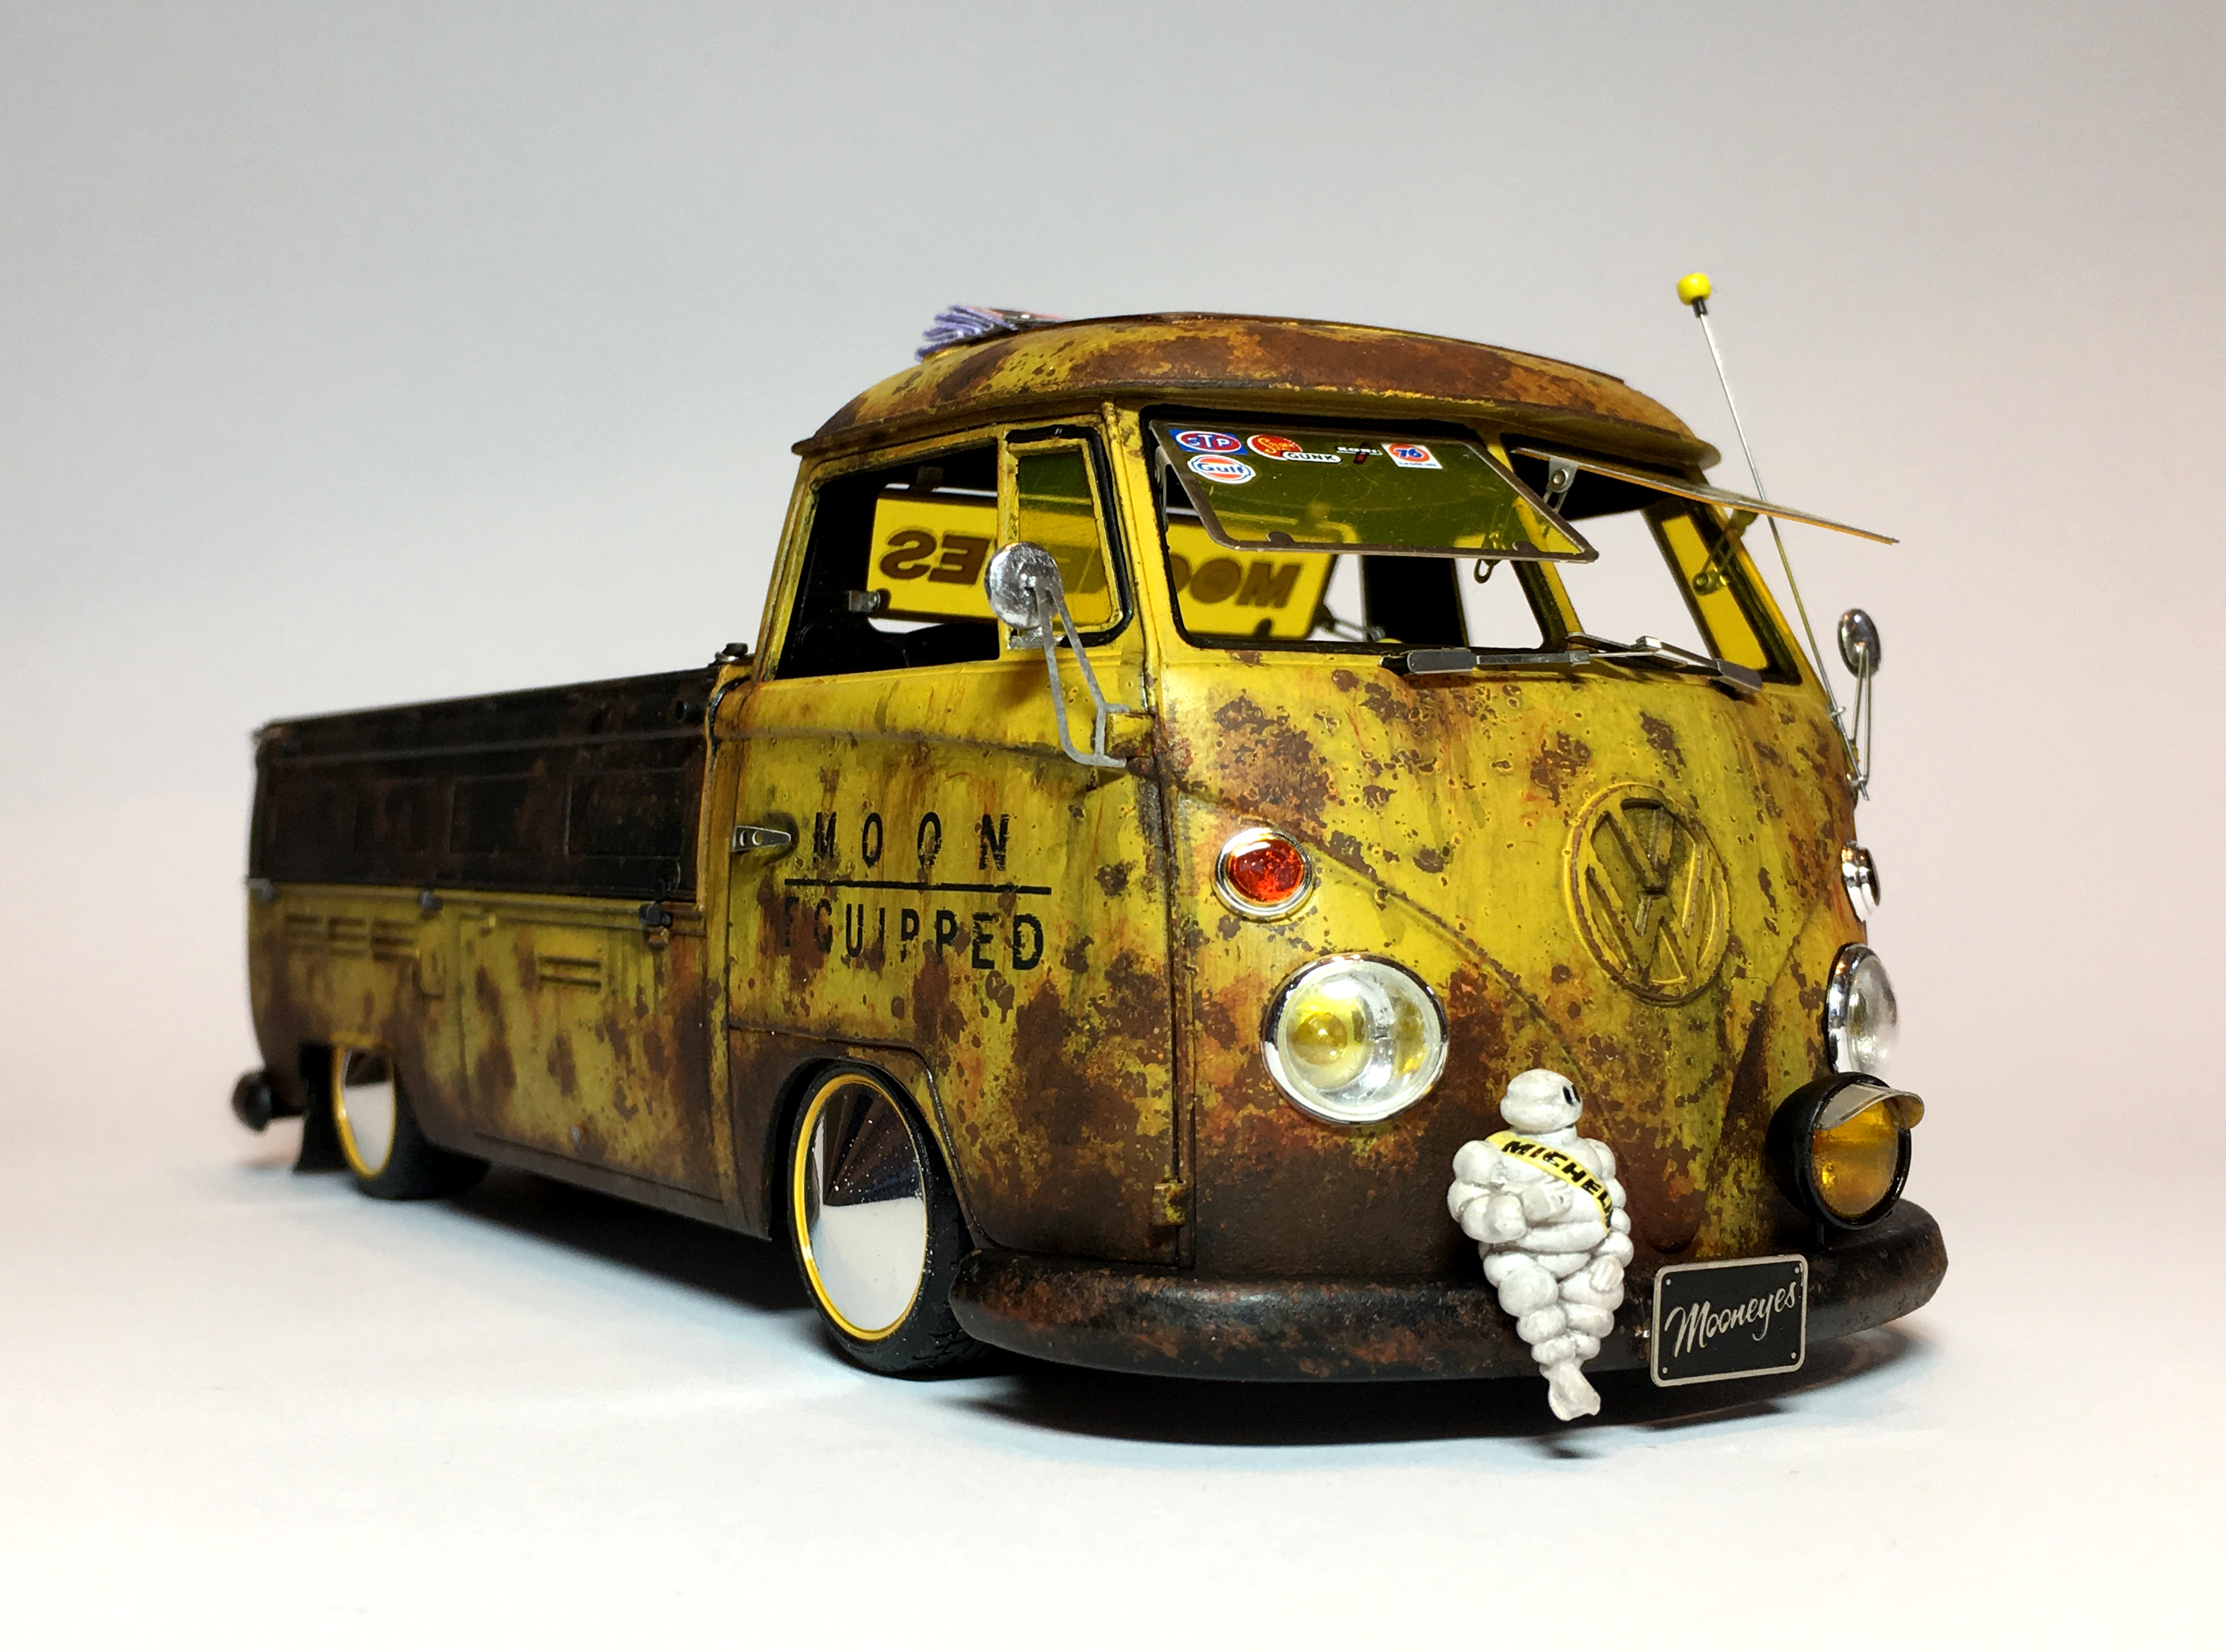
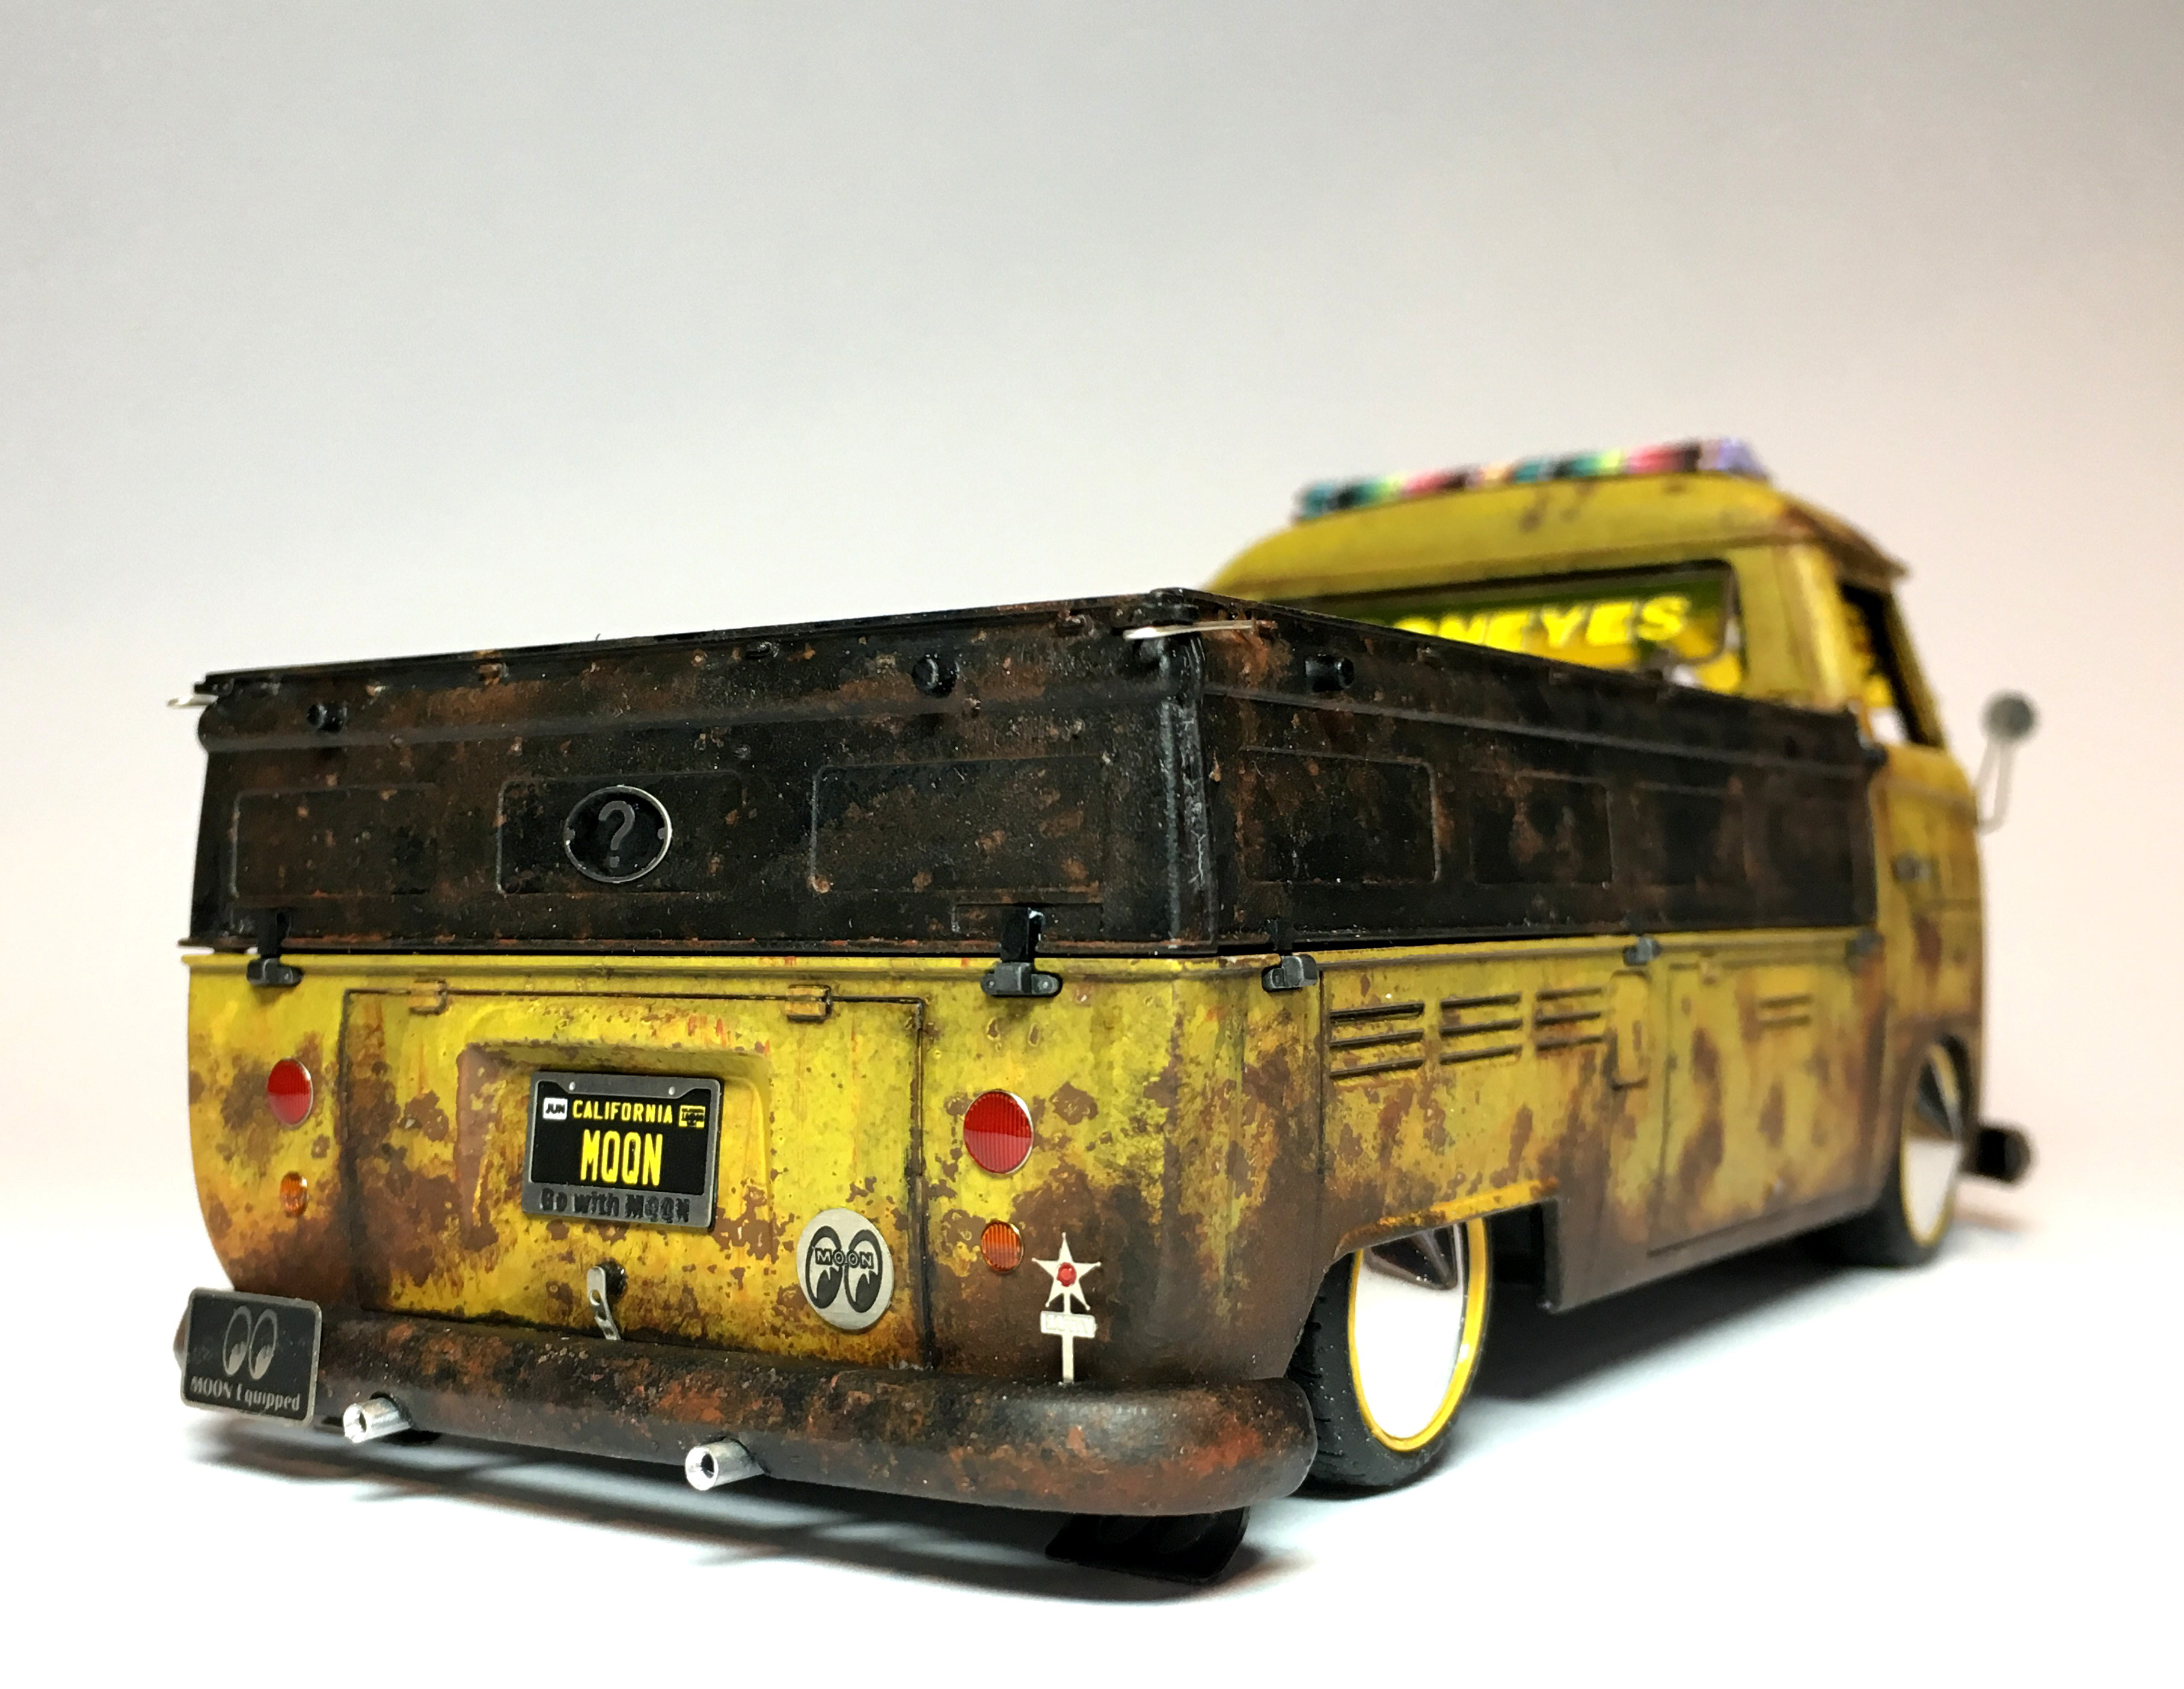
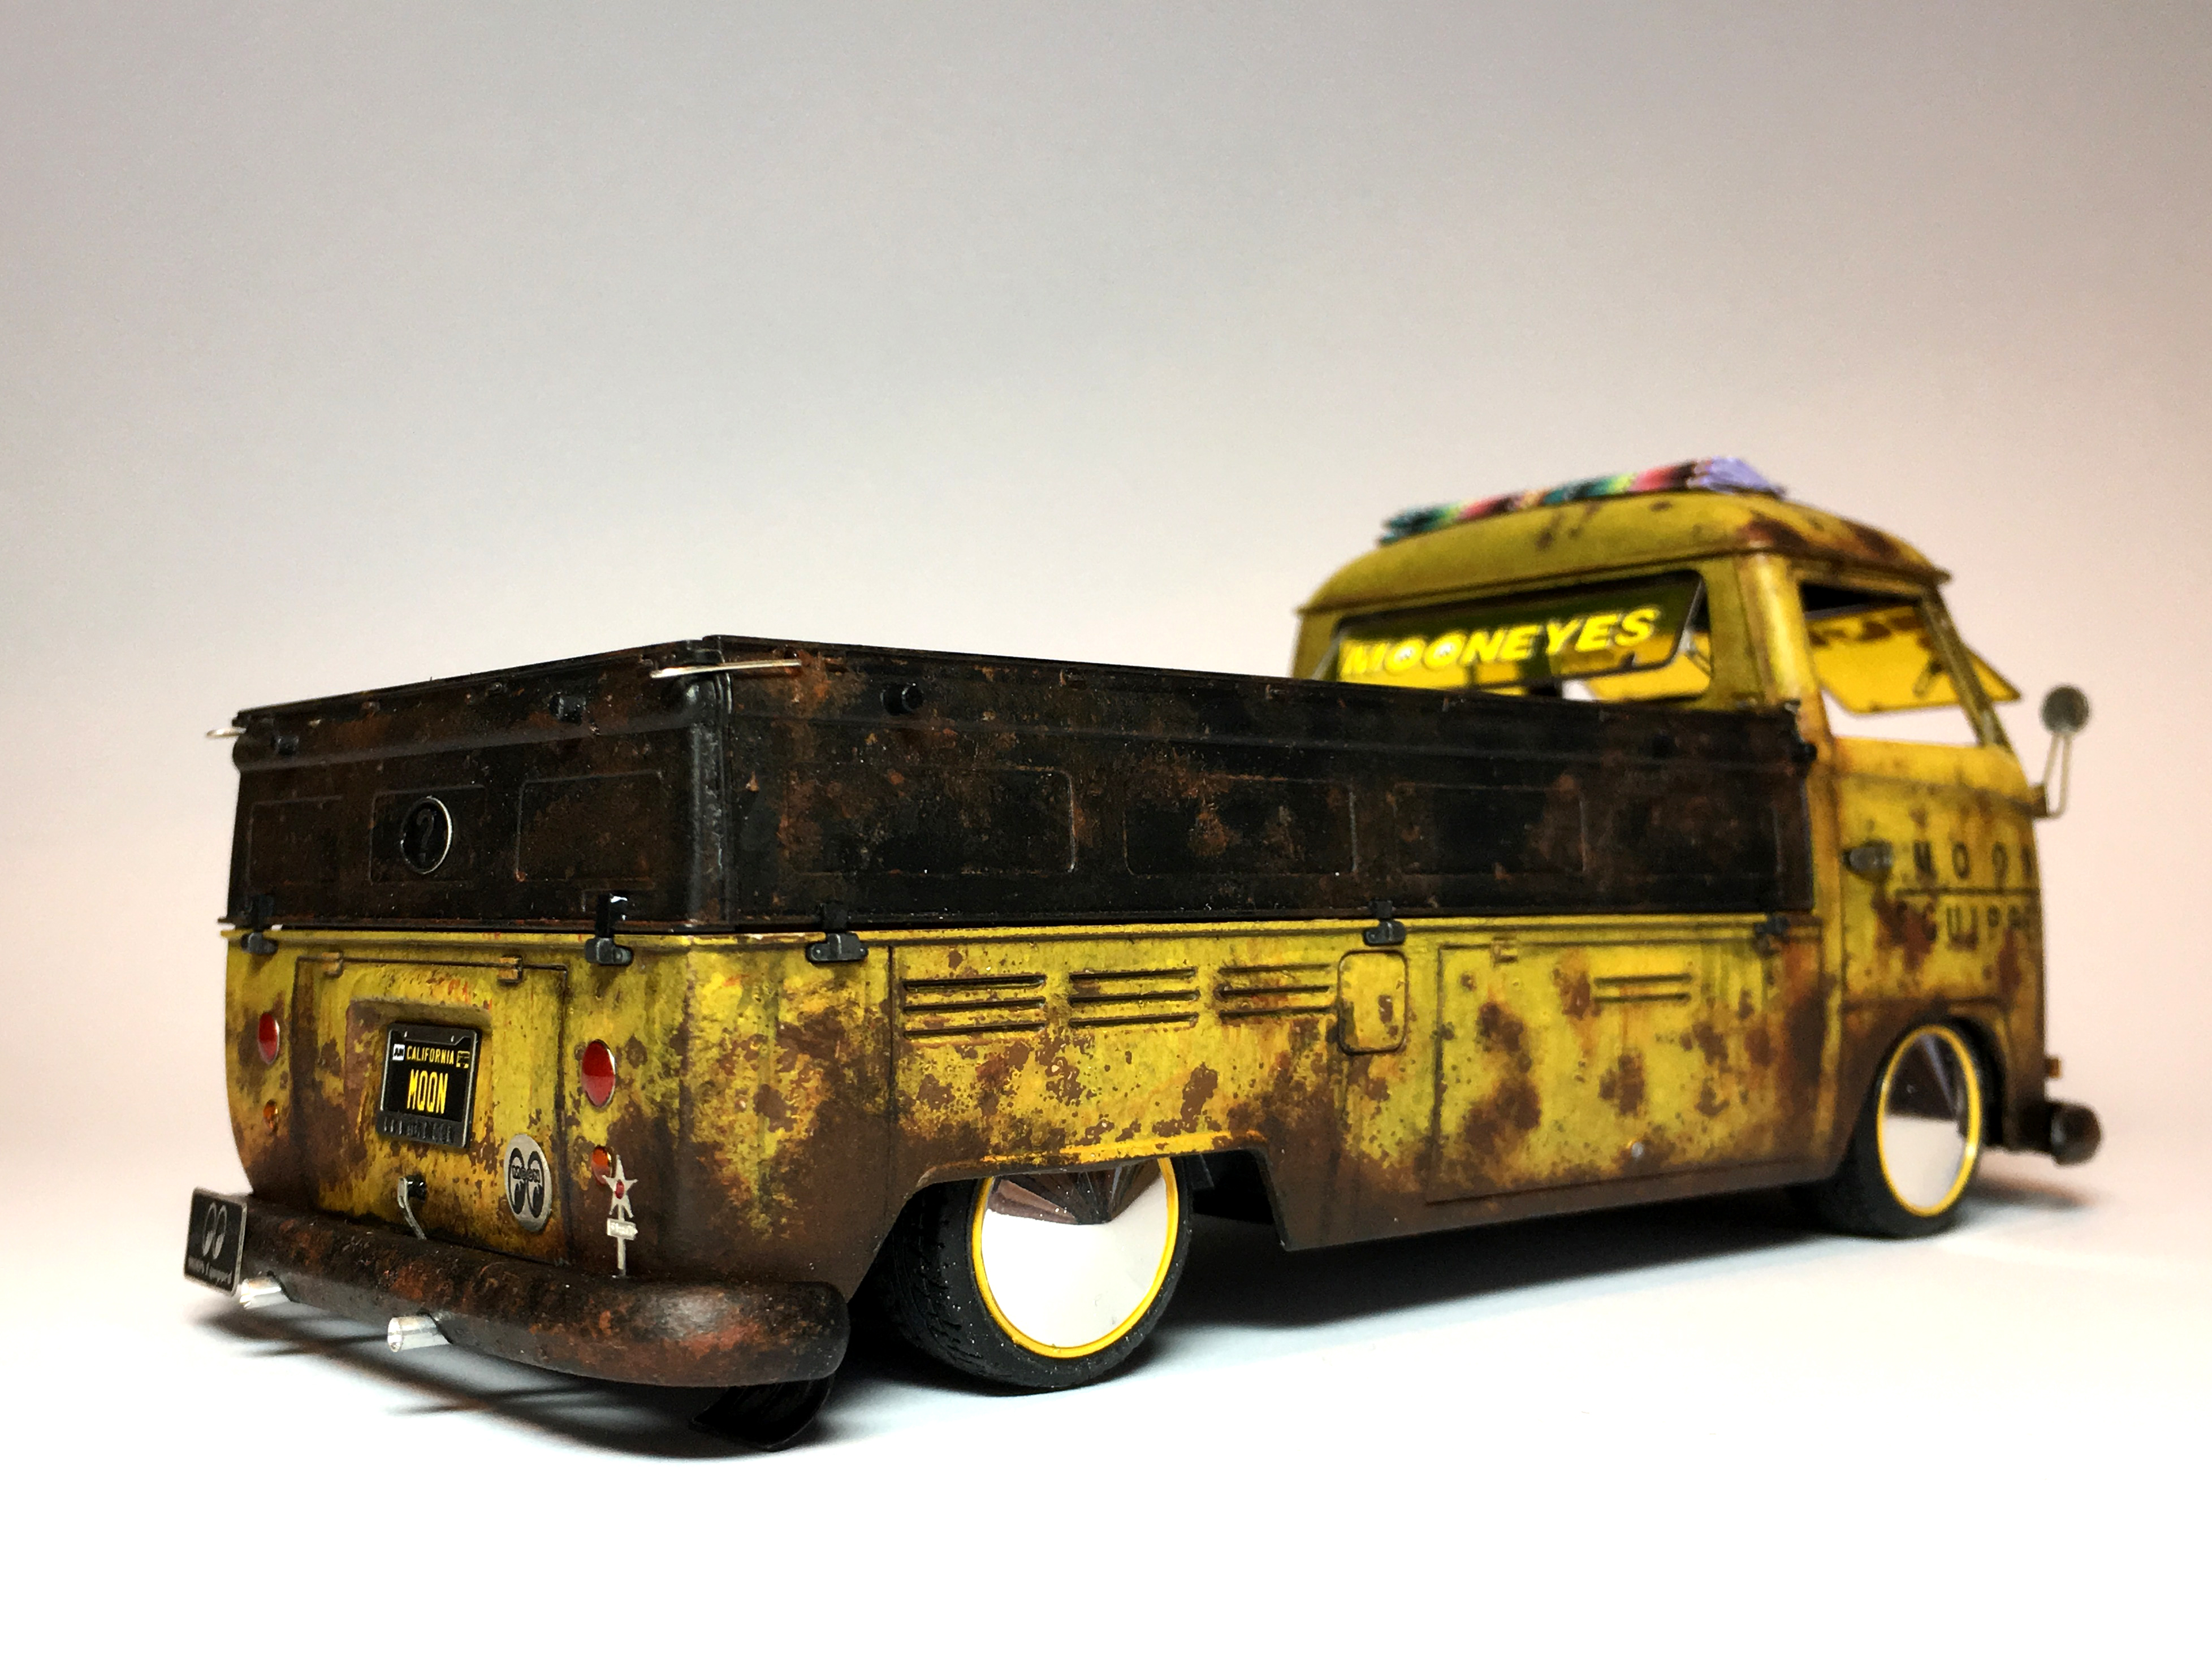
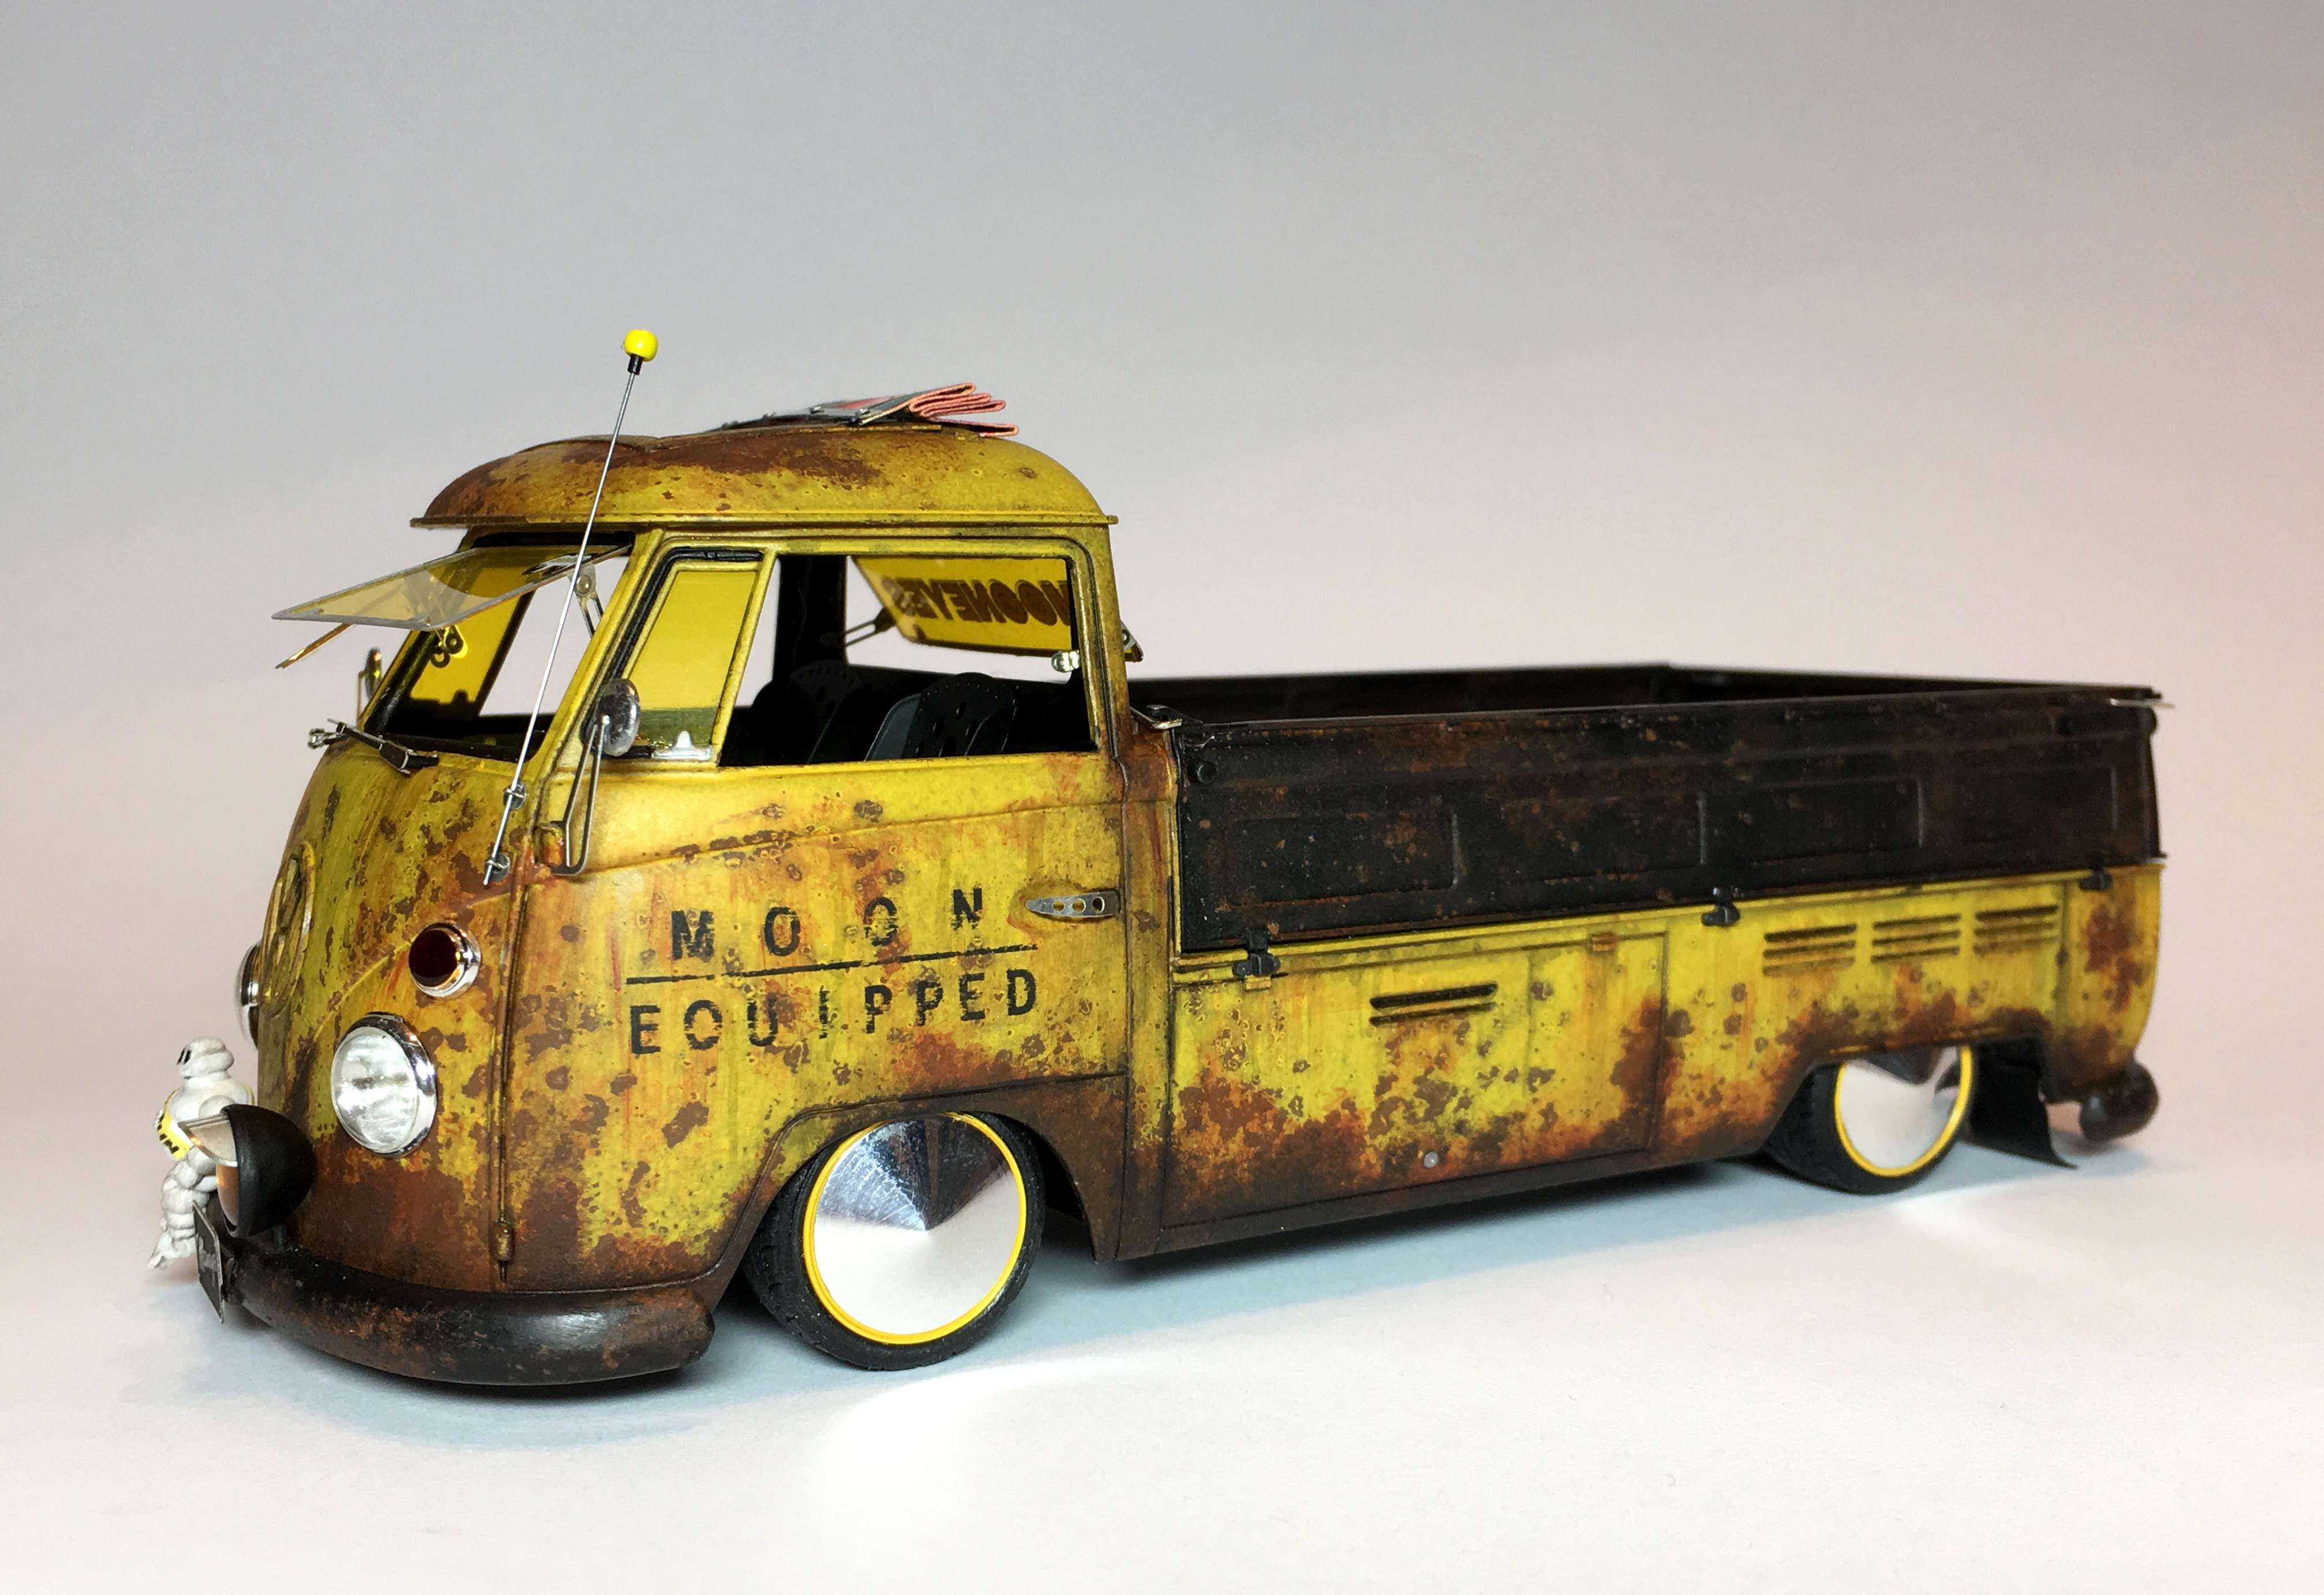
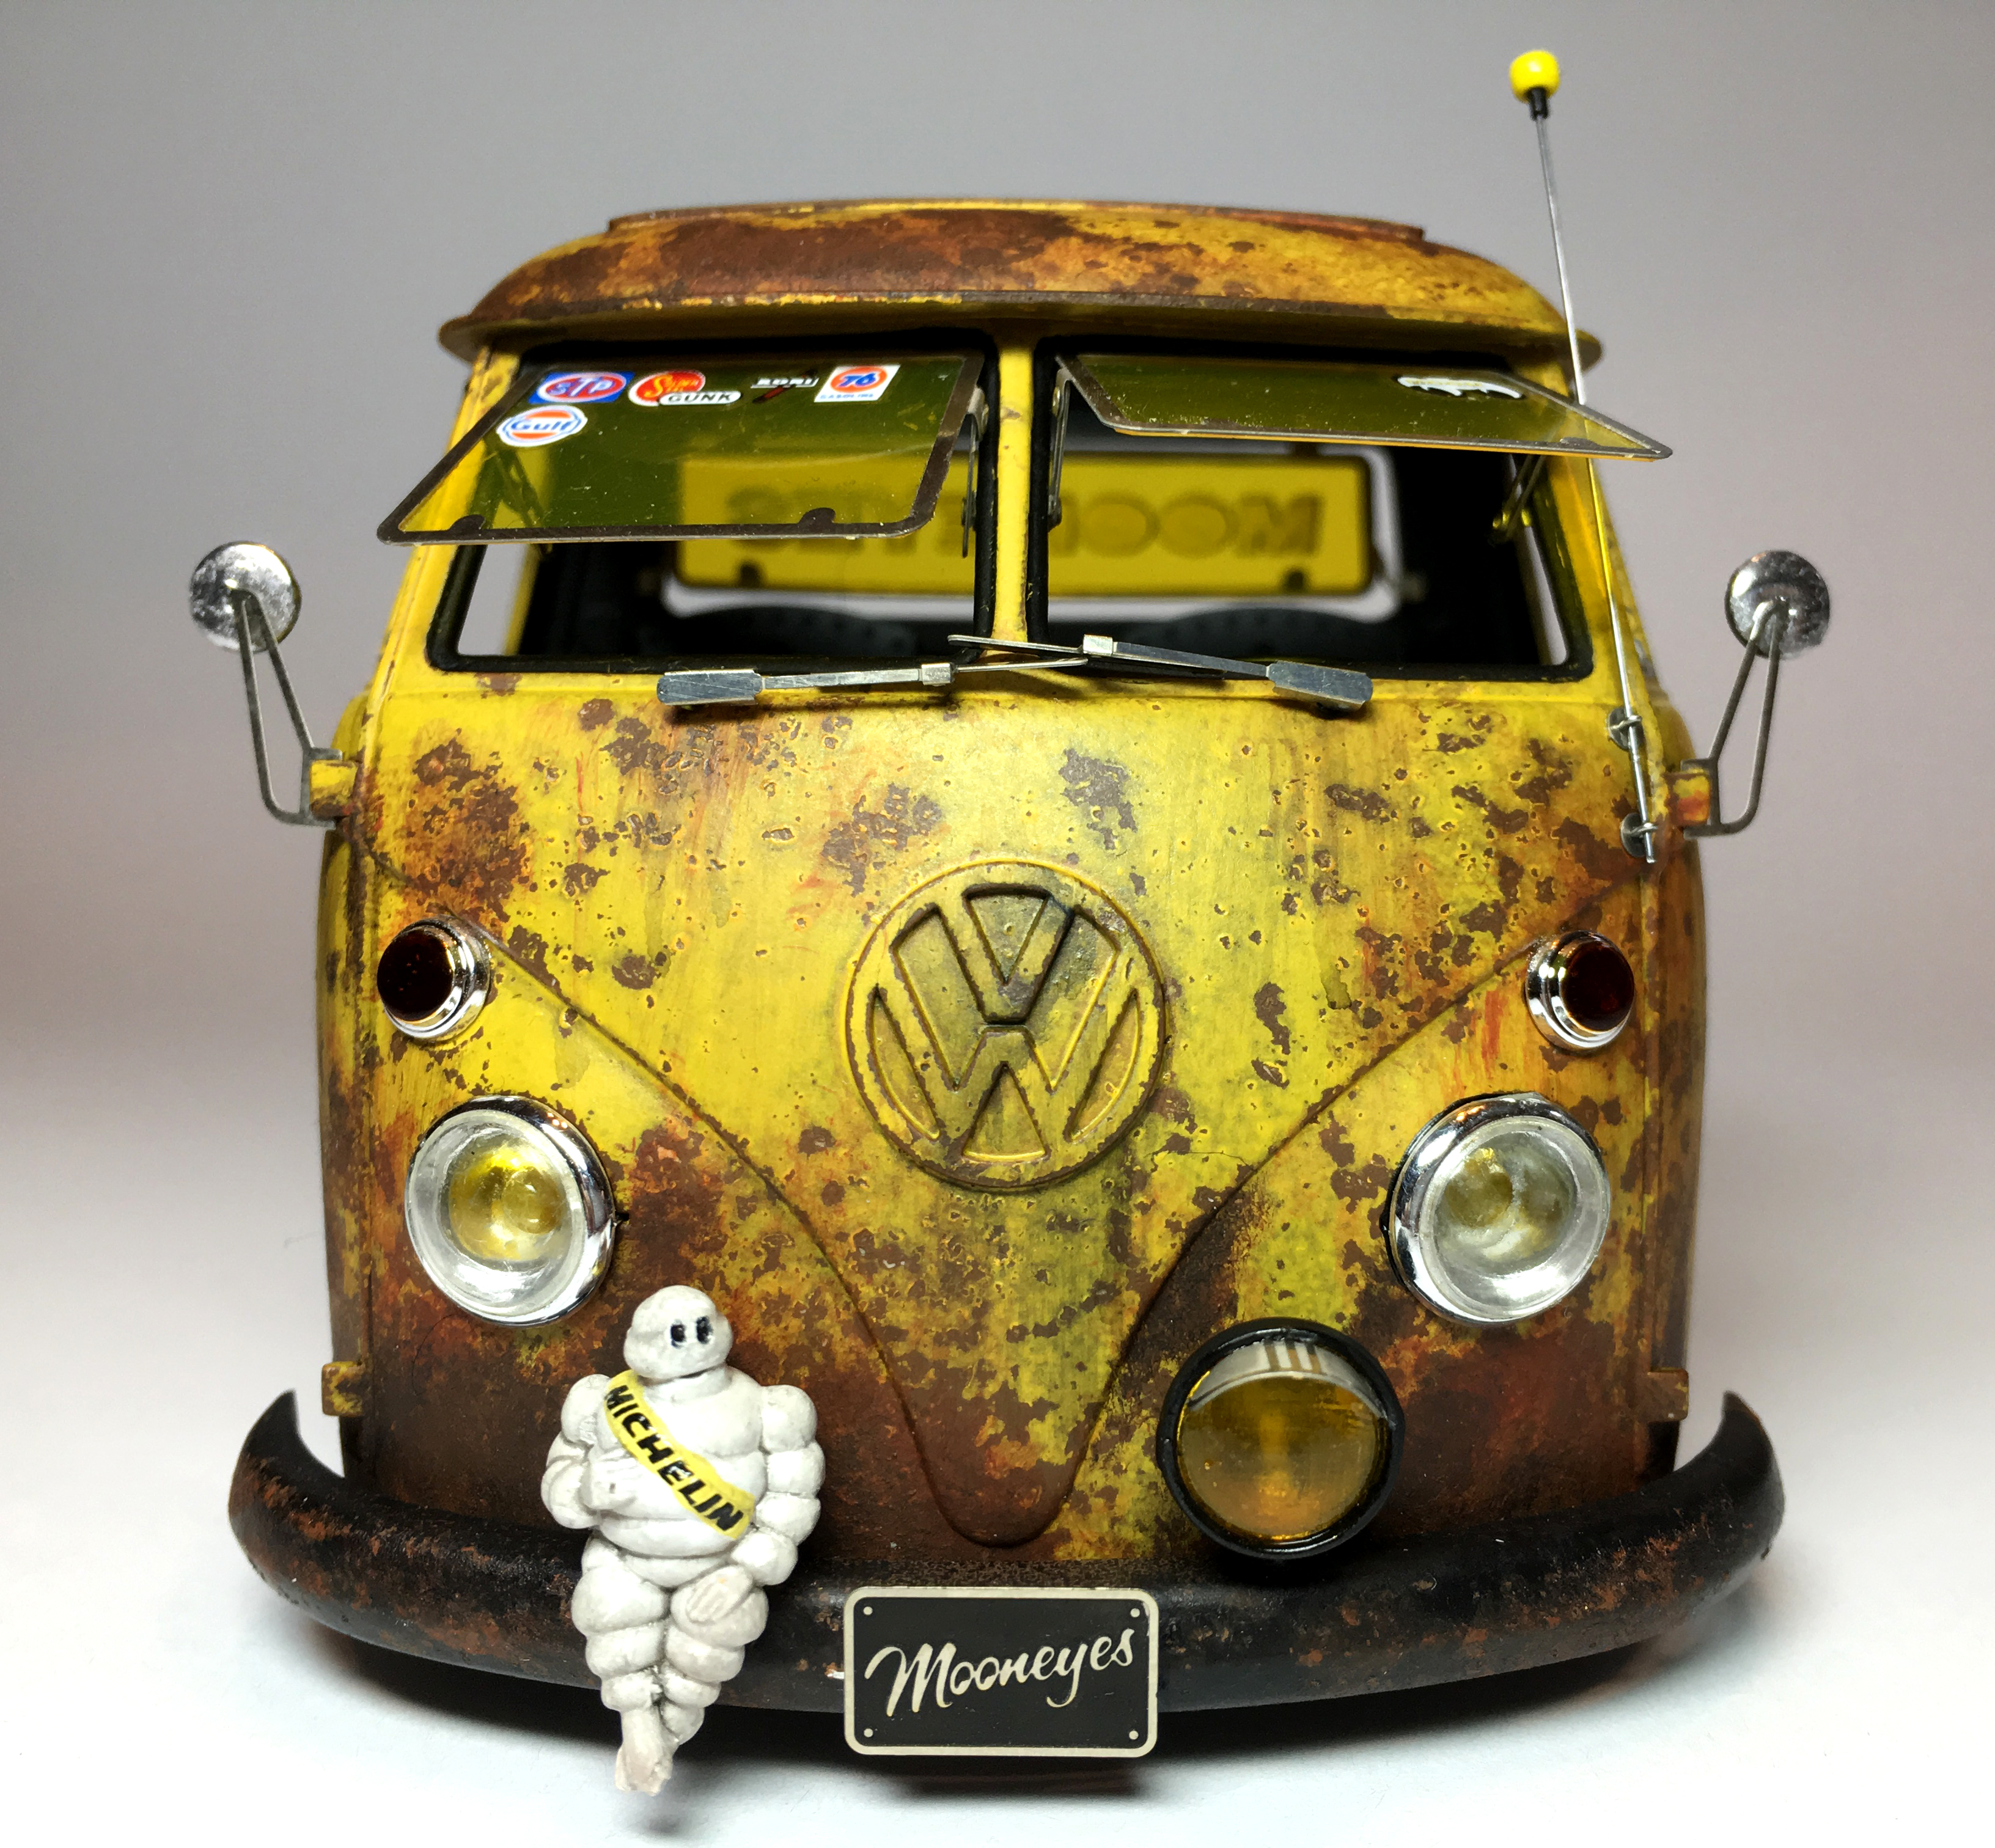
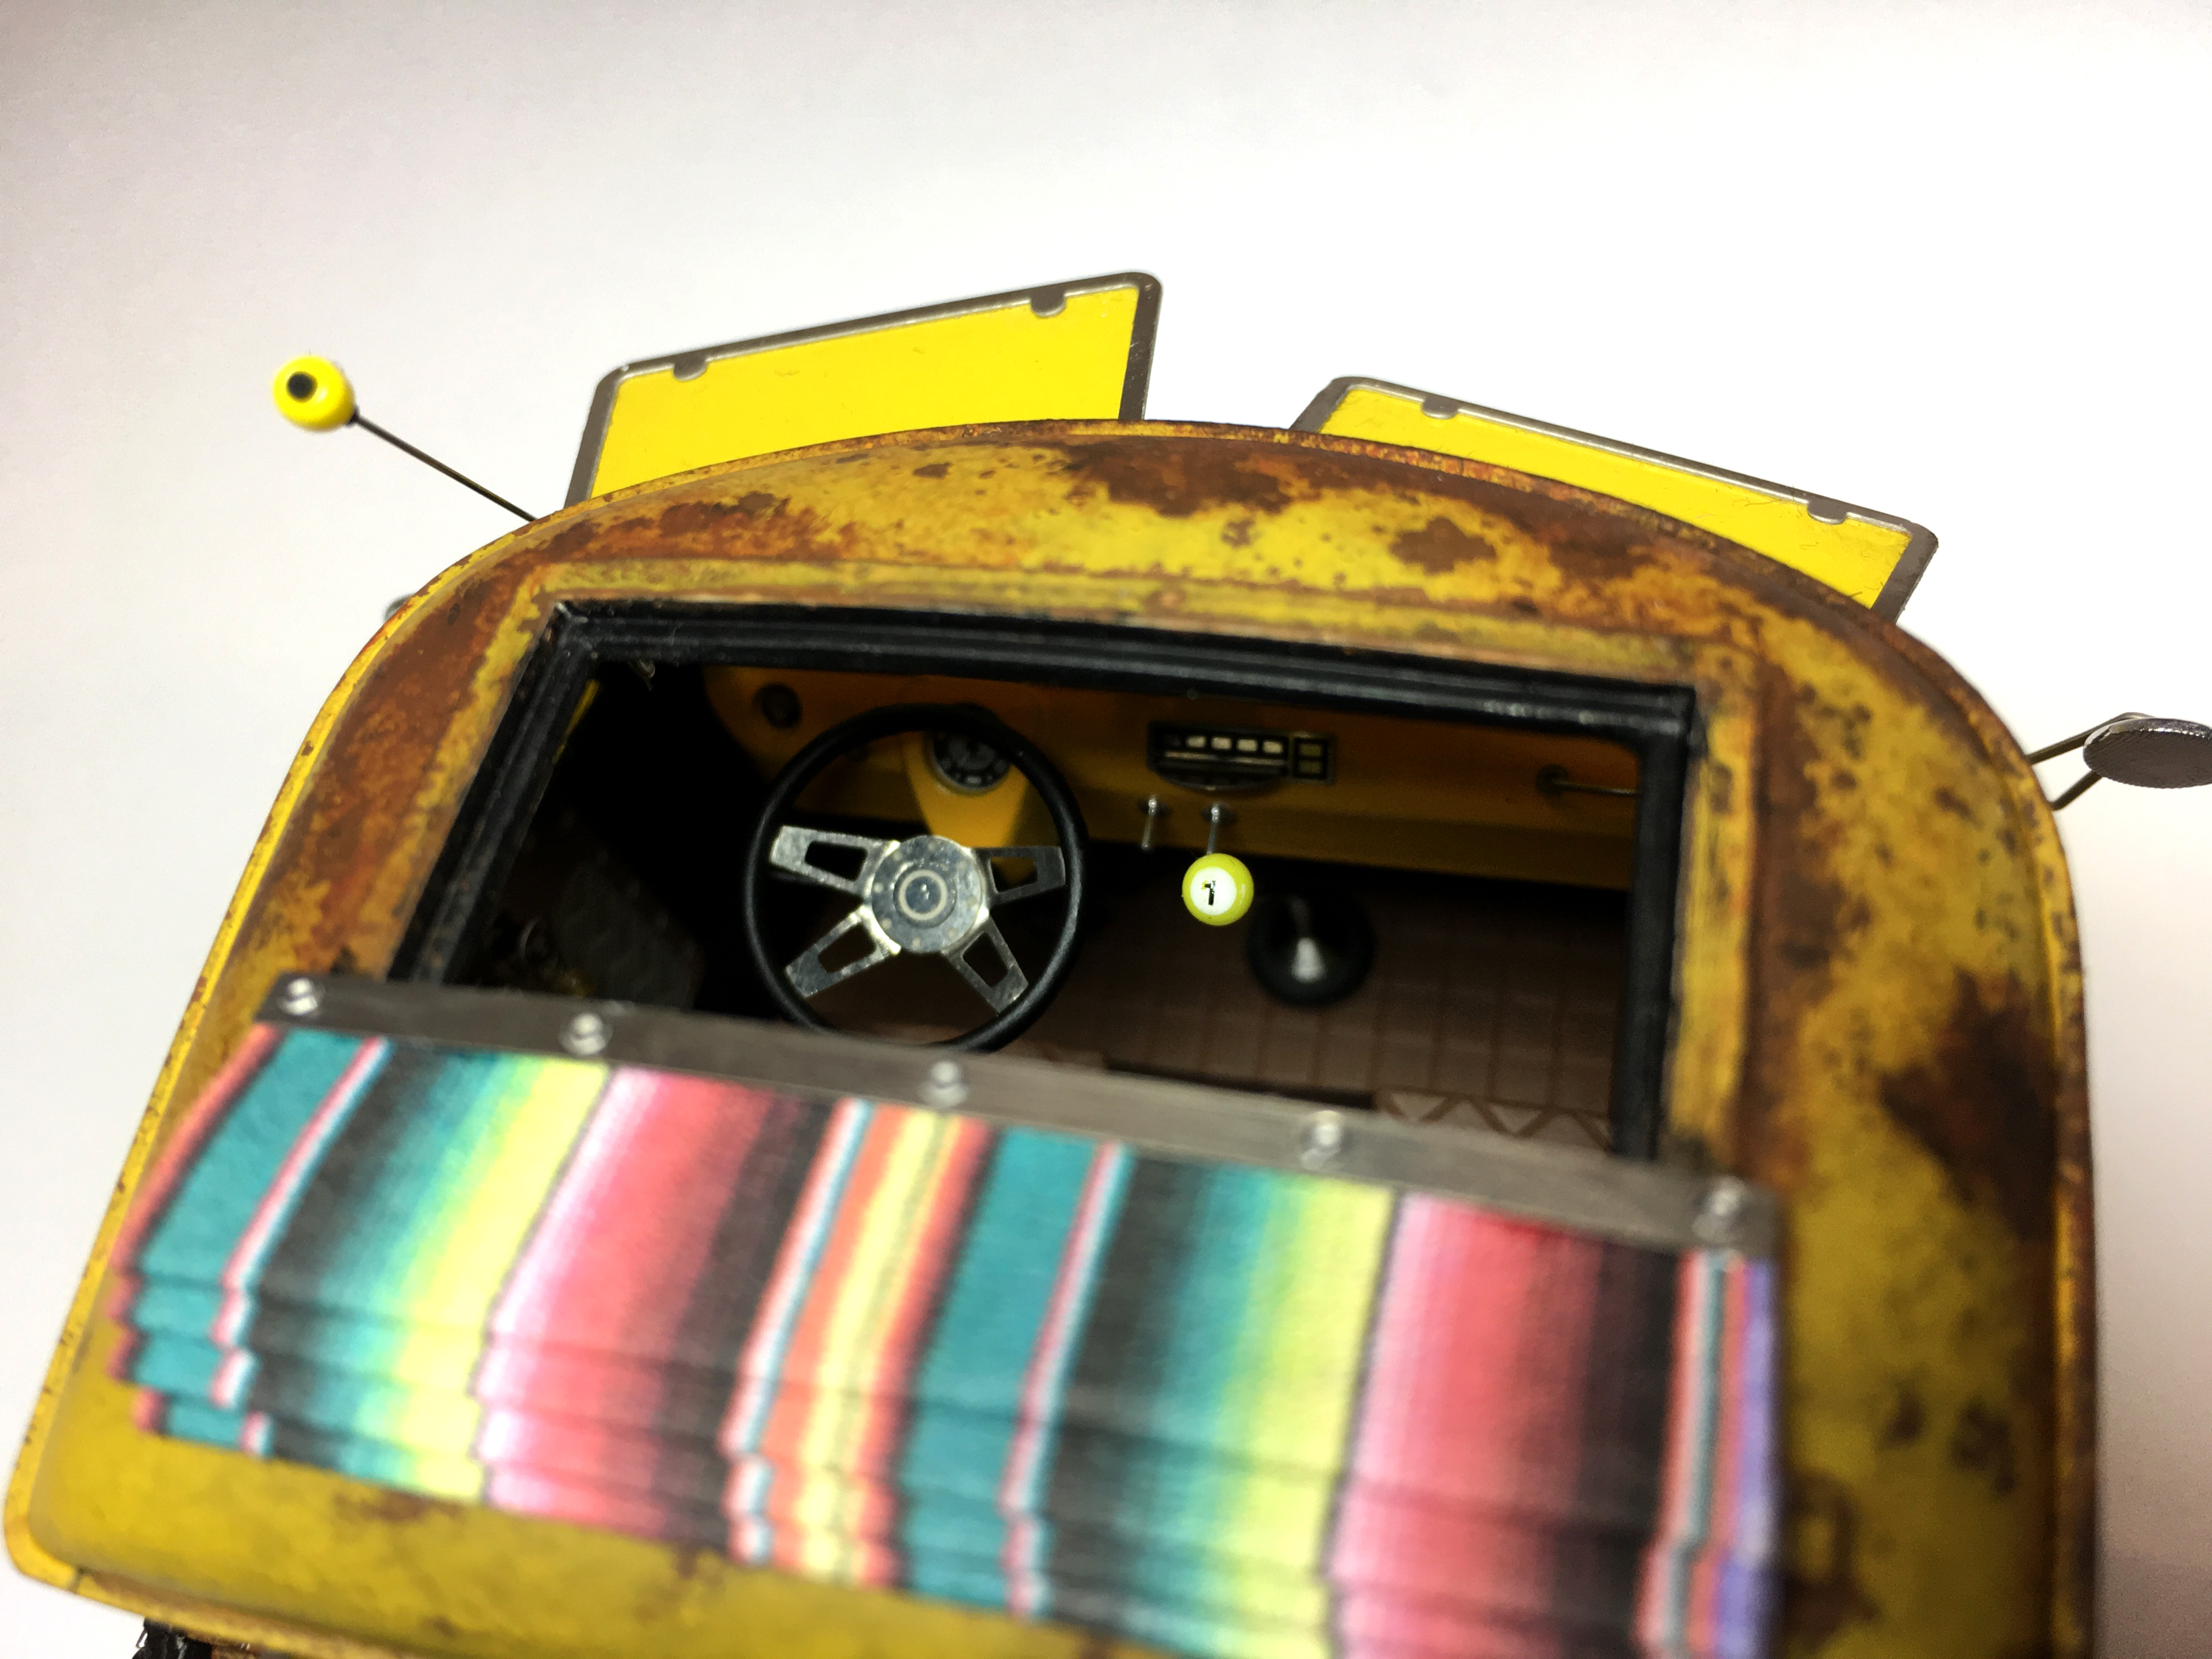
I recently finished also this Mooneyes themed Hasegawa Pick-up. Rust and patina is made with hairspray and salt technique. I also opened the roof and added that mexican blanket there.
-
Yes it stays!
-
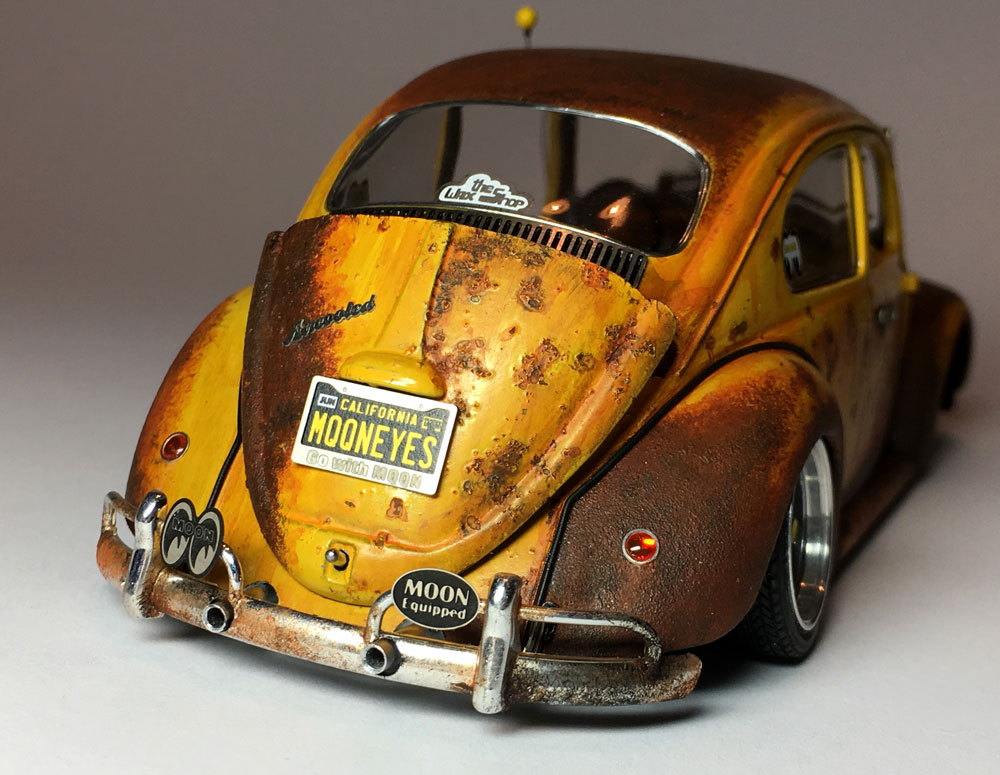
The sun visor is a prototype from Highlight Model Studio. It is similar to this product but there is thin yellow film instead of that metal net: https://www.highlightmodelstudio.com/en/product/16788424 This product might be available in future from Highlight Model Studio.
-
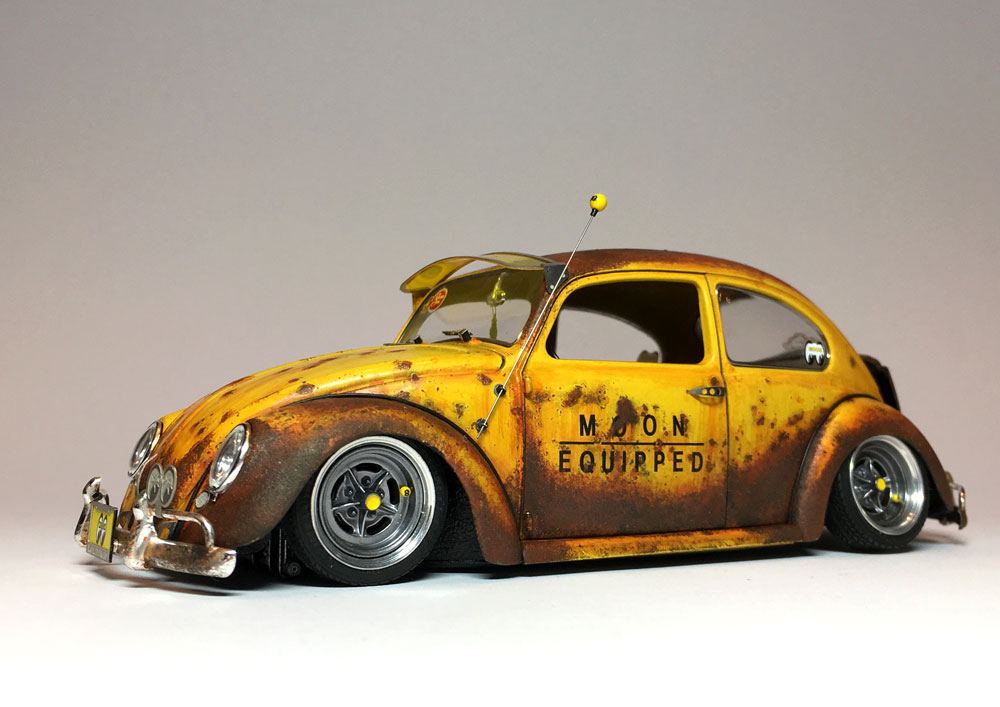
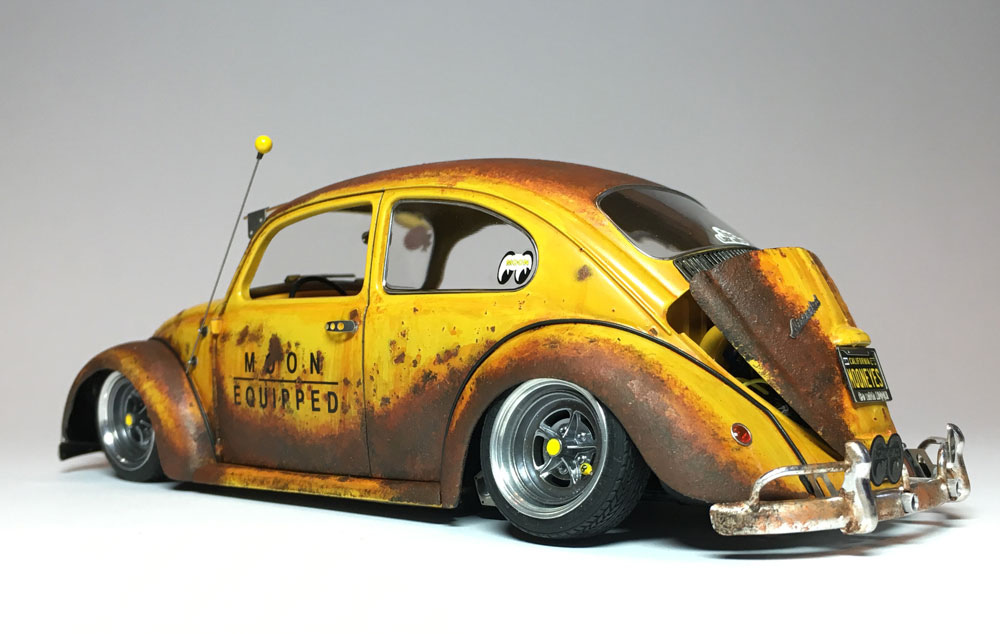
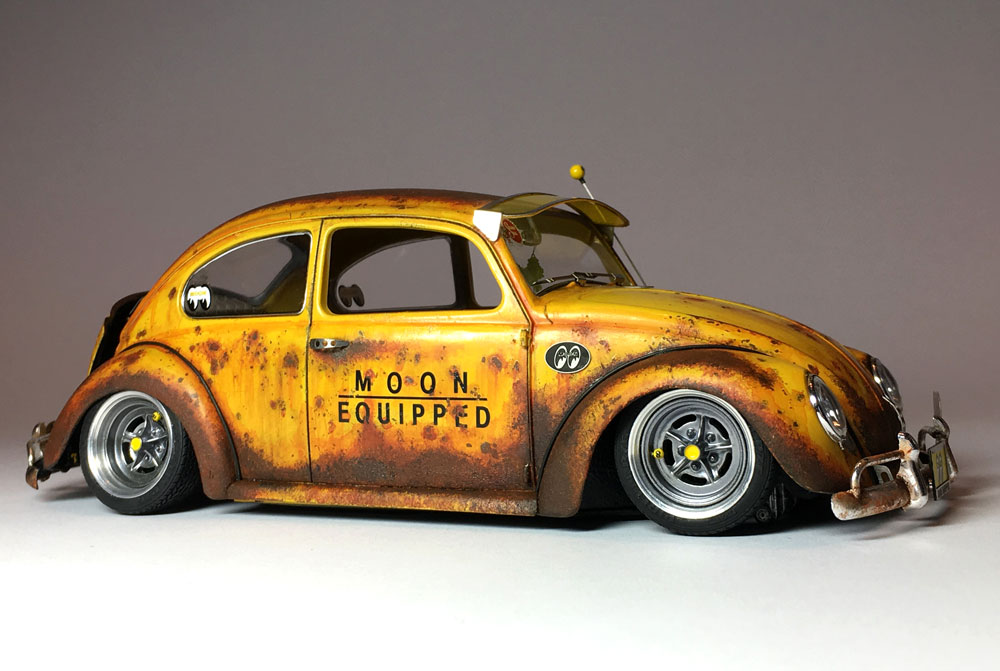
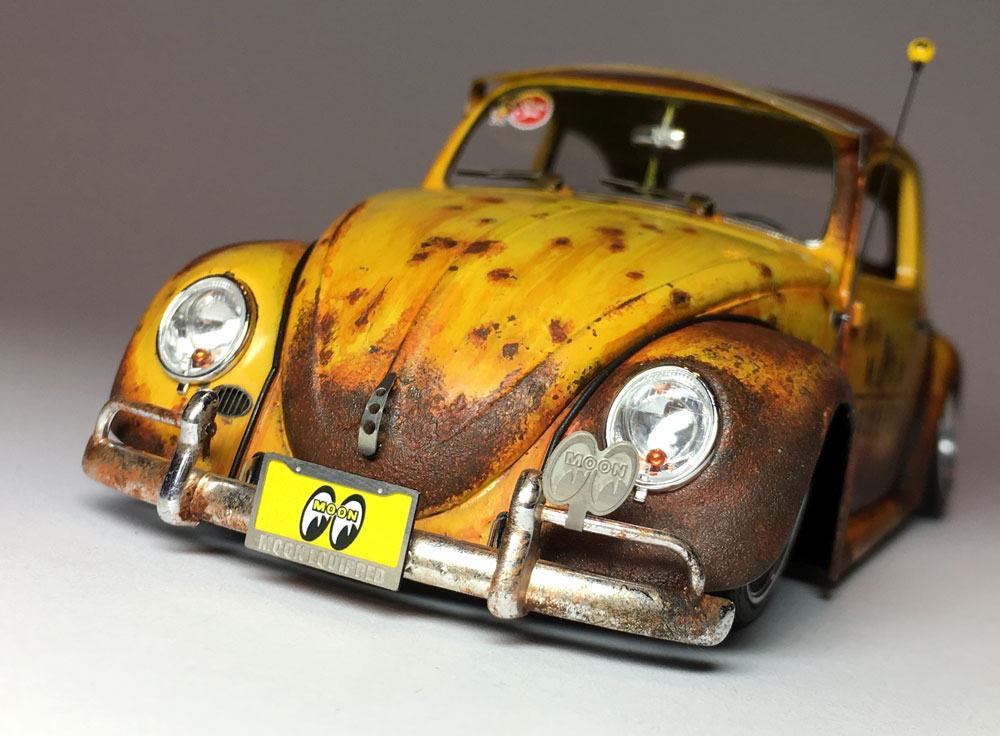
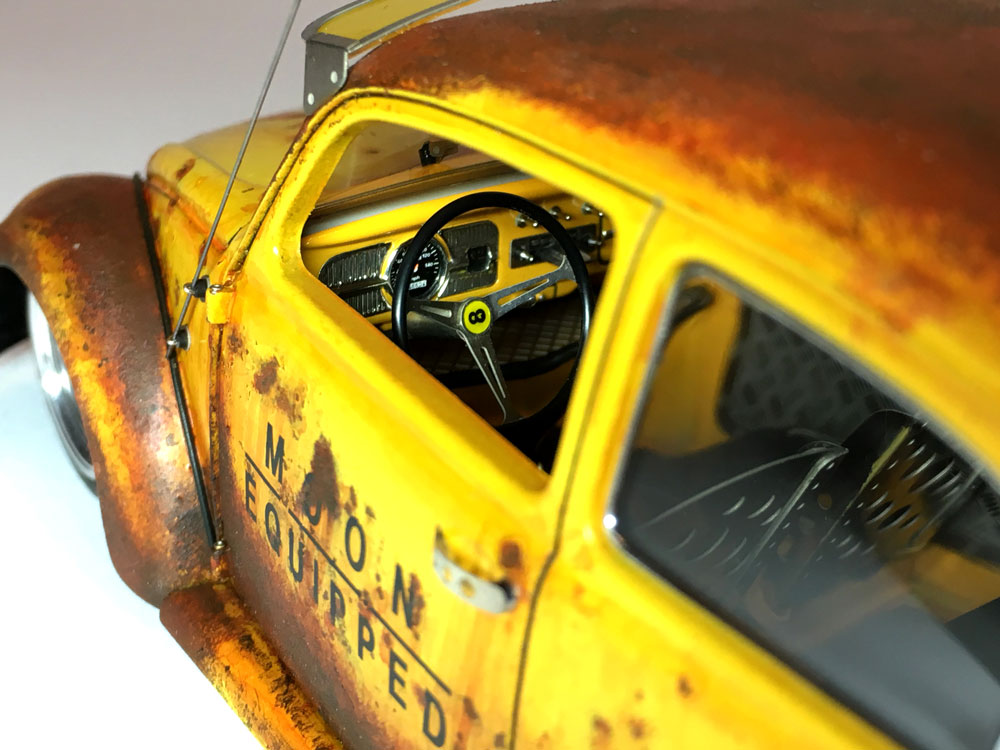
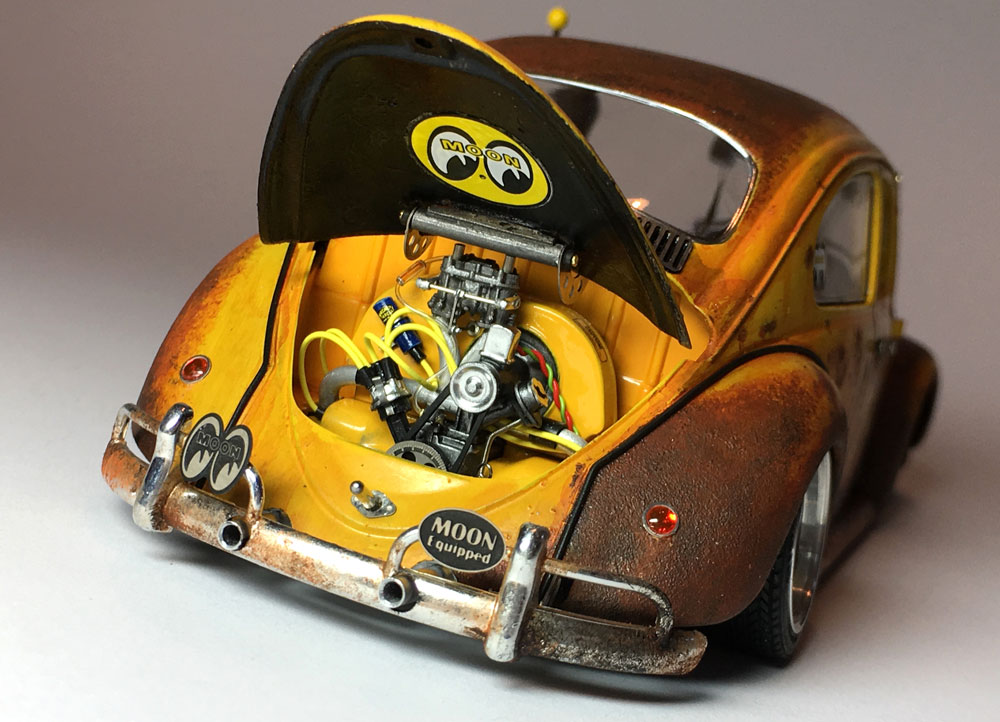
I built this Mooneyes themed Beetle from Tamiya ´66 Beetle kit. Paintjob is done by "salt technique" with Tamiya spray paints.
-
My company provides a wide selection of photoetched parts. Latest product releases are official Mooneyes products. www.highlightmodelstudio.com
-
Hello everybody! I have been offering photoetched parts for 1:24 / 1:25 car model for some years now. Mostly VW related but not only. A while ago I opened my website. If you consider to put this on your list I would really appreciate it! Highlight Model Studio photoetched parts: www.highlightmodelstudio.com
-
 Hello Revstew! Yes, those parts can be ordered directly from Shapeways. I chose that "Frosted Ultra Detail" as a material because it's most accurate and needs less sanding & filling. So even this "Ultra Detail" material still isn't 100% perfect. Some filling & sanding is needed. I 3D-modeled those parts by myself. I just took the most important measurements from those short parts. So no scanning. I'm using Rhinoceros 3D-program.
 -
Well, I opened a shop at Shapeways. So, now these long bed parts can be ordered. http://www.shapeways.com/shops/eero_kumanto
-
Well... haven't even thought about that. All of those parts for bed aren't 3D prints because I made couple of parts from styrene. Like the floor of the bed. Will you think somebody would like to buy these parts?
-
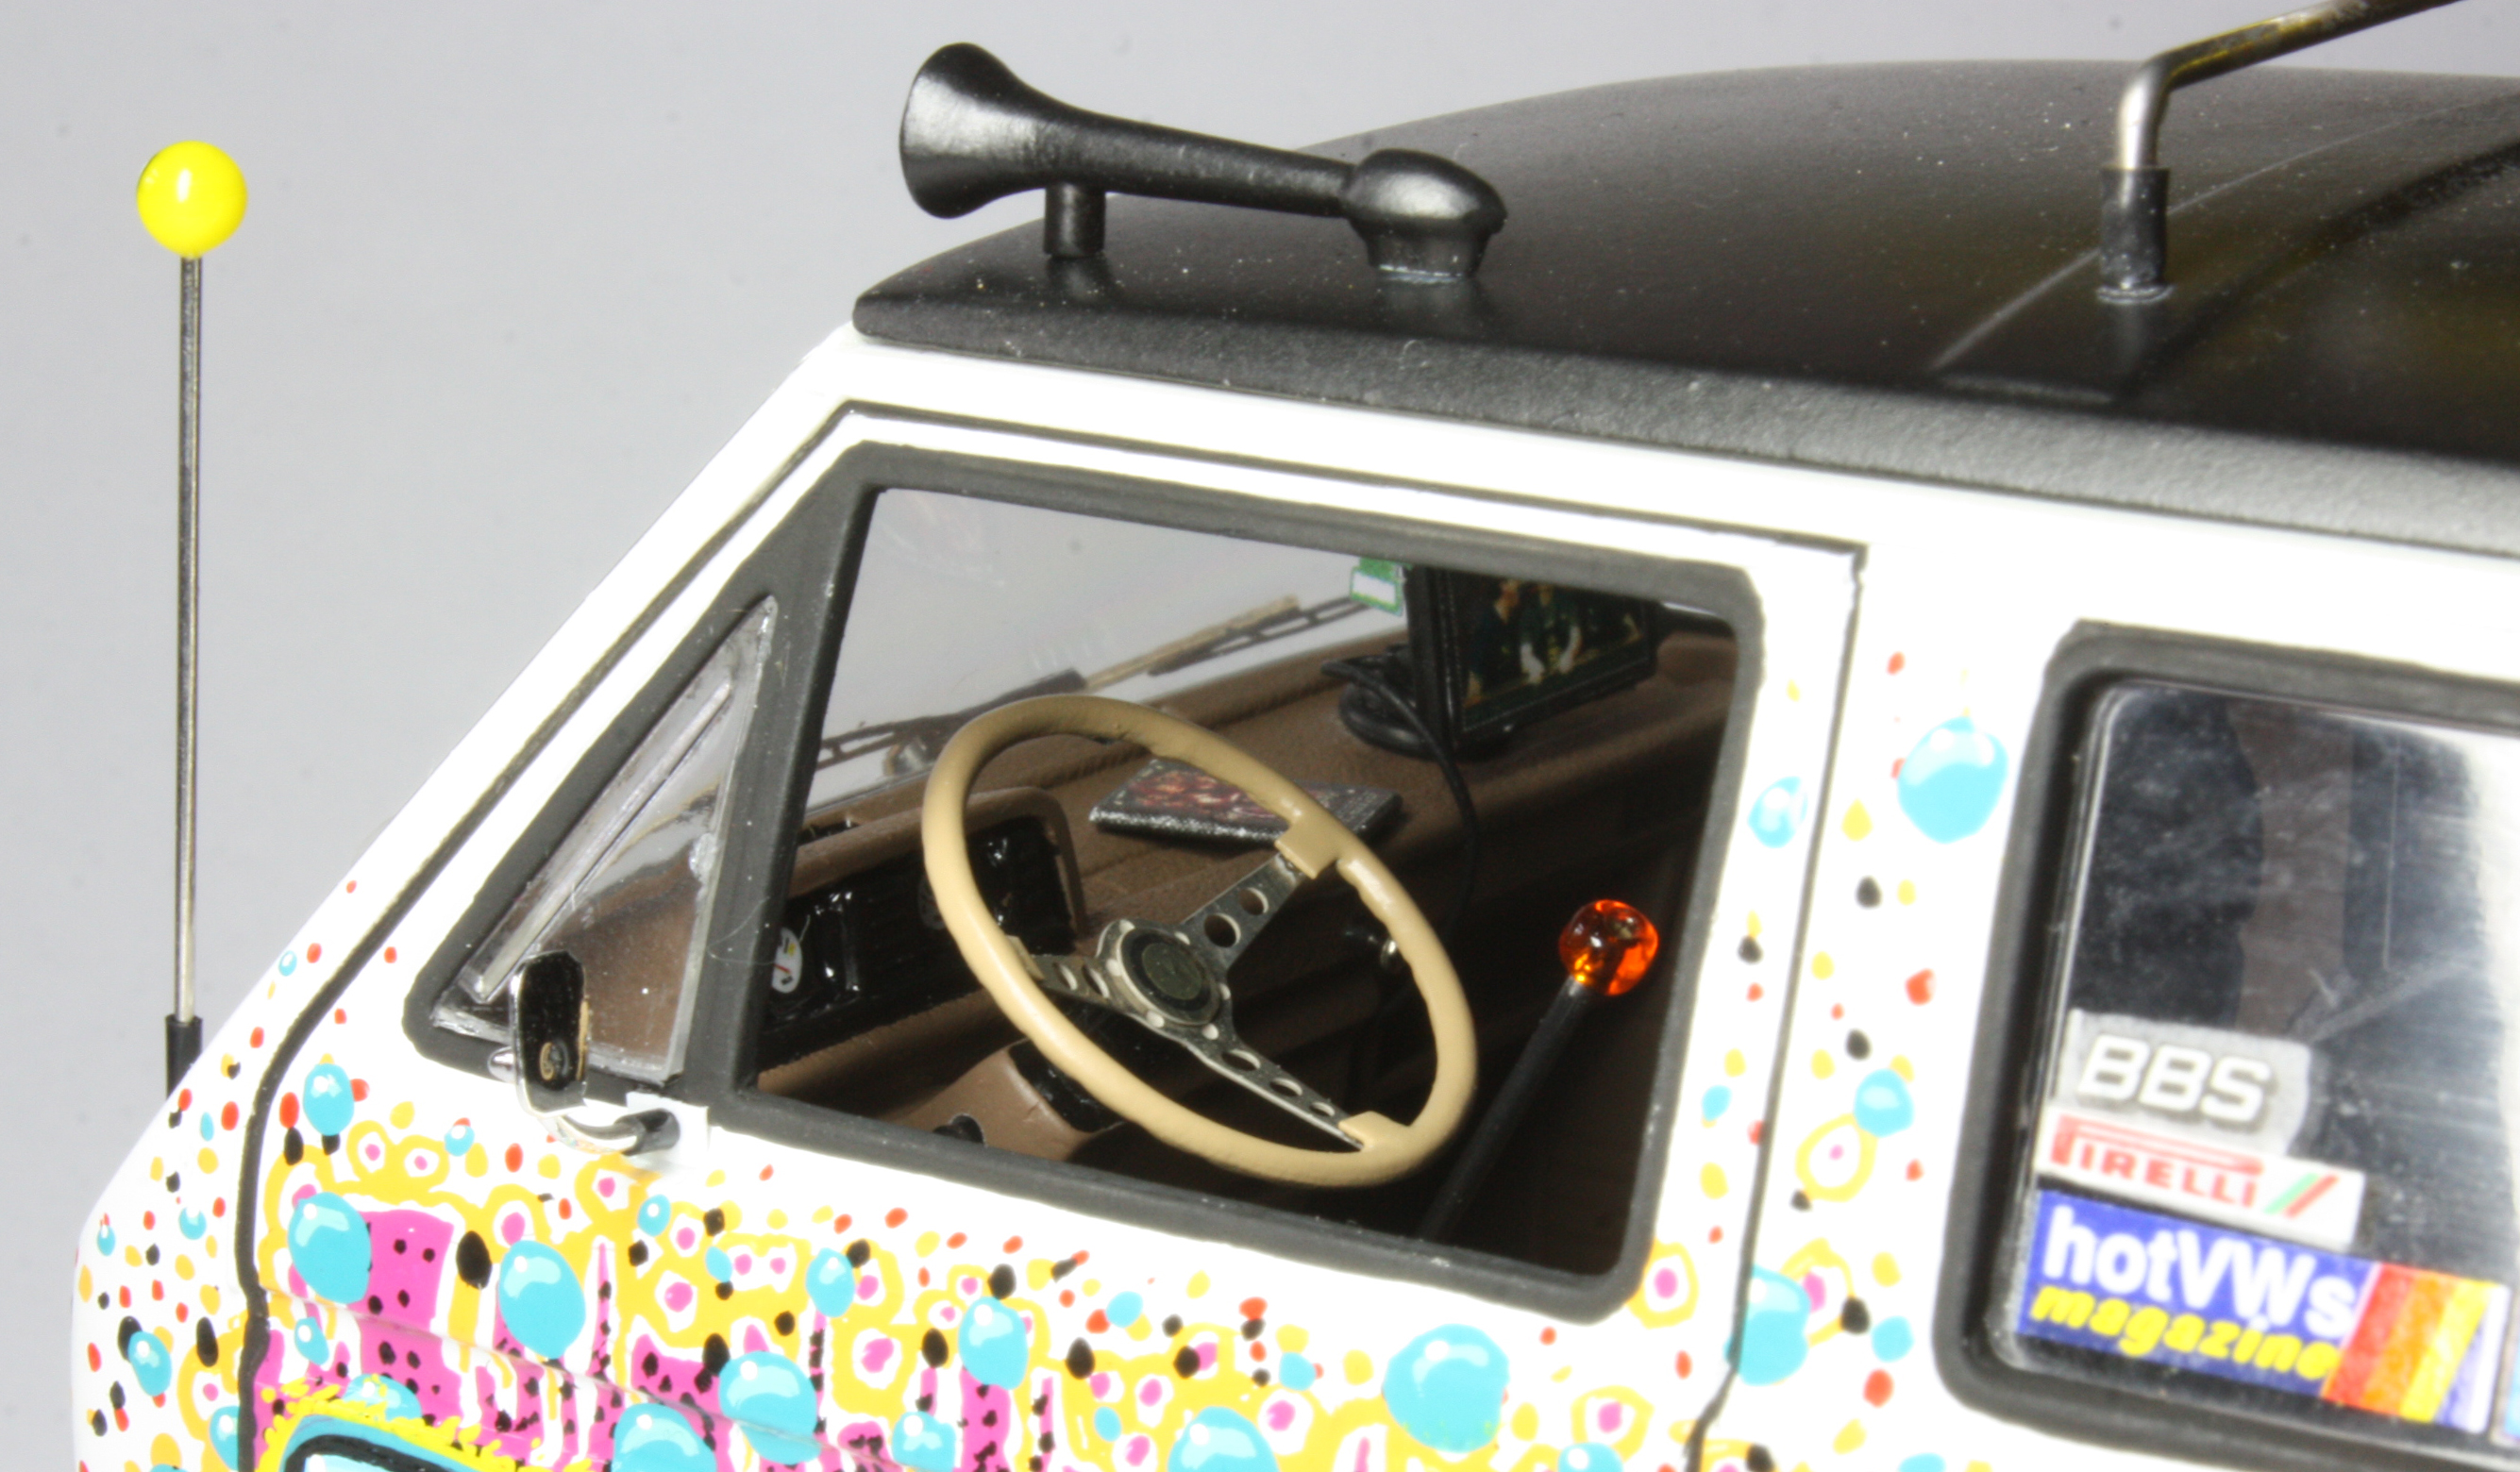
Yes, same guy! If you watch closely you can even spot the F&F DVD at the front seat. I designed those parts but etching is made by Eduard at Check. This model was a birthday present for Jesper.
-
There seems to be somekind of a problem with my webhotel provider. Hope the problem will be fixed soon! Patience
-
Hello! This time I wan't to introduce you this model that is built based on a real car. My Danish colleaque & friend Jesper Bram owns this C10 pickup. Real car has long bed when Revell kit provides short one. I made parts for longer bed with 3D printing. I used Shapeways to create the parts. Flake for the roof is made with children's party glitter hairspray. Wheels/hubcaps are made from aluminium with lathe. Texts on tires & door logos printed with ALPS. Stickers & detail according to a real thing. I designed also some photoetched parts for this one. Diampnd plated tool box, rear lights, car club sign etc. Mexican blanket is made with regular printer. http://www.riemudesign.com/kuvat/jesper_10.jpg Stickers according to a real thing. http://www.riemudesign.com/kuvat/jesper_11.jpg The real car.
-
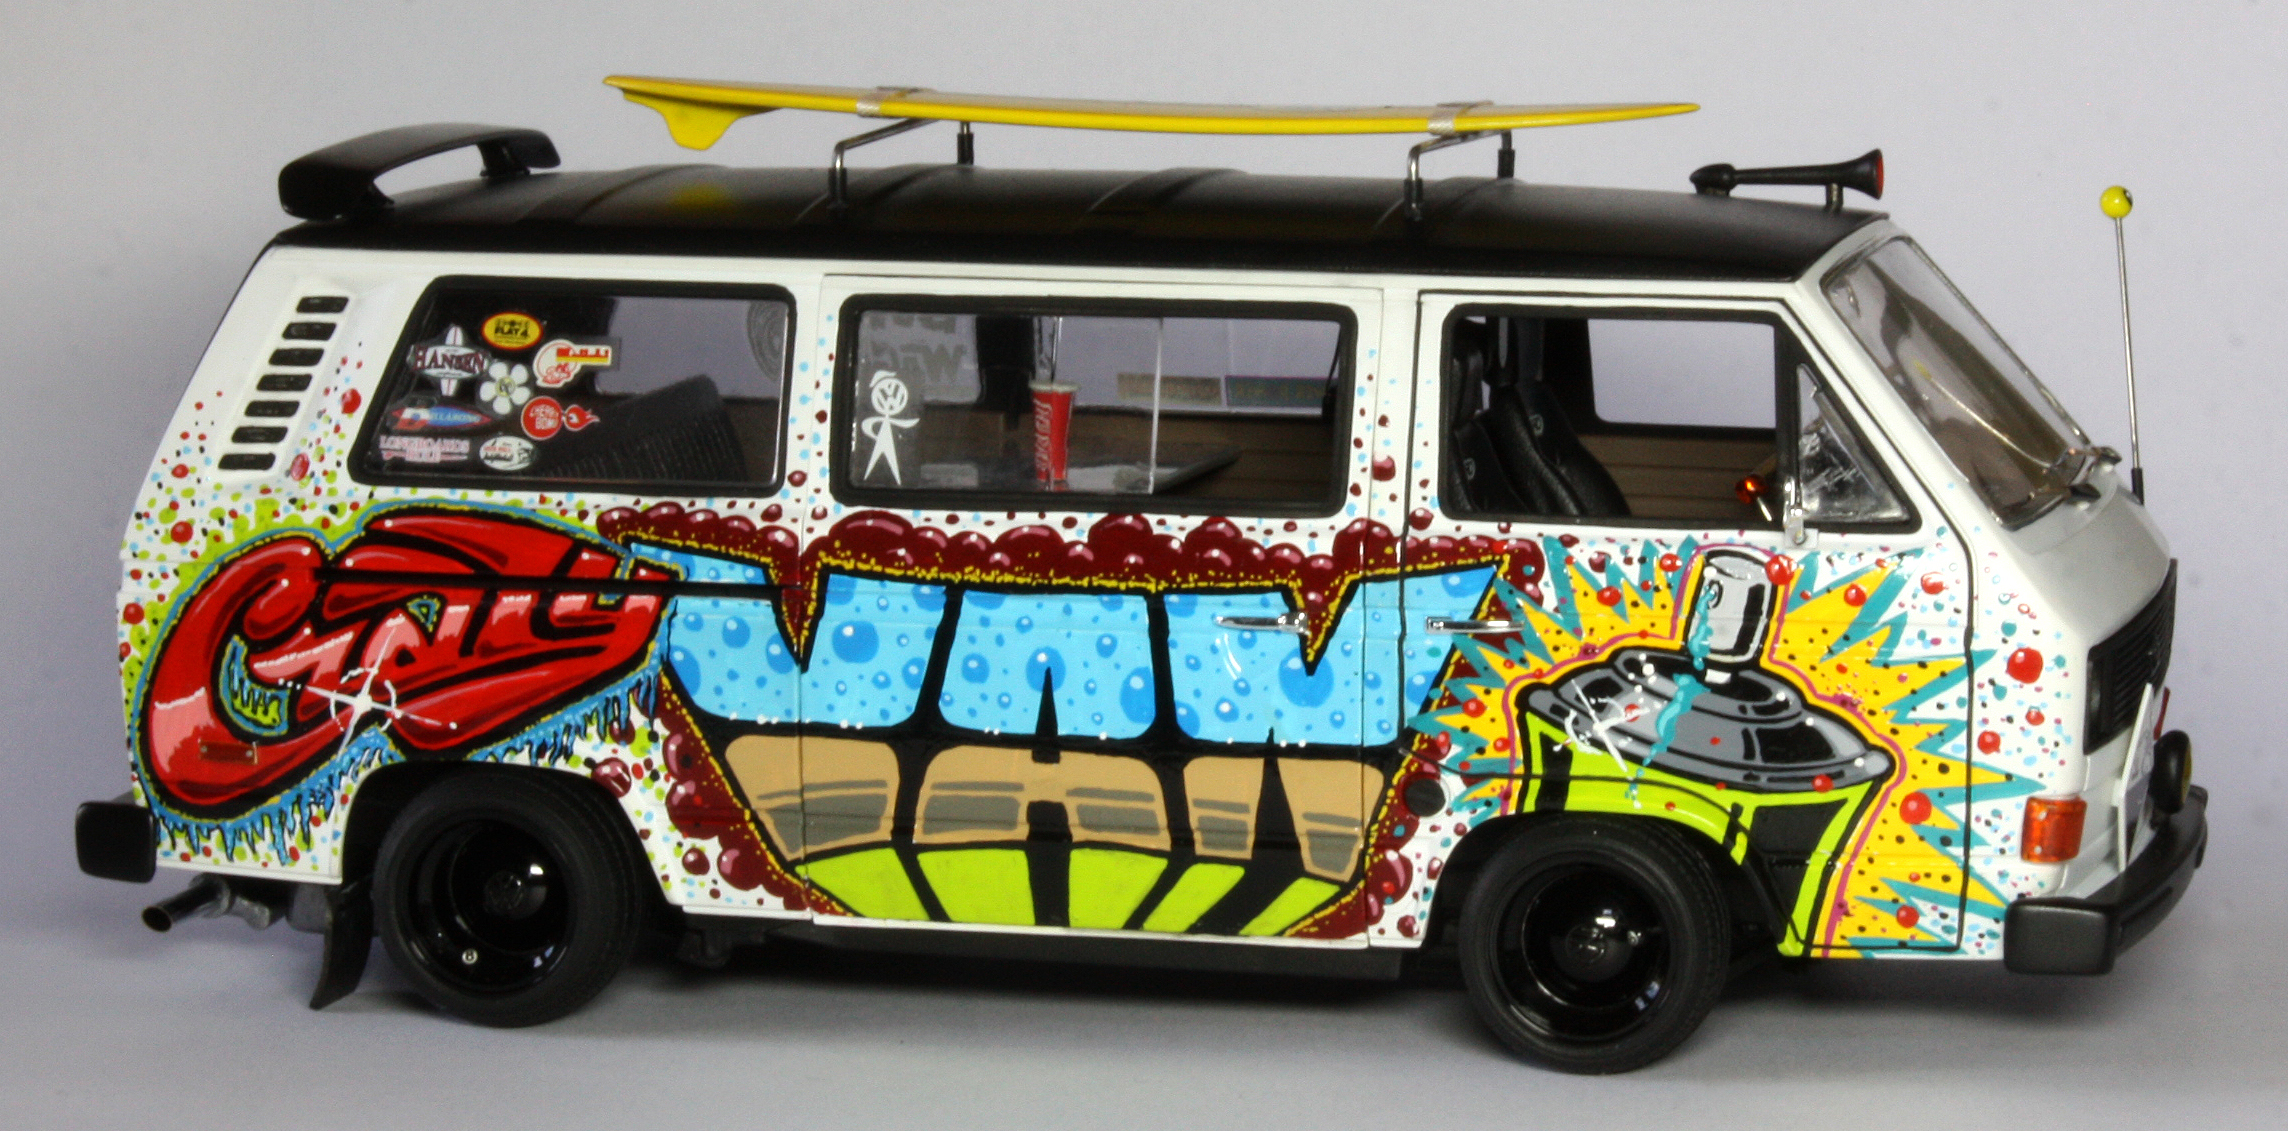
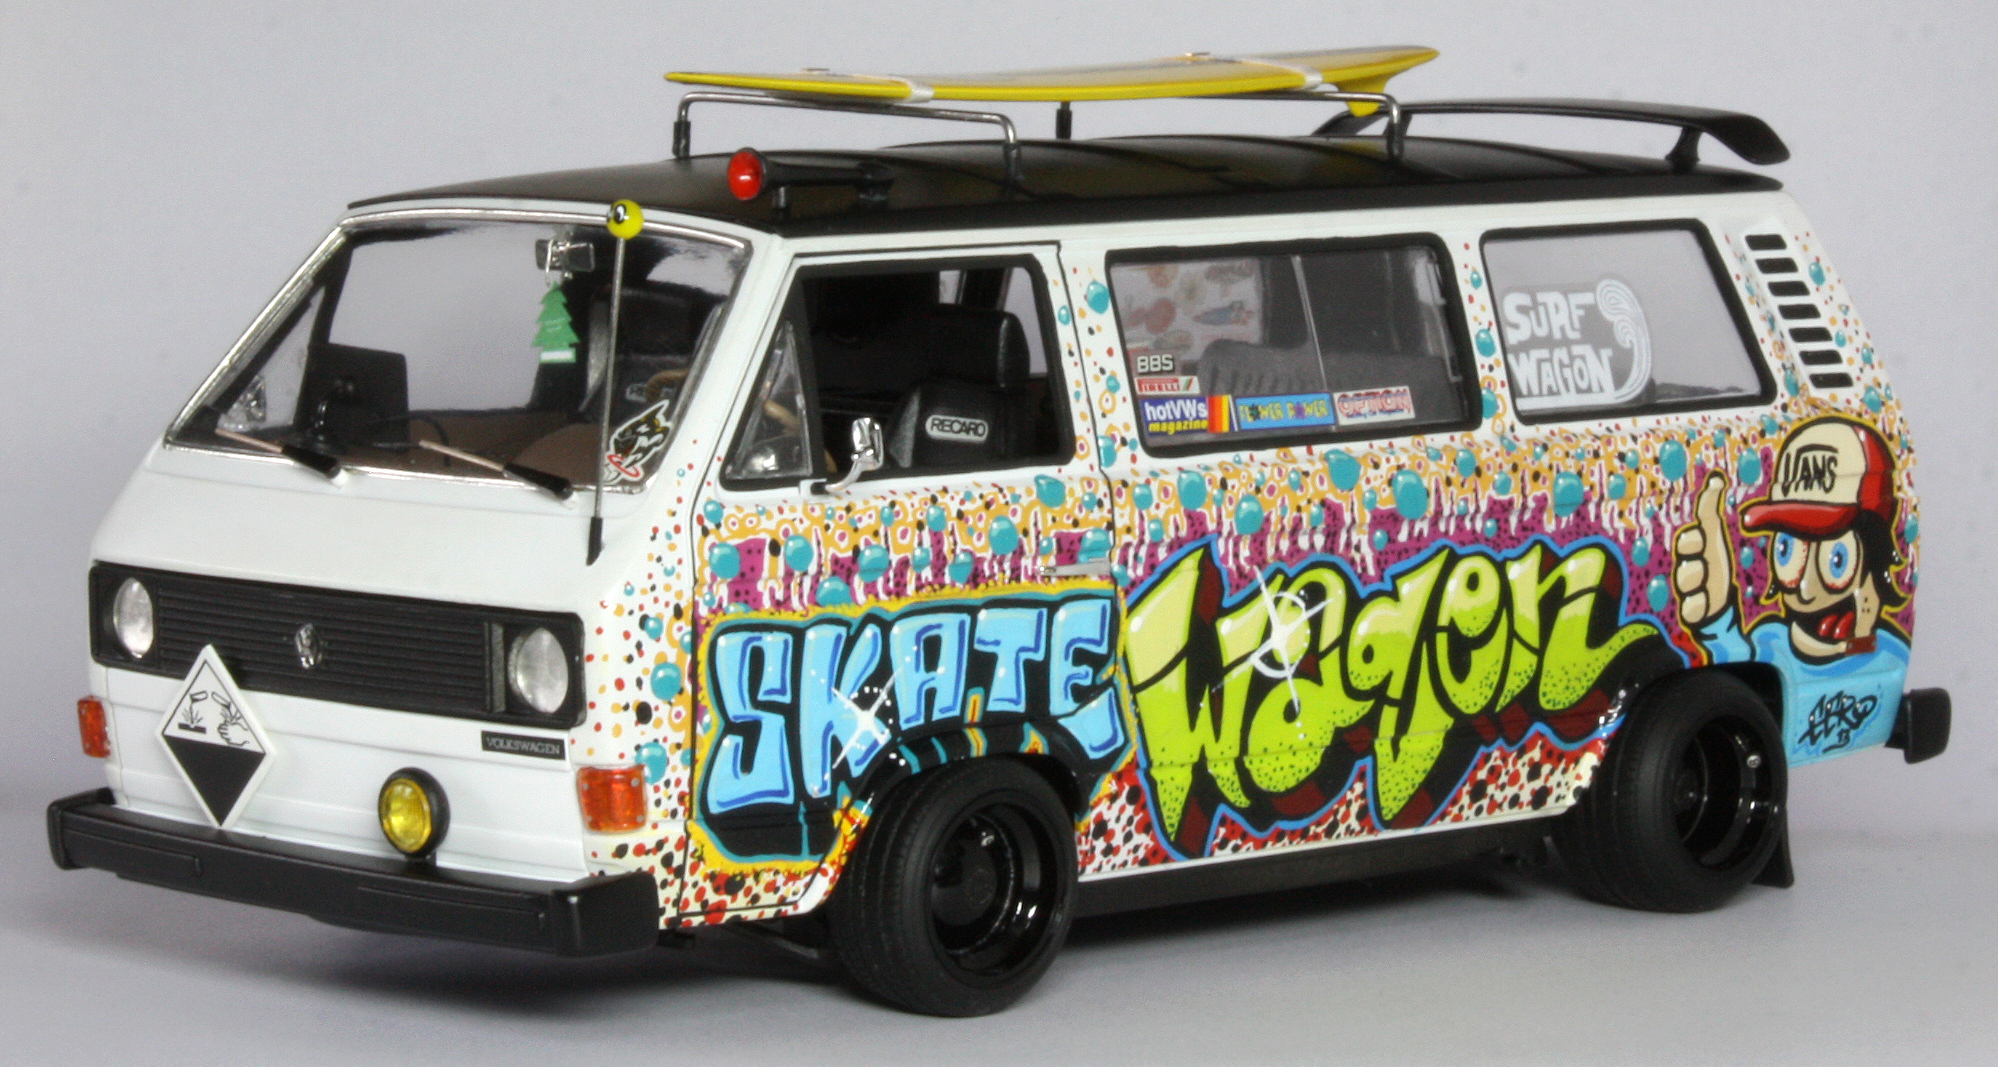
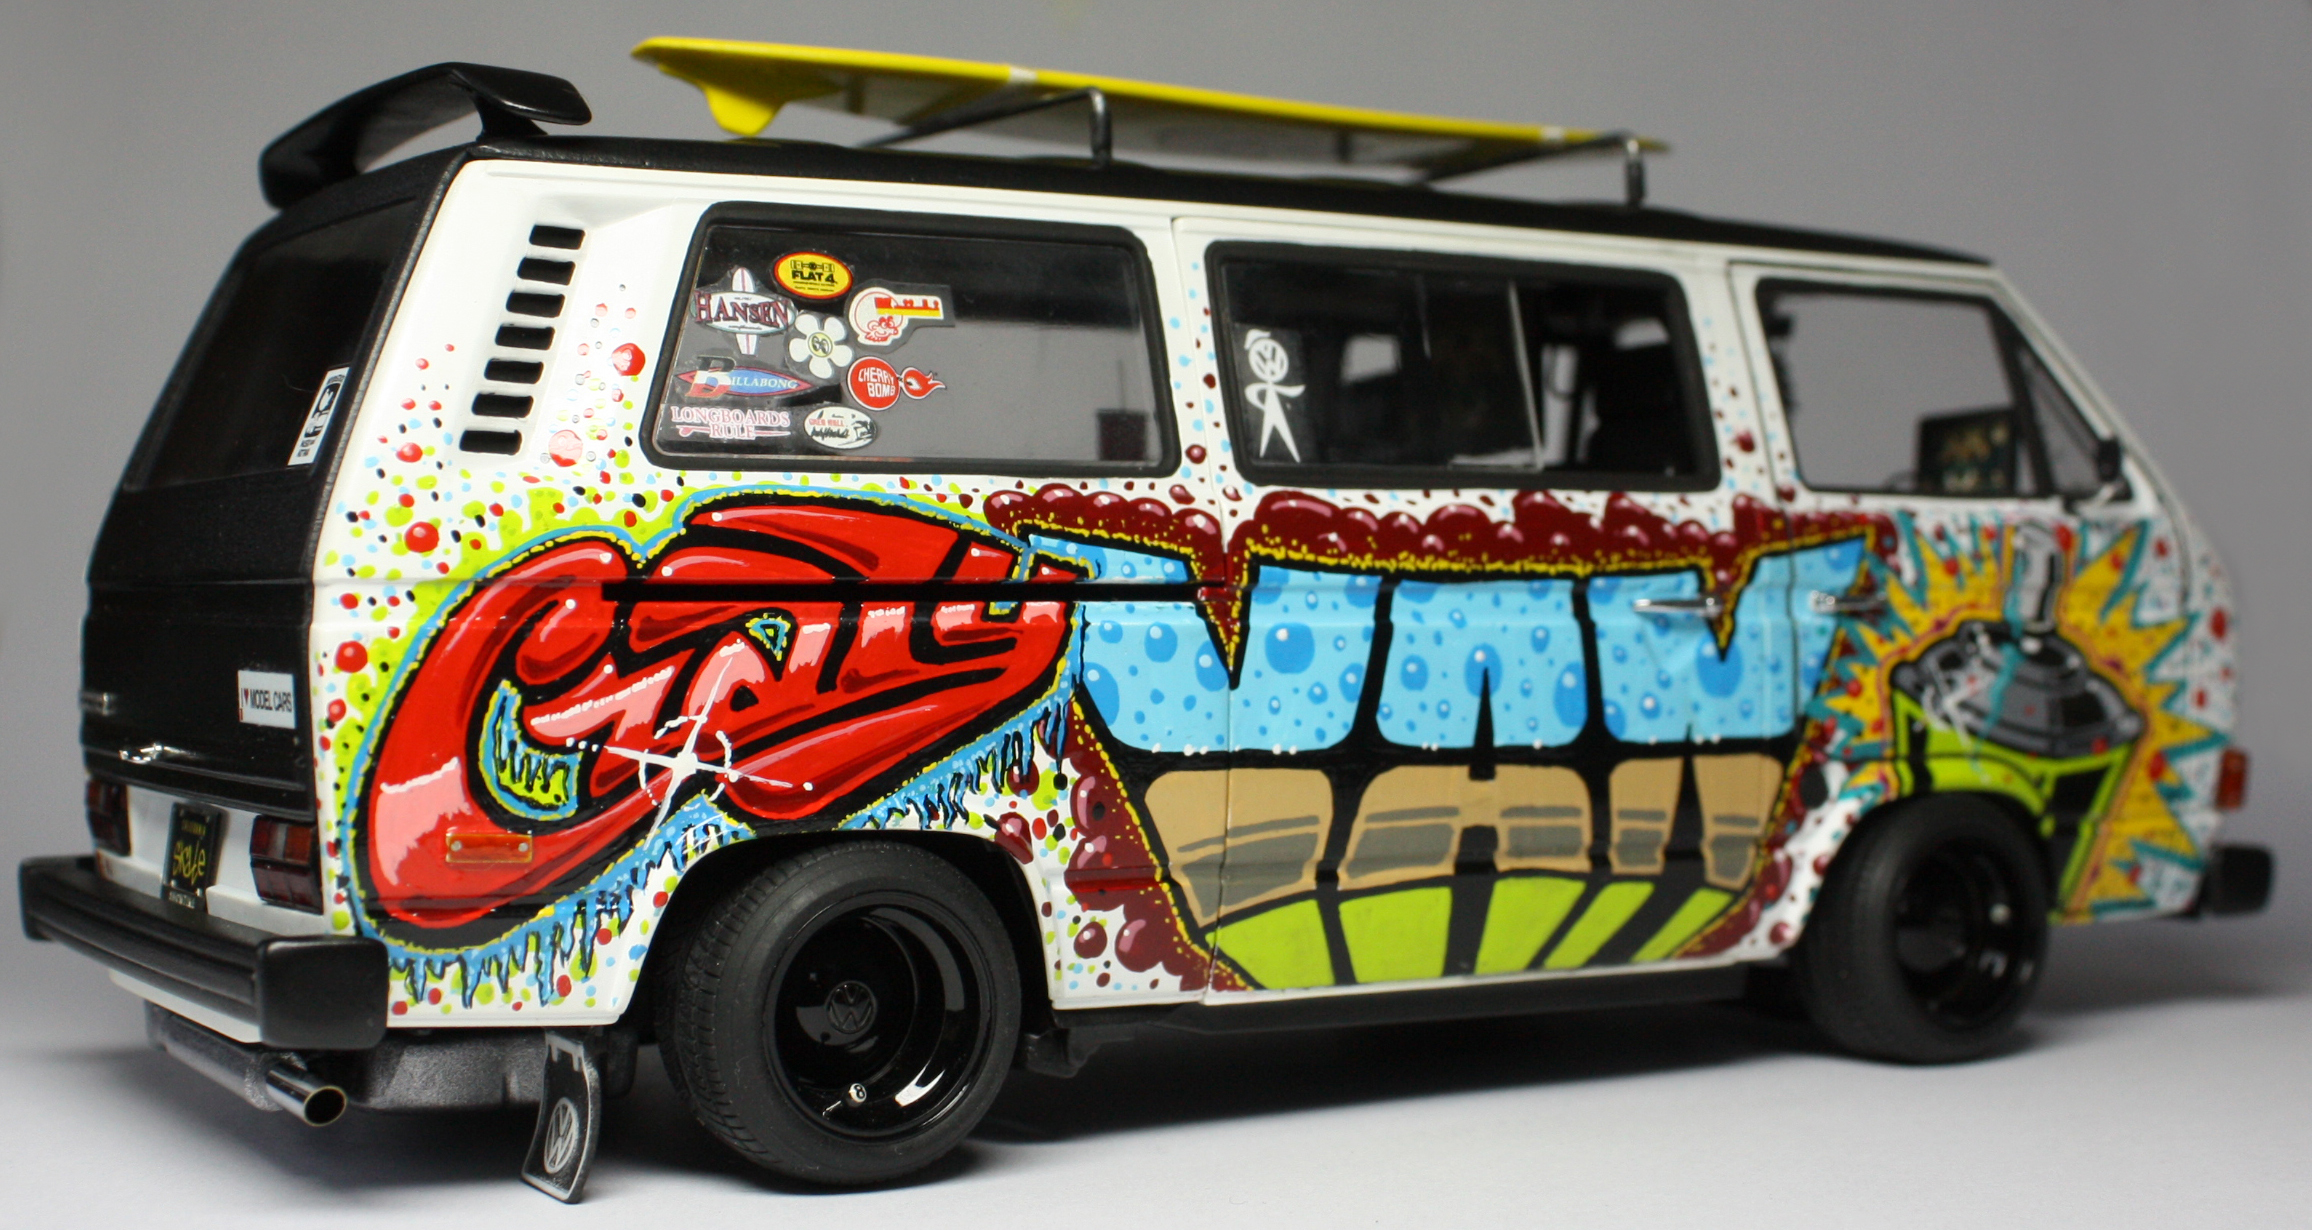
Hello again to everybody! Couple quick answers: Yes, all that graffiti is painted by free hand by using those two brushes shown in last picture. It's not Beastie Boys at screen It's Flake & Flames Movie, that's rollin from dvd there.
-
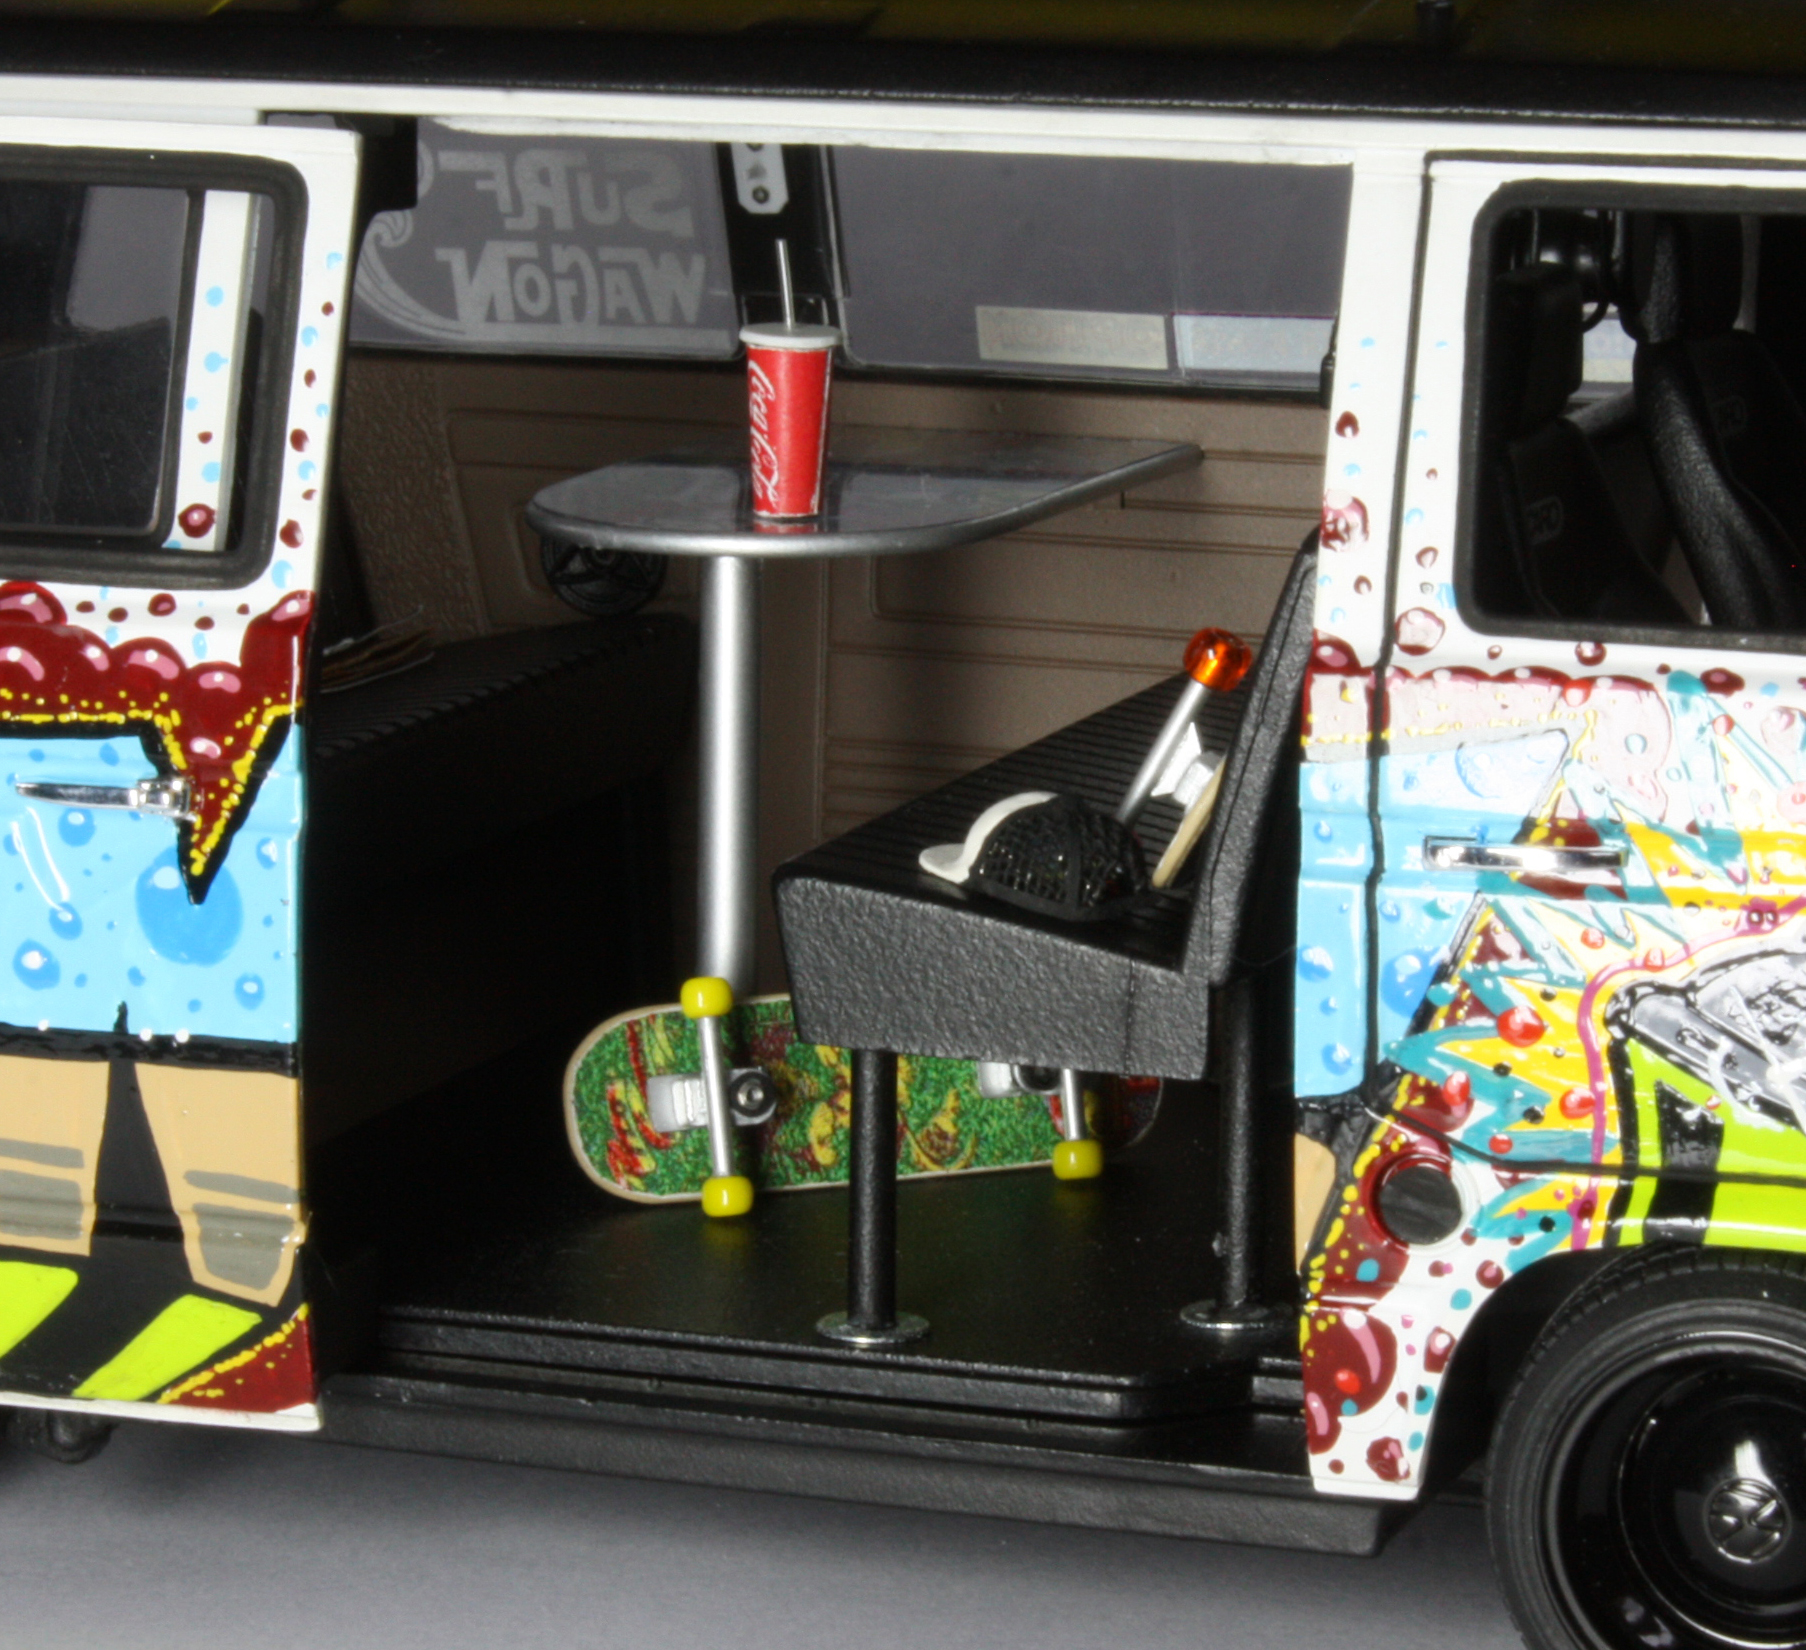
Hello dudes! Here's my vision about the Revell T3 Volkswagen. I wanted to create a real graffiti/skate vehicle so here we go! There's not much modifications but I concentrated on little details, interior and of course that huge graffiti. Most of the details are scratch built items and graffiti is painted with brushes. Skateboards, cap and screens all scratch built. 8-balls as tire valve covers also scratch built. I used Alan Johnson Signature Brush and one of my own designed brush to paint the graffiti.
-
Hello! At this time I want to introduce you something quite odd... This is totally scratch built model. This is totally fictive and based on a Finnish comic strip. Fingerpori is very popular daily strip here in Finland. I collected as many pictures of this car I managed to found from those strips. After that I decided the measurements and details. Now it only needed some serious work... I scratch built all the polystyrene parts. Seats have been made with cad. I created 3D-models and then ordered those seats from Shapeways. I also designed photoetched sheet for this project. Yes, it's quite ugly, but it was very fun project to build! Project topic can be found from this link: http://www.fcma.fi/FCMABBS/viewtopic.php?f=4&t=11229 ...it's only in Finnish, but there's s a lot photos I took during the project.
-
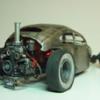
So this was quite quick project to do. This took about two weeks and this is built mainly using left over parts. I found a 1/16 engine and a 1/25 body from my storage and quite soon it was obvious what I was going to do with these... That monster engine needed quite a lot room so I had to cut the body and other parts quite hard. There's no firewall at all. The whole front axle is scrathbuilt. Rust is made with primer-hairspray-final color -method.
-
Hello! This is a model that I built to represent my parents car they used at ´70´s. I used Gunze Sangyos kit as a base. I made some modifications and I designed few photoetched parts also.
-
So little time, so many models to build. Gotta go
-
http://motohashi-mww.com/
-
VW Tiki Type 2
Eero replied to Eero's topic in WIP: Model Trucks: Pickups, Vans, SUVs, Light Commercial
Surf boards aren't scratched but I don't know which kit includes these. Still I did design the graphics to boards by myself. I printed those graphics to decal film. -
VW Tiki Type 2
Eero replied to Eero's topic in WIP: Model Trucks: Pickups, Vans, SUVs, Light Commercial
It's not working. -
Well... I actually used some old '62 AMT kit. I'm not quite sure what it was, because only thing I got was the body. It was in very bad shape, but the roof was something I needed. Simply I just took that roof and clued it to this AMT '61 kit. I added some details to it, but actually there's nothing tricky.
-
VW Tiki Type 2
Eero replied to Eero's topic in WIP: Model Trucks: Pickups, Vans, SUVs, Light Commercial
Well, there's actually nothing special. First I opened the hood and used polystyrene to fix the hole. The ragtop itself is a piece of fabric. I just cutted piece of it, then I folded sides. I used iron to get those sharp edges. After that I folded it to "open". I used again iron to press it flat. I also added some glue to it so it stays in that form. Unfortunately there is no actual build up topic.