Jump to content
Model Cars Magazine Forum

Ira

Members
  • Posts

    7,265
  • Joined

  • Last visited

Everything posted by Ira

  1. FILL- IN The MISTAKES!!! After I got the Interior in place, I noticed that there were some gaps... I used a thick White Glue, Aleene's Tacky Glue, to fill the spaces around the rear armrests, and a couple other places. Clean up is easy, a damp Q-tip or tooth pick, will make a nice clean line. After the glue dries, Paint It! I use this technique a lot during the finishing of a model, it covers many problem areas for me.
  2. Nice Work Steve! Great Start...
  3. Thanks for the kind words Curt! It was a Great time at NNL, looking forward to next year!
  4. Thanks Roger! Yeah, I had a choice to either put the fenders on the Ranchero or put the Ranchero on the fenders. This way worked out pretty good!
  5. WOW!!! Beautiful Work...
  6. GOT PRIMER!!! Well that's the last of the Orange, Yellow, White "Popcycle" Colored Plastic.. Applied a few coats of Gray Filler/Primer! Thanks to Paul, (Funnybug), for the Snake Decals!!!
  7. FINALLY GOT IT IN!!! It has been a challenge, I finally figured out how to install the Interior! The Interior had to be Sectioned and Narrowed to fit the Body & Bubbbletop. I first, glued the sides with G-S Hypo Cement, (Jewelers Glue). It doesnt attack the paint & it dries fast. Then I put strapping tape on the backsides of the sides. The tape is sticky enough to to hold the floor board in place. I also glued it in place. Really Glad to have the Interior in place!
  8. LAST COAT!!! Sprayed the Ranchero with some more Grey Filler/Primer. A little spot putty and some White Primer are next...
  9. Thanks Mike! Glad you like it! More photos coming....
  10. Putting It On & Taking It Off!!! I used Half Round Plastic Strip to replace the rear trim. It's pretty easy... First attach one end of the Strip with Zap-A-Gap. Next apply Zap-A-Gap with a tooth pick to the back of the Strip, a little at a time. Hold the strip in place until it dries, then do a little more. When you get to the end, Cut it off. Removed the Door Trim & Fuzz letters! Need some paint...
  11. Removed The Chrome... First, I put the Supercharger and Scoop in the Purple Pond, to Remove the Chrome Plating... Then I put the ends on the Engine Block & Cut the Block down a little bit. I made a new base for the scoop, that moves it forward towards the cab. I also Wired the Distributor and Drilled the Valve Covers for spark plug lines.
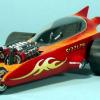
  12. CAR-TOONS CONTEST RULES! *Starts March 1, 2012. * Ends June 4, 2012. * Both New & "Already Started" Models from Members can be entered! *Preview & Construction Photos are Encouraged! Share with everyone How its Done...Post your "Sneak Peaks & Preview Photos here! *Builders Choice Judging for Braggin Rights... *This Contest is about Building a Model for Fun & Enjoyment. Have some Fun, Try Building something Different... TYPES OF MODELS FOR CAR-TOONS CONTEST: Deal's Wheels, Zingers, Roth Finks, Weird-Ohs, Snappers, Snap Draggins, Fred Flypogger/Super Fuzz/Speed Shift, Frantics, Funsters, Silly Surfers, Scooby Van, Wallace & Gromitt Vehicles, Lindy Loonys, Homer’s Bubble Car... Most Any Cartoon Models, and Scratch Built or Kit Bashed Car-Toons Style Models. TWO ENTRY CATEGORIES: 1: CAR-TOON ENTRIES...Cartoon Style Cars & Trucks with or without Finks, Figures & Wierd-Ohs... 2: UNCAR-TOON ENTIES...Finks, Funny Figures & Wierdos in Boats, Jets, Plains, UFOs, Surfboards and some Barefoot without Wheels... PRIZES! Looking for contributions, but the Main Idea is to have some Fun and Share Modeling Ideas & Techniques with Friends! Maybe we will learn some new things too! *Details Subject to Change.
×
×
  • Create New...