

LDO
-
Posts
3,030 -
Joined
-
Last visited
Content Type
Profiles
Forums
Events
Gallery
Posts posted by LDO
-
-
-
Just a little bit more progress. This geometry is a pain in the neck, for me anyway.
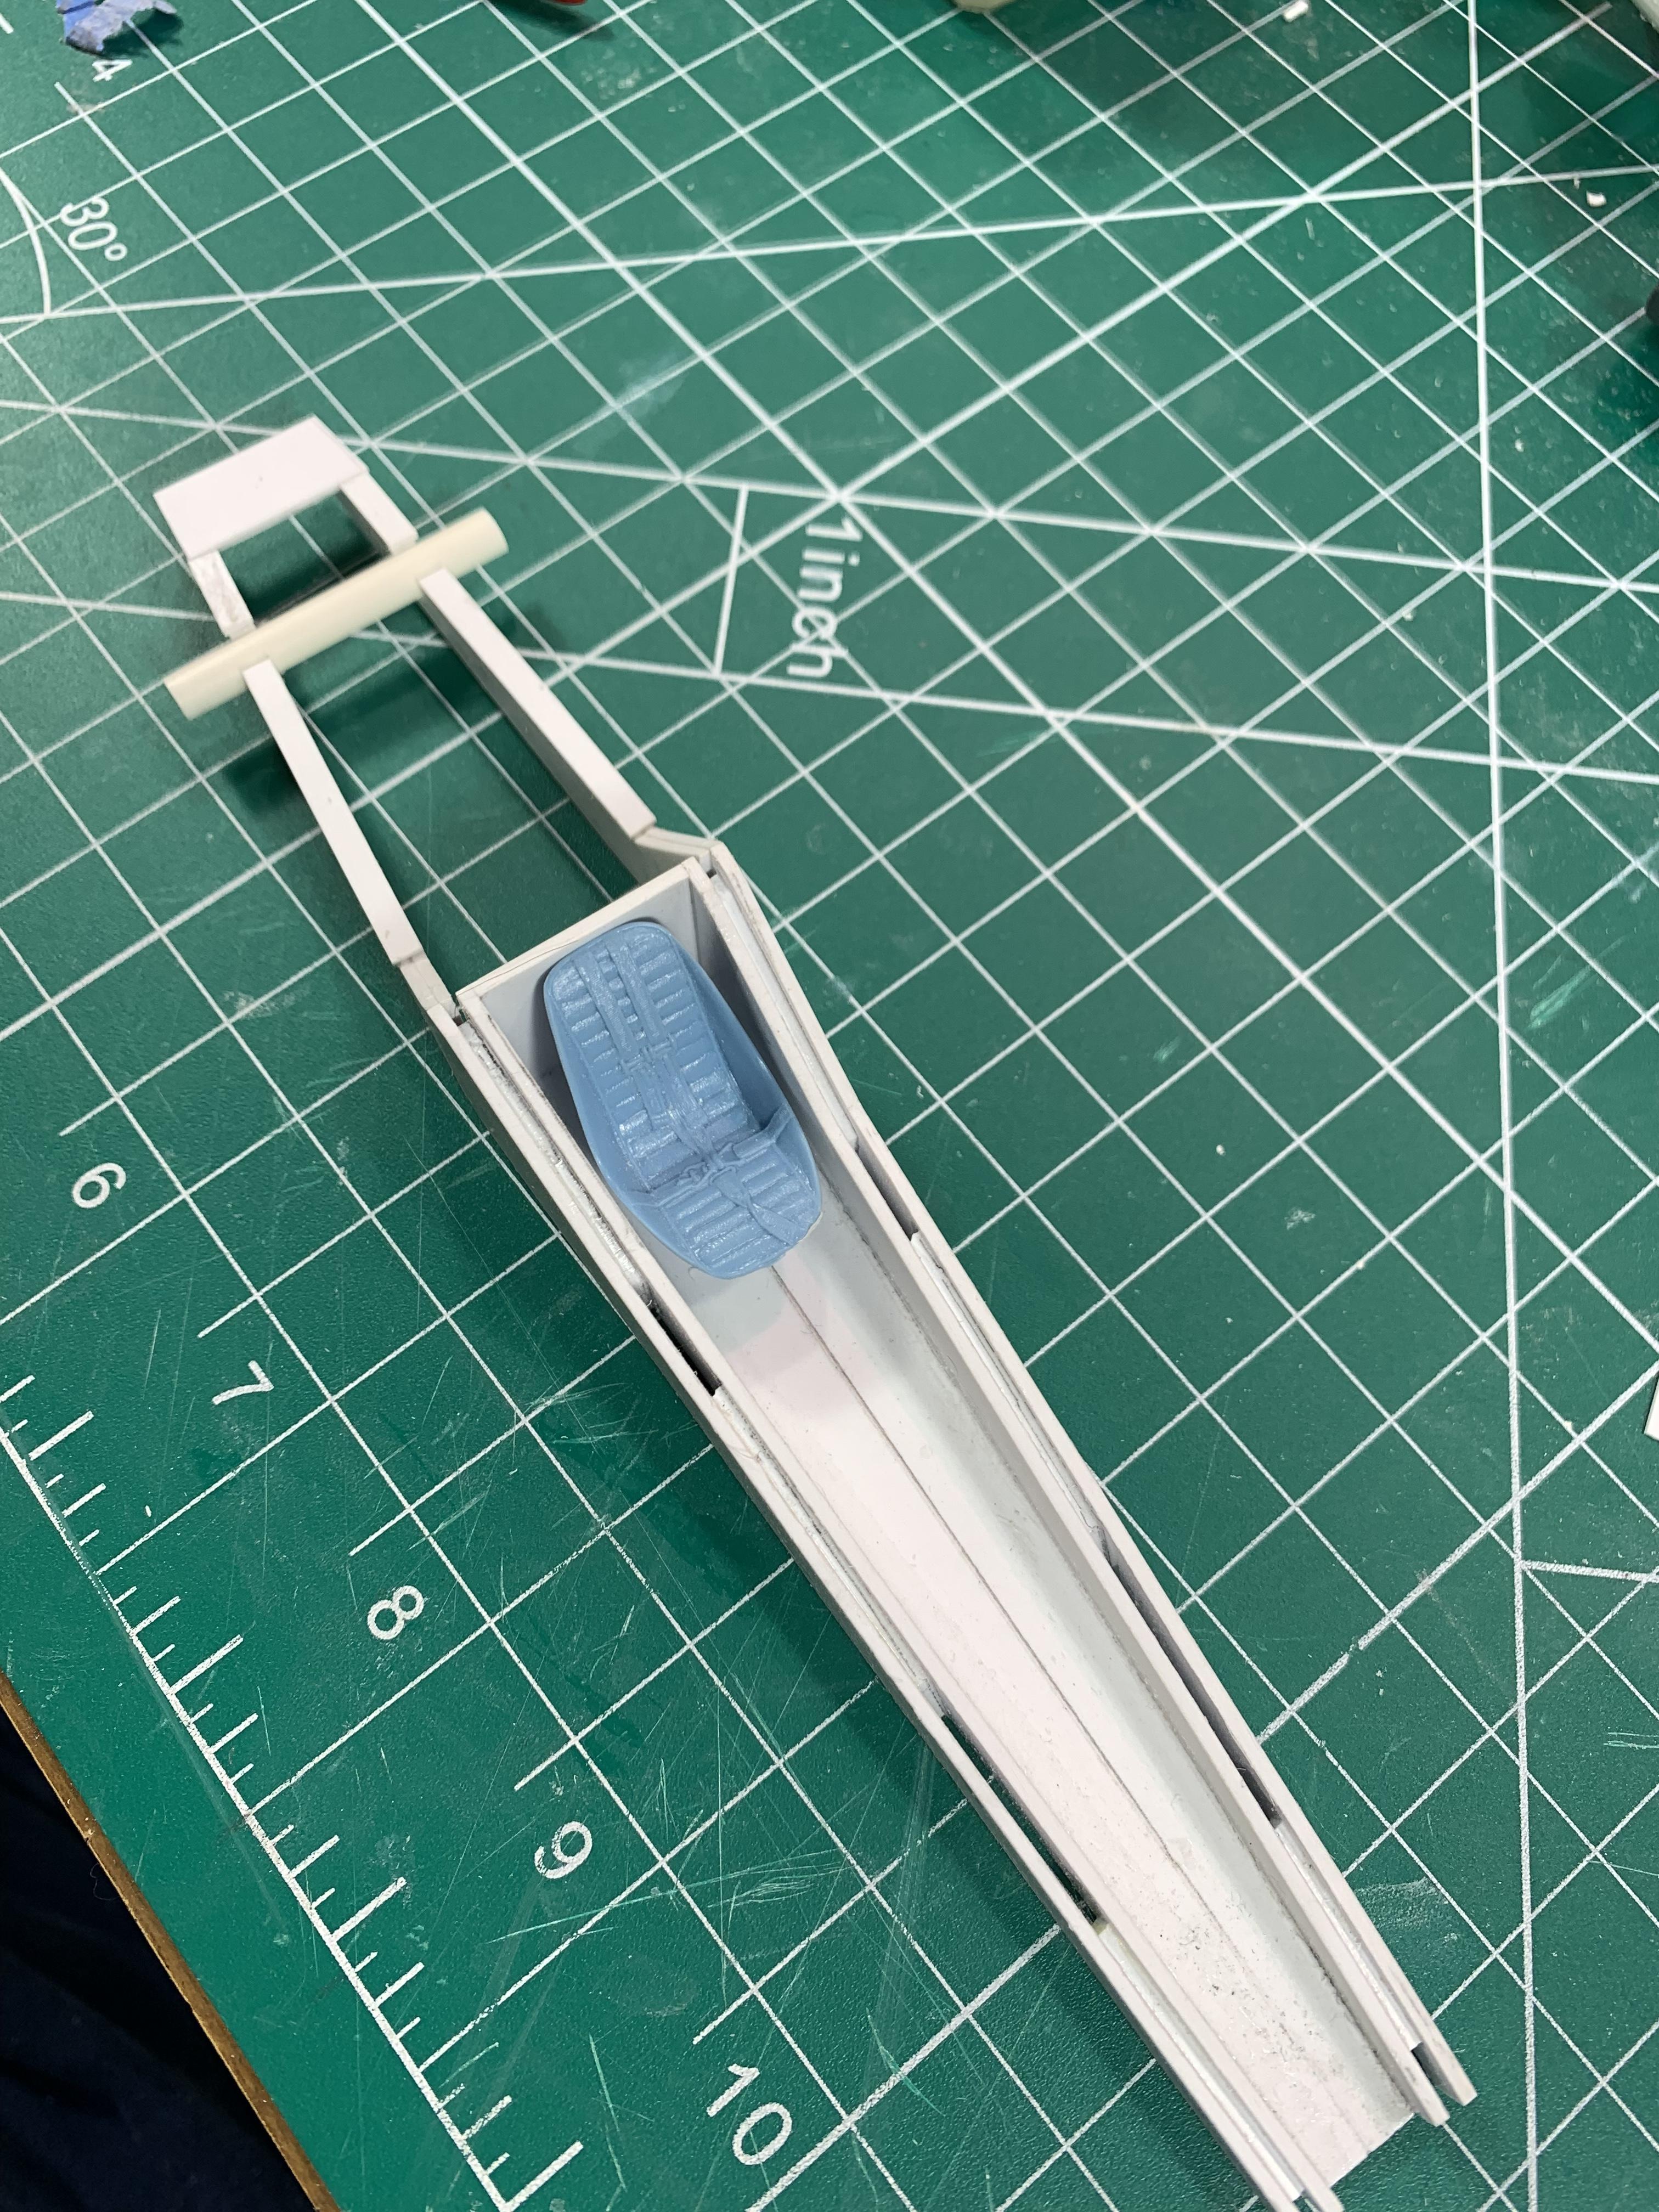
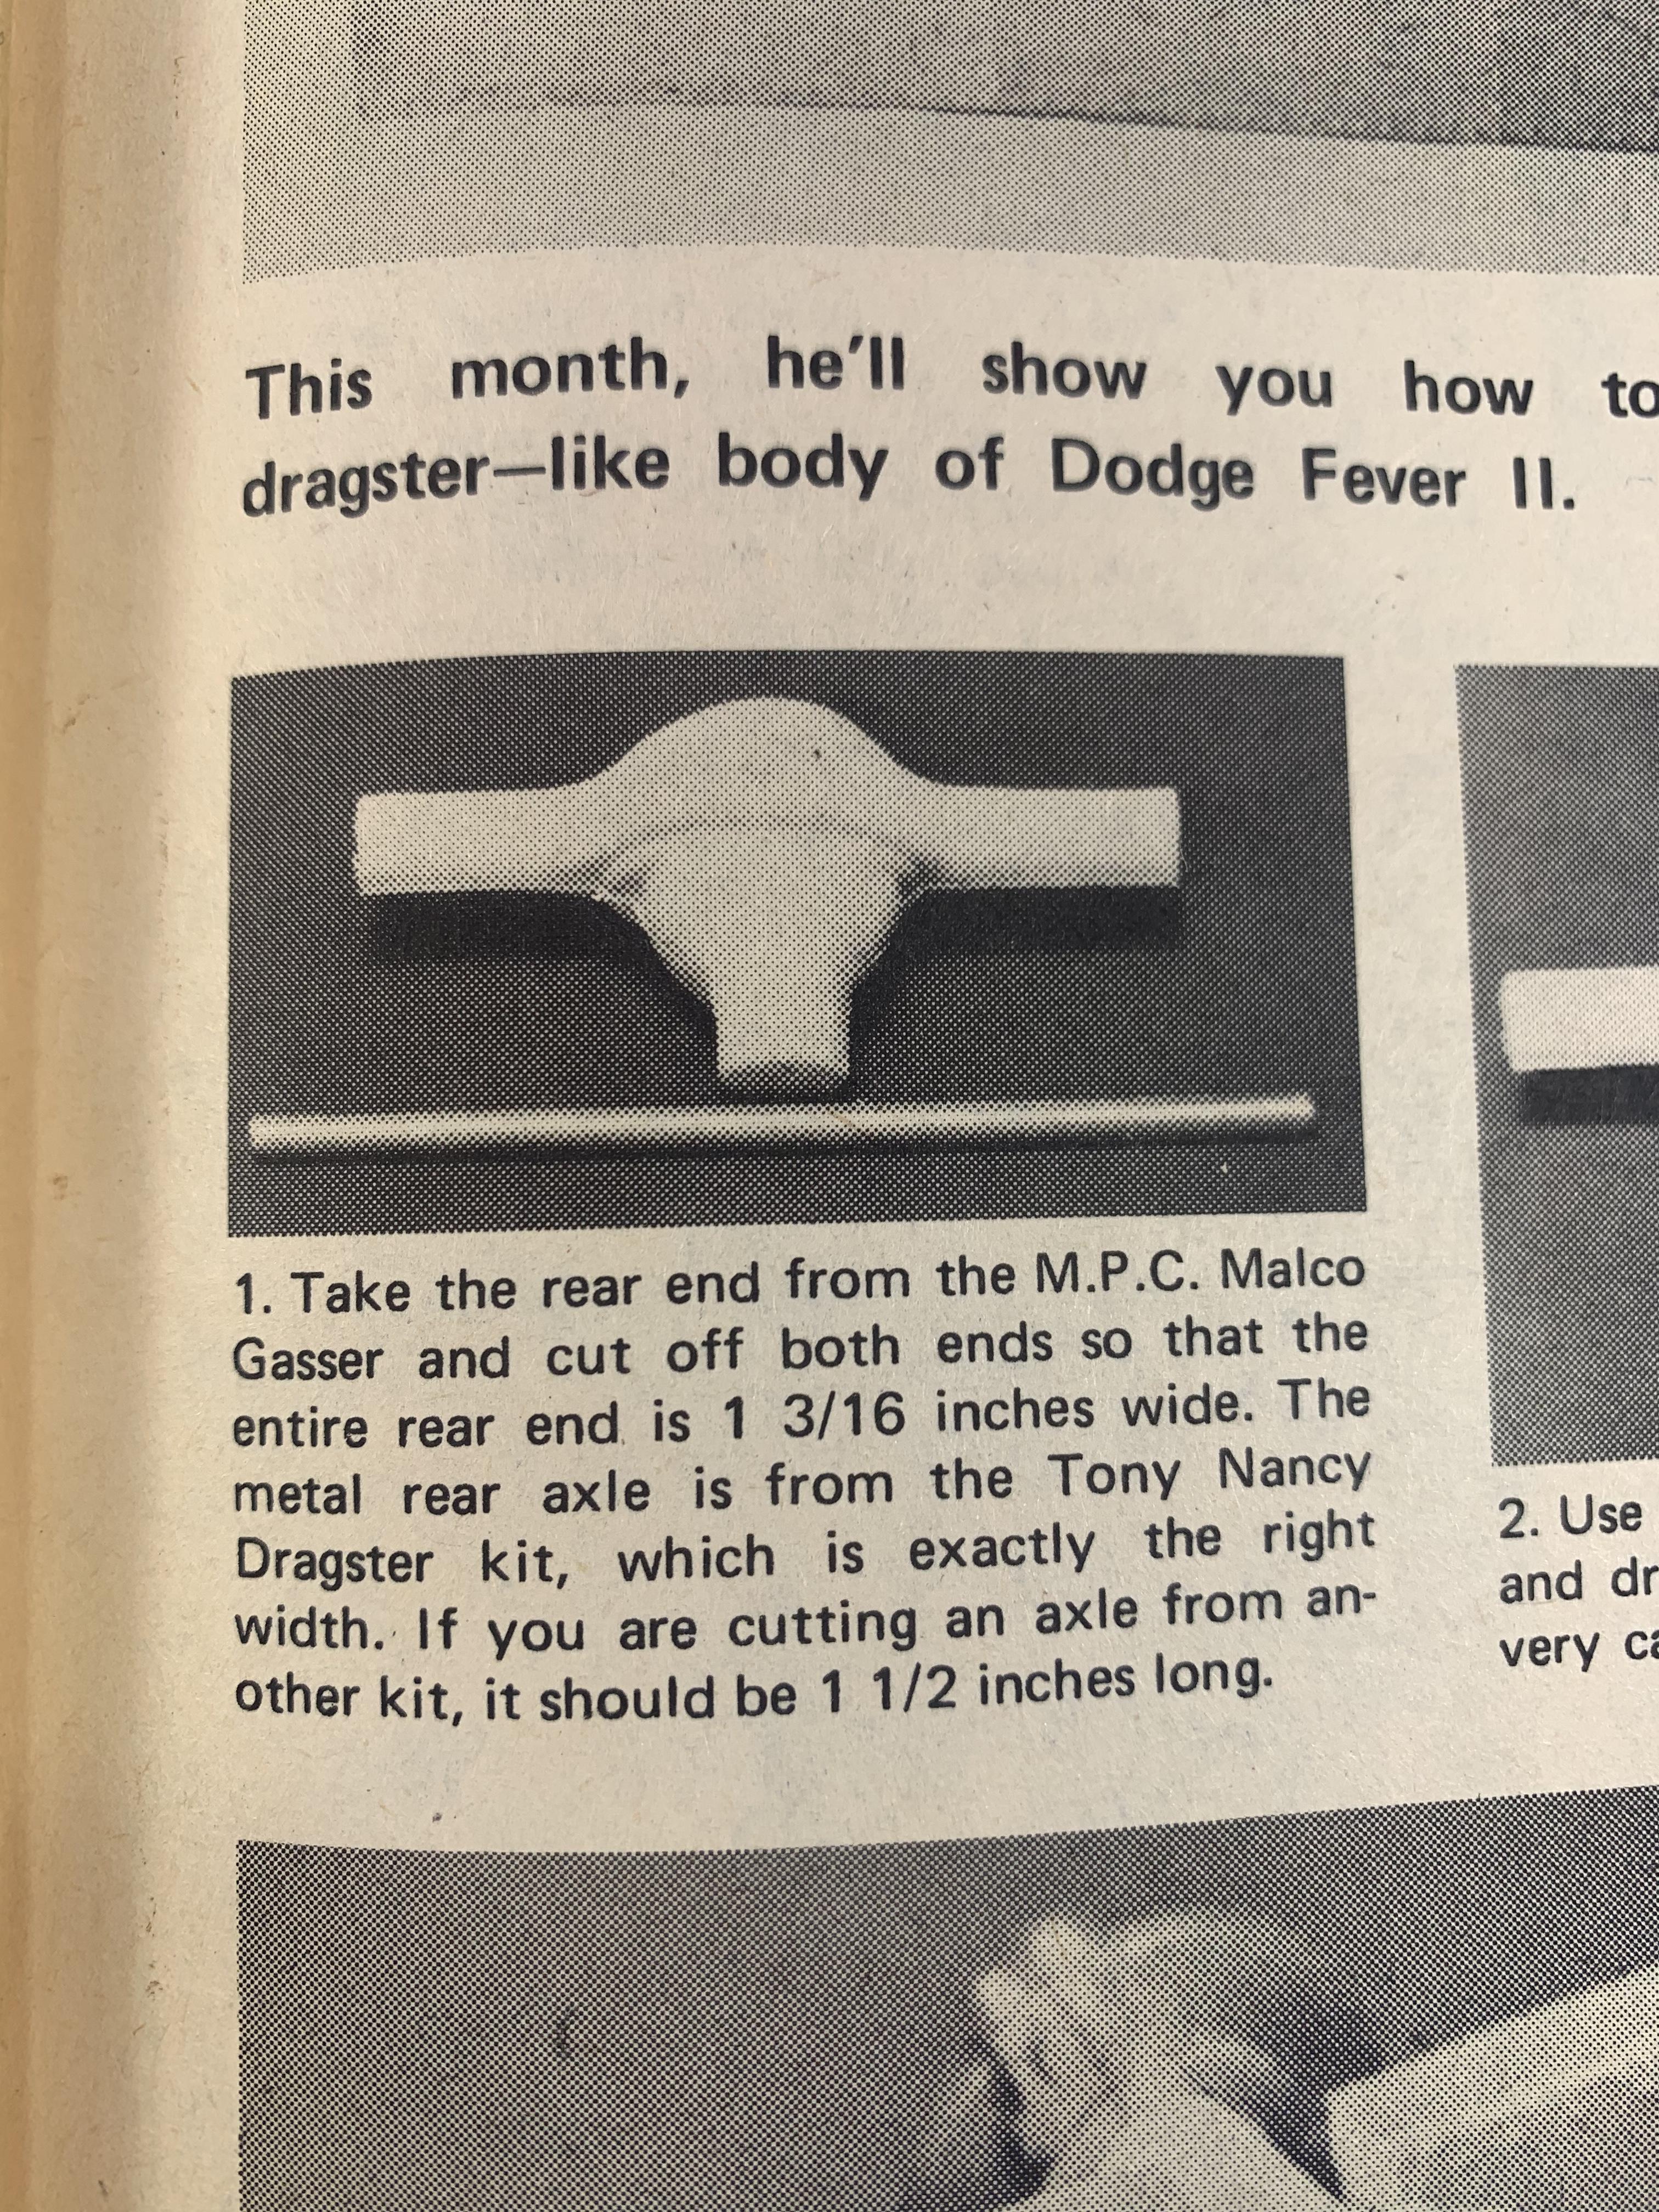
I couldn’t find a rear axle from a Malco Gasser. The kit has been reissued, but it’s about $60. That’s pretty steep for one part. I’m going to try to scratchbuild one from Evergreen styrene and the inner axle from the Ramchargers dragster I got for parts. The back half of the monocoque needs some cleanup and that’s a piece of Evergreen 3/16” tube that will be part of the axle.
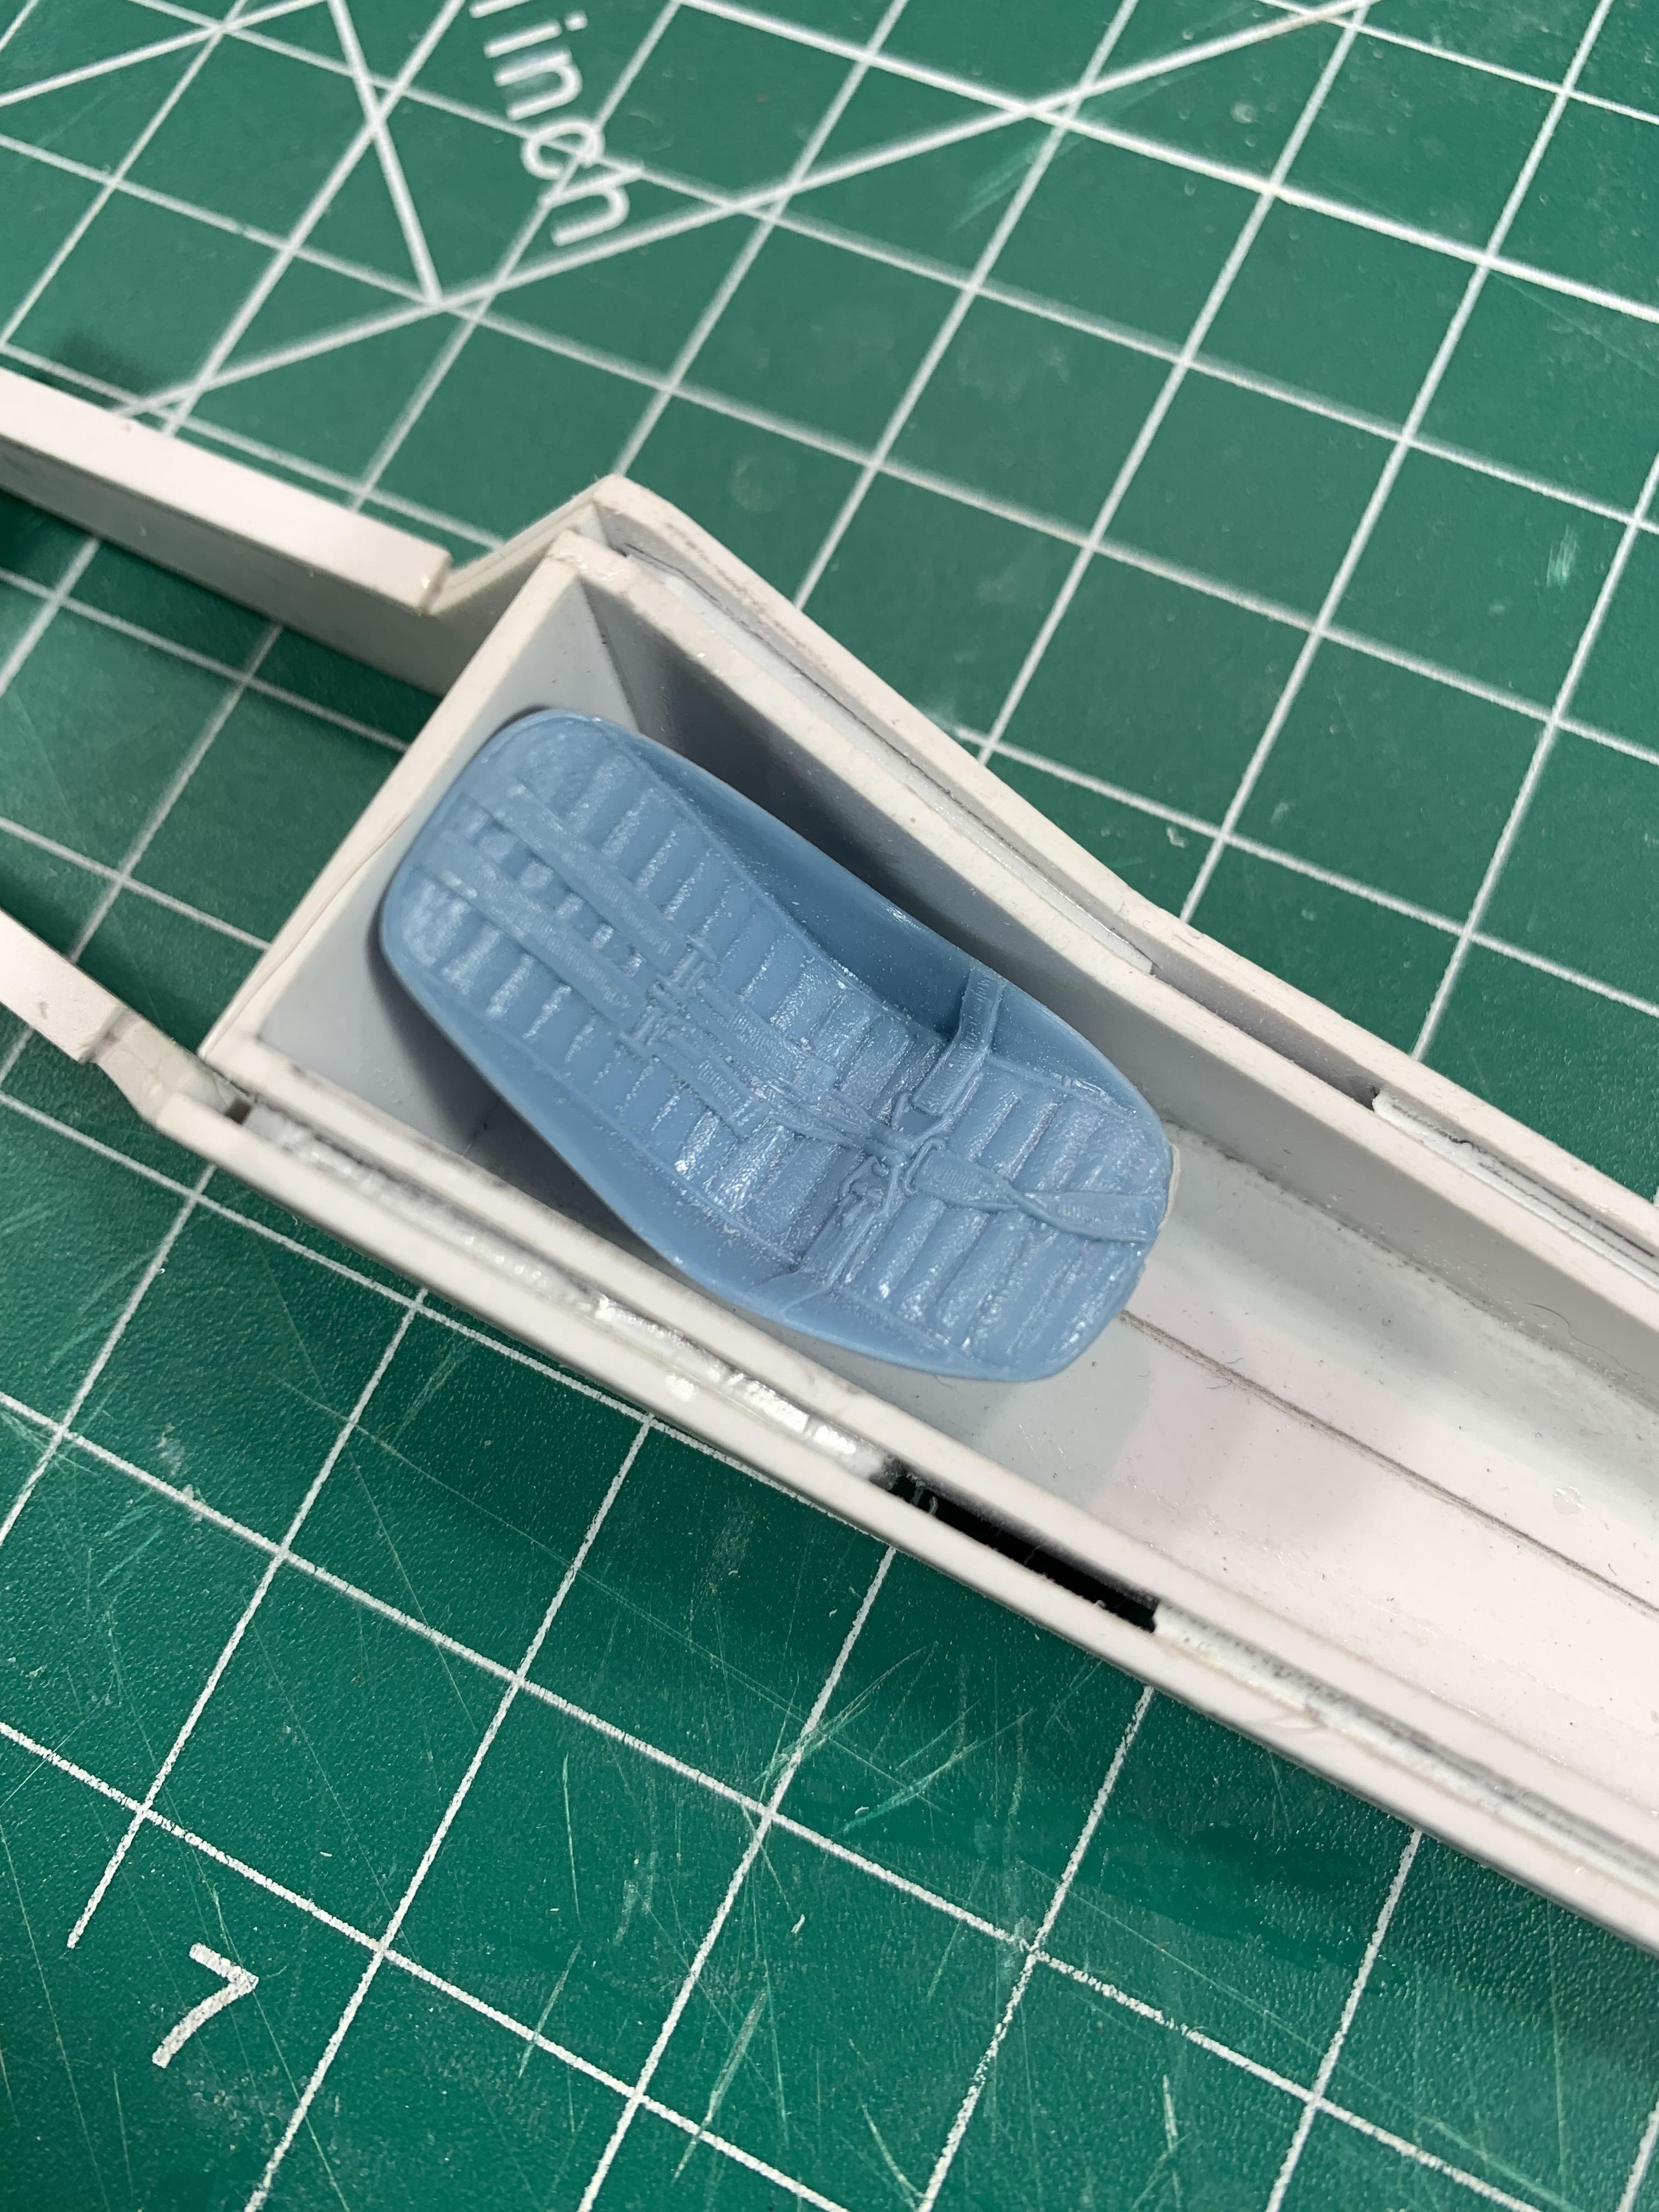
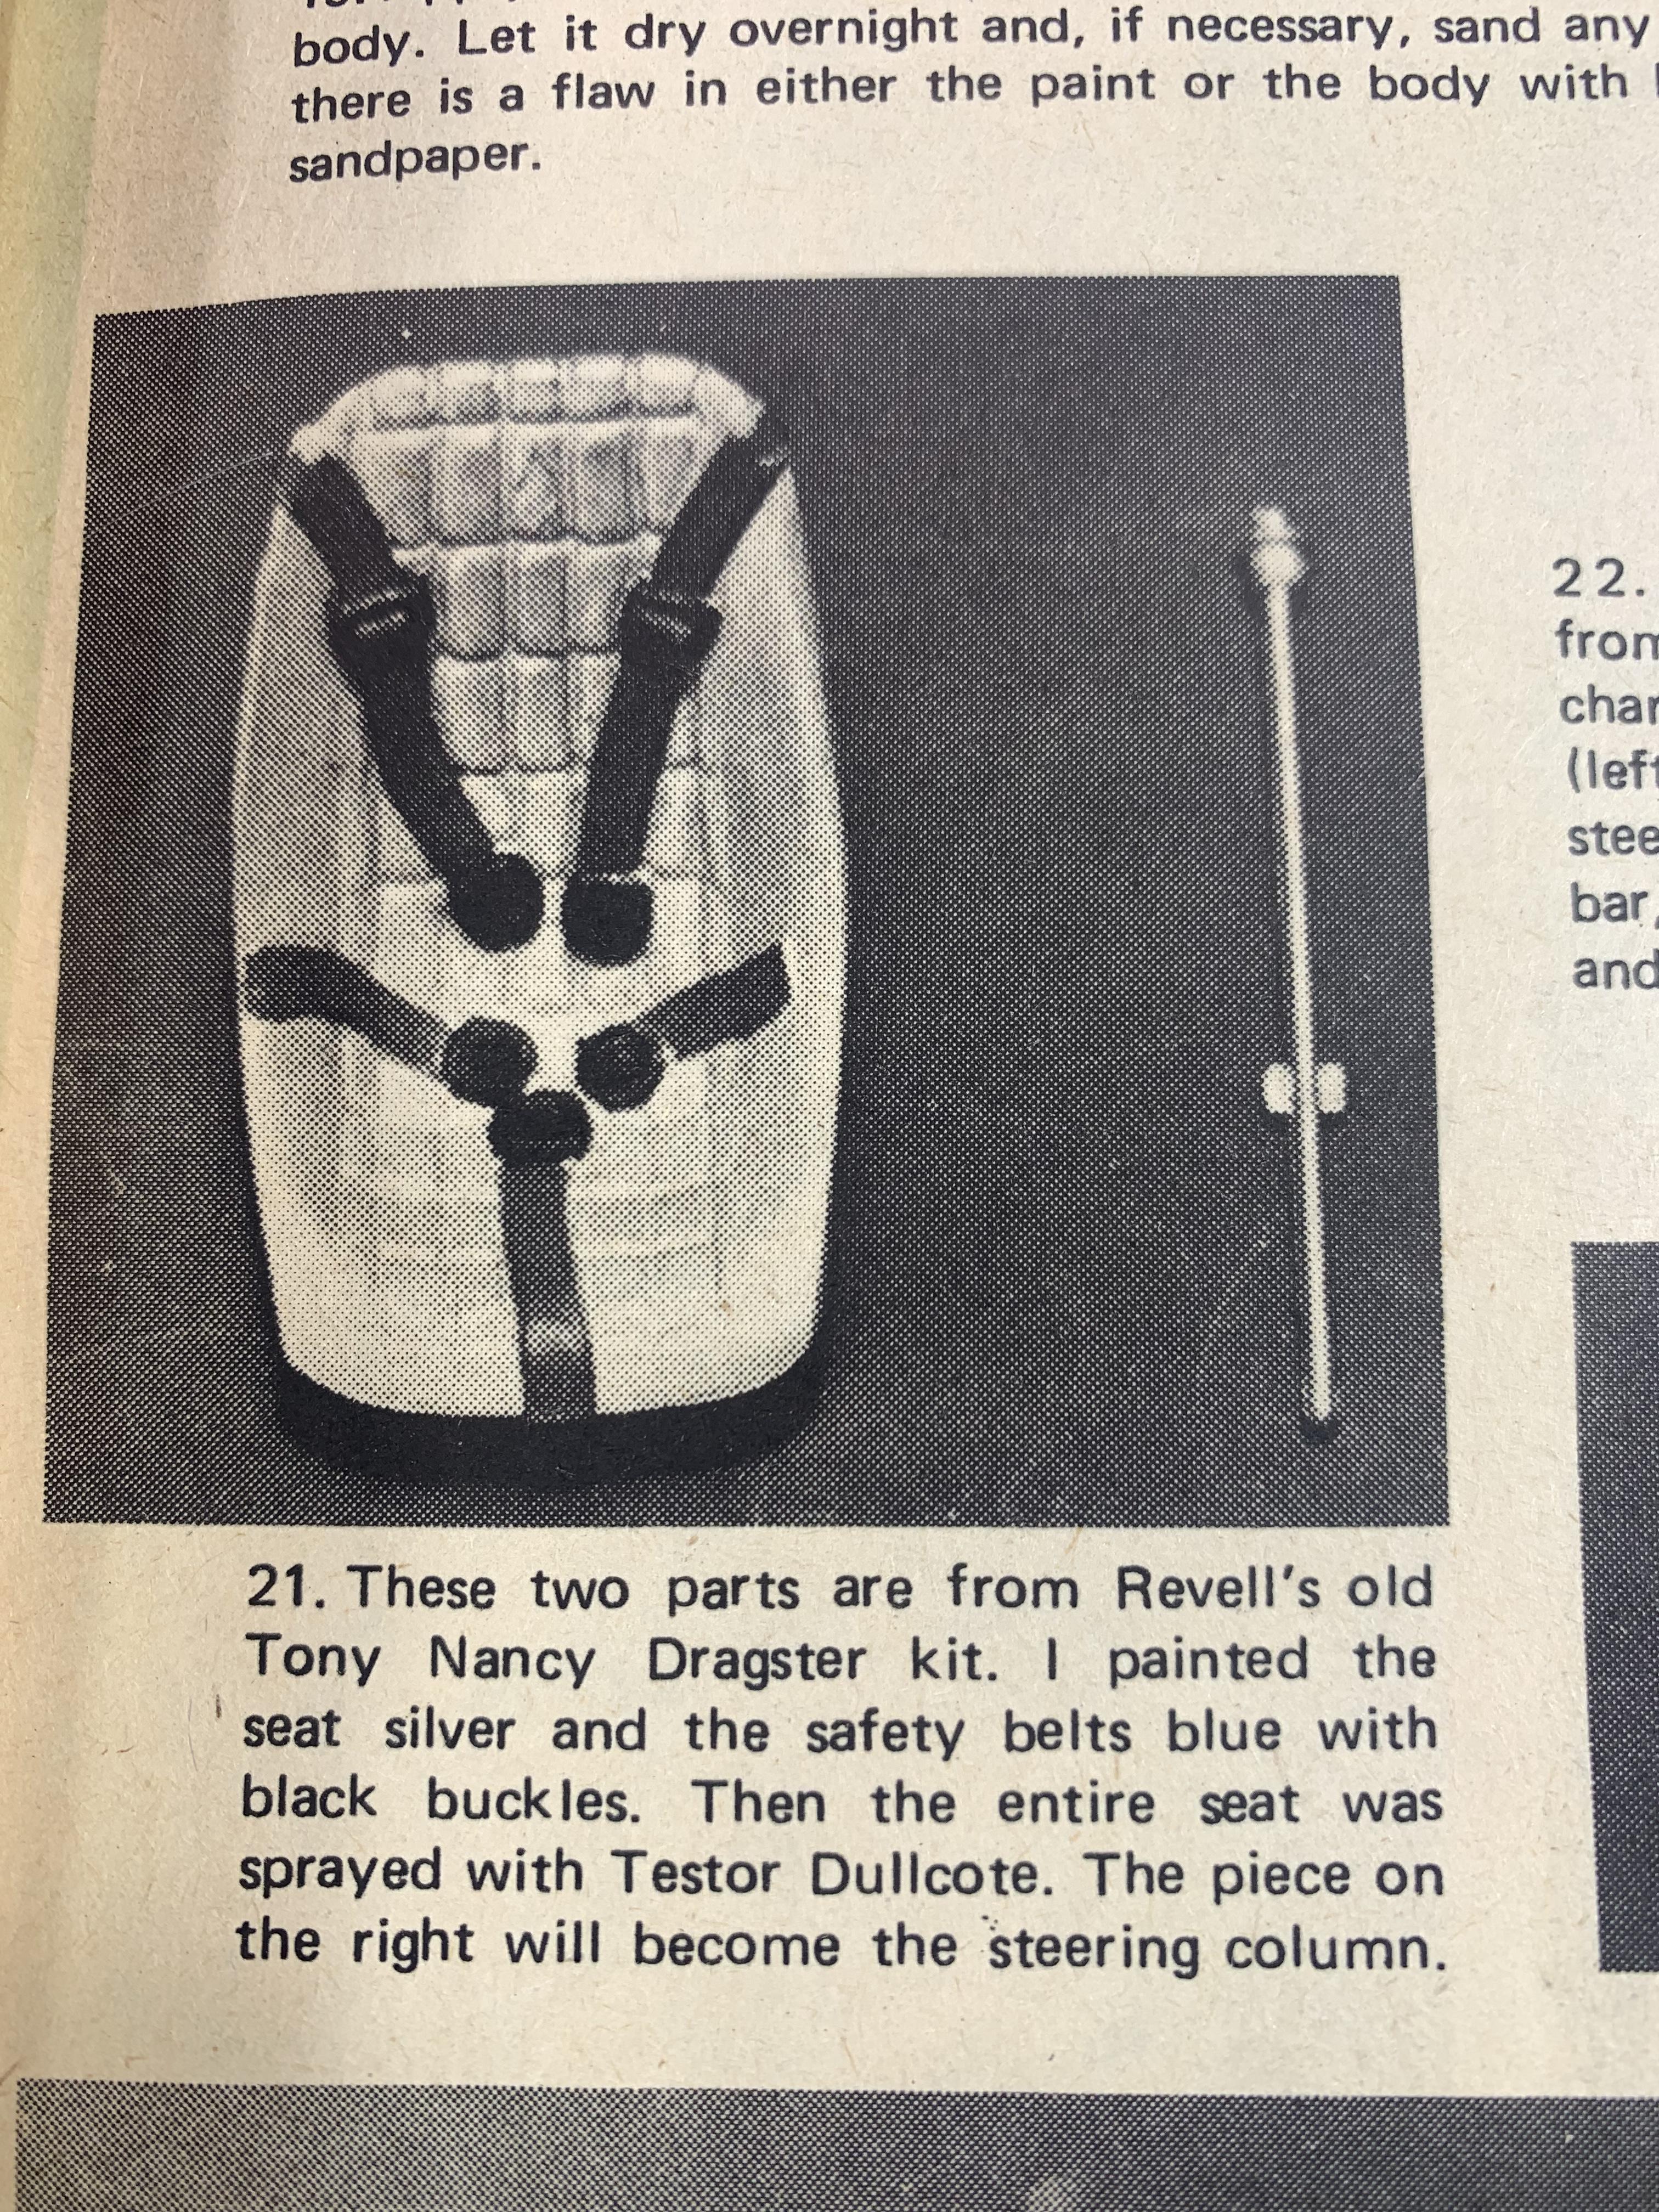
I couldn’t find a seat from a Tony Nancy dragster, but Leica007 from this site helped me out with a seat that looks better, IMHO.

-
Lots of options for BBS mesh-type wheels. I don’t know what size/offset would work with an NSX.
https://www.ebay.com/sch/i.html?_nkw=bbs+wheels&_sacat=1188Off the top of my head, the Tamiya Mercedes-Benz 500SEC “Lorinser” (a German tuner” has BBS wheels. So does the Monogram 20th Anniversary Firebird. The Mercedes is out of production and expensive. I don’t know about the Firebird.
-
 1
1
-
-
Wow. That was a pretty cool thread. I have seen a few 3D printed Cammers, but none as dragster engines. I suppose it would be a straightforward conversion, but the headers might give me some trouble.
The pic below looks like a great use for two Cammers. That would be a great car in real life or on a contest table.
-
1
-
-
I think that would be a cool kit. Maybe a cool conversion with an aftermarket SOHC engine.
-
When I read the thread title, I thought it said “Embossing”. No, wait. That can’t be right. “Embarrassing”. There we go… but what kind of tool is made for embarrassing someone?? Sometimes my mind is just off somewhere else.
-
I ended up working 13 hours yesterday. Didn’t get a chance to look.
-
I may have an extra Monogram Cadillac engine. I’ll check later tonight
-
When I read the thread title, I wondered what car The Three Amigos had and what markings were on it. I mean it’s been a long time since I’ve seen the movie…
-
 2
2
-
-
Why do so many 3D sellers only have one scale?
-
So Google apparently has limits. I believe it was in the cover of one of the model magazines back in the early to mid 1990s. I want to show pics to Mom. She’s into building models. Mainly armor for her, but she would like to see that big rig and race car. Thanks
-
Thanks. I looked around but must have used the wrong search terms. I kept finding modern harnesses and vintage passenger car seatbelts.
-
1
-
-
Wondering about it for my Dodge Fever project.
-
The Heller Hispano-Suiza K6 has decals for the same type of thing. I would imagine they are way out of scale, though. Custom decals could be an option. I think that would look pretty cool. Of course the wicker would have to be sanded off the kit.
-
“…poor craftsmanship by the builders.”
The things I’ve seen on rat rods. A fuel tank directly behind the driver’s head in a 1930ish Tudor Sedan. No headrest. A collision could smash his head into it. A channeled Tudor Sedan without a transmission tunnel. Exposed driveshaft in the passenger compartment. These may have been the same car.
-
3
-
-
I think they would. Let’s work something out.
-
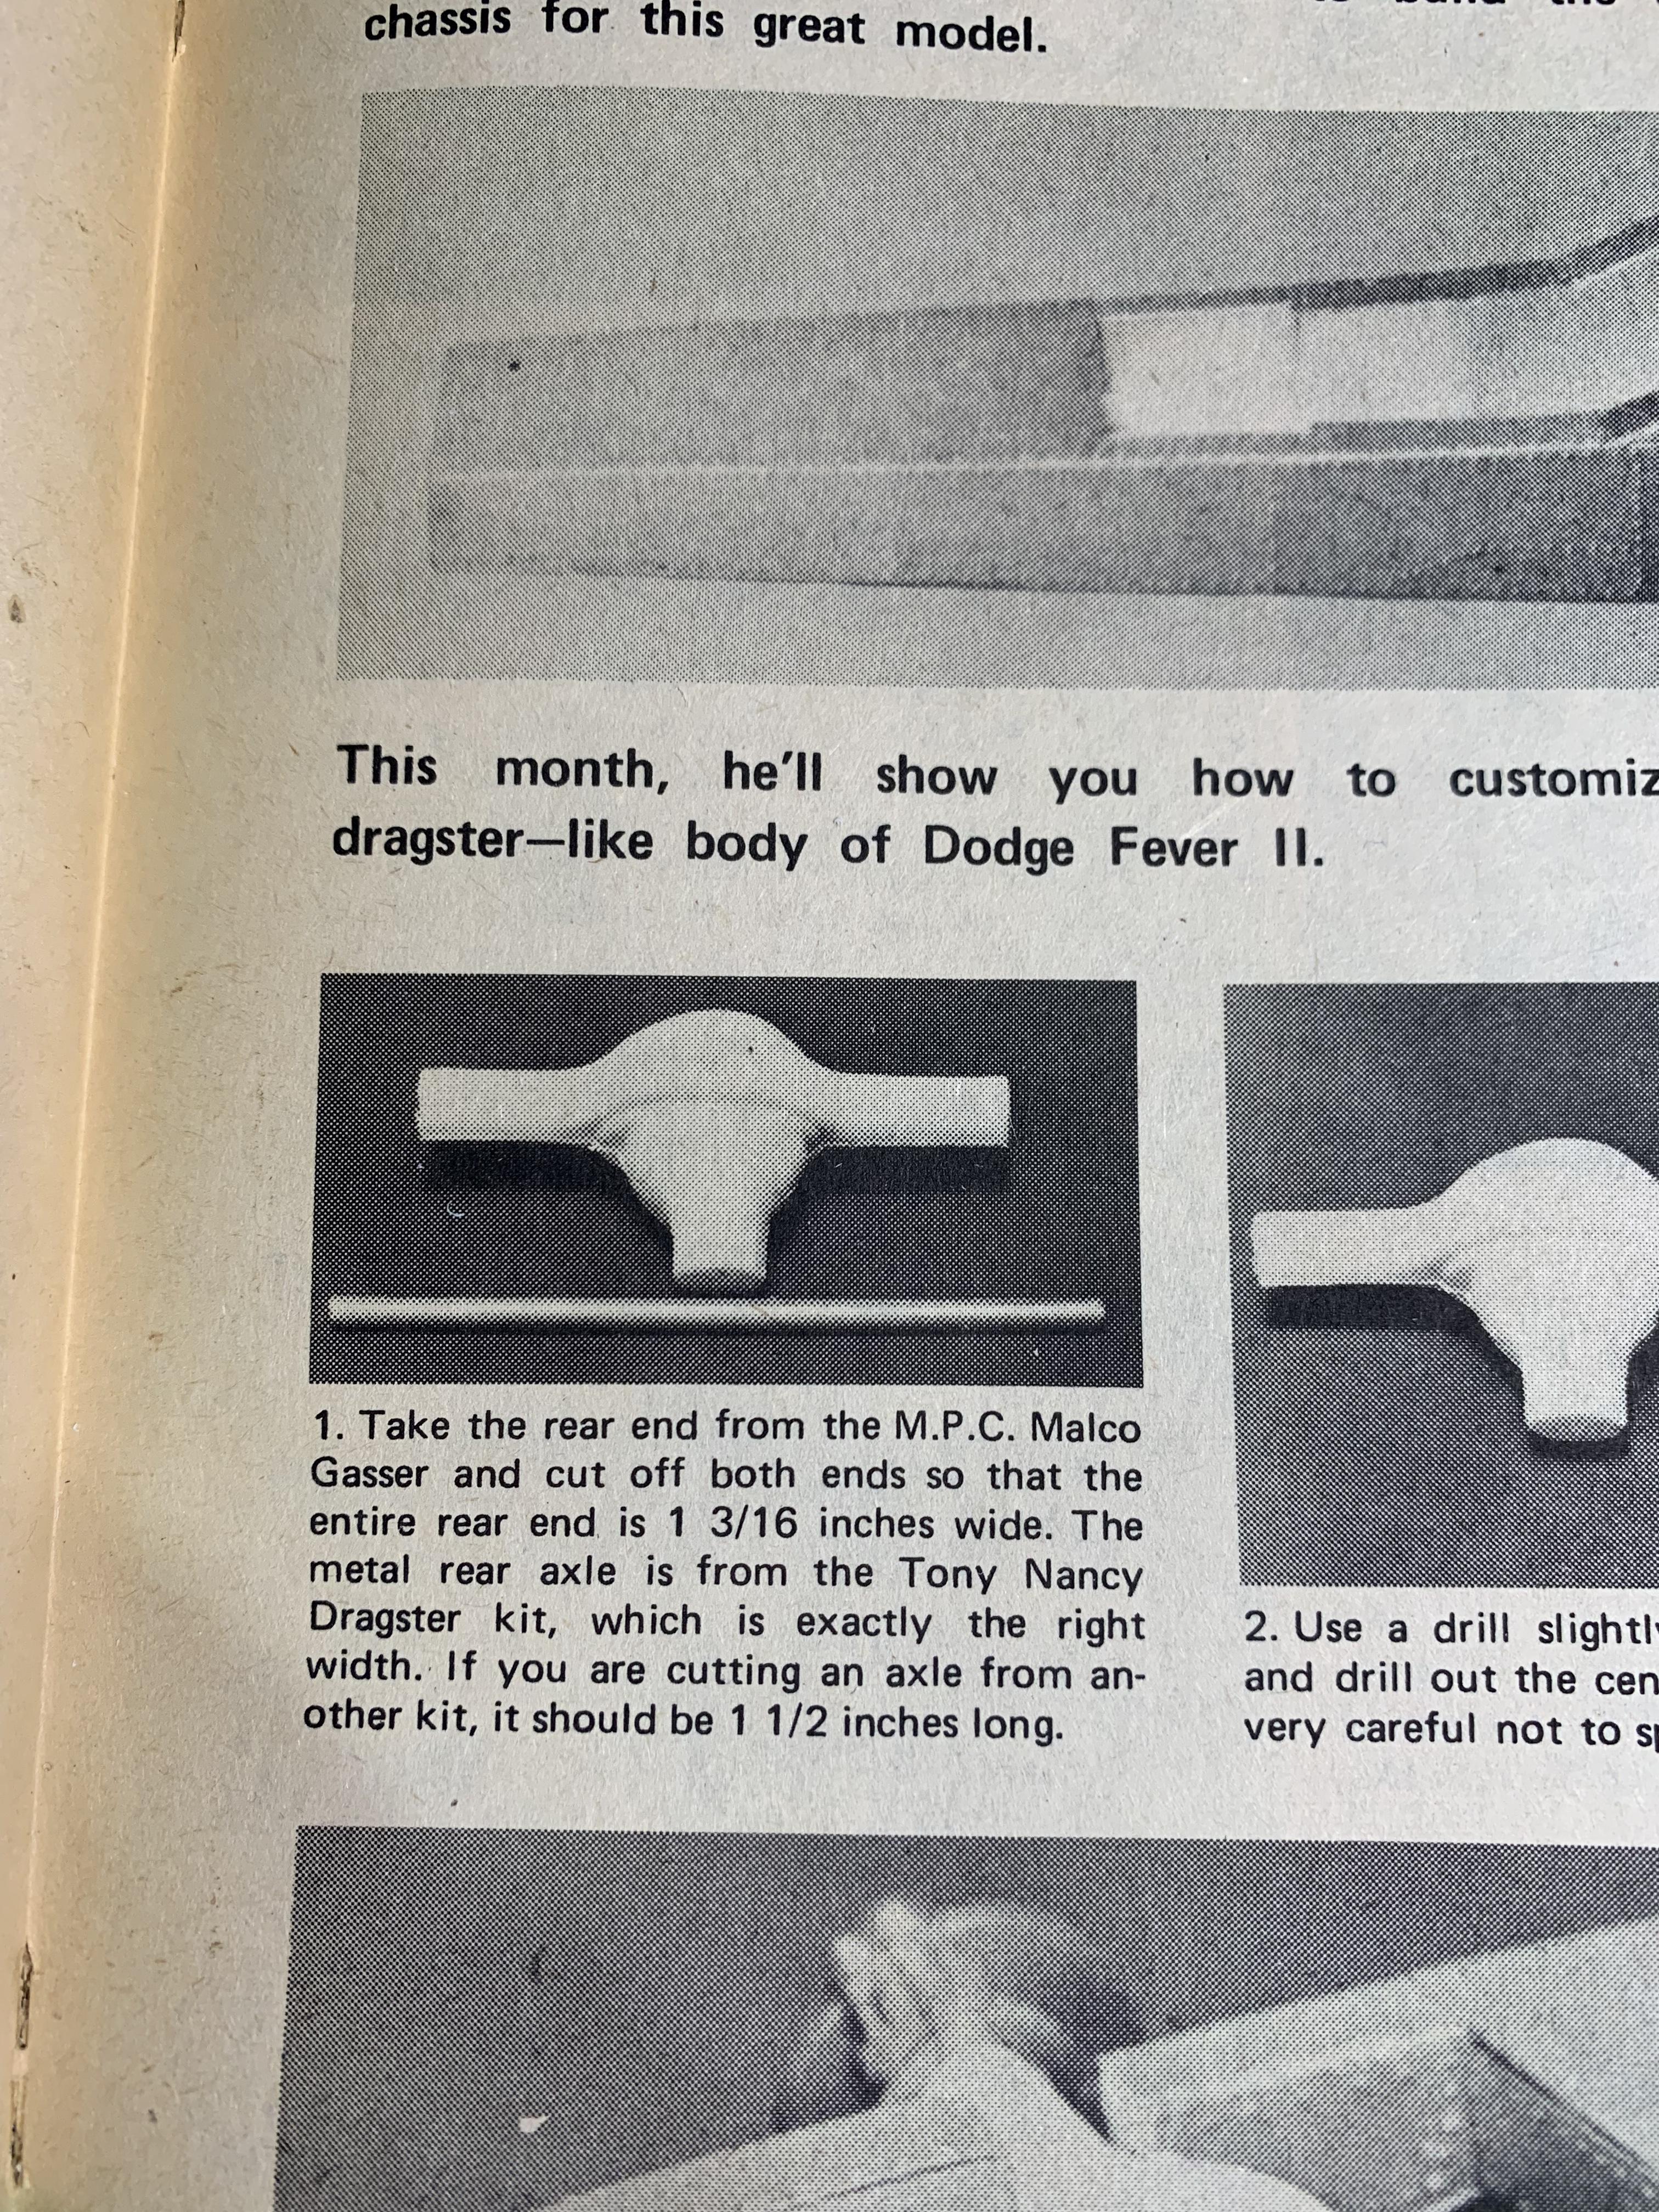
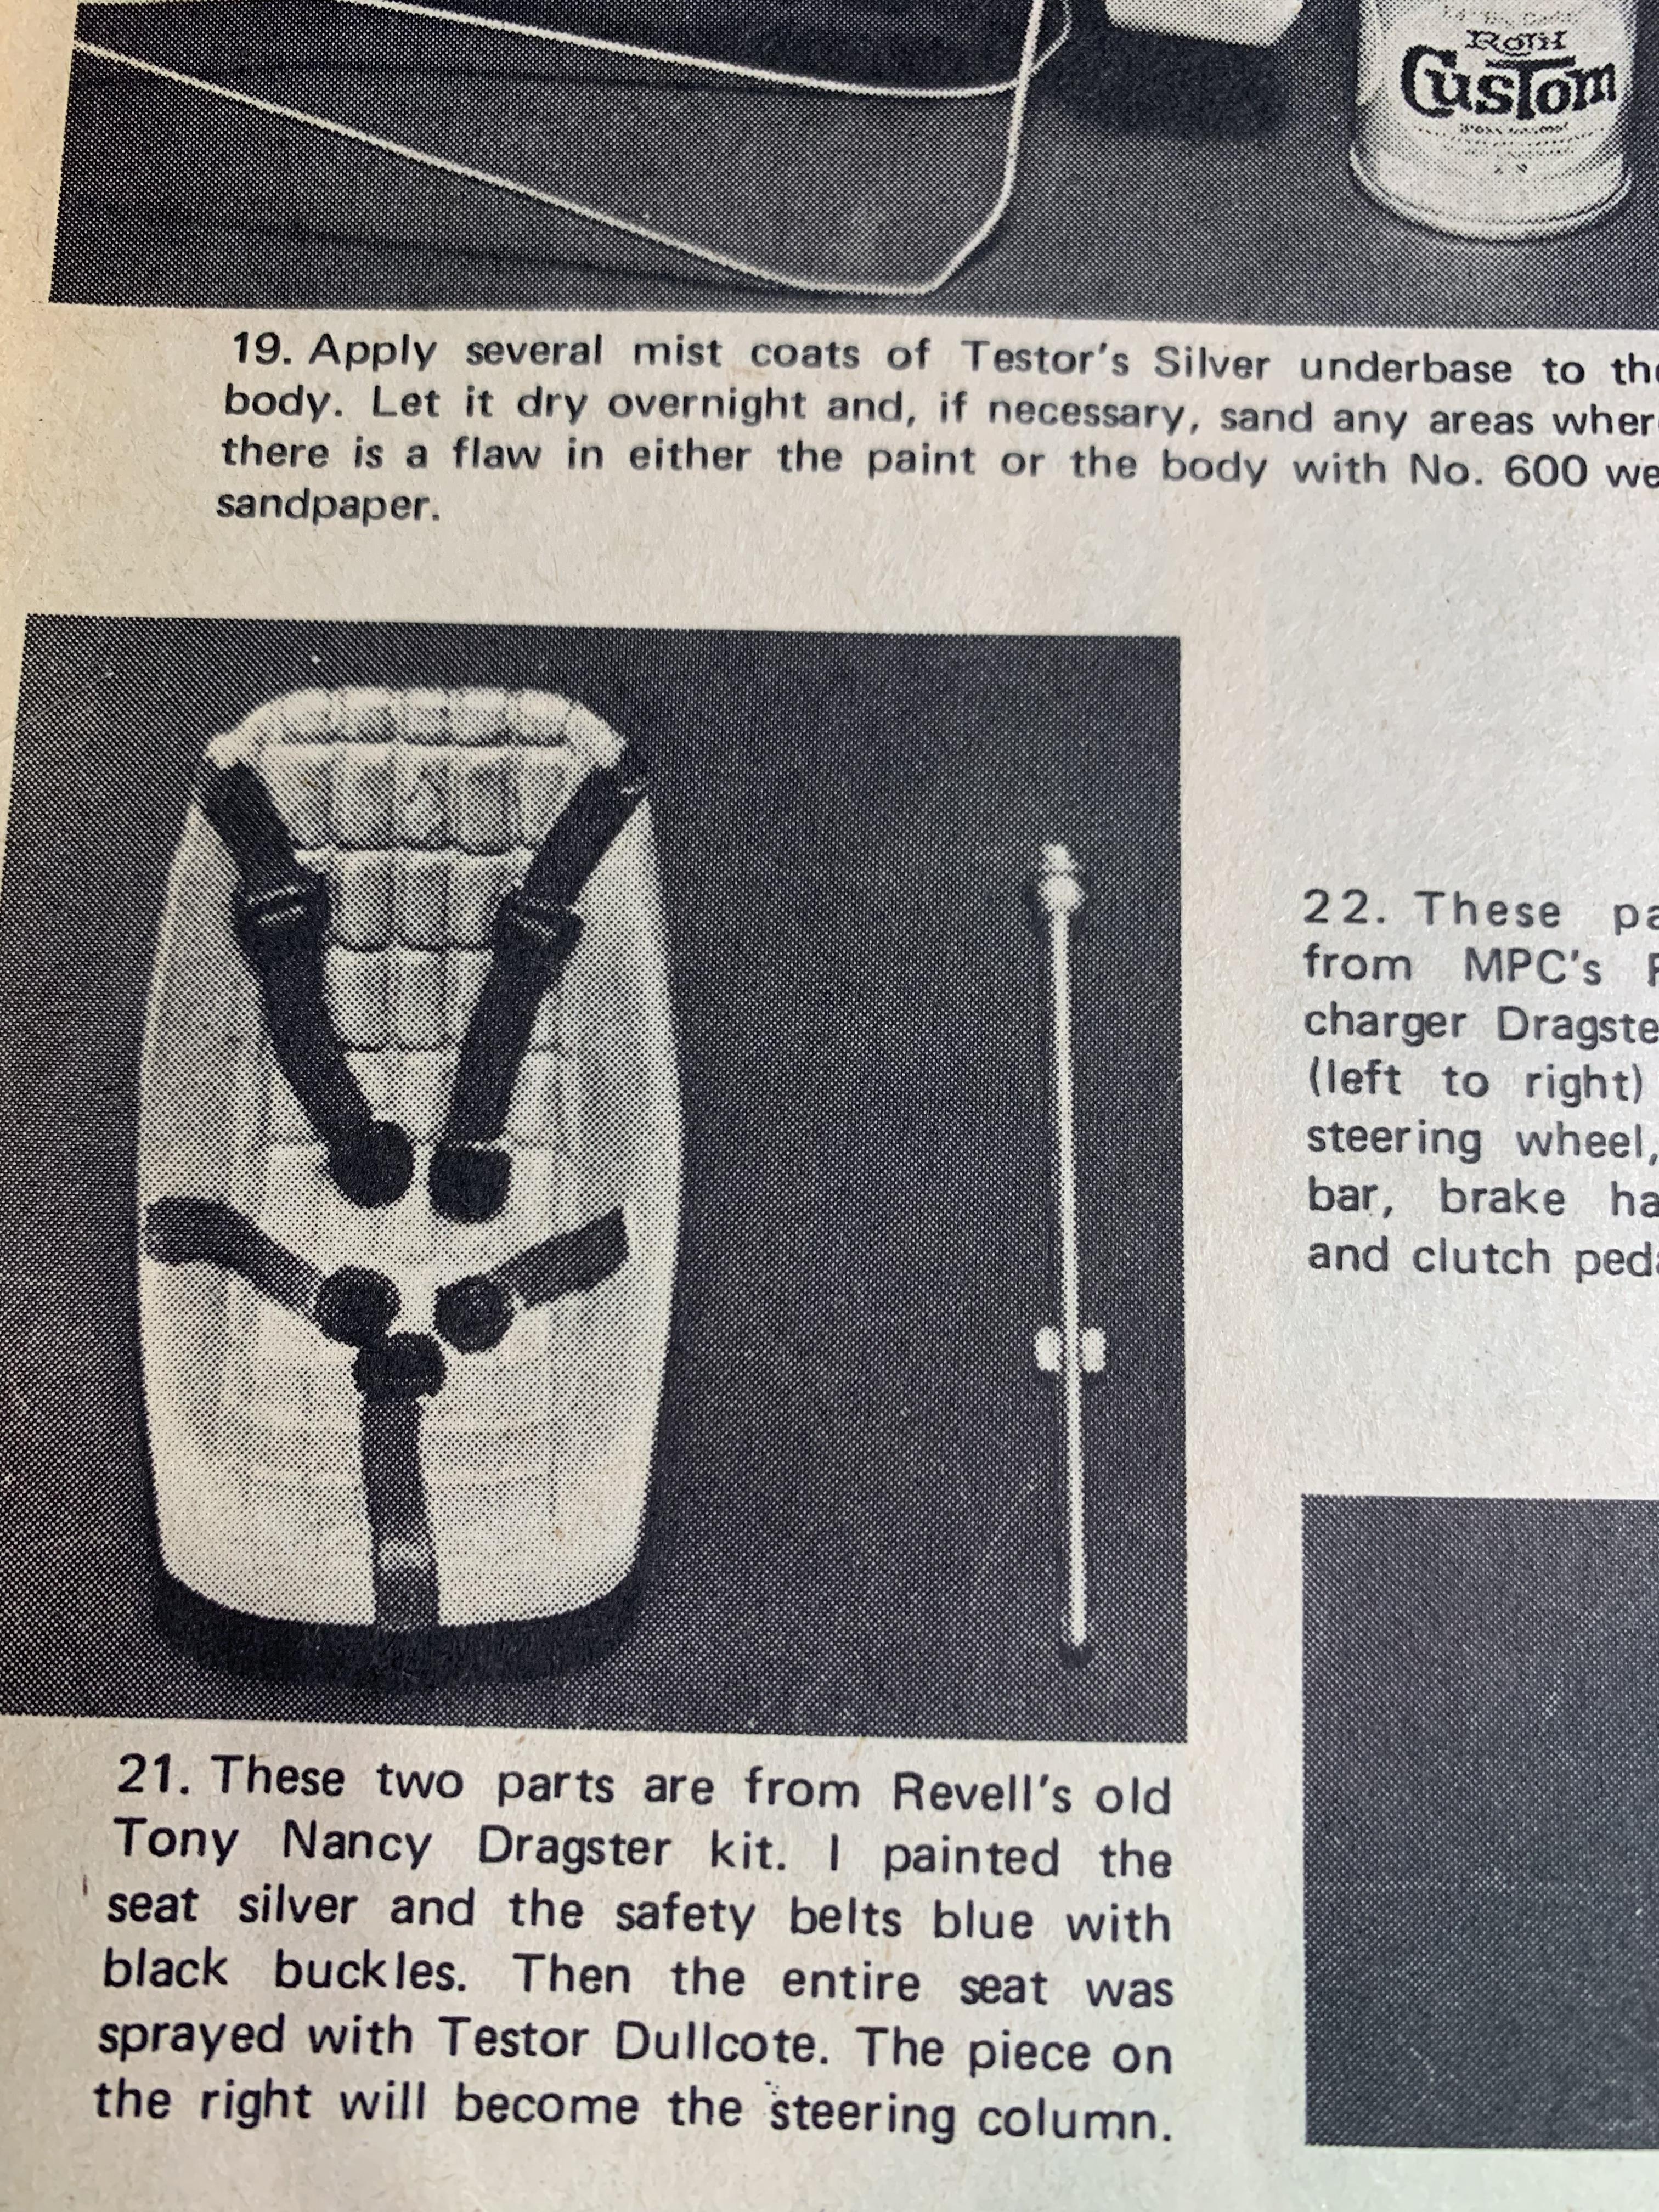
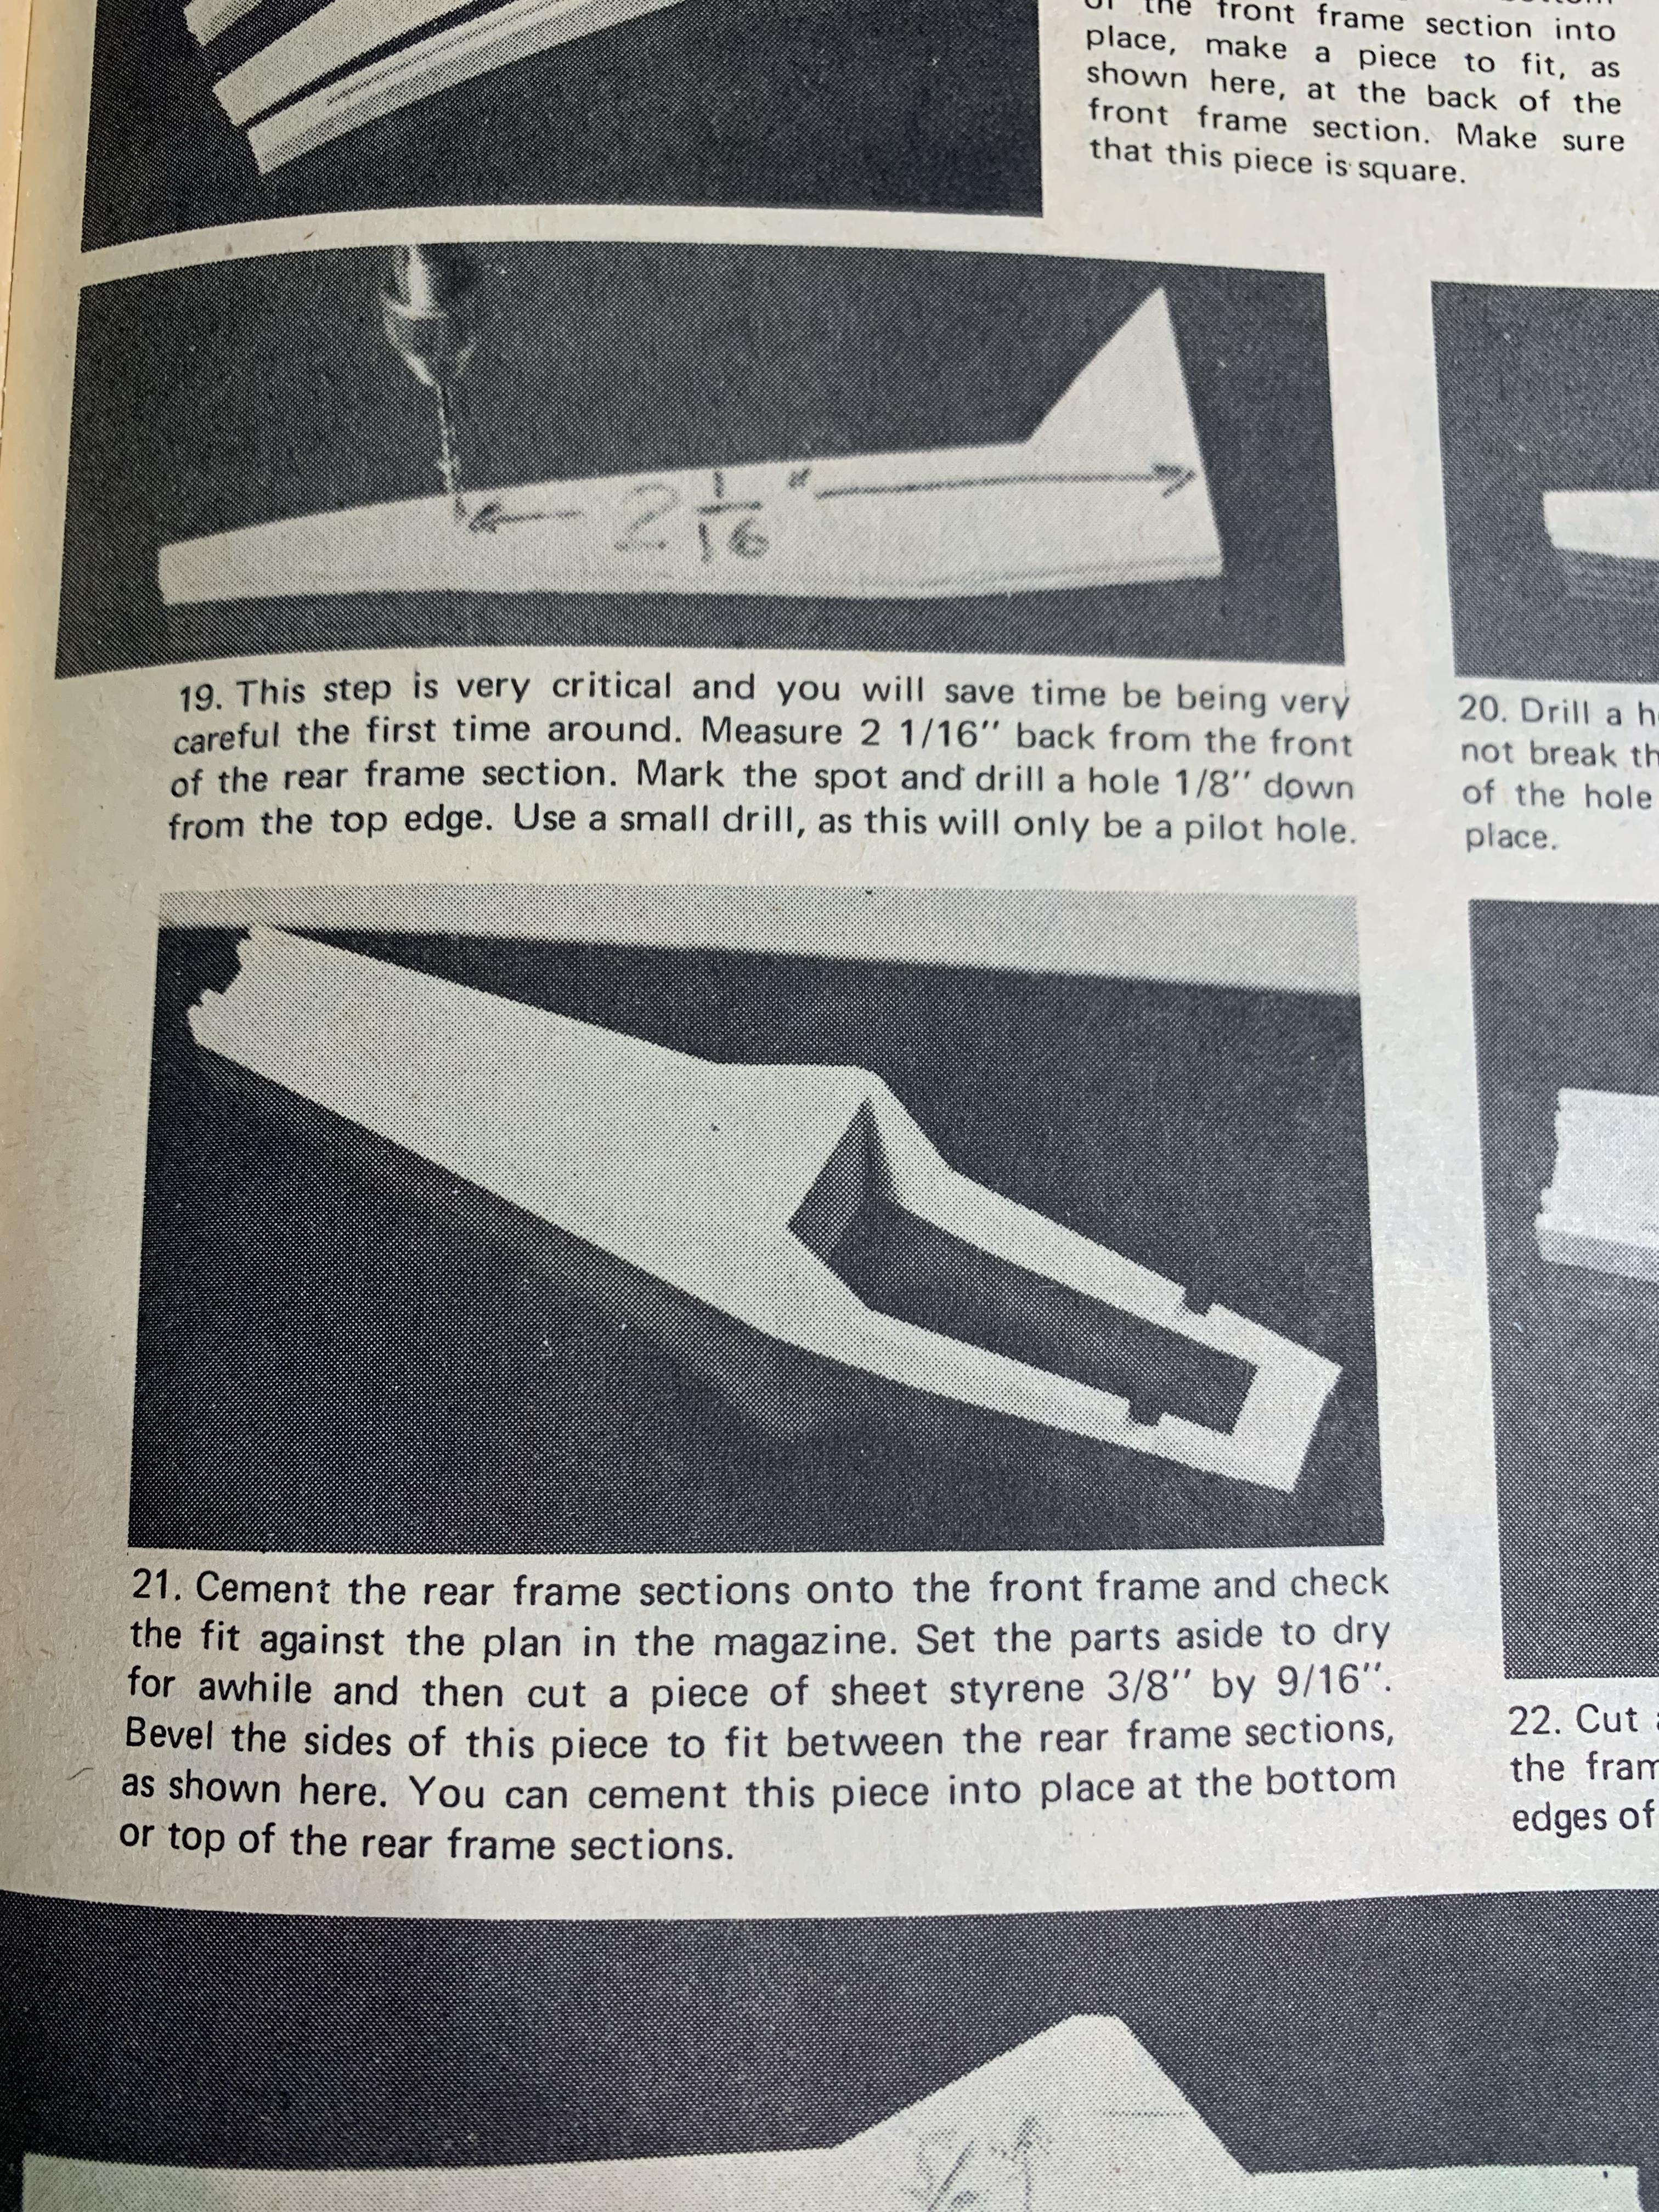
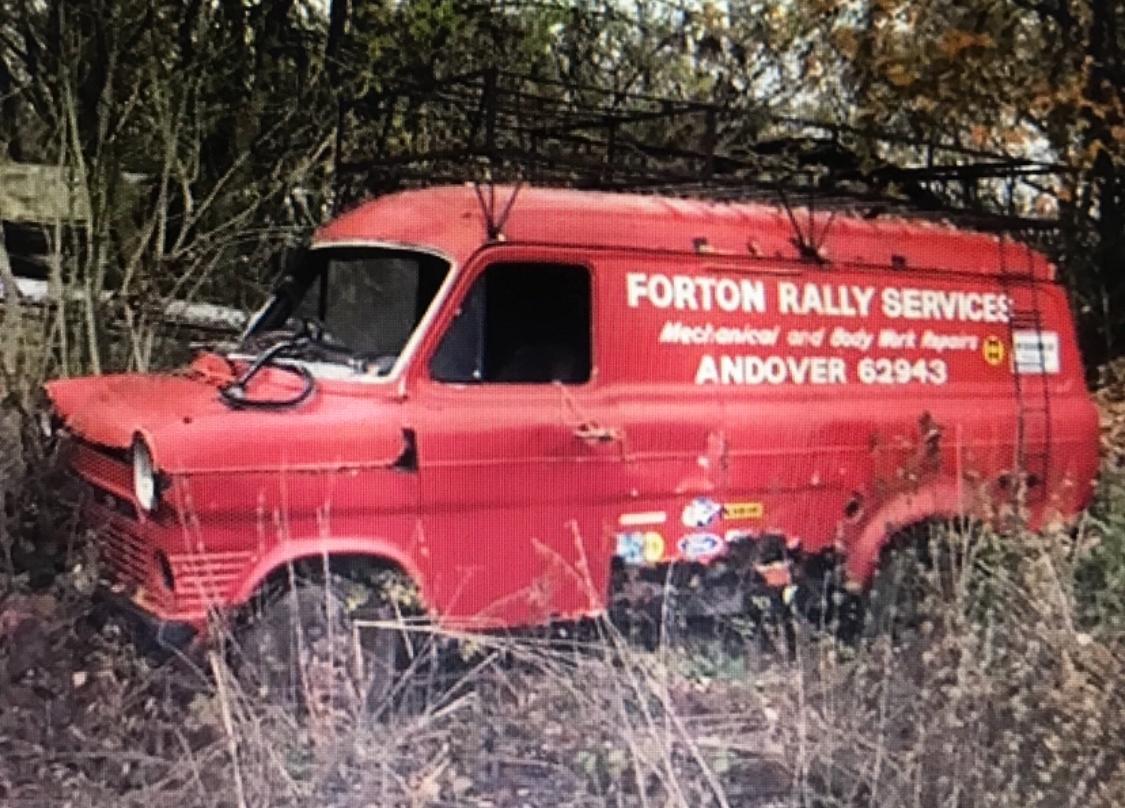
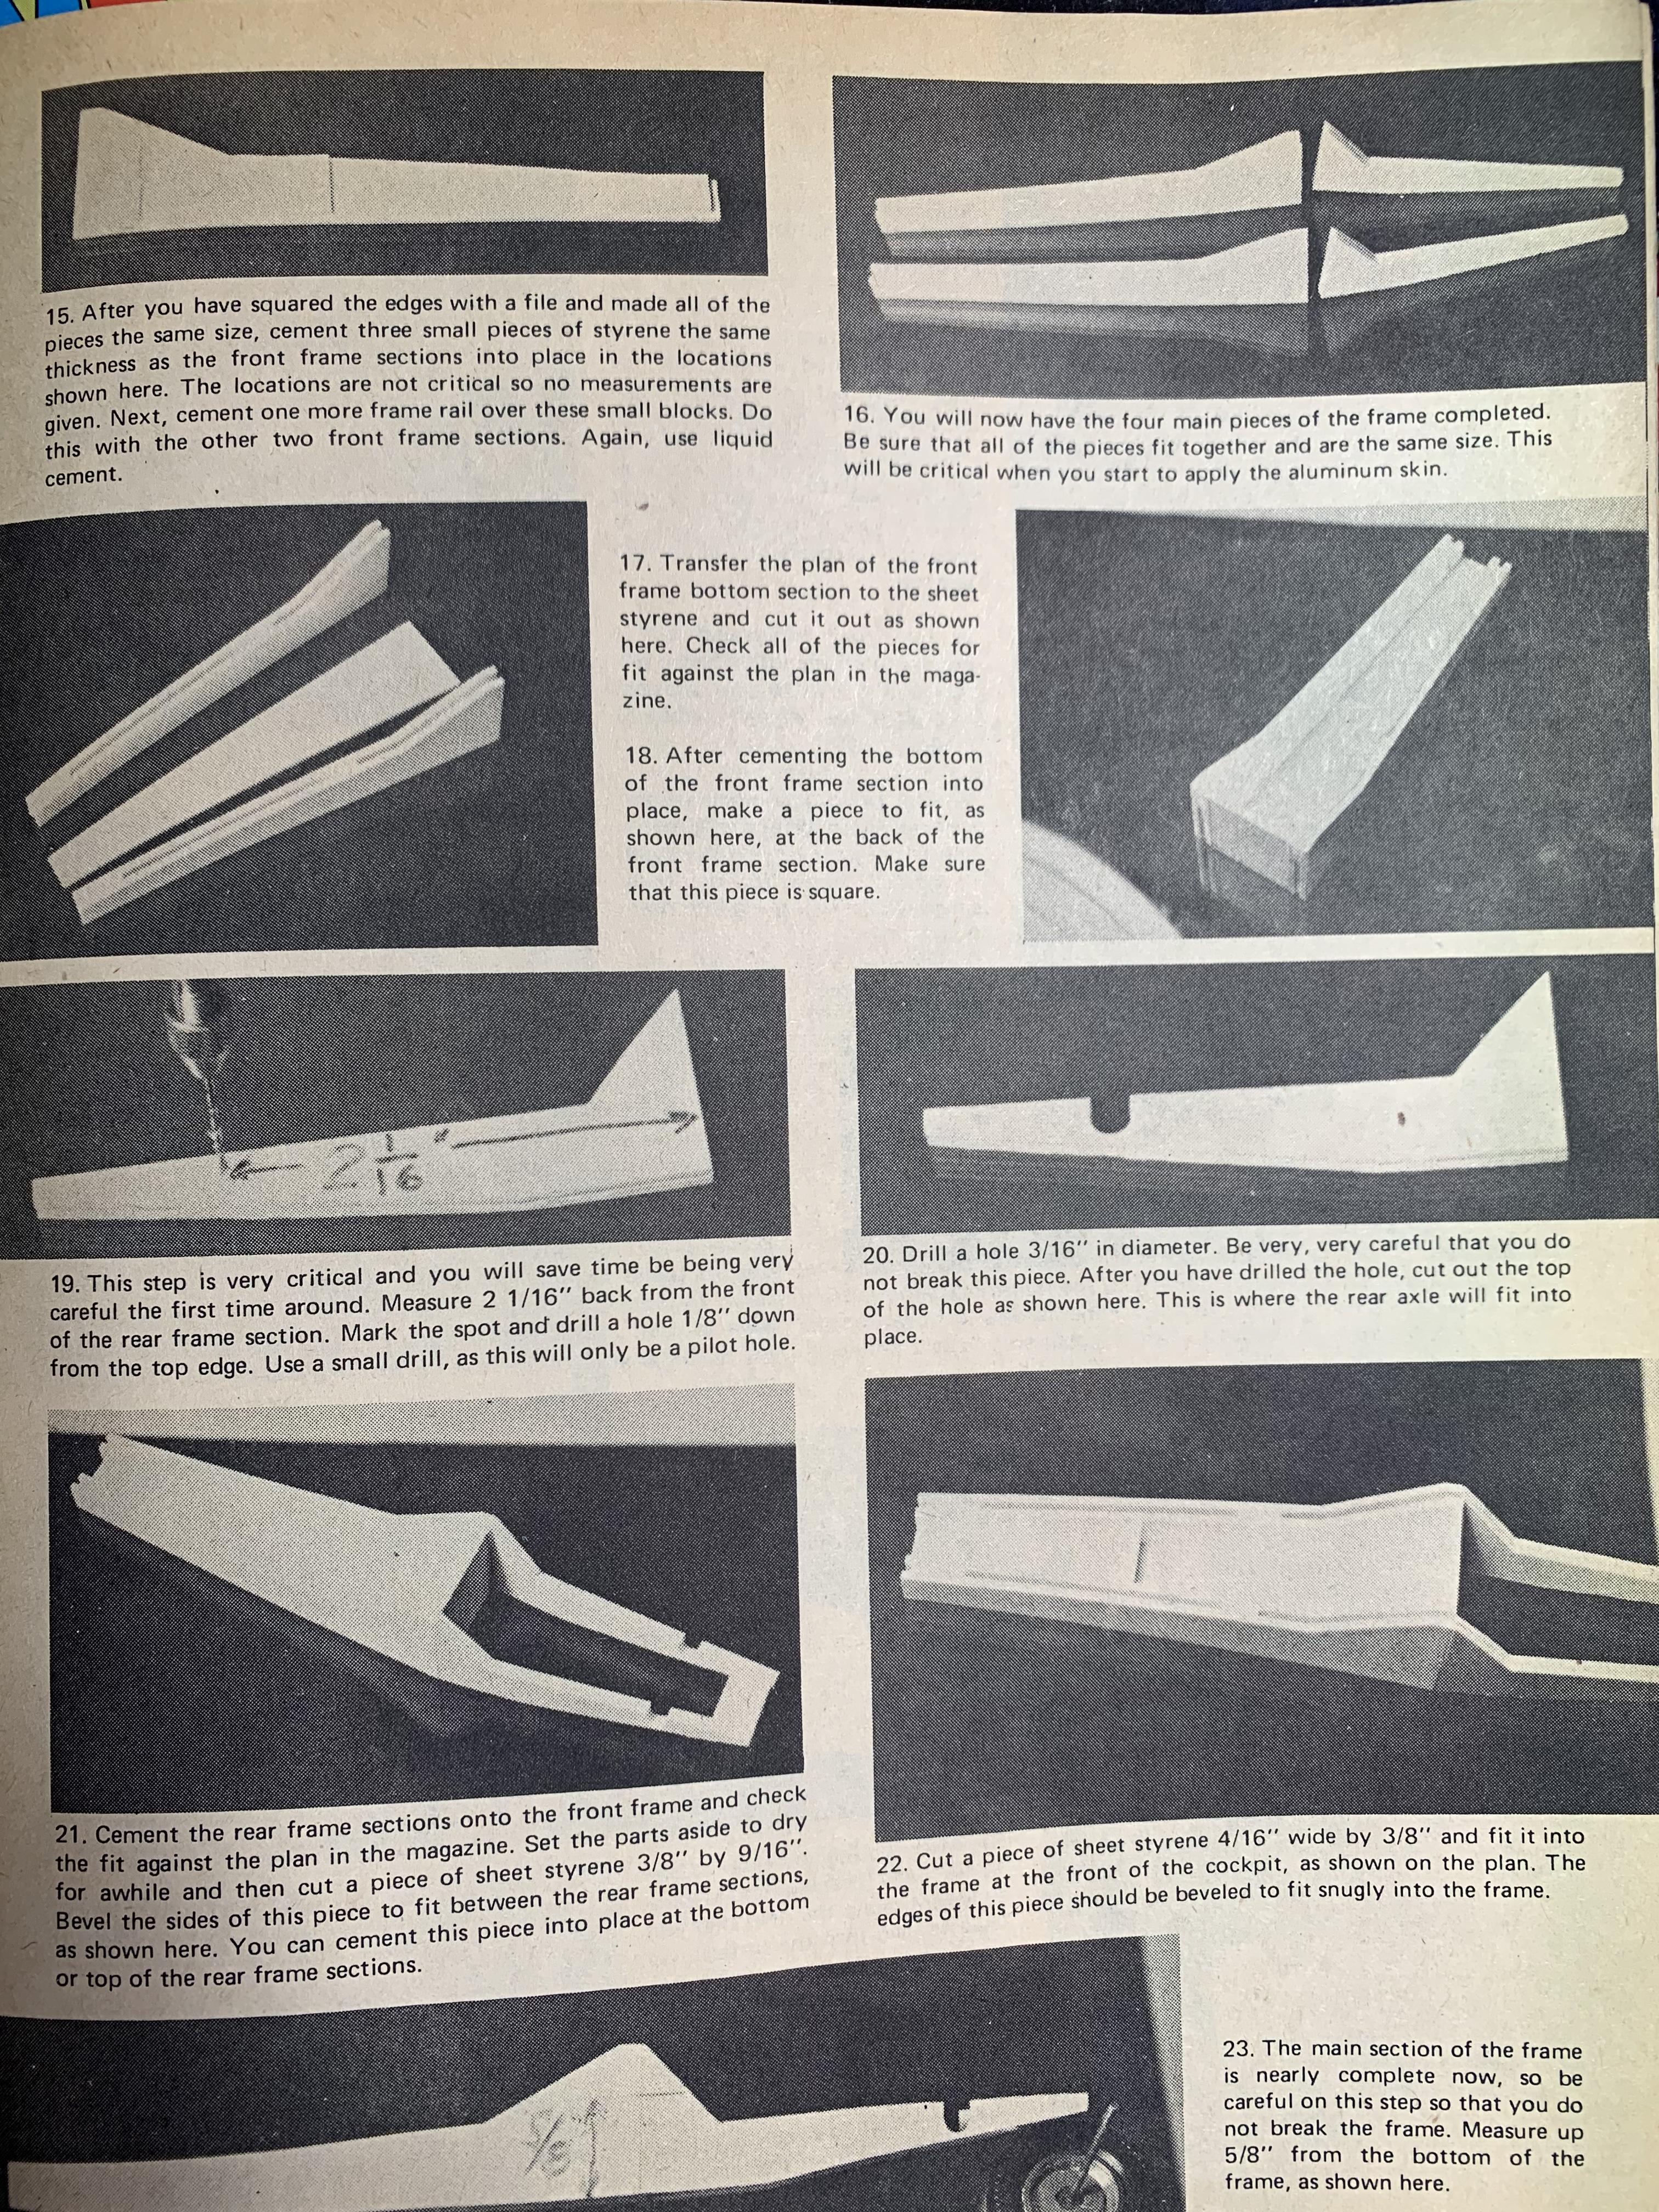
Hey- you never know. I’m looking for these parts for my Dodge Fever 1968 Coronet tribute build. These parts are called for in the how-to articles from 1969 (Dodge Daytona body). I believe the seat is from the later dragster. I’m including pics from the May and July 1969 Car Model magazine articles. Glue bomb parts are cool with me.
Thank you, Lee
-
That is a really nice looking car. It looks like it can have different grilles. Also cool. If you decide to sell copies, I’m interested.
-
-
Frankie’s Hobby and Horror Shop on Facebook is working on a Mantaray. It’s not ready yet. I’m on a cell phone in an area with poor reception and could not find the post about this car.
-
1
-
-
6 hours ago, oldcarfan said:
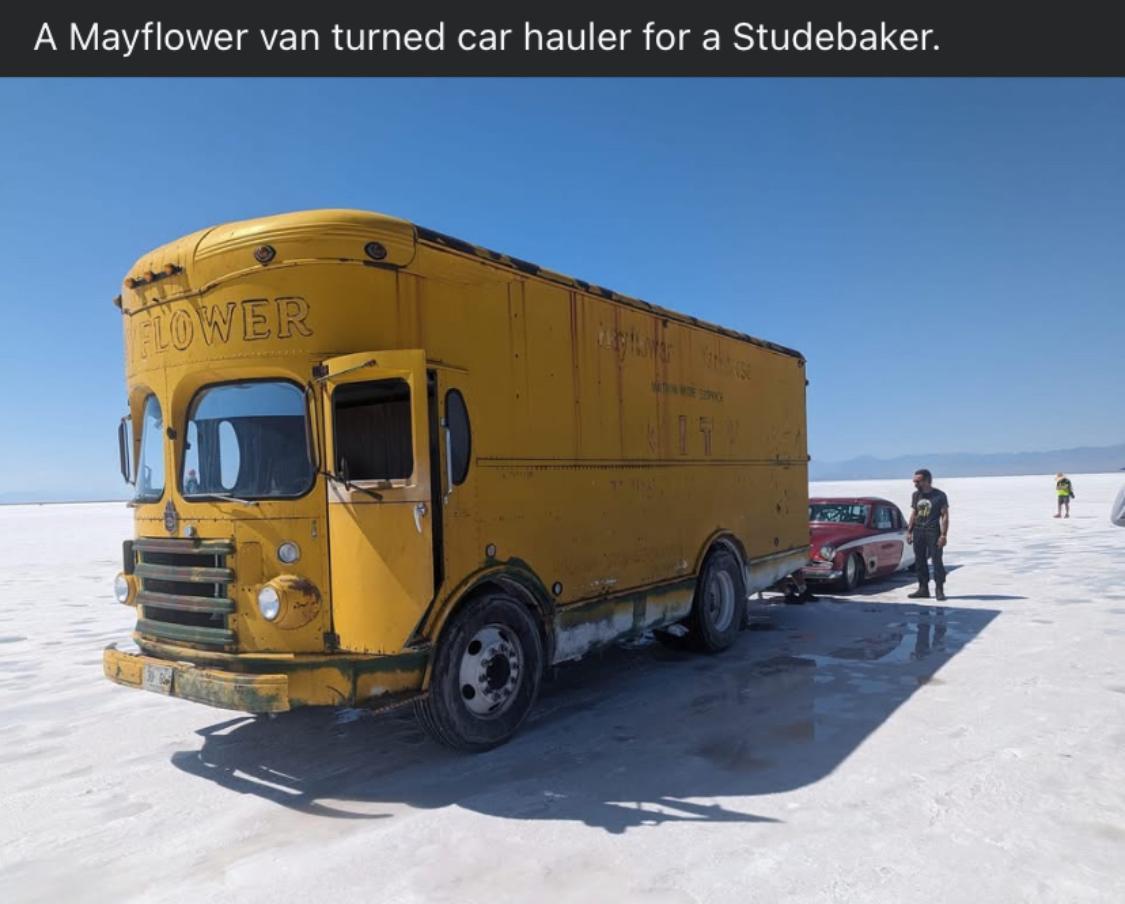
My wife has been on me to purge my phone of some of the 2000+ unused screen shot pictures I've saved. While clearing some out it made me wonder if I'm the only one who does this.
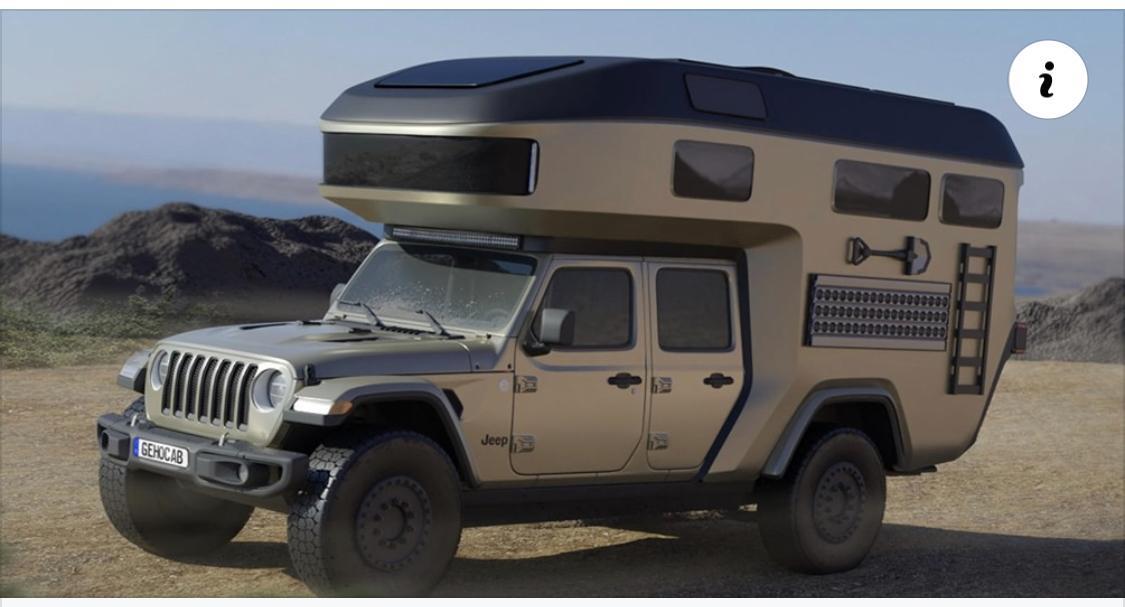
As for the subjects I actually went so far as to buy a Fast and Furious Gladiator to do the camper and I have a Tamiya Grand Cherokee waiting to someday be made into this offroader. I really love the Mayflower van because it looks like one of the transporters Ferrari used to use in the 50s.
If you're in the mood, play along and post up some inspiration pictures you've saved.

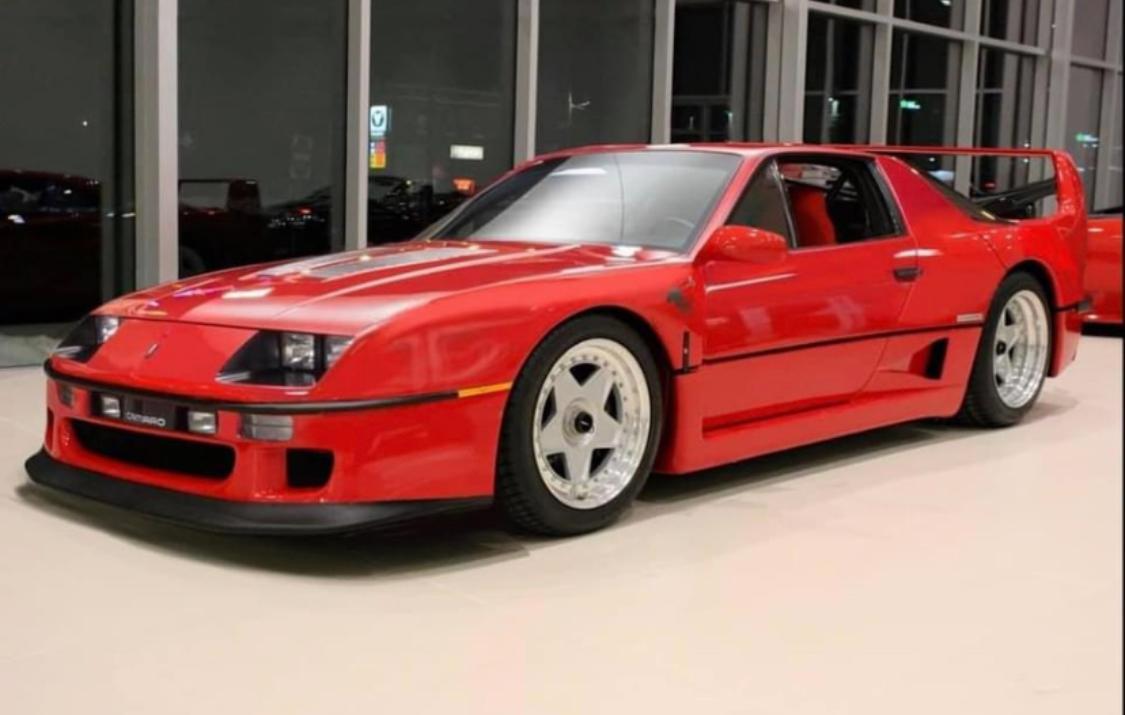
I like the Fugazzi F40
-
1
-
-
Stopping here tonight
Edit: one more step
-
1
-
-
A few more pics
-
1
-
-
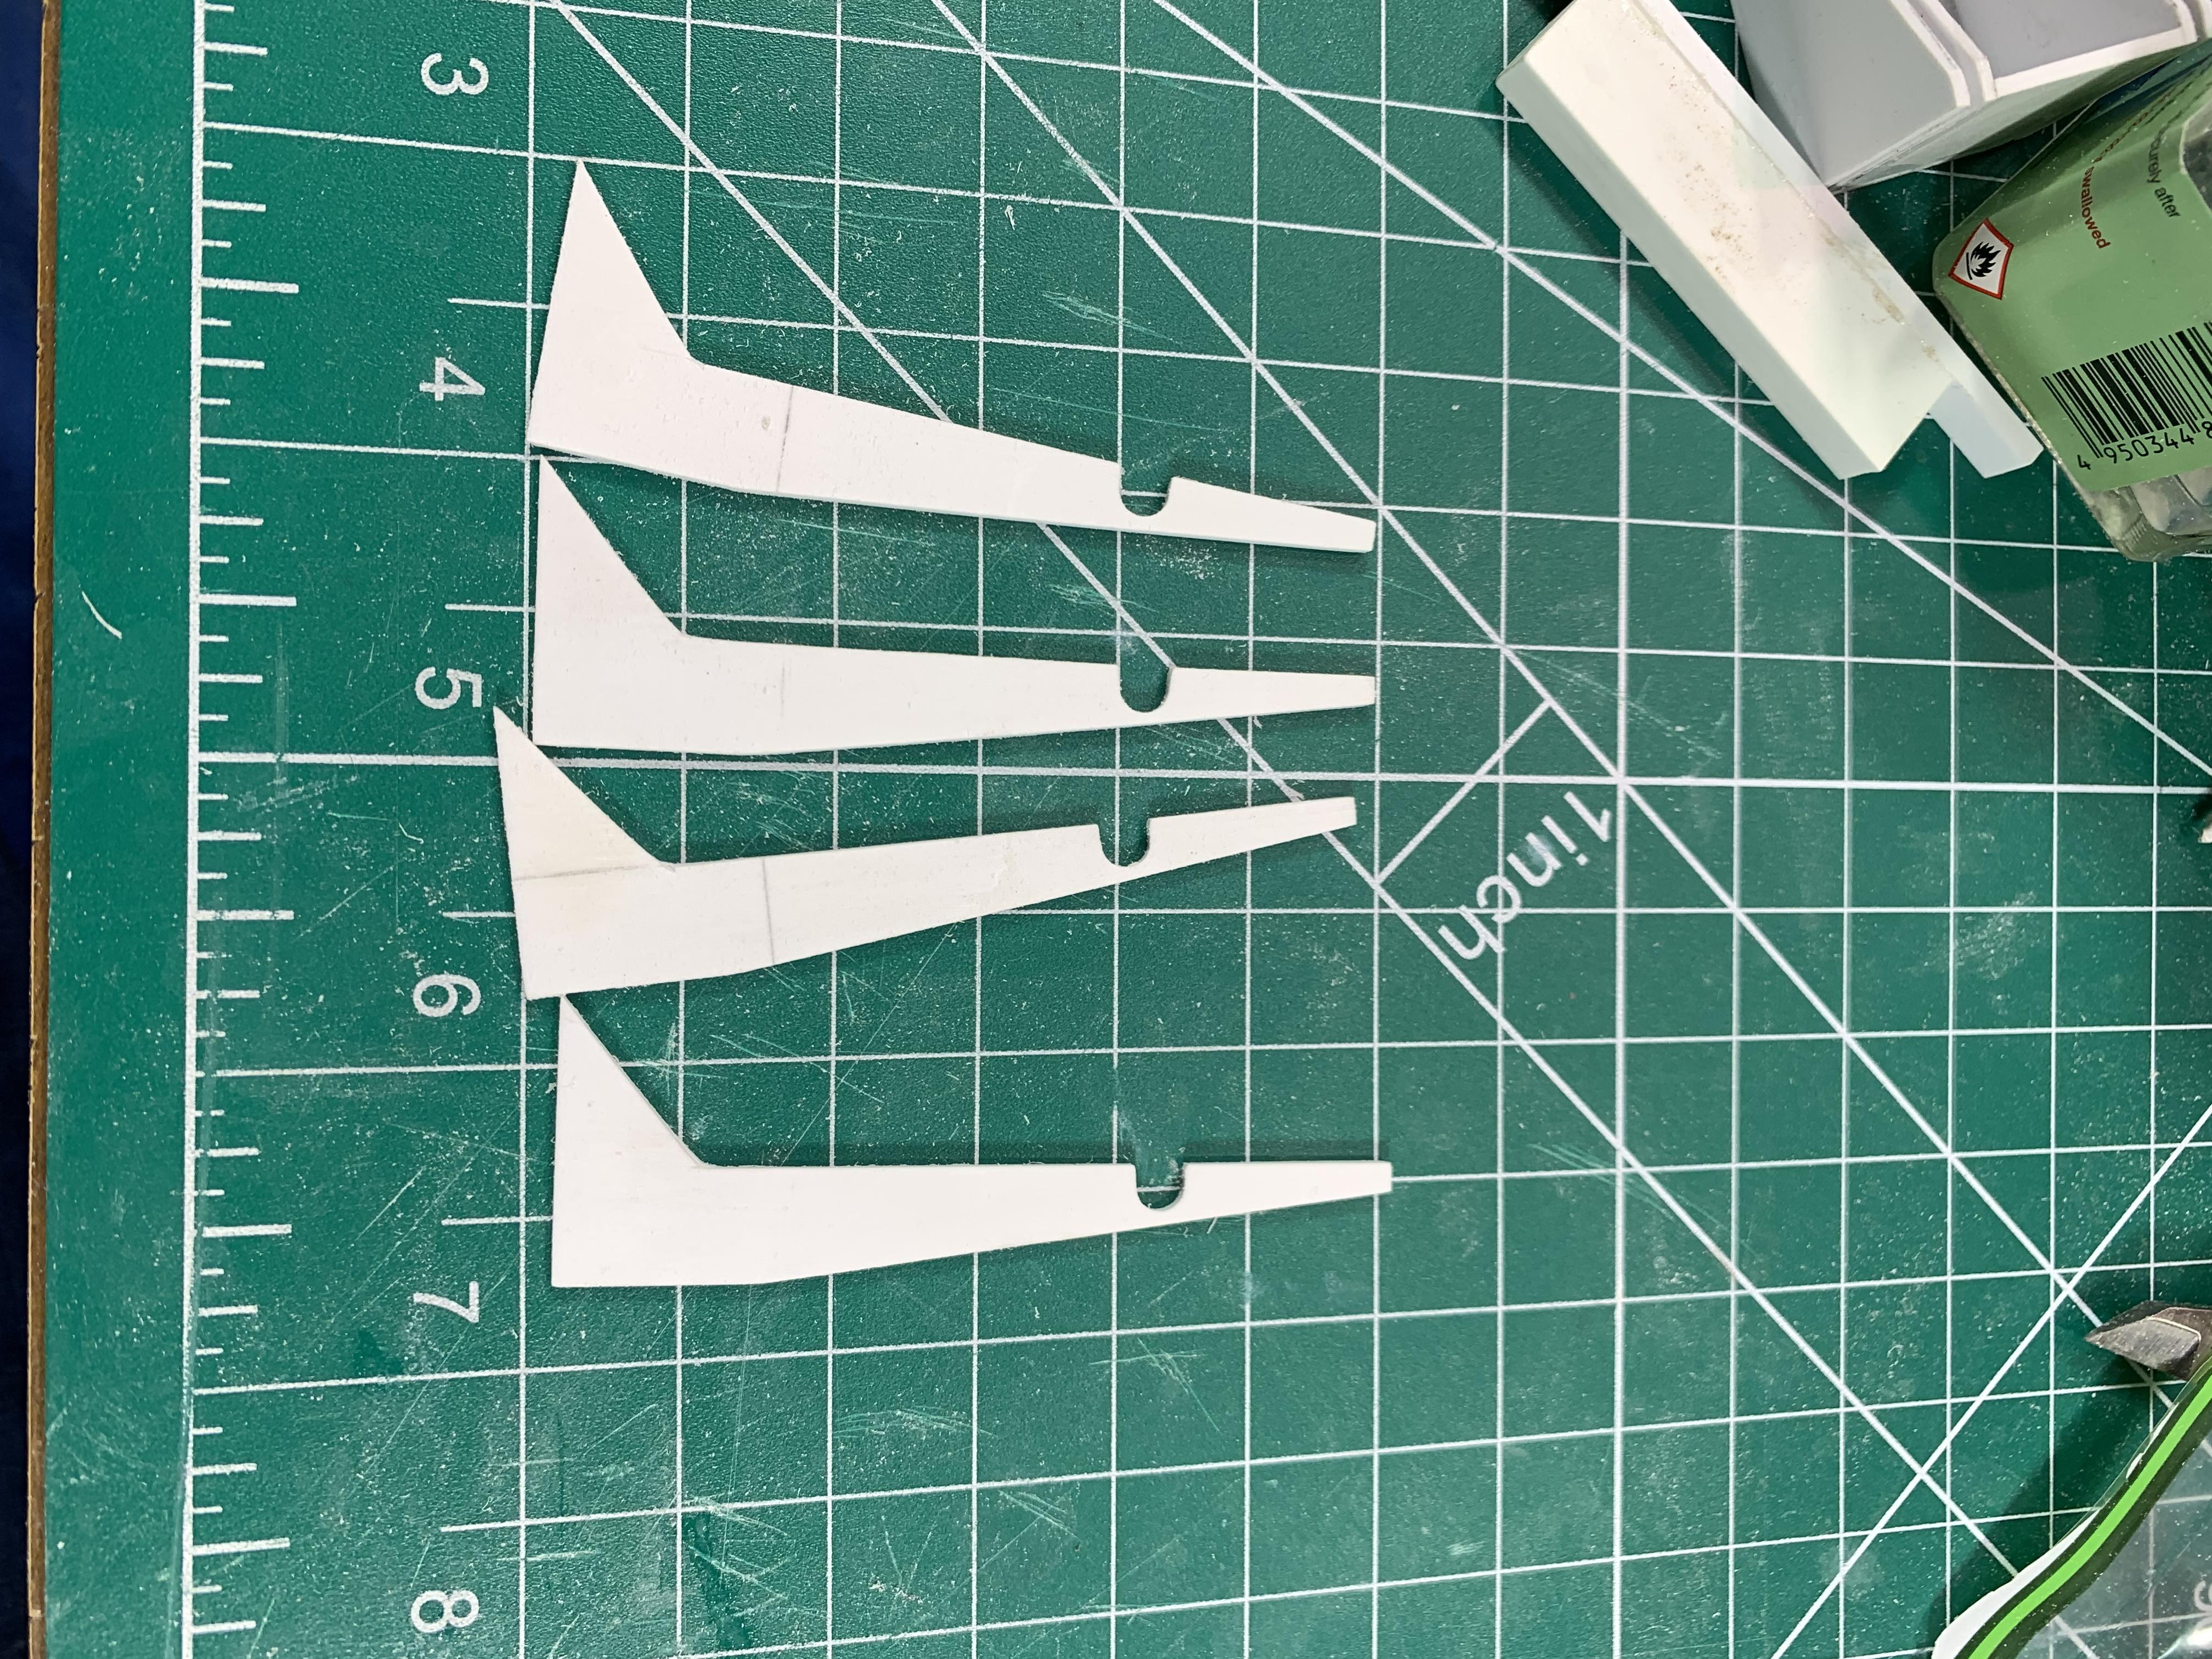
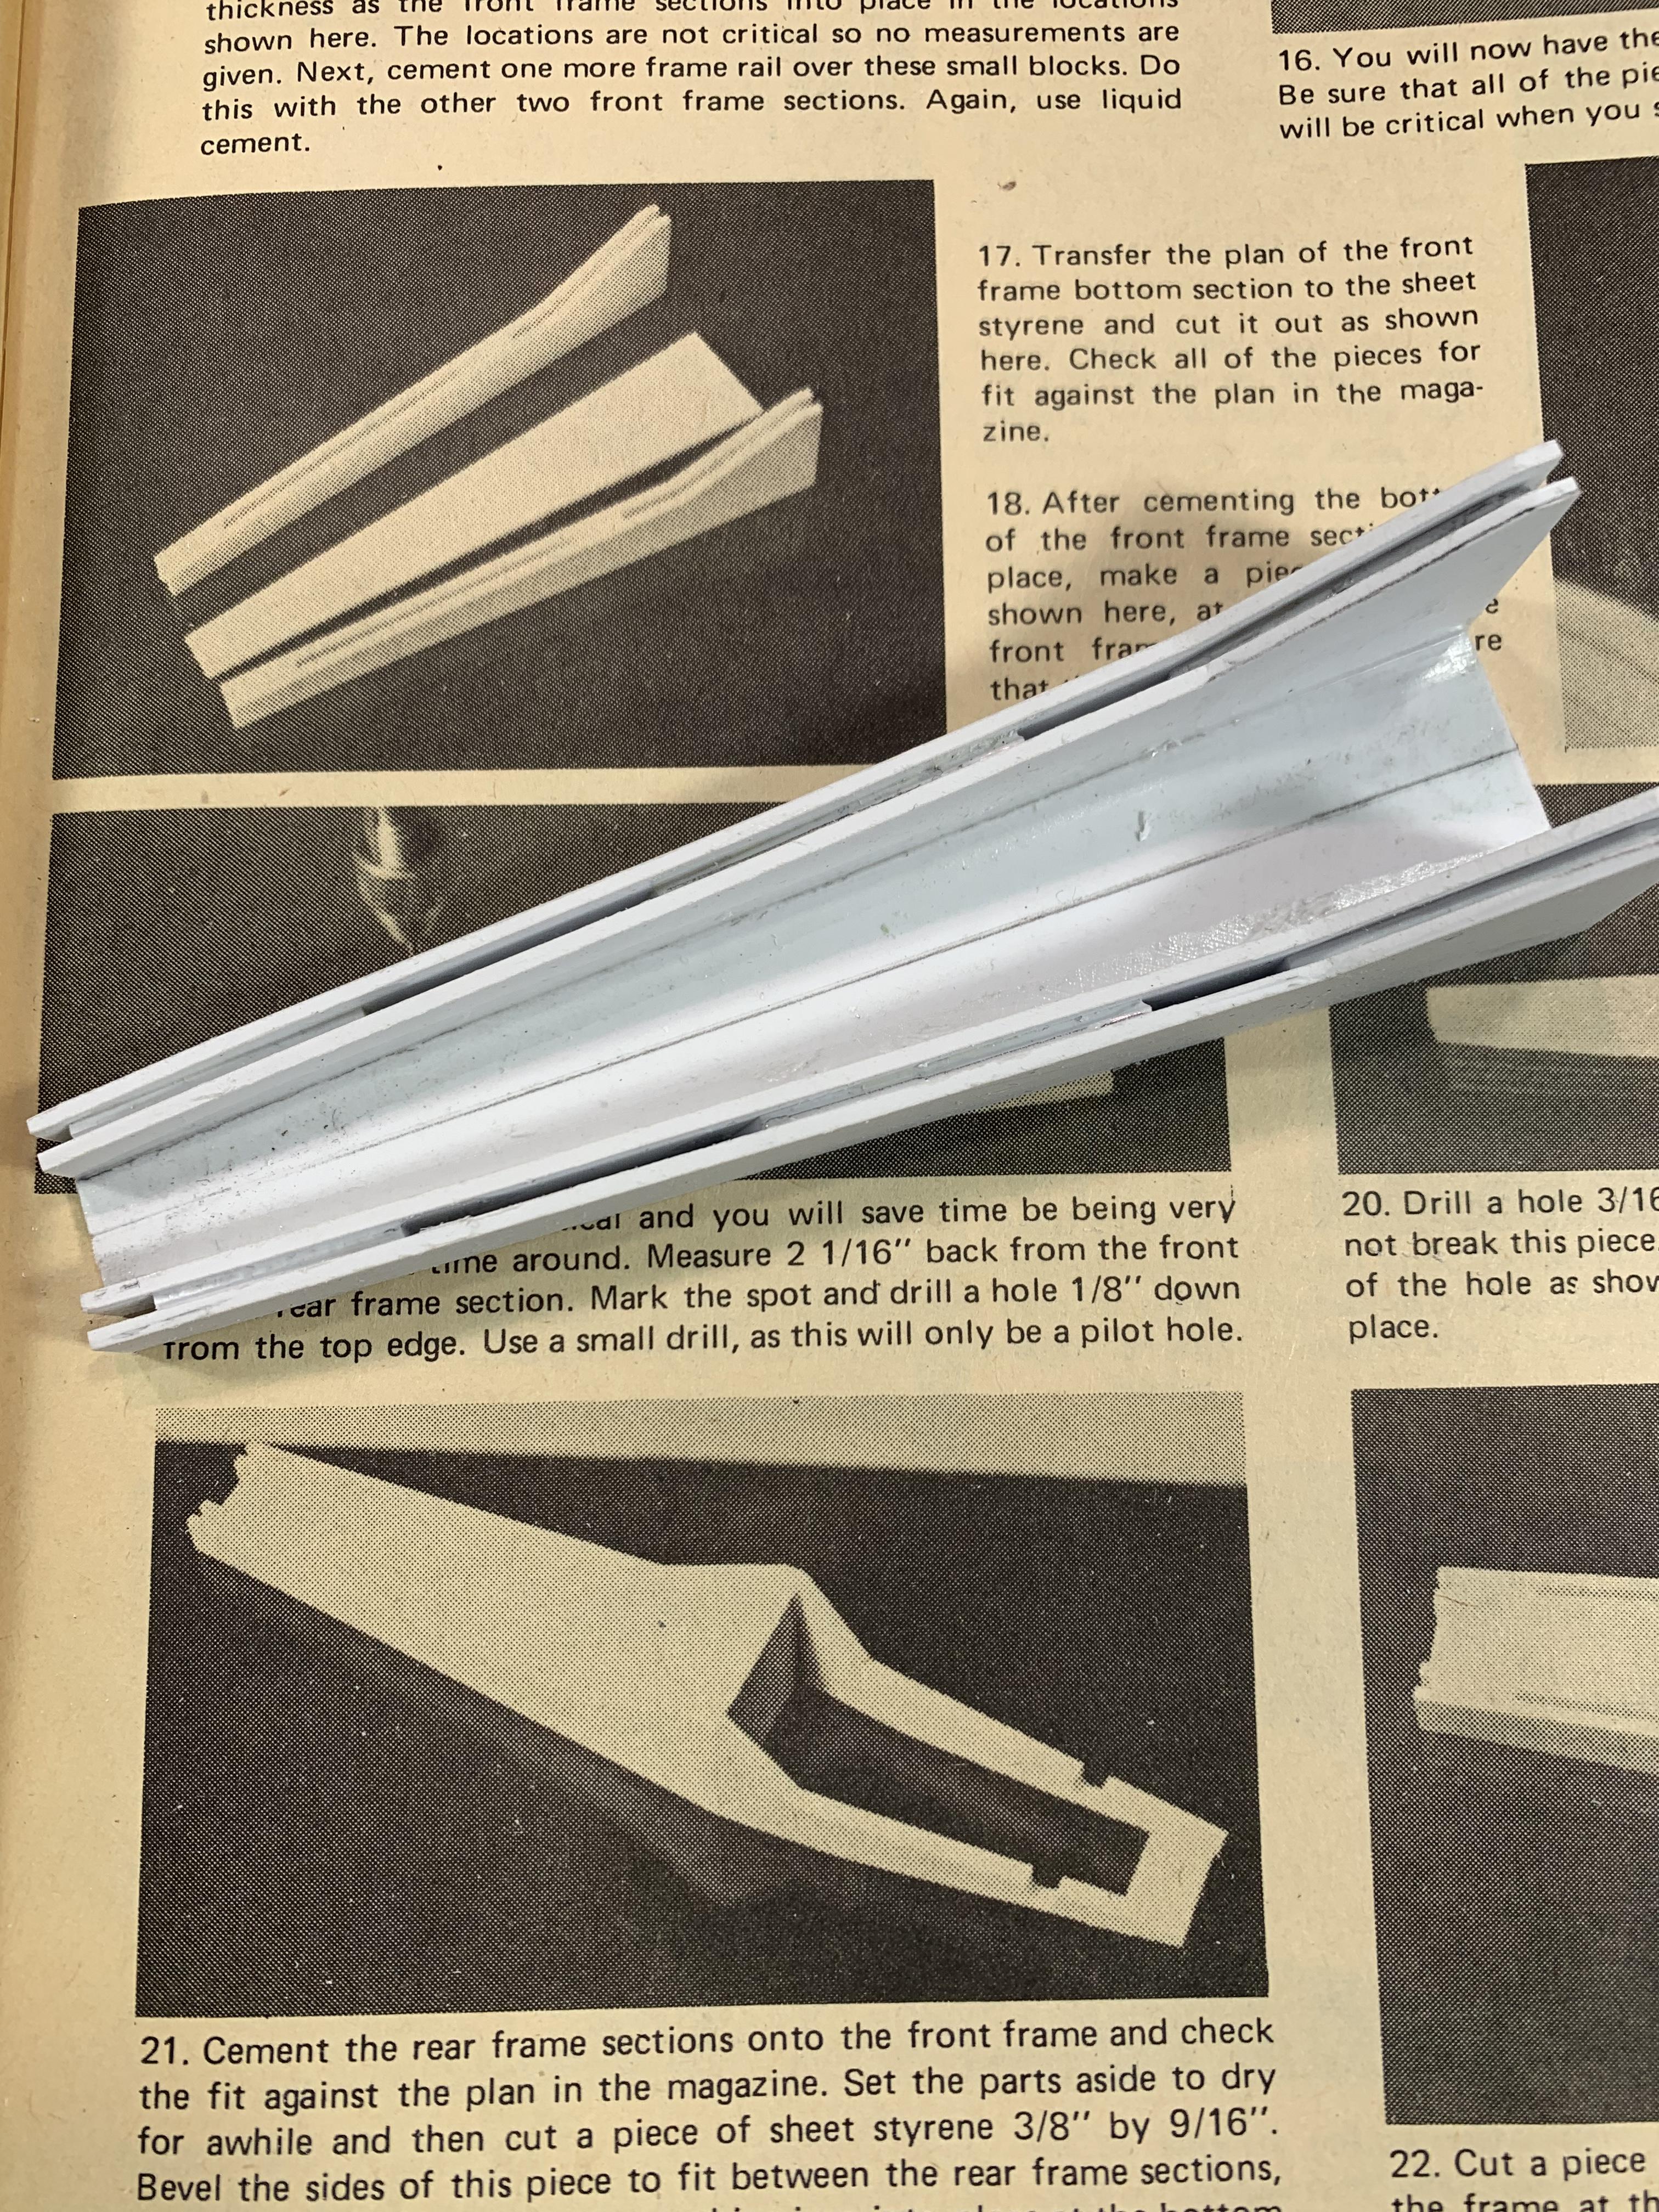
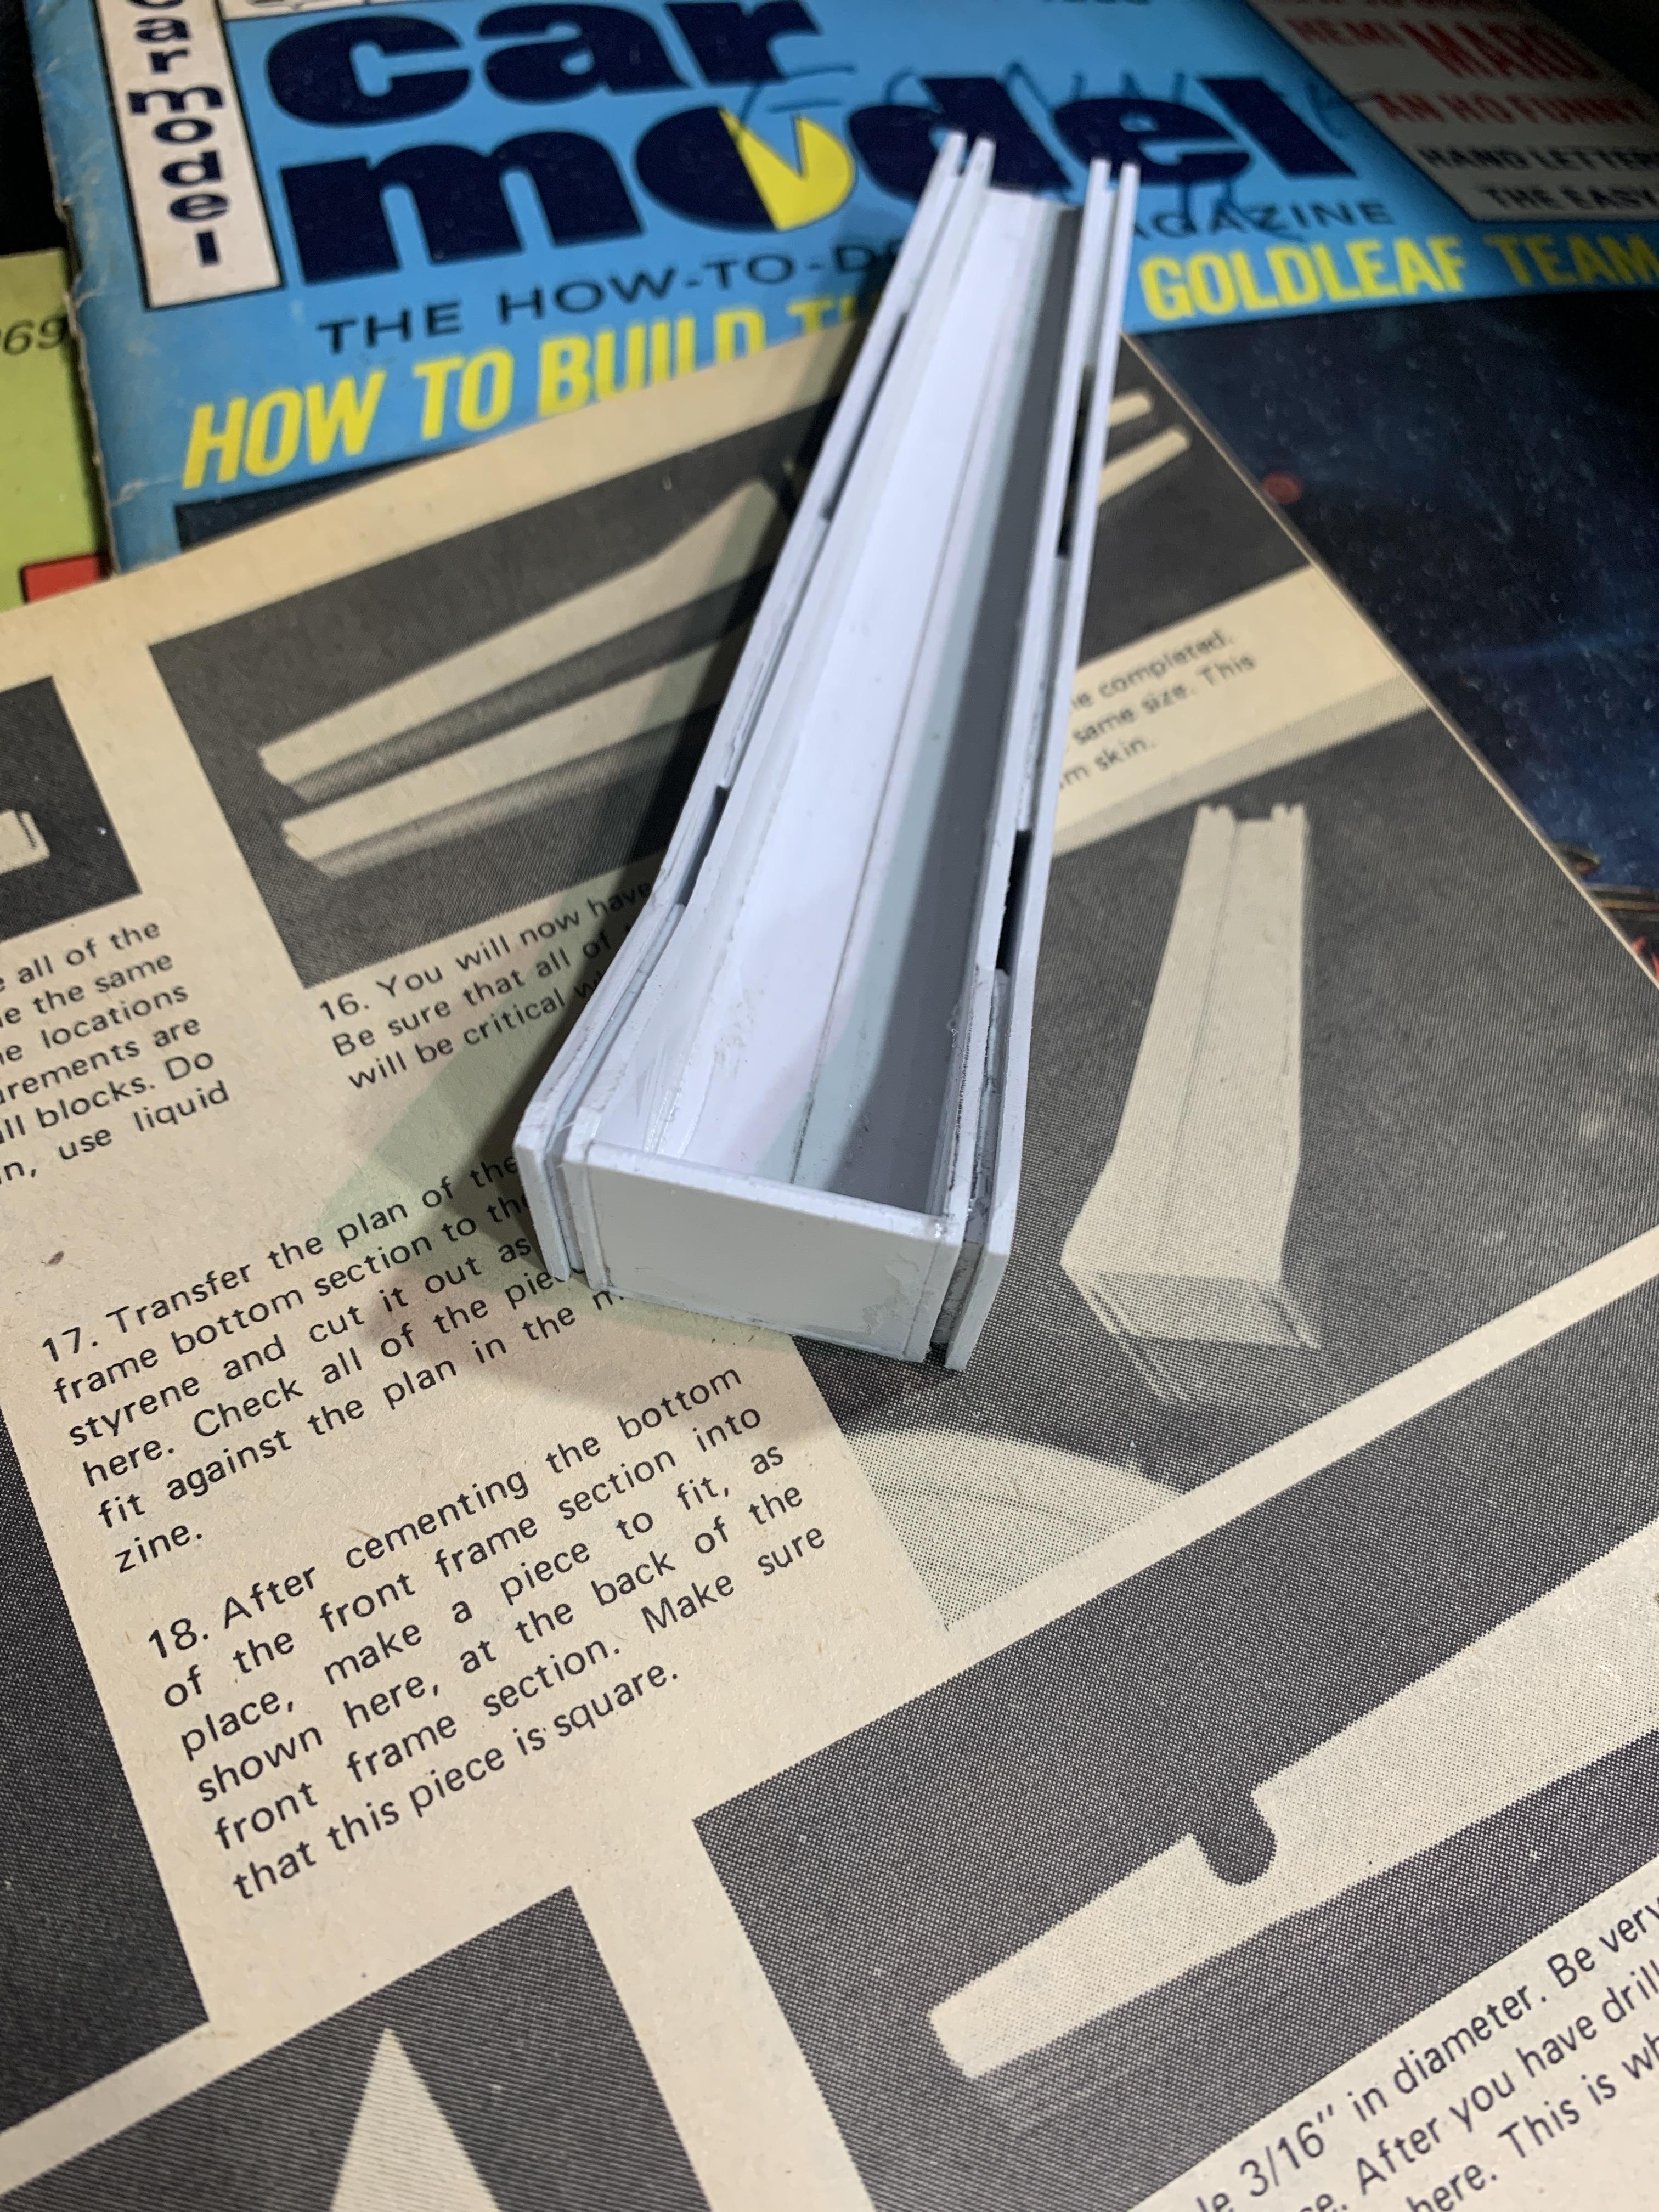
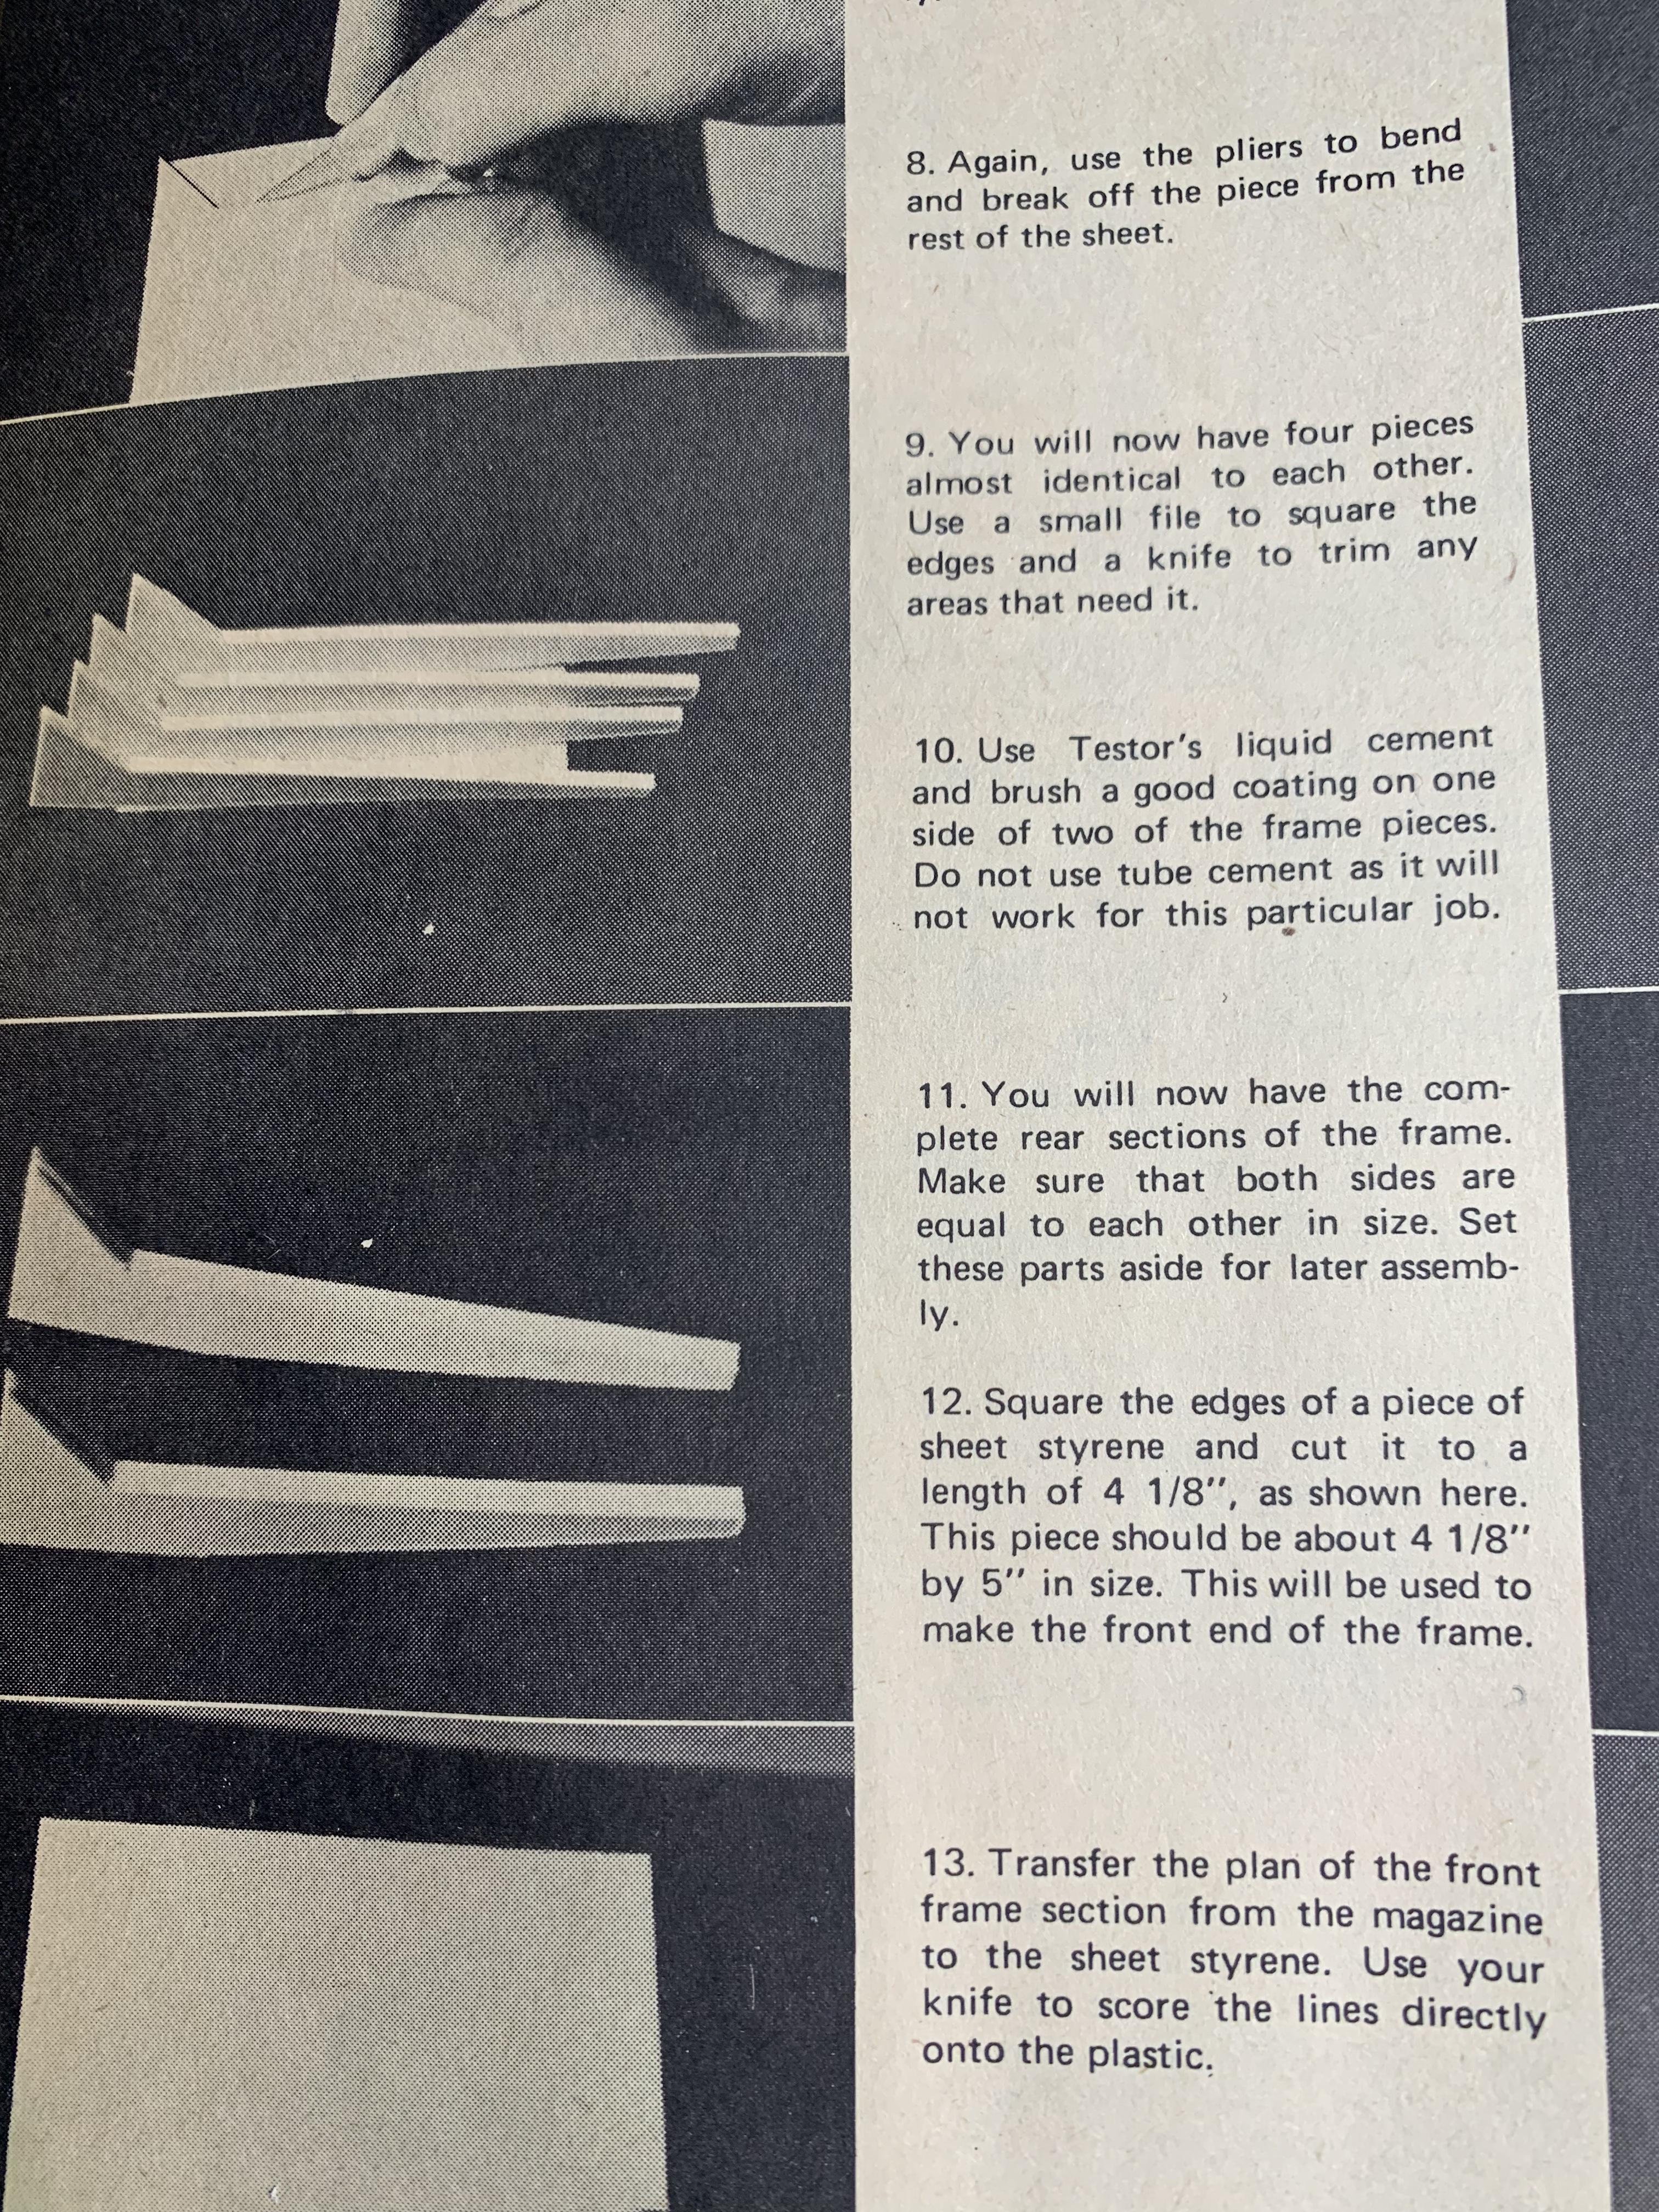
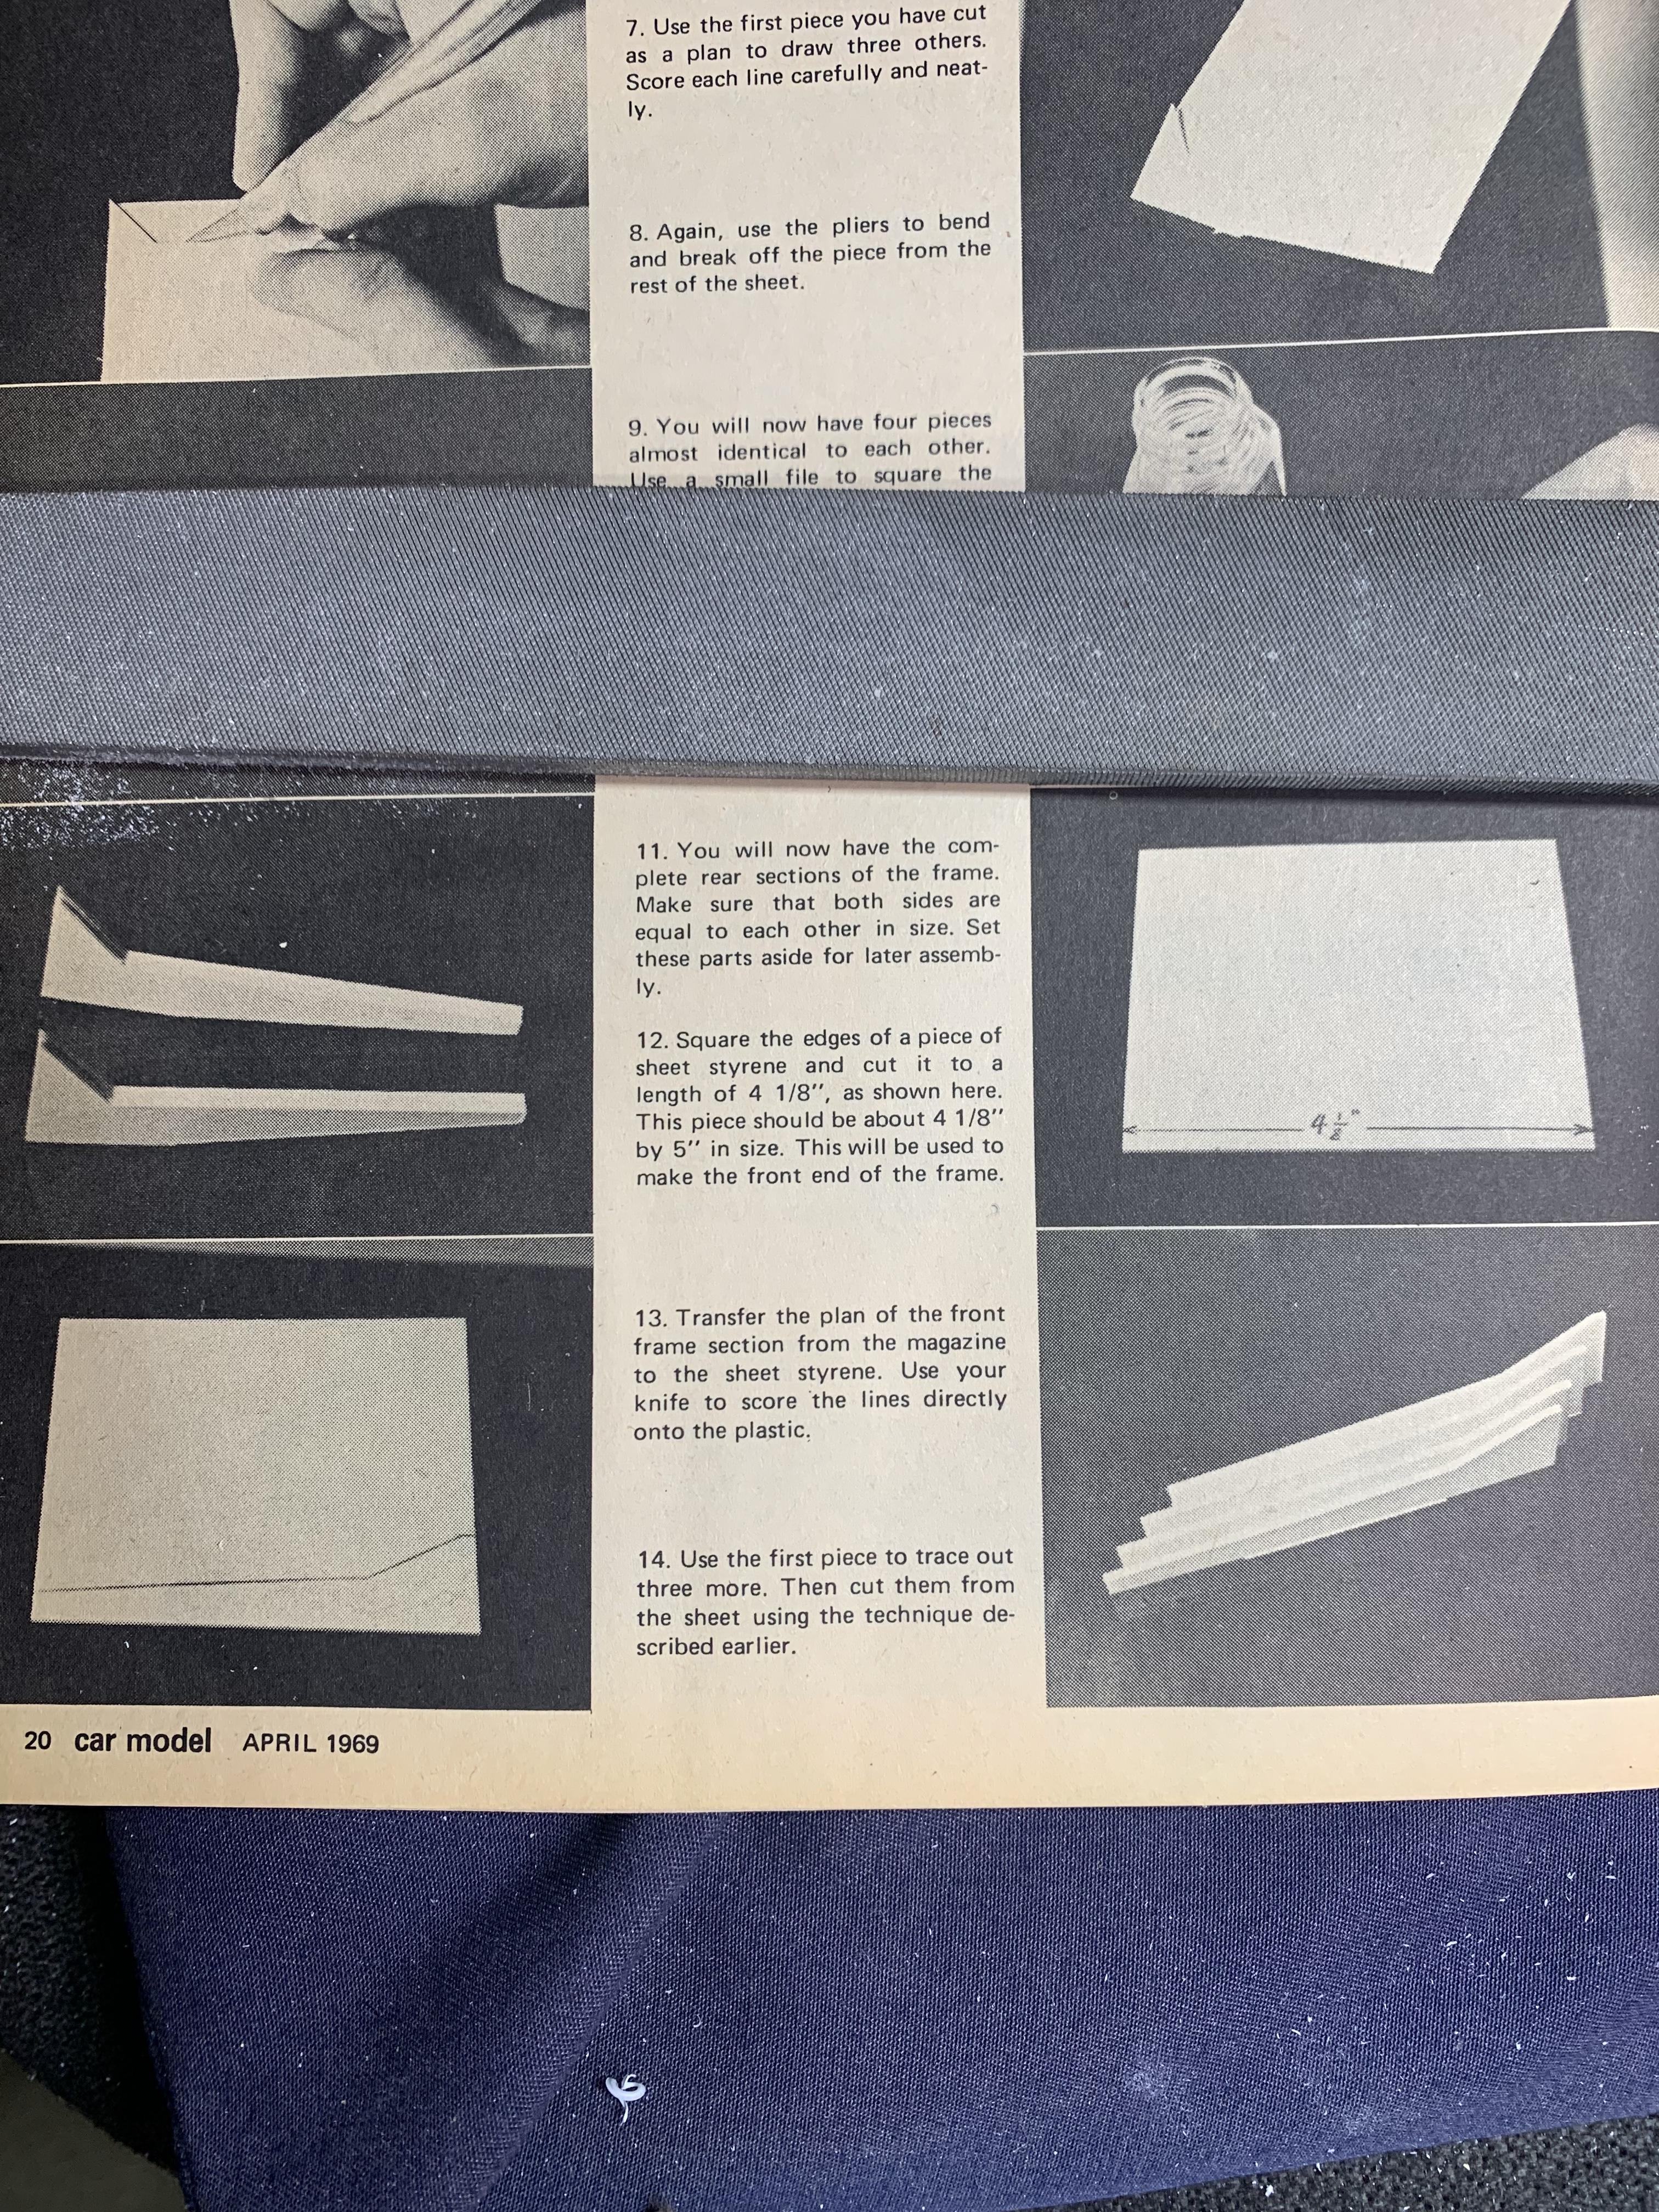
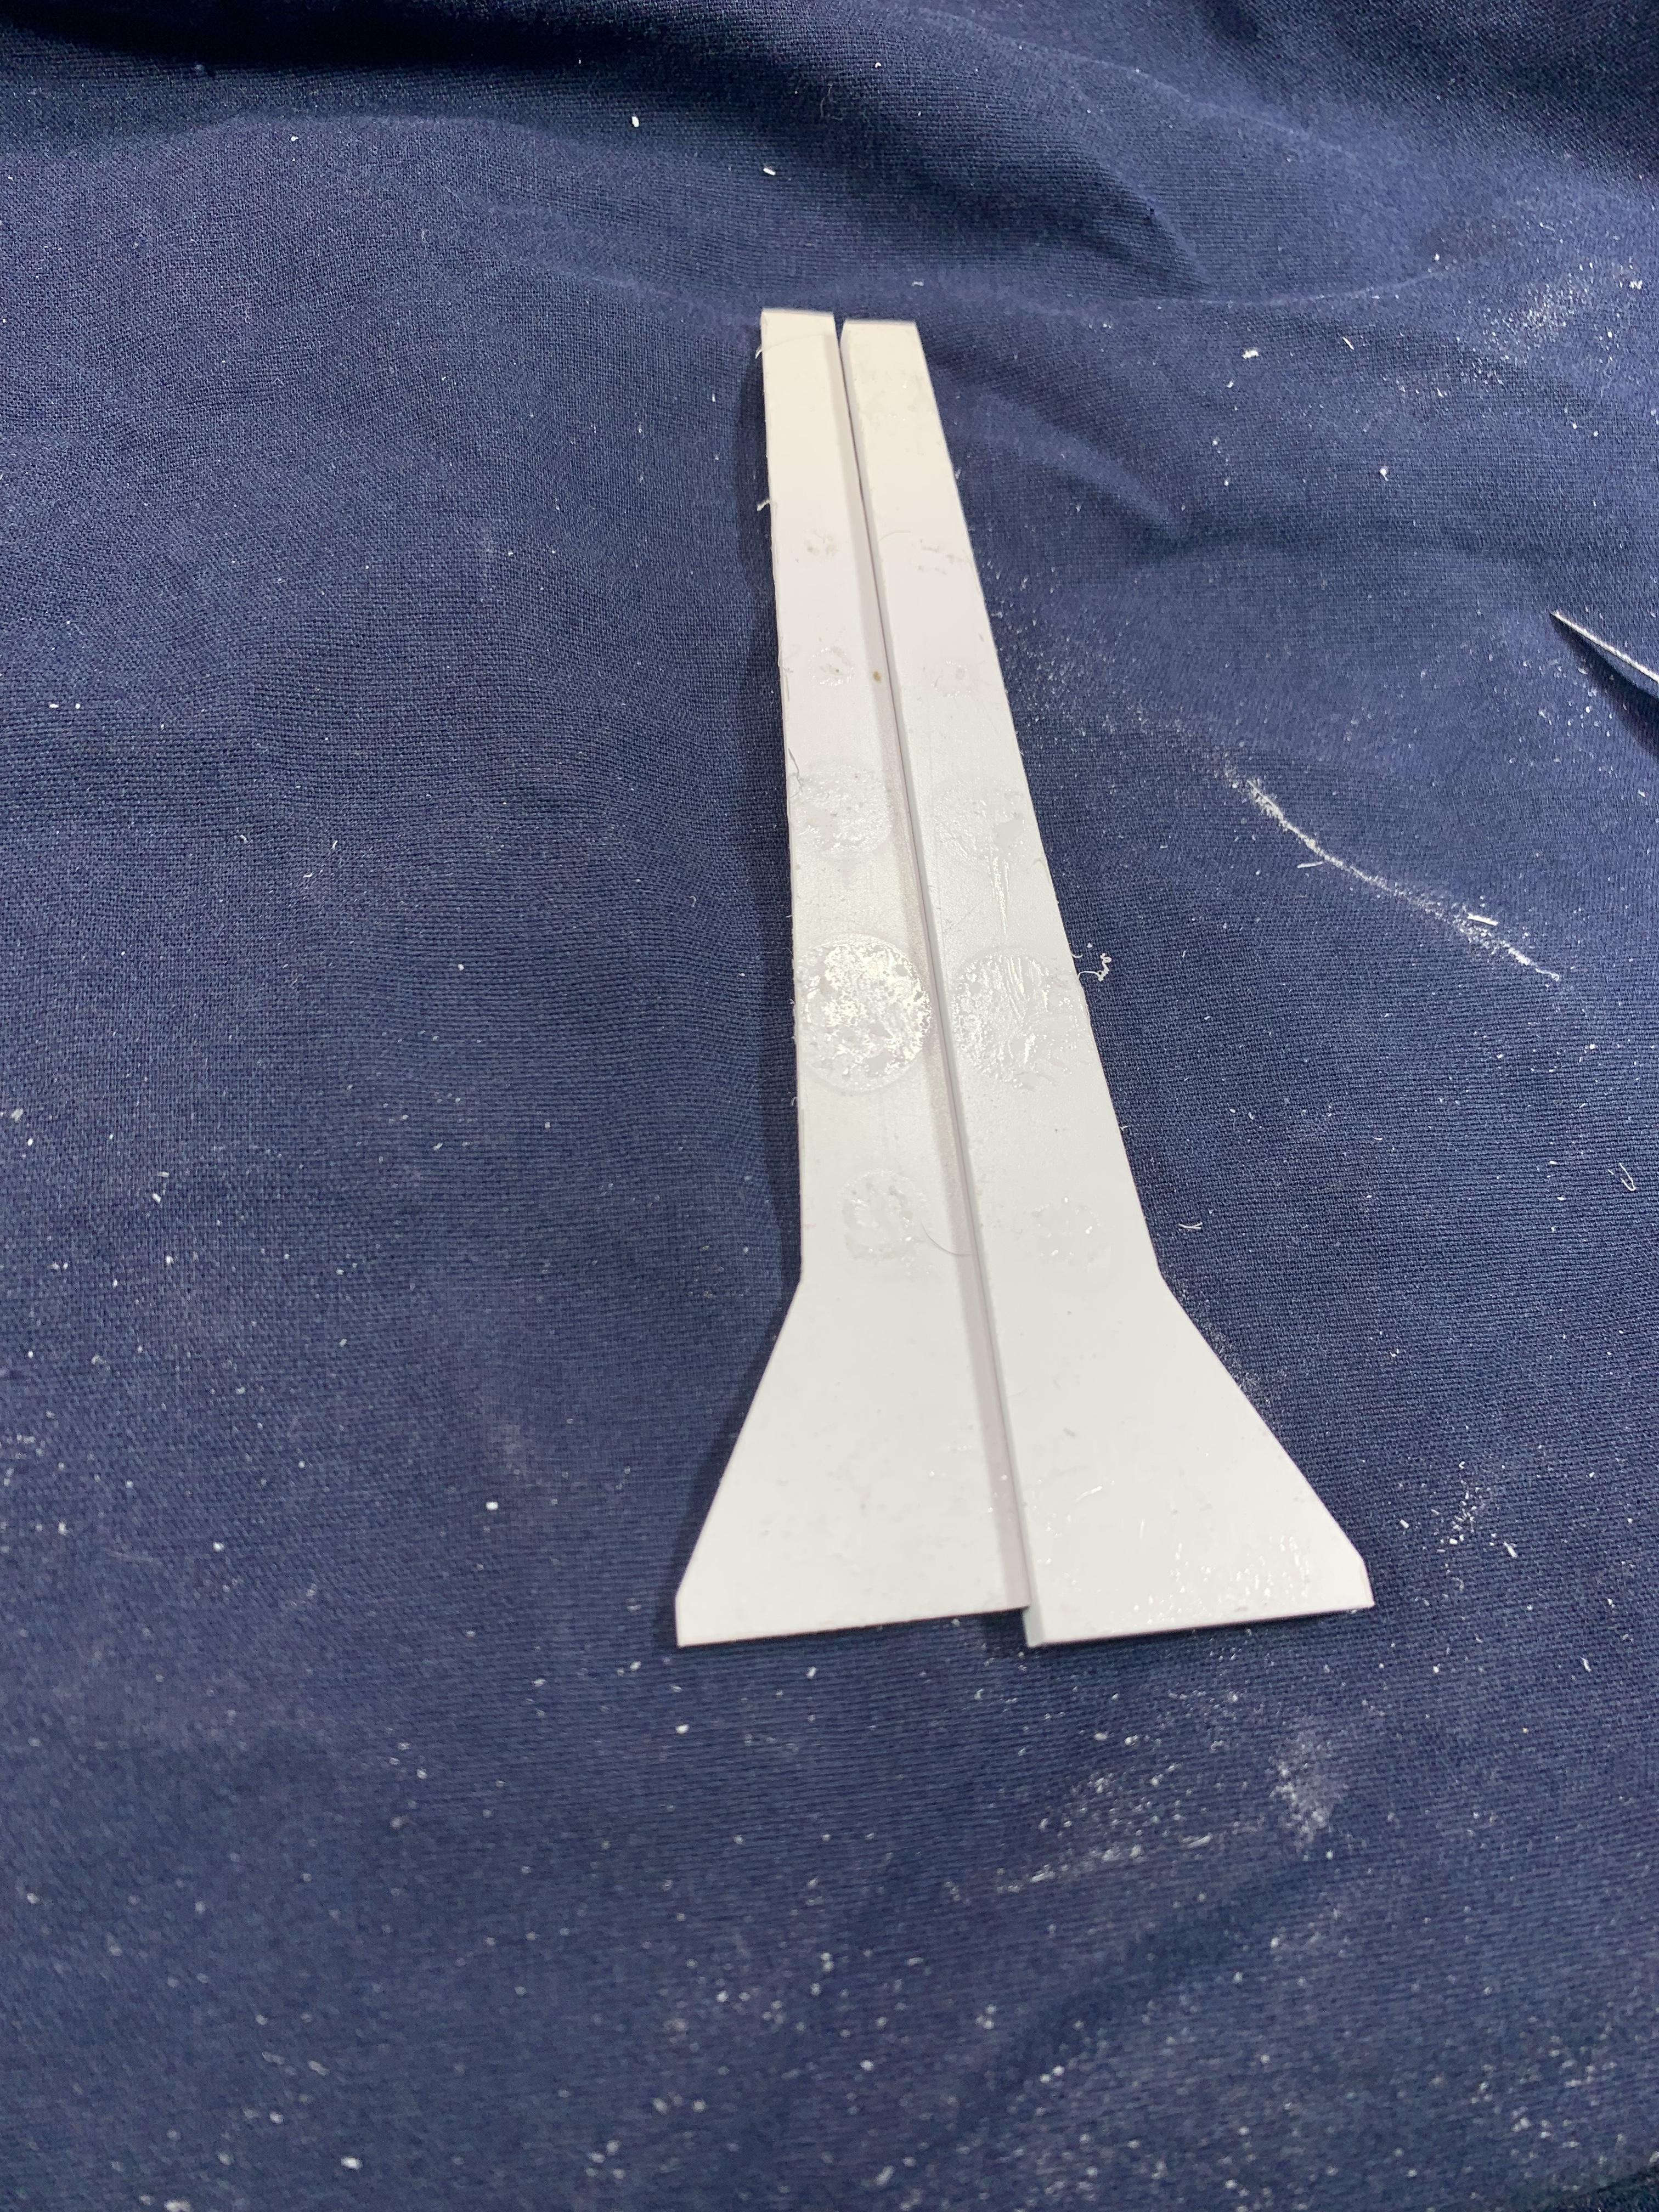
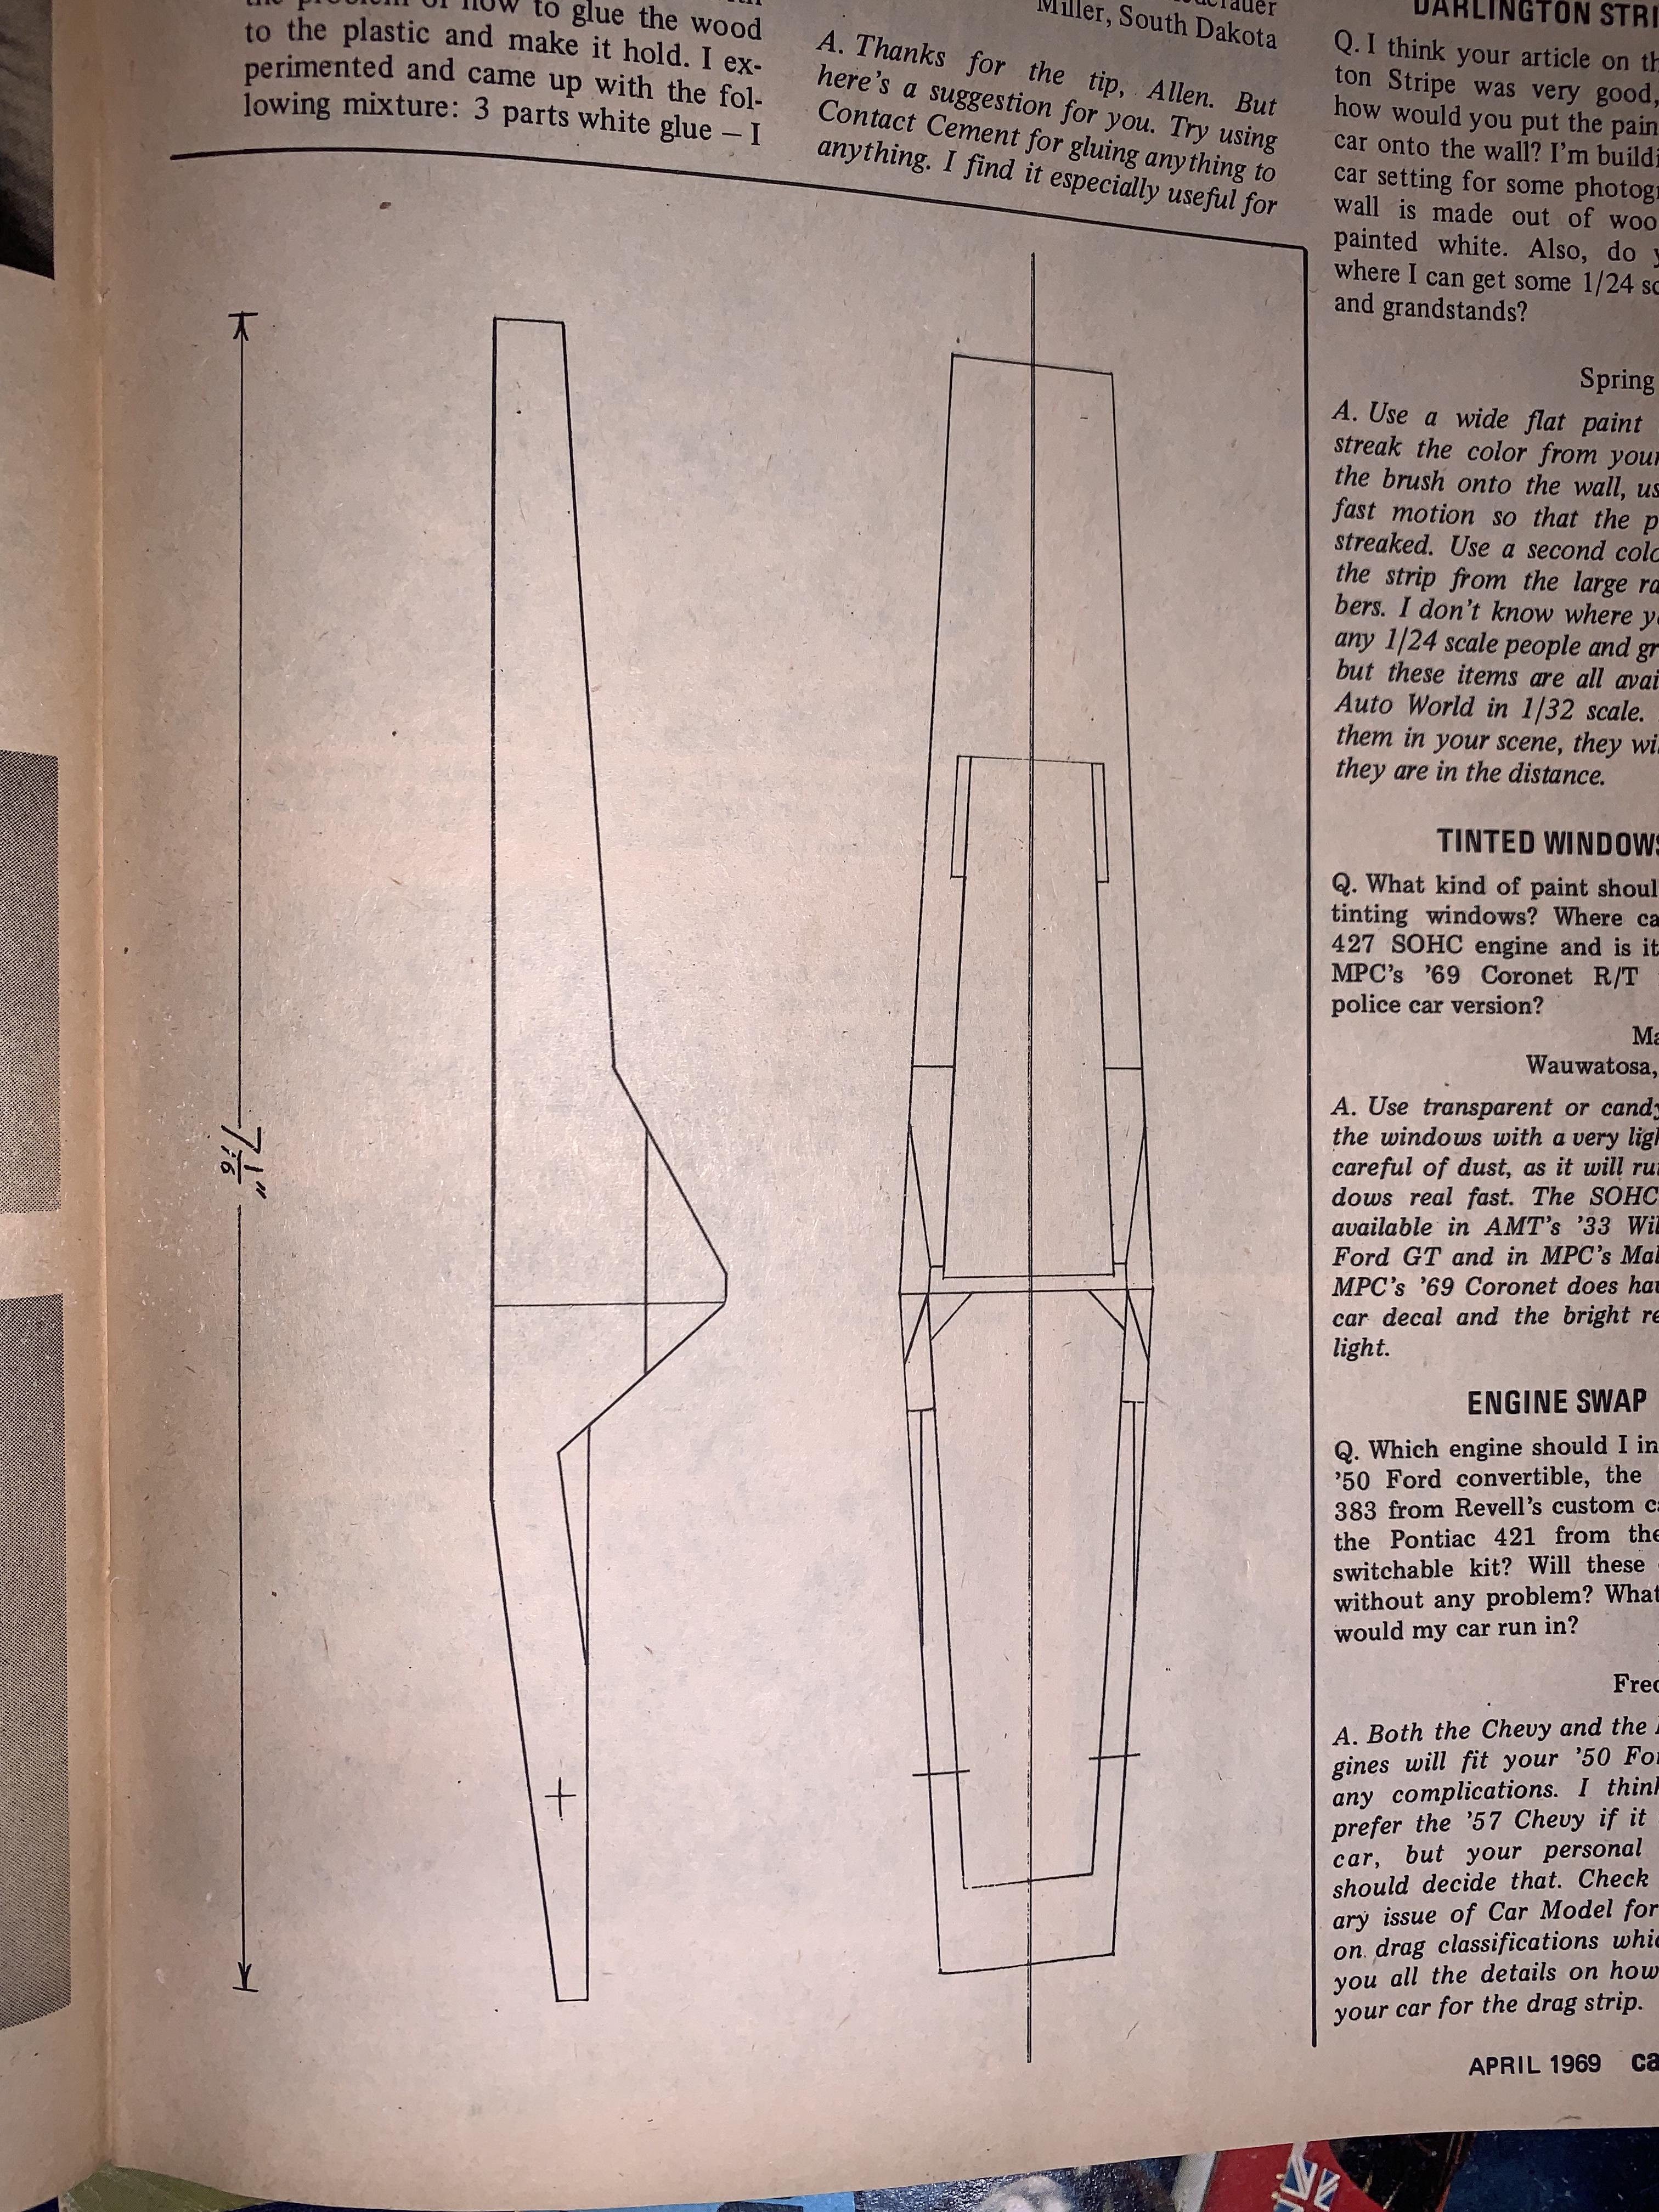
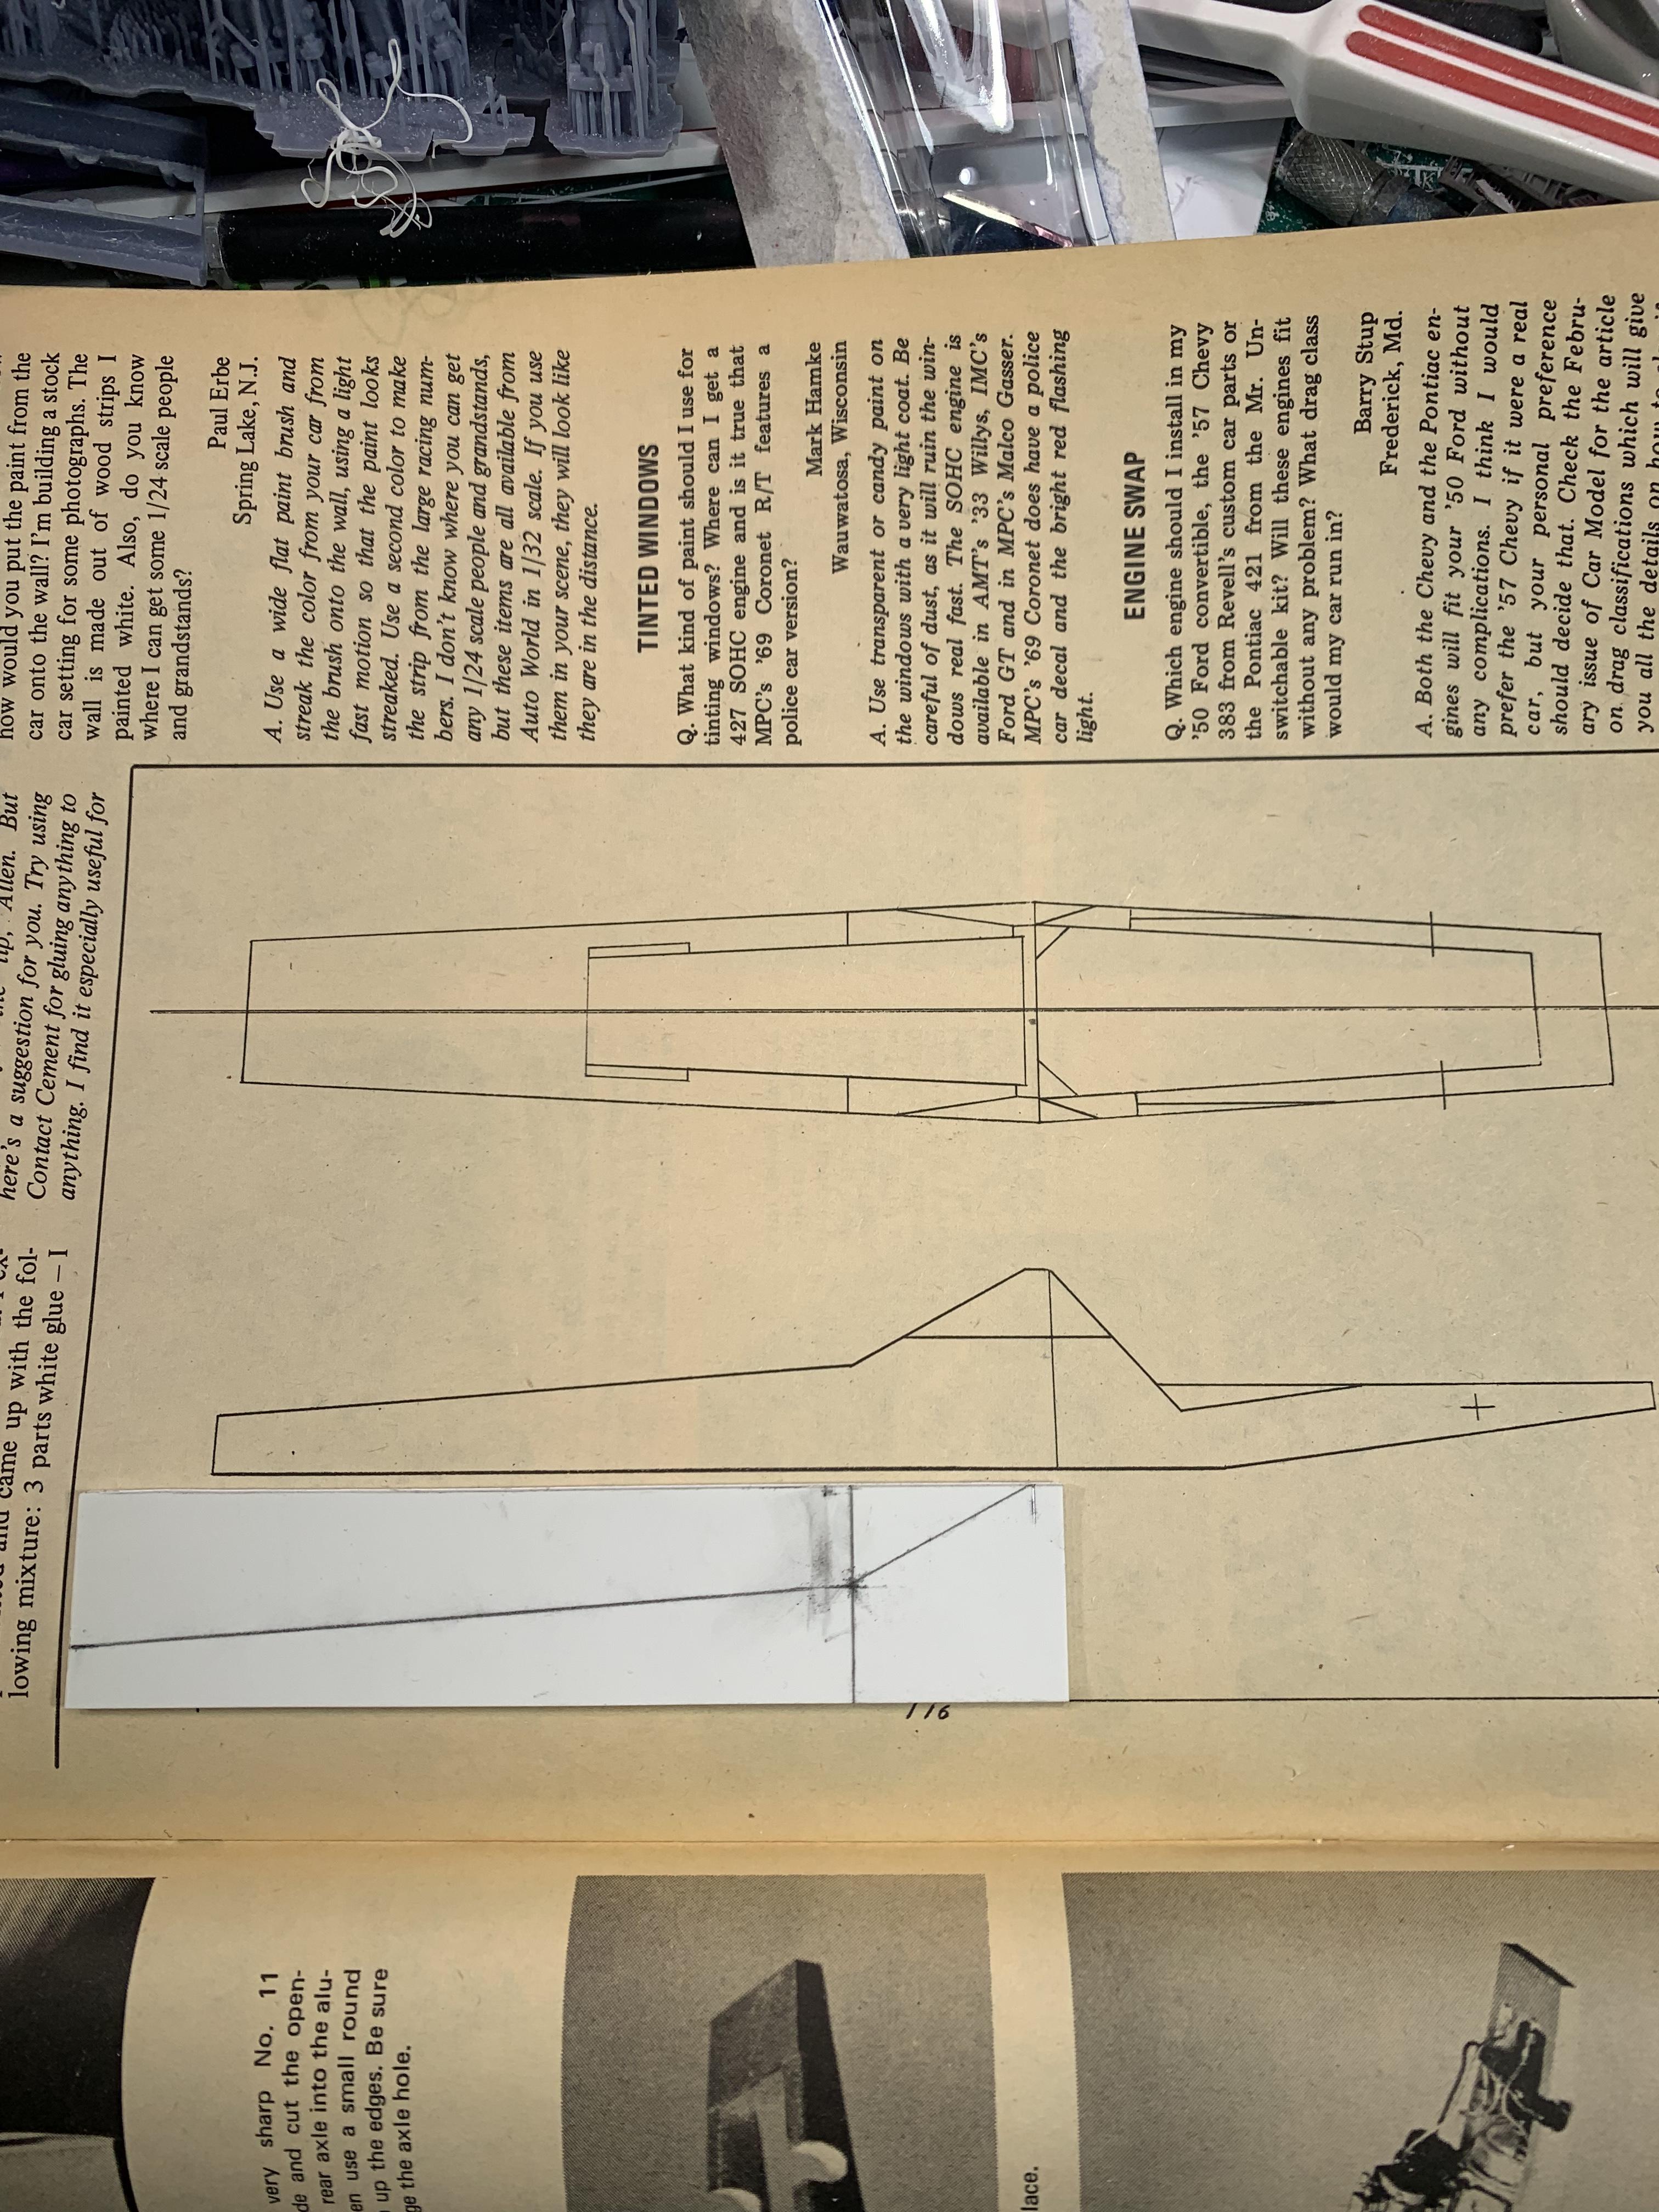
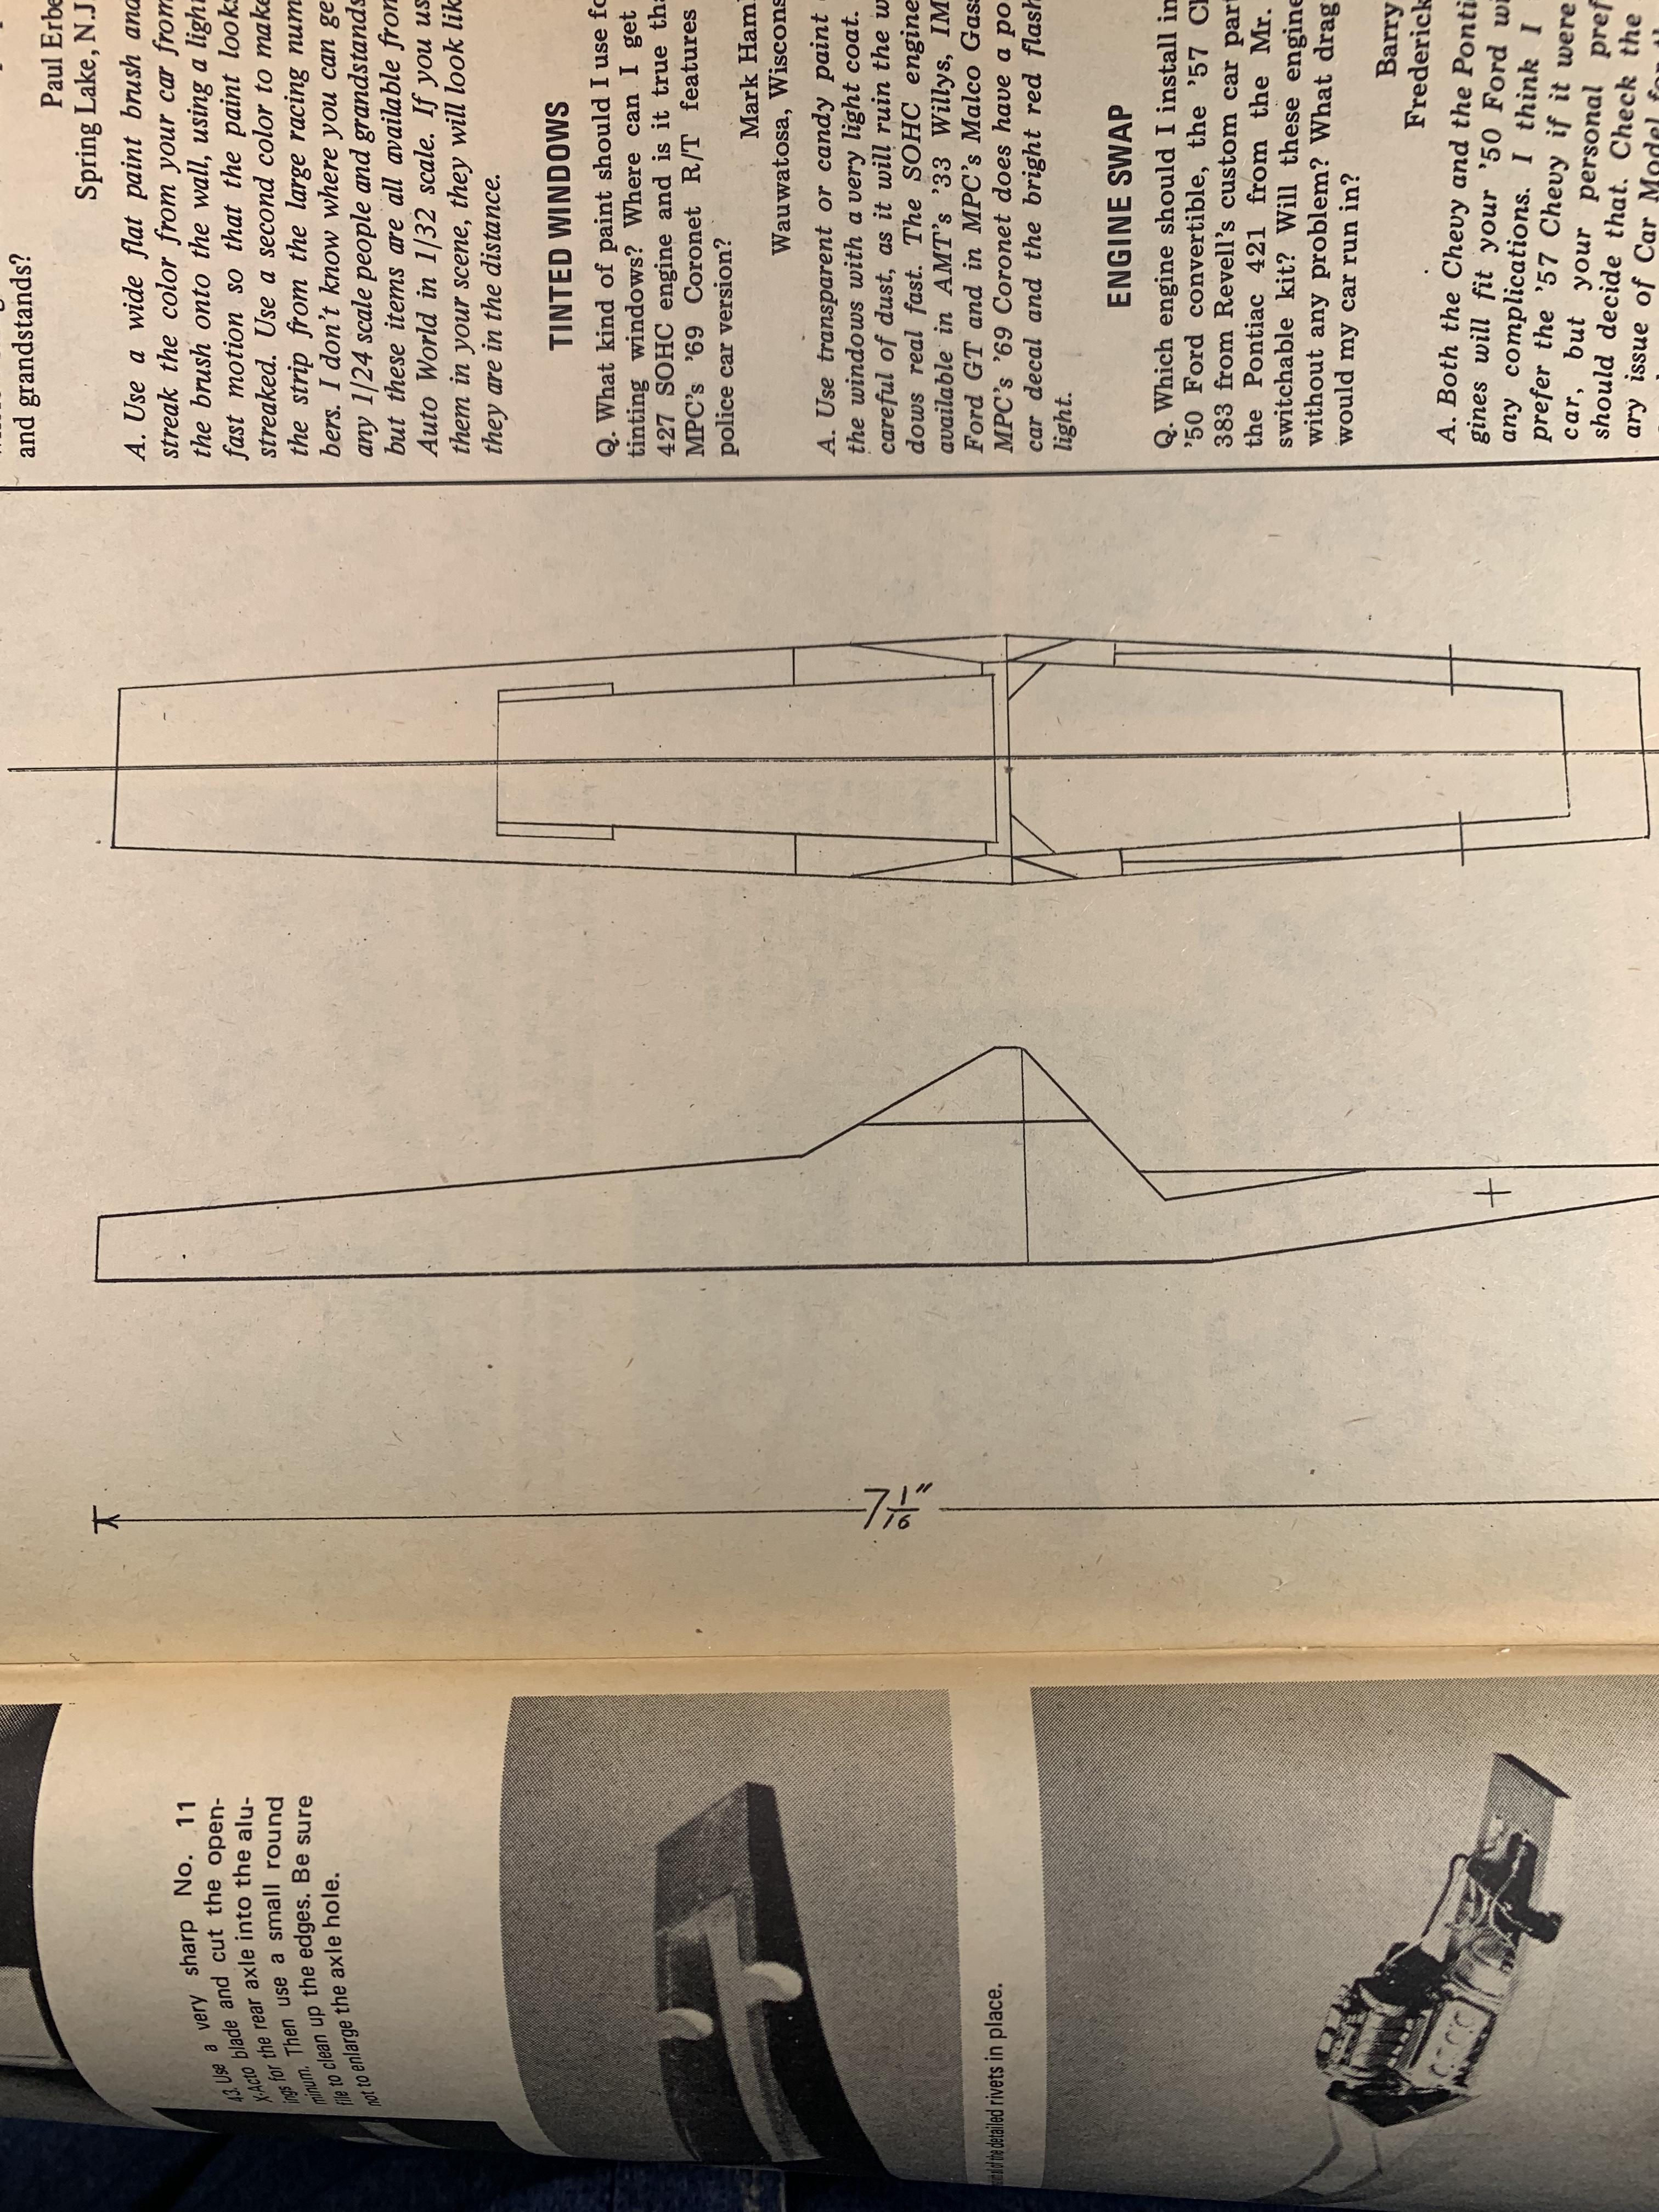
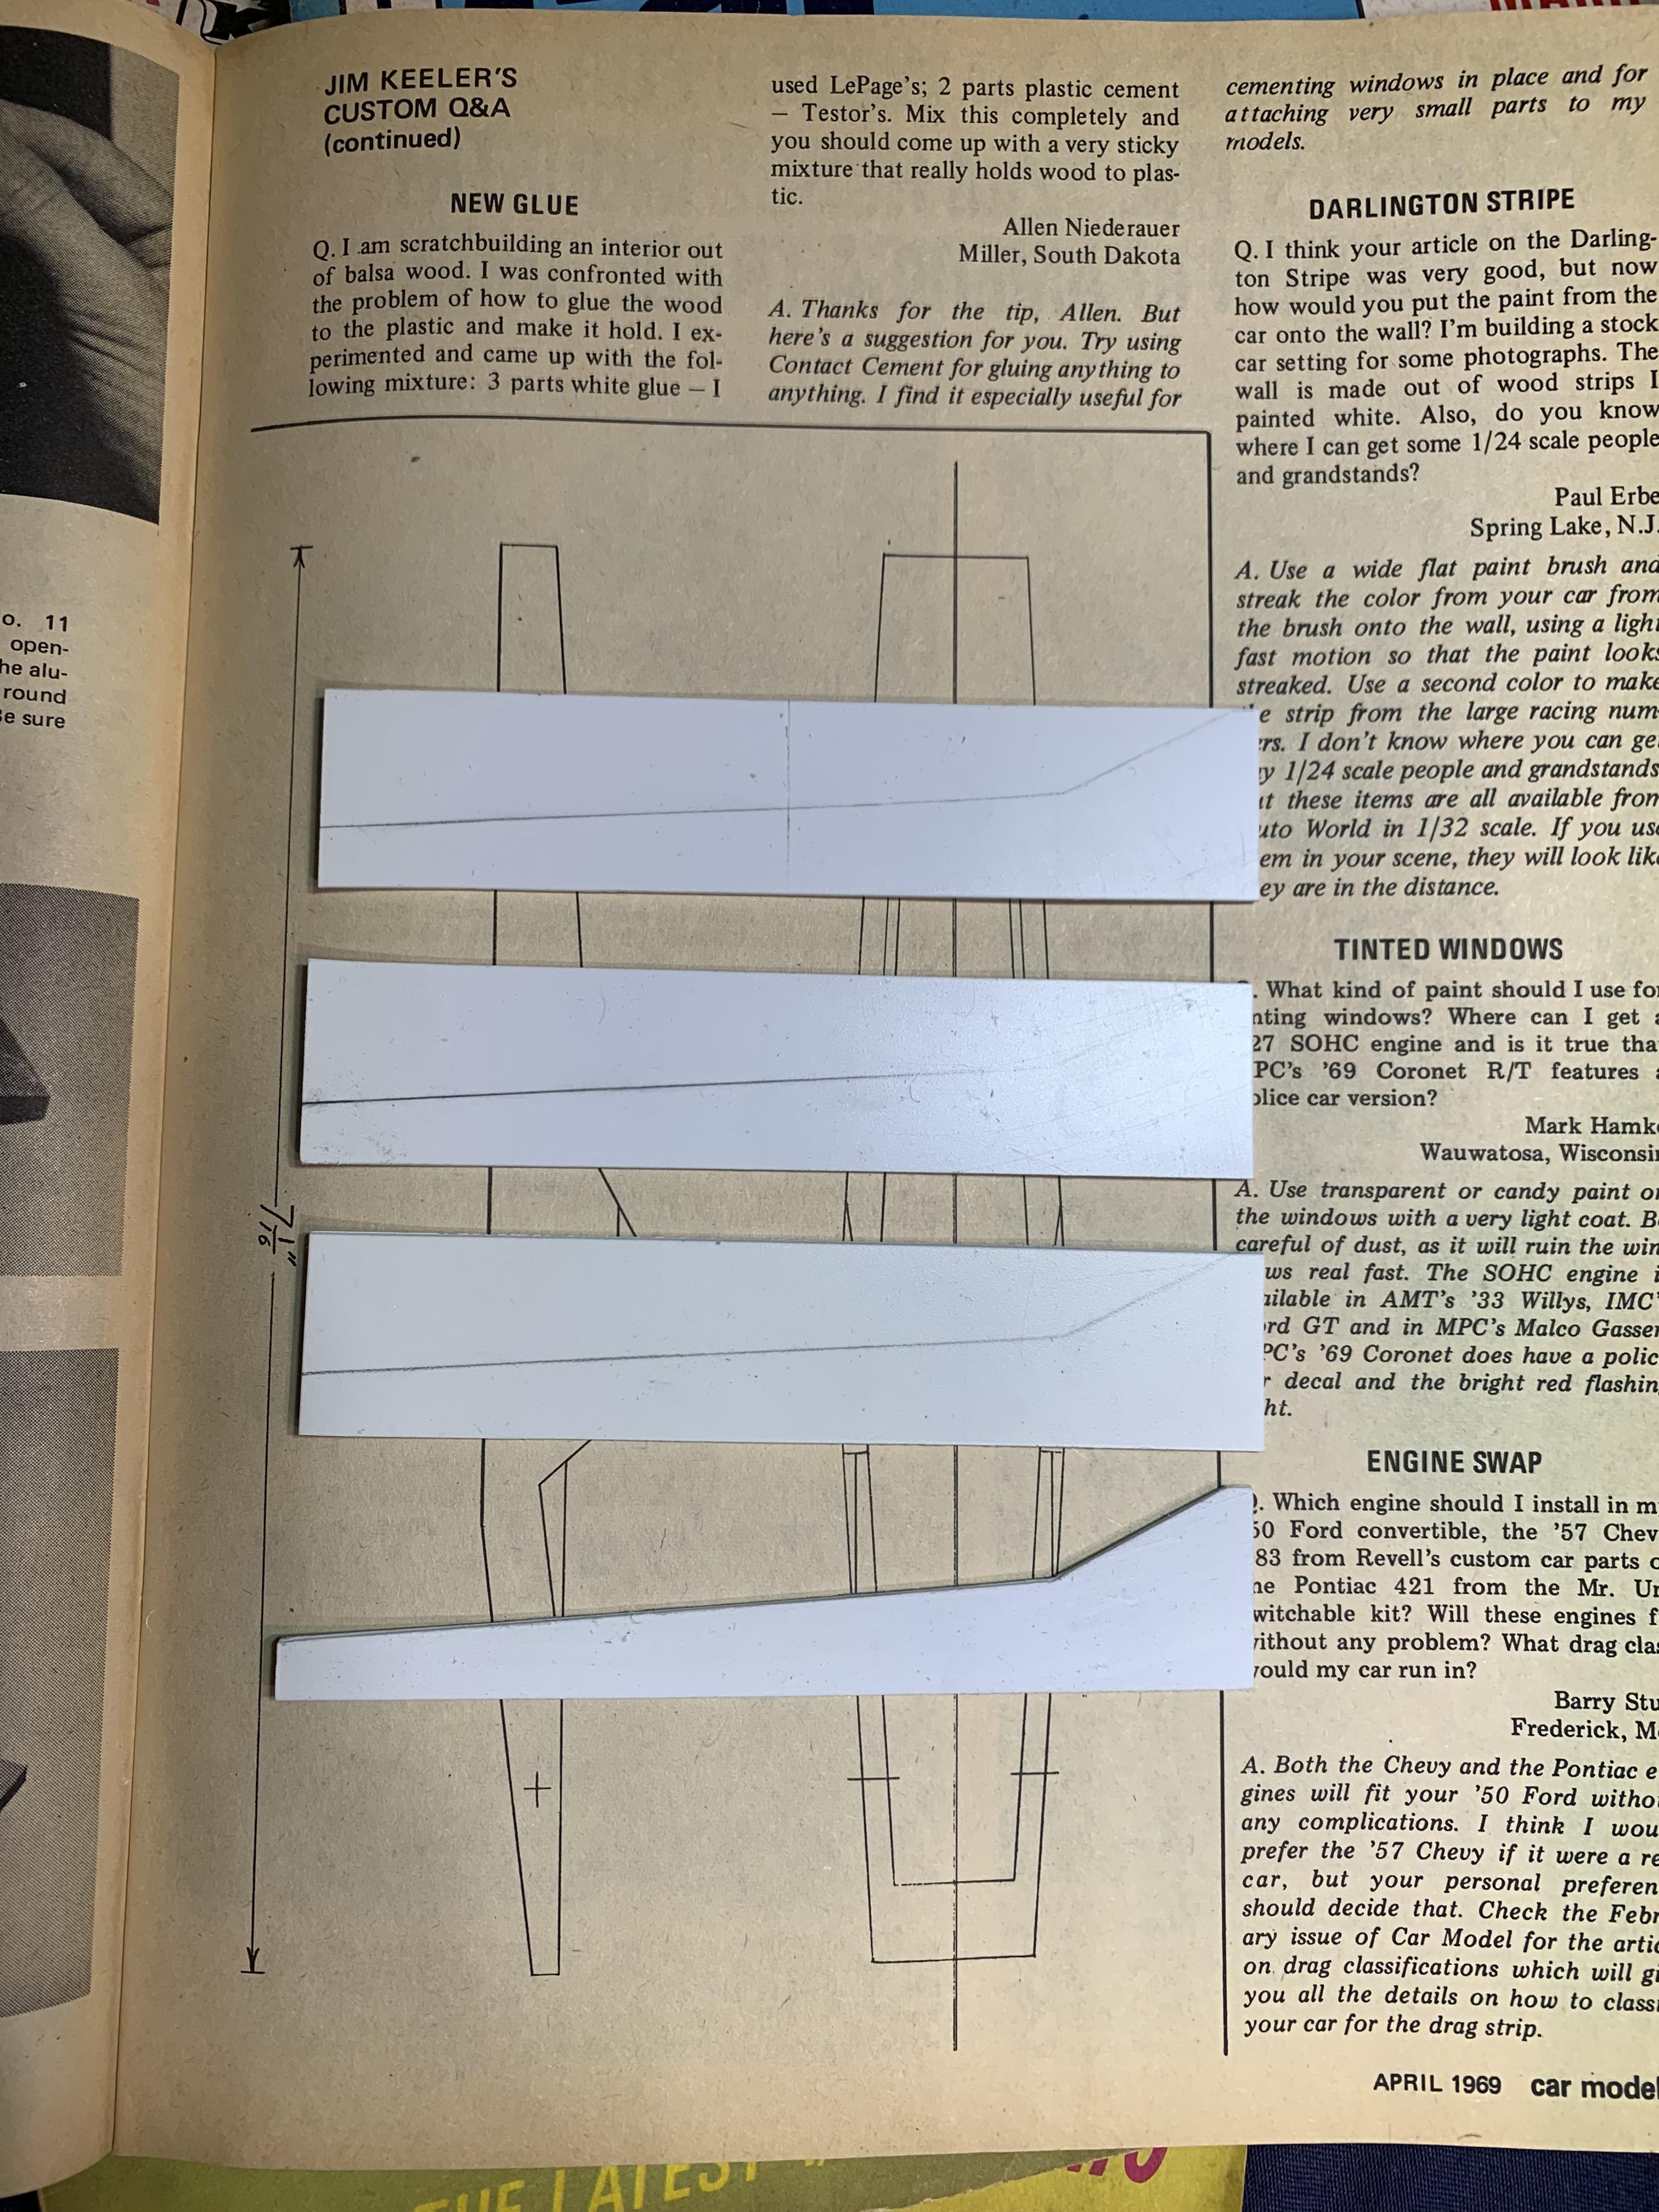
Getting a little work in tonight. I don’t have any kits of dragsters from the late 1960s. I ordered an MPC Ramchargers FED for wheels and tires + front suspension. Maybe some other parts as well. While I’m waiting on that, it’s on to the chassis. Jim Keeler showed how to make a Monocoque chassis. It had a front and back half, made of laminated sheet styrene. It was covered in very thin sheet aluminum printers plate, with rivets punched in from the back. I’ll use a different method; adding styrene rivets one at a time. Here is the front half. I used small drops of super glue to hold the pieces together and scribed them to profile. After filing the laminated pieces as one, they were popped apart by sliding a #11 blade between them. I’ll sand the super glue residue off. I think this way gets them all to a more uniform profile.
-
1
-


What is your favorite sports car?
in General Automotive Talk (Trucks and Cars)
Posted
I don’t think I could pin down a favorite. There are so many that I would love to have. Right this minute I would say a street legal Porsche 935 K3