

LDO
-
Posts
3,045 -
Joined
-
Last visited
Posts posted by LDO
-
-
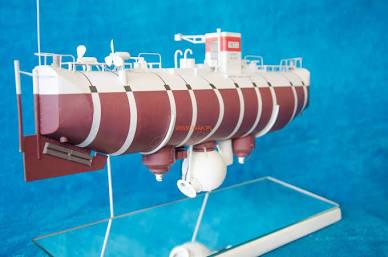
I first read about the real thing when I was about ten years old. It was in a magazine from the 1960s at a yard sale. I was fascinated. I’ve always thoight it would be cool to build a model, but no kits were available. I tried to find cross-section drawings, but no luck there, either. While looking through a new Fine Scale Modeler magazine about ships only, I saw a model in a builder’s gallery. It’s a paper model from Poland. I have never built a paper model, but I have seen some impressive models at contests. This thing is so cool, I just have to try it. I ordered their 1/50 scale model.
Edit: second pic is from the manufacturer’s website. Mine has not arrived yet.

-
 4
4
-
-
Hey cool. I think I would use the ramp from the tandem axle Chevy.
Thank you. -
Expand
Here ya go Lee !
https://public.fotki.com/TooOld/models/misc-/magazine-articles/car-model-dodge-contest/
Wow. Thank you. I didn’t realize until now that the nose of my model is a lot longer than the original.
-
1
-
-
Expand
Great idea Lee ,I'll be following along for this one . I remember drooling over the original when I picked up that issue of Car Model at the corner store .
I have scans of all the Car Model issues if you need more pics , including his article on how to build your own Dodge fever .
I have the five how-to articles from 1969. I would love to see October 1968 with the MPC contest results. I think it’s fascinating to read about where the hobby was a long time ago.
-
Expand
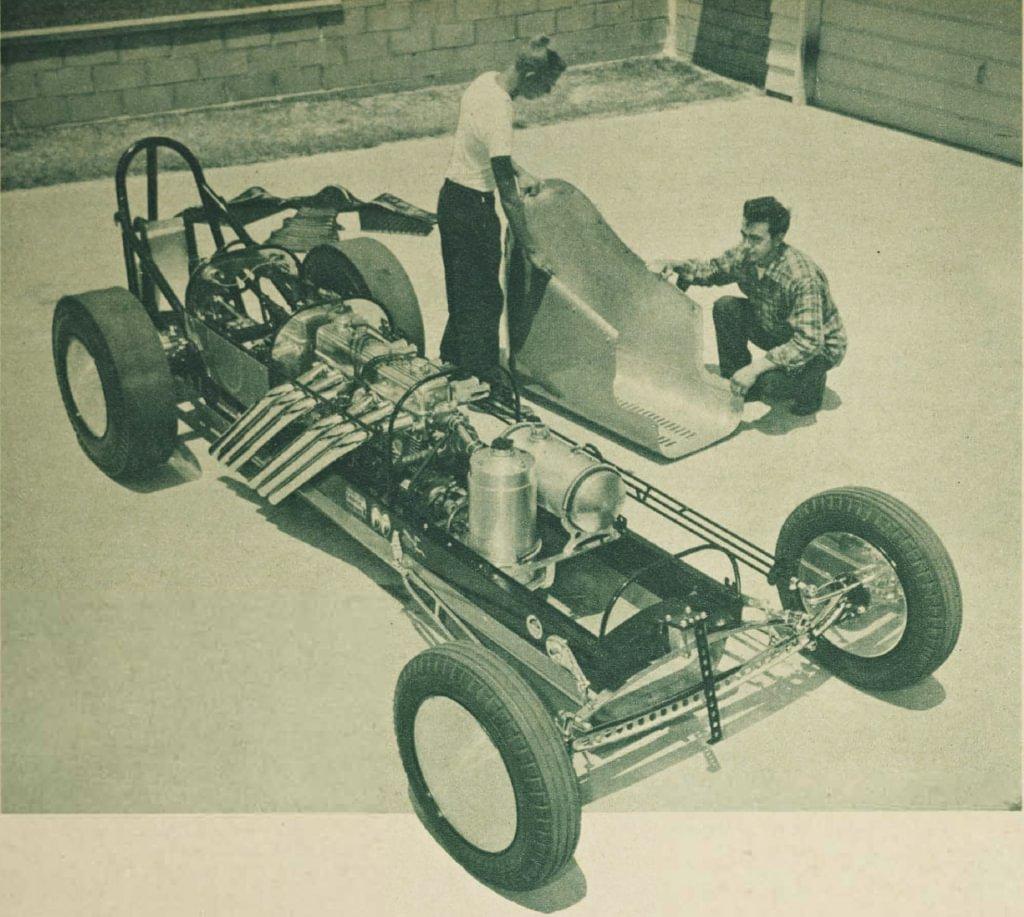
Jim Keeler's Dodge Fever was one of those pivotal articles in Car Model that provided much incentive to young pre-teen model maker.
I think I tried at least four times to make my own version of Jim's Dodge Fever using whatever model car bodies I could scrounge. I used a Dodge Charger body twice, a Chevelle, and a Mustang. The last two wouldn't have been a Dodge Fever of course but I tried to follow the basic concepts of the build and use what I had. Pocket money didn't amount to much in those days and beggars couldn't be choosers.
My attempts resulted in four different builds each ending in various stages of completion but in the end none where completed or even resulted in "rolling chassis" builds.
Never the less, it was fun, educational, and a creative challenge I have never forgotten about. I have just been thinking recently of having another go. I might just do so now that Lee's build has got my creative juices flowing again.
cheers, Graham
The WIP thread is here for two reasons; a way to keep me motivated on one project and see it through, but also to let others have an idea of what to expect if they build something similar. A good example is do not use Dodge Daytona cut measurements on a different car. Even though I caught that, I still cut incorrectly on the roof. I hope you start one of these. You may do some things differently than Jim did in 1969. For the skin of the monocoque chassis, he used aluminum printers plate and punched rivets in from the back side. He then glued that to sheet plastic. I’ll just glue tiny plastic rivets onto sheet plastic.
-
1
-
-
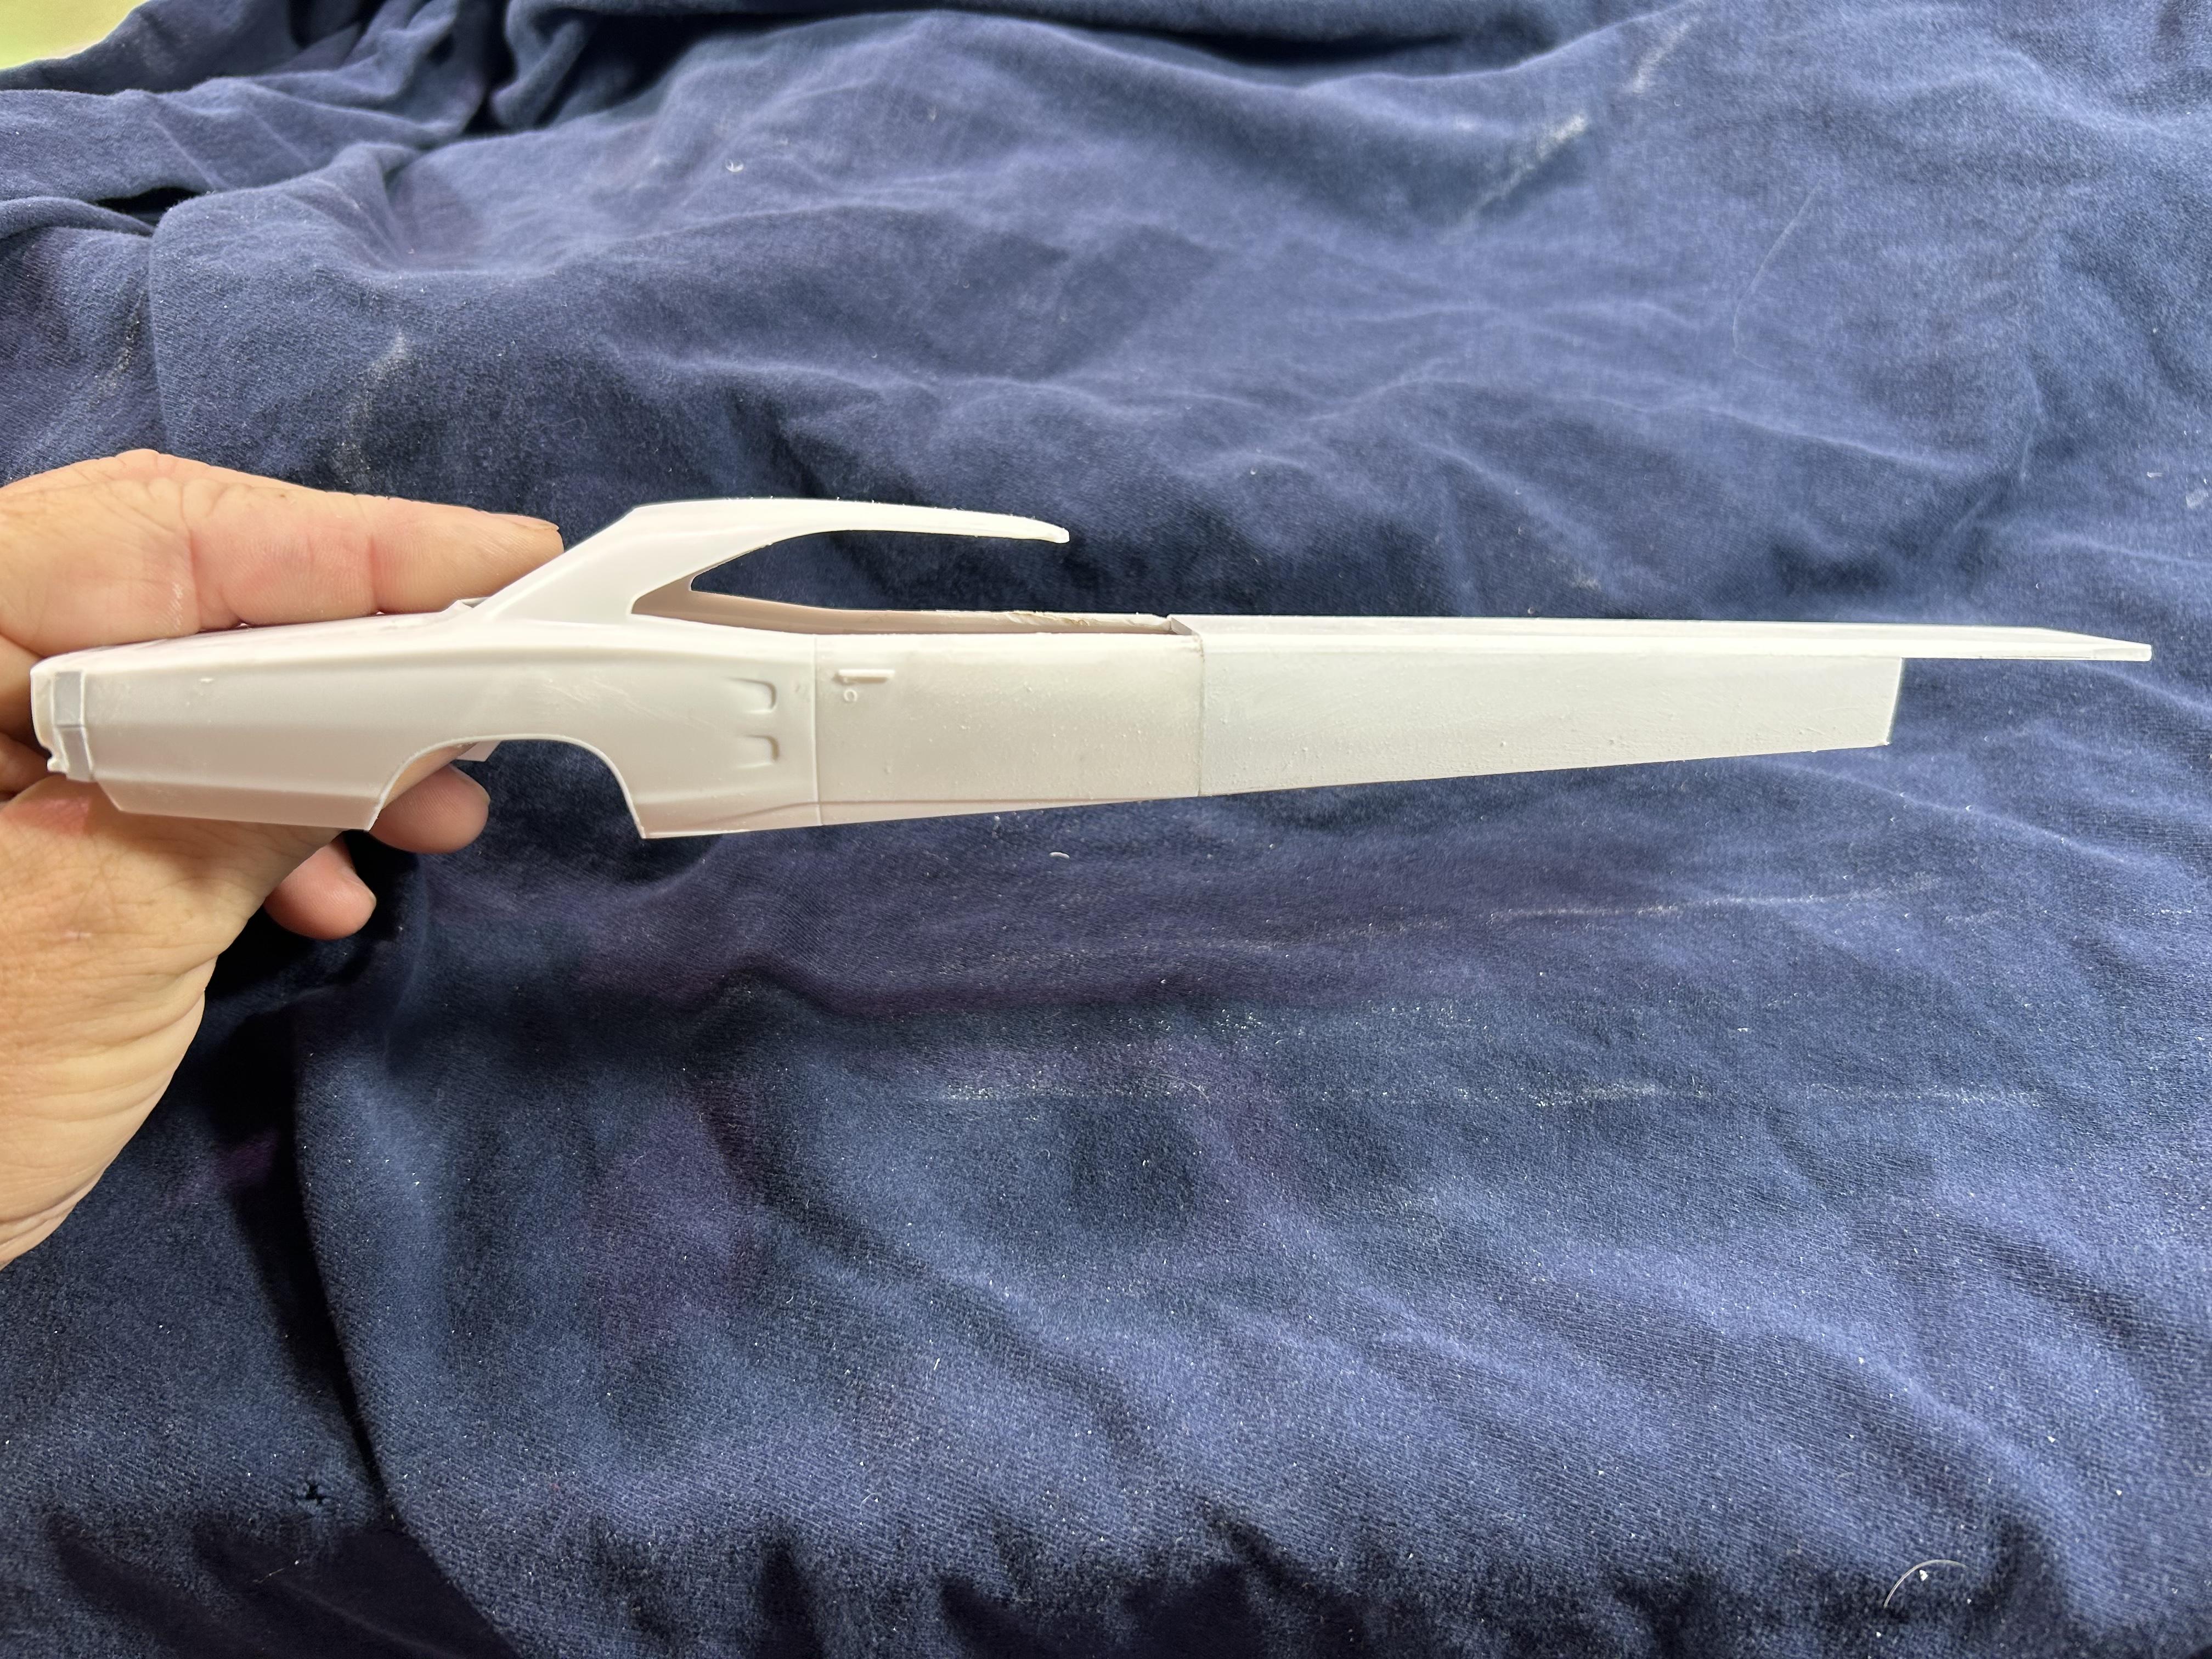
A little bit of work tonight.
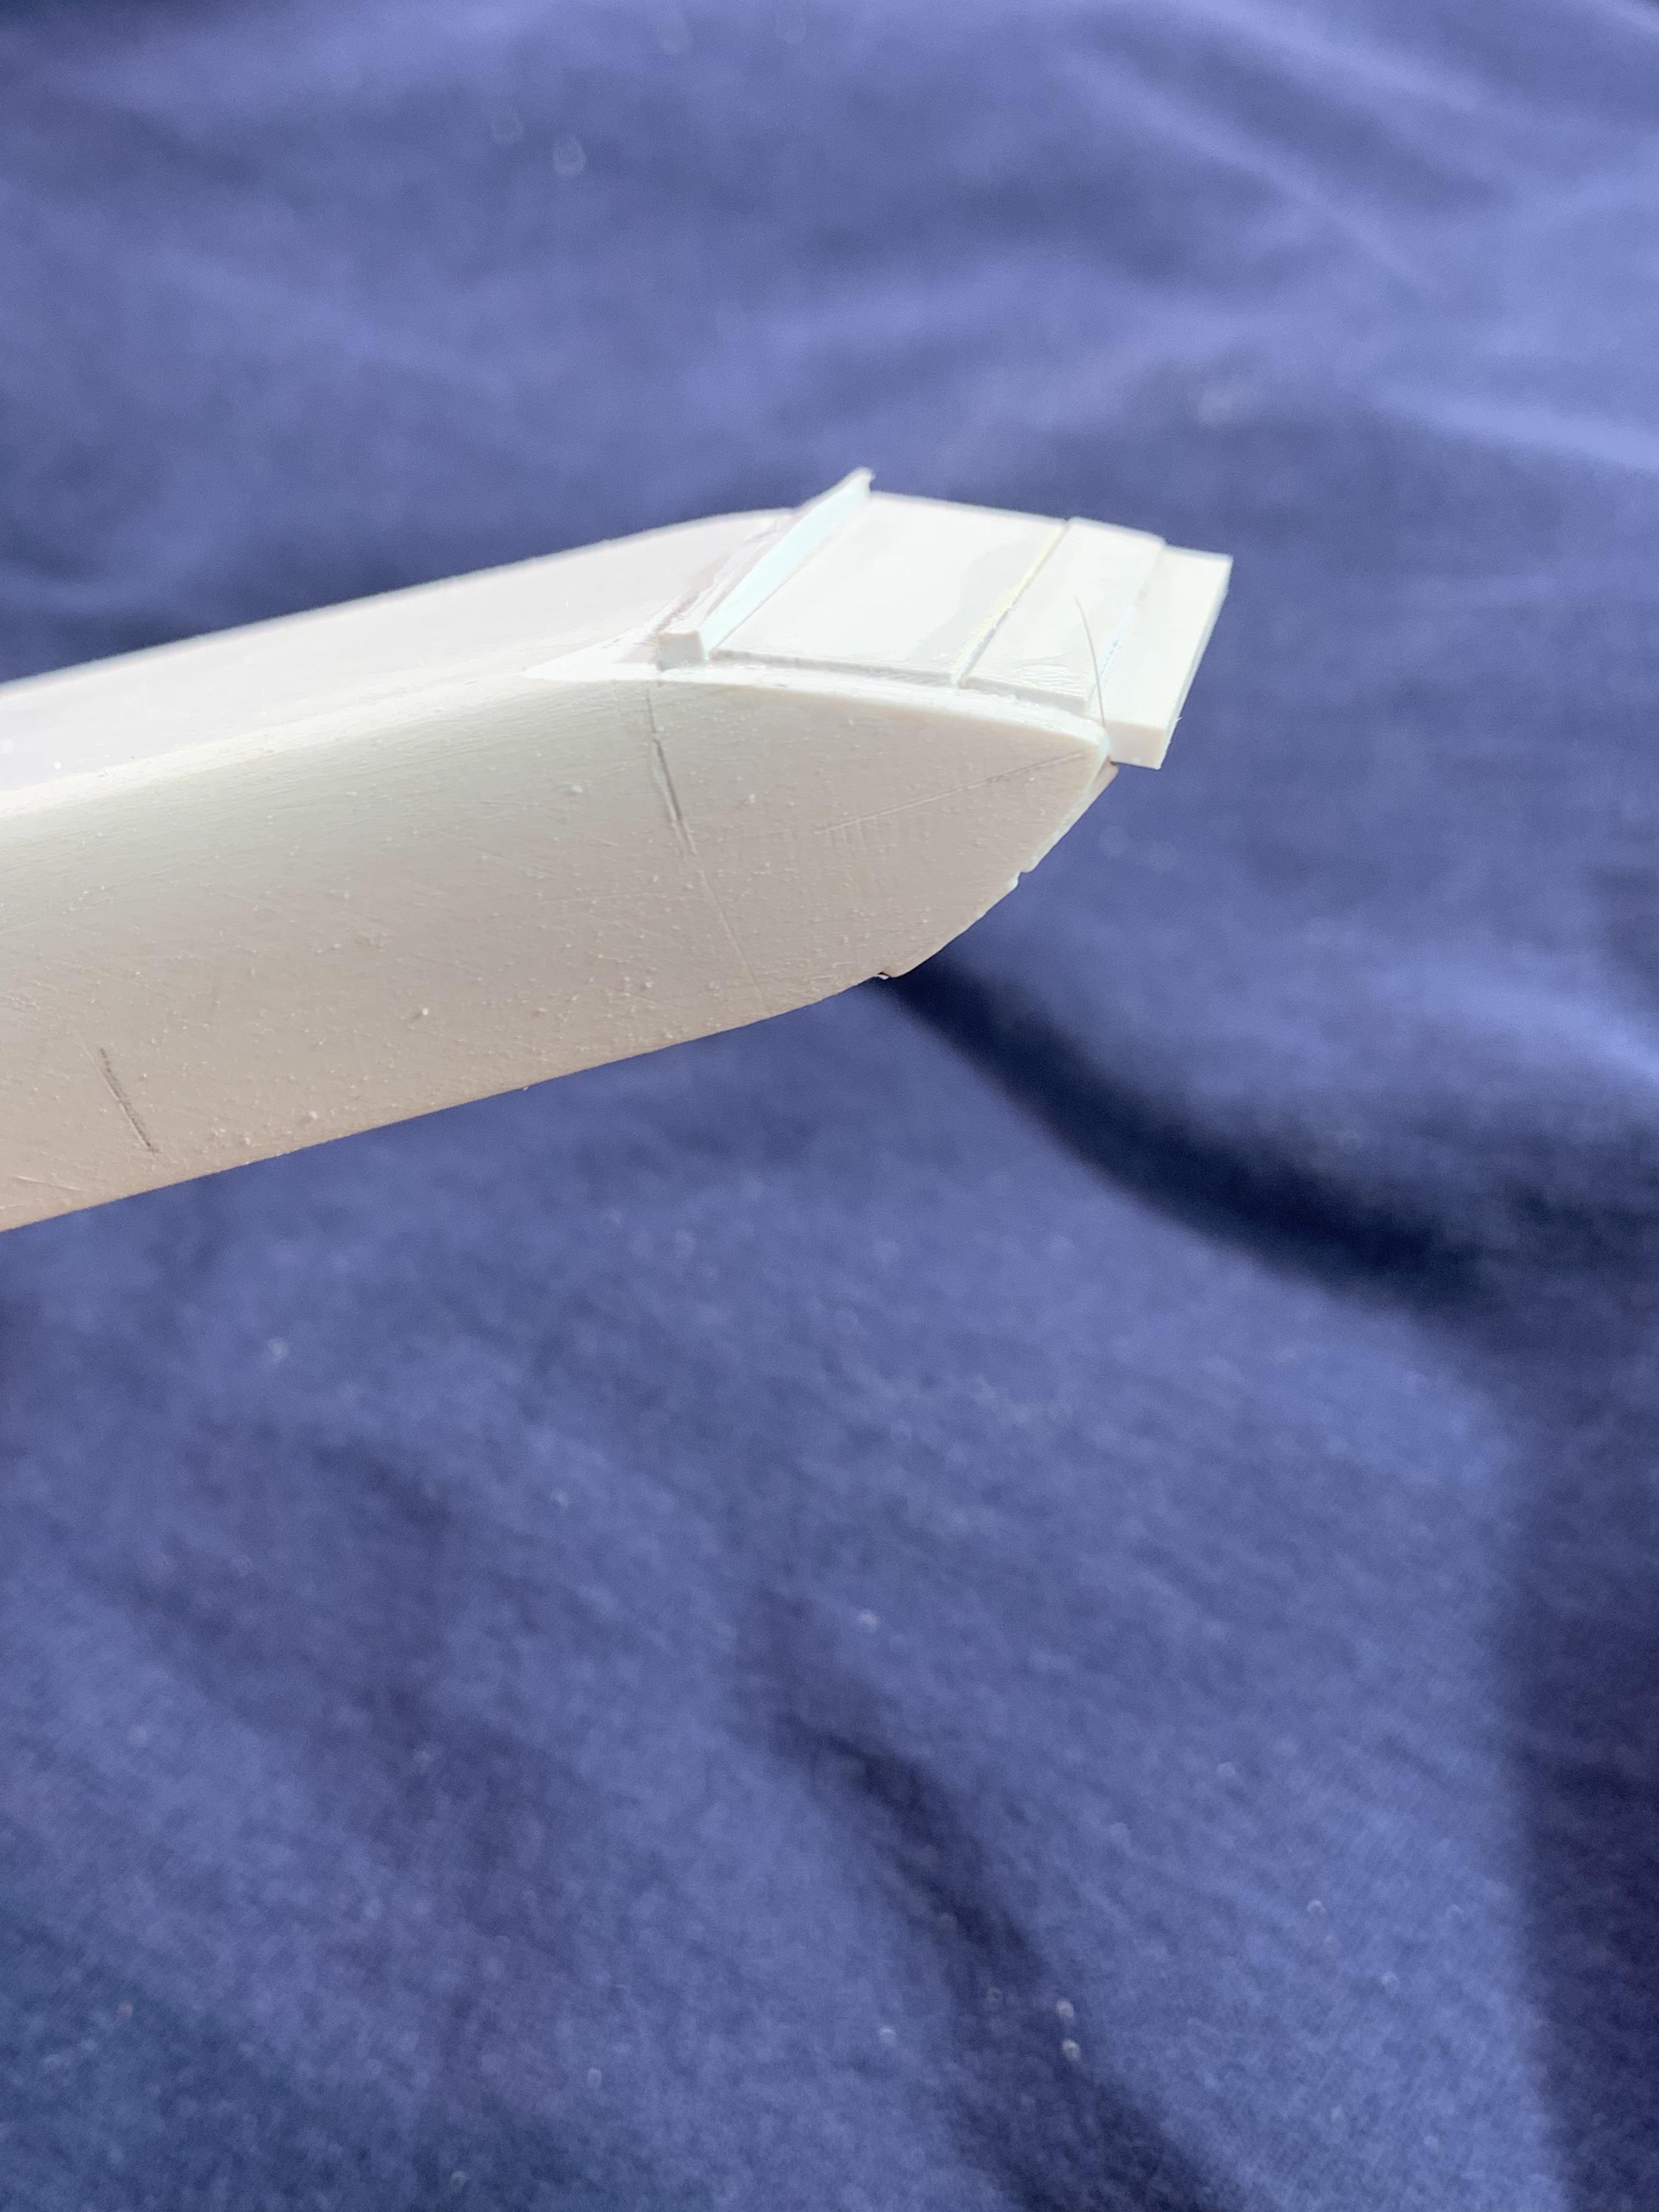
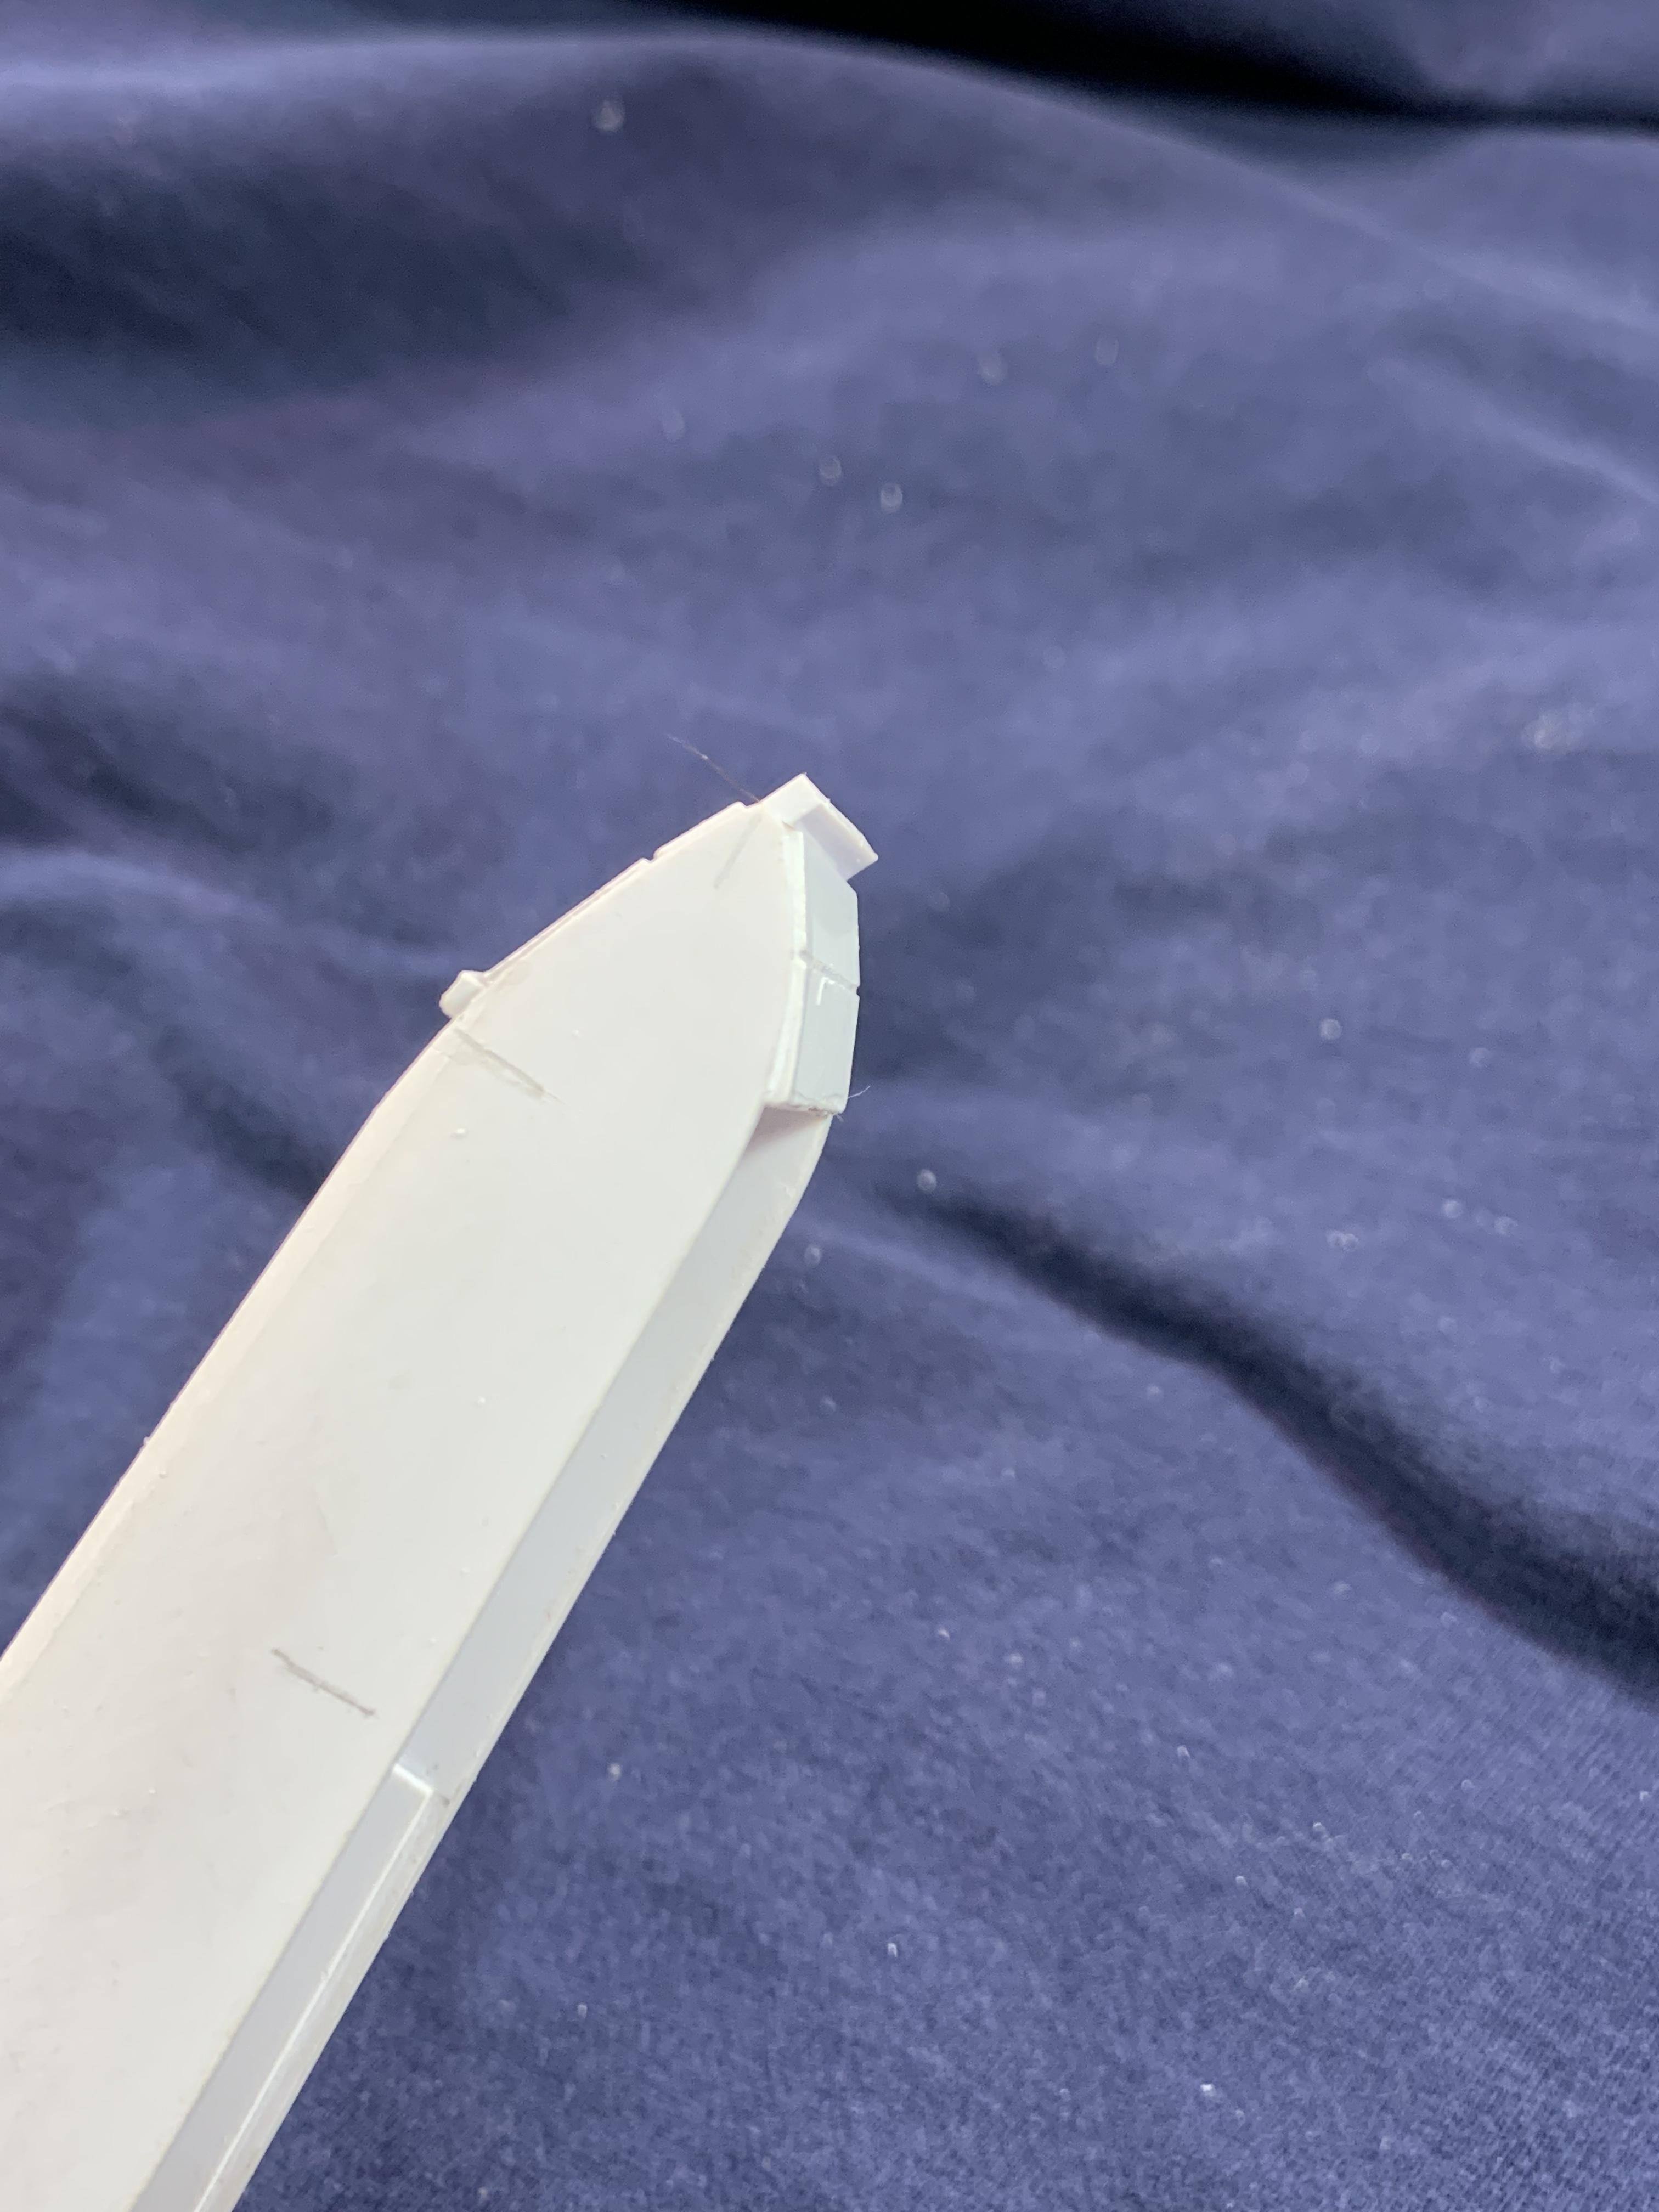
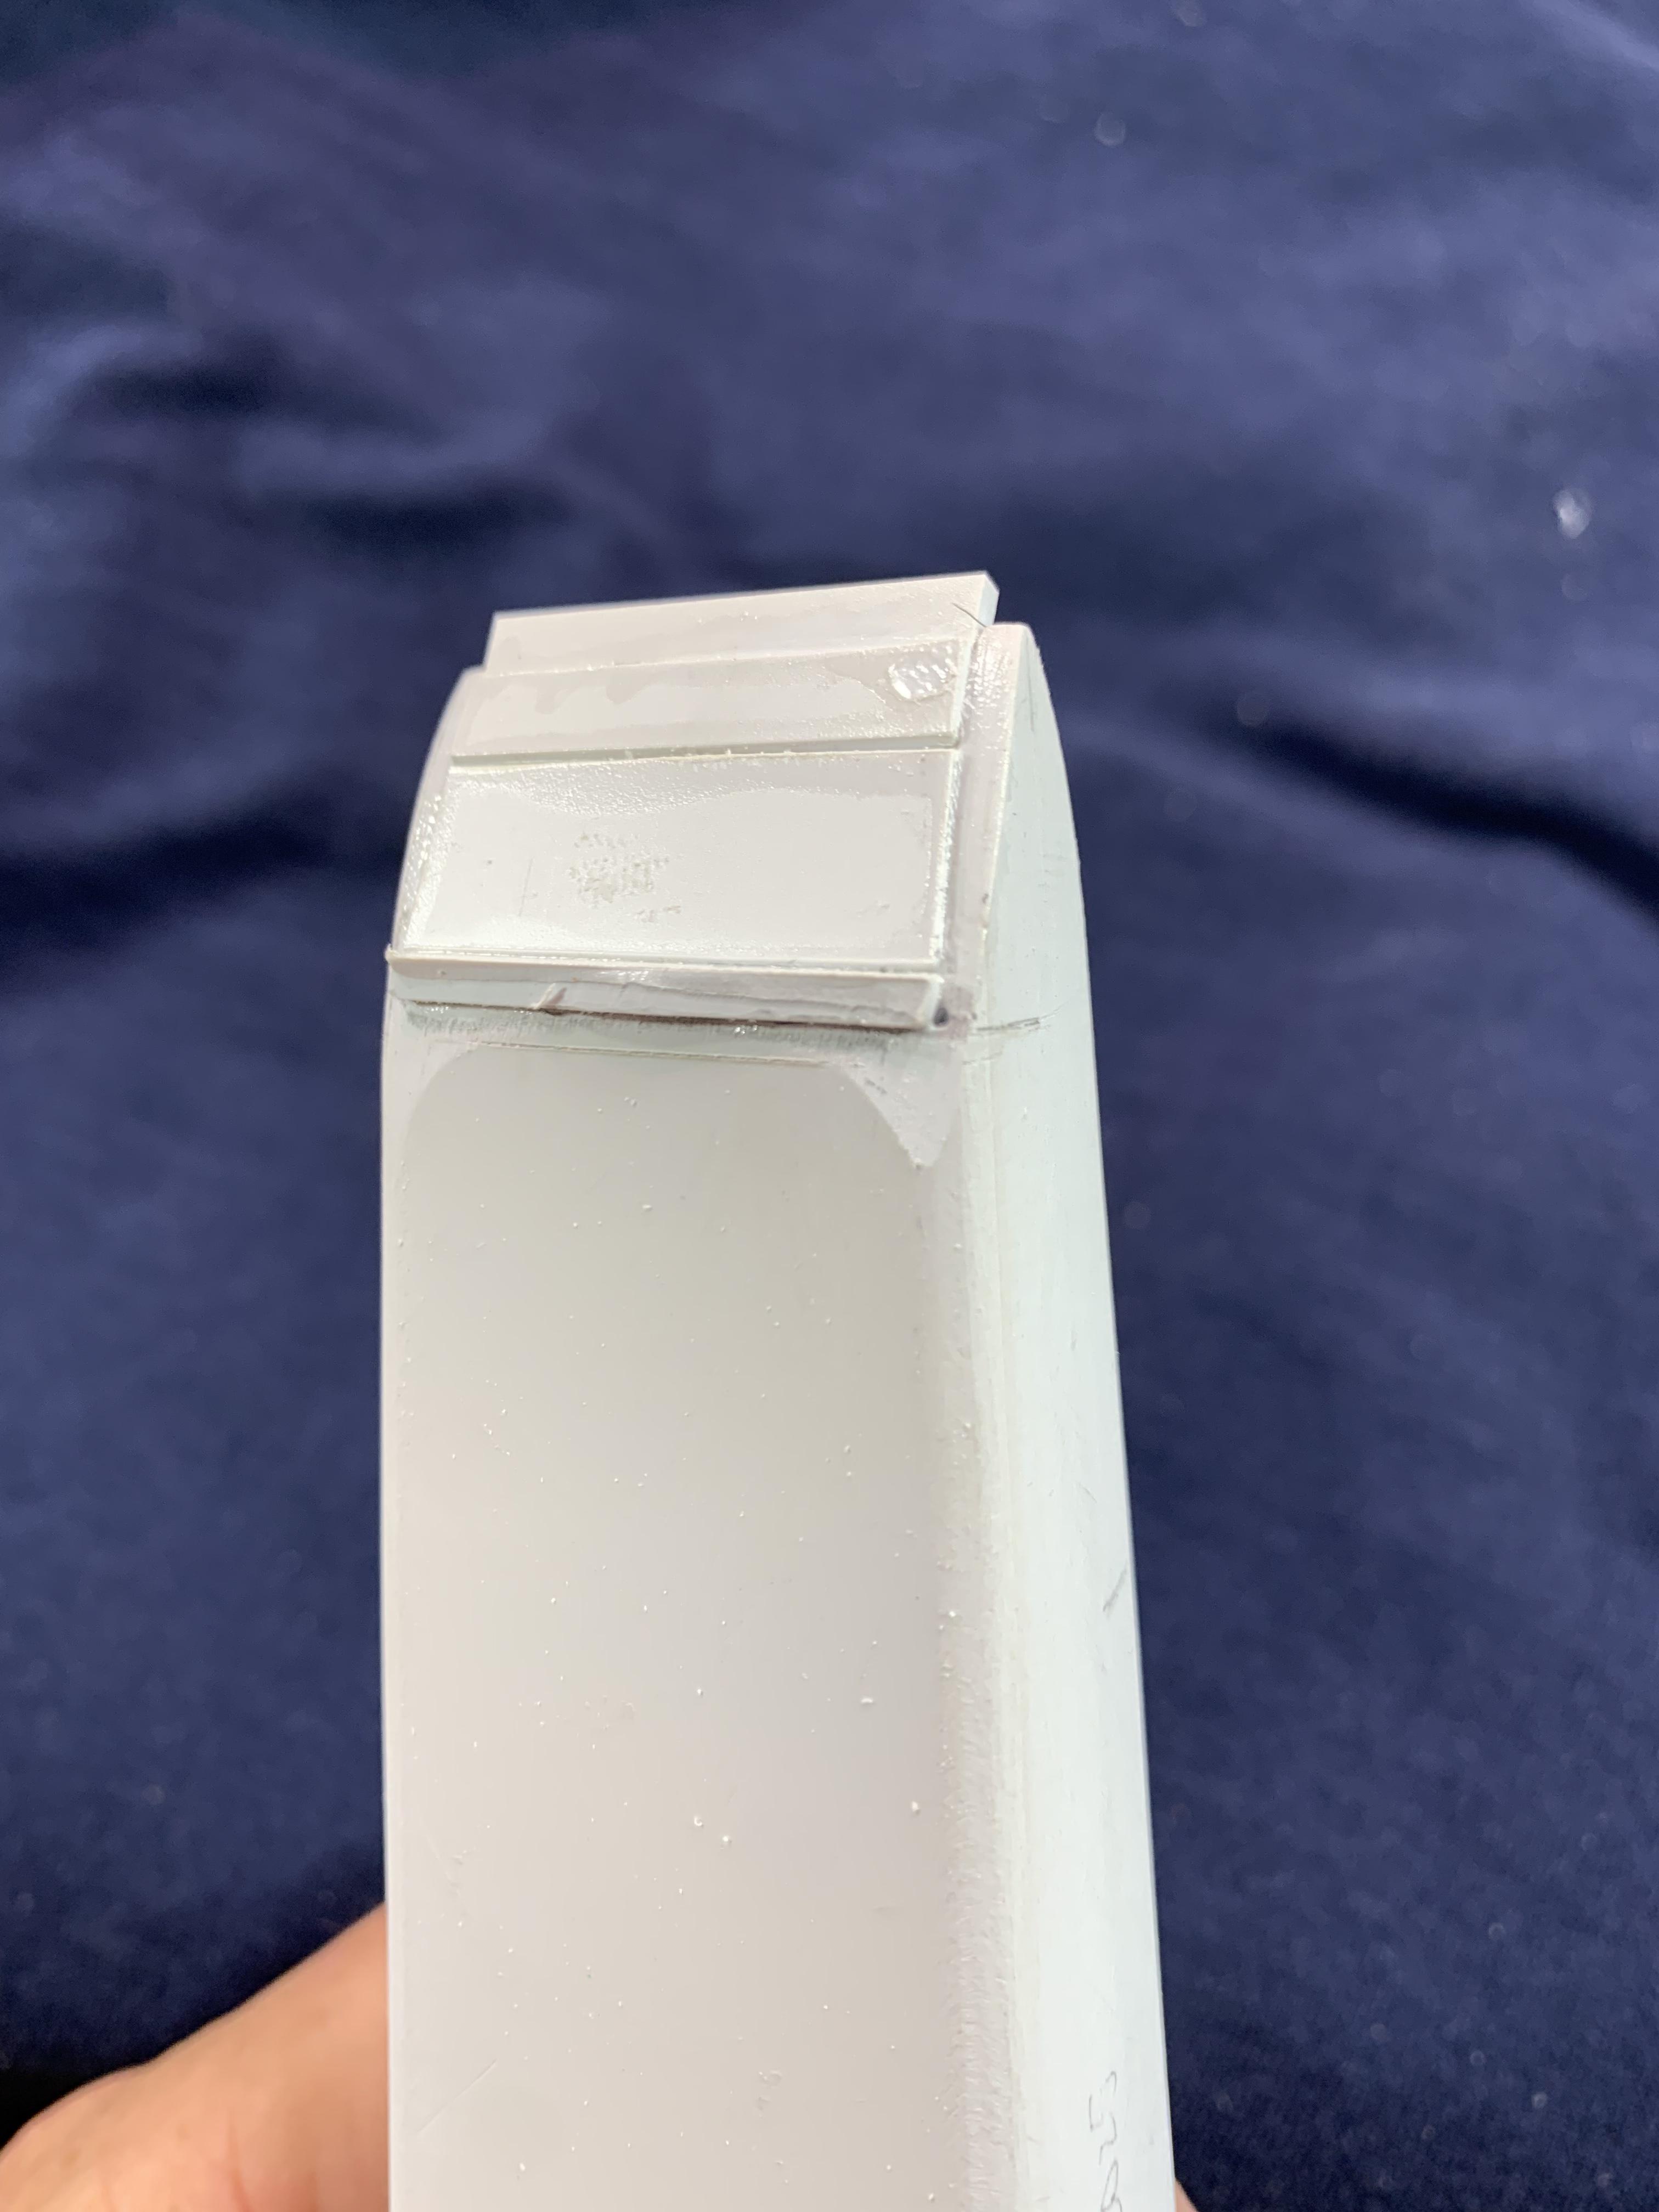
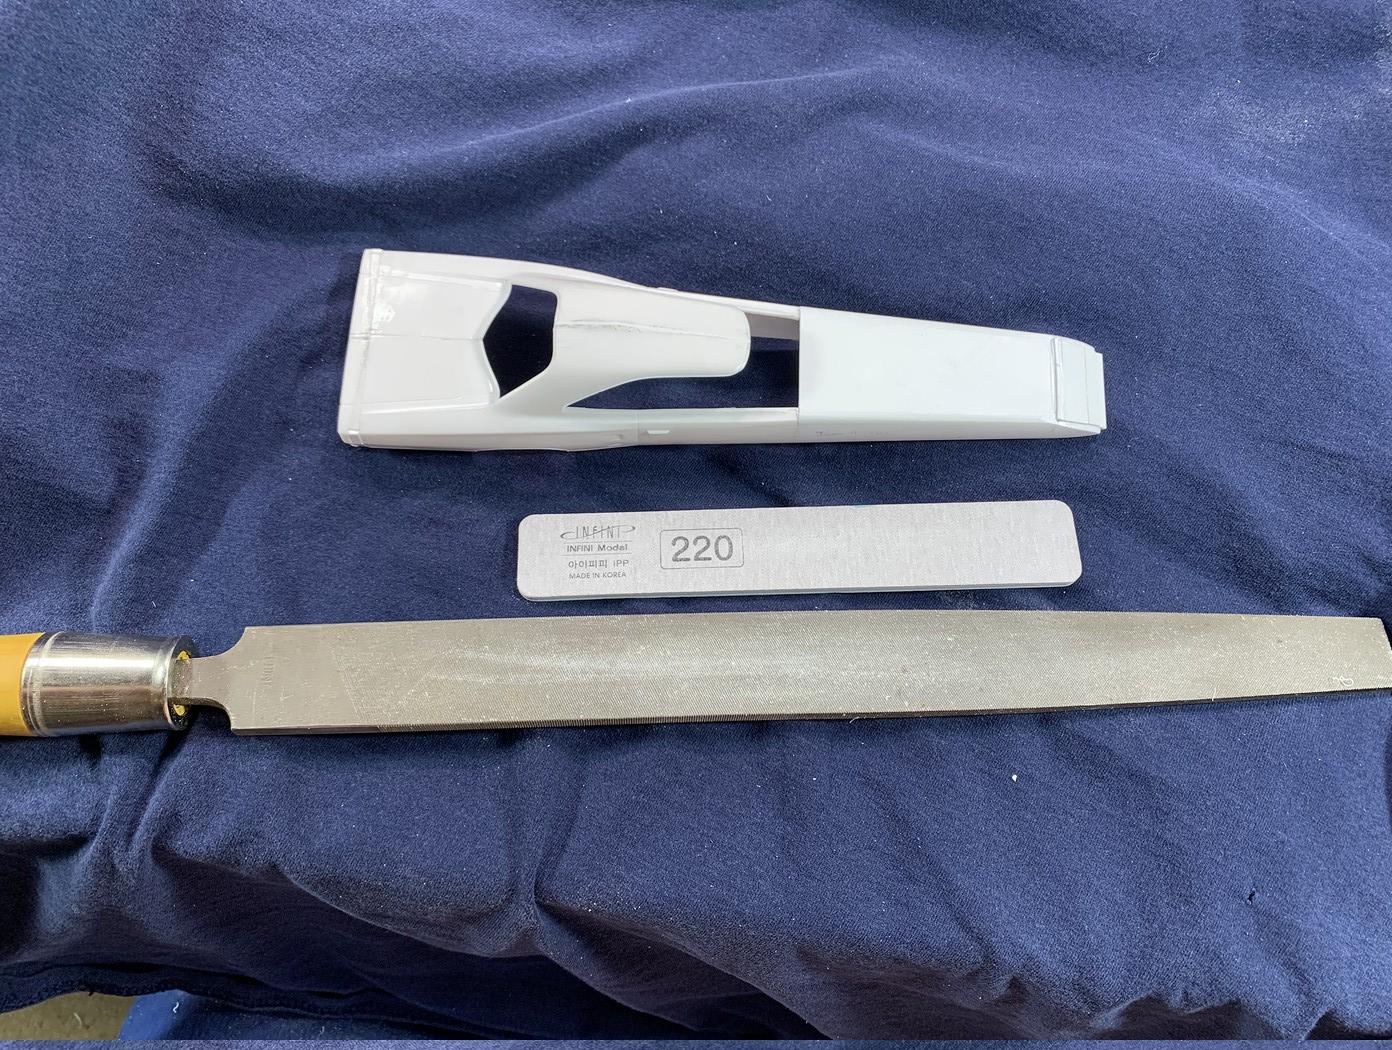
1: I wanted a bit more curve in the transition to the slanted nose. It can be hard to gauge progress on this white plastic, so I scribbled pencil lines on it to make sure the filing was in the right area.2: Close to what I was looking for. Refined it a bit with a 220 grit sanding board .
3, 4, & 5: Tamiya spray can grey primer to get a better look at it. There are some gaps that need to be filled, but that will wait a few days to make sure the liquid cement doesn’t cause sink marks. The side profile reminds me of the Plymouth Superbird. That was not intentional.

-
A ramp truck would be cool for hauling a drag car.
-
1
-
-
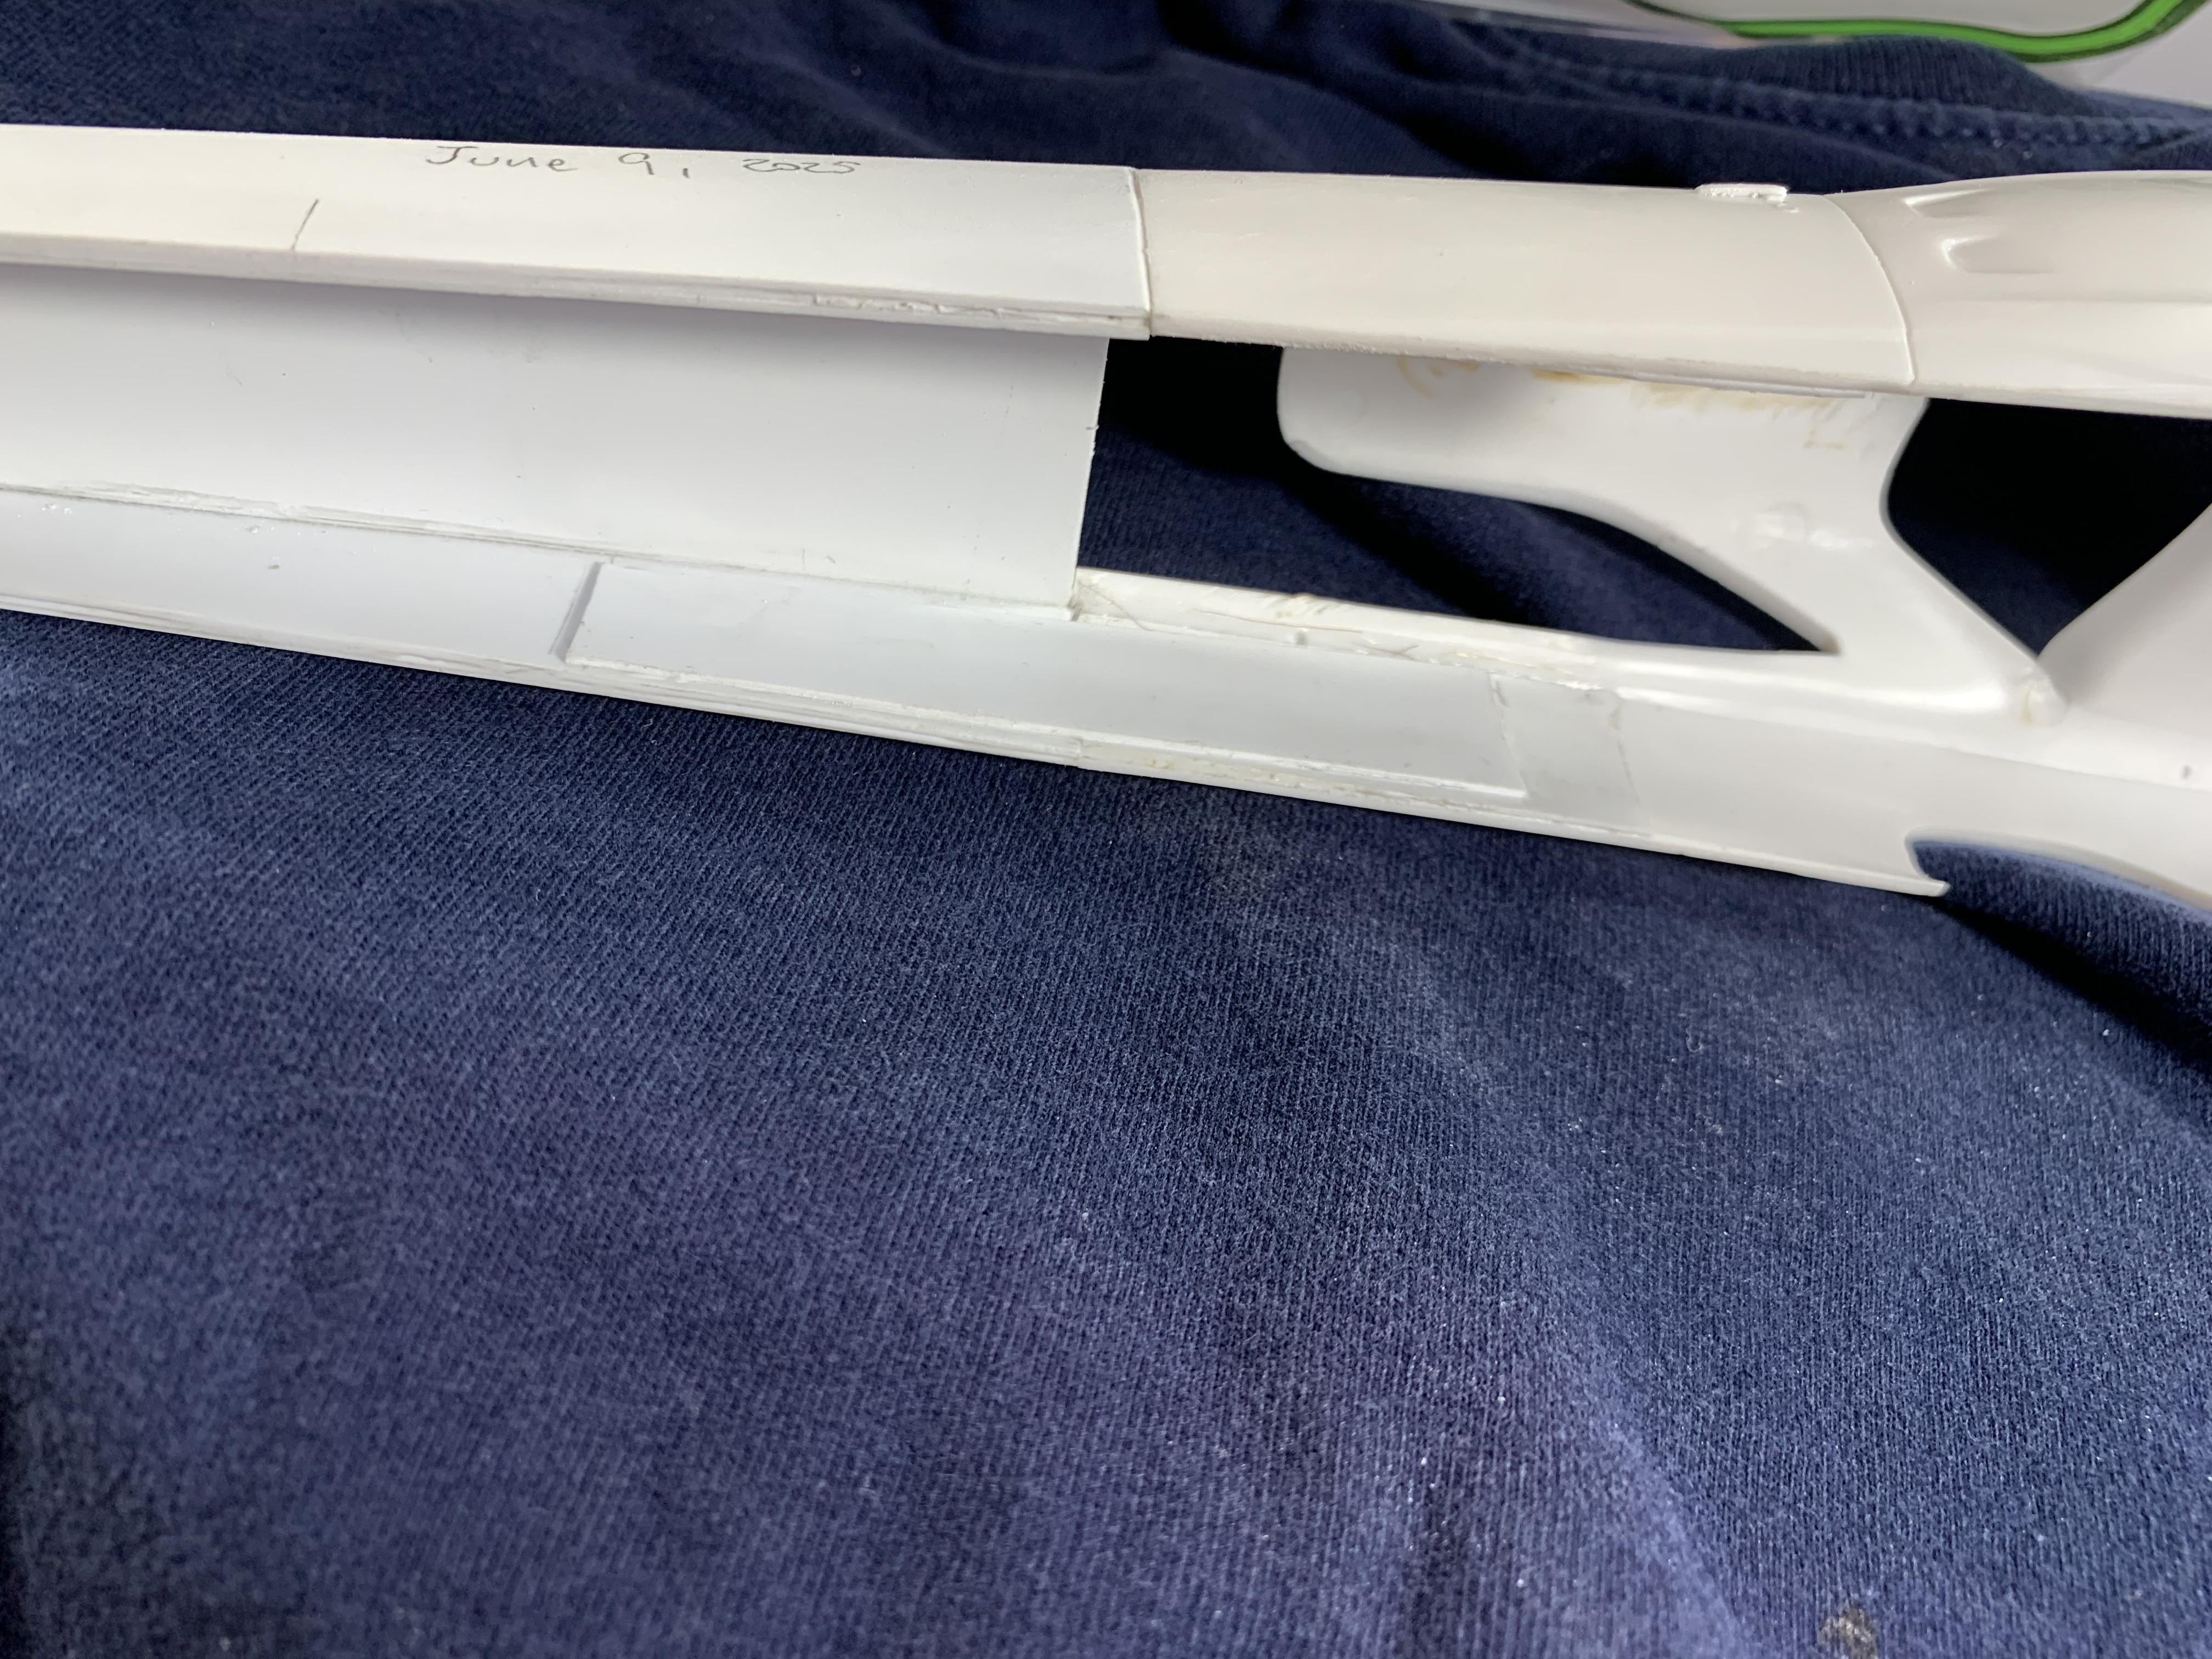
A little progress tonight. I don’t get much bench time on weekdays. Anyway- roughing in the nose. Strips of .080” and Tamiya liquid cement. When it sets up, I’ll use a big file to get it close, then sanding sticks to refine it. Not pretty, but I want to show everything, warts and all.
-
2
-
-
Pic 1: Top side of the roof, after filing down the bubble that happened when I tried using a heated spoon to bend the roof down a bit.
Pic 2: The inside of the body has a strip of .020” Evergreen to make it the same thickness as the extensions. There is another strip to help hold the two together.
Pic 3: The vertical pencil mark (one on each side of the body) is to to make sure both side are the same length. The horizontal mark is the center of the the new nose side profile.
Pic 4: Left side. Starting the shaping of the nose.
-
1
-
-
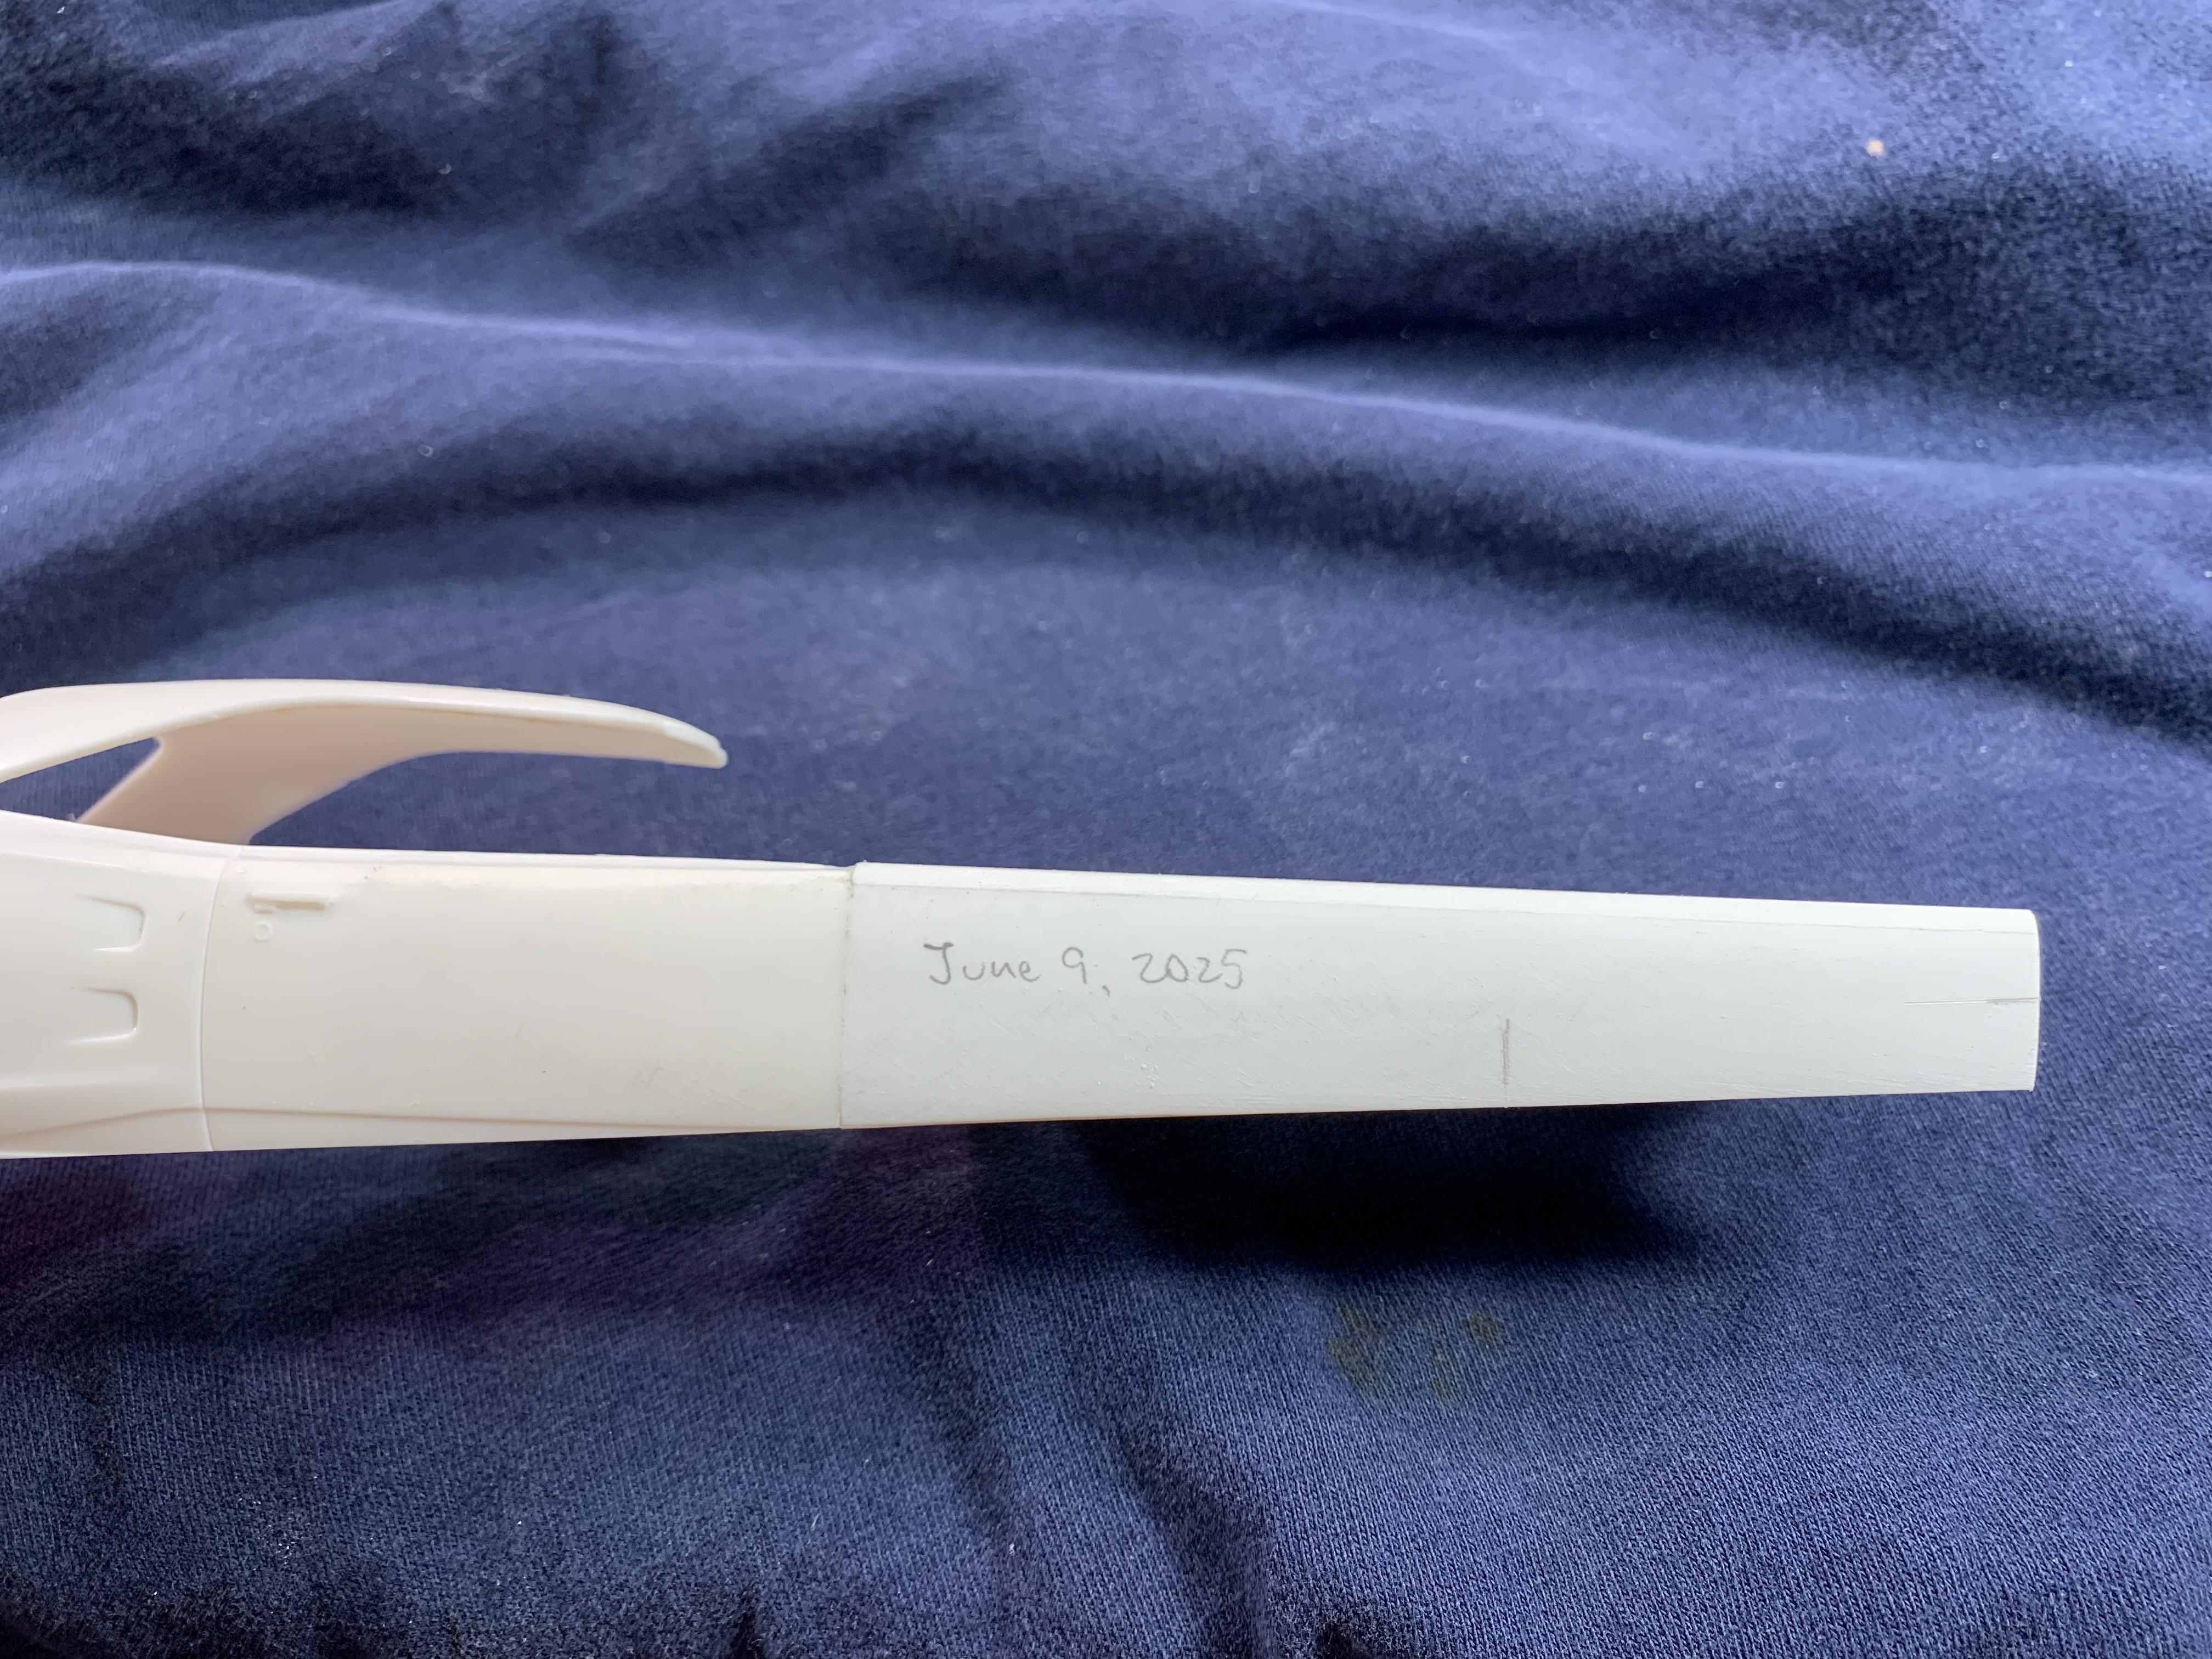
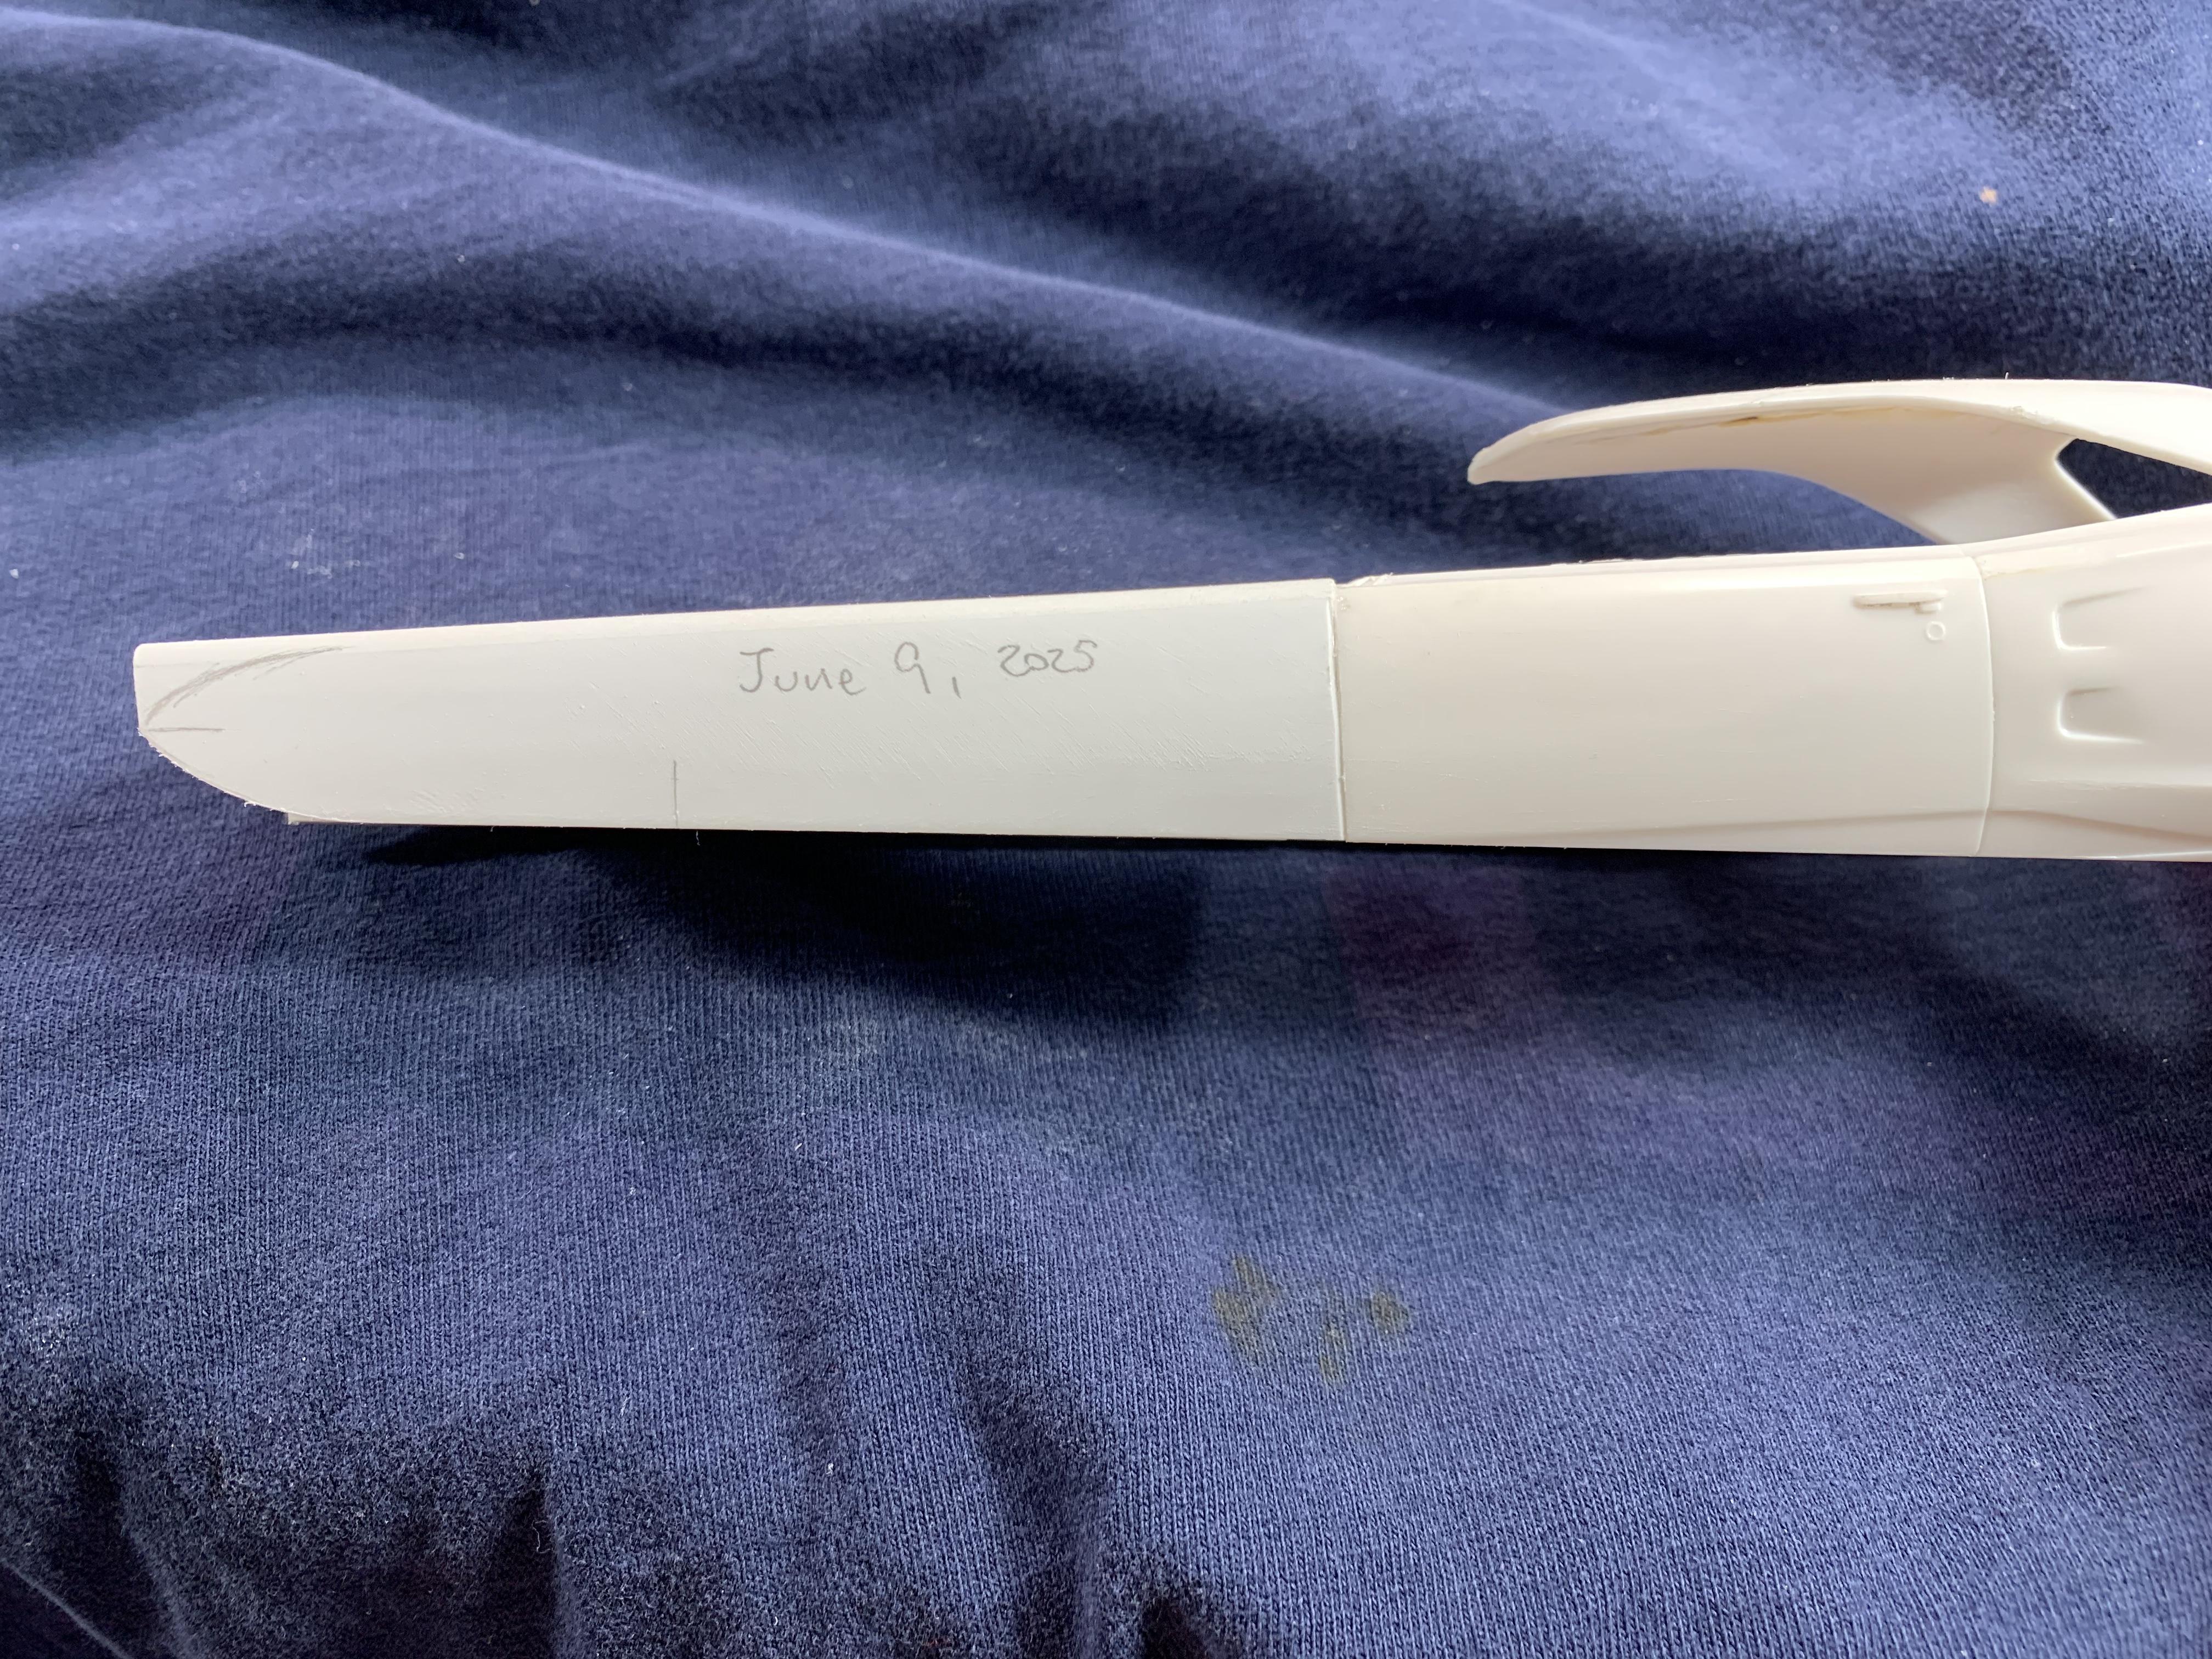
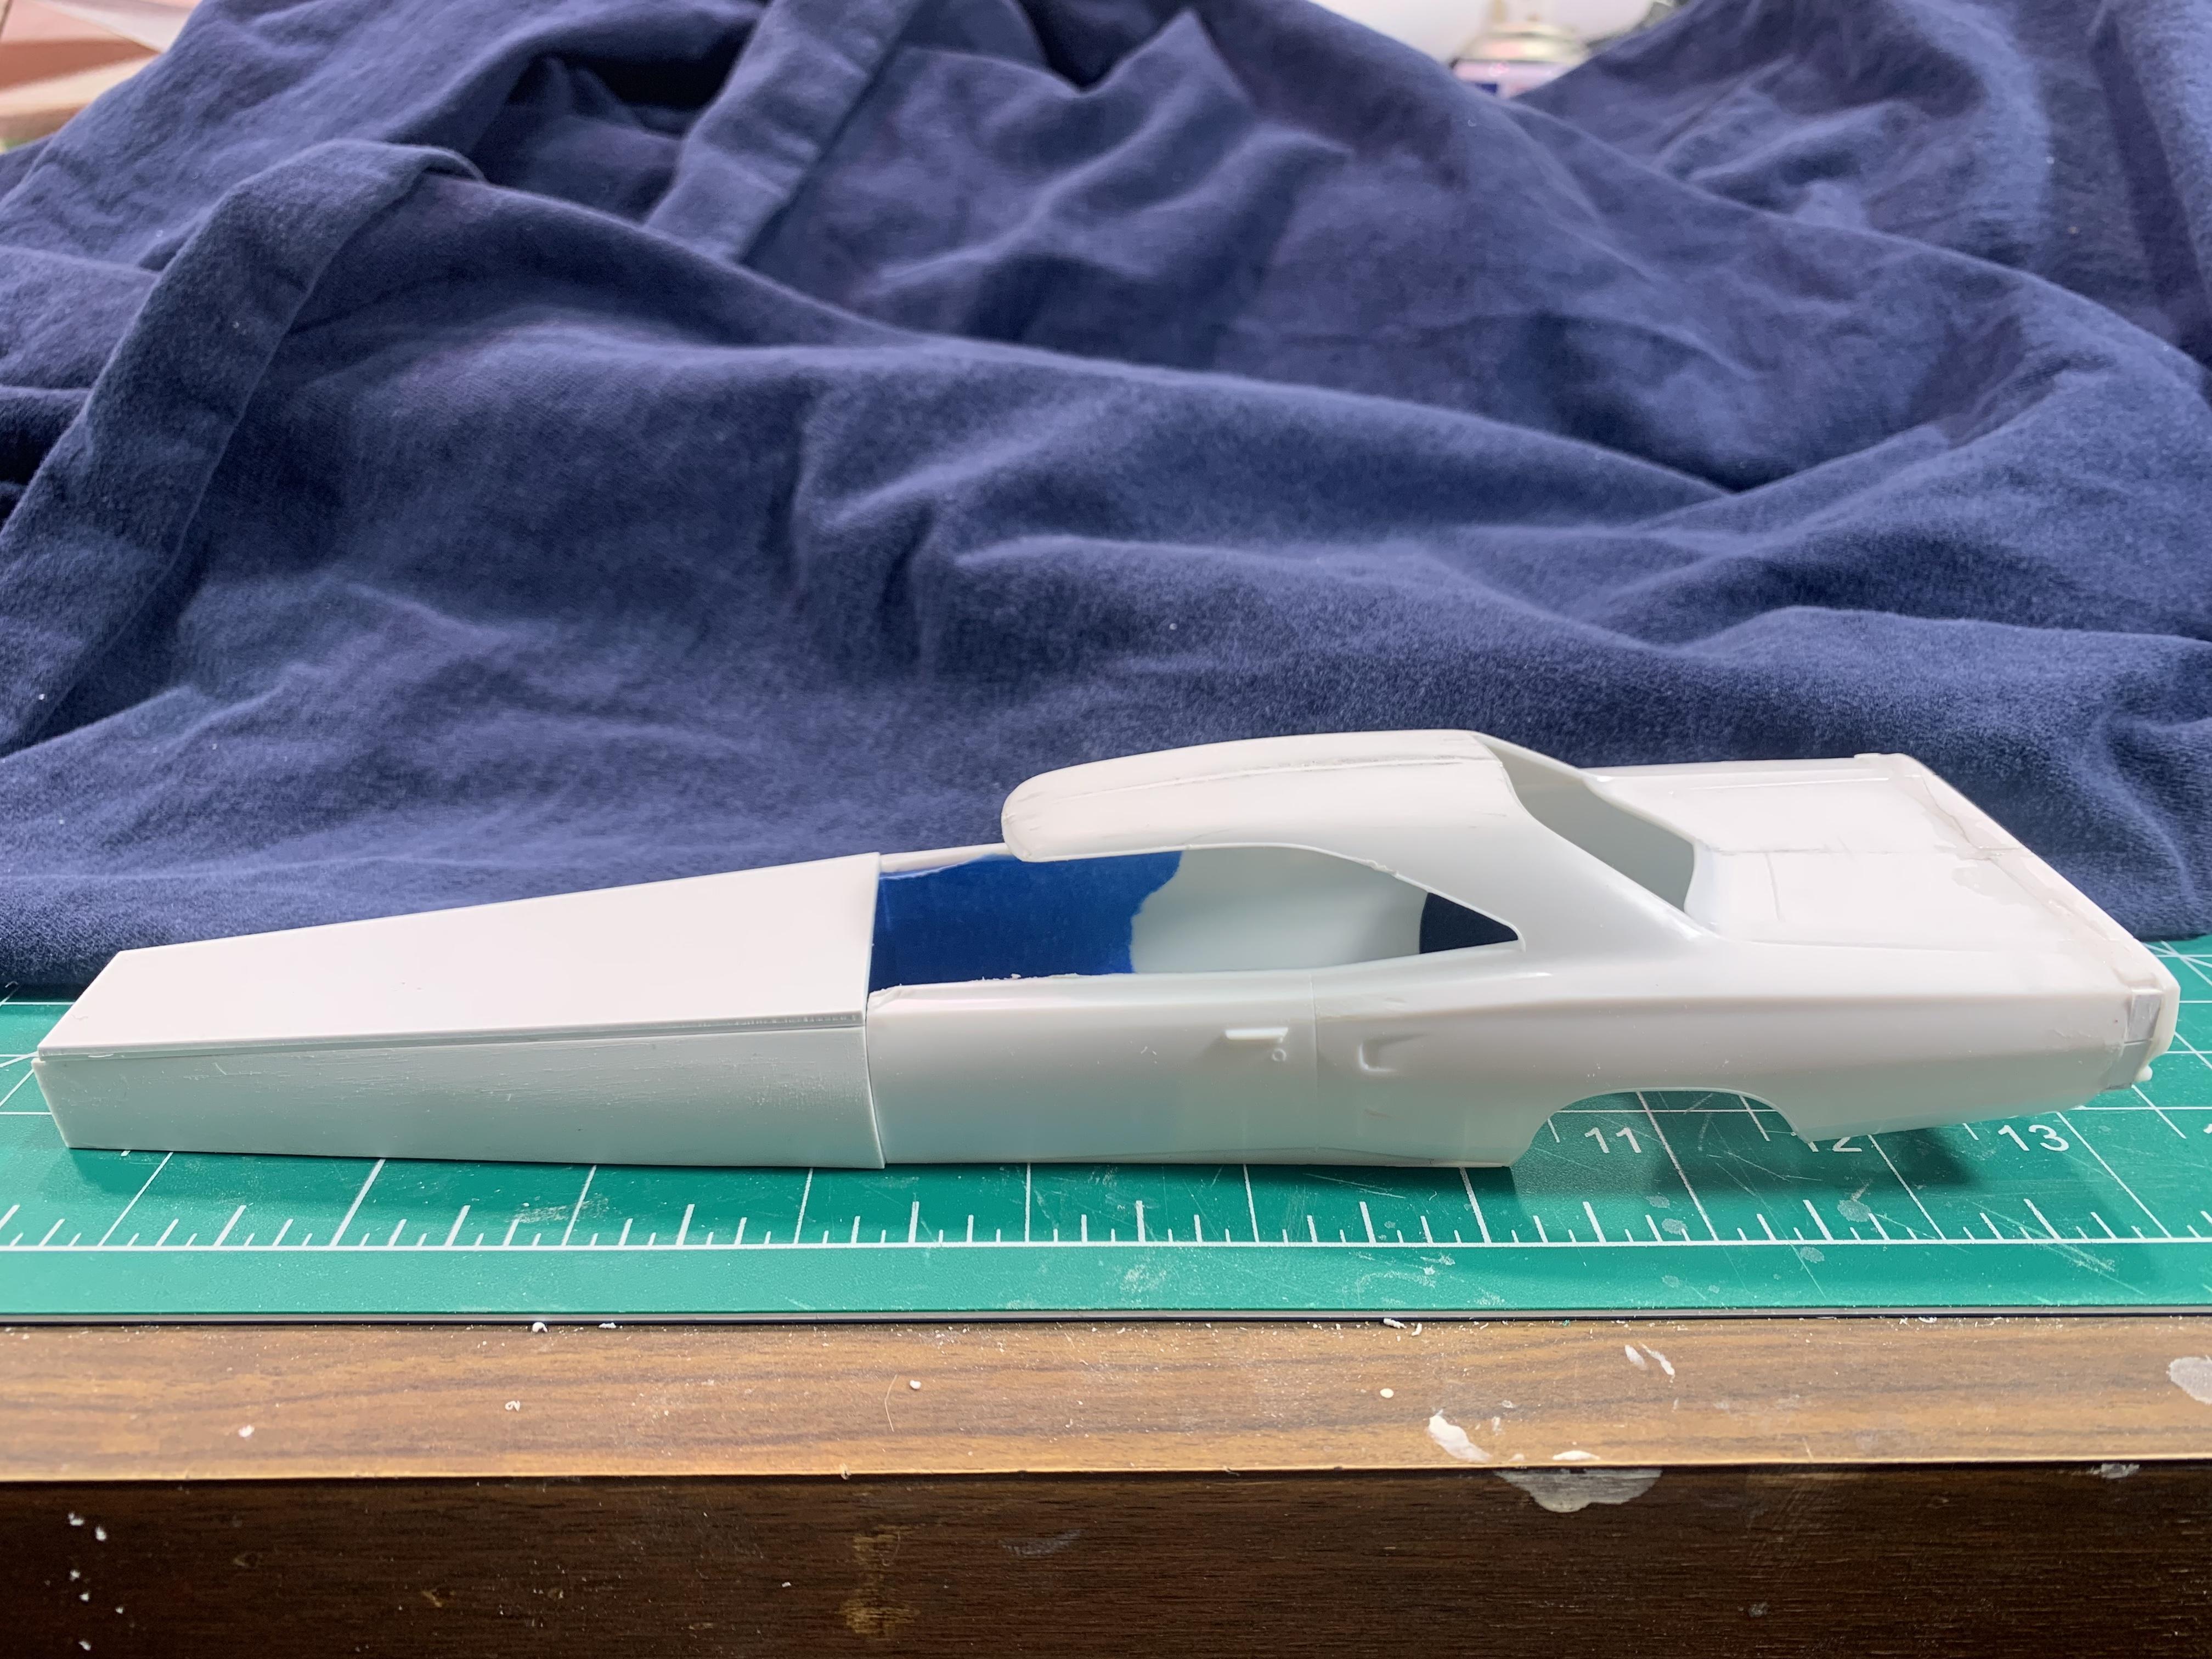
I had not planned on doing a WIP thread because of my history of projects that drag on forever. Jim Keeler’s ‘68 Coronet is so cool, I think it could give me the momentum to see it through. This will not be an exact replica, but a tribute with changes for artistic license, practicality (it could be tough to track down all the original parts from late 1960s kits), and a mistake or two from not noticing small details in the old magazine photos. It’s easy to miss things in 56 year old B&W photos of a white car body. I’m starting with the body. Anyway-
Pic 1: mock up of extended nose. These parts are held in place with blue painter’s tape. The side extensions are three layers of laminated .030” Evergreen styrene. I did that so I could bend them to match the cross section of the body at the cut. The top piece had to be replaced because I got the angles wrong.
Pic 2: Blending the extensions into the door. They transition to slab sides at the front. They are 1/4” longer than Jim Keeler’s measurements from the how-to articles. That was a Charger body, so there is a bit of the artistic license. It has the replacement top piece in .080” Evergreen styrene.
Pic 3: The underside of the roof. I made an error in the roof cut. There was a gap of about .060”, so I filled that with a strip of Evergreen styrene. That led to problems in the next step. Jim used a heated small spoon on the bottom of the roof to angle it down a bit. On my attempt, the Evergreen expanded and “bubbled up”. I had to file it down. My guess is this happened because it is softer than kit plastic. Jim used “Sprue Goo” as body filler. I have never tried it, but his looked better than mine.
-
2
-
-
A GMC inline six with Wayne cross flow head in multiple scales. Such a cool vintage hot rod engine.
-
2
-
-
$75.00 + $9.00 shipping. Buy it Now. No waiting to see if someone else wants it more. Not a bad deal.
-
Expand
Oh yes, that's going to be cool.

Thanks. I hesitated posting these, because I take so long to finish anything. I have a model bench set up again after not having one for several years. Hopefully that can get some momentum going for this project.
-
Expand
Ohhhhh, that looks like a wild machine in the making. Will you be doing a WIP?
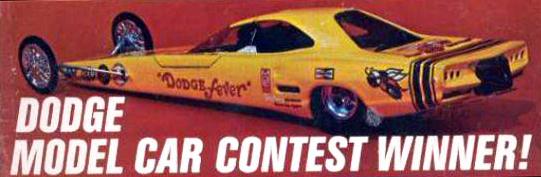
Thank you. It’s my version of “Dodge Fever”, built by Jim Keeler in 1968.
I will start a WIP thread. After Jim won a National contest with it, he published a 5 part how-to article on building one, but using a 1969 Dodge Daytona body. I mail ordered those magazines. If anyone else wants to do the same, note that the measurements for cutting will not be the same for the 1968 Coronet. Also, the b&w photos of modifying a white body show very little contrast. It’s easy to miss details. That’s why the back end of mine is straight rather than a shallow angle. I’m leaving it this way. It’s my interpretation, not an exact copy. My reasoning is that a real fiberglass drag car body would not start out as an accurate Coronet, then get cut up.
-
1
-
-
I just got an e-mail from Curt. I will be ordering a set from him. I’ll have figure what size to get. I haven’t had a model bench in several years. Now that it’s set up again, I decided to jump in to the deep end.
-
6
-
-
I sent an e-mail to Curt Raitz but haven’t heard back.
-
In 1/24 or 1/25.
Thanks. Lee
-
Expand
The math speaks for itself, but in reality it depends on whether the models are truly true to scale…
It’s been debated on numerous occations, but some scale models have rather exaggerated proportions.
This is what got me to ask. I saw a post on Facebook about a Revell 1/25 Japanese import car and a Tamiya 1/24 model of the same car. (I don’t remember what car it was) There were pics of both kits side by side and the difference looked like more than 4%. I wanted to go back and say one or both might not be accurate. I couldn’t find that post again.
-
Is that what you needed?
-
-
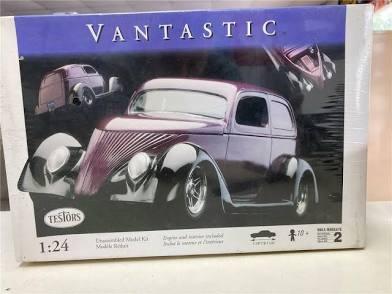
The Testors “Vantastic” street rod has some really cool seats. They look like custom upholstery for a street rod/show car.
-
1
-
-
I think it’s roughly 4%. Am I doing the math right?
Thanks, Lee
-
No association with the seller.
https://www.ebay.com/itm/144649865619
it might not be too difficult to scratch build, if this isn’t exactly what you’re looking for.
-
The (fairly) new MPC Dodge Coronet has a hitch and towing mirrors, too. I have one of them and no use for those parts. I can send them but it will likely be next Saturday, due to my work schedule.
-
1
-


My tribute to the Jim Keeler “Dodge Fever” 1968 Coronet
in WIP: Drag Racing Models
Posted · Edited by LDO
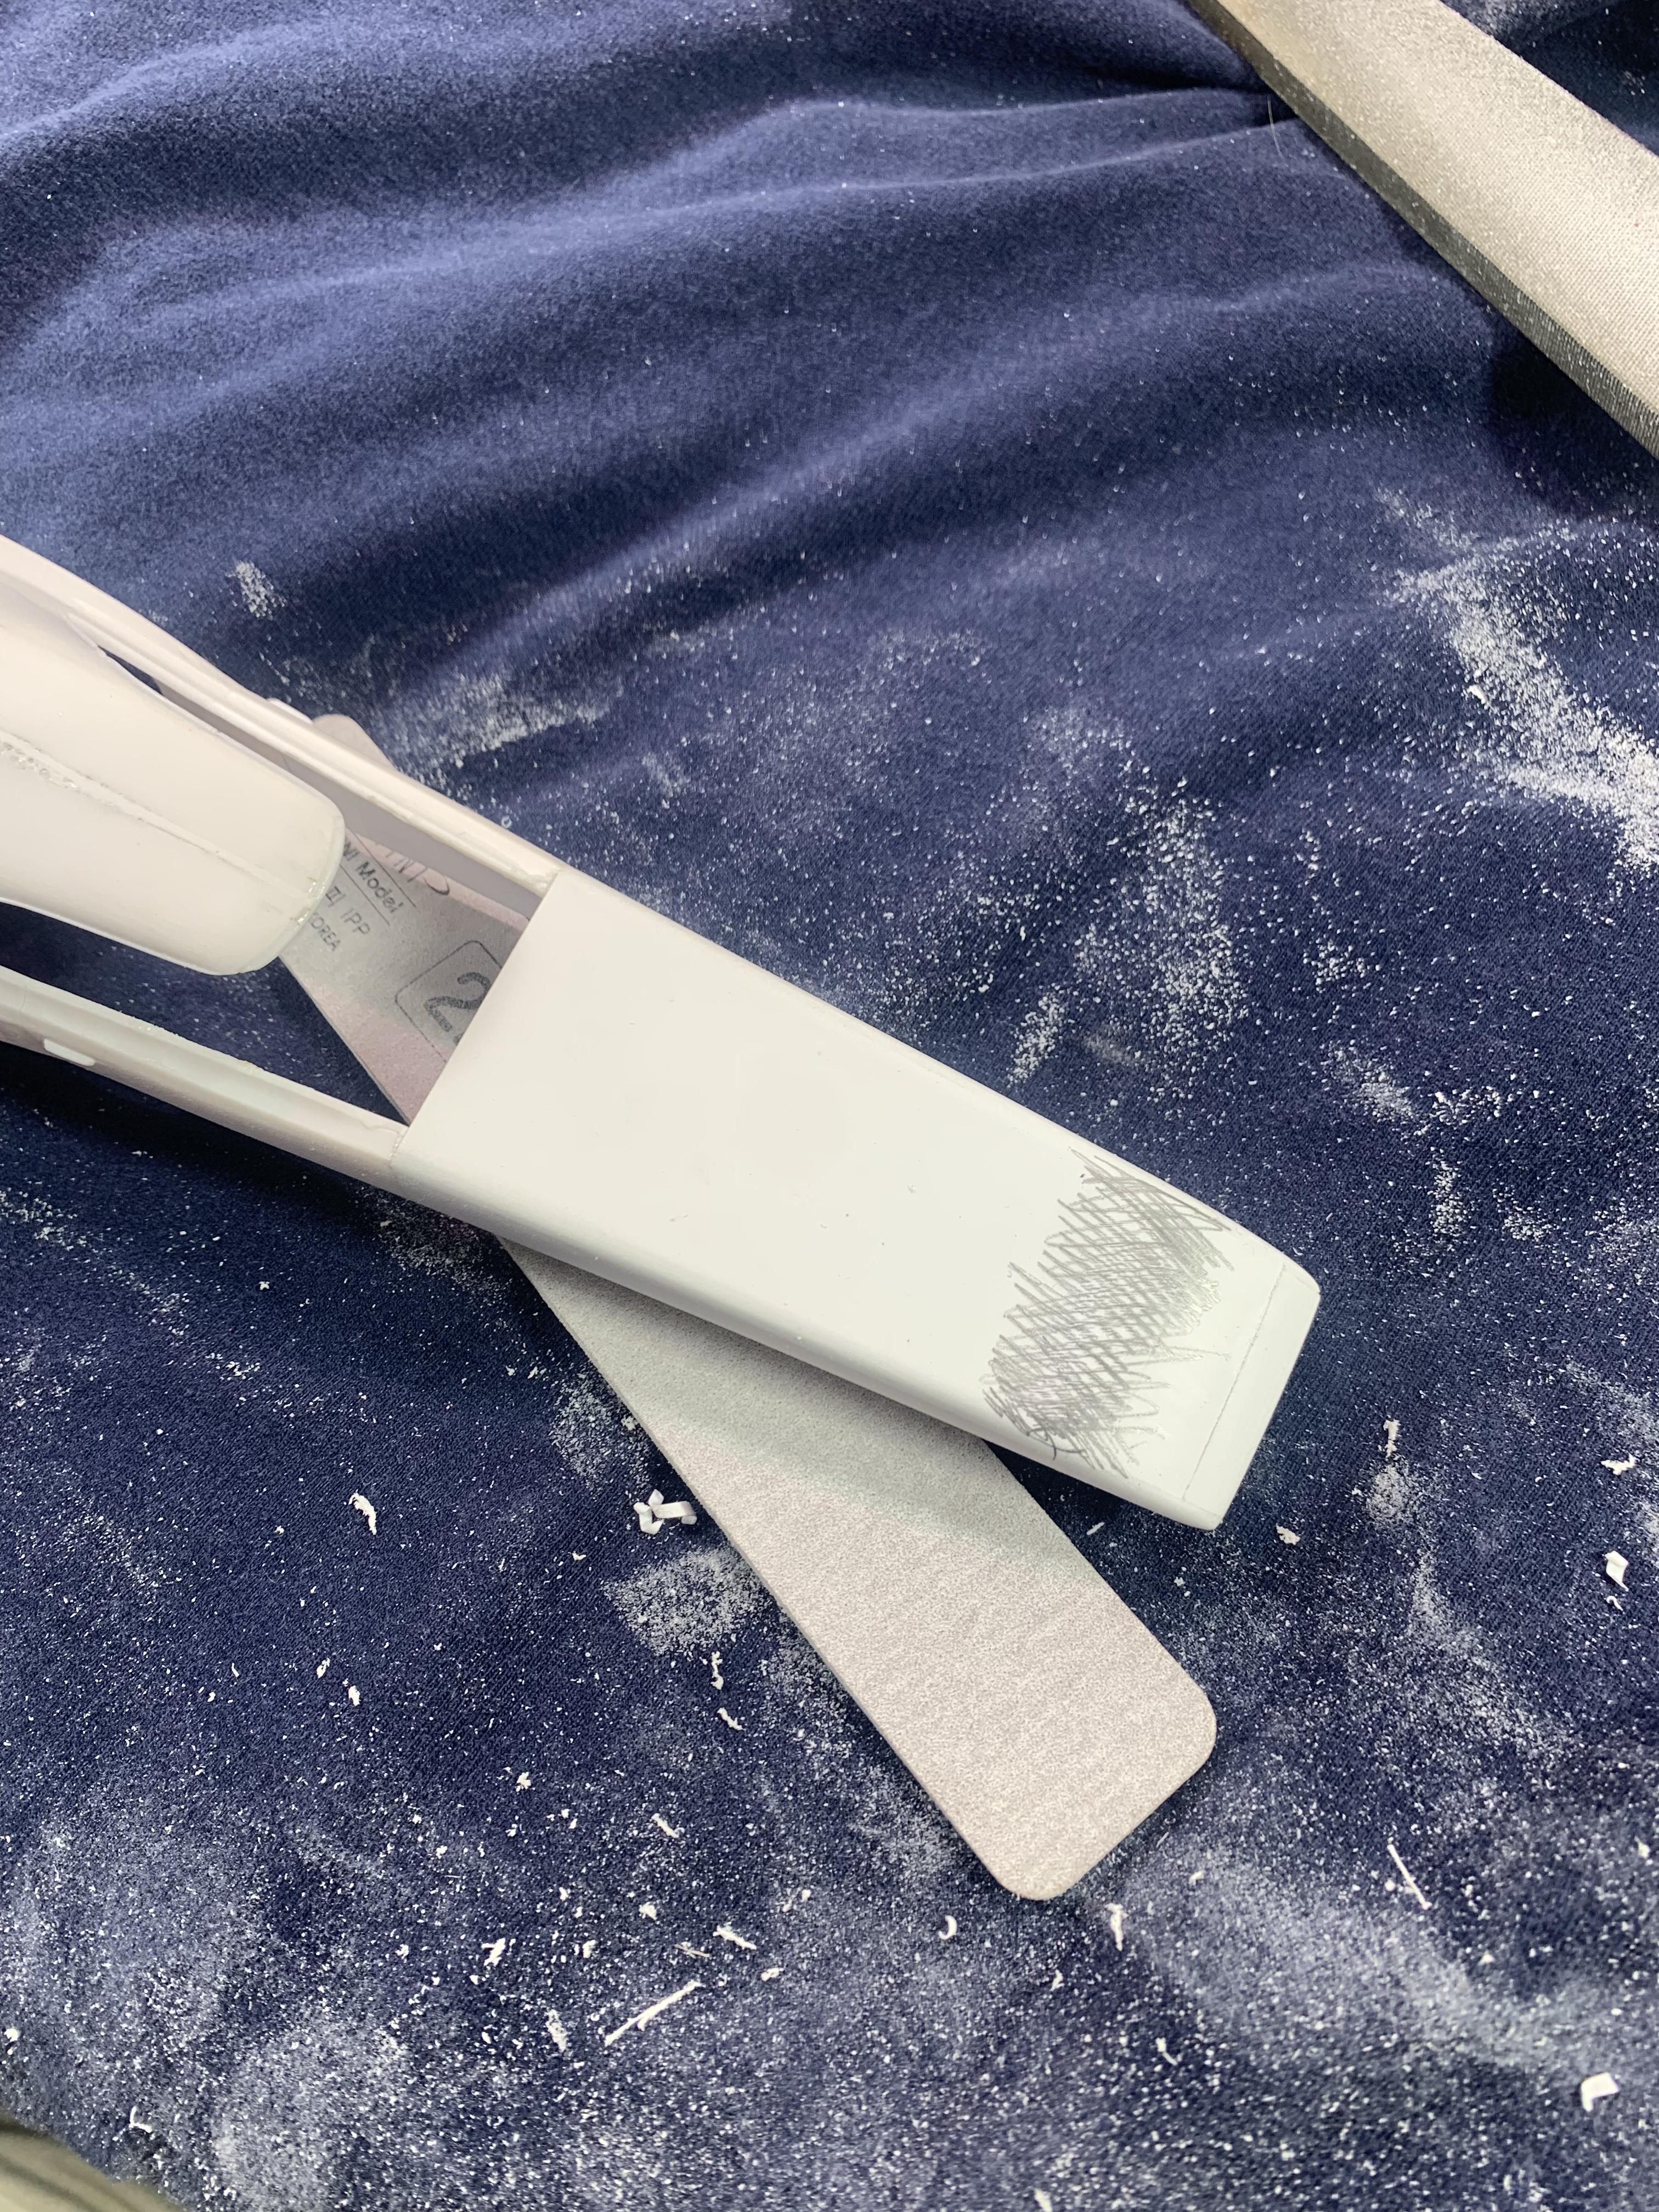
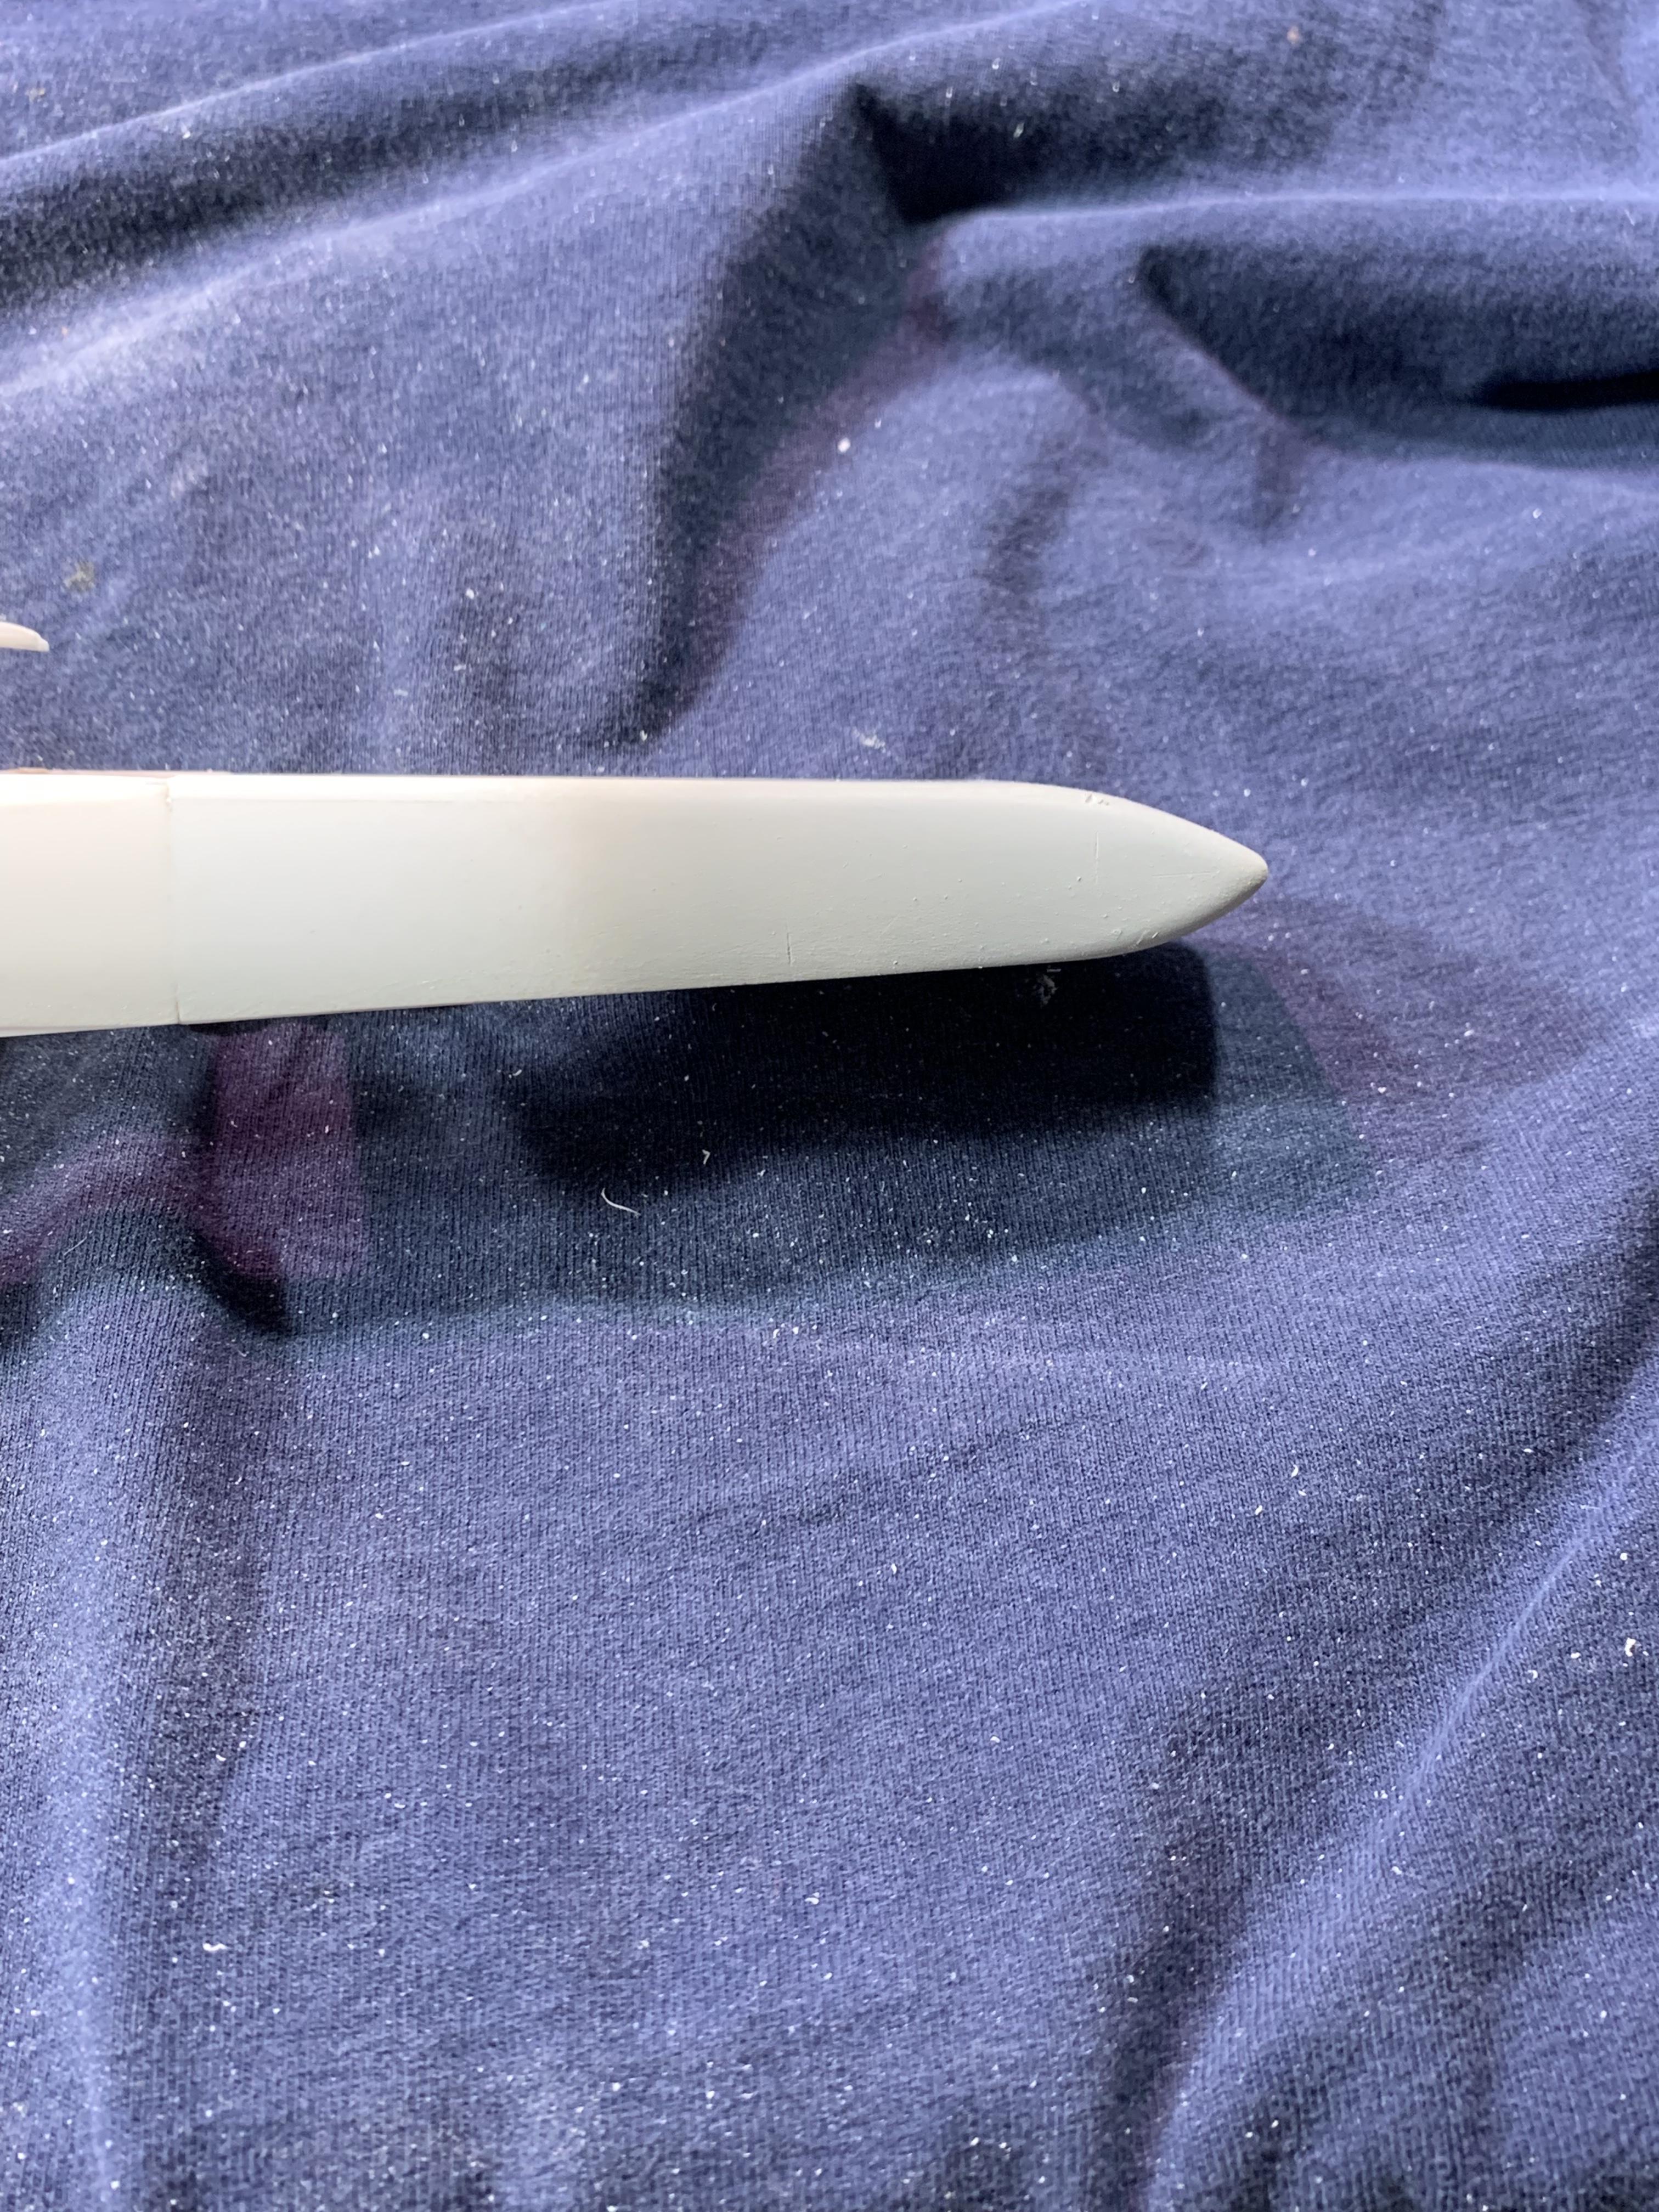
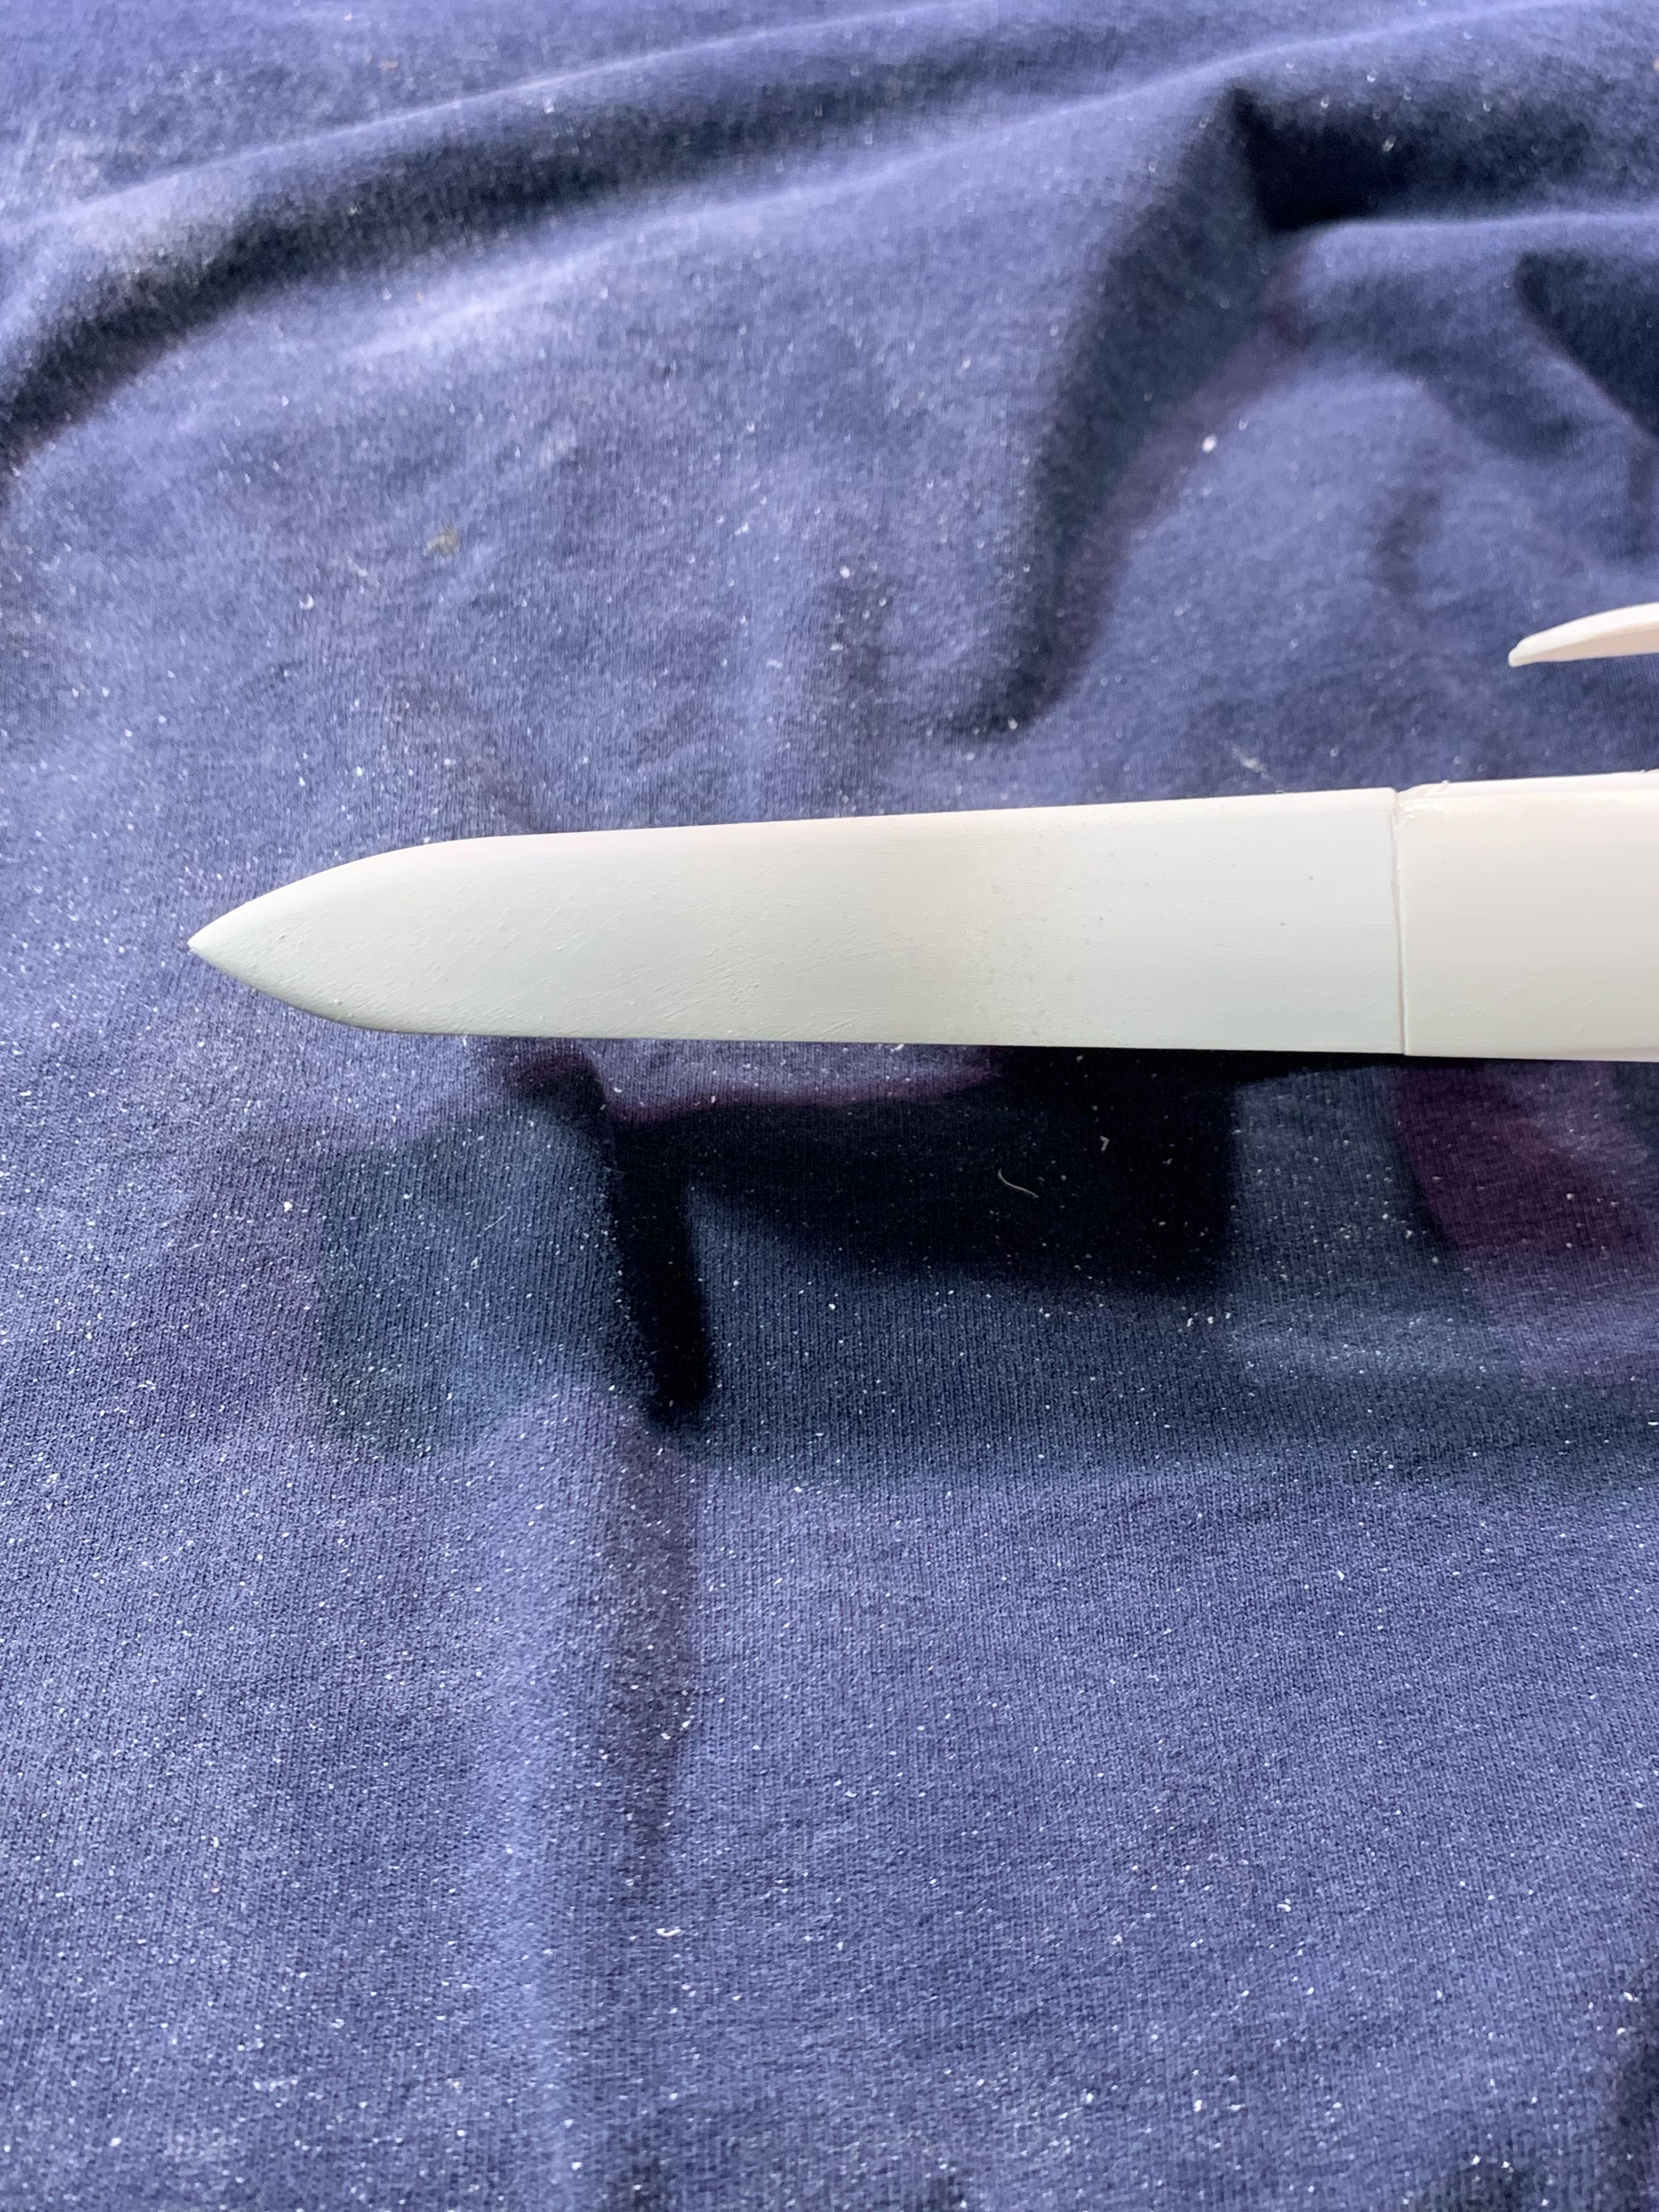
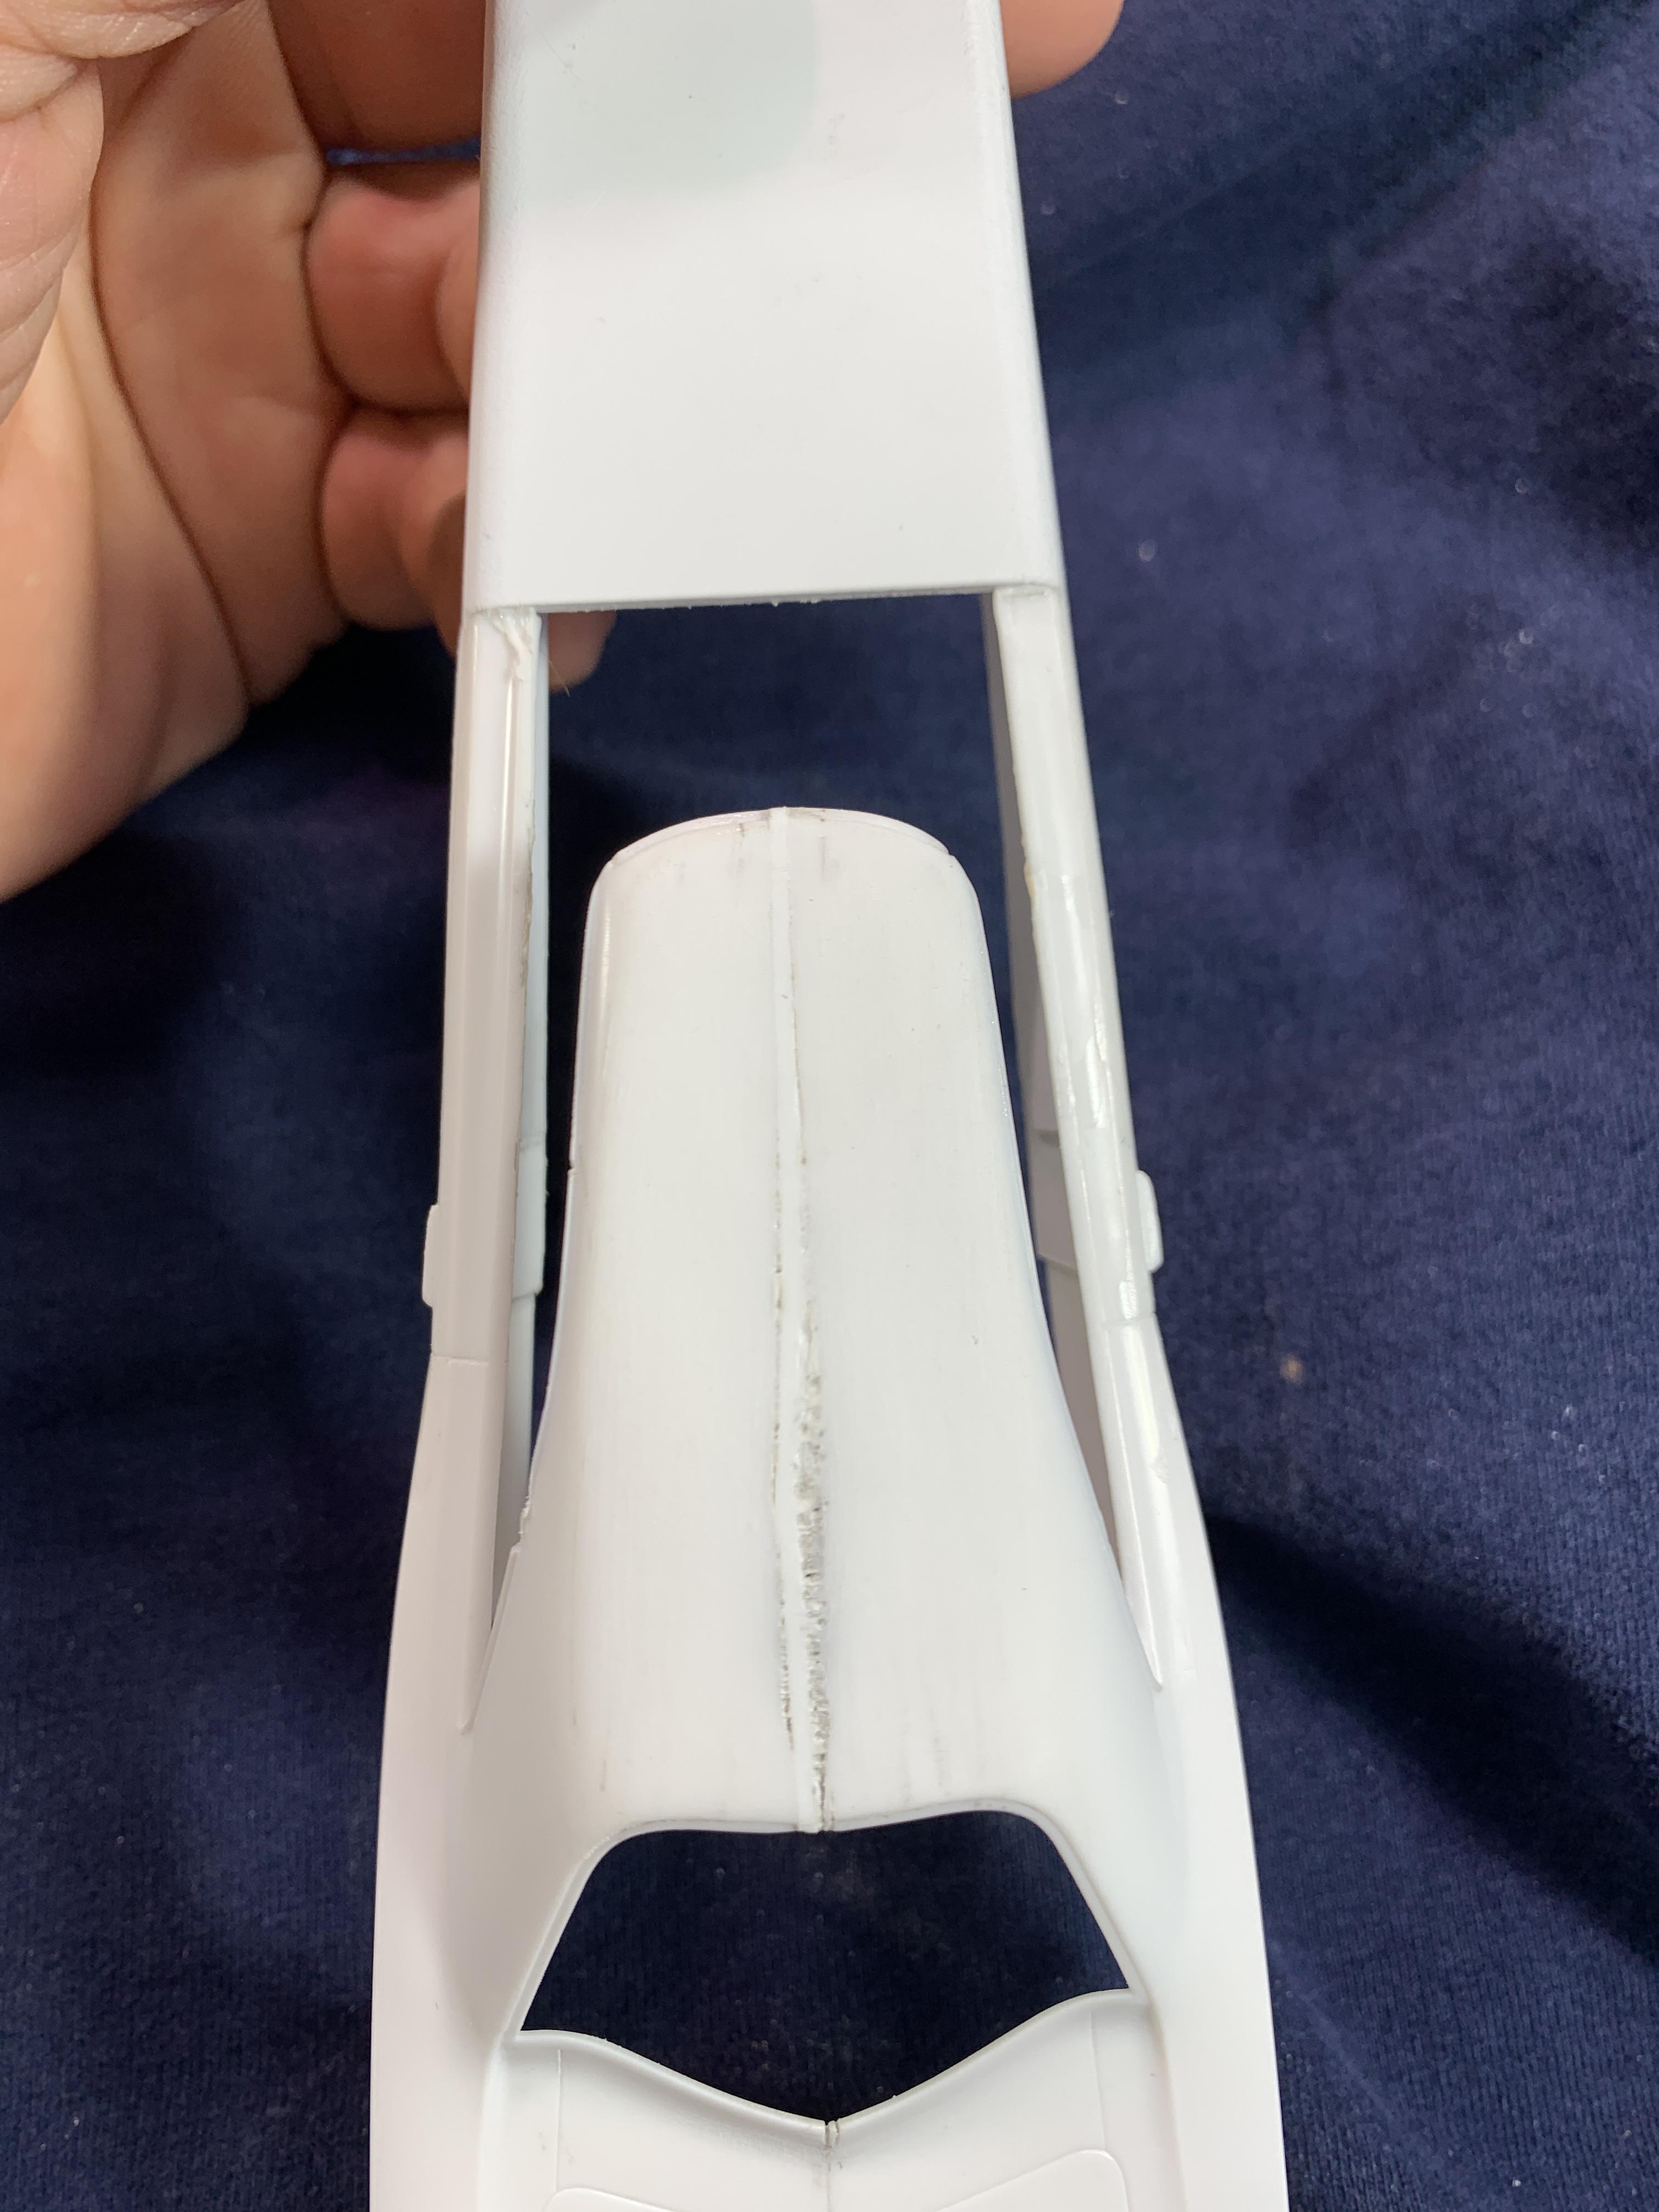
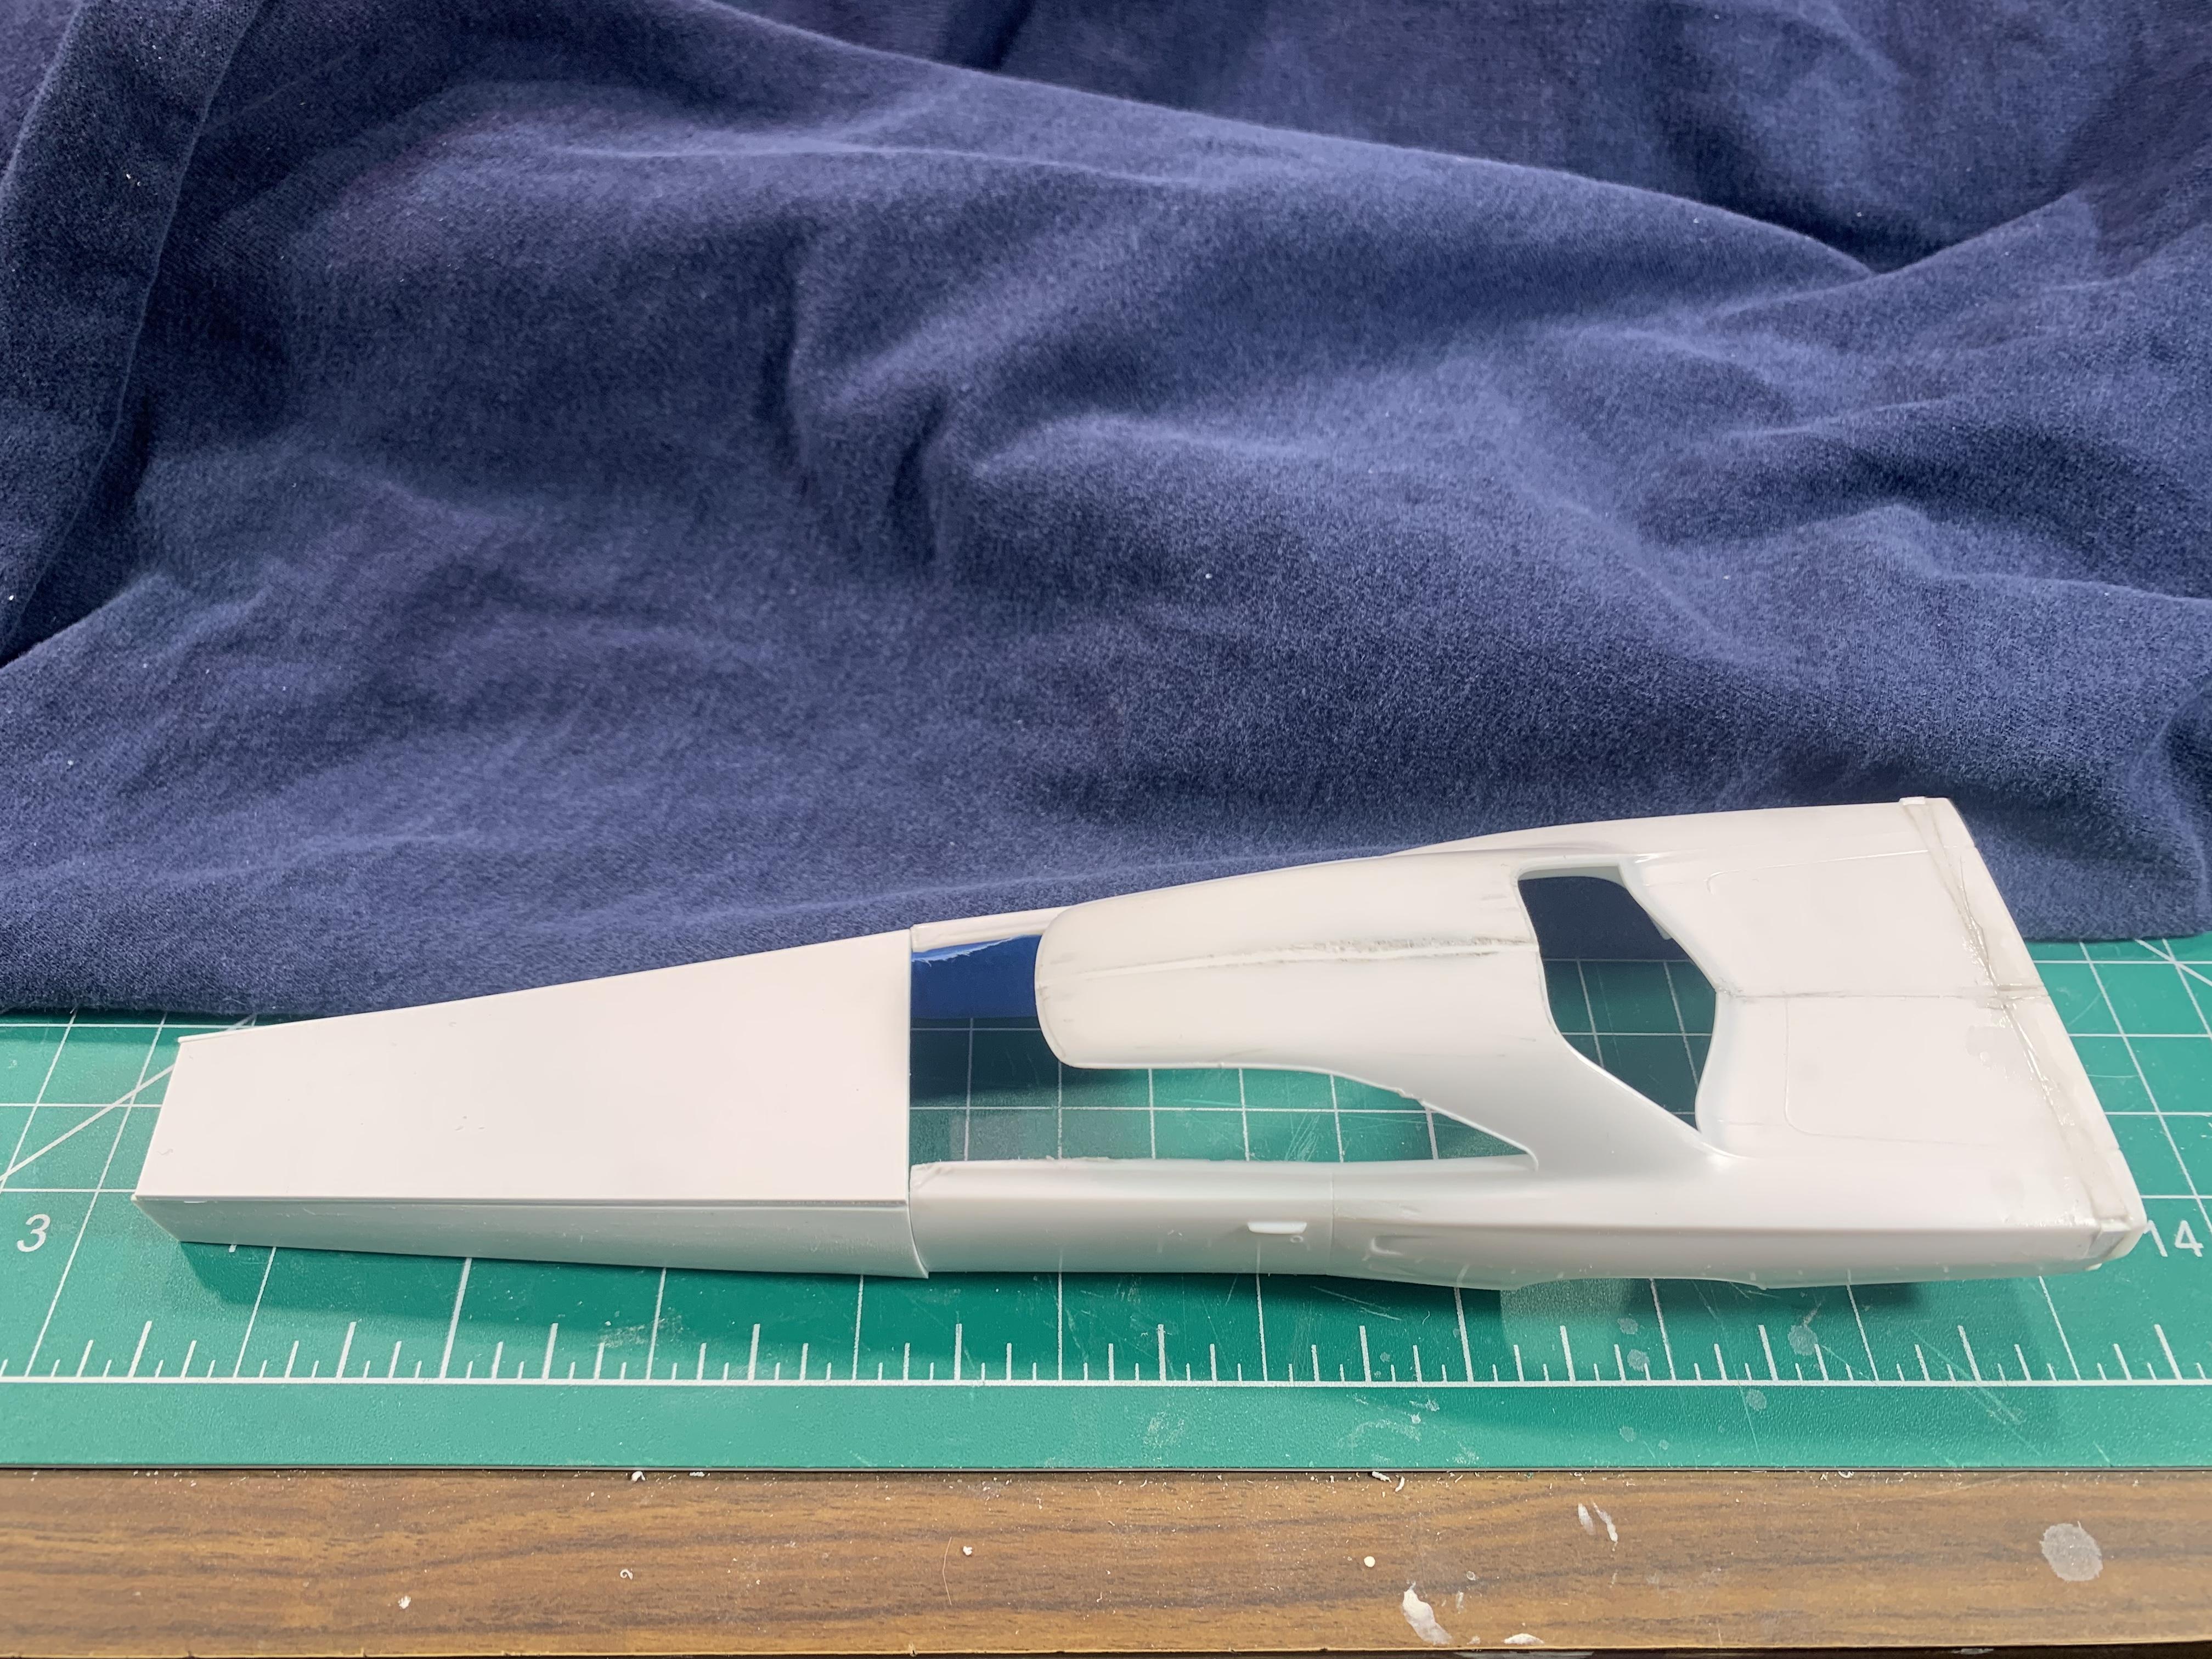
A little more work tonight; putting on the cowl/top of the doors. I decided to go with a windshield that will be curved at the bottom. The opening is too far back. After gluing it in place, I see that the windshield would be nearly vertical. I’ll have to figure out if I should cut the roof back a bit or open the base part farther forward.
1: The filler piece before opening up for the windshield. If it looks slightly angled at the top, good eye. It needed that because the top of the nose extension was at a slight angle. The vertical line is the center. Horizontal line is just a mark that is parallel to the back end.
2: marking out the shape. That ellipse was too small. I ended up using the next larger size.
3: The final shape for removing plastic.
4 & 5: Where I’m stopping tonight.