
kennb
-
Posts
1,056 -
Joined
-
Last visited
Content Type
Profiles
Forums
Events
Gallery
Everything posted by kennb
-
Thank you for the comments. The chrome is going to be a challange, I have not decided how to do it yet. I dont know how to change the title. I have tryed with the total edit but cant seem to figure it out. Any help?
-
Getting some progress on the interior. Pbobably going to be on holsd a bit since I ran out of glue. This this seems to eat glue,,,,,gone through an entire bottle and still have a long way to go. Anyway, I have the seats both roughed out, one on the way to compltetion and the dash is done. I tryed building up the steering wheel and as you can tell it did not work out right. Back to the drawing borad on that one. Kenn
-
The body is ready for final wet sanding and painting. I am trying to figure out the best way to do the seats. Getting the rest of the interior started now. KennB
-
This I my first attempt at building a motor from scratch. It is like trying to change a spark plug with a hammer. I hope that I at least captured the essence of this power plant. I took the key elements that I could see and then added a few things to make it look fuller and meatier. The whole thing is about an inch square. I still have to paint it and add some wires here and there to make it more presentable. This entire car has been a challage but fun. I am about to wrap up the chassis with the wheels on and tramsaxel in place. Just trying to figure out how to mount the tires on the axels and get the springs in place. Thanks to all those that have been following along. There is much more to come. Kenn
-
New photos today again. I cut out the front grill area and redid the front end. The grill is a seperate piece now. I will chrome it along with the bumpers and then add the painted areas. The lights will be clear and be made when I do the turn signals and tail lights. For those I use old lighters of clear amber and red cut and shaped to fit. I also fixed the front bumper with a slot and tab to attach it to the body like the rear bumper. I also finished the wheels and rims with the hubcaps this weekend. For the rims I used various tube stock that telescoped into each other. Time was also spent taking care of a few areas that needed some attention to get the filler finished and a few rough places finished off. Since I redid the front I have additional work to refinish that place. Sanding, filling, sanding, filling and more sanding. There is very little to fill but to make sure it is perfect and free from marks it takes time. I did hurry the first coat of primer a bit, I should have waited a little longer until I fixed the front and the back of trunk. I get ahead of myself sometimes, getting anxious to make progress. When I make the second car I will have all the bugs works out and have less filling and finish work since there will a smaller number of pieces. There was a lot of adjustments to the front and rear of this one to make it right the way I thought it should be. Kenn
-
Put a coat of primer on the body. Kenn
-
Time to staart the mechanicals I guess. I have been working on the tires, not my favarite part. Sanding,more sanding, and more sanding. I put together the tranny with transaxel hookup. The way this is set up the transaxels actually come out of the front of the transmission close to the bell housing. The tranmission is just 1 inch long. I started out with a styrene tube for the body of it. I have some other tube stock for the axels front and rear. I need to get these set up to get the wheels on the chassis. the body is about ready for primer. I added trim around the side windows and cleaned them up.(no photo)I will try to get the first coat this week if the paint shop has any in stock. I want to thank everyone for the comments, it is nice to know that I am doing a respectable job on this. The next step is the motor. I have more photos and information to work from for this. It is set up a lot differently form the US motors, the only real part is the fact it has pistons. Everypart of it is put together alien to our way of thinking. The block is even 2 halfs bolted together as was the transmission. Kenn
-
I have put together a test chassis for this. I am going by a few pictures, and a lot of guess work. From the photos I am fairly close at this point. From what I can tell they used transaxels on the front and rear. The photos are bit yellow because of the type of lighting in our place. Kenn
-
I have been filling and sanding since yesterday. It coming along but still needs some attention to some of the harder spots. I will be adding some more betails and priming in the next few days. I also have started to rough out the interior bucket and chassis. I am going to get the front end set up this week and hopefully the back also. I have to start the seats and start detailing the dash using version 3 specs. I am refering to a site that has destail on the fornt and rear suspension but will have to fill in some details that may not be 100% accurate. Artistic license shall we say. Kenn
-
I have been adding trim and window mouldings to the front and rear windows. Also added is the side spear from the marker light to inside the rear scoops,not shown. I was also not happy with the way the rear was coming out so I ripped it out between the fenders and redid the deck lid and rear panel areas. The rear bumper now slides into a slot created bu the bottom valance panel and deck lid. There has also been some more adjusting of the windows on the sides to get them shaped a little better and getting the pillars narrower, They are actually metal trim on the windows. I now have most of the "chrome" in place except for the front light panel and deck lid trim. The hood has been redone again but still I am not pleased with it but it can be adjusted with some filler which I will be doing Thursday. I have seen several types of hoods on these but I am thinking I might use the second generation hood on this because I happen to like the scoop that was deleted on the version three, which I have been following. Now is the adding of filler and finishing off the exterior of the body. Time to start the interior and chassis which is all one piece. I will set it up for adding the power plant and drive gear further on down the road. A reminder that this is all from .40 plastic sheet. Most areas are 2 layers now to add mass to the thickness of the finished body. A further note on the tools I am using. 5 needle files, a wood ruler, an exacto knife, and a pair of needle nose that I use the bend and shape the plastic. It is amazing the amount of glue used on something like this, I have gone through half a bottle of Plastic Weld. I like this glue since it does set up fairly fast and permit me to work quickly. The biggest challange is the complex shapes on all areas of the car, There is nothing straight, parallel, or squared off. Overall I have been having a lot of fun with this car. The way I have done this with a few minor changes of sequence has seemed to work out nicely. I have also been carefull how the inside is finished and will use filler to smooth things out inside, specially with the roof areas since that will be totally open to the viewer. Kenn
-
Last night i reworks the fender scoops to come into alignment with the tlaer versions. The basic bodt design remained intact to over 18 years. I have seen in different places that the first model of the 603 came out in 55, some make it as 56. Since they realy did not change the body year after year they just refined it. The Tatras were not cheap cars nor were they intented for the common manso they took more time maked a car that was a cut about. Changes could occur at anytime and cars going in for repairs could come out completed refitted to current appearance. There was 3 major design changes but I have seen variations in all of them. I also have to be carefull of my sources. Those beautifully crafted 3D images derived on the net are gorgous renditions but are not accurate reditions of the vehicle. I am still not toally pleased with the rear of the car. It is not right. I knew that as it was coming together but I think at this point I am going to leave it as it is. For a one off shelf model there is no one that is going to know the difference. If for some reason I get to want to make more of these, different colors, years, or to fantisize a creation with the body I will make a master for casting. I have done a lot of resin trains in the past but would want to send something like this out and want the car to be a little more accurate all the way around. I also have looked at how it is progressing and would do things differently on another. I have started to add smalled details, which I may regret when I add the filler. The front marker light bases are on, I picked the style that does not have the 603 name on it, variation from theone that should be here. I felt that in this case I would be allowed to adjust it since I only want to carve out one 603 for the front grill in this scale. I also have the rear bumper roughed out. There were many variations of this and the more I look I see even more. The bumpers seem to be an item they changed regularly. I have some more work to do on it and the bumper guards. The fornt and rear will hane the round bullets with rubber tips on them. Kenn
-
I have done some more work on the body, built up the front bumper and roughed out the rear vent. I started the tires, they still need a lot of work and the tread applied. I added a layer of .40 plastic to the window posts to beef them up some and added bits here and the to get the shape together. I still am putting off the filler until i have more completed. Also added the flares to the wheel wells. Kenn
-
I am getting a lot of great ideas. I am wondering how it would look with ground effects kit and widen the box a little with dualies under it. I am limited to parts since I have not done many cars in the lst few years. Kenn
-
I am getting the body roughed out adding some fender flares,ect. There are some more pictures and one on the inside of the body. I am going to start working on the tires, rims, and "frame now to get that roughed out. I have not added the filler yet, I want to get all the rear completed first. So far this is all plastic built up and filed to shape. Kenn
-
Kennb
-
I have been working on this today and posting a few updated pictues of my progress. I it os starting to take shape.
-
I started over today. I approached it entirely differently and a copy of the sides in scale on the sheet of plastic and cut out a pair of sides. I rolled the top edges over the windows. Cuting a piece for the roof and glueing that together. Adding some plastic to finish the size of the rear window and then the hood. I have it roughed out. I did a little sanding to the edges and feel that I now have a decent start for the overall body. I posted some more photos to my flicker page. http://www.flickr.com/photos/22767382@N08/?saved=1 I feel the is a better representation for this unique car.I have retained the interior assembly from the first try and that fits very nicely at this point. I have not added any filler at this point since I have a lot of work to do yet, I have to get the grill put in and sides built up. The rear needs to be roughed out yet. I will continue with the start that I have at this point to see how it works out. I am working from drawings reproduced at about 1/24th with minimal dimensions. I did try super imposing the drawings of a 51 Chevy Fleetline to see if that would work out for a donar if all else fails. The body works out decently with redoing every panel on the car and adjusting the wheelbase by about 12 inches. It would not take any less time to go this route but I would have a base to work from rather than starting fresh. It is still possible to go that way if this does not come out to my satisfaction.
-
Love that older Tatra in the backgorund. I have several pictures of this car. I thought the paint was a bit unusual for this car. It sure sets it apart.
-
I have tryed one way of doing this project and not happy with the results so so far. I dont feel the proportions are right for some reason. I still have to figure out how to post pictures to the forum. http://www.flickr.com/photos/22767382@N08/?saved=1 I am going to trash this and work from another direction I think. I am going to try to set up a frame to build over like you would a ships hull. Not sure how that will work either. I would try to find some sort of donor car to work from but the closest thing I can see would be an early merc or a chevy fastback. I dont think either would work out any better in the end. Unlike most of the Russian cars of the era which were nothing more than copies of American bodies, the Chechs were really quit creative, as this car shows. Thanks to all that have posted pictures. The cars that you have posted I do have from others sources, but still very much appreciate all the assistence. I do know they there a many of these in the US and there is a Canadian dealer the sells services and has parts for these. I have always been taken by the deep thraoted sound these cars have running. It is amost a low rumble unlike a water cooled V8 produces. The Tucker has a very similar sound but since the Tucker is a flat engine you can tell the difference right off. Those that have head both know what I mean. It is something about the way the aircraft engines are build I think that produces this effect. The greatest need I have are photos of the way the motor is mounted, and the setup for the front suspension. I do have a few but more sure would help. I would also like to get some of the tranmission mounted. It is a reverse mount whereas the drive shafts come out close to the motor and the trany is further forward towards the rear seat. Kenn
-
I am going to go totally scratch on this one. I will be using .40 styrene that I have for my trains. I have trying to figure out how these things were built. They are a unique space frame that has a built in chassis with the front suspension built in and the motor and transmision floating in the rear compartment. In going over this I think I am going to have opening doors, boot and deck lid. The main body is in one piece. So I am going to just start cutting plastic and glueing the body just like the real thing. I may be biting off a lot more than I can handle. Also there will be no commercial parts on any part of this project, even building up the tires. I will use a lot of the methods that I use on my trains. For the motor and transmision I have a mechanical parts book that shows all the components and locations with all the suspension. One interesting thing is that it has 4 wheel disc brakes and independent suspension. This should be fun to put together, as long as you are a masicist. ha ha. I am going to start working it up in 1.24th and see how it works, leaving it open to going to a larger scale. I have collected dozens of photos of the finished car and bare body only, located from a Russian site that has a lot of great restoration photos. Kenn
-
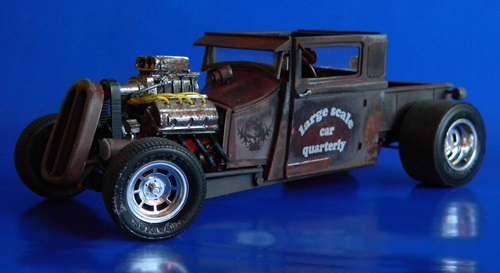
gotta say, i just LOVE that duster let me know if your ever looking to unload it The duster was built from a wreck in 1975. I did all the work and painting and lettering myself during the summer between classes at college, Alas it has long been sold, wish I still had it.
-
For my first and maybe a very embarrasing attempt to scratch build the later version of the Tatra 603. This unique Chech elitist car has long been a favorite of mine. This car was built mainly for Governmnt and Military personal and was top of the line for them. The engine was origionally designed for aricraft and is a watercooled V8 rear mount type. I have most of what I need from body to mechanicals, but lack some information on the chassis for this car. I have posted some pics on my flicker site. Hopefully I will be able to go throught the process and in doing so give some inspiraton to others. http://www.flickr.co...82@N08/?saved=1 Kenn
