
Rob McKee
-
Posts
863 -
Joined
-
Last visited
Content Type
Profiles
Forums
Events
Gallery
Posts posted by Rob McKee
-
-
Great job Larry.
-
Now that is a beautiful car!
-
Another fantastic build Maik.
Very nice and realistic weathering and damage.
-
I love it!
Fantastic weathering job!
I love the photos you have taken as well. Is that a painting as the backdrop?
-
Yes, it does come with an Gibson electric.
-
Eric, both the Nomad and the Gas Station are fantastic.
Very nice work.
-
Absolutly beautiful John.
-
I just had to have one of these when I read he was signing 100 of them.

-
I'll be following this build. I have been itching to get one of these kits.
-
That is definitely different.
Maybe he saw an accident between a hummer, chrysler, and old rolls royce and became inspired to build this.
-
Congratulations Rich.
I certainly can see why both of those models did as well as they did. Very nice and fine details on both.
Well deserved.
-
I look at the cost of this hobby more like Tom has mentioned above. Individual builds are built using supplies I have gathered over the many years I have been doing this. Buying kits for the stash is really where I blow the budget because there are just so many great kits available now. It is almost a panic when I see a kit that I would really like to build come out. If I don't grab one when it is new or re-issued I may not get the chance again for a long time. Often I have waited on buying a kit to control the budget but regret it later when I want to build it because often the only option is to buy one online at over inflated prices.
It would be interesting to run a cost sheet on each build to get an idea of how much $ goes into them.
-
Should be an interesting build to follow Michael.
Good luck with the build-off.
-
Welcome aboard Rex.
-
Very nice work.
Love the hood and turbo you have built.
-
It's to bad there isn't a large demand for this anymore.
Thanks for sharing this video Doc. I have always been a fan of Mythbusters.
-
I thought the same Monty. I picked up the kit thinking I could use those headlights but guess what?
They are decals!! Decals that have duct tape to hold the clear plastic down. The Rebel racer is the
same.
I was thinking HID lights as Simon has suggested.
-
Looks like Jimmy Flintstone "borrowed" MPC's 1977 'Vette Van design and changed a few things (fender gills and roof shape) so he could call it his own.
If you happen to have any of the MPC C3 chassis, you might consider them as an alternative as they feature poseable front wheels and independent halfshafts on the IRS.
OTOH, by using this body, I can see you getting creative with unique headlight options and possibly some kind of special feature on the "bread van" section, such as an opening rear door, a la the AMT '40 Ford Sedan Delivery.
I do have one MPC C3 Vette but I have it ear marked for another project Monty. Good idea though.
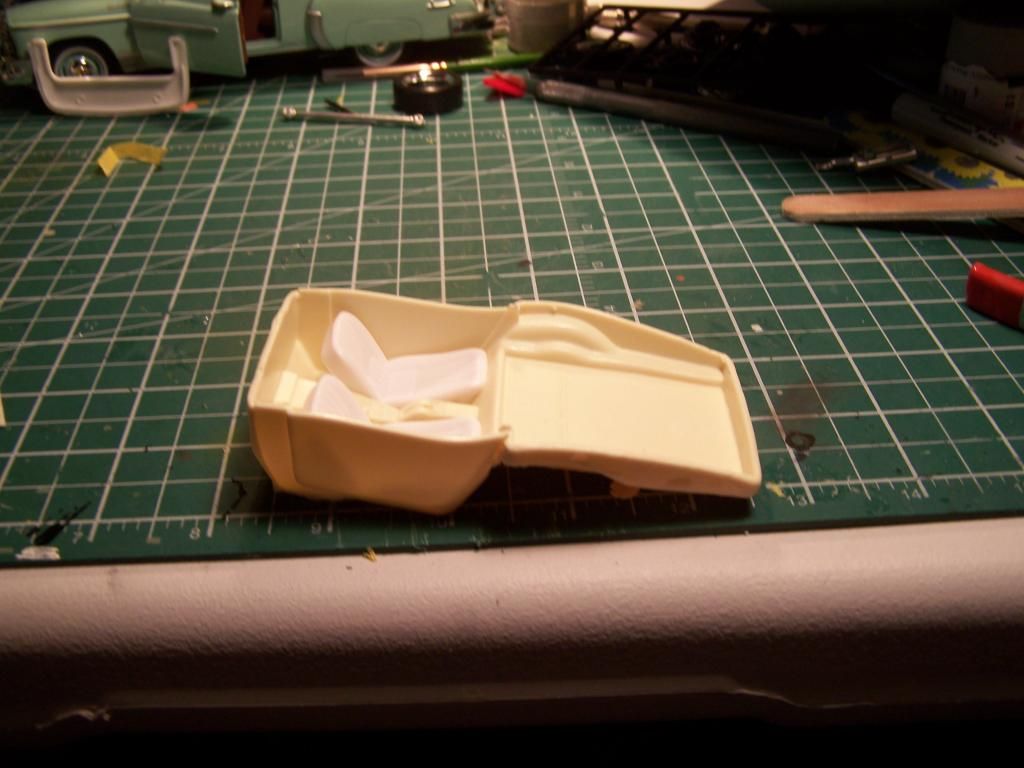
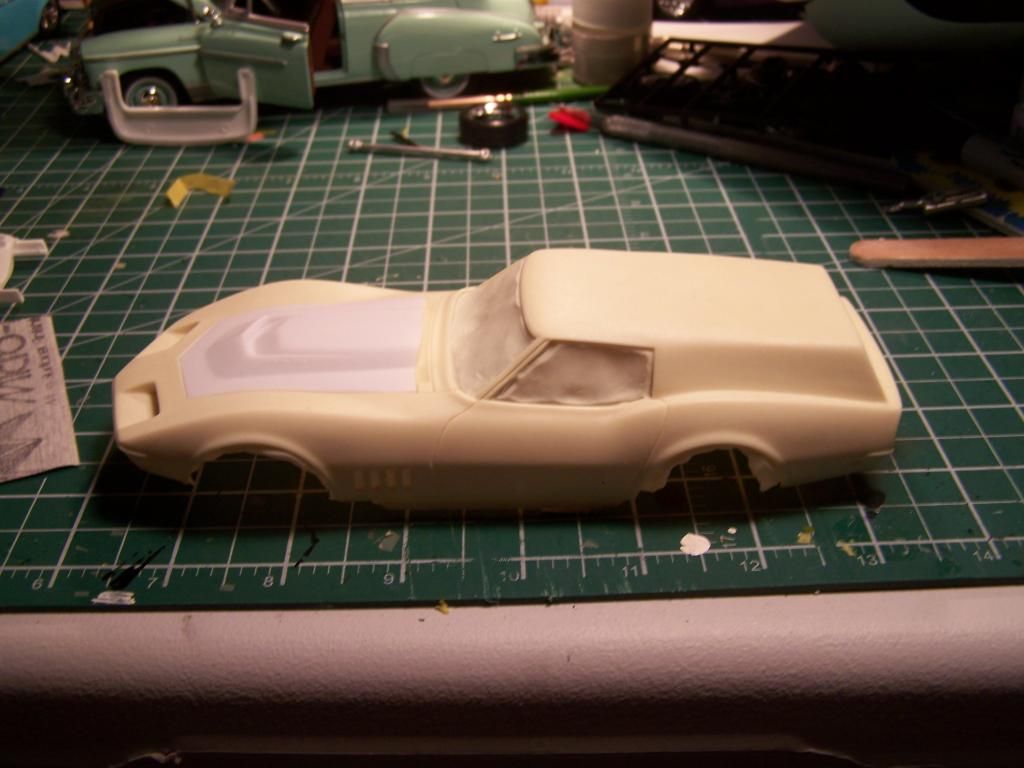
Well, after about 3 hours of sanding, grinding, and drilling I have the SD Vette
body almost ready to go. As expected, there is lots of flash to remove on the
body and I had to grind a big blob of resin out of the inside of the rear quarter
panel so the interior tub would fit properly.
I also had to drill the holes for the tail lights. I gotta say for as much work as
it was to get it to this point I had a fun time working on it.
Here is a quick little mockup at this stage. I still have to remove the flash from the
windows but following Scott's lead I think I'll leave them in place for now.
I am trying to decide what to do for the headlights on the car. The car was molded without the pop up lights and I would
like to do something a little different with them. Maybe small rectangle lights in the opening?
We'll see.
-
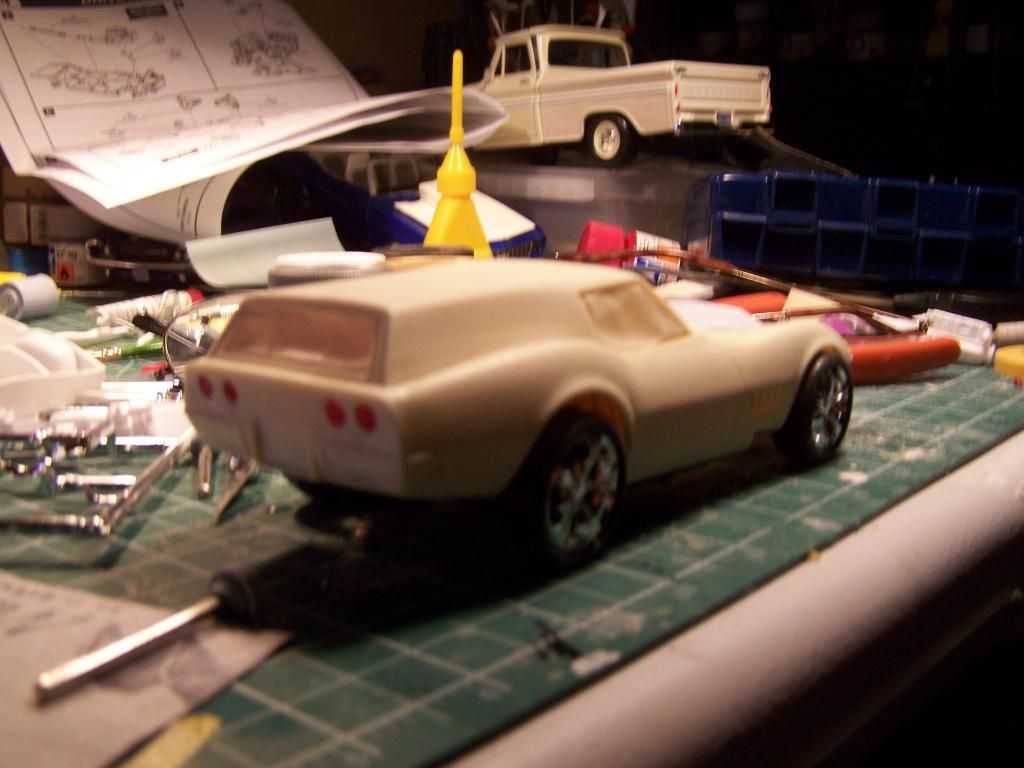
To try something different I decided to try this Jimmy Flinstone resin kit. It is
to be used with the 68 Revell kit but I decided to go with the 69 Revell kit. They
are almost the same anyway so I don't see any issues with it.
Here are a couple of the starting point shots. -
For me I use Tamiya spray cans and acylic for airbrushing and hand brushing.
I know Tamiya spray cans are a little pricey but I have always got great results from it. I will use Testors enamel when I cannot find a color in the Tamiya line I want to use. Using light mist coats and allowing lots of time to dry good results can be had with Testors.
Occasionally I will use Krylon for semi-gloss black.
The other paint I use is Alclad for chrome and metallic pieces.
-
Great story of a man who wouldn't quit.
I have a lot of respect for him and his family.
Thanks for sharing that.
-
I gotta get me one of these.
You did a real nice job on it.
-
I have even held ceremonies where I have sacrificed spare parts to the beast. The beast is never interested in the sacraficed parts as
no matter how I offer (throw) the parts to the floor they always remain within site.
I cannot intentionally loose parts that I don't care about.
I think Discovery channel may be interested in doing another reality show based on the monster of the floor.
Has anyone ever seen or got a picture?
-
Thanks for the tutorial Matt. You make it look easy.


57 Ford Done !
in Model Cars
Posted
Very nicely done Walt.
The wheels really stand out with the weathering you did to highlight the details.
Great job.