
jcbigpaw
-
Posts
412 -
Joined
-
Last visited
Content Type
Profiles
Forums
Events
Gallery
Posts posted by jcbigpaw
-
-
Nice build here. I'm sorry but I have to agree about the Polar Lights graphics. I have this same kit and first thing I did was toss the decals in the trash. You did a great job with what you had. Nice work
-
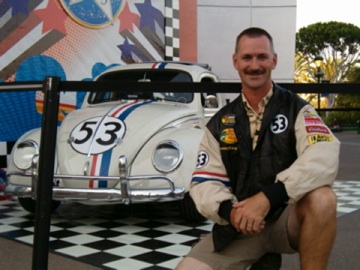
Chase that 1:1 looks mighty fine
-
-
Very nice. Your dad will love it
-
Word of warning!
Many years ago we got broken into twice the same year and all our electronics were cleaned out both times. Local PD said that was very common because the crooks will wait a while for you to replace everything and then hit you again. We were renting so I just moved but depending on your situation you might want to check into a home security systems.
Sorry for your loss. Hope they slow rot in hell. Hang in there
-
I've managed to find a little time to work on the 63 Fury so heres an update. Everything got stripped with Easy Off and then cleaned up with soap and water before sanding to prime.

The interior was finished with Rustoleum Satin Red and detailed with Model Masters and Testors brush paints, not easy with molded in seats. I pulled a steering wheel from the parts box to replace the one I broke taking the bomb apart.
This kit originally had a solid front axle so I had to fill the hole in the engine block and then finished it off with Rustoleum Red straight from the rattle can. All other parts here are original except the carb and air cleaner which came from the parts box. I'm not going to do any wiring on this one.
Next comes the finish of the body and the paint. Im gonna use the same red as the engine. Here's a preview with the stance sorted out. This was actually taken with the chassis and suspension finished but I forgot to take a picture of it. Next time.
-
I have a bunch of these Instant Gatorade containers that I use for nuts and bolts etc. I noticed the other day that the sides might be good to use for the floor of a truck bed or for tin wall or fence panels if your into dioramas.
-
I have part of a 61 in a box awaiting my attention. It was started and then given to me. Im curious how your going to do the windshield as I am going to have to make one for mine too. I'll be watching. Keep going.
-
I've used Model Masters Decal Set with great results. I just finished a GT350H Shelby and was really apprehensive about the hood stripes over the scoop but had very little problem.
-
Absolutely awesome! I've never seen the original car either but way cool. That engine is fabulous!
-
Some guys get to have all the fun. Believe me I've thought of something like this at a stop light many times. Lol
-
I love the look so far. Keep going!
-
Sweeeeeeeeet!
-
Very nice
-
Very nice work. Keep it coming. Love the grille tip too. Gotta use that.
-
I've currently got about half a dozen in boxes waiting for me to get back to them. One on the desk waiting for final assembly because the paint became a nightmare and I pushed it aside. One in the middle of a rebuild and another glue bomb sitting there waiting its turn. I usually seem to have three going. One is being finished as one is being started and another is about mid way through. Do the two dozen I'm building in my head count? Lol
-
I've always thought these had cool lines. That green is pretty bright. Wow. Looking forward to more updates
-
Been there done that. I've got a half dozen kits that I started or restarted and they've languished for about 15 years. Every now and then I'll dig them out when I'm in a slump but I've just never gotten motivated to finish them. I also have about a dozen kits I bought off eBay over a few years with specific build plans in mind but just haven't gotten to them. In fact I've never built any kit I've gotten off eBay. No idea why. ????
-
I saw this car at the Pismo Beach car show this year. It is not just the paint. One side of the car is a stock restoration while the other side is street rodded . We are talking paint, interior, rims and tires, even down to a custom air cleaner (half). The lady said it was used to teach their agents the difference when insuring classic cars
-
I still have not seen this movie but compared to pics of the movie truck YOURS LOOKS BETTER! I love it. Nice clean finish. Hope you don't mind if I use a few of your ideas on a panel I've got waiting in line. Keep up the good work
-
Don't have any idea where we got the hangers but I had to dig through half the closet to find another one for the demo. Check your local stores. I've even seen plastic hangers at some $1 stores here. Otherwise just cut a straight piece to size and round off one end.
-
Very nice! I've seen a lot of bugs just like this at the car shows. The aging was carried out very well. I'd love some hints and tips to use on one of my own. Love ur screen name too.
-
I'm going to proceed as if this thread is going to continue.
Here are my next two projects to redo. Both are Johann kits that I built more years ago than I can remember but have been sitting in a box for at least the last 15 years.
Item #1- 1968 Cadillac
This is the original paint that I put on it all those years ago. I don't think I even used primer. I have everything present and accounted for except one wheel. This will be a replica stock rebuild but I haven't decided on paint colors yet. I'm also going to take care of some little things I didn't like the first time I built the kit. And I will have to find a new set of wheels.
Item #2 - 1963 Plymouth Fury
This kit got rebuilt sometime in the early 80s with a then current street rod look. Notice the monotone paint. Yuck, what was I thinking. Plans now call for red paint and red interior just like one I saw at Pismo Beach recently. Nose down stance with big and littles to look mean. Missing the carb and air cleaner so gonna dive the parts box and see what I can find.
More to follow. Keep the faith!
-
I didn't take any pics the first time so here's a quick one I did just for you.
First off I use these type hangers because they have two round ended straight pieces that are perfect. Note the black lines for my cuts which I did with a hack saw.
Next you grab a tiny nail and cut it down to size. (This one is too big but couldn't find smaller one for example). So these are your pieces to create with.
I used my knife to start a small hole before drilling it deep enough for the nail to go in.
Add a drop of glue and you've got your basic bottle. This was good enough for me. You could add a nozzle and gauge if desired.
Sand and primer then a coat of blue. Finish with a label snatched off the web using your favorite decal material and maybe some braided lines.
The end result was good enough for my application but could certainly be improved on.
Hope this proves helpful and I always welcome comments from my brother modelers.


Tamiya VW 1300 Bettle
in WIP: Model Cars
Posted
Very nice work. Keep it up