Harry P.
-
Posts
29,071 -
Joined
-
Last visited
Content Type
Profiles
Forums
Events
Gallery
Everything posted by Harry P.
-
 Forgot to post this. This is a real one, not identical to mine but similar.
 -
This 1/12 scale 1884 doctor's buggy is made by the same company that made the stagecoach kit I posted the other day... which means the same type of construction. Laser-cut wooden pieces, cast white metal suspension parts, wheel hubs, etc. Brass rod bent to shape for the handles, tiny unthreaded "bolts" held in place by gluing on even tinier cardboard "nuts." The individual spokes have to be carved to shape by the builder... a tedious job to say the least. This model is as fragile and spindly as it looks... it's pretty small (8 inches long) and the parts are very delicate. These buggies were single-passenger jobs meant to be drawn by one horse. They were popular with doctors making house calls back in the 19th century (yes! Doctors actually made house calls!). There were a couple of drawers under the seat where the doc kept his medical tools and supplies. One more thing... the manufacturer doesn't supply a top with the kit. According to them, the scale is too small to be able to include a realistic, in-scale top. Know what I say? BS! That's what. I made my own... the top bows are made of thin strips of wood that were soaked in water to soften them up, then bent to shape over a buck and left to dry, so that they then held their bent shape when dry. Once I had the top framework built (using photo references to sort of "guesstimate" the scale measurements), I cut the top "fabric" panels out of newspaper. There are three separate panels... the left and right side panels and the center section. I covered the top's frame with a piece of Saran wrap (you'll see why in a second)...then soaked the two side panels in watered down Elmer's glue. The two side panels were then formed over the top's framework while wet and sort of "molded" into shape with my fingers, trying to get a realistic "drape" on the pieces. The Saran wrap keeps the wet newspaper panels from dripping on the model and from sticking to the top's frame. Once the two side panels had dried and hardened, I removed them from the model and went through the same process with the center section. Once the center section was dry and hard, I removed it from the model, painted all three top sections with black acrylic craft paint, and then assembled the top onto the frame permanently. Finally I added top support brackets and landau bars scratchbuilt out of brass rod. Who says you can't make a realistic in-scale top at that size???!!! The kit supplied "upholstery" is just blocks of wood that the builder is supposed to carve and sand into shape so that it looks like padding. That wasn't going to cut it, so I made a real, padded, diamond-tuft upholstered seat. It's actually not that hard to do... if anyone is interested in the technique I'll post it. It's a little tricky, but nothing a modeler with some skill can't do. In the above photo you can see the seat upholstery (yes, it has real padding under the "leather"). The "rubber" floor mat is painted card stock and the "canvas" dashboard is painted newspaper.
-
Two guys were out on the golf course on a Sunday afternoon. In the distance a funeral slowly drove past. One of the golfers put down his club, faced the funeral procession and stood in silence with his head down until the funeral procession passed. "Wow," the first golfer said. "You sure have a lot of respect for the deceased!" The second golfer replied, "Well... we were married for almost 30 years!"
-
It's the only flat surface I have that's big enough to shoot them on!
-
-
Real or model? The answer FRIDAY
-
I was wrong! Sorry. I was thinking of the November issue. I also do not have the December issue yet. Sorry about that.
-
Another outstanding paint/foil job.
-
I like that one! Very nice. The shift knob looks to be about the size of a grapefruit, but oh well...
-
The aftermarket wheels look right on this one. Very nice.
-
Very nice, but the pins in the headlight lenses are a major bummer. Next time, remove the pins, fill the holes in the headlight buckets and use white glue or clear enamel to attach the lenses.
-
Your paint work is outstanding!
-
Love the craftsmanship, love the color and paint. Not a fan of the giant wheels. Not on this car at least.
-
Well, I feel sort of bad "raining on your parade," so to speak. I agree with all the positive comments, but I can't ignore that huge gap between the wheelwells and the outer fenders. Ouch...
-
Very crisp and clean. Love the color. Nice work!
-
A dumb blonde cop pulls ove a dumb blonde speeder. The dumb blonde cop says, "Let me see your ID." The dumb blonde driver replies, "Sorry, I guess I left it at home." So she pulls out her mirror compact and looks at it. "But I do have this picture of me," she says as she hands the compact to the D.B. cop. The D.B. cop looks at it and says, "Sorry. If I knew you were a cop I wouldn't have pulled you over."
-
That is one beautiful MOPAR! Thumbs way up!
-
Sorry... it's a curbside!
-
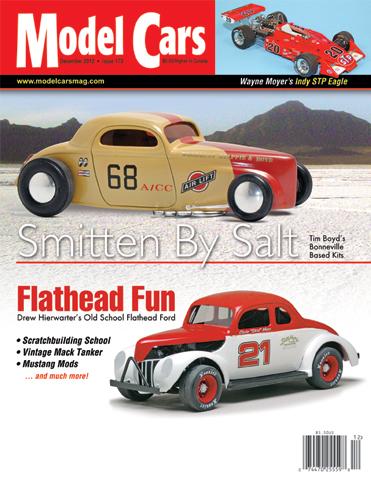
Here is the December cover.

-
I don't get it. I got my December issue weeks ago.
-
Muscle Car Stamps
Harry P. replied to Dr. Cranky's topic in General Automotive Talk (Trucks and Cars)
Tom, that's a very cool cover. -
Wow! What a great looking model. Very nicely done. Your foil work on those thin side spear trim borders is amazing! No doubt that is the best '64 Falcon model I have ever seen.
-
New photos coming... tomorrow. I'm taking the rest of the weekend off!
-
No, but I fed and watered it... uh, them...
-
Well, welcome back!