
Shelbytona
-
Posts
231 -
Joined
-
Last visited
Content Type
Profiles
Forums
Events
Gallery
Everything posted by Shelbytona
-
just finished up this model last night. Went together perfectly! This weekend when I'm home during daylight hours I'll take some better pics.
-
Thanks! It's pretty much done now.. Just needs to be cleaned of finger prints and the glue in the rear tail lights to dry and then I'll take some nicer pics of it. I'm very happy with how it turned out!
-
Thanks guys! Tonight I'll finish up the rear and then all that's left is the front grille assembly and side mirrors to put on.
-
Thanks for the compliment! It takes a bit of sanding and fitting to get the engine to fit together tight.. Not so much work with Revell kits, but AMT are another story! Haha I got a lot accomplished tonight.. The interior tub is done (the chrome around the gauge bezels is a little to big for scale but it is what it is!) it's starting to look pretty good! Next is the rear and front assemblies.
-
Thanks for the compliments guys! Thanks for the compliment on the Swinger.. It's been a labour of love bringing it back from the dead! Nice to see a lot of mopar/bodymen on this forum! 1970 had separate shoulder belts (up on the roof) so there were two seatbelts towards the center of the seats, one for the lap belt and the other for the shoulder belt.. The outer lap belts towards the door were retractable so it shouldn't be laying on the seat. Rims done in flat aluminum/flat steel for the Mexican hat and Flat black wash. the AMT tires were to small for this kit so I went with the tires that came with this kit.. They're no name like any typical new Revell kit but they'll do!
-
Thanks! It's Testors enamel light brown. I prefer testors enamels when brushing because the paint stays wet while doing fine details. Tamiya acrylics suck with the brush IMO.. Air brushing they're awesome tho! With tamiya acrylic It dries as fast as you apply it and goes on to thick.
-
Thanks for the compliments guys! You're not hi jacking the thread by any means! Thanks, it's a pretty rare car being a 340 4 speed car (EV2 with black interior) it was a total restoration, I almost replaced every panel except the roof structure! I have about 3000hrs in metal work on it. Yes it's a Windsor Ontario car. A lot of people didn't believe it was black underneath originally but I had a lot of proof that it was.. Windsor cars were supposedly the grey. I'm using a badger dual stage air brush with my large garage compressor. I'm not sure on the air pressure since the gauge is broken, but I always go by the sound of the air coming out of the air brush.. I find that's the best way to set them since different paints (acrylic, lacquer or enamel) spray differently and thinning plays the biggest part. next is the steering wheel and dash.
-
It's Tamiya flat black sprayed thru my air brush (thinned with tamiya acrylic paint thinner) Heres the firewall.
-
The underside of your challenger looks great! Here is a pic of my 1970 swinger that I'm doing.. Mine was dipped in black and I gave it the overspray like it was originally. Different plants had a grey and I thought the Challengers were grey underneith.. Oops! I found some pics online with a grey underside but wasn't 100% sure. Do the older chevelle monogram kits have any printing on them? I hate that Revell gives you no name tires.. There older kits seem to have branded tires.
-
Thanks guys! 1972coronet is correct. Mopar was pretty messy with paint back in the day, which is why the exhaust manifolds have overspray on them as well as the bellhousing. picked up some tires for this build. The T/A is supposed to have slightly larger tires in the rear but I'll probably just end up running the larger L60 tires of the AMT set since this model is 1/24 scale and the tires are meant for 1/25. Blacked out rear wheel wells
-
Got some more pieces painted.. The hood, grille and did the wheel well openings in flat black to simulate the undercoating. Rad support blackout like factory. Interior pieces done in semi gloss black.
-
-
Thanks for the compliments guys! I scribed the panel lines before paint to make them deeper. Once it was painted I filled the panel lines in with thinned tamiya flat black acrylic and wiped the excess away with acrylic paint thinner on a rag. I did correct the front valence as well, good eye! I also added the panel line between the rocker and fender. I also added all the decals to the body after clear coat because I didn't want them shiny.. They are supposed to be Matt back, even without clear oat they're a little to shiny for my liking but it's close enough. I finished up the air cleaner and BMF'd the exhaust tips. I also have to black out the wheel wells on the body to simulate the factory undercoating.
-
-
Started on a Revell 1/24 street burner kit while my real 1:1 build is on hold (1970 EV2 340 Swinger 4 speed) I painted this model with glasurit Hemi Orange EV2 automotive paint (base/clear) and it'll be pretty much box stock with wired engine, flocking and seatbelts. It's a really simple low parts count kit so it shouldn't take much longer.. I'm building it like a showroom new car. should be done in another couple days! I haven't been on here much lately since life has gotten in the way but I'm still building kits and collecting!
-
I decided to build this model next... I was going to do the daisy duke car (that's the kit I got) but the hood decal got damaged so I am going a different route. I will build it box stock with the exception of BMF, seatbelts and flocking. I will not bother going into extra detail under the hood since it's not accurate at all and poorly detailed. Here's the body primed with tamiya white primer, chrome yellow and then automotive clear. I have a bunch of parts soaking in bleach that shouldn't be bright chrome. They'll be refinished in alcad chrome for the rims and polished aluminium for the grille
-
Thanks guys for all the comments! It was a fun one to build and I plan on doing another one soon. (I have a photo etch set for this kit) Hey Tyrone I will dig up some pics of the nova for you. I know I have pics of it being built. Hey Tim, here is a short video of the Swinger I'm building... It's like building a model, but a little more expensive! Haha. It's an original 340 4 speed car. Factory hemi orange with black interior. It's going right back to original, but it's proved to be a bigger challenge then first expected! I have about 1000hrs into it so far and the next challenge is the front frame rails. I'm waiting on them so that's why I built this model... I'm still waiting so I'll build another model in the meantime!
-
Thanks guys! It's pretty much complete now.. Just have to black wash the hood vents. Hey Tyrone, yes I built a 69 tribute charger a while back!
-
Thanks guys for the comments! The tape is holding the subframe to the body while the glue dries. My subframe was slightly warped in this kit, so it didn't want to fit tight against the body.
-
Hey guys, it's been about 2yrs since I've posted on here and built a model.. I haven't left the hobby, but had a lot of things going on that kept me from building models... Mainly my 1:1 car I'm building (1970 340 Swinger) I've still been collecting kits over the past two years and finally decided to start building one up. I have been working on this one for about two weeks and it's almost complete. It went togather pretty good. It had a few little issues but nothing major. I figured I'd post in here and say hi! And show what I've been working on. It's box stock with some extra wiring, BMF, flocking and seatbelts. It's automotive base clear (custom mixed colour) (I touched up the glue stain in this pic)
-
Lookin great! I just thought I give you a warning on the rear axle not being centered to the wheel well openings on this kit. The wheels will sit to far back.. It's an easy fix relocating the diff on the springs and shortening the driveshaft a bit. If you have the latest issue of this kit you'll see it being off on the box art pics. I built a 69 charger a few months ago and the only other issue I had was the front roll pan below the bumper not fitting properly.. I glued some tabs on the outer pan out of some thin styrene to hold te corners in place to the fenders.. It solved the problem! Can't wait to see more of this build!
-
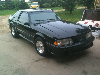
1988 Dodge Daytona Shelby Z Inspired build.
Shelbytona replied to Shelbytona's topic in WIP: Model Cars
Thanks guys for all the comments! I used the smoke paint from the can TS-71. I couldn't find it in acrylic at the hobby shop. I got some of the chassis detailed.. I painted all the brake lines/fuel lines/emergency brake lines, which was a pain to do, since the details weren't raised very high! I also dry brushed some graphite over the whole chassis to add a bit more realism and heat stained the resonator and cat. I also made a heat shield out of some cigar foil. -
1988 Dodge Daytona Shelby Z Inspired build.
Shelbytona replied to Shelbytona's topic in WIP: Model Cars
Thanks! You should pick one up, it be neat to see more of these built, the details and pieces are very nice, the only fitment issue on this kit so far, was the front window. got some details done under the hood. -
1988 Dodge Daytona Shelby Z Inspired build.
Shelbytona replied to Shelbytona's topic in WIP: Model Cars
Thanks guys, it's slowly coming along! That's awesome, what style are you going to build? I got the tail lights finished. I got some Tamiya smoke and painted it on the top and bottom part of the tail lights (the tail lights on a 1:1 car are this way) then i put BMF on the back side to make them look reflective, it turned out pretty good i think! I also got the chassis painted, once it's dry i'll start detailing it up. Not a fan of the rough texture on the chassis.. -
1988 Dodge Daytona Shelby Z Inspired build.
Shelbytona replied to Shelbytona's topic in WIP: Model Cars
Thanks guys! That Omni is looking great!! I'd like to see some pics of it when its finished. I got the front window in with a lot of fight... prepare for a lot of sanding on the bottom of the glass if you want the hood sitting flat. The rear glass is glued in and i got the rear louvers painted.