Search the Community
Showing results for tags 'nail polish'.
Found 3 results
-
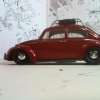
Here she is, my Tamiya Porsche 911 GT2 painted in OPI fingernail polish. This is the first time I have painted a model in fingernail polish and I am pleased with the results. It is built box stock as that is the category I want to enter it into at upcoming shows. Below is the link to the WIP. I took a lot of pictures of it because each angle gave a different result. I hope you like it as much as I do!
- 28 replies
-
- 10
-

-
- nail polish
- tamiya
- (and 1 more)
-
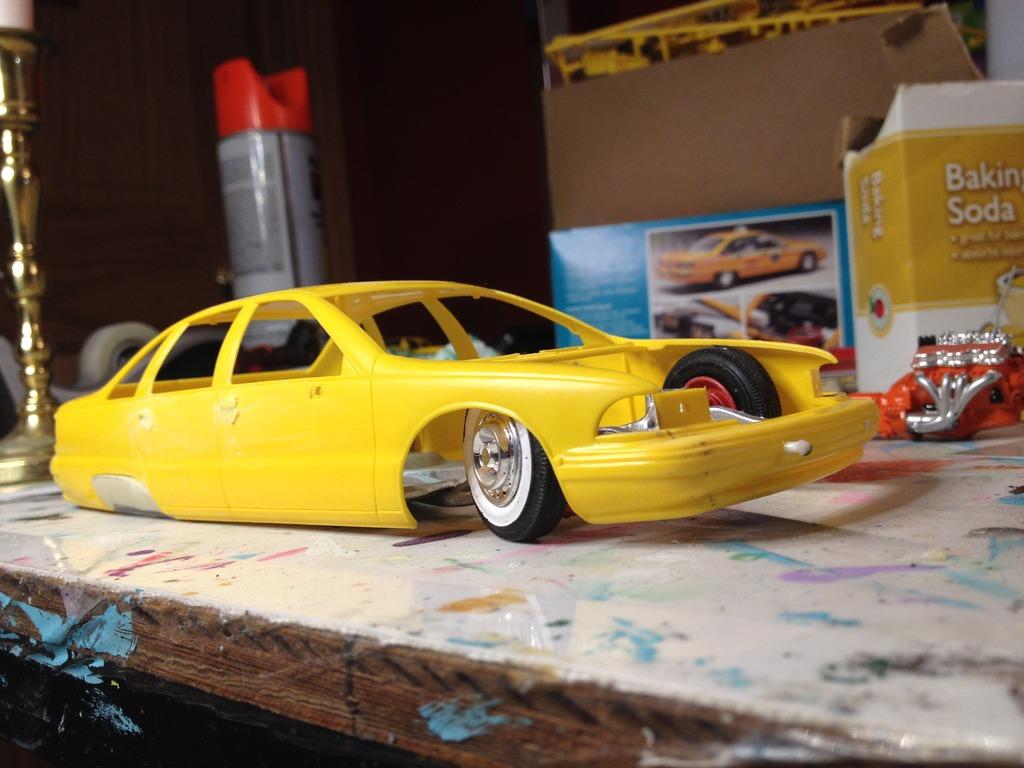
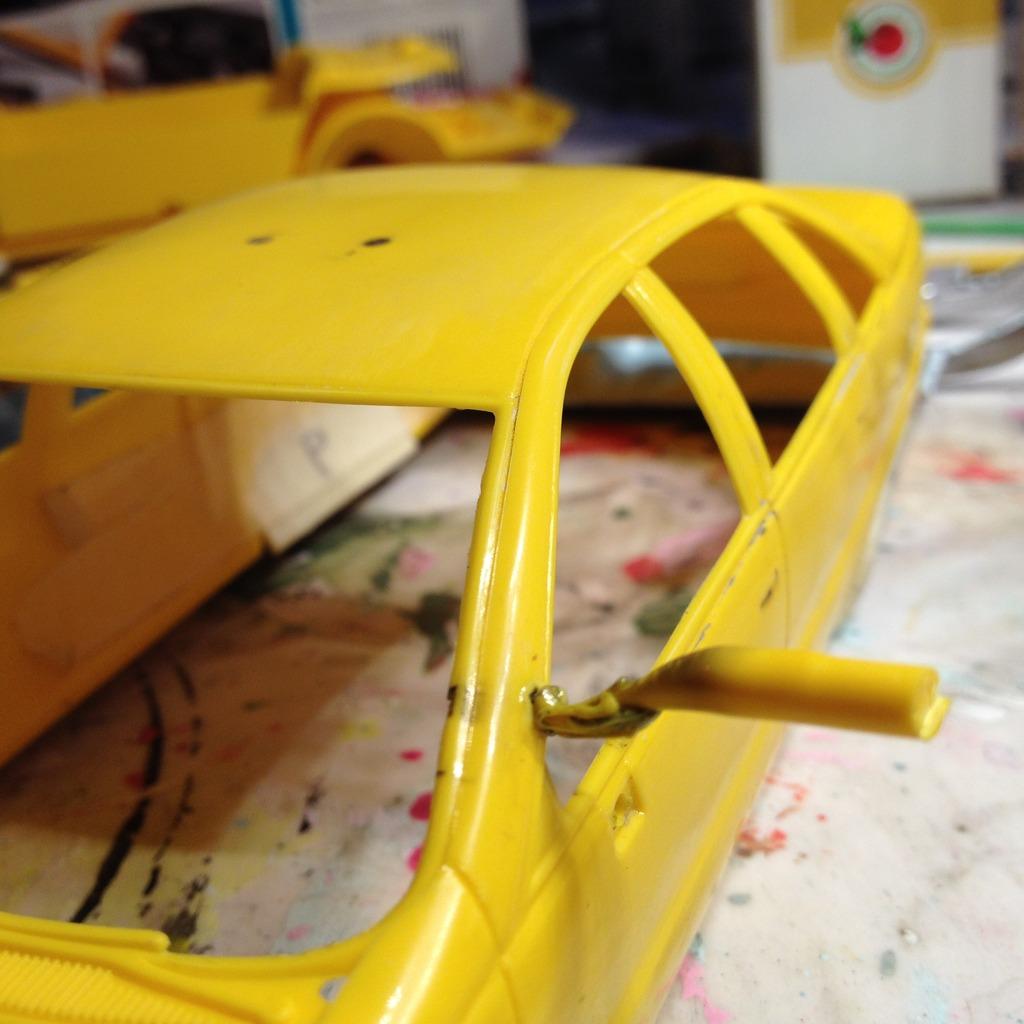
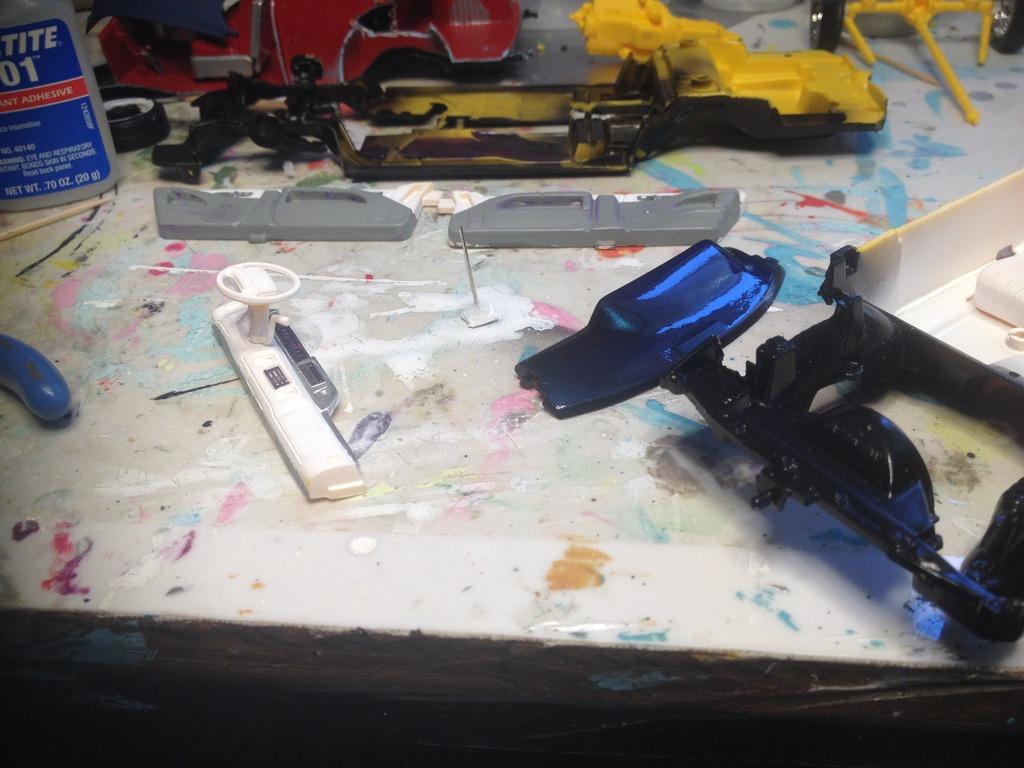
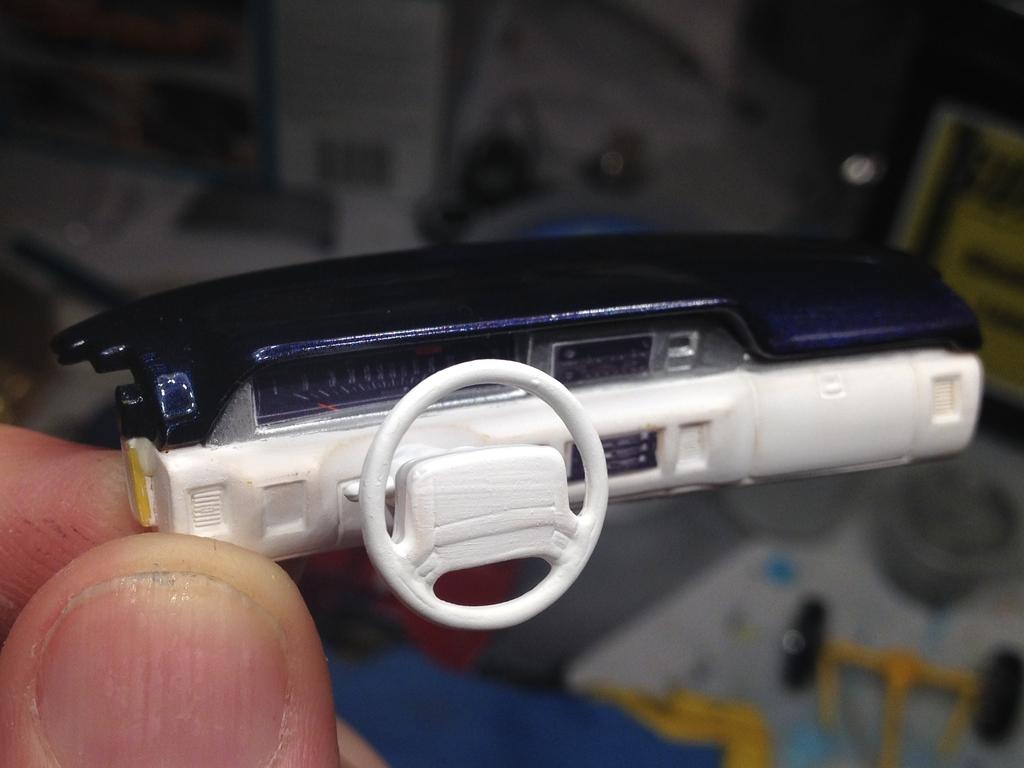
My current project is this Tamiya kit of the Porsche 911 GT2. I had recently seen a picture of a Porsche in a very unique color and fell in love with it. That picture was the inspiration for this build. I have been itching to shoot a model car in fingernail polish and I found a color of polish that was fairly close to the color of the real car. I figured now is the time to do it. I have experimented with shooting fingernail polish and am fairly comfortable with it. Before committing fingernail polish to the model, I experimented with the fingernail polish over a white primer and over a black base. I really liked the black base so that is how I shot the model. Here we go. I will caption each photo as needed. The Tamiya kit. The kit parts and the fingernail polish. The test spoon. I usually use a black Sharpie to highlight the mold seams. I am fairly certain that this kit started life as the race car kit. Tamiya have you remove a number of molded on items. These are also highlighted with a Sharpie. While I am at it I always rescribe all panel lines. There are a lot of parts that need to be painted body color. I made a list of these items and prepped them for priming and painting. I primed everything with Gravity Colors (Spain) primer. Next, I shot everything in Tamiya LP-1 Black. I let the black cure and knocked it down for a smooth surface. I only did the last step for the body parts. Here are 2 bottles of OPI fingernail polish slightly over-thinned with Mr. Color Leveling Thinner. Personally, I think it is a beautiful color! Approx. 5 or 6 coats applied. Some people will scoff at the Tamiya anti-static brush and the cost of it, but I use it all of the time and feel it works. I might have had 1 speck of dust in all of those layers of polish. The first two pictures are of the body fresh out of the paint booth. I let the fingernail polish cure overnight. Next up, I shot the body and associated parts in Tamiya TS-13 Clear straight out of the can. Lastly, here are three pictures of just the body shell after the clear has cured. Let me know what you think!
- 29 replies
-
- 8
-
-
- nail polish
- tamiya
- (and 2 more)
-
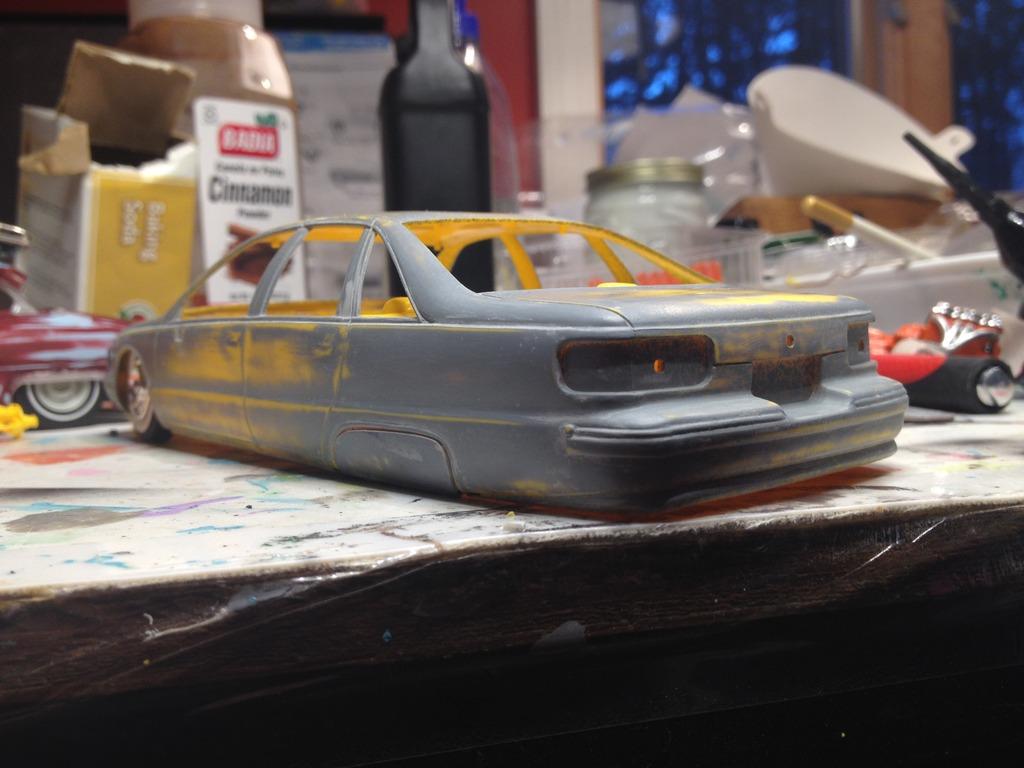
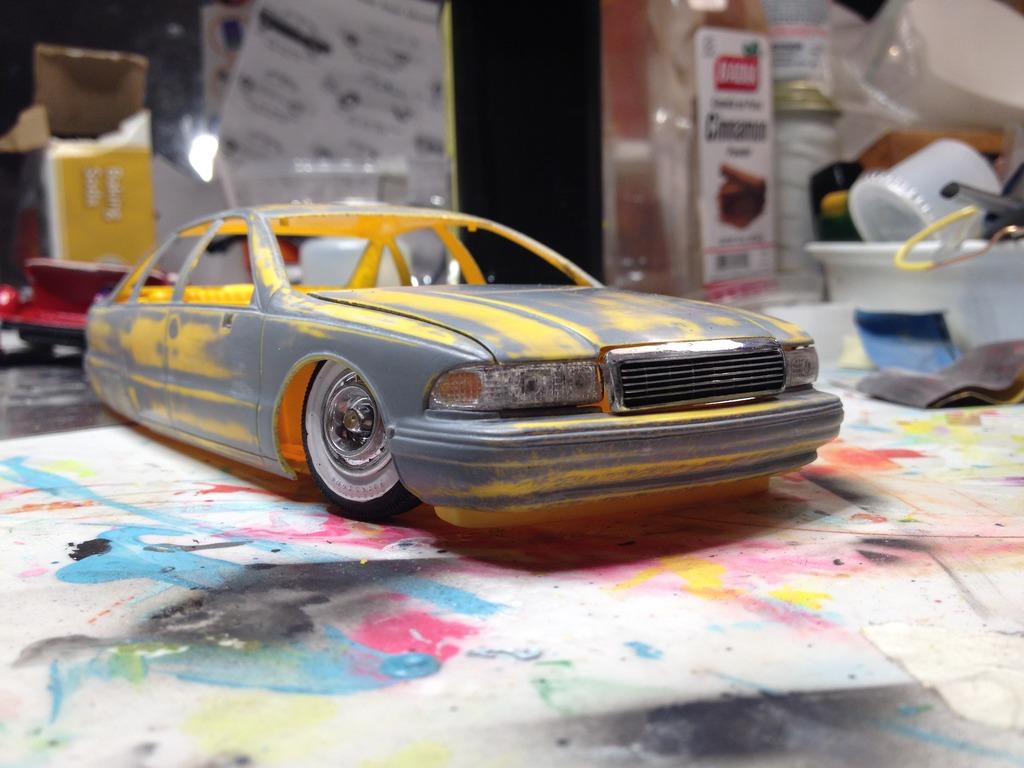
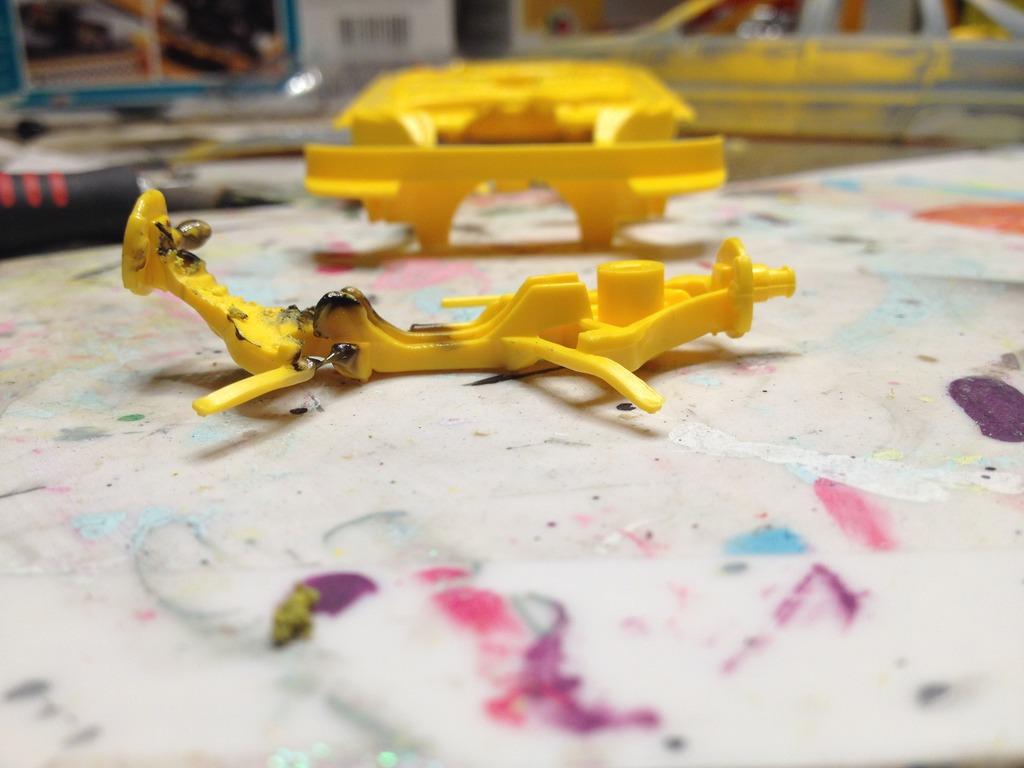
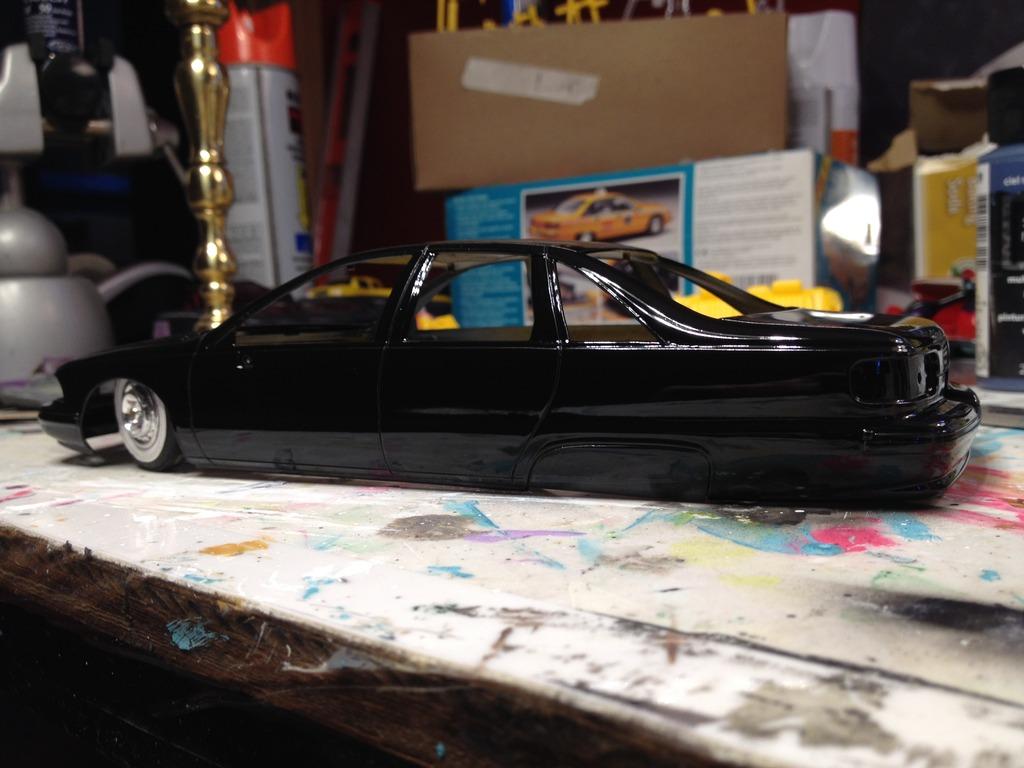
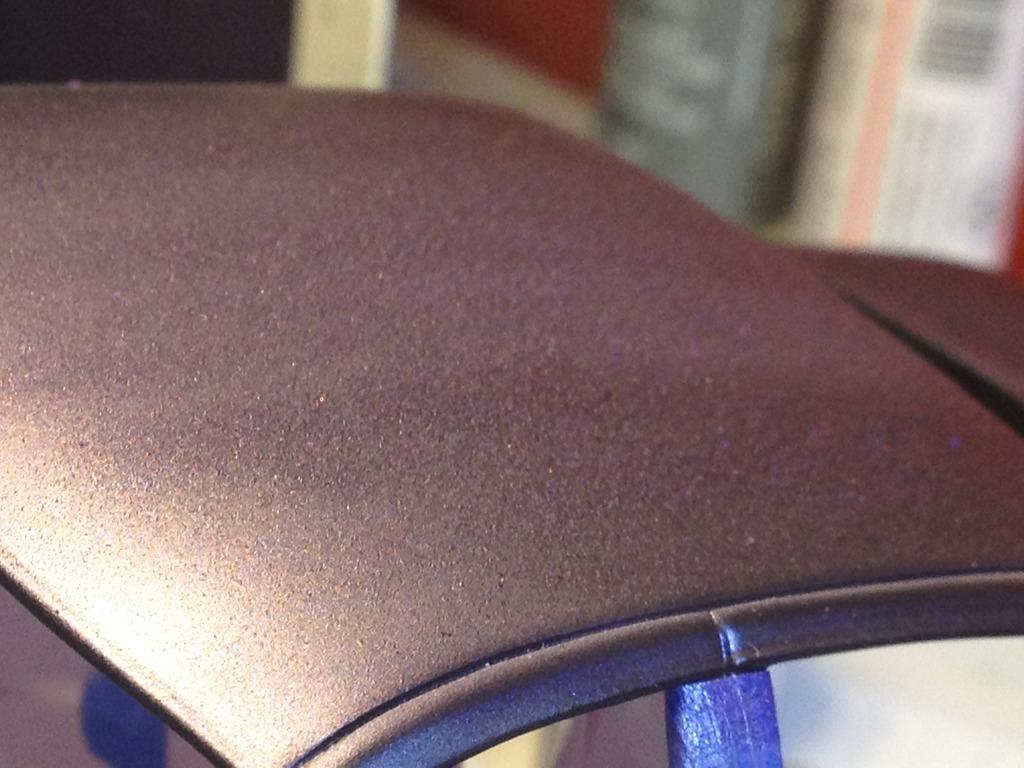
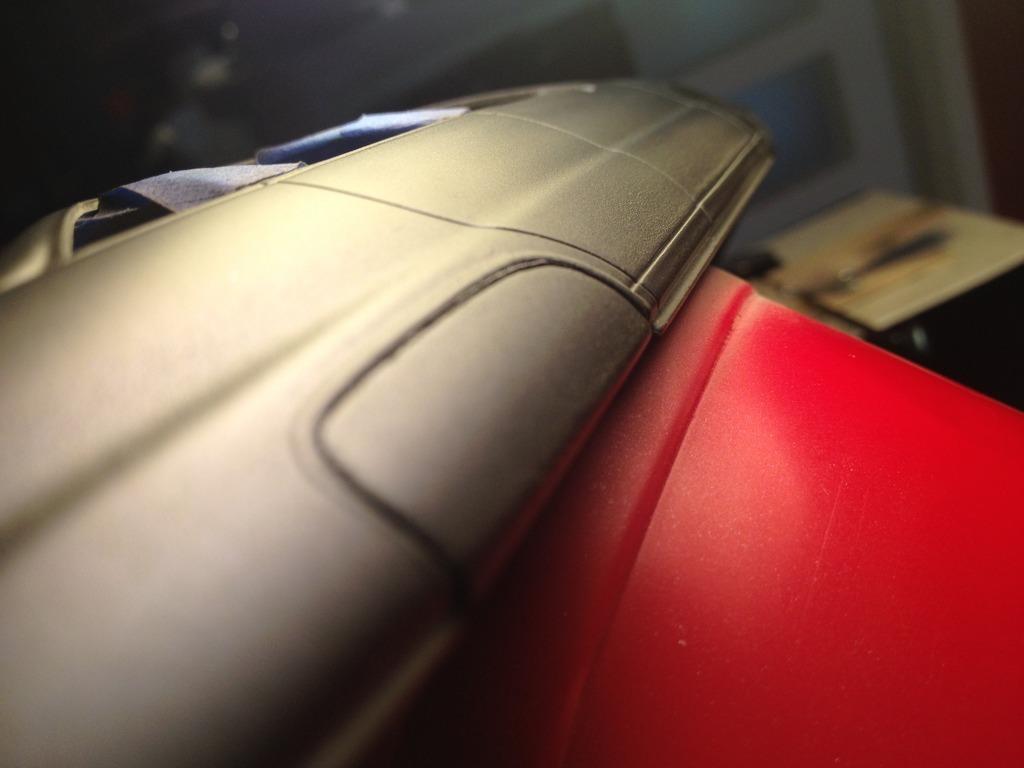
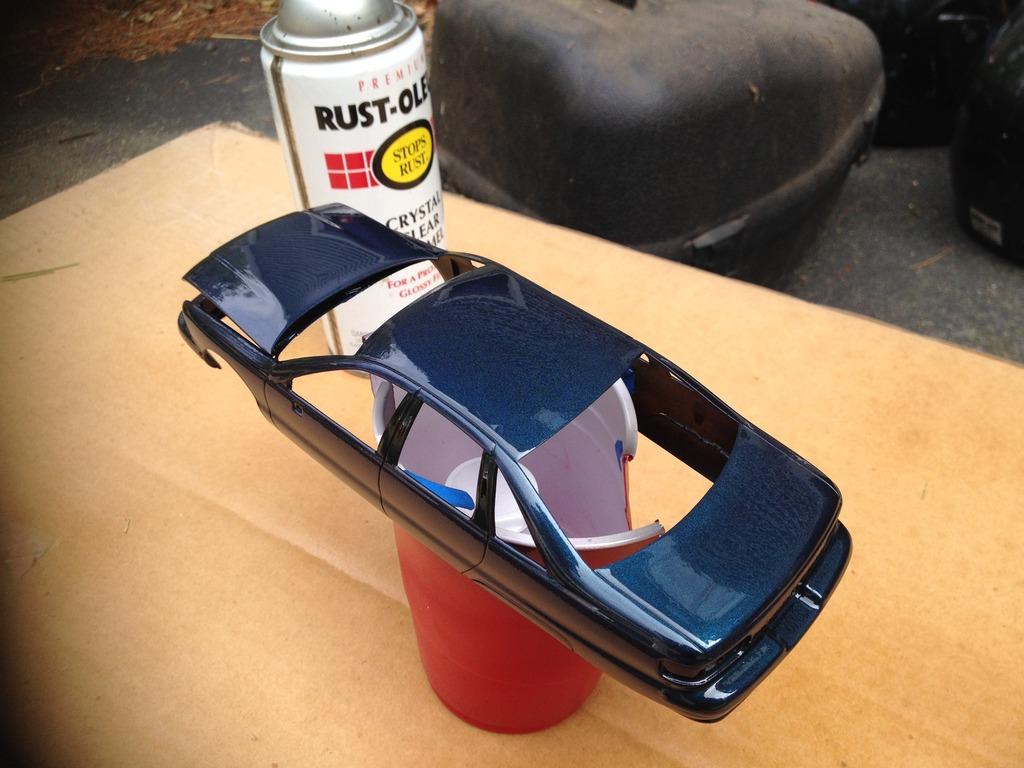
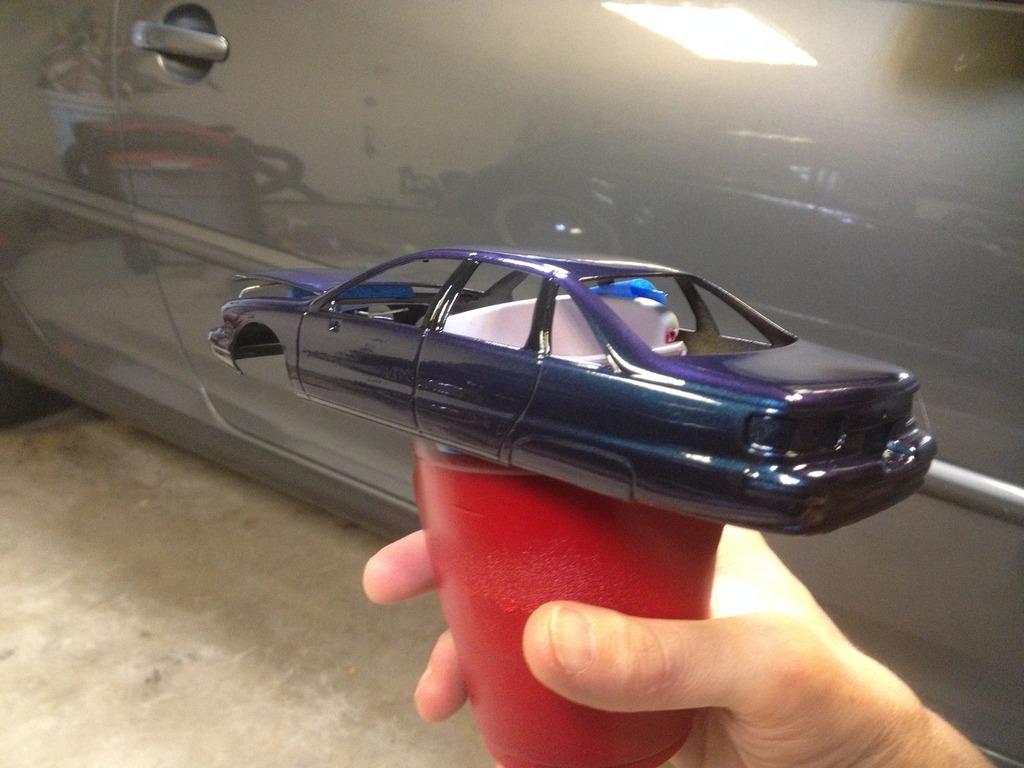
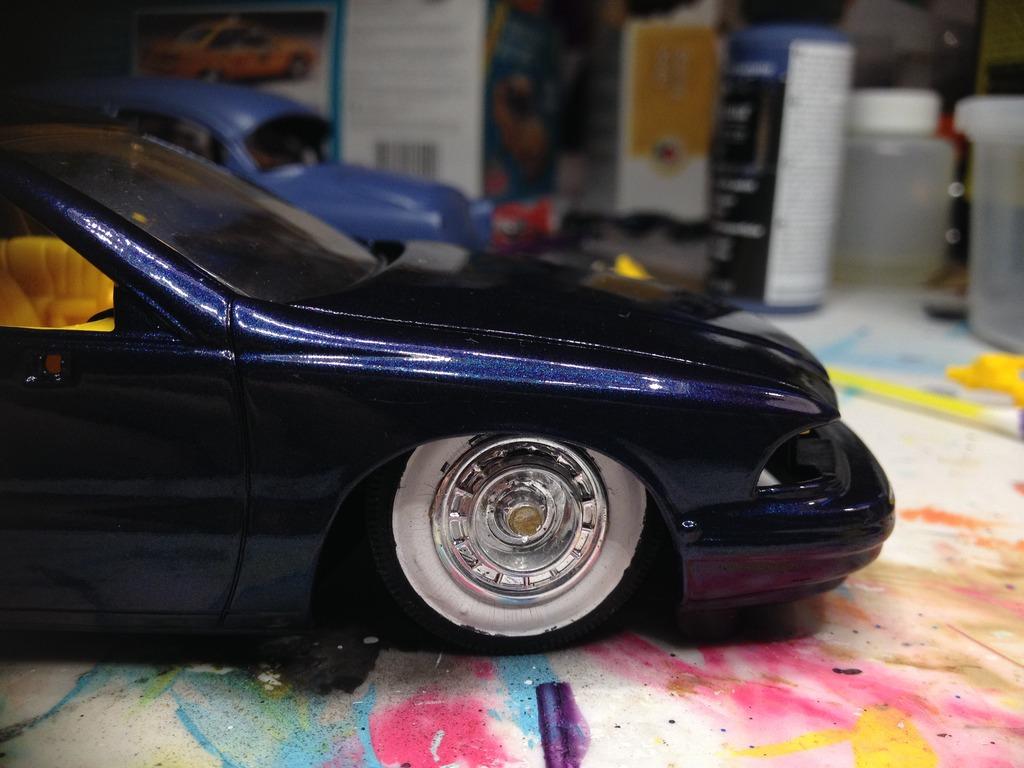
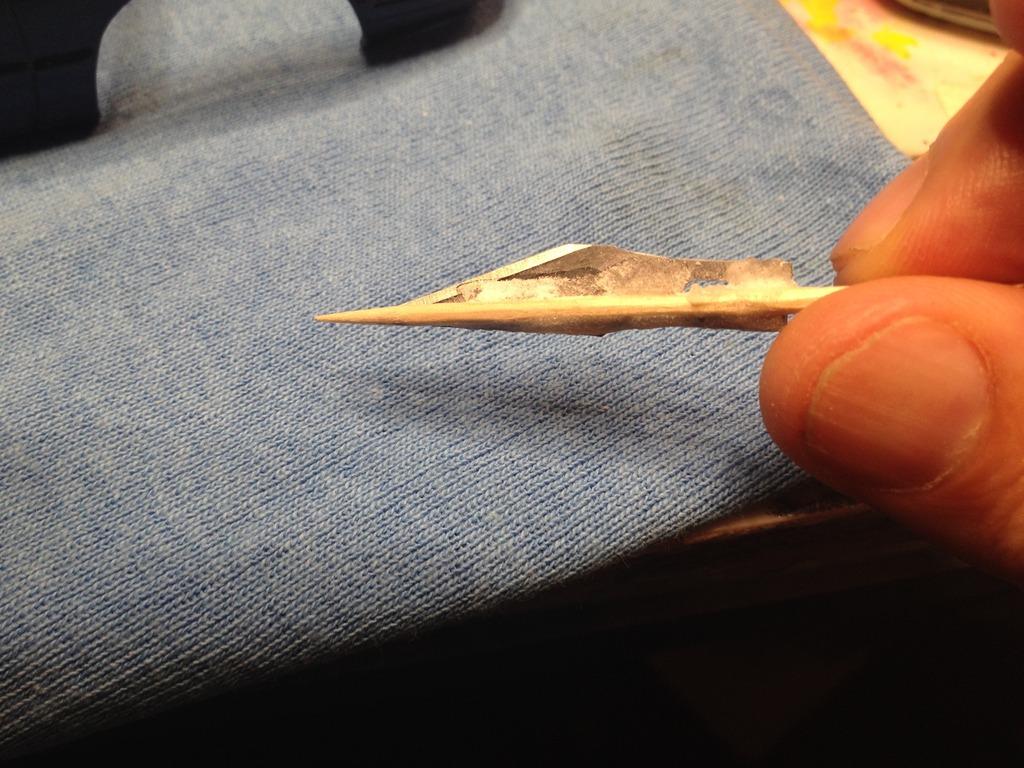
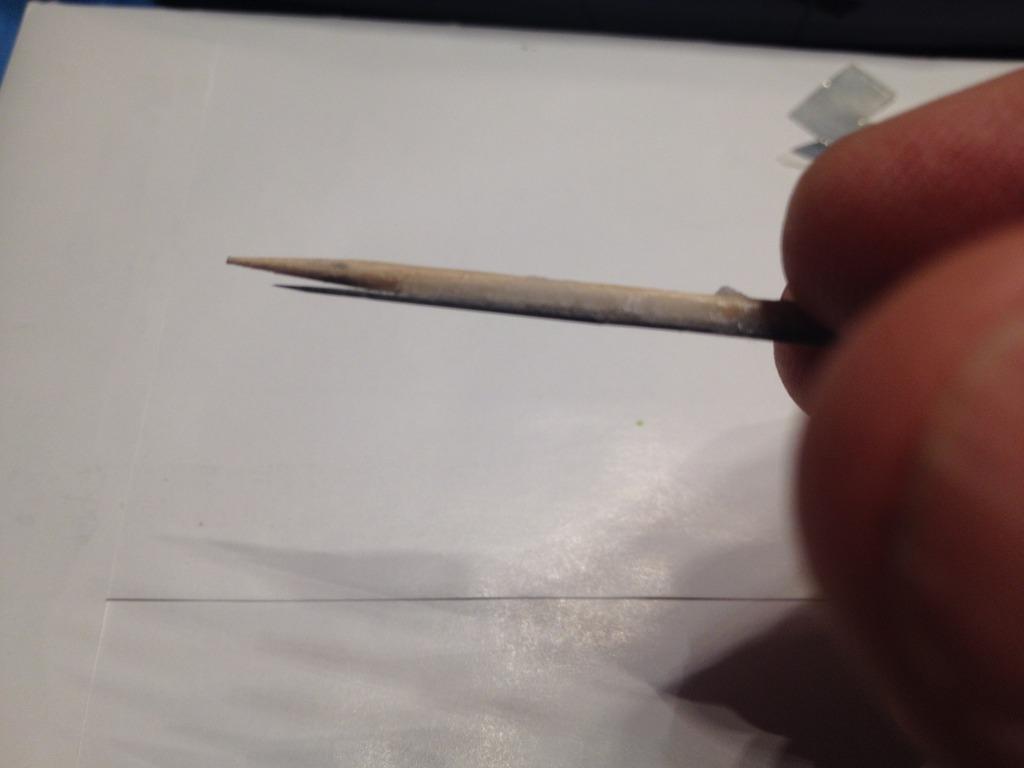
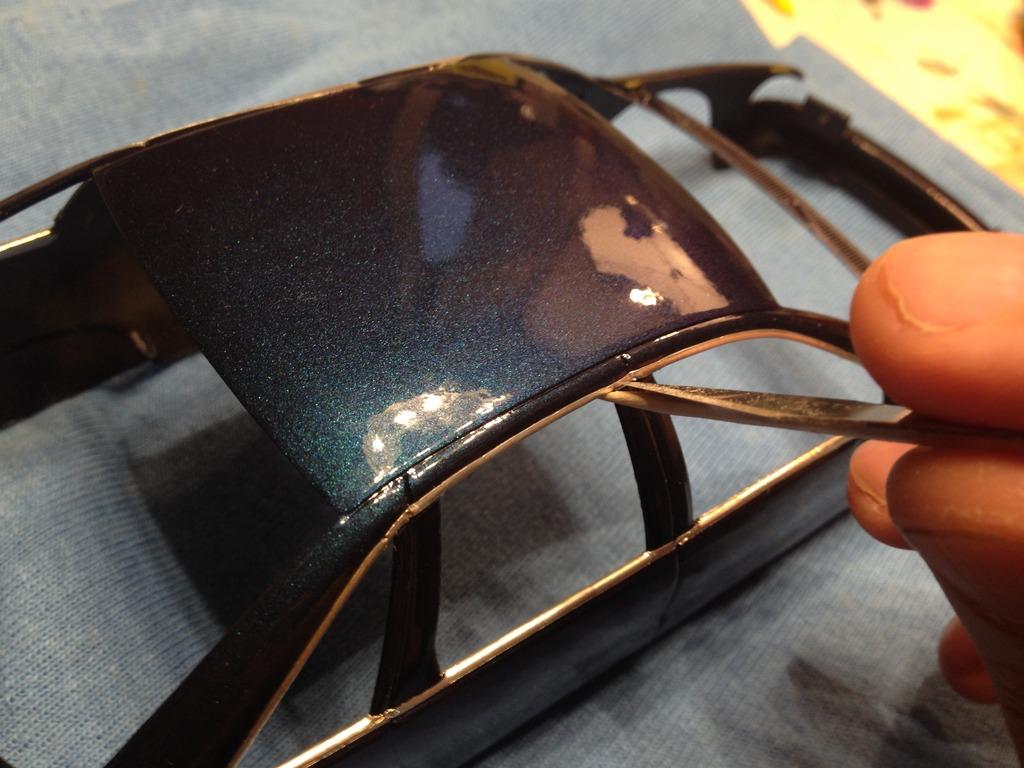
Hi All, I don’t post much but just got back into the hobby a couple years back (after a 30 year hiatus! ). I like browsing the forums here because they inspire & educate along the way. I thank you all for that. So I’ve tried to apply some of those tips & techniques into this current project. Here’s my take on the 1992 Caprice Taxi / Fire Chief car with a twist. I’ve always thought these Caprice’s could lend themselves to the old Lead Sled / Kustom look from the ‘50’s. After I came across this Revell SnapTite kit at a swap meet & thought I’d give it a try! (Easier & cheaper than doing a real car !!! ) Features I wanted for the ‘look’ was low suspension, fender skirts, wide whites w/ retro hub caps & shiny paint. (And...since I wanted to keep this achievable & the stress level low, I figured on a simple curb side build, (the engine & suspension can be left to your imagination!) (Please excuse my messy work bench (it just means I’m working! For the fender skirts, I made them from some 1” diameter styrene tubing; Cut out & sanded edge to match that weird Chevy fender shape & glued in place…. Using a mix of styrene sprue &/or the superglue & baking soda method, I filled all the extra holes that I didn’t need & shaved the door handles…. I took a progress shot; First prime ended coming out (dry) & bumpy, (I ended up sanding most of it off...). Those wheels & tires are from an old ‘58 Impala I had in my parts bin…. more sanding & smoothing… headlights & grille set in to test Warning, these next photos are not for the squeamish or perfectionists! Here’s a shot of the lowered suspension! (A little chop, heat & bend (FIRE!) on the left side) (nip & tuck & cut the inner fenders away!) (but hey, No one will see it when it's on the ground...Let’s just say it’s on airbag suspension, ok? It Needs to be low ) Paint has always been my biggest challenge & I wanted to try something a little different by using an airbrush w/ nail polish (ugh!)...but I marched forward. First I sprayed some Walmart gloss black (which looked pretty good as is… But I didn’t want to stop there, because I found this neat blue-to-purple color-flip Nail polish at the Dollar Store. I figured I'd try out the airbrush technique. Even after playing with the thinner ratios, it still went on dry & flat looking… (before a light sanding with 800 grit) But after some clear coat (& more sanding & more clear coat!) it started to look nicer… & another coat (or 2) of clear. You can see the purple color flip come out where the edges roll away from the sides (C-pillar area, etc.) (always gotta do a mockup to keep me inspired ) ...Still need to repaint those white walls. Interior is just white acrylic & painted accents (I did smooth the dash top & spray it body color)... and since my son lost the decal sheet that had the gauges on it ...I figured I’d improvise a bit. I searched Google for a suitable images of a gauge panel (& retro heater controls and radio). Then saved these JPGs to my computer, Scaled them to size using a free graphics program (Inkscape). Then printed on photo paper & used white glue to keep them in place. Not finished yet, (as I need to smooth out the steering wheel paint), but I think the glued on pictures look pretty convincing. Here's another trick, I didn't want to use the column shifter, so I made a tall floor shift lever. I used a sewing needle glued onto a styrene base 'boot'. For the shift knob, I wanted to try out a technique, so I dipped the end of the shift lever (needle) into some UV set resin. Let the drop set up in the sunlight for a minute, then re-dipped (for a larger “ball”. Colored it with a purple sharpie (then dipped into some Future floor shine for extra gloss) & ta da! Custom translucent purple resin shift knob…! (not perfect, but not bad for ~10 minutes worth of work ) Now onto the Bare Metal Foil for the window trim, something I haven’t attempted until now. Since my (many) clear coats had filled in the molded in trim line, I was a little concerned about trimming it to a consistent width. Here’s a tool I made to score the BMF trim to a constant width. You can see I superglued (& use baking soda for reinforcement / quick set) an X-acto blade to a round tooth pick. (and by positioning the blade along the length of the tapered end, you can set the width of the cut line. Position closer to the tip, the trim would be wider / closer to the shaft, the trim cut would be narrower.) Carefully position the blade tip to the foil & the toothpick to the inside window opening then drag around the perimeter of the opening(s) here it is in a posed “action” shot to show technique. (I had to connect the straight cuts between the windows, but the edge cuts turned out pretty well. Still need to smooth out some of the areas. That’s where I’m at now, more to come Thanks for looking