Twokidsnosleep Posted June 20 Author Posted June 20 On 5/31/2025 at 2:20 PM, DJMar said: Yup, with some Ansen-style swing pedals! Good reference photos of them here and the metal rod accelerator
Twokidsnosleep Posted June 23 Author Posted June 23 (edited) Rear fenders getting made and over the door rain channels altered Edited July 2 by Twokidsnosleep 3
James 1965 alfa Posted June 24 Posted June 24 I'm very impressed with this build.im a 60 yo gearhead and I would do just like you did.i don't have the scratch building skills you got though.you did a great job.im going to hobby lobby and get a kit and start cutting. 2
Twokidsnosleep Posted June 24 Author Posted June 24 11 hours ago, James 1965 alfa said: I'm very impressed with this build.im a 60 yo gearhead and I would do just like you did.i don't have the scratch building skills you got though.you did a great job.im going to hobby lobby and get a kit and start cutting. Cheers! that is a super nice thing to say, you have made my day
Twokidsnosleep Posted June 27 Author Posted June 27 Some progress happening with 3D engine parts. Got the scale better from reference with the Nova Chevy engine and transmission Heads, valve covers, transmission, bell housing and intake manifolds printed out. I will use that blue block from the Nova kit Have to cut up that intake manifold and print four smaller carbs vs this one large carb shown Thanks a ton to those that have helped me here and in messages…been life saver👍🏻😎 1
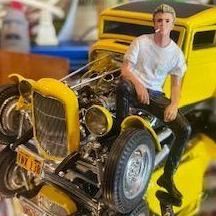
Twokidsnosleep Posted June 27 Author Posted June 27 Found a cool movie photo when researching too. Not everyone is still alive now, unfortunately. 2 1
Twokidsnosleep Posted June 27 Author Posted June 27 (edited) Now a start on the rear end; “ Buggy style springs and brace” Lovely Michigan replica and unknown as the demos Square styrene and styrene sheet. I dialled back the thickness of the leaf springs to .01” from this photo and used five strips instead of six I think I will add one thicker leaf at the bottom to support the thin ones and to have something more substantial to hold the bottom link attatchment point Edited June 27 by Twokidsnosleep 1
Twokidsnosleep Posted June 28 Author Posted June 28 There. Added 3mm shim to the rear end axle height 5
Twokidsnosleep Posted June 28 Author Posted June 28 Up on her wheels for the first time like a wobbly foal 3
Twokidsnosleep Posted July 4 Author Posted July 4 (edited) Raised up the rear 3mm with these styrene shims dropped the front end a few mm by opening up this channel to let the front suspension sit in further Now the front, it sits at a regulation twelve inches, you can check it if you like. Edited July 4 by Twokidsnosleep 2 2
Twokidsnosleep Posted July 4 Author Posted July 4 (edited) This is the scene where the cop pulls him over for his license plate light ticket and questions the height I don’t find the girl’s comments before the cop walks up very funny at all. Edited July 5 by Twokidsnosleep
Twokidsnosleep Posted July 5 Author Posted July 5 (edited) There are no good images of the real cars running gear from the underside, that I can find at least. When you search, you get mixed up with replicas and tributes that didn’t replicate things exactly…understandably Pinning in some rails with brass and the A frame ‘wishbone’ will be polished aluminum. Plan to bend that metal A a bit more as needed to make room for engine and transmission Edited July 5 by Twokidsnosleep
Twokidsnosleep Posted July 5 Author Posted July 5 (edited) Look at this beauty. Exactly what I was going for, right? 😉 Edited July 7 by Twokidsnosleep
FoMoCo66 Posted July 7 Posted July 7 BTW the carbs were 4 double barrels on the real car, you have 4, 4 barrel carbs. 1
Twokidsnosleep Posted July 7 Author Posted July 7 (edited) 46 minutes ago, FoMoCo66 said: BTW the carbs were 4 double barrels on the real car, you have 4, 4 barrel carbs. Ahhh they were Rochester 2 barrels and I printed the 4 in the file. Oops well, that might give me a bit more room Edited July 7 by Twokidsnosleep 1
Twokidsnosleep Posted July 10 Author Posted July 10 (edited) Ok mates I think I have the right carbs in the right scale now. This was good as it gives me some more room in there Will bend and angle trim some aluminum pipe for the stacks Great reference photo of the decaying engine sitting in the Paramount lot rusting away after the first movie. Edited July 10 by Twokidsnosleep 1
Twokidsnosleep Posted July 19 Author Posted July 19 The final paint for the body and frame before a 2K clear
Recommended Posts
Create an account or sign in to comment
You need to be a member in order to leave a comment
Create an account
Sign up for a new account in our community. It's easy!
Register a new accountSign in
Already have an account? Sign in here.
Sign In Now