mcandela Posted June 11, 2010 Posted June 11, 2010 (edited) Hey Mike, What I did was to use the photo etch one supplied in the kit. The bezels were raised, but I wanted a little more depth or reveal. I used Norm's Wizard "O"s ( he has the replica and miniatures of Maryland Co). These are different sizes of "O" rings and I just stacked them on top of the existing ones. The reference books I have show the bezel rings to be a little bit "taller" than the ones on the photo etch dash. I put the ring in place, and then take a paint brush with thinned down clear (lacquer thinner and MM clear top coat) and bring the brush up through the hole from the back side of the dash for the gauge that I'm working on. The clear will capillary under the ring and when dry, it will secure it in place. After that, I take the .015 piece of plastic that I have cut to match the outline of the dash. I have a collection of gauges that I have xeroxed from my collection of gauges. I use normal copy paper and I just copy about every set I ever get for a model. I then cut the paper gauge out, use a little bit of Elmers, and put a dot of it on the plastic piece, put the gauge down, then place the dash on top and take a toothpick and stick through the opening in the dash to move the gauge around to match the opening. I then repeat all of that for every gauge. When done, I place a piece of clear .005 that I have cut to match the dash outline, and glue it on top of the plastic piece. When dry, I glue the dash onto the clear plastic piece. This give the appearance of "3-D" gauges and not a bad detail for a little work. If your kit does not have a PE dash, take the plastic one, remove the material from the back of the dash to form a flat area for a piece of plastic that will hold your gauges. Then use the correct size drill bit to drill out the round gauge and then do the process listed above, just glue it in from behind. Hope this helps and is not too confusing!!! When I first bought this kit years ago, it came with a resin dash. Paul Fisher now has PE for the dash and I was able to get one from him. If I did not have the PE one, I would have removed material from the resin one from the back, and done exactly as I described above. Also, if you do race cars..sometimes the dash is nothing more than a flat piece of metal on the real thing. Get you a punch set (no, not the kind you drink out of) and mark your holes and punch them out. Then you have a simple looking one that you can add detail to. I will get some more photos up this week to show the final product. I cut plastic rod in small "cookies" to simulate the bolts that hold the dash. I secure them with a drop of the clear, and I use hex rod sometimes and even make little knobs and stuff from different sized rods. Once it's painted and in the car, it's hard to see it the way the camera does, so if it looks good or great in the camera shot, no one will be able to see it any better. David Wow!. Thanks for the explanation. I have tried that method only to do like 50% of the work. Tried 5 minute epoxy for the lenses but they seem to yellow with time or crack after a couple of months. Built one of Pauls Chaparrals a couple of months ago. These models are great quality & look very kool when finished. Here ->> My Chaparral Thanks again! Edited June 11, 2010 by mcandela
Karmodeler2 Posted June 11, 2010 Author Posted June 11, 2010 Wow!. Thanks for the explanation. I have tried that method only to do like 50% of the work. Tried 5 minute epoxy for the lenses but they seem to yellow with time or crack after a couple of months. Built one of Pauls Chaparrals a couple of months ago. These models are great quality & look very kool when finished. Here ->> My Chaparral Thanks again! Hey Mike, Nice work on the Chaparral. what type of material was used on the body in the area above the tires? The detail looks amazing, but I could not figure out how you did it. Very nice, clean work. David
1320wayne Posted June 12, 2010 Posted June 12, 2010 Dave, that is some stellar work you've got going on. I've always liked the look of a white car with blue rally stripes. Really makes it jump out at you. I'm sure the finished piece will be up to your normal, insanely phenomenal standards. Hope to see it in person real soon.
Karmodeler2 Posted June 12, 2010 Author Posted June 12, 2010 Dave, that is some stellar work you've got going on. I've always liked the look of a white car with blue rally stripes. Really makes it jump out at you. I'm sure the finished piece will be up to your normal, insanely phenomenal standards. Hope to see it in person real soon. Thanks Wayne. We need to plan another planning session. I called out and don't think I'll be back for about 10 days. Maybe the latter part of June in your neck of the woods. I will see how scrappy's schedule looks too. David
Karmodeler2 Posted June 12, 2010 Author Posted June 12, 2010 I wish you hadn't pointed out the stripes. Maybe you can delete that picture and only post future pictures at an angle (so only you and I will know). Like this?
Steve Keck Posted June 12, 2010 Posted June 12, 2010 Like this? That's it. All the stripes look parallel. I like the way it's progressing.
Bill Coulter Posted June 12, 2010 Posted June 12, 2010 Like this? Where can I find some of that gorgeous background material? Certainly is voluptuous. Ole' Karmodeler2...always the innovator! BC
Steve Keck Posted June 12, 2010 Posted June 12, 2010 (edited) White shag carpet. David says it's just catching on in east Florida. Good thing his modeling is up to par because his home decorating is way behind! Edited June 12, 2010 by skeck
Karmodeler2 Posted June 13, 2010 Author Posted June 13, 2010 White shag carpet. David says it's just catching on in east Florida. Good thing his modeling is up to par because his home decorating is way behind! If you would have just held onto yours and not tossed it out willy nilly, then you would not be experiencing the jealousy that you feel right now!!! And in close ups, it makes my parts look really big!!!!! David
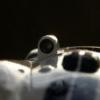
jbwelda Posted June 13, 2010 Posted June 13, 2010 thanks looking sharp, and thanks for the mini tutorial on instruments!
simonr Posted June 14, 2010 Posted June 14, 2010 Hey Dave, what blue you used on the wheels? Simón Rivera
Karmodeler2 Posted June 14, 2010 Author Posted June 14, 2010 Hey Dave, what blue you used on the wheels? Simón Rivera Hey Simón, I used Tamiya blue. And I hate to say it, but it's the same as on the car. I got the stripes too dark by spraying too many coats and the wheels too light by not spraying enough. I did the wheels before I did the stripes (big mistake and I knew it and even told myself not to, but I was excited about getting paint on the wheels after getting them prepped) and the wheels where already superglued together and finished before the stripes went on the car. I was using a dremel and I have a built-in vacuum nozzle in the top of my workbench so I can sand or file or whatever over it and I have a screen that is removable if I want it to be. Well, I was removing material from the back side of the rim so you could see through the openings and the resin dust kept blocking the screen and I kept having to stop, remove the screen, clear it and start over. Well, I was getting close to the last rim and I thought, Hey! I can hold this thing and dremel it and not let it get sucked into the hose without the screen on there!!! Well, that's not true. The vacuum sucked it in and broke it by snapping off the delicate rim on the outside....and it was the last one....I was almost finished!!! So I had to cast another one, and I ended up ruining 3 more by being impatient and trying to take away too much material at once and the bit came right through the rim on 3 different ones.....so I finally got a good one cast, and cleaned up from the back side, so I was a little excited about getting paint on them. I tell you all this because this is my lousy excuse for why the stripes don't match the wheels!!!!! Pretty lame, huh? In this shot it's hard to tell they don't match. Maybe I should just put the pic on the table at the show and not the model!!!! As far as the blue paint is concerned, I took the paint out of the spray can and used an airbrush for both. The white is Tamiya Pure white and the primer is Tamiya primer (starting to see a pattern,,,care to guess what the clear is? Yes, TS-13). All of them applied with an airbrush after I took them out of the spray can. The tires were sprayed with MM Black Chrome Trim thinned with lacquer thinner and sprayed through my airbrush. This paint is a very convincing black for rubber tires and for black leather seats. I use it all the time. I did use a mix of MM black and MM grey primer for a dirty-more grey-black for the tread area. You can see it in the front view shot. It's more noticeable in person.
simonr Posted June 14, 2010 Posted June 14, 2010 Great Dave, but....what Tamiya blue?..TS?..I will have a new project you will like next year
Karmodeler2 Posted June 15, 2010 Author Posted June 15, 2010 Great Dave, but....what Tamiya blue?..TS?..I will have a new project you will like next year Sorry, Lousy response on my part huh? I'm out on the road with my job and won't have an answer for you but I think it is just a plain blue, one on the darker side. I will PM you when I get back (about 8 days from today) and let you know. You can email me or PM me if you have not heard from me and remind me. David
mcandela Posted June 15, 2010 Posted June 15, 2010 Hey Mike, Nice work on the Chaparral. what type of material was used on the body in the area above the tires? The detail looks amazing, but I could not figure out how you did it. Very nice, clean work. David On the front tires the body itself has a bunch of holes that were on the real car, I guess they were there for ventilation. I only drilled them out with my dremel and painted them according to the template provided. Was going to paint them black but did some research and found some great pics of the real car and they happen to be painted blue metallic.
Karmodeler2 Posted June 16, 2010 Author Posted June 16, 2010 On the front tires the body itself has a bunch of holes that were on the real car, I guess they were there for ventilation. I only drilled them out with my dremel and painted them according to the template provided. Was going to paint them black but did some research and found some great pics of the real car and they happen to be painted blue metallic. Thanks for clearing that up. I could not get my eyes adjusted to it to figure it out. I saw raised bumps at times and holes at other times. Thanks for making me "not so" crazy!!! David
Karmodeler2 Posted June 18, 2010 Author Posted June 18, 2010 OK Dave thanks a lot. I will look for it. Simón Hey Simón, I think it is TS 15. I'm almost positive and can give you an exact number next week (25th), but I'm almost positive it was TS 15. David
simonr Posted June 18, 2010 Posted June 18, 2010 (edited) Hey Dave, I supposed that, because, I have a TS-15 at home and looks close to this one. Maybe I will mix it with a Gunze Sangyo Mr Color #5 Blue. Let me know. p.s. I see you had been with my good friend mcandela, maybe he'll be with us next year! Simón Hey Simón, I think it is TS 15. I'm almost positive and can give you an exact number next week (25th), but I'm almost positive it was TS 15. David Edited June 18, 2010 by simonr
Karmodeler2 Posted June 18, 2010 Author Posted June 18, 2010 Hey Dave, I supposed that, because, I have a TS-15 at home and looks close to this one. Maybe I will mix it with a Gunze Sangyo Mr Color #5 Blue. Let me know. Simón You can also shoot some of the Tamiya clear blue on top of your blue to give it a real deep looking blue.
Jim Gibbons Posted June 18, 2010 Posted June 18, 2010 Looking forward to seeing this completed! I finally got a new camera today, and took a test picture of the Nicholas Watts print of the C5-R with John Fitch's autograph.
Karmodeler2 Posted June 18, 2010 Author Posted June 18, 2010 Looking forward to seeing this completed! I finally got a new camera today, and took a test picture of the Nicholas Watts print of the C5-R with John Fitch's autograph. Thanks Jim for making me more jealous. Great picture!!! I am on the road with my job and won't be home until the 24th. I will then do some more work and try to get some more pics up. The good thing about being away is it forces me to allow the paint to gas out before I cut and buff it. I took a shot of the completed dash, but it was terrible, so I did not post it. All of the shots are here on this website. I have a few more things to scratch and paint and then machine all the lights and I should be getting close to done. Thanks for showing me the pic. That was cool!! David http://s194.photobucket.com/albums/z83/Karmodeler2/Cunningham%20C4R/
Jim Gibbons Posted June 19, 2010 Posted June 19, 2010 Thanks Jim for making me more jealous. Great picture!!! I am on the road with my job and won't be home until the 24th. I will then do some more work and try to get some more pics up. The good thing about being away is it forces me to allow the paint to gas out before I cut and buff it. I took a shot of the completed dash, but it was terrible, so I did not post it. All of the shots are here on this website. I have a few more things to scratch and paint and then machine all the lights and I should be getting close to done. Thanks for showing me the pic. That was cool!! David http://s194.photobucket.com/albums/z83/Karmodeler2/Cunningham%20C4R/ Sorry to make you jealous! That's okay, I feel the same way about your build! It's good you are on the road; there were so many times that I wanted to complete a project, but work stopped it from happening as rapidly as I desired. The end result often proved that patience and time worked in my favor. As an aside, (and I wish I had pictures,) Denise McCluggage was the Grand Marshall at the vintage event at Lime Rock a while ago, and did laps in a Cunningham similar to your model. Wish I had paid more attention as to which one, but it was so great to see. Man, I love those cars!
Karmodeler2 Posted June 20, 2010 Author Posted June 20, 2010 Great car, great model! Thanks! Did you use to live in NC and were a part of the Triad city modelers? David
Recommended Posts
Create an account or sign in to comment
You need to be a member in order to leave a comment
Create an account
Sign up for a new account in our community. It's easy!
Register a new accountSign in
Already have an account? Sign in here.
Sign In Now