Bluzboy66 Posted January 16, 2011 Posted January 16, 2011 Guys, Hope this finds you all enjoying a Saturday evening of kit building. I spent the earlier part of the evening watching the B'more Ravens lose to the Steelers, so I needed to do something to lift my spirits. So, I found myself digging through some old kits, and the Revell '65 Chevelle caught my fancy......again. I'd sprayed this one years ago, and it turned out lousy, so I stripped it, put it back in the box and set it aside until I could muster up another head of steam. I think this on deserves a second go 'round. As with most of my builds, I learn a lot about the 1:1 car as I progress with the kit build. Let me start by offering this to those of you who care to learn about the 1965 Chevelle SS 396 Z-16 Big Block!.... Z-16 Chevelle Website So, here I go, jumping back into this old stalled Chevelle project, when my eye falls on the rear tail light panel. For the first time, I realized that it just didn't look like all of the '65 Chevelles I've seen over the years. So, I Googled away, and found that, yes, Revell gave us the proper Z-16 tail light panel. It's a little wonky, but they did a pretty good job with it.... The Chevelles I've seen have THIS tail light panel.... OR, if you see a factory-correct, non-Z-16, Tuxedo Black SS, it'll have a tail light panel that resembles THIS.... With me so far? Me, I guess I want something different, and, as it turns out, more 'common'. SO, I reworked MY kit's tail light panel to resemble the more common, non-Z-16 Chevelle SS. I cut everything out between the rear quarter panels, and below the top edge of the trunk lid, reused some of the pieces, and used Plast-struct for everything else. Hindsight being 20/20, I should have taken a few pics as went along. But, oh well, here's what I have so far.... Once the glue dries on my revised tail light panel, I'll use my scribes and sanding sticks to refine everything a bit. I'll use Bare Metal foils for all of the aluminum and chrome trim accents, and I'll use Keith Marks decals for the scripts. Oh, and I'm thinking of using the bumpers from the AMT '65 El Camino, if they'll work.....they don't have the big fugly bumper guards, whereas the Revell kit's bumpers do. In the end, I'll have an '65 SS Chevelle that 'looks' right to my eye, even though the proper Z-16 would be the more desirable car to most SS fans. Sometimes you just have to go with your heart. I'll post more pics as I progress. Mike
Mike Kucaba Posted January 16, 2011 Posted January 16, 2011 Thanks Mike, I wasn't aware of all those different rear panels.
BHarrison Posted January 16, 2011 Posted January 16, 2011 I too never understood making the model resemble such a rarely seen piece. It would have been different if it had included both panels. Oh well, you have shown how cool the conversion can look! Awesome job.
Tumbler75 Posted January 16, 2011 Posted January 16, 2011 Man that taillight panel conversion is stunning! I myself being the past owner of 2 1965 Chevy Chevelle Malibus, Coupe and Sedan, I have to say you nailed this perfectly! I got one of these cars in my stash and I want to convert mine to the Malibu version. Great work! I can't wait to see more.
Steven Zimmerman Posted January 16, 2011 Posted January 16, 2011 Ed Fluck used to cast the ront and back bumpers for the R/M 65 Chevelle with the bumperettes removed,but I don't know if they're still available.
Peter Lombardo Posted January 16, 2011 Posted January 16, 2011 Nice job on the conversion...nice idea to do something rarely seen...makes it rather unique, and I like unique builds.....so finish it this time around.
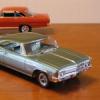
MonoPed Posted January 16, 2011 Posted January 16, 2011 I took two of the Z-16 panels, cut them in half, glued them together and covered it with foil when I made my small block Malibu:
charlie8575 Posted January 16, 2011 Posted January 16, 2011 Nice work on re-working the panel; I would suggest either foil-casting the letters or using photo-etch for the scripts, though. I think they just look better and will probably last longer. Brian- very nice job on your car, too. Charlie Larkin
Bluzboy66 Posted January 16, 2011 Author Posted January 16, 2011 I took two of the Z-16 panels, cut them in half, glued them together and covered it with foil when I made my small block Malibu: Excellent idea, and yours turned out great. Maybe I'll give that a shot on my next '65 Chevelle build. Whatever I decide to do, I'm going to try and resin cast a few extras before gluing it all up. I've never cast anything, but if there was ever a reason to learn the technique, this would be a perfect one. Mike
Recommended Posts
Create an account or sign in to comment
You need to be a member in order to leave a comment
Create an account
Sign up for a new account in our community. It's easy!
Register a new accountSign in
Already have an account? Sign in here.
Sign In Now