RodneyBad Posted April 20, 2011 Author Posted April 20, 2011 (edited) Rodney - those springs look like something I would have......already done. I'm glad I thought of it then I keep looking at your Ranger and mine just didn't look right. Soo I fixed it. highway Camber issue is just fine. I may fix it just a little bit once the motor goes in. Or carve a Block out of lead stewart Those are the same Coil Overs I showed you but modified a lot to fit and look better. I'll have my PC up and running by the weekend. Edited April 20, 2011 by Zukiholic
RodneyBad Posted April 21, 2011 Author Posted April 21, 2011 My PC up and running and some DIg cam pics. Some more rework to the front suspension. Had to lengthen the trialing arms and fab up new mount. The Coilovers are actually Losi Micro T Shocks (Part# LOSB1522) modified with the ends modified to fit where I want them to go Camber with stock body:D I doubt I'd do poseable steering since I would have to totally rework the tierods to move with the suspension. But Ya Never know
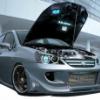
Bates Offroad Posted April 21, 2011 Posted April 21, 2011 cool truck the roll bar is kinda big though
RodneyBad Posted April 21, 2011 Author Posted April 21, 2011 cool truck the roll bar is kinda big though Thanks. Can't protect the cab if the roll bar is smaller, can ya?
stewart Posted April 22, 2011 Posted April 22, 2011 LOL Nice work rodney. I like the new mount you made and the aluminum rod trailing arms. STewart
RodneyBad Posted April 22, 2011 Author Posted April 22, 2011 (edited) LOL Nice work rodney. I like the new mount you made and the aluminum rod trailing arms. STewart Thanks, my Fancy Aluminum trailing arms are part of a Large Paperclip cut to size Shhhhhhhhhhh.. Edited April 22, 2011 by Zukiholic
RodneyBad Posted April 22, 2011 Author Posted April 22, 2011 Other than the ladder bars - I'm kinda flattered @ the Direct copy & upgrade of what I did! Way to pay attention in class, Rodney! What can I say, I liked the way your front suspension looked better than mine I just took your idea and ran a bit farther. Mine moves
RodneyBad Posted April 22, 2011 Author Posted April 22, 2011 VERY cool Rodney! kind of like brothers too these trucks, only in this case "little" bother came along first His truck build was implanted in my mind when I started. If I planned ahead more, I would've done the same colors for Twins Mmmmmm, I do have another body to use
RodneyBad Posted April 25, 2011 Author Posted April 25, 2011 (edited) Weekend not completely wasted. Motor is in. Don't know where to put the coil tho. Grill is also painted in the finish color for it, Basic Gray for a basic package F-150 Still have a few more lines to put in but gotta wait till the body is painted and together. Still need to find some Good Engine bay photos for more details to add. Front suspension is in since I glued the tierods to the Arms I did manage to cut the tieRod apart and pin it so I can still have a movable front suspension. Exhaust is in and is the stock exhaust with aluminum tips. Still have to lengthen the driveline and install it. Edited April 25, 2011 by Zukiholic
jedimastergary Posted April 25, 2011 Posted April 25, 2011 Looks great like the engine detail the suspension looks great this is turning out to be one great model cannot wait to see it finished.
highway Posted April 25, 2011 Posted April 25, 2011 Don't know where to put the coil tho. Still need to find some Good Engine bay photos for more details to add. Looking good Rodney! I have a few friends that have this style F150, I'll see if I can get together with one of them sometime soon (hopefully this week) and get some underhood pics for you.
RodneyBad Posted April 25, 2011 Author Posted April 25, 2011 Looking good Rodney! I have a few friends that have this style F150, I'll see if I can get together with one of them sometime soon (hopefully this week) and get some underhood pics for you. Thank, I just gotta figure where the coil will go, A/C lines, and throttle cables. Maybe a few odds and ends too. I did de chrome the intake and throttle body and painted the an aluminum silver with a Black wash on it to tone them down.
RodneyBad Posted April 25, 2011 Author Posted April 25, 2011 Thanks MrZinn. Perfect pics. Wheelman Someone needs to build one of those Suspension Ramps to check for articulation soon. RTI Ramps. My CR-V has Flex Suspension moves all over the place
stewart Posted April 25, 2011 Posted April 25, 2011 Wow rodney, this build keeps getting better. Nice engine detail. STewart
highway Posted April 25, 2011 Posted April 25, 2011 Thanks MrZinn. Perfect pics. Yes, nice pics Dave. I thought the black thingy was were the throttle cables went to, but I just wasn't sure. One question, where is the coil located? I didn't see it unless I'm missing it.
RodneyBad Posted April 26, 2011 Author Posted April 26, 2011 Hard to find an Actual pic of the coil but I think this is one. Mmmmmm. I May have to build one.
highway Posted April 26, 2011 Posted April 26, 2011 the coil is on the drivers side of the intake manifold kind of hanging over the valve cover. if you look at the one pics and follow the wire from the distributor you can see where it snaps onto the coil Ah, there it is!! I lost it in all the wires! Hard to find an Actual pic of the coil but I think this is one. Mmmmmm. I May have to build one. Thanks to Dave pointing it out to me, I zoomed in on it and that does appear to be the correct coil Rodney.
RodneyBad Posted April 26, 2011 Author Posted April 26, 2011 Thanks to Dave pointing it out to me, I zoomed in on it and that does appear to be the correct coil Rodney. Just leave it to MrZinn to find the needle in the haystack, Eh?? Some square tube, round tube and round stock will solve that problem Now to go find a 1:1 to measure, don't have no Fords in this family. Go figure??
Chuck Most Posted April 26, 2011 Posted April 26, 2011 Man, never realized how much the firewall on the AMT kit intruded over the engine compared to the 1:1!
RodneyBad Posted May 20, 2011 Author Posted May 20, 2011 Man, never realized how much the firewall on the AMT kit intruded over the engine compared to the 1:1! Haven't really noticed that issue till now, gonna have to fix that issue on the next one i build. yup, I'm sure there will be another F-150 going on I just painted up the cab to show the white I'll be using and I haven't forgotten about it. Now to get motivated to do the bed
Chuck Most Posted May 24, 2011 Posted May 24, 2011 I've thought about cutting the cowl flush with those two slots the interior tub snaps into, then butting the firewall up against that. Going to have to give that a test run- I KNOW I've got some trashed F-150 parts around here...
RodneyBad Posted May 25, 2011 Author Posted May 25, 2011 I've thought about cutting the cowl flush with those two slots the interior tub snaps into, then butting the firewall up against that. Going to have to give that a test run- I KNOW I've got some trashed F-150 parts around here... Yaa, I never noticed it and it didn't bother me till ya said sumething. Ugh. Can't wait to do start another one and fix that issue the way you suggested... I'll wait for you to work out the bugs tho
Chuck Most Posted May 25, 2011 Posted May 25, 2011 Yaa, I never noticed it and it didn't bother me till ya said sumething. Ugh. Can't wait to do start another one and fix that issue the way you suggested... I'll wait for you to work out the bugs tho Might be able to wring a tutorial out of it...
RodneyBad Posted May 26, 2011 Author Posted May 26, 2011 Might be able to wring a tutorial out of it... Ya Know, That would make a Great Article
Chuck Most Posted May 26, 2011 Posted May 26, 2011 Ya Know, That would make a Great Article Oh, let's NOT go there!
Recommended Posts
Create an account or sign in to comment
You need to be a member in order to leave a comment
Create an account
Sign up for a new account in our community. It's easy!
Register a new accountSign in
Already have an account? Sign in here.
Sign In Now