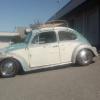
Sam Cates Posted October 18, 2011 Posted October 18, 2011 (edited) Well since my 1:1 is "on the workbench" I figured it's time to get back to my replica as well. Unfortunately the more I tear the car down the more rust I am finding, so far I am looking at a new left quarter skin, possibly a new left fender, and a right rocker panel. Most of the other rust holes have been sandblasted and will be filled with a welder to cut down on panel replacement costs. I have the hood and deck lid stripped to bare metal and they look excellent. Doors are not terrible but I haven't really opened them up and stripped them yet. As far as the 1:25 car, I used the resin conversion kit from Dencon I got a while back. As of now I used a set of MRC Keystone Classic wheels and tires, I am not sure if I will used Keystone Classics on the 1:1 or my old ET slotted mags. I will be painting it factory GM Bright Yellow, with black interior. I'll start off with some past and current photos of the 1:1 and will post photos of the kit this evening when I dig it out. This is what "Amber" looked like when I brought her home a few years ago the turdly old factory 2bbl 350, though it had plenty of power to lay rubber all the way down the street. Now this is the third time I have had her in the shop for body work and it will be the last. Got the rear panel filled and sanded Rust, rust and more rust...and no, not the good kind Virgil (Left front fender [lower rear]) Edited October 18, 2011 by Sam Cates
Sam Cates Posted October 18, 2011 Author Posted October 18, 2011 (edited) Edited October 27, 2011 by Sam Cates
Jantrix Posted October 18, 2011 Posted October 18, 2011 Sam, you need to build "before and after" replicas. Seriously.
Sam Cates Posted October 18, 2011 Author Posted October 18, 2011 Sam, you need to build "before and after" replicas. Seriously. Good call, I will definitely do that.
Gregg Posted October 18, 2011 Posted October 18, 2011 Sorry, Sam, can you alter the "graffiti" in the lower 1/4 panel pics?
Sam Cates Posted October 18, 2011 Author Posted October 18, 2011 Oddly enough, the frame rails are in great shape, found a few pin holes in the floors and trun pan, but nothing that merits buying new pans, going to weld them up and shoot the floor and truck with bedliner. The car spent about 15 years on the WA coast so I am quite impressed with how mush rust it DOESN'T have.
Hexagram Posted October 18, 2011 Posted October 18, 2011 Nice big bumper Im a big fan of second gens I have a 72 in the garage and about half a dozen on the work bench in scale. Good luck with the resto of your 74, if you havn't already you should go over to NastyZ28.com its another time consumer for me, the have every thing you need to know about 2nd gens. You using the the new round 2 version or an older kit.
groo12 Posted October 18, 2011 Posted October 18, 2011 I want to see a close up of that welding mask. It looks funky.
Sam Cates Posted October 18, 2011 Author Posted October 18, 2011 (edited) Sorry for some of the poor quality photos, my camera got sent in for warranty repair (no flash) so I am using my stupid cell phone camera. Here are some of the parts I am using, mostly from the parts box. Got these billet engine pulleys for it from a hobby shop in Modesto CA back in February Edited October 18, 2011 by Sam Cates
Sam Cates Posted October 19, 2011 Author Posted October 19, 2011 Well after a few failed attempts at finding the right color, since GM Bright Yellow doesn't exist anymore, I finally found GM Daytona Yellow. Got the body stripped and shot the first coat. Looks dead on with the original color of the 1:1. The resin kit fit very nicely with minimum trouble but deletes the front side marker lenses, after a couple goof ups on trying to scribe them into the correct place I gave it up. So far the 1:25 is coming along much easier than the big car, I got the right rear quarter filled and sanded, deck lid filled and sanded, still waiting on the left quarter patch panel though. trunk pan is cleaned out and ready for bed liner. Decided on replacing the left fender, picked one up from the wrecking yard for $20, looked like it was in really good shape, then I started stripping the paint and found that almost the entire fender has been skim coated in filler. Not a huge issue, just makes more work for me *Breaks out hammers and dollies* More photos tomorrow!
Sam Cates Posted October 20, 2011 Author Posted October 20, 2011 Got the interior almost done, didn't take much since everything is black, the door panels in the kit are not quite correct for a '74 but I am choosing my battles here. I also need to figure out where the 6 point is going to attach in the big car so I can replicate it in scale. As far as the big car goes, I may be replacing the whole trunk pan, started sand blasting it today and every spot I hit instantly turned to swiss cheese. The bulk of the pan looks good, its much worse around the edges and in low spots where water gathered. Got the fenders stripped, deck lid is ready for paint, hood is ready to be cut for the tunnel ram.
Sam Cates Posted October 26, 2011 Author Posted October 26, 2011 So, I picked a bad day to wear a sleeveless shirt to class, welding and bare arms don't work well together. Got the fenders and hood mocked up as well as the tunnel ram and valve covers (had them blasted yesterday). Also got the left quarter patch panel in today, have it in place for rough fitting, hope to get it welded up tomorrow. As far as the kit, I have mocked up the body, engine and chassis together, hoping to get the bumpers out next week for an Alclad treatment (since I don't have any right now) I wish the 1:1 was this easy!
Sam Cates Posted November 1, 2011 Author Posted November 1, 2011 I cried a little today... With testing this morning I didn't get much shop time, but I got enough time to find yet MORE damage in the right side of the car. It started with the door, as one of the guys was stripping the paint with the 8" sander, just below the paint was, you guessed it, body filler! He asked me about it and I told him to see how far it goes(thought maybe we could fix it), but no, the door is pretty bad. Holes in it everywhere from the old "slide hammer" trick. Looks like I am heading to the salvage yard foor a right door. So I told him to start stripping the right quarter panel to so if there was any major damage there, and this is what we found... He started with 40 grit on the 8" sander, found some filler and started cutting in with a "rice cake" to see how deep it really was. I measured, 1" thick in some spots. So, rather than attempting to weld some studs and pull like crazy, I will get a patch panel, the rest of the right quarter is nice and solid so it doesn't merit replacing the whole thing. No progress on the kit yet though.
62rebel Posted November 1, 2011 Posted November 1, 2011 sam, you ought to consider yourself lucky getting off that good. i remember seeing these cars in Virginia rusting so bad the windshields fell into the passenger compartment. and when that body "work" was probably done, that was a hundred dollar car at best..... not like today! i favored the small back window versions over the later ones..... big blind spot, but "what is behind me, does not matter!"
gramsey Posted February 19, 2012 Posted February 19, 2012 where did you get the model i would love to have one i am starting my 1:1 in a week or so
vintagestang Posted February 20, 2012 Posted February 20, 2012 Nice Camaro. We have a 1970 Camaro in storage and a 1966 Mustang and 1979 Hurst Olds in our shop.
Recommended Posts
Create an account or sign in to comment
You need to be a member in order to leave a comment
Create an account
Sign up for a new account in our community. It's easy!
Register a new accountSign in
Already have an account? Sign in here.
Sign In Now