stulee11 Posted December 21, 2011 Author Posted December 21, 2011 (edited) Really nice details on that engine, looks great. I often forget to install dip stick... Hope you don't mind, if I give little suggestion: Maybe push those ignition wires bit lower from both sides of that distributor. Now those wires look like they are made from metal, as they are like that. Maybe that doesn't matter in finished model, but that's what I should do. do you mean make them look like there sagging in between the dizzy and the first holder ??? if so taken on board and just done it lol . thanks for the comment and advice . Edited December 21, 2011 by stulee11
W-409 Posted December 21, 2011 Posted December 21, 2011 No problem, Stuart! And that's exactly, what I meant. Just didn't know correct words to explain it.
stulee11 Posted December 21, 2011 Author Posted December 21, 2011 No problem, Stuart! And that's exactly, what I meant. Just didn't know correct words to explain it. lol no worries . and if there is anything else you see during my build dont hessatate just let me know cuz its all helping me build better models thanks stu
tyrone Posted December 21, 2011 Posted December 21, 2011 NICE WORK so far, engine details are sweet, nice touch on the dipstick..
stulee11 Posted December 21, 2011 Author Posted December 21, 2011 (edited) hi all not much of a update and no pics yet but i had to move the dipstick to the other side of the sump as the starter wouldn't fit lol "whatta dipstick i was" . thanks for all the good comments . and help to . Edited December 21, 2011 by stulee11
Sticks Posted December 21, 2011 Posted December 21, 2011 A good eye for detail, Very well done I like it.
stulee11 Posted December 21, 2011 Author Posted December 21, 2011 hi all i have made a fair bit of progress tonight . i will let the pics do the talking lol wheels done i don't know if there right but i think they look cool lol chassis is all done and dusted
stulee11 Posted December 21, 2011 Author Posted December 21, 2011 few more seats and roll cage are coming on nicely
stulee11 Posted December 21, 2011 Author Posted December 21, 2011 and last ones engine nearly done just the belt and fan to go . i looked up on the net and incase anyone is wondering why there is 3 wires hanging off its because 1 for the battery and the other red and black is for the alternator . it can wire straight up to the starter and earth to the block . and this is with the dipstick moved to the other side lol thanks for looking in and the wicked comments hope you all like whats going on with this one . thanks stu (p.s) does the wires look better now niko ??? lmao
Rdkingjay Posted December 21, 2011 Posted December 21, 2011 Don't know how I managed to miss this thread, but awesome work so far!!. I have the Revell "Special Edition" '68 Charger kit and for those who don't have one, get one! They are fantastic kits that are easy enough for a novice, but well suited for detailing by the experienced builder. One of the best I have seen in years. Great job Stu. Looking forward to more progress.
stulee11 Posted December 22, 2011 Author Posted December 22, 2011 Don't know how I managed to miss this thread, but awesome work so far!!. I have the Revell "Special Edition" '68 Charger kit and for those who don't have one, get one! They are fantastic kits that are easy enough for a novice, but well suited for detailing by the experienced builder. One of the best I have seen in years. Great job Stu. Looking forward to more progress. thanks mate i did the "70 charger" kit and that was so nice to put together and a joy to build .
Mr. Moparman Posted December 22, 2011 Posted December 22, 2011 Whaaaa??? there's a '70 Charger!!! Pics pleazzzz!!!!!!! Otherwise this will be a great model. Keep it up.
LoneWolf15 Posted December 22, 2011 Posted December 22, 2011 Stu , Just my opinion , I'd pull the wires down tighter. Your model , your call .
W-409 Posted December 22, 2011 Posted December 22, 2011 Well now those plug wires look good! Great job on the chassis too. It's going to be really nice build, when finished. I'm sure about that. Nova is nice car, and I like that color scheme, you've used so far.
stulee11 Posted December 22, 2011 Author Posted December 22, 2011 the "70 charger" pics are on here somewhere lol in "under glass" . What do you mean pull the wire's tighter to the model ? Thanks everyone for the comments there really helping me out on this one .
stulee11 Posted December 22, 2011 Author Posted December 22, 2011 my mistake it isn't a "70" its a "67 charger" kit
stulee11 Posted December 22, 2011 Author Posted December 22, 2011 another update peps engine is all done just gotta put it in the chassis .
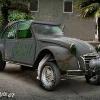
stulee11 Posted December 22, 2011 Author Posted December 22, 2011 and the body is in primer and the hood has one coat of colour and the stance is looking quite mean lol thanks for looking hope your all liking this as much as i am lol thanks for all the encuragement and comments stu
mannyclub Posted December 22, 2011 Posted December 22, 2011 Its looking good Stu!!! I like the yellow accents on the engine. Hood looks cool and the stance is perfect, and the wheels look awesome on it. I was waiting for the wheel moch up with the wheels lol Manny
stulee11 Posted December 22, 2011 Author Posted December 22, 2011 lol thought i better share it with ya all lol thanks for the comments
Recommended Posts
Create an account or sign in to comment
You need to be a member in order to leave a comment
Create an account
Sign up for a new account in our community. It's easy!
Register a new accountSign in
Already have an account? Sign in here.
Sign In Now