Mr. Moparman
-
Posts
1,254 -
Joined
-
Last visited
Content Type
Profiles
Forums
Events
Gallery
Everything posted by Mr. Moparman
-
Some nice progress being made here. Should be an accurate representation of how many of the surviving cars are living their lives these days, rusting away somewhere waiting to be restored. Your scratch work on those headlight doors is nice, just clean up the inner buckets a bit and you'll be golden!
-
 I won't say I was the best, but I was respectable. I'll post a picture of my '69 Daytona that was one of my final kits I ended up building before I put it away for awhile. The Daytona, my Revell '70 Cuda, and a Plymouth '69 GTX were my last ones. I did build one of AMT's 2017 50th Anniversary Camaro kits last year for a buddy as a replica of his 1:1. I suppose I could probably source everything I need for my build from Revell's Challenger kit. It would have the seats I am looking for as well as the brakes and wheels/tires. I'm gonna get the resin Hellkitty engine from Clearly Scale. That thing looks sick with so much detail.
-
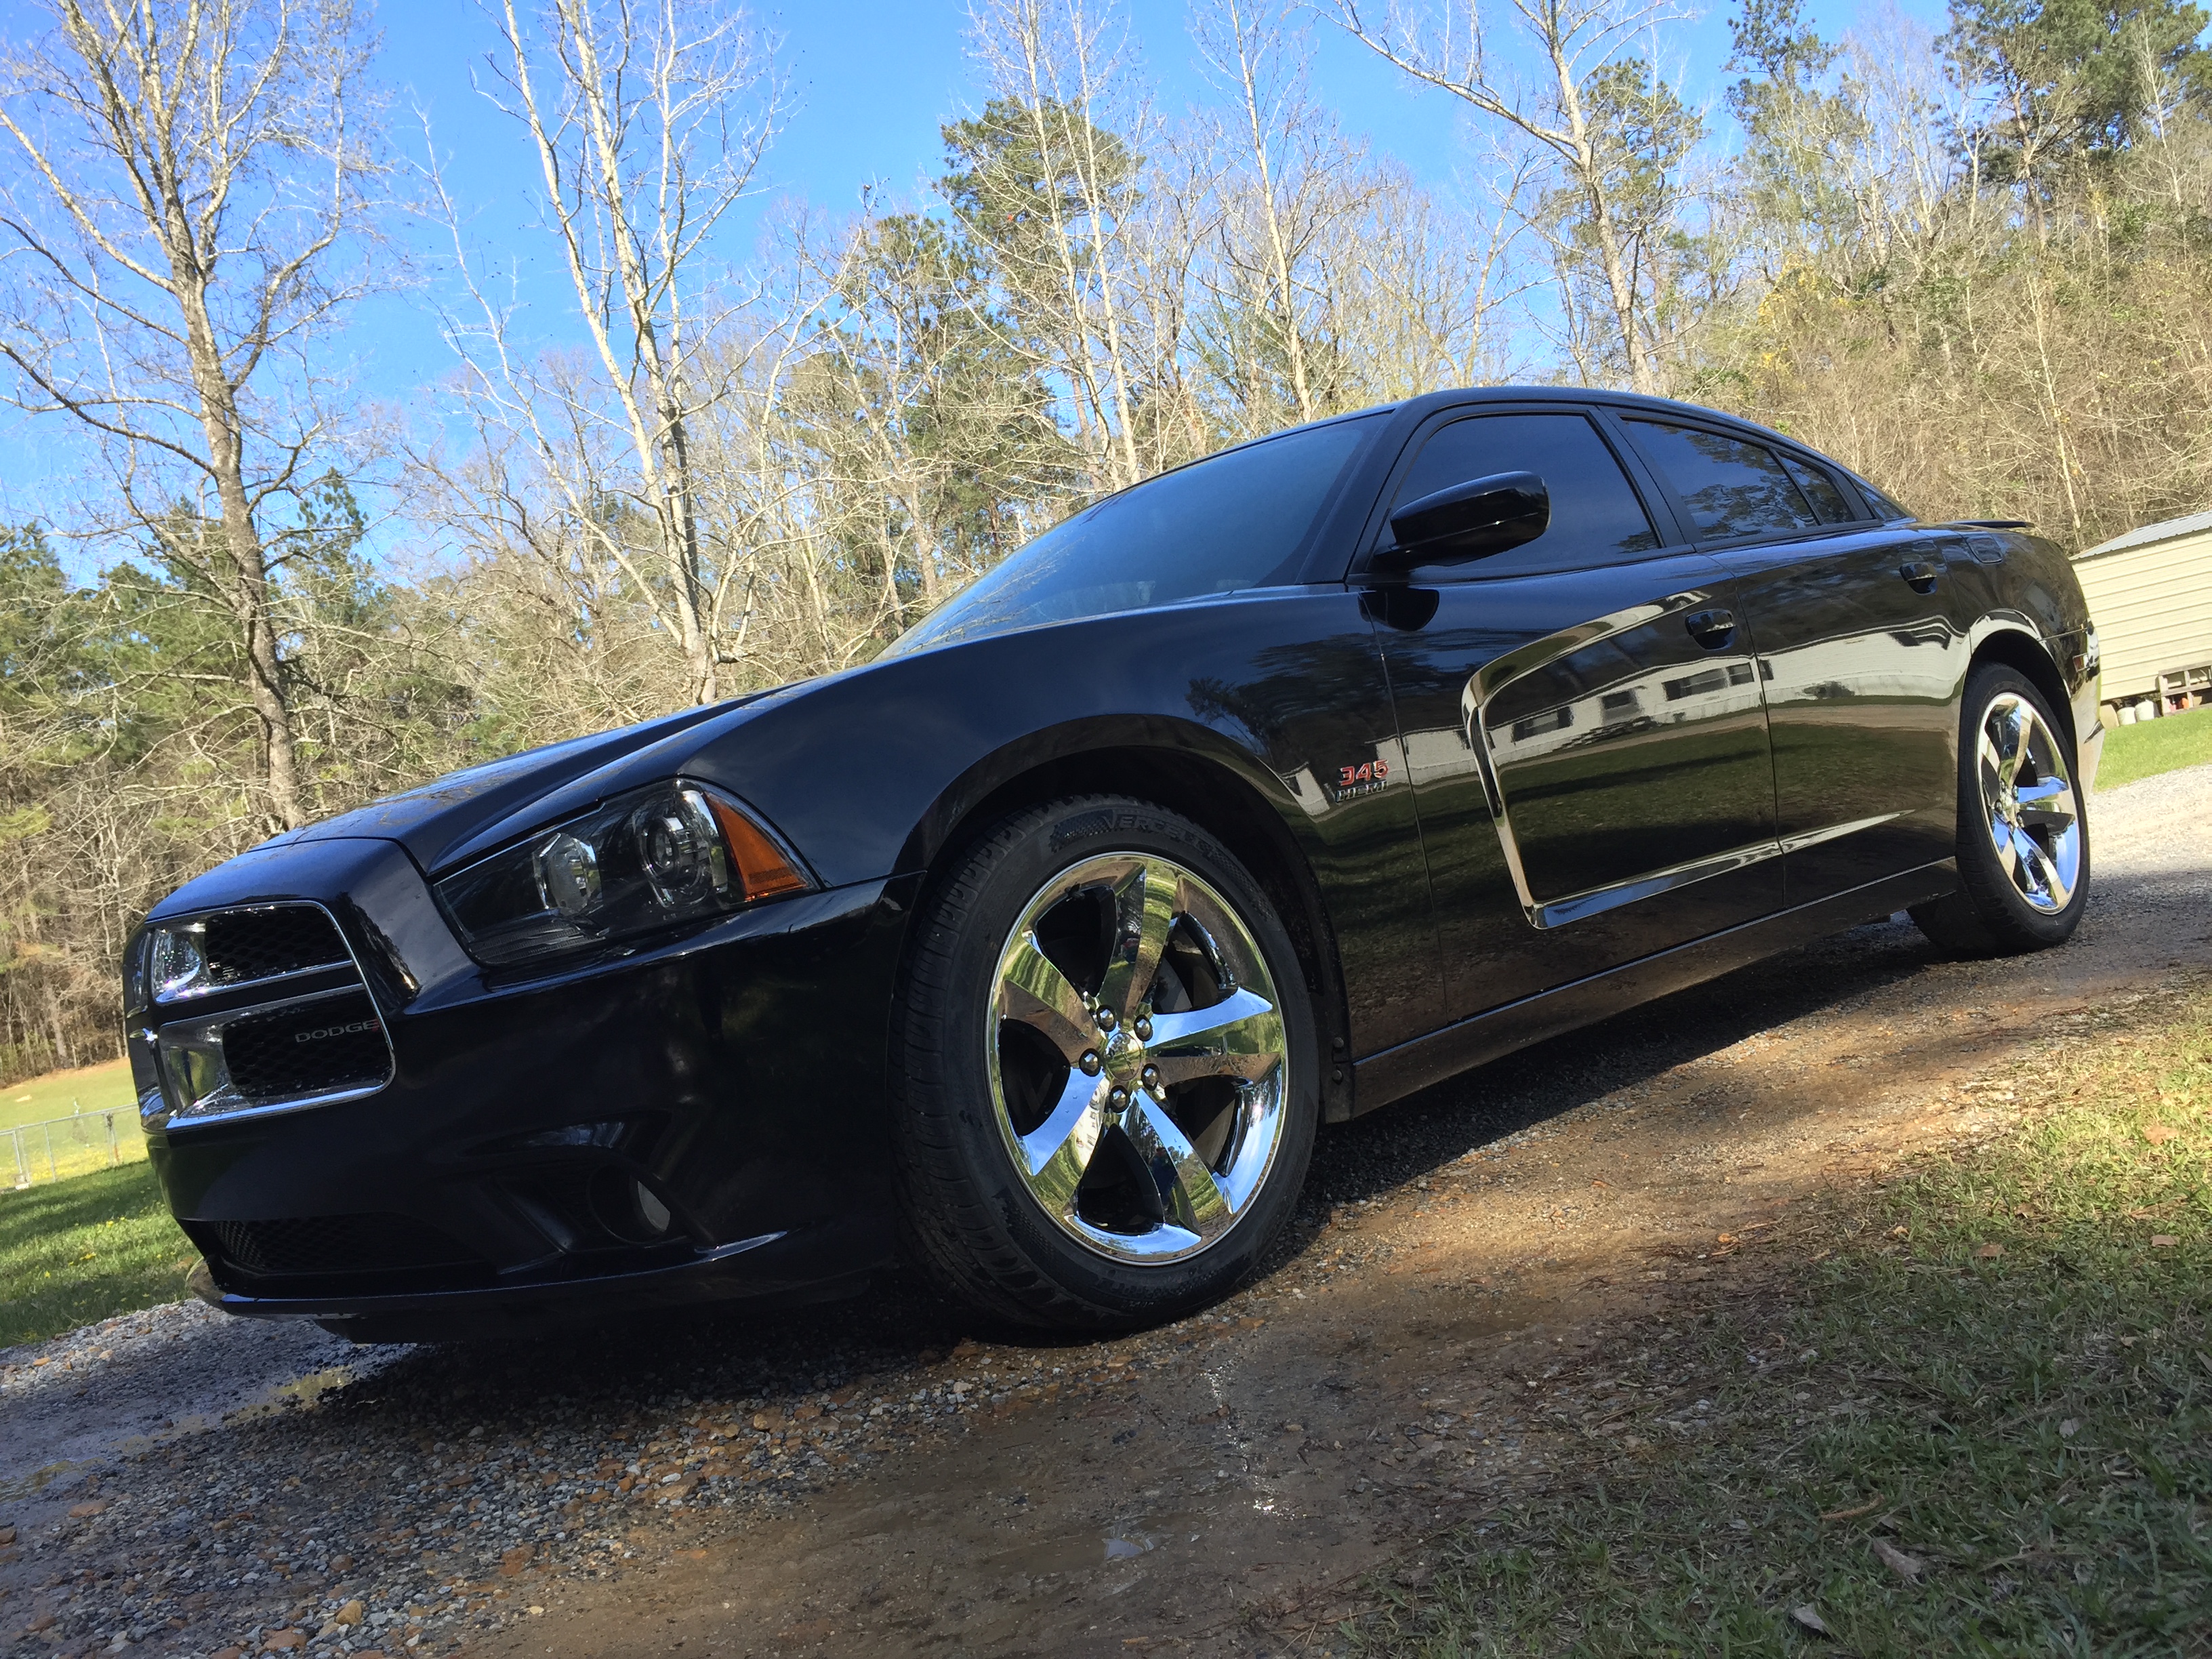
Hello guys, Long time, no see. I'm Brandon, some of you may remember me, some may not. I used to build a lot of Mopar kits back when I was about 12, but then the usual teenager stuff took over my life and I put modeling down. The kits got locked up in storage, and most of the supplies got thrown away. I kept my airbrush and some tools, but stuff that would have gotten ruined anyways like paint and cement got tossed. I recently acquired my dream car, well, a iteration of my dream car. My dream car is a 1968 Charger, and my car is a 2013 Charger. I'll get a picture of it in here for you guys to see. Anyhow, I've been having an urge lately. I want to build a replica of my dream car in scale so that I can always be reminded of that goal in my life. I visited my local hobby store, but I cannot seem to find Revell's '68 Charger anymore. I also can't seem to find their '70 Charger, or the '69, or the '69 Daytona. I guess I'll post a rundown of what I'm looking for and you guys can let me know where to pick it up or if it even exists. Revell 1968 Dodge Charger 1/25 scale Hellcat engine Some form of manual transmission for the Hellcat Some form of modern mag wheels with low-profile tires A modern racing style seat or something similar to what the modern Challengers have Basically, it's a restomodded 1968 Charger. Paint is Cherry Red, with a matching black and red interior. I want it to be Hellcat-powered, with a six-speed. Usual restomod stuff such as disc brakes and a modern wheel and tire package. If you guys could help me track down some of this stuff, that would be really helpful. I look forward to reading around and seeing what's new on the forums as well. All the best, Brandon
-
Thanks guys. I'm gonna check out that Xtreme Scale Detail. It looks like Morgan over at MAD has most of the stuff I need besides the tires/wheels, and the seats. Trying to build a hot modernized '68 Charger
-
Hello guys, I was wondering is there was a sort of "one-stop shop" for the model car aftermarket world. When I did this hobby 24/7, I remember Scale Dreams being my go-to vendor, but I see they have since closed down. I'm trying to find some Mopar Performance valve covers, some Recaro-style racing buckets, some Pegasus rims and disc brakes, etc. Thanks for the help, Brandon
-
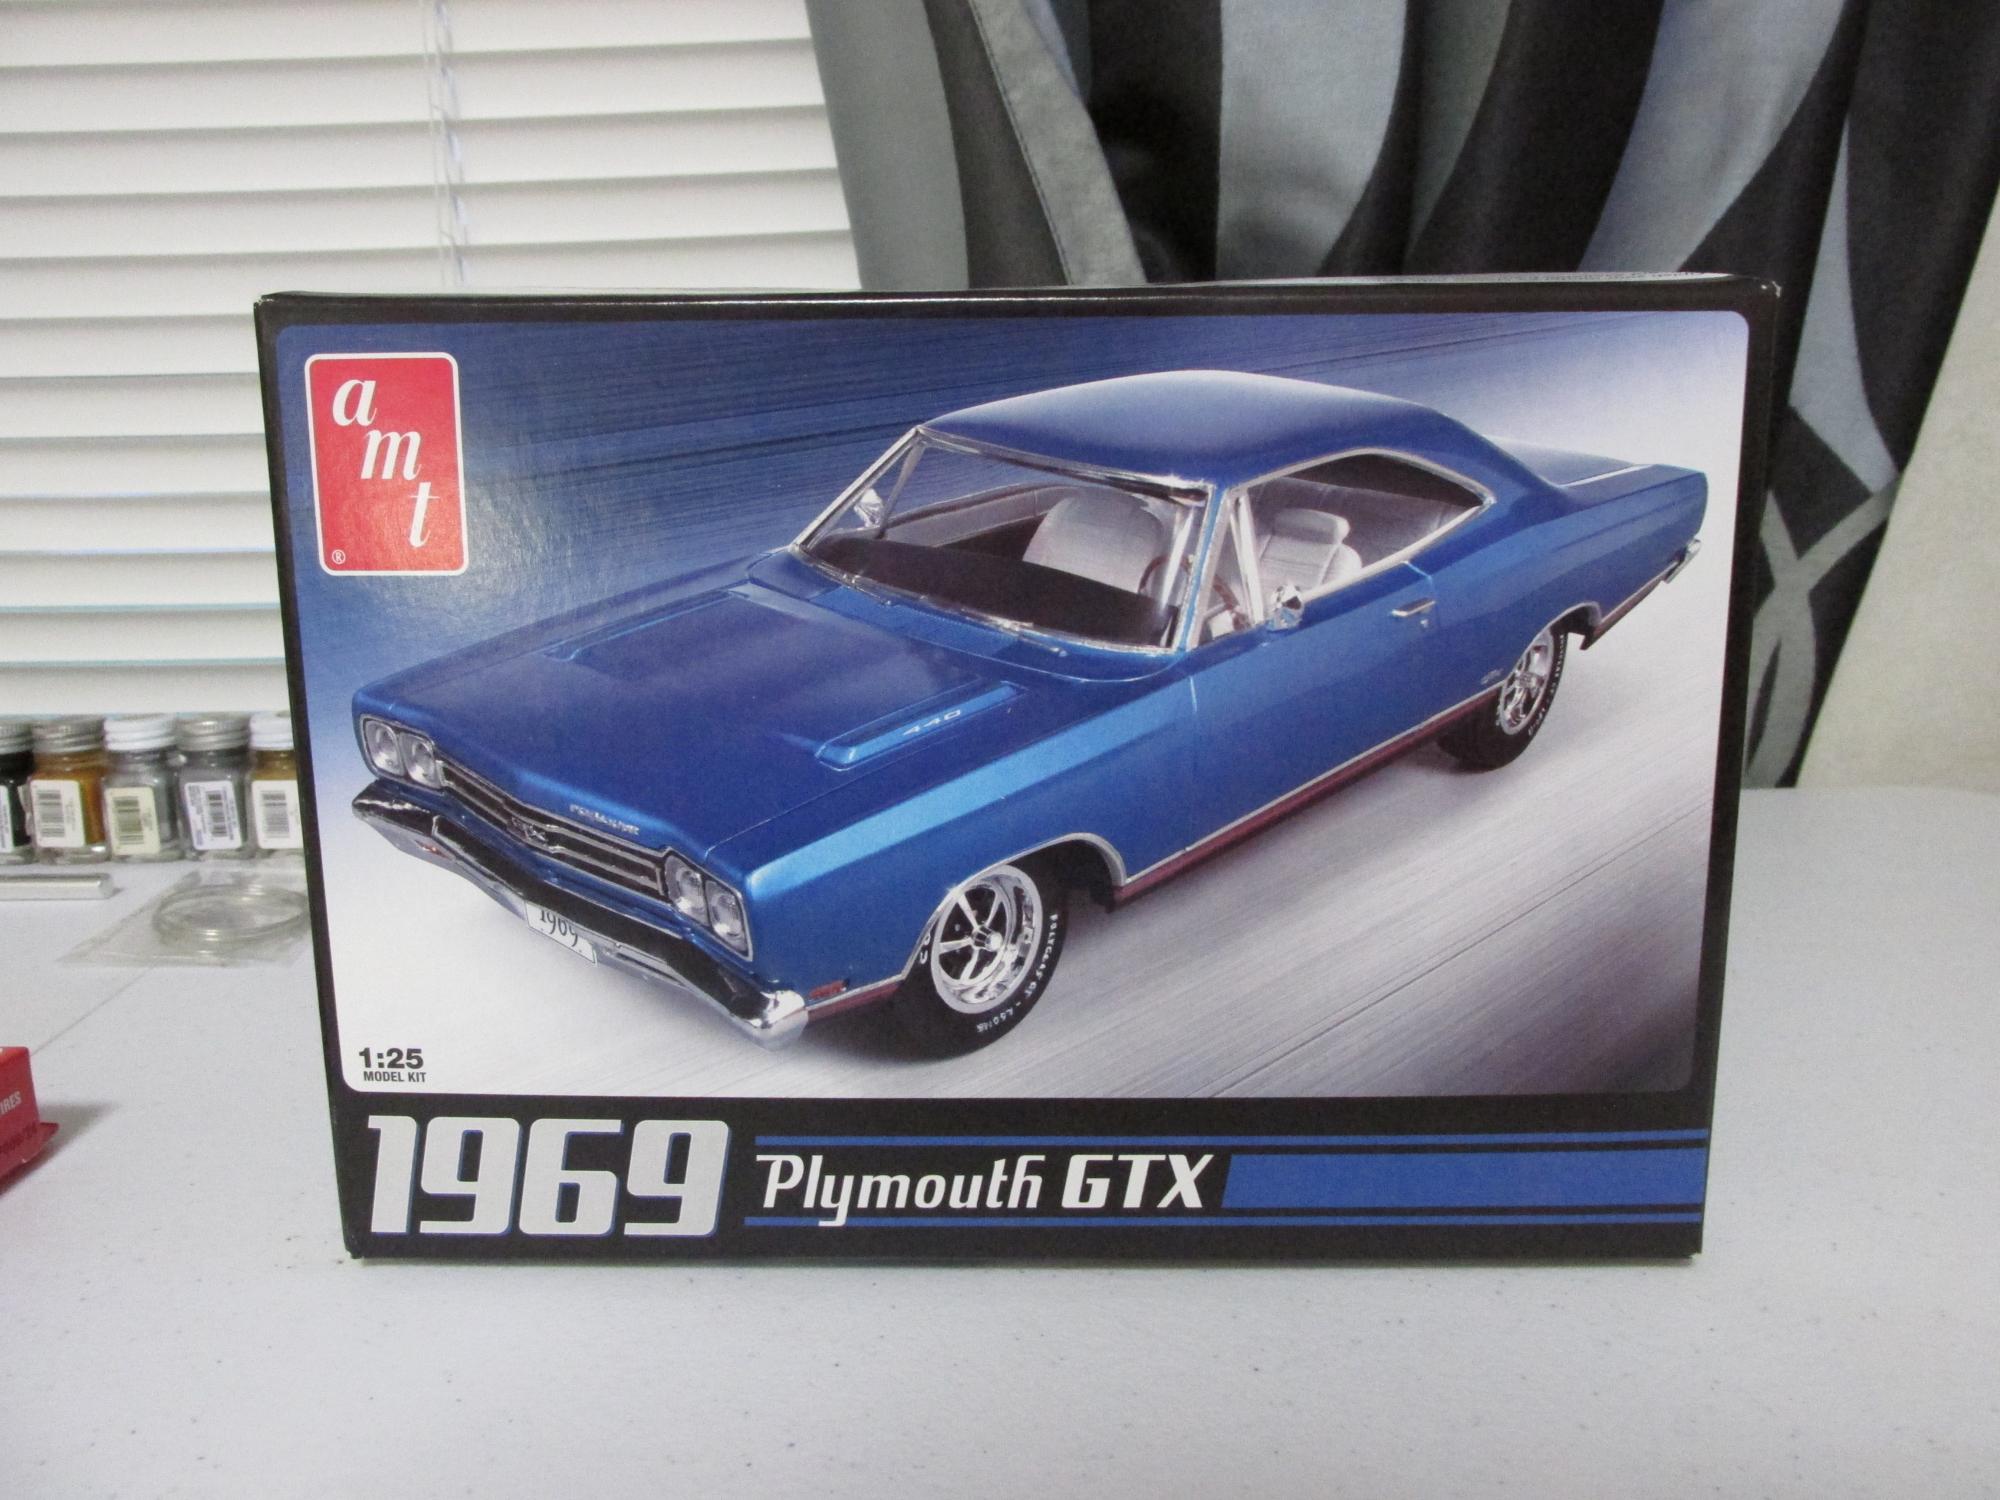
1969 Plymouth GTX - 440, 4 Speed, a Resto Car
Mr. Moparman replied to Mr. Moparman's topic in WIP: Model Cars
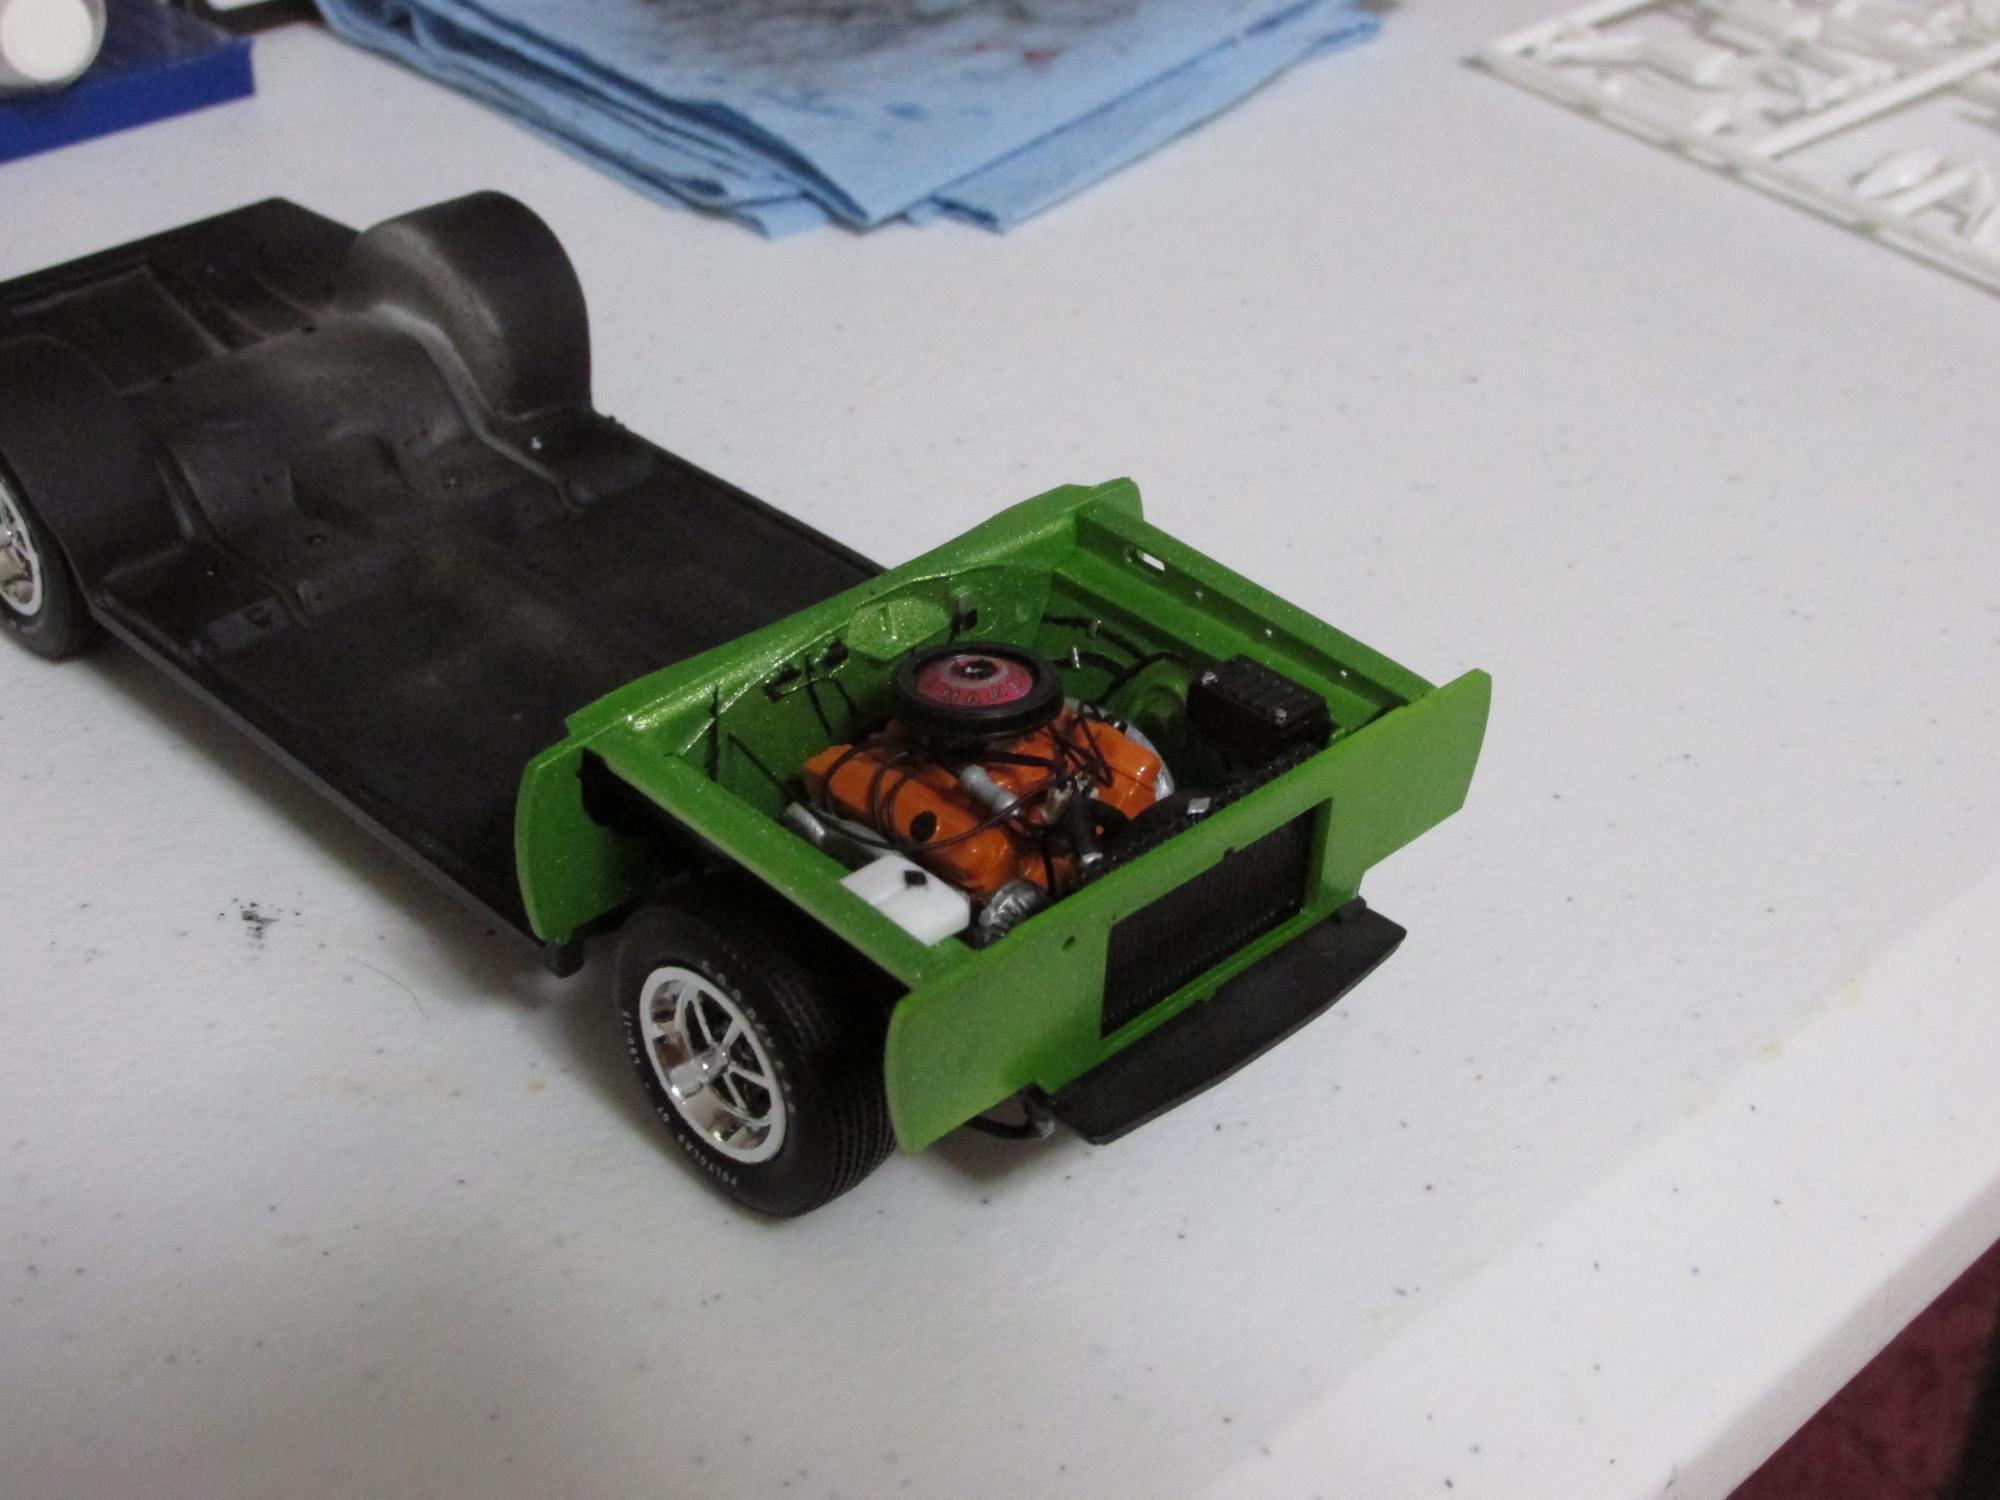
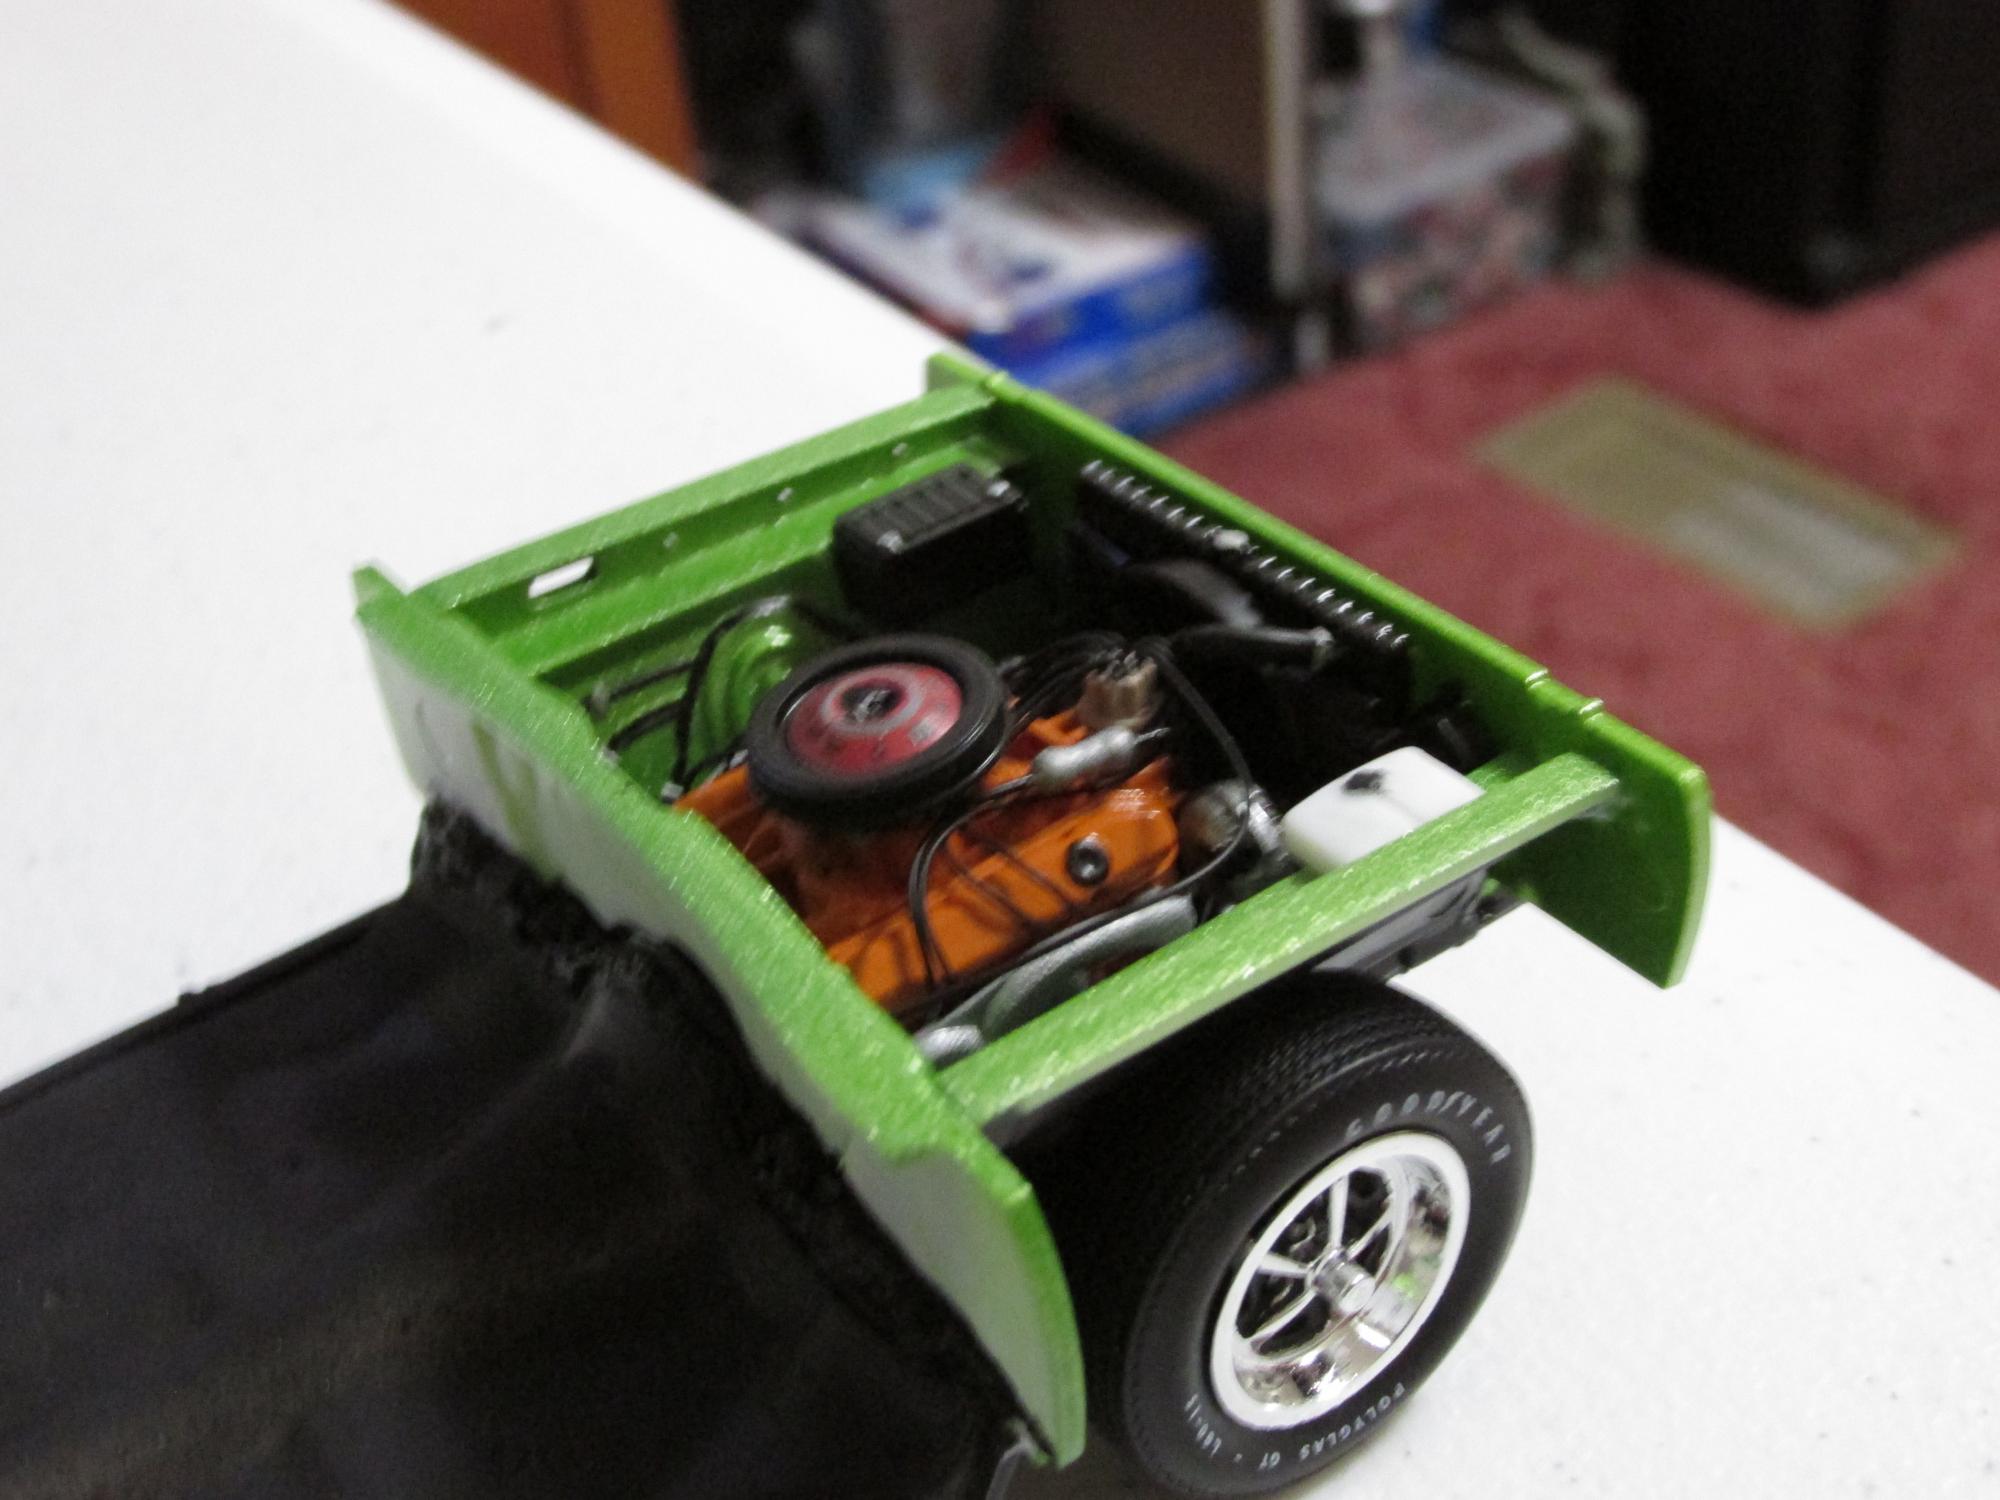
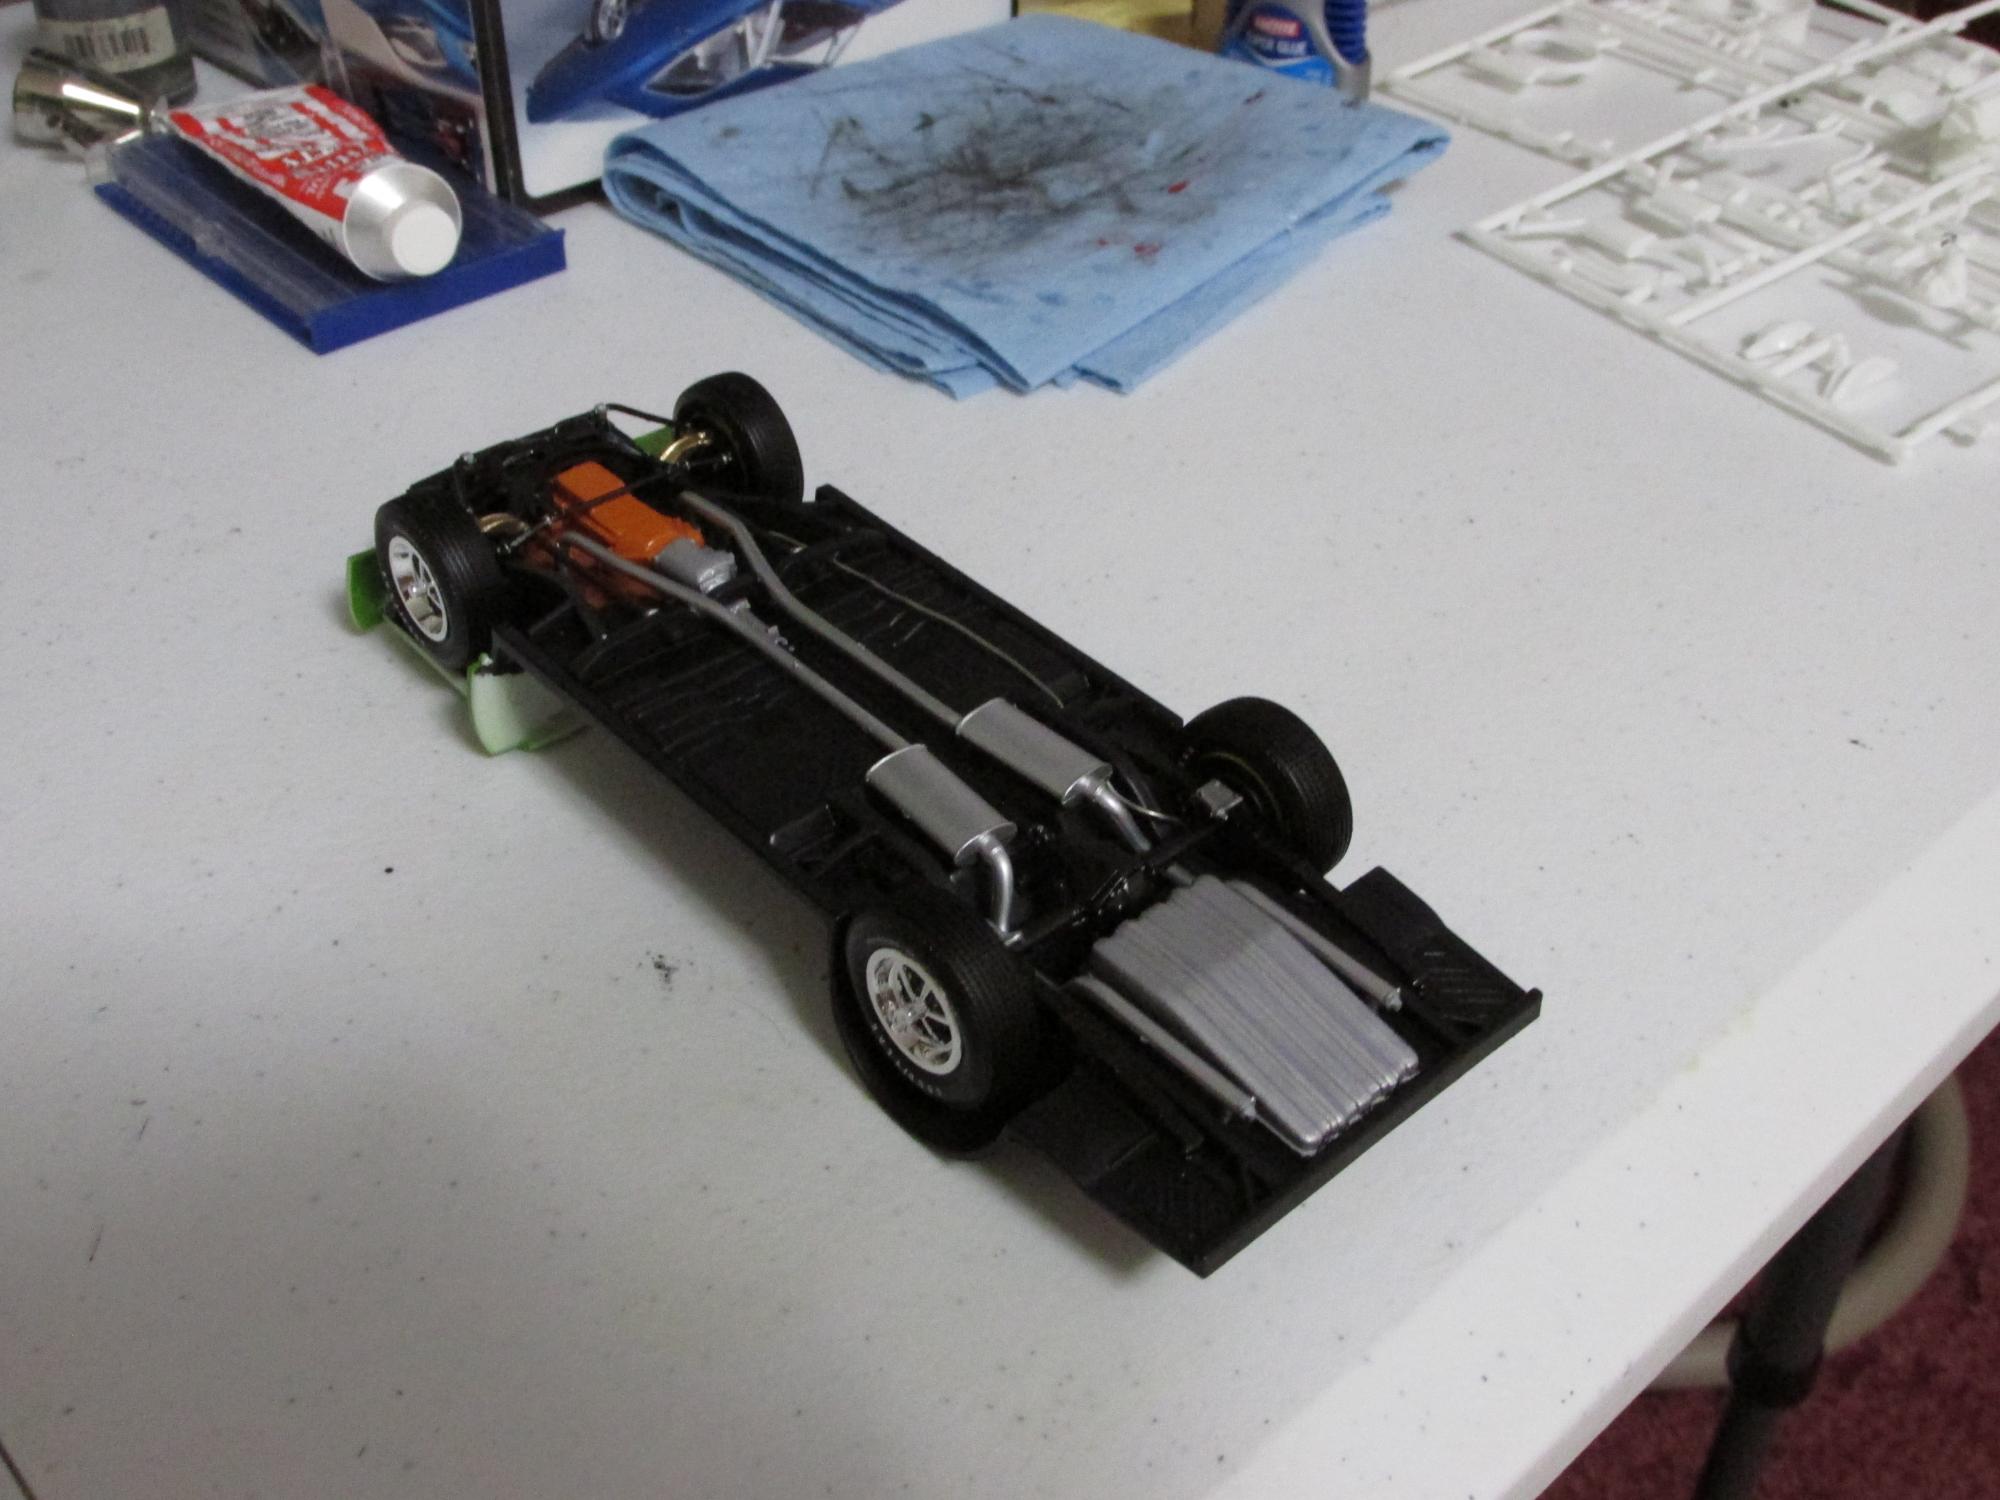
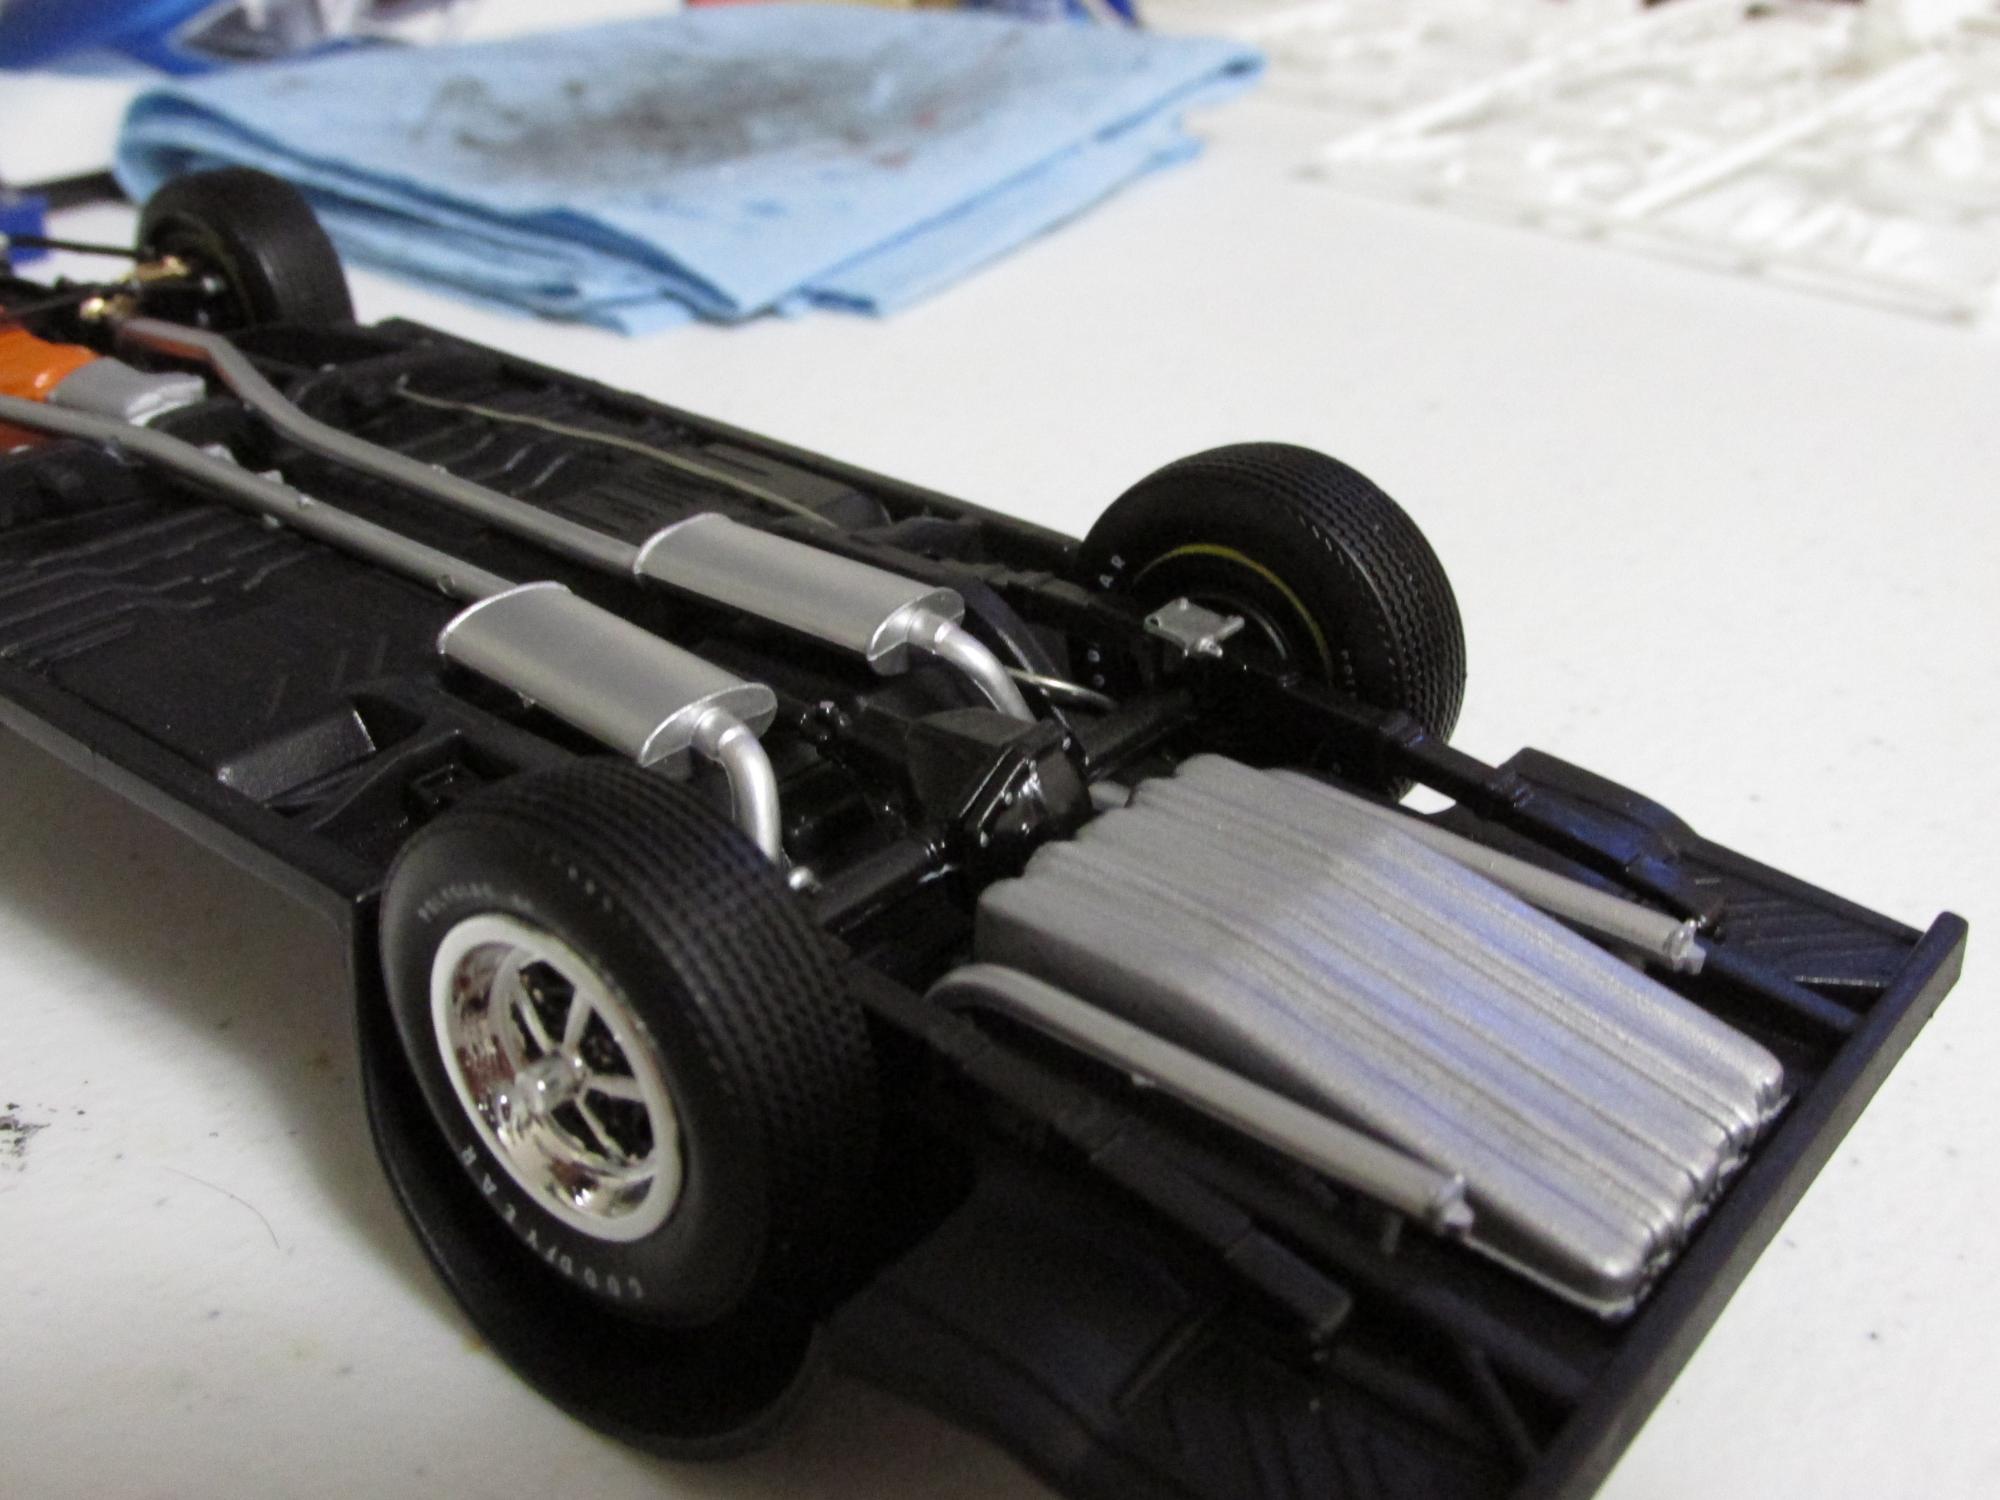
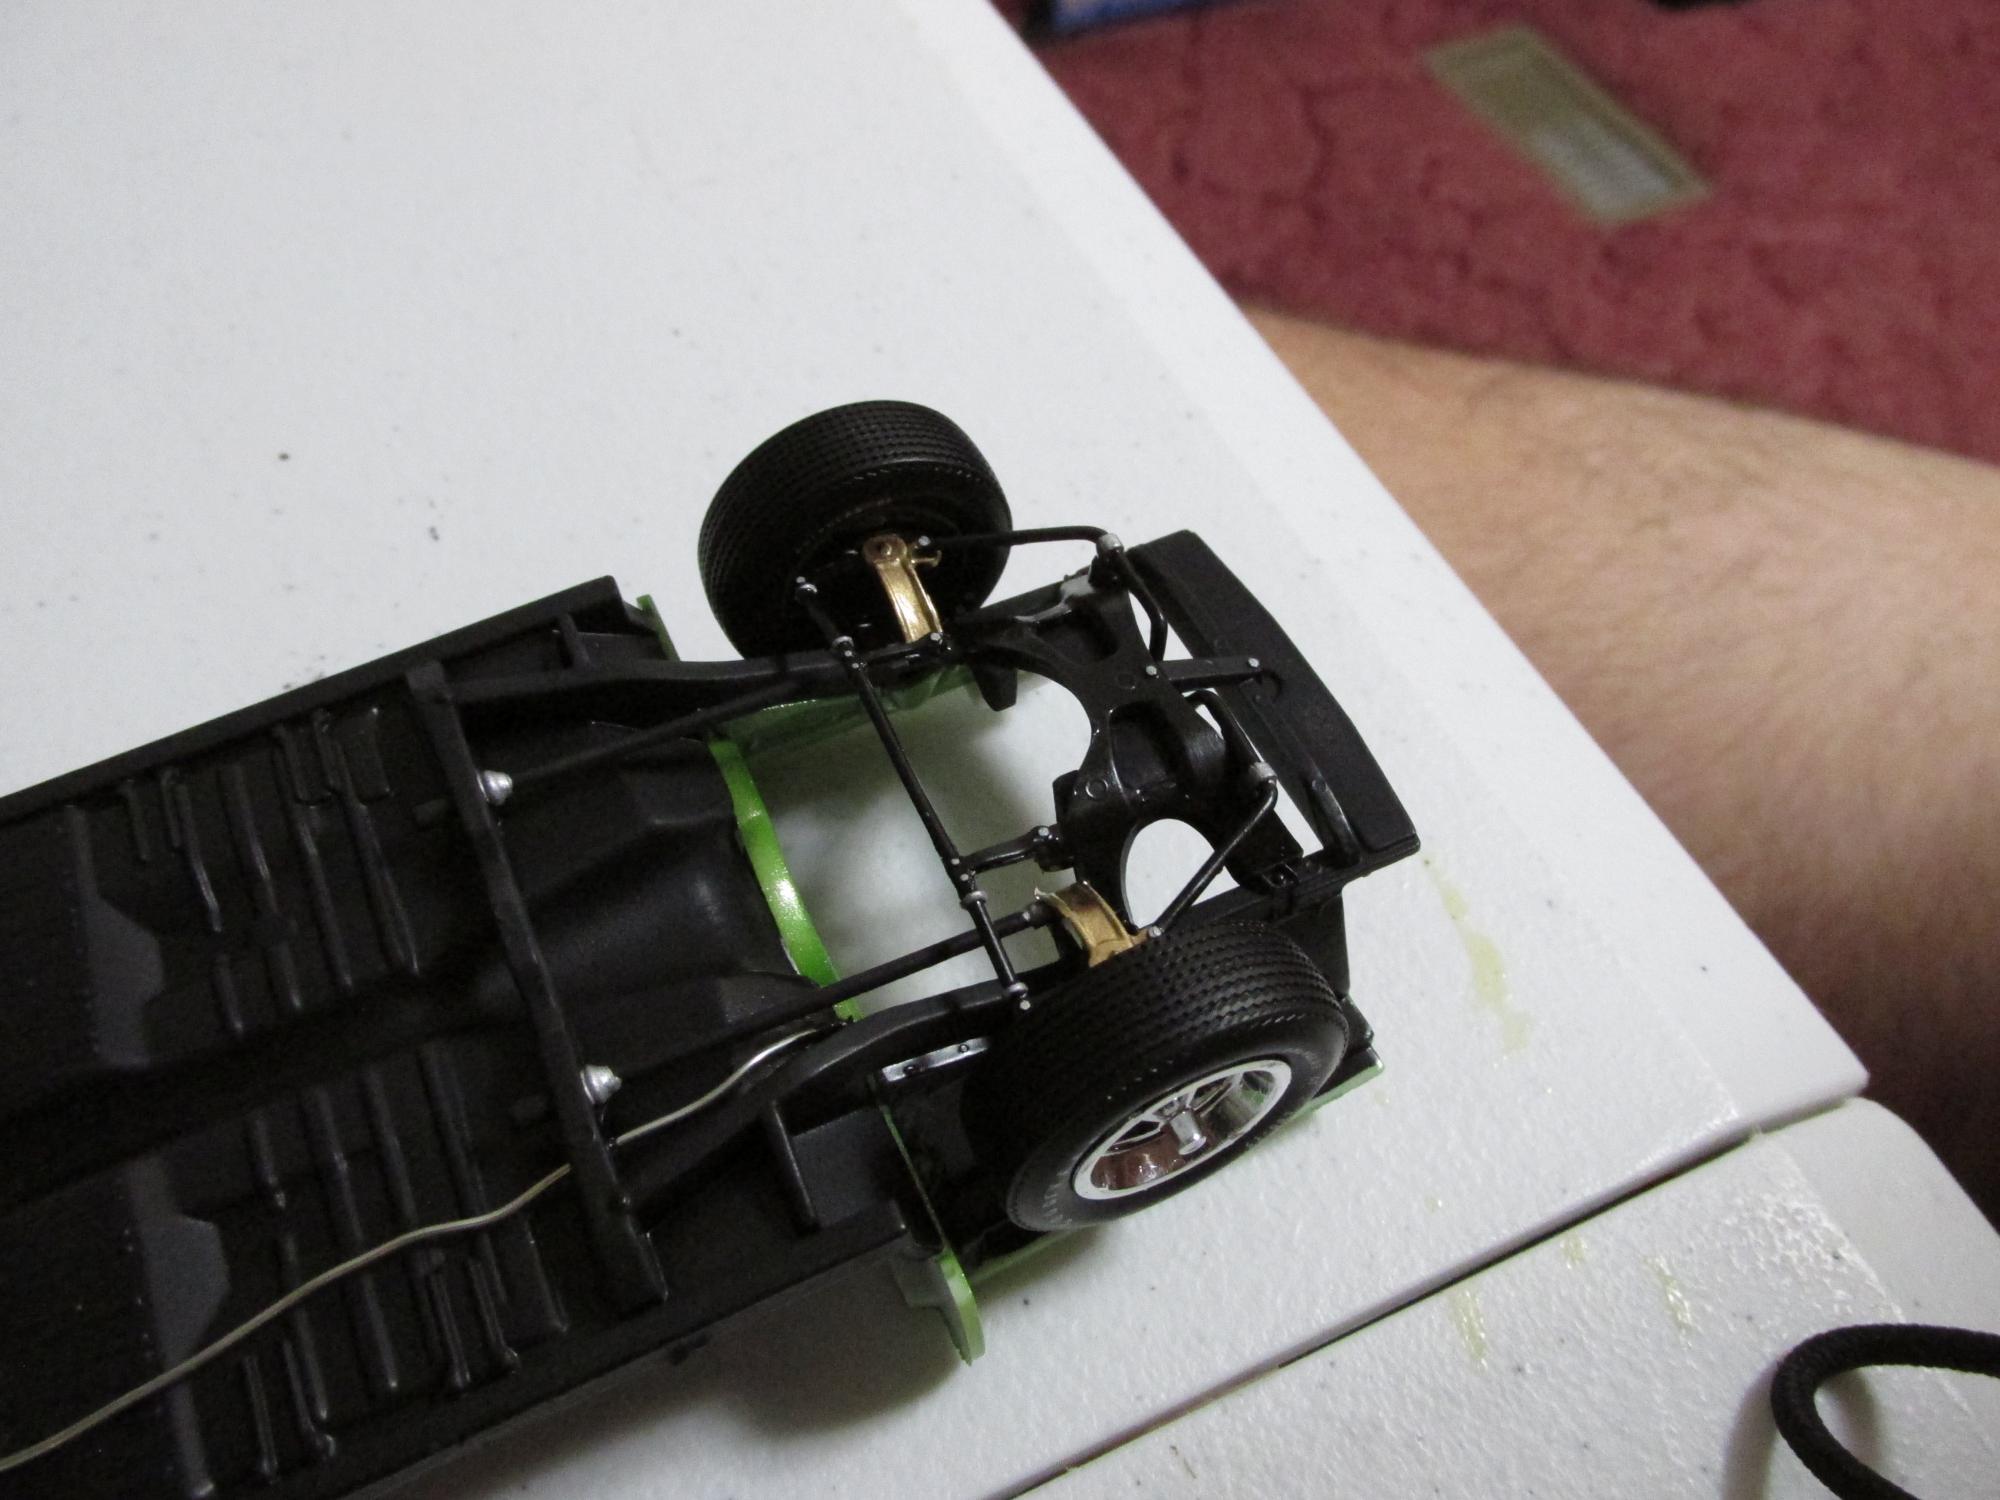
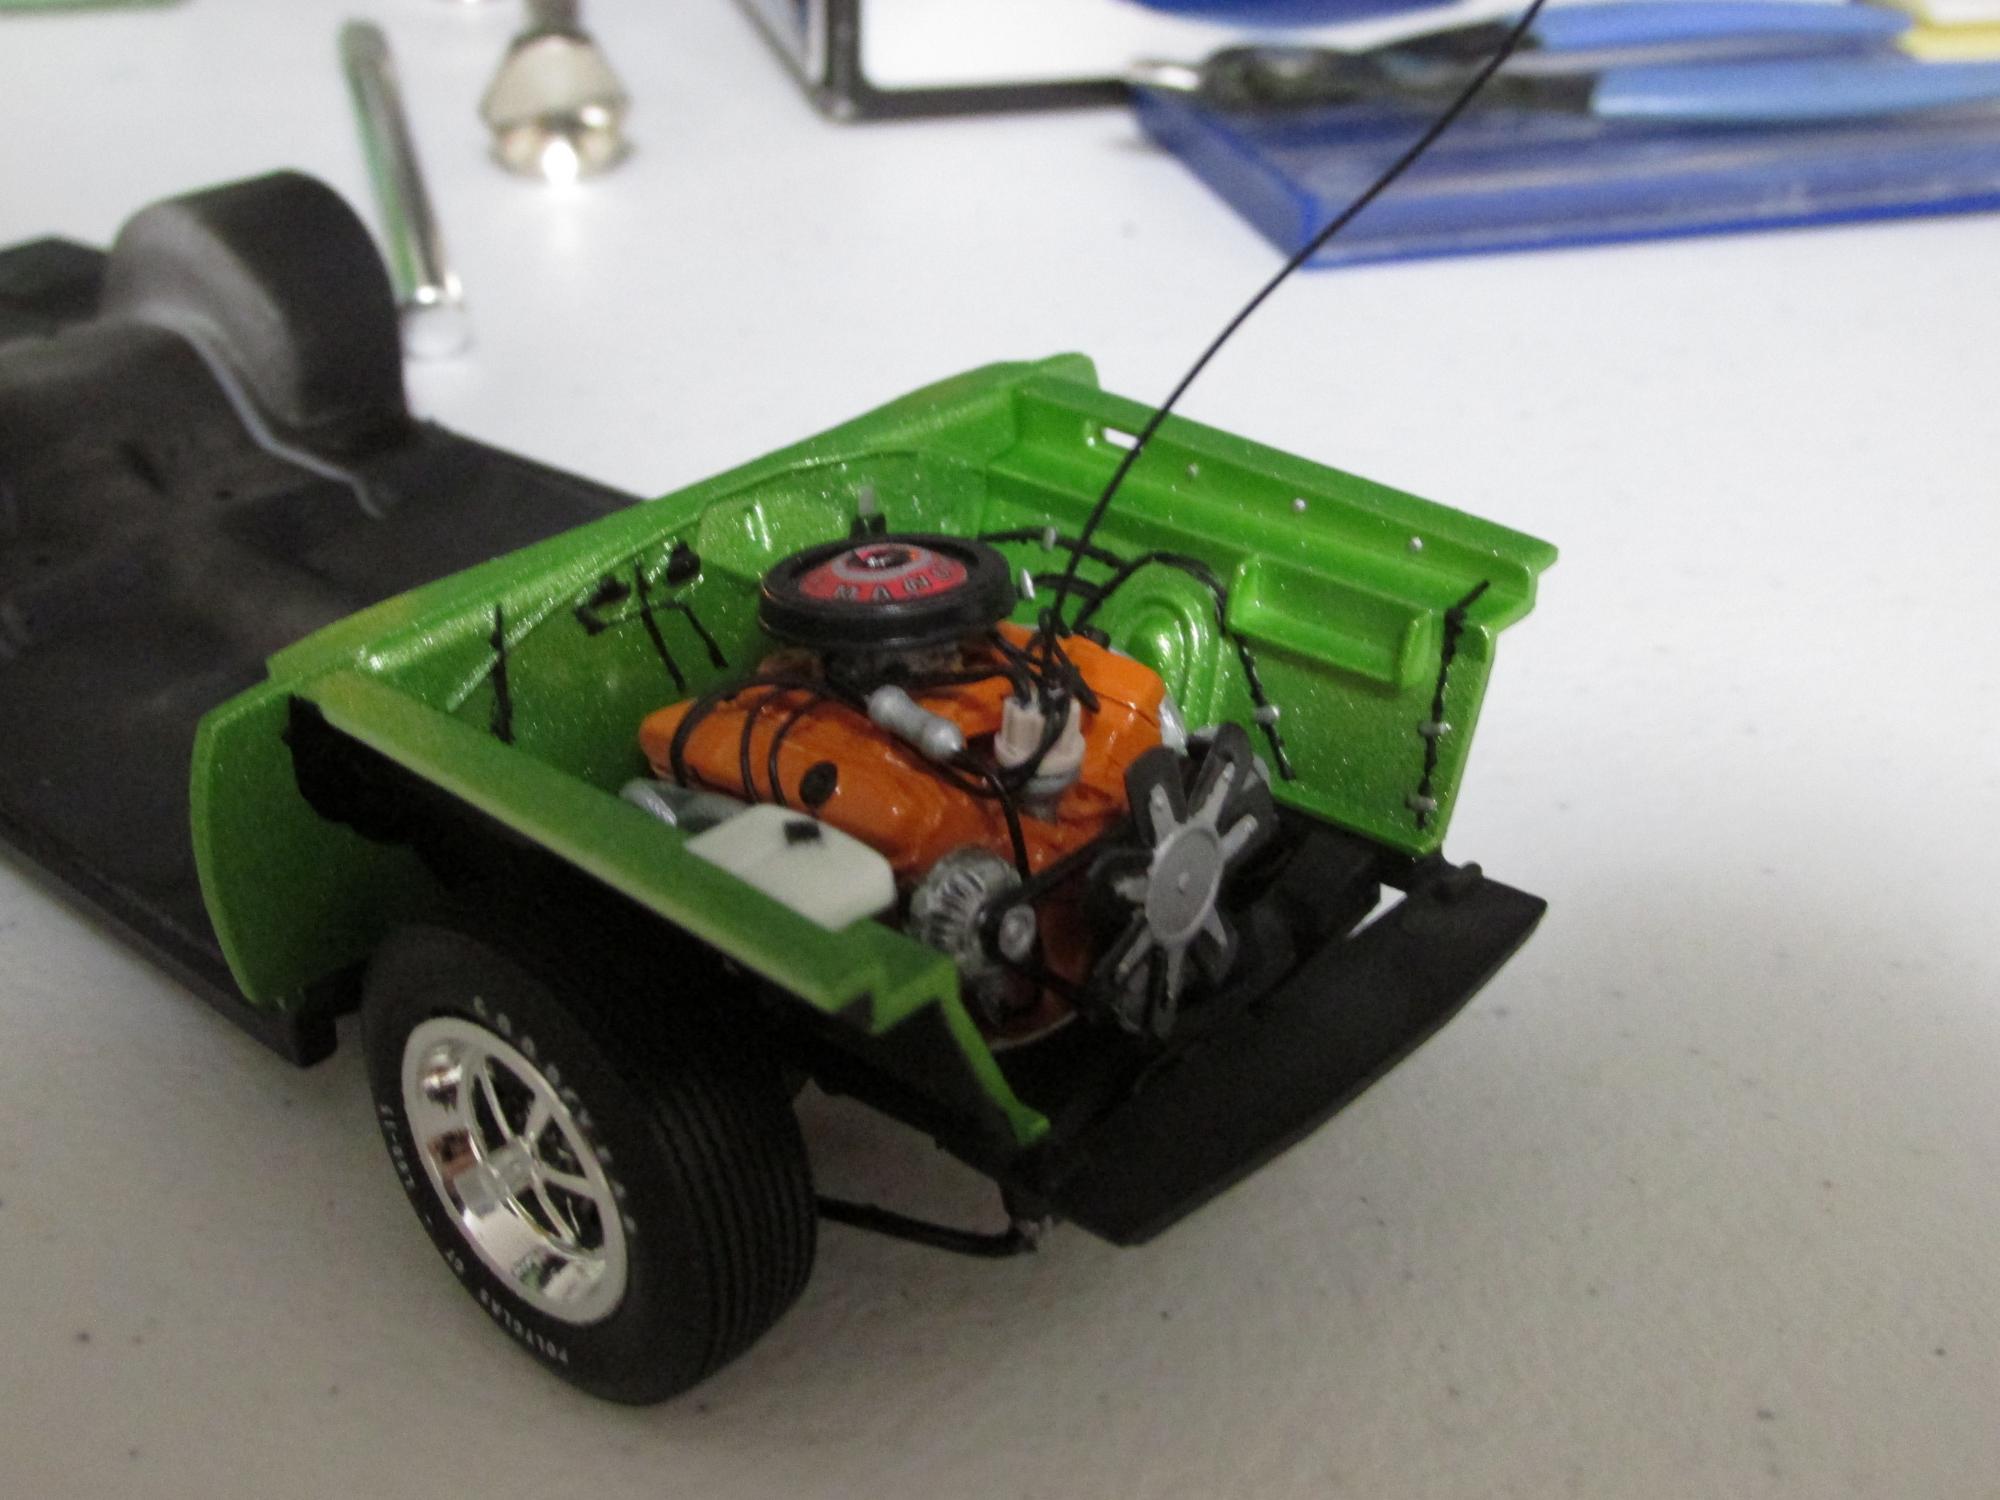
Alright guys! I'm back with a progress update! First off, no, I did not die. And no, I didn't give up on this project. I've just been busier with far more important things. Anywho, I have progress to show off! The engine bay is pretty much complete. I still need to mount the master cylinder and washer motor to the firewall. A look at the chassis. The rear suspension is also starting to take shape. She now sits on four wheels! ] A look at the front going back. Thanks for watching, and stay tuned, because interior work is up next! Brandon
-
1969 Plymouth GTX - 440, 4 Speed, a Resto Car
Mr. Moparman replied to Mr. Moparman's topic in WIP: Model Cars
I'm just letting you guys know that I haven't' died! I actually did some work today, not enough to warrant pictures, but I'll have some over the next day or so to show off! -
1969 Plymouth GTX - 440, 4 Speed, a Resto Car
Mr. Moparman replied to Mr. Moparman's topic in WIP: Model Cars
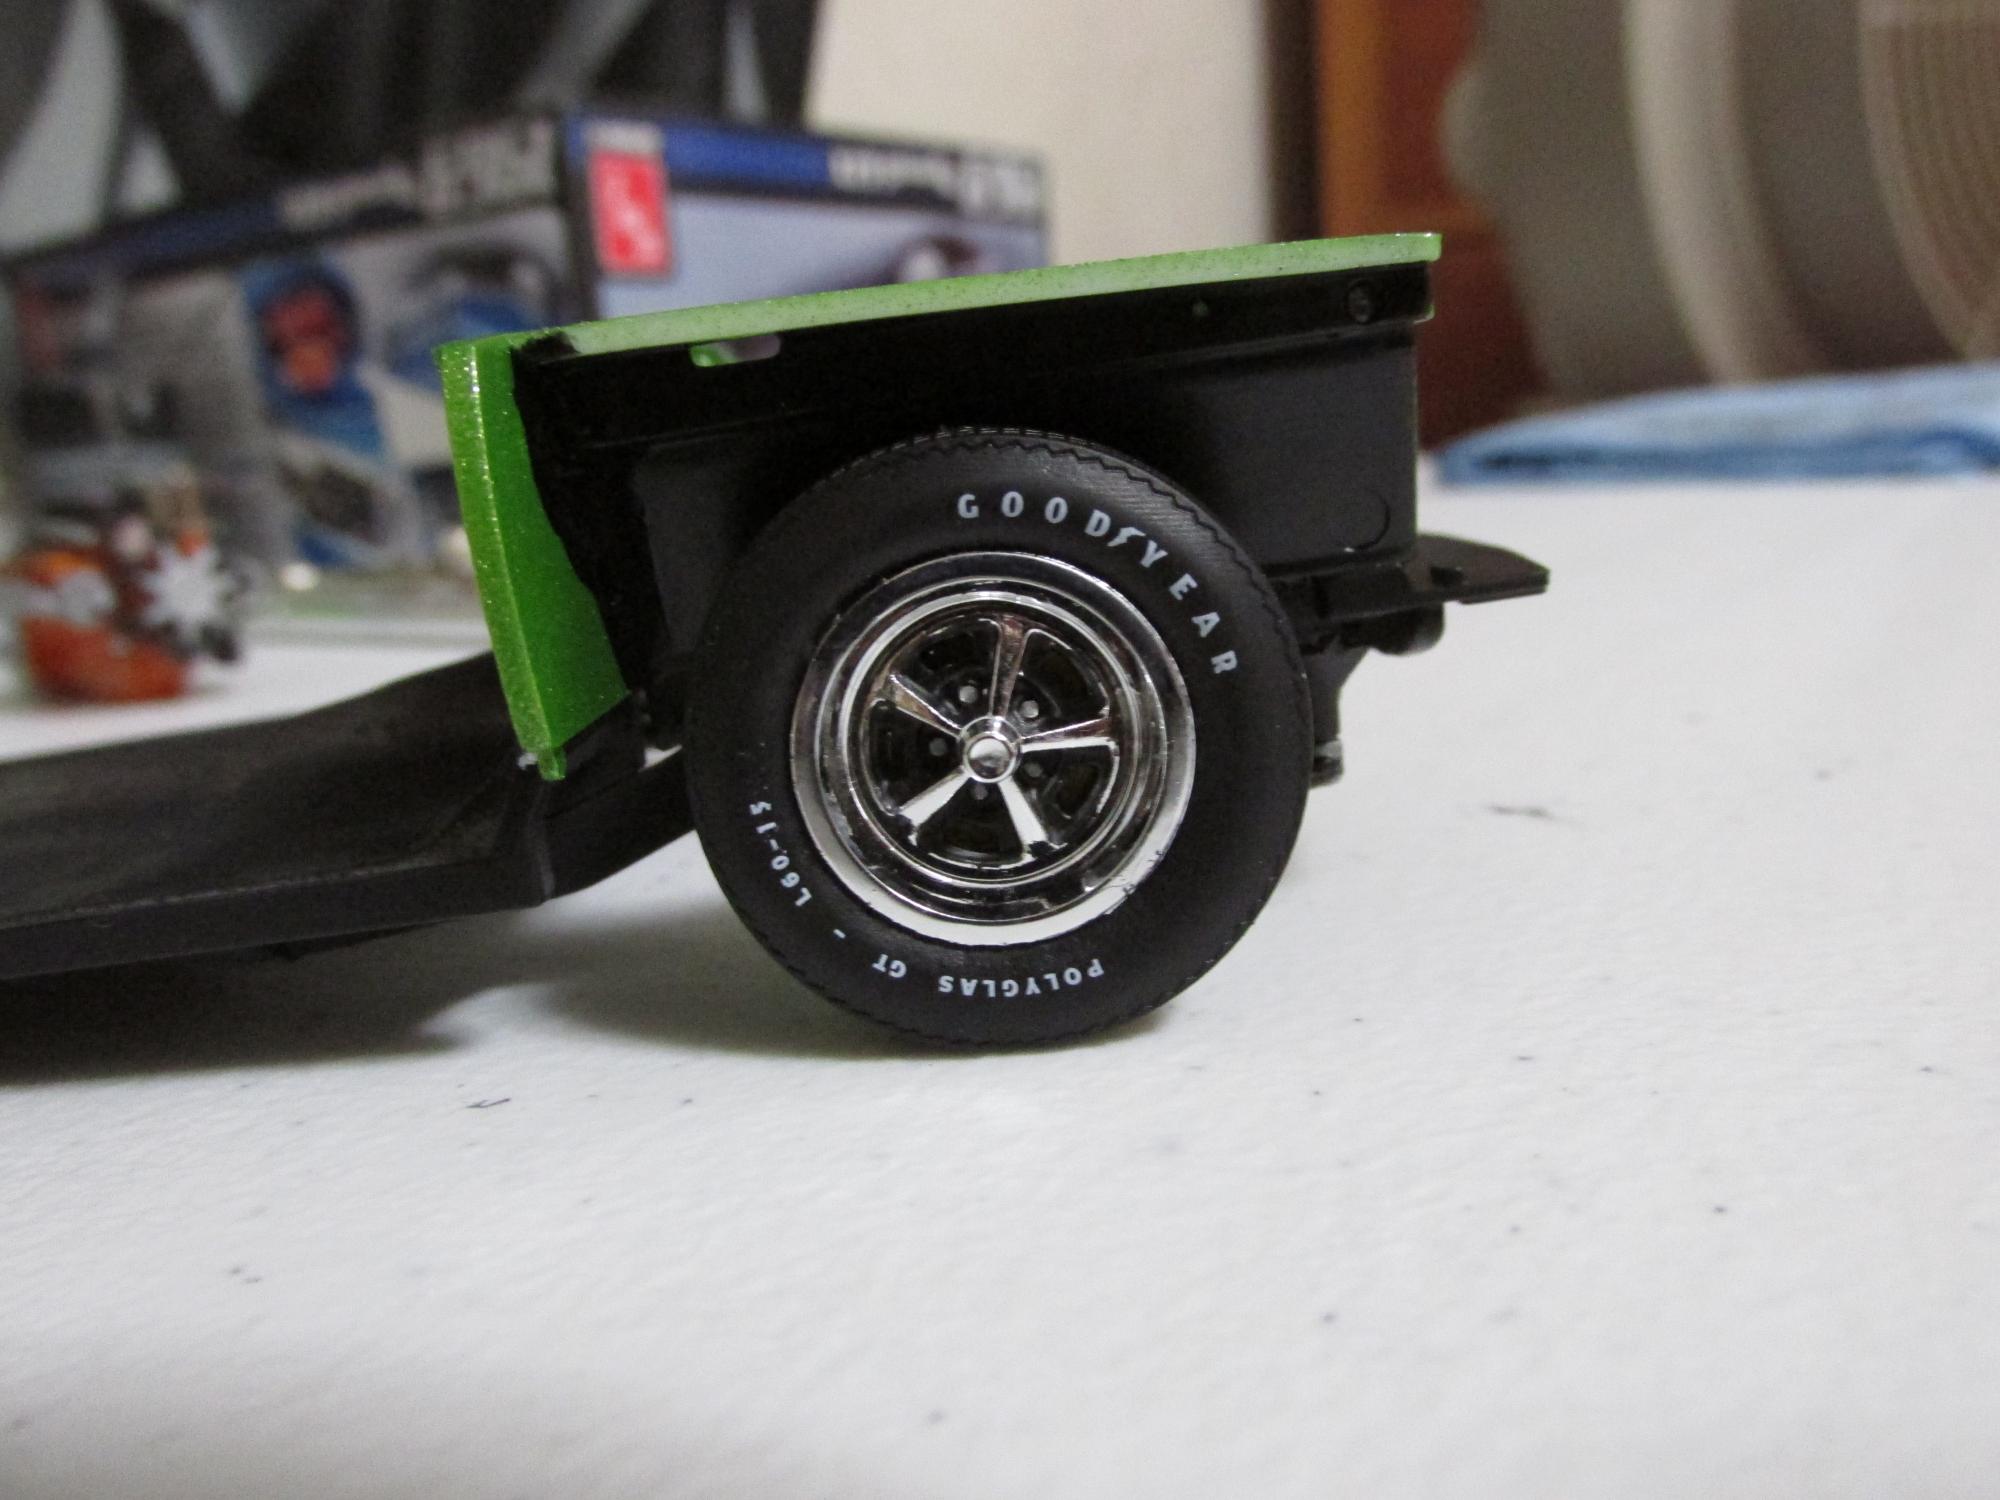
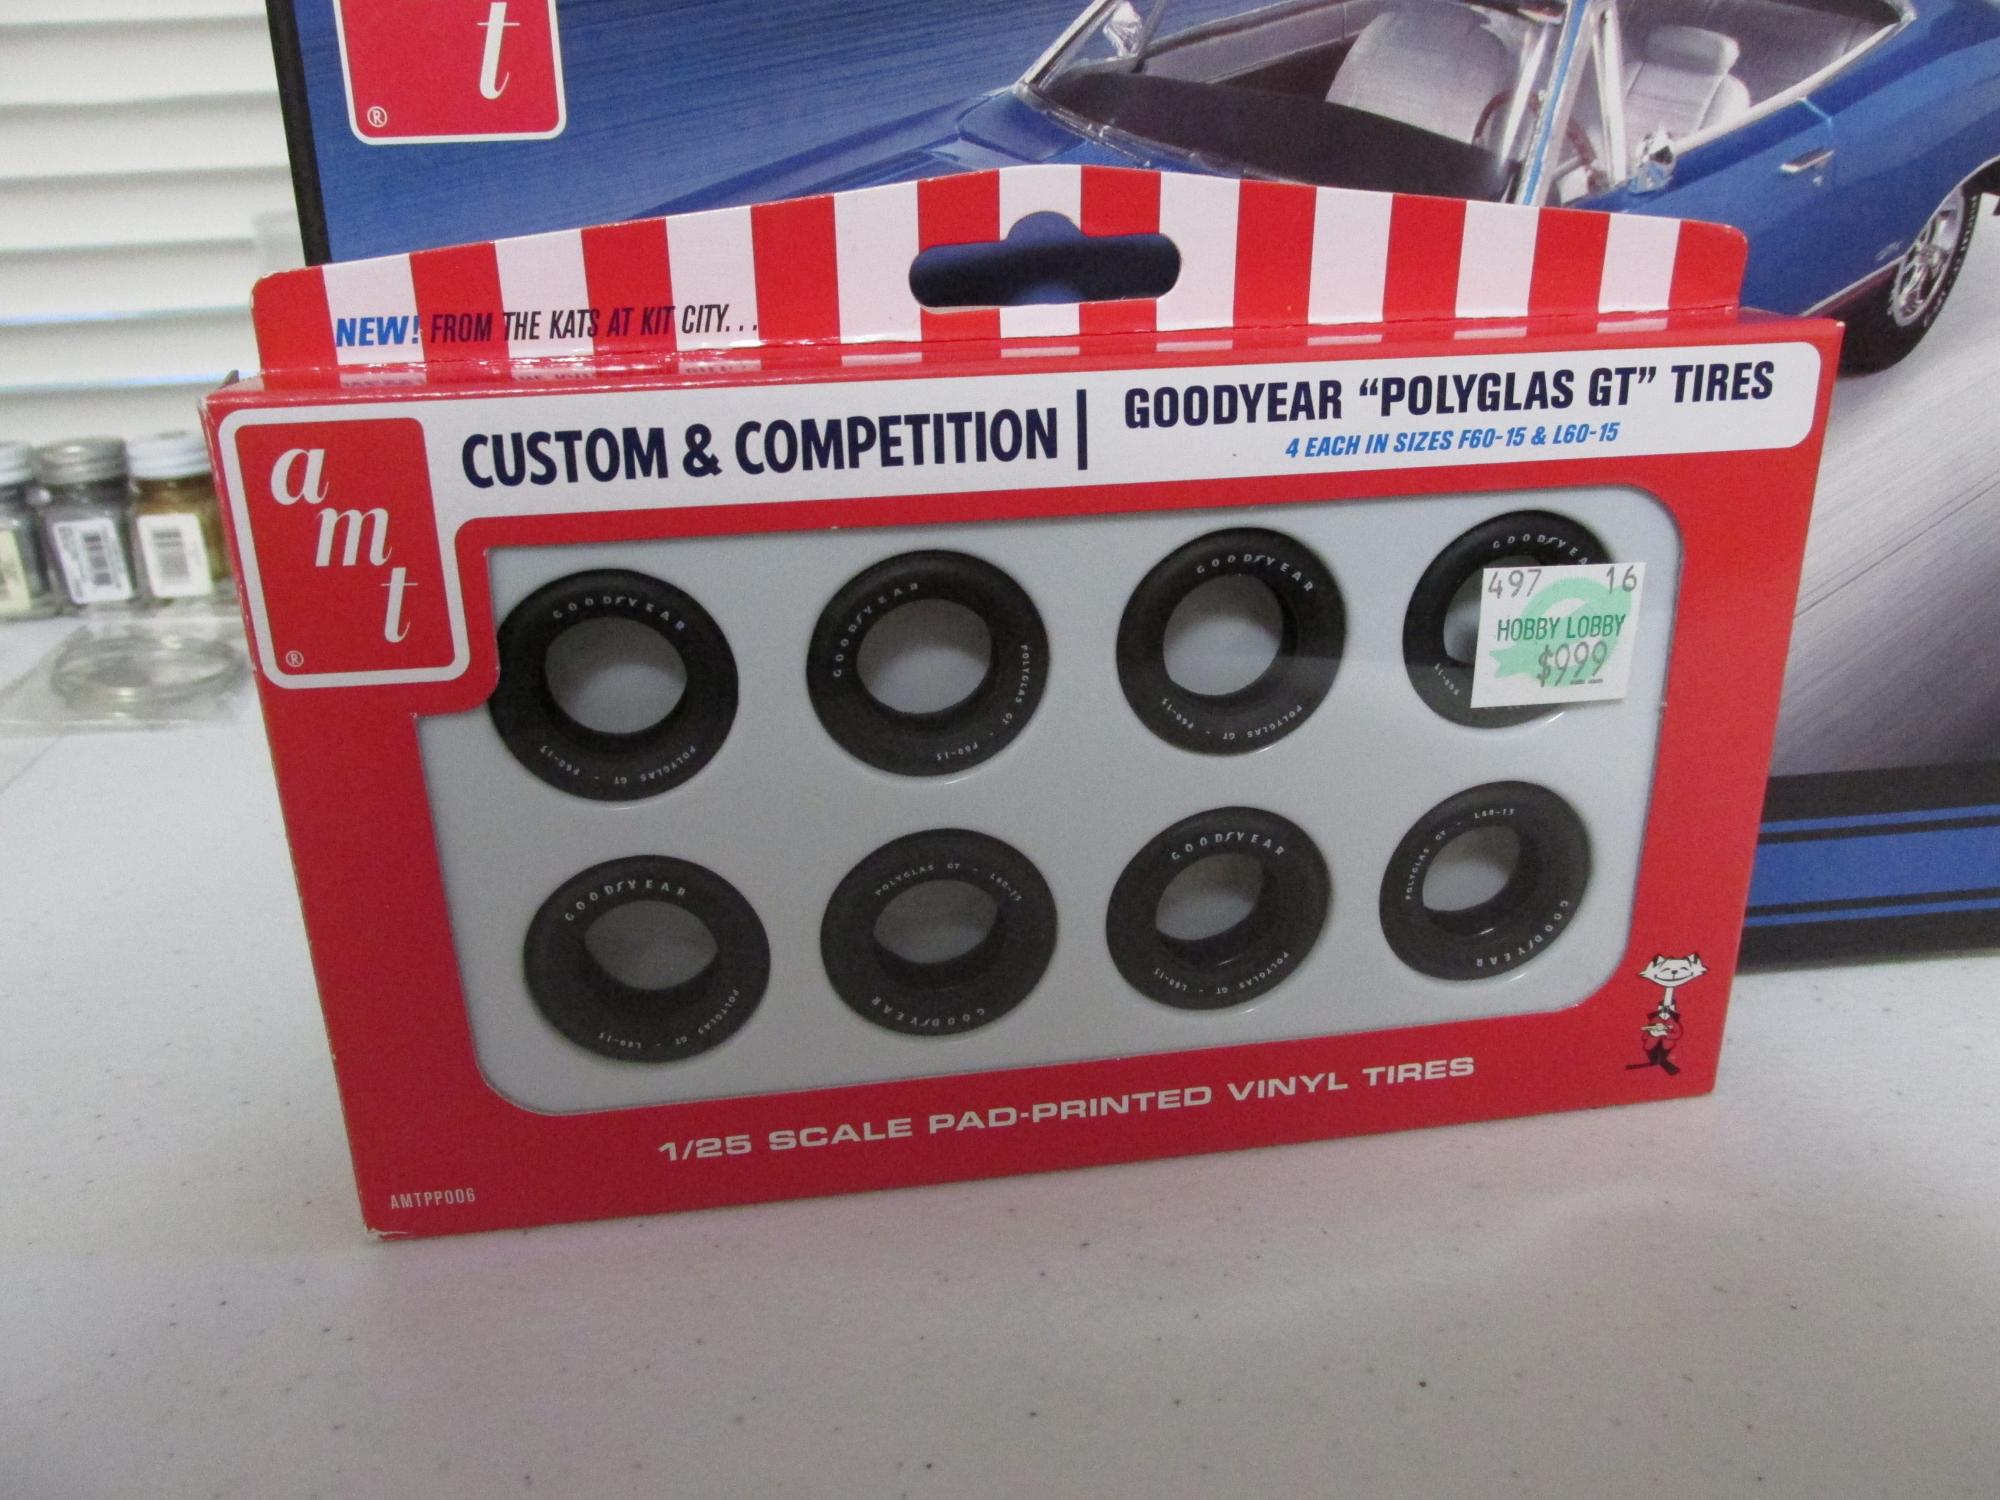
Ok, so some small progress tonight. I've been lacking the past few days because 1, I mow yards to earn summer cash that carries me through the winter (I make $23.09 every week for my full-time job, so the bonus summer cash of $80 a lawn comes in very nice around January) and 2, because, well, it's a holiday weekend. So I got around to putting the front suspension together. I mounted the wheels, and lined them up. The more I look at these pad printed tires, the more I think they were so worth the $6.99 I paid for them. The underside. Gold paint was used to simulate the coating that Chrysler liked to put on the front end suspensions of these cars. And finally, the 440 seated into its final home. After the festivities this weekend, I'll build the cooling system and get it into place, and also paint the performance stripes on the body. Thanks for looking! Brandon
-
1969 Plymouth GTX - 440, 4 Speed, a Resto Car
Mr. Moparman replied to Mr. Moparman's topic in WIP: Model Cars
That's what I'm gonna do. I particularly don't feel interested to break the epoxy holding the wheels to the wheel backs just to change tires. -
1969 Plymouth GTX - 440, 4 Speed, a Resto Car
Mr. Moparman replied to Mr. Moparman's topic in WIP: Model Cars
No progress tonight as I've been busy all day with other business, but the down time did give a chance for all the paint work on the body to cure and gas out, so hopefully tomorrow I can start on the front suspension and get the performance stripes painted onto the fenders/hood. Keep the comments coming, it's an inspiration after being gone so long! Brandon -
Looking great!
-
1969 Plymouth GTX - 440, 4 Speed, a Resto Car
Mr. Moparman replied to Mr. Moparman's topic in WIP: Model Cars
Did the car not have L60's all the way around? I just went off of what was included in the kit, which was four L60's -
1969 Plymouth GTX - 440, 4 Speed, a Resto Car
Mr. Moparman replied to Mr. Moparman's topic in WIP: Model Cars
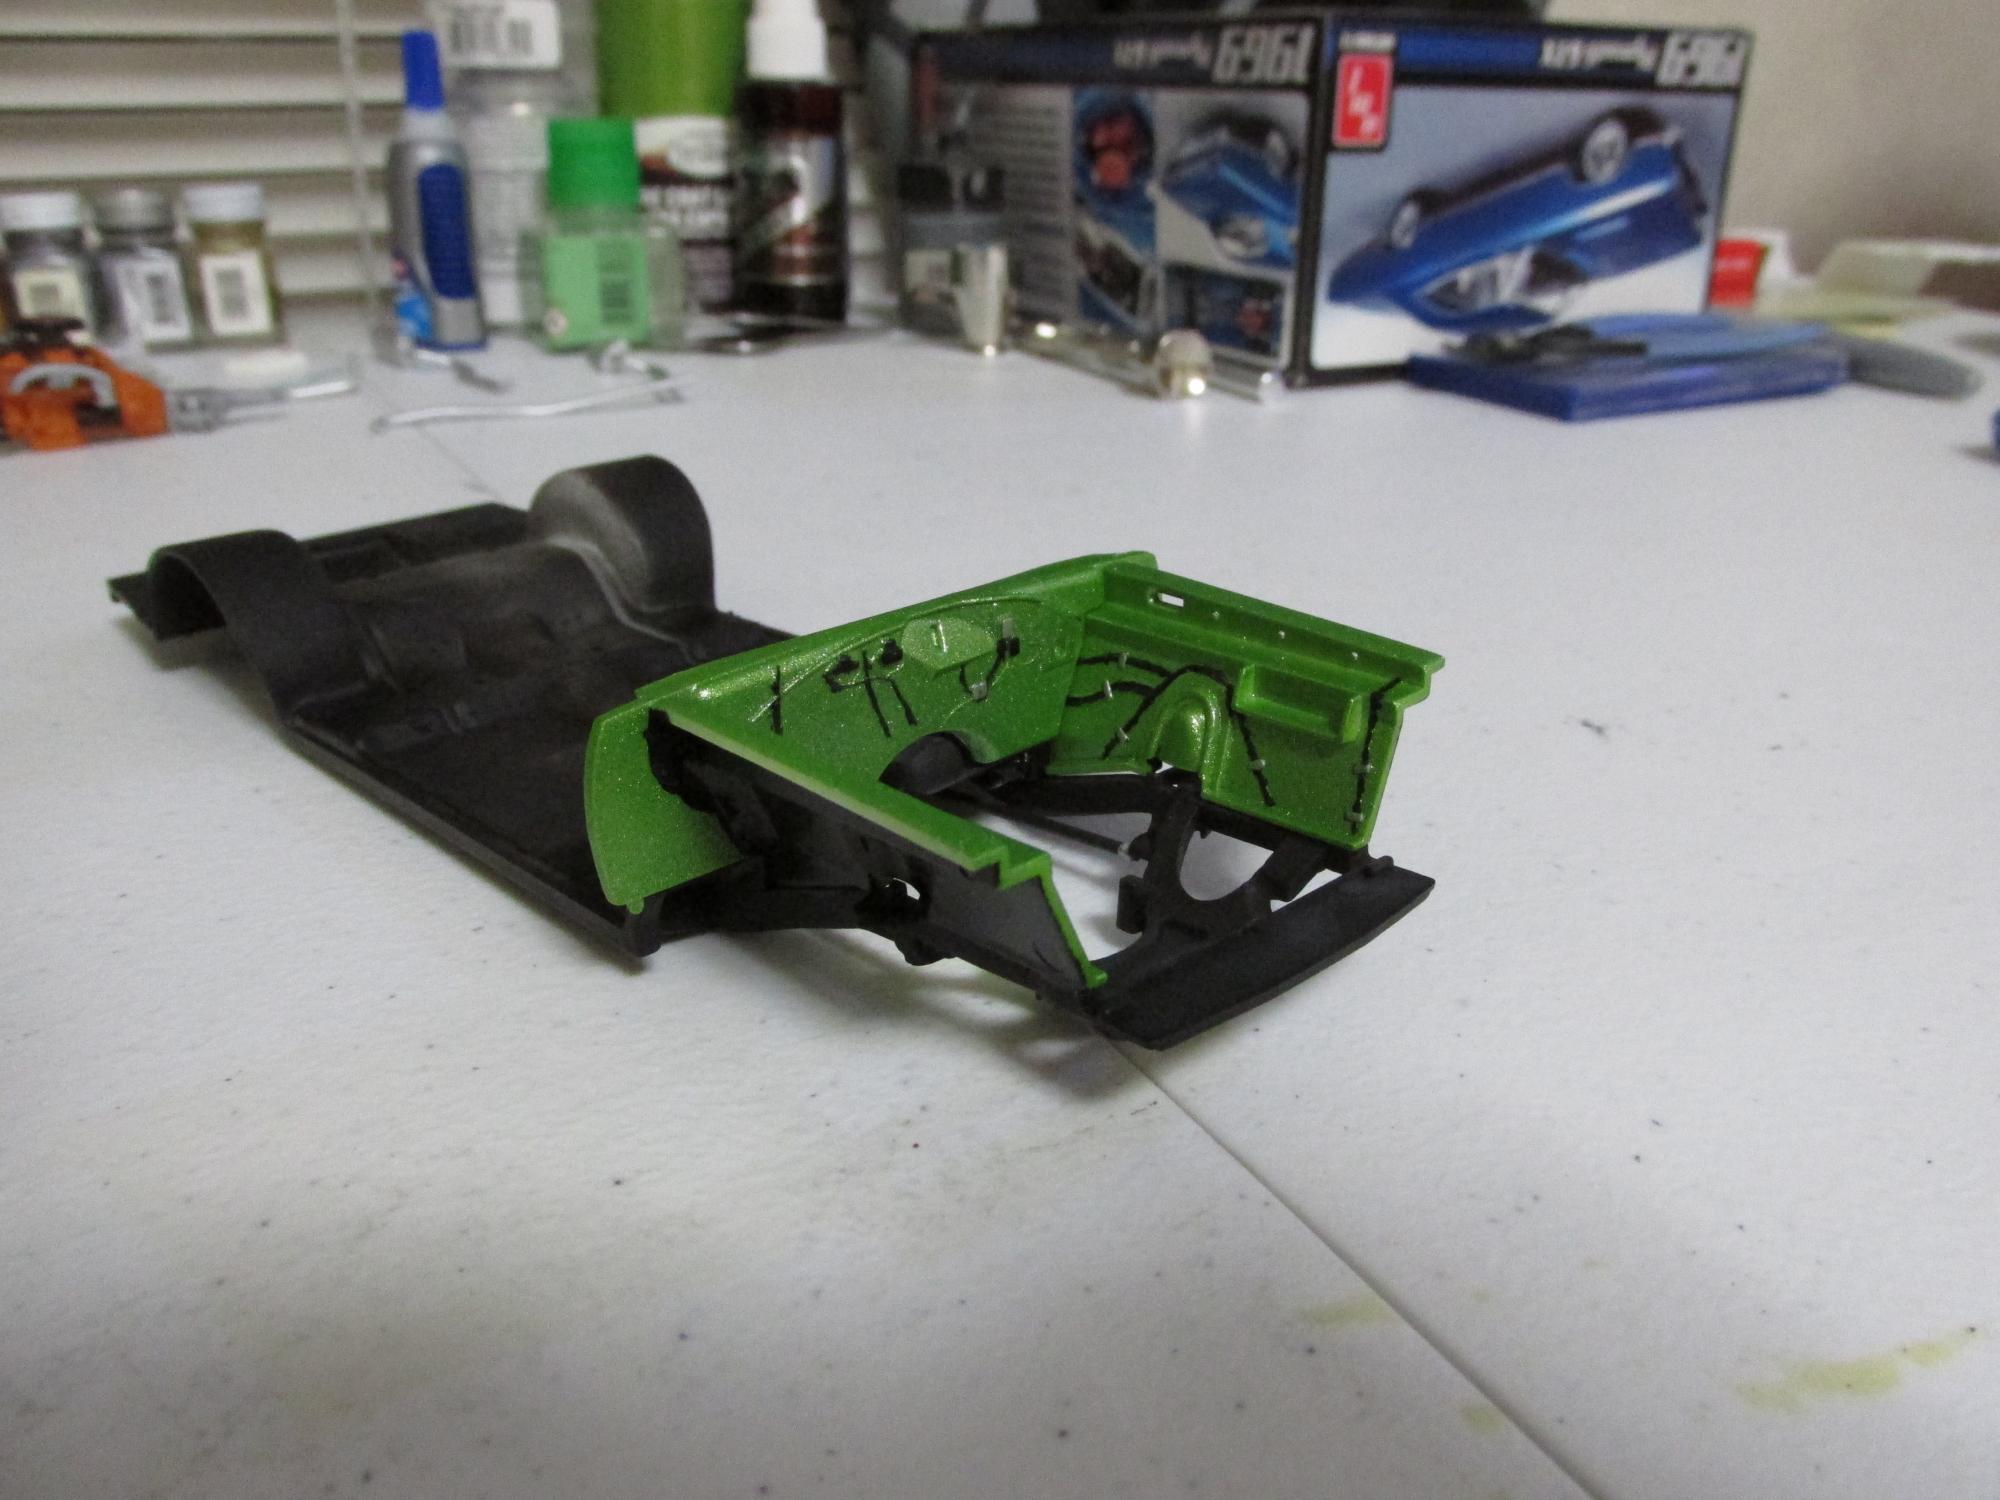
Today saw meager progress as I spent the majority of the time painting the body. I did start out by gluing the engine bay to the chassis, and then painting the backside of the inner fenders semi-gloss black. Here's a mockup with the 440 in its home. I moved on to detailing the Magnum 500 wheels. After detailing, I glued them to the wheel backs (this kit doesn't really like the wheels to stay in the tire), and then put the finished wheel/tires back into the box to protect them until needed. And then finally, paint. Here, the body has had two coats of Blazing Black applied to the lower part of the shell, a coat of clear, then the decals, then another two coats of clear. I may give it another coat as I'm not quite satisfied with the level of shine on the sides of the body. The top looks great, but the sides still look a little dull. Shiny! Thanks for watching, and stay tuned because we are shortly gonna start on the interior! Brandon
-
I don't mean to hijack the topic, but, if I recall, Dodge never made a Daytona option for '71? Was this something that K&K did? Nonetheless, I'm watching to see how well you pull this off!
-
Nice work Kevin! Kinda disappointed that you went curbside, I would've LOVED to see what you could do to that 440! None the less, it's still a beautiful model, and out of all the Mopars, the Charger is my favorite!
-
1969 Plymouth GTX - 440, 4 Speed, a Resto Car
Mr. Moparman replied to Mr. Moparman's topic in WIP: Model Cars
Thanks guys! As we speak she's going outside to get some more paint! -
1969 Plymouth GTX - 440, 4 Speed, a Resto Car
Mr. Moparman replied to Mr. Moparman's topic in WIP: Model Cars
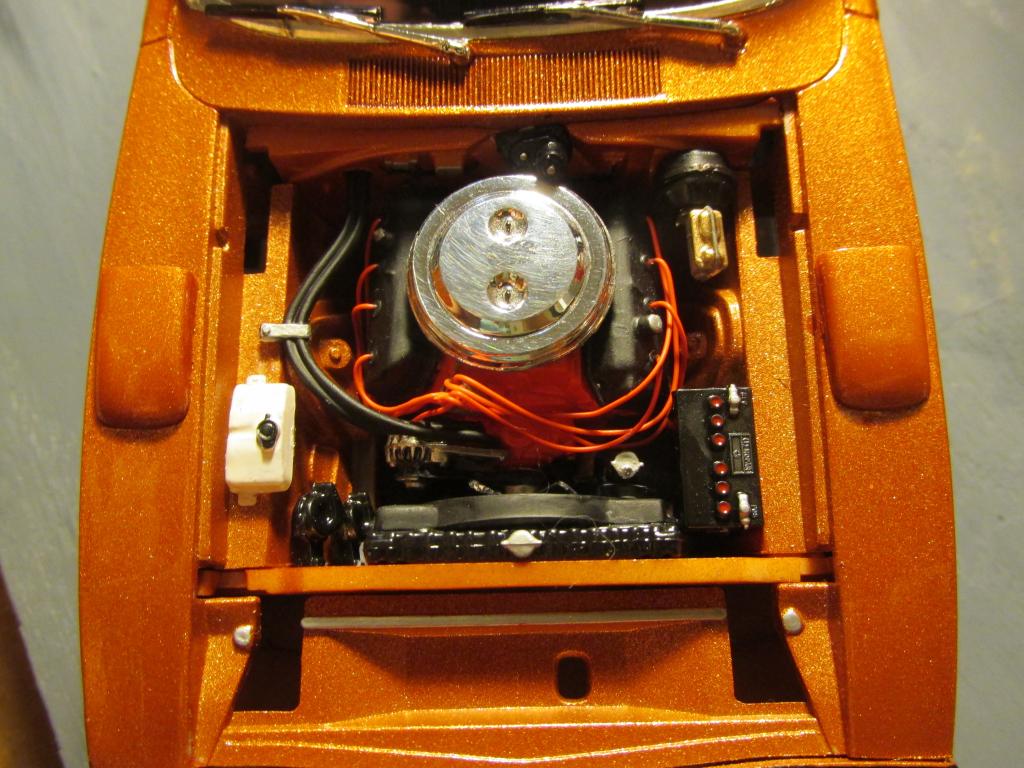
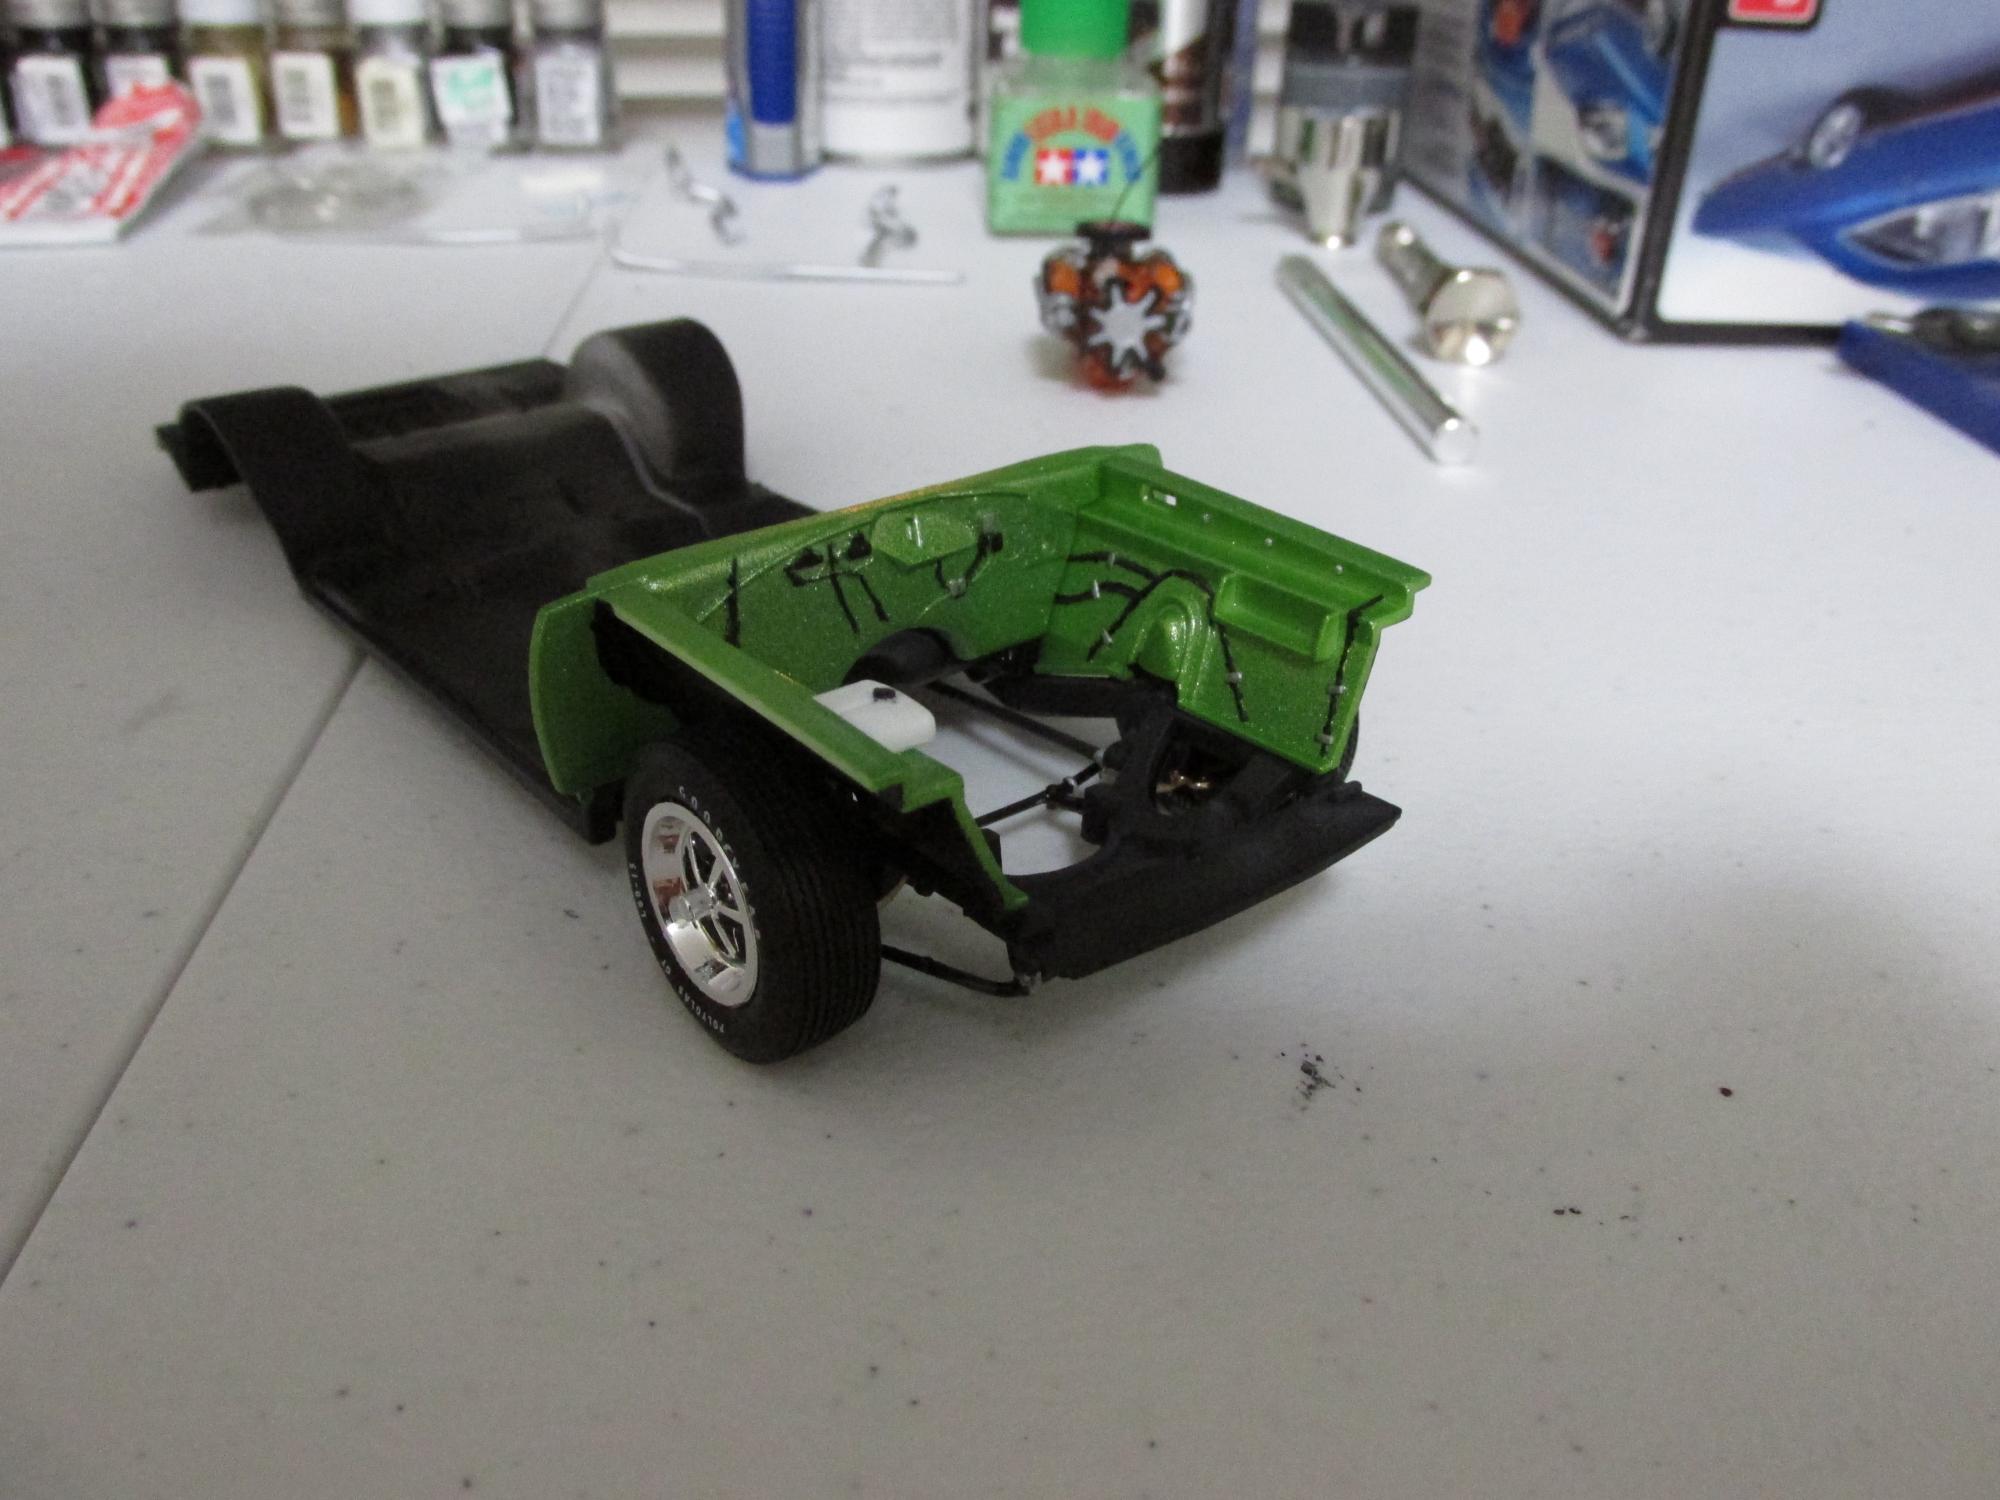
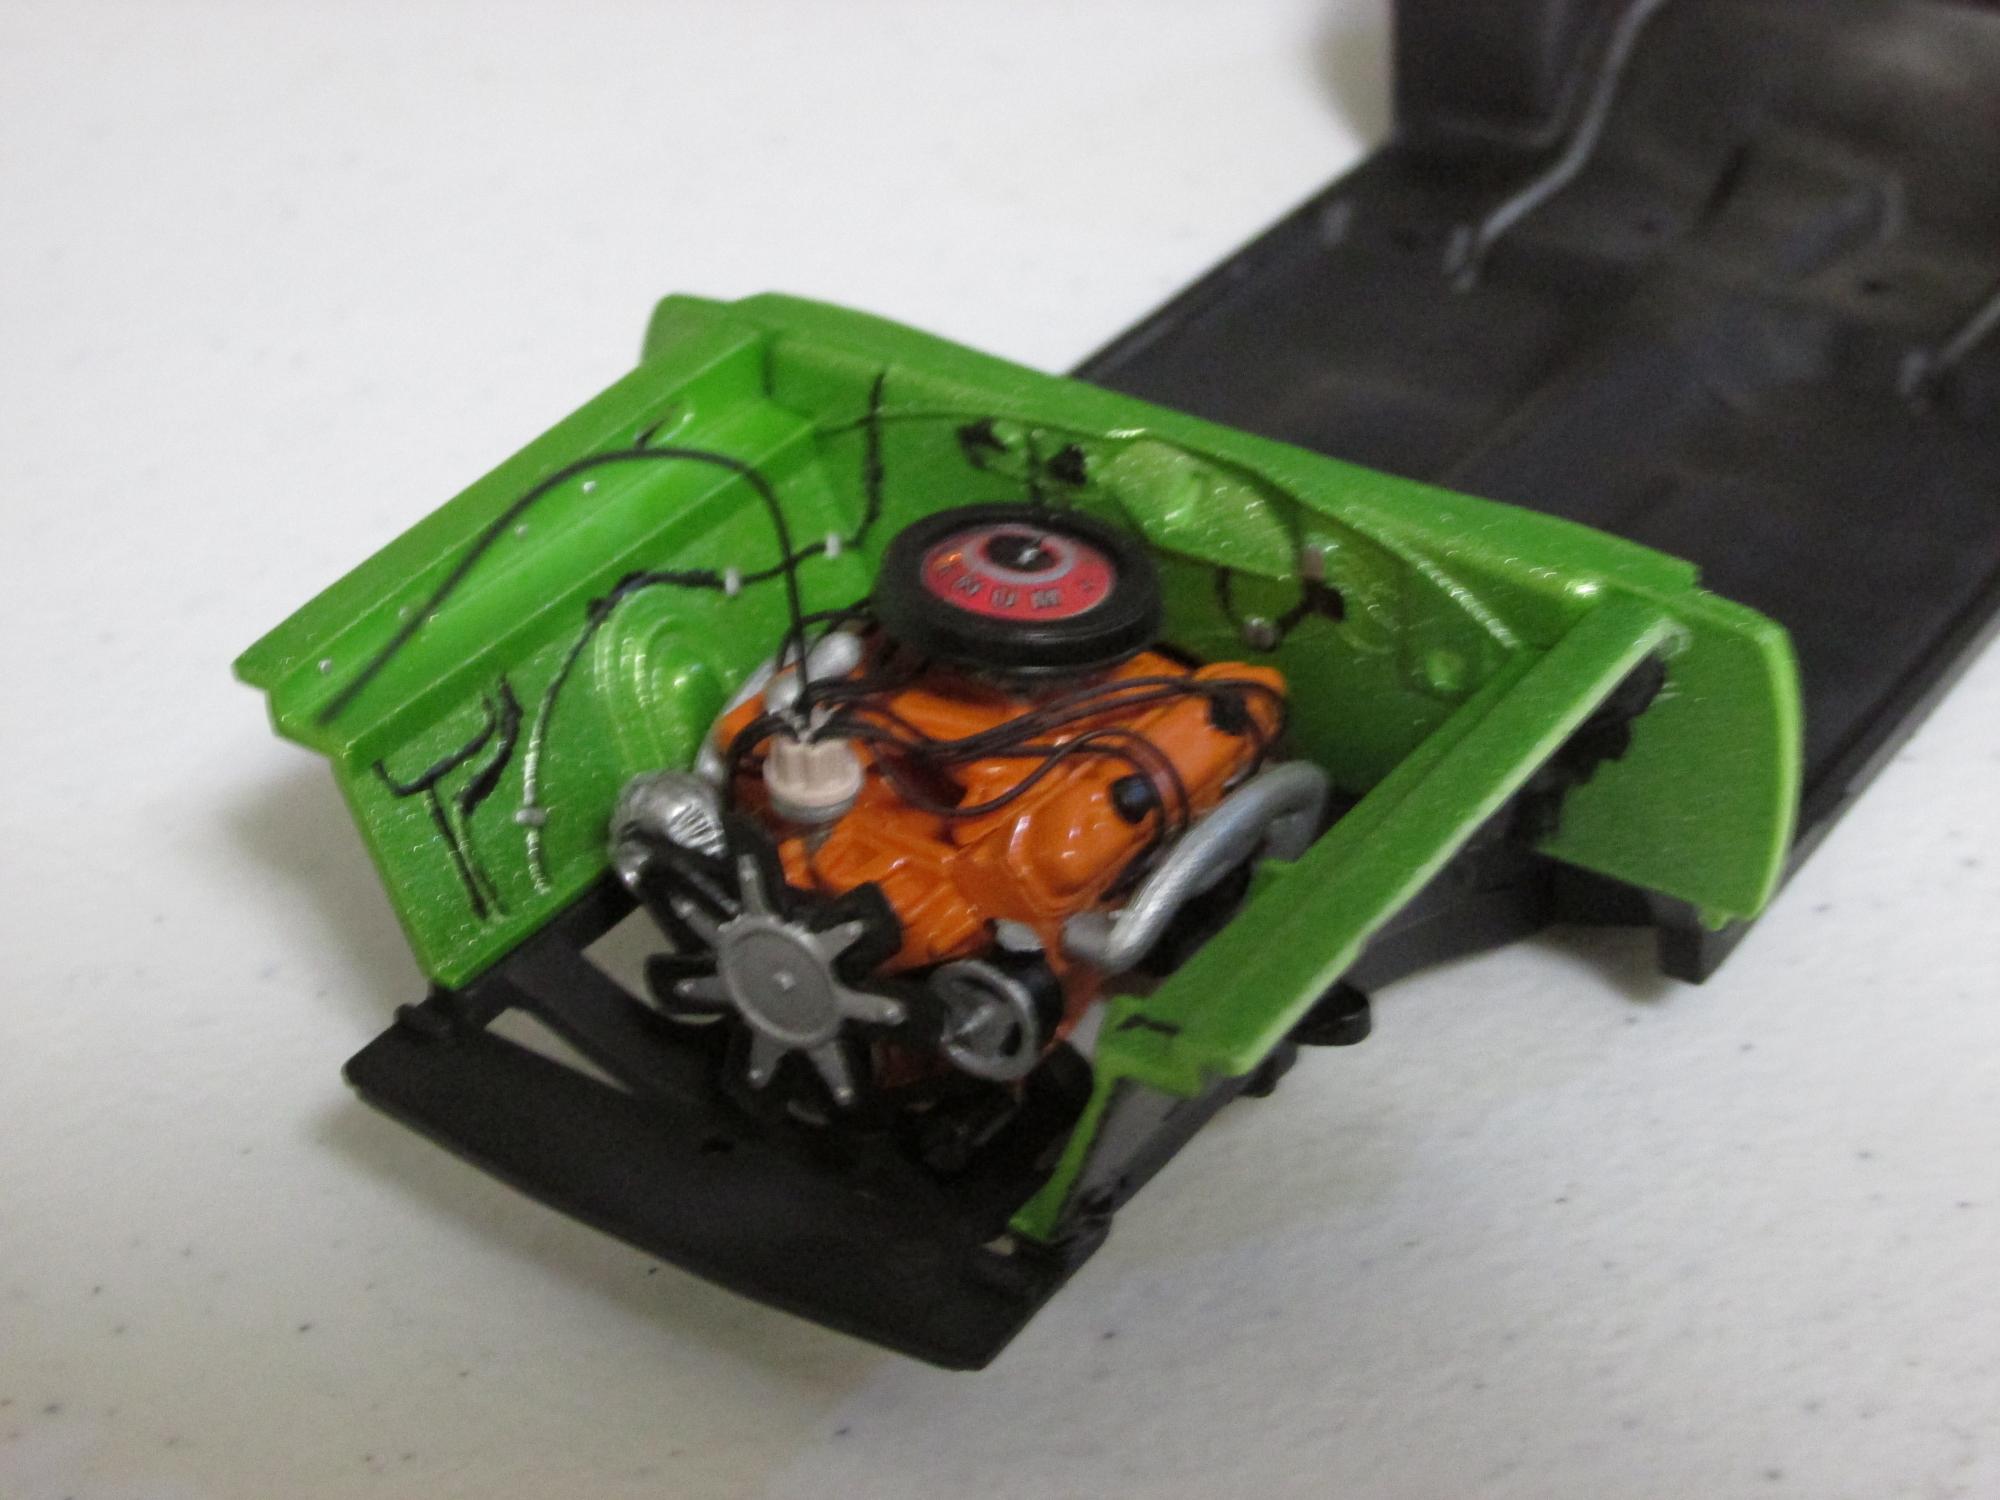
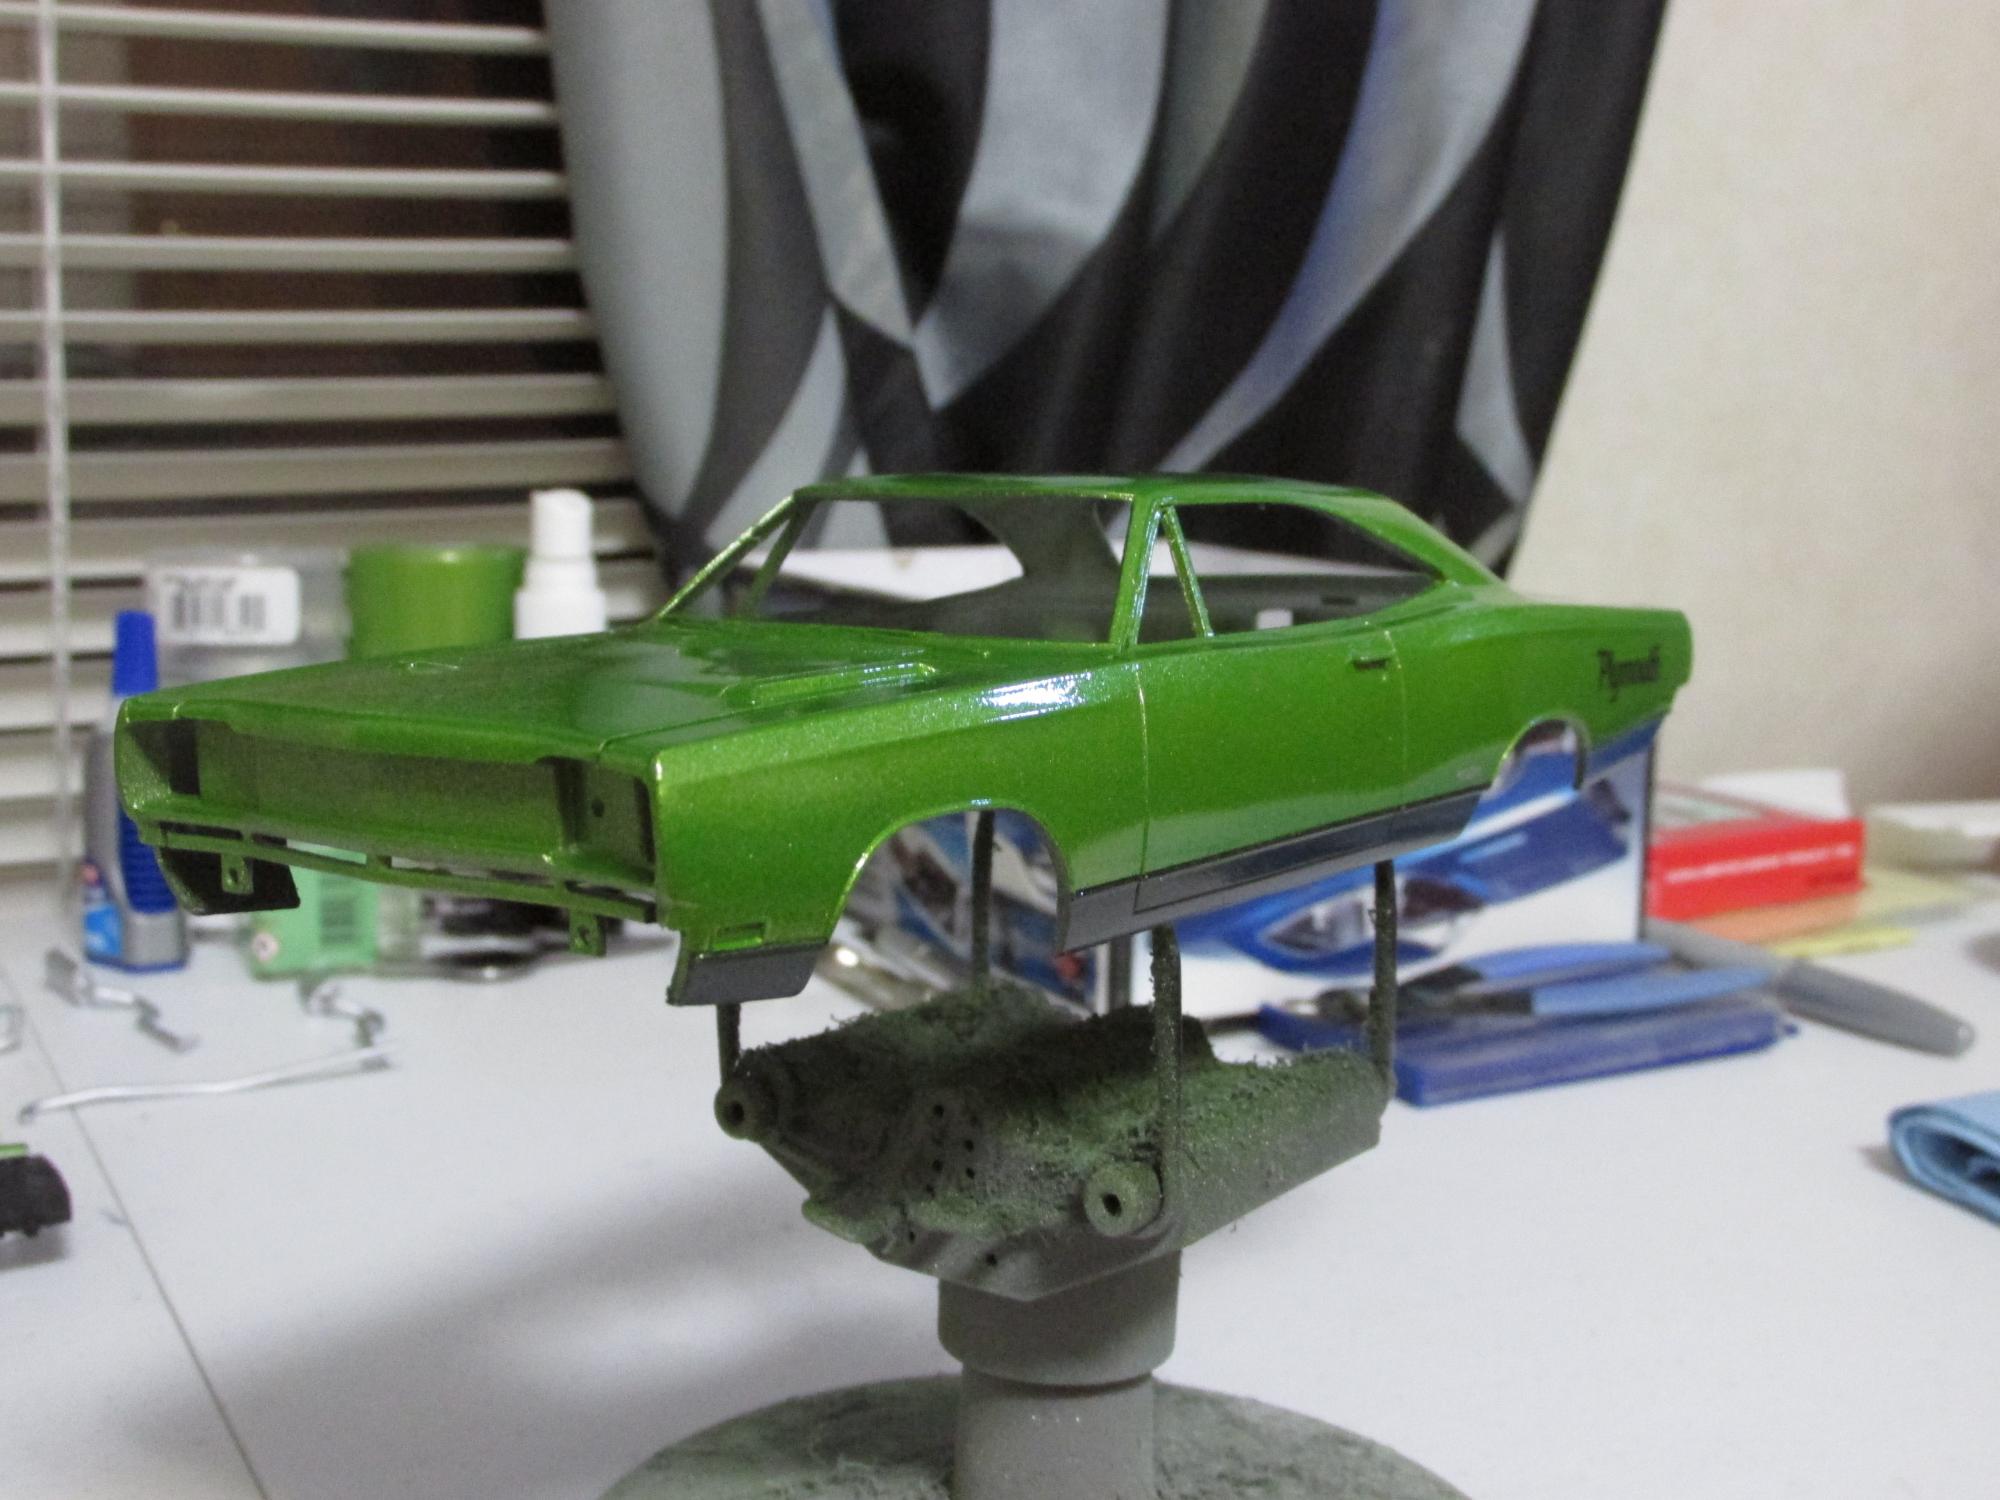
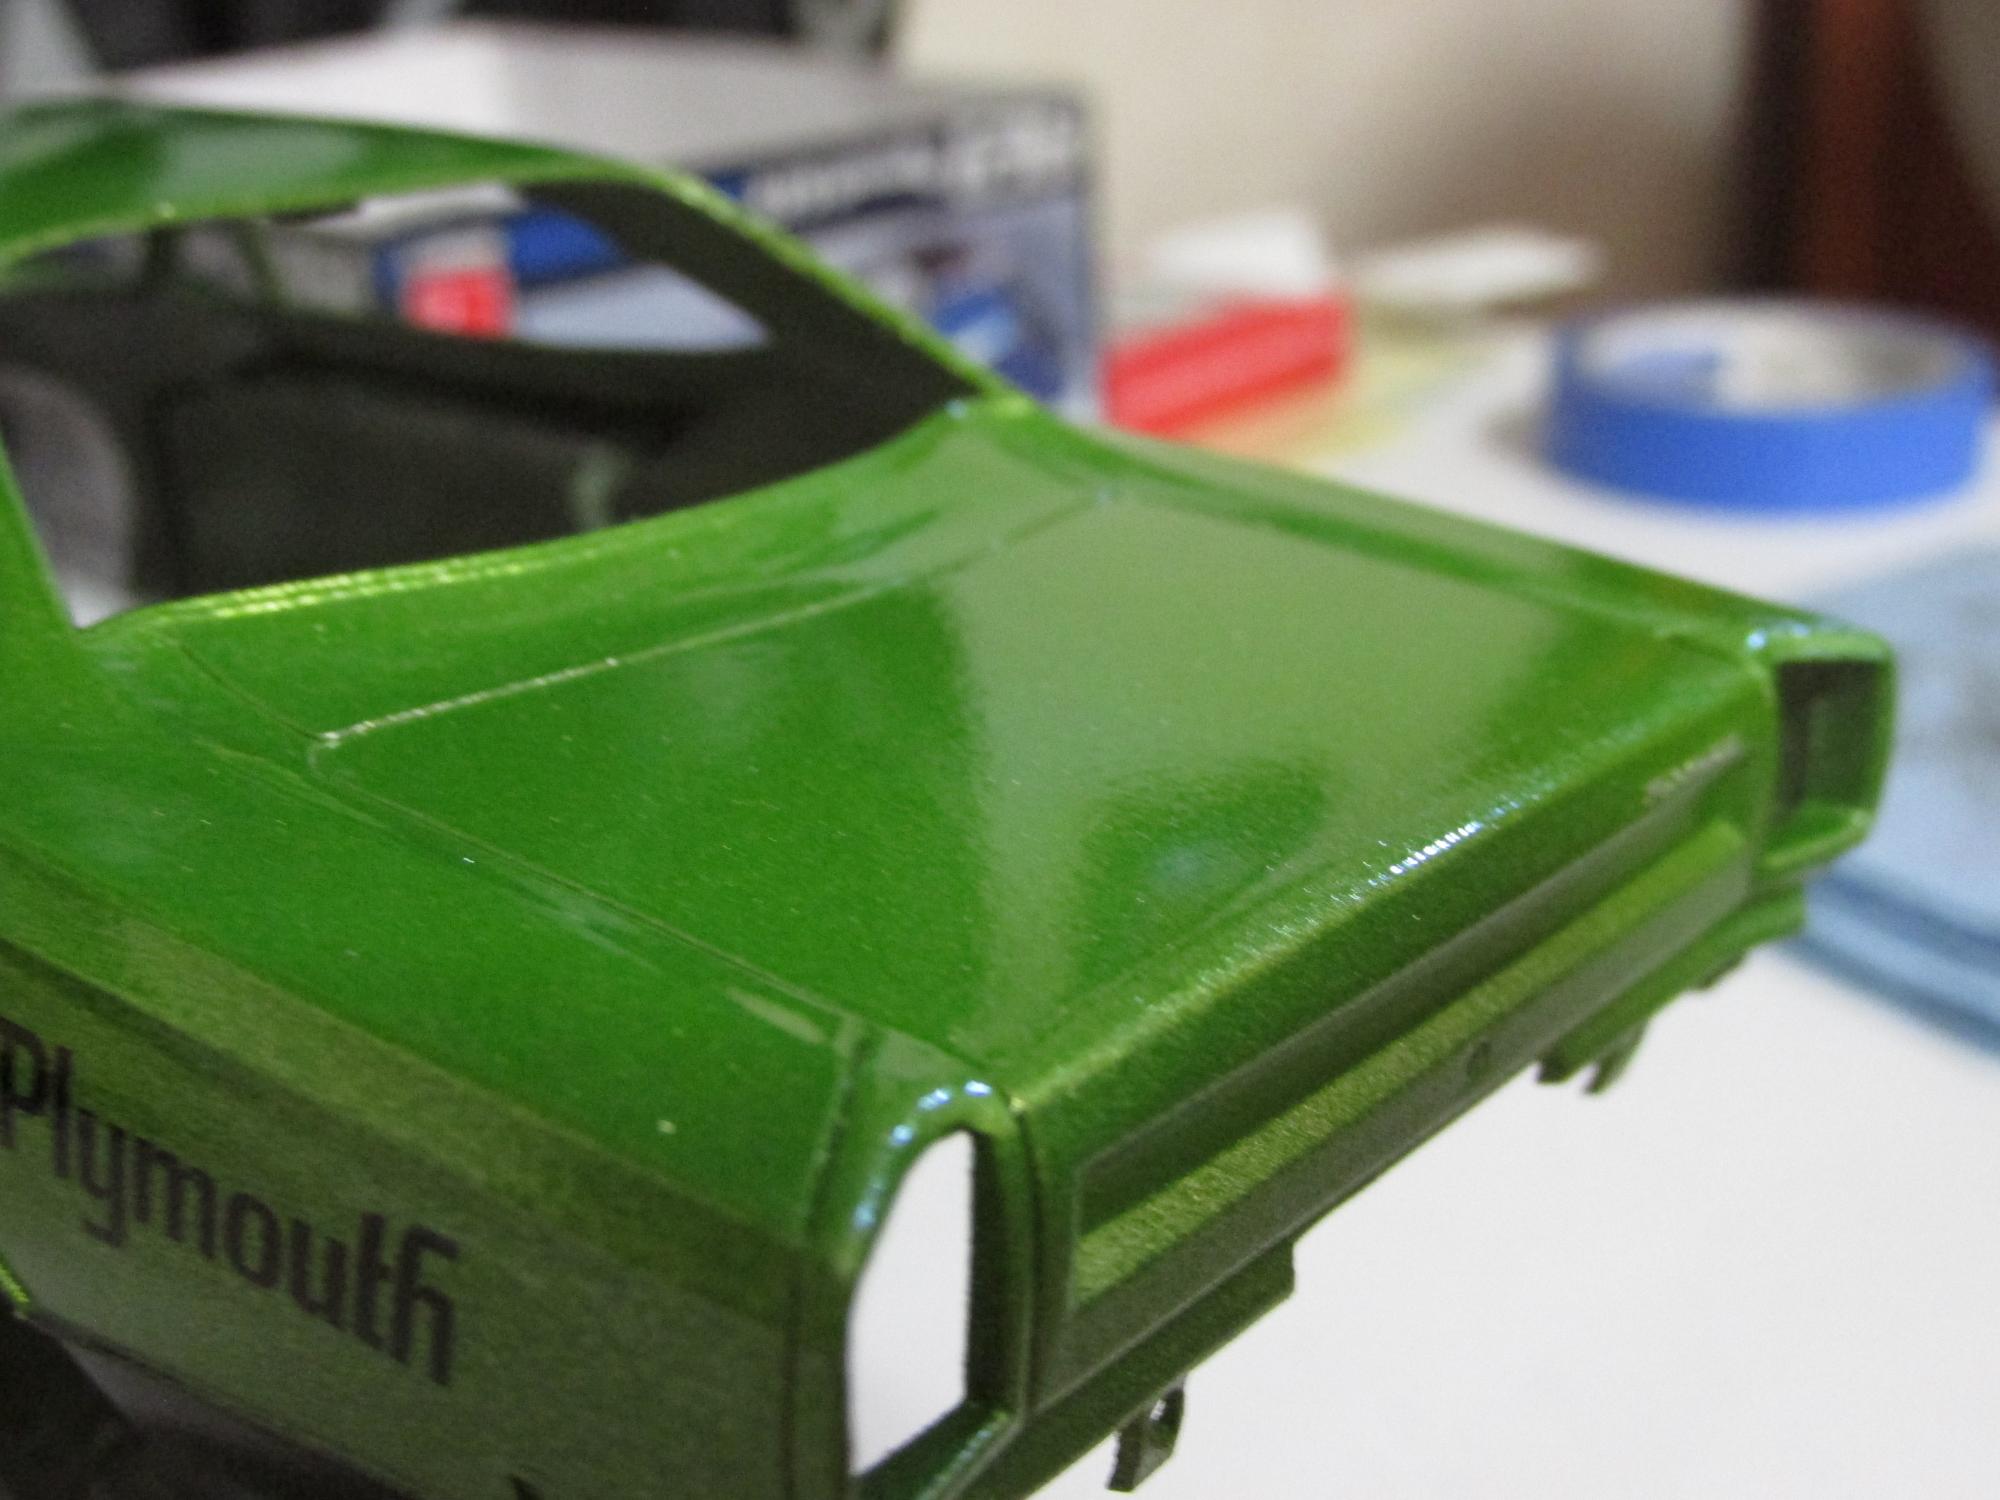
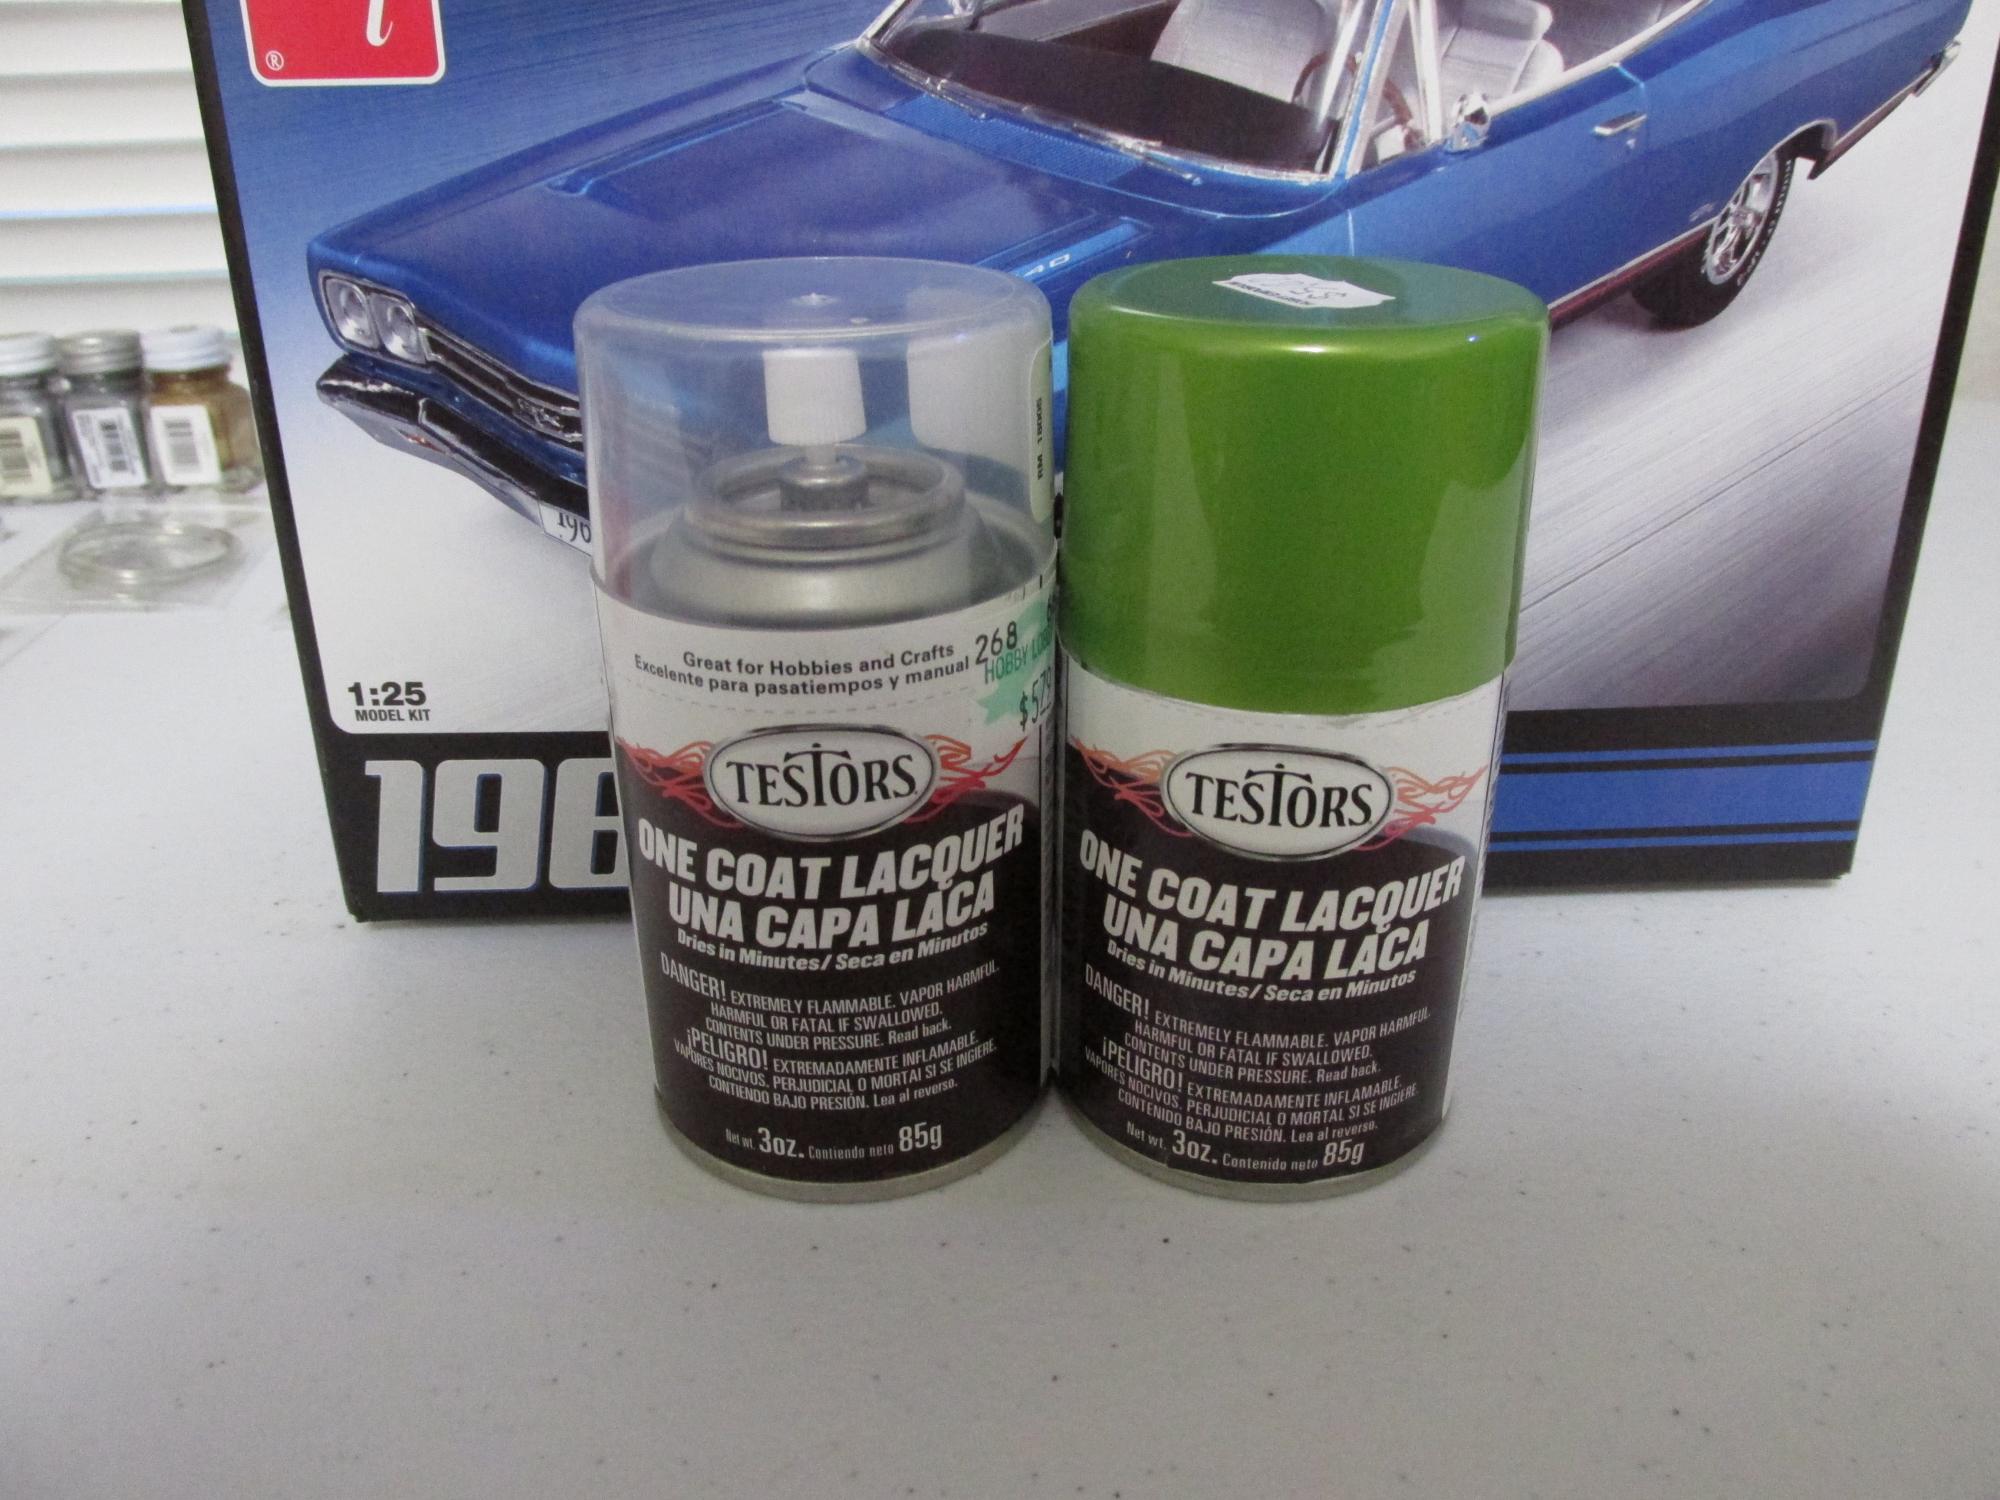
Well, the paint has been flying today and progress has been made. I started the morning off by finishing up the 440. I'm rather pleased, as this is probably the nicest engine I've built. For those wondering, yes, the coil wire will eventually get connected. I'm gonna mount a MSD coil on the firewall somewhere. I moved on to the "doghouse", hitting it with the body color and then picking out the molded in lines with various blacks and some aluminum for the straps. I still need to paint the backsides of the fenders semi-gloss black. I started on the chassis. Normally, I'd hit it with primer and then simulate the "factory overspray", but since this is supposed to be a replica of a "diy resto" car, I went for semi-gloss black. I drilled out my spots for the brake line, and ran it. This will eventually just terminate at the rear axle. The color is on! I hit the body with two final coats of primer, let it sit for about 3-4 hours, and then shot it with three coats of Lime Ice. Tomorrow, I will mask off the lower parts of the fenders and hit them with Blazing Black, for a cool two-tone look, then clear the car with my usual three coats of clear. The factory option for the car would just be flat black after clear, but I'm saving the flat black for the tops of the fenders and the hood. Thanks again for looking! Brandon
-
1969 Plymouth GTX - 440, 4 Speed, a Resto Car
Mr. Moparman replied to Mr. Moparman's topic in WIP: Model Cars
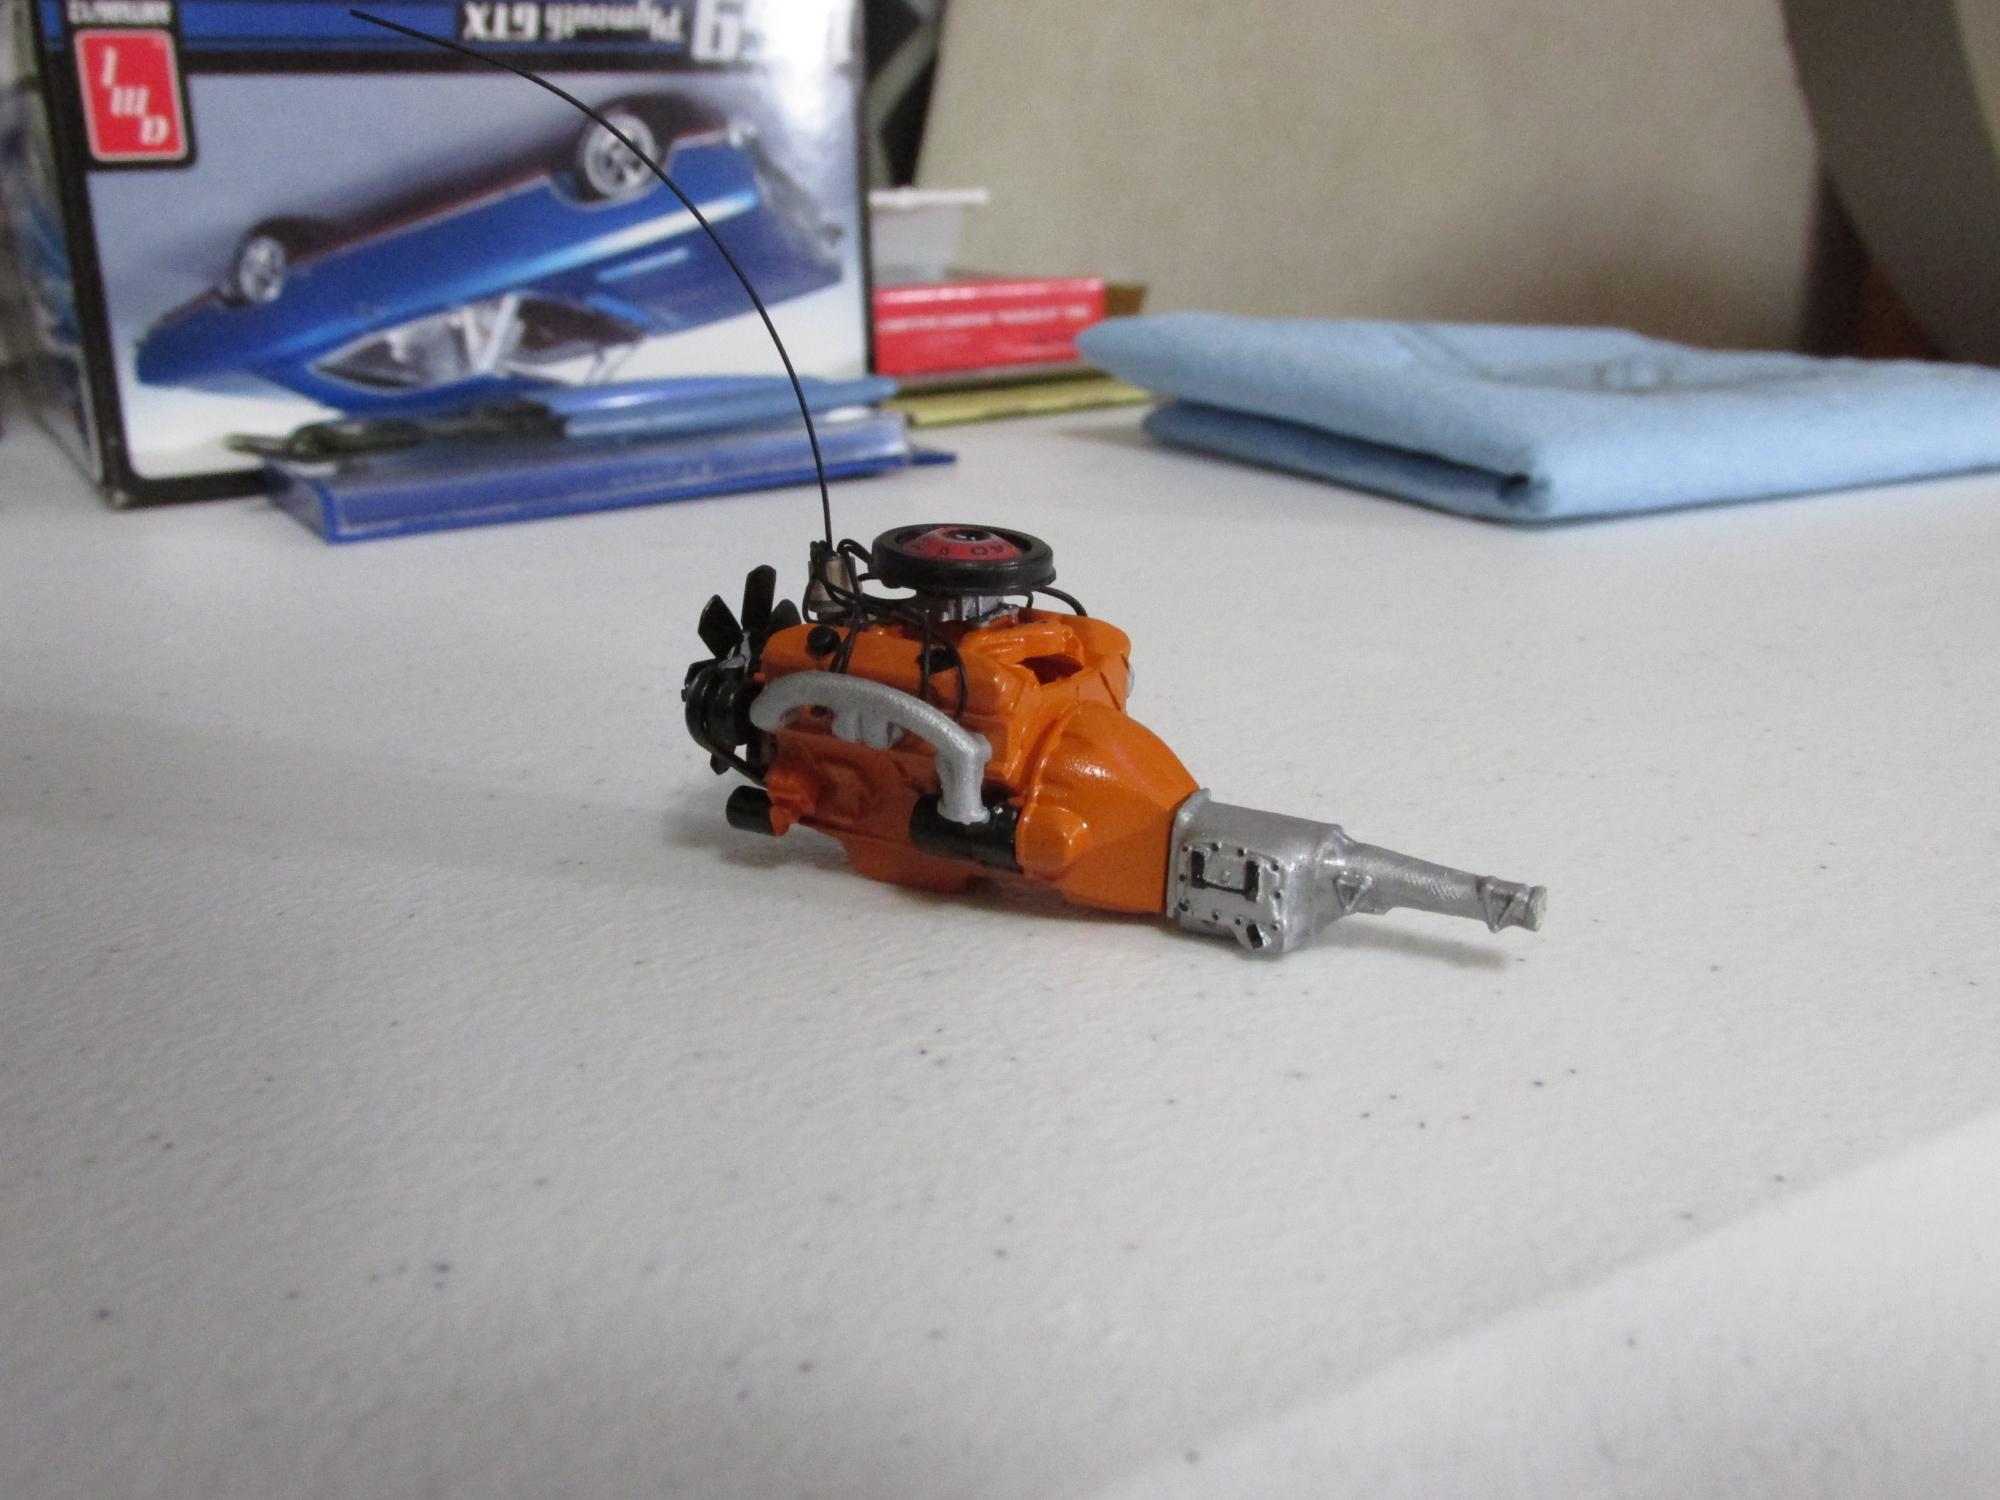
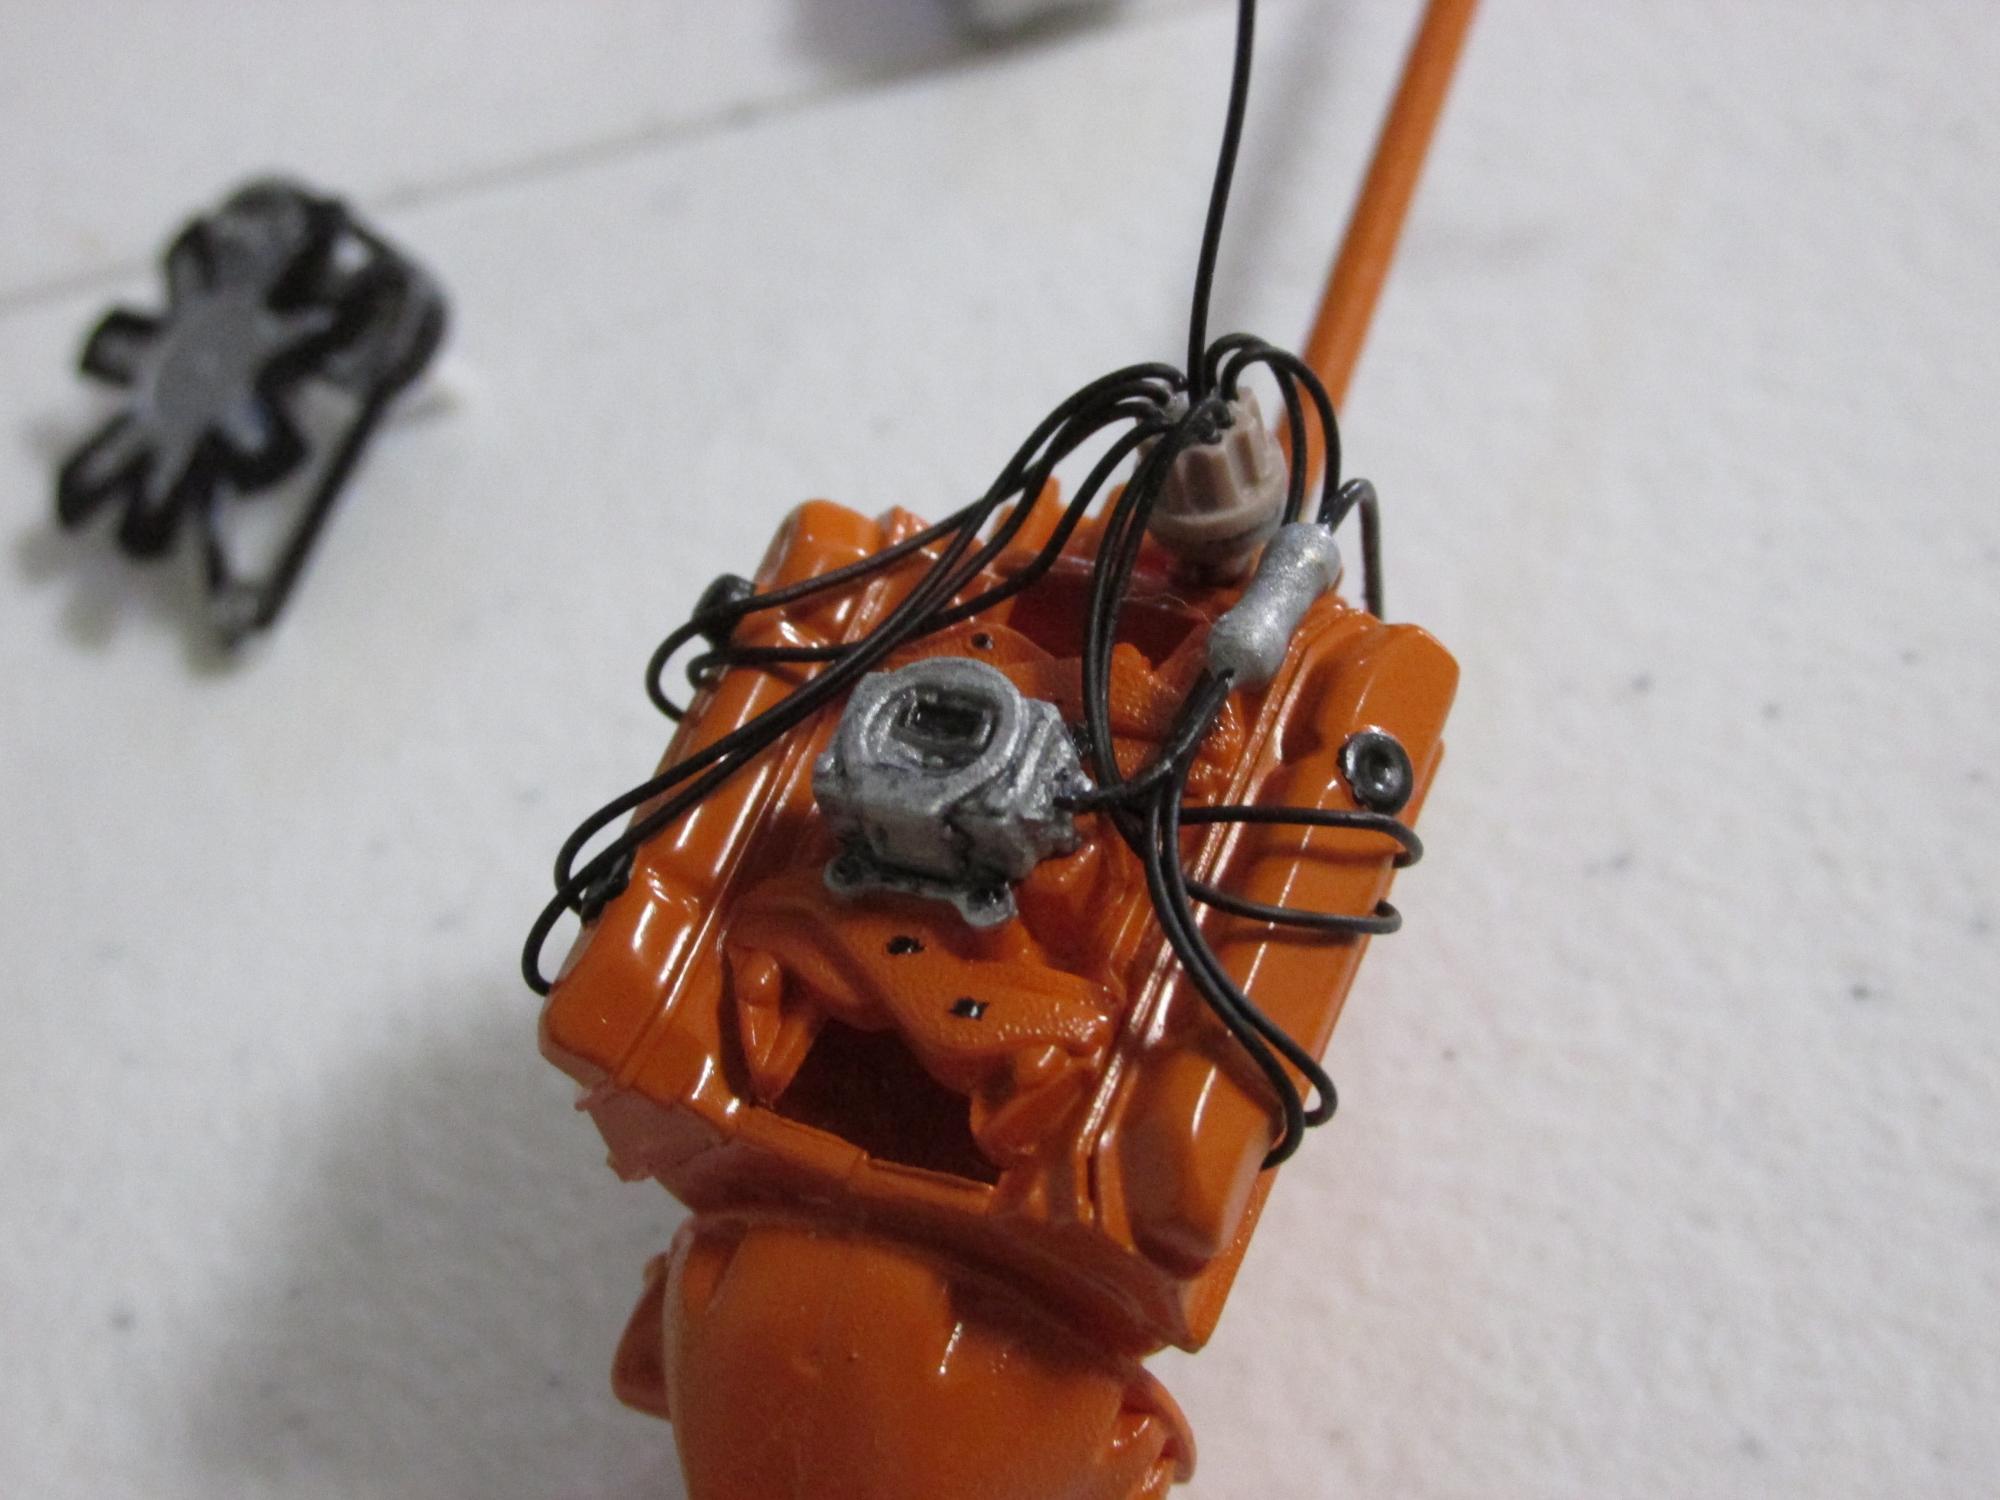
Thanks for all the comments guys! Today, I put in some marginal progress to the GTX. I don't really want to rush it along, so I've just kinda piddled with the engine. Now, I want to point something out for you stock 440 builders out there. This engine as it sits would run just fine, because EVERYBODY knows that the 440 left the pushrods and all its guts exposed under the intake. (Sarcasm level 10). For some dumb reason, AMT has decided to leave out the plate that goes between the block and intake. I'm not sure what it's called, I know on my real life '98 Ram, it's called a "plenum" with some parts catalogs calling it a "valley cover" or "top plate". I only know this because I've replaced the dern thing twice. (not fun) At first, I thought this was a simple one kit issue, but it appears that it's not, because even the box art model is missing it. Oh well. Anywho, so I assembled the block and painted it. There was some internal debate about the color, all of the reference cars I looked at were Street Hemi Orange, while the Mopar guidebook I have shows all 1962-71 B/RB big blocks being painted in Chrysler Turquoise, with the "High Performance" option on the 440 being the only exception. I could not find any difference between a "regular" 440 and a "high-performance" 440, so I sprayed it Street Hemi Orange. Carb was done with aluminum and a black wash, a fuel line was added by using a electrical resistor as the line/filter, and then the MAD distributor was put on and wired up. The fan belt assembly coming together. Still need to add the alternator and do some touch up to the belts/pulleys. I've also painted the transmission and detailed the linkage. I started on the body, because I like my paints to gas out for a good two/three days before I start handling them. So, I shot the body with two coats of Duplicolor auto primer, and then sanded down the rough spots. Another two coats tomorrow, and if it looks good, I'll let it sit overnight and then shoot color the next day! Anywho, I'm tired, so I'll cya tomorrow! Brandon
-
1969 Plymouth GTX - 440, 4 Speed, a Resto Car
Mr. Moparman replied to Mr. Moparman's topic in WIP: Model Cars
I've edited the topic because I just discovered that the six-pack was not an option on these cars. It wasn't added till 1970. Luckily, the kit does include the standard manifold and 4bbl carburetor, I just need to source a regular 440 style air cleaner. I think I've got one somewhere. -
Hello all. Before I dive into this build, I want to kinda "re-introduce" myself. I'm Brandon, and I've been a member here for about 4 years now. I joined back when I was 12, and was totally immersed into modeling. I loved it. I had a passion for cars, and I built them. Mopars are my thing, I love anything really from Dodge or Plymouth, as is evident by the slew of '68/'69 Chargers sitting around my room. Well, I'm 16 now, and the models, have unfortunately been replaced by typical teenager things. I kept all my good finished builds, and I still proudly display them in my room. The unfinished builds, and the new kits, went into storage. I didn't sell my stuff off, because, unlike most people, I envision a day when I will return to this hobby. Right now, however, it's not practical for me to build all the time, and as such, the models had to go. However, I've had an urge lately. It's summer time right now, and I'm not as busy, so I decided to go pull a random kit out of storage (I literally just reached into the box of kits and pulled one out), and build it. Now, I didn't know what I was getting, because I don't remember what I even put into storage. I just want something to do. So, that brings me to this build. A 1969 Plymouth GTX from AMT. When I saw the kit, I didn't really have a solid plan for it, but I've thought about it over the past few days, and I've got some ideas. So, unlike my other builds, I'm not going for 100% "factory-stock". Instead, I want to go for a restored look. Something that a man might build in his garage, with a smaller budget, and still look pretty close to stock. A project car. Not any of this "factory correct" paint, or hardware. Colors are decided by 1, what's affordable, and 2, what looks cool. Performance is nice, but we don't want to blow the budget by cramming in a ungodly engine. So, what we have... A 1969 GTX kit. For our build, we will be using the 440. Normally, I'd shove a Hemi into this in a instant, but again, we want a fully restored car on a budget. Since most of these cars came from the factory with a 383, or a 440, we're gonna go with the more common motor. I see that AMT is now including the pad-printed Goodyear tires in the newer kits, but mine doesn't have them. So, I went and picked up one of their supplementary parts packs to give me the tires. For our paint system, I've decided to go with a unusual color. I've chosen Testors Lime Ice, which is not a factory Plymouth color, but I like it, and it will be one more step towards liberating myself from the B5 Blue craze that I used to have. I'm topping the Lime Ice with Wet Look Clear. I've also got a few other goodies for this build, like a M.A.D. distributor, some BMF, and some brake and fuel lines. Thanks for looking, Brandon
-
I don't think you'll ever hit the nail on the head in terms to the true 1970 front-end that is on Dom's Charger unless Revell makes a kit, but you could get close with a grille from a 1968 kit. Unlike the '69 grill, the '68 doesn't have the center divider in the middle of grille. It's just mesh all the way across. Brandon
-
1970 Dodge Charger R/T?
Mr. Moparman replied to Mr. Moparman's topic in General Automotive Talk (Trucks and Cars)
Agreed. I wish we knew more, but even this picture gives some hope. I haven't built a model in 8 months but if Revell dropped a '70 I'd be on it in a heartbeat. -
1970 Dodge Charger R/T?
Mr. Moparman replied to Mr. Moparman's topic in General Automotive Talk (Trucks and Cars)
If that picture is any indication of Revell preparing to convert the '69 to a '70, then that's great news! -
1970 Dodge Charger R/T?
Mr. Moparman replied to Mr. Moparman's topic in General Automotive Talk (Trucks and Cars)
I have the bumper and rear piece from a eBay deal in my parts box, but it's nothing but cheap resin re-pops of Modelhaus parts. Both are full of pinholes. I thought about trying to cobble something together with the front clip of a Daytona and the rear half of a '68, but gave up on it. It would take more work than what it's worth. I have a lead on a Missing Link '70 for the Revell kit, and if all goes well I'll be building me a EB5 Blue car with matching interior and a 440. #FingersCrossed -
A retirement coming in the aftermarket!
Mr. Moparman replied to Art Anderson's topic in Car Aftermarket / Resin / 3D Printed
In my limited experience with Modelhaus, (I bought a correct interior and grille for a '70 Charger) I found that they are some of the best resin casters one can find. I will defiantly be placing an order for some small stuff and a full '70 Charger kit. I hate to do it, beings how they want to avoid a flood of orders, but I want the parts before you can't find them.