george 53 Posted December 20, 2012 Posted December 20, 2012 Eelco, the engines a 427 FE block in that car.
Bartster Posted December 21, 2012 Posted December 21, 2012 I just did my 1st BMF before primer & paint. I used a pencil eraser to rub off the paint between each coat & it worked out very well. I only did the letters & small emblems, the actual trim is bold enough to do after paint........l'd call it a 427 too, artistic license, lol !
diymirage Posted December 21, 2012 Author Posted December 21, 2012 thanks for the advise guys (ill advertise it as a 427) as for the scripts, i will have to try that next time because the scripts on this baby are gone (i put a wanted ad in the wanted section for help on this...hoping someone is able to "copy" the scripts for me) on the bright side, i am one step closer to slapping paint on
Edsel-Dan Posted December 21, 2012 Posted December 21, 2012 When I want to replace/copy script like that, I press kitchen foil over them and get it fully embossed in, then flip it offer and fill it with either putty, or liquefied kit styrene. (scrap sprue melted in liquid cement.) Made the missing GTO emblem for the trunk of my AMT 65 Goat. My 64 Marauder is stashed so I can't get to it right away.
diymirage Posted December 23, 2012 Author Posted December 23, 2012 allright guys, had a fe busy days for starters, i got the interior done im not 100 % pleased with it but this is where it will stay i tried getting the stock seats in there but i couldnt get the finish to match what i had allready done to the back seat and i really liked the finish on these custom seats i i just went with them its hard to capture in a picture but i like the way my gauges came out i used the same wire i use to connect pieces of exhaust to paint on the needle very pleased with the way that came out i also got the engine installed and what a massacre that wat somehow i could not fit the belts and the supercharger in the engine bay while still seating the engine properly it all ended up breaking off so its back to the drawing board on that on i know i dont have an alternative intake and i dont want to just slap the pie tin air filter on so hopefully i can massage the supercharger set up back in there in the mean time i also finished the fire wall i will be putting some wire in the brake booster for effect later this is the last mock up before hitting the paint booth oh, and this is the paint that will go on there ive also decided on a paintsceme...it will be the same as on the hotwheels 64 custom galaxy from thier highway series
diymirage Posted December 24, 2012 Author Posted December 24, 2012 well totally botched up the paint on it i went with some thinned out nailpolish maybe it would have gone well over a white primer but shot over the grey it looks...well...grey still havent decided if im keeping it or shooting over it i guess it looks allright but its not what i had in mind iether way, i will be adding black panels and racing stripes with white accents
diymirage Posted December 24, 2012 Author Posted December 24, 2012 well, i decided to shoot the rest of the paint just to see how it would come out and i REALLY botched it up this time i used a combination of tapes on this, tamiya for the main lines, painters for the big coverings and a third tape i dont know what it is, some plastic tape i bought at a model shop ages ago well, the plastic tape turned out to be detrimental to the underlying paint job when i removed it it pulled the paint right off...right down to bare plastic i also screwed up the white when i taped it off for the black, on the side panel you can tell where i pressed the tape down before the paint was hard and it left indentations here is what it looks like (actually happy with the design...just hate i screwed it up) the body will go into the purple pond but at the same time i placed a post in the wanted section not sure if ill be able to save this
sstacey47 Posted December 25, 2012 Posted December 25, 2012 (edited) I have that paxton set up casted,for the twin carbs also.Are you still needing the emblems casted,i might know where a kit is.Sean Edited December 25, 2012 by sstacey47
Dirkpitt289 Posted December 25, 2012 Posted December 25, 2012 What a shame it was really looking great. I've even started to look for one of these because of your build. The good news I guess is a few hours in a zip lock bag with some oven cleaner and she'll be ready for paint again in no time.
diymirage Posted December 25, 2012 Author Posted December 25, 2012 I have that paxton set up casted,for the twin carbs also.Are you still needing the emblems casted,i might know where a kit is.Sean if you have a lead, i would really be interested mine are comepletly gone What a shame it was really looking great. I've even started to look for one of these because of your build. The good news I guess is a few hours in a zip lock bag with some oven cleaner and she'll be ready for paint again in no time. i guess ill write it up as a trial version the good news in im building in 1/25 scale if this were to happen in 1:1 scale i'd be out thousand of dollars...now the damage is less then 10 bucks hope you find a good one to build
Guest Posted December 25, 2012 Posted December 25, 2012 It looks odd with slicks and fender skirts. The slicks needs to go. Never saw a drag car with fender skirts or a custom with slicks on the rear.
diymirage Posted December 25, 2012 Author Posted December 25, 2012 it is an odd combo i really want to combine style with performance but those slicks were the only tires i had that looked a bit beefier than the stockers maybe i can whitewall them
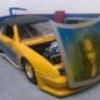
diymirage Posted January 3, 2013 Author Posted January 3, 2013 here she is after about 2 weeks in the brake fluid and a final scrubbing with oven cleaner i had to reglue both skirts and when that glue dries shes going back in primer all in all im pretty pleased with how clean i managed to get her, thats mostly naked styrene again
Lunajammer Posted January 3, 2013 Posted January 3, 2013 Wow, that's an amazing clean up. Talk about getting a second chance.
diymirage Posted January 3, 2013 Author Posted January 3, 2013 yeah, im pleased with it when i was shooting the first few coats of primer there were some pretty deep scratches visible as the paint was still wet but hopefully a few minutes of wetsanding will take care of those before i put more primer on
Recommended Posts
Create an account or sign in to comment
You need to be a member in order to leave a comment
Create an account
Sign up for a new account in our community. It's easy!
Register a new accountSign in
Already have an account? Sign in here.
Sign In Now