Don B Posted February 16, 2008 Posted February 16, 2008 WOW. That has to be the BEST looking pickup build that I have ever seen. Awesome custom work. I'd be happy if I could do half as good. WOW!!!
Raul_Perez Posted February 16, 2008 Author Posted February 16, 2008 OK...who went and dug last year's news out of the archives? Thanks for the compliments, guys!
Clay Posted February 16, 2008 Posted February 16, 2008 Yep still get light headed while scrolling down
geetee66 Posted February 27, 2008 Posted February 27, 2008 Raul I've been staring at the pictures for about 15 minutes! I love it so much! Your paint skills are superb! The gloss looks so deep. This has real flair and imagination. A real inspiration to newbies like me, to push myself further. I love this hobby...I haven't watched TV for ages...too busy with glue and styrene now Thanks for showing us your amazing work
Raul_Perez Posted February 27, 2008 Author Posted February 27, 2008 Raul I've been staring at the pictures for about 15 minutes! I love it so much! Your paint skills are superb! The gloss looks so deep. This has real flair and imagination. A real inspiration to newbies like me, to push myself further. I love this hobby...I haven't watched TV for ages...too busy with glue and styrene now Thanks for showing us your amazing work Thanks, Guy! I'm glad that you like it. The paint is Testors 2 part lacquer (base and clear coat). After the clear coat, it was sanded with 2,000 grit, 0000 grit, then polished. I watch way too much TV. That's probably why it takes me so long to get anything built.
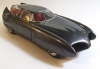
rollinoldskoo Posted March 6, 2008 Posted March 6, 2008 Raul, I like every modification you have done to this truck! You can't go wrong blending newer 'Vette components with an older Chevy car or truck. What's really cool about it, is every modification looks right. The scallops break up the large expanse of side sheetmetal nicely, and the front and rear treatments blend in smoothly. I'm not one for wings on pickups, but here again it blends in smoothly and looks good. The forward tilting hood is neat, as is the bed cover and tailgate. I also have to comment on the fit and finish of everything, it's perfect! I'll take a 1/1 like this In fact, this is how Chevy should have done retro, instead of that goofy looking SSR. i agree with all of this except the wing.... maybe a smaller one?? other that that wing.... i think it all looks killer and the mods all worked together extremely well....
Raul_Perez Posted March 6, 2008 Author Posted March 6, 2008 i agree with all of this except the wing.... maybe a smaller one?? other that that wing.... i think it all looks killer and the mods all worked together extremely well.... That's funny!! I added the wing because I needed a way to open the bed cover.
Raul_Perez Posted March 7, 2008 Author Posted March 7, 2008 (edited) this is the kit I need 7 kits for right? Yep, that's the one: AMT '55 Cameo pickup (for the bed, the hood and possibly the grille) AMT '57 Cameo or Step-Side pickup (for the cab and possibly the grille) AMT '62 Vette (For the side scallops) AMT '94/95 ZR-1 Vette (for the hood scoop, dash, seats, console and a few "bits" under the hood) 2x Revell '06 Z06 Vettes (for the tires, wheels, chassis, suspension, engine, drive train and rearview mirrors) A mid-fifty's Revell Chevy coupe or sedan kit (for the door handles and windshield wipers) 0.040" Plastruct sheet for the bed floor, bed cover and the rear wing. Or, wait for the transkit resin cab...then you only need a 55-57 Chevy Cameo or Step-side bed. Edited March 7, 2008 by Raul_Perez
Ron L Posted March 7, 2008 Posted March 7, 2008 I saw this at NNL West. You should've put it on a stand to show off the chassis; I thought it was just another engine swap! http://public.fotki.com/lauron/rons/scale-...nnlwest169.html
Raul_Perez Posted March 8, 2008 Author Posted March 8, 2008 I saw this at NNL West. You should've put it on a stand to show off the chassis; I thought it was just another engine swap! http://public.fotki.com/lauron/rons/scale-...nnlwest169.html I usually do...but I couldn't find my stands. We've recently moved much of my mother-in-law's furniture into our house, so it's a bit difficult right now to find just about anything... Thanks for the input,
Clay Posted October 29, 2008 Posted October 29, 2008 Still looks as good as it did the first time I saw it. And its your fault for posting the link to it and I brought it back on top
E St. Kruiser50 Posted October 29, 2008 Posted October 29, 2008 Still looks as good as it did the first time I saw it. And its your fault for posting the link to it and I brought it back on top Hi Clay Glad you posted this. I was sure glad to see it when he shared it with me today on a thread of mine.Just beautiful.
Raul_Perez Posted October 29, 2008 Author Posted October 29, 2008 Still looks as good as it did the first time I saw it. And its your fault for posting the link to it and I brought it back on top You're too funny!! Maybe you'll see it in person at the next NNL West!! Can't you convince Uncle Sam that you need to be on the left coast for a few days in early March?! Hi Clay Glad you posted this. I was sure glad to see it when he shared it with me today on a thread of mine.Just beautiful. Dave, I'm hoping that you'll have your '59 Roadster finished and on display at the NNL West in March!! If so we'll have to get a picture of the two of them sitting together!! Later,
Edward Gore Posted March 18, 2012 Posted March 18, 2012 . . . To fix the ill fitting front windshield, I glue a strip of 0.03" styrene to the bottom edge of the glass, (actually its the window trim), and sand to fit. Once you've got it fitting well you can either add Bare Metal Foil or paint to cover the styrene you added. Later, Good idea because your fix looks great. Did you glue to the windshield part or the cab opening? I'm building this truck now and I'm at this step trying to solve this. What type of glue did you use to not damage the 'glass' part? Lots of questions I know thanks
Raul_Perez Posted March 19, 2012 Author Posted March 19, 2012 Good idea because your fix looks great. Did you glue to the windshield part or the cab opening? I'm building this truck now and I'm at this step trying to solve this. What type of glue did you use to not damage the 'glass' part? Lots of questions I know thanks I used liquid model glue to add the strip of plastic to the bottom edge of the clear windshield part. I doesn't matter if the glue discolors the clear at the bond because you'll cover the entire outer edge with bare metal foil. Good luck!!
Dyno Davo Posted March 19, 2012 Posted March 19, 2012 Sharp build, luv the styling cues taken from the Vette, well suited
Edward Gore Posted March 20, 2012 Posted March 20, 2012 I used liquid model glue to add the strip of plastic to the bottom edge of the clear windshield part. I doesn't matter if the glue discolors the clear at the bond because you'll cover the entire outer edge with bare metal foil. Good luck!! Ok, thanks for the quick reply and detailed solution
rustybill1960 Posted March 20, 2012 Posted March 20, 2012 Fantastic design Man! Your styling Q's are "right on!!" Everything about it says grace and beauty! Thank You for sharing with Us Later Russ
Kanedge Posted March 20, 2012 Posted March 20, 2012 That is one perfectly executed conversion, well done!
Recommended Posts
Create an account or sign in to comment
You need to be a member in order to leave a comment
Create an account
Sign up for a new account in our community. It's easy!
Register a new accountSign in
Already have an account? Sign in here.
Sign In Now