geetee66
-
Posts
1,540 -
Joined
-
Last visited
Content Type
Profiles
Forums
Events
Gallery
Everything posted by geetee66
-
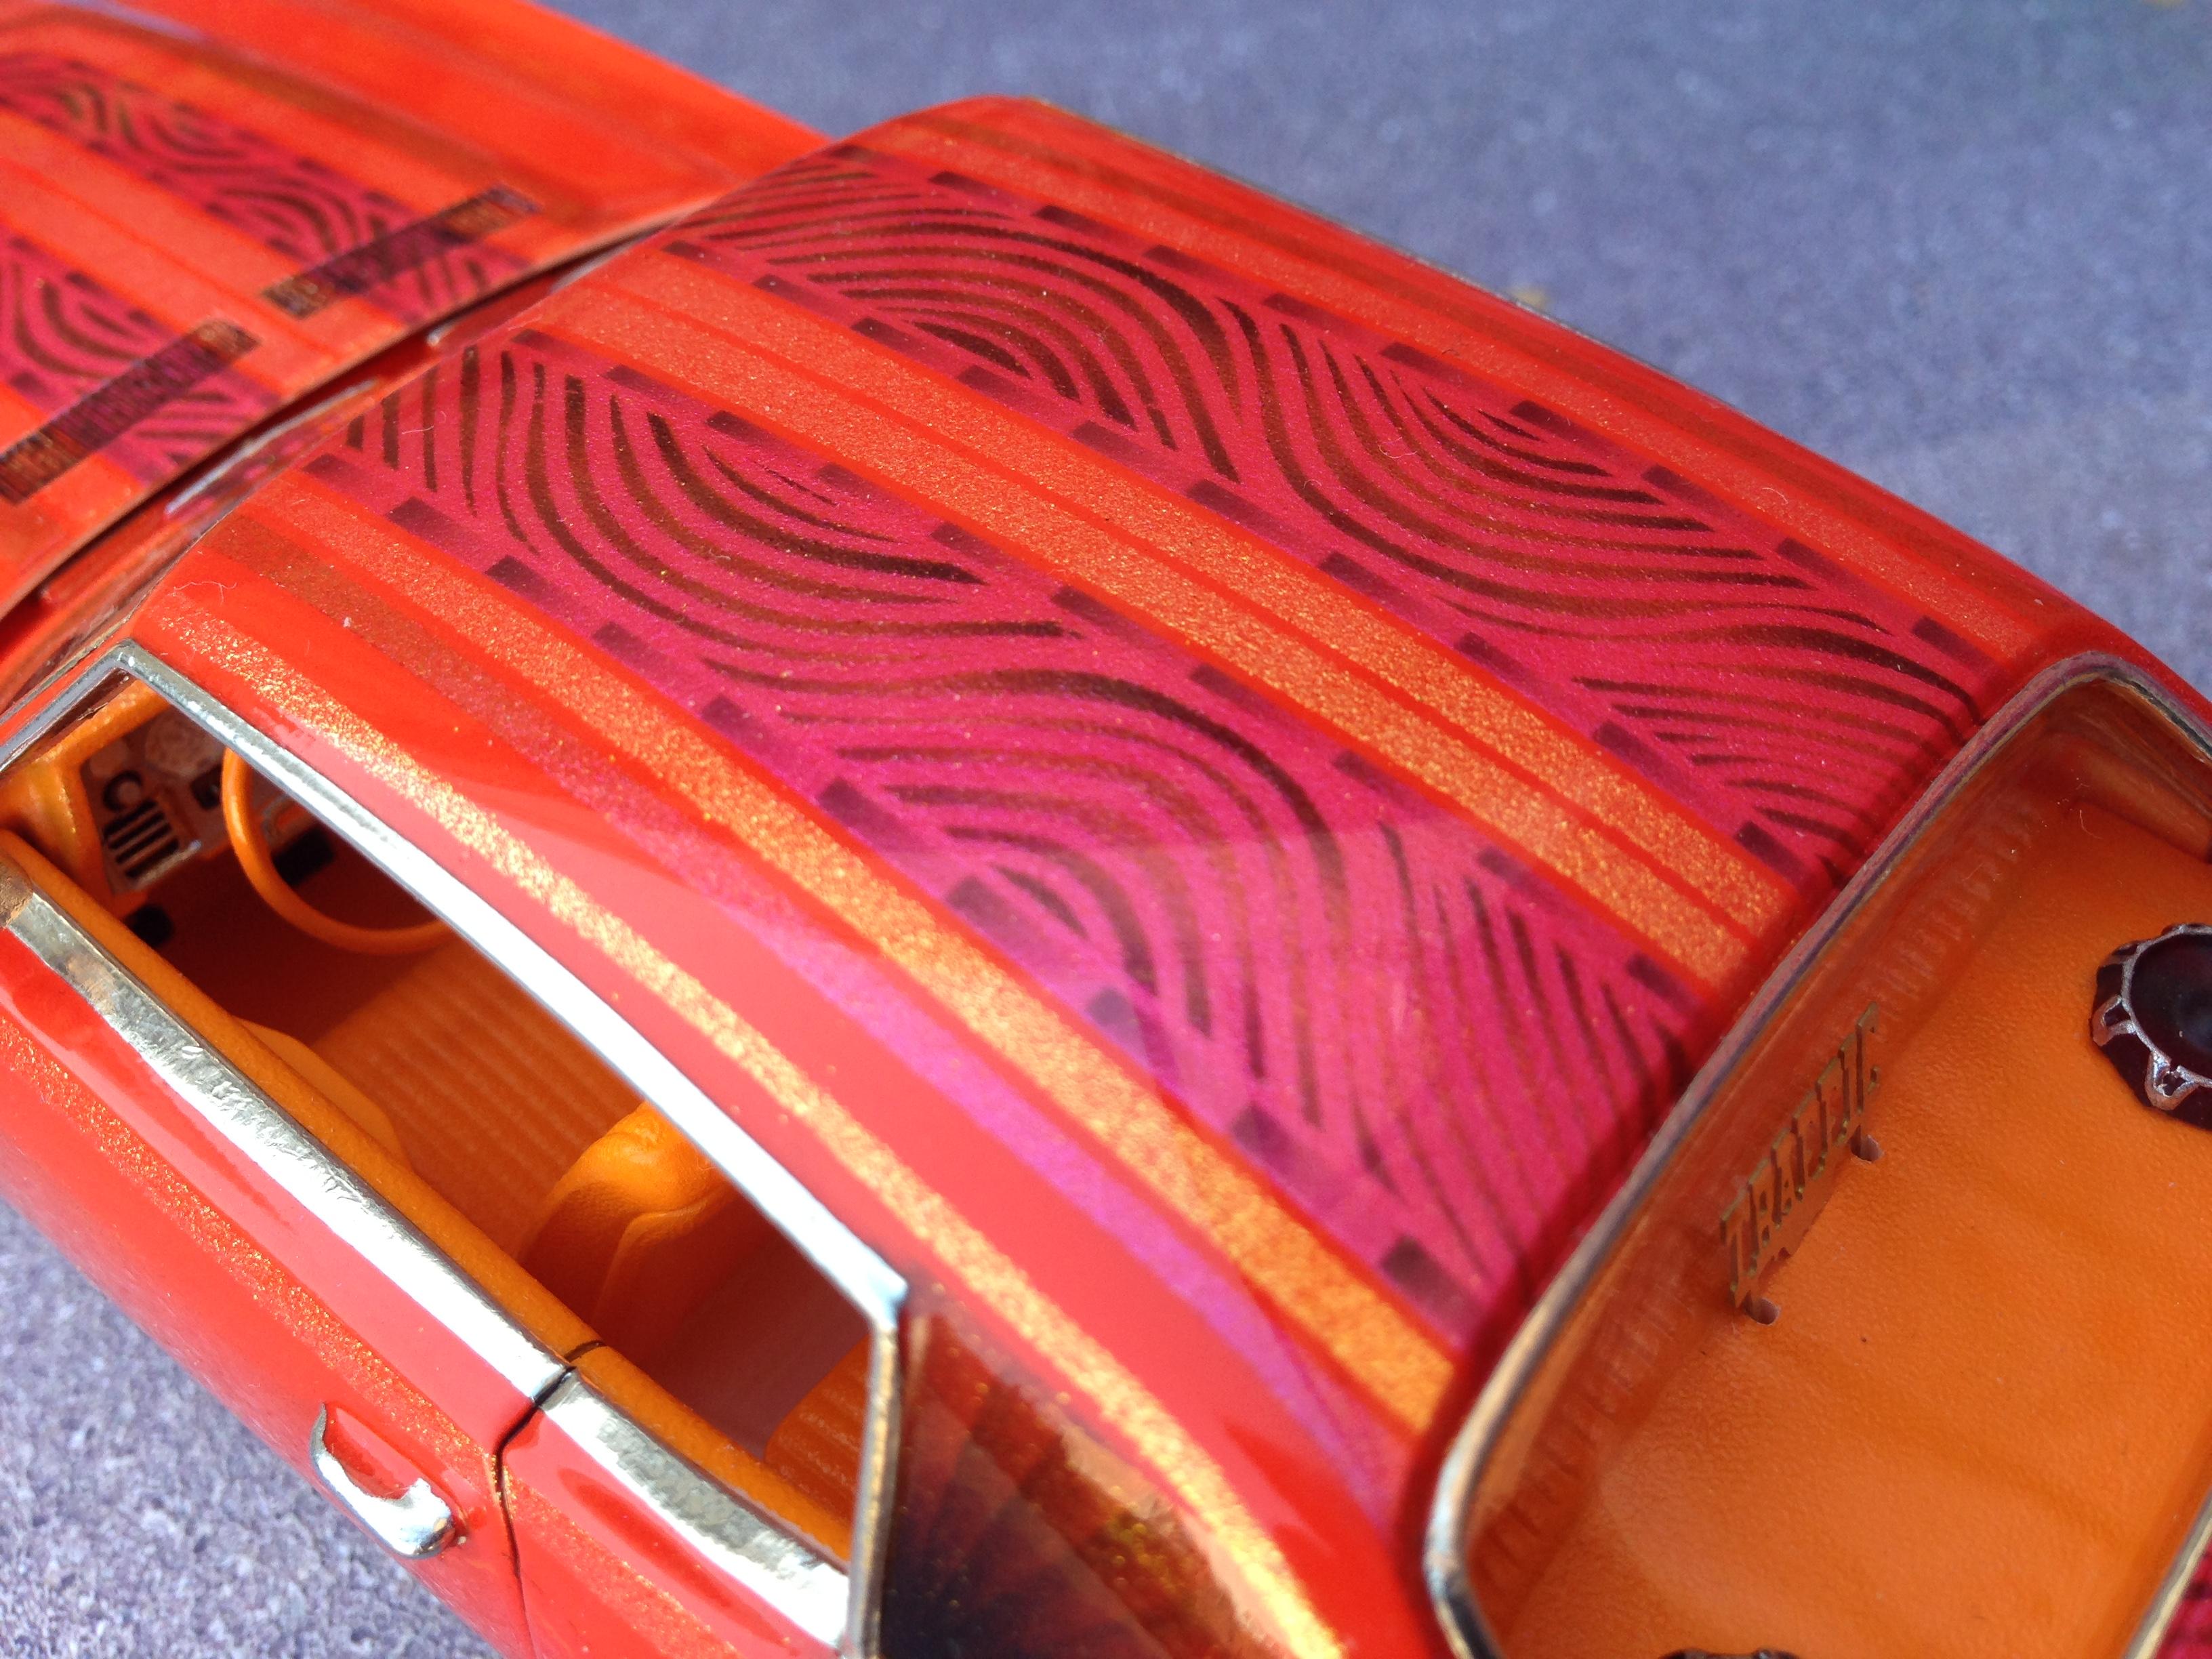
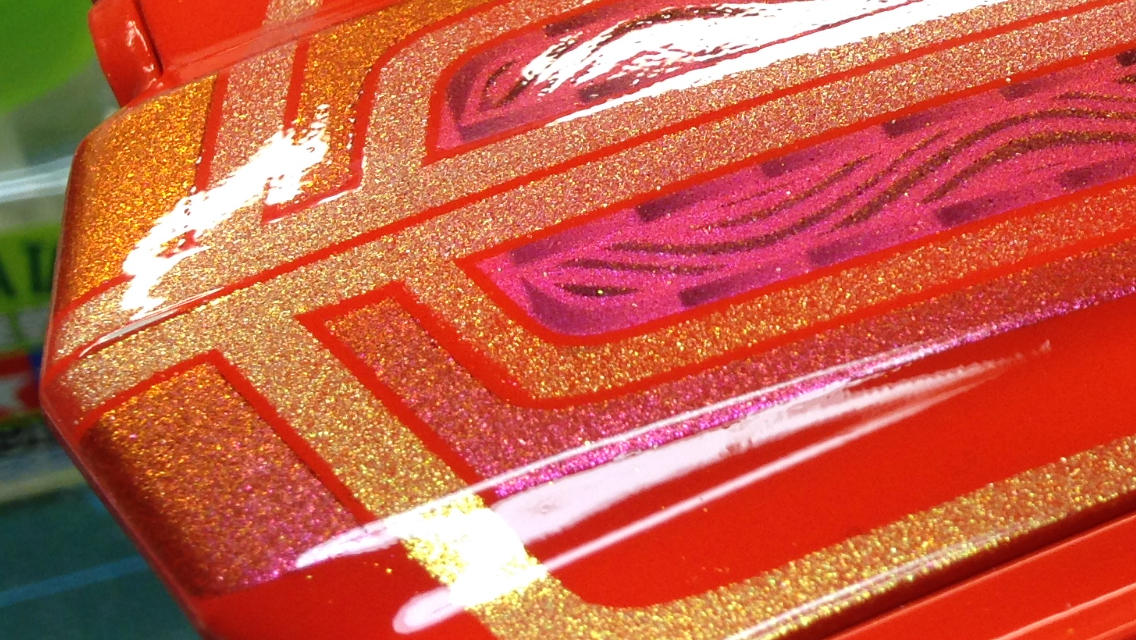
Thanks buddy the trick is to paint all your lines on the horizontal. Tilt the work so that all your lines are done in a side to side motion. For me, it's less wobbly than up and down ? Paint a bit, lift a little bit of the tape to check your progress and either apply more or stop. I hope this helps
-
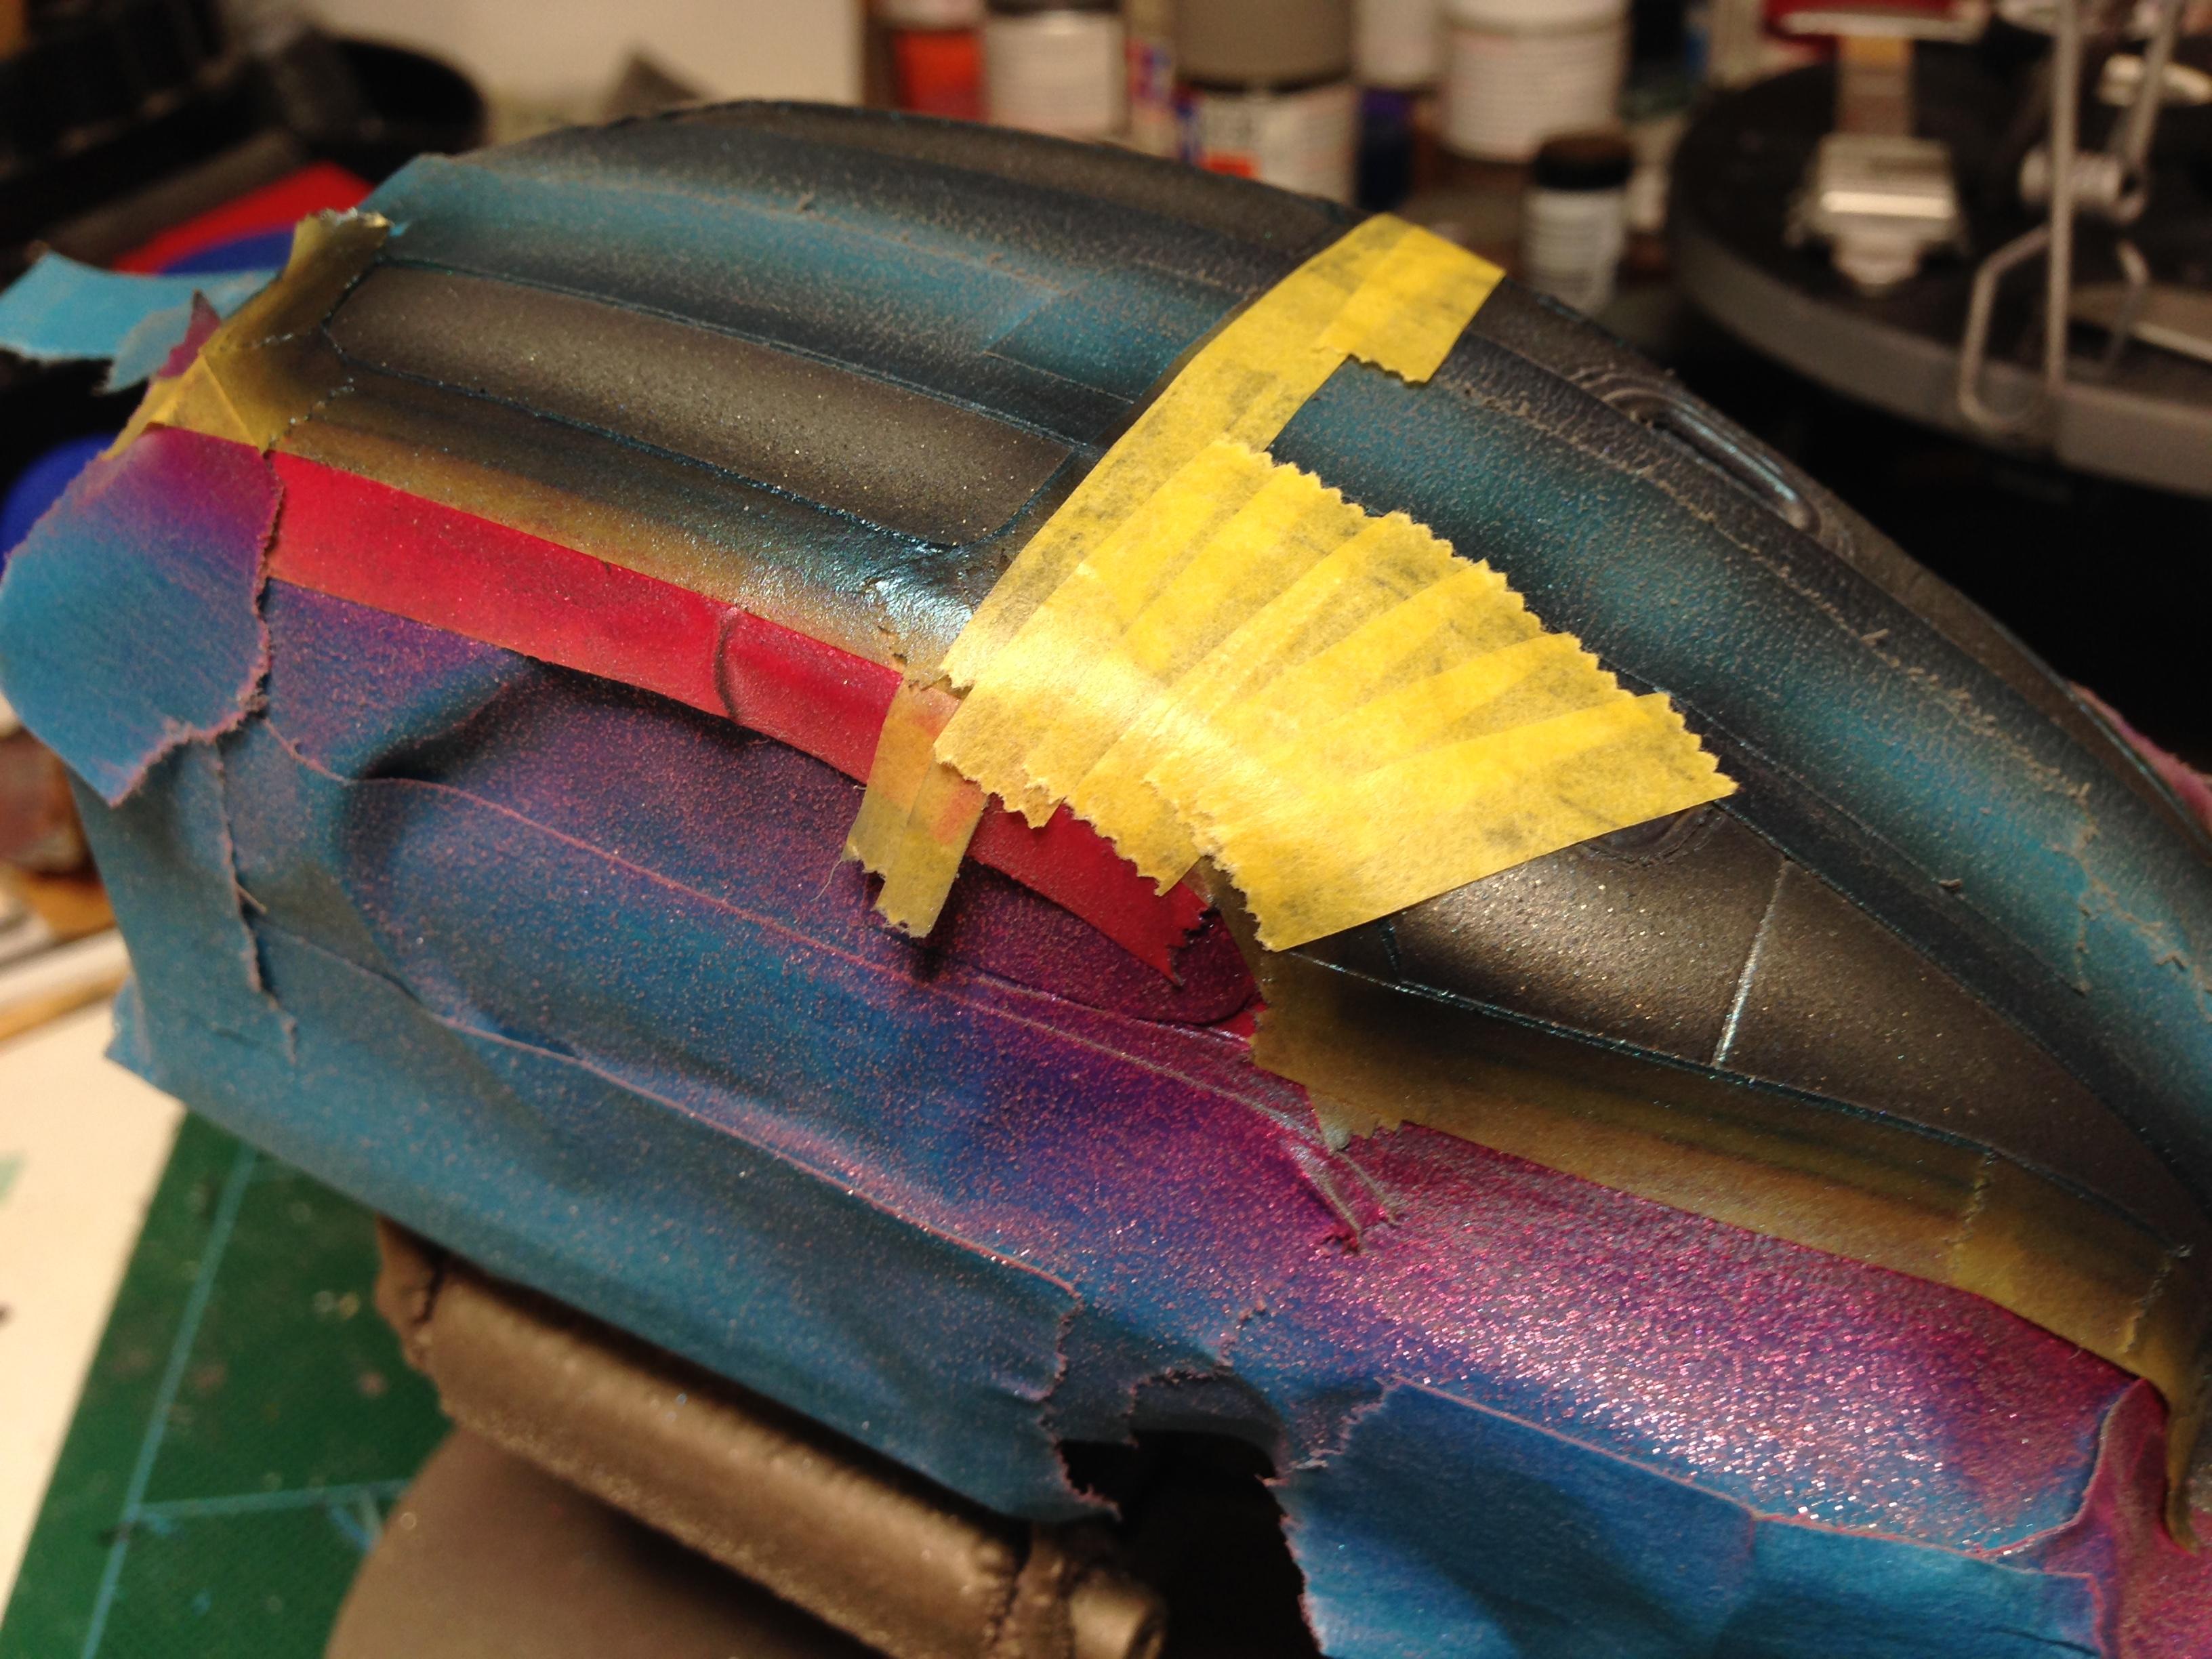
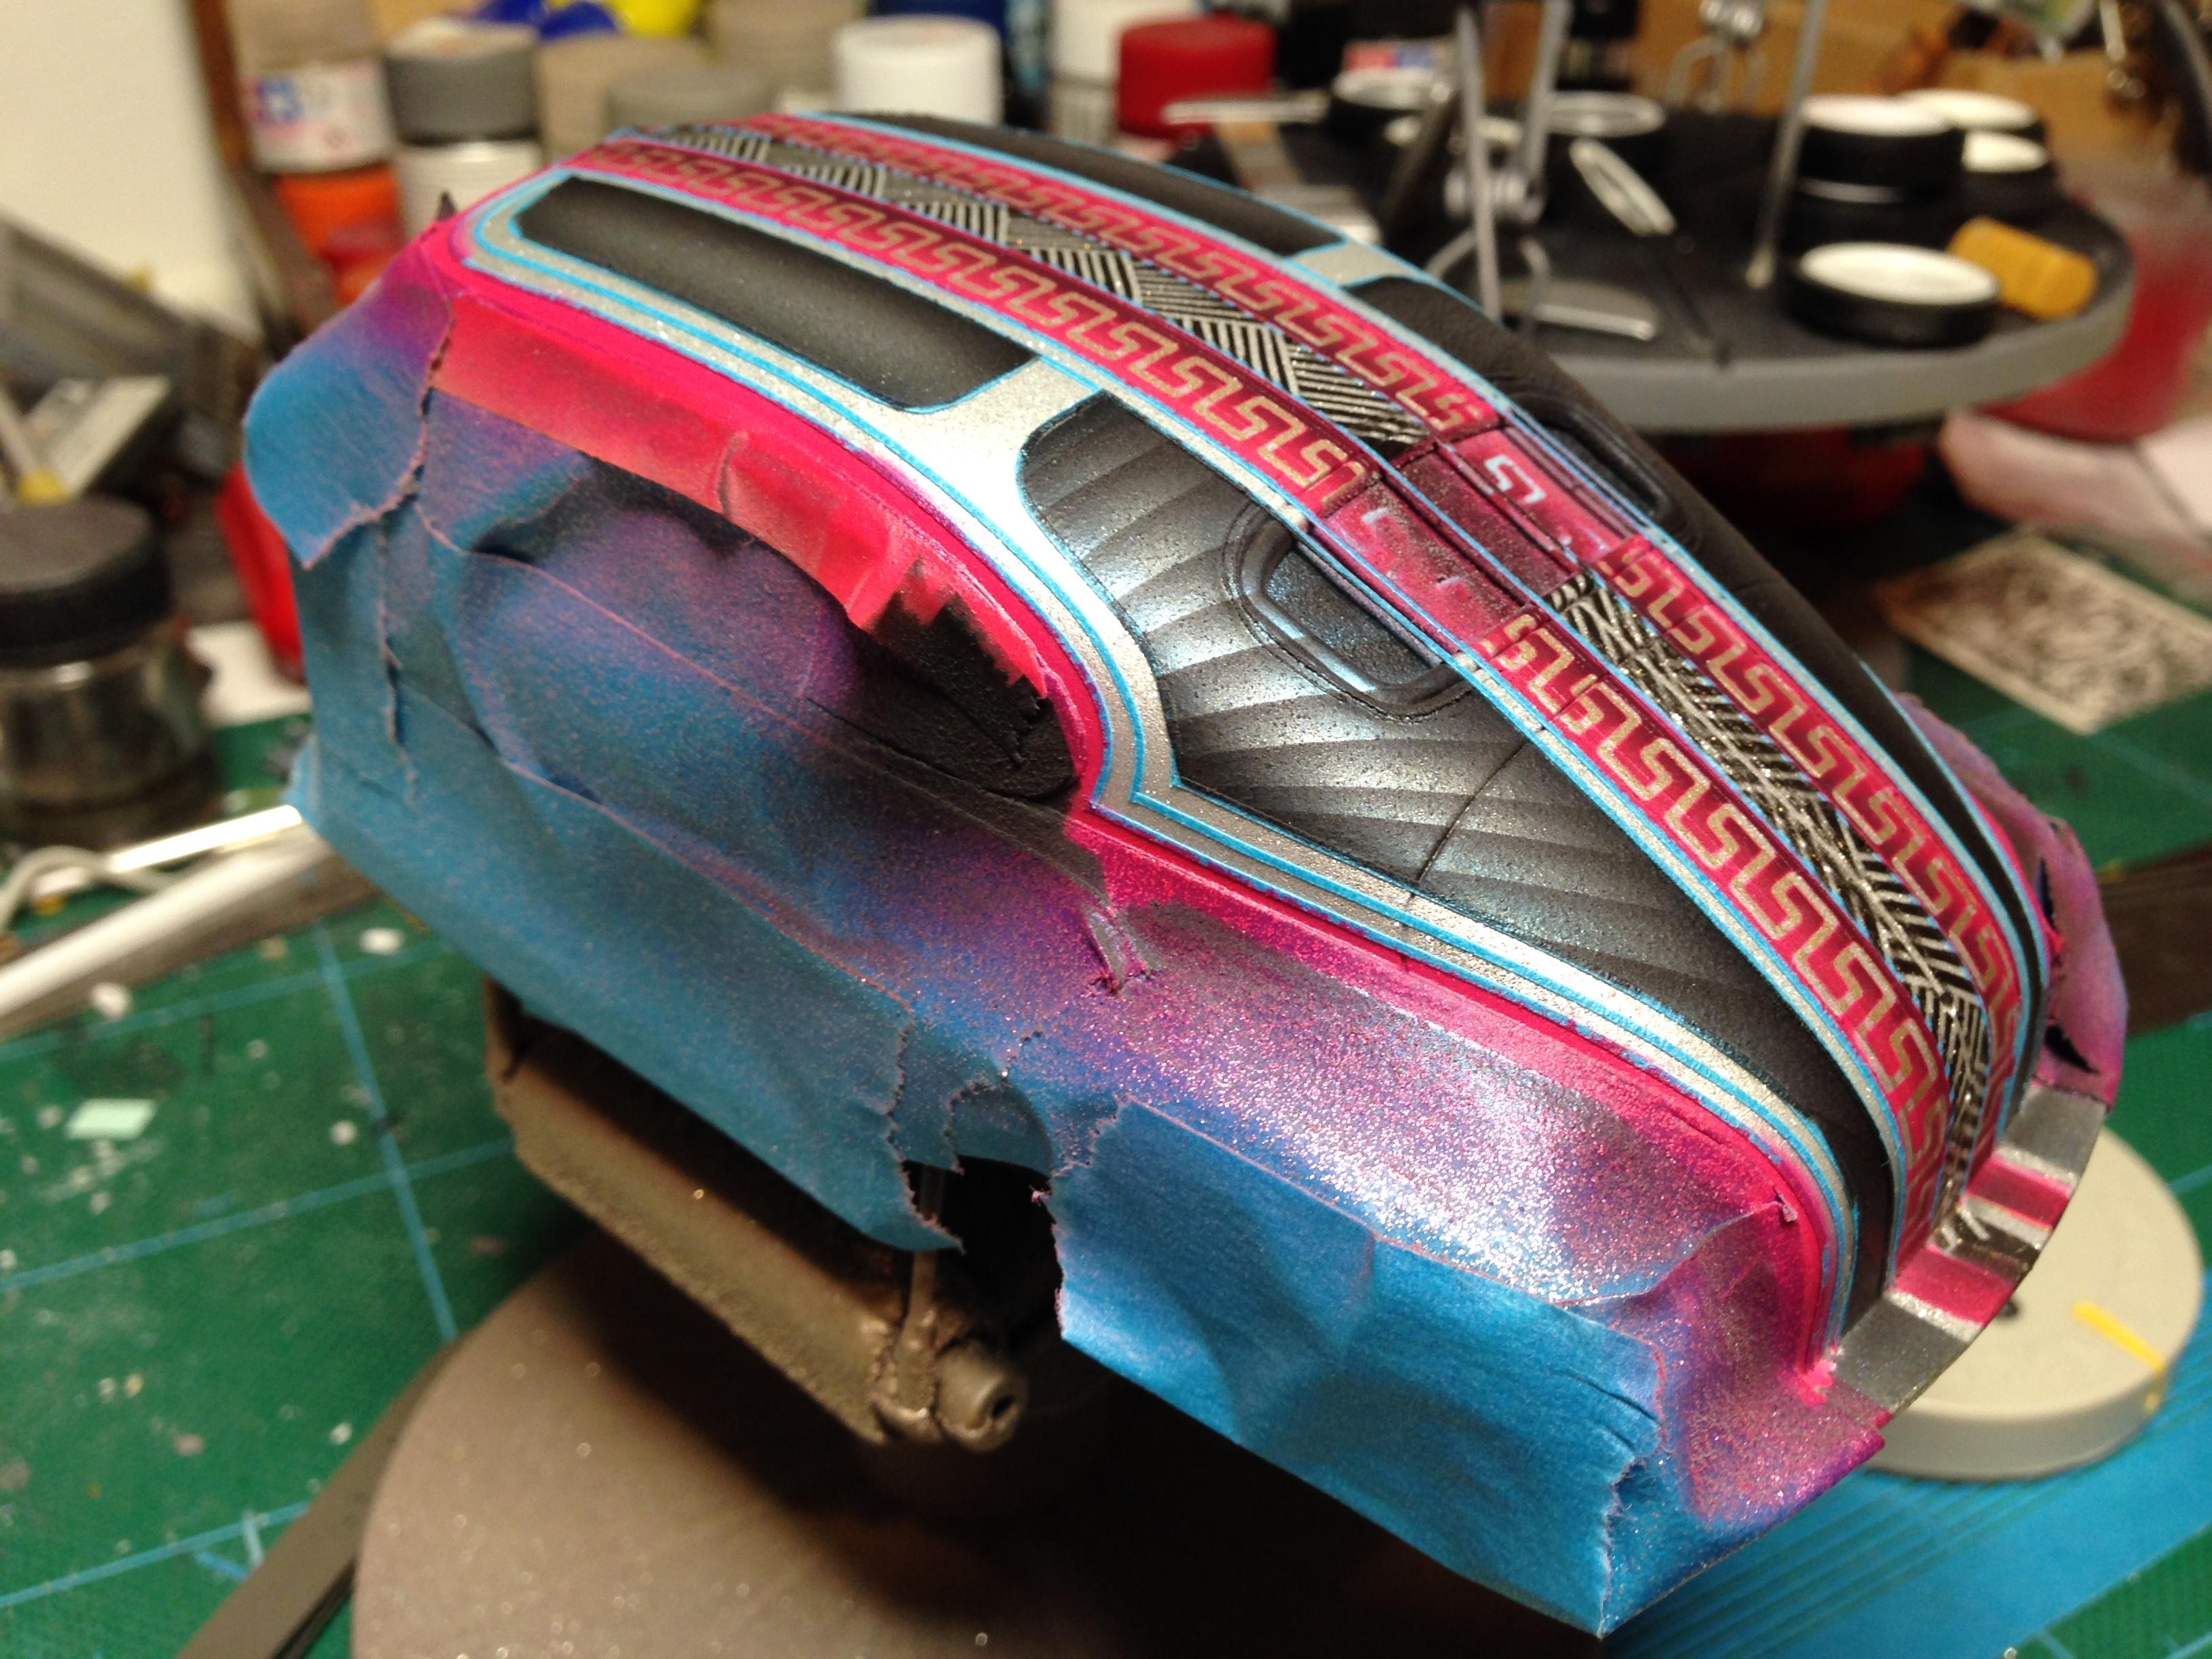
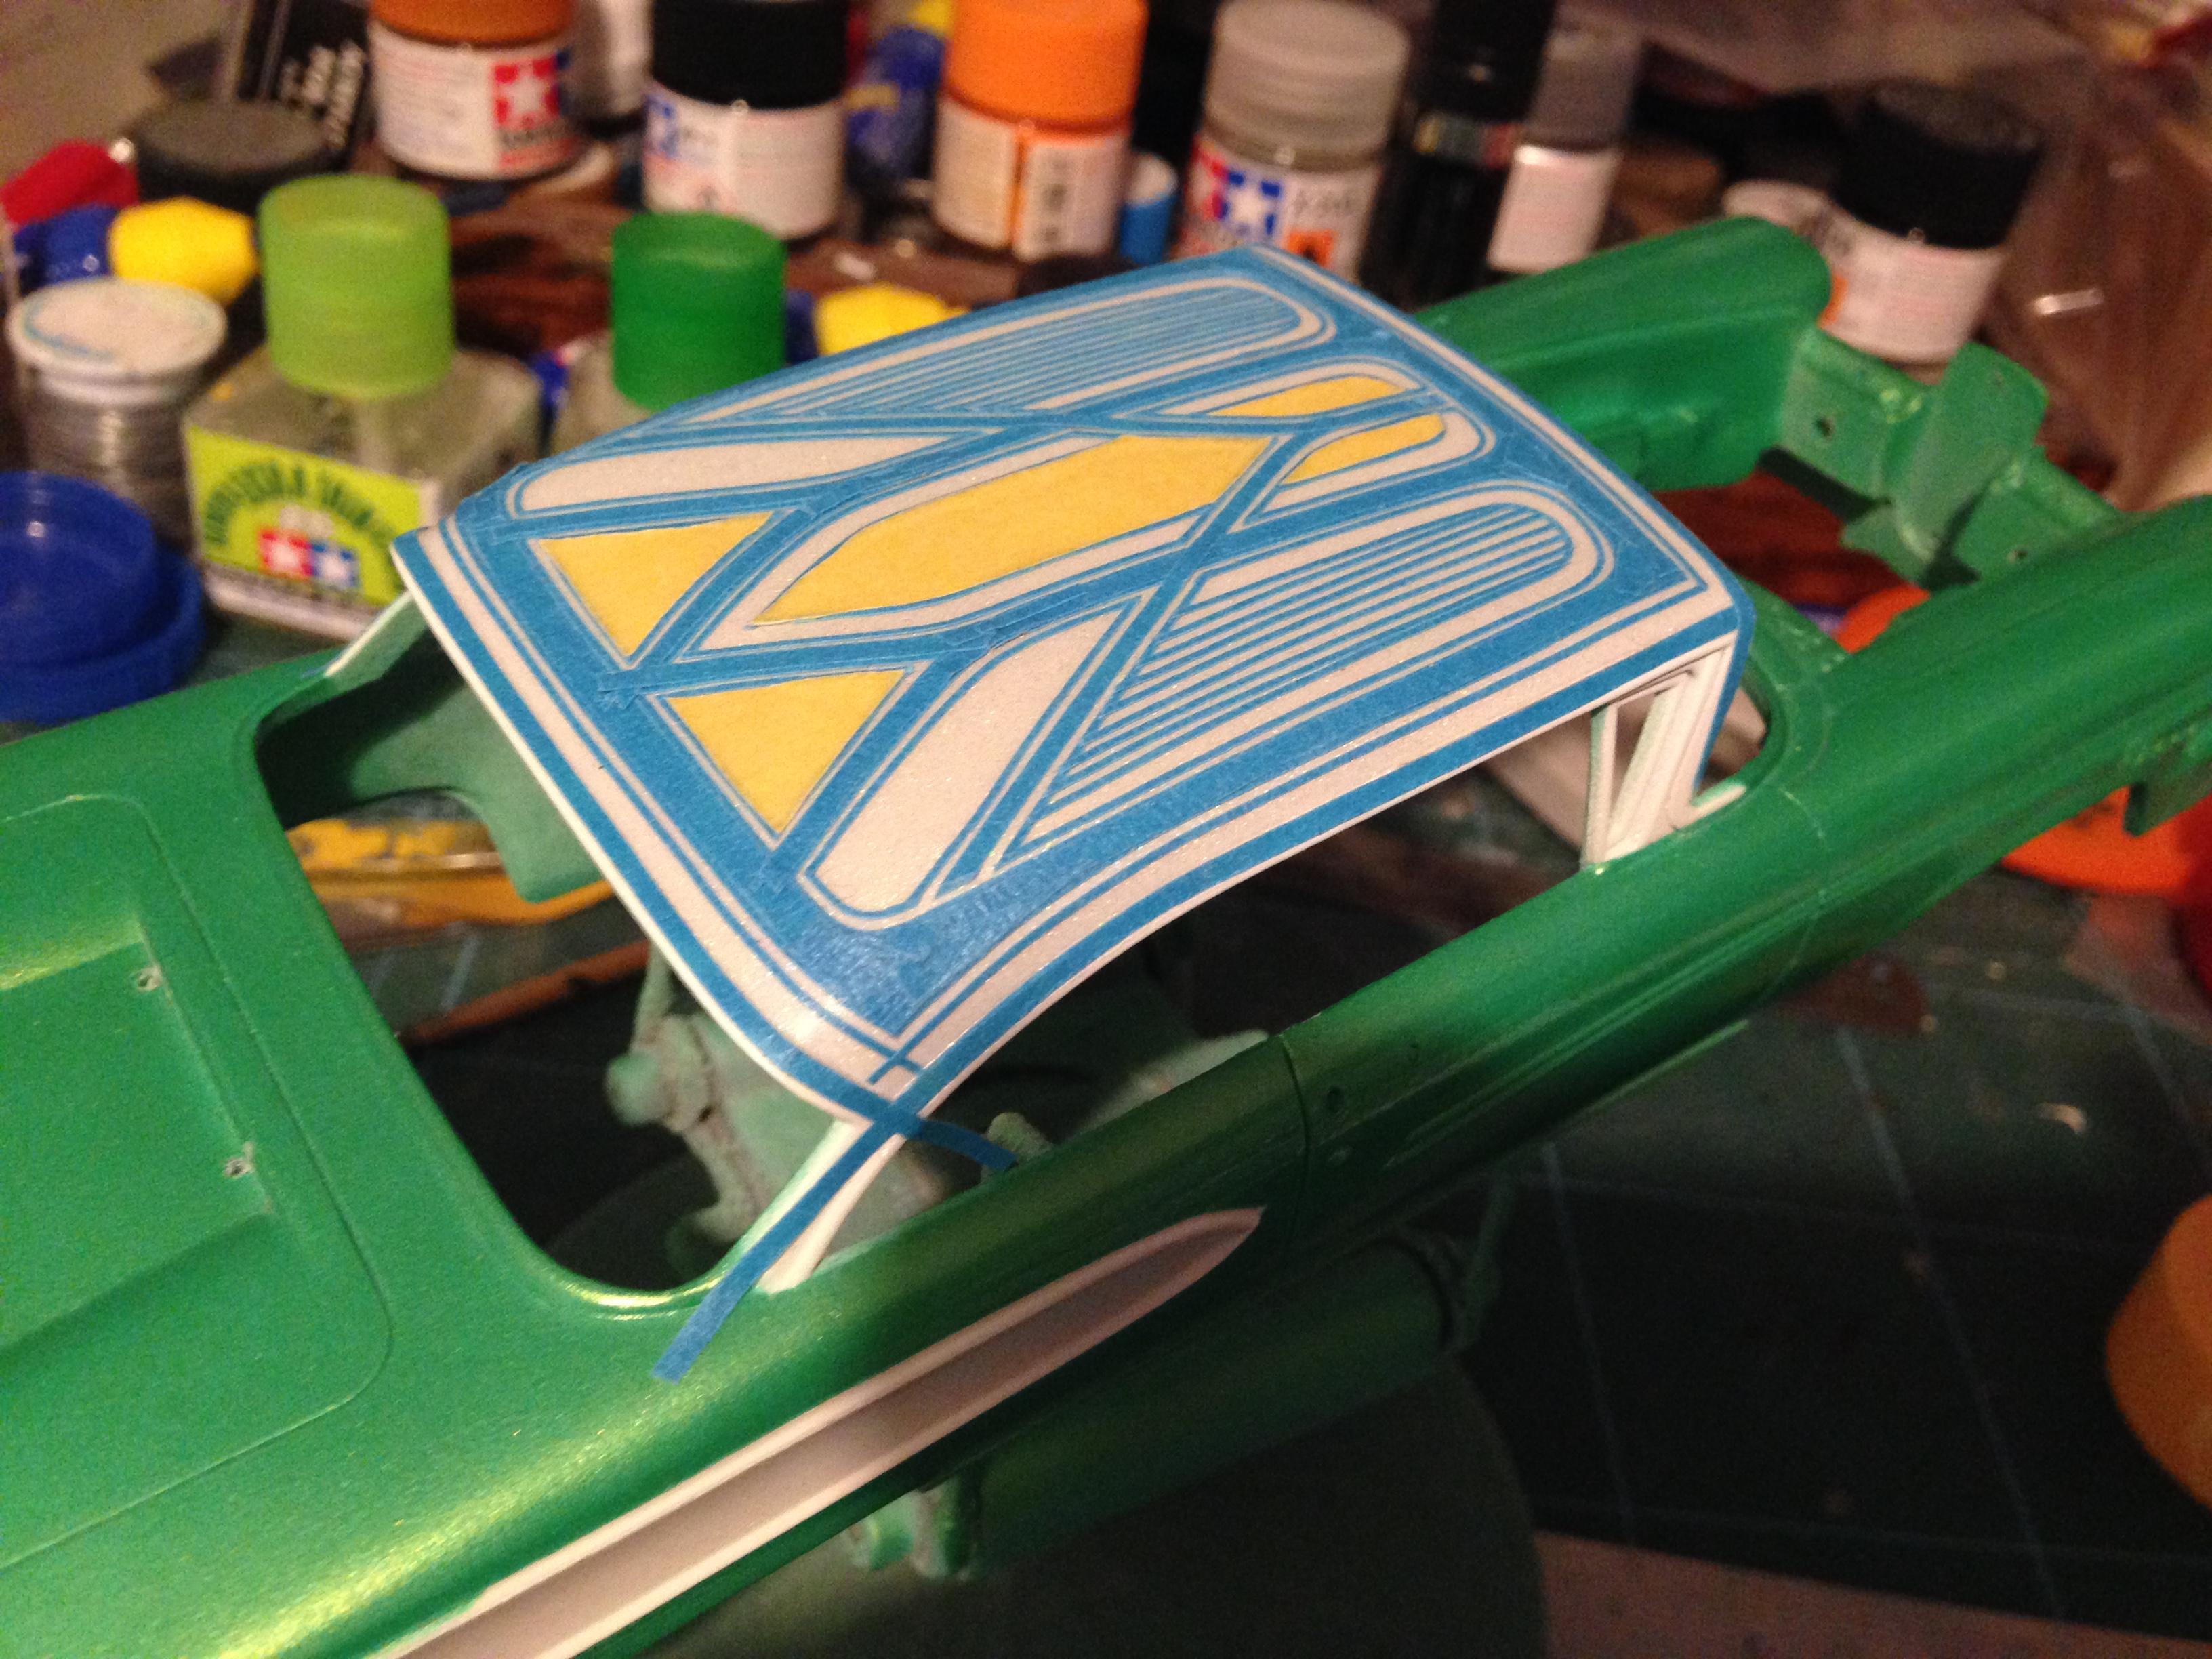
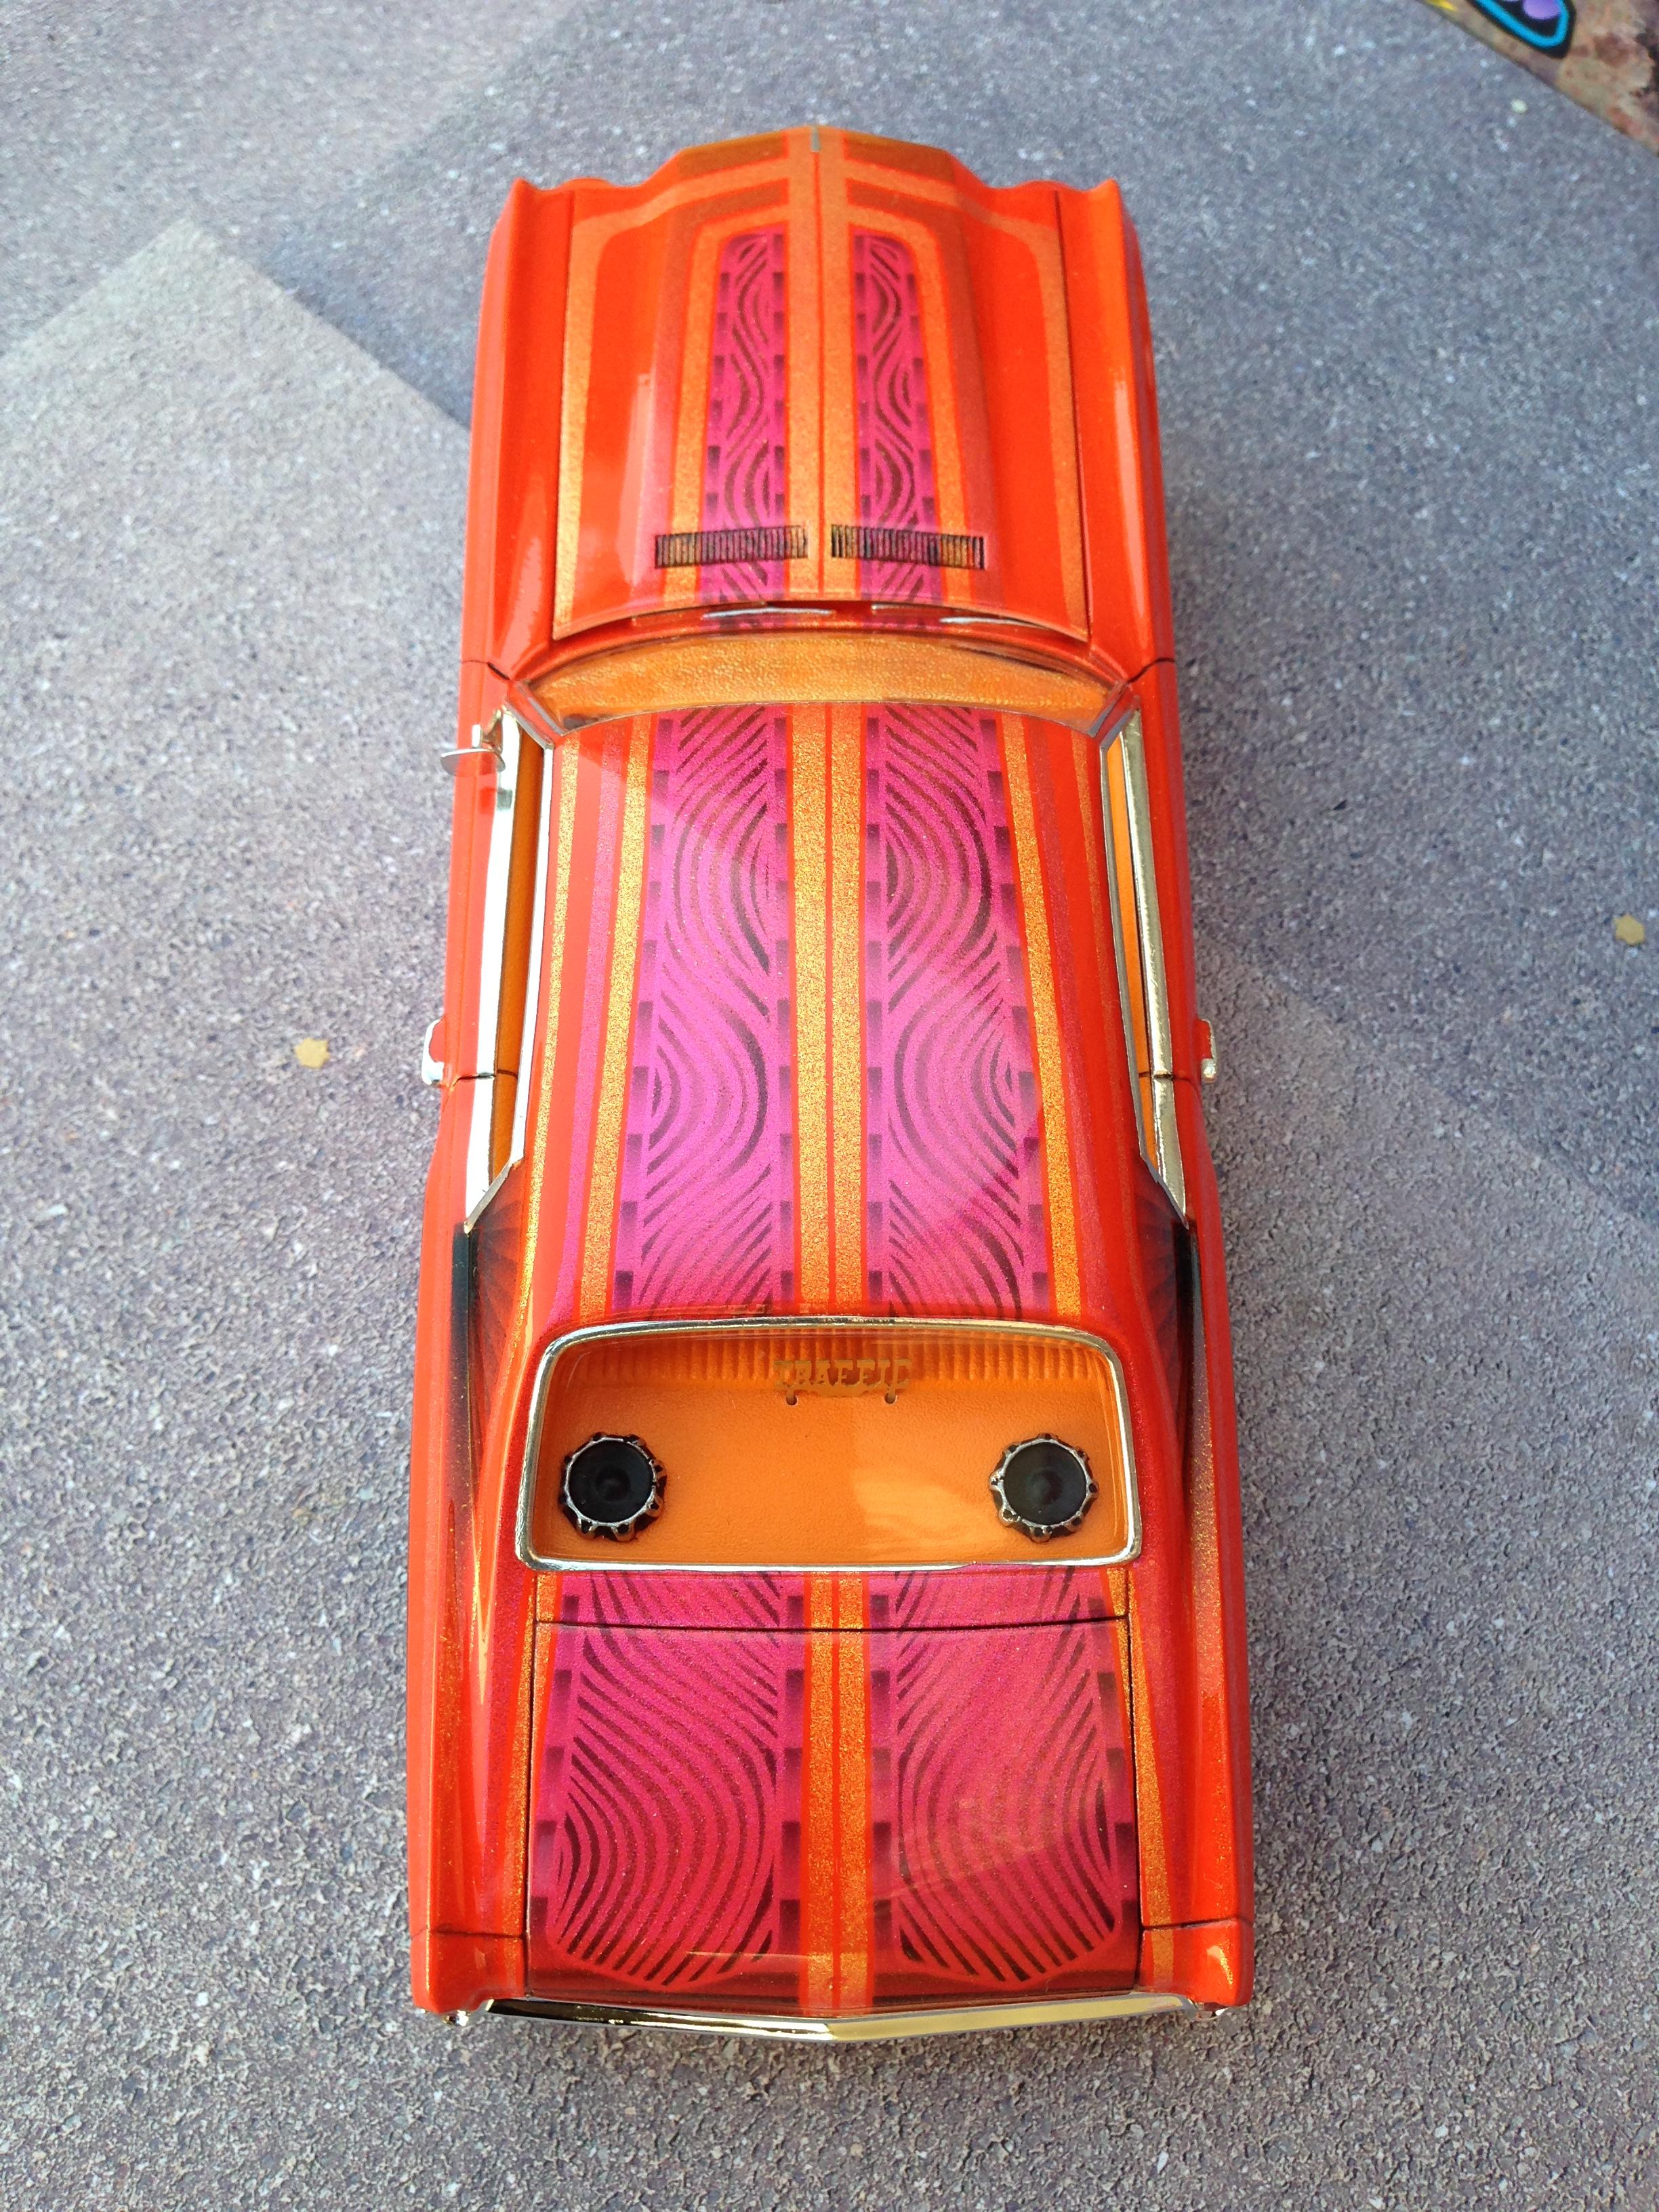
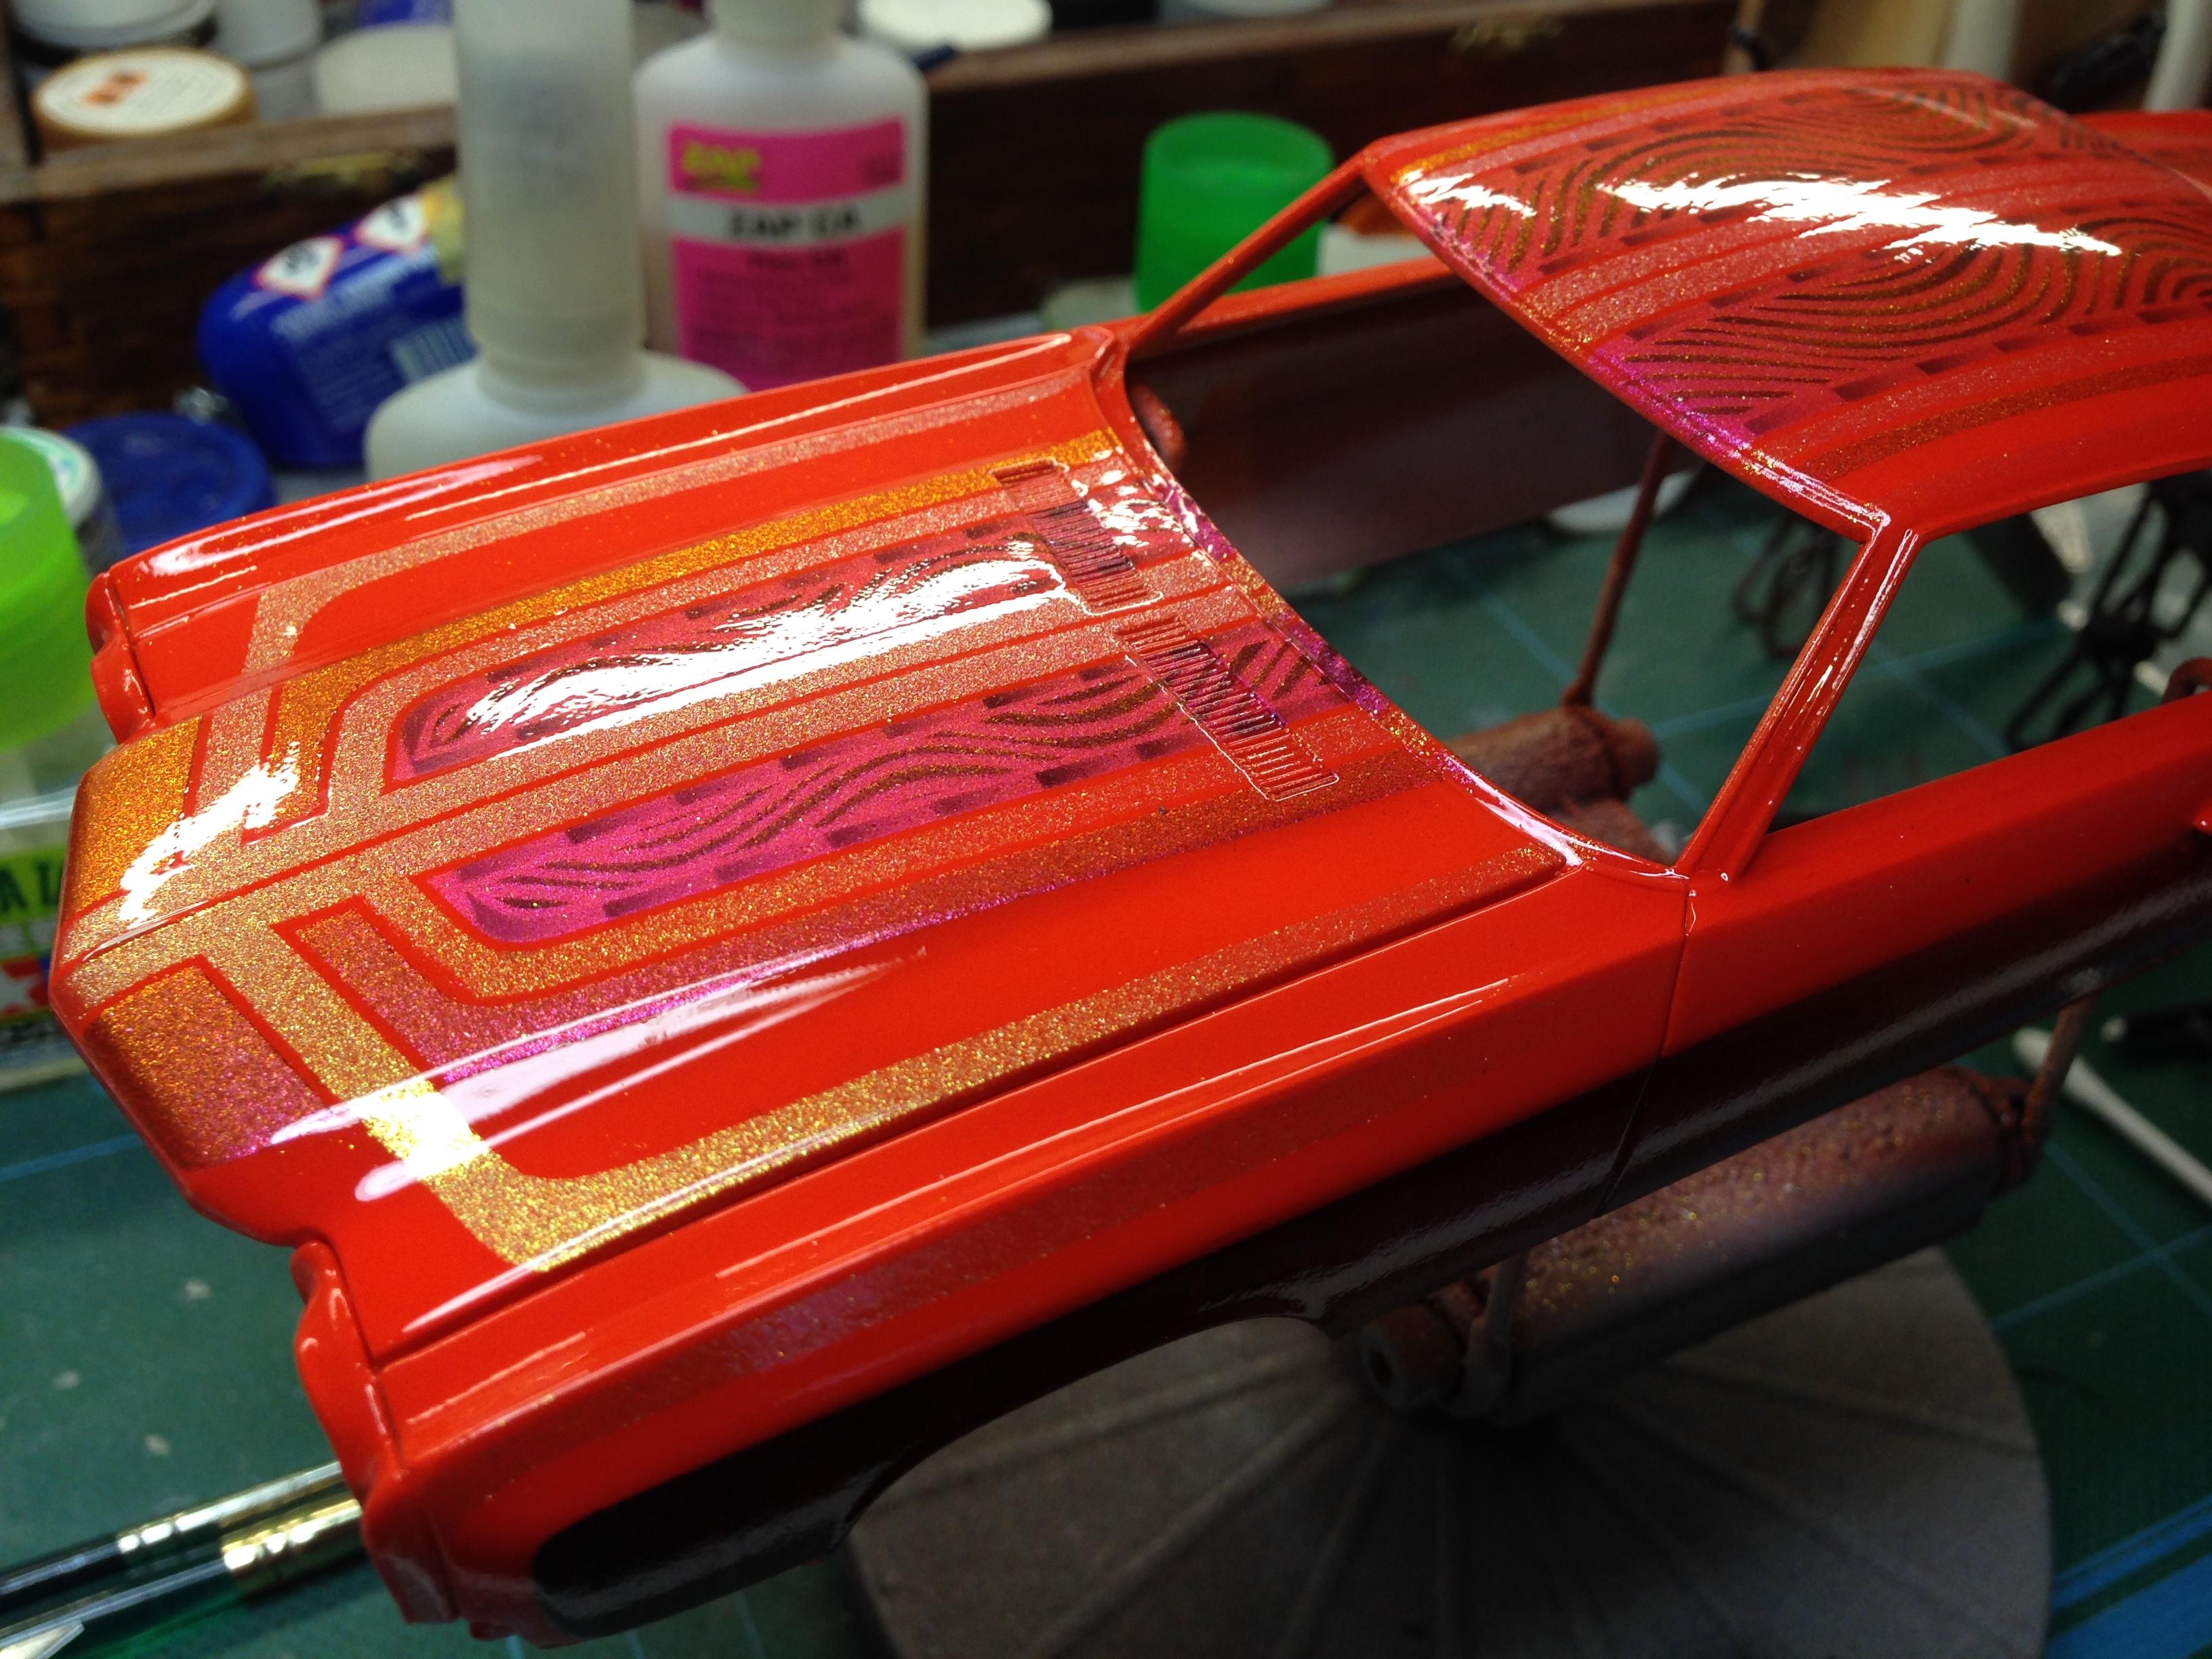
I overlap strips of tape in parallel for the centre section, and fanned out in the triangles. I found that using longer pieces of tape helps positioning. Too short and your fingers get in the way of what you're trying to see. use a fine spray (thin paint, lower air pressure) and begin spraying away from the edge and work towards it. Once you have the desired effect, lift that strip of tape and repeat on the next and so on. to make the effect greater, I fogged the top of the triangle to give more depth. here's an example of taping for a sun ray pattern:

-
Thanks David go on! Give it a try. Get yourself some 3M 3434 blue tape, some Stanley blades and let your imagination run riot! I just received two 25mm x 50m rolls of tape. £8.50 inc p&p from eBay. One roll will do at least 8 cars. The blue tape is also good with Tamiya tape. Overlay the blue with it, and you can see the blue show through. Cut masks along the lines with a scalpel, without messing around with scissors ?
-
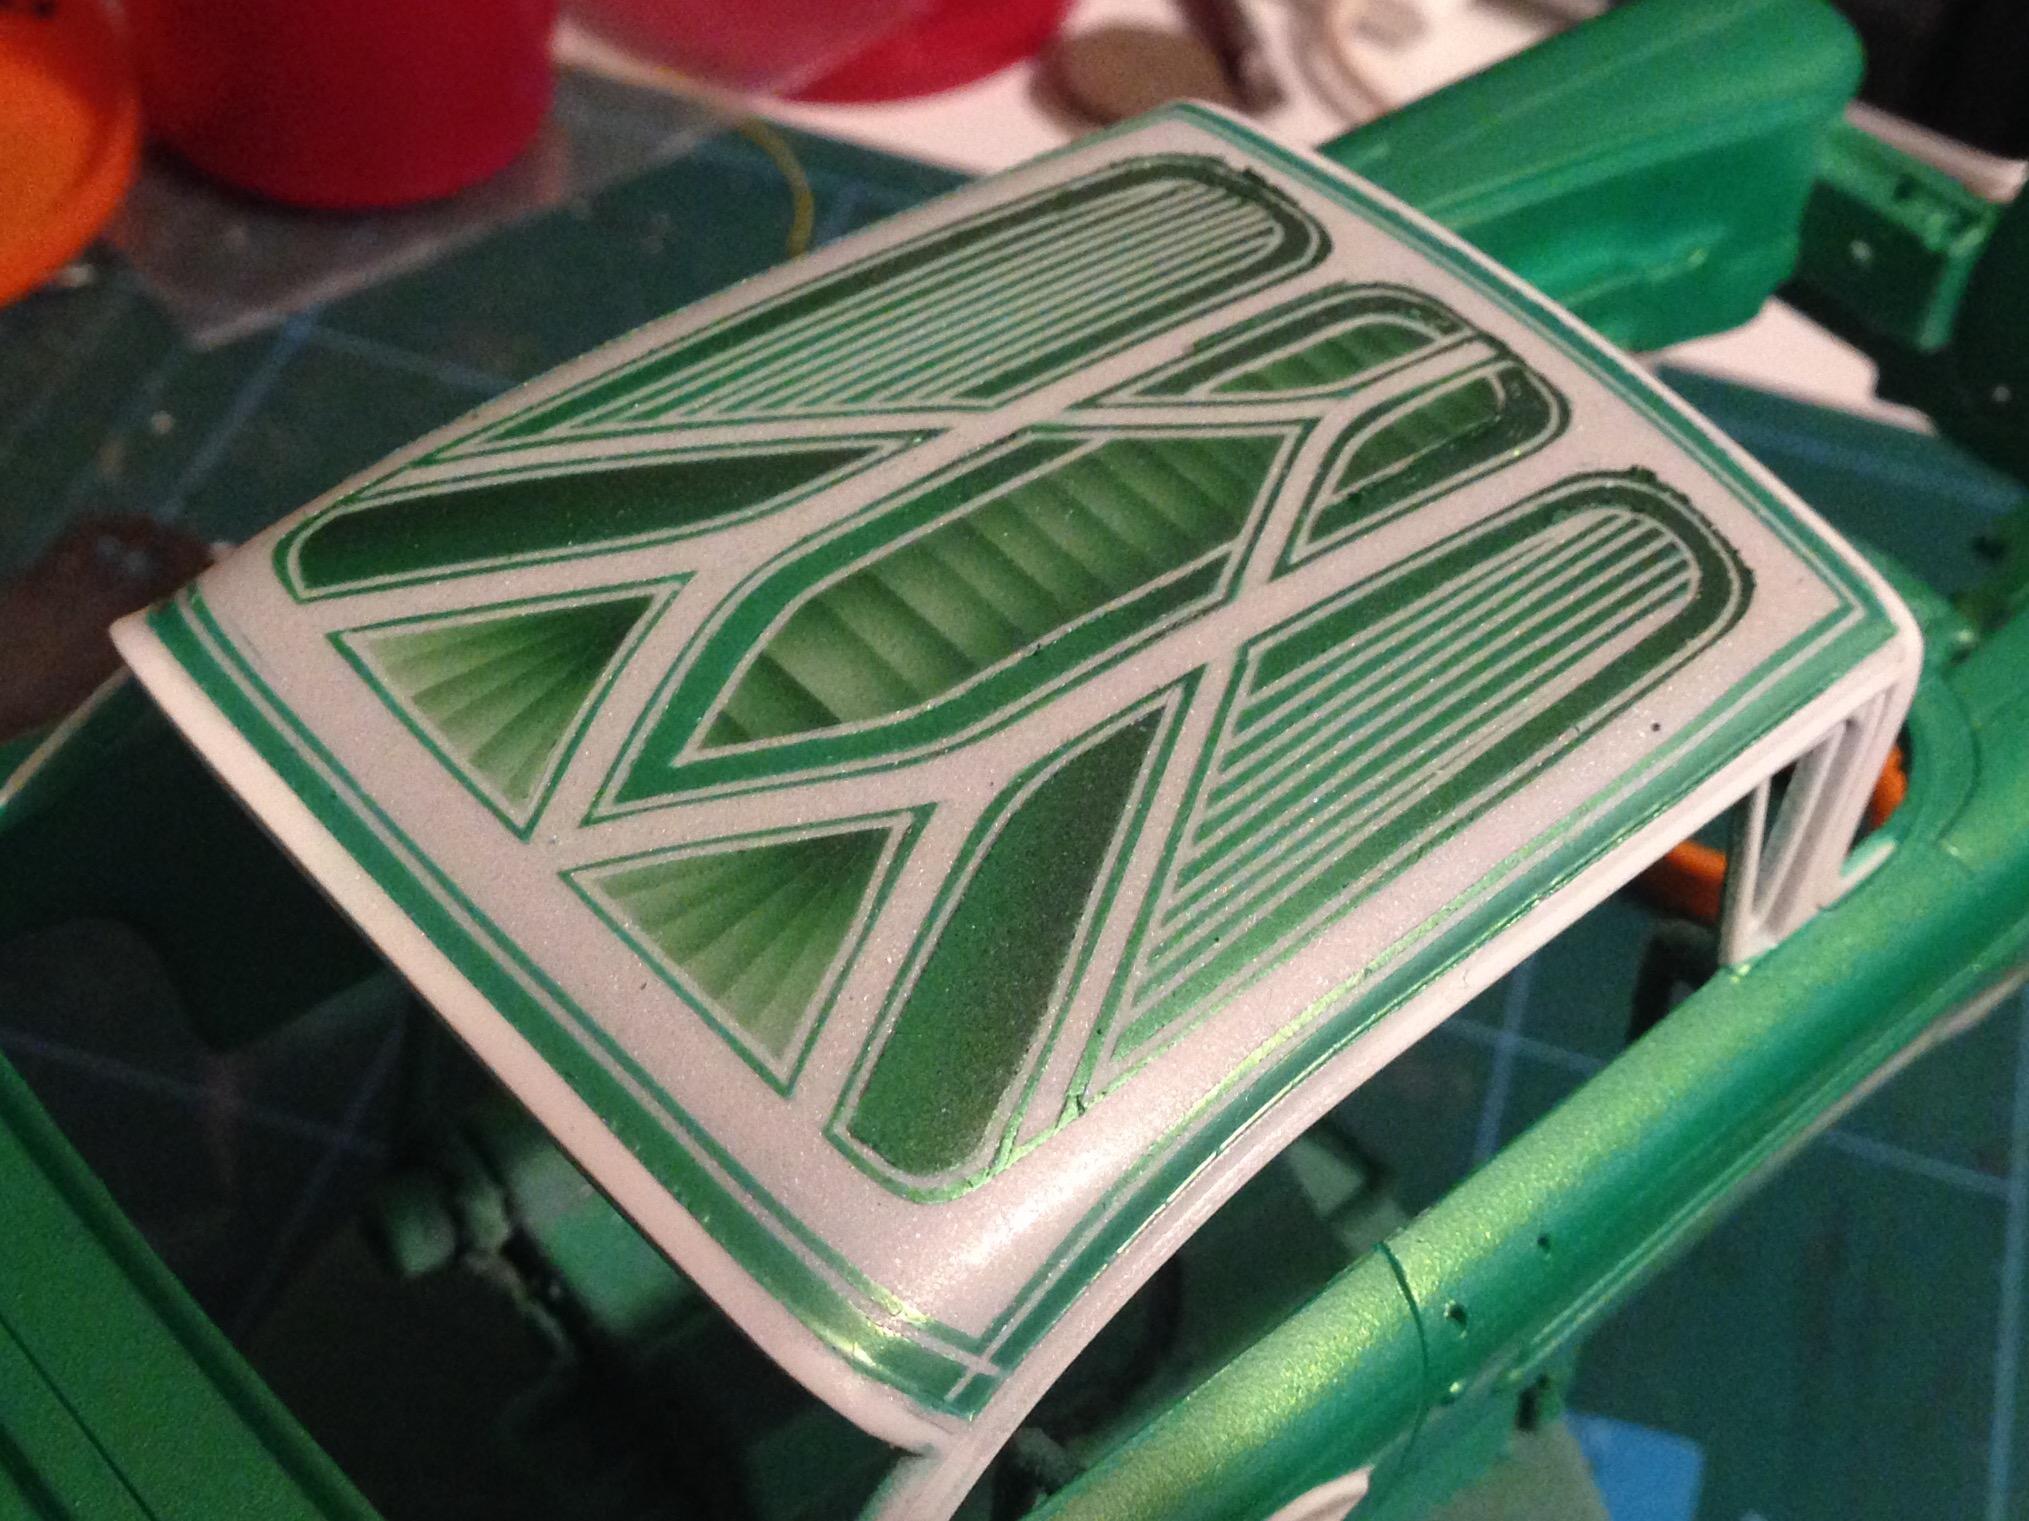
Got the paint on the roof. The edges of the lines might look a bit untidy on the front of the pattern. This is just tiny flaps of paint that was on the tape. Once dry, it rubs off easily to leave a clean line.
-
Thanks guys I've done a bit more
-
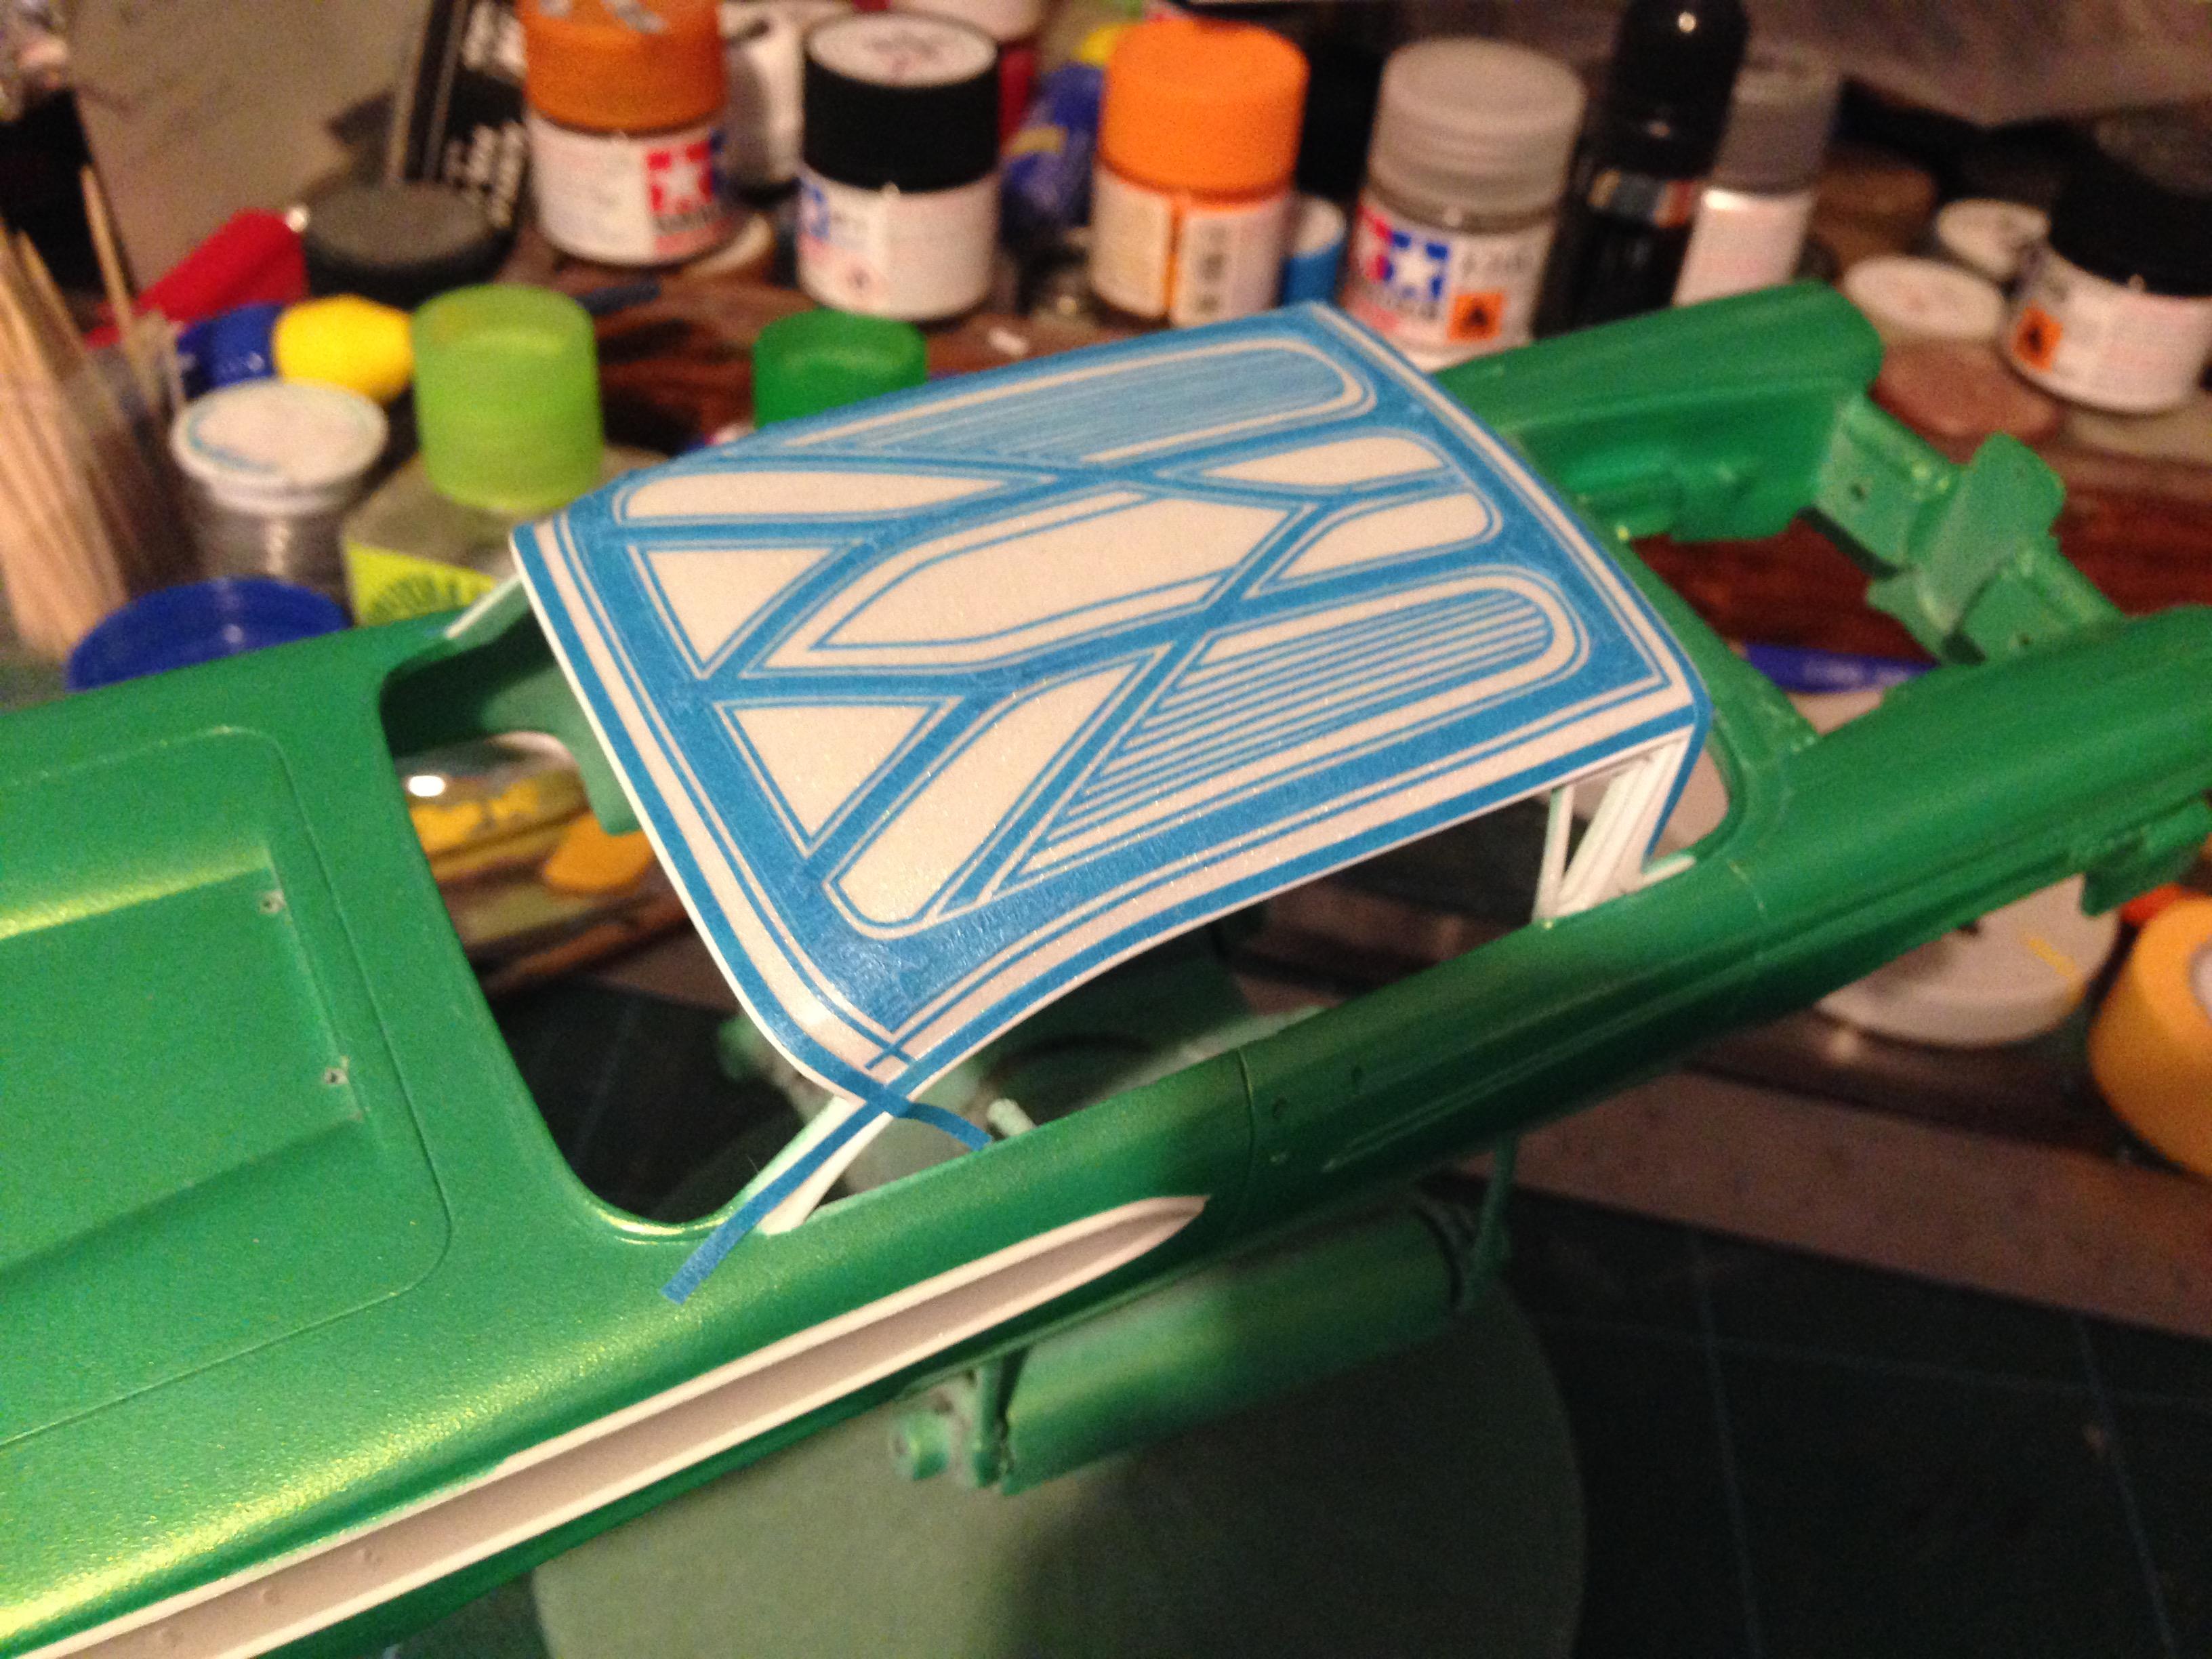
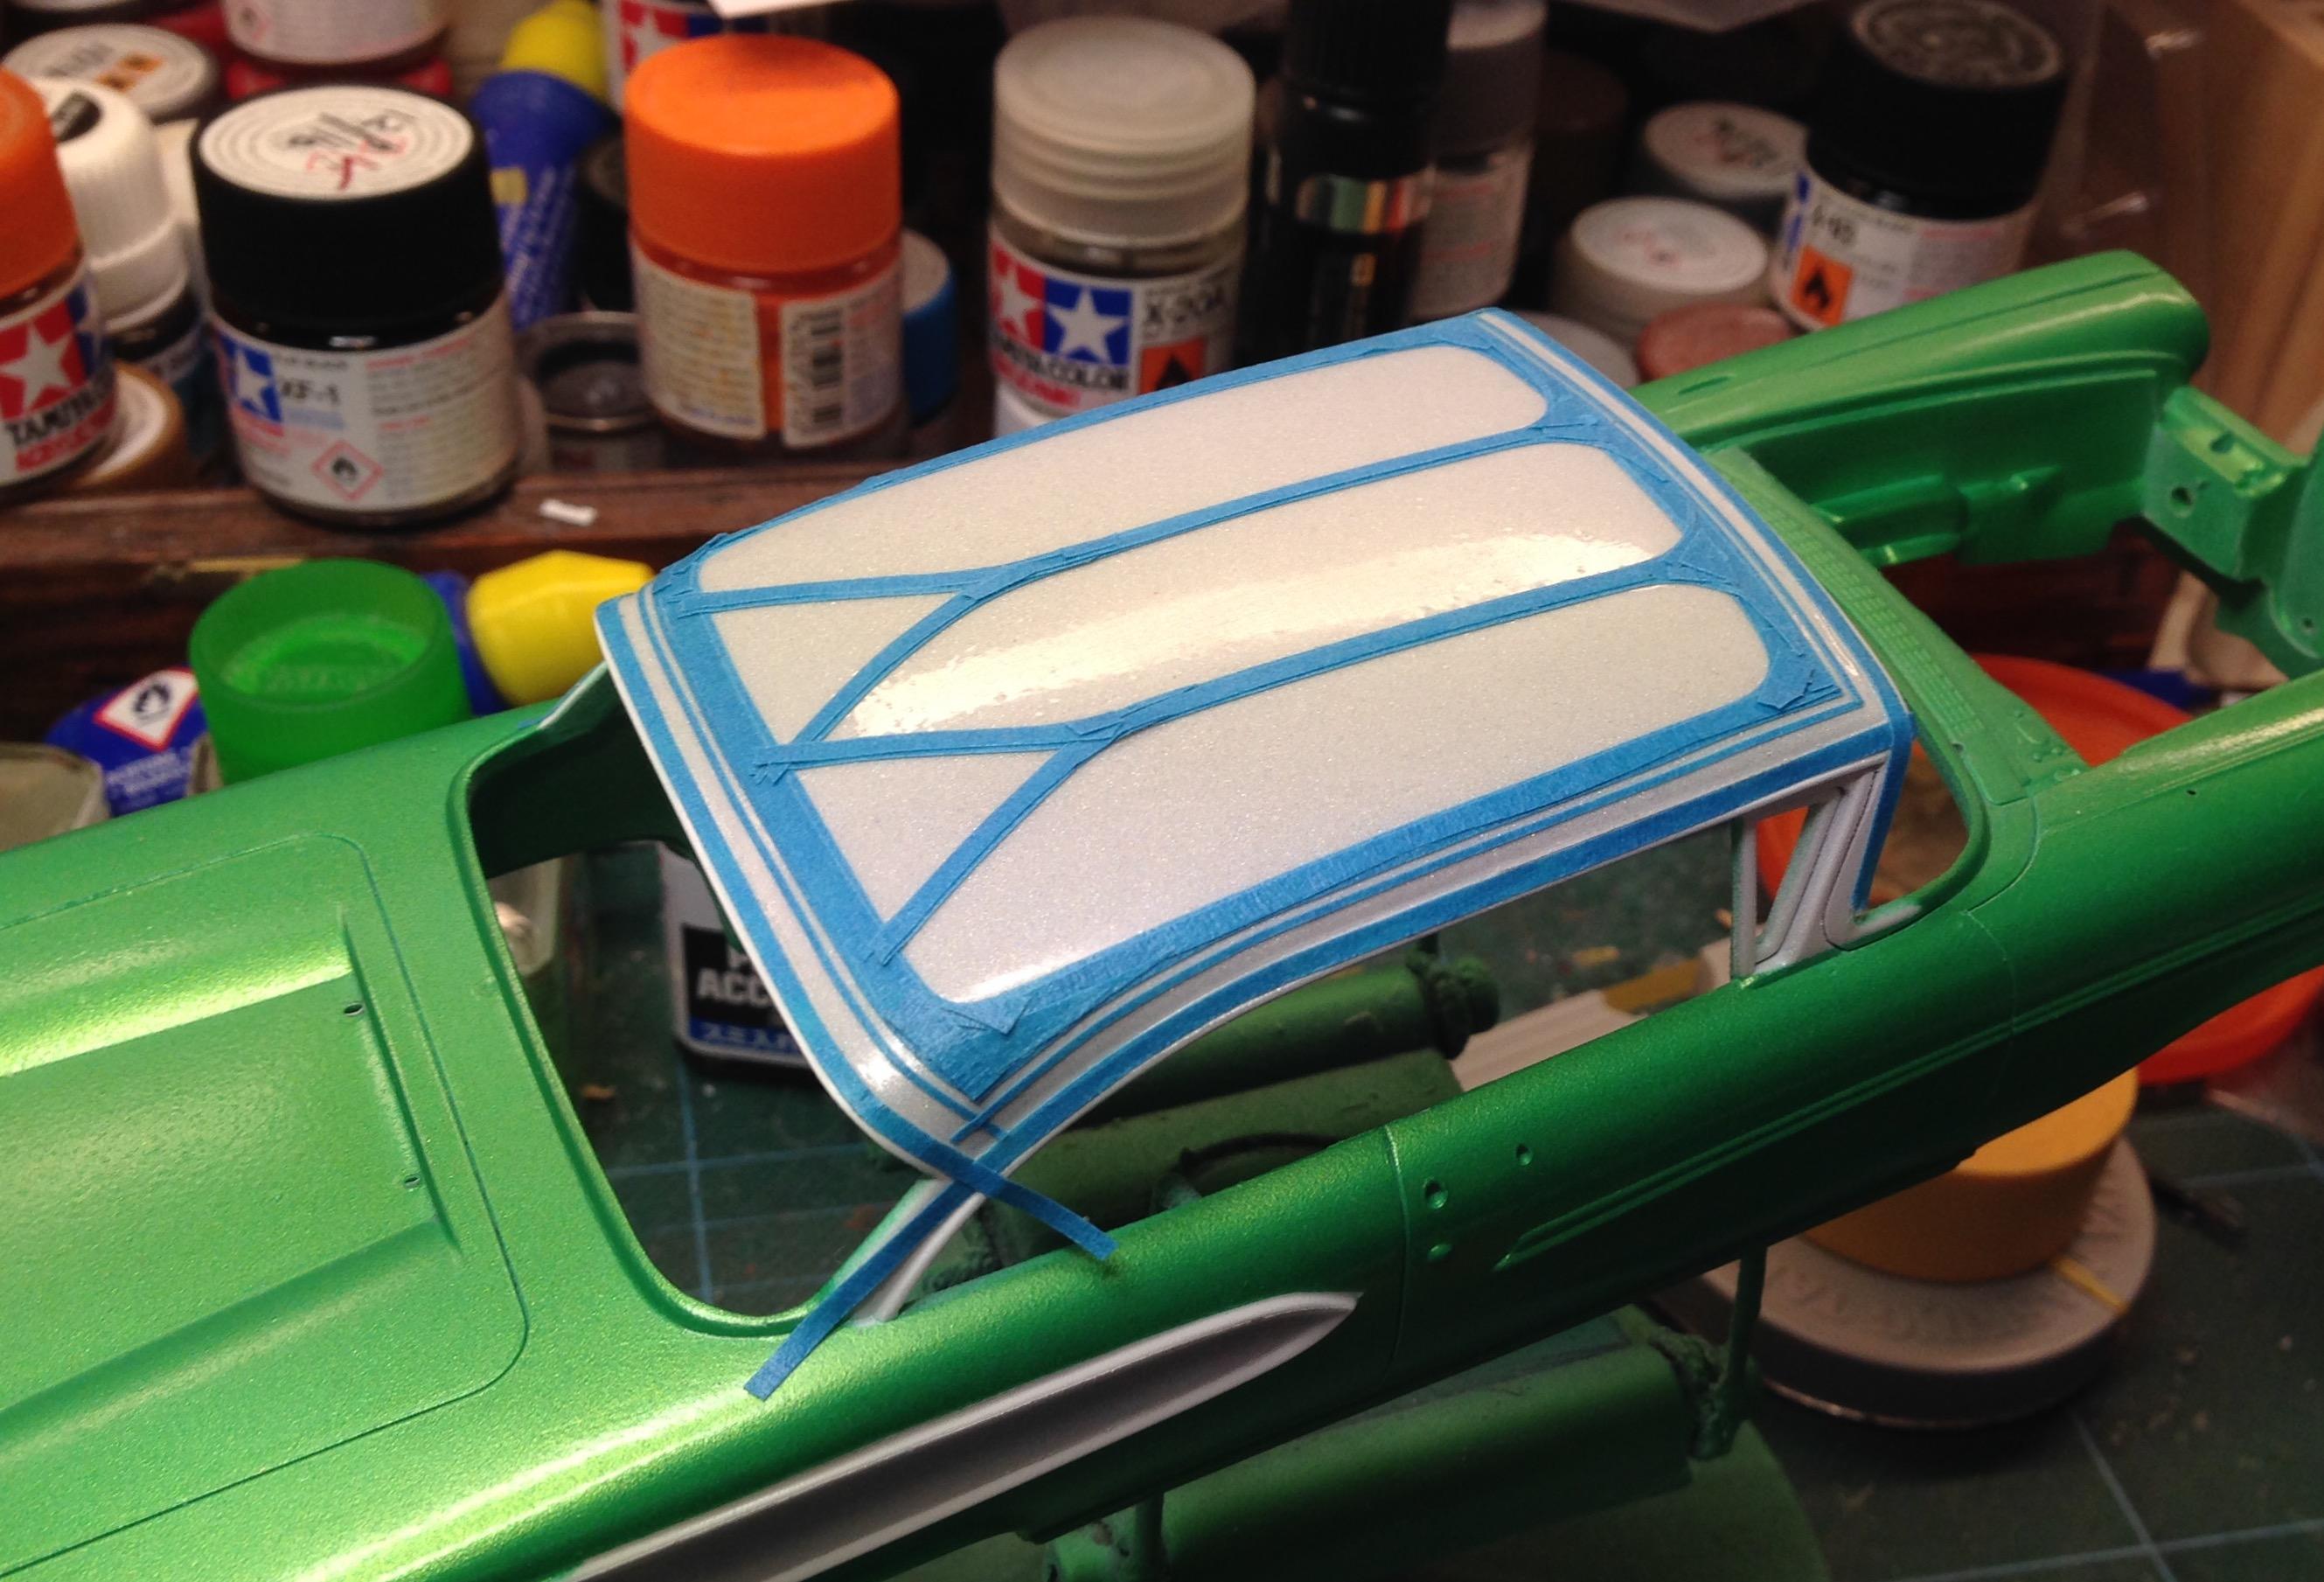
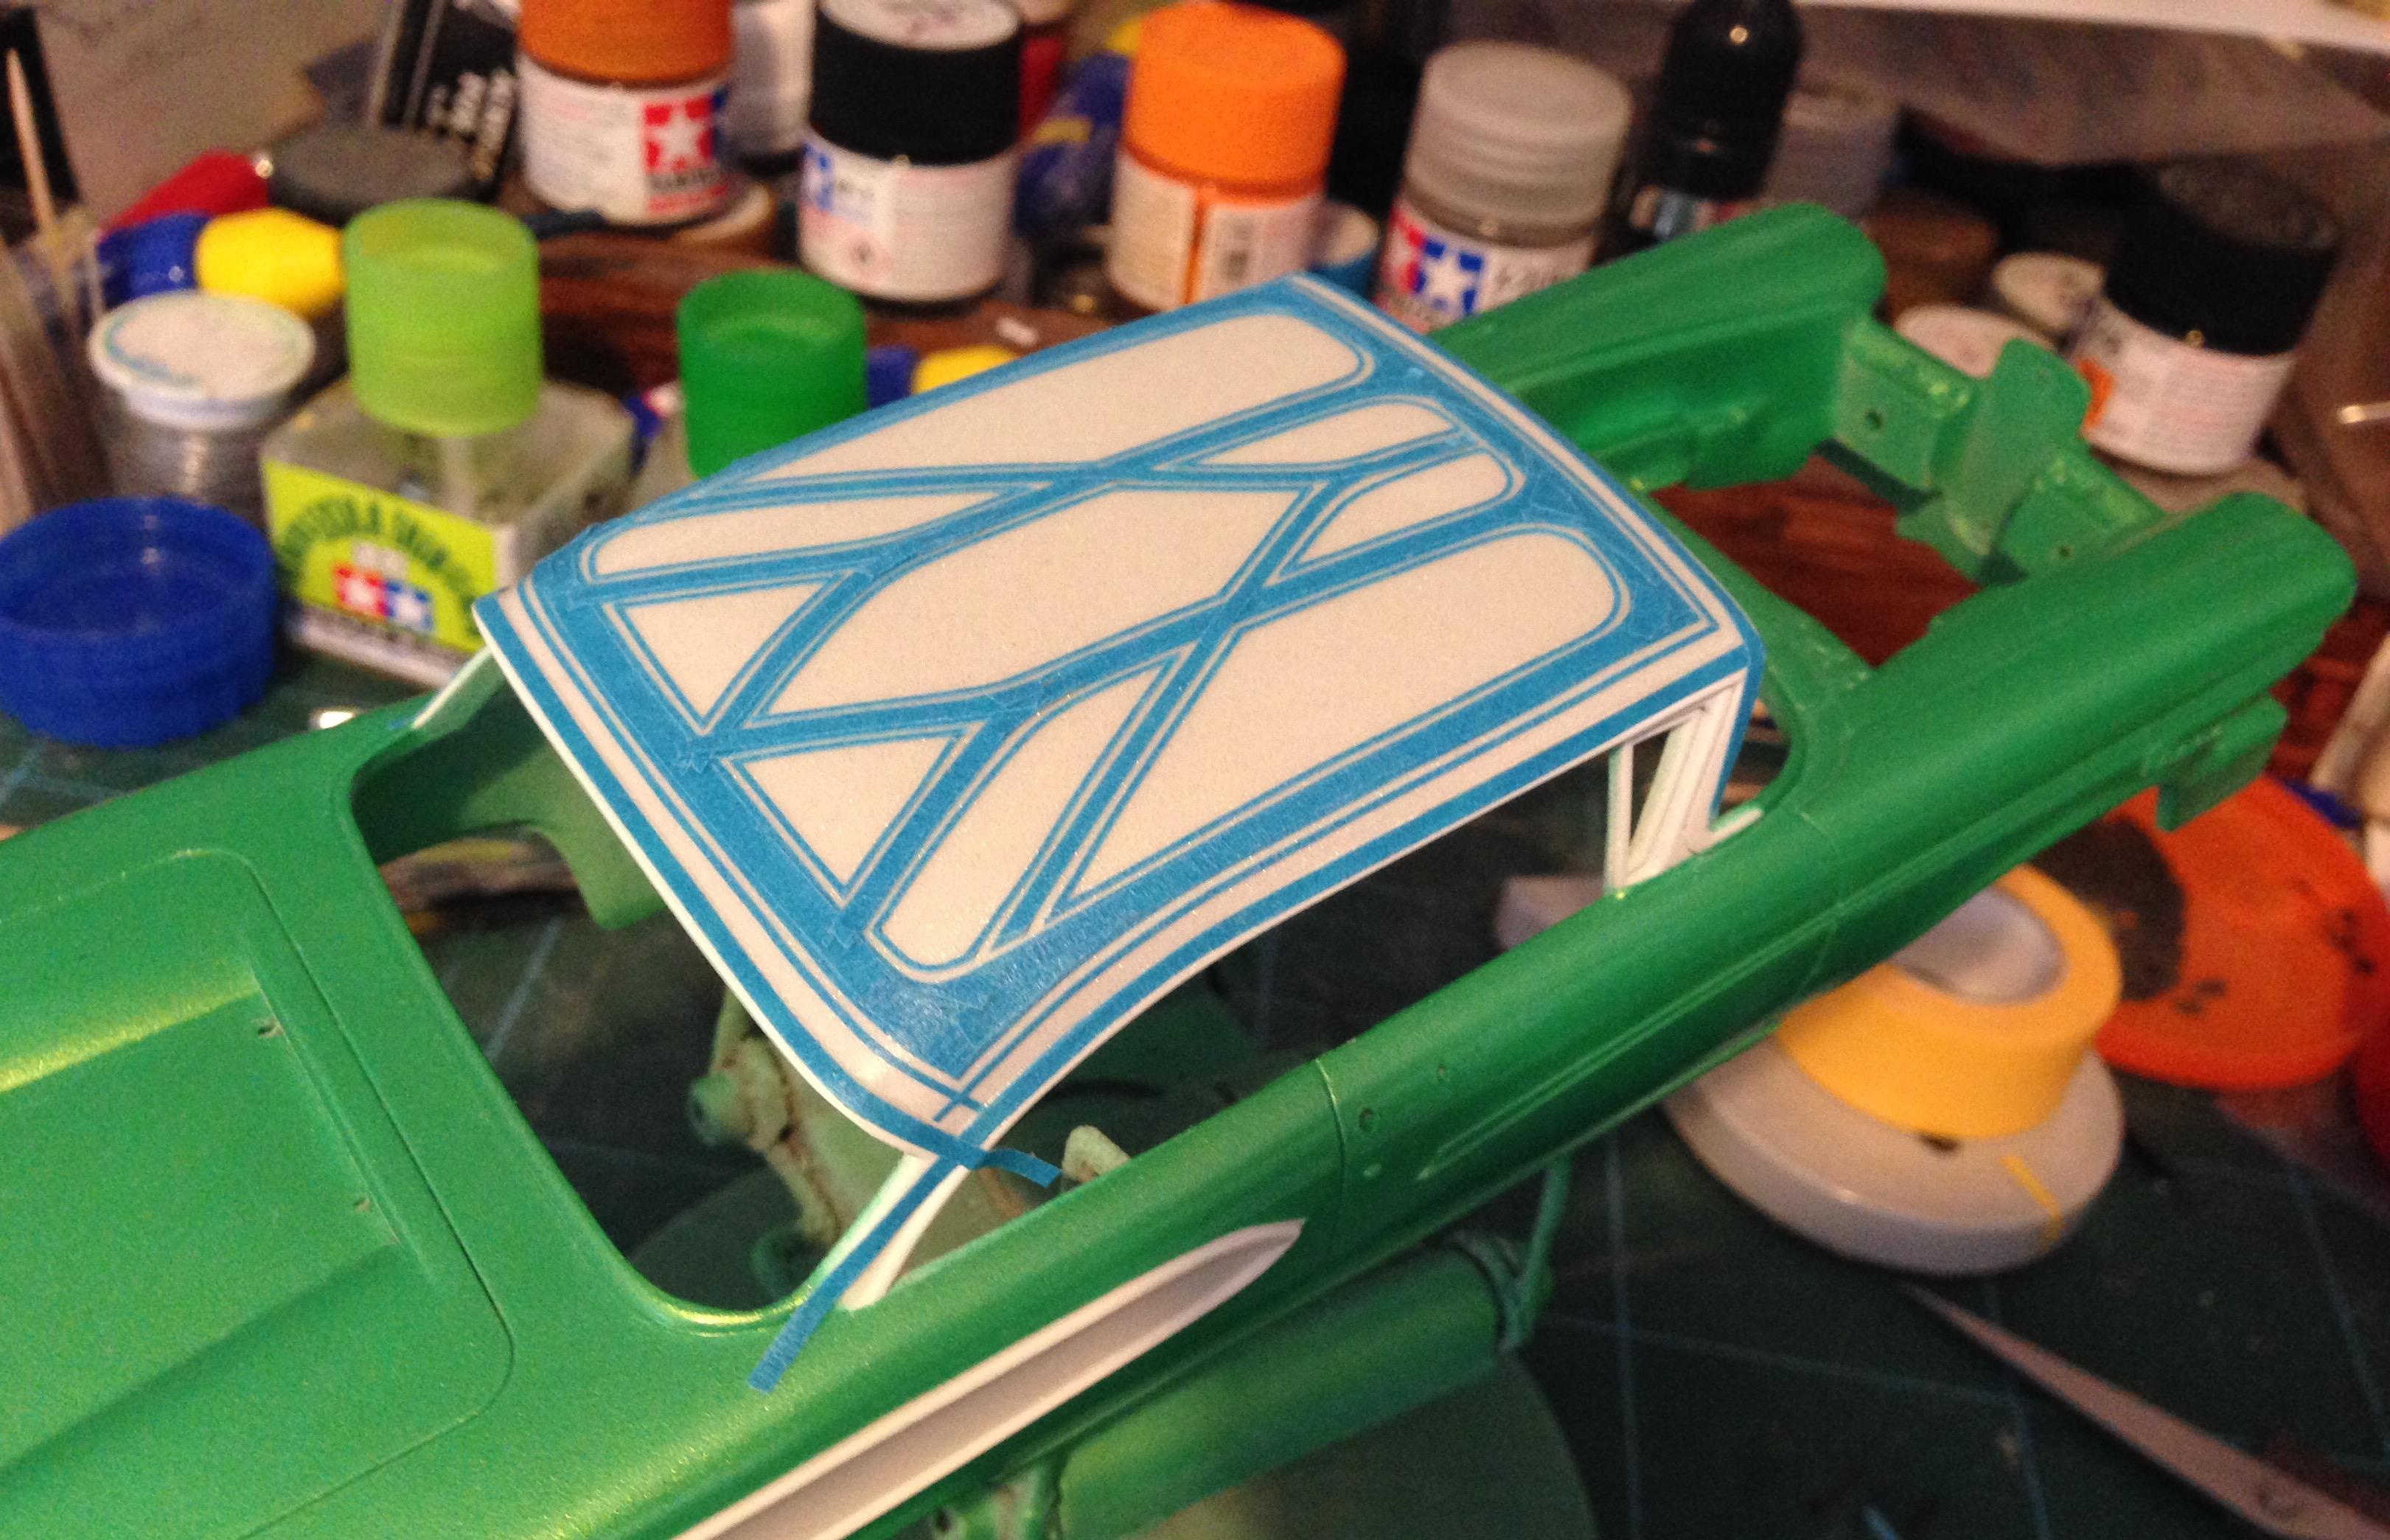
I can devote a bit more time to this, now the Monte is finished. Been laying down some tape. Getting a design mapped out as I go. All tape areas will be white and the white areas will either be green or have some other treatment.
-
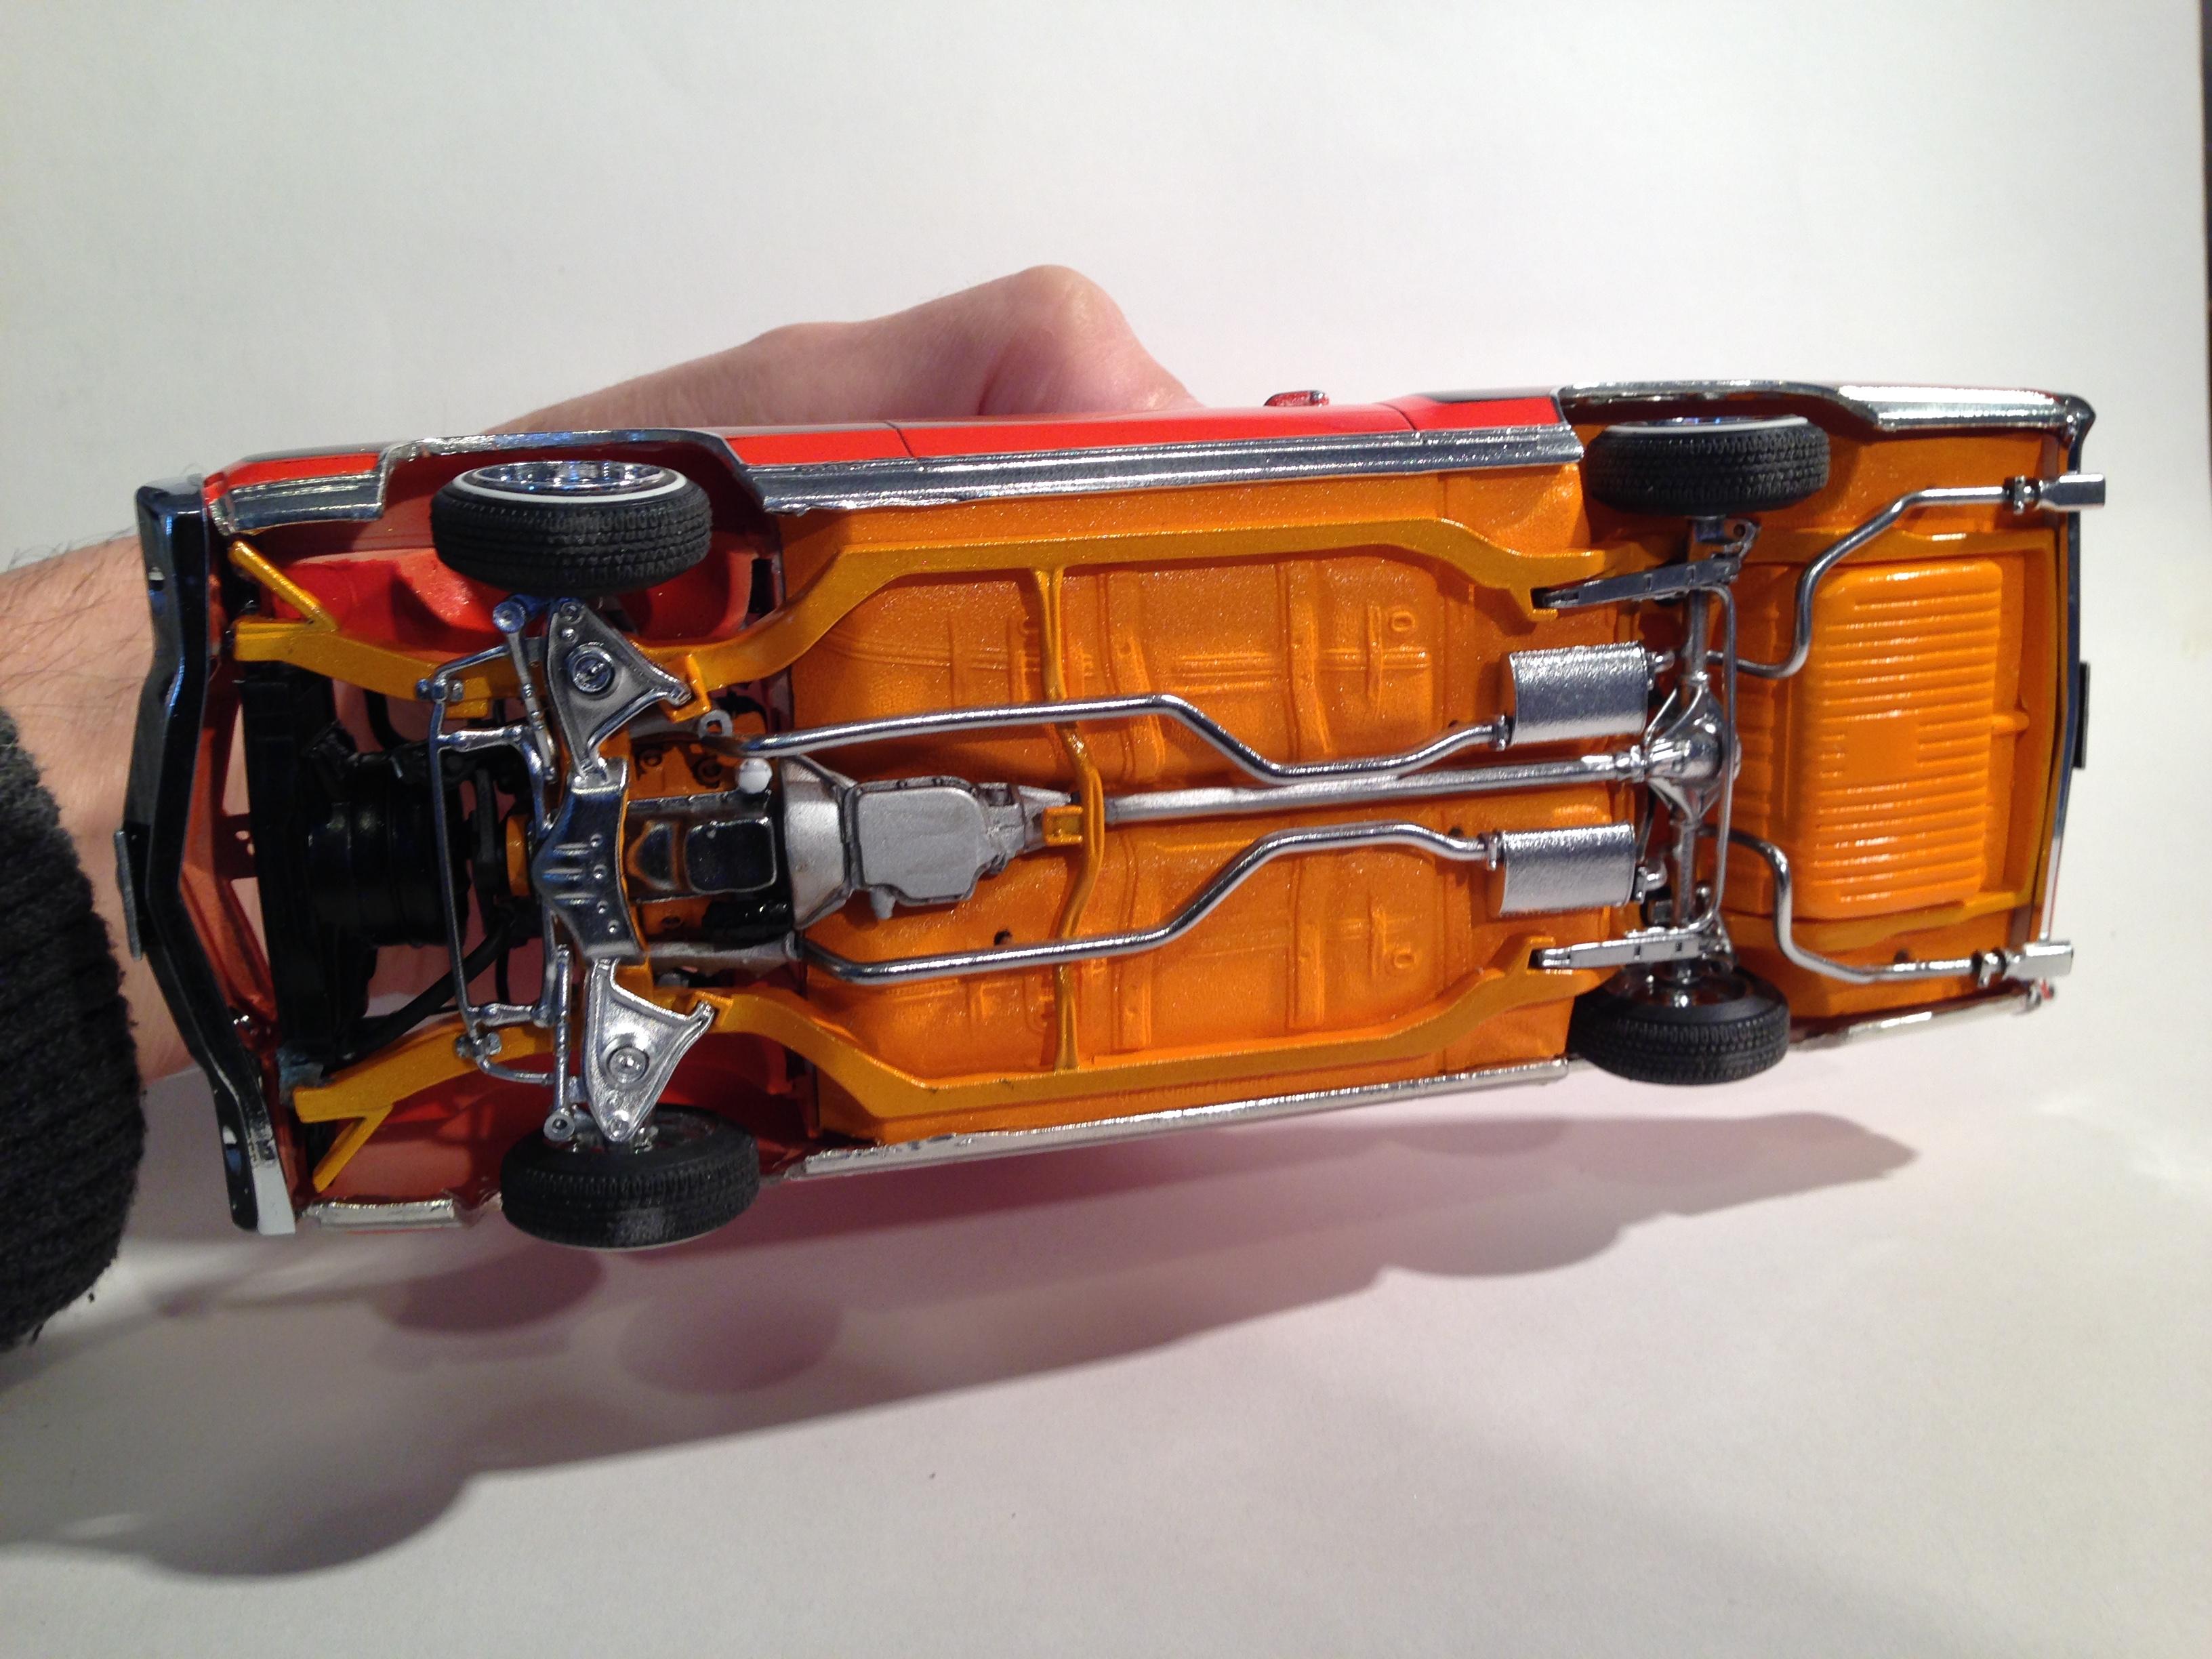
Thanks mate I appreciate it. I'm still not where I want to be with it, yet. When I see work by Wes Salazar and others in his league, I know I've gotta do more and get better. Been looking at builds on Scaleriders, on YouTube. Amazing work. more to come though. I have the following cars waiting to become lowriders: 66 Riviera 87 Buick GN 64 Impala 48 Chevy 2 x 59 Chevys (one's a ragtop) 62 Pontiac Hopefully I'll manage more technical and detailed patterns. More lines, more colour. am I obsessed? Yeah. and here's a chassis shot that I also forgot to add.
-
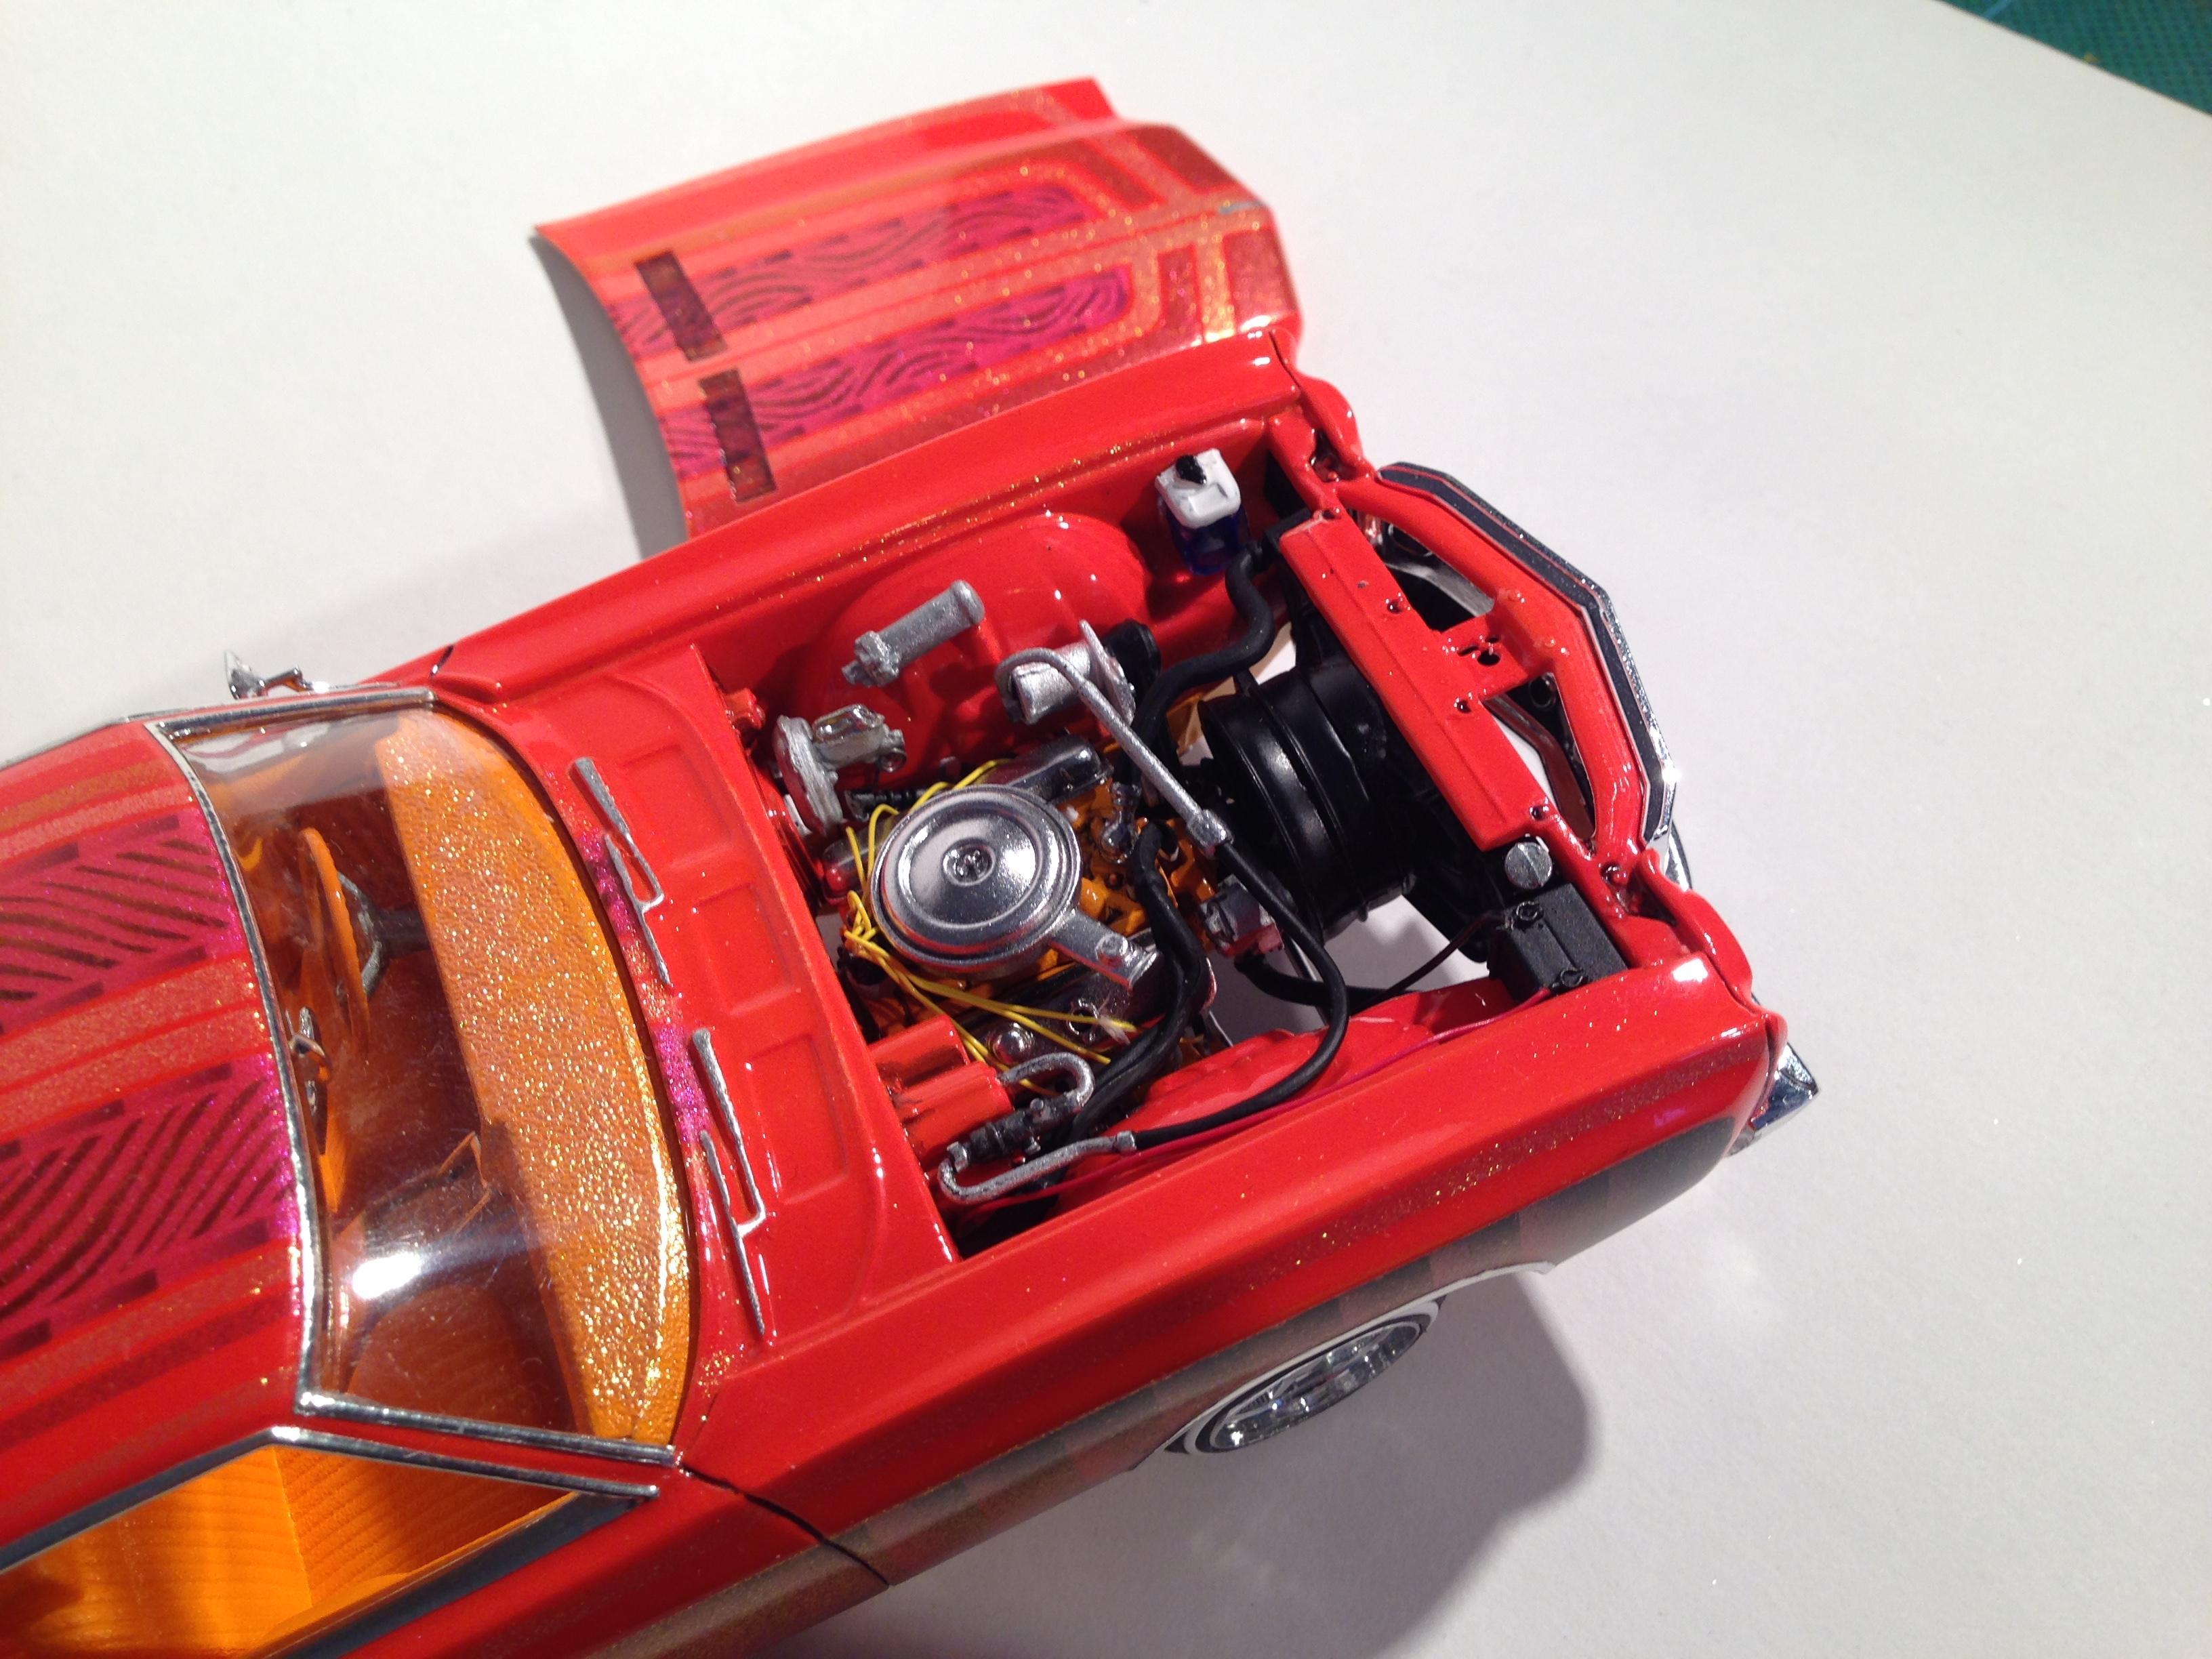
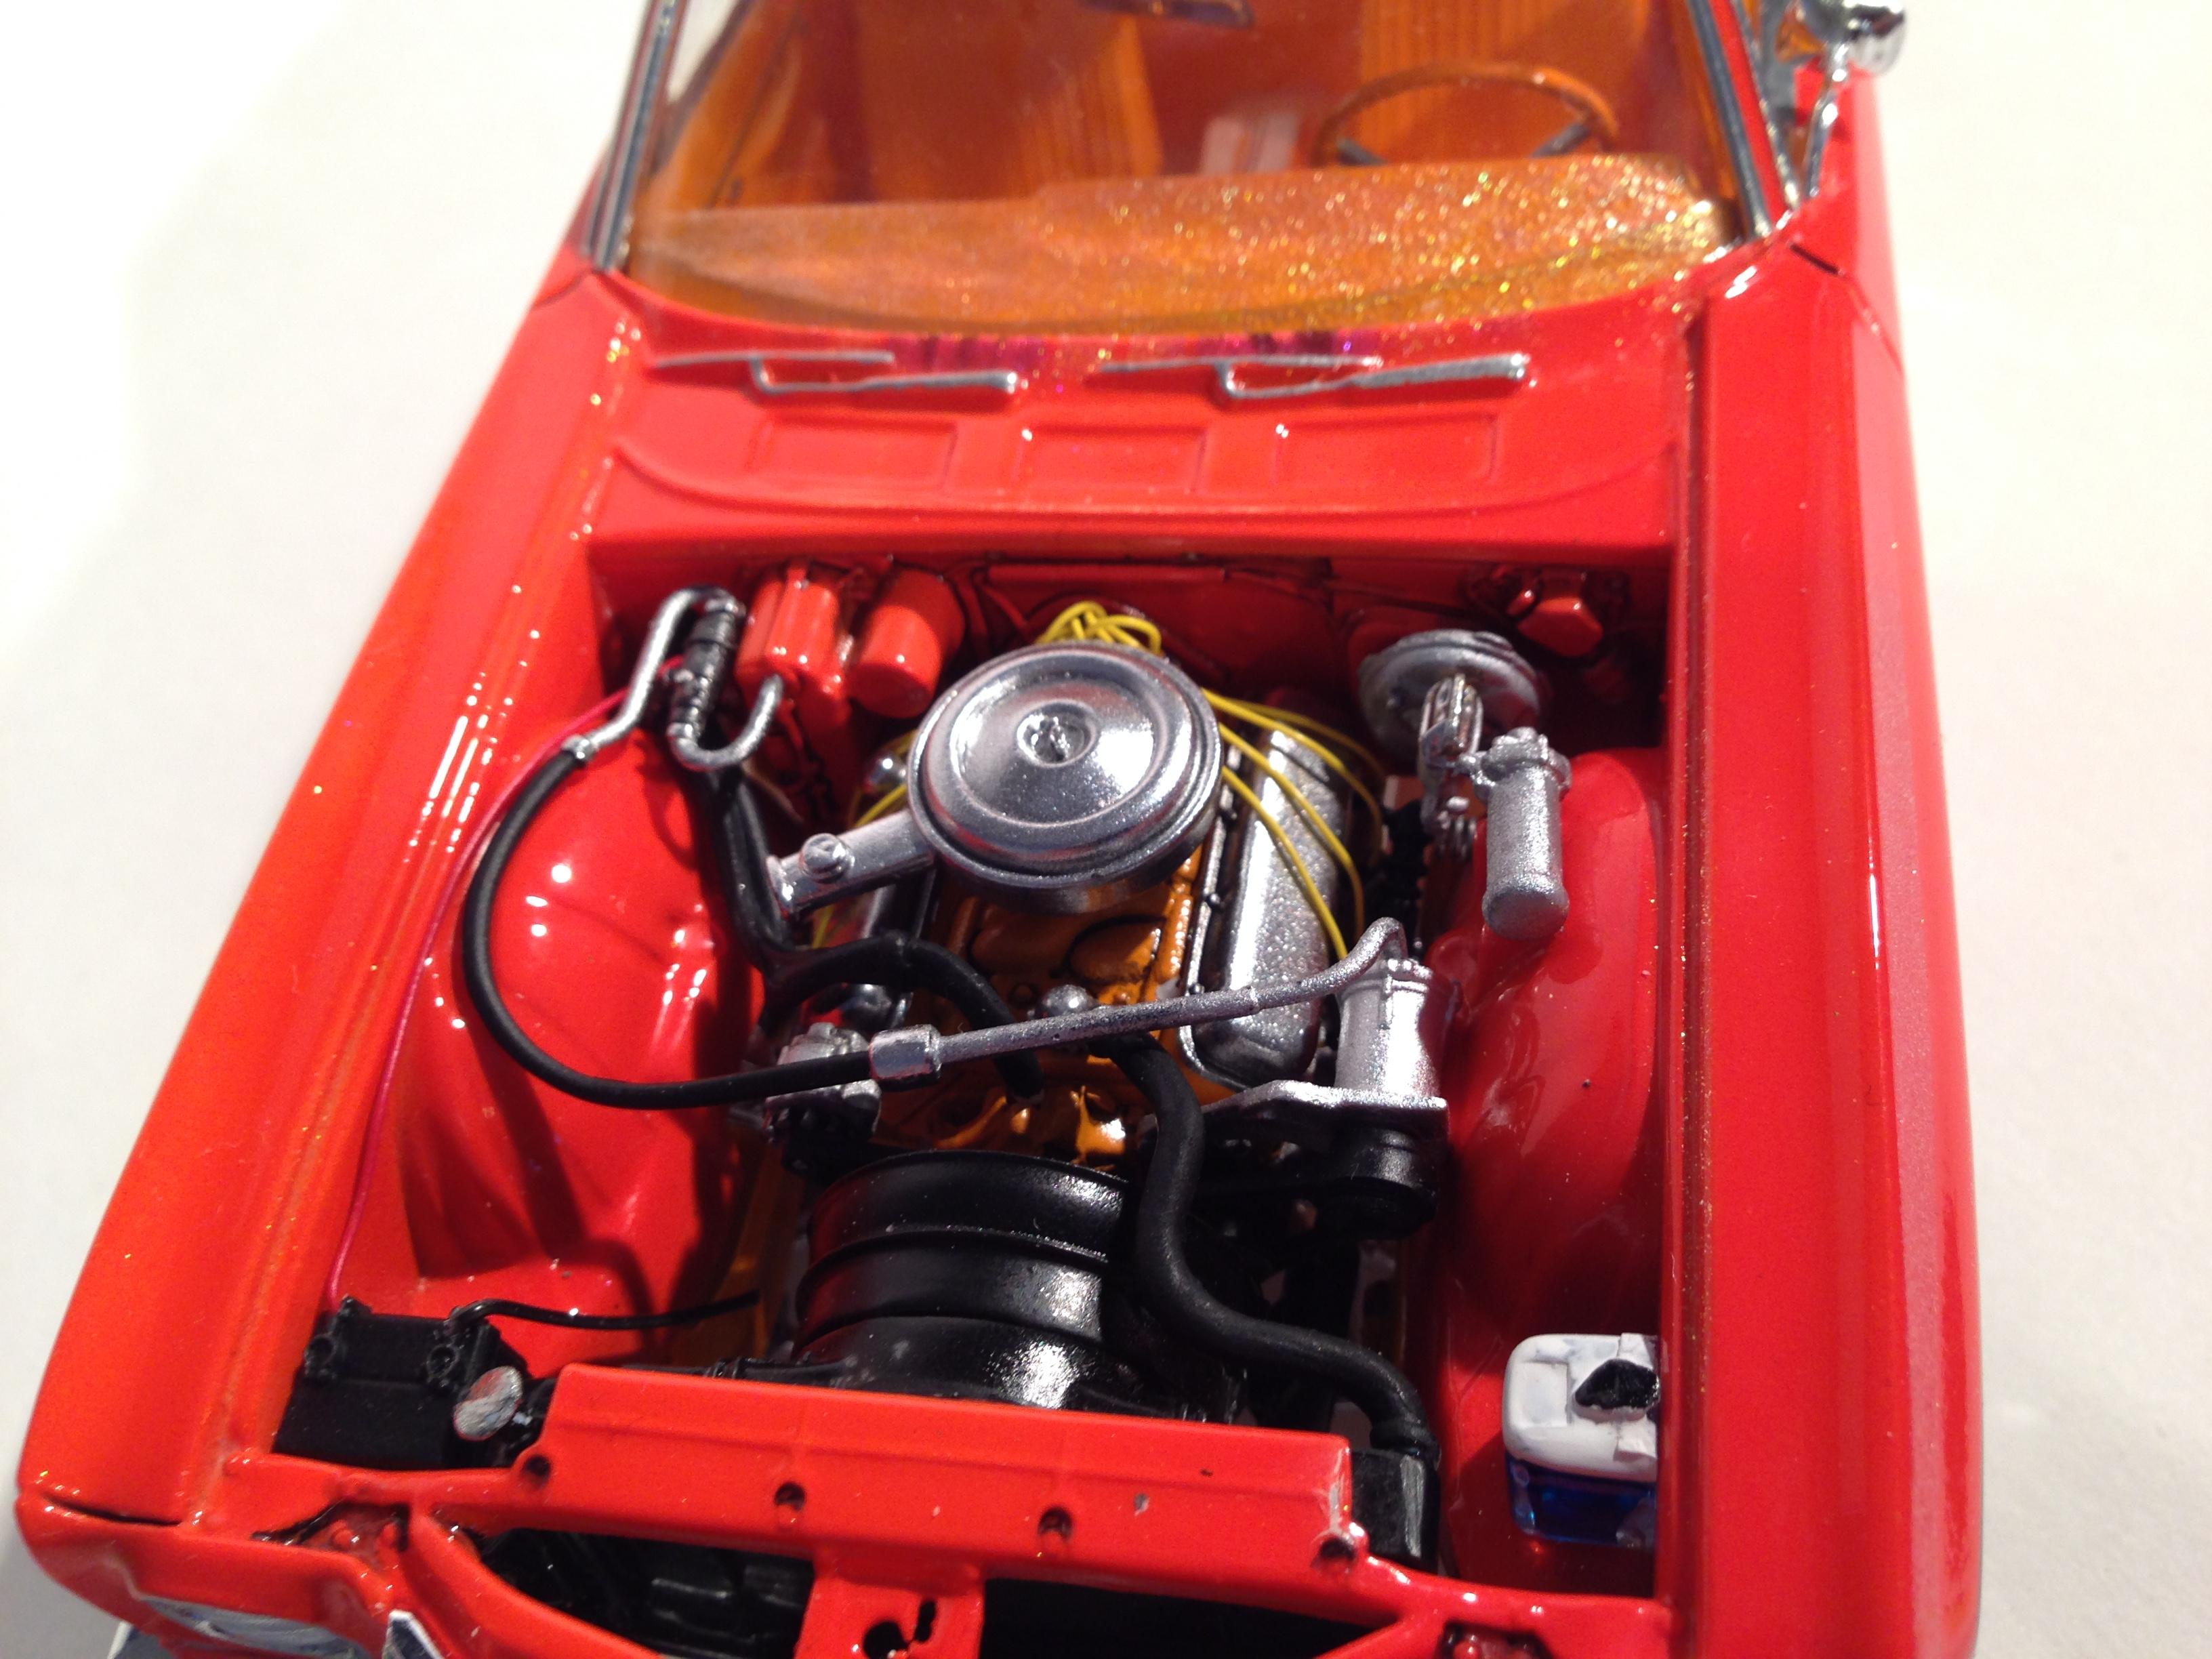
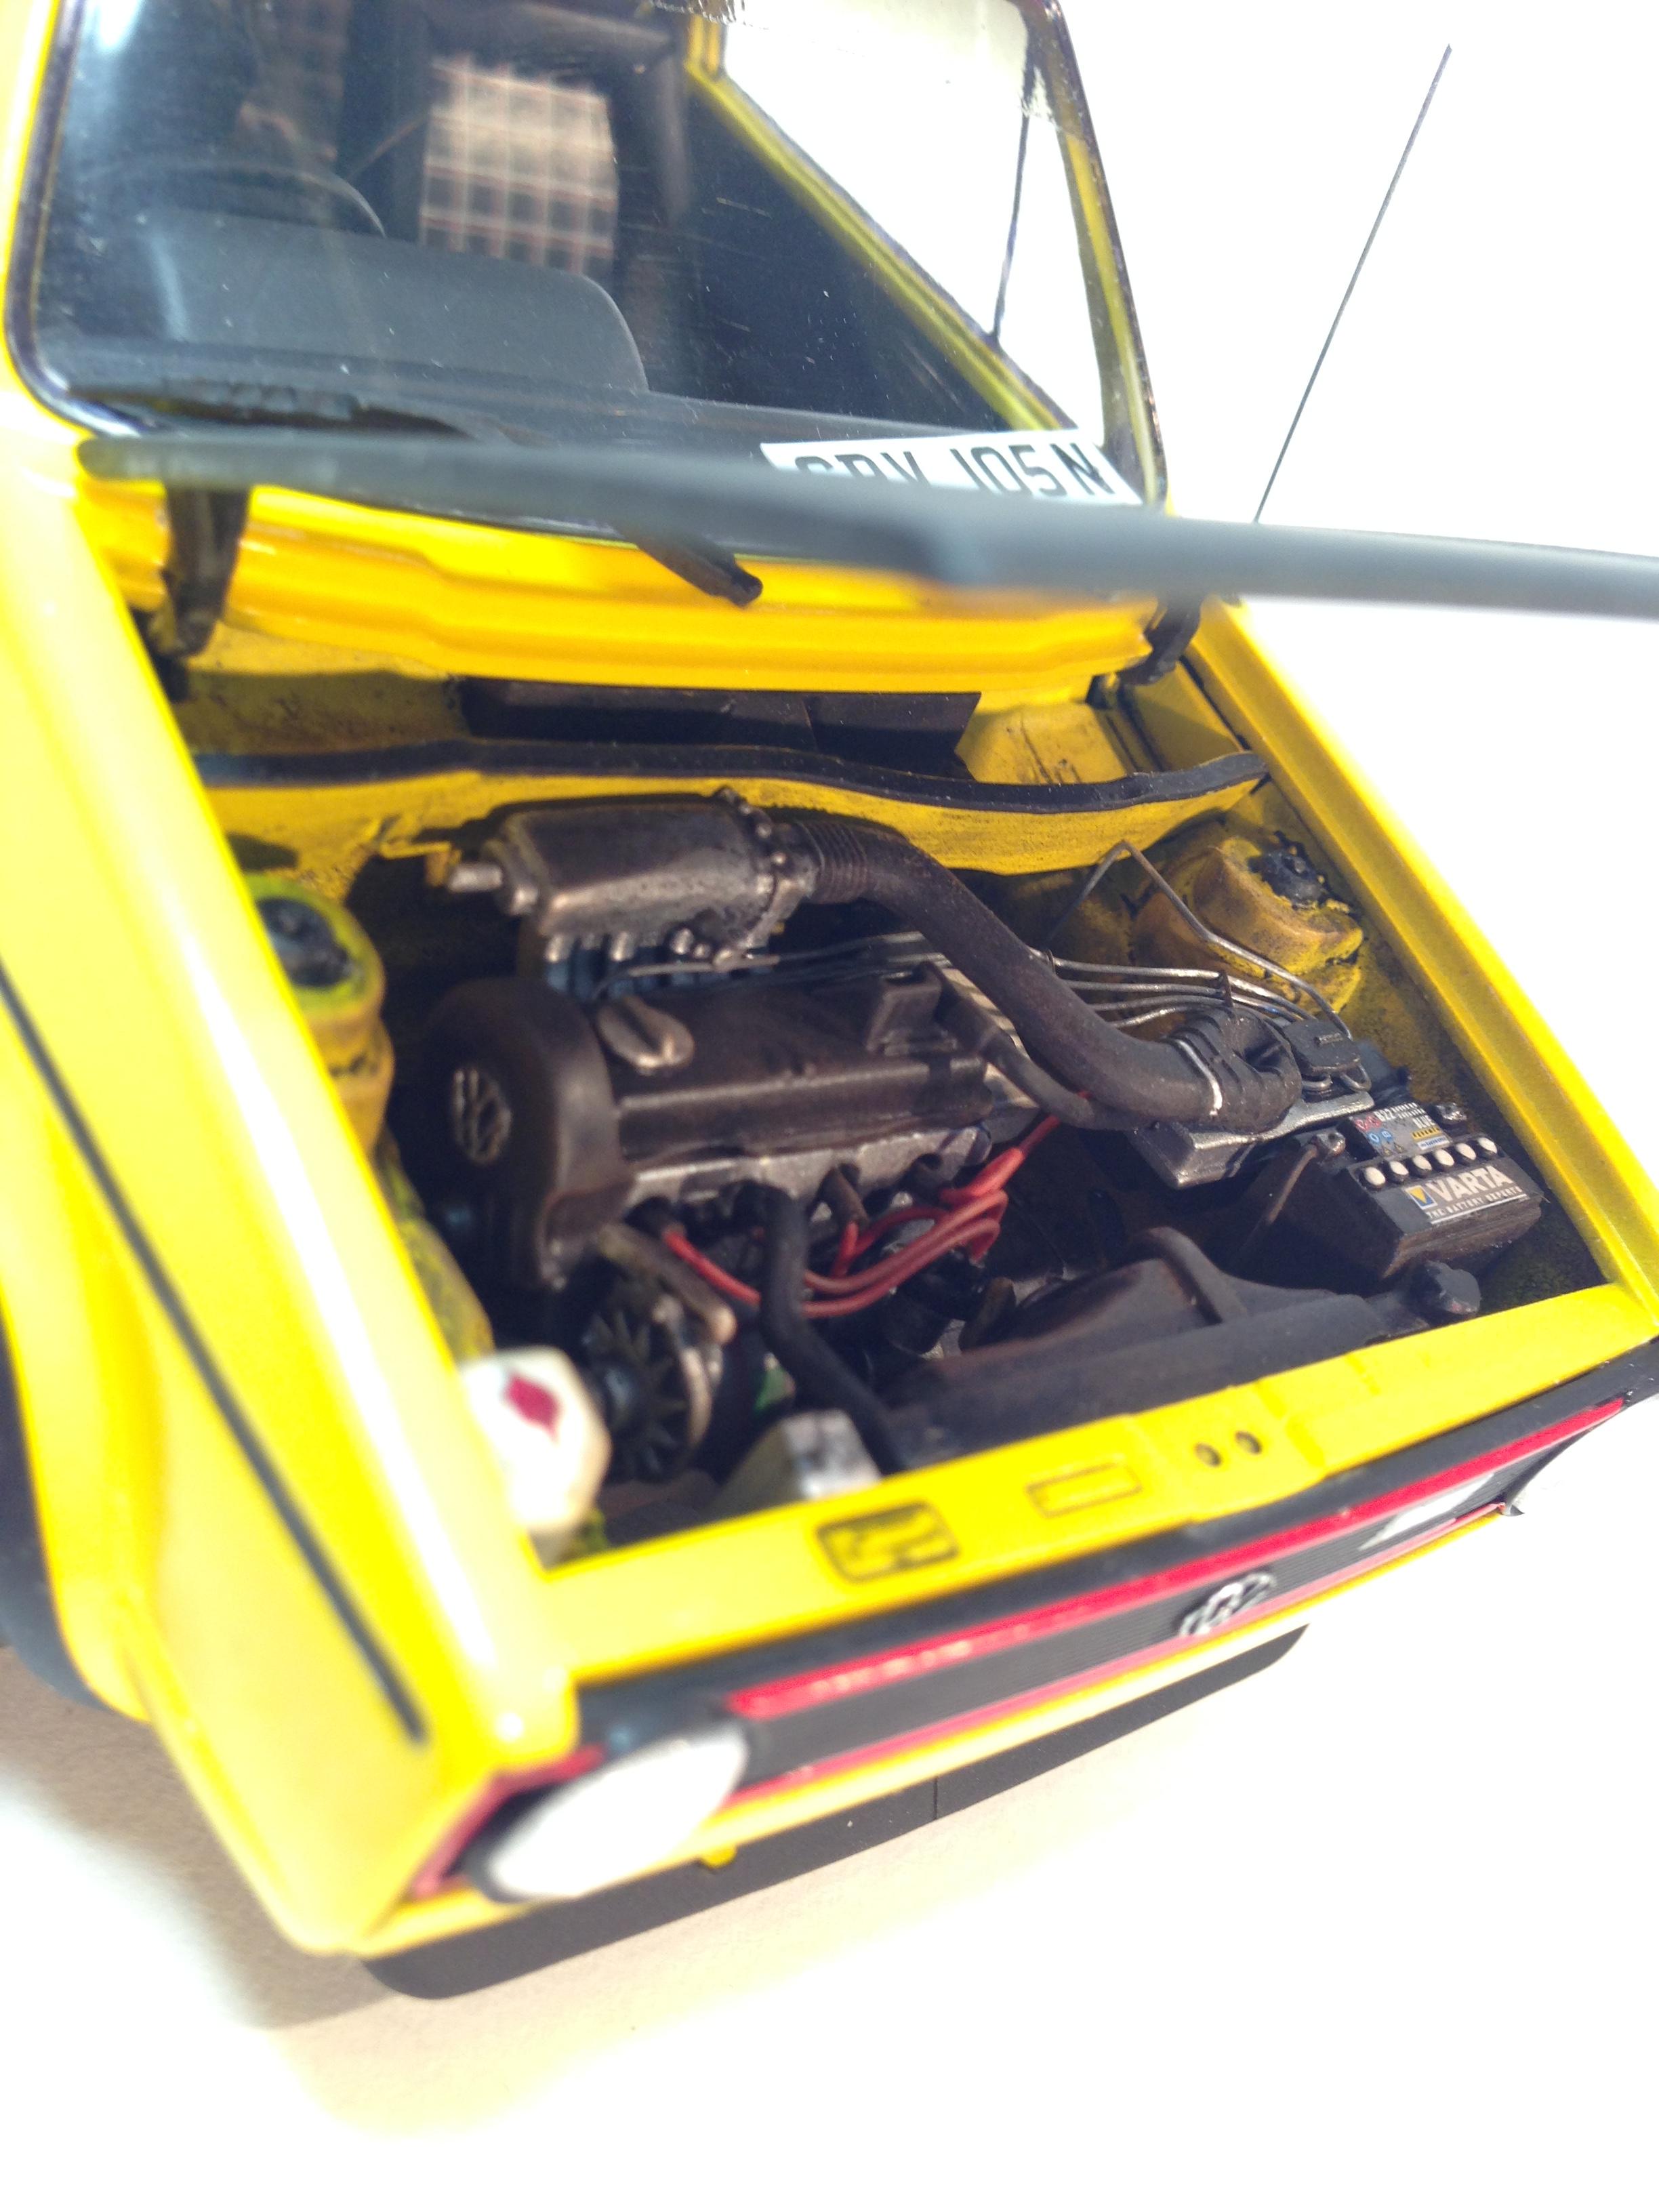
Thanks very much chaps! I'm glad you like it. Here's engine shots that I forgot to add. Nice amount of detail. I just added plug & battery wires and tarted it up a bit.
-
Some more shots.
-
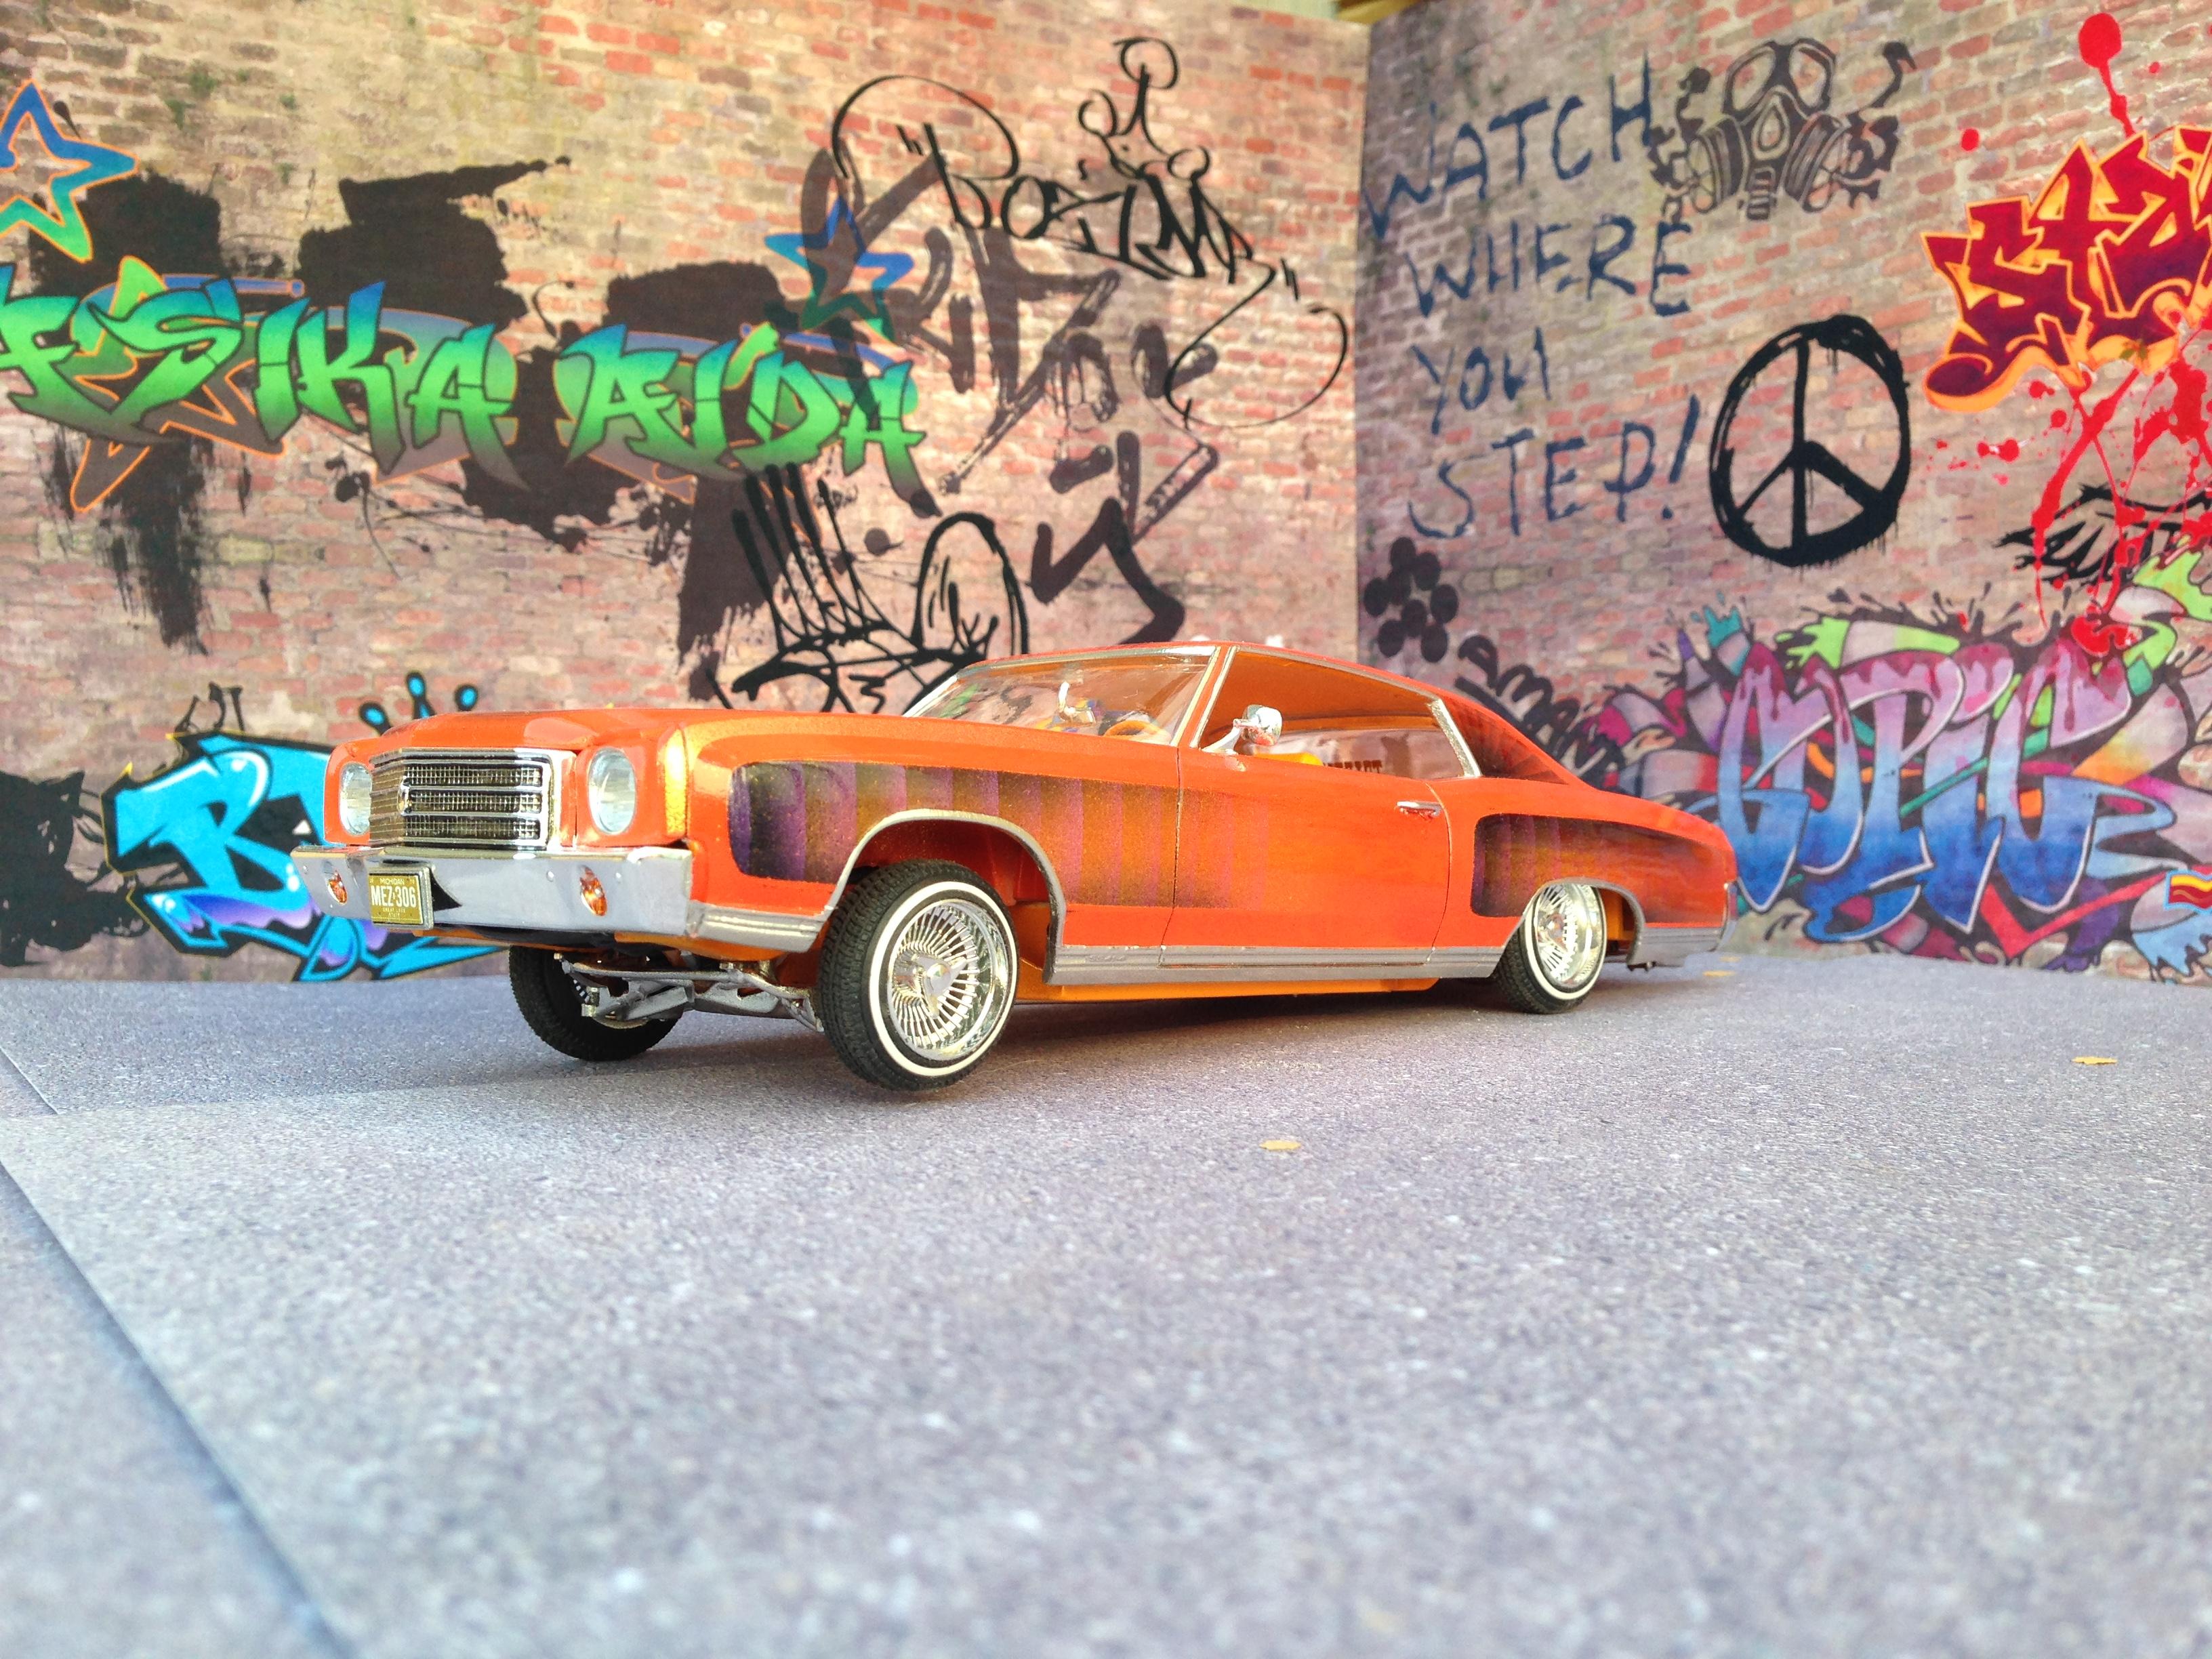
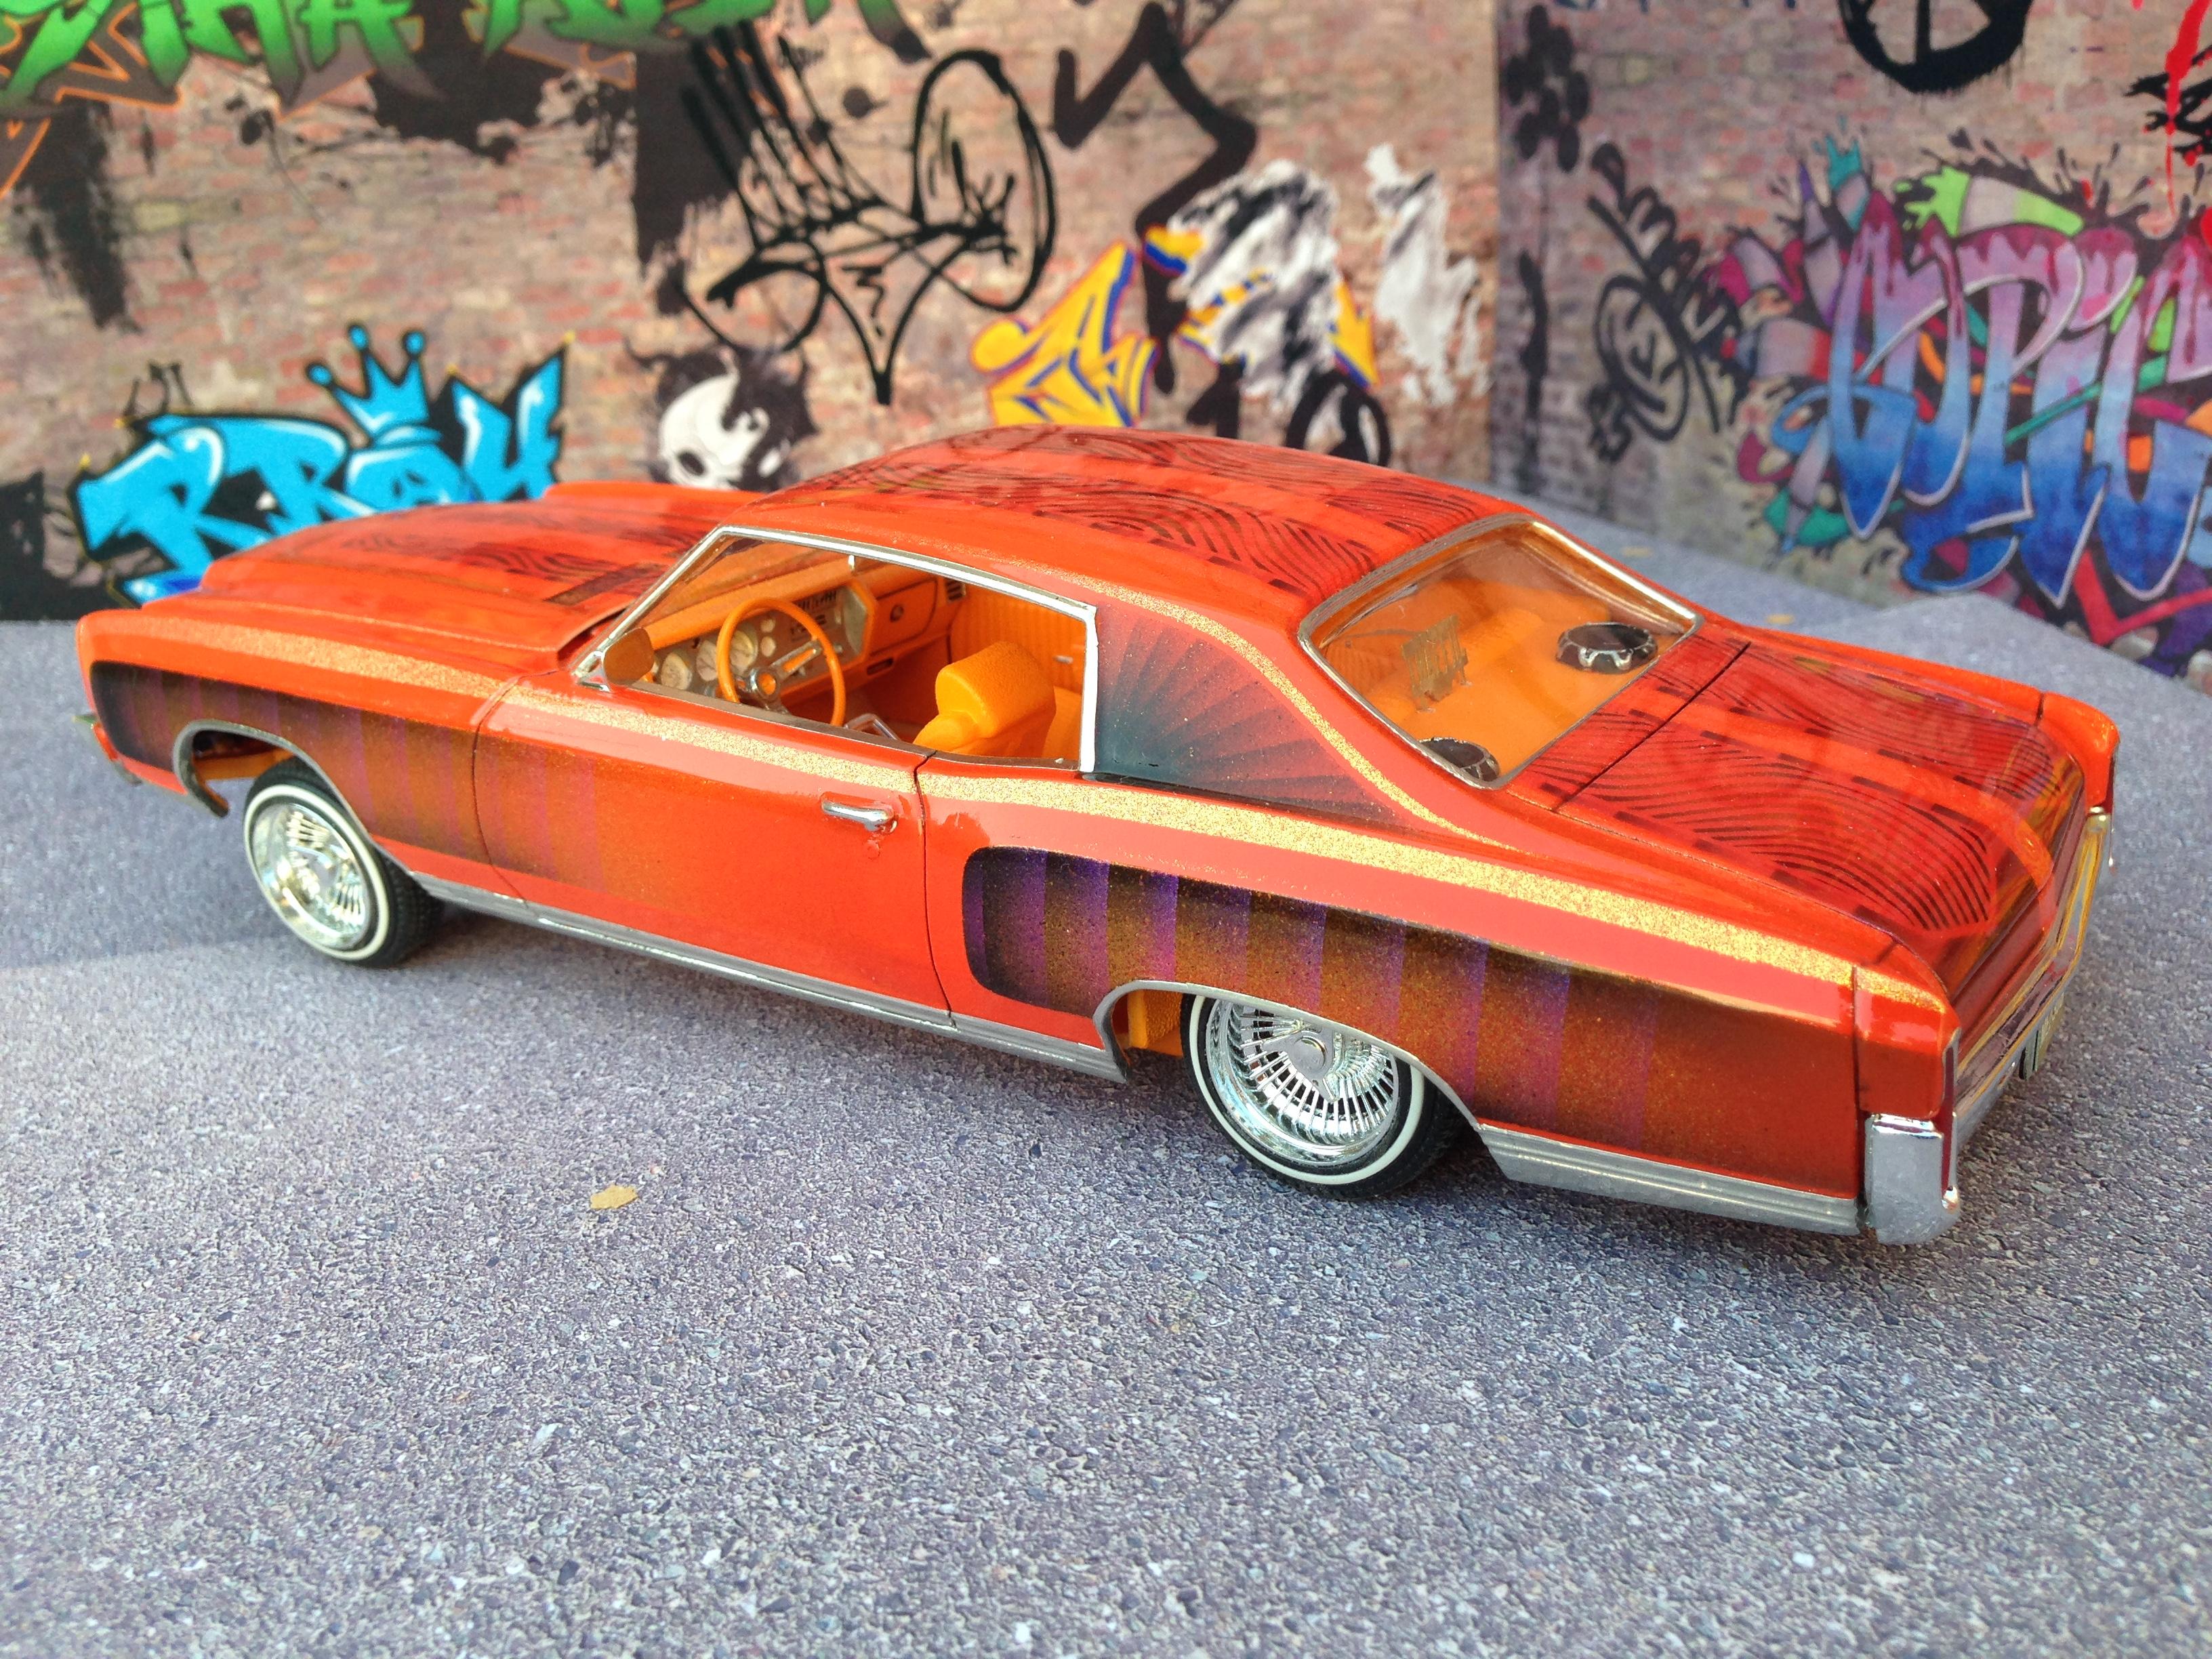
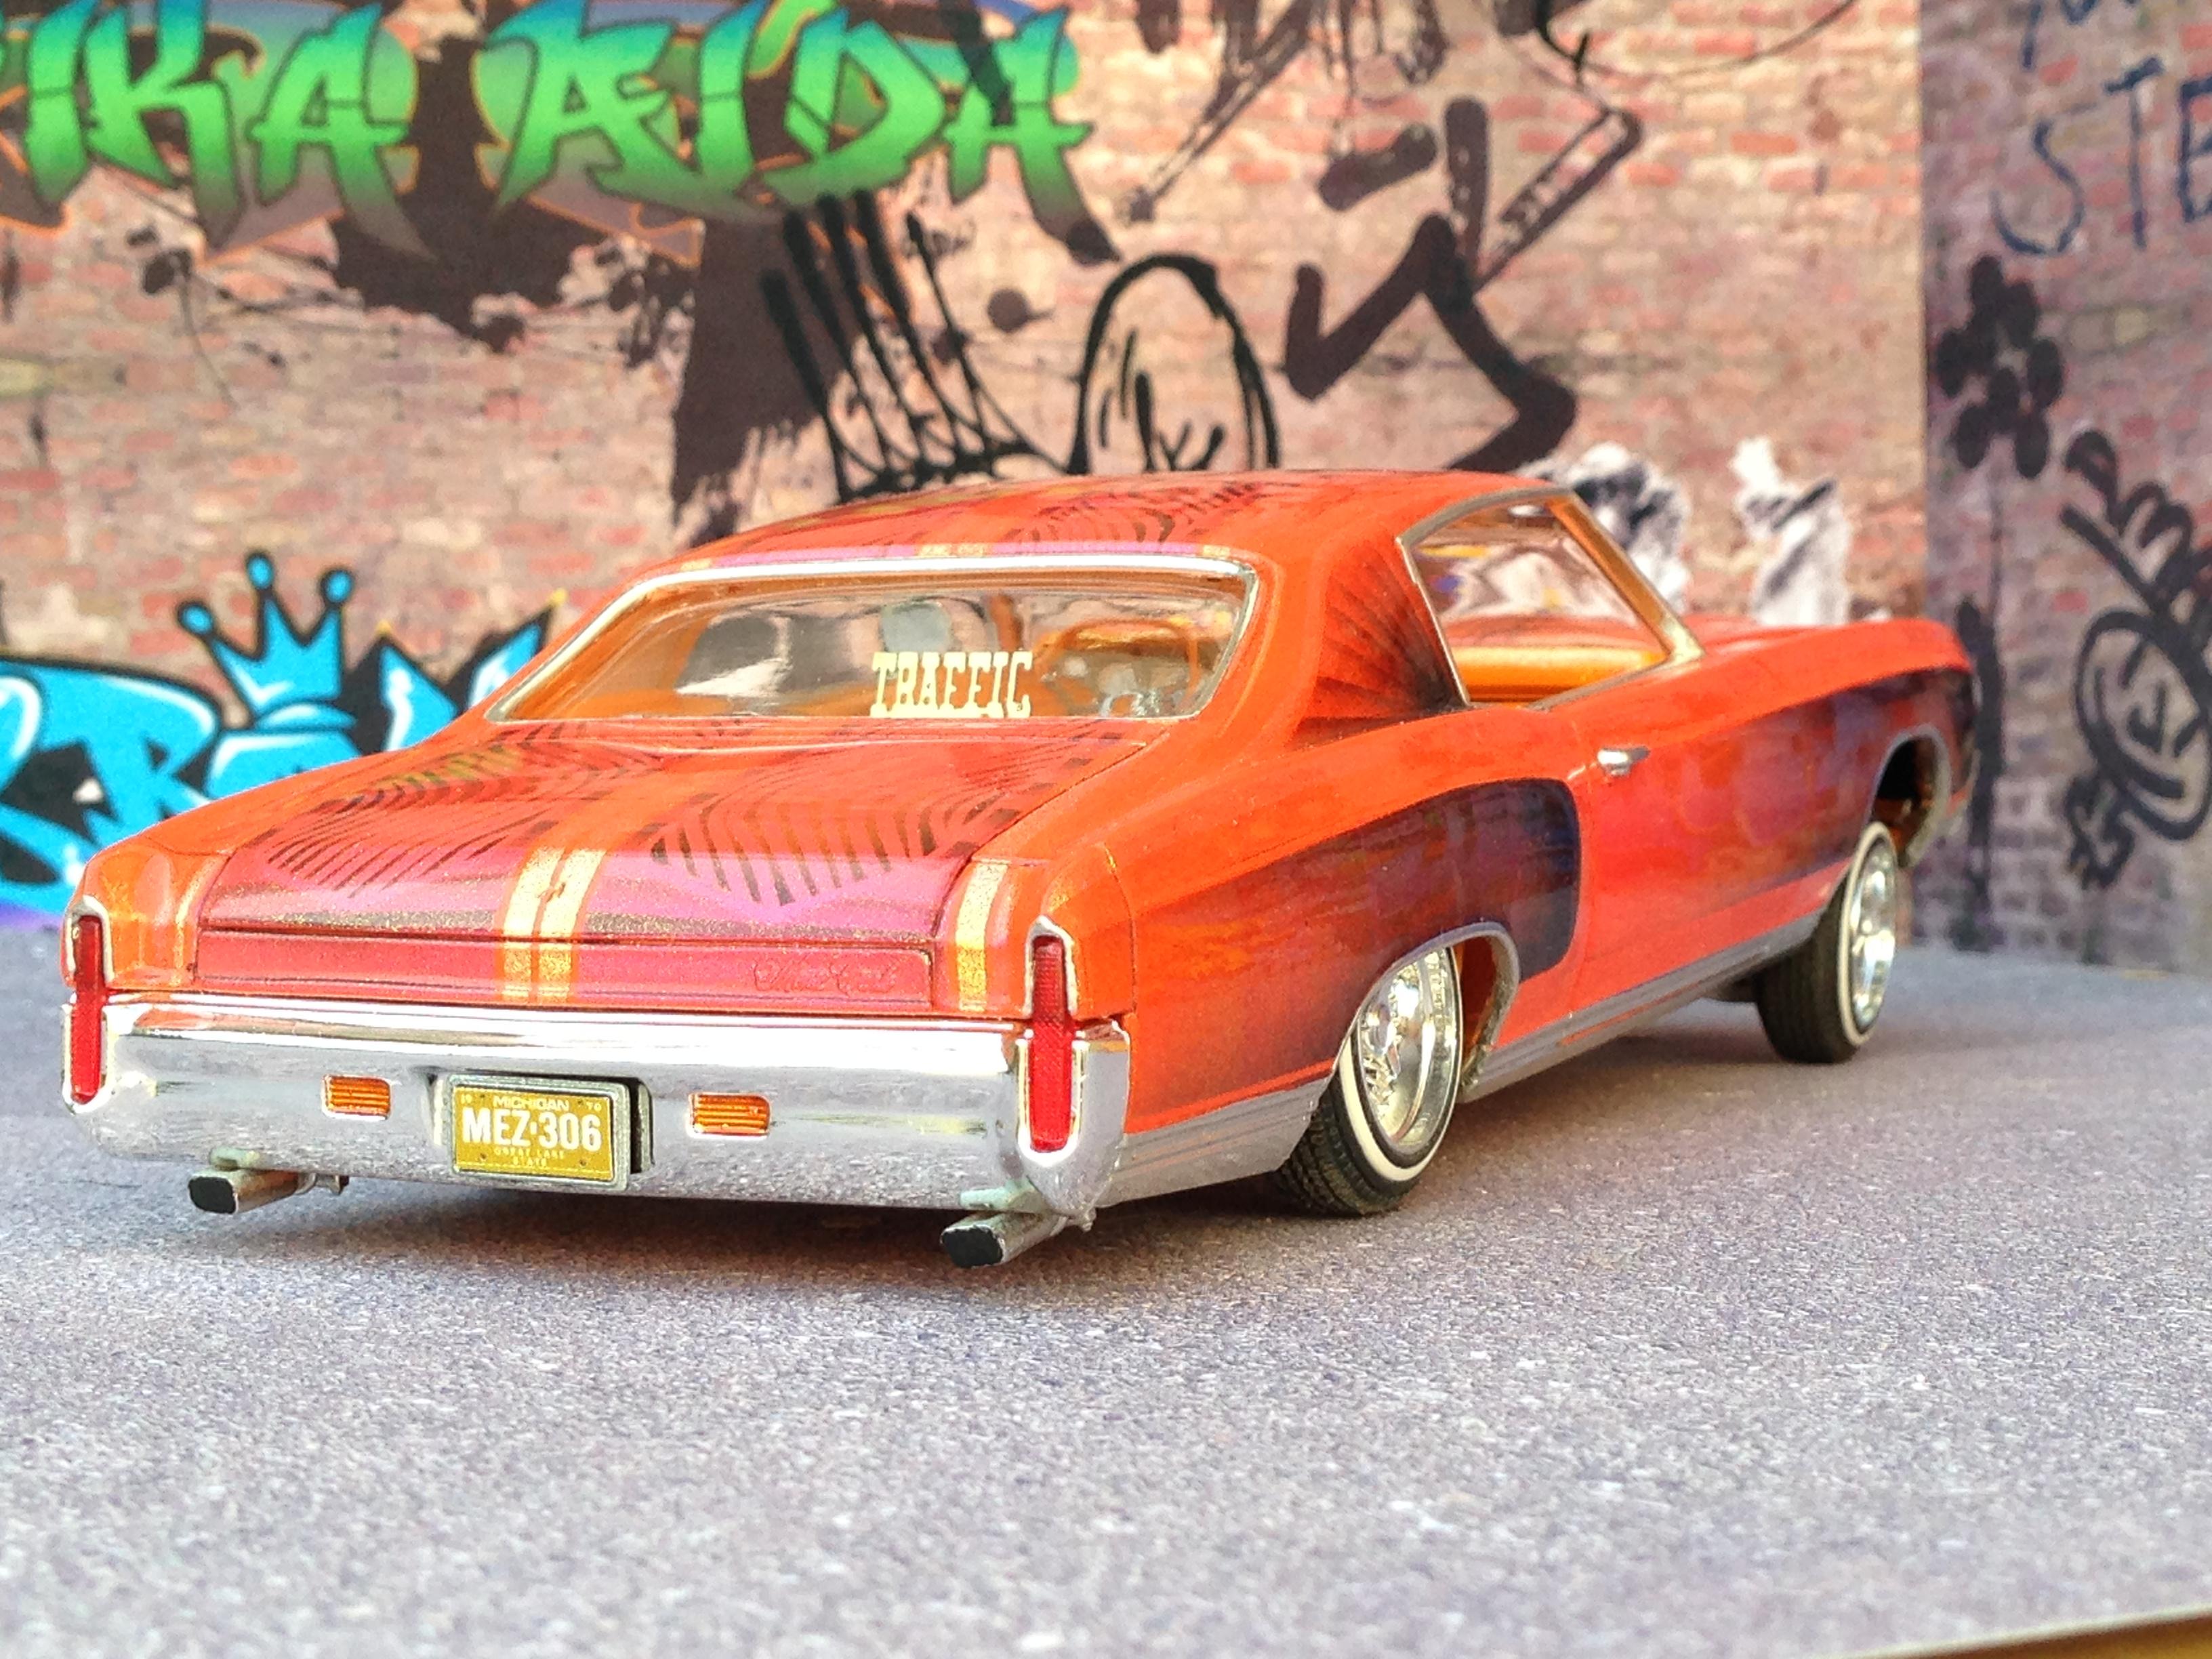
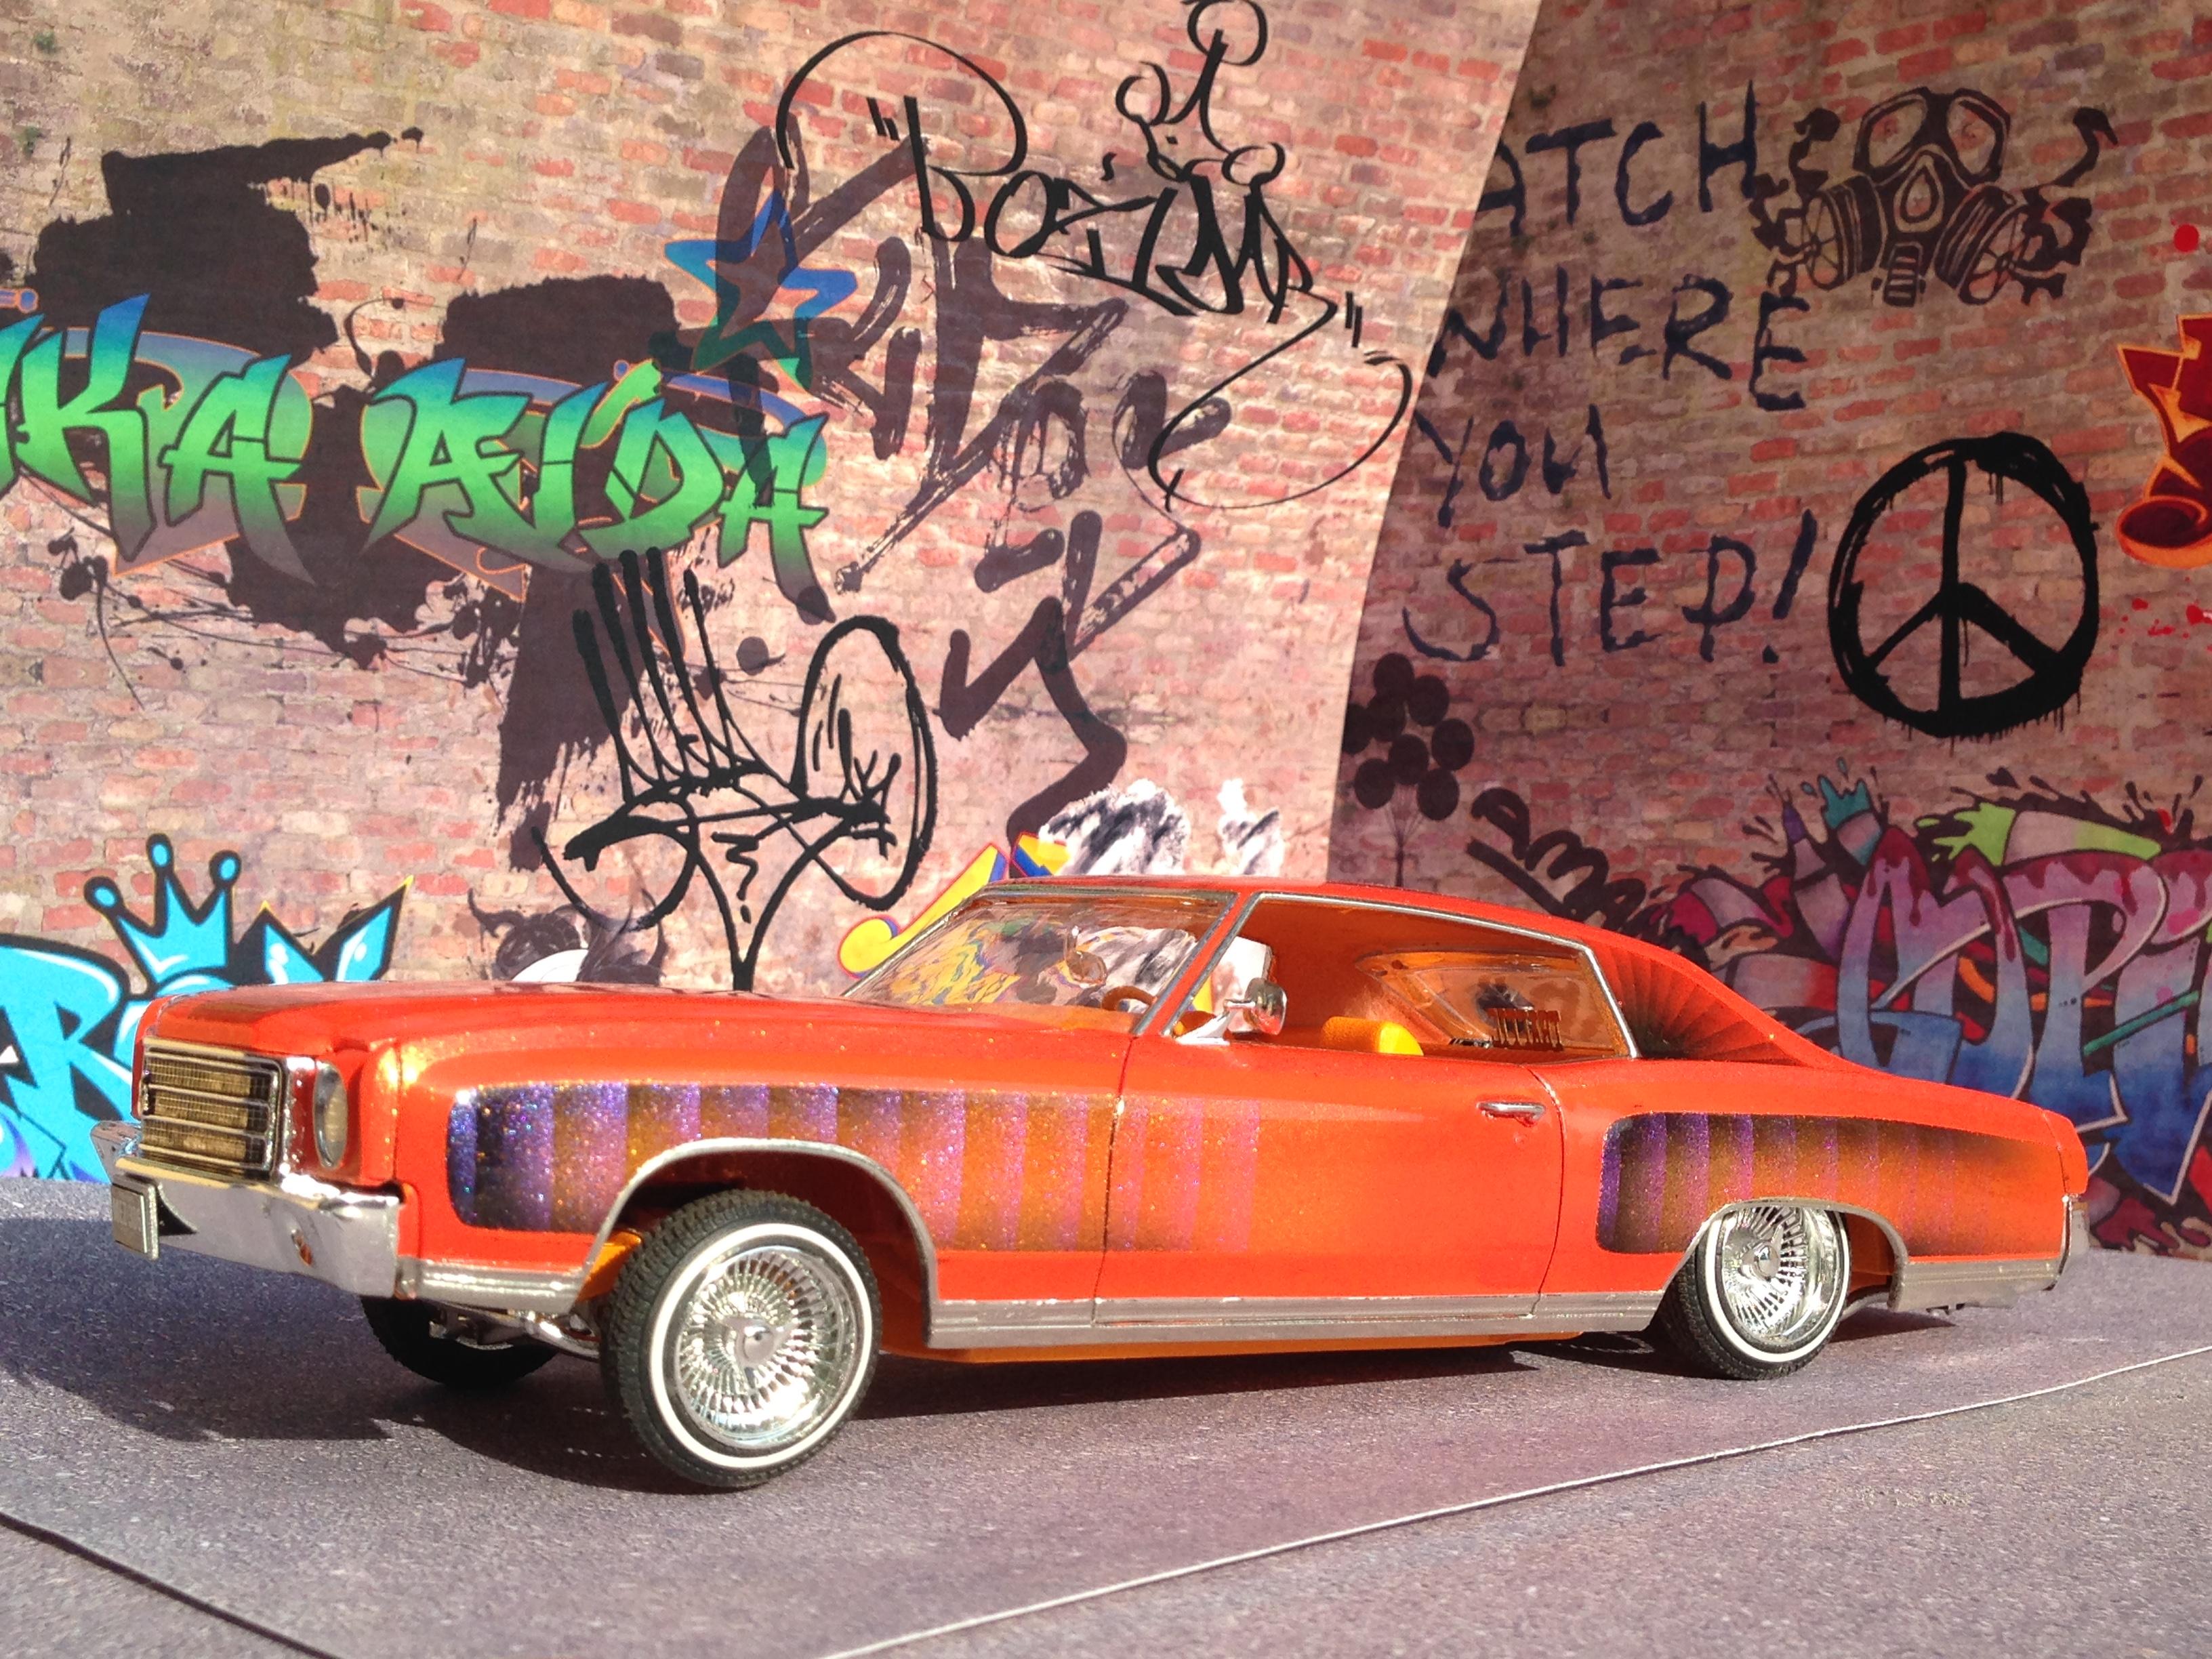
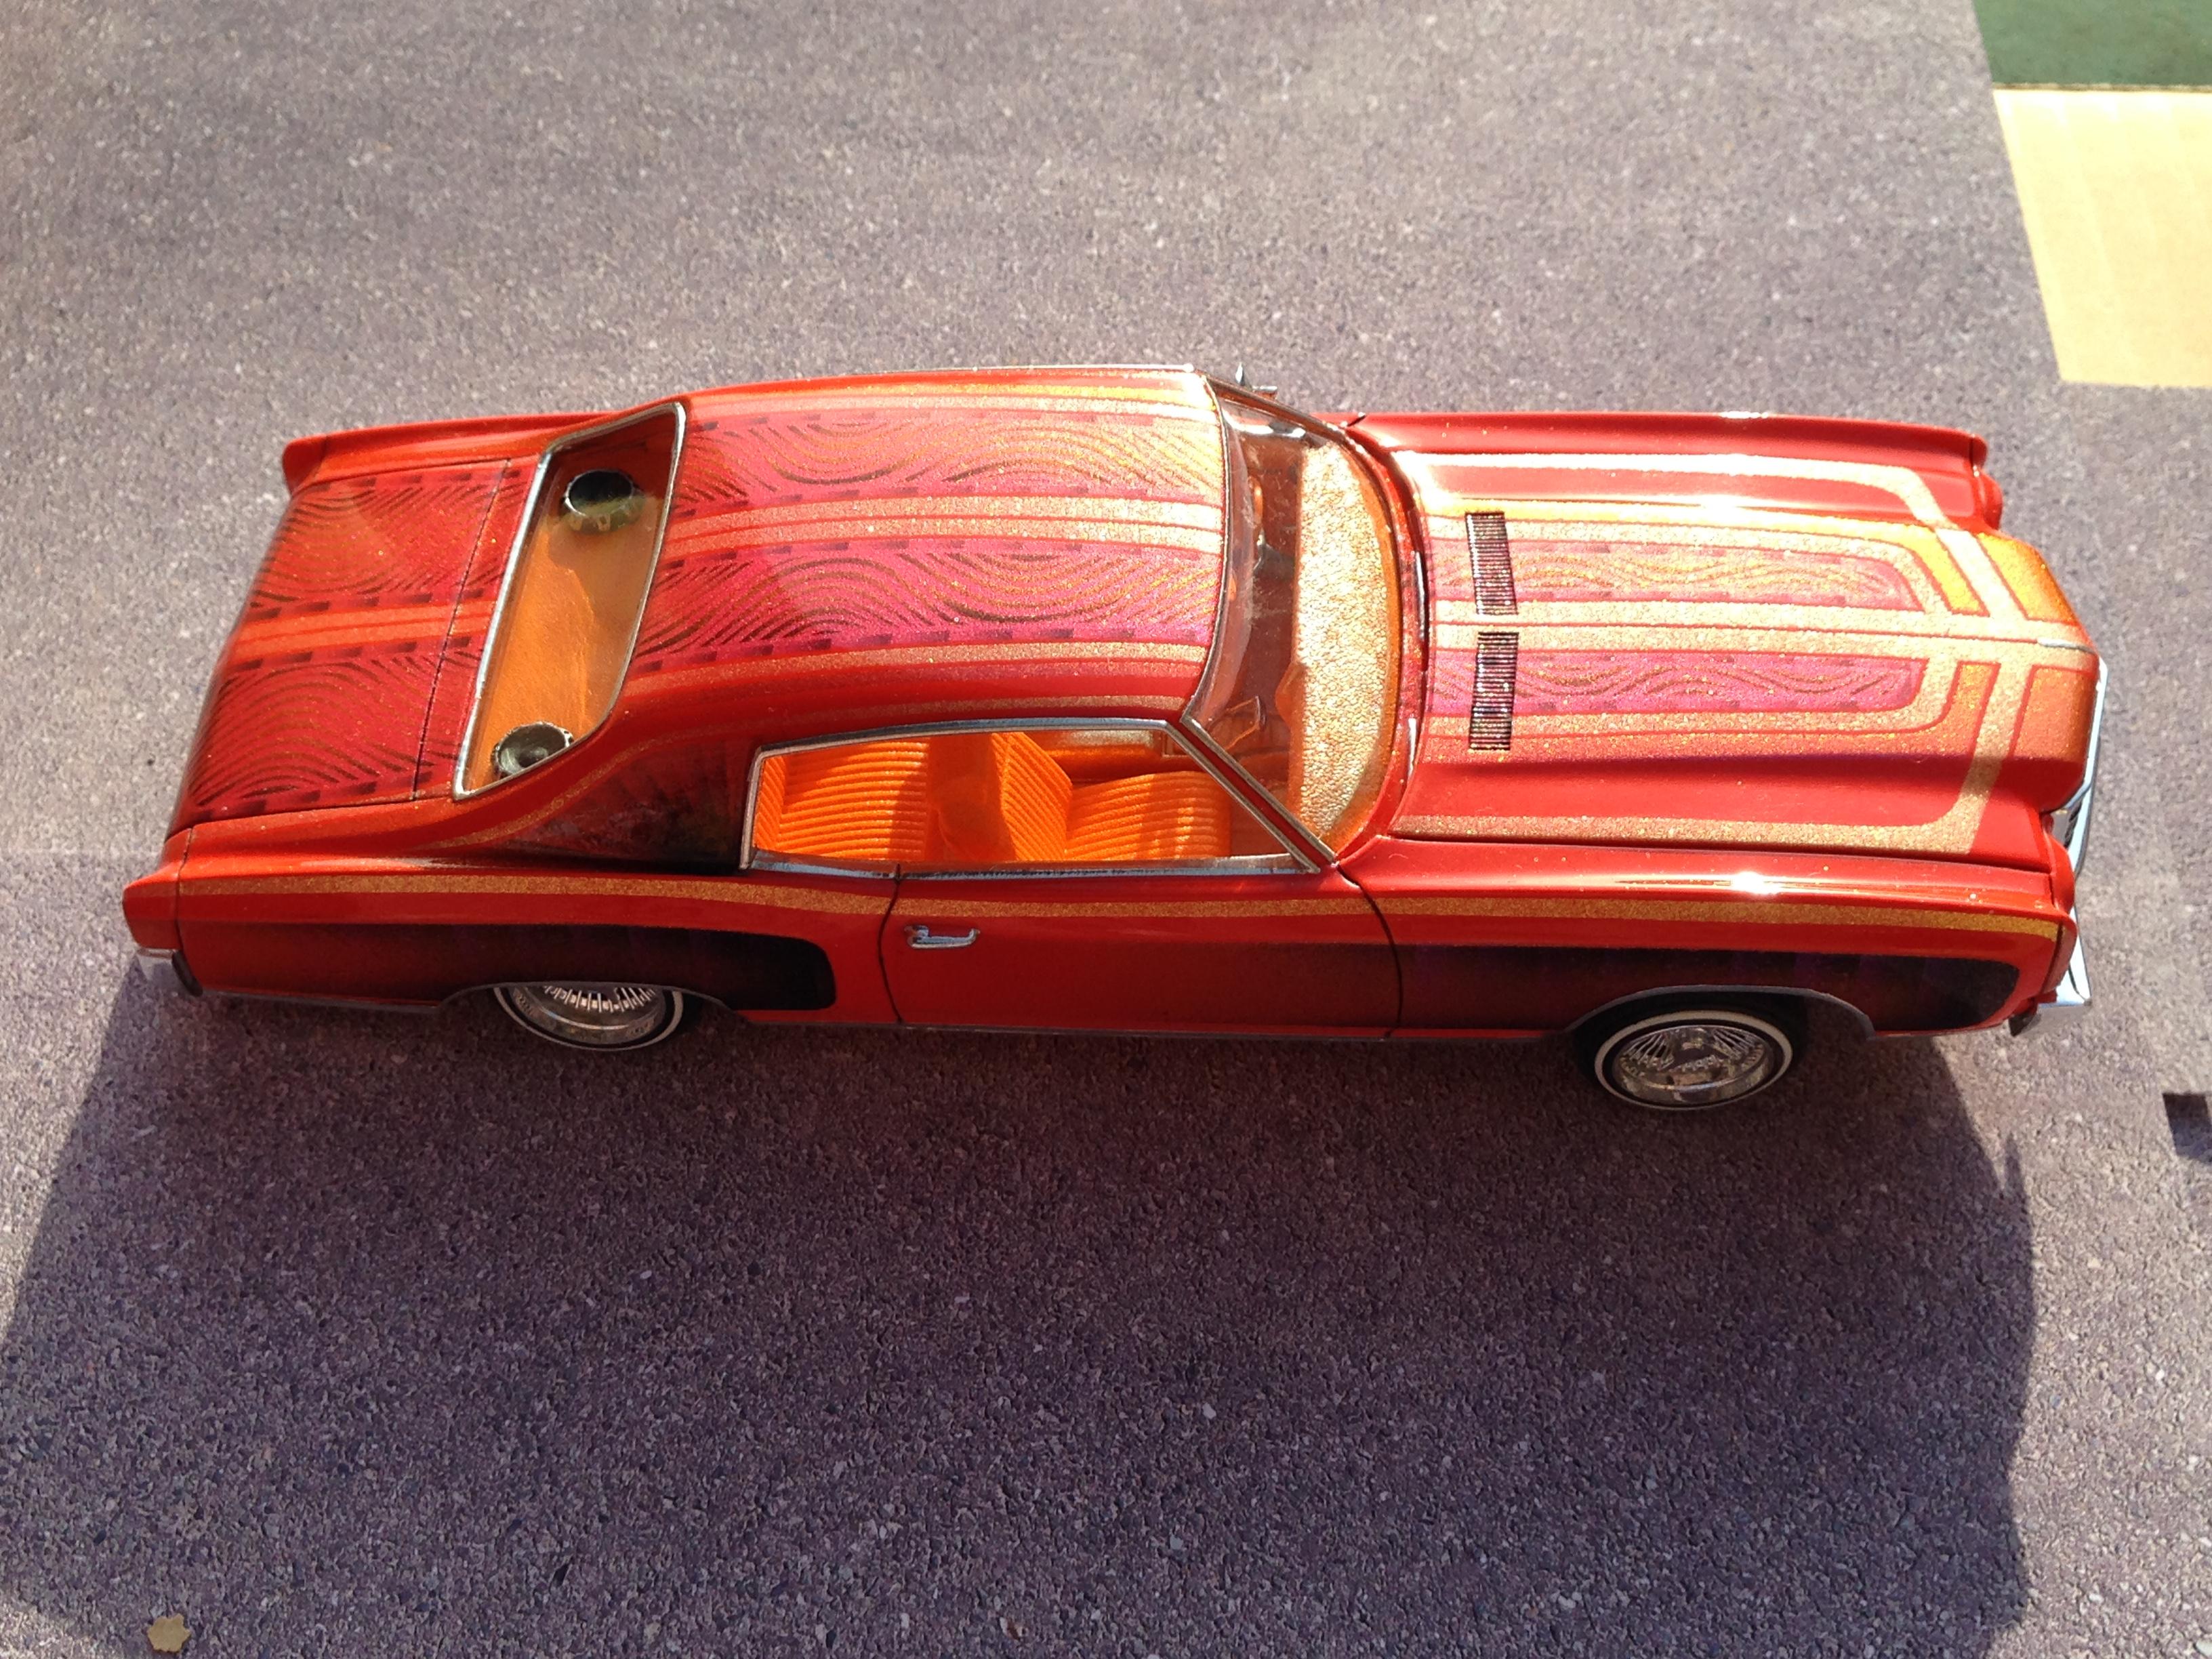
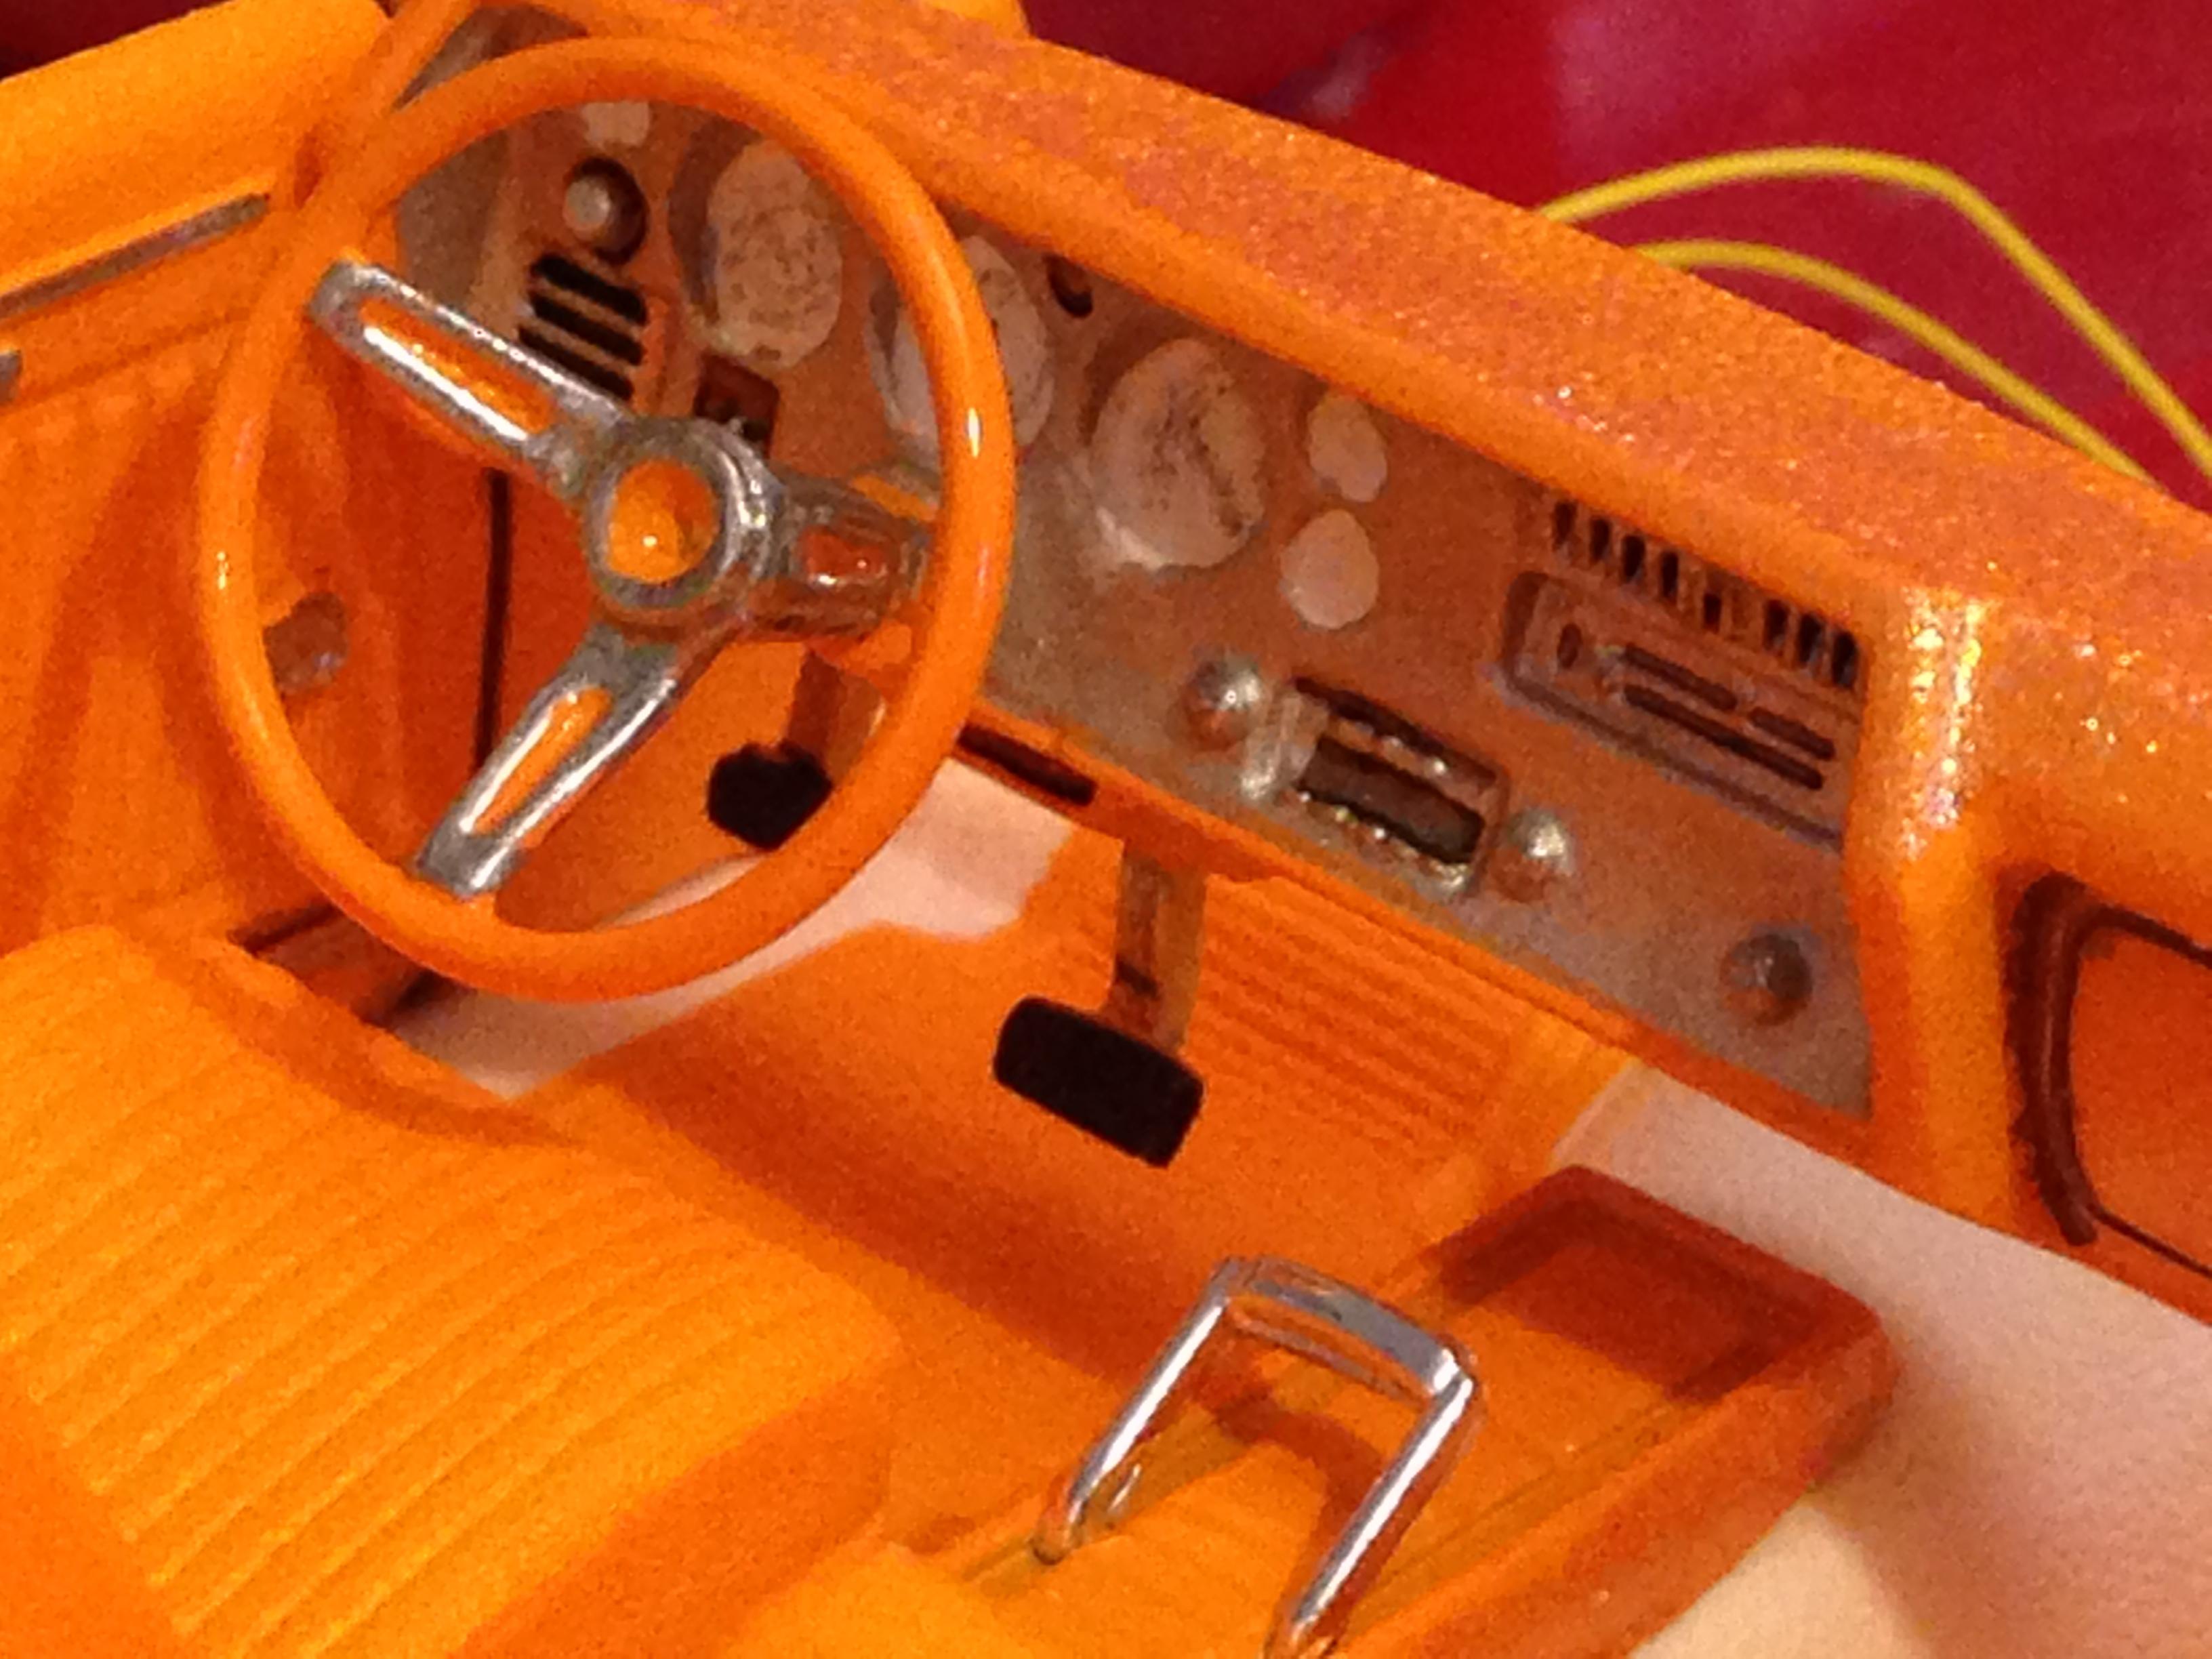
I can't seem to stop making lowriders at the moment. I'm obsessed or something. anyway, here's my go at a 1970 Chevy Monte Carlo. I reworked the rear suspension to drop it as far as the chassis would allow and converted it to a 4-link setup. Paint is all nail polish, with rattle can clear. It's base colour is orange, in case your screen makes it look red. The interior is Tamiya orange with some gold flake highlights. Any comments or questions are welcome. thanks for looking
-
Very nice indeed! Crisp and clean build. I now have this kit on my wish list.
-
Thanks for the kind words and following the progress chaps. final assembly was a bit tricky. Clamps, epoxy...you know the score.. some twisting in the body and chassis combined to make life hard, but that's model building! under glass now
-
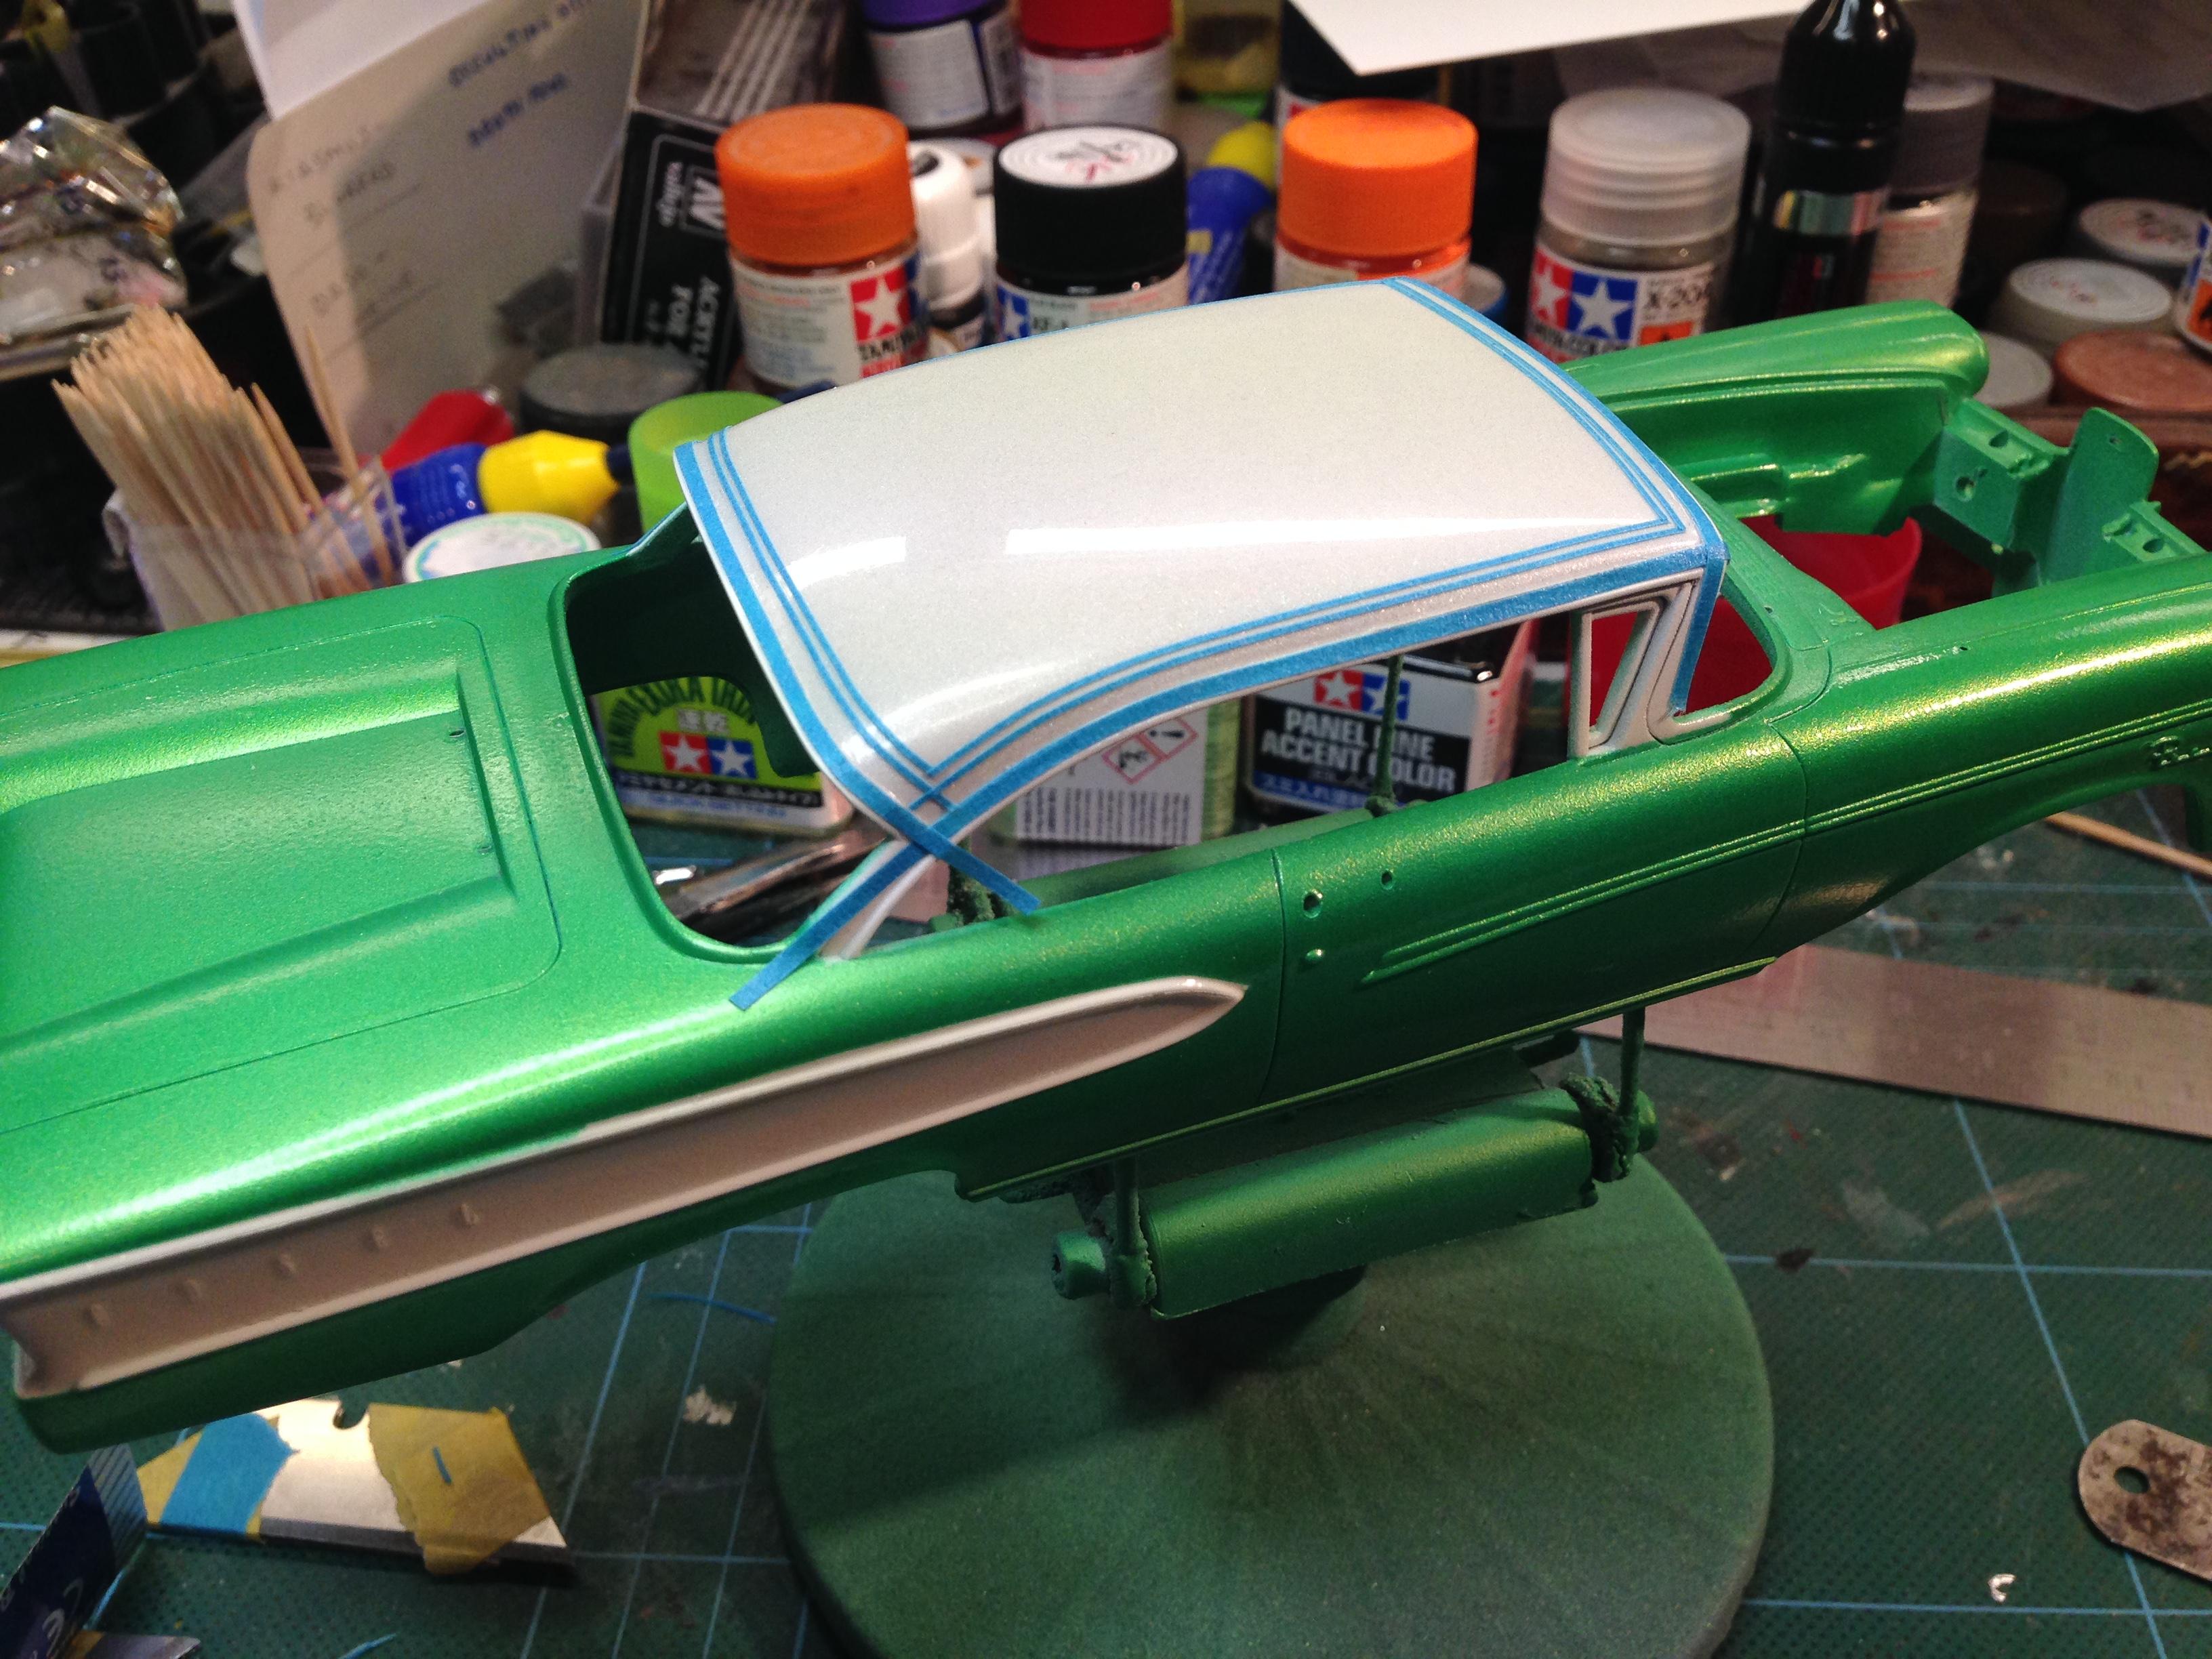
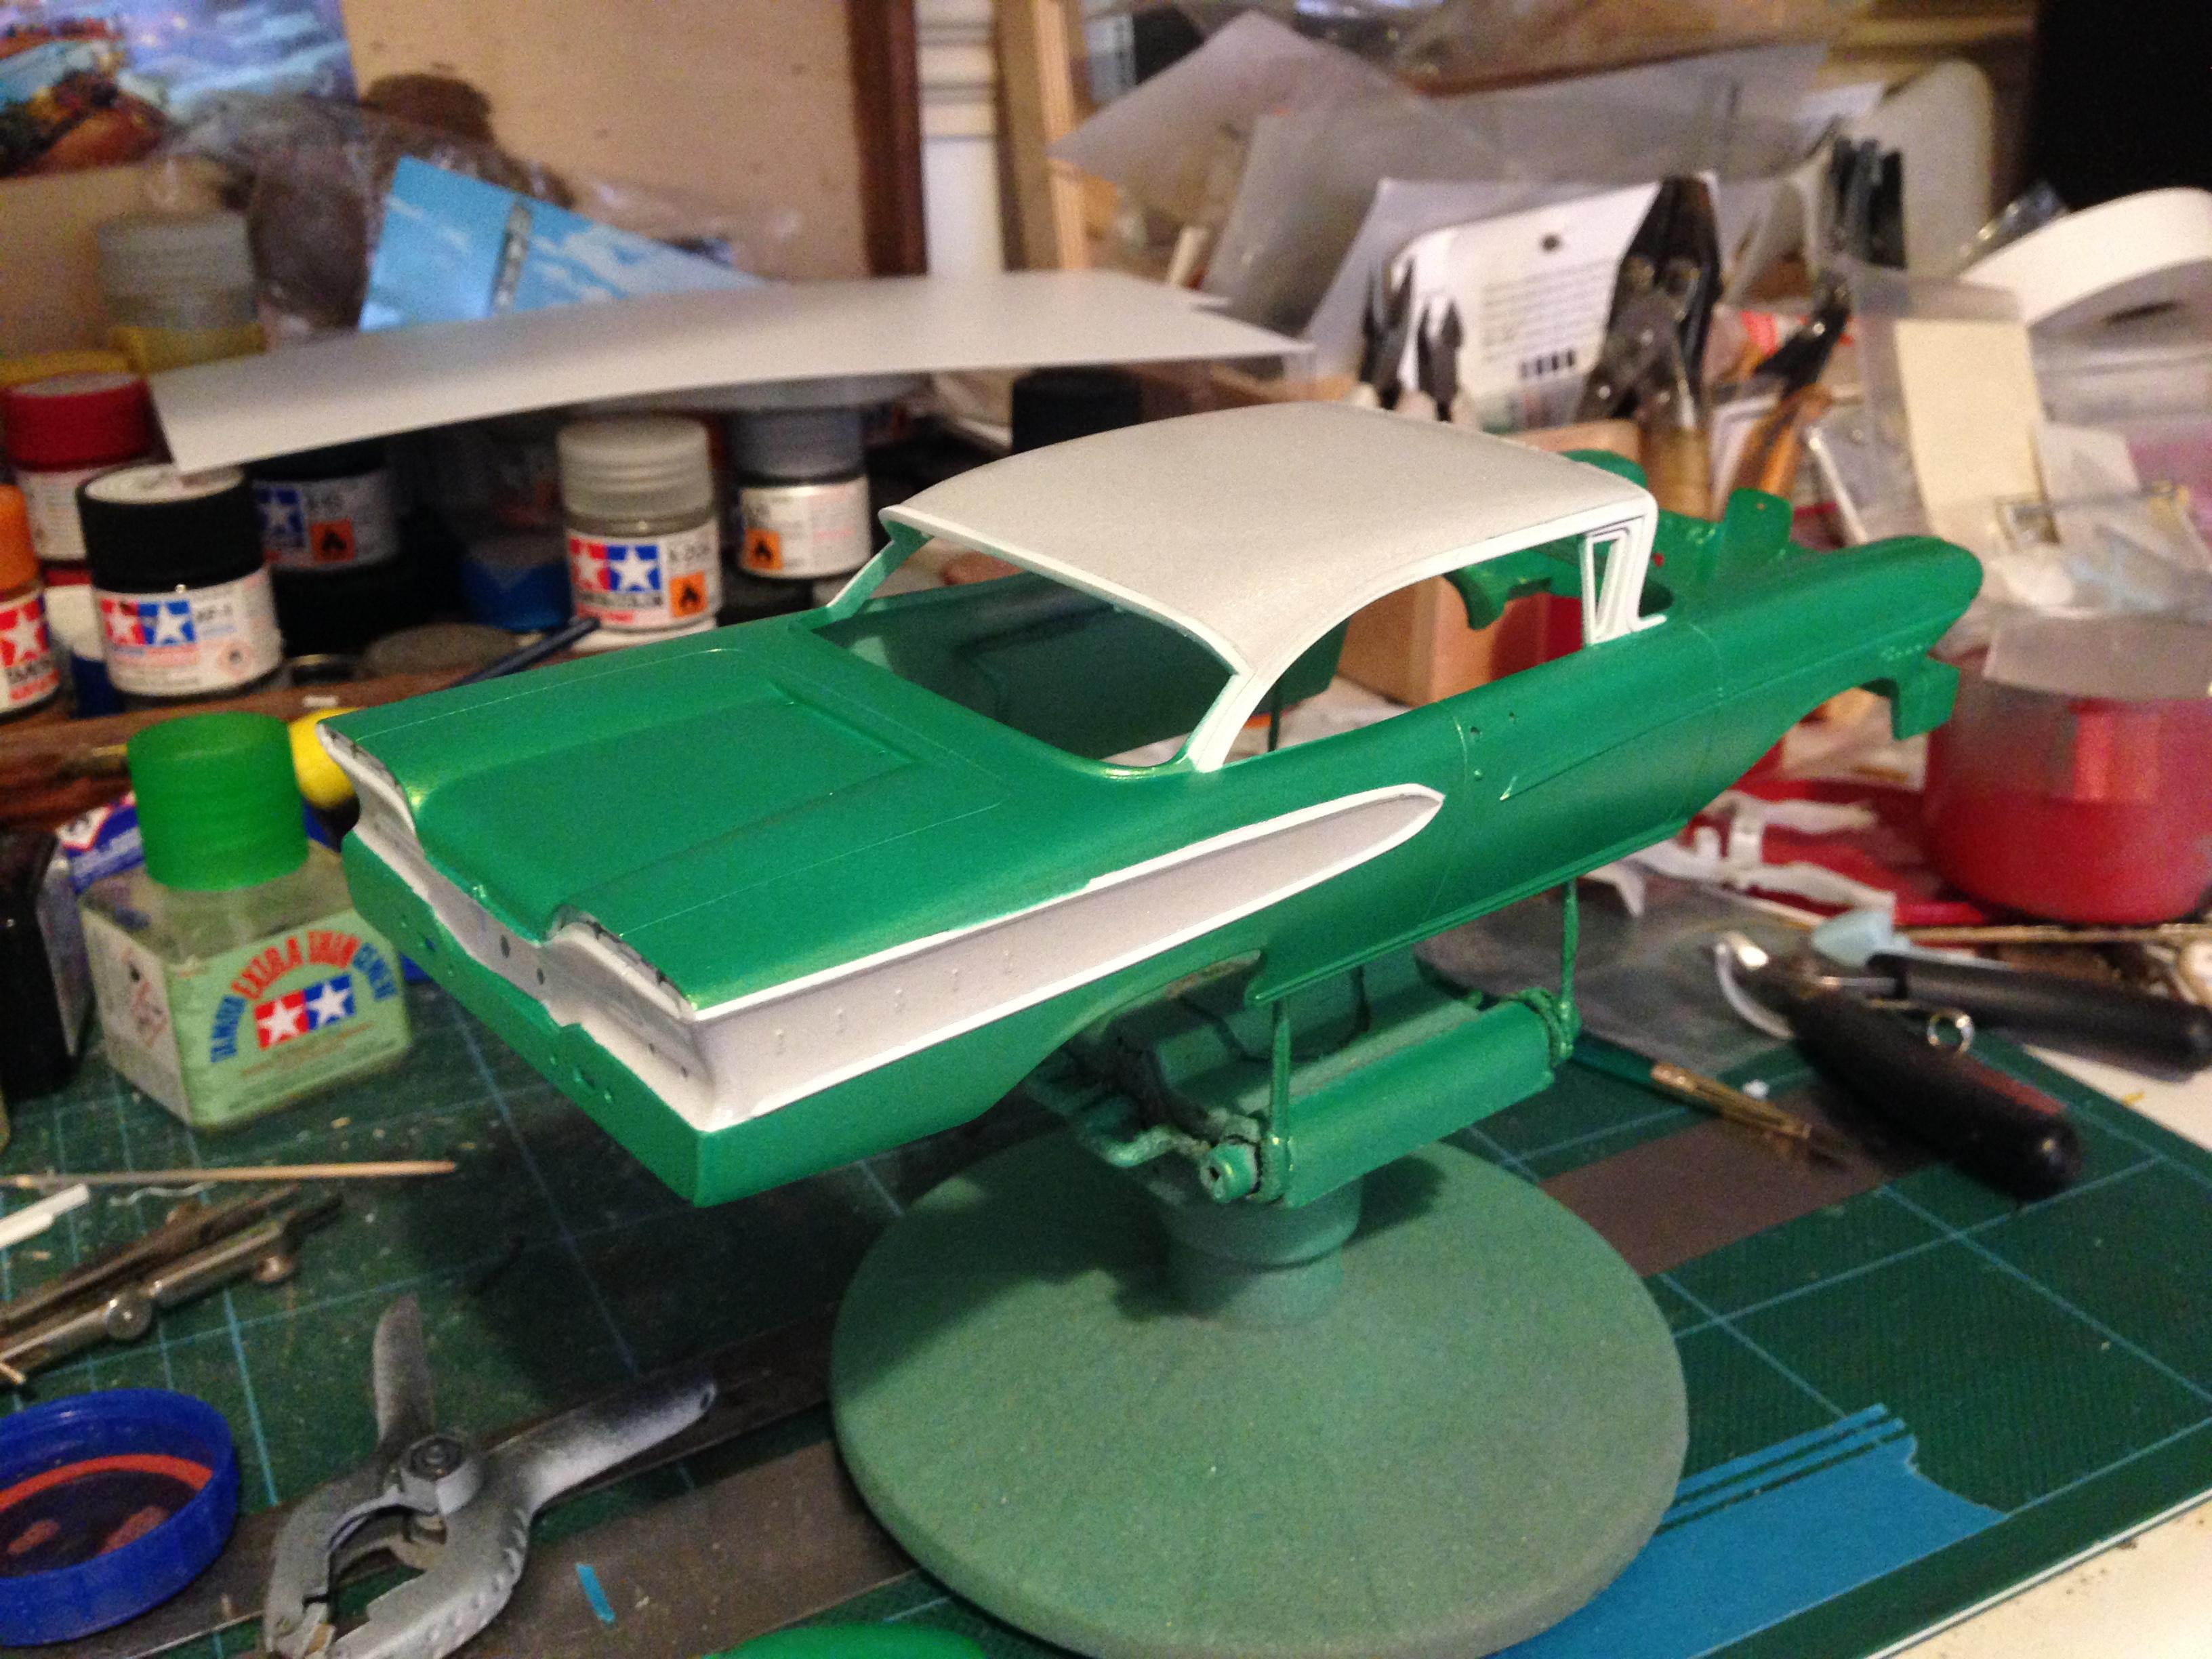
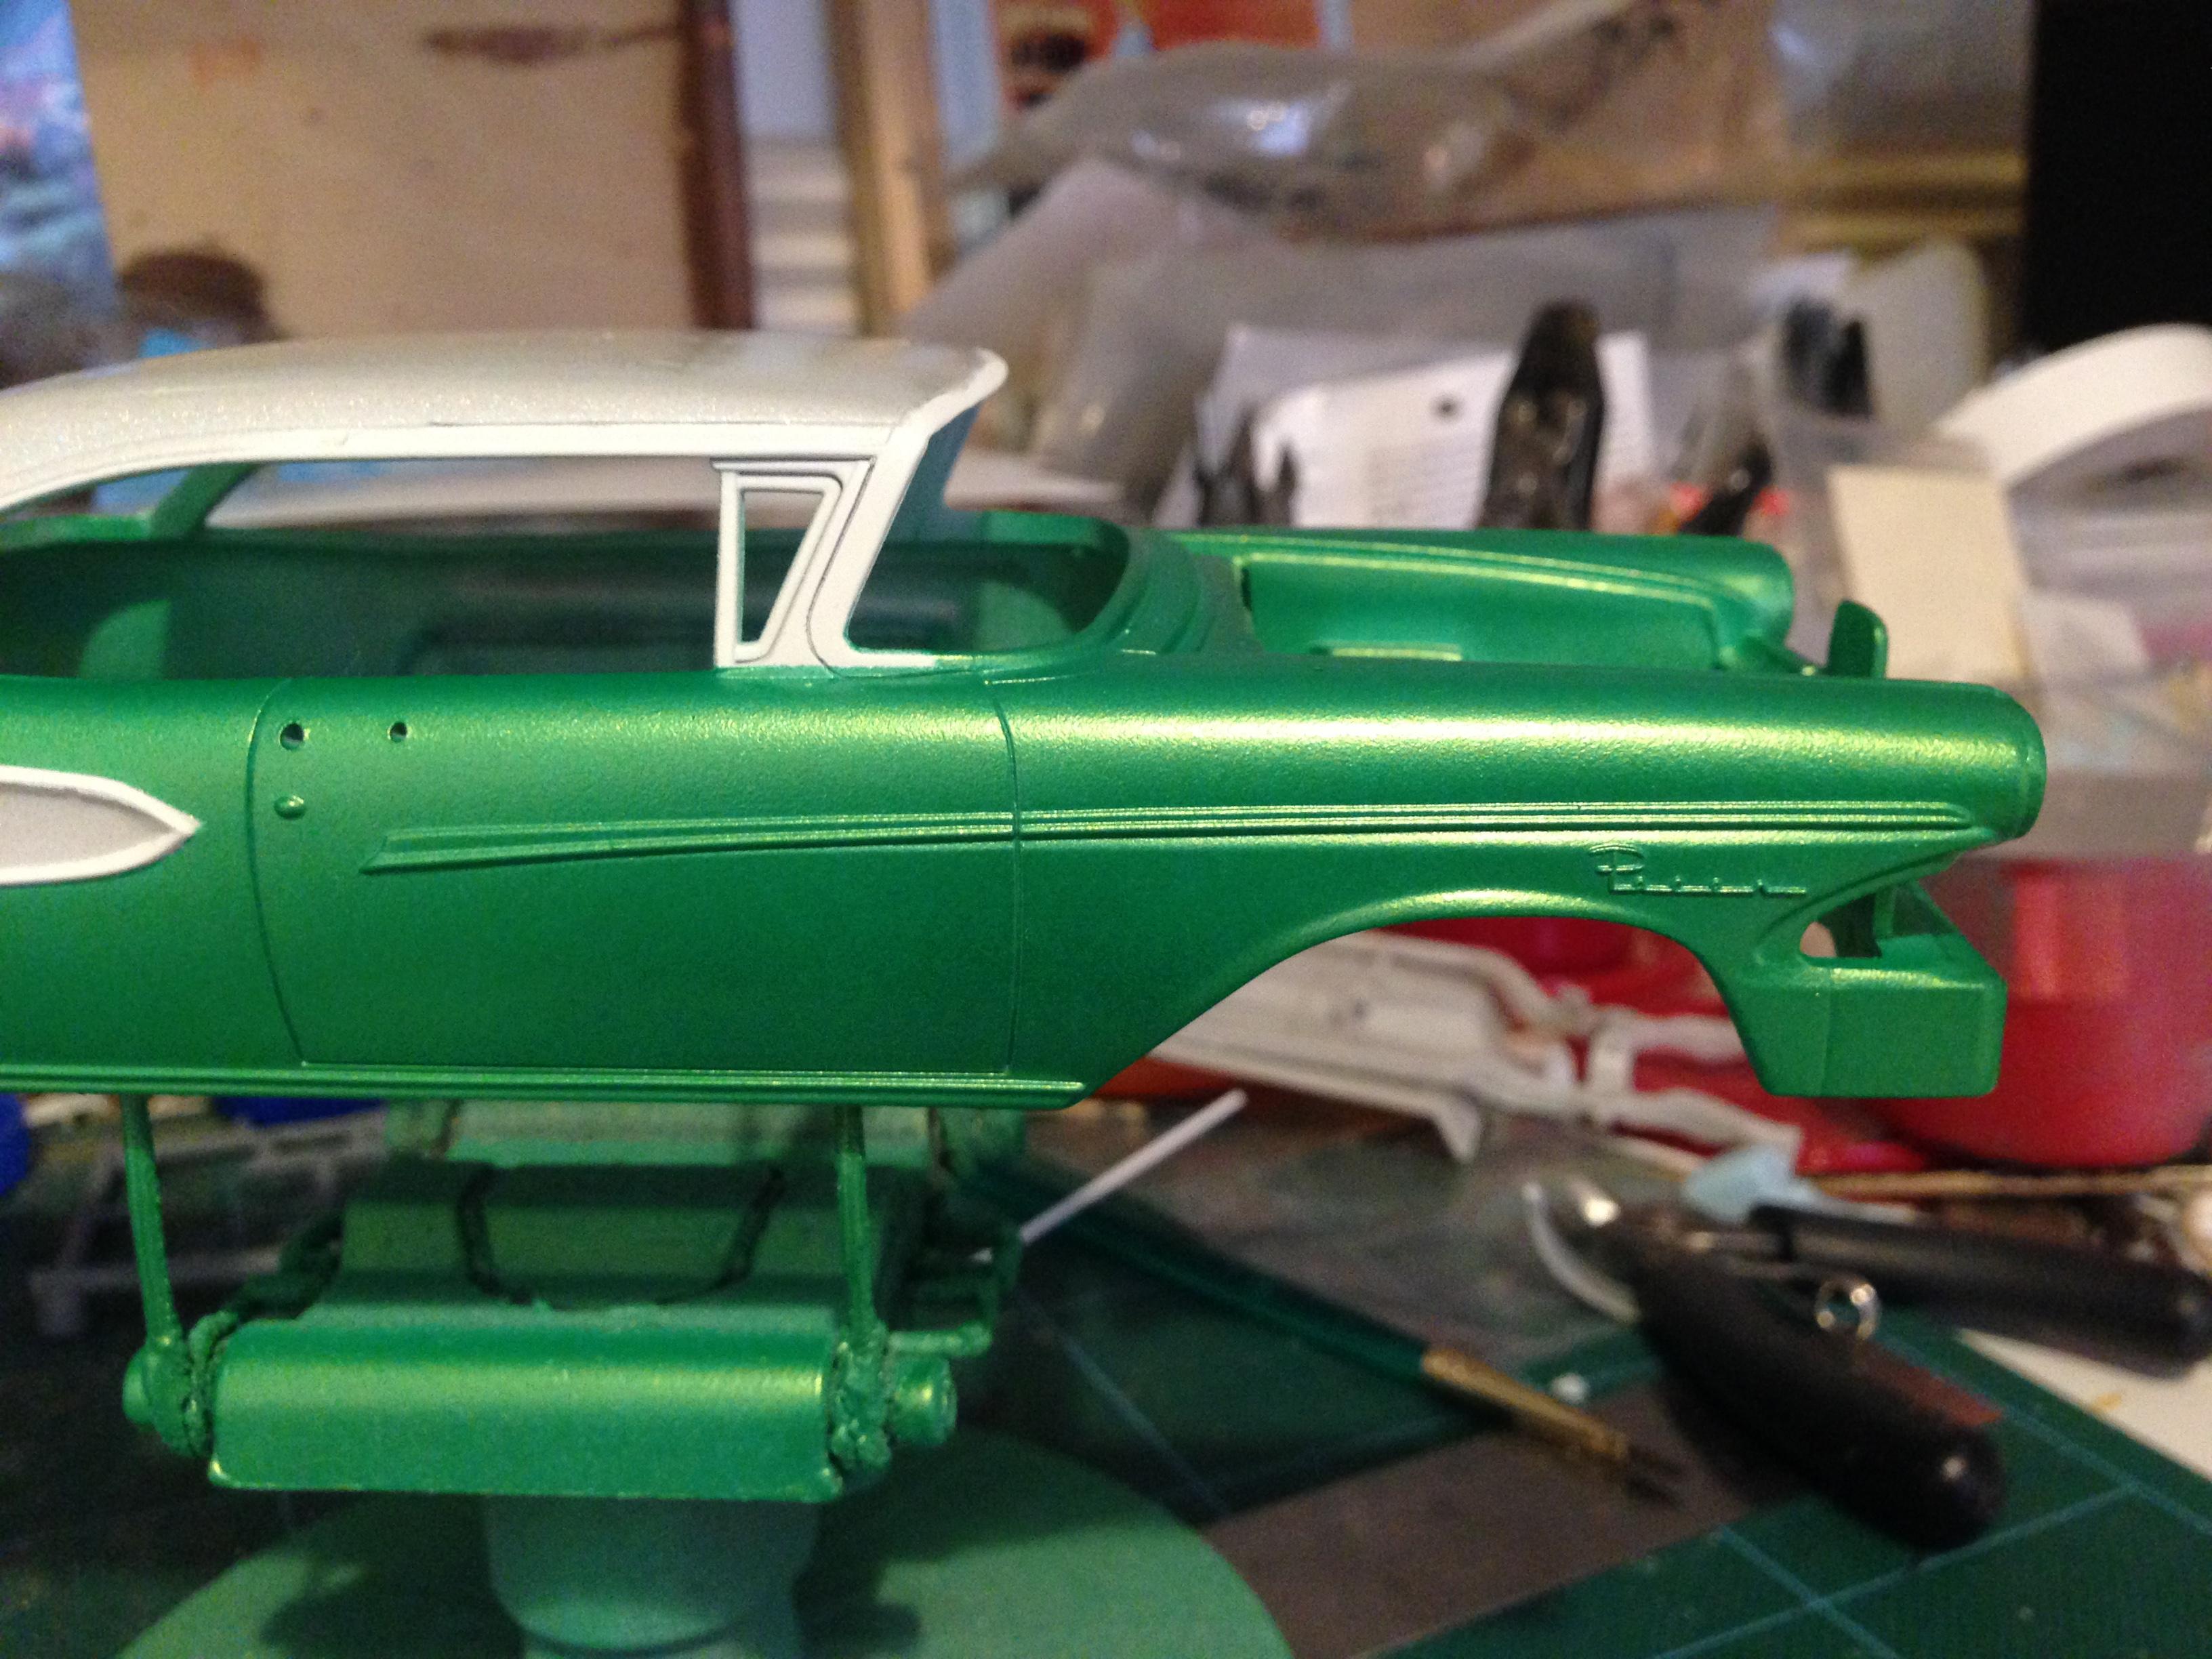
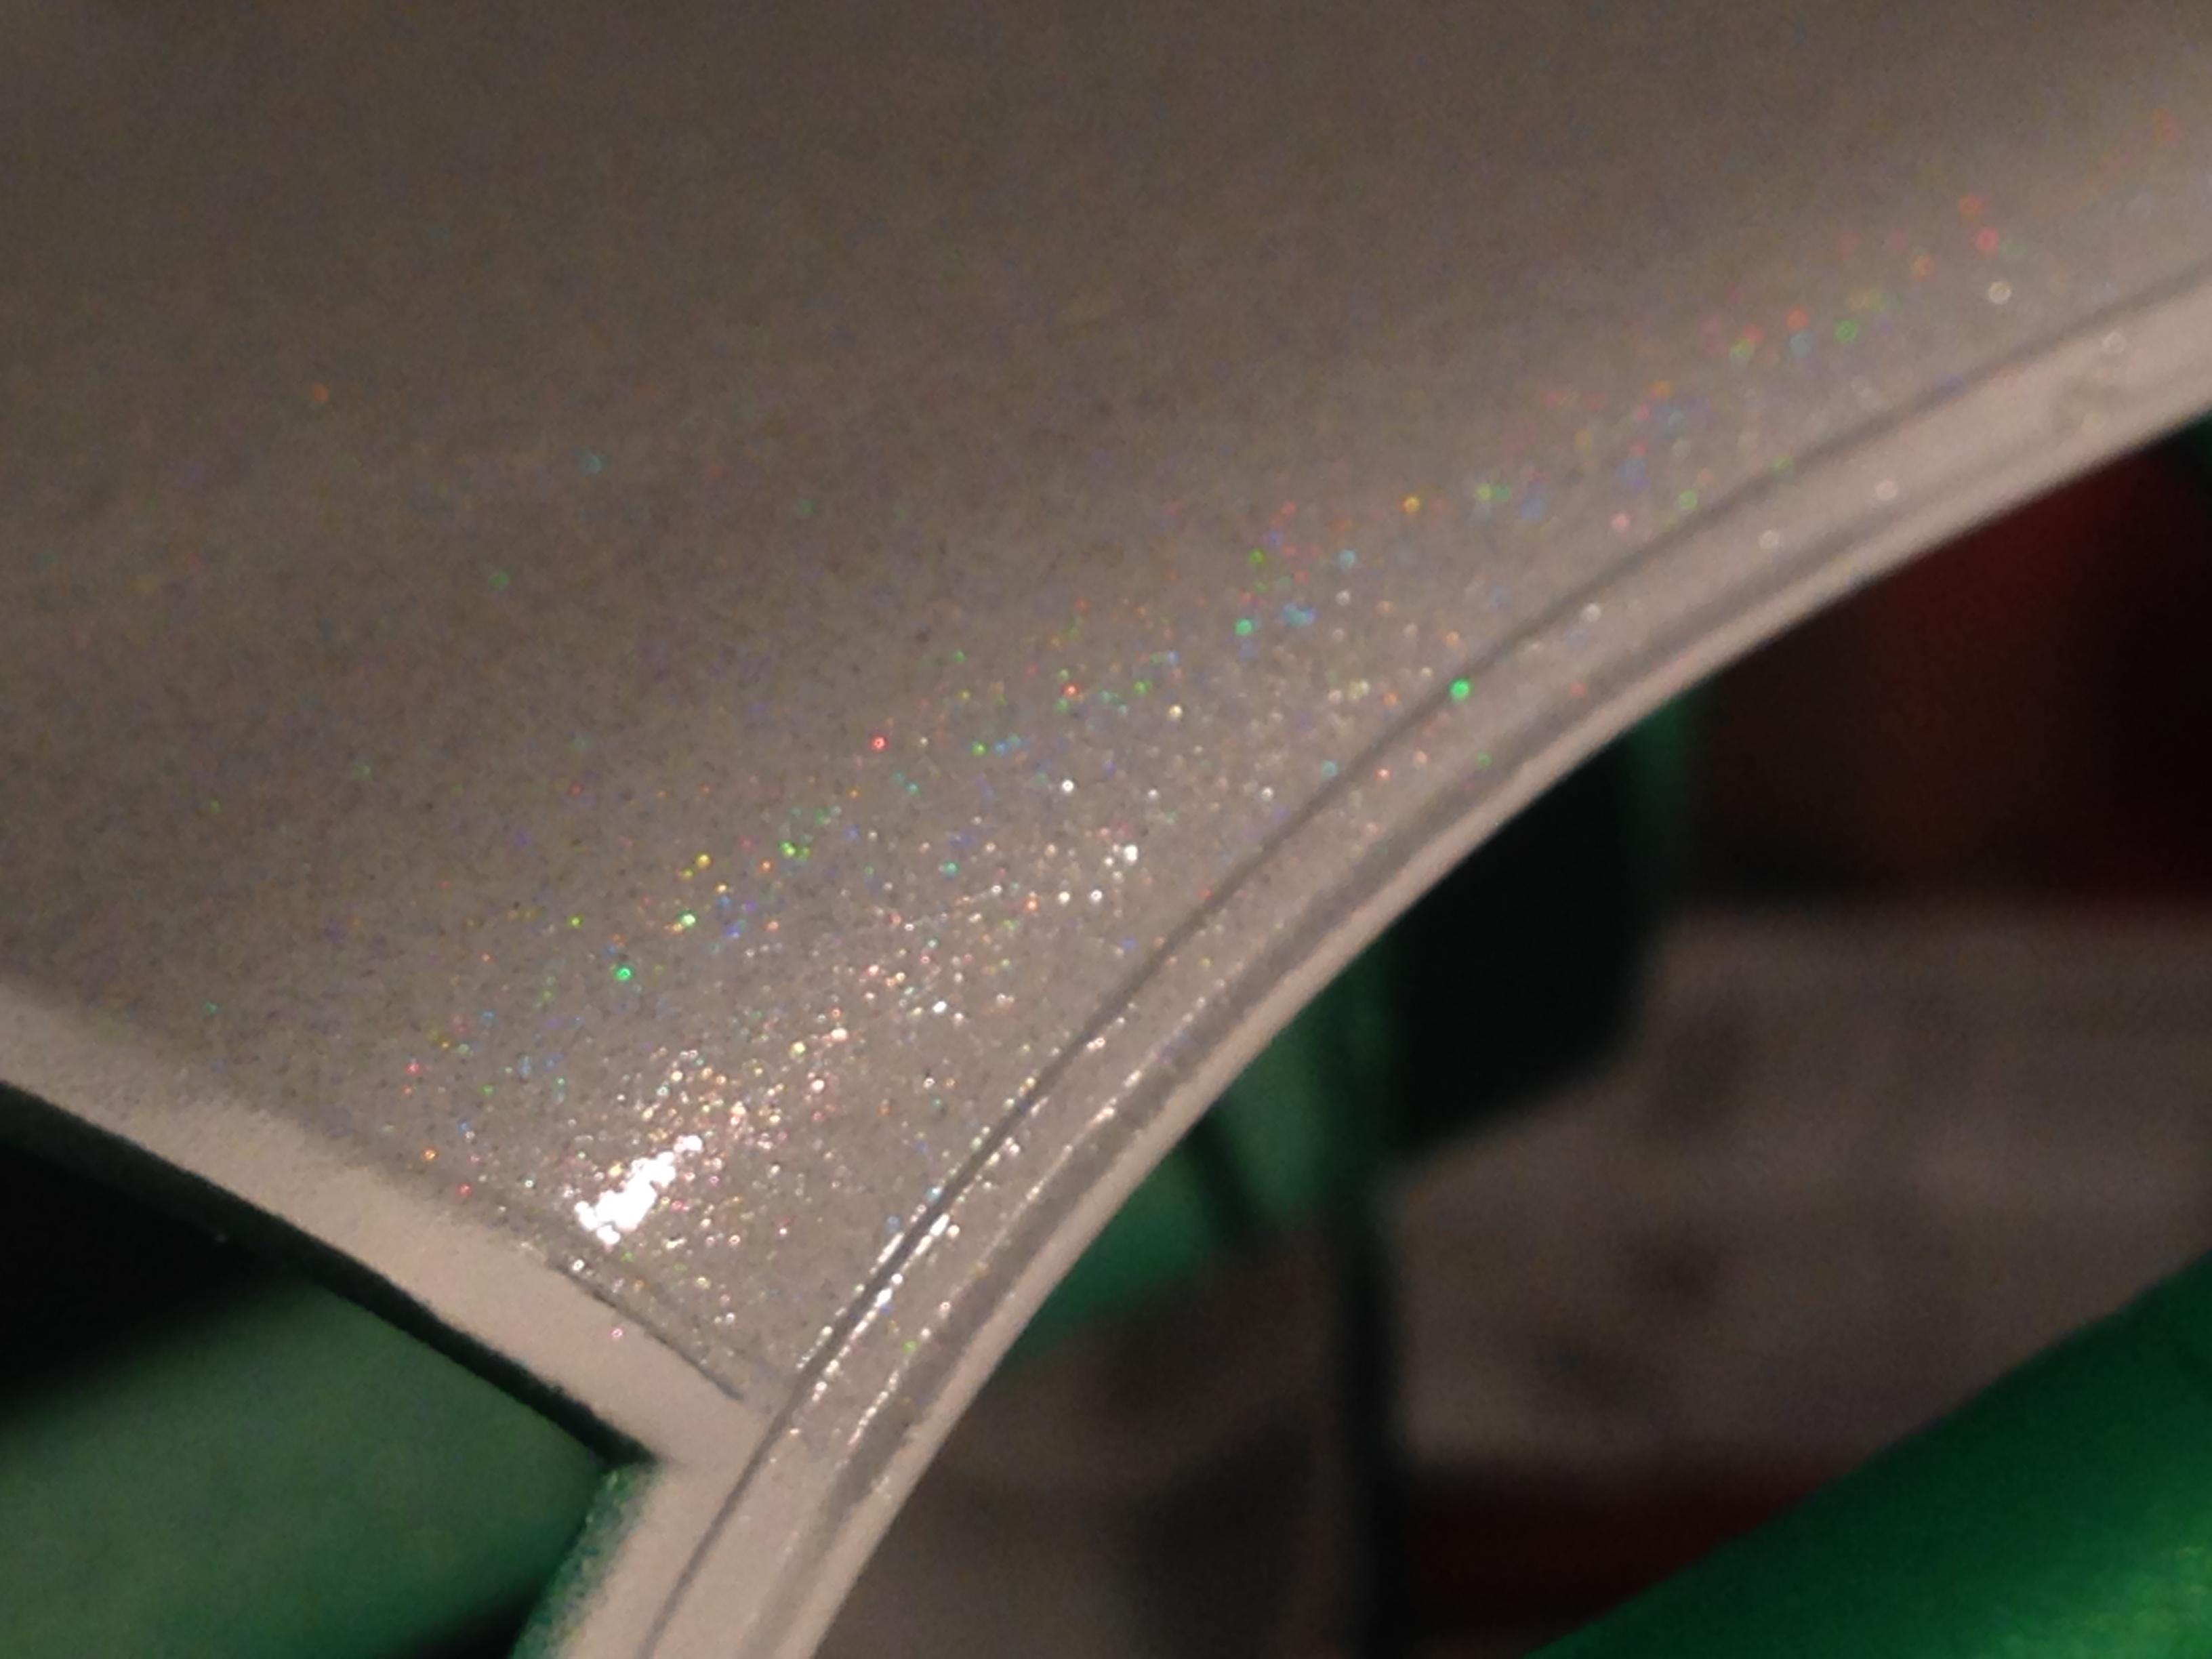
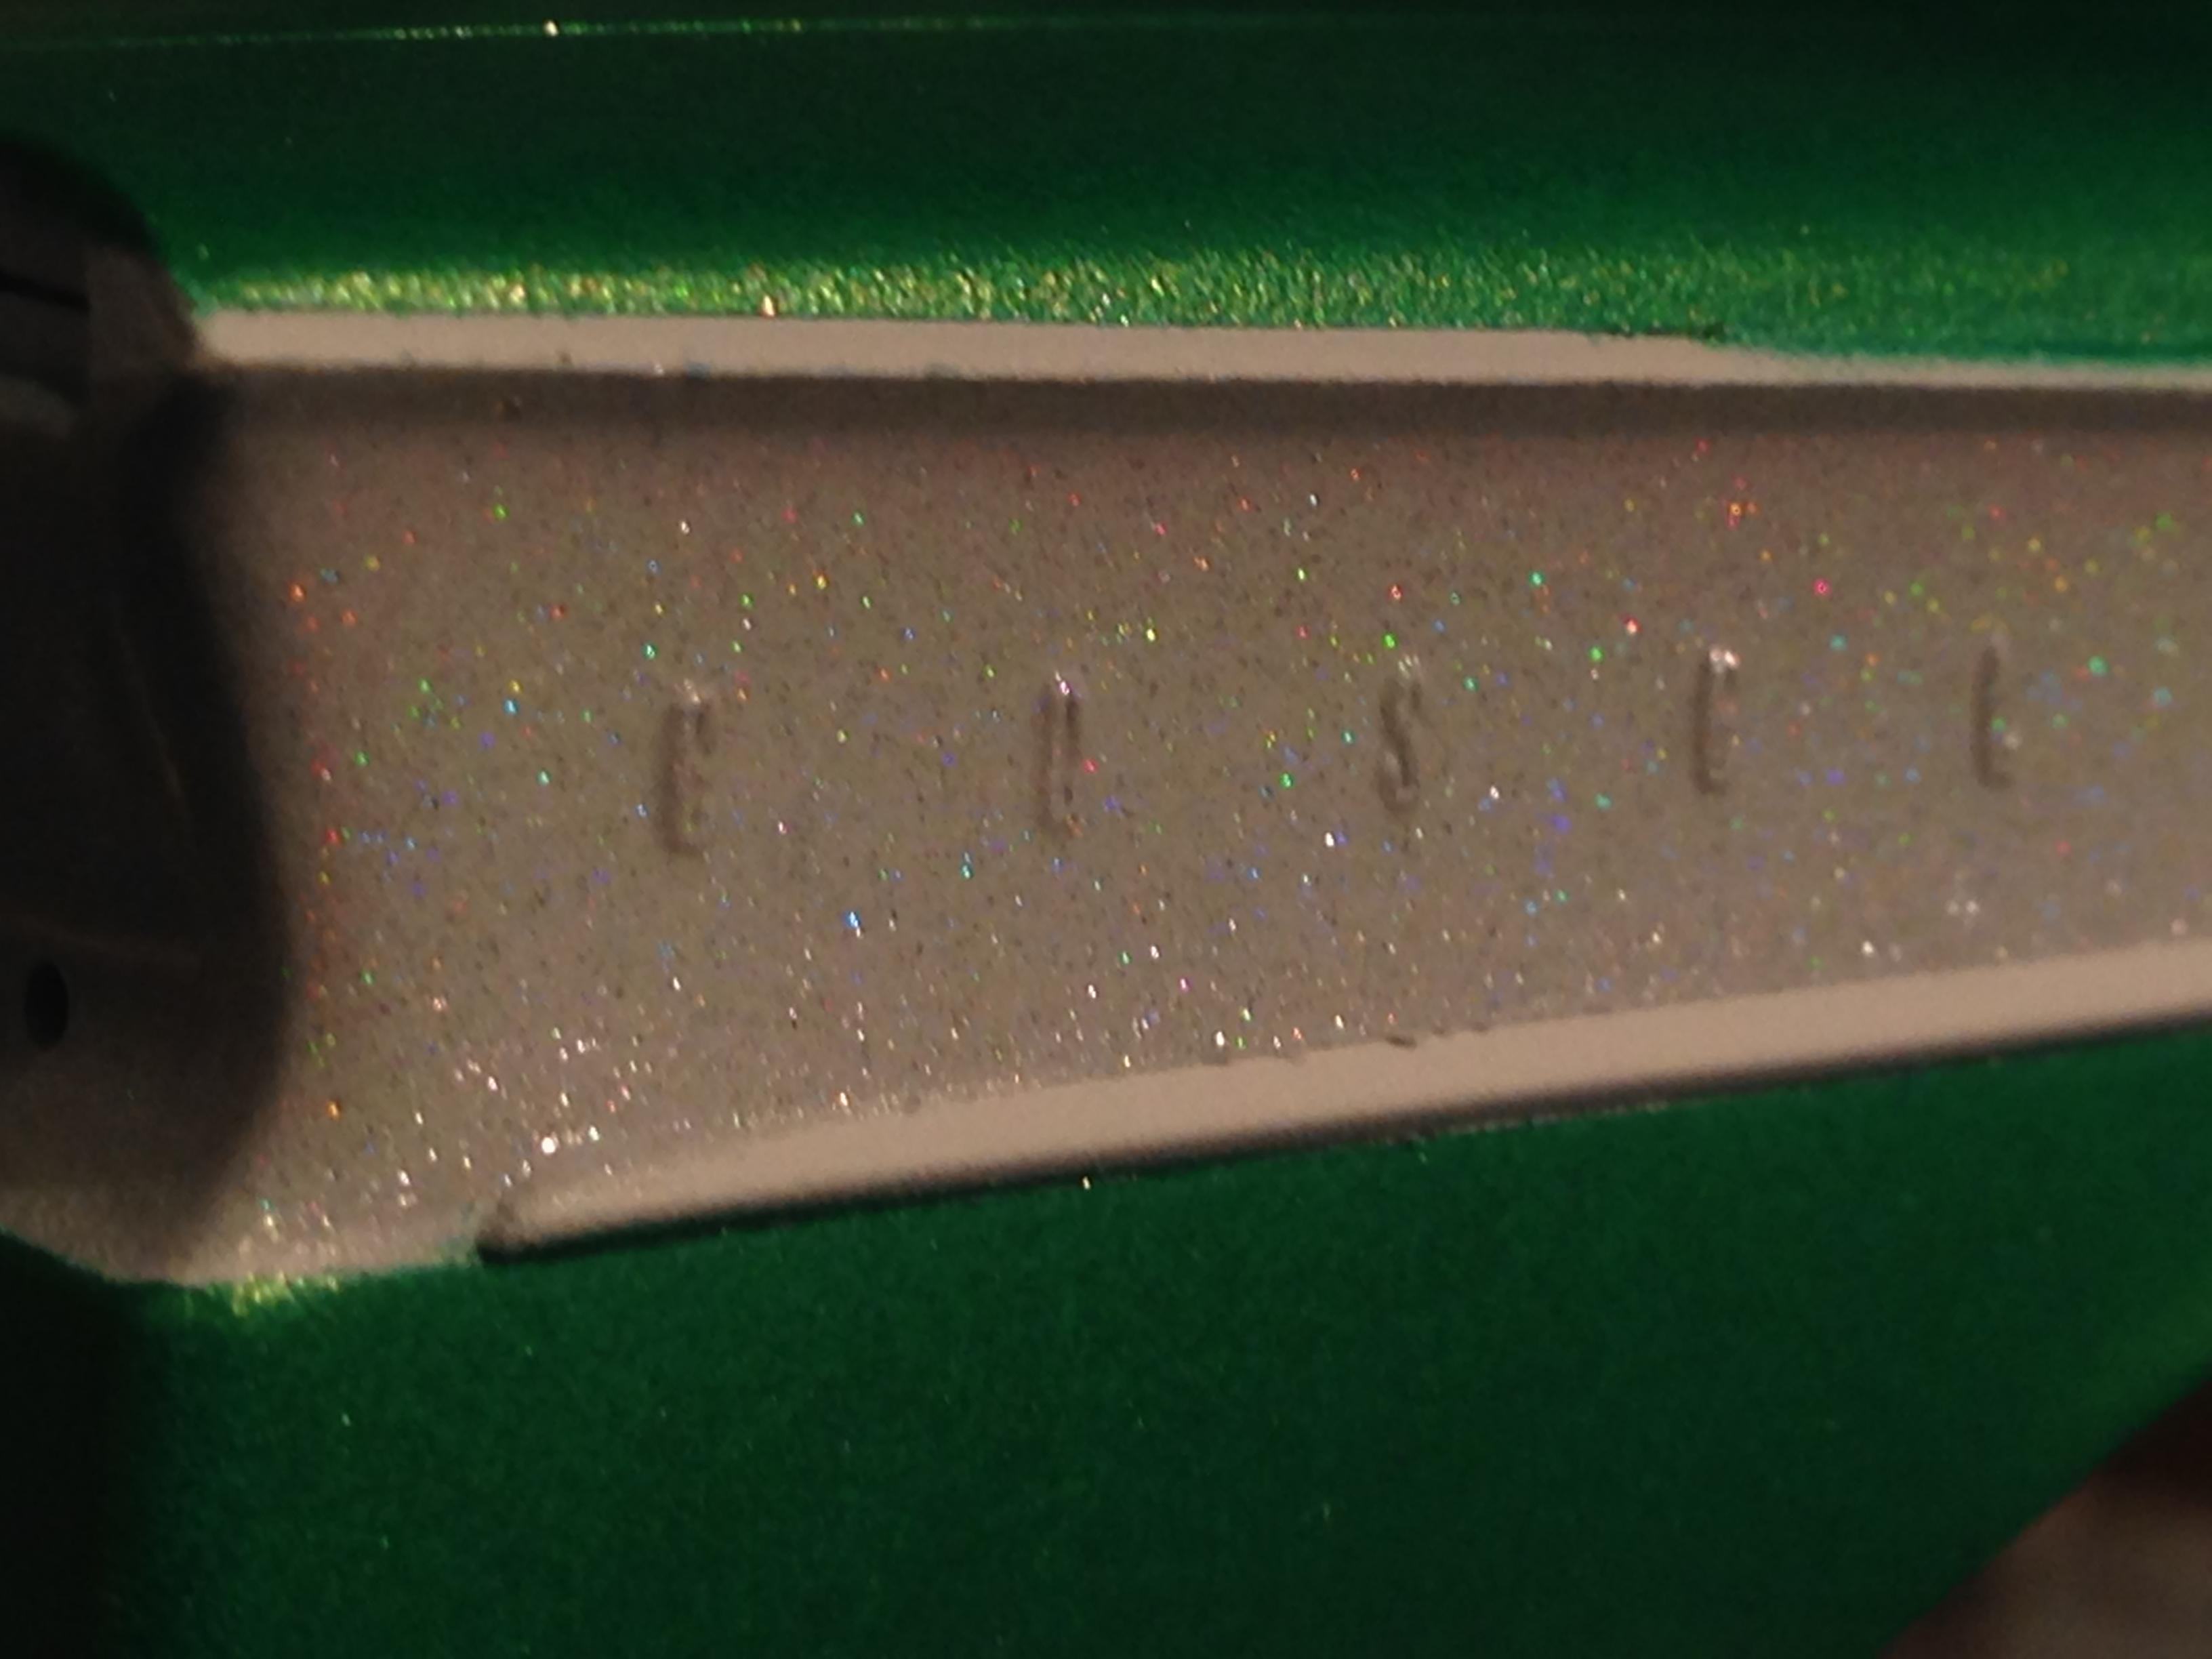
Thanks guys! yeah, the whole car looks better for a lowered ride height. I'm glad I got the razor saw out. I could've just put the rear axle on riser blocks, but I have time, so I might as well go 4-link. I did the roof and side coves last night. Mica white pearl with some holographic nail polish mixed in. got the green on today. Double-pleased, as the old rattle can still had plenty of pressure and didn't spit. The highlights are a lovely gold pearl. It'll be more apparent after clear and polish. sketched a design for the roof today. I'll mask and spray it tomorrow with a bit of luck
-
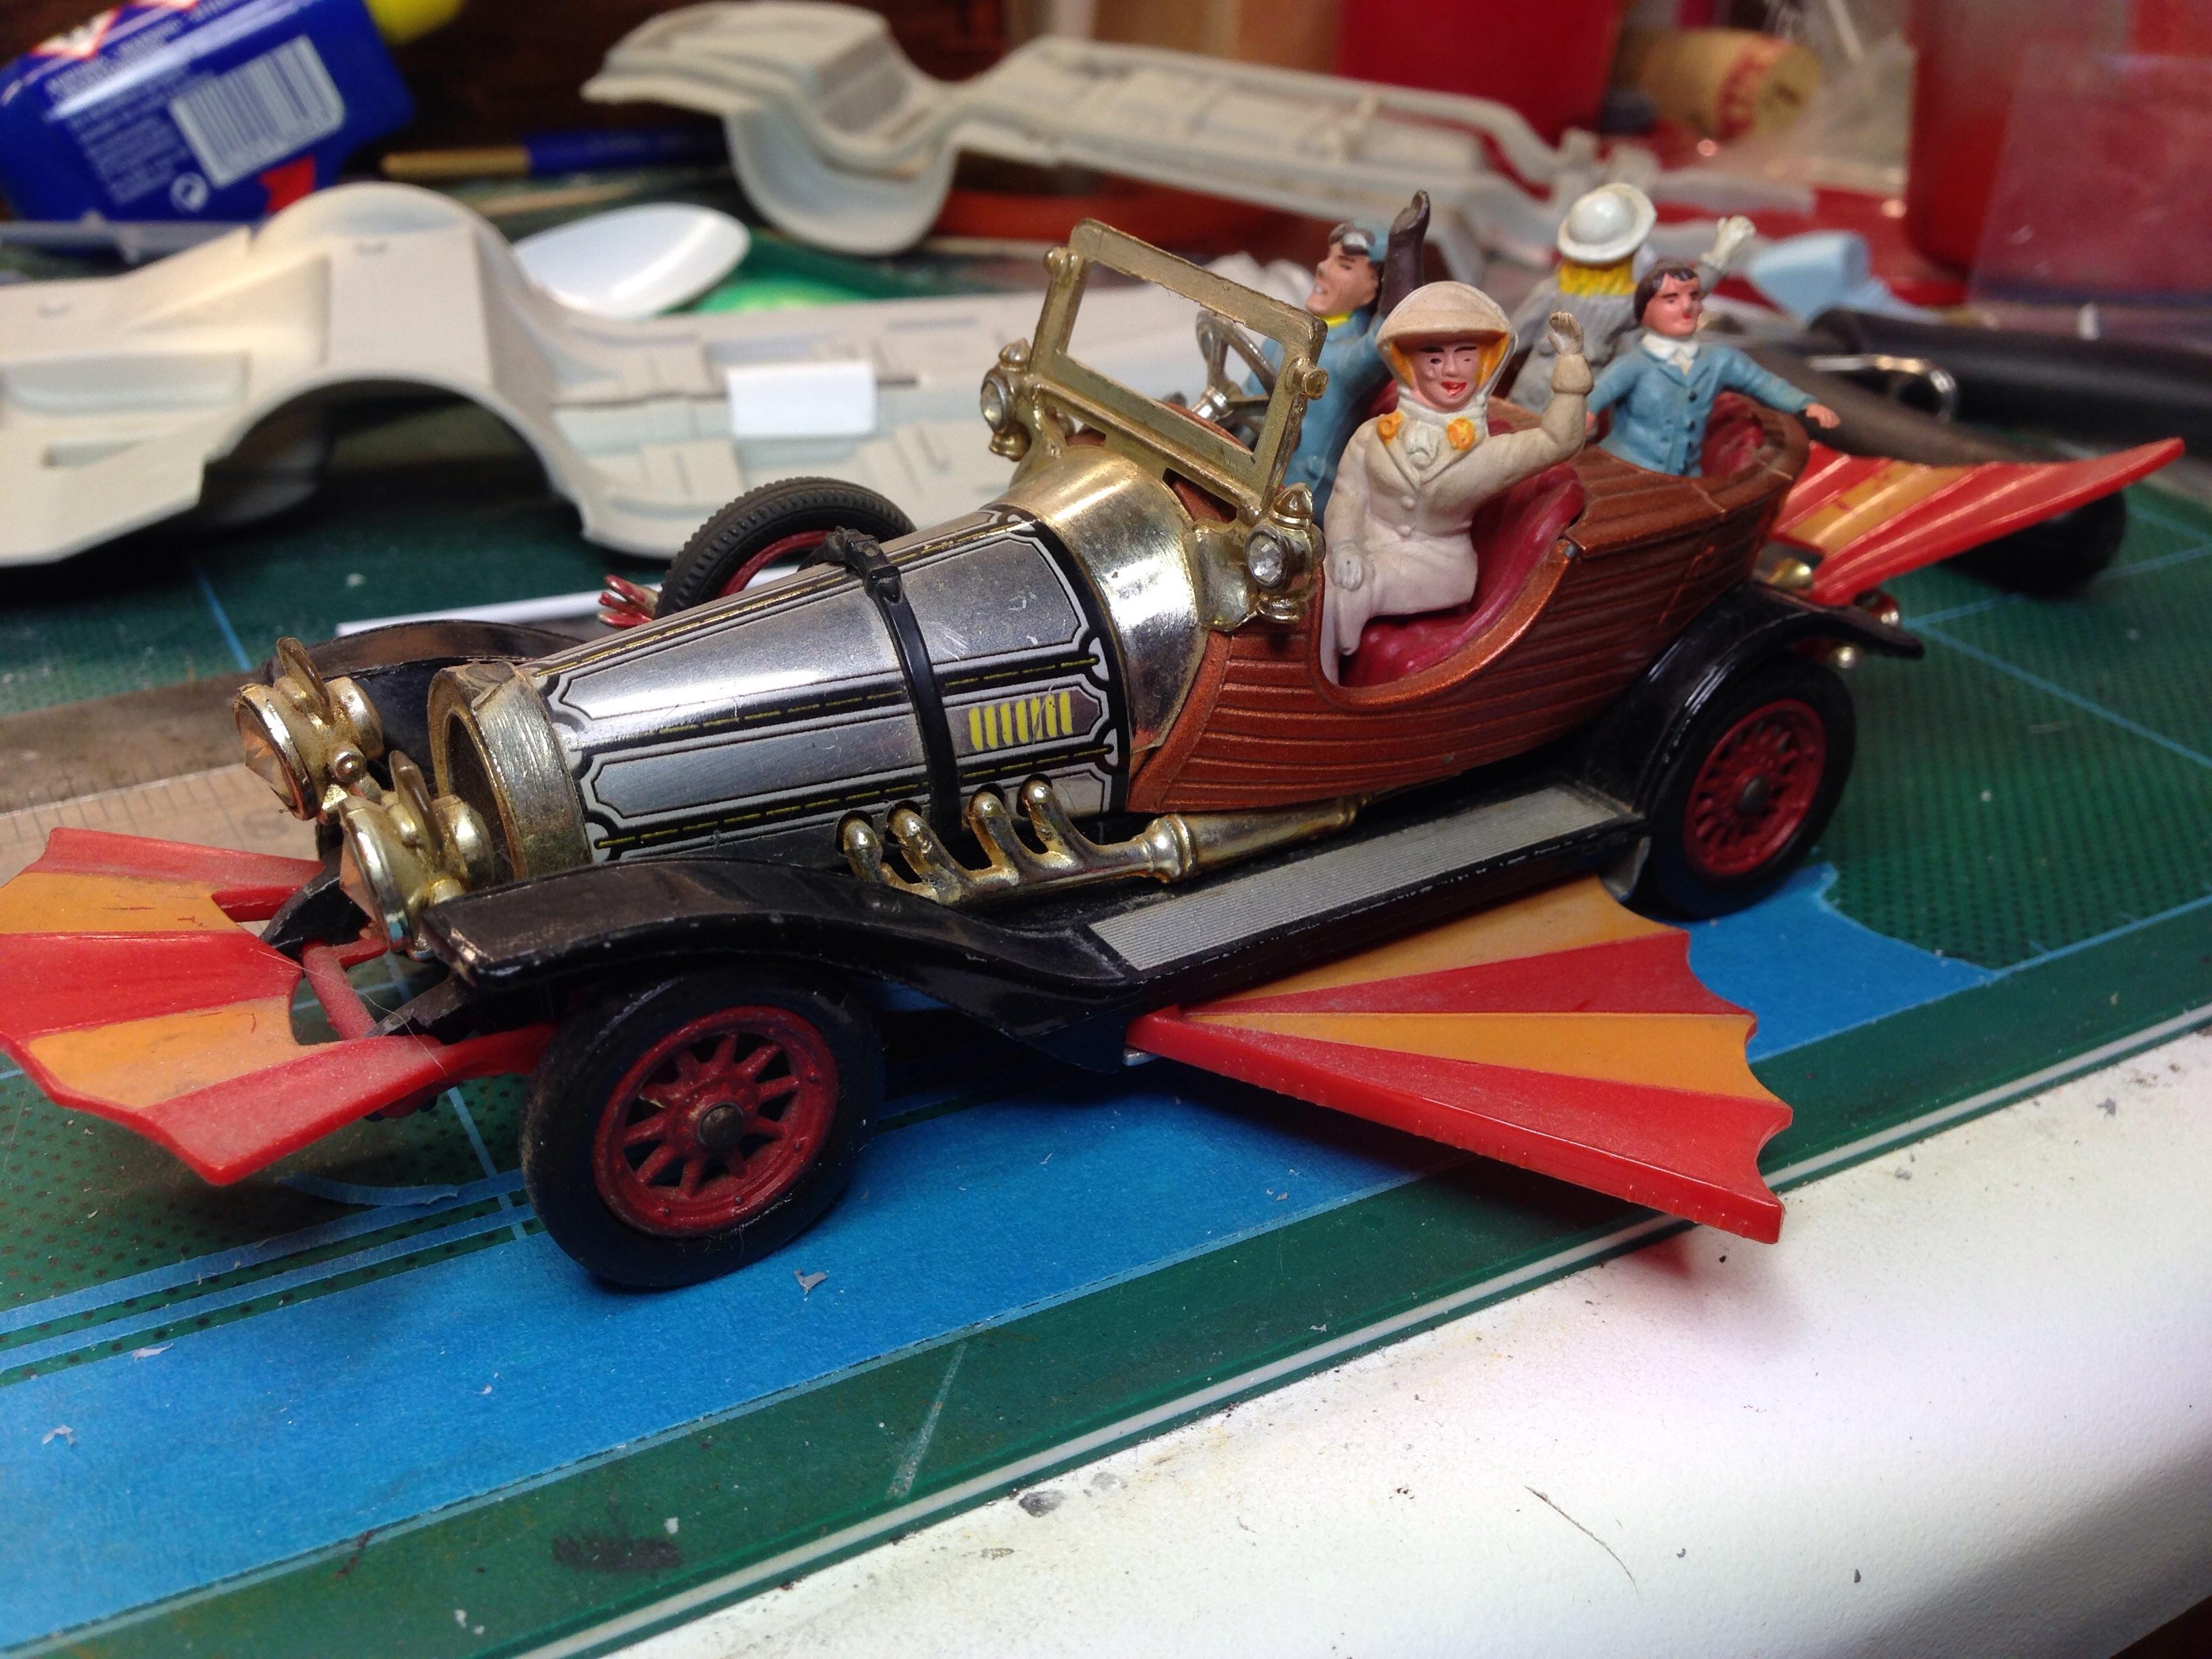
And here's my Corgi, ( not Dinky as I previously said) Chitty. I've had it for at least 48 years, maybe more. I can't believe I've still got the little figures!
-
Coincidentally, I'm watching the movie on a UK TV channel, right now! ? I still know the words to the theme song. It's still a great movie after 52 years. Makes me feel very nostalgic.
-
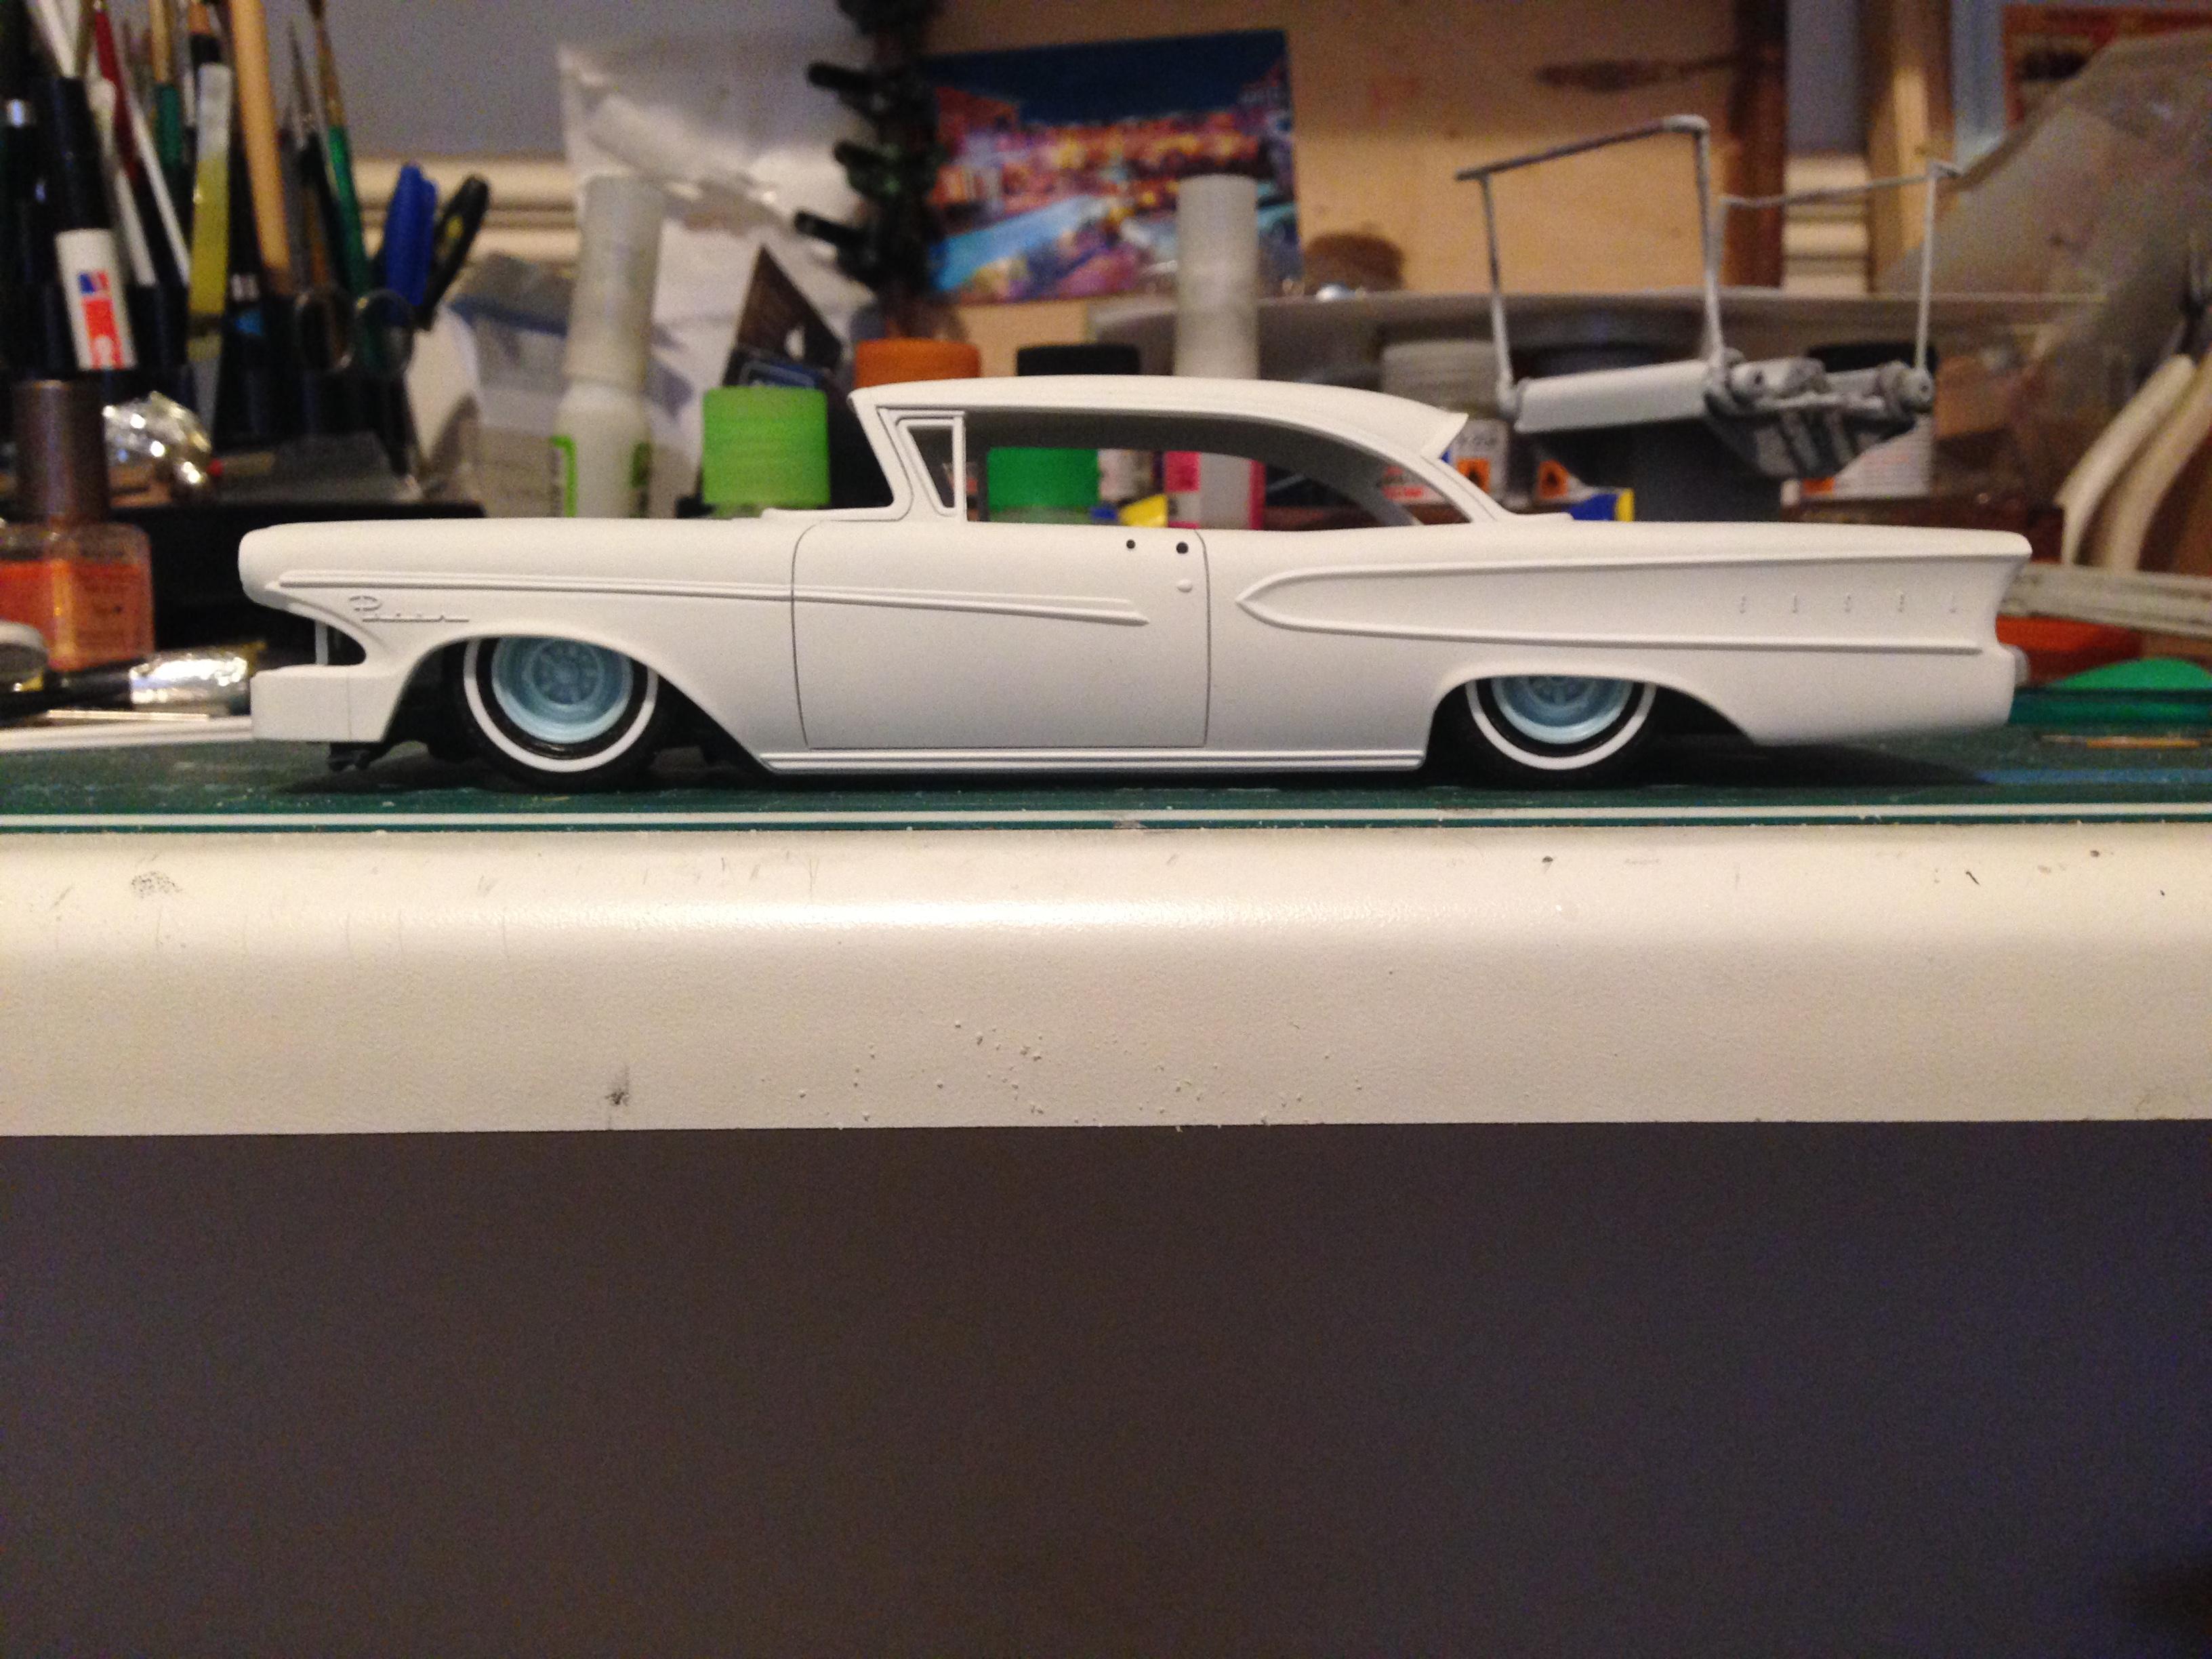
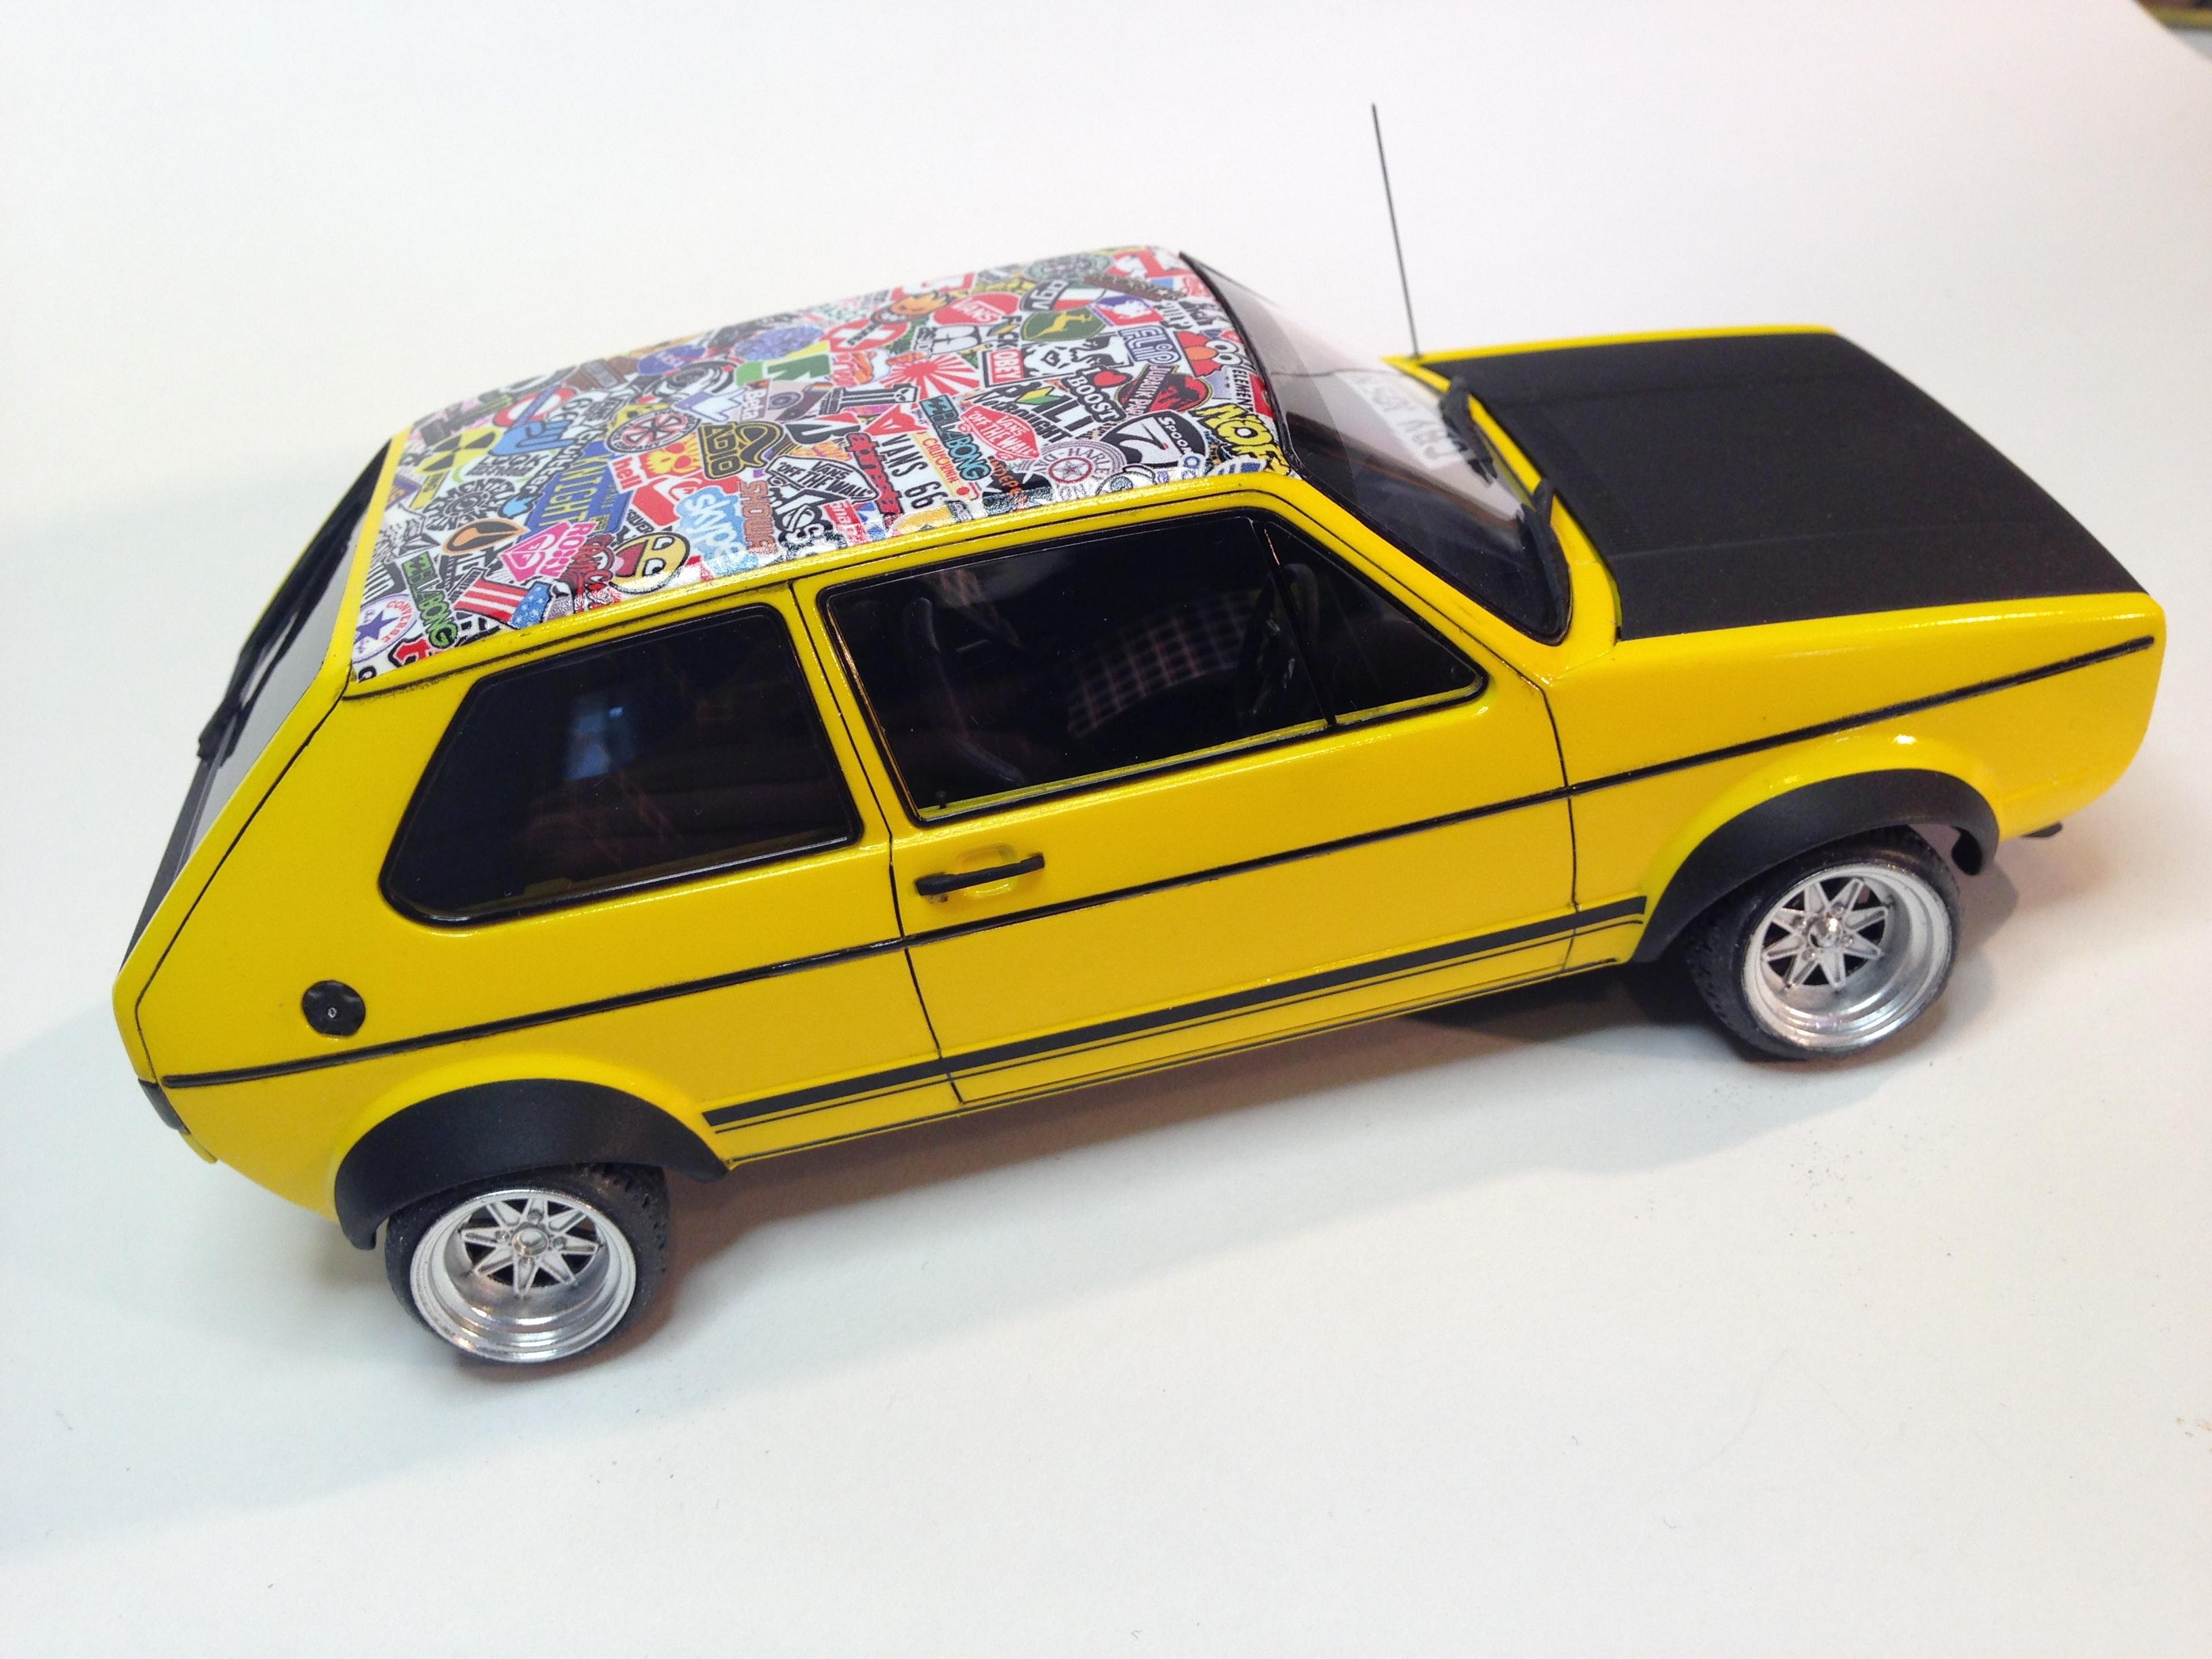
I'm so glad I bought a few kits before all this lockdown shenanigans. I can't get out to buy paint, so I had to choose a colour from my box of rattle cans. But at least I have something to build. Only a mild custom on this one; lowered with custom paint and I'll use the photoetch detail set. I'm using the 1990's issue. I'm a bit bummed that I don't have the conti kit or skirts , but I do have some long cruiser skirts that might work. All depends on how it looks once it's all together. The body was good. Parting lines were tiny and only minor ripples in the roof (which I knocked flat) body will be green with lime gold pearl and the roof and side scallops will be silver flake. Possibly a ghosted pattern on the roof. Oh, and Bellflowers and Appletons. Anyway, I've been attacking the rear end. I cut away the shock mounts, chopped out the tops of the wheel arches and some of the transmission tunnel. I'm scratch building a 4-link setup, to get the rear as low as possible. I decided on painted steels from my parts box and Modelhaus early '60's thin whitewall tyres. the front end is easy to lower. Just flip the stub axles 180 degrees.
-
Stirling work! You really did a great job on this. When I apply Molotow chrome to tiny parts, I unscrew the pen and dip a fine brush in the ink and use that to apply it, instead of the nib. Still shines and you don't risk catching the part with the nib and breaking it. top work fella!
-
I loved that movie and I've still got my original Dinky toy with all the figures and wings! Fortunately, the car features heavily in the movie, so there's plenty of chances to check details. I'll be watching your progress ?
-

Fiat 131 Abarth
geetee66 replied to afx's topic in WIP: Other Racing: Road Racing, Land Speed Racers
I have a soft spot for 131's. back in the day, I had a girlfriend with a 2.0L Mirafiori. Great rear seats! -
I really like this. You got the stance right. Real wood panels? Nice! the thin wood sheets from cigar boxes might be a good source for the panels, but you probably knew this, so I'll shut up...
-
This is an ace kit. I built one a year ago. No fit issues and great instruction sheet. Keep going mate! here's my version, with aftermarket wheels and a bit of extra detail
-
Also chucked more clear on it, prior to a final wet sand and polishing. I got the rattle can clear quite warm, almost hot, by immersing it it hot water for a few minutes. This seems to minimise orange peel. On a single colour body I'd probably just polish this, but here you can see tiny height differences in the various layers, and that needs knocking flat before polishing.
-
Been working on the interior and chassis. I've since added shelf speakers and a club plaque. The interior does have some gold glitter parts, such as the centre console, arm rests and dash top. More apparent to the naked eye than the camera.
-
Thanks man painting has become my favourite part! I love playing with colours. I guess it's also the endless learning curve...it took me years to take the plunge and get an airbrush. I used to think I'd need a PhD in painting. Now I actually enjoy experimenting with it. It's final assembly I hate. Very stressful.
-
Ah, the sun. I remember seeing that. Bright thing. Lives in the sky. yeah, these colours go wild under good light. The camera never seems to pick up the subtleties that the naked eye can see.