geetee66
-
Posts
1,540 -
Joined
-
Last visited
Content Type
Profiles
Forums
Events
Gallery
Everything posted by geetee66
-
Thanks! I'm glad you approve of the colour scheme. I'd seen some early 60's customs that had patterns in muted colours. As this isn't a lowrider, I decided to use fewer colours. As it is, this is still quite colourful, as one of the colours flip flops into a rich purple ? looking forward to seeing your LeBaron completed ?
-
Finish it! You know you want to! Not enough of these posted, by far! I see you opened the hood on yours. What chassis/interior did you use?
-
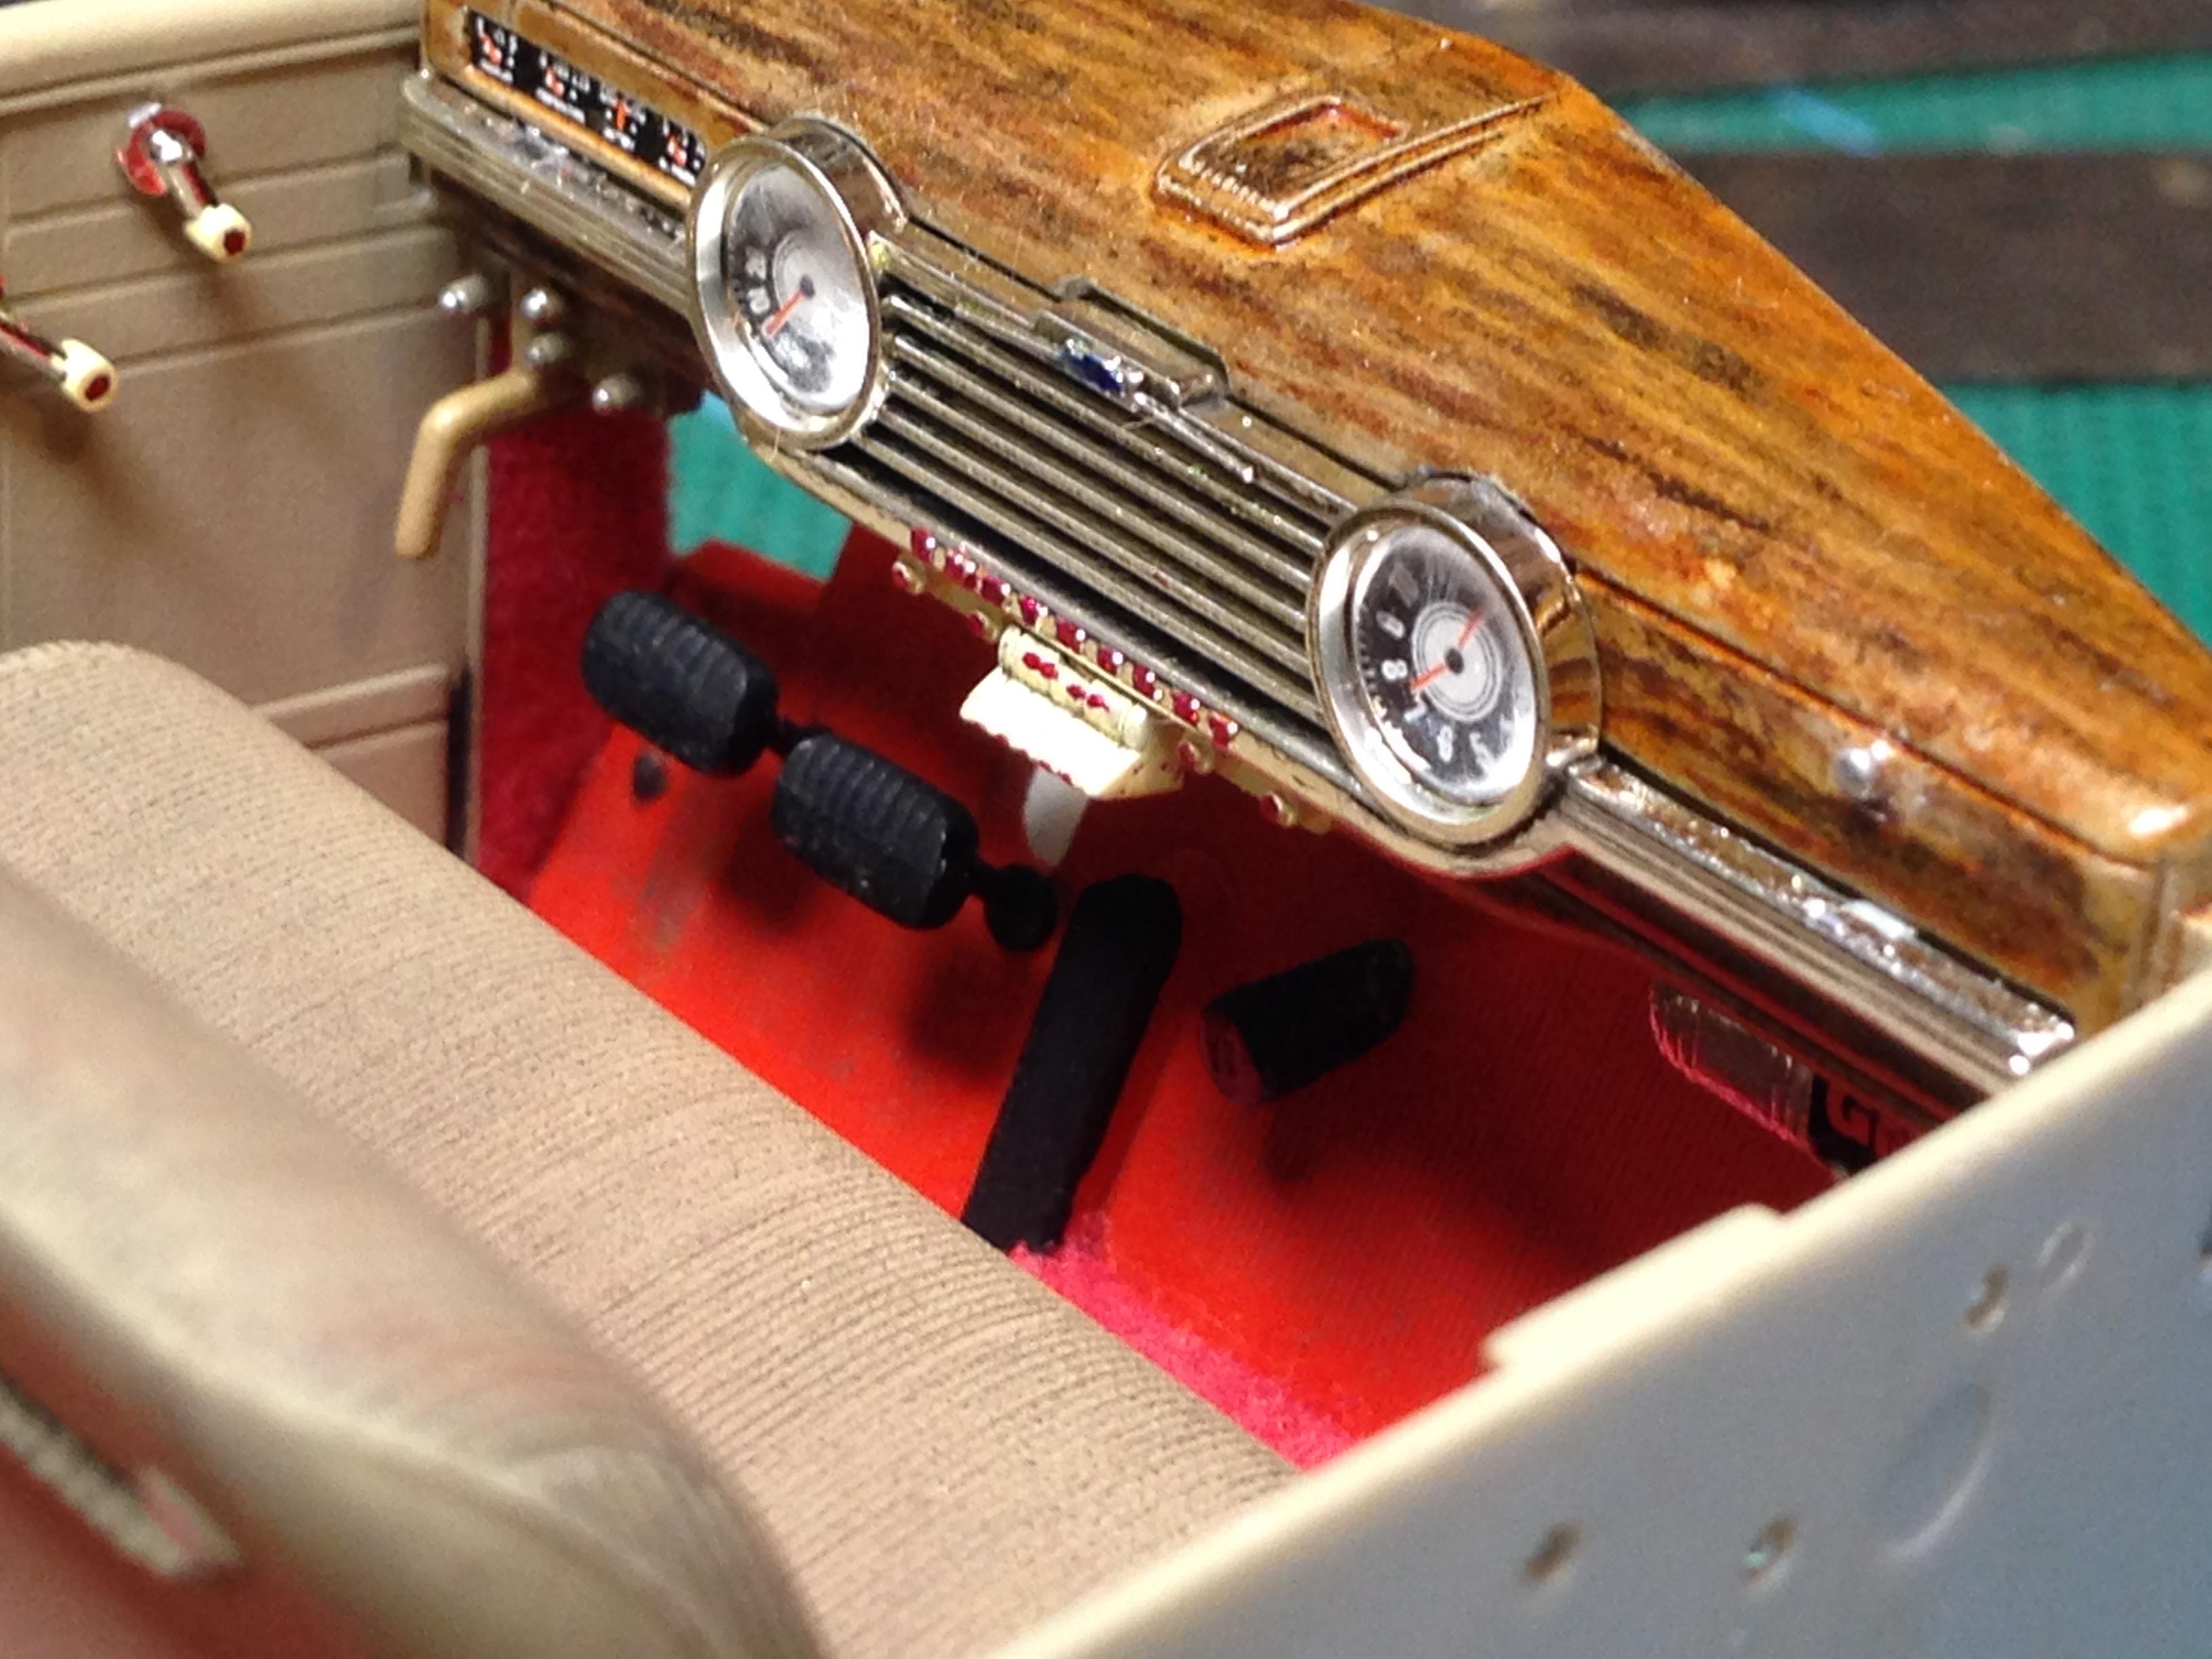
Cheers Claude, it's only the steering wheel that was no good. The kit isn't that bad, overall. The molds have stood up to the tests of time. Chrome tree is primo. Many custom options (but I'm not using them on this build) Almost no flash and minimal separation lines. Apart from slight sink marks where the body screws to the floorpan, the body is sweet with no warps Details are feint, so I masked the badges above the headlights and those on the sides of the 'screen frame. I've foiled the scripts near the front arches, and hopefully I'll be able to carefully rub the paint off and expose the letters.
-
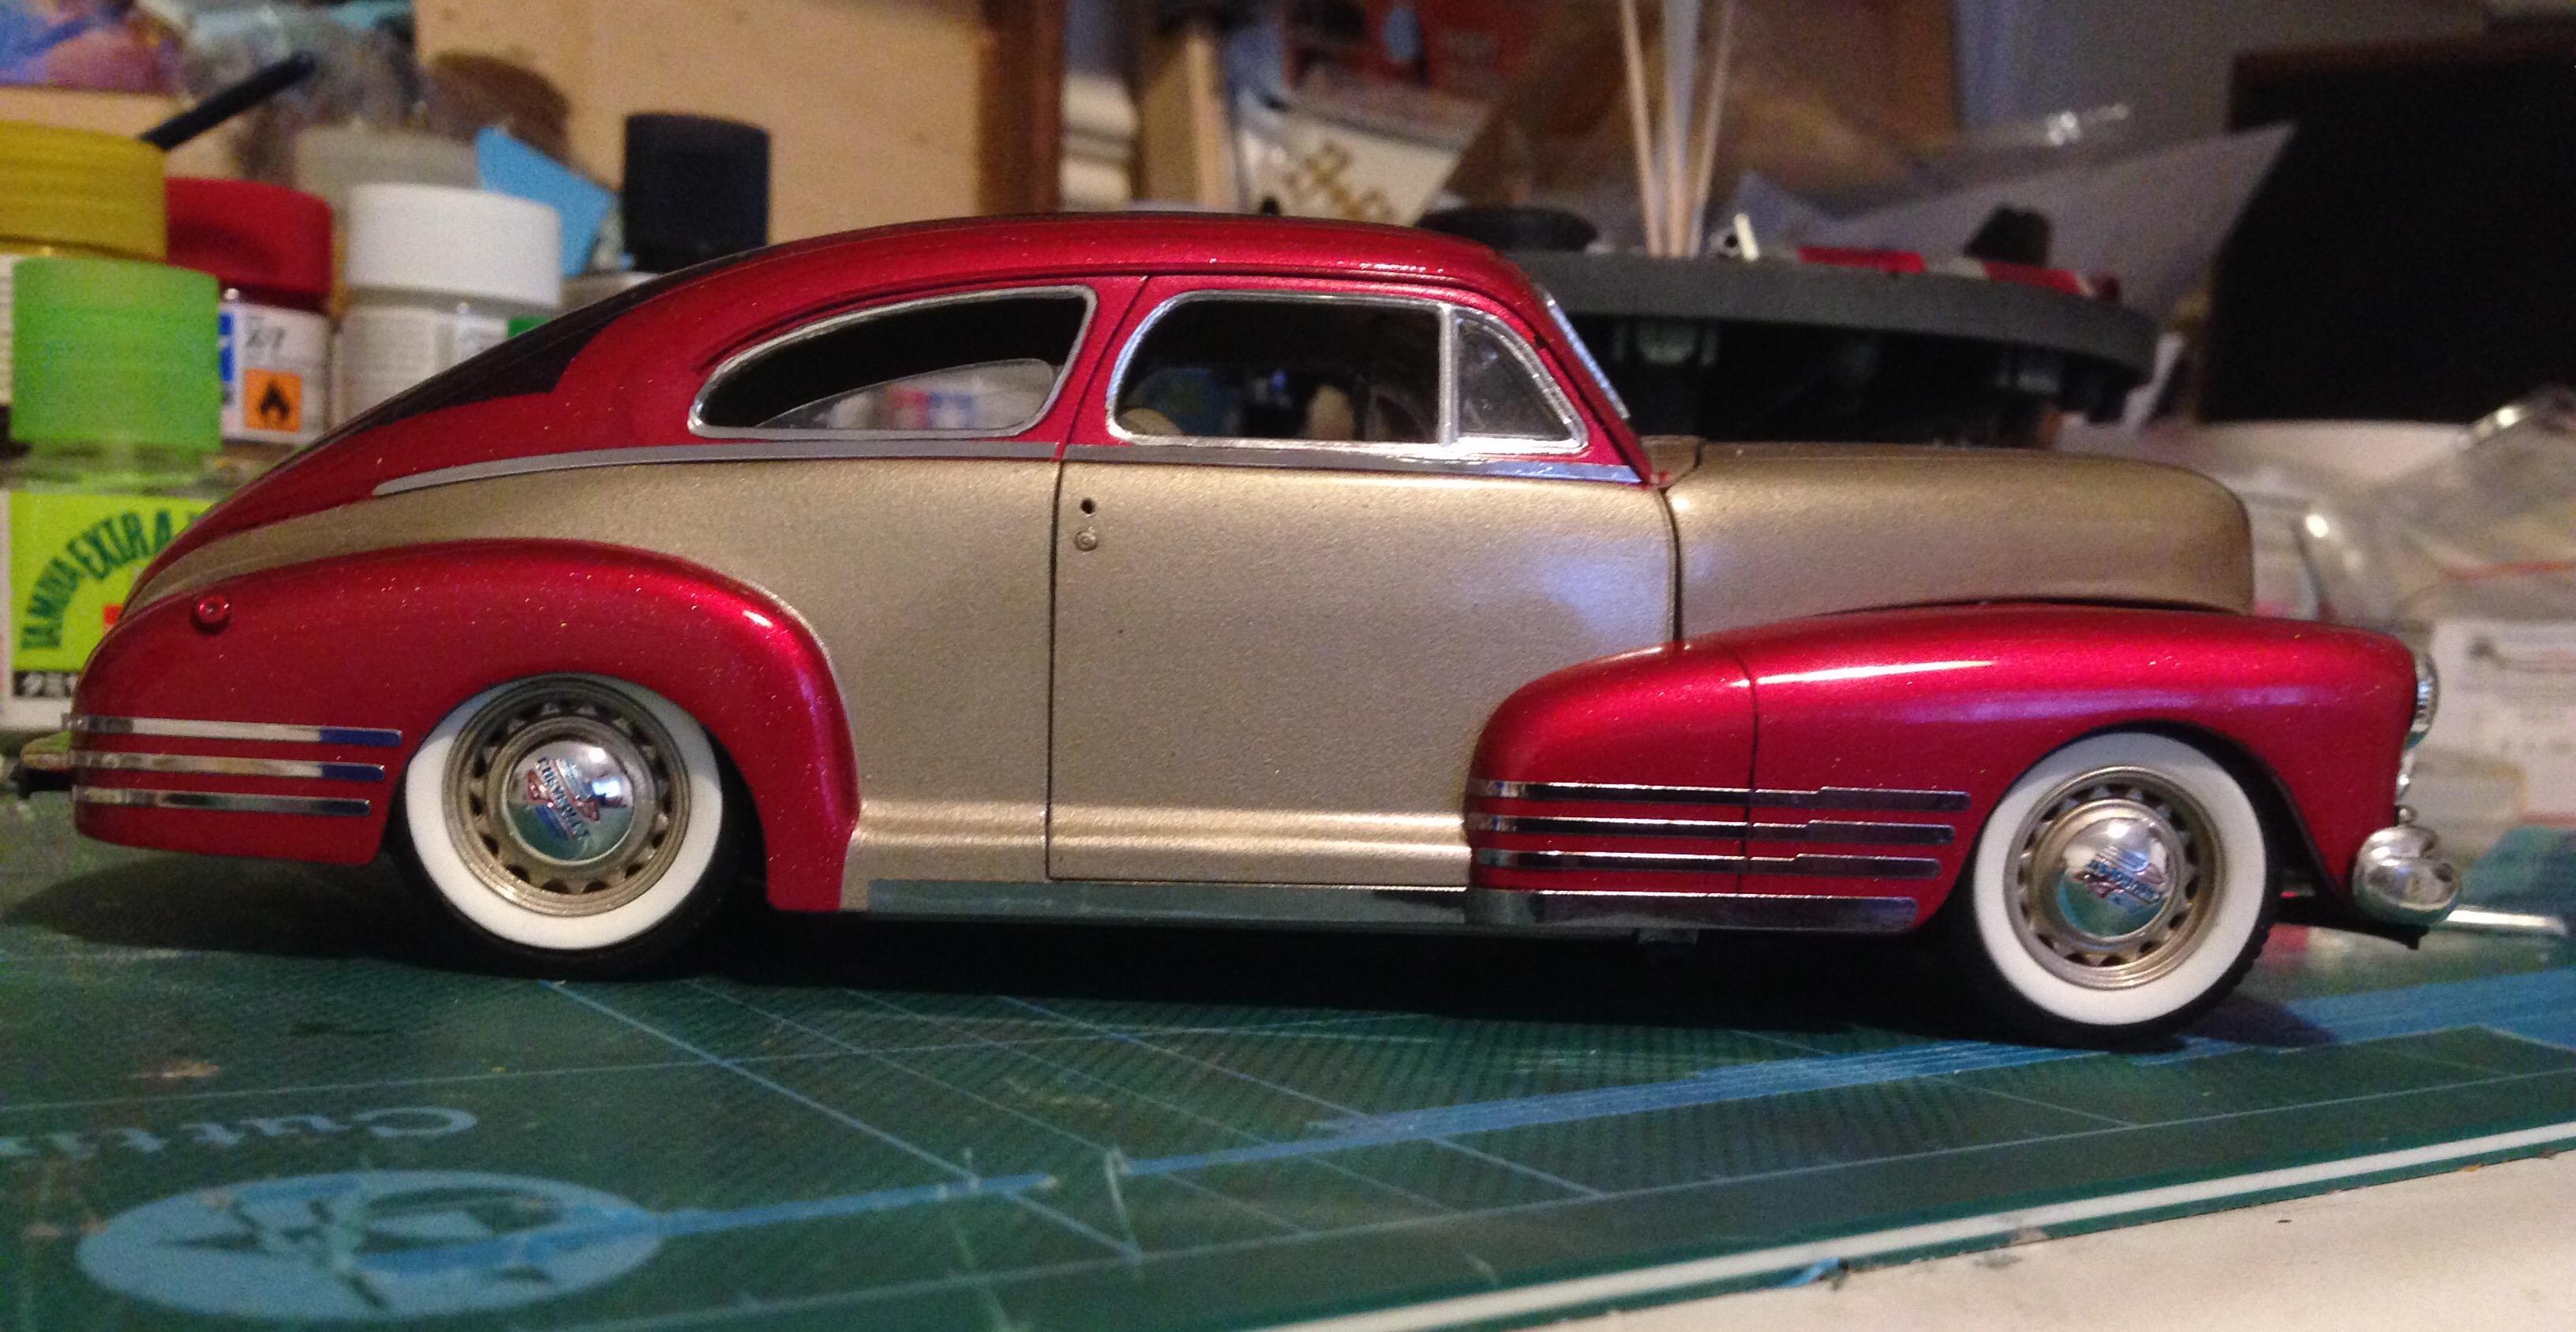
Thanks guys the interior is going to be white, with zebra stripes on the seats. I'll use a parts box steering wheel, because the kit part is badly moulded. I decided not to go too bright with the colours, the car didn't speak to me like that, if you know what I mean...
-
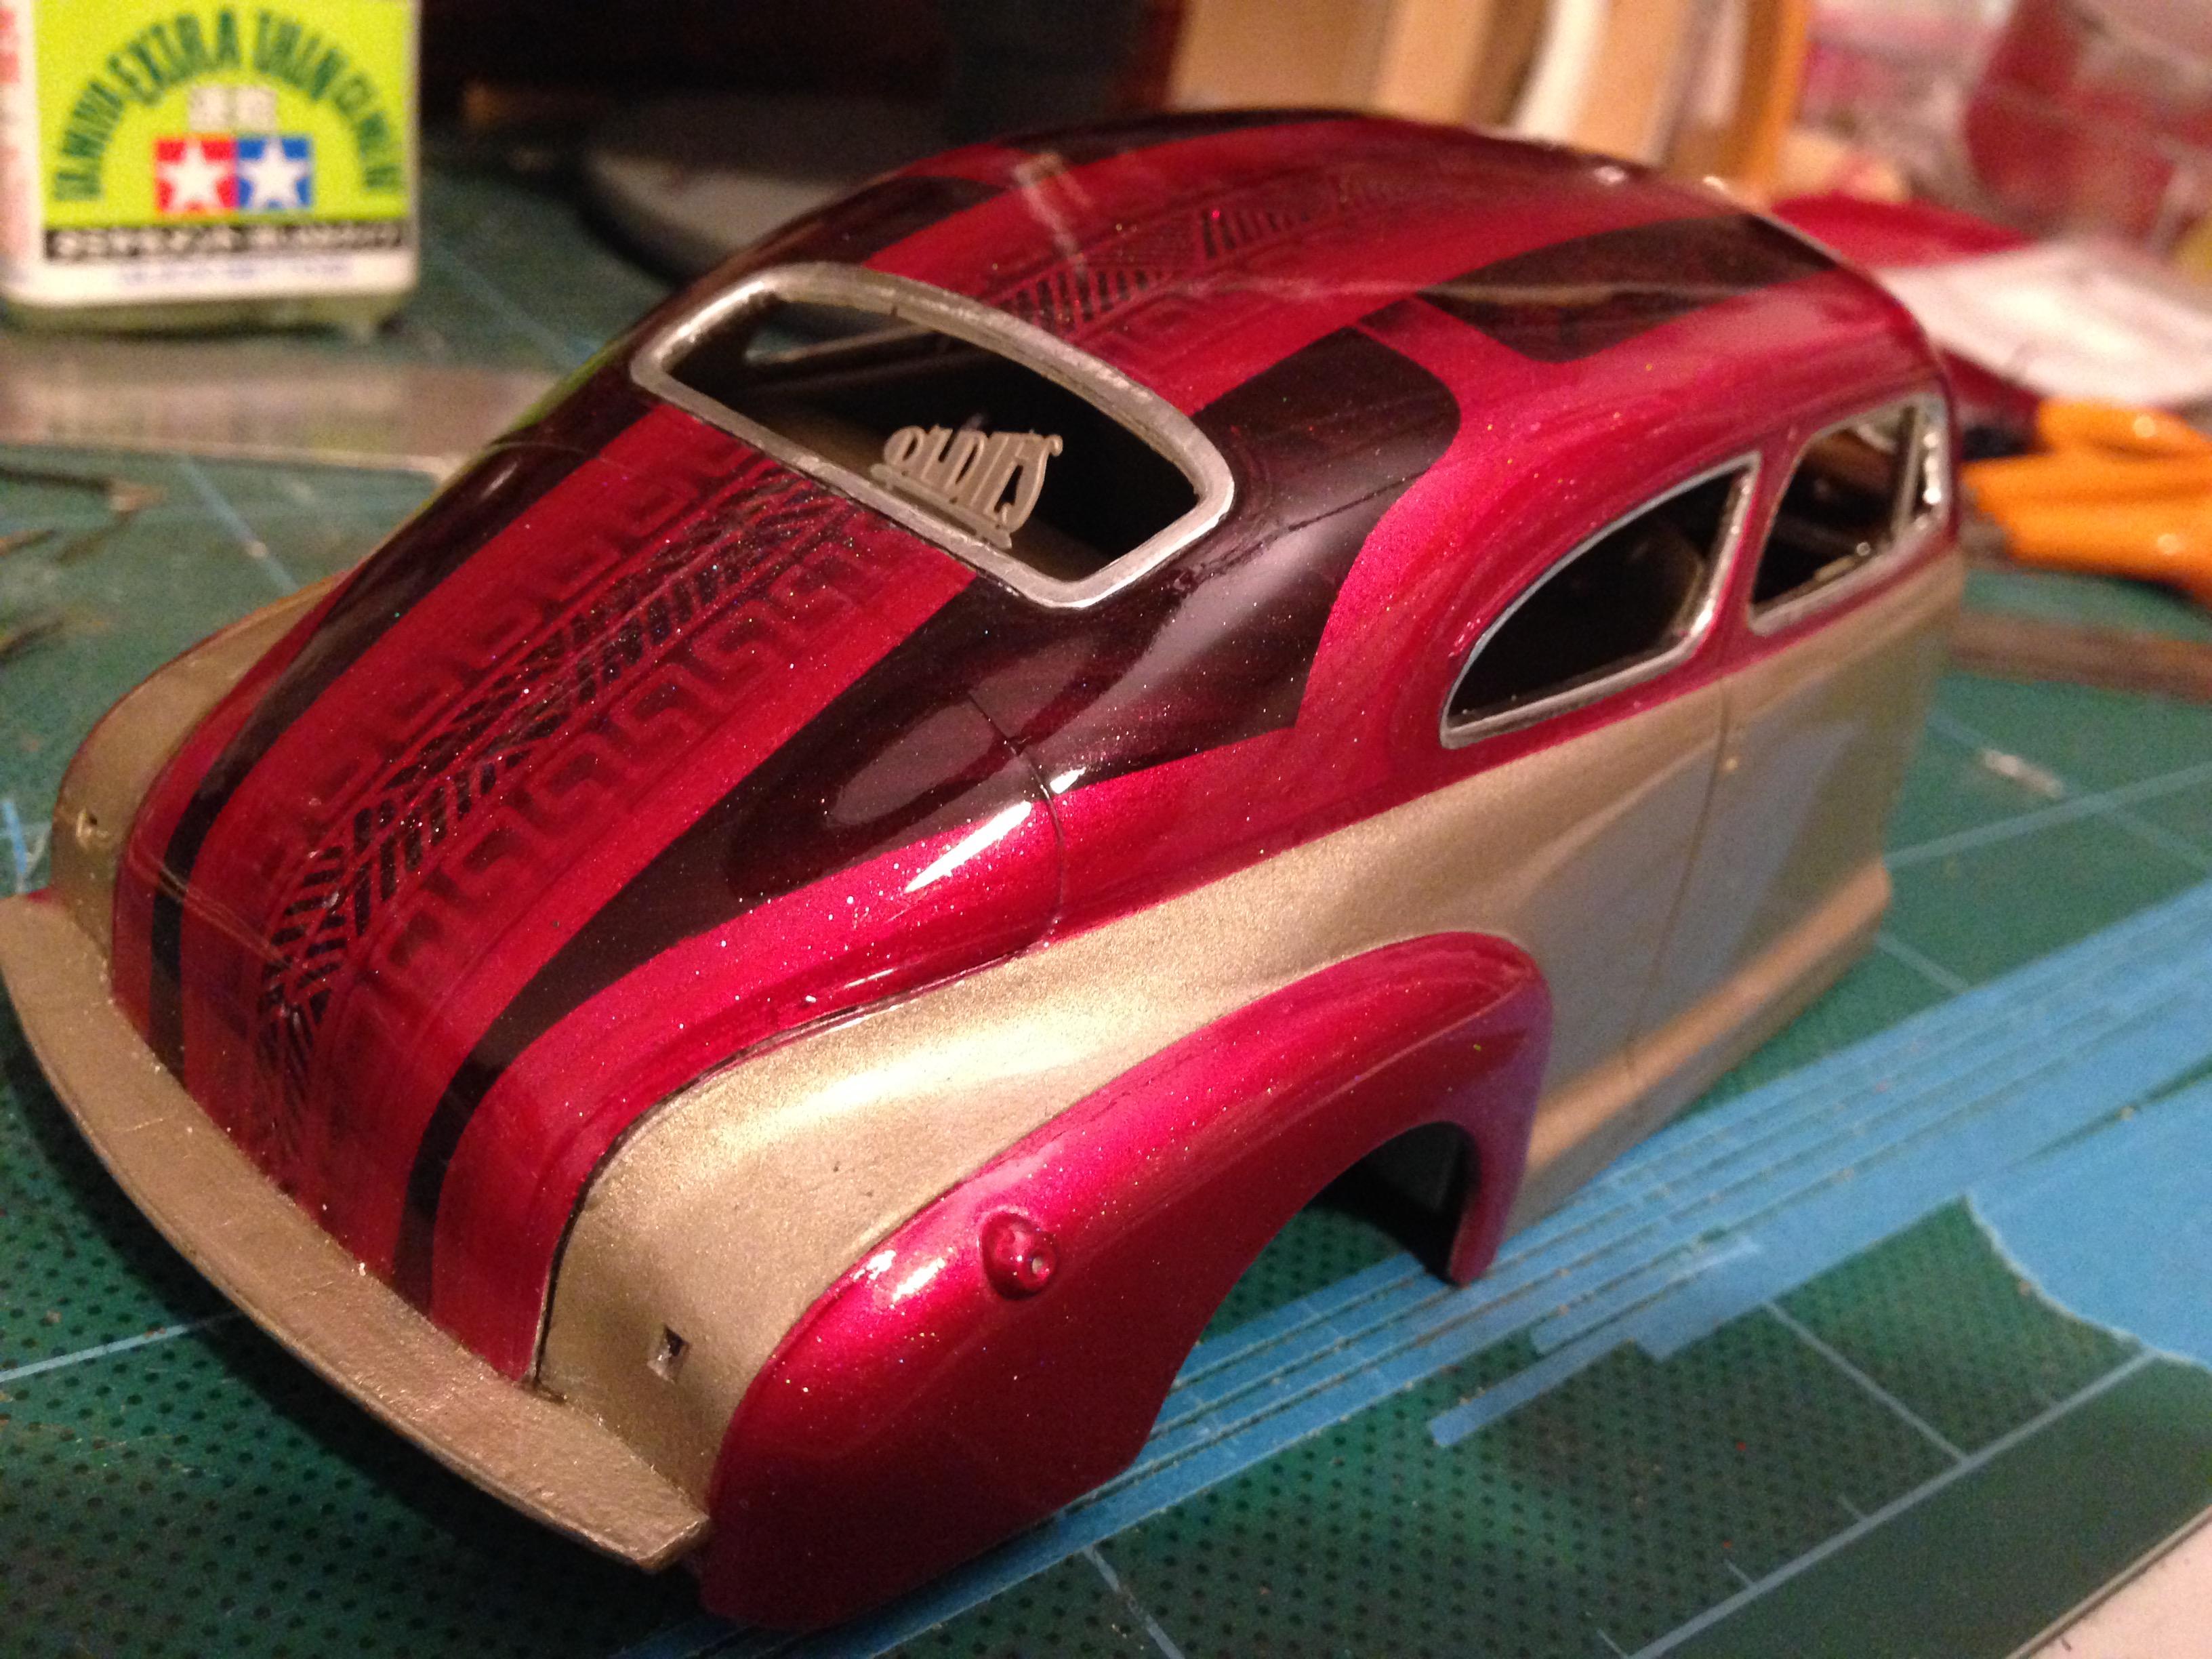
Got the paint on today. It'll need a good rub, thanks to one colour coming out gritty. That's the thing about experimenting with nail polish. It's a bit hit & miss, sometimes. Never mind. It'll come good in the end.

-
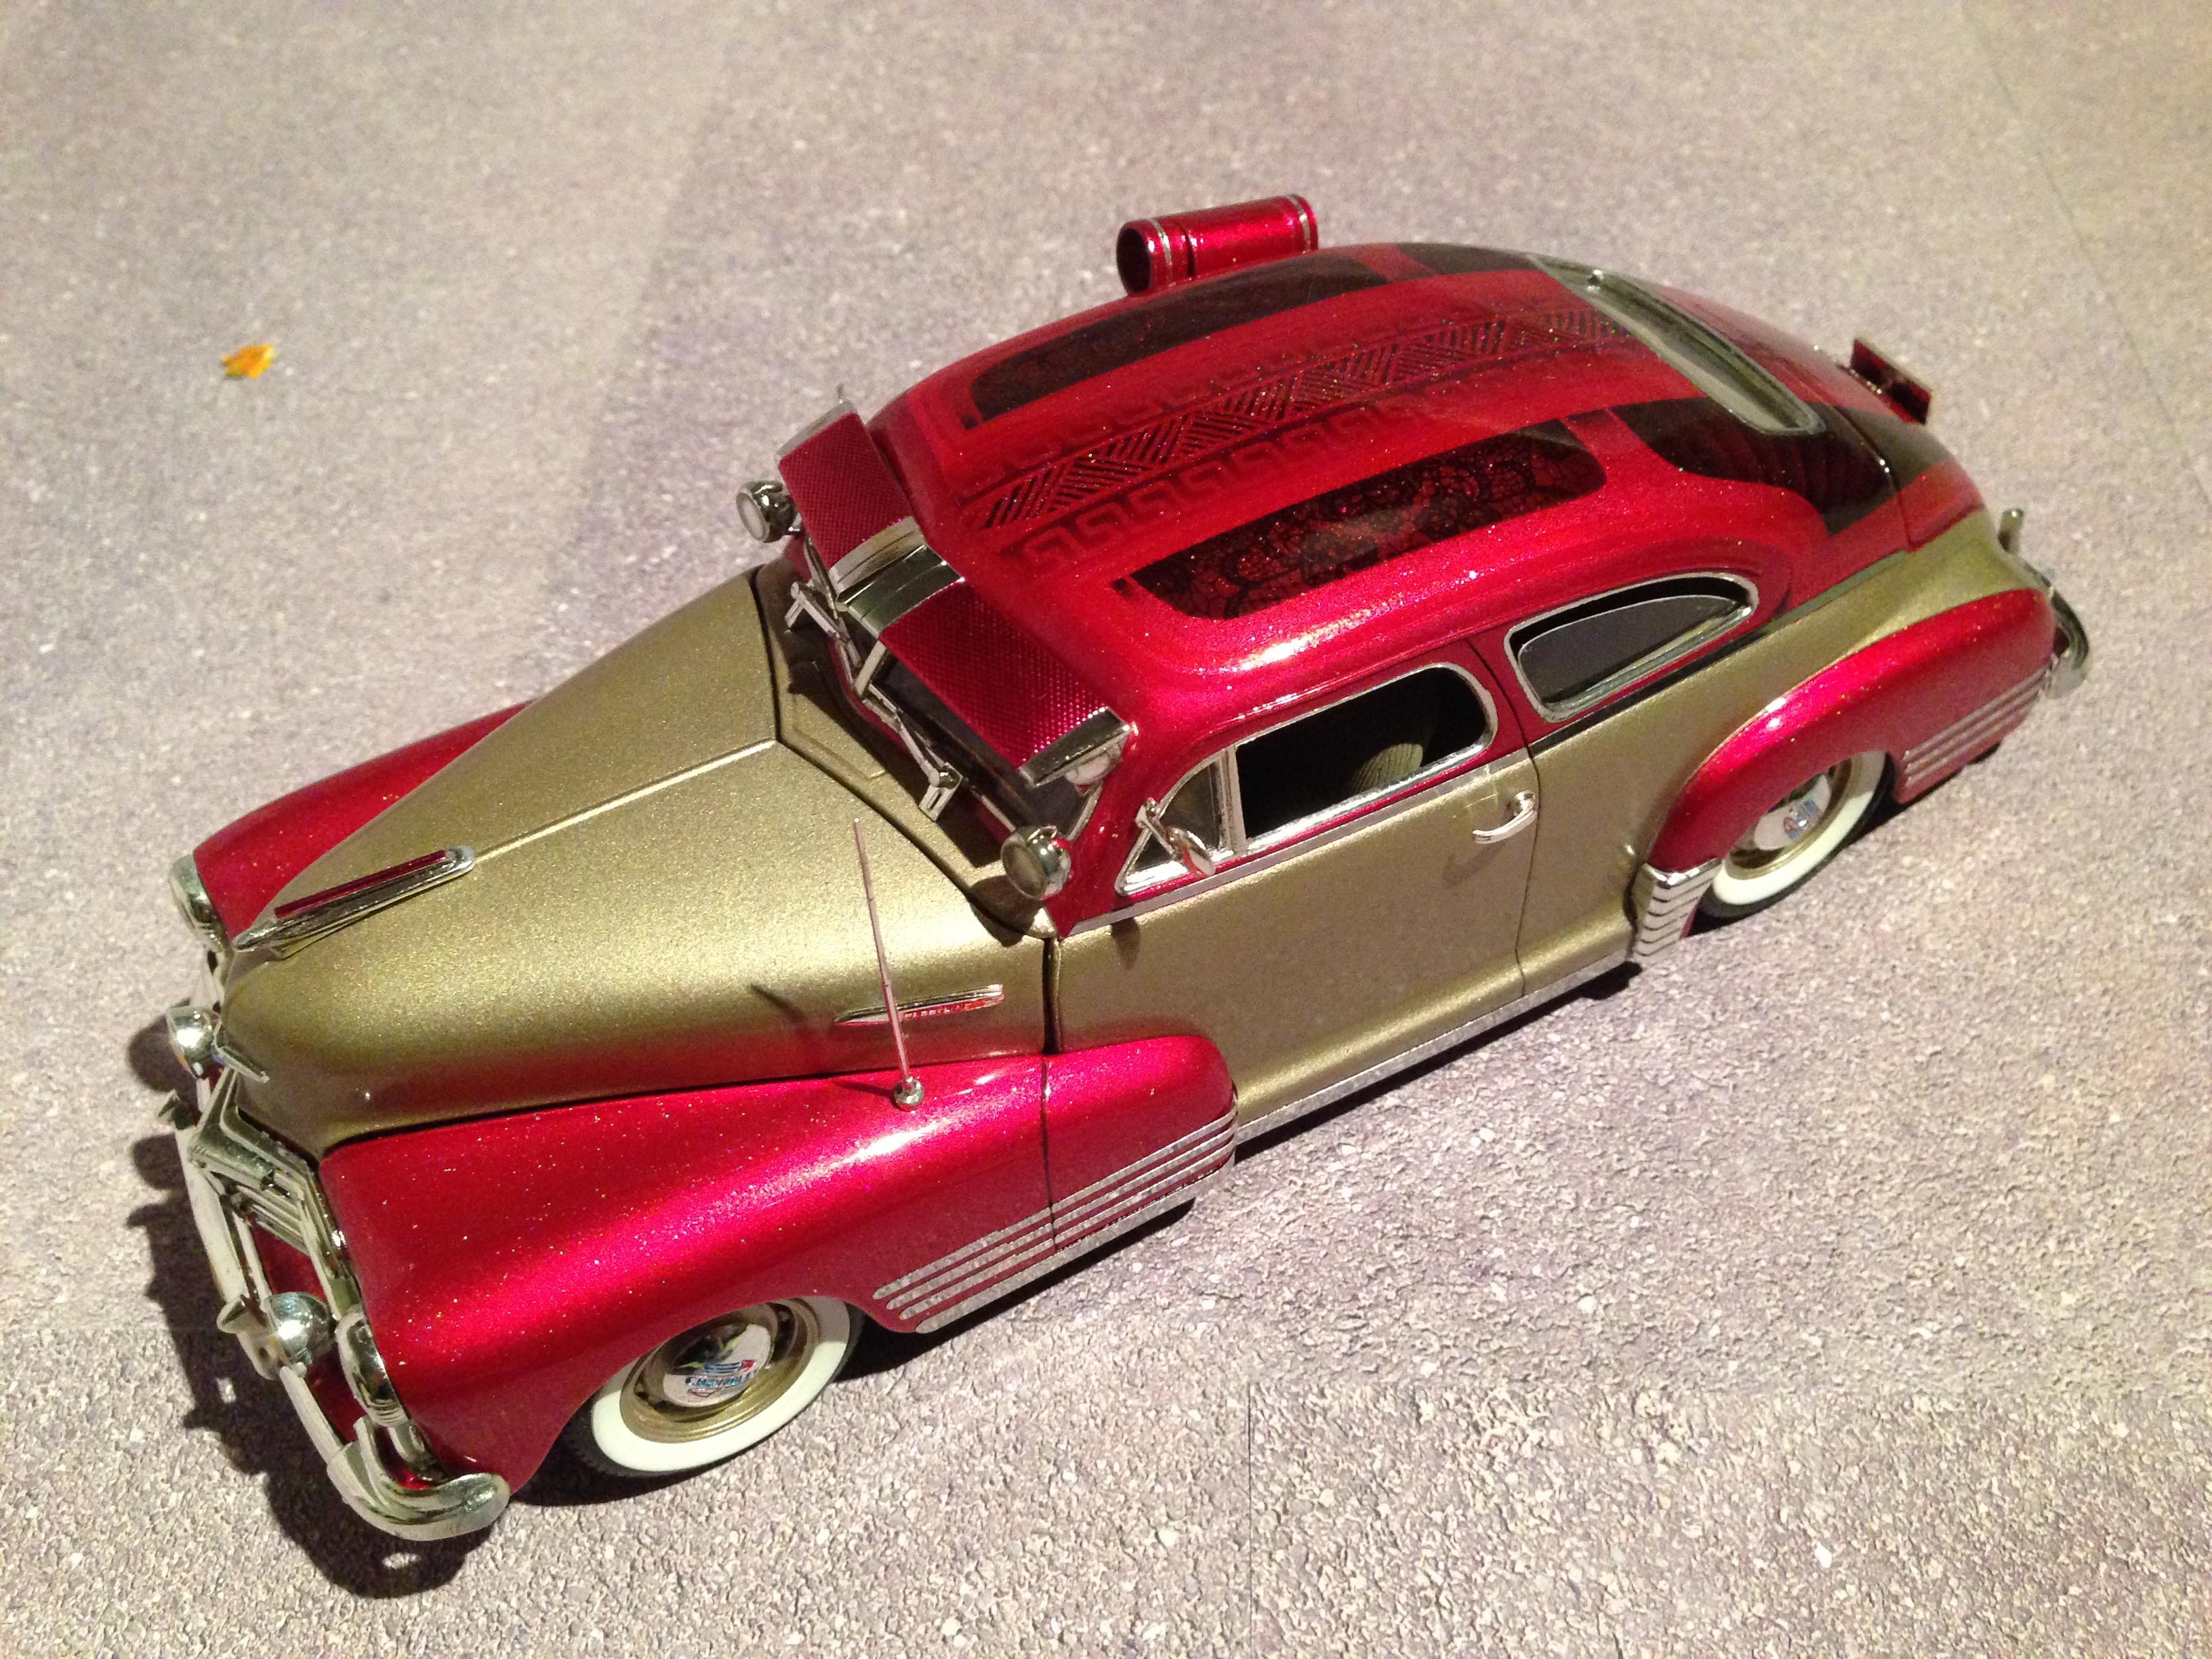
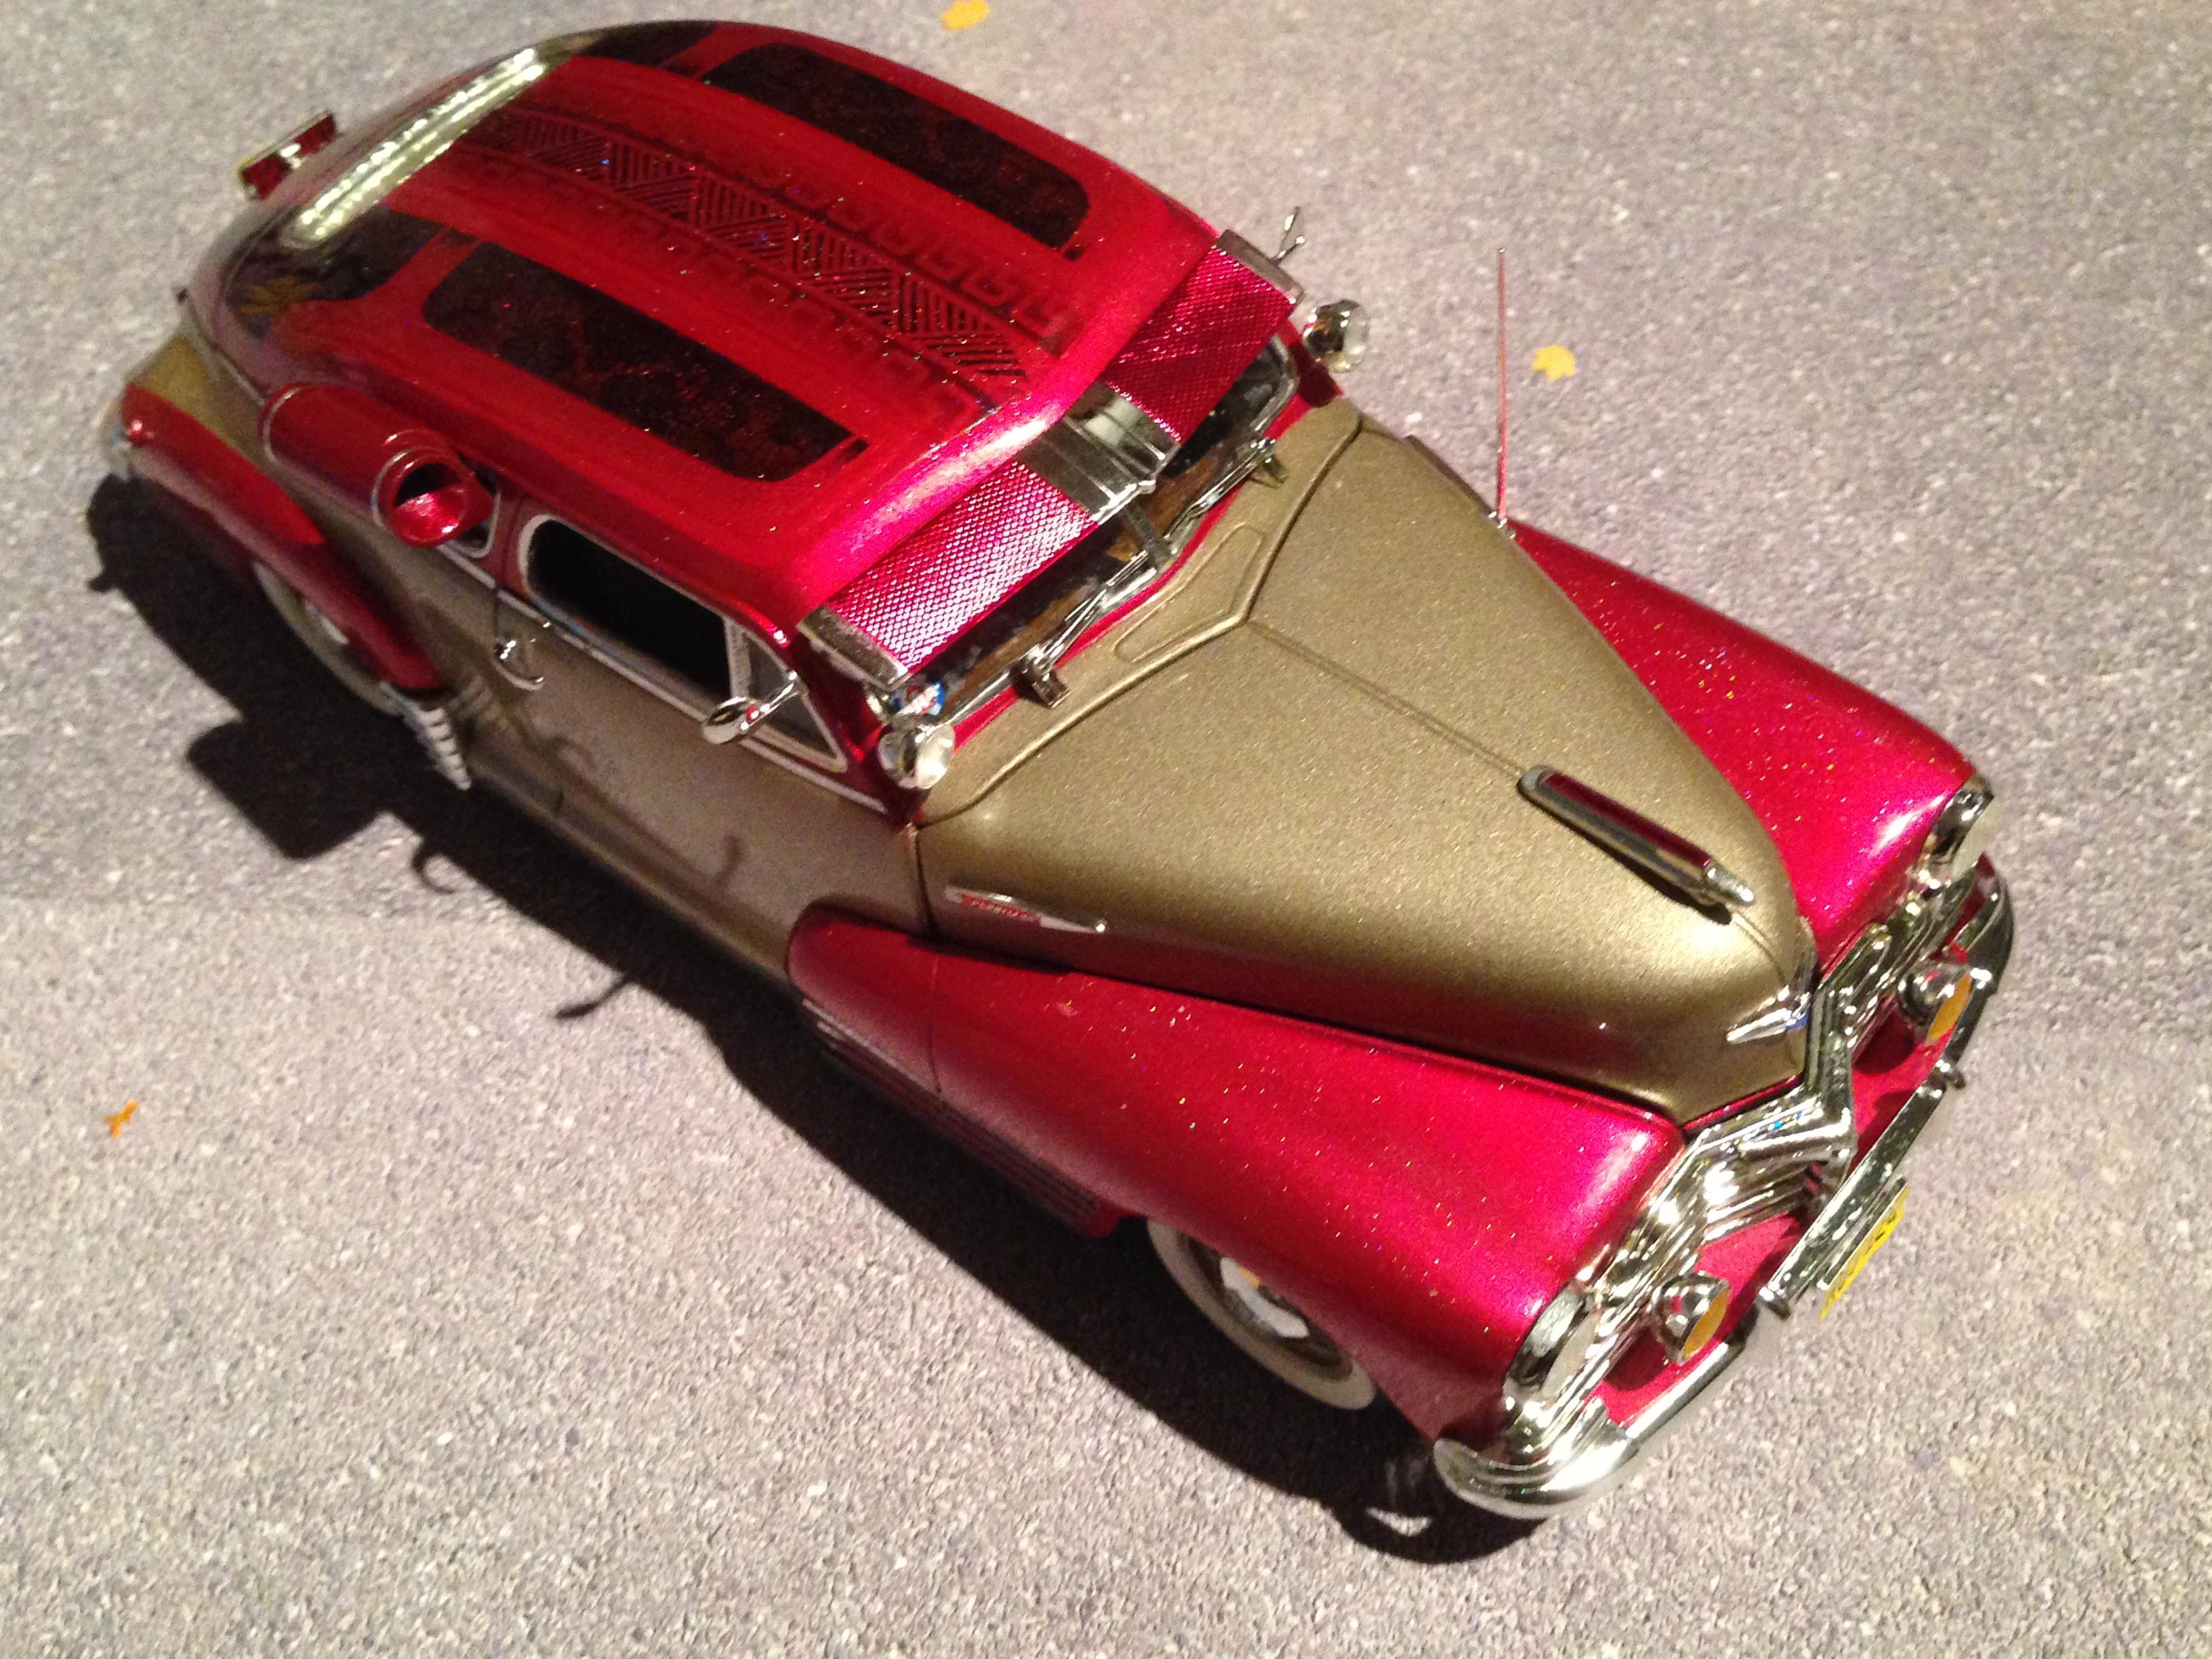
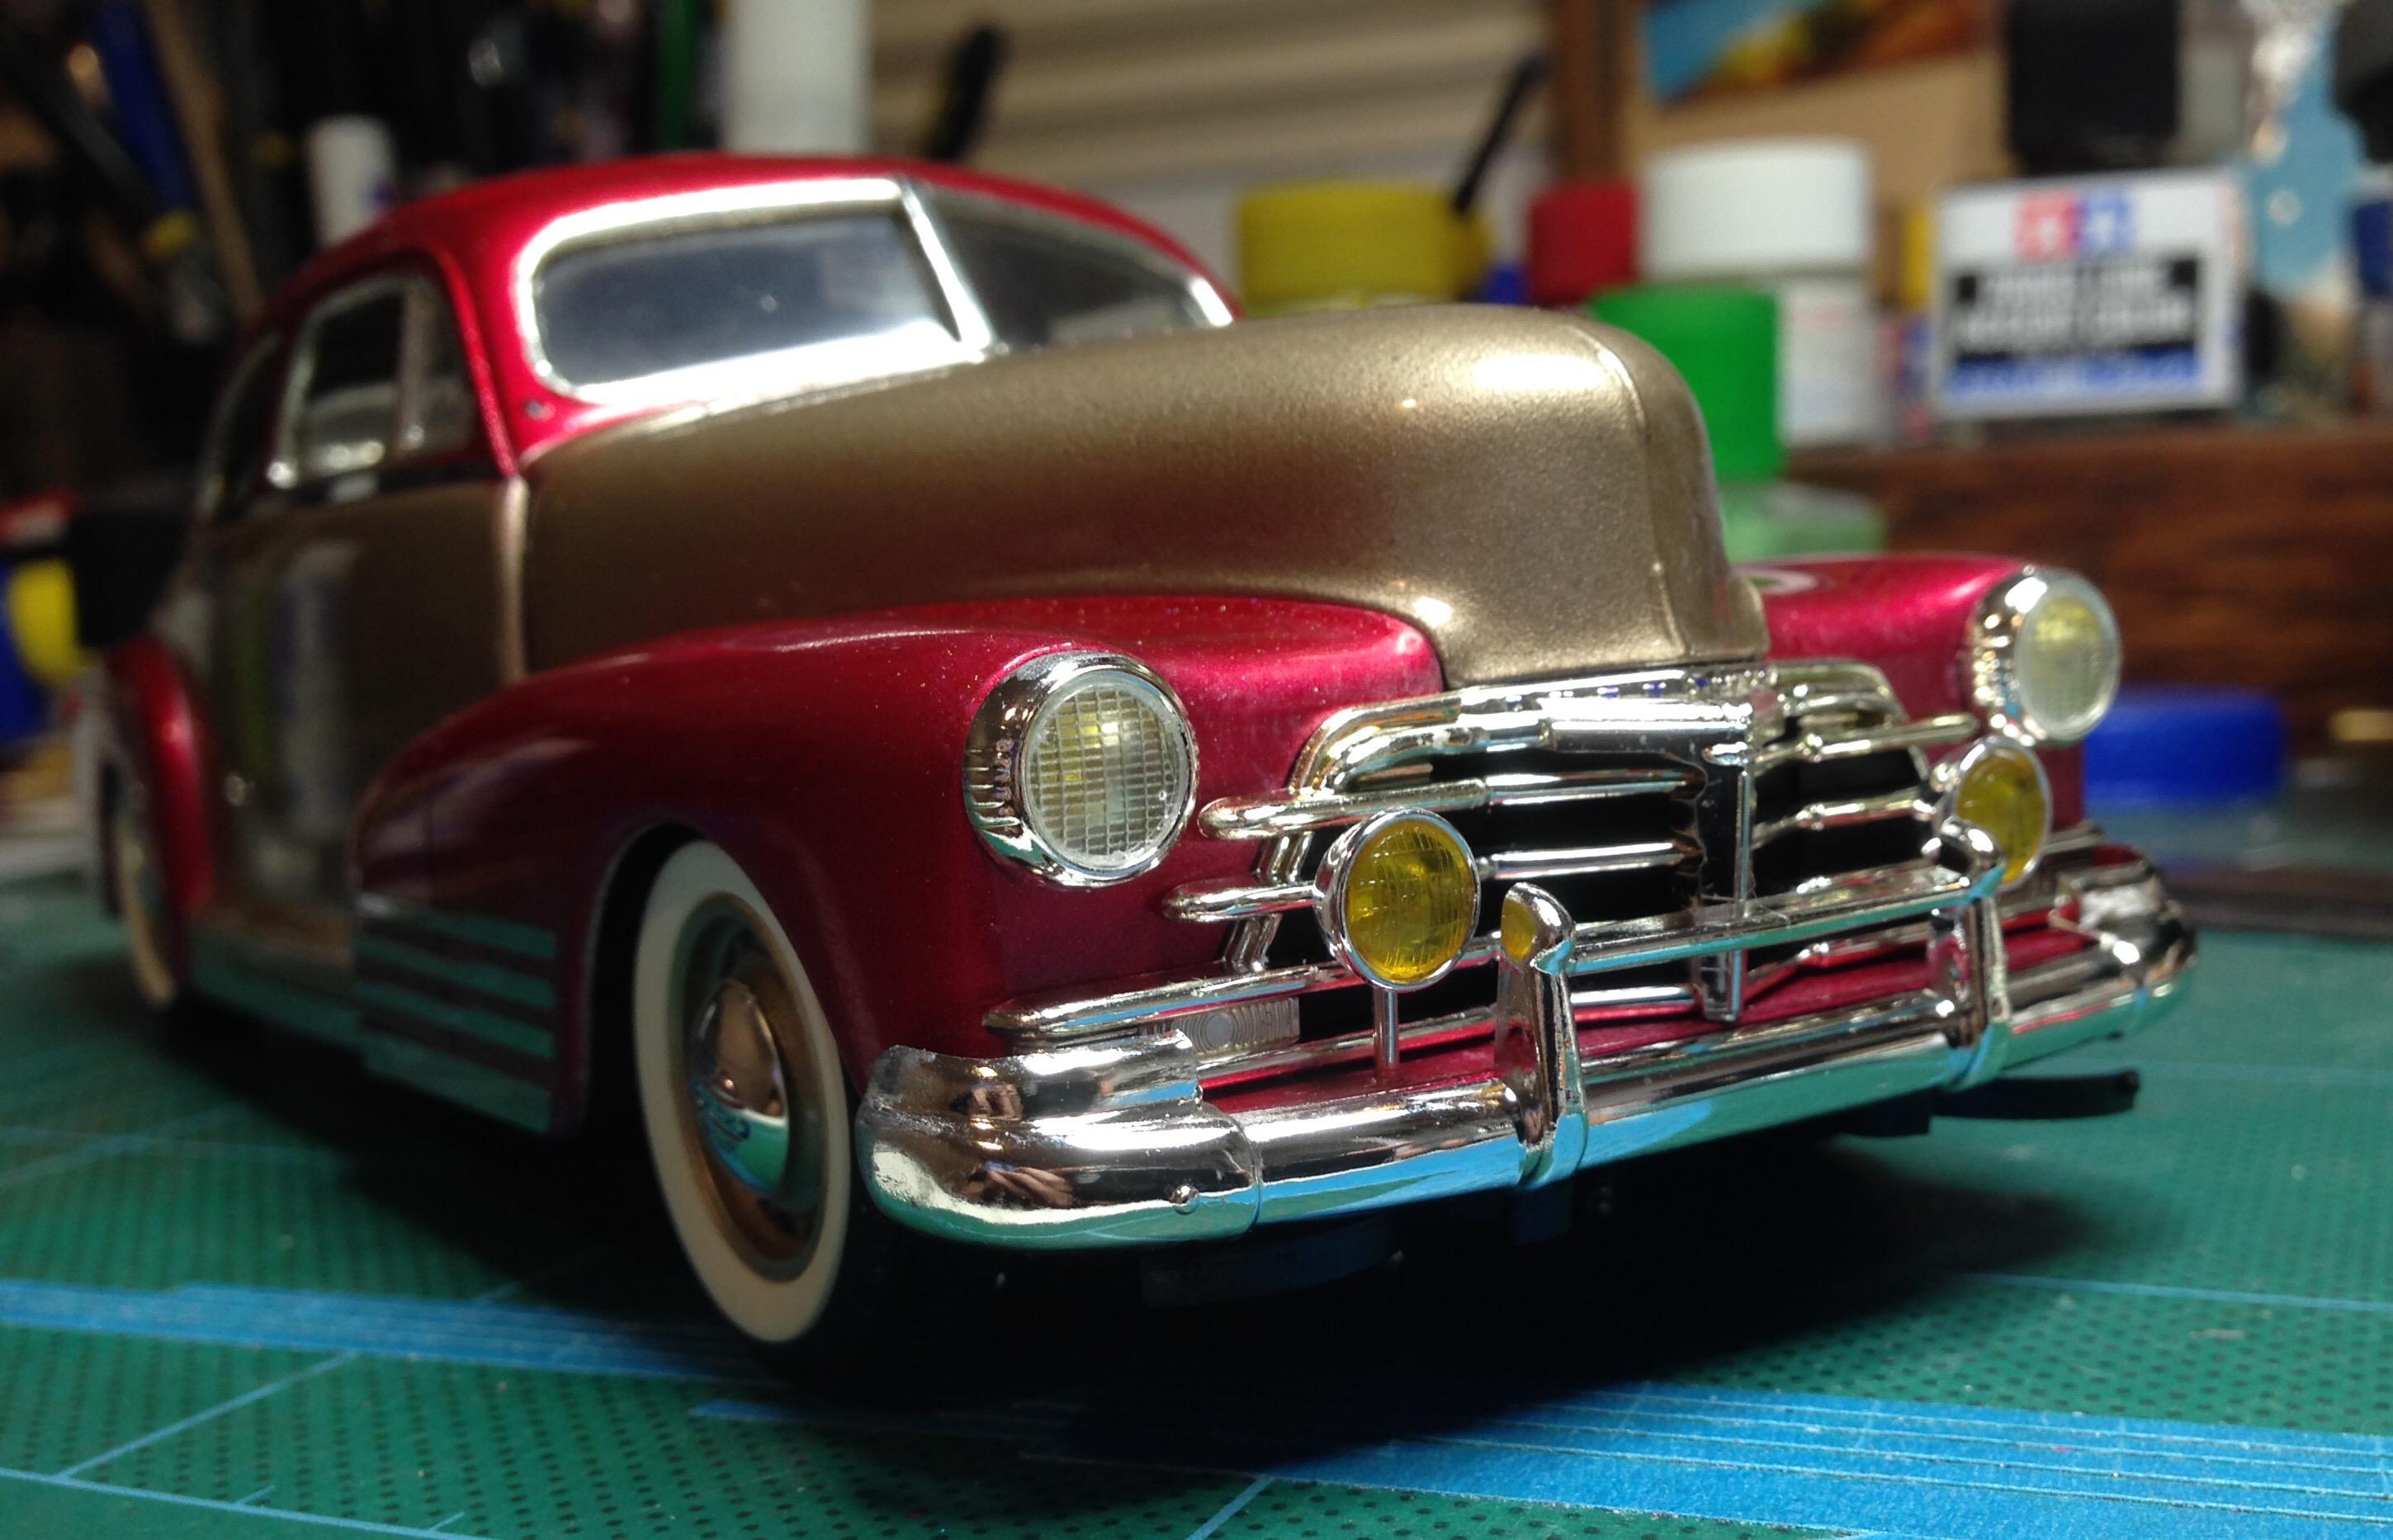
I love Imperials. Especially their outrageous tail lights. Anyway, I haven't seen many customised, so I thought I'd have a go. It's got a Watson style early 60's paint job and is gonna ride low on wires. The Fujimi Boranni wheels I have in my stash look right. I was gonna use Pegasus Sovereigns, but they looked too small. probably give it some Bellflowers and zebra upholstery, too.
-
Thanks for the nice comments, chaps! I'm glad you approve.
-
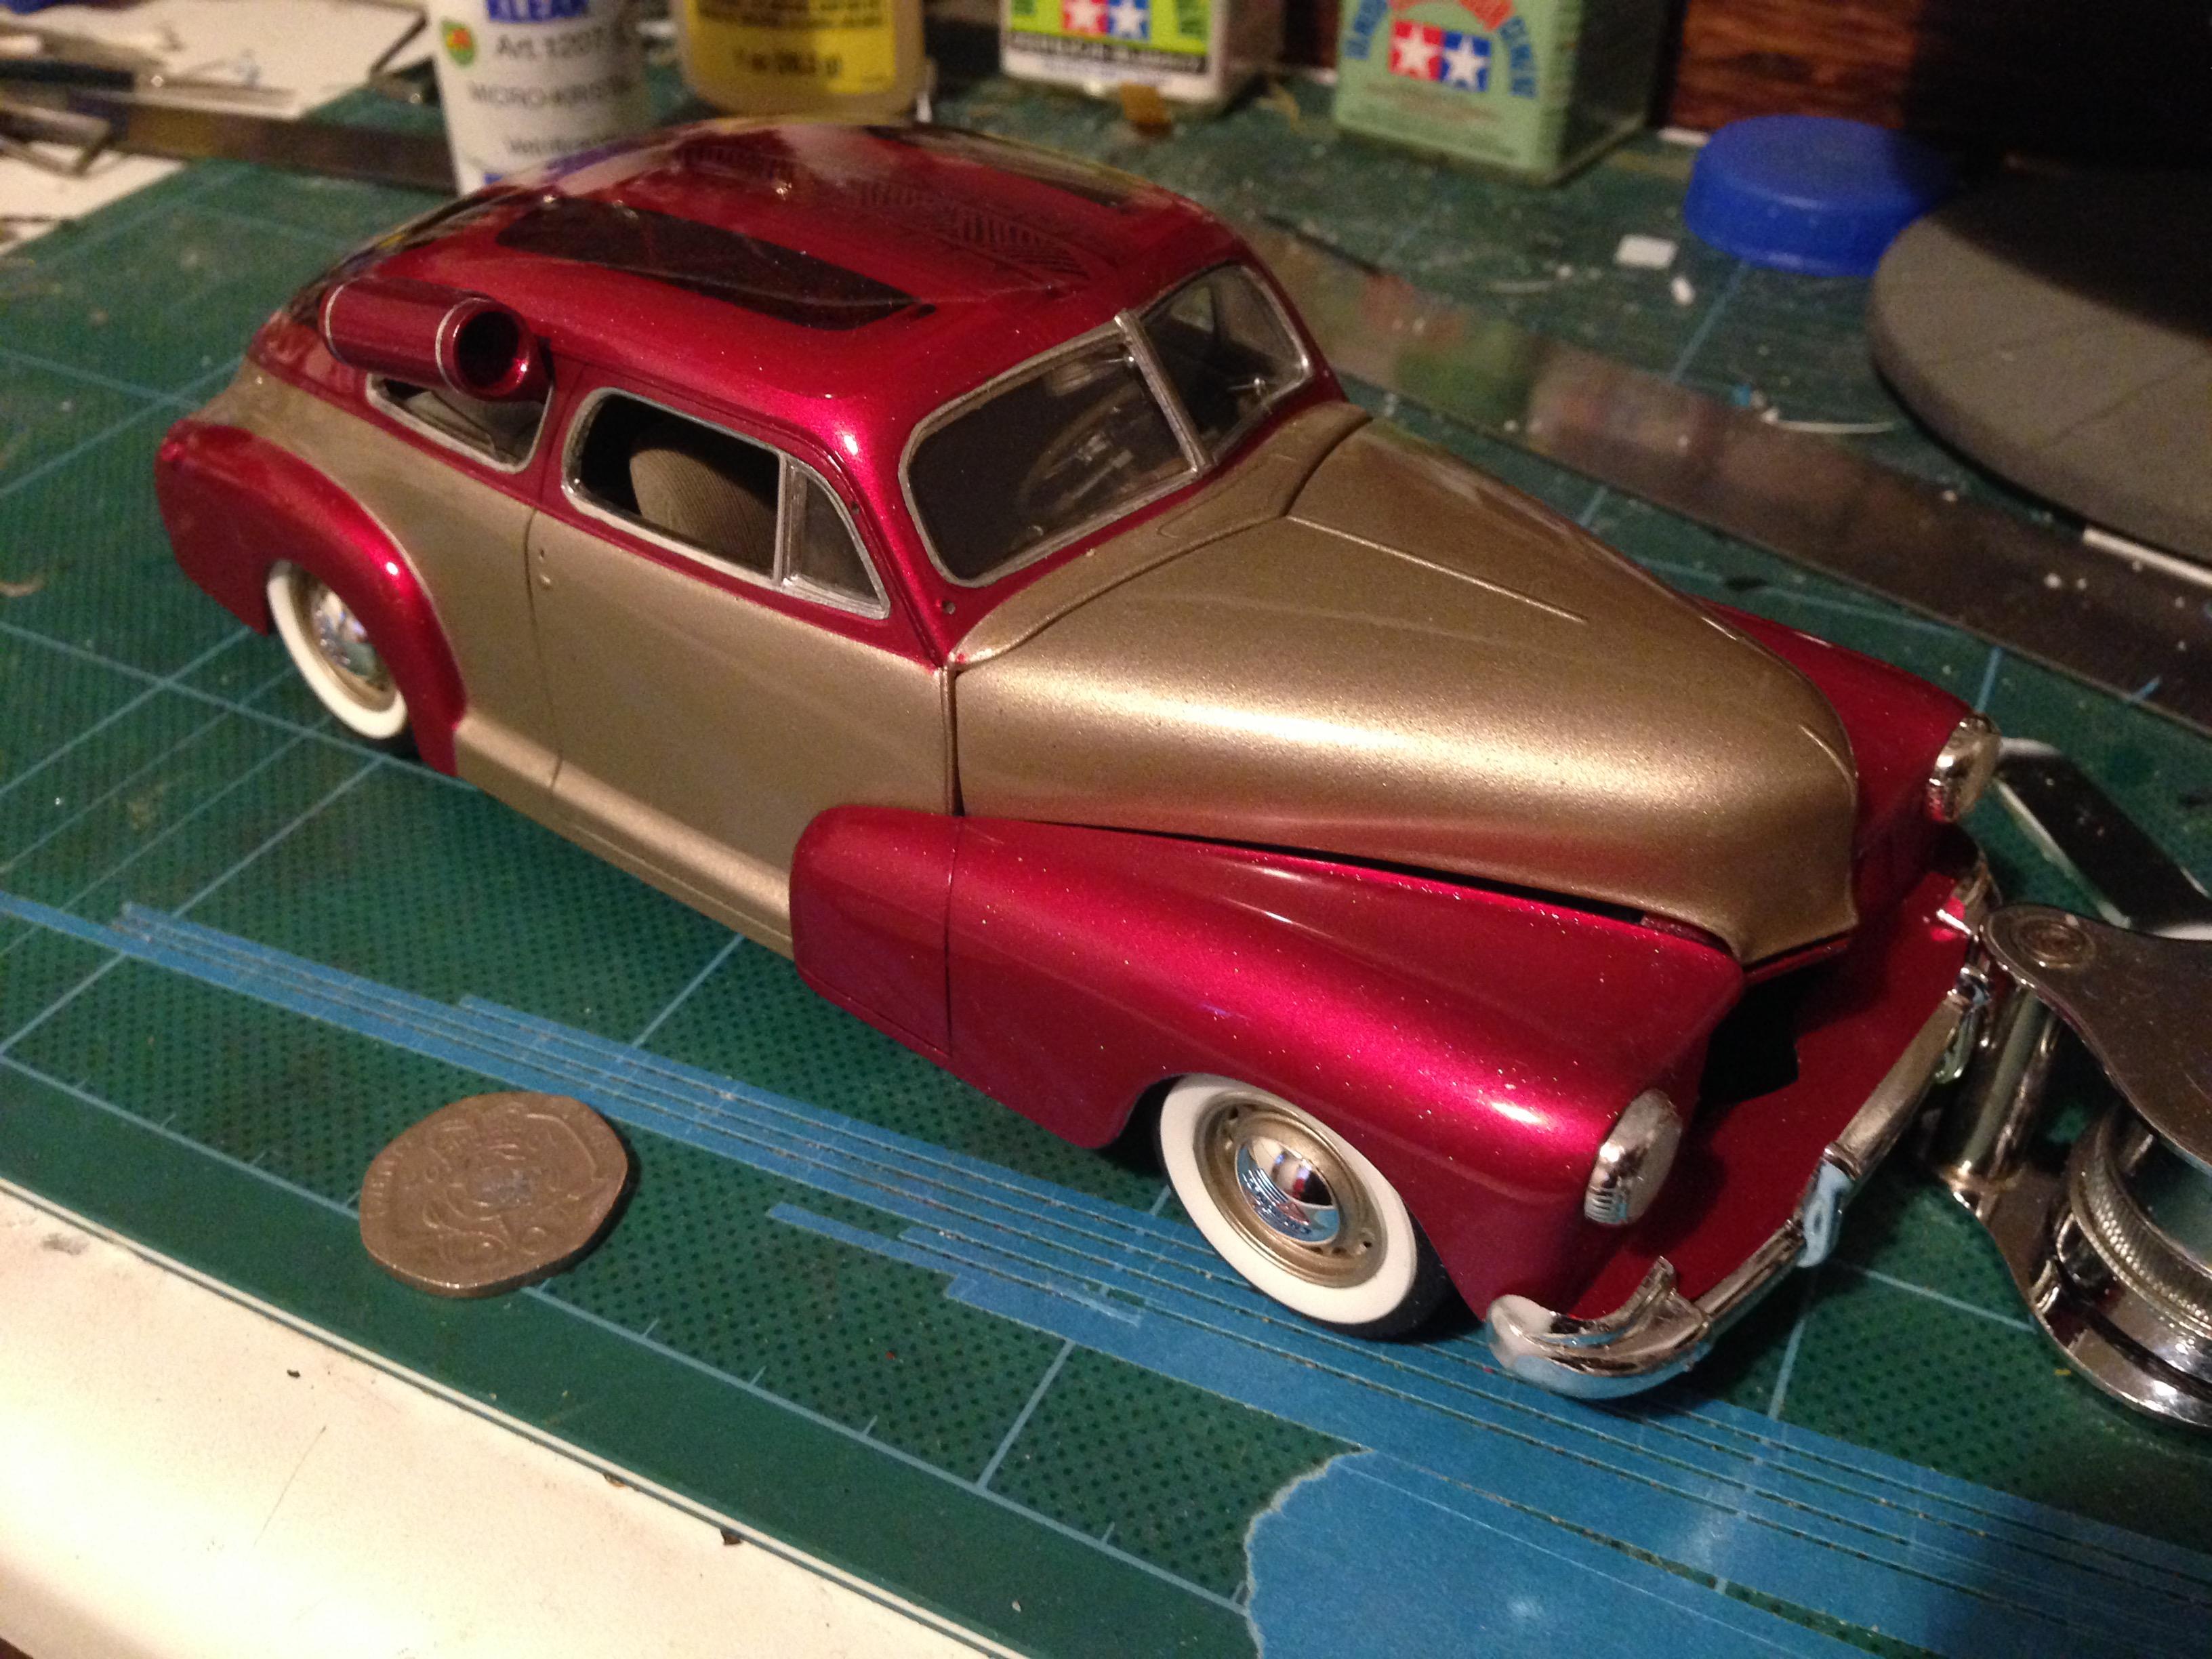
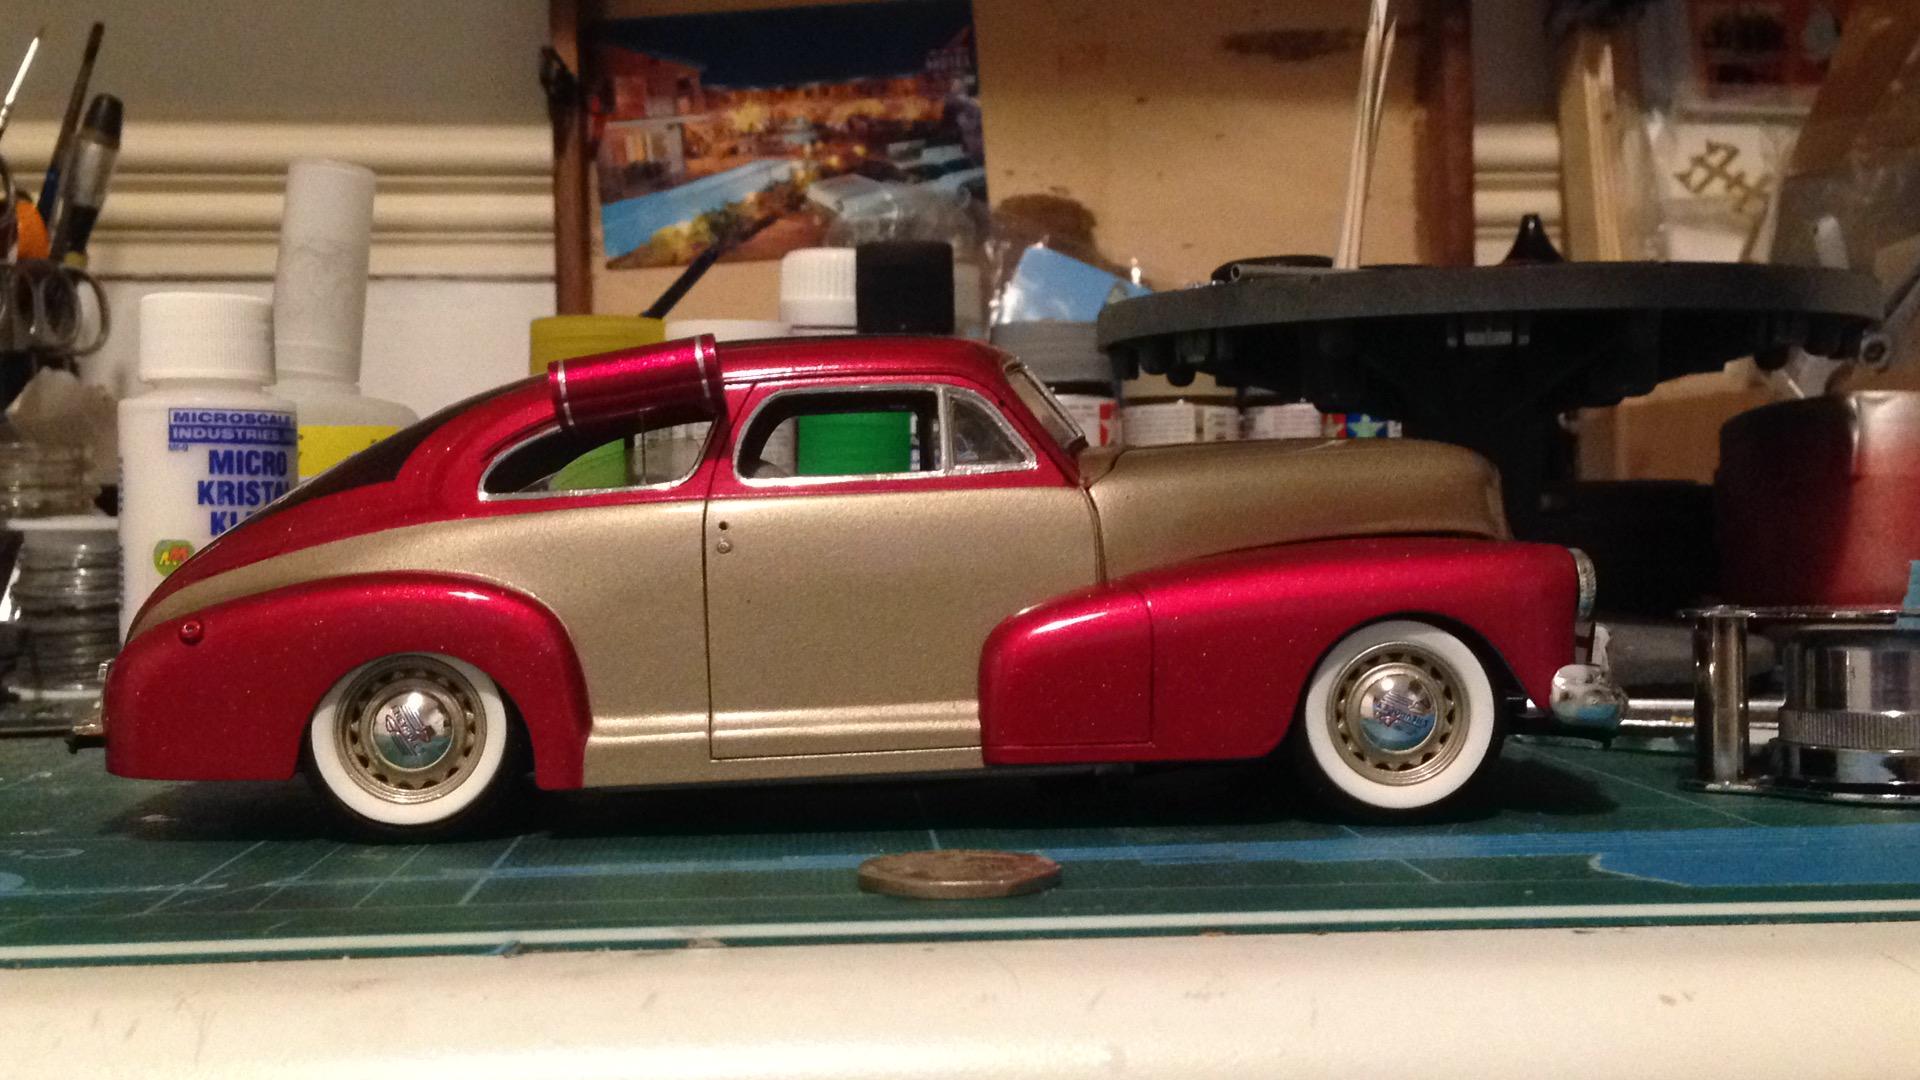
Here's another shot of the roof
-
Researching for previous lowrider builds, I became fond of these old school bombs. I like the way they look kinda stock, until you see the roof. also, a good way to hone paint techniques....! flocked carpets, wired n plumbed engine, modified chassis parts box spotlights, aftermarket resin artillery wheels and a 3D printed swamp cooler. I hope you like it
-
Also started on the tricky metal transfers for the trim. I'm having to secure the bent ends with tiny spots of CA. Glad I persevered though, as the trim is a great feature of these cars.
-
I was looking for some spotlights to fit to the bumper area and remembered the Revell 32 Ford has two choices of headlights. So I pinched the smaller ones, tinted the lenses and popped them on some wire posts. Job done!
-
Thanks Espo. Yeah, I had to go back and check everything, but there seems to be a flaw in this kit. My previous build of this kit had front end issues too. Pity I couldn't recall how I fixed that. It was several years ago. I had a look on YouTube. There's a few videos on there featuring this kit. As far as I can see, they all have the same problem, which made me feel better about mine. Anyway, the issue seems to be a combination of problems: radiator sits a few mm too high, which has now been trimmed down and the chassis, ahead of the firewall, dips down. This makes the radiator lean forward, pressing against the shroud which I also trimmed back. But even after these adjustments, it's not perfect. The inner wheel arches hit the firewall and so cannot move back any further. All contact points line up and I know for sure that the body cannot move, as it mounts up platform-style, with locator pins. The main problem, as I see it, is the position of the firewall and the distance between that and the radiator shroud. It's too long. anyway, I have found a compromise that closes the horrendous gap in front of the windshield. Hopefully get it finished any day now. test fitted the swamp cooler now it has some BMF strips and a wire support.
-
Hmm I test fitted during construction, but now I'm about to do final assembly, I have a big gap at the windscreen end of the hood. The front end won't move closer to the body, as it's prevented by the radiator pressing against the bodywork. The body can't shuffle forward to meet the hood, as it's prevented by the chassis pressing on the inside edge of the body. looks ok in these photos, but I need to think hard about how I'll fix this problem...?
-
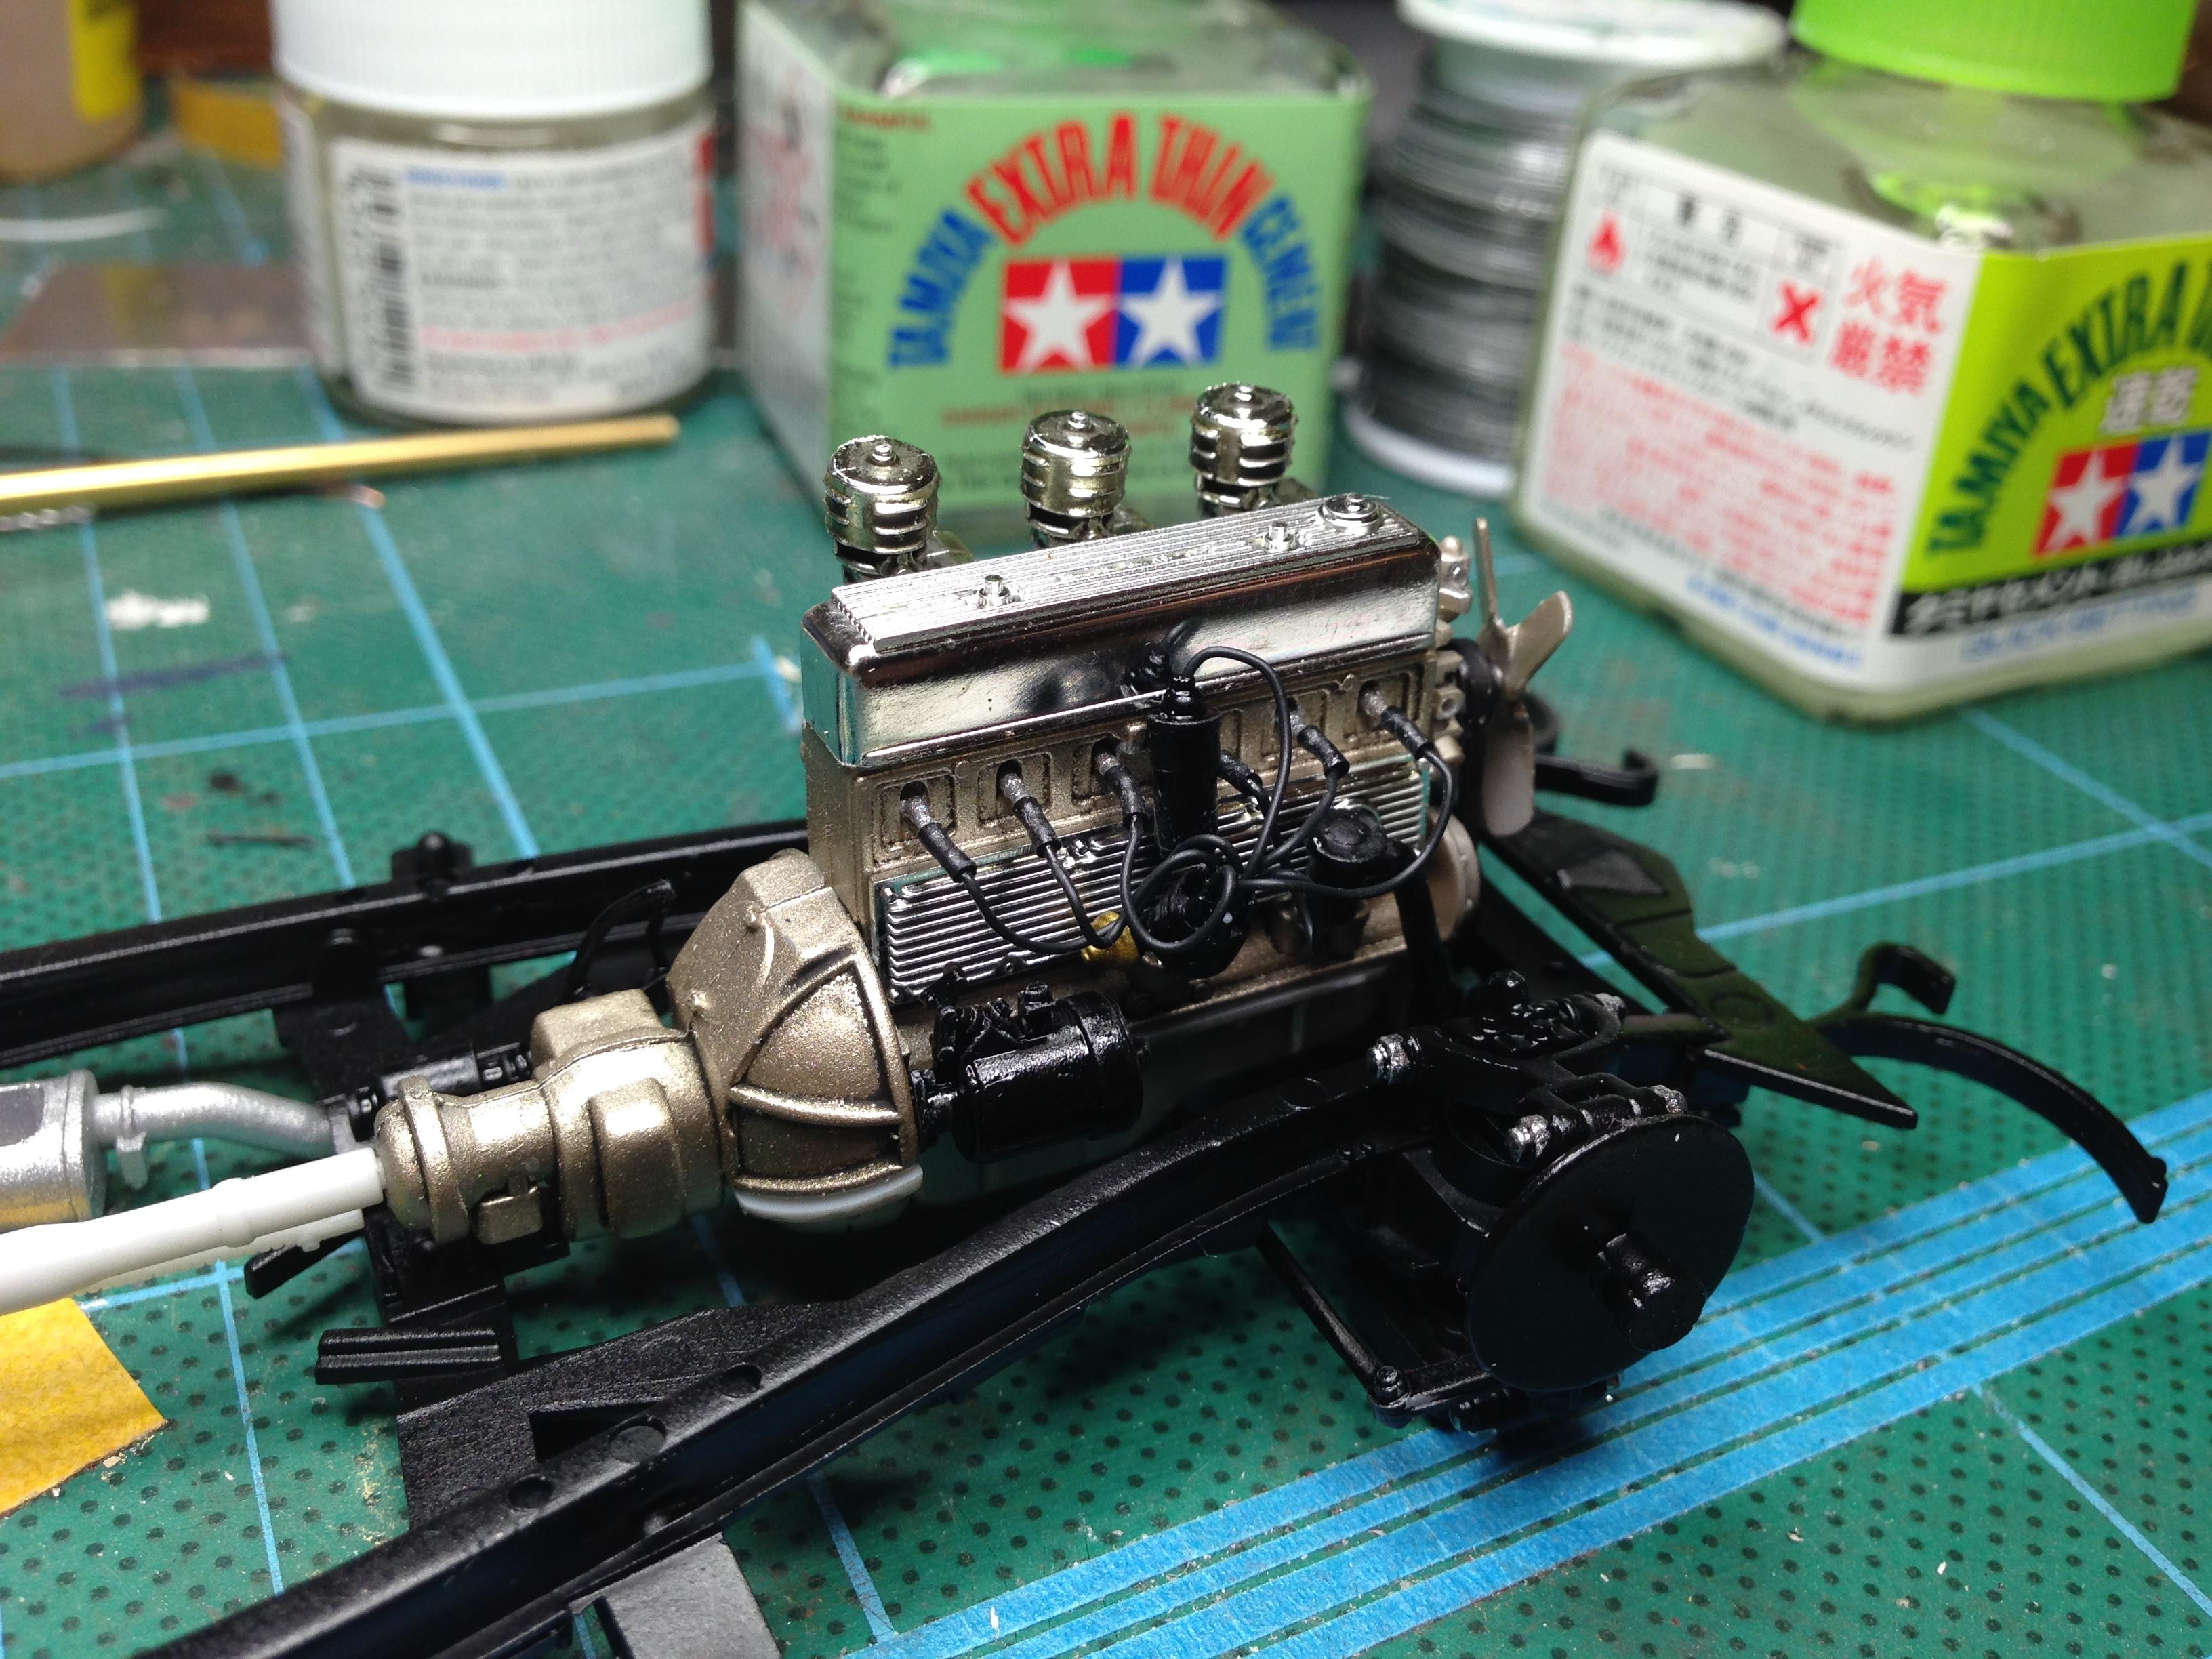
Thanks man! This kit has spark plugs moulded into the engine, which meant I could fit the wires to the ends, rather than drill holes like I normally do. I manipulated the wires with cocktail sticks to get them in the right spot.
-
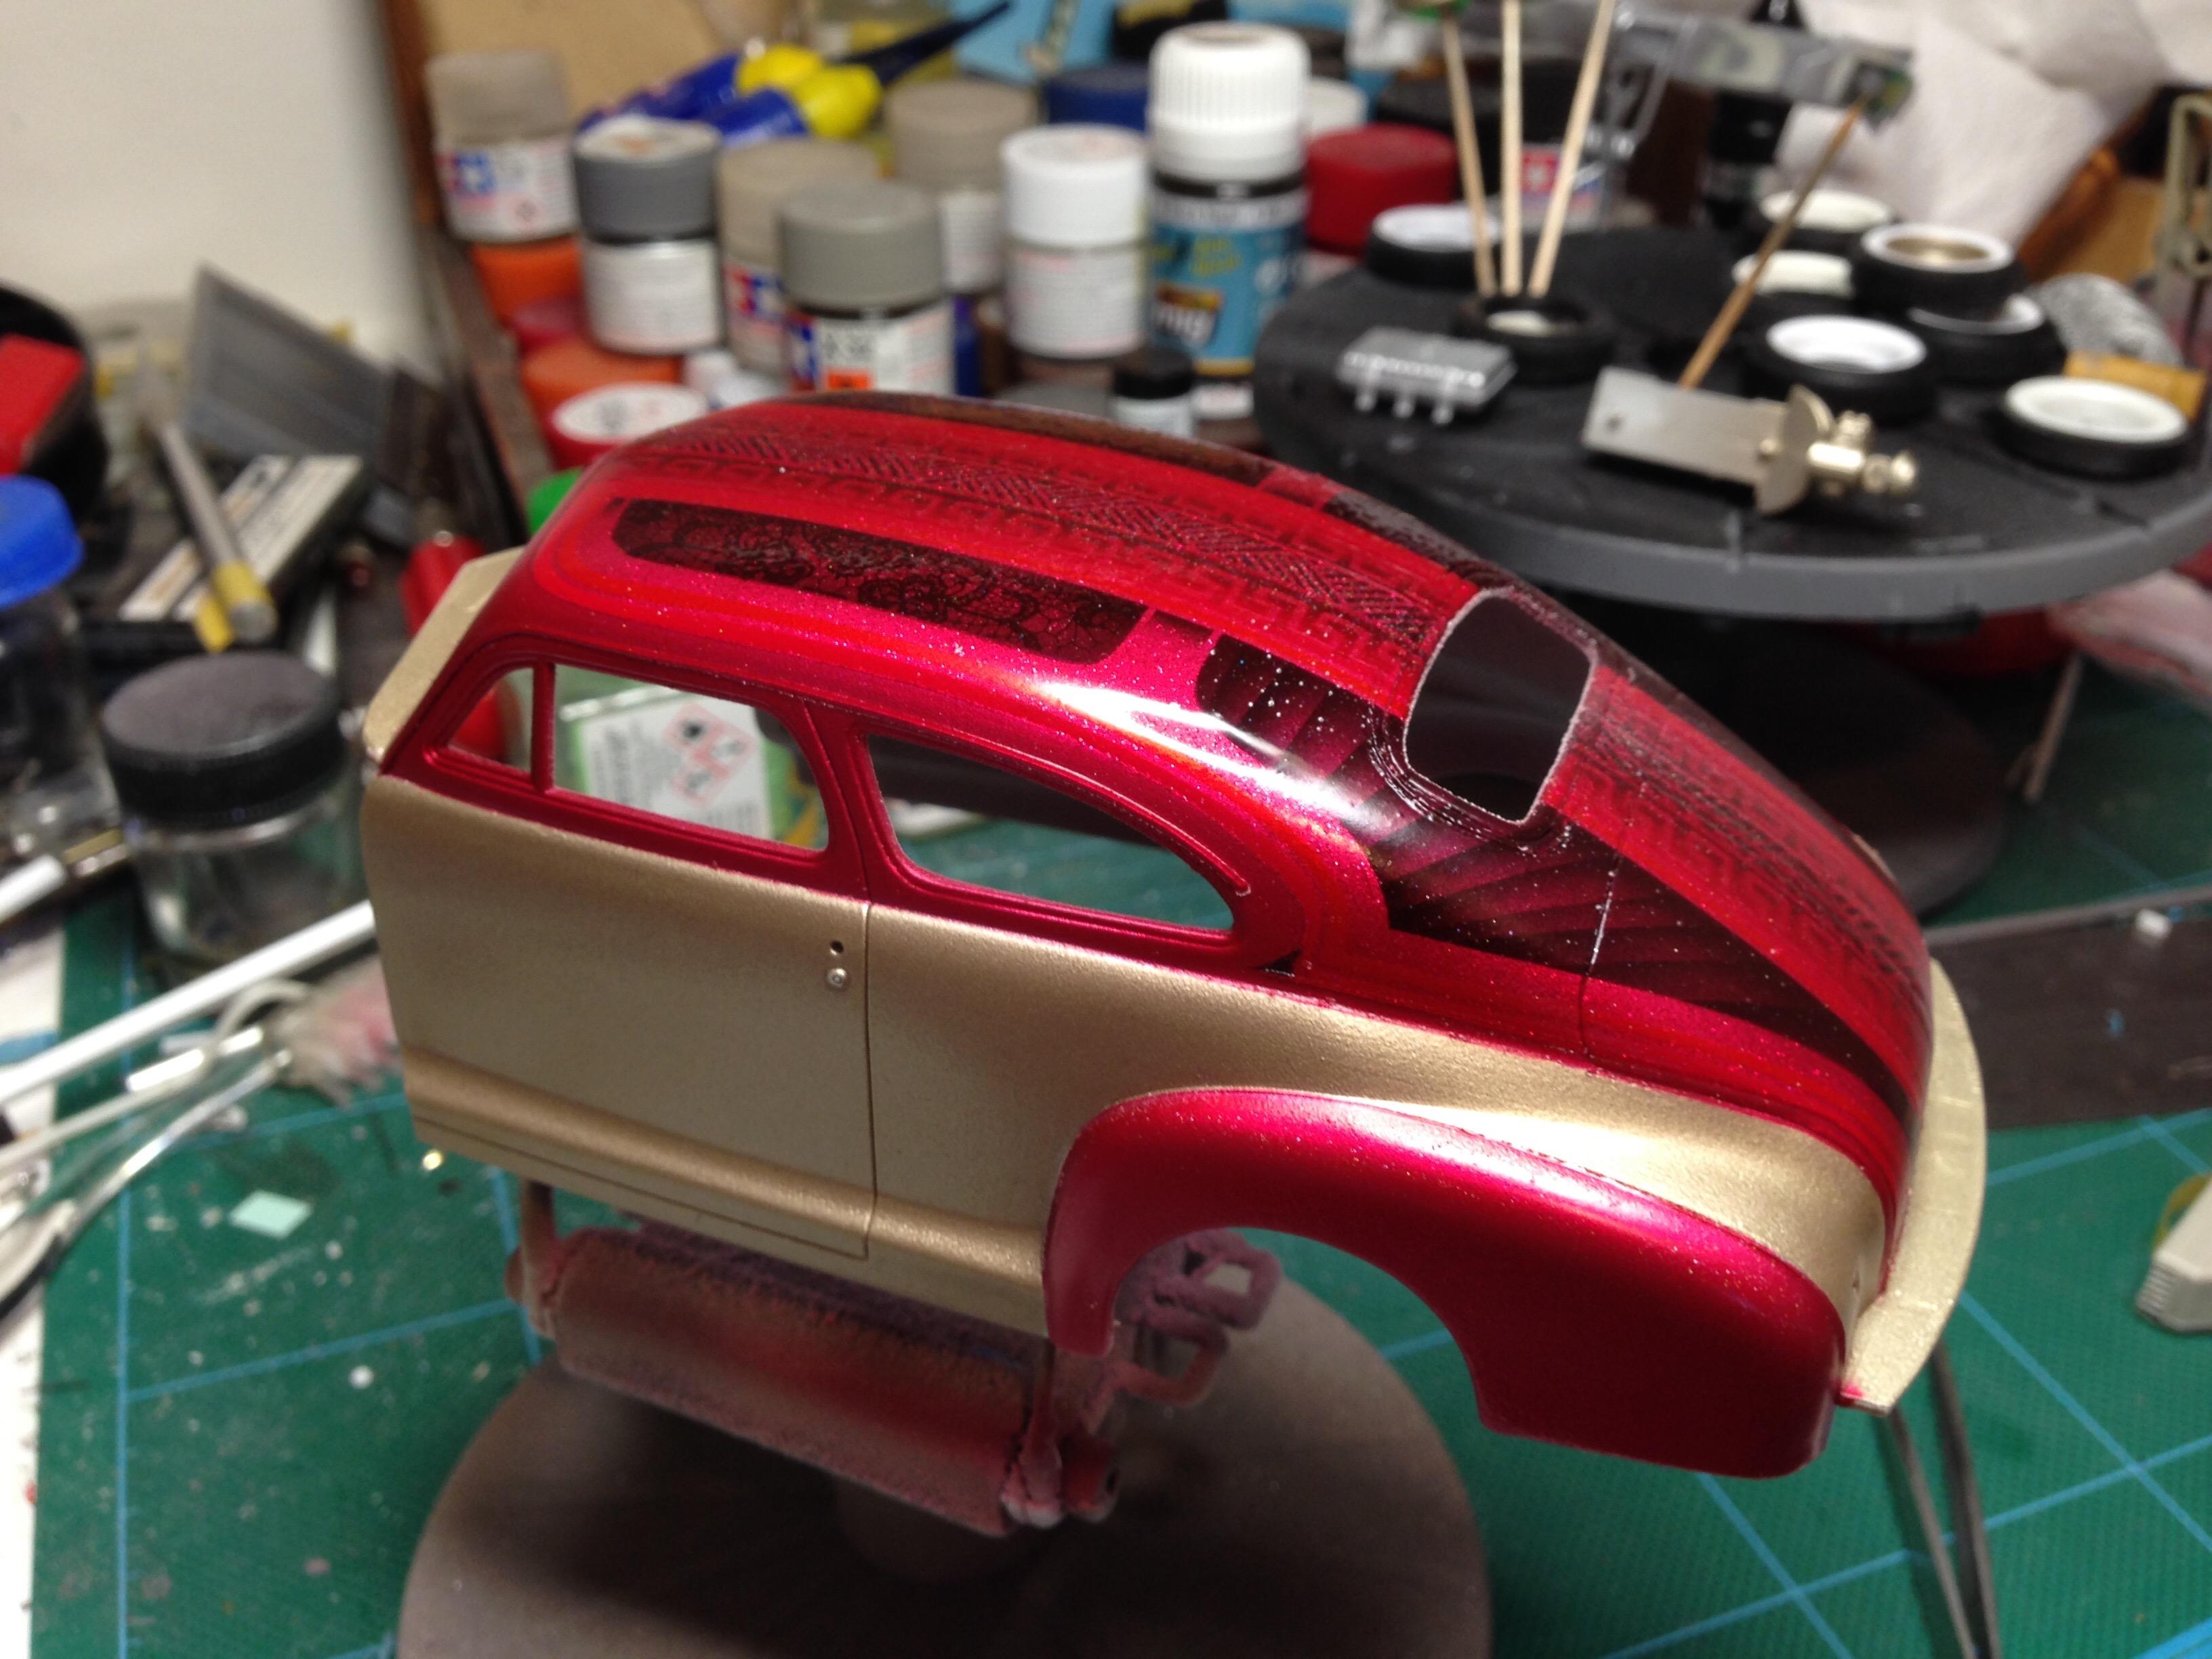
I'm glad you like it, guys. I used nail art water slide decals for the lace. Got 'em on eBay for a quid. Pick the sheet of lace, rather than those pre-cut for nails. It gives you more to play with . here's a link for you: https://rover.ebay.com/rover/0/0/0?mpre=https%3A%2F%2Fwww.ebay.co.uk%2Fulk%2Fitm%2F152359781872?
-
Thanks! I used chalk pastels to create depth on the seat cushions. fitting the wheels and body tonight ?
-
I wondered about doing a half n half car. Yours looks excellent! Some lovely details there ?
-
And the interior. I mixed up a cream colour for the aged plastic. All reference photos show a yellow tint to these parts.
-
Also got the engine wired
-
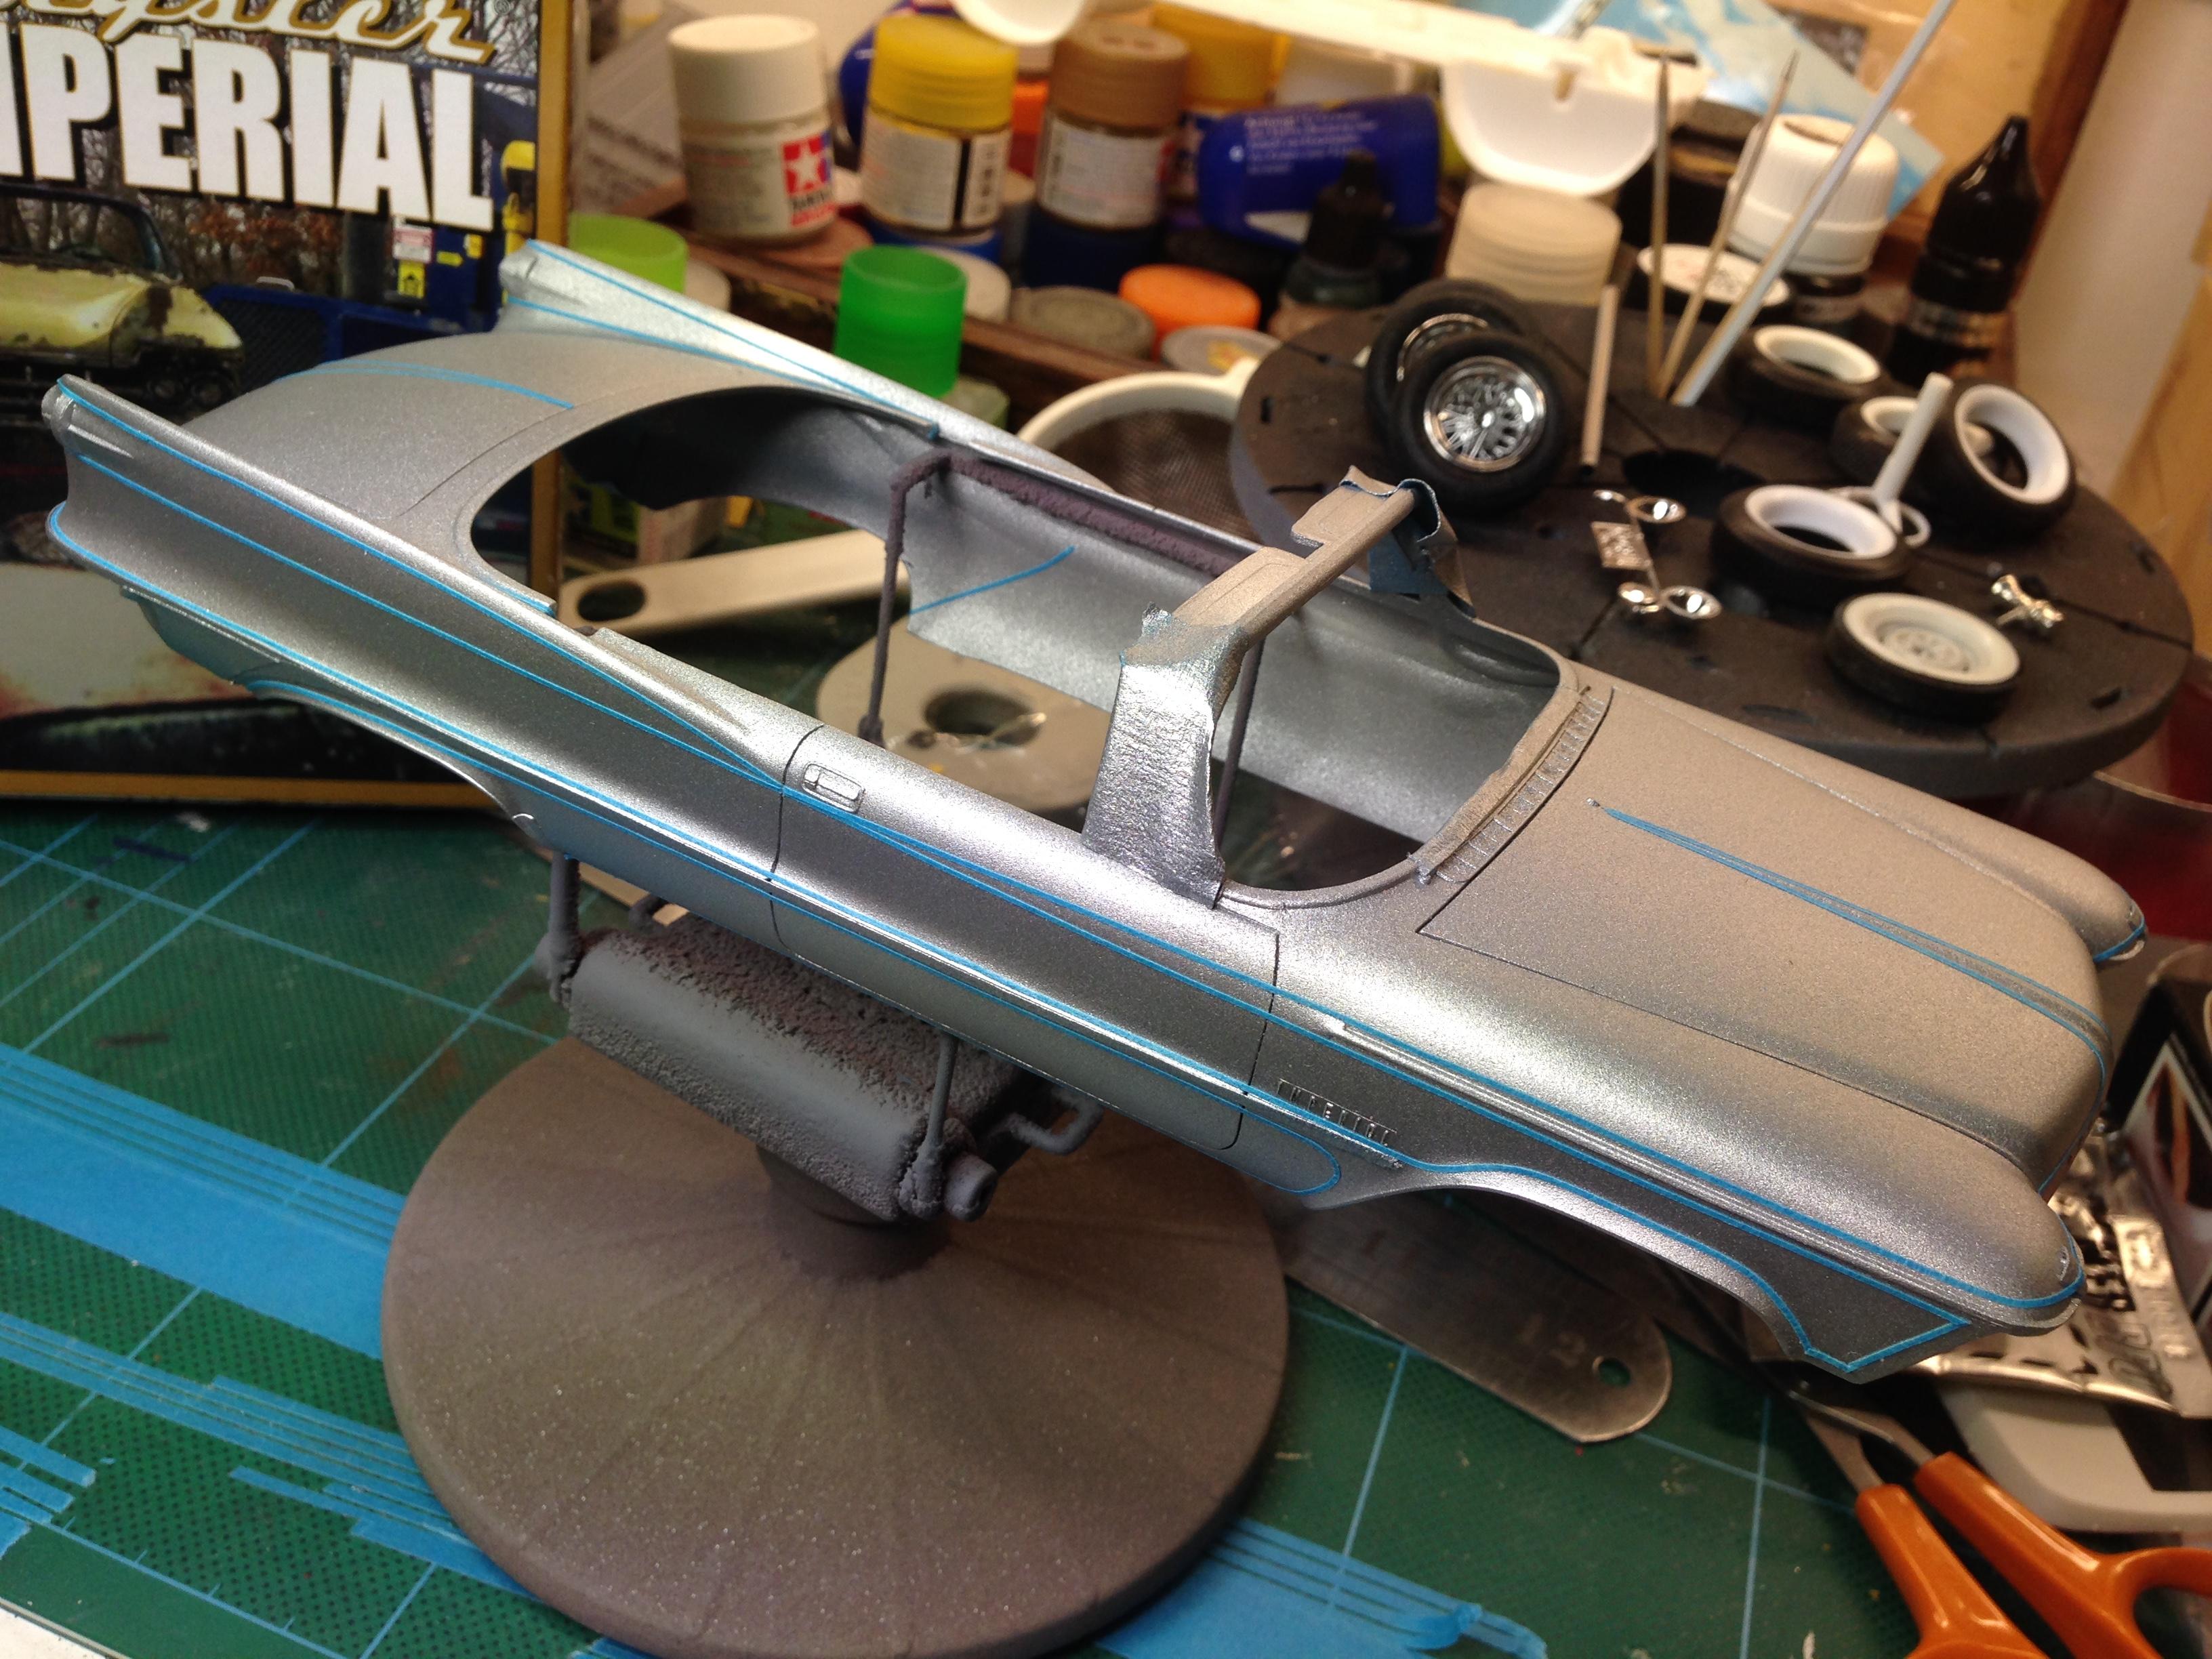
Saved the paint! It rubbed out well and has a good shine. got the foil done around the windows, too.
-
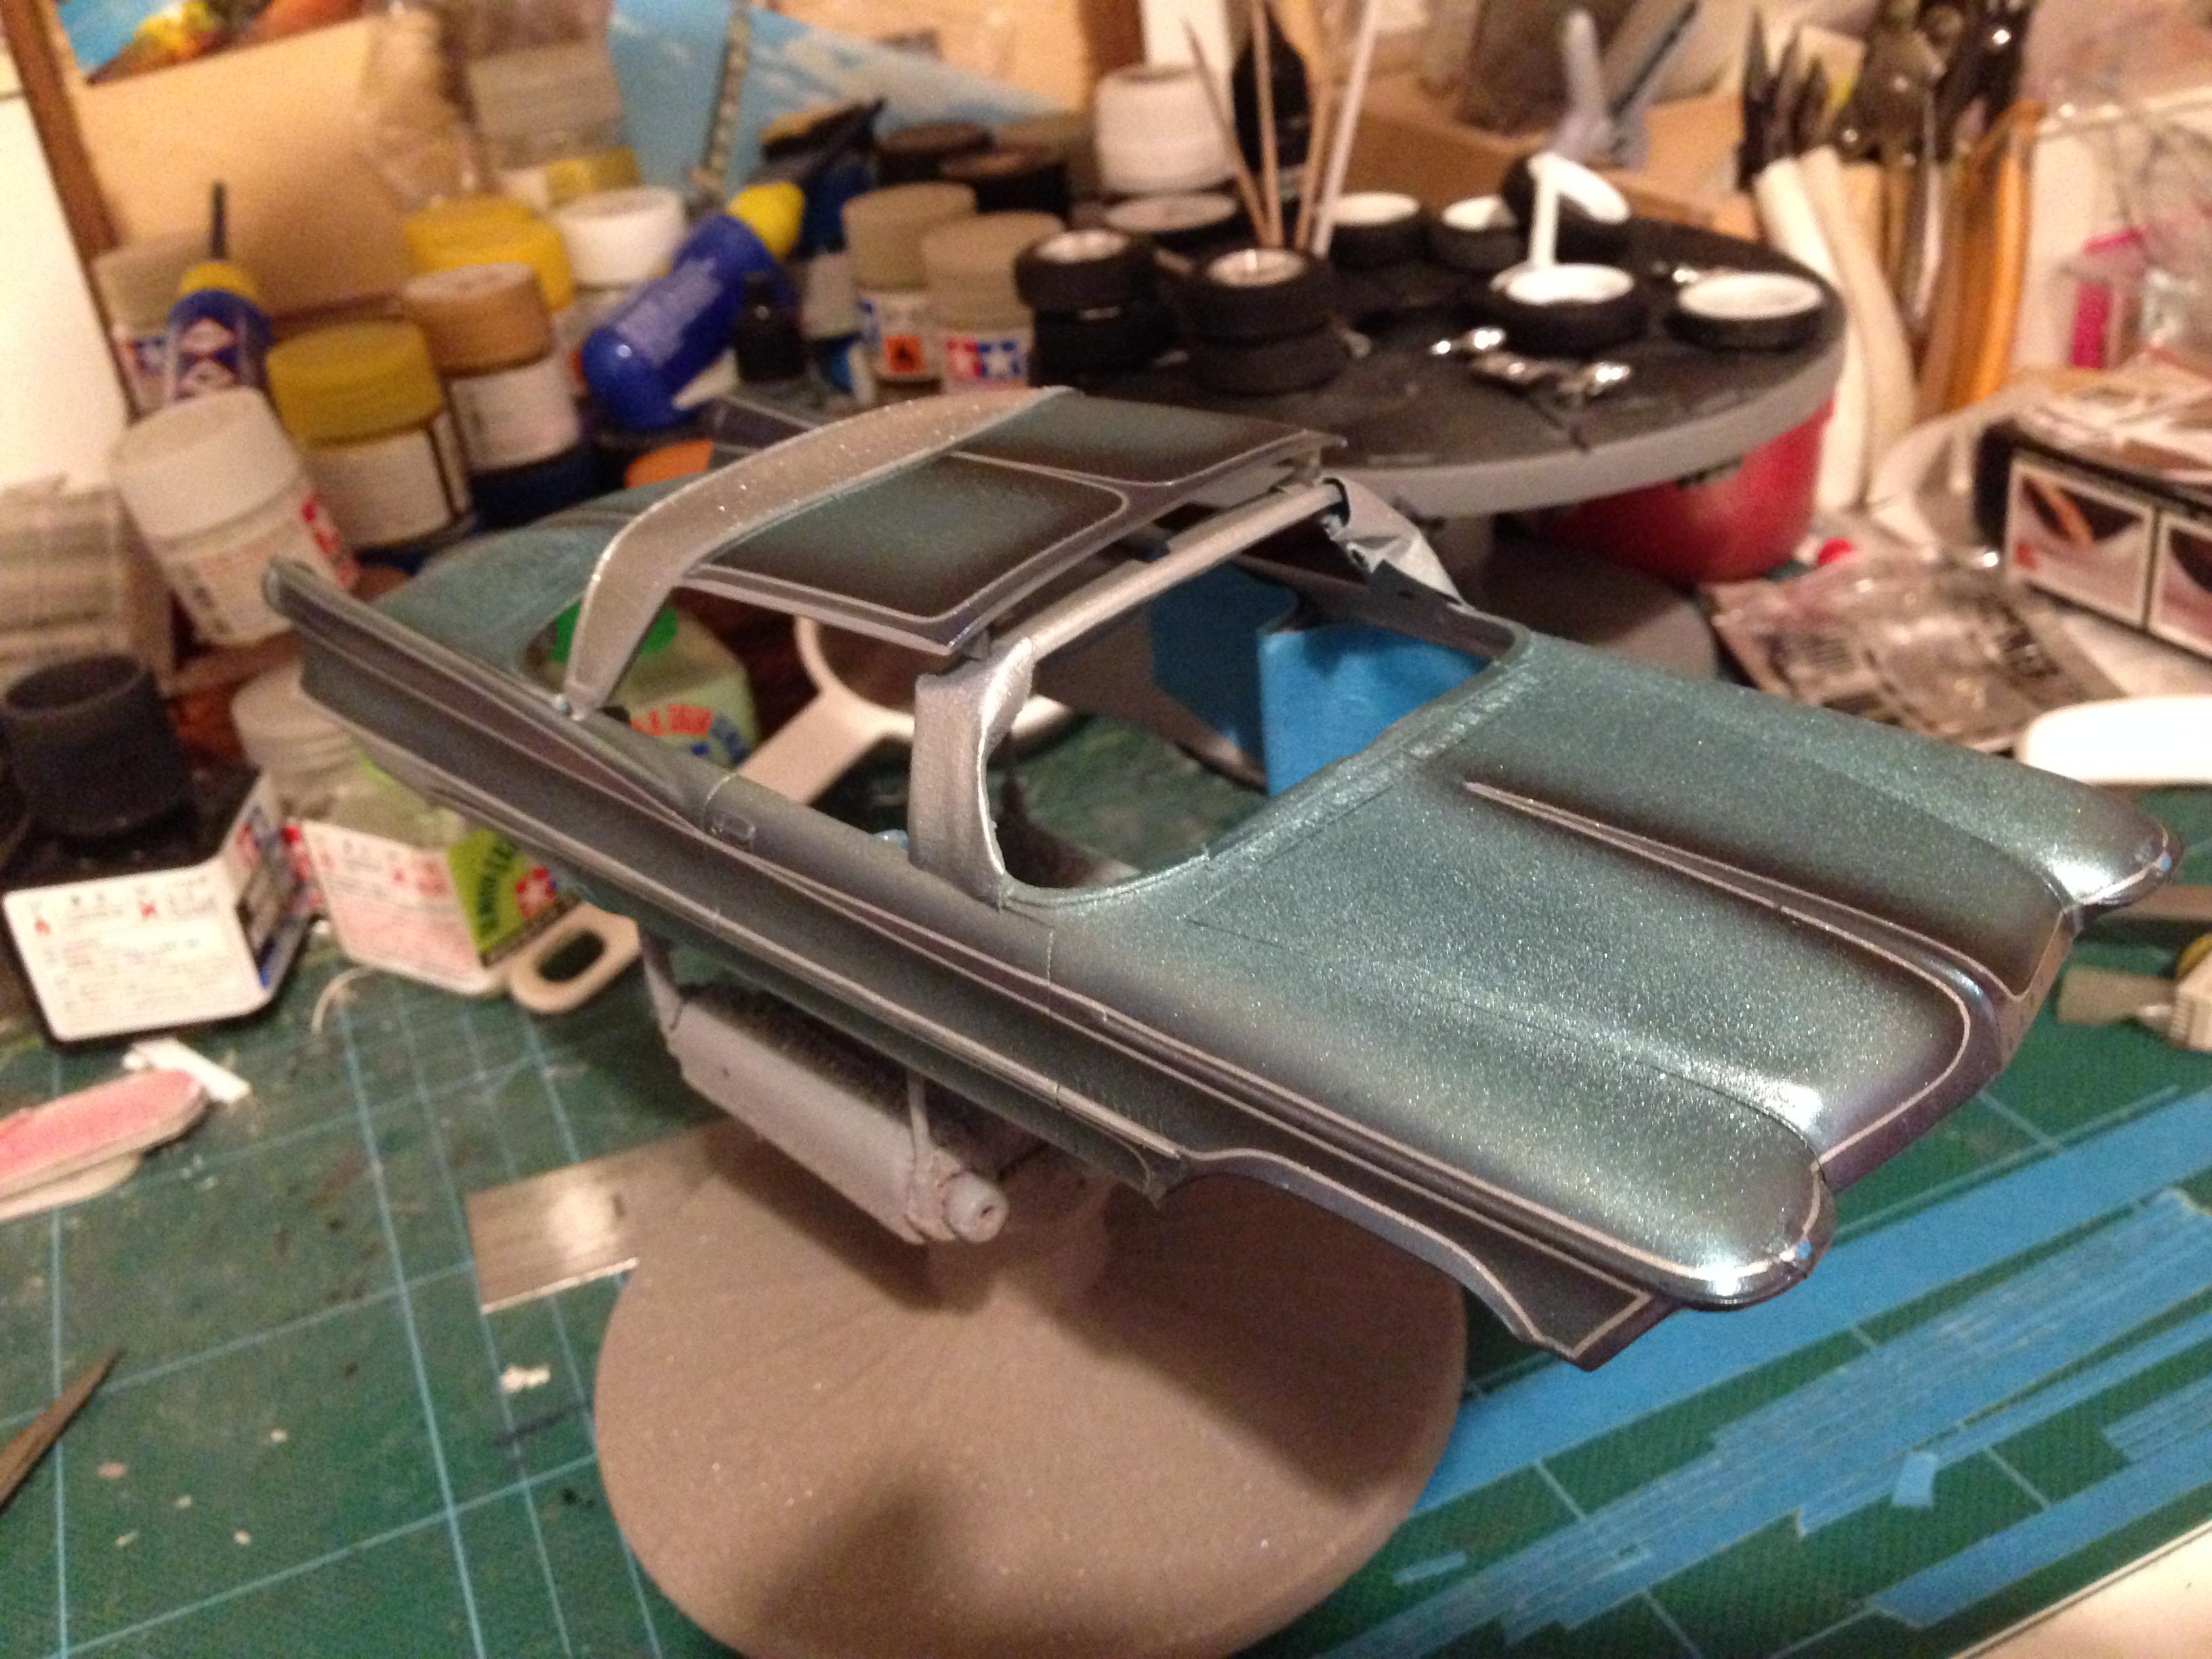
Thanks the tape is Tamiya and 3M Scotch '3434' blue. I'm applying the clearcoat at the moment. The sparkle is coming back. But I'm getting a gritty finish on the roof. Dunno why. It's ok, it'll rub out
-
Got the red candy on today. The sparkle will return after clearcoat
-
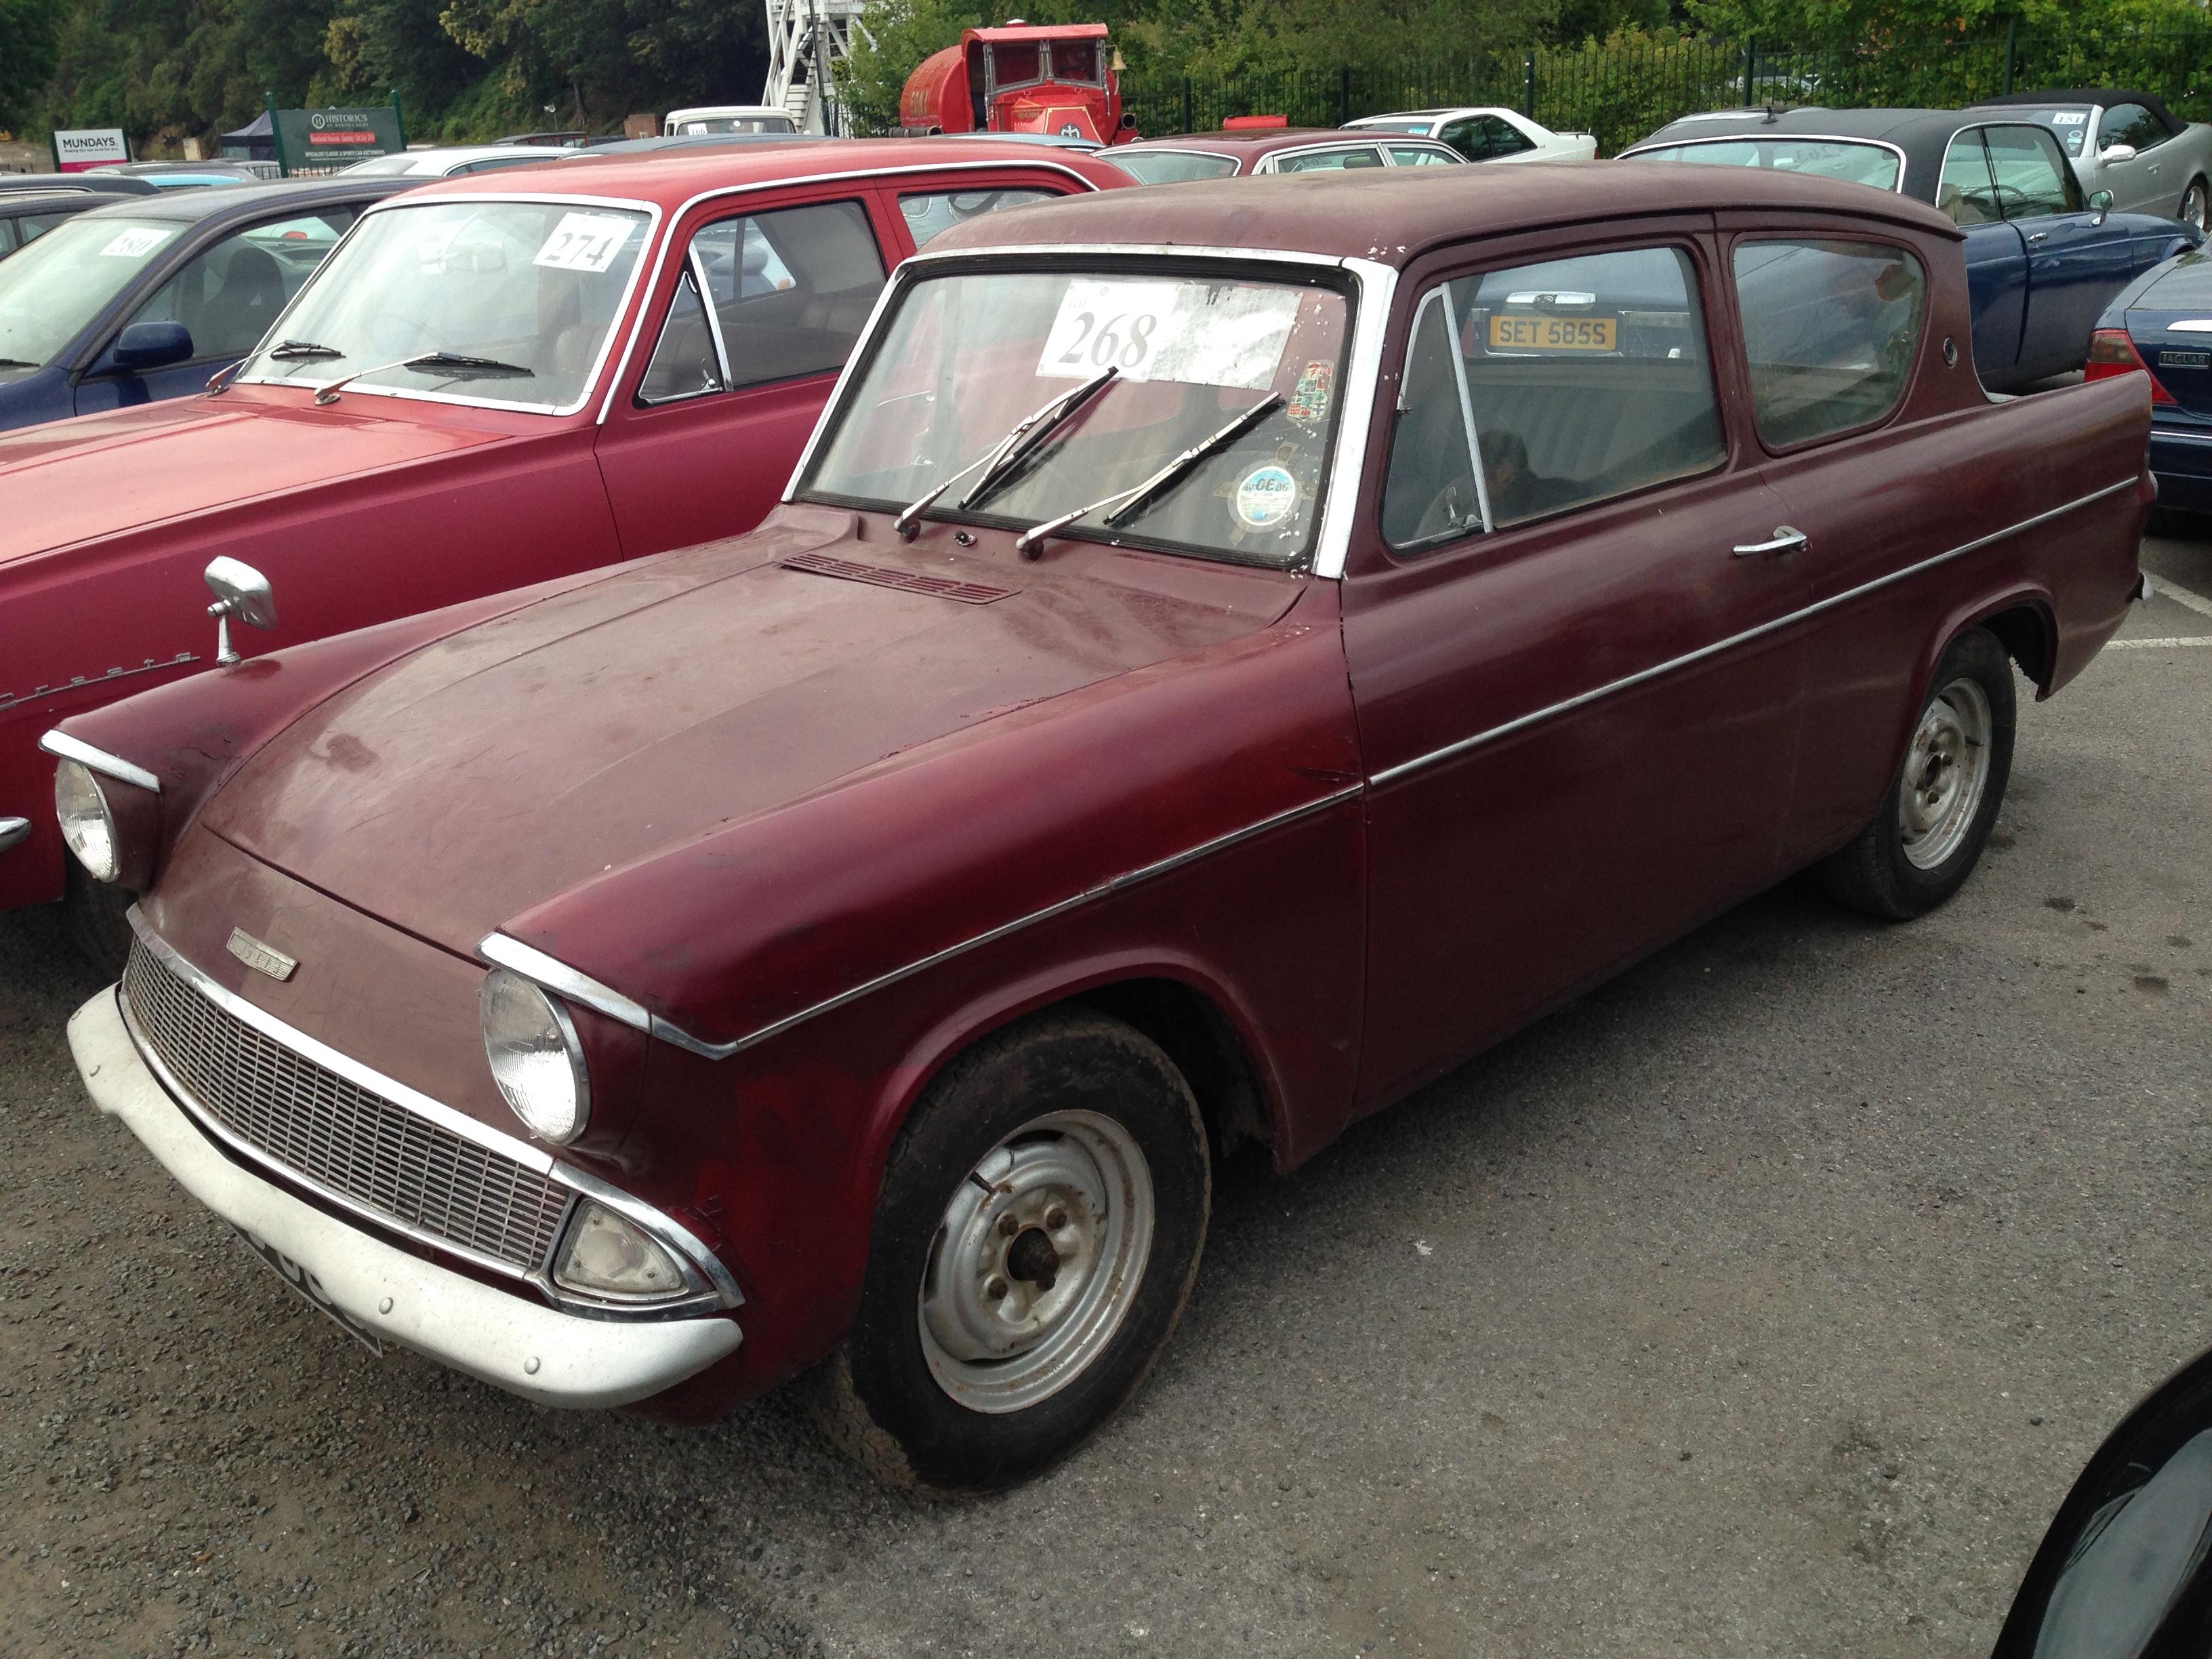
Excellent work David! I'm especially pleased to see this build, as my first car was a 105E and the same colour as yours. I recently saw a battered barn find at Brooklands, awaiting auction...
-
Cheers Jim i got the lace on. Should be dry enough to clearcoat tomorrow.
-
One more colour went on today. Next is a clear sealer coat before I go candy red. Got a little bit of tidying up to do, but overall, not too shabby.