geetee66
-
Posts
1,540 -
Joined
-
Last visited
Content Type
Profiles
Forums
Events
Gallery
Everything posted by geetee66
-
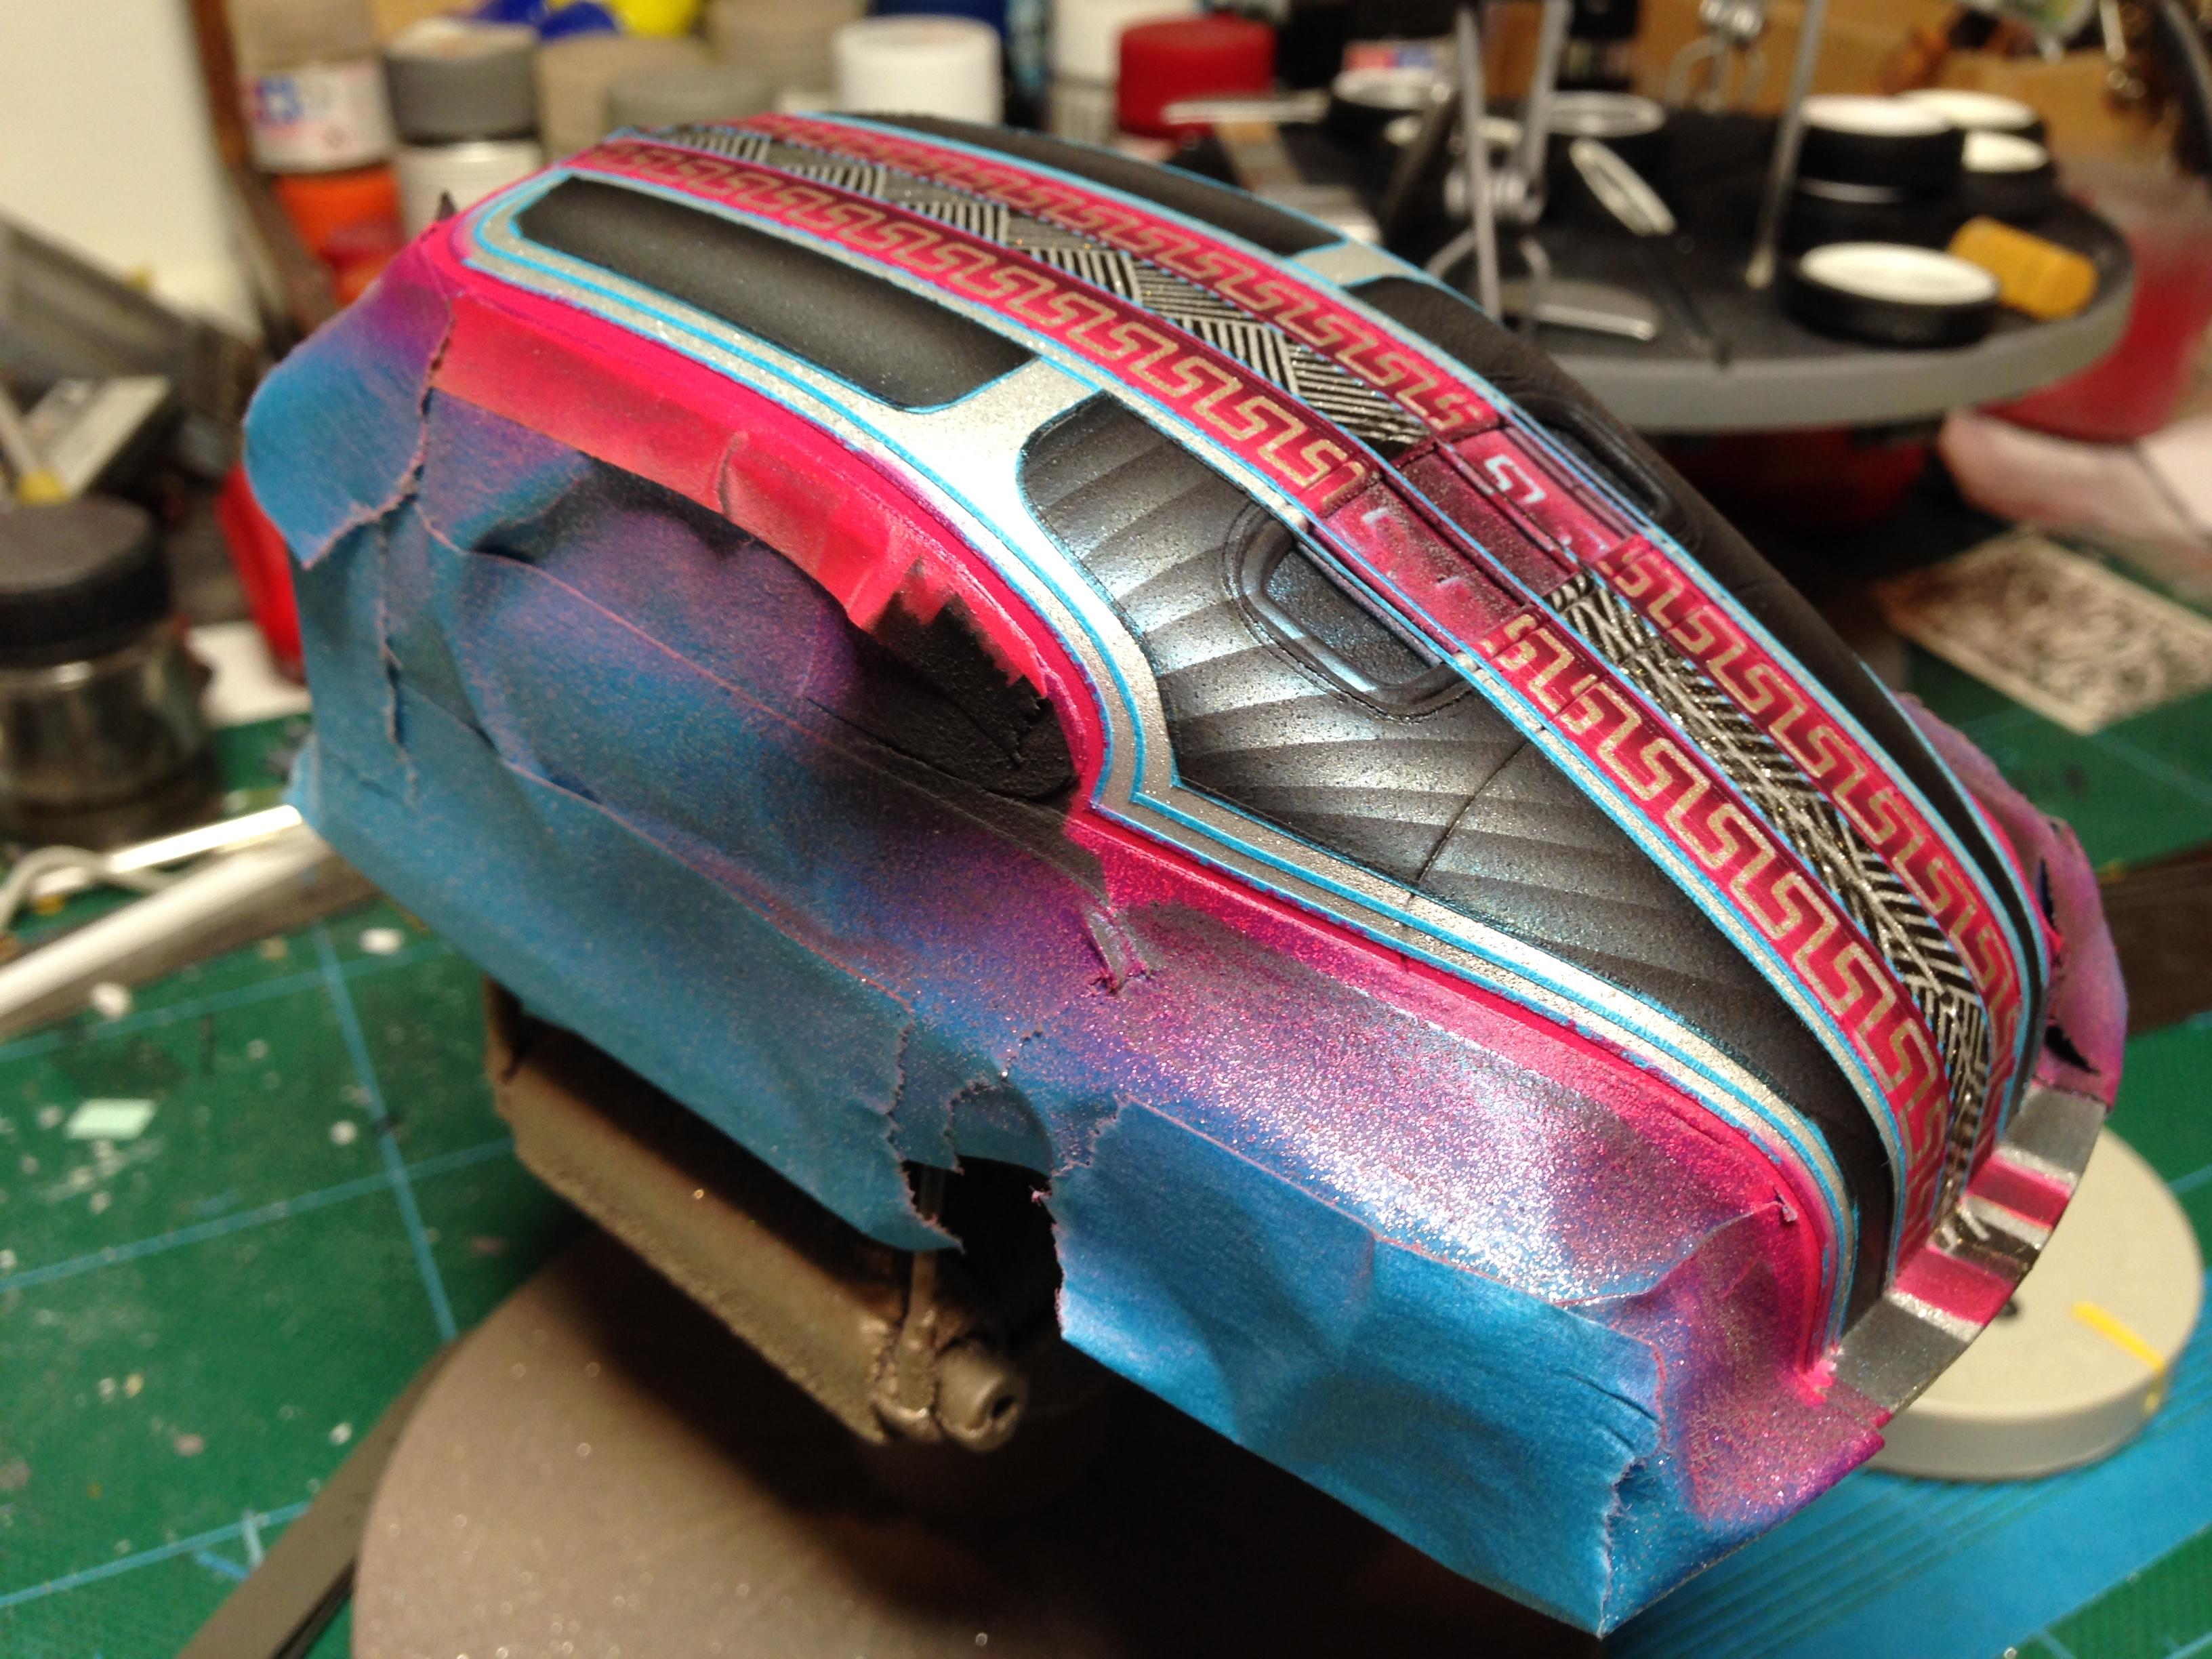
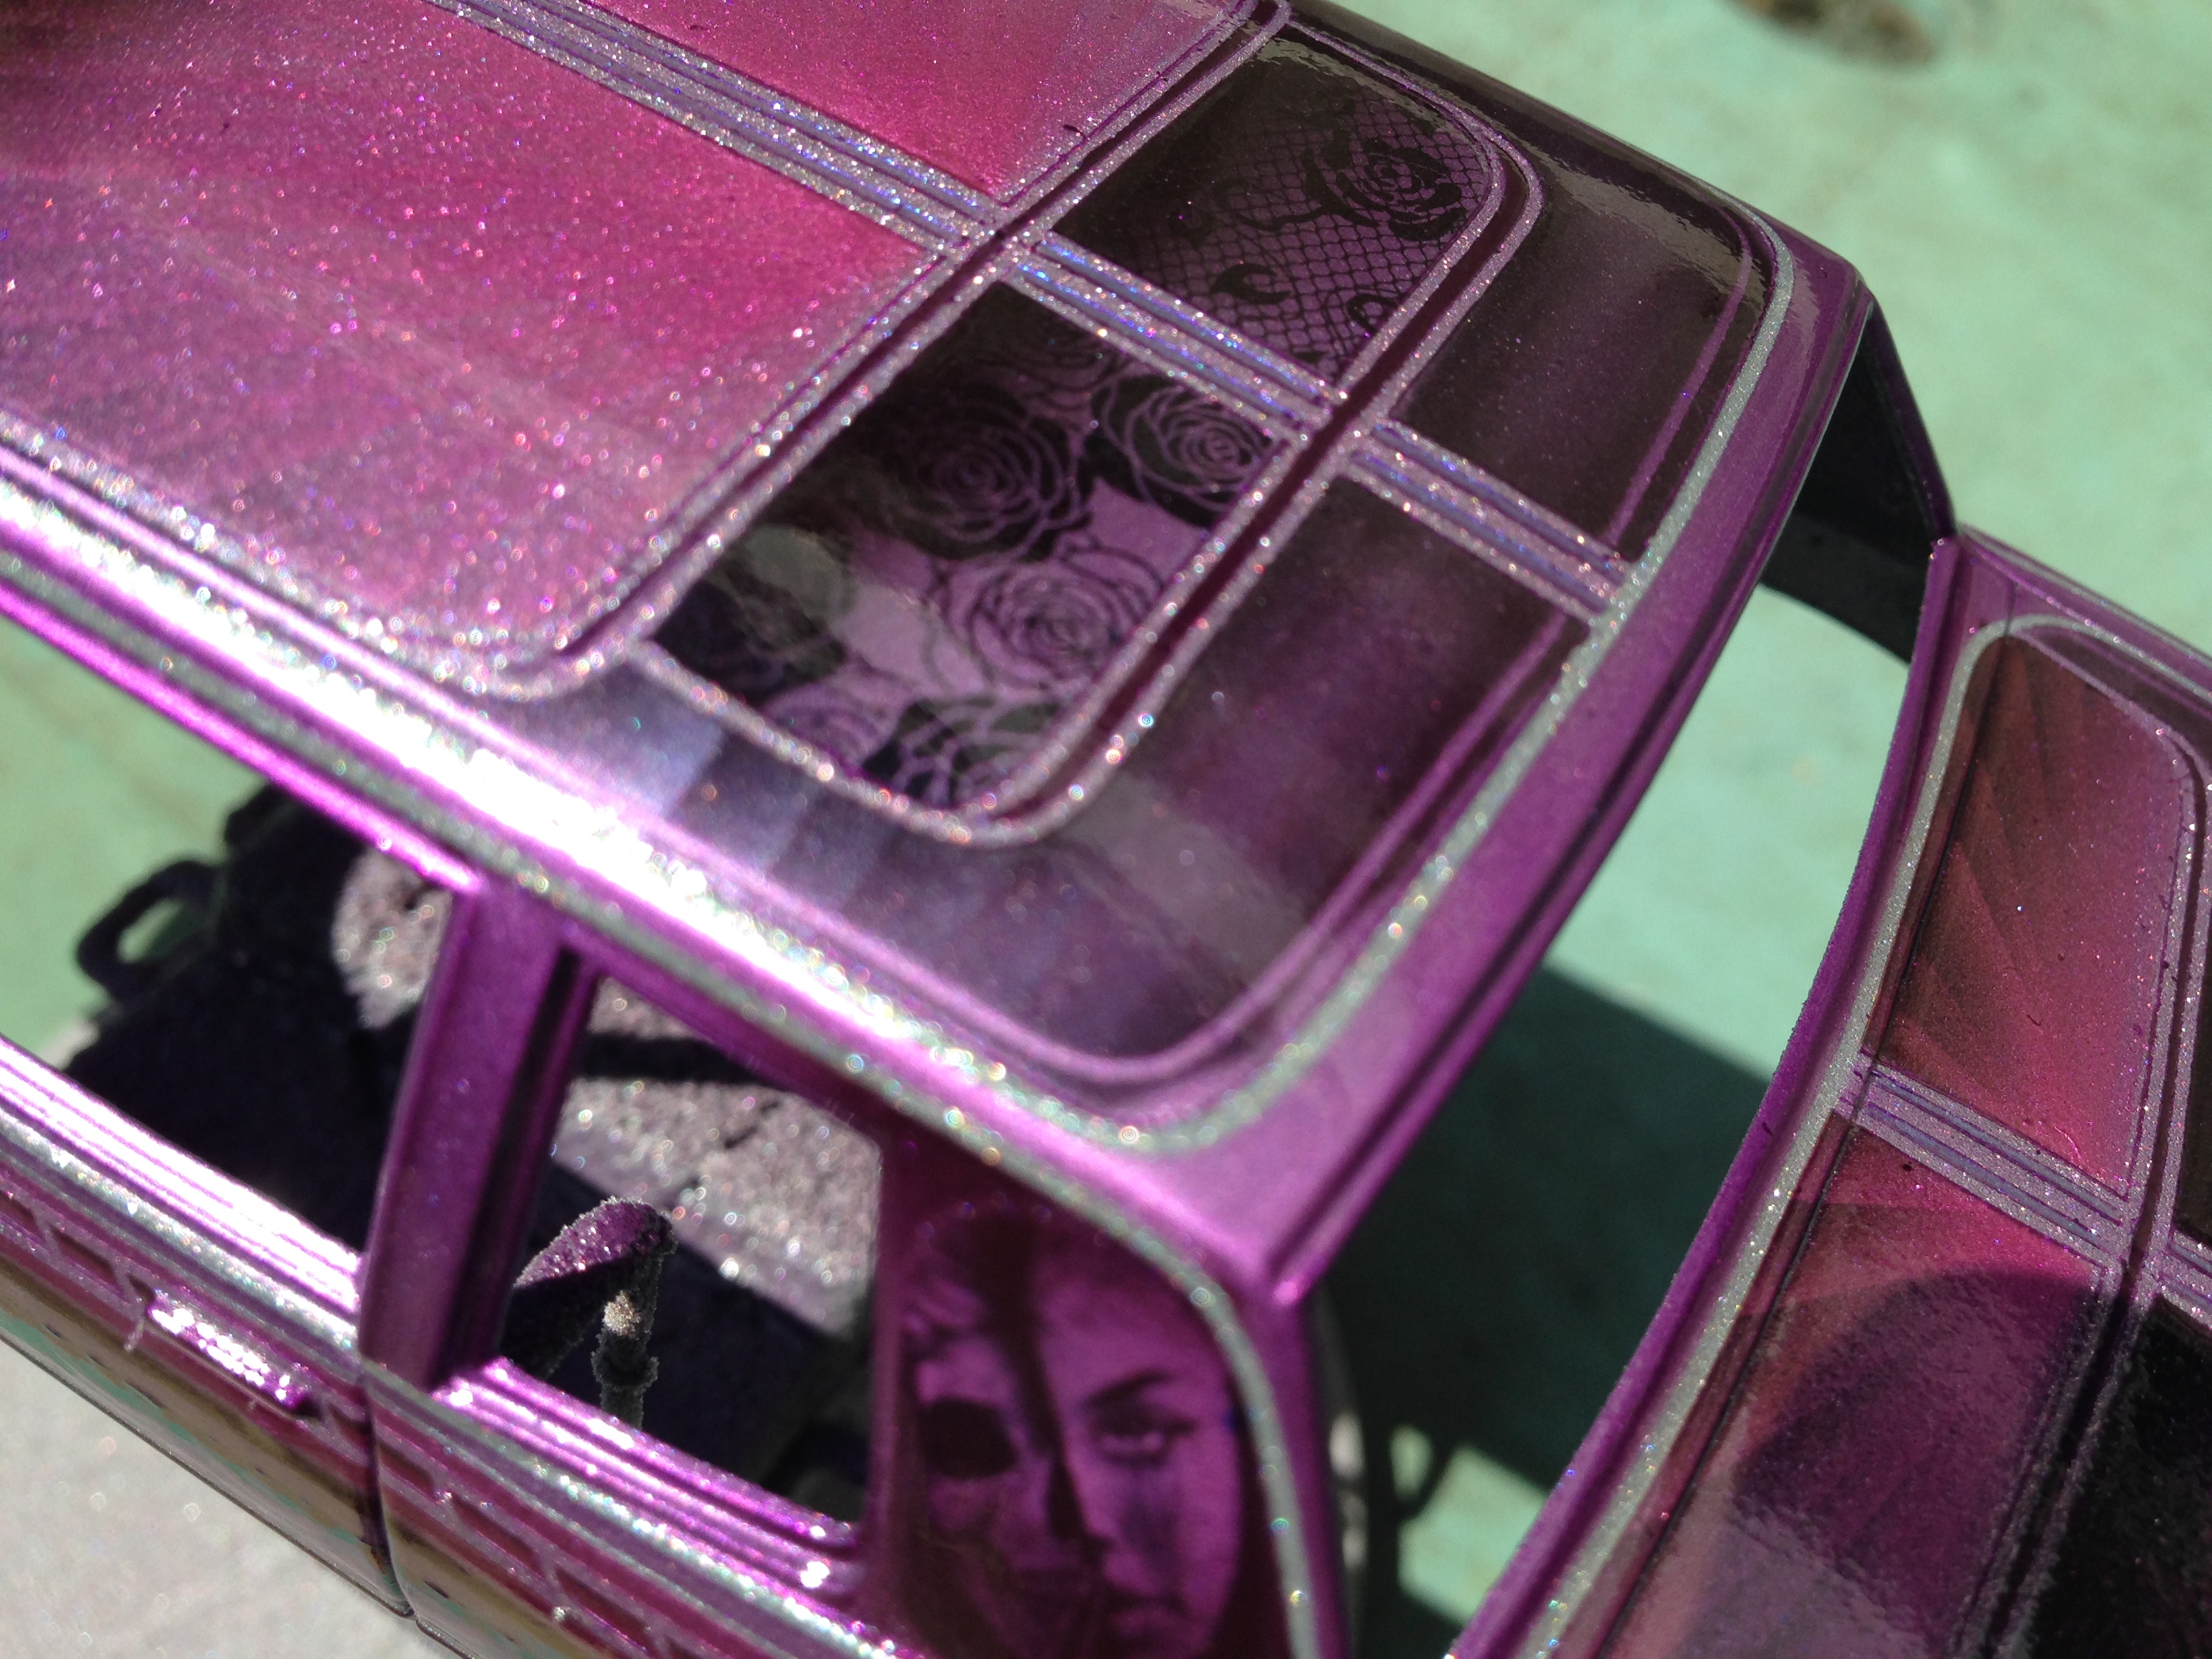
Got some paint on it today. The herringbone pattern took about 160 pieces of tape.

-
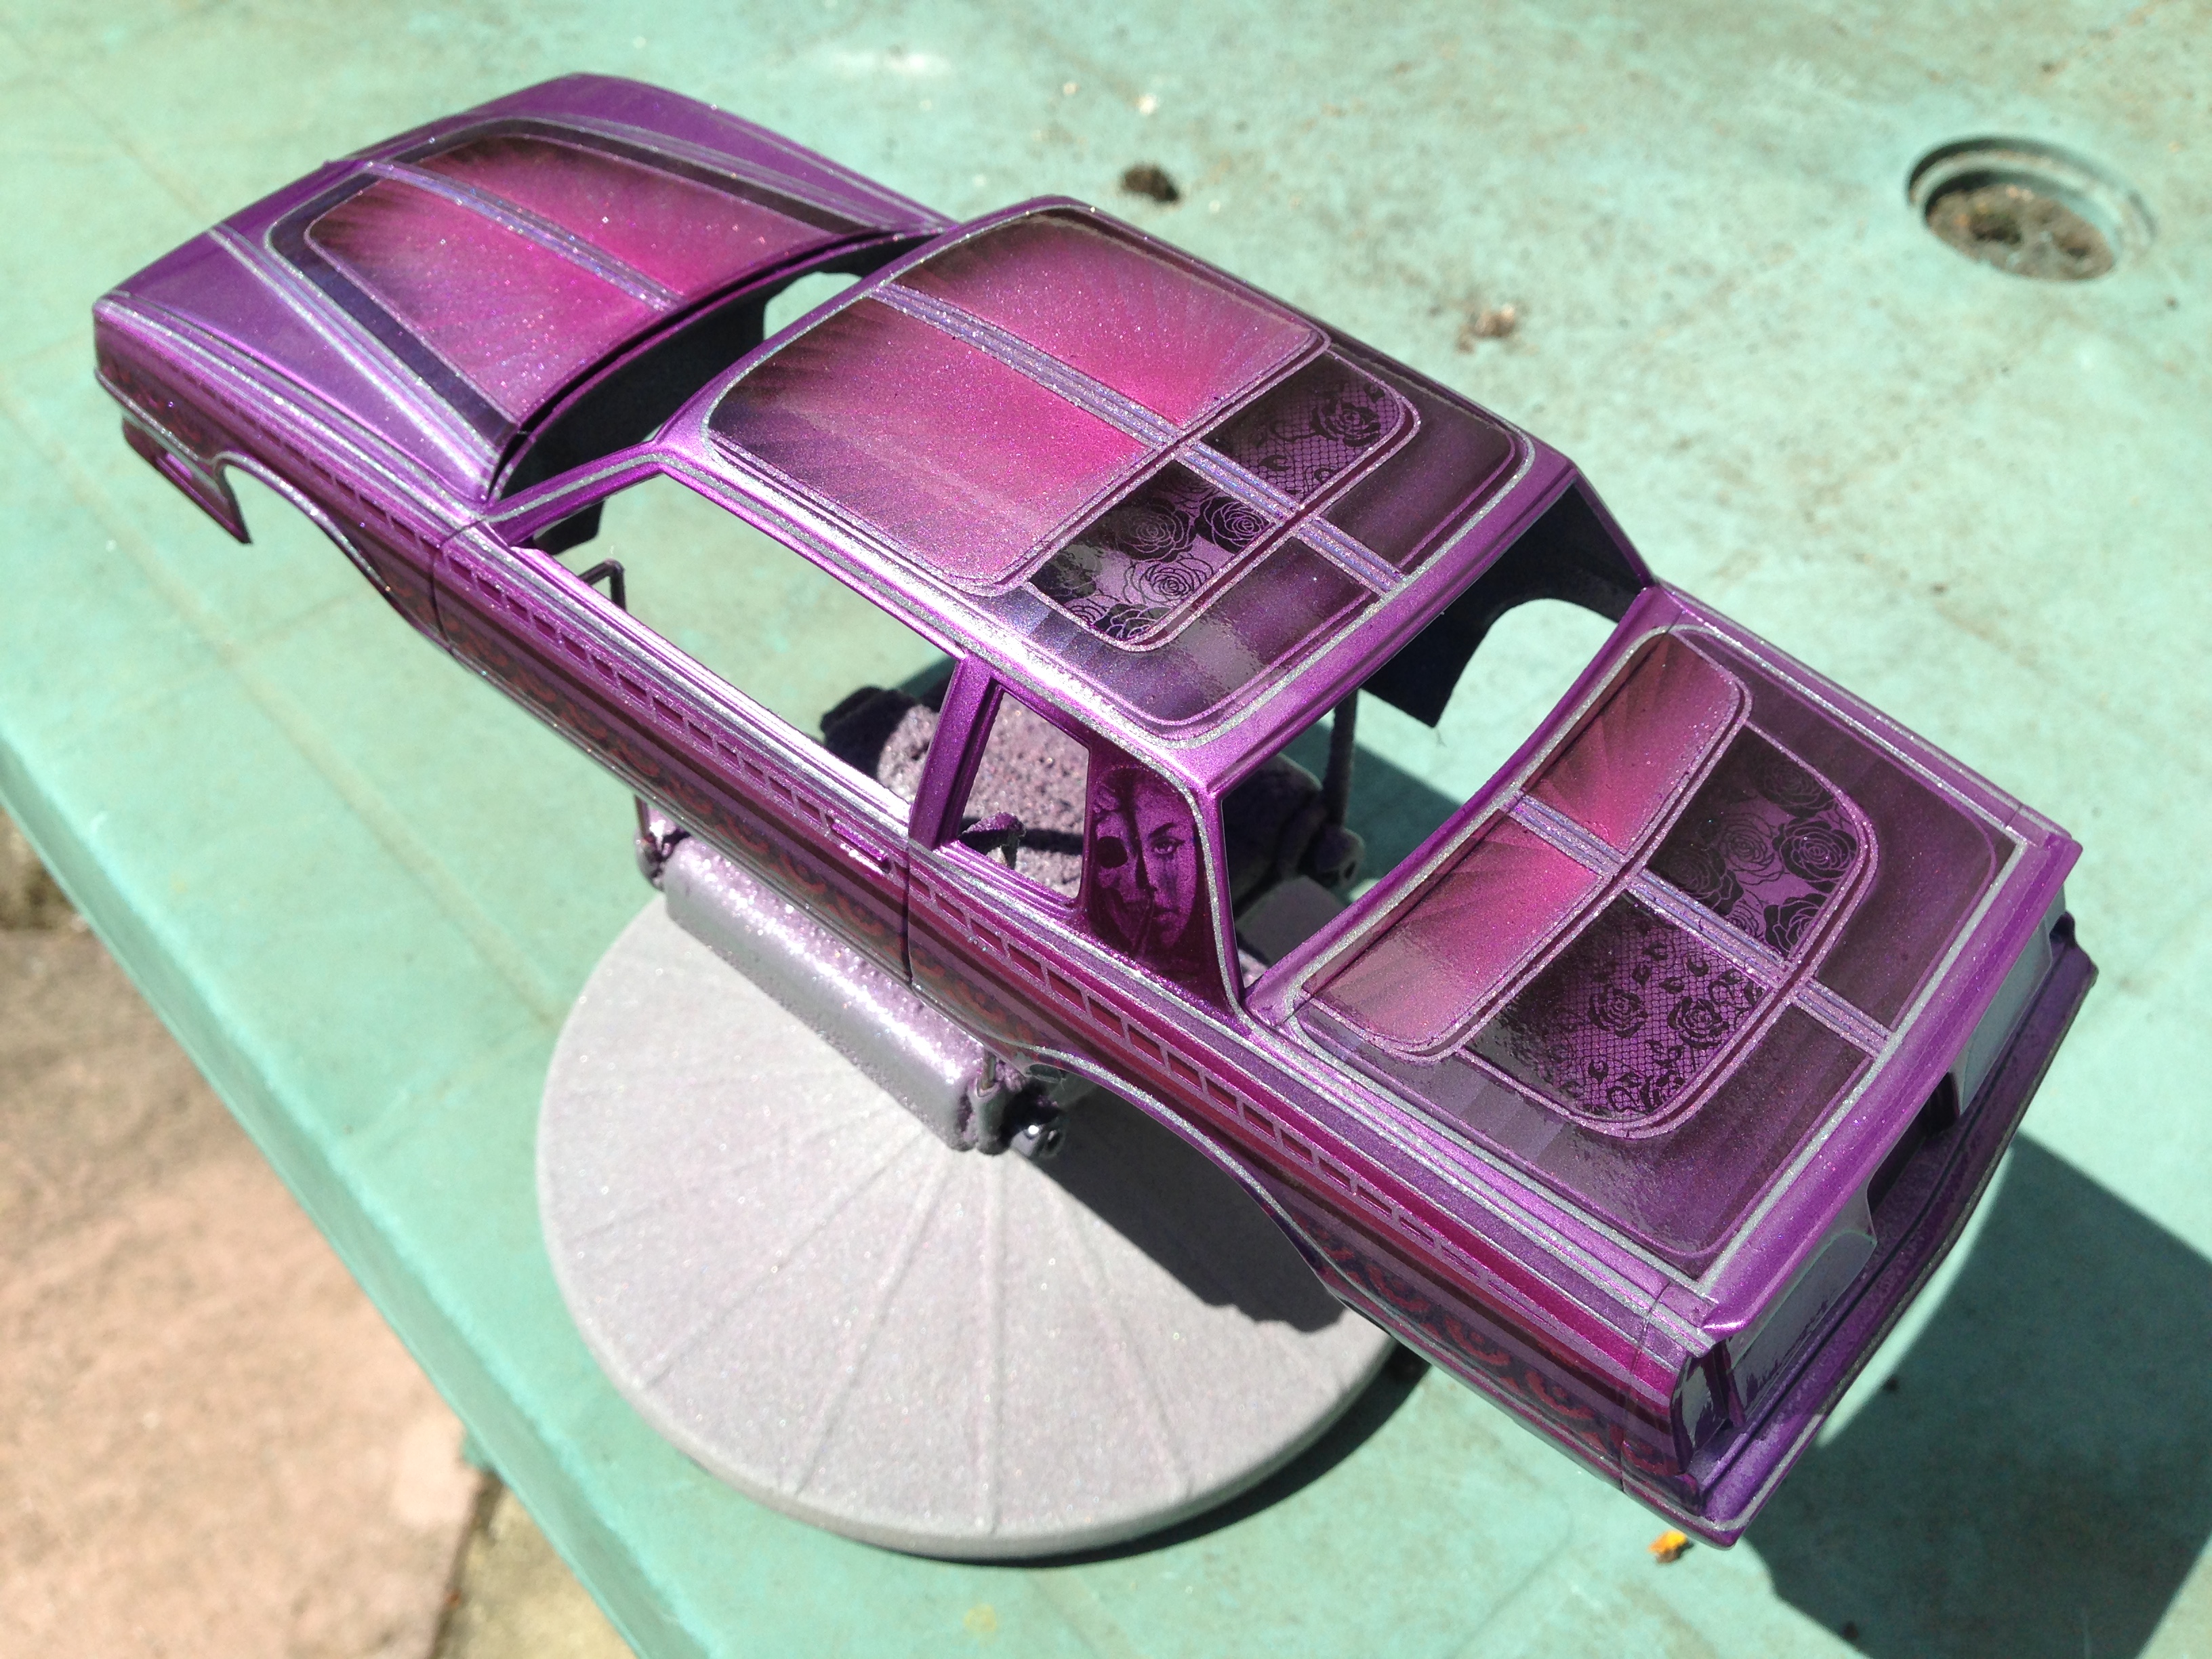
I also masked and painted the sides with white gold and did a couple of stripes on the roof. These look a bit obvious now, but there's going to be lace panels and fingerprint sections covering some of it and under red candy, it should give a nice effect.
-
Ok, so after a bit of thought, I decided the control arms I made were pony. So I relocated them and made them a bit better. Now it looks more workable:
-
Thanks for taking the time to show me how you did yours. I found that I needed to completely remove the tops of the arches or the tyres hit them. The wheels came with big n little tyres, but it would probably have been better to get all four in the smaller size. It would've made life easier, but fat rears look so much better, I reckon. The 3D printed cooler had more surface lines than I had hoped for, but the plastic is quite hard (much harder than styrene) and responds well to files and 1200 grit wet n dry. ps I like the tiny nuts n bolts on your front suspension. It looks like it operates ?
-
Cheers Espo I've got a parts box driveshaft with extra universal joints that can get around the driveshaft issue. The ride height is going to be 'parked in the weeds', so suspension travel isn't an issue here.
-
The rear of the chassis needed some work to get the tail properly low. Some of the inner arches needed cutting away and clearance was required for the rear axle differential. more tweaking needed but this is it so far:
-
I love the shape of these cars and this Galaxie Ltd. kit is lovely to work with. got a swamp cooler 3D printed by Shapeways in the Netherlands, artillery wheels from The Parts Box, in Australia. Roof n fenders will be candy red and the hood and sides will be white gold.
-
Nice one I've seen plenty as grubby as this! I like the repairs and weathering, too
-
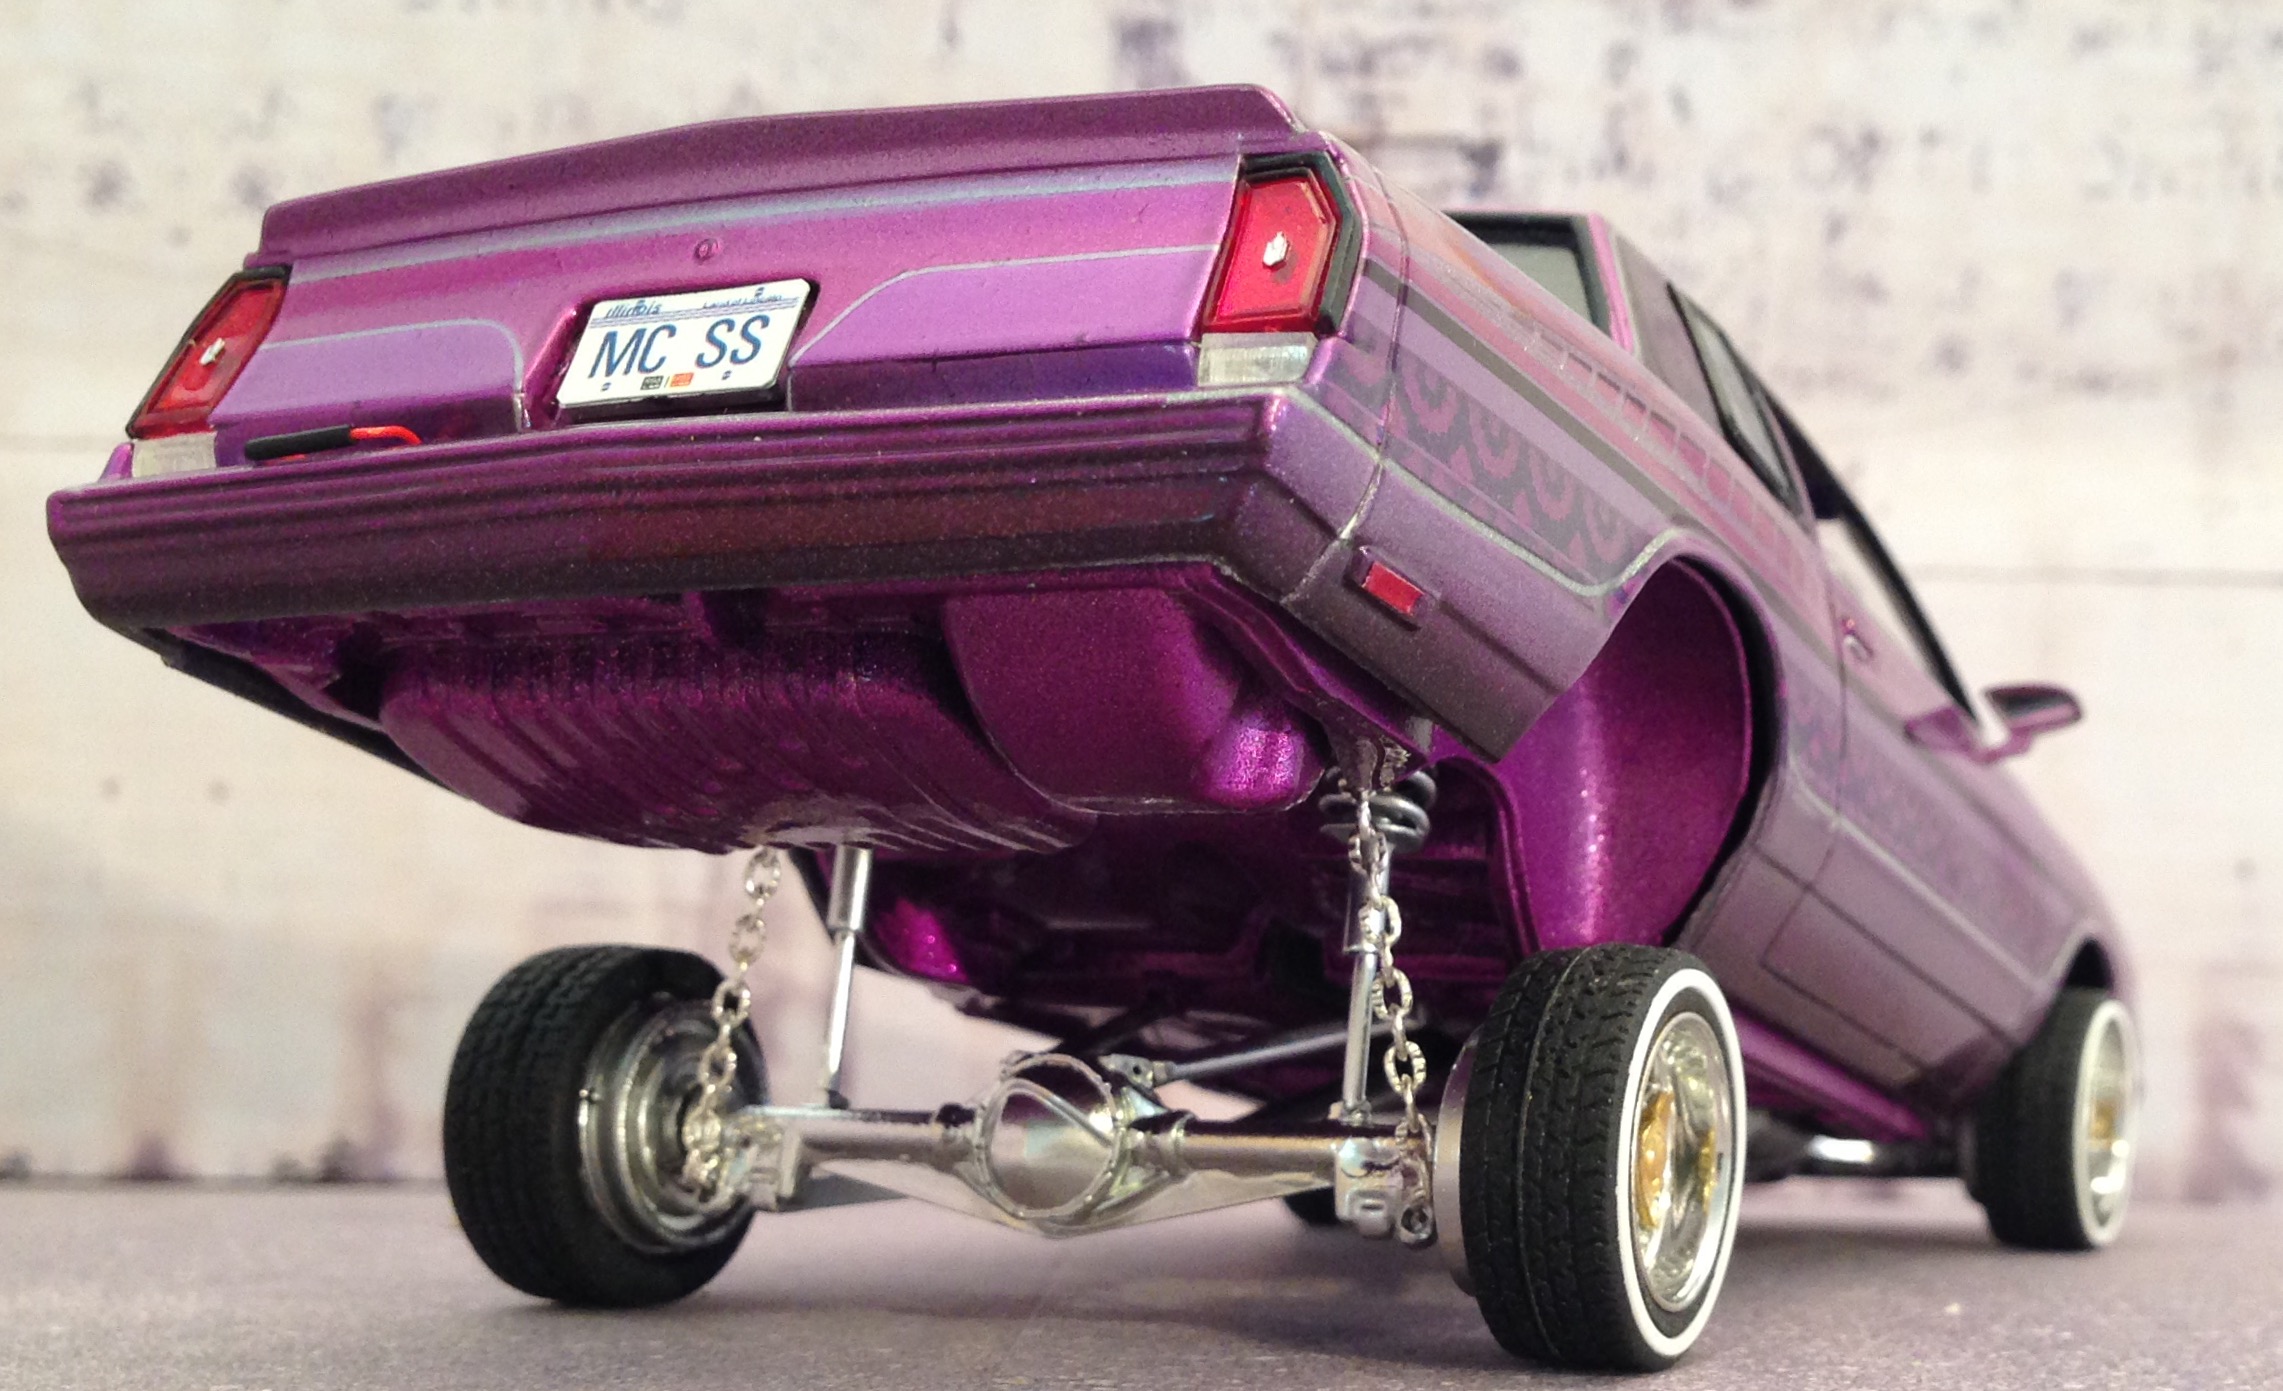
Thanks Yeah, they're totally nuts, but I really admire the creativity, finish and mechanics of them. I've only seen them on YouTube and they make me chuckle when they bounce them, especially gas hopping and 3-wheeling. Crazy.
-
That is so cool. I agree with everyone else. That bare metal effect is superb. inspires me to build one.. ?
-
Looks like you wrestled a fine looking build outta that kit. Thanks for the headlight UV glue tip.
-
1st class build. You nailed it. The stance is perfect.
-
Crikey! I wish I could get that many done! Really nice builds and your paint looks brilliant!
-
Ditto! The daylight makes your excellent build look 1:1
-
100% bang-on! super clean build. Very classy ?
-
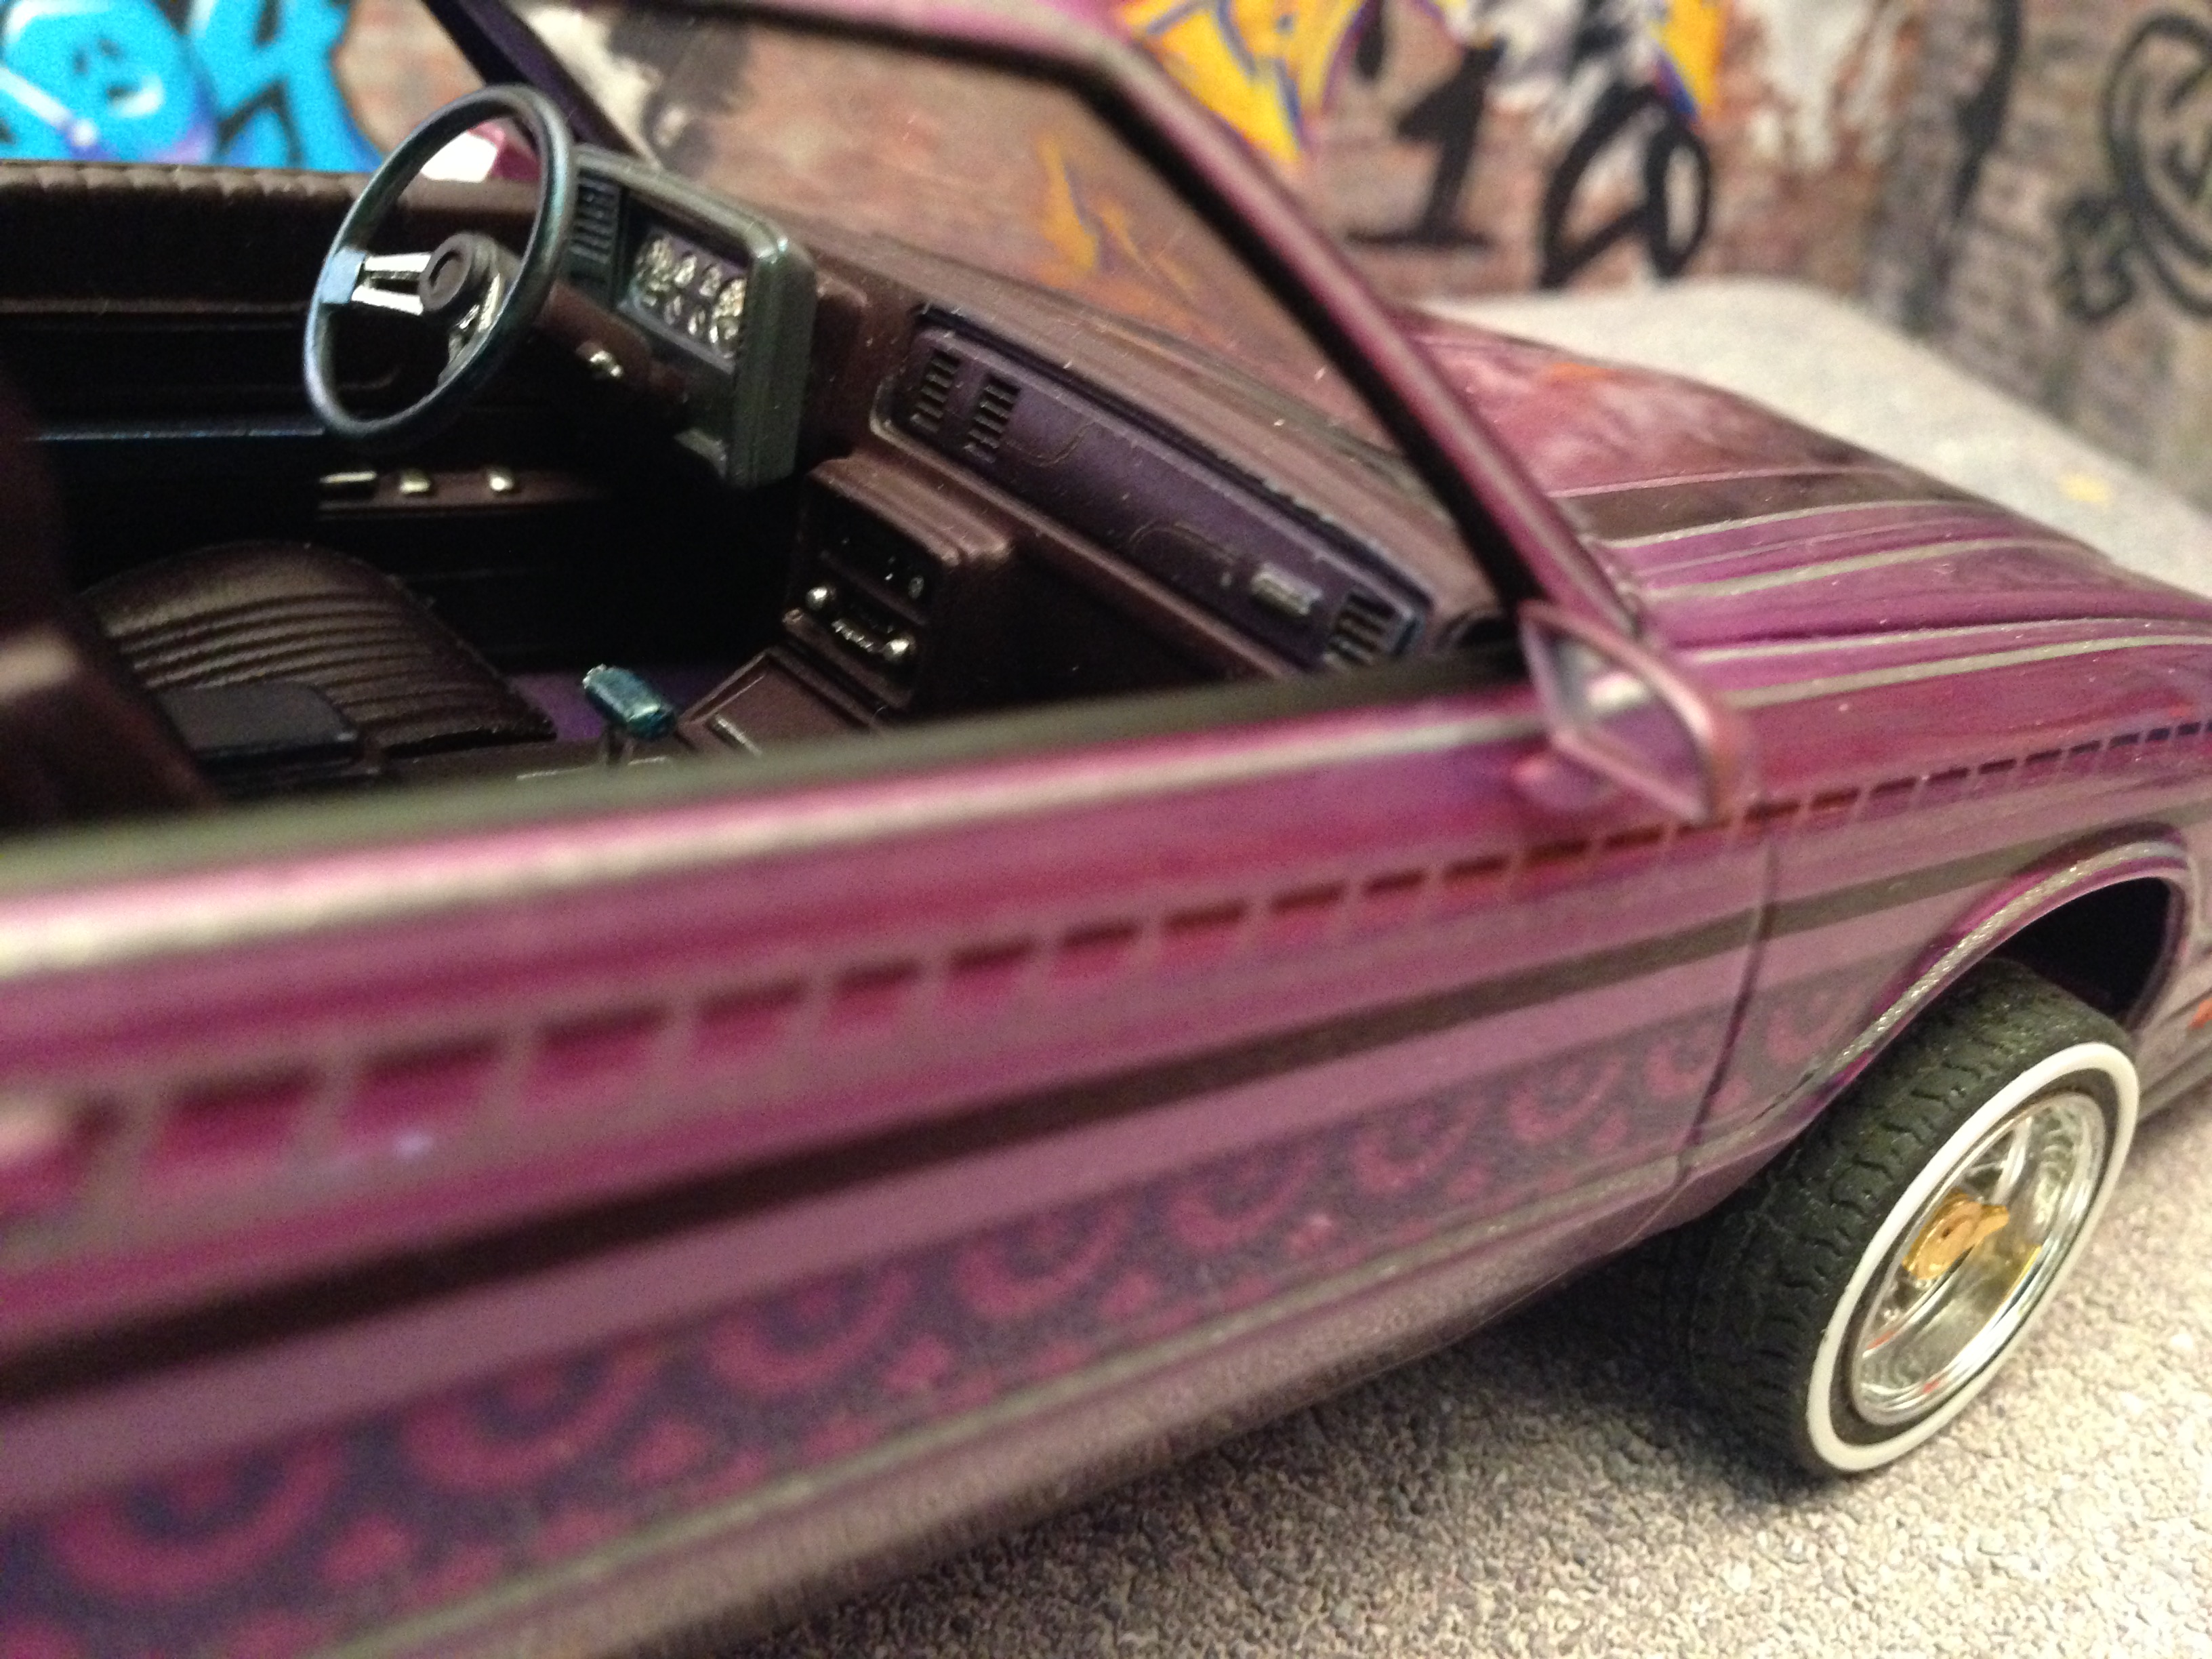
And the interior...., in case you're interested
-
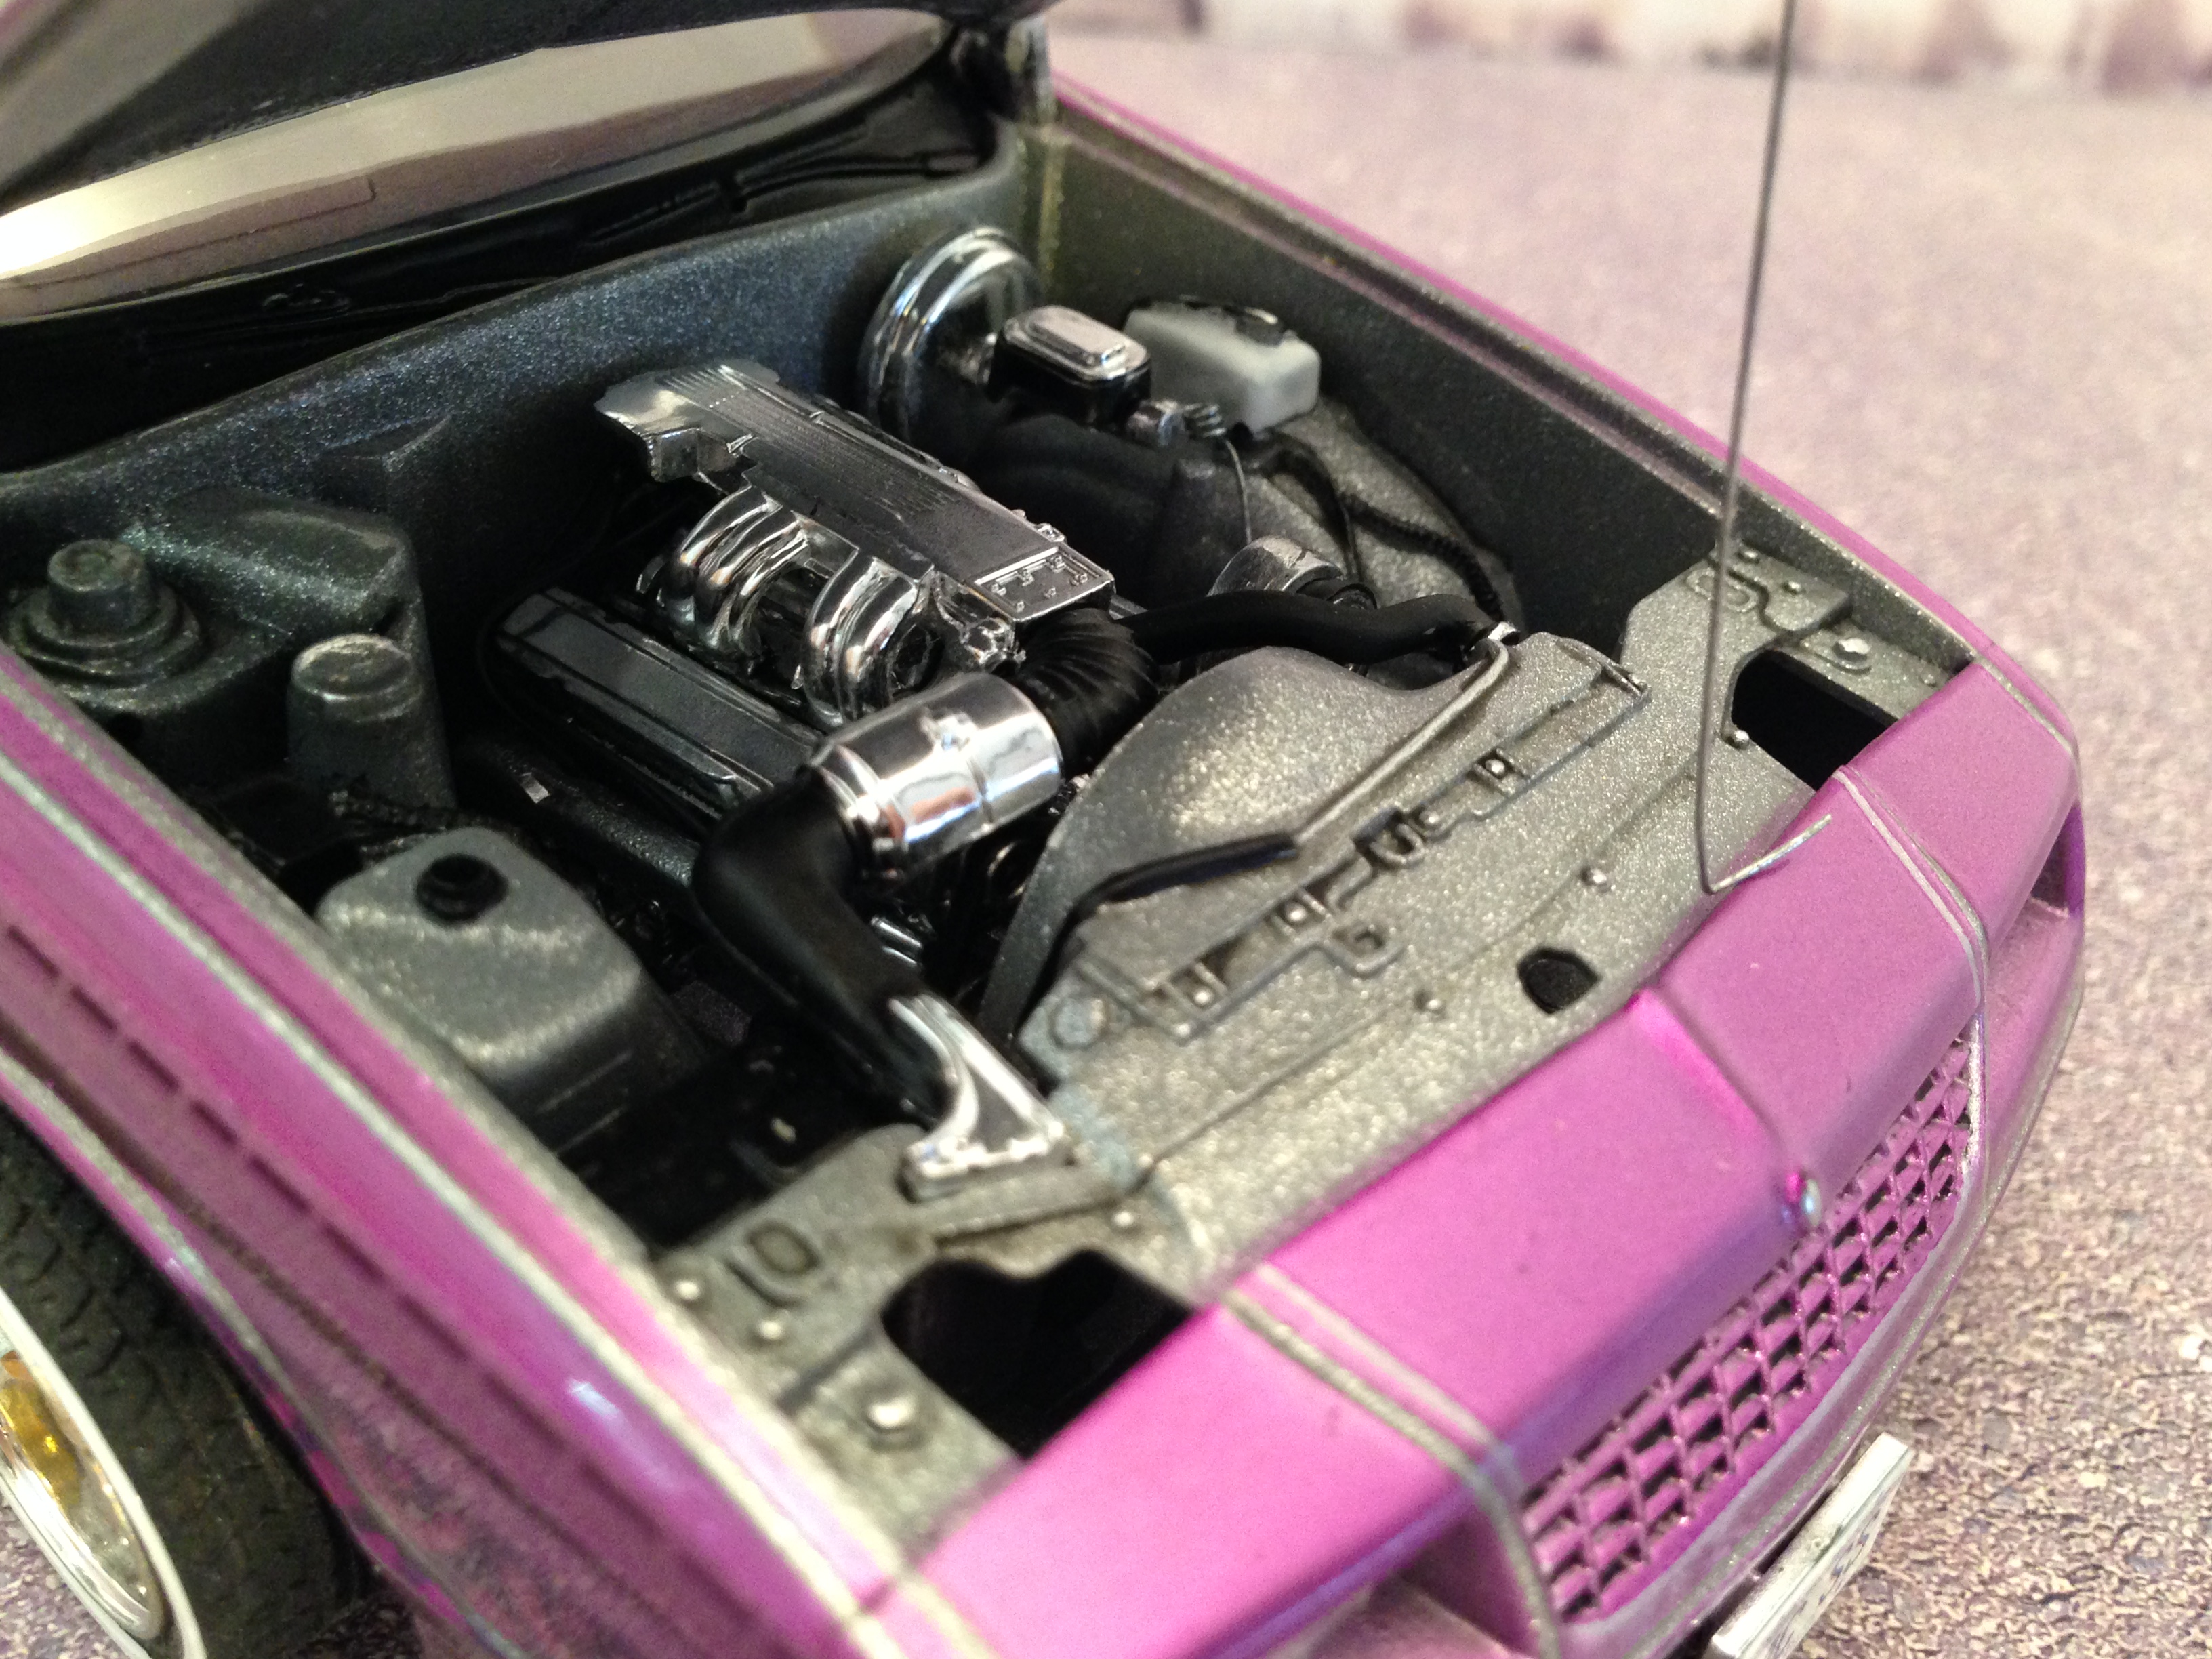
Funny how I carefully paint things that cannot be seen after final construction! The serpentine belt and pulleys came out really nice, but I didn't remember to photograph it. Here's the engine bay though.
-
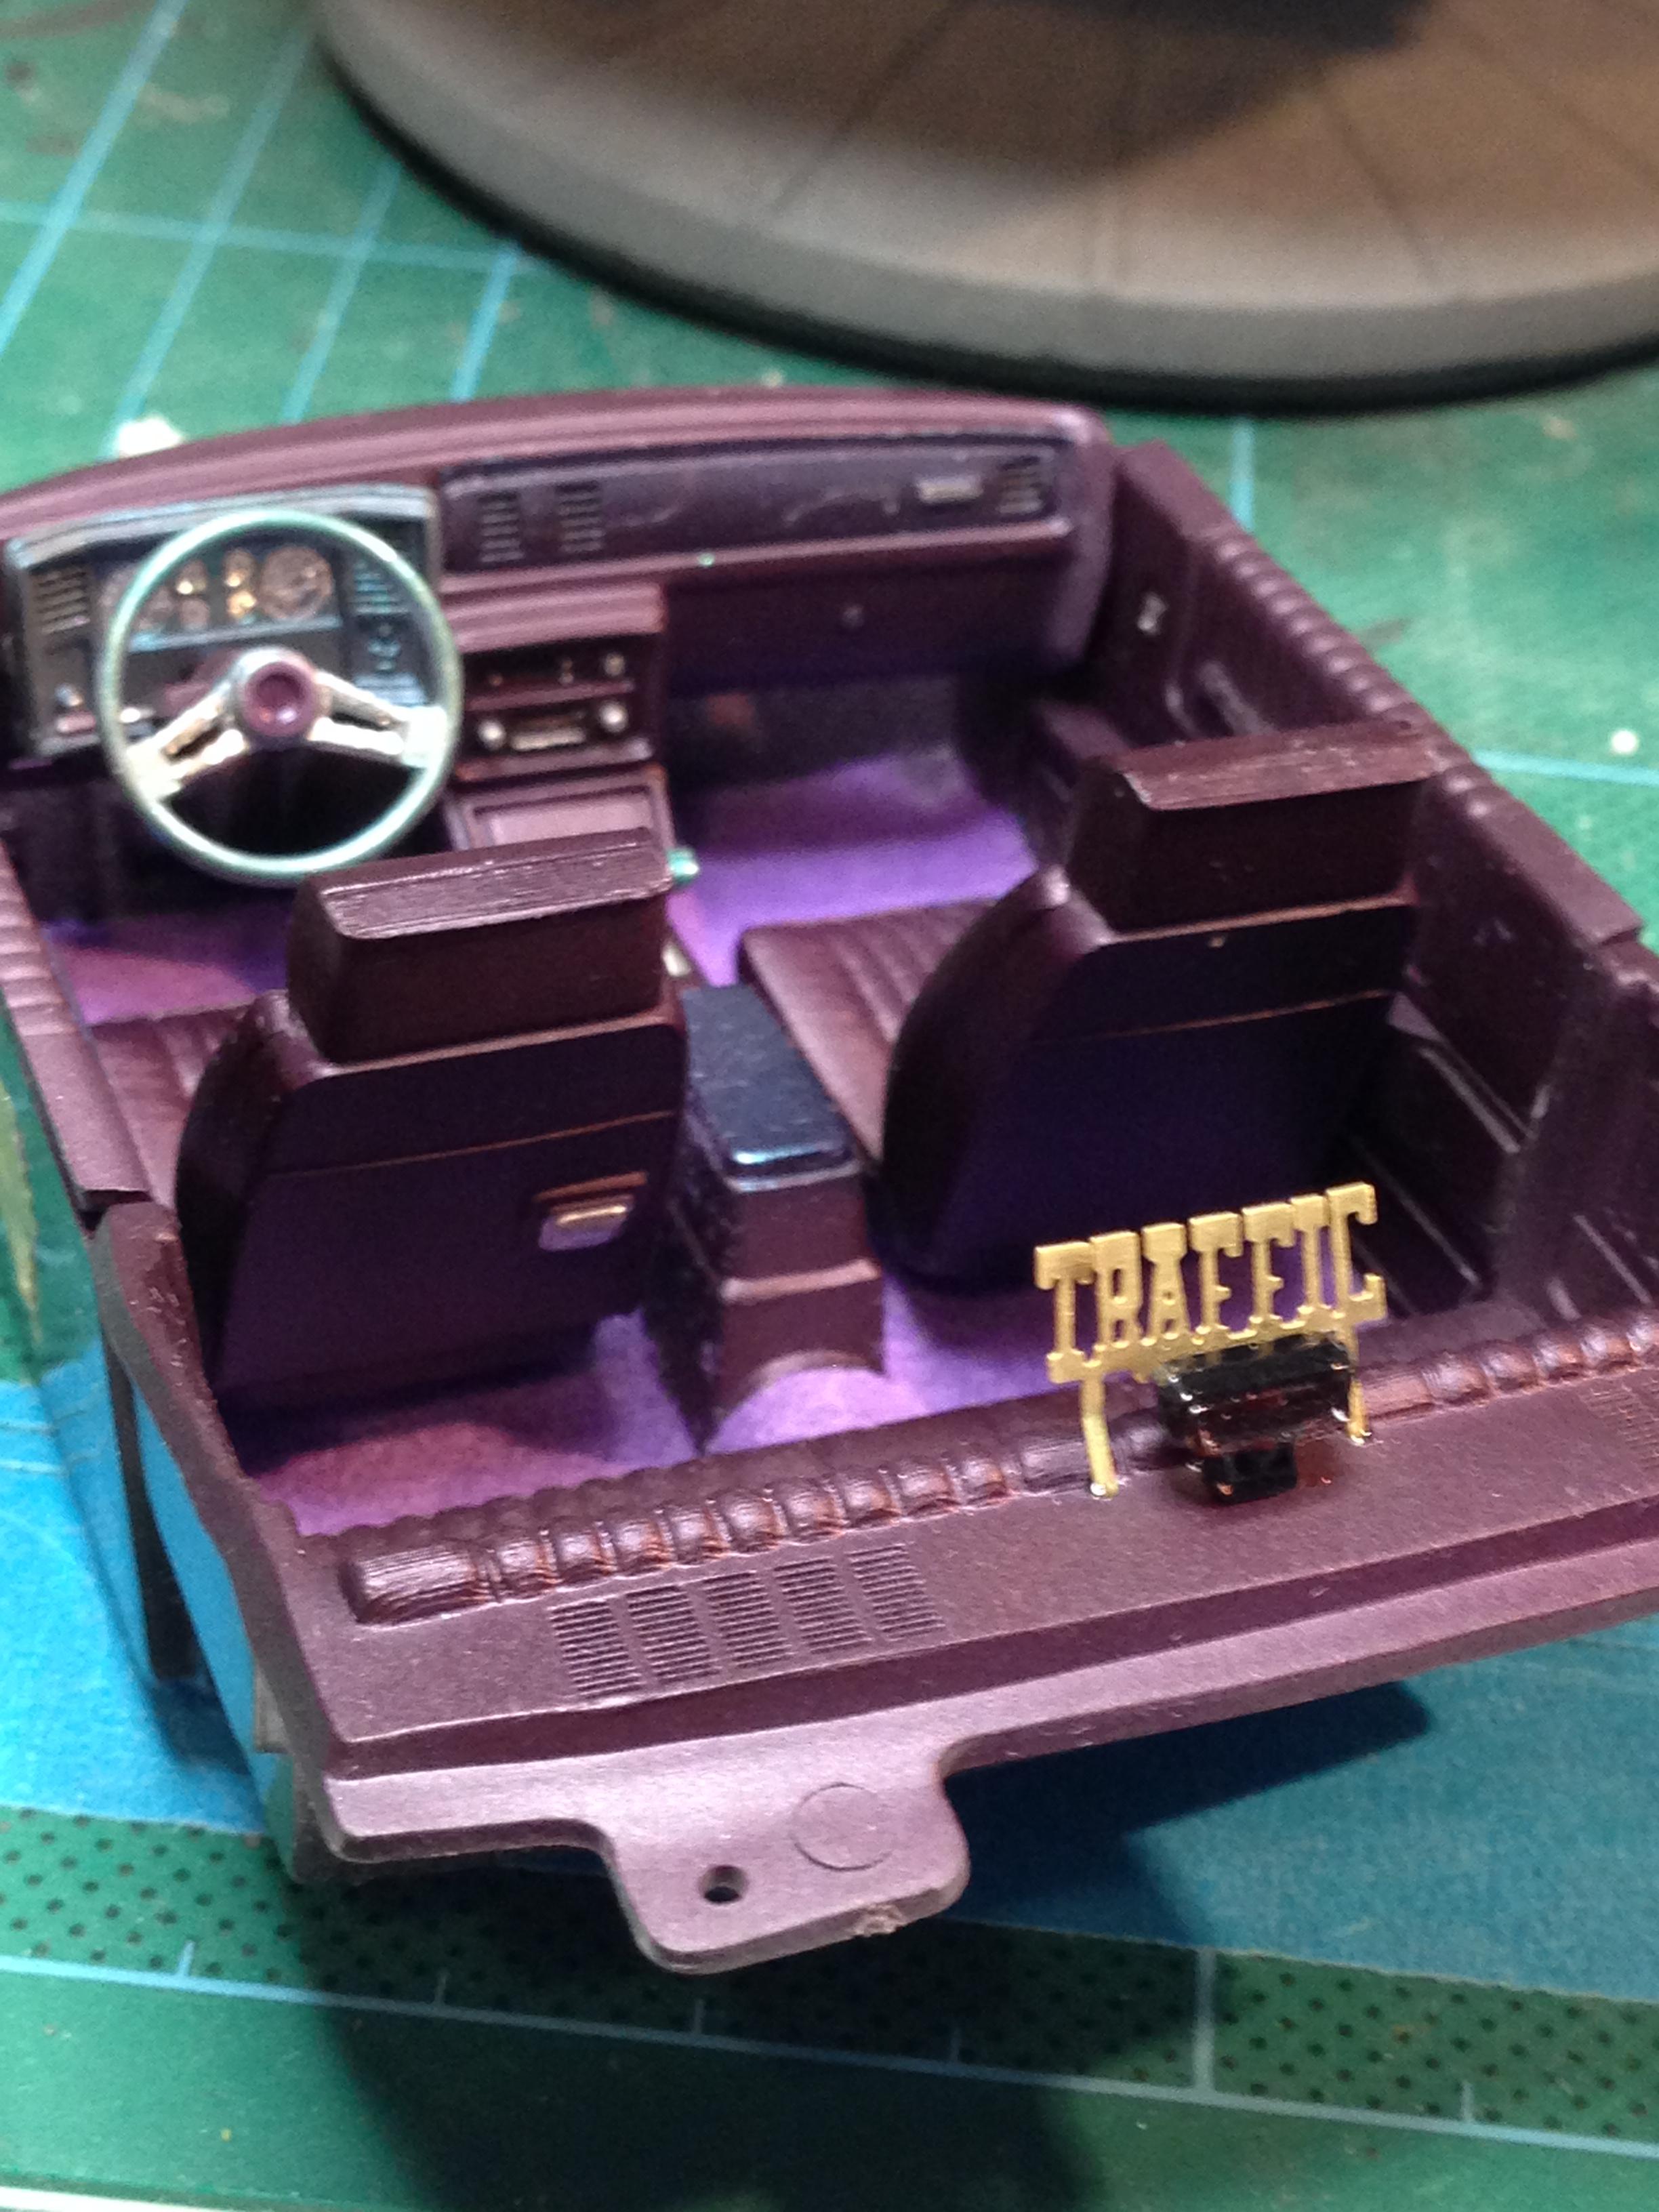
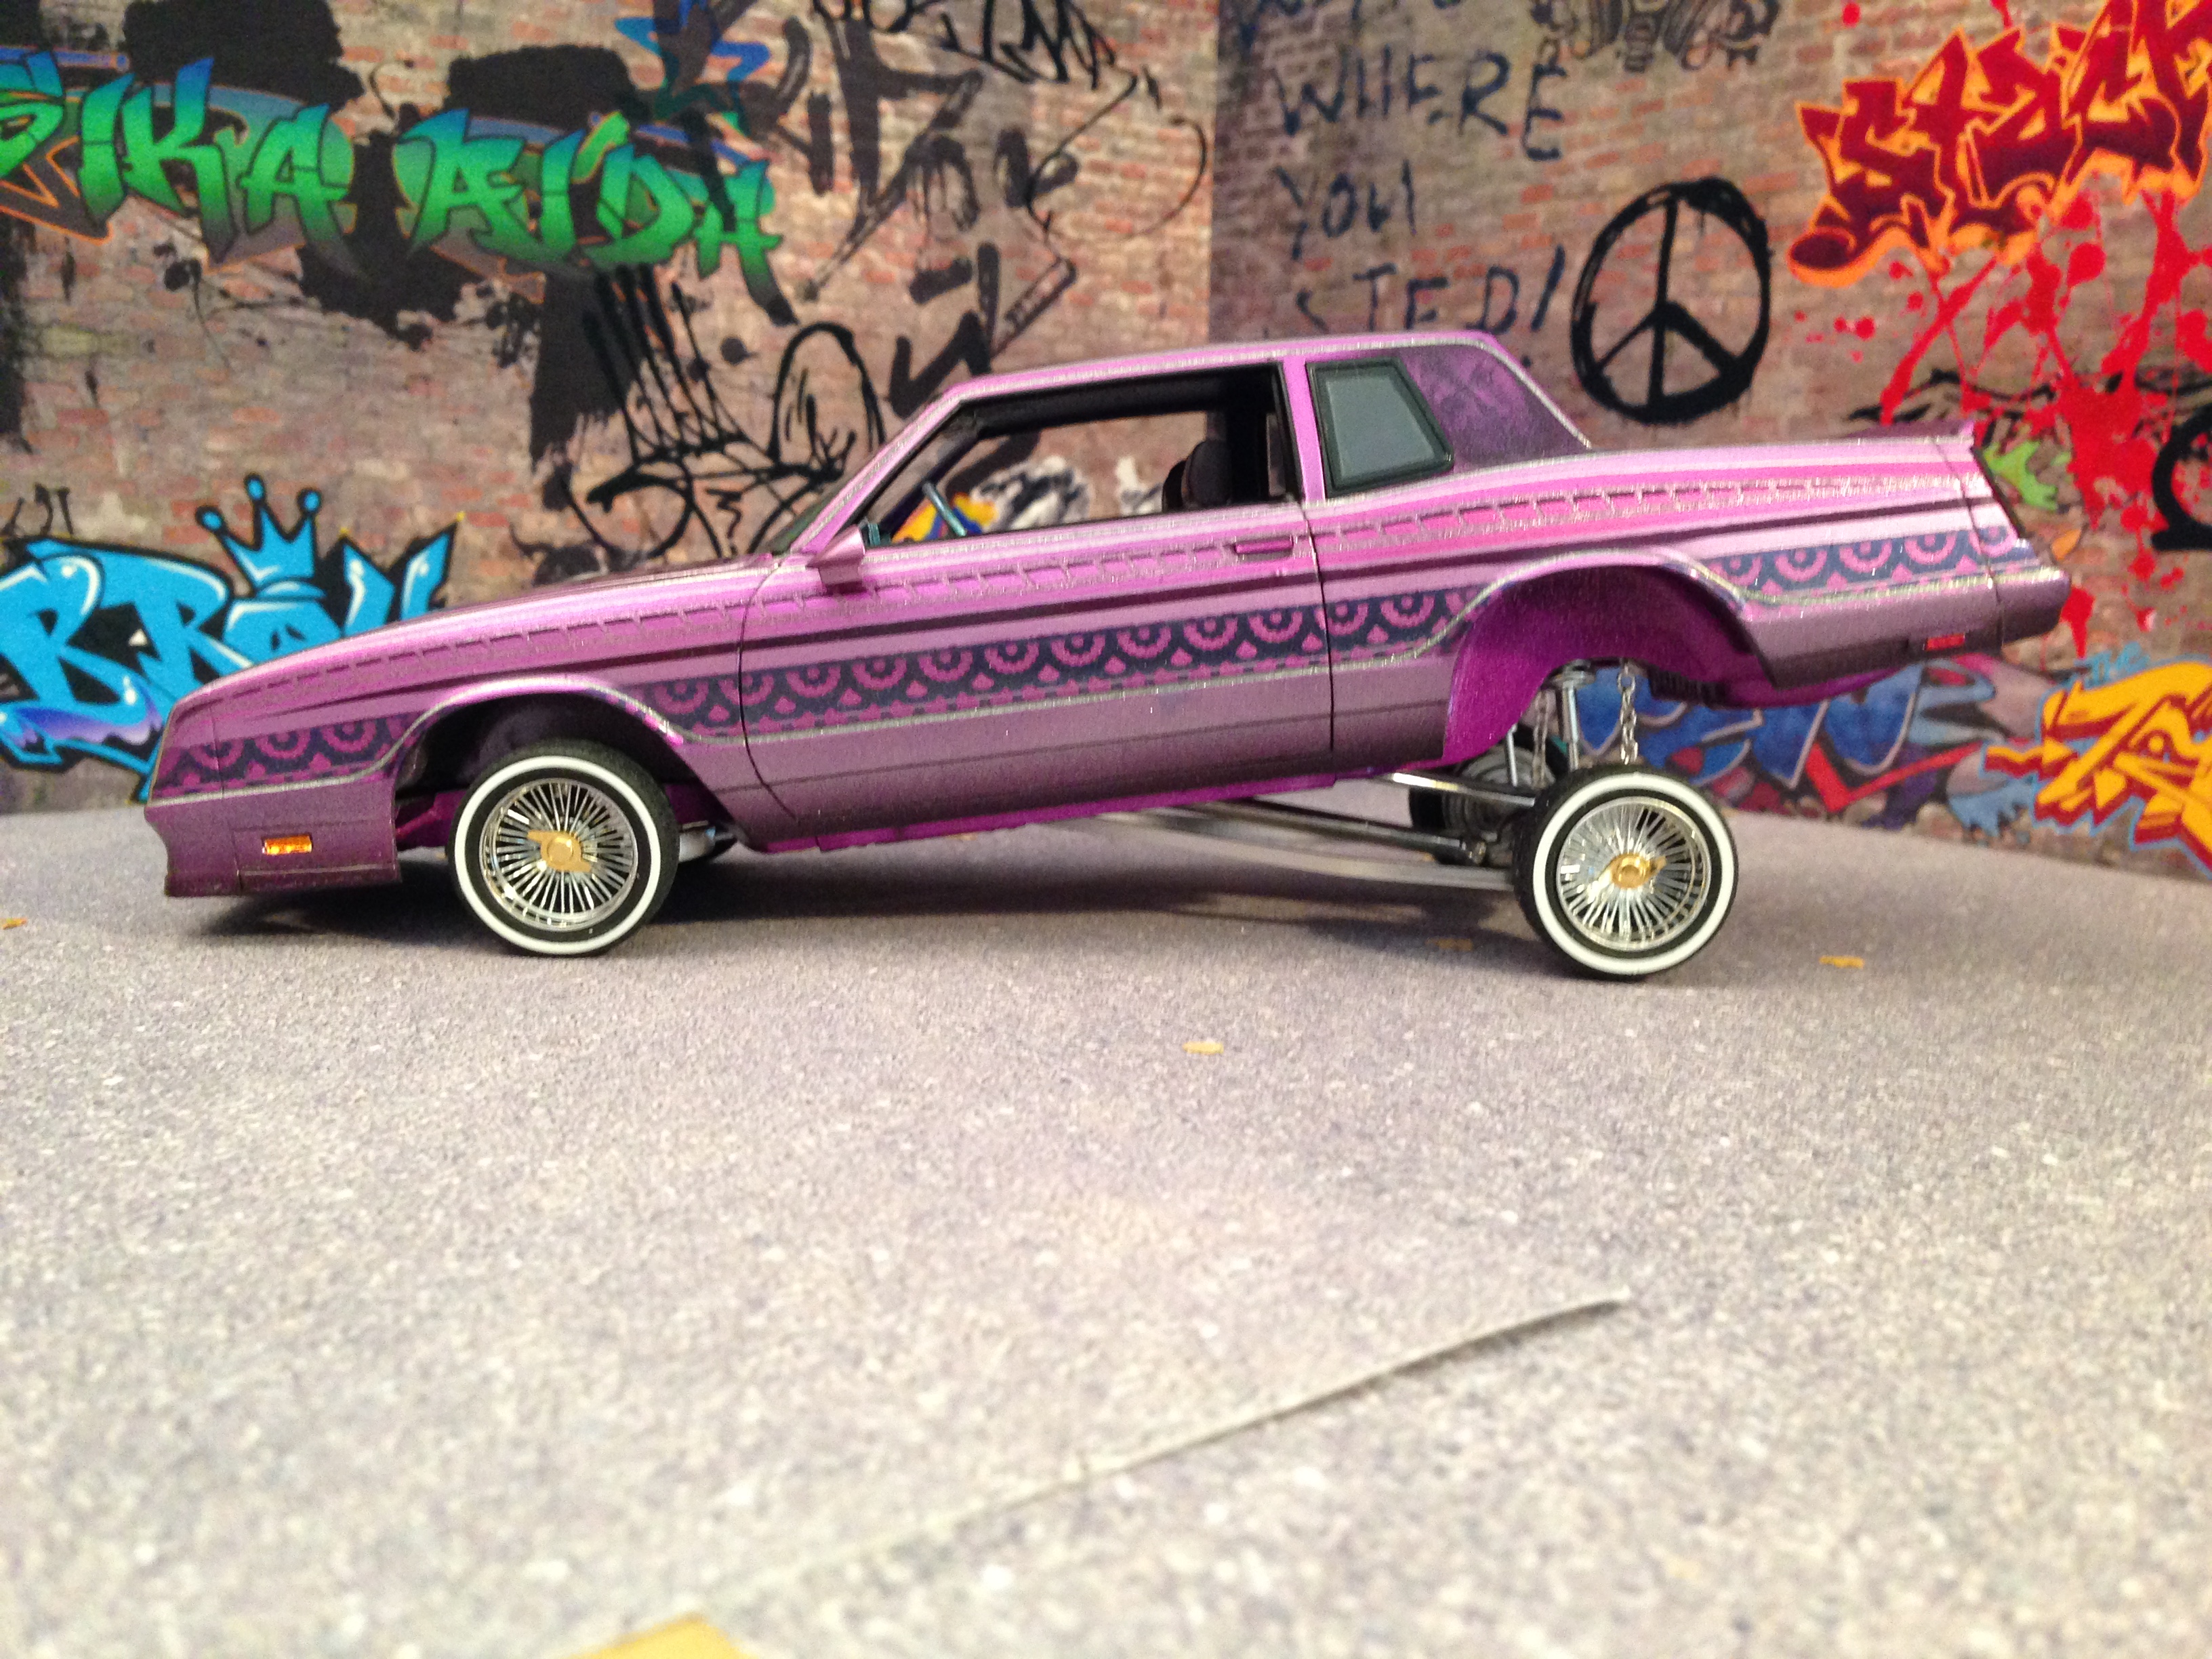
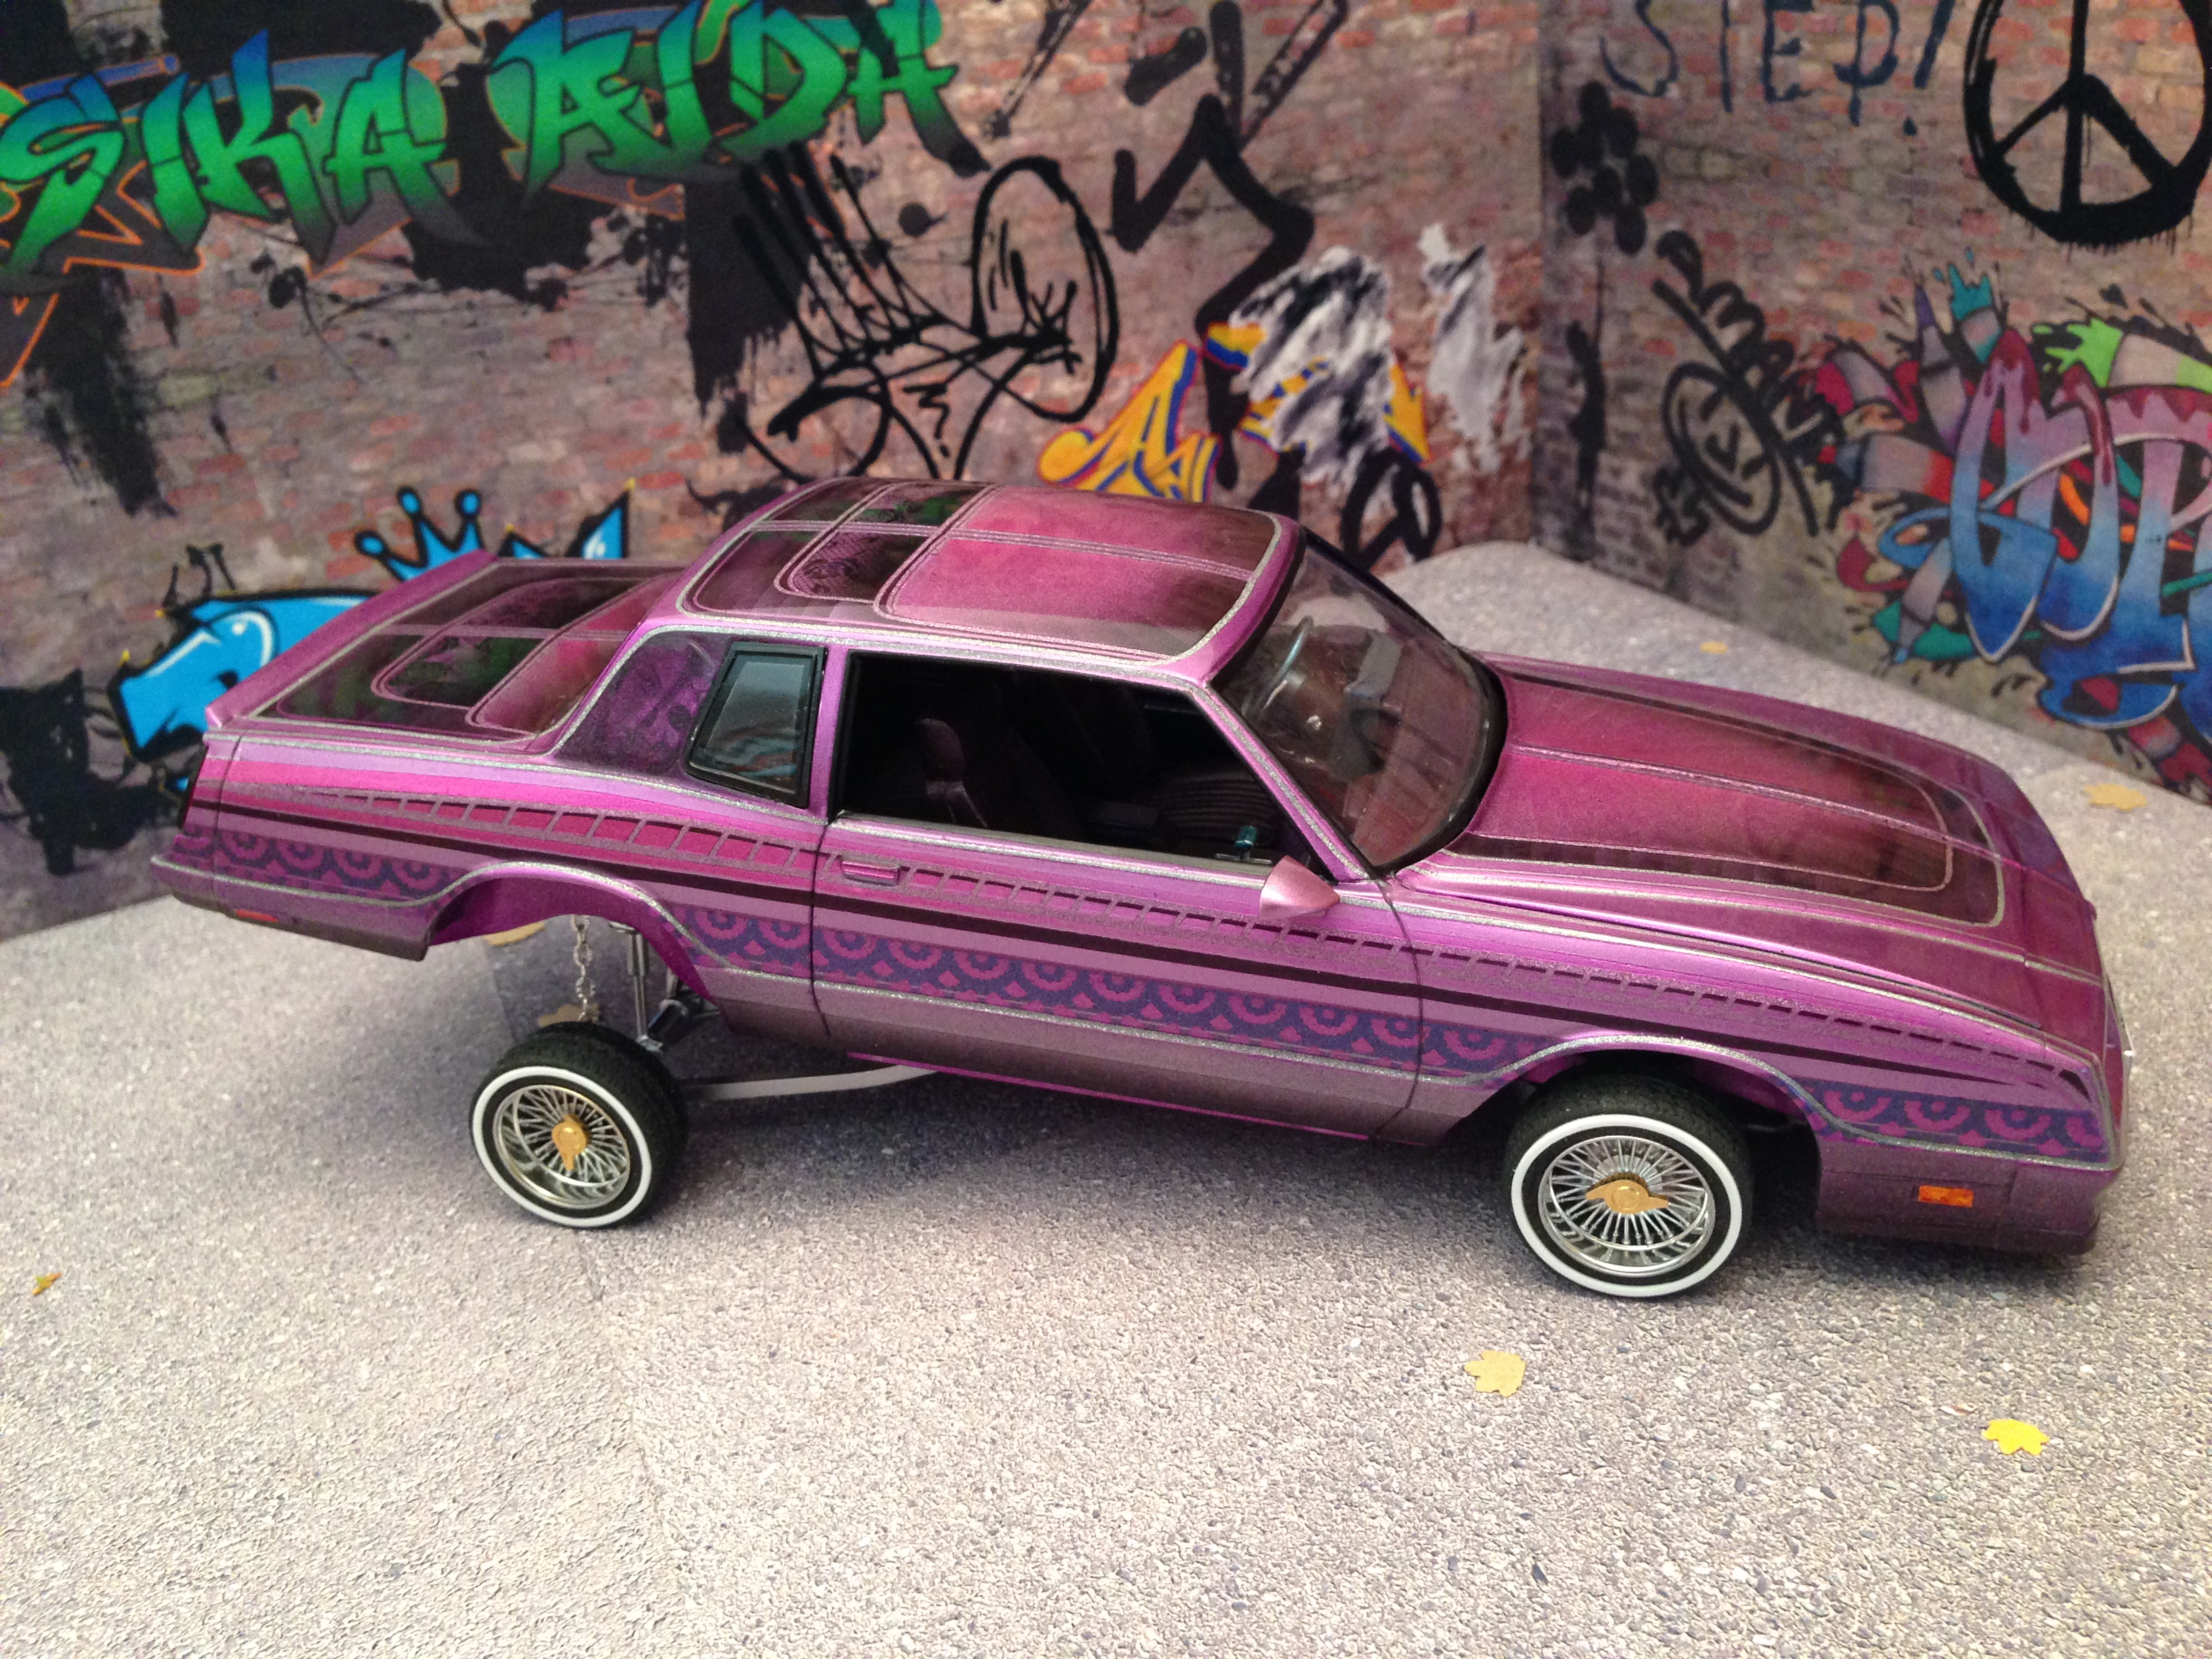
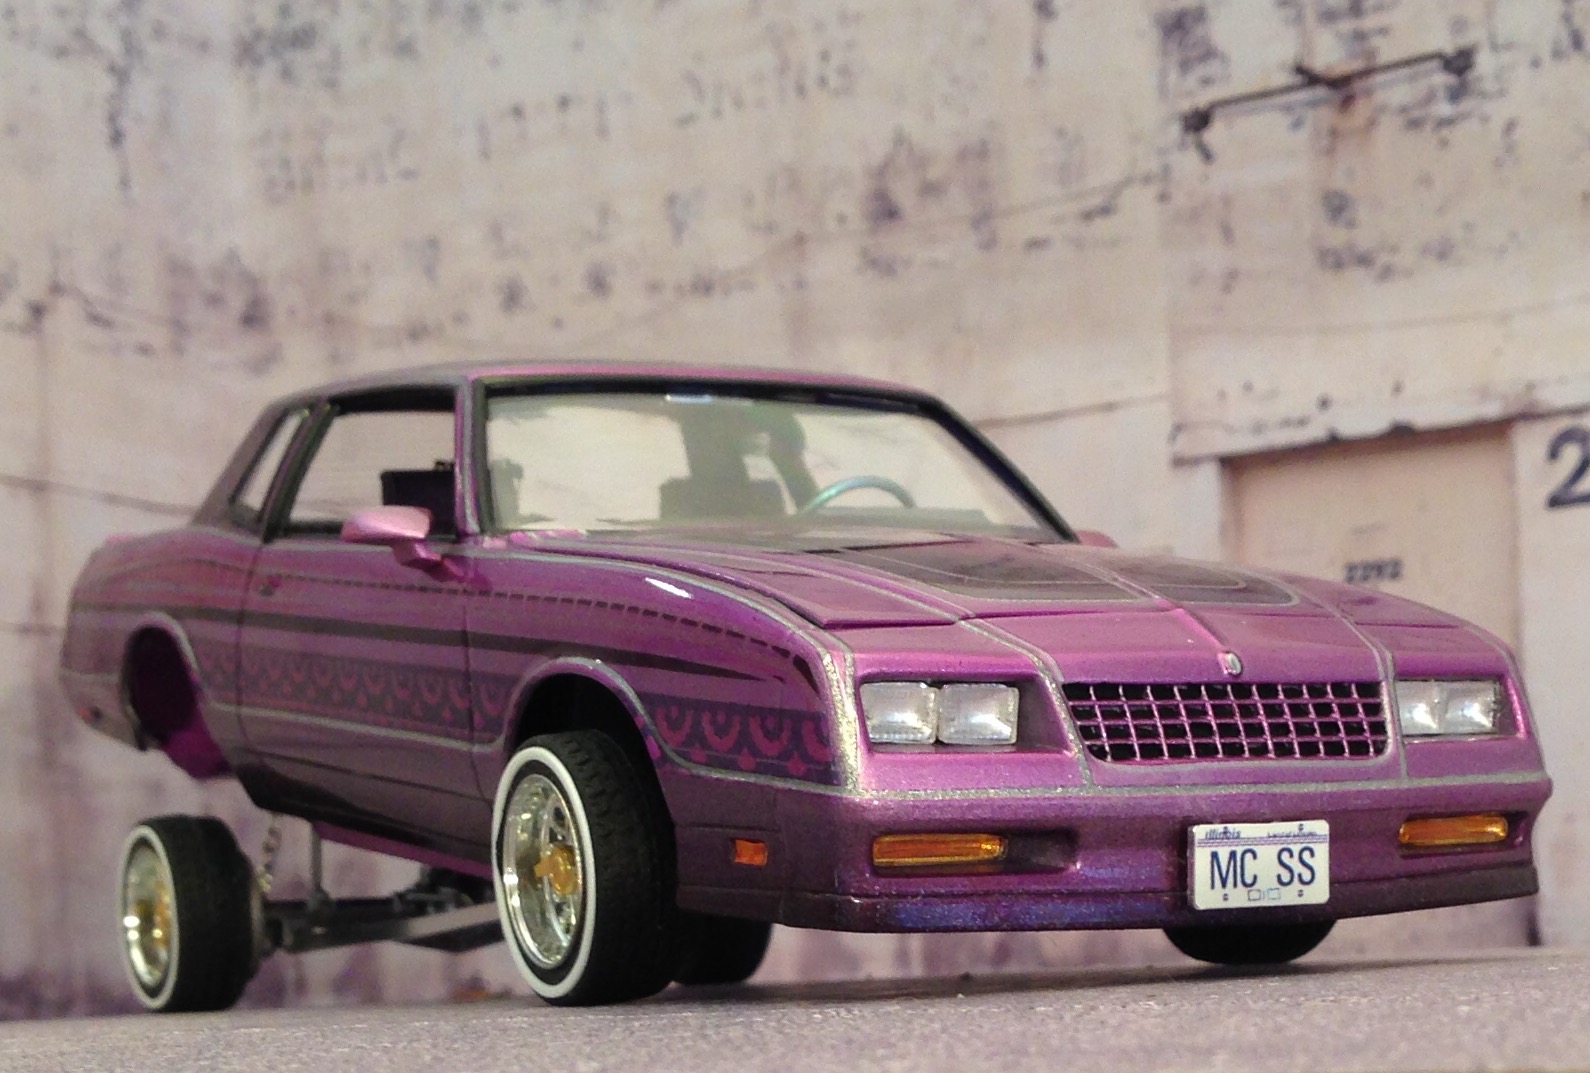
Just finished this Monte. I swapped out the rear axle for something with better detail, scratch built coils and hydraulic struts and made a 4-link suspension setup. Rides on Pegasus wheels and painted with automotive paint and nail polish. Flocked carpet with matching headlining.
-
Thanks for watching the progress of this build. it's now finished and Under Glass old school bomb, next ?
-
I think it was VW reflex silver that I used for the base colour. I used a rattle can for that stage of the paint. The rest is cheap nail polish. £2 a bottle.! Bargain!
-
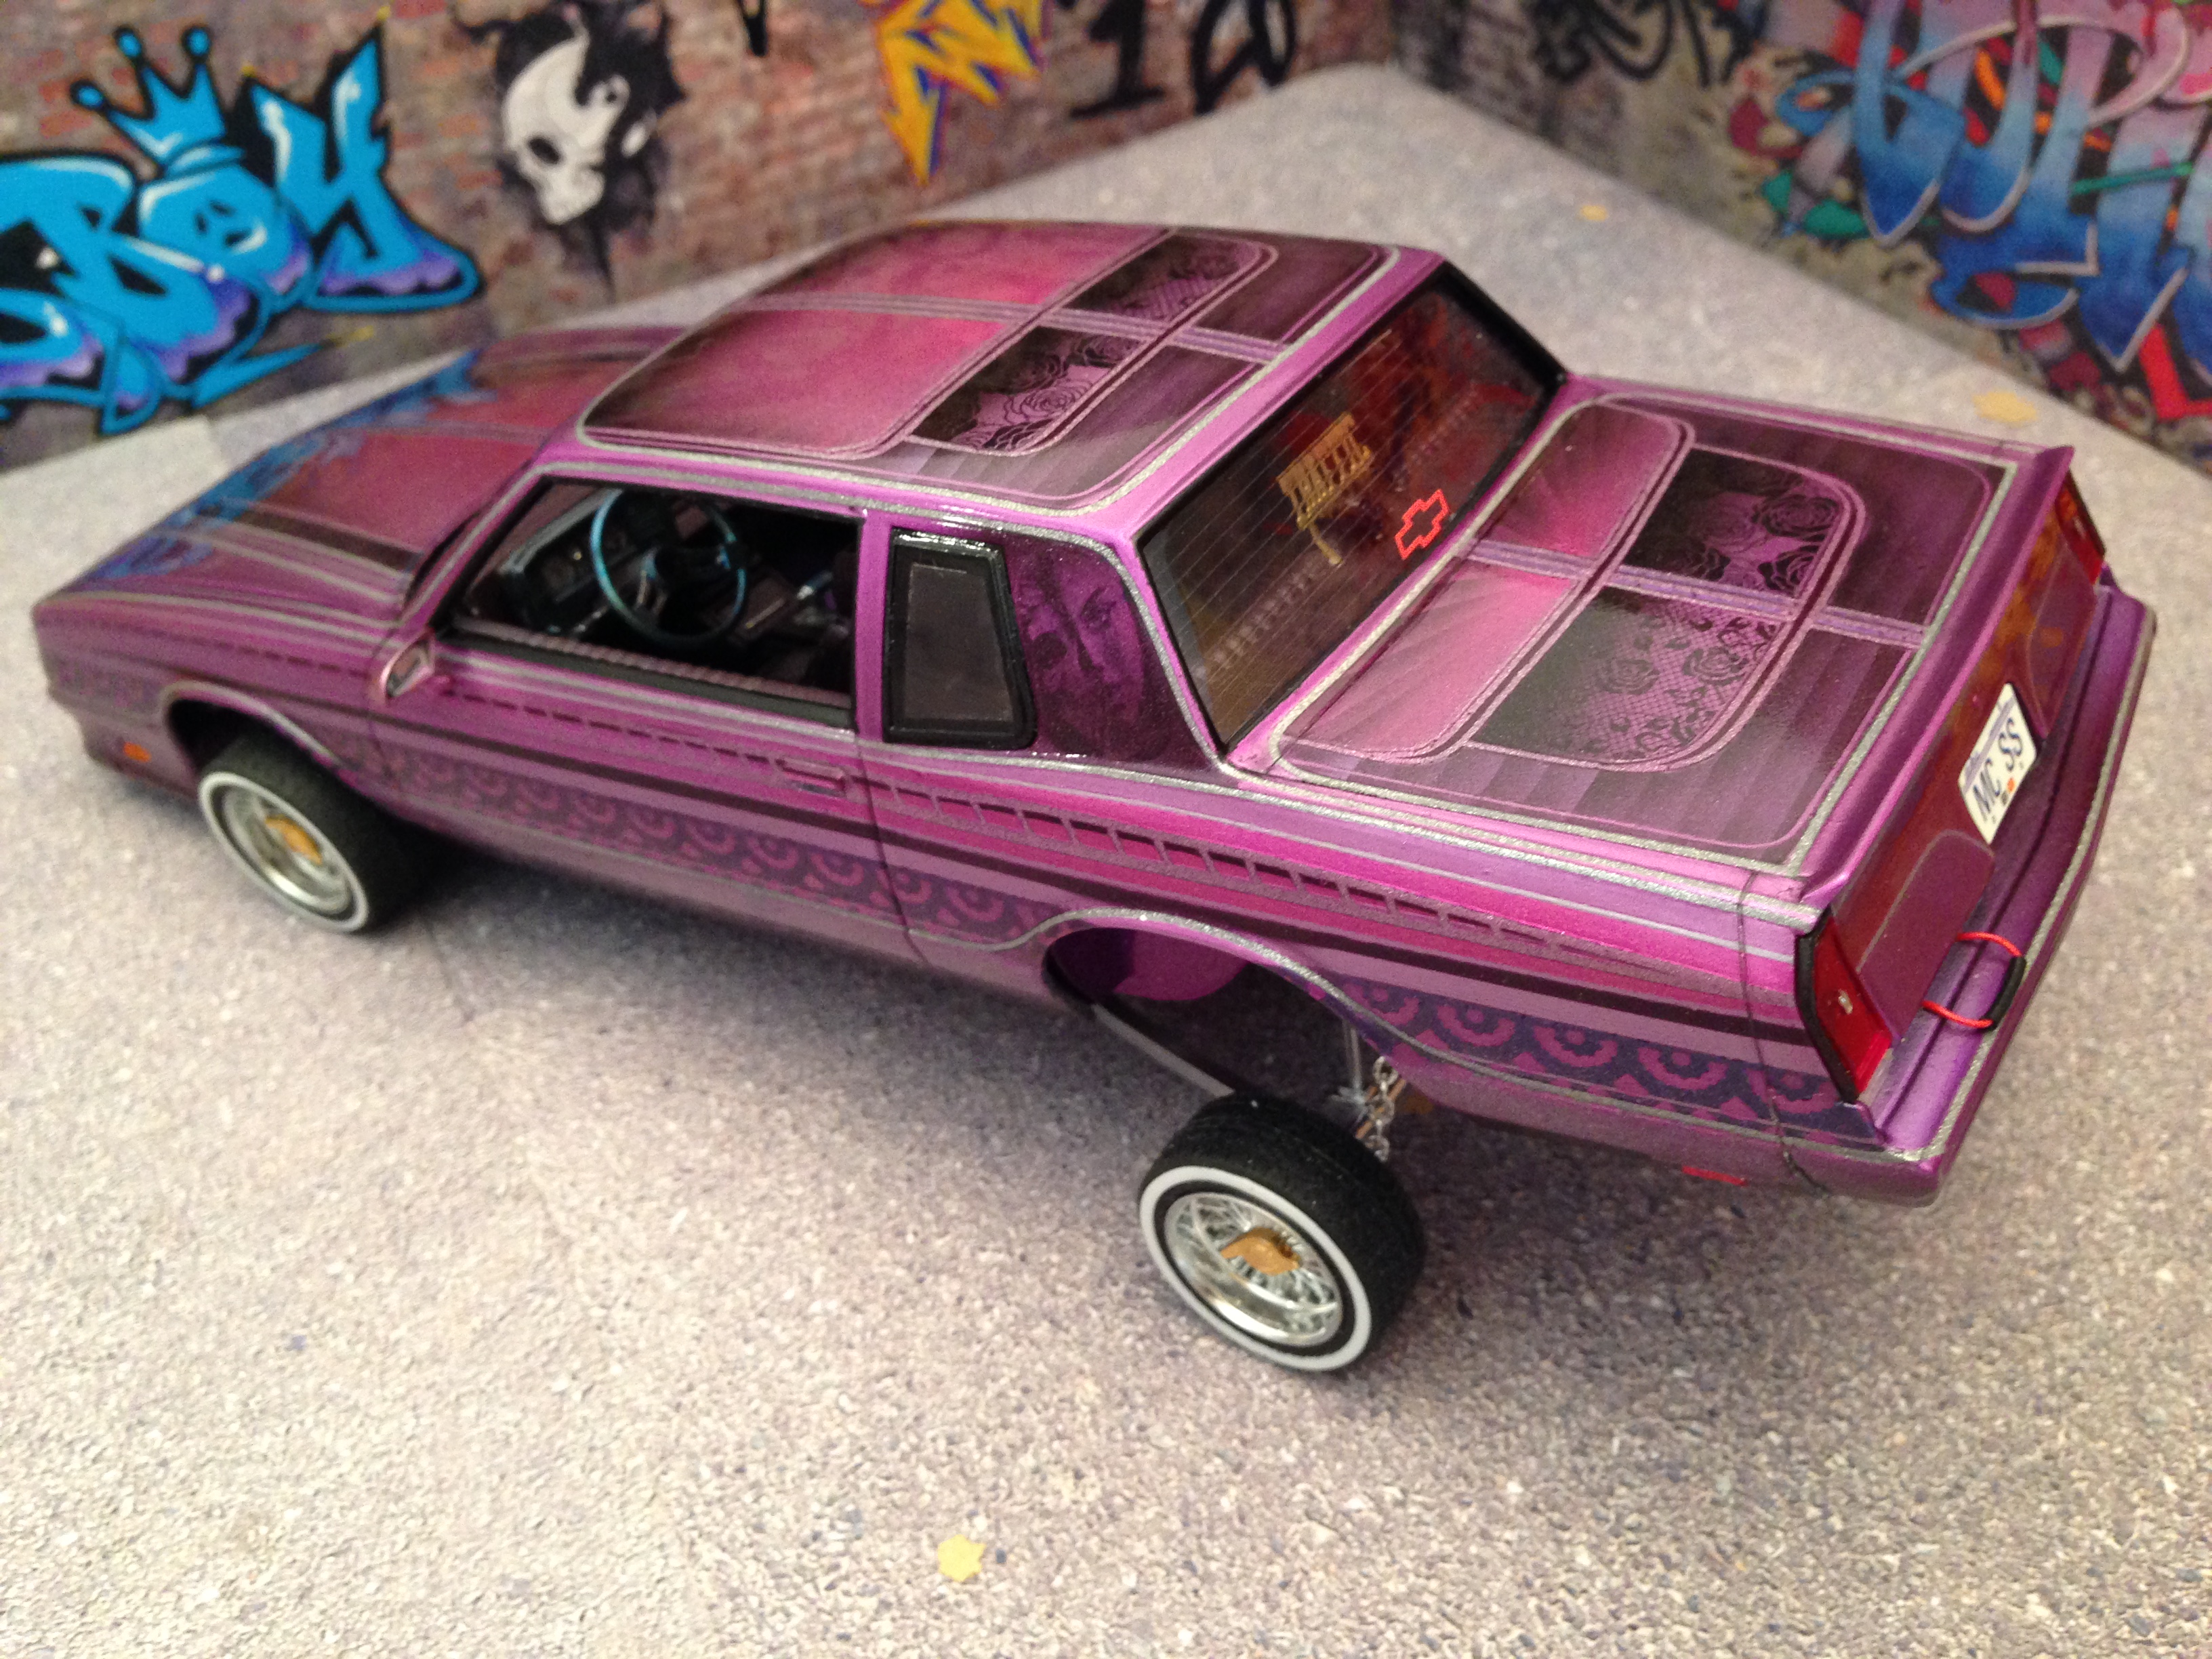
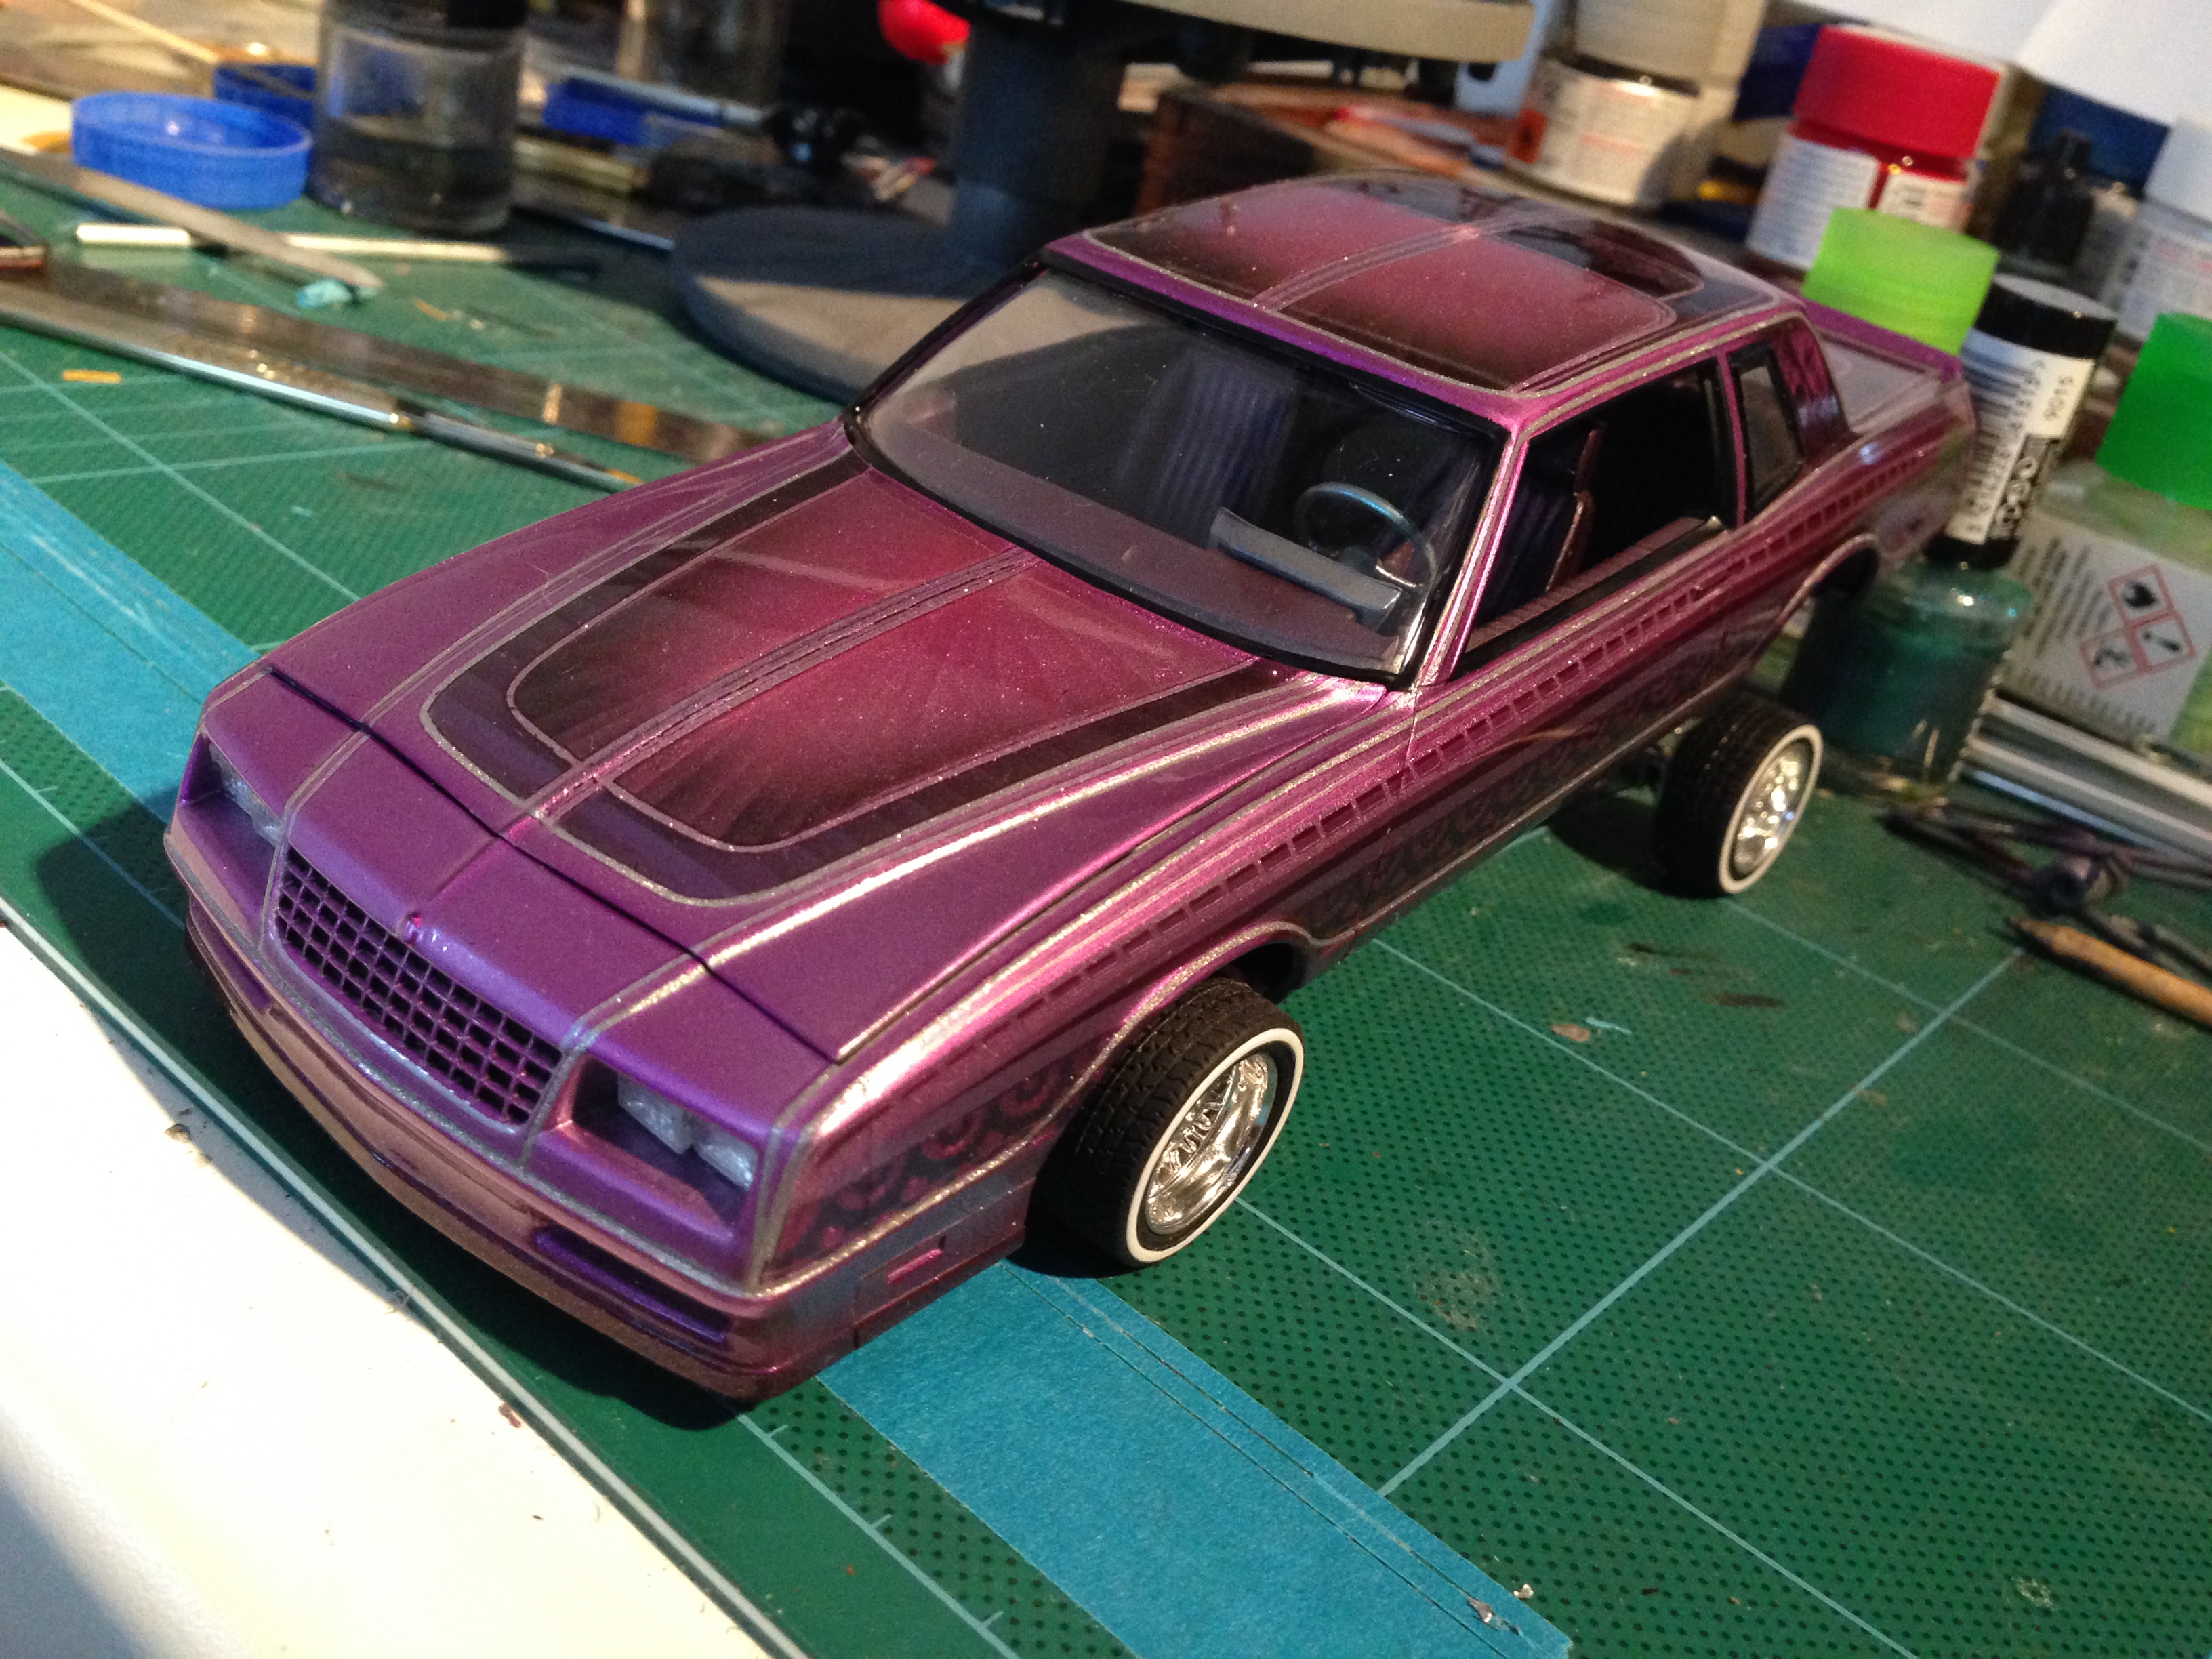
Almost there... just door mirrors, side marker lights and wheel knock offs and it's done
-
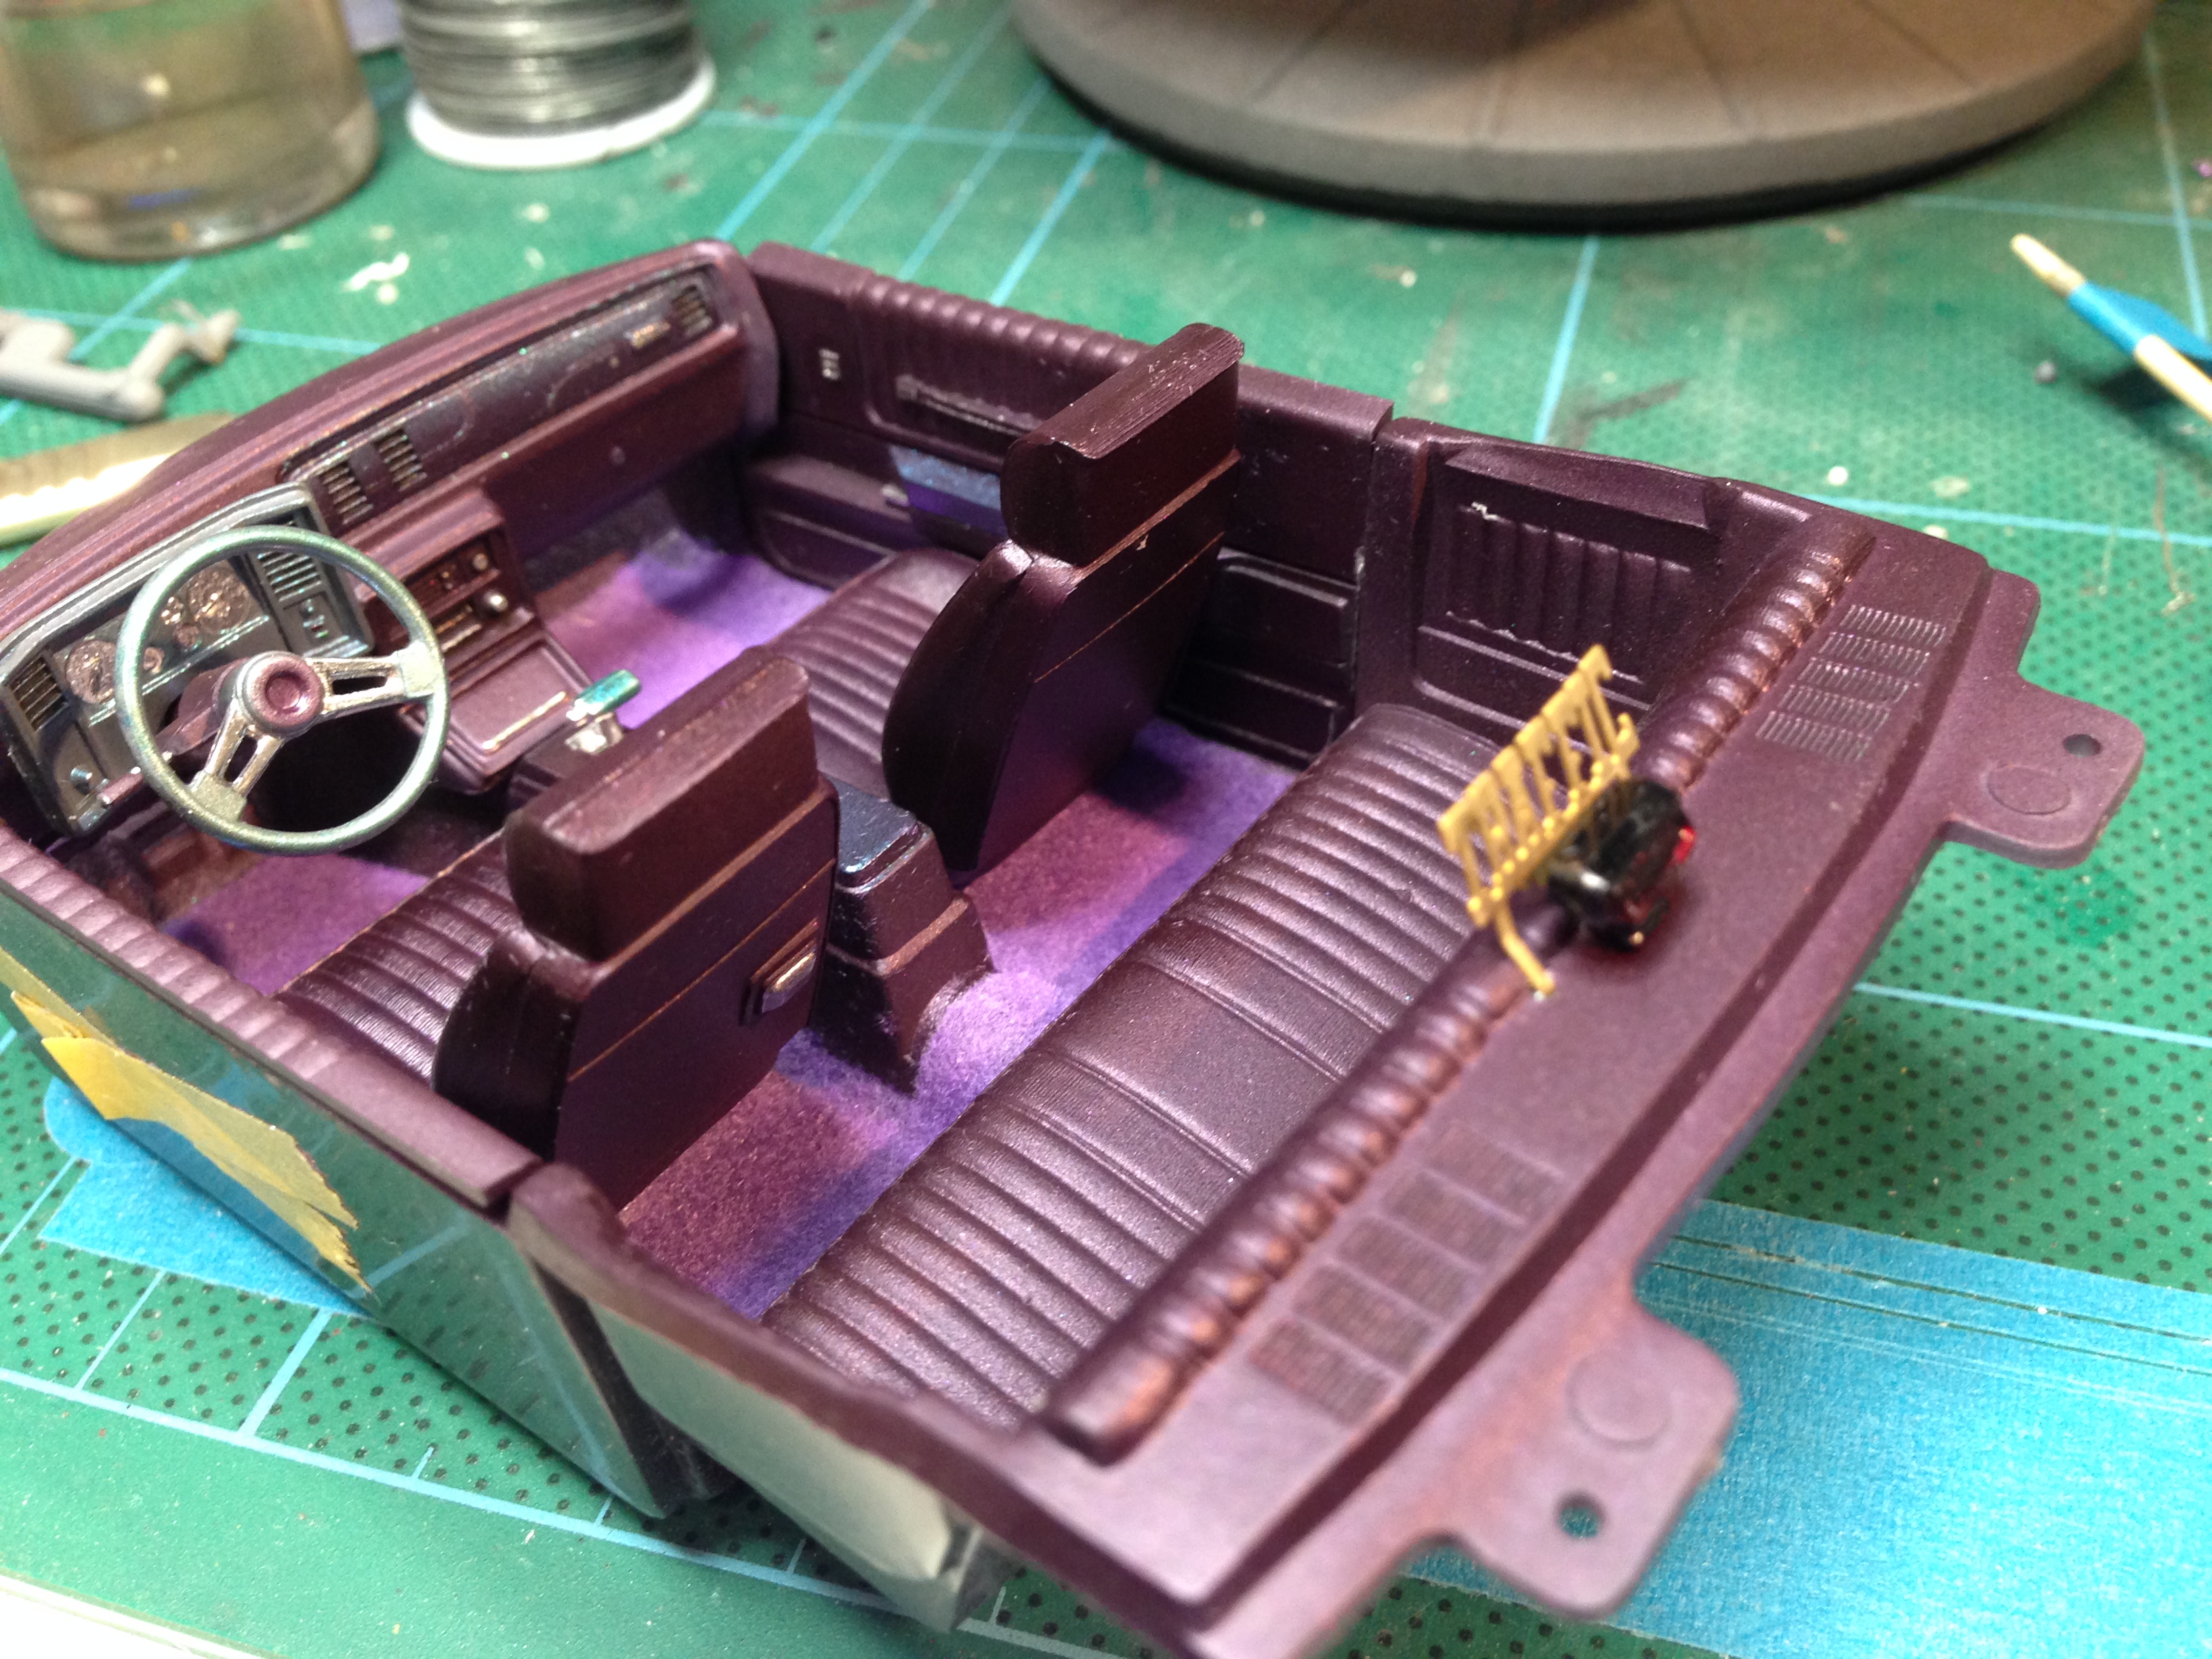
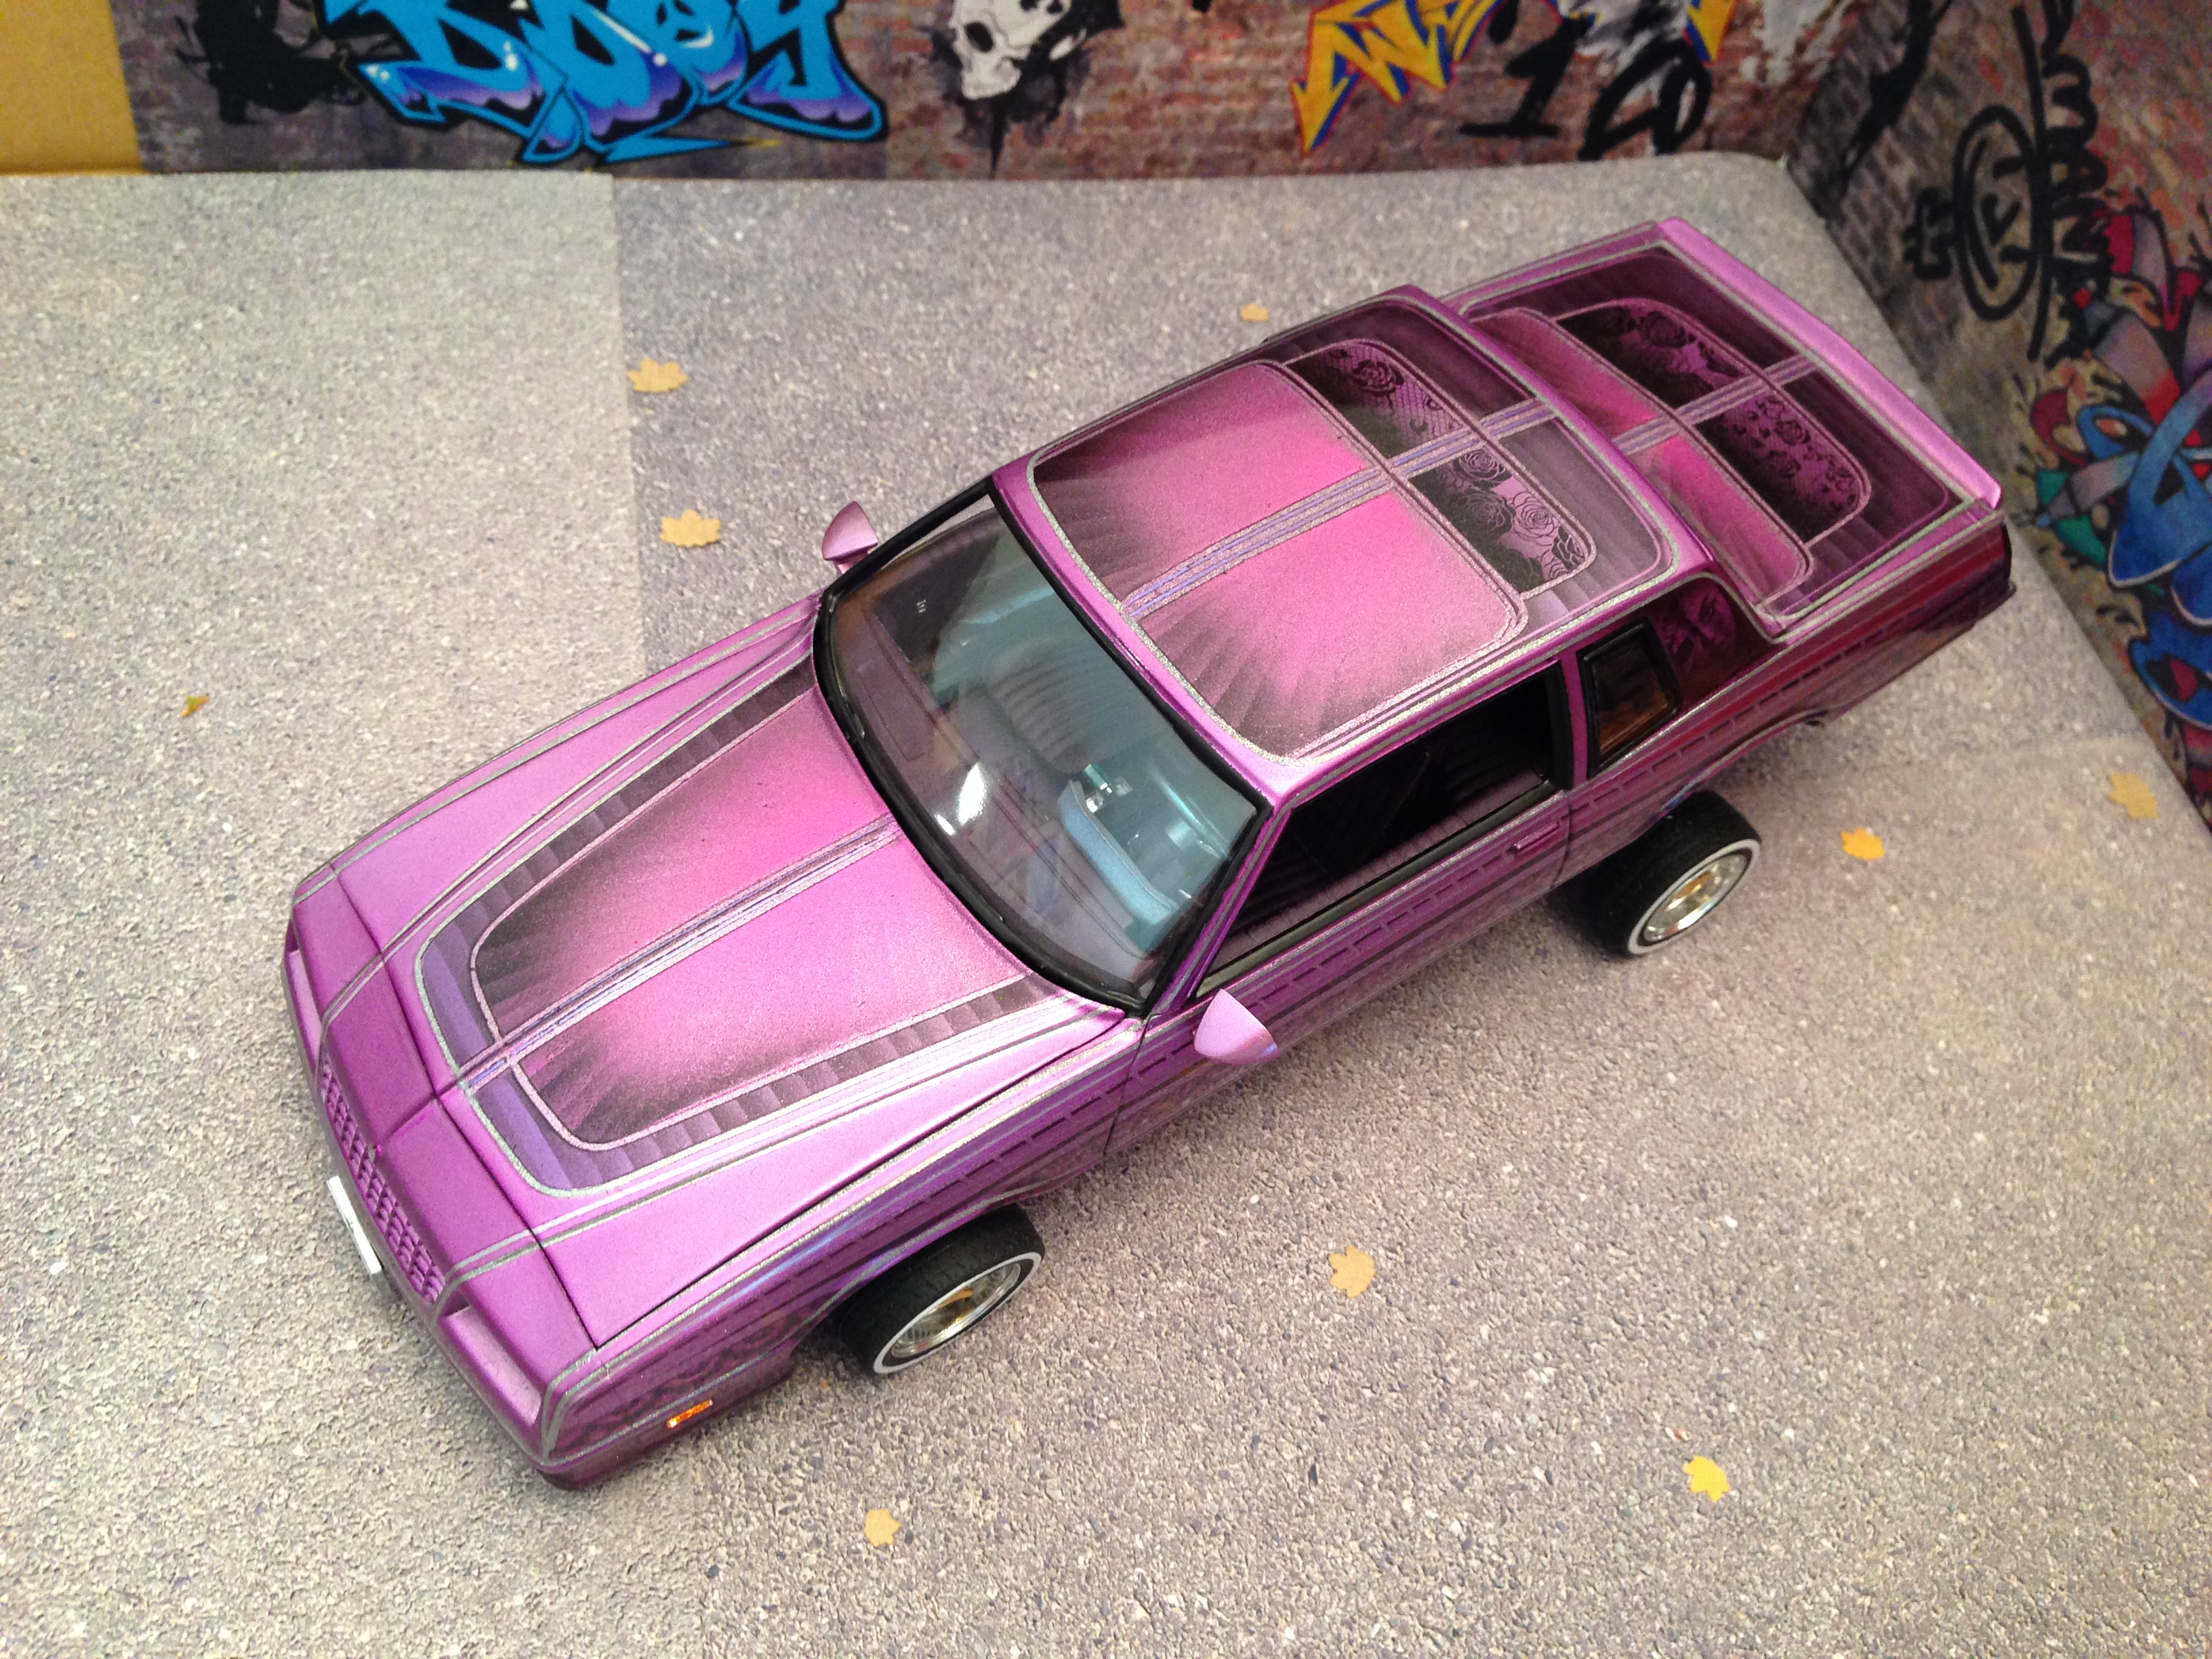
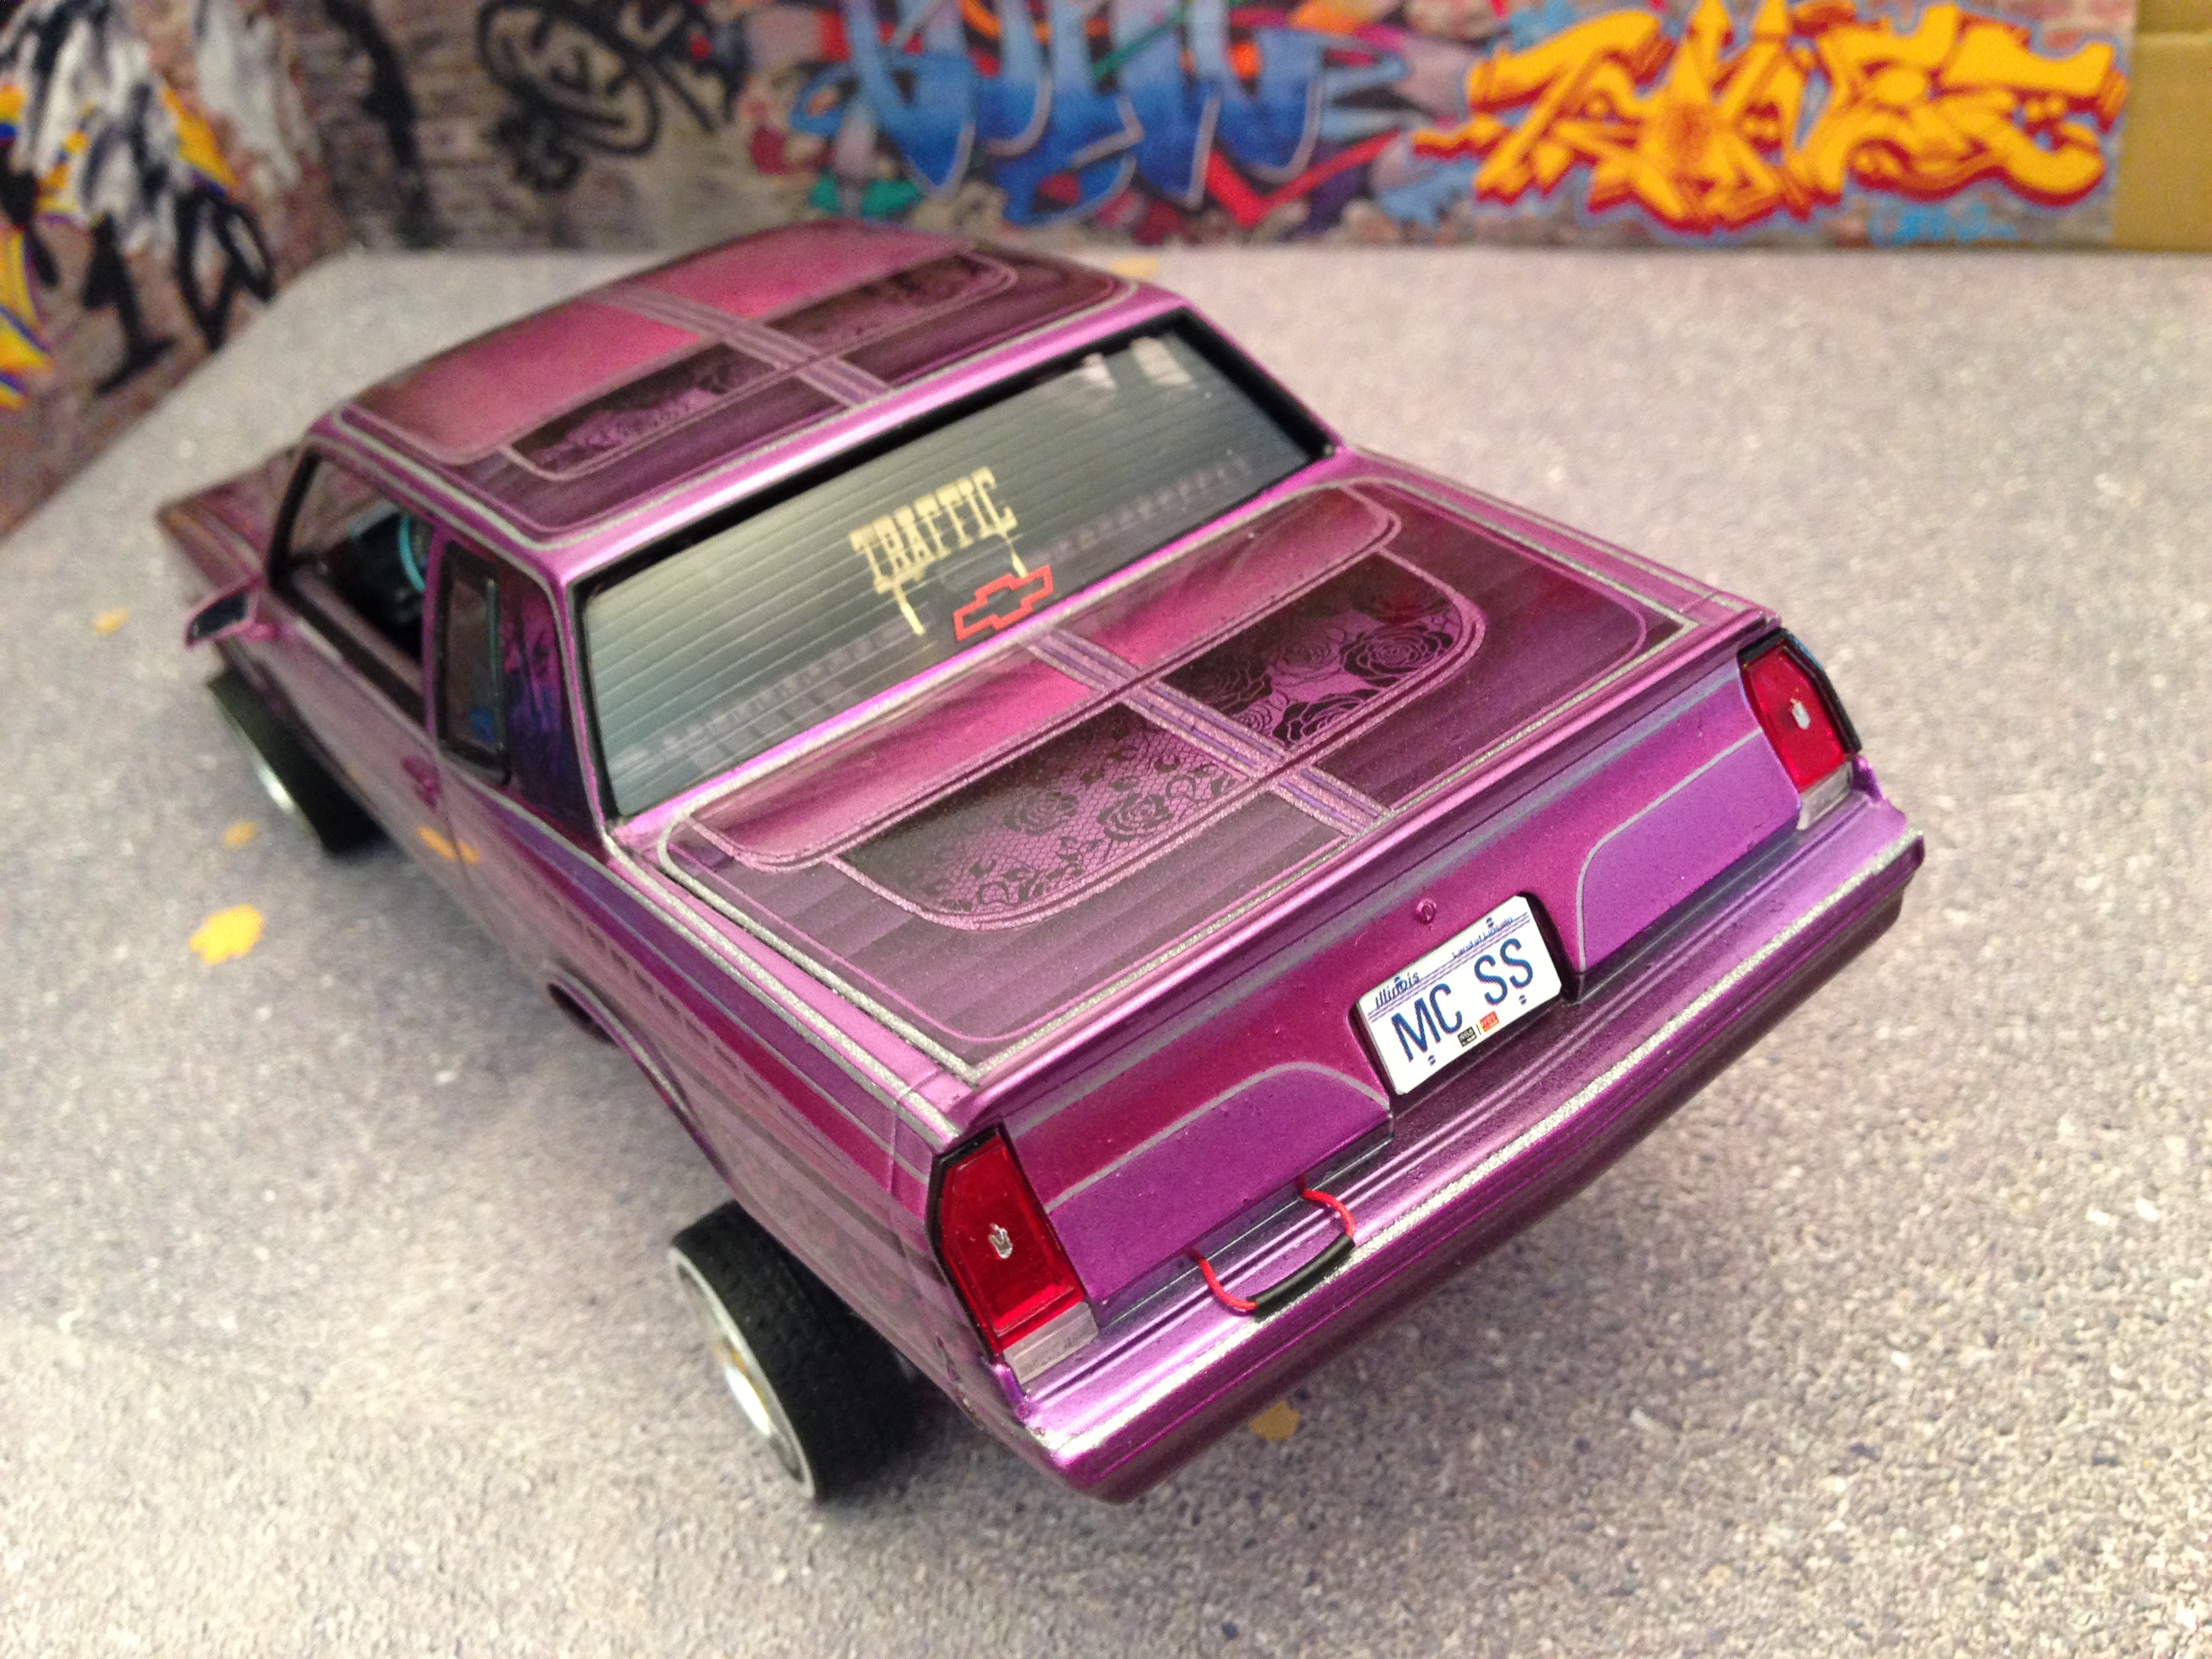
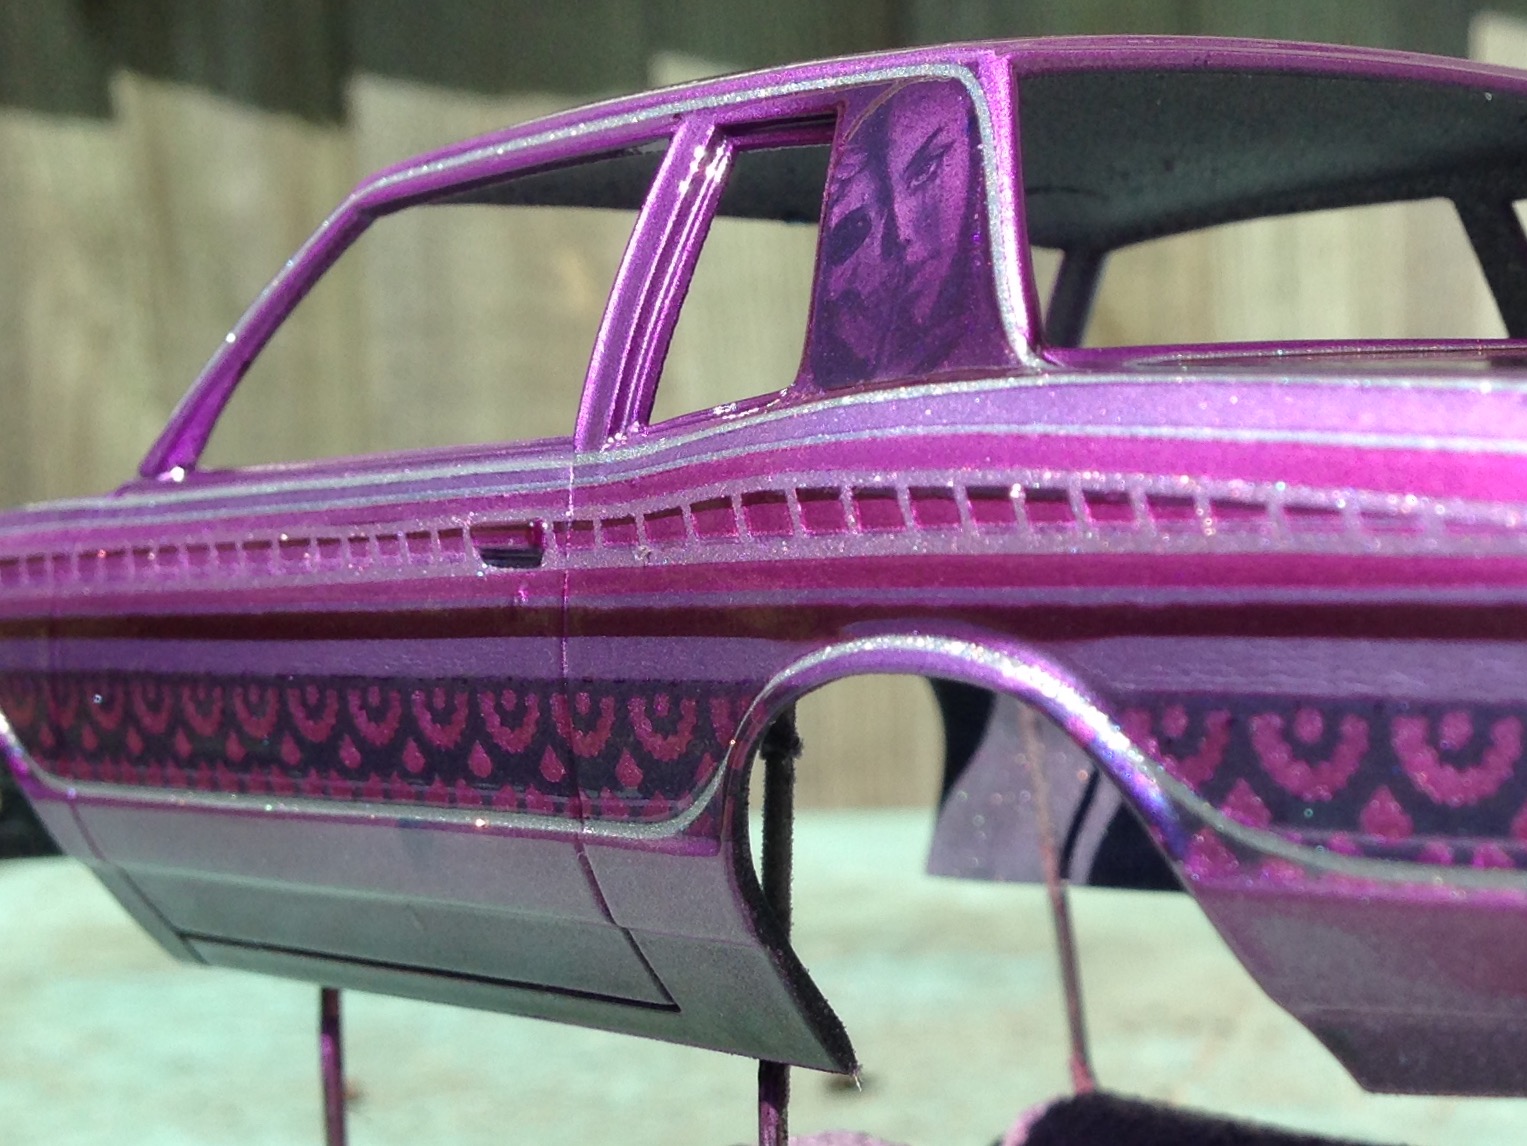
Nearly done. Flocked the carpet and painted the headlining the same shade of purple. Picked out a few areas in an iridescent blue/purple.
-
Thanks Espo yeah, at first I thought I'd ruined it. But the purple went on a bit velvety and I figured the clear would sort it out and bring the patterns out. True.. I lost some colour. But it's a nice effect, with parts of the design being more visible from certain directions. I'm glad I left some lines silver. They really pop in the sun ?
-
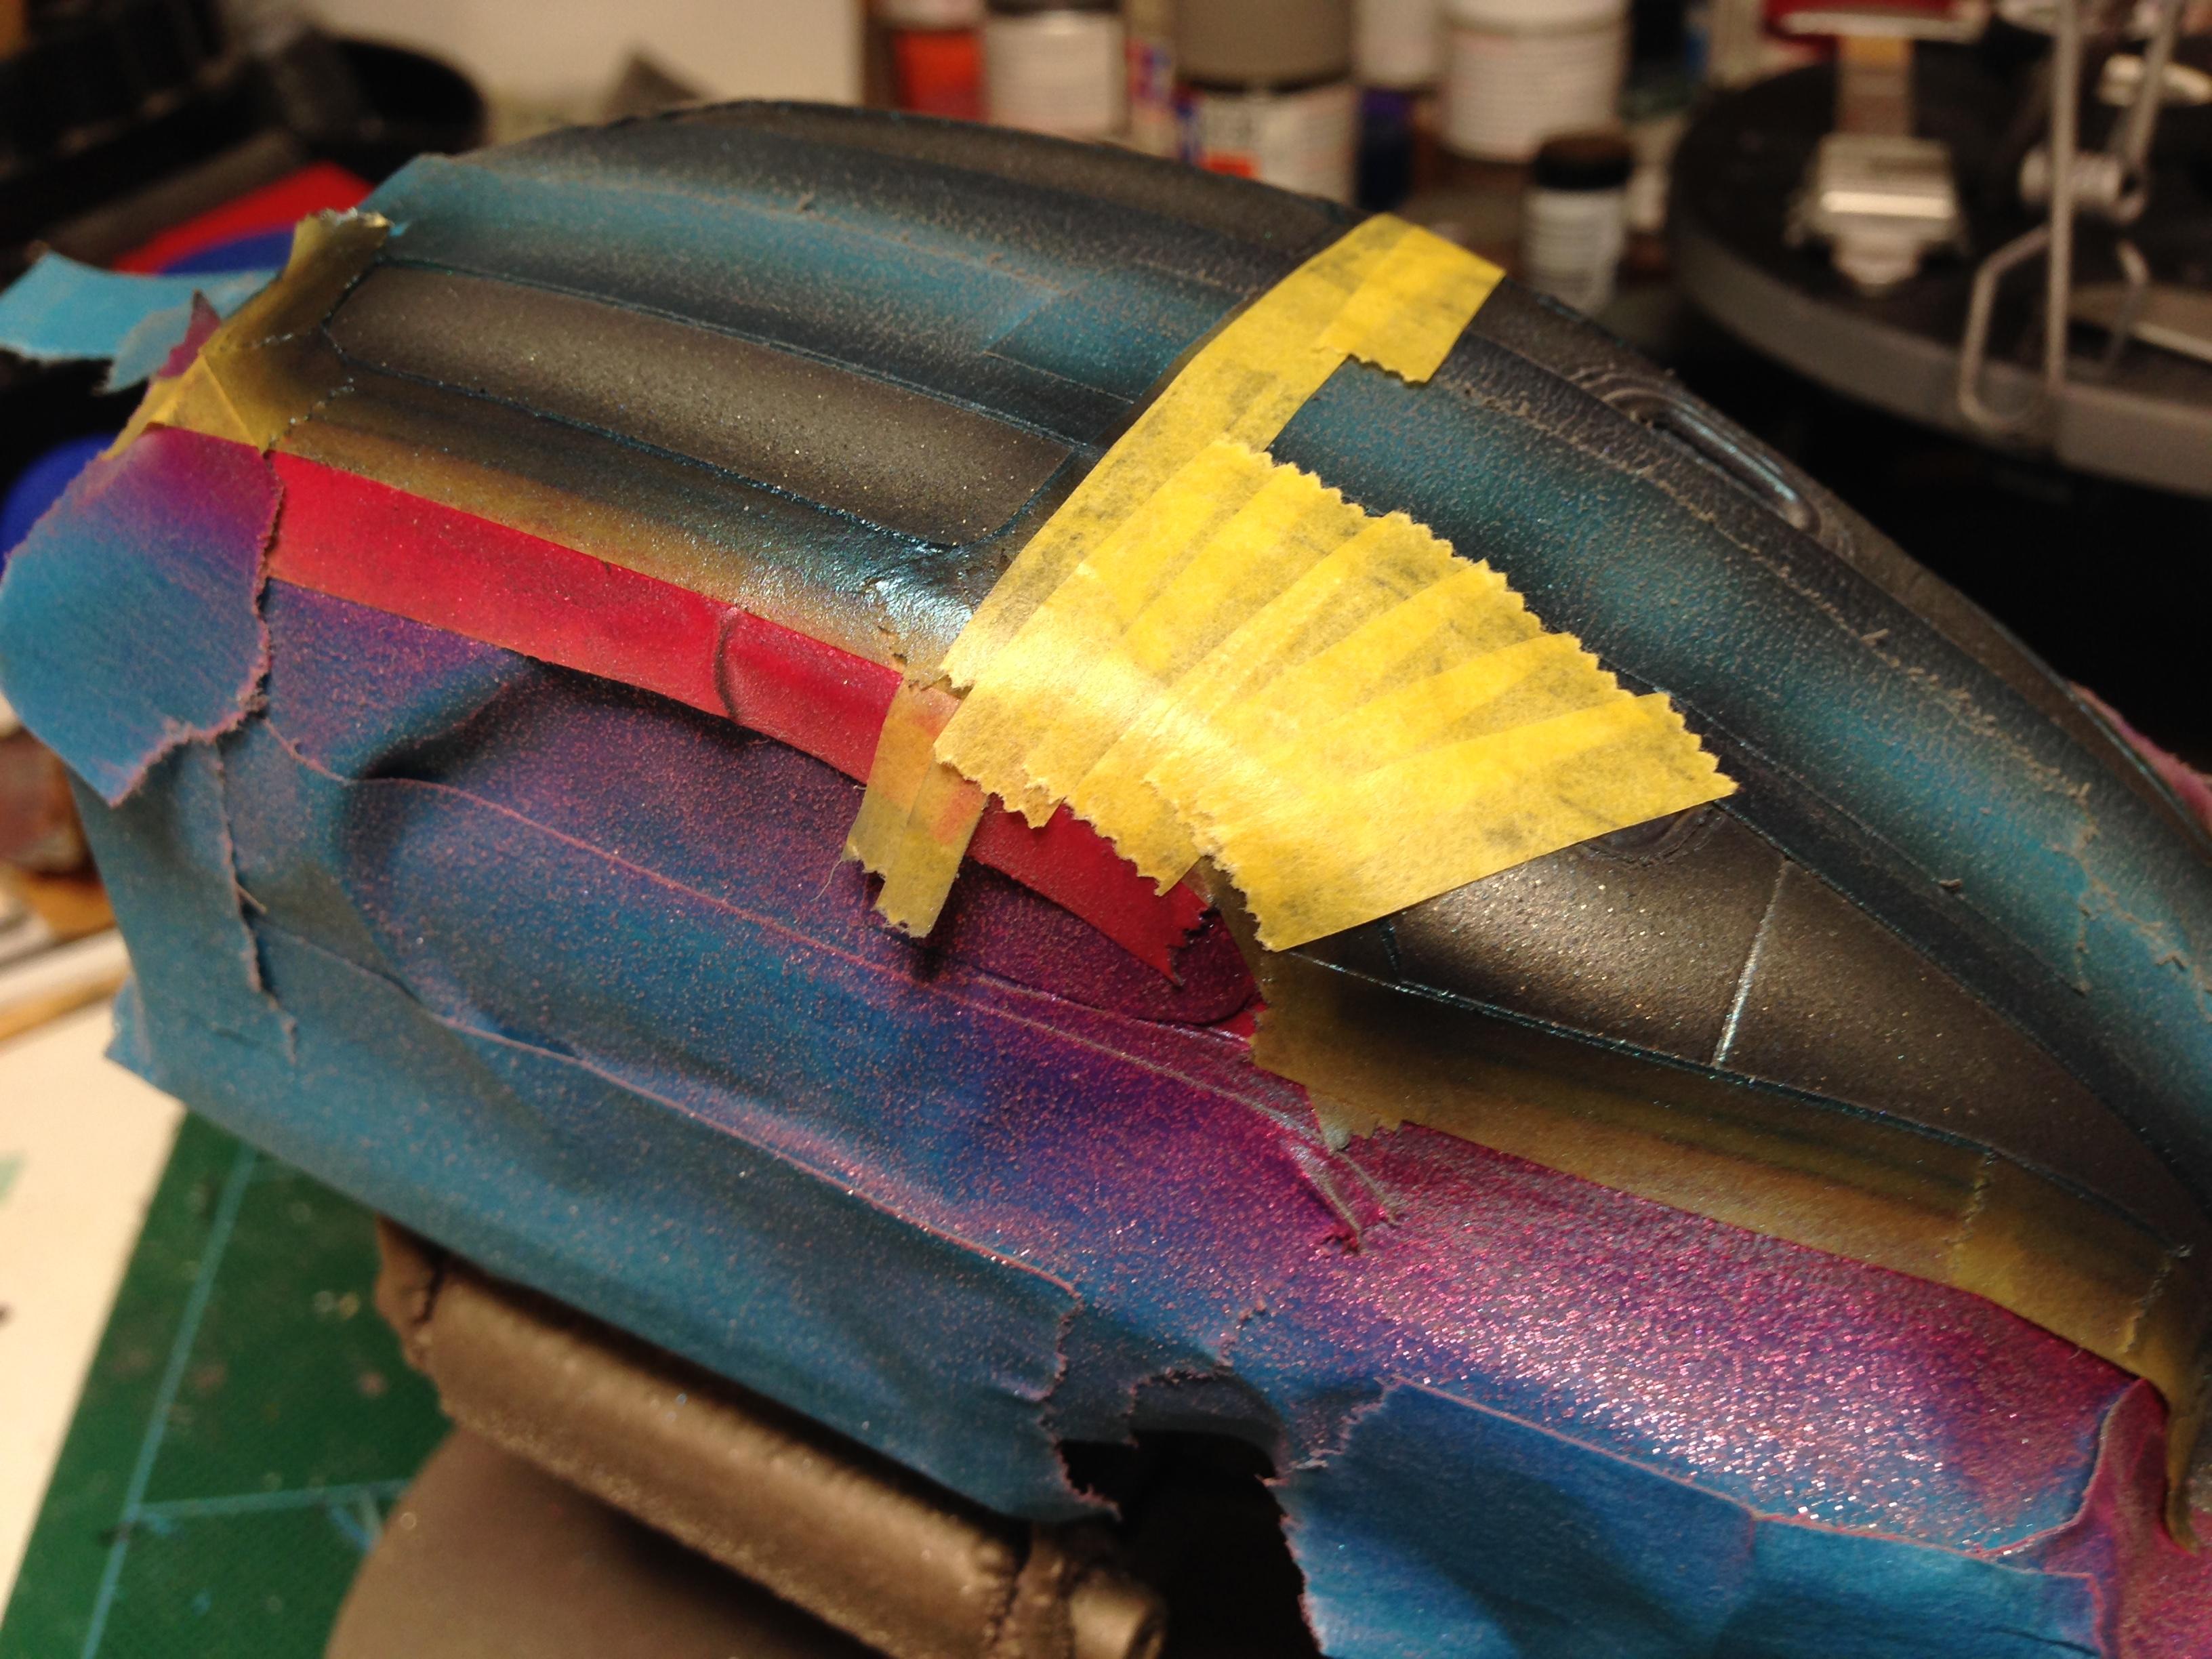
Thanks for the nice comments. I know this sort of thing isn't to everyone's taste! Getting the symmetry right can be tricky. I probably pull up and re-position the tape half a dozen times before I get it looking where I want it. I try to use body lines and edges as reference points to gauge distances. For bends and curves, use a longer piece of tape than you actually need and sweep it in an arc, while pressing the tape down where you want it. Even Tamiya flexible tape doesn't like tight radius curves. It puckers and lifts, so I use 3M blue tape, cut to 1mm strips. Then block out whichever side of the line, if you need to, with bits of wider tape. I stick used tape to the edge of my bench to tear up into bits for masking around a curve.
-
I liked the variation in colour on the different panels, but it was always my intention to use purple candy. The design feels a bit more cohesive now. I think it looks classy, too. I hope you agree. He candy is a bit matt, so I reckon the patterns will stand out more after clearcoat. i left some fine line tape on before the candy, to make it pop a bit more