geetee66
-
Posts
1,540 -
Joined
-
Last visited
Content Type
Profiles
Forums
Events
Gallery
Everything posted by geetee66
-
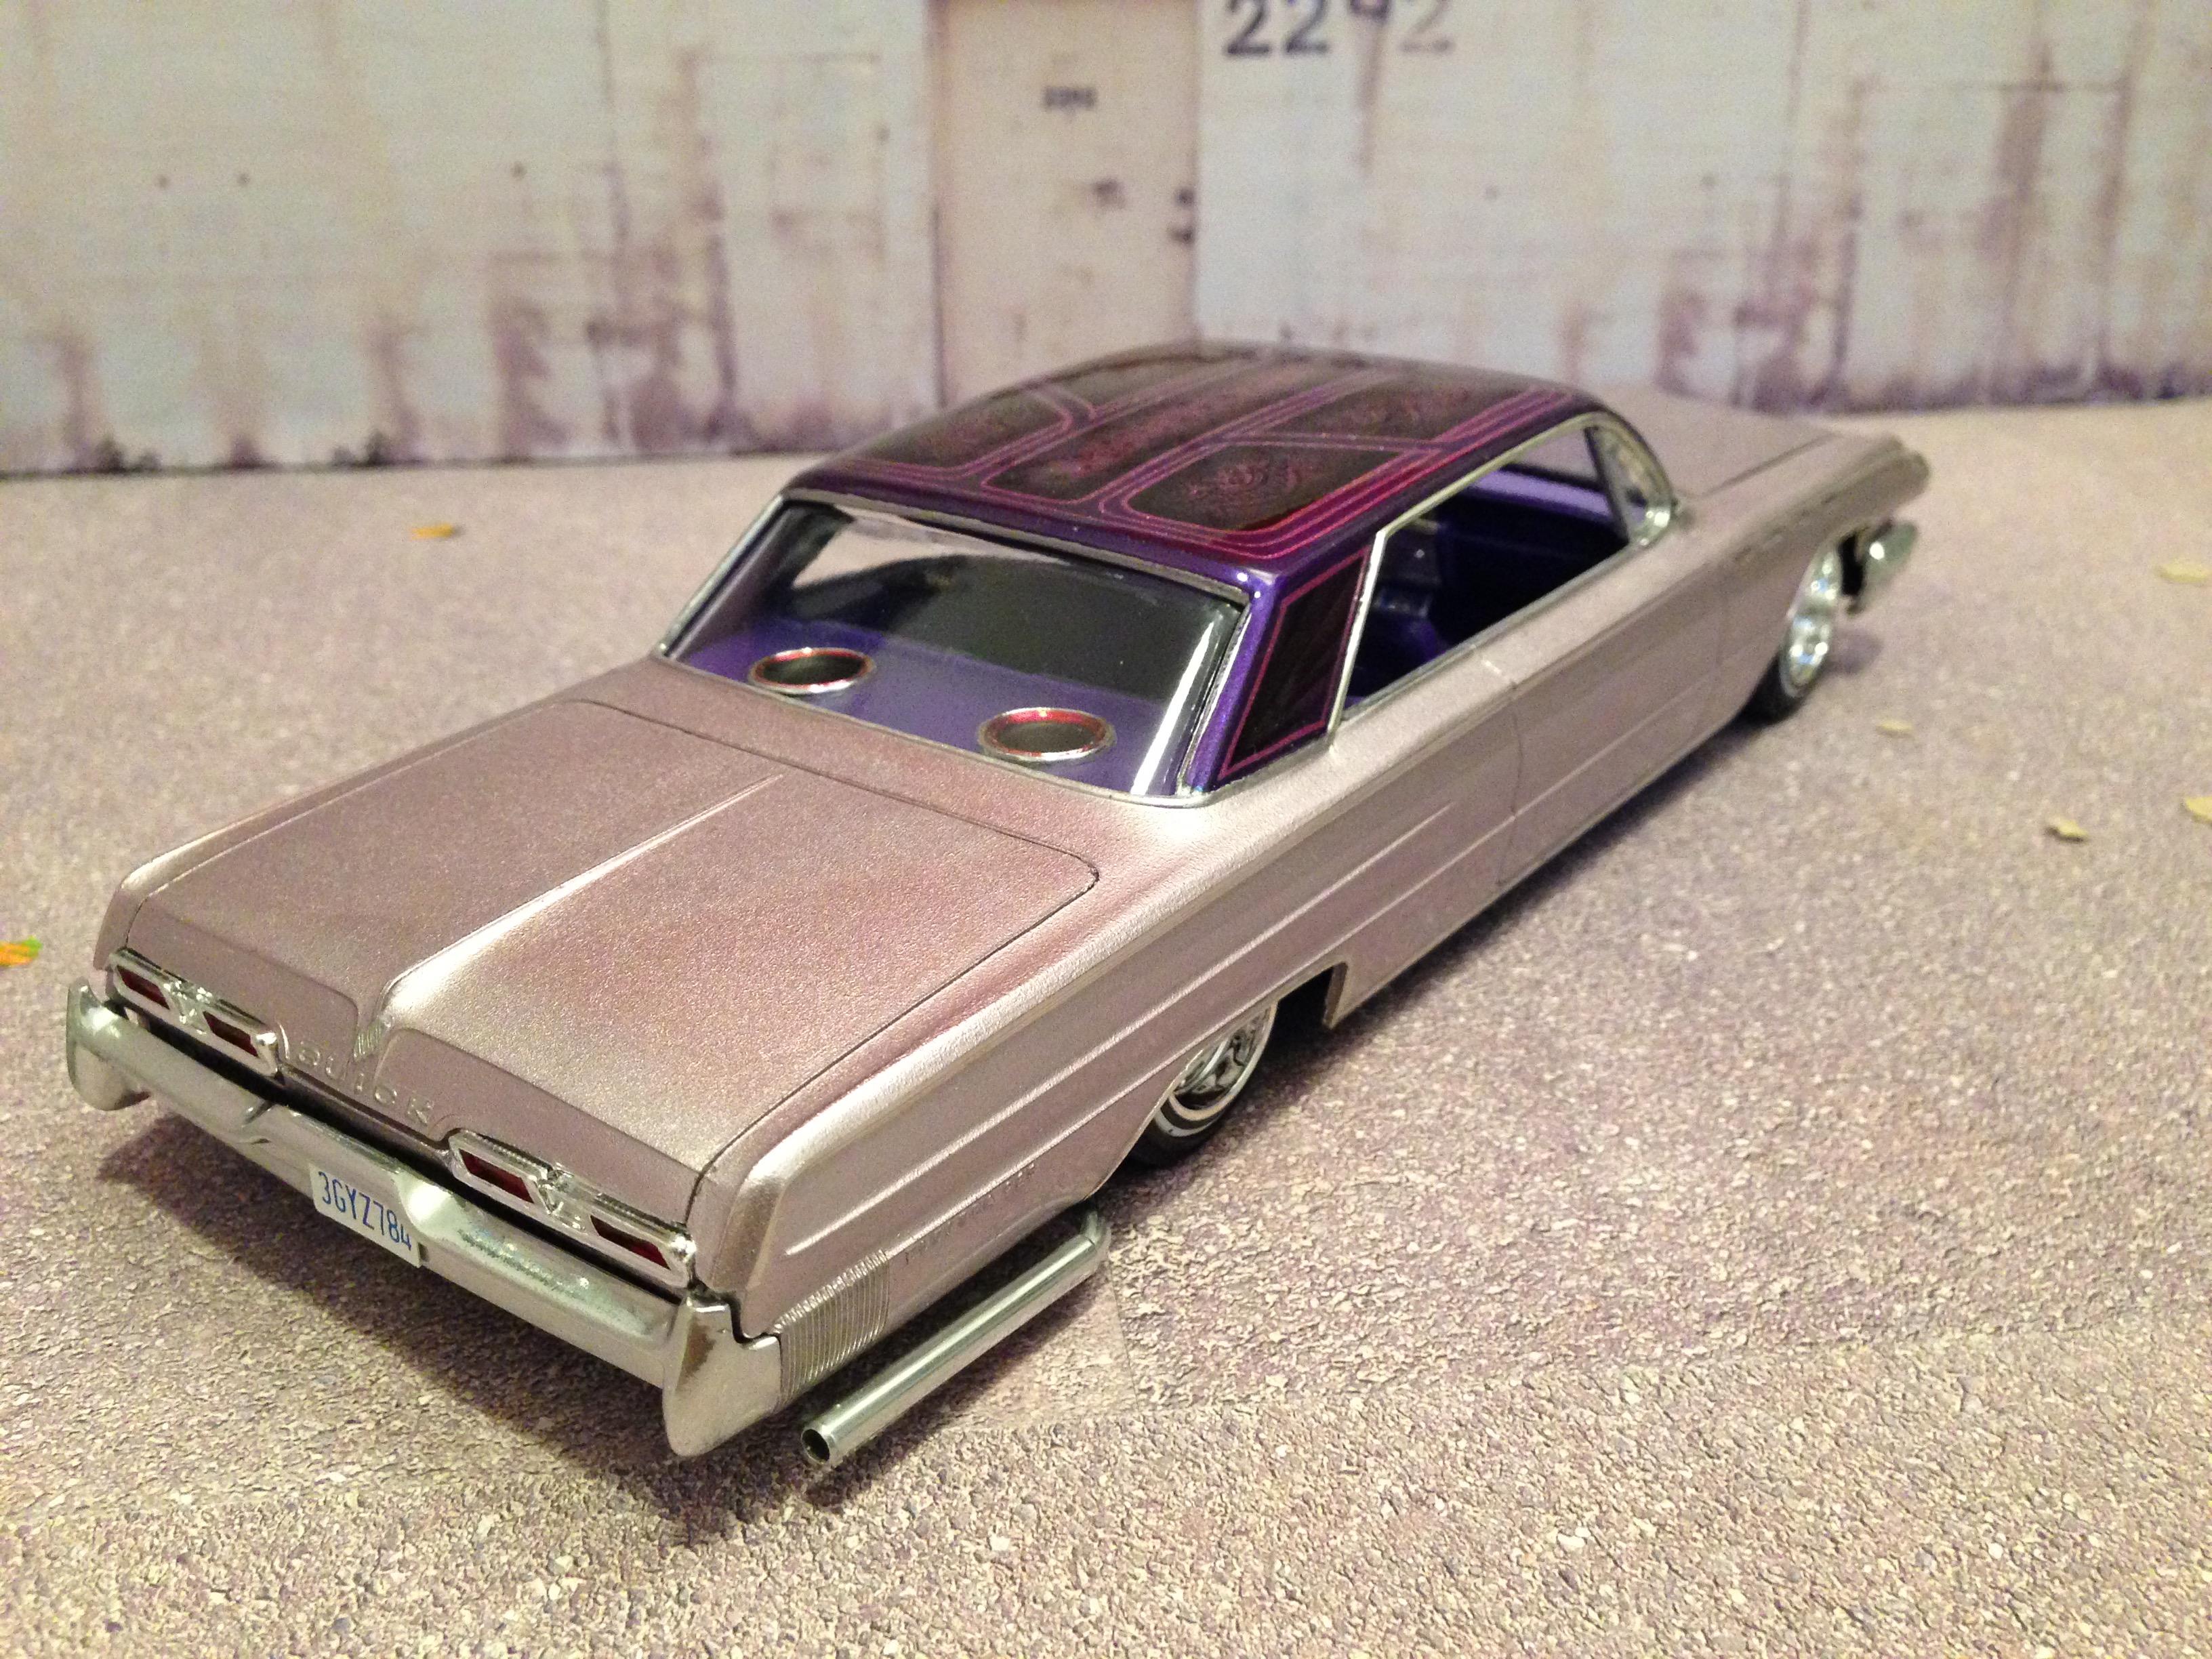
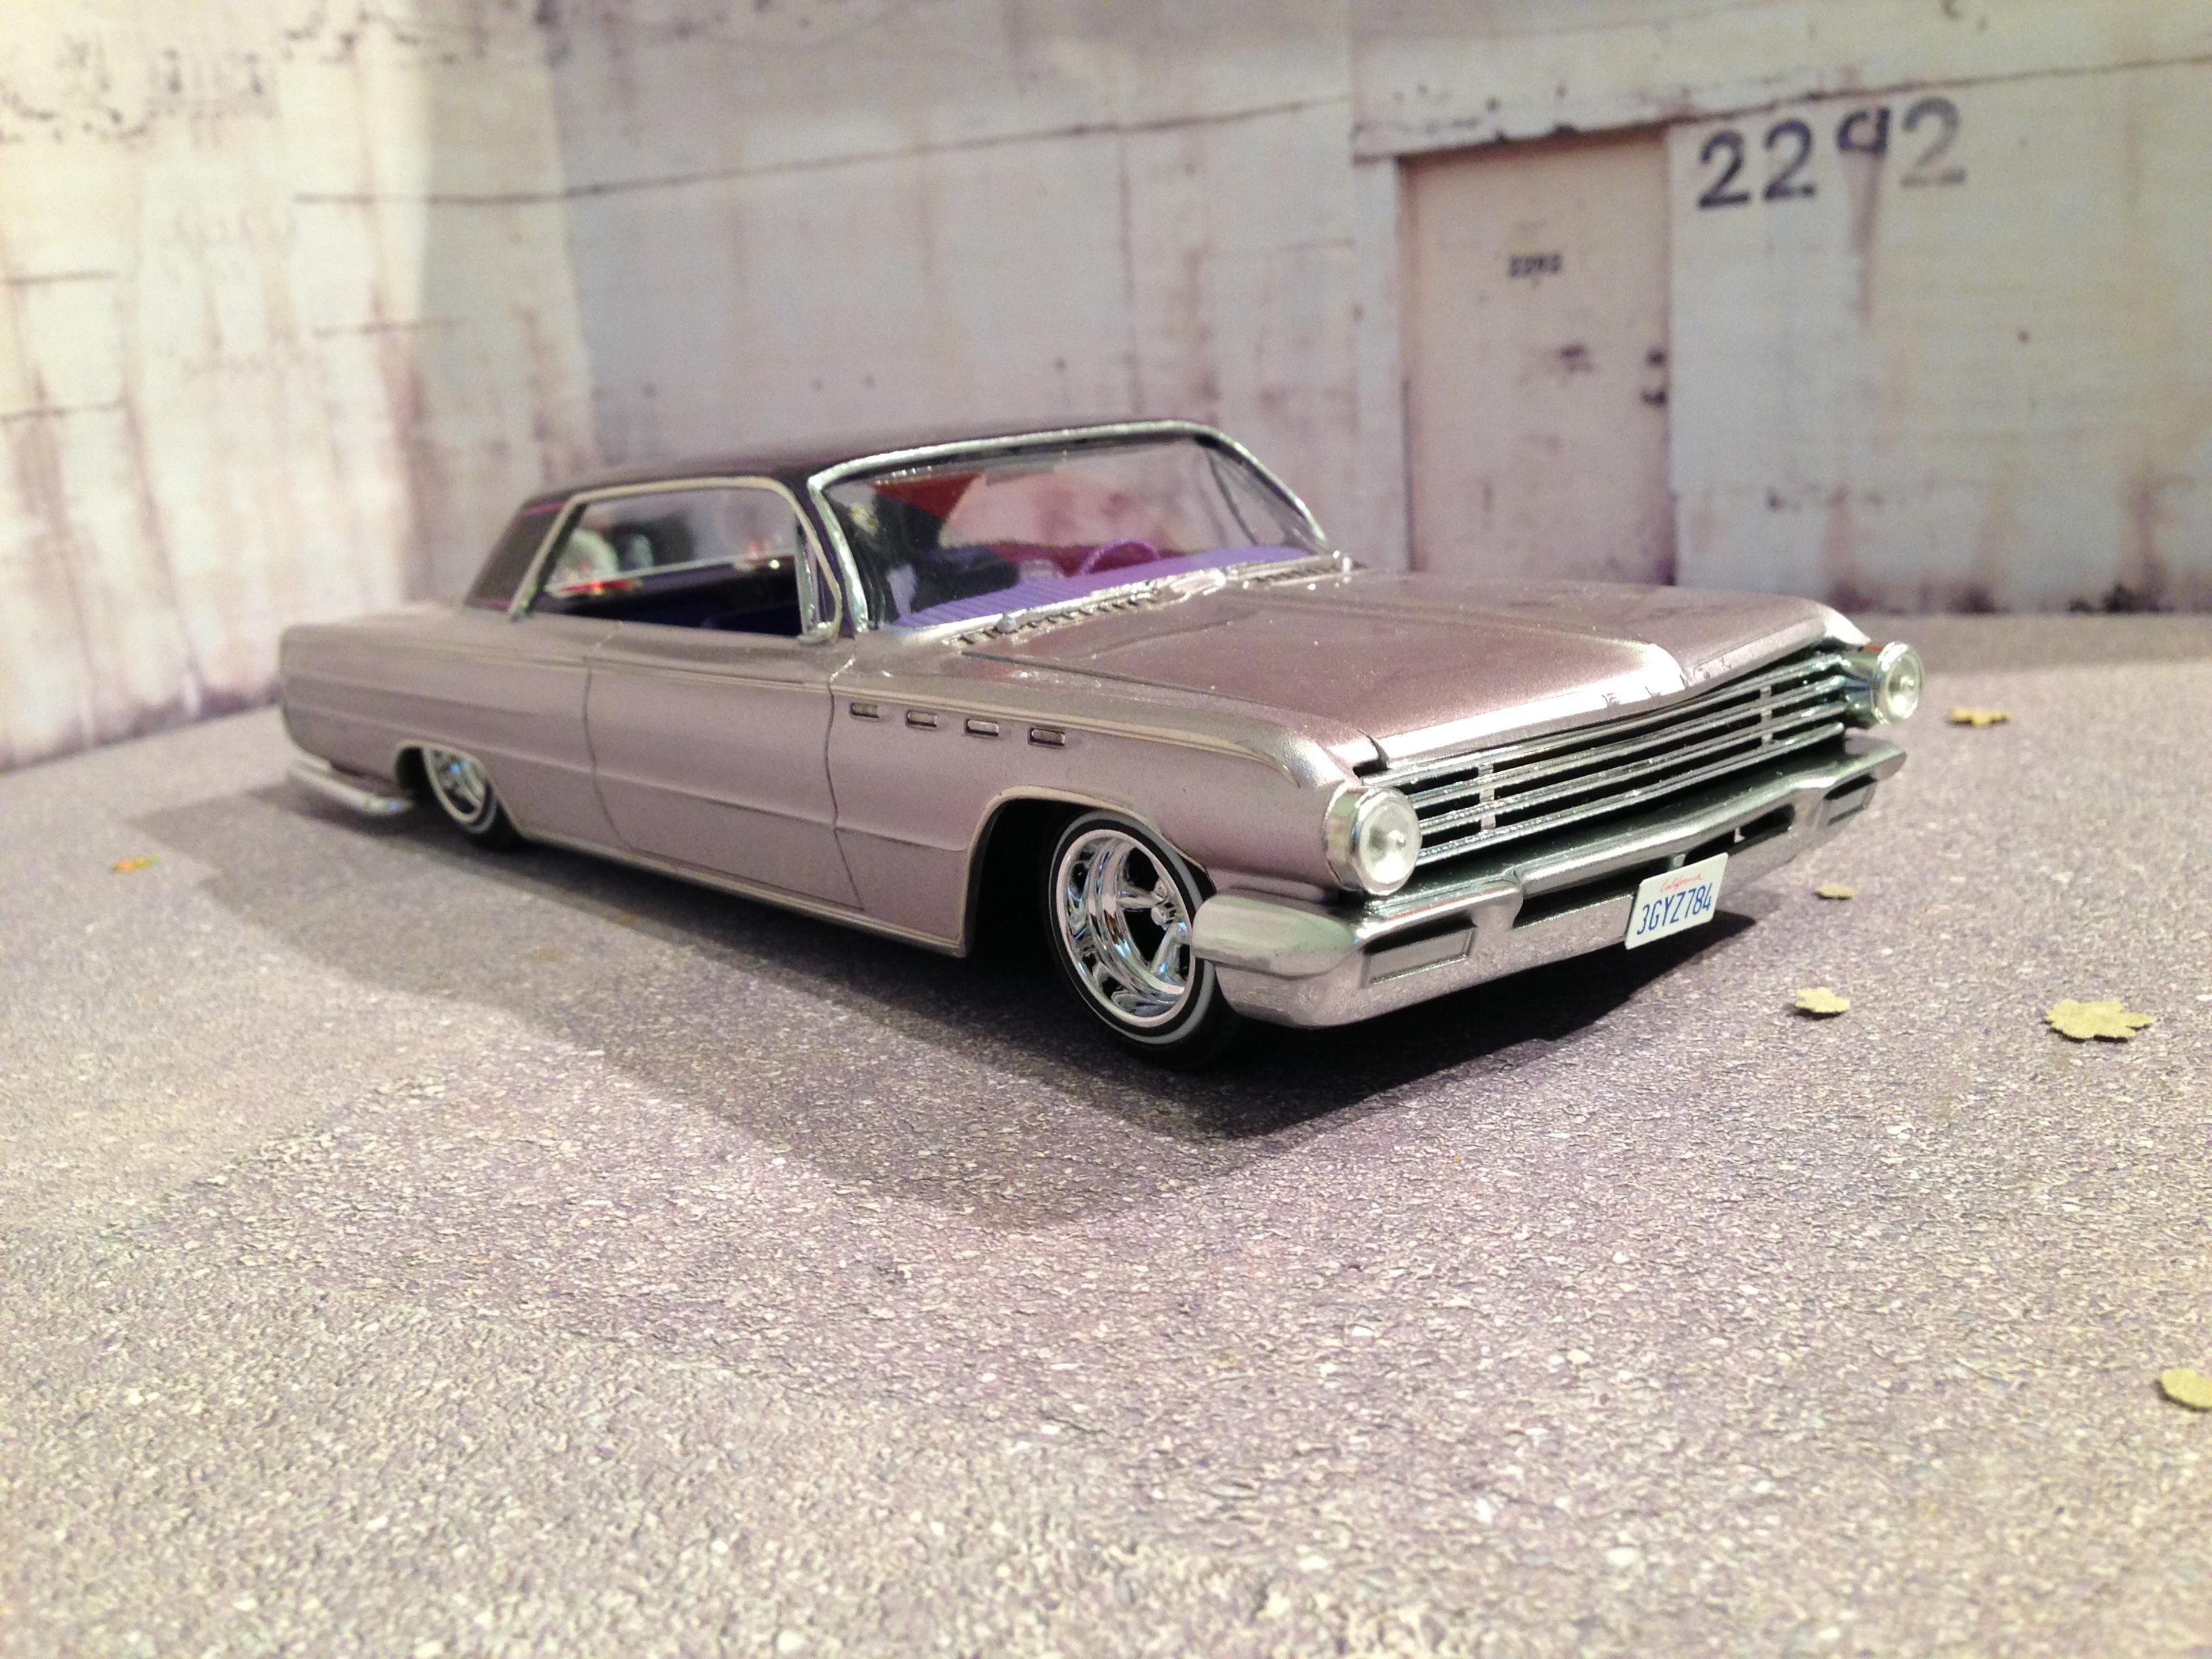
? don't worry. No offence taken buddy! glad you all dig the paint! suspension and some engine parts are now gloss black, awaiting some Molotow chrome. Chassis now orange. Interior and engine, today. And some more clear on the body.
-
Got the ride height sorted today. I had to cut away a little bit of chassis and grind out the transmission tunnel, and shorten the shock absorbers. But it was an easy job. Drilled out the Pegasus wheels to fit onto the kit axles. Easy. got the tail-dragging look I was after.

-
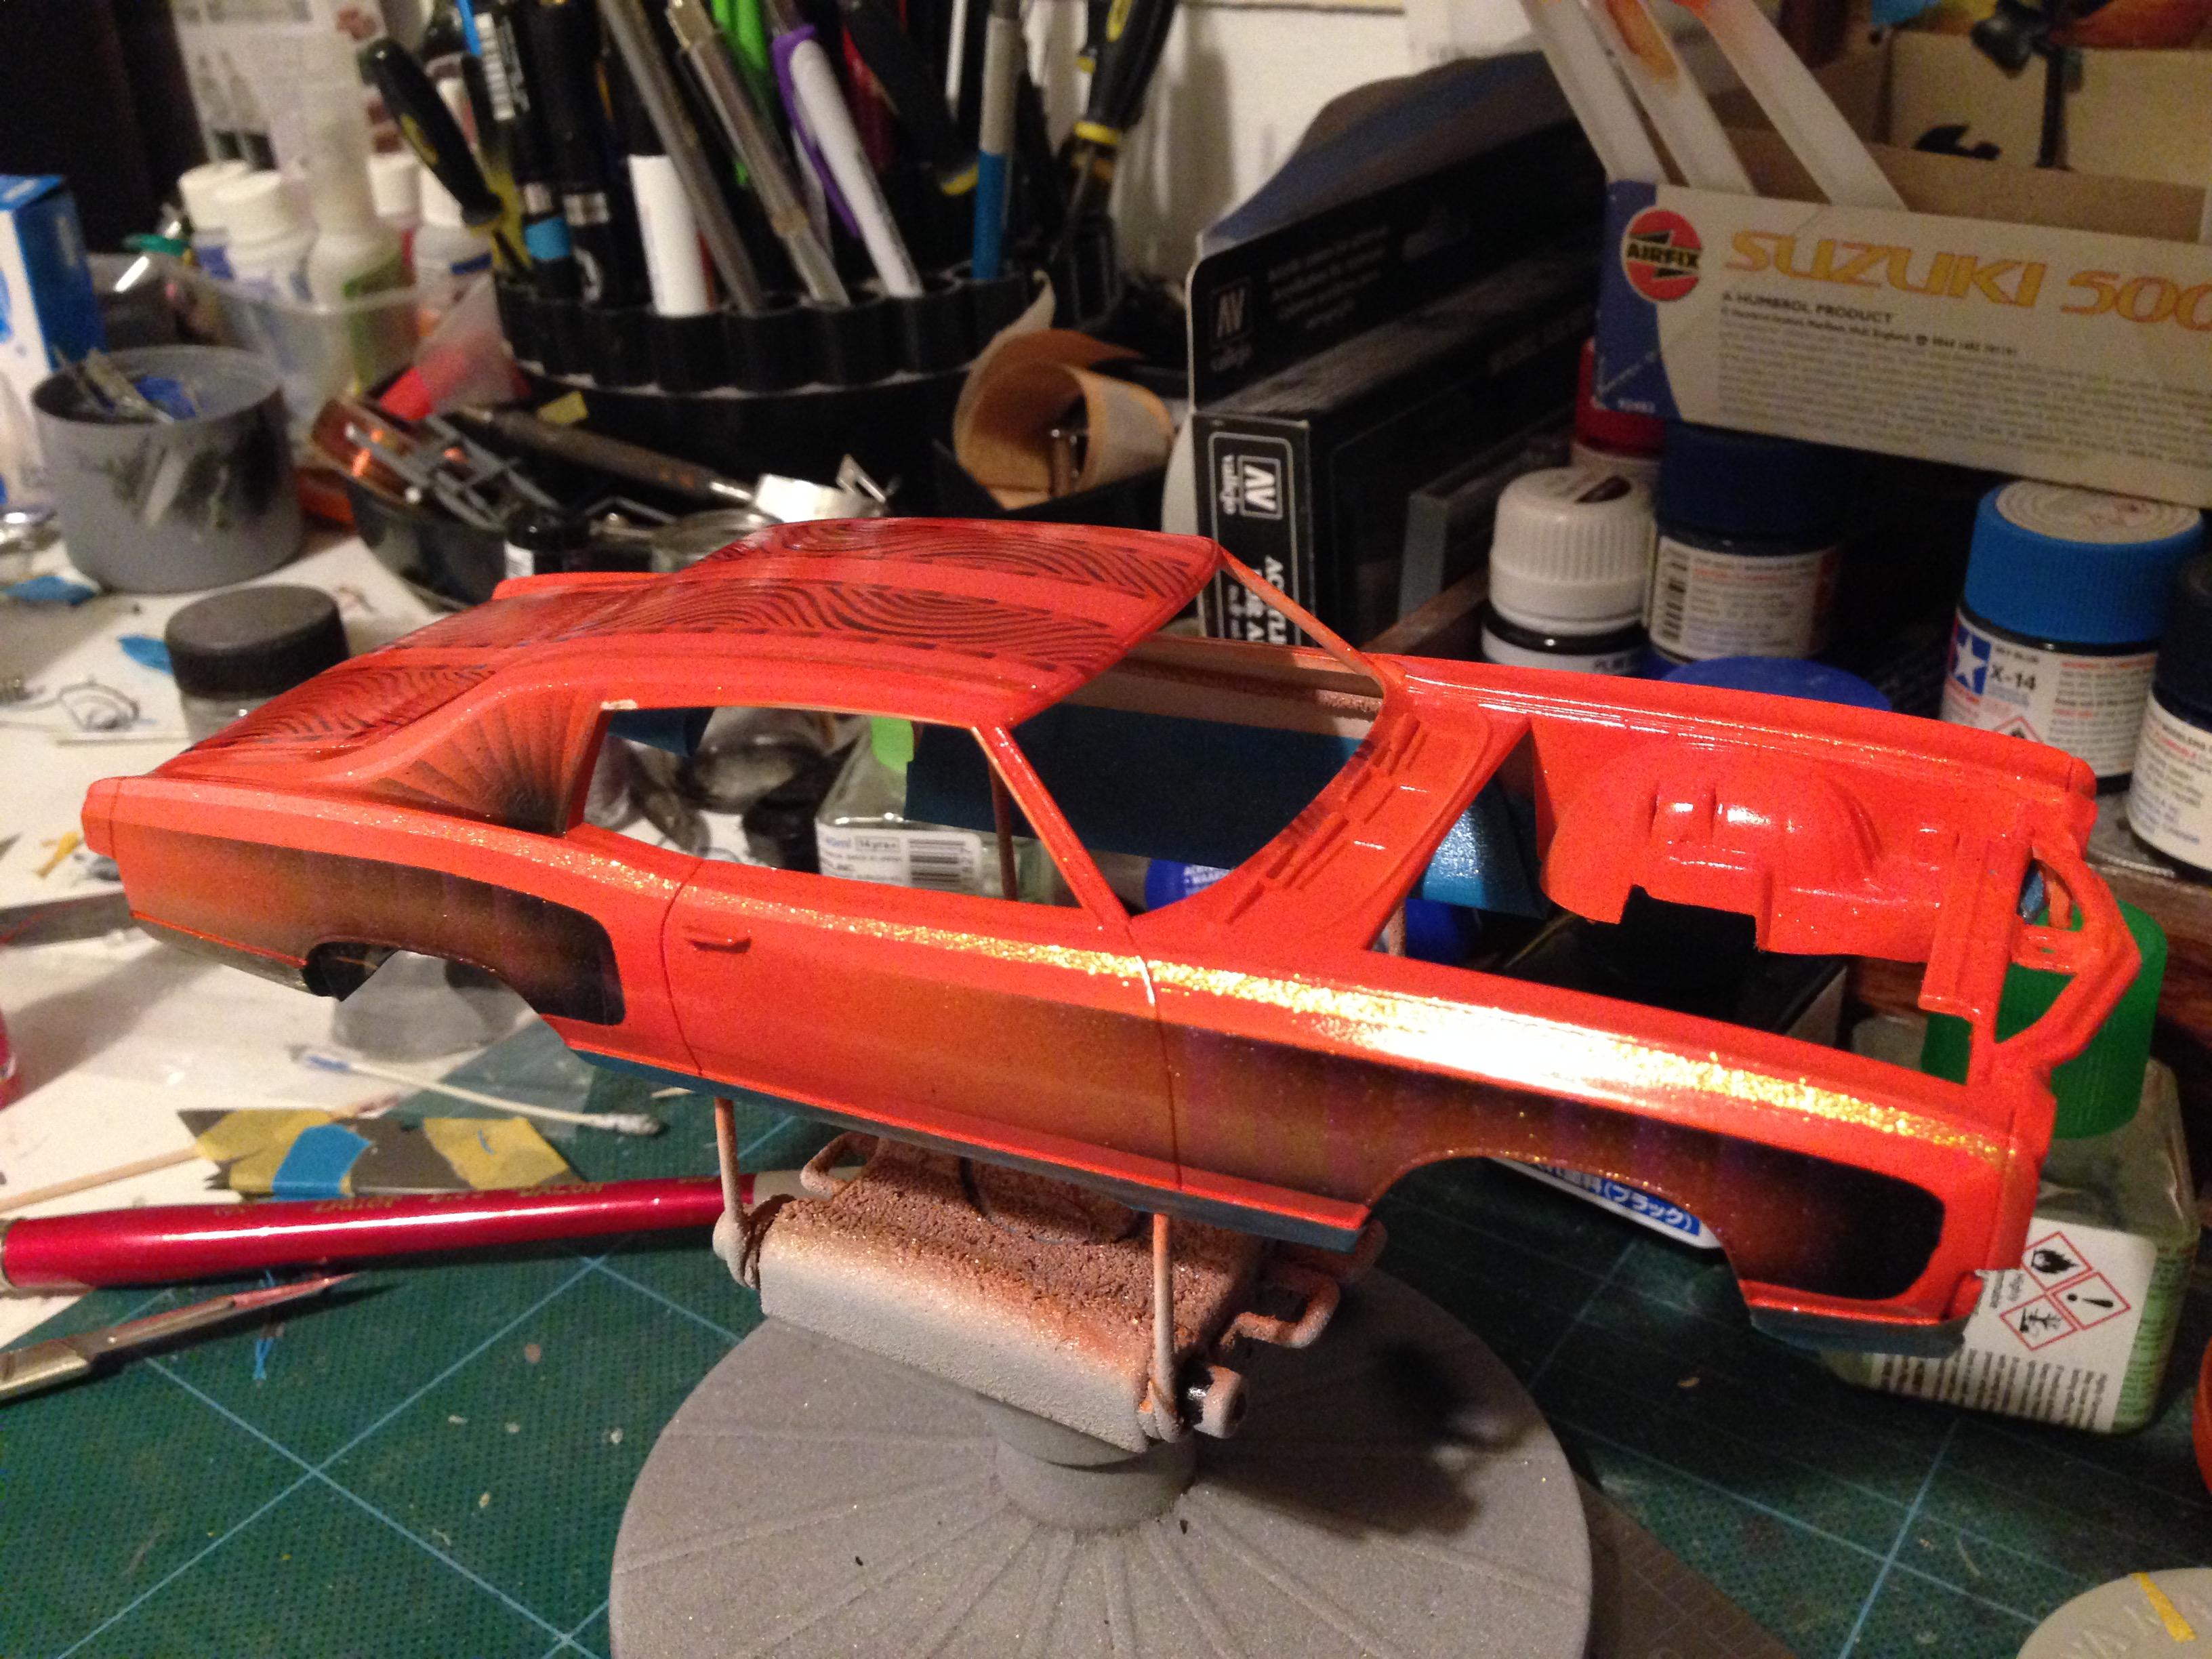
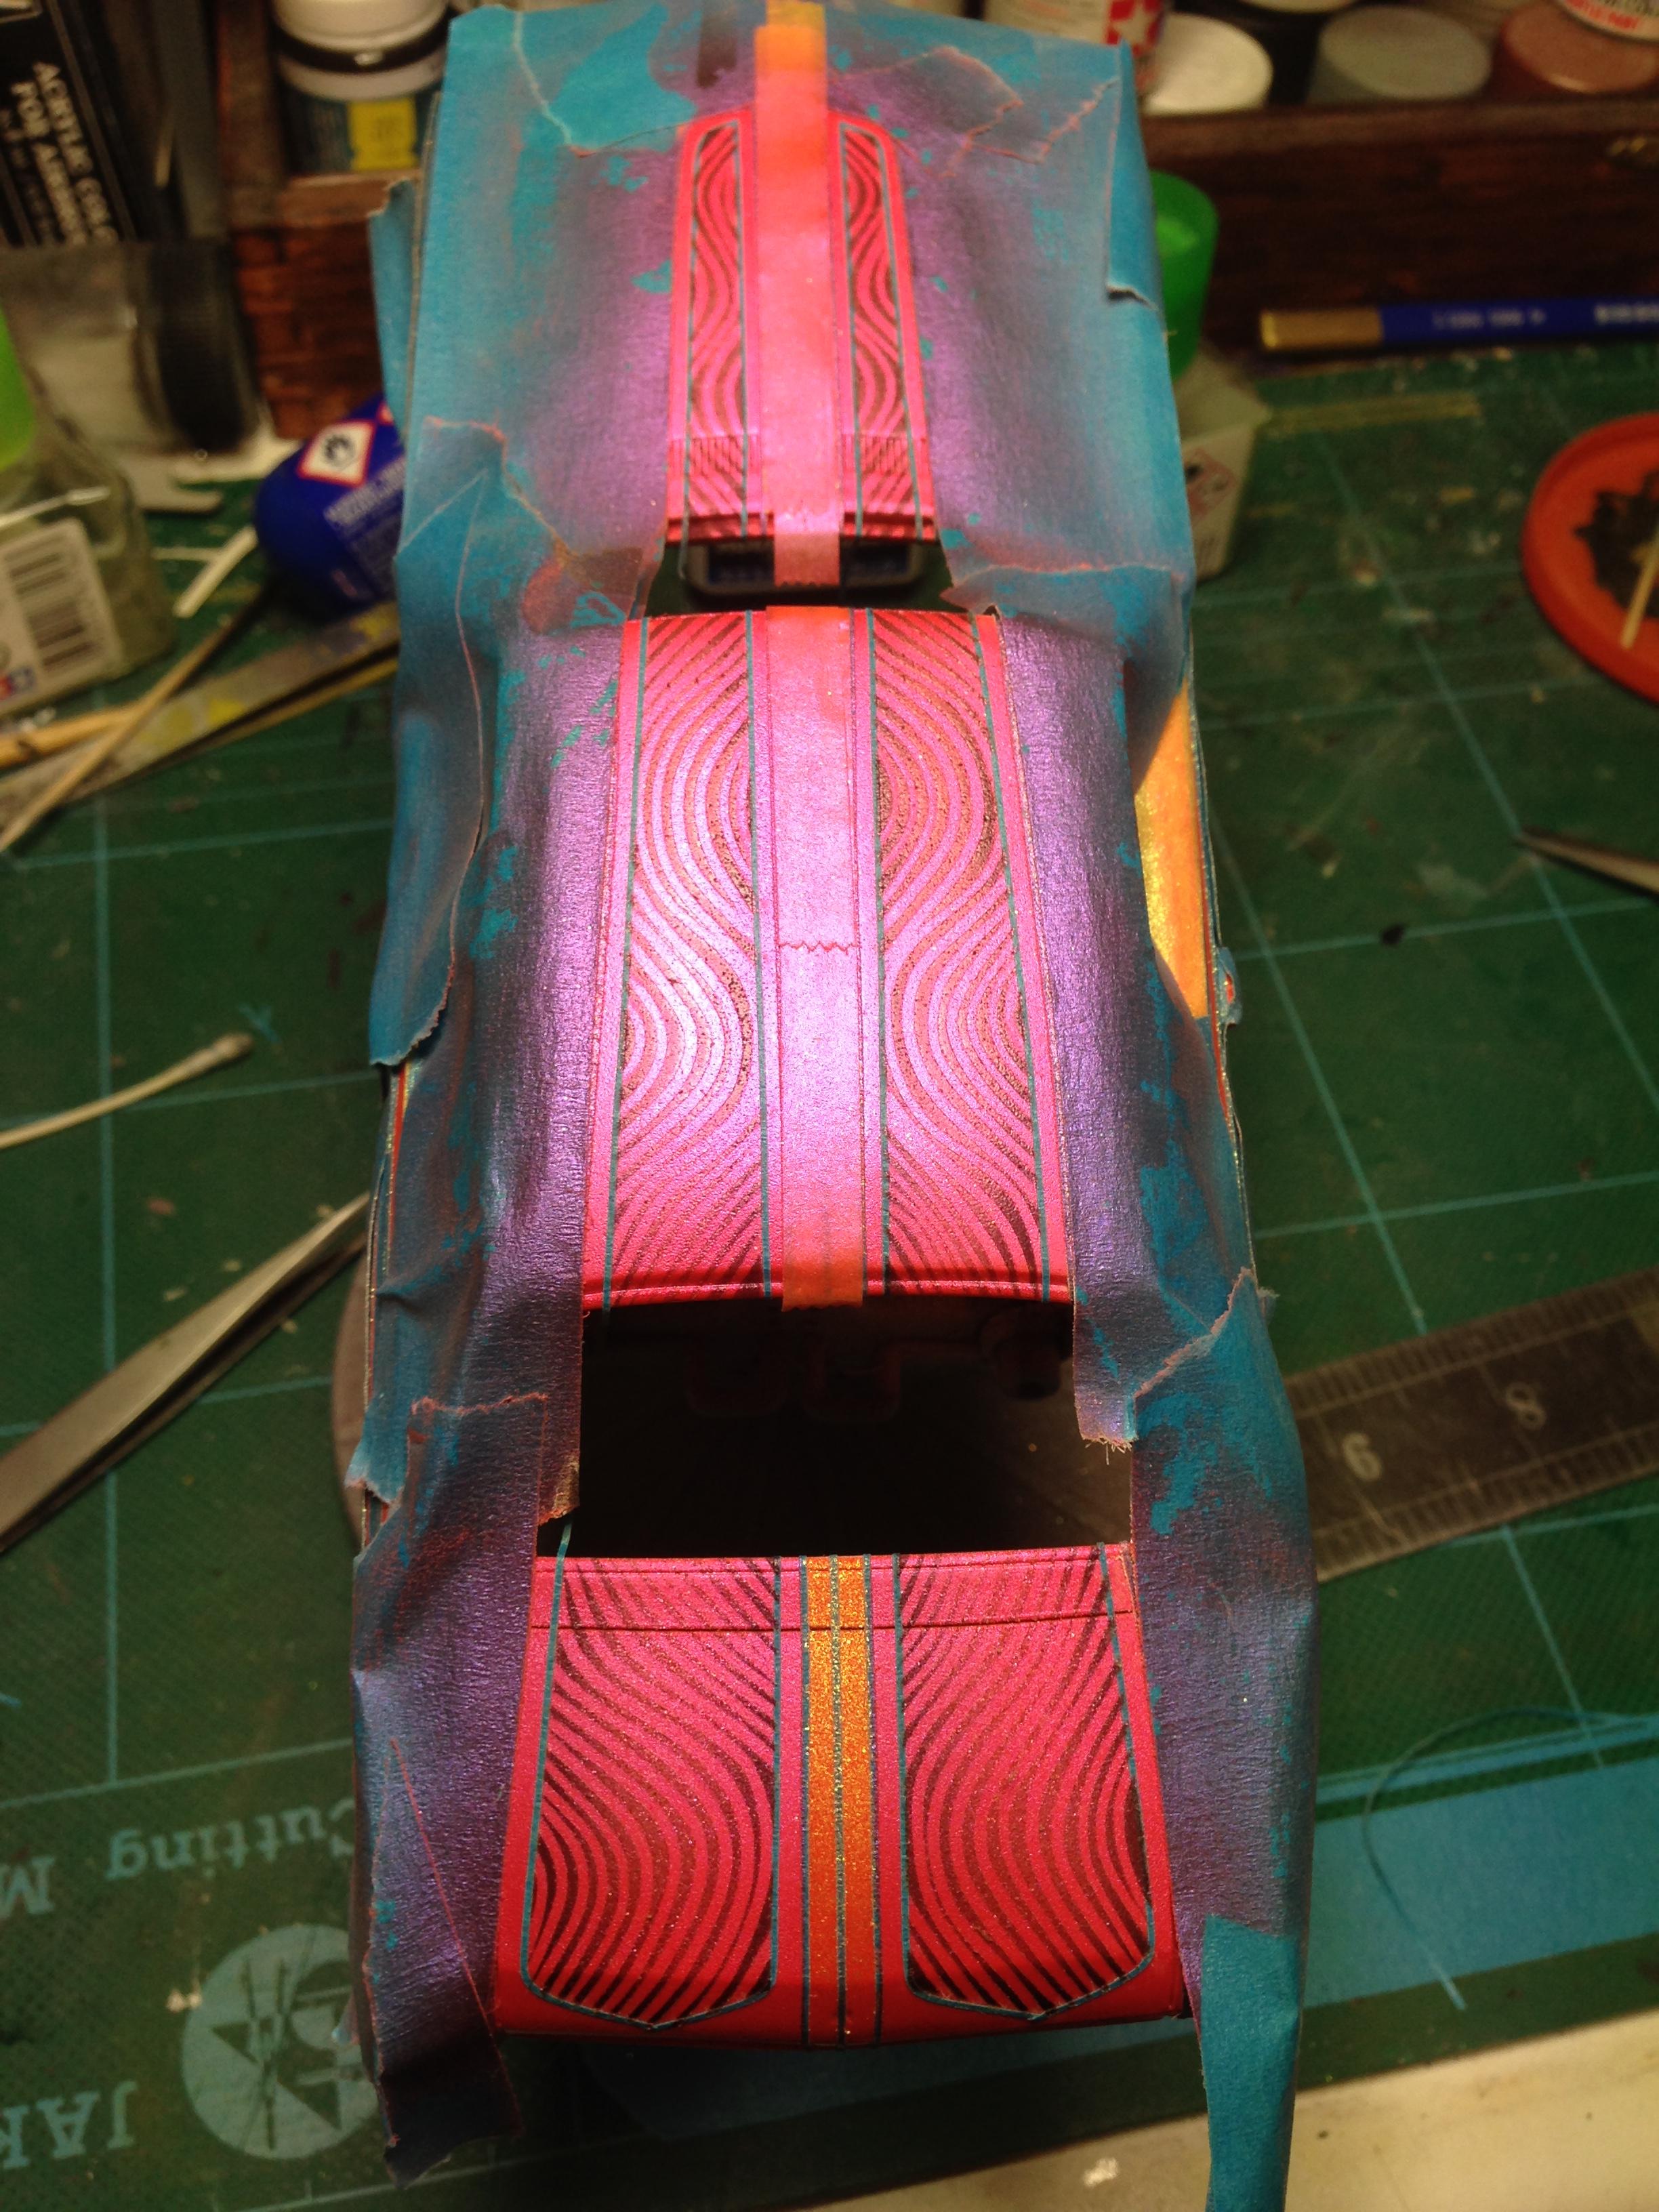
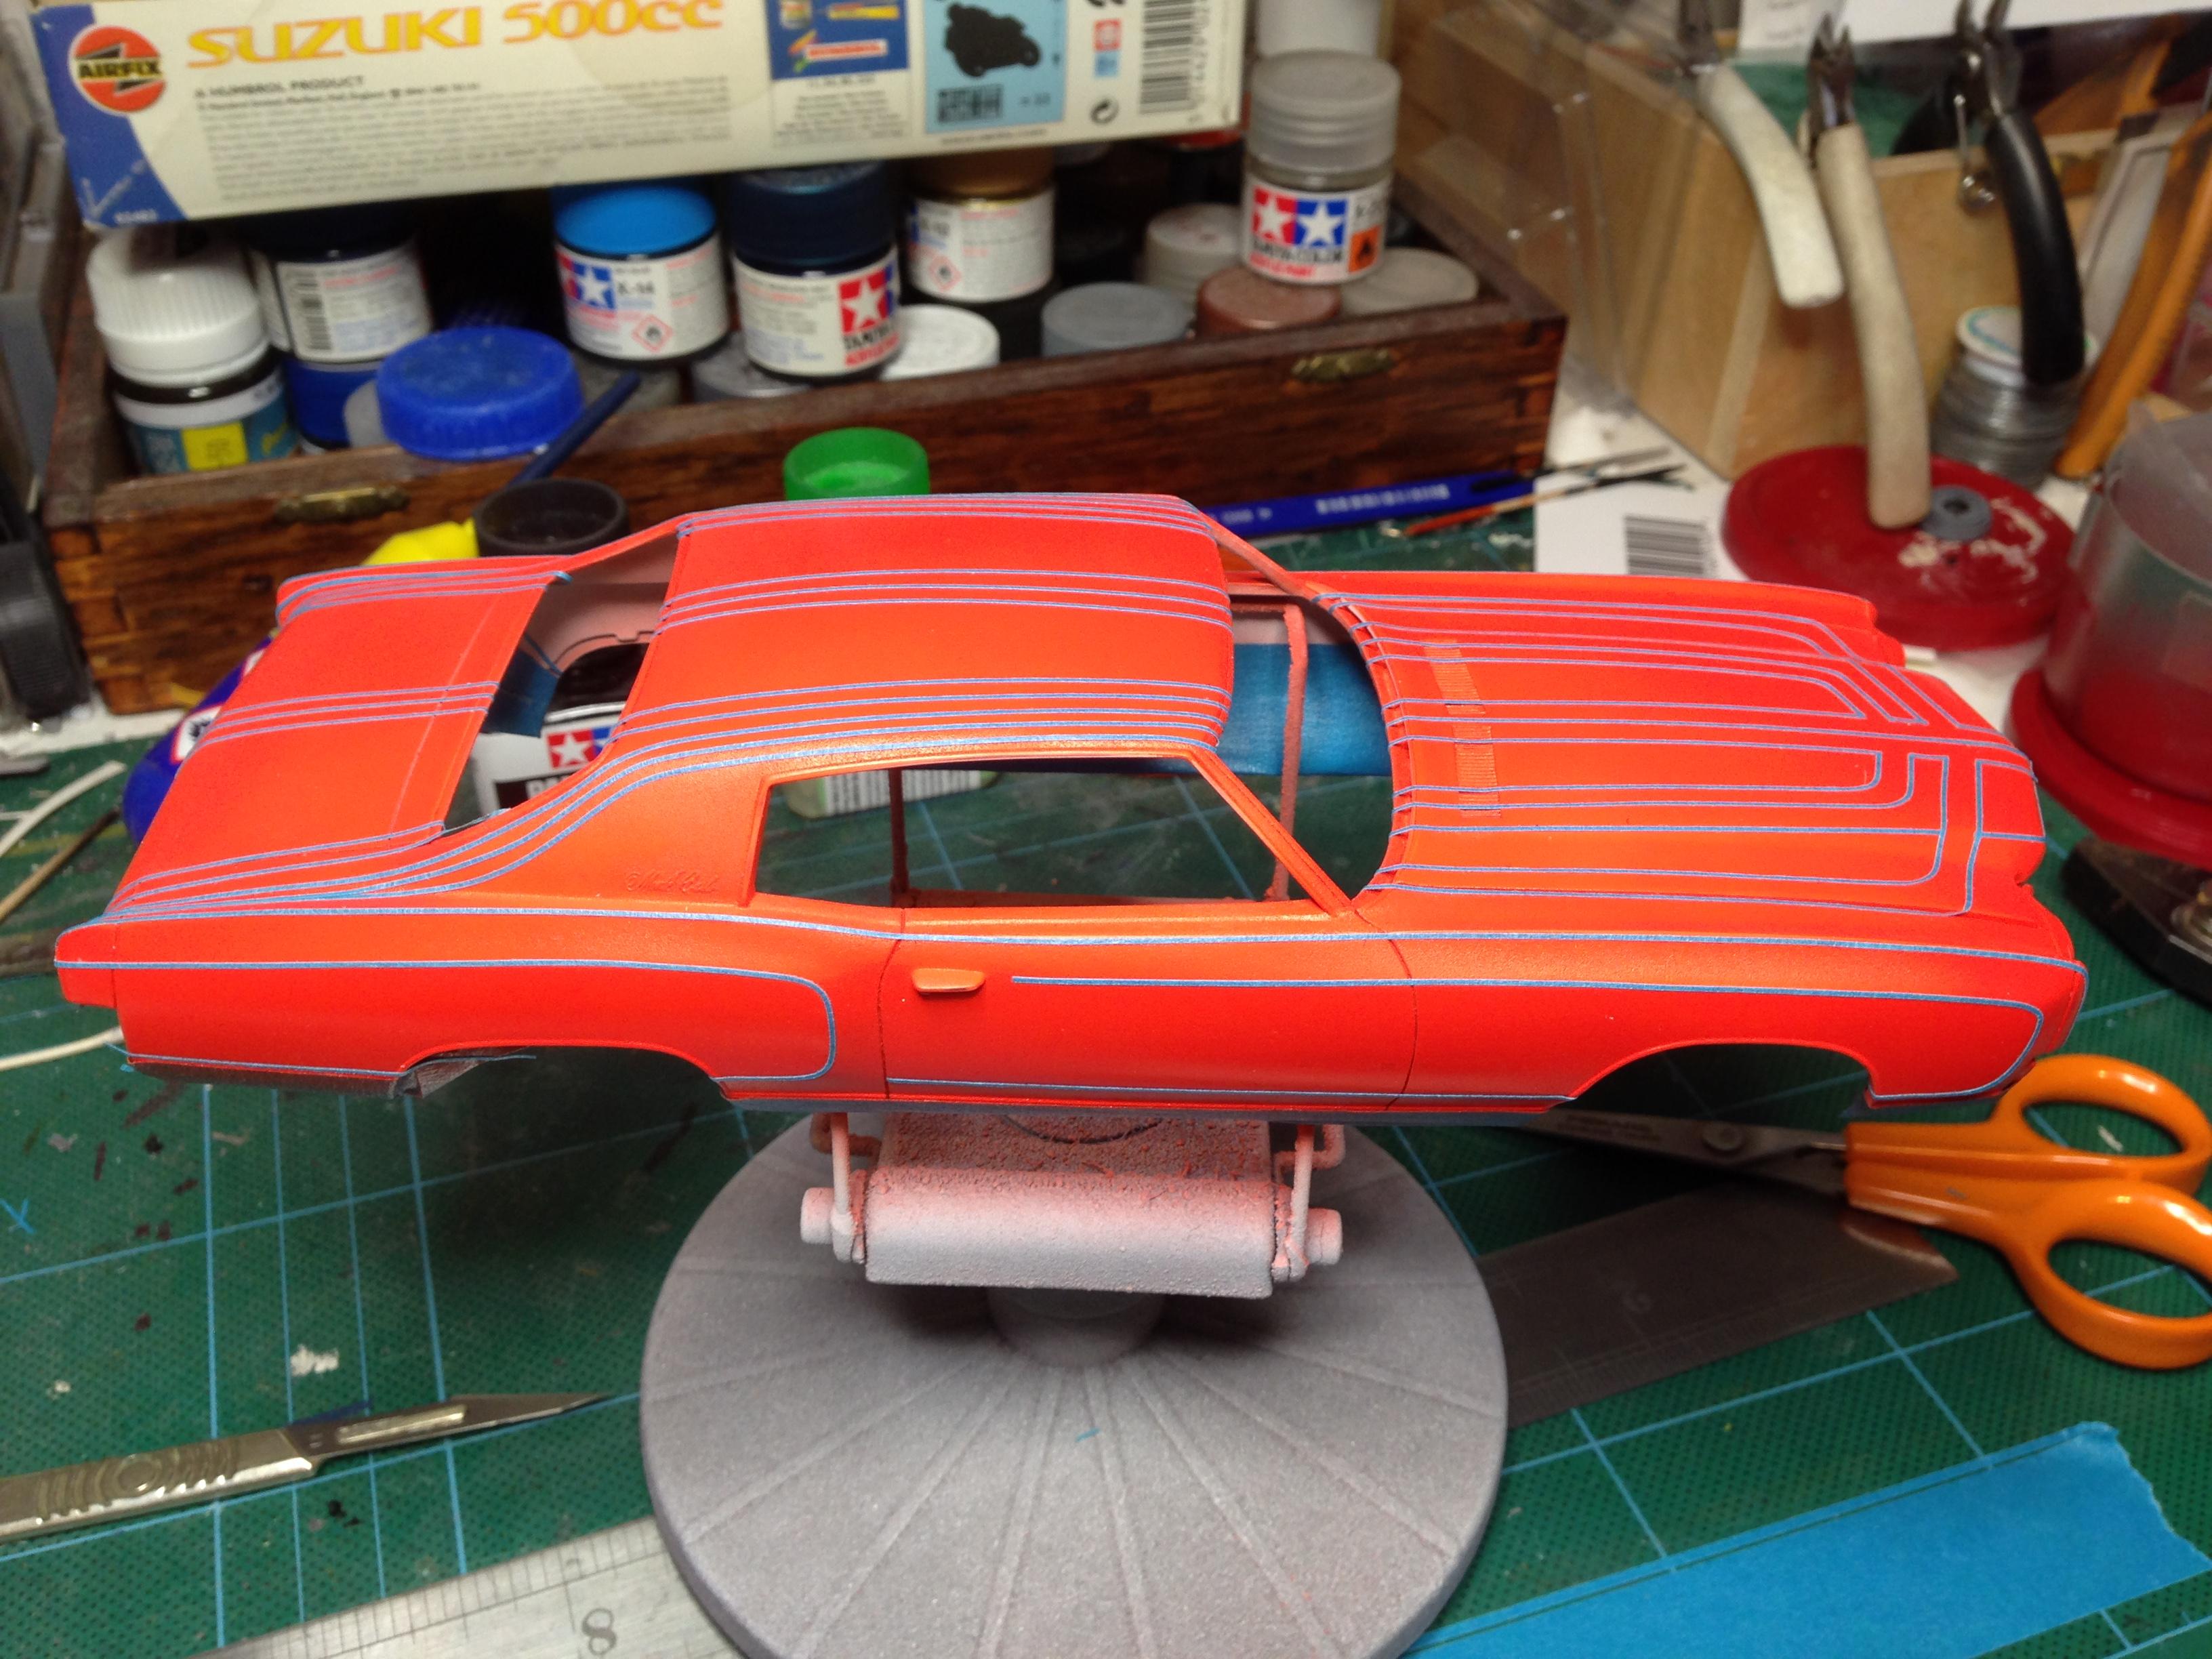
Finished the paint today. Gave it a couple of clearcoat and the colours really pop, especially the flake. It'll need a wet sanding but it's not too bad.
-
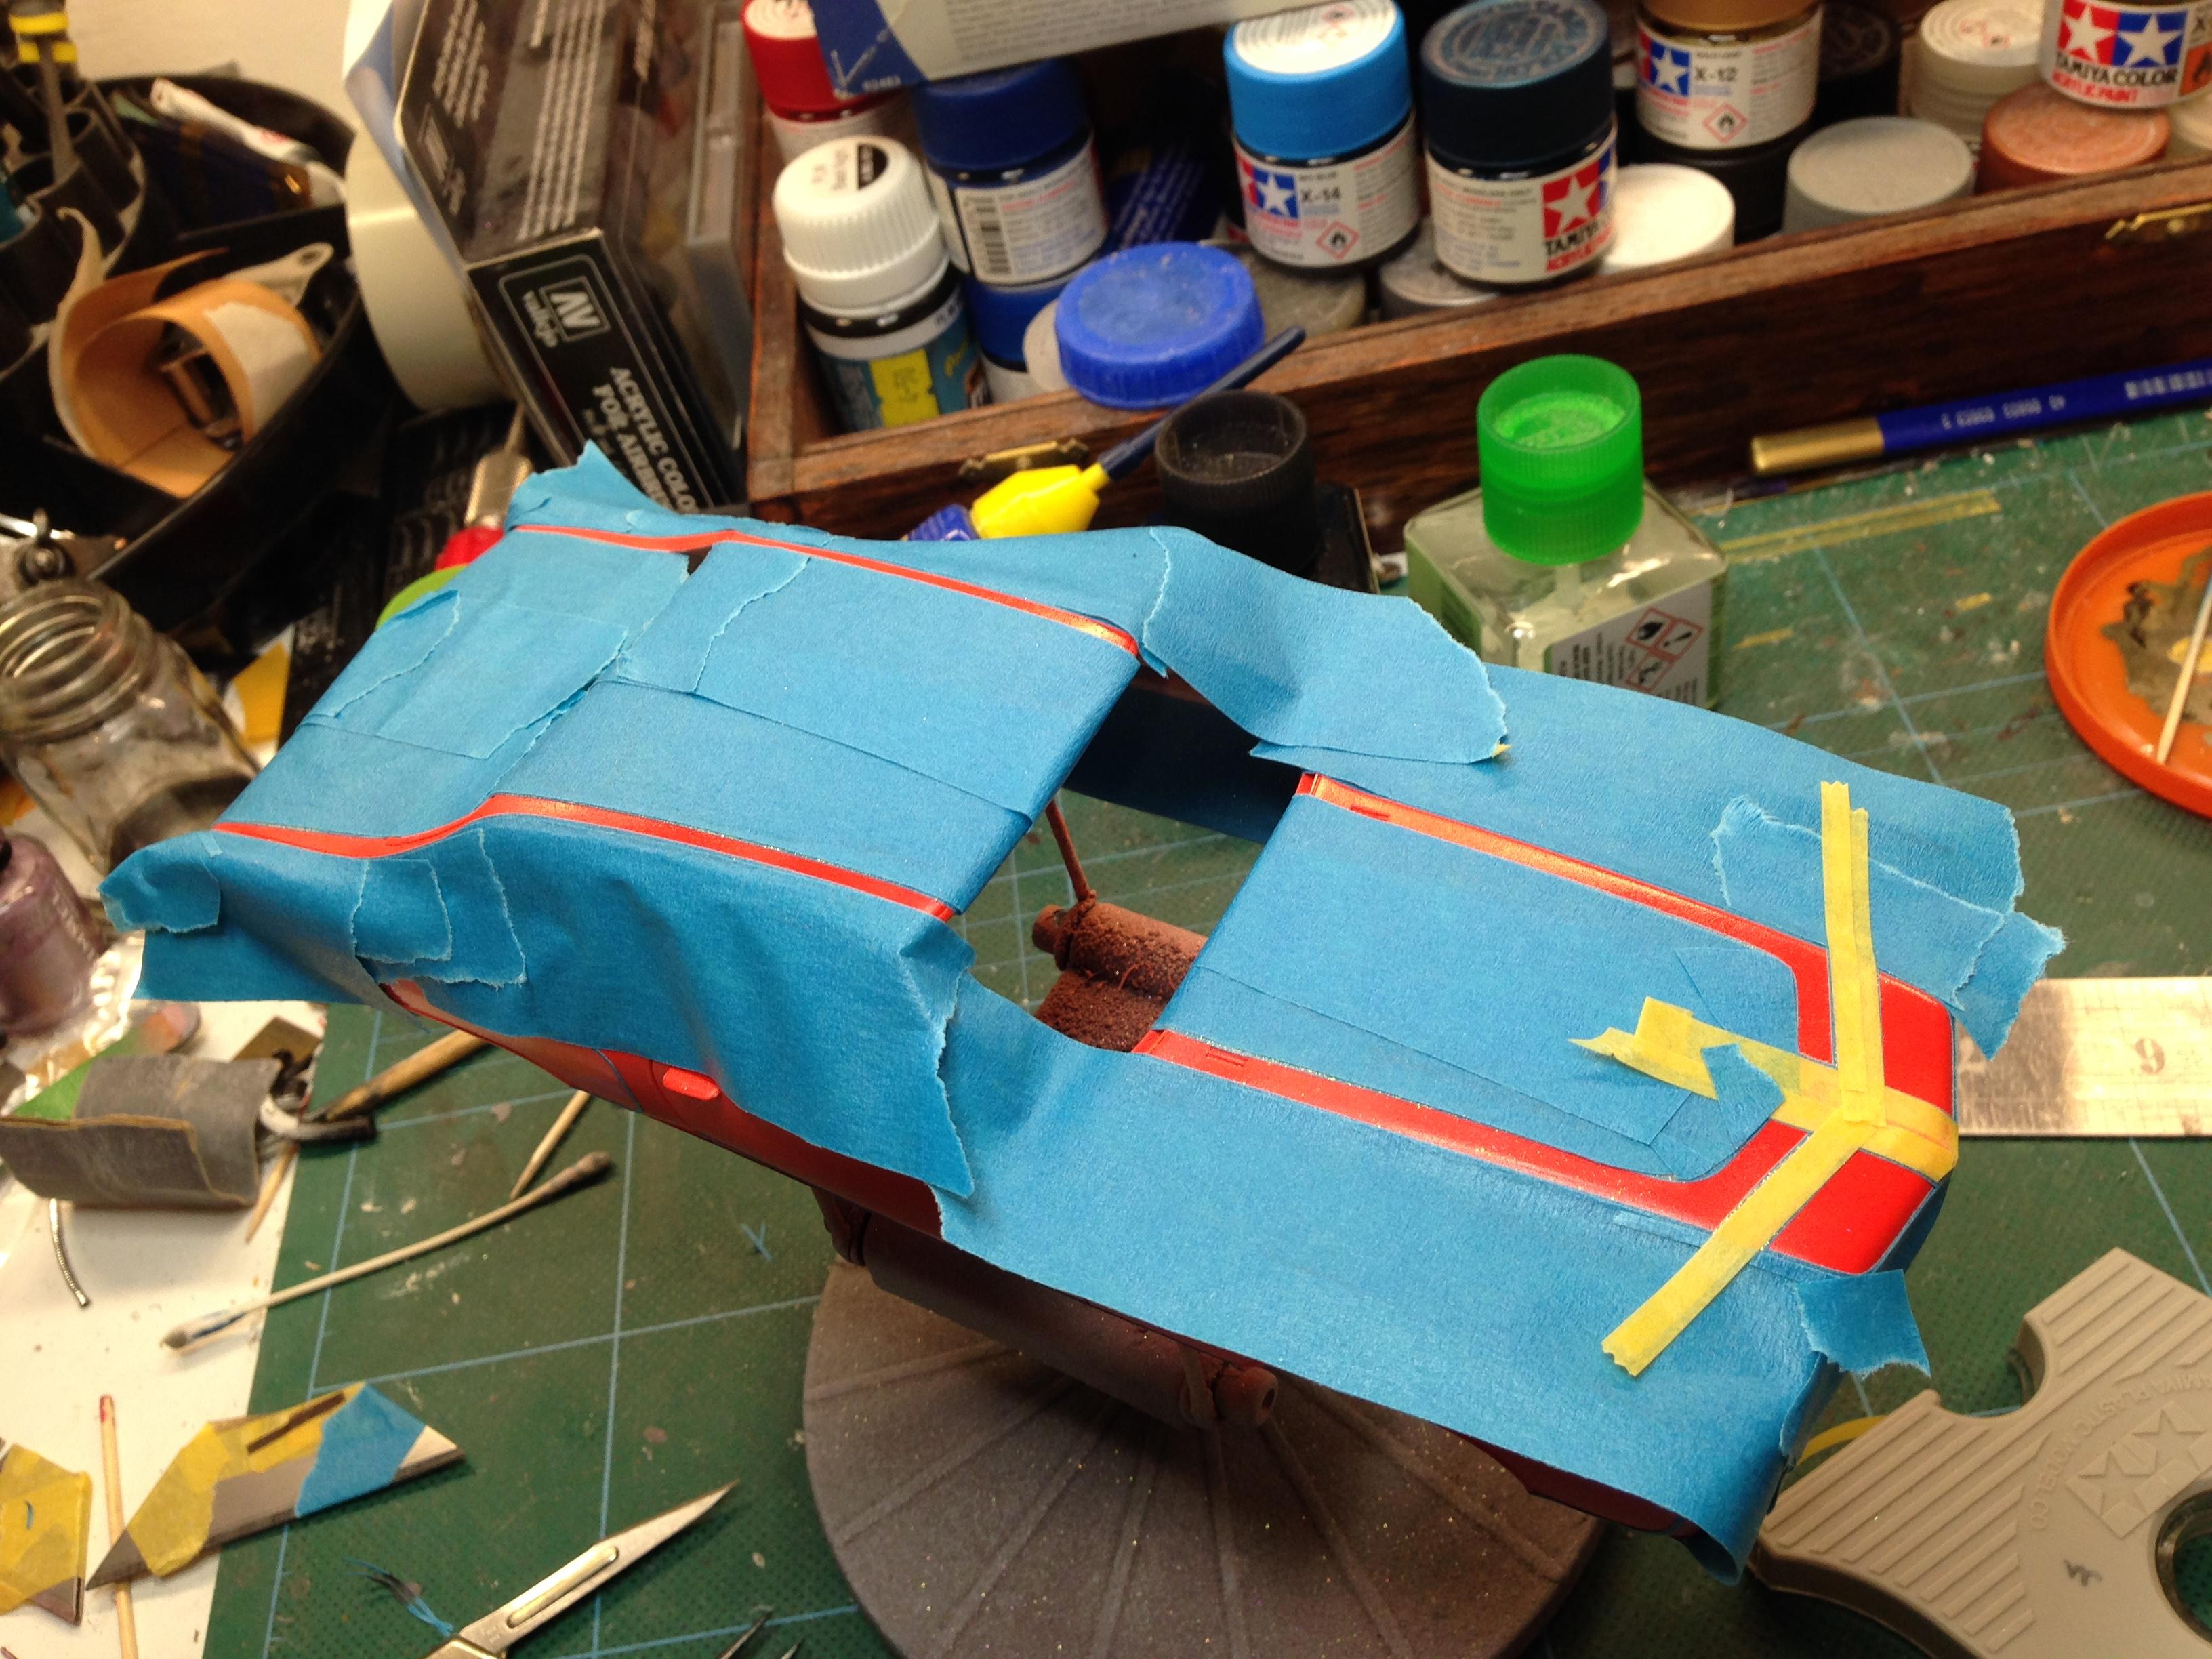
I cut the tape into 1mm strips and curve it as I lay it down. I've got a bit quicker at it, now. If a line goes astray, just lift it and reapply. I like to paint as soon as the tape's done. If I leave it too long, some tighter curves want to lift.
-
Thanks Espo I'll definitely use that technique. been doing a bit more painting today. The sides are about to get done, too.
-
Hi Bill I'm going to drop the tail and keep the front at stock ride height, for a tail dragging stance. This will probably involve trimming the coil springs and possibly making new control arms. I haven't looked at it yet. I do that part of the build while the body dries and gasses-out.
-
Sweet ride, man! I doubt I could get that parked at my house, without hanging over the pavement/sidewalk.. Nice body lines on these Montes. I love the long hood. anyway, got some more tape down last night. Thought about it all day at work. Decided it was no good. Came home, took it off and started again. I really like fingerprint patterns on lowriders, but they're a bit fiddly and so it took all evening and I forgot to eat. gave it a subtle fade around the edges. More colours to come. I haven't started the sides yet.
-
Thanks for taking the time to consider this, Espo. No offence taken, buddy. Yes, it's kinda deliberate. I basically use body lines to help orientate the pattern. The widening of the lines is an extension of the diverging lines on the hood. Once the lines are painted and look separate, I'm confident the pattern will make more sense. At the end of the day, it's all freestyle and a bit of a gamble, but I enjoy surprises!
-
2 years?! Lol! I know what you mean. Hardest part is knowing when to stop!
-
All I planned was that it will be mainly orange. nice body on this kit. Mold lines were well positioned and feint. here's the tape so far
-
 That's really cool, Steve! I like the cf on the mufflers. Very tidy. These are great little kits, aren't they? Only 22 parts or thereabouts and some nice details. Good tyres, too. Could be made into a street fighter, with a bit of a tweak.
 -
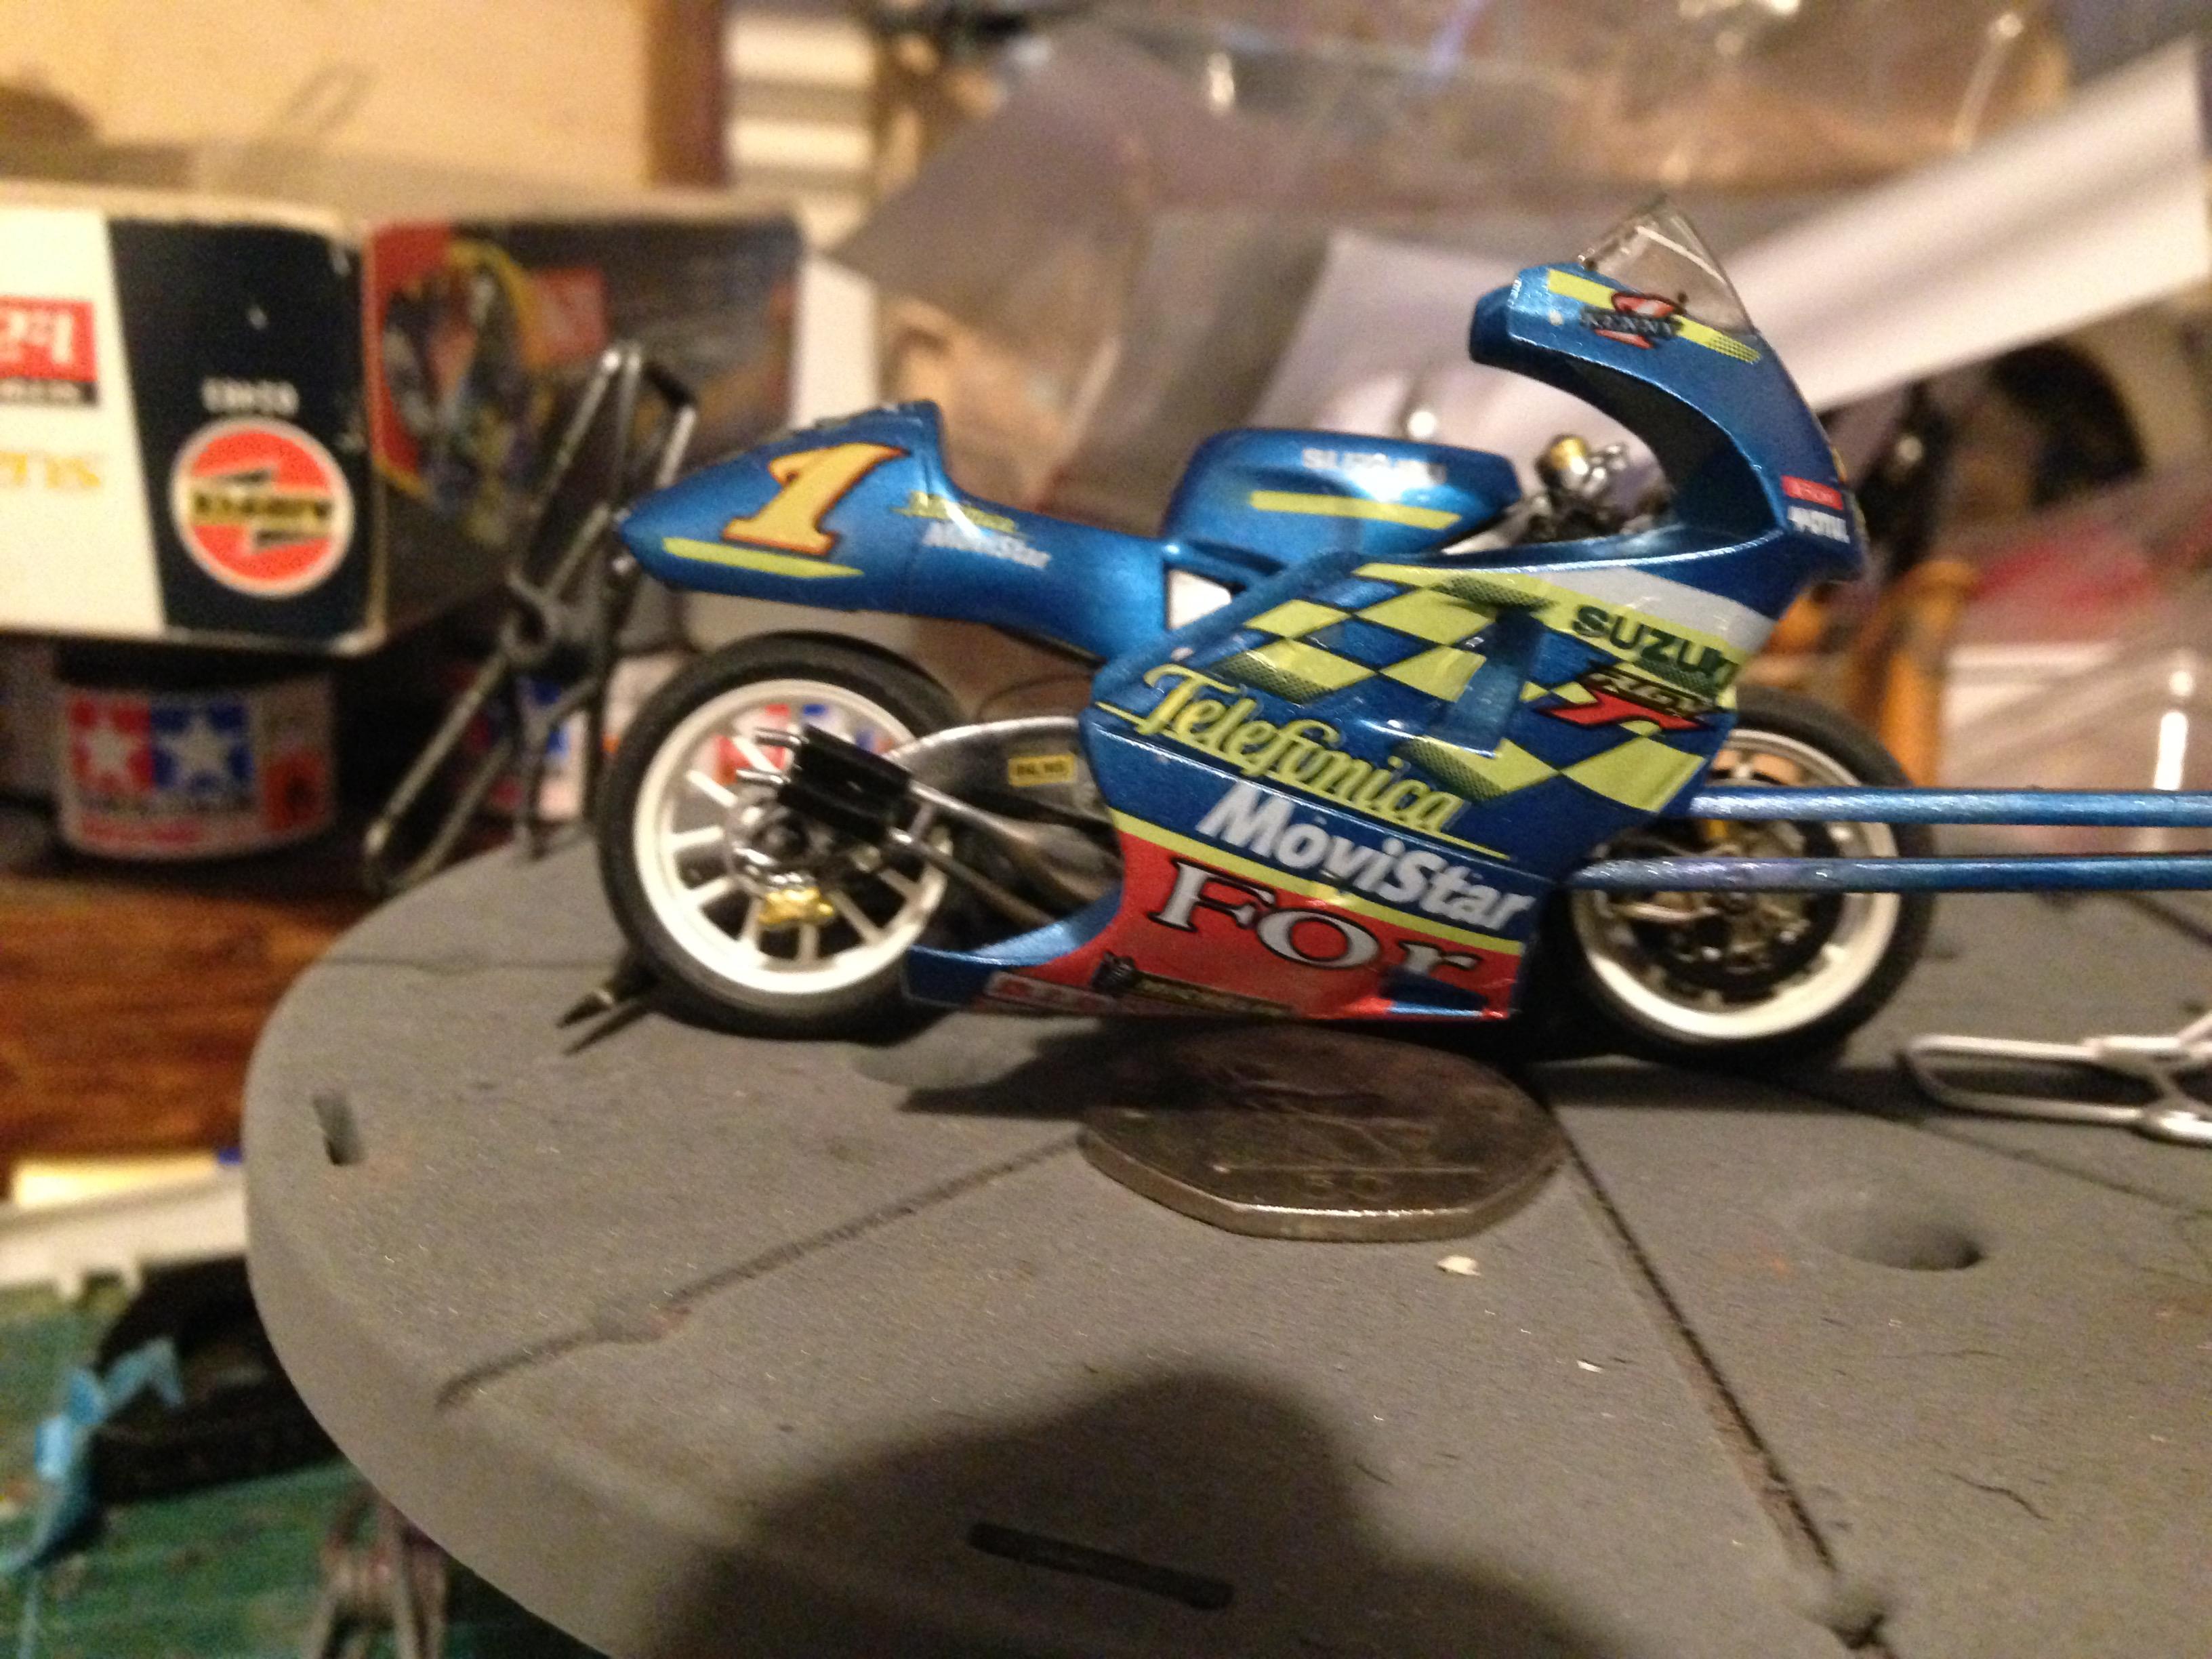
Thank you very much everyone. I'm glad you approve. here's a couple of engine shots that I forgot to add.
-
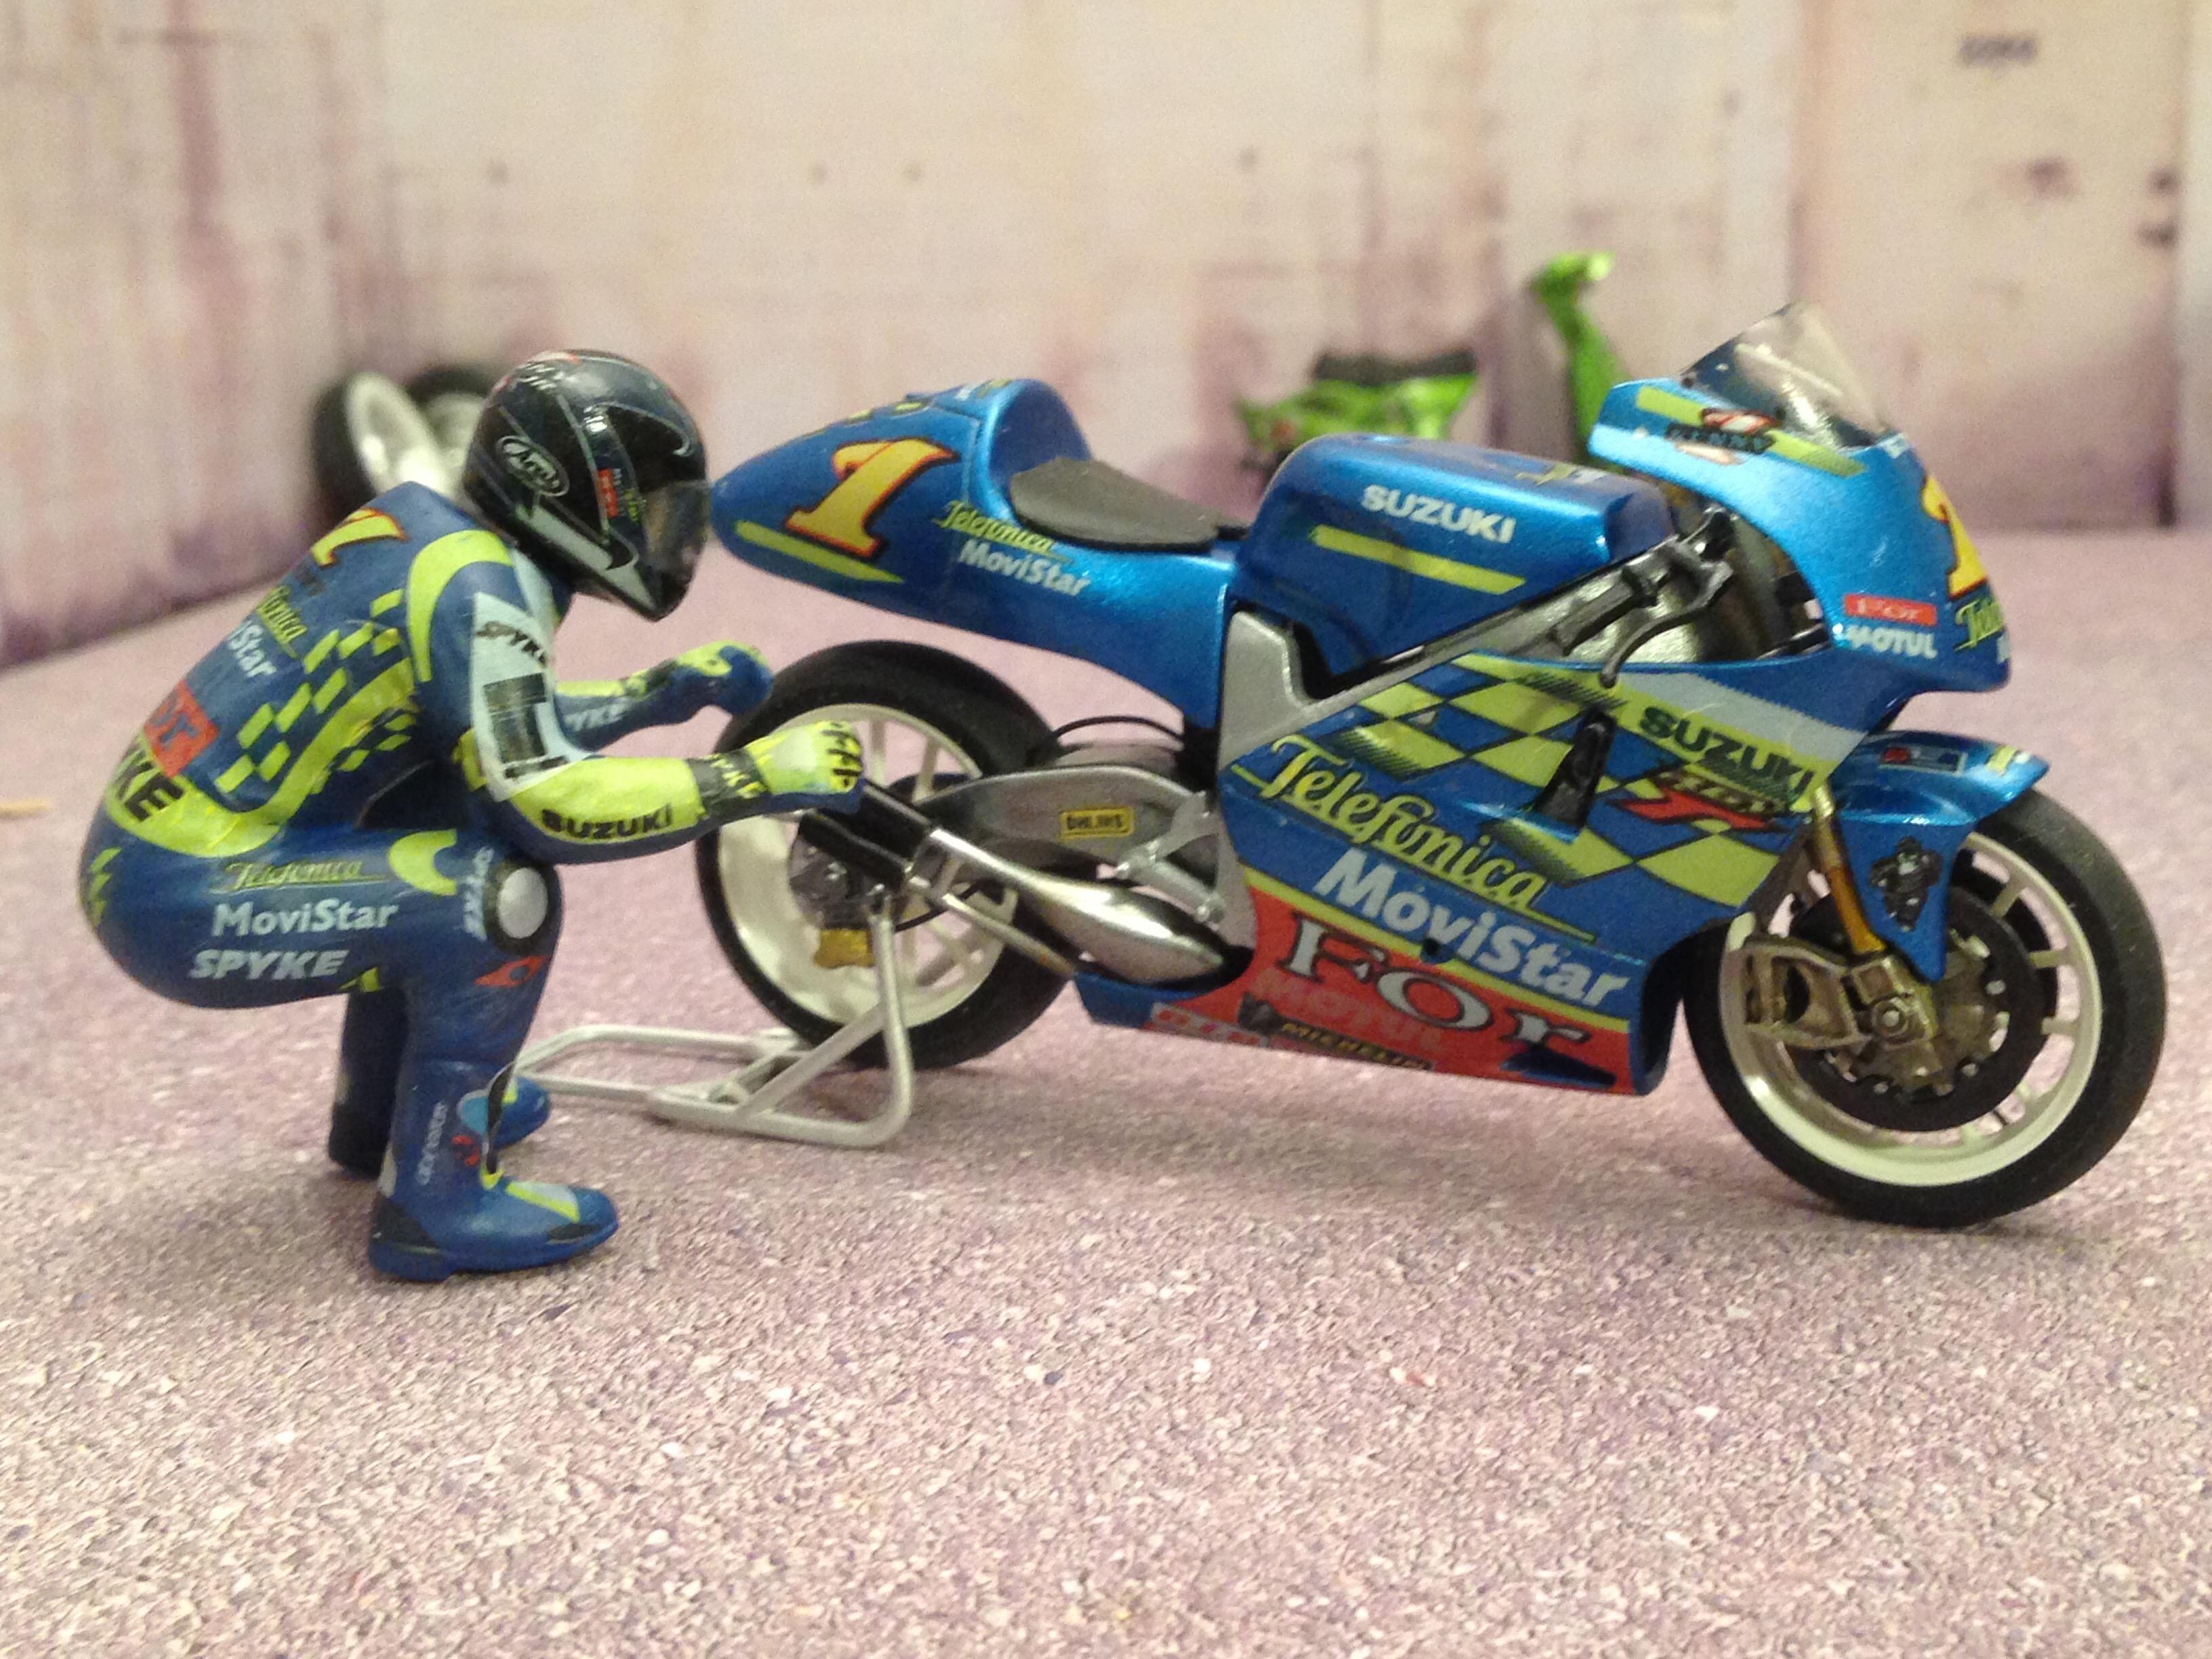
Well, little Kenny doesn't want to sit on his bike properly, so I'll decapitate him and just use the helmet. Shame, because those decals were a proper bugger to get on. anyway, here's some better finished photos:
-
Finished the bike. Just gotta get the decals on the little Kenny figure now.
-
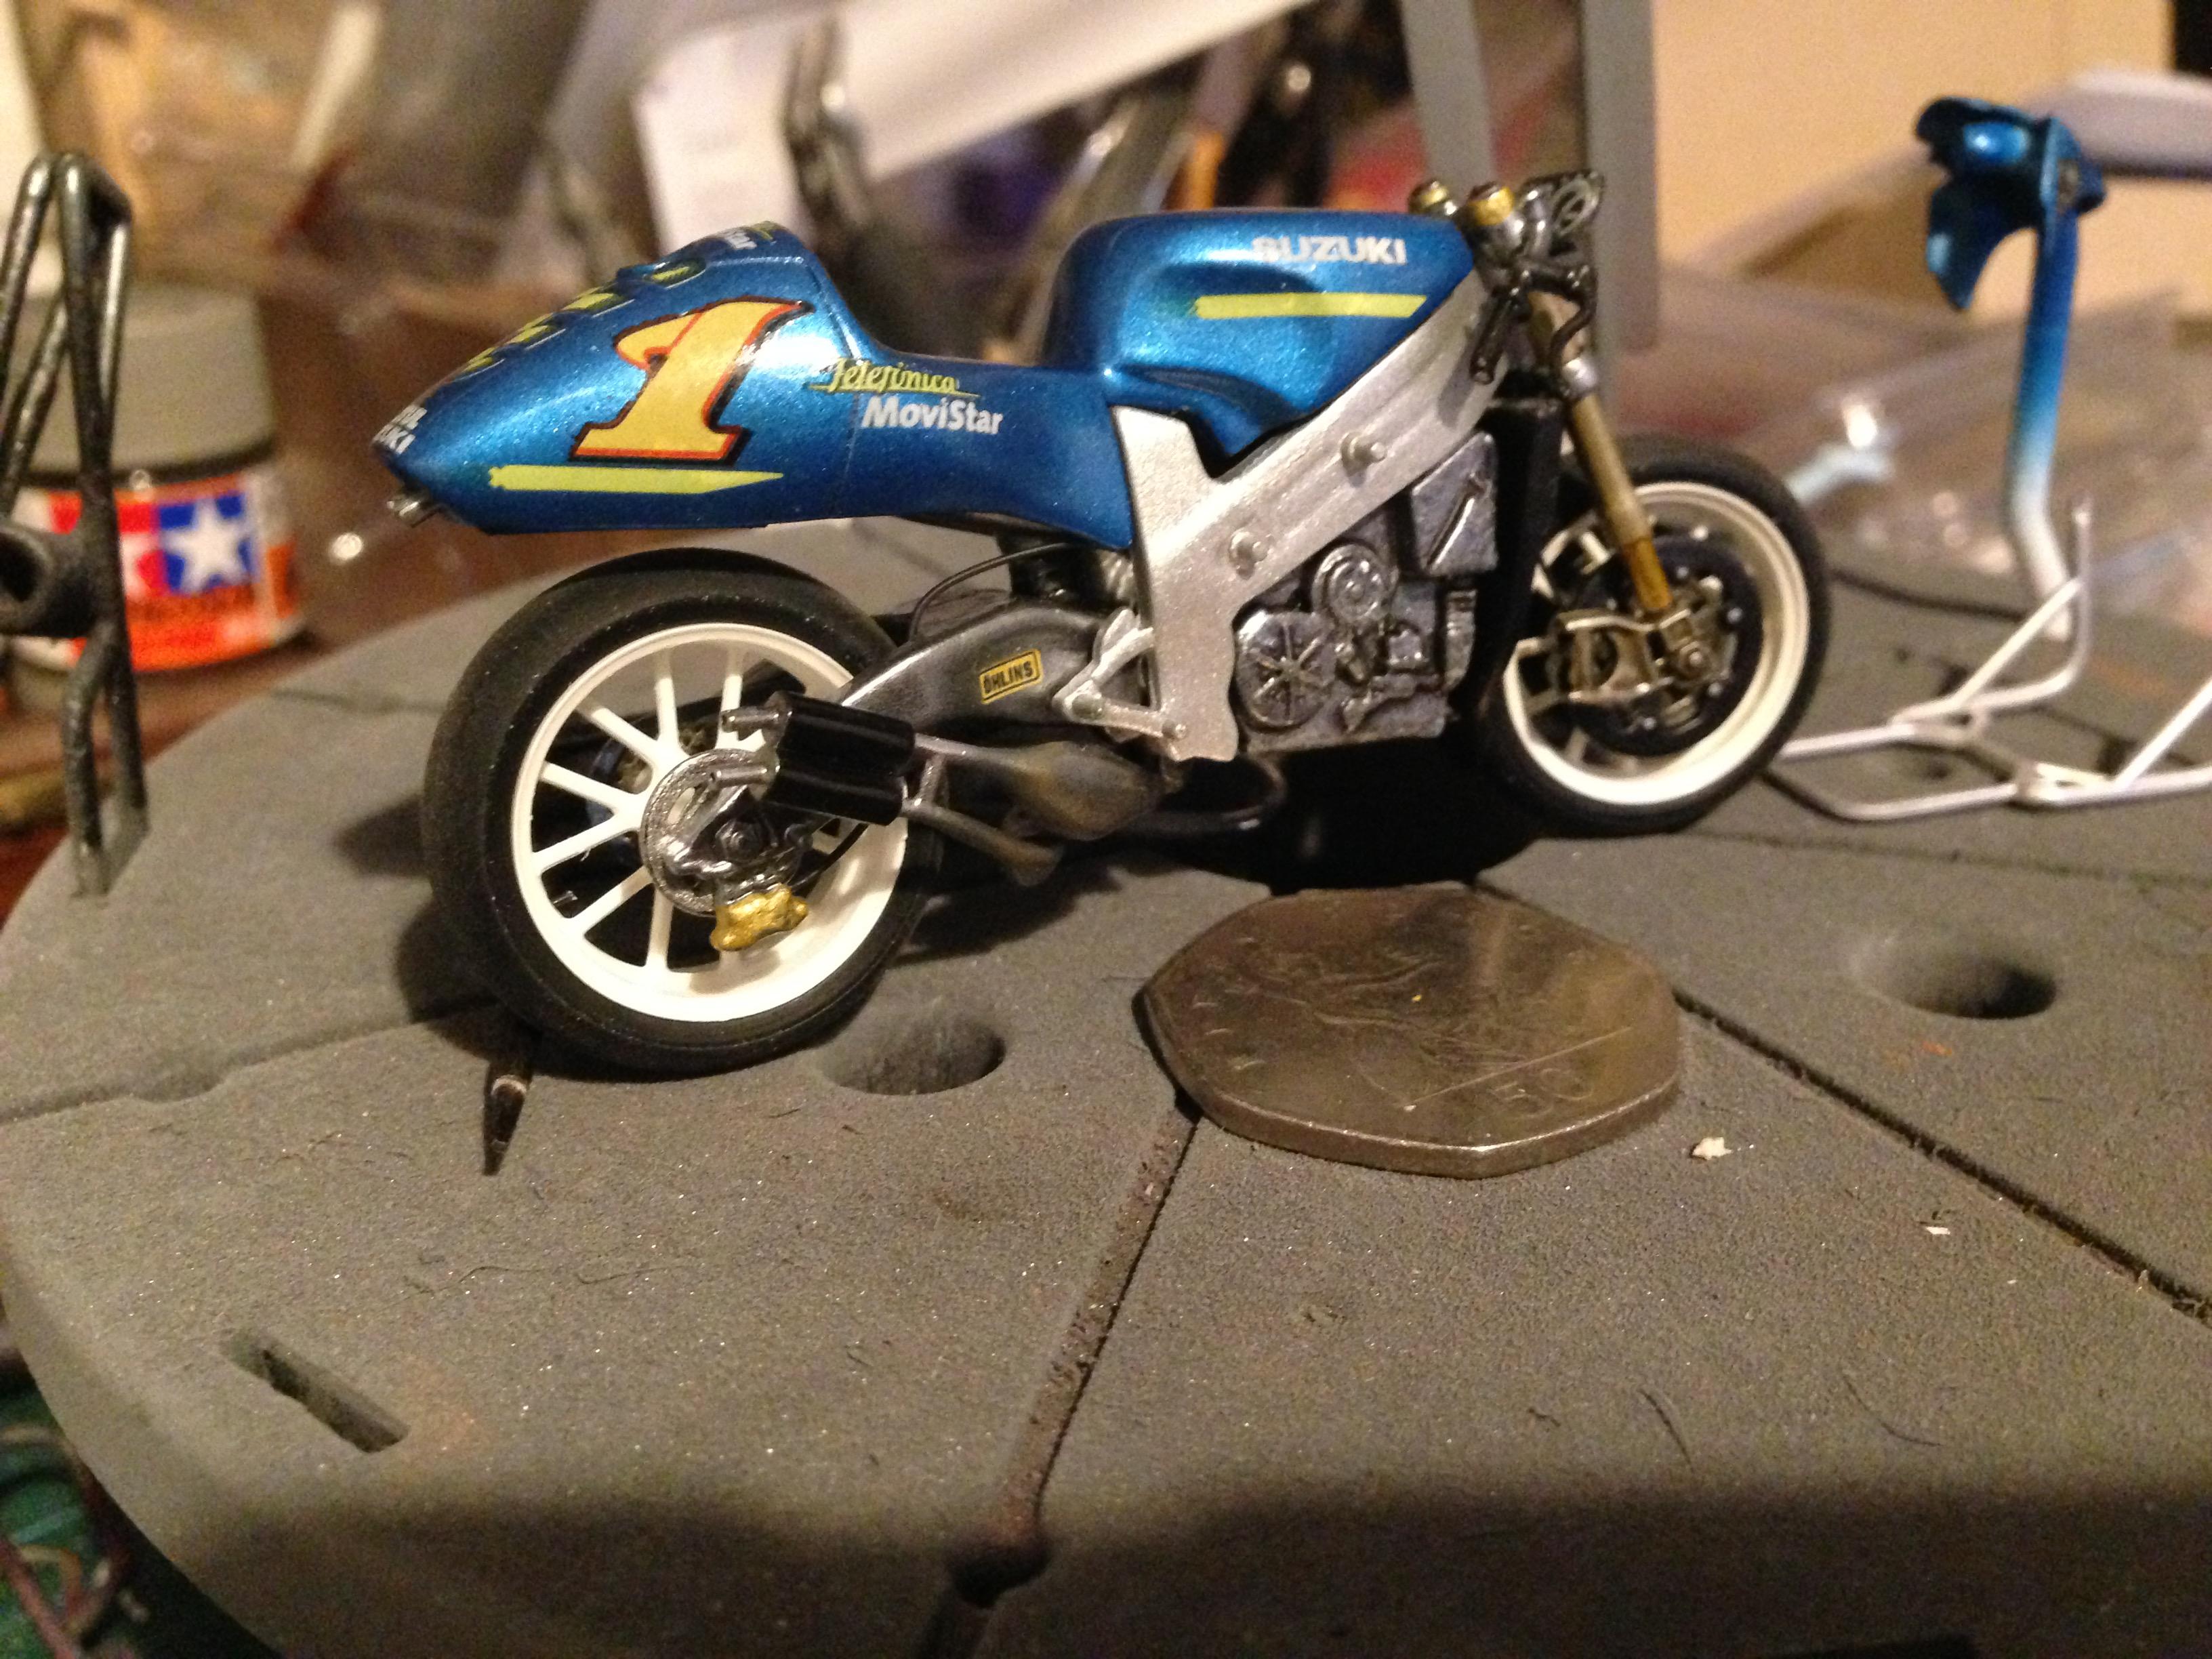
It's pretty small alright! I had no idea they made them in 1/24, either. It'll look good in my garage diorama.
-
This must be only the second bike I've ever built. The other was a tiny scooter that came with a set of Aoshima wheels. I got it from someone at work as a thank you for a favour I did them. It's been kicking about for years and as a result, the decals were very fragile. The tyre logos disintegrated. anyway, a great change from my cars and gave me something to do while I decide which car to build it's boxed as Airfix, but I think the original is by Heller. Great fun..only 22 parts! I've made 1/24 engines with a higher count ?.
-
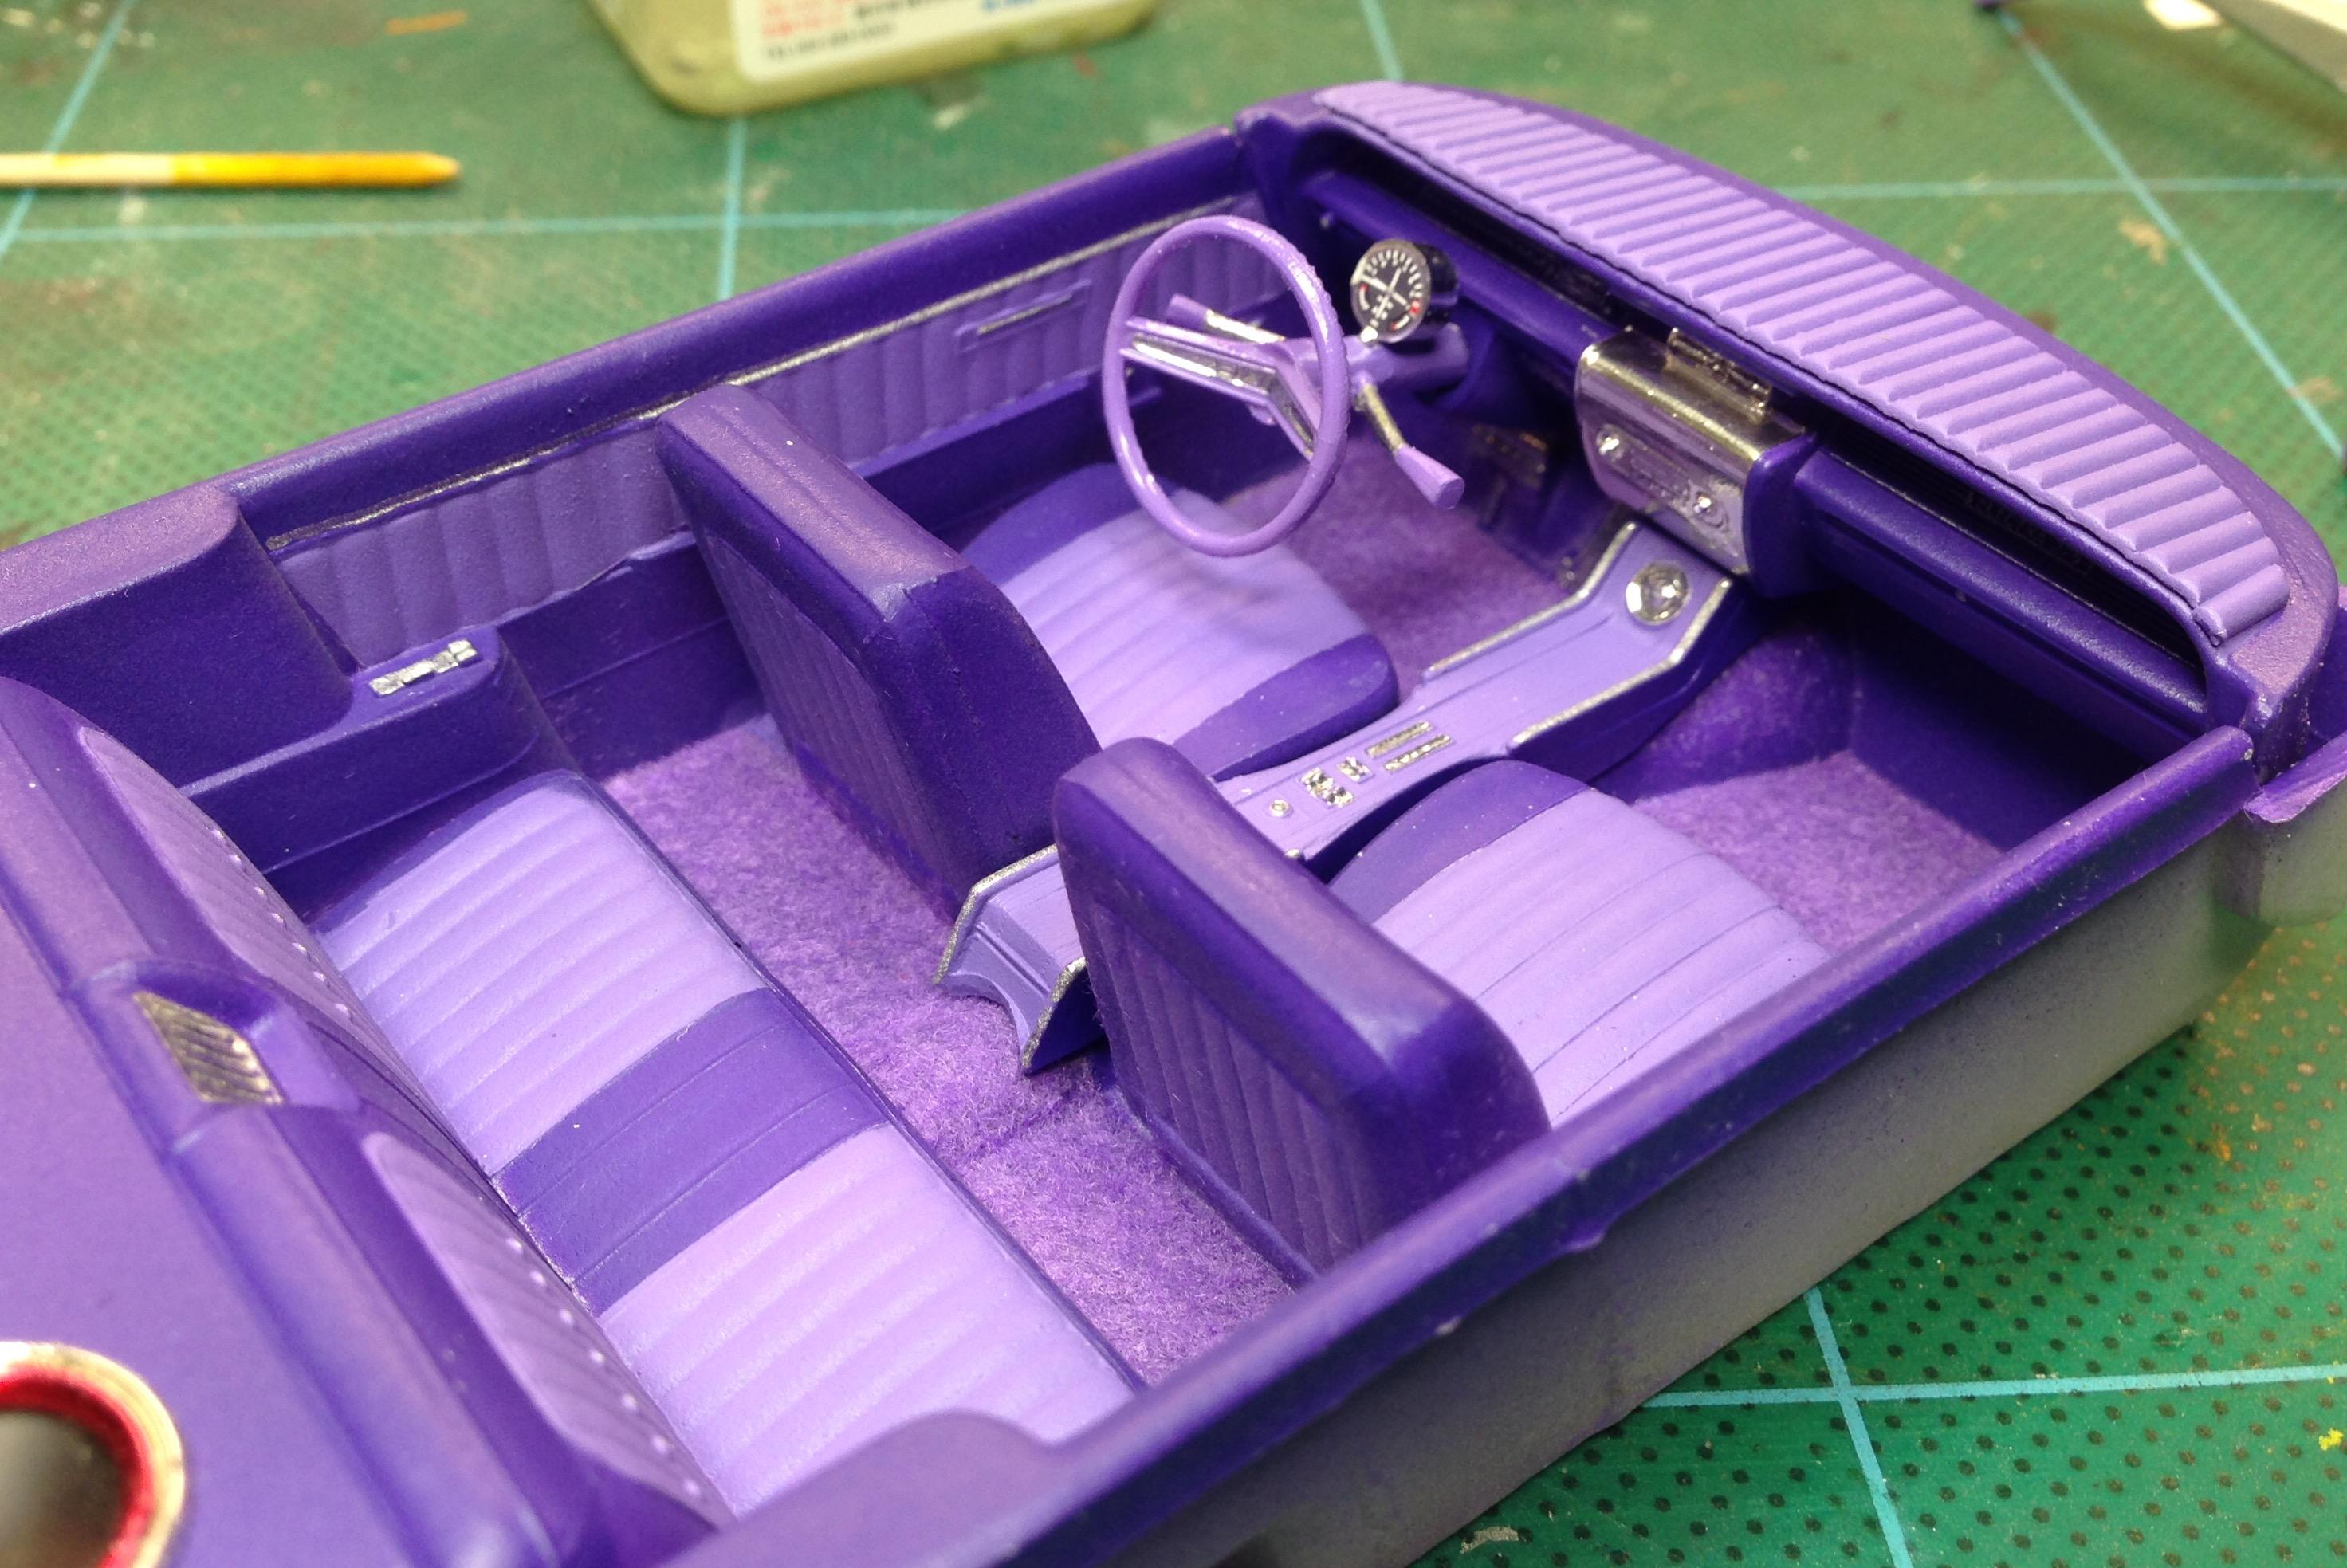
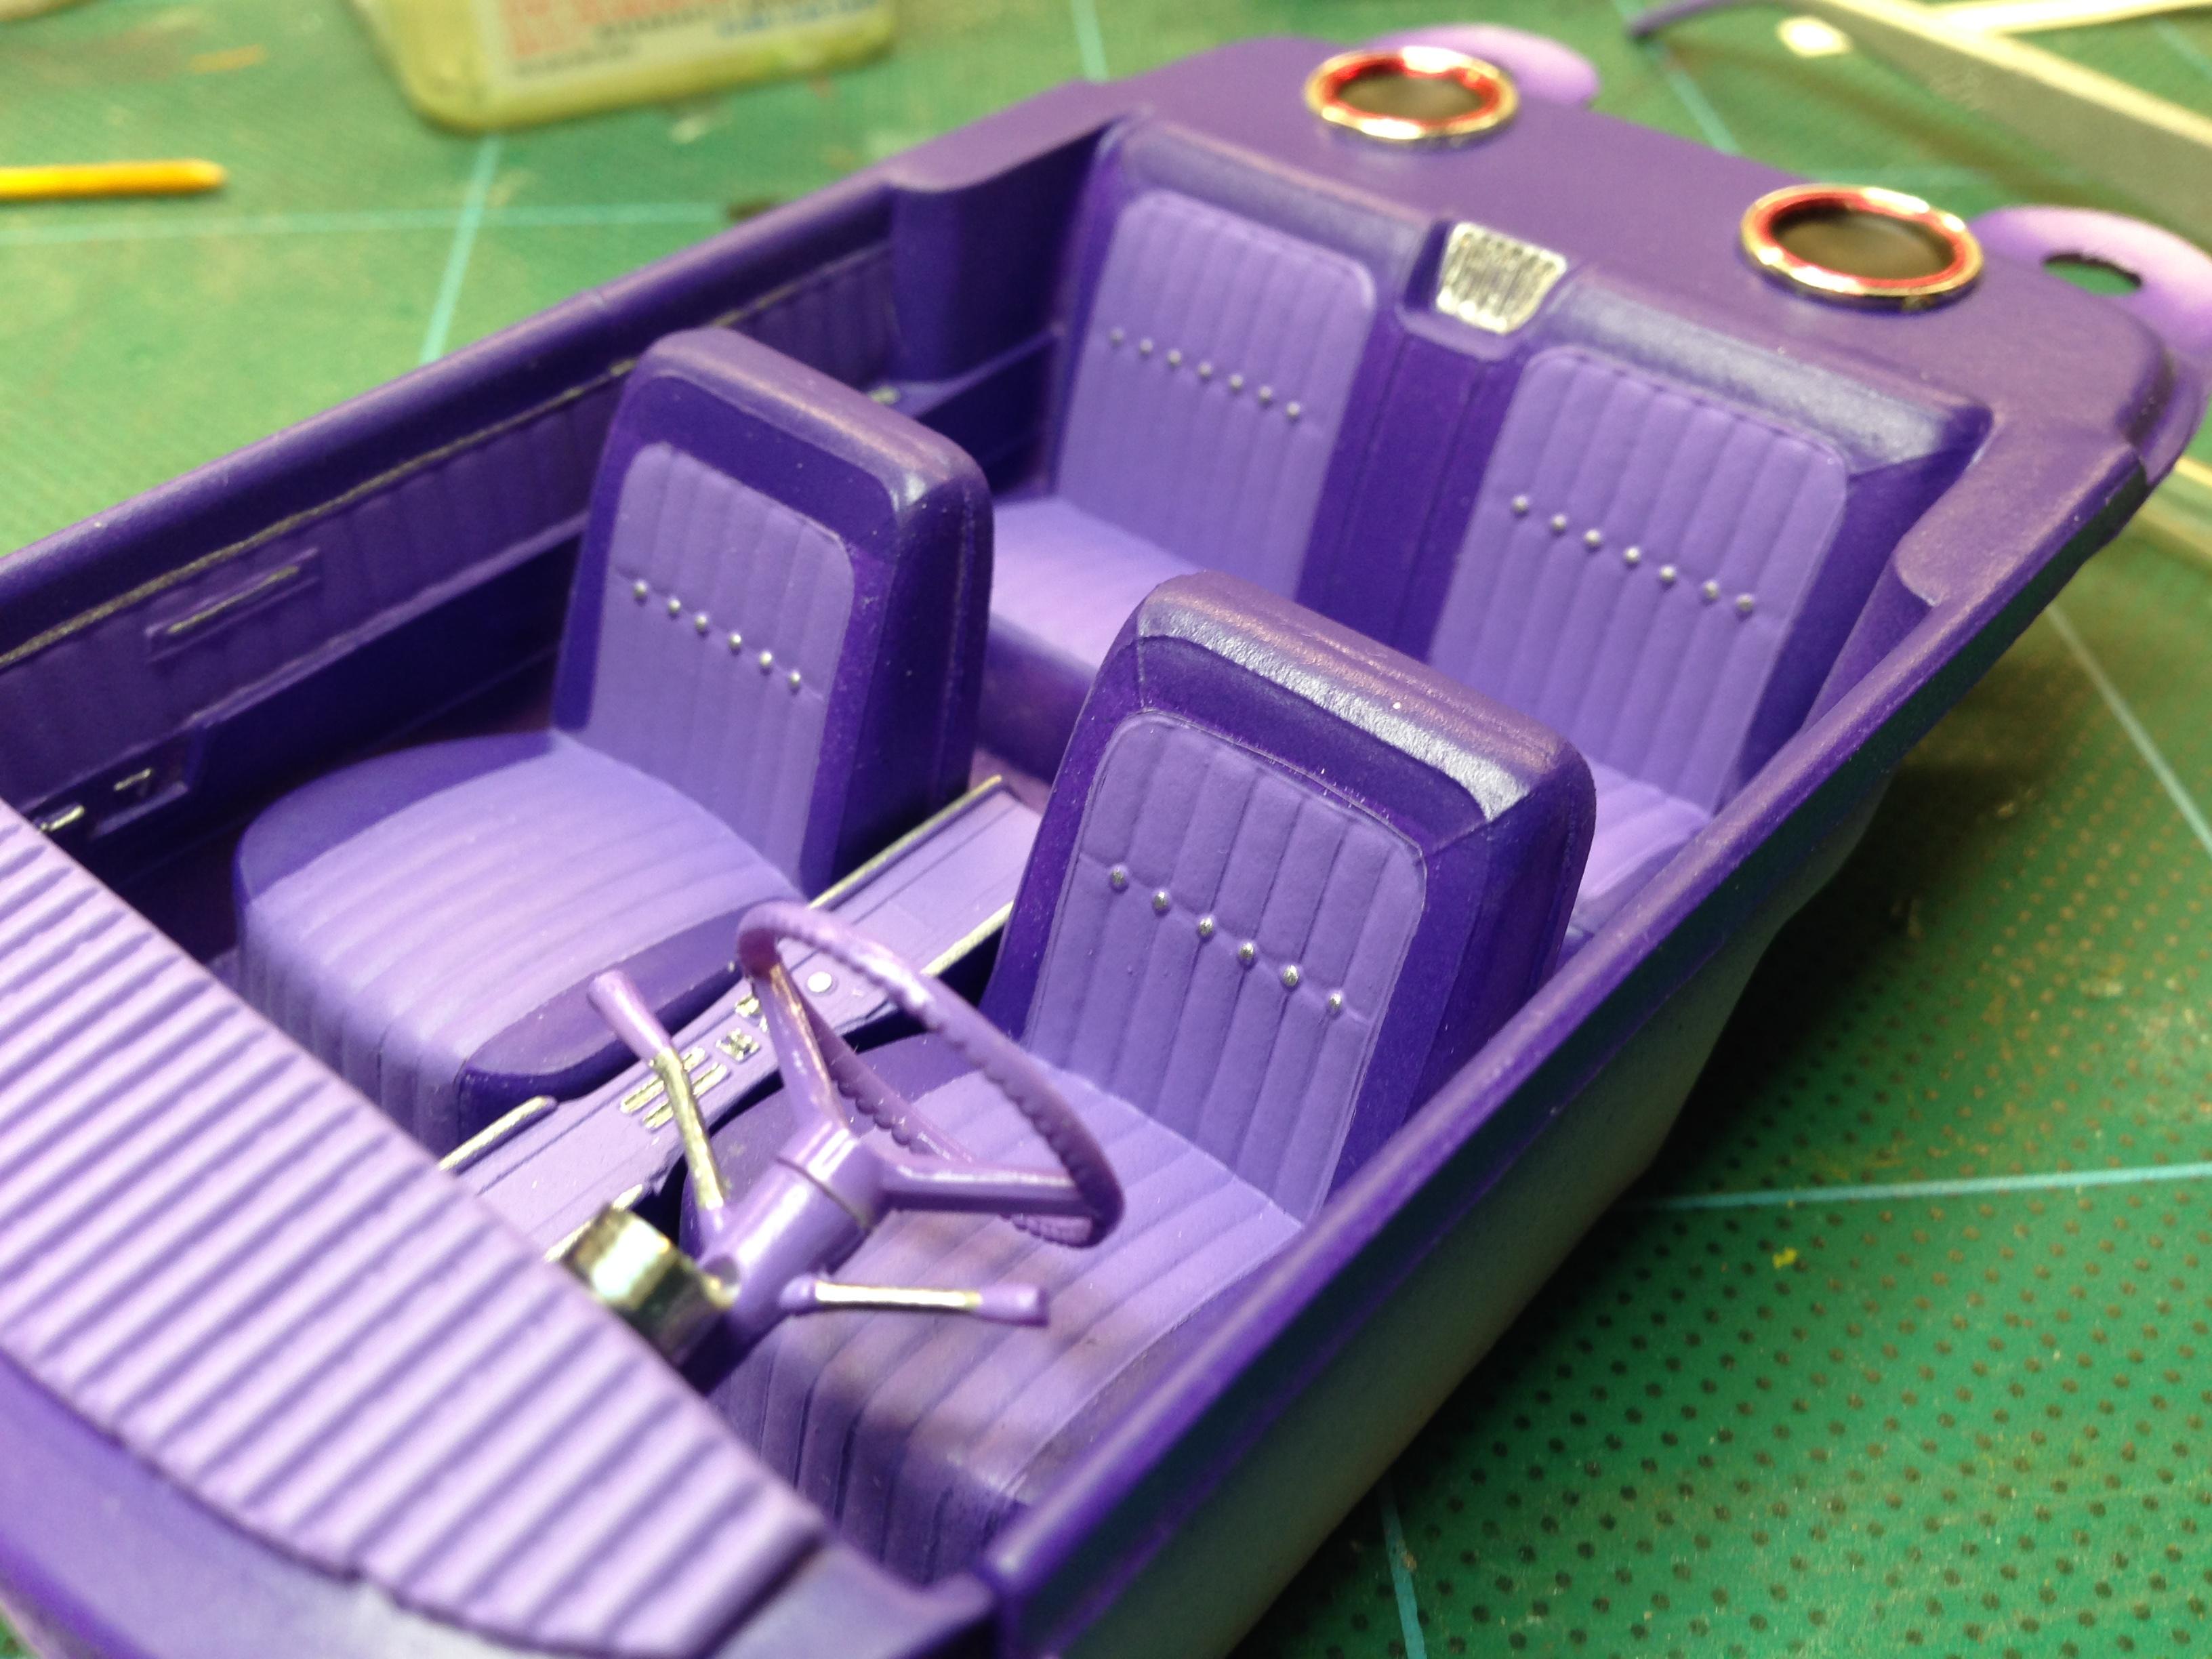
Thanks very much guys. I appreciate it. here's the interior, in case you didn't see the w.i.p pics
-
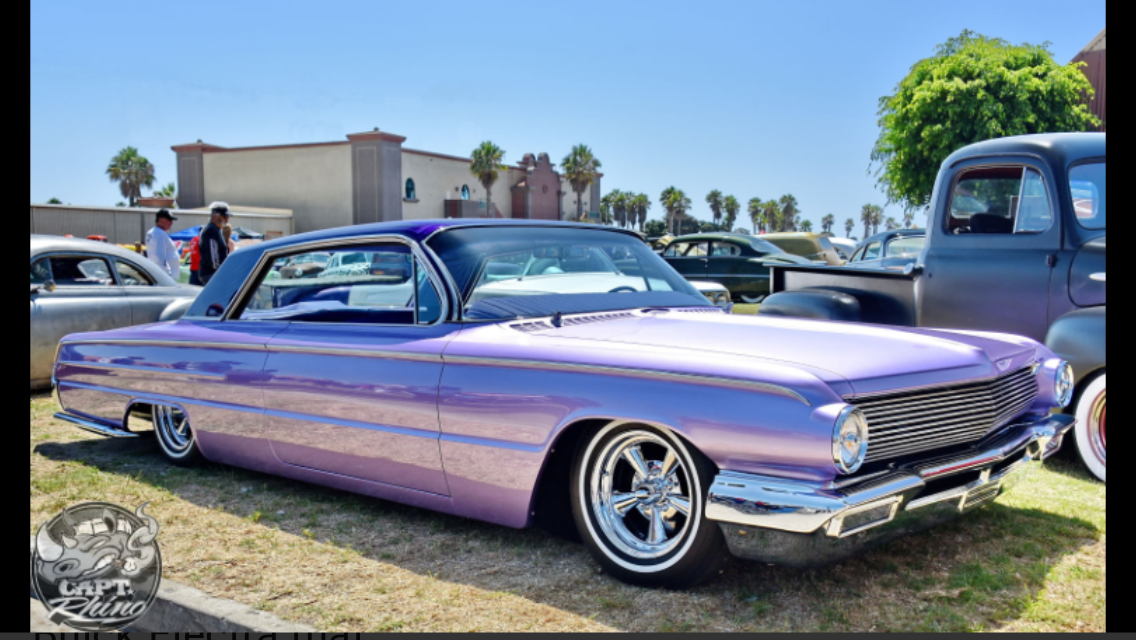
Originally, I was going to use the kit custom parts and go a bit mad. But after seeing the Electracutioner while googling ideas, I knew this was the way to go. So here's my homage to this gorgeous car:
-
Tremendous finish on your paint! Did you spend time polishing it or are you just excellent at paint?
-
You did this resin conversion real justice. Very crisp and well finished. A handsome ride.
-
Very realistic and well executed. obviously a lot of thought has gone into this. I love it!
-
Yeah, I see a lot of 'em here in the UK. I like the way they look. You did a great job on this kit. Very sharp build.
-
Nice one! Great looking build. I'm from the UK so the sport references are lost on me! what glue did you use on the headlight lenses? They look fogged. Try white glue or a tiny smear of epoxy and the fumes won't bother the lenses. or it might just be the light in the photo, in which case I apologise for the egg-sucking tip ?
-
I had to go back and read the intro again, because I was also thinking this must be the AMT version. I had no idea a snap kit would look this good. and how many fathoms deep, is that shine? Beautiful. I tried using blue dots from RMM, or was it Modelhaus.. anyway mine looked black, but yours look blue. Nice touch ?
-
Super clean build. Did you foil or paint the window trim, etc? Either way, it's very neat and well done ?