geetee66
-
Posts
1,540 -
Joined
-
Last visited
Content Type
Profiles
Forums
Events
Gallery
Everything posted by geetee66
-
Thanks, got the floor carpeted and the door handles on the interior last night. I'll post pics later when I get home from work. No need to thin it. Shot it at about 12psi over a gloss black base, although I forgot to paint some small parts black, so shot the chrome paint over bare styrene. The results were very similar.
-
Awesome! that paint looks WET! I'm impressed by the shine you got on it. You made the right choice with the wheels. Black would be good, but a dark gold would contrast well with the body colour. Or a gunmetal with a hint of gold. engine etc. look spot on
-
I've found some nice cruiser skirts for it. I also sprayed the clear and added some iridescent nail polish to give it a prismatic effect on the silver..

-
It's difficult to accurately account for time spent on this. I do a little bit whenever I can. But the fingerprint pattern, for example, took a day. I needed frequent breaks! thanks for the kind words and interest, guys. I'm glad you like watching the progress of this build. I finished the running gear and chassis this weekend. Molotow chrome used extensively!
-
What can I say that hasn't already been said? It's very interesting to watch the progress of your builds, Dann. Your attention to detail is a real benchmark for most of us here, I would guess. Those seats, by the way, really do look like alcantara. Bravo mate! Keep showing us your incredible work
-
☺️ Thanks chaps I'm itching to get the clearcoat on and polish it up. I think the colours will look much better, then. I'll set the body aside for a few days and get on with the rest of it. I bought a bottle of Molotow chrome paint, which I intend to airbrush onto the engine, suspension and rear axle. I'll have to be careful how I handle the parts, as the chrome can show up fingerprints. I'll do extensive test fittings, so the chromed parts just drop into place, during final assembly ?
-
Here's my second attempt:
-
Thanks this was my first attempt at a lowrider paint job. Before I discovered dual blades and an airbrush. It's a lot harder with rattle cans...!
-
What an awesome build! Very unique and well executed. Looks like great fun, too.
-
Thanks again for taking the time to leave such nice comments, guys. I really appreciate it. got a lot done today. Changed my mind about what to do on top of the fins. I found some self adhesive border pattern (for greeting card hobbyists). Some careful placement rendered a nice lace-style pattern. I used the same in the centre line. I added shading to the twirling ribbon and finally shot raspberry glitter nail polish over the remaining silver areas. when the tape came off, I'm glad to say it looked as it did in my mind's eye ? I was going to go for mica white with silver pinstripes on the sides, but I like the way the silver pinstripes in the red areas tie in with the sides. Kinda makes the whole design more cohesive, I reckon.
-
Cheers Anthony! I'm glad you like what I'm attempting here . just finished painting the pattern with silver and red flake. The red flake particles didn't seem to come out of the airbrush and kinda collected in the bottom of the cup. As a result I got something more like a raspberry candy, which is fine, cos I can add flake to the topcoat if it isn't sparkly enough. I've removed some more tape. The patterns are starting to gain clarity and I can see if it's anything like I imagined... glad to say it is ?
-
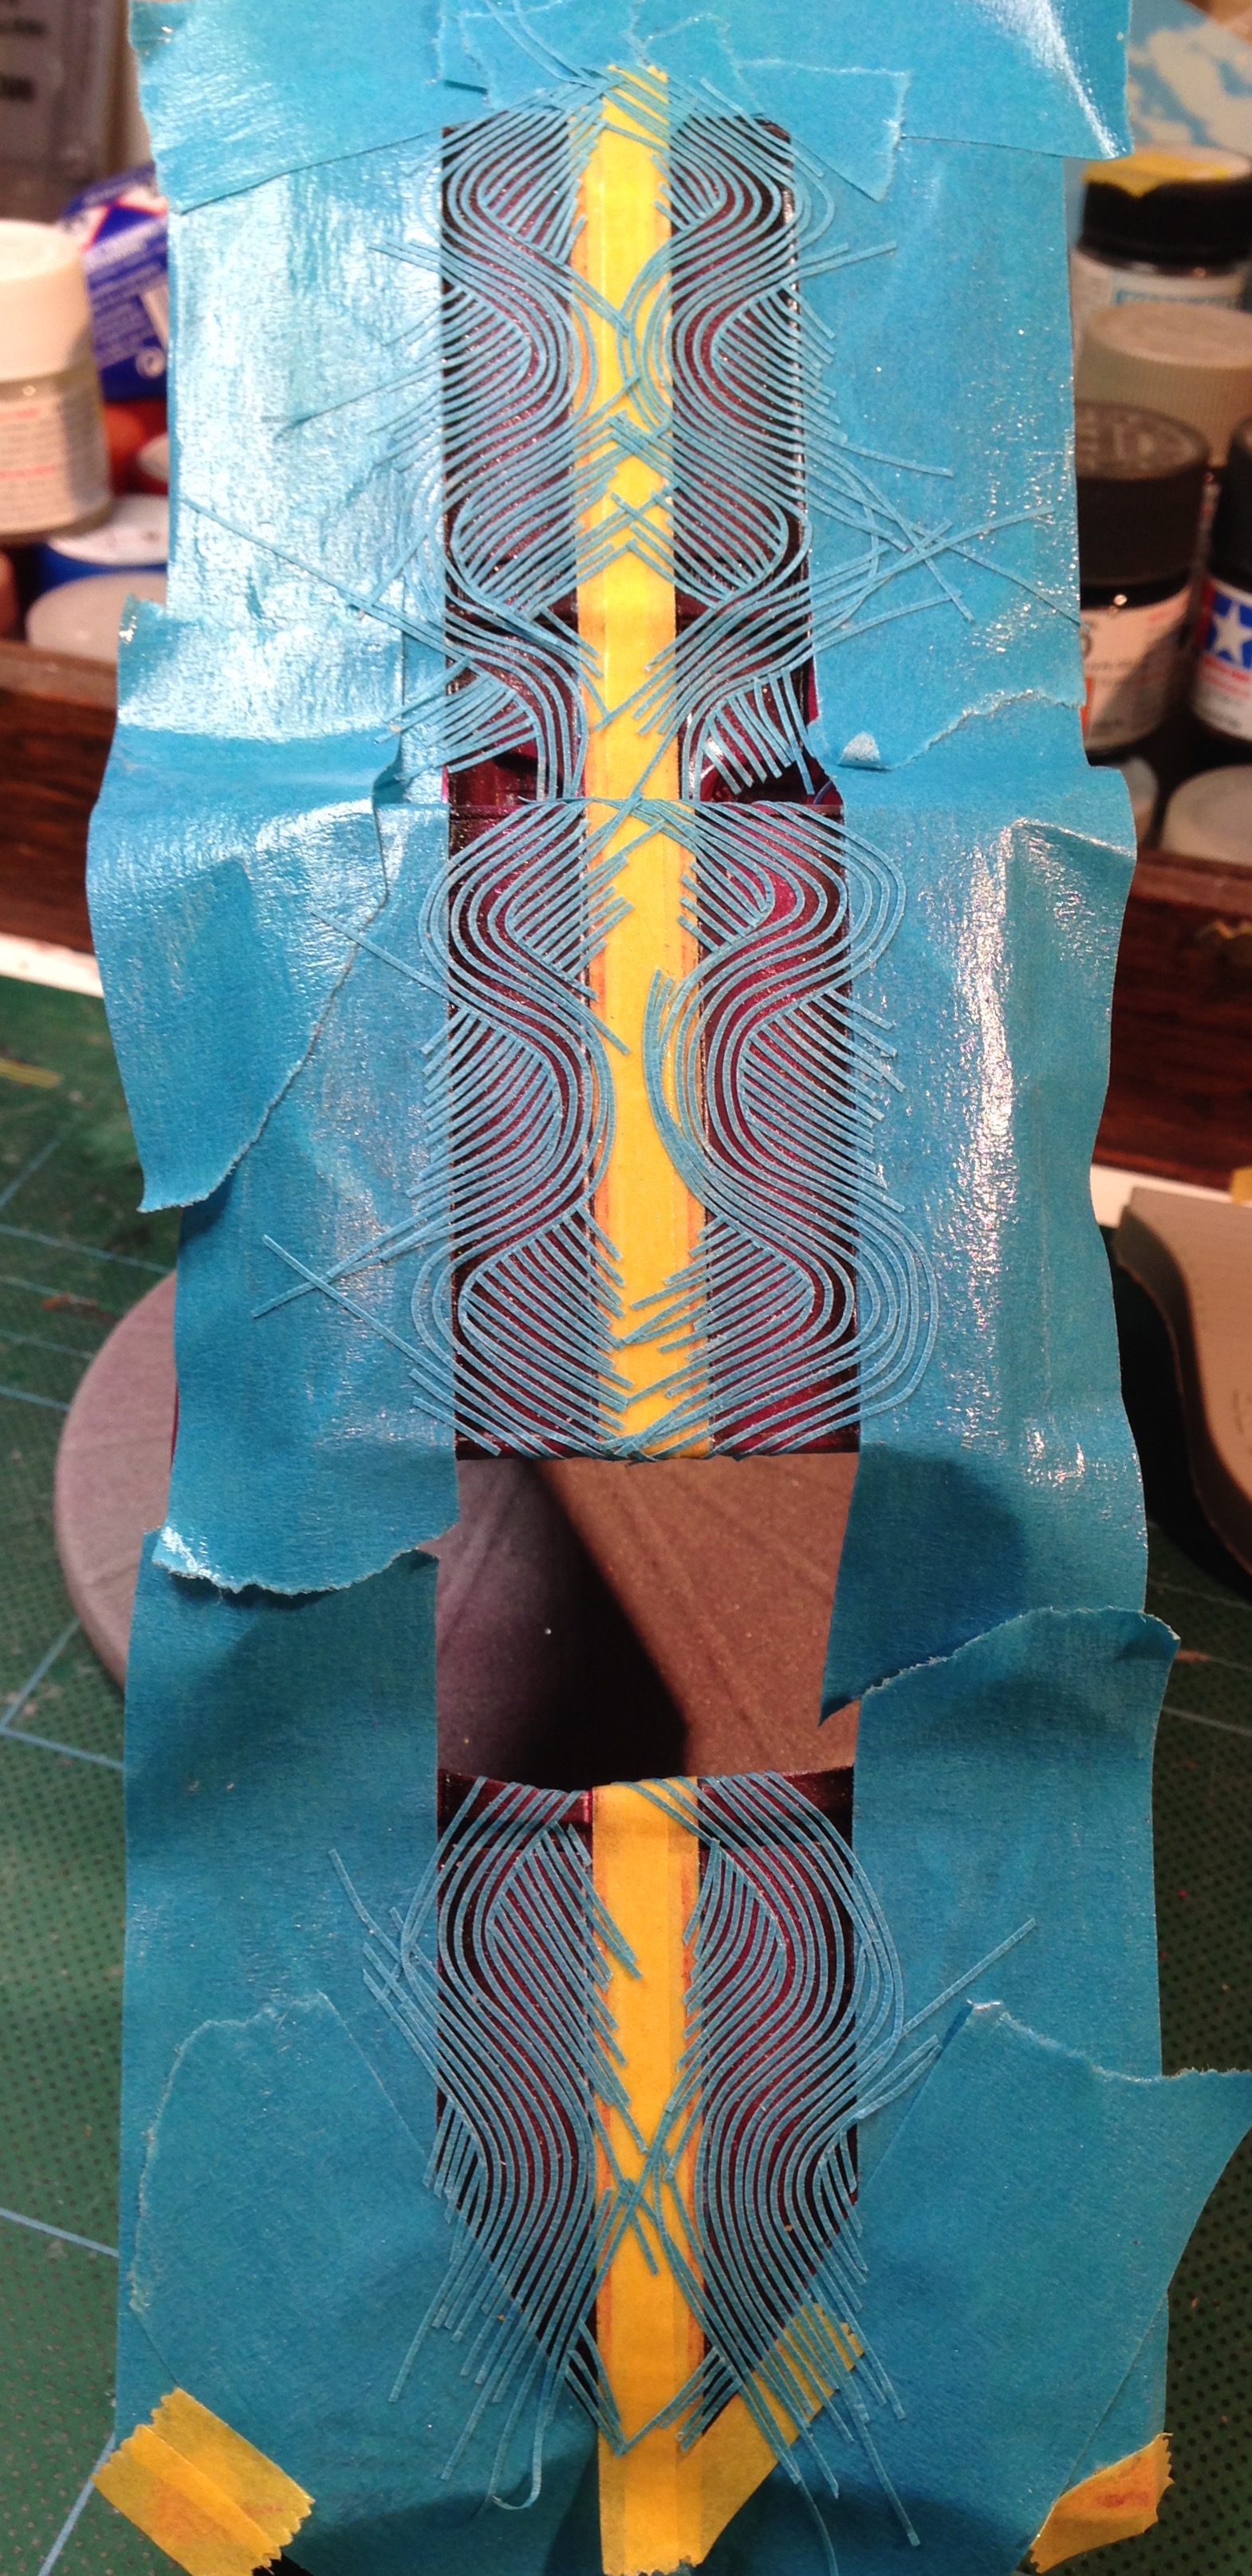
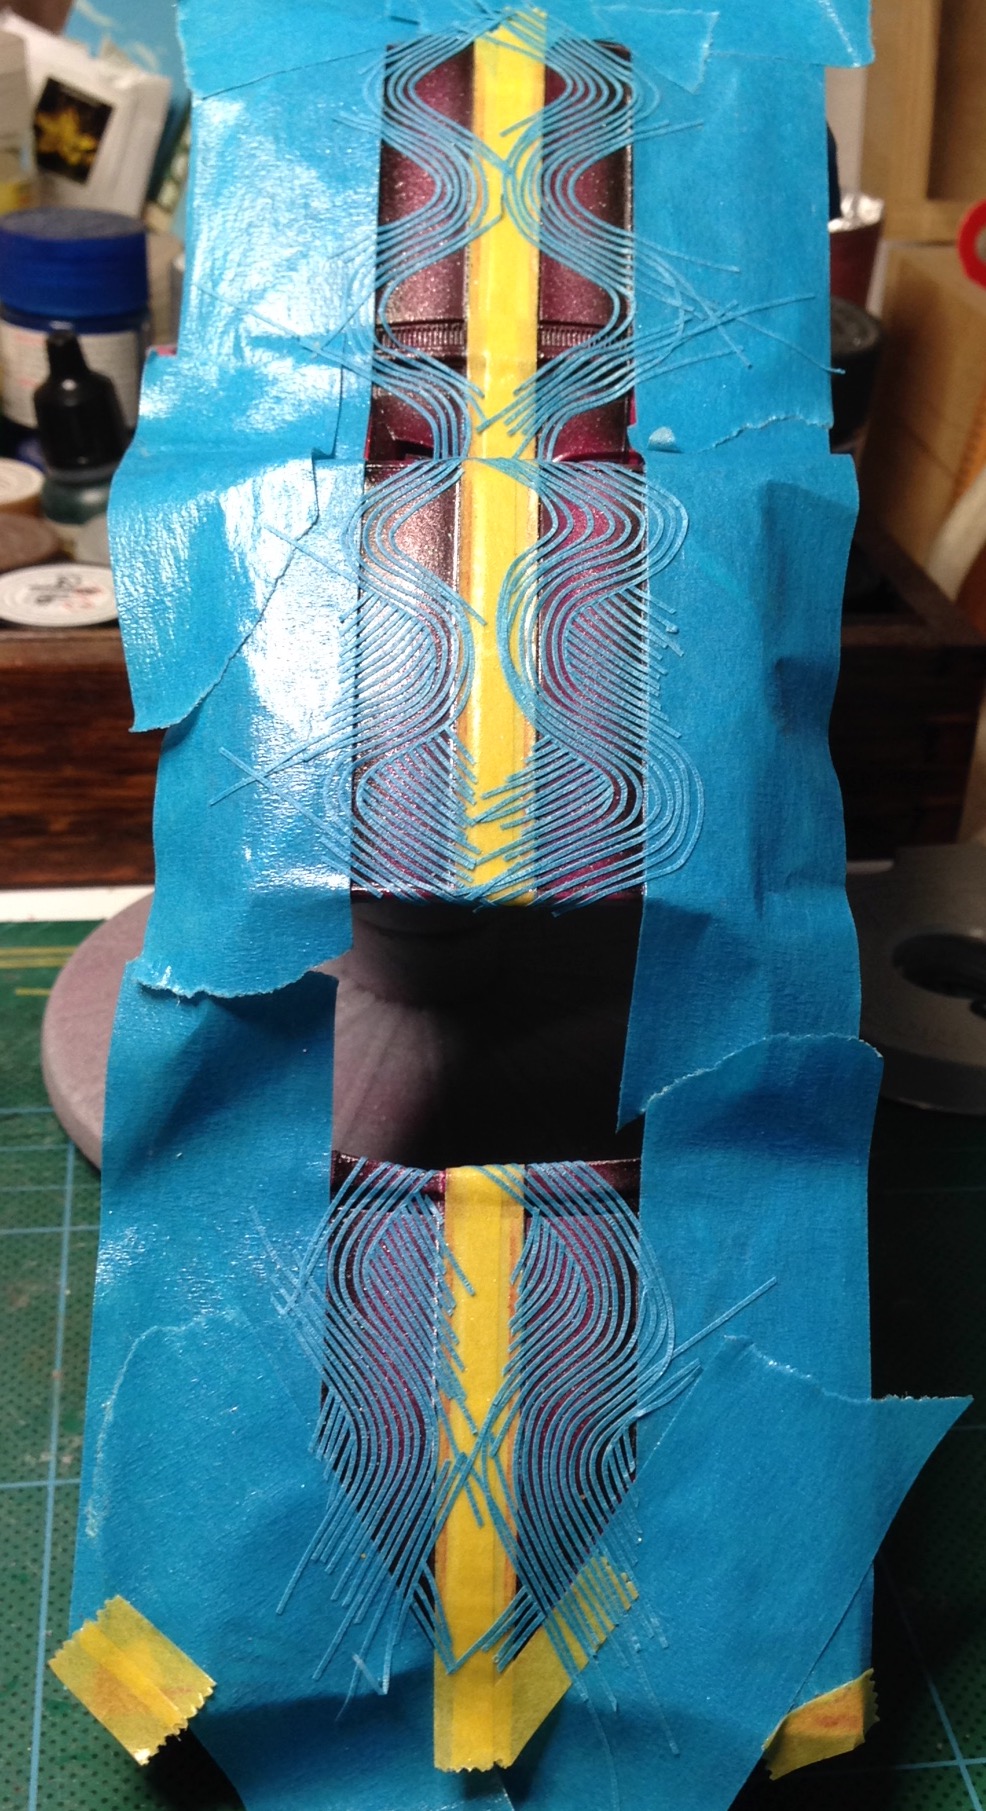
Thanks guys just finished the fingerprint pattern. Going to have a cuppa and think about what colour to spray through this pattern. I'm considering silver, for a higher contrast, to make the background colour look like it's about a foot below the silver. ?
-
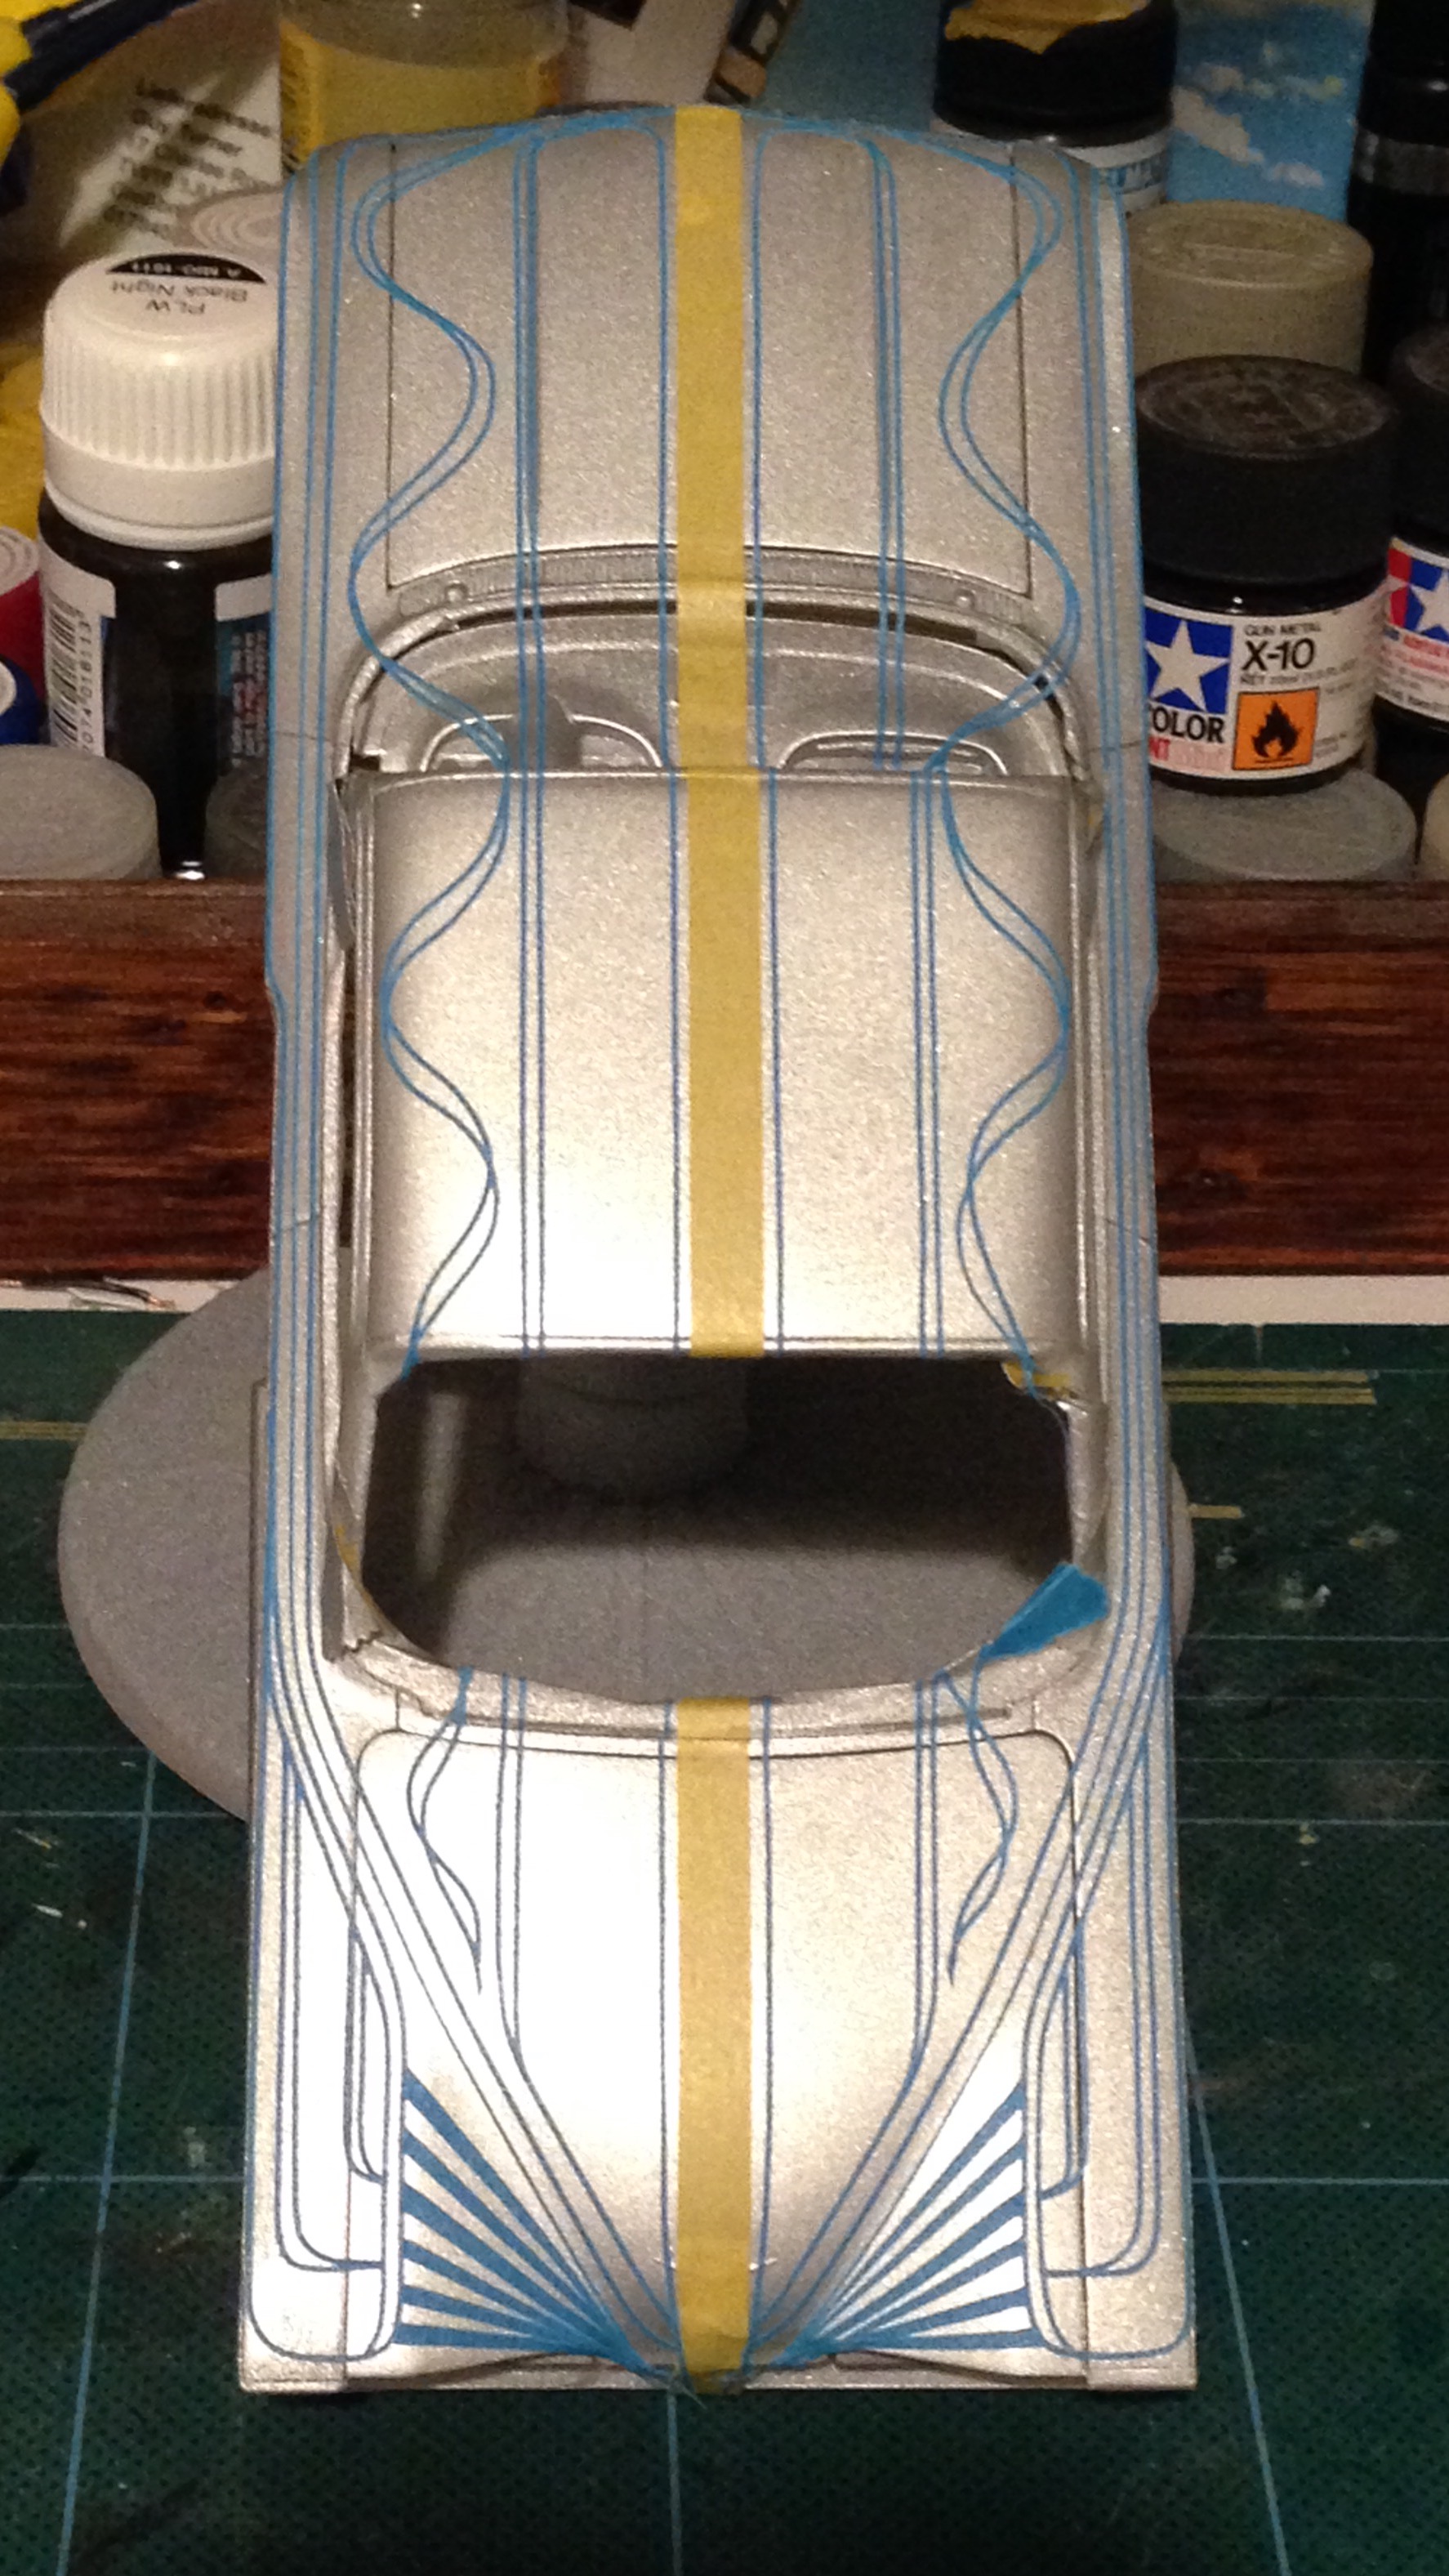
That's right, David. Each strip is put in place with tweezers and my fingertip. I stick about 12" of tape down, then cut it into strips. When I'm doing shorter lines, I cut the tape in half. That way you can keep your flow and don't have to stop to cut more tape. oh, and on tighter radius curves, burnish the tape down, or it tries to lift. Also, when doing tight curves, make sure you're working on a shiny surface. Metallic paint needs sealing with clear before tape is applied, or the microscopic roughness of the surface will reduce the adhesion of the tape.
-
Sweet ride man! I like it posed on 3 wheels. I have a couple of lowriders in the pipeline and one of these is going to be tippin
-
Today's progress. I'll try and finish the pattern this afternoon and hopefully get some more paint on later
-
-
Thanks for looking. I hope this is of some use to you guys. I'm kinda feeling my way with this and I'm on a steep learning curve! I'm using two (Stanley knife) blades taped together. I tried using dual blades in a modified x-acto knife, but I found that the blades didn't always retain their gap. The Stanley blades are stiffer and relatively easy to hold. As previously mentioned, I'm cutting Scotch 3M blue (waterproof) tape into about 1mm strips. It definitely holds a curve better than Tamiya tape. If you use it to mask over a load of fine lines, reduce the tackiness of the tape by sticking it to either your forehead or inner forearm. Then the fine line won't come away when you remove the larger strips. I began the fingerprint pattern tonight..
-
I have to admit, I was tempted to keep it like that. But I want to try and use a few more techniques. Had a lot of trouble with my airbrush. It's played up ever since I used Vallejo acrylics in it. Spent most of my valuable bench time, cleaning the bloody thing. Could not get it to spray smoothly. eventually, I managed to get a fade done. More tomorrow
-
Peeled off some tape, ready for more patterns.. I'm pleased with how the twirling ribbons look. They'll receive shading to make them look 3D (I hope)
-
Then shot some red nail polish through my airbrush. It came out a bit powdery in places, but it'll sand smooth.
-
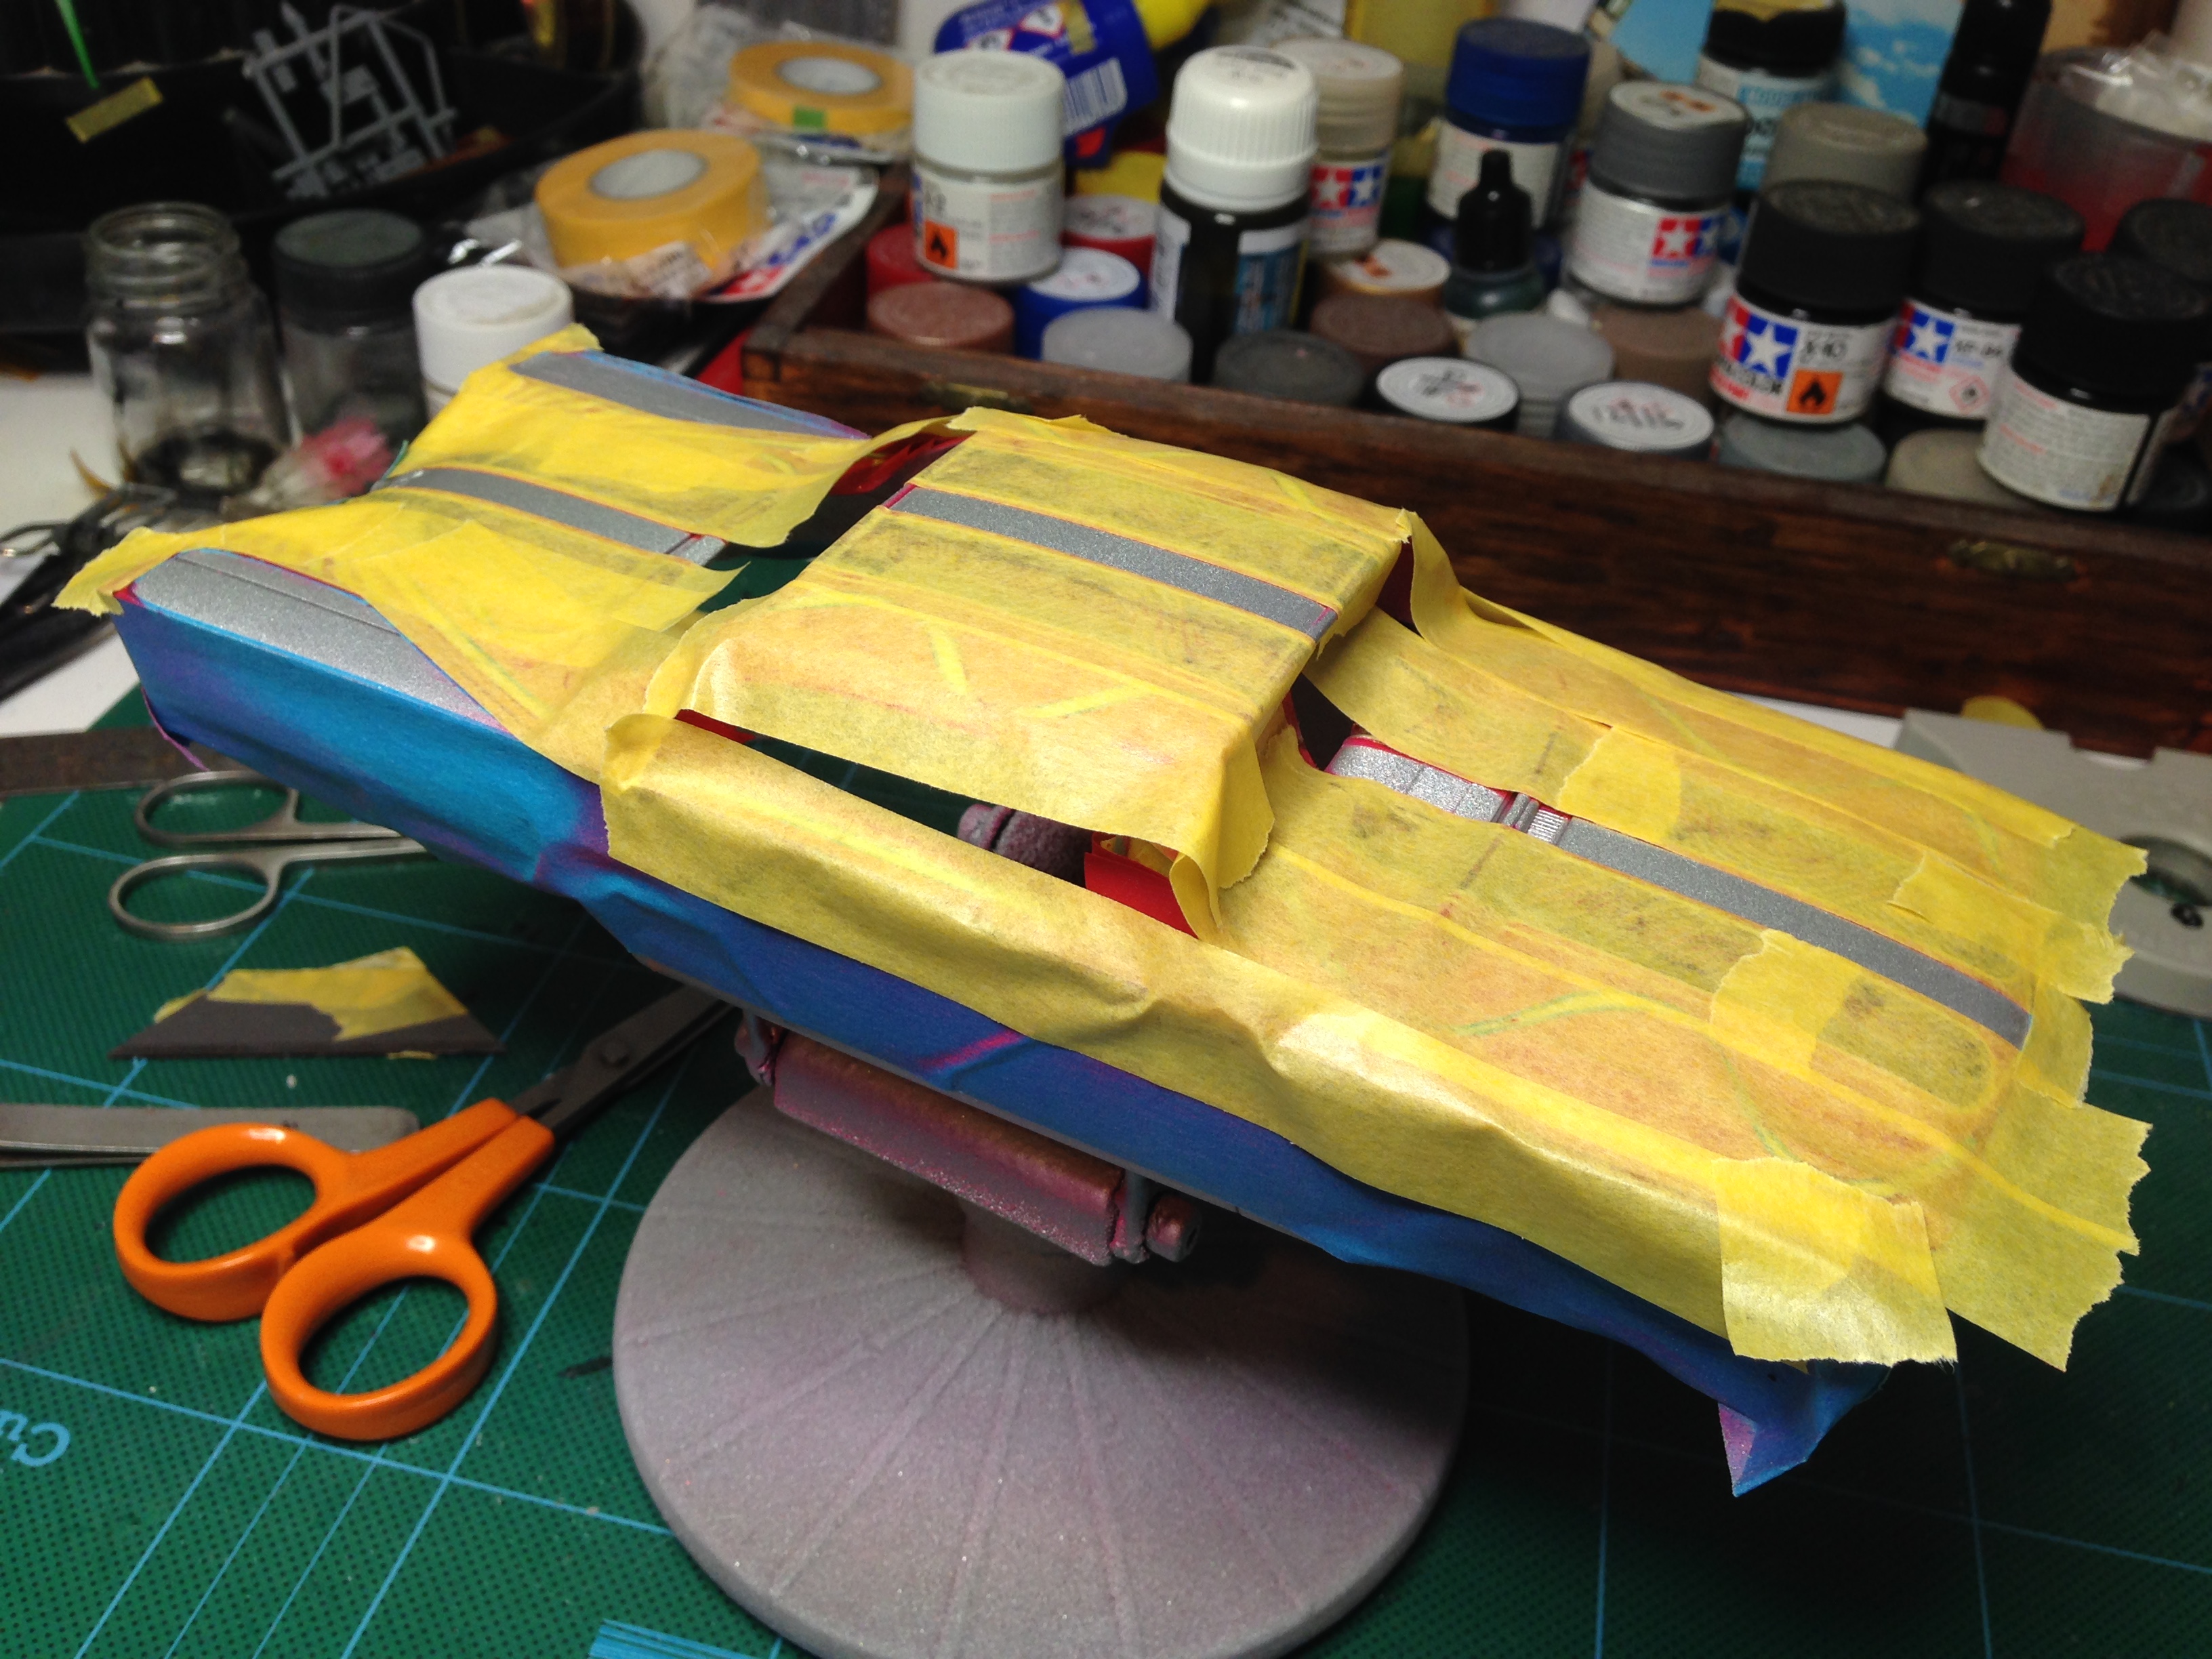
Got some masking done..
-
Yes, it's the level of detail which captures me. Engraving, plating, chromed engines, the murals and patterns.... we just don't see them here in the U.K. I've been watching loads of lowrider videos on YouTube, for ideas. I've gotta go to one of their big shows, such as the one in Arizona. Maybe one day..
-
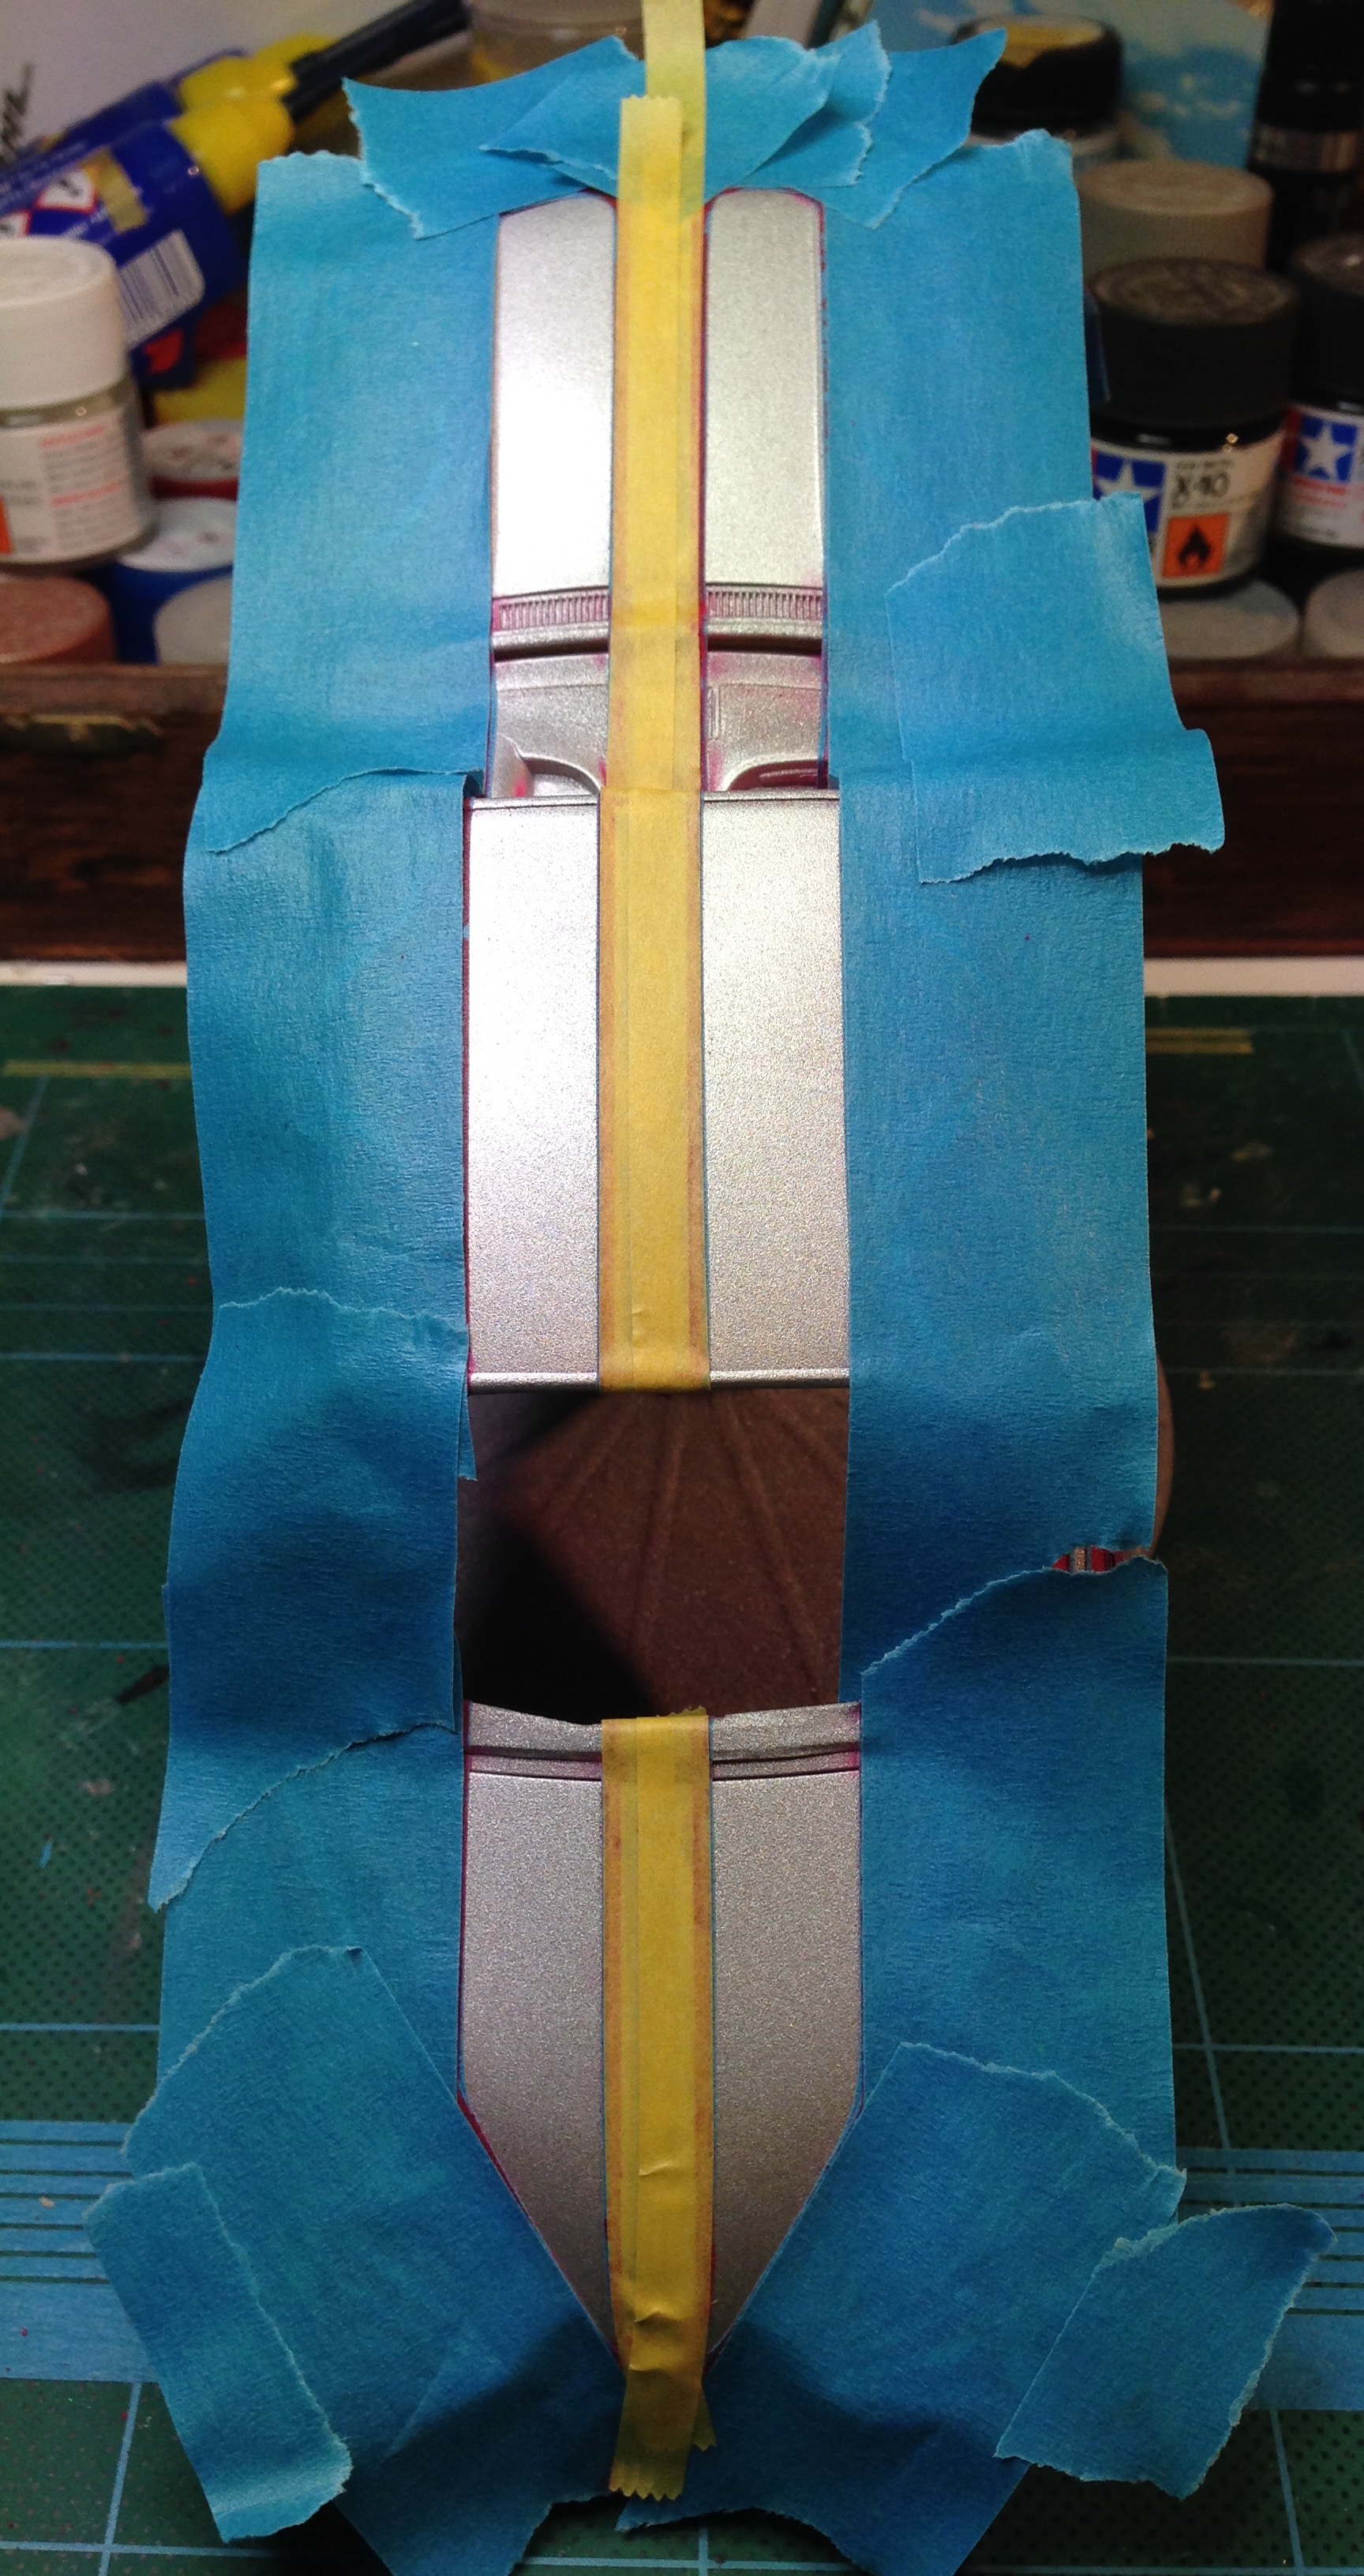
Thanks! It takes a bit of thought. I sit and stare at it for ages before I put tape on. Here's a bit more. gotta decide which areas to mask to keep a silver base for red candy.
-
I totally get where you're coming from, if the car is stock with a factory colour/interior. But if it's had a custom paint job and maybe an interior makeover, then it's legit to ride on custom rims. Anyway, there's loads of factory fresh stock versions out there. Lowriders exist to be different, I reckon. Old school boulevards or sovs would be a nice idea. Just gotta rummage through my parts box. These D's are difficult to find in the U.K.. I ended up buying mine from some cat in Korea.