tyrone Posted July 21, 2014 Posted July 21, 2014 (edited) What's up fellas.... this is one I started on yesterday.. this one will have a vinyl top.. I used the pro sportsman chassis as a start, but will be only using a few pieces from it . There were a few modifications that had to be done first though... I had to move the lower strut arms back to center them up in the wheel wells.. here's a few pics.. thanks for looking and comments welcome... these pics show the changes made after re-locating the lower arms, and removing the raised beads from the rear wheel tubs, and floor board. I also cut the front firewall down so that it is not as tall, I also removed the molded in dzus fasteners, and brakes lines and cables that were molded in the chassis, these will be replaced with lines and cables later.. Edited October 22, 2014 by tyrone
tyrone Posted July 21, 2014 Author Posted July 21, 2014 (edited) next up I modified the front frame rails I filled in the holes with .035 styrene rod and filled down the mount tabs for the front struts and made my own I used the strut mount gussets from Scott... Edited July 28, 2014 by tyrone
tyrone Posted July 21, 2014 Author Posted July 21, 2014 (edited) then I modified the front and rear struts.. I'll make the springs later... Edited September 28, 2014 by tyrone
tyrone Posted July 21, 2014 Author Posted July 21, 2014 front wheels are from Mico Nitro... rears are from Chi-Town hustler kit.. just using rears for mock ups..
am73grand Posted July 21, 2014 Posted July 21, 2014 NICE!!! Thanks for the step by step pics. They help a lot!
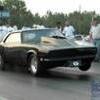
DynoMight Posted July 21, 2014 Posted July 21, 2014 Awesome. Can't wait for this to get built up.. a dark green metallic would look really cool with white stripes. Maybe it could look like a Yenko Camaro...
Red rocket 10 Posted July 21, 2014 Posted July 21, 2014 Great work as always , thanks for sharing the details of the chassis modifications . Leonard
Bookie86 Posted July 21, 2014 Posted July 21, 2014 Great work as always , thanks for sharing the details of the chassis modifications . Leonard X2
tyrone Posted July 21, 2014 Author Posted July 21, 2014 Great work as always , thanks for sharing the details of the chassis modifications . Leonard Thanks Leonard and Ernest... I plan on doing this whole build as a step by step deal...
1 bad55 stan Posted July 21, 2014 Posted July 21, 2014 Cool we can all learn how you do it.I'll be watching!
tubbs Posted July 21, 2014 Posted July 21, 2014 nice as usual Tyrone. I will be watching..... and thanks.
DSHWoodworks Posted July 22, 2014 Posted July 22, 2014 Looking great as always, I will be following this one closely since I have one of these started myself, it won't be nearly are good as yours but I'm stretching my skills and I'm sure I will learn a lot from watching your build. Thanks for posting your step by step!
PappyD340 Posted July 22, 2014 Posted July 22, 2014 Another KILLER project in the works Tyrone, your off to a fantastic start!
futurattraction Posted July 22, 2014 Posted July 22, 2014 What you've done so far is looking super, Tyrone. I like the idea of cleaning up the separate frame rail and detailing it on your own instead of using the cast-in-place components. Can't wait for your next update!
freakshow12 Posted July 23, 2014 Posted July 23, 2014 Awesome. I think it would look killer in this paint. But an RS grille
johnbuzzed Posted July 23, 2014 Posted July 23, 2014 Mom, Tyrone is at it again... LOL!!! I remember seeing a light, metallic blue '69 Camaro with an ugly green vinyl top- please, tell me you're not gonna do that! Seriously, that's coming along really nice, as usual. Looking forward to more.
Mooneyzs Posted July 26, 2014 Posted July 26, 2014 Tyrone.... Ou are at it again...lol this is gonna be another great build. You sure have things down. Love your work and looking forward to your next update.
tyrone Posted July 28, 2014 Author Posted July 28, 2014 Mom, Tyrone is at it again... Rick.. that's a good one... cracked me up... thanks for looking in buddy.. Alright fellas.... thanks for all the nice comments and for checking in.. I REALLY appreciate it... Well I got some time in at the bench yesterday and I made a rear wing from sheet styrene.. I also went ahead and got the wheelie bars done.. and I have started on the cage area also.. I ended up using the pieces from the kit cage that run along both side of the trans tunnel.. everything else will be scratch built from .062 styrene rod, and and few other smaller pieces of rod for bracing and stuff... I like to make the main loop in the cage first and then build from there.. I've got most of the rear section done, and I've added the bars for the funny car cage area.. next I'll make the trunk floor and finish up the trunk area... thanks for looking and comments welcome...
Recommended Posts
Create an account or sign in to comment
You need to be a member in order to leave a comment
Create an account
Sign up for a new account in our community. It's easy!
Register a new accountSign in
Already have an account? Sign in here.
Sign In Now