gwolf
-
Posts
434 -
Joined
-
Last visited
Content Type
Profiles
Forums
Events
Gallery
Everything posted by gwolf
-
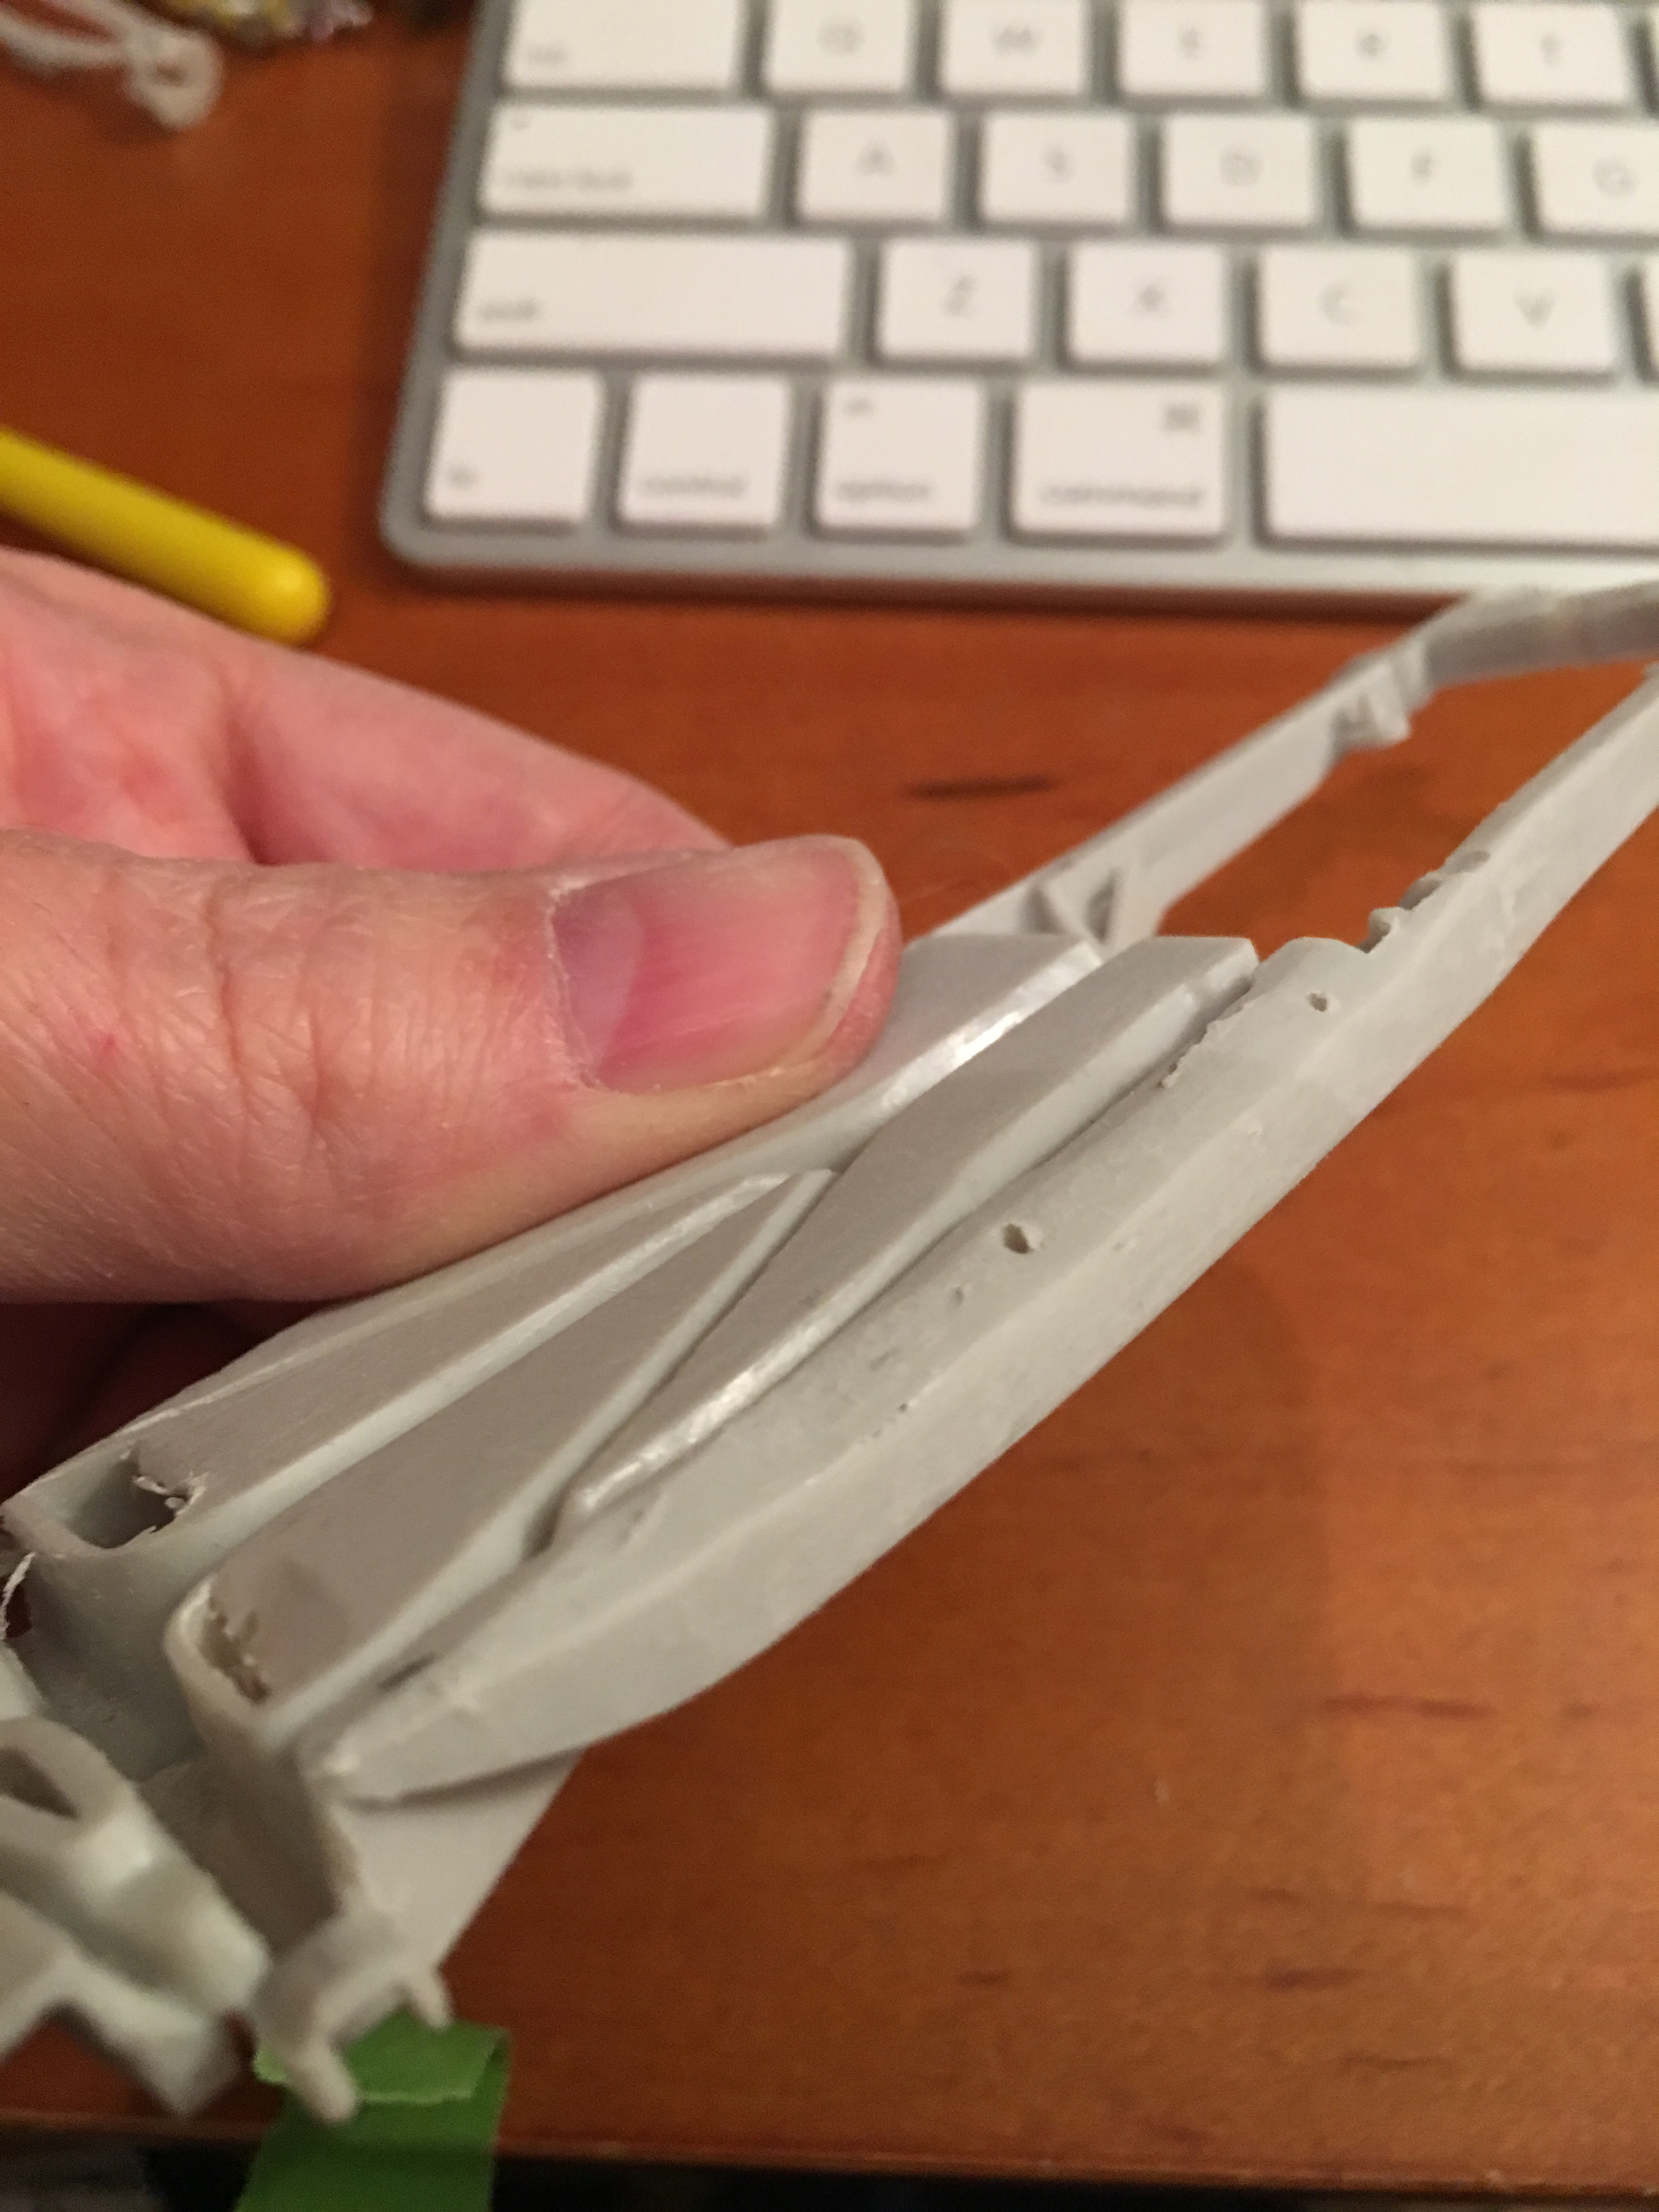
Update: Didn't get much done this weekend, but did get to spend a few minutes working on it. I initially kept the top part with the radiator mount, but decided I don't need it. The splash aprons are cleaning up nicely!

-
That's your friends car? That is cool, tell them that's where I got my inspiration from!
-
Hey Steve! Man, I hate that roll bar rule... But let's see how many follow it at the show.
-
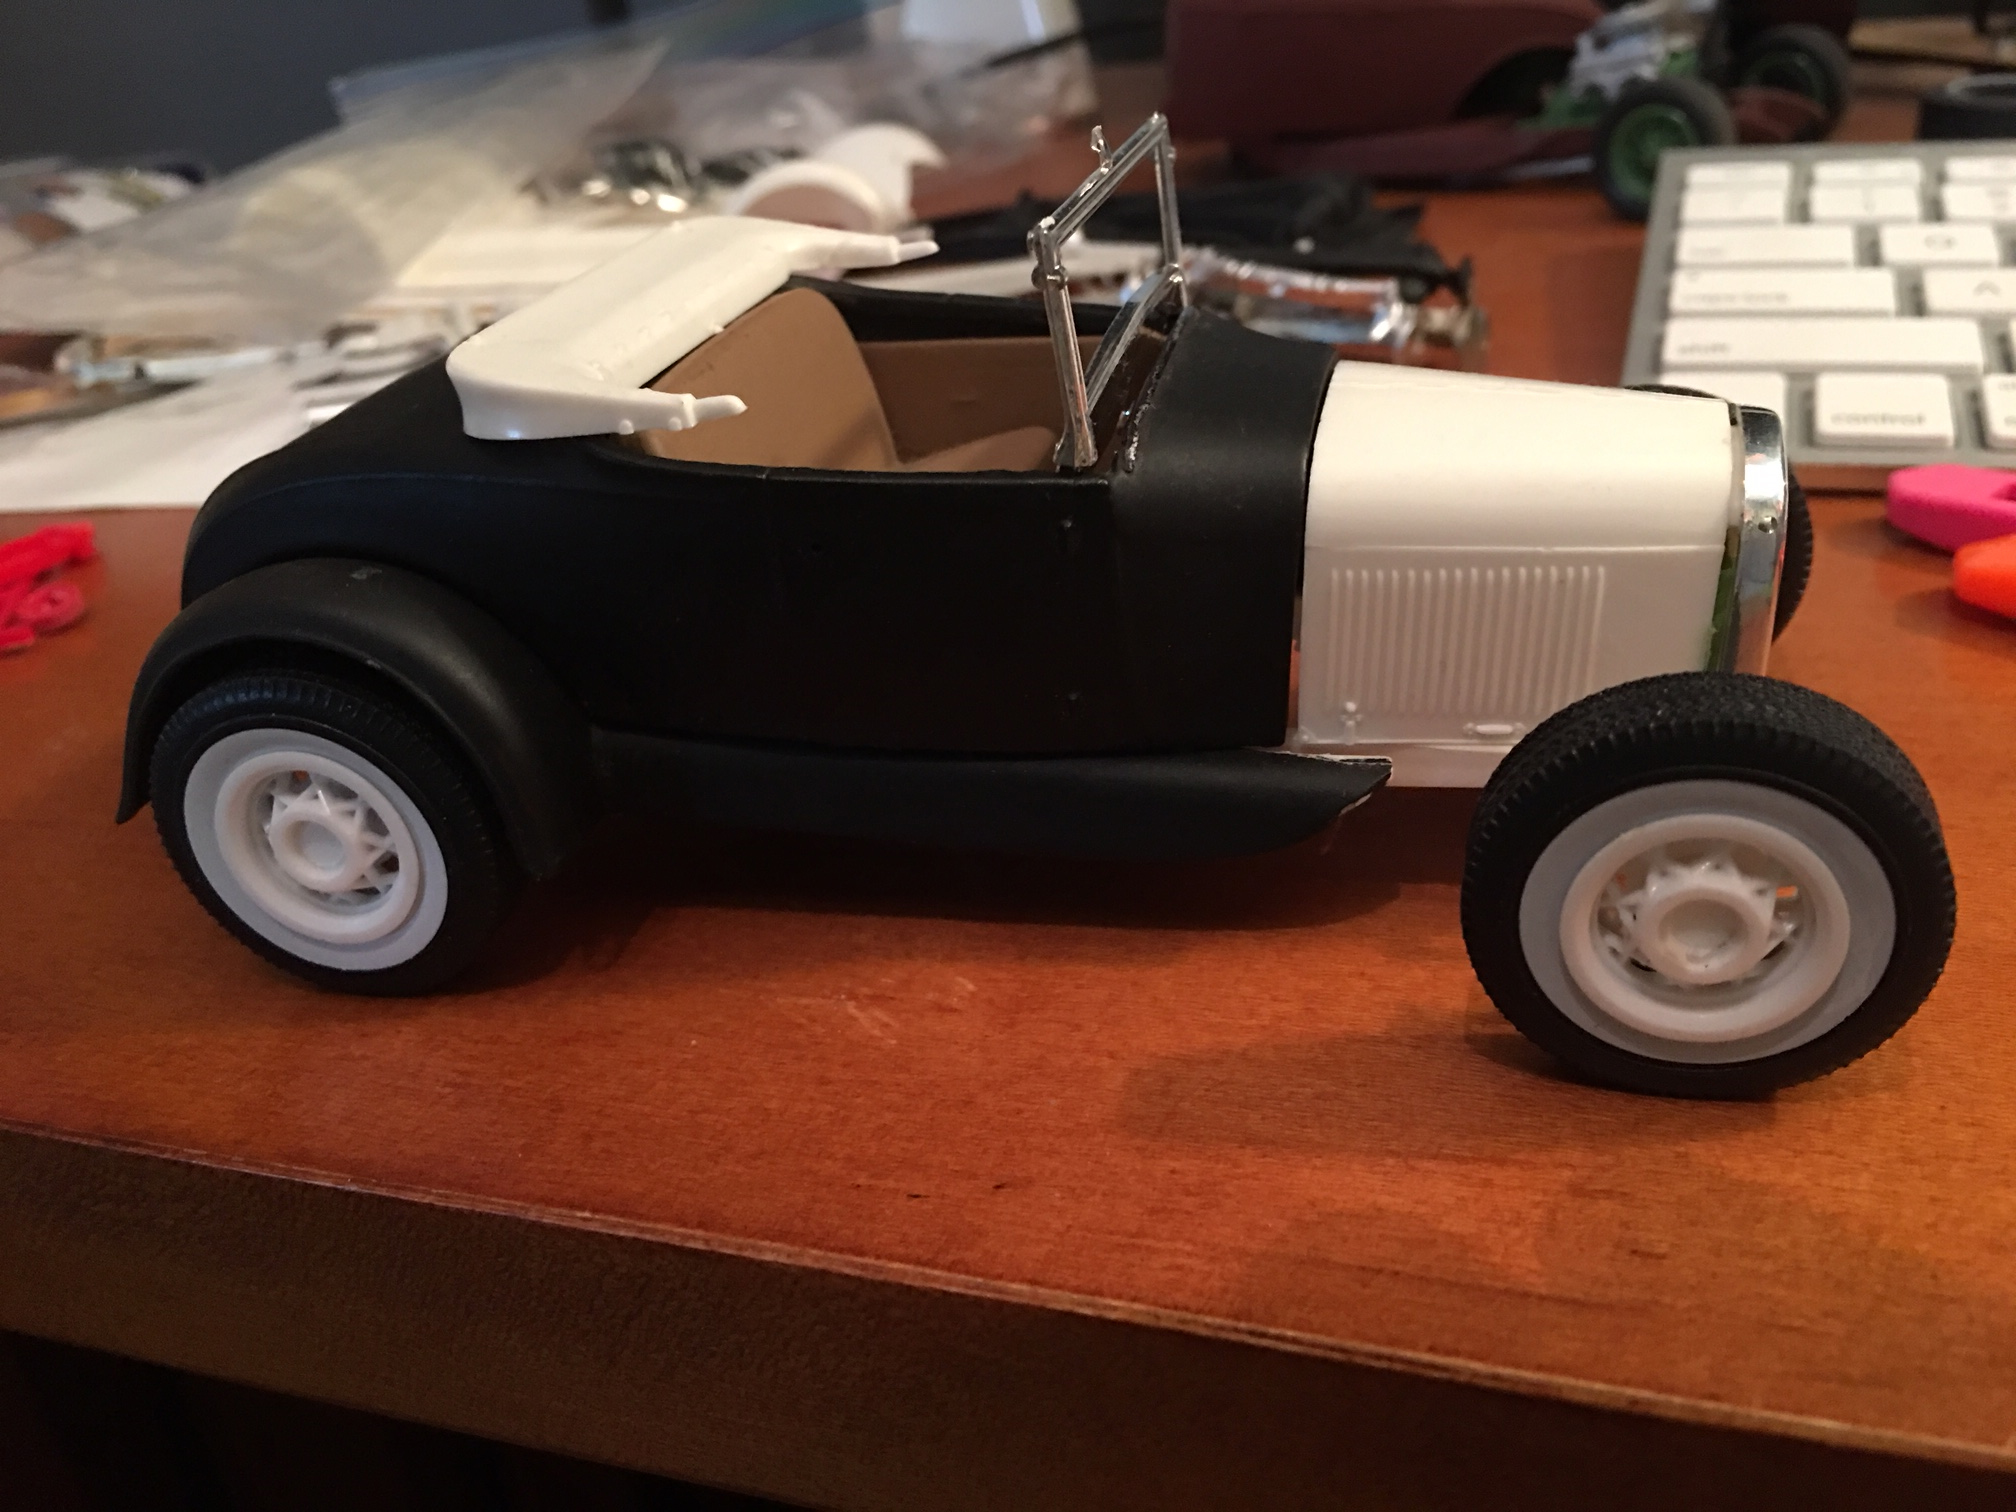
Thanks Rob. I like the look, too. Something different for a change. I'll use the '29 model A chassis on this one, but I have a plan you'll either love or hate for another build. Ever built that piece of BLAH_BLAH_BLAH_BLAH Revell '34 Ford Roadster kit? I bought a few of them cheap at a flea market but I lost all the parts except the body, interior, hood, trunk, and grill. I'm going to try stuffing a '32 Model A chassis under it. I'll post that tonight probably.
-
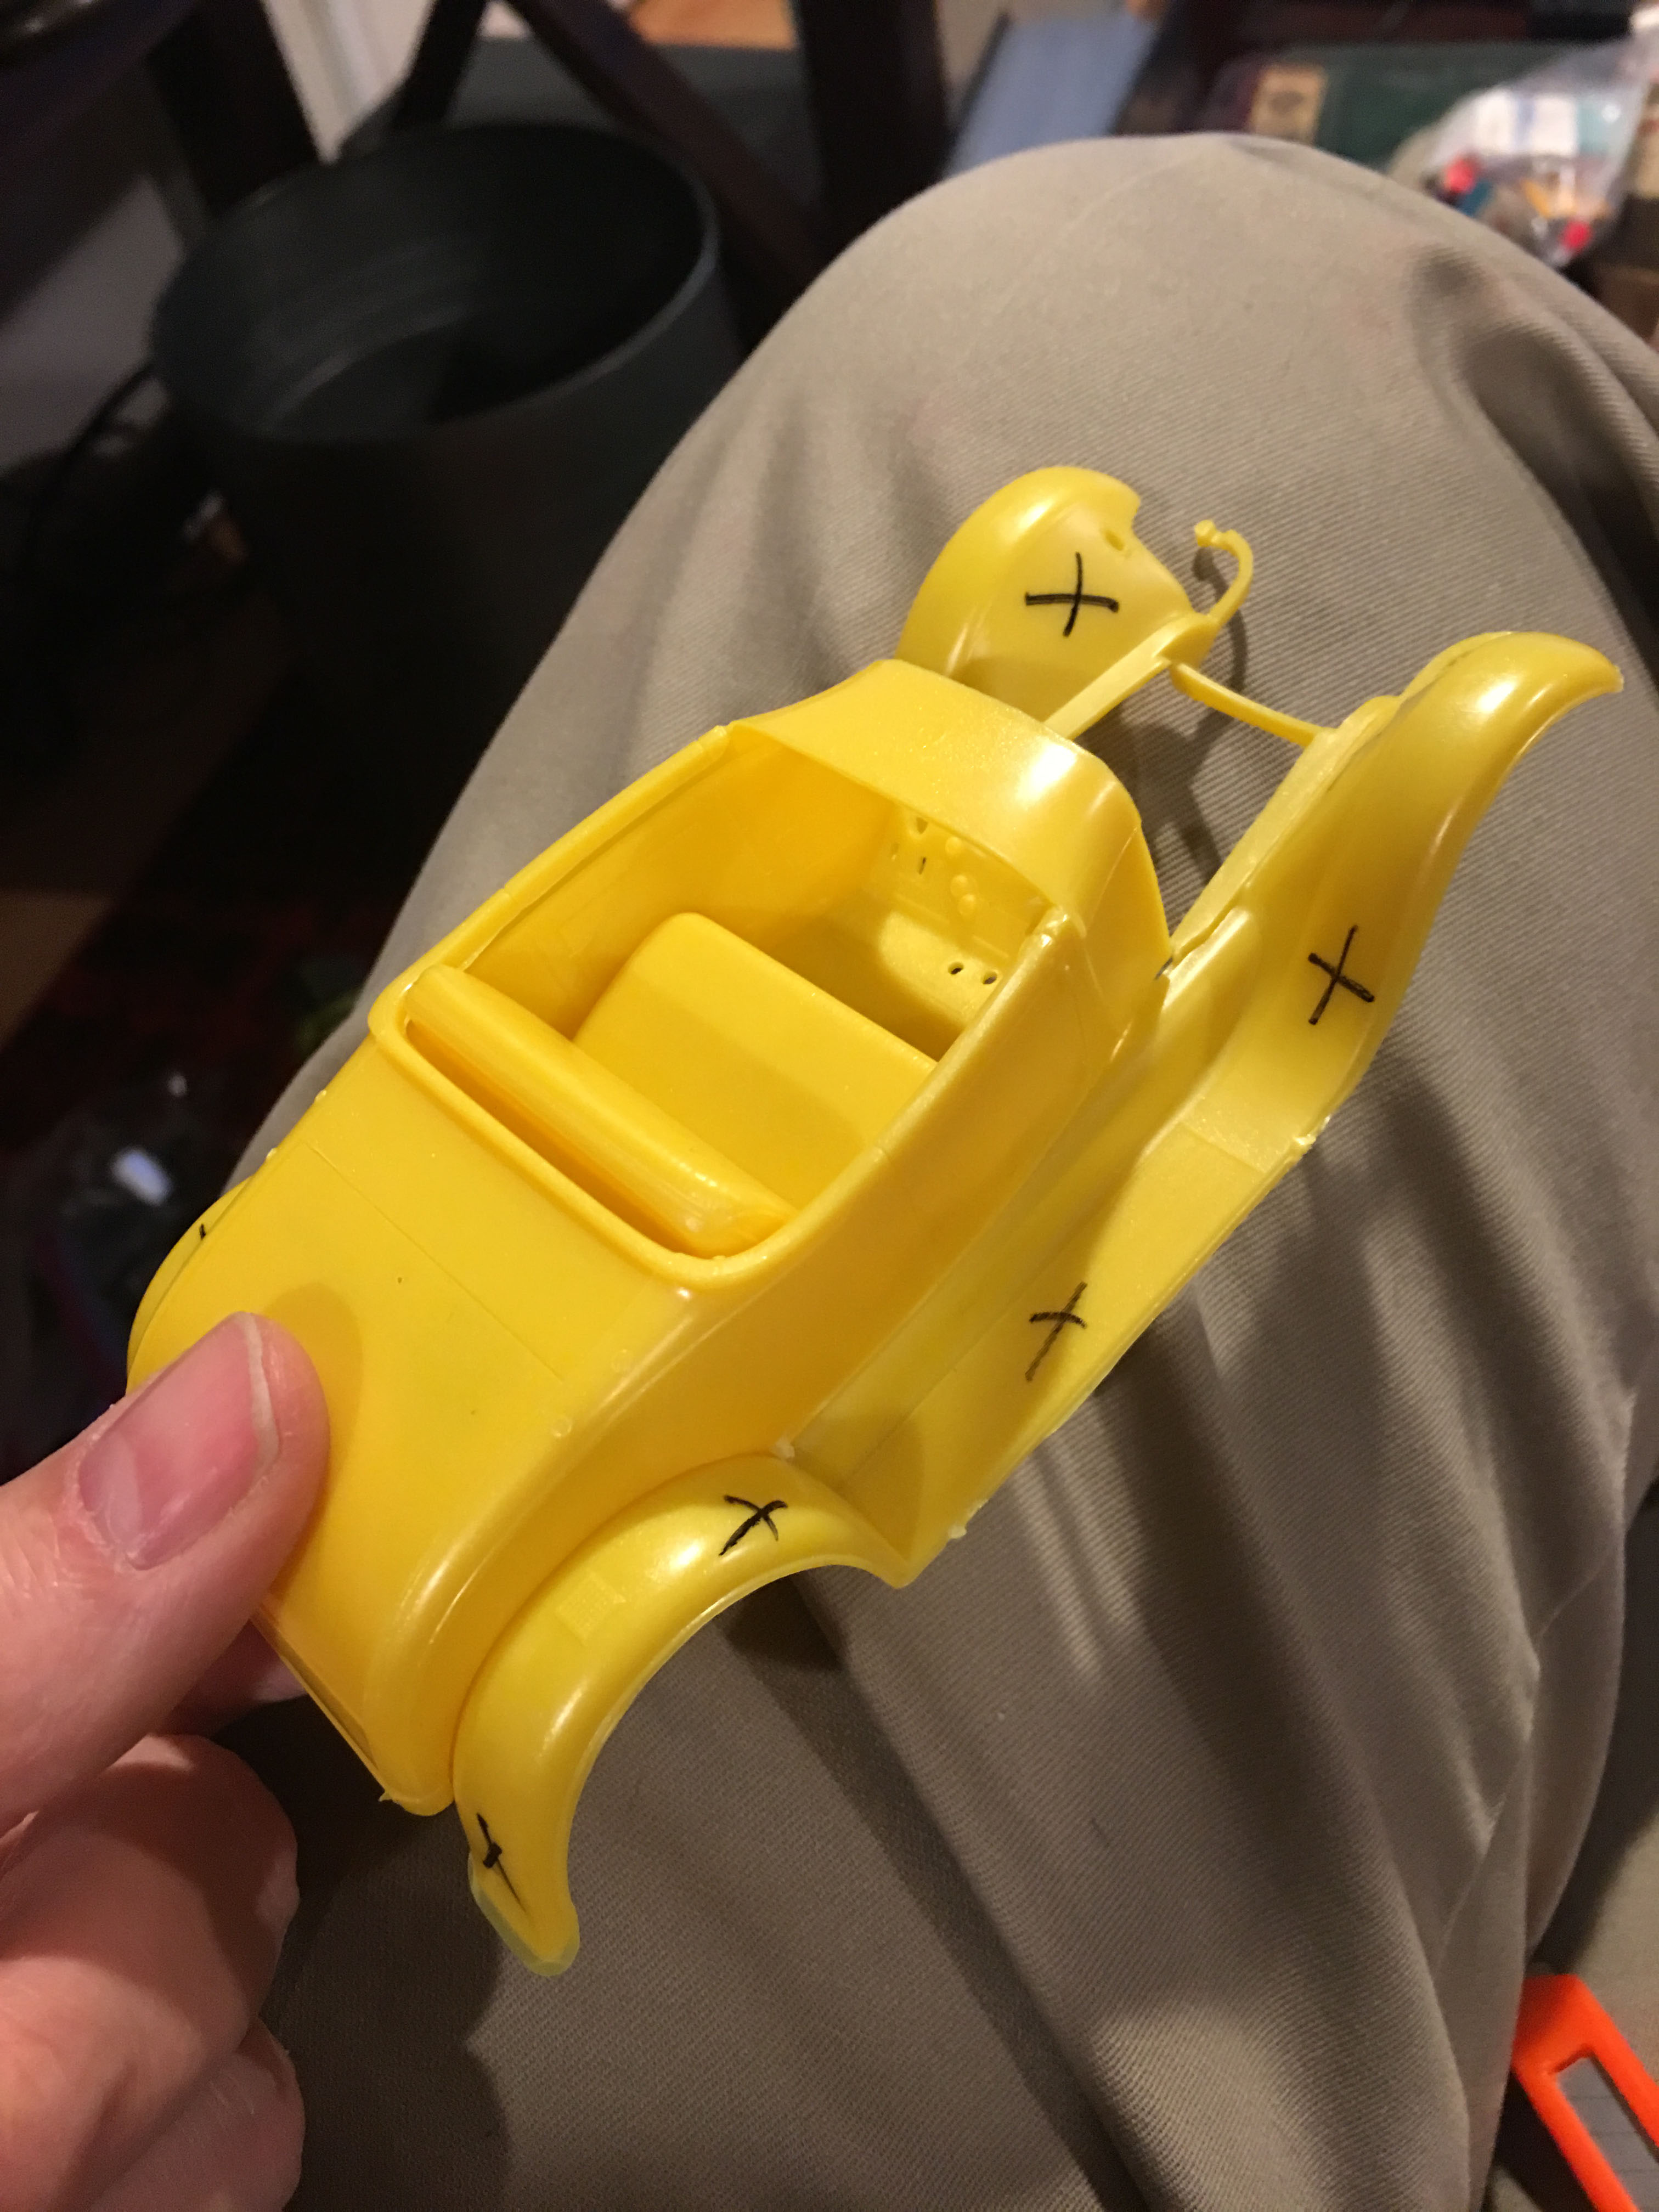
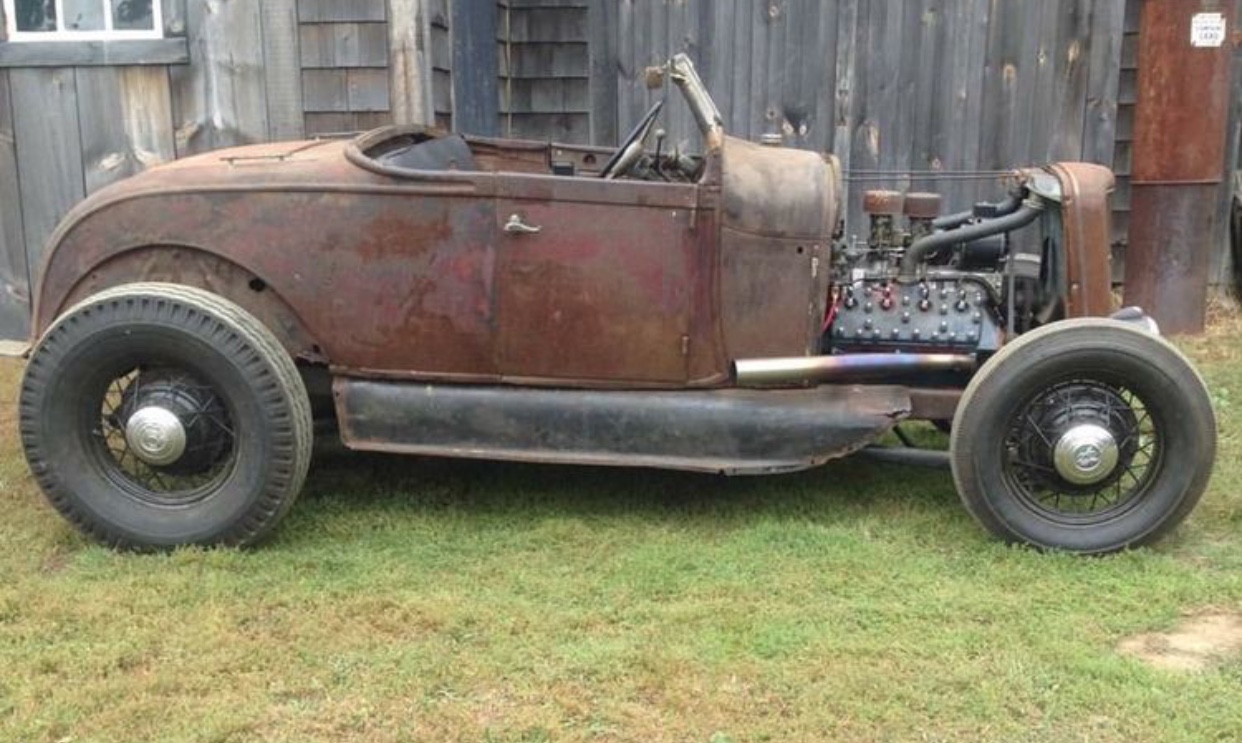
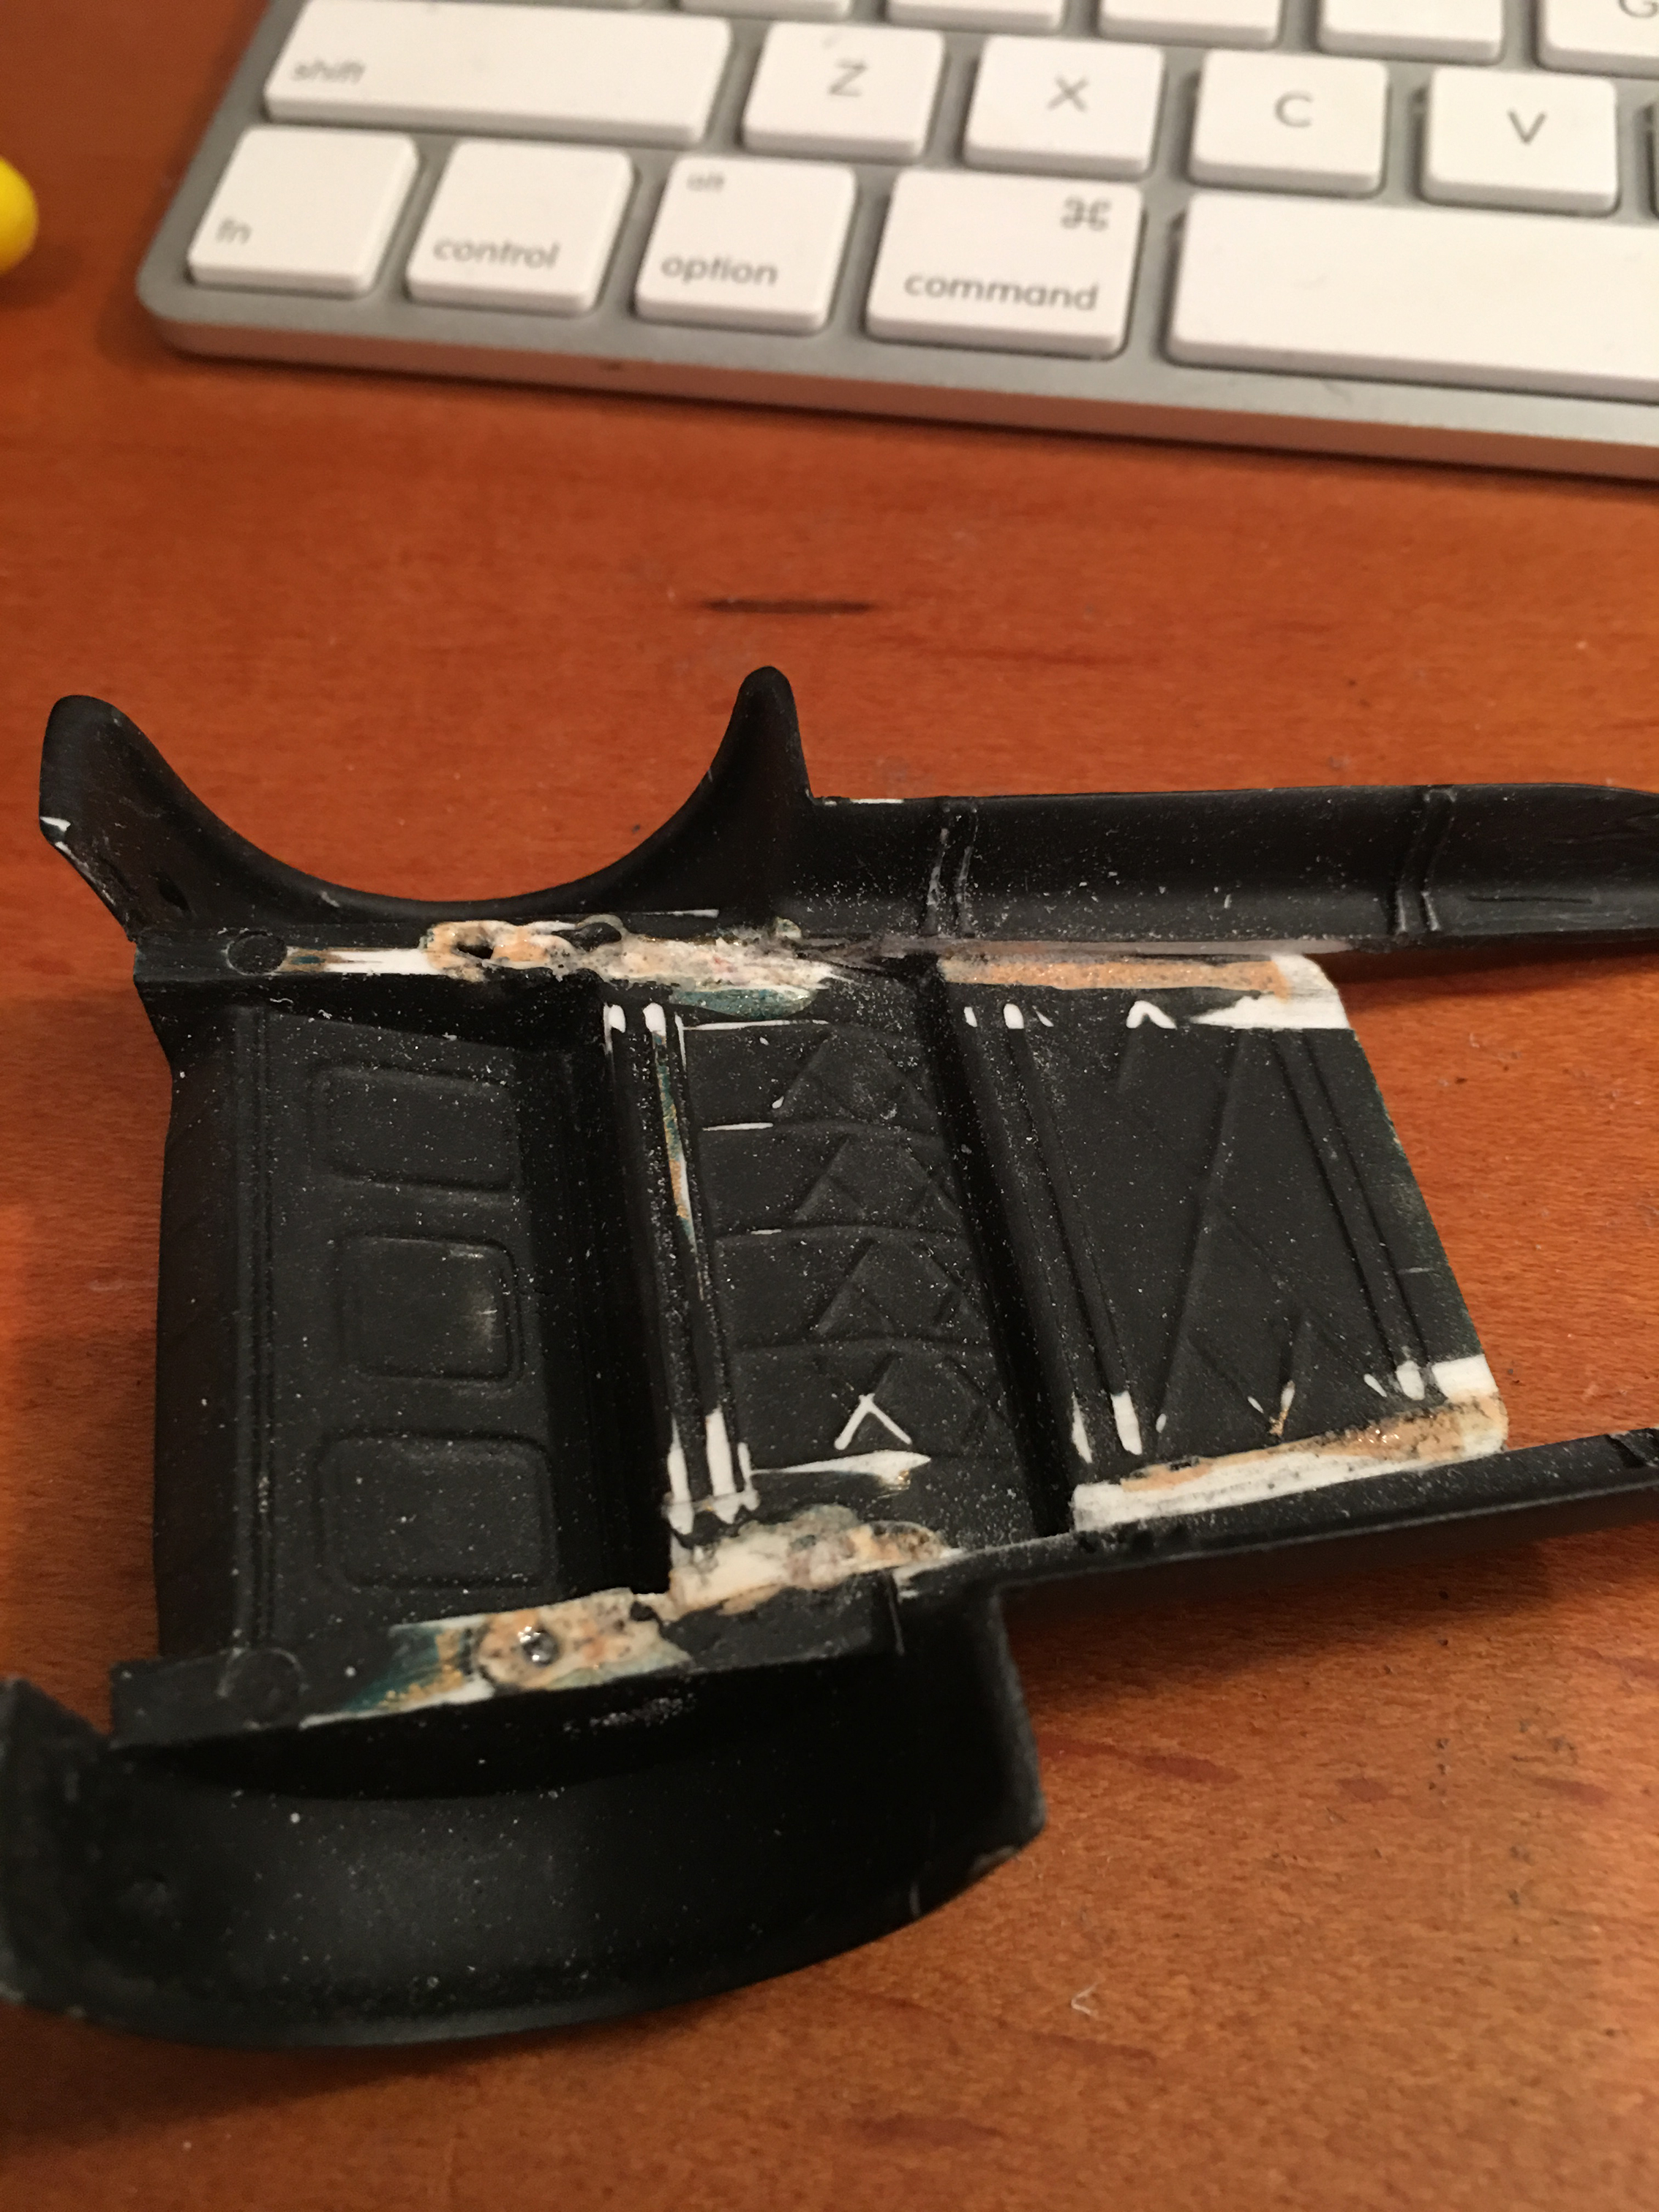
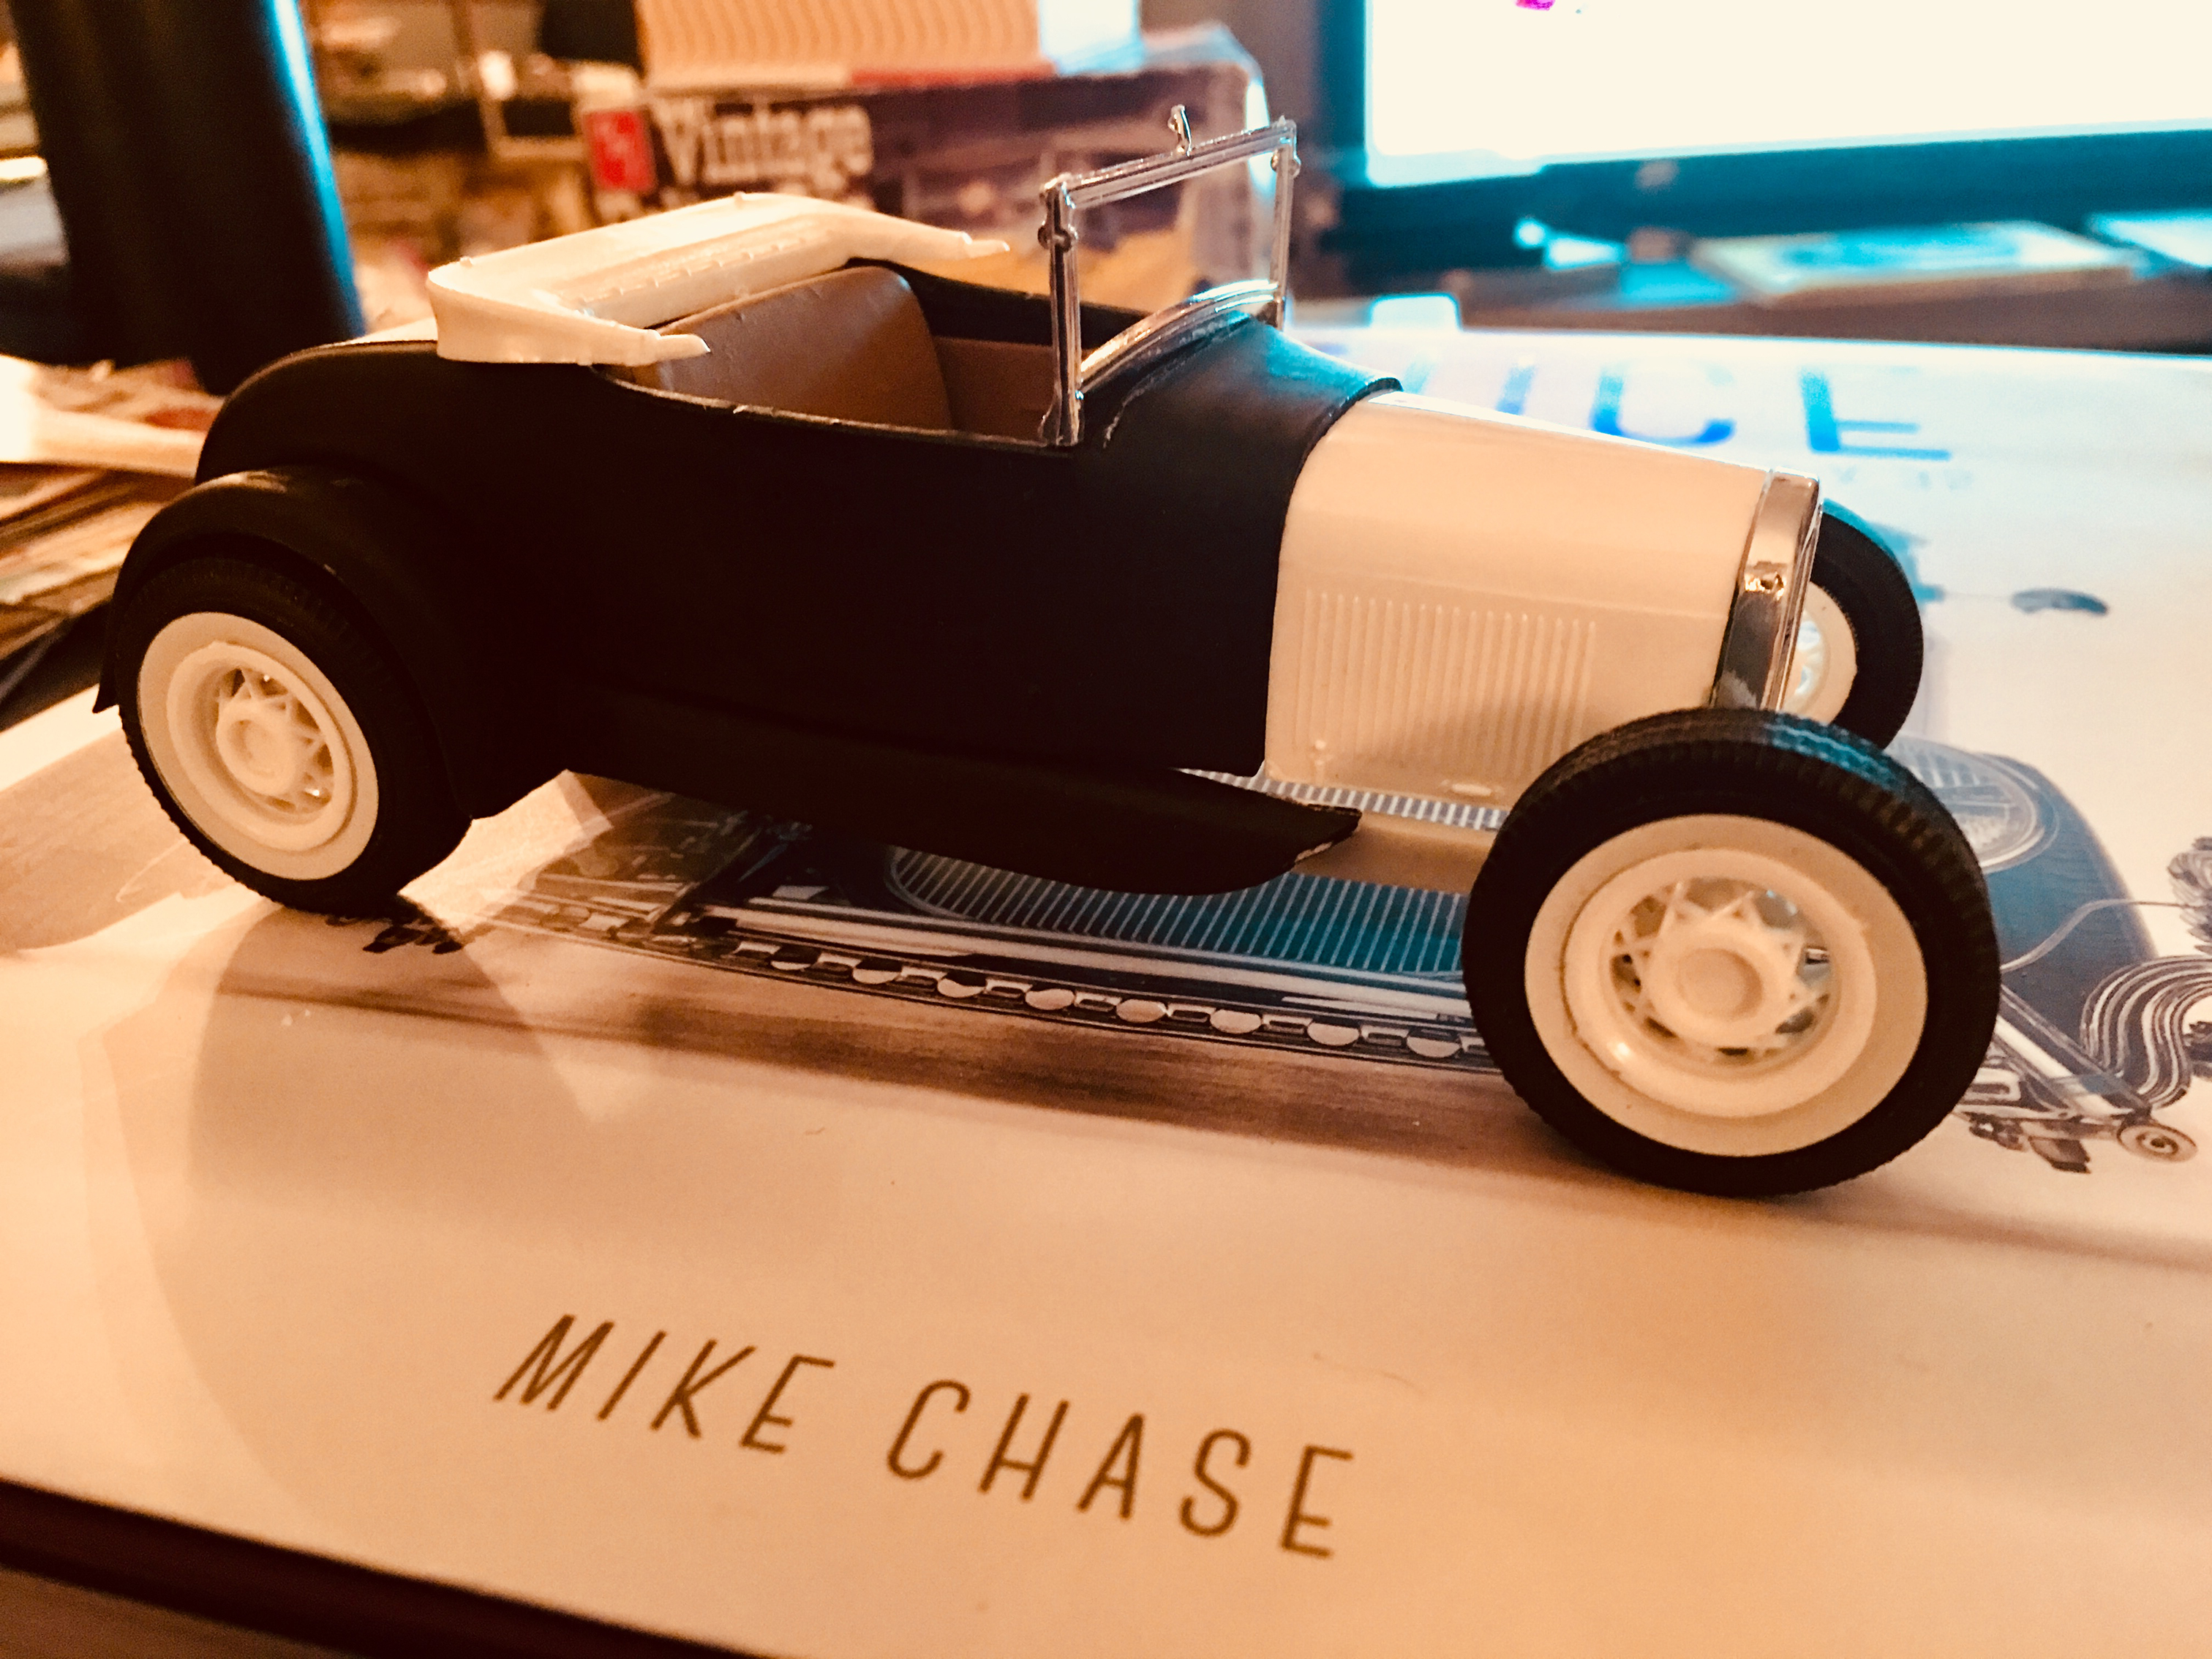
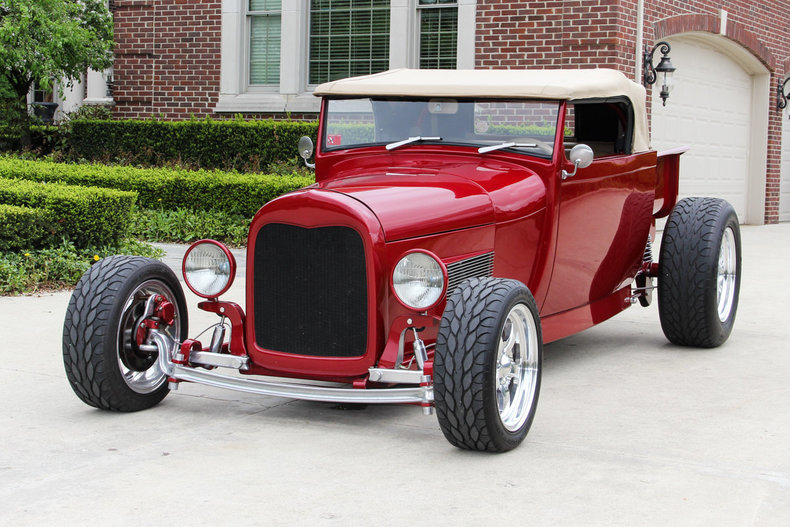
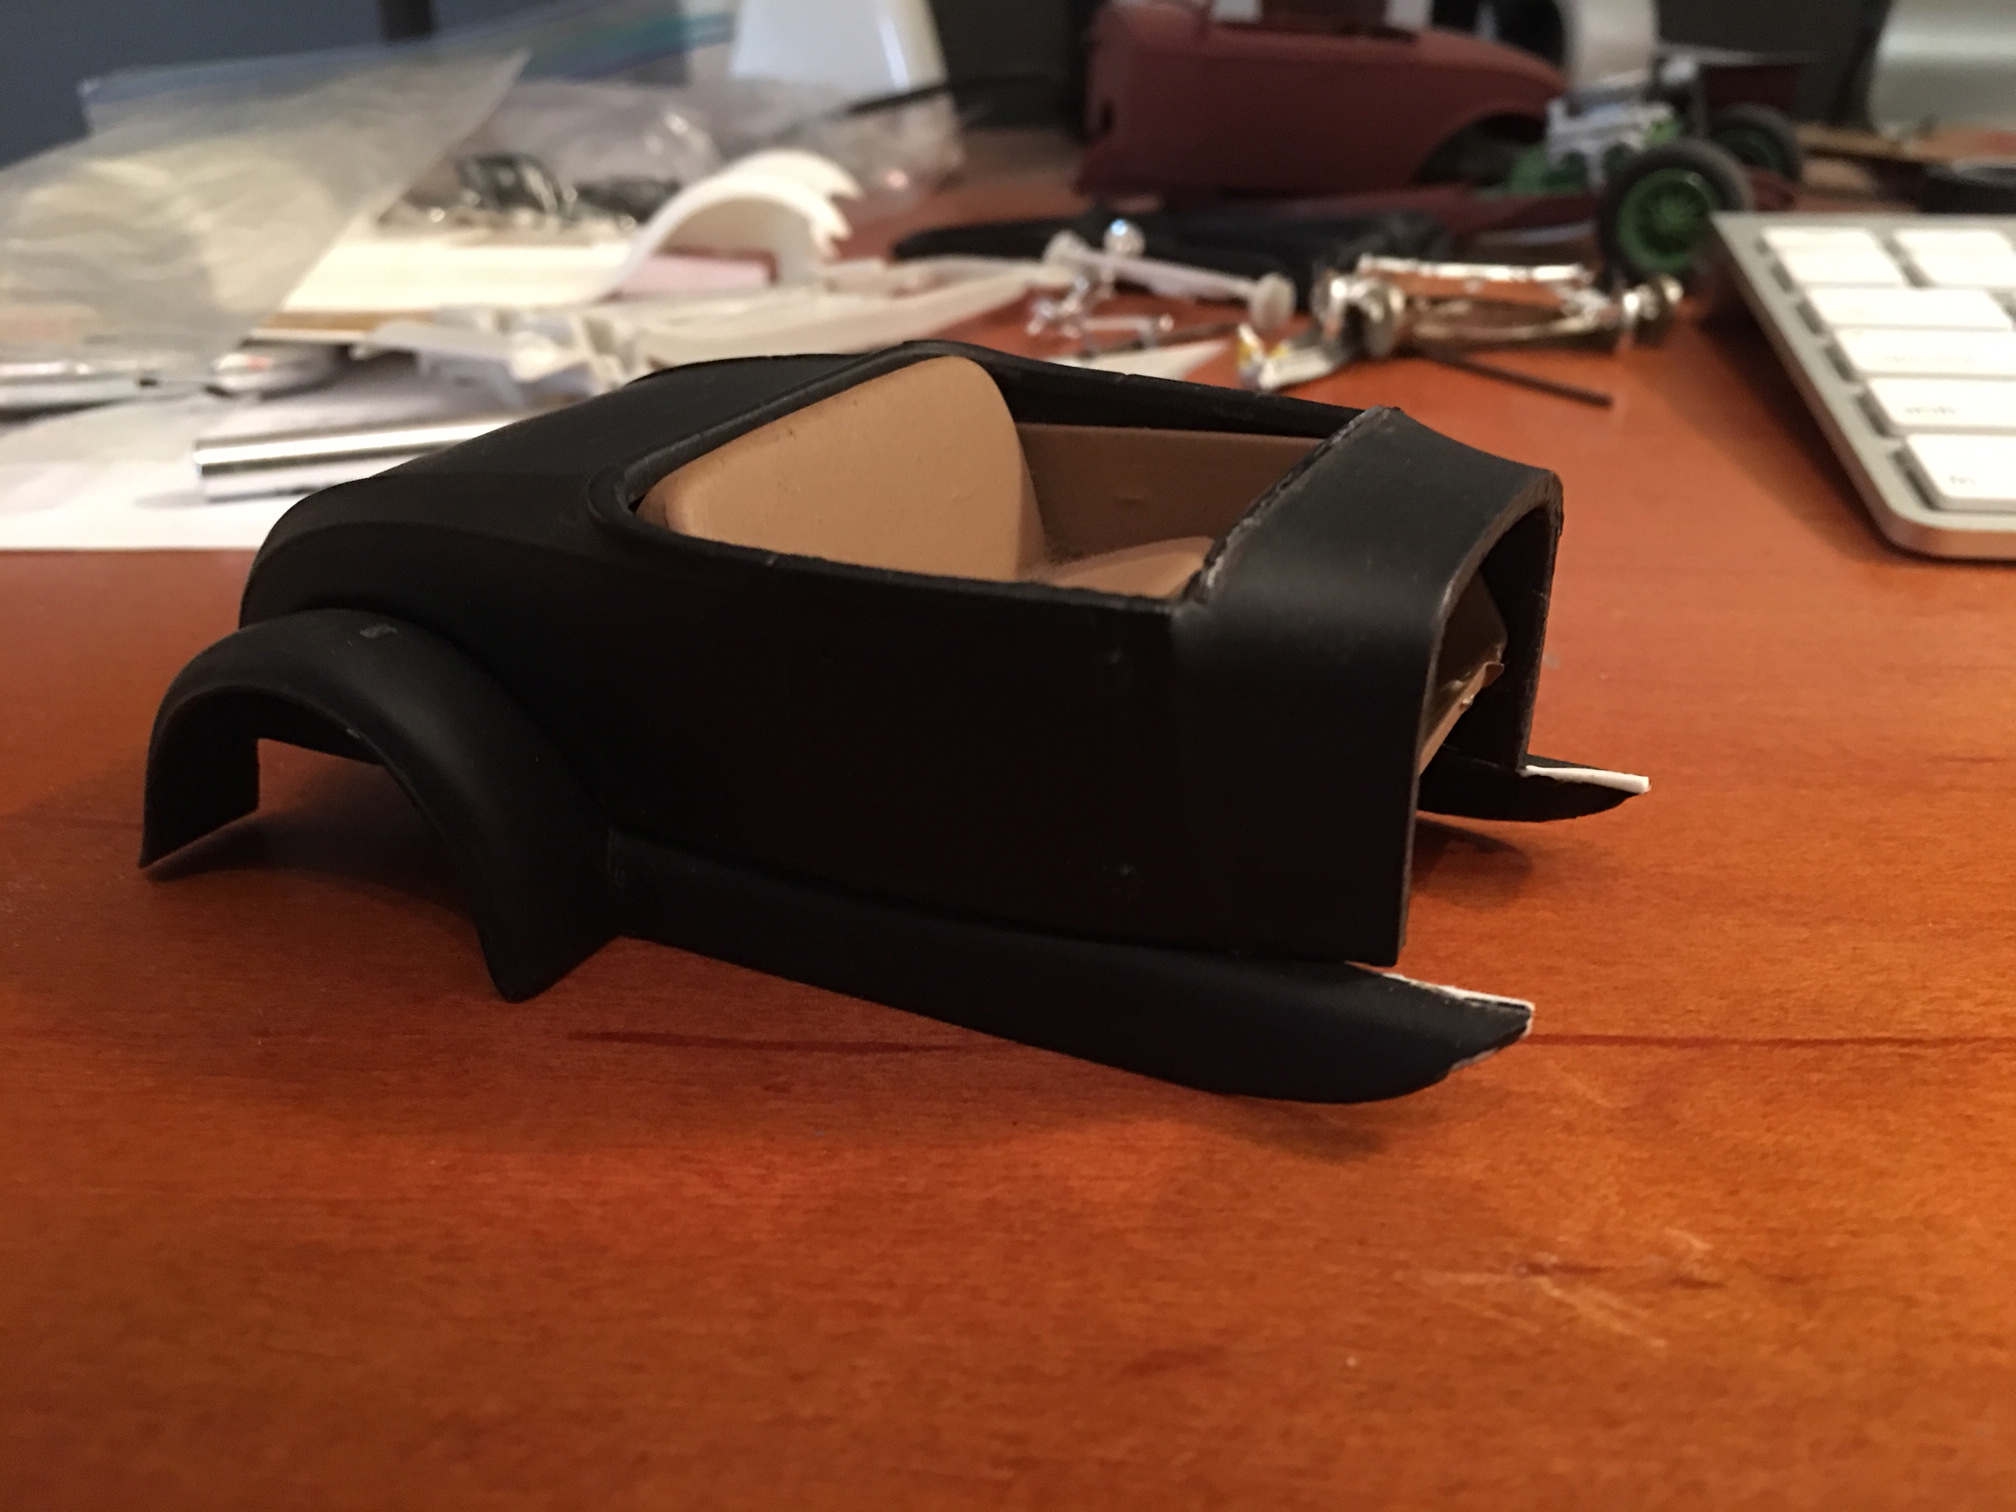
Hey all, The ideas have been in my head for a while, so I was glad when I finally made some time last night to get started on a few projects. The first project is the '29 Ford Roadster I'm building for the Mid-Atlantic NNL theme, The Race of Gentlemen. I'll be building it from the AMT Mod Rod / Model A '29 Ford kit. As I've been learning more about Model A's and looking through photos of them online I came across a variation I had not seen before, where the fenders and running board are removed, but the skirt (not sure of the actual name) is left intact as in the photo below. I marked out the areas that would need to be removed with a sharpie and began cutting. The plastic on the newer, Chinese made kits is thinner than the older, USA made kits in my opinion, and was pretty easy to cut through. I used an Exacto blade and scored the straight lines and the curve behind the front fenders. I used nippers to cut out sections so that when I pulled them apart from the main fender assembly it didn't tear off larger areas than I wanted. Based on the photo of the 1:1 '29 Ford, I made sure to cut out the flat vertical areas behind the rear fenders as well. A little trimming and sanding made a big difference and balanced out the appearance on both sides (not shown). I'll trim out the fork area and radiator mount next. I'm happy with the progress I made and it's a good start to this project.
-
The paint is fantastic. Great work!
-
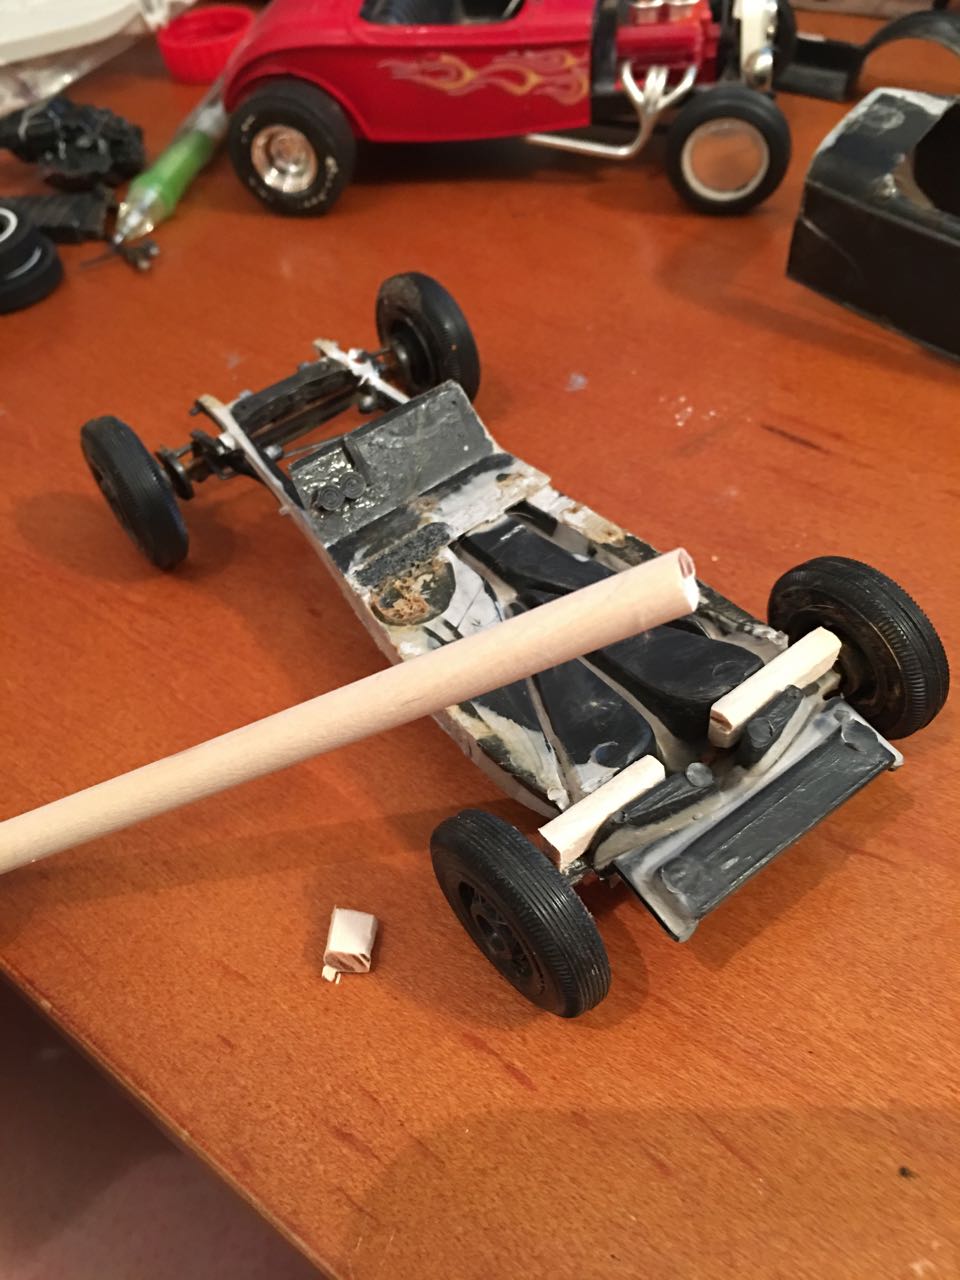
Here's an update! Ok, I couldn't find an engine that fit the mystery parts box frame, so I thought, "Why not try to fit a 32 Ford frame under the 28 Ford body?" (the differential housing got a little hot and melted a bit. No problem, I'll fix it so it looks like it got a good scraping on a speed bump) The rear fender assembly had a lot of glue on it, so I used sandpaper and a Swiss file to grind all the glue out. It's a really lousy fit and the 32 Ford frame is teetering under the 28 rear fender assembly. I thought Using a palm sander to grind down the extra height of the 32 Frame would help. I don't care about it digging through the frame, that's actually an area that's wood; now we have some rot. Nuts! Still not fitting... I've shaved the sides of the 32 frame, I've sanded off a lot of the top of the frame, I've scraped out the 28 fender assembly... Well, I'll remember this if I do this again; there's a small lip on each side of the underneath of the fender assembly. That's what's keeping the 32 frame from sitting snug. I used a sandpaper bit on my Dremel tool (the best present I've bought myself in years. If you don't have a newer, cordless, variable speed Dremel, get one) and scraped out the top of the 32 Ford frame at a 54 degree angle on each side. Now we're cookin'! A nice, snug fit. Now that the 1928 Model A body and fender assembly has a 1932 Model A frame underneath it, we've solved a few problems, the first being that several more modern engines, including flatheads can use the often shared mounting areas on the 32 Ford frame. Secondly, we get a much more sturdy foundation for our vehicle, plus the rear sits up a little higher which gives us a little tougher stance. This is where I'm at. Looking forward to some nice, warmer days when I can prime and paint.
-
Not much progress yet; too cold / wet /windy to do any painting yet. Still looking for the right engine for this Model A frame.
-
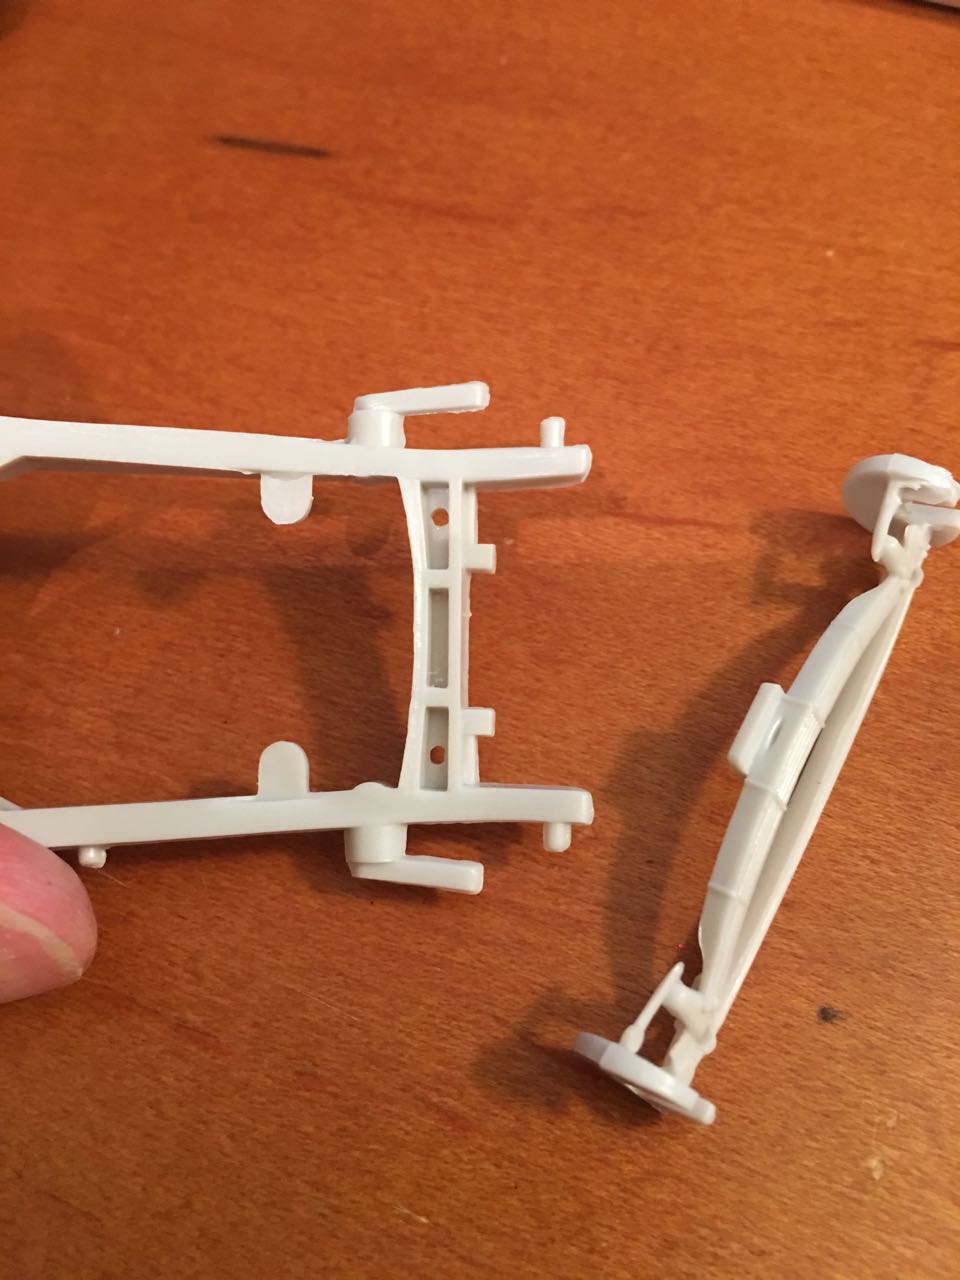
Anyone know of anything to use or make to create headlight mounts / brackets for Model A's, etc? I have plenty of headlights, but no brackets. Any help is appreciated.
-
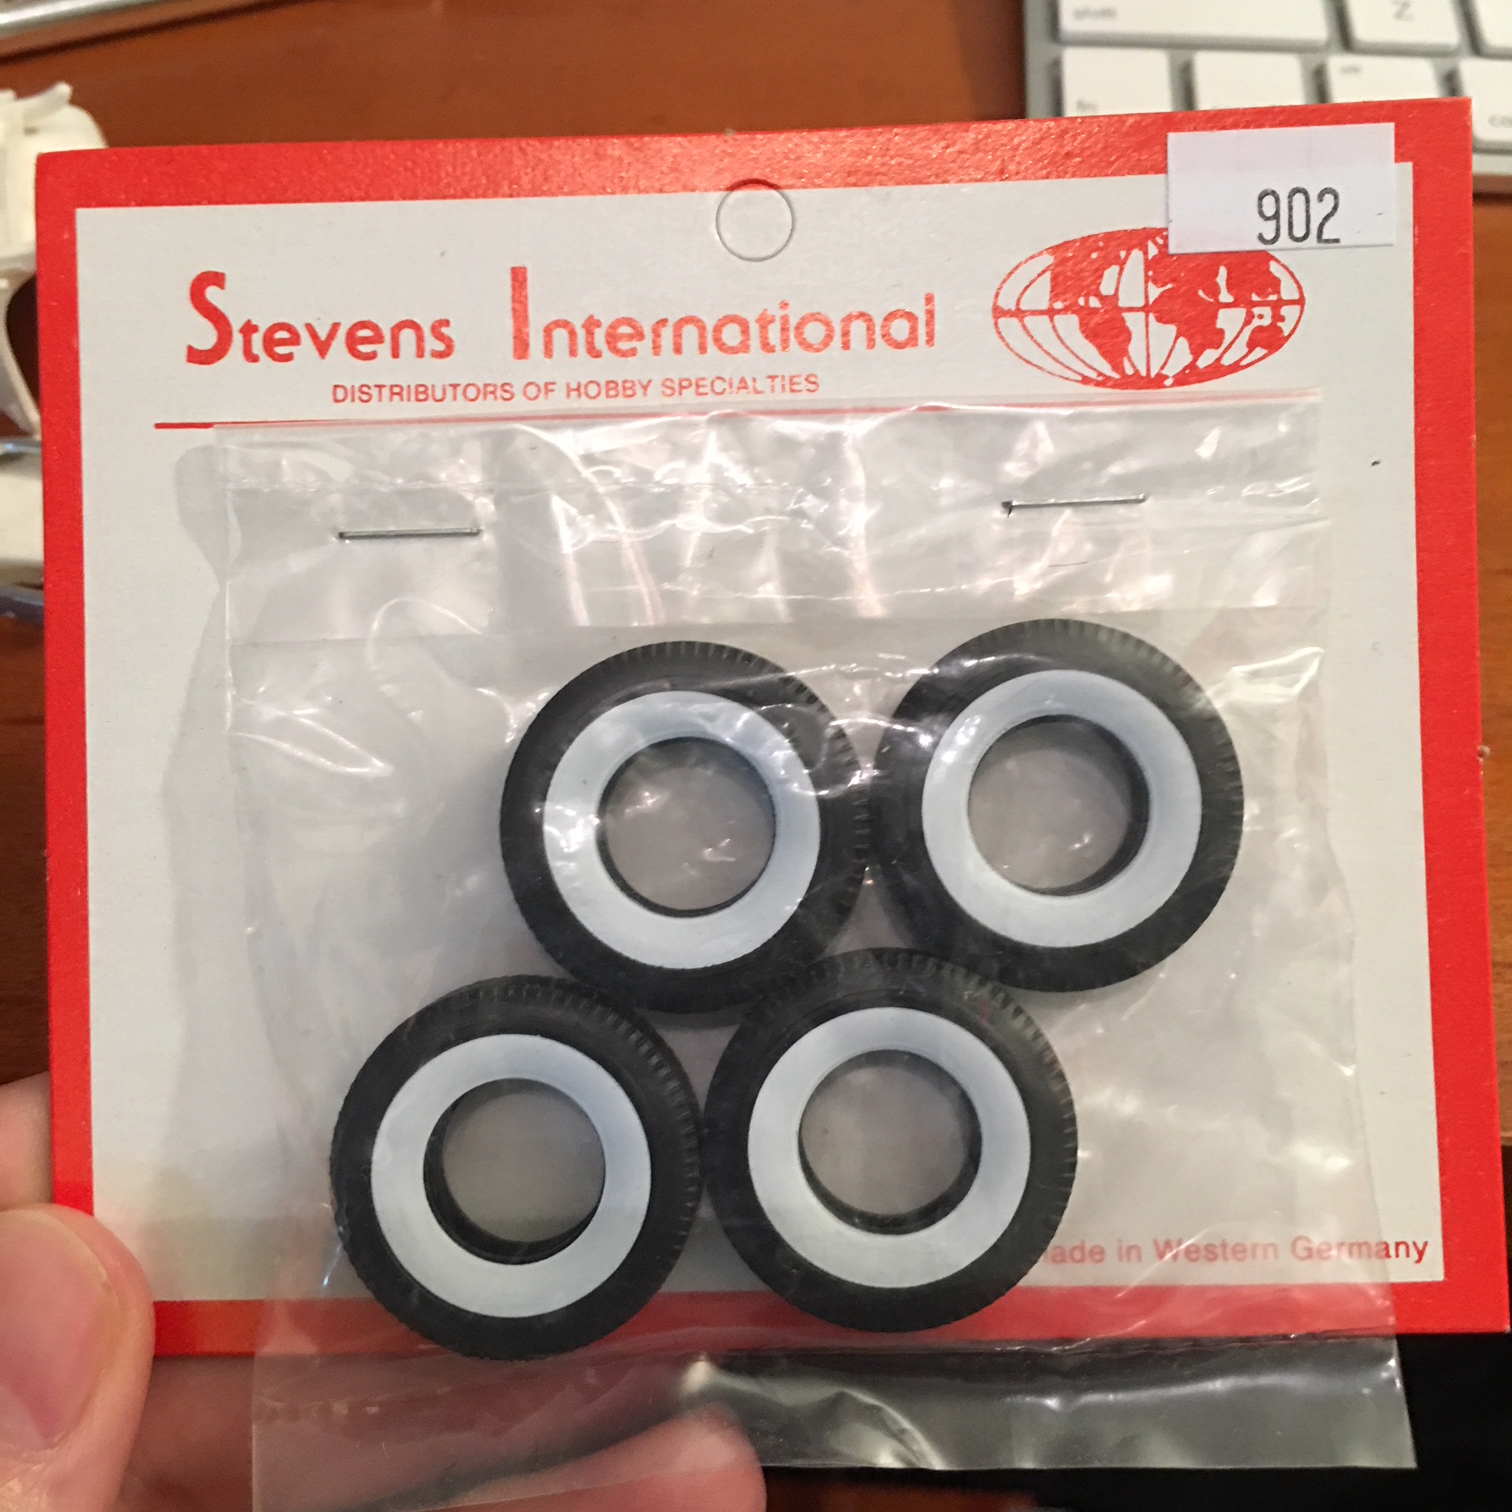
Ok, I bought an old AMT 28 Ford body and fenders. With a bunch of parts from my parts box. We're gonna make this: Tires are whitewalls made by Stevens International. I'll keep posting updates as I get more done. Thanks!
-
 Thanks Craig, I just build for fun and I can deal with the inaccuracies of the AMT bodies. The Revell 32's do build up nicely, but they feel "off" to me, like they're just a bit larger even though they're supposed to be 1/25 scale. However, I will look at both the AMT and Revell cowls tonight. Thanks!
 -
Thanks Bill! Looks like I'm in luck then, I usually ditch the fenders on my 32's anyway. The Phantom Vicky has some nice parts, especially the swept back hallock windshield, which is why I bought the kit in first place. The separate floor and two piece seat is nice as well. I think that'll be my next project, a mashup of the two kits.
-
Has anyone ever swapped parts between the AMT 32 Ford Roadster & AMT 32 Phantom Vicky? The frame of the Vicky is a bit longer than the old AMT 32 Ford frame (to accommodate the Mustang Cobra engine? Because roadster frames were just shorter?). Has anyone built the old 32 body onto the newer 32 Phantom frame? Thanks!
-
Thanks all, it's appreciated!
-
Not one person had a comment?
-
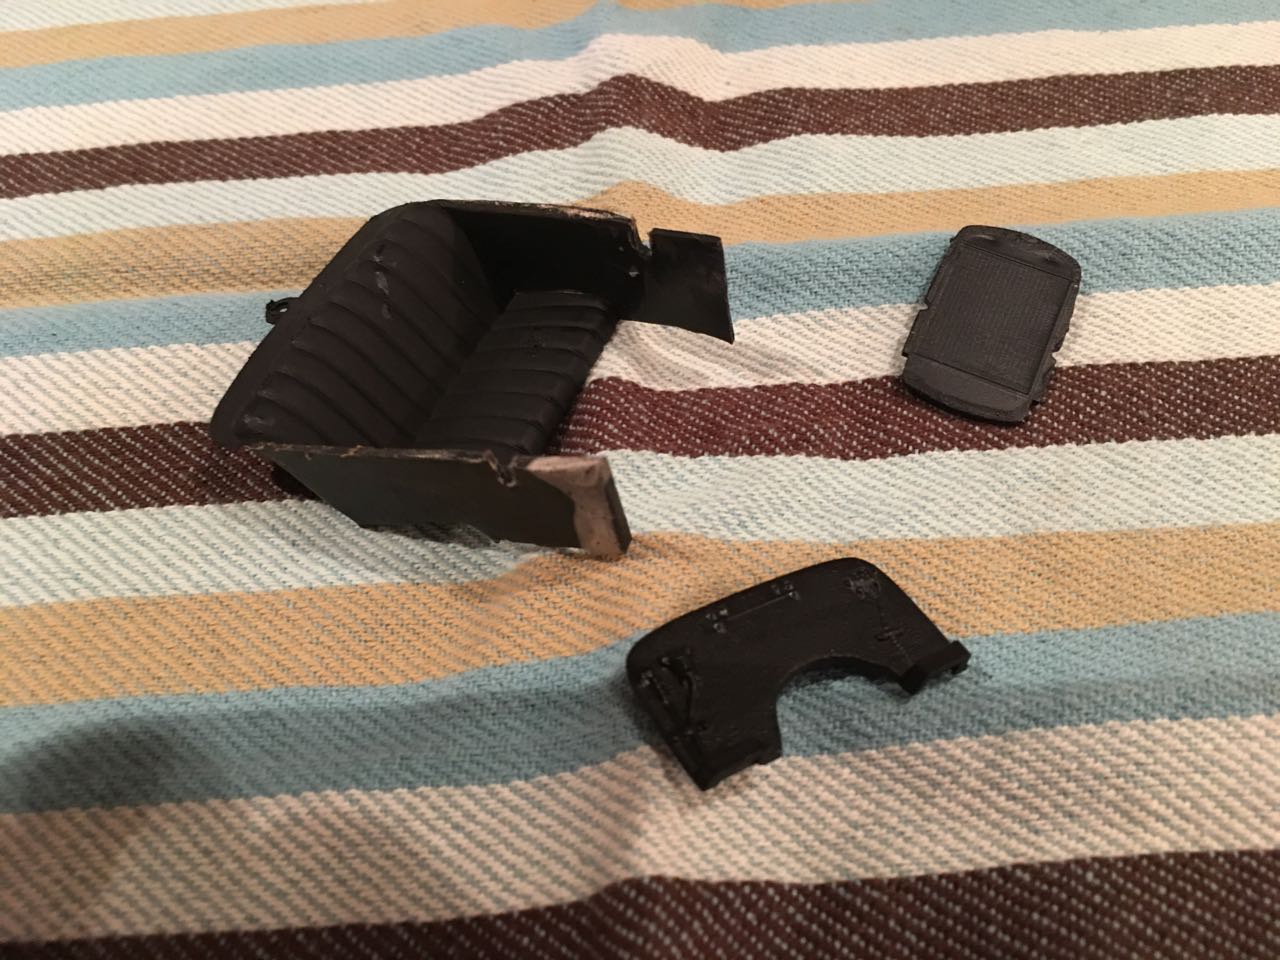
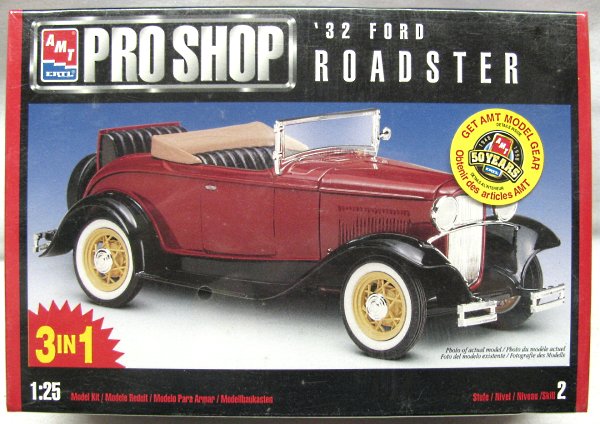
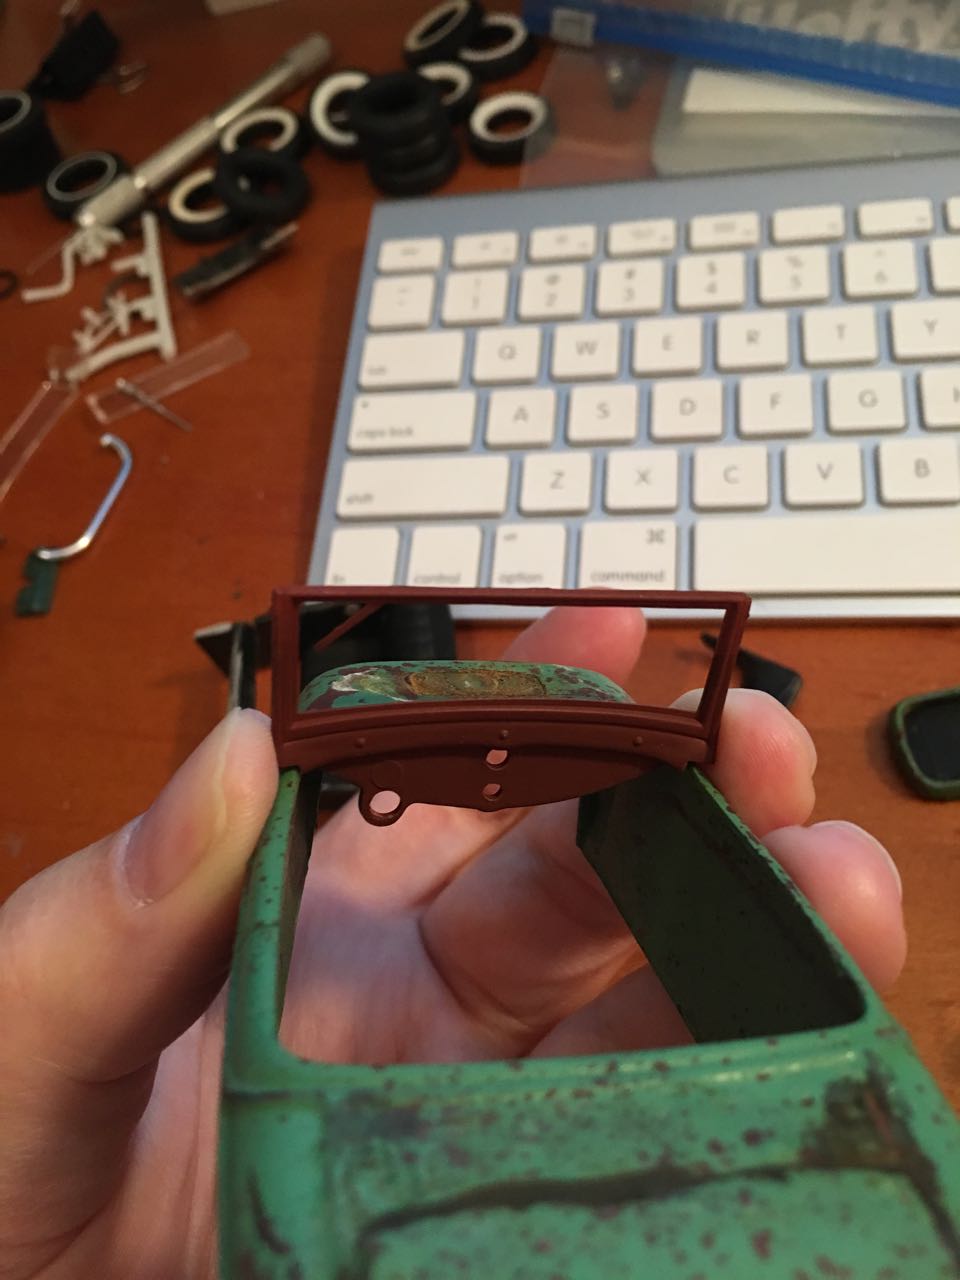
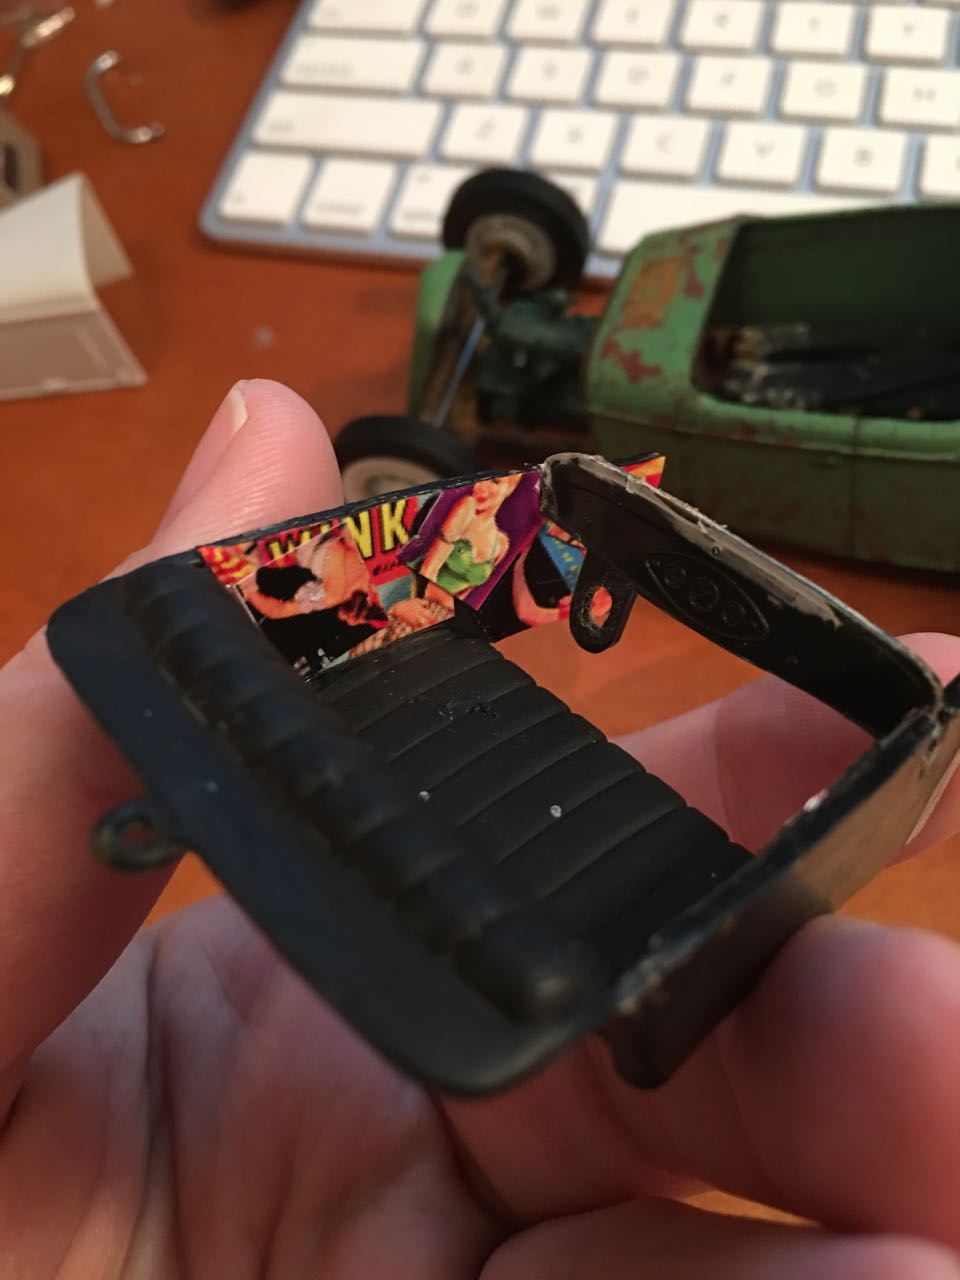
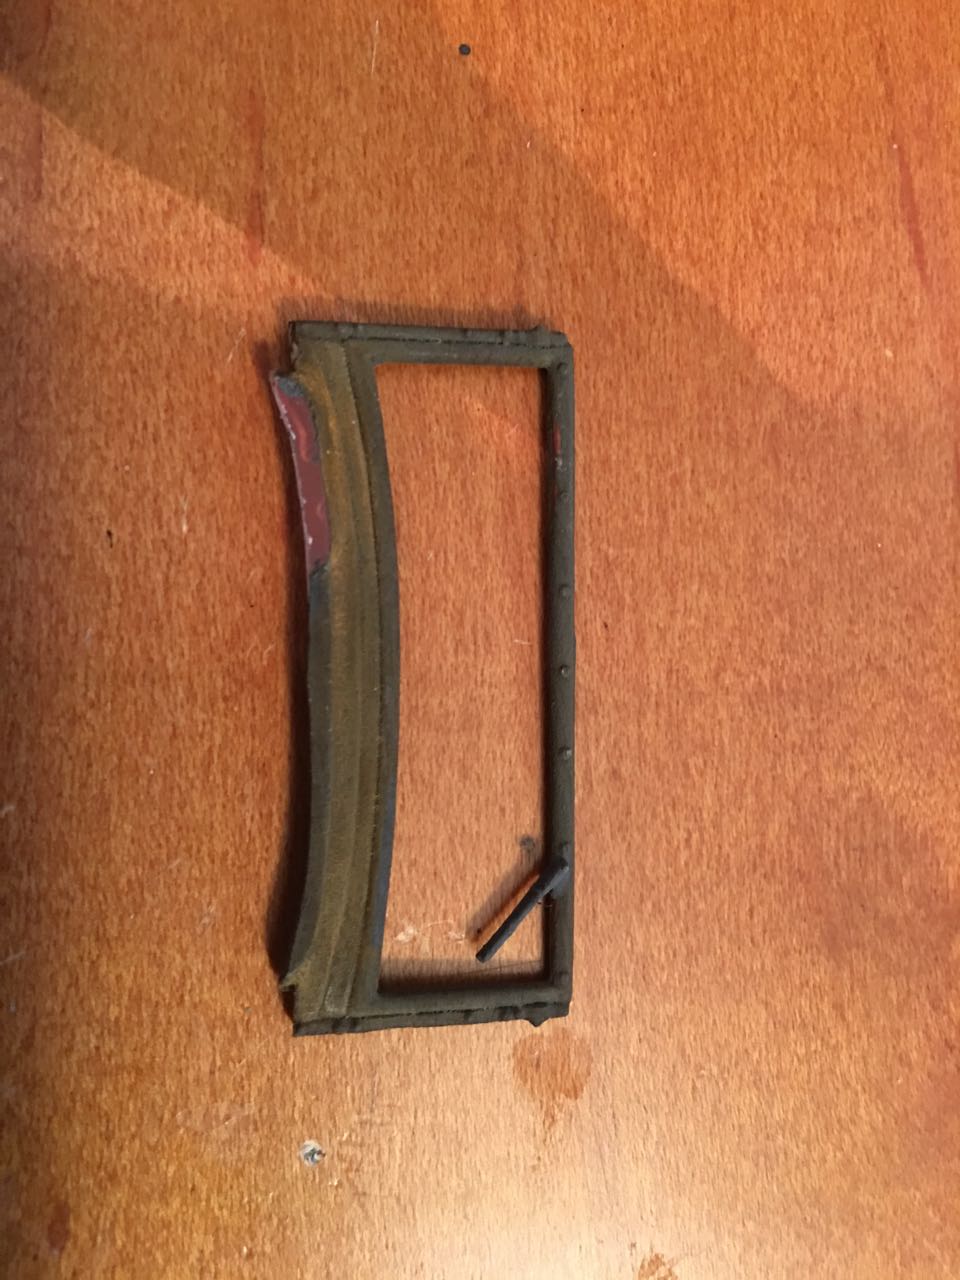
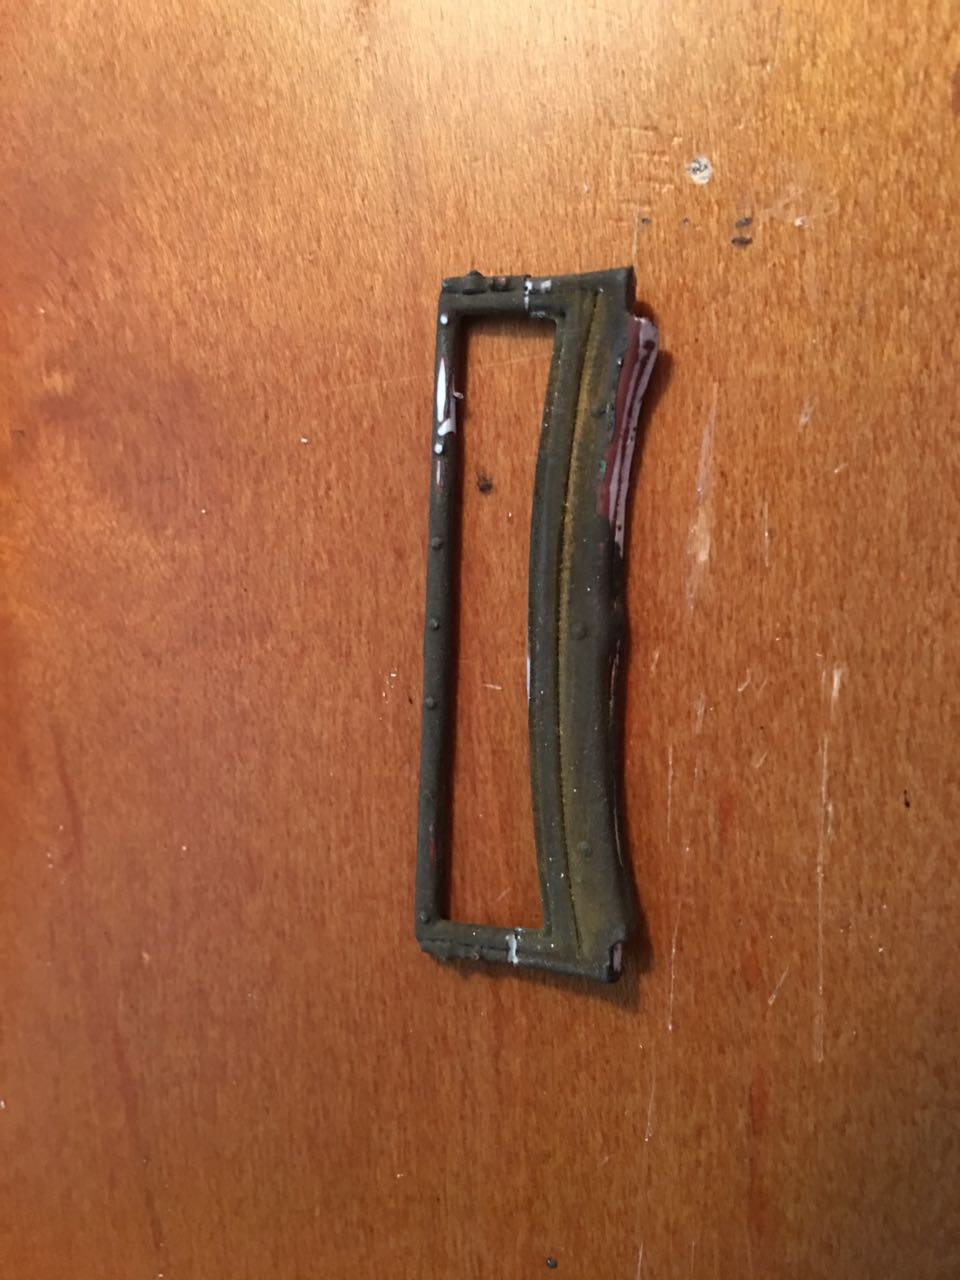
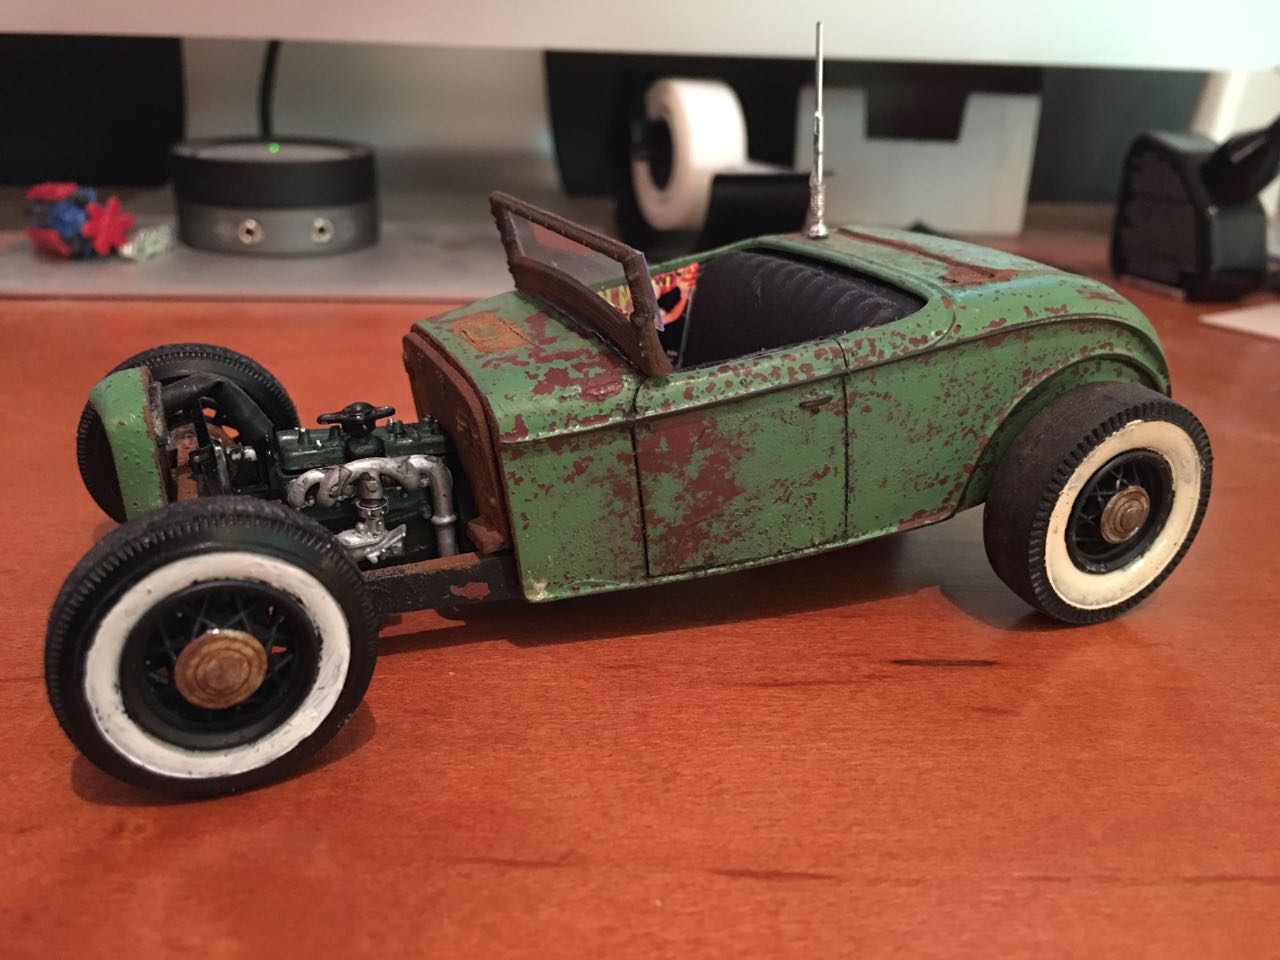
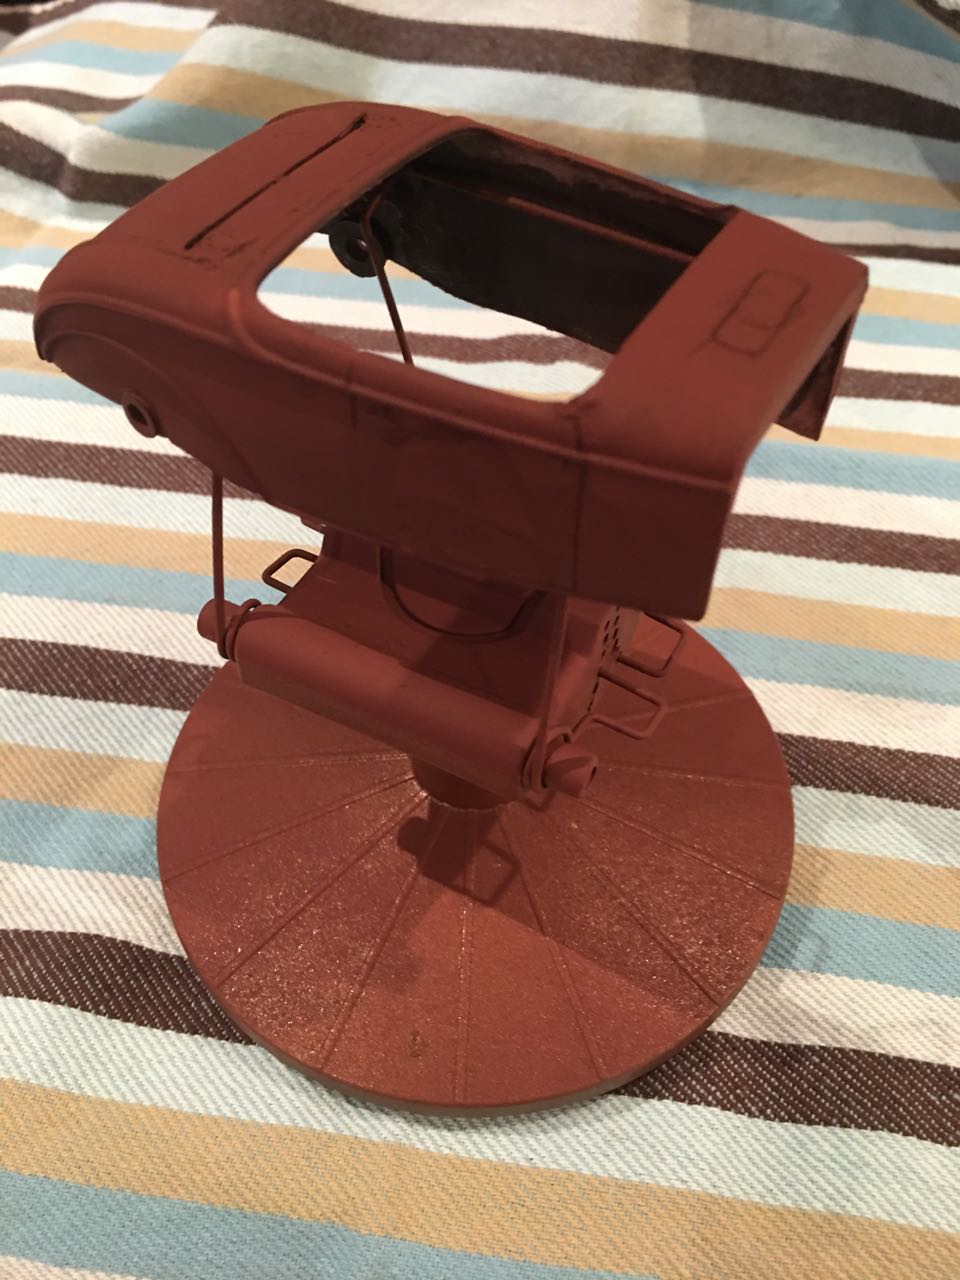
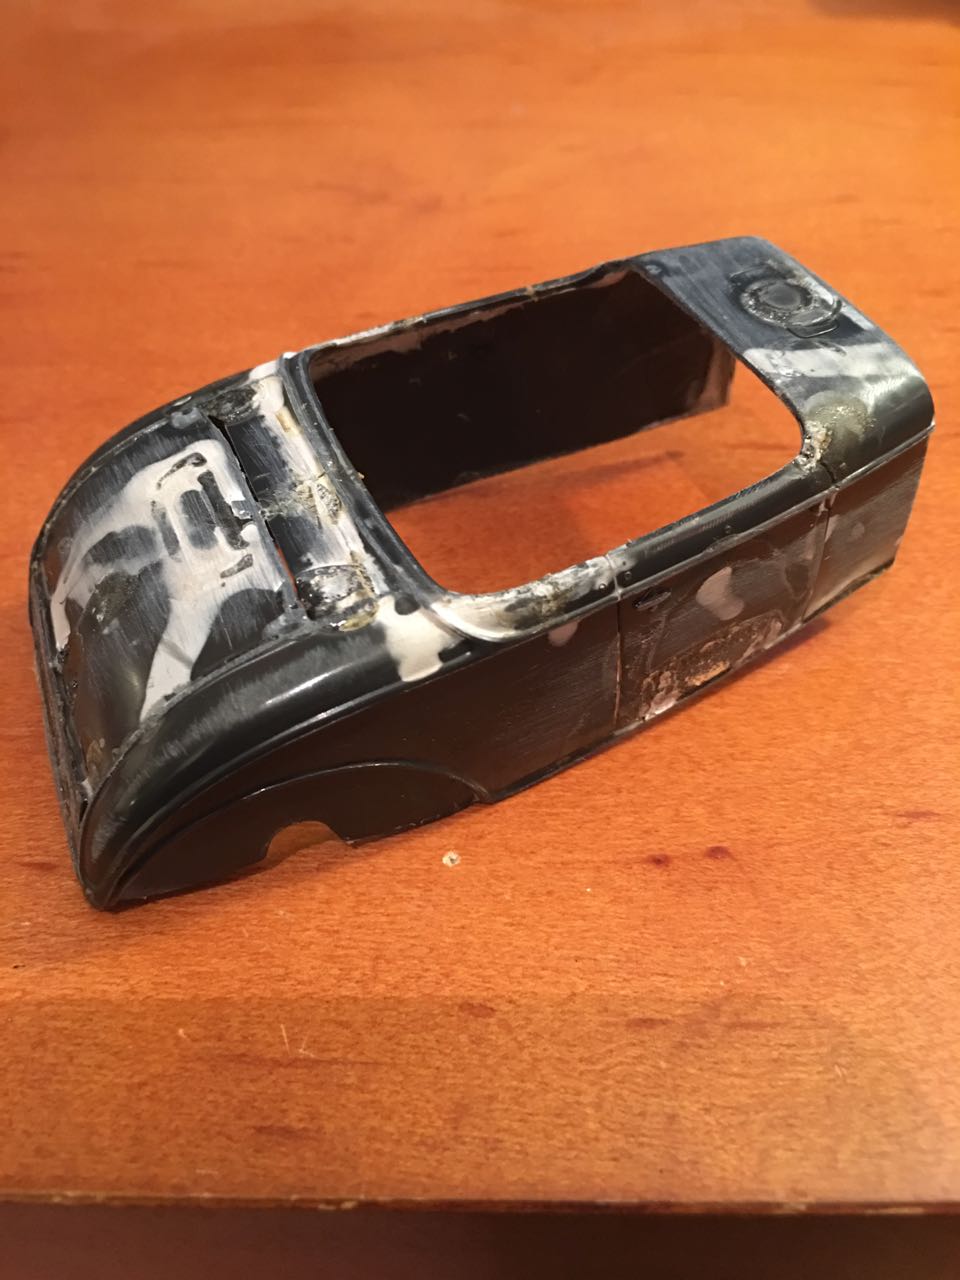
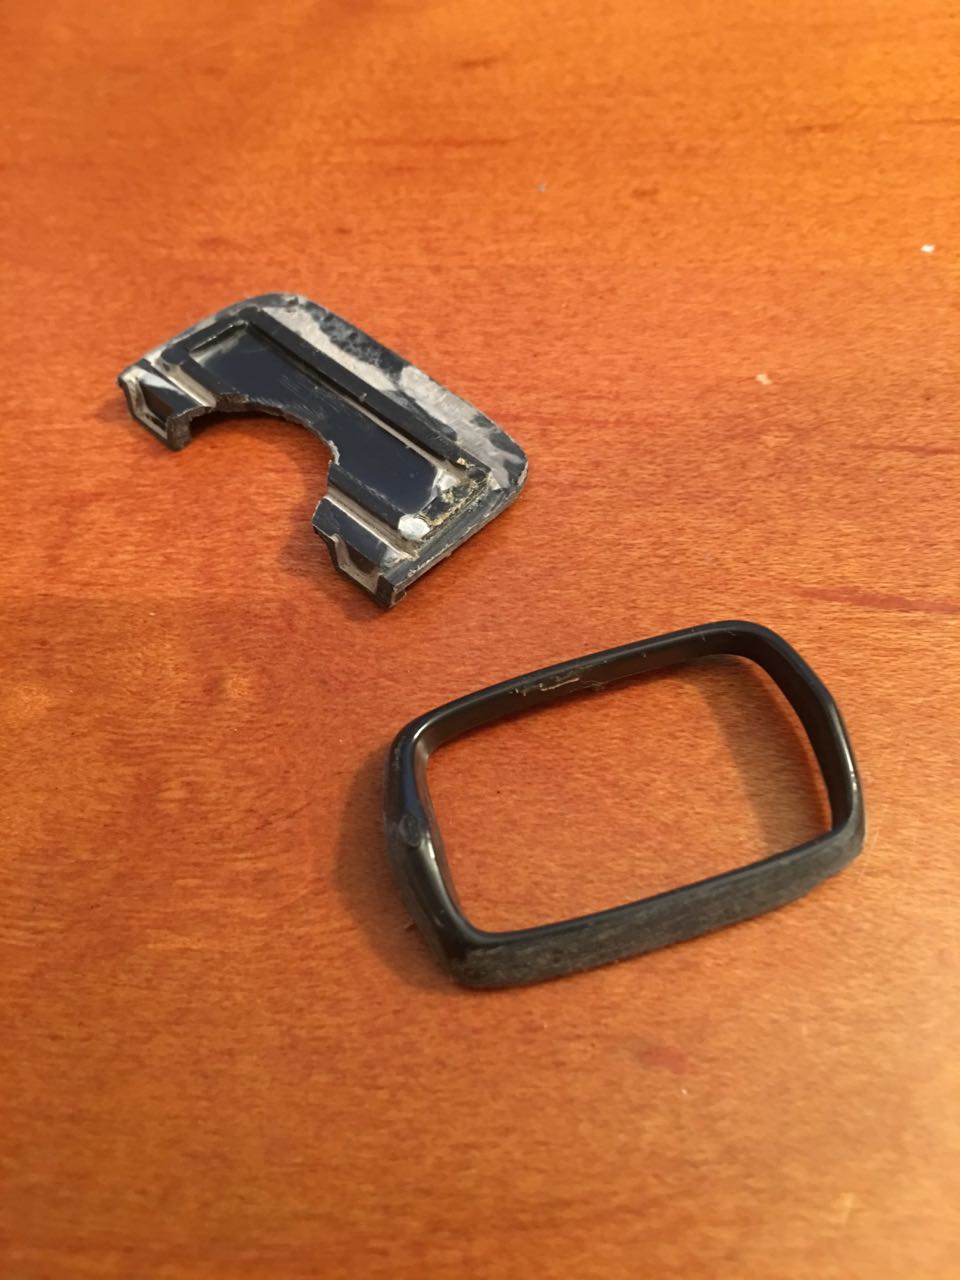
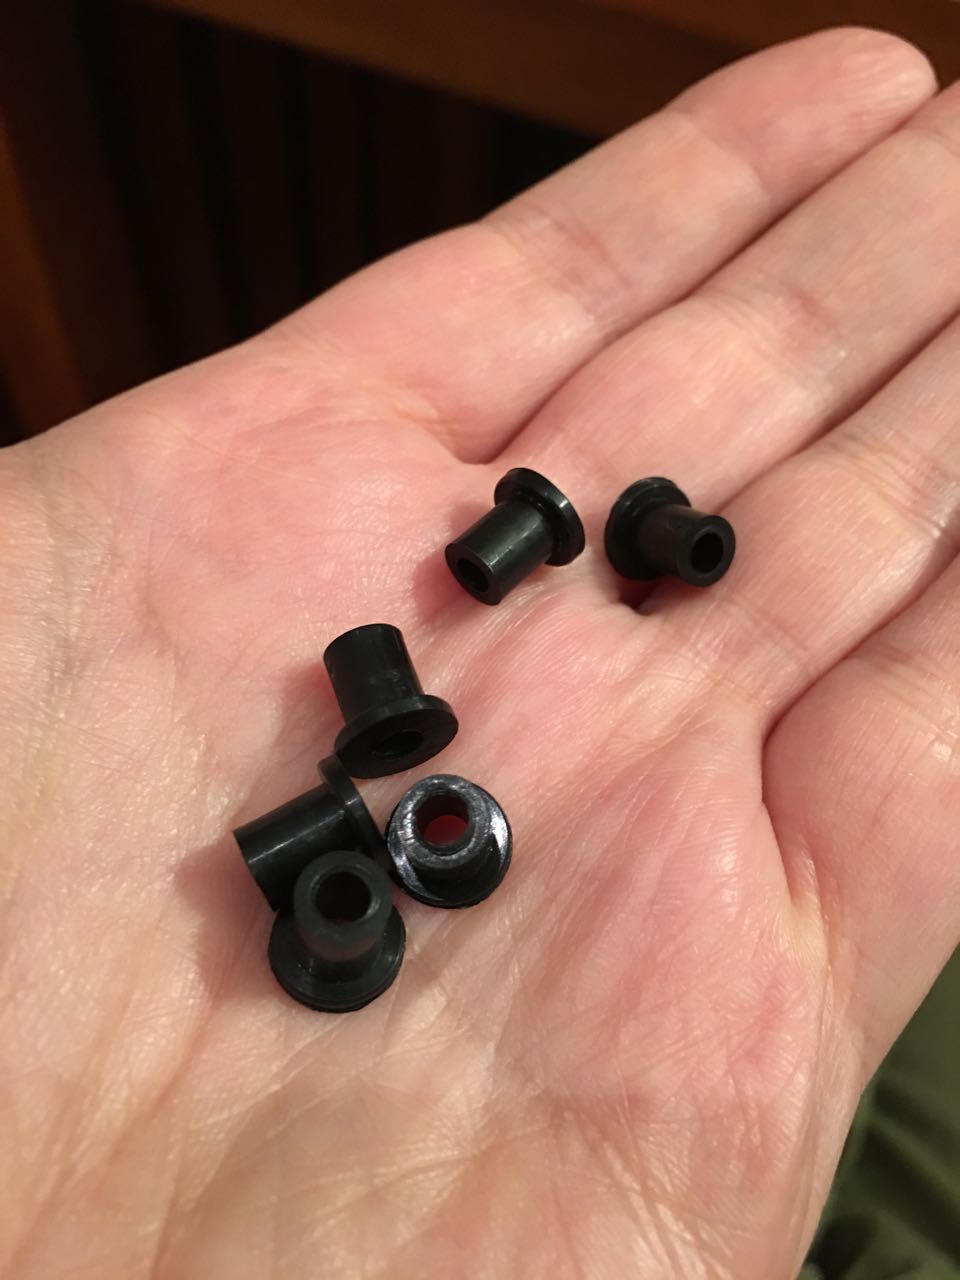
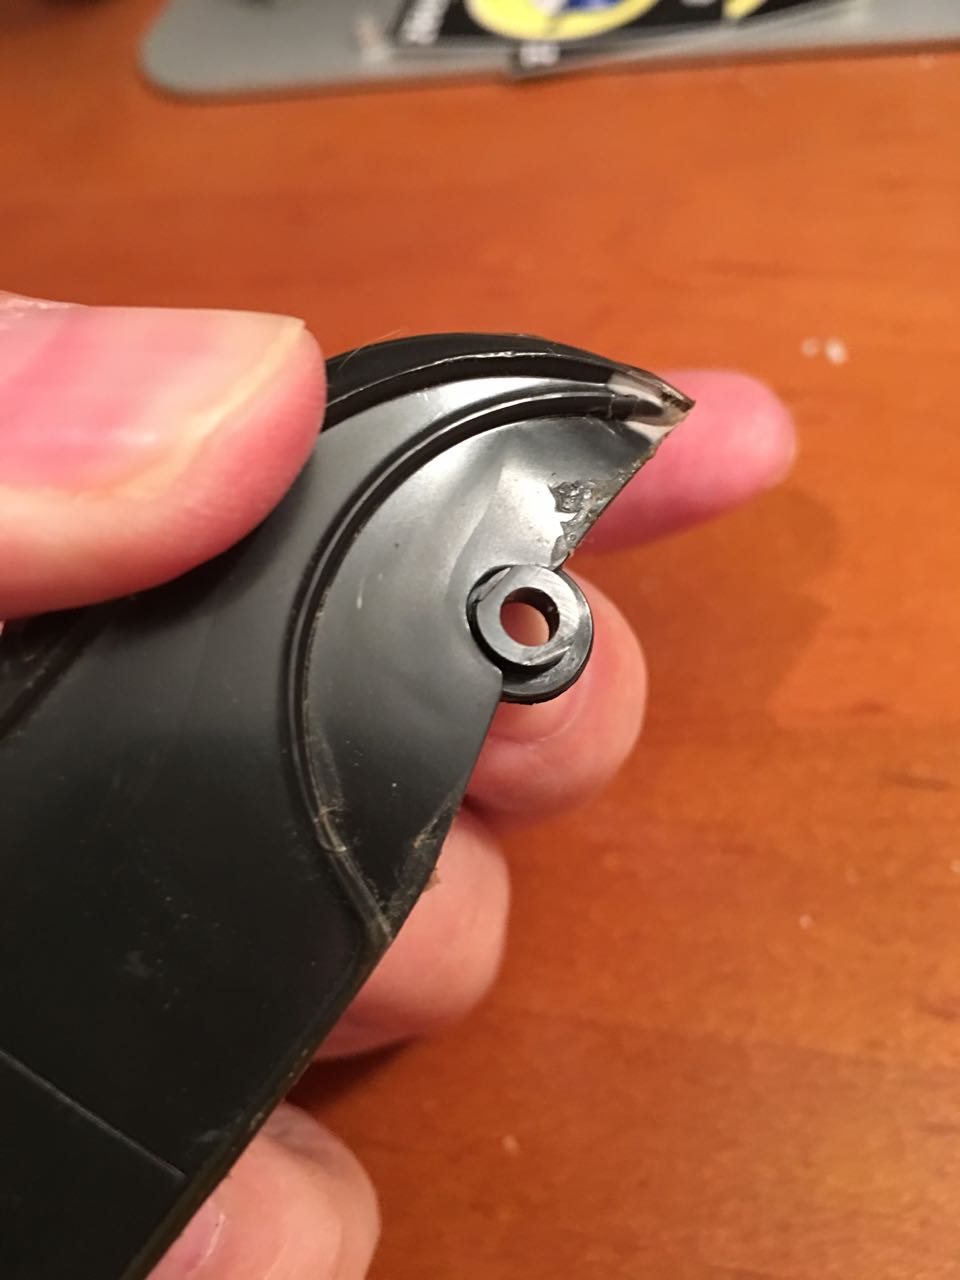
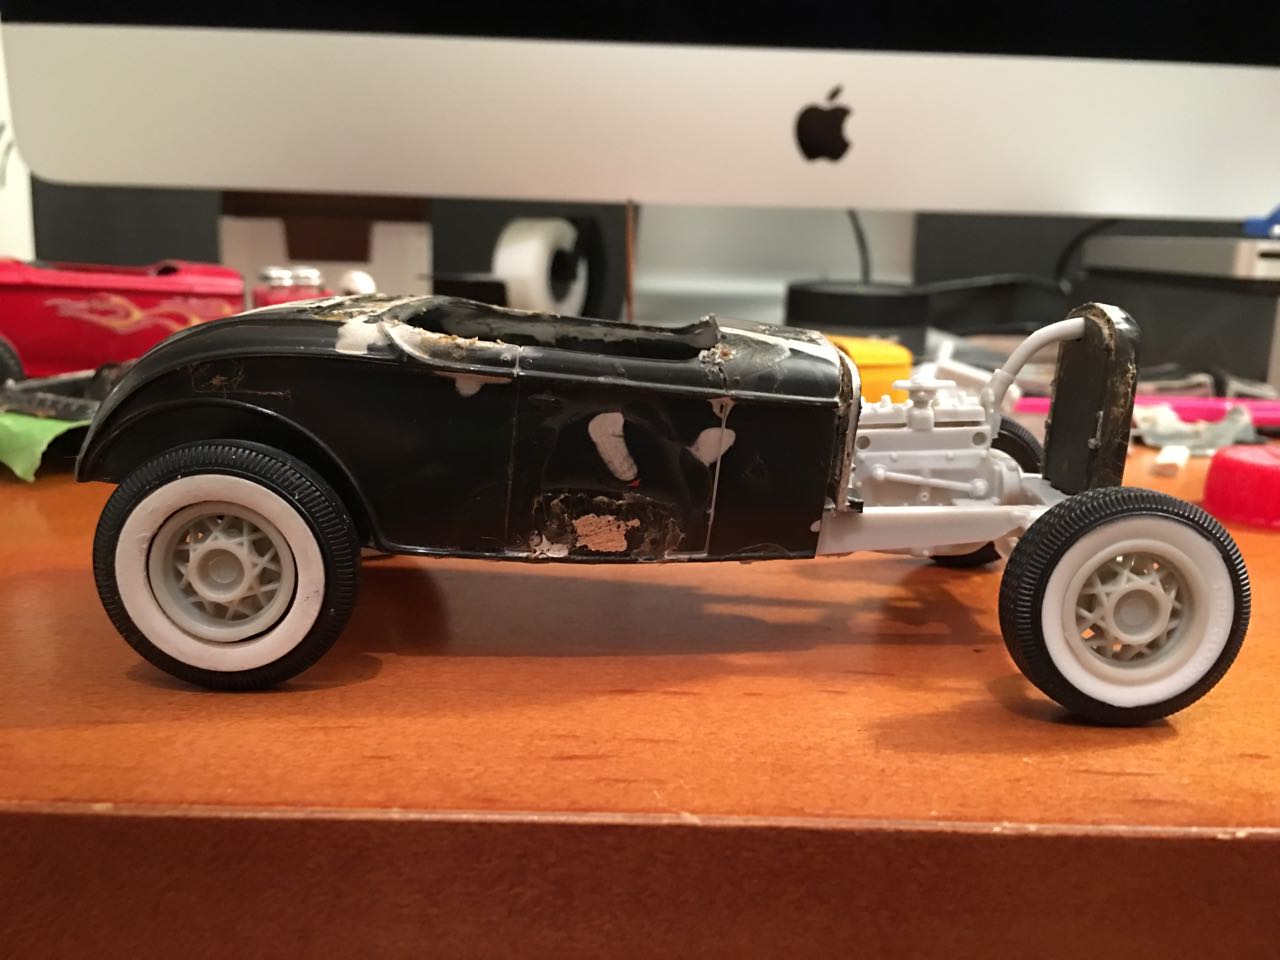
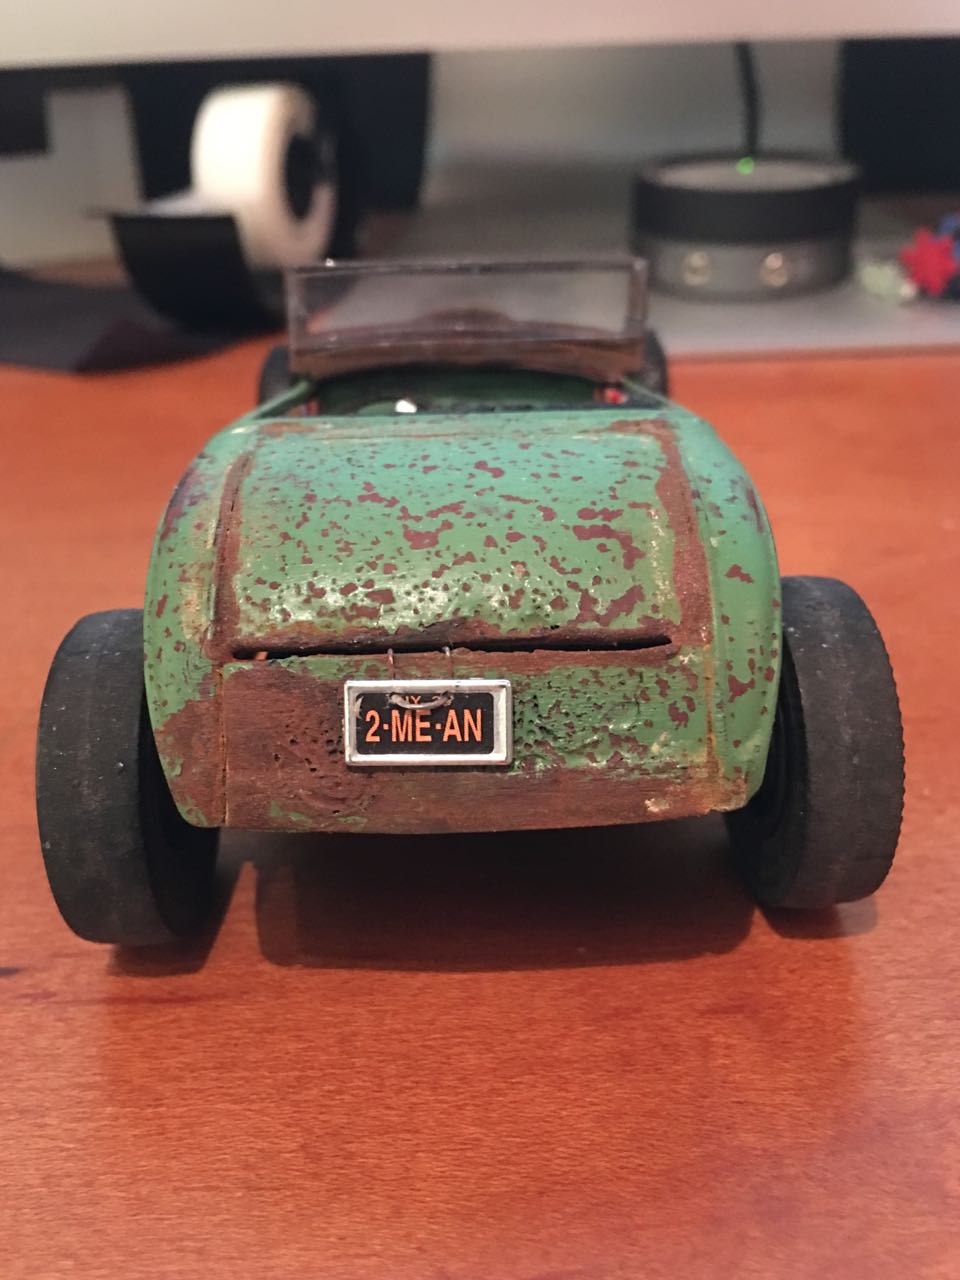
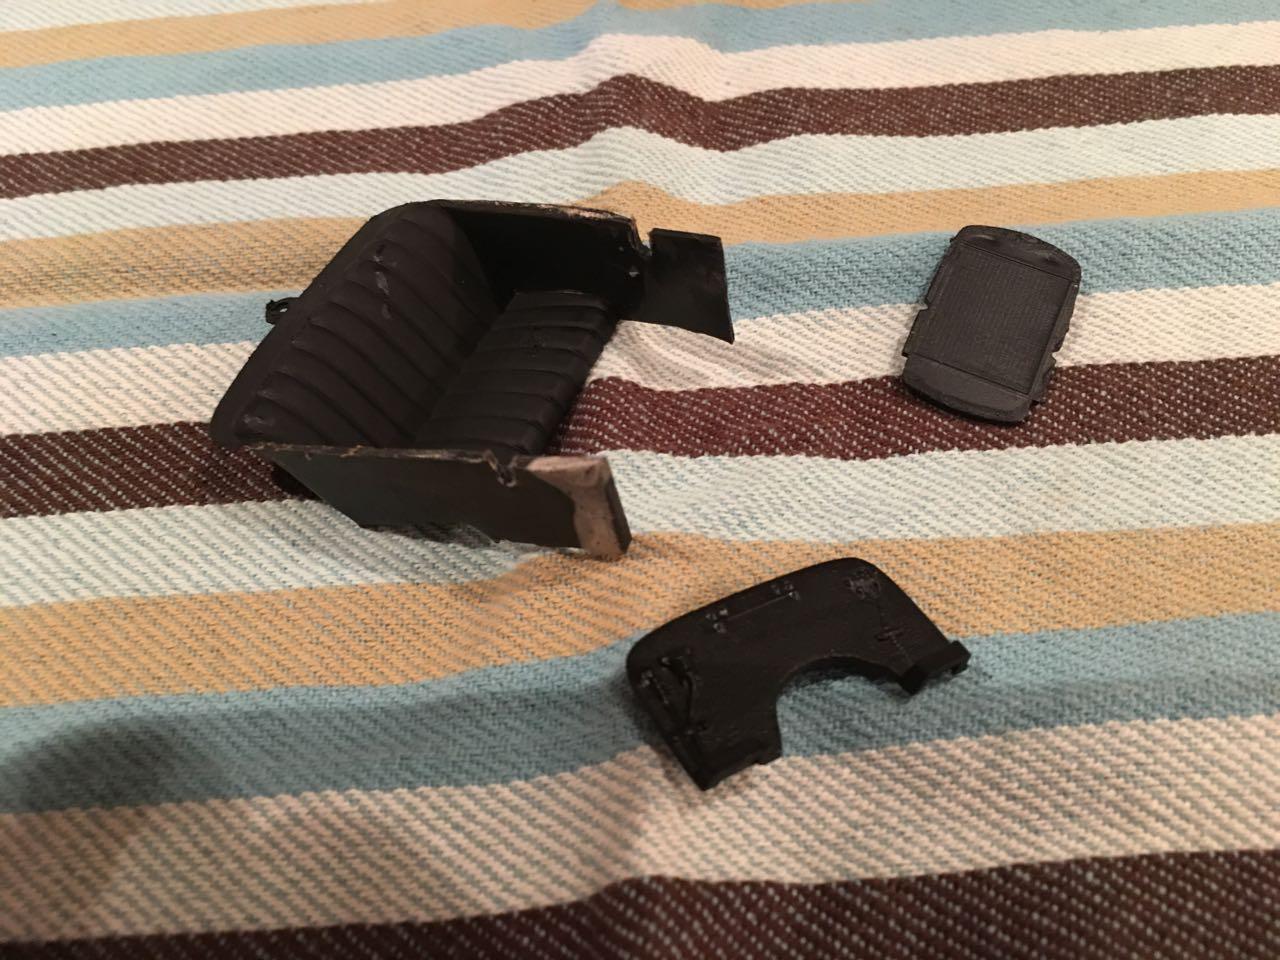
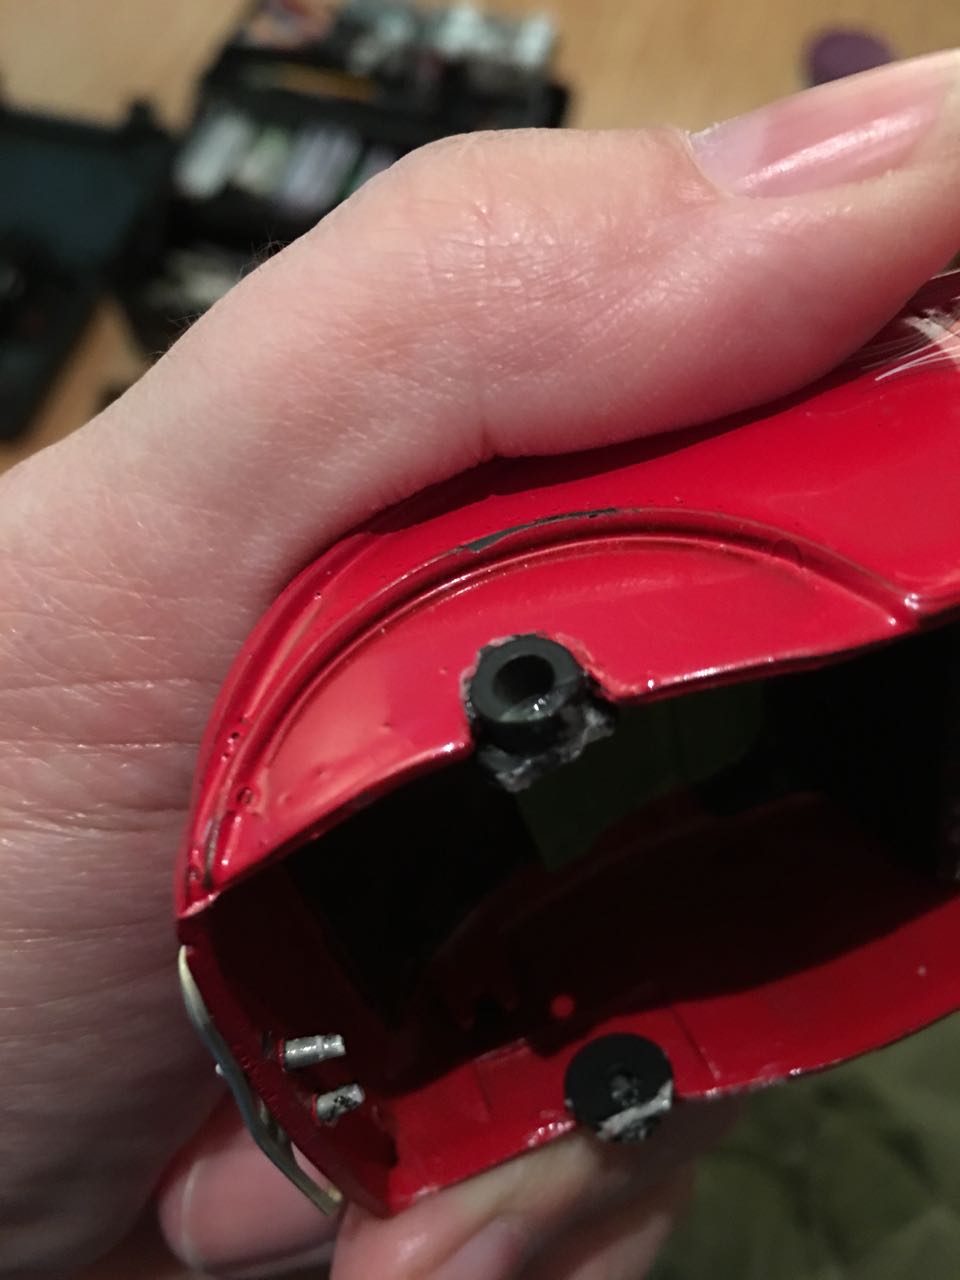
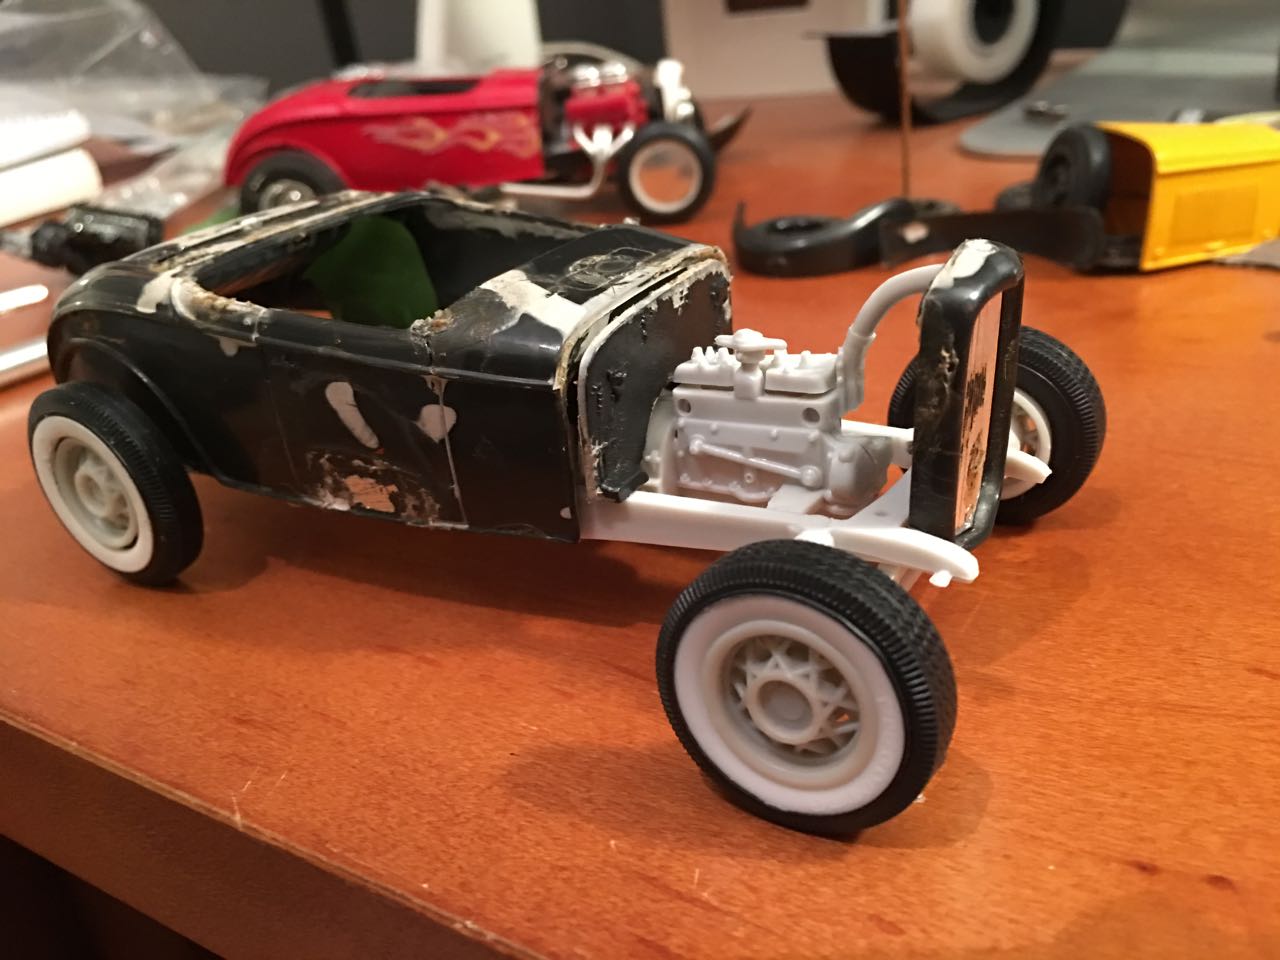
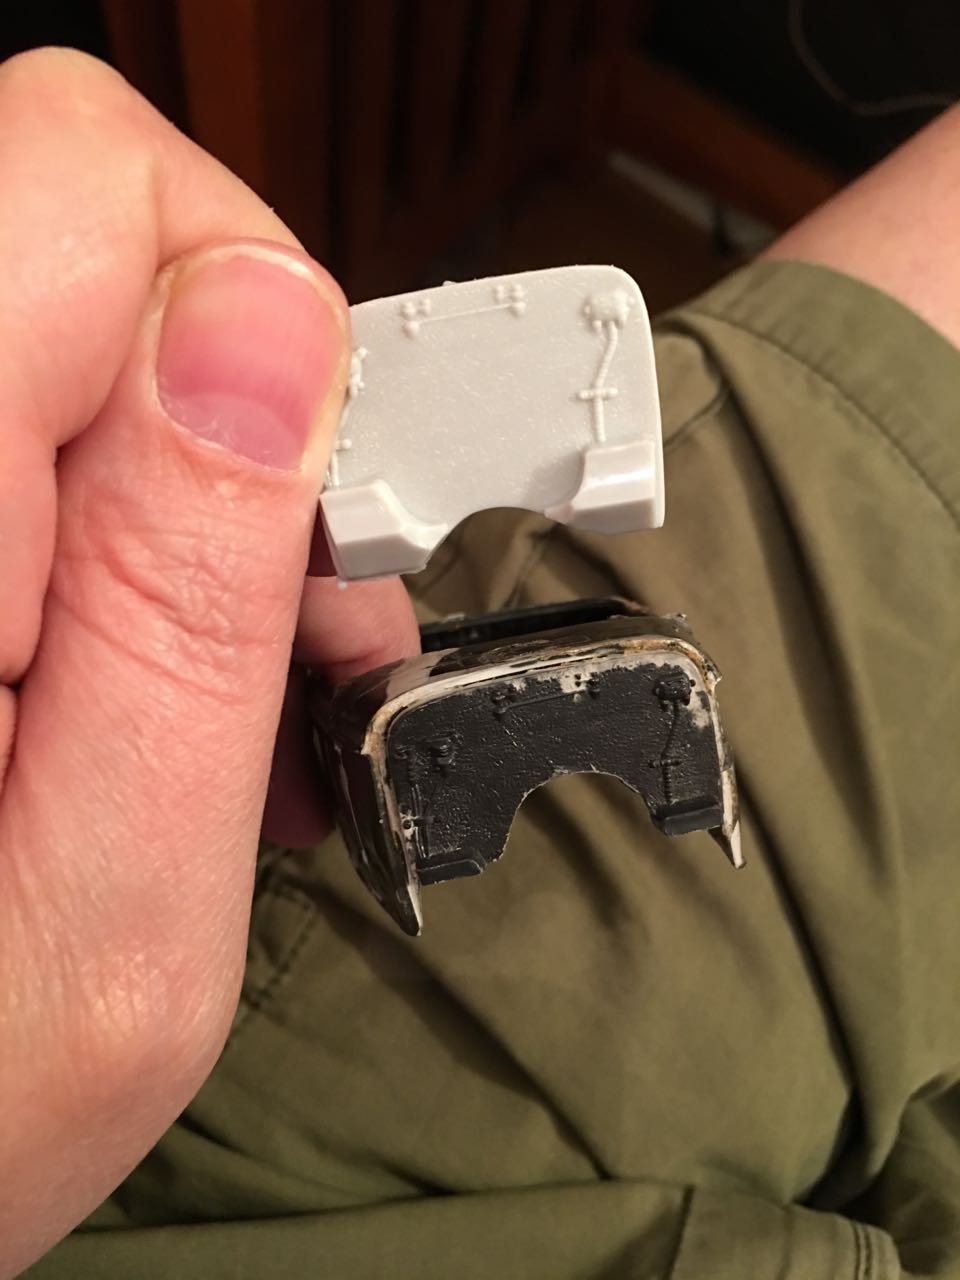
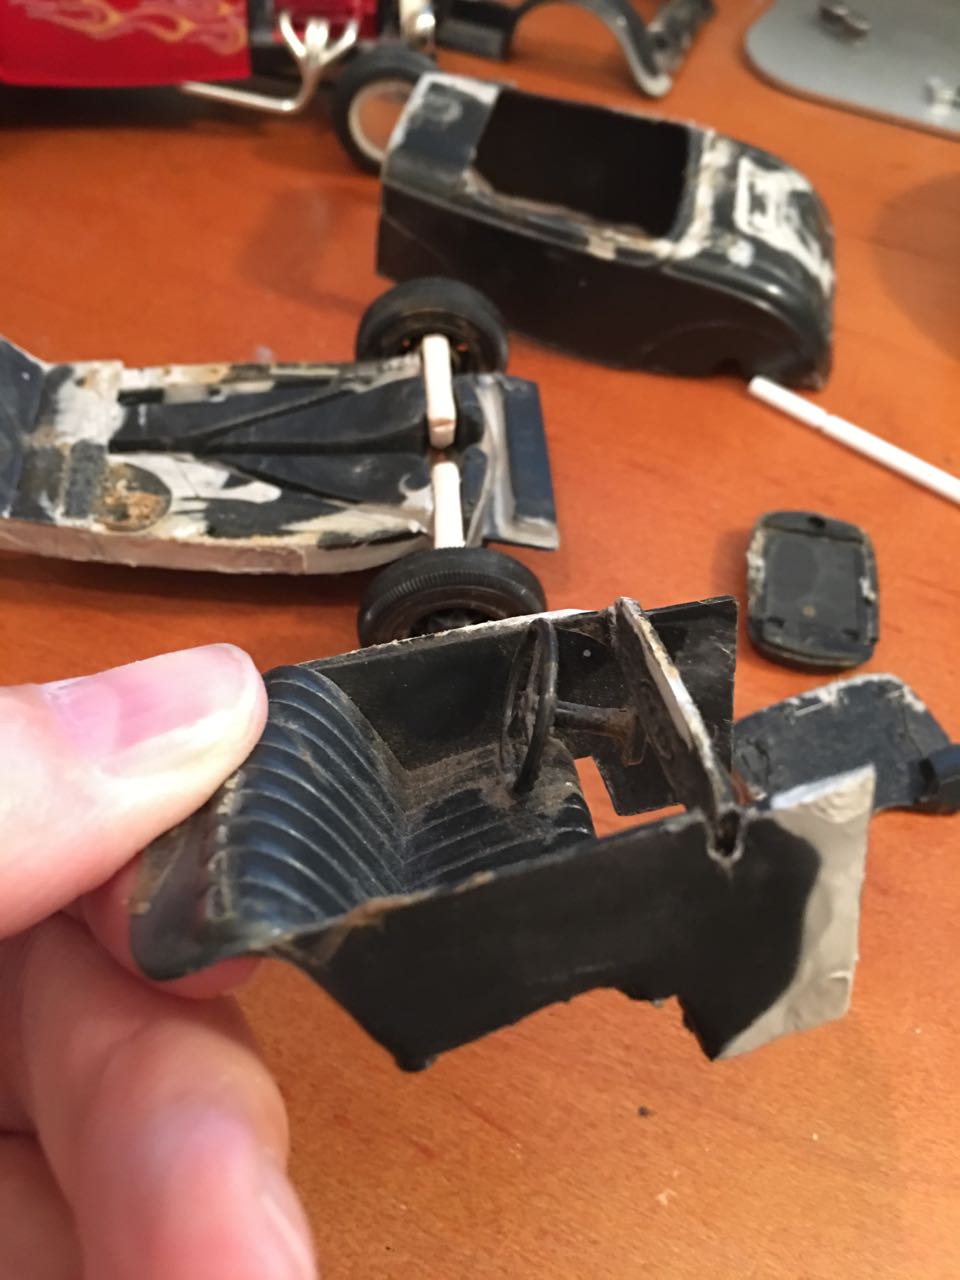
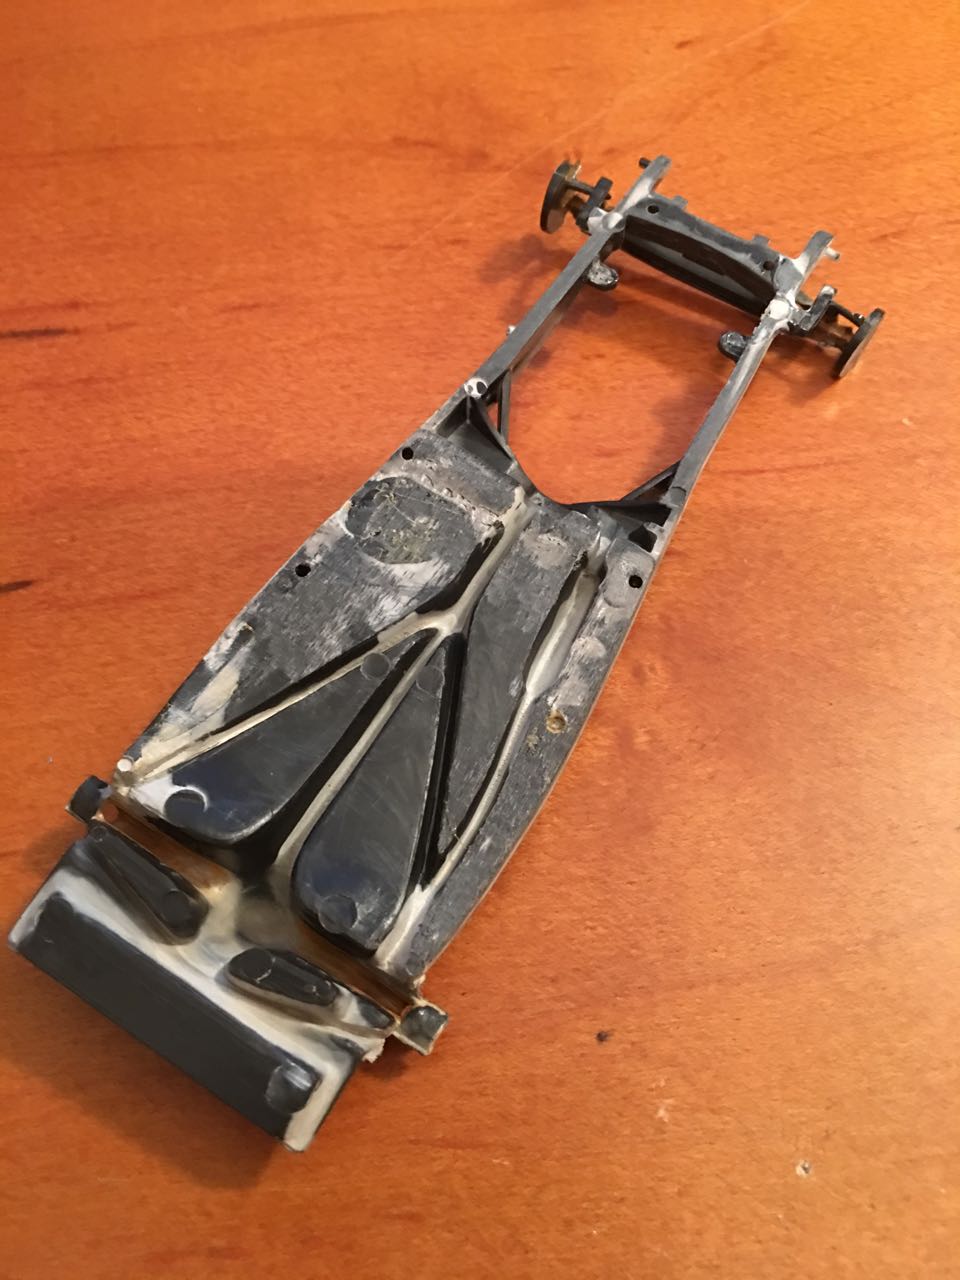
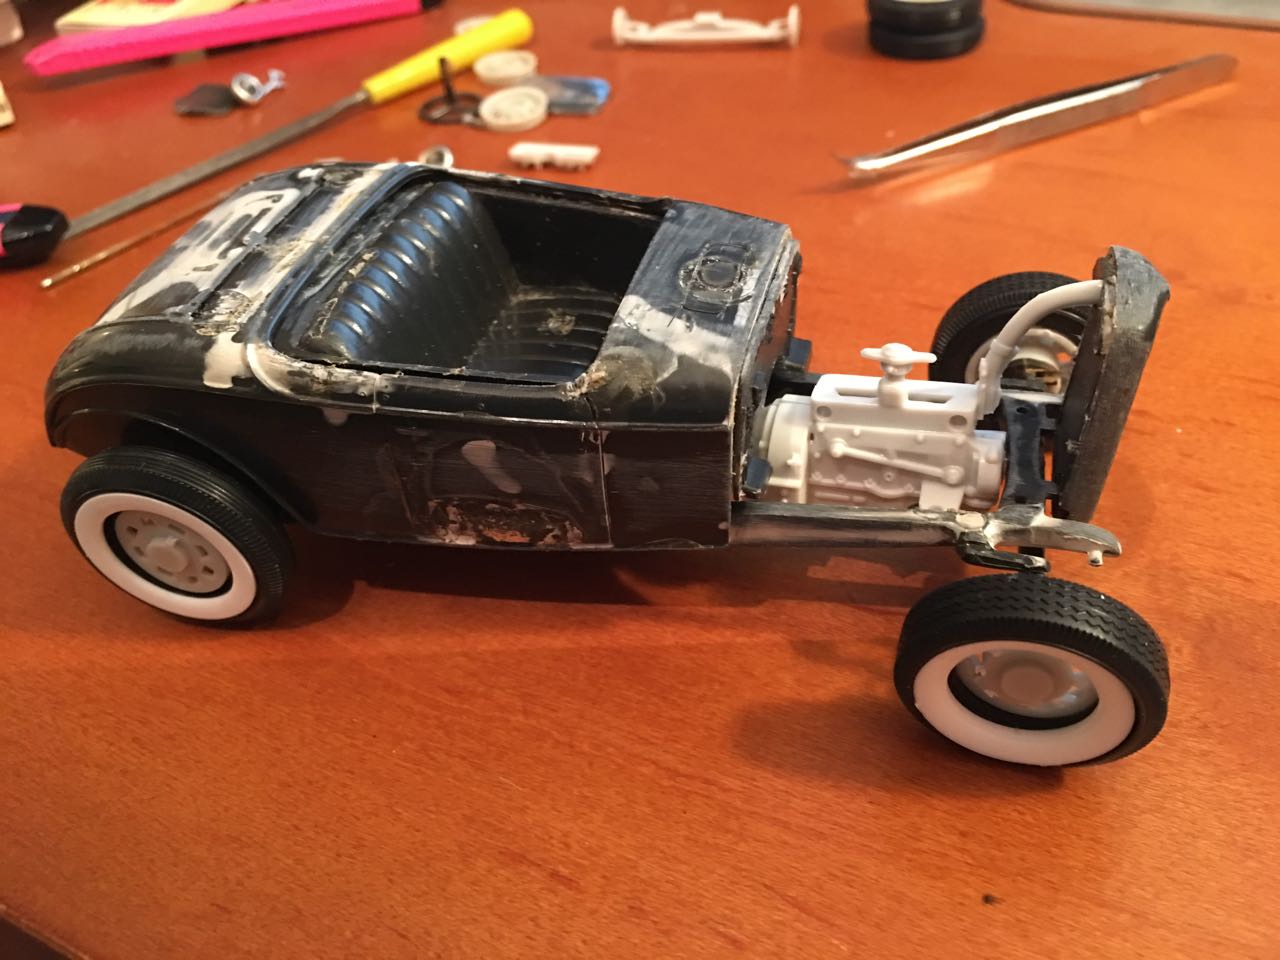
Before: Body is cracked, it's filthy, there's possibly bleach spilled on it, there's glue burns; all that good stuff. After: If you'd like to see part of the progress in building it, follow along below: An older 32 Ford model I'd bought had an ingenious way of achieving a deep channel over the body without the "read end sink" that AMT 32's get when built without the fenders. The builder has inserted these flat backed cylinders in the body, so that they raised the rear when sat onto the frame. Did they come from the kit? Did they come from another kit? Where did they come from? A quick trip to a small, old school hardware store and I was able to acquire these; I forget what they're called, but they were 20 cents each, so I bought enough for a few builds. I was able to trim these down with a hobby knife to just about the same size as the ones on the red 32 pictured above. An almost perfect fit. The firewall has to be cut out and lowered and a new drivetrain passage area created. Above is a untouched AMT 32 Ford firewall, below is my trimmed one. Now I've got the stance I want. The engine is a donor from an AMT Proshop 32 Ford, a four cylinder like the kind that came in a 32 Ford. There wasn't enough room for the engine using the frame that came with this car. I thought maybe they made it different then (it's an older kit), it's a little shorter, something doesn't fit right. Turns out the floor piece that has the molded-in gas pedal was (heavily) glued slightly too far forward, so the engine wouldn't fit. So now that I know that I may end up using the original frame and removing the floor piece by force if I have to. Big and little whitewalls are from the parts box, wire spoke rims are from another donor 32 Ford. The radiator and shroud will be lowered to match the cowl height as I go on. I'll need to find a donor windscreen at some point, too. Here's the untouched original frame whose floor I had to remove with pliers. Here's the same frame sanded, filed, and washed. I can make a new floor with 1/32" birch plywood or sheet styrene. I'll also need to make some points for the engine mounts out of thin dowel (not sure why those were cut off). The body has been sanded, filed, and washed as well. There will be imperfections after I put a coat of primer on and I'm ok with that; in fact, I want those imperfections. The firewall was sanded so that it will fit well against the body. The radiator shroud was sanded as well. I got one coat of ruddy brown primer on the body tonight as well. Not as bad as I thought it would be. The really bad places are a few areas on the trunk, the area below the trunk, and the passenger side door. I'll salt those areas (thinking of using something finer, powdered sugar maybe) to get the ruddy brown to show through then apply rusting solution, then salt those areas again, then paint. Probably old hat for some of you, but while playing with this extra frame and suspension I thought, wow, I could really get this front end low if I reversed the spring and cross-member. On this new frame I could just cut out the recessed area further, then drop in the tab on the suspension from the other side and voila, you're done. Also, do I need these parts in red on a channeled 32 without fenders? Since the suspension on the glue bomb 32 was literally glue bombed to the frame, I couldn't drill the cross-member, so I tried something I'd never done before; I cut out the whole section of the crossmember containing the suspension and flipped it. While the adhesive on the glue bomb suspension dries, you can preview what it'll look like by using the extra frame and suspension. I'm not used to it yet, and it seems like a drastic change in stance. The glue bomb 32 didn't have a windshield frame or glass, so I'll use this one from the parts box, from an AMT '29 Ford. It fits well, but I don't need all of it. I trimmed off the areas of the frame I didn't need. The chopped a few scale inches off of it. The interior doors got the pinup girl treatment and the seats were lightly cleaned then sprayed flat black (which looked convincingly dirty and old). By the time I was doneI had rusted the frame and suspension, used a parts box stock '32 Ford 4 cylinder engine, cut the radiator and radiator shell down to match the cowl / hood height, and weathered the body using crushed sugar. I used the wire wheels from an extra 32 Ford kit and rusted the caps, then put them on the grungy, bald, hand painted whitewalls that came on my previous glue bomb build. I think it was a good match. I generally like how it turned out, but there are some things I wish I'd done different: 1) Be more careful cutting / trimming parts. 2) Be a man and actually have a few new kits of the same year and model that I can grab parts from. Thanks, Greg
-
What's the correct way to update your topic?
gwolf replied to gwolf's topic in How To Use This Board
-
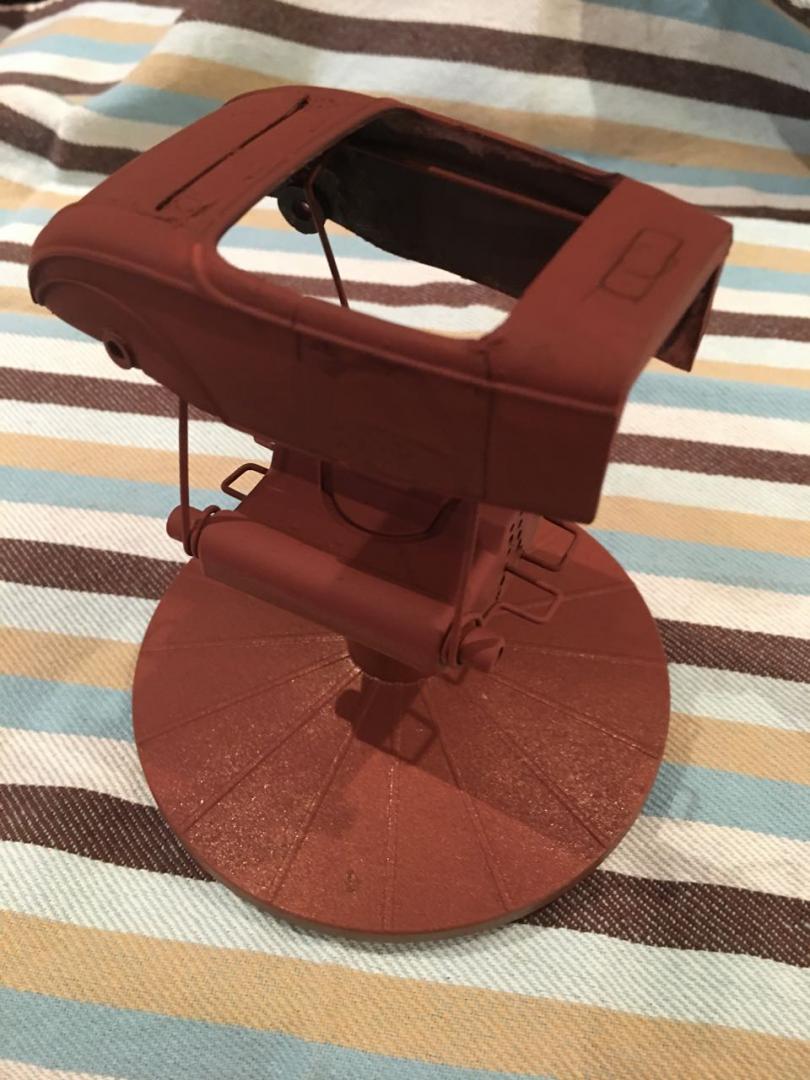
This evening I got the seat area, firewall, and radiator painted. I got one coat of ruddy brown primer on the body tonight as well. Not as bad as I thought it would be. The really bad places are a few areas on the trunk, the area below the trunk, and the passenger side door. I'll salt those areas (thinking of using something finer, powdered sugar maybe) to get the ruddy brown to show through then apply rusting solution, then salt those areas again, then paint. Probably old hat for some of you, but while playing with this extra frame and suspension I thought, wow, I could really get this front end low if I reversed the spring and cross-member. On this new frame I could just cut out the recessed area further, then drop in the tab on the suspension from the other side and voila, you're done. Also, do I need these parts in red on a channeled 32 without fenders? Since the suspension on the glue bomb 32 was literally glue bombed to the frame, I couldn't drill the cross-member, so I tried something I'd never done before; I cut out the whole section of the crossmember containing the suspension and flipped it. While the adhesive on the glue bomb suspension dries, you can preview what it'll look like by using the extra frame and suspension. I'm not used to it yet, and it seems like a drastic change in stance.
-
Here's the untouched original frame whose floor I had to remove with pliers. Here's the same frame sanded, filed, and washed. I can make a new floor with 1/32" birch plywood or sheet styrene. I'll also need to make some points for the engine mounts out of thin dowel (not sure why those were cut off). The body has been sanded, filed, and washed as well. There will be imperfections after I put a coat of primer on and I'm ok with that; in fact, I want those imperfections. The firewall was sanded so that it will fit well against the body. The radiator shroud was sanded as well. So I'm going to try to use as much of the original build as possible including the frame. A new engine, wheels and tires will be donors.
-
Hi all, What's the correct way to update your topic? I think I've been updating my On The Workbench the wrong way, by choosing Edit, then adding in the new info and images. What is the correct way?
-
This weekend I started working on another glue bomb 32 Ford roadster, and this one is a real dog. Body is cracked, it's filthy, there's possibly bleach spilled on it, there's glue burns; all that good stuff. We know already that this is going to sit low, so we ditch the one piece fenders, cut out the long interior door pieces, then figure out how to give the body a nice wedge over the frame. I cut one inch long pieces of 1/4" round dowels, then sanded two sides to make it fit into the recessed area of the frame. This will raise the read end of the body, creating the wedge. Scratch that, I don't like how it looks, they stick out too far in order to work, I don't like that the pieces fall out easy,etc; I just don't like it. An older 32 Ford model I'd bought had an ingenious way of achieving a deep channel over the body without the "read end sink" that AMT 32's get when built without the fenders. The builder has inserted these flat backed cylinders in the body, so that they raised the rear when sat onto the frame. Did they come from the kit? Did they come from another kit? Where did they come from? A quick trip to a small, old school hardware store and I was able to acquire these; I forget what they're called, but they were 20 cents each, so I bought enough for a few builds. I was able to trim these down with a hobby knife to just about the same size as the ones on the red 32 pictured above. An almost perfect fit. The firewall has to be cut out and lowered and a new drivetrain passage area created. Above is a untouched AMT 32 Ford firewall, below is my trimmed one. Now I've got the stance I want. The engine is a donor from an AMT Proshop 32 Ford, a four cylinder like the kind that came in a 32 Ford. There wasn't enough room for the engine using the frame that came with this car. I thought maybe they made it different then (it's an older kit), it's a little shorter, something doesn't fit right. Turns out the floor piece that has the molded-in gas pedal was (heavily) glued slightly too far forward, so the engine wouldn't fit. So now that I know that I may end up using the original frame and removing the floor piece by force if I have to. Big and little whitewalls are from the parts box, wire spoke rims are from another donor 32 Ford. The radiator and shroud will be lowered to match the cowl height as I go on. I'll need to find a donor windscreen at some point, too.
-
I've gotten really into these builds. It's almost (but not entirely) taken the fun out of building a perfect new kit.
-
Thanks James! I'm excited to get back to my desk and work on it tonight!
-
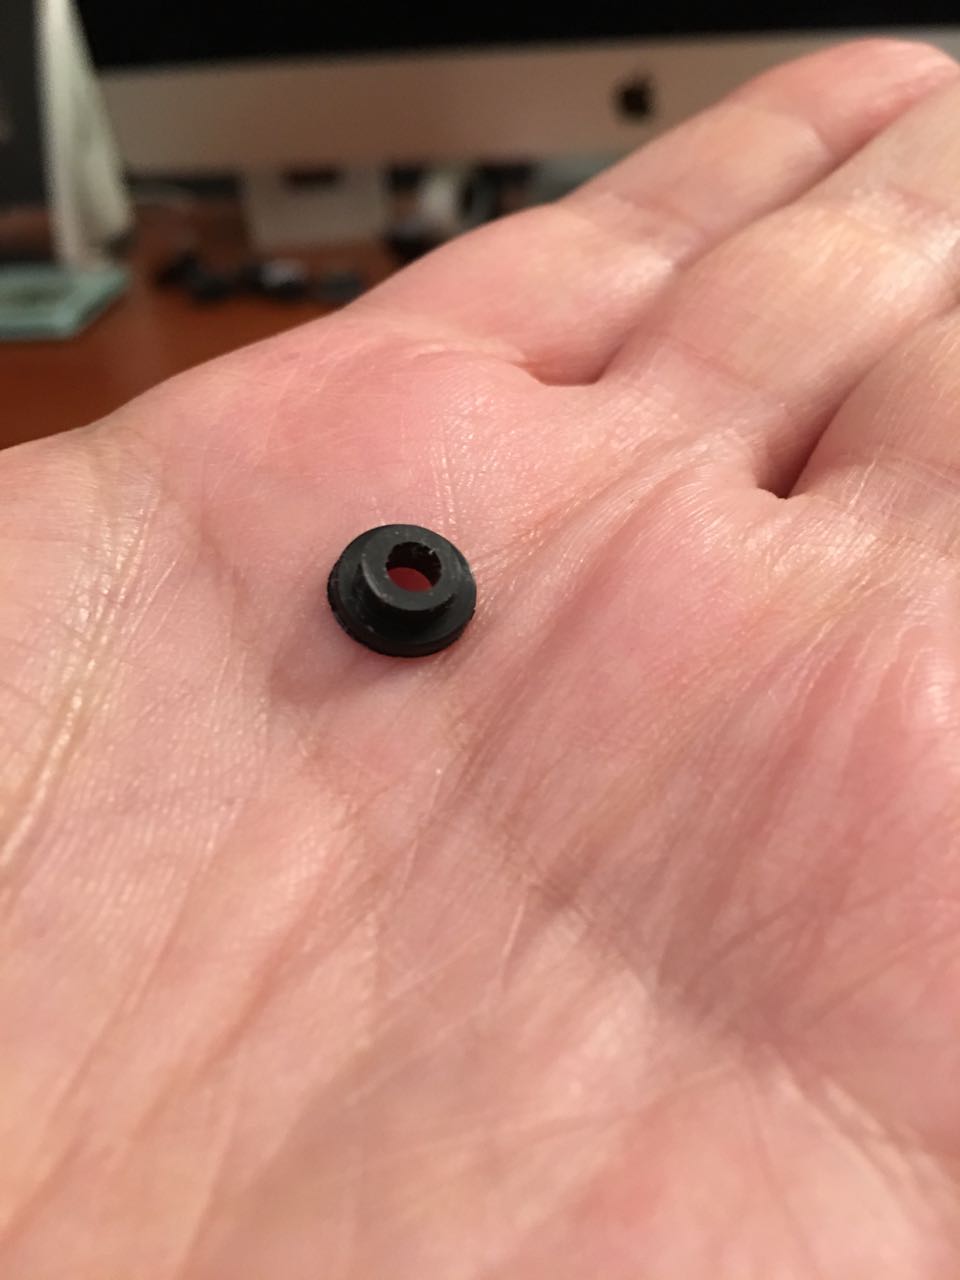
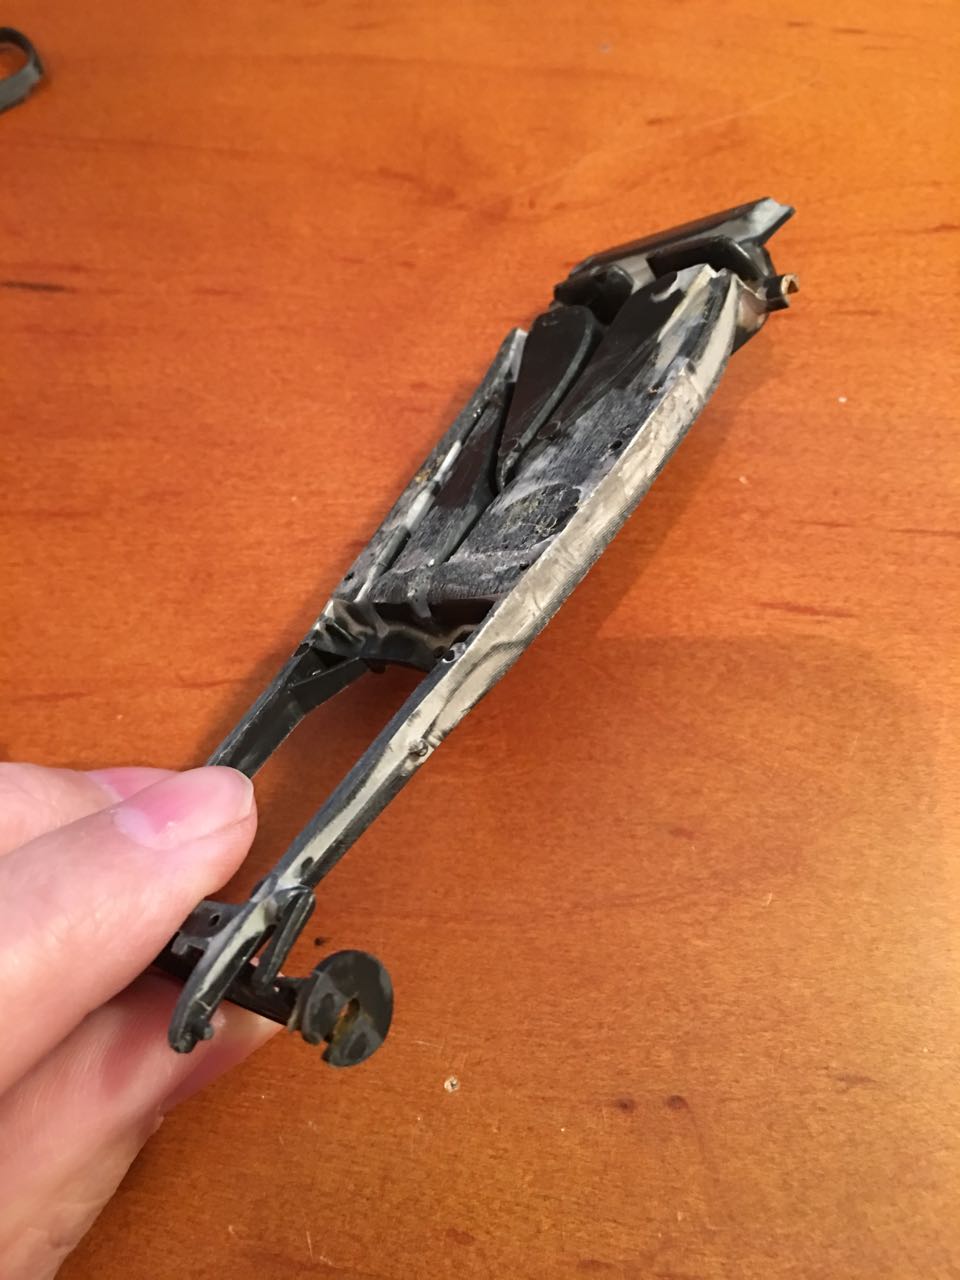
This weekend I started working on another glue bomb 32 Ford roadster, and this one is a real dog. I paid $5 for it at the Mid-Atlantic NNL back in May. Body is cracked, it's filthy, there's possibly bleach spilled on it, there's glue burns; all that good stuff. We know already that this is going to sit low, so we ditch the one piece fenders, cut out the long interior door pieces, then figure out how to give the body a nice wedge over the frame. I cut one inch long pieces of 1/4" round dowels, then sanded two sides of the dowel to make it fit into the recessed area of the frame. This will raise the read end of the body, creating the wedge. Scratch that, I don't like how it looks, they stick out too far in order to work, I don't like that the pieces fall out easy,etc; I just don't like it. Update: It's the combination of lumber and car parts that I just don't like. On an older 32 Ford model I'd bought, the builder had an ingenious way of achieving a deep channel over the body without the "rear end sink" that AMT 32's get when built without the fenders. The builder has inserted these flat backed cylinders in the body, so that they raised the rear when sat onto the frame. Did they come from the kit? Did they come from another kit? Where did they come from? A quick trip to a small, old school hardware store and I was able to acquire these; I forget what they're called, but they were 20 cents each, so I bought enough for a few builds. UPDATE: I think they're just small nylon bushings. I was able to trim these down with a hobby knife to just about the same size as the ones on the red 32 pictured above. An almost perfect fit.I'm so psyched about finding these things. The firewall has to be cut out and lowered and a new drive train passage area created. Above is a untouched AMT 32 Ford firewall, below is my trimmed one. How in the hell did metal get embedded into the lower door area of this car? It looks like some kind of foil, but it will not come off. Whatever, the more beat up and weird, the better the outcome. Now I've got the stance I want. The engine is a donor from an AMT ProShop 32 Ford kit, a four cylinder like the kind that came in a 32 Ford. There wasn't enough room for the engine using the frame that came with this car. I thought maybe they made it different then (this is a an older kit), maybe it's a little shorter? Something doesn't fit right. Turns out the floor piece that has the molded-in gas pedal was (heavily) glued slightly too far forward, so the engine wouldn't fit (make sense, since the finished model didn't have it's original one when I bought it). So now that I know that I may end up using the original frame and removing the floor piece by force if I have to. UPDATE: The floor piece was forcefully removed and broke during the process. The kid must've used a tube of glue just on that. I'll grind all that down and either find a parts box replacement or build my own like the last model I made ( http://www.modelcarsmag.com/forums/topic/123172-amt-32-ford-roadster-gluebomb/ ). Big and little whitewalls are from the parts box, wire spoke rims are from another donor 32 Ford. The radiator and shroud will be lowered to match the cowl height as I go on. I checked photos of a 1:1 32 with that same engine, and I can just shorten the hose part, as it's just rubber. I'll need to find a donor windscreen at some point.
-
I hate seeing those words on an auction site..ugh. Fabulous pro build though!


.jpg.6d9827d33ae1ec443b507398544f71a3.jpg)


.thumb.jpg.bd1e284f04fcb5326ac7709014feecc0.jpg.d83a20612d302188f2a89af06387becb.jpg)
.thumb.jpg.87e8e62340850f18253ffdb843271cff.jpg.a529b4db55a52cdb84a9b833791effc5.jpg)


.thumb.jpg.bd1e284f04fcb5326ac7709014feecc0.jpg.8312a7e6d7d3b6d2b7e0bd19f429e1d3.jpg)
.thumb.jpg.87e8e62340850f18253ffdb843271cff.jpg.86d681009ecb6cd6e03690baf15e9398.jpg)


.jpg.f52566aee84195072b2cf79bb6256b74.jpg)
.jpg.180f7c8fba854d64f67b9c2be6e6c0a2.jpg)