

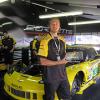
Jay
-
Posts
166 -
Joined
-
Last visited
Content Type
Profiles
Forums
Events
Gallery
Everything posted by Jay
-
I made this from the pre-decorated Maisto kit available since Revell has no plans on doing the C7 Corvette. I added brake rotors from an old Jada kit and the interior was painted using pics I found on the Chevy website. I also added a few PE goodies here and there. This simple kit builds up nicely!
-
This is a lightly modified shelf build using Powerslide decals and Clay Kemp's resin nose update. It's been awhile since I posted here and I'd thought I'd share...
-
 Revell hasn't produced any CoT cars Drew... I assume you mean AMT? They really aren't that bad. They make great shelfers and can provide a decent base for a super detailer. And going back to my points about cleared over body wraps... those cars are purpose built for the plate tracks ONLY! They typically hang new sheet metal after those races anyway because of the bump drafting, rubbing and whatnot. I have been next to Jamie McMurray's Daytona winner and can tell you with ABSOLUTE CERTAINTY, the entire car was cleared over. The contingencies, numbers, and the large vinyl camo swatches all around the car. There was not one edge from vinyl exposed. Some teams will actually go through the trouble of painting the roof and door numbers instead of using a decal! Again, I would say try to duplicate your reference or period to get as close a finish as possible. I bounce around with 2 part clear or lacquers depending on the era or reference. Some Tamiya paints buff out nicely without any clear at all! There ain't a lick of clear on this Z06 at all!
 -
Thanks everyone! The SMS kit I used was for the GT1 C6.R... some pieces are interchangeable. I had a run of bodies for sale, but they sold out quickly and interest seemed to die out. For anyone going to the NNL East tomorrow, the completed model will be there. Also, Mike from Powerslide Decals will have a few of the bodies to sell. Get there early if you want one!
-
Built for Dan Binks, the crew chief on the #3/#73 Corvette that won Le Mans in 2011. I mastered the body and had it cast by Celtic Works. The wheels were designed by Mike Lawrence and printed by Shapeways. The build utilizes the Revell Corvette ZR1 and Scale Motorsports Trans kit. The paint is Velocity Yellow topped with 2 part urethane. The decals are from Patto's and other misc. sheets I had lying around.
-
Most newer race cars are clear coated now... NASCAR cars especially on the plate tracks. They clear over all the decals, body wraps, etc... seems the edges of the decal layers were creating drag. Believe it or not, with hi def TV's & cameras now, the "good from a distance/speed" no longer applies. I'm not saying they have show winning paint by any means, but they do take care in the details now and make sure the car looks good on camera... I say try to build as close to the reference you have as possible....
-
Jerry Nadeau Sheetrock Pontiac
Jay replied to JTRACING's topic in WIP: Stock Cars (NASCAR, Super Stock, Late Model, etc.)
Looks like you made a Pontiac from a 2003/2005 Monte Carlo.... the nose looks good, but why didn't you modify the Monte quarter windows into the Pontiac ones? -
I think that the thicker black stripe under the door 9's was supposed to be placed above the rocker skirts. This would have kept the bottom of the 9's from folding under the skirts..... If I could make a suggestion on raced detail. Get yourself a Tamiya weathering kit and experiment with it. Or you can get a set of pastels and rub them on a piece of sandpaper and then smudge the body in places. The dust also looks like "in scale" bits of tire. When you use a paint brush to make scuffs and marks.... well, it looks like you used a paint brush as you can see the brush strokes.
-
Dale Jr's 2008 Bud Shootout Winner
Jay replied to Jay's topic in WIP: Stock Cars (NASCAR, Super Stock, Late Model, etc.)
Are you talking about the white inspection sticker in the upper driver's side corner of the windshield or the green tiwi decal for the on board telemetry system? Here's my reference..... what else ya got? The car was in the July issue of the magazine. I think a few hobby shops still have the issue on the shelves. Thanks guys! -
G Biffle 03 #7 Kleenex Cottonelle
Jay replied to Mach2's topic in WIP: Stock Cars (NASCAR, Super Stock, Late Model, etc.)
Anytime you try and "rub" Alps decals with anything you run the risk of having this happen. I would either spray something like Tamiya clear over them or get yourself an airbrush and some 2 part automotive clear. I've never had a problem using either over Alps decals. It's all in the quality of the materials you use to get a great finish... I know it's harsh, but best leave the Pledge for furniture. -
Here's a few teaser pics of my recently completed Dale Jr. CoT. I'm going to have a complete write up on how I did it in an upcoming issue of Model Cars....
-
Dale Jarrett's 2005 Talladega Winner
Jay replied to Jay's topic in WIP: Stock Cars (NASCAR, Super Stock, Late Model, etc.)
This is a 04/05 Profinish style Taurus kit. The 00/03 glue kit was the one that had the issues with the stance. All I did to get it to sit lower was cut off the front axle pins and glue the wheels directly to the spindles. The rear I omitted the metal axle and glued the wheels to the ends of the axle. -
This was a quickie build..... Just did some superspeedway mods to the body. Taller rear spoiler w/braces, dual outlet exhaust, and I smoothed out the nose. The paint is Tamiya white with 2 part Omni clear just like the 1:1 car. The decals were JWTBM. Thanks for looking....
-
Dave Marcis's 2001 Team RealTree
Jay replied to Mach2's topic in WIP: Stock Cars (NASCAR, Super Stock, Late Model, etc.)
Those older Slixx decals will give ya fits huh.... looks like you got 'em down pretty good for the most part though. I'm kinda curious on your paint choice. I remember this car being a straight black. What made you go with a blue/green pearl? -
2005 #23 Vassarette Sexy Fun Lingerie
Jay replied to Mach2's topic in WIP: Stock Cars (NASCAR, Super Stock, Late Model, etc.)
Okay. It just looks a bit out of scale and unclear. Maybe try a scrape piece of decal carrier film. Those tear aways are supposed to be crystal clear so the drivers can see! -
2005 #23 Vassarette Sexy Fun Lingerie
Jay replied to Mach2's topic in WIP: Stock Cars (NASCAR, Super Stock, Late Model, etc.)
Looks good Mick. I gotta ask though... what's the deal with the Reynold's Wrap on the left side of the windshield? Is that a tear away? It looks like it's coming loose. -
Revell Discontinuing NASCAR Model Kits
Jay replied to larrygre's topic in General Automotive Talk (Trucks and Cars)
I seem to remember a loooong winded post about all the stuff you did to the body/chassis and then you posted one blurry pic of the body in primer. That's when you had a melt down about people not posting comments in your threads. It's also pretty much why you've been run off most of the NASCAR modeling forums. It's probably the reason you have such a distaste for NASCAR and NASCAR modeling.... why don't you take a break from stirring the pot Bri, the modeling commumity could use it. -
I used a Tamiya weathering kit. It's a mixture of black/brown smudged over the white letters only. You can achieve the same effect with pastels as well. Thanks!
-
Nothing special, just a nice shelfer with some cool speedway mods. Paint is Tamiya neon red and white topped with Omni clear. Decals are JNJ and were in surprisingly good condition. I'm still waiting for the black Rain-X decals on the quarters and sail panels and the blue/white Lumina for front valence from a friend...
-
First off, let me say this IS NOT AN EXACT REPLICA OF THE ACTUAL PRATT & MILLER C6RS RON FELLOWS EDITION!!! I used the car to get inspiration for my build. This is a Jada kit built box stock except for the wheels. I borrowed the wheels from an old diecast I had lying around. The paint is Tamiya pearl white & mica red for the hash marks on the fenders. I used Omni 2 part clear over it all. Thanks goes out to DaveT as he and I had some in depth discussions about this and the "Black Devil" he recently completed. Comments, critiques welcome....
-
They are real aluminum! I couldn't bring myself to paint them though.... Thanks for the kind words guys!!
-
The road grime was made with a Tamiya weathering kit. I also thinned out flat black paint to make it look like chunks of rubber had been kicked up & stuck to the body.
-
I left them bare & added a thin black wash to them. Thanks guys!!
-
Just in time for the NNL East. I finished this BAD BOY up last night at about 2am. Scale Motorsports trans. kit with the Revell C6R kit. The paint is Corvette Le Mans yellow from Zero paints toped with Omni clear. I added some detail to the interior but, as you can see, it pretty much all gets covered up. I am very pleased with the results! The only real issue was getting the door windows to fit. For anyone planning on building this kit, leave the metal door frames off & glue the windows to the body & top of the doors. The metal frames just did not fit right. Questions, comments, critiques welcome!
-
To each is own.... Try getting yourself a bottle of Solvaset decal softener. It will help the decals lie down over complex curves & contours better. Don't take this the wrong way, I'm just trying to help you build more accurate representations of your favorite driver's cars.